
hedotwo
-
Posts
1,551 -
Joined
-
Last visited
Content Type
Profiles
Forums
Events
Gallery
Everything posted by hedotwo
-
1969 Chevy base C/10
hedotwo replied to hedotwo's topic in WIP: Model Trucks: Pickups, Vans, SUVs, Light Commercial
Made some progress on the step bumper. Started by cutting the lower half of the stock bumper away and then fabricating a replacement from strip stock. To attach to the upper portion I filed the face of the bumper flat to give a good mating surface. Our 1:1 license was printed on heavy paper stock and then attached to a 020 piece of sheet and then to the bumper. The hitch ball is the head of a pin. I'm happy with the result. Thanks for looking
-
1969 Chevy base C/10
hedotwo replied to hedotwo's topic in WIP: Model Trucks: Pickups, Vans, SUVs, Light Commercial
From everything I could find it looks like the plain C/10 emblem wasn't part of any kit. Unless I missed it. -
1969 Chevy base C/10
hedotwo replied to hedotwo's topic in WIP: Model Trucks: Pickups, Vans, SUVs, Light Commercial
From what little I know these MPC Chevy's had single molded exhaust for a year or two? I know this one began as a 70 MPC and this is what it came as. As for the trim on the tailgate it got removed along with the rest of the non-base trim on the cab and bed. File/sanding did it. Unless I'm misunderstanding the question ?♂️ -
1969 Chevy base C/10
hedotwo replied to hedotwo's topic in WIP: Model Trucks: Pickups, Vans, SUVs, Light Commercial
The transfers are to replace the Custom C/10 emblems that were on it. I removed them because our 1:1 was a base C/10 with just that marking. The transfers were about the only way I could do a resemblence to a plain C/10 emblem. I will use the white 2mm high lettering and hopefully it'll pass well enough. I don't have access to a color printer that will print an opaque silver on a clear backing so decals in my case are out. The font used in these transfers isn't exact to what Chevy used but they're close enough. The base paint will be a darkish green. The lettering is so small I don't have many options. Be nice if there was a PE option for the emblems, or even 3D. -
1969 Chevy base C/10
hedotwo replied to hedotwo's topic in WIP: Model Trucks: Pickups, Vans, SUVs, Light Commercial
Finished up the topper. Red running lights are half round styrene with the ends rounded and painted a burgundy. Screen mesh is from an aftermarket vendor but can't remember which. It's scale anyway. The window tint film was donated by Petski (thanks again Peter) and turned out pretty good for my liking. I don't have a final pic with a lift handle added but it'll be seen when this project gets finished. Now that the topper is finished I'll move on to adding a bench seat to replace the kit buckets. Nothing crazy, but it'll be closer to our 1:1 than having buckets. From there it'll be easier with engine assembly and body painting. When all that's done and the C/10 is finished I'll move onto the trailer itself. Thanks for looking.... Here's are few pics of a test I did applying film.
-
X2...
-
1969 Chevy base C/10
hedotwo replied to hedotwo's topic in WIP: Model Trucks: Pickups, Vans, SUVs, Light Commercial
I have a few different riffler sets and this set, and another I have that's finer, are my most used. Like most things, you get what you pay for in the way they cut. I use rifflers more than standard files I think. -
1969 Chevy base C/10
hedotwo replied to hedotwo's topic in WIP: Model Trucks: Pickups, Vans, SUVs, Light Commercial
I have a number of riffler files that I used all the time. I'm pretty sure the one in the pic came from Amazon in this set but it says it's not in stock. This set is fairly coarse but works really well when you want to take it down quickly. https://www.amazon.com/gp/product/B0009PJWPK/ref=ppx_yo_dt_b_search_asin_image?ie=UTF8&psc=1 -
1969 Chevy base C/10
hedotwo replied to hedotwo's topic in WIP: Model Trucks: Pickups, Vans, SUVs, Light Commercial
Next up was to attach a roof section and make templates for the side windows which will have both tinted and scale screen windows. Unfortunately the best photo I have of our topper, but my memory can fill in the rest.
-
1969 Chevy base C/10
hedotwo replied to hedotwo's topic in WIP: Model Trucks: Pickups, Vans, SUVs, Light Commercial
Fortunately I won't have to worry about hubcaps as ours had plain steels painted white. Thanks for the tip though. -
1969 Chevy base C/10
hedotwo replied to hedotwo's topic in WIP: Model Trucks: Pickups, Vans, SUVs, Light Commercial
A bit more progress on the topper overnight.
-
3D Printed 1960 Maserati Birdcage Tipo 60
hedotwo replied to MrObsessive's topic in Car Aftermarket / Resin / 3D Printed
Turned out great! -
1969 Chevy base C/10
hedotwo replied to hedotwo's topic in WIP: Model Trucks: Pickups, Vans, SUVs, Light Commercial
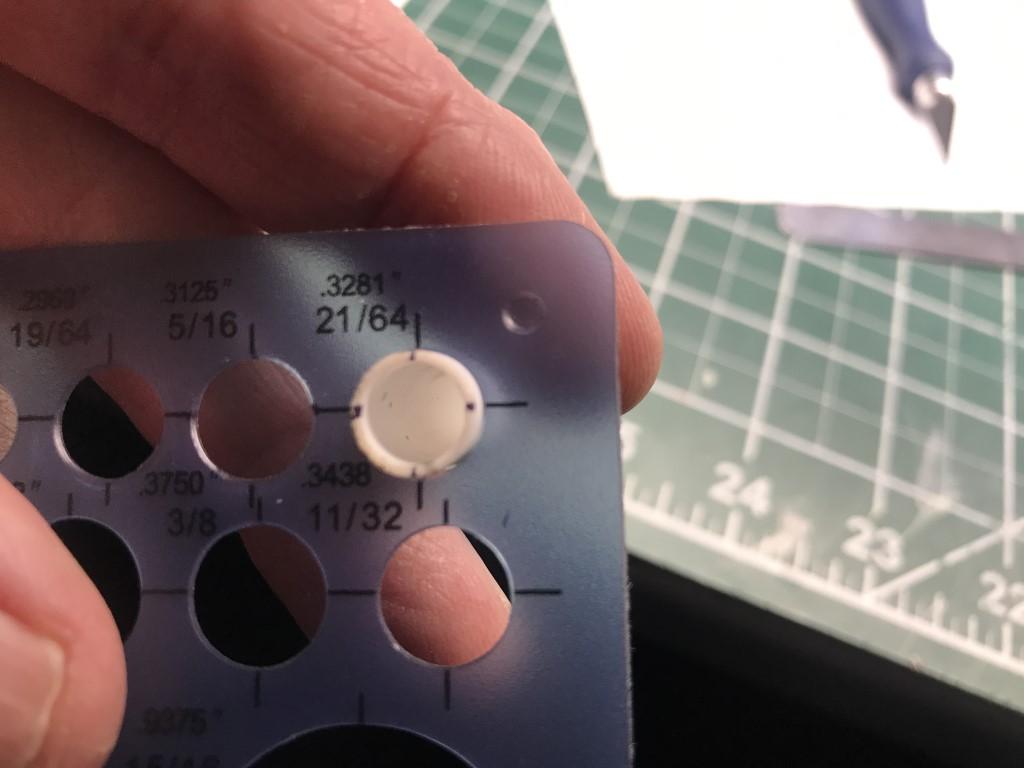
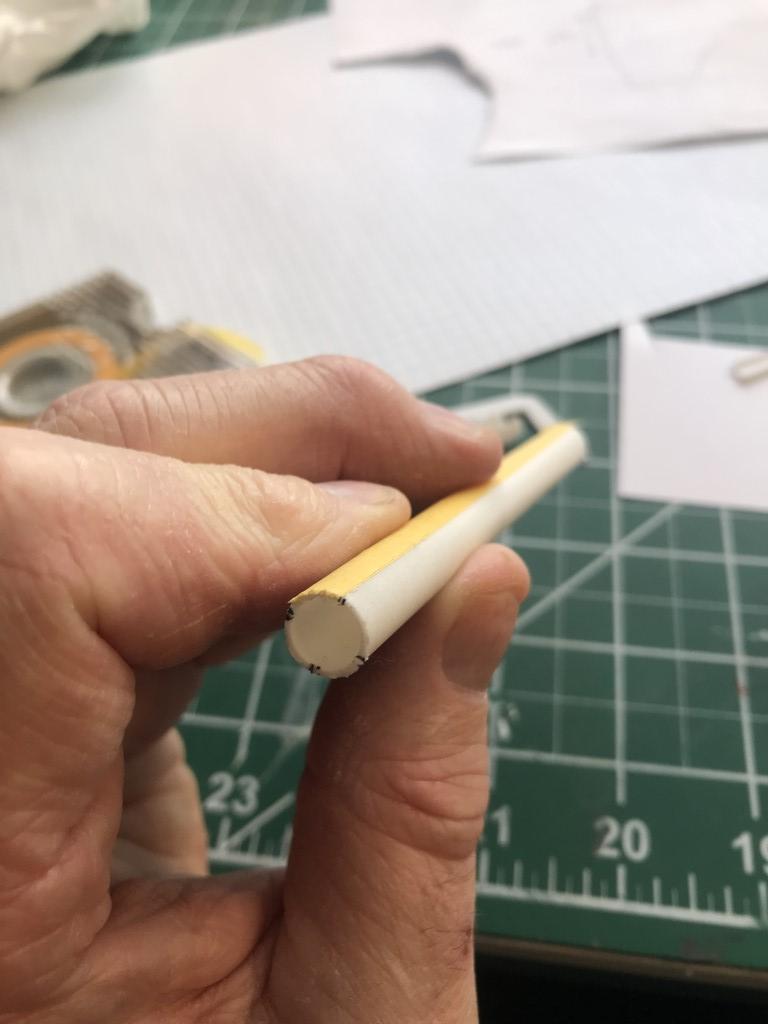
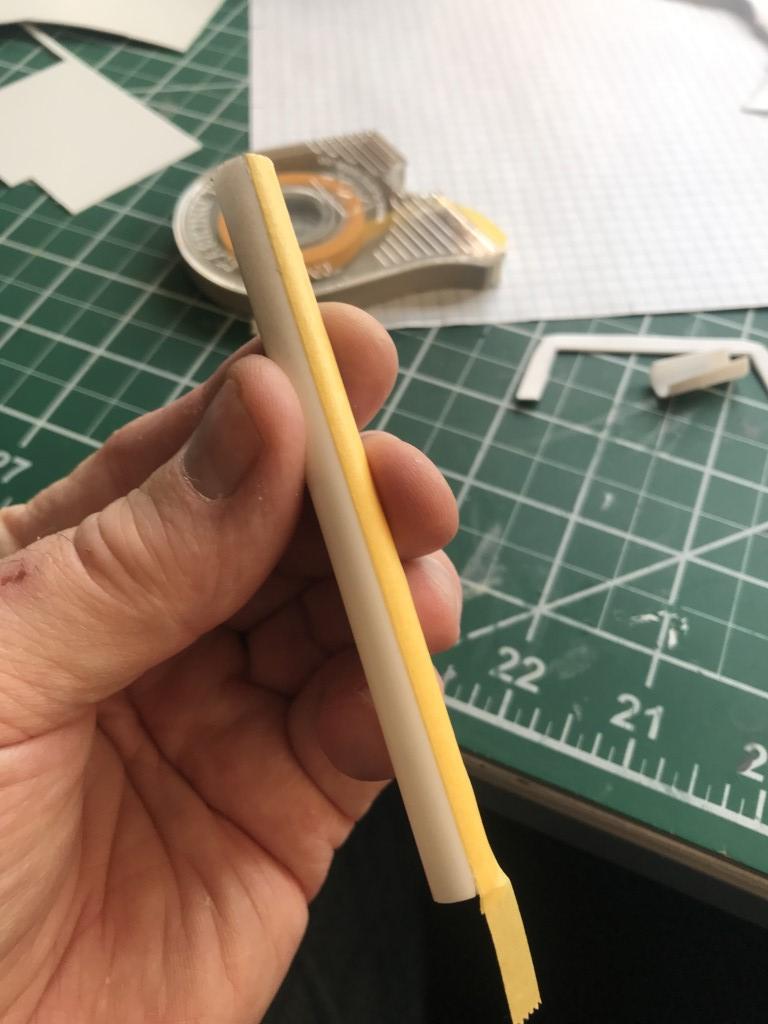
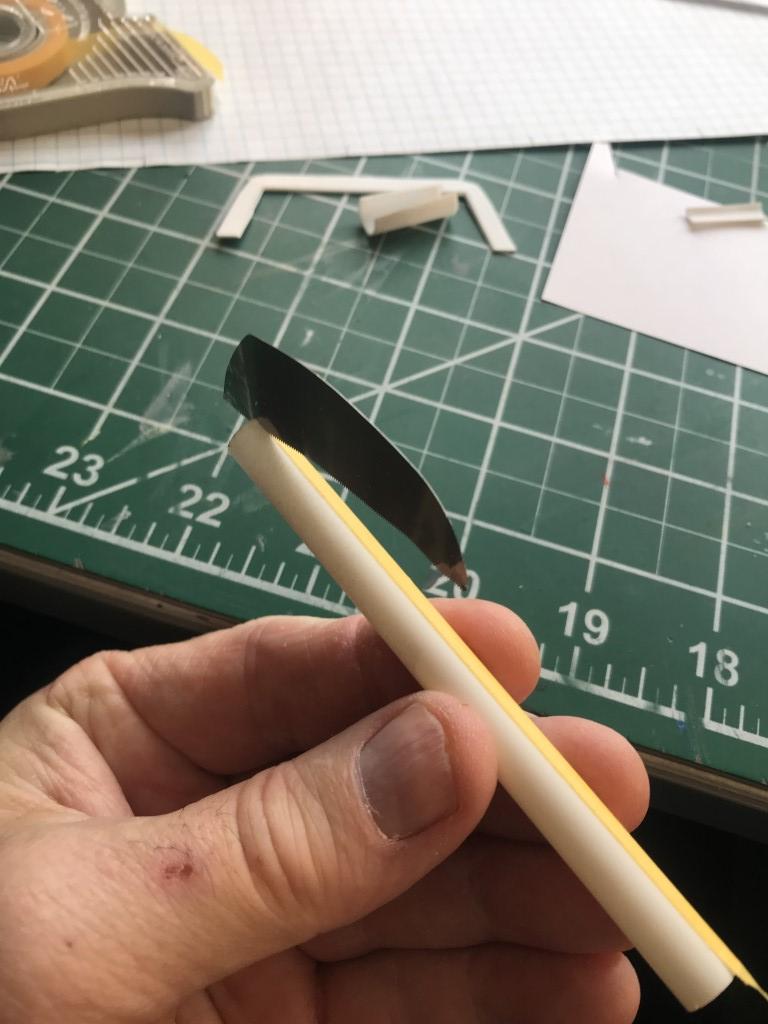
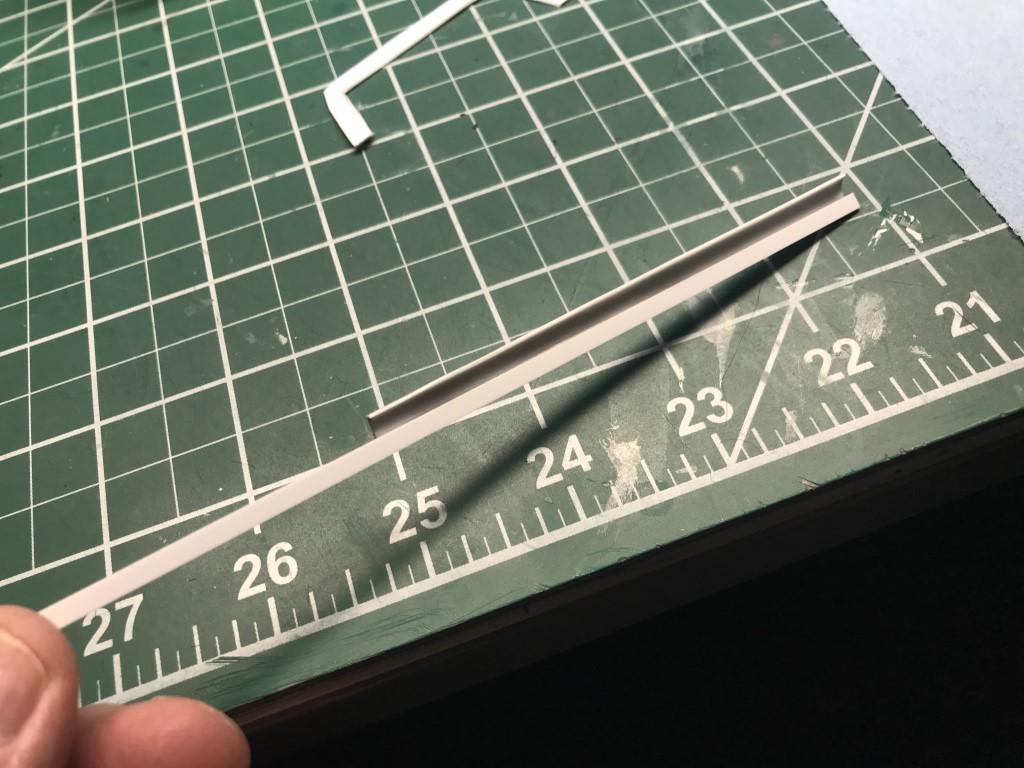
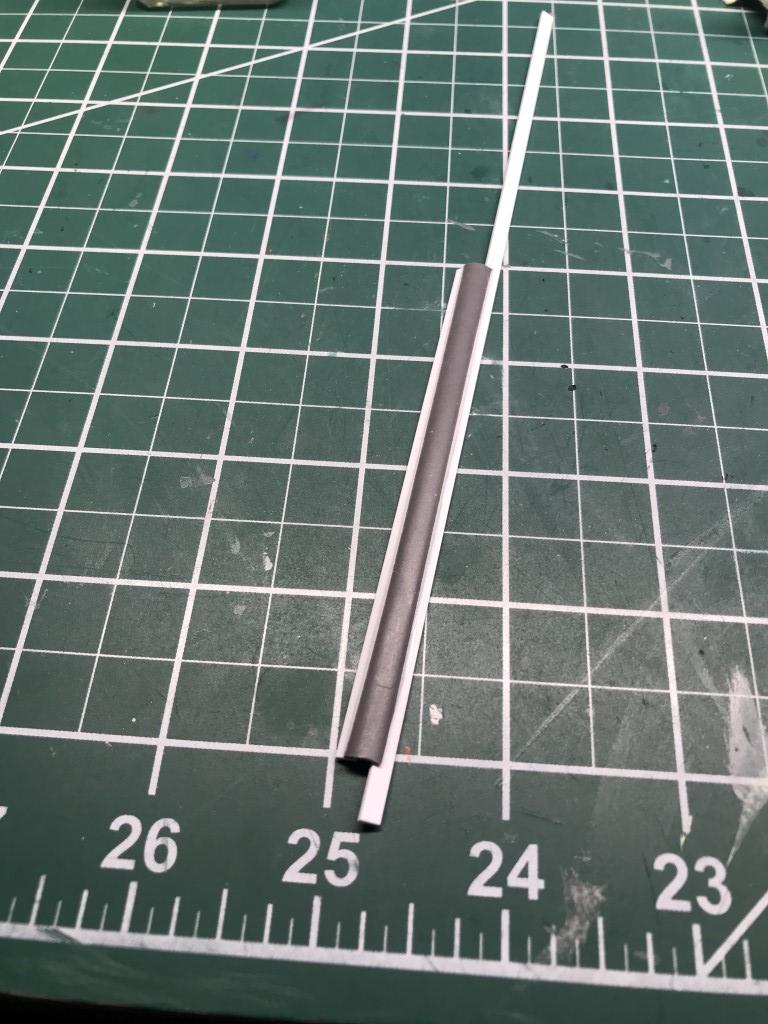
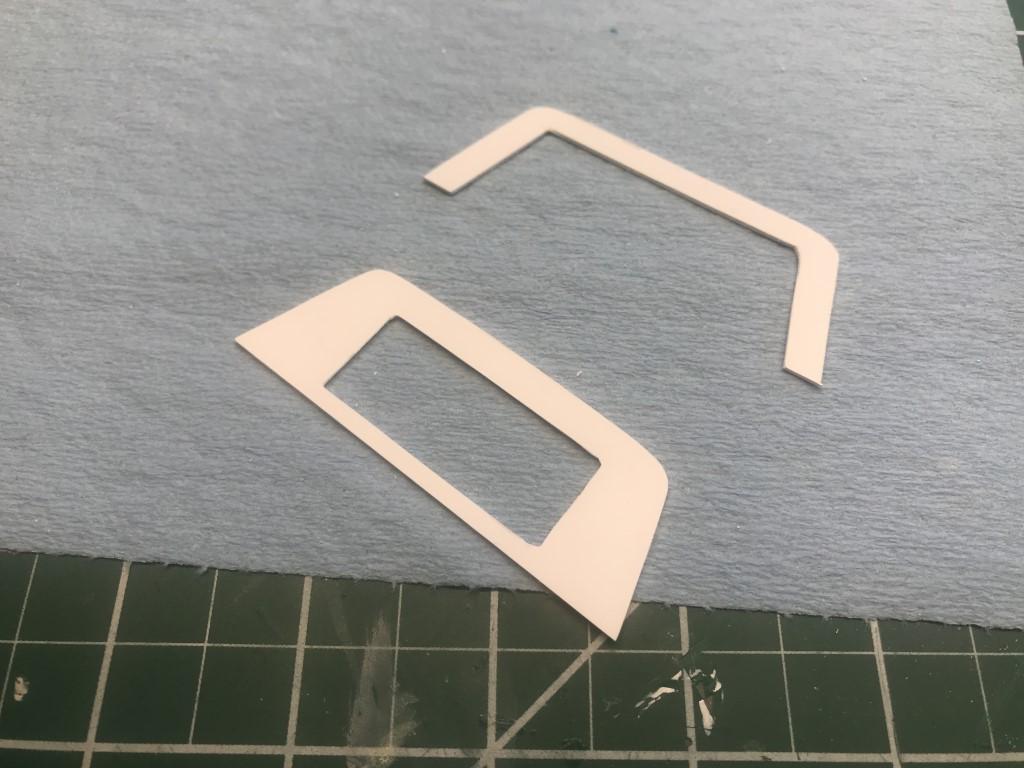
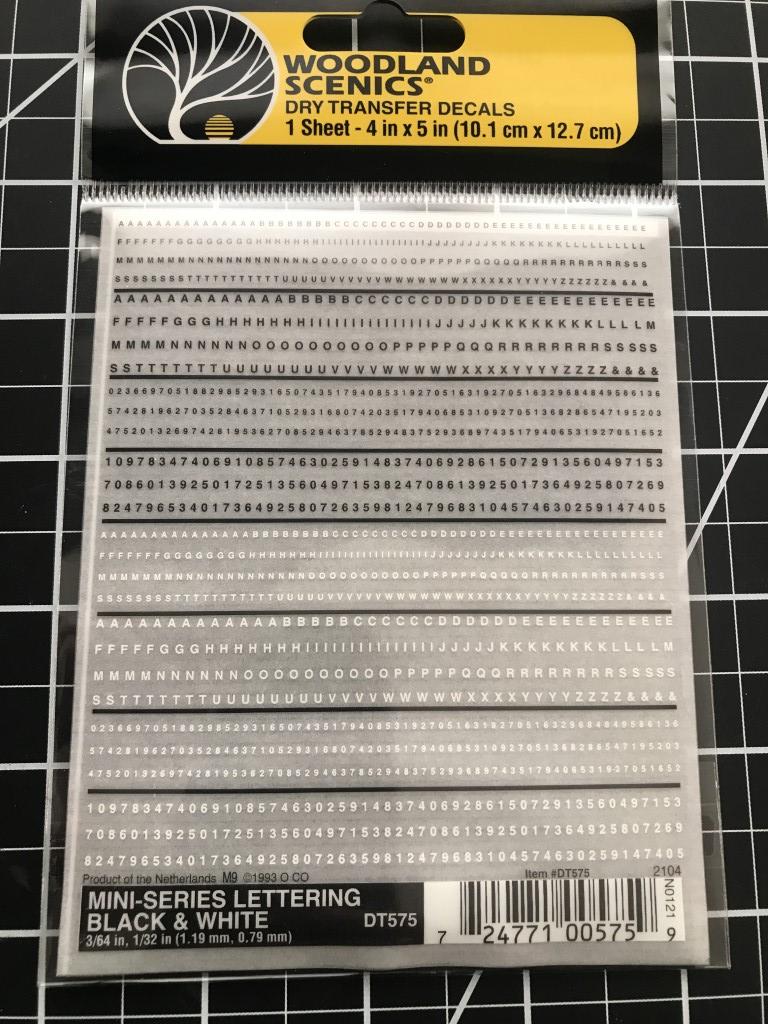
Some progress on the beginning of the topper for the truck. After much experimenting with the curvature needed to bring the top to the sides I ended up using 90 degrees of an 11/32 Evergreen styrene tube. I used a hole template to mark off both ends of the tube, which wasn't easy to ensure the cuts ended up fairly straight along the lines. Using the tubing had the benefit of holding its' shape after cut and being able to glue the "step" strips. I used masking tape to mark the cut lines and then used various PE saws to make rough cuts. I then finished by using my dremel VERY lightly with a fine drum sander to meet the tape. I ended up with two sections that I was happy with and added two strips to each to provide strength to the joints where the top and sides attach to the curved sections. I also made the templates for the front and back end panels. Lastly, a pic of a sheet of Woodland Scenics dry transfer letters/numbers that I'm reluctantly going to use for the side C/10 emblems used in 69. I guessed the height of the 1:1 emblems to be like 2" high, which works out to approximately 2mm high in 1/25. This sheet has the 2mm I needed, plus it had both white and black. Not thinking of an alternative to this sketchy way of replicating the emblems, I'll use the white letters against the dark green final paint of the truck. I may experiment with trying to paint a few of the letters silver and see how that works when transfered. Not holding out much hope on that . I'm a ways off from adding the transfers to the cab so if anyone has a better idea I'm all ears (well... eyes).
-
1969 Chevy base C/10
hedotwo replied to hedotwo's topic in WIP: Model Trucks: Pickups, Vans, SUVs, Light Commercial
Thanks Rog but I'm one of the oddballs that aren't too concerned with the underside as long as things sit level when finished. Mostly because of my trouble dealing with smaller, fiddly suspension pieces. Probably why I enjoy the old annuals. Years ago I never had that problem but many of us older folks know that your steadiness and dexterity can change as you age. Mine has. So I stick to things that are easier to fit and handle. We all build to what we enjoy doing I guess. ? -
1969 Chevy base C/10
hedotwo replied to hedotwo's topic in WIP: Model Trucks: Pickups, Vans, SUVs, Light Commercial
Read your thread more than once and am amazed at the detailing you did. I know I don't have the skills or patience to do the same.... congrats! Here's a look at the minimal chassis.
-
1969 Chevy base C/10
hedotwo replied to hedotwo's topic in WIP: Model Trucks: Pickups, Vans, SUVs, Light Commercial
Don't expect much for the interior. I know I'll replace the buckets with a bench of some type but will likely leave the door panels. Not sure I have the patience to do them. Once this ends up in my display case no one will likely get within 2' of it so (to me anyway) there isn't as much reward for the time spent on them. I know the parts of building I enjoy, and those I don't really . Your mileage may vary of course..... Oh, and mine had the 307 with 3 on the tree of all things. -
I've started on a project I've been hoping to do for quite some time. It will be a replica (as close as I will take it anyway) of a 69 base C/10 that my wife and I owned early in our marriage to tow a 16' Winnebago trailer. I was able to make a trade with DRIPTROIT71 (thanks again Brian!) for an MPC 70 CST trimmed Chevy that will need to be backdated to a 69 along with eliminating the custom trim level. I also scored a diecast 64 Winnebago from VON ZIPPER (thanks again Chris!) that, other than the accent paint scheme, is a great replica of ours. As part of the build I'll be scratch building a replica of the topper (aka cap, shell) we had as well. In all the years I've been building (starting in the early 60's) I don't remember building a truck of any kind, so this will be a first.
-
If you're referring to vintagemodelcarparts on ebay his name is AJ McPherson I think. I've bought from him many times on ebay and he's always come through for my needs. He can be a bit slow sometimes on shipping but it's not a big deal to me.
-
Thanks Mark
-
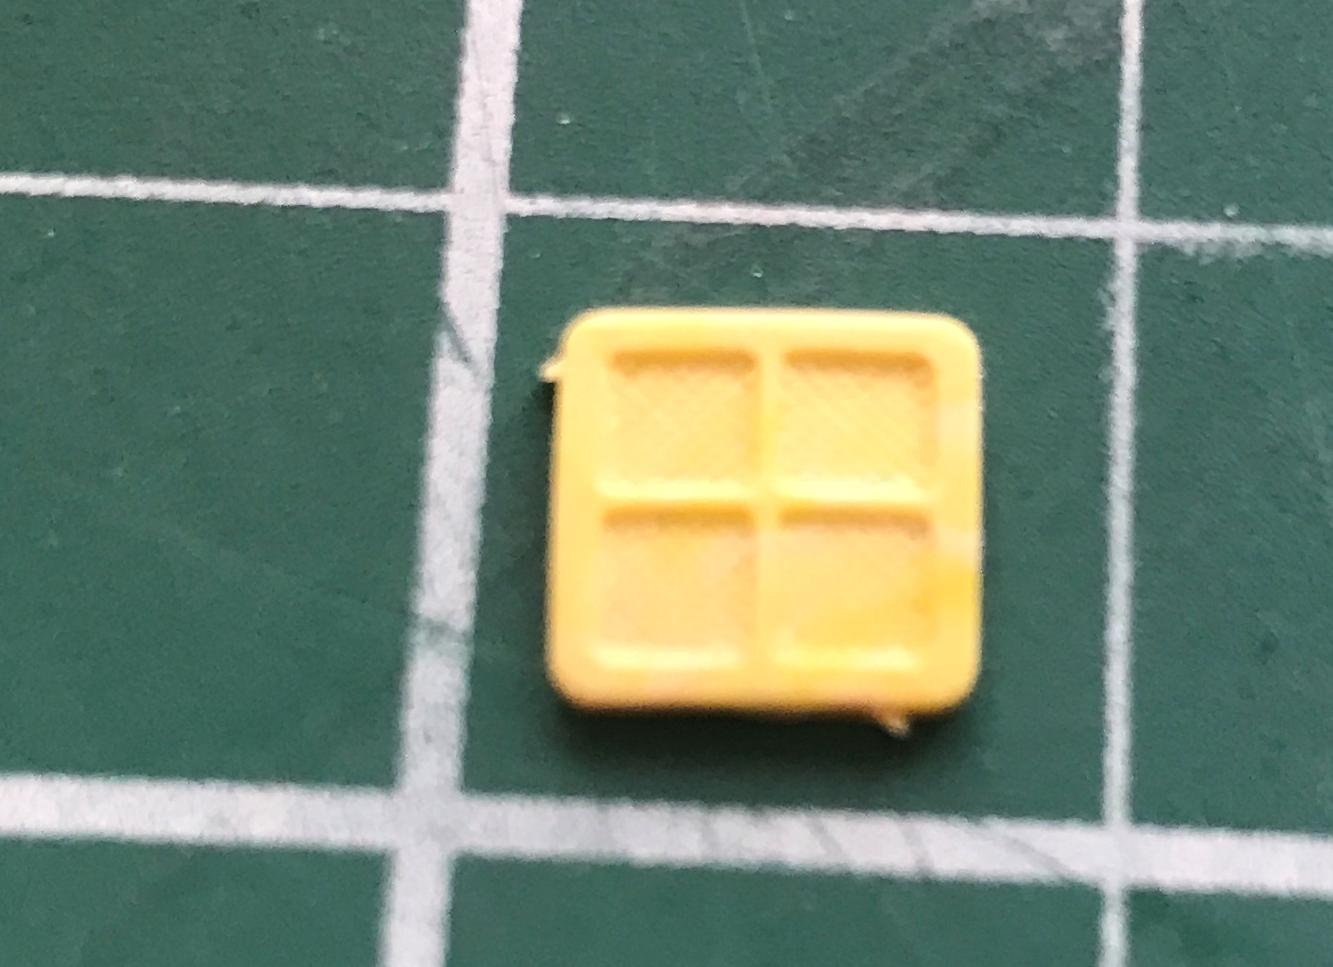
Draining an old container of Super Clean I found this little guy at the bottom. I used the Super Clean quite a bit and I have no clue what it is. Hard to see in the pic but there is screening in each square.
-
Test
-
Might have been worth a try but they're already gone
-
I've used card stock a number of times for license plates and it works good. That's a good suggestion for these emblems.
-
I was replying to Mike C about the 64-66 emblems. The C/10 emblem photos you posted Greg are what I need. Thanks
-
Those wouldn't really work anyway. To my knowledge the '69 and '70 C/10's had the same, or real similar, fender emblems. I'm looking for just the C/10 itself... no bowtie or "custom" or "cst". I'll likely have to make up some decals as I've searched and searched.
.JPG.c0700b49a5e8d9c4f5dd76d8106130a2.JPG)
.JPG.ef55af0cd0f8d97c5ba6a64ba6c2b96e.JPG)
.JPG.3755488a4516231d2174abeeba154013.JPG)
.JPG.23eea8ab1d67a3c805cf837db9ac64bf.JPG)
.JPG.89dd2853225c3d2a12d6e0a7f46ca8c1.JPG)
.JPG.71a4d10fa6df0db3cb208d40d828f0c5.JPG)
.JPG.61b9646269f4be95132fde439dd29886.JPG)
.JPG.1b3939225a255de05a8c352d359ac8db.JPG)
.JPG.a2342e06099d042fd212929c6c313498.JPG)

.JPG.0410735ea59e0a2fb26befe2940043da.JPG)
.JPG.bdb1df119be979fa91ba7443e841ff77.JPG)
.JPG.1af85eb47a23be6fdb6c6a5ab4254ab2.JPG)
.JPG.7df625cf777b5ae6dbb3be5a883c44df.JPG)
.JPG.8fd4512fa2744d18943014cd2a7254dd.JPG)
.JPG.726e8cb79d353fbe4e022a3e7bf64a9d.JPG)
.JPG.0da1273012b11af7a4ccc86fadbe87b5.JPG)
.JPG.c066b42f32cdc077f3182fcf24fdf68c.JPG)
(Medium).JPG.56a403ce7ab87bfbd98a50af07bc1eb8.JPG)
(Medium).JPG.aa01456967b9e8dd934003cc6dcd2789.JPG)
.JPG.4eb917d8045681c5f340d3478f9e0727.JPG)
.JPG.48621676a08c246d225533fe5cc02201.JPG)
.JPG.b95037277cf0911213054699a1f7ab88.JPG)
.JPG.70e287c6a201393fbe383d6f6577d84b.JPG)
.JPG.9b5d84ea14cb419759e234ca0d713a2e.JPG)
.JPG.ed4a0947efc5ca572a1f1591b8cdd9e8.JPG)
.jpg.6b76b7e0332fa106c62456ac1e98f35a.jpg)
.JPG.11e27c06477c28cf0e29bf7d88ec9bf9.JPG)
(Medium).JPG.1ae1eb2670e49c05552b6167005bcb0c.JPG)
.JPG.123d8bbd7c721e1028644e1f419213c0.JPG)
(Medium).JPG.6f4fd89bf02c3095dd322983d7857a9c.JPG)
(Medium).JPG.4310cf9751e7ef66811d5ca411434979.JPG)
(Medium).JPG.19cbb5dfa089e387541701060be9c93d.JPG)
(Medium).JPG.98e5fe9d9647930154cf81c31b1f7d65.JPG)
(Medium).JPG.173ed8f81ca02f143e743504f001a99e.JPG)
.JPG.b8b88c41794c32275d3f5c42f3178cf7.JPG)
.JPG.6b945407aac3a8712de3737a3a7f28f6.JPG)

.JPG.59ac09da739d6c22b5779cb92dbb3704.JPG)
.JPG.f873a089929c6443aa556a9fabe1368c.JPG)
.JPG.af058342778934467e5b580350f376a1.JPG)
.JPG.11c884f4482d09229183c2e41b963f41.JPG)
.JPG.ff116b2da904990a0c67dd5884b42ccc.JPG)
.JPG.c5b7df573395ad61cf73d741817fcba7.JPG)
.JPG.4e20025653e132b286298ad4b505fbdc.JPG)
.JPG.deefb4846d7d2a3f39831850c8ac4847.JPG)
.JPG.2b1b7e603b57ba1ea35704e32f5b1d67.JPG)
.JPG.07870a7d5b2633774996f55da07a7b2c.JPG)
.JPG.292a2eec7f663a9eb7aad0d0e8c5d3df.JPG)
.JPG.334b92d0e1a51c27f7ce31f25ef8a413.JPG)
.JPG.b3a4fcaf881f65267e79ea5043c35047.JPG)
.JPG.fe7507caa6c19016c46ef2a29f22b835.JPG)