Russell C
-
Posts
1,930 -
Joined
-
Last visited
Content Type
Profiles
Forums
Events
Gallery
Everything posted by Russell C
-
Vehicle obsolesce, Part II. There's been a trace of a gasoline smell underhood of my '86 VW GTI for a while, exponentially worse today, where I could finally clearly see it. The forward flexible section of the "fuel supply line" that is grafted onto the hard line going into the fuel distributor has a crack that now leaks under pressure. I assume it is a somewhat flexible inner plastic tube protected by an outer rubber covering, because back closer to the firewall, I see a crack in the rubber cover and a shinier bit below in the crack. Clamping the forward section's cracked leaking area where it goes into the hard line doesn't stop the leak one bit. Problem is, I've searched for a couple of hours far and wide across the internet and haven't found anyone selling a used one. Left a message with one of the south Phoenix VW junkyards that's been good to me over the last decade, will have to try again tomorrow to catch a live person there. Really shouldn't drive it with it leaking that much, but it may be an uphill struggle trying to locate a fuel line. CIS-e fuel injection, in case any of you have one laying around or know someone who does ....
-
Vehicle obsolesce, combined with wacko inflationary prices. Took my daily driver 300k+ miles '86 VW GTI to the same mechanics' place I've been going to since '97-ish, my CV boots on one axle split from old age, and I don't like fixing that sort of thing myself. The longtime employee I've known there since 2002 bought the shop from his boss, and told me the basic reality today was that from jacked up building rental and other rising costs, he was going to have drop most of the time-consuming, barely profitable work on old VWs (taking no new customers of old ones, but courteously doing work for legacy customers like me). To keep viable, he can only take work on newer technowonder VWs. My bill was $309 parts & labor for a new axle with new boots on either end, cheaper than replacing only the grease-spitting outer boot and cracking apart inner boot. Other car there was an '09 2009 diesel Jetta Wagon with a blown turbo and other decaying bits, looking at a $4 grand repair estimate .....
-
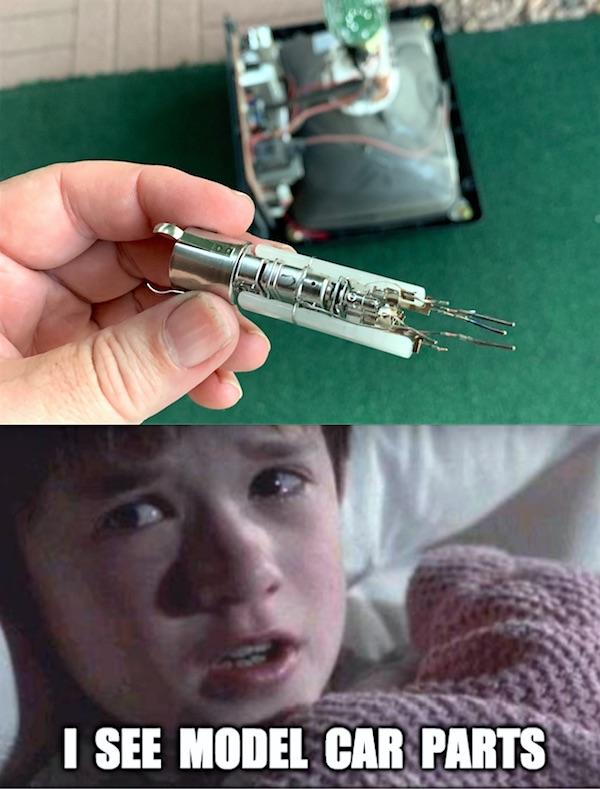
 Always wondered what was in the pointy end of an old CRT television set. Now I know. And since I've been kicking around the idea of doing a jet car / hover car sorta like our MCM forum man Daxman has built, I have another victim right at hand for a second turbine-like engine to go in one of the currently unloved glue bomb bodies I acquired several years back ….
-
Nice! Got that same kit many years back. The weakness I have for these is my current daily driver '86 GTI with its 300k+ miles. I was thinking I'd one day do a replica of it, but with my preferences of upgrades such as the larger side windows / mirrors placed further forward on '87s & up. Also 5-spoke aftermarket wheels. And maybe syncro AWD. (would do the same on my 1:1 if I could afford it - taking donations, just be sure to make the checks out to "Cash" ?)
-
I resemble that remark!!
-
2023 BRGB Movin' On Kenworth
Russell C replied to leafsprings's topic in WIP: Model Trucks: Big Rigs and Heavy Equipment
For a few moments, I thought the wheels out of the old AMT Pete 359 or Pete cabover might be the answer, bit potentially a bit too small in diameter. But when I looked close at the wheels in my ancient IH 4070A that I put the Pete cabover wheels on, that raised lugnut circle was there, just not as prominent as the Freightliner ones. Did a quick search for the AMT Autocar tractor that had the 5 hole front wheels - same raised lugnut circle area. Haven't paid a lot of attention to the aftermarket turned aluminum wheels market, I wonder if someone makes the proper set, or has made them in the past. -
Carolina Ford WT 9000
Russell C replied to DRIPTROIT 71's topic in WIP: Model Trucks: Big Rigs and Heavy Equipment
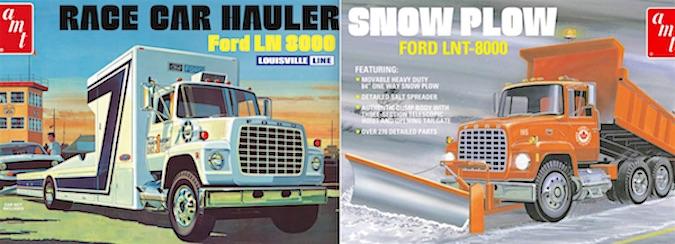
You mean the AMT LN or LNT 8000 conventional? I'm wondering if anyone has effectively sliced that surround area off the front of the hood to use for a cabover ...
-
GSL Common Kit '29 roadster - Snoopy steals the Red Baron!
Russell C replied to Russell C's topic in Model Cars
Thanks all! The one deciding factor for the slant to the driver's side was the curve of the original (+ one more pipe) Red Baron kit headers. Build thread here: http://www.modelcarsmag.com/forums/topic/177430-gsl-common-kit-29-roadster-with-gm-slant-engine-prototype-you-never-heard-of/ -
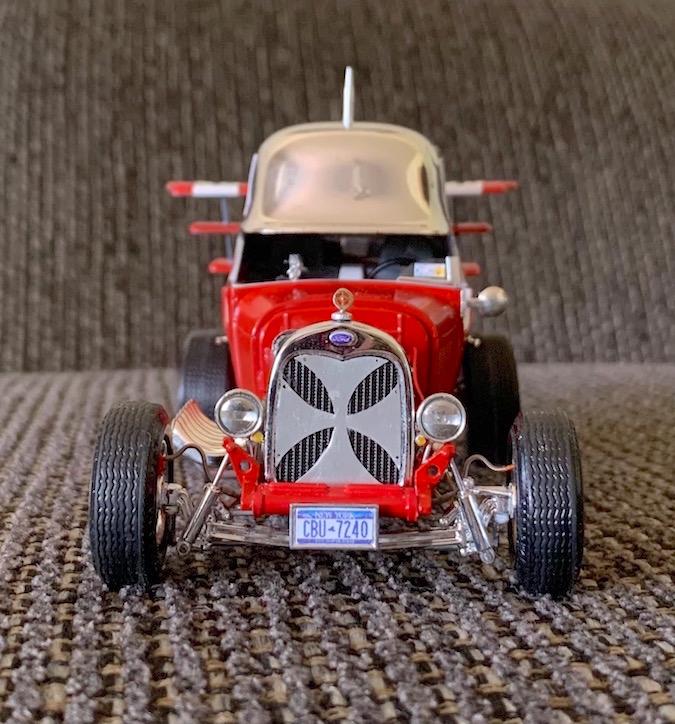
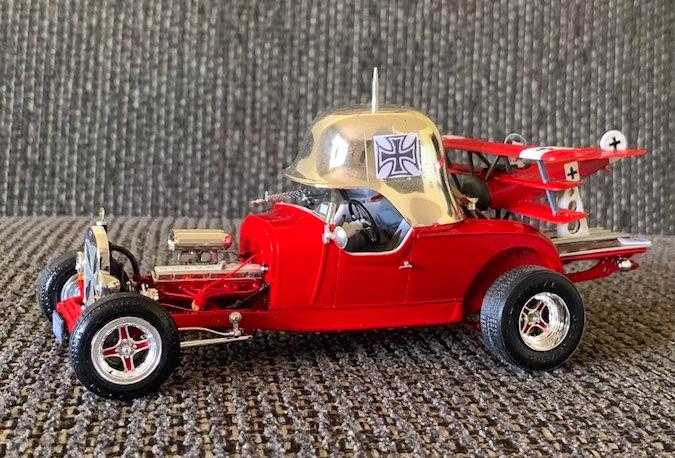
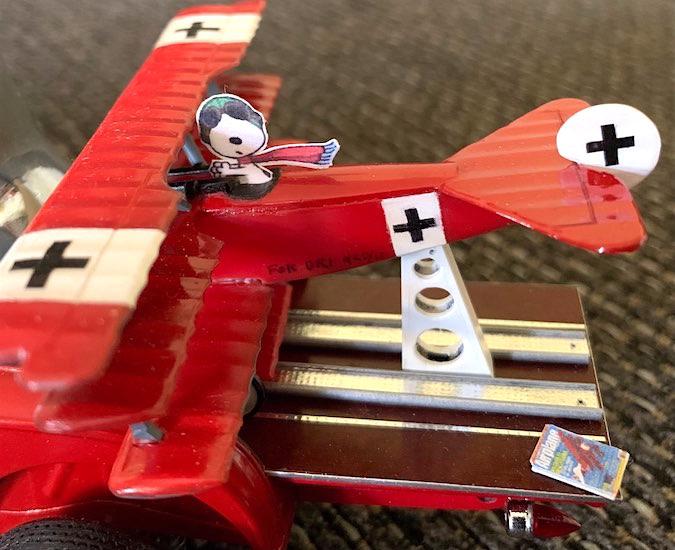
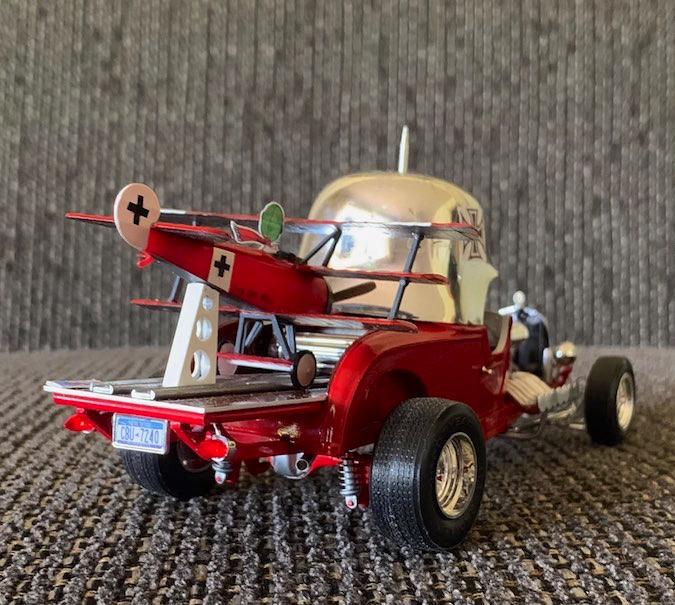
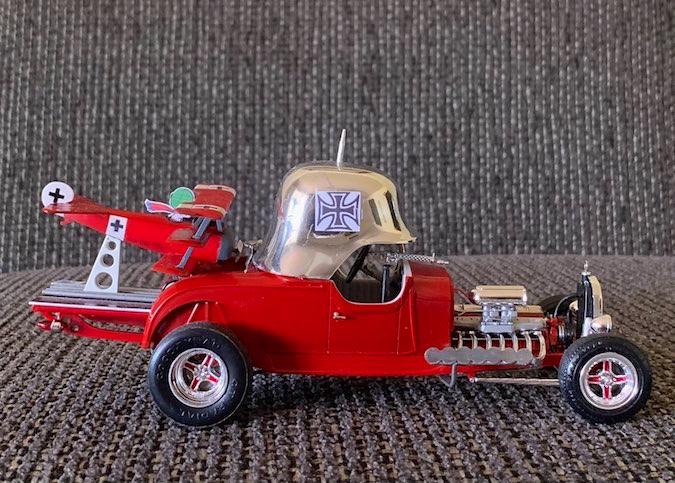
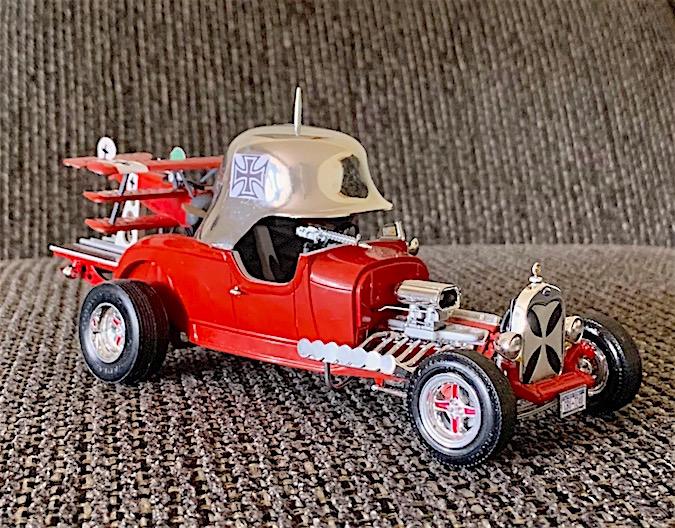
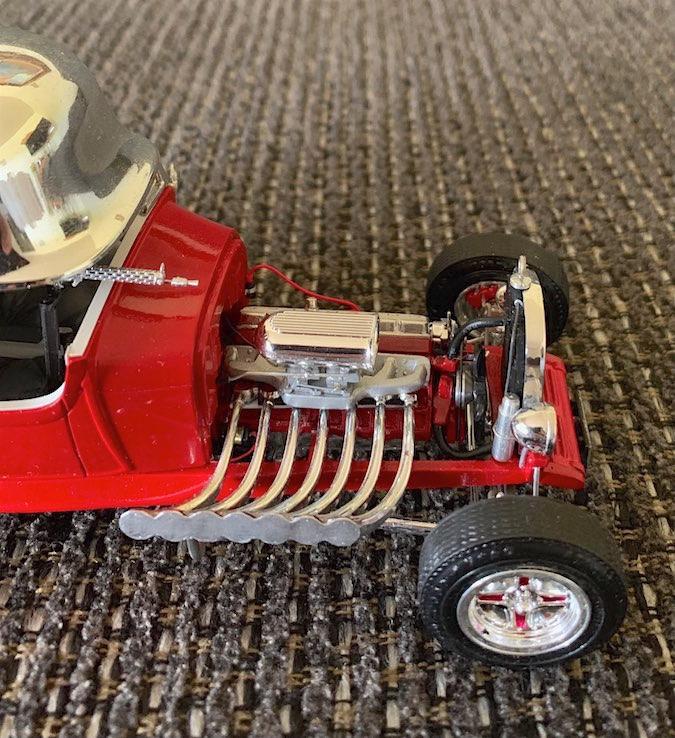
I sure had fun at the GSL contest, and at least got the chance to mess with folks' minds one more time on the number of cylinders I put in my engines. The backstory here is that I originally intended to put this GM slant 7 prototype in a fantasy prototype of a Dale Earnhardt NASCAR, and had started on it a couple of years ago with a different block. But then it dawned on me that it would be better out in the open in the Revell '29 roadster, rather than where I'd have to open a hood to show it. Not stopping there, however, I thought it would be one increment more fun to have a "what if" build that Tom Daniel might have done if he'd chosen the '29 Model A instead of a T-bucket for his Red Baron design, and if he'd included the little triplane as something that would resemble a quarter or 3rd scale radio control plane that could be loaded onto a platform out back. More likely Tom Daniel and/or Monogram would have maybe used the same slant 6 that's found in the Horn Toad kit, who knows? Here, lets just say I still lose track of all my fingers when I count up how many cylinders I want in my engines. Since the Revell roadster had capped exhaust headers that dumped into underside pipes/mufflers, this was a great excuse to create a cap over all the pipe ends (thin polished aluminum) rather than hollow all of those out! It still needs a couple more details - a better spear for the helmet, a little radio control box to sit next to the magazine on the back, a bungee cord to hold the plane tail to that big post, and maybe I'll eventually locate an original chrome helmet top that's in much better shape to replace the so-so one here. Enjoy!
-
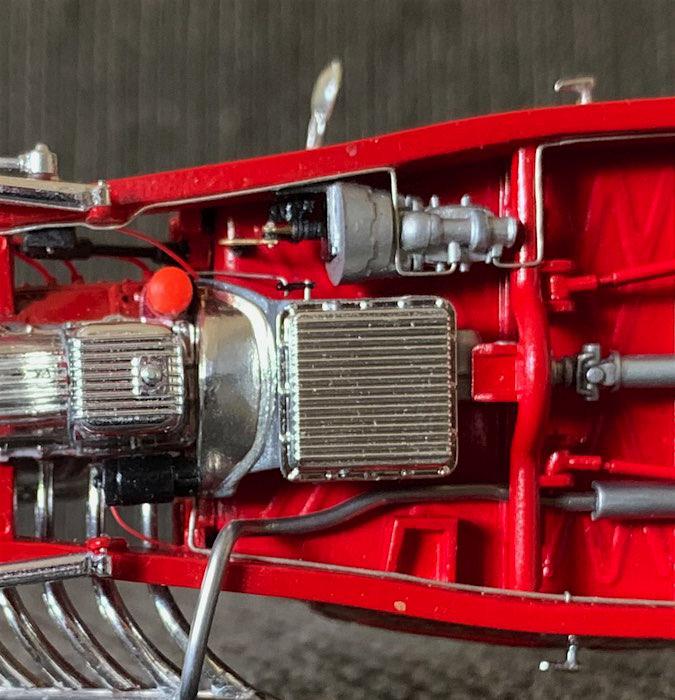
Running behind on this thread, we had a big unavoidable family function happening right after I returned from Salt Lake City which wrapped up finally yesterday. Last of the WIP photos, which shows the muzzle flash reducer (?) at the end of the Spandau machine gun barrel that I machined out of aluminum, compared to the complete 3D printed barrels that came out of the GasPatch Models 1/48 scale kit. My barrel itself is a length of polished aluminum rod, and the gun was spray painted with a really old can of Dutch Boy chrome silver, which turned out quite shiny. And finally, I did put in a linkage from the transmission to the steering column shifter sleeve bracket just beyond the firewall. Under Glass link here:
-
Loading ramps located / bolted down on the flatbed, stop / loud pedals installed after the 'carpeting' was laid down (a skinned layer of light gray cardboard that resembles short pile carpet), dash / steering column done with shifter / turn signal levers, brake lines installed along with most of the fuel line. A fuel filter will be installed at that terminus, and then the rest of it will be installed when I have the body in place. Bare Metal Foil on the transmission flywheel cover, to resemble the aftermarket polished stainless steel ones. Counting my blessings that I managed - in advance - to create a flexible throttle cable from the carbs to the firewall that snaps in place every time. Unfortunately, time is short, so I must concentrate on getting this project done to be ready for the Thursday morning flight up, so no more time for WIP photos 'til I return next week., and then the Under Glass separate thread. Which part are certain about?
-
News to me as well. Does that have something to do with the recent movie, or some other new interpretation, or an old TV show dream sequence episode?
-
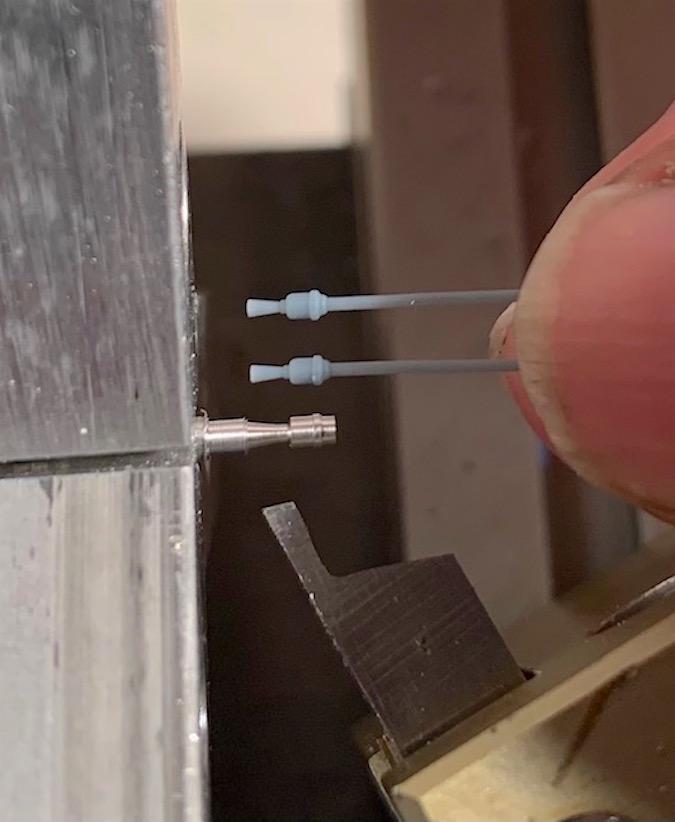
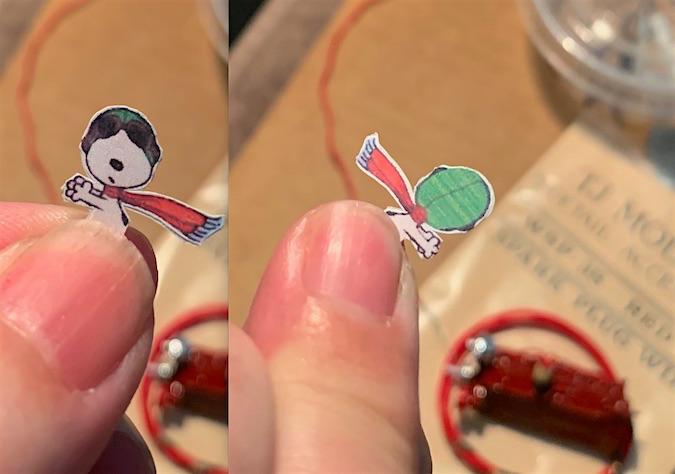
Gettin' there. '29 roadster kit alternator with machined aluminum pulley installed, kit crankshaft pulley painted and installed, machined aluminum fan pulley installed, and they actually line up right. Never cared for all-in-one pulleys/fanbelt plastic assemblies in kits since I crave the look of more scale-appearing belts and belt grooves in the pulleys. Finally got around to using the TJ Models spark plug wire I've had forever, this color works well for the deep dark red engine color. The plug wire boots is from some electrical wire insulation, cut into teensy sections which fits really snugly over the TJ Models wire. Also, folded my Snoopy in half and cut around the image perimeter. This worked out easier than I originally guessed. You'll see ……
-
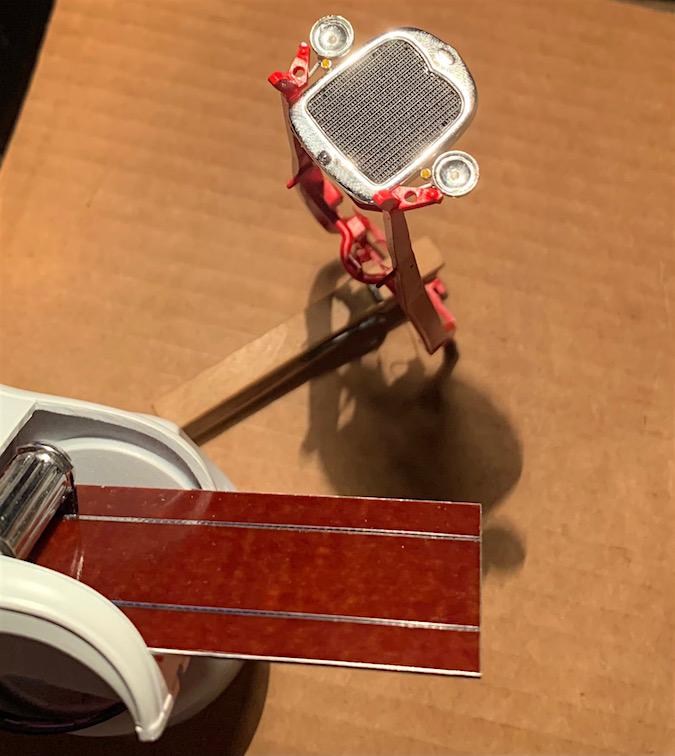
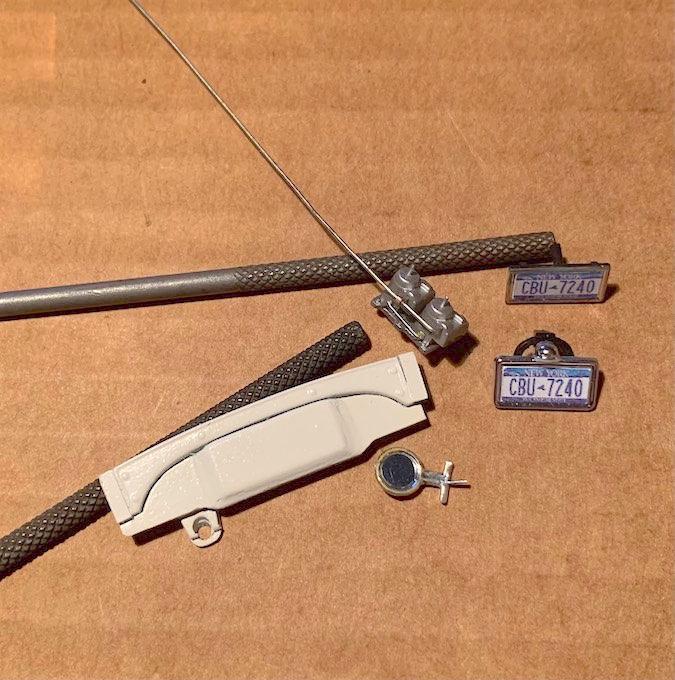
Gettin' there. Color on the frame. Before gluing in the aluminum foil headlight reflectors (to get rid of the deep dark eye look of the Revell '29 roadster kit headlight buckets), I needed to temporarily locate the units on the frame to be sure the height was right for the wire brackets that go into the buckets - a touch of super glue at those points inside the buckets makes 'em permanent. The bulbs are heat-stretched clear sprue, with just a bit of extra heat waved in at their ends to make them flare out into bulb shapes. Added bits of leftover adhesive-backed aluminum strips to the edges of the "wood" platform. That aluminum material came from the aerospace nameplate place I used to work at. Cuts with an X-Acto blade and the industry strength 3M adhesive makes it stick very well to the edges. The dotted ribs are thin strips cut out of a dimpled pattern adhesive back Triple A chrome mylar bumper sticker. Fuel tank permanently superglued in at the front of the platform. Aiming to have the roadster body in its final red color by tomorrow. Got the final white coat on the dash, ready for the application of the "Red Skull" style gauge cluster 'decal' that I mentioned in my Feb 8 post. Sideview mirror has been rattling around in my parts box unused for a decade+. Permanent throttle linkage on the carbs, along with a two-into-one wire fuel line temporarily pinned in here. NY state license plates in their frames. Bonus points to anybody who can ID what TV show car those came from.
-
Nice work! Magazines for me. Didn't click on the link within this page, but it appears the plans for these are still available: https://protected.hostcentric.com/rqriley/minihome.html
-
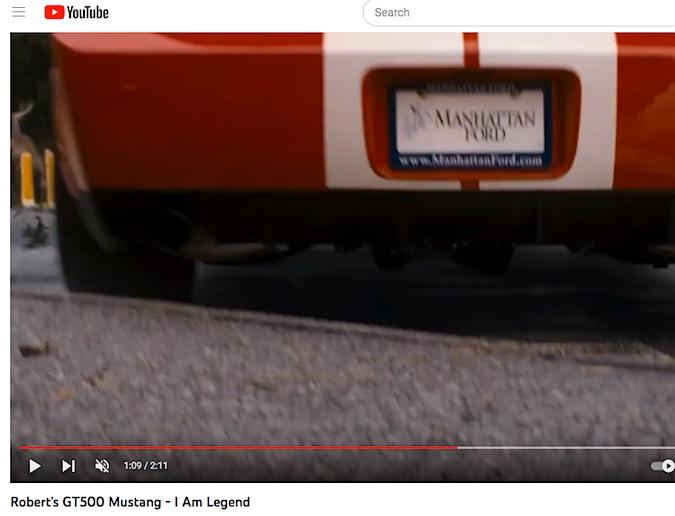
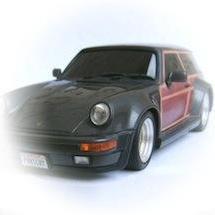
Nice! Seen the movie a few times on cable TV, but your build had me wondering what the back plate said. Got a screengrab from one of the Youtube clips of the deer chase scene. I should have guessed, he 'borrowed' the car straight out of a fictional dealership.
-
Haven't missed a single GSL since 1990, not missing this one either. Thought with the postponements from the virus situation that I would have several completed projects to bring, but real life intervened with other non-hobby obligations, so the most I'll have is my Common Kit entry and maybe one older build for display.
-
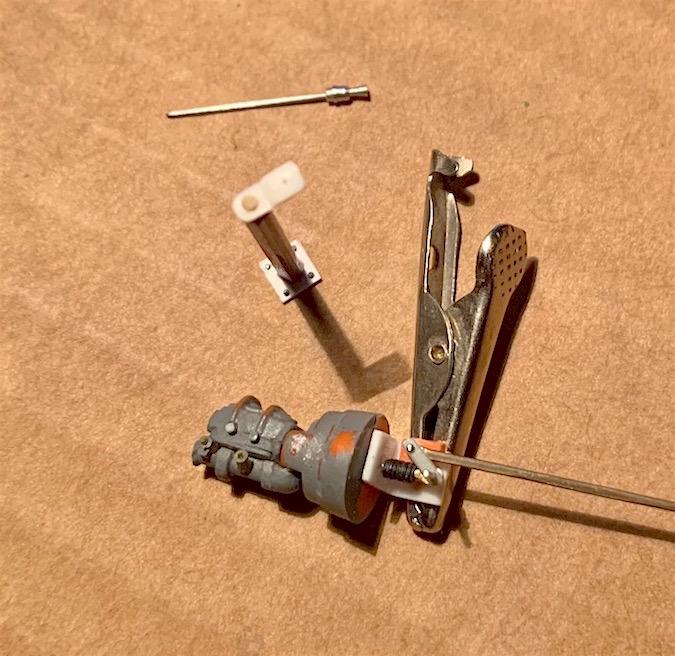
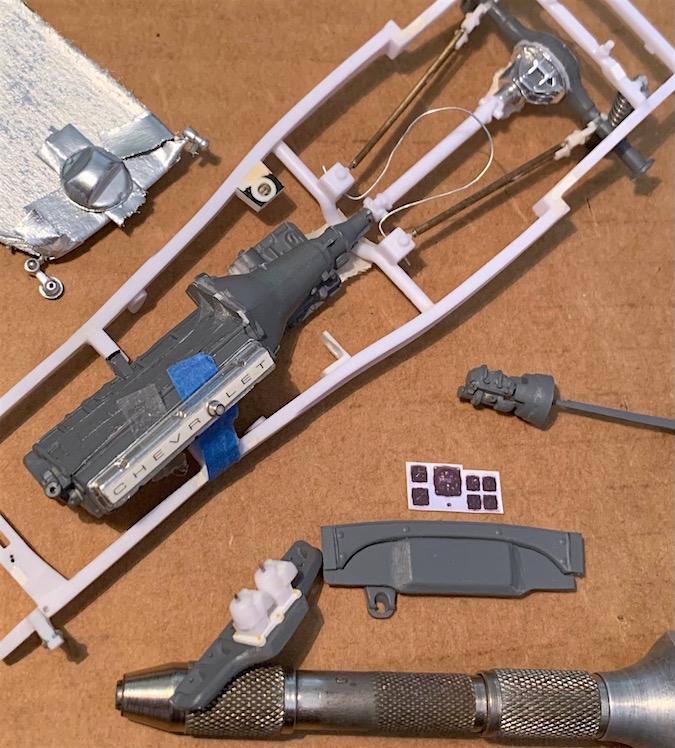
Three progress items today: First, Plan B for the brake booster bracket & lever arms. Originally I thought it would be easier to glue the bracket onto the frame with a predrilled hole through matching one in the back of the brake booster assembly. That way, I could stick in the lever arms from the front side and wouldn't have to paint the bracket separately the same color as the frame later and scrape paint off the frame to glue in the bracket. Poor planning, since it was turning out to be way too fiddly yesterday to test-fit the lever arm stuff with the bracket already on the frame. So, I drilled two pin locator holes through it into the frame late last night, then sawed it off and glued in two locator pins. I'll paint the bracket and the lever arm items black instead. All that will be needed to do afterward is assemble the whole unit permanently, and then locate the brake pedal arm up into the floorboard and finally just glue the whole unit onto the frame. Next in the photo is the cantilevered pedestal I mentioned in my Feb 11 post. Don't quite know how the swivels at the top work, but it looks good enough for jazz for me. Easy to put together out of scrap plastic bits, with heat-stretched sprue again serving as the 4 bolts at the bottom, like I did with the adapter plate for the carbs. And at the top of the photo is a length of polished stainless steel wire for the gun barrel and some aluminum rod I turned on my mini lathe to be the end trumpet thing. Might be intended to be a muzzle flash reducer, don't quite know how those work, either. WHAT??!!
-
Thanks for the kind words! A little more primer painting today, with final coat black on the steering column/box. That little thin down pointing bit on it is the column shifter arm for the rod that goes down to the transmission. I've got it pretty much worked out what the shape & length of that rod must be and how it attaches to a short crank arm at the transmission. At the bottom of the photo is the primered top end of the steering column - ignore the masking tape at the left side which keeps the plastic bare where the steering wheel attaches. Will create a wire shift selector arm along with a wire turn signal lever on the other side of it. Rear axle / radius rods may be ready for the final paint color, but I think the frame extension there will need some more sanding in a few spots. Might be able to get the whole rest of the frame primered this week ...
-
Had nothing done to enter, but made the trip across town to & from in one piece (thank heavens!), and got to catch up with several old friends in my too short of limited time there. Quality work on the contest tables, that's for sure!
-
Temporarily double-stick taped the valve cover to the engine with its permanently glued-on oil filler cap. "Chevr O let"! And reshaped the intake manifold to better match the carbs adapter plate they're now glued to. Dash seems now to be in good enough final shape to paint white and then double-stick tape on a better paper printout version of those gauges (this version is off my old Canon inkjet just to see if I got the size right). Premiered the whole underbody brake booster unit so it can be painted Metal Master stainless steel silver next. The decade-old spray can of Dutch Boy chrome has held up well enough to shoot a coat on the rear diff cover and the two white plastic steering link ends out of the Revell roadster kit. I didn't take them off the aluminum wire rod connecting the two, so if I'm lucky when I take them off that cardboard, I'll be able to attach the whole unit to the frame / front axle and superglue them in place with minimum handling that might otherwise mar that shiny paint. (ignore the giant temporary wire loop holding the front of the radius rods to the frame)
-
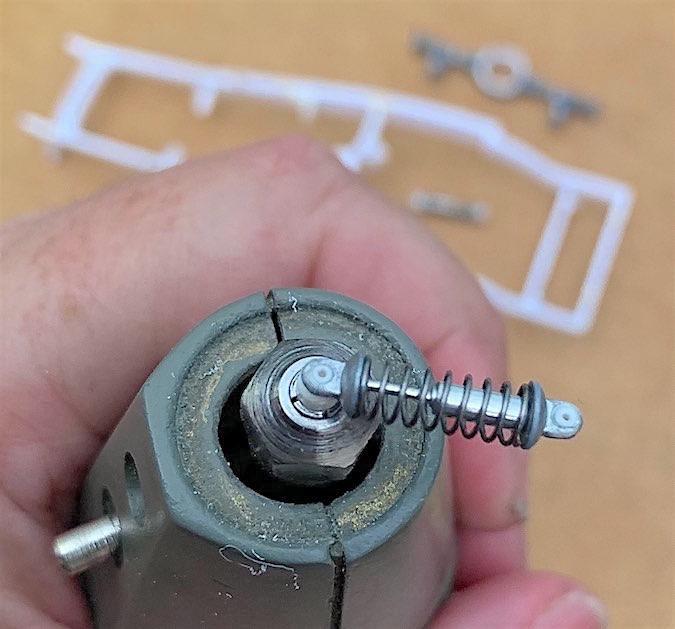
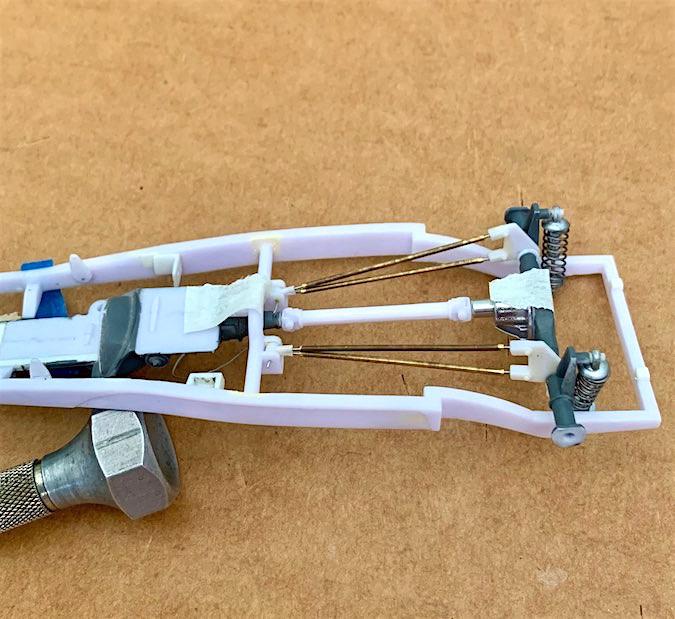
The 'slop' of the too-large-of-holes in the coilovers were bothering me when it comes to friction-fitting the whole rear suspension together on the frame, where I could finalize the gluing of the radius rods, so I 'lathe-turned' sleeves on my motor tool to glue into the holes that I could later ream out to fit snugly onto the mounting posts. Excess handling of those ends from the Revell '29 roadster kit means I'll have to repaint the Model Master buffing stainless steel paint before the final assembly. Now, on to the brass tube & wire ends to replace the rear radius rods that came busted in the roadster kit. This is where the point comes in from my Jan 3 post about the extra 'sleeve' bits I added to the kit's radius rod arms at their connection to the rear axle. They now friction-fit onto the axle tightly enough that I could put them in place, and with the wire ends stuffed into holes drilled in each end of the plastic remains of the kit's rods, I could slide the brass tubes back 'n forth until the positions were right, and then use superglue to set them on permanently at their back ends, and then use Tenax liquid cement to permanently glue the plastic arm ends to the rear axle. Everything else is still friction-fit in place temporarily for the coilovers / front ends of the radius rods / drive shaft / chrome front diff piece, all for easy removal. The radius rods will be the same color as the frame & main part of the rear axle. (that's masking tape holding the front diff part to the axle) Because the cylinder end of the chrome diff part was not especially well plated on its bottom and it needed its length corrected anyway, I wiped it out and drilled a new hole in the front of the diff to take a polished aluminum tube the same diameter, where I stuffed a 'lathe-turned' bit of plastic sprue into the tube and drilled a hole in that exactly the same size as the post on the back of the driveshaft. Makes the driveshaft have a much better, wiggle-free fit. That is another plausible sounding scenario …..
-
Old thread with a busted link in the 3rd post down from the top, but is preserved in the Internet Archive, where it appears some of the photo links still work: https://web.archive.org/web/20180818153313/http://fatjacksplace.com/tableofcontents.htm
-
Don't need one myself, but a potential suggestion via a mildly quick 'n dirty alteration of your image - '59 Blazer?
-
Yup, when you type into the "Reply to this topic" box at the bottom of any thread, your reply then appears for all to see and isn't restricted to just one person. Somehow, ads that appear at people's websites generate pennies of revenue for the websites, but I don't know how. While I would like to support this MCM site that way, the growing number of ads I saw several years back just became too intolerably obnoxious to see (like what you seem to be describing about the "offer to download the PDF Manual"), so I went to the AdBlock website ( https://getadblock.com/en/ ) and clicked on their button to install that application on my computer. It's free, and it absolutely kills every ad there is that appears in this forum. ALL of them. I know there are ads because every once in a while when I am out of town, I use the borrowed smartphone I have to log into the forum, and there's no AdBlock on that thing, so that's when I see what other members here have been complaining about.