Russell C
-
Posts
1,930 -
Joined
-
Last visited
Content Type
Profiles
Forums
Events
Gallery
Everything posted by Russell C
-
Looking for ideas on how to widen rubber tires
Russell C replied to midlineqb's topic in Model Building Questions and Answers
This is something that I've thought about but haven't tried yet. It might work best on a tread where a wide flat center section would not look out of place. Using some form or another of plastic, I'd find a way to 'lathe-turn a dowel so that the widening center section is the diameter of the tire, while the two outer areas are cut down just enough to be the inside diameter, thus giving me areas to superglue the split tire sections onto. Or, I suppose just a straight dowel section could be cut down to match the inside diameter, and the widened section in the center could be a strip cut out of a donor tire and all three could be glued onto the dowel. Do it right, and the added center section could have the deeper levels on each side, making the graft much harder to see.
-
Year end roundup: just the one for 2023 - "Snoopy steals the Red Baron"
Russell C replied to Russell C's topic in Model Cars
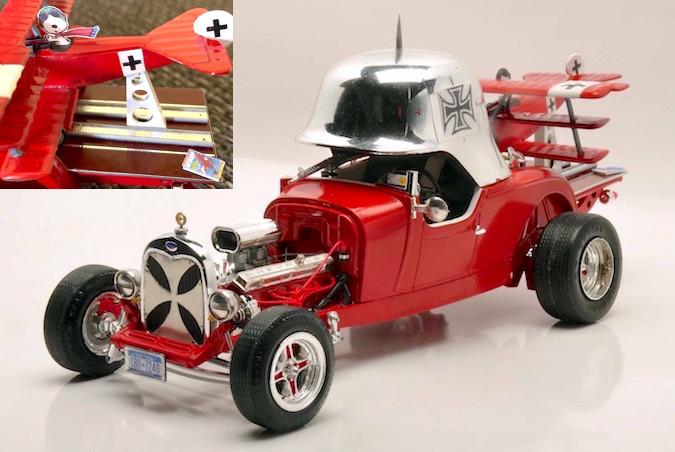
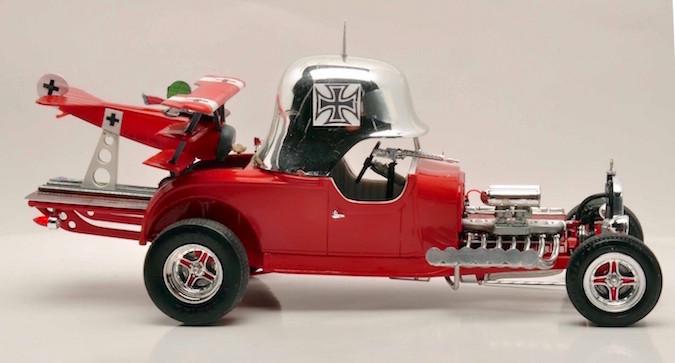
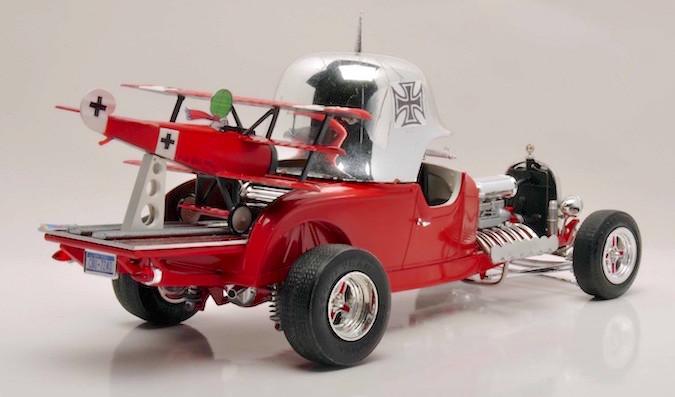
Thanks to all for the kind words! As with many models, it's not actually finished. I worked 24 hours straight before the flight up to Salt Lake City, and even then didn't have two last little details done, one was to machine the aluminum rod spike on the helmet into a more refined shape, and the other was to make a bungee cord to secure the triplane to the pedestal at the back. Took some stretched yellow sprue along with a bit of yellow electrical wire on the flight, but both didn't work out well in the hotel room, so I just left that off. So the goal is to find a helmet in better chrome shape (ignore the scratches on the passenger side), find some actual vintage decals for the helmet instead of the adhesive back paper printouts here, and make a bungee cord out of something that stays put.
-
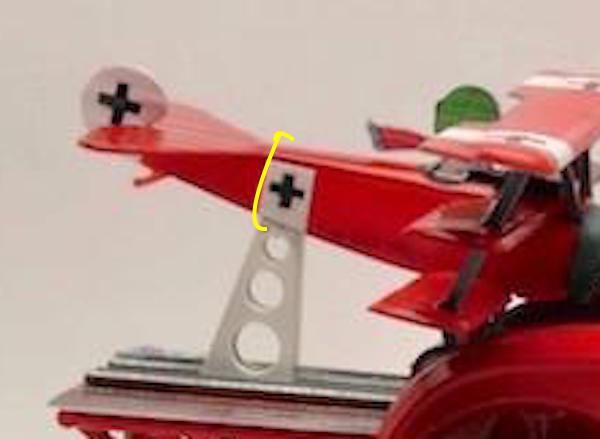
If only real life would not get so much in the way that it shoves hobby time almost completely aside. ..... So, all I could bash out this year was my entry in the GSL final contest in Salt Lake City to go in the Common Kit (Revell '29 roadster) Class. A couple of glue bomb salvages off eBay minimally provided the plane, helmet roof, fuel tank, and the two sets of exhaust headers I needed because I just could not resist turning the Revell V8 into a slant 7. The machine gun is a GasPatch Models 32nd scale 3D printed Spandau which I sprayed with a DutchBoy chrome can, left over for years in my dad's garage (use up the good stuff when you can!) No easy way to realistically hollow out all those exhaust trumpet ends, so they are capped with a one-piece sheet for street legal use with a collector pipe underneath and out the back. The excuse for the whole thing was that the little triplane in the original Tom Daniel Red Baron seemed to be included in the kit as an unrelated afterthought item, while here I incorporated it into this build to be a 1/3rd scale radio control plane which is hauled to the hobby airfield on a really snazzy show rod. Call it a "what if?" version where Tom Daniel and Monogram had the same idea, but used a '29 Ford instead of a T bucket. Since the official GSL Contest entry photos are way better than my photography, that's what these are, except for my own inset closeup of the 2D Snoopy paper-printed pilot and the photo-reduced R/C airplane magazine on the back end of the flatbed.
-
Mercedes Outlaws & Hot Rods
Russell C replied to 89AKurt's topic in General Automotive Talk (Trucks and Cars)
Yep, a "very nearly there, but not quite" for me. Entirely subjective opinion, but if a zillion dollars dropped out of the sky where I could buy it or have someone replicate it, I'd go a couple of increments more toward widebody flares for the back fenders, and put ordinary old stock headlights back in. I can imagine black on black fine, but gloss on the body and just flat on the bumpers and other former chrome stuff. Can't guess what the glowing toaster element is for at the bottom of the radiator, though .....- 130 replies
-
- 1
-

-
- mercedes benz
- outlaw
- (and 2 more)
-
203 Classic Cars Found In Texas Barn. Part One.
Russell C replied to John M.'s topic in The Off-Topic Lounge
Having seen enough varieties of actual barn / storage shed / carport finds in the "BarnFinds.com" website over the years, the thing that looks odd in that video is the seemingly inadequate about of dust accumulated on the vertical surfaces. Of course, more would accumulate on the horizontal surfaces, but after enough time in otherwise drafty rooms, the fine dust sticks to the upright surfaces as well, giving a vehicle a basic overall filthy appearance, and what's on the horizontal surfaces looks a lot more uniform than what's seen in the stills in this video. -
The rod carrying the Ark of the Covenant plunder -- clever idea!
-
Heavy sigh. I remember when he had hair. I remember when I had more hair. I remember when Paula Cole was about my same age. She still is.
-
Never heard of the Radwood term before this thread. Irony is that those were my formative years - BBS spoke wheels, widebody flares over steamroller tires. When I got my current daily driver '86 GTI back in '93, the dream was the Rieger kit for it and synchro drive to at least give the rear tires a legit reason for that width (still dreamin' though, accepting donations, just remember to make the checks out to "Cash.")
-
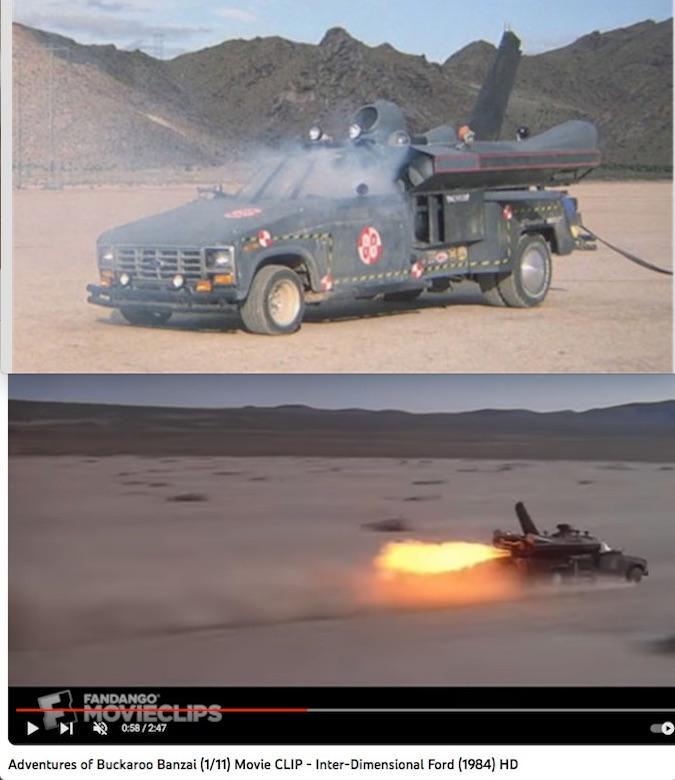
Ancient thread revived gives me the model idea of a jet car Jet Car. Still might melt the nearby models if aimed in the inadvisable direction.
-
If you'd only shown the top photo and said the plan was to build a model replica of the 1:1 there, ya could have totally fooled me. Really nice work!
-
Autoquiz #593 - Finished
Russell C replied to carsntrucks4you's topic in Real or Model? / Auto ID Quiz
Cool, my guess actually turned out to be right. Usually I don't have the first clue what these mystery vehicles are. Didn't know that bit about the Italeri Ford "Jeep", I'll have to look at my parts pile to see that crossmember, which I'd gotten a couple of decades ago in order to use the frame & axles to create a 4x4 Cobra ranch truck abomination with a Jeep-style halfcab / hollowed-out trunk area pickup bed. -
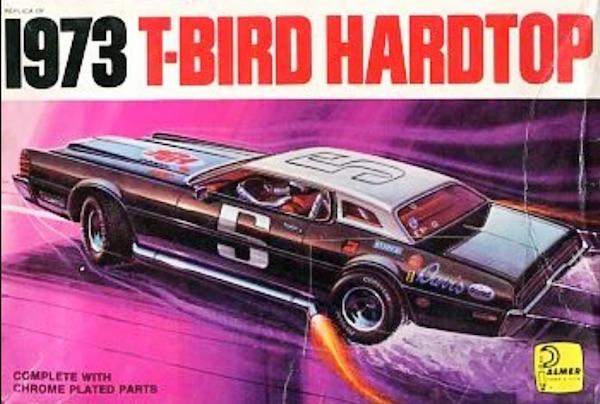
Alternative utterly offbeat suggestion, not for a particular 1:1 vehicle category, but instead for a particular kit manufacturer. Specifically, find whatever version of those old widely ill-proportioned 1:32nd scale Palmer Plastics kits (rescued glue bomb or unbuilt unloved kit, doesn't matter the source), and do whatever justice you can with it to make it into a really interesting model that it never would have been otherwise. Many of that company's box artworks implied these would be great Cannonball racers. Just a thought, anyway ....
-
Autoquiz #593 - Finished
Russell C replied to carsntrucks4you's topic in Real or Model? / Auto ID Quiz
PM'd a guess, but likely I'm wrong. -
I count my blessings that I didn’t kill my entire family.
Russell C replied to NYLIBUD's topic in The Off-Topic Lounge
A nomenclature correction, if may offer it: CO detectors -- carbon monoxide, single carbon atom / single oxygen atom combined, deadly to breathe in large quantities. It's what folks do to take themselves out when parked in a garage with the engine running and a hose directing all the tailpipe fumes into the car. CO2 has two oxygen atoms, it's what we breathe out, and when there's too much of it in a crowded room with everyone talking, the air begins to just feel a bit stuffy. -
Interesting - my profile page "Activity" that I'd never looked at before has at least partly returned, going back to October 5th.
-
Didn't see any problems before, don't see any now. But additionally, I don't think I ever looked once into my profile page "Activity", so whatever was there - nothing now - I don't miss it. If it helps with any diagnostics, however, I'm using a version of Firefox that is at least two years out of date, due to my iMac's OS being obsolete* enough that it can't load any new browser updates. *(Accepting donations to help me buy a new used iMac, just remember to make the check out to "Cash.")
-
1910 horse and buggy picture
Russell C replied to 89AKurt's topic in General Automotive Talk (Trucks and Cars)
My mom, a child in the late 1920s/early '30s, spoke more than once about her mom being technically a huge advocate of "People for the Ethical Treatment of Horses," where her mom was one who gladly advocated for the use of motorized vehicles because she saw way too many instances of horse owners - probably mostly delivery wagon guys in the big city - who were very abusive and/or careless with their horses.- 12 replies
-
- 1
-
-
- historic
- horse buggy
- (and 1 more)
-
Would the lights in your neighborhood dim momentarily if you turned on all 4 at once? ?
-
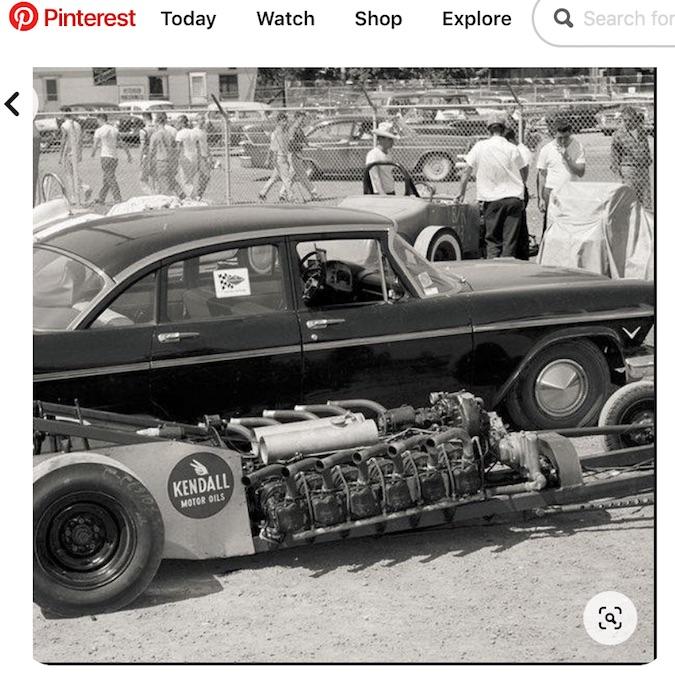
Safety in the 50's
Russell C replied to TarheelRick's topic in General Automotive Talk (Trucks and Cars)
Wasn't initially convinced about Bill's answer since the Franklin engines I found in an image search didn't have exhaust pipes, but then I figured out what the caps in the tops of those cylinders were. A little more searching finally turned up this Pinterest page of what sure looks like the same dragster. The tell-tale is the circle thing at the front with all the bolts in it.
-
https://getadblock.com/en/ Wipes out all ads on my iMac. Youtube included, where that site tries to first load ad videos, but when I hit the play button for the video I want to see, no ads ever play.
-
DWNW Surf-burban
Russell C replied to TooOld's topic in All The Rest: Motorcycles, Aviation, Military, Sci-Fi, Figures
Perfect! -
Looks like the Albuquerque Model Car Club is still going. I don't live there now, but I was one of the original members way back starting in 1990.
-
Leapin' Fairlane! Won this as a single bidder on eBay for cheap, it's really arch-warped, but certainly not at the end of its shelf display life yet! I vaguely remember mentioning this idea to our MCM builder Brizio years back, this kind of thing can be salvaged by turning it into a caricature wheelie burnout dragster, complete with the exaggerated oval-shape tires out of the 1:32 scale Tom Daniel Snappers series of caricature dragsters, (or the Polar Lights repop variants) and with a double-blower intake sticking out of the hood from one of the old MPC Zingers kits, along with other requisite dragster bits.
- 39,060 replies
-
- 4
-
-
- johan
- glue bombs
- (and 1 more)
-