Russell C
-
Posts
1,931 -
Joined
-
Last visited
Content Type
Profiles
Forums
Events
Gallery
Everything posted by Russell C
-

-
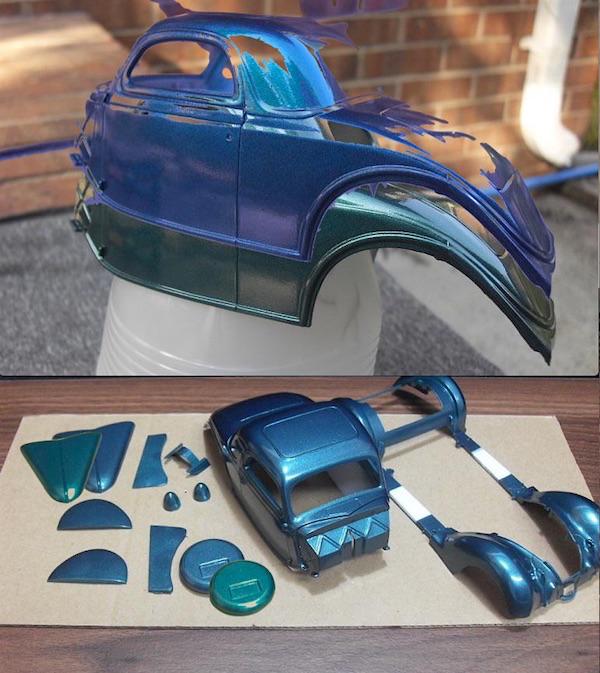
 Pearl turquoise / yellow scallops with the open trunk lid -- Kurt Womack, known as "89AKurt" here at MCM. I had fun with my "Snoopy steals the Red Baron" build.
 -
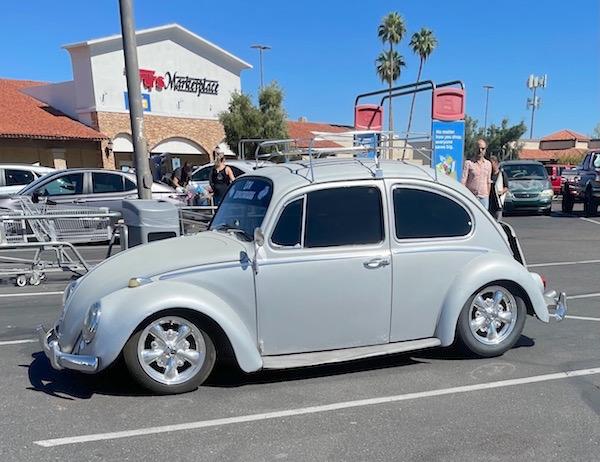
What did you see on the road today?
Russell C replied to Harry P.'s topic in General Automotive Talk (Trucks and Cars)
At the grocery store before lunch.
-
What is it please?
Russell C replied to Earl Marischal's topic in General Automotive Talk (Trucks and Cars)
Never knew those existed. Quick search for that vintage turns up, among other results, that somebody makes a diecast of 'em.
-
Not able to go to switch pages on individual topics.
Russell C replied to GMP440's topic in How To Use This Board
All works fine for me, no page viewing problems, can leave all the 'Likes' I want. I'm using iMac / Firefox / AdBlock. -
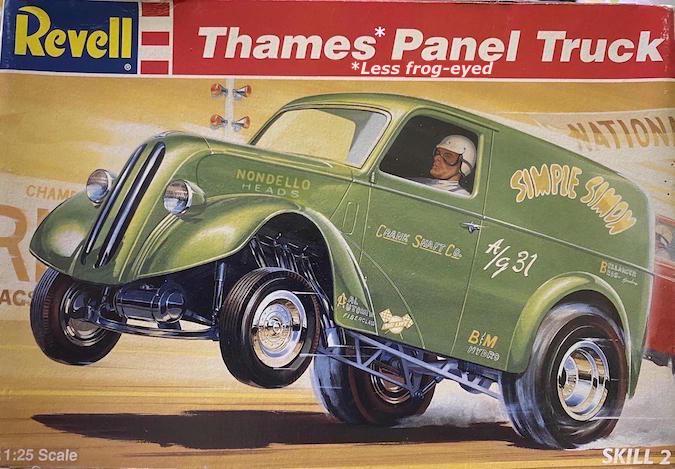
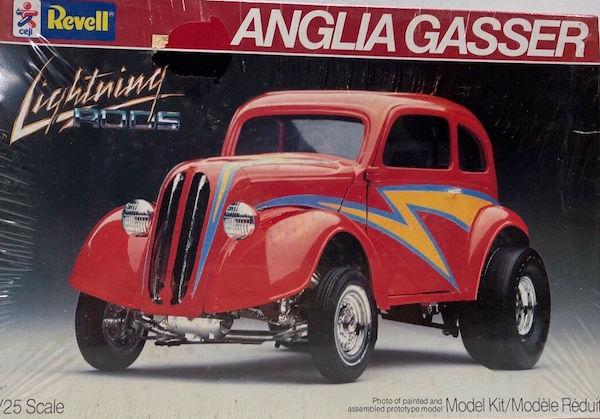
Less frog-eyed Thames Panel dragster Sacrilege to Thames Panel Purists, of course. Unlike some of my other 'redesign' ideas involving mostly unobtainium-priced kits (at least for my thin budget), this is just a single affordable kit. However, I lack the time to do such a project in the face of so many other projects I should get to first. Same basic idea for the Anglia Gasser kit, although it could use a mildly chopped top and fatter back fenders ...
-
No offense to Revell, but these tires are quite an improvement - at least for my own personal tastes - to the basic look of that kit.
-
How architectural models are made (Videos)
Russell C replied to Brian Austin's topic in The Off-Topic Lounge
'Fraid so, although my encounter with such modelers was more than two decades back. But I don't doubt for a minute that the deadlines still apply today. I applied for a job at a couple of places like that in the mid '90s thinking it would be right up my alley. One guy told me straight out he needed either a guy who could slice out window walls from thick cardboard with an Xacto blade as fast and accurate as he could, or he was going to have to invest in a laser cutter to bash those out. Man, my fingers hurt after the test run he gave me, but the thing that prompted me not to pursue working with him was his attitude - all work and no joy. At least the second place had a manager who expressed some joy in doing what he did, but the deadlines he spoke of were the deal killer for me. Some guys thrive on that, but I sure don't. -
Autoquiz 587 - finished
Russell C replied to carsntrucks4you's topic in Real or Model? / Auto ID Quiz
-
Morley Indy Car
Russell C replied to Scale-Master's topic in Other Racing: Road Racing, Salt Flat Racers
Ya learn something every day. Never heard of Morley before. -
Heavy sigh. My daily driver MkII GTI is pretty much right in the same weight range .... and down more than 250 hp. If only I could afford to experience that fun there. Scenic roads, too.
-
My Father's slides: The Rock Island Line
Russell C replied to Brian Austin's topic in The Off-Topic Lounge
The blue & white is what I favored for my late '80s phantom Mercedes NASCAR build. I figured if the car make and engine could not be correct along with the car number, then the main sponsor ought to be a bankrupt-by-then railroad. Fits the "technically correct" overall theme, but the one liberty I took was with the lettering on the hood spelling out the whole name in case some folks had no idea what "The Rock" was. -
Yesterday, I was standing out in the gravel backyard, trying to hang a wet rug up to dry on the edge of my shed roof, while standing on a tippy block. Block tipped over when I hoped it wouldn't, and down I went. Nobody is pleased about having a sprained wrist or a jagged bleeding rock cut. What pleased me today is that the pain was way less than yesterday, plus I'm even more glad I hadn't broken anything, and the cut shows no sign of infection. This could have been much worse.
-
More natural light inside?
Russell C replied to JollySipper's topic in Model Building Questions and Answers
The fun I sometimes have (doesn't always work easily) is digital color manipulation of color in photos, using my iMac's simple "Preview" program. Personally, I think I like the bluer tone more.
-
I run my daily driver VW hatchback into the gas gauge red zone under a quarter tank all the time, and have done so basically every time with only summer vacation exceptions since 1993. During my summer Colorado vacations, I could actually drive from Phoenix across the mostly empty Navajo Nation to arrive in Durango on fumes, but I refill in Holbrook a half a tank down to be on the safe side. No way an EV can touch that range and wouldn't want be caught dead in that open empty country.
-
Eek. Dec 1979 would have been halfway through my second year of high school.
-
TROUBLE WITH SLIXX WEBSITE
Russell C replied to DavidChampagne's topic in General Automotive Talk (Trucks and Cars)
https://www.slixx.com/ Main page opens up, but when I click on anything, same blank page result: Service Unavailable HTTP Error 503. The service is unavailable. -
Got a large metal file? Try sharpening the edges.
-
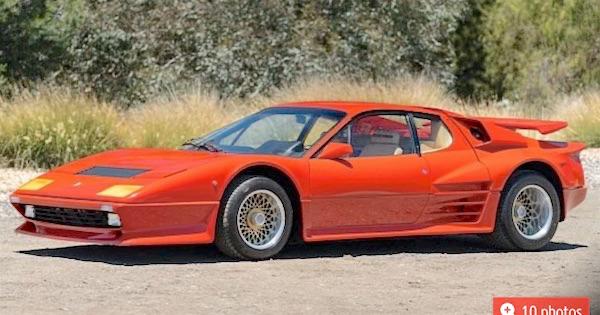
Italian Outlaws and Restomods
Russell C replied to Matt Bacon's topic in General Automotive Talk (Trucks and Cars)
Who can forget where the outlaw widebody supecar craze started? "Koenig Specials Ferrari BB: Remembering the 650-HP Tuning Legend From the 1980s" https://www.autoevolution.com/news/koenig-specials-ferrari-bb-remembering-the-650-hp-tuning-legend-from-the-1980s-212589.html
-
Odds & Ends you'd Like to See
Russell C replied to Calb56's topic in Car Aftermarket / Resin / 3D Printed
Sorta. But what's driving the prices up really boils down to a dozen or so guys over the last 5-6 years who have oodles of dollars and no sense to inquire deep into the sales history of the rigs they are buying or question the sellers assertions of them. I'm the current caretaker of the ancient blazerchalet.com website (it was given to me back when I owned Chalet #1747, I've never had the time or cash to update the site), and I've been tracking the sales of these since 2005. When guys don't do background research on these, they fall for lines like the one seen in the current eBay auction of Chalet #1683 who claims much of the rig is original when in fact it had significant (and incorrectly done) restoration back in 2009-'10. Many, including that particular one, just shift from one classic car dealer/flipper to the next, with jacked up prices each time, often with unsubstantiated assertions made about the rigs. Guy last summer claimed my former rig was a "barn find" when it absolutely was not, going clean back through at least 7 owners back to when I sold it in 2010. -
Never heard of it. Quick search in Youtube turned up this account which has collected many episodes, this one will show the list off to the side when you click on the "Watch on Youtube" option:
-
Odds & Ends you'd Like to See
Russell C replied to Calb56's topic in Car Aftermarket / Resin / 3D Printed
There actually is the 3D print file out there https://hum3d.com/3d-models/chevy-blazer-chalet-1976/ , but whoever drew it made the mistake of placing it on a shortbed Chevy pickup rather than the unibody Blazer, and had to stretch the camper unit improperly through the window area to make it fit. Correcting the 3D print file would be the first hurdle, but the next one would be to figure out which of the three kit versions is the most accurate starting point for a buildup. -
Counter opposite of my "irk" over in the other thread on vehicle obsolescence / unavailable OEM parts for 37 year old cars - rather than put in a potentially dicey used fuel supply line in my 1:1 daily driver, I had it rebuilt at an industrial hose service with a new central flexible section that could handle the pressure of my car's fuel injection system. It actually re-installed easier than when it came out today, and now my car starts and runs fine again, no gasoline leaks. Feels great to have a fully functional vehicle.
-
All true, the fierce AZ heat not helping things one bit. Valiantly on the search** to see what guys who rebuild these are using for new fuel supply lines .... ** new development edit: local AZ VW scrapyard guy / MkII enthusiast referred me to an expert shop specializing in rebuilding A/C, hydraulic & high pressure fuel line hoses. Score!