vamach1
-
Posts
5,207 -
Joined
-
Last visited
Content Type
Profiles
Forums
Events
Gallery
Everything posted by vamach1
-
Looks great. Happy Mustang 60th birthday. There are a few original owners out there that still own and drive their 1965 Mustangs.
-
I owned a used CB750 in the 1990s that was maybe a late 70s model but I am not sure as I only had it a few years. Somewhere in the depths of my computer there might be a picture. It was heavy and I rarely got it over 80mph (my choice) and the handling was average. I ended up selling it for $800. Oh well.?
-

Replicas & Miniatures Co of Maryland
vamach1 replied to Claes Ericsson's topic in Model Building Questions and Answers
You might try emailing Norman again with the subject line stating you would like to order R&M co of MD products. -
GT40 MkII...LeMans 1966
vamach1 replied to Mothersworry's topic in Other Racing: Road Racing, Salt Flat Racers
Beautiful build. Did you prefer the Cady decals over the Fujumi ones? -
Trumpeter Ford GT40 with my twists
vamach1 replied to kensar's topic in WIP: Other Racing: Road Racing, Land Speed Racers
Will do. Thanks. Can I use them on my 351. ?
-
Trumpeter Ford GT40 with my twists
vamach1 replied to kensar's topic in WIP: Other Racing: Road Racing, Land Speed Racers
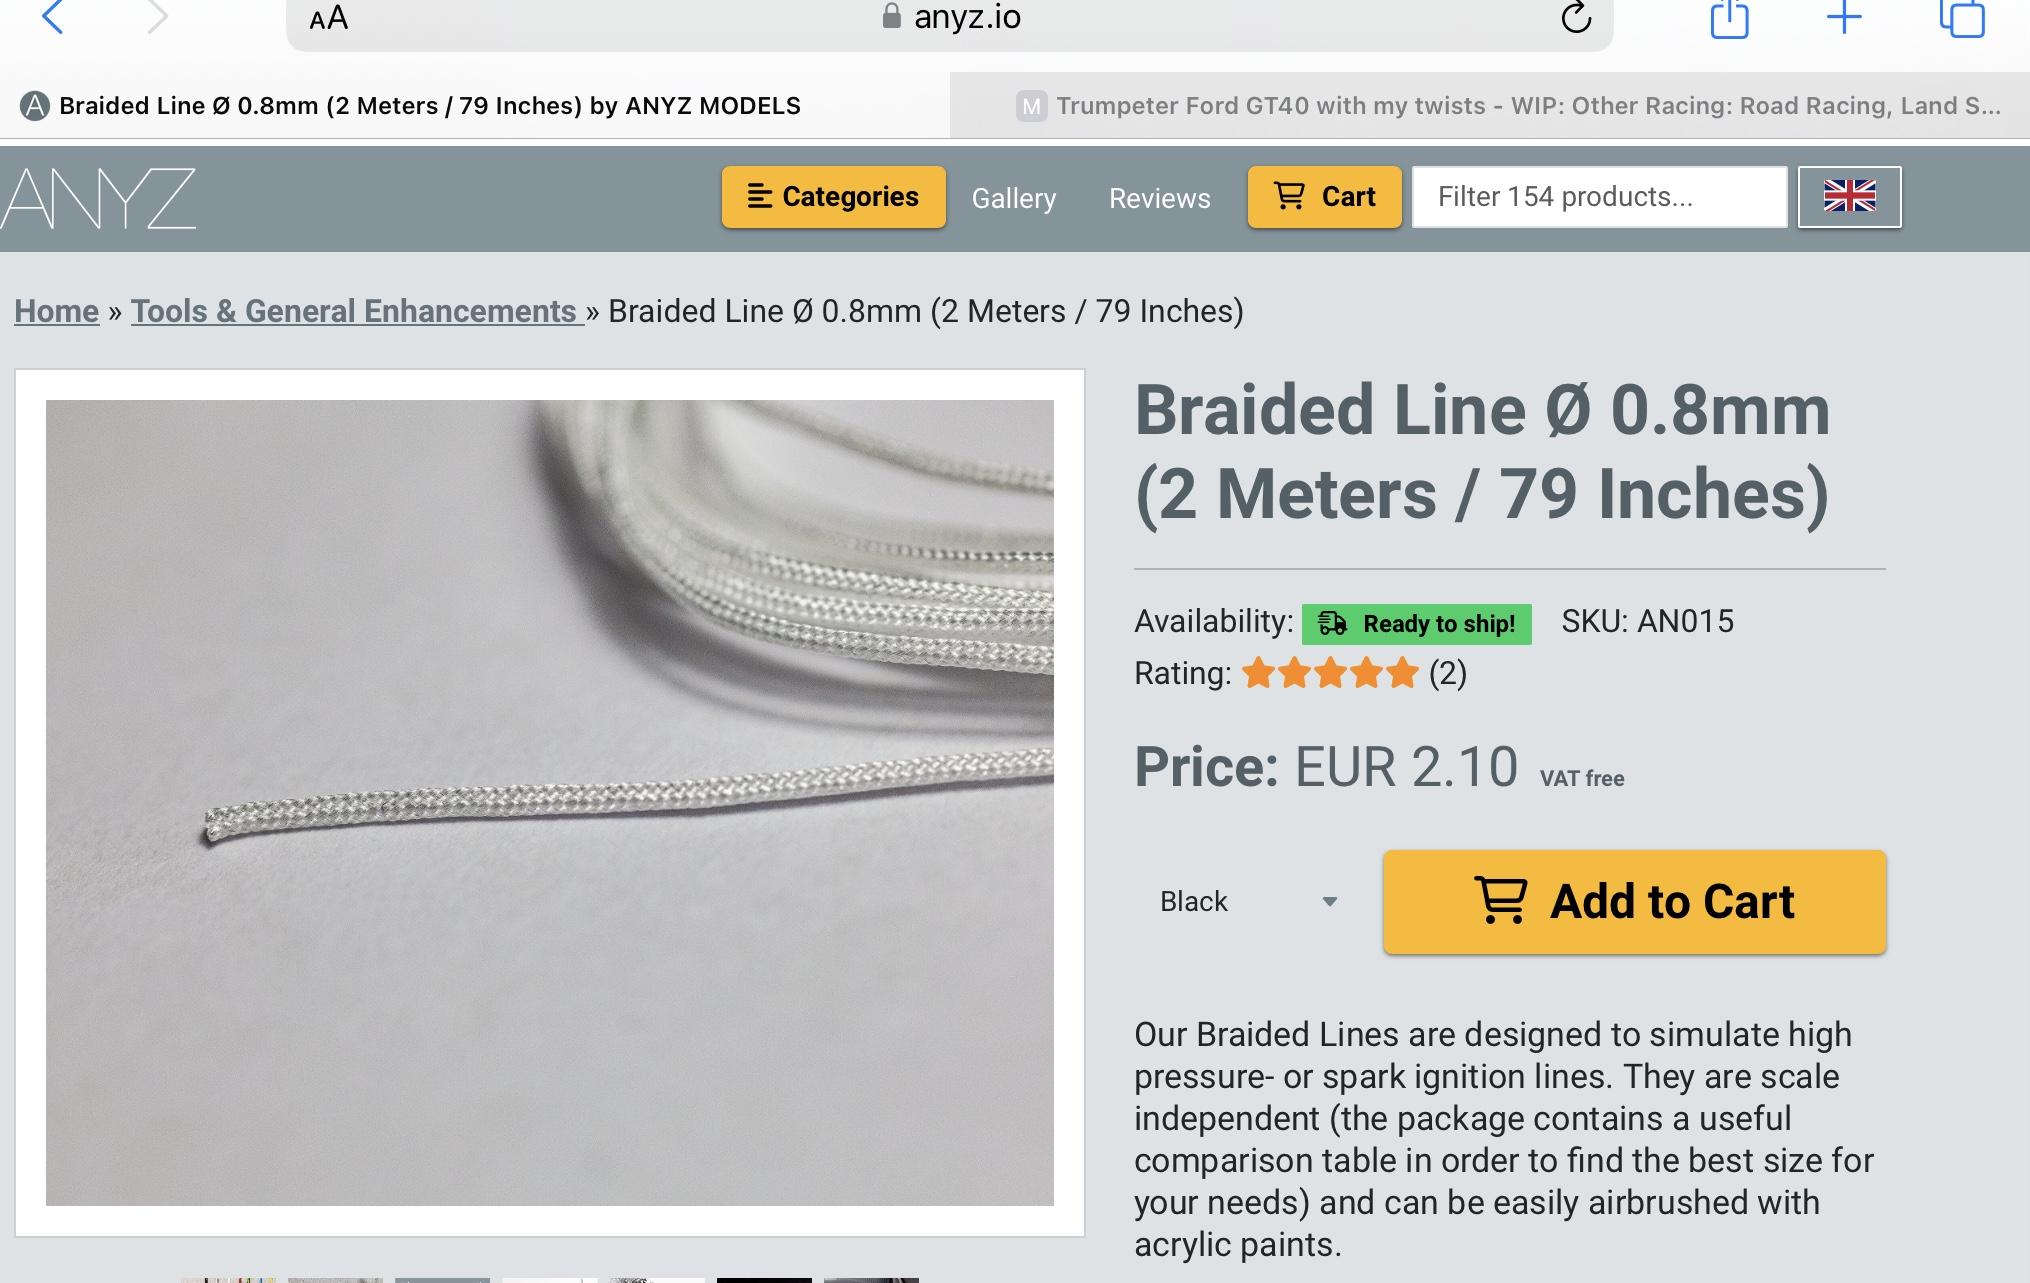
Found the s website per Andy’s comment. I think I’ll have to order those once I determine the best size. https://anyz.io/shop/product/AN015
-
Mercury GT40 MKII-B
vamach1 replied to Phildaupho's topic in Other Racing: Road Racing, Salt Flat Racers
Very nice build with the modifications. I cannot remember if I ordered the Indycal decal set which might be a good backup if there are issues with the kit ones. They include decals for the tires also. Starfighter makes the decals for the Mercury MkIIs also. -
Trumpeter Ford GT40 with my twists
vamach1 replied to kensar's topic in WIP: Other Racing: Road Racing, Land Speed Racers
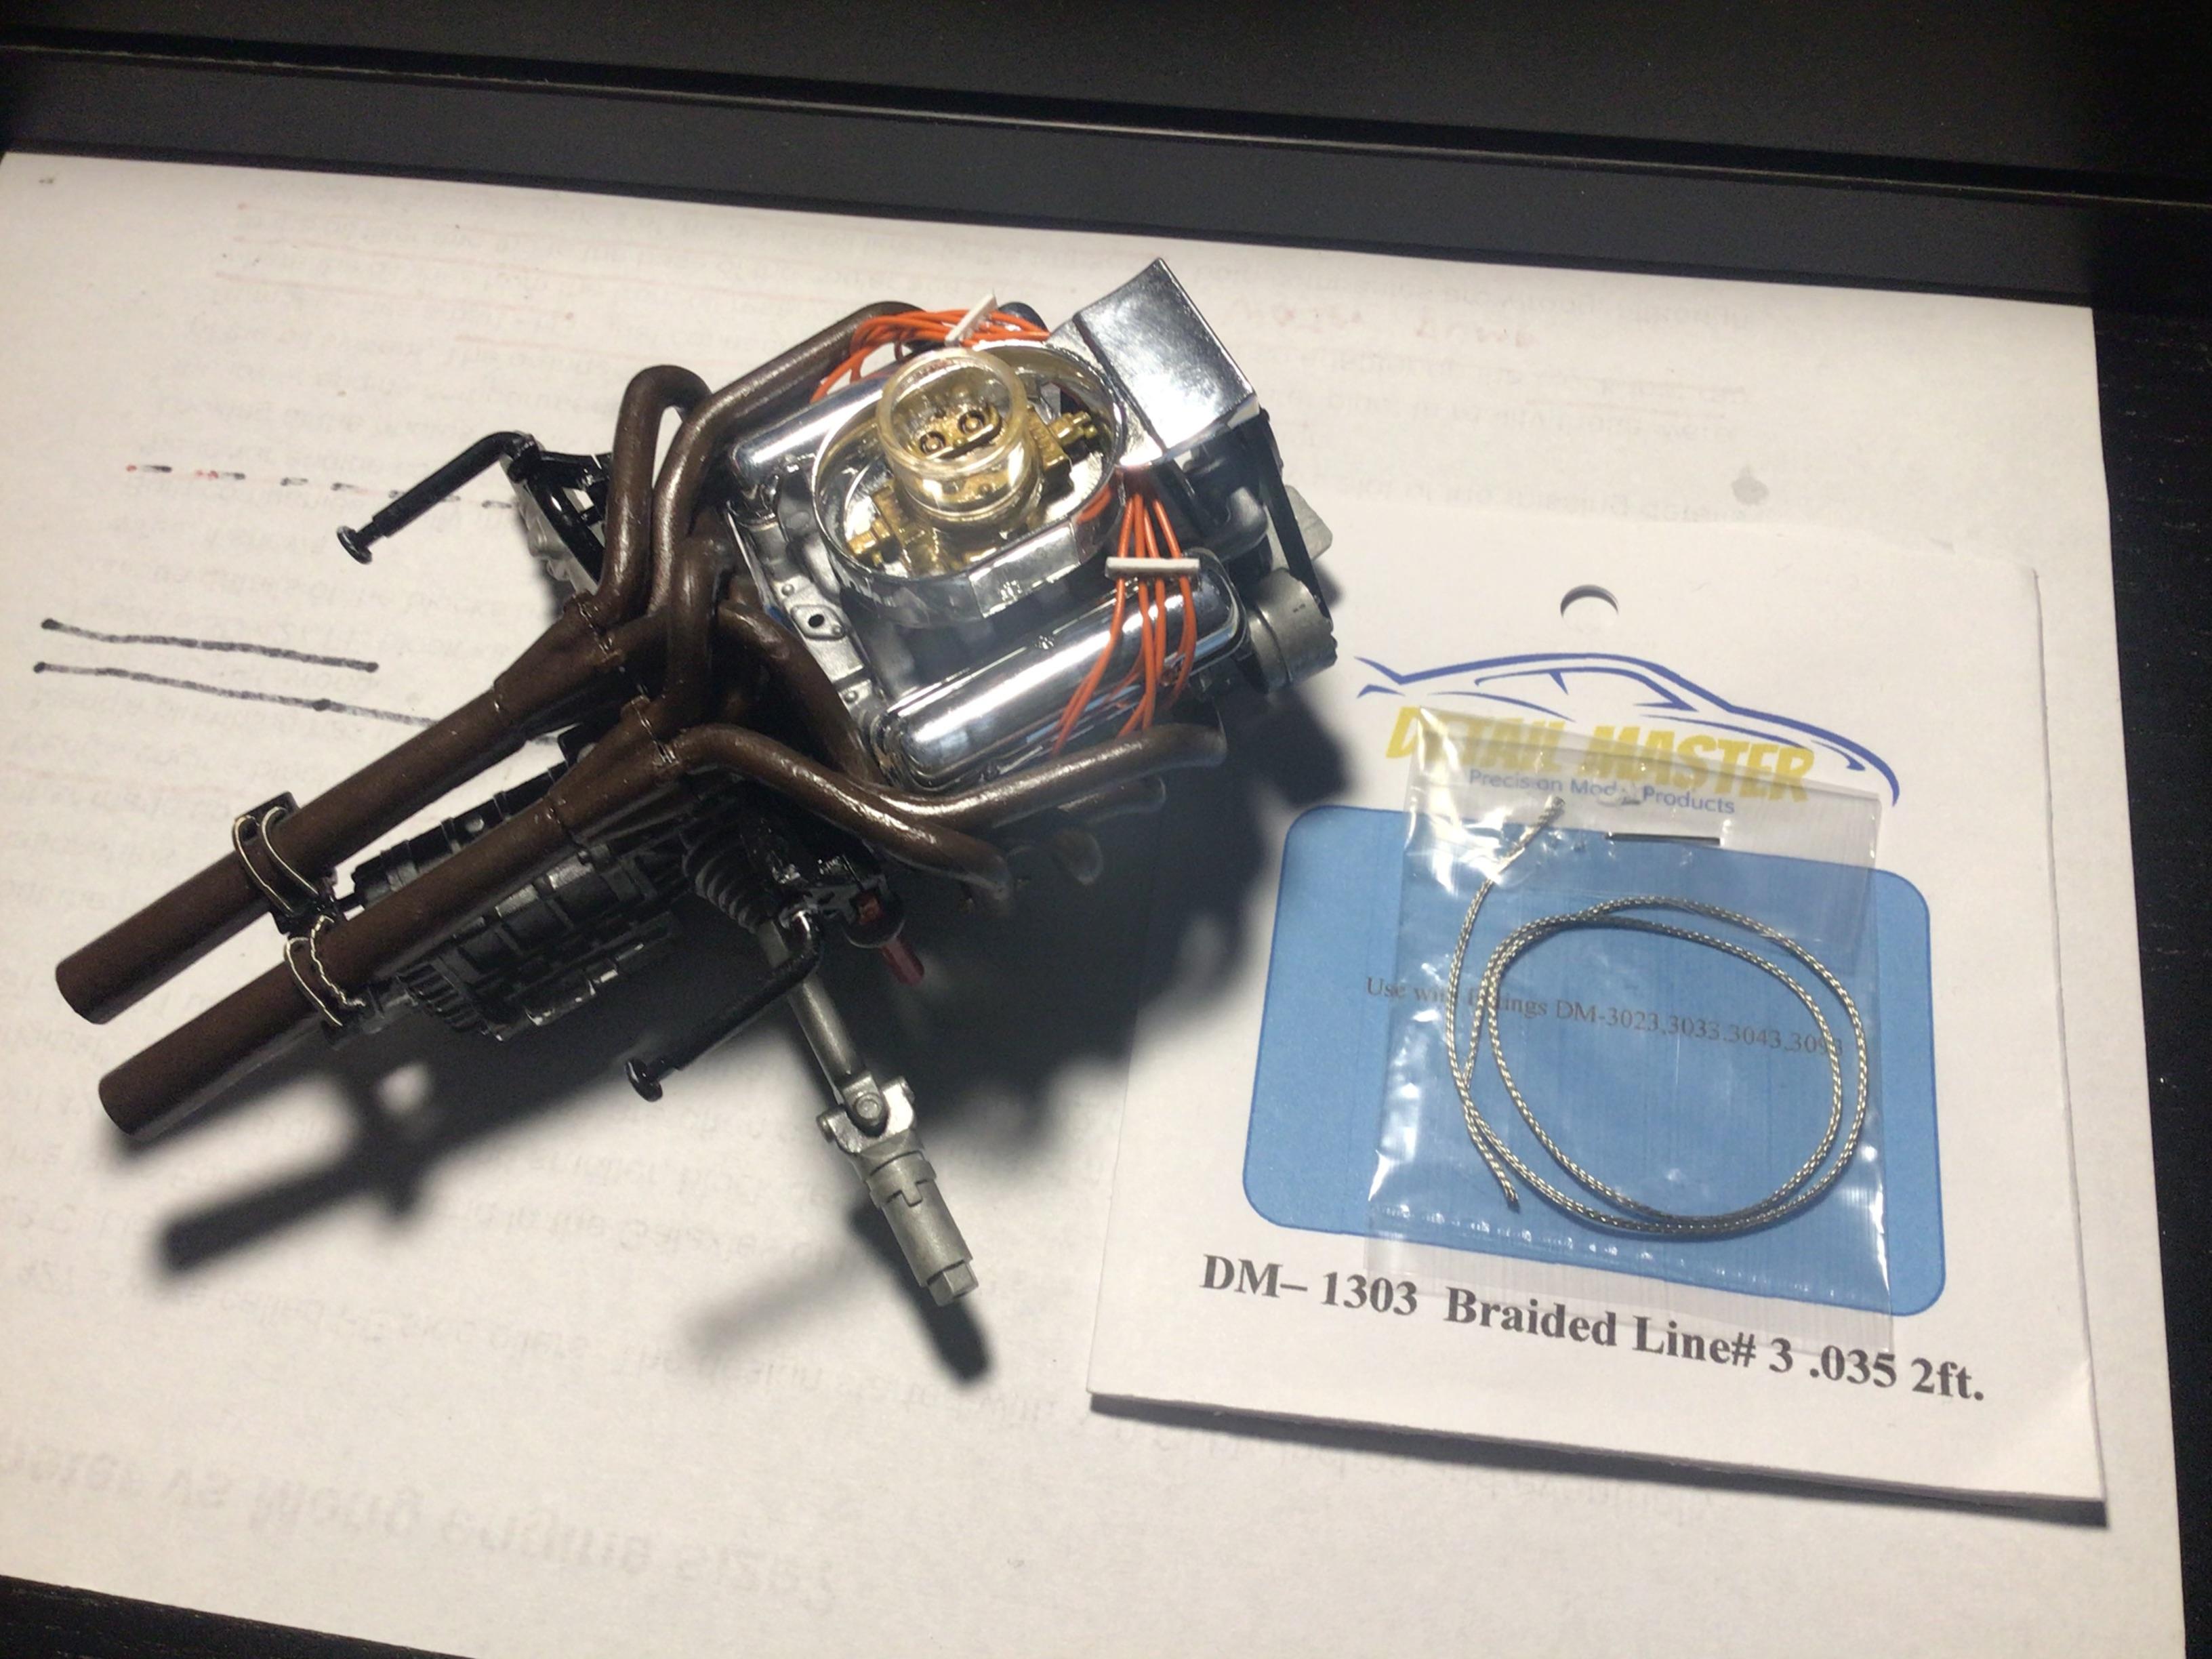
Thanks for the tip. I bought some Old stock detail master braided lines in various sizes. It is hard to cut, the frayed pieces will give you splinters and it is not hollow so the kit fittings do not fit inside.
-
Fantastic restoration. I just got to Birmingham AL today for the Mustang 60th anniversary. The show should be great with hundreds of classic Mustangs and a lot of newer ones on the track.
-
Trumpeter Ford GT40 with my twists
vamach1 replied to kensar's topic in WIP: Other Racing: Road Racing, Land Speed Racers
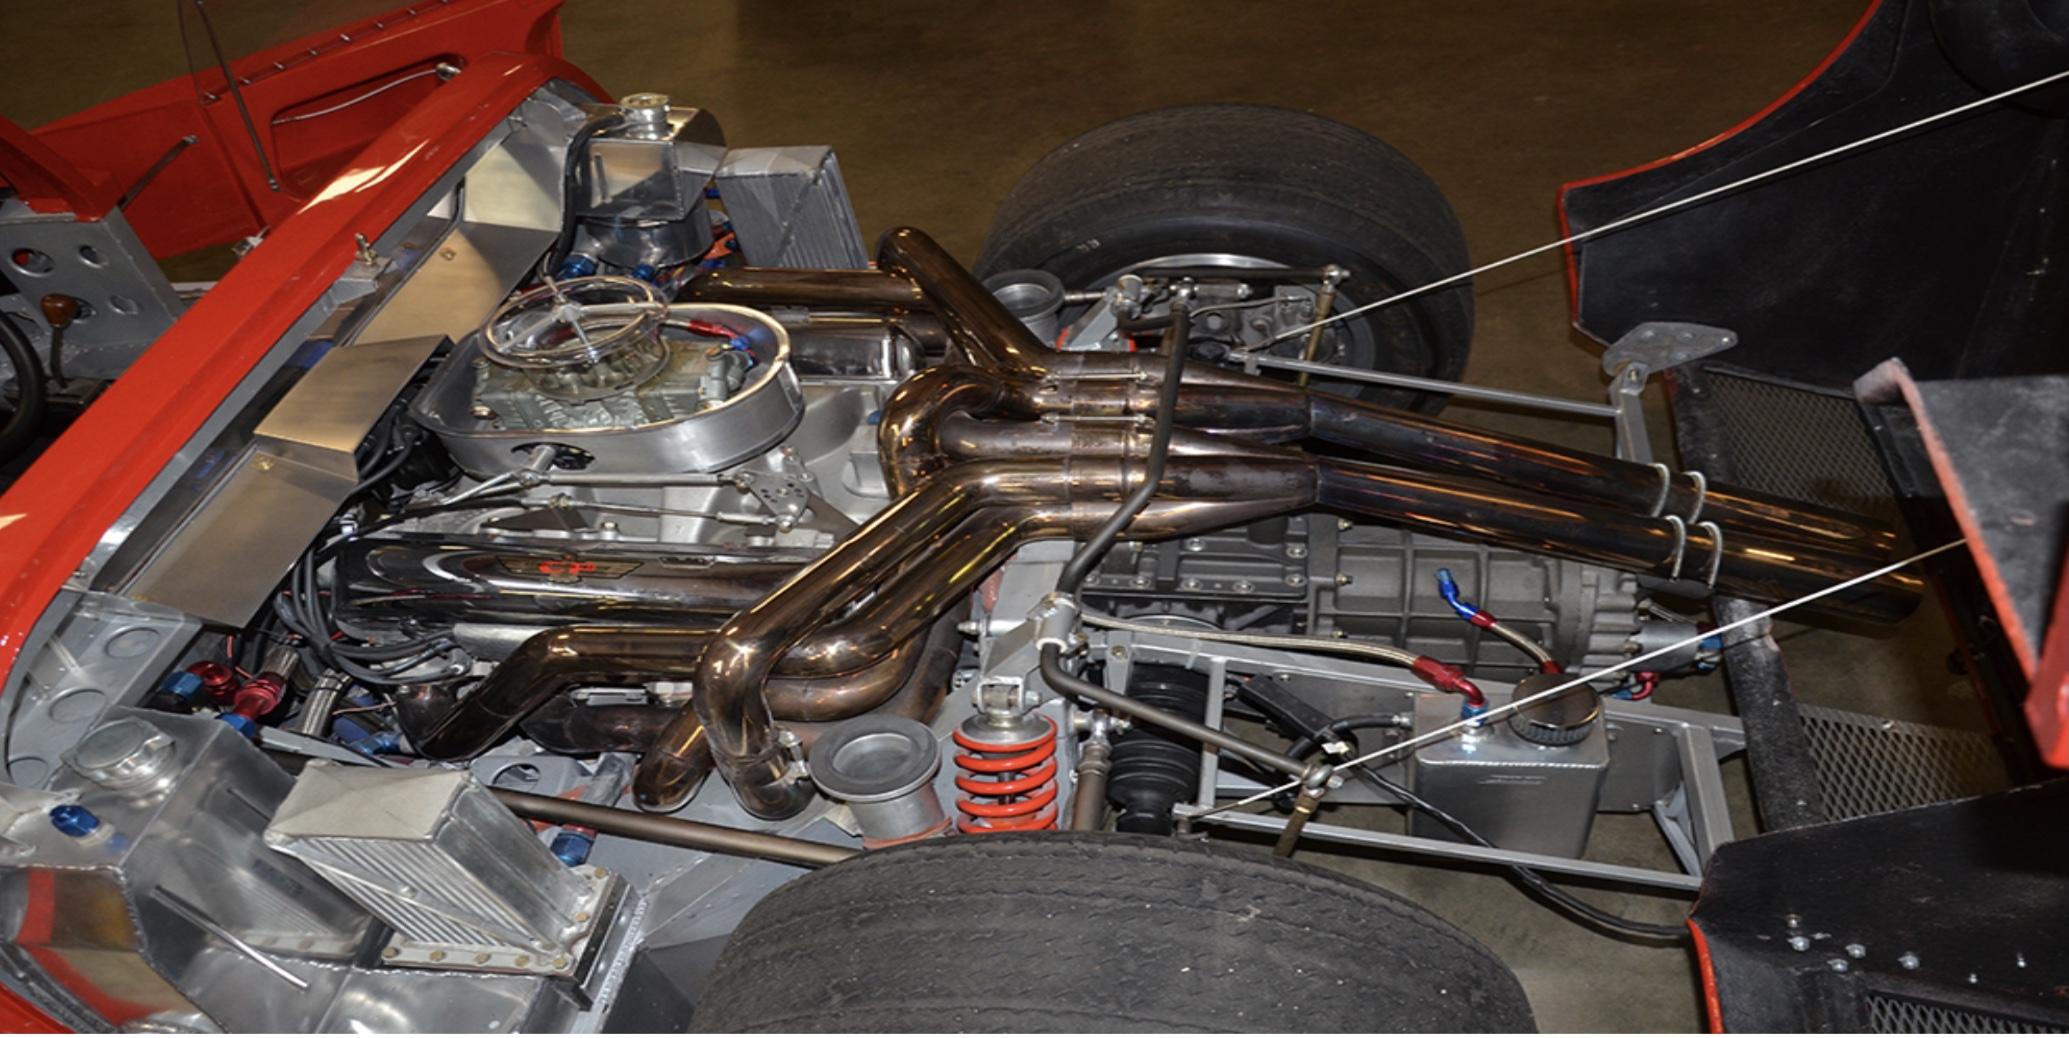
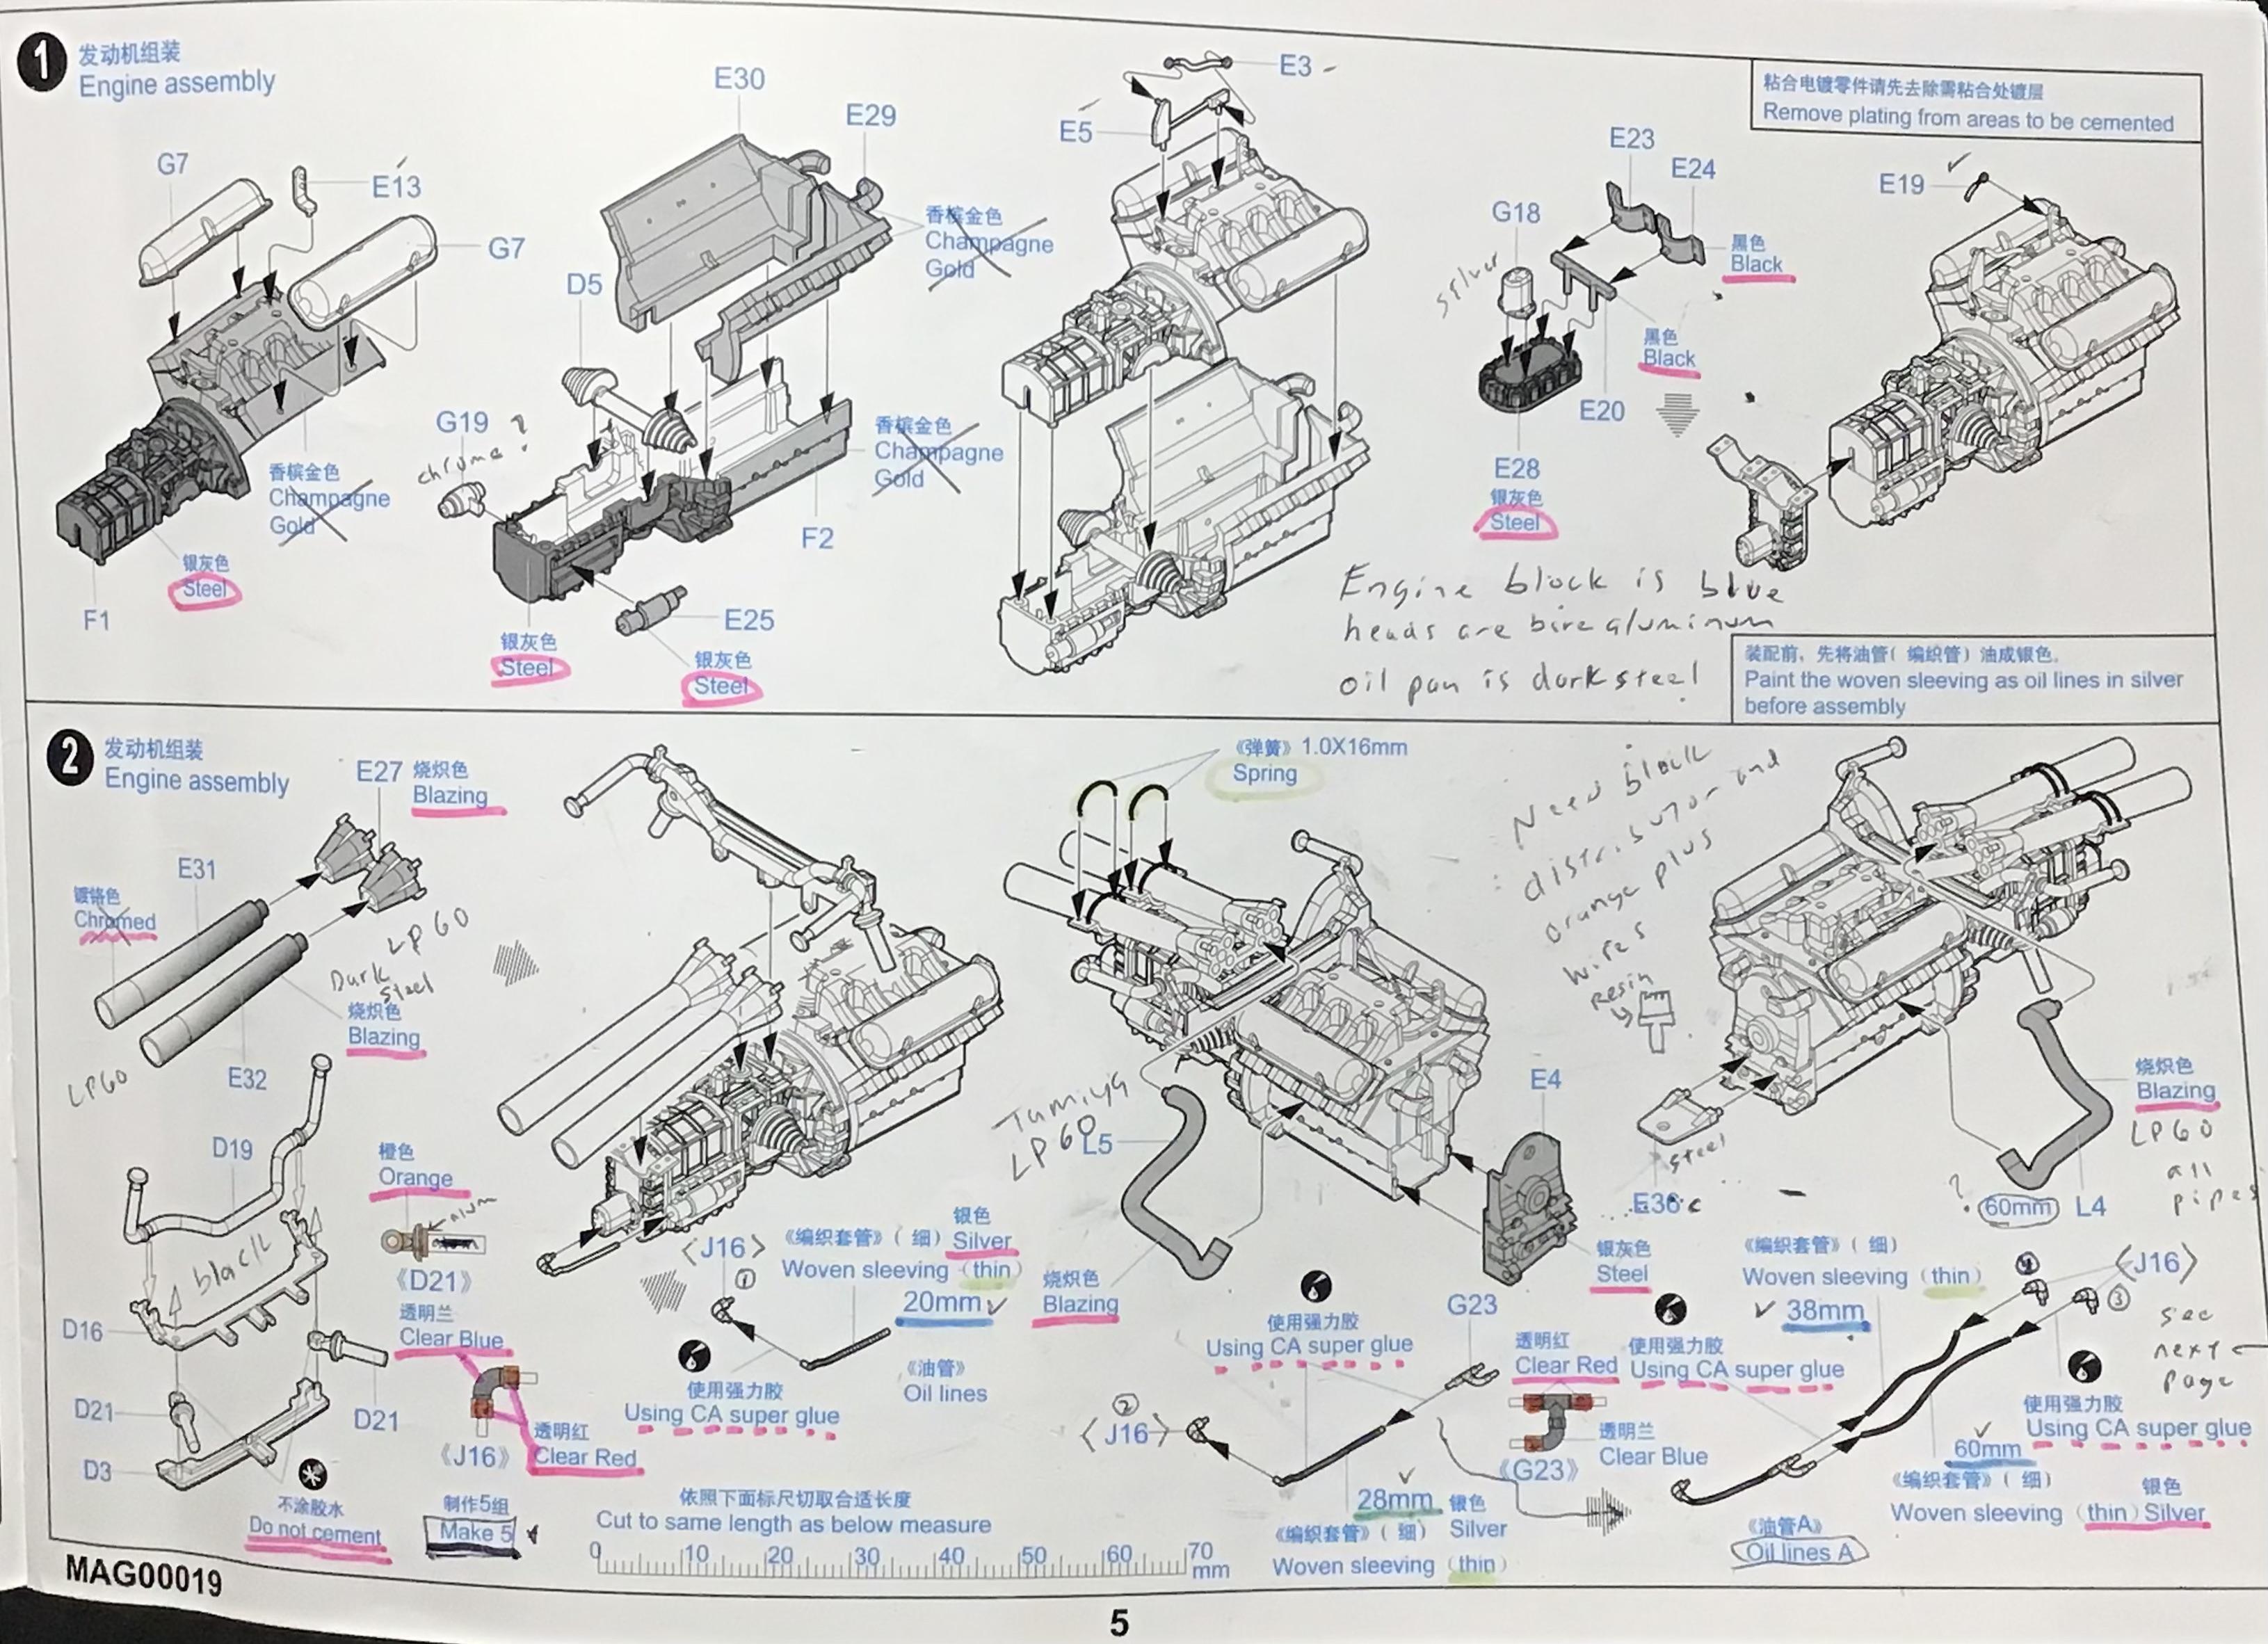
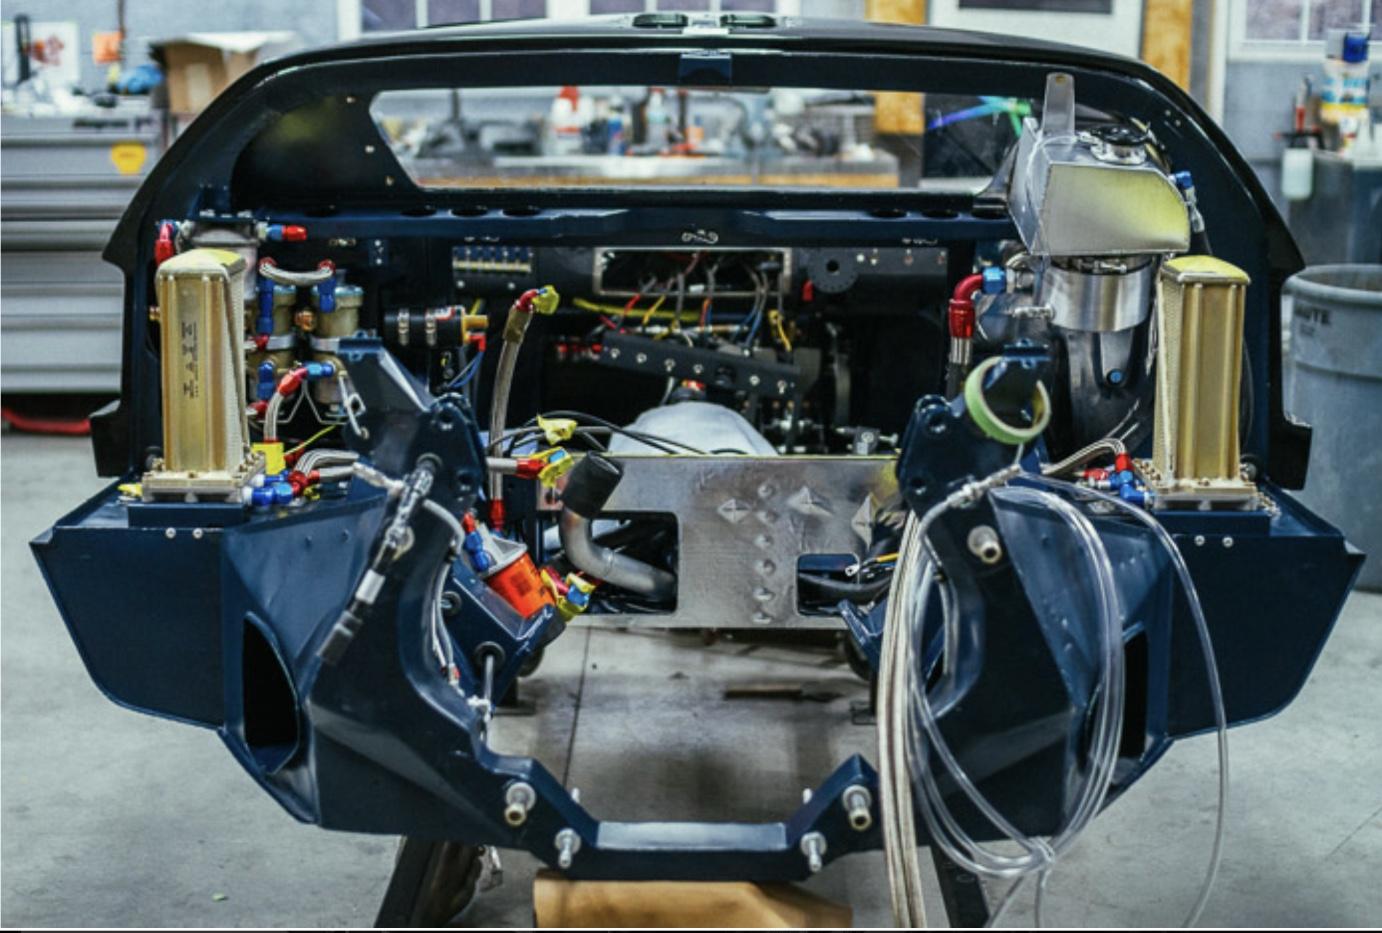
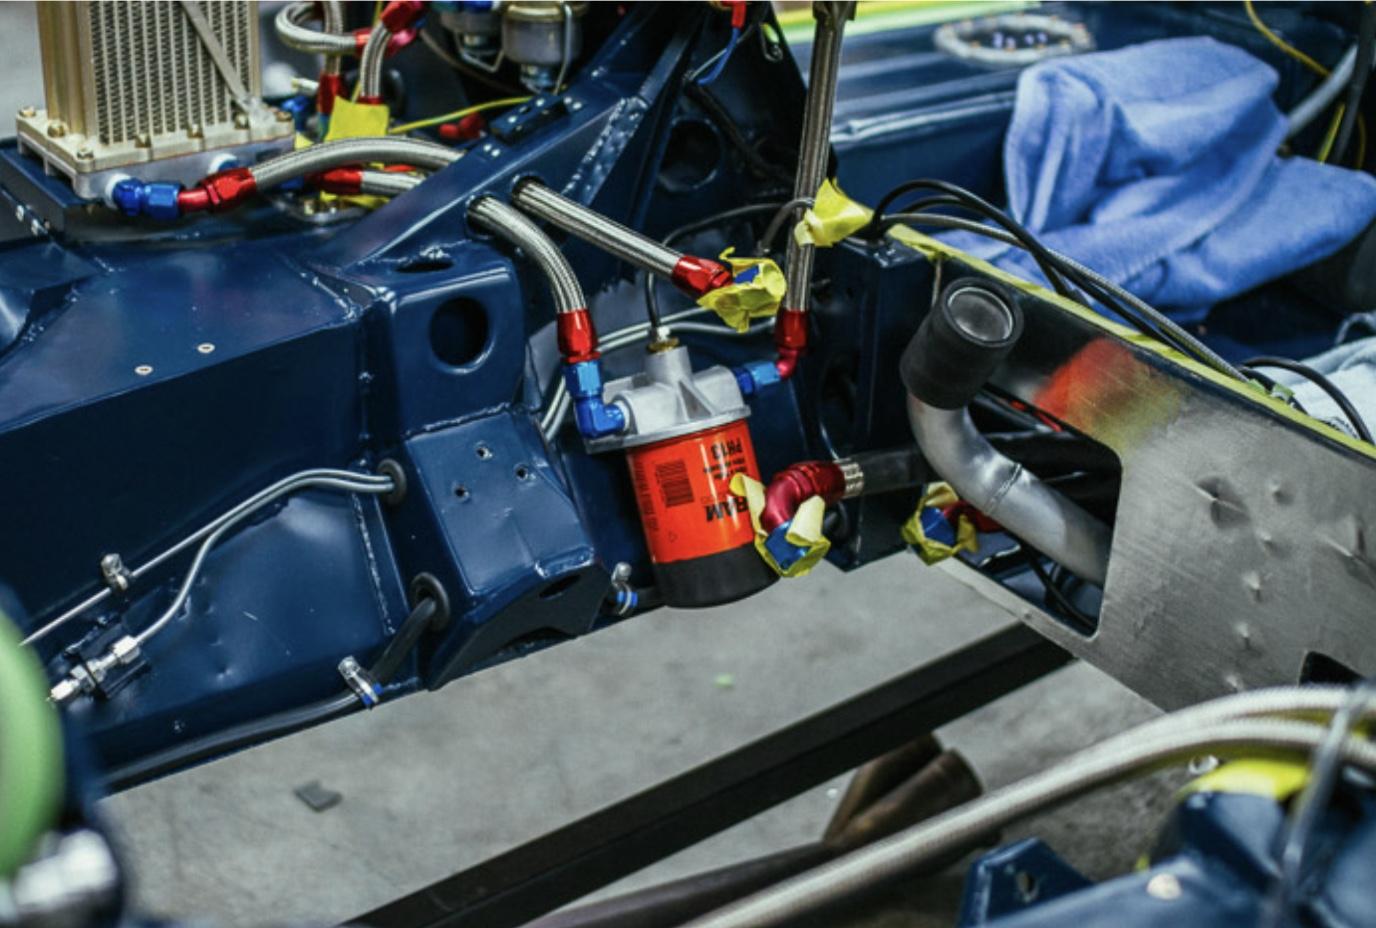
Thanks again. The Force is with us. ? Here is one more picture but a diagram in this case is worth dozens of pictures. We have the best of both.
-
Trumpeter Ford GT40 with my twists
vamach1 replied to kensar's topic in WIP: Other Racing: Road Racing, Land Speed Racers
Thanks so much for posting. I was going to search online for a diagram like this so see if one existed. You would think companies that make models would do the same. I had already started modifying the kits to make it appear the radiator hoses will go from the water pump and block up to the front of the car where the radiator is mounted. I do not plan on running them the entire length as a large portion is hidden by the tunnel between the seats. I found a link (below) to a build of the MENG kit which has some nice diagrams also. https://www.themodellingnews.com/2021/06/build-review-ptii-mengs-12th-scale-ford.htm -
Ford vs Ferrari #98 Cobra
vamach1 replied to Phildaupho's topic in Other Racing: Road Racing, Salt Flat Racers
Awesome job with combining parts from multiple kits. I also bought one of the GTM kits so I this is no joke. -
Trumpeter Ford GT40 with my twists
vamach1 replied to kensar's topic in WIP: Other Racing: Road Racing, Land Speed Racers
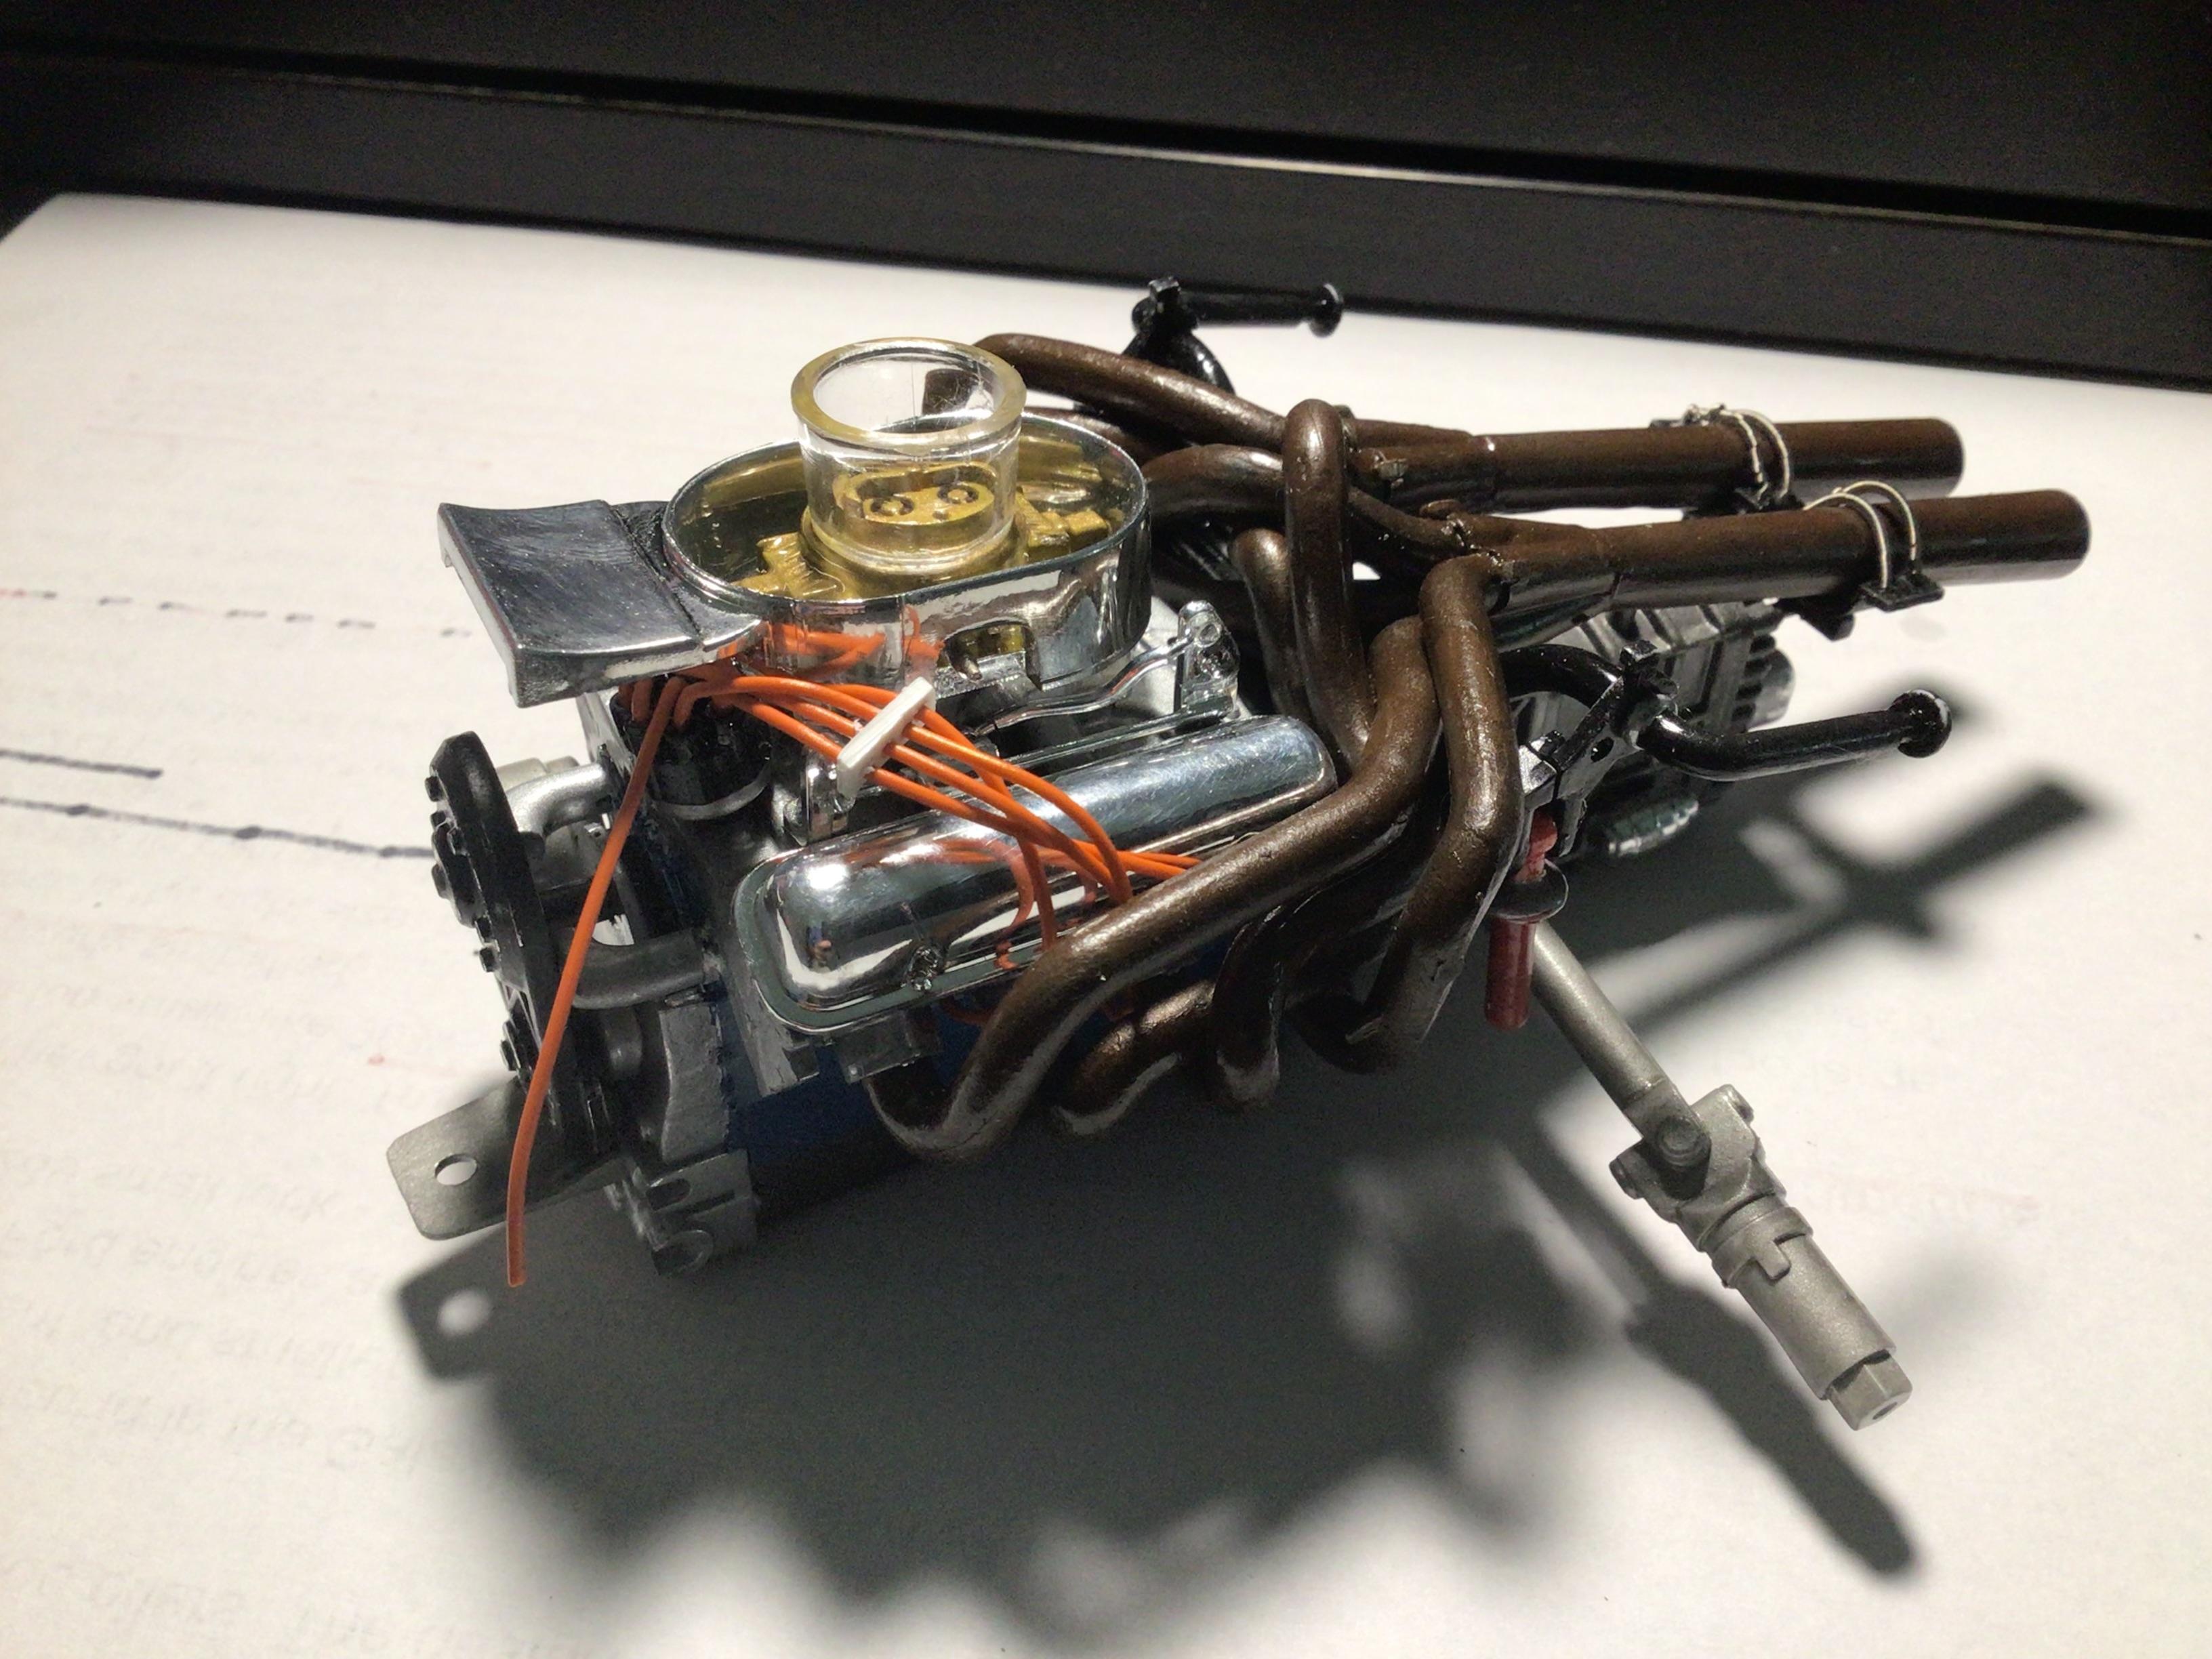
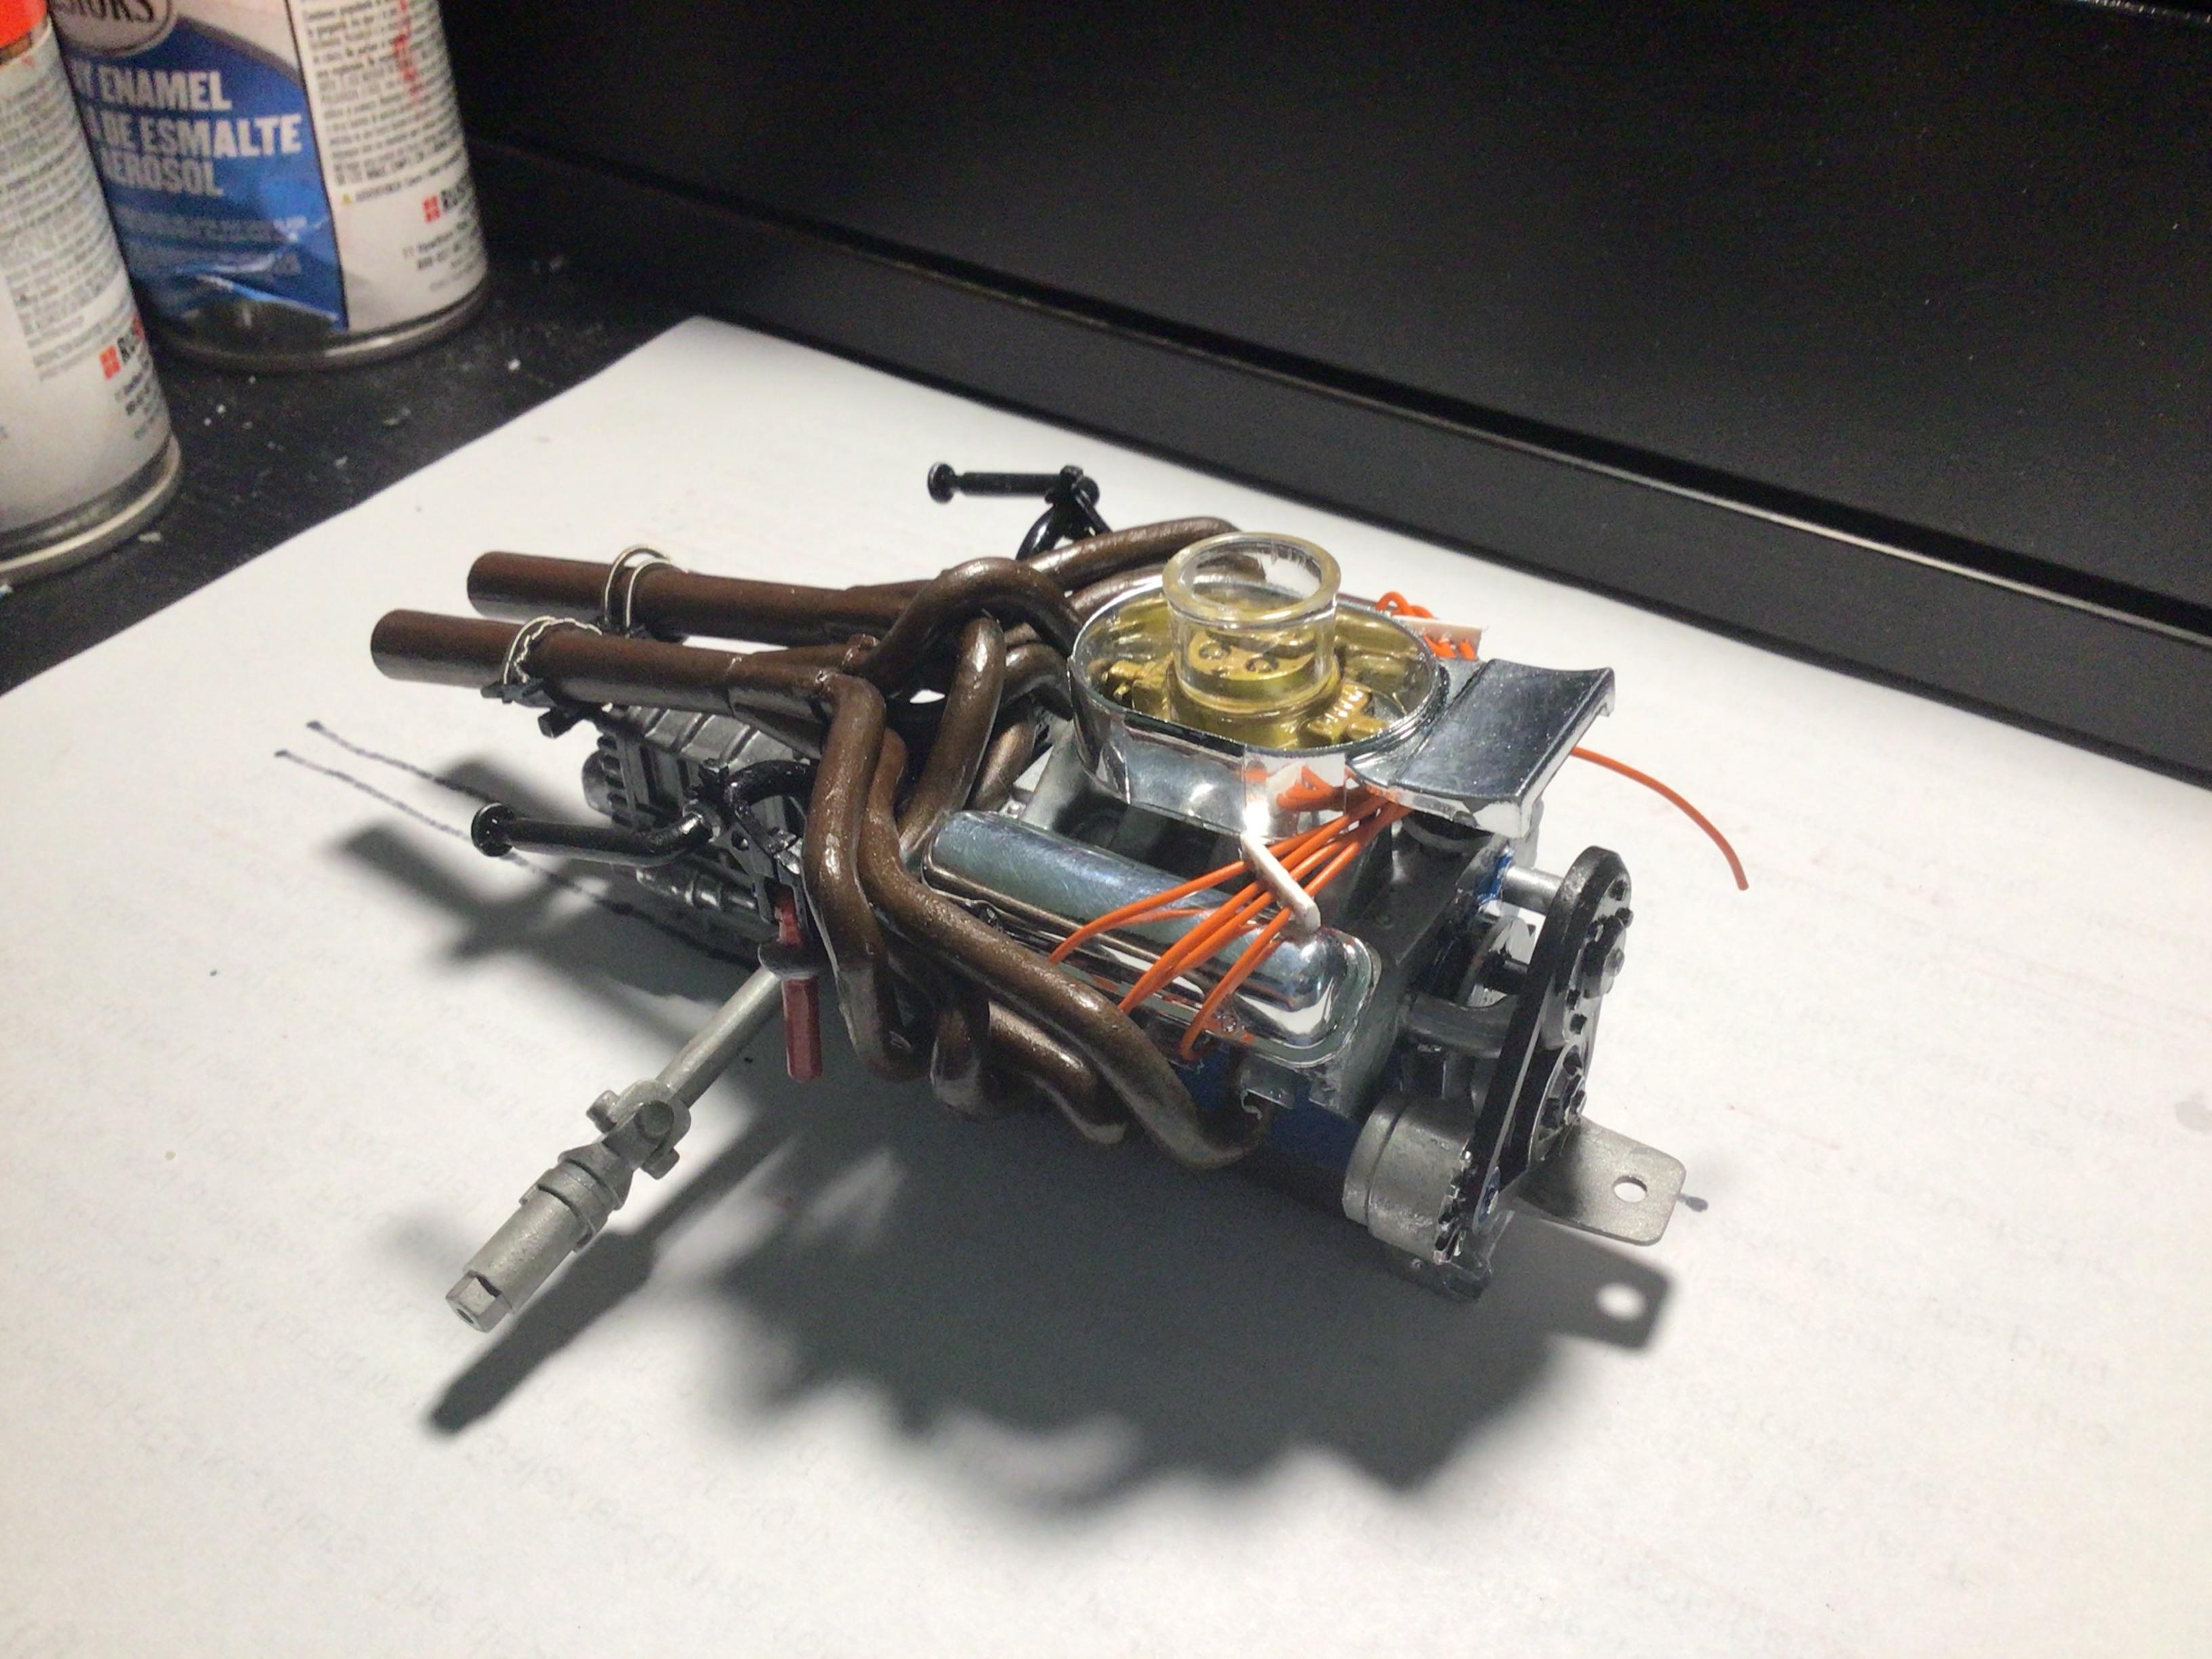
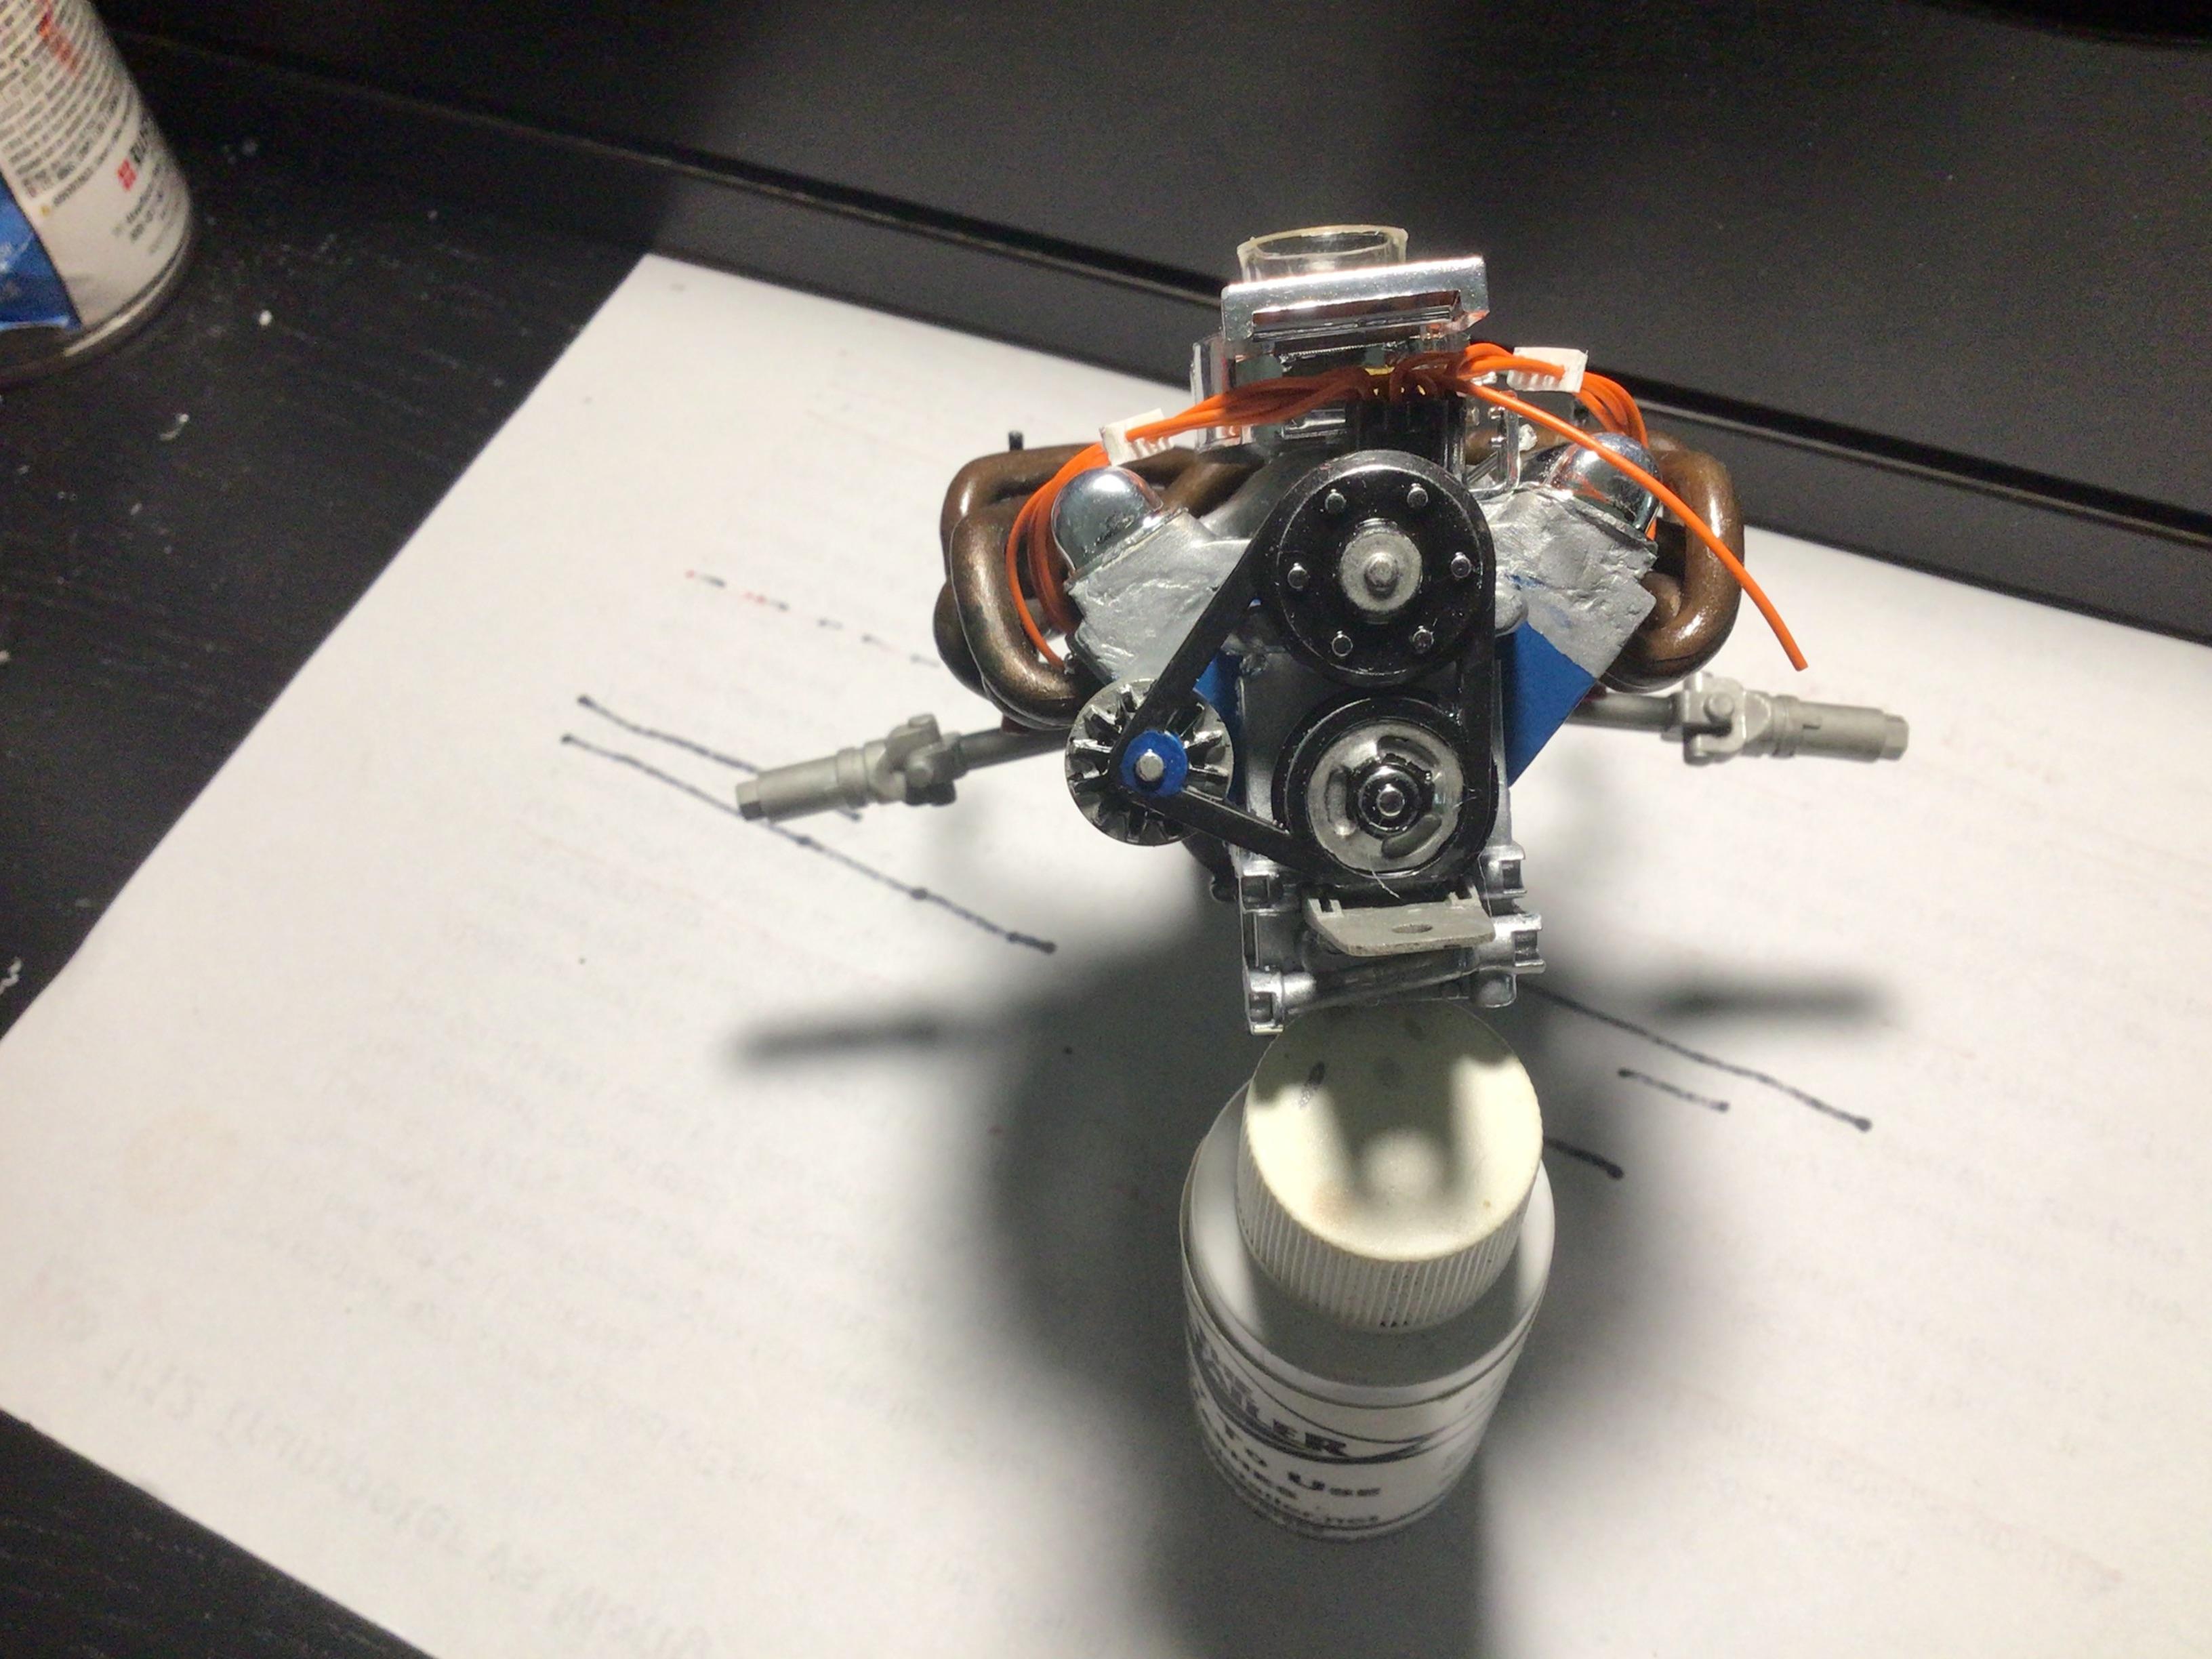
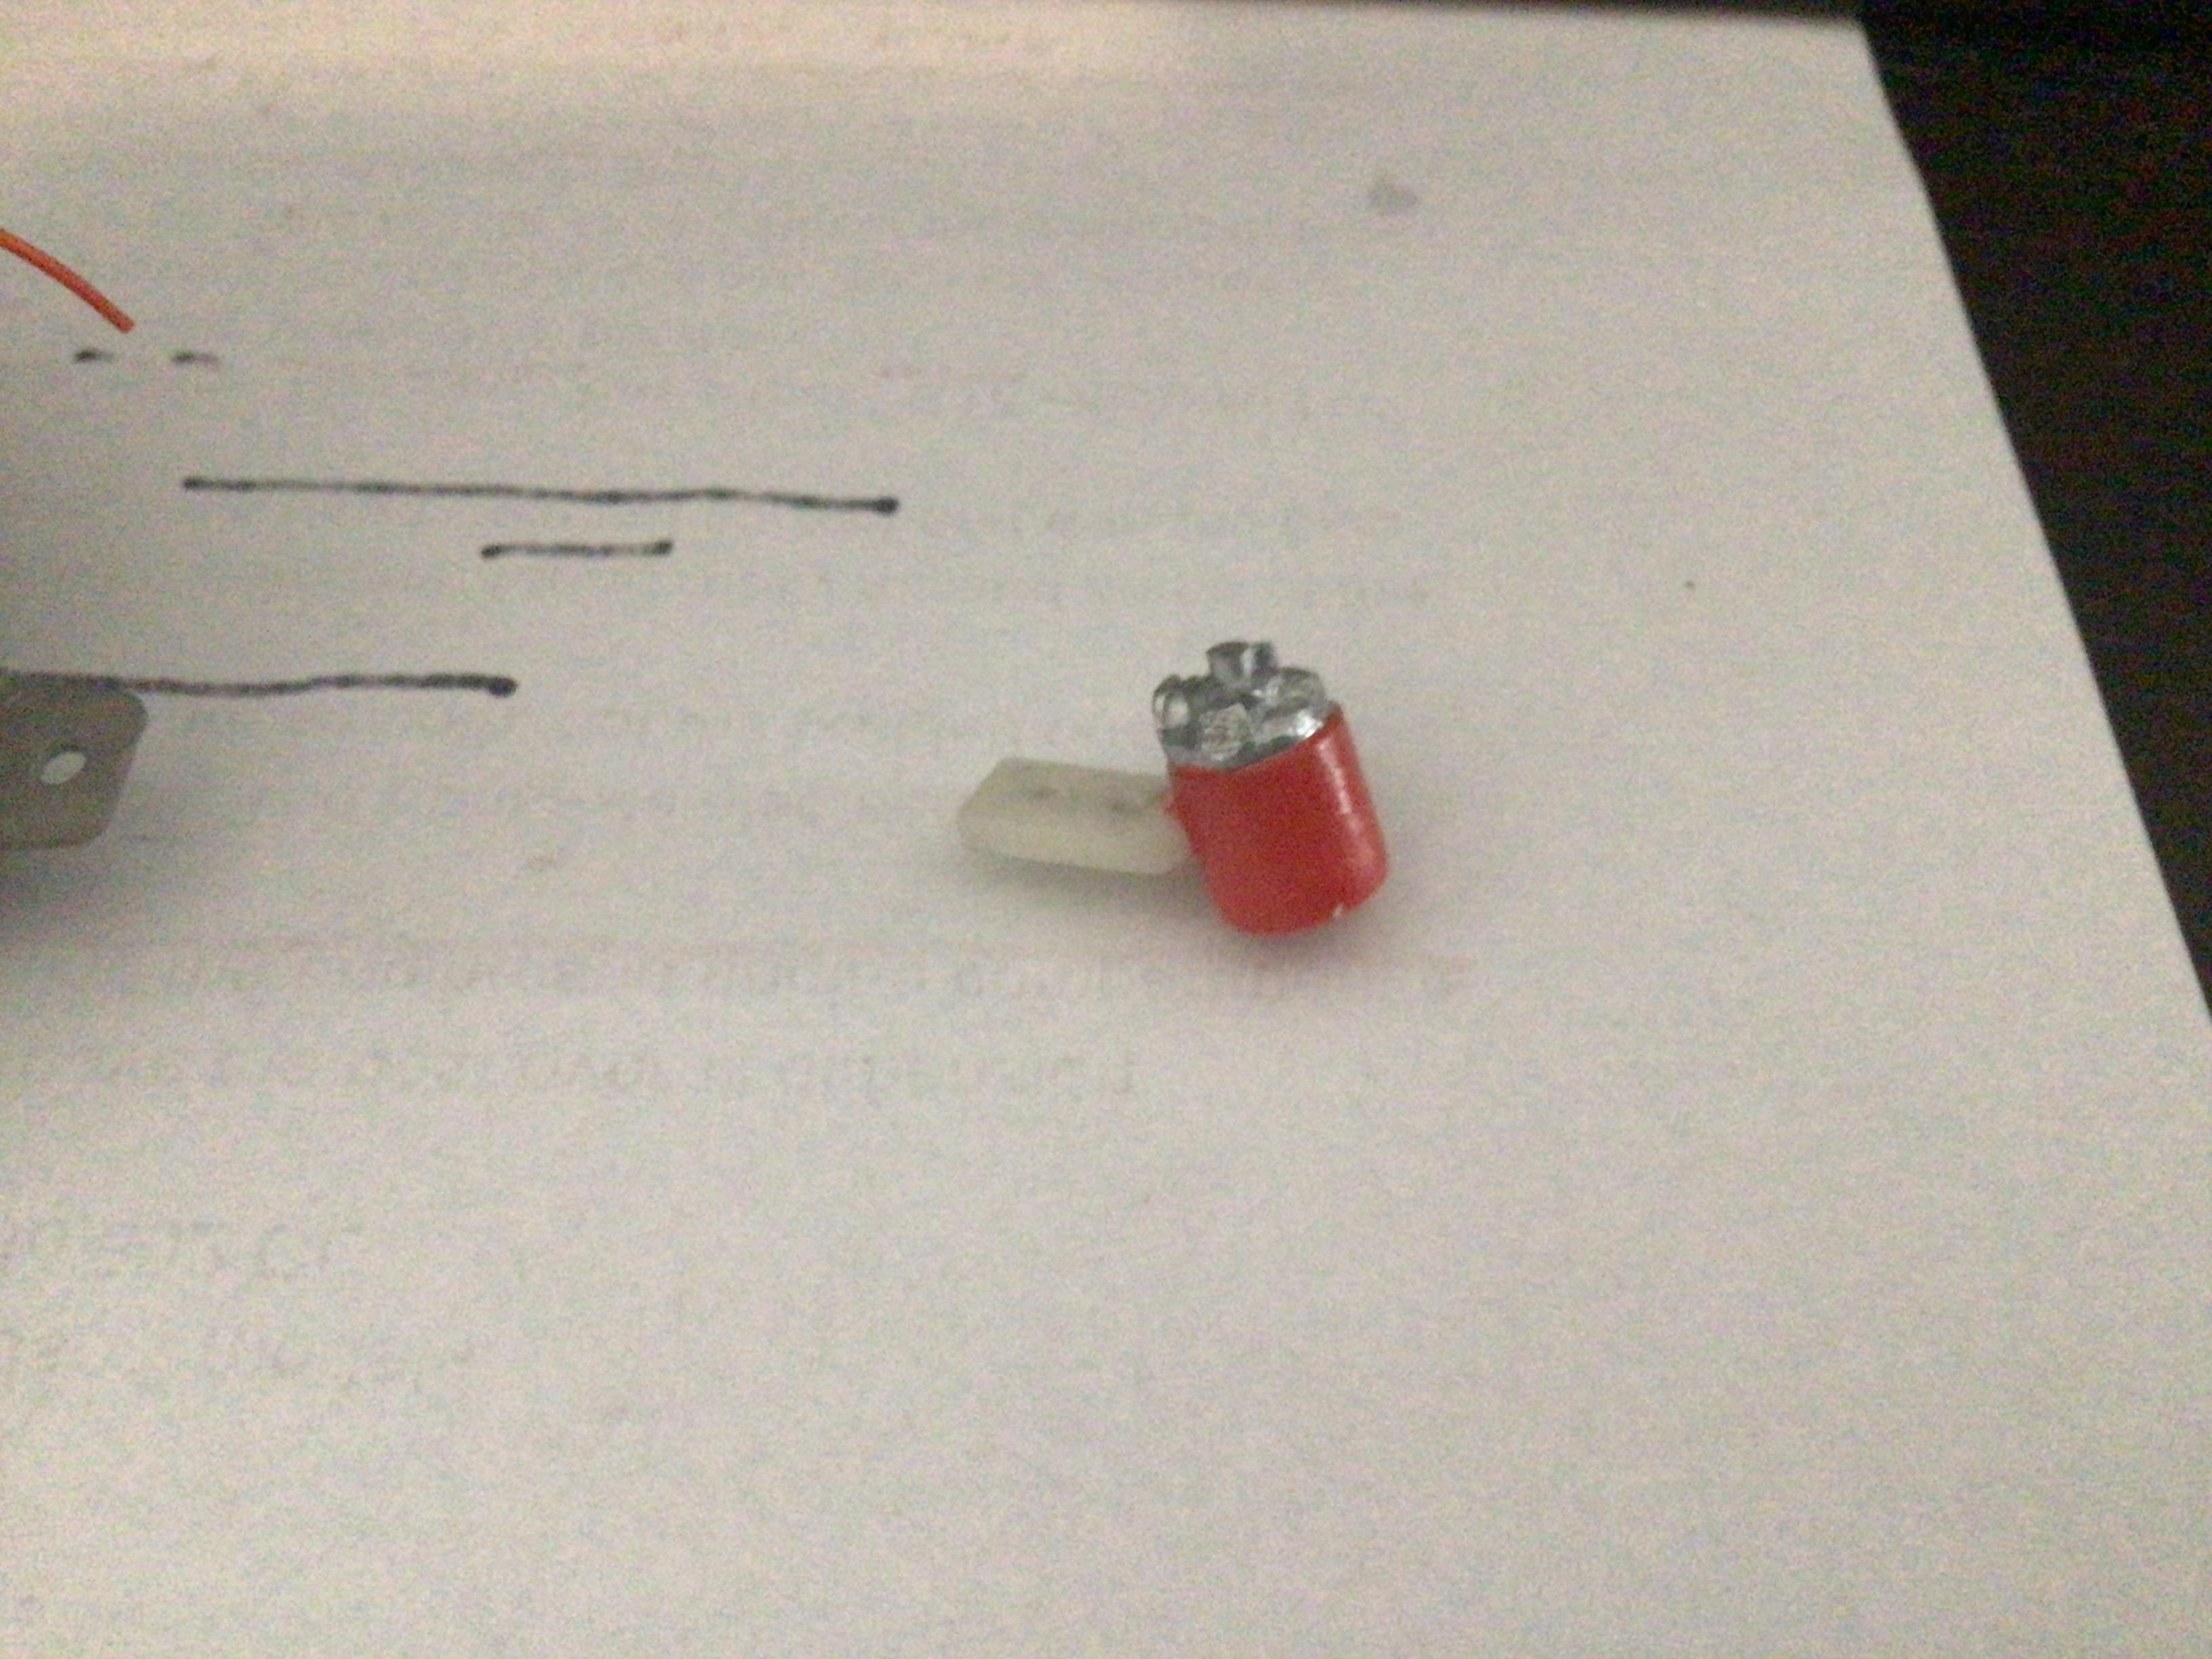
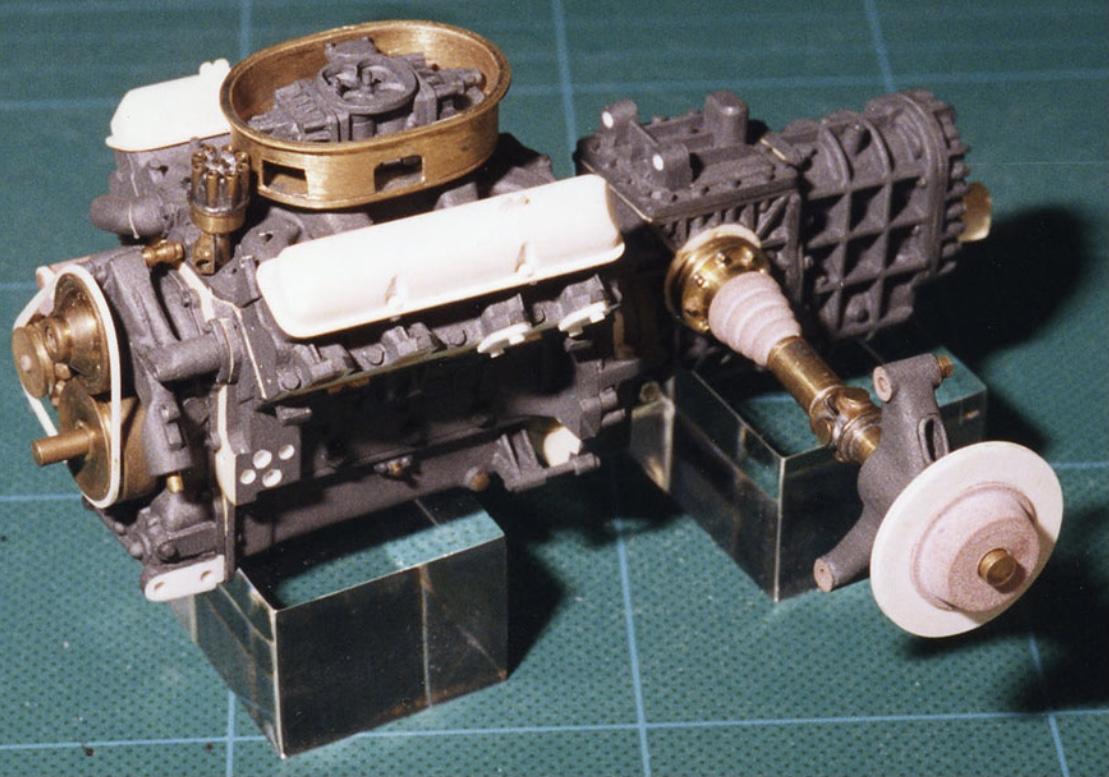
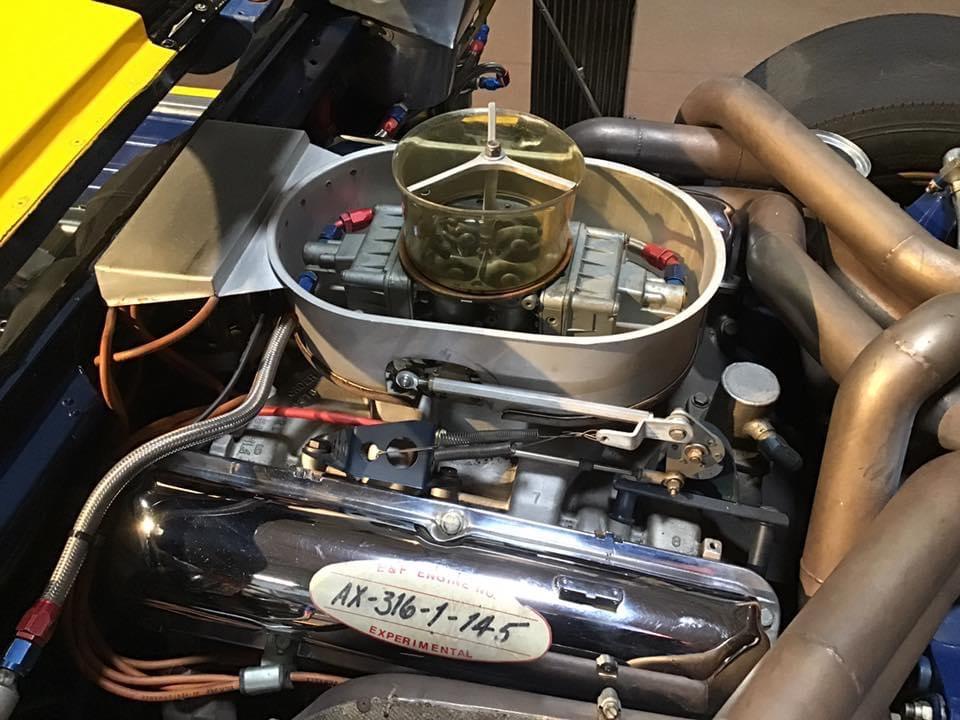
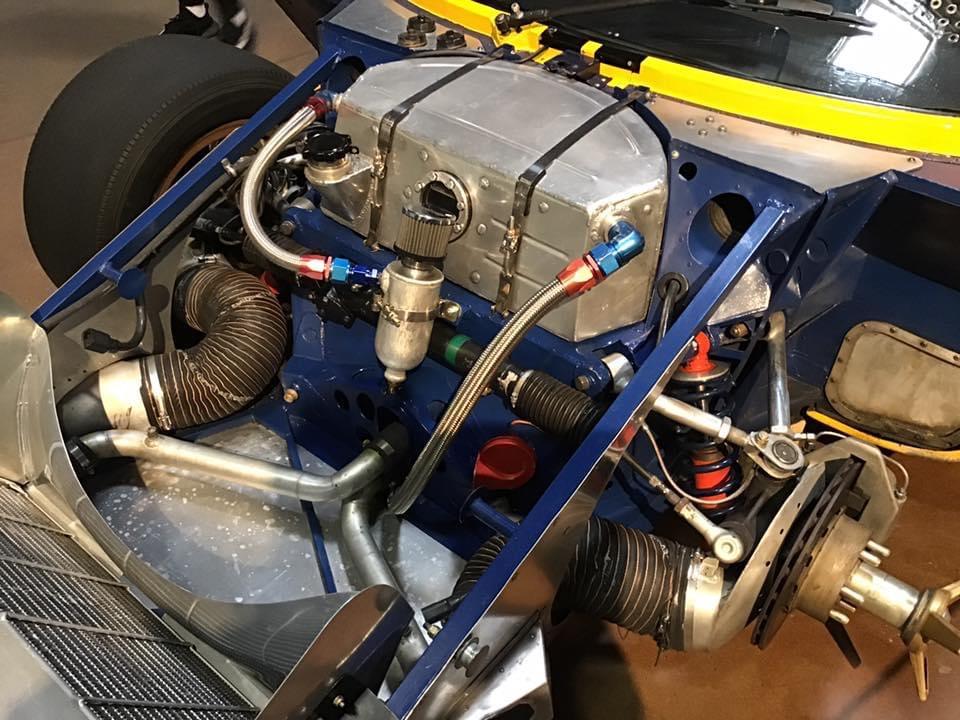
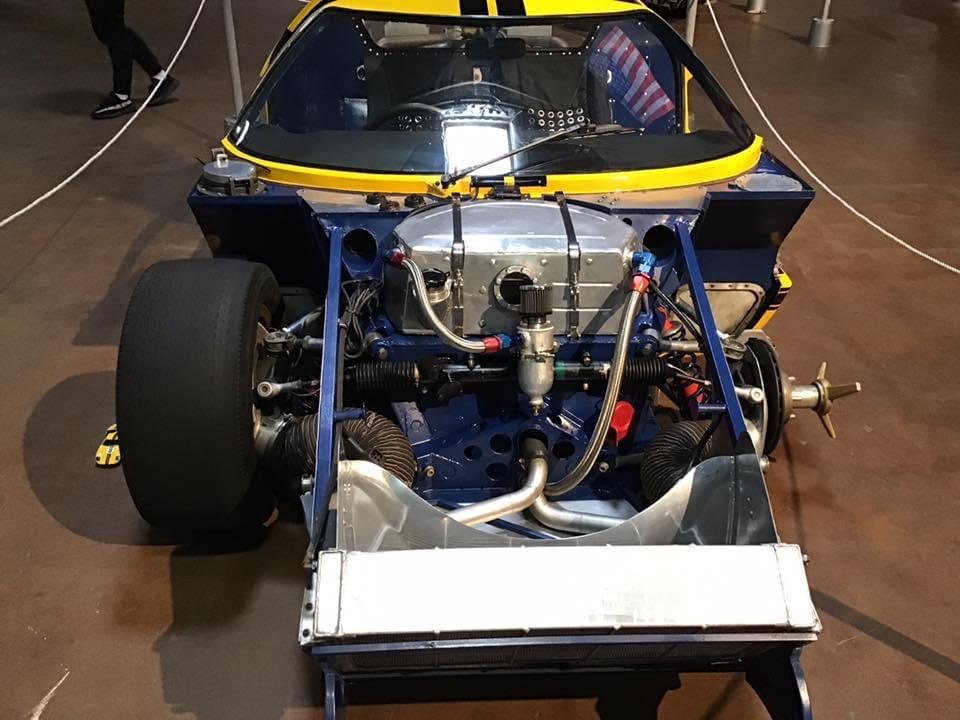
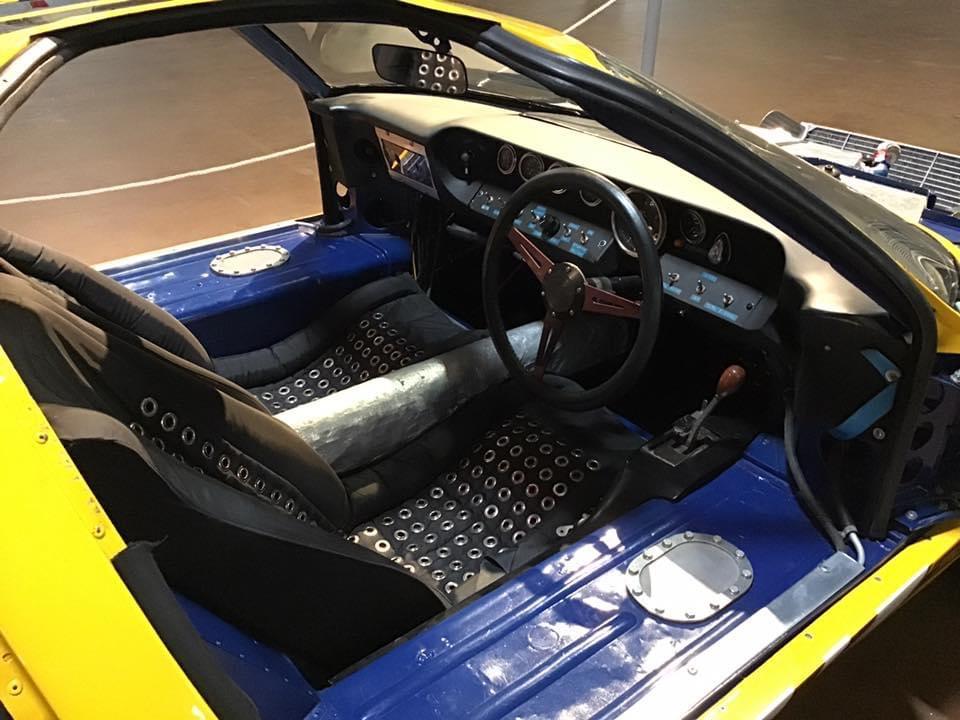
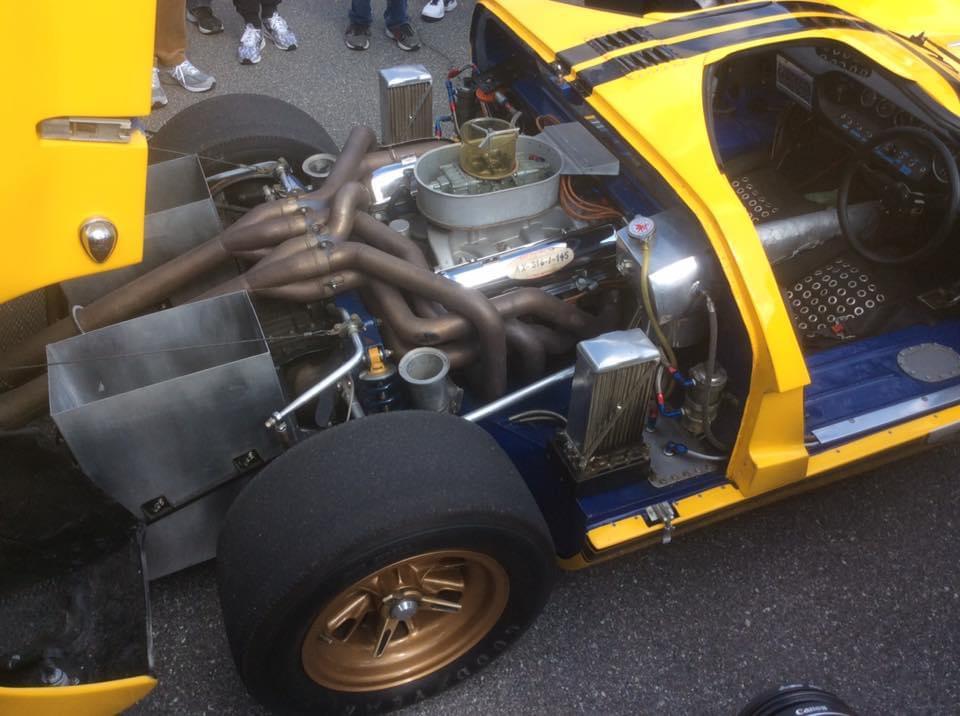
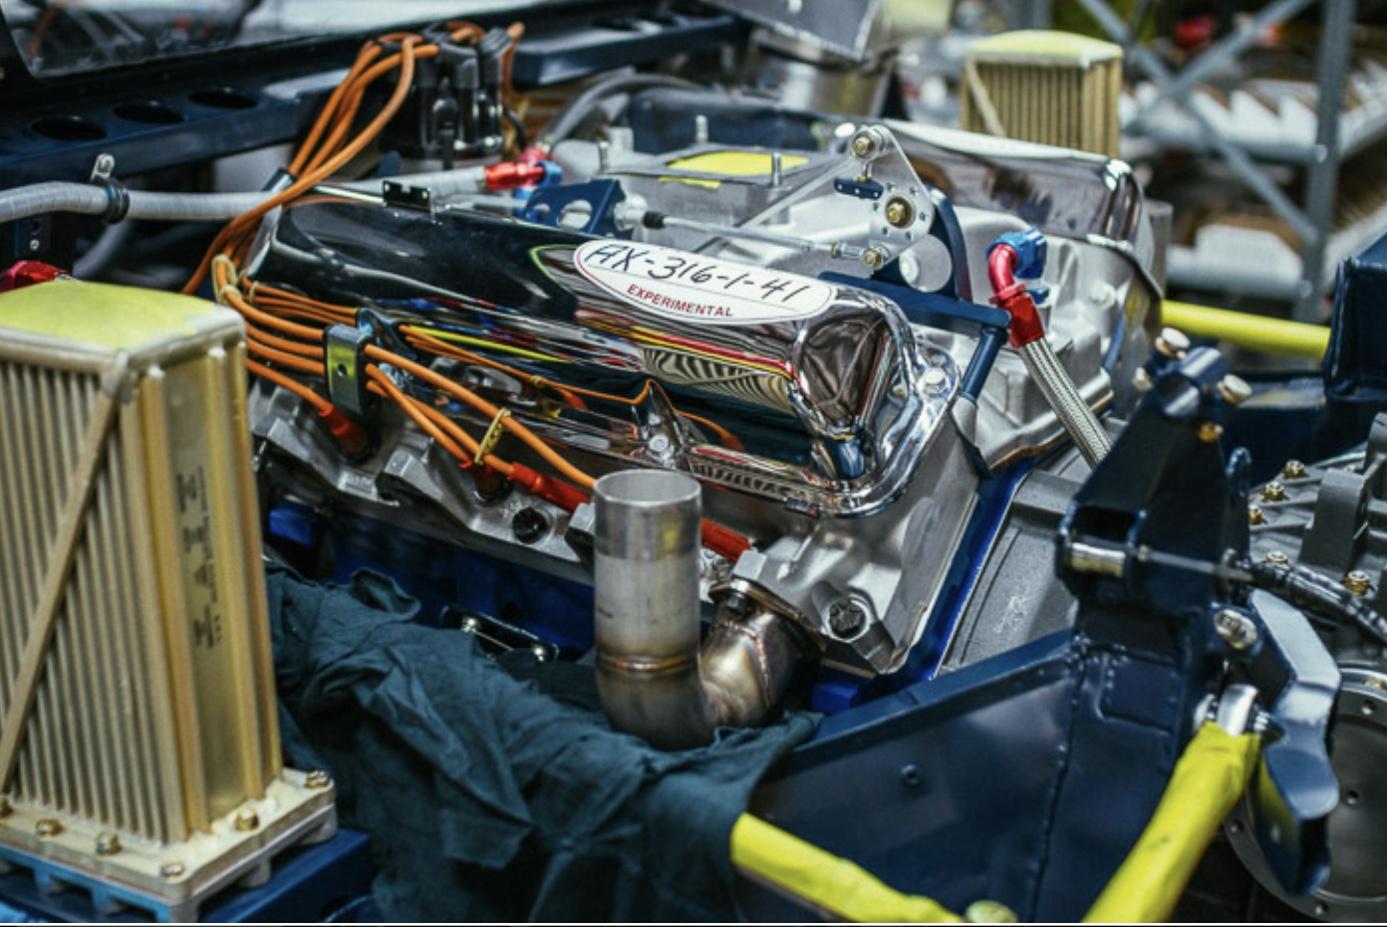
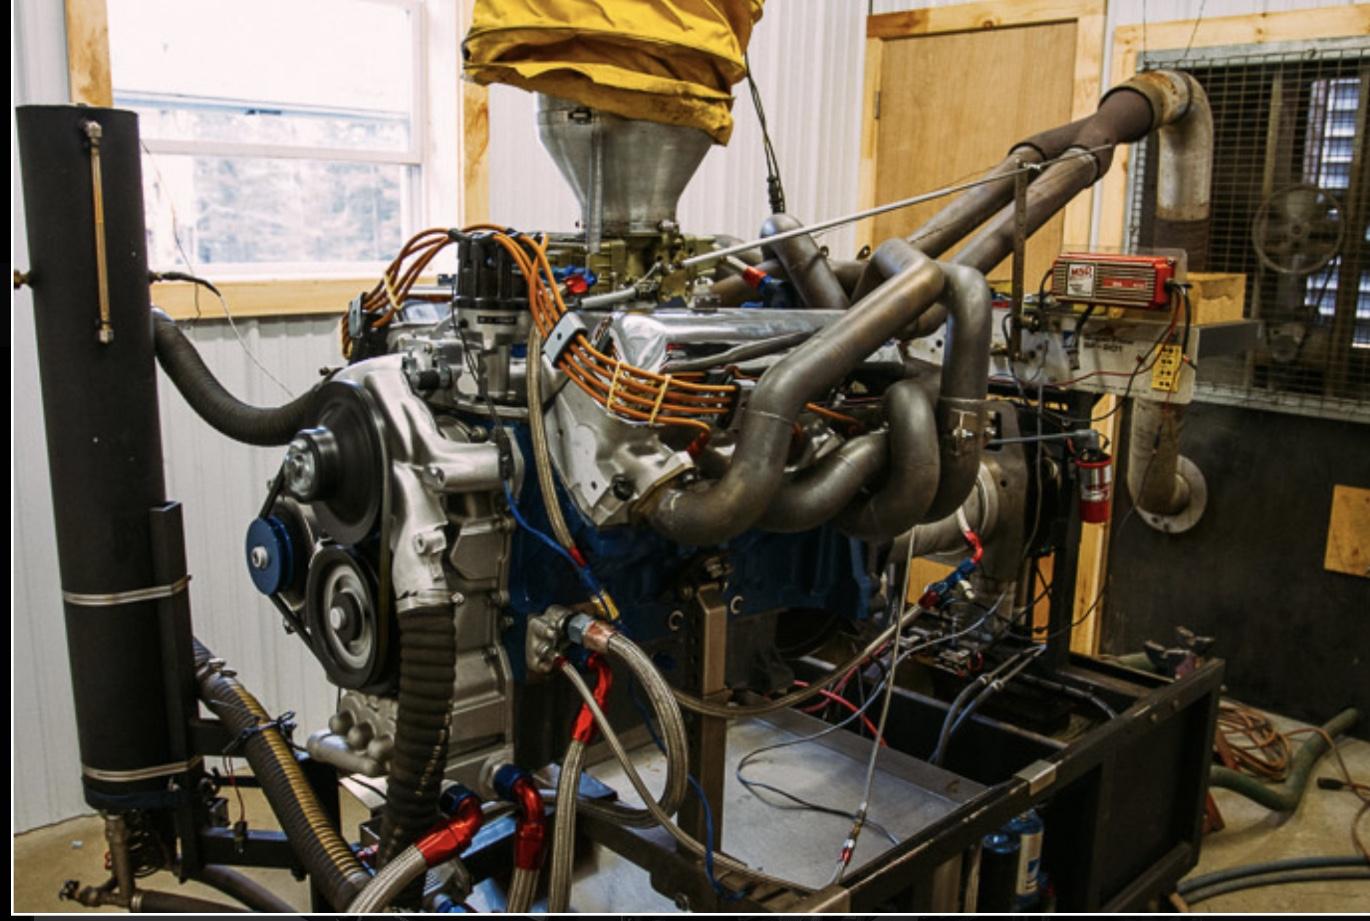
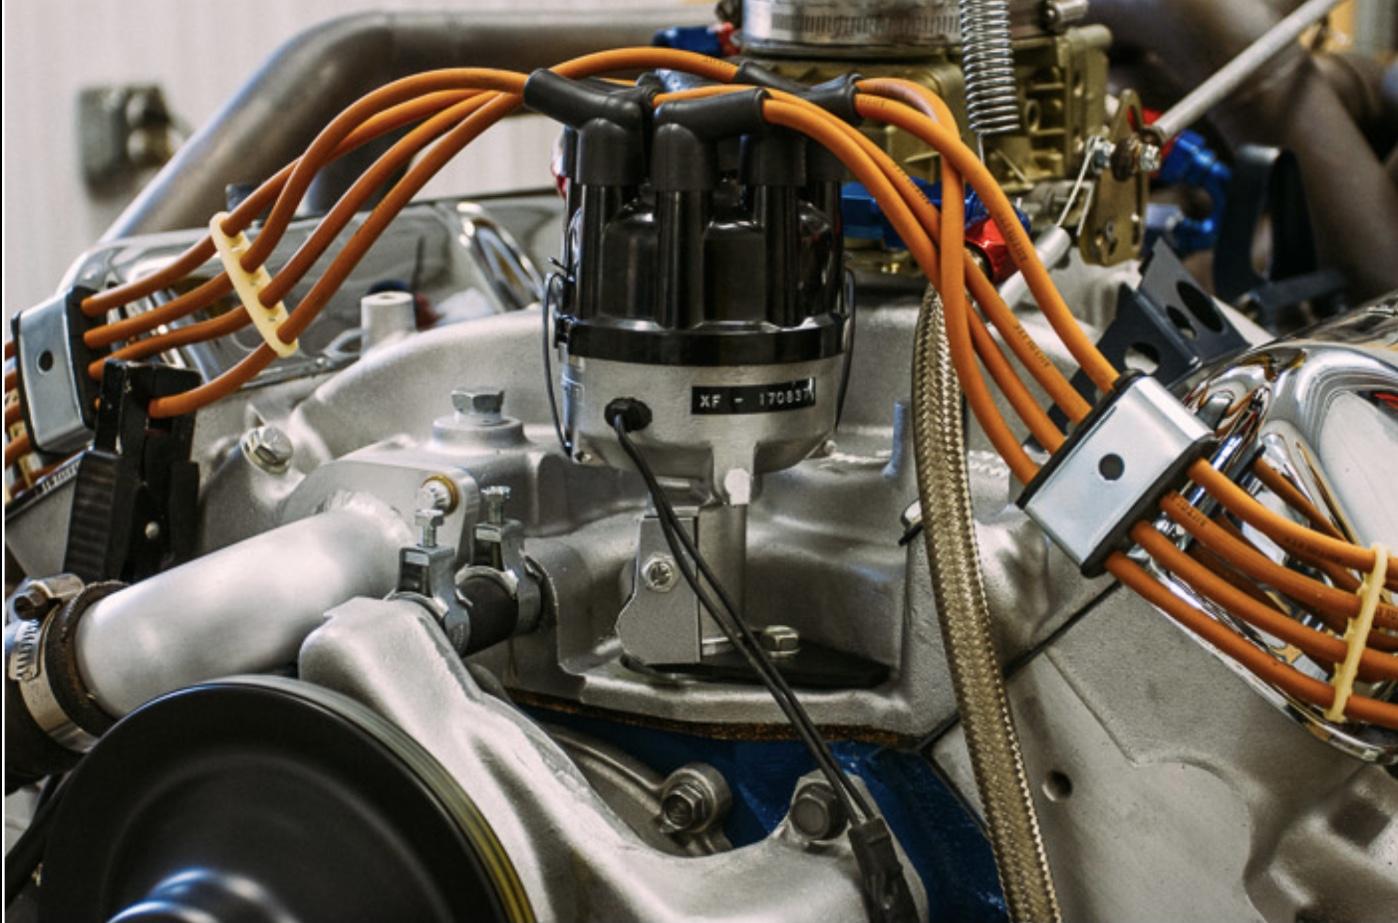
The CMA model looks amazing and of course very expensive and supposedly 98% towards being ready for molds. No mention of a kit version and $10k is out of my price range for a built version. I thinks some of those pictures go back 20 years so we shall see. There are very nice 1/12 diecast MKIIs that have been available from ACME/GMP for about $1k for several years. Perhaps they got the oil and radiator hoses and lines right - let’s hope so for that price. As for the Trumpeter engine - the more I look at this thing the more I become amazed at the errors. The front of the engine does not have a water pump which makes it pretty difficult to connect any hoses or pipes. Instead Trumpeter has large radiator pipes going into the bottom of the oil pan which of course is where the oil lines should be. So at point I am going to attempt to work with the various pictures I have and try to make this as correct as I can within reason for my own sanity and to perhaps encourage others that want to tackle this kit that following the kit directions is not the only option. So far I have scratch built the oil filter line adapter and added the distributor and plug wires. See below for pictures of the interior where you can see the front of the engine as it is being installed. As other club members in South Florida will be taking turns finishing the build when I pass it on in a week, I will start a new post and hopefully can add their progress pictures from across the country after I move this July to Arizona. The last two pics are one from the CMA site and a 1/12 diecast.
-
Thanks for the tip. I have another AMT glue bomb I can make that modification.
-
Trumpeter Ford GT40 with my twists
vamach1 replied to kensar's topic in WIP: Other Racing: Road Racing, Land Speed Racers
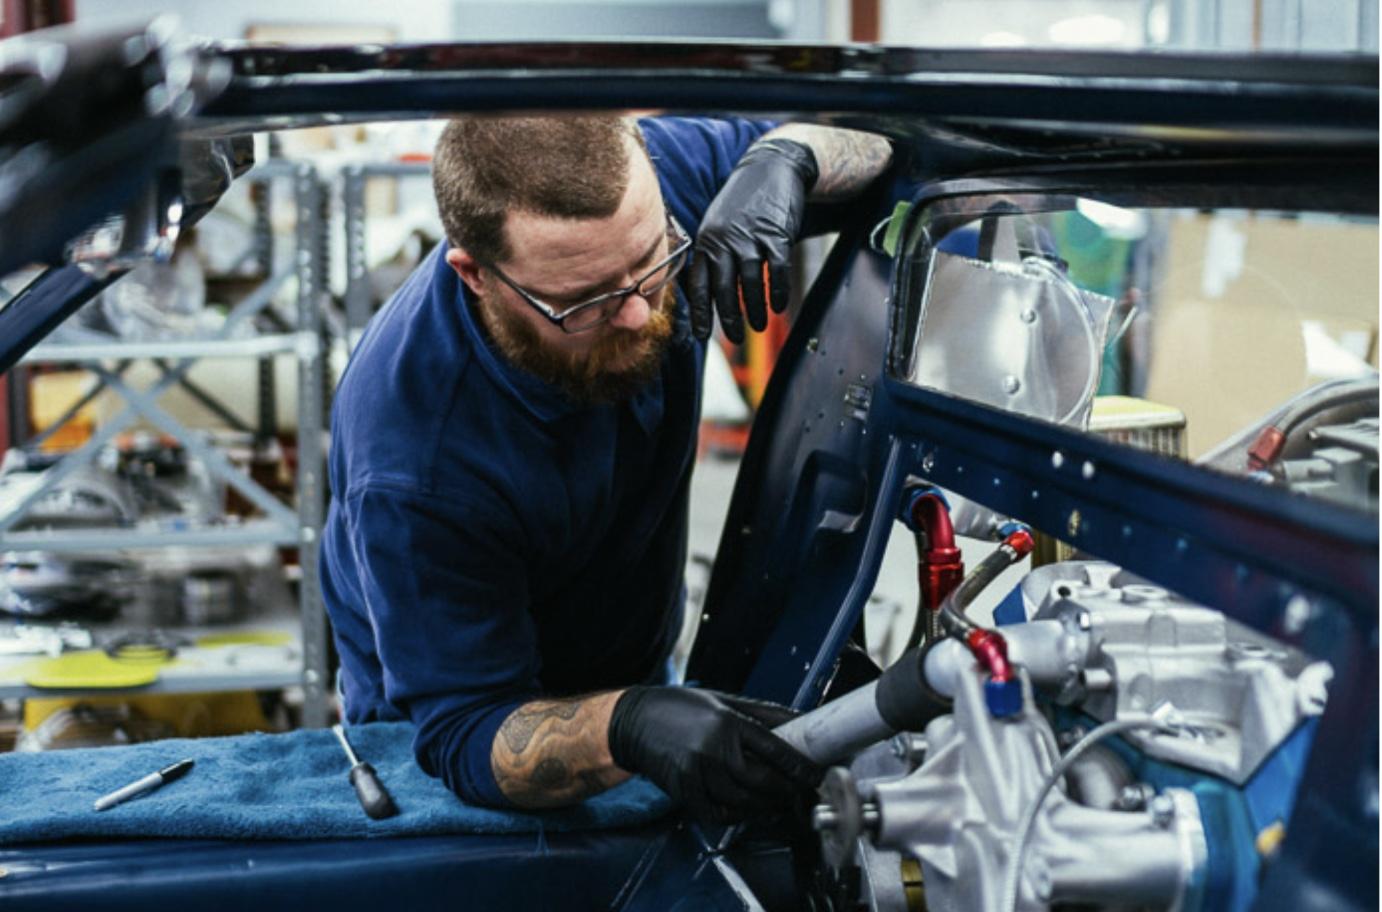
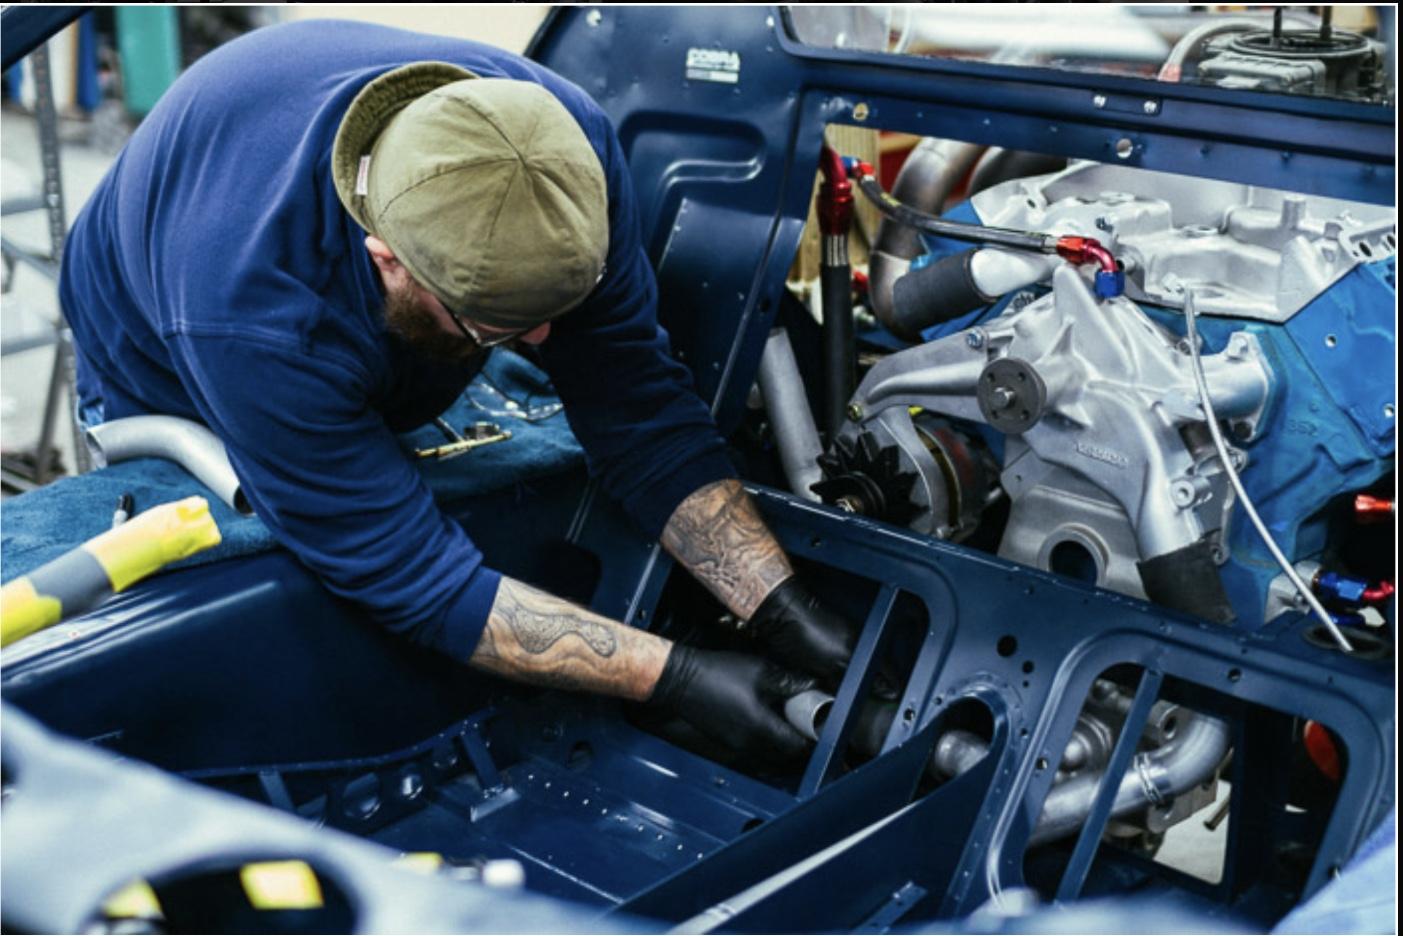
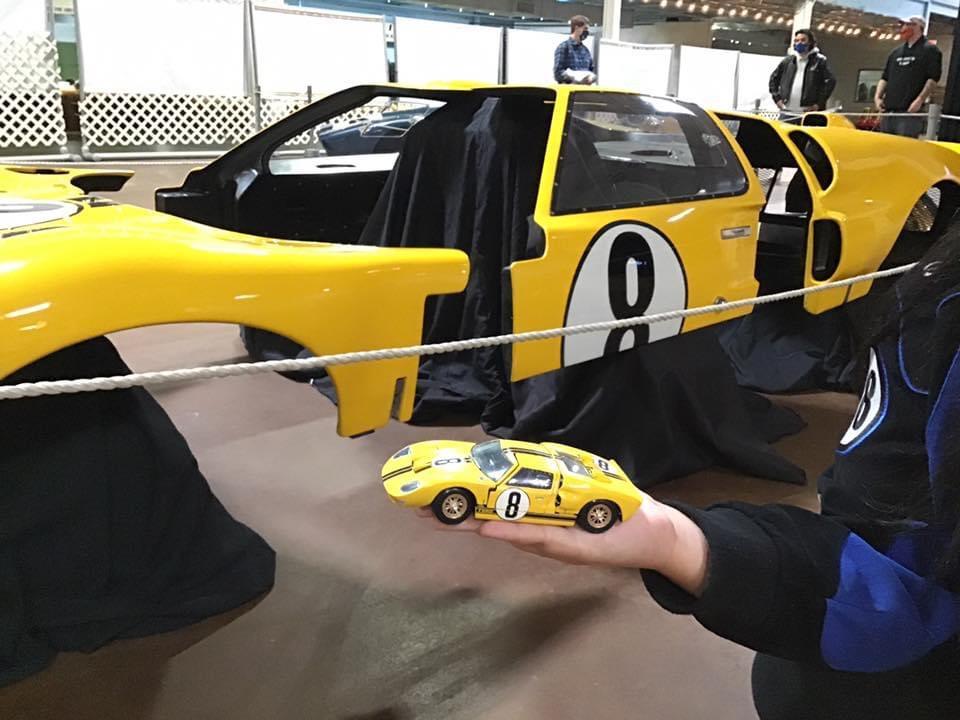
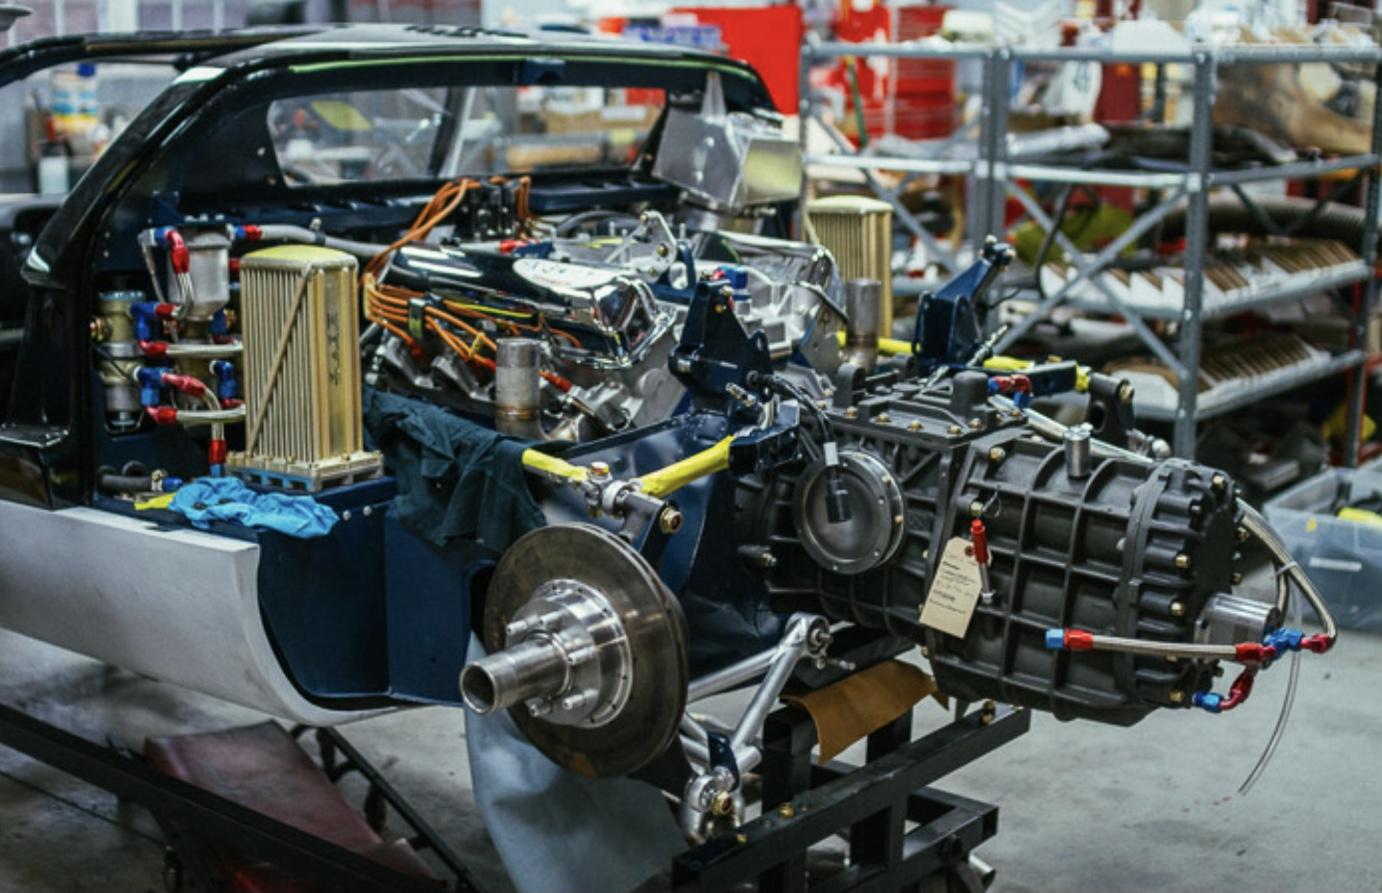
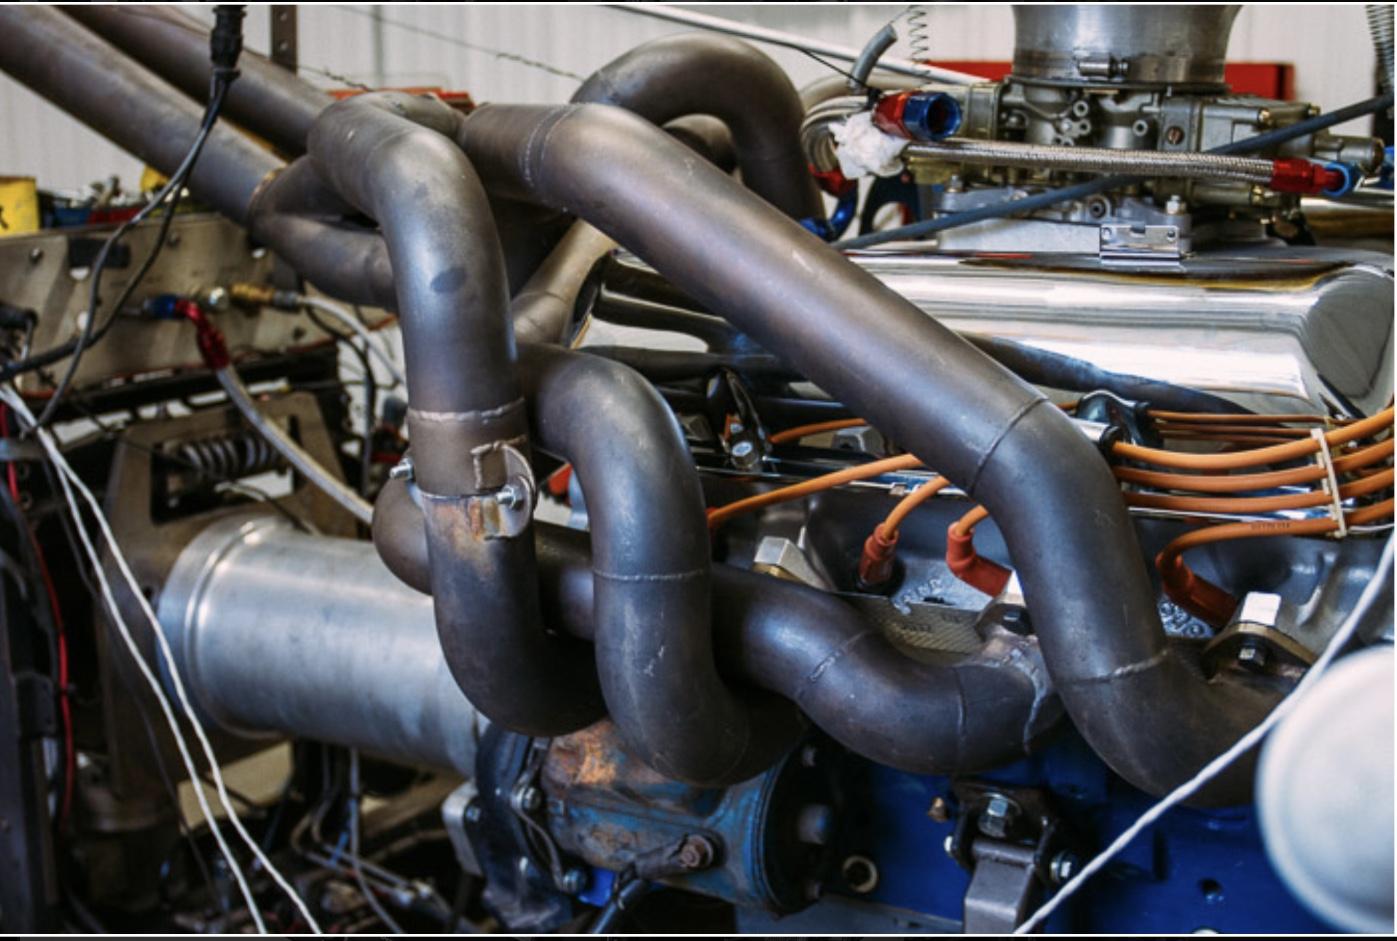
I found a few more pictures from 2020. Not a MKIIB but this car resides in the Simeone museum and is in very original condition.
-
Trumpeter Ford GT40 with my twists
vamach1 replied to kensar's topic in WIP: Other Racing: Road Racing, Land Speed Racers
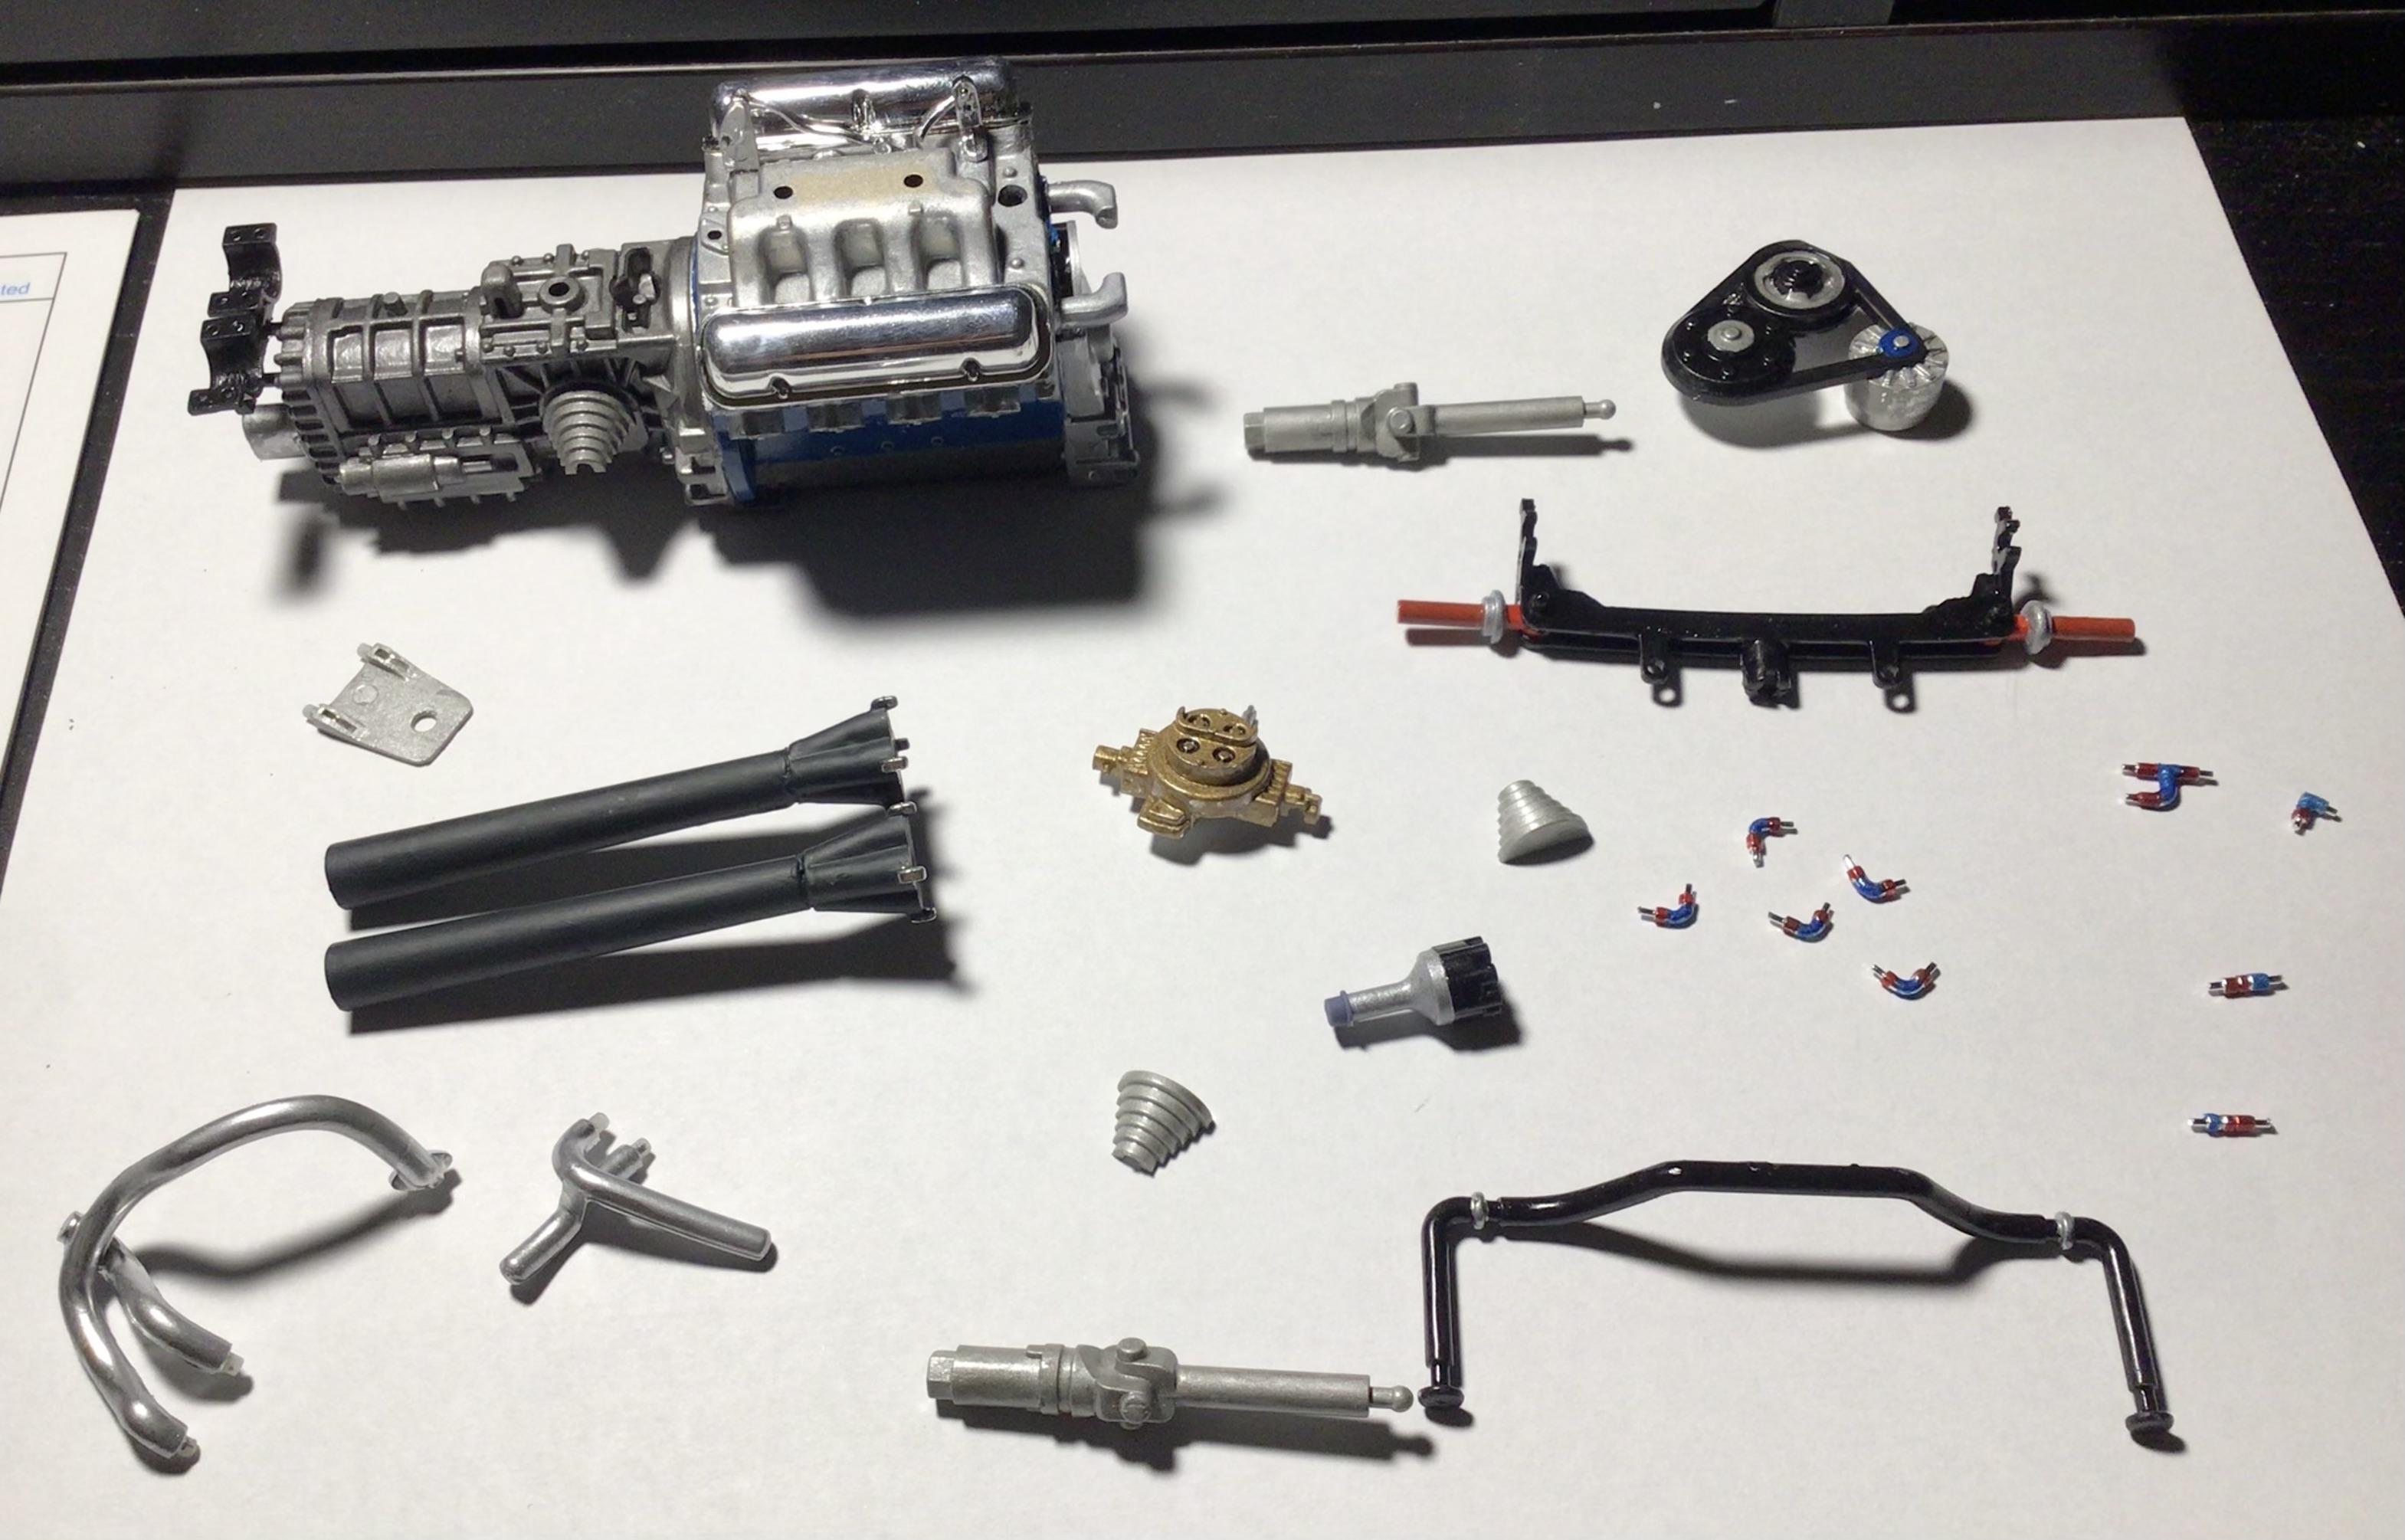
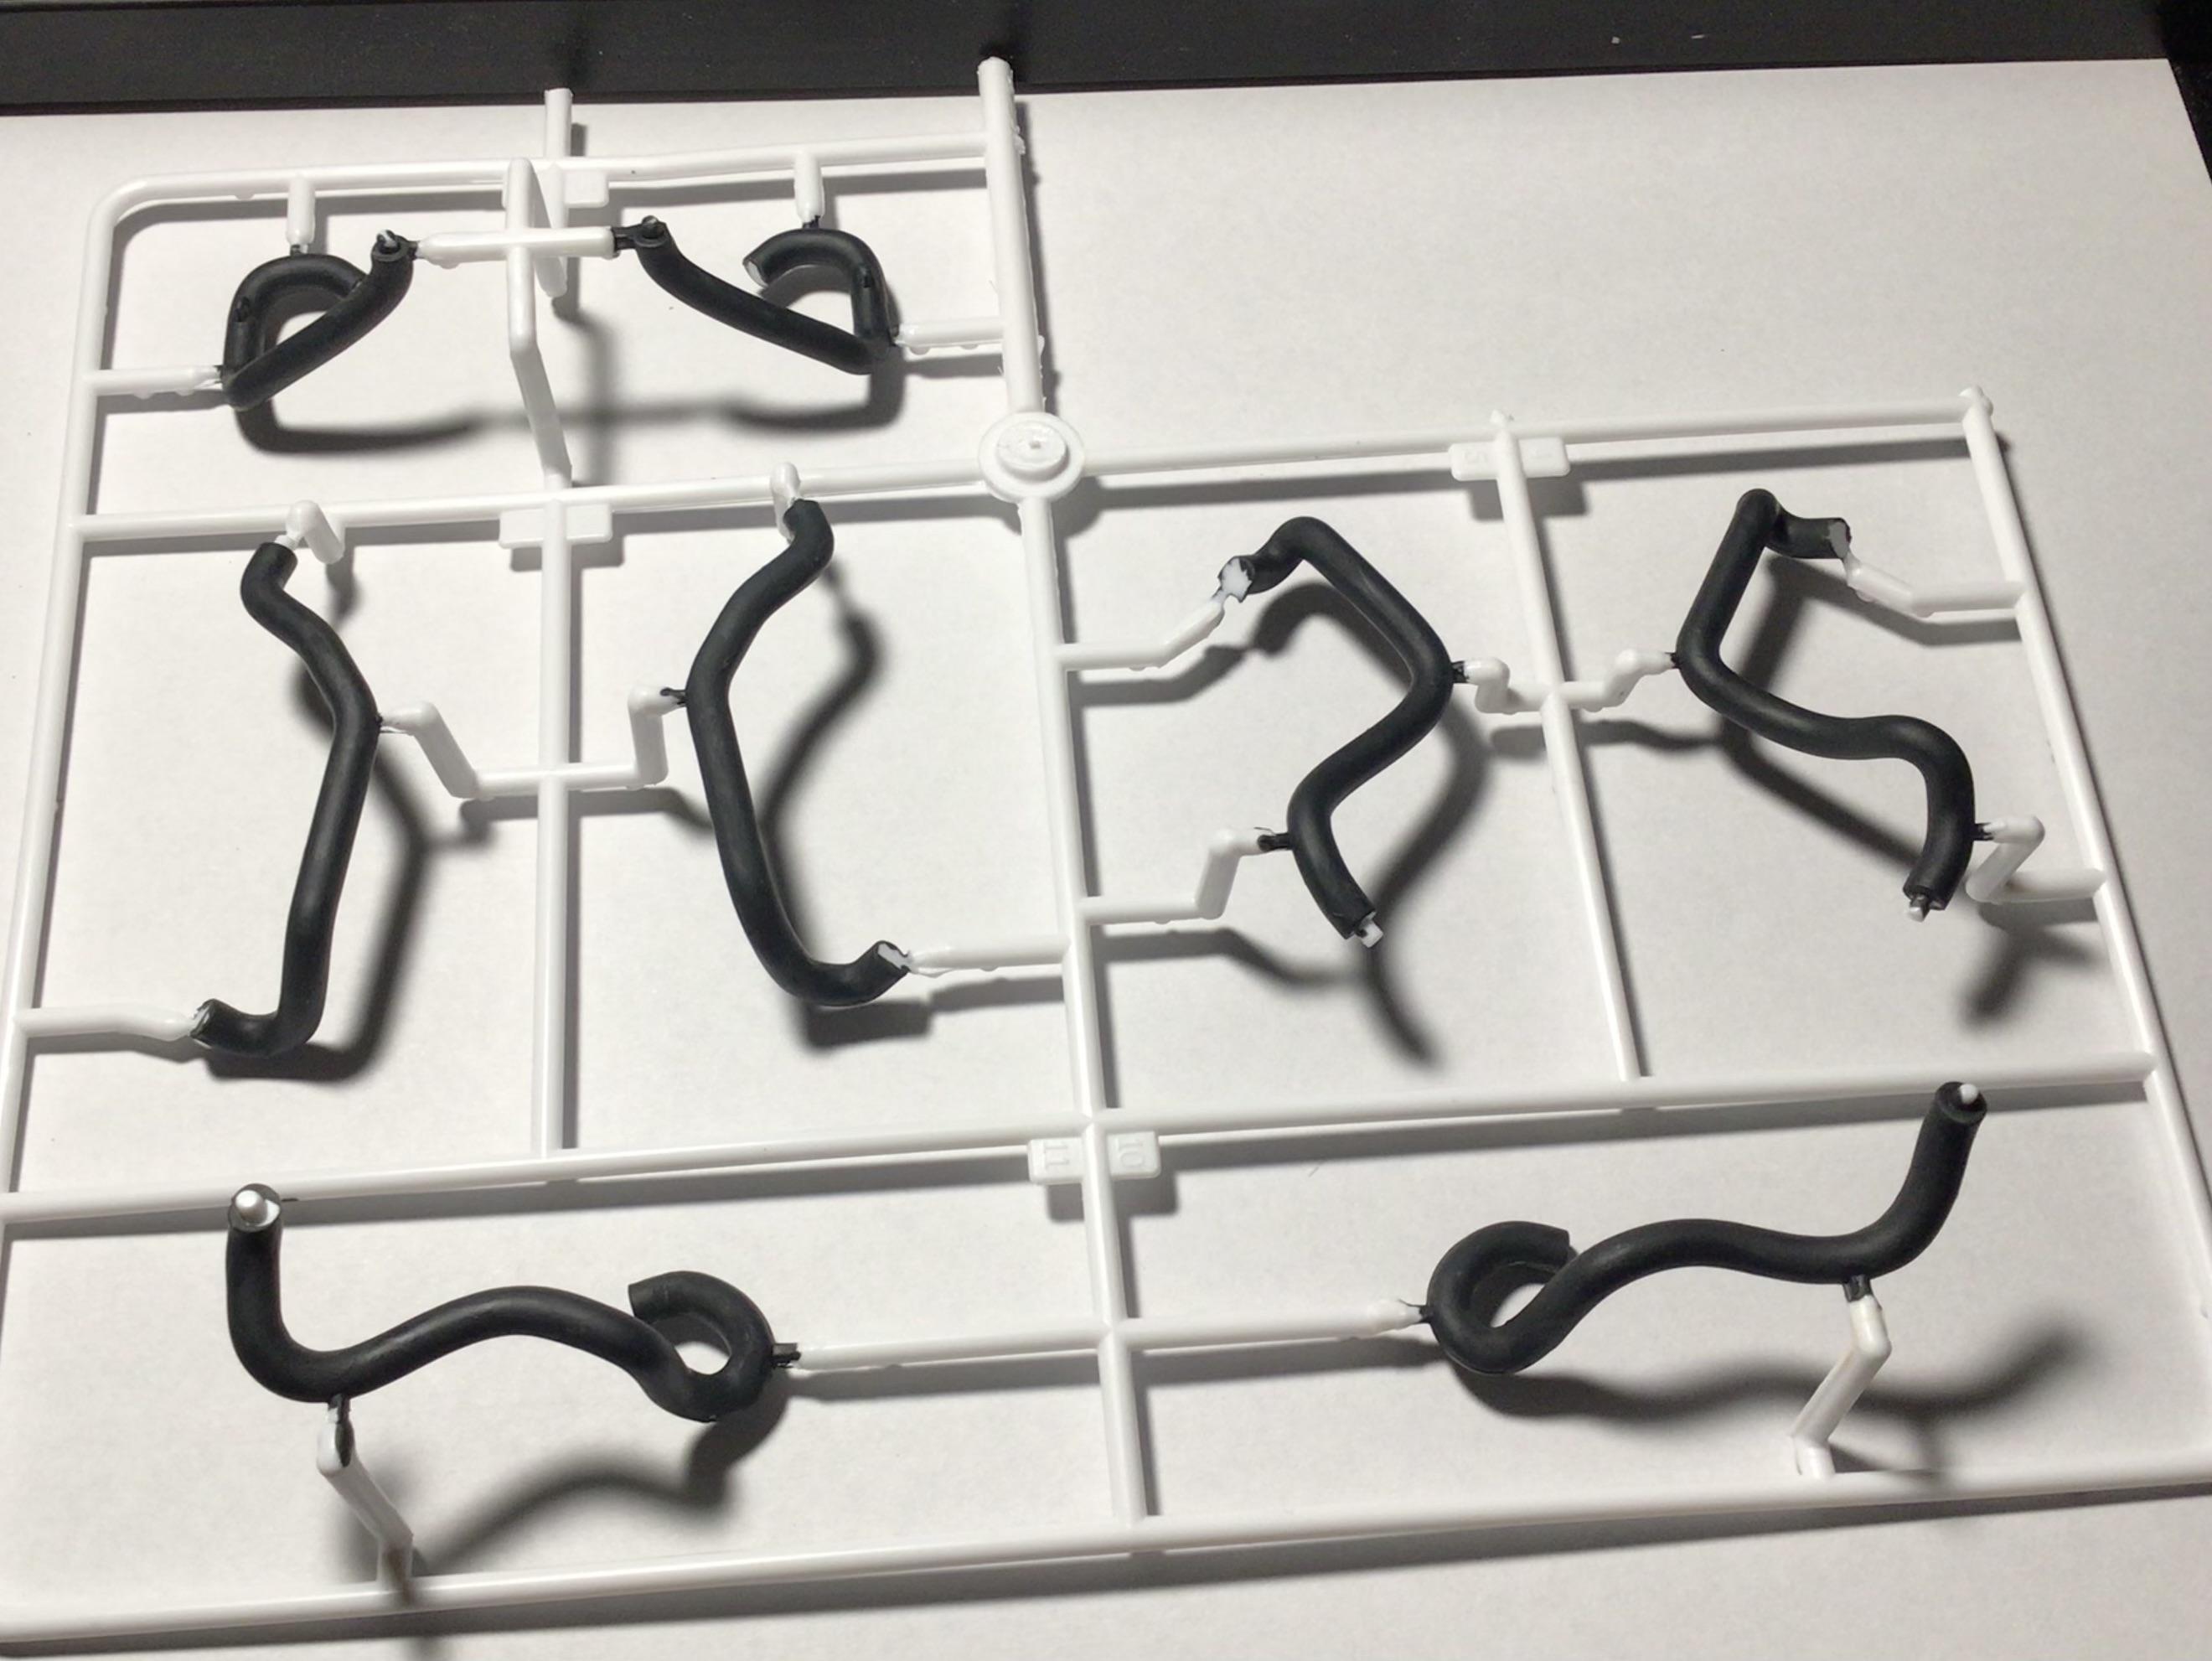
I’ll start a new thread of the MCC group build but this gives other an idea of what this kit entails and the extra work required just to make the engine close to the real thing. The distributor is not from the kit and I am waiting on orange spark plug wires. Not shown is the cloth you are supposed to cut and paint silver for the oil and fuel lines. I ordered some silver colored lines to replace the kit white ones. I also bought the MENG 1/12 MarkII kit and I hope it is a easier build whenever I start on that one.
-
Trumpeter Ford GT40 with my twists
vamach1 replied to kensar's topic in WIP: Other Racing: Road Racing, Land Speed Racers
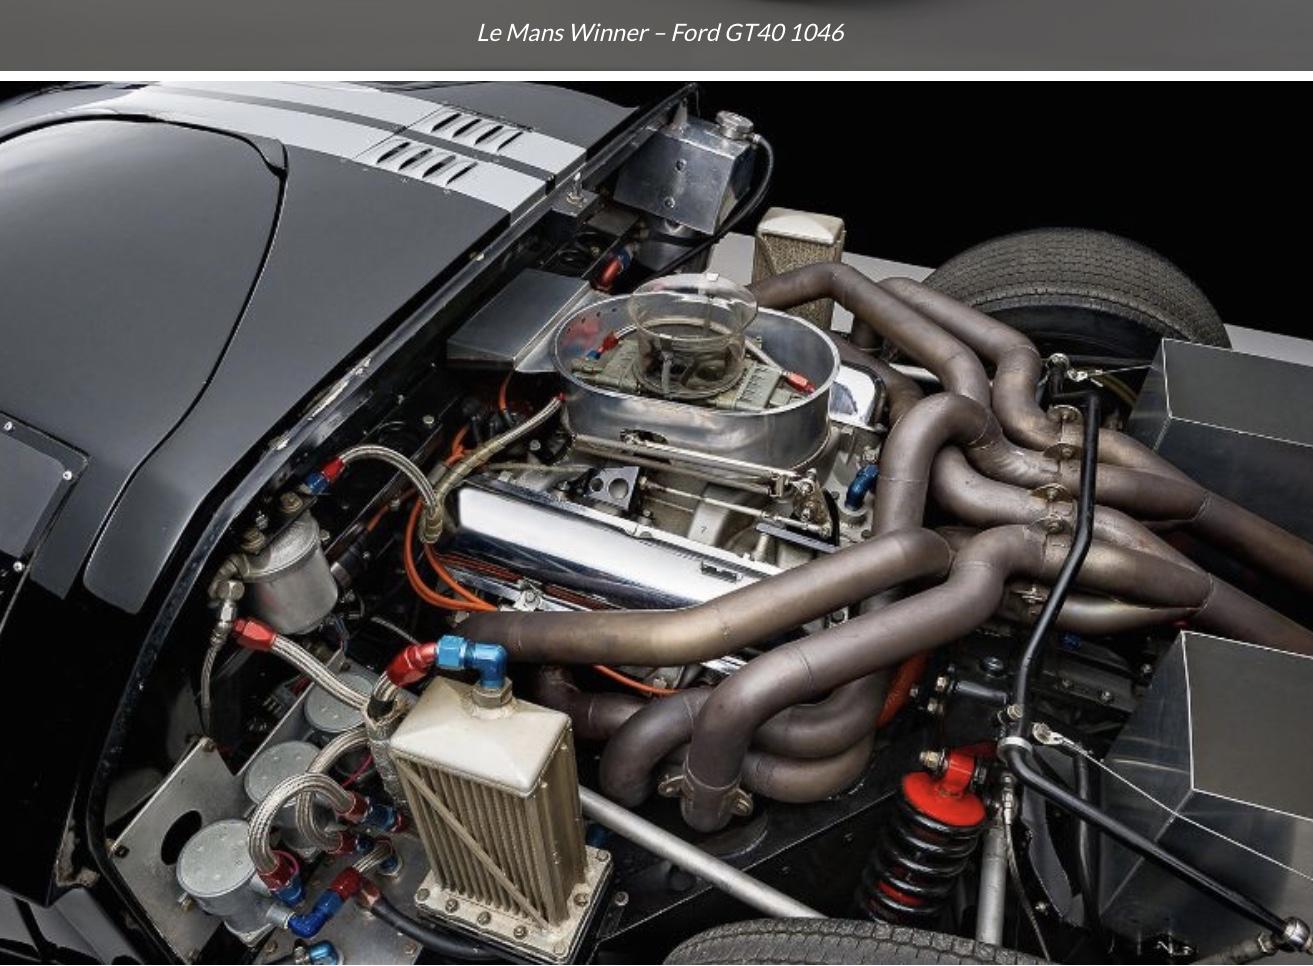
I recently started on the Magnifer version which is basically a clone of the Trumpeter kit. There are some build and open box reviews of these kits online. If you are going for an accurate race day MKII there is a video by the company that restores the real Black #2 MKII online at http://gt40.rkmotorscharlotte.com/restoration/ As a race car there are of course differences between what you would expect to find on a street car engine such as the lack of the breather caps. The lack of the distributor is crazy but the coil is on the firewall. I’m not sure what they used as a starter and the Kit I have does not identify any parts by name. The club I joined Model Car Creations is going to tackle building this kit as a group project and I have started on the engine and have done a lot of research so we can do a respectable build. You are 100% correct in that it was ridiculous so many parts are chromed which just makes for more work to remove the chrome and paint the correct metallic shades. I notices also the parts molded in white has no painting guides so I am referring to the color restoration photos as a guide. I’ll post some pictures once I finish the engine.
-
Hobby shops near Scottsdale AZ
vamach1 replied to Hotrods4ever's topic in General Automotive Talk (Trucks and Cars)
I am moving to AZ this summer and look forward to checking out the hobby shops, model clubs, swap meets, contests and meeting car modelers. -
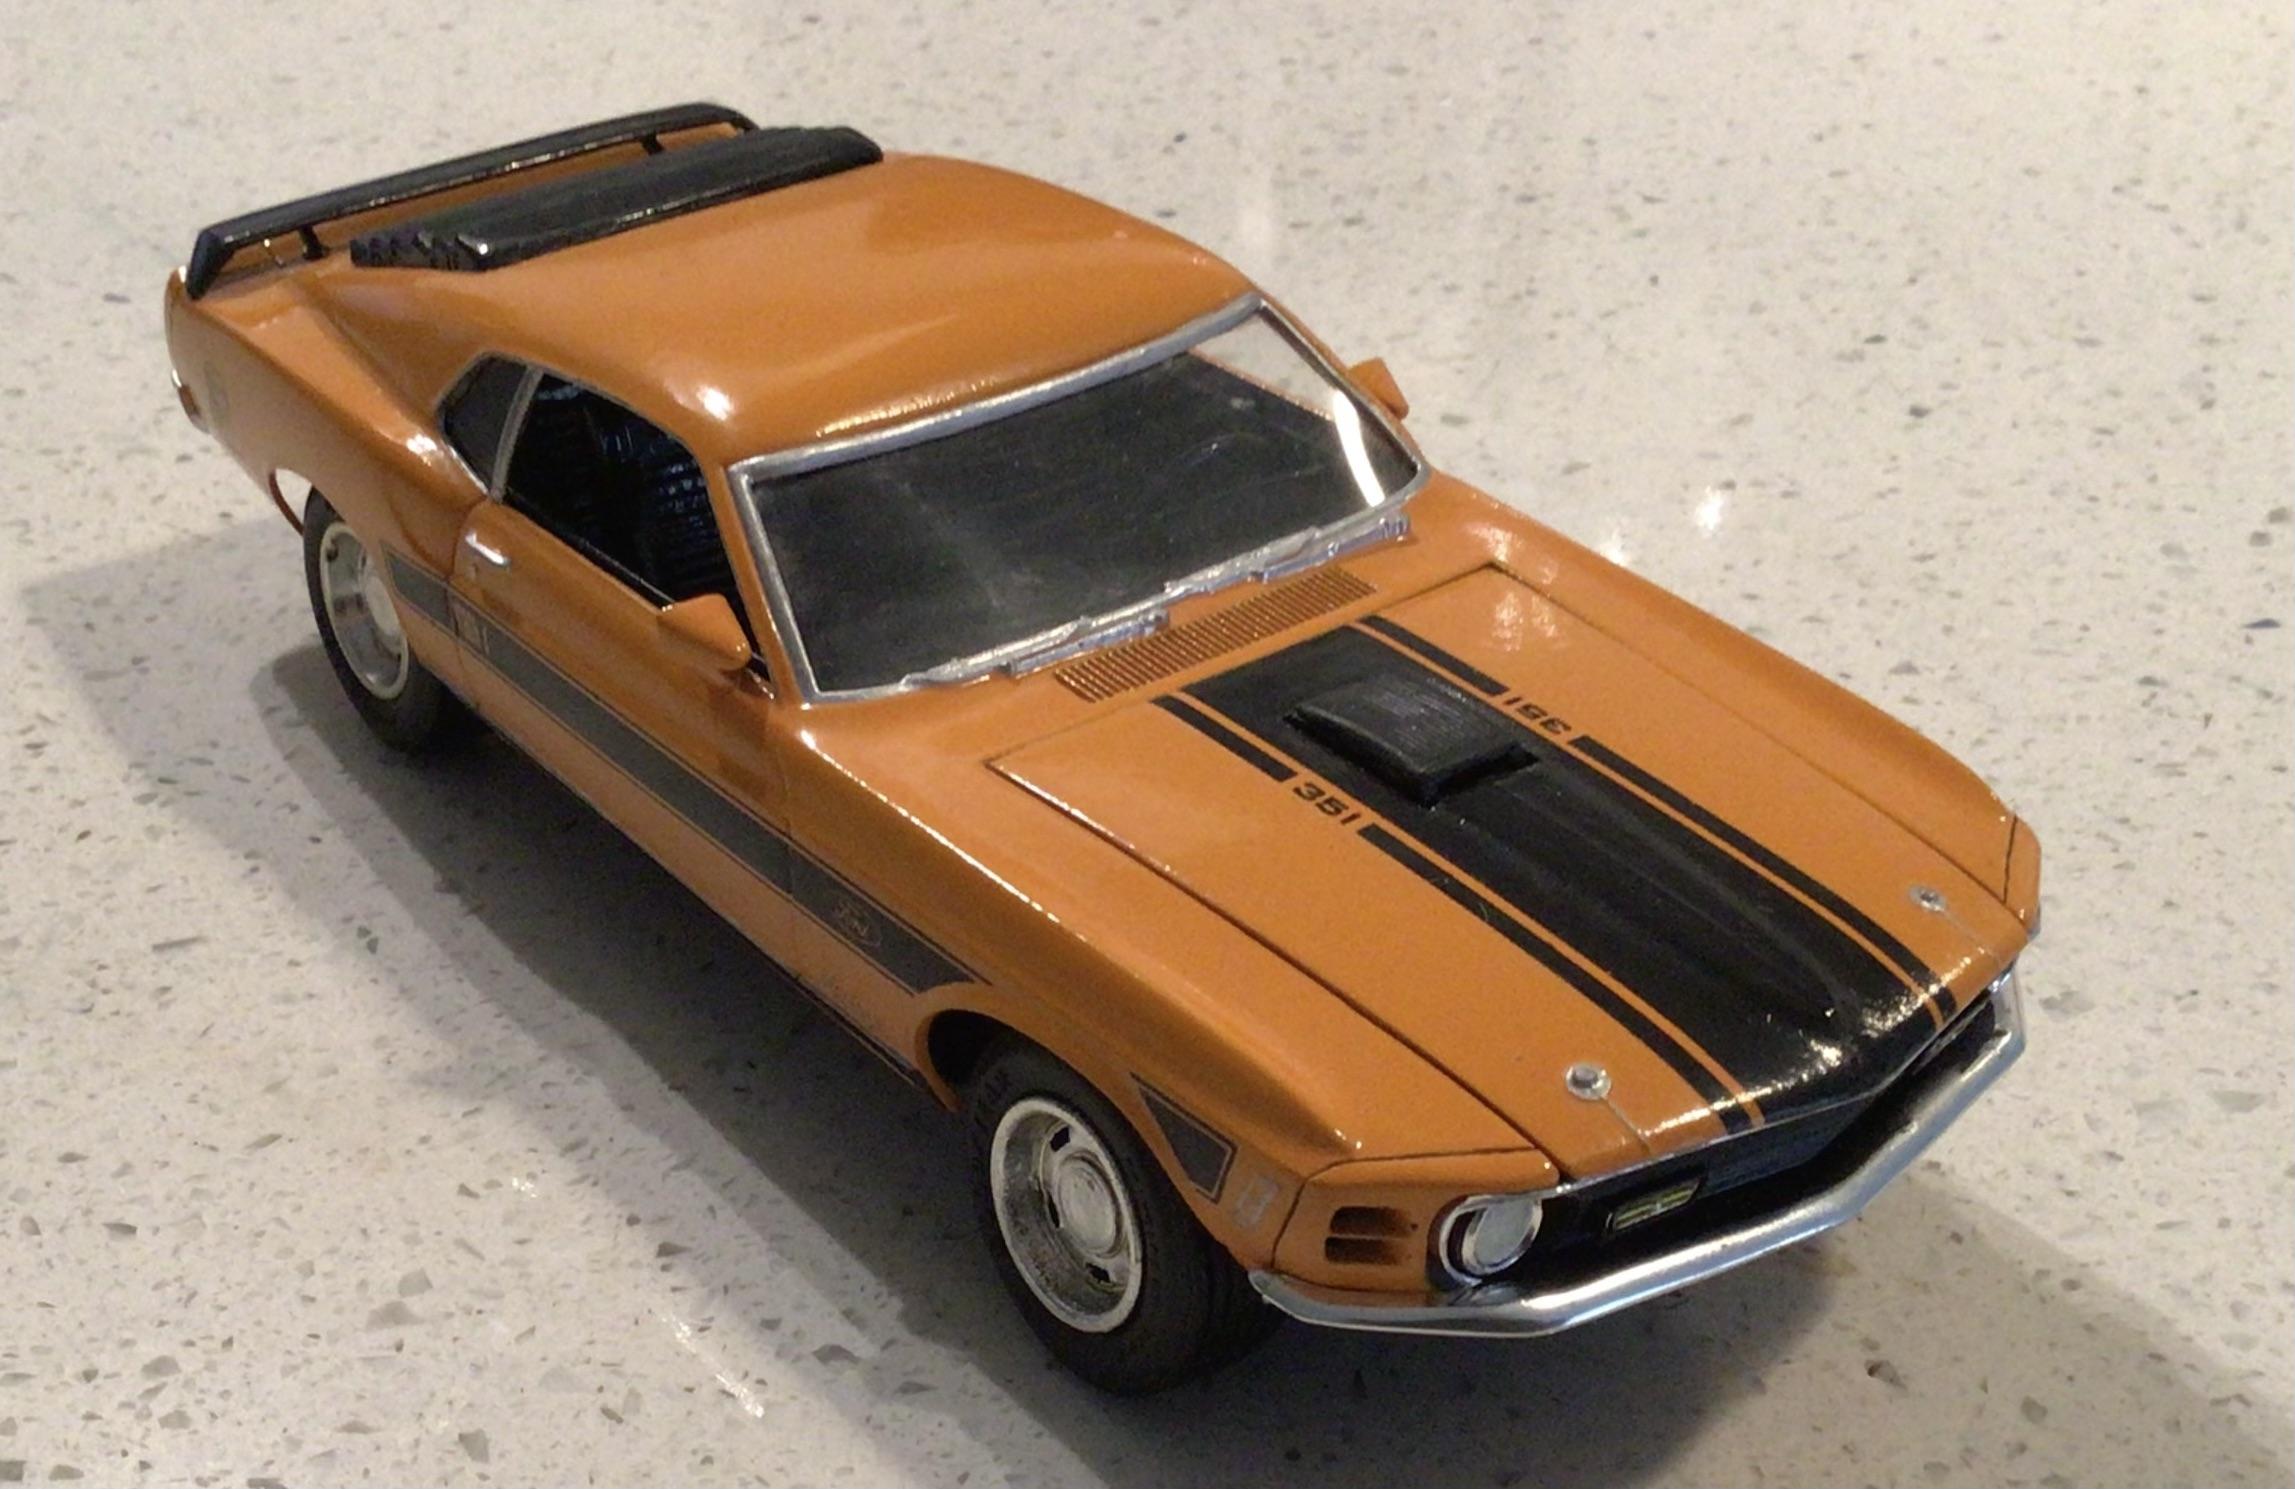
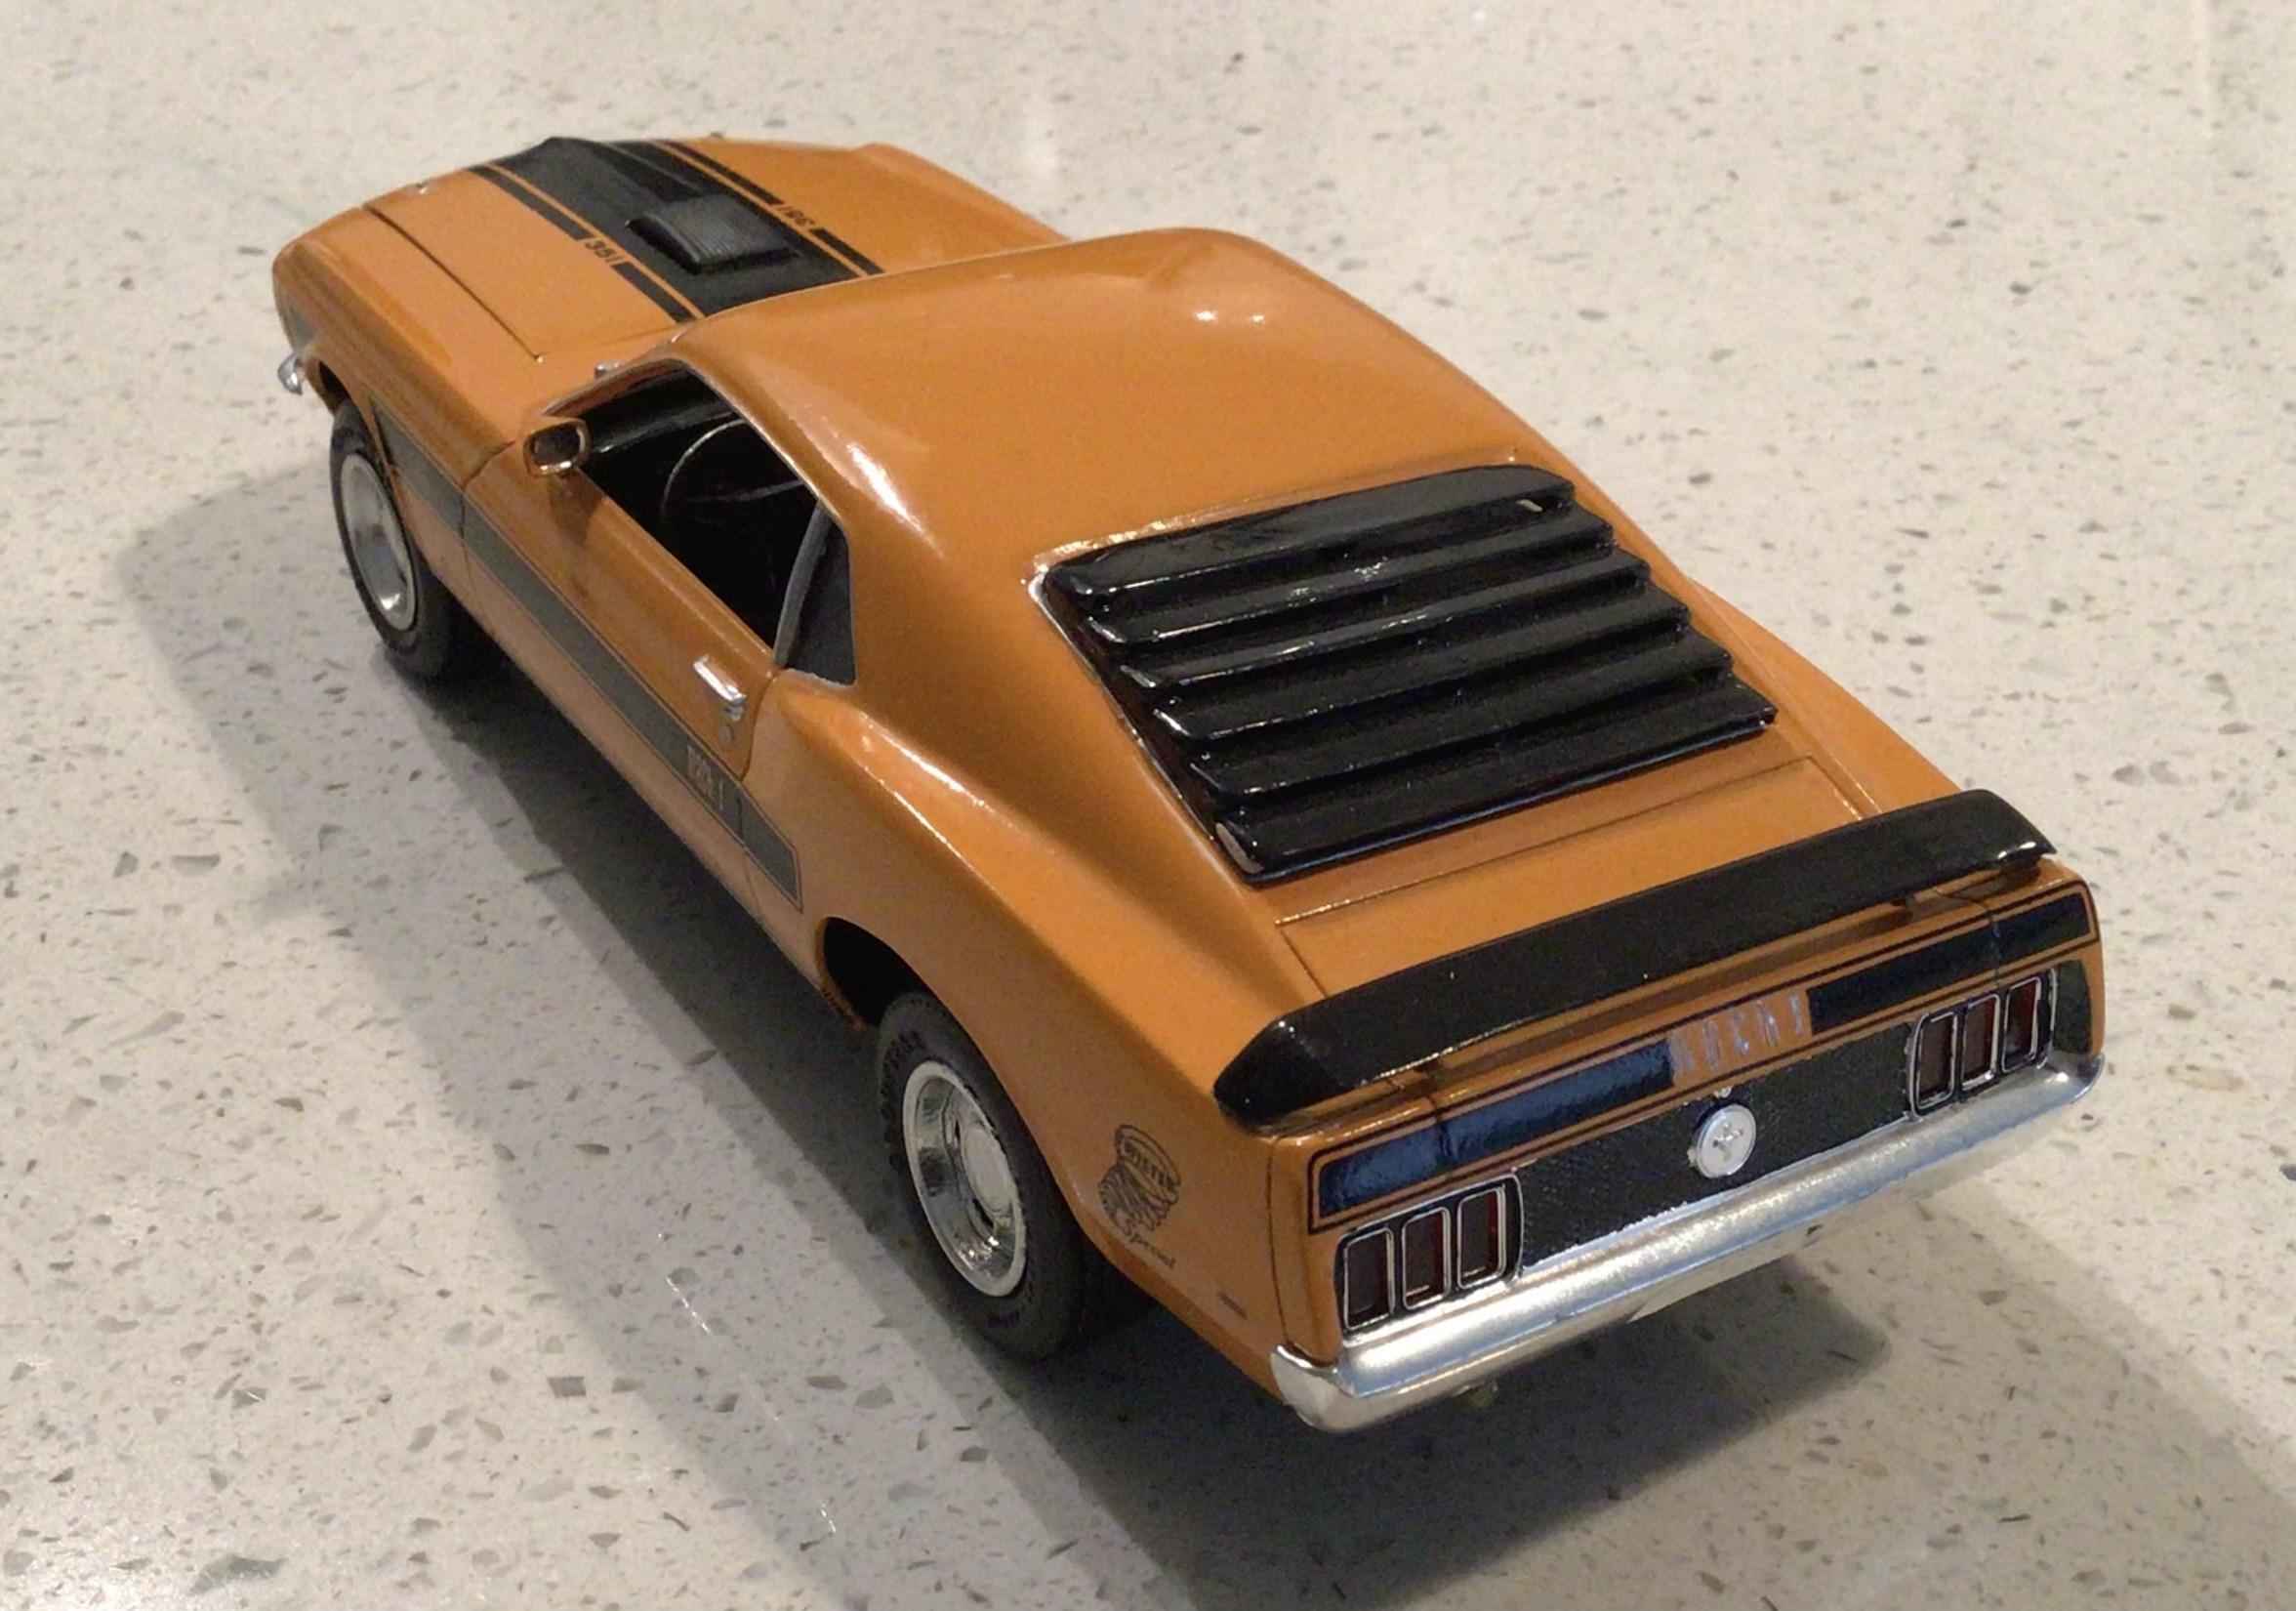
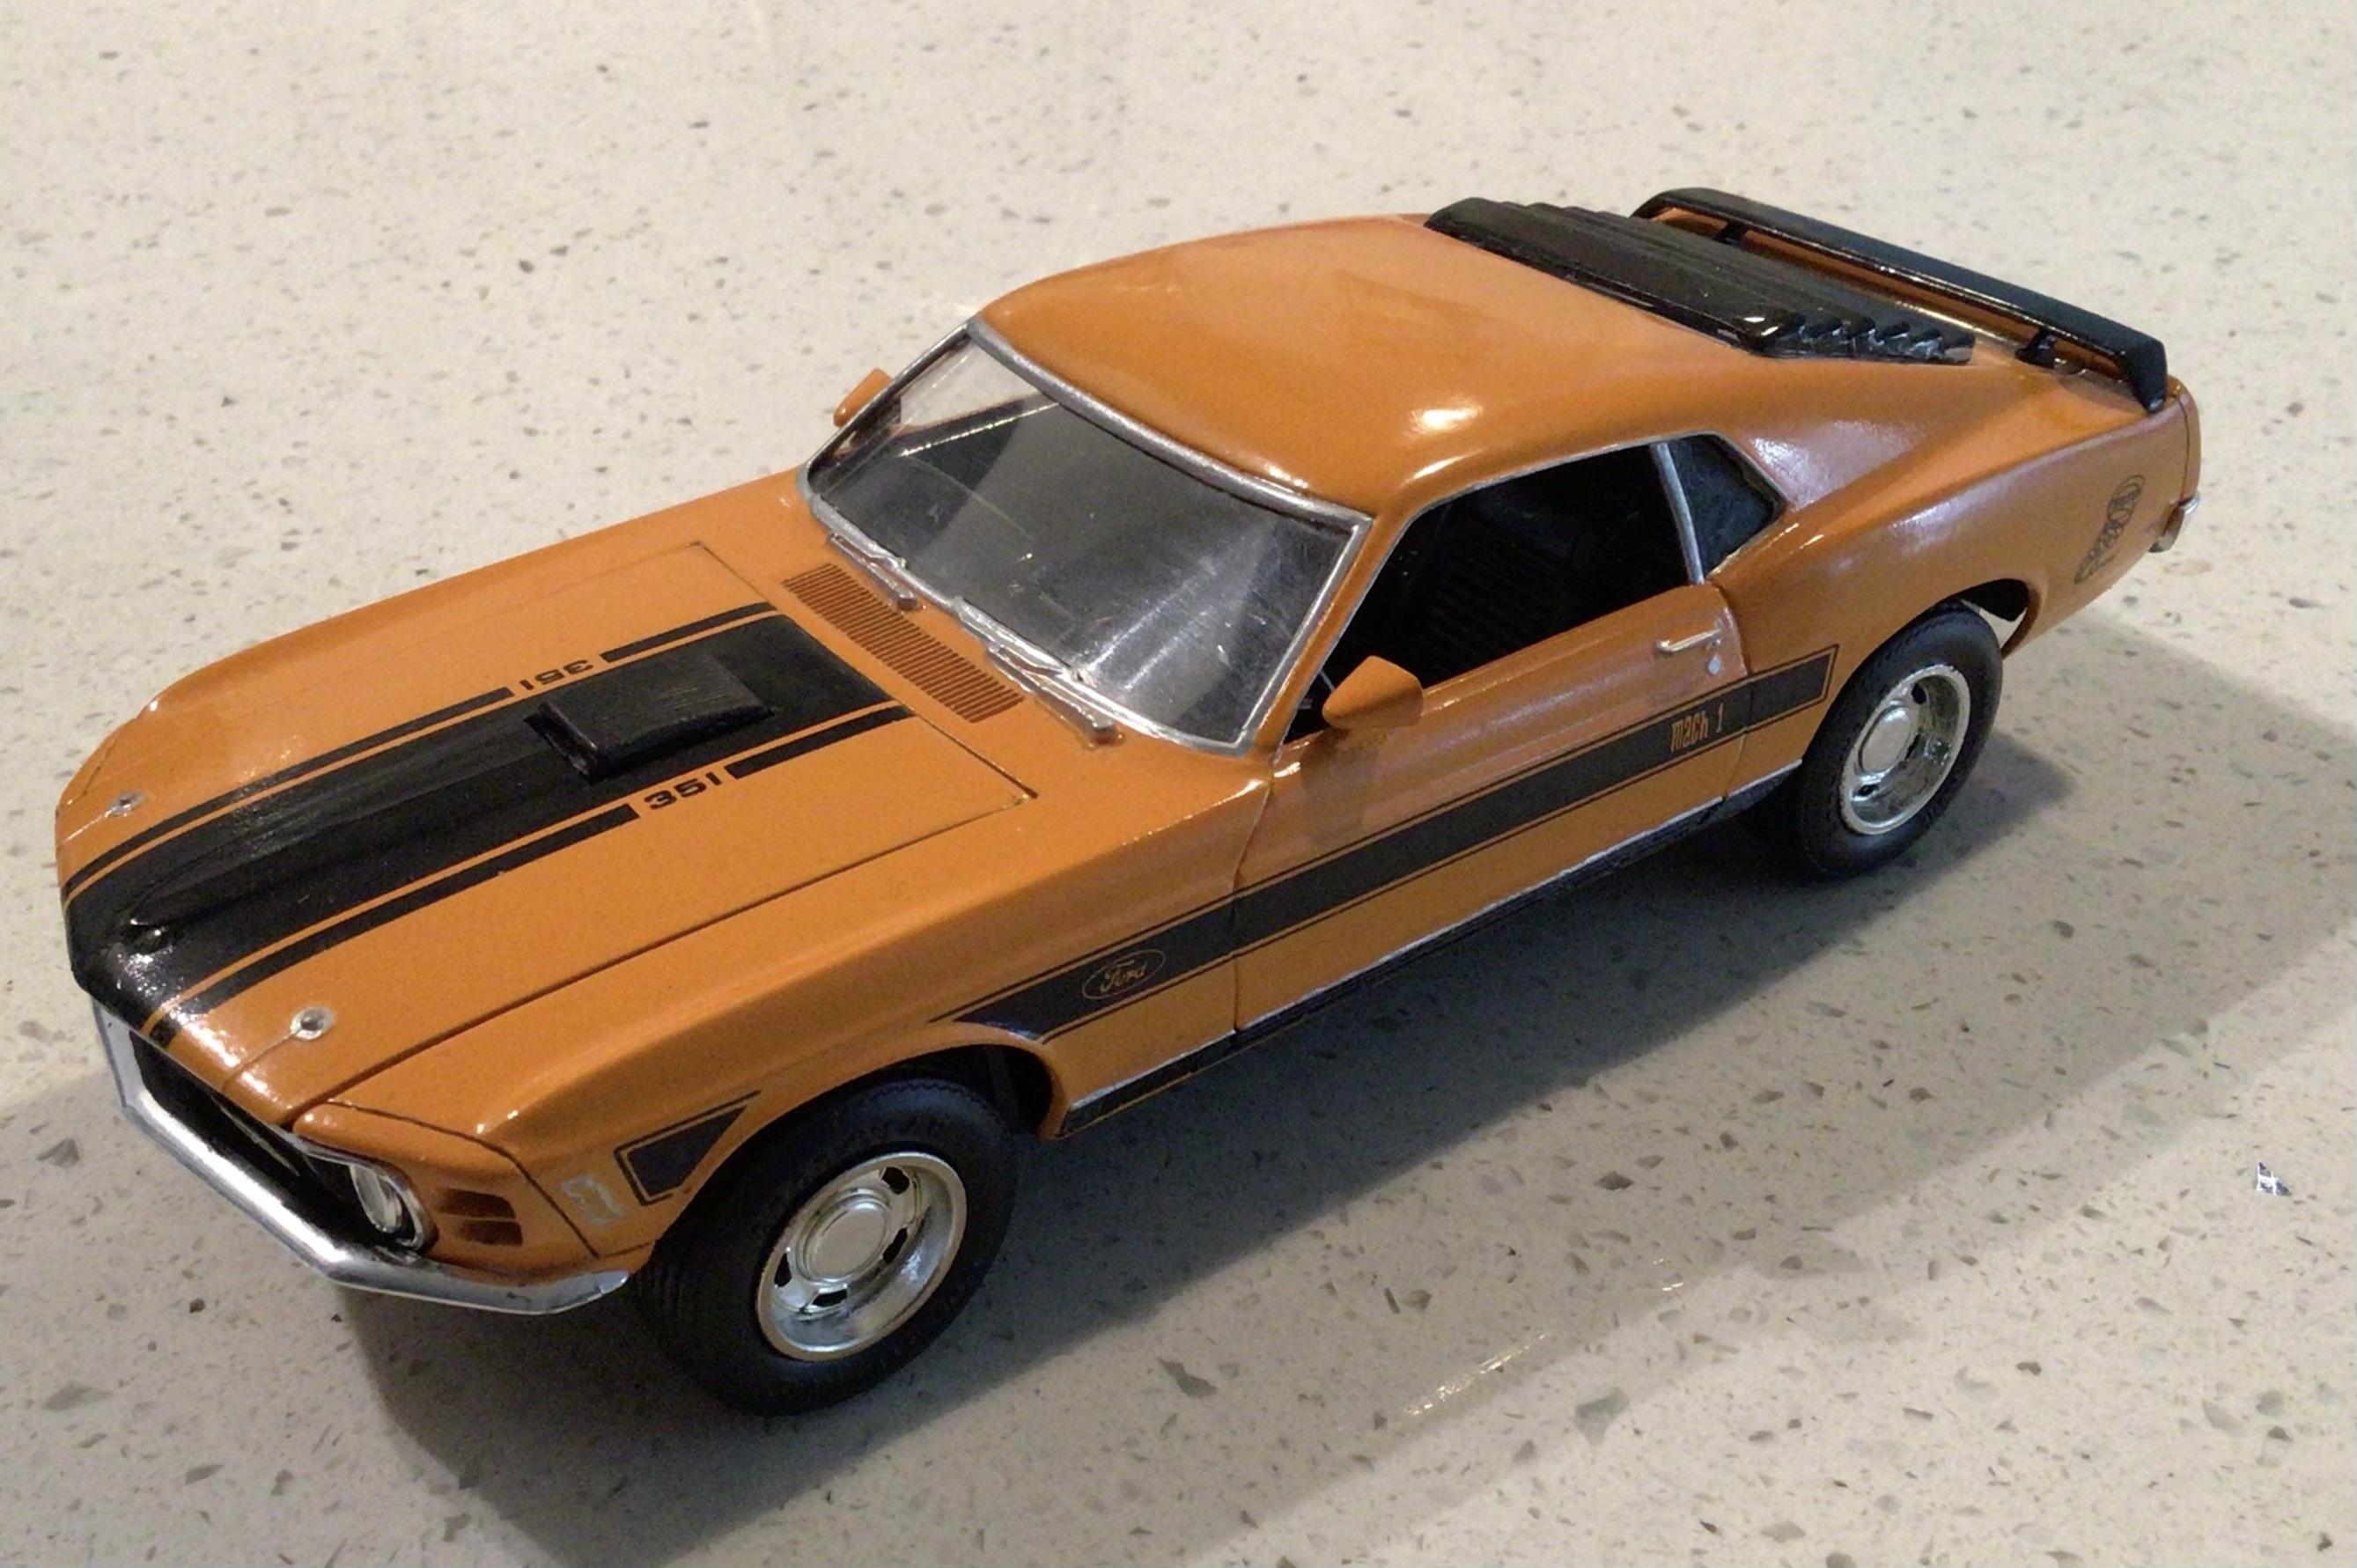
Here is a glue bomb 70 Mach1 original AMT I saved many years ago. I stripped it and painted it MCW grabber orange and used Fred Cady decals. I would like to see a complete kit again in 1/25.
-
Very nice. Like many I wish Round2 had included stock interior parts, glass and a chassis. Maybe next time. Seeing this begs the question of whatever happened to the MPC 70 Boss 302 kit molds.
-
Very nice for a MOPAR guy. ?
-
80's IMSA Mustang
vamach1 replied to Chinacar's topic in Other Racing: Road Racing, Salt Flat Racers
Very nice build. I built the same kit almost 40 years ago and the decals have pretty much held up and I did not even clear coat them. -
Are you sure he has the flat hood for the Revell kit? The resin coupe he made used the Revell Boss 351 kit hood.
-
A cutout hood from the Johan funny car worked for the AMT and MPC Mustang kits but I do not think it will work very well on the Revell Boss 351 and Mach1 kits. I’m guessing by this fall we will see an Eleanor version of a modified Mach1 kit and with the flat hood announced. At least that is what I hope happens since pre-productions shots have been out a while. I would also like to see a 73 Mach1 version with the larger front bumper and the 73 only Mach1 decals and a 72 Sprint which came with the flat hood. The sprint decals are from Keith Marks.
-
Who manufacturers these kits in US or UK???
vamach1 replied to Stanward VonDiederichs's topic in Wanted!
A search in Scalemates would be a good start. It has listings for resin, plastic and metal kits from the last 90 years. Once you narrow down when a kit was made the next challenge is of course finding one. You may end up searching for custom 3D printed ones for more off beat subject matter