
Superpeterbilt
-
Posts
2,752 -
Joined
-
Last visited
Content Type
Profiles
Forums
Events
Gallery
Everything posted by Superpeterbilt
-
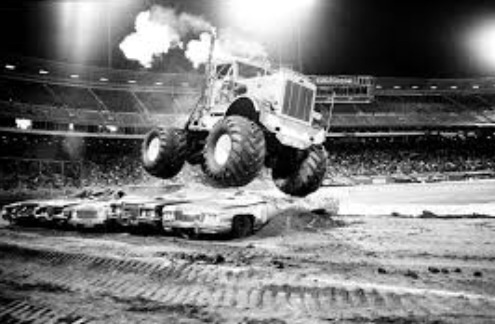
 That crane sure is a helluva tire swing! That poor dump truck is going to be dumping those rocks for eternity.
 -
Hey, whatever gets the job done. Looks like a pretty well built concoction to me. I wish it said "Forck" on it because thats freakin hilarious!
-
post just your cabovers here
Superpeterbilt replied to Ken Gilkeson's topic in Model Trucks: Big Rigs and Heavy Equipment
These were built many moons ago. The pics are bad quality, and so are the trucks! These are the only cabovers Ive ever built with the exception of a Titan that I cant find any pics of. Heres the only one Ive started on in about 15 years -
More Amazing work Dennis. I cant wait to see this combo
-
DR Giant Straight Truck
Superpeterbilt replied to kilrathy10's topic in Model Trucks: Big Rigs and Heavy Equipment
Great job on this one JT. I especially like the Pete hood on the load. The flat bed is nice, straight, and cleanly built. The tool boxes are a nice touch also. -
Thats a Diamond T. Clayton, that FL daycab sure is a sweet rig. Those 5 hole Alcoas are beautiful. If you can get some shots of the Bullnose, and bubblenose I would love to see them. Have they done any work to the 281, or the Autocar?
-
Ford Race Car Hauler
Superpeterbilt replied to landman's topic in WIP: Model Trucks: Big Rigs and Heavy Equipment
The paint on that body looks excellent. You have really taken this well above the quality of the kit. Its going to look great when completed. -
Mack Superliner
Superpeterbilt replied to Drunken Goat's topic in WIP: Model Trucks: Big Rigs and Heavy Equipment
Looking good man. What type of powerplant and driveline are you going with? I like a rough and rugged Superliner. -
Nice score Tom!
-
post just your cabovers here
Superpeterbilt replied to Ken Gilkeson's topic in Model Trucks: Big Rigs and Heavy Equipment
Jeez!!! Man that Daycab FL is bad to the bone!! I love the KW also. That Freightliner may be my new favorite. -
Outstanding build Charles. This really shows how versatile these kits, and the real trucks were.
-
Gator, this is a 1:8 motorcycle chain. The 1:1 chain on the truck looks to be 1.25" wide or bigger, but Im guessing.
-
Charles, I definitely want those. If they don't get used on this, I'm building a dump truck right behind this.
-
Mack Cruise-liner
Superpeterbilt replied to Old Buckaroo's topic in WIP: Model Trucks: Big Rigs and Heavy Equipment
Looking great so far. I bought a few of these when they were re-issued, but theyre donors for Mack resin cabovers. I need to get one to build stock. -
Excellent work Tom. That sure is a nice load of American muscle.
-
Thanks a lot guys, I appreciate the comments. Clayton, more than likely the lowboy will stay on this truck until I build something older-ish. There are mismatched period tractor trailer at truck shows all the time. Im dating the trailer at late 50s to 60s, and the truck is from the 30s. It could happen? Charles, Im still playing with it trying to get it right. I had to set them higher because of the wheels which threw everything off. Im going to extend them. I started mocking up the chain drive. Im going to have to shorten the chains(I was hoping not to), and maybe stretch the frame a tad. The PTO comes off the front of the trans, which is under the cab right now. I need it back under the winch to make that work, so thats the only logical thing to do. I kind of like the stance right now, so I really hate to mess with it. With the chains shortened, I can move the trans back and hopefully that will fix it.
-
Thats exactly what I did.I cut the sidewalls out of the old Goodyears, and attached them to the new , undistorted kit tires that have no brand name.Literally all of my old kits have out of round tires. I have several of the MPC kits as well. I was modifying some rims also, with correct looking planetary hubs. I cant find anything jn my info that even says what kind of "heavy truck" they used. Every article just says "burned up water truck".
-
I was going to backdate the lowboy much older, but an accidental mock up with these wheels changed the direction of the build. This might not be the trailer that stays with this truck(though it was built specifically for this frame height).
-
I also started building a lowboy for this truck. Using an old built up amt lowboy, I first hacked off the gooseneck. The rear frame was detached from the main trailer, so I took this chance to use fresh kit parts and make it a tandem. I scratch built a tandem walking beam suspension for it. I mixed in a few features of several lowboy styles to make it no brand specific.
-
I started working on the hood stretch. Using two kit hoods, I cut the rear most hood vent off of each side of the first one. I counted three vents back and cut the hood there. I cut the other hood behind the rear most vent and lined it up with the other cut hood. The side top angles are cut out and replaced with the longer sweeping angles.
-
Awesome Brian, I cant wait to see you tackle that. I may try to mould my corrected 66"s, before you complete it. I also may be able to help with the correct axles. Do you have any detail picks of the stacked chassis? I know they set the van frame on top of the "heavy truck chassis" as it says in many articles.
-
Thank you for sharing these. They will be very helpful.
-
1/25 Studebaker Turbine Truck
Superpeterbilt replied to Casey's topic in WIP: Model Trucks: Big Rigs and Heavy Equipment
Very cool -
Looks great Pavel