Straightliner59
-
Posts
5,817 -
Joined
-
Last visited
Content Type
Profiles
Forums
Events
Gallery
Everything posted by Straightliner59
-
 By the '70s, most of them were just bracket racers. Go to make a couple of dial-in passes set your ET, and don't go too quick. Mostly, they would just say something like "ET 13.27", or something like that. In the '60s, I think they may have been classified, somehow by the sanctioning body at hand.
 -
Thanks, Rusty! That's exactly what I thought, once I put them on. I think it kind of sets a theme.
-
Drilled the holes for the rollbars. Poked 'em in, to see how it looks. Works for me!

-
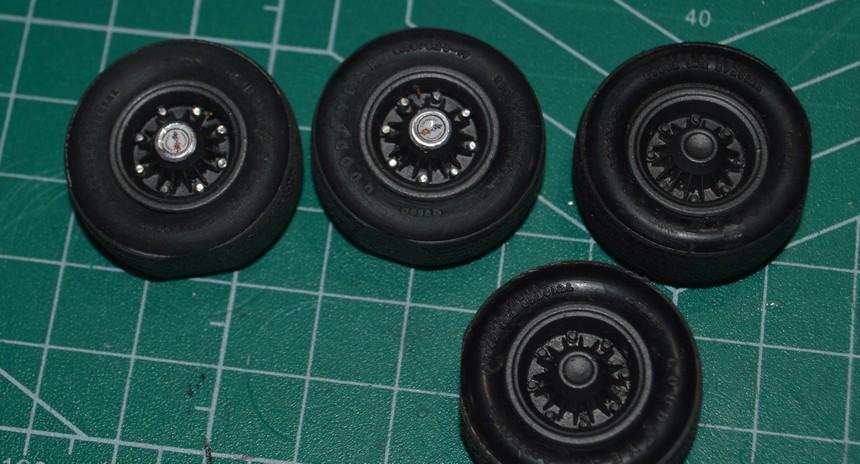
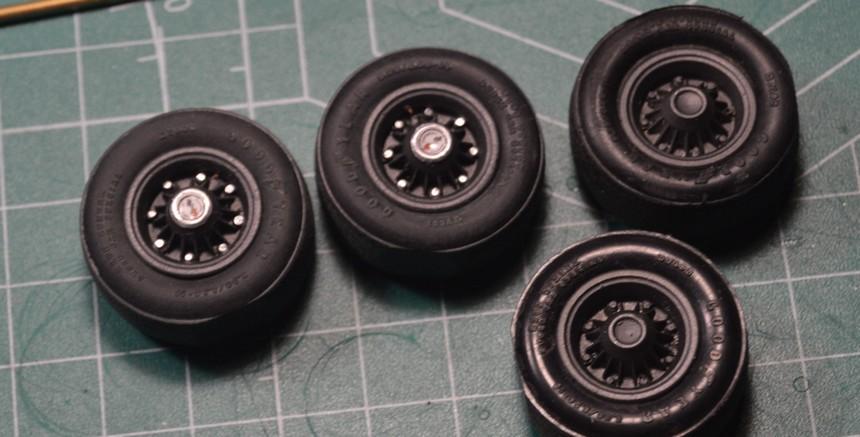
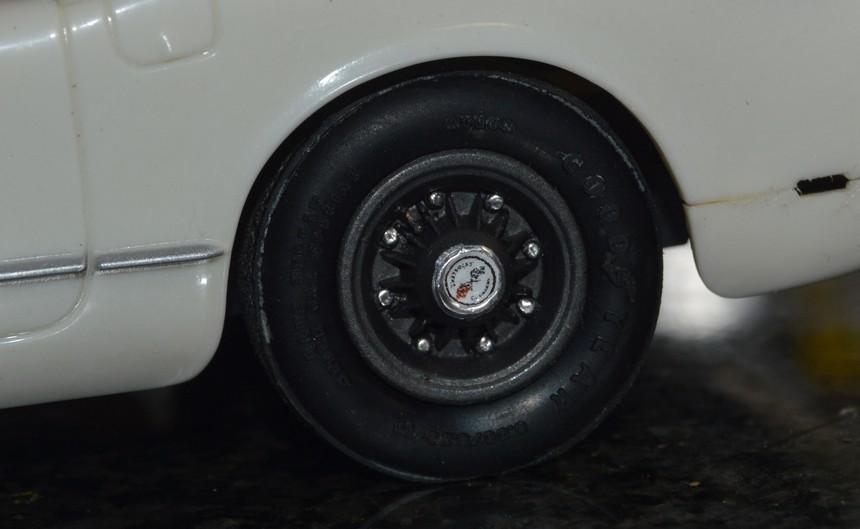
Here are two of the wheels/tires completed, alongside two that have only been painted. I used a Scotch Brite pad, coned, and kind of shoved through the center of the tire, so that I could easily spin the tire, dulling the finish. I wanted to be sure I got a shot that illustrated the difference between the two "finishes". I added a drop of Floquil Crystal-Cote to the center of each wheel, to return the shine to them, after shooting Dullcote over the wheels (only).I really like the way these turned out! Questions, critiques and comments are always welcome. Thanks for looking!
-
AMT '70s Short Body R.E. Dragster (05/22/2022)
Straightliner59 replied to Straightliner59's topic in WIP: Drag Racing Models
Thanks so much, Ian! I got distracted by another model I've had sitting around, so I haven't got back to this one, yet. I've kind of been thinking about that new body for the NFD. It should be a piece of cake--I already have the patterns for the panels just by flattening the soft ones out and copying them onto flashing. It really would be a cool model! Where did you move to? When I was a kid, we used to get to Lethbridge, fairly regularly. I've always loved Canada. Beautiful place! -
Thanks, Dennis. I appreciate that! They kind of look at home, on there!?
-
Thanks, Greg! It's just a cheapo Canon MG 2520 I bought at Walmart. It's done a very nice job, for me--and it's printed a lot of decals!
-
Thank you, David.
-
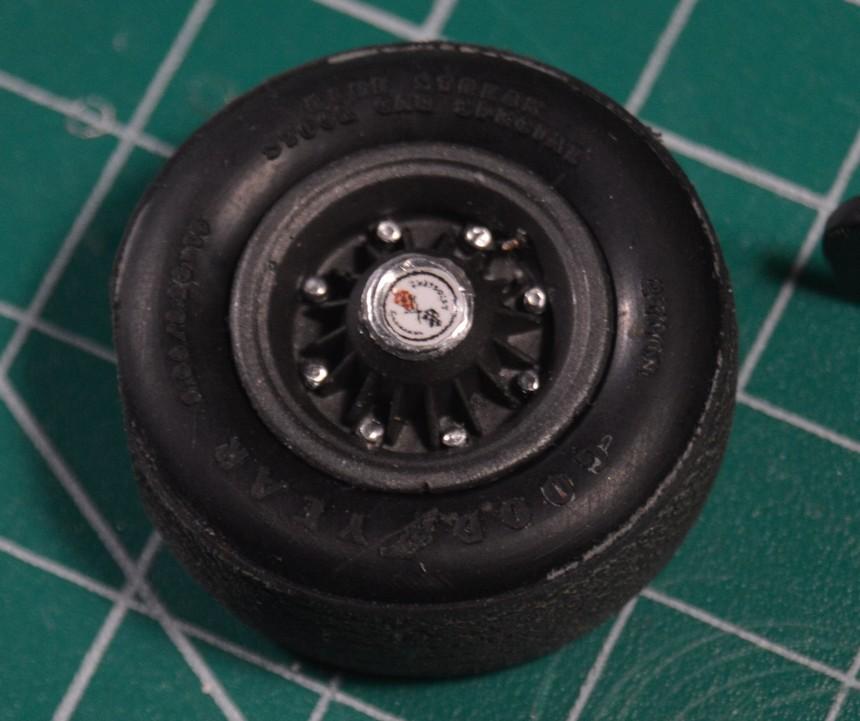
I got one of the wheels done, except for the silver Prismacolor, down the edge of each rib (it's since been done). I used a punch I made from 1/32" brass tube to punch the tiny discs that cover the lugs. I printed Corvette badges for the wheel centers. I'm happy with the way the wheel looks. Now, just three to go! I have most of the large interior components painted--still a way to go, on that front, though. Questions, comments and critiques are always welcome. Thanks for looking!
-
AMT '70s Short Body R.E. Dragster (05/22/2022)
Straightliner59 replied to Straightliner59's topic in WIP: Drag Racing Models
Thanks, David. I'll get back on it, when I have had enough of the '53 'Vette, I started messing around with!? -
AMT '70s Short Body R.E. Dragster (05/22/2022)
Straightliner59 replied to Straightliner59's topic in WIP: Drag Racing Models
Thanks, Guido! -
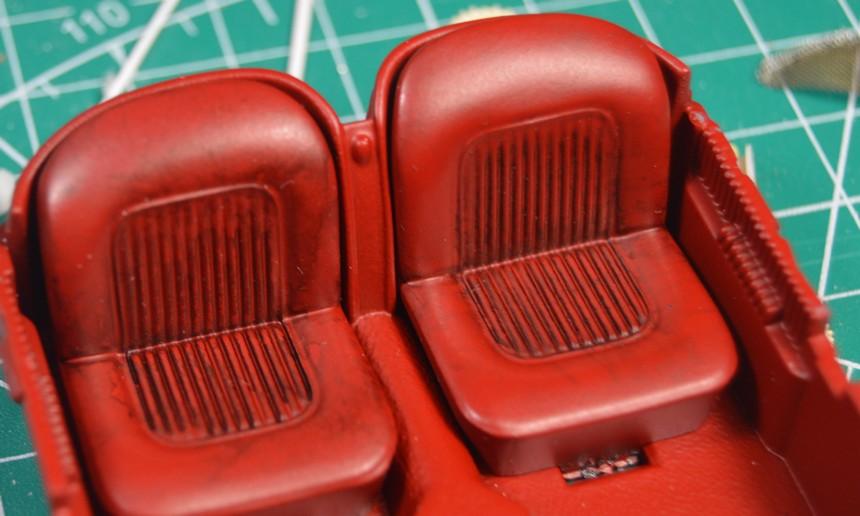
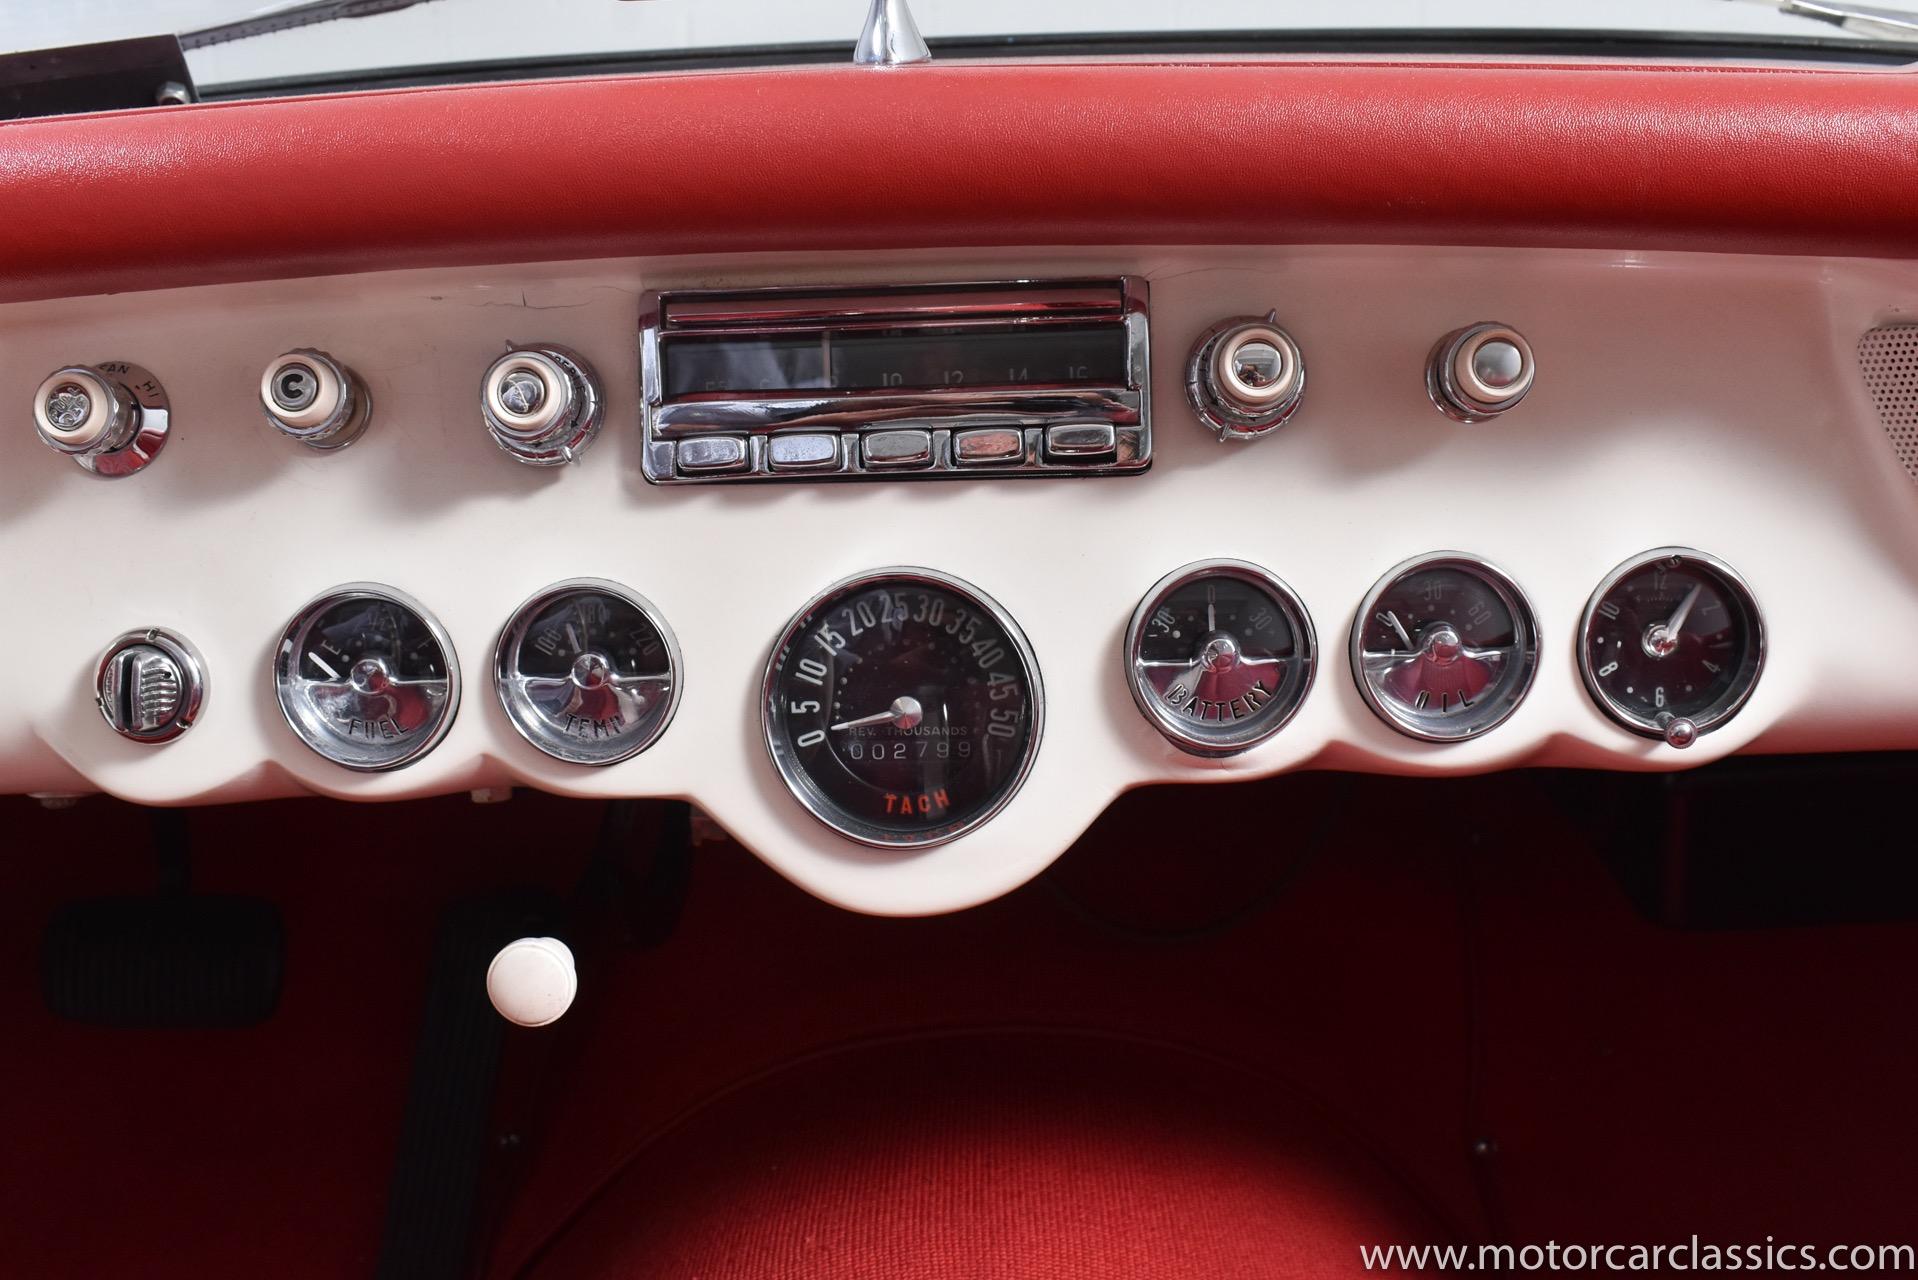
I've started messing around with the interior. It's all painted with the same Krylon red I used on the Supermod. This time, with a flat clear coat over it. I used India ink on the seats to create something of a mottled look to them, and to deepen the pleats in the inserts. The real car has white stitching in those pleats and those on the door. It's rather prominent. I think I can simulate that with a white Prismacolor pencil. Its effect can be seen on the test seat, in front of the model's seats. I drilled the holes for door "knobs". Model railroad rivets will serve as the knobs--a touch of white glue, or super glue will round them out. I plan on using black embossing powder for carpeting. I am "changing" the trans over to a four-speed, so I will make a cover for the void left by the three-speed shifter, and put a new one a tad farther back on the tunnel. I'm making knobs and photo reproduced white-faced gauges for the dash. Questions, comments and critiques are always welcome. Thanks for looking!
-
Super cool idea, Claude! Very nicely done.
-
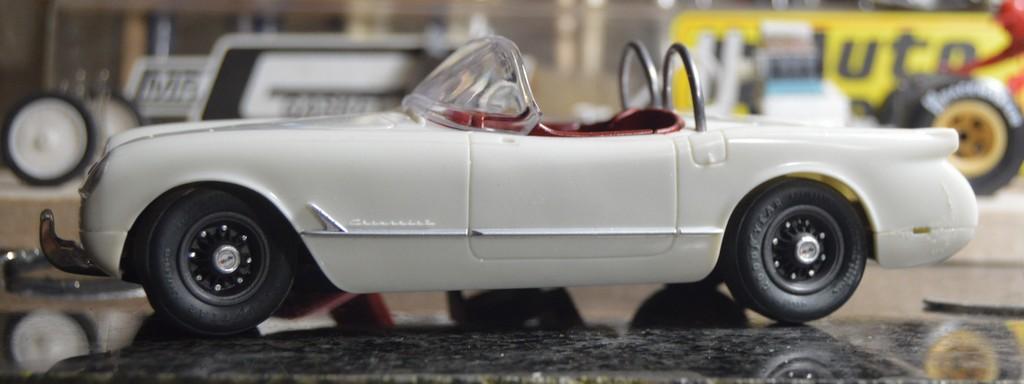
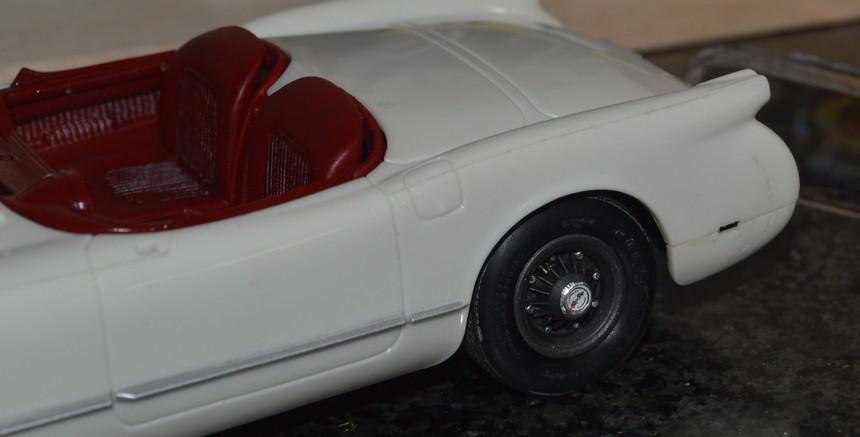
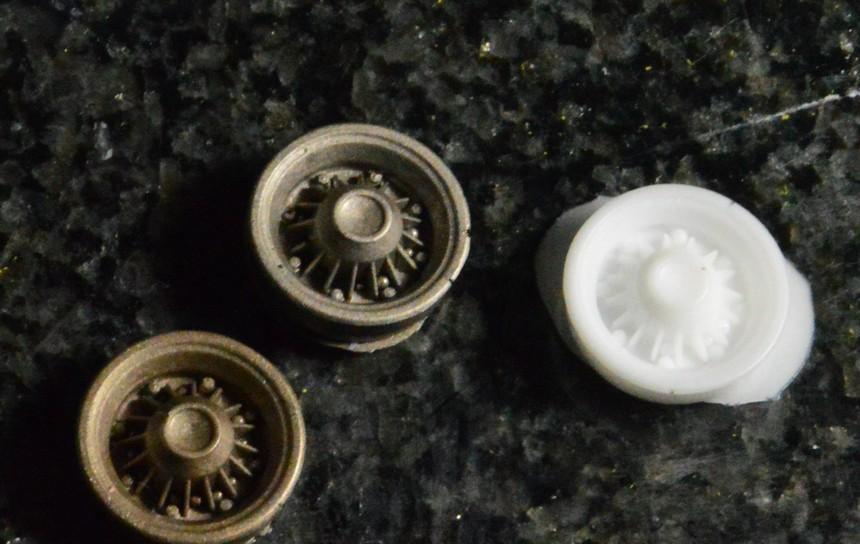
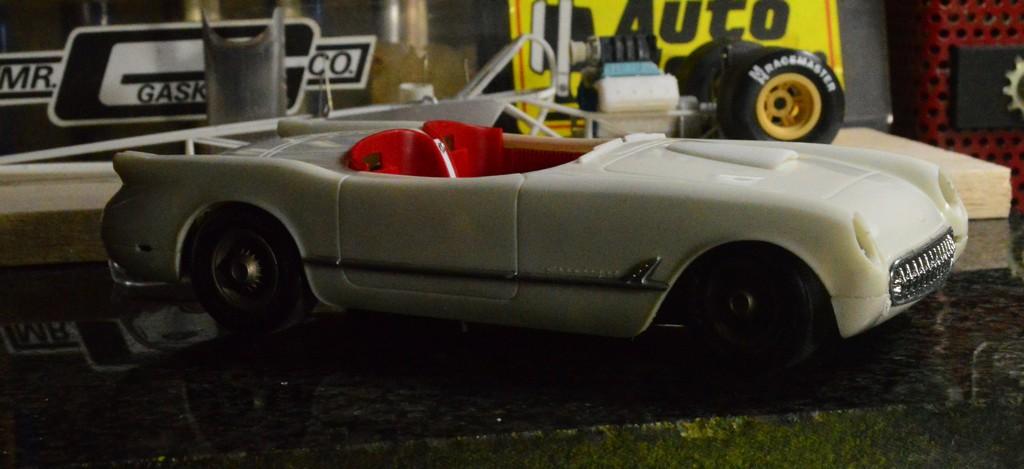
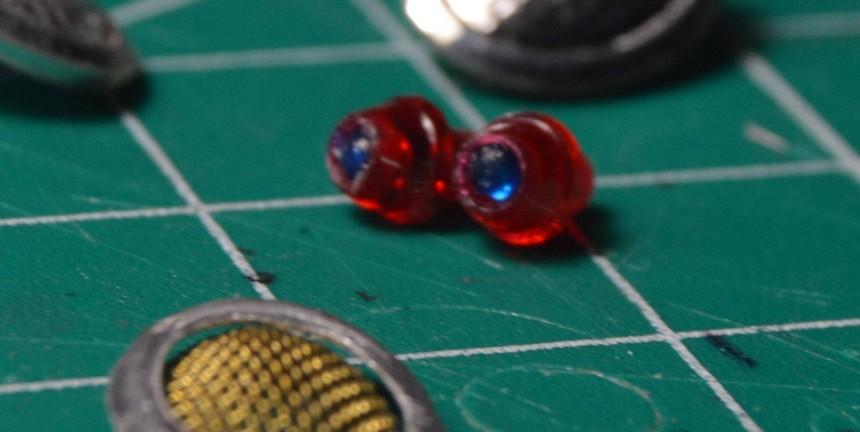
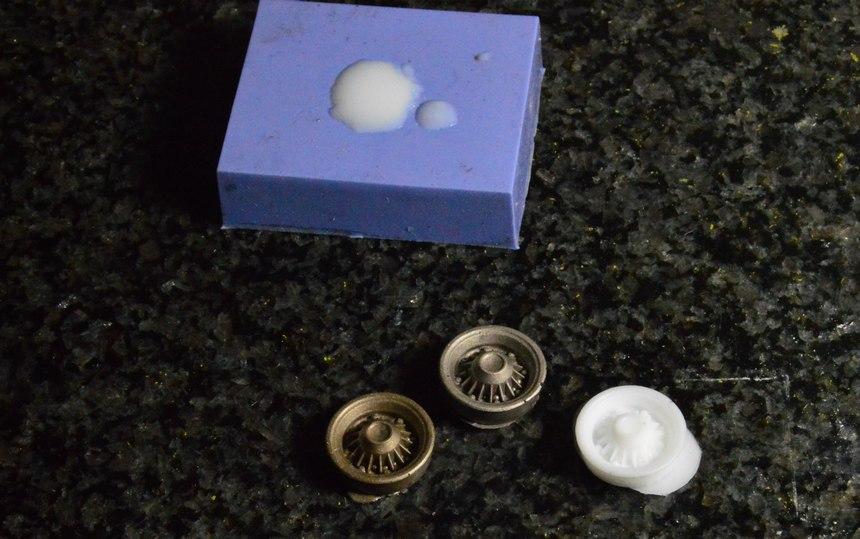
I've had the idea to build one of these, for a while. Trouble was, I would get it out, swap around some wheels and tires, and nothing would quite "get" me. A couple of weeks back, I ran across a solitary '62 Catalina wheel. I put it in an old AMT NASCAR tire, and...there was what I had been looking for. I made a mold of the wheel, and cast up a set (the first couple, I mixed metal powders into the resin, just to see what would happen. There are likely at least a couple more metal powders in my future!). I figure that an innovative car guy could make them work on a 'Vette. Next, I fiddled around getting the ride height. That's where I like it, now. I used the disassembled "promo's" molded headlight to burnish the ring that holds the deflector screen in place. I then drilled open the center, and carefully finished opening it with a round diamond file (highly recommended tool!) I cut a piece of brass screen, and curved it in a doming block. Now, to make another ring! I opened the headlight tunnels. Headlights will be made up of components including a lens, reflector, etc. I drilled the taillights, and inserted a blue MV lens into each. I found the scoop in my parts boxes and think it looks right at home, on this car. I replaced the crossbar on the bumper riser with plastic rod. I haven't yet decided whether i will use just the bumperettes on the corners, or no bumpers, at all. I'm thinking that I will go with satin to semi-gloss black, for the body, and a medium, kind of primer-colored grey, for the interior. I really want to concentrate my efforts on the interior. The work I've seen here, especially from a couple of Steves--Guthmiller and Boutte--is really an inspiration! I don't expect I'll achieve their standards, but I hope to head in that direction. I plan to add a couple of simple roll loops, behind the seats. I will probably open the grille up, and add some radiator wall detail behind it. I haven't yet decided whether I'll go with sidepipes or under-the-car exhaust system. I'm open to suggestions, on a lot of this, but, a vision is definitely forming. As always, questions, comments and critiques are welcomed. Thanks for looking!
-
That Rennsport is super-cool!
-
Who doesn't love a mock-up? Let's see yours!
Straightliner59 replied to Belairconvertable's topic in WIP: Model Cars
I've been kicking ideas for this car for quite some time. I waffled between a gas class drag racer and a sort of tourer, but, neither quite struck a chord. Recently, I ran across an old AMT '62 Pontiac wheel. I've always liked their look; utilitarian and high-performance, combined, I think. I believe an innovative rodder (1:1) could adapt them to the 'Vette. Anyway, I received an Oomoo 30 rubber kit, the other day (I'd never tried it, until now. I quite like it!), and poured an open mold of that wheel. The first two I made, I mixed in a couple of colors of metal powder (I will definitely be buying more colors of this stuff!). Rubber is vintage AMT NASCAR (and other kits). I found this scoop in my spares box. Not sure where it came from. It had a peak down the center, that I began sanding off. I'm thinking satin black finish, Bare Metal, new headlights with separate mesh covers. I'm considering a red interior, colored using techniques in the leather painting thread on here, a short while back. I'm going to try to lower it a tad more, as well. What do you guys think?
-
34 Ford 3W Coupe
Straightliner59 replied to ModWrench's topic in WIP: Other Racing: Road Racing, Land Speed Racers
You won't be disappointed! -
That is such a beautiful blue! I always enjoy looking at your finishes, too. Nice work, as always.
-
AMT '70s Short Body R.E. Dragster (05/22/2022)
Straightliner59 replied to Straightliner59's topic in WIP: Drag Racing Models
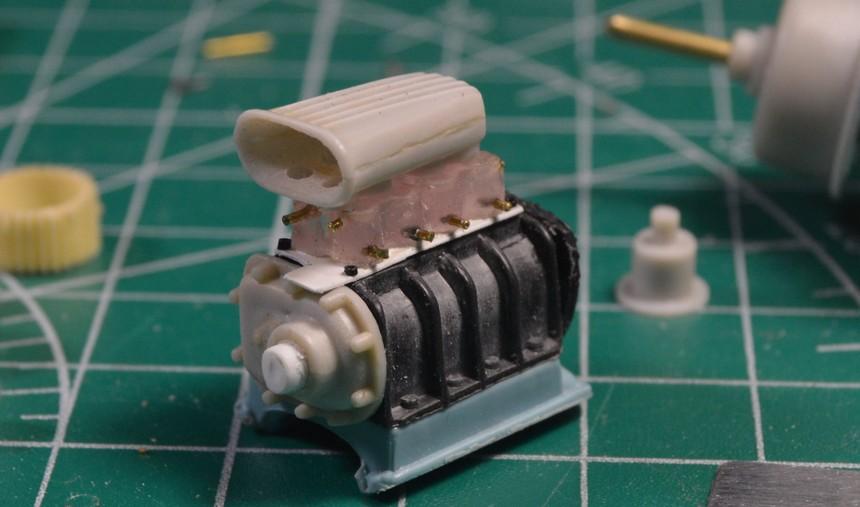
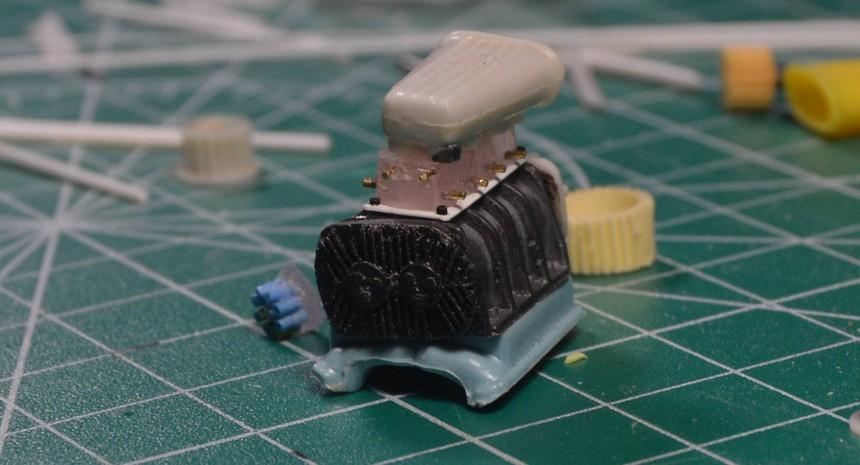
Building a blower and injector...The injector is cast nail resin, drilled for brass rod fittings. I'm going to run "rubber" hoses. The plate is .010" Evergreen. The allen heads are wire insulation. Next up, I'll work on the fuel valve. Thanks for looking!
-
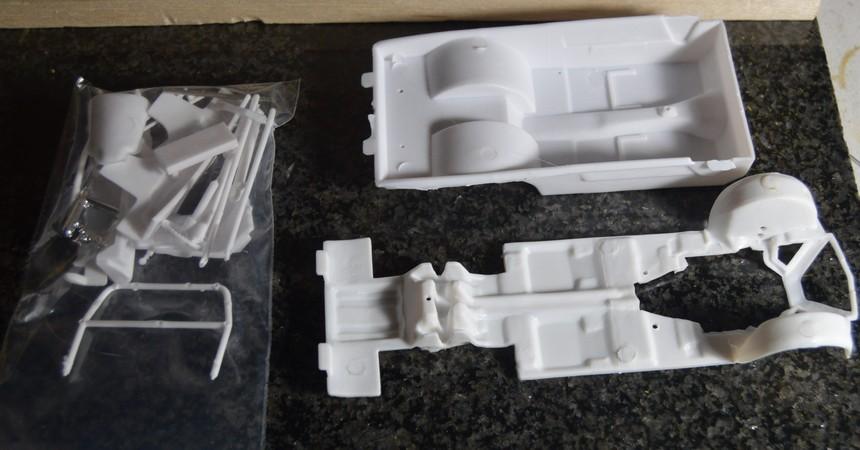
I got the interior and chassis parts from one of the MPC Pro Stock Vegas, from one of the "kit parsers". I'm going to use it for a curbside project with this '77 Promo body. It'll likely be a mid-'80s Super Gasser.
-
Art! Beautiful art!
-
34 Ford 3W Coupe
Straightliner59 replied to ModWrench's topic in WIP: Other Racing: Road Racing, Land Speed Racers
https://www.ebay.com/itm/353941136052?hash=item52688922b4:g:gMYAAOSwFbNiHwQO Here's one that's reasonable. I think the latest version is a rat rod. It's been around a long time, in several boxes. It's definitely one of the better sources for vintage hot rod parts! -
34 Ford 3W Coupe
Straightliner59 replied to ModWrench's topic in WIP: Other Racing: Road Racing, Land Speed Racers
A great source for vintage parts will be Revell's Model A Pickup. It's got a ton of nice stuff--two front axles, one of which is a dropped beam. Friction shocks, brakes...it's well worth the price of admission! -
AMT '70s Short Body R.E. Dragster (05/22/2022)
Straightliner59 replied to Straightliner59's topic in WIP: Drag Racing Models
I should add that I have lost track of the number of times I thought "Why didn't I just scratchbuild this dadgum thing?!"? That's so much more fun than cleaning up mold lines! -
AMT '70s Short Body R.E. Dragster (05/22/2022)
Straightliner59 replied to Straightliner59's topic in WIP: Drag Racing Models
Thanks, Mike. Here you go: