Straightliner59
-
Posts
5,817 -
Joined
-
Last visited
Content Type
Profiles
Forums
Events
Gallery
Everything posted by Straightliner59
-

Finger nail powder chrome works great
Straightliner59 replied to my66s55's topic in Tips, Tricks, and Tutorials
Whatever, dude. You could use some self-awareness. My point about sharing your work is this: If you're going to sit up there, and pontificate, you might gain some credibility, if you share something you're actually doing. That's all. As for any comments I made regarding the use of metal powders and substrates, I stand by them. And, the reason I think SNJ's system didn't work, is because their undercoat flashed, way too fast which left us rubbing the powder onto the undercoat, and not into it. I still have a bottle of their powder. It works, just fine, and is plenty durable when burnished into a proper base. I've found both lacquers and enamels to be effective. As I stated very early in this thread, the chrome powder system is exactly the same technique, simply using more modern materials. As to your questions regarding its durability over the long-haul? That's impossible to know, given that it's a new product. -
AMT '70s Short Body R.E. Dragster (05/22/2022)
Straightliner59 replied to Straightliner59's topic in WIP: Drag Racing Models
Mike Williams posted a method on here for lacing them, that simplifies the process. They look really nice! It just seems like a good time for me to turn a set! Thanks, David! -
Nothing glamorous, like kits, but I got these 10 meter spools of .011" wire, I found on Ebay. The yellow looks a bit bright, for my taste, although I think I've seen some newer plug wires that are closer to it. .011" is a nice size. The price was good, and, it only took two weeks to get here from China! I also got this 3/4" brass bar stock, with the idea of using it to make rims for dragster fronts. I've since found 1/8" wall tube, that will be a better starting point, so...

-
AMT '70s Short Body R.E. Dragster (05/22/2022)
Straightliner59 replied to Straightliner59's topic in WIP: Drag Racing Models
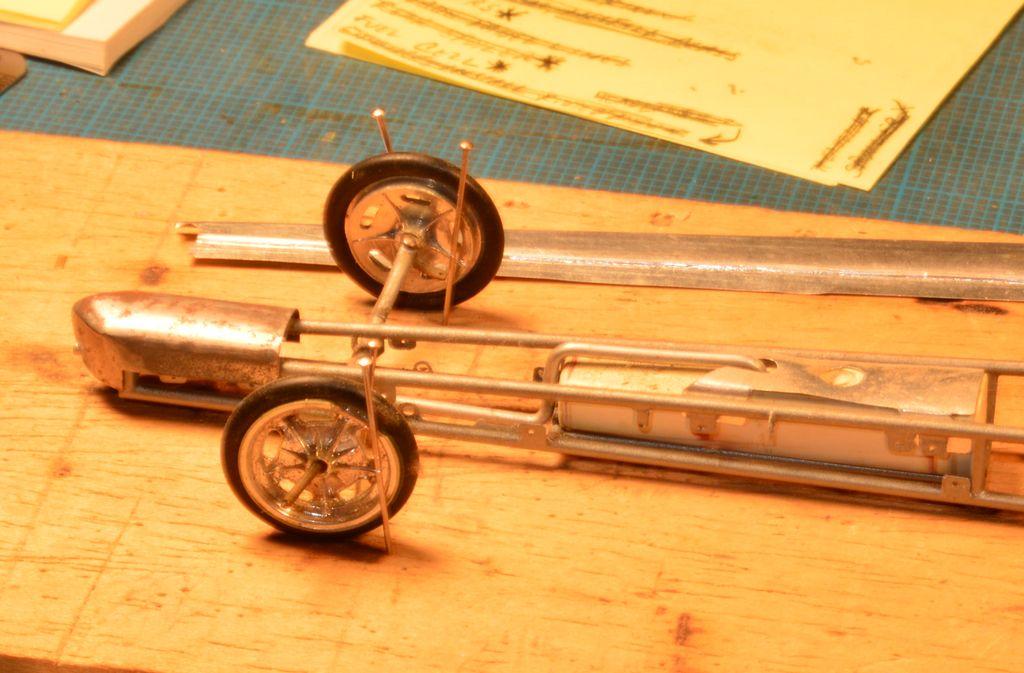
I was going to make a set of laced wires, for the front of this car, but am now leaning toward turning a set of these...
-
AMT '70s Short Body R.E. Dragster (05/22/2022)
Straightliner59 replied to Straightliner59's topic in WIP: Drag Racing Models
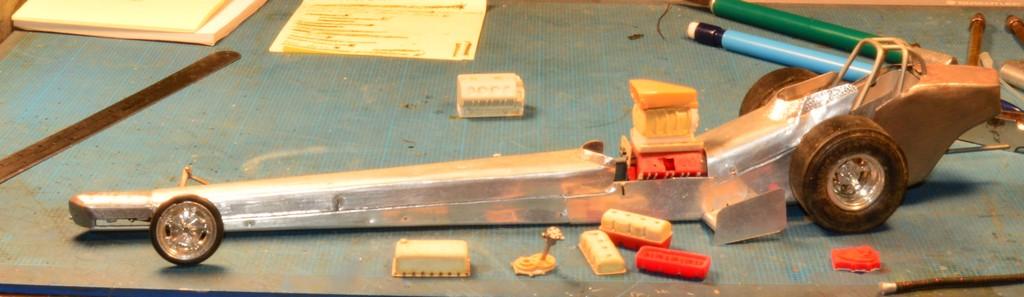
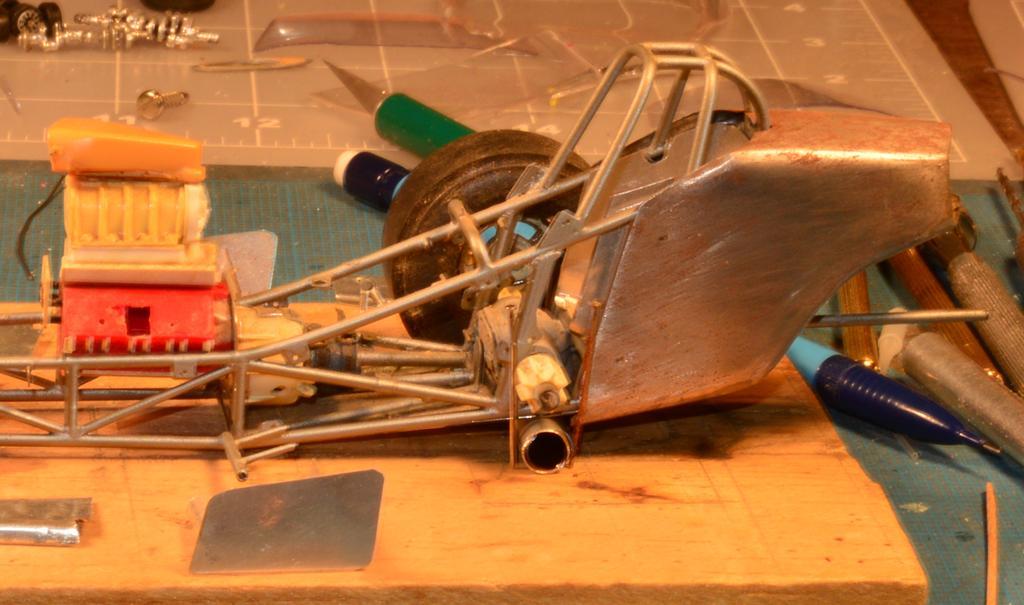
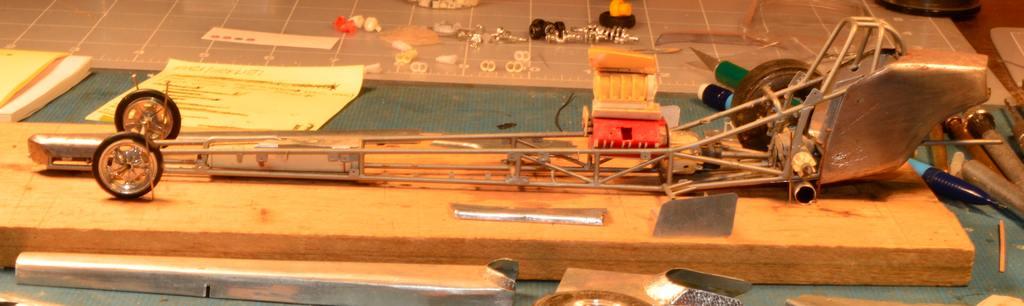
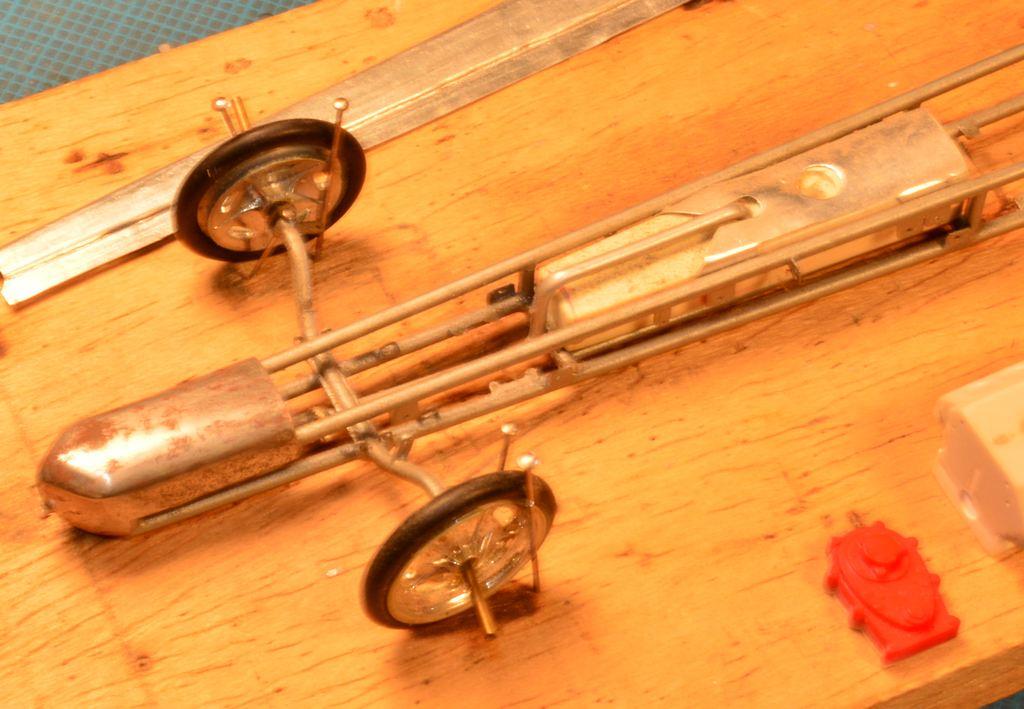
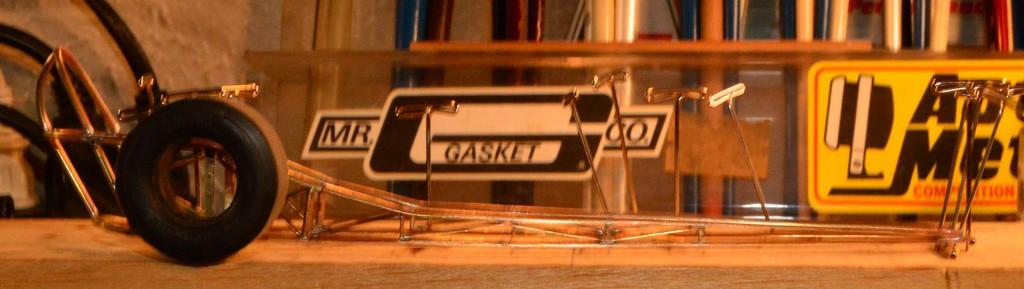
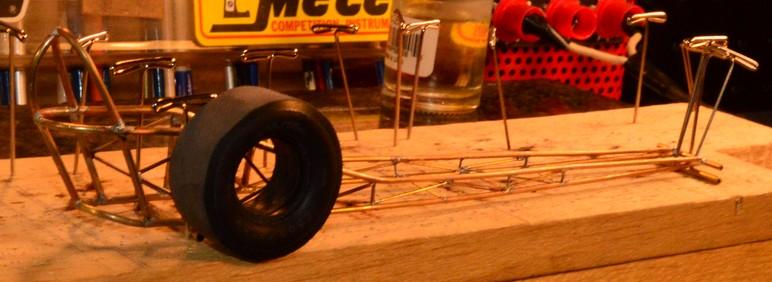
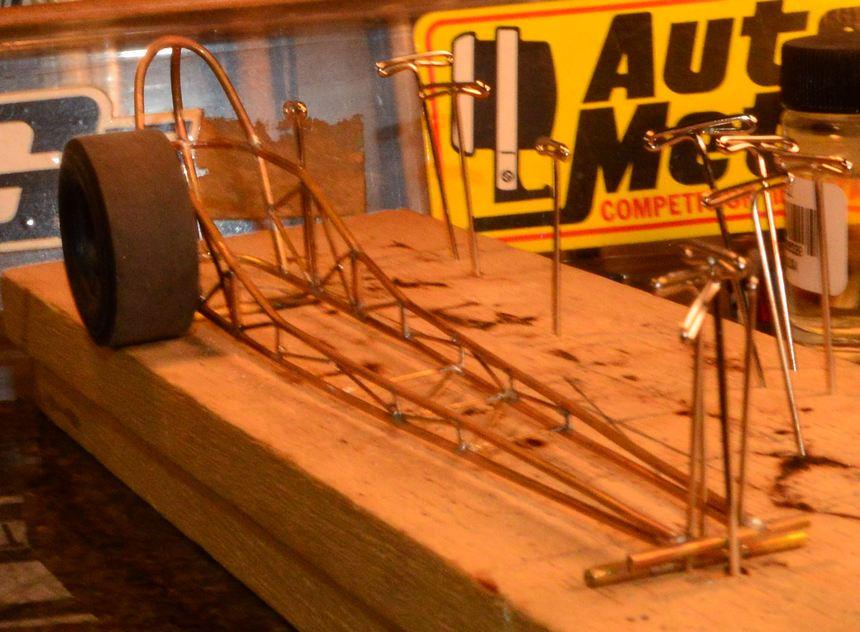
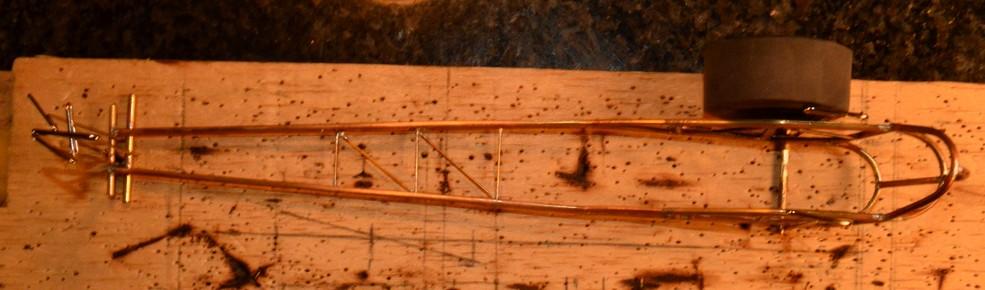
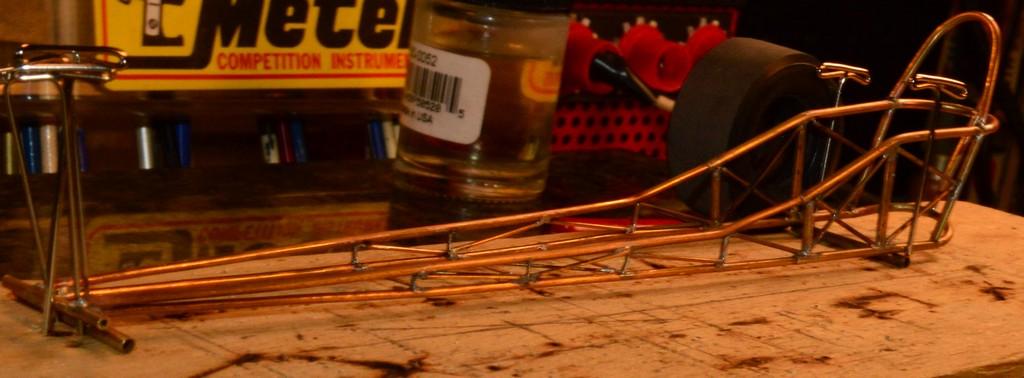
Oh, yeah! This nostalgia fueler has an all brass chassis. The body is made from tooling aluminum, and if I ever decide to finish this, it will be rebuilt with flashing--except the nse and tail sections. Those are hammered and soldered tin. This Surfers chassis is also brass. I have another brass dragster chassis I built in 1986, or so. It was my first brass chassis. I'm always afraid of finishing them, because "What if I leave off a tab?!"? Thanks for checking in, my friend. It's always nice to hear from you!
-
Engine-Turning Aluminum
Straightliner59 replied to Straightliner59's topic in Tips, Tricks, and Tutorials
I know, Kurt, I'm really happy with it! Nothing I'd tried ever looked quite right. I really do think the backing on the Micro Mesh cloths is what makes the difference. It has a nice amount of "give", to it. -
Finger nail powder chrome works great
Straightliner59 replied to my66s55's topic in Tips, Tricks, and Tutorials
Then, perhaps you need to work on your reading comprehension. Everything I said is valid, and pertinent to the conversation, not a bunch of contrarian horse dung. No, I called you snarky, before the south end/north bound comment, because that's what you were being. In fact, that's typically your demeanor. It's surprising that A) I'm only the second person to call you out for your lack of "sharing", and B ) That I'm the first to mention your general rudeness. So, we're back to your reading comprehension skills: Yes, I'm snarky because of the horse comment you made in your post. Or, maybe you're just a liar. I'll admit--I always read your posts, just to see what kind of asinine thing you'll have to say, next. -
Finger nail powder chrome works great
Straightliner59 replied to my66s55's topic in Tips, Tricks, and Tutorials
Thanks. I am genuinely interested in trying this out. -
Finger nail powder chrome works great
Straightliner59 replied to my66s55's topic in Tips, Tricks, and Tutorials
I fail to see why you have to be so snarky, all the time. I was offering my opinion based on my own experience. I didn't see anyone else offering any of their experiences. I guess I was the collective, in this instance, so, instead of engaging in a meaningful discussion, you decided to behave like the south end of a northbound horse. I have yet to see any evidence of your decades of modeling experience, at any rate. -
Finger nail powder chrome works great
Straightliner59 replied to my66s55's topic in Tips, Tricks, and Tutorials
Then perform your own experiments! That's what I intend to do. Yes, fingernails get redone, often. They also get "handled" a thousand times more frequently than any model ever will. If I want to know how, something works, or if it will work, I try it! Why wait around for someone else to see if it works? As I stated earlier, too, the technique I used has been around, forever. All these new "miracle chrome powder" systems are directly based on the same technology. The chemistry is different, is all. Whether you adhere the powder with paint, clear varnish or UV activated gloss, it's a durable system. It doesn't pick up fingerprints, once the undercoat's cured. Rubbing it only burnishes the powder deeper into the undercoat. -
AMT '70s Short Body R.E. Dragster (05/22/2022)
Straightliner59 replied to Straightliner59's topic in WIP: Drag Racing Models
Hi, Bob. I use whatever I can find least expensively, but, in quantities that I can use, before they go bad. Most recently, I used something called Startso World rubber. It flows out, very nicely. Most typically, I end up with Alumilite. It generally performs well, and is readily available. Once it arrives, my next try will be with Smooth On Oomoo (I think). For casting, I use Alumilite white resin for larger castings, and acrylic nail resin for small ones. There are likely better performing products out there, but, since I am only casting parts for my own use, my molds don't need to be as durable as a professional caster. I also like Amazing Mold Putty, for quickie stuff. Hope this answers your questions! Thanks for looking in! -
Finger nail powder chrome works great
Straightliner59 replied to my66s55's topic in Tips, Tricks, and Tutorials
The stuff on my headers has been there for over 20 years. I suspect the nail chrome powder will be plenty durable for a model. After all, it's made for fingernails! -
Finger nail powder chrome works great
Straightliner59 replied to my66s55's topic in Tips, Tricks, and Tutorials
And the word you were looking for is "prAy". -
Finger nail powder chrome works great
Straightliner59 replied to my66s55's topic in Tips, Tricks, and Tutorials
Exactly everything. Think about it... -
Finger nail powder chrome works great
Straightliner59 replied to my66s55's topic in Tips, Tricks, and Tutorials
This is a modern variation of an old technique used mainly by aircraft modelers, in the days prior to metalizers. It works excellently, especially in creating a non-grainy metal finish. I did the headers on this car rubbing graphite powder into flat black paint. For all intents and purposes, it looks like shiny, burnt metal.
-
Excellent idea! I'll use exactly this, the next time I need that size. It's frustrating that neither mfr. makes it!
-
MPC Flip Nose '57 gasser converted to......well, a gasser.
Straightliner59 replied to roadhawg's topic in Drag Racing
Nice work, Tommy! This perfectly captures what it's supposed to be. From the stance, to the graphics--it's just right! -
AMT '70s Short Body R.E. Dragster (05/22/2022)
Straightliner59 replied to Straightliner59's topic in WIP: Drag Racing Models
Thanks, Rooster. That's why I keep casting stuff. That way, I can stop raiding my kit stash, for parts.? I wish I'd started casting parts more frequently, long ago! -
Engine-Turning Aluminum
Straightliner59 replied to Straightliner59's topic in Tips, Tricks, and Tutorials
I think the Micro Mesh makes it work--it has that nice, cushiony backing. Now, I need to pick up some 1/8" and 1/16" dowels! Thanks, Jim! -
64 Dodge D100 Pickup Pro Street
Straightliner59 replied to AmericanMuscleFan's topic in WIP: Drag Racing Models
Hot dang! I am glad you went with the aluminum grille and bumpers, instead of the white that I would have. What a fabulous creation, my friend! The hood hinges are perfect. Excellent, excellent work, Francis. -
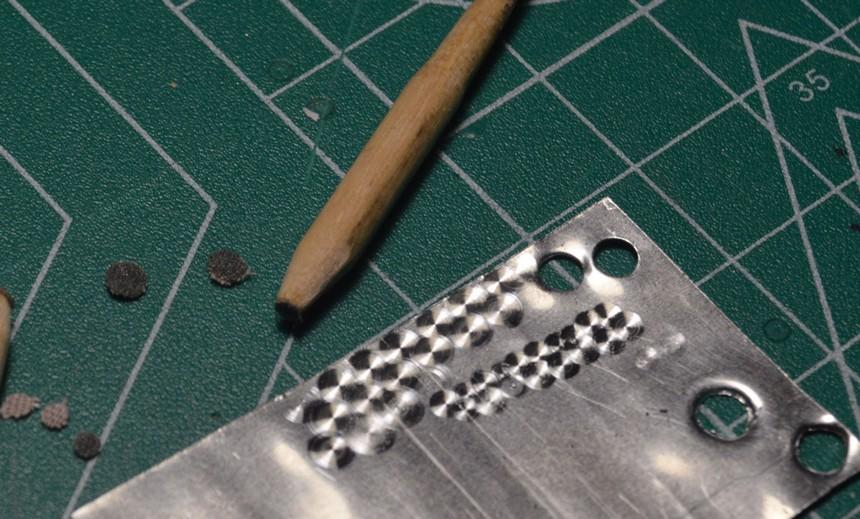
I've been experimenting with different ways of creating an engine-turned finish for aluminum sheet. I have an X/Y table for my Dremel Work Station, so, the pattern isn't the issue. Rather it was the cutting medium that was the bugaboo. While re-reading Scott Colmer's thread/how-to/article on his technique, it dawned on me to use the sheets from my old MSC polishing kit, and replace those with new Micro Mesh sheets. I didn't seem to have any 1/8" dowels (although I swear I did!), so I turned down a cuticle stick, until it fit the 1/8" collet for the Dremel. I then cut and smoothed the other end, and attached a disc of 1800 grit polishing cloth to it with a dab of super glue (Loctite gel). Using a light touch, I was able to achieve these results. I just free-handed on this sheet, as an experiment. It's the most consistent swirls I've been able to create, as well as most hassle-free. I'm going to try it with plastic rod, but, I suspect that will melt, from generated heat, even given the light touch. I don't think any kind of metal would have enough "give". Anyway, I thought I would share the results, in case anybody else finds it useful!
-
AMT '70s Short Body R.E. Dragster (05/22/2022)
Straightliner59 replied to Straightliner59's topic in WIP: Drag Racing Models
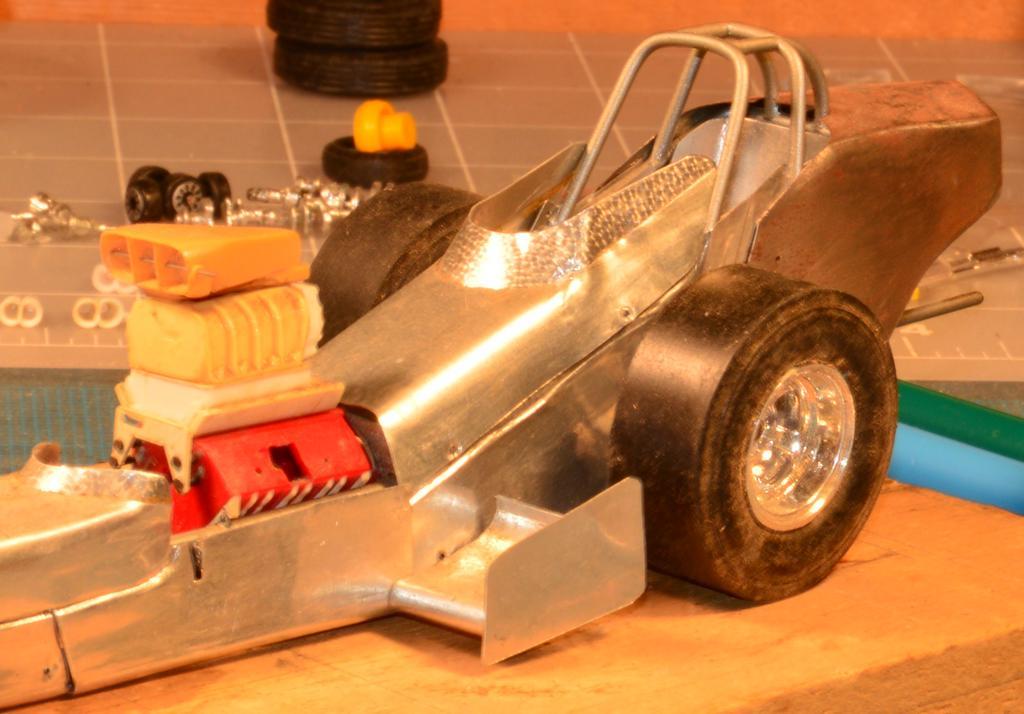
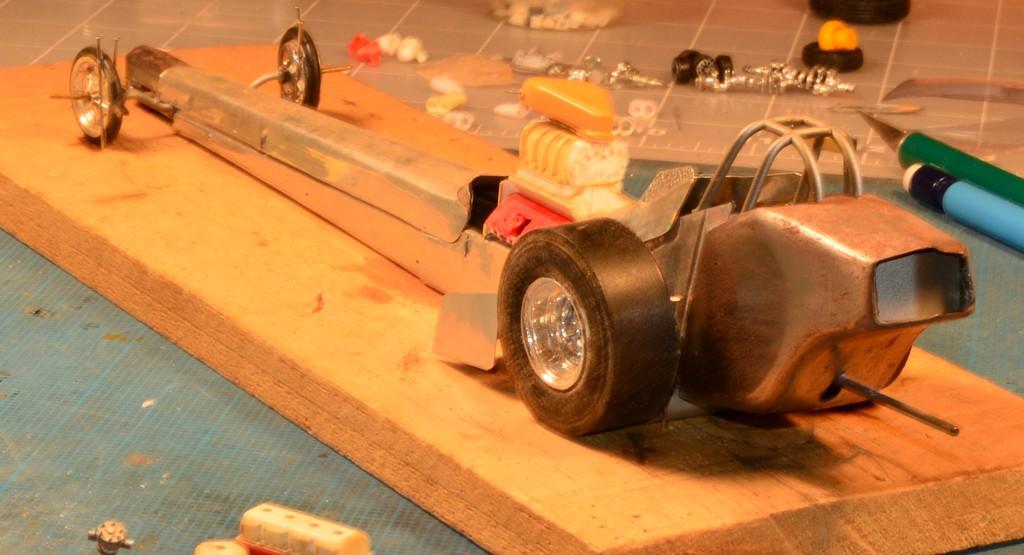
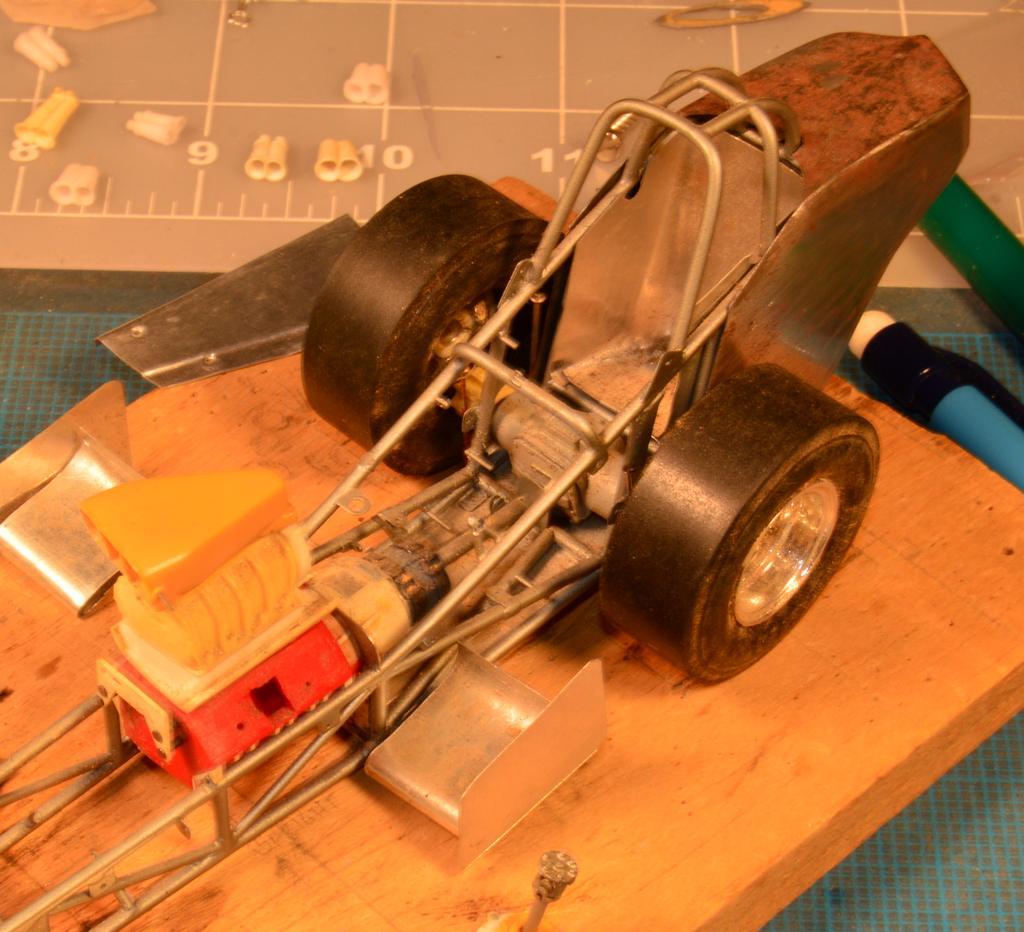
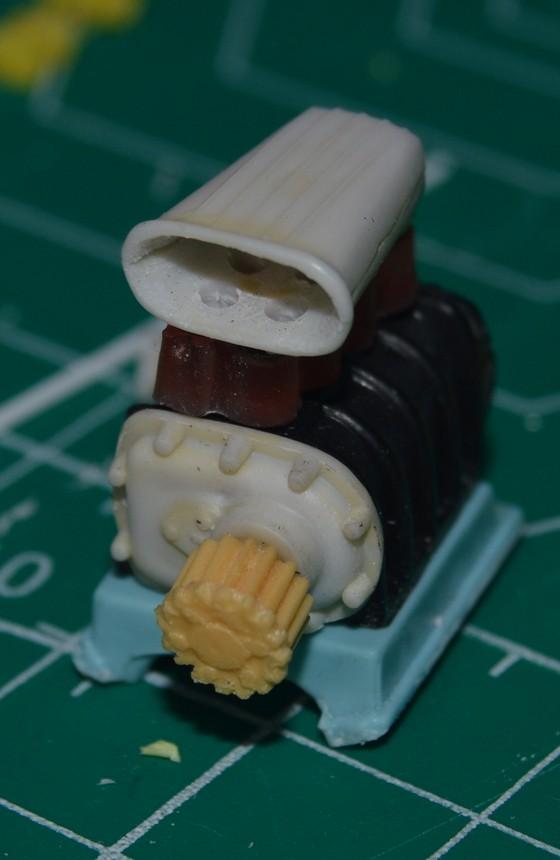
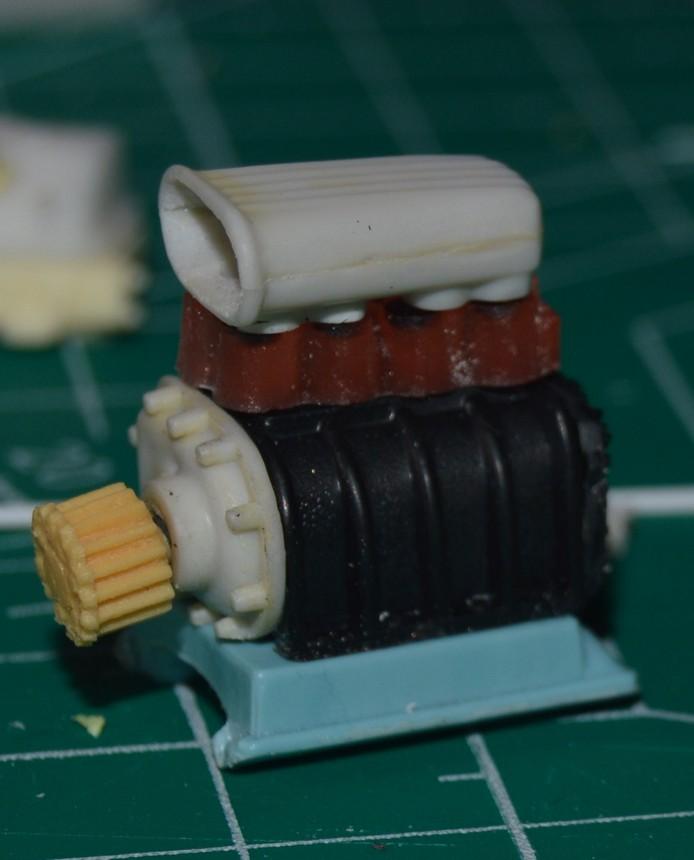
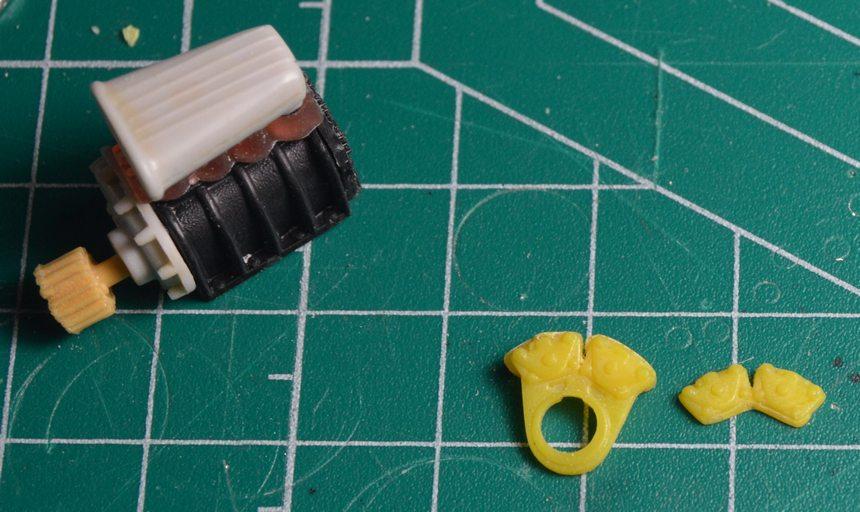
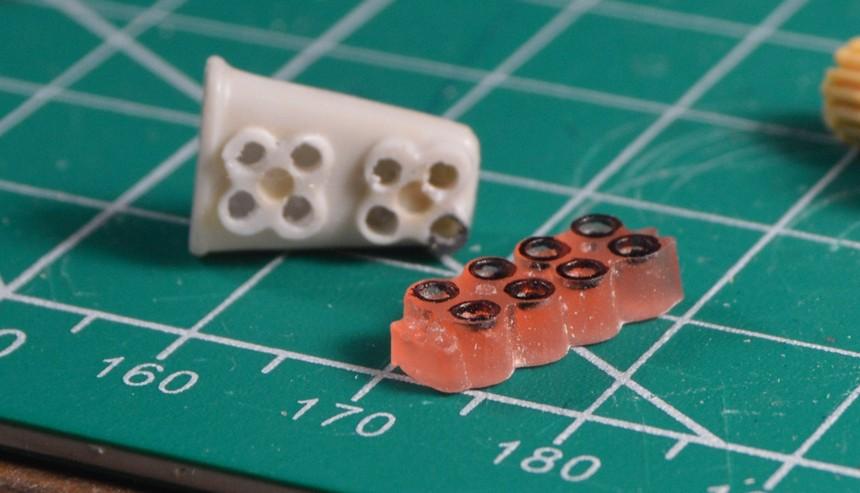
The parts for the blower and injector are coming together. I'm going with the eight-hole Crower. The hat is from the Wynn's Charger kit. The injector is from a mid-'70s Revell fuel car, and was modified and cast by Don Fahrni, back in around '86. The blower case, and front and rear covers are from various iterations of the Wynn's Jammer kit. I used a set of round diamond files to "hog out" the hat. Then, I drilled out the throats. The bit of black, in the lower right corner, in one of the photos is where the drill ripped a hunk out of the hat. I replaced it with some Contrails plastic tubing. I still have some work to do. The drive cog seen here is not the one I will use. Blower manifold is from Miss Deal. The brake calipers seen here are from the Prudhomme yellow dragster. Of course they're the same as those in the Garlits kit. I have passed them over, many times, because they didn't look very well engraved, detail-wise. A dip in the purple bath revealed a whole new world, beneath that coat of "blech"! I decided that I needed to make two of them into parts for a single unit (one for the outside of the rotor, as well). I made a mold of the pieces, but, am mostly unhappy with them, so I will try it over again! I intend to cast them with acrylic nail resin. Using nail resin allows the parts to be cemented with Weld-On 4. That's a lot more words than progress...Thanks for looking!
-
I think it looks great, just like that! Cool shot, too!
-
Finger nail powder chrome works great
Straightliner59 replied to my66s55's topic in Tips, Tricks, and Tutorials
I've been intrigued by this stuff. Based on results I've had with SNJ aluminum powder, this stuff looks even finer than SNJ's is. It comes in colors, as well. -
I've been using Krylon's clears. I've had good results with their products, generally. For brush paints, I will use anything that's a color I need or like. I don't see any point to limiting oneself to a single product.