Straightliner59
-
Posts
5,809 -
Joined
-
Last visited
Content Type
Profiles
Forums
Events
Gallery
Everything posted by Straightliner59
-
 You are very welcome! And, yes, it does!
 -
It does not! I've been doing it, for decades, now. I would guess, though, that, even if it did, it would leave a nice dimple, to start the drill. However, I can't recall a single incident of that happening. If you find that your resin is too thick to flow around them, nicely, you can use acrylic nail resin (Sally Beauty Supply and some Walmarts carry it.)as a casting medium. If you have any questions, feel free to ask!
-
They shoot horses, don't they?
Straightliner59 replied to STYRENE-SURFER's topic in WIP: Drag Racing Models
It's perfectly plausible! -
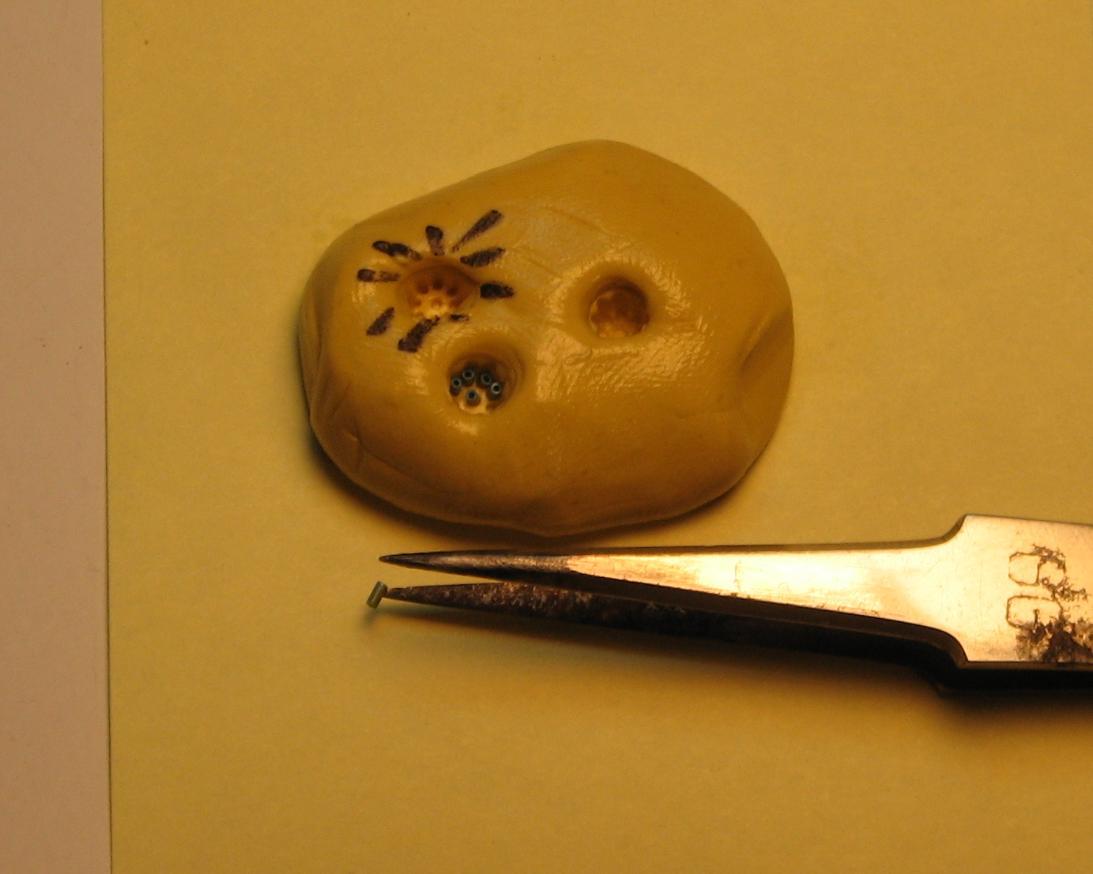
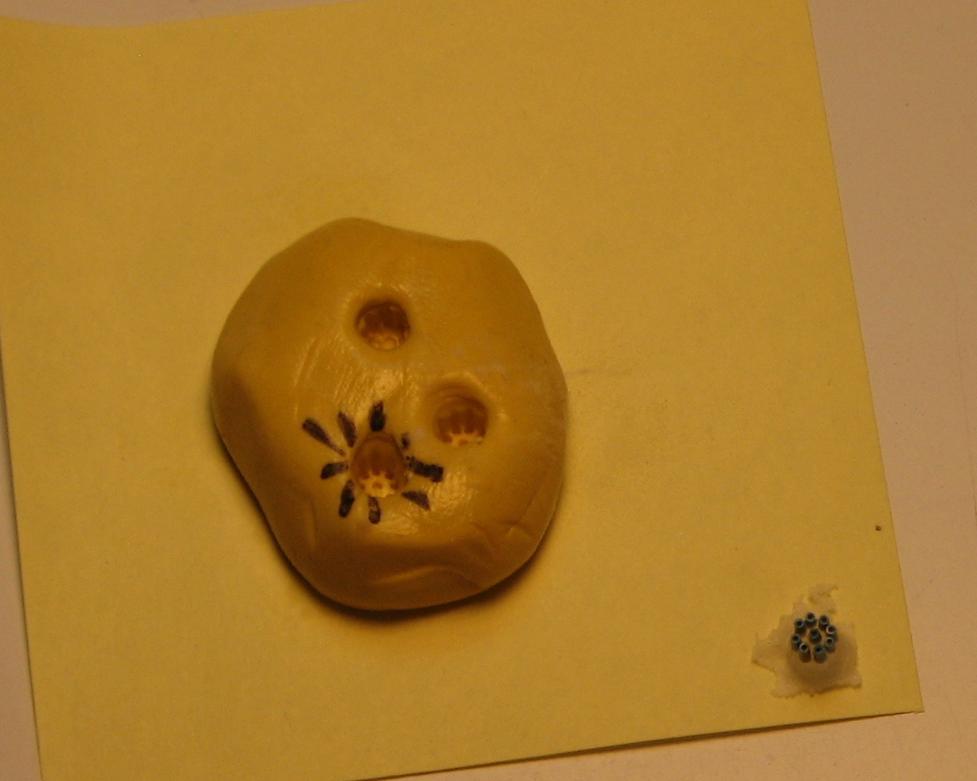
Hi, Jim. Next time, before you pour your distributors, insert short lengths of wire insulation into the "lugs". Then, when you de-mold them, they will already be "drilled". You can thank me, later! ?

-
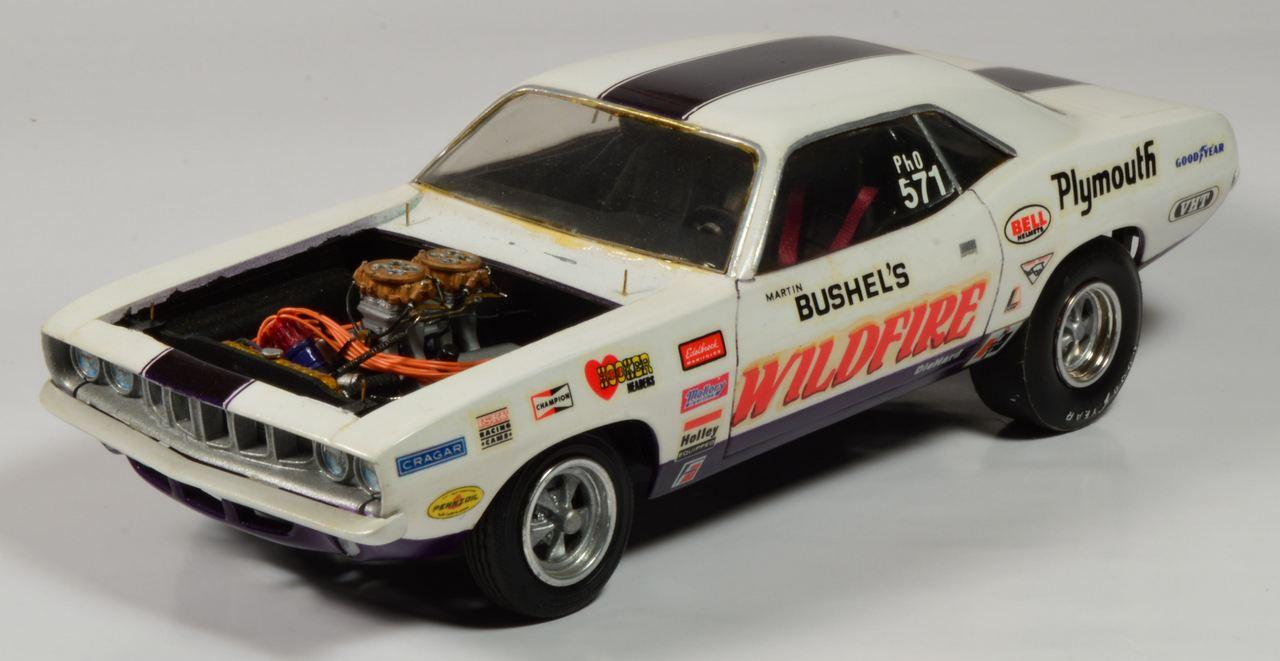
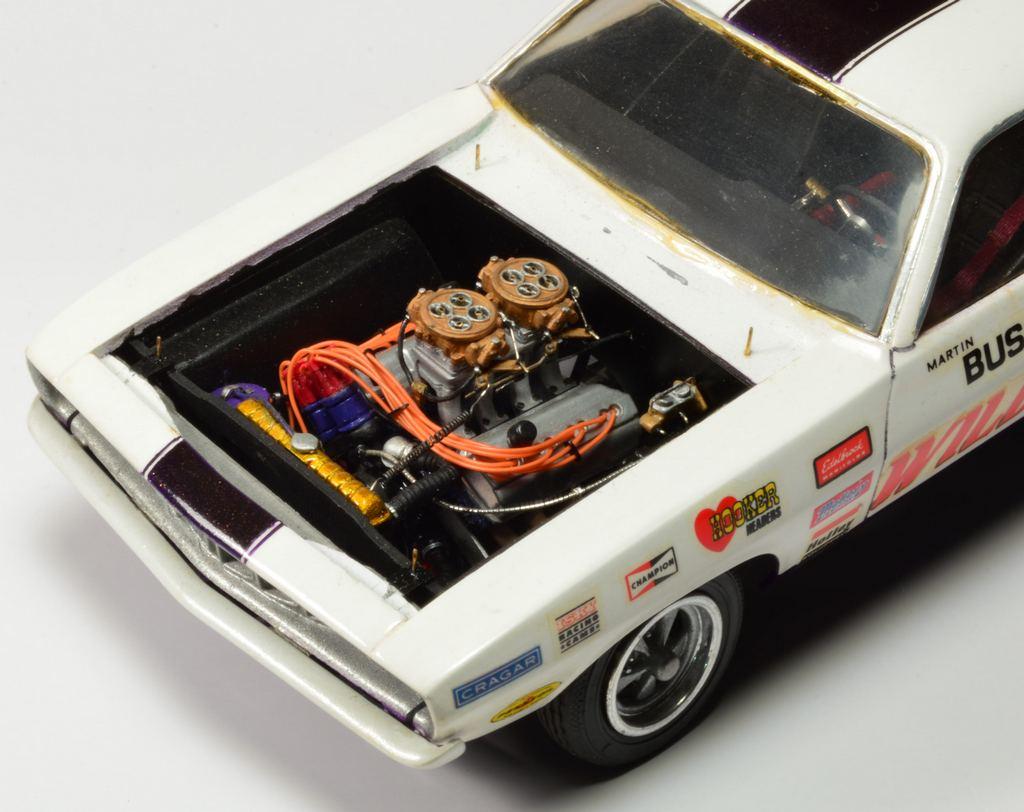
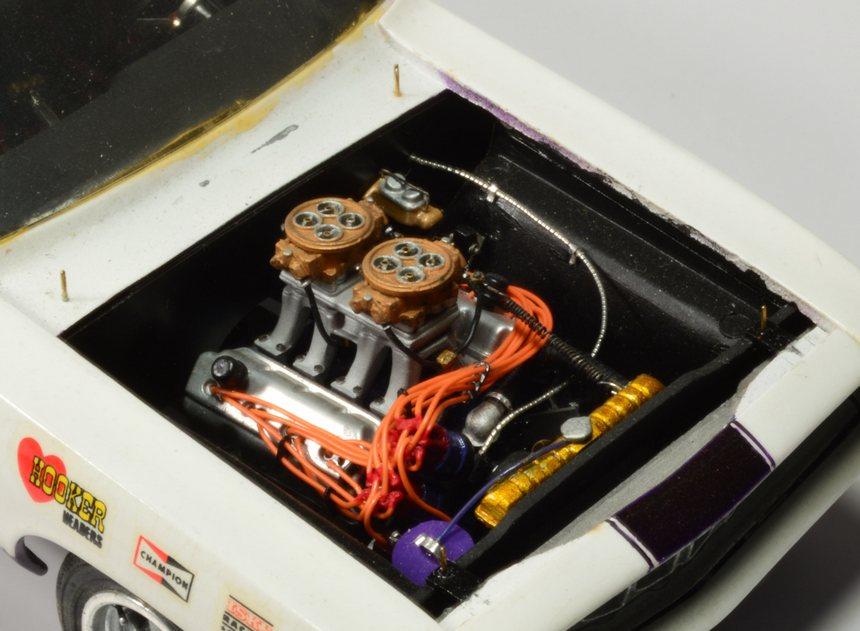
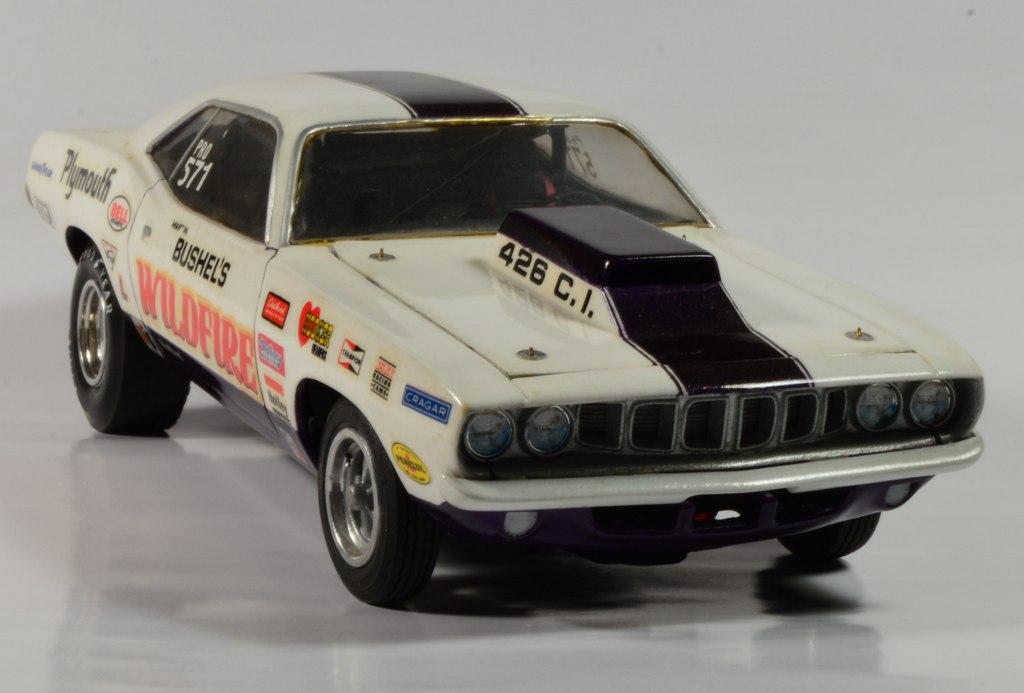
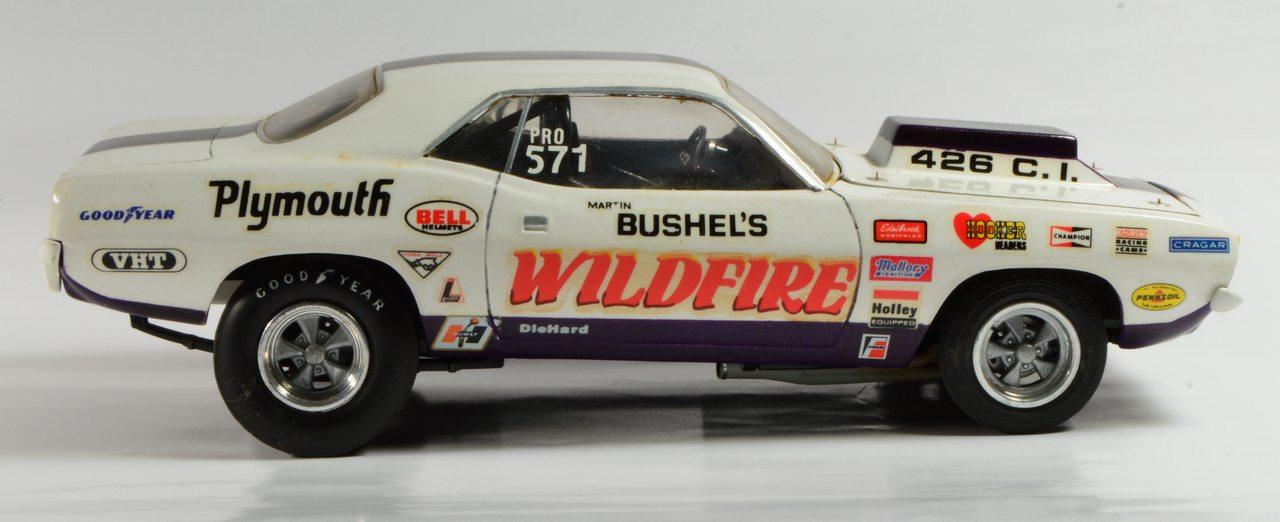
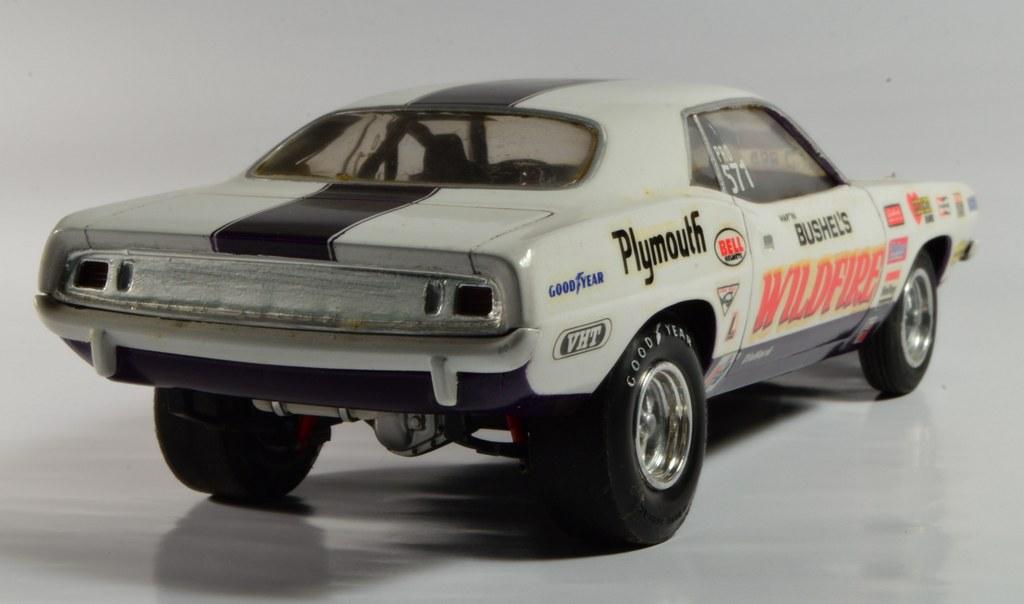
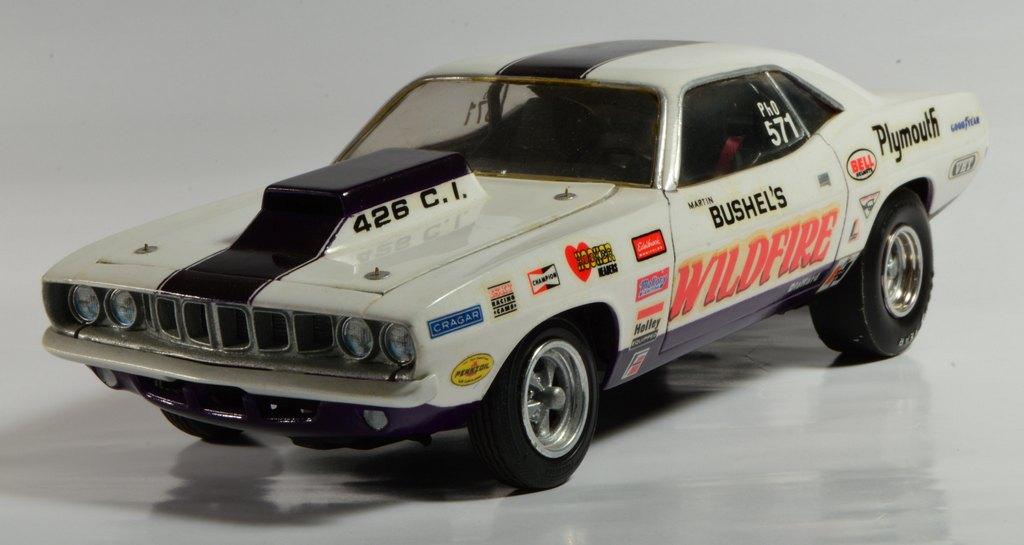
1971 'Cuda Pro Stock--New Photos August 6
Straightliner59 replied to Straightliner59's topic in Drag Racing
Thank you, Francis. As I recall, this one was green, when I got it. I remember seeing them in tan, and orange, as well. I think I recall other colors, too. I haven't seen a white one, since the very first one I built, back in '73 or '74. There are a couple of things i would do differently, now, but, all in all, I am still happy with it! Thanks, everyone, for looking, and taking the time to comment. That is very much appreciated! -
They shoot horses, don't they?
Straightliner59 replied to STYRENE-SURFER's topic in WIP: Drag Racing Models
Thanks, Kurt! I posted more photos the under glass section. This Stangarang, is gonna' be cool! -
Yes, I always try to be aware of file size. Generally, I use 1024 pixels wide, and keep my files under 100k. I go through my original images, crop them, resize them, then set the PPI to bring the file size under 100K. It's easy enough, and photos load faster, too.
-
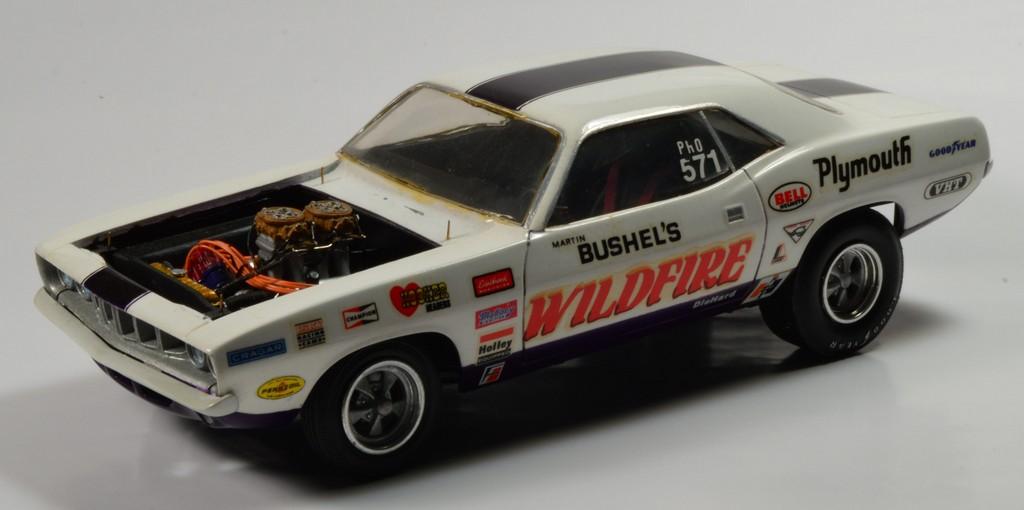
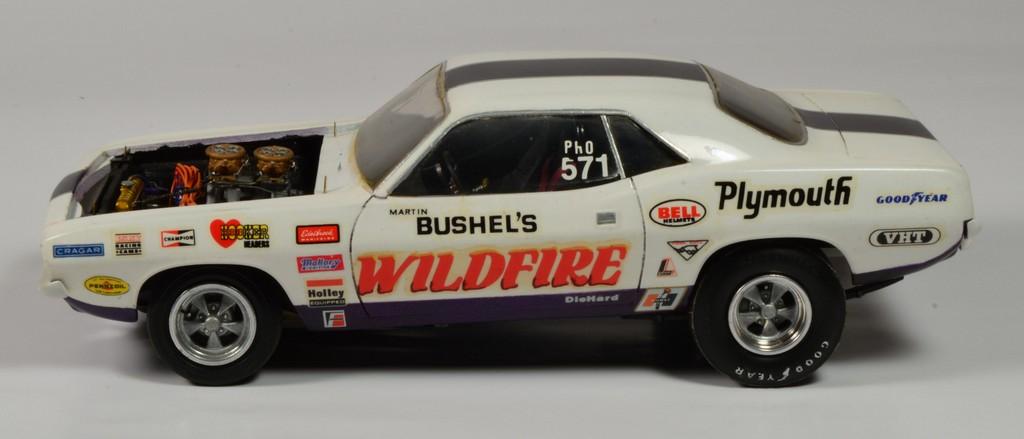
I finished this in late 1985 or early 1986. It was built using Johan's Sox and Martin 'Cuda, which, despite its shortcomings, is one of my favorite kits. It could stand a little bit of cleaning! I wonder if the sun trick would fade the yellow on decals that have been on a model for 35 years?? I flush-mounted the windshield and the rear window, and, you can see that the epoxy I used to secure them is yellowing. In 1986, I took it to Salt Lake, for my first trip there, and it placed third, in the drag class. It also appeared in an article in Muscle Car Review (or Muscle Car Performance, later). The purple stripe is good ol' Pactra Lightning Purple. I can still smell that line of colors, in my head! Anyway, questions, comments and critiques are always welcome! Thanks for looking!
-
Nice model of a subject you don't see, often. Very cool!
-
It's easy to get rid of those, just by clicking on each one and hitting "delete", before replying. I wish more people would do that.
-
They shoot horses, don't they?
Straightliner59 replied to STYRENE-SURFER's topic in WIP: Drag Racing Models
Agreed! I used sewing needles, for these hood pins. I punched aluminum discs, for the scratch plates. I didn't bother with the clips, either.
-
They shoot horses, don't they?
Straightliner59 replied to STYRENE-SURFER's topic in WIP: Drag Racing Models
Zolatone. Here's their color chart,! ?
-
'32 Ford Modified Fuel Roadster New Photos 07/23/20
Straightliner59 replied to Straightliner59's topic in Drag Racing
Thank you, Rob, I appreciate it! I try to keep my parts correct for the period of the car I am building. -
AMT Pete 352 Day Cab
Straightliner59 replied to Straightliner59's topic in WIP: Model Trucks: Big Rigs and Heavy Equipment
Thank you, Dan. I think they're better than the kit parts, no? ? I got the joints cleaned up, on them, after I took these. -
AMT Pete 352 Day Cab
Straightliner59 replied to Straightliner59's topic in WIP: Model Trucks: Big Rigs and Heavy Equipment
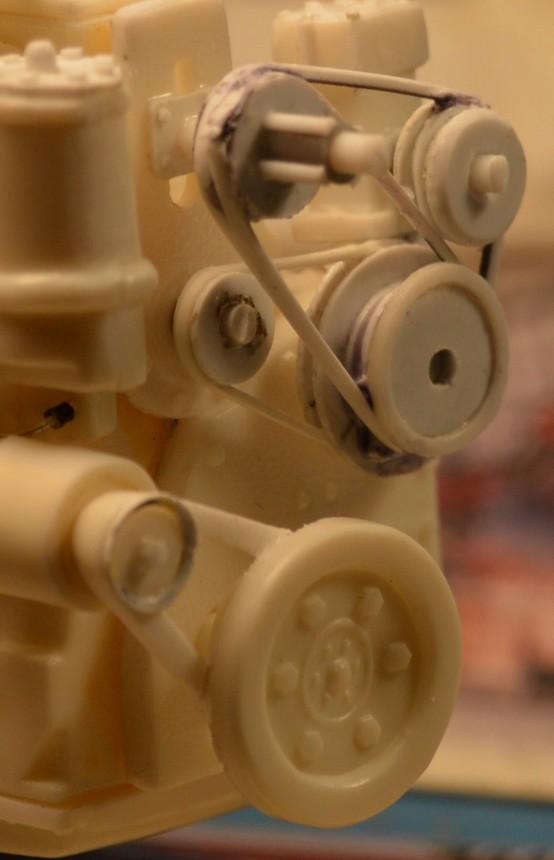
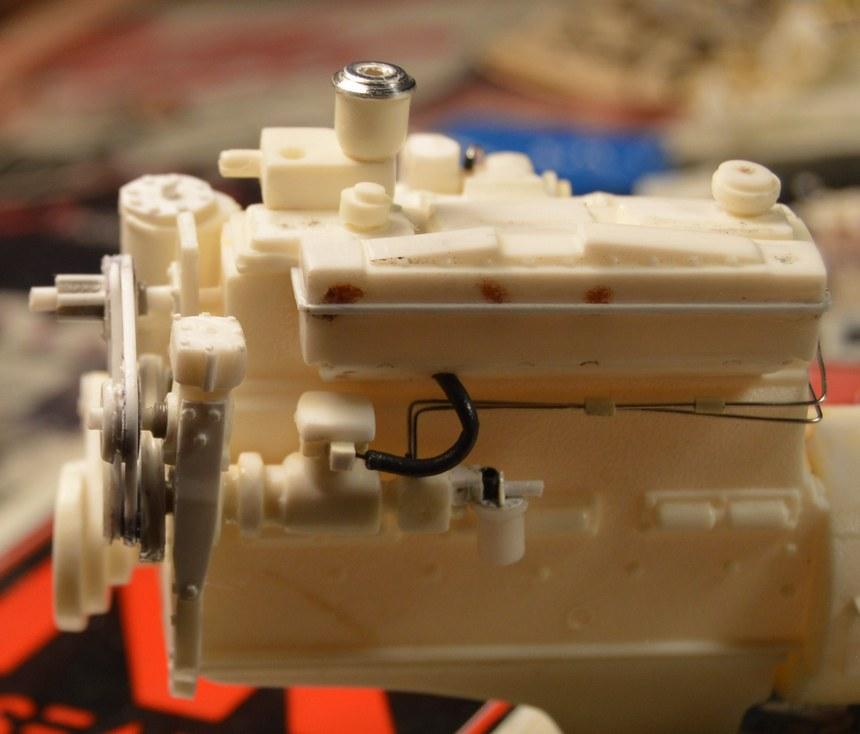
Okay, they need some cleanup and adjustments, but, the belts are on! I used a no. 11 blade as an adze, to flatten one of the angles. I colored the flattened edge with a black Sharpie, so that I could easily see which side I wanted to be facing in. I made the belts with Plastruct .030" triangular stock. There is also a photo of the kit piece these belts replaced. As always, questions, critiques, and comments are always welcome! Thanks for looking!
-
AMT Pete 352 Day Cab
Straightliner59 replied to Straightliner59's topic in WIP: Model Trucks: Big Rigs and Heavy Equipment
Hey, Francis! Thanks for stopping by. Thanks for your kind words. I will build just about anything, but, I've loved trucks, since I started building, back when AMT's GMC Astro 95 still had the turbine, in the kit. I got it for Christmas, that year. I think I built a couple of others back then, the Road Boss, and the Freightliner Dual Drive tractor, but, I haven't built one, since the middle-'70s. I got inspired enough, looking here, that I dug this old project out, and started working on it, again. I'm installing the belts, now. Thanks, Carl! -
'32 Ford Modified Fuel Roadster New Photos 07/23/20
Straightliner59 replied to Straightliner59's topic in Drag Racing
Thank you, Dennis. That is very kind of you, to say! I do love those old Monogram kits. -
AMT Pete 352 Day Cab
Straightliner59 replied to Straightliner59's topic in WIP: Model Trucks: Big Rigs and Heavy Equipment
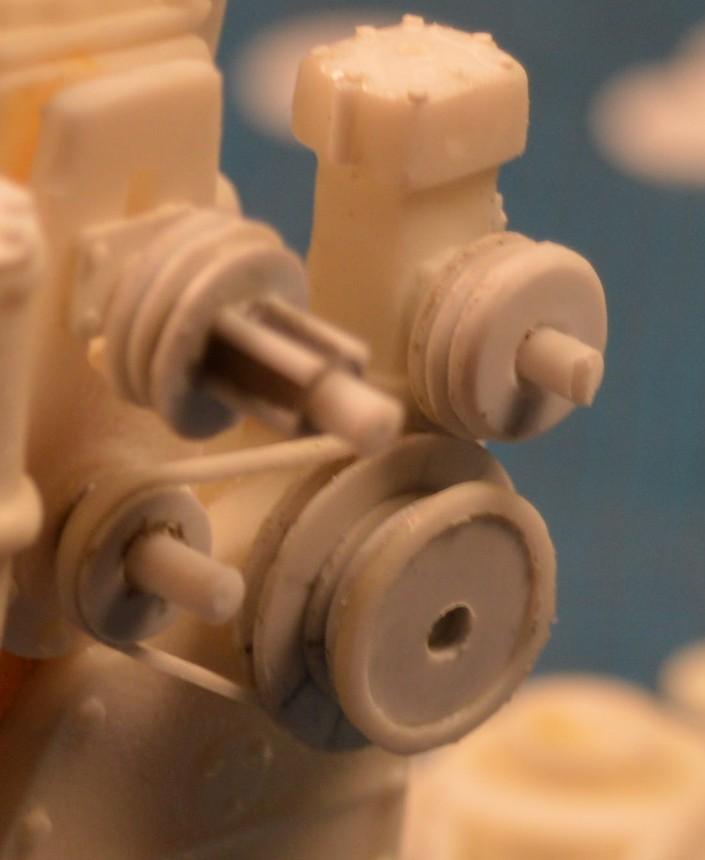
I think the pulleys are mostly done, excepting some minor details. You can see the belt/pulleys for the crank and alternator, as well. It will be interesting, making v-belts from triangle stock, but, it should look pretty cool, when it's done. Looking to get the engine to the point of paint, so I can move along to the chassis. Questions, comments and critiques always welcome!
-
"Bring Out Your Dead" Completion Build--ROUND 2 Is On!
Straightliner59 replied to Snake45's topic in WIP: Model Cars
Got the pulleys mostly finished. I hope I'm not far from getting paint on this, so I can move on to the chassis. I added bolts to the compressor head, too. You can also see the crank and alternator pulleys and the belt made from strip plastic.
-
AMT Pete 352 Day Cab
Straightliner59 replied to Straightliner59's topic in WIP: Model Trucks: Big Rigs and Heavy Equipment
Thank you, Geoffrey. I agree! I enjoy knowing it's there. Some of the lines seem to be common to almost all Cummins engines of that era. -
AMT Pete 352 Day Cab
Straightliner59 replied to Straightliner59's topic in WIP: Model Trucks: Big Rigs and Heavy Equipment
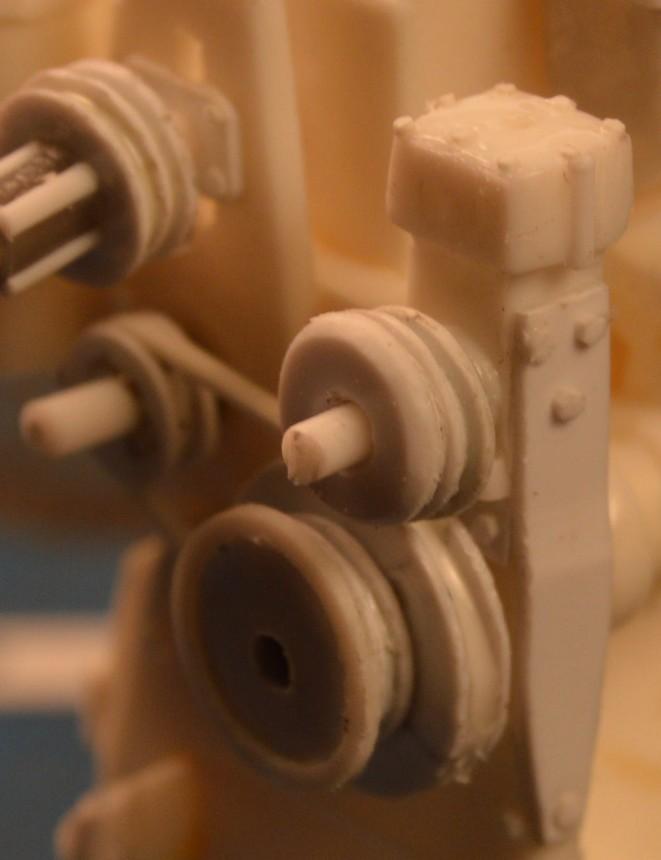
A little more of the belts/pulleys assemblies. If I had larger diameter stock, on hand, I would have turned the pulleys on the lathe. Since I don't, I am using punched discs of alternating diameters, to make the pulleys. I've begun to make one of the belts. This is a flat belt. To re-create the v-belts, I plan to sand off one of the angles from some Evergreen triangular stock. Here, the now mounted compressor can also be seen. As always, questions, critiques and compliments are welcome!
-
AMT Pete 352 Day Cab
Straightliner59 replied to Straightliner59's topic in WIP: Model Trucks: Big Rigs and Heavy Equipment
That would be cool! I didn't even think of the butterfly hood, on the Autocar. Yes, that could make it interesting. -
Stretched AMT lowboy
Straightliner59 replied to gatorincebu's topic in WIP: Model Trucks: Big Rigs and Heavy Equipment
I am so glad you did! It looks great! -
AMT Pete 352 Day Cab
Straightliner59 replied to Straightliner59's topic in WIP: Model Trucks: Big Rigs and Heavy Equipment
Lee, it is easy to see why! You have to figure out which component is which, then plumb it, accordingly. It's even more confusing when two pictures of the same part look different! Very perplexing! Good luck. If you have some photos of your engine, maybe I can help. I'd be happy to give it a shot! Thank you, Dan! -
'34 Ford Coupe A/A--New Photos 07/26/20
Straightliner59 replied to Straightliner59's topic in Drag Racing
I would stick with the bar! I've never tried anything else, just because, when I was doing the research, that was the one that came up in most descriptions of the process. I think the bar, because it's easier to get a more uniform coat, that stays where you put it! ? I will say this, though. If I didn't have a bar of Ivory soap, I would certainly experiment. Thanks, Francis! It's always a pleasure, sir!