Straightliner59
-
Posts
5,814 -
Joined
-
Last visited
Content Type
Profiles
Forums
Events
Gallery
Everything posted by Straightliner59
-

The ‘other’ mag is stopping publication
Straightliner59 replied to cruz's topic in General Automotive Talk (Trucks and Cars)
I just got the second issue of a new subscription! -
AMT Pete 352 Day Cab
Straightliner59 replied to Straightliner59's topic in WIP: Model Trucks: Big Rigs and Heavy Equipment
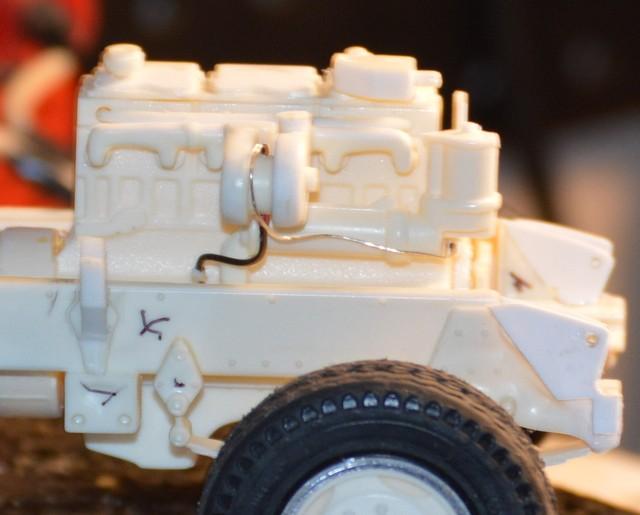
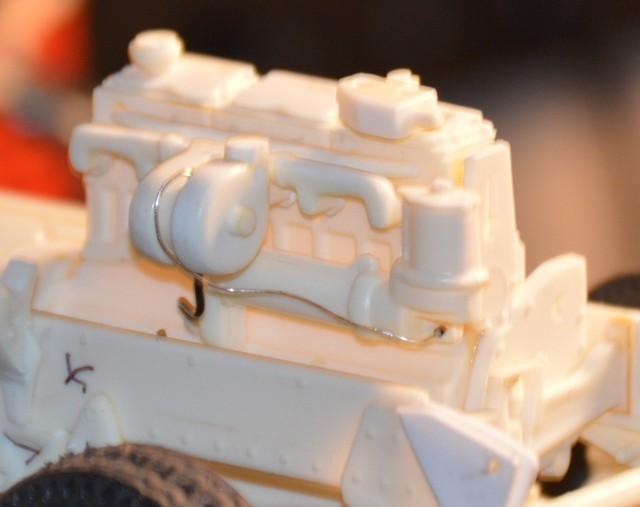
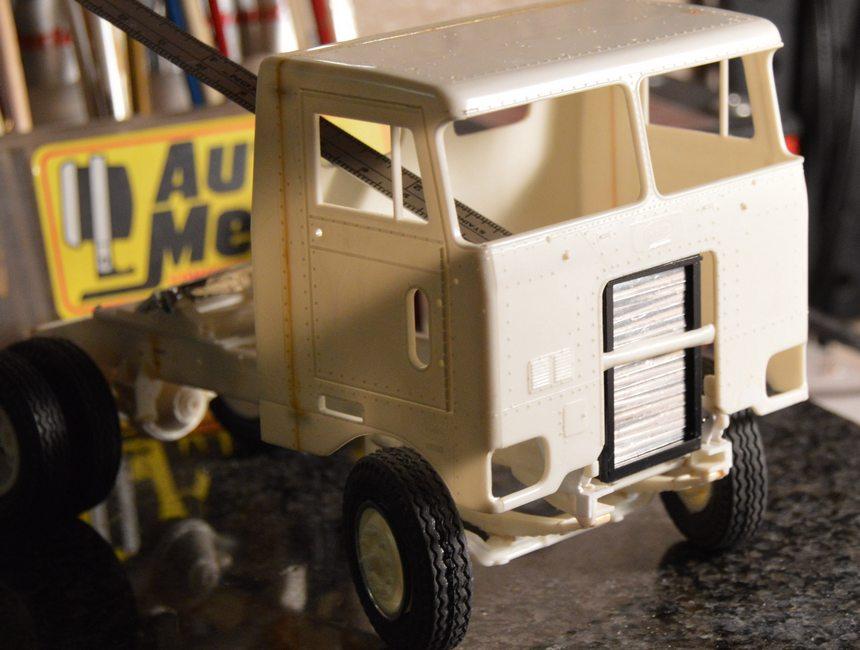
Getting some engine work done. Fortunately, there are a TON of reference photos for 350 Cummins engines. I will have to be careful, not to get carried away! Also shot the first primer on the reworked grille area.
-
Archer Rivet Decals for Trucks
Straightliner59 replied to Straightliner59's topic in Model Building Questions and Answers
Thank you, Bill. I will check these out, tomorrow, when I am off work. It should be helpful. I am looking to replace the row of rivets, where I cut out the cab section.
-
Archer Rivet Decals for Trucks
Straightliner59 replied to Straightliner59's topic in Model Building Questions and Answers
Thank you, Casey! This is the best info I have seen, yet! -
Archer Rivet Decals for Trucks
Straightliner59 replied to Straightliner59's topic in Model Building Questions and Answers
Thank you, sir. After doing the math, I think O-scale 7/8" rivets will come pretty close to what's already there. -
You are correct, sir! There's one in my stash. Nice kit!
-
If you've used them, how well do they work, and is there a particular sheet that works best to match the rivets on AMT's Pete 352? I am going to have a ton to replace, especially since the grille area needs to be reworked. I'm not sure I want to make all of them, by hand! Thanks!
-
64 Dodge D100 Pickup Pro Street
Straightliner59 replied to AmericanMuscleFan's topic in WIP: Drag Racing Models
Still killin' it, Francis! Excellent work! Love that little stuff, like the starter drive! -
AMT Pete 352 Day Cab
Straightliner59 replied to Straightliner59's topic in WIP: Model Trucks: Big Rigs and Heavy Equipment
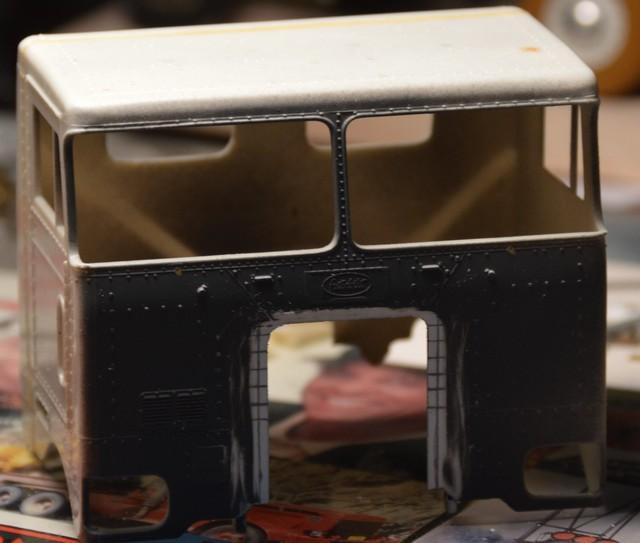
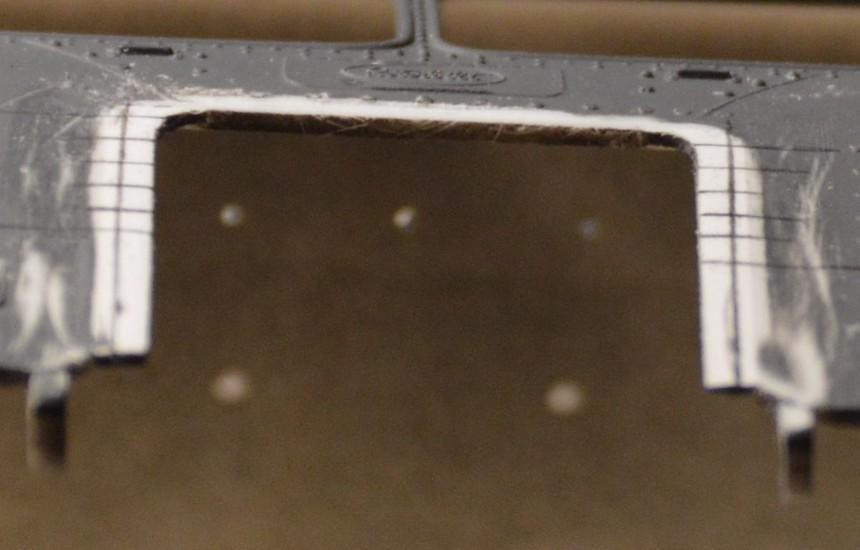
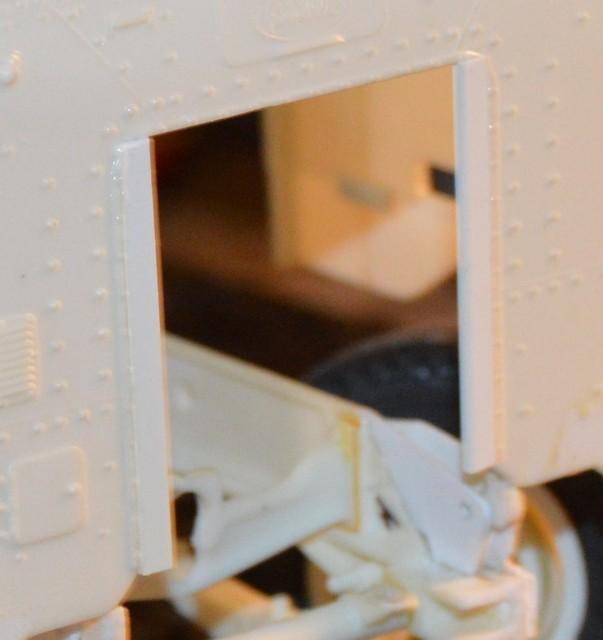
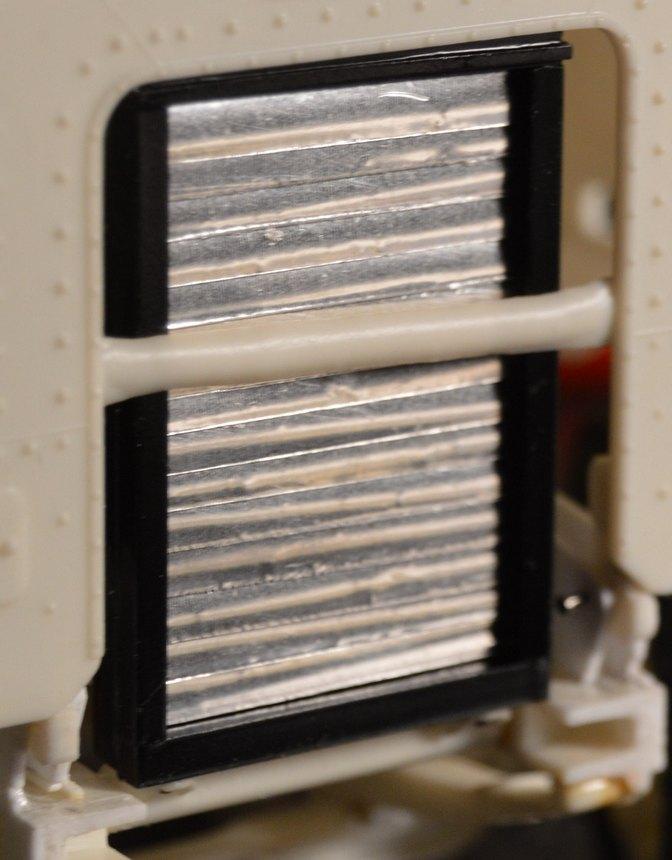
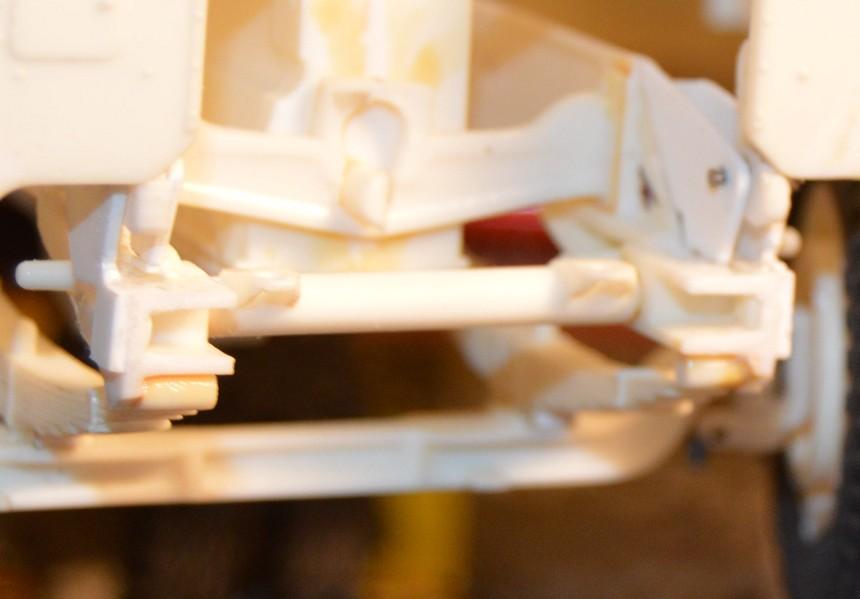
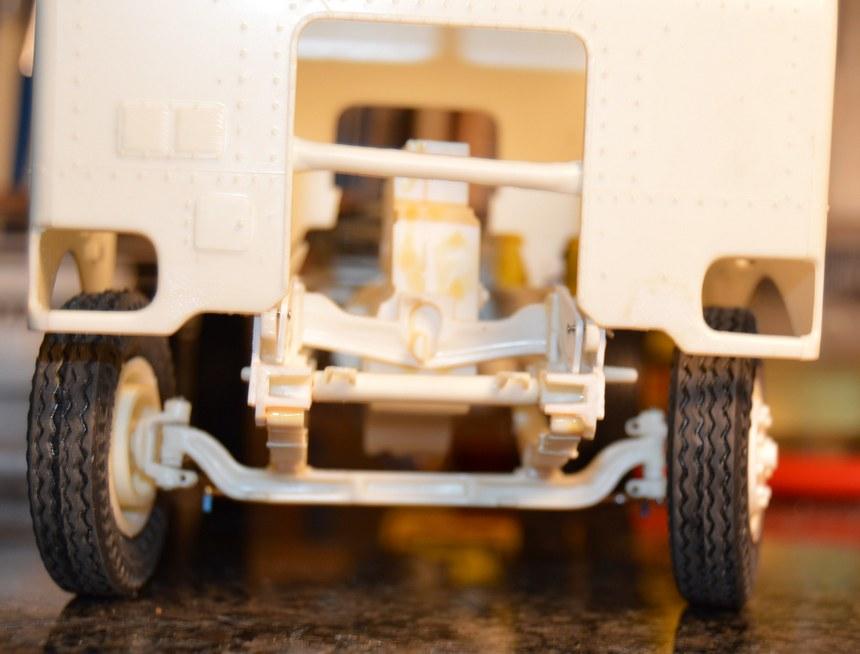
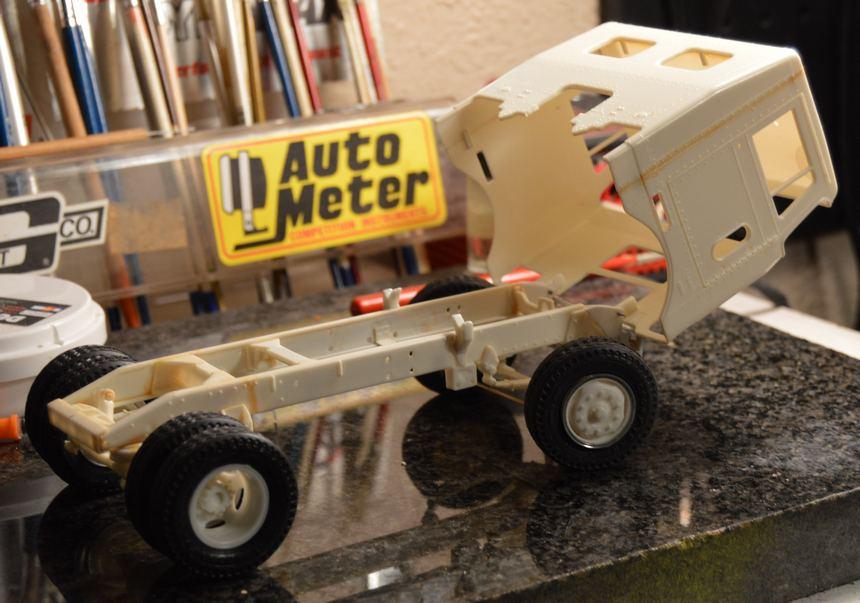
Well, there has been something bugging me about this cab, all along. Once I had finished the radiator, and started to figure out how I was going to do the grille surround, I realized that the opening for the grille was too wide. Looking at photos of 352s, the kit's grille opening looked squat and fat, compared to those on the real trucks. The "grille", which is just a frame with a screen, should be approximately the same width as the radiator. I decided I couldn't live with that. I added a strip of .040"X.100" Evergreen strip to each side of the opening. It closed the space up a bit, and, I think it looks better. Now, i am going to have a bunch of cleanup to do and a bunch more rivets to add! Dang it! This was supposed to be an easy one!
-
AMT Pete 352 Day Cab
Straightliner59 replied to Straightliner59's topic in WIP: Model Trucks: Big Rigs and Heavy Equipment
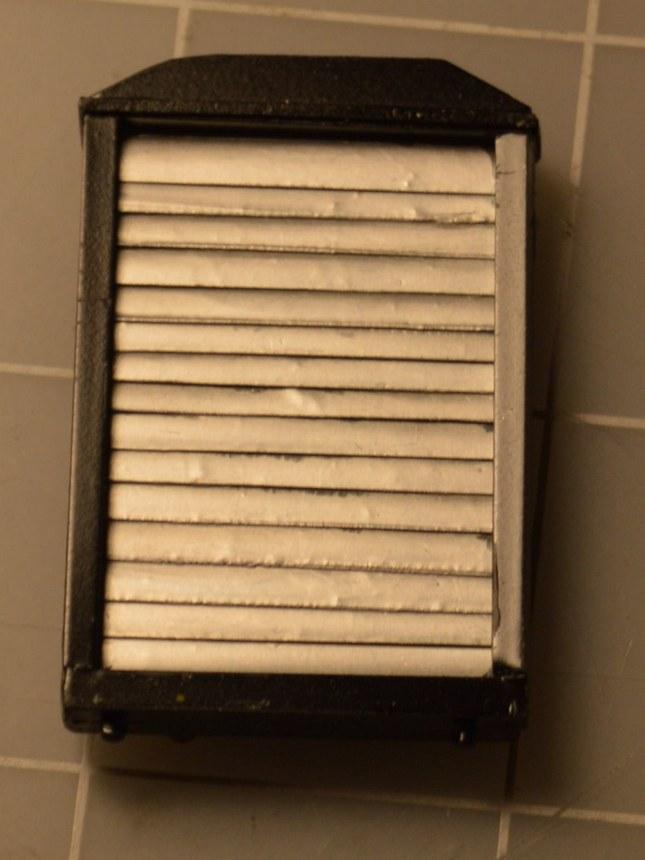
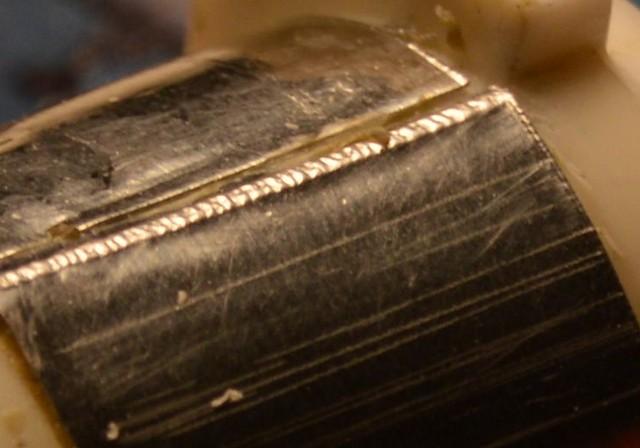
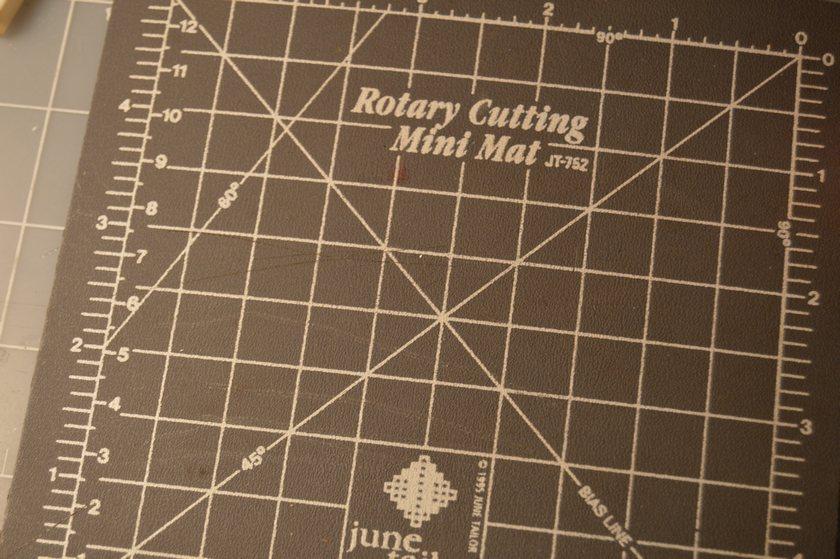
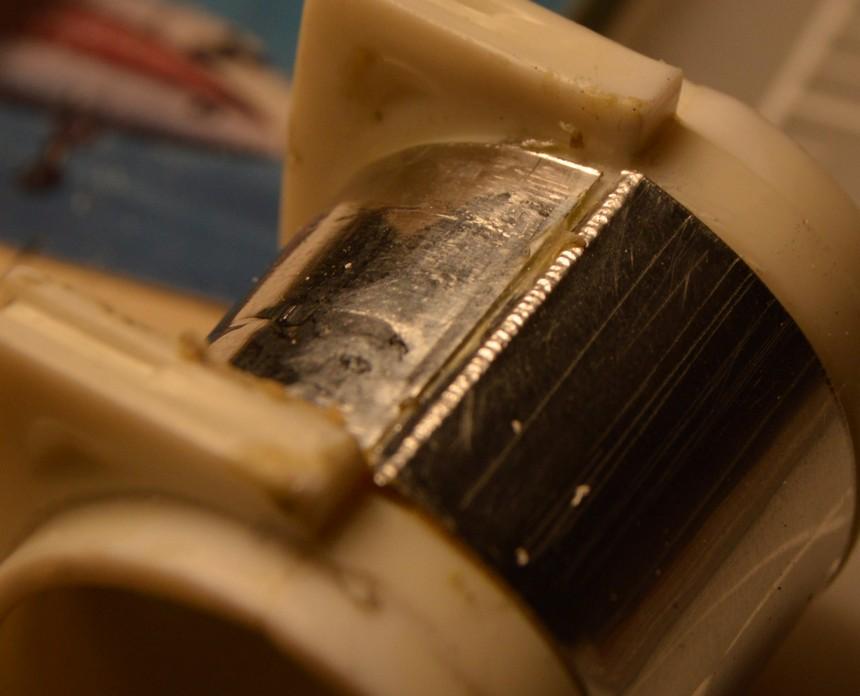
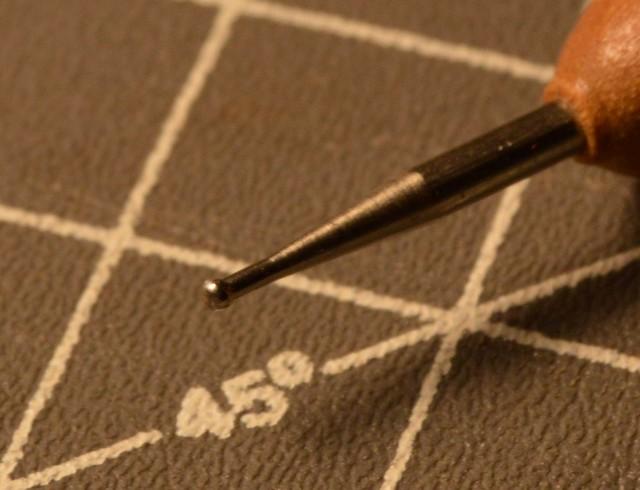
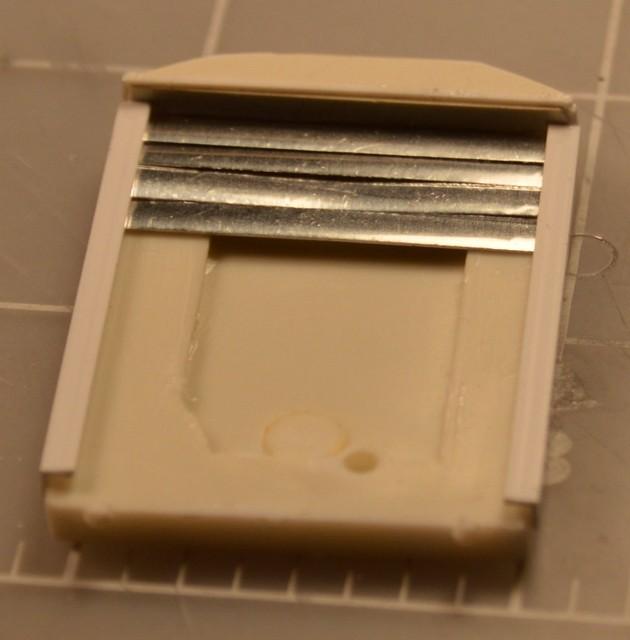
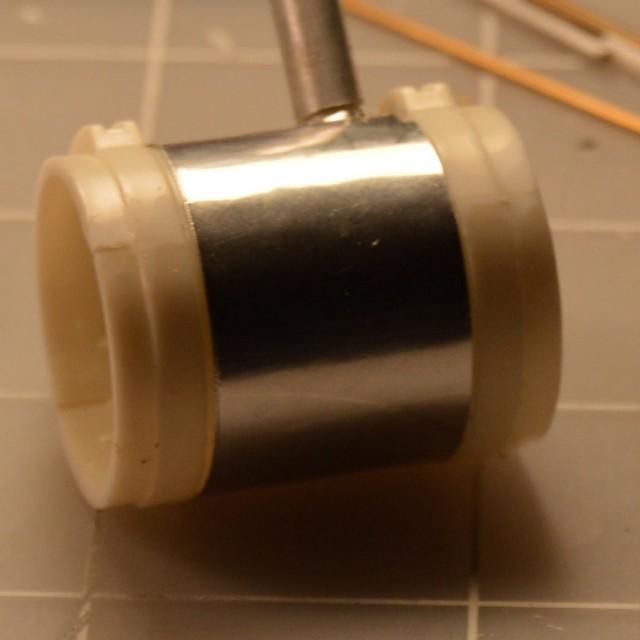
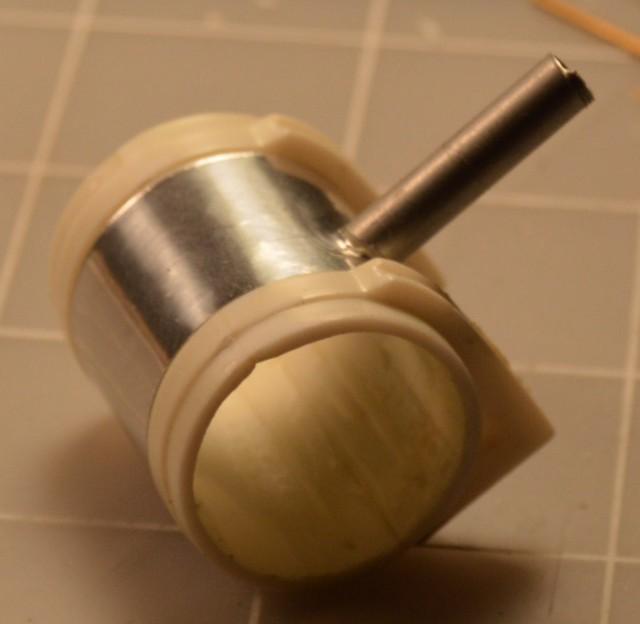
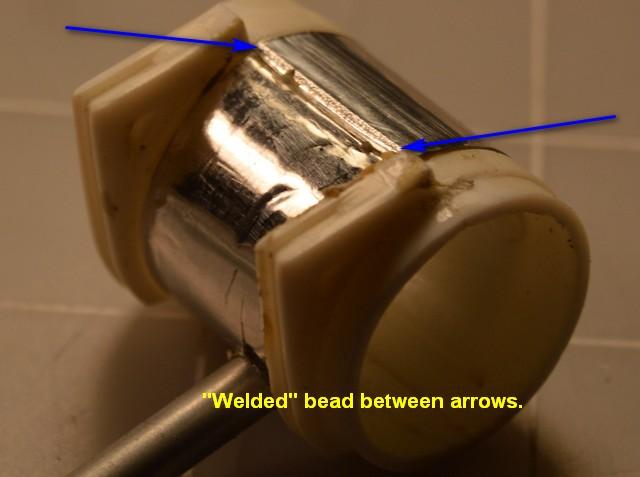
I applied a flat coat to the aluminum louvers. I worked on the radiator fins with a silver Prismacolor pencil, and an oily residue color from a Tamiya weathering kit. Next, I want to work on the grille surround, and build the motor. Thanks for looking! Questions, comments and critiques are always welcome! I have also included some better photos of the weld beads that can be created using tooling aluminum, a ball-ended burnisher, and a pebbled surface, similar to that pictured. It's perfect for doing welded aluminum tanks, welded panels, etc. .
-
AMT Pete 352 Day Cab
Straightliner59 replied to Straightliner59's topic in WIP: Model Trucks: Big Rigs and Heavy Equipment
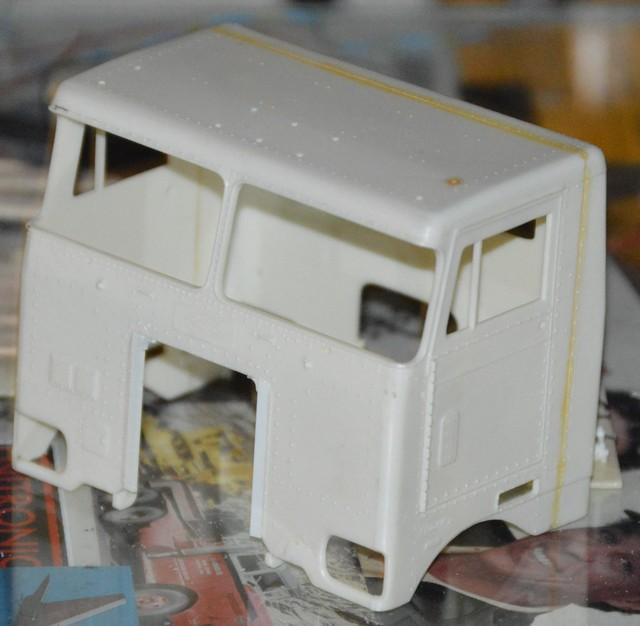
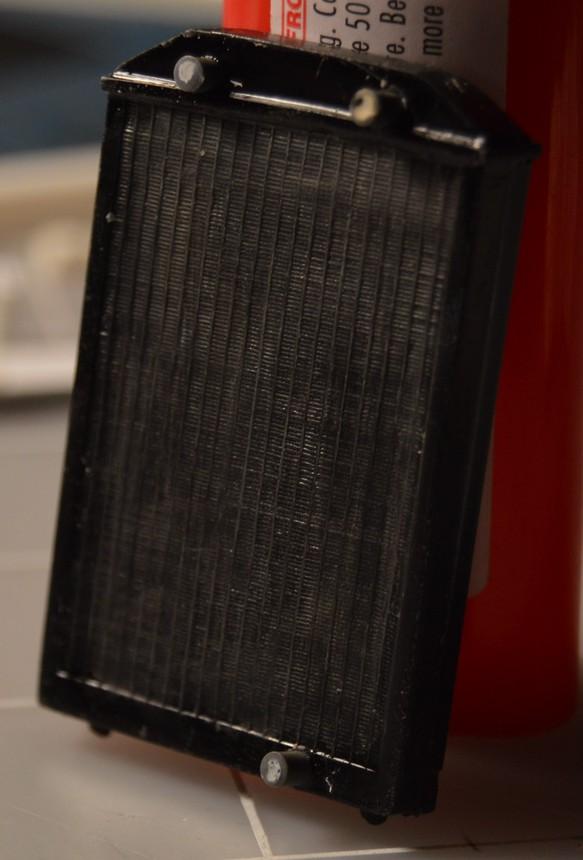
Well, I went ahead and pretty much built the radiator. I wasn't going to do that, twice! It was a pain, working with those slats!
-
AMT Pete 352 Day Cab
Straightliner59 replied to Straightliner59's topic in WIP: Model Trucks: Big Rigs and Heavy Equipment
Thank you, sir! They are super-simple to do, as well! I had created rolled beads in tooling aluminum with a ball-ended burnisher. One day, I noticed that one of my cutting mats had a pebbled surface, and the light bulb went on! -
AMT Pete 352 Day Cab
Straightliner59 replied to Straightliner59's topic in WIP: Model Trucks: Big Rigs and Heavy Equipment
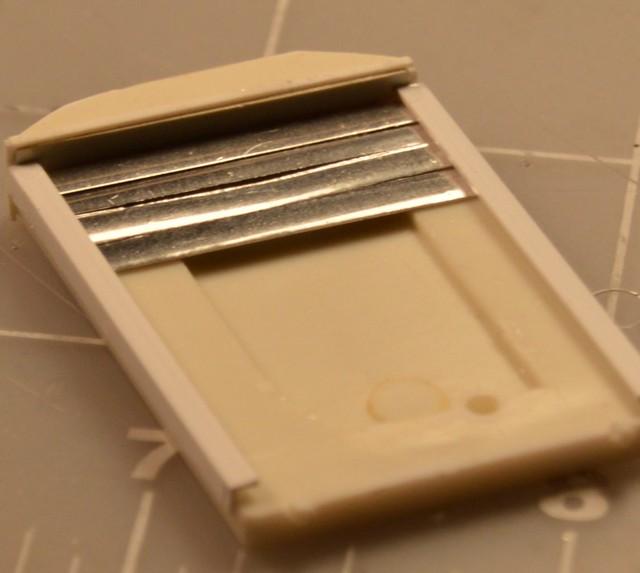
I started working on the radiator assembly. Added some Evergreen for the front side of the top tank, and some .080" Evergreen angle to slide the aluminum louvers behind. They are all loose, here. I won't glue them, until I have them all made (17). Once cut from Maid-O-Metal tooling aluminum, I roll them under an old brass bushing I found, to give them a bit of a curve. Eventually, I will open the grille surround, and replace the open area with mesh, of some sort. The fuel tank is beginning to be wrapped with tooling aluminum. I will add thin strips to the ends, and make the tank ends using a doming block. One thing I like about tooling aluminum (among many!) is that, by using a ball ended burnisher on a cutting mat with a pebbled surface, it creates a pretty convincing weld bead. I'm posting a photo to illustrate it, but, I'm unsure how visible it will be. Thanks for looking! Questions, critiques and comments are always welcome!
-
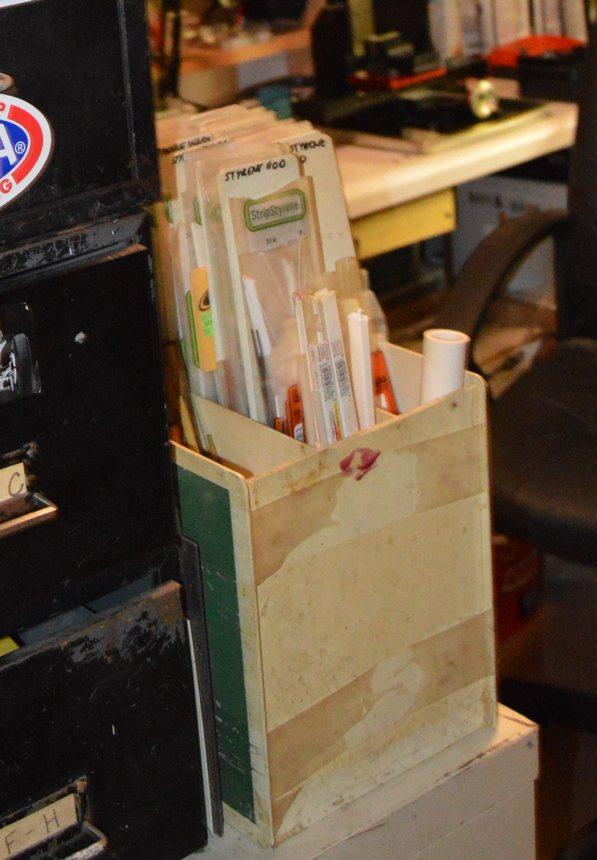
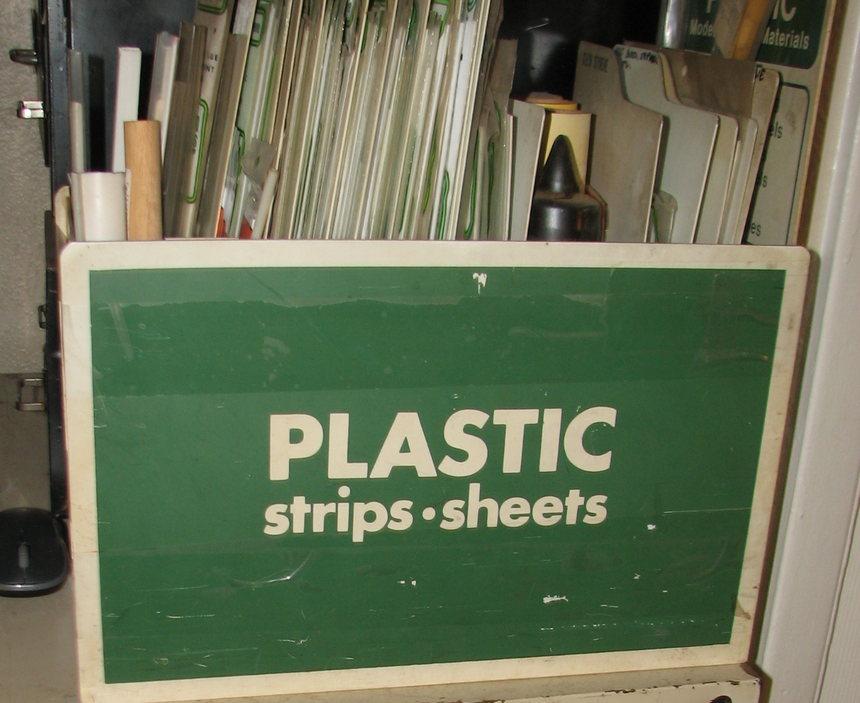
Organizing Evergreen strip stock. Super easy
Straightliner59 replied to LDO's topic in Tips, Tricks, and Tutorials
Luckily, back when I was working in a hobby shop, the store moved. Since they got new displays, I was able to bring this home. It would be easy to build one from plexiglas, or another fusible plastic sheet. Plex might look kind of cool, and look artsy!
-
This is looking very cool! I like 1/32 stuff!
-
Got the latest issue of the other auto modeling magazine, and a refund from Ebay, for something I really needed, but, never arrived.
-
AMT Pete 352 Day Cab
Straightliner59 replied to Straightliner59's topic in WIP: Model Trucks: Big Rigs and Heavy Equipment
Thanks, Dan. I think you're right, about that! Thank you, Harvey! That's good to know to be on the lookout for. -
AMT Pete 352 Day Cab
Straightliner59 replied to Straightliner59's topic in WIP: Model Trucks: Big Rigs and Heavy Equipment
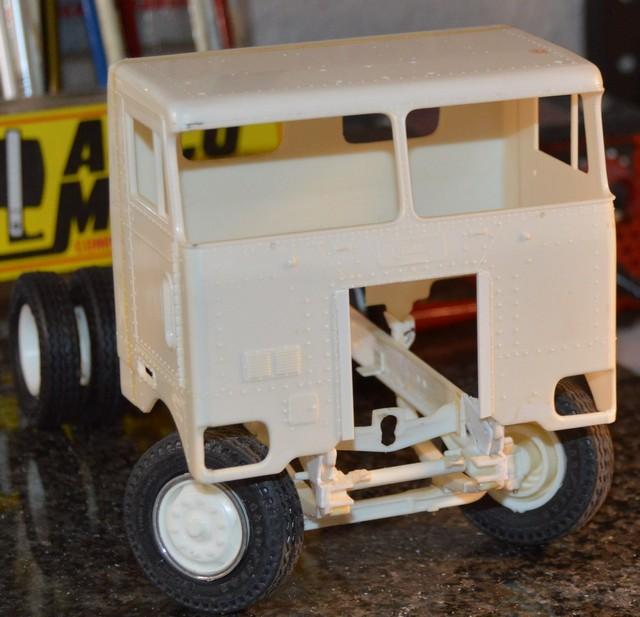
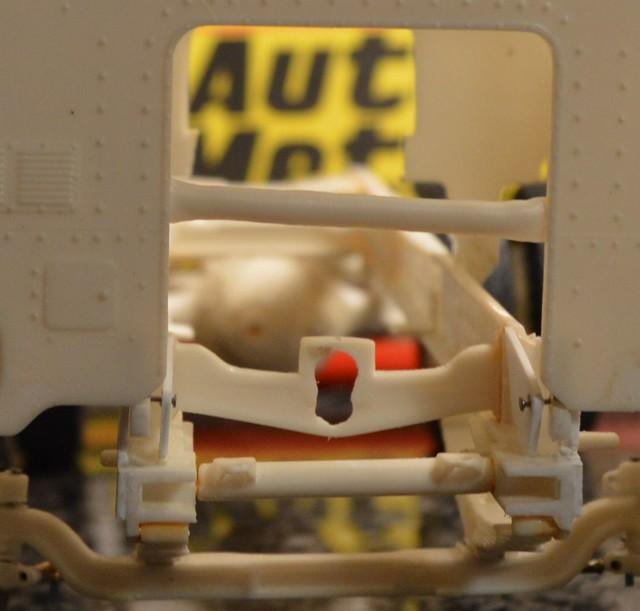
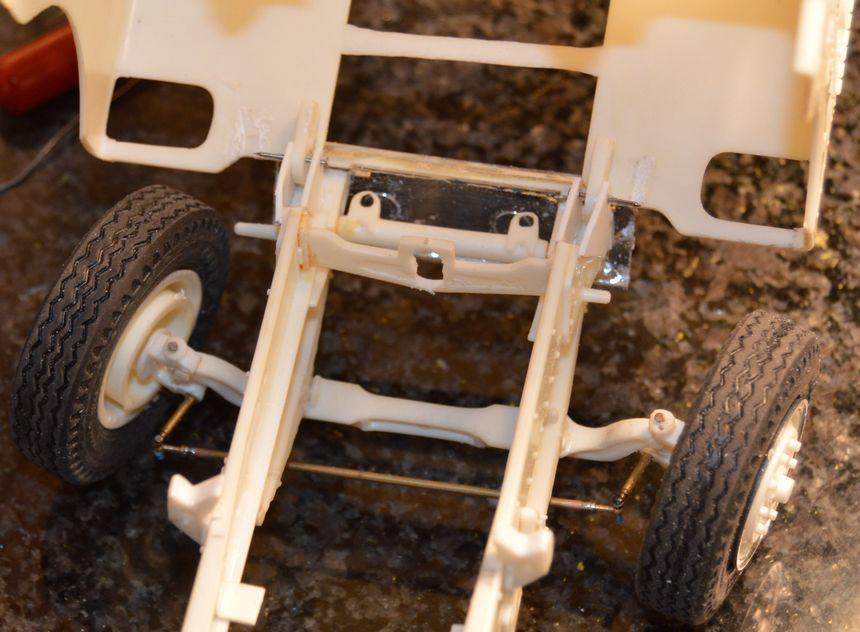
I fixed the cab hinges. They need a little cleanup, but, they look better, without the gaps!
-
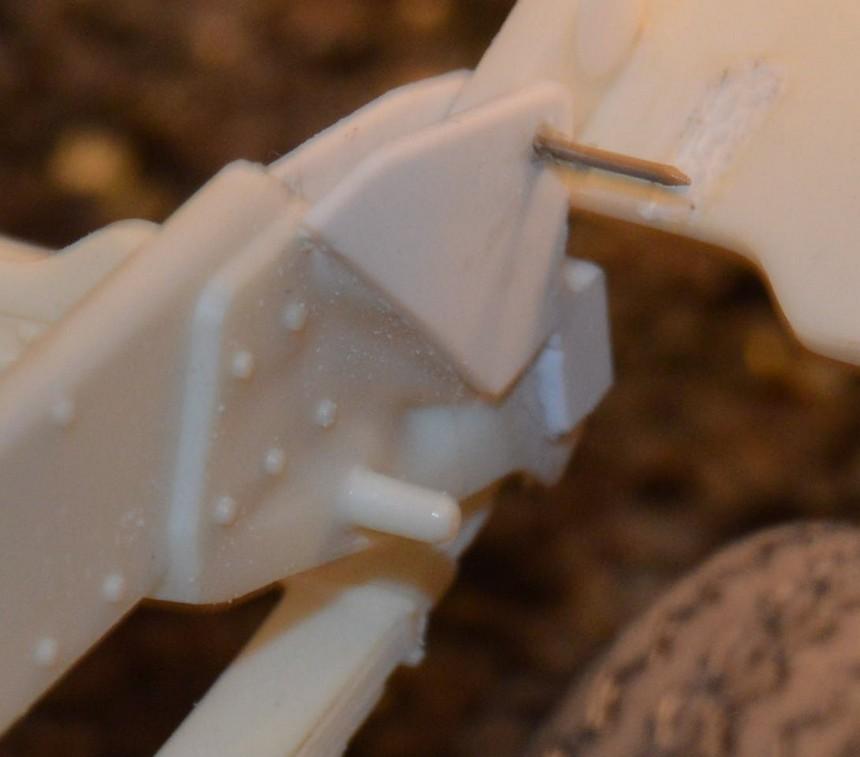
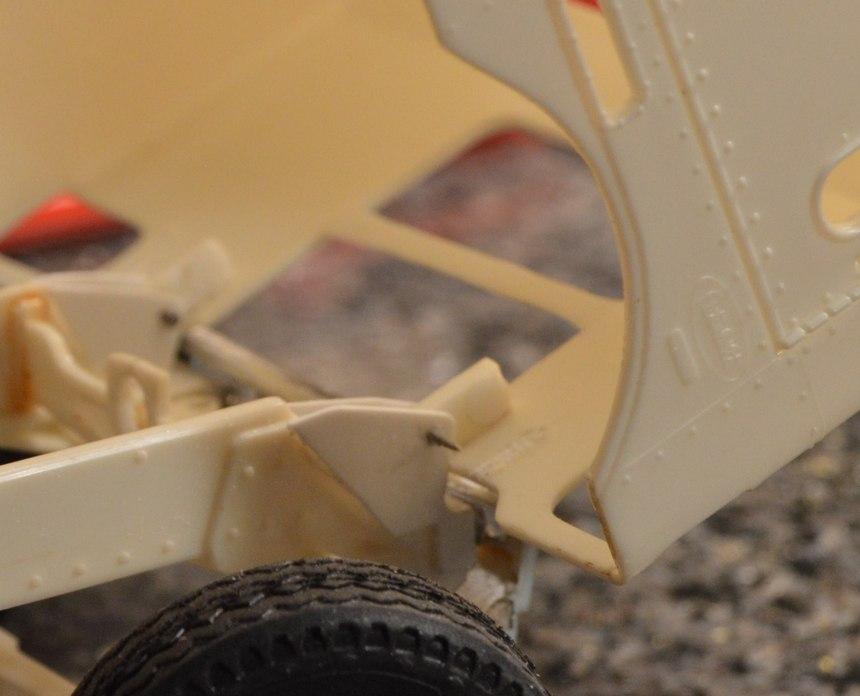
I moved the inner brackets on my cab hinges closer to the outer ones. There was just too much space between them, before. First photo is before, second, after. Still scratching my head over AMT's decision to mold the cab hinges to the bumper!
-
Stretched AMT lowboy
Straightliner59 replied to gatorincebu's topic in WIP: Model Trucks: Big Rigs and Heavy Equipment
Oh, yeah! This thing looks great, and it deserves it! -
online shopping??
Straightliner59 replied to Painted Black's topic in Model Building Questions and Answers
It's all over Ebay for reasonable prices! -
AMT Pete 352 Day Cab
Straightliner59 replied to Straightliner59's topic in WIP: Model Trucks: Big Rigs and Heavy Equipment
Thanks, Dan! I think I can get the inner ones loose, and move them closer to the outer plates, to tighten the gap. It looks pretty sloppy, like this, for sure! -
AMT Pete 352 Day Cab
Straightliner59 replied to Straightliner59's topic in WIP: Model Trucks: Big Rigs and Heavy Equipment
I need to work on those inner plates, and get them a bit tighter, I can see. -
AMT Pete 352 Day Cab
Straightliner59 replied to Straightliner59's topic in WIP: Model Trucks: Big Rigs and Heavy Equipment
Those are together!
-
AMT Pete 352 Day Cab
Straightliner59 replied to Straightliner59's topic in WIP: Model Trucks: Big Rigs and Heavy Equipment
Thanks, Gator! I kinda' like day cabs!