Straightliner59
-
Posts
5,809 -
Joined
-
Last visited
Content Type
Profiles
Forums
Events
Gallery
Everything posted by Straightliner59
-
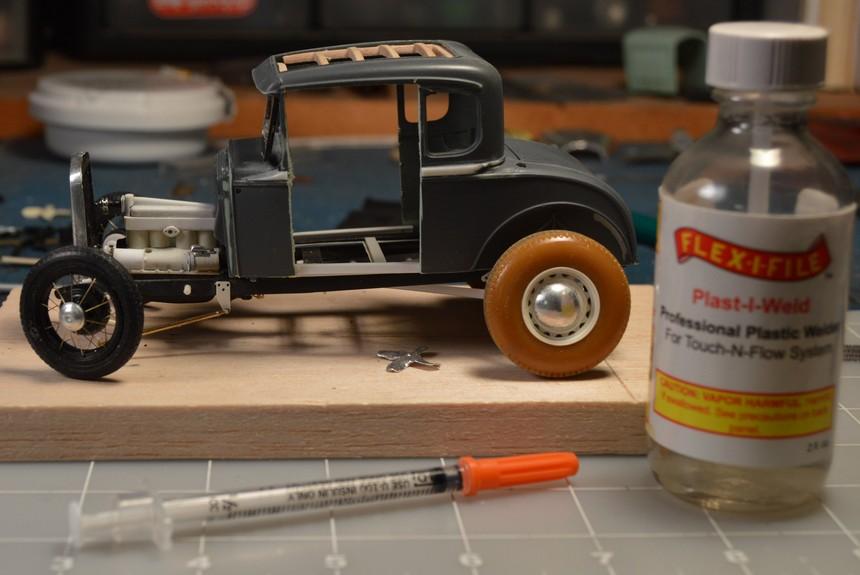
This is at least a temporary solution, but, since the real one has a reinforced area inside the door, if it works, I can keep it. I added some .100" Evergreen angle. It holds the door opening to the proper width, and stabilizes the body, immensely. The other day, in a thread regarding liquid cement applicators, Ace mentioned insulin syringes. Back in 2000, I moved into a trailer, and found several bags of brand new ones. I had a thought they might work for cement, but, I put them aside and never really thought about them, until Bill mentioned them, then. I'll just say that I'm glad I have a lot of them. They work great! I left a small amount of cement in this one for a couple of days, and the thing still works. No issue with the solvent eating the rubber or plastic!

-
I agree, about the blanket. If I don't make one, I'll get some printable fabric, and make one, that way! Thanks, Tom! Glad you're enjoying it!
-
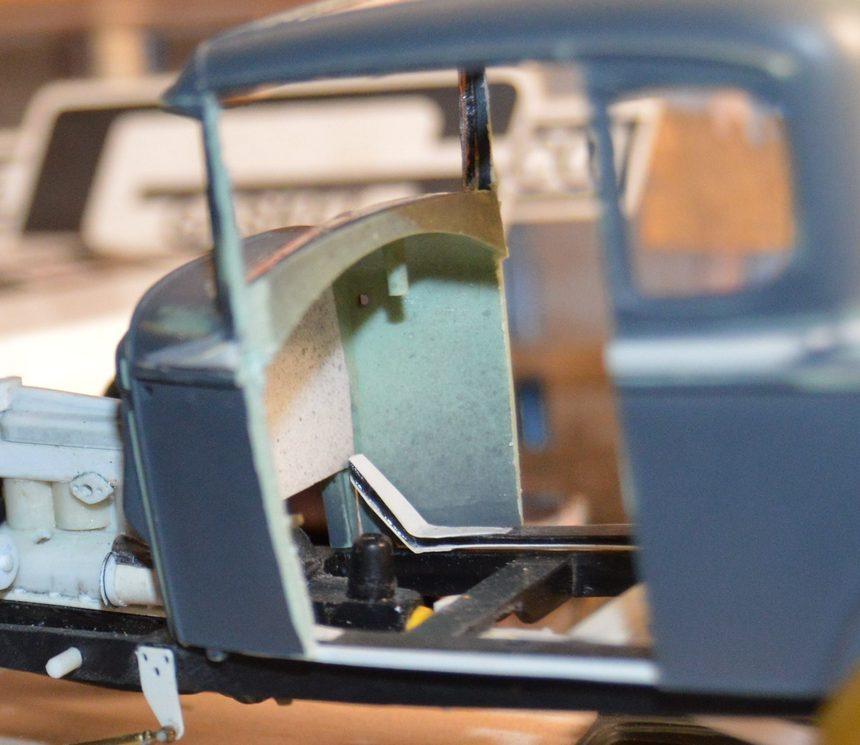
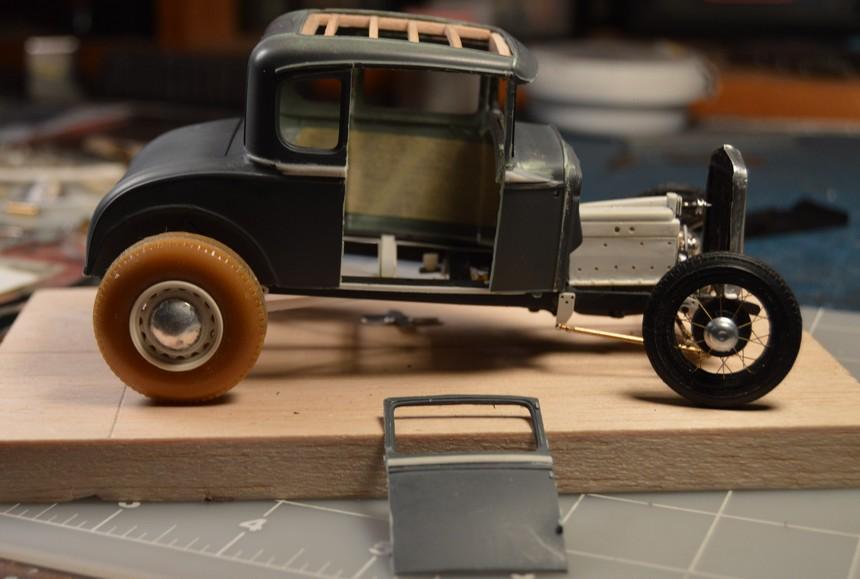
Thanks, Robert! That is very kind, and much appreciated. I basically had the A-pillars fixed, right away, thankfully! I still need to strengthen them, before I can do any work. Ideally, I'd be able to cement the body permanently to the chassis, now, since I essentially have a prototypical body, at this point. Unfortunately, I don't think there would be enough access, to finish the work I need to do, inside. Even while I was "hemming and hawing", I knew the doors were going to be opened. ? Here are a couple of photos one of the fractures (yellow arrow), and the culprit that caused the pillars to break (the area between the red arrows). The area between the red arrows should not have protruded into the door line. Instead, it should be flush, between the jambs. It was cutting the doors free from that, that over-stressed the pillars. At this point, however, I think my best option is to square up and clean up (finish) the ends, and accept it. I don't see the cowl staying attached to the roof, if I was to either try to sand it flush, or, to remove it, altogether, and fabricate a new panel. Before anything else happens, I need to drill and pin the breaks, first. I am fairly certain I can drill at an angle, and pin it, as it's cemented, now (blue line). It's looking pretty cool, I think. In further news, I am actually considering buying some thread, and building a tiny loom, to weave a new blanket, for the seat. having had some time to take it in, I'm not sold on the experimental one. As always, comment, critiques and questions are welcome. Thanks for looking!
-
I think that is what I will try. Don't feel guilty! This is all my doing! It was actually one of the goals I'd hoped to accomplish, when I started this project. Now, I need to figure out in which order to proceed.
-
That's very cool, Dave. We can always use a little inspiration! Thanks, Jim! I'm a little curious, myself!
-
Superb work, sir! Absolutely love the safety wiring.
-
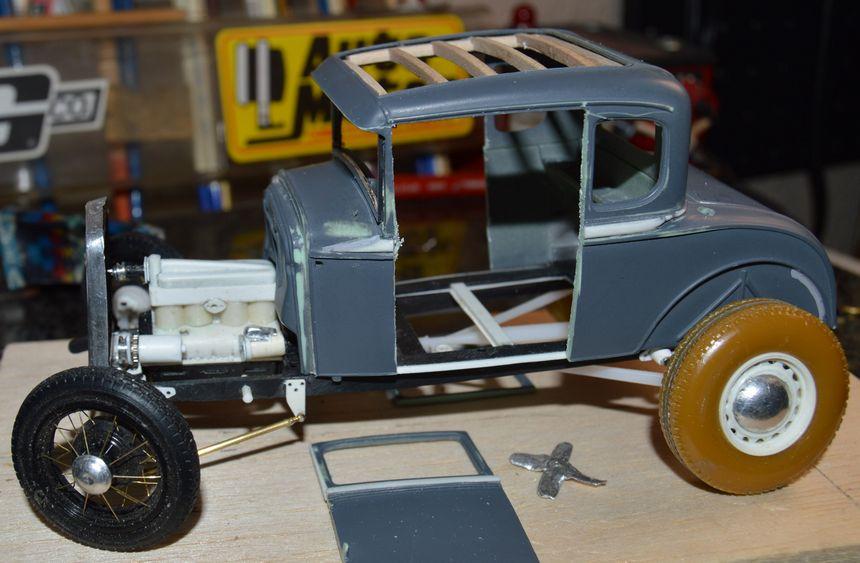
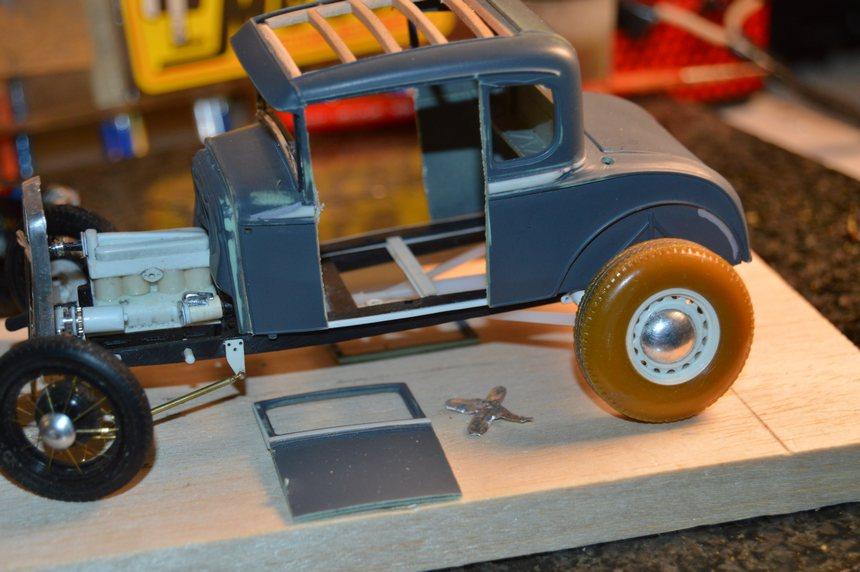
The doors have been removed from the body. As feared, the A-pillars broke, exactly where they meet the cowl. They literally broke, as I was freeing the last bit of door from where it was molded to he dash. Got a lot of cleanup to do, along with fabrication of jambs, inner framing and mounting the hinges and doors. I think I can drill through the bases of the A-pillars and pin them to he body. I am weighing options, re: jambs. I could make them from strip brass, and solder the hinges to them, but, I am unsure of the practicality of that. Not like there's no time to figure it out! As always, questions, critiques and comments are always welcome!
-
I just hope I can stick that landing!
-
Hahaha! Thank you, Francis. Those words of confidence have often been my "famous last words". I hope you are correct!
-
 This thing is super cool! Just a great look.
 -
Painting before assembly question
Straightliner59 replied to jdhog's topic in Model Building Questions and Answers
I'm amazed at the number of builders, some, very accomplished, who use Testors' tube glue. I don't think I have had one of those, since about 1975! Nothing against it, I just never saw a reason for it, once I discovered liquid cement, super glue, and epoxy. -
For the record, I have opened the top door line, passenger side, of this thing. No turning back, now!
-
A Question of Scale
Straightliner59 replied to Greg Myers's topic in General Automotive Talk (Trucks and Cars)
A couple of friends and I were messing around with a Sizzler, one day, and figured it's about 1/22.5 scale, based on the length of the engine. -
I whacked these wheels and tires from a Maisto (?) diecast, and mounted them to this 1/32 AMT Ranchero. They don't look too bad, to me. I washed them with some Testors' black enamel wash.
-
Applicators for solvent cements?
Straightliner59 replied to bh1701's topic in Model Building Questions and Answers
I always use the brush in the cap! ? I also have a Touch N Flow applicator that works pretty nicely, too. There are a couple of guys here who swear by them. -
I haven't ever built any of these kits, but, I've always been impressed by the parts in the boxes! I'll have t try one, before too long.
-
Got these two, in the last couple of weeks. The Porsche was less than $9, shipped! Here's a pic of what I have of this series. The only other one I am really interested in is the Porsche 935.
-
Your handwork is excellent, Andy. Fuel system bracketry looks fantastic! A quick Ebay search revealed a lot of Parafilm, at reasonable prices, much of it with free shipping. So, more plentiful than T.P.!
-
Very, very cool, JC! Nice work, sir!
-
'70 Superbird Build Ideas Wanted
Straightliner59 replied to Snake45's topic in Model Building Questions and Answers
I like the sound of that! -
'70 Superbird Build Ideas Wanted
Straightliner59 replied to Snake45's topic in Model Building Questions and Answers
Well, what the hell's another project? ? -
I'll say!
-
Pre-"Drilled" Distributors
Straightliner59 replied to Straightliner59's topic in Tips, Tricks, and Tutorials
I just tried it out. Seemed to work fine, with one shot of resin. I haven't tried to wire it, yet, but, the insulation seems fairly well attached. -
'70 Superbird Build Ideas Wanted
Straightliner59 replied to Snake45's topic in Model Building Questions and Answers
I'd be tempted to section the second nose to fit a '69 'Cuda, and build something "Blowfish"-inspired!
-
Pre-"Drilled" Distributors
Straightliner59 replied to Straightliner59's topic in Tips, Tricks, and Tutorials
It is certainly worth a shot! I think the nail resin would be less expensive, though. On the other hand, it doesn't take much! The best part is: no drilling! Thank you for the kind words, sir.