Straightliner59
-
Posts
5,809 -
Joined
-
Last visited
Content Type
Profiles
Forums
Events
Gallery
Everything posted by Straightliner59
-
Thank you, Greg. I figured that there would be no point to cutting the doors open, if I didn't have a way to hinge them! I do, too, Dave. It's a nice kit--except, I don't understand why they left the molding off the body... Thank you, Francis! Now, I need to overcome my trepidation over cutting on those A pillars. Is there even enough there, to pin a hinge to? Perhaps we will see! ? I looked around, online for hinges, and couldn't find any that looked like they would work, so, I did what any of us nutty scratch-builders would do! This was the best way to make them work, and still be small enough to look good. That you would have done them the same way, is reassuring. Thank you, Jim. I'm very happy with it. The finish came out just as I'd hoped!
-
I've built a couple, over the years!

-
 Very cool, Jim. I really need to learn how to make my Cricut work, for me. The possibilities seem fairly limitless.
 -
64 Dodge D100 Pickup Pro Street
Straightliner59 replied to AmericanMuscleFan's topic in WIP: Drag Racing Models
Beautiful work, Francis! That clutch can is fantastic! I'm loving this project, sir. -
Excellent work, Tim! You've passed the test that I frequently come up short on: You made two things that are supposed to match, that actually do! Just kidding. They look great!
-
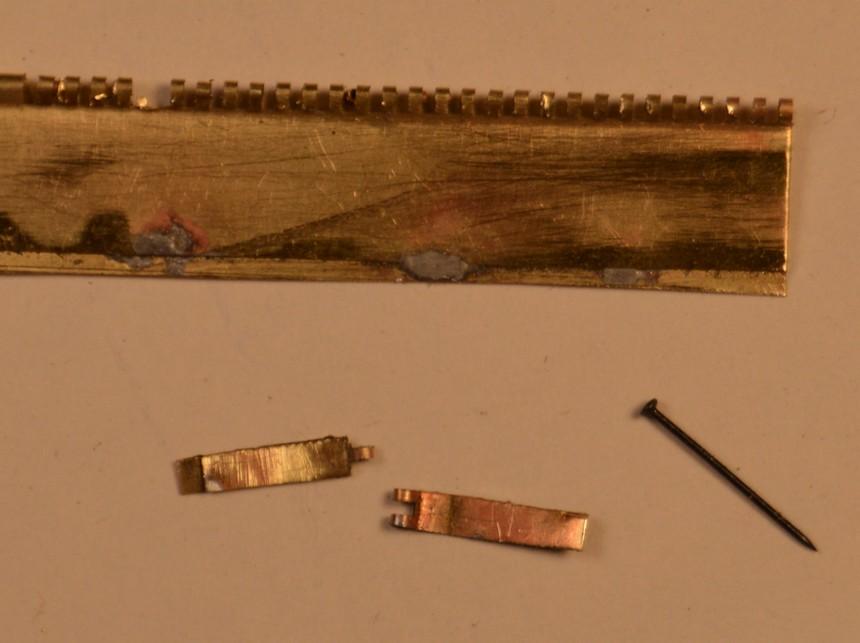
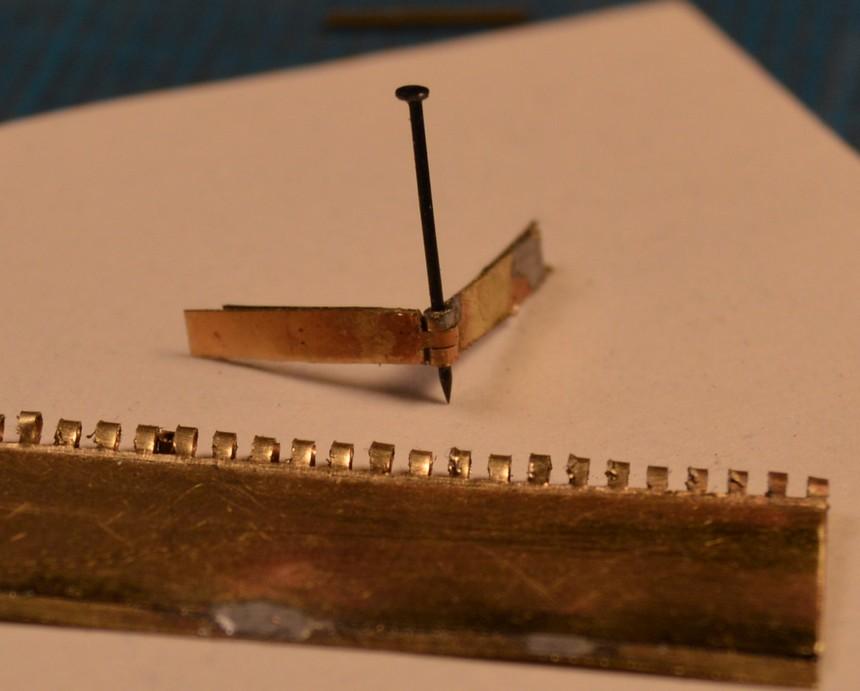
Started working on some door hinges. I crimped some .005" brass sheet around 1/32" brass tube, and soldered it, a bit. Then, I put it in the machinist's vise and passed a .032" square end mill through it, creating a sort of piano hinge. From here, I can use a pair of Wiss snips to cut individual hinge halves, as shown. I will hit them with another round of solder, once they're properly shaped. I think, too, that, once they are final-soldered, I will be able to file them to an even more delicate size. They work nicely! Now, as Mr. Sapiro suggested above--do I have the guts to work on that 'A' pillar? Stay tuned! Thanks for looking! As always--questions, comments and critiques are welcome!
-
David, thank you! When I remembered I had that bottle of Blacken-It, I knew what I was going to do. It worked out just as I had hoped it would! Thank you, Francis! I think it found its place, for sure!
-
Thanks so much for your kind words, Tim. As I've told Francis--they are especially nice coming from a craftsman. Scratch building is a kick in the pants! I am attempting to make door hinges on the mill. We'll see how that works out! Thanks for your comments, and for looking in!
-
I'm working on an idea for some hinges, now. I kind of feel like I need to do it!
-
Thank you, Carl. I'm enjoying it, immensely! In fact, I just poked a hole in it, for the filler nap/neck. I think it suits the look I'm after, pretty well.
-
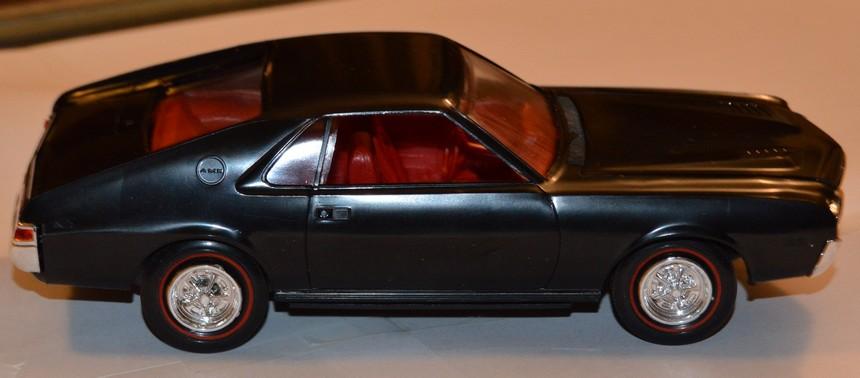
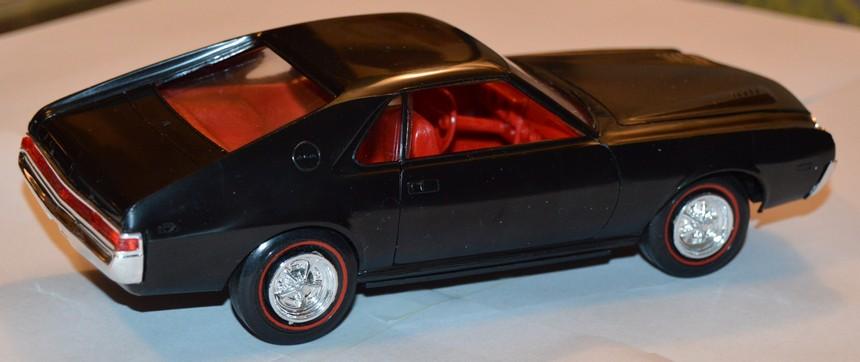
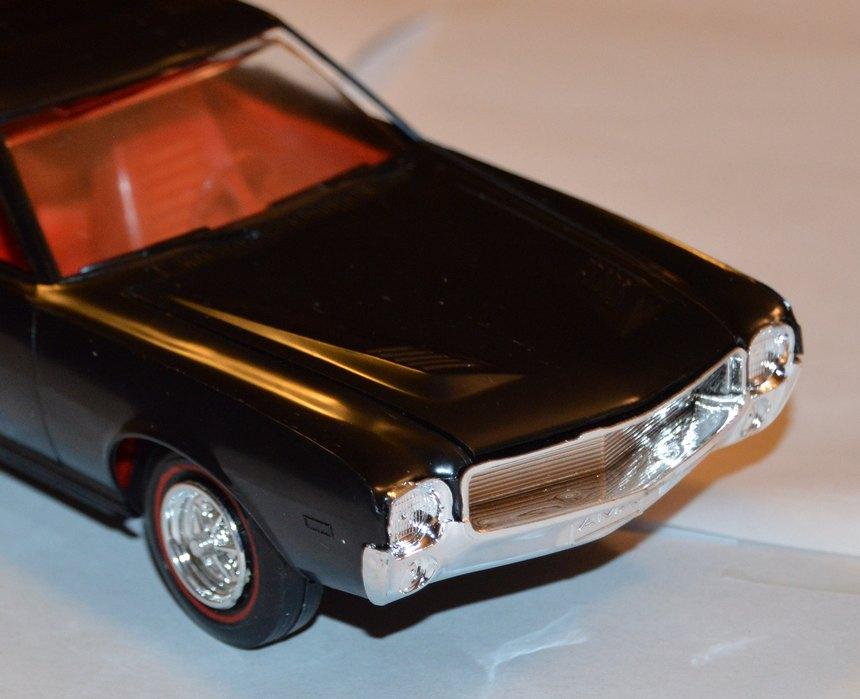
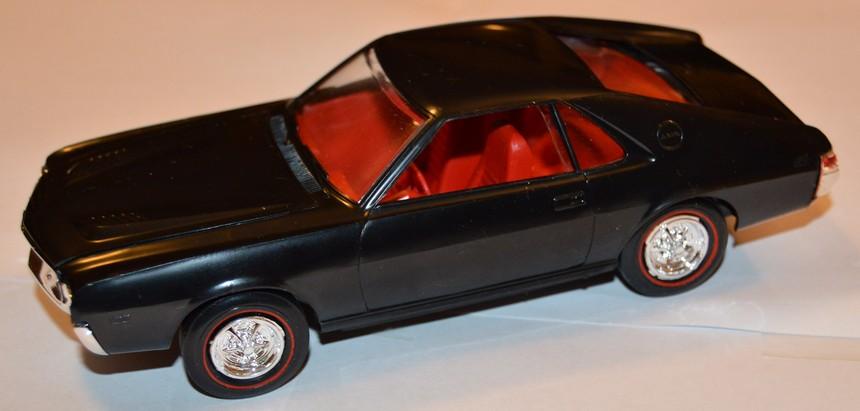
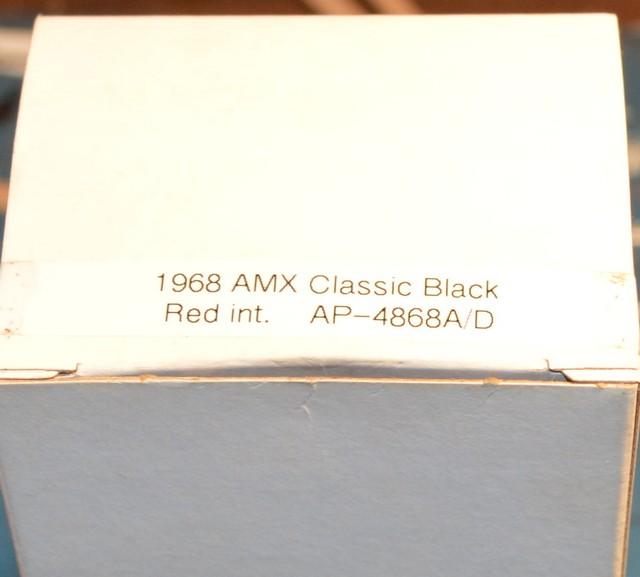
Scott, here are a few photos of the car, along with one of the box label.
-
Oops! I meant to. It's a Johan/Xcel promo. I will get it back out and take a couple more photos, later. It's a '68, in "Classic Black" with a red interior, according to the box. I meant to mention all that, originally. Sorry.
-
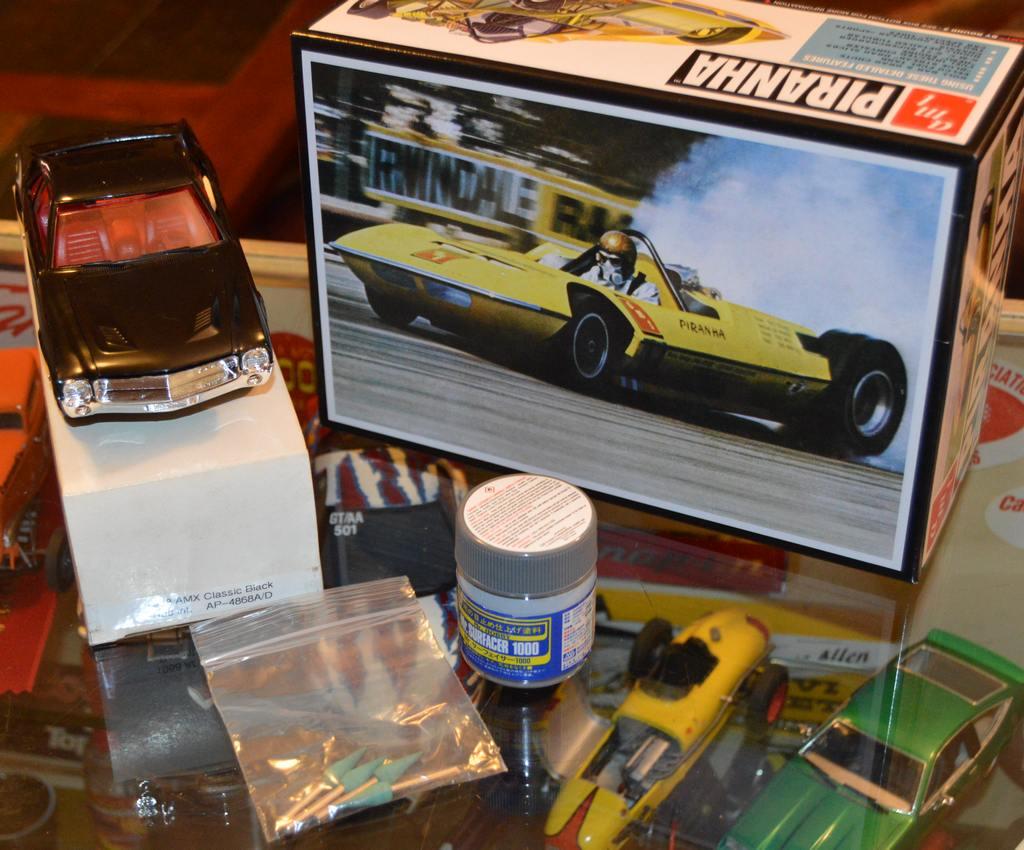
I got a few things, today. The booklet in the Piranha kit is almost worth the price of admission, itself. It's pages of nothing but gorgeous photos! I got the AMX because neither kits, nor promos are getting any cheaper, and, I wanted something I could build--it'll likely be a curbside. Maybe either a Stock class drag car, or a road racer, of some sort.
-
Did a bit of sanding on the character line. I've never been much for body work! The spear point on the cowl is especially tricky to get to...
-
Here it is with the Blacken-It. I left it on about 45 seconds, or so. I really like it!
-
'29 Ford Highboy Roadster with old black paint
Straightliner59 replied to Bernard Kron's topic in WIP: Model Cars
This is very cool, Bernard! I love that choice of setup for the engine--perfect! Excellent work, sir! -
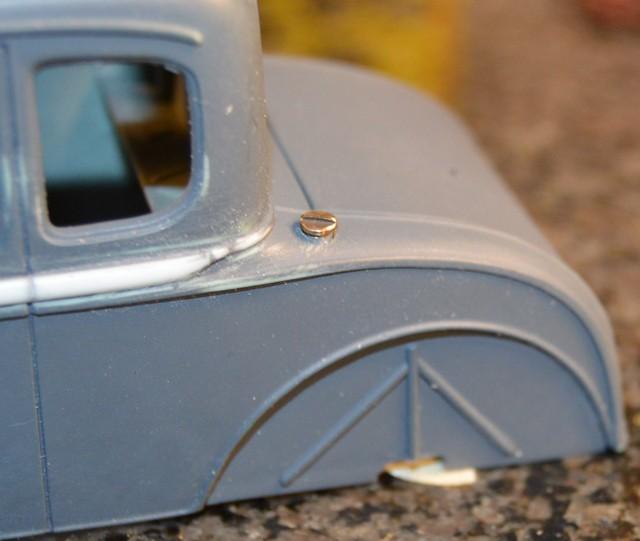
David, I found just the thing for the fuel cap--Blacken-it! It etched it, just the right amount. I'll get some photos, tomorrow.
-
Thank you, so very much, Tim. I am truly honored that you stopped by and commented! I still have some sanding to do with that molding, but, I am happy with the start! Thank you, also, for all your hard work for our hobby. I am sure that you are easily the most prolific writer this hobby has known--and I doubt it's even close. Thank you for your inspiration. Not only for the times I've been inspired by your work, but, there must be thousands more, who've also been inspired by the things you've built and written about. Thank you, for all of that! Finally, thank you for my first-ever magazine appearance, in your Street Rodder column, back in 1985 or '86. You posted a photo of a Model A roadster I entered at the Oakland Roadster Show.
-
Thank you, David. I agree regarding the body molding. It's such an important part of the car's look, it's hard to believe Monogram left it off. I suppose it's a concession to that open-top version they had of it, that uses the same body, and was molded in yellow. I plan on putting the tank, and the battery in the trunk. The trunk won't open, so the only indicators of them will be the filler cap, and, on the underside, the battery cables and the fuel line and pump. I am pretty happy with the cap! Agreed, too, that a bit of a wash will do wonders, for it. I think I'll install it there, on top of the body panel, probably adjacent to the top line of the trunk. Thanks for your comments.
-
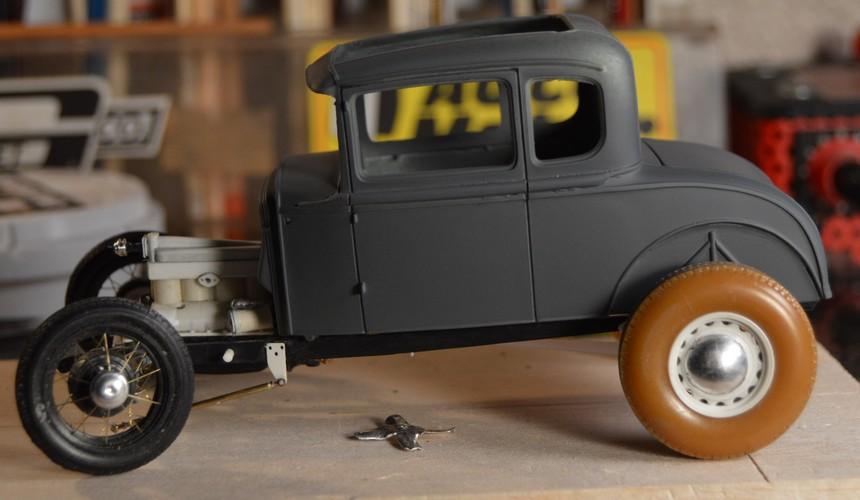
Thank you, sir! I think the fender would look best, too. As I said, earlier, I am kind of leaning toward opening them, just to try something new! It's more fun, that way! I shot some primer on it, to get an idea of where I am. Not bad, for a rough draft, I think.
-
I'm leaning closer toward opening the doors. I've not completed a model, before, that I opened the doors. This one should be relatively simple, to do. Inspired by Francis and Tim, I took a very baby step, and made a filler cap for the fuel tank. The tank will be relocated to the trunk/rumble seat area. I ran across a really neat way a guy did his, that uses a small electric pump, mounted to the frame. The lines are run through the glass bowl, and everything. Apparently, a pump is desired, when running two carbs. Anyway, making the brass cap (inspired by those on many of the trucks I've driven, through the years) went without a hitch! You can see, in a couple of the images, pencil marks on the body, indicating possible locations for the filler to be located. I am open to suggestions--please? ? I think it will be simple projects like this filler cap that will give me some confidence, and a greater comfort level, with my mill. That will likely lead to more ambitious efforts! Now, about those doors...
-
Yeah, I don't need any help, there! I added the rolled ribs pretty early on. It definitely looks naked, without them! I'll likely talking myself out of opening the doors, right up 'til the second I cut 'em out!
-
I've started work on the welting that Monogram oddly left off the body. A fair amount of sanding and filling to do, but, I think it's a good start. I'm debating whether I want to open the doors, or not. I'm not sure if I am trying to talk myself into it, or out of it! As always, questions, comments and critiques are welcome. Thank for looking!
-
I would go with the smaller. It's closer to correct, and, I think the larger wire may draw attention away from other details.
-
64 Dodge D100 Pickup Pro Street
Straightliner59 replied to AmericanMuscleFan's topic in WIP: Drag Racing Models
Excellent work, Francis! It is satisfying to watch a craftsman at work. Your work is inspirational. Thanks for sharing it, with us!