Straightliner59
-
Posts
5,809 -
Joined
-
Last visited
Content Type
Profiles
Forums
Events
Gallery
Everything posted by Straightliner59
-
This looks very nice! Good work! Chaparrals are such cool cars. I started scratchbuilding one, years ago, based on the article in Motor Racing Replica News. Was that your article? All I got done was cutting out and putting together the middle section of the body. It's still sitting here. should I ever decide I need to finish it.
-
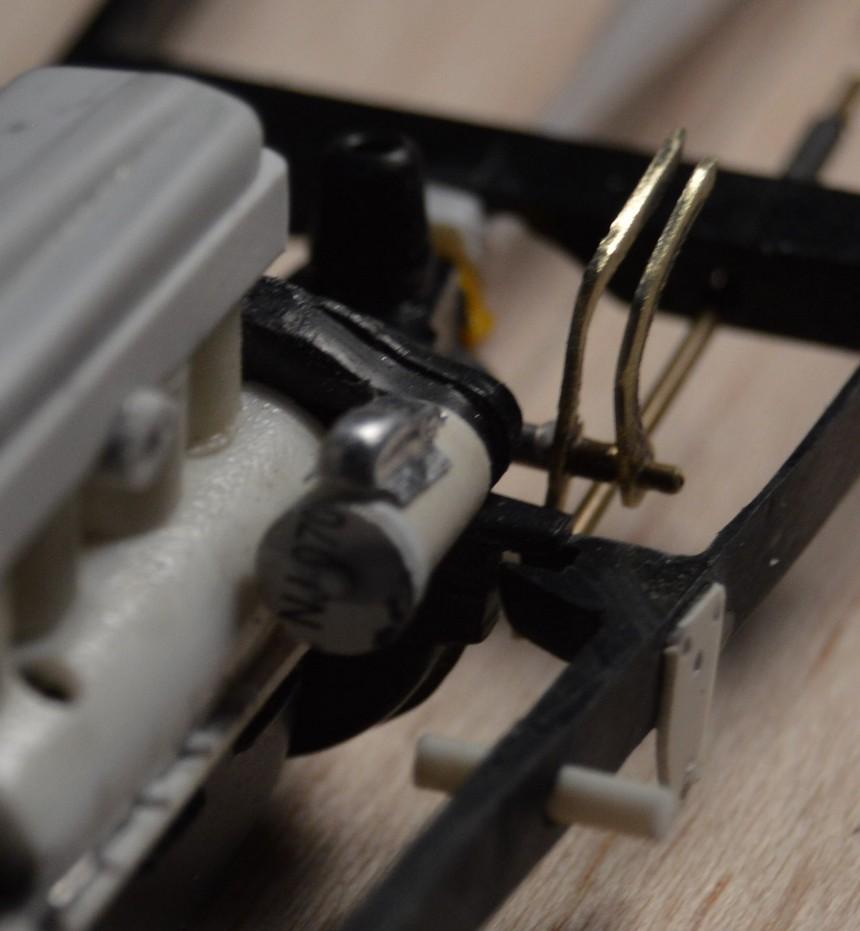
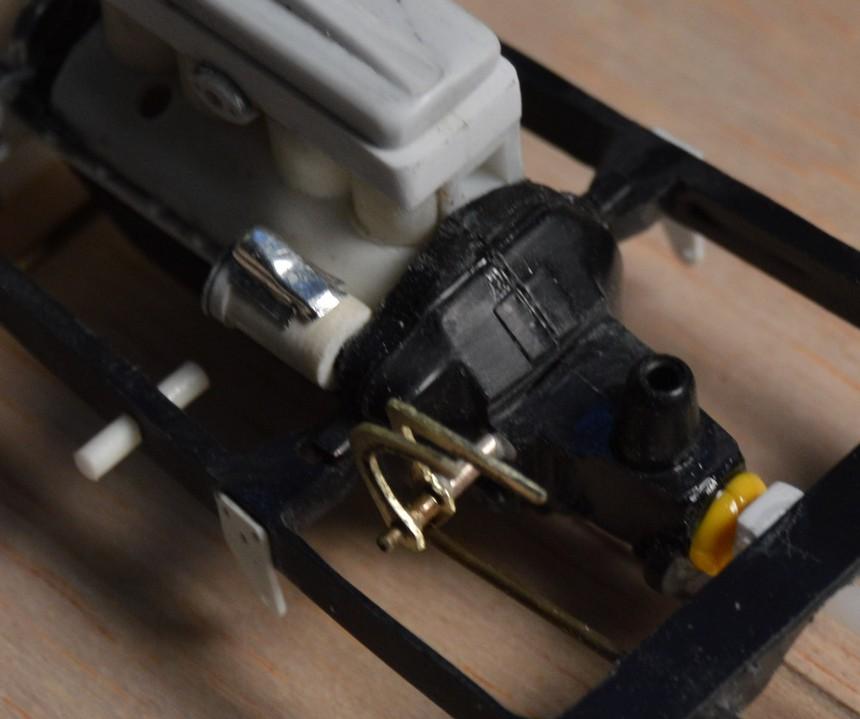
My favorite aspect of racing and hot rodding, in that era is because so much of that stuff was either cobbled together, or handmade. It led to such unique and interesting vehicles. This post is certified...well, "virus-free" has a whole new meaning, now! My hands were freshly washed. A couple of shots of the brass pedal arms, in place. Still a bit of shaping to do, and I need to make the clutch linkage, yet. The pushrod for the master cylinder is just lying in place awaiting completion of the master cylinder, to find its home. The master cy;imder will be built atop the piece of Contrails tubing sheathing the pushrod, behind the crossmember. I will have to cut a hole in the floor, to access the master cylinder cap. I am debating front brakes. The parking brake will be one of those Mico brake locks.

-
Thank you, Mr. Sapiro! I've been watching that little Cooper of yours coming together. Love that project!
-
I would begin by searching for plans, online, first. I am pretty sure there are some, out there.
-
Thank you, Robert. I now have both arms made in brass. I need to make the rest of the clutch linkage, and make and mount the master cylinder. The dang floor is bowed, again. I need to flatten it...again.
-
I've done more work on the chassis. I added the spring mounting hardware, and got the shocks, and their accoutrements taken care of. I will remount the radius rods, once I have the brake/clutch arms assembly worked out, and the master cylinder in place. I've made a lot of progress toward that end, as I have worked out the shape of the arms, themselves. I will thin this one down, a bit more, then transfer the pattern to brass. This one fits, beautifully, and swings, just right (not that it's going to!). I have an idea for the pedals, themselves, as well. Stay tuned! As always, questions, critiques and comments are welcome. Thank you for looking!
-

64 Dodge D100 Pickup Pro Street
Straightliner59 replied to AmericanMuscleFan's topic in WIP: Drag Racing Models
Francis! Impressive work! I would love to use my mill, like you and Tim do, but whenever I begin to think about it, the order of work boggles my mind. I will get it figured out, but, I am very right-brained--much more an artist than an engineer. My hat is off, to you, sir. -
Stand alone engine kits
Straightliner59 replied to Greg Myers's topic in General Automotive Talk (Trucks and Cars)
Three years ago, I bought a three kit assortment of Hawk engines for about $60. I started working on one, but, couldn't "leave it alone", and got sidetracked by other projects, so, it's sitting... -
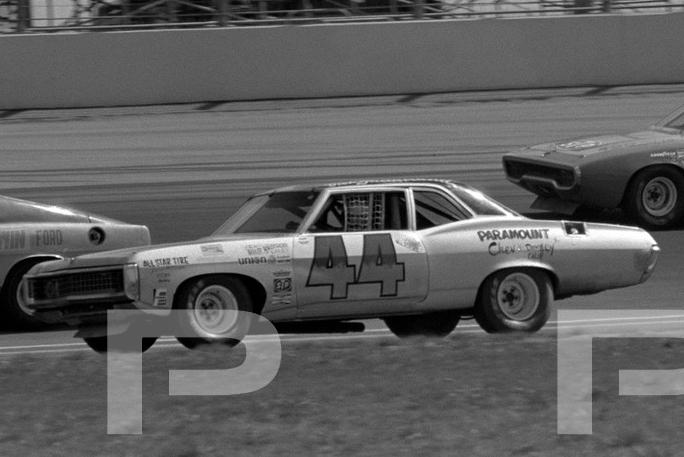
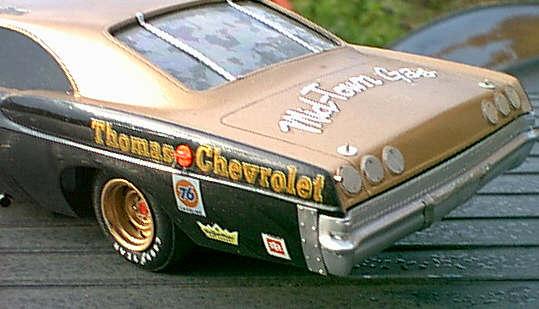
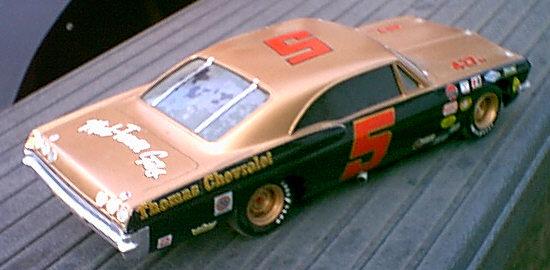
This is the first Impala I recall seeing. I built one using one of the old Hasegawa '66, just because I wanted to do an old NASCAR stocker, because there were details I wanted to play with, and, they just look cool! Why is it there weren't more of them? I assume because the Chevelles performed better? The model is a slammer, and could use some sprucing-up, and some photos with my newer camera. It was a fun, quick project.
-
Those old '50s-'60s streamliners are so beautiful! Redhead is another of my favorites. Very cool subject!
-
True enough!
-
Ever try to have sex in the back seat of a car while watching a movie on a tiny, hand held screen? Now, that'd be some accomplishment! ?
-
Yep! I have all four of the magazines, from the year I was a member.
-
Revell did have a modeling club. I think it might have been called ?Revell Master Modeler's Club." I may still have a couple of the old club magazines around here, somewhere.
-
Lightweight Body Filler
Straightliner59 replied to Bridgebuster490's topic in Model Building Questions and Answers
Agreed! Different materials work better, for different situations, as you noted. That two-part epoxy putty works great for heavy applications, like fender flares. Options can't be too plentiful! ? -
Lightweight Body Filler
Straightliner59 replied to Bridgebuster490's topic in Model Building Questions and Answers
Epoxy micro balloons can be used with either epoxy or superglue. Used with super glue, you can begin sanding, pretty much immediately. They are used mainly by R/C aircraft modelers, I think. -
I would call both John MacGowan's GSL winning Willys Pickup and his '37 Woodie trendsetters, and iconic.
-
Thanks, David. I still need to sand the ball ends down, but, those should work! I remembered doing something similar, when I built The Bug, almost years ago.
-
"Bring Out Your Dead" Completion Build--ROUND 2 Is On!
Straightliner59 replied to Snake45's topic in WIP: Model Cars
Another, heavier, coat of clear on the 'Bird. I should make it, this time! -
I needed to make the little brackets that mount to the axle ends of the rear shocks. They have a little ball on the end that the shock arm attaches to. It's a tiny piece of plastic, and oddly-shaped. I ended up making it by stretching some .060" plastic rod, holding the ends at similar angles, as I pulled, since the needed to bend in. Once i had those cut apart (leaving some of the long, thin end attached), I fitted them with the shocks in place, to get them close to where they belong. Next, I used a lighter to melt the thin end, carefully, to create the balled end. I still need to clean up the balls, a little, but, I am happy with them! It's kind of cool that they will be readily visible, on the finished model. Here are a couple of photos of the brackets, themselves, and with them, and the shocks, sitting in place. I've also included an overhead shot of the chassis, as it edges toward completion. As always, comments, critiques and questions are welcome! Thanks for stopping by!
-
"Bring Out Your Dead" Completion Build--ROUND 2 Is On!
Straightliner59 replied to Snake45's topic in WIP: Model Cars
I have two coats of clear on the Firebird. A couple more, and I will wet sand with the pad and cloths from an MSC polishing kit, before more clear. I don't like clear-coating race cars, but, I don't want it to be super bumpy, either! -
Thanks so much, David! Scratching those little details is one of my favorite aspects of modeling. Thanks for looking, and for your comment!
-
I got the front suspension back together. The shocks are new, not yet "bolted" to the eyes on the springs. Next up will be putting the rear suspension all back together, with shocks, this time. After that, I will probably move to the clutch/brake pedal assembly...
-
I did further work to the front suspension. I made the u-bolts and the retainer plate. I have a start on the steering box, as well.
-
There are a lot of excellent modelers, "out there". There is something about your work, that sets it apart. I can't describe it, but, there is a realism there, that I have never seen anyone else achieve--I mean, not even, say, Francois Ver Linden. I think a part of it, is that you have built models in many different areas. I mean, didn't you do a big, vinyl Godzilla figure? Anyway, I've been awed and inspired by your work, since I became familiar with it, back in the old SLM days. Oh, yeah! Then, there's the McLaren!