StevenGuthmiller
-
Posts
15,071 -
Joined
-
Last visited
Content Type
Profiles
Forums
Events
Gallery
Everything posted by StevenGuthmiller
-
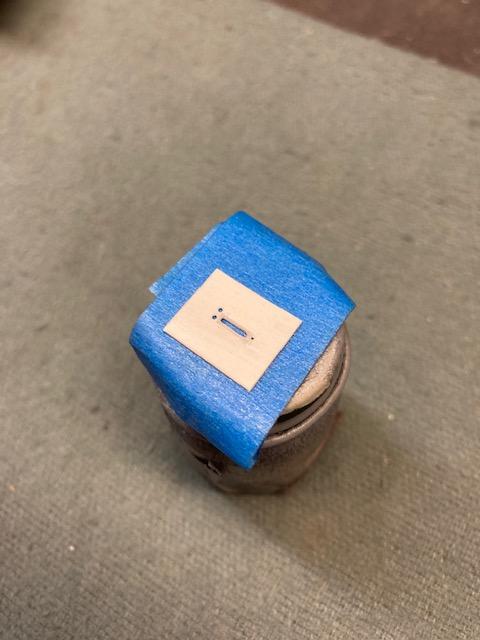
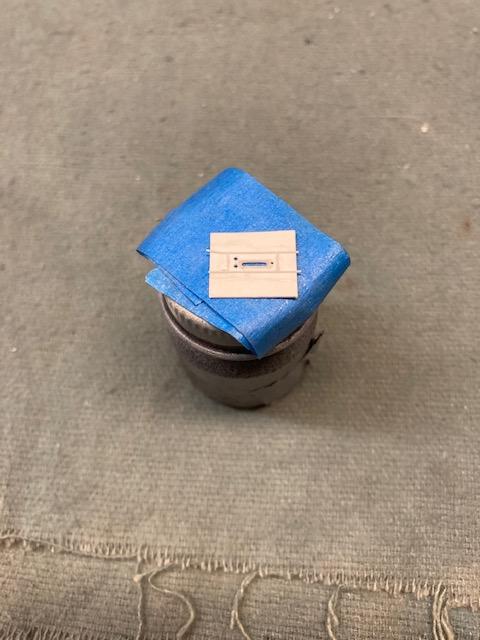
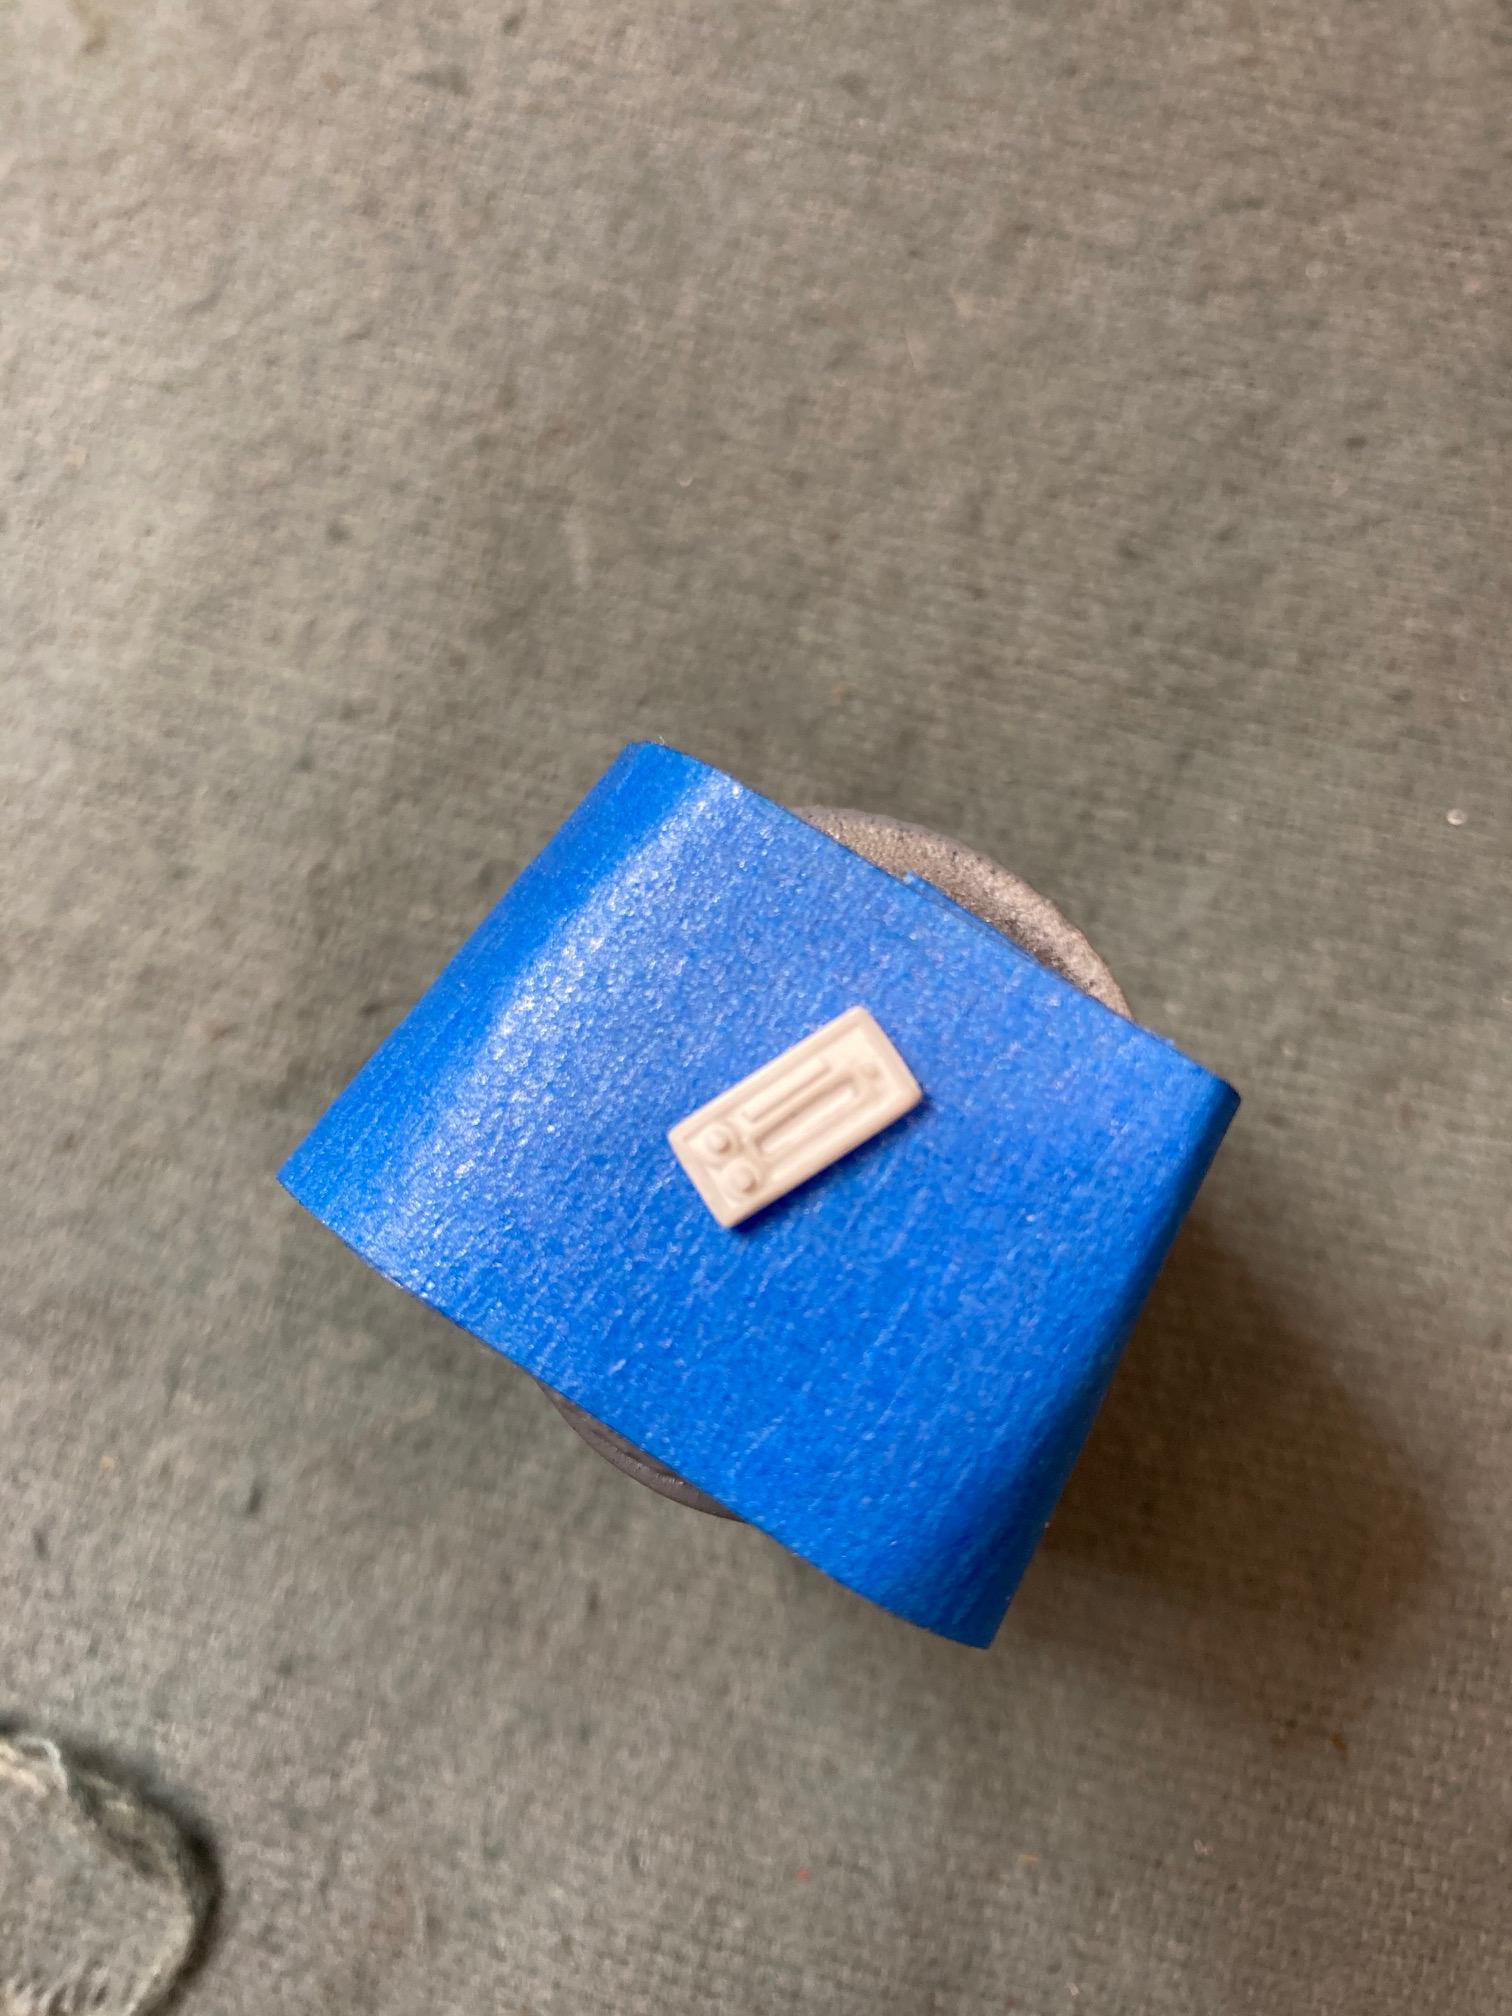
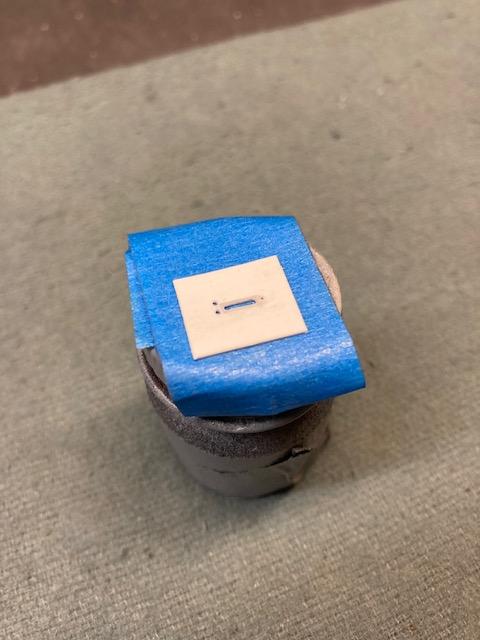
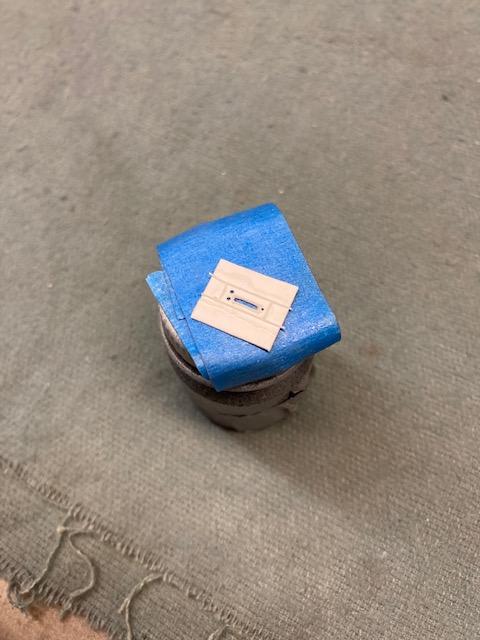
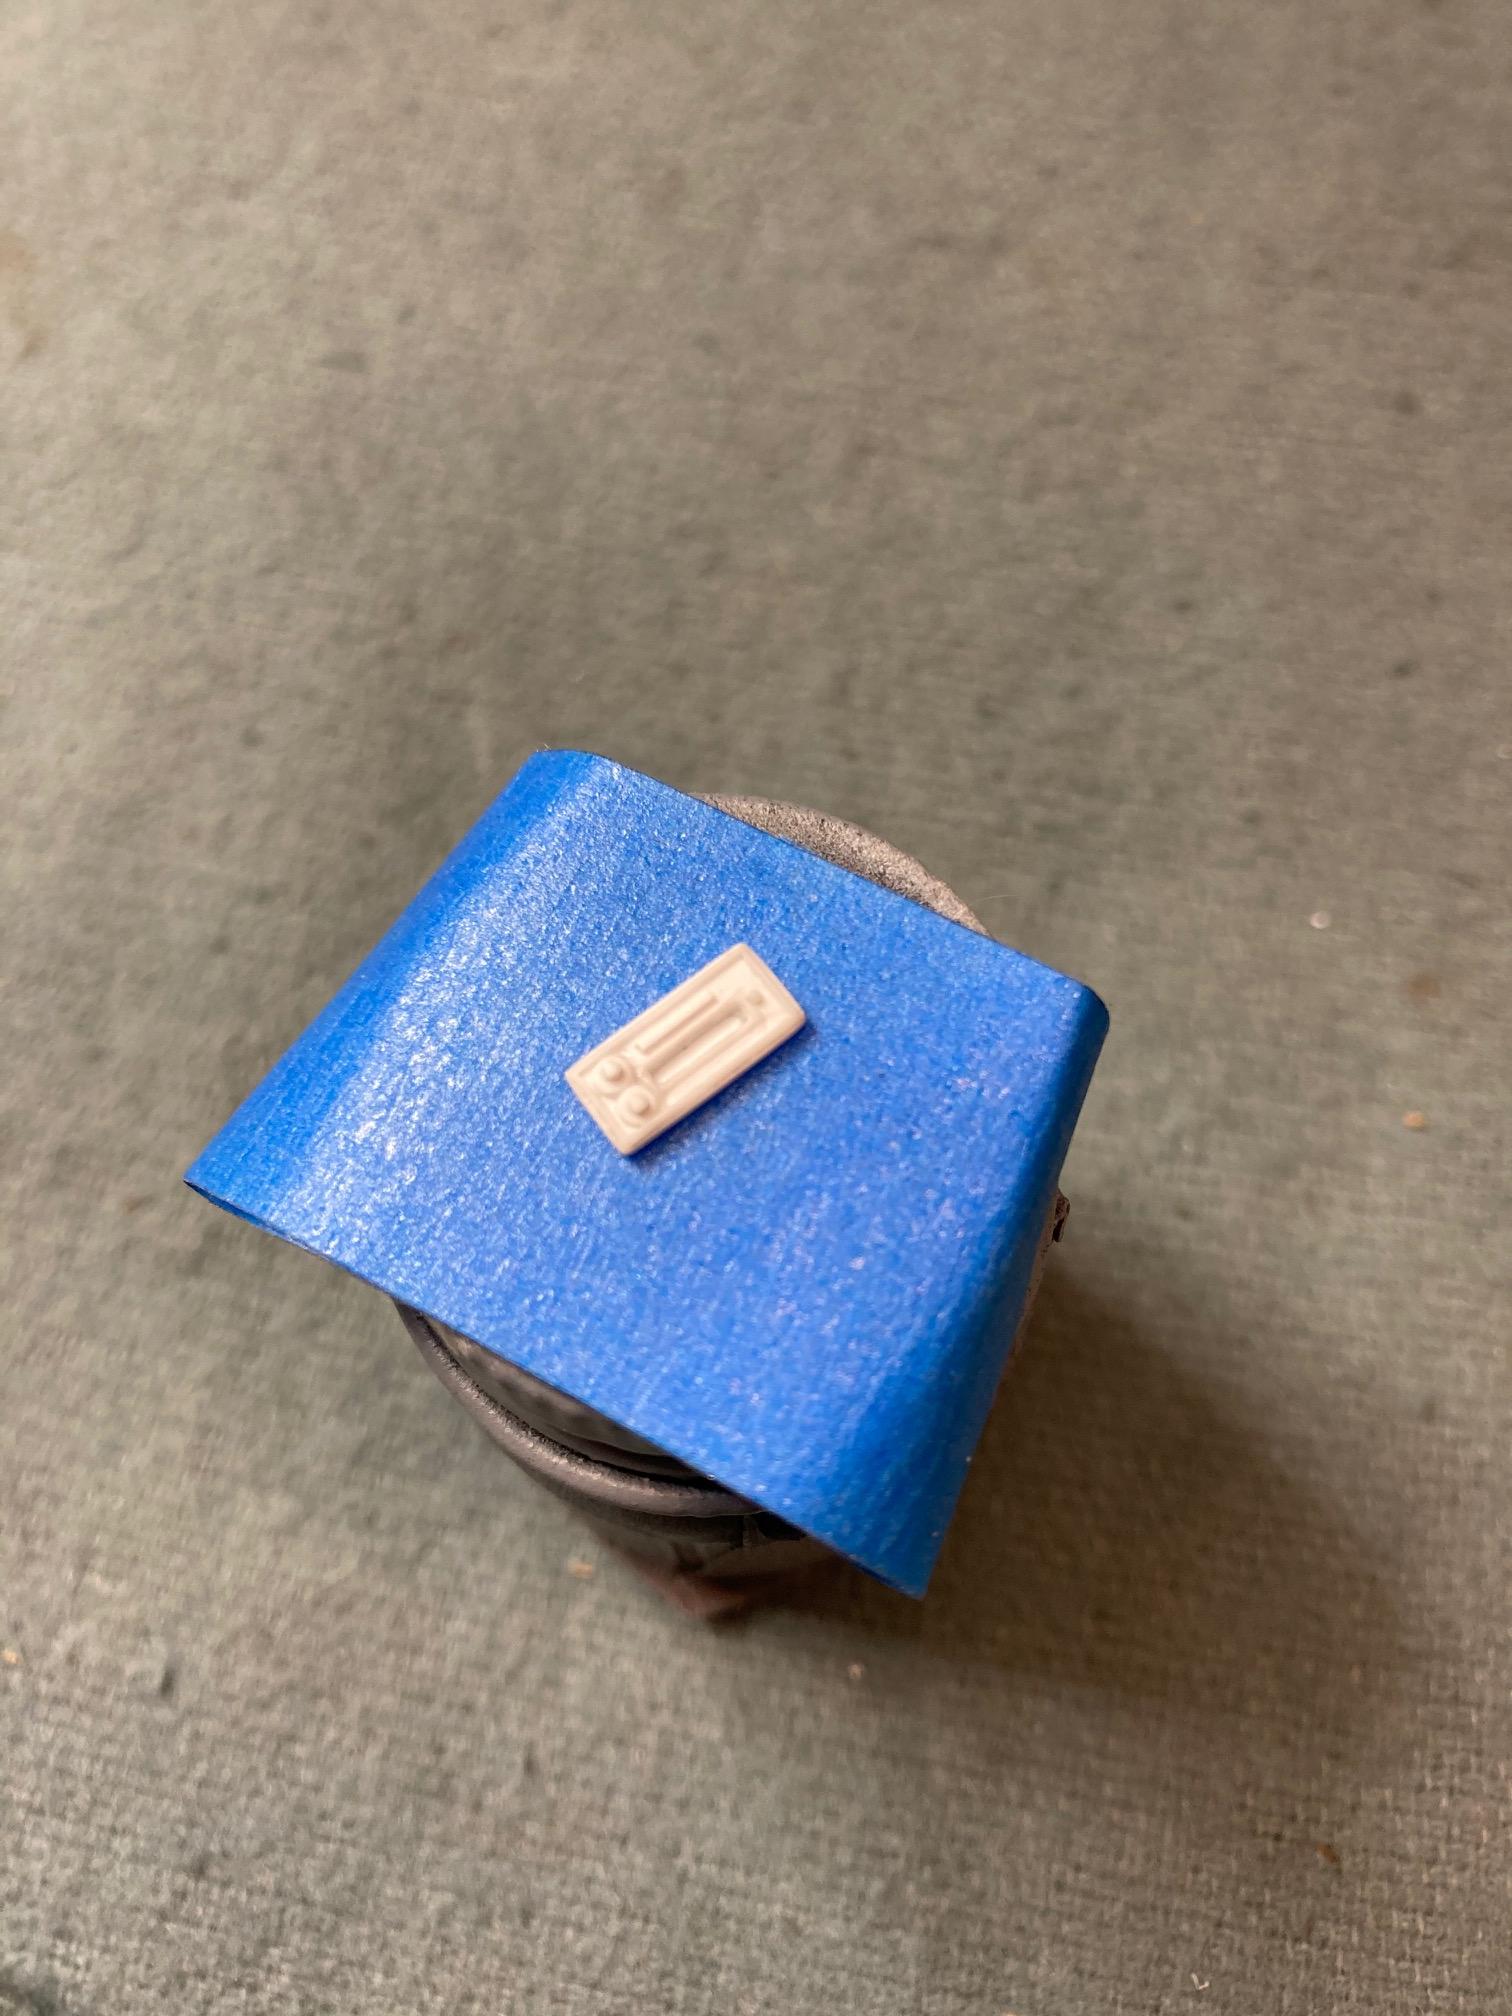
 Someone brought up an under dash 8-track player, and I became intrigued. I decided that it might be fun to try my hand at making one. Steve
-
Well, not to be the type that shies away from a challenge, I thought how hard could it be to make an under dash 8-track player. Then it occurred to me that it might be fun, so away we go. Steve
-
Okay. The kits that I have are the original issue stock versions. Steve
-
I'm assuming that you're referring to the 4 door kit? I have a couple of the SS sport coupes. No 8-track that I can see in that kit. Steve
-
My back yard is full of garter snakes. I have absolutely no problem with them as I see them as a benefit, but my wife won’t even walk across the back lawn! ? Steve
-
Sprue Stretching Tutorial
StevenGuthmiller replied to StevenGuthmiller's topic in Tips, Tricks, and Tutorials
Part 2 Steve -
I think I would if I could find one! ? Steve
-
Like button
StevenGuthmiller replied to BubbaBrown's topic in Forum News and Questions (formerly: How To Use This Board)
I guess I’ve always looked at the concept of the “Like” button from the perspective that if all that I can muster in the form of enthusiasm for the approval of something is a single jab of an index finger, I probably don’t really “like” it all that much. ? Steve -
You're correct, it is easier. It's also impersonal and lazy if you ask me. If I "like" something, I'll tell you so and then possibly offer a reason or two why I like it. In my opinion, "likes" don't carry a lot of value. Steve
-
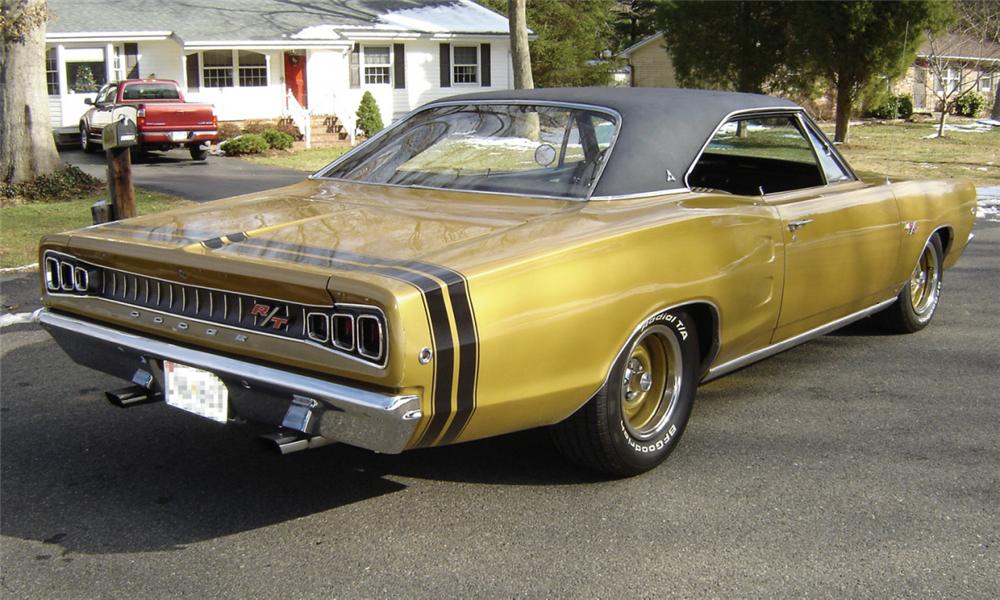
Thanks fellas! I think that I've finally decided on the color for this project. Not going to be everyone's cup of tea, but I've been contemplating this for a long time, and I've decided that I'm going with "J-Code Medium Gold" with a 2-tone gold and black interior, black bumblebee stripe and black vinyl top. Just ordered the paint from MCW today. Steve
-
Wouldn't it be just as easy to type something short, like "Nice" or "Cool" instead of goofing around with these Facebook style "likes"? I never put much weight in those things. I don't pay much attention to "likes" on Facebook and I never use them myself. If I have something to say, I'll say it. If not, I'll just leave it alone. I'm not interested in keeping score. Steve
-
worst commercials - i have to mute the tv
StevenGuthmiller replied to youpey's topic in The Off-Topic Lounge
I can watch Geico and Liberty Mutual Insurance commercials ALL DAY LONG compared to these things! I just cringe every 10 minutes when one of these STUPID drug commercials comes on!!!! Steve -
Well, I didn't want to get into their entire line, but my point is, there was virtually a zero probability that you were ever going to see "any" of the type of subject matter from Revell that Moebius has brought us. Nothing wrong with that if these kinds of kits are your thing, but if you're waiting for a Henry J, Willys or Jeep pickup from Revell, I suggest that you don't waste your time dreaming. Moebius is likely your only hope for any of these kinds of obscure subjects, and even that prospect is pretty slim. Steve
-
Sprue Stretching Tutorial
StevenGuthmiller replied to StevenGuthmiller's topic in Tips, Tricks, and Tutorials
I stretch mine right in my shop in my basement. If you do it the way I depicted above, there are no noticeable fumes whatsoever. If you watch the above video, you'll see that I only rotate the sprue in the flame for about 10 seconds. Not enough time or heat to produce much for fumes. You're only heating the plastic to the point of softening. If the sprue catches fire, you're too close the flame. That's when the smoke and fumes come into play. Steve -
That's "tongue in cheek" for there was no '60 Polara kit. Unless you have a couple of Modelhaus creations. Steve
-
I don't really see any justification for giving Moebius any grief. They've consistently given us kits that the other manufacturers won't even consider! I mean c'mon, just in the past year or so, Moebius gave us 2 generations of Ford pickups! Where's Revell on this one?........Oh, that's right. It's not another Camaro or Mustang or '32 Ford, so forget it. Early 50s Hudsons, mid 50s Chryslers, '61 Pontiacs, and '65 Plymouths and Mercurys, as well as the Ford trucks, just i the past 6 or eight years is a pretty darn good record in my opinion when you compare it to what the other manufacturers have done. As far as the "never ending variants" go, I think that's been discussed ad nauseam on this forum. We know that it's pretty hard in today's environment to make any money on a mold without doing it. Steve
-
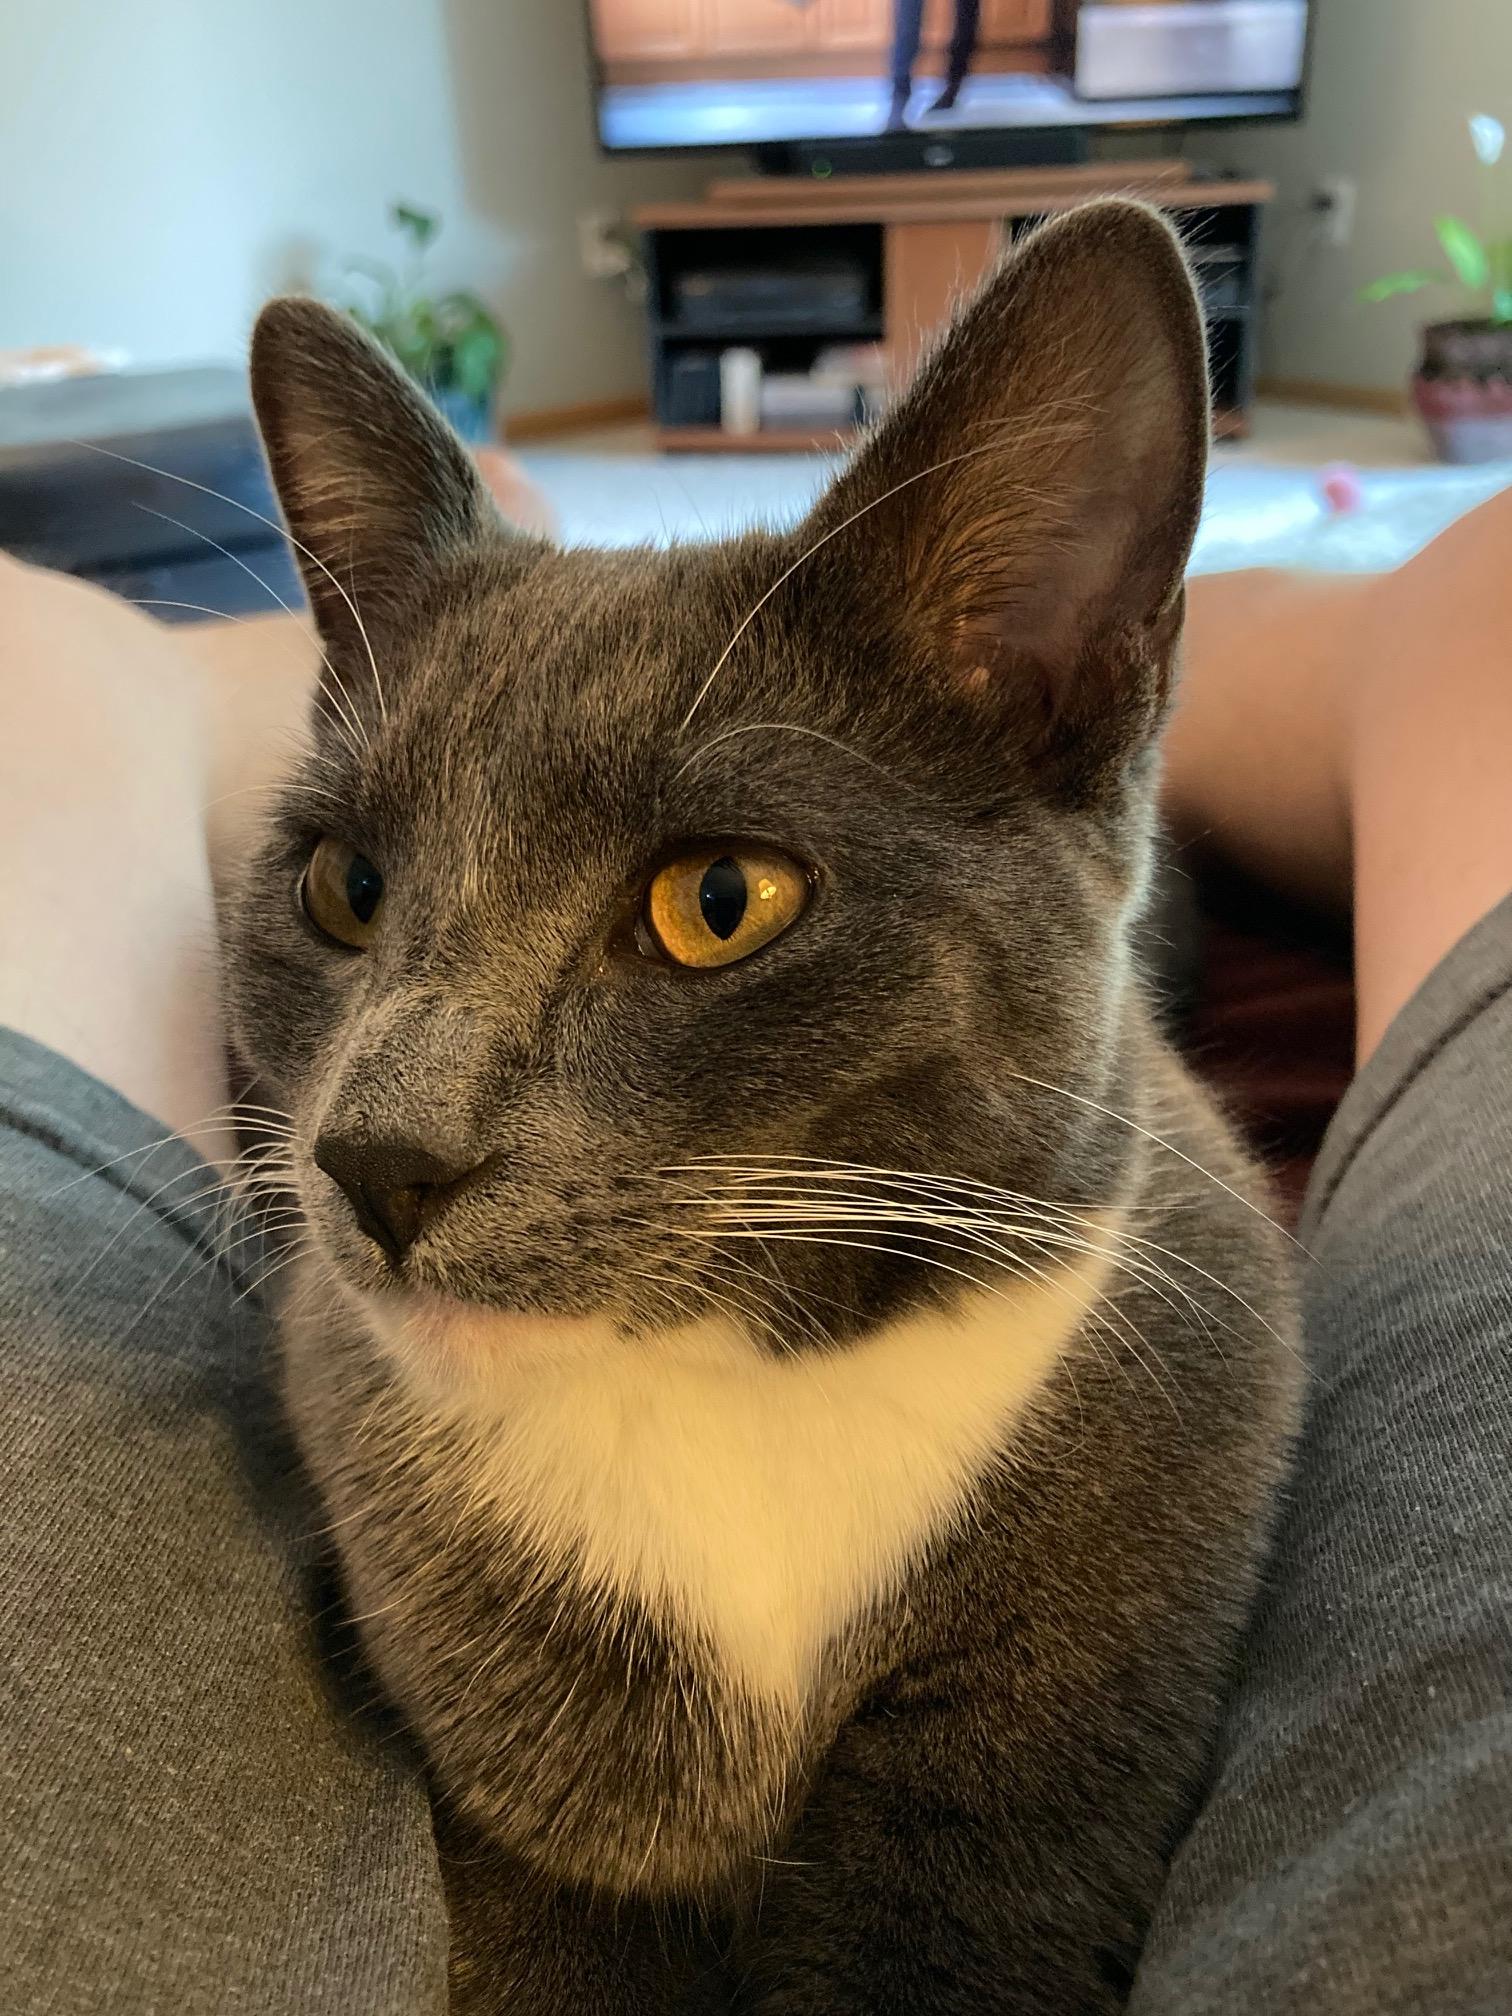
They grow up so fast. Marcy in January. And in May. Steve
-
Thanks Kevin! It was good to see you too! Although I did feel a little guilty that I didn’t get to spend a little more time visiting with you. ? Steve
-
I’ve learned over time that the fan is usually not worth spending a great deal of time on. By the time you tuck it into the fan shroud, it will be virtually impossible to view, no matter what angle you try to view it from. I’ve discussed these kinds of issues with others in the past. Most of what I do, I do because I enjoy it, more so than I’m trying to get every detail absolutely and perfectly correct. I know that people are likely never going to see some of the things that I add to a model, but I do it for me, not anybody else. And in the the same vein, there are always going to be people that think that I should have gone farther, but as I’ve said many times before, for my own sanity, and “my” continued enjoyment of the hobby, I have to set some parameters and make some decisions as to how far I’m going to go. I guess you could say it this way. It’s impossible to meet everyone else’s expectations. But as long as I’m meeting my own, all is right with the world. Oh, by the way, I did thin the belts to some extent, but short of completely tearing apart the pulley and belt system and completely redoing it, I thinned them as much as possible without getting to the point where they would have been too thin to prevent breakage. And for the record, to the best of my knowledge, the fan is supposed to be black with an aluminum clutch mechanism. Steve
-
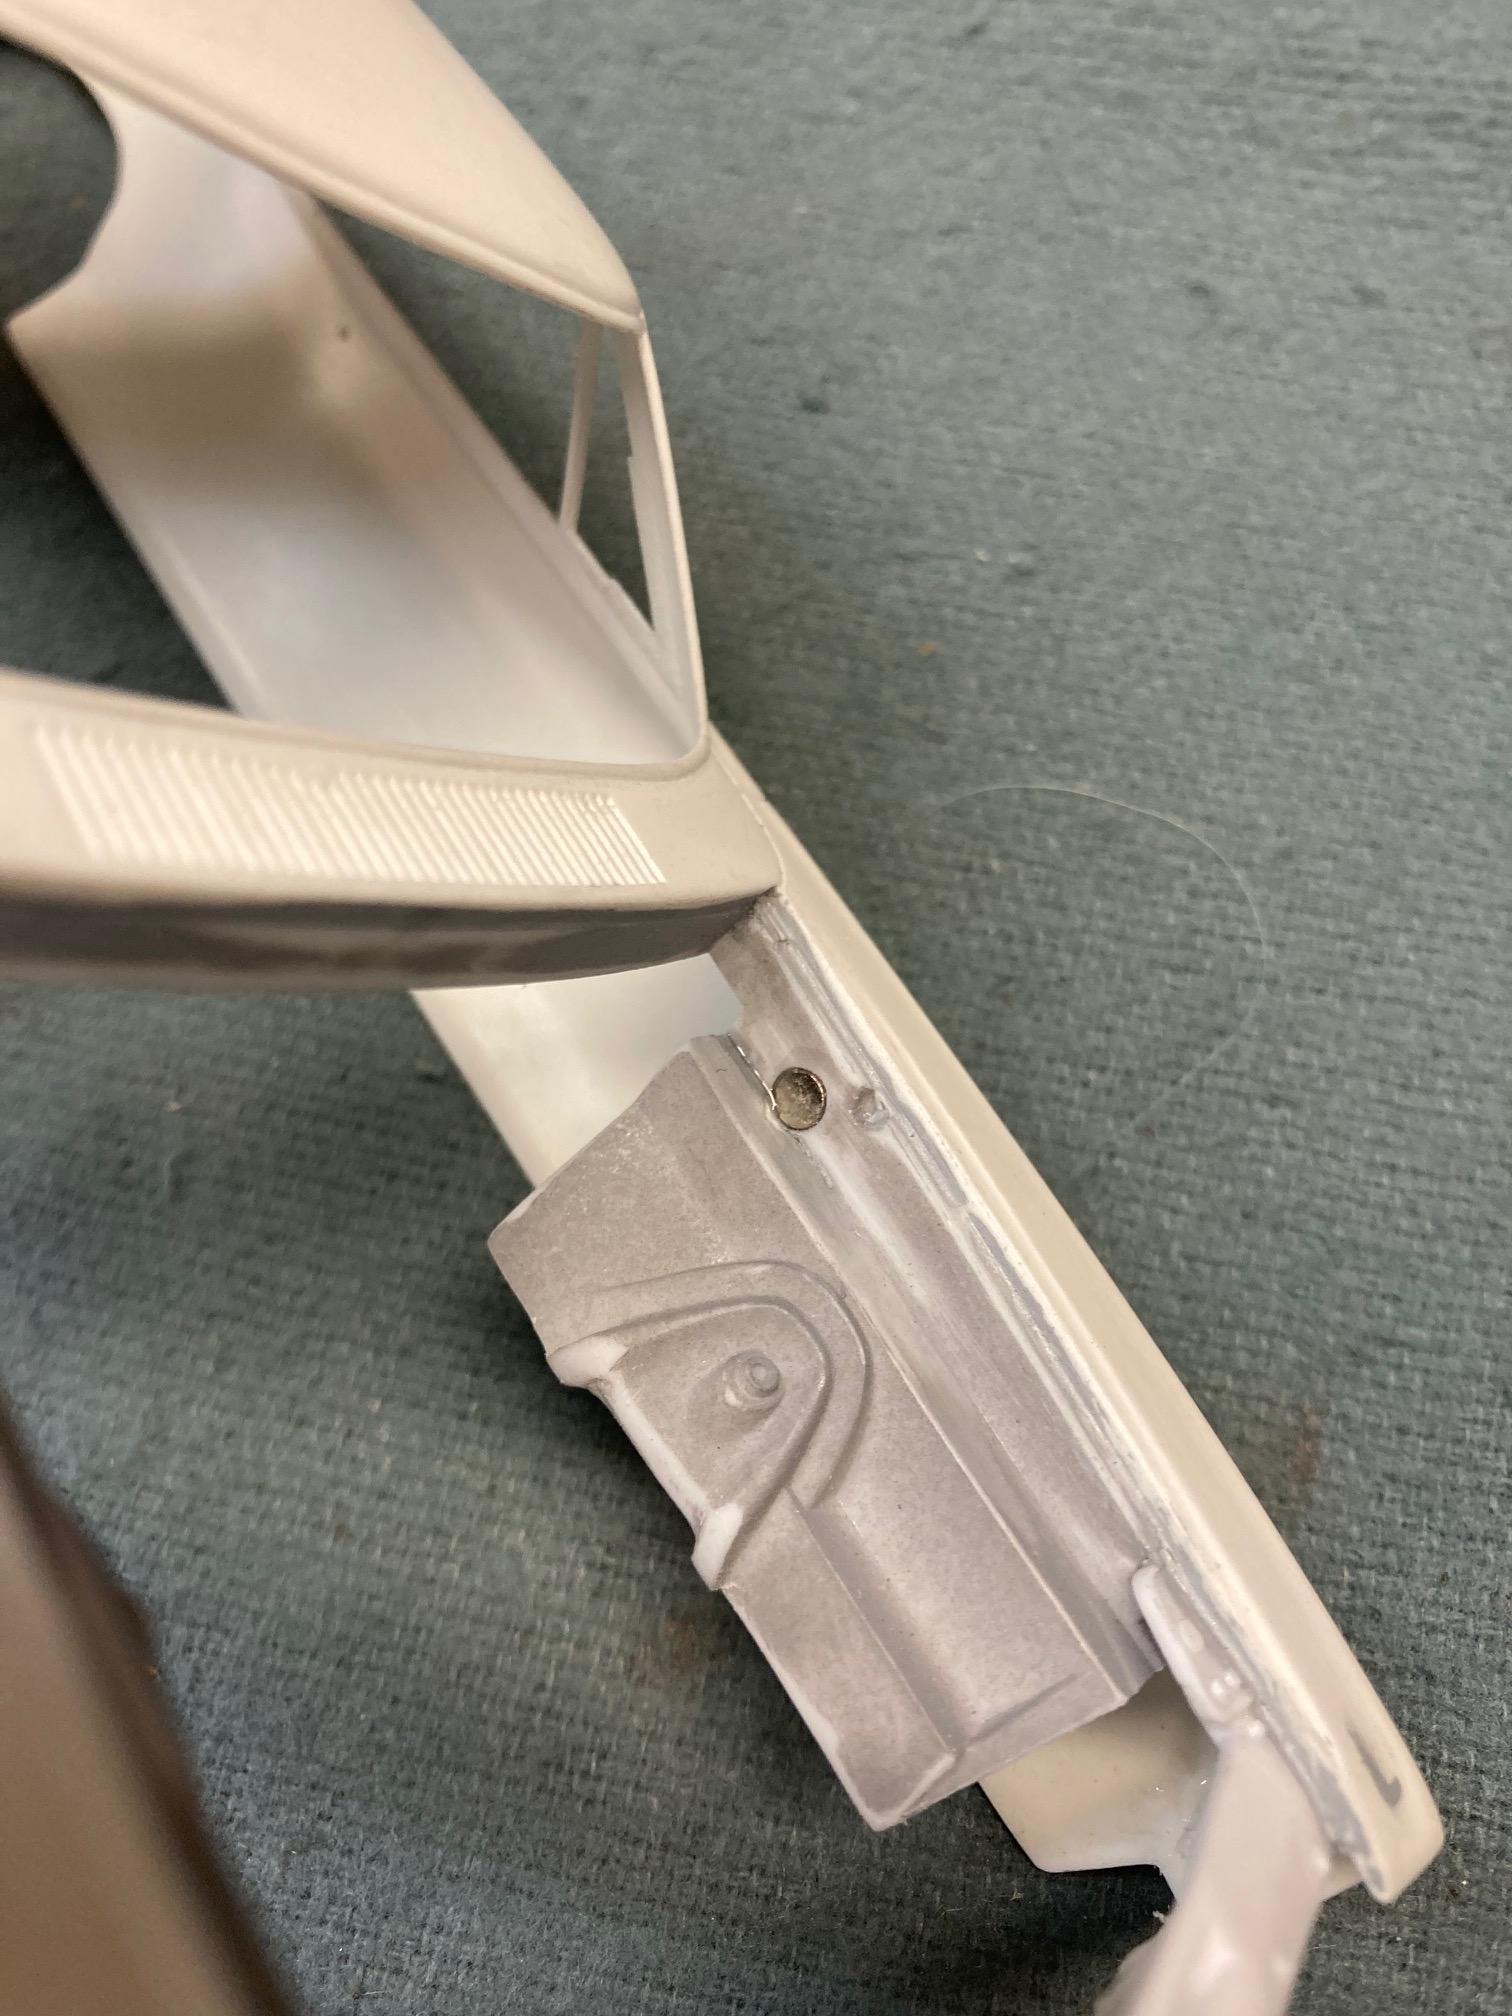
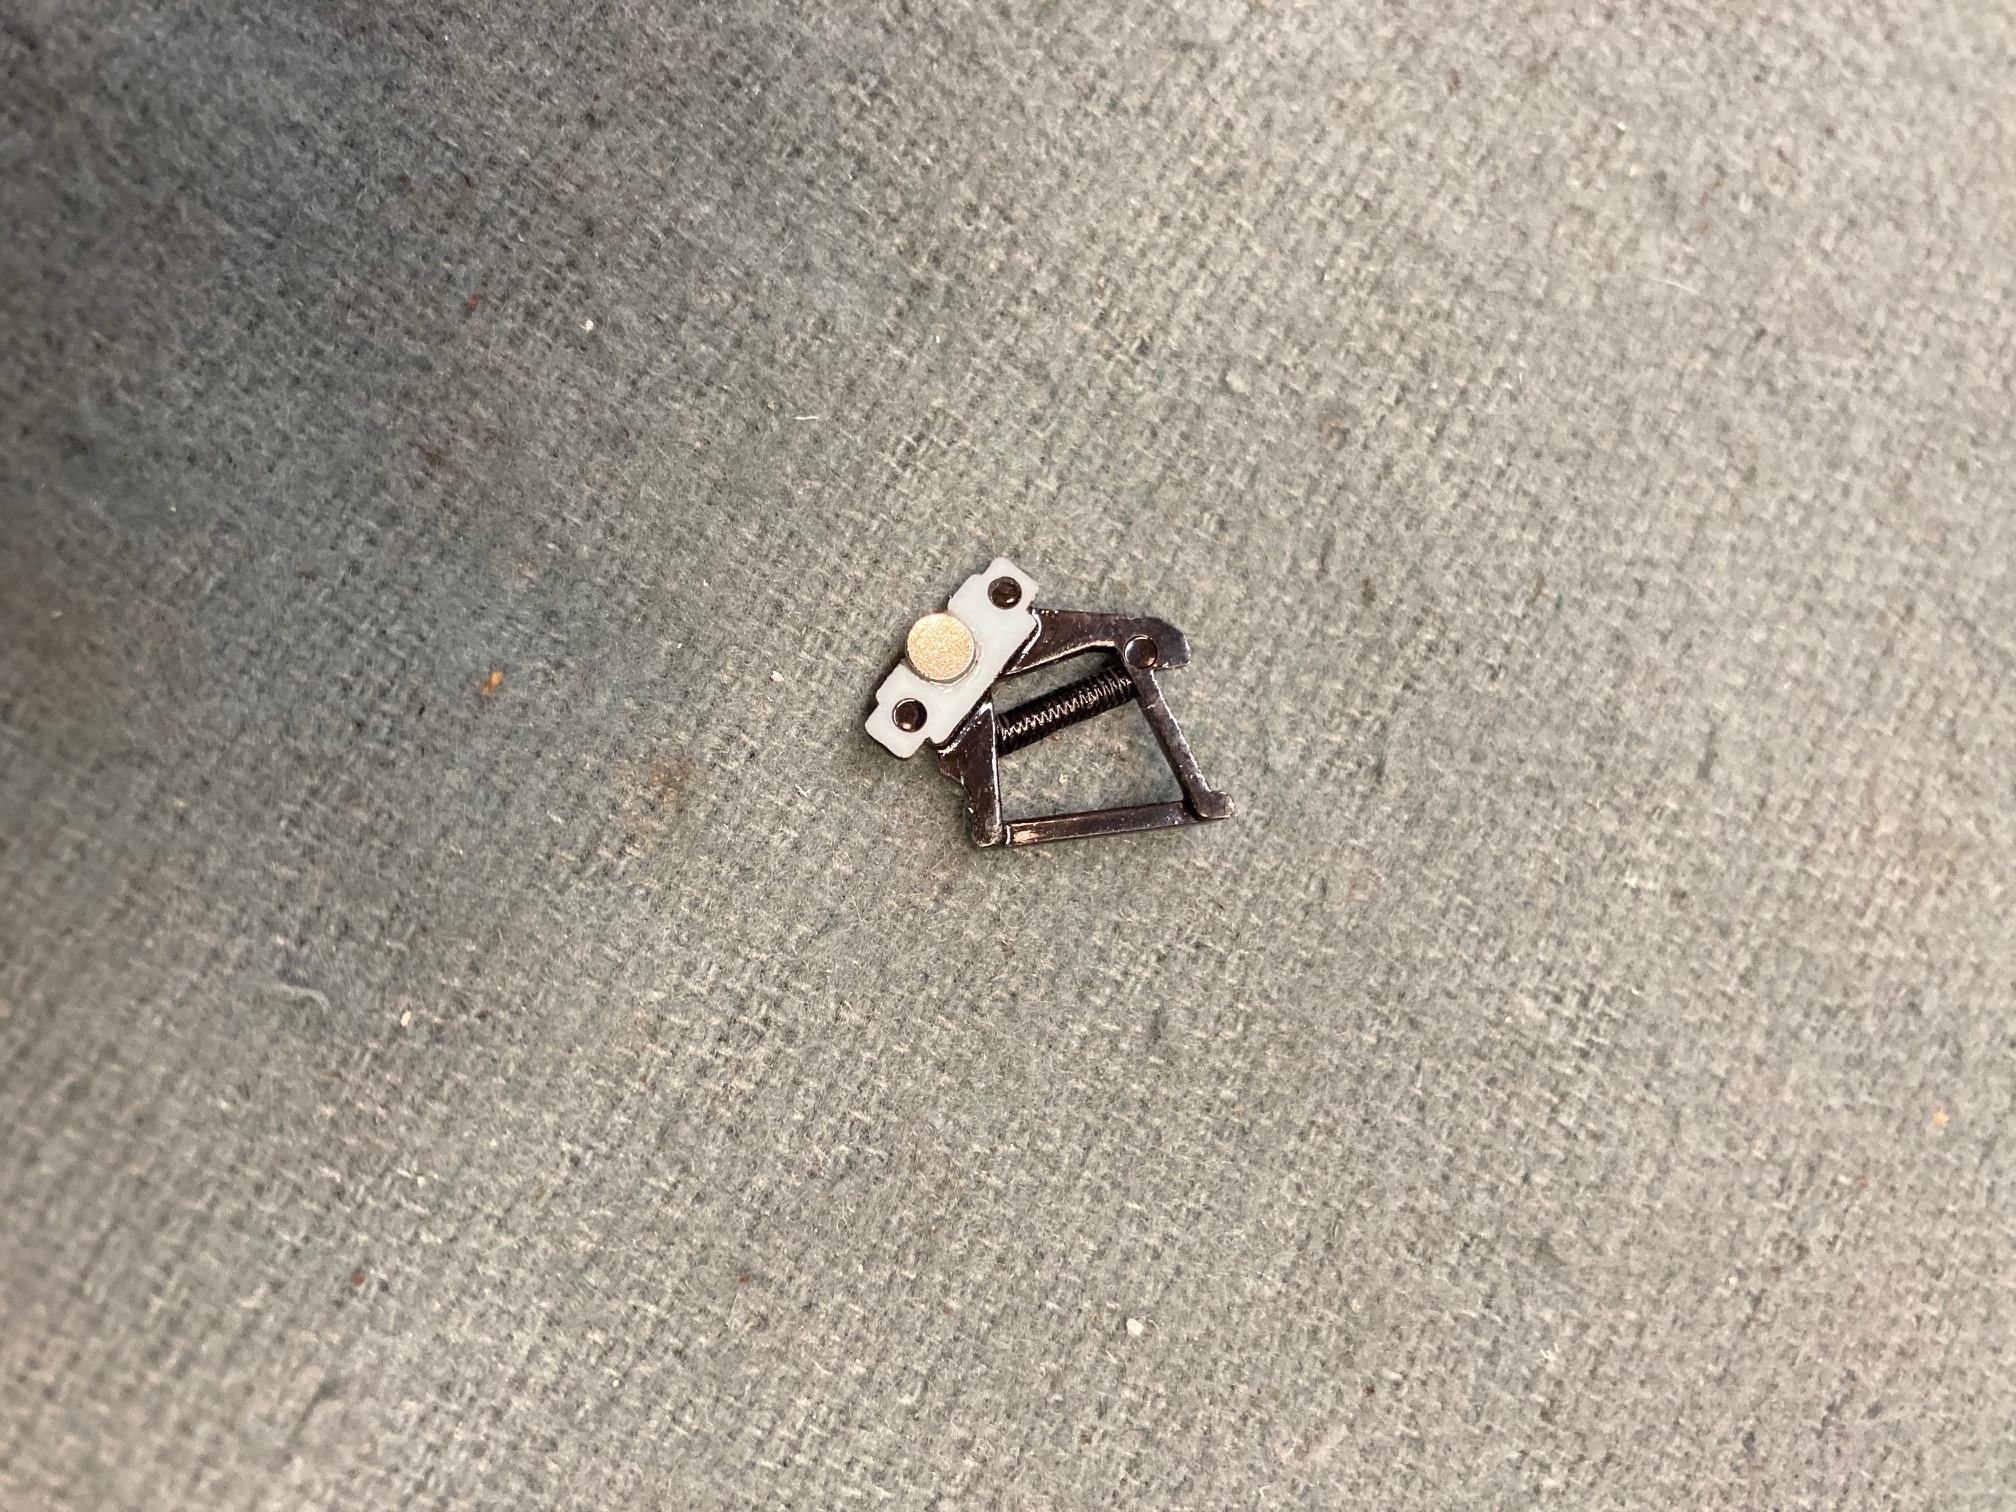
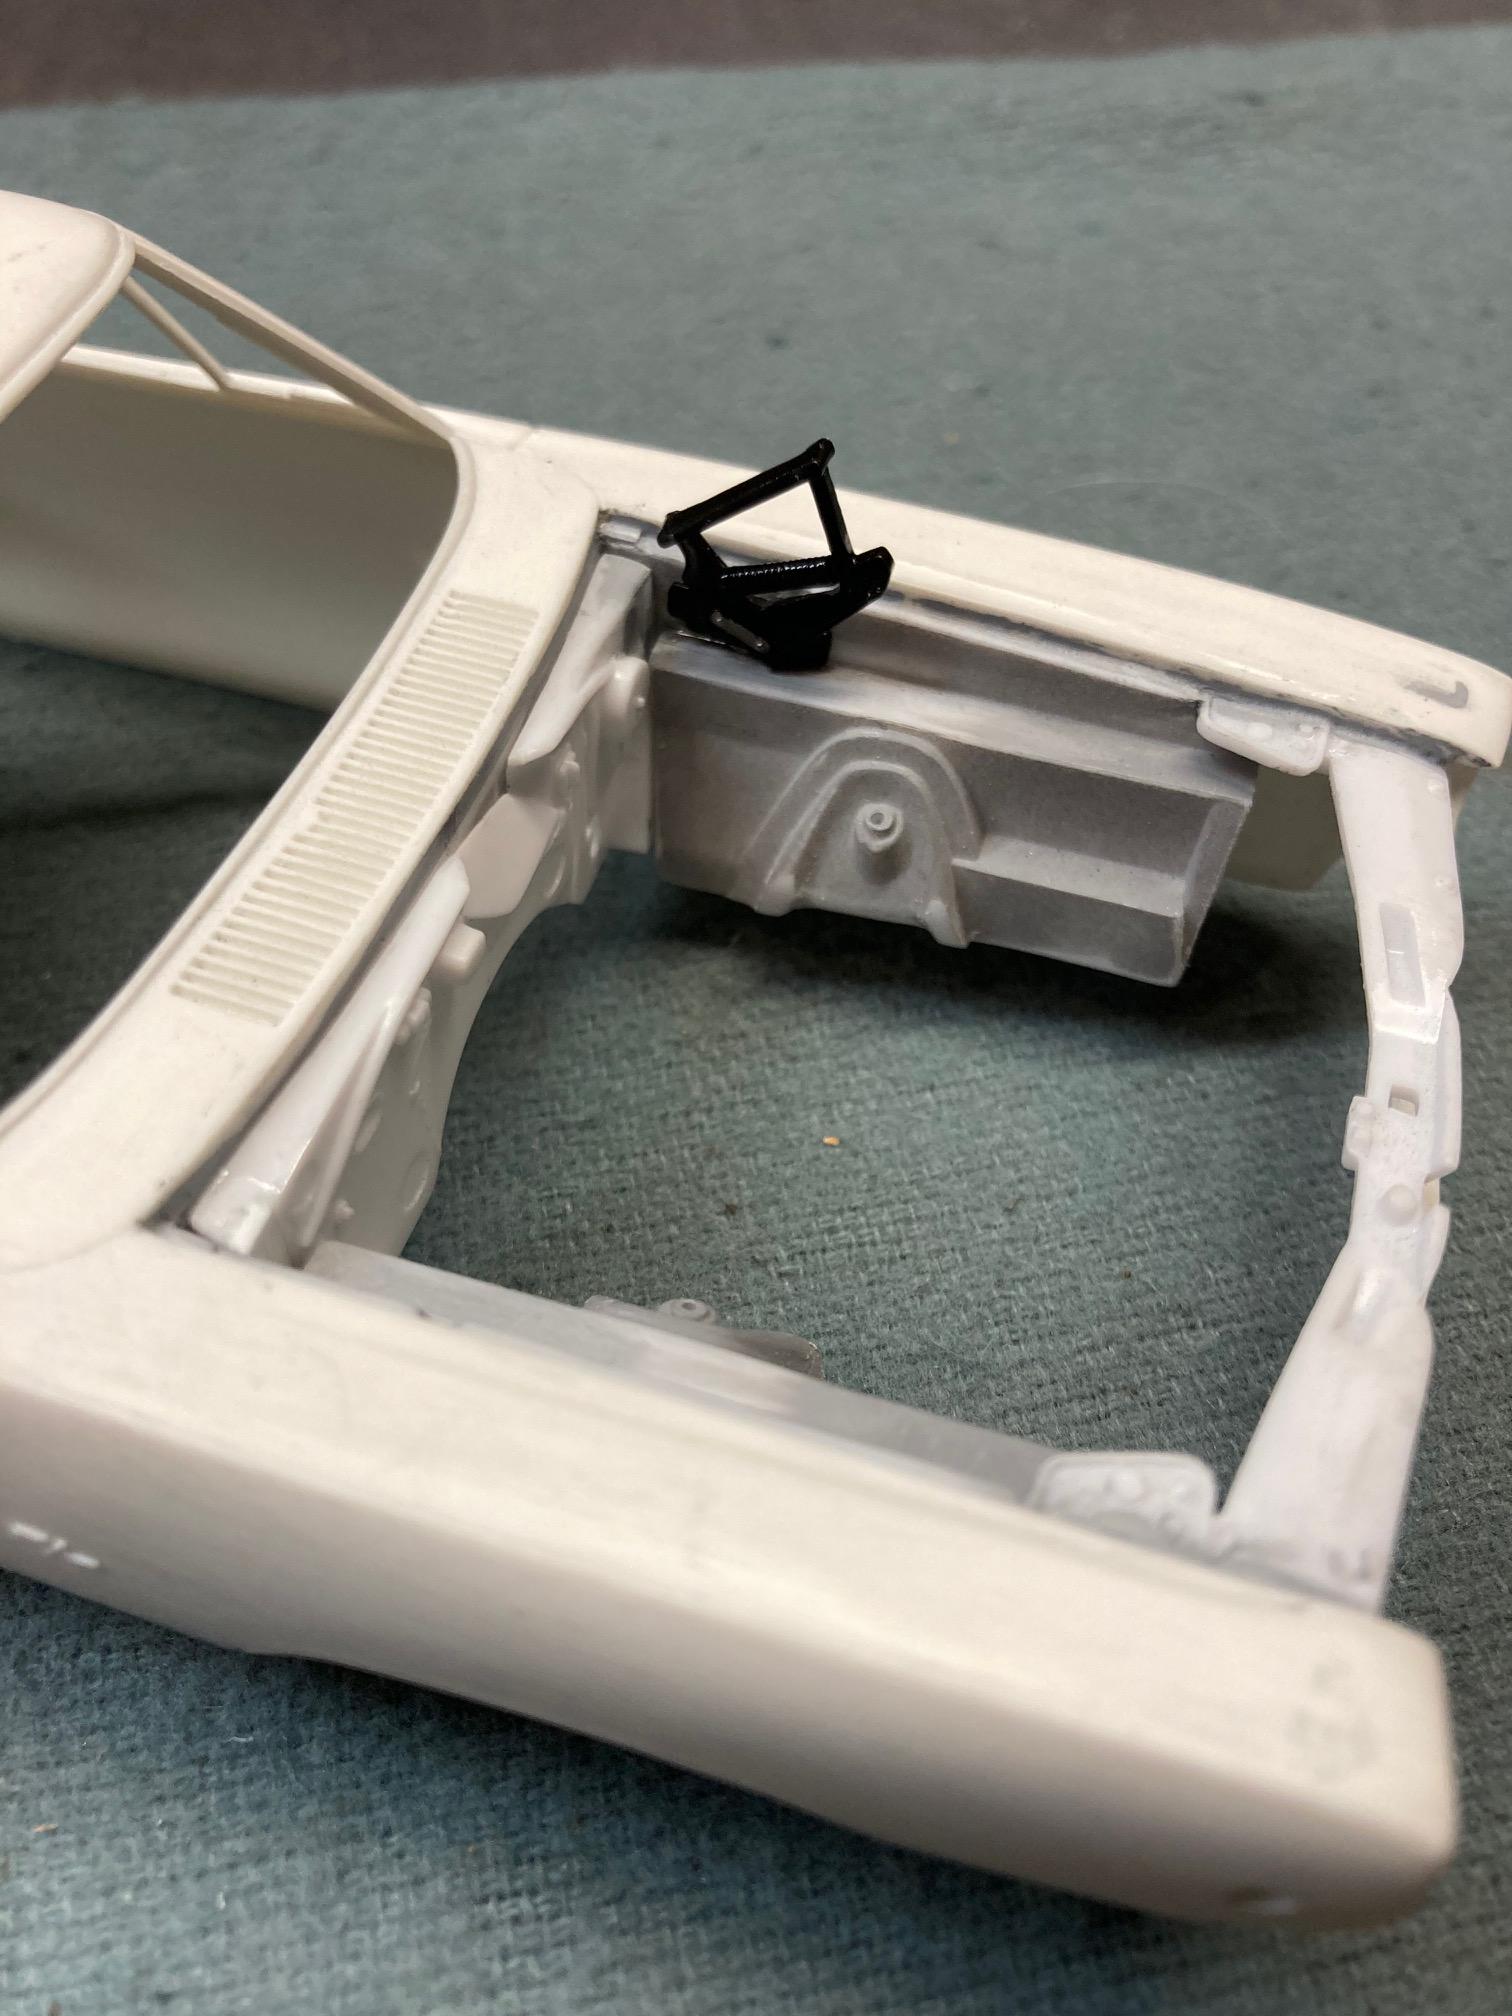
While I'm working on the chassis and a few more engine bay mods, I decided it was time to begin the task of making the removable hood hinges. I did this on my '64 Grand Prix, and liked how it worked out, so I'm going to do it again on this project with a couple of possible changes. I first drilled the correct sized hole in the inner fender to accommodate on of the magnet disks. Then, with a tiny Dremel reamer, I hogged out a portion of the hinge to accommodate another. Now I just have to work on how I want to do the connection between the hinge and hood. I have a couple of ideas. Steve
-
Nope, don't know Augie. I've only really been "out of the modeling closet" shall we say, for the past 6 or 8 years, so I really don't know of many of the "old timers" in the hobby. I've done most of my building in relative obscurity for most of the nearly 50 years that I've been building. Just started getting involved in "the scene" in the past decade or so. Steve
-
Now the fun begins Bob! This has become my favorite part of revamping an interior is working out the upholstery patterns, etc! Love what you've done so far! Steve
-
Model car contests
StevenGuthmiller replied to Repstock's topic in General Automotive Talk (Trucks and Cars)
I agree that "the best model" should win. But, the problem with not "spreading the wealth" is that if you have one or two consistently great modelers that make multiple entries in a particular show every year, and they take home all of the trophies every time, then, as Peter said, the "what's the point of entering the contest" attitude is what all of the other contestants begin to think, and pretty soon you don't have a show anymore. "Spreading the wealth" helps keep people coming back. If the guy who thinks he's being slighted because he feels his model is better than one of the winners in a given contest, it's better to lose him the next year than it is to lose a couple of dozen others that feel like there's no point in competing anymore. A couple of years ago, I attended a small show in South central Minnesota. The automotive entries were very limited, but not knowing how small some of the categories might be, I brought along 3 factory stock models. It turned out that there were a total of six models, (including my 3) in the factory stock category. There were to be 3 awards given for each category, and I don't want to sound conceited, but if any of you would have been there, it would have been very obvious that my 3 entries should have taken all three awards. The other three entrants appeared to have been built by a novice. Heavily orange peeled paint, none, or very little trim foiled or painted, no washes or detailing on grilles or wheels, etc, etc. I guess you could say that I was a little surprised that I only took home one medal from that show, but in hindsight, I can understand why the judges awarded second and third place to a couple of the other models. In my opinion, the optics would have been worse if one person had taken home all three medals from that category. Anyway, If I attend that show in the future, at least I know what to expect. We just have to accept the fact that politics are involved with the decisions at many shows. Steve -
Have you seen this?
StevenGuthmiller replied to Rakentaja's topic in Model Building Questions and Answers
Yes Mike, I should have mentioned that. The Johan Fleetwood is in fact a little smaller that 1/25th scale. Apparently Johan did that with some of the larger cars so that they would fit in the standard Johan box. Not that easy to find either. Likewise, The IMEX kit is all of 1/24th scale if not larger. It has it's dimension problems as well, but all in all, it's a fairly nice kit. I think with some love it would build up into a pretty convincing Eldorado Biarritz. Steve -
Have you seen this?
StevenGuthmiller replied to Rakentaja's topic in Model Building Questions and Answers
Unless you actually had an Eldorado Brougham, I personally would either look for one of the Johan/X-EL ‘58 Fleetwoods or one of the Imex ‘58 Eldorados. Both are better than the Revell ‘57. Steve