StevenGuthmiller
-
Posts
15,088 -
Joined
-
Last visited
Content Type
Profiles
Forums
Events
Gallery
Everything posted by StevenGuthmiller
-

AMT '62 Buick vs AMT/ERTL '62 Chevy
StevenGuthmiller replied to Joe Handley's topic in Model Building Questions and Answers
That's a lot of stretchin' ! Your best bet for something close to the correct wheel base for a '62 Electra is probably going to be the Trumpeter '60 Bonneville kit. It at least had a 124" wheel base. Steve -
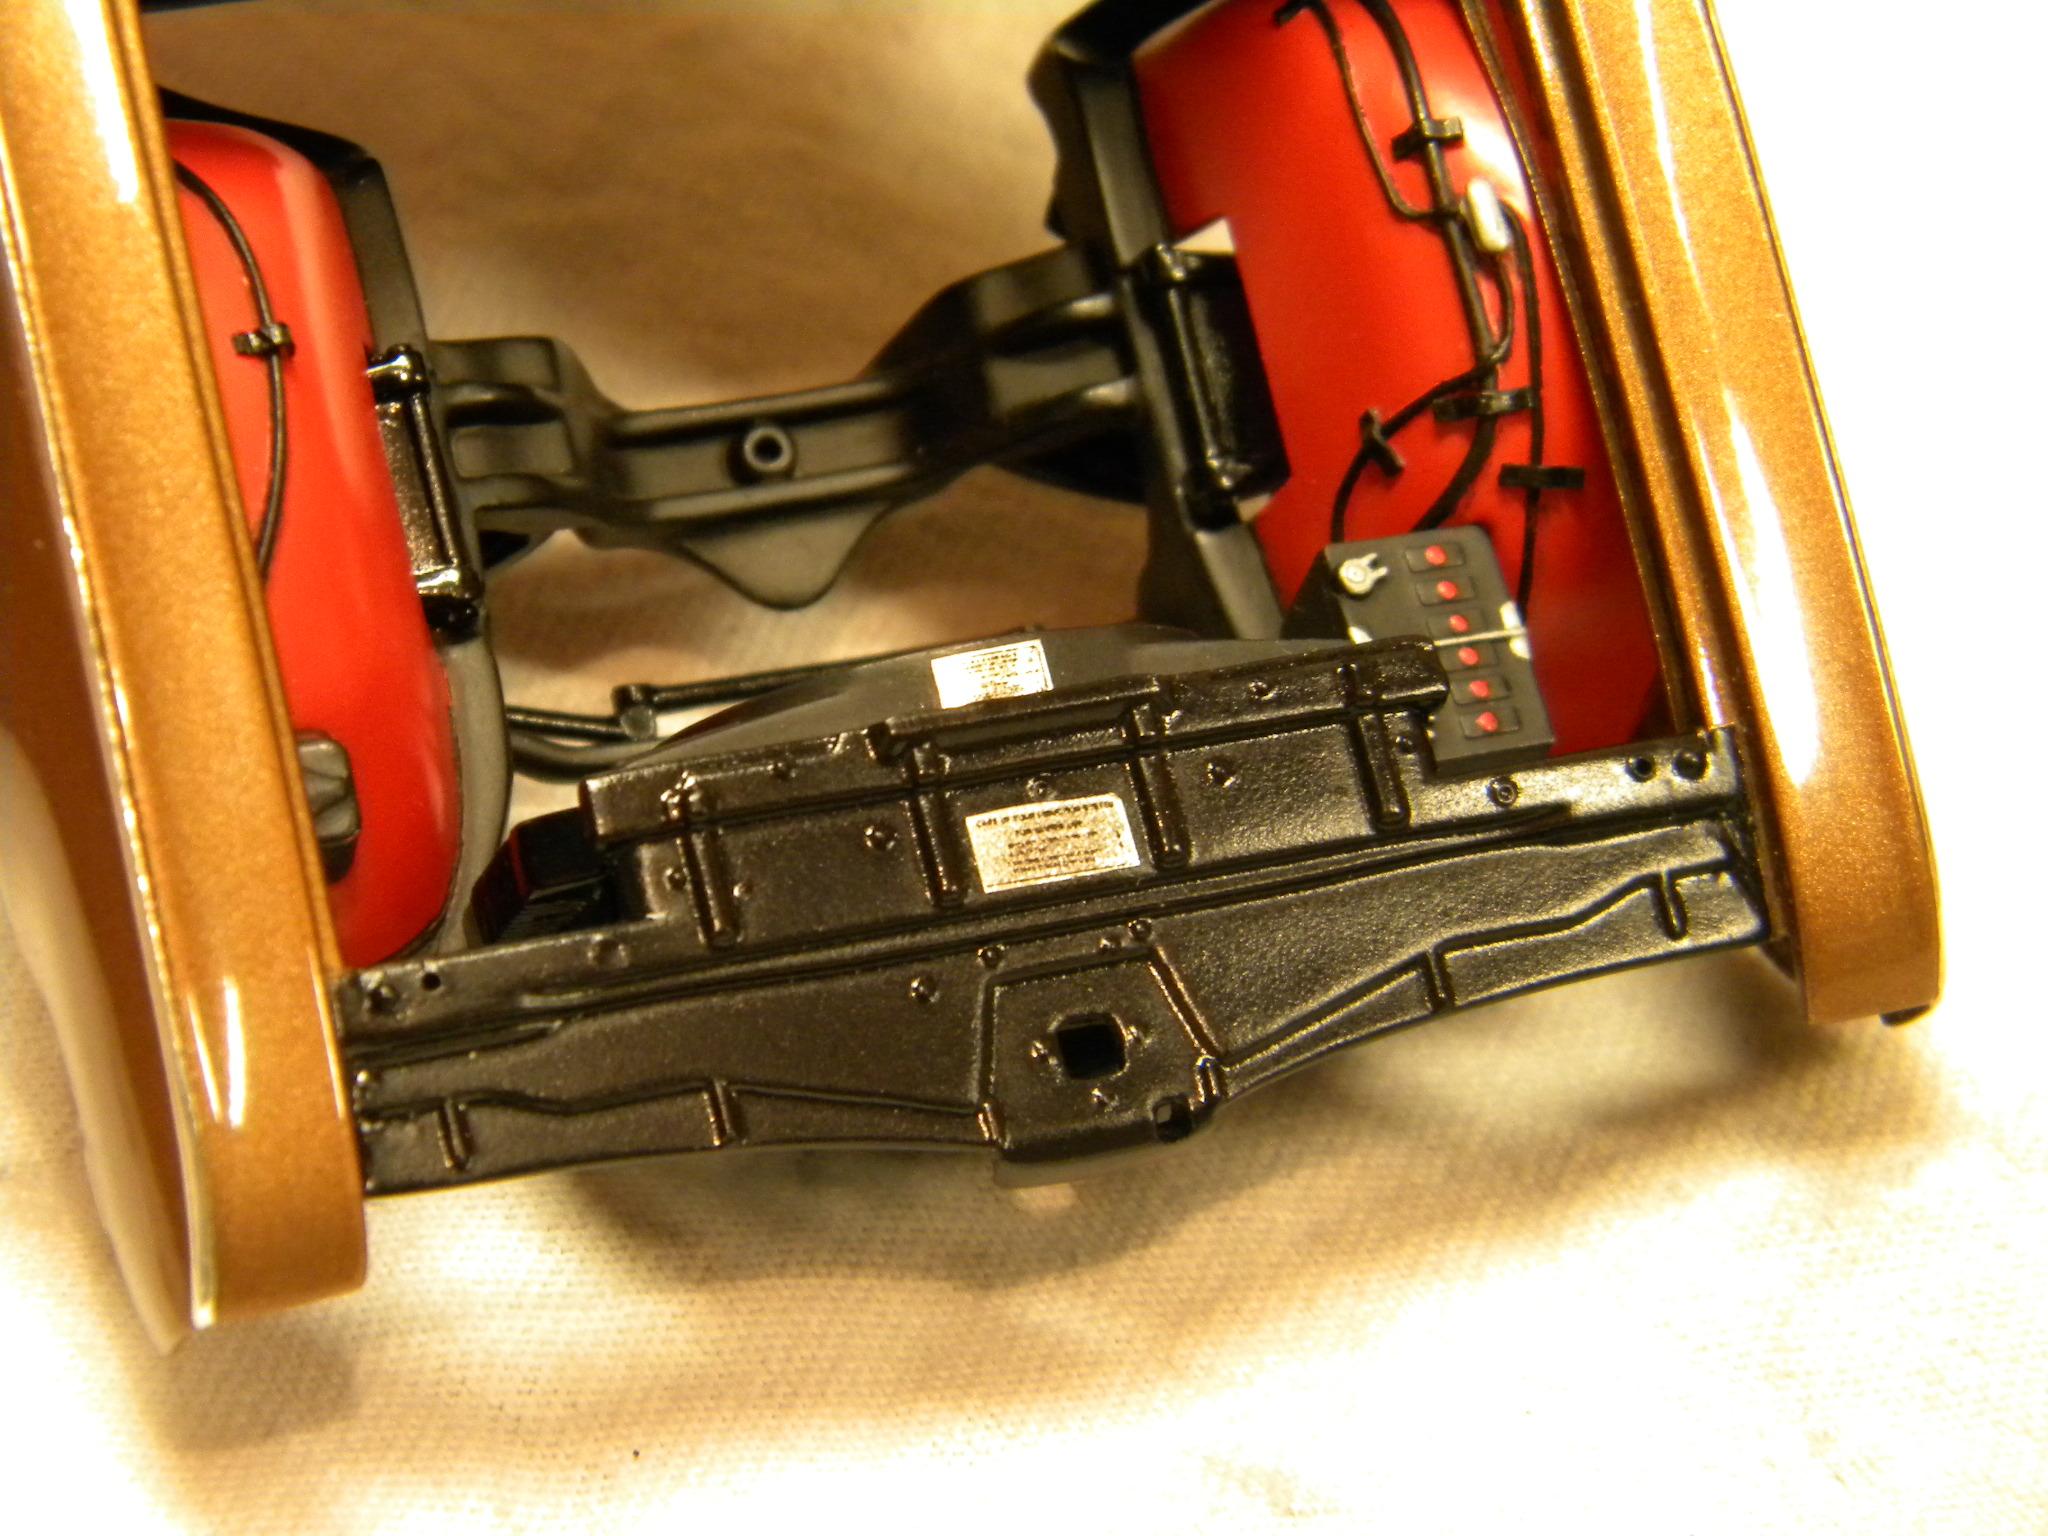
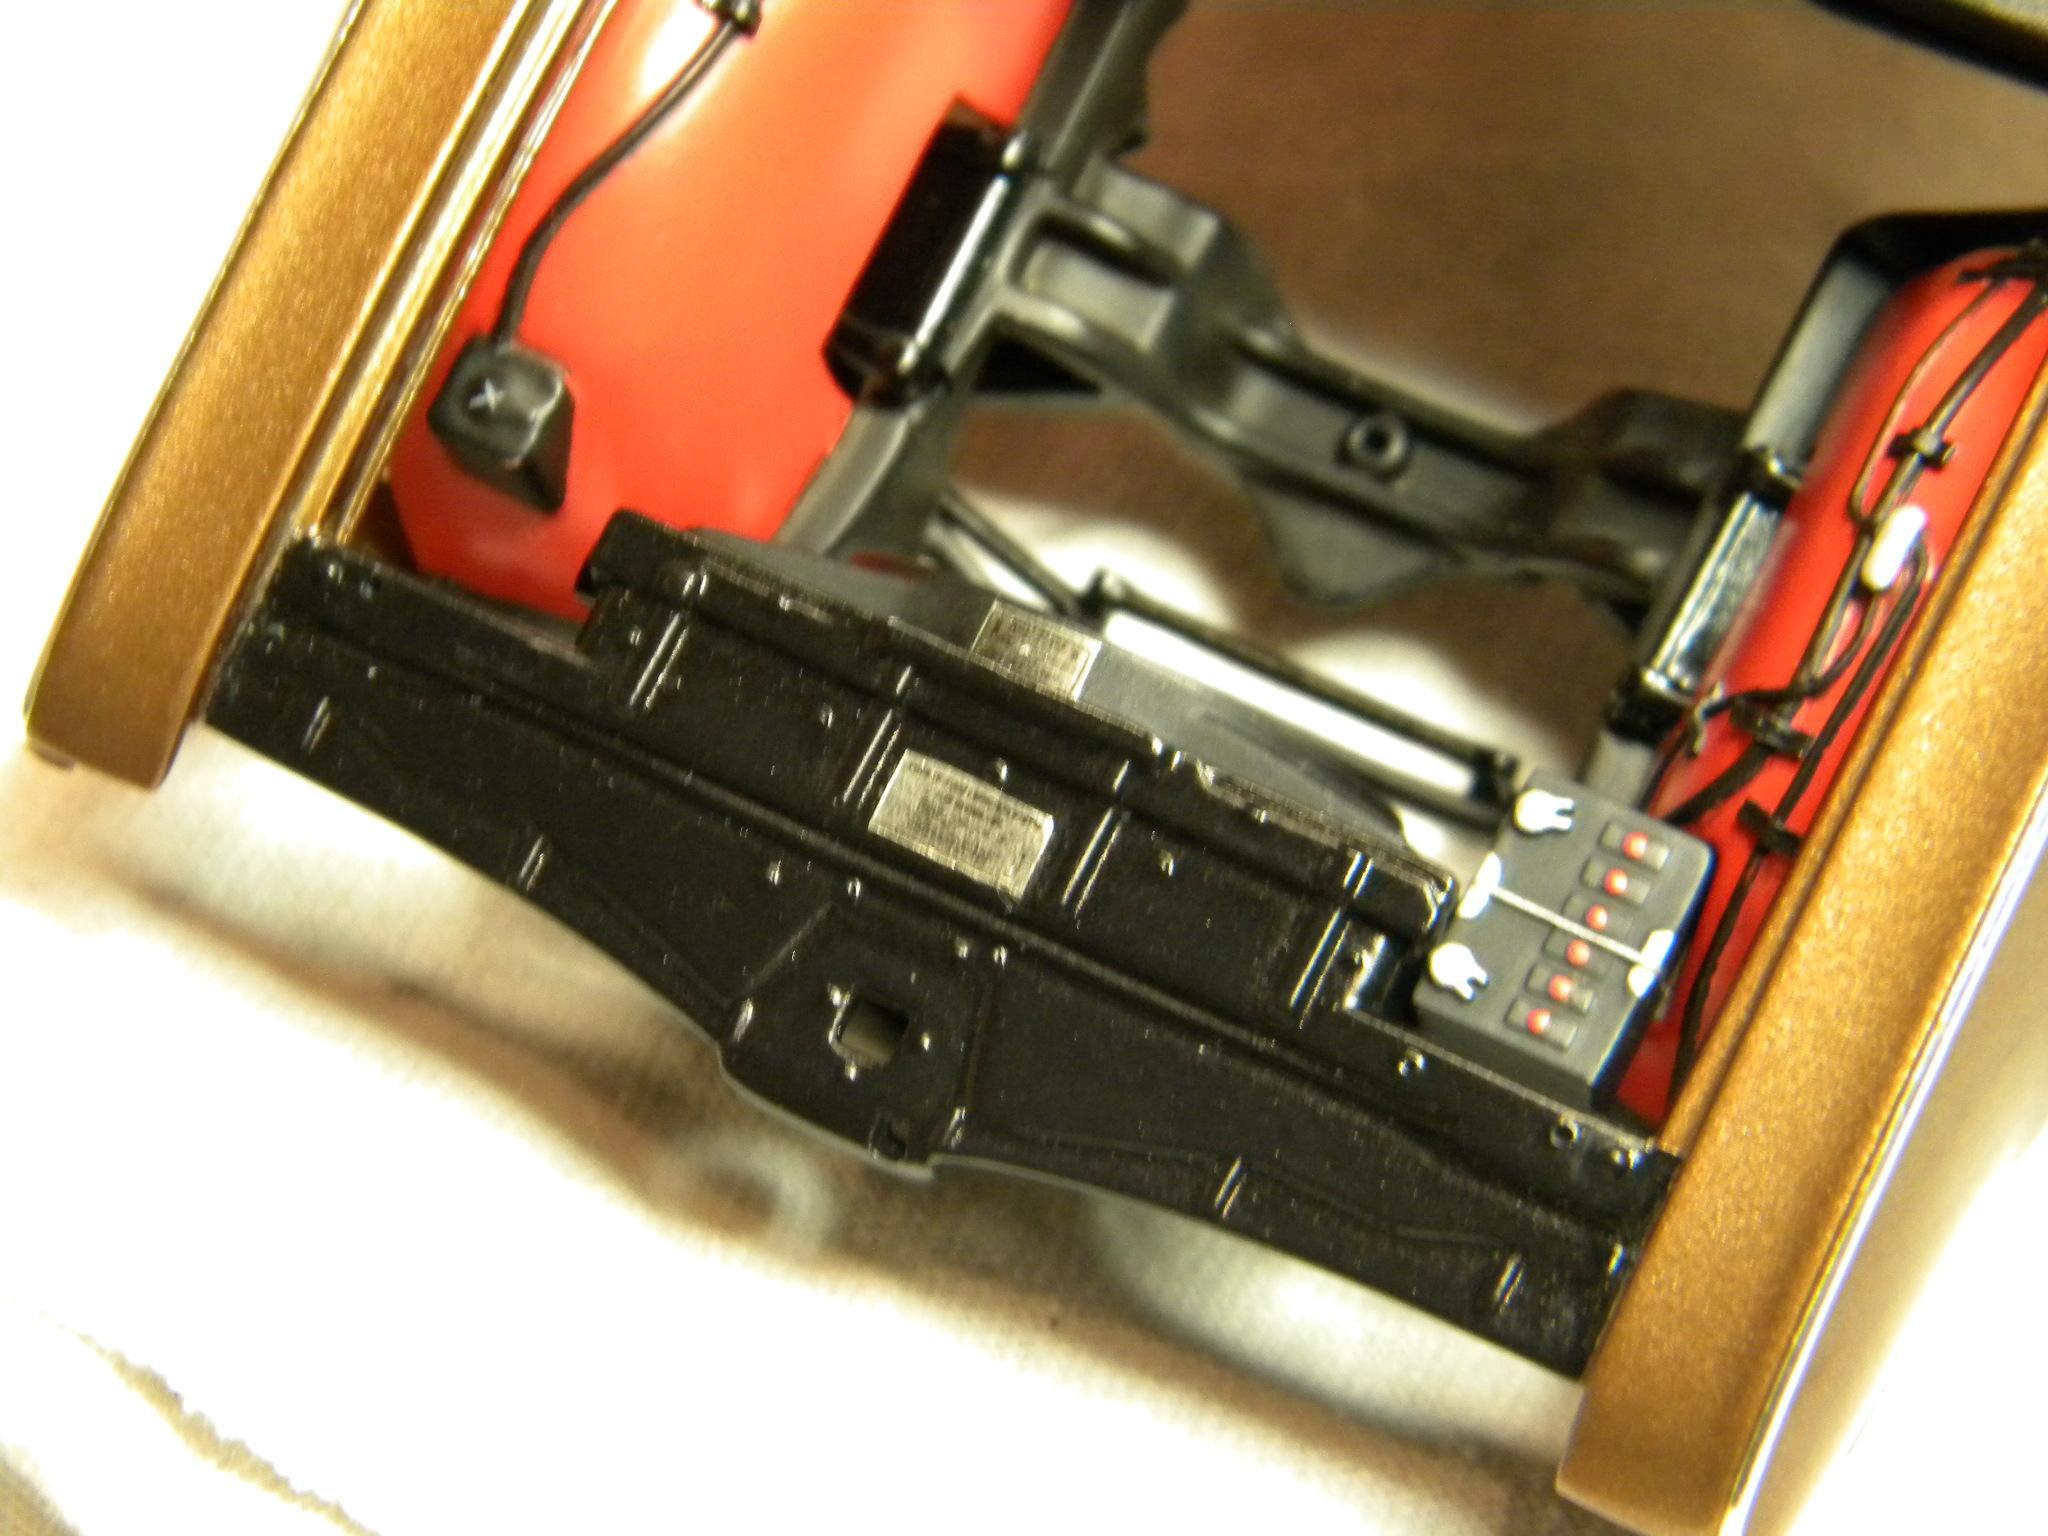
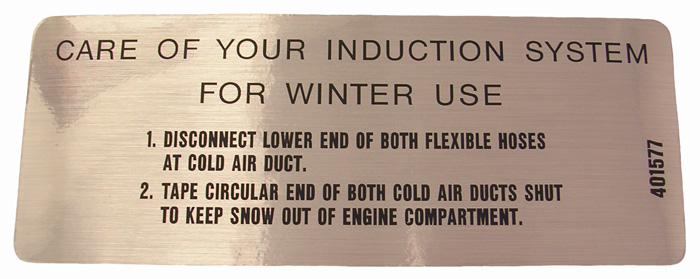
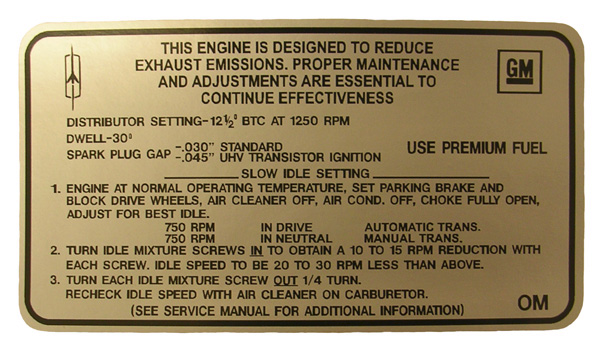
Thanks for the info guys. At this point, I'm doubting whether I will add any seat belts. That would require me to run out and buy more stuff. While I'm here, I had to shoot a couple of shots of the beautiful engine bay detail decals that Bob Spedding, (TooOld) made for me! Clear decals applied over foil. Steve

-
See there? You've just made my point for me. I didn't understand a single word of that. I guess I'm a bit of an automotive neanderthal! "Put big foot on gas pedal real hard, big holes in carburetor open up, dump lots of gas in engine, car go real fast". Steve
-
Thanks guys! Being as the backlite is curved differently, I'll likely just glue it in place and then add some trim over it after the fact. That's a thought. I don't have any seat belt material of any kind, and I had no plans to add seat belts to the seats, but it's something to mull over. Steve
-
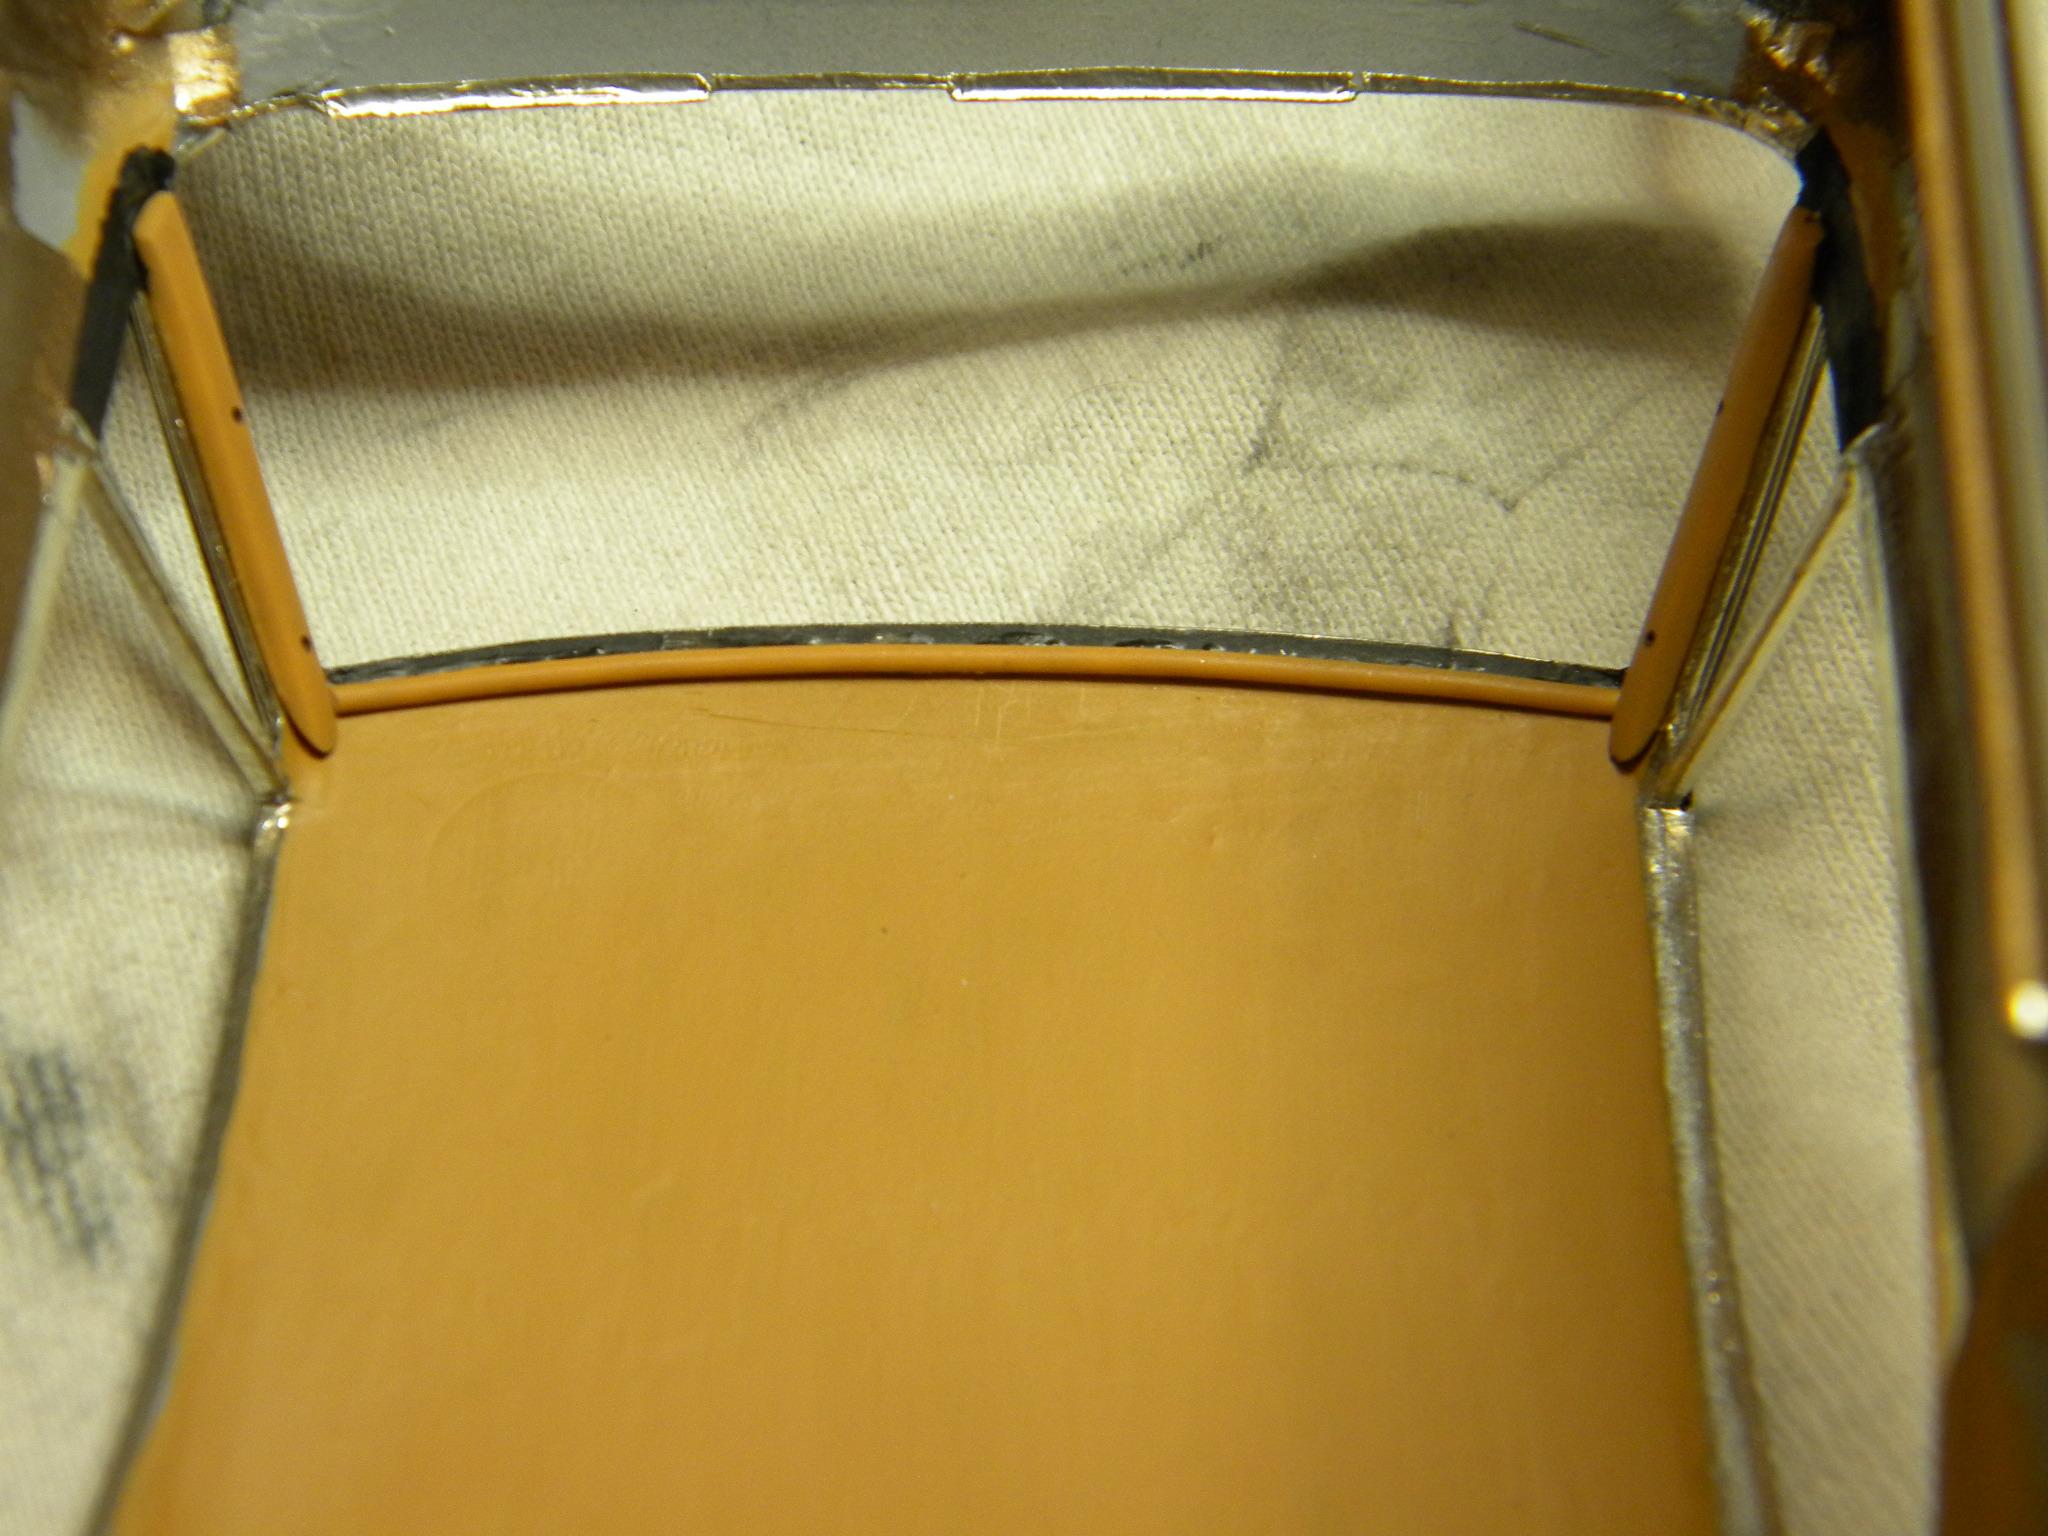
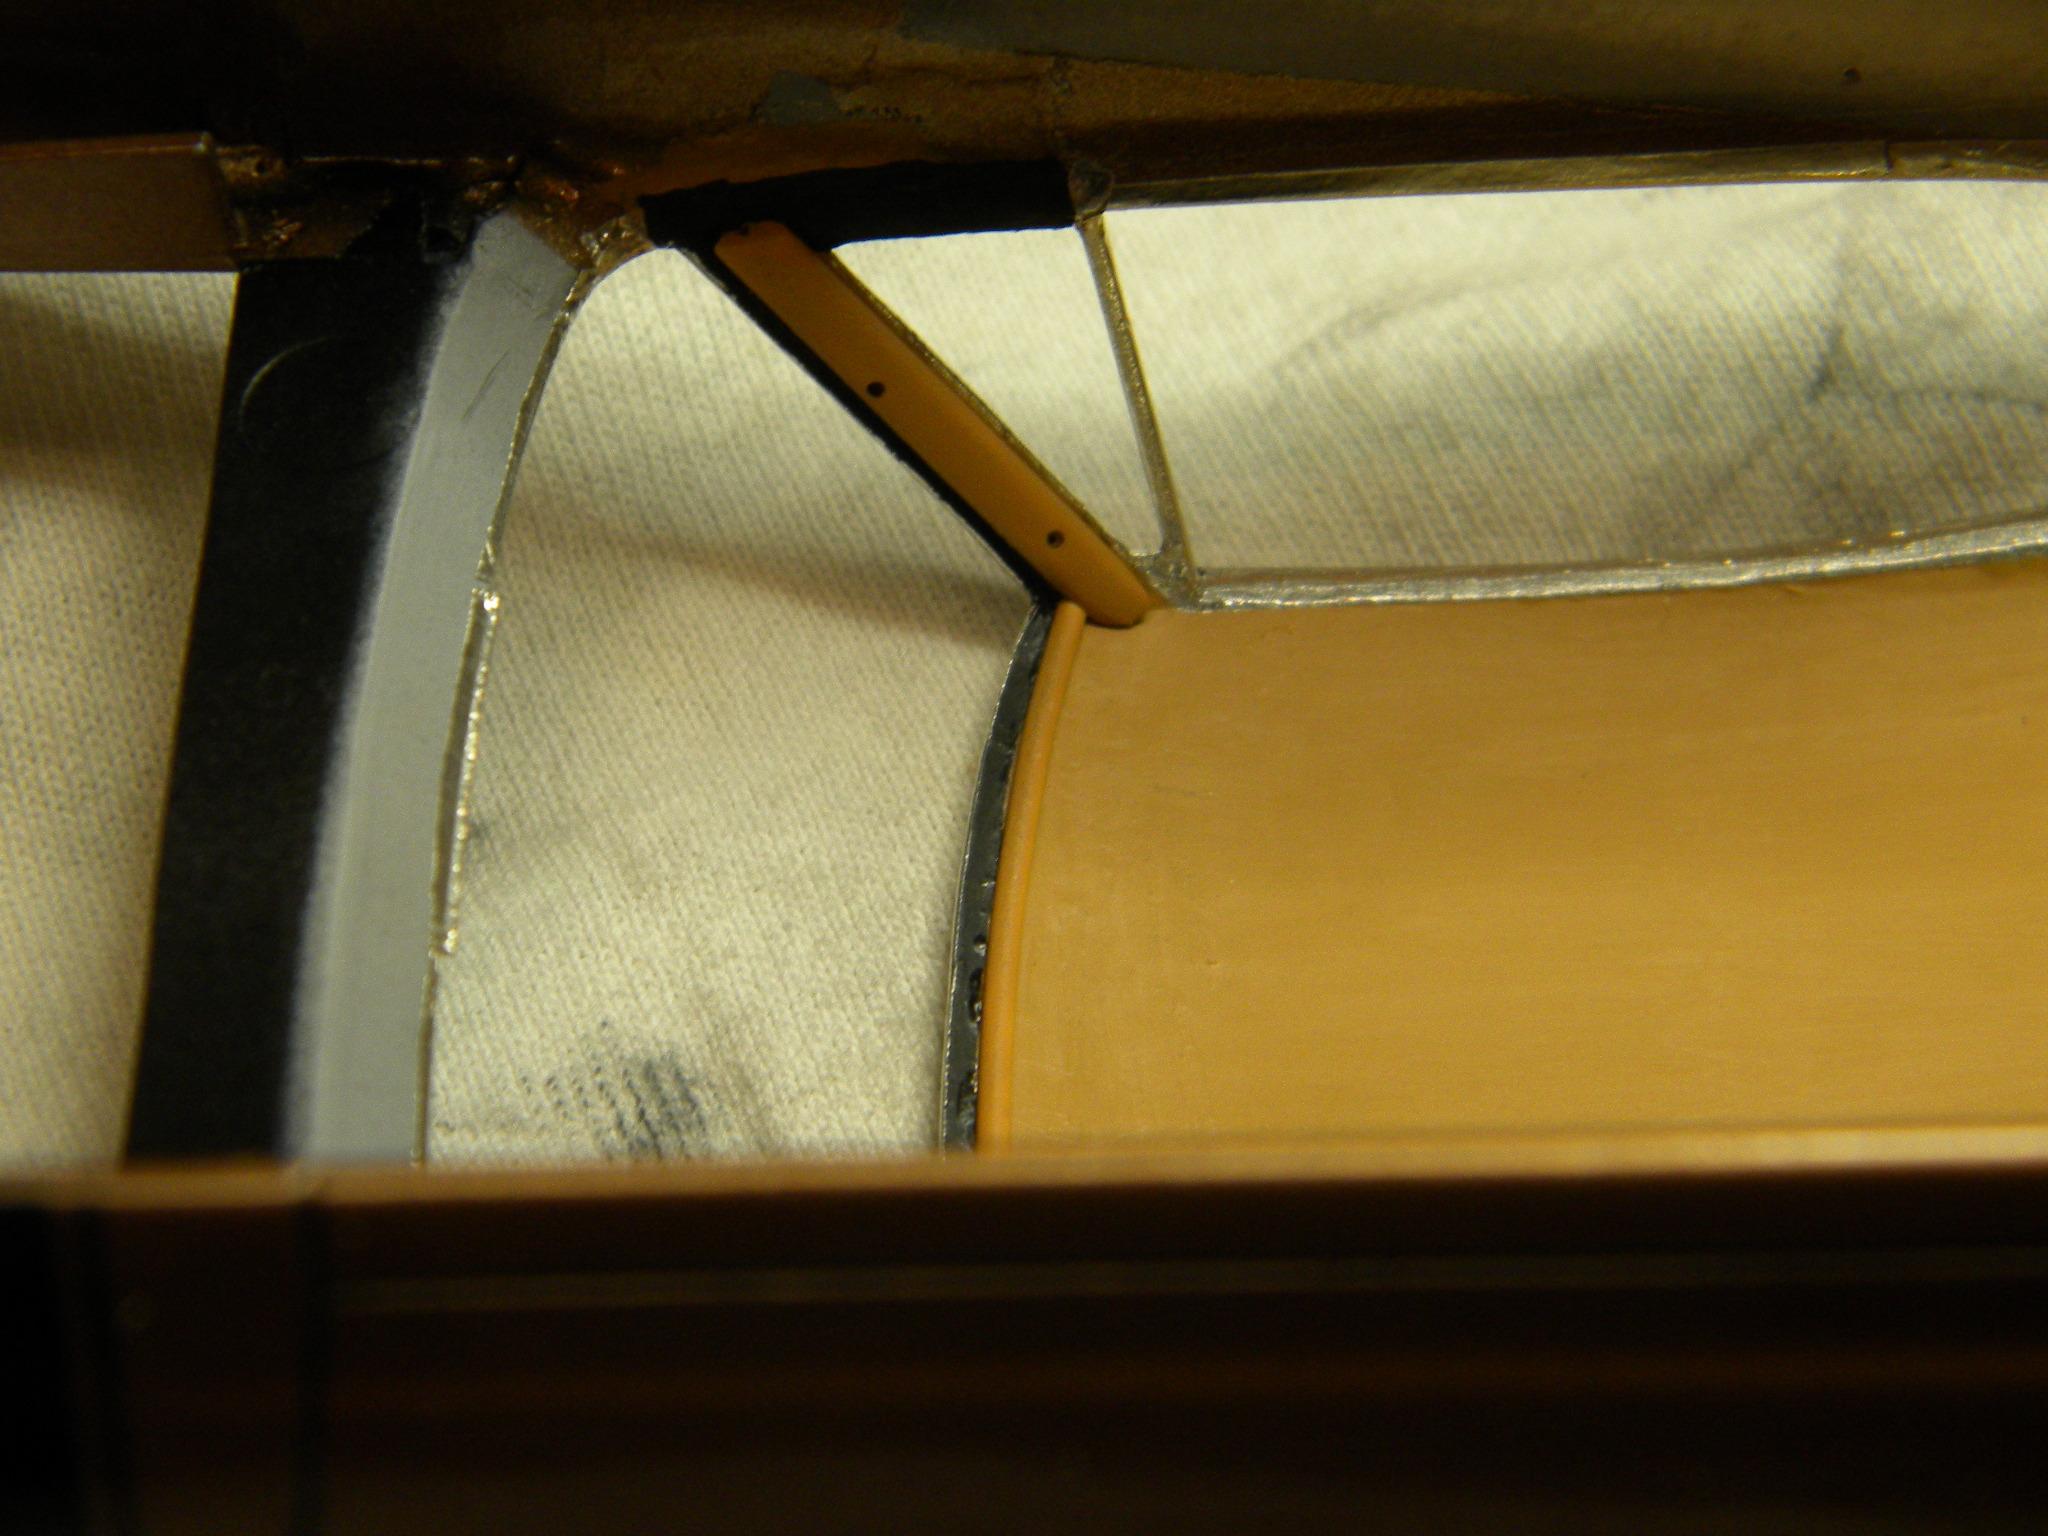
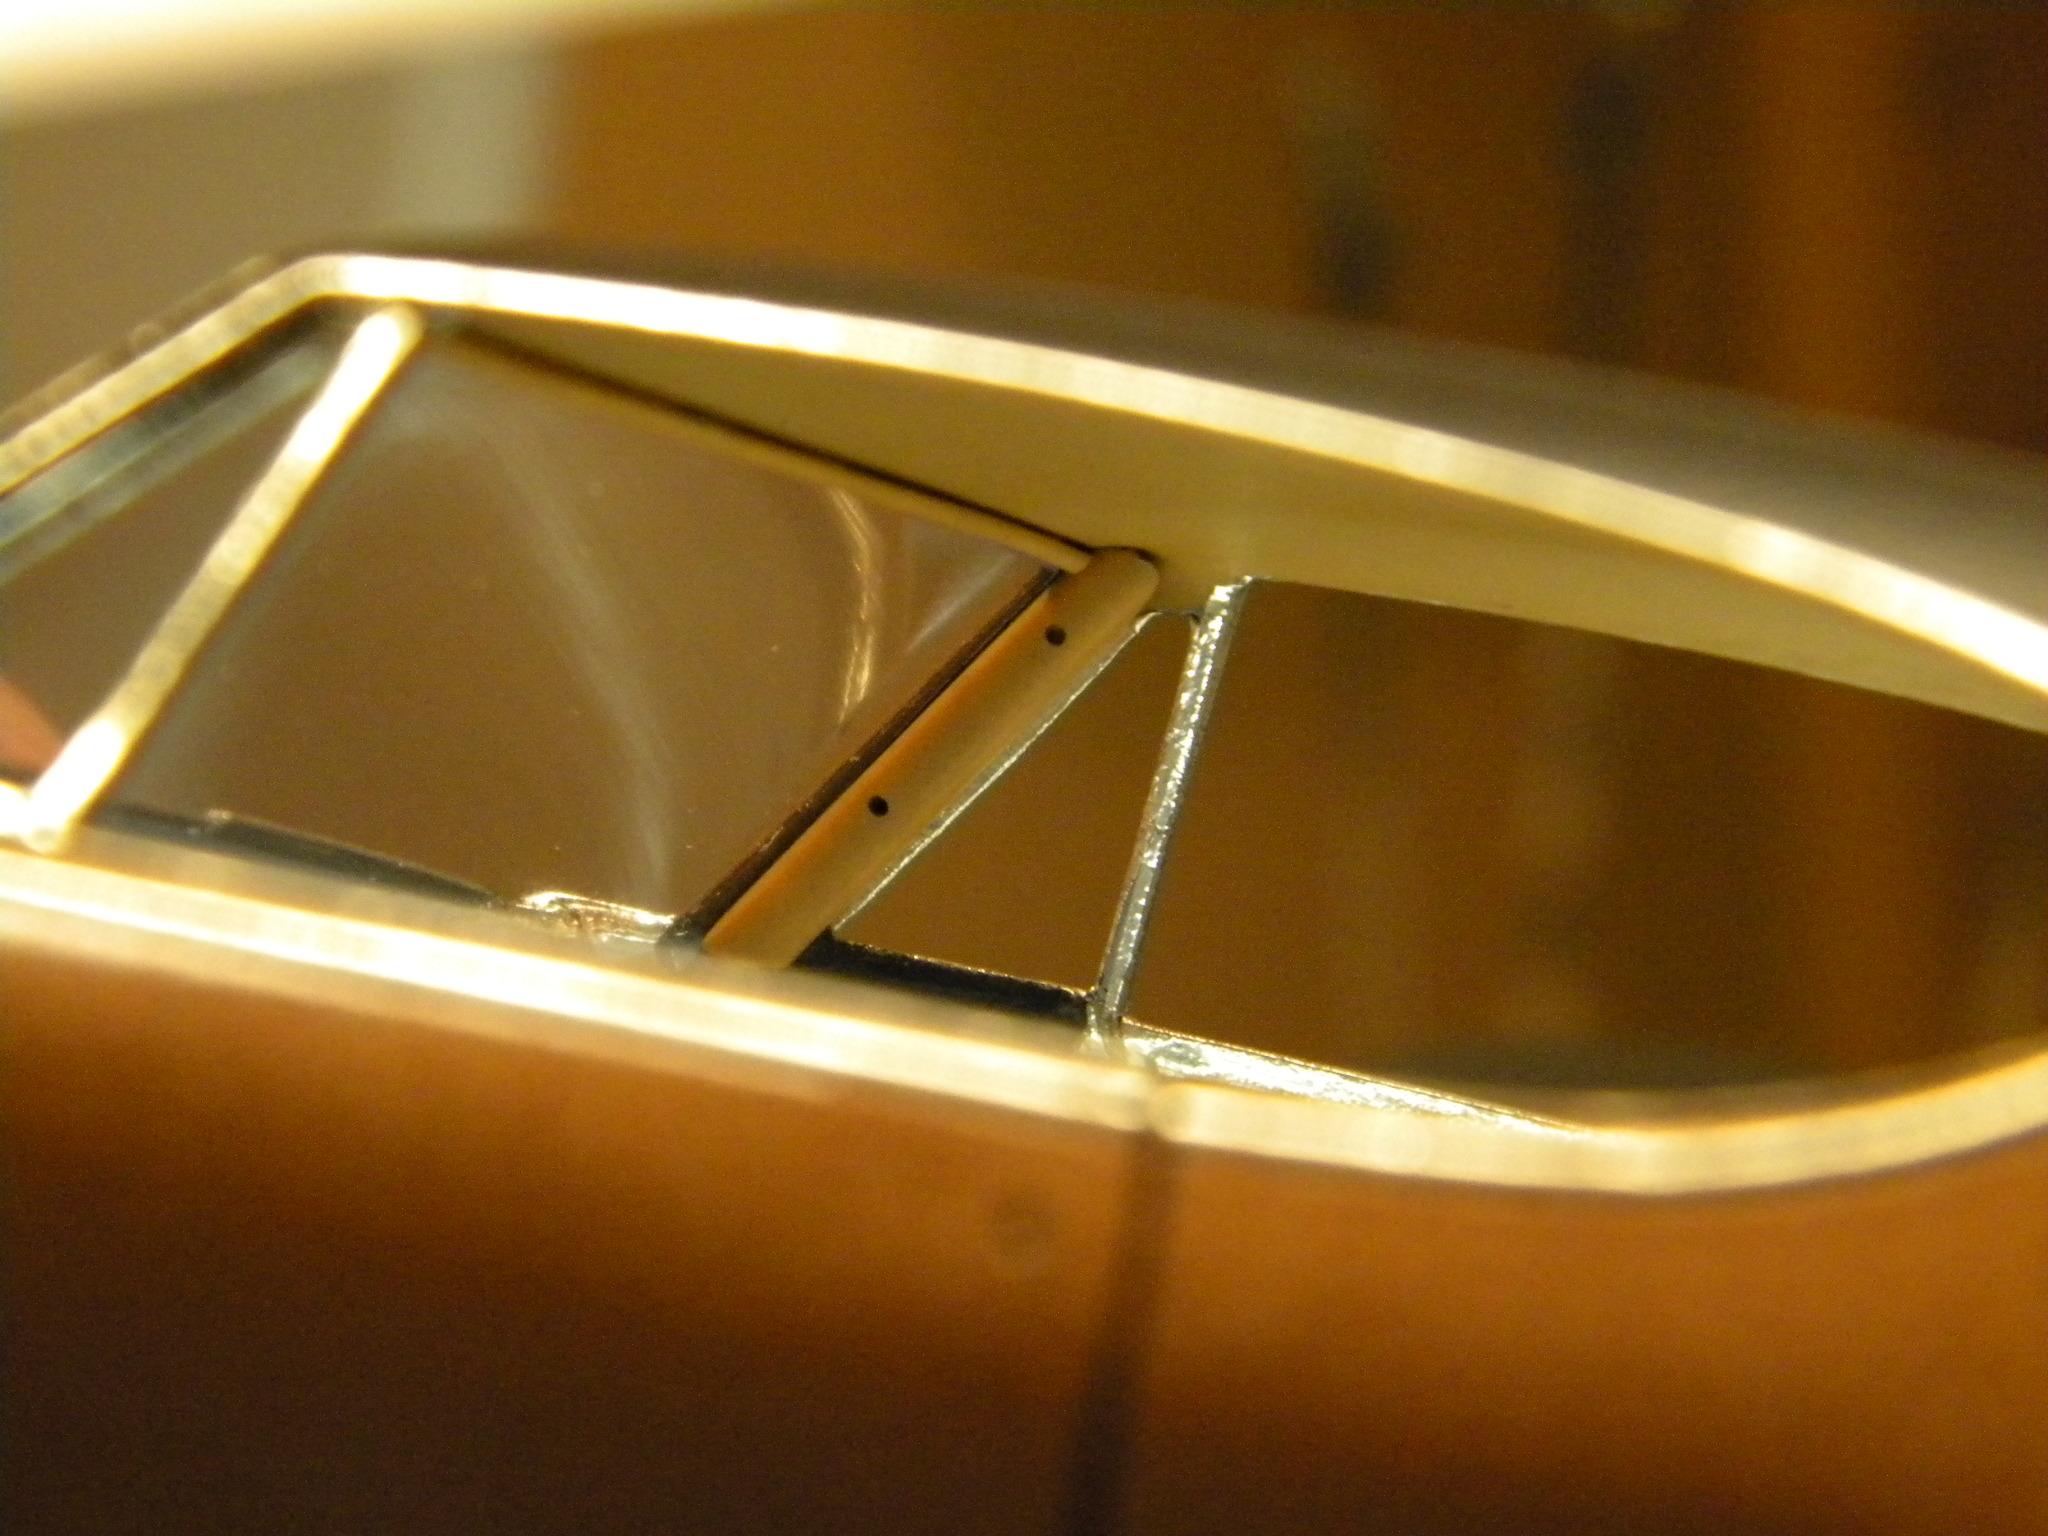
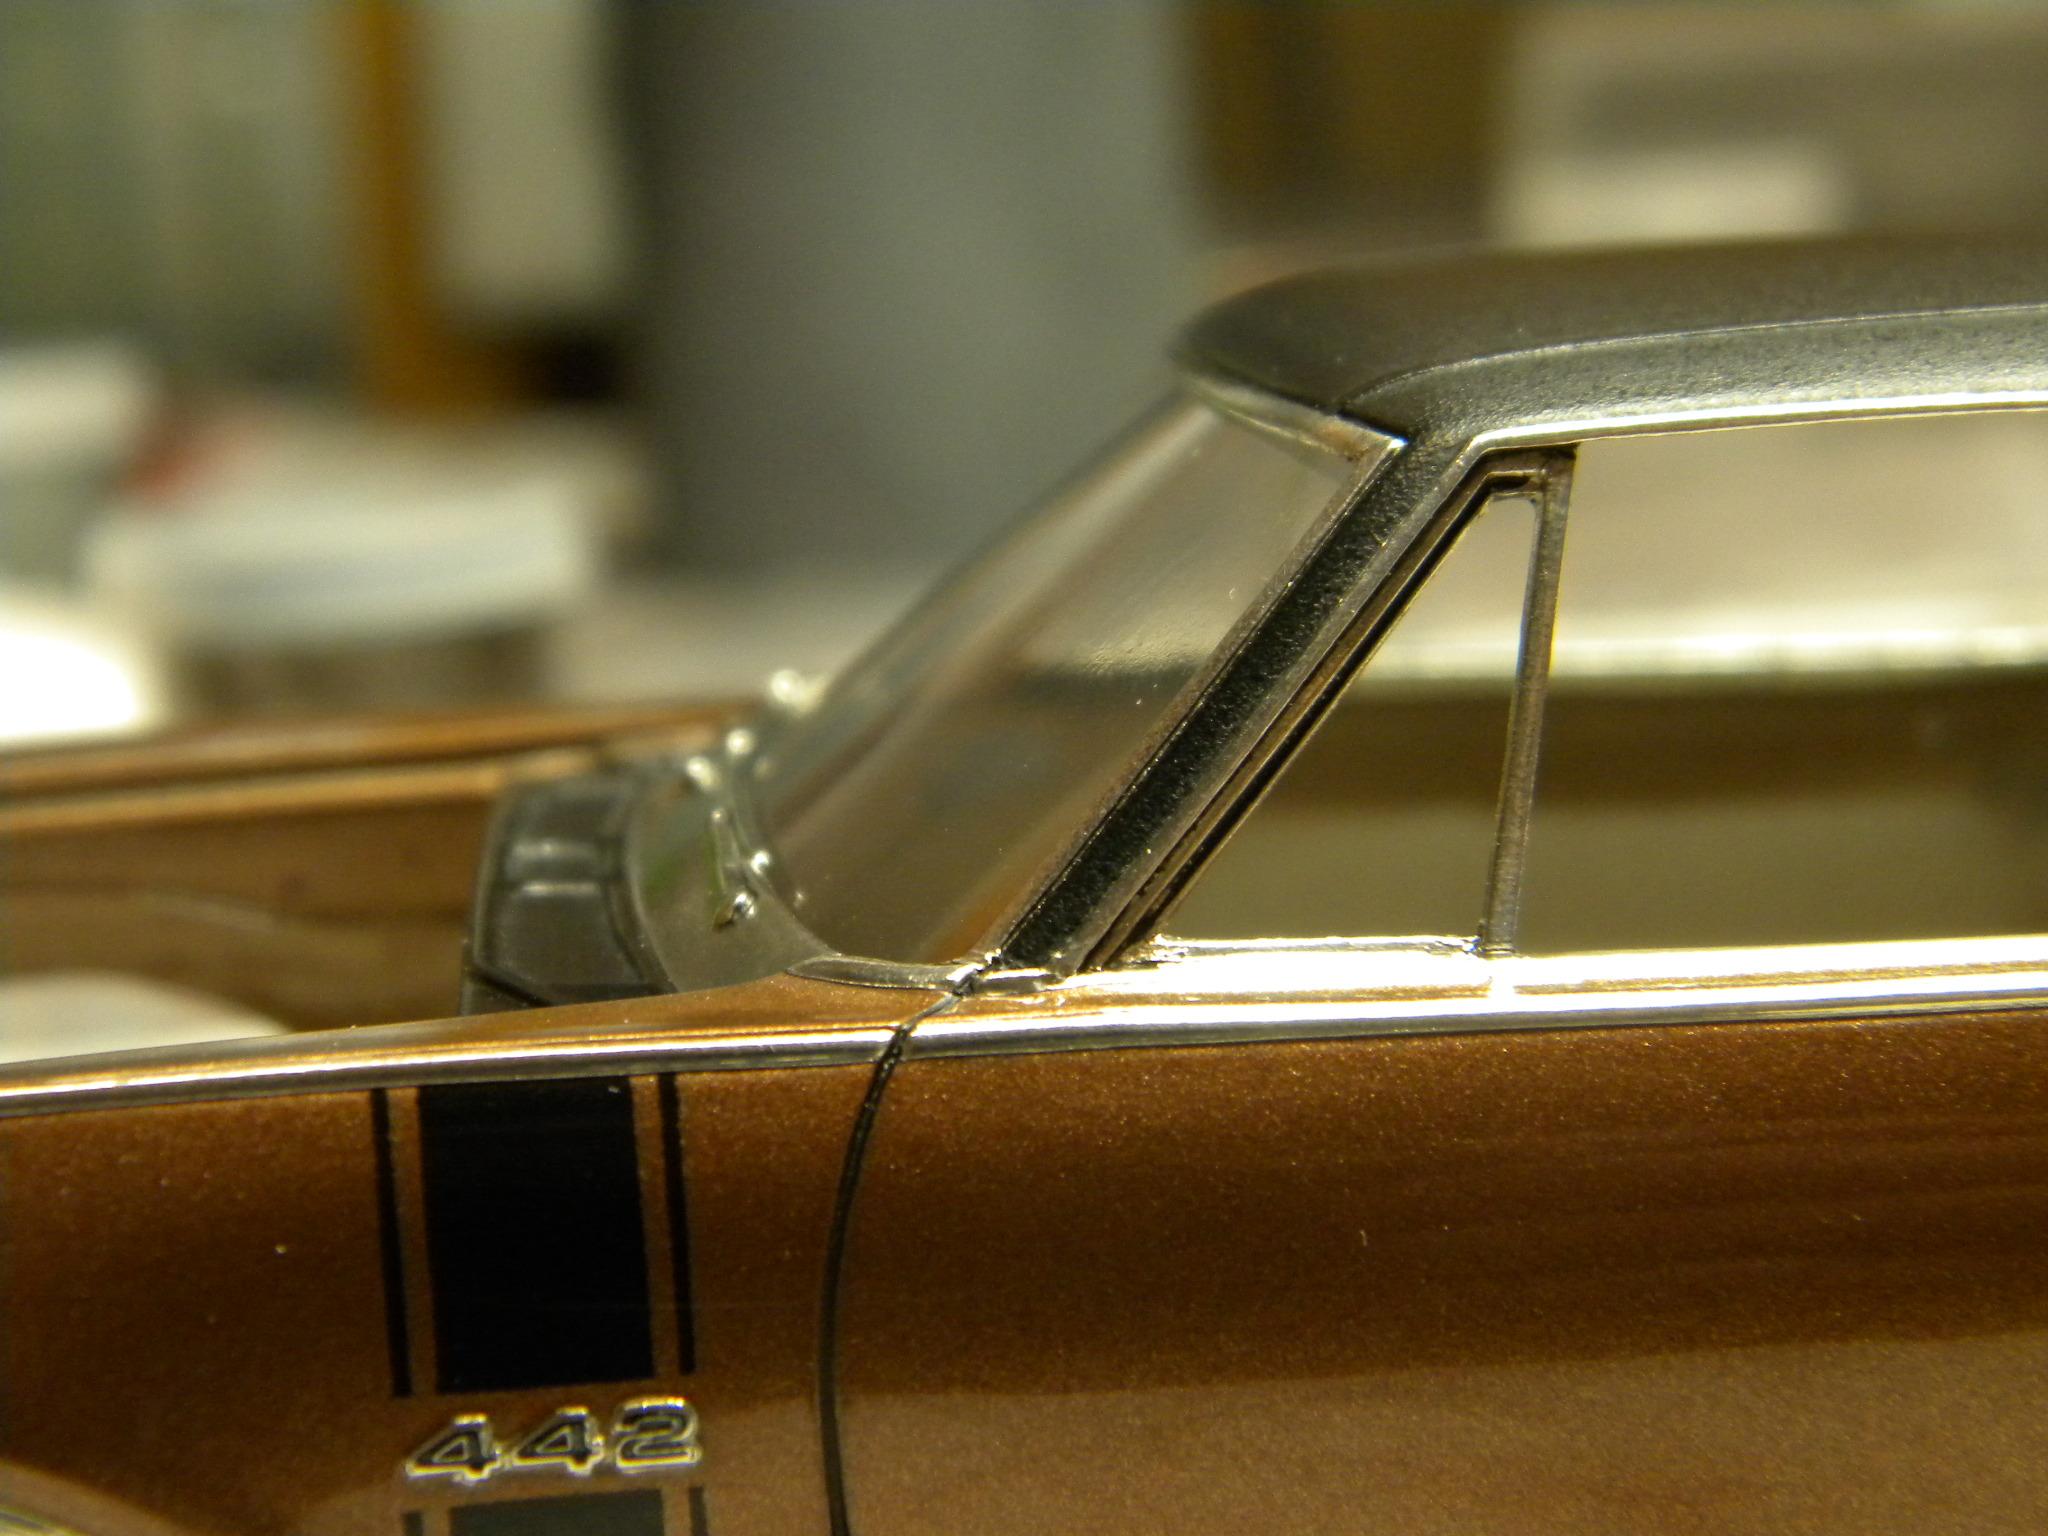
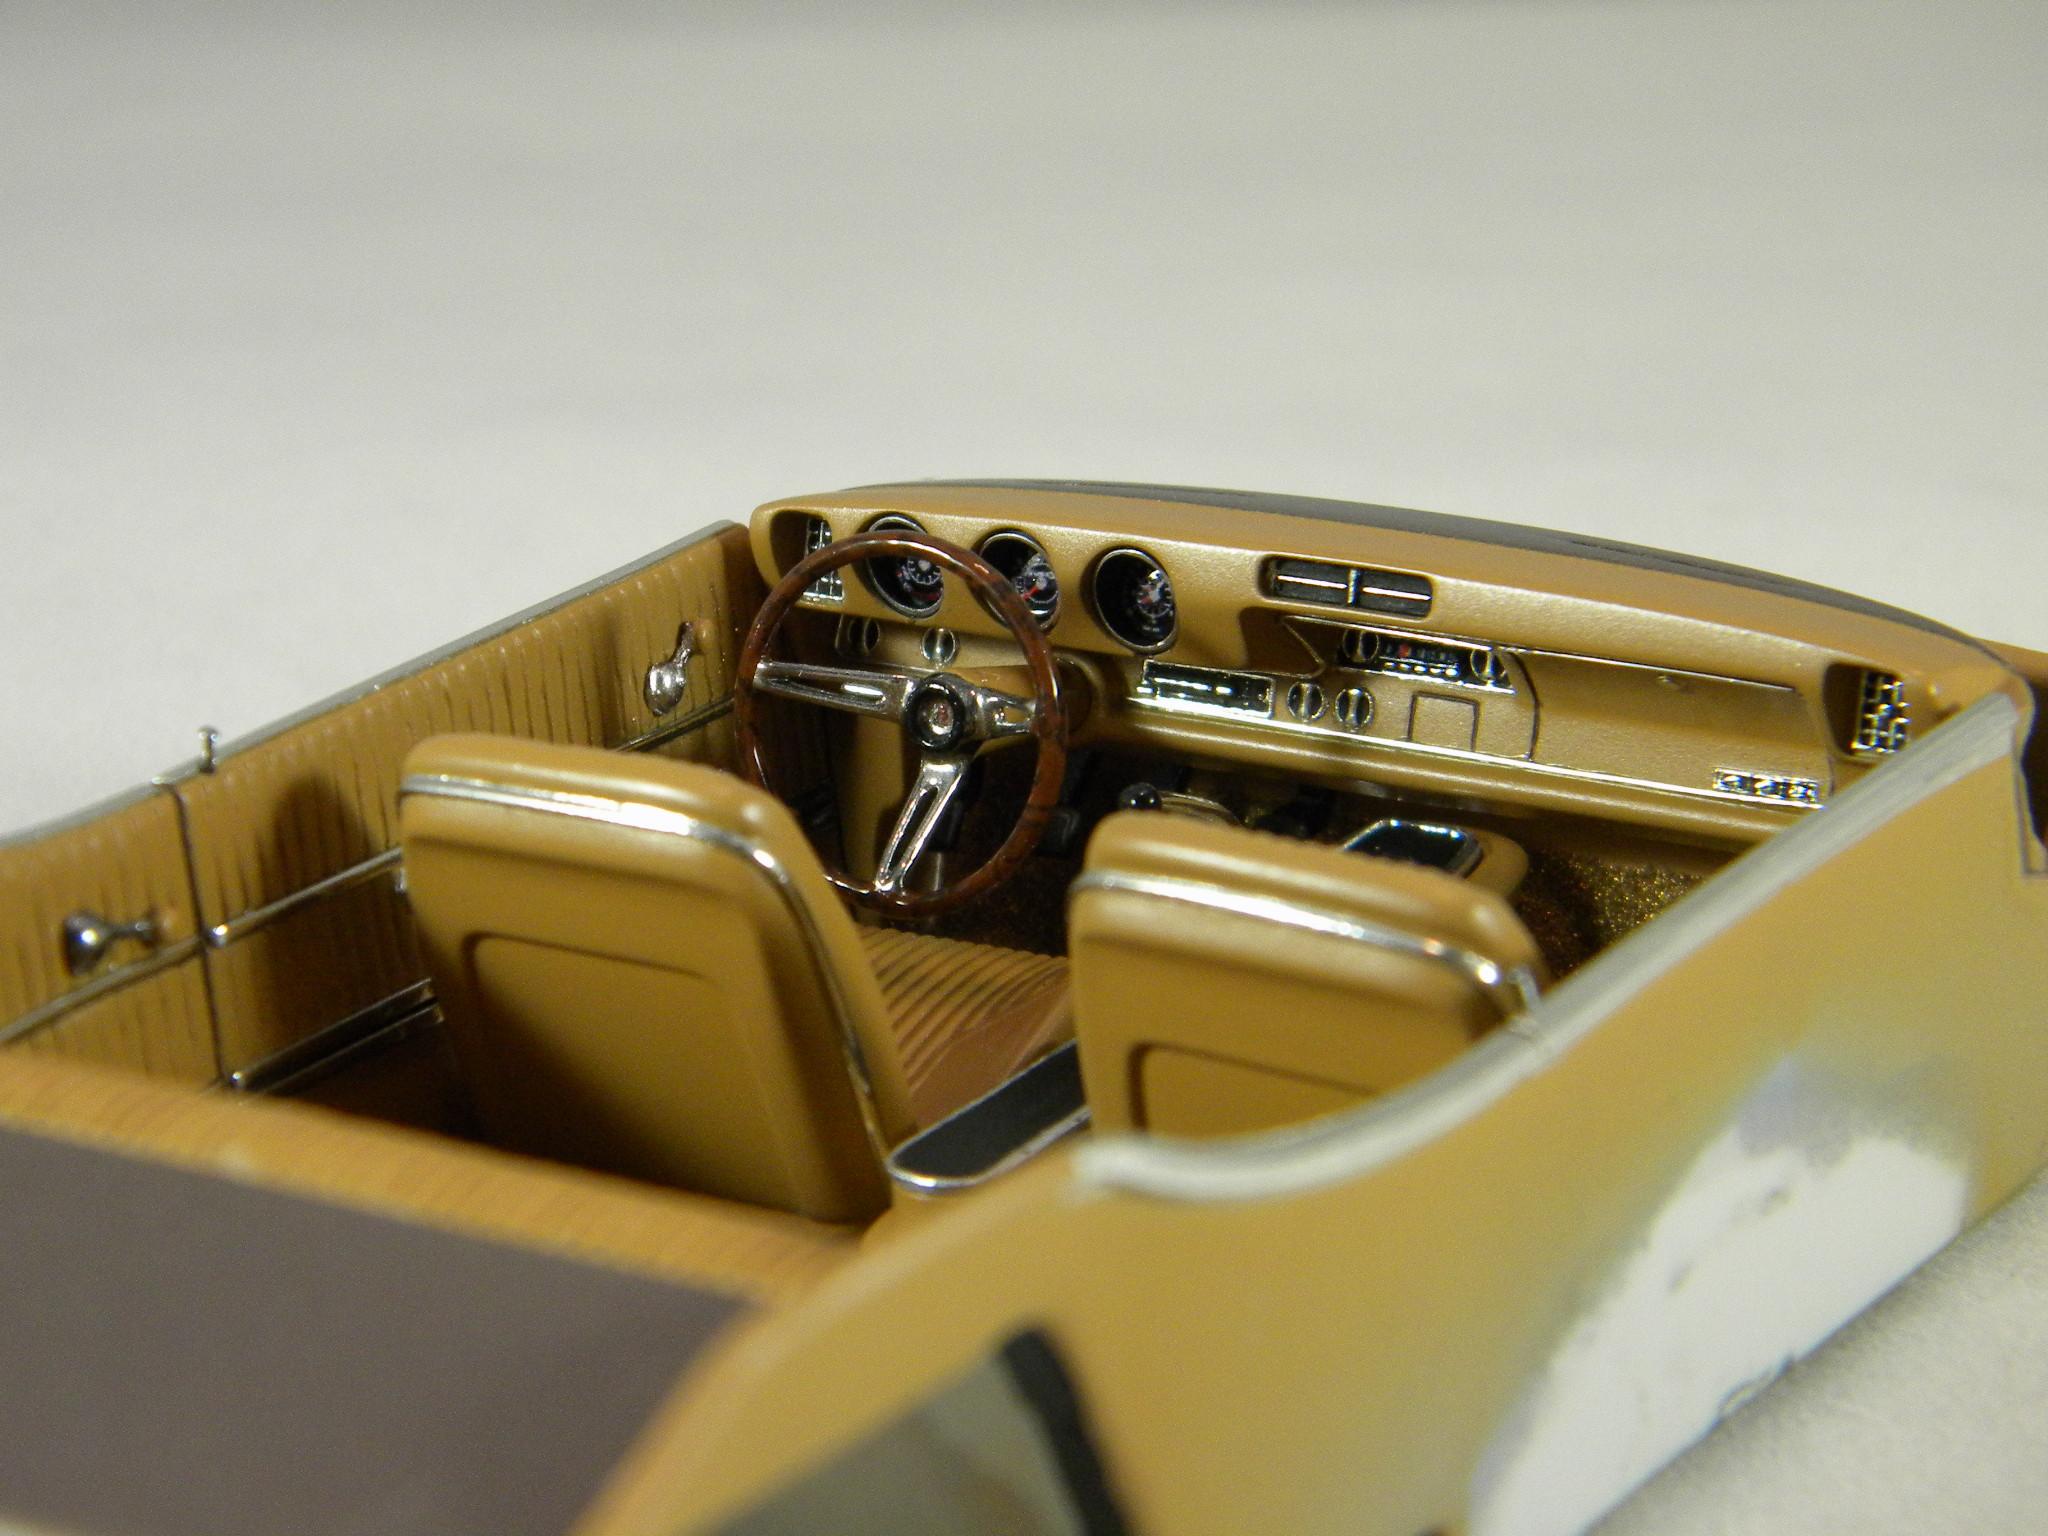
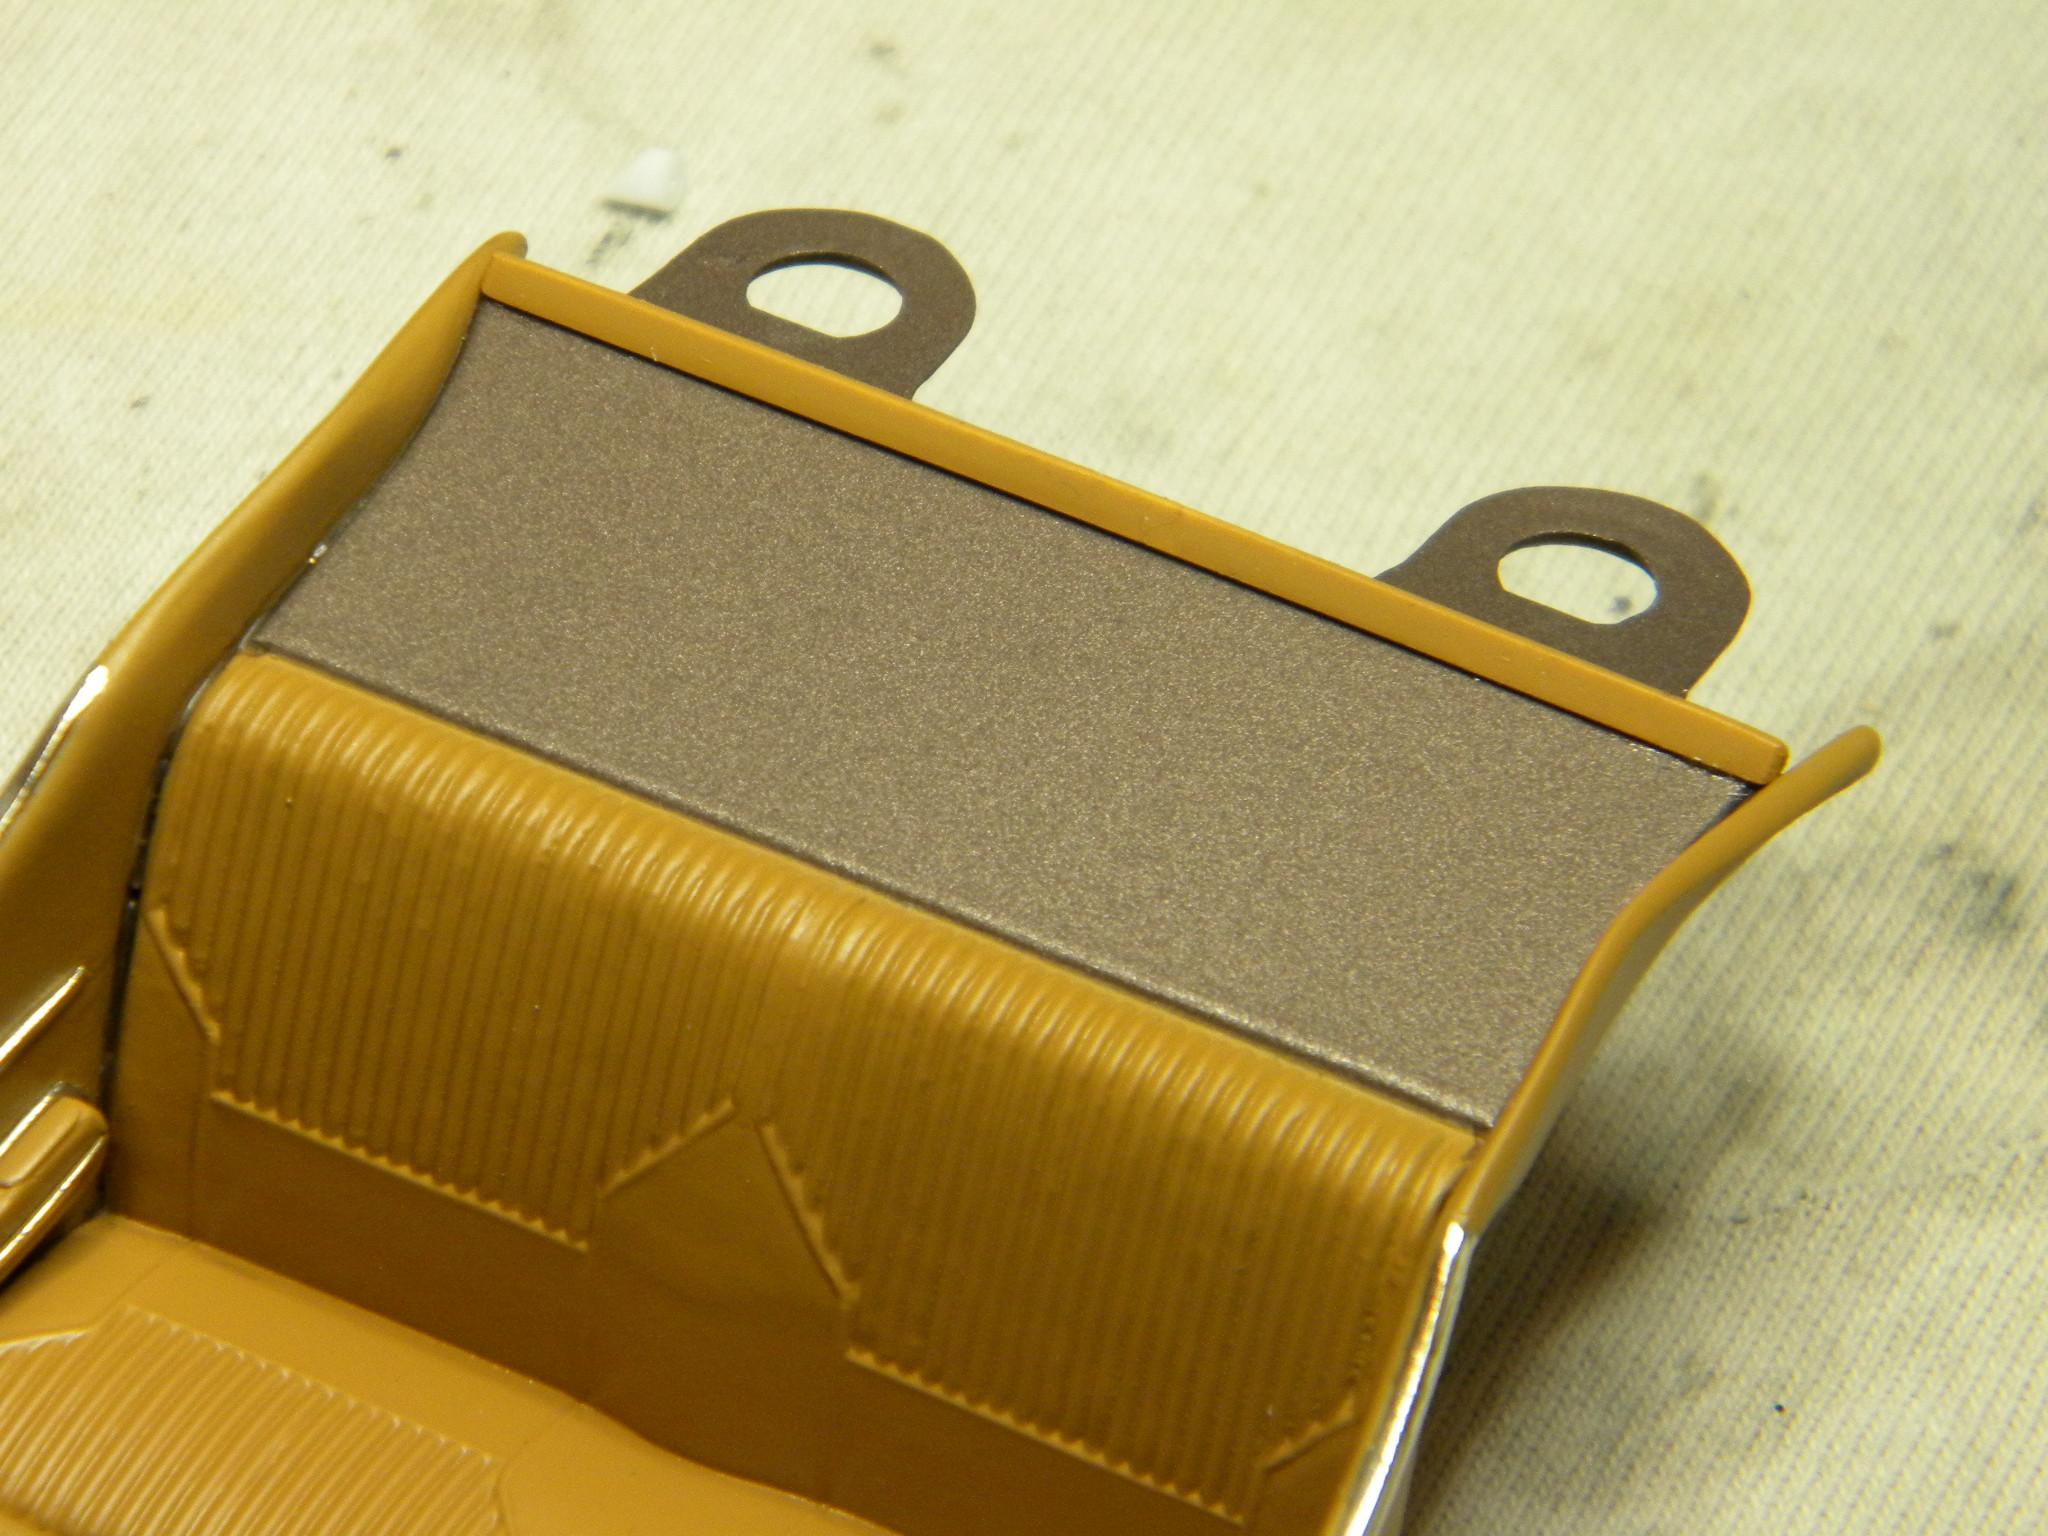
Back to work again! I decided that I really wanted to bypass the kit glass on this project and use something thinner. I have done this in the past, but just glued in the film and left it at that. This time I thought that I would try my hand at a technique that I saw some time ago on the board. I thought that I could kill two birds with one stone and refine how the glass was mounted, and at the same time, improve the appearance of the inside of the body. I started by fashioning a pair of A pillar covers from some plastic rod and installing them on the inside of the A pillars. This not only will improve the look of the glass area from the inside, but doubles as a mounting medium that will hold the glass in place at the sides with friction. I should be able to glue only the bottom of the glass to the inside of the cowl, and maybe a little on the top which should be sufficient to hold the glass securely in place without any unsightly edges or glue being evident. While I was at it, I made a trim piece for the top of the glass as well for the glass to butt up to. So far it looks like it will work very well. Steve
-
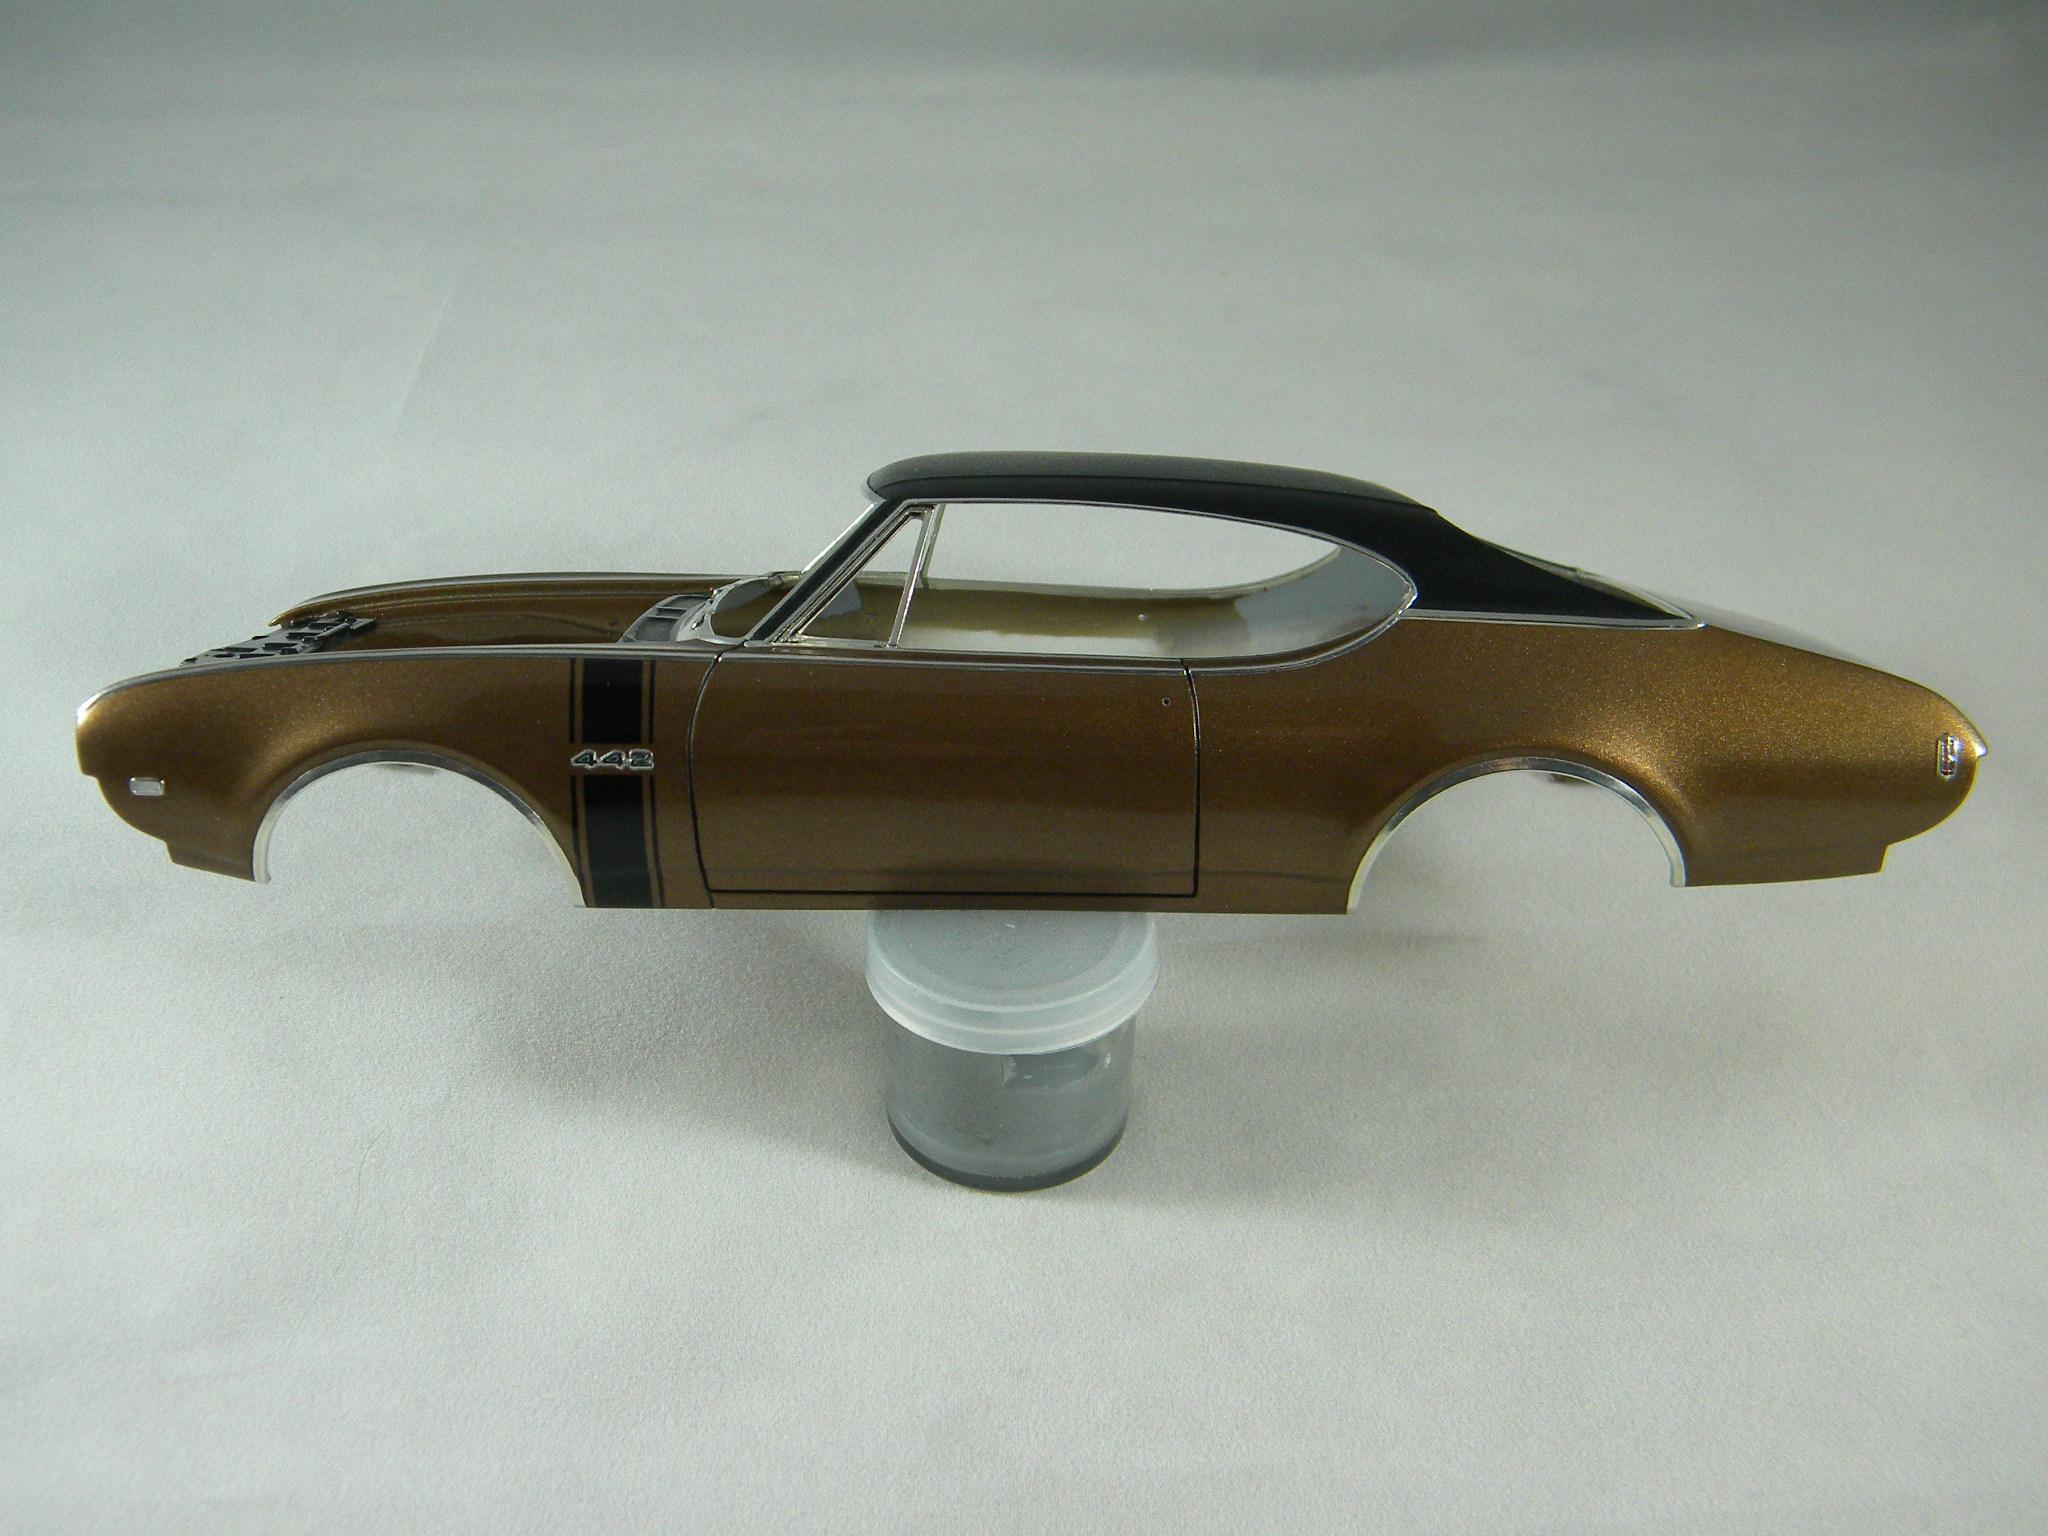
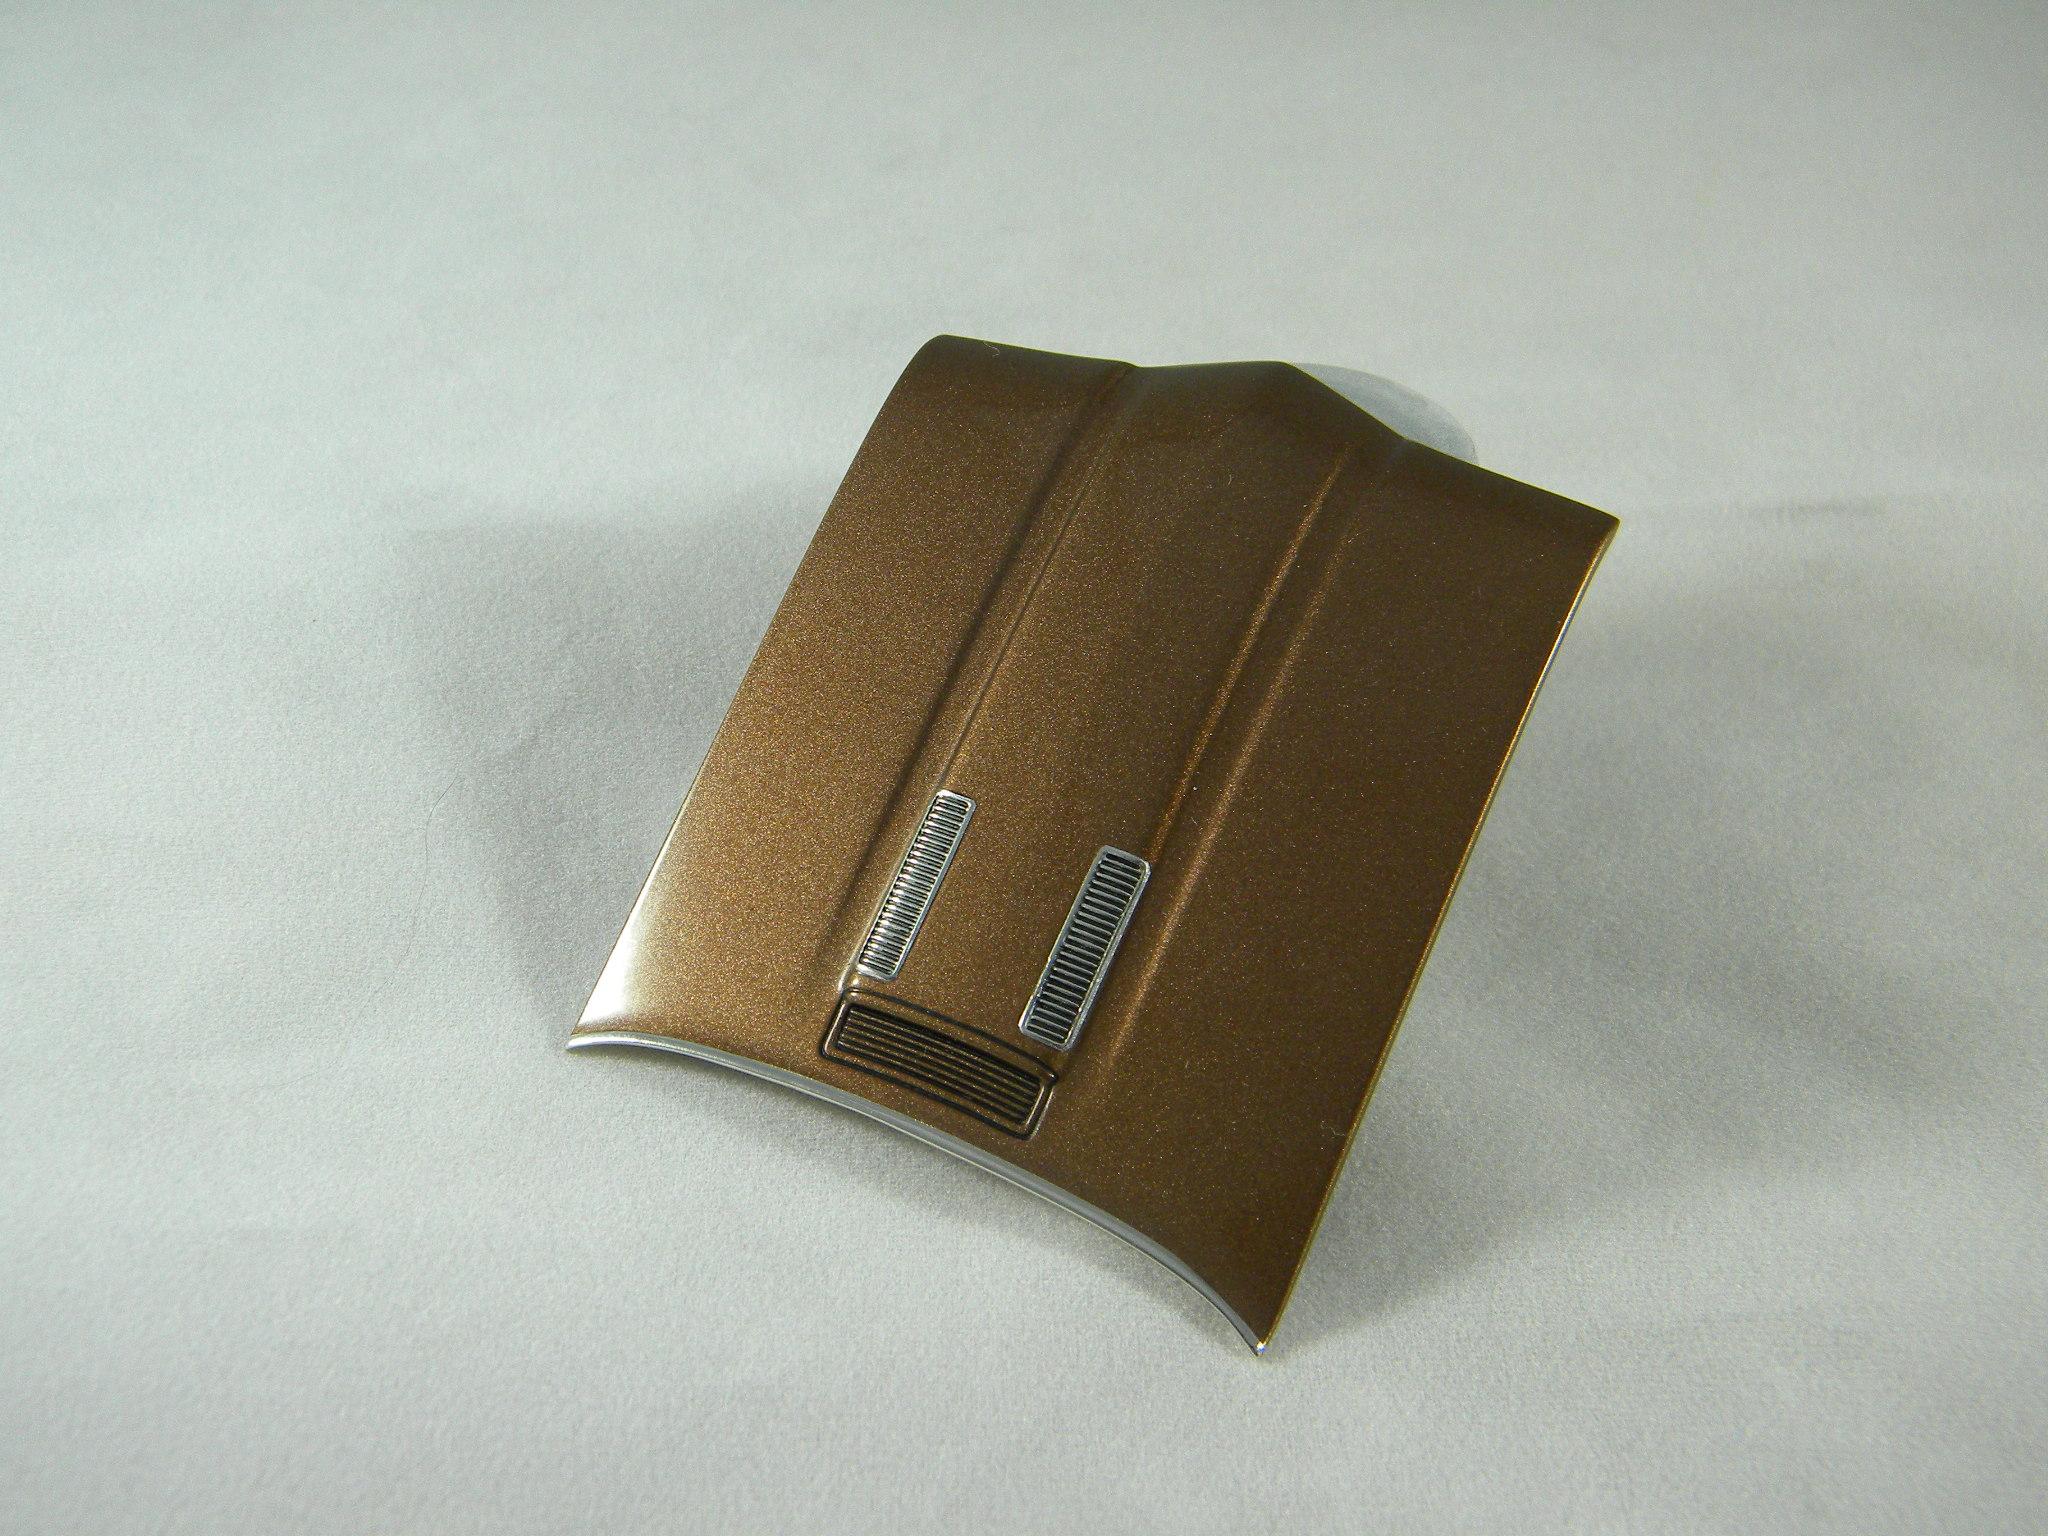
I hear you Kevin! I've had the same "boredom" issue especially when it came to doing several kits with basically the same chassis and drive train. Don't get me wrong, I love Chevrolets, but once you've seen a 427 Chevy engine, you've pretty much seen them all. The excitement comes back into the equation for me when I start building cars with more unusual engine configurations. Mopar and Ford seem to have a little more variation in the appearance of many of their engines and induction systems, as does this Olds with the Oldsmobile unique cold air intake system. I've also started becoming a lot more interested in interior detail once I started getting away from just painting and finishing what was included in the kit. I find I really enjoy blowing apart these old vintage kit tubs and trying my hand at making them a little more interesting on the inside. It's a challenge at times, but the results are very satisfying. Steve
-
Yeah baby!! Now we're talkin'! I love seeing these old kits redone with today's techniques and materials! I built a hard top version of this kit a couple of years ago and I'm greatly looking forward to building the '68 hard top version of this car! The turquoise that you have chosen will be absolutely beautiful! Steve
-
And George Hernandez at "Kustom Krome". Only ones that I know of. Steve
-
I agree with this 100%. I'll take this conversation into a slightly different realm as well, as it pertains to old vehicles. This is part of the reason why I really dislike "resto-mods". I could never get past the idea that people "must have" all of the creature comforts that their 2019 Audi has, in their '69 Camaro that they spend maybe 6 hours a year in. I have always been of the opinion that if I'm going to own an "old car", I want it to feel like an old car. I want it to run, stop and corner like one. Isn't it the point of owning a classic car for the nostalgia of it? When I get into my '69 Grand Prix, I want to be transported back to that era. The feeling of a trip back in time would be completely destroyed with a brand new, custom stitched, tan leather interior and a smooth running modern V-8 under the hood. I want to have to pump the gas to get it started! I want it to "lope" at an idle like a 400 should! I want to hear the secondaries open up on that big old Rochester carb when I stomp on the gas! I love the fact that I have to put my drink between my legs as I drive because there are NO CUP HOLDERS!!! It makes me feel young again. If I really feel that I need blue tooth and Sirius Radio, I'll take my wife's Acura. Steve
-
That's a beauty! I can't say that I recall ever seeing one of these in Panther Pink. It looks great in that shade with the white stripe and interior! Something you don't see every day. Great work Dominick!! Steve
-
Grill slot blackouts
StevenGuthmiller replied to NOBLNG's topic in Model Building Questions and Answers
Looks great the way it is. I wouldn't change a thing. Steve -
Hardly Peter, but I appreciate your vote of confidence. Steve
-
After reading my initial post Snake, I realized that I made it sound like breaking the steering wheel in a couple of places was "your fault". What I meant was, it was your fault that I was attempting to alter it in the first place! But in retrospect, I'm glad that you brought it up. This is part of the reason why I love "On the Bench" build threads! Believe it or not, after I finished it for the second time, I began lamenting the fact that I didn't go farther and separate the steering column and grind out and replace the horn button. These items will very possibly be on my mind for the next project. Steve
-
Wheel Arch Molding Foiling Tutorial
StevenGuthmiller replied to StevenGuthmiller's topic in Tips, Tricks, and Tutorials
You may possibly have good luck with Molotow ink, but the question still remains on durability. I have models that I built 30 years ago with BMF and they look exactly the same as the day they were finished. I would be interested to see some done with Molotow 30 years from now to see how well they have held up. Until then, I will use BMF for everything that is possible to use it on. Steve -
Grill slot blackouts
StevenGuthmiller replied to NOBLNG's topic in Model Building Questions and Answers
There's really no need to strip the chrome to open up a grille like this. A deep grooved grille like this one is relatively simple to grind away at the back of the grille with a variable speed Dremel tool fitted with a reamer bit. Just keep carefully grinding until the slots are close to opening up, and then if you're unsure of your Dremel skills, you can finish with sand paper. The chrome on the front of the grille will remain intact. On this particular grill, you would need to leave a little material at the bottom for strength purposes because there is no border around the base of the grille. Steve -
Grill slot blackouts
StevenGuthmiller replied to NOBLNG's topic in Model Building Questions and Answers
I use the exact technique using acrylic craft paint thinned with regular old tap water. It has worked very well for me for in excess of 35 years. Steve -
Very cool! I have thought hard about purchasing one of the MCW Oldsmobile's, but have yet to pull the trigger. Looks like a pretty nice kit. Steve
-
Perfectly understandable Kevin. You are never going to see me milling a 1/25th scale engine block from a chunk of aluminum! We all have our own ideas of what is required for a project to be considered acceptable to ourselves. Steve
-
I have thought about opening doors at times, but at this point, it's not one of those things that I feel the necessity to do. Undoubtedly, there is no way that I will ever return to this project to open the doors! Steve
-
Thanks Tom! Recently I have managed to finish such items as getting the interior back together after re-working the steering wheel, finish the foil and darken the panel lines on the body, and am currently working on some interior trim parts in preparation for glass installation. Most recently I added a trim piece to the back of the rear package shelf to help fill the gap that would have been fairly pronounced between the interior and the body. Steve
-
I understand completely Kevin. If you go back and look at some of my curbside builds over the past few years, you'll see that outside of paint and possibly a few other small details, most of those interiors were changed very little from the kit parts. It's a fairly recent development for me to begin putting more effort into the interiors. Just sort of a natural progression I guess. I find myself more and more recognizing the philosophy that "every sub assembly is a model in itself" and I have really been enjoying becoming occupied with exploring what I'm capable of doing with some of my projects. Not all of them mind you, but I feel some are worthy of the extra attention. Especially something like this Olds, which is very likely the rarest kit that I have in my collection. Steve
-
Wrong attitude Kevin. Truth be known, I spend the time that I do on interiors, regardless of what they go into, because I love it!!! Steve
-
I've often thought that myself, but I've resigned myself to the philosophy that regardless of whether the model is a hard top or convertible, the interior, like every other aspect of a project, deserves my full attention. Steve
-
Wheel Arch Molding Foiling Tutorial
StevenGuthmiller replied to StevenGuthmiller's topic in Tips, Tricks, and Tutorials
Absolutely! This technique is a relatively sound one, but the foil itself, on the other hand, can be an issue. I've had cracking foil as well, and as someone else in this thread had mentioned, occasionally you can get some that has an orange peeled texture from the adhesive, but that's beyond our control of course. What is within our control is something that I probably should have mentioned again that has been brought up often. The finish of the foil will only be as good as the substrate that you are applying it over. If you have a grainy or orange peeled surface, the foil will reflect that. Steve -
Thanks fellas! Yes John, I was a little worried about removing it once it was glued in place, but luckily I used 2 part epoxy and the glue was not fully hardened when I decided to take it out. I tried my best to take my time and be very careful as I re-worked the spokes, and luckily I had no major mishaps other than the cracks in the rim. I guess the modeling gods had my back this time. Steve