StevenGuthmiller
-
Posts
15,088 -
Joined
-
Last visited
Content Type
Profiles
Forums
Events
Gallery
Everything posted by StevenGuthmiller
-
I hope to have this finished by then Wayne. Shouldn't be terribly difficult. It will be a little strange for me this year not having anything on the "factory stock" table. The Olds will be on the "muscle car" table, and I will bring my '65 Plymouth Fury for the "street machine" category. That will be about it this year. Steve
-
Wow! That's very nice! Super clean! Steve
-
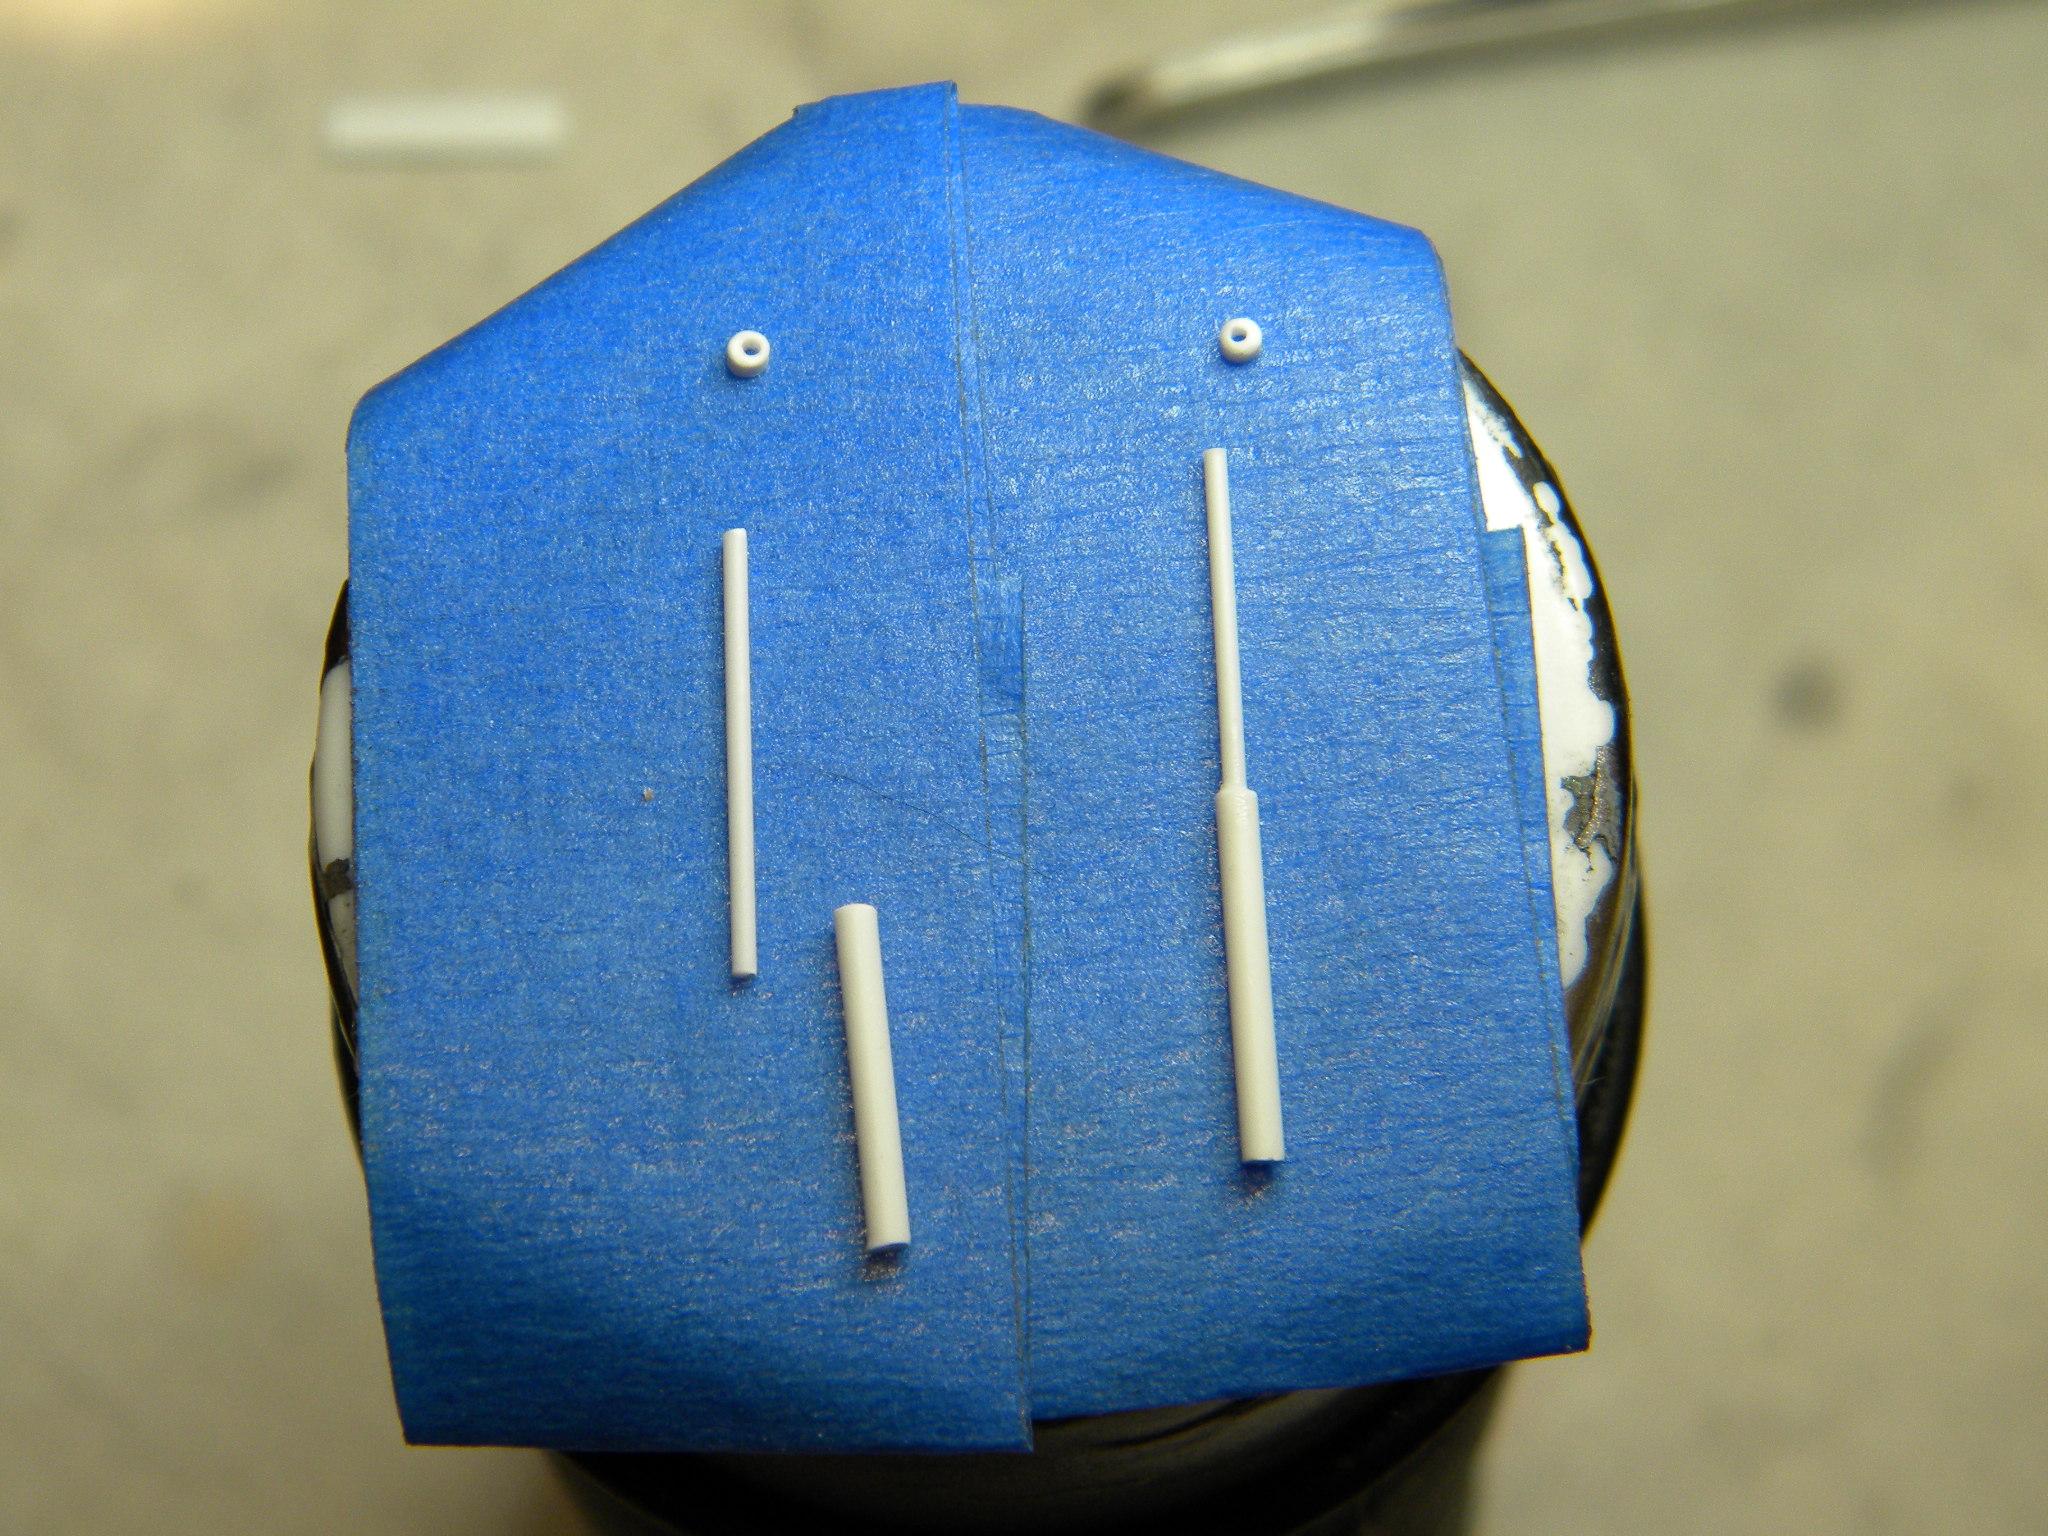
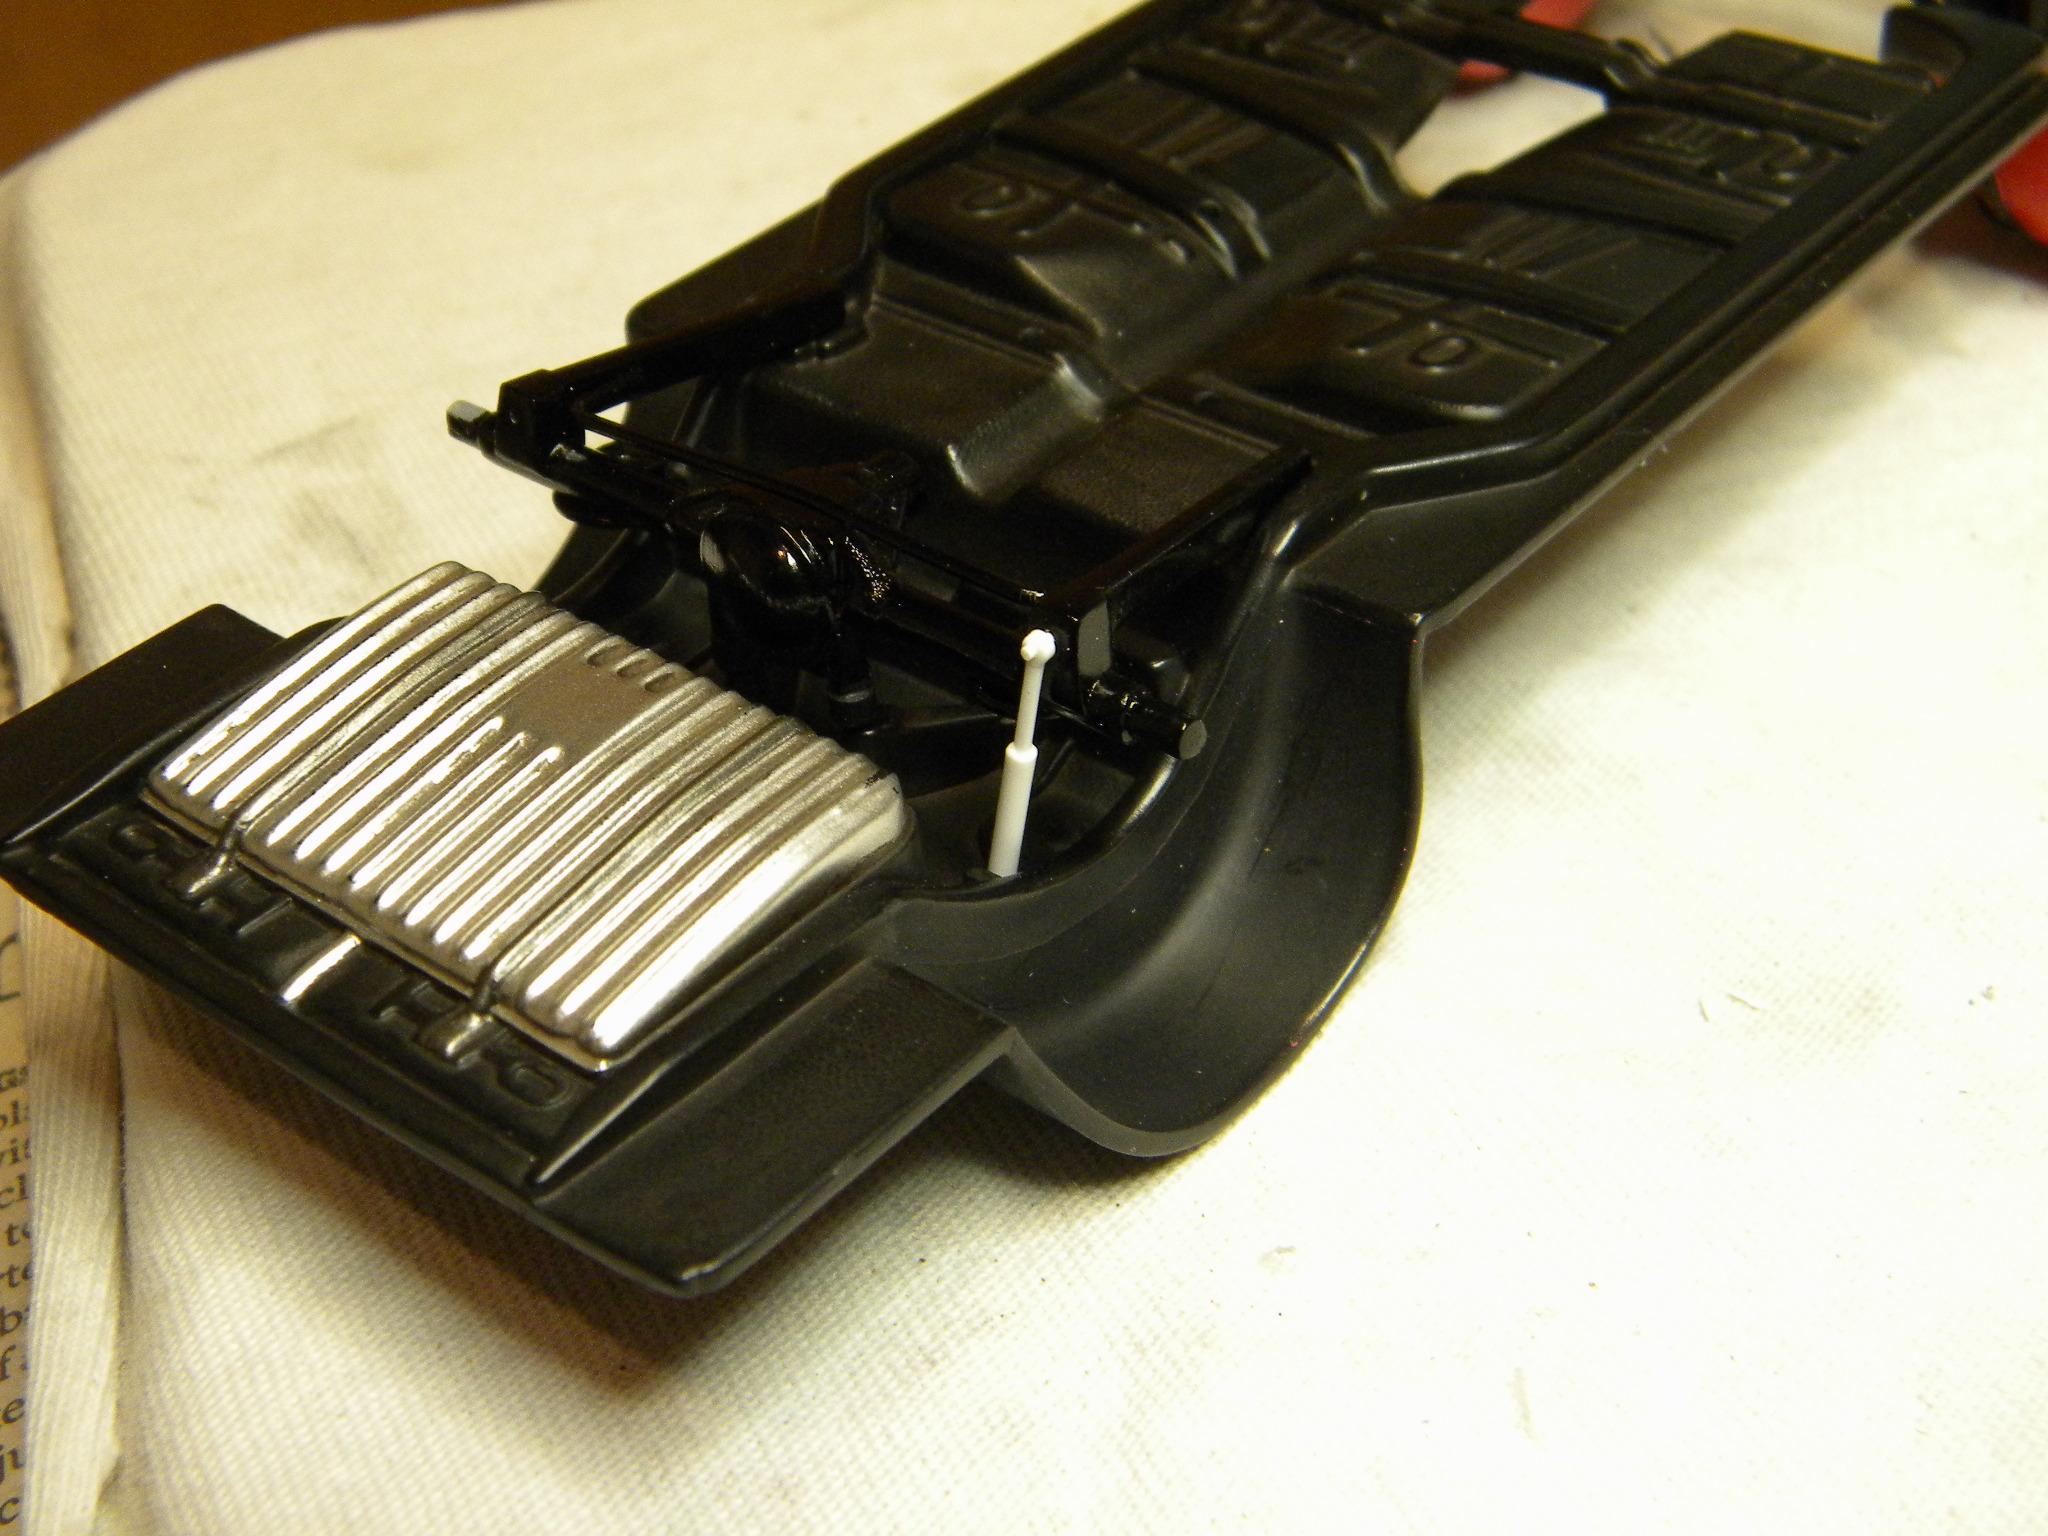
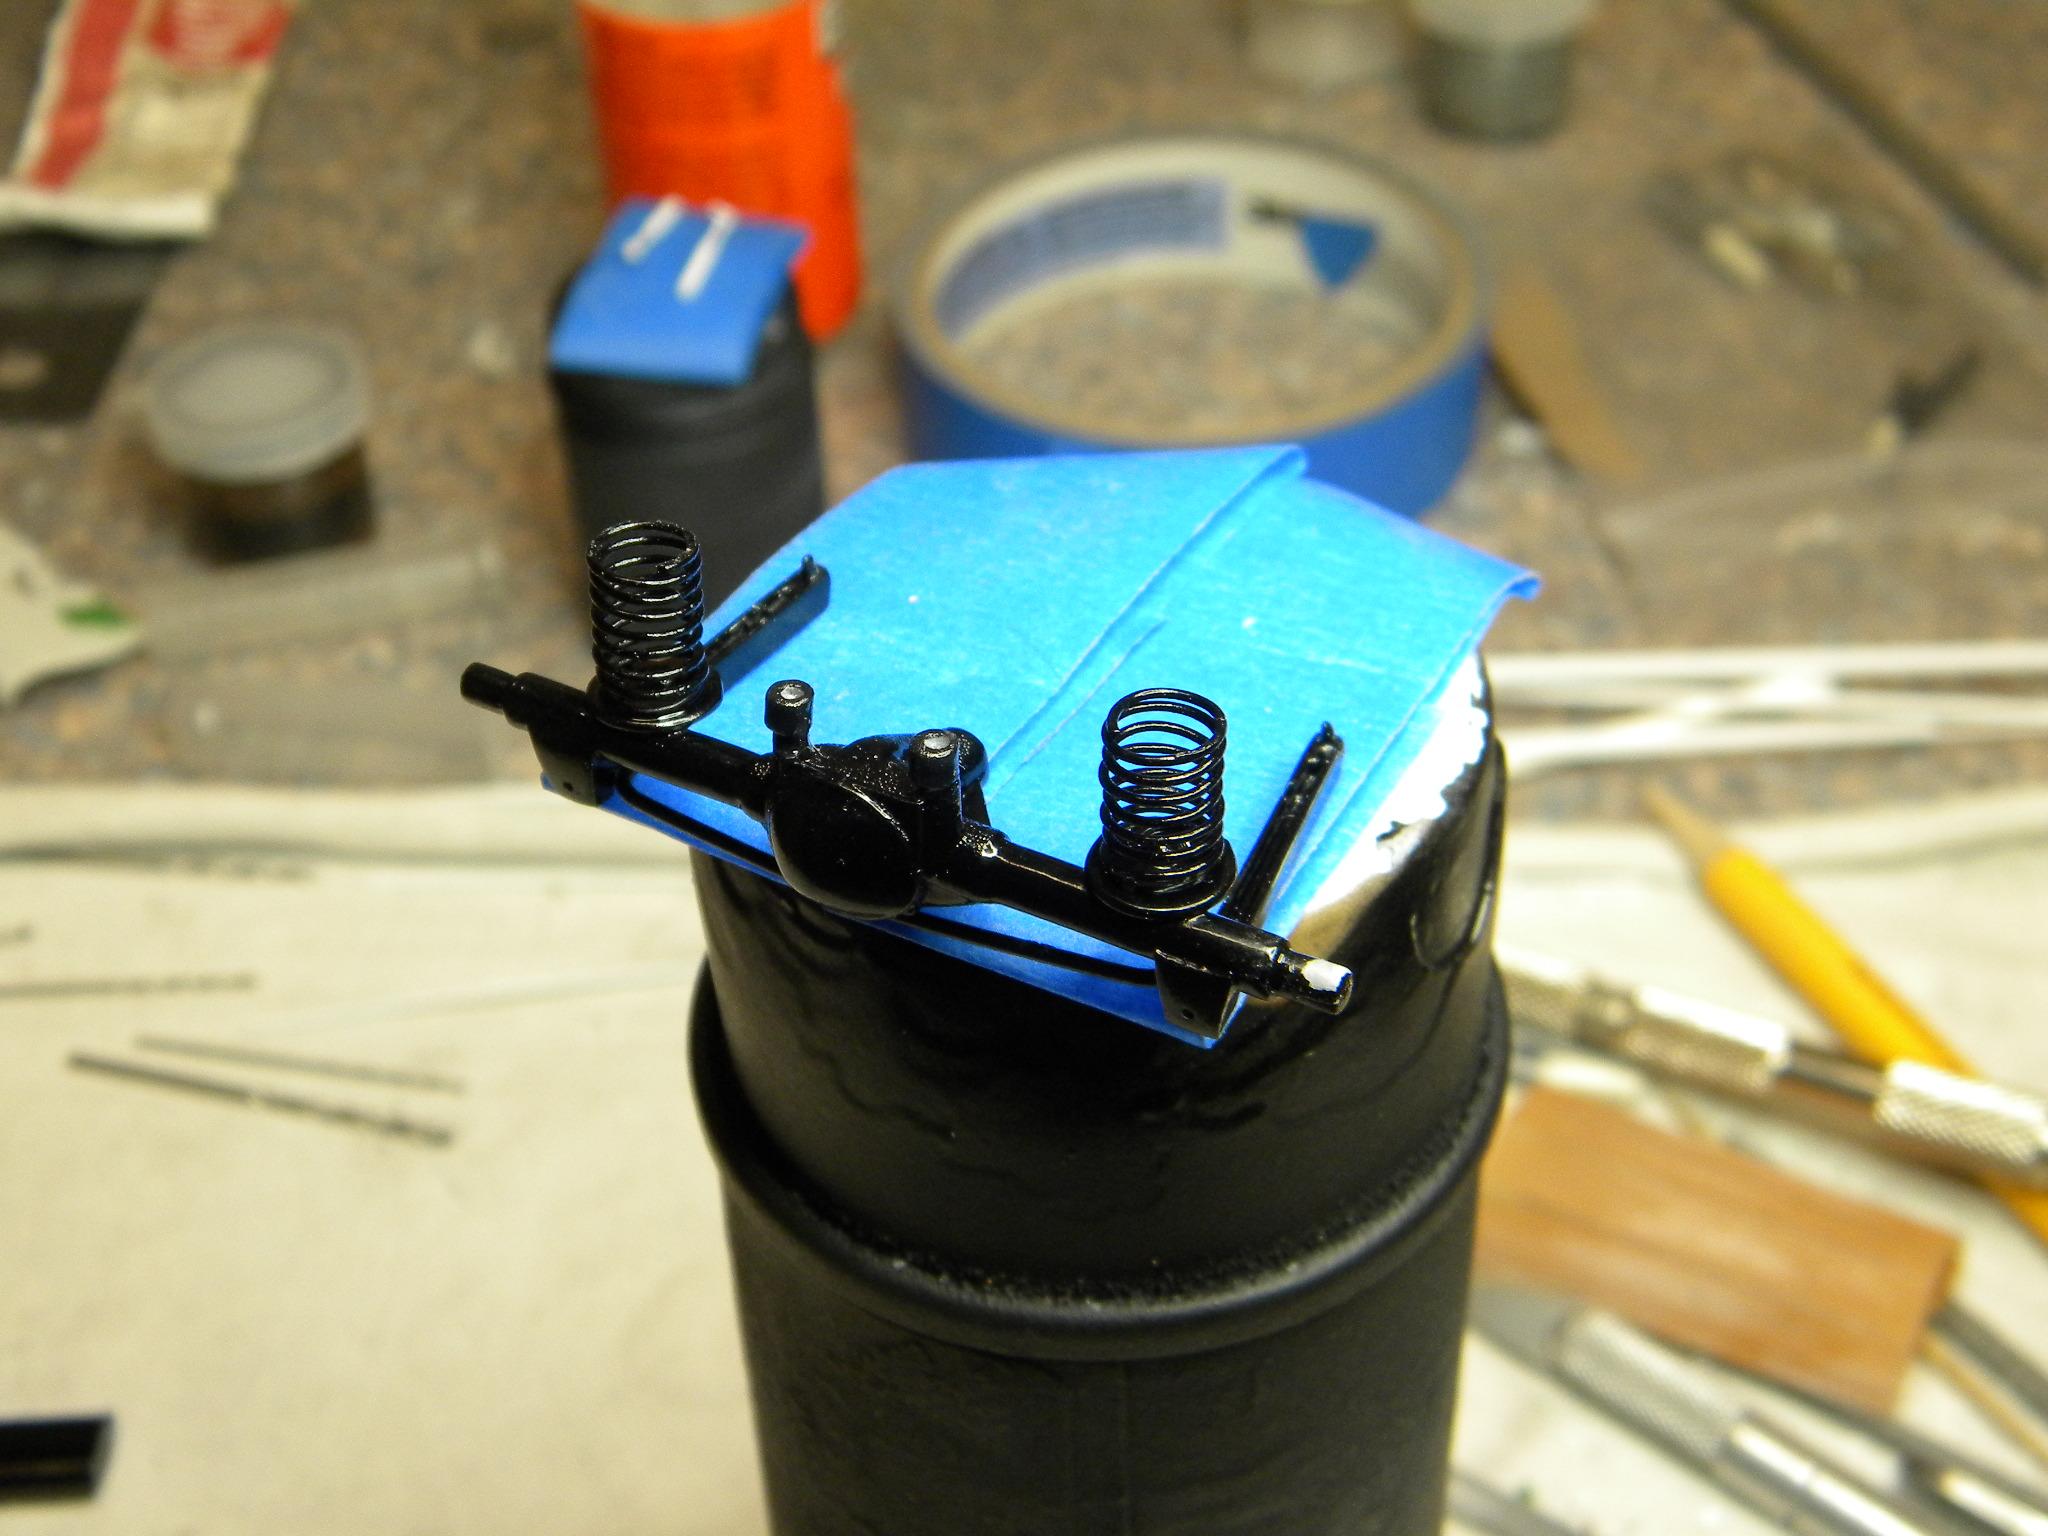
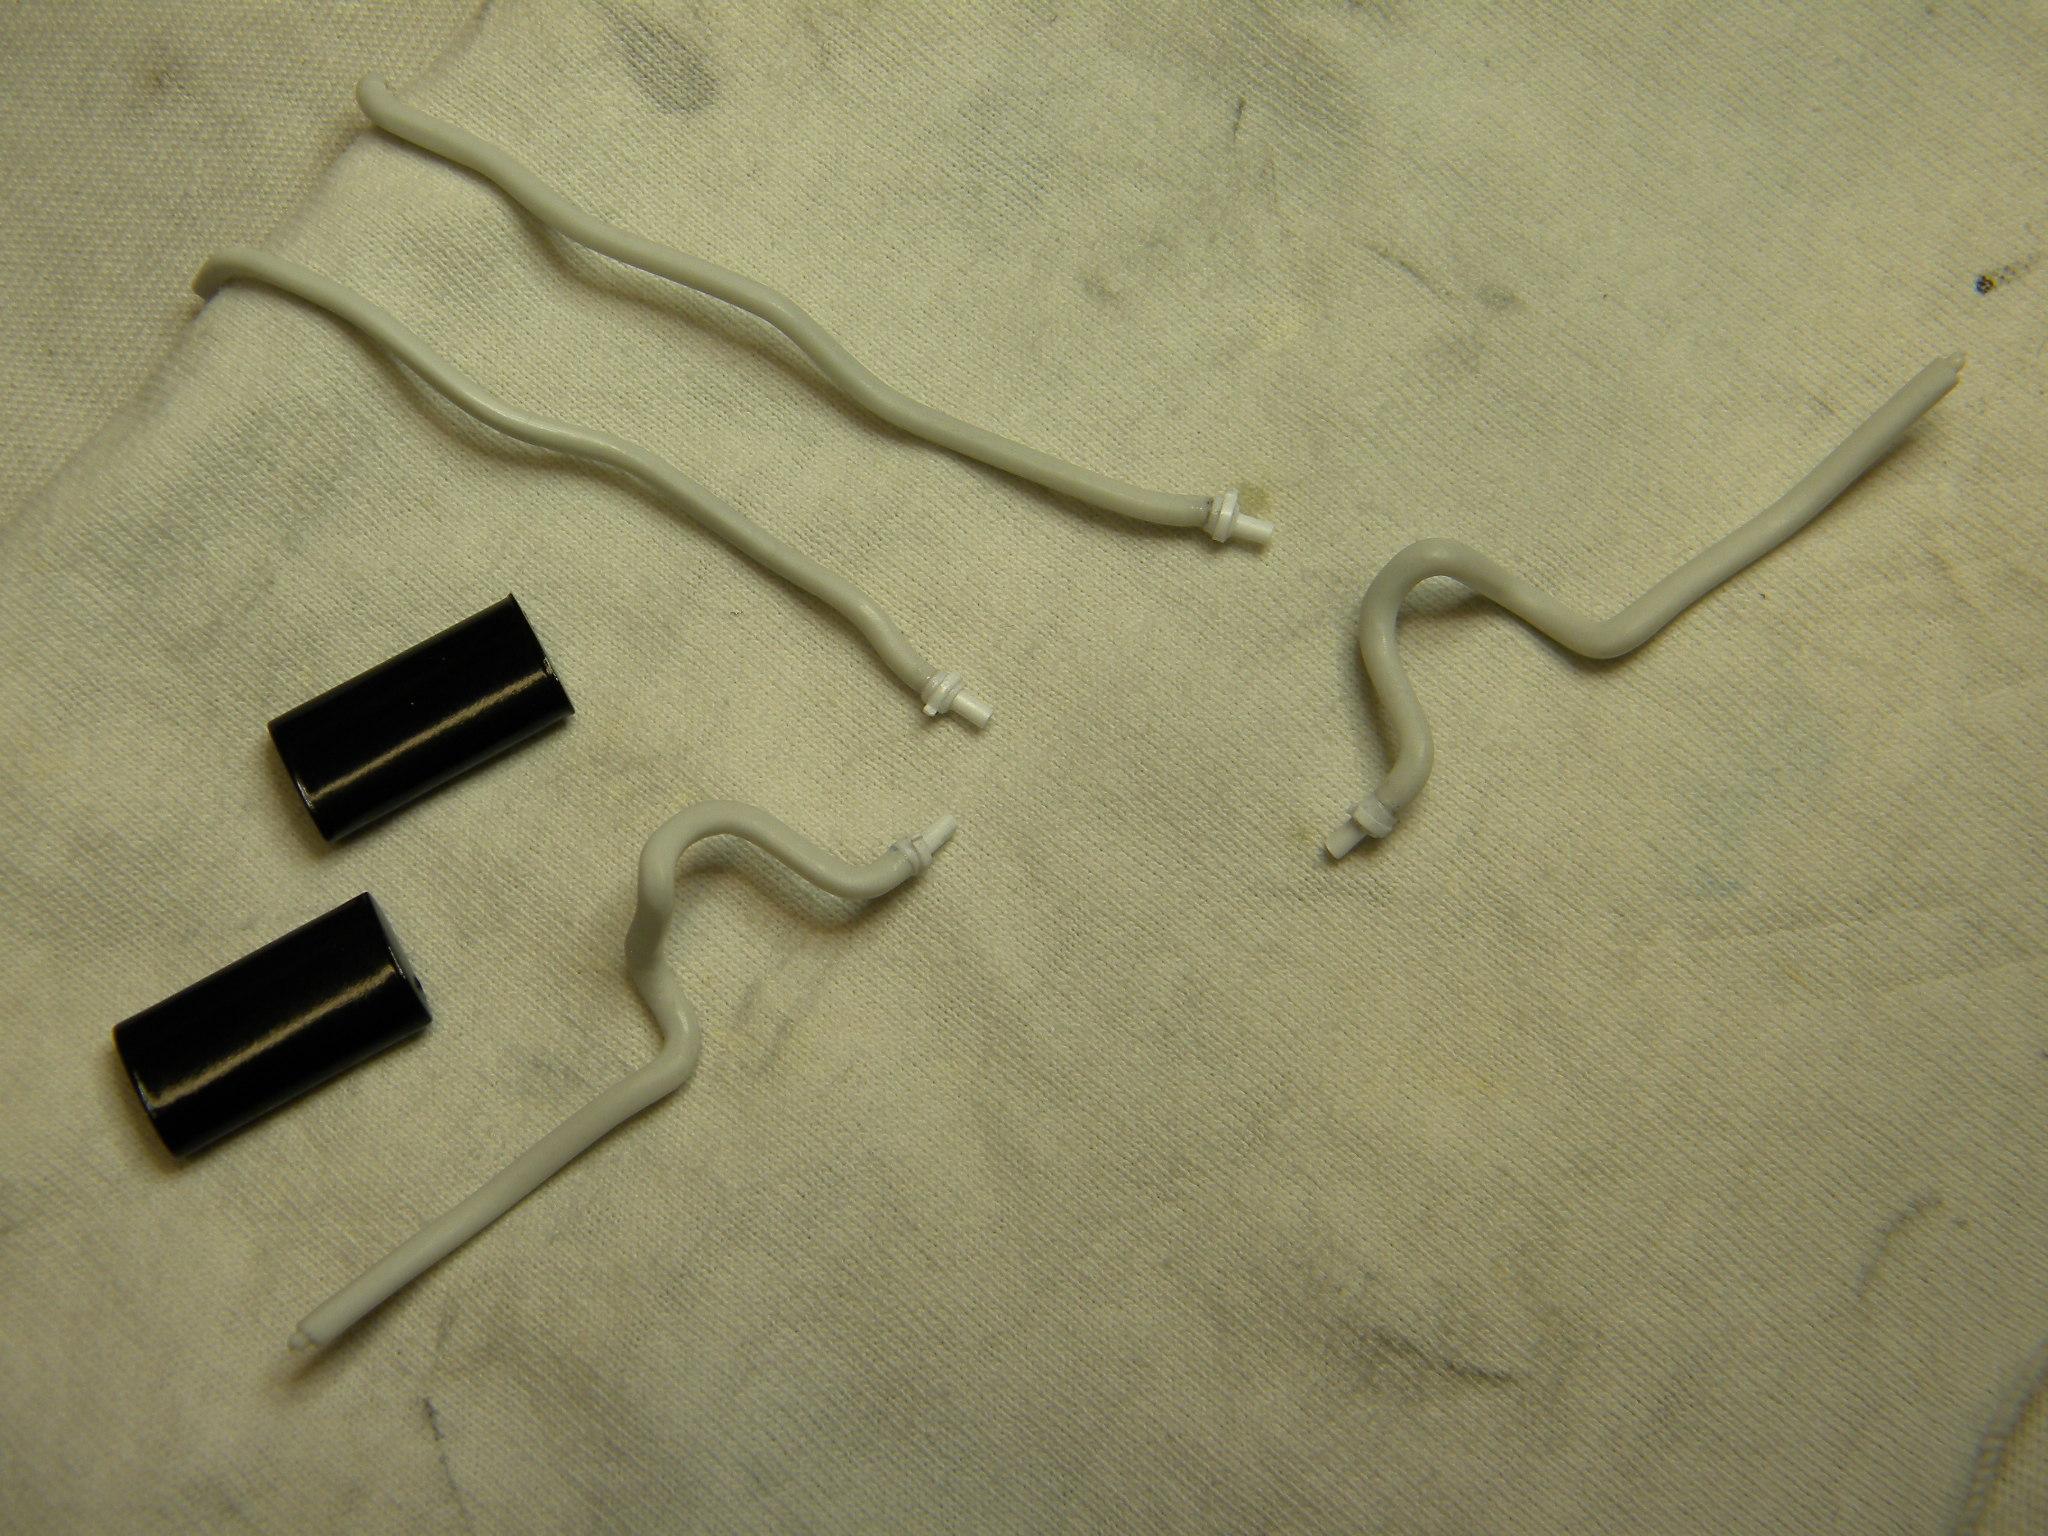
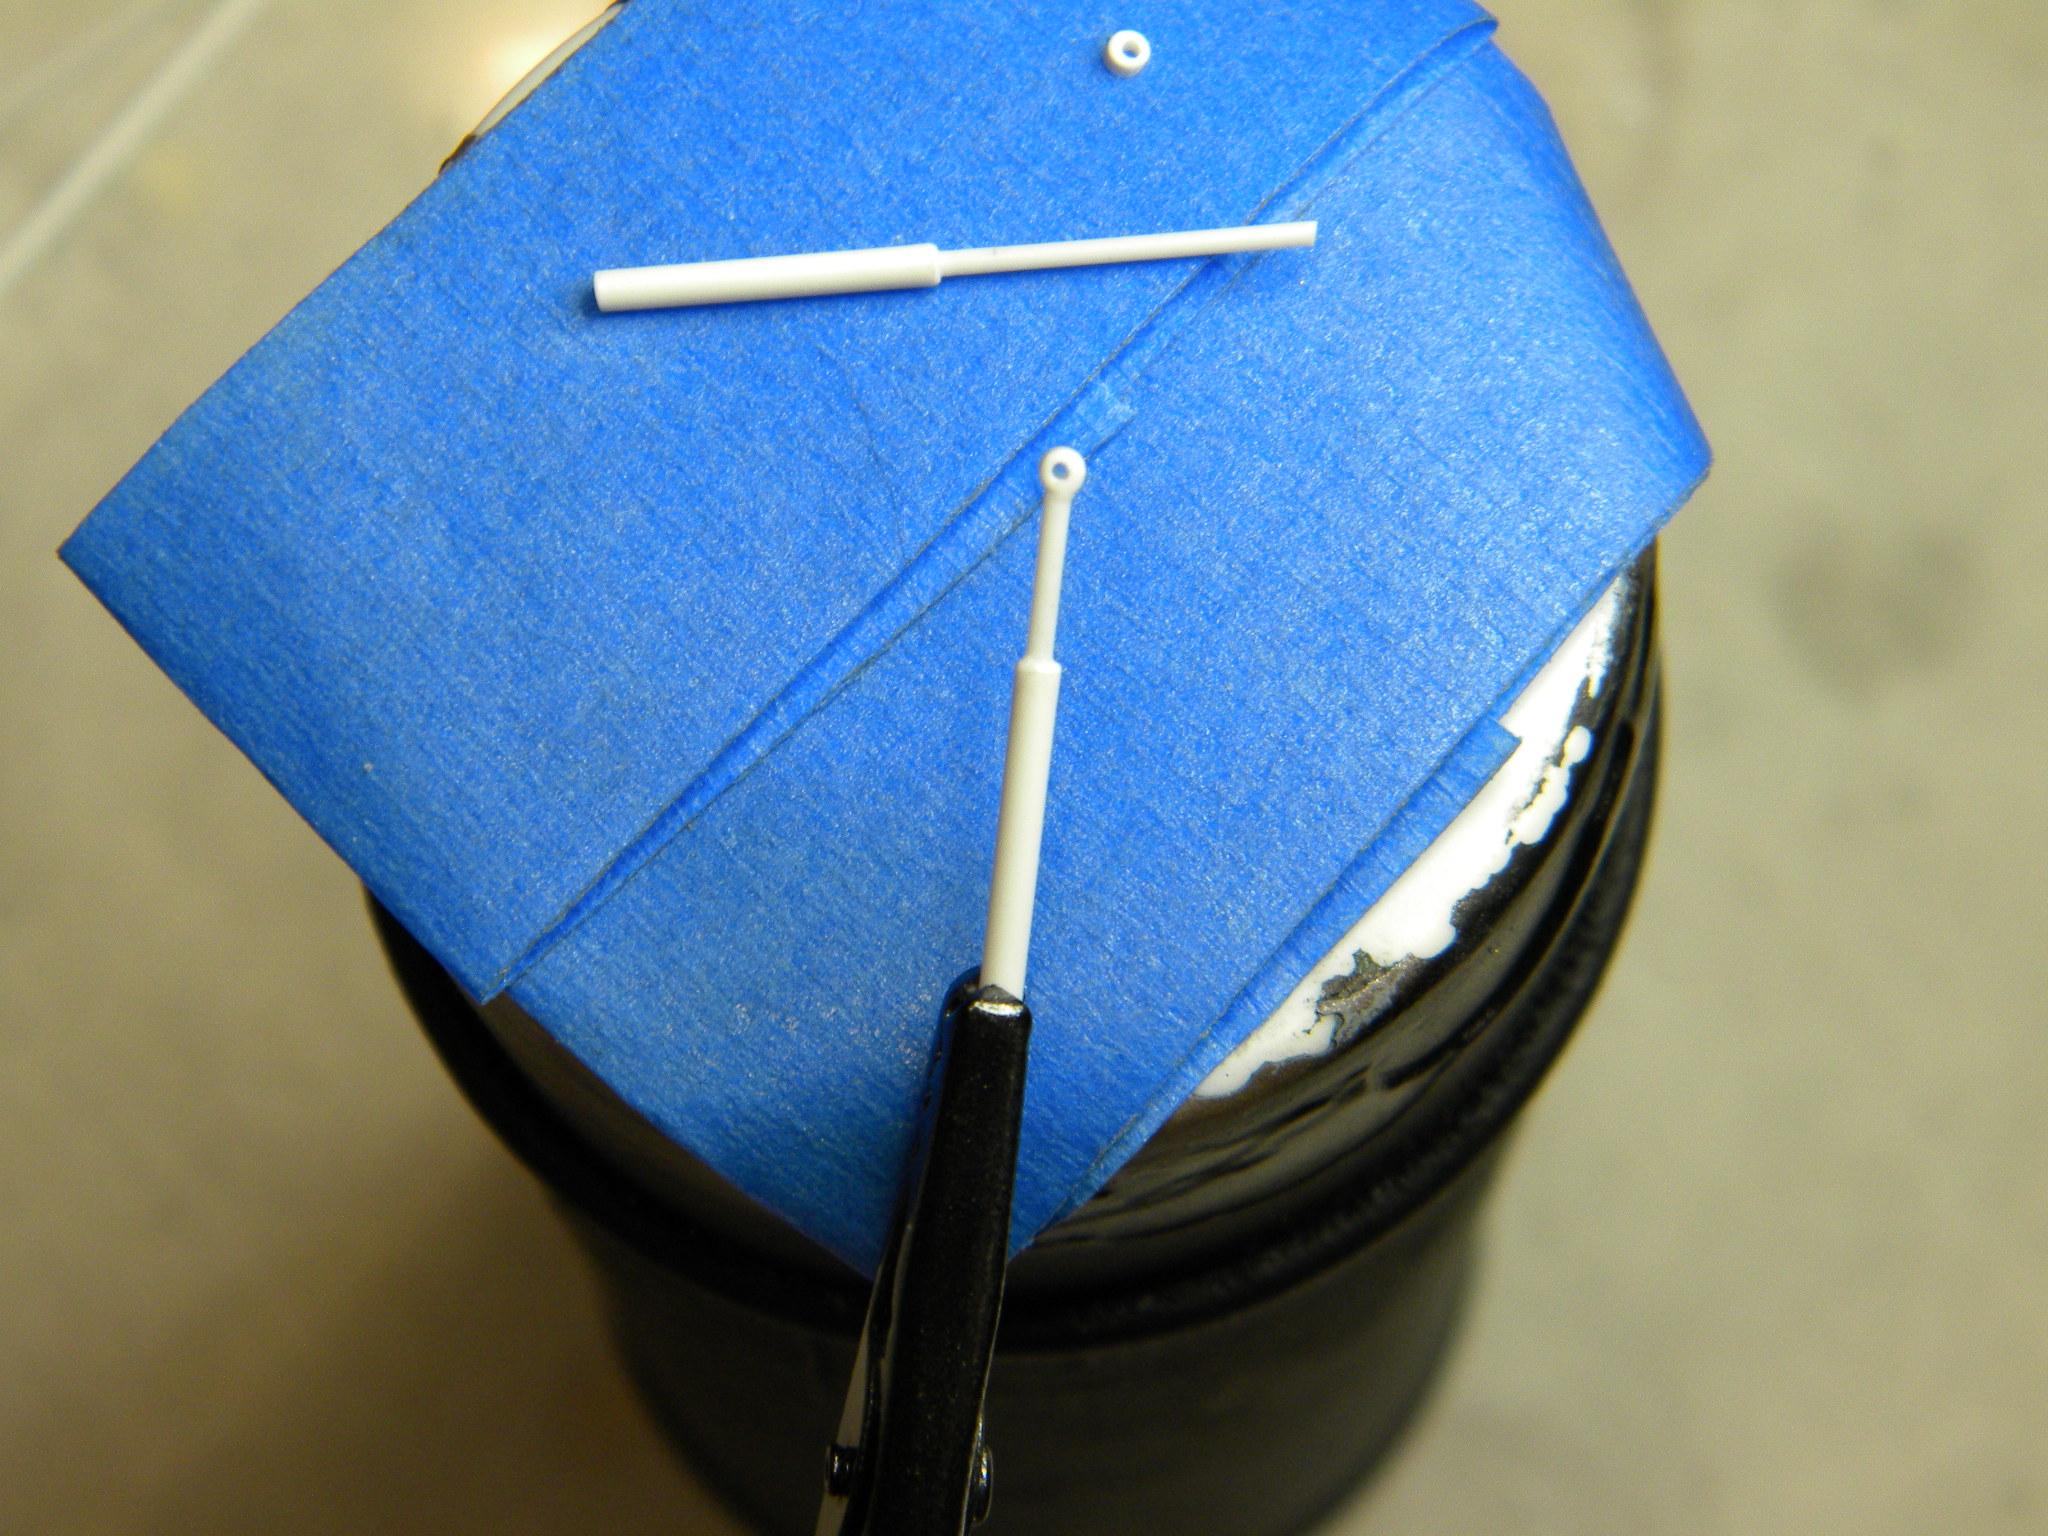
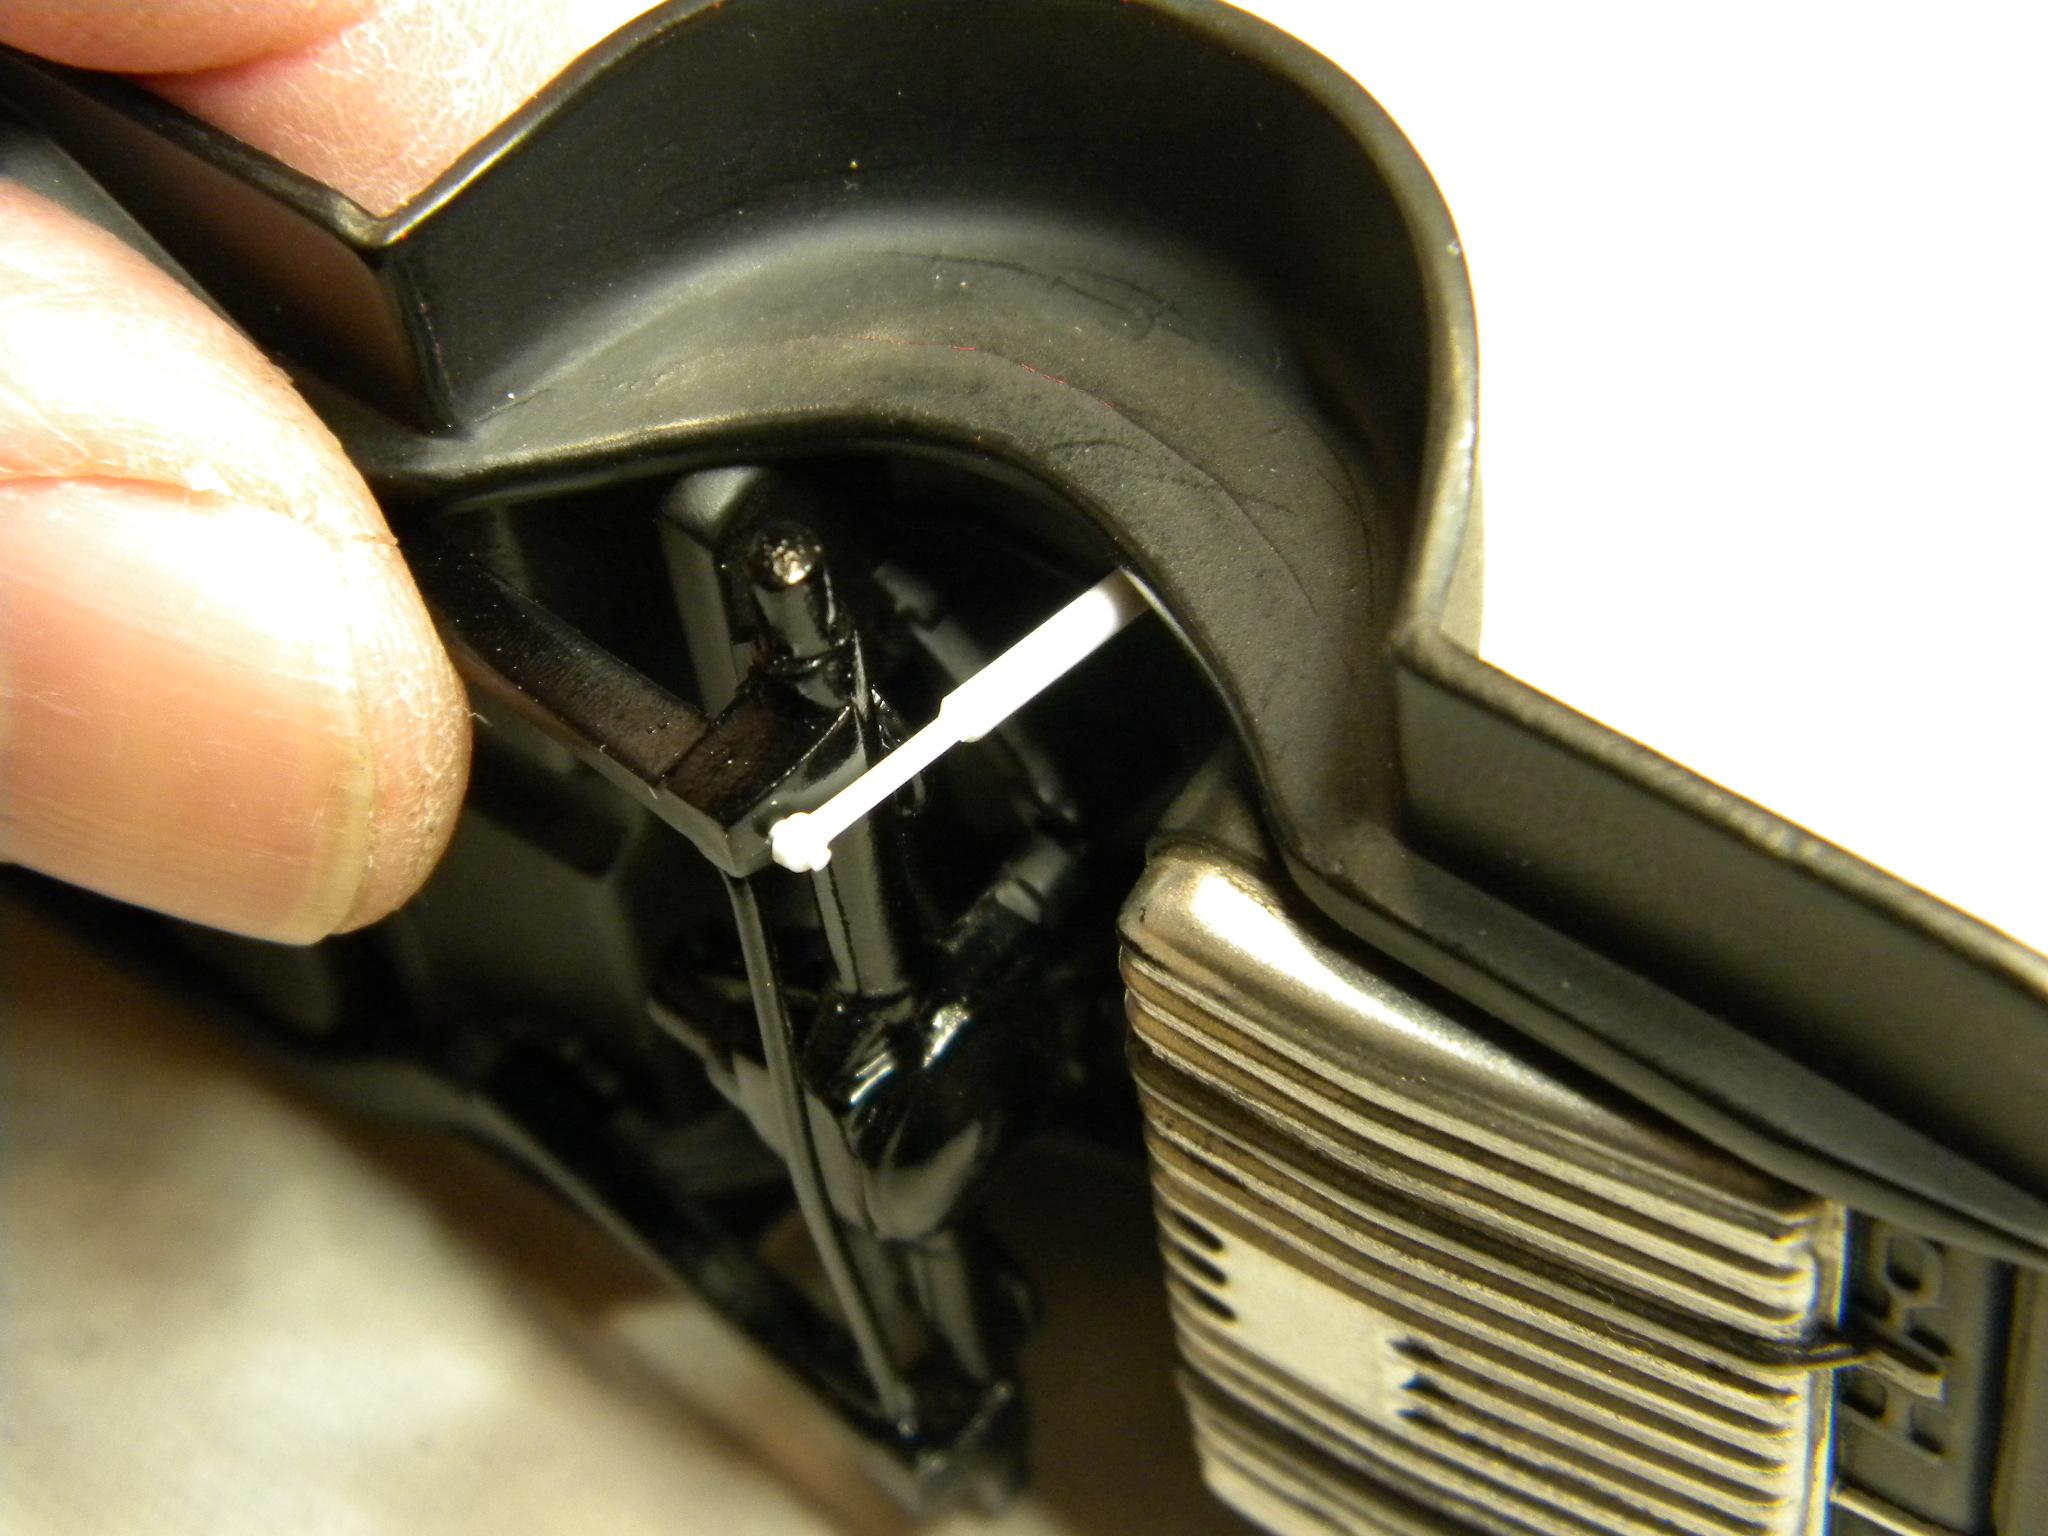
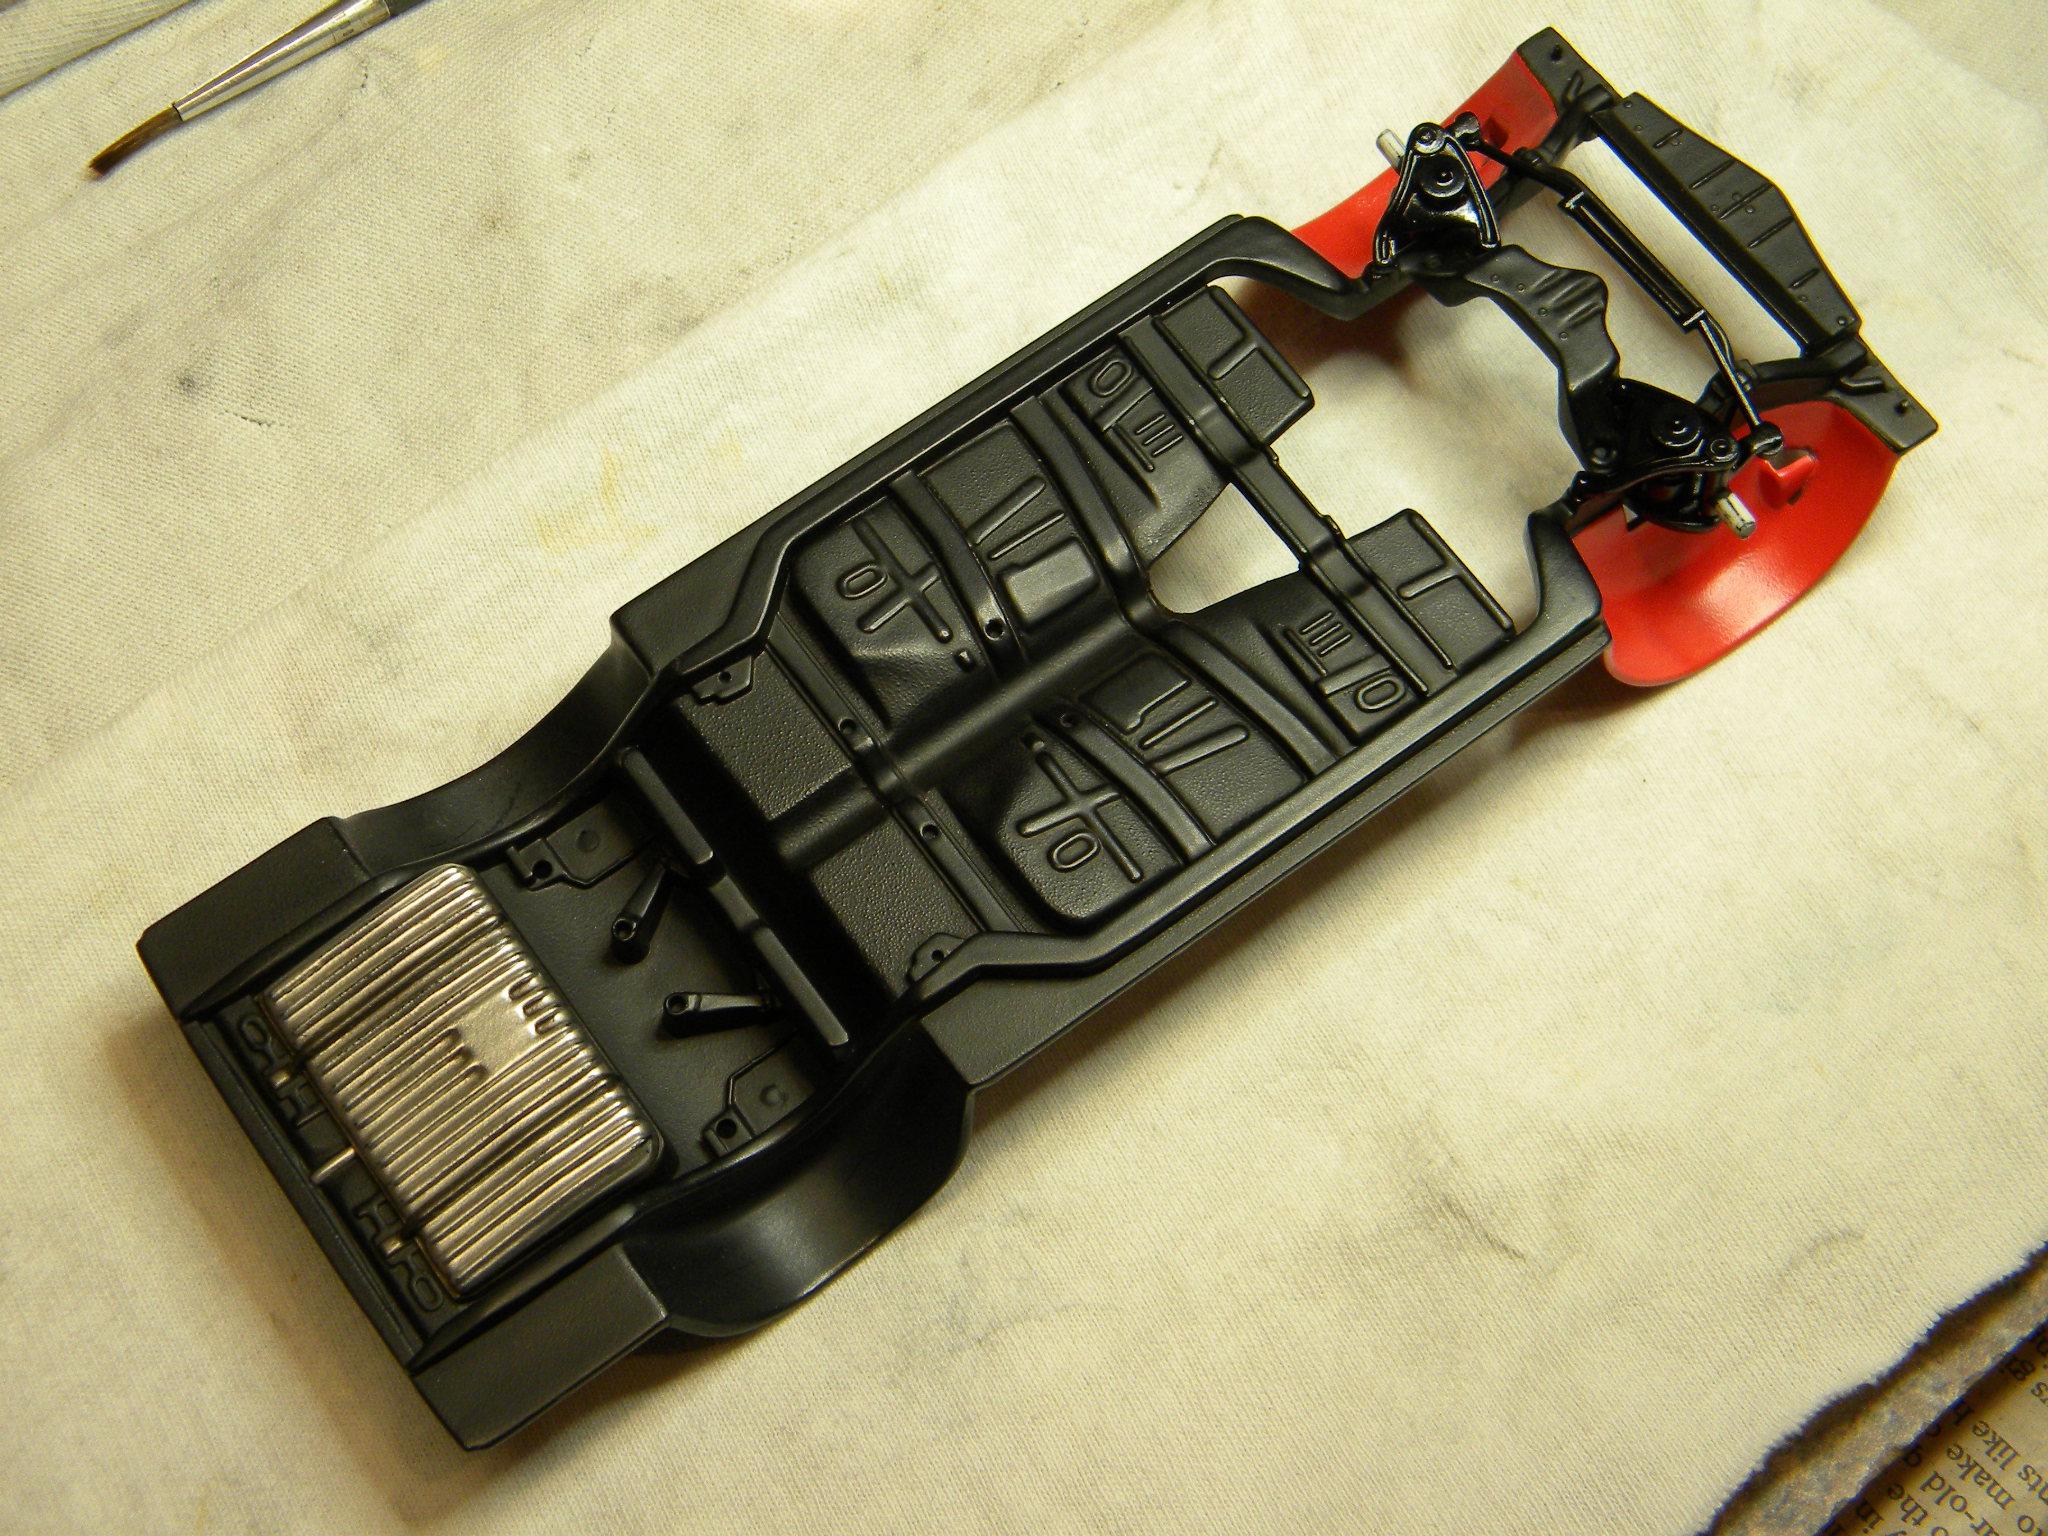
Just working on getting some chassis stuff up to speed. Working on the exhaust as well as throwing together some rear shocks and adding the springs to the rear axle. Steve

-
 Just fiddling with some chassis details. Working on the exhaust, and throwing together a pair of rear shocks. Steve
-
What did you see on the road today?
StevenGuthmiller replied to Harry P.'s topic in General Automotive Talk (Trucks and Cars)
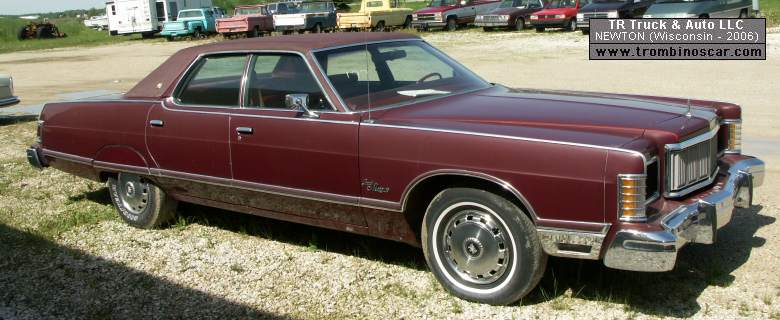
Working at my part time valet job at a medical facility, I was surprised to have a gentleman ask me to park his Mercury yesterday. A 1975 Mercury Marquis. Talk about a "boat"! This is not the actual car, but it looked exactly like this. Steve
-
My opinion.......ditch the wheels! You have a beautiful factory stock build going there. Don't ruin it with ugly wheels. If you feel like an after market wheel is the way you want to go, maybe a set of Cragar S/S's, Torque Thrusts, Keystone Classics, something along those lines. "Classic wheels" with a "classic car". You can never go wrong. Steve
-
I just use a digital camera and shoot a picture or two when I've finished a task and am taking a break. I rarely sit at the bench for more than an hour at a time. I'd end up with such a headache that I wouldn't be able to see straight! Steve
-
Okay Joe, I did a little "house cleaning". Steve
-
Sorry Joe. I didn't know it was full! I'll take care of that ASAP! Steve
-
I polish every build regardless of how the finish turns out. I find that a polished paint job looks more realistic than unpolished as a rule. Often, even a perfect shiny paint job can have a toy like "hard candy" appearance that looks out of place. Polishing will add a nice correct sheen. I use "Micro-Mesh" pads, followed by Novus polishes, and finished with some Turtle Wax "Scratch and Swirl Remover". Steve
-
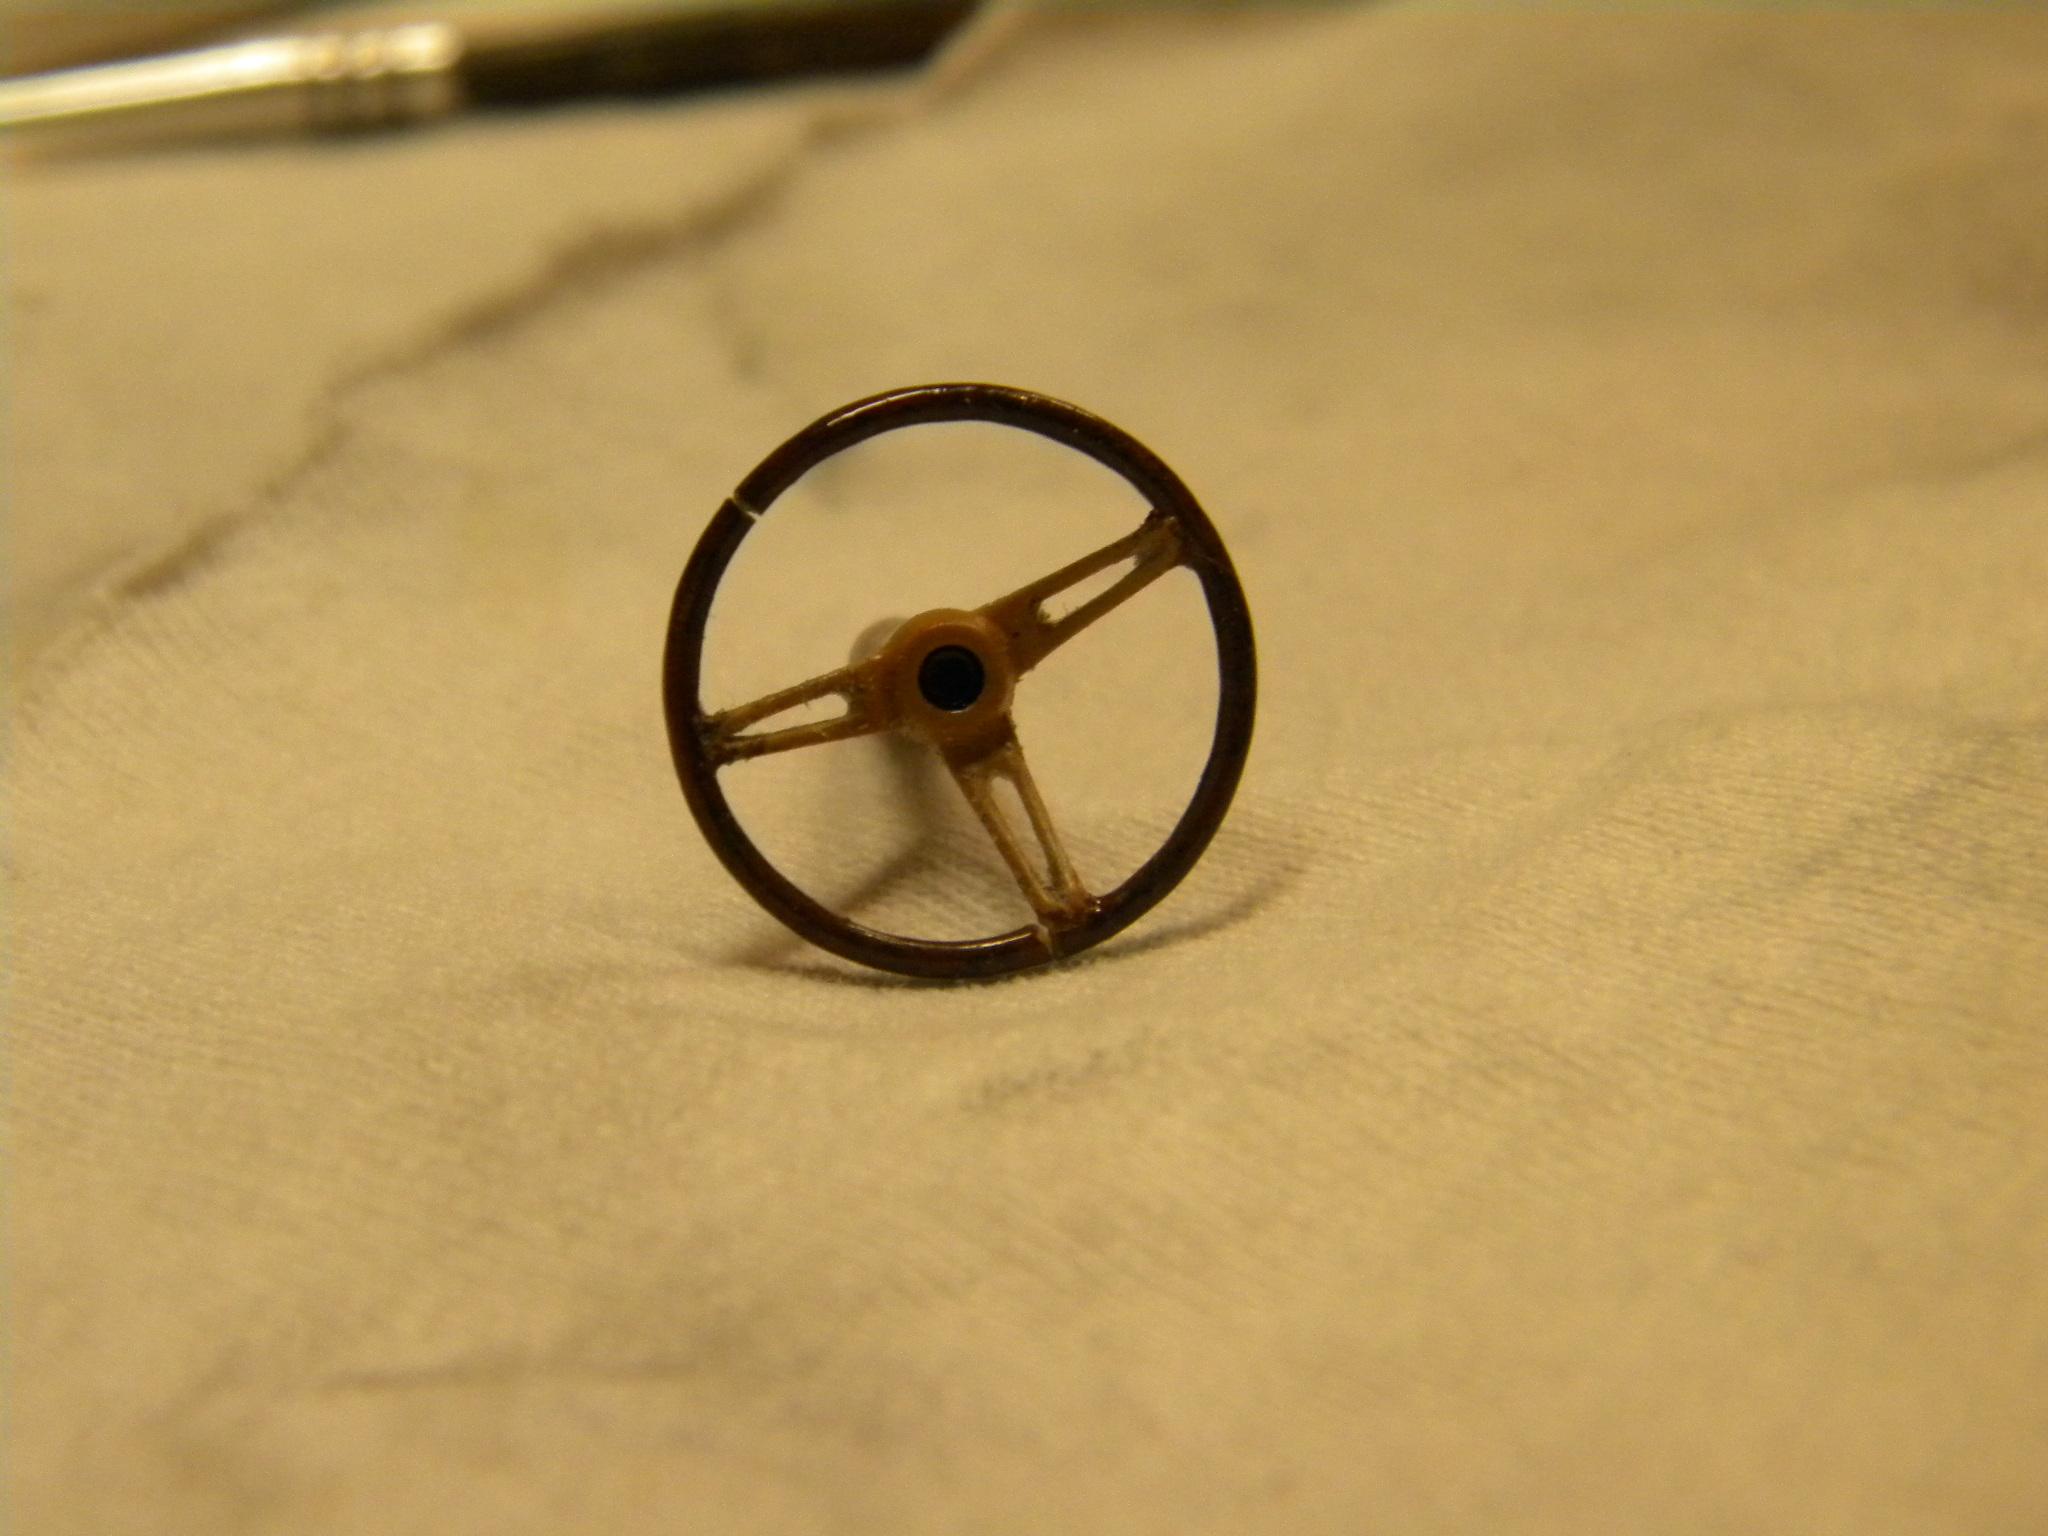
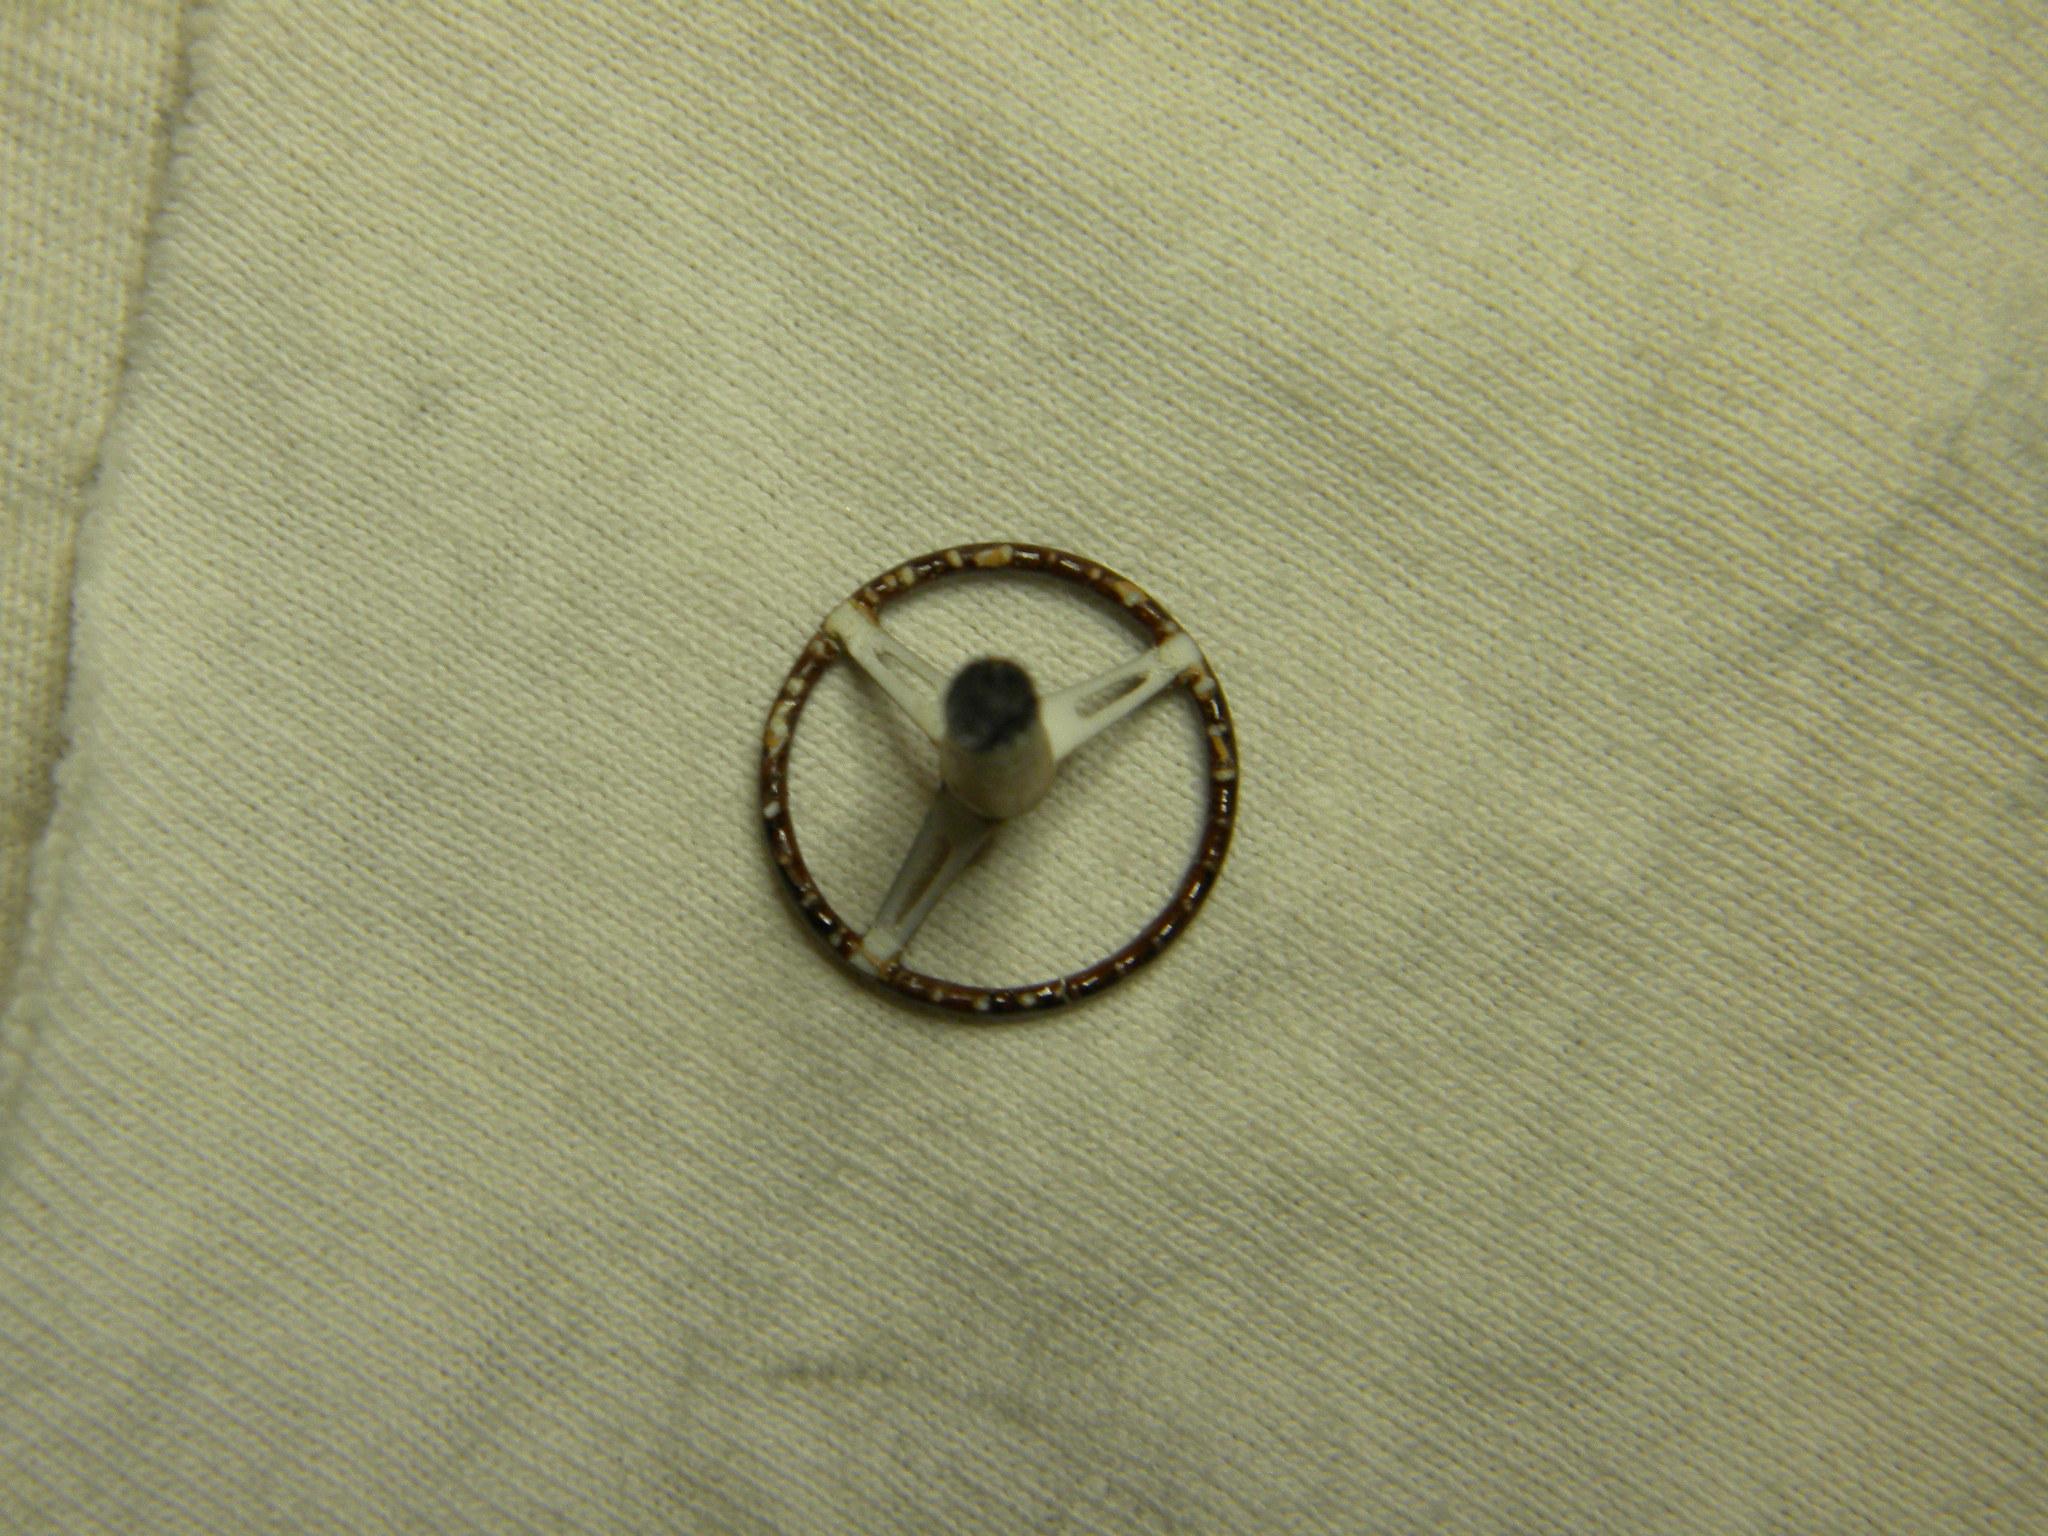
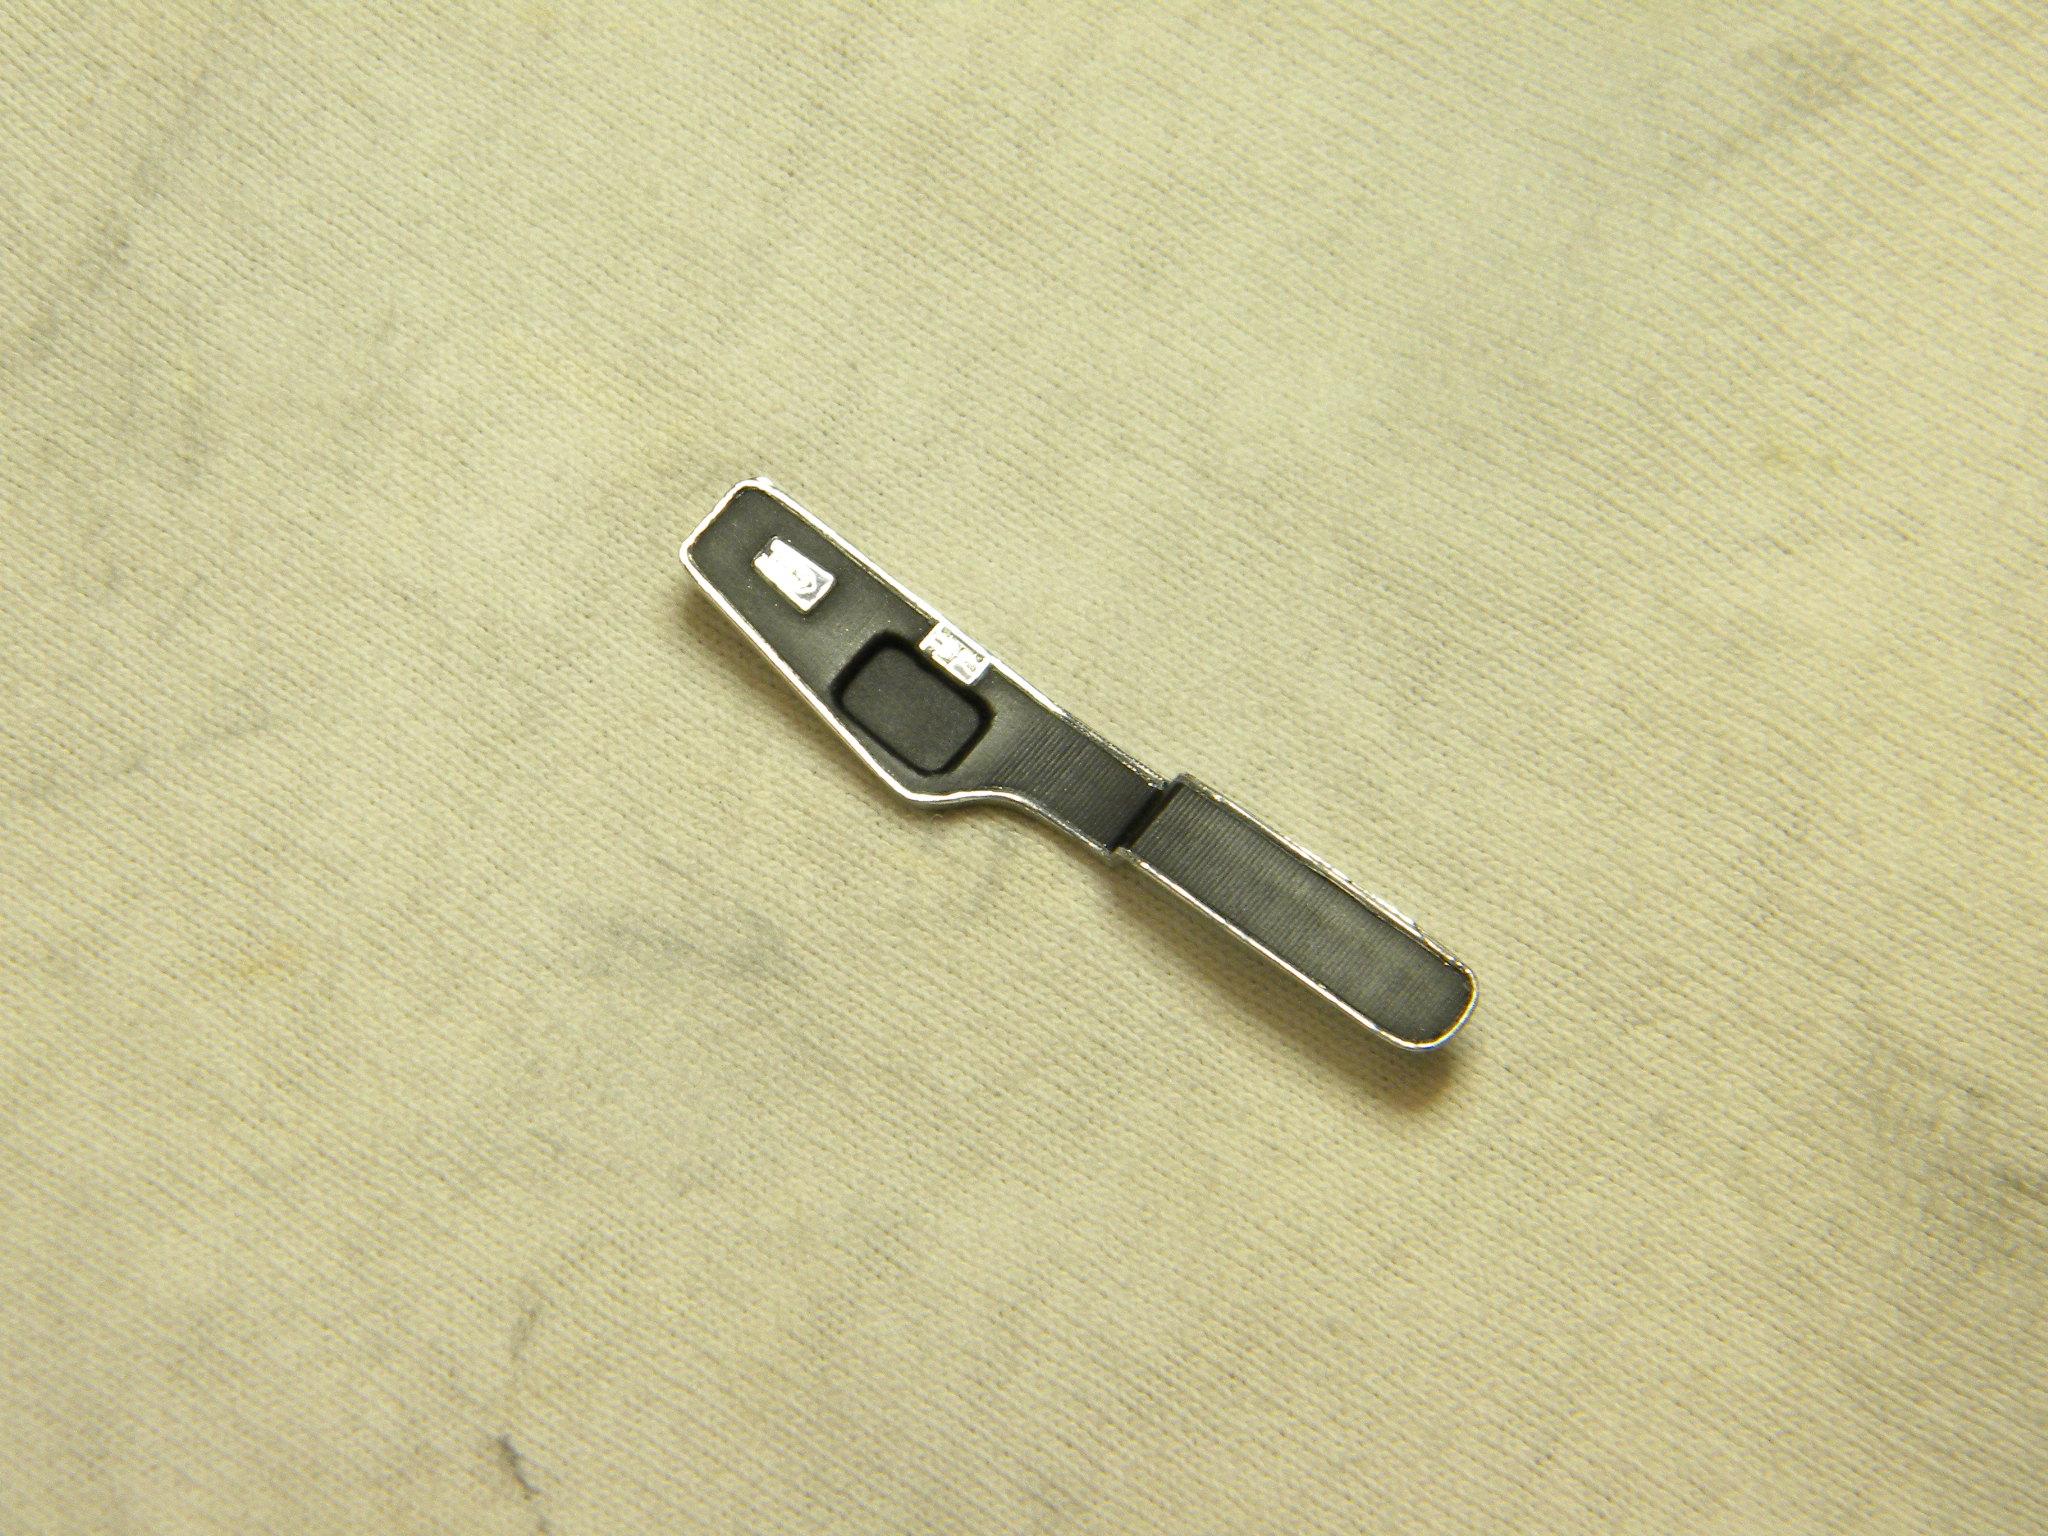
Okay Snake.......This is YOUR fault!!! As I was afraid of, the steering wheel cracked in two places as I attempted this alteration. Luckily, the breaks were in spots that should be easy to repair. Steve
-
Biggest pet peeves on builds.
StevenGuthmiller replied to LL3 Model Worx's topic in General Automotive Talk (Trucks and Cars)
I'll agree with that! It's not difficult to remove 10 photos from a reply rather than re-posting them all over again! Steve -
I actually did look through my stash to find a steering wheel that was more accurate, but the only one that I had was from the Revell '66 GTO kit, but that was already used for my '67 Bonneville build, and it was after the fact anyway. This is one of those circumstances where I didn't catch it until it was too late and the steering wheel was already painted. That plus the fact that this is the original Johan steering wheel and it was very brittle and already had a crack in it that needed to be repaired. It might not have been a good candidate for any major modifications. There is the possibility that I might pull it back out and see if I can somehow manage to work something out with it, but probably not likely. Steve
-
Biggest pet peeves on builds.
StevenGuthmiller replied to LL3 Model Worx's topic in General Automotive Talk (Trucks and Cars)
Many builders use a lot of aftermarket parts, often many of them on one particular build. They're not going to give a list of names, websites, etc for every part they used. The solution is a simple one. Just ask. Steve -
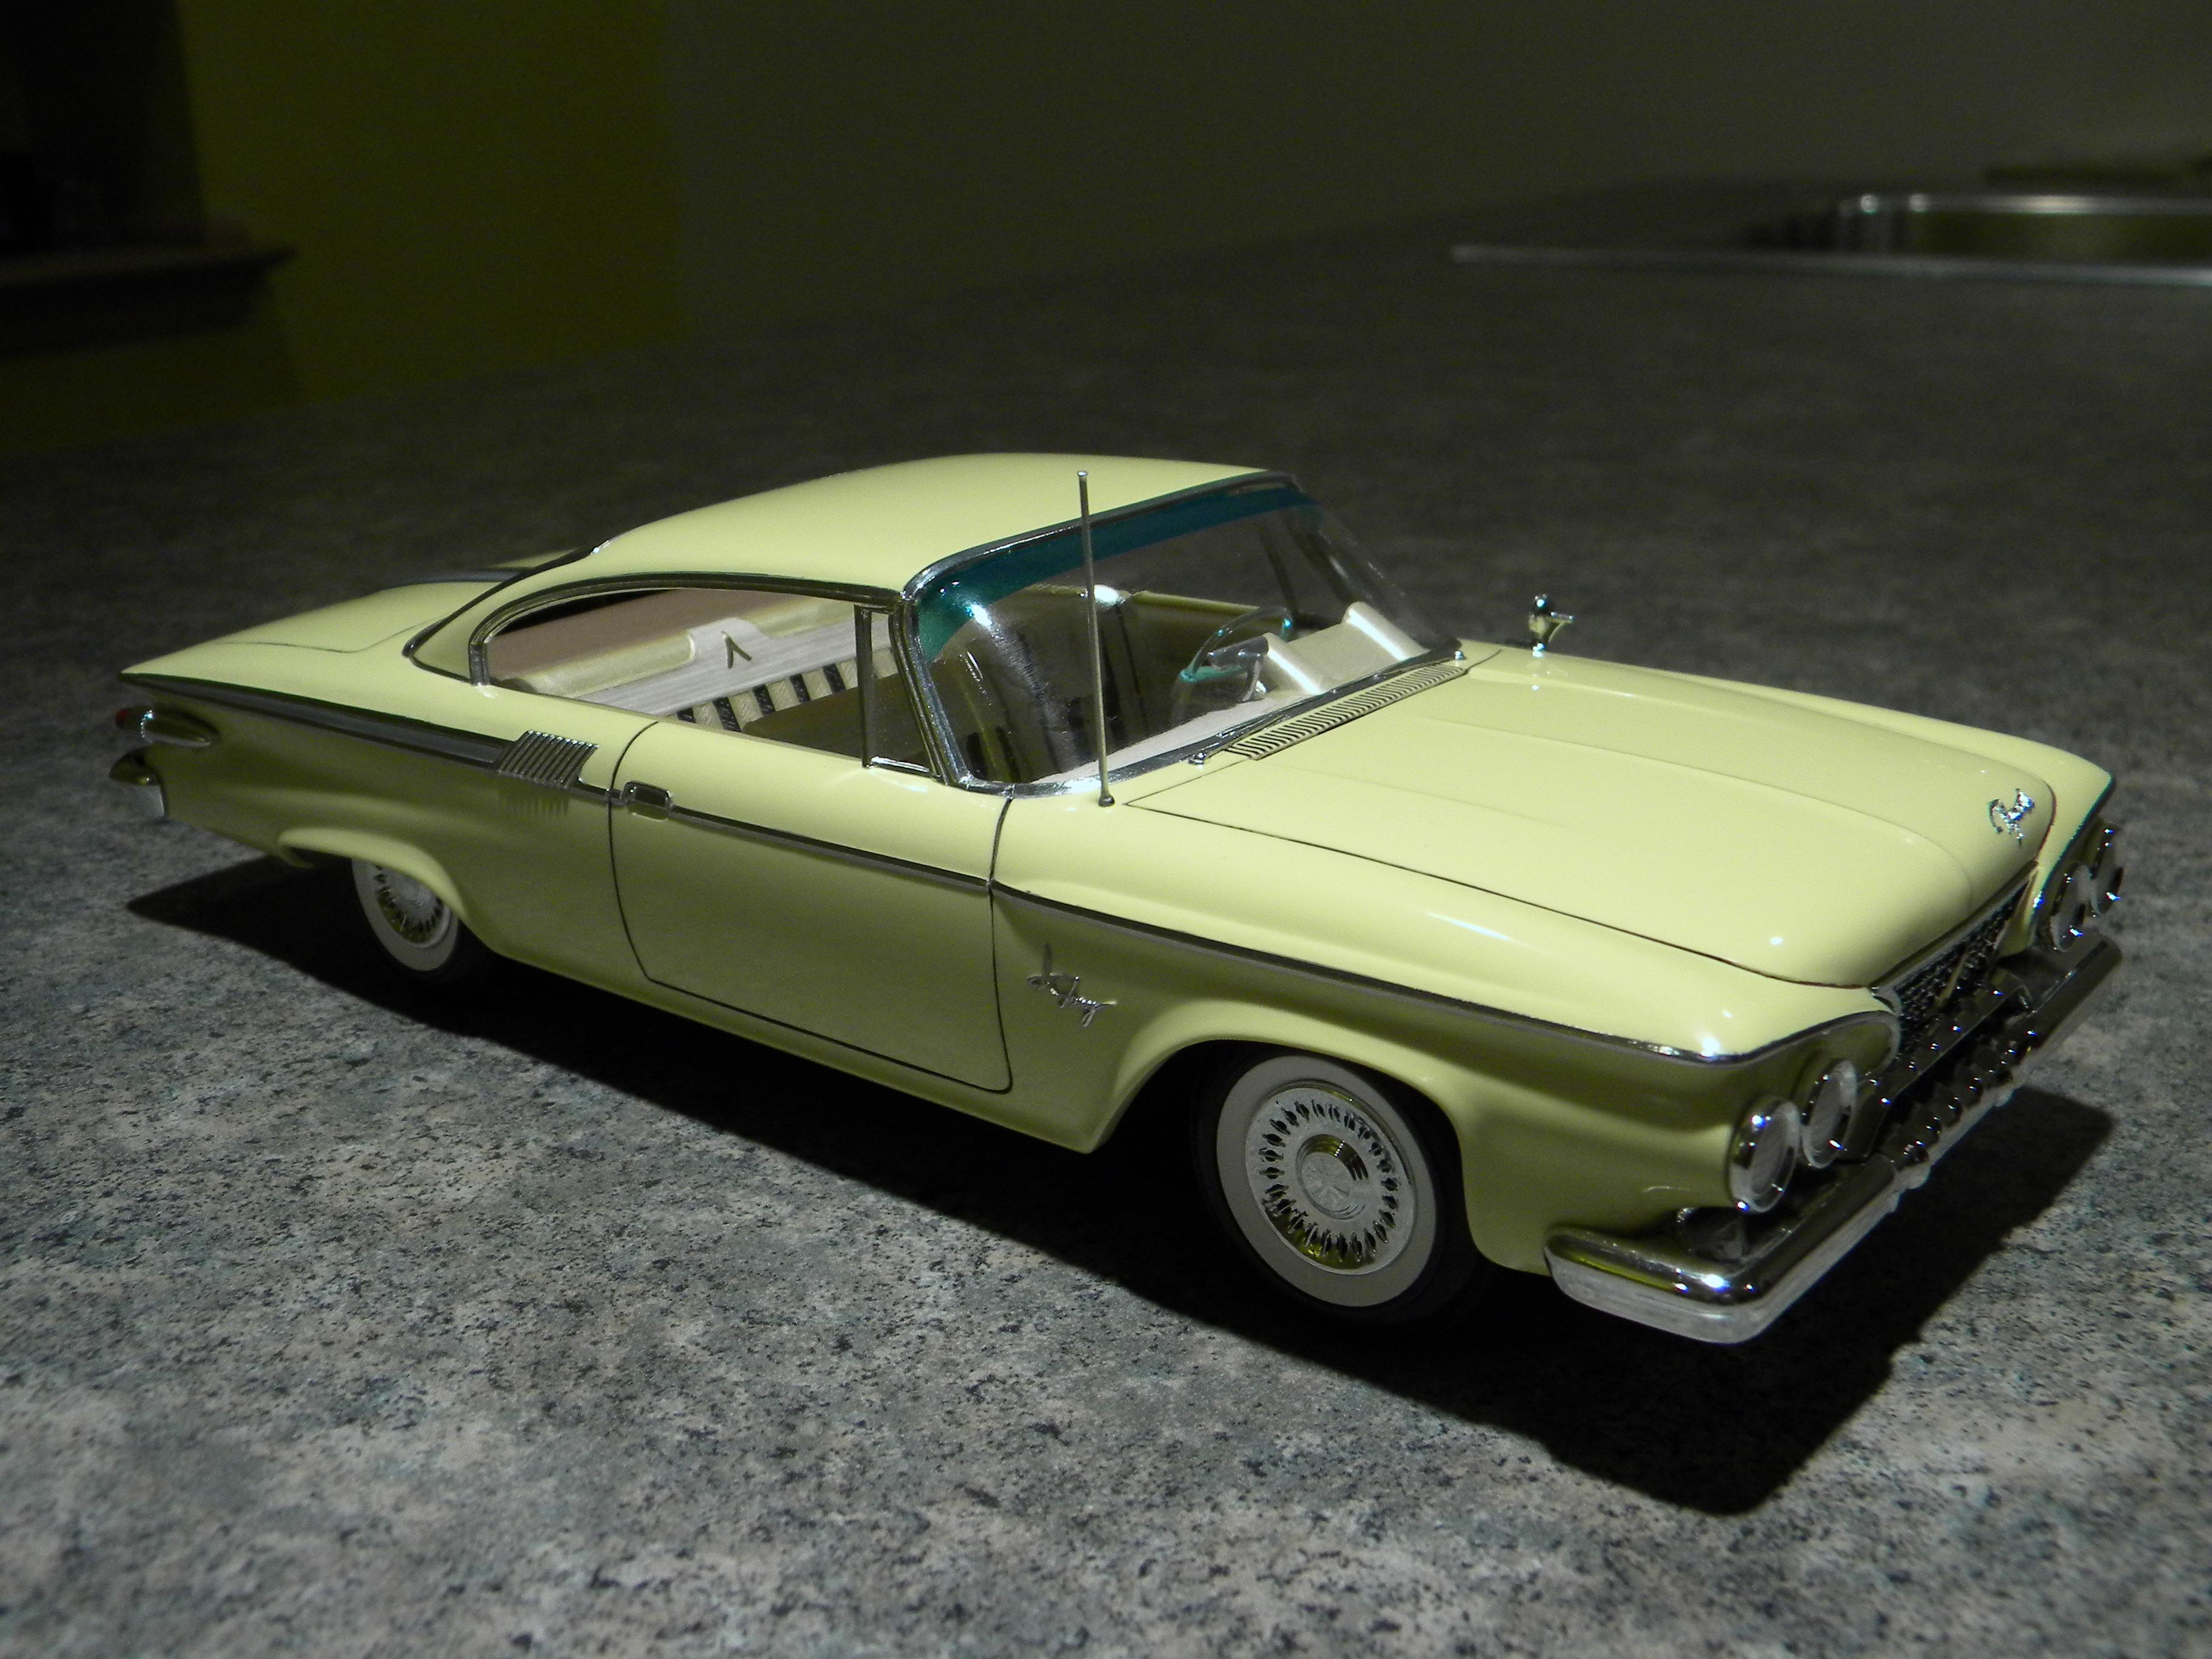
Thanks Keith! Here are a couple of photos depicting what I started with, and where I wound up. Steve
-
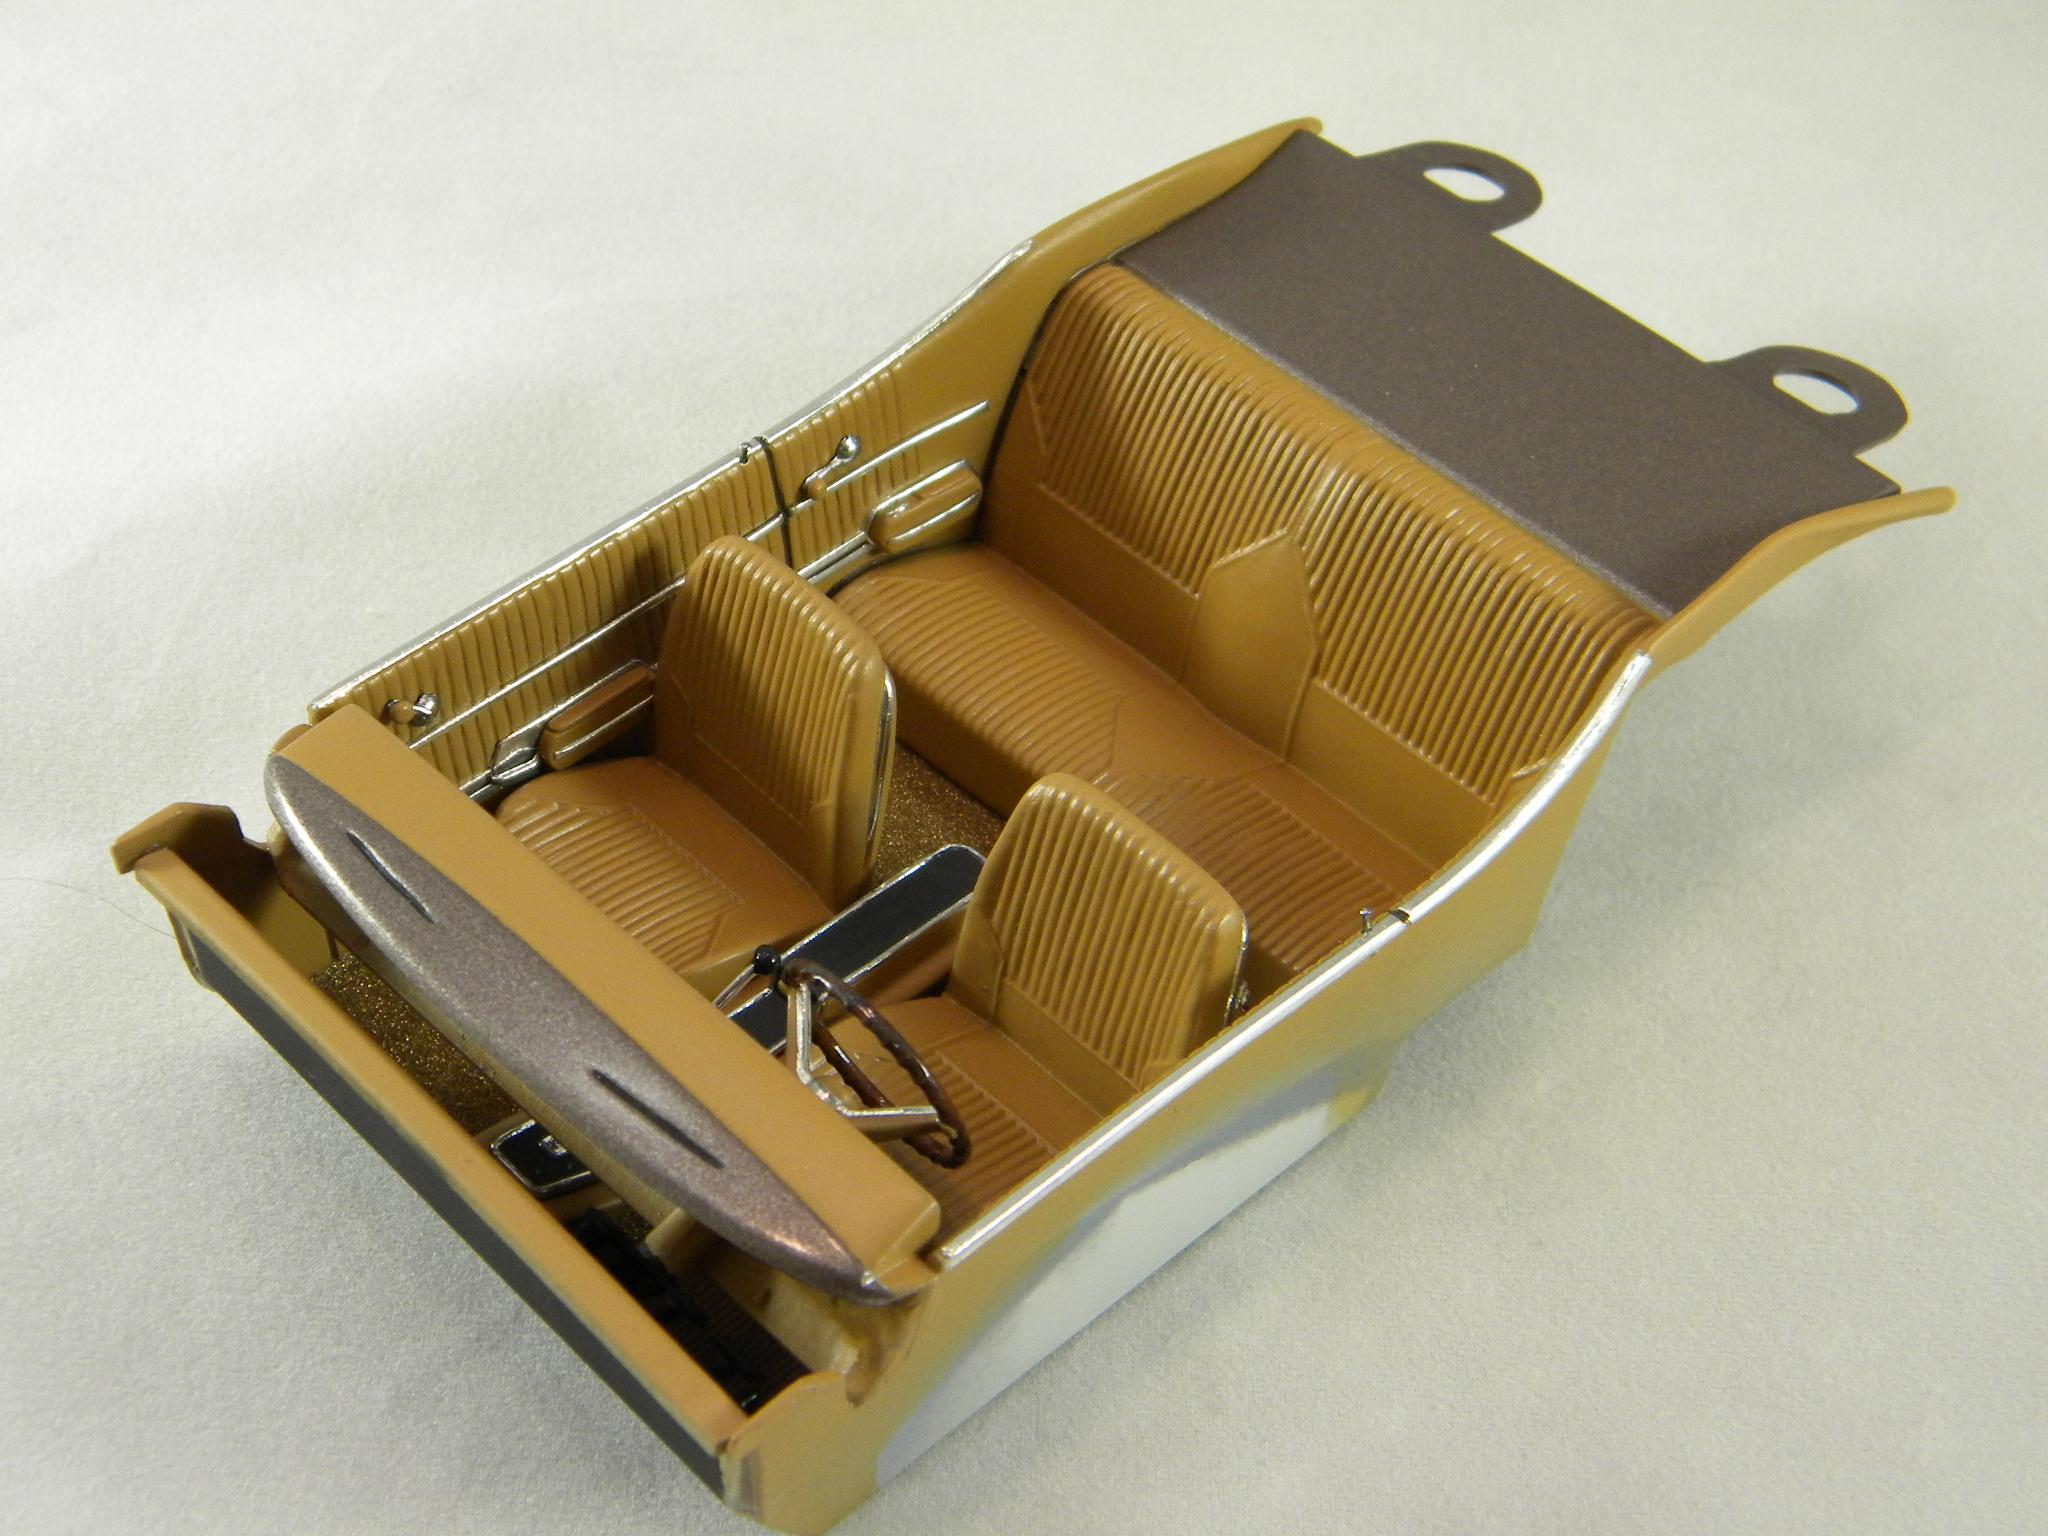
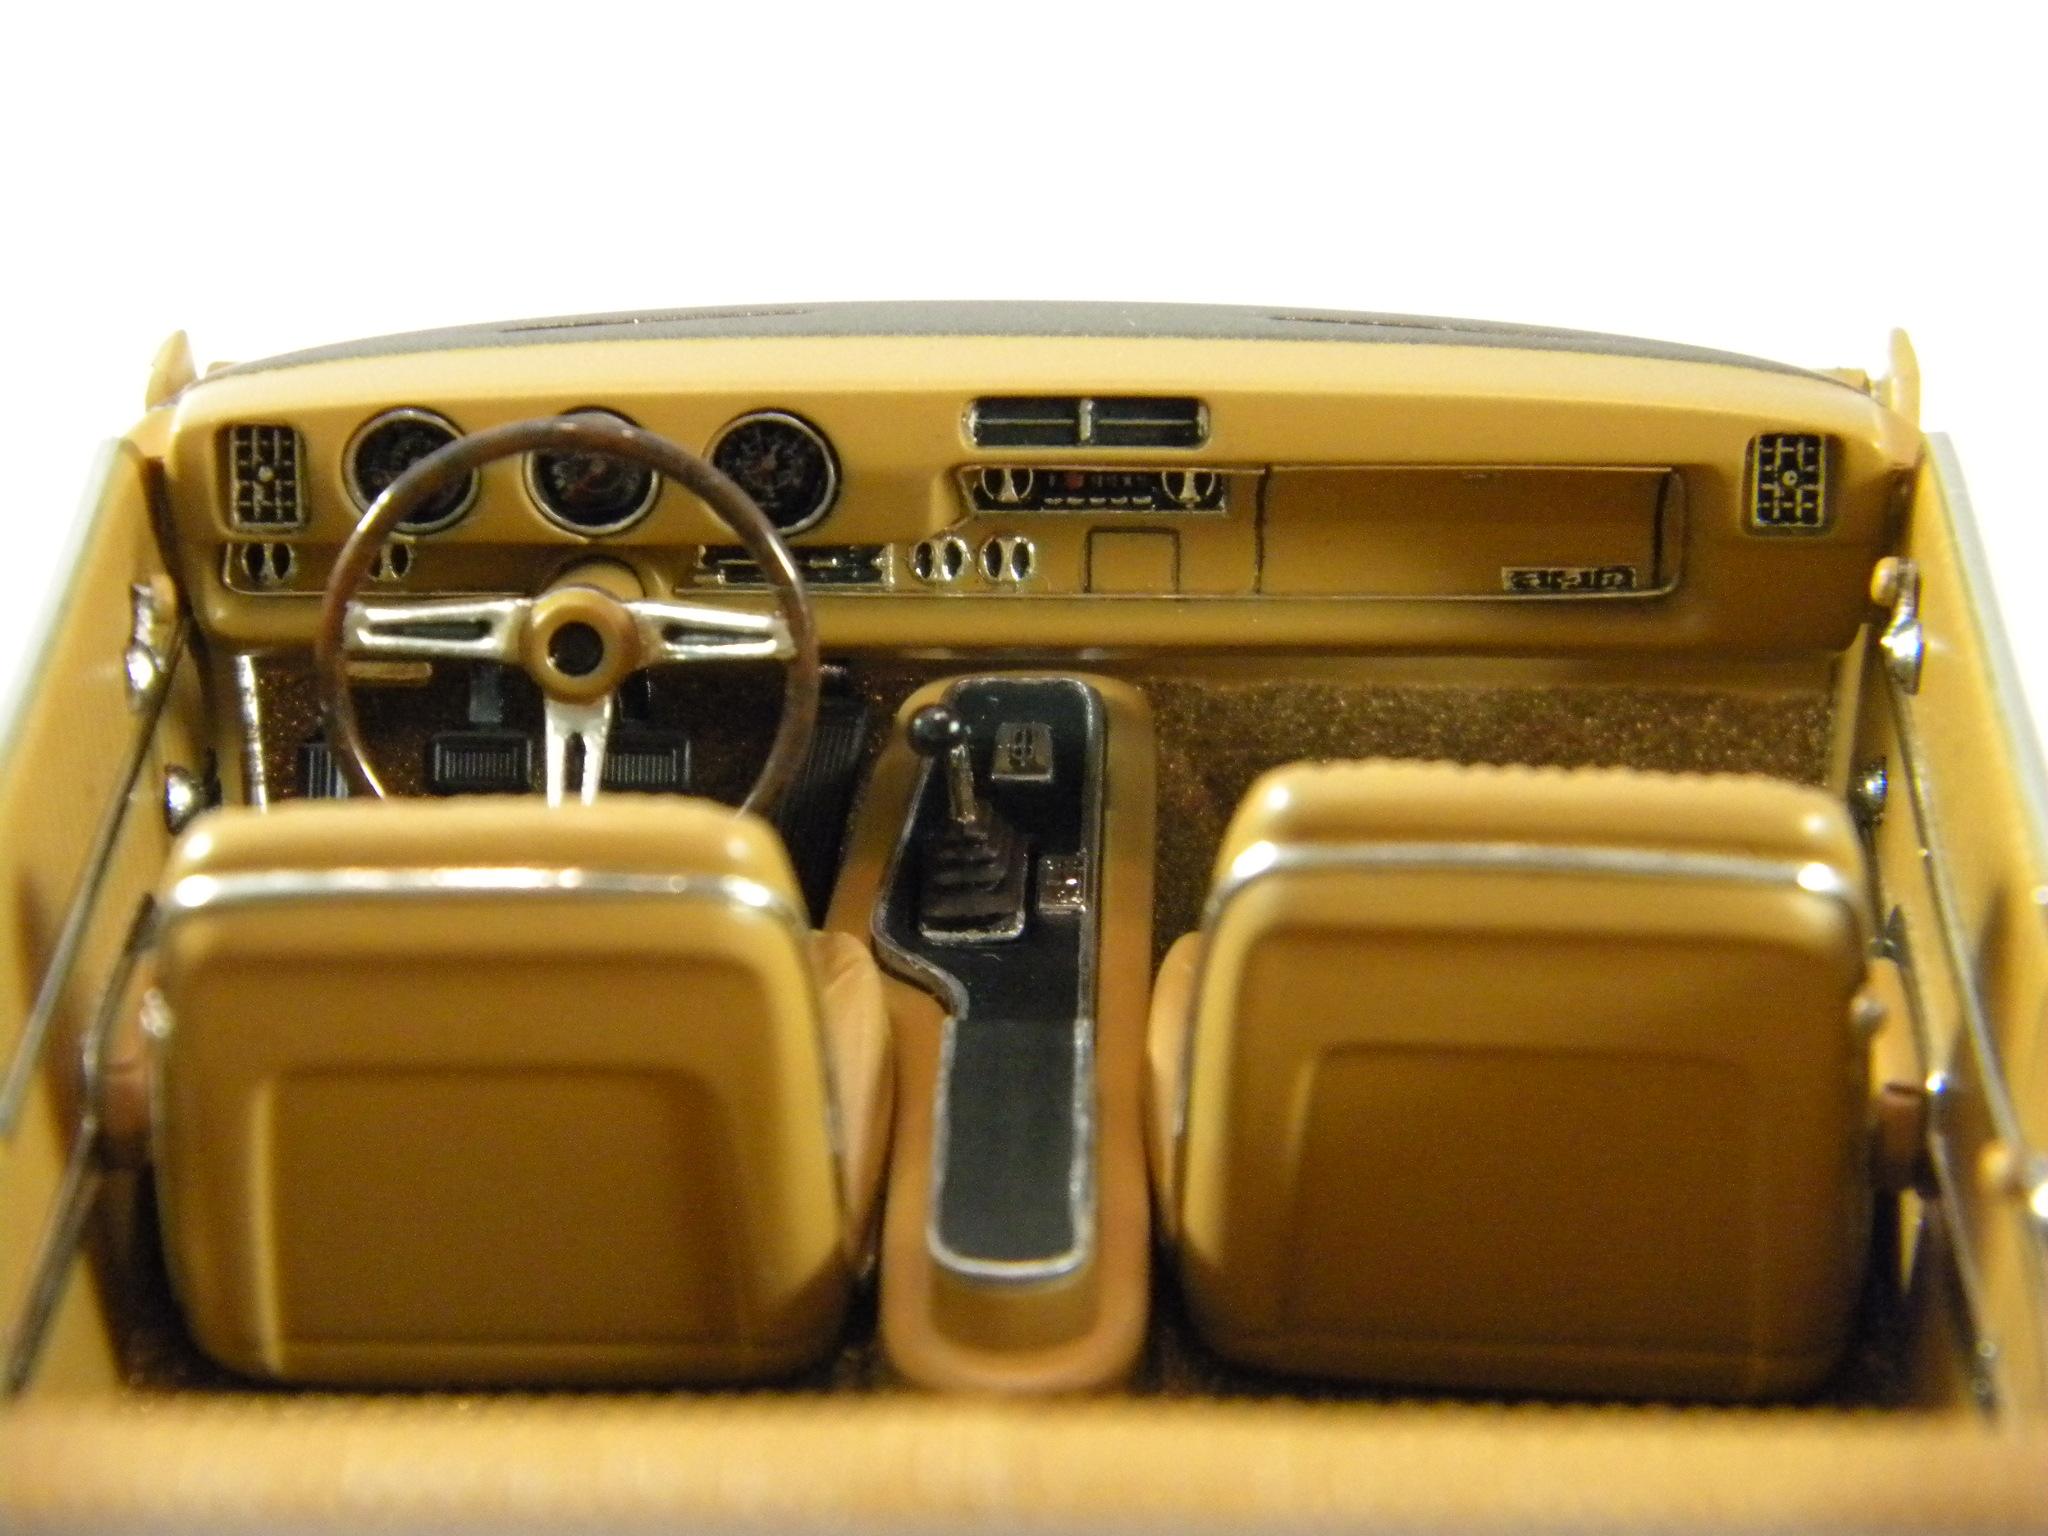
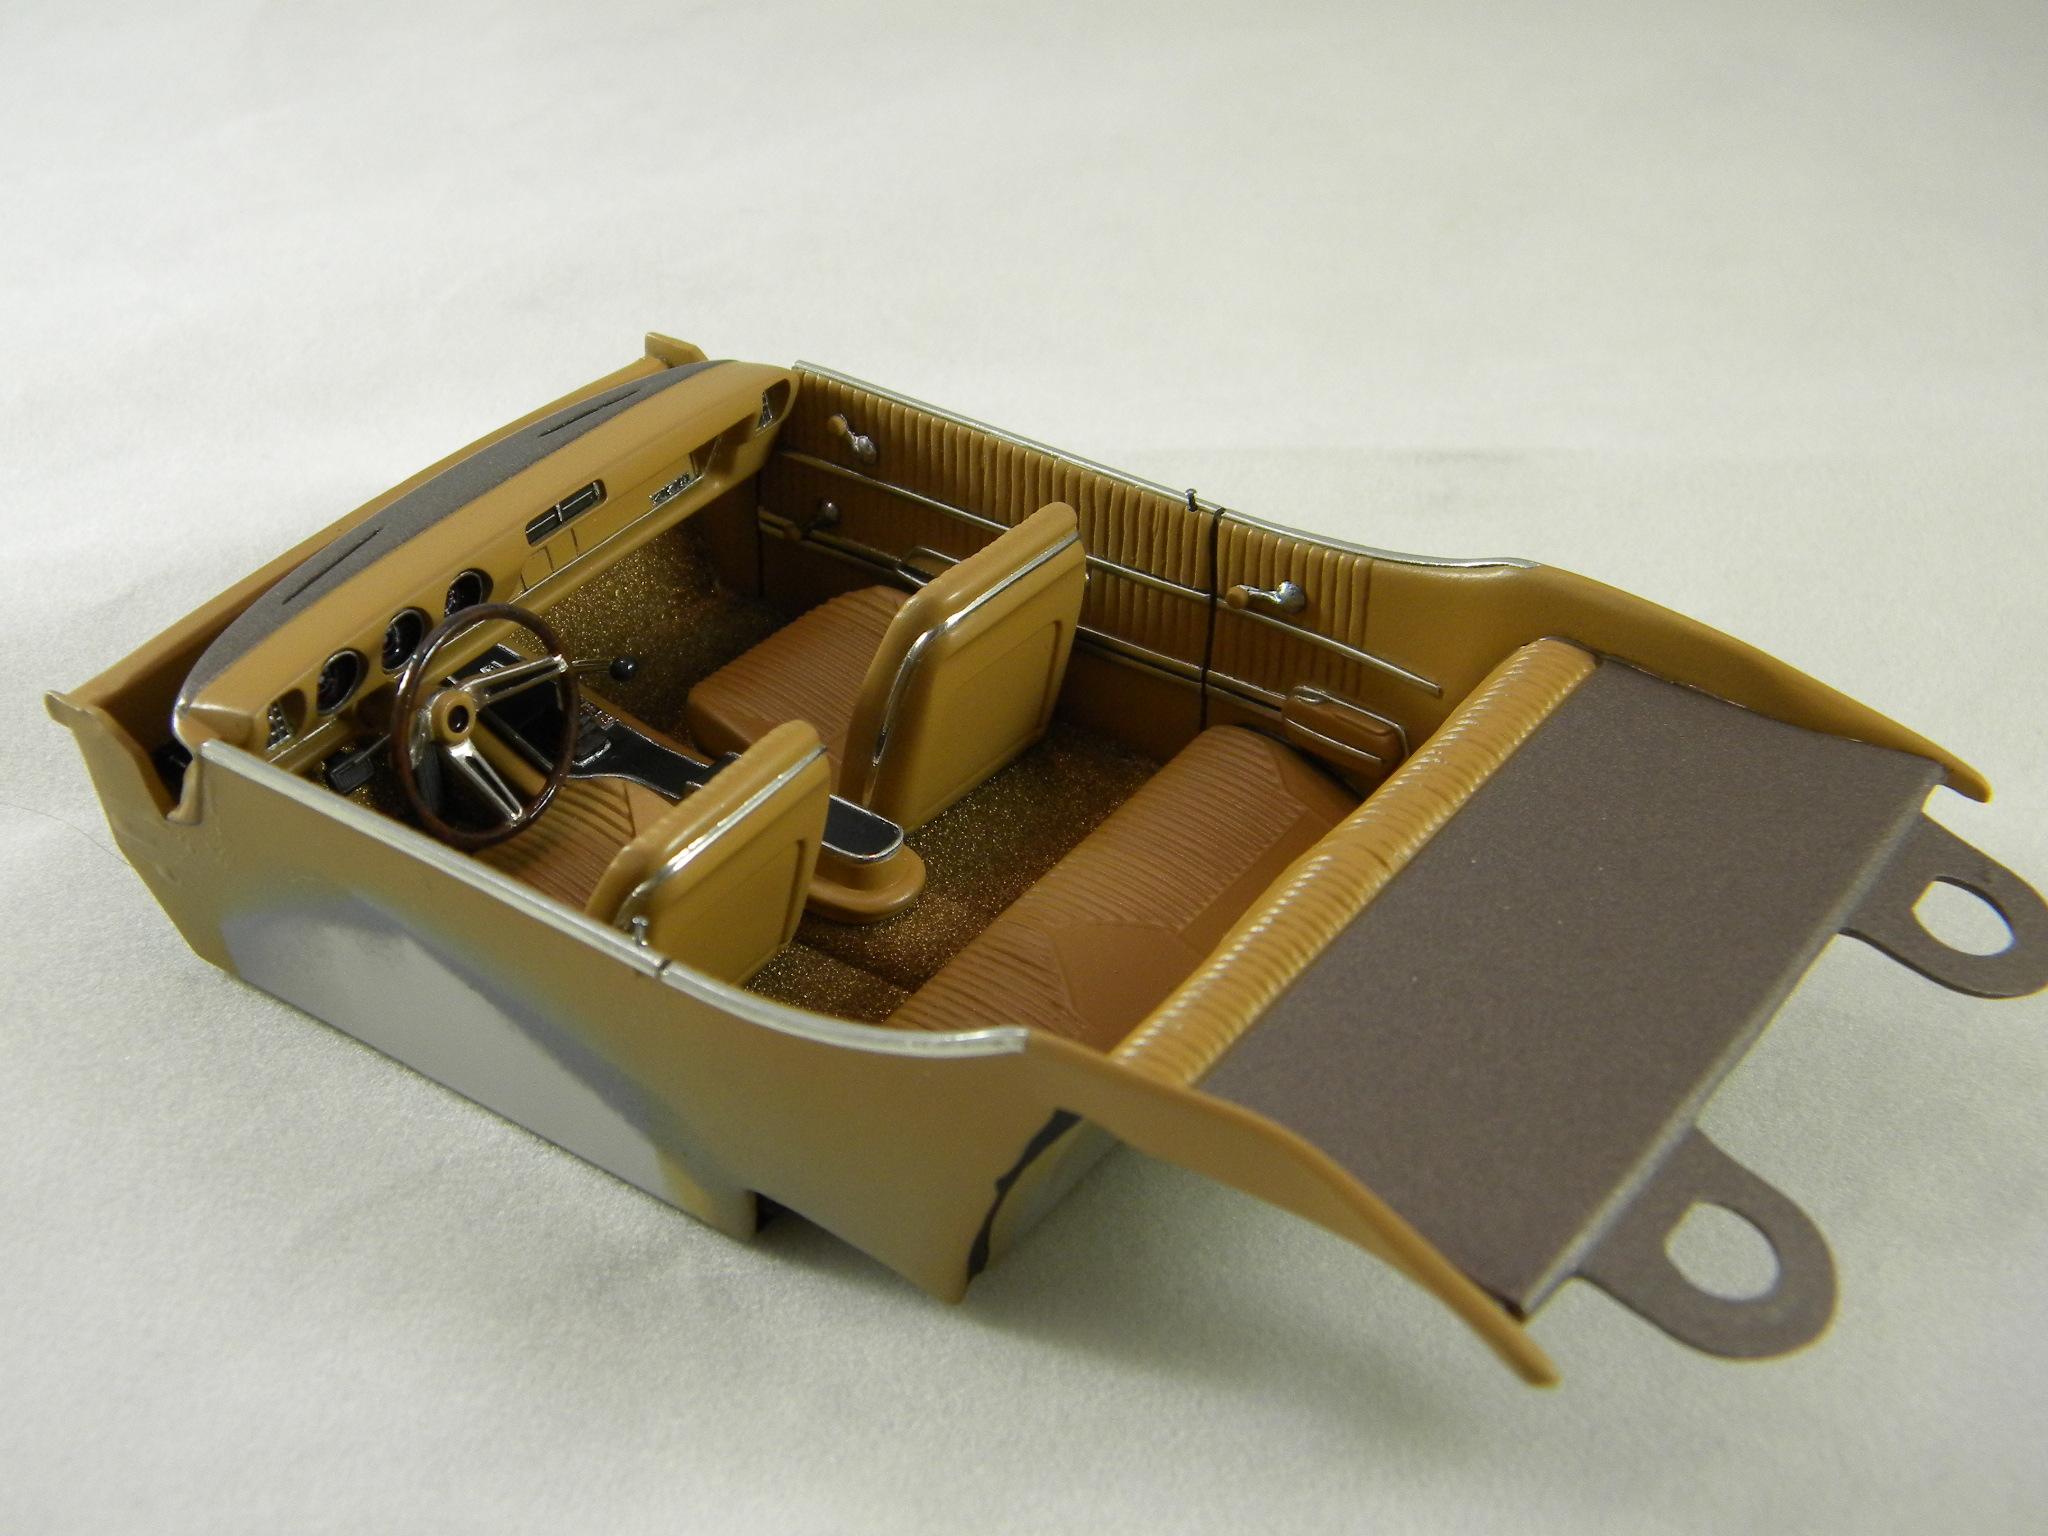
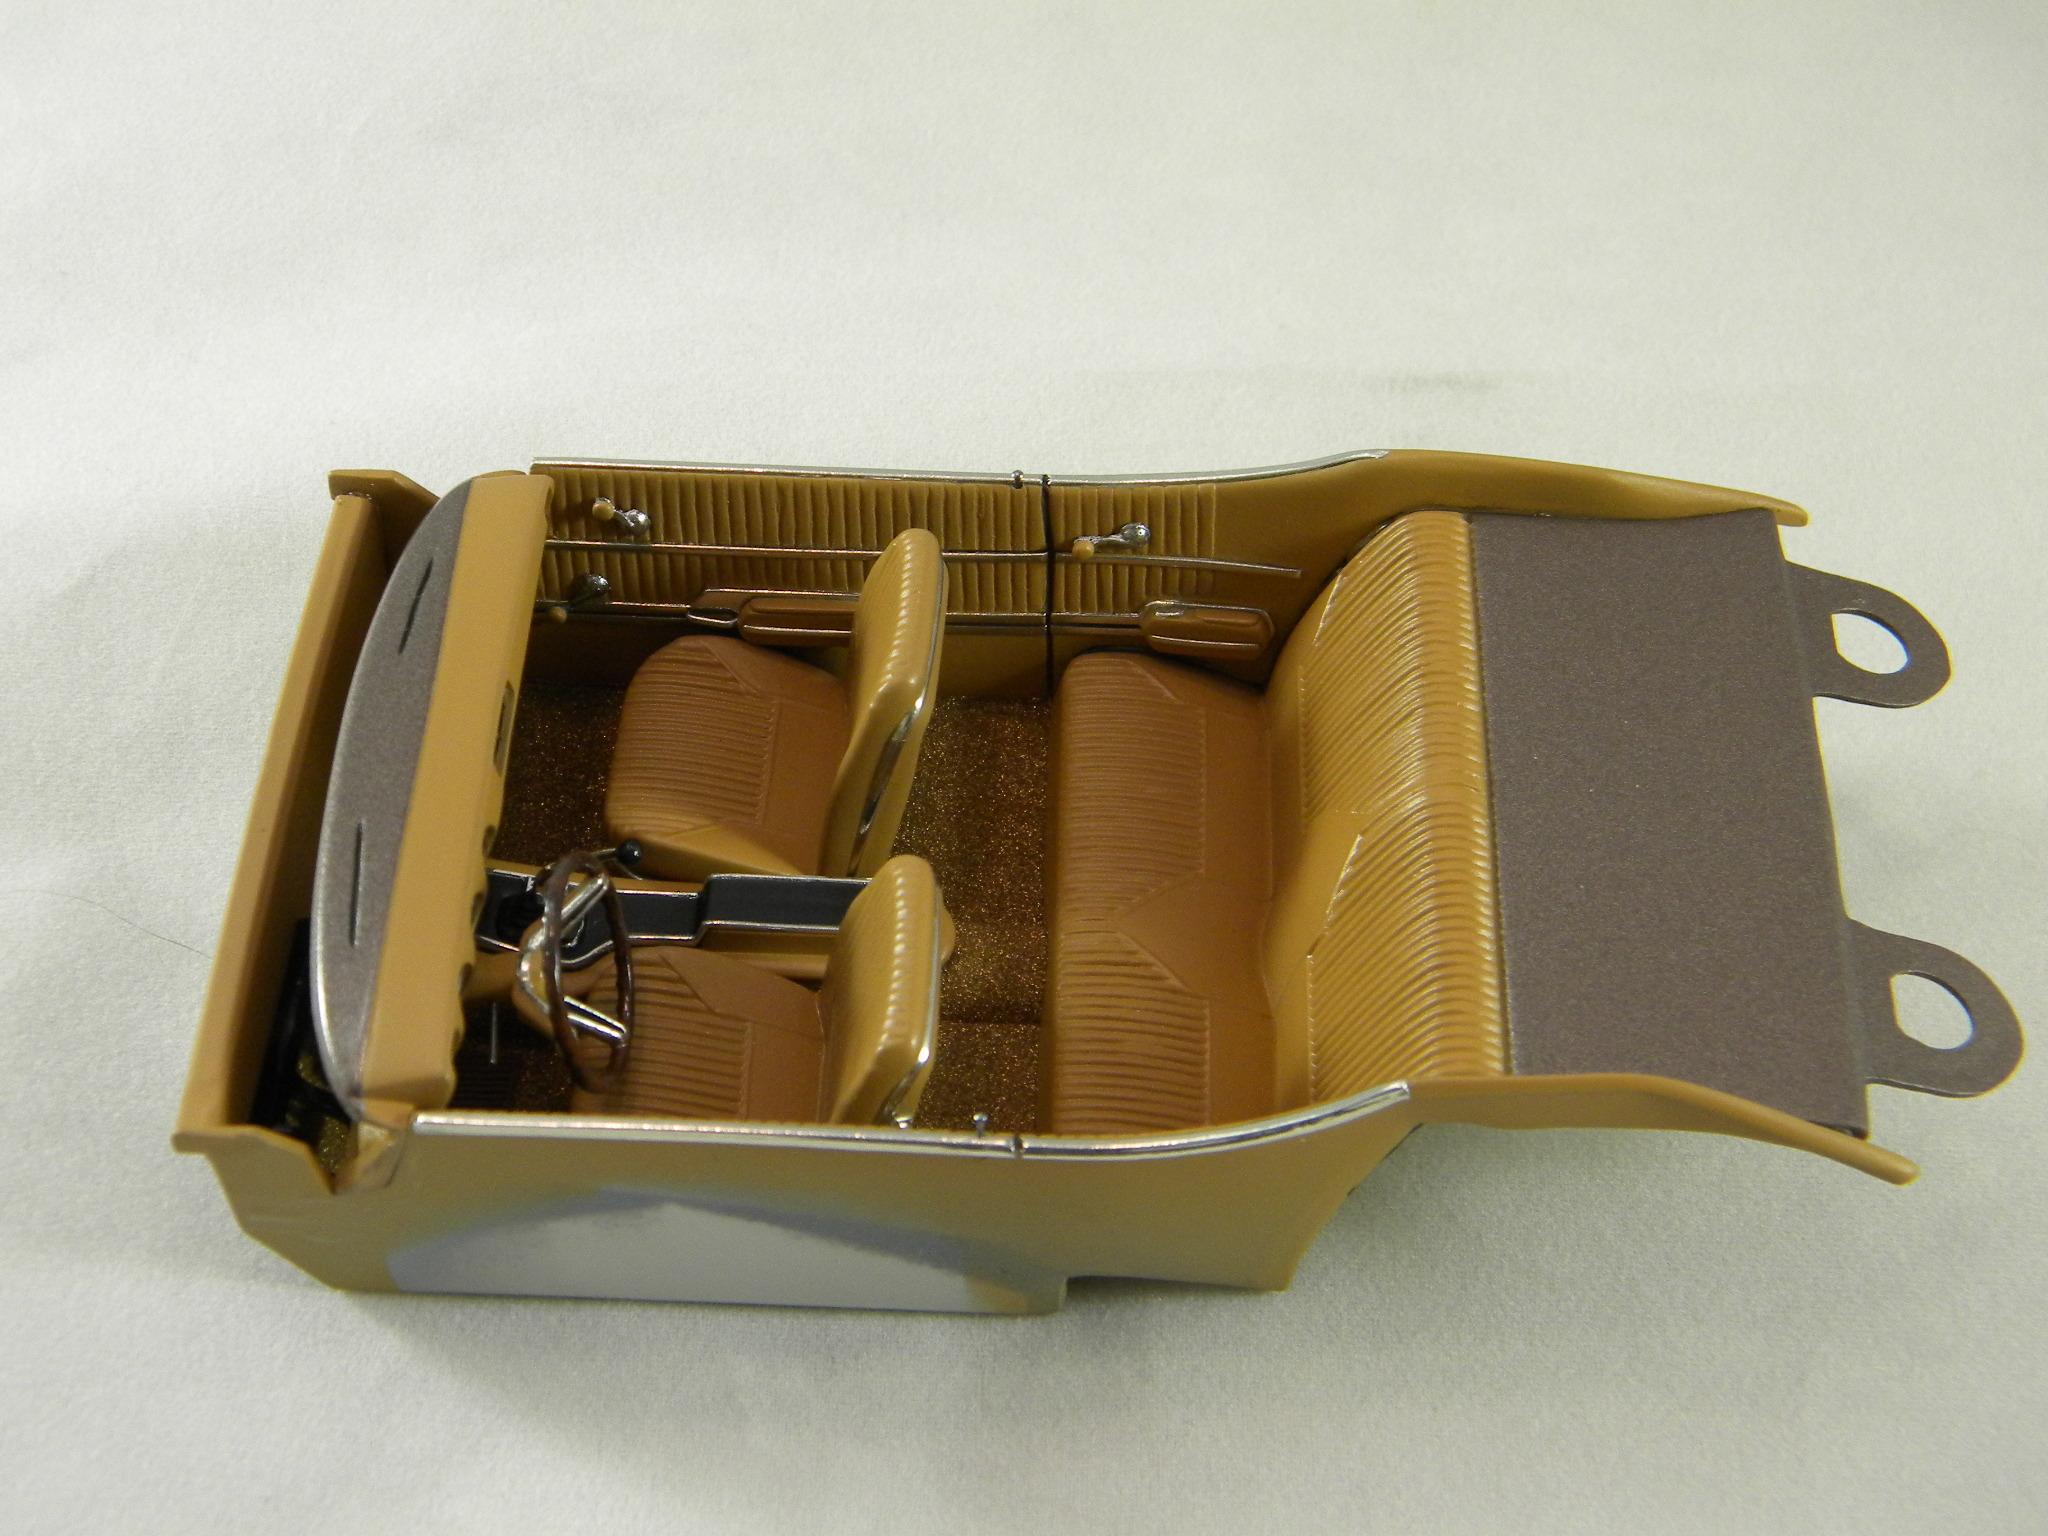
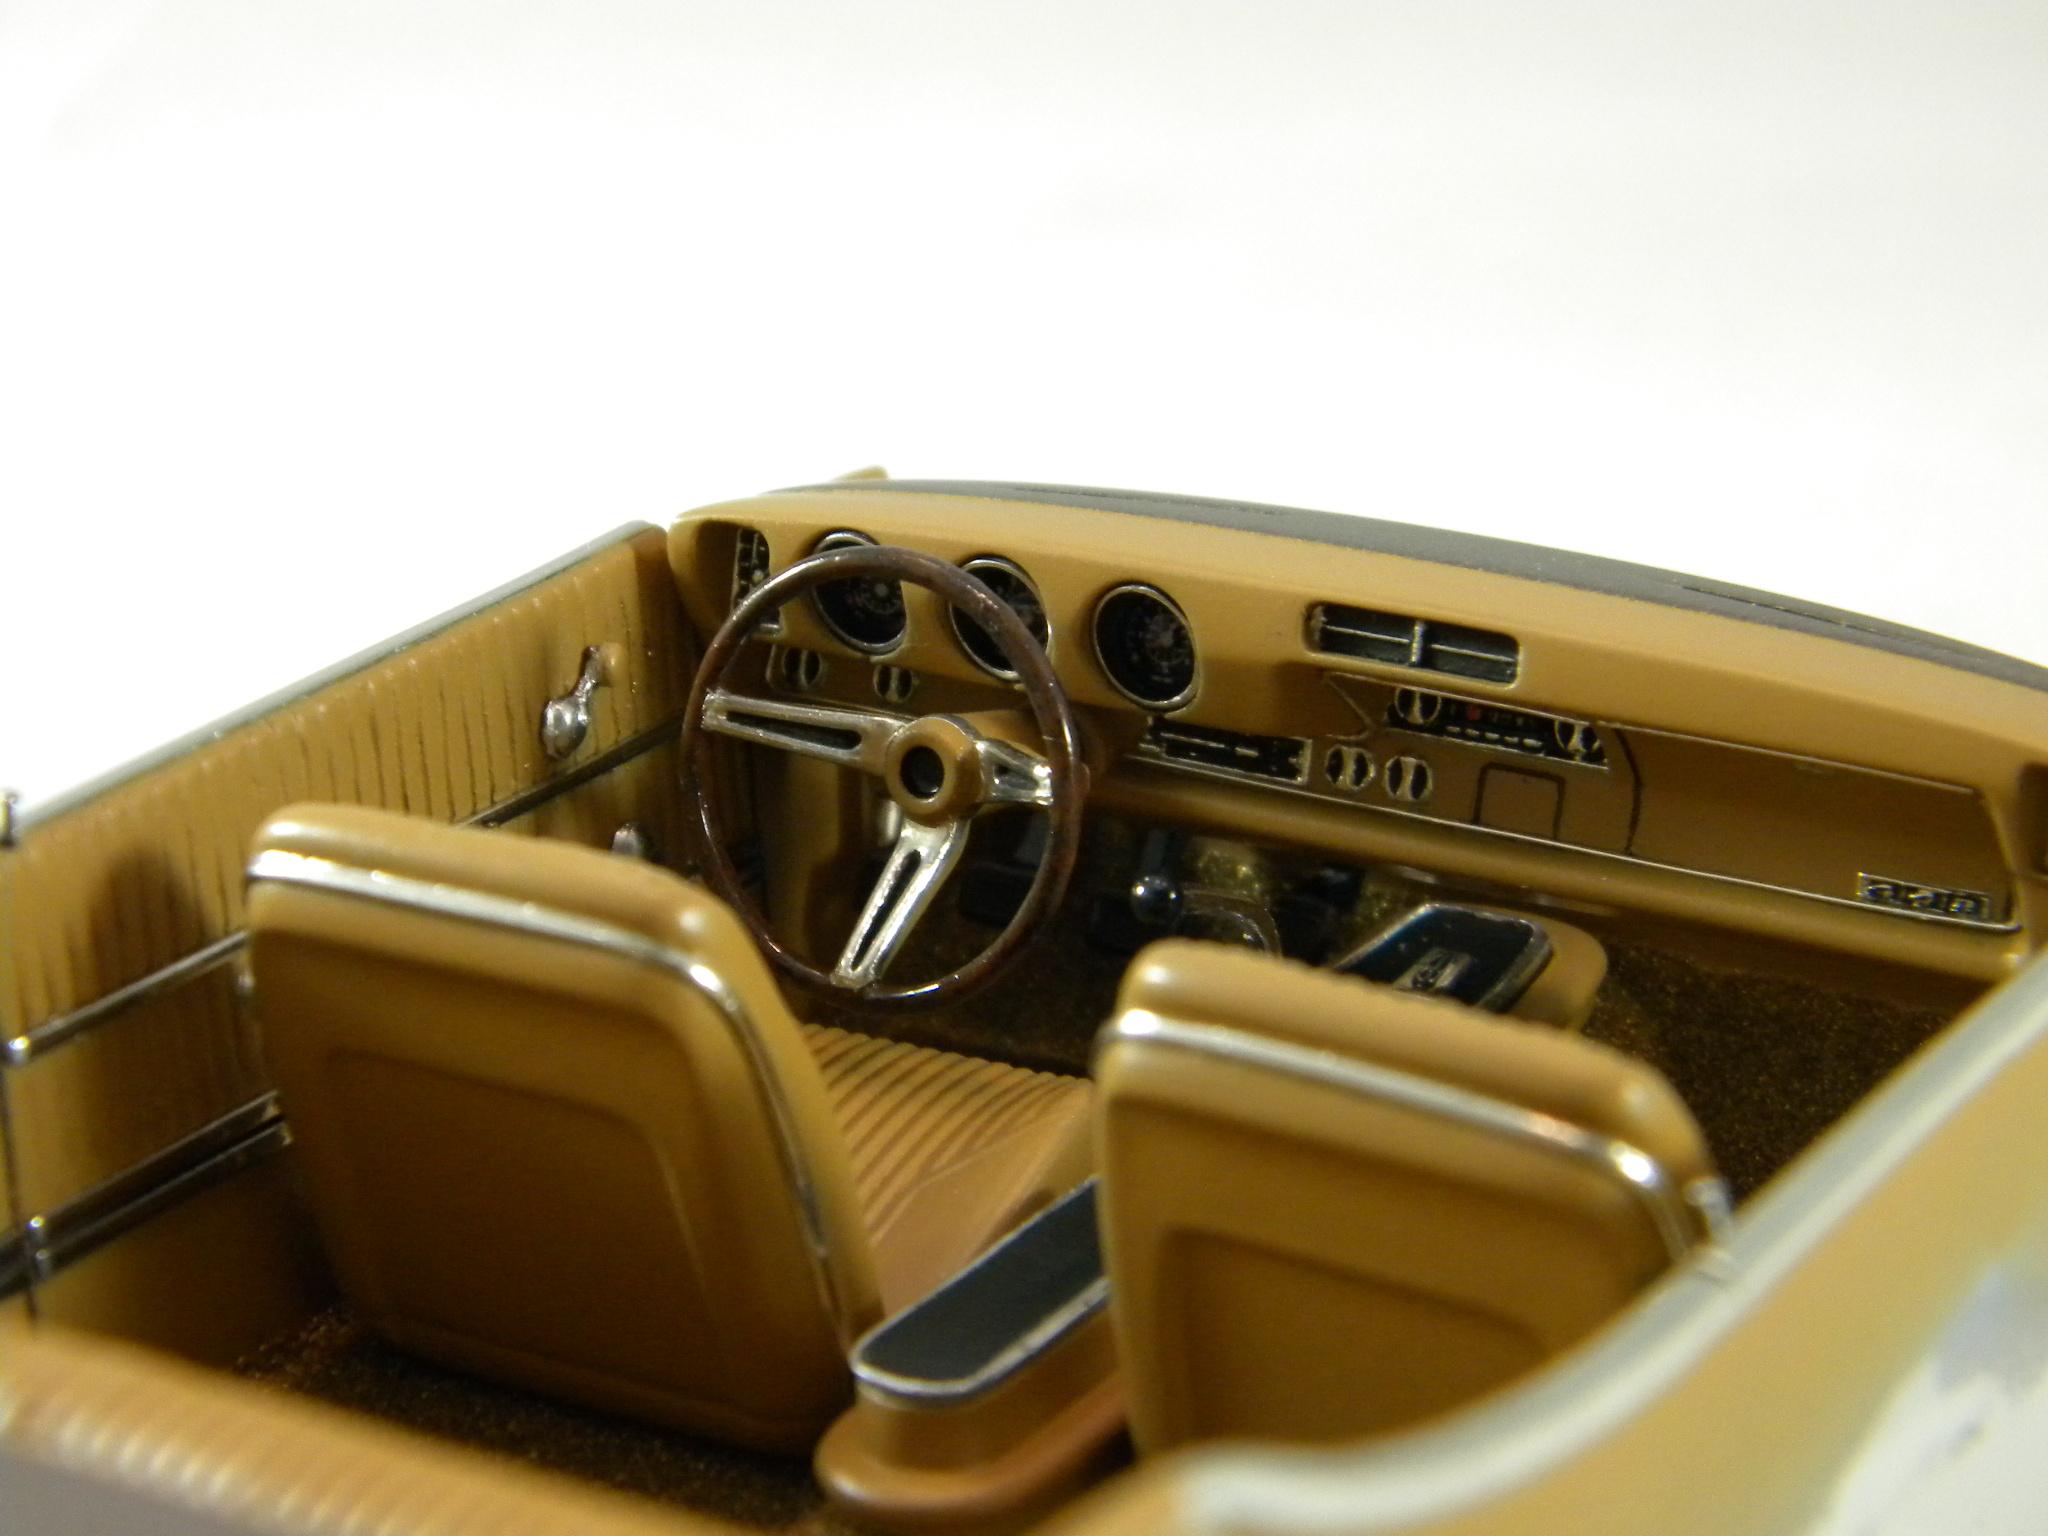
Finished up the interior on the '68 442 today. Steve
-
Thanks guys!! I believe that the interior is finished! Steve
-
Nice find John!! These are really tough to find! I spent gobs of money on my un-built kit a few years ago. Still one of my favorite builds. And yes, I did just polish the plastic and detail it up. Steve
-
Help with a Paint Adhesion issue
StevenGuthmiller replied to RT6PK's topic in Model Building Questions and Answers
I would never try to scrape paint from a body to glue finish parts to it. It's a recipe for disasters such as this. This is just the nature of the beast with lacquer. It can chip very easily. External parts can be glued on with any number of adhesives that do not require scraping, including CA glues or epoxies, among others. I use almost no solvent based cements of any kind in the final assembly of my projects. I save them for assemblies prior to paint. Steve -
1953 Mercury - Class of '53 - Graduate # 5
StevenGuthmiller replied to Ramfins59's topic in Model Cars
Very nice Richard! This would have been a very cool and logical "next step" for Lindberg after the '53 Ford. Steve -
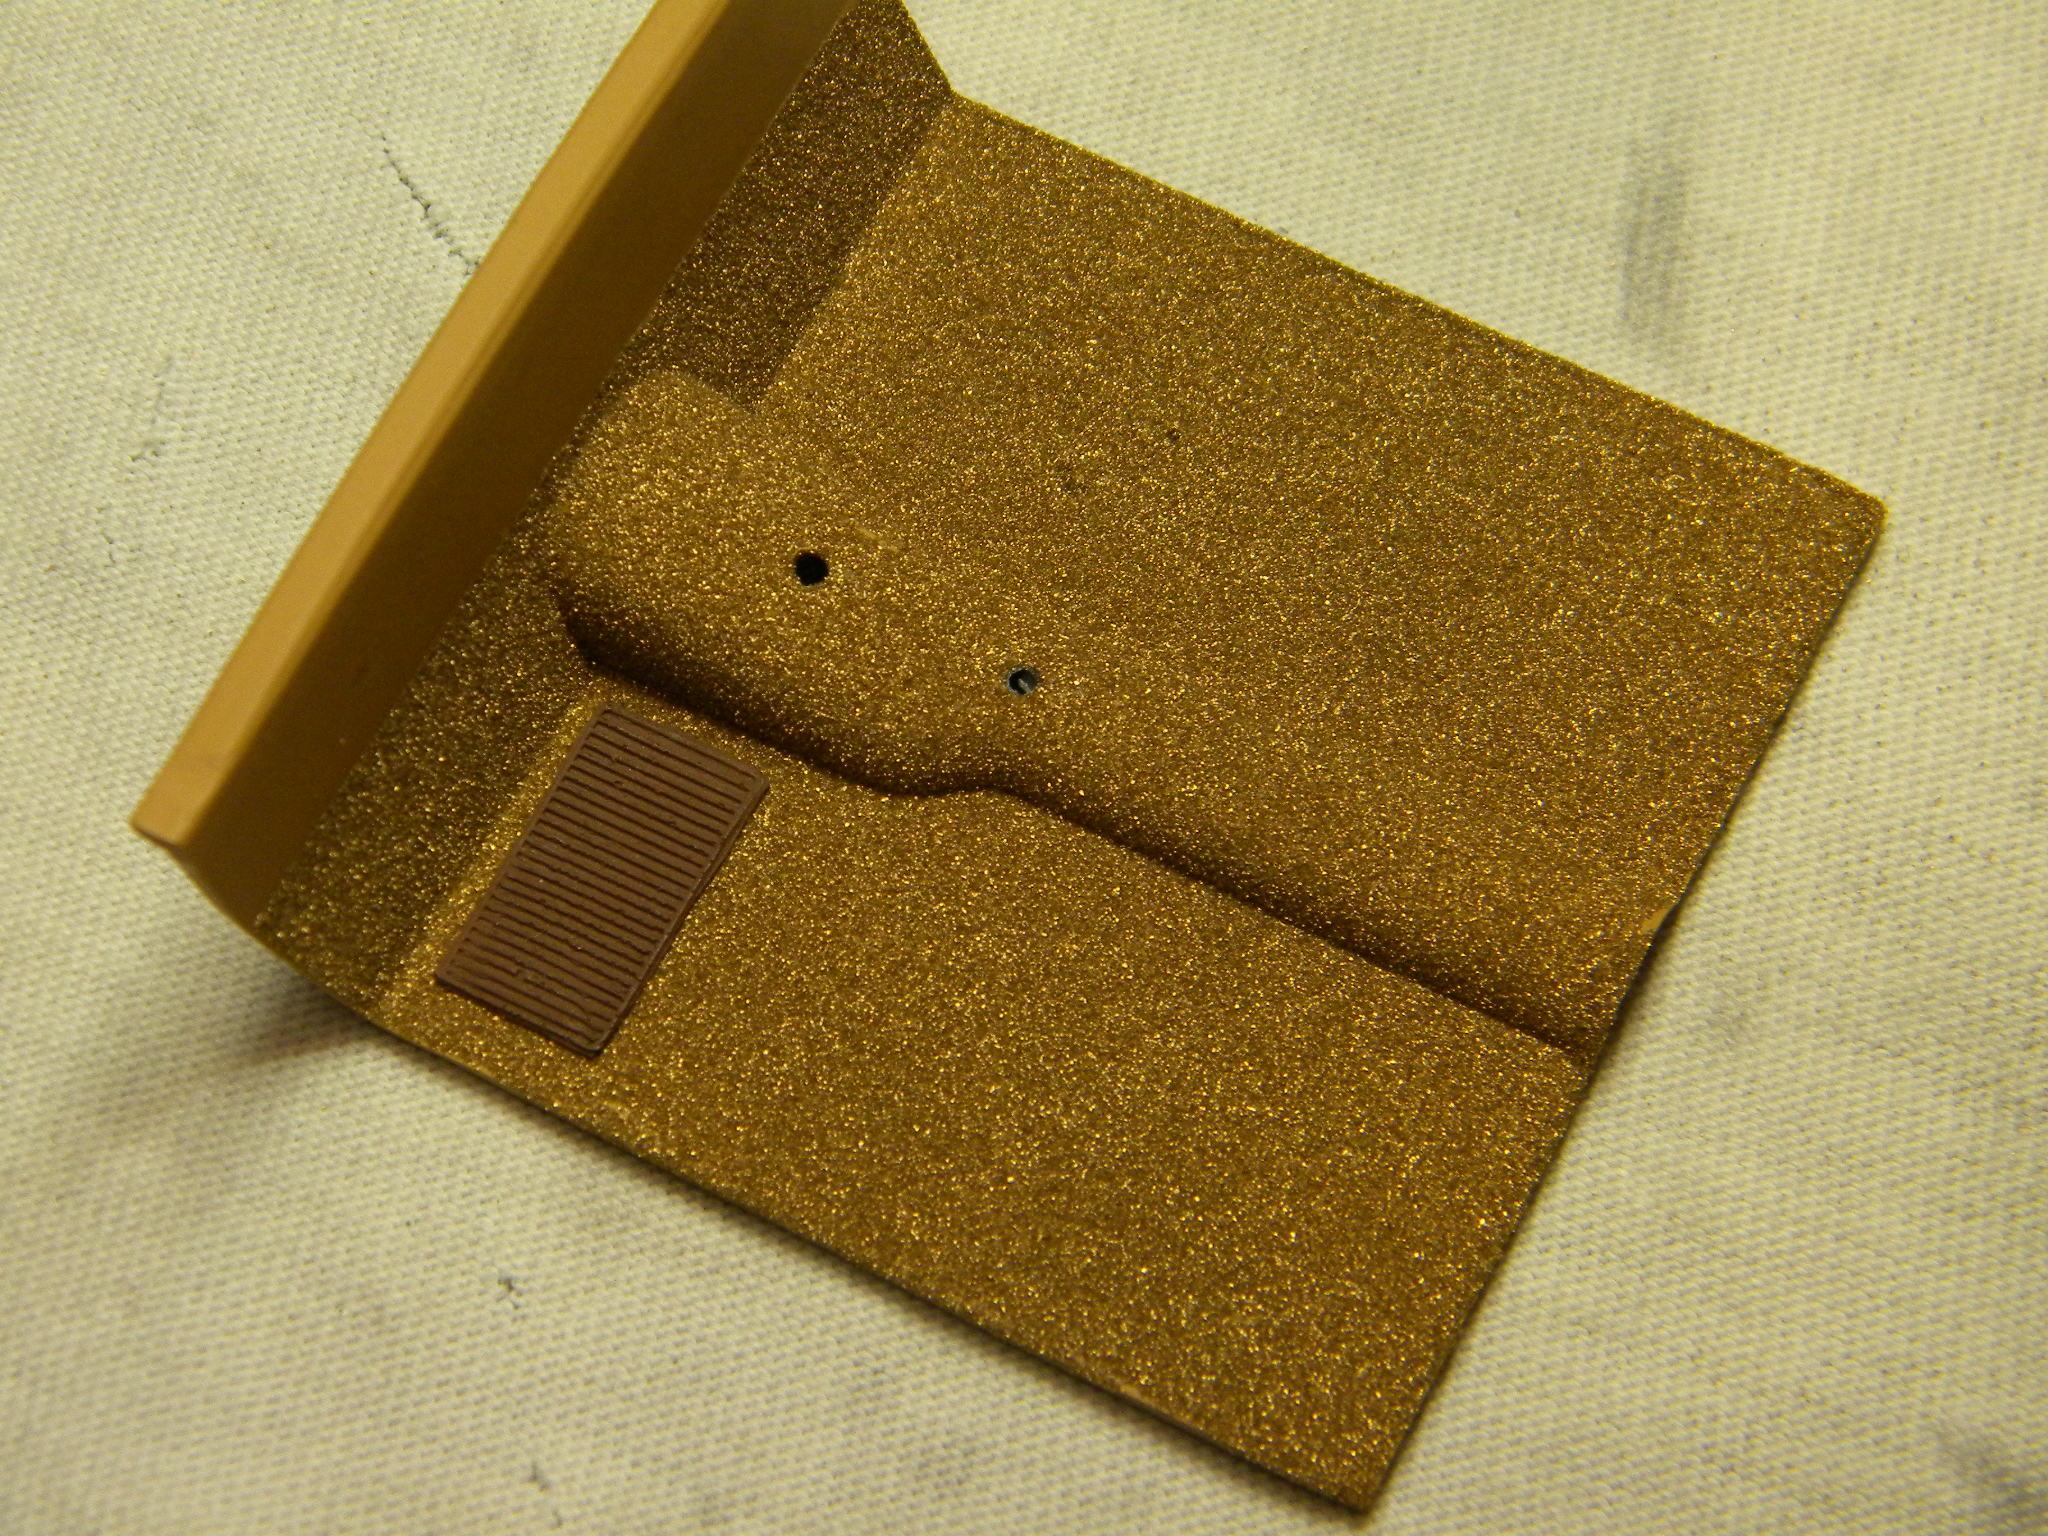
Added the carpet protector that I made from acrylic craft paint. Steve
-
Let me guess.........Fireball Modelworks. Steve
-
Terrific looking engine!! Steve
-
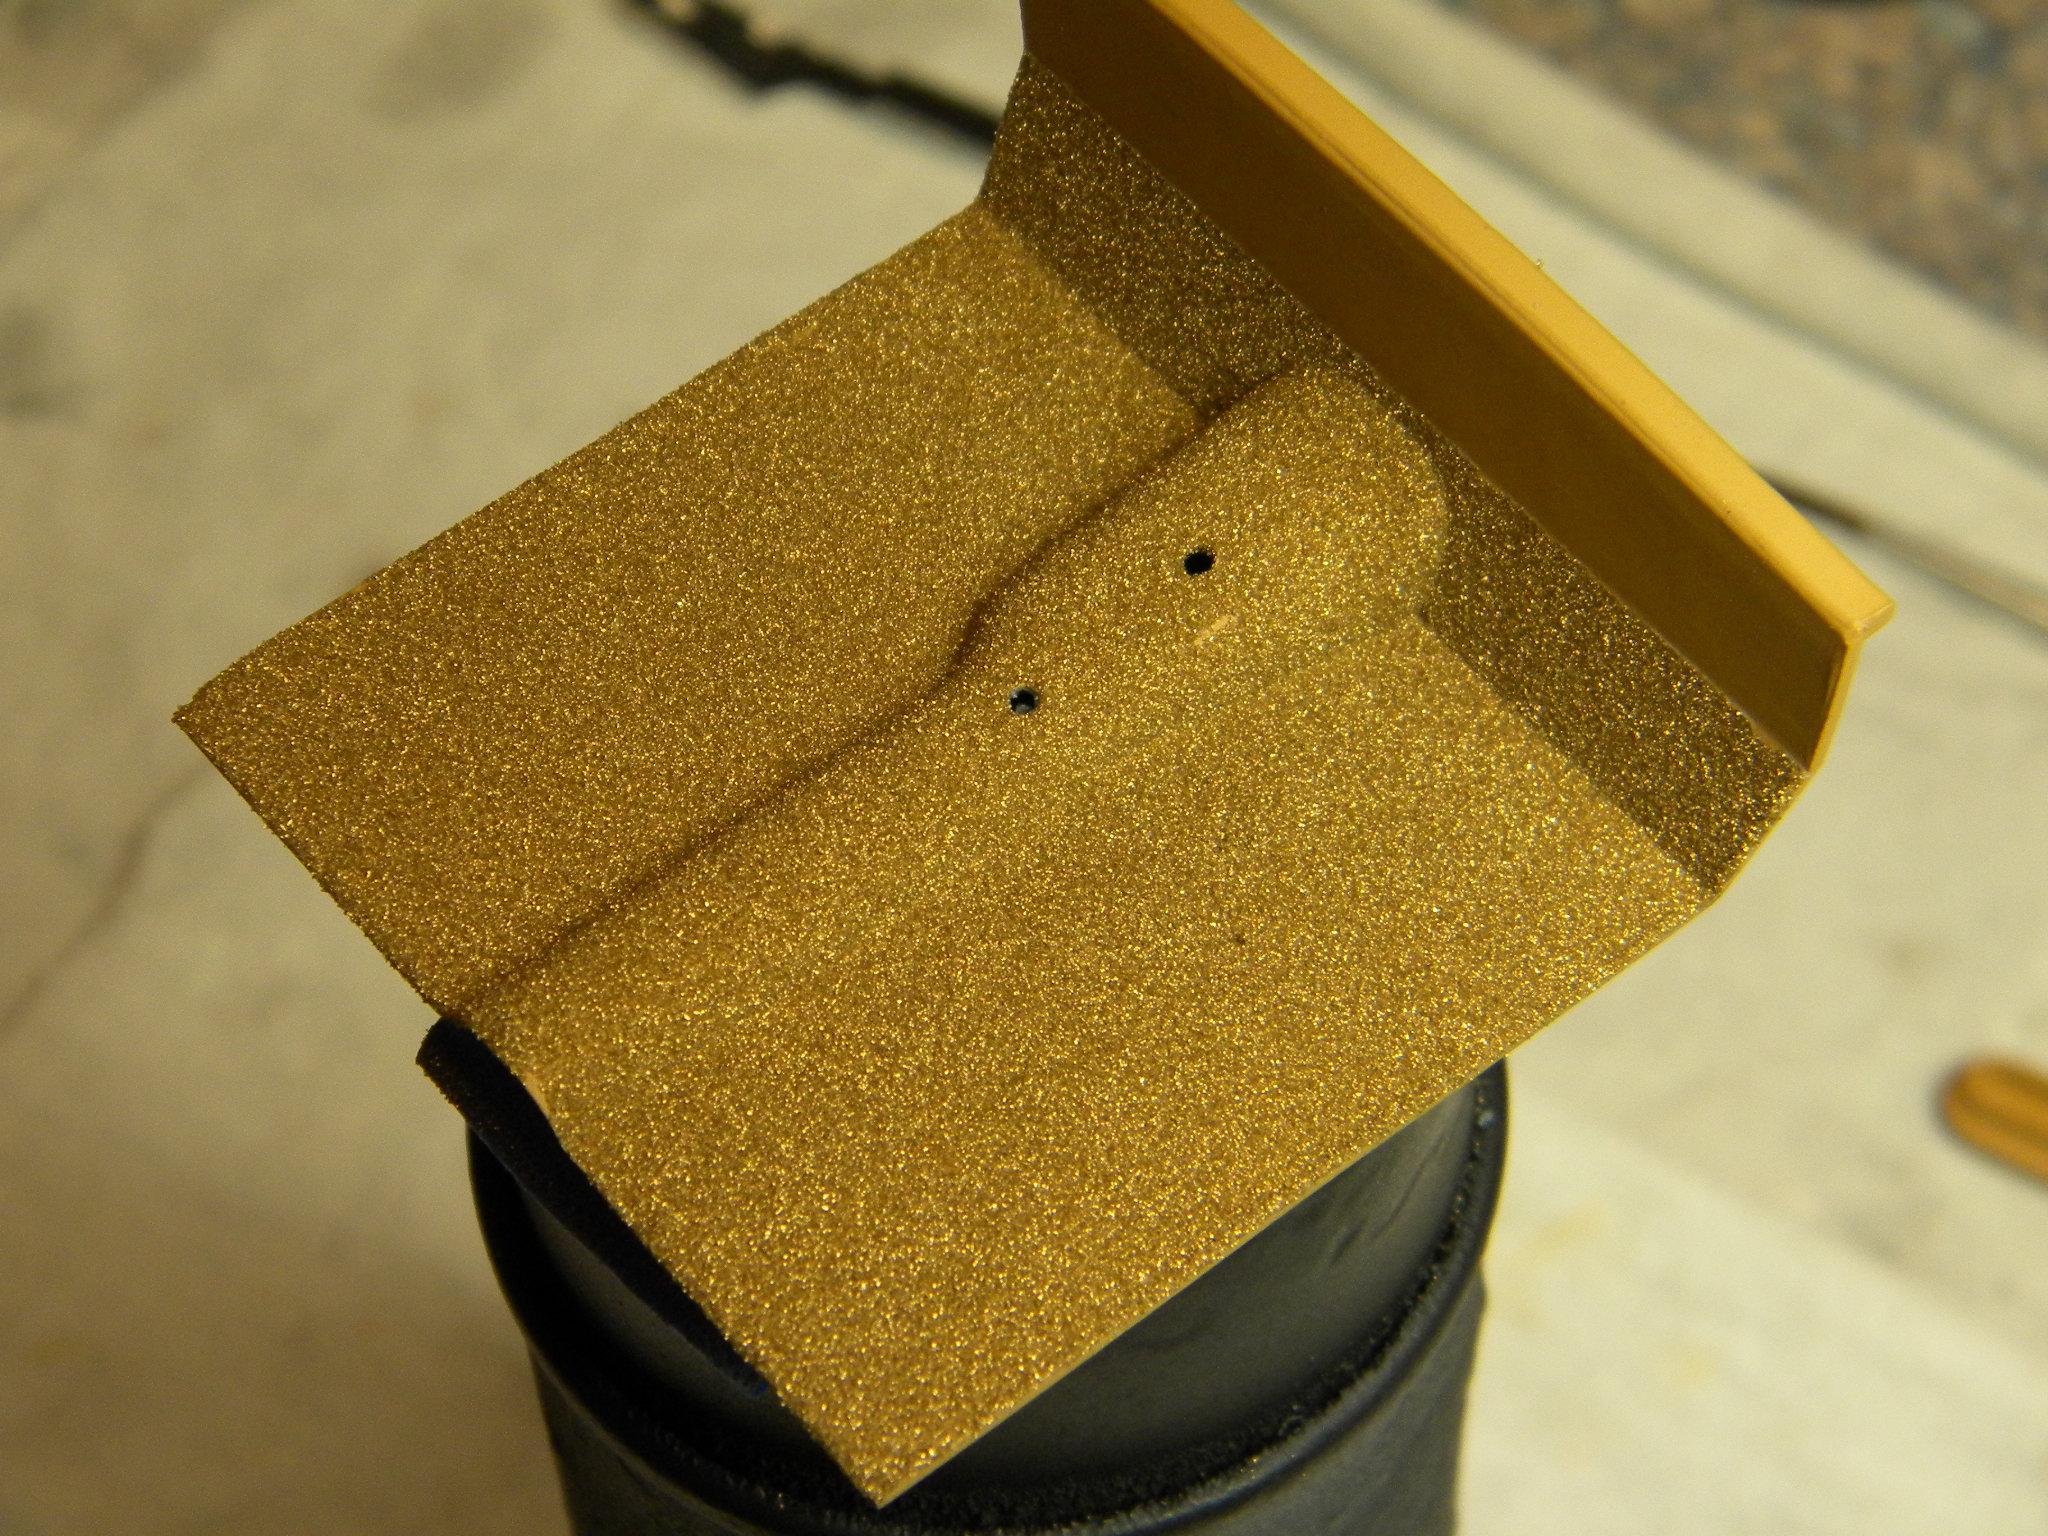
Got the console detailed and the carpet laid down for the '68 442. Steve
-
Thanks so much guys!! A few more small steps accomplished today. I got the rear wheel wells "Back in Black" as they apparently should be. (A little homage to AC/DC there) I also got the console plate finished, (after a couple of failed attempts). And I got the carpet laid down. Steve