StevenGuthmiller
-
Posts
15,071 -
Joined
-
Last visited
Content Type
Profiles
Forums
Events
Gallery
Everything posted by StevenGuthmiller
-
 Or you could just take your chances like I do. I kinda like livin' on the edge. Steve
 -
My problem is that when I'm working on small details such as linkages, plug wires, etc. I have to get the assembly as close to the magnifier as possible so that I can really see what I'm doing. If I taped a stand to me bench, I'd have to put a chin rest on the edge of it, and my back would look and feel like a pretzel after a few minutes. I guess I've just learned how to manage with one hand holding the assembly, and the other manipulating the parts. Short of holding the engine in my teeth, I really can't think of a way to do it any other way. Steve
-
I just use my third hand. Steve
-
1964 Pontiac Lemans Convertible.
StevenGuthmiller replied to StevenGuthmiller's topic in WIP: Model Cars
On to some other modifications. I started looking at what needed to be done to the engine compartment, and as there are differences between the '66 GTO compartment that I'm using, and the '64's compartment, I began investigating what changes had to be made. The most glaring difference was the radiator guard/shroud. As I had to remove the '66's guard, I discovered an issue that I needed to find a solution for. The radiator from the '66 GTO is molded to fit around the guard that I was removing, so I either needed to find a replacement for at least the upper tank, or I was going to have to modify what I had. Look as I may, I couldn't find a radiator tank that resembled the tank from the '64/'66 in any of the kits that I had. So, into the shop to basically scratch build a radiator tank. This is what I came up with. Steve -
How do I spray these details?
StevenGuthmiller replied to Milo's topic in Model Building Questions and Answers
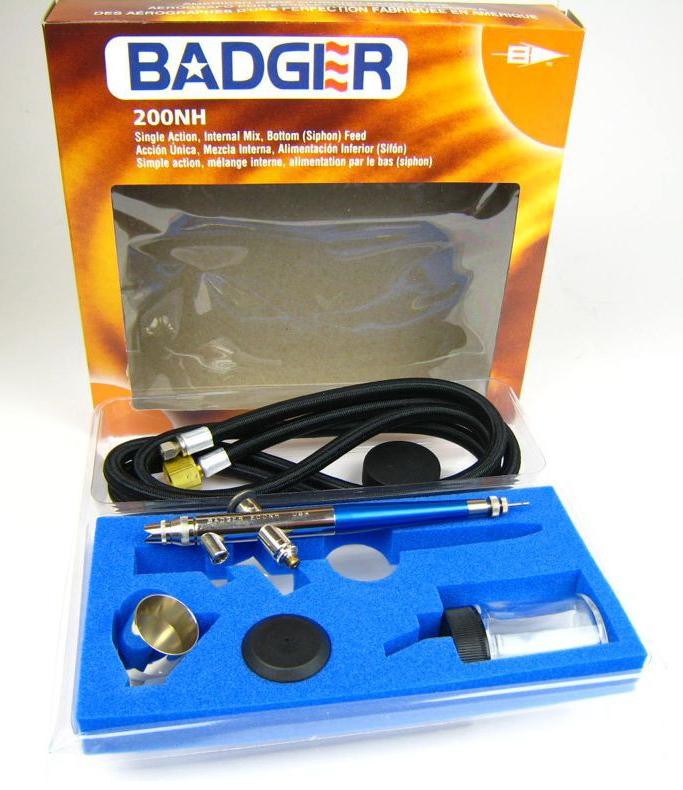
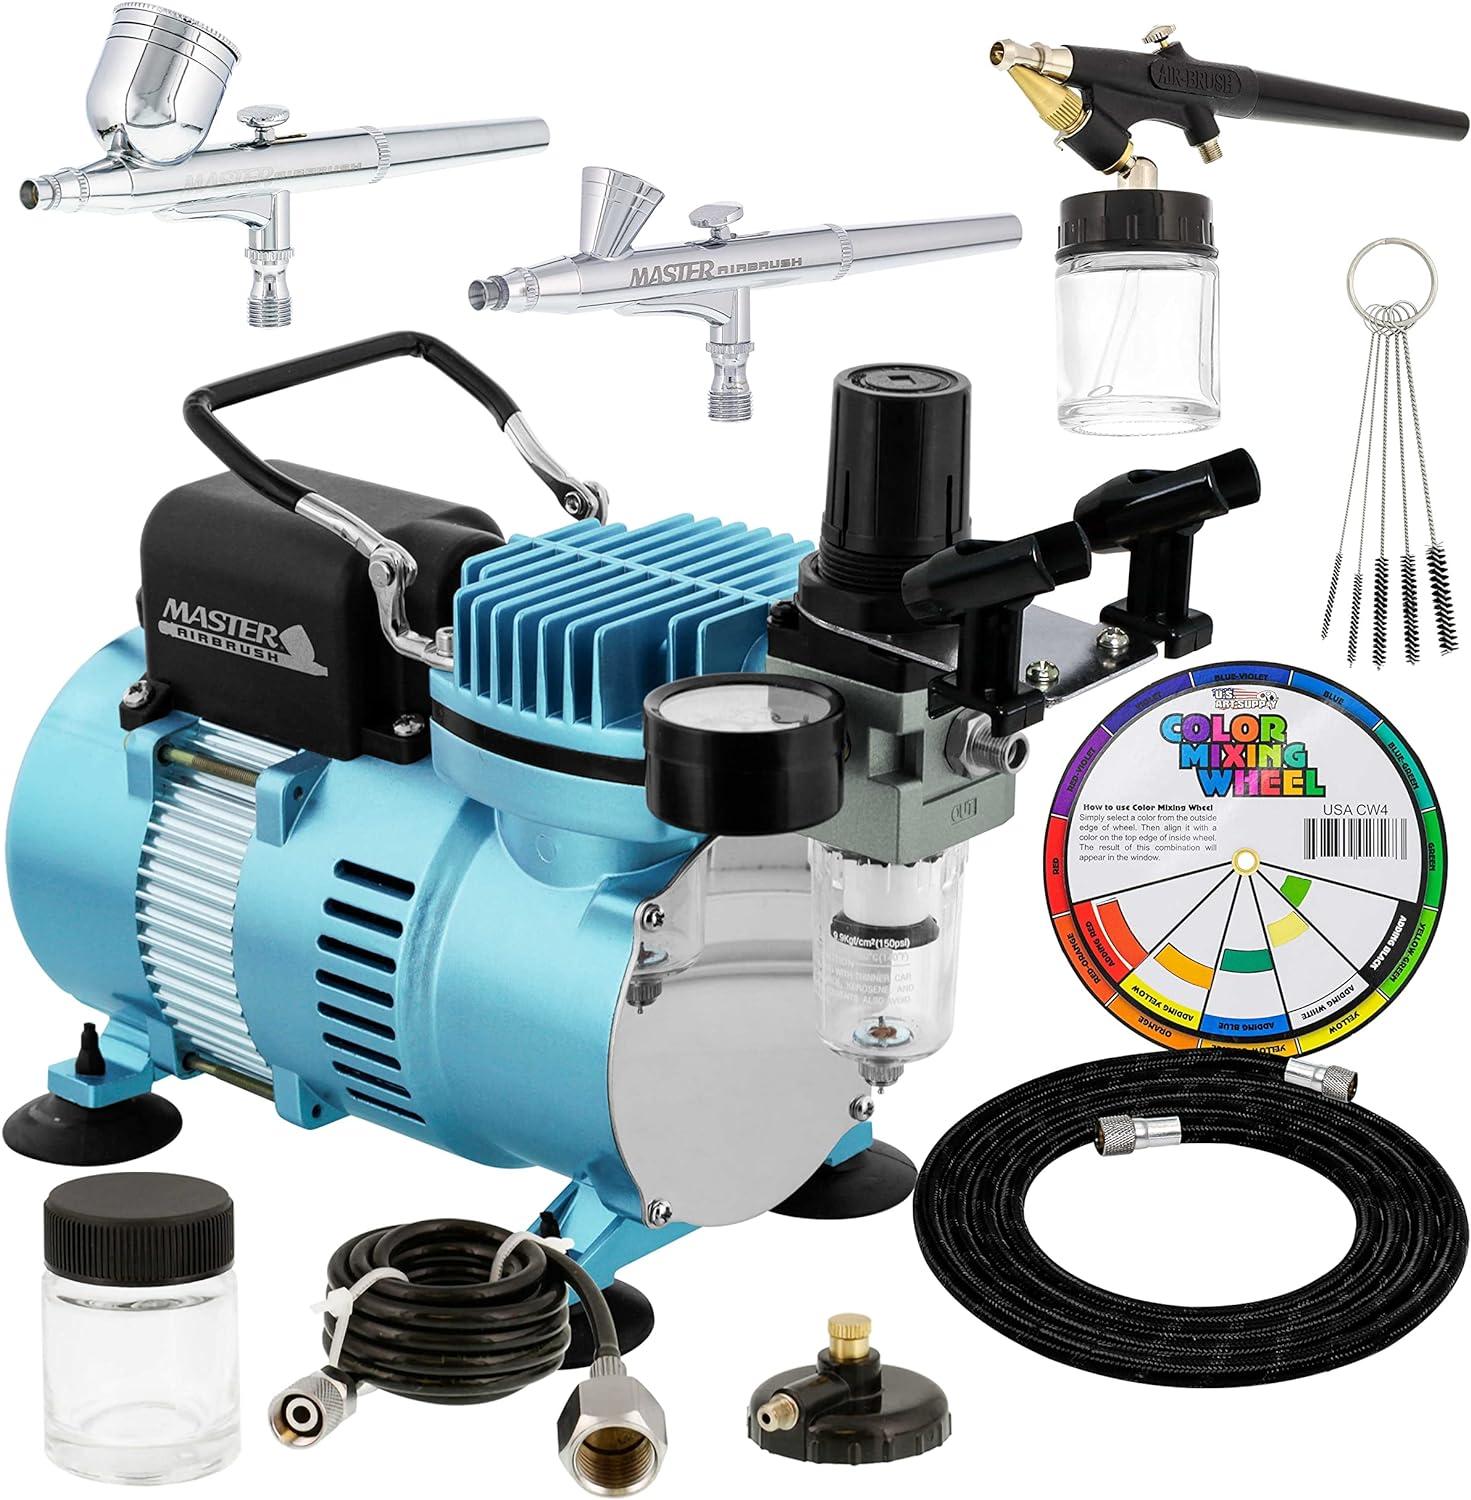
If you start with a simple airbrush, it will make it that much easier to clean as well. I have an old Badger 200-NH single action that I've had for many years, and it's my go-to for virtually everything. I break it down and clean it after nearly every use just to ensure that it remains squeaky clean, but it's just a matter of removing the tip and needle. I dip one of those little between the teeth flossing brushes in some lacquer thinner and run it through the tip, wipe the needle with lacquer thinner on a Q-tip, and then dip a pipe cleaner in lacquer thinner and run it through the paint passages in the body. From start to finish, including disassembly and reassembly, it takes me no more than 3 or 4 minutes to clean the brush. You can usually find these simple single action, siphon feed badgers for somewhere around $60.00 or $70.00. They're extremely easy to operate and maintain, and they'll basically last forever. Now, if it's really cheap that you're looking for, you can buy a set such as this, complete with 3 airbrushes, cleaning brushes, a compressor and a color mixing wheel for $130.00! Of course I'm not going to vouch for them at all. Steve
-
How do I spray these details?
StevenGuthmiller replied to Milo's topic in Model Building Questions and Answers
Give Duplicolor primer a try. They can also go on a little thin and transparent to begin with, but I find that the “fan spray nozzles” do a fabulous job of atomizing the paint and getting into those little recesses. I know everyone seems to rave about the Tamiya spray nozzles, but I have never been particularly enamored with them. In my opinion, you’ll get better overall control, and more even coverage with the Duplicolor nozzles, and they don’t have the tendency to hose on the paint so localized and heavy. You’ll still need to do a few light coats rather than trying to do it in one heavy one, but that’s best practice anyway. In my personal opinion, even if you’re doing a light color, I would start with a couple of light coats of light gray Duplicolor primer to get some coverage over the blue plastic. It will give you something for the white primer to adhere to, to help keep it from drawing away from the high points and pooling in the low points as in your photos. A couple of light coats of white primer, followed by a medium coat or two, and you’ll be golden. Don’t worry about spraying a number of coats of primer. The Duplicolor primers dry extremely thin and won’t exhibit any detail hide, even with 5 or 6 light coats. In the end, depending on what type of paint you’re using, more primer is much better than less to protect the plastic from a potentially hotter paint anyway. In conclusion, never expect to be able to get great primer, paint or clear coat coverages in one coat. My opinion is that this is one of the greatest mistakes that many new modelers make. The idea that you can take short cuts and do it fast and cheap is almost always a loosing strategy in my view. Steve -
Painting with the hood on or off?
StevenGuthmiller replied to av405's topic in Model Building Questions and Answers
As Ace says, spraying the body and hood separately for the initial coats to get color on the engine compartment where applicable, followed by taping the hood in place for the final coat or two is the best approach. That said, I don’t always do it. Probably out of laziness more than anything. Now if I were doing the model as a curbside, I would absolutely glue the hood in place prior to paint. If you’re having issues with filling in the hood gaps with paint, you should be having the same problem with the other panel lines. If not, that tells me that you need to do some additional work on the hood gaps so that they match the door and trunk gaps. If you are having problems with obscuring the other panel lines, you either need to use different paint, or less of it, or you should be scribing to make all of the gaps deeper. Steve -
Honestly, all that you really need is some thin, narrow plastic strip for the molding separating the top from the body at the base of the C-pillar. My recommendation would be Evergreen .010 x .030 styrene strip. It’s extremely thin and pliable and will look in scale. If you prefer to go thicker and sand down to an acceptable thickness, that’s fine as well. Measure and mark the location of the moldings and then glue them in place with a MEK glue, or plastic cement of your choosing before any paint is applied. Then it’s just a matter of masking and painting. My suggestion is to paint the body first and do any cutting and polishing of the paint before doing any painting of the top. This ensures that you won’t inadvertently polish or sand portions of the finished top. I will usually mask the top off after priming and keep it covered until all of the work is completed, and then unmask and mask the body for top painting. If you plan on doing the top in black, I find that Duplicolor black sandable primer is an excellent choice. Once the body is masked, I’ve discovered that an excellent solution for the top seams is to measure and mark their location, and then mask the outer edges of the roof, and to spray a couple of coats of paint down the center. Whatever paint you choose, as long as it can be over sprayed with the Duplicolor primer will be fine. You’re just using the paint to add thickness to the center panel to create the seams. I recently tried this on a convertible top and it worked beautifully!! Once the seams are finished, unmask the outer portion of the top and give the entire top a couple of coverage coats of the black primer. Finally, the texture stage is achieved by spraying a fine mist coat or two of the black primer from a couple of feet away over the entire top. This is one circumstance where a fine orange peel is a good thing. ? Once all this is complete, unmask the body, and foil the C-pillar molding. Another great trick is to rub the top lightly all over with your fingers. The oil in you skin will “polish” the surface of the little bumps in the texture, leaving the background more of a flat finish and creating contrast and a very realistic looking finish. I know.....a lot of information there. But it’s really pretty simple, and in the end, will net you a MUCH more in scale and realistic looking top than most other techniques, such as using masking tape for the texture. In my view, masking tape is FAR too heavily textured for a 1/25th scale vinyl top. If you should choose to use my method, feel free to PM me at anytime should you need any further suggestions. Steve
-
The only real difficulty would be adding the chrome molding between the top and the body. Other than that, you should be able to add it without disturbing the paint if you're careful. Steve
-
1958 amt annuals wheel covers
StevenGuthmiller replied to hedotwo's topic in Model Building Questions and Answers
Yes. Steve -
1958 amt annuals wheel covers
StevenGuthmiller replied to hedotwo's topic in Model Building Questions and Answers
I'm not certain about all of them, but I do know that some of the AMT '58s did not come with stock wheel covers. Case in point, the '58 Bonneville kit did not include stock covers. Why, I don't know, but the '58 Bonneville promo did. I was lucky enough to get a set of stock wheel covers for my '58 Bonneville from Modelhaus before they closed their doors. I really miss those guys! Steve -
Let's play "Speculate"
StevenGuthmiller replied to Monty's topic in General Automotive Talk (Trucks and Cars)
That’s why I’m thinking the ‘66 Barracuda is probably coming.......because I have one! ? Steve -
Identification request
StevenGuthmiller replied to Earl Marischal's topic in General Automotive Talk (Trucks and Cars)
I understand that. I’m not comparing every pro and con of modern cars vs. old ones. I’m merely pointing out how much more robust the construction of the cars from that period were compared to the flimsy cars of today. Put the same safety equipment available in today’s cars into one of that vintage, and you’d have something akin to a Sherman tank! ? Steve -
Let's play "Speculate"
StevenGuthmiller replied to Monty's topic in General Automotive Talk (Trucks and Cars)
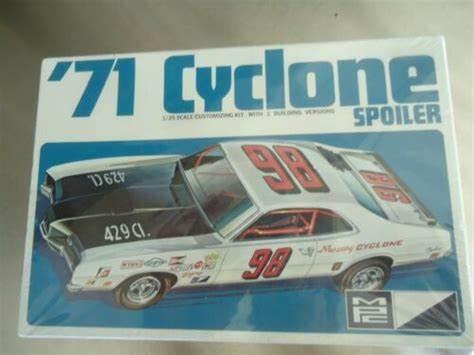
I just have the feeling that the ones that I posted would be viable alternatives based on the fact that the molds of all three still exist to some extent as they were all offered as altered versions some time later. The Cyclone as a NASCAR only kit, the ‘66 Buick as a “stocker”, and the Barracuda as the “Hemi Under Glass”. There should at least be a fair starting point with all three, which seems to be Round-2’s MO as of late. Who knows what remains, if anything, of the ‘70 Cougar. Plus, it just seems to me that the Barracuda, Cyclone, and Grand Sport have all been very sought after kits for many years. The Cougar strikes me as being a little bit more of a “niche” kit with probably less of a following than the others. Round-2 will be looking for kits to reissue that will give them the biggest bang for the buck as possible. Steve -
Very good idea! If you decide to go that route Jeremy, I would be more than happy to offer any help that I can. Steve
-
Let's play "Speculate"
StevenGuthmiller replied to Monty's topic in General Automotive Talk (Trucks and Cars)
In all honesty, I think the Cougar might be possible, but with the ‘69 already available, I have my doubts. Personally, I wouldn’t hold my breath for the other 2 either. My opinion? I would keep an eye out for these 3 in the not too distant future. Just a guess. Steve
-
Identification request
StevenGuthmiller replied to Earl Marischal's topic in General Automotive Talk (Trucks and Cars)
And the chains worked worse than expected. ? Steve -
I think you might be too late already. From what I’m seeing, the color coats have already been affected. Steve
-
Identification request
StevenGuthmiller replied to Earl Marischal's topic in General Automotive Talk (Trucks and Cars)
Of course, today’s cars are safer for the occupants, but they’re also constructed of tin foil and plastic. The car in the photo could be easily repaired. A modern car would be loaded directly onto another truck to be hauled to the bone yard. Steve -
Identification request
StevenGuthmiller replied to Earl Marischal's topic in General Automotive Talk (Trucks and Cars)
You’d be lucky if it wasn’t bent in half. ? Steve -
Identification request
StevenGuthmiller replied to Earl Marischal's topic in General Automotive Talk (Trucks and Cars)
Funny part is, try that with a modern car and see what you’d have left. you’d be hauling it to the junk yard. ? Steve -
I hate that “I build for fun” nonsense as well. As if those of us who dedicate ourselves to more time and effort can’t possibly be enjoying ourselves. ? I’ve been building “for myself” my whole life, but I will reveal that the first time that I attended a model show was a true epiphany for me. Seeing the unbelievable models on display was an absolute inspiration! I saw things there that I had never seen before, or had even thought possible in 1/25th scale. I could have either returned and decided to remain stagnant in my modeling approach, or I could do what I did, and strive to reach the highest level that was possible for me. Funny thing is, I enjoy this hobby SO much more now than I ever did back when I was just slapping them together in a few days and using the “I build for fun” excuse. Steve
-
Pledge Revive It before and after
StevenGuthmiller replied to ewetwo's topic in General Automotive Talk (Trucks and Cars)
Well, I KNOW that I’d never use it in place of clear lacquer. The only reason that I had ever considered buying any was possibly for glass, but the last thing that I need is more stuff that I’ll never use cluttering up my shop. ? Steve -
Why is my clear coat coming out textured?
StevenGuthmiller replied to Milo's topic in Model Building Questions and Answers
The real issue is not that the nozzles can’t be cleaned, it’s just the fact that you shouldn’t have to soak your spray nozzles every time you use the stuff. I bought a few cans of Rustoleum a few years ago, hoping that they would be a good choice for spraying chassis parts, etc. Problem was that the nozzles plugged up on every can after the first use, a couple of them during the first use! I can honestly say that from my brief experience with Rustoleum spray paints that there is no worse paint delivery system on the market! At least not that I’ve seen. Steve -
Pledge Revive It before and after
StevenGuthmiller replied to ewetwo's topic in General Automotive Talk (Trucks and Cars)
That’s all fine, and you can have my share. I’ll stick with real paint. ? Steve