StevenGuthmiller
-
Posts
15,071 -
Joined
-
Last visited
Content Type
Profiles
Forums
Events
Gallery
Everything posted by StevenGuthmiller
-

Flocking
StevenGuthmiller replied to Sidney Schwartz's topic in Model Building Questions and Answers
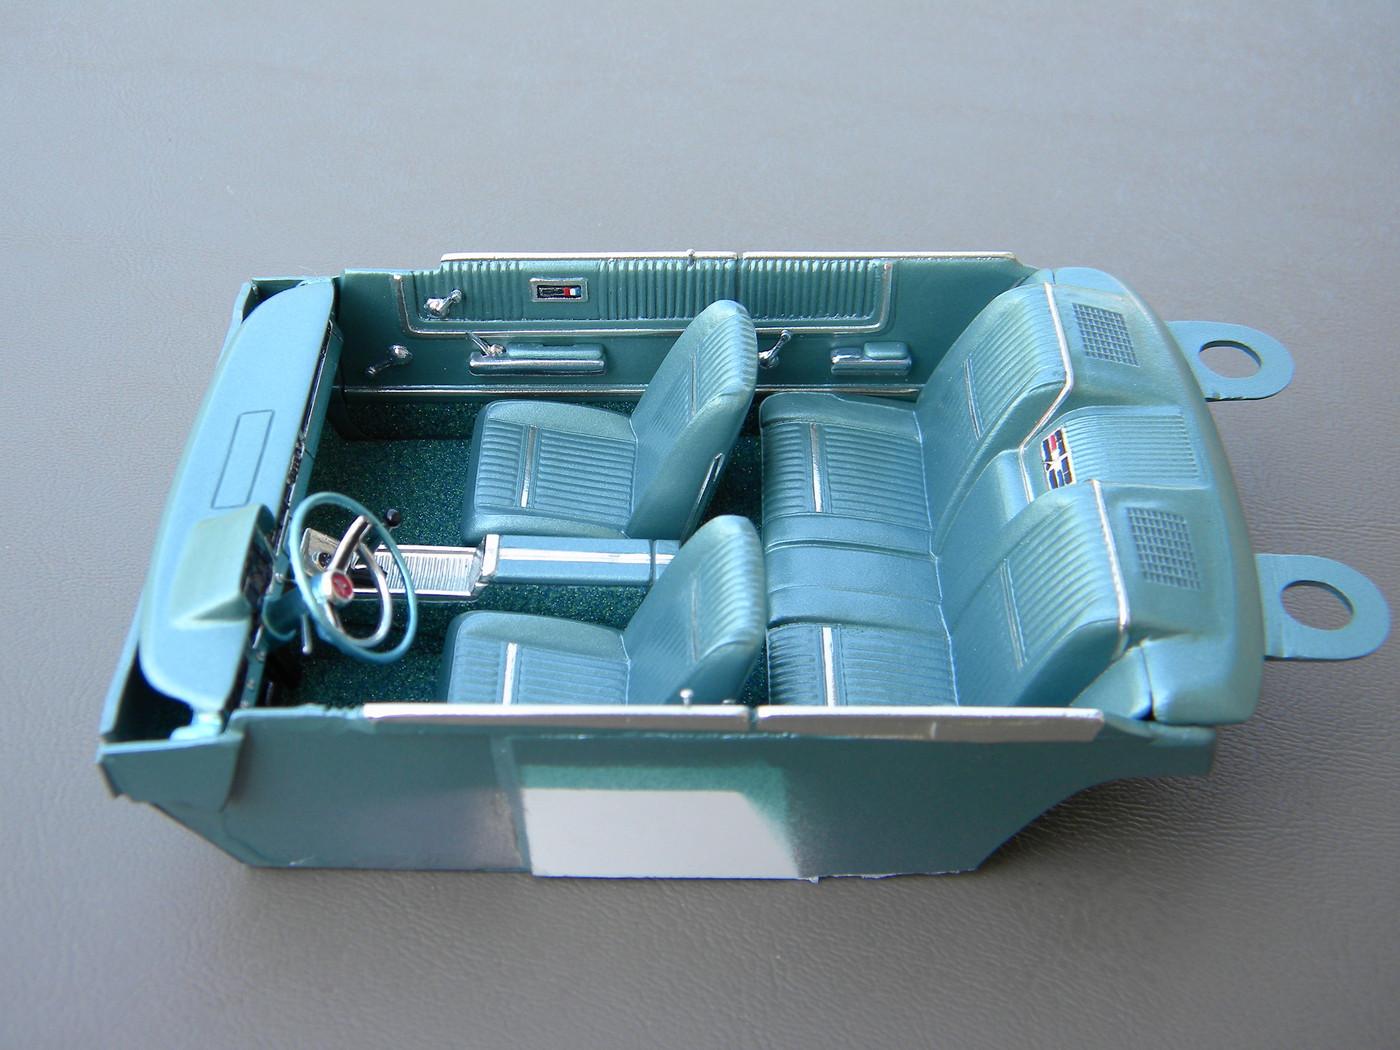
The powders can be mixed fairly convincingly, although don’t expect to mix red and yellow to get orange. It works pretty well to mix similar colors to achieve certain results. In the case of this ‘65 Plymouth, I had no turquoise, so mixing blue and green worked fairly well. Otherwise, the powders come in a wide variety of colors, and if you need a color that you can’t find, the powder is easily painted after application. Steve
-
Flocking
StevenGuthmiller replied to Sidney Schwartz's topic in Model Building Questions and Answers
Flocking is very fine fibers. I've never had much luck with flocking. It has a tendency to float all over the place, and it's very prone to static electricity, making it want to stick to everything that you don't want it to stick to. It's long fibers make it look more like a shag carpet. Embossing powder is a very fine granular powder. Personally, I find it easier to work with, and it's appearance is more in tune with the cut pile carpet found in most cars. These were done with metallic embossing powder. Steve -
Flocking
StevenGuthmiller replied to Sidney Schwartz's topic in Model Building Questions and Answers
Do you want flocking, or embossing powder? Steve -
I may have posted this before, but I still have people ask me how I do this on occasion, so I figured that I would post it regardless. This is a pretty common technique that I assume many modelers have mastered, but here it is for anyone that may not be familiar with it. Steve
-
1964 Pontiac Bonneville Convertible.
StevenGuthmiller replied to StevenGuthmiller's topic in WIP: Model Cars
Steve -
1964 Pontiac Bonneville Convertible.
StevenGuthmiller replied to StevenGuthmiller's topic in WIP: Model Cars
Maybe this will help Bruce? Steve -
1964 Pontiac Bonneville Convertible.
StevenGuthmiller replied to StevenGuthmiller's topic in WIP: Model Cars
Thanks Bruce. I don't really no how to describe it other than to heat the sprue over a flame until it really starts to sag, and then immediately pull on both ends with very slow and steady tension. The slower you pull, the thicker the piece, the faster you pull, the thinner. I've learned to be able to stretch sprue pieces probably not much thicker than a human hair, and possibly as long as 3 feet long. Steve -
1964 Pontiac Bonneville Convertible.
StevenGuthmiller replied to StevenGuthmiller's topic in WIP: Model Cars
Thank you guys! I have been rolling some ideas around in my head for a few chassis details, (although, I don't think I'm going to go crazy with it), but I was thinking about one of the more visually obvious features, and how I should approach it. I was thinking about how to best throw in some emergency brake cables, and originally, the obligatory "wires" approach seemed to be the most likely solution. But then I started thinking, "I really don't want to start monkeying with trying to route these wires once the chassis is painted and in the finishing stages, and there's nothing that I hate more than trying to keep exposed wire details straight and free of bends and kinks during the assembly process, and after". In my mind at least, I figured that thin plastic would be more flexible and less likely to bend up on me as I progressed, and much easier to assemble and fit prior to the finishing stages of the build. Granted, it would be more prone to breakage, but as flexible as stretched sprue is, it would require some fairly radical forces to break it, so, I decided that there was absolutely nothing to lose by attempting to construct an entire unit that could be painted and virtually just slipped into place towards the very end of construction. It actually went much better than I anticipated, and installing it will require nothing more than a couple of seconds to slip it into place. Steve -
Agreed. Any clear that you desire will help protect the painted details. In many cases, I'll use flat paints for a lot of the base colors and details. That way, a coat of Testors clear gloss lacquer will give the parts a nice matte finish. Sort of killing two birds with one stone. Steve
-
Best Adhesive for Windscreens?
StevenGuthmiller replied to Bugatti Fan's topic in Tips, Tricks, and Tutorials
I don't want to call it "the best", but I've found that clear 2-part epoxy works better than anything else that I've tried, and once it's dry, that glass ain't goin' nowhere! I'll usually tape the glass in position in several places around the perimeter, and then apply glue to the open areas with a tooth pick. Once the glue has set hard, I'll remove the tape and apply more glue to the areas that were covered by the tape. I don't like thin glues, or ones with "capillary" capabilities, because I don't want the glue, "capillary-ing" all over the place, and, well, we all know how well some kit glass fits, so I find that a thicker glue works better for me. Steve -
Unique part question.
StevenGuthmiller replied to Geno's topic in Model Building Questions and Answers
If the stuff is that tough, just sand it as smooth as you can get it, prime the part, and send it off to the chromer. Apparently, it's not going anywhere. Steve -
Agreed. If it were mine, in retrospect, I would have drilled holes in the dash slightly smaller than the vents, and installed them prior to paint. But as that’s moot at this point, a very tiny amount of any kind of glue, or paint will work as well as another. As a matter of fact, if you want to avoid any glue “squeeze out”, an epoxy, allowed to set up until just barely still tacky before installing the vents should work well to keep that from being a problem. Steve
-
Looking for 68 Dodge paint match
StevenGuthmiller replied to Modlbldr's topic in Model Building Questions and Answers
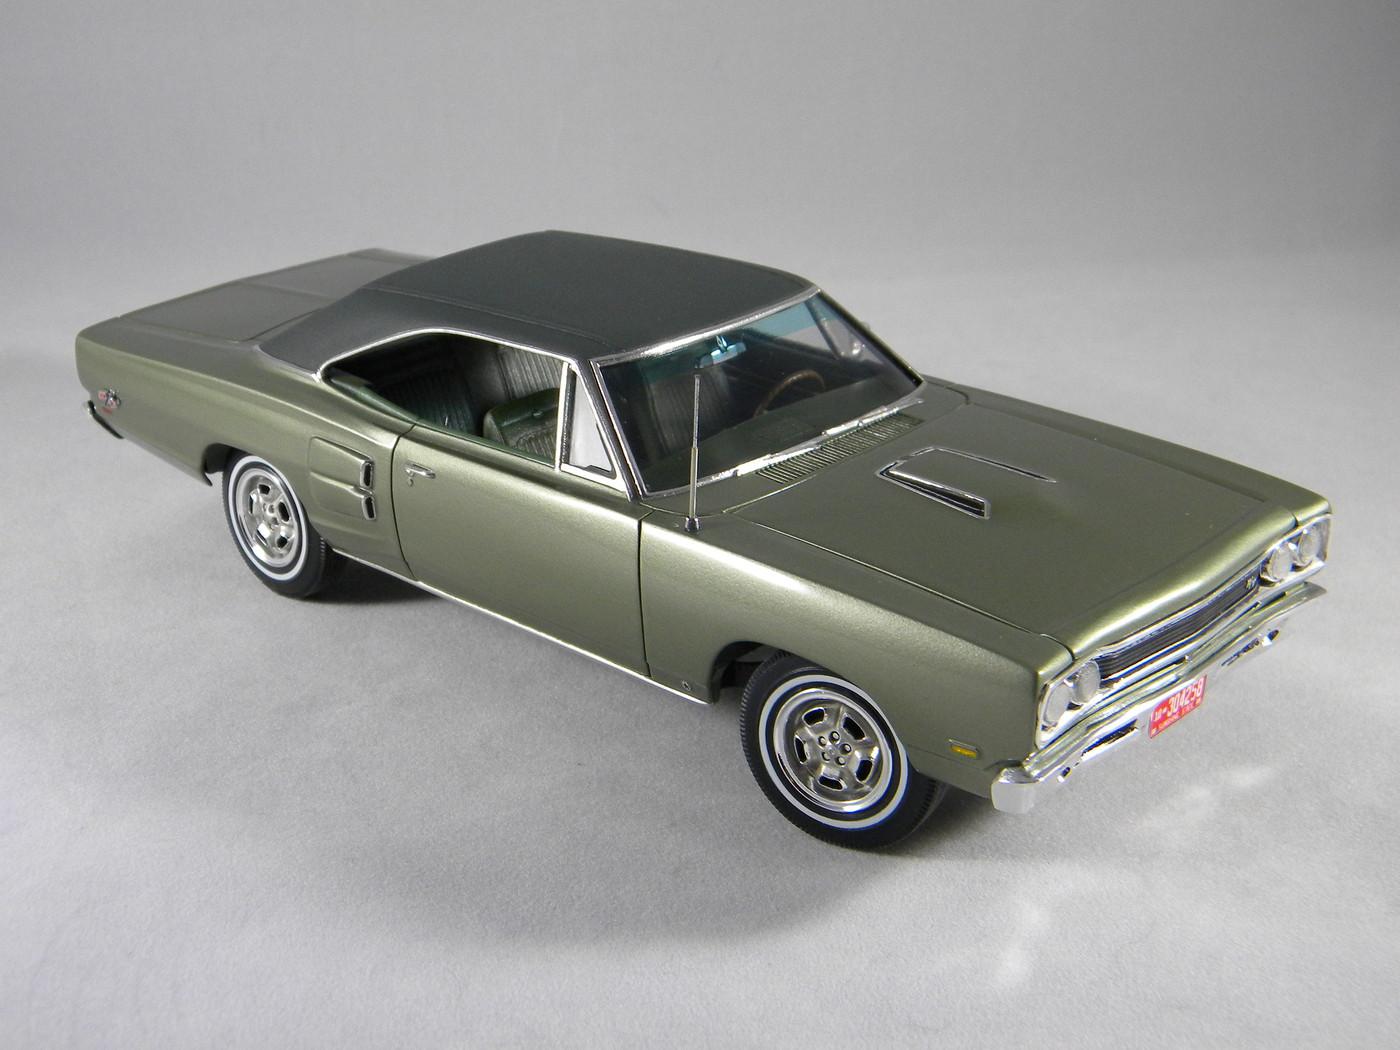
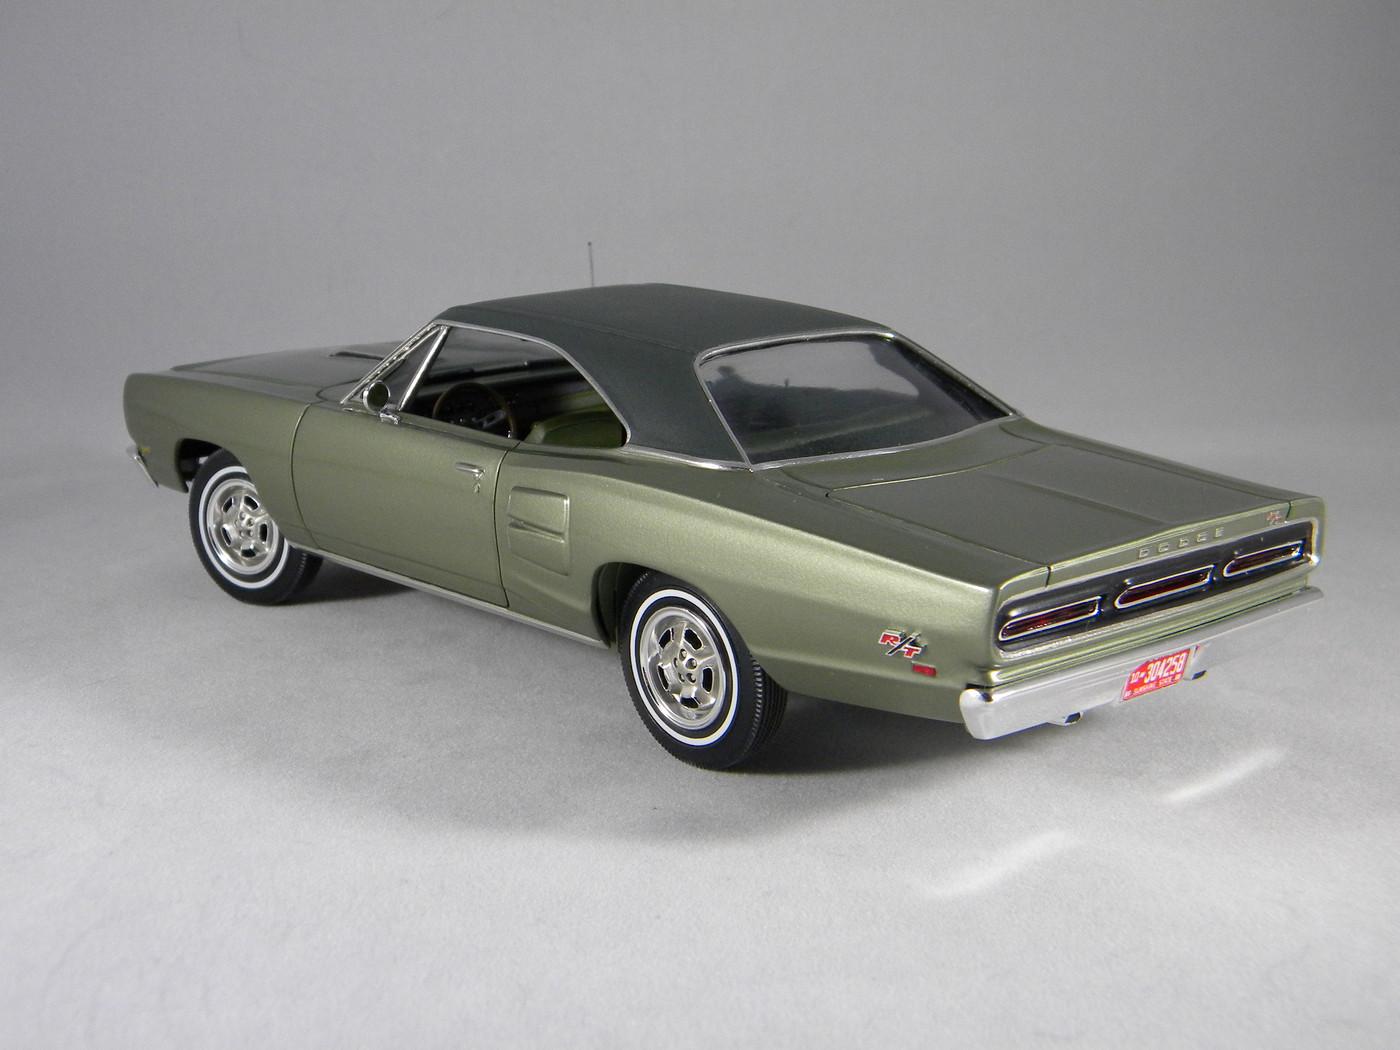
I can vouch for both MCW and Scale Finishes!! Both produce EXCELLENT acrylic lacquers, and some enamels as well. But, unfortunately, I don’t think either one offers paint in spray cans anymore. But, I might be wrong, so check out their websites. If they do still offer spray cans, they come at quite a price! Let’s just say that for the price of 4 or 5 cans, you could buy a nice airbrush, and then your paint searches would be over! ? This is a shot of a ‘69 Coronet I did some years ago in MCW Mopar, F-Code, “Light Green Poly”. Steve
-
But won’t the canopy glue dry to more of a gloss? With the dash being flat black, any glue overflow would show. I think if it was mine, I would tack them in place with whatever glue you want to use, and then give the whole dash a coat of whatever clear finish you envision, (ie, flat, semi gloss, gloss) That way there’ll be no finish variations, and the clear will seal down the vents. Steve
-
Looking for 68 Dodge paint match
StevenGuthmiller replied to Modlbldr's topic in Model Building Questions and Answers
If I recall correctly, MCW no longer offers spray cans. Don’t remember where I heard that, and it’s certainly worth checking into, but I believe it is the case. Steve -
In time for what? There's no trophy for finishing first. Steve
-
Glueing evergreen to clear windshield.
StevenGuthmiller replied to NOBLNG's topic in Model Building Questions and Answers
I would use this approach. The acetate or clear styrene would look better, (thinner) anyway. If it were mine, I would add a molding around the perimeter of the window opening, using half round, plastic rod, stretched sprue, whatever you prefer, using a plastic cement, (I like Plastruct "Plastic Weld"), and then make a fresh windshield. Even if you opt to not make a new glass, I would cement the new molding prior to doing anything else to the body. Steve -
Scribing panel lines. How is it done?
StevenGuthmiller replied to conchan's topic in Model Building Questions and Answers
Agreed! Let the tool do the work, whatever the tool may be. Steve -
I'm sorry Len, but you'll never convince me that Molotow stands up to handling better than Alclad. The fragility of Molotow is widely known and has been a major bone of contention pretty much since day one. I've used both as well, and without some sort of protective coat over Molotow, you should basically never touch it again. But, if you're getting a clear over Molotow and it still looks like chrome, more power to you. Not trying to bust your chops or anything Len, but Molotow has left such a bad taste in my mouth that I like to bring alternatives up to people if they're not aware of them. Carry on. Steve
-
Scribing panel lines. How is it done?
StevenGuthmiller replied to conchan's topic in Model Building Questions and Answers
That's the truth! Like many other operations in our hobby, there are really no short cuts. Steve -
One of the many reasons why I quit using it. Way more hassle than it's worth. While Alclad chrome requires the extra step of a shiny black, (or other dark color) base, I find it to be a better alternative, (for air brushing) than Molotow. Alclad is actually a lacquer paint, not an ink, so I also find it to be more durable than Molotow. You still don't want to handle it a lot, but it's much more forgiving than Molotow, and it dries MUCH faster. Apparently a lot easier to use as well, as it doesn't require any unusual remixing practices, etc. Just shake up the bottle, dump it in your cup, and spray, just like you would any other ready to spray, pre-mixed air brush paint. I haven't taken the time to really research this fact as I don't know how many ounces there are in a Molotow pen, but I assume that Alclad is more economical as well. $10.00 or $12.00 for a Molotow pen versus $8.00 or $9.00 for a 1 oz bottle of Alclad makes me think that's the case, and looking at larger amounts makes it very evident. A 30ml, (1 oz) refill of Molotow runs around $32.00, while a 4 oz. bottle of Alclad chrome will run around $35.00.......not even close! Steve
-
Scribing panel lines. How is it done?
StevenGuthmiller replied to conchan's topic in Model Building Questions and Answers
I used to use a BMF scribing tool, but I found that I get better results with an old, dull, backwards #11 blade. The BMF scriber is too wide for a convincing panel line. My technique is as follows. Run a sharp #11 blade around the panel lightly a few times to give the dull blade something to dig into. Then I begin using the backwards blade, just a couple of inches at a time until I am about to the depth that I'm shooting for, then move on to the next couple of inches. Rounded corners are the most difficult, but as with any scribing tool, you just have to go slowly and lightly until the depth develops. Once I've finished with the #11 blade, I'll usually get down into the groove a little more with a sharp pointed dental tool, and possibly a pointed round file, just to clean things up a little. Finally, I'll lightly sand the edges of the groove to ease over the sharp edges a little. It's kind of hard to describe some of these steps, but I find that I can get a lot better job, a lot faster with the #11 blade, than I ever could with the scriber. The panel lines on the '64 Bonneville I'm working on were done in this fashion, and if I recall correctly, I don't remember the blade jumping out and scratching the body once. No darkening of the panel lines is required at all if you get them deep enough. I also do all of the body moldings in the same fashion to give them more depth and make them easier to foil. These are the tools that I use in order from left to right, with the second from the left "dull blade" doing the brunt of the work. (By the way, by a "dull blade" I mean that it actually has the very tip broken off) Steve -
1964 Pontiac Bonneville Convertible.
StevenGuthmiller replied to StevenGuthmiller's topic in WIP: Model Cars
Fantastic! Glad that you can join in again! Steve -
1964 Pontiac Bonneville Convertible.
StevenGuthmiller replied to StevenGuthmiller's topic in WIP: Model Cars
Kind of like Newton's third law, "For every action, there is an equal but opposite reaction", every modification, "usually" requires another. As the chassis needed to be stretched, which required that the transmission cross member be moved forward, (at least as is the case with the way that I stretched it) so therefore the kit exhaust will no longer fit as it should because of interference from the cross member due to it's proximity to the floor pan. Of course the exhaust was designed to fit the Super Duty exhaust manifolds rather than stock manifolds anyway, so in any case, the exhaust pipes required replacement. This just took a length of carefully bent plastic rod to remedy. I'll tackle the other side and add some clamps forthwith. Steve -
1964 Pontiac Bonneville Convertible.
StevenGuthmiller replied to StevenGuthmiller's topic in WIP: Model Cars
Moving on with the chassis mods, my first change was re-configuring the front suspension to be steerable. The Moebius front suspension is not steerable, but it has most of the necessary components to be able to convert it relatively simply. First, I needed to find a suitable substitute for the tie rod, which the Revell 1966 GTO kit provided. As an added bonus, the tie rod from the GTO is a better piece than what's molded onto the Moebius suspension as well. Next, I simply needed to add some steering arms to the steering knuckles, which was ultimately accomplished by forming the arms from styrene strip, and then gluing a piece of drilled out plastic rod to the end. These were glued to the existing knuckles. Then the existing tie rod was removed and the new tie rod drilled out on the ends to accept some pins. Looks like it should work pretty well without looking too clunky or contrived. A little extra refining, and I can move on to other things. Steve