

peteski
-
Posts
9,236 -
Joined
-
Last visited
Content Type
Profiles
Forums
Events
Gallery
Posts posted by peteski
-
-
16 hours ago, Bugatti Fan said:
Remember though it using PCB board drill bits that they are made from tungsten carbide and the slightest side pressure can break them.
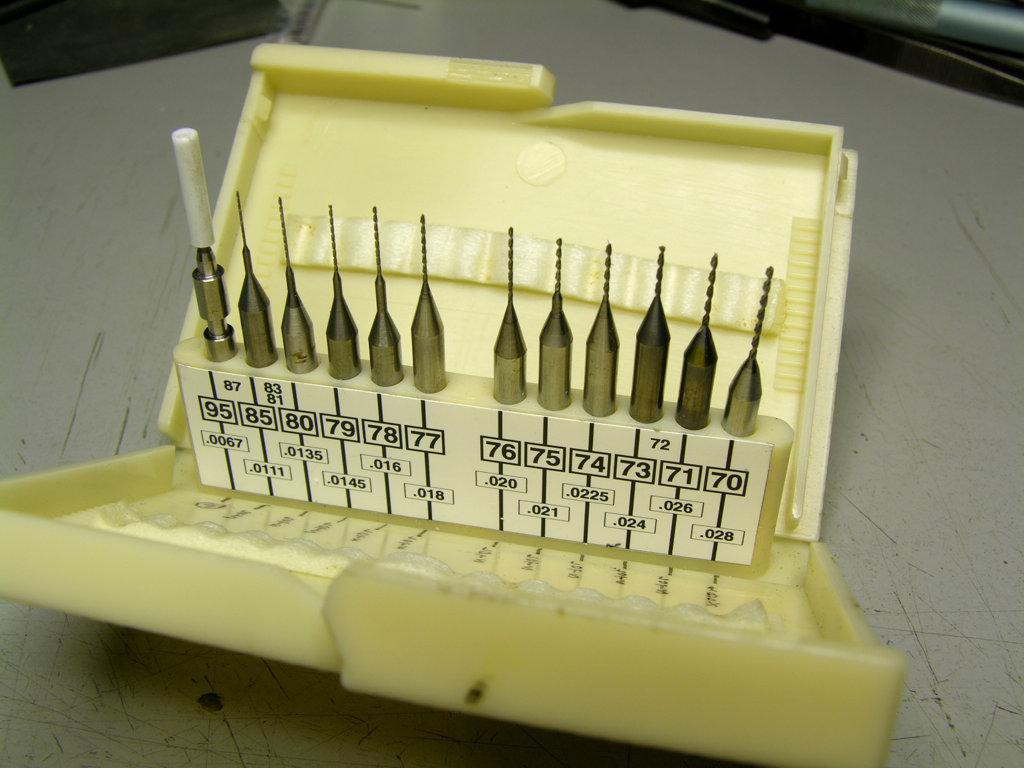
Well yes, they are very hard and the real small sizes can be fragile if not handled properly, but I almost exclusively use PC board drills in my hobby, and while I have plenty of spares, I don't break them often. I guess it is all in ones tough and handling. I hold very small ones shank directly in my fingers, and when I use a pin vise I prefer ones which have rotating top. I can rest the top in the palm of my hand while using the thumb an index finger to spin it, Only few of the alternate holders described here have that helpful feature.
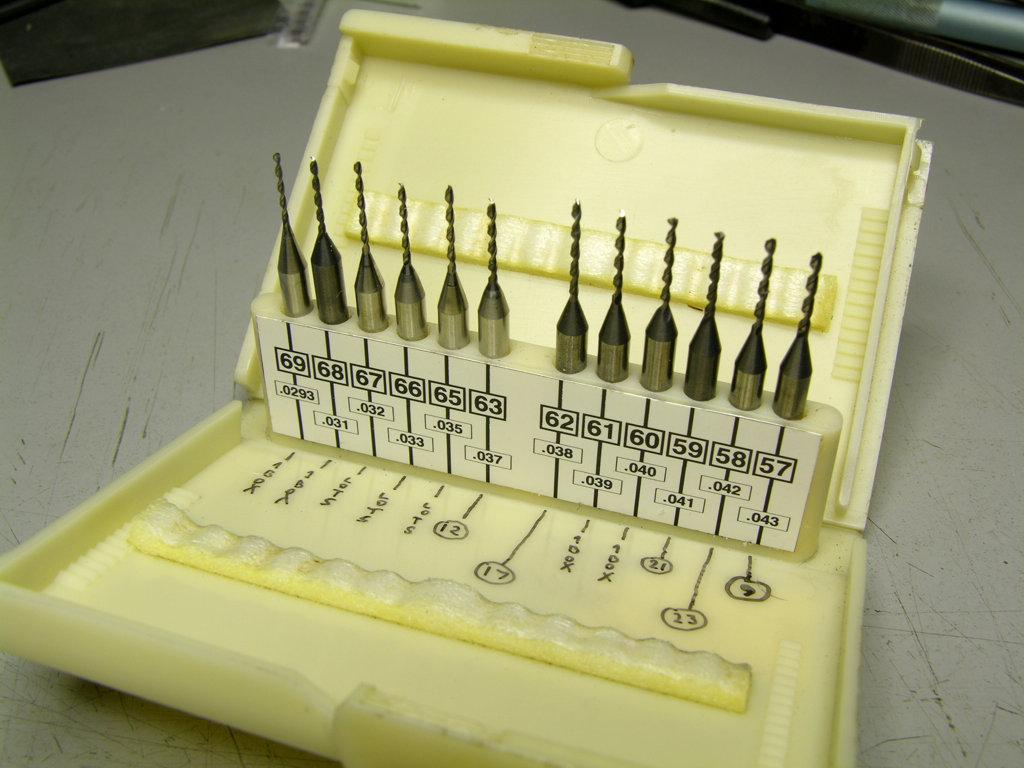
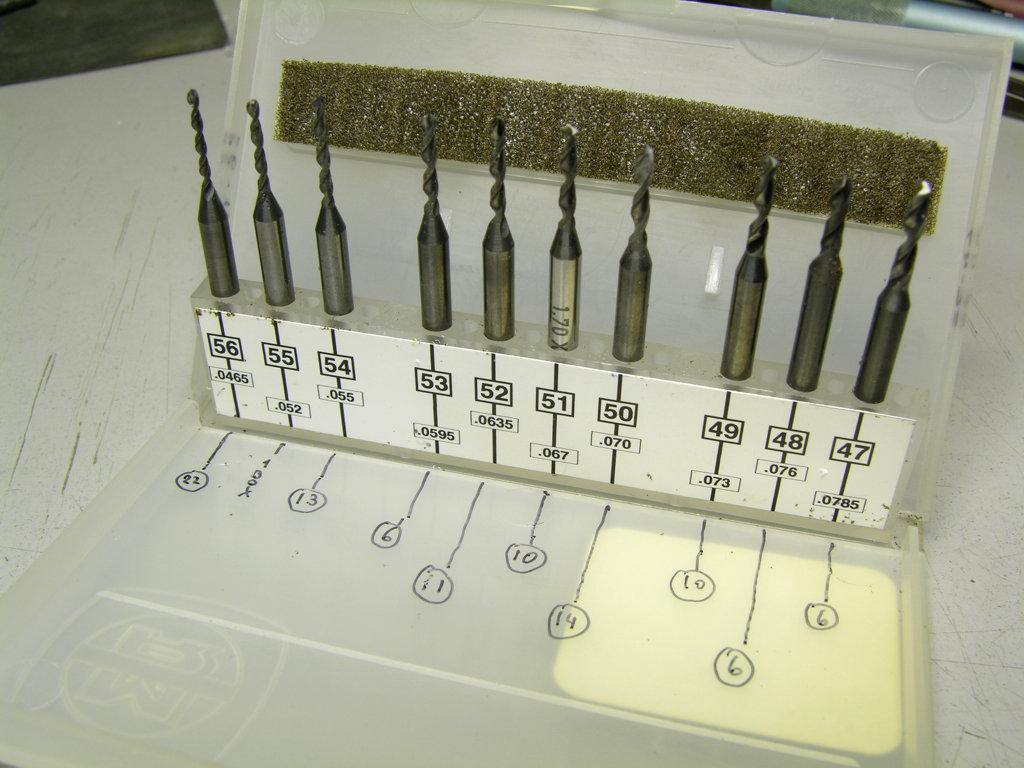
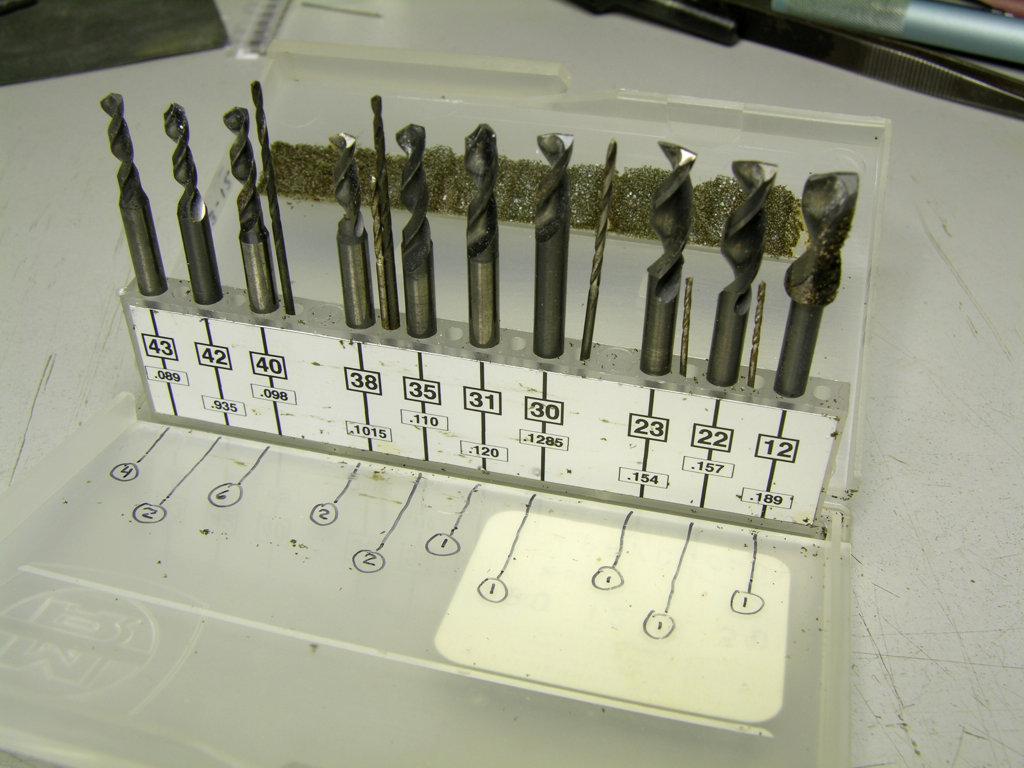
To me the advantage of the extremely sharp split-point cutting surface outweighs their inherent fragility. Storing those bits securely also reduces the breakage from accidental dropping. Here is my collection gathered over the years.

-
 1
1
-
-
5 hours ago, James Maynard said:
Does anybody remember these kits being this cheap? Why can't they be like this again?
Oh yeah, the good old days . . .
Why? Because the minimum wage in the '70s was less than $2/hr, and a loaf of bread cost 25-30 cents. It is called inflation, and while if someone is old enough to remember, those are pleasant memories, that is never to return.
-
1
-
-
5 hours ago, martsky said:
I just finished a Ferrari airbrushed with Tamiya flat red and followed with Tamiya matte clear. Cleaned up with water. Ended up looking nice kinda similar to the high dollar real car matte finishes.
I only use Tamiya bottled paints because of my wife's sensitivities. I have no idea what the airbrush or tank are set up are. All I know is I have lots of cars on the shelf in the same (limited selection) Tamiya colors.
Good luck
Actually the Tamiya acrylic paints in the glass jars aren't true water-based acrylic paints. They use alcohol as a low-odor solvent. They seem to behave more like the stinky solvent-based paints than true water-based acrylic paints.
-
Actually, including in the Forum Rules sticky thread the number of posts required to be taken of moderation would make sense to reduce the need to ask this type of question. "Moderated for a while" is not very informative.
-
 1
1
-
-
Looks like the original video was pulled down?
-
Some model railroad "people" figures from various companies (German and Japanese) are now 3D printed using the full color printing process. Those are tiny (1:160 scale).
-
1
-
-
Yeah, this type of authentication is getting out of hand. Looks like you are using a smart phone. Can you try logging in using a "regular" computer?
I just tried logging in on a computer and I can see that they did change things. Even before I login a popup showed instructing me to slide a slider to the right to verify I'm a human. After that I got the regular login prompt. Looks like more and more companies are trying to prevent AI-based hacking.
-
1
-
-
What email reader are you using?
What exactly does the "undeliverable" email show? Copy/paste its contents here (editing out your or any email personal address you don't want to publicly show here). That email should give a clue as to what's going on. Even better if you could copy/paste the entire raw email (again, editing any email addresses you don't want to show here).
-
23 hours ago, DJMar said:
I think those who use the tired argument that websites are expensive, too much work, etc., are just parroting something they heard years ago, and are ignorant of the current state of website creation, hosting and eCommerce, especially when it comes to user-friendly, free and low-cost options.
I agree 100%. I was just presenting some excuses I have heard from businesses that only used FB.
-
1
-
-
16 hours ago, krassandbernie said:
There simply is not enough time or energy in a day to do it all. You do have me re-thinking a web site again so that I might possibly funnel everyone to one location that I have more control over, so thank you for that!
Now that is, IMO, some logical thinking. I hope you go that route and good luck!
-
1
-
-
On 9/20/2025 at 9:01 PM, DJMar said:
Sending a PM through Facebook is not the way to do business these days.
Unfortunately, many cottage industry manufacturers seem to be going that way. No website - just FB. Websiteseem so "last decade". I agree that it doesn't seem to be the best way to do business (I'm not on FB), but it seems to work for many of them. Websites cost money and have to be created and maintained, where FB is free.
-
Yea, I'm also wondering why, if you like the Badger, you ant to get a new airbrush? Don't be like the people who always buy newest iPhone, just because it is the newest (even if they really don't need all the new features).
") Since the problem is intermittent, it is likely your technique or the paint, or paint consistency.
Since the problem is intermittent, it is likely your technique or the paint, or paint consistency.
-
On 9/23/2025 at 8:11 AM, Beans said:
I'm not a Porsche expert but don't think I have ever seen one with a spare tire carrier on the back.
That "Continental Kit" looks to me like it came from the Gunze Sangyo 1:32 scale '59 Caddy Eldorado. Looks to me like a good match. Besides I don't think Palmer had chromed parts. Just some creative kitbashing.
EDIT: now that the center is shown, I still think it is from a 1:32 Gunze kit, just not the Caddy. There were other '50s cars with optional Continental Kits in that model series.
-
2
-
-
On 9/22/2025 at 4:46 AM, horsepower said:
That's a pretty bad thing to happen to a kit that sold out at most places before they could get them out of the box and onto the shelf because being under the Revell of Germany banner and the tools have basically became property of the Chinese companies that were molding for Revell.
As far as I know, Revell AG (Germany) kits have been molded in Poland for quite some time now. At least several of the kits I own.
-
There is a Tamiya logo on one of them. While I have not built those specific models, Tamiya models by reputation are good quality models which fall together without problems.
-
1
-
-
Any pin-vise type tool with 1/8"
shankcollet works well to hold those PC board drills. I simply use one of several pin-vises I own.-
3
-
-
4 hours ago, Straightliner59 said:
Yep. Generally, I sand off the sidewall derails and replace them with decals.
Yes, that works really well for tires with white lettering, but many of use need blackwall tires with just black raised or recessed marking on them.
-
1
-
-
38 minutes ago, johnyrotten said:
From what I see that one ain't too bad,either. Anyone else tired of black primer?
Yes, and also tired of the satin or flat finish factory-paint. They look like they need a serious polishing and a wax job! Give ma a glossy paint any day.
-
1
-
-
5 hours ago, NOBLNG said:
I don’t intend to ever get competitive but here’s my take on it. If the model (or a substantial portion of it) can be reproduced with the touch of a button then it is not scratch built and should have its own category.
Assuming that the model in question was actually designed by the individual entering the contest, the fact that he spend as much time designing it on the computer screen as it would have making it from physical materials, and that they had too learn the CAD skills to be able to design the model in the first place doesn't count?
Anyways, none of this likely matters all that much because 3D models are entered in the same contest categories as standard factory-molded model kits. My club's annual contest and other contests I have attended or participated in did not have "Scratchbuilt" category. I am curious which model contest actually have "Scratchbuilt" category.
But when judging models my club uses a point system and one of the judging categories is "difficulty level". A scratchbuilt model will score much higher than a typical injection molded styrene kit.
-
2
-
-
If the paint you are using is plastic-safe (not "hot") and the plastic is white that I would skip the primer. Just prep the body and shoot the yellow paint. If you have to use primer with yellow body, use white primer for the reason mentioned in the earlier post. I avoid using primer whenever possible because it just adds another layer to the overall paint thickness (which, since model paint does not have "scale thickness" is already out-of-scale too thick).
-
6 hours ago, Bugatti Fan said:
Kit chrome always looks over bright to me.
As I mentioned, it seems to be a very personal choice. We're all individuals.
 Some like it bright, other's don't. As I mentioned, to me highly reflective 1:1 chrome surface does not scale to duller less-bright finish just because it is in smaller scale.
-
Yes, that tread (specifically its subject line) can be interpreted as more of a question than . The "looking for" the actual kit statement is buried in the post. The subject line shows "I will try again-not much info first time . . ." That sounds more like a question than anything else. It it was me I would have made the subject line something like "Looking for a resin kit of 63-65 AWB NOVA fastback". Very clear and direct.
Then, in the body of the message placing the "lookign for" statement on the top would make it very clear. Like:
Looking for 63-65 AWB NOVA fastback resin kit. New, built or rebuilder.
Speed City use to make one but no longer does. Thank you-Larry Any info deeply appreciated. -
On 9/1/2025 at 3:40 PM, Jim B said:
Very nice-looking Crosley. Well done. Never heard of this manufacturer, and it's always nice to see some unique subjects.
They low end economy cars and the make didn't last very long. I occasionally see restored ones at local car shows.
Here is some info: https://en.wikipedia.org/wiki/Crosley
I agree with others that the model looks great (and both the model and 1:1 car are rare).
-
1
-
-
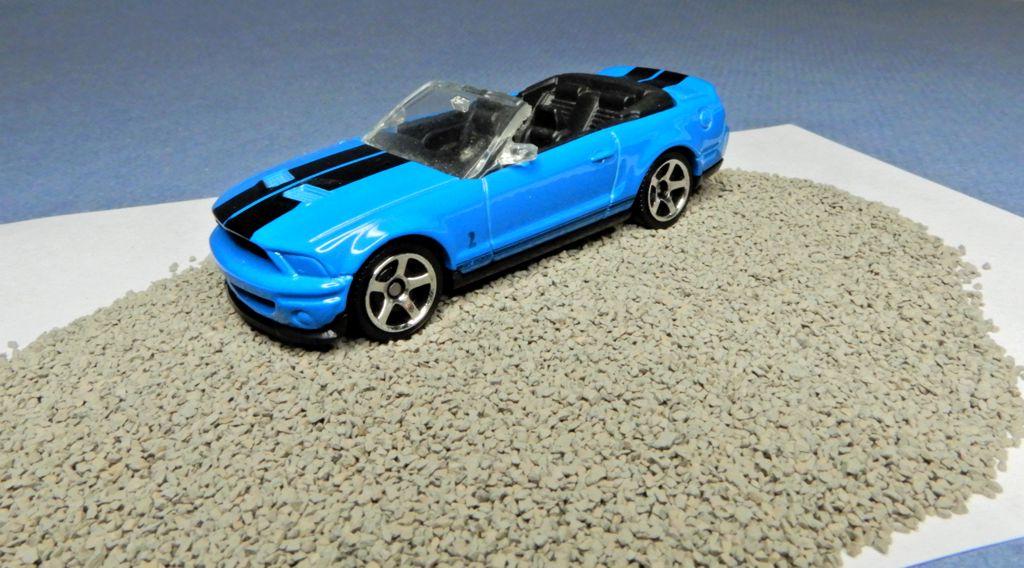
I guess it depends on how fastidious of a modeler one is, but sand looks to me nothing like gravel. Even in 1:64 scale. I dug up some of my N scale ballast, and photos are worth a thousand words. No more guessing and speculating.
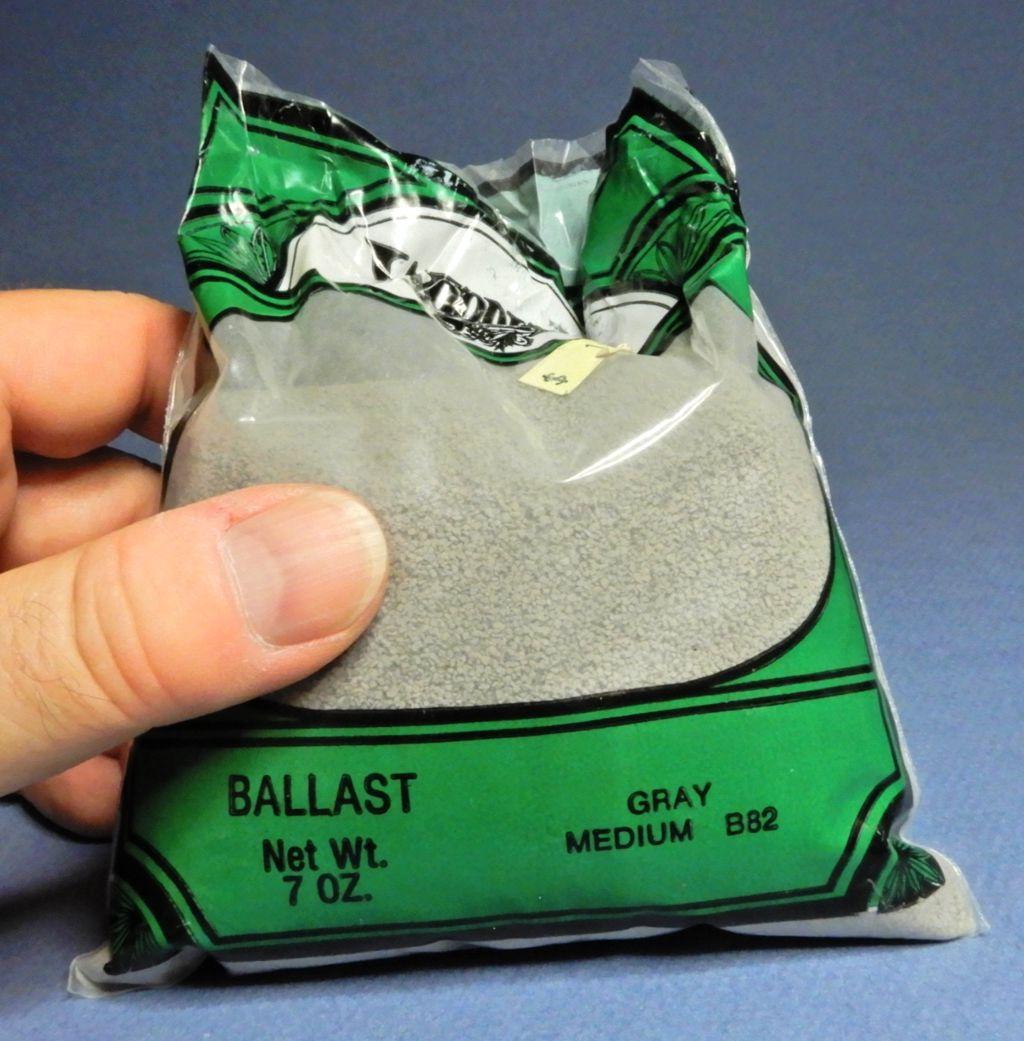
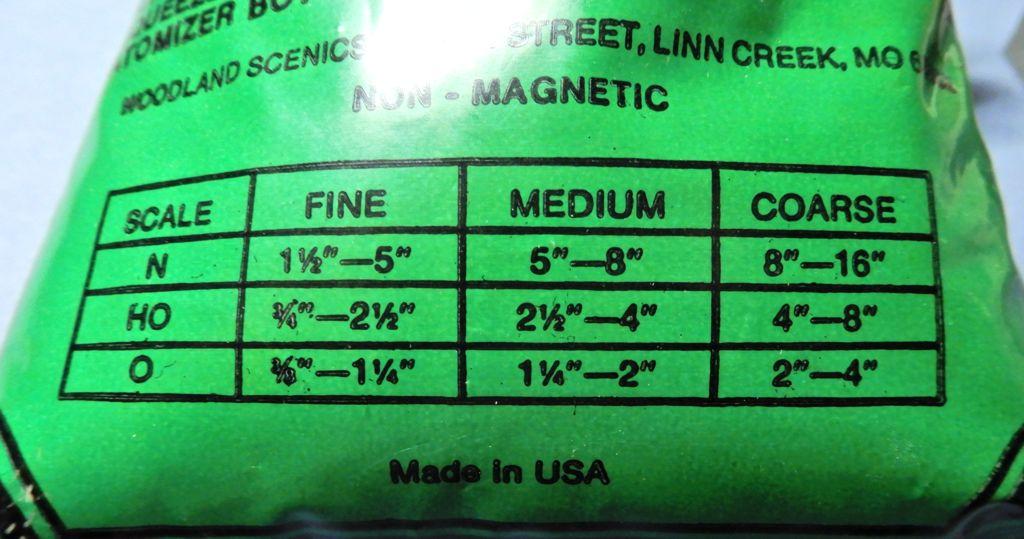
Here we have a 1:64 scale Mustang on Woodland Scenics Medium size railroad ballast. Has a look very similar to the gravel in the 1:1 photo I posted earlier. It is actually still a bit too coarse. Fine size ballast would be even closer to scale, but all I had was medium size. Also, the shapes of the grains are similar to what gravel looks like.
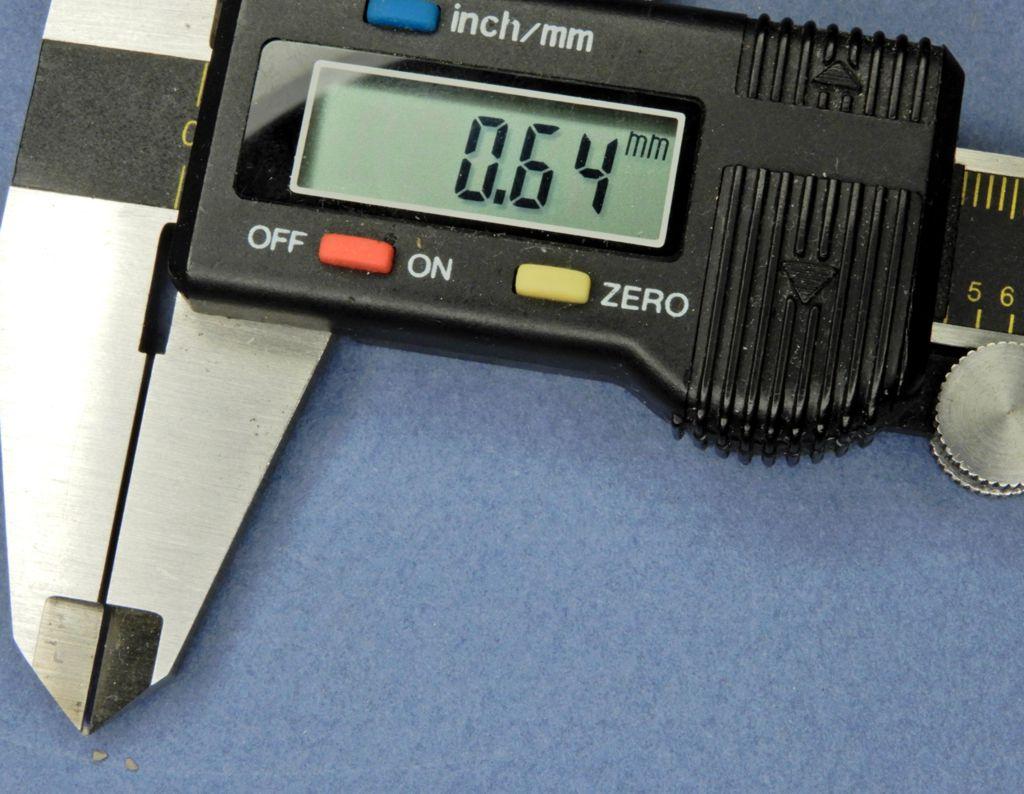
And like Mike S. posted, here's a thumb photo.
Some of the smaller grains are about 0.64mm in size, but on average the grains are around 1-1.5mm.
My ballast was purchased over 30 years ago, but I suspect the ballast currently sold by Woodland Scenics is very similar in size and color.
-
1
-
1
-
 1
1
-


Pcb drill bit "vise"
in Tips, Tricks, and Tutorials
Posted
Good advice for drilling metal, but not needed for drilling plastics. They cut plastic like hot knife through butter.