
fseva
-
Posts
1,547 -
Joined
-
Last visited
Content Type
Profiles
Forums
Events
Gallery
Everything posted by fseva
-
 Dave, sealer is supposed to be used over primer, and it is for reducing the chance of color bleed-thru. You don't use it instead of a primer, do you?
 -
Thanks for the help, guys!
-
Thoughts on Perfect Plastic Putty?
fseva replied to russosborne's topic in Model Building Questions and Answers
Well, the manufacturer is in the UK - so, you're basically buying an "import". Here is their website... https://www.deluxematerials.co.uk/gb/scale-plastics/87-perfect-plastic-putty-5060243901095.html -
I recently tried JB Weld's Epoxy Putty, and I'm just wondering if there is a better way to mix it - this stuff is really sticky, and hard to get off your fingers when it is mixed. Anyone?
-
I've tried quite a few, including my latest which was a photo-etch scriber (it was too flexible and couldn't handle any kind of pressure), and now I have returned to my Trumpeter.
-
I really hate rescribing, because no matter what I do, I always slip up and put a scratch in my model. Otherwise, I can see how deepening the line before would have helped. I actually tried some FBS Proband tape to attempt a rescribe, but found that my Trumpeter scriber just pushed it aside. I was able to get it done by just taking my time and starting where the line was OK. Sure did have palpitations doing that curved corner, though...
-
Yes, I can see how the Tamiya tape would have protected my panel line! Thanks!
-
Hmmm... it will be difficult answering your questions when we can't really tell what you have... Revell doesn't make paint - they make kits. If you have a clear gloss lacquer, it could be by Model Master or Testors, or even Tamiya. If you have a bottle of paint, is it enamel, lacquer or acrylic?
-
Well, I screwed up my latest project - a 59 Imperial - the trunk panel line wound up right next to the parting line that went from each fin and then down to the bottom. I was having trouble getting the parting line out, even priming to see if that would seal it up, but without much success. Finally, I decided to sand the heck out of it, and in the process lost the trunk panel line in that area. So, does anyone have a tip for me to use in the future?
-
Painting wide white walls (old trick)
fseva replied to Lovefordgalaxie's topic in Tips, Tricks, and Tutorials
Good idea! I will definitely look into getting a compass cutter - this should eliminate the need to have multiple circle cutting templates! Thanks! Now, all we have to come up with is a good way of inserting wheels without ruining great paint jobs! -
Painting wide white walls (old trick)
fseva replied to Lovefordgalaxie's topic in Tips, Tricks, and Tutorials
I should have been clearer - this is a bottle of Acrylic Flat White. -
Painting wide white walls (old trick)
fseva replied to Lovefordgalaxie's topic in Tips, Tricks, and Tutorials
I tried hand-painting a set of 4 tires that came in the 59 Imperial kit I started yesterday. I started with the same bottle of Testors Flat White... maybe I have a bad bottle, because the coverage was so poor, I would have had to give them 4+ coats to get them to look uniform. So, I tried Detail White by Creative/Wicked, and found that this paint flowed on smoother, and covered very well. Not that 1 coat would do, but I could see that it would not take as many as the Testors flat white. Detail White is supposed to be flat, but the more layers, the glossier it will look, and when it goes down the first time, it looks really glossy until it's dry. BTW, you might think that this project was too hard, but I simply followed the raised line on the tires, and had a moist q-tip ready for any slips, and I think they turned out pretty good. Of course, getting the wheels into them could ruin the paint; so, I have 4 AMT whitewalls ready just in case. -
I have used Tamiya acrylic thinned with alcohol (which is what Tamiya's thinner is) - I airbrushed some clear blue on a windshield, and it turned out very nice. Since it's cut with alcohol, it will also remove Tamiya paint (had to do the windshield twice - hence - how I know). Odors are almost undetectable.
-
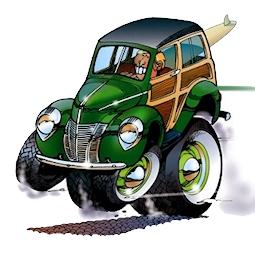
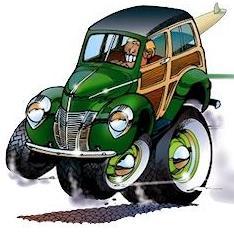
Here's my 39 Chevy Wagon Rod that I finished about a year ago...
-
Just finished today: This is my 31 Ford Model A Sedan that I converted to a "delivery". (Please click on the small photo to view a larger, less compressed version that will look more like it looks in real life).
-
Painting wide white walls (old trick)
fseva replied to Lovefordgalaxie's topic in Tips, Tricks, and Tutorials
Wow! I wish I'd thought of that a long time ago! That's a great tip! Thanks! As an auxiliary suggestion - apply the tape to a piece of glass, to make sure you're getting a really cleanly cut circle, and to insure that it will remove easily. -
That's how I started when I re-entered the hobby about 5 years ago. I was determined to find a way to make acrylics look as good as lacquers... I failed! Doesn't mean you won't succeed, but it isn't going to be easy... so, don't expect your first try to become the exact look you were hoping for. BTW, please keep us abreast of your progress (I would love to know about your results using acrylics)!
-
Don't use lacquer thinner in acrylics! Some folks would tell you to use water; some - Simple Green; but I have personally found that those can be touchy to get the right ratio (or to get the paint to atomize correctly). If I have to airbrush an acrylic, I will first of all consider if the manufacturer offers a recommended "reducer", and use that. They also usually suggest a ratio for thinning. If they don't offer a specific reducer, I use Airbrush Medium by Liquitex. It has stuff in it that's only GOOD for the paint (as opposed to Simple Green and water). If you just want the LT for cleanup, any brand will do.
-
Testors One-Coat Lacquers/Model Master Custom Lacquer System. I use regular lacquer thinner to thin these (if necessary - decanting them for airbrushing - you may not need any additional thinning), and for general cleanup of my airbrush.
-
If you're concerned with odor, this is not the way to go. Testor's enamels are solvent-based, and they are the old stuff that stinks to high heaven. Yes, you can thin with lacquer thinner - it helps speed up drying, but they will still take many days to dry and cure. Normally, you would use mineral spirits/turpentine/paint thinner. In the previous message, you asked about Auto Air and its odor... Compared to enamels, any acrylic is going to smell like nothing at all. However, be prepared to learn all about reducing Auto Air, and practice this religiously... remember that this paint was originally created for auto shops and their higher powered spray guns. Make sure you read the instructions about airbrushing. This paint can be kind of translucent, in that it seems to take forever to get full coverage. But don't try to speed up the process by applying more paint - you could wind up causing runs.
-
What to do with decals for tires?
fseva replied to meaneyme's topic in Model Building Questions and Answers
Kevin, I leave the wheels in the tires before applying the decals. If they are relatively new decals, you should not have to do much prep work, but if the surface is dull from sanding off raised lettering, I use several sanders to bring them back to a smooth surface. You could also brush on an acrylic gloss to make it easier to position the decals. Let this dry thoroughly, or it could soften when applying decals with water. After the decals are in place, apply Micro-Sol once and set aside to dry thoroughly. The final step is to brush on a flat acrylic finish to kill the shine of the decals, and I always do the whole front of the tire, to make it look uniform. -
Painting wide white walls (old trick)
fseva replied to Lovefordgalaxie's topic in Tips, Tricks, and Tutorials
What I really need are some professional stencils with self adhesive backing! -
I found hose clamps at Hobbylinc... http://www.hobbylinc.com/detail-master-hose-clamp-plastic-model-vehicle-accessory-kit-1:24-1:25-scale-2480
-
I was reading an article in an older back issue about improving engine bays by using commonly available materials. The author recommended 18awg black solid-core wire for radiator hoses. From his photos, they look exactly like the ones made with aluminum wire and styrene tubing. The #18 wire is the hardest to find with a solid core, but after doing numerous searches at Amazon, I came up with a source that offered small 25ft spools. Check them out here... http://www.amazon.com/gp/product/B004XESS9E/ref=ox_sc_act_title_2?ie=UTF8&psc=1&smid=A3IHVK7SOJGEA7
-
Painting wide white walls (old trick)
fseva replied to Lovefordgalaxie's topic in Tips, Tricks, and Tutorials
I decided to try it again... dug out my old template and found my bottle of Testors Flat White Acrylic. BTW, not only did I make the same errors, but that white paint was a dog to thin, and really hard to clean out of my airbrush. I think I will stick to kit-supplied and aftermarket whitewalls.