Stray
-
Posts
504 -
Joined
-
Last visited
Content Type
Profiles
Forums
Events
Gallery
Everything posted by Stray
-
Man, so many different techniques. I will have to play with it some I think. Thanks for the info guys
-
UPDATED 6/12 - 1968 Hemi Dart - Body Mounted, Almost Done
Stray replied to Quick GMC's topic in WIP: Model Cars
Thats some awesome finish on them headers and wheels man. -
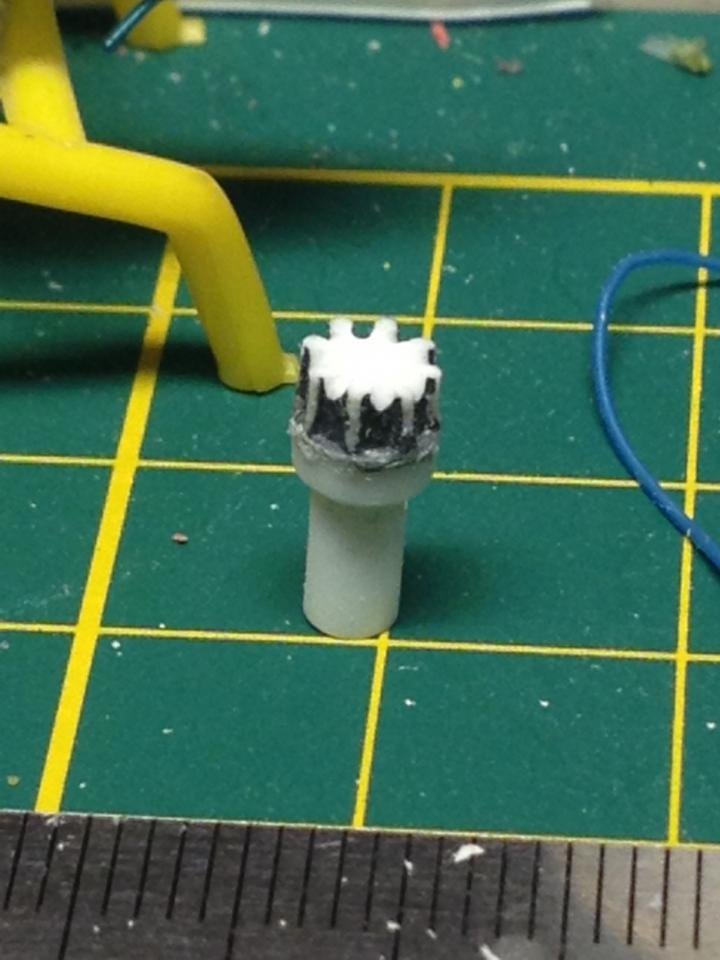
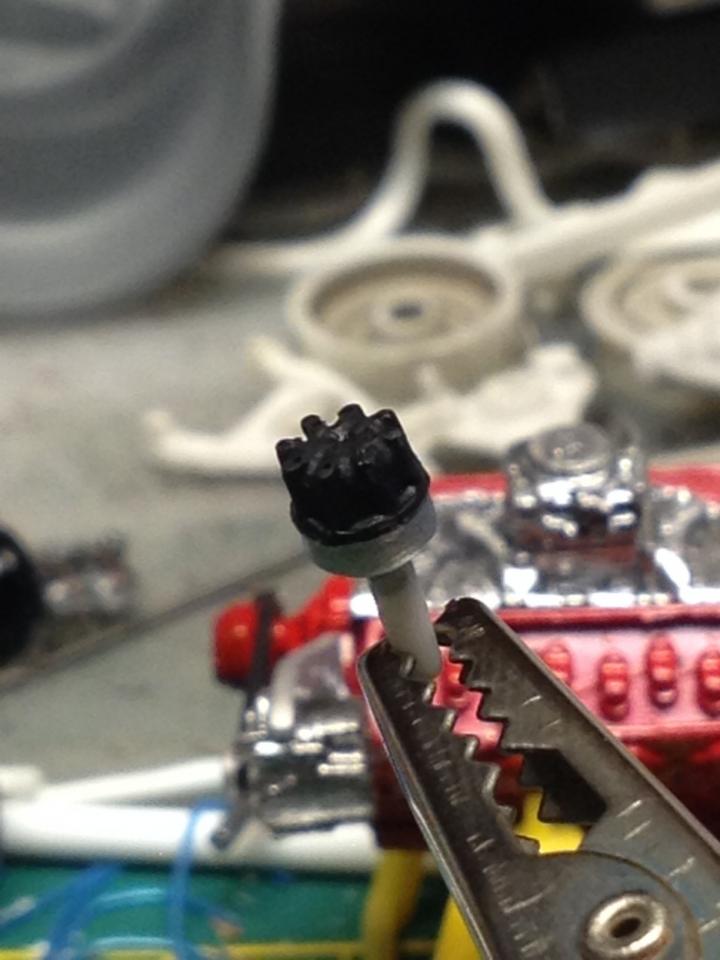
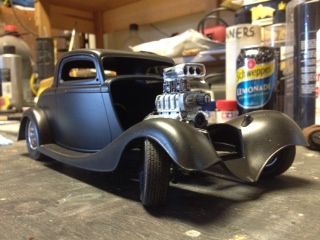
So, like I said just before the kit distributer on this was as simple as you can get. And I went and managed to lose it when I was stripping all the parts anyway, it's probably gone down the sink. So I went through my leftovers and found an old dizzy cap from some other kit years ago. I cleaned up the top of it and thought what the hell... so I glued some styrene tube to the bottom of it and then some rod inside that. That gives me a proper distributer, not just a cap as most kits have. I drilled out some 1mm rod and wired it to use as the regulator on the side, then squashed flat some more 1mm rod to bend up into the clips. It is drilled and ready for wiring, just need to figure out something for the wire boots. I might have to drill some more of the 1mil rod and use that as it would look good in scale with the wire I have for the leads. Anyhow, here's some pics, still crappy quality sorry.

-
Thanks Jeff. 5-7psi??? I think i can trust my regulator to go to 10 but even using my Mojo 3 or my HP-CS's I dont think I would even get a mist under that! But you can sure bet I am gonna try it
-
people dragged in them? It kind of looks like Garth's Mirth Mobile.
-
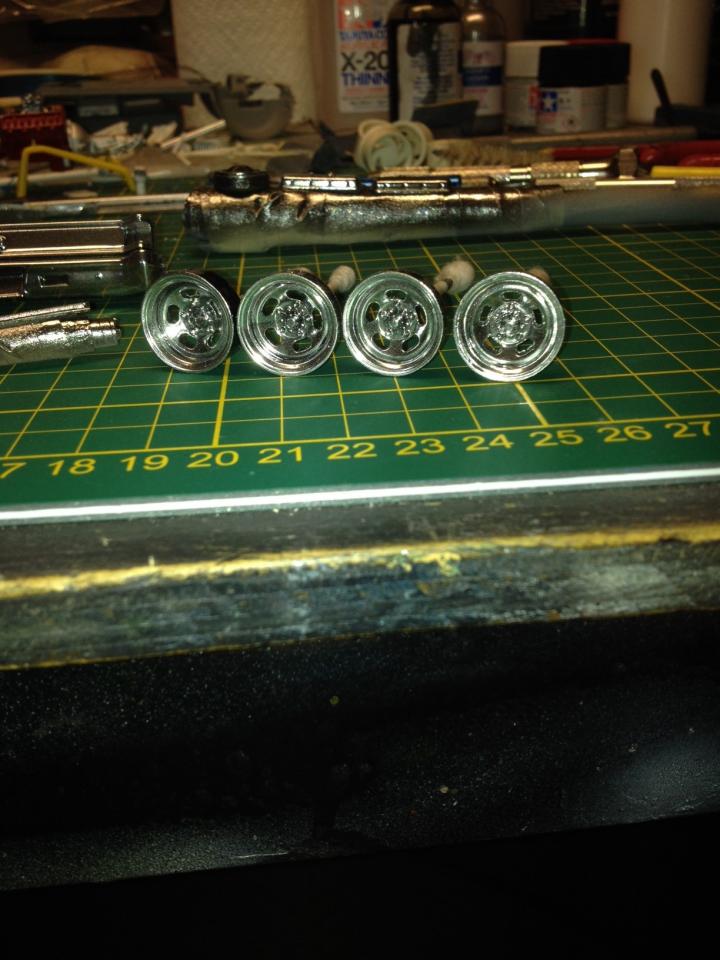
Okay first use of Alclad and I gotta say I am impressed. I think I did get a little much on the front bumper, as I was trying to do a pass from each side and from the bottom then the top to cover all the angles and nooks in the part. But I am pleased with the finish. I will refine my use over future build, but will let this be for now. Wheels with flash on.
-
Okay first use of it and I gotta say I am impressed. I think I did get a little much on the front bumper, as I was trying to do a pass from each side and from the bottom then the top to cover all the angles and nooks in the part. But I am pleased with the finish.
-
what the hell is that?
-
'32 ford 5-window coupe , top chopped rebuild
Stray replied to crazyrichard's topic in WIP: Model Cars
this just keeps getting sweeter. -
Interesting colour combo, and it came out nice. Instructions supplied in the kits are merely suggestions I always thought.
-
well whatever you decide to do it's gonna come out tops man. I really dig the old pickups.
-
This is looking as good as I'd thought. And I think a wash is always needed as even a light one provides definition and depth to the piece.
-
welcome aboard.
-
very very cool. What do you mean by 'printed' for the murals though?
-
I see what you did there. And I completely agree!
-
Looking cool. What you guys call elcamino's is basically just a ute to us. And we love our ute's over here!
-
This looks amazing man. Way to go. How did you do the dash? It looks super clean.
-
CARtoons....55 Chevy Bel Air w/ Blown 1/16 HEMI (ALL DONE!)
Stray replied to Kennyboy's topic in Model Cars
this is mad as. -
Yeah a classic Charlie Sheen movie Look forward to seeing this build.
-
This is great.
-
Looking real good. I have a 57, but it has opening doors. Did you glue yours or they stopped doing that?
-
Thanks for looking guys I can't believe how I used to wire up the kit distributers and paint the dashes as a kid without the need of glasses. Now it's hard enough to find the pieces on my desk if I'm not wearing them! Bob: I haven't done the revell kit, the only chevelles I have built is this one and the monogram Heavy Chevy 1970 one. So I can't actually compare this AMT version but I will say that the detail is quite lacking in some areas. Some of the panel lines are a bit shallow, and others are deeper. Most things fit together quite well, and some detailing is very well done, where other areas are not. Like the chev emblem on the front quarters. The one on the left is holding up kind of okay after the thin prime, but the emblem on the right panel is almost buried so it is going to be hard to pick that out when detailing, especially after a couple layers of paint are added. It's odd how AMT would go and add something like the alternator bracket, which is good detailing, and then do such an appalling job moulding in the sway bar, and the kit dizzy is lacking also, but like most kits the dizzy is actually just the cap stuck to the manifold. If I can I might do the Revell kit some day, just to compare. One obvious difference I have noticed in the ones people have built on here is when they show the chassis the gearbox crossmember is completely different. But looking at reference pics the AMT one appears to be correct.
-
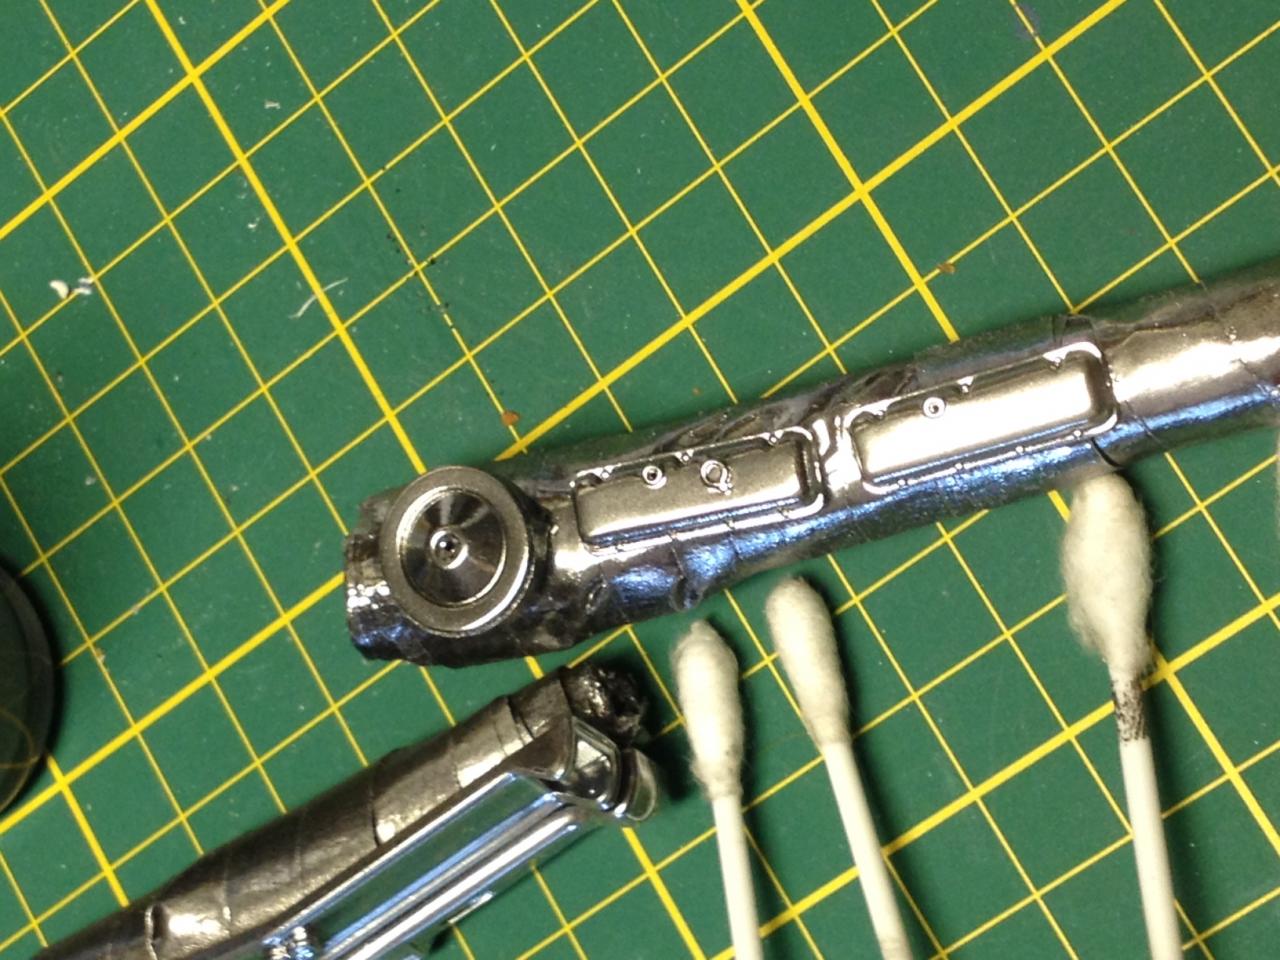
Ahh... thanks for the replies. Yes everything I read says to wait overnight after applying the black as well as the chrome. Which I found odd because using only light coats it was flashing off pretty fast. And you're correct, the black really is very thin, I noticed that on the grille area. I got one sinlge piece of dust on the 13 pieces I did and it just so happens to be on the front bumper aaaargh! But as it is my test run for using alclad I will let it slide. I have waited 16 hours anyhow and will be doing the chrome coats shortly. I will have to get my hands on some finer wet & dry anyway once I get to doing the body paint and clears, also because I prefer to prime almost every surface I paint with can or airbrush. I may even look into a polishing set since it appears some of you guys have amazing results with your paint finishes. Thanks again for the info.
-
-
'62 Chrysler 300, Update, Color On, 3/7
Stray replied to StevenGuthmiller's topic in WIP: Model Cars
It's a nice looking car. And you will build it differently than the others. So who care's if it's been done before? Go for it!