DoctorLarry
-
Posts
1,135 -
Joined
-
Last visited
Content Type
Profiles
Forums
Events
Gallery
Everything posted by DoctorLarry
-
Well. more fabrication. The dash panel was too high and interfered with the hood and the front tires still sit pretty high in the fenderwells. So I put a shorter dash panel in which fixed the hood problem and radiused the front fender lips up a little more. Everything seems to sit where it should but I now need to raise the rear spring mounting points up. Once I get the body sitting right I will move on to the cage and rest of the frame. The Monogram GSX has a 455 Buick engine but it is in 1/24 scale so a little larger than normal. It also has a molded on transmission. A 69 Riviera has a correct engine with a molded on trans as well so I would have to cut them off and glue on another trans either way. More fabrication, I guess.

-
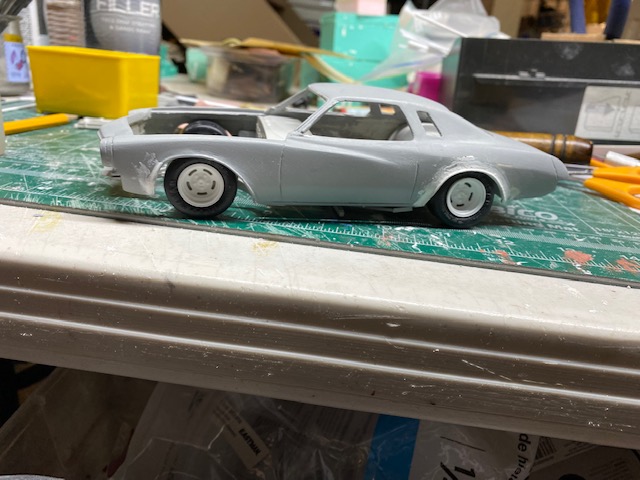
Got some more work done. I lengthened the TBird chassis about 1/4" to put the wheels in the center of the wheel wells. The track on this chassis is really too wide for these bodies so I had to revise the rear wheel wells slightly and I need to thin the body some around the wheel lips for a better fit. I may need to re-do the rear wheel openings-I may have rounded them too much. I also had to modify the wheel tubs some-they arch too high so I put a flat spot on top so they would fit under the quarter windows. I may need to lower the front spindles some because the chassis sits the car really low. I have not tried to make a cage yet but that will probably have to be scratch made.
-
#25 Jabe Thomas
DoctorLarry replied to satterwhite78's topic in Stock Cars (NASCAR, Super Stock, Late Model, etc.)
Very cool vintage build! -
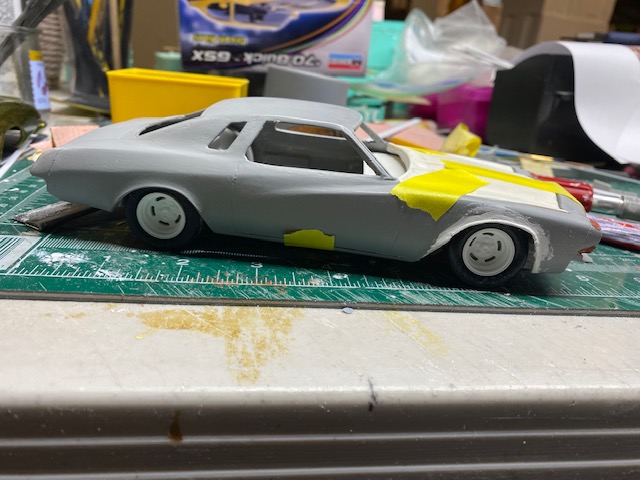
Well, after Tim Stevens and I staring at one grainy picture for hours we have concluded this is a Century fastback with opera windows and a 73 Regal front end. So I cut the front end off the 75 and glued it to a 73 Gran Sport Century body, I opened up the front wheel wells and filled in the triangle window and cut out the opera window. I have assembled part of the chassis and need to lengthen it for the correct wheelbase. I need to fair in the windows and then prime the body. Back on track again.
-
I guess I will extend a 73 nose and fill in the quarter window.
-
I have scoured the internet but this seems to be the only one. Filling in the window is easy.
-
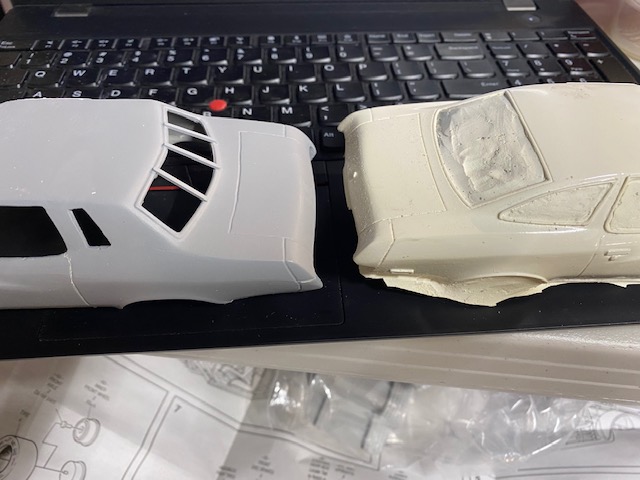
Here's how they modeled out. The roof to quarter is flat and the roof on the fastback sweeps back.
-
Luckily I have an unlimited ability to make more bodies!
-
It looks like it has the opera windows in it, though?
-
Black Widow 57 Chevy
DoctorLarry replied to Dan Hay's topic in Stock Cars (NASCAR, Super Stock, Late Model, etc.)
Very clean. Nice work! -
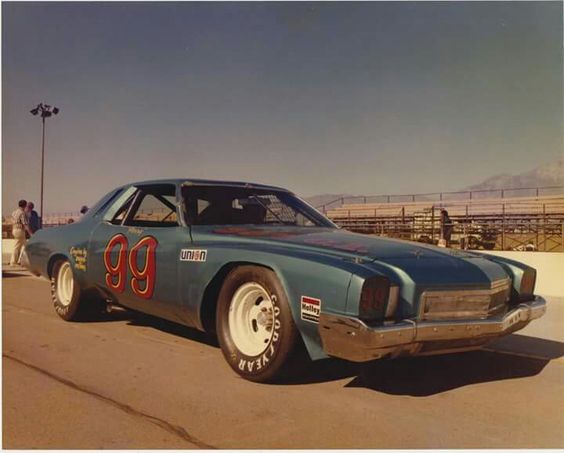
Count this one as another from the Tim Stevens file of little known 1970's NASCAR cars. Evidently Perry Cottingham raced a Buick Skylark and this Regal out west and at one point had Kenne-Bell engines in his cars. First a 455 then a 350. Didn't win much but this car was unique. As far as I can tell this is the only picture of the car. It is a73 Buick Regal. I started with two of my own castings. I have a 73 Century Gran Sport and a 75 Century Indy Pace Car. The Regal has a longer nose and rectangular marker lights and a slightly different grille than the Century and this car has a formal roofline. So do I cut the formal roof off the 75 and splice it to the 73 or cut the nose off the 73 and glue it to the 75? I chose option 2. I will worry about the back later-it is different too. I will use a T Bird chassis and engine out of a GM NASCAR kit or a Buick one if I can find one. The other kits have a correct seat, too. PPP 5 slot wheels and Monogram tires. Decals will be scratch made-there are not many to worry about. Paint is a GM touch up that is close in color. Should be a fun build. First step was to get rid of the T tops, moldings, marker lights, door handles and glue the nose and headlight bezels on from the 73. Next is to fix the rear and narrow the bumpers. Then fit the chassis. Away we go!
-
Gerald, we need to drink whatever Tim does in the morning-maybe it will help us get builds done as fast as he does! Looks really good-what did you use for clear coat?
-
Looks great so far!
-
37 Chevy Coupe Modified
DoctorLarry replied to raisin27's topic in Stock Cars (NASCAR, Super Stock, Late Model, etc.)
Great builds with super detailing. What did you use for hose clamps? -
There is a show this Saturday in Franklin Indiana, about 20 miles from me. I'm thinking about entering my NASCAR stuff. It would be a first time entering a contest for me.
-
They must be way up there if yours are "pretty simple".
-
Did you win any prizes or just enter them for display?
-
Thanks, all. It was definitely the most challenging of my NASCAR builds.
-
When I did my Herb Adams 1973 NASCAR Grand Am, there were only about 3 published photos of the car. One of the original engineers/crew members on his car told me about the Petersen Archives. There were dozens of pictures of the car including almost every imaginable close up. I could not have done the car correctly without those photos. The same was true with my Buick Centuries. There were a lot of vintage photos there.
-
Amen to that.
-
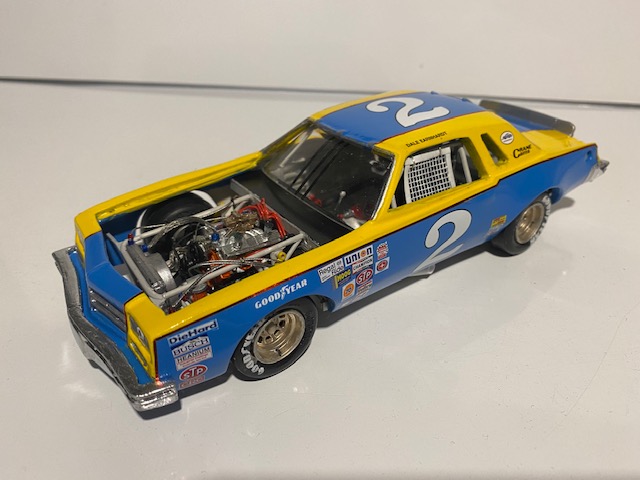
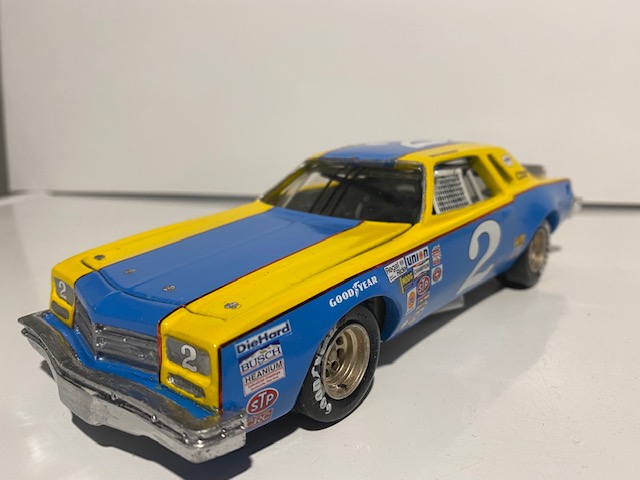
I'm calling it quits on this one. Not a great outcome. Paint fought me, chassis fought me. I had to remove and reinstall the engine, stance is not great but it is done, finally! Not my best work but looks OK from a distance.
-
Try the petersen archives. https://archive.petersen.org/pages/home.php?login=true Go to the NASCAR page and search by year.
-
Dale Earnhardt's Lumina
DoctorLarry replied to gatorfan69's topic in WIP: Stock Cars (NASCAR, Super Stock, Late Model, etc.)
What did you use for seat belts? -
That's the plan ultimately.
-
Can't take them all everywhere! Where do you keep 100 models? Must be a big wall!