dragstk
-
Posts
388 -
Joined
-
Last visited
Content Type
Profiles
Forums
Events
Gallery
Everything posted by dragstk
-

Revell '39 Chevy hood fitment
dragstk replied to dragstk's topic in Model Building Questions and Answers
Your just trying to make me do more work...🤣 Im doing a low rider version, so I guess semi custom. Im going to take a breath and consider options. Maybe no sides, maybe build up the low area and now, maybe make custom side panels. All are valid. I realize this kit is old. But it is so far out of square, everywhere, it has been a struggle And now this hood issue. But its a hobby and its only plastic. We'll get this sorted, one way or another -
Revell '39 Chevy hood fitment
dragstk replied to dragstk's topic in Model Building Questions and Answers
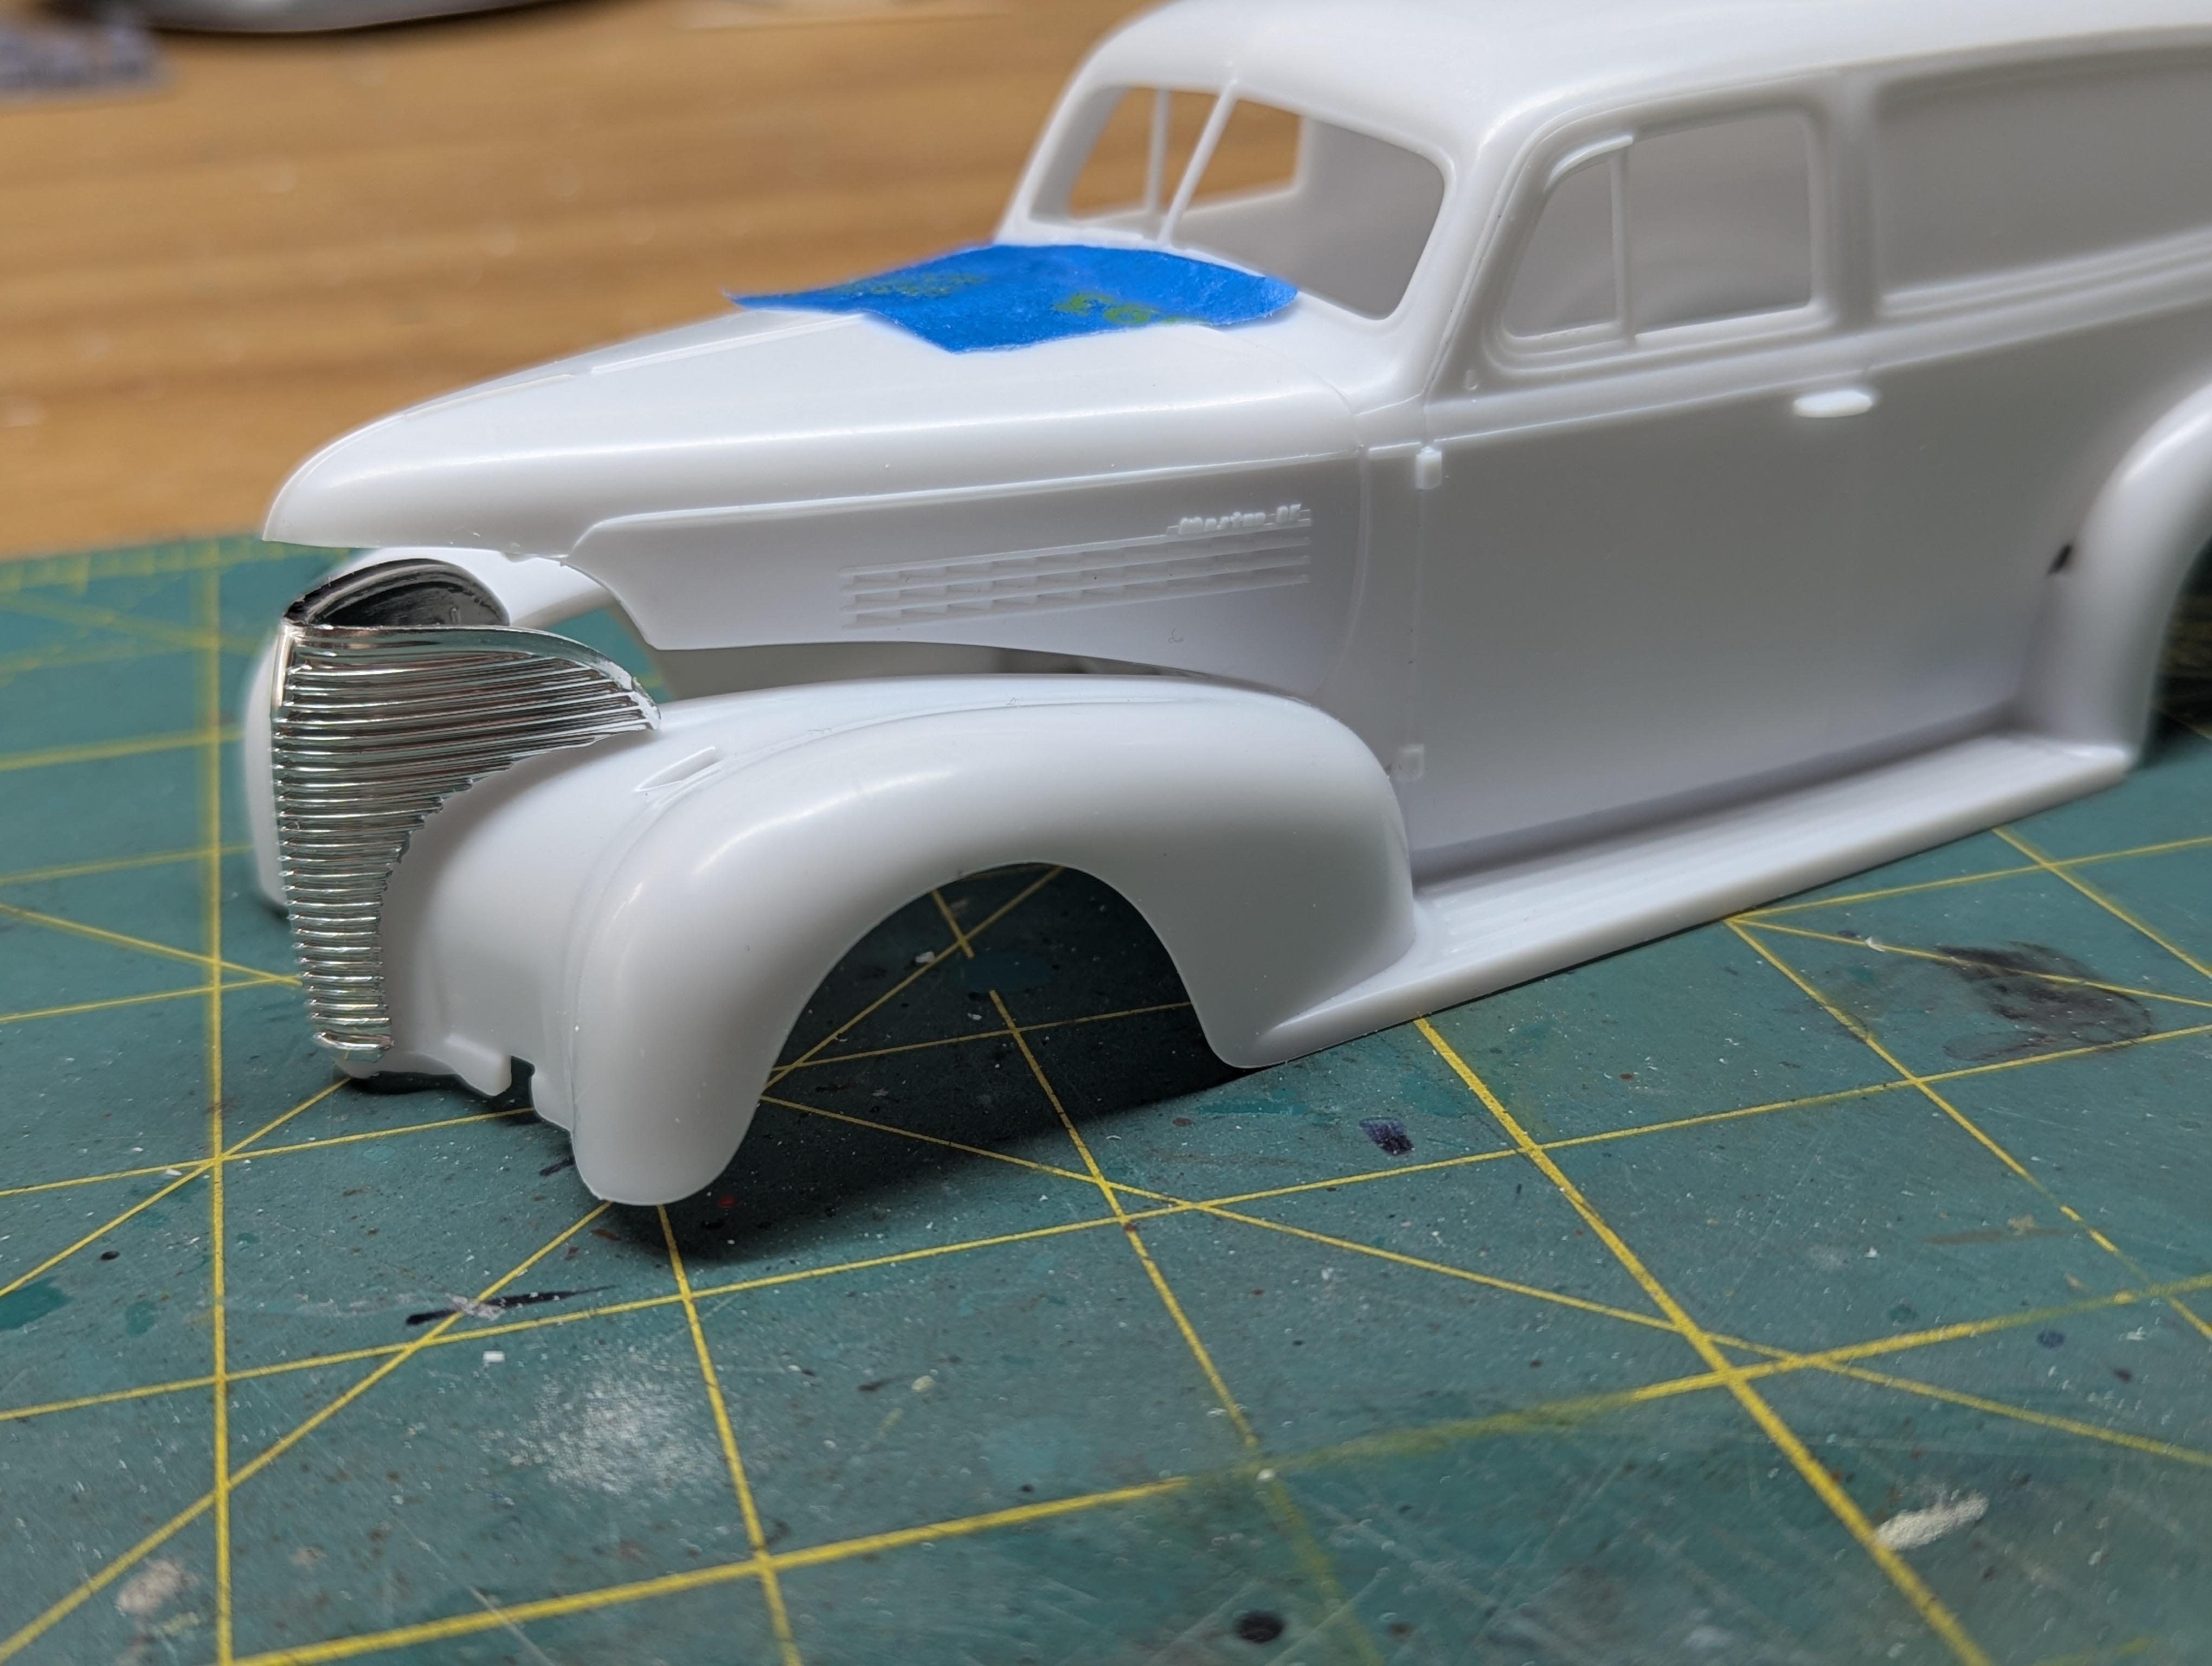
The saga continues.... I evened up the gap between the body and the fenders. It looks better and fits good. Then I started on squaring up the hood. Got one side pretty close, with some minor trimming of the bottom of the hood. Then went around to the other side and the gap is still as large as In my original picture. So spent a while doing some measuring. Turns out the passenger side , where the hood sits, is 1/16 low at the firewall and dips lower as it goes forward. Seems I have a bad casting. Im trying to not put this back in the box because of the amount of time I already have invested. But it has fought me the whole way @Greg- The kit im working on is the sedan delivery. The one with the wooden barrels included. The picture Brian posted is the kit Ive got -
Revell '39 Chevy hood fitment
dragstk replied to dragstk's topic in Model Building Questions and Answers
Thank you all for your help with this. I completely missed the grill in the wrong place. But last night I did work on lower/eliminating the gap between the body and fenders. It definitely looks better This is why I ask questions here. Thanks again -
Revell '39 Chevy hood fitment
dragstk replied to dragstk's topic in Model Building Questions and Answers
@David-Yes, there is a small gap between the body and the running boards. I originally agreed with you. But the body fits the fenders right everywhere else. And the hood fits correctly (?) at the back of the hood where it sits on the firewall. But I might have to go that route and lower the body more. @sidcharles-Yes, the grill is to short, I had high hopes that it would grow up to be taller, but alas, not yet @Les-I thought it was kinda weird that the hood came in a separate bag, not on a sprue. Maybe I got the wrong hood Thanks to all of you for your replies! -
After working on the chassis and engine for this kit, I decided to do some test fitting on the body. And this is what I got. The hood fits the body and the grill fits the fenders. But the 2 dont come close to each other In the 40+ years of model building, Ive never seen such a worst parts fit. I realize this kit is 20 years old but something is wrong here. Anyone else have this issue? Am I missing something? Any help or idea are appreciated

-
Do you make notes/memory aids as you build?
dragstk replied to Mattblack's topic in Model Building Questions and Answers
Ive started keeping notes. Especially for paint, so that if I have to go back and touch up, I know the correct color. And as I get older 🫤, I write down who I bought parts from, so I can give credit when the model is at a show -
Looks like all your "first" came out really well. Great job on your build
-
Thats a very clean build. Nice Job!! What kit is this and what scale is it?
-
Lifted Jeep Honcho
dragstk replied to Jurva's topic in Model Trucks: Pickups, Vans, SUVs, Light Commercial
I came for the great looking patina and stayed for the magnets in the hood. Great build, I really like it -
Thats an interesting variation. Nice job on your build. I like it
-
Really nice build, Bob! I really like the stance and the tires and wheels. Wide white, red wheels, to me are just perfect
-
Revell Bronco
dragstk replied to Chuckyg1's topic in Model Trucks: Pickups, Vans, SUVs, Light Commercial
Nice looking Bronco, John. I really like what you did in the interior. I may have to borrow the idea of using Washi tape on seats. Thats a nice look -
Show Us Your Work Bench
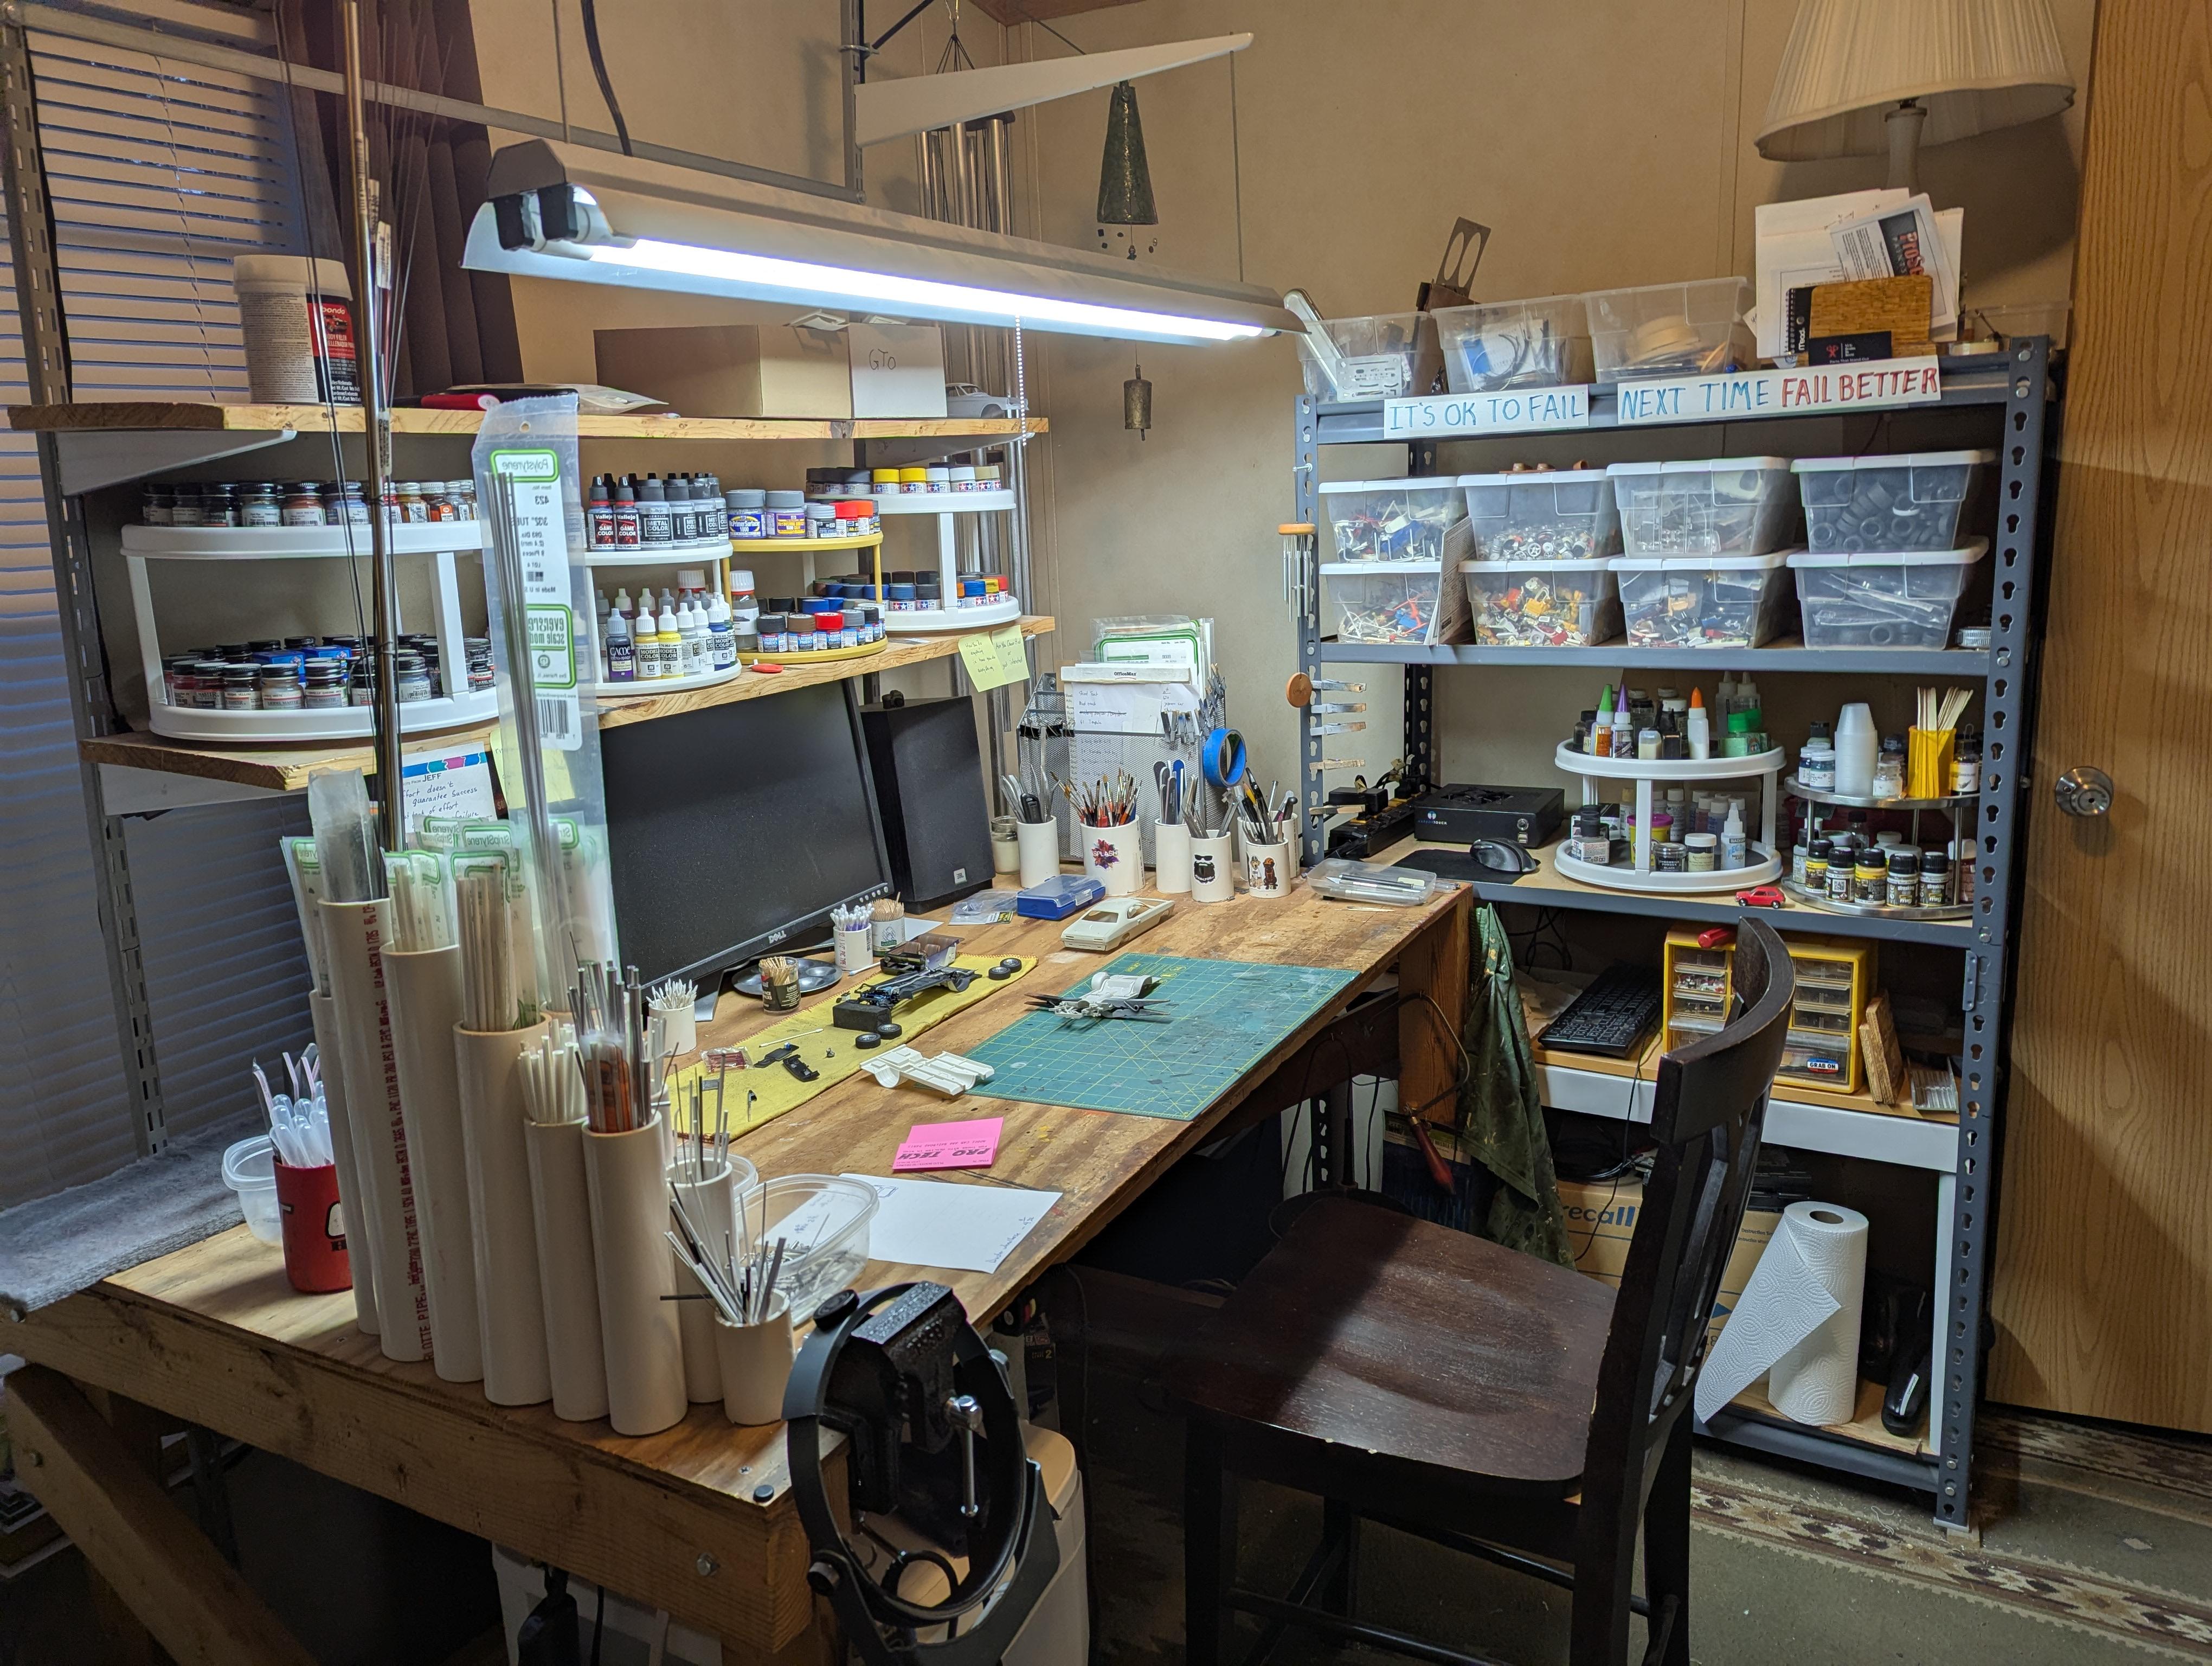
dragstk replied to Bruce Poage's topic in General Automotive Talk (Trucks and Cars)
Here is my desk set up. I made this table when I was a jr in high school and it has gone with me every where Ive lived. And this is as messy as my desk ever gets. Im kind of a stickler in putting things back so I dont have to go look for them I have an air brush set up, just out of the pic, on the left and my stash of about 130 kits
-
How many models are you working on at one time?
dragstk replied to rossfox's topic in Model Building Questions and Answers
I generally work on 2 builds at a time. One is a box stock + (pretty much box build with a few mods.) And I also have a long term project going. As the long term projects go slow (waiting for putty/primer, etc to dry), I work on the box stock. With my current rate of building, its 1 1/2 box stock builds to 1 long term. I have room to keep both on my bench at the same time. And like Bill, I keep notes of where I am, what colors Im using etc -
Anyone order from Plaza Japan
dragstk replied to Bigfordguy's topic in General Automotive Talk (Trucks and Cars)
I have ordered from them twice. Other than the long delivery time, I was happy with ordering from them. I wouldn't hesitate to order from them again -
Looking for replacement blades
dragstk replied to dragstk's topic in Model Building Questions and Answers
I got the 74160 blades today. Not even close. I have 4 different #11 blade holders and 3 out of 4, these blade would not fit. But they did in 1 of them, so thats how Ill use them Original scriber blades on top, new ones on the bottom
-
Spray Booth Exhaust Venting
dragstk replied to fcriscuo's topic in Model Building Questions and Answers
I agree with Greg. I have one of those $100.00 Amazon spray booths. My window is about 5ft from my booth. I replaced about 4ft with metal piping. Made quite the difference -
Mr Hobby and Mr Color Spray paint
dragstk replied to Valvefloat's topic in Model Building Questions and Answers
Im not positive but I believe the Mr. Hobby paint is similar to Tamiya. Some sort of a acrylic lacquer. I have used both the spray and the bottle paints. I treat them exactly like the Tamiya paints and never had any issues. Ive also used them over each other and had no compatibility issues -
Looking for replacement blades
dragstk replied to dragstk's topic in Model Building Questions and Answers
yes,Im just looking for the blades. According to the Tamiya web site, replacement blades are discontinued. So, Ive ordered the 74160 blades, made for a #11 holder. If they wont work in my scriber handle, then Ill just use the blades in a #11 holder. It seems funny that Tamiya is still selling the Scriber ll. Or maybe its just until stock runs out. Either way, Ill report back when I get blades and let you know how it goes. Thank you to all that took the time to reply -
Looking for replacement blades
dragstk replied to dragstk's topic in Model Building Questions and Answers
Thanks Greg, but as far as I understand it, the 74160 is for a #11 blade holder. They are actually smaller, thinner than the ones that come in the scriber I have. The blades for the Scriber ll part # 74015. And I now see they are discontinued Now maybe 74160 blades will fit and work. I dont know, but that is what I was able to gather from my internet search. Any one have any experience with these? -
This is the well known and commonly used Tamiya Plastic Scriber ll. And mine needs a new set of blades. Does anyone know where I can get some new blades? There is none listed on the Tamiya site, or on any online hobby shop Ive been to. The scriber is marked as a Olfa product and they list the scriber but no replacement blades. Any help here would be most appreciated Jeff
-
How does the saying go..."Every model is practice for the next one" I think your build came out really good. But when you learn from a build and improve on the next, to me, that is the most important part
-
Bit of T Cut would sort this…
dragstk replied to Earl Marischal's topic in General Automotive Talk (Trucks and Cars)
Quit making fun of my car....🤣🤣🤣 -
For a long time, I would look at cars of this era and think that they might look better with a longer roof. Its something that is on my build list, but Ive never acted on it. But you have answered my question and I really like it. Good job! I guess that moves this project up on the build list 😁
-
Thanks guys for the thoughts. It seems like it ok to glue PE after wax. Which is the way Id prefer to do it Thanks again