dragstk
-
Posts
388 -
Joined
-
Last visited
Content Type
Profiles
Forums
Events
Gallery
Everything posted by dragstk
-

Revell 1971 Olds 442 W-30, 1/25 Scale. In Tamiya Black.
dragstk replied to Dragonhawk1066's topic in Model Cars
A very impressive build. That black came out great. Congrats on a great build -
Well it certainly looks like you won the fight! Nice build!!
-
Anyone watch A4 Garage?
dragstk replied to Scott8950's topic in General Automotive Talk (Trucks and Cars)
I have been following him for a while and have seen all his videos. Im amazed at his work. I always feel motivated to build after one of his videos -
What about us Linux users?
-
Now that is a Pro tip! Ill keep that in mind.??
-
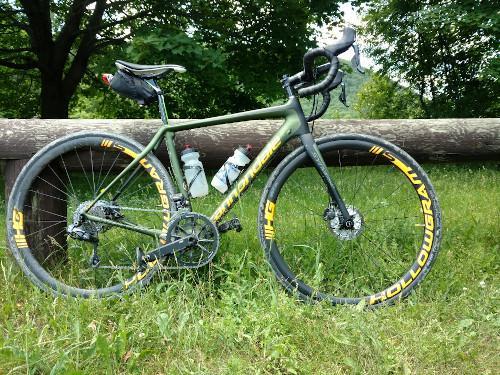
Show us your summer toys! (Non-auto related)
dragstk replied to atomicholiday's topic in The Off-Topic Lounge
Here's my summer toys An Ellsworth Id mountain and my Cannondale Synapse road bike
-
Well Steve, If letting my bench get messy so I could build cars as well detailed as your, I'd consider it. ?
-
7 Eleven IMSA Mustang GTP
dragstk replied to Rich Chernosky's topic in Other Racing: Road Racing, Salt Flat Racers
Thank you for the offer. Let me dig in to mine more and see where Im at with it. But I will keep your offer in mind. Thanks again -
7 Eleven IMSA Mustang GTP
dragstk replied to Rich Chernosky's topic in Other Racing: Road Racing, Salt Flat Racers
Ive had the same kit for years and years. Every once and a while I pull it out and say I should start it. Seeing how nice your came out, Im going to revisit it. Nice build, thanks for the motivation -
I used to have a bench that was pretty messy all the time. Then I got a job at a place where no one ever put anything back or just moved it out of their way, regardless of what it did to others. And I hated this, because I was the one who had to clean up the messes. So my model table became more and more organized. It was just my way of dealing with work. Like most of you, the tools I use most are right near by. But once I use it, it goes back in its spot. Yes, its a bit obsessive (can you say OCD?). But it helped me have some sanity. But Ive retired but the habit of putting tools away still remains. Same with parts. If Im not actually working with them, they are in the box.
-
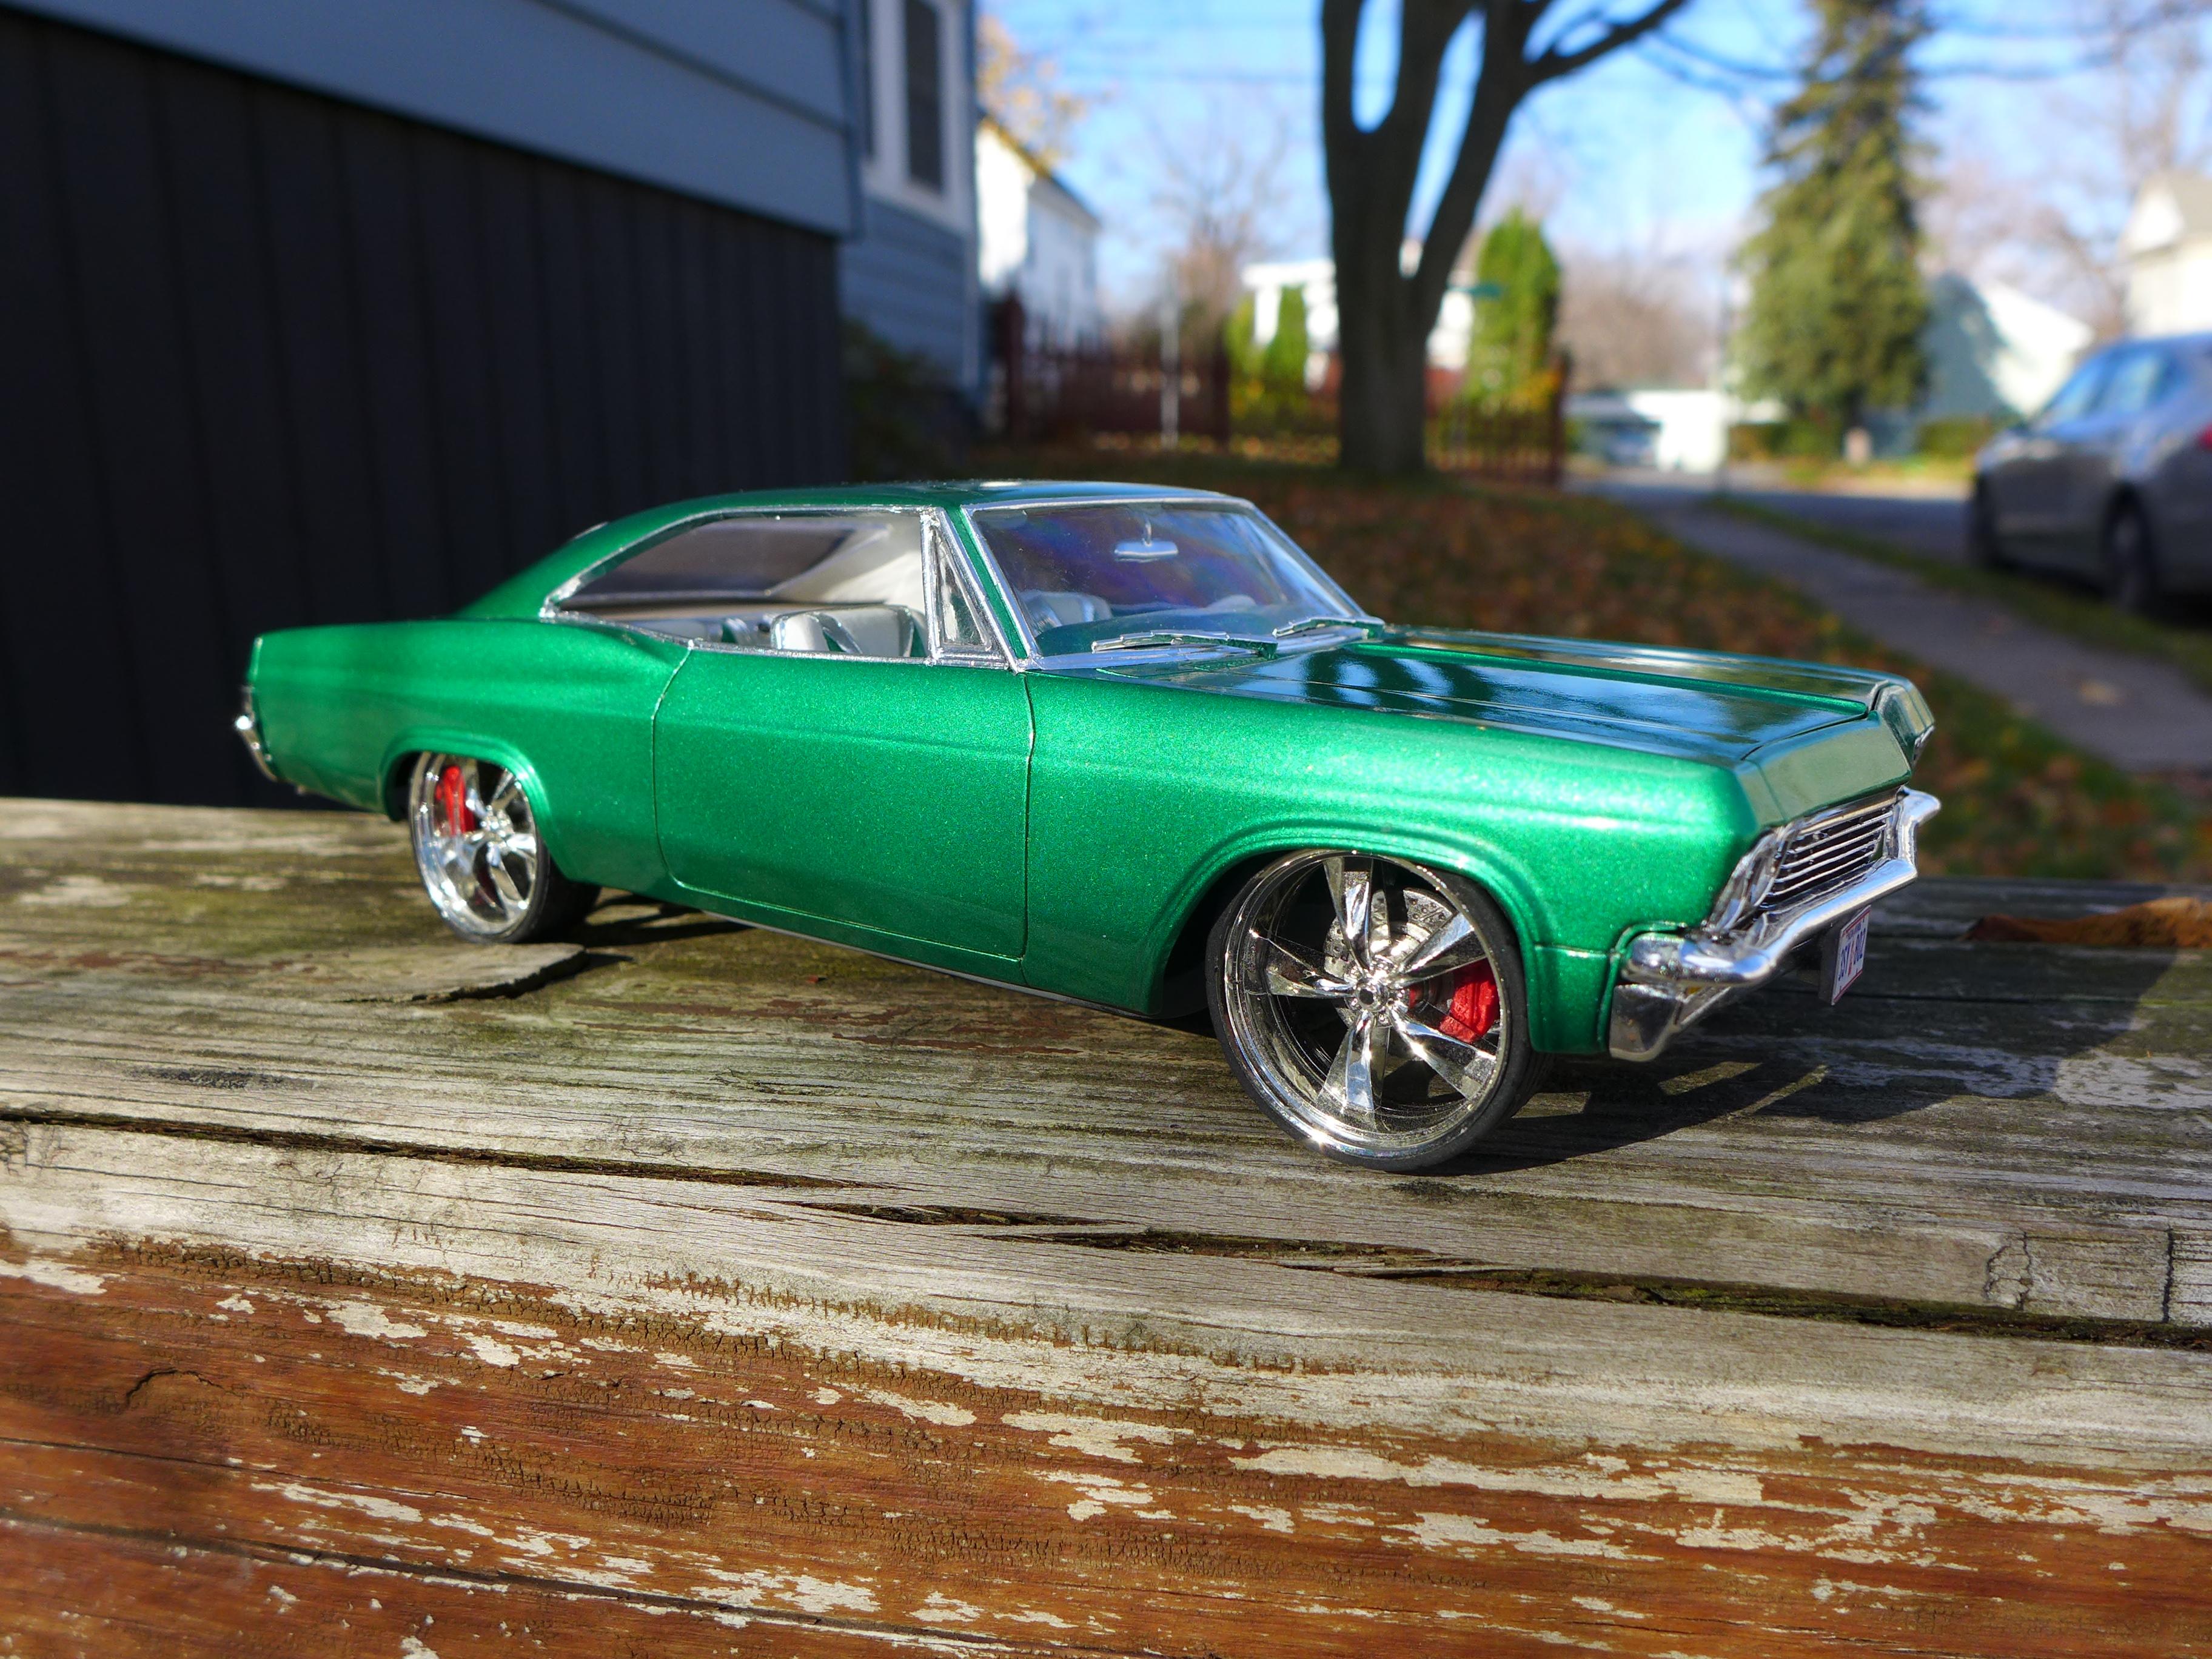
Foose 65 Chevy impala custom wheels?
dragstk replied to Dpate's topic in Model Building Questions and Answers
I built the same kit about 5 yrs ago using the same tires/wheels you have chosen. I dont believe I did any modifications to height. I did cut off the kit pins (clips?) and used some dowel mounted in the spindles and in the rear diff.
-
Revell Baja Bronco
dragstk replied to dragstk's topic in Model Trucks: Pickups, Vans, SUVs, Light Commercial
Thanks Carl. I Appreciate you looking in -
my journey continues, Nova 66 pro street
dragstk replied to Blueberry_no1's topic in WIP: Model Cars
Looks like your off to a great start!. Ill be keeping an eye on this build -
1/8 Pocher Lotus 72
dragstk replied to Chris Smith's topic in Other Racing: Road Racing, Salt Flat Racers
That is a nice build. And the fact that you got it done in 5 weeks. Impressive -
'65 Ford Galaxie Convertible - Kindig-based
dragstk replied to Chris in Berwyn's topic in Model Cars
Nice job! I like your color scheme better than the original -
I always "pre build". Ive ruined so many models in the past, by finding out, after their painted and the glue is on, it doesnt fit. It seems like it takes longer to fit everything up, but in the end, when your doing final assembly there are far fewer surprises
-
Revell Baja Bronco
dragstk replied to dragstk's topic in Model Trucks: Pickups, Vans, SUVs, Light Commercial
Thanks Michael. That was a lot of seatbelts, and probably the most frustrating/time consuming part of this build. Thanks for noticing -
Outlaw Kart
dragstk replied to Stevens19's topic in WIP: Other Racing: Road Racing, Land Speed Racers
This is an unusual but very cool project. I cant wait to see this come together -
I started with a Badger 350, more like struggled with it. But I did learn. Then I bought a cheap Master. The difference was eye opening. So after a while, I bought a Badger 105 Patriot. And for over a year I fought with it. It just wasnt consistent. So after some discussion here at the forums, I sent it back to Badger. They had it for over a month. In the mean time, I bought a Creos PS-289. Holy BLAH_BLAH_BLAH_BLAH, this thing is nice, My results just shot up. I had so much more control. So when I need a good finish, I always go with the Creos
-
The Foose kits offers 2 suspension heights, stock and "Foose" (their words.). Its different lowered spindles in the front and shorter coils in the back
-
Revell Baja Bronco
dragstk replied to dragstk's topic in Model Trucks: Pickups, Vans, SUVs, Light Commercial
Thank you Philippe and Eric. I do appreciate your comments. -
Yes, you did do it justice. Nice build!!?
-
Escalade EST
dragstk replied to avidinha's topic in Model Trucks: Pickups, Vans, SUVs, Light Commercial
Nice save on a failed project. I like what you did with it.That stance, tire /wheel combo really work -
Who took over Scenes unlimited
dragstk replied to junkyardjeff's topic in General Automotive Talk (Trucks and Cars)
I believe that Scenes Unlimited was taken over by Paul's Model Truck parts. But his site has no where the number of tires and wheels that Scenes Unlimited did. -
Revell 2015 Chevrolet Corvette C7.R
dragstk replied to Jim B's topic in Other Racing: Road Racing, Salt Flat Racers
Nice. Looks like a clean build. I like it!