swede70
-
Posts
727 -
Joined
-
Last visited
Content Type
Profiles
Forums
Events
Gallery
Everything posted by swede70
-
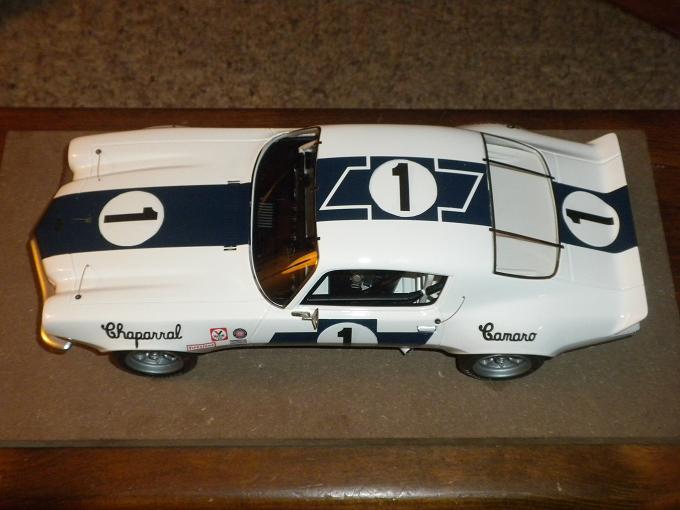
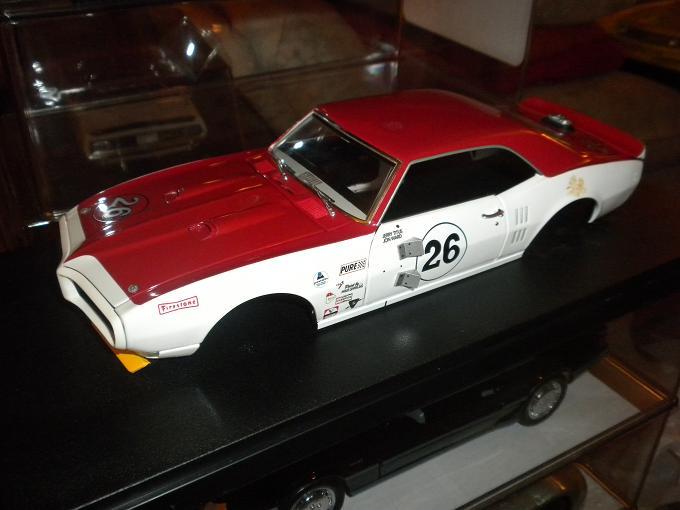
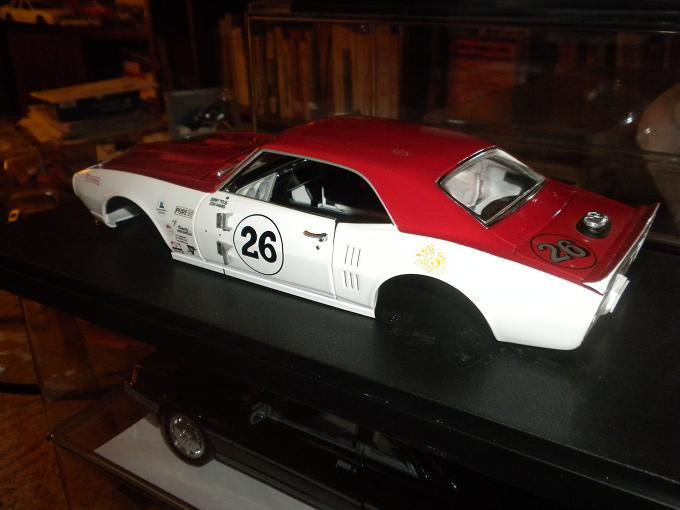
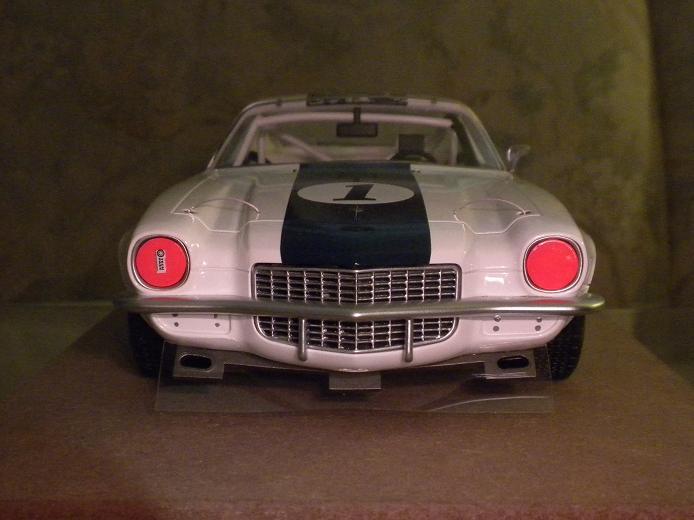
Greetings... Very tedious, barely noticed will be revised roundel artwork consistent with replacing the styled and italicized numeral one with font employed by the team after the '70-season opener held at Laguna Seca, CA. The now upright and austere numeral art was done by 3 Amigos Decals, whereas working up a white layer to disguise the old numeral art beneath across five roundels and applying no less than four layers to more or less address bleed through issues proved a chore. The first effort at applying roundels from what stock I had in hand failed for proving far too translucent, whereas eventually I just reached for some clear decal stock, traced patterns on the back of such with a suitable stencil set, painted the uncut decal stock on the film side, finishing the effort for cutting each disc of material out by hand and employing an emery board to clean and true up the edges so the resultant wafer of decal stock would be (more or less) round. Doing these consistently enough to match the dimensions of the 'hole' each roundel overlay had to fit into without unduly spilling over an edge proved more fun still... As to the technique, utterly unrecommended to any novices looking on then, while pondering now how else I'd approach things. Were this model less expensive, I might have dared to wash out the roundel decal art from within the graphics seen, although risking something like this risks the total write-off of the exterior finish of something rendered in resin and draped in photo-etched trim. If I can devise a means to more consistently trim the roundels so they'd match for size four deep I'll likely redo what's made out here, although for the moment what's seen seems an achievement. Kind thanks for your review of this post. Mike K./Swede70

-
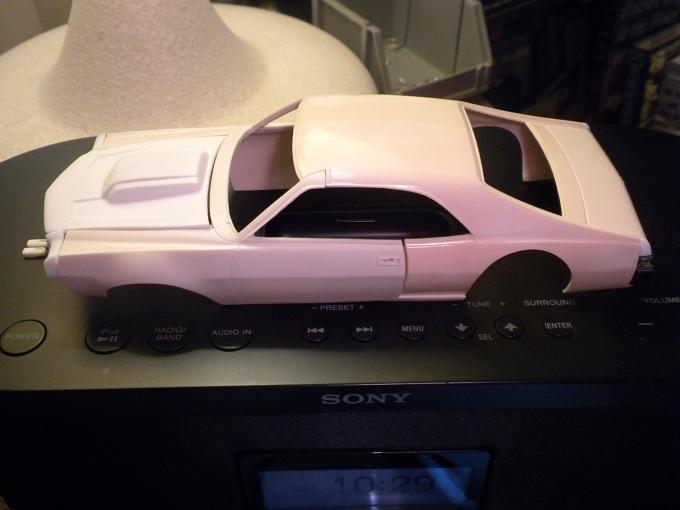
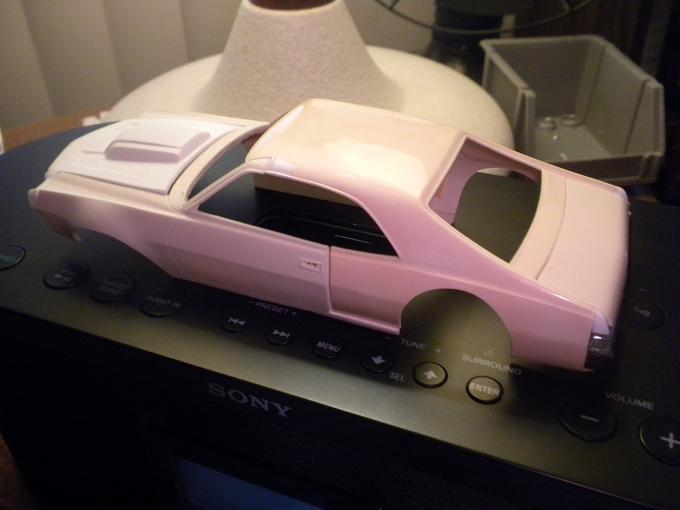
Greetings and a short return to form here... With a spare body in hand and some chassis parts also available in duplicate, here I'm attempting to work up some Holman & Moody stub frame stiffening structure built atop late AMT Thunderbird NASCAR parts. Removing the rendered hood from the all-of-a-piece body plus bumpers and grille wasn't fun but proves possible again. At least the risk of damage to the rest of the model is minimized for cobbling together this engineering hack of sorts; i.e. if things go seriously amiss, this effort reengage the project will vanish in the middle of the night! Quickly revising some earlier work and photographs of the same, here the firewall top has been filled in and finished with greater care. The removable stress/cross brace hasn't been final fit and simply rests unglued atop matters waiting if you will for further application on my part. The Holman & Moody upper shock mounting points/eyelets come next, while the shape of the tubes in this area are pretty much dictated the stub frame shape/configuration situated directly below. The driver's side will be a bit of a cheat given material is missing and/or offset here, although in some fashion I'll manage. And just resting quietly to one side exists the project otherwise untouched, anticipating what I hope will prove well-sorted implants. Kind thanks... Mike K./Swede70
-
Greetings... A small update this, scarcely rating a post. The KK model seen above has a tampo print on the tail panel which denotes the example as a 2002 tii Lux, whereas given the interior suggests a lesser 2002, I took some Tamiya tape and acetone solution dipped cotton swabs and scrubbed off what I could until only the 2002 badge as it were remained. Tedious in total, the markings could have been ruined entire, but mostly looking good now. Thanks... ...as delivered then. This must be a prototype given the exhaust doesn't look quite a bad on the actual model as it does here. ...and the results with some Interdecal EU license plate decals set/overlaid onto what KK provides even as the images used seem a bit narrow relative to the width KK rendered just beneath. Thanks for your review of this post. Mike K./Swede70
-
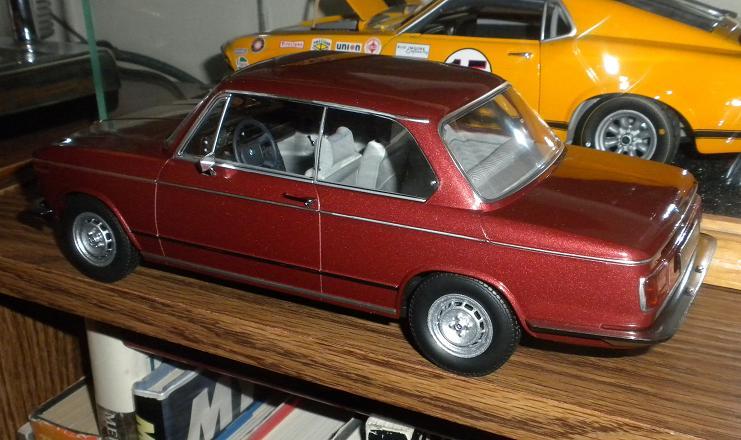
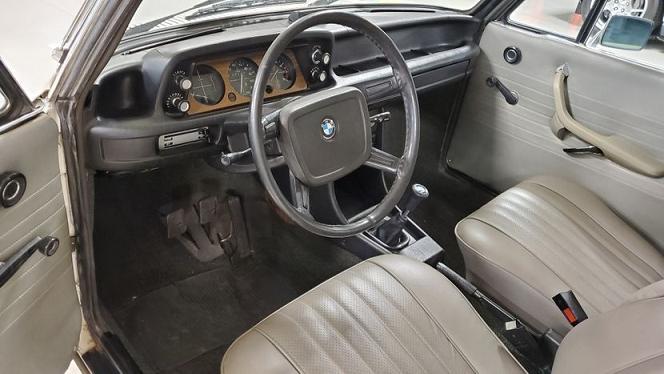
Greetings... Just a small interior overall performed on the new 1:18th KK 1974 BMW 2002 tii/Lux, presumably finished in Granatrot Metallic even as I'd hoped for Malaga given I'd owned an example so-painted many years ago. Some diecast vendor web images suggested a hue that could be mistaken for Malaga here (think a period solid burgundy), but when the model finally washed ashore no longer could I cling to this hope. Further, KK didn't do a full Lux interior, something denoted by the inclusion of applique wood trim on the door cards as well as the center console, while given my 1:1 example was outfitted with a fairly rare light gray interior, I decided to disassemble this KK release consistent with redoing things to reflect a stand spec. interior in this less common scheme. As AUTOart 1:18th releases of old continue to appreciate well beyond my capacity to collect such, the KK option becomes increasingly attractive do understand. On with the limited show and tell then. Seen just below is a '74 and on light gray vinyl interior, unusual given these cars are usually outfitted with black, tan/buckskin or navy blue vinyl interiors with the typical deteriorating horse hair (i.e. gummihaar) seat padding and peculiar smell to match! Combined with wonderful mechanical noises and the faint smell or oil and gasoline, there exists a definite and visceral aesthetic with regards to owning and driving an old BMW... Back to my scale example, Tamiya AS-2 (IJN) Light Gray was employed where seen (all is largely unfinished black plastic as-delivered but for some chrome painted trim), with the raised and chrome applique trim on the door cards carefully masked and repainted, while an AUTOart E21 BMW 323i steering wheel picked up via AUTOart Spares was switched in given the model came through with something specific to an earlier iteration of the E10 platform. Low-pile salt & pepper carpeting was just simulated with a dusting of white paint sprayed at a distance atop a matt black basecoat, while the sides of the interior fall away to facilitate whatever work one would want to perform upon them. The means by which the dash and the side panels attach to each other is simple and easily serviced without risking damage to the model, while the whole chassis detaches from the body for the removal of only four easily accessed screws; i.e. this is a benign scale platform as such things go. I might still fabricate an overlay for the instrument cluster given it too reflects an earlier spec. '02 for not featuring a wood grain finish, while an AUTOart E10 chrome exhaust tip might further be added. The tii-specific clock installation usually seen on the dashboard/pad is also missing... Really not awful though, with the Tamiya paint really capturing the look of period vinyl well. From experience and review of online photos, the 1:1 light gray interior often discolored, the seat piping turning both brown and hard, etc. Some Granatrot and Malaga-painted examples came through to the United States outfitted with such (other exterior colors too - albeit very few), but in the main it wasn't a common choice... I might make an effort to clean and respray select aluminum perimeter beltline trim given it appears incomplete here. Thanks for your review of this post... Mike K./Swede70
-
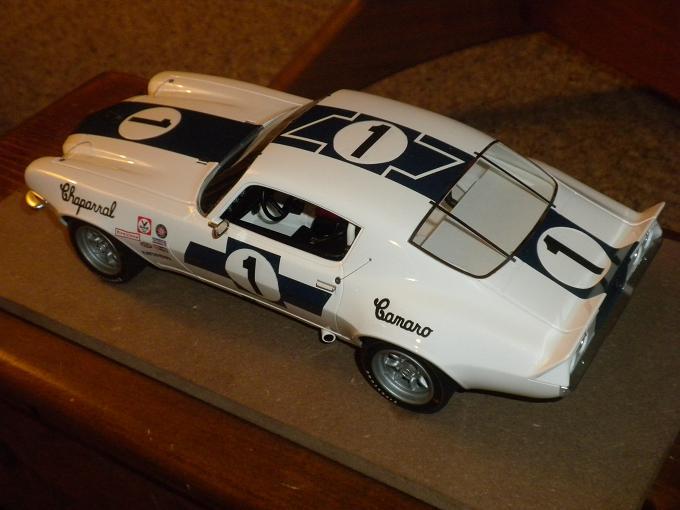
Greetings... Seen would be the addition of some external door number/roundel-illuminating lamp housings worked up from some architectural plastic stock and replicated four times over if you will. Tedious to shape, although generally acceptable now for size and position. I'd nevertheless like to add some grain of wheat/scale railroading-sourced electric bulbs to situate within each housing even as I wouldn't harbor ambitions that they'd strictly work. Further, the plastic 'glass' front and rear has been reaffixed with the chrome trim surrounding each panel likewise refit. Along the bottom of each fender, the Valvoline decals have had their lettering covered over with what presume might have been lengths of electrical tape given a possible conflict with the associate sponsor deal given the PURE oil/lubricants decals otherwise situated in pride of place higher up on each respective fender. Slow progress then - thanks... Mike K./Swede70
-
Greetings and certainly a surprise to notice this thread rescued from the deep... Neat association there and highly unexpected. The model remains in about this state at present, although some reassembly has since been performed. About a month ago I fabricated some door numeral illumination lamps w/housings, hence in little ways the model has received sporadic attention and isn't wholly dormant. This much related, I think I'm going to have to adjust some aspects of the roll cage to accommodate the 'glass' installation with chrome trim, while the firewall needs some work given the cross ram air cleaner setup and the Lane tool wiper motor don't coexist well with each other (i.e. bang, bang). Beyond this most of the scale model engineering problems have been addressed, the ride height and track about as close as I can get for better or for worse. I remember some mild interference encountered with the interior rear quarter area trim too, while it's happened that serendipitous discovery of new or better research materials have prompted reengagement with this or that project given confidence will be restored. Pity that the ACME release evidences so many errors for might otherwise have been done well albeit at greater expense. I'm currently working on a '70-season Milt Minter American Racing Associates '69 Camaro based on the well worn and familiar GMP '69 Penske Trans-Am tool, and for so doing I'm finishing up on the Al Bartz-prepared engine which in some ways closely reflects what was fit to the Jon Ward/Jerry Titus Daytona 500 class-winning Firebird less the cross ram setup, hence this other effort could serve to prompt me to reengage the engine aspect of this project. Recently I was afforded/availed many clear plastic display cases and was able to find housing so to speak for my incomplete projects consistent with pulling this and that together for carefully cleaning and segregating out what I'd worked up to date, while I was appalled at how much dust covered all of the delicate decal work. Not nearly as badly neglected as it had so recently been, hopefully I can see the project out before too long. Thanks for your interest and outreach... Mike K./Swede70
-
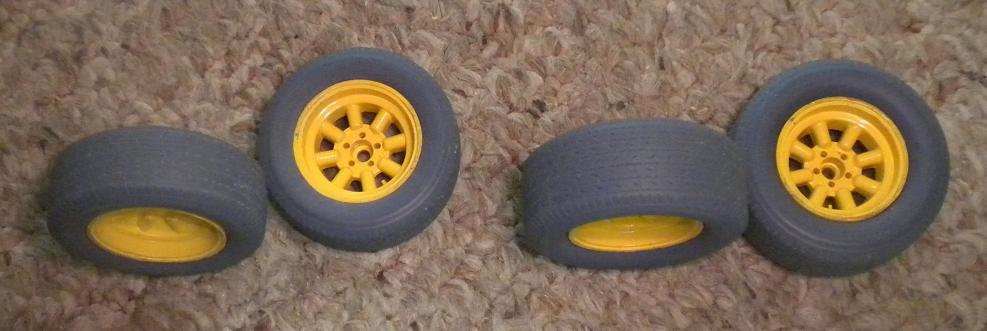
Just in brief this... Curious as to the utility of a set of 1:18th scale Goodyear Blue Streak Sports Car Specials in two sizes (front and rears then) matched to Minilite wheels rendered as 3D prints and sold via an eBay listing, seen are some photo images consistent with telegraphing what's on offer there. I think I paid $26.95 with free shipping, and while wheels look a touch shallow for offset, the lugs somewhat short, the wheel spokes somewhat underdeveloped around the wheel hub/spider by my estimate, the total effort isn't a hateful one. Better to have them than not... The last photo relates that GMP Camaro Trans-Am wheels can be ground down to coexist with the tires alone (the wheels and tires are rendered separately do know), hence for some this might be the best approach. Notice that wheels ride on axles, thus if one intends to overhaul a Replicarz '70 Camaro or '71-'72 Javelin Trans-Am topic with such, you'd have this on your side even as the tire choice here is restricted to Goodyears. Lest I confuse anyone, the yellow wheels are GMP issue, the bluish gray the 3D-rendered items whereupon I'd sprayed the tires with Tamiya Rubber Black which accounts for their revised appearance. Thanks... Mike K./Swede70
-
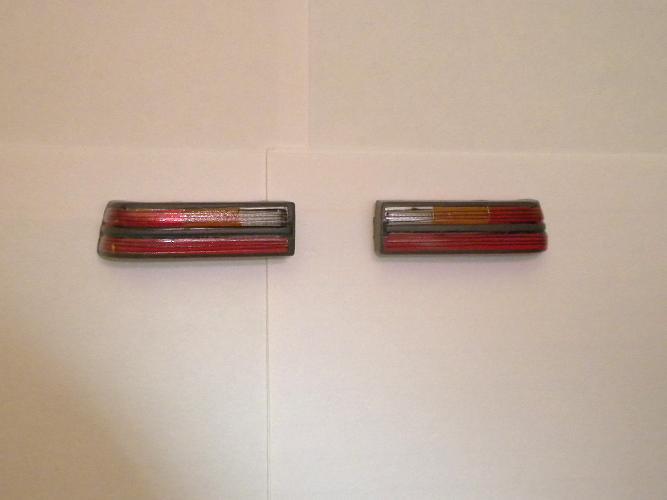
Greetings... Efforts to reproduce the tail lamp pinstriping detail mostly comes off - although a bit further work will be required before it's complete. Two brands were tried, the first Interdecal waterslide black lines in various widths proving unmanageable, although the Belgian manufactured Marko waterslide black lines (also afforded in various widths on the same sheet) worked far better in this instance for being better rendered, easier to shift, stickier, and compliant around the bends much to my surprise and relief both. Seen above would be an '84 SVO Mustang with black trim versus the desired '85 and on gray exterior trim reflecting the '86 spec. of the topic. Rather a challenge to make out, look close and the trio of horizontal stripes can be made out across each of the four lense clusters. That one dips on the right hand side top three lines down across the reverse lamp is something I hope to correct/replace. Three problems exist that need rectification, although only two might realistically be addressed. From 1985 the pinstripes ought to be gray versus black much like the exterior trim had been updated and altered for color, while a small section of the second from bottom stripe as it wraps around the side of the tail lamp lense/cluster ought to be shorter/shortened to leave the reflective surface situated beneath open/bare. None of the stripes were applied perfectly, with the aforementioned wiggle seen top right third stripe down that shows up in the photos posted. Pity gray stripes aren't available - hence out of luck there, but most everything else I should be able to address and correct. Thanks... Mike K./Swede70
-
Greetings, An answer is provided concerning whether or not the broken down/kit version of the 1:24th scale Maisto 1993 Mustang Cobra might possibly come through in Teal versus what appeared to be a middling medium metallic blue; i.e. answer: sorry - a middling metallic blue versus the hoped-for Teal is what we'll be afforded. The kit iteration does afford two sets of wheels, while with one set chromed I suppose it might be possible to mask the centers of these and spray the rest silver to come up with an alternate look, otherwise few surprises. Although not my video, a link is afforded to view someone's video where the kit version is reviewed consistent with answering all. Thanks... Mike K./Swede70
-
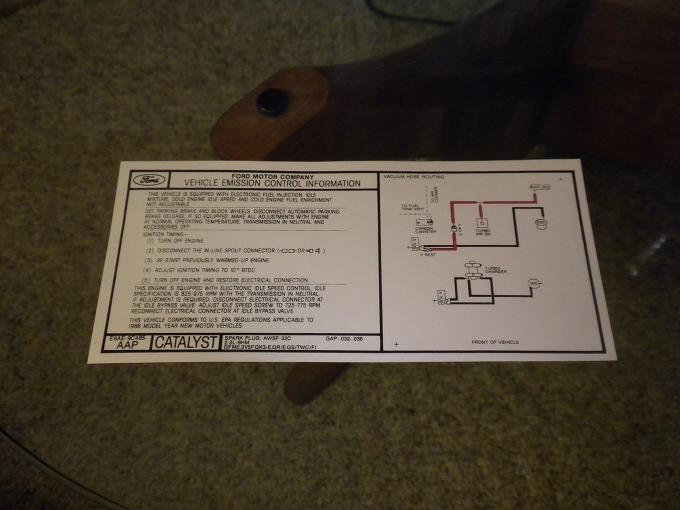
Greetings... Not very pleasant to do, all the side window trim as well as the front and rear screen perimeter trim here has been masked and painted in gray versus the as-delivered spec. in black. The side 'glass' could be removed to facilitate the work undertaken, although the front and rear 'glass' was left in-place, masking carefully performed, then finish was applied with the relevant assemblies sprayed in-situ. A mess was made of the front 'glass' for poor masking, allowing for material creep behind what I'd imperfectly applied and requiring much effort to save for concerted polishing to remove burns inflicted upon what ought to remain clear. Most of the damage (albeit not all) was addressed, but very discouraging in total, whereas pleased this not so nice aspect of the rebuild has been seen to. Note that a black wash was applied to the window frame part and parcel of the door glass positioned 'up'. Usually 1:18th diecast models have open windows and little to offer here, whereas the few models that do sometimes sport an undesired budget look given the detail can appear out of scale, distorted, or too plastic for words. Some polishing of the panels was performed which helped a bit, while the side exterior mirrors were refinished as well just after cutting and fitting thin plastic panels to mask the mirrored surfaces on the back of each. The rear hatch 'glass' was the most challenging to mask given the presence here of some unexpected curves, although saving the effort for last ensured that a technique had been worked up to more or less ensure quality work could be performed. Effort to screen scrape and subsequently reduce said image(s) to something legible came to nothing, hence a 1:1 reproduction emissions system decal for use under the hood was ordered... Here the reduced image is fit atop a scratch built weather shield/heat insulator resting atop where key ignition components are sited on the SVO Mustang inner fender well. It's coming along then. Thanks for your review of this project update. Mike K./Swede70
-
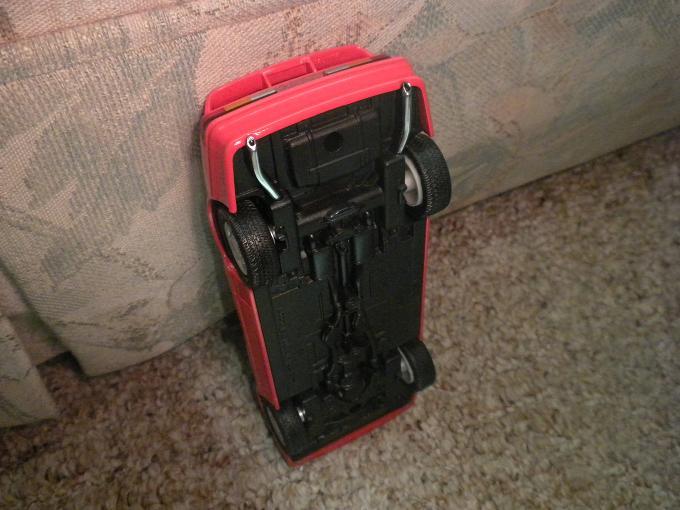
Greetings again... I was searching for interior photos too and after a period the realization hit me that perhaps the 1993 Mustang Cobra is the most listed Bring a Trailer topic of all time! Wow - just listing after listing after listing... - Something discreet tried here - namely an attempt to employ a Silly Putty mask to the exhaust tips prior to applying the few passes of Revell of Germany 'Chrom' aerosol spray lacquer to what remained exposed. Silly Putty can be used to mask very irregular surfaces with light practice, and while the exhaust pipes aren't rendered separately on the Miasto 1993 Mustang Cobra chassis, if masked creatively one can finesse things consistent with coming up with a good enough result. First, I isolated two small balls of said putty, rolling the results to come up with a pair of coils 'o putty, both which were in turn wrapped around the exhaust pipe tip detail hanging down twice over. The chassis was removed from the body (two screws only here), then the rest of the chassis was masked, the Revell product identified above sprayed/applied. The tips received two dots of black paint to suggest these are tubes at the ends, but otherwise not a huge effort. All in all, the effort came out cleanly... Barely discernible then, whereas I still have trouble taking clear and accurate photos of this topic. Thanks... Mike K./Swede70
-
Nice work on the interior Angelo - carefully controlled flocking and paint work as well. Very impressive in total... - Just a recap of the photos afforded elsewhere but soon to be buried beneath content otherwise standard to the new diecast acquisition thread. Things tried to date are as follows: The top of the door frames were touched in with a very wet application of Revell of Germany Matte Black applied with a brush which leveled out nicely and blends well. The door and hatch exterior lock cylinders were painted black. No raised detail is afforded here, while in truth perhaps I should have left the door lock cylinders alone as they are touched in with silver paint as-delivered. The tires were replaced here/above, although fitting solid tires versus hollow vinyl tires from a kit entails more work given one is required to file off a raised locking lip cast-in to each rim. I found it well nigh impossible to remove the wheels from the axles (i.e. they'd spin a little for twisting, alas they wouldn't shift from the axles however hard I tried), but know too that for metal file as well as emory board work, one can safely file off the unwanted material without fouling or damaging the chassis detail for just restricting work to the topmost section of each wheel when each is positioned where the wheel house detail isn't provided; i.e. the chassis plate doesn't extend over any of the wheel/tire assemblies when things are disassembled and inspected close in. Although not identified on the sidewalls as 17 inch fitment, some AMT Mustang tires were done as directional Goodyear Eagle 'Gatorback' ZR45's, while if a search is set up on eBay restricted just to 'AMT Mustang tires', sellers exist who split out the parts contained within a plastic kit to make such affordable. Some very light touch-in work was required to address quality control issues in relation to the windscreen trim (in flat black again). Nothing too serious, and hardly a deal breaker... For applying lengths of Tamiya hobby masking tape and isolating the exterior side view mirrors, then popping a hole in a drug store poly bag to protect the rest of the body shell, I spray painted the mirror housings to match the door frame paint. Not difficult, whereas things look a touch better for so doing. Thanks... Mike K./Swede70
-
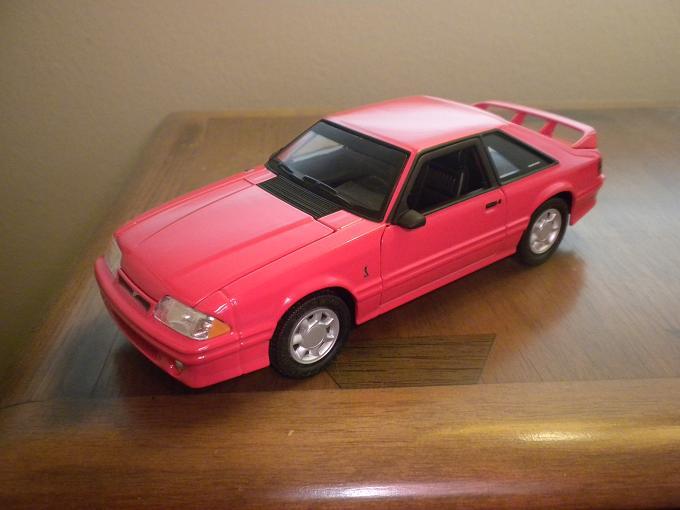
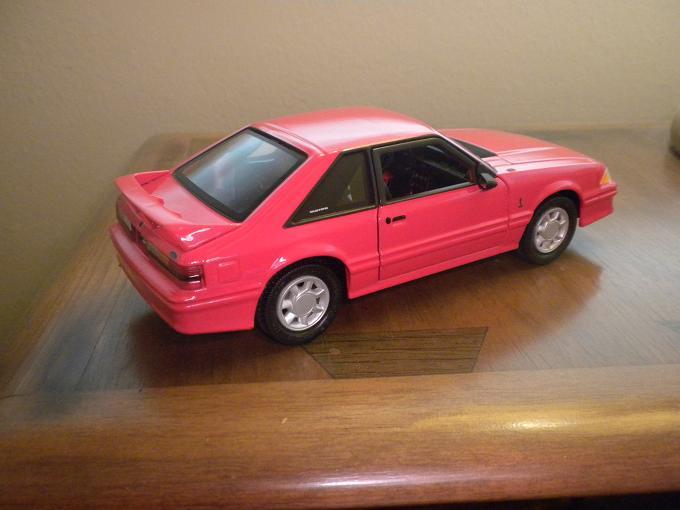
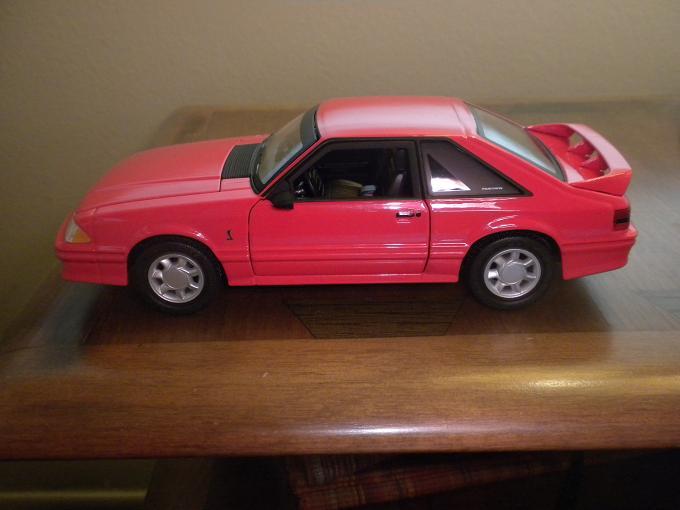
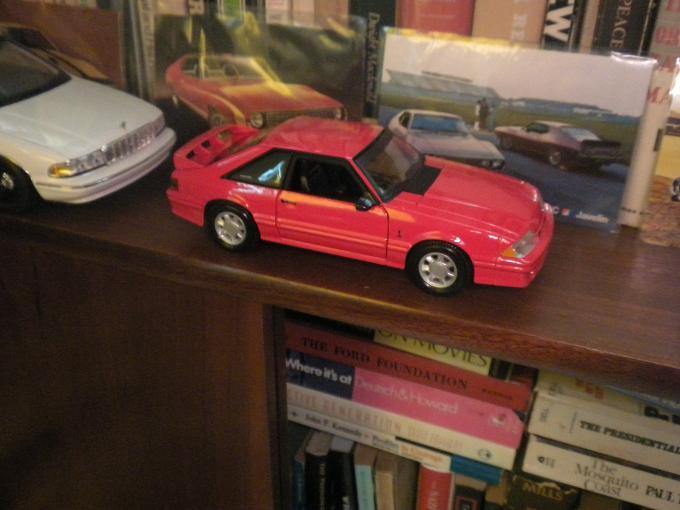
Greetings, Just briefly, this would be the 1:24th Maisto 1993 Mustang Cobra on the AMT tires referenced above. Sort of a trial to fit to the rims given the rims couldn't be removed from the axles and furthermore required file work to sand down a raised tire lock bead, but after about three or four hours things came into focus. I did try to file out and enlarge the inside diameter of each tire, although minimal success was registered here; i.e. eventually I just microwaved a bowl of water, immersed the tires, and persuaded the now semi-pliable result onto the shaved rims. Not huge fun in total then - but then what's made out didn't take weeks to achieve either. The side exterior mirror are now painted to match the door frame trim, so too the small radio aerial base atop the passenger's side fender. Thanks... Excuse the fact that the body hue appears pink in this set of photos, alas things appear far better when one has the model in hand; i.e. the body color appears a quite accurate and sharp fire engine red. Thanks... Mike K./Swede70
-
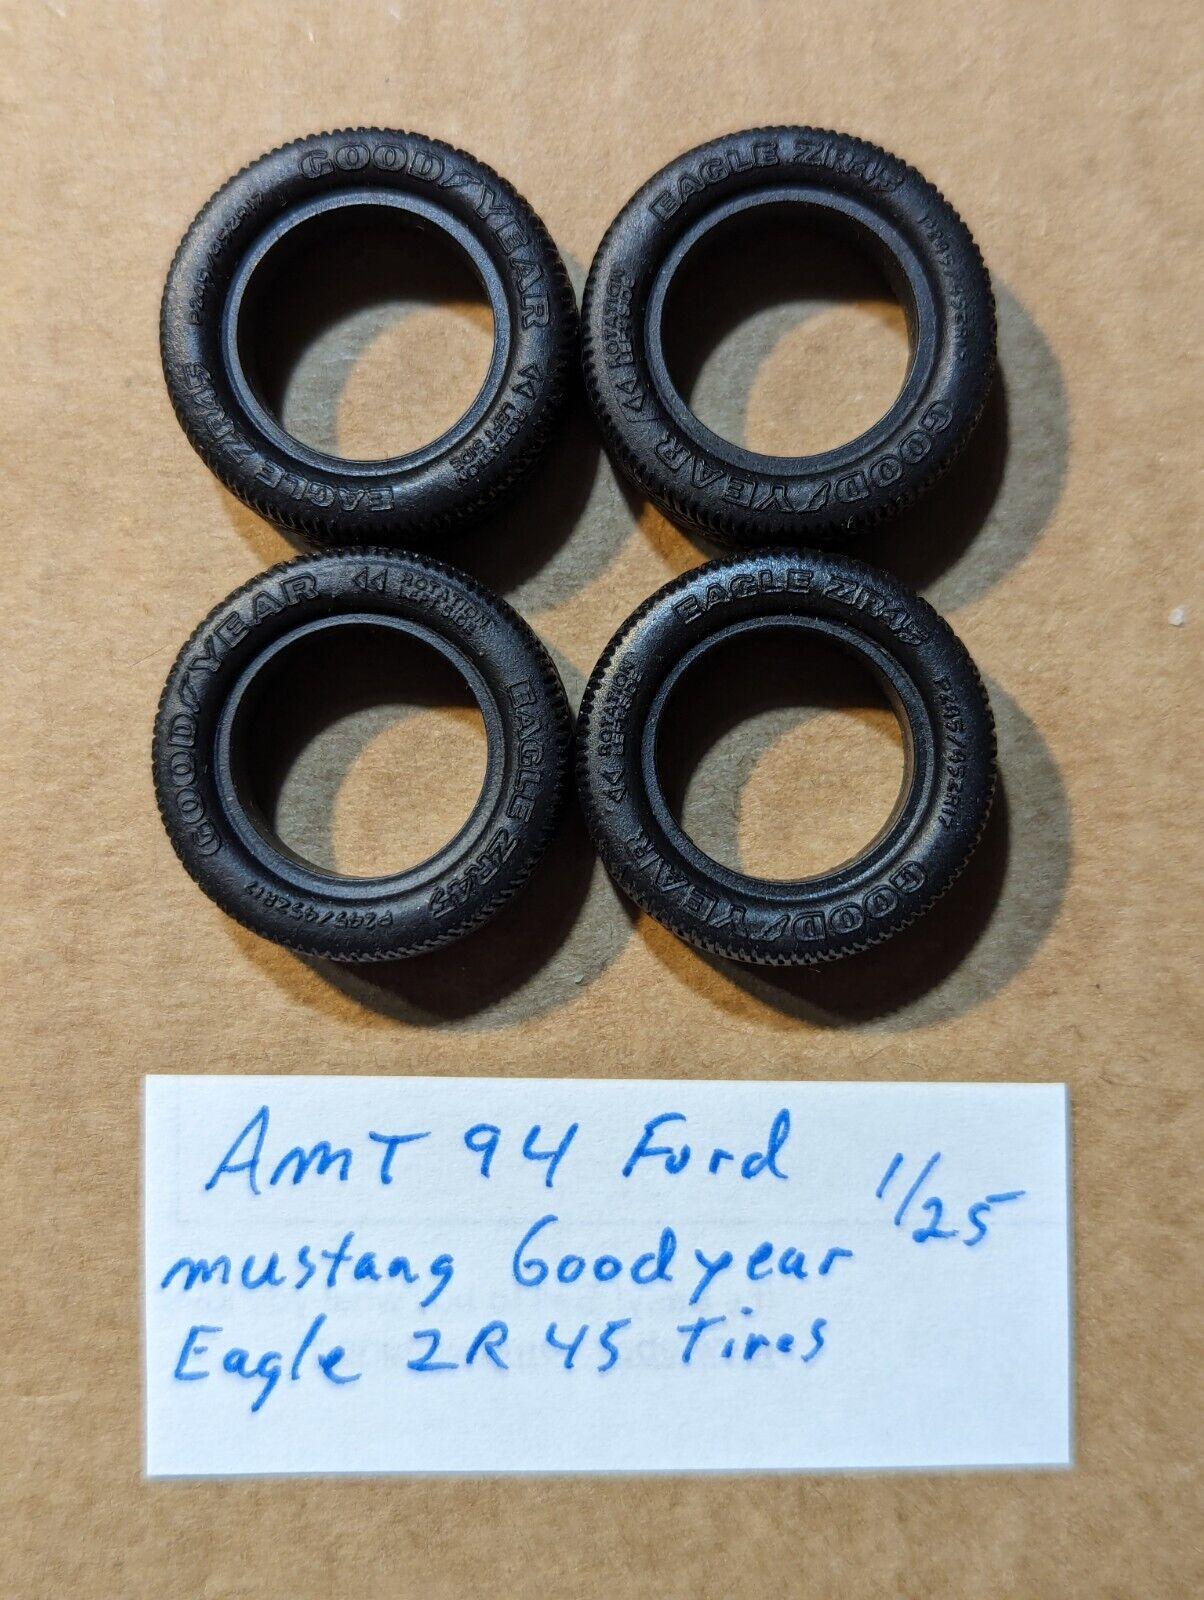
I don't have the 1:24th scale Revellogram tires to reach for/compare at present (sigh), although here would be an image of the 1:25th AMT tires I've ordered and await. Hoping too that grinding down material from the wheels to facilitate a fit won't prove a massive headache (i.e. surprisingly removing the wheels from each axle/shaft proved impossible to shift yesterday), whereas we'll see... As related elsewhere (I think!), Maisto just did one mold for the rims; i.e. don't expect the dimensional/alternate side with the wheel spokes/vanes leaning in the opposite direction here. Hey - the price point is low, and we can't be afforded everything. - No pictures availed, but I also applied a pool of black wash to the air vent/opening situated along the bottom front of the fascia to better fill it out, whereas if the model is tipped from side to side the small serrated vent detail on either end/edge of the opening can be filled with the black wash as such will pool into the recesses. I kept messing matters up for trying and cleaning things repeatedly, but then just applying too much and tipping the model proved enough to move the material/wash and flesh out detail that's discreetly rendered in the body tooling. Thanks... Mike K./Swede70
-
Thanks Angel for the advice and tip... I found a listing for what seems to be the same tire/tool split out from a kit yesterday and ordered the same this morning. They date from an early '94 release of the Mustang from AMT, the sidewall markings appear the same, hence I'm hopeful. In the main I'm quite happy with what we've been provided, whereas let's hope the blue kit turns into the teal release most of us would go for. Not sure if I'll pull my interior to paint the same from the red iteration just purchased, whereas I'm thinking of just ignoring the underhood area consistent with a claim that my example is maintenance free - so there! Kind thanks... Mike K./Swede70
-
Greetings, Not an epic project update this, but some movement for adding tail light pinstripe decals to suggest SVO/'93 Cobra Mustang-specific issue lenses as well as adding a photo etched lock cylinder to the hatch after first painting the same Testor's Model Master Titanium. The wheel paint was redone to address some irregularities along the edges, whereas interior work otherwise invisible was further attempted. Ugh - just adding four lines was a trial here, whereas my chances of cleanly adding eight more to complete the lense pinstripes seem hopeless. Still - a modest and useful difference... Concerning the wheels, previously I'd not painted the same from behind - namely in an aluminum hue with the slots taking up a bit of the finish. Here they've been redone, with the faces resprayed with Revell of Germany's 'Chrom' to clean up matters. Again - the latter is good stuff even as it's expensive to source. Thanks for your review of this post. Mike K./Swede70
-
Happy to see someone else found/glommed onto the new 1:24 Miasto 1993 Mustang Cobra which I grabbed today and intended to share here first(!). I spotted an example at a local hobby shop for a competitive $25.95 yesterday, while given what Fox-platform Mustangs usually do (note what's happening to the new 1:18 Greenlight range), I thought I'd better grab it quick. I've repainted the lock cylinders on mine black (the rear hatch lock cylinder isn't painted at all), touched in the top of the door frames to match the matte black otherwise smoothly applied (Revell of Germany Flat Black in a bottle worked nicely here), while maybe I'll attempt a tire swap with dead and truly valueless Corvette promotional models given the Maisto tires appear a bit agricultural. Still - a pretty sound effort from Maisto and welcome here. Happy in particular that they nailed the exterior color with a sharp fire engine red versus something milky and possibly a bit off. Apparently a kit/broke down version is coming - although the blue specified won't likely be the specific metallic aqua we'd otherwise desire. Thanks for posting the photos... Mike K./Swede70
-
Greetings, If it helps, for long I've hand cast resin parts of the bulk of what's made out consistent with supplying my own project needs, whereas typically I've worked out something informal between myself and the bare handful of other period SCCA Trans-Am enthusiasts consistent with making stuff available. Mass orders of anything I've done never seemed in the cards, hence I never formally went into business, but again - usually something can be finessed. Not everything strictly has a mold (i.e. the roll cages are hand bent and essentially one-off's), while some other elements await more elaborate application to create mold and hence duplicates of (i.e. specifically the hand sculpted wheel arch flares seen on the Chaparral Camaro above). Sometimes too it happens that the urethane molds I create pretty much give out and expire if you will, hence I'm prompted to create new ones to work up a new supply. PM me via my contact information and a dialogue may begin. Kind thanks for your notice... Mike K./Swede70
-
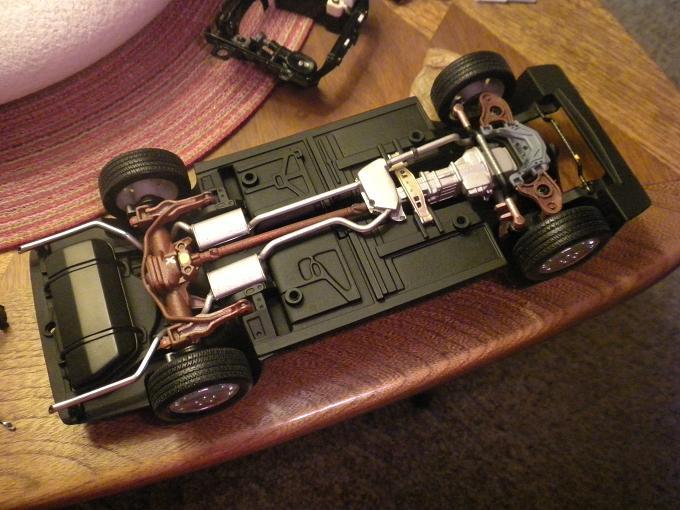
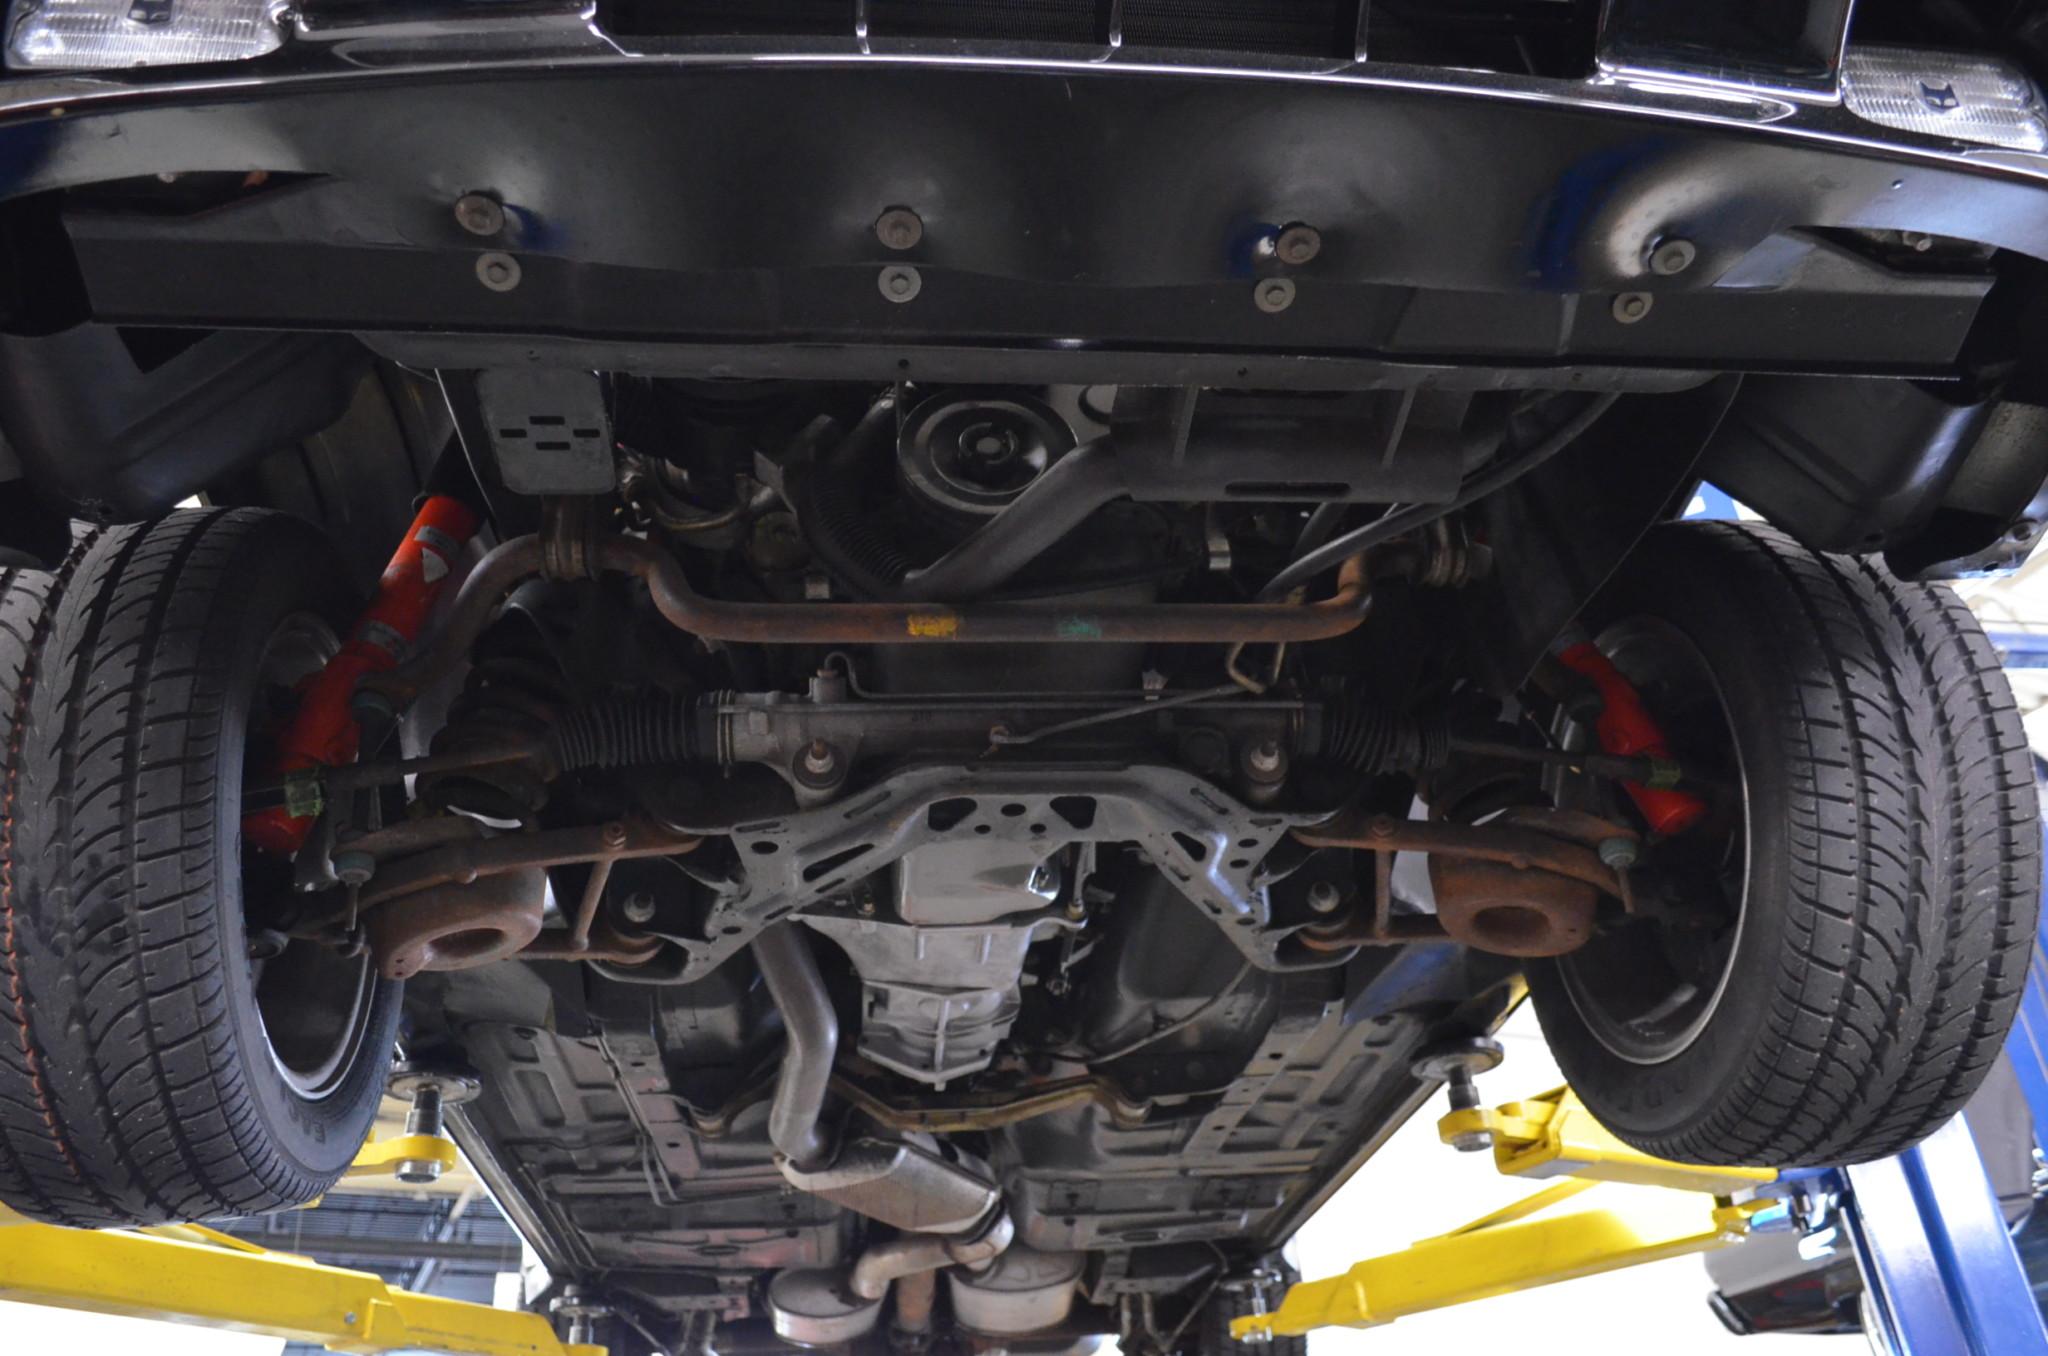
Greetings... Even with limitless funds and if one is on the hunt for an '80's performance topic in the American mold, usually the best examples are low-mileage 'survivors'; i.e. almost freakishly clean in a cosmetic sense, although rarely gone through with an eye towards achieving a high score at a concours level event. Not really knowing how to tackle things across the chassis for the dearth of fully restored examples otherwise not discovered online, here I've attempted to mimic the underbody condition of what equate to the best as-found examples that do pop up on the market. The 'Quadrashock' setup Ford employed in period to control movement of the rear suspension is being worked up, although it hasn't been fully sorted and is missing from these photos. Thanks... Sorry - this a huge 1:1 topic image. Neat that the tires here are original... Enormous again, but then it's helpful if one is referring to such to add assembly line paint markings, approximate corrosion across suspension components, etc. Note that the actually unibody is as clean as they come for all the distressing cosmetics of the various suspension bits. Hard to make out from my photos, each trailing arm was painted a light gray, the axle a dull iron before being overshot with Rustoleum Paprika (hoping too that at some point it'll decide to dry). Revell of Germany 'Chrom' aerosol spray was applied to the exhaust tips/extensions at what seemed an appropriate point, while note too that even as the tire sidewalls bear no markings, Welly did opt to accurately reproduce the Goodyear VR-50 'Gatorback' directional tread which is a nice touch. The differential 'X' paint mark was added, so too the slightly messy yellow paint blob applied to what appears a differential weight of some kind, along with other odd additions I hope equate to something reasoned. The front steer rack and pinion system wasn't tooled, hence I've made do with painting up the spurious rear steer worm and sector system to suggest a faintly weather rack and pinion setup. Thanks for your review of this post. Mike K./Swede70
-
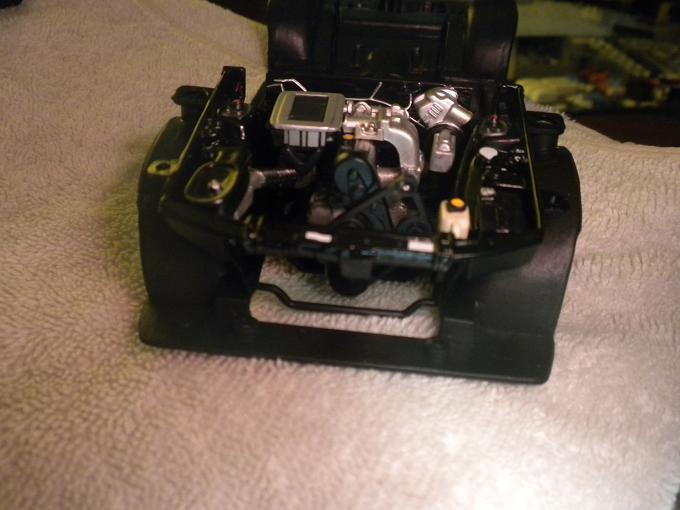
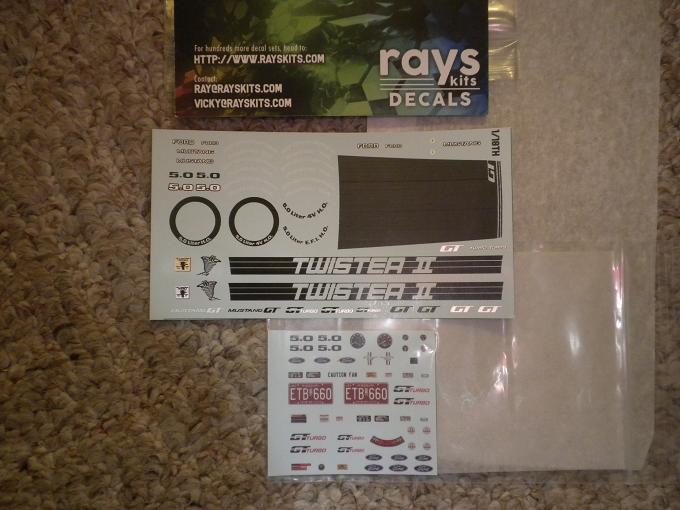
Thanks for the interest expressed - whereas hoping indeed to work up something qualitatively better (in some respects) versus the admittedly very early GMP effort brought to market so many years ago... Seen here would be some underhood progress, with various bits painted, the rather difficult intercooler stripe detail done with delicate bands of sheet plastic painted to suit and applied with a dental pick after dipping the tip of such in petroleum jelly to grab hold of what I couldn't have positioned accurately with fingers alone. Much is missing as I stumble and move along, although certainly the total effect is better than before. Silly Putty was employed as a masking agent for the top strut mount plates, noticed here finished in a dark gray that mimics an unpainted metal surface. Said putty is terrific for in situ. masking of detail(s) found on irregular surfaces, and although a bit tedious to setup and handle, it's nevertheless something inexpensive that generates results when thoughtfully employed. Not immediately apparent unless one has this particular model and/or tool to examine, the A/C compressor, drive to the same and compressor mount have been carefully removed consistent with this replicating a Competition Prep. credit option package. Also made out will be a rare 1:18th 1985 Mustang Twister II decal sheet blown up from the Ray's Decals art out of The Netherlands. Apparently from 2024 the option of having his 1:25th sheets enlarged to suit bigger scales is no longer offered, hence very fortunate I am to have secured one as discernible below. Some underhood decals afforded here will help matters out, in particular the battery decals and some warnings/declarations relating to service requirements, etc. Kind thanks for your review of this project update.... Mike K./Swede70
-
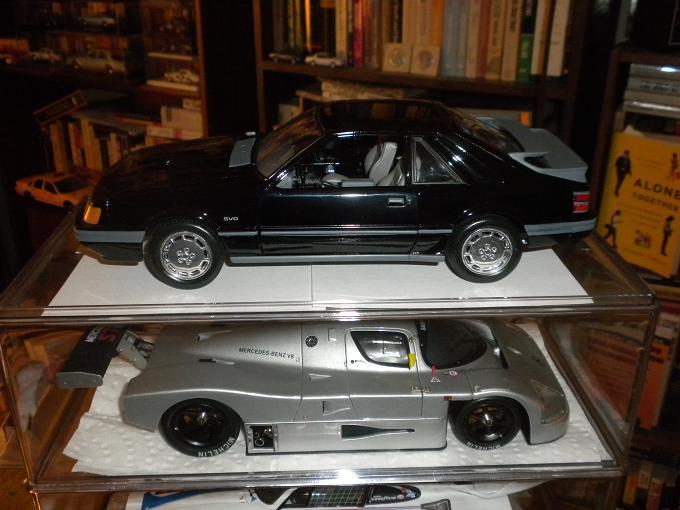
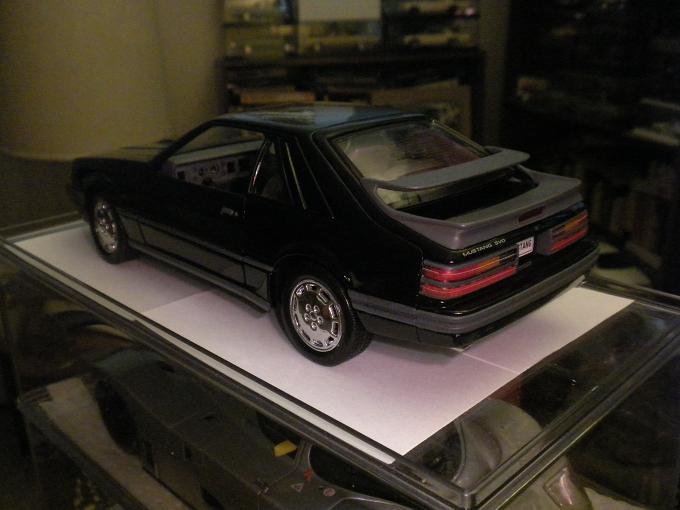
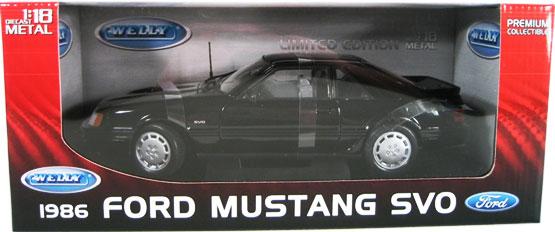
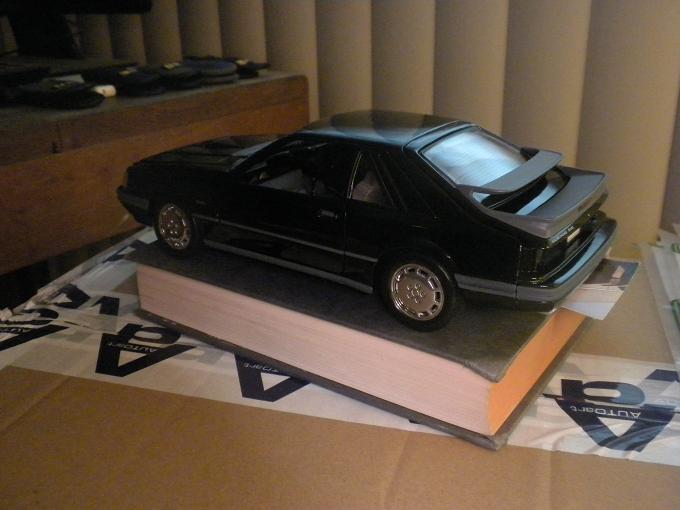
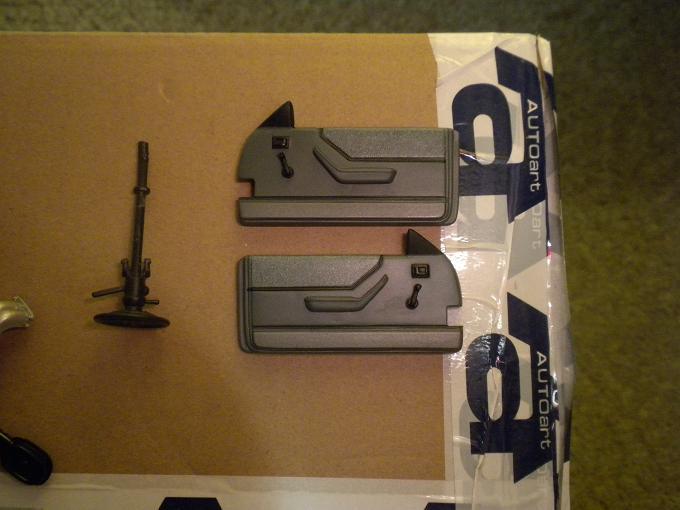
Greetings... Sort of an unexpected project this, for long I didn't give the Welly (or rebadged as NEX) 1:18the scale 1986 Mustang SVO release much attention given the build quality didn't seem all that great, the price point (when new) suggesting something cut rate and far less compelling than the GMP release(s) of old. With an example in-hand, my opinion has revised, although (choke choke) - so too has the second hand market price asked for such which likely can't be justified irrespective if one is intrigued by what I write and upload in terms of photos here. First, some initial photos: What isn't immediately apparent for reviewing the images discerned above is the parts count. I was greatly surprised to note that all of the perimeter trim (i.e. rub strips, etc.) are separately rendered, are easily removed (melted tabs accessible from behind can be ground off without issue), while most of the tooling is pretty sound and less toy-like than initially feared. - Seen below would be the same model with the wheels refinished with Revell of Germany 'Chrom' aerosol can spray which really perks things up even as the product is $30+ purchase, while from the 1985 model year the exterior trim was finished in a charcoal hue versus black, lending considerable contrast as-witnessed. Many parts (specifically, the side windows plus trim) are off the model at this juncture, but still - better than expected. - Likewise, an effort to refinish the tail light clusters largely succeeds even if I didn't hazard stripping the lenses entire for fear of burning the clear plastic panels/parts rendered by Welly. Mostly what's made out here is a combination of Tamiya lacquers combined with tinted and pearlescent clears from the same firm. The framing witnessed around the colored elements was likewise redone, needing to be charcoal-colored to match the rest of the exterior trim refinished up to this point. Not perfect, although far from terrible. - ...and finally, a quick interior door panel/interior door trim project. The Welly release comes through as a normal high-standard equipment iteration versus a comparatively bare Competition Prep. version sans power door locks, power window lifts, A/C or radio. Here I ground out the door controls, fit refinished Yat Ming/Road Legends 1970 Rebel Machine window cranks, and carefully refinished the surfaces for employing what seemed miles of Tamiya yellow masking tape. The project is unfolding smoothly enough - thus far anyhow! Thanks for your review of this post... Mike K./Swede70
-
Greetings... I was pondering the remains of a first issue silver MPC Mustang SVO model and was wondering if anyone had recoiled as I had with respect to the rather underwhelming B.F. Goodrich hollow vinyl tires usually found within annual kits of this period. Odd I didn't think of it earlier, but has anyone ripped apart a later almost too cheap to worry about MPC promo in search of low profile Goodyear tires to help matters. Yes - I know they wouldn't strictly be period Goodyear VR50 or 60-Series 'Gatorbacks', although I think it would be worth trying to improve upon what has always been a shortfall of these kits. For a target promo or period kit to try upon, I was thinking a Dodge Stealth might possibly be sacrificed without anyone strictly taking notice. Obviously and if no one chimes in, I'll likely just spend the money and see what comes of the idea. Kind thanks for your review of this post... Mike K./Swede70
-
Greetings... Just something quickly. As Don Adams might have said across the space of an episode of Get Smart back in the day, this would be 'Evidence of the famous brass wire employed as a paint brush/applicator trick' in a decidedly old school vein. I wanted to reproduce discreet mounting hardware to hold the turn signal fill panels consistent with lending a bit of visual interest up front, hence a length of brass wire and some chrome paint was employed to do this by (my unsteady) hand. Not laser precise perhaps, although not so horrible as to suggest the worst of the American folk art tradition. Thanks... Mike K.
-
Greetings... Variations on a theme for seen is another Replicarz '70 Chaparral Camaro (not mine) with late-season fender accessory/contingency sponsor decals, while also made out (in brief) would be small dots of paint applied to the center of the inbound round rear tail light lenses to suggest back up lamps. Removing all the carrier film from the fenders wasn't huge fun (speaking of the decals that were very strongly adhered), whereas the decals substituted in constitute a mix of items sourced from sheets that are thankfully replenishable. Kind thanks... Mike K.
-
1968 RKE/JRT SCCA Trans Am Javelin
swede70 replied to swede70's topic in WIP: Other Racing: Road Racing, Land Speed Racers
Greetings... Seen would be the beginnings of a second attempt at a '69 Ronnie Kaplan Engineering/Javelin Racing Team flared SCCA Trans-Am shell, the difference being that I've opted to graft the rear clip of a period glue burned '69 Javelin SST annual kit to the front two-thirds of the (now usual) Jimmy Flintstone '70 Penske Javelin flared resin body. For so-doing I can add bubble flares to stock-profile standard rear quarter panels, retain the crisp shape(s) of the annual tool where material was saved, and generally sidestep the odd tapered profile of the J.F. effort as things narrow towards the rear of their resin effort which causes fit issues when adding the tail light unit and bumper. Very tedious to mount the effort thus far, although happily nothing has strictly shattered - yet. A fine study of the 1:1 topic at rest... A new urethane mold offers up fuller front and rear trim caps/extensions. I'm hoping to do further copies consistent with allowing for the possibility of blending the additions on the front, grinding off some material and working up thinner fender trim caps to better match the actual topic. Nothing permanently glued here given things are still in flux, but not horrible with regards to gaps and within the realm of being further refined. The flush exterior door handles so difficult to paint/finish are witnessed half drilled out in anticipation of adding resin clones cut out from a dead Jo-Han Javelin/AMX shell and rendered separately. At least I can try (and retry) finish options apart and away from the painted body (at some point then) without wild risk of either damaging the finish or being sharply underwhelmed by a compromise/rushed effort on the latches. The bubble flares stand to come, having been done once before for forming sheet plastic laminate pucks finally filed to shape and carefully fit. Hoping to swap all the '69 RKE/JRT chassis and interior build over to this refined effort if all proceeds apace - ah, a touch of progress then! Thanks for your review of this post. Mike K.