swede70
-
Posts
727 -
Joined
-
Last visited
Content Type
Profiles
Forums
Events
Gallery
Everything posted by swede70
-
Looking nice, whereas it sits well too. Thanks for sharing... Mike K./Swede70
-
Greetings... Seen would be yet another attempt at a four-point cage (with additions from here not all that difficult), reflecting that learned from four tries at the main hoop dimensions before things came into reasoned focus. Too wide, poorly judged bends, asymmetry, etc., scuppered previous efforts - although matters are better now. Although the dash isn't in, the plastic 'glass' insert is, as is the interior door trim. No collisions, no conflict then... Also witnessed is an attempt at the abbreviated side pipes for the recycling of some 1:18 ERTL 427 Cobra S/C material combined with heat bent plastic rod. Tubing benders on hand aren't strictly allowing me to employ brass or aluminum for the fairly sharp bends desired and required here, hence hunting for a better way forward. Happily two points on the chassis where screws secure the plastic chassis plate to the metal body shell can be half covered up and disguised as mounts for the exhaust pipes leading to the side pipes/exhaust dumps, thus things won't look quite as terrible beneath as I'd feared. A real drag on the works, in 1:18th scale parts are often scarce and/or expensive when they can be sourced, hence pressure exists to economize however and whenever possible. Quality parts and subassemblies can be had, but it takes the fortuitous discovery or the help of friends to secure this or that to push ahead at times given one can basically run up against a brick wall if nothing strictly exists to work with. Out of sight, some urethane is curing around both new and old parts to duplicate, and this fact should help me maintain modest momentum. Thanks... Mike K./Swede70

-
'66 Shelby Mustang Group II
swede70 replied to afx's topic in WIP: Other Racing: Road Racing, Land Speed Racers
Looking very crisp and controlled; i.e. very nice indeed. Thanks for the continuous flow of well-photographed and documented updates... Mike K./Swede70 -
Just a short update this... Happy to turn up something unexpectedly via FB Marketplace, this an AMT '64 Tempest convertible assembled plastic kit which will yield a hood, as well as a tail light cluster plus tail light lenses for my early-season 1:25th scale '64/'71-season Gray Ghost evidencing the window framing before such was cut out entire. An earlier Scale Coachworks flared shell purchased long ago is up on wheels and is configured to reflect a later-season spec., hence I have two examples in 1:25th scale based upon the AMT annual tool. Unfortunately the stock bumpers were discarded from the model purchased for $20 back earlier today, but still - a step forward and a means to save money given period parts sourcing is typically tedious and expensive both. The hood is soaking in Scalecoat, while I hope it'll strip cleanly. Thanks... This would be the cleaned up (for molding flash) second Scale Coachworks Gray Ghost shell with enlarged wheel arch openings (reshaped a bit then) and what more or less box stock parts I've collected up to this point to flesh the build out. A rear bumper still needs to be sourced, but in the main it's good. Seen to the right is the very clean 'new' tail light cluster w/lenses, while to the left may be seen some period screw-bottom hardware. The hood is soaking, while less the other parts discerned in the first photo, here would be the rest of the kit. Happy to have the same. Mike K./Swede70
-
Thanks for the kinds words and notice... A little raw, but this would be the first attempt at a new rollcage for working up a four-point design over an evening. A touch wide, the main hoop bends situated a bit low, the mid-level bars also set too low; i.e. the usual given I almost have to learn again what it is I'm doing before results begin to match expectations. It helps to have spares in relation to everything with special reference to possessing a bodies and interior castings consistent with reducing stress most certainly... Moving along, the cast-in interior console was cut out, while the locating tabs, pedal assemblies and carpeting texture were filed off the floor. Plugging the floor consistent with cleaning up the transmission/driveshaft tunnel calls out to be performed next. Tedious labor and largely invisible. Thanks... Mike K./Swede70
-
The cut would be made inside the hood stripe, hence the curves on all four corners plus the front 'vee' would have to be taken into consideration. Dragging a metal ruler atop the art likely wouldn't do the stripes much good, thus the search for some other means to go about things. Thanks... Mike K./Swede70
-
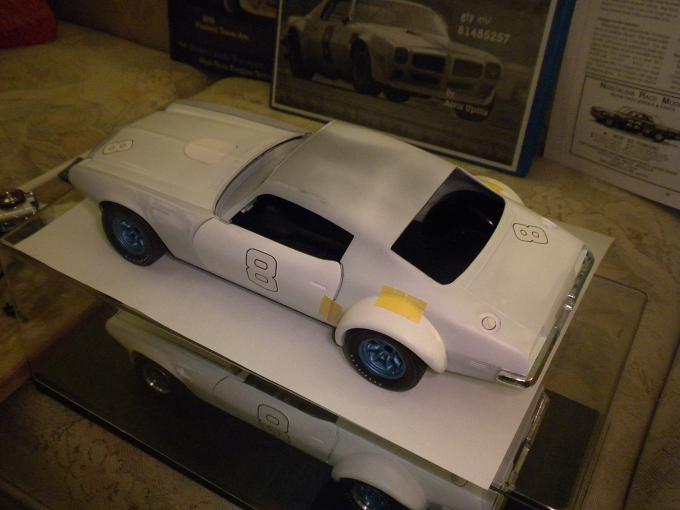
Greetings, I'm wrapping up a custom decal order for a 1:18th diecast topic consisting of '70 1/2 Firebird Trans Am over-the-top stripes in addition to other graphics that were part of the livery run in the SCCA Trans-Am Series. In particular, I'll need to cut out material from inside the stripework on the hood to allow for the shaker hood scoop to clear things, and given it wasn't an option to order decal work commissioned in a pre-trimmed or outlined fashion anyhow, I was thinking what could be done to cut the material needed to be removed without stressing the decal art/paper more than was strictly necessary? Maybe too the fact that things are a bit larger in 1:18th makes such an approach sensible, while if the cut could be consistent across two builds, this too would be a plus... https://cookiecutter.com/make-your-own-cookie-cutters.htm Seen above is just a test fitting with color photocopies cut out and craft glued in-place... I suppose I could apply the decal art suggested above and trim such for use of a deft hand and light touch - but I just might not be that good. Anyhow, tossing the idea out there, inviting responses for better or for worse. Thanks... Mike K./Swede70
-
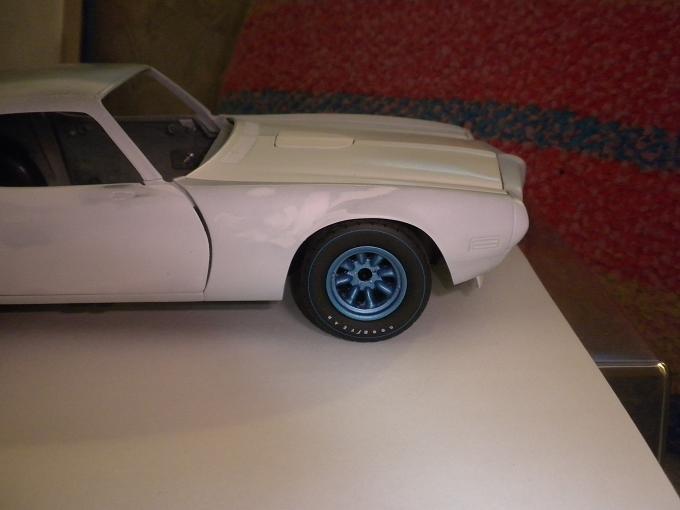
Thanks - happy the artwork is now finalized and almost ready to send to the printer... Avoided until now would be subtle front flares needed on the '70 Laguna Seca Jerry Titus effort. I recycled some thin resin lips that almost appeared as oversized nail clippings from my collection of past castings, filing and shaping such to employ as overlays atop each arch opening as noticed below. In addition, tiny slivers of material were added to the ends of the front spoiler element guided by select period photos. This latter material may well be cut off if I can't convince myself the topic was configured in this manner for the race itself... T/G Racing began with one GM-supplied engineering prototype, but also a mundane '70 350-powered base Firebird going into the season, hence standard argent-colored Firebird grille mesh featured. To my understanding, T/G wasn't afforded bodies-in-white and started with normal production examples prior to laborious conversion and fabrication undertaken by the team to compete in the SCCA Trans-Am Series that year. Generally the front flares look acceptable, although the usual CA glue application and putty work to cleanly integrate each will further be required before matters are sorted. Each lip profile is a bit large at this stage, although I reserve hope that I'll be able to shrink them a bit before adhering the pair to the body, applying putty and perhaps filing out the results from behind so actual clearance might be afforded. Thanks... Mike K./Swede70
-
Greetings... View of what will likely be the final draft of artwork comprising the 3 Amigos Decals livery, seen here on a '73 shell largely unmodified but for the removal of the usual exterior tampo prints. Alternate contingency sponsor/accessory decals were likewise worked up, as were shorter side numerals made up of a smaller loop atop one larger. With this, hopefully I can return to other necessary project fabrication. Thanks. Mike K./Swede70
-
Tamiya TS65 Pearl Clear questions
swede70 replied to bh1701's topic in Model Building Questions and Answers
Another use was to tape off the tampo-printed tape stripes on my 1:18th scale diecast '70 Rebel Machine to suggest that the colored sections of the stripes had a reflective quality sort of like '69-'70 Mustang BOSS 302 side stripes if this makes sense. Tedious to do, but the effect was achieved... Mike K./Swede70
-
Tamiya TS65 Pearl Clear questions
swede70 replied to bh1701's topic in Model Building Questions and Answers
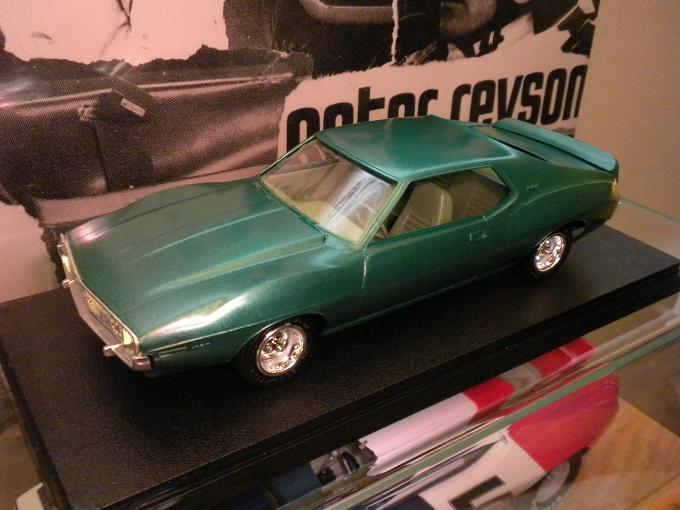
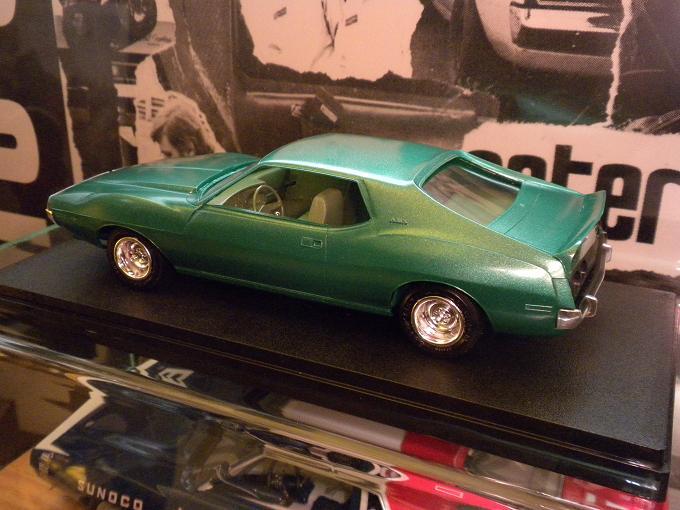
If it helps, it was semi-standard practice back in the day for 1:25th scale plastic promotional models to be molded all in one color, although often the body received a thin layer of clear (sometimes with a light color tint besides) with a touch of metallic in it to convey quality and of course to match up to a hue afforded that year. The contrast being the interior and body was often subtle (not quite so as-witnessed below!), but in the main the effect was appealing. Here I've tried to work up a more or less 'missing' promo offering to fill out my Jo-Han Javelin promo collection, and for applying TS-20 Metallic Green followed up with TS-65 Pearl Clear, the results were really all I could have hoped for. MPC small Goodyear Polyglas GT hard vinyl tires and AMT 'Volcano' wheels round things out to yield a 'would be' '73 full promo vs. just the snap together option. Thanks... Mike K./Swede70
-
Greetings... Still sizing artwork for the decals, the greater effort outsourced to 3 Amigos Decals and the considerable patience of S. Lopez who's done a lot here. Numeral size tweaking remains, nearing the end then. Also seen would be some minimal work done for fabricating cowl grate fill panels on the '70 Laguna Seca Firebird, and subtle repositioning work on the carburetor/air cleaner which proved all that was necessary. Thanks... Mike K.
-
'66 Shelby Mustang Group II
swede70 replied to afx's topic in WIP: Other Racing: Road Racing, Land Speed Racers
Likely examined before, this would be link to the Dave Friedman collection via the Benson Ford Research Center referencing the '66 Sebring 12 Hour race. I haven't reviewed the holdings complete, but many are promised with a few especially clear images of the topic popping up almost immediately... https://www.flickr.com/photos/thehenryford/sets/72157629575463746/with/6985517460 Mike K./Swede70 -
As mentioned above, I would have four for you should you wish. Thanks... Mike K./Swede70
-
Greetings J.C., Indeed - alternately popping up in either Jo-Han or AMT kits, typically NASCAR topics. At least with my earlier Javelin Trans-Am efforts, it seems a good front tire. With regards to the rears, certainly consider ordering or at least contemplating Plastic Performance Products #6569G 1965-1969 Goodyear Style Stock Car Tire that also includes excellent Goodyear Blue Streak waterslide 'Blue Lines' complete with untilted or italicized GOODYEAR sidewall lettering in the appropriate small style. Yesterday's Decals was tapped to do the sidewall decals, four to a set of four tires, hence one purchase basically covers you for two sets of 'rear' tires and sufficient sidewall markings for whatever you can cobble up for searching for 'fronts'. I've shopped for new/collected likely old tool tires searching for better, although the above seems to be where I return to concerning period sedan road racing rubber. I should have four of the first option if you'd want to reach out. Wishing you well... Mike K./Swede70
-
Maybe the decal sheet is/was produced by UMi Modelwerke? I remember purchasing two sets, scraps of which I still have. I have the 1:18th Sun Star diecast model, regretting deeply that the color chosen with regards to the red/orange definitely trends towards orange on both releases afforded even as they could have changed things the second time 'round. Neat topic surely... Mike K./Swede70
-
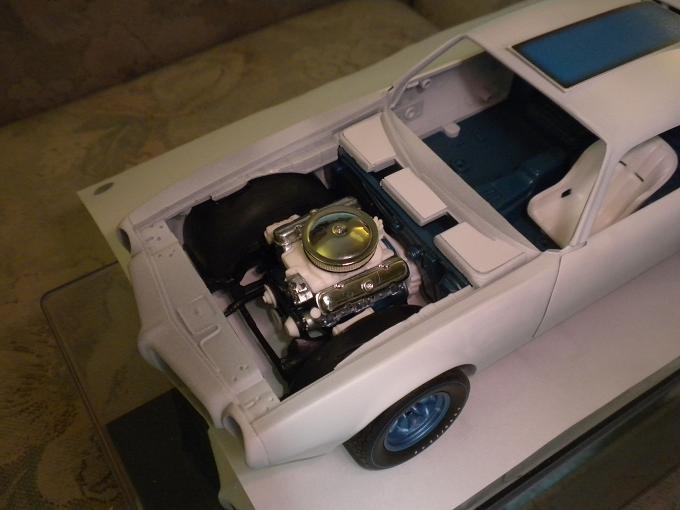
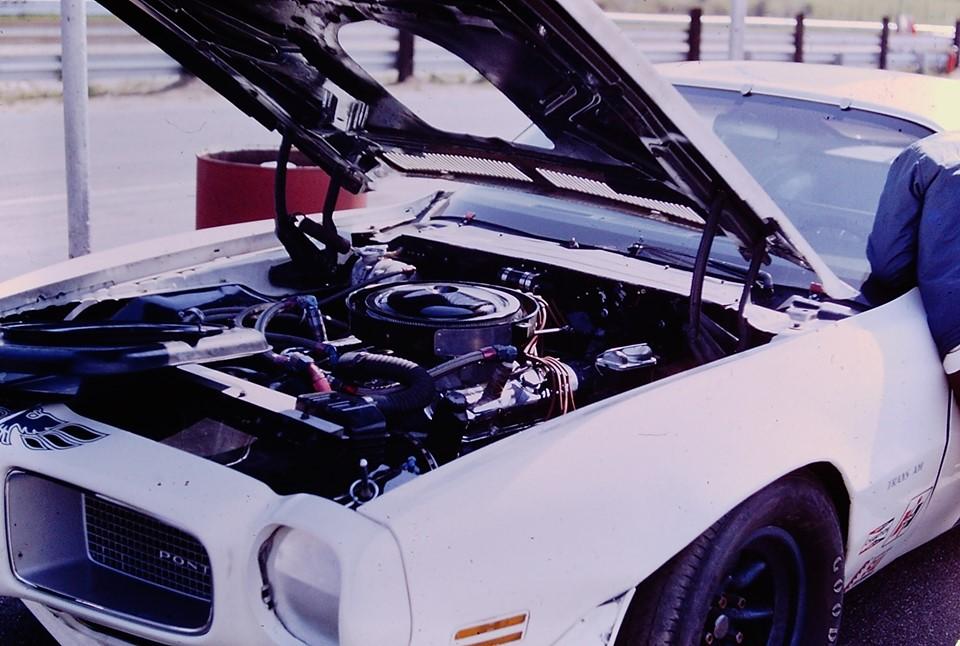
Greetings... Not quite as elaborate as the earlier '70 Mid-Ohio effort, here I'm beginning to hash out an engine for the '70 Laguna Seca entry. The so-so engine block and accessory drive remain, although a scratch built intake and Lakewood explosion-proof bellhousing have been added (these cast in resin and shared across Pontiac SCCA Trans-Am projects), as has a GMP Muncie M22 four-speed transmission hidden further back. A GMP Penske Camaro driveshaft with U-joint detail stands to be introduced underneath. The distributor base and cap are situated a bit too far forward, this mistake in turn shoving the intake further forward than it ought to be. The air cleaner is a GMP '67 Penske Camaro item that usually appears a bit odd for shape on other topics, although it looks pretty accurate here. Top-to-bottom dimensions concerning the engine assembly mated to the low-slung second generation F-body platform equates to a tight fit, although I hope things will in fact work out for further finessing things. Kind thanks for your review of this project update... ...seen at Lime Rock, CT. not long after the '70 Laguna Seca contest. I'm guessing that the open element air cleaner was run sans the largely stock air cleaner housing base made out here. Notice how the team fabricated patches where the stock snorkels might otherwise be witnessed on said housing base. ...also made out are trimmed cast resin GMP Penske Camaro upper control arms fit after filing out the so-so ERTL rendition of the same detail. ...waiting for adjustment to the distributor installation, but otherwise looking more or less appropriate. A GMP '70 GTO Judge radiator will likely be fit here. Thanks... Mike K./Swede70
-
Greetings... Seen would be the top stripe artwork worked up and negotiated out with 3 Amigos Decals across days. Accessory/contingency sponsor decals to suit the same pair of projects has also been completed even as the work effort out of sight. Generally looking good then, and likely something that could also be employed on my stock ERTL '70 release - something modified, painted and foiled short of refinishing the body shell years earlier. Thanks... Mike K./Swede70
-
'66 Shelby Mustang Group II
swede70 replied to afx's topic in WIP: Other Racing: Road Racing, Land Speed Racers
Excellent work J.C. Certainly appearing trim and well-engineered for your intelligent upgrades. Anticipating further progress... Mike K./Swede70 -
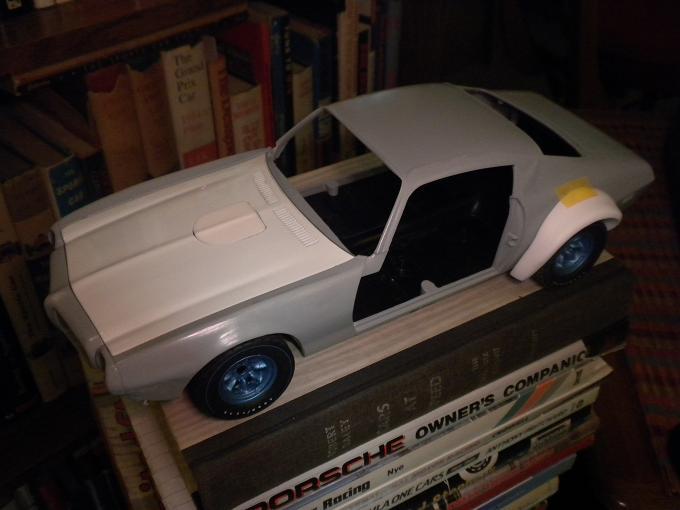
Work of a day (and a long one at that), here the rear flares have been bonded in place and blended into the surrounding panel work. Thanks... Mike K./Swede70
-
Greetings, Witnessed are a pair of refueling ports drilled through the quarter panels in deliberate stages. Far less painful an experience versus what was encountered the first time around on the '70 Mid-Ohio iteration, here the work was done fairly quickly. The flares on the back stand to be bonded and blended into position next. Thanks... Mike K./Swede70
-
It cleaned up nicely and is certainly looking trim. Care must be demonstrated with the Mark I and Mark II finger removers as I can readily attest to! Thanks for sharing your progress... Mike K./Swede70
-
Thanks for looking in and all the continued encouragement! Sometimes I overlook the obvious as a stumbling block, and here I finally tossed out all my sandpaper scraps, purchased anew and employed proper dense rubber sanding blocks to rebuild and recontour the front fenders. Air extractor vents were previously filed down and hidden under an application of putty, albeit the surface contour achieved wasn't exactly impressive. Needless to say the results discernible below are far better, while so too the doors which have had the perforations to site the exterior mounted rear view mirrors and clumsily rendered exterior door latches plugged and finished off smooth. I appreciate your review of this update... Mike K/Swede70
-
Thanks for the kind notice... Here the cast-in side window weather stripping as well as the raised rain gutter trim was alternately filed off or sanded flat. Metal files, emery boards, sanding paper teamed with body shop rubber sanding blocks was employed to very laboriously take control of matters here. In addition, the trunk panel openings were scribed across the area where the rear spoiler had been sanded off, the front wheel arch openings were radiused slightly, and finally, the top of front fenders as they merge with the base of the windshield were filed down a bit even as they require further work. Hardly noticeable in sum even as all of the above took time and created considerable debris. Thanks... Mike K./Swede70
-
Thanks for the additional information - they both look very nice. Eventually I'd like to find/snag a Matador Red example, and with time I will. I hope in time that we'll be afforded other colors literally out of the box. Mike K./Swede70