Joe Handley
-
Posts
8,933 -
Joined
-
Last visited
Content Type
Profiles
Forums
Events
Gallery
Everything posted by Joe Handley
-
I love watching that chase just for the looks on the gunman's face, it's a combination of shock, fear, and terror, like he was actually riding with Hickman the whole time and didn't expect a ride like that! I wouldn't be surprised if the more heavily abused stunt vehicles are just scraped after they are done with them, especially if there is body and frame damage too.
-
Added some .030" quarter round to the outside of the .040" quarter round surrounding the .030" sheet skirts as well as some .040" to fill the gap between the sheet and kit lower quarter panel bottoms.

-

4 Foot Effy!
Joe Handley replied to Joe Handley's topic in General Automotive Talk (Trucks and Cars)
It probably wouldn't be much different than what Revell did with their '69 Camaro kits, resize it to 1/25 and print out a master to to resin cast. -
Just trust me and check this out! https://www.kiwimill.com/blog/2017/01/20/ford-f100-truck-build-lots-pictures/
-
1.1 cars that got away
Joe Handley replied to l88 chevelle's topic in General Automotive Talk (Trucks and Cars)
For me, it would be my first car, an '85 Lebaron GTS with the factory 2.2 Turbo 1, Sport Handling 2 suspension and wheel package in black with gold pinstriping and blood red leather,. Be pretty awesome to still have the dark green '70 Charger R/T with the 440 Six Pack/4-Speed/Track Pack my folks used to own, at least one of the old G-Series Full Sized Chevy Beauville Vans we had, even the '88 Cherokee Dad used to own, which was so stripped down that is didn't even have a passenger door mirror, but it did have the 4.0l/AW4/242 TRIO with factory multi spoked 15x7 aluminum rims! -
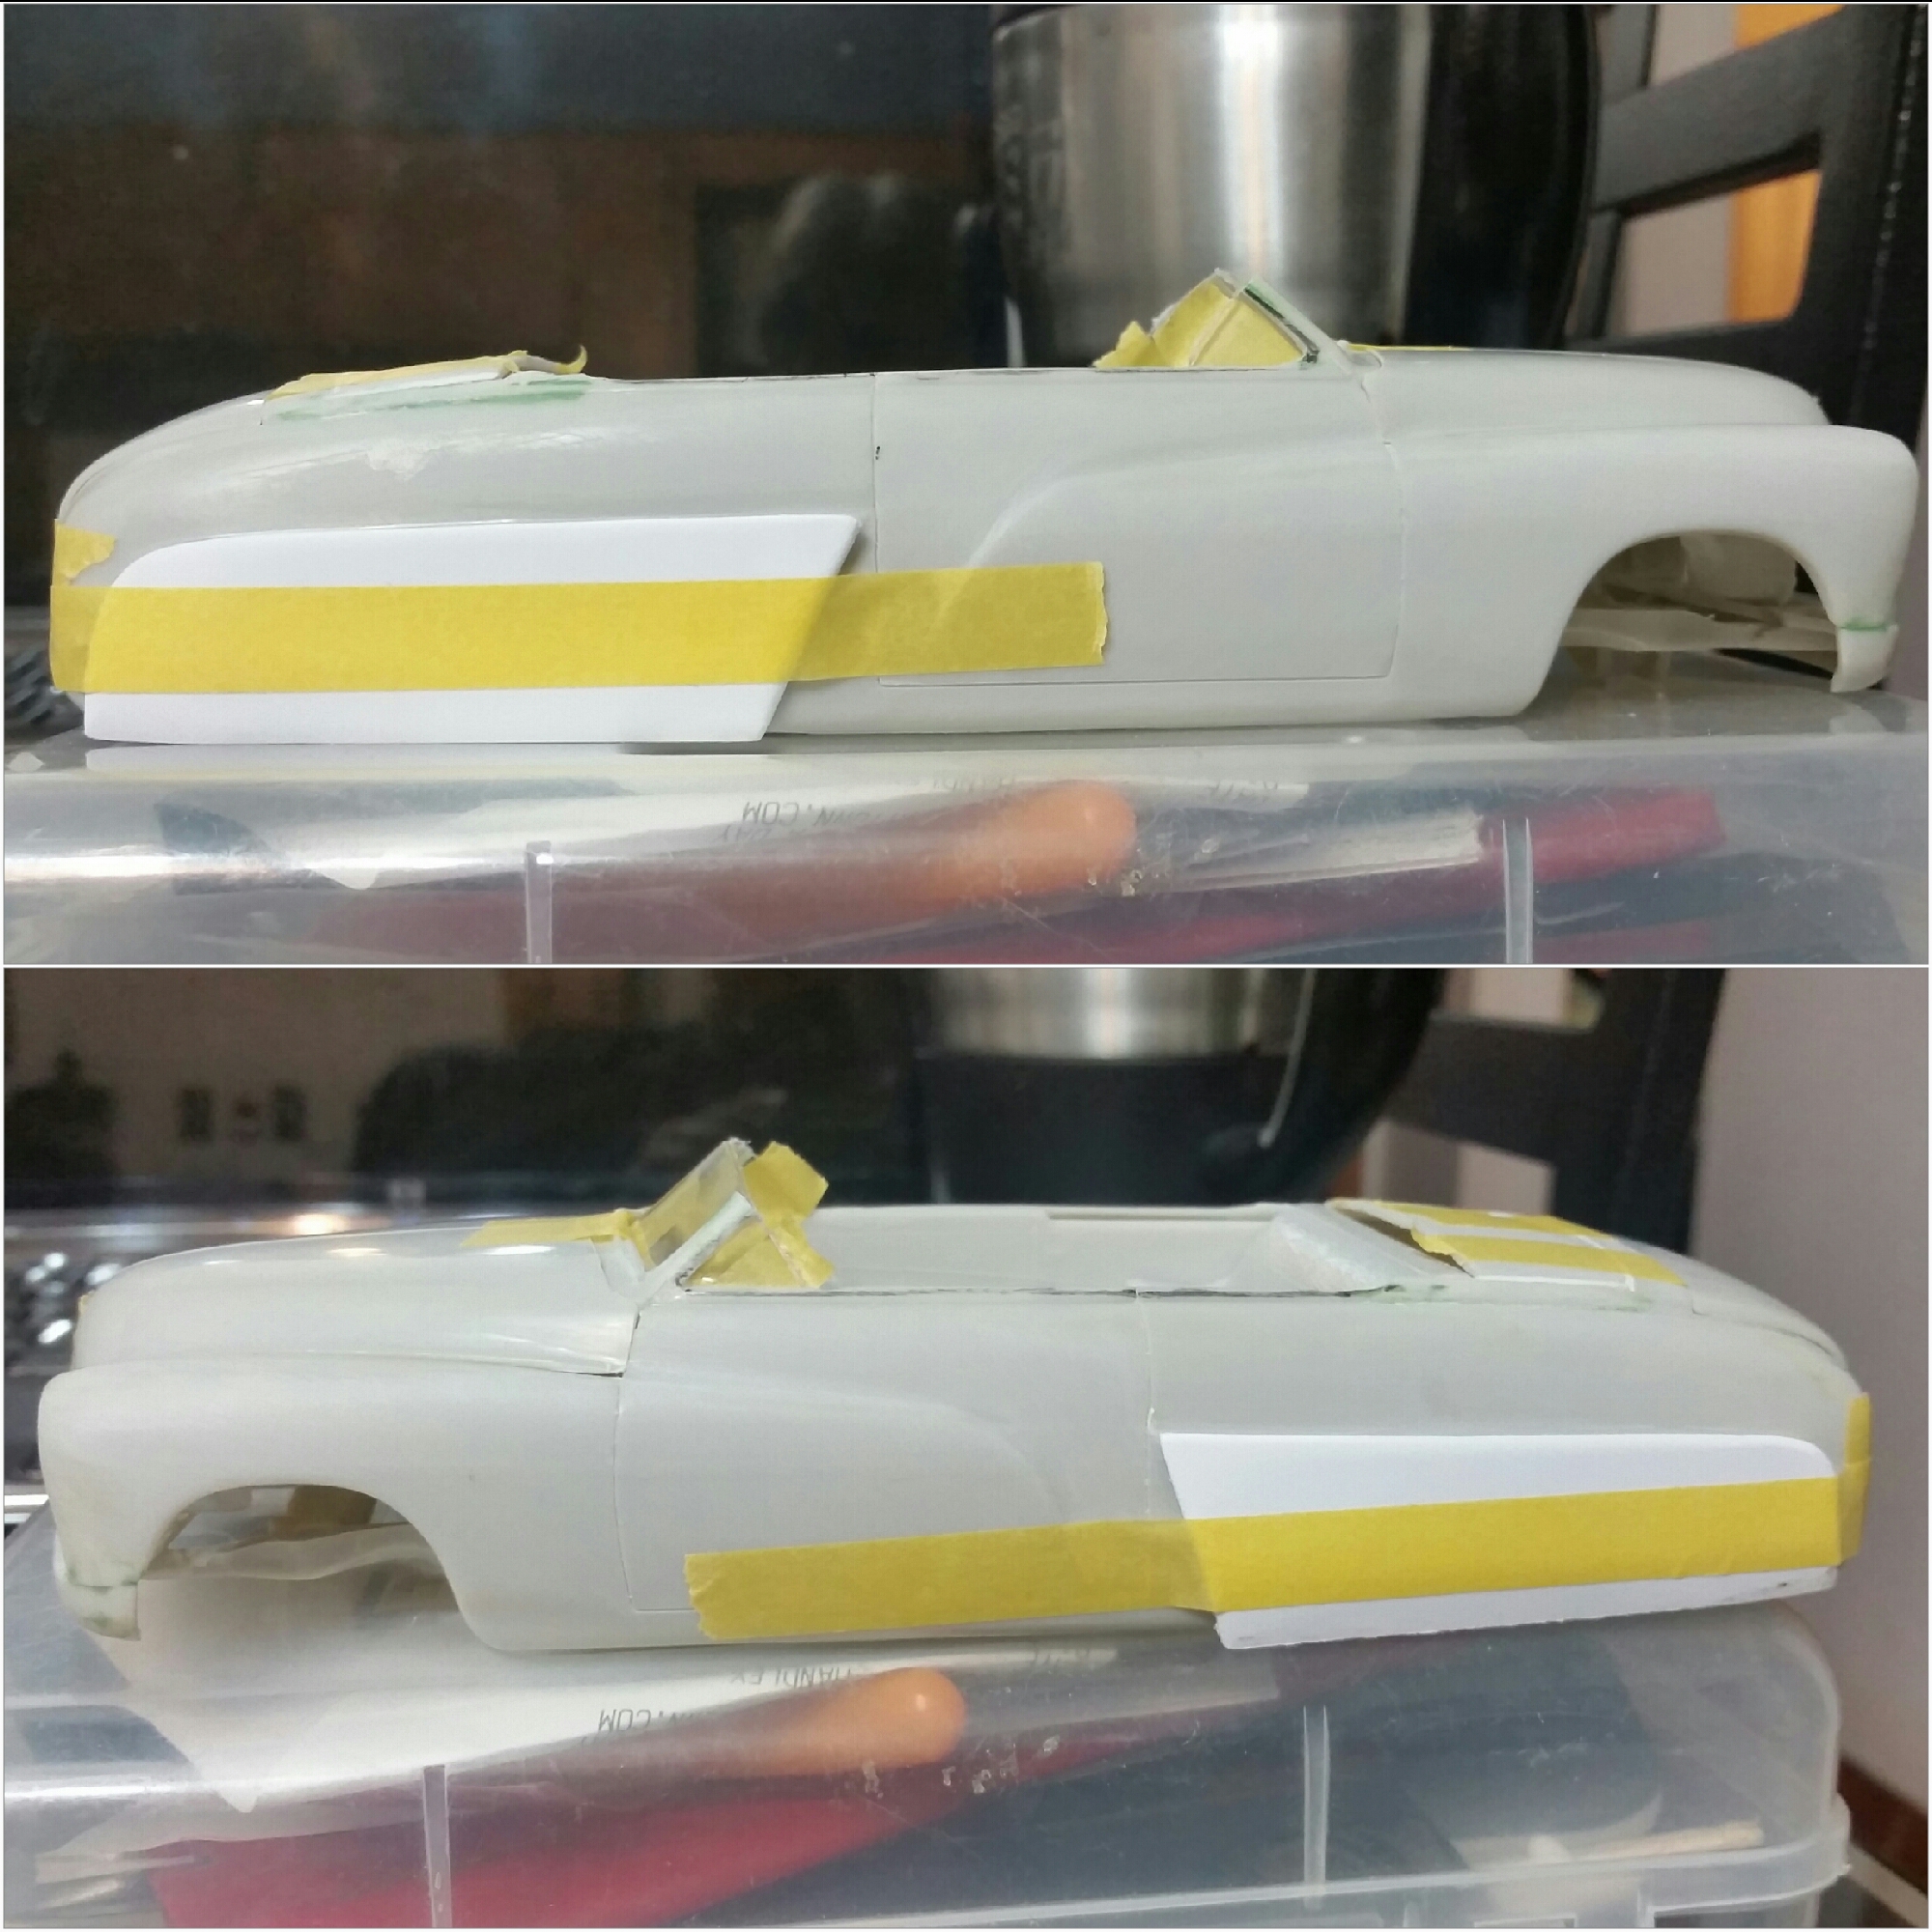
Turns out the skirts, as attached, didn't quite fit as I liked, so I trimmed the outer edges of the skirts down some and picked up some .040" 1/4 Round to glue around the outer edges of the skirt. Things will then get puttied to the body once the other side is done and cured. Not sure if I should use Squadron White Putty or Milliput 2-Part Putty to do the filling just yet, don't want to risk the melting issues on the thin plastics, but have never used Milliput either.
-
Think of it this way, at least the majority of those celebrities who passed in the last year lived a long, full life.
-
Anybody Casting 1/16 Daytona nose&wing PHOTO
Joe Handley replied to Mr mopar's topic in Car Aftermarket / Resin / 3D Printed
Is there a window plug to go with it too? -
Found out today that a former coworker at the HTU I was at gave a customer my cell number without doing anything to ask me first! Since I didn't have his number, I sent him a PM via a R/C forum to not do that again and I must be asked first and just texted the guy who replaced me as a surpervisor to make sure that if he hears anything, that it doesn't get done again. I'm going to mention it to the store owners after I hear back from said former coworker.
-
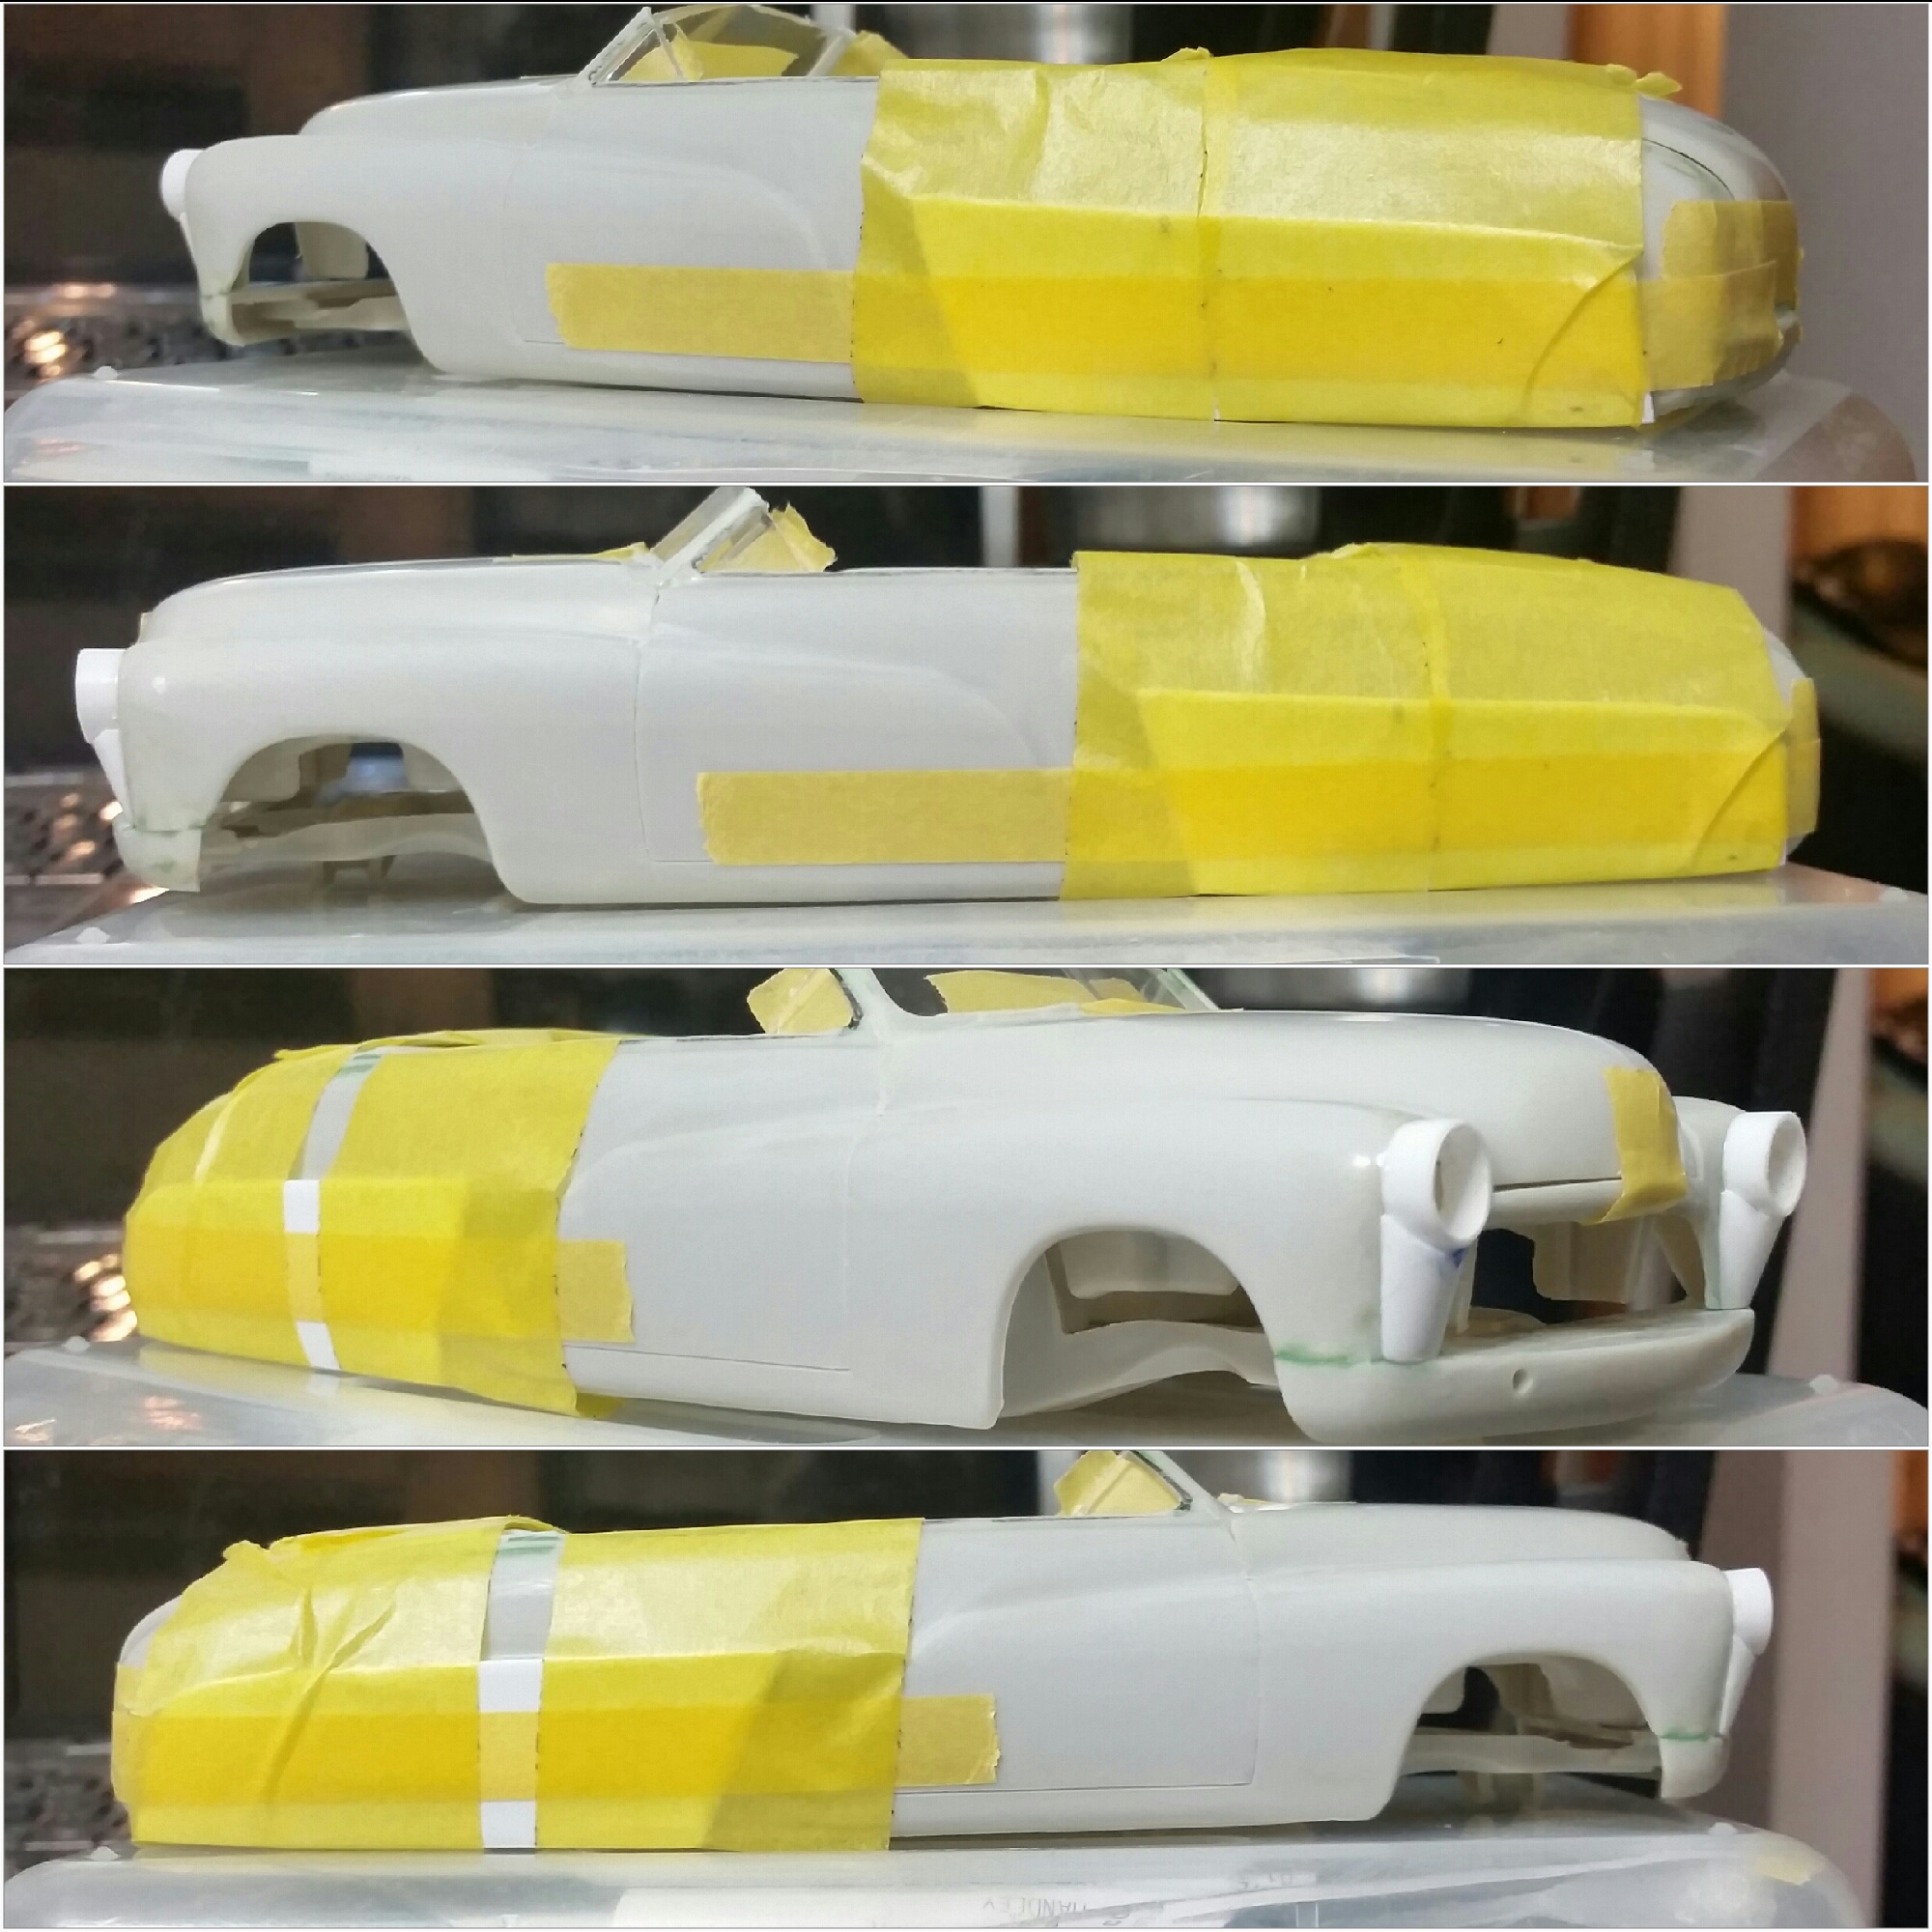
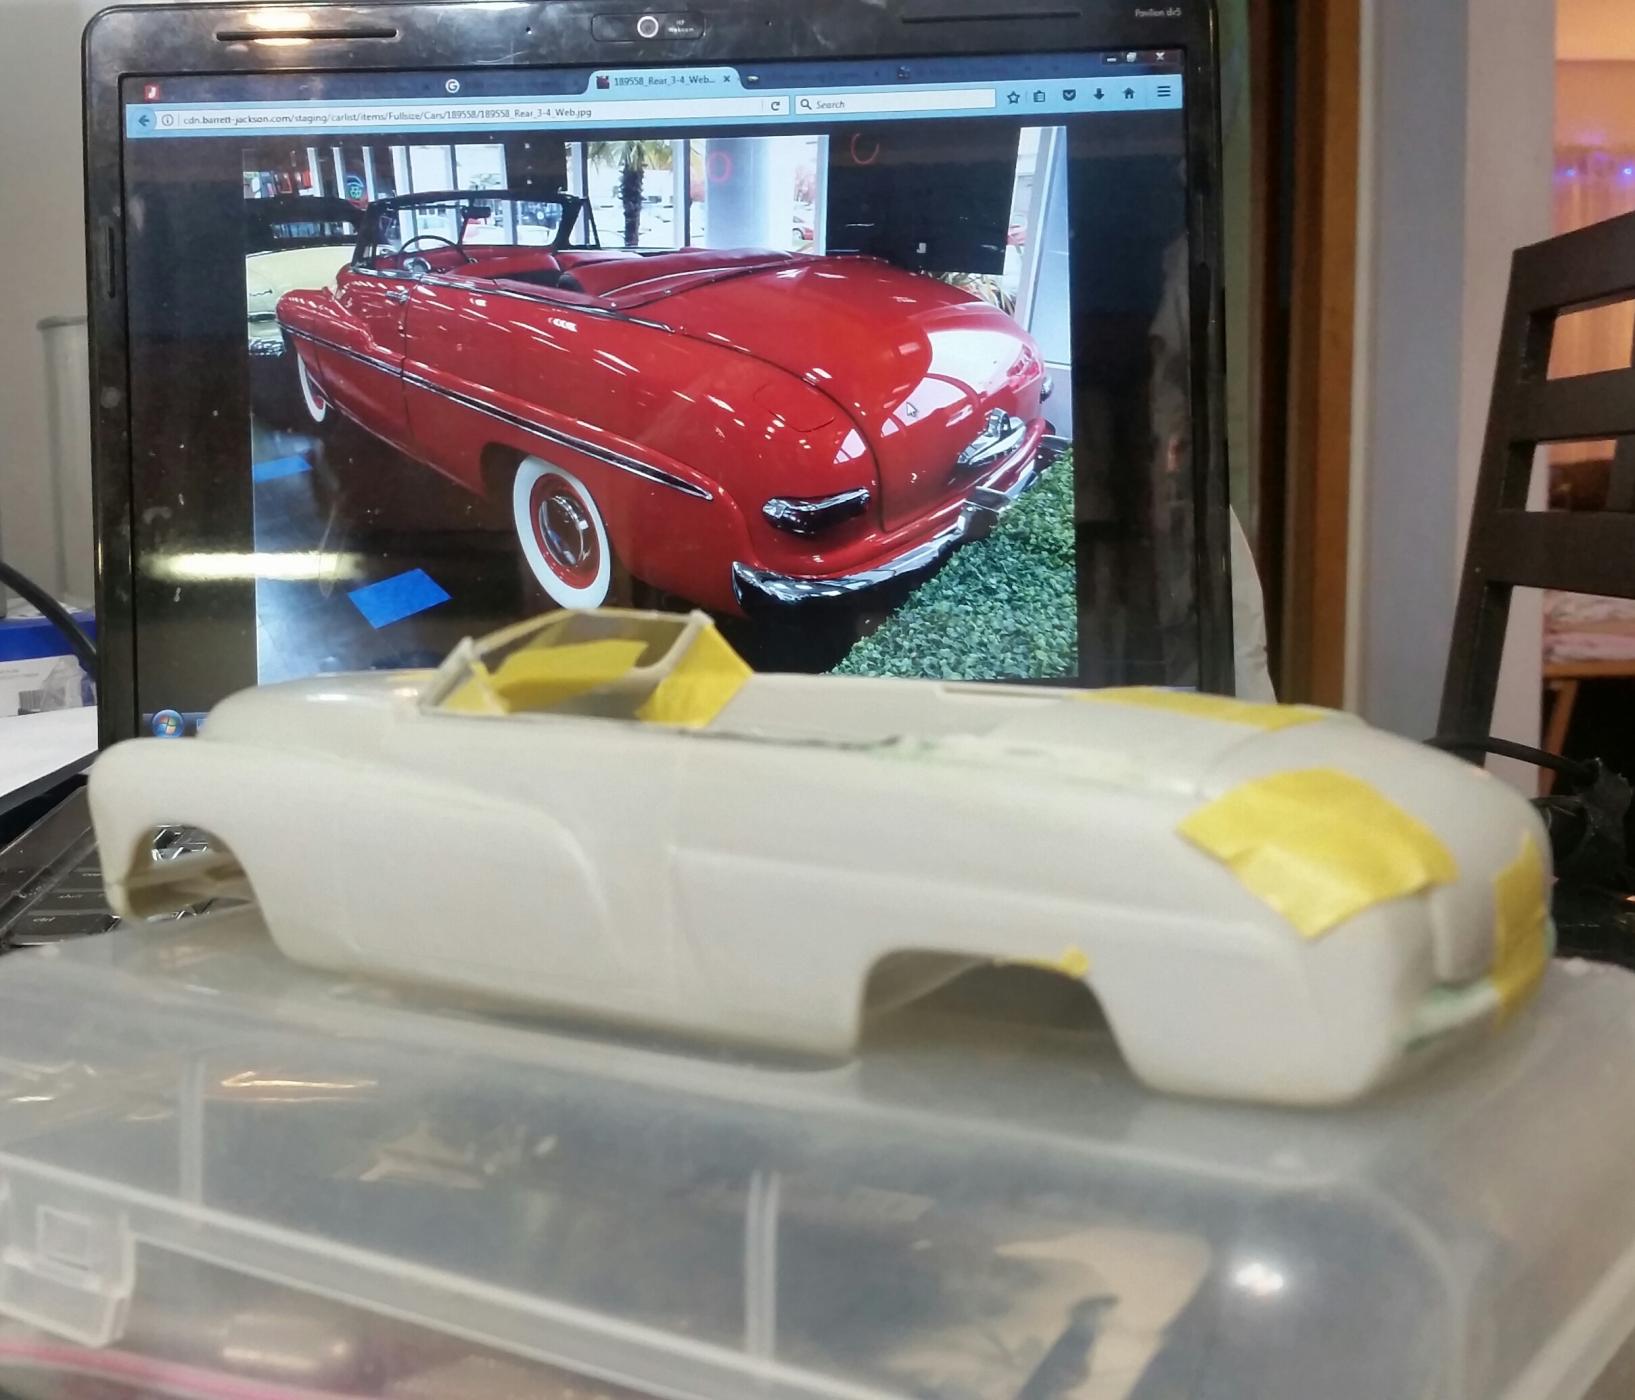
Here's where I left the Merc for the night, or morning, it's 3am as I type this and I've been up 23 hours so far. I started extending the front fenders and moving the headlight openings out farther, although if I use the tunneled headlight buckets in the kit, the lenses will roughly still be in th stock location on the fenders Hope I like how things turn out when I wake up!
-
Got the skirts trimmed and shaped to match the lower quarters, just need to mount them, not sure if I want to use the Model Master Liquid Cement in the diamond shaped container or some of the Bob Smith Odorless CA I picked up a few days back to do so, or the best way to hold them in place while what ever I use dries.
-
That would make a great what if build if the rest of the car was left factory stock, now that I think of it.
-
I like that!
-
When I worked at Toy's "R" Us, they would give us box cutter that has the warning "Caution, it's Razor Sharp!" Stamped on the outsides of them.
-
Ok, thanks, reason I asked is that it reminds me of the '57 T-Bird owned by a local sports anchor.
-
What was the name of the magazine car's owner?
-
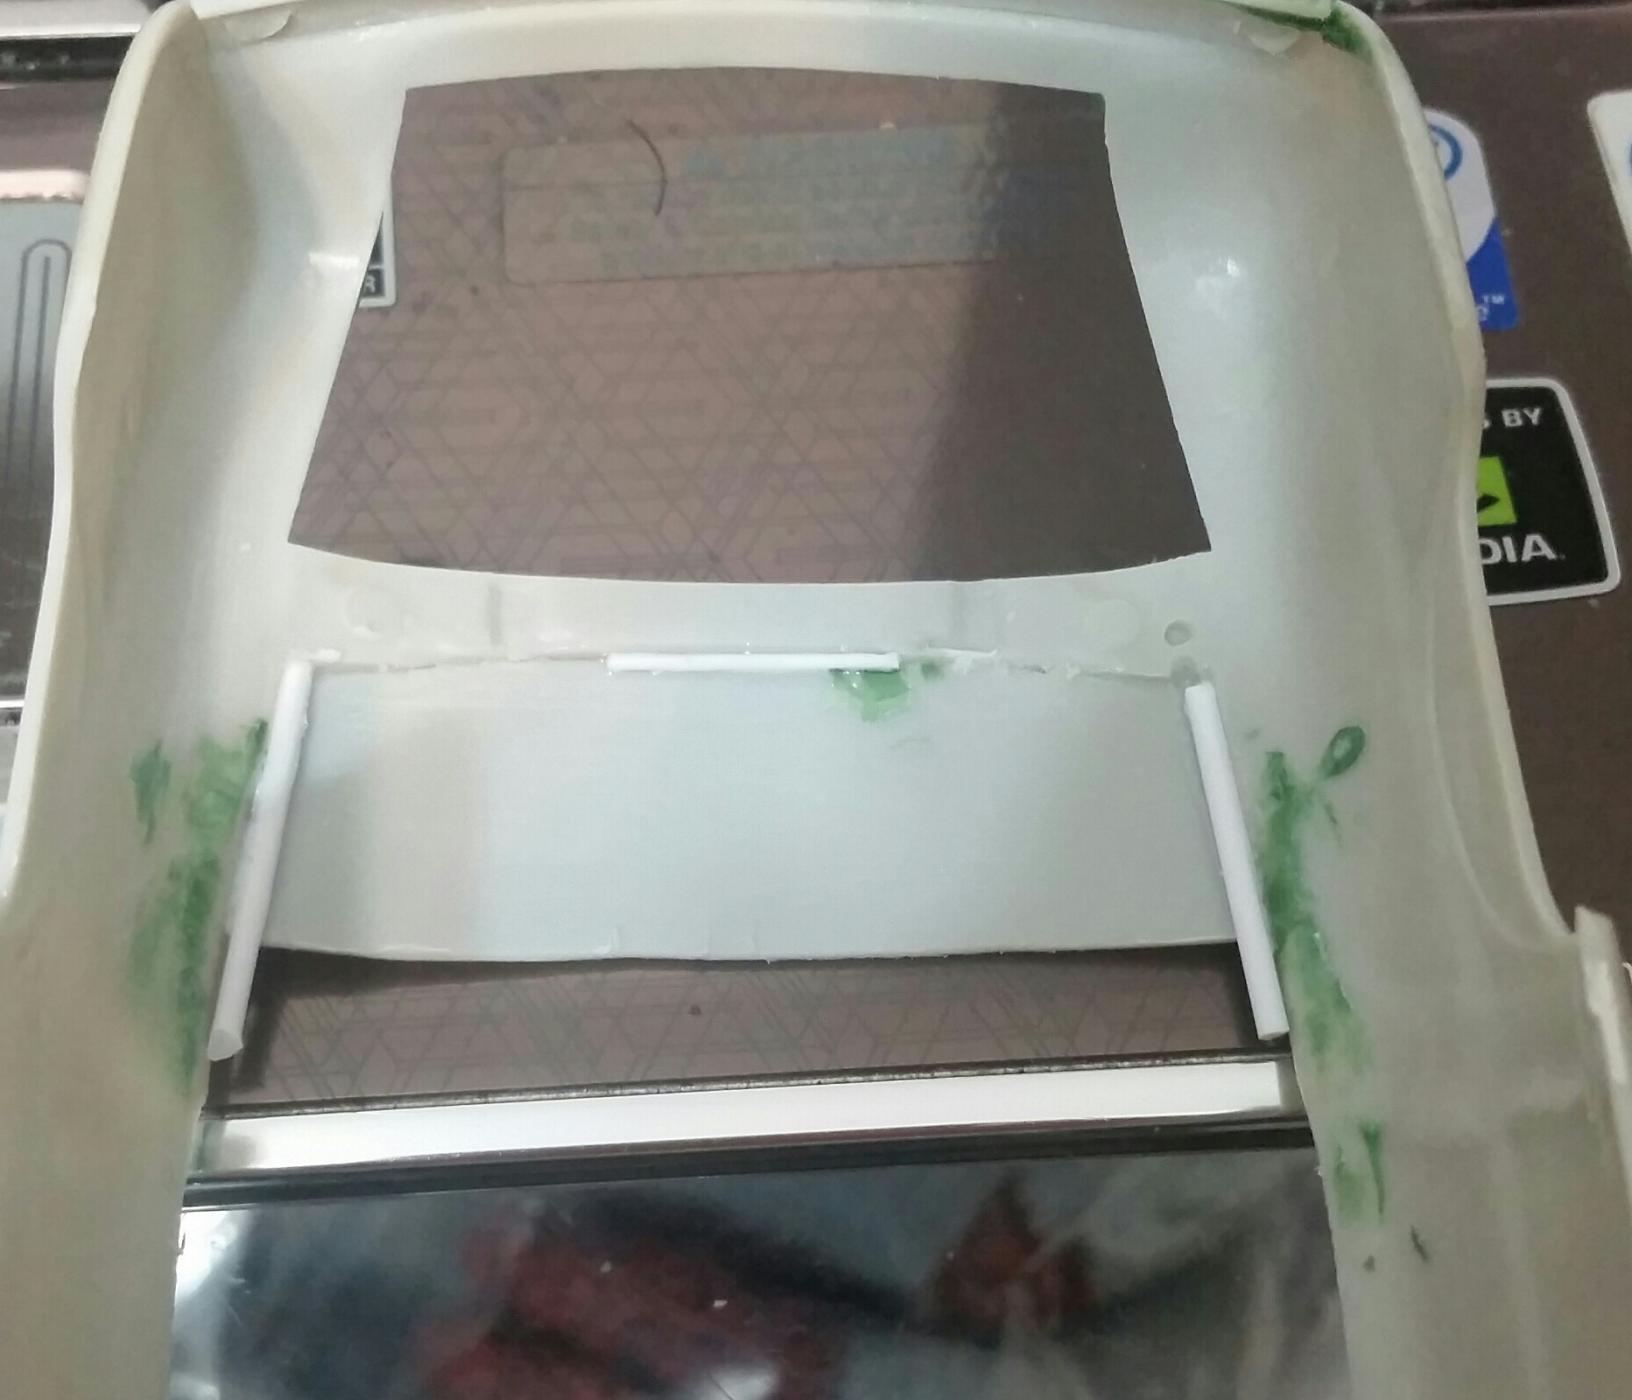
Got the filler panel cemented in and used some styrene rod as gap filler and more on the bottom as reinforcement while I was at it. I did find that one side was a bit low and needs a wee bit of filler to get it even with the daisey panel and sand/file the leading edge flat where it would fit behind the back seat.
-
Lol, I'm suddenly wondering if the non-motorized kit that I have upstairs has that figure with it too. Suddenly kinda want to build an autonomous cab out of it!
-
48 ford woody (gluebomb series) > rodded> 99% done pics
Joe Handley replied to crazyrichard's topic in WIP: Model Cars
That would be a good base for this '48 -
I'm going to have to watch this thread just for the nail polish part, planning on that for my '49 Merc too.
-
Just one of those days.
Joe Handley replied to gtx6970's topic in General Automotive Talk (Trucks and Cars)
I've been there with Pactra and Model Master Lacquers on lexan R/C bodies, sometimes they would spot up or run in weird ways then have had Pactra's Candy Red and Blue fog up on me. -
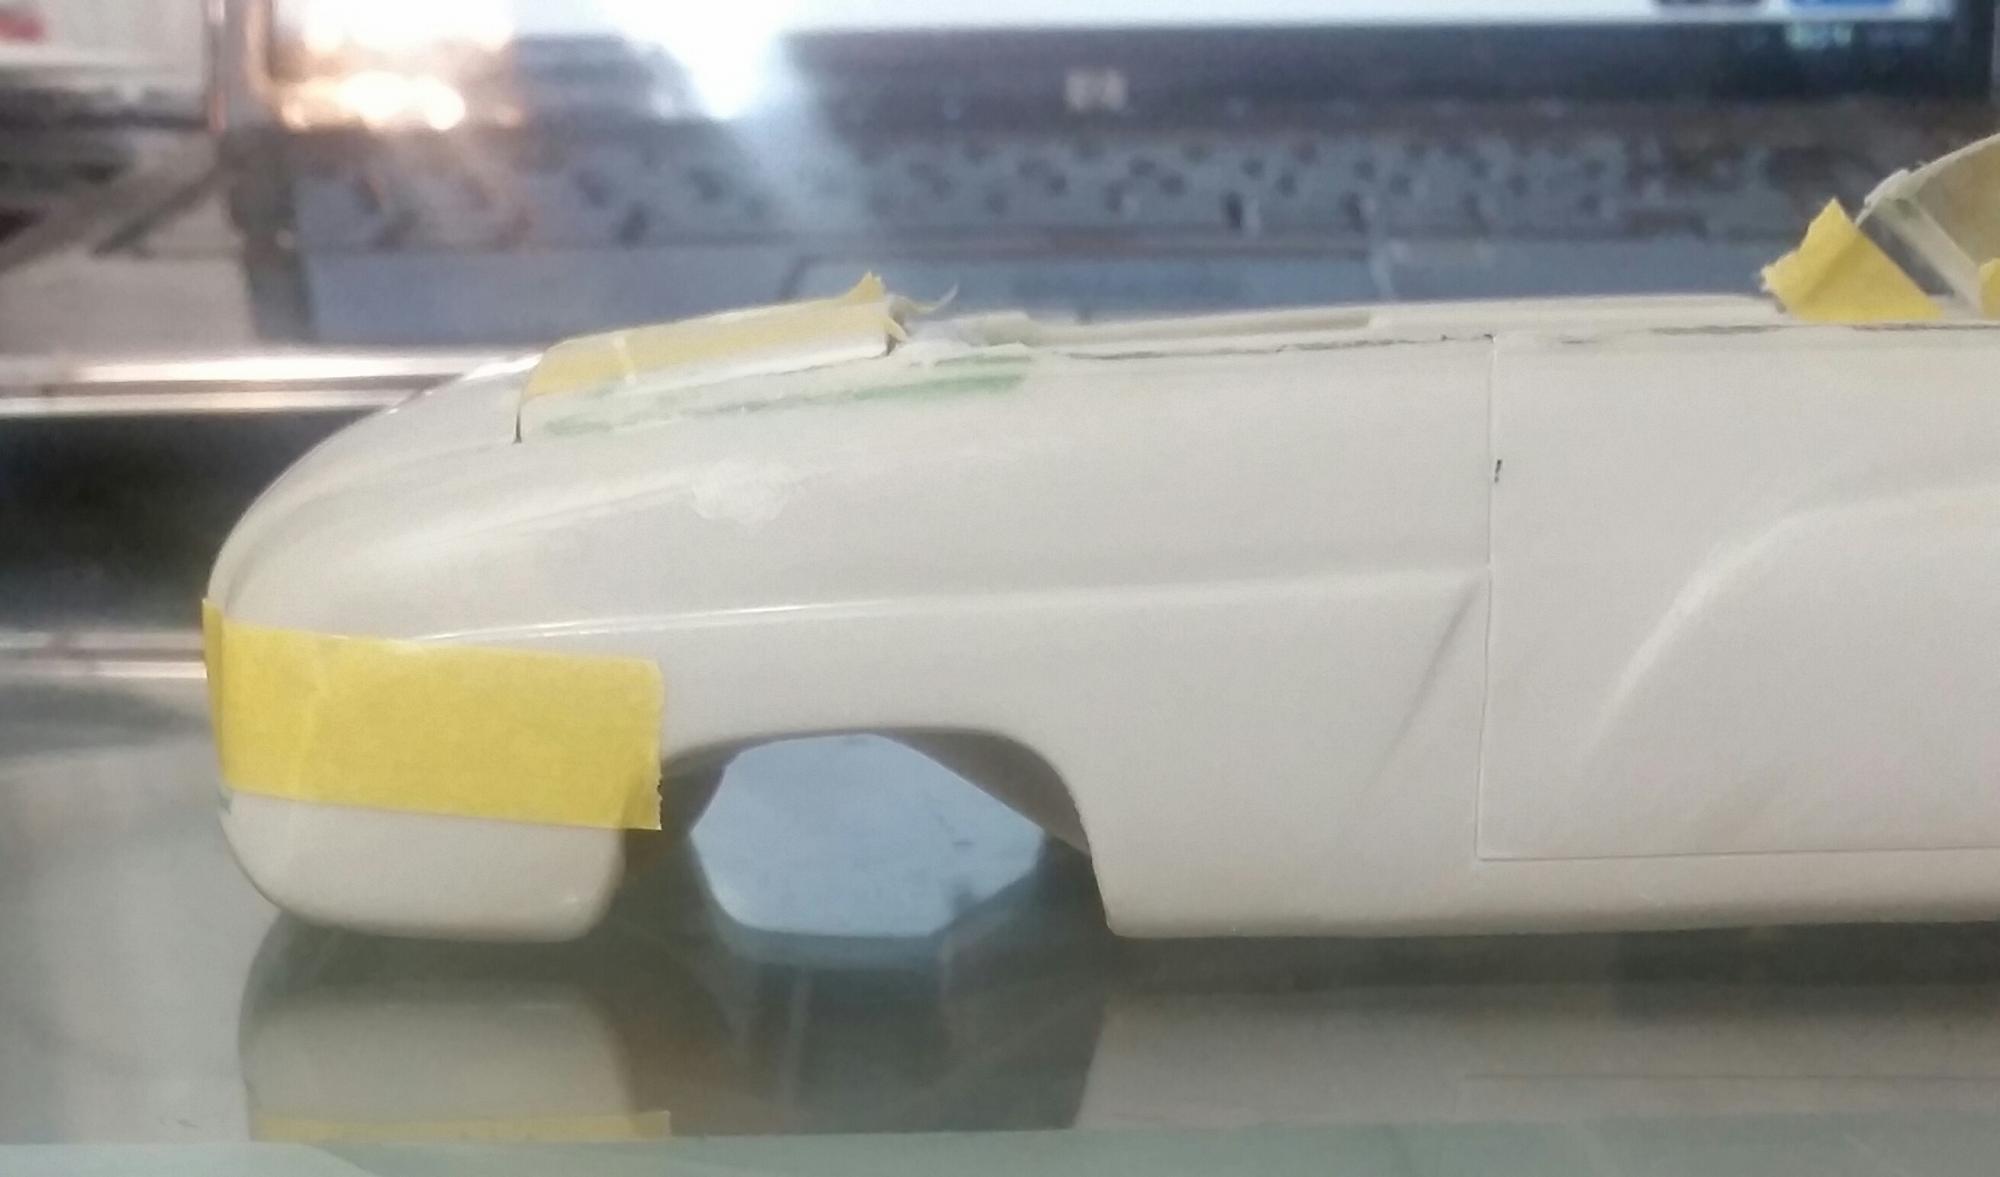
Well, finally got the A-Pillars and windshield cut down on the Merc. Still have to glue the filler panel in place and do something to fill in that gap as well. Oddly, it looks like the vent window portion of the windshield glass came out with nearly the same rake to it that the separation I filed into the sides have.......didn't intend for that to happen!
-
Not a problem, kinda looking forward to others giving this a try and putting their own spin on this!
-
I started all over on my 1944 Ford GPW Jeep project!
Joe Handley replied to Art Anderson's topic in WIP: Model Cars
Looks good so far Art! -
Thanks, all I did is mark off where I wanted the breaks after the dog leg to be and the final shape in Tamiya Masking Tape then started filing away with a K&S Hobby File set I bought years ago from the HTU I used to work for. After that, it was just a matter of filing the character line to continue the shape of the bodywork above it (Bill might have to chime in here, but I'm thinking that might even be difficult in 1/1 with the shapes involved and having to form the doorskins into those shapes) and carving things into the shape you see, then finish sanding the areas with a course sanding stick that happened to fit nicely into that spot. Not really which was worse, trying to get the shapes symitrical in the tape, the amount of time and effort to do the same with the files once I started working at it, or the mess it left behind!