camaro69
-
Posts
272 -
Joined
-
Last visited
Content Type
Profiles
Forums
Events
Gallery
Everything posted by camaro69
-
These should be nearly what you´re looking for. I think I would only change the center of the rims and design the hubcap and then these should be ready. The fender side scopps should be possible to design too. Best, Rico

-
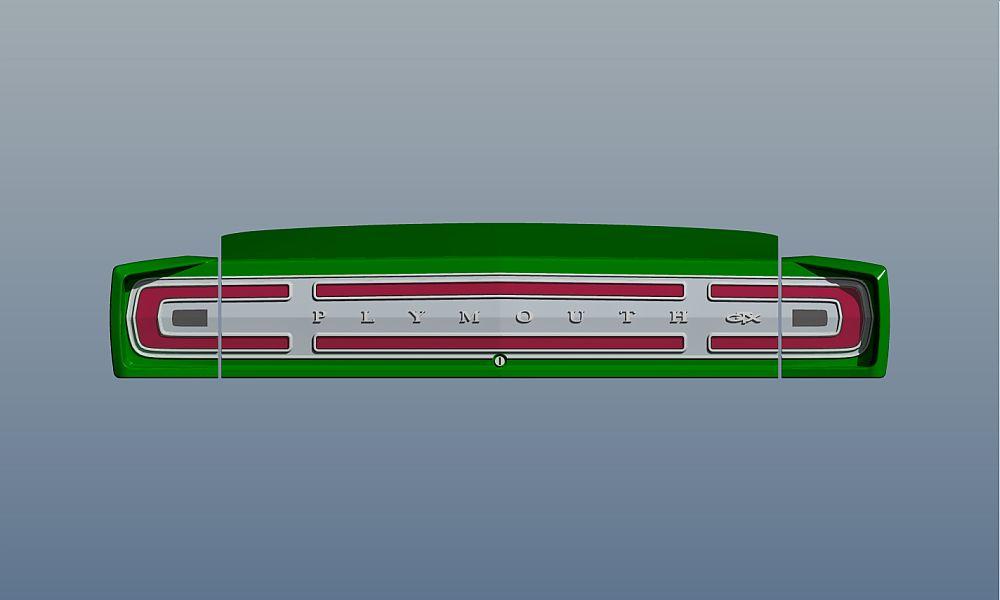
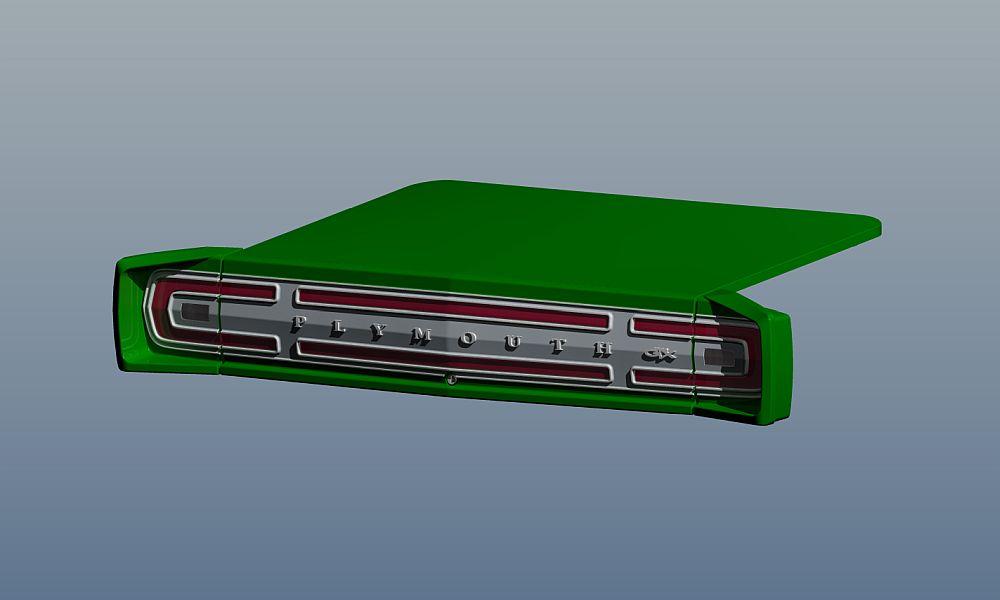
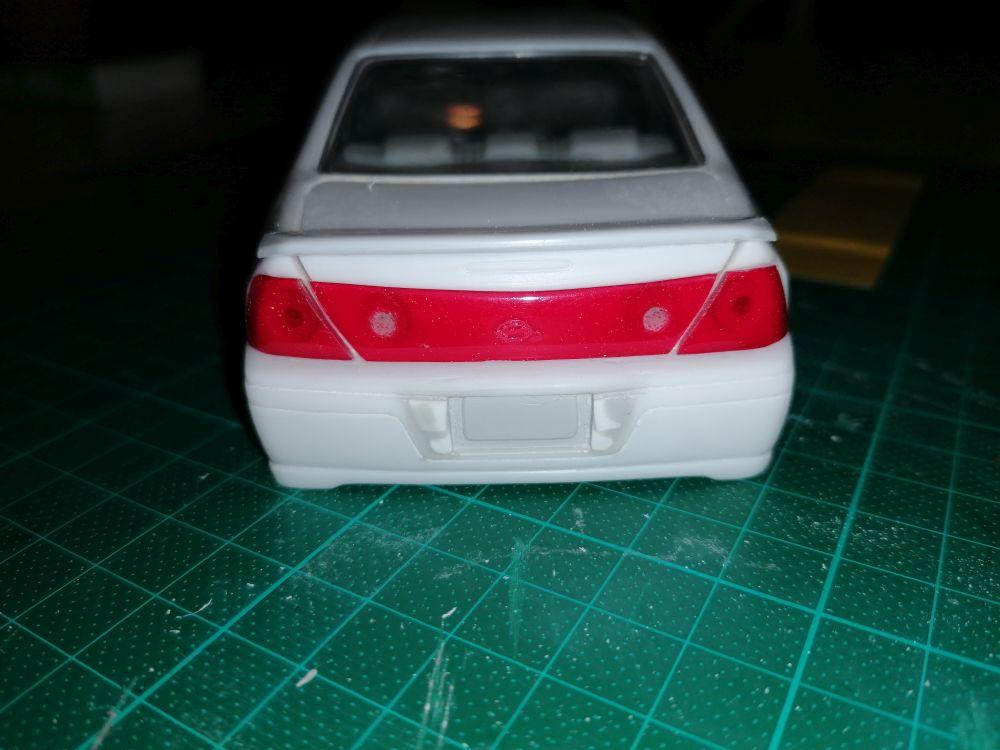
Hey guys, I proudly present a new update... After a long time of try and error and busy times with a lot of work in any direction I now totally redesigned the ´68 GTX rear end. First tesprints on my Anycubic Photon Mono showed the last issues. Now I think I have this one done. Before this is going into my shop I will order another testprint at shapeways to make sure this will work. The only thing left to do for completing this is to connect the taillight housings on the underside and use this connection as mounting area for the rear bumper which I also want to do next weekend. Here are some renderings of the new design. Hope you´ll like it, Rico
-

Looking for 59 Caddy taillights
camaro69 replied to 58 Impala's topic in Car Aftermarket / Resin / 3D Printed
Hi Tom, I had designded them per request some time ago and they are still available at my shapeways store... https://www.shapeways.com/product/6K9CZZZ2M/1-25-1959-cadillac-taillights?optionId=106113942&li=shops Rico -
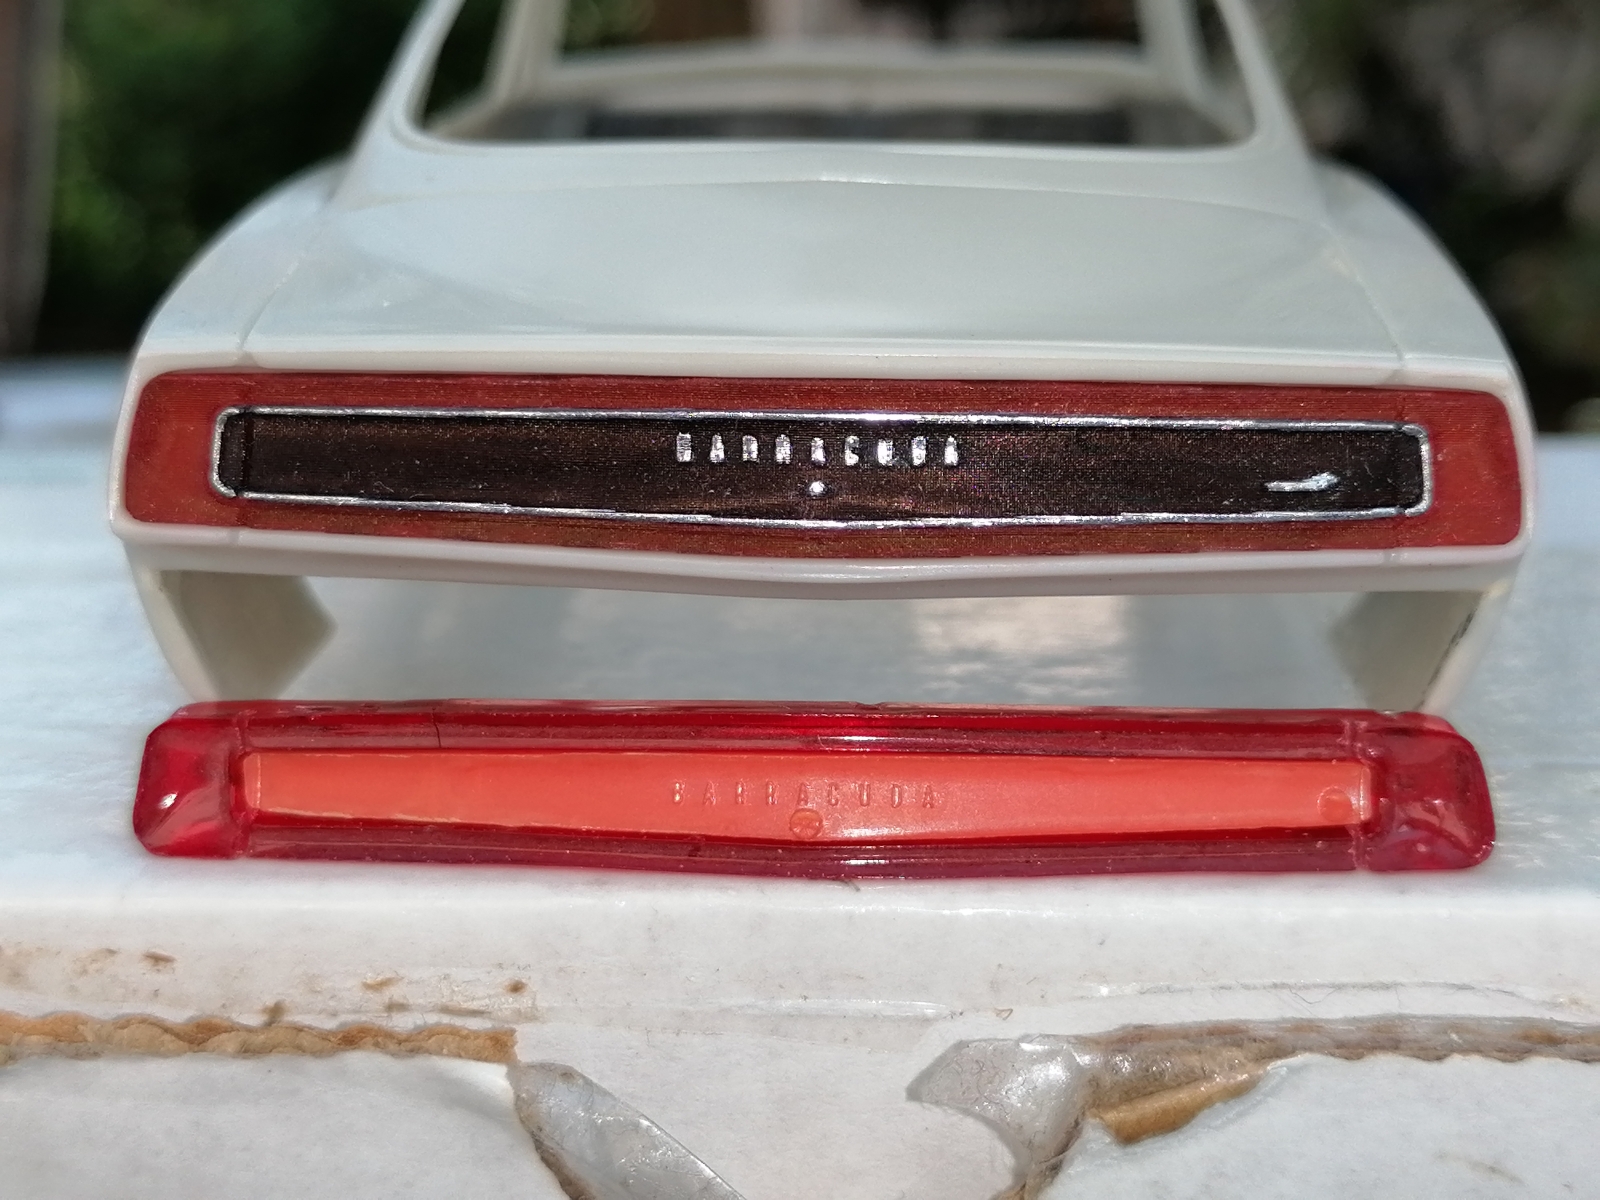
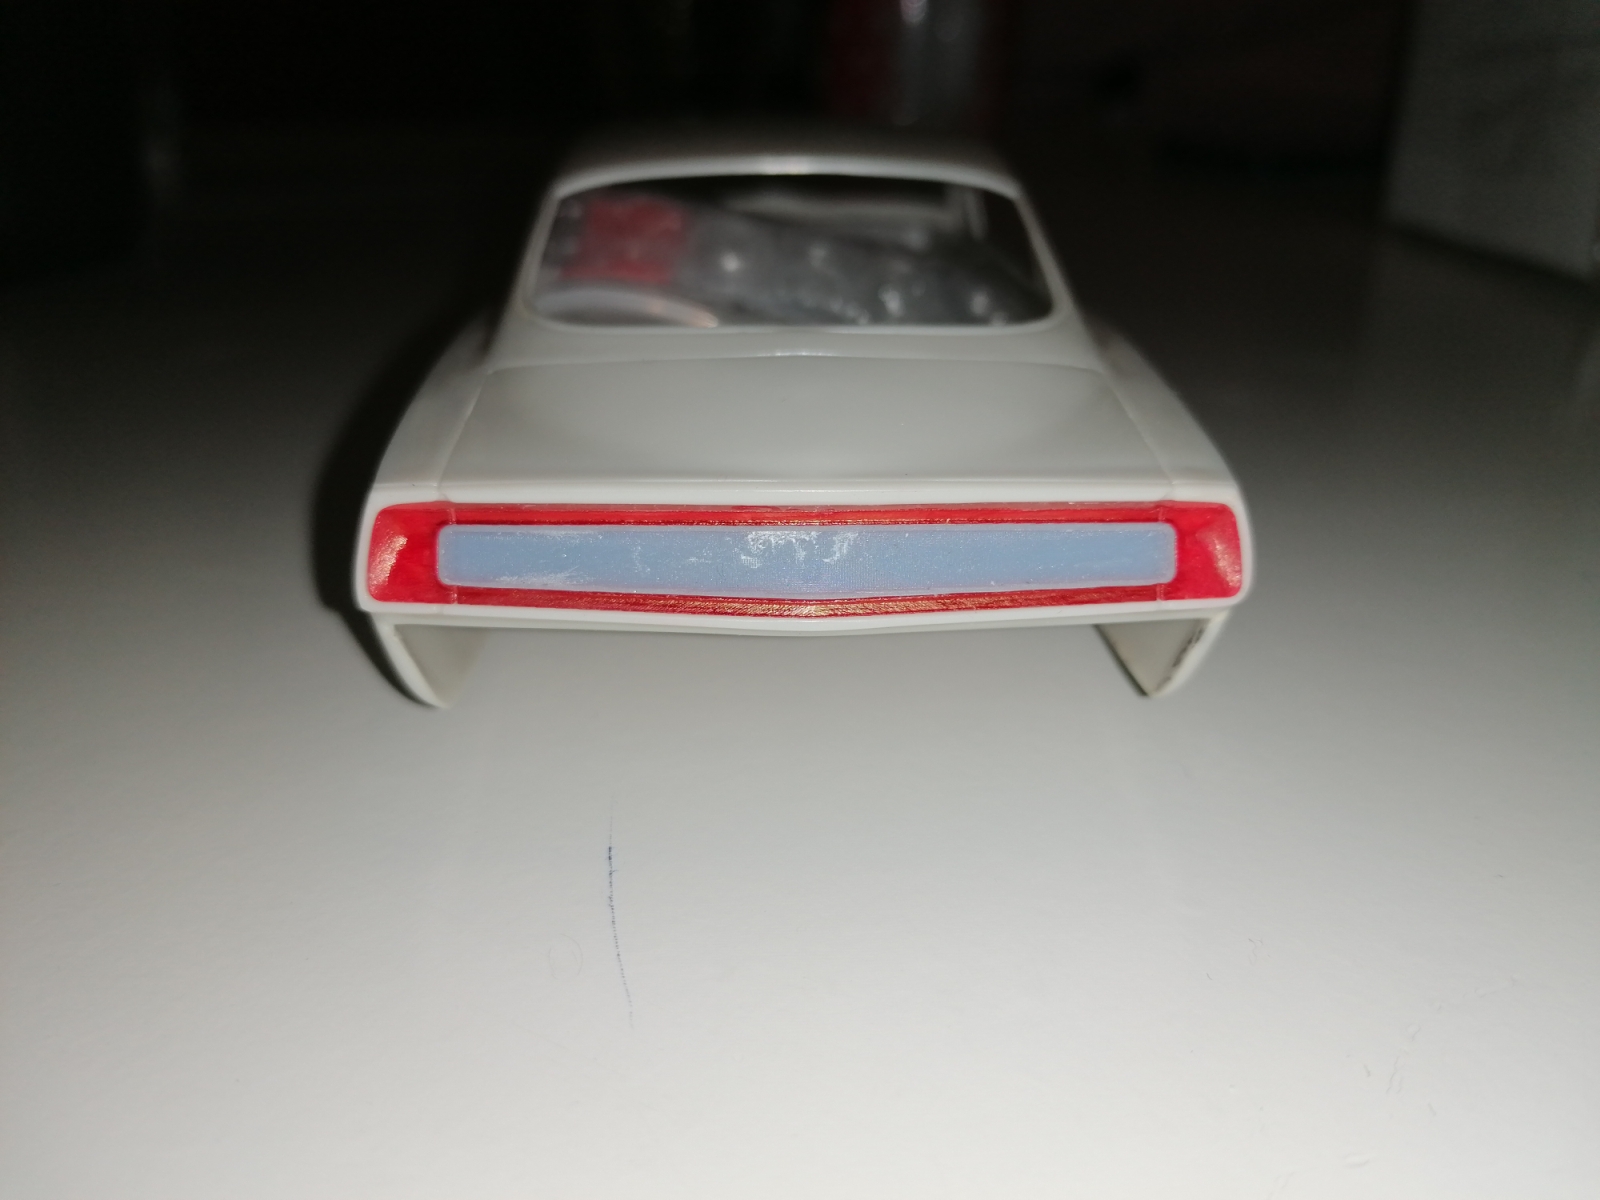
Hey guys, did the next testprint by myself and I´m really pleased with the look. I hope you´ll like it too. Here´re the new pics... And some pics for comparison with the kit parts... I even uploaded the parts already and they are now available at the following link: https://www.shapeways.com/product/PDGTY742K/1-25-1969-cuda-tailpanel?optionId=222013002&li=shops Once again thank you all, especially Bob, for your patience. Rico
-
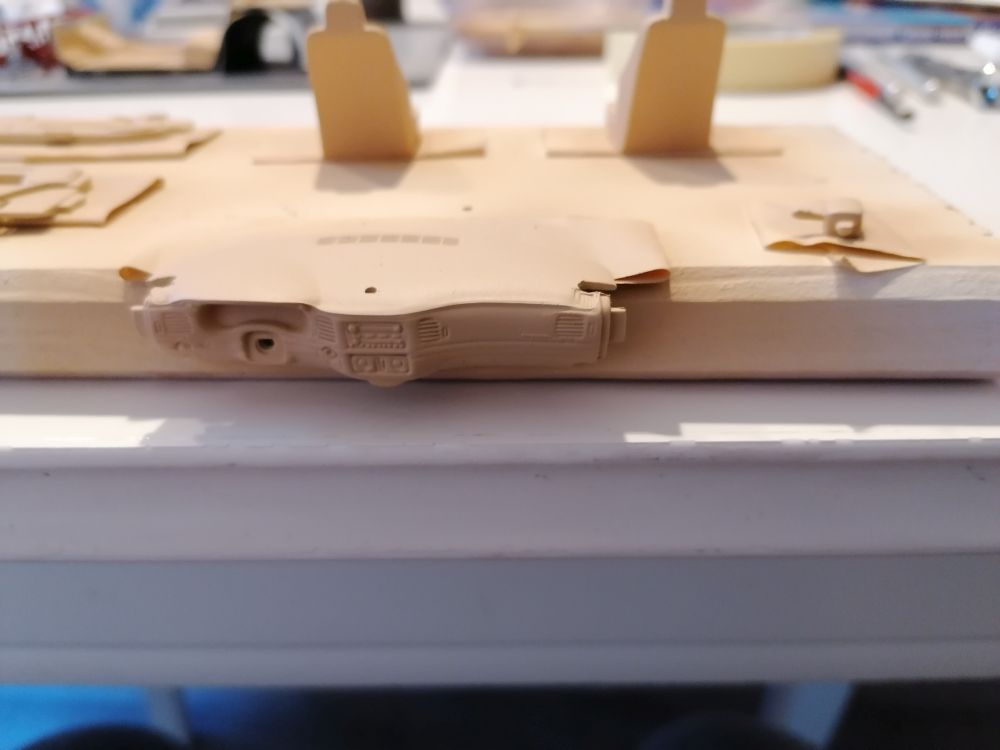
Hey guys, I know there are many of you waiting for the tailpanel and I thank you all very much for your patience. After a long time full of work I now have the first testprint in hand. There are some minor issues because the inner panel isn´t wide and the scriptings are not tall enough. I will try to fix this now in a short timeline to make these parts available. And because I now have my own 3d printer I can do the next testprints on my own. Anyway here are two pics of the first testprint. Hope you´ll like it. Best regards, Rico
-
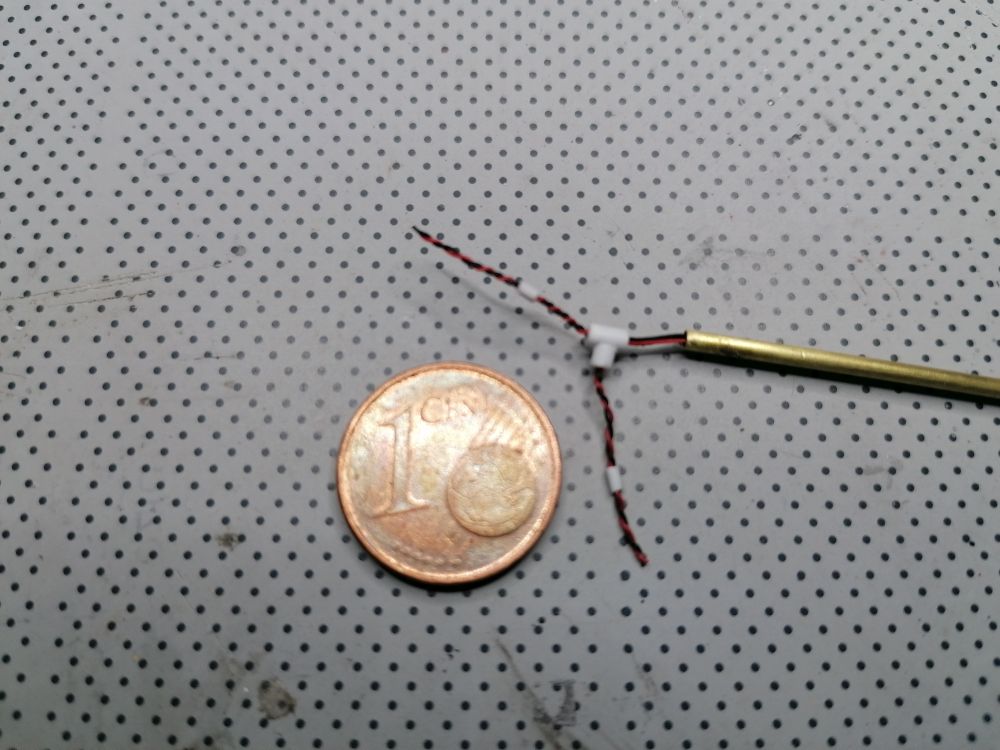
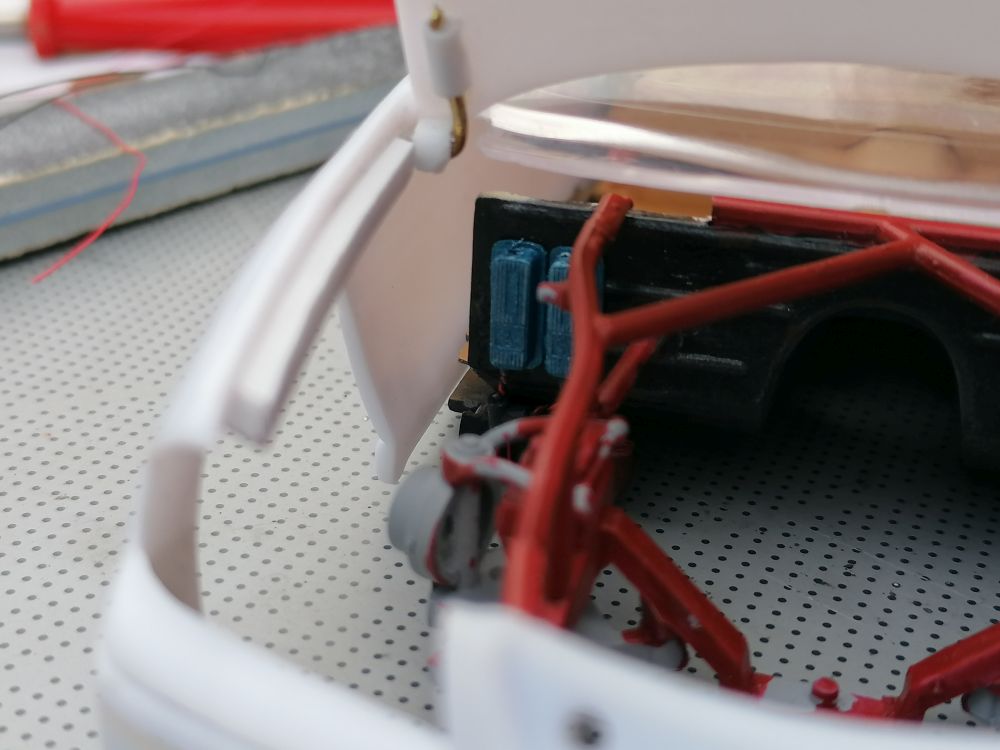
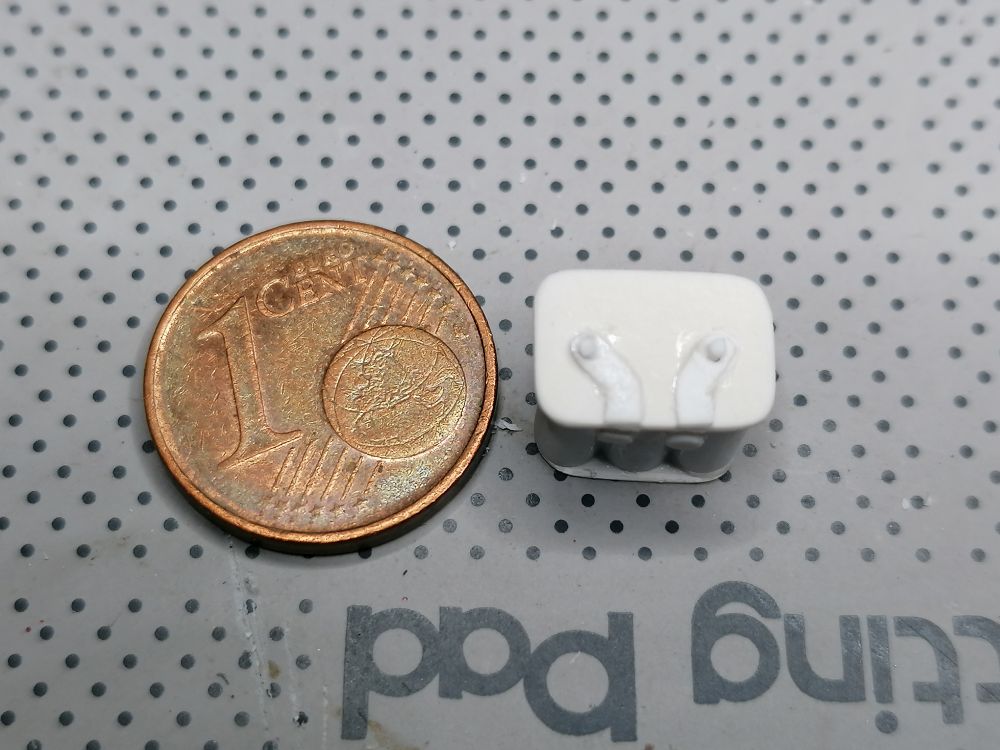
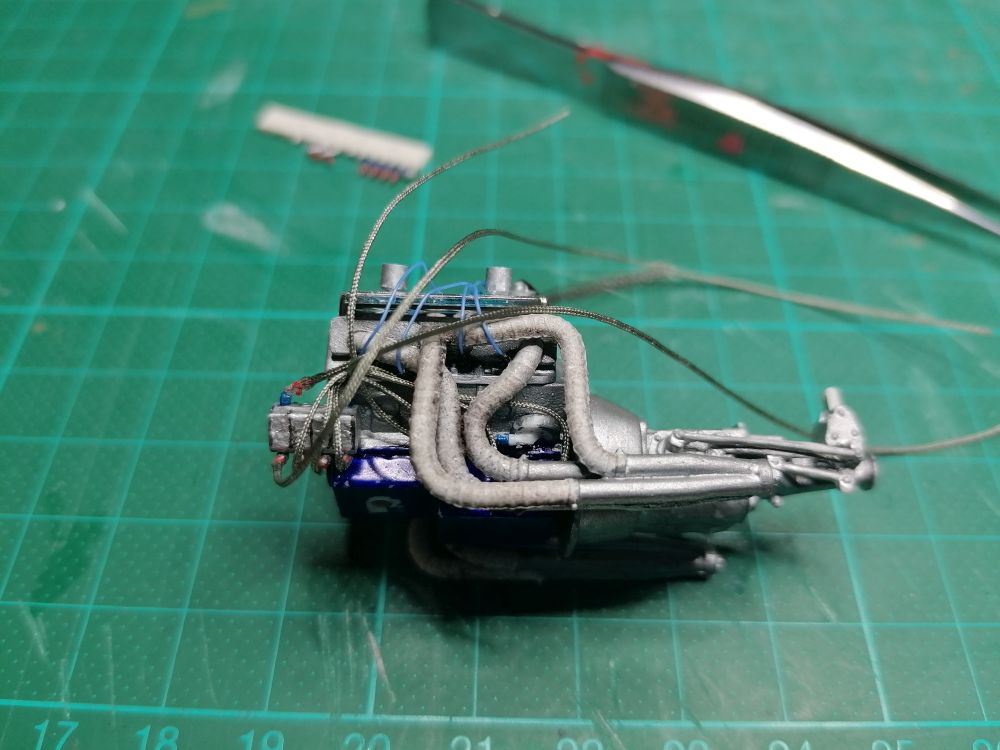
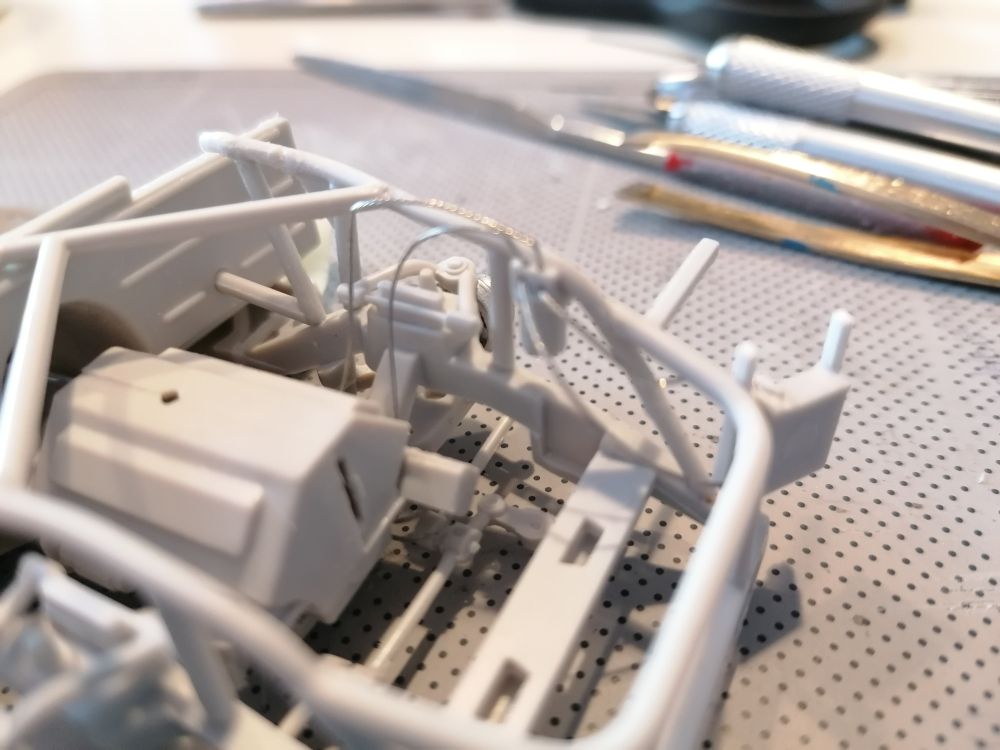
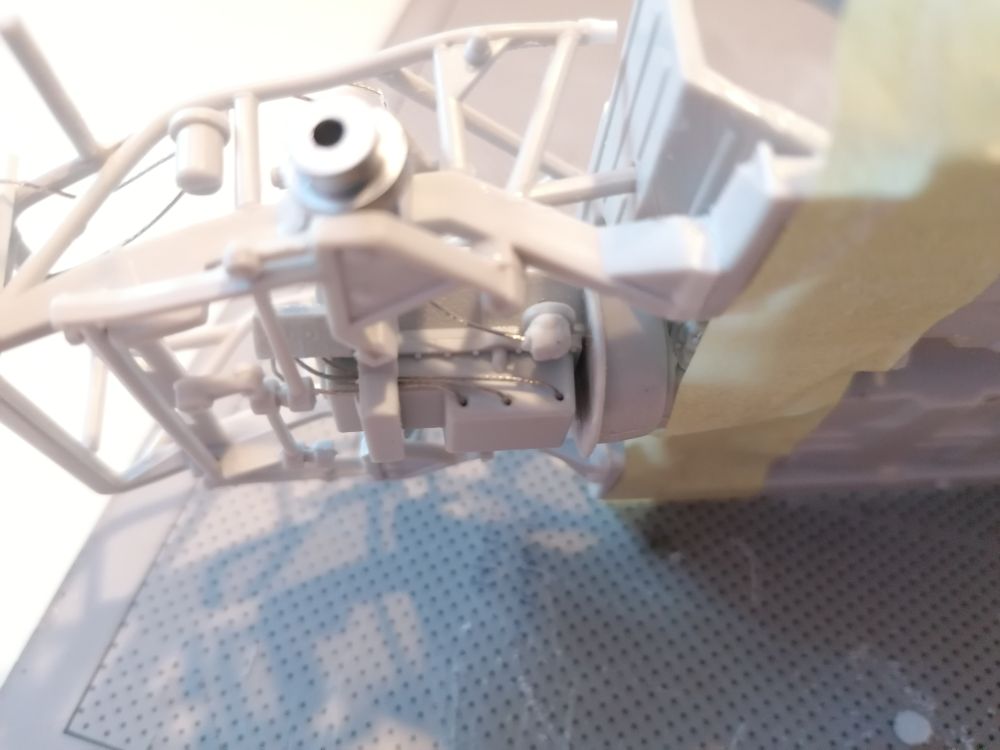
Four weeks again since my last update and there´s some great progress on every build I can see here. So here´s mine... I´m still hanging on the details. First of all I started wiring the MSD ignition boxes. I choosed a place on the passengers side firewall for mounting them... ... then, because both kits doesn´t have one, I started scratchbuilding my own Optima battery... ... and an ignition coil. After that I started wiring the engine... ...painted the Optima... ... and this weekend I finished the ignition wiring and started the plumbing gas tank, the oil pan and pumps. The fitting still have to become repainted after mounting. But that´s the work for next week. Thank you all for looking, Rico
-
Thank you guys, I will give it another try...
-
Hello guys, I know there are many threads in here about hinging doors, hoods and trunk lids. But all of the hinged parts are nearly straight on the hinged side. My problem is that the trunk lid I want to get work isn´t straight. I already tried the tipps out of the forum but nothing worked like I wanted. Any help would be much apprecciated. Thank you all in advance. Rico
-
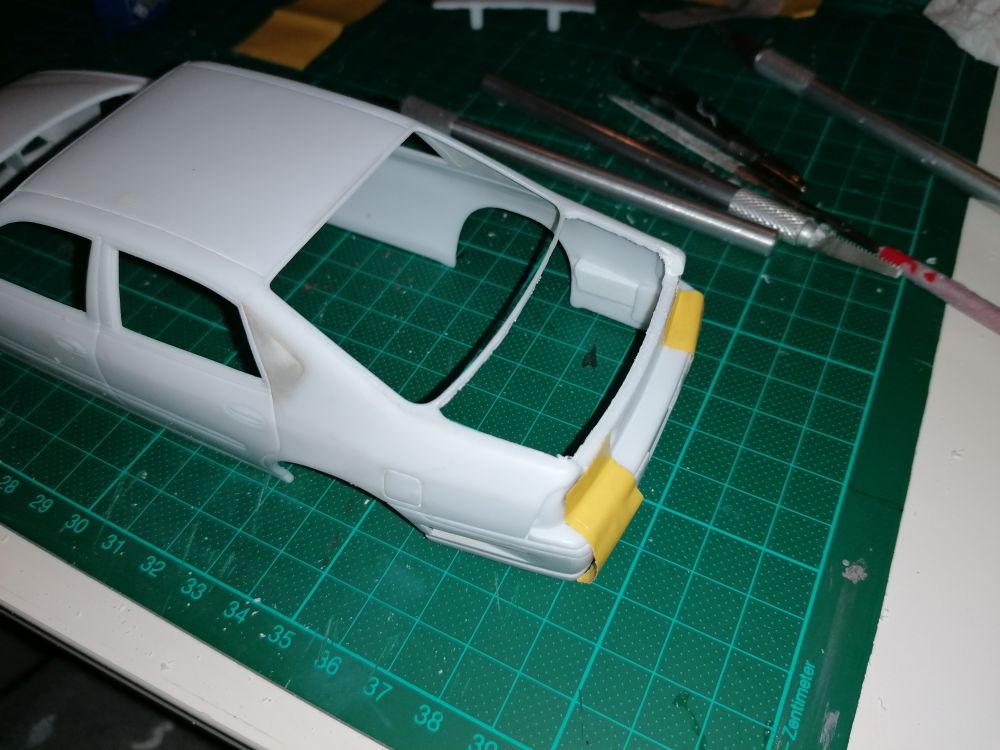
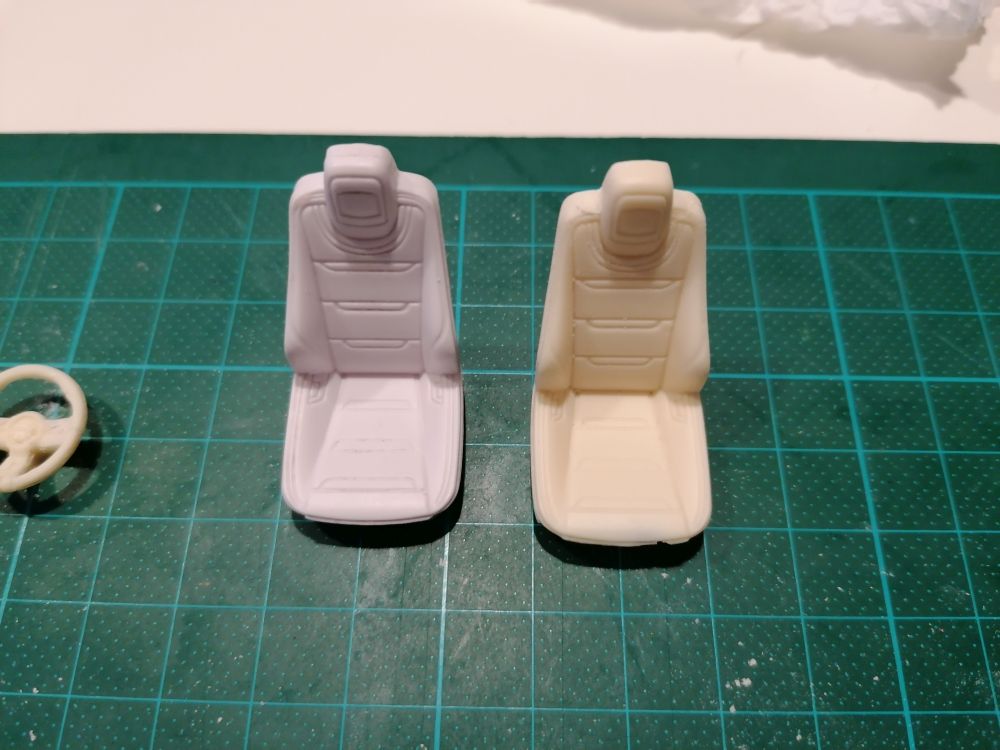
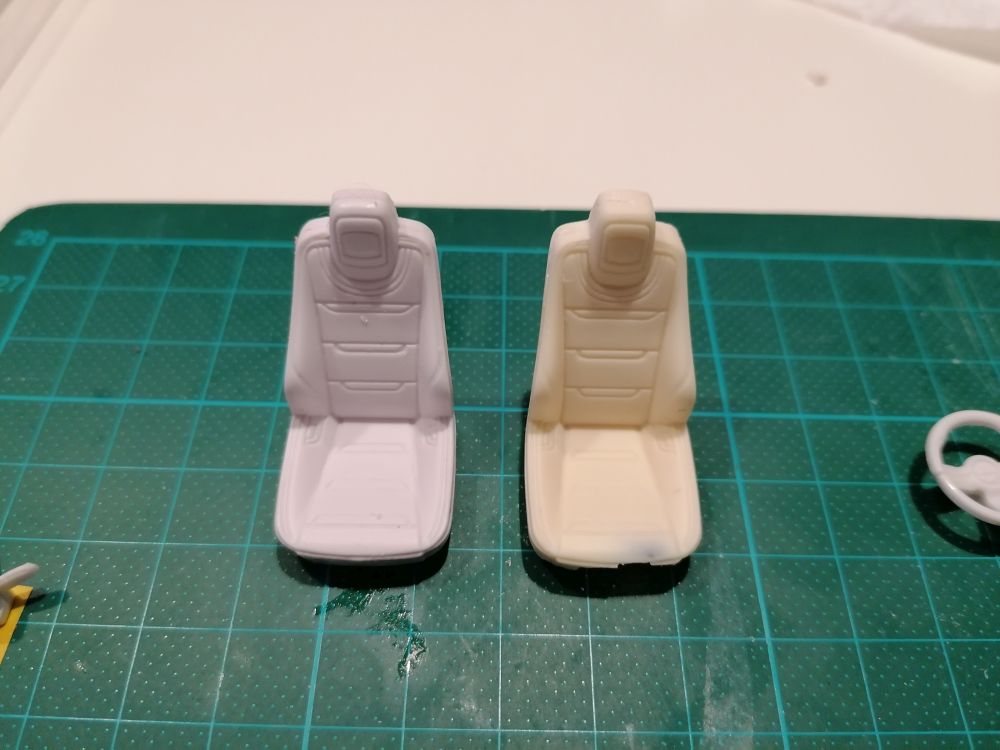
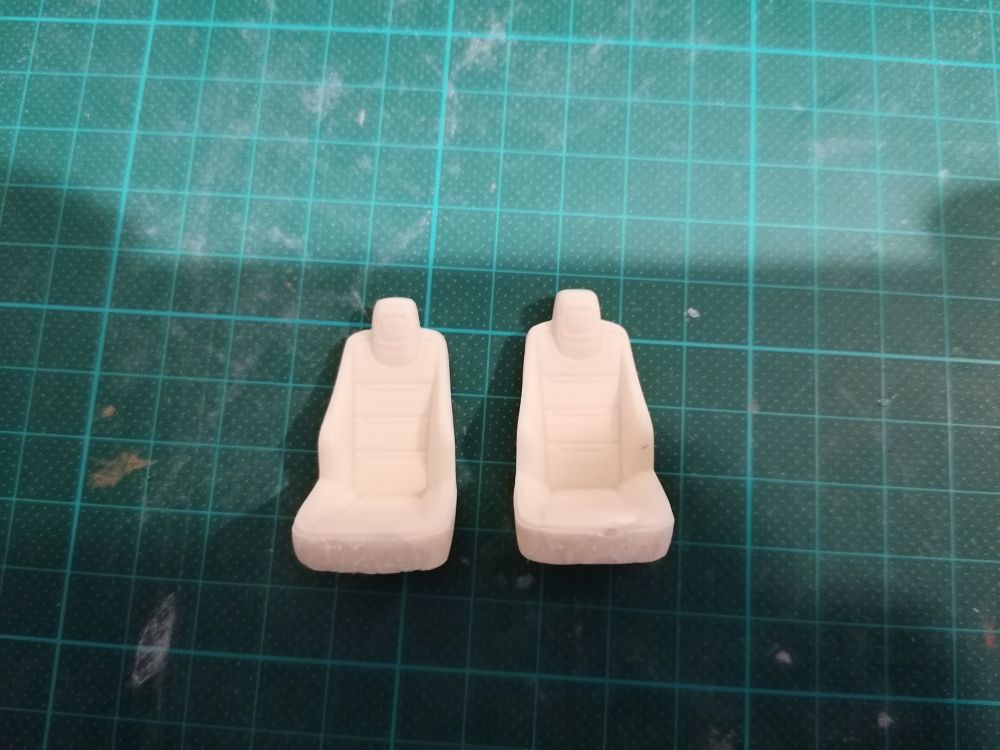
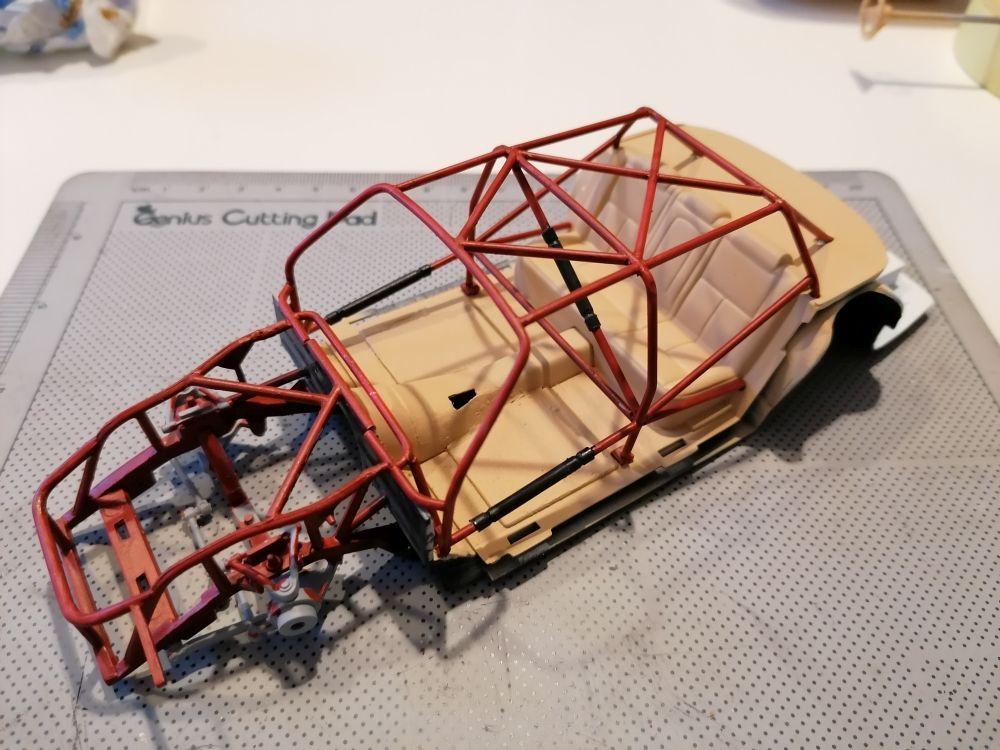
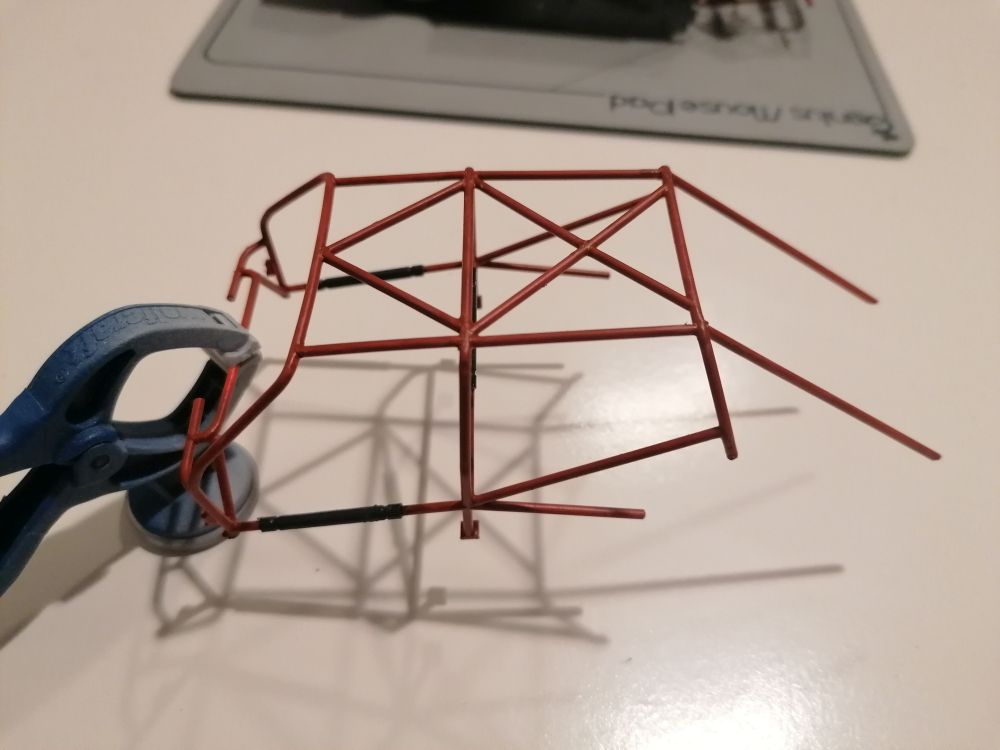
#25 - Update... I wasn´t really happy with my first casting so I gave it a second try. This time I´ve choosen the wrong position for the overfloating pipes. But because I placed them on the lower front area of the seats I was able to fix the issues. They won´t be to be seen once assembled. I also tried to cast the Camaros steering wheel. For my second casting ever I´m now pleased with the results. Here are the pics... After fixing the issues at the seats there was time for some color again... (Revell africabrown matt / glossy white mixed 1:1) After drying I did a quick mockup of the chassis and the roll cage (not glued yet). I really like the color combo. Then this weekend after splitting the rear side windows on the body, cutting the rear side windows out of the glass and widthen the B-pillars I colored the clear part with a mixure a little bit lighter than the rest of the interior. Next will be a tricky thing. Coloring the black surrounding of the front and rear window... I hope you´ll like my progress. Any comments are much apprecciated. Rico
-
Thanks Pat, I always enjoy your builds. Your weathering skills are awesome. I´m still in the learning process.
-
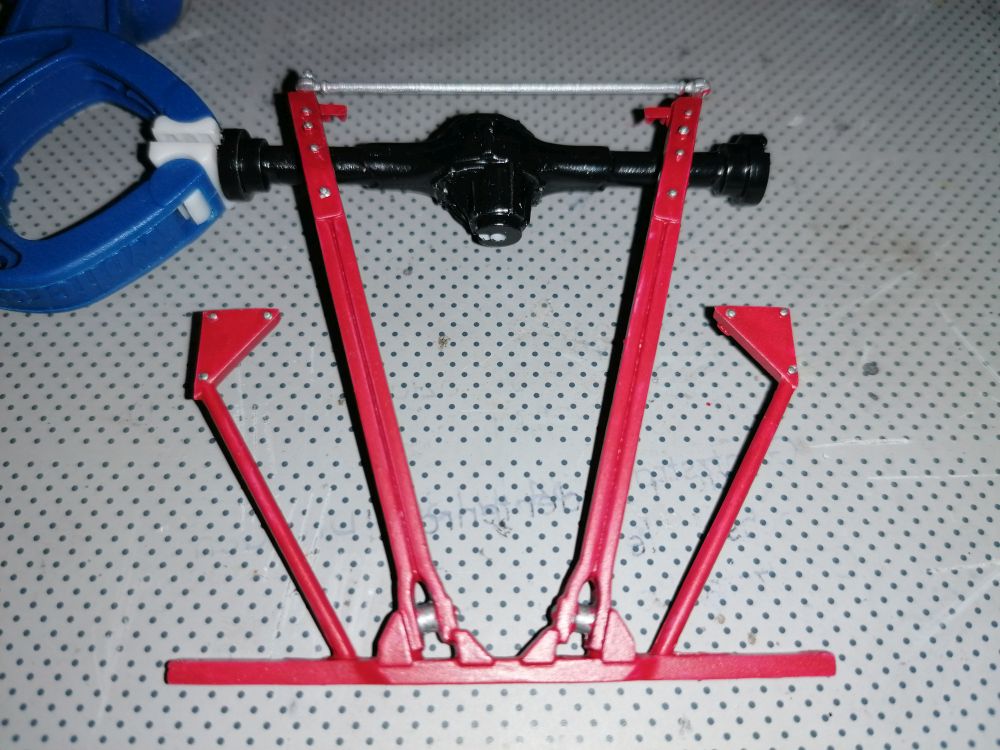
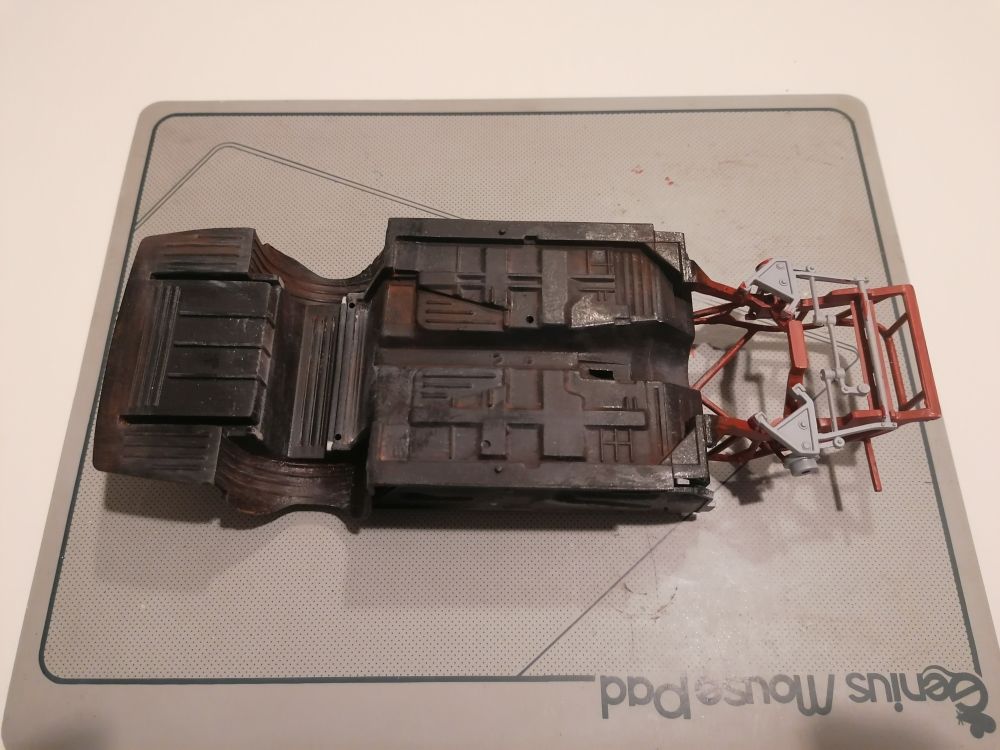
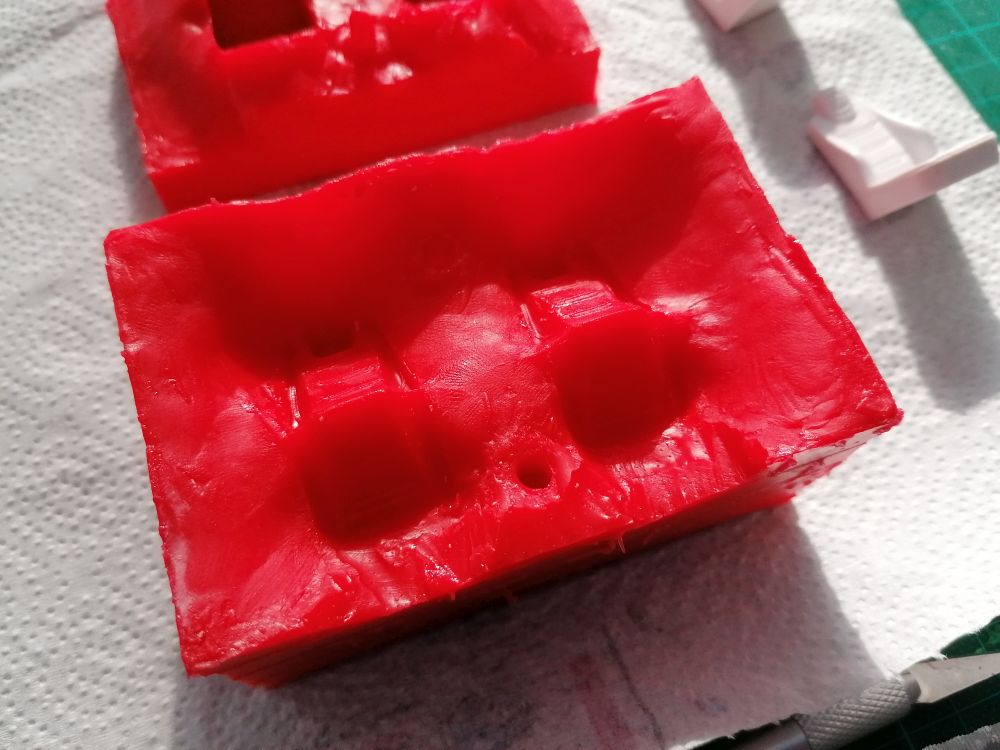
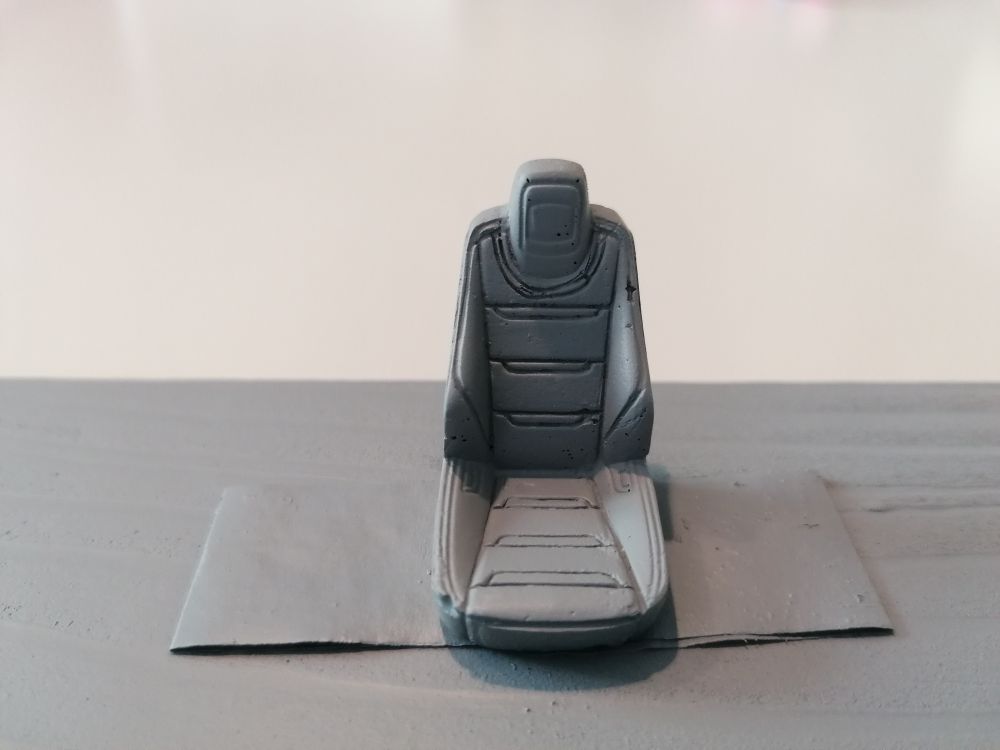
Hey guys, there are some great projects going on here. It´s nearly two months ago now since my last post. There were a lot of work and family business to do. But at the last two weeks I had some time to get some things done on my "Monte ´pala" ?. First of all the stock Impala seats were not sporty enough to me so I searched my kits stash and found something better. These are from the Jada Camaro Concept Kit and will be casted. Then I thought about doing the oil line routing for the first time ever because oil pumps without oil pipes are useless (first try with 0.4 mm wire). Meanwhile I changed my mind and I will go with 0.6 mm wire. The adapter will be changed too because I think it´s to big. And I will try to do some fittings by myself... After that I wanted some parts to get painted to see some progress for myself... The chassis is already weathered a bit but not ready yet. scratchbuilt roll cage with pads... chassis base colored and weathered... Then this weekend I wanted to cast the Camaro seats. It´s the first time ever making a mold and casting resin. Therefore I think the result is not that bad. Preparing the 1st half of the mold... release the first half... One seat falls into it´s two pieces again and I had to reglue it... first mold piece... second mold piece... ready forc casting... fresh out of the mold... comparison between kit part (left), fresh out of the mold casting (middle) and grinded casting (right)... grinded and primed... We´ll see how they will look once installed. I will try to put them on rails like the real ones. I wish everyone here good luck and happy modelling. Rico
-
1/24 Chevy and GMC grilles for Revell/Monogram
camaro69 replied to camaro69's topic in Truck Aftermarket / Resin / 3D Printed
Hi Dave, could be done... -
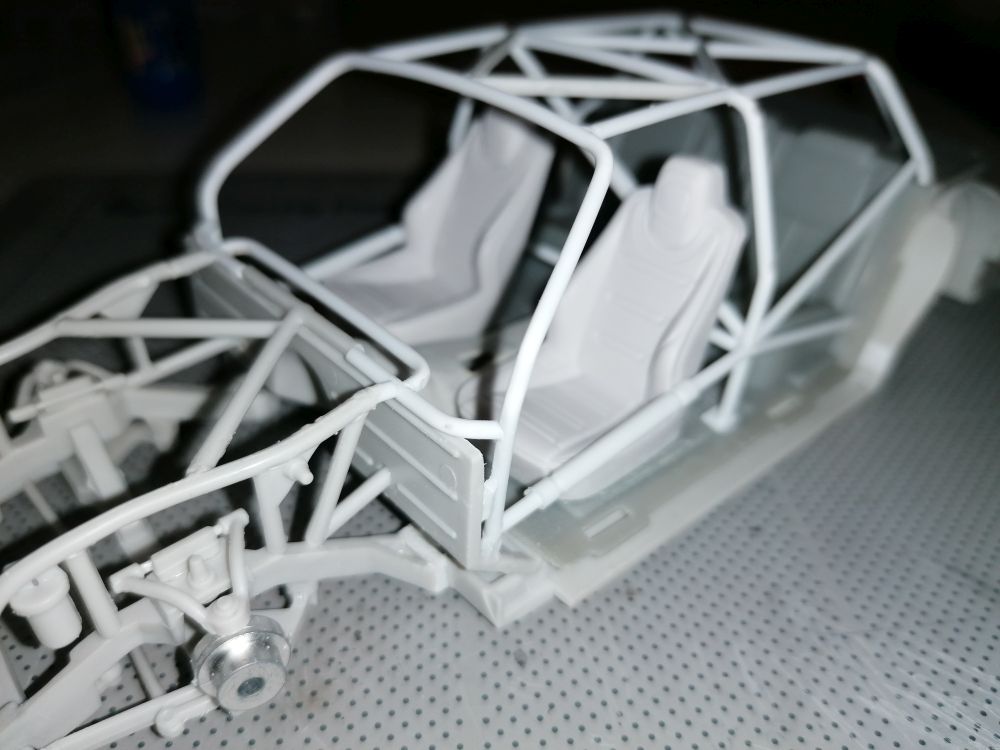
The race goes on... Nice progress here. @pete75: I´m feeling with you. Wish you luck for the second body. @misha: Your Camaro is looking good. Nice details at all. I have done some things too over the last days. Cutted out the trunk lid but on the rear I did a fail ? and cutted it above the taillights. Here´s stage 1. Stage 2: corrected it and did the water drip rails... My wife (and me too) wasn´t happy with the Monte Carlo´s roll cage because it would be seen through the rear side windows. So we (I) decided to scratchbuild a new one for a four door sedan... It´s nearly done even with some pads... After finishing the cage I will try to lift it of the chassis for easier painting then reconnect it. That´s for this week. Rico
-
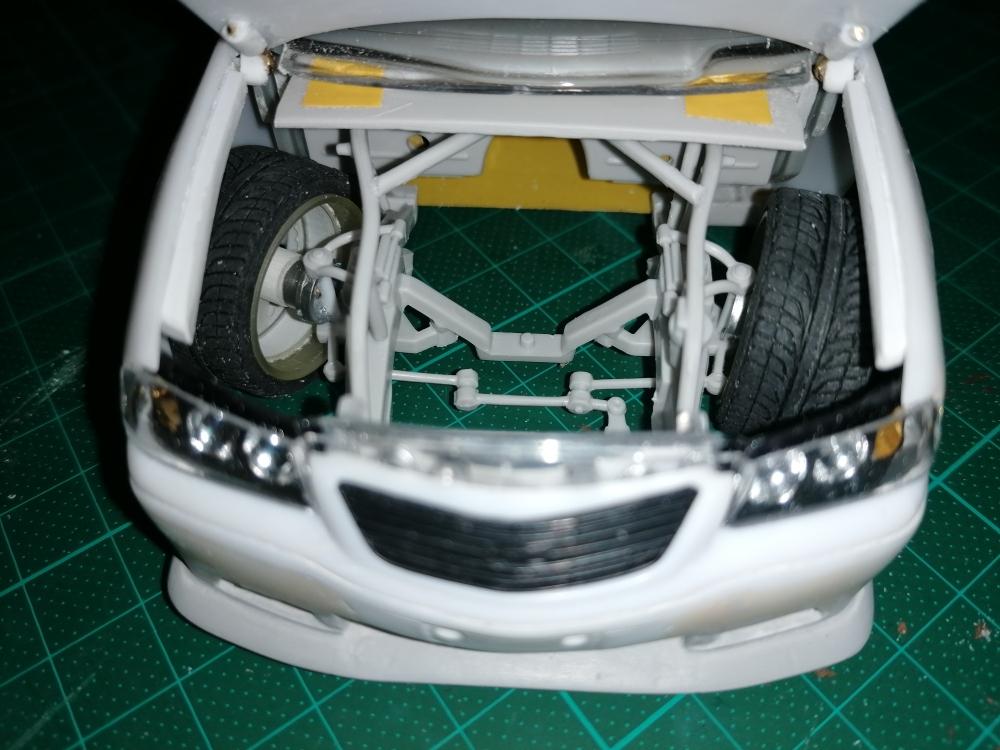
Hey guys, nice progress everyone. I did some progress too. It took three attempts to hinge the hood but now I did it. Not 100% accurate but I´m pleased with how it turned out. I also corrected the wheelbase... cutted the front frame off from the main chassis and put 1.2 mm of styrene between both parts... then glued together all the things and it turns out great. Here´s the result... open... and closed. Made the wheels steered in but haven´t corrected the steering linkage yet... (don´t worry they are not glued yet)??? Rico
-
Hey Bruce, thanks for the info about the oil pumps. I´d prefer the steelies on your build. Rico
-
Thanks Anthony ! Maybe anyone can help me with this... What should the red marked area be? In the second step there is a pulley mounted to it too (green marked) ??? Thank you all in advance, Rico
-
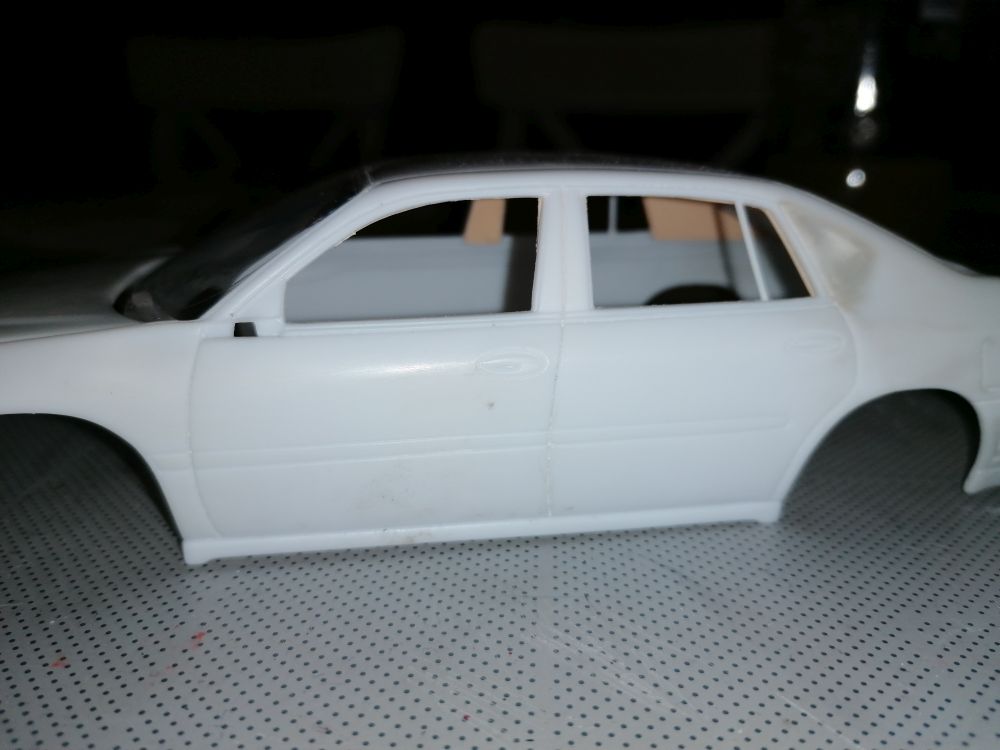
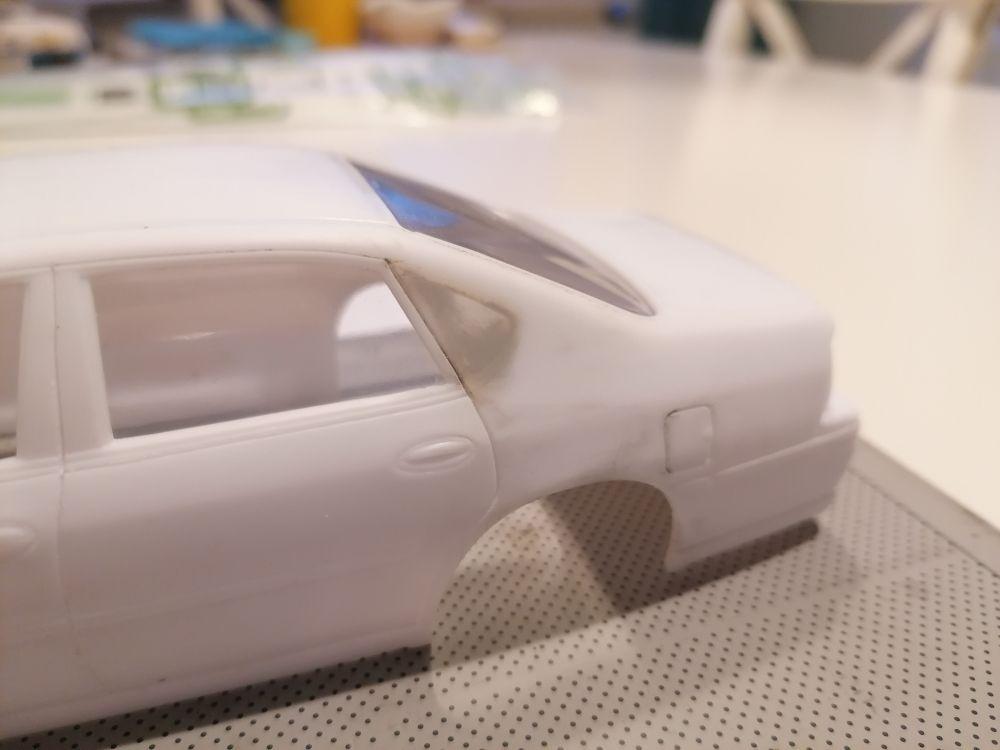
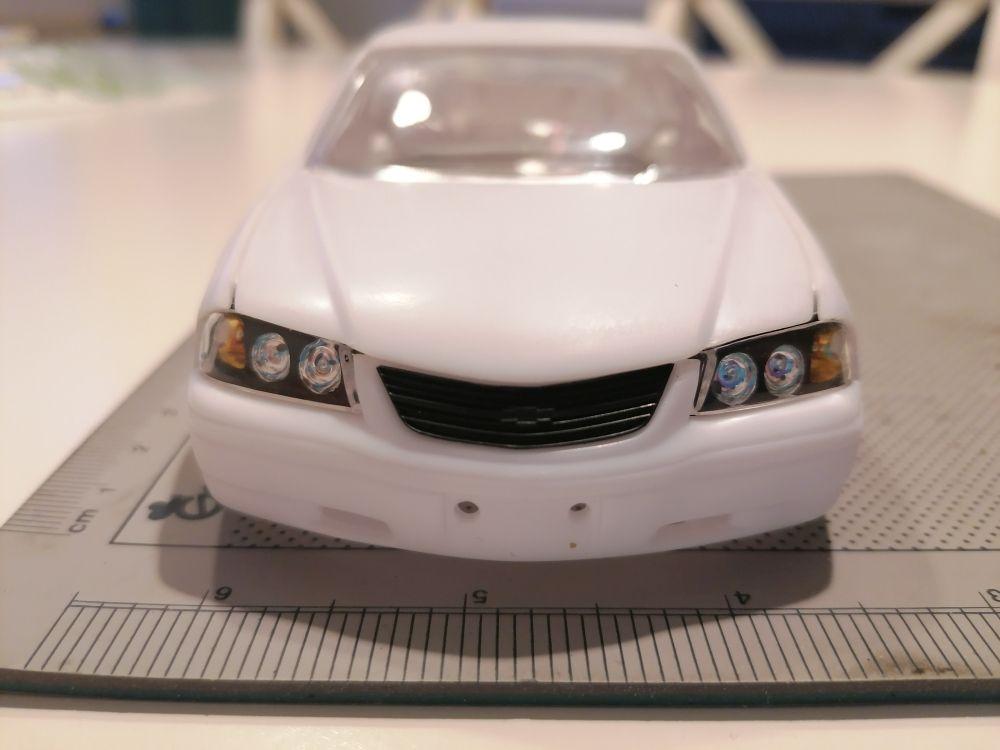
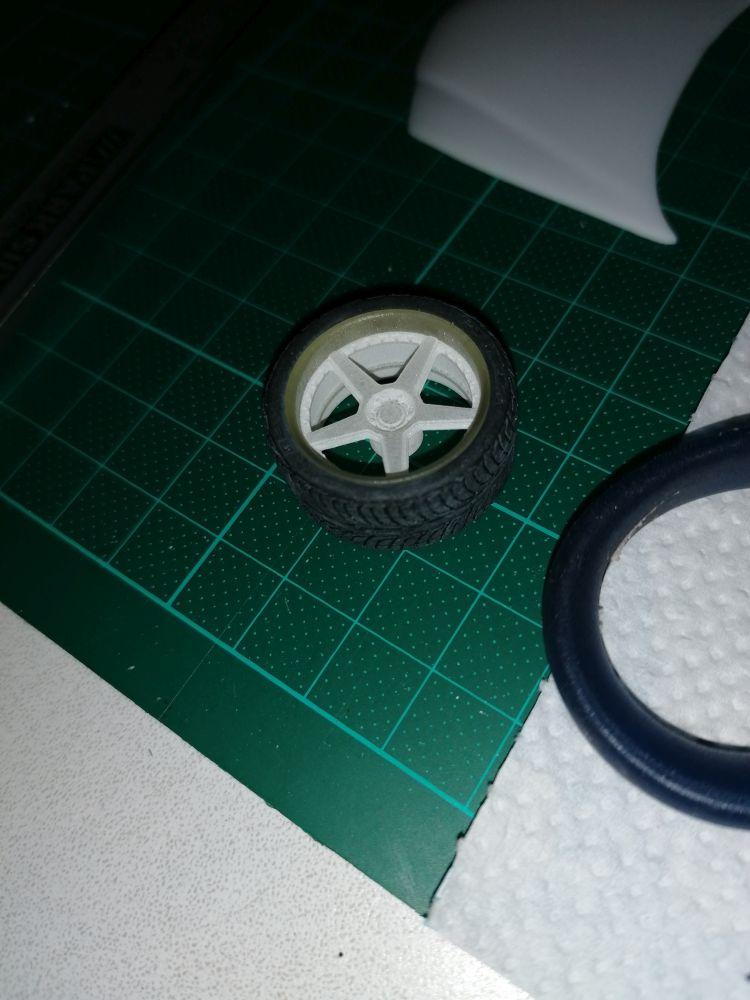
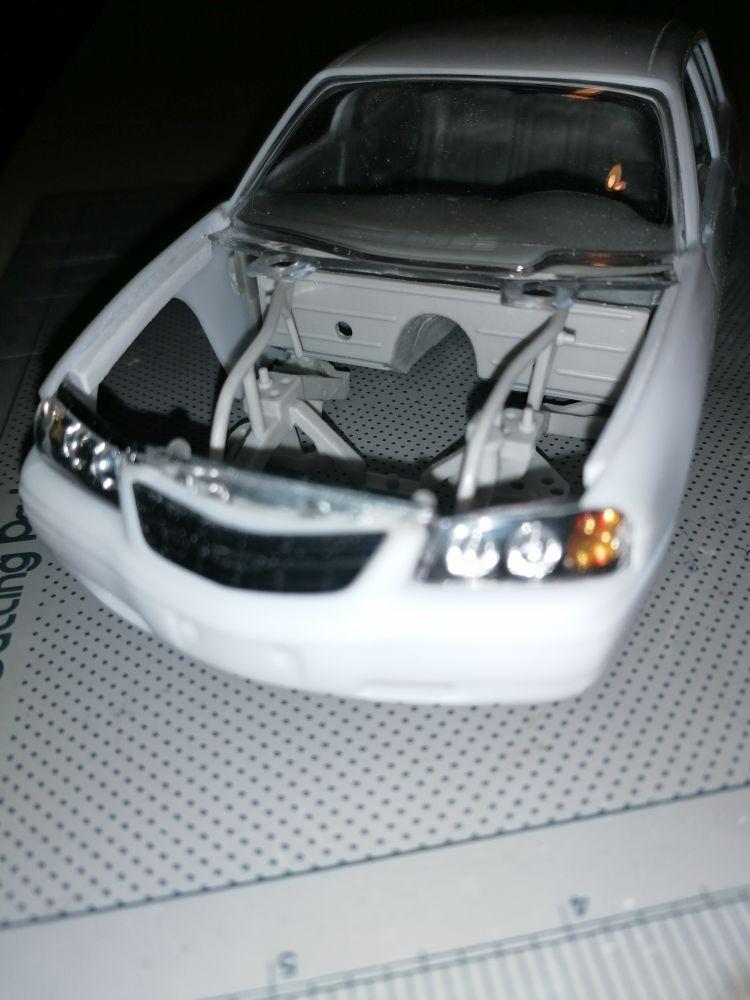
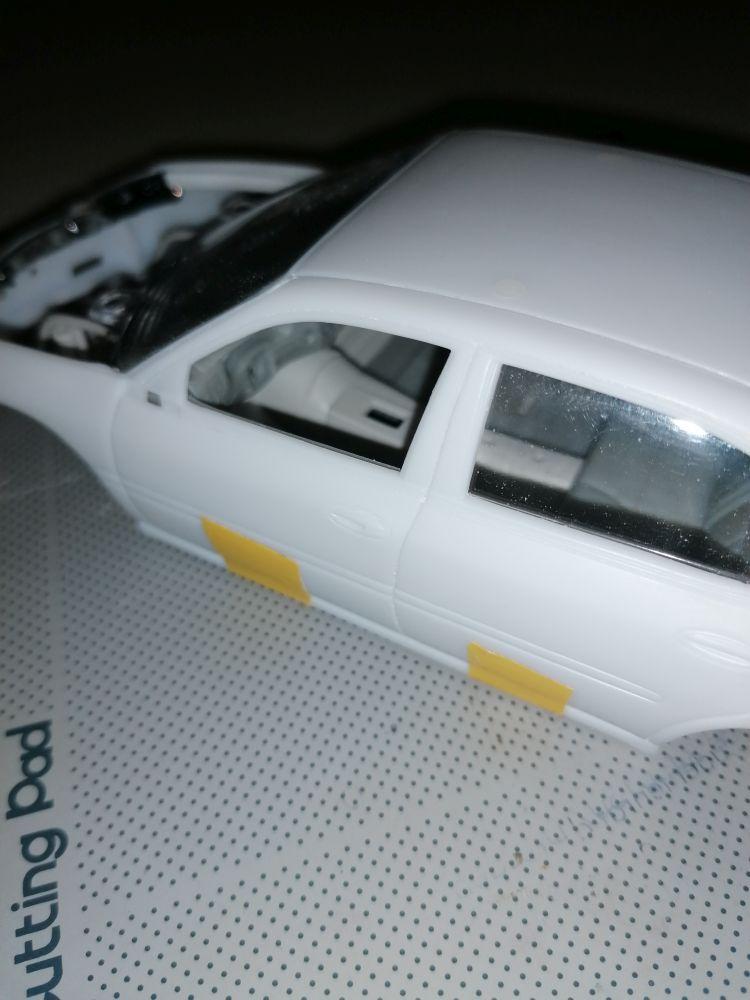
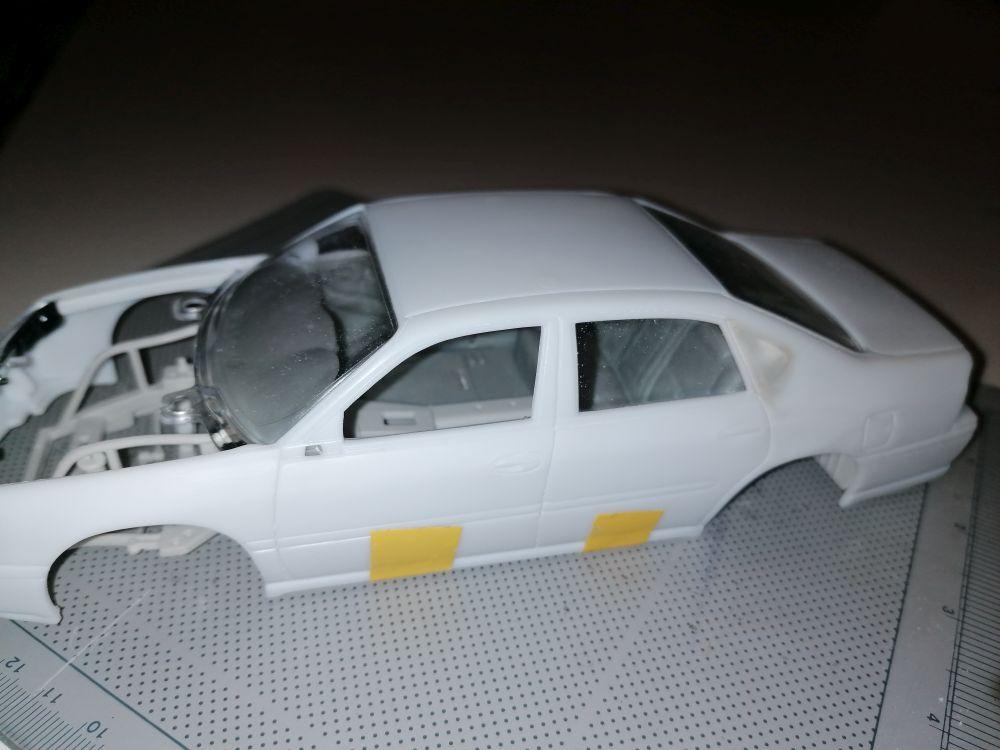
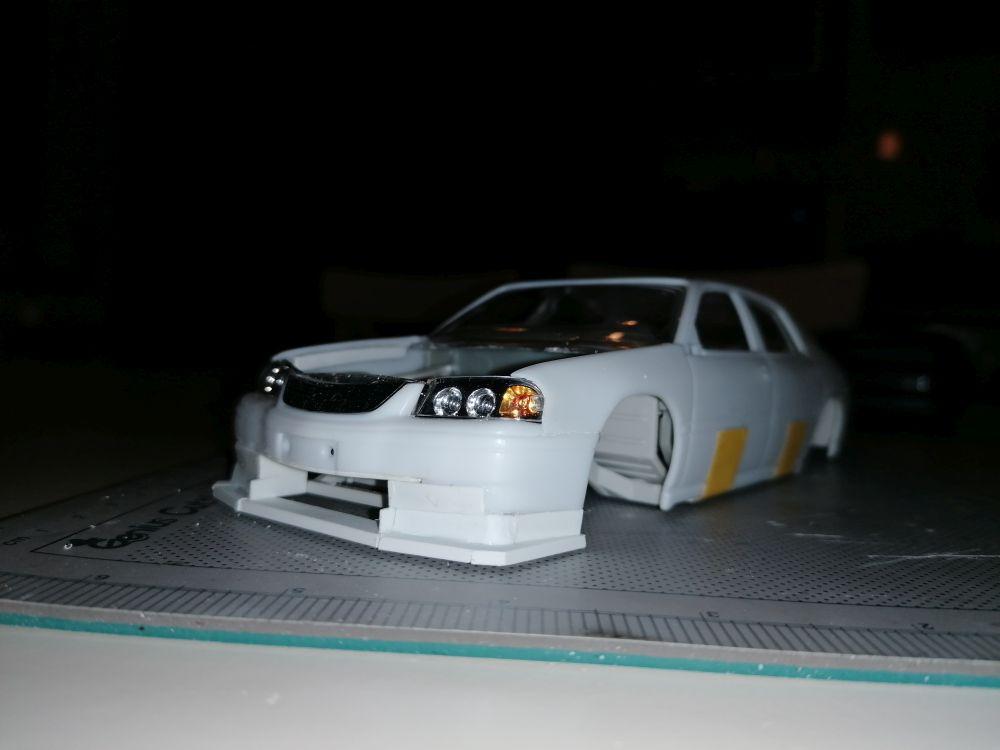
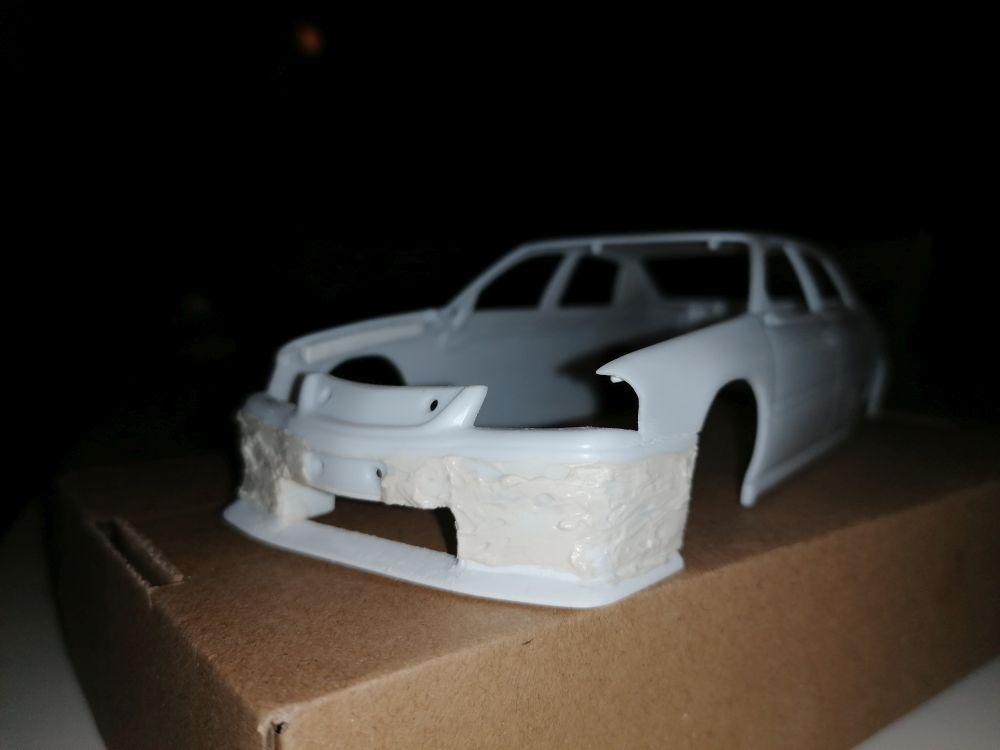
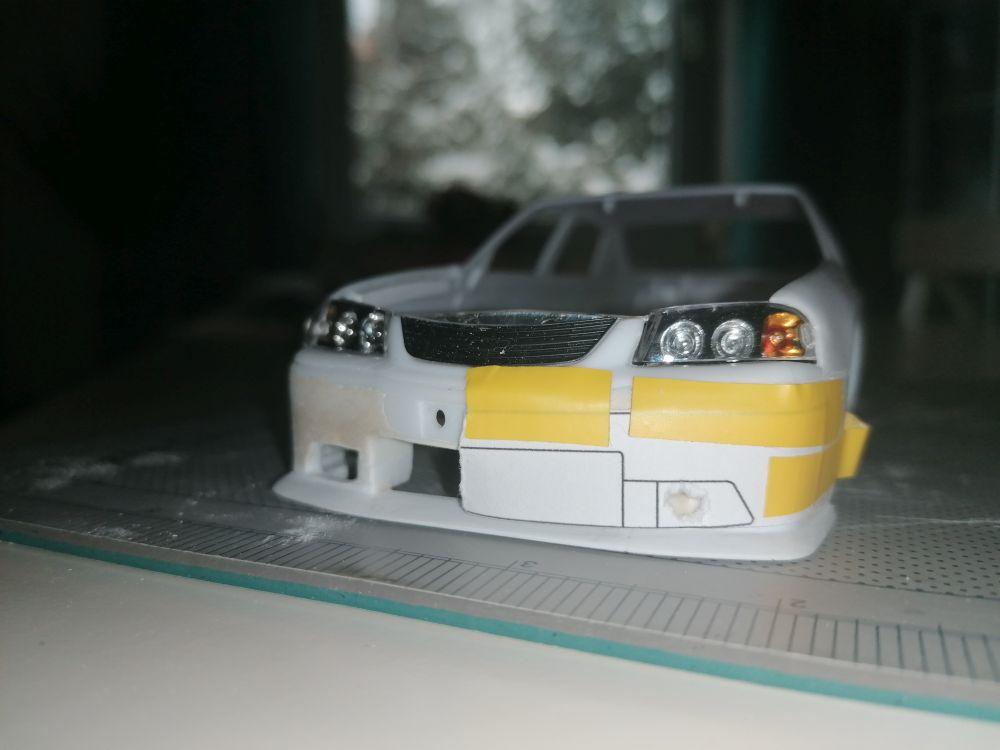
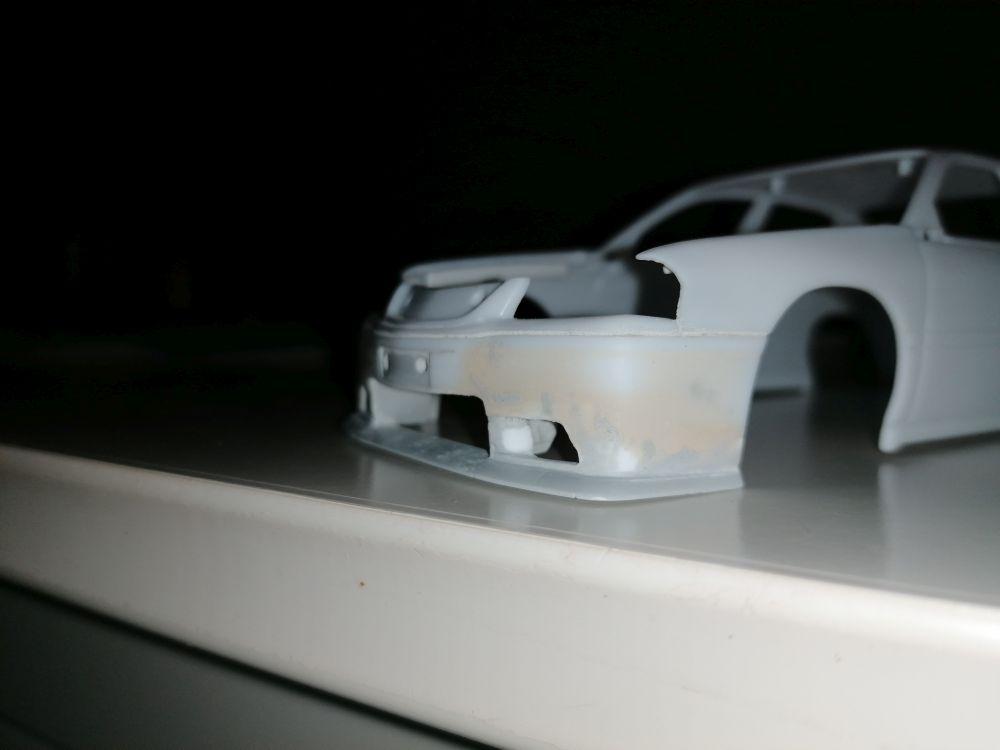
Hi Guys, it´s four weeks now since my entry post here. Had some time to build but no time to post yet. But here is my progress... First: Closed the rear quarter windows to make a wide C-pillar and rescribed all the panel lines... Second: painted the headlights and cut out the hood to make the engine visible... Third: Changed my mind on the wheels ( choosed some self-designed 3dprinted Racing Hart with different offset on front and rear) Fourth: Made the Impala interior fit the Nascar chassis... Fifth: Created a new front end... Last but not least: Tuned the rear end... That´s all for now. Hope to get some mor done soon... Greets, Rico P.S.: Congrats to the finishers. You cars are looking killer.
-
Anyone seen a 75/76 Duster grill?
camaro69 replied to DusterJoe's topic in Car Aftermarket / Resin / 3D Printed
Hey Joe, I already noticed your need. You can simply send me a PM here. Rico -
1/24 Chevy and GMC grilles for Revell/Monogram
camaro69 replied to camaro69's topic in Truck Aftermarket / Resin / 3D Printed
Thank you guys. Ideas are always welcome although my spare time is still very limited and many requests are left to fullfil. On the other hand I want to give it a try and take part on the CBR to build and finish at least one model kit this year. It´s been a very long time since my last finished build. -
1/24 Chevy and GMC grilles for Revell/Monogram
camaro69 replied to camaro69's topic in Truck Aftermarket / Resin / 3D Printed
Hey guys, orders have been cancelled. I had to rework the sprues. Did this today and will upload the new models this evening. Rico -
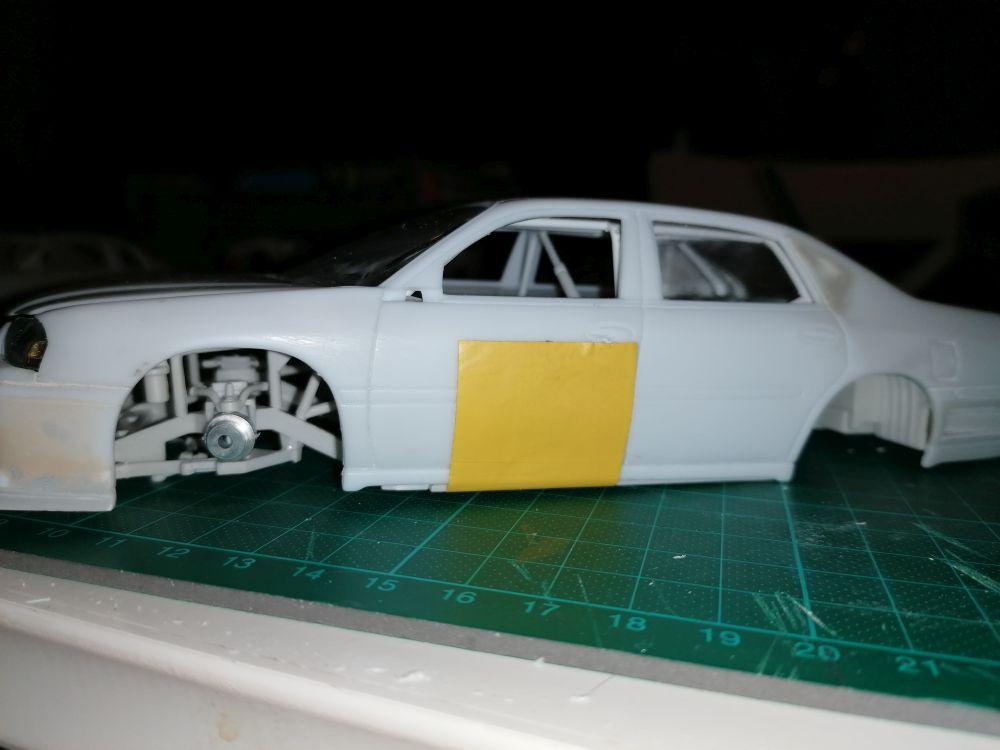
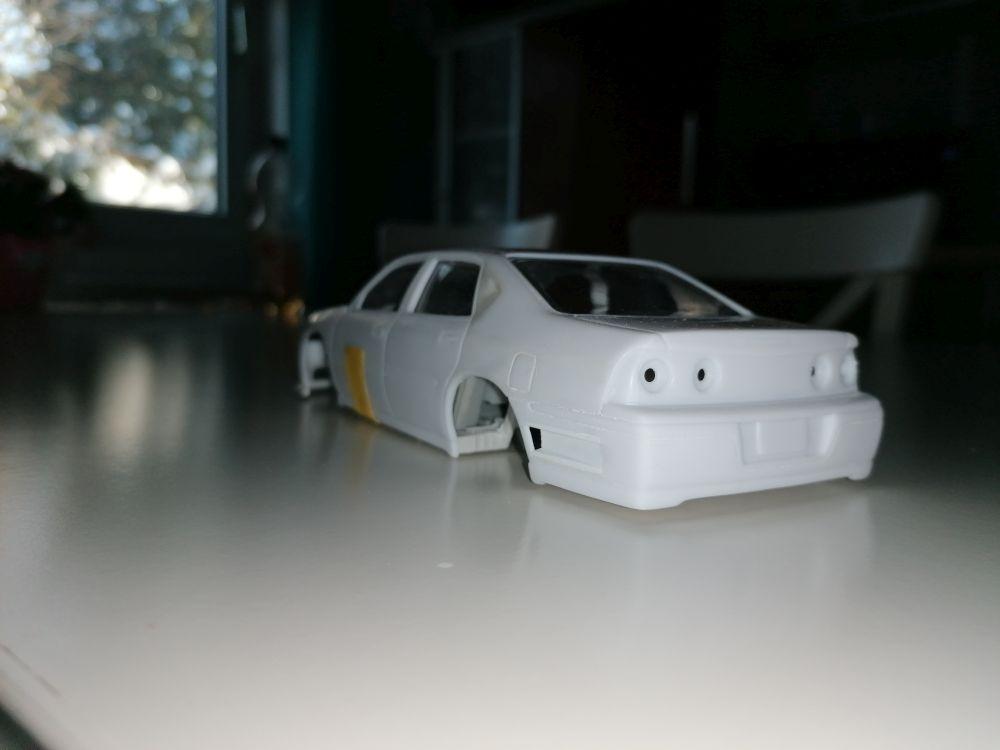
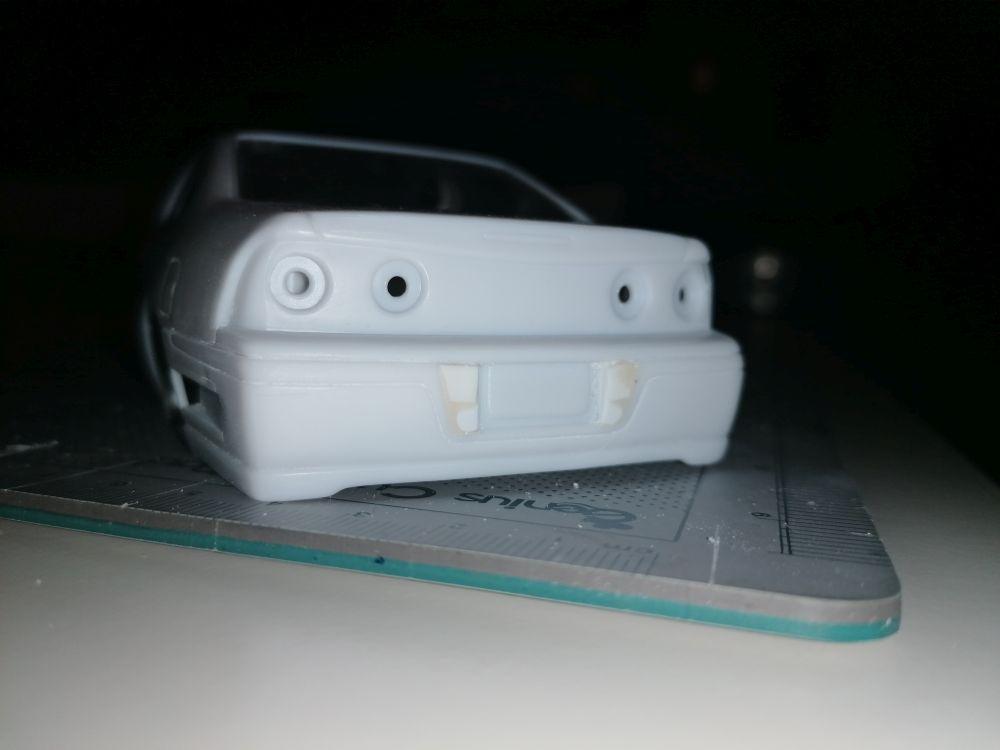
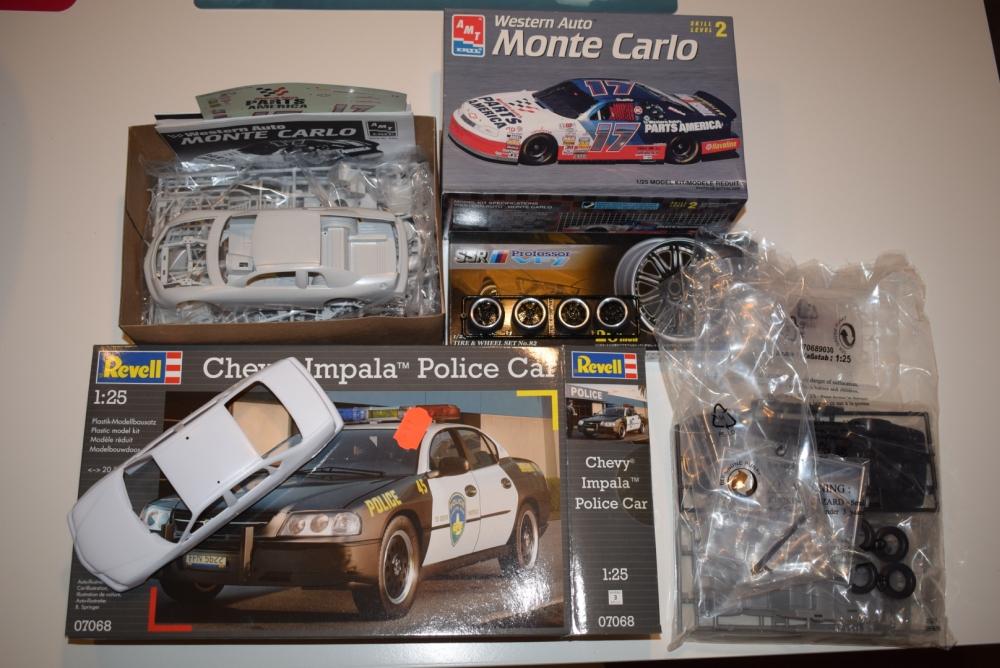
Hi guys, after my fail or even non existent participation because of moving to another town in 2019 I would like to take part this year with these. Chevy Impala Police Car body on top of the chassis from the Western Auto Monte Carlo. Will try to put the Aoshima SSR Professor wheels on it. I already found out that I have to lenghten the chassis for correct wheelbase. Greets, Rico
-
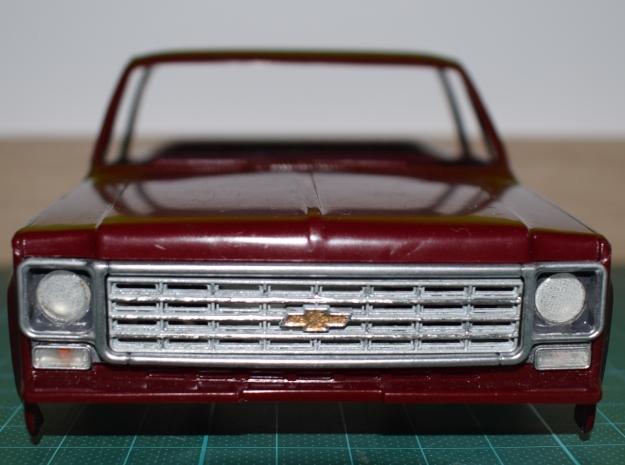
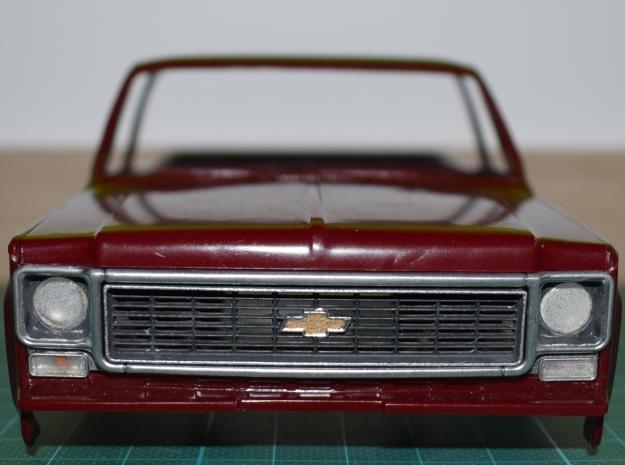
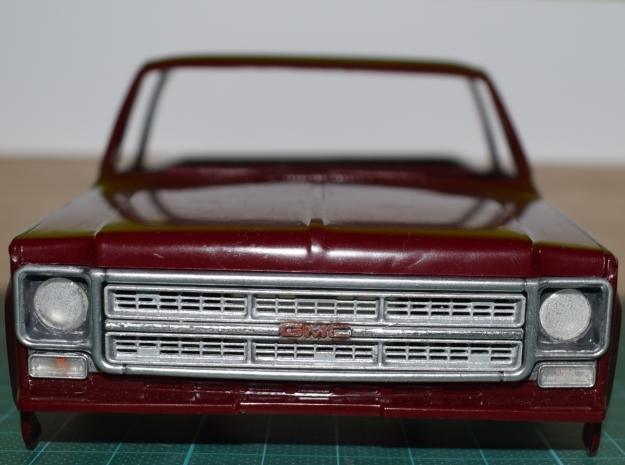
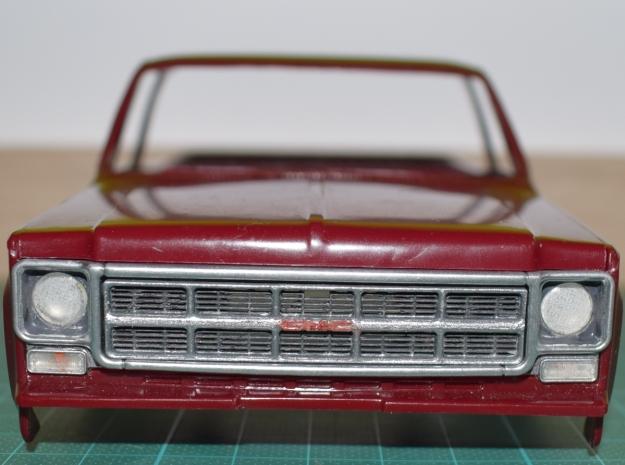
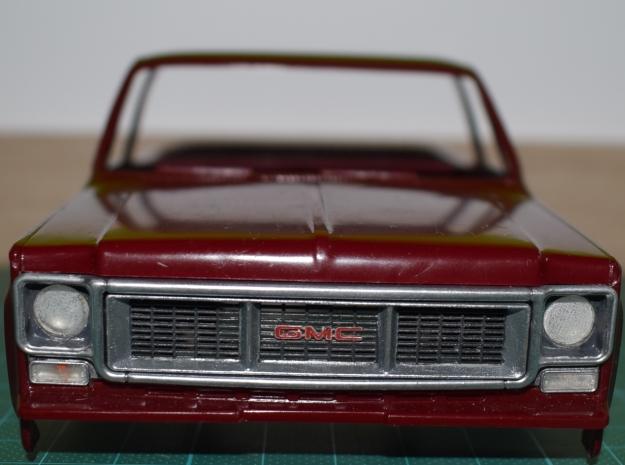
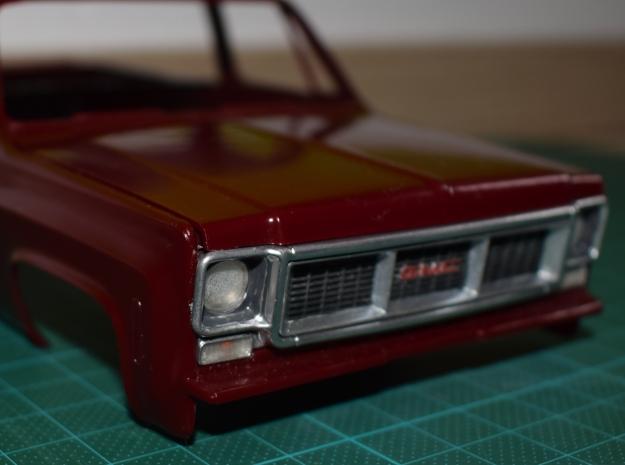
Hi fellow modelers, a long time project is finally done. I designed grilles for the 1/24 scale kits of the Chevy Blazer and the GMC Pickups from Monogram and Revell. I did three model years for both and they are now available at my shapeways shop. https://www.shapeways.com/shops/ra-sti-acute-s-scale-accessories Here some pics of the painted test prints I ordered to make sure they´ll fit. They are all open and made out of six seperate parts (grill housing, grill insert, headlight lenses and turn signal lenses). I added a seperate lens of each if one gets broken or lost. Best regards, Rico
-
Hello fellow modelers, many of you know me already and requested or even bought some parts trough my shapeways shop. I want to take the chance and thank all of you guys for your support and much more for your patience. Last year I moved with my family far away (325 km ?) from our old hometown, changed my job, and started to renew our "new" home. It was a very, very busy year. On the other hand before I started with my shop I never thought that the ammount of requests would become so much in such a short time. Meanwhile there are some members here waiting for parts already two years now (especially BobbyG - who sent me a body and parts of MPC´s 69 Plymouth Barracuda). It´s really hard to explain why I didn´t finished these parts yet. That´s why I wanted to let you all know that I will fulfill all the requests. I do all the designing and drawing as hobby beside my regular job which takes about 40 up to 50 hours a week and my family. Because I have three weeks of holidays over XMAS this year I want to finish some parts over that time. I wish all of you a Merry Christmas. Rico
-
You only have to type your letters aus you do in any other software. You can even set the distance between the single letters and after you are satisfied you can convert them into curves with two mouseclicks. As Peter said: Inkscape is a free vector drawing software. You can import your jpg and convert it into curves. The only problem is that you have to smooth the automatically generated curves. It's a learning process but it works too.
-
Vector graphics can have a transparent background. 950 mm = 37,4 inches, that's the maximum width at decalprint.eu It's your choice. I only wanted to let you know that I could.