camaro69
-
Posts
272 -
Joined
-
Last visited
Content Type
Profiles
Forums
Events
Gallery
Everything posted by camaro69
-
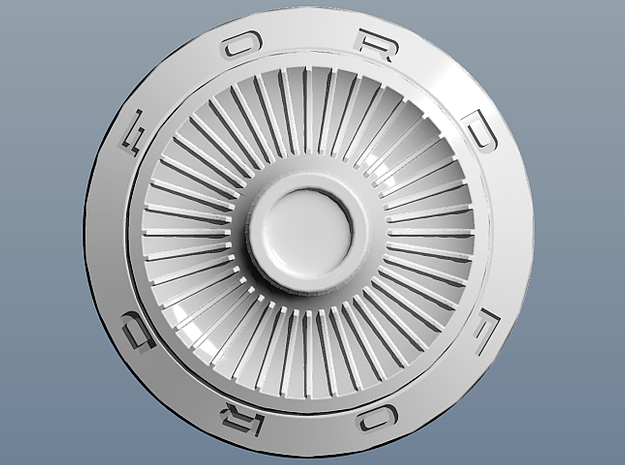
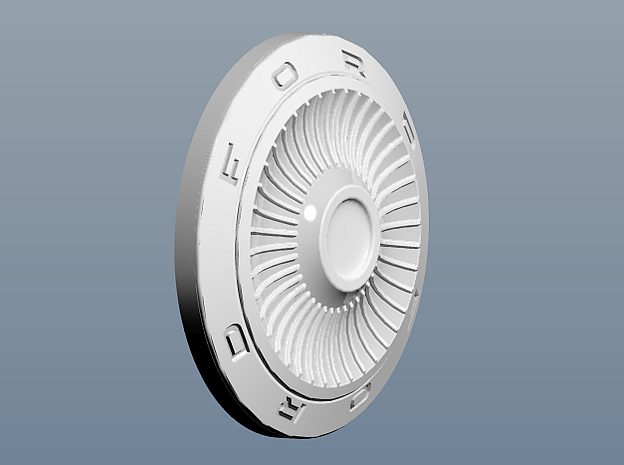
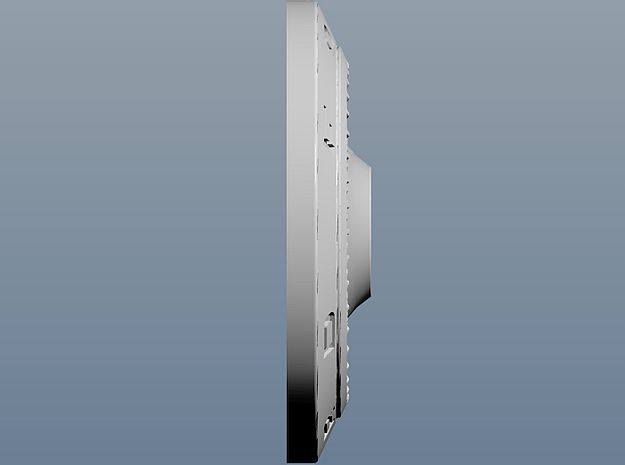
Hey guys, had some time today to check the dimensions of the hubcaps. Would call them done now. I really hope the details come out like they should. Please let me know what you think. Will put them into my shop in the next days as a set of 8 caps. Best regards, Rico

-

AMT Go-Kart Aftermarket Parts
camaro69 replied to afx's topic in Car Aftermarket / Resin / 3D Printed
Let me know via PM. -
Thank you guys. Nice to see that there´s so much interest in these items. Håkan sent me a big bunch of photos with dimensions so I can check now if my 3d model is correct. @gtx6970: Best way is to simply send me a PM. One thing I can tell you already is that I don´t have a ´67 GTX in my stash. So I need dimensions of the kits parts you want to have to be replaced. I hope this helps for the first time. Update will come.
-
Already started on these... Here some rendered preview pics. They have a flat back. Diameter 10.7mm, depth 1.96mm. Rico
-
THANK YOU FOR YOUR PATIENCE WITH ME BOBBY. I had never thought that I would get so many requests in that short time.
-
I already created different grilles for the 1/24 Revell Ramcharger. The 1977-78´s is available in 1/25 scale too (only scaled down but fits the Dodge Little Red Wagon kit). The other ones I also plan to scale down in the near future. If you would like to see, here´s the link: https://www.shapeways.com/shops/ra-sti-acute-s-scale-accessories
-
Hey guys, the Cuda grille isn´t there because I had to thicken the outside yet to make it offerable for everybody. The testprint I ordered by myself and this makes the difference. Let me explain: As a designer you have the possibility to order your part with the option "Print it anyway". This means even if the walls of your parts are a little bit to thin you´re able to order these parts. As a customer you don´t have the opportunity to choose this option. This means the designer has to thicken the walls to make the part available for customers. Because of my less spare time since April last year I hadn´t the chance to do this. I started already but it isn´t ready to go. Once I´ve done it I will post it here for sure. BTW Bobby is still waiting for the tailpanel and I´m really sorry that I haven´t finished this. But I want to bring it to live too. I hope you will be patient with me and give me some more time. THX, Rico
-
72 Buick Riviera Boattail (Update 18/12/26)
camaro69 replied to camaro69's topic in Car Aftermarket / Resin / 3D Printed
No progress yet. Lot of work and much less spare time. But it will be finished anyway. I´m still in need for the chassis and interior for reworking this too. -
1988 - 1991 Ford LTD Crown Victoria Scratchbuild
camaro69 replied to DEL's topic in Car Aftermarket / Resin / 3D Printed
I want to thank you three guys for bringing this to life. Received my copy today and have to say it´s an awesome work you did and do. King regards, Rico -
-Monogram 1971 'Cuda Front Valance-
camaro69 replied to 1972coronet's topic in Tips, Tricks, and Tutorials
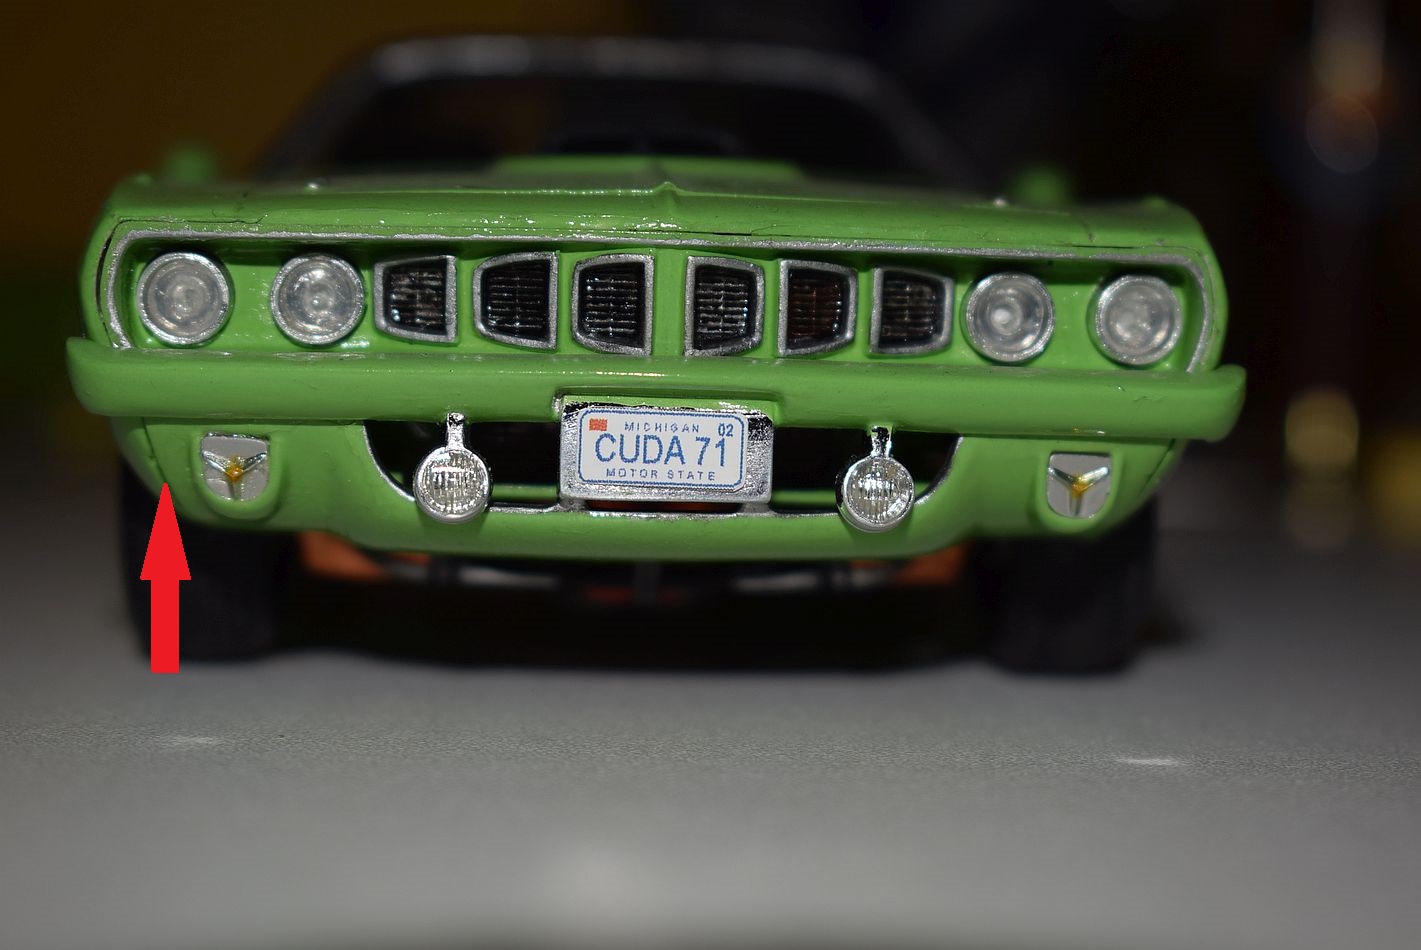
Hi John, did this correction on my Cuda a long time ago... On the first pic you can see that I cutted the front valance into three pieces. The side pieces I simply glued to the fenders. After that I puttied and sanded these areas into shape. The center of the front valance is still one part with the grille. No other modifications were necessary. Hope that helps. Rico
-
Hey guys, after some additional research I overthought the engine compartment for my build. Will go with the Cammer from Revell´s ´99 Mustang SVT Cobra. Rear suspension will also come from this kit. I know it´s a 1/25 kit but the parts seem to fit very well. Update pics will come soon. On the other hand I´m trying to build a base for finish line photos. Hope to get this done as well. @ Scott: Like your progress on the high roof and the suspension. Looks pretty cool for me. Sorry I couldn´t help you this time (that fast)... @Jacob: Like your idea for the decals and the 4x4 drive. It´s looking very interesting. Best, Rico
-
Although I´m new to the CBR too, I wouldn´t have a problem with using a diecast. Let´s see what Ryan is making out of it... Happy new year and let´s go.
-
@ Jim: Me too. @ Bob: Seems to be the same thing I wanted to do with my Panel...
-
This is VERY interesting. Hey Mike, what´s interesting? My project or the sentence below? BTW: Nice choices of kits already in here... Greets, Rico
-
72 Buick Riviera Boattail (Update 18/12/26)
camaro69 replied to camaro69's topic in Car Aftermarket / Resin / 3D Printed
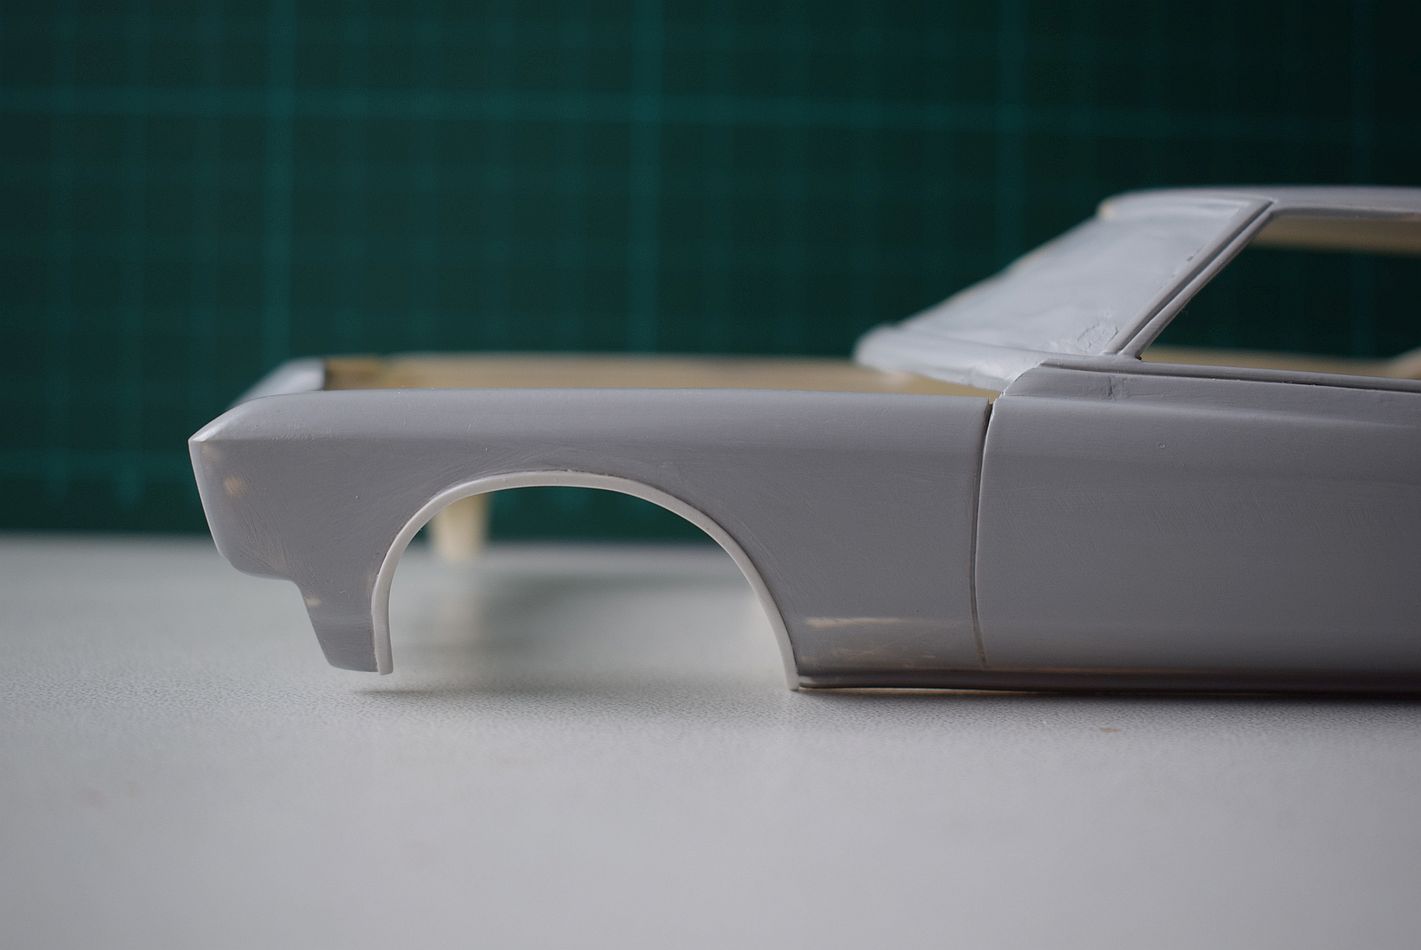
Thank you Peter for your suggestions. I really apprecciate this. The wideness of the wheel-well moldings is no problem. I can ever grind there a little more. There is no point with more then 0.25mm offset from the bodies surface on these... Maybe it´s the photos angle which makes them look thicker. We´ll see how it´s going on... Thanks, Rico -
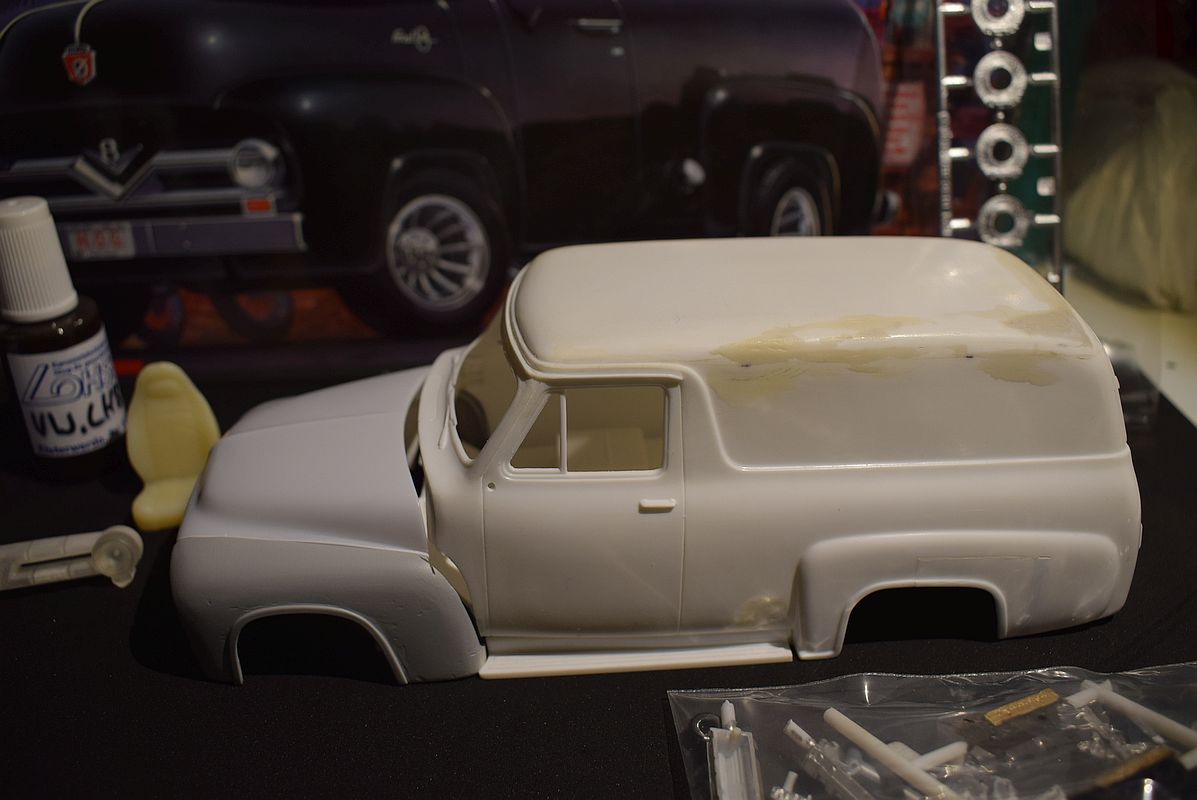
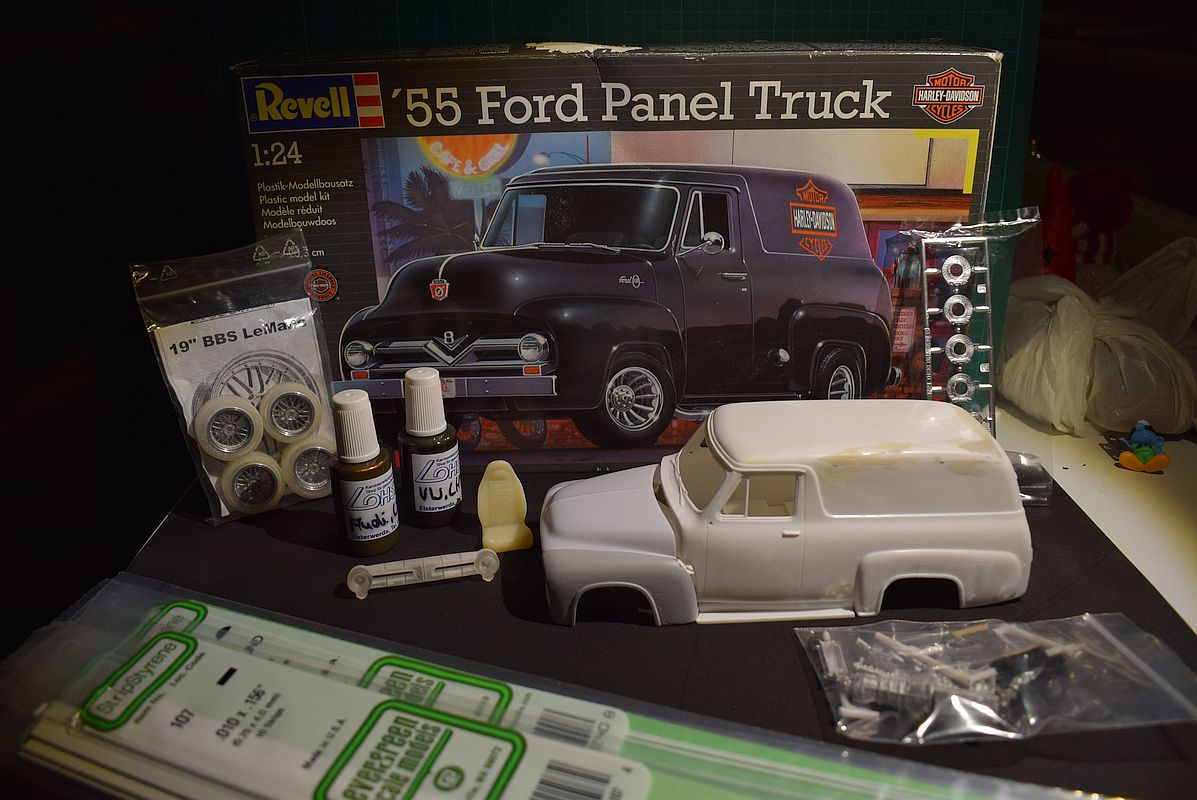
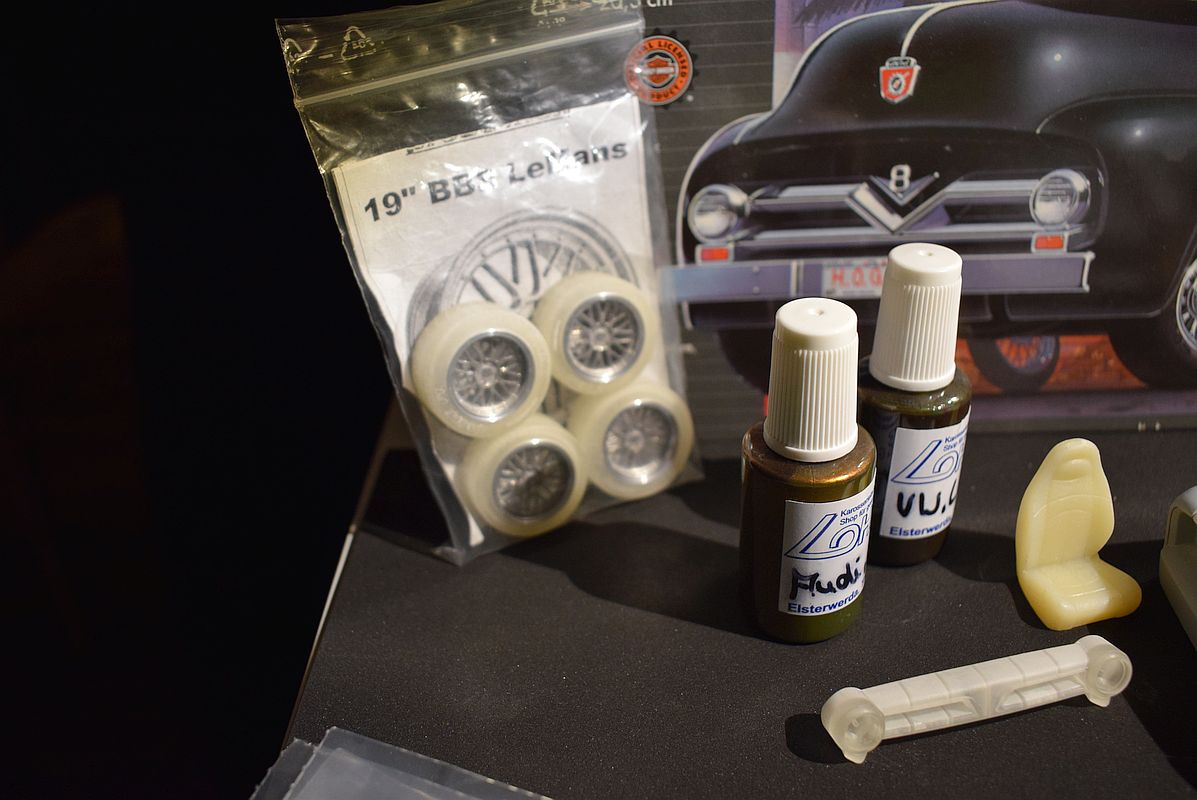
Here is my entry (first time ever)... the 1/24 scale ´55 Ford Panel Truck from Revell. Already started (some bodywork) but I would call him at maximum 5% complete... Scaleproduction 19" BBS LM wheels with 3d printed Good Year Eagle F1 tires, VW and Audi laquer, 3d printed ´53 grille, resin casted seat. There will be two seats but I have to give the first one the right pattern before casting again. 2005 Shelby GT500 engine parts from a gluebomb I found on eBay... Hood from the ´56 Chip Foose PickUp... Happy building for all... Best, Rico
-
72 Buick Riviera Boattail (Update 18/12/26)
camaro69 replied to camaro69's topic in Car Aftermarket / Resin / 3D Printed
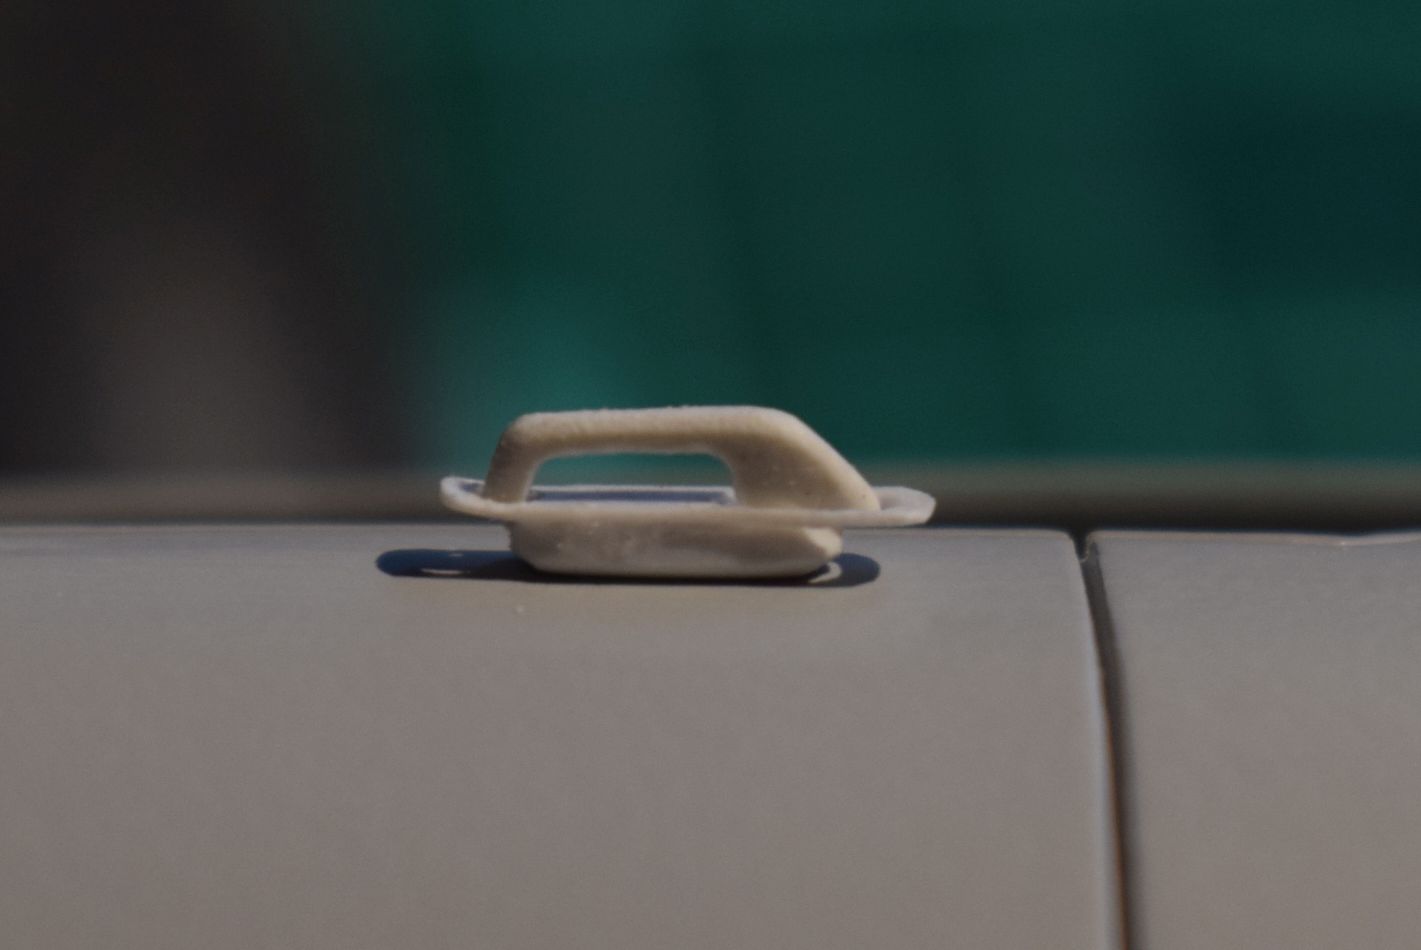
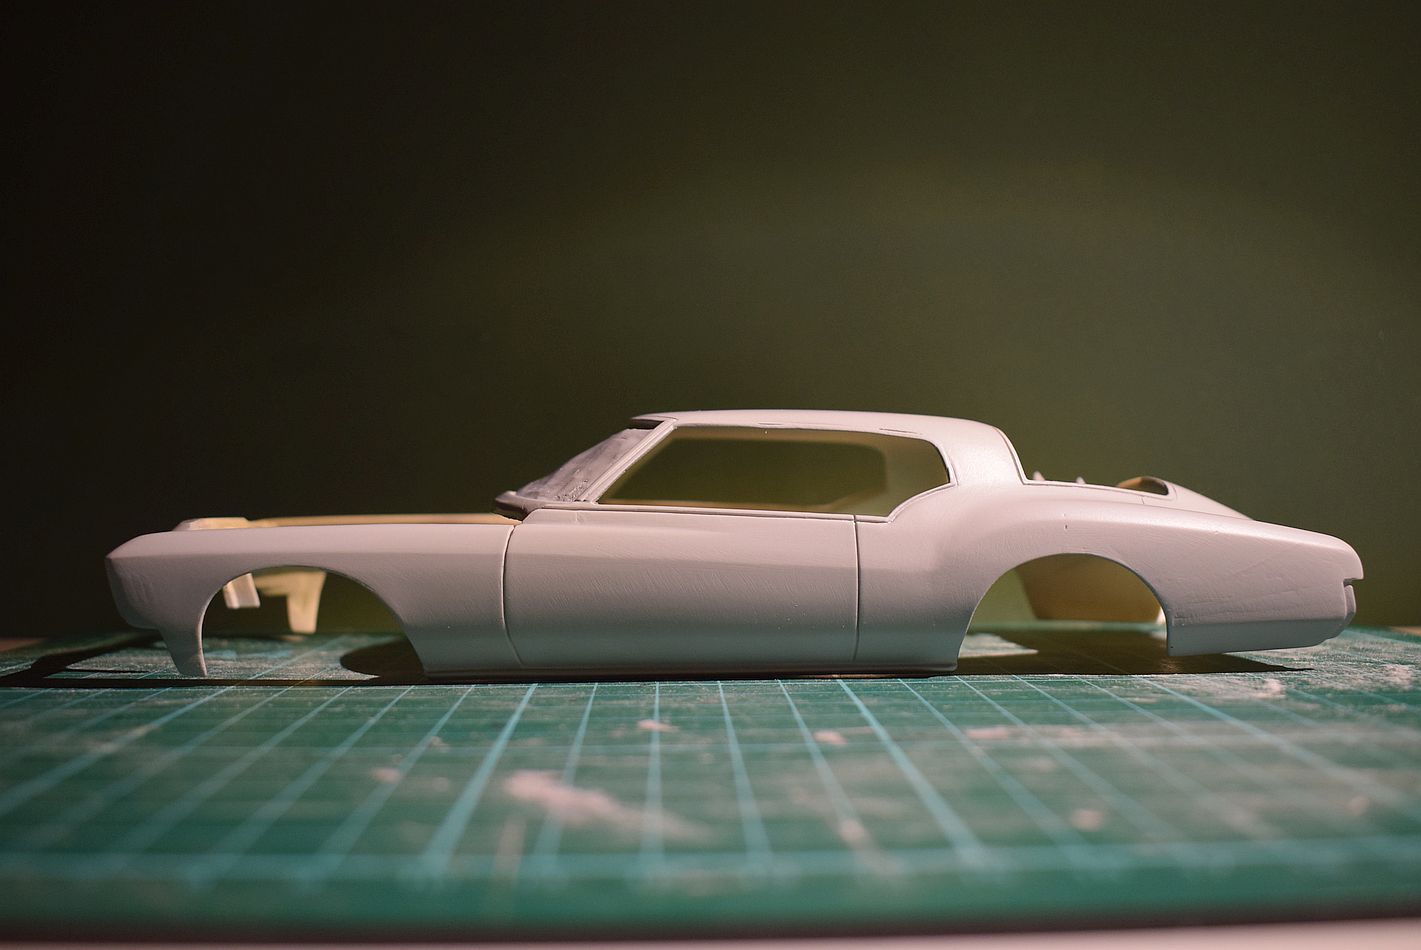
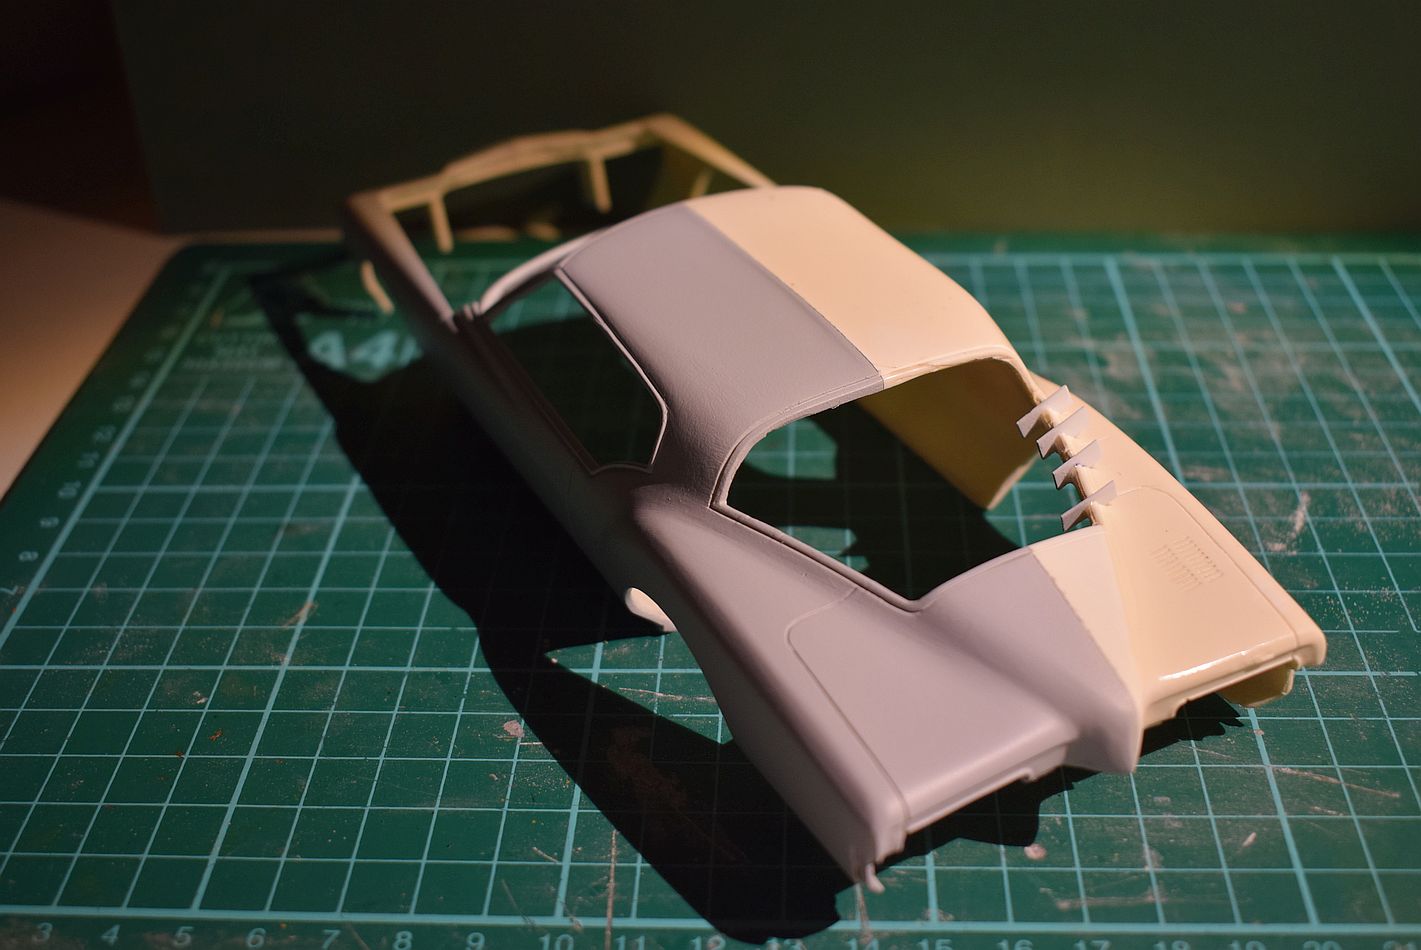
Hey buddies, shaved down the moldings around the wheel openings. Think it looks much better now but don´t know if it´s the final result. @ Peter: I really apprecciate your interest in this and I want to make it offerable for everybody who wants one. New glass will be created too. Then came my first attempt ever to build a door handle from scratch. It should become a little smaller I think but the shape looks just right to me. Also I´m thinking of making the thinner side a little longer for using it as a pin and adding an extra pin to the wider side. Then only drill two holes into the body where the handle should sit ?! The handle plate I would glue directly to the body without the block behind it... What do you think about these suggestions? Thank you all for looking. Rico
-
72 Buick Riviera Boattail (Update 18/12/26)
camaro69 replied to camaro69's topic in Car Aftermarket / Resin / 3D Printed
Thank you all for your encouragement. @Peter: I noticed already that the moldings will be to thick. Will try to correct this the next days and show you the progress when done. @Mike: Yes I planned to cast this when ready. -
72 Buick Riviera Boattail (Update 18/12/26)
camaro69 replied to camaro69's topic in Car Aftermarket / Resin / 3D Printed
Thanks Bill, the mirror and door handles will definitely be seperate parts. I had the same thoughts about the mounting. We´ll see how I can handle it. -
72 Buick Riviera Boattail (Update 18/12/26)
camaro69 replied to camaro69's topic in Car Aftermarket / Resin / 3D Printed
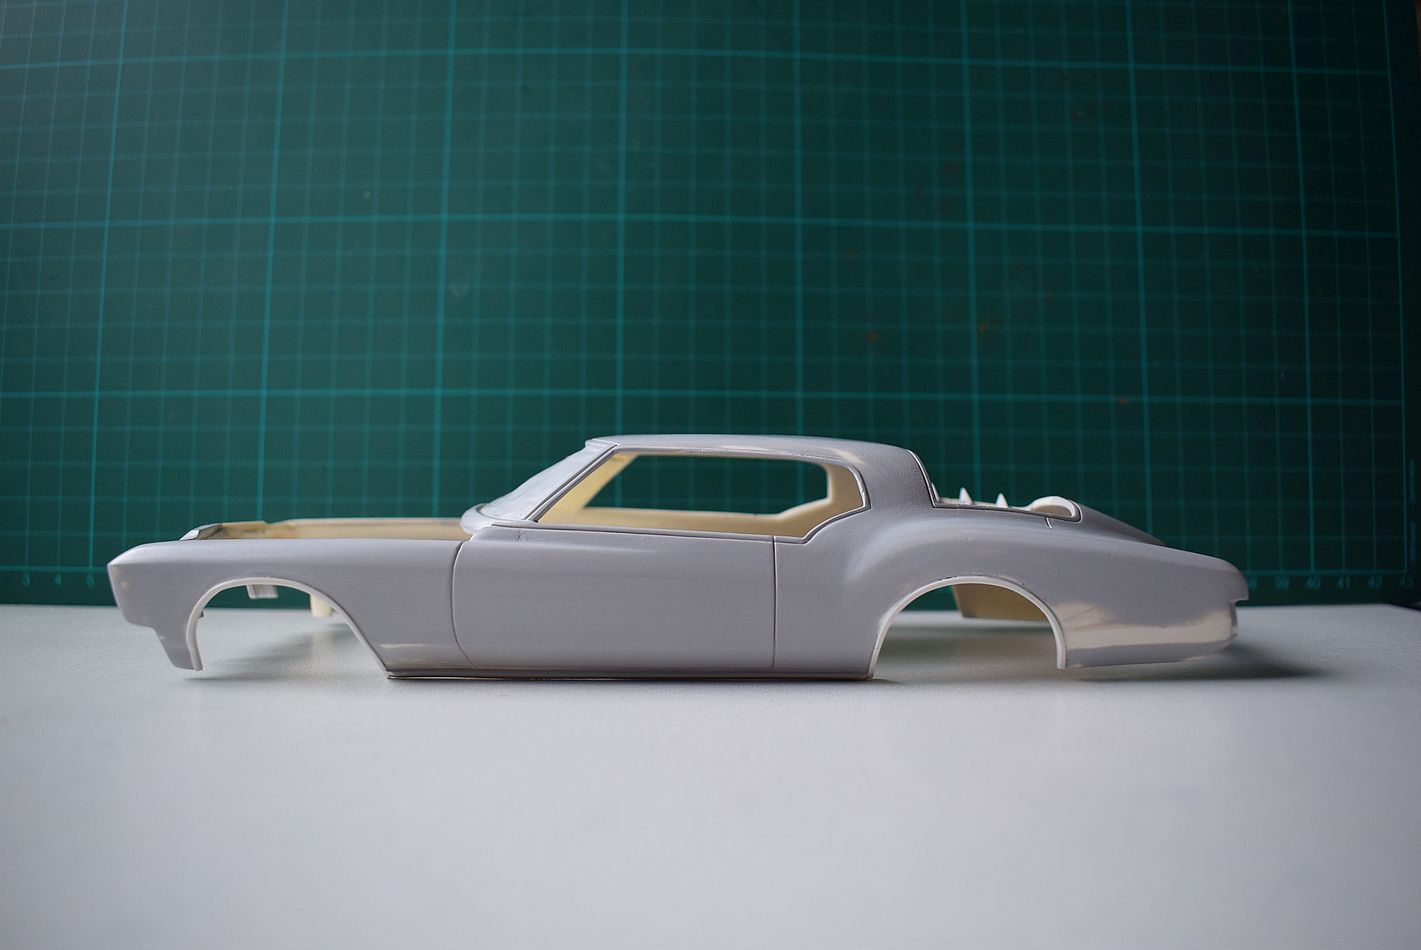
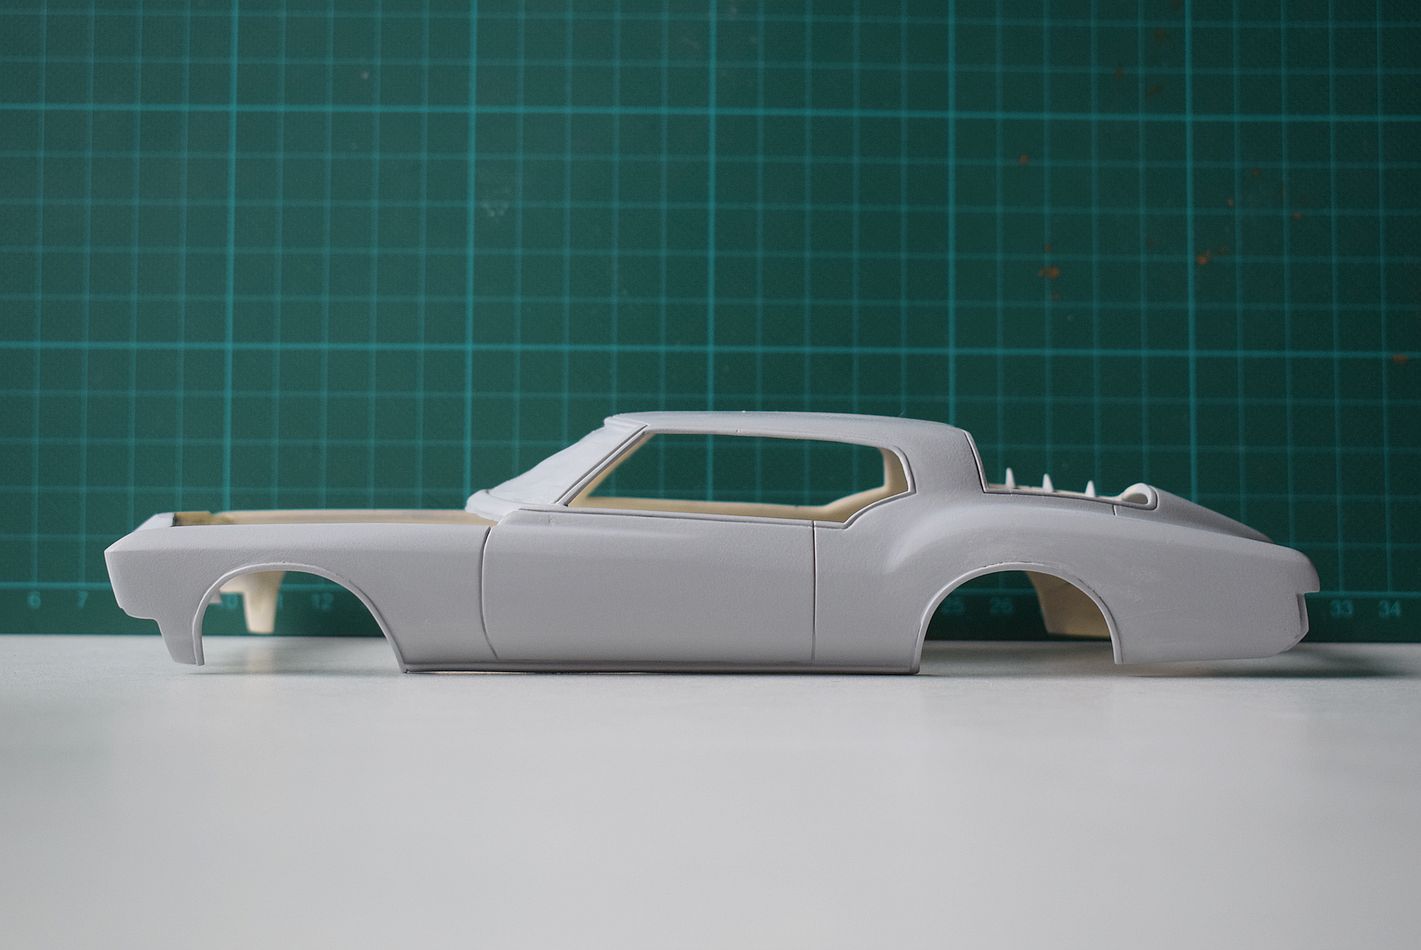
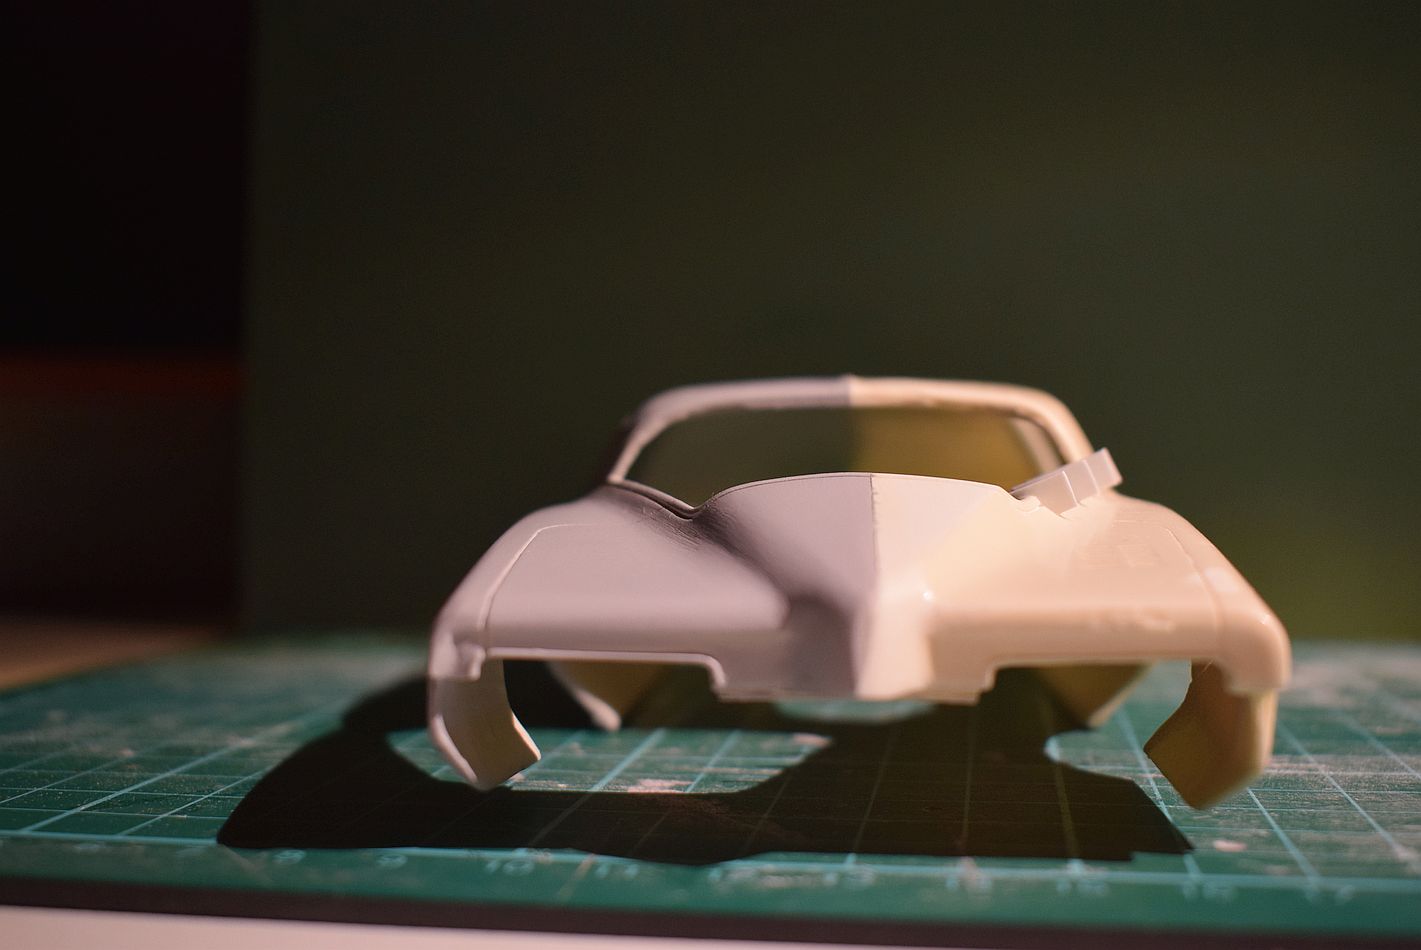
Thank you Kris! A small update before Christmas... Added the chrome trim around the wheel openings out of 1mm sheet styrene and sanded them in shape. And I corrected the rear a little bit for the parking light and the rear bumper. The cut above the upper side window edge was filled too. At least some filler primer again. I still thinking about how to mount the side view mirror and the door handles. Hope you´ll like it. Any comments and suggestions will be much apprecciated. Thanks again for looking and wish me luck for the passengers side. Rico
-
Bench seat and grille for '69 Roadrunner
camaro69 replied to vintagercr's topic in Car Aftermarket / Resin / 3D Printed
Hi Steve, yes I´m selling on shapeways. I understood that you want the Roadrunner grill. Because of the other grilles it will be relatively simple to make it. Let me know if I should do one. -
Bench seat and grille for '69 Roadrunner
camaro69 replied to vintagercr's topic in Car Aftermarket / Resin / 3D Printed
I have already modeled the 68 RR, GTX and the 69 GTX grill for 3d printing. Take a look if you want. Would be able to do the 69 RR too. Also had a request for the 68 bucket seats. Once I have them on the bench maybe I can also model the 69 bench seat. Rico -
72 Buick Riviera Boattail (Update 18/12/26)
camaro69 replied to camaro69's topic in Car Aftermarket / Resin / 3D Printed
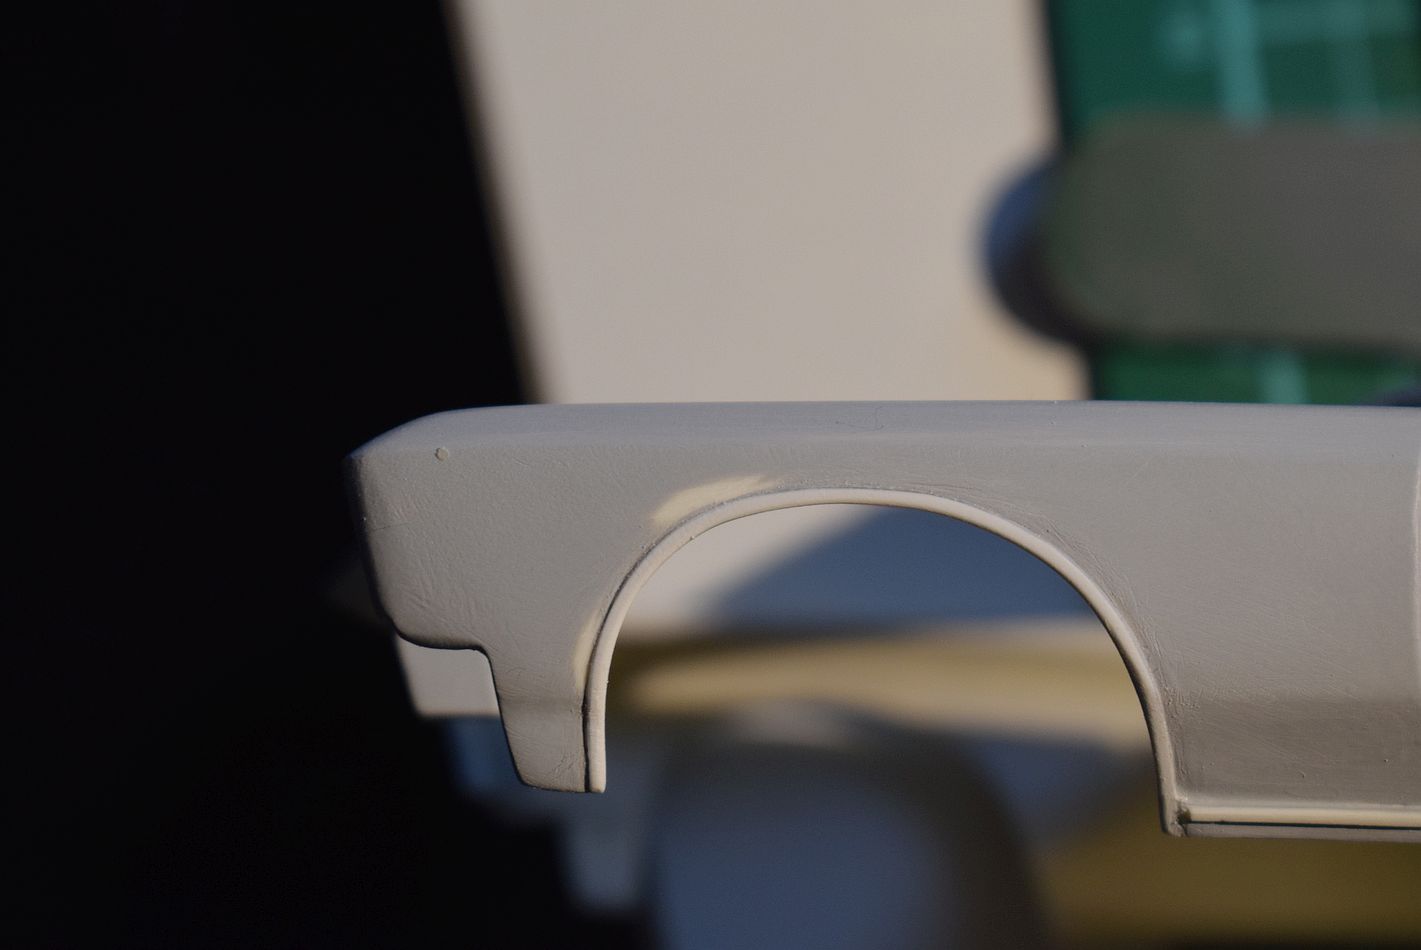
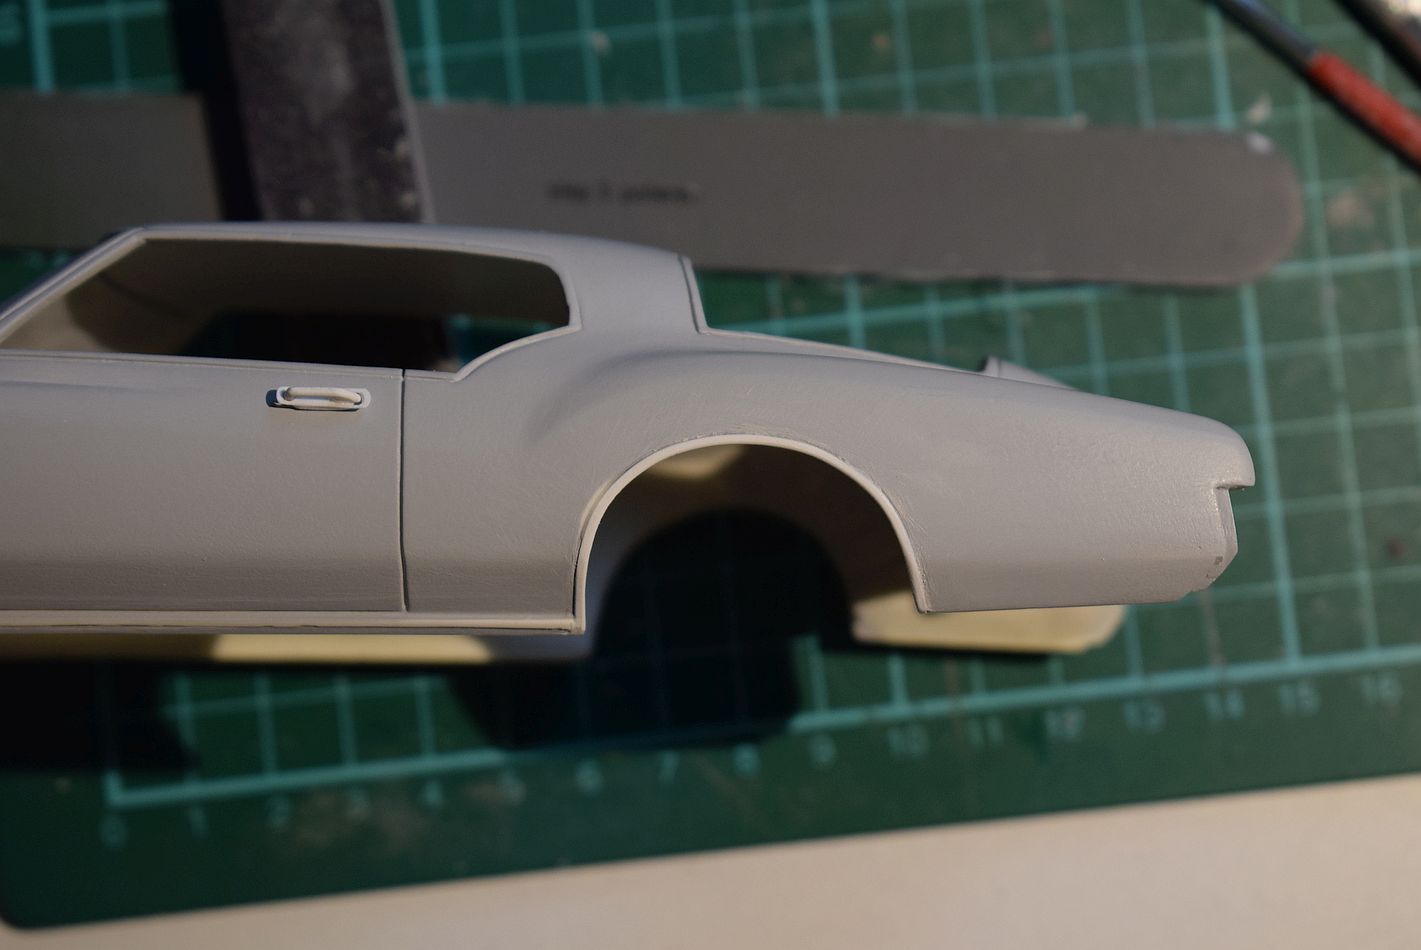
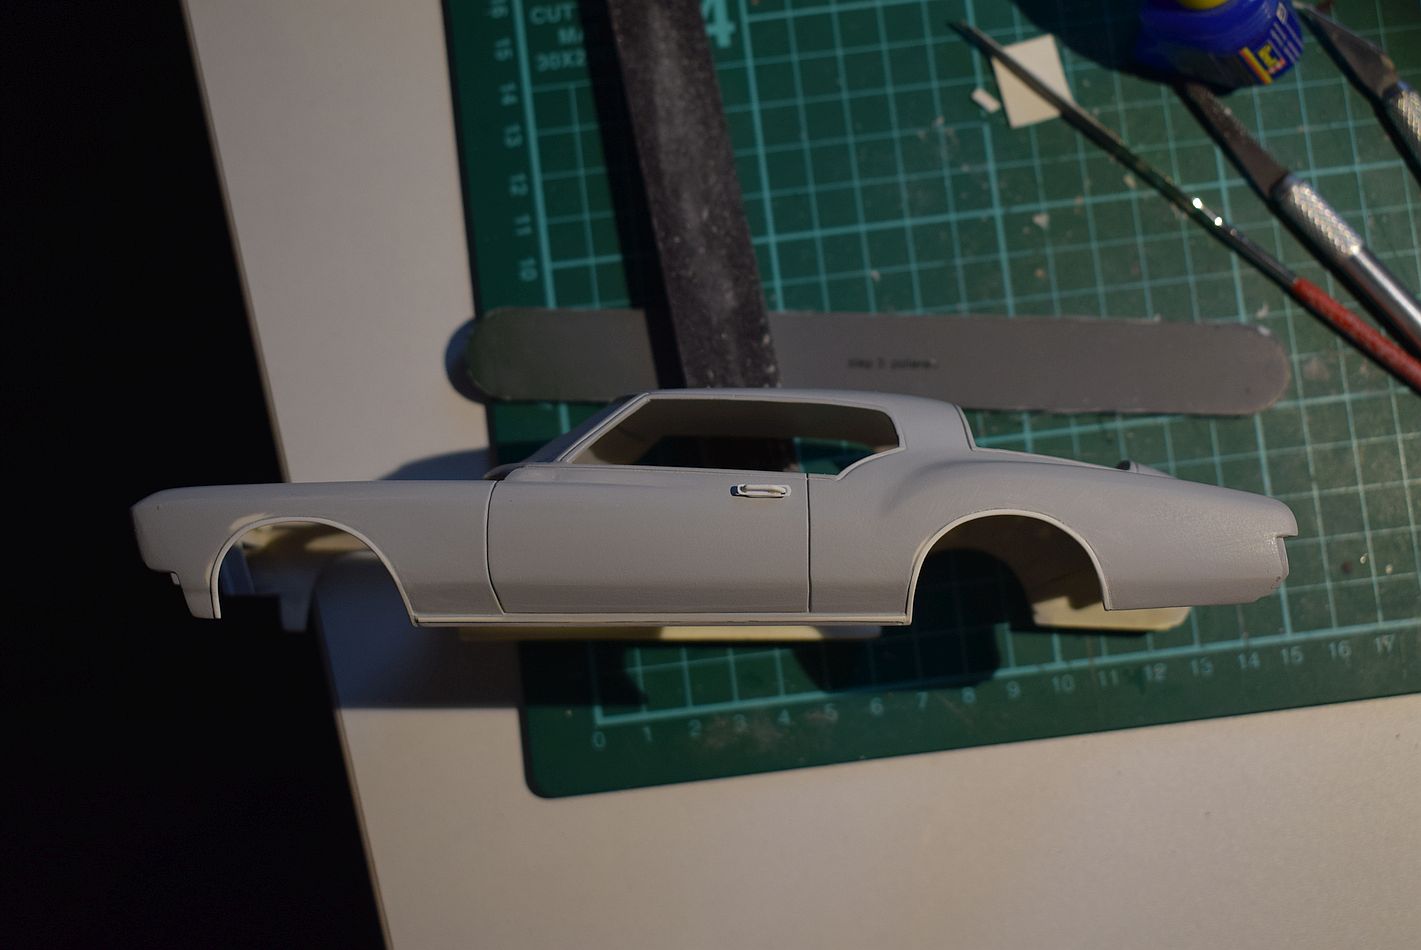
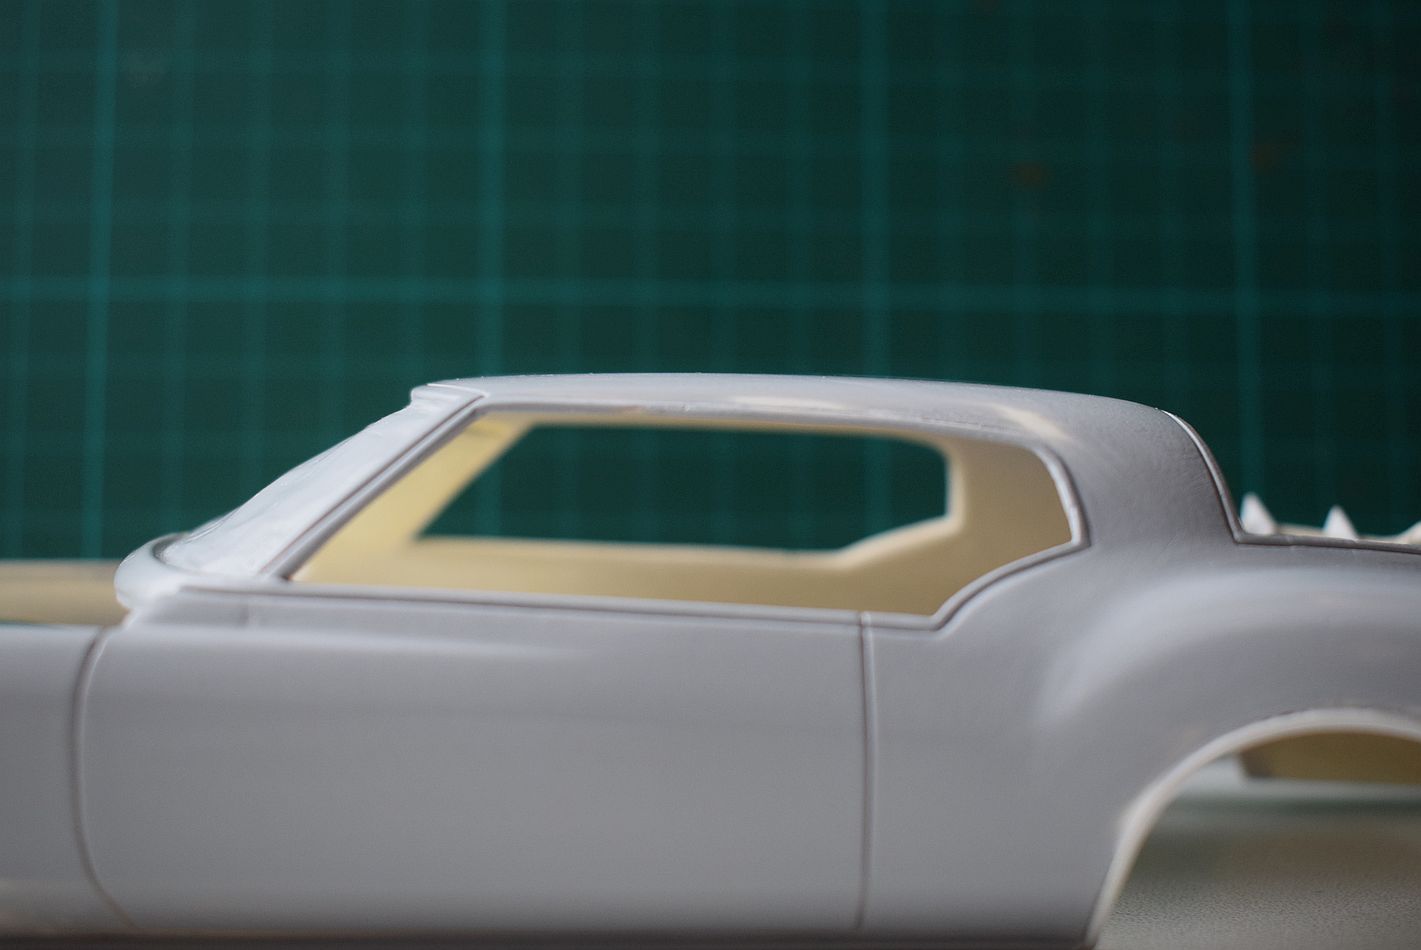
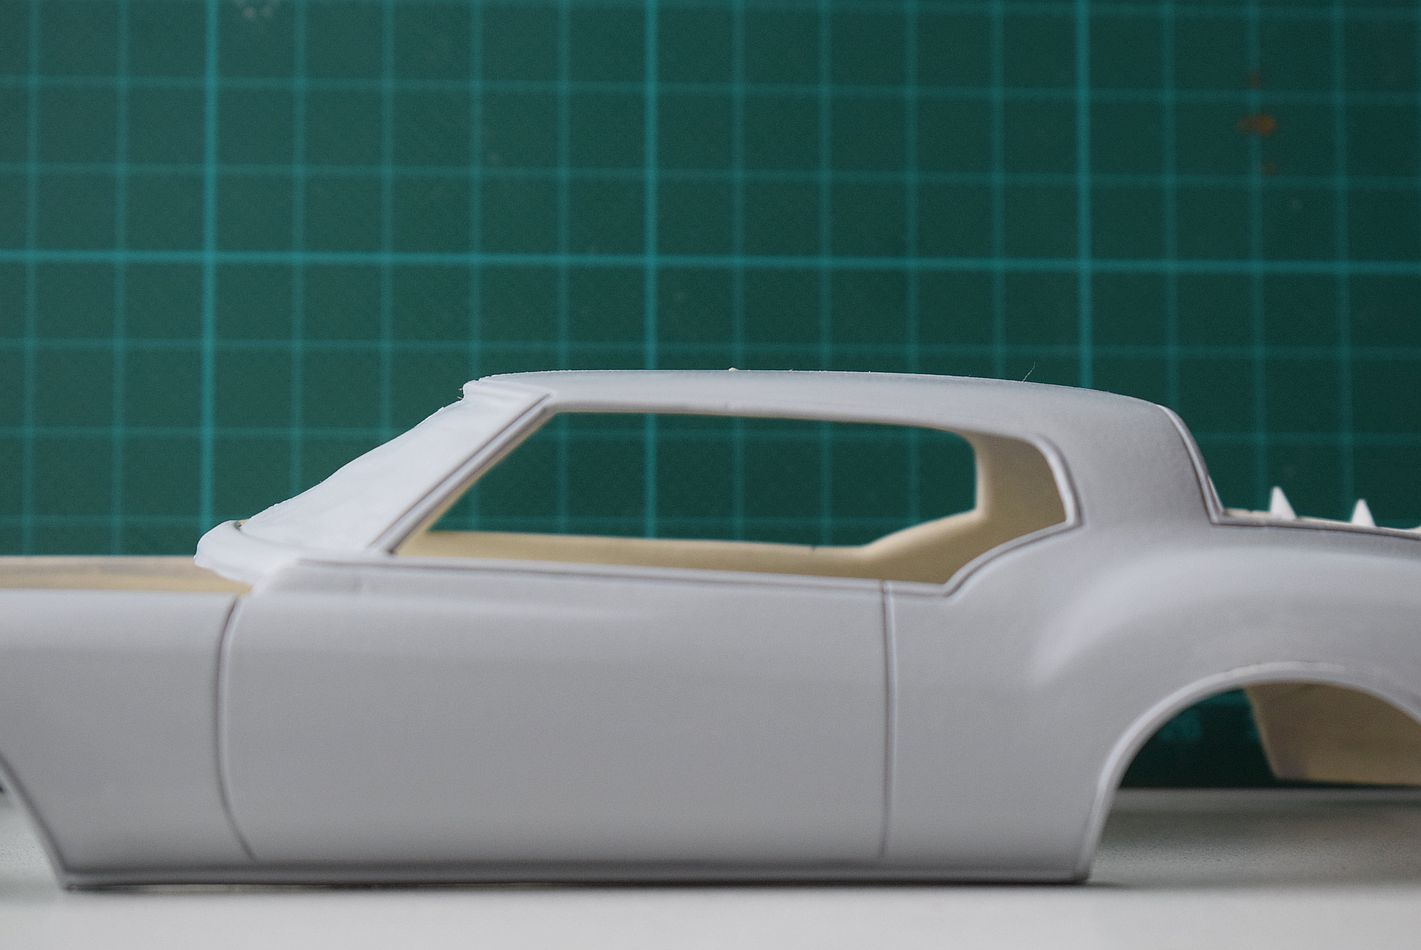
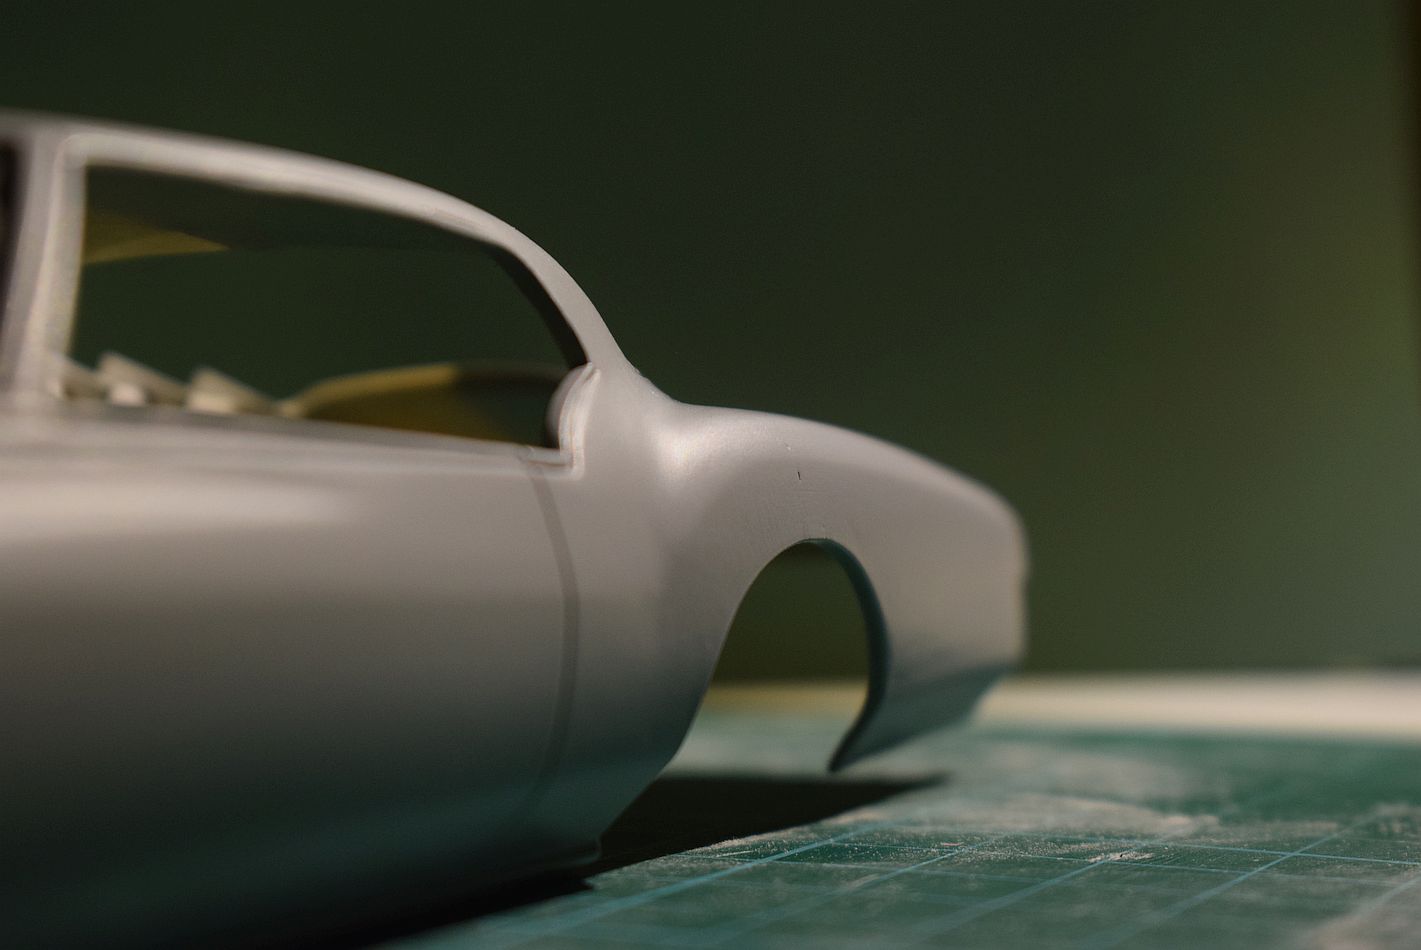
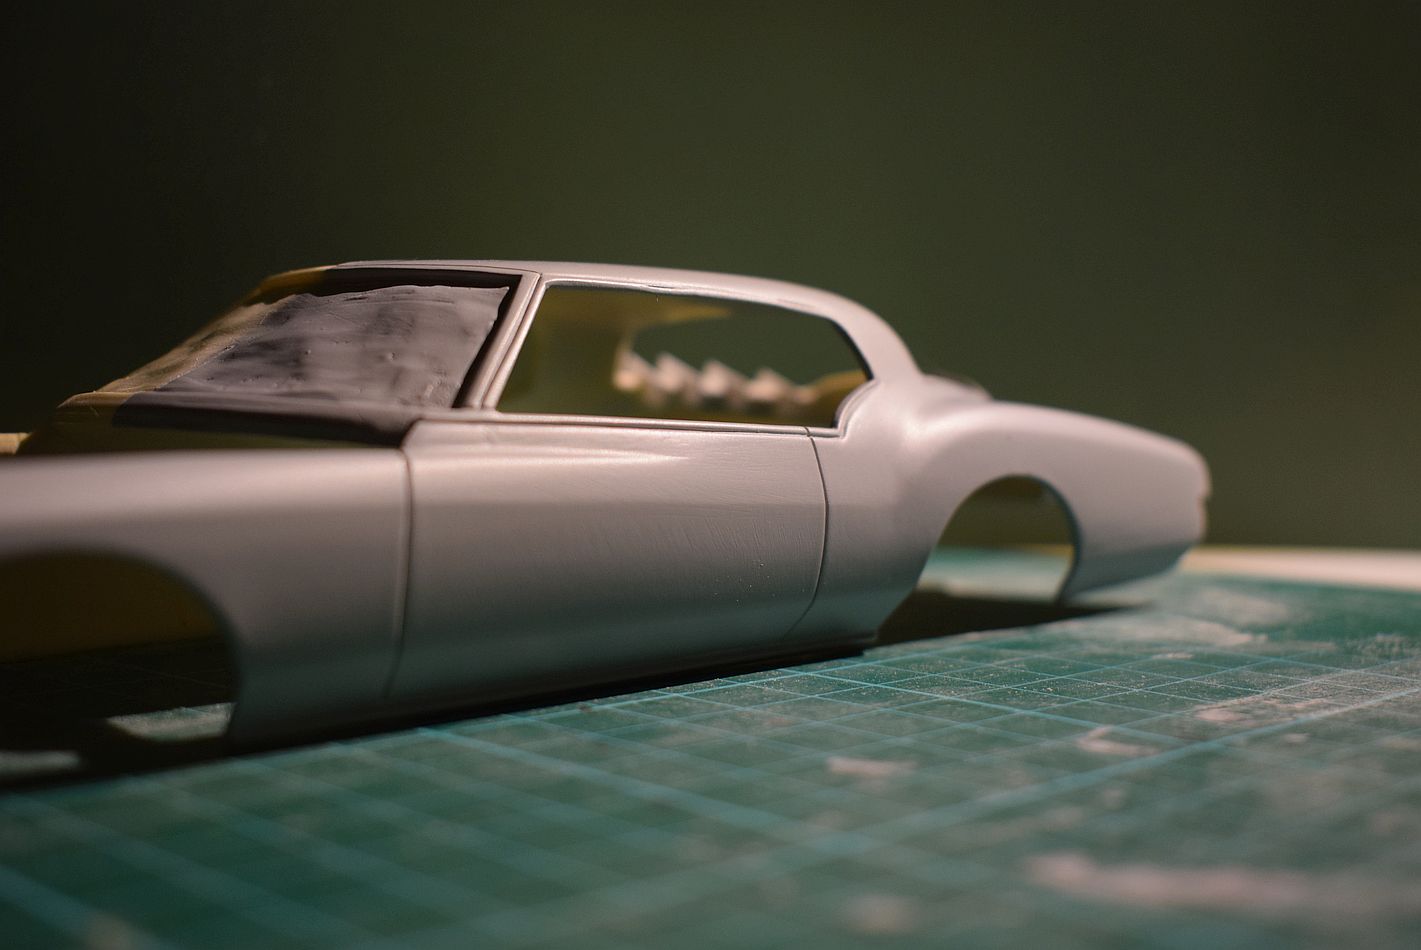
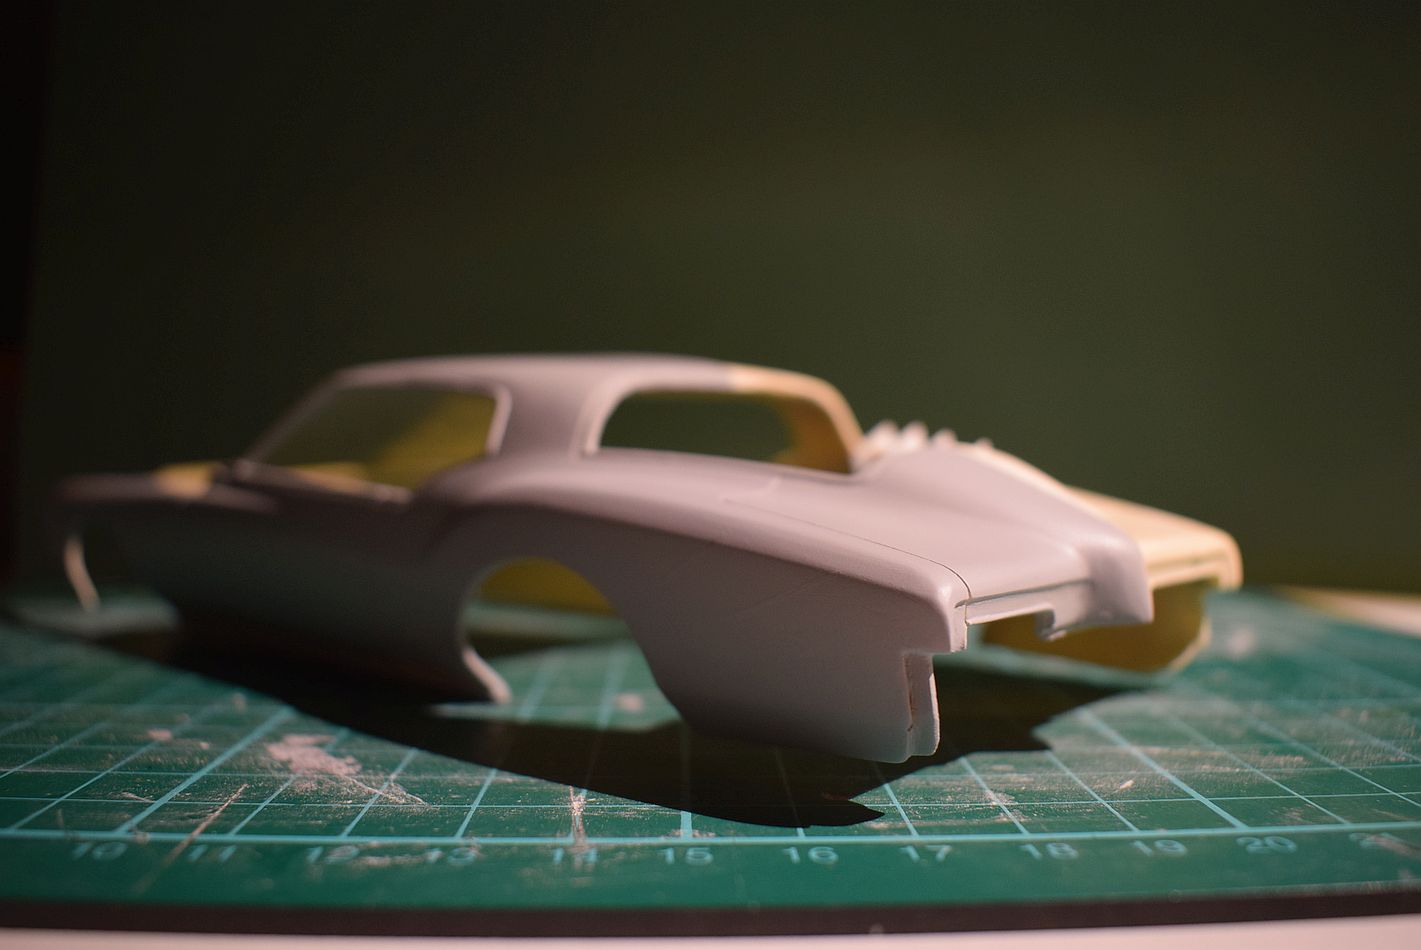
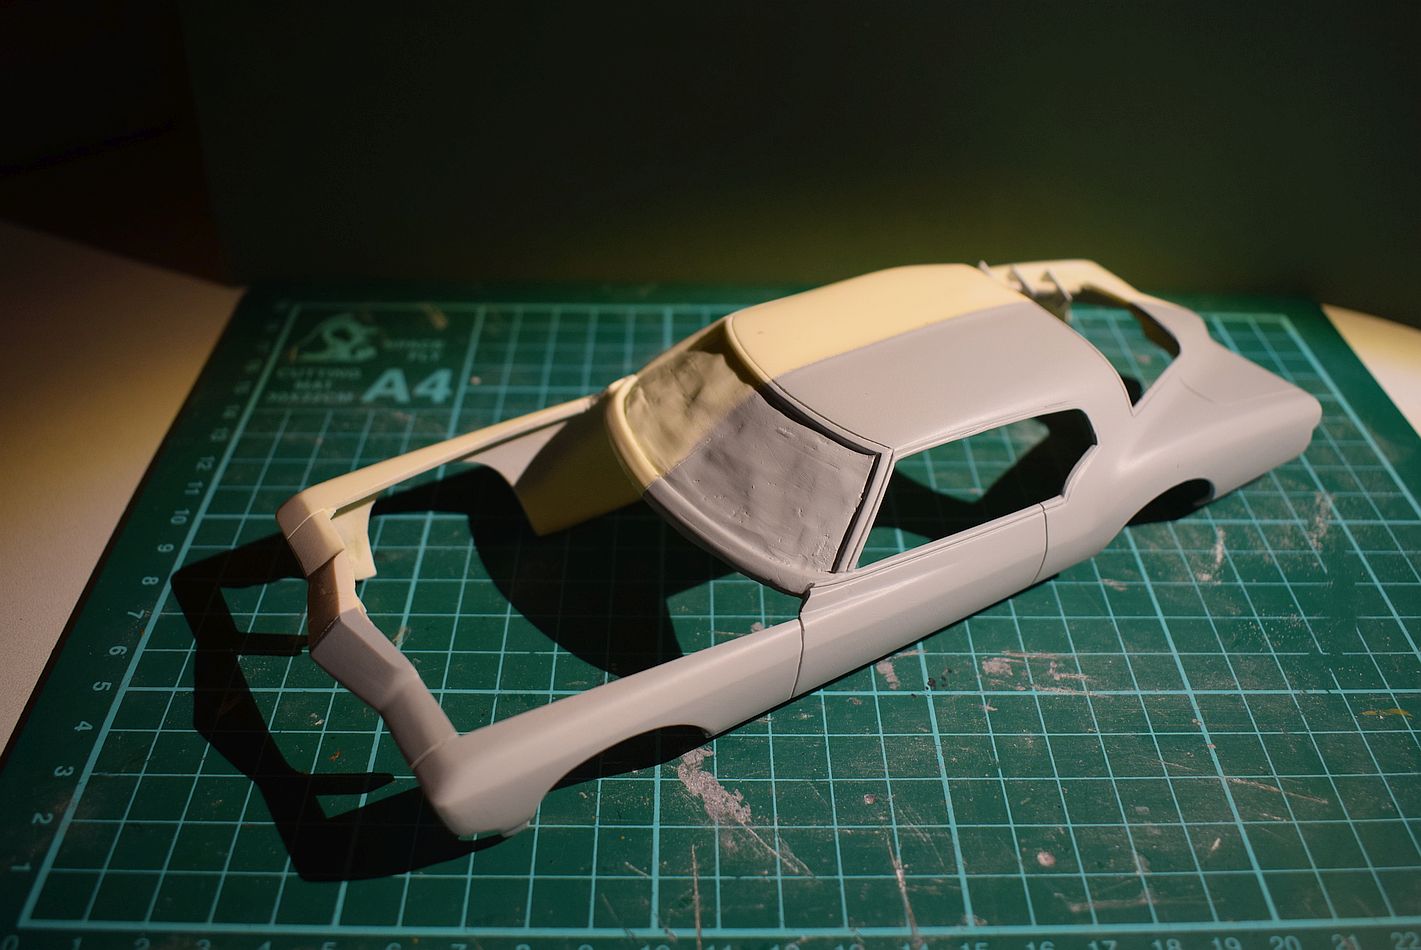
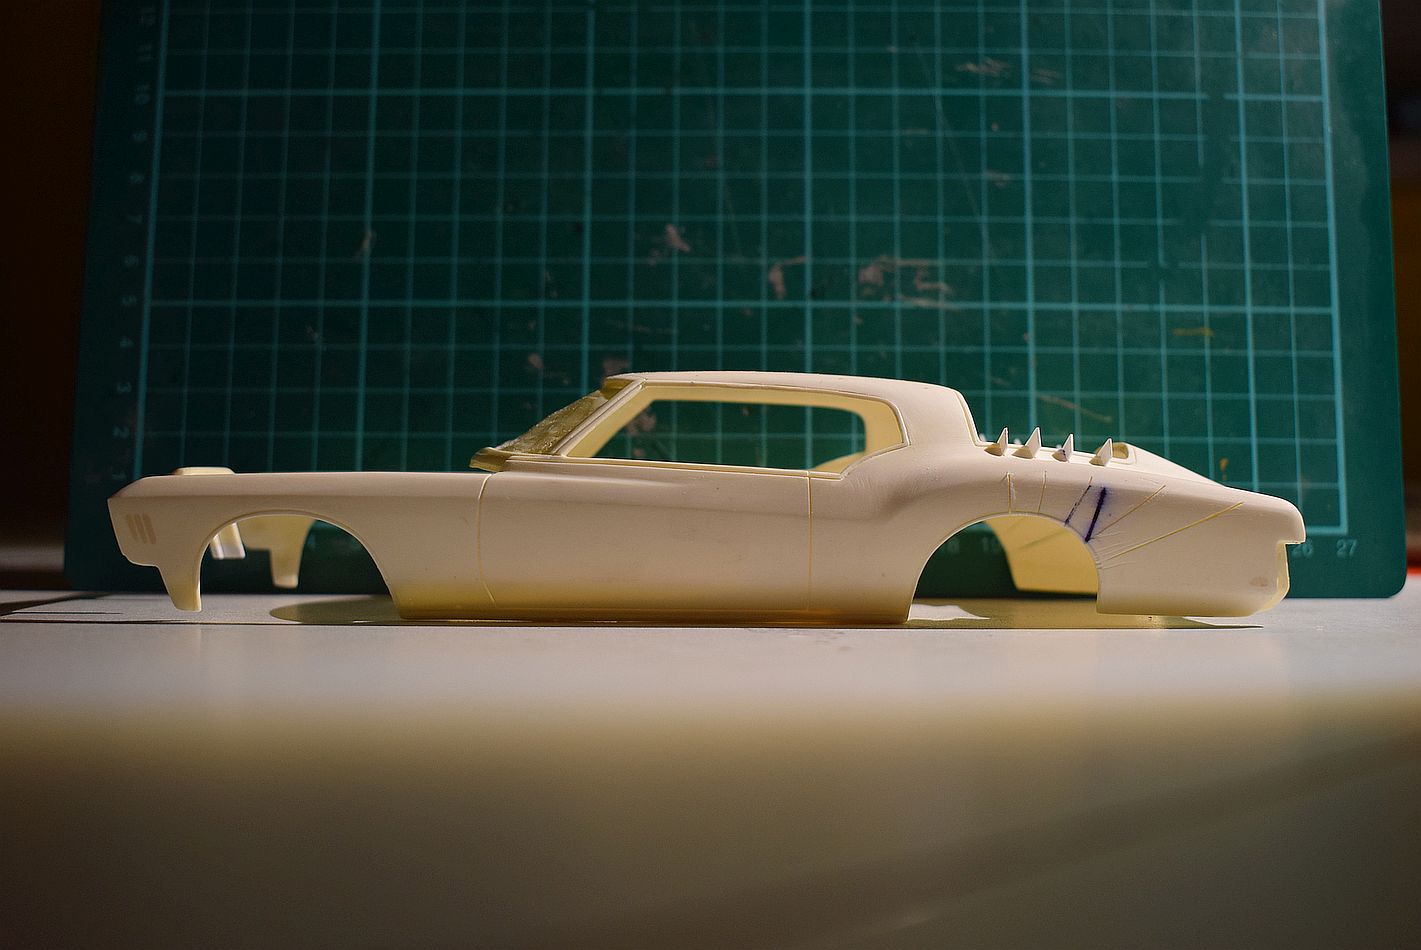
Thank you Paul !!! Feels good to hear this from an owner of the real thing... Today I have to present some little progress. Drivers side is mostly done. Some small areas to clean and the chrome trim around the wheel openings to renew. But I have this side in primer to make my fails visible. Hope you like it... Now the pics ! Door detail... Front detail... Rear fender detail... Thanks for looking. Rico
-
72 Buick Riviera Boattail (Update 18/12/26)
camaro69 replied to camaro69's topic in Car Aftermarket / Resin / 3D Printed
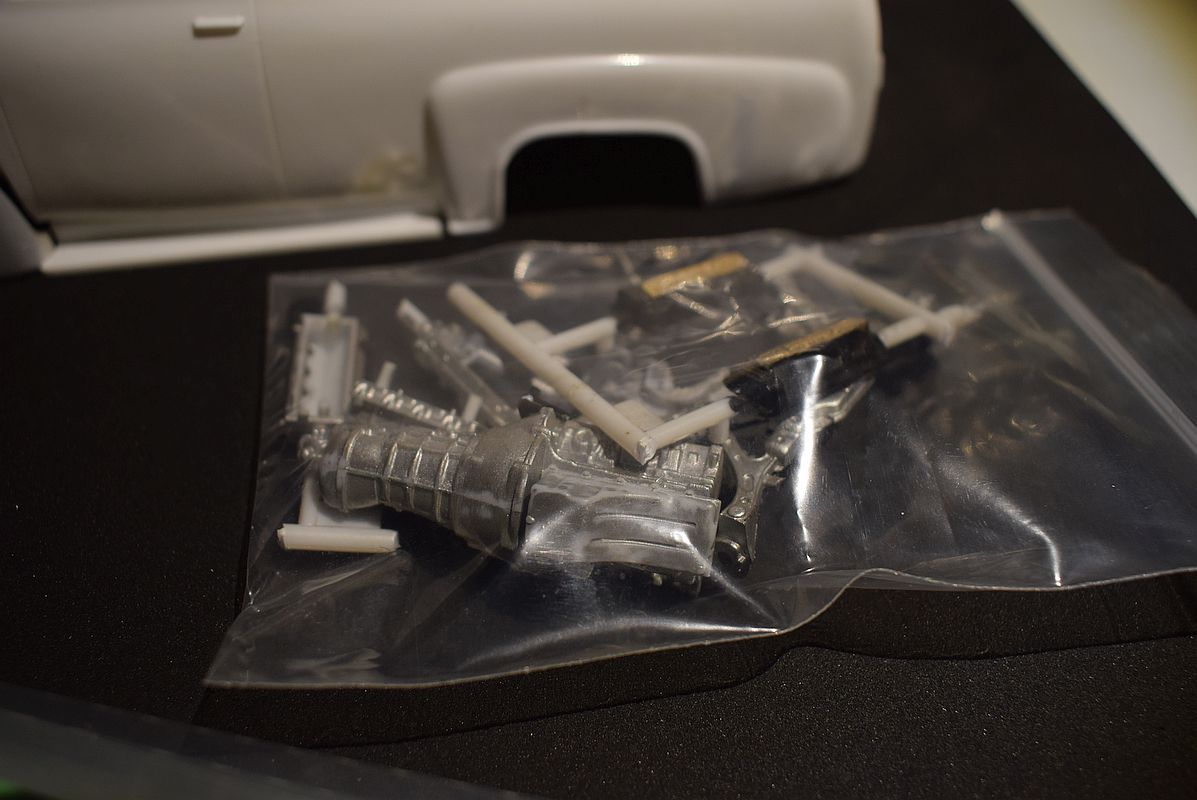
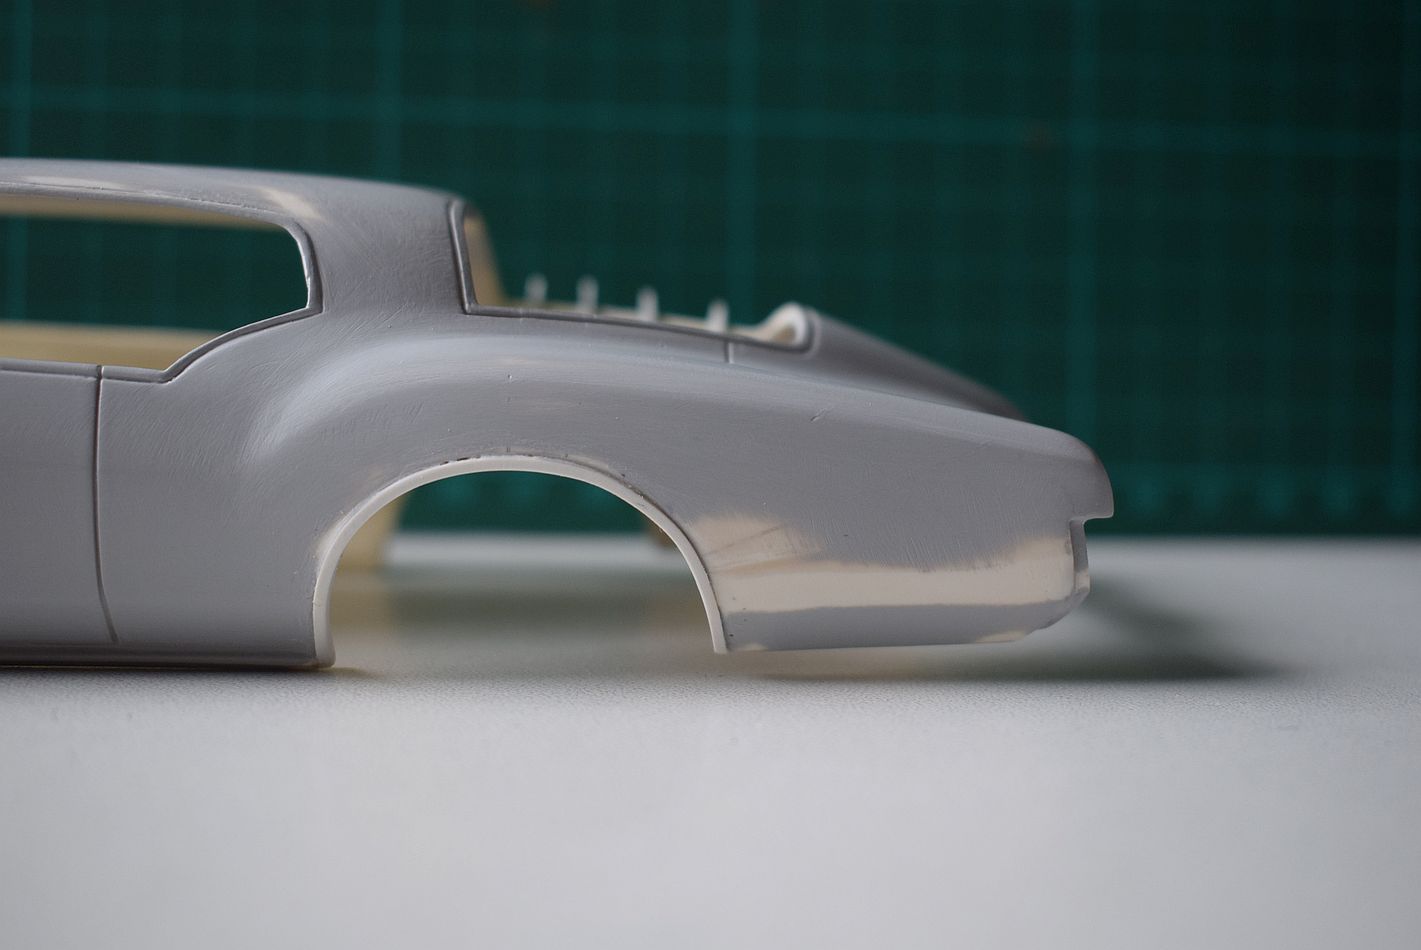
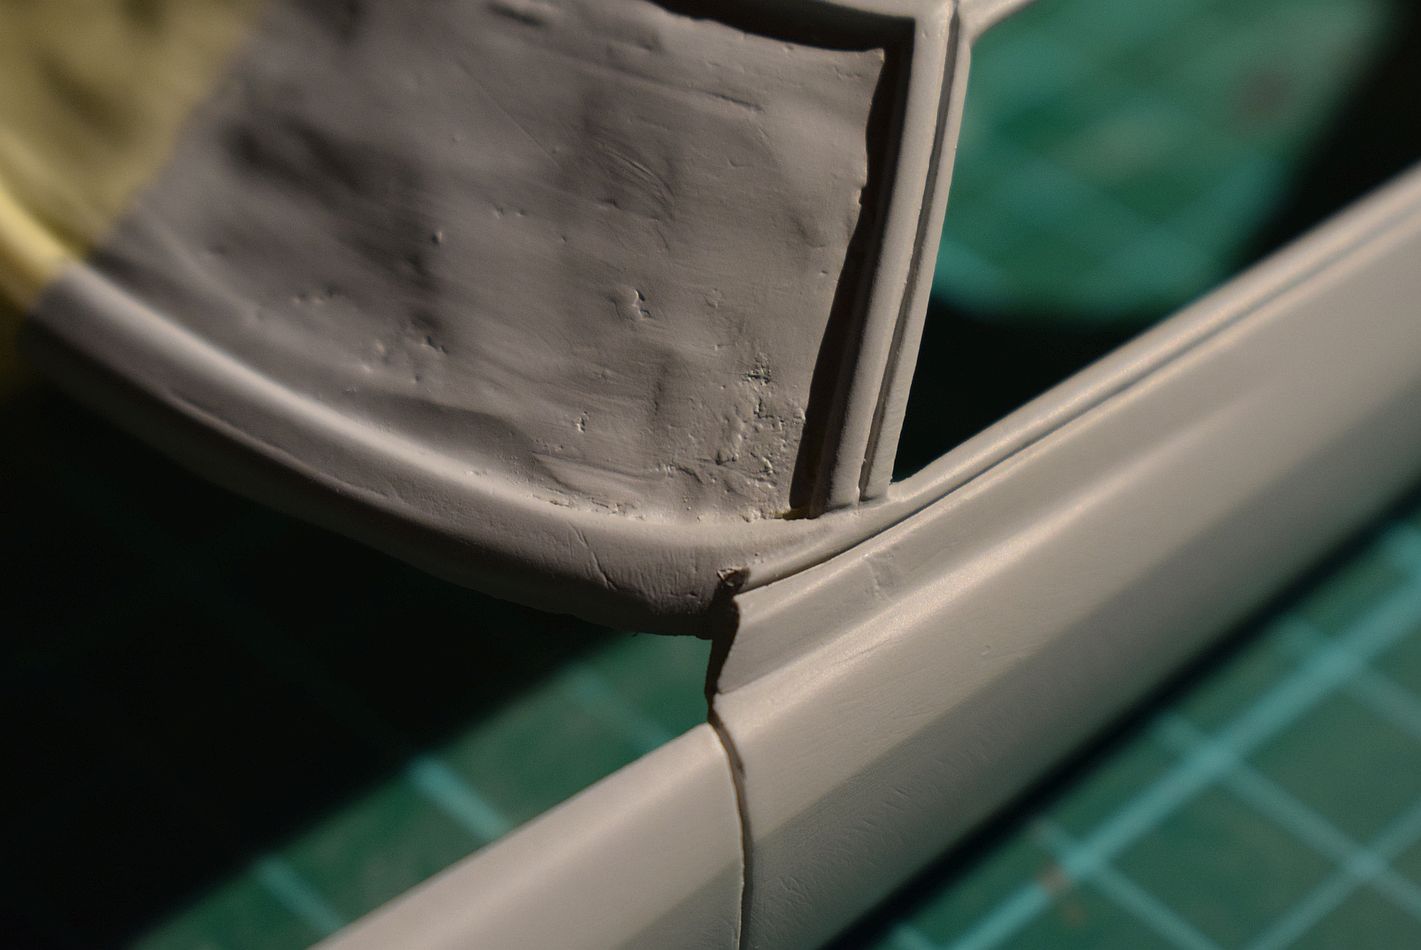
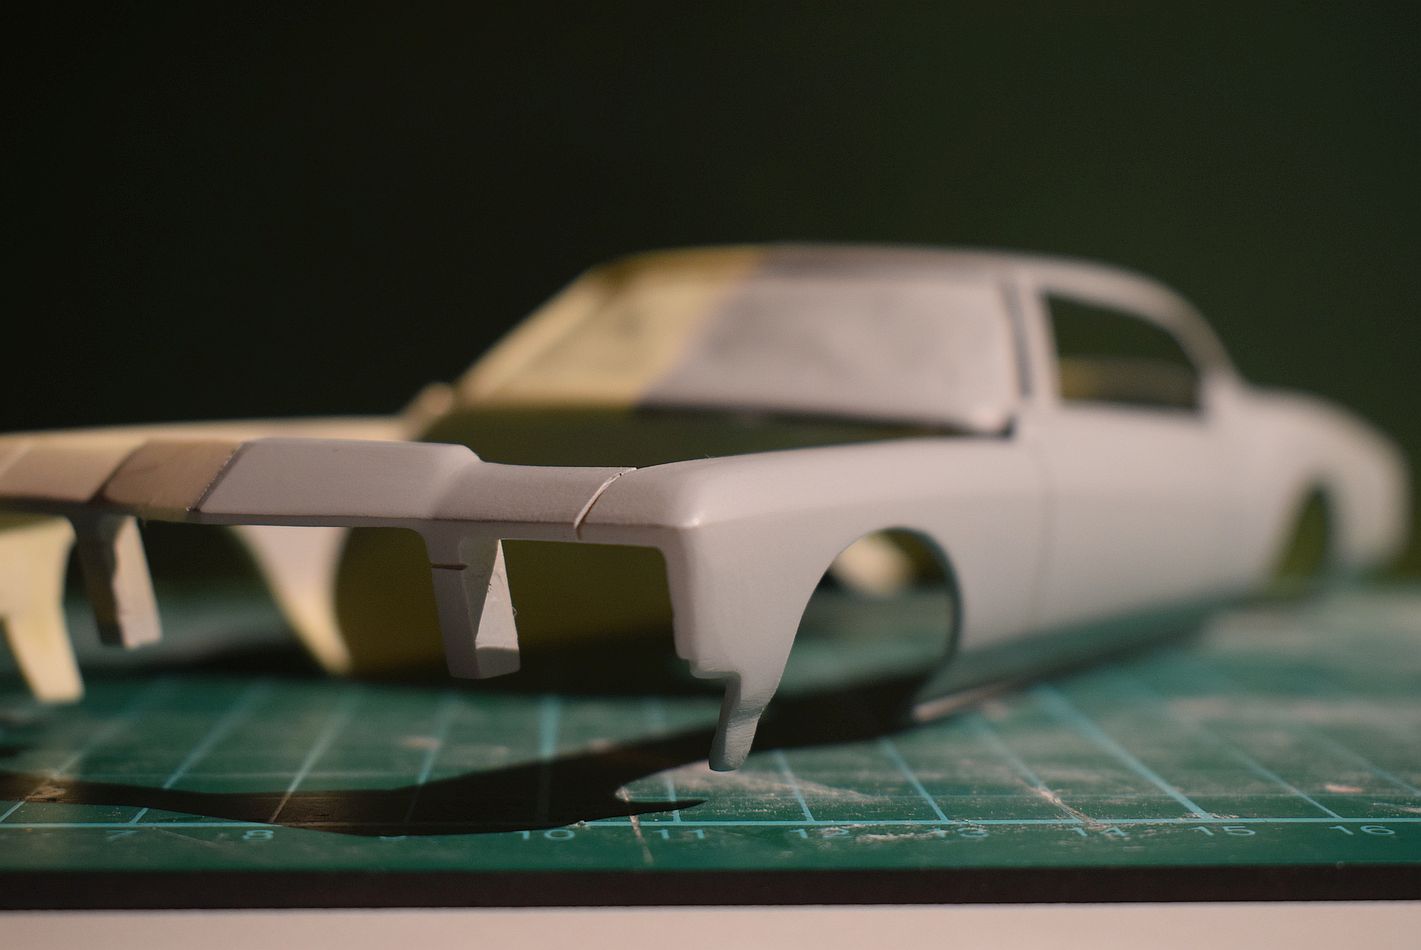
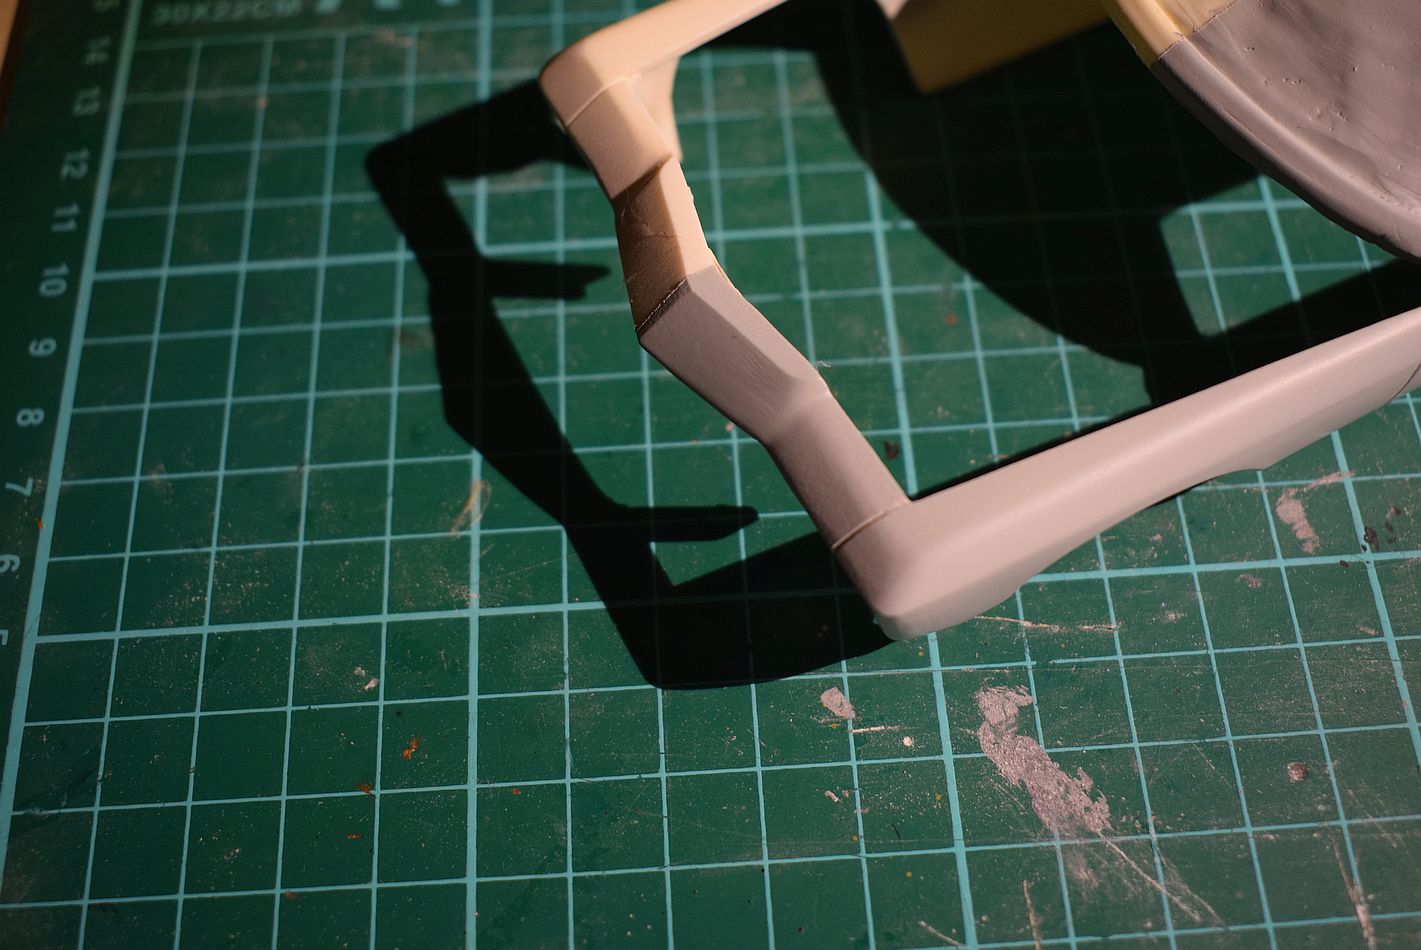
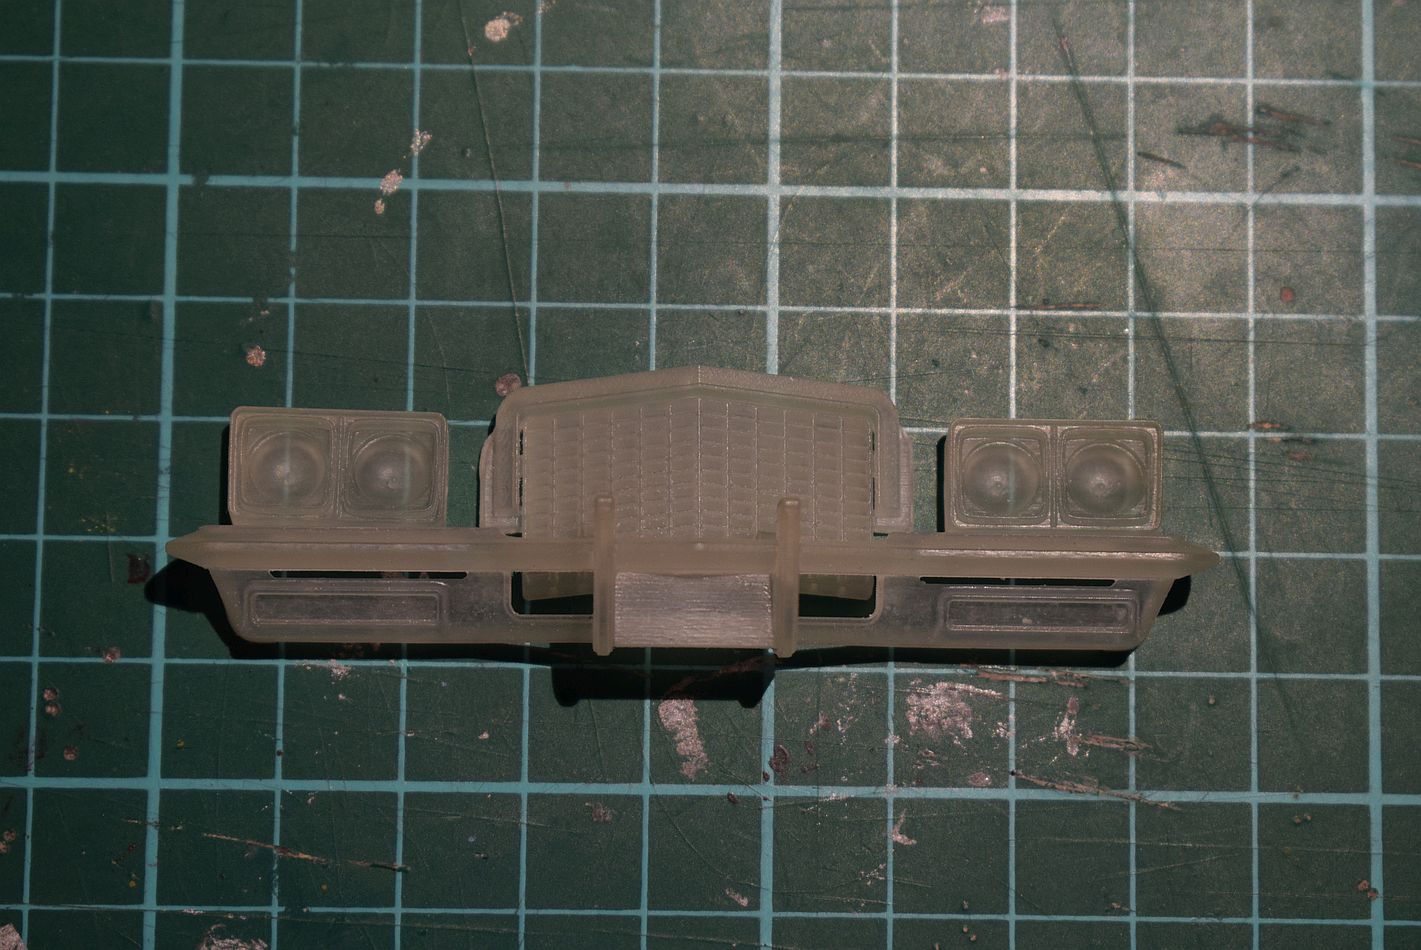
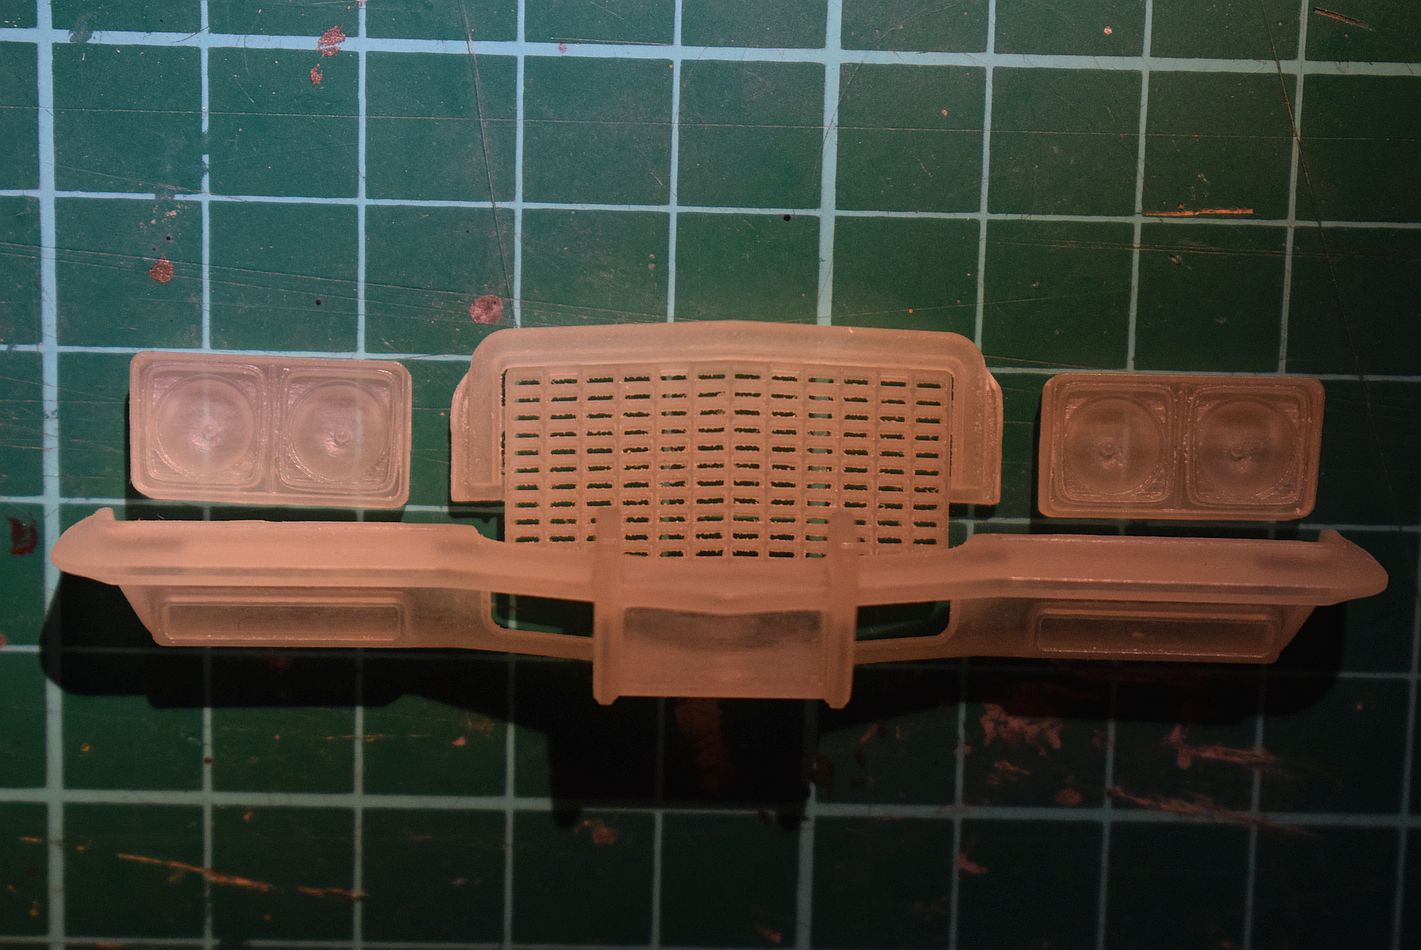
Hey buddies, sorry for the late reply. But I wanted to wait till I can present you an update. Had a little bit time last days and started to correct the rear fenders. Nothing glued yet. A lot of puttying and grinding left to do... Also have to reshape the wheel opening and the lower edges behind it. And the first 3d printed parts arrived yesterday. The headlights fit like gloves. The grille needed some grinding but the bumper I have to reshape for a better fit. Hope you like it anyway. Thanks for looking. Rico
-
No, have to do some adjustments yet... Will let you know if it is.