camaro69
-
Posts
272 -
Joined
-
Last visited
Content Type
Profiles
Forums
Events
Gallery
Everything posted by camaro69
-
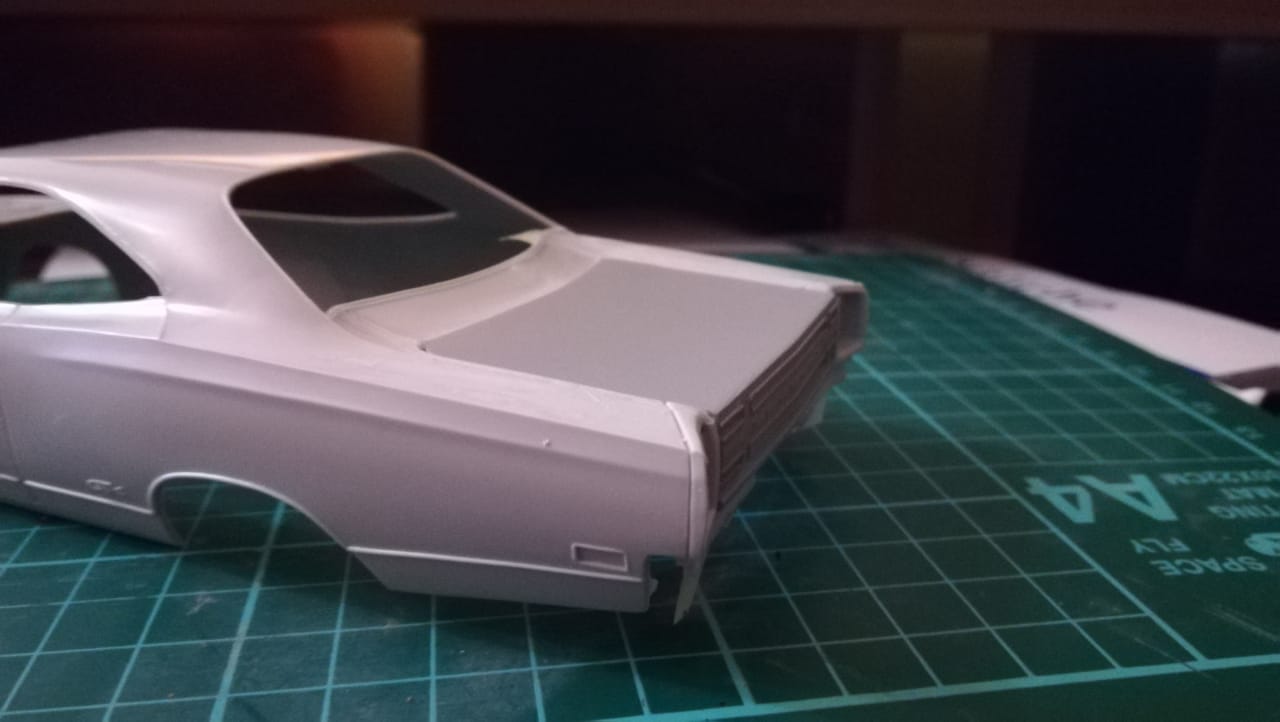
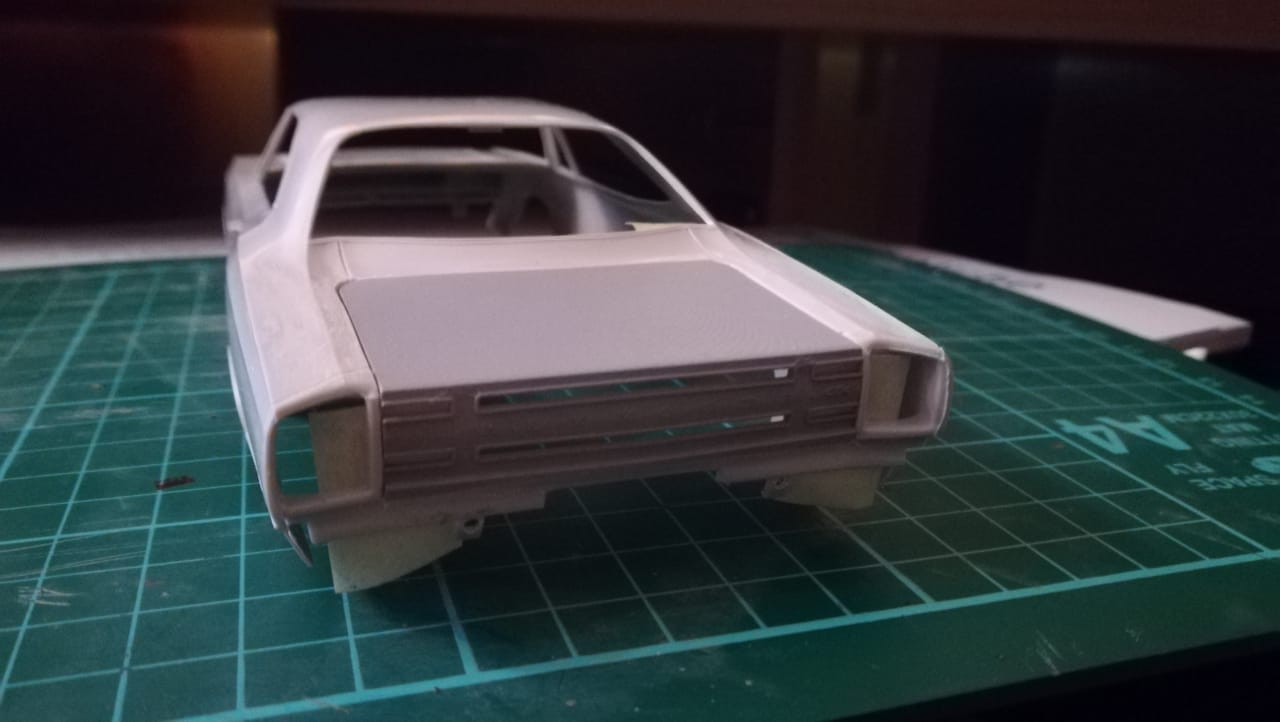
Update... Today the next testprint of the rear parts arrived. The trunk lid is now mor accurate and with detail underneath. My only problem are the taillight frames for the fenders they don´t fit like they should so I had to reshape them. Now some pics... At the end the whole assembly consists out of eight sepaerate parts. Hope you like the progress although it took a lot of time. Thank you all for your patience.

-
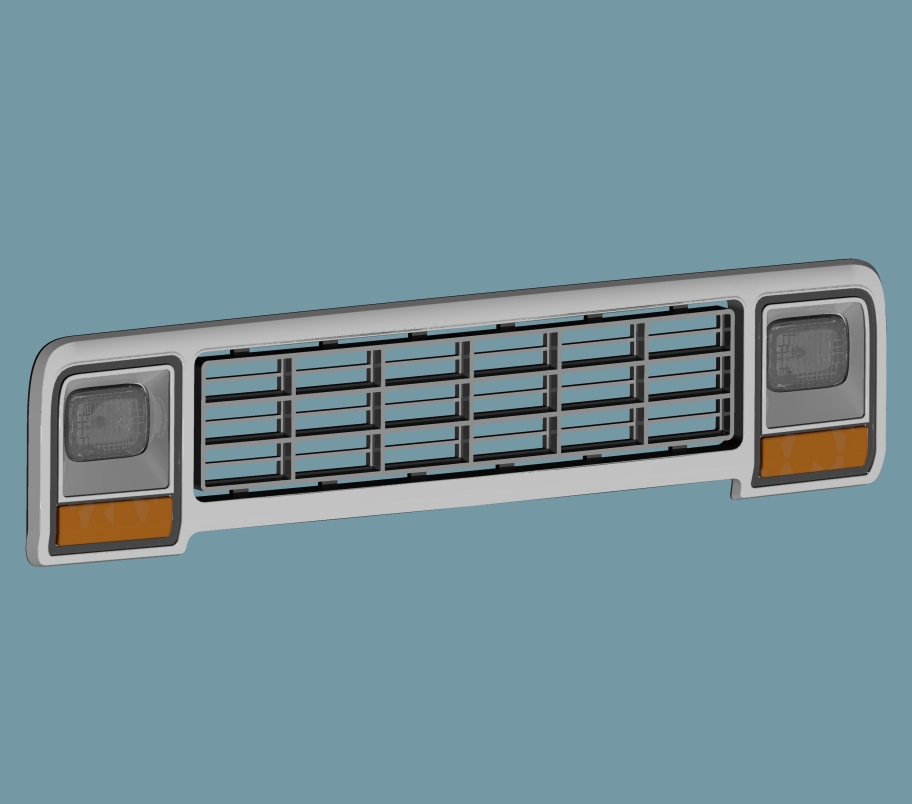
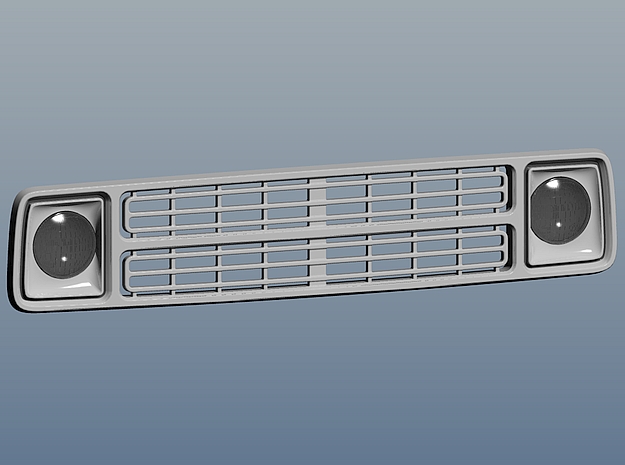
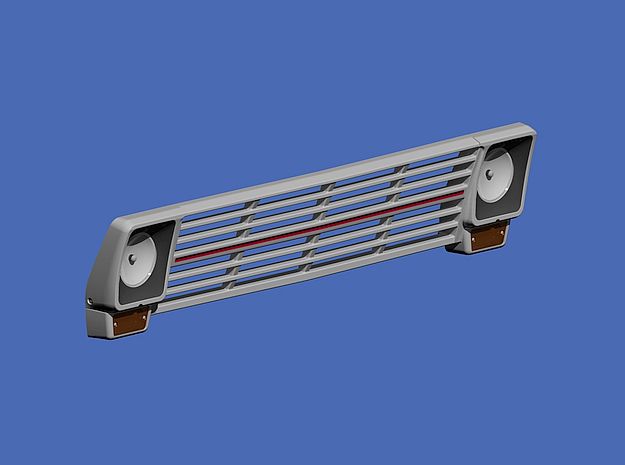
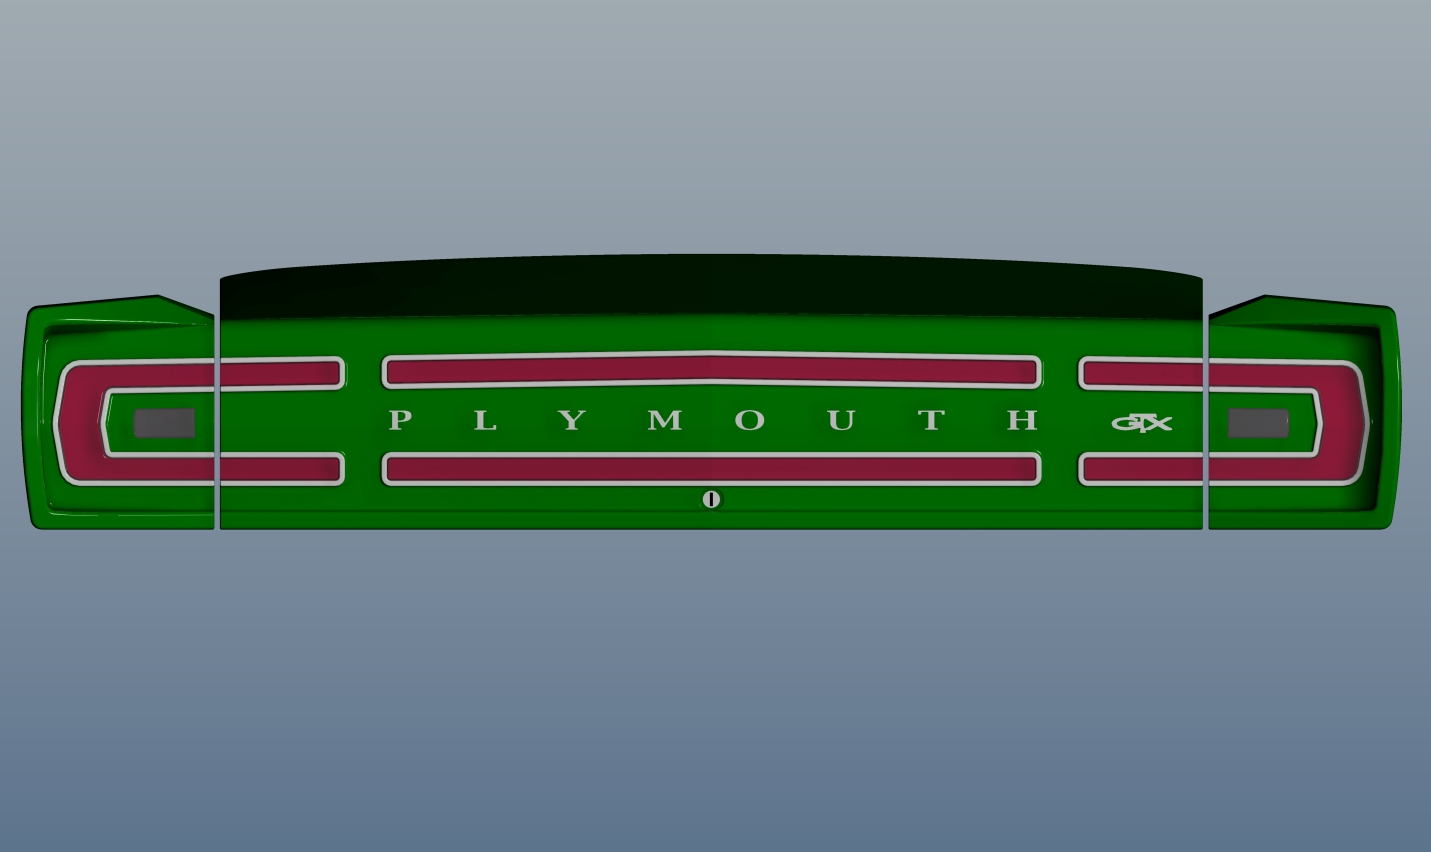
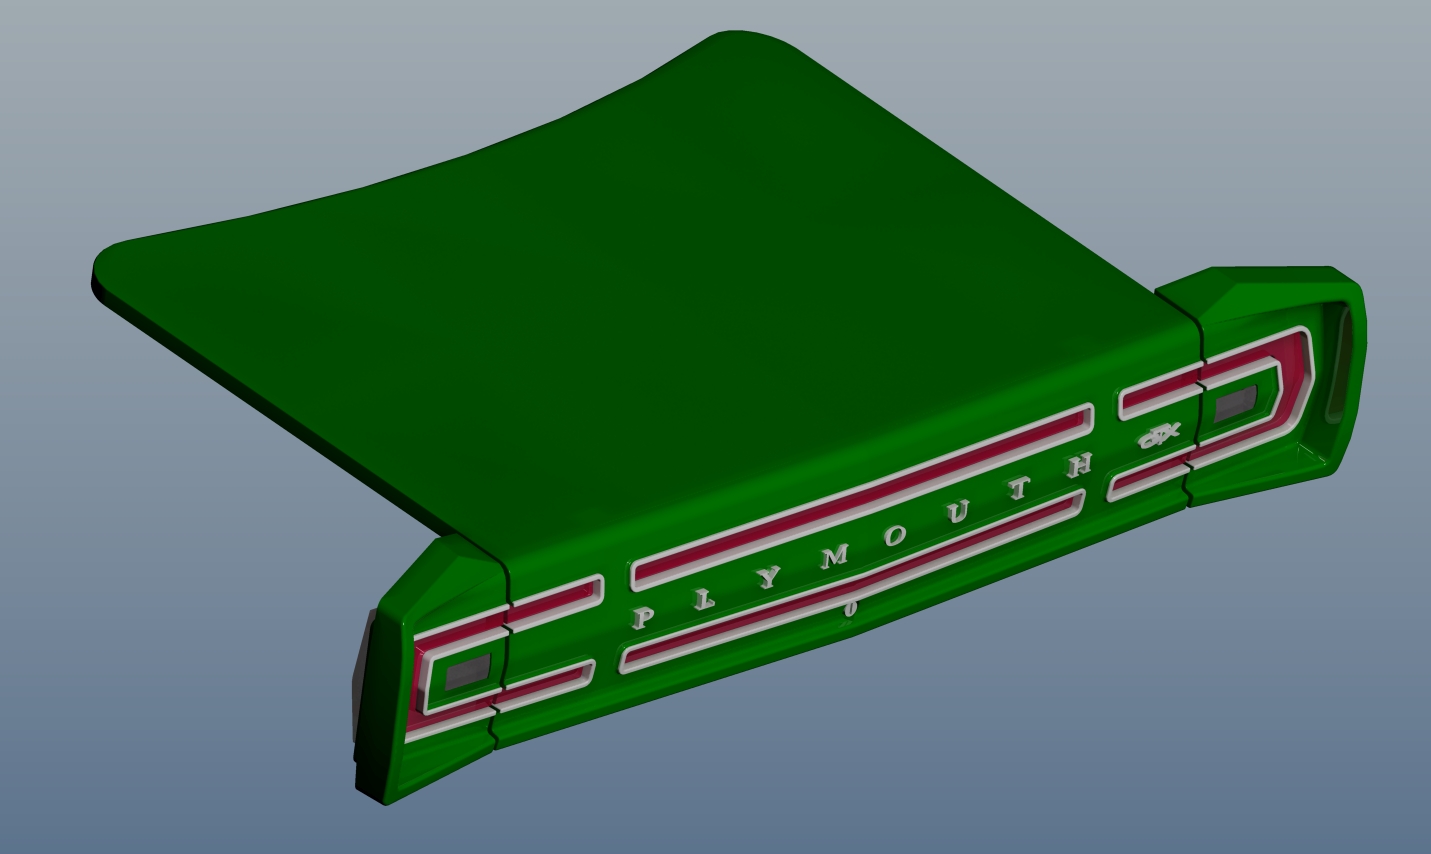
Hi everyone, I´m involved in this project in making the accurate grille inserts and taillights. Today the testprint of the grille arrived. There are some little touchups left to do, especially the upper center parts of the inserts which I have to reshape. Otherwise I would call the grille done. Turn signal lenses are already drawn but not printed yet. Here some pics... Hope you like it. Rico
-
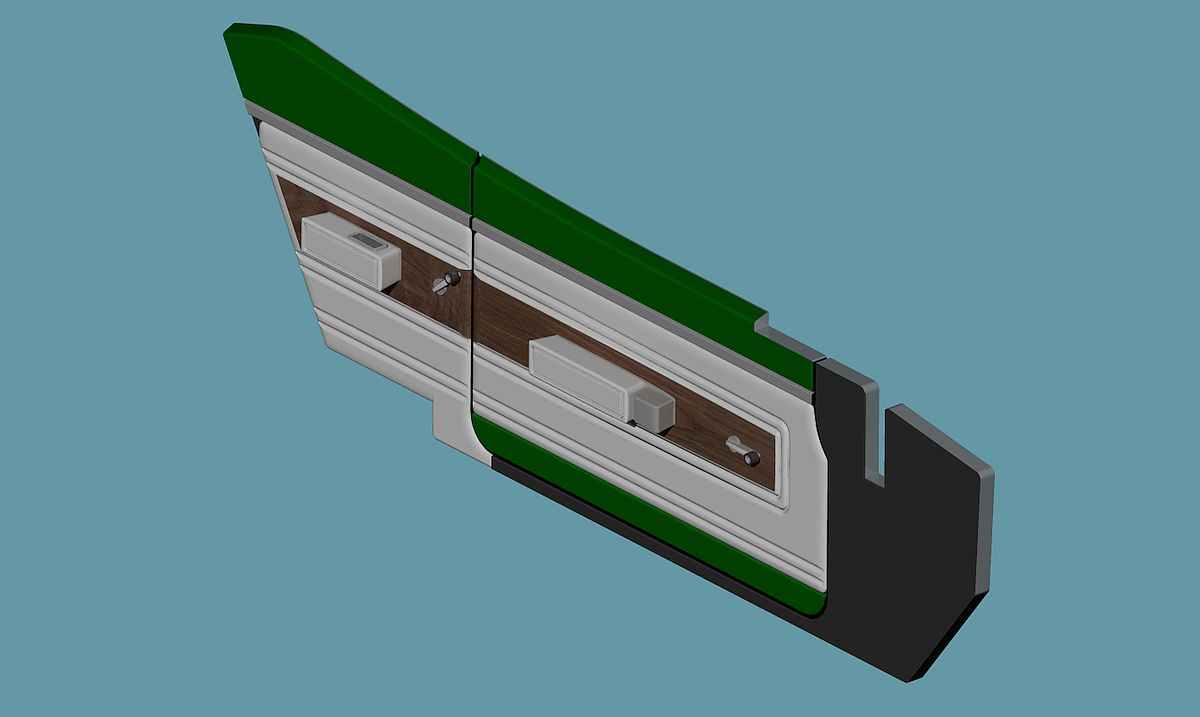
Another update... Meanwhile it becomes off topic but I´ve got news for you. I ordered the 68 GTX rear end yesterday and will get it by the end of next week. Today I finished the 68 GTX door panels too so theat only the seats are left to do. The door panels are already available... Here some renderings. Hope you´ll like it. Any critism and suggestions are welcome. Rico
-
 Hi Scott, looking really good. You did a great job on the hood. Thank you very much for your positive feedback for my parts.
 -
@ Scott: Thank you very much for these informations. Maybe you could tell us which headlight lenses you used. In case of the hood your prototype was without the underhood structure. That´s why I really appreciate your positive feedback. After your first message I added the underhood structure so it should be better now. BTW your grille looks fantastic. I really like how it turned out. Is it already glued in? If yes which glue did you use? @Dan: Thank you too. I´m really happy if you are satisfied with my parts. Best regards, Rico
-
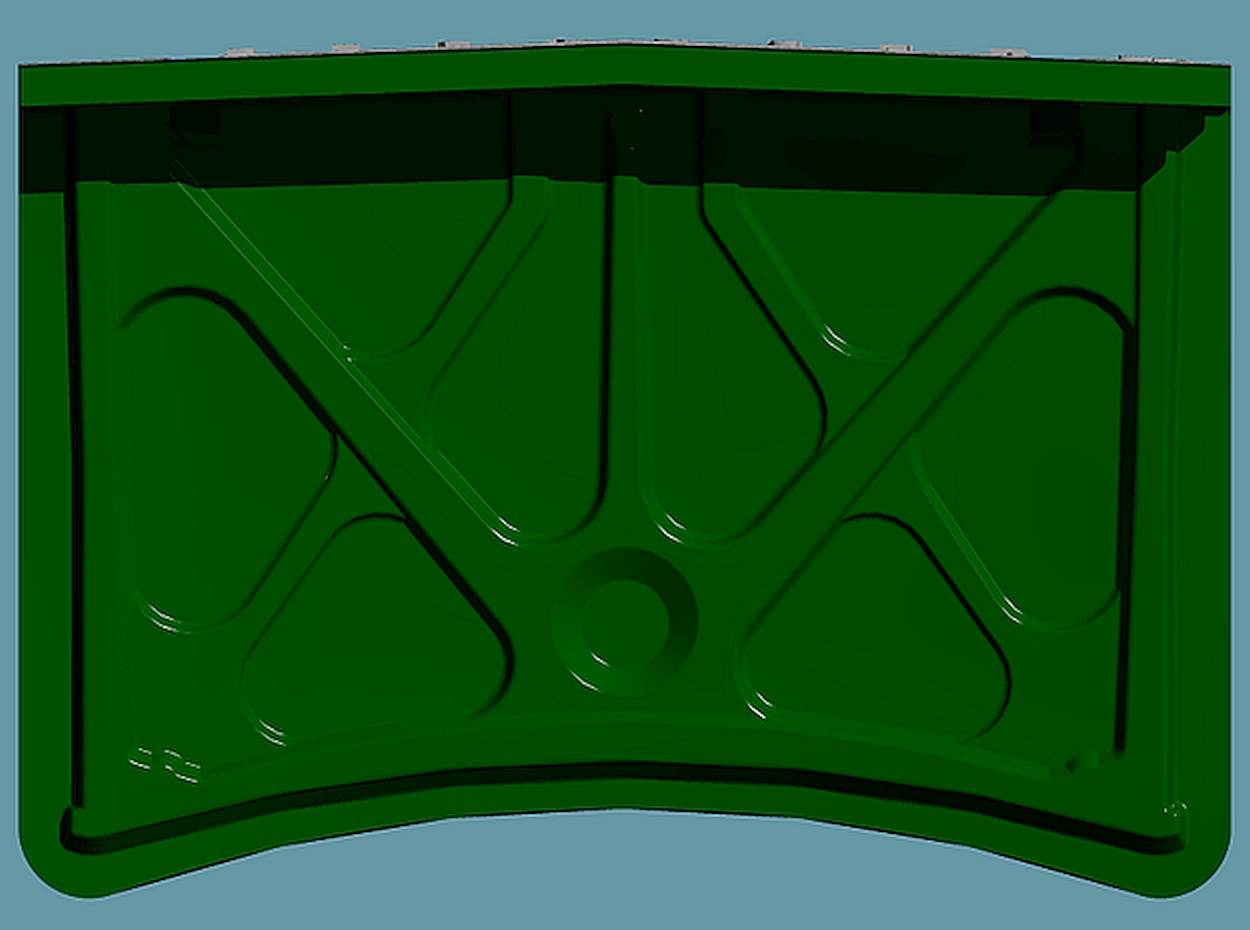
Update... After a long time of waiting for you guys I finally finished the bracing on the 68 GTX trunk lid. It´s not 100% accurate but it´s very close. Studied a lot of photos for doing this. Hope you guys like it. The bracing will prevent the lid from warping to much during the cleaning process at shapeways and makes the part stronger for itself. The next thing to do is a testprint before offering this at my shop. Will show pics when parts arrived. Any comments and suggestions would be much appreciated. Thanks all of you for your patience and your support.
-
Yes Dan you did... Looking forward to see your pics. How did the parts work and fit?
-
Hi Mark, go to my shop (link above) and you´ll find the ´74 Ramcharger and Trailduster grilles and hoods. If there are other parts missing please feel free to let me know. Rico
-
Sure I can... https://www.shapeways.com/shops/ra-sti-acute-s-scale-accessories If you have any questions or suggestions for other parts feel free to let me know. It only takes time to do this because of my two regular jobs. Designing parts for 3d-printing is only hobby for me. It´s to stay in contact to my modeling software and level up my skills. But I want to expand my assortment for sure. There are so much kits out there that need some attention... I had so many requests during the last months that I have enough work till christmas I think... Hope I become faster. But I try to help anybody who asks for. Best regards, Rico
-
Very nice build Tommy! Did you use the 1/25 MPC grille on yours? Have finished the 84 Ramcharger grille with seperate headlight and turn signal lenses too. It´s now available at my shapeways shop. Any suggestions will be much appreciated.
-
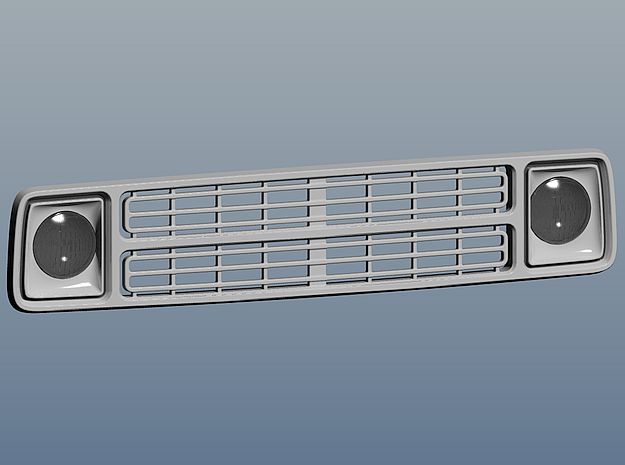
Little update... started to complete the collection of grilles for the 1/24 Revell 80´s Ramcharger. Did a 77´s and a 80´s with round headlights. Still working on the 84´s too. Thanks for looking and hope you like it. Rico
-
Hi Steve, thank you very much for your praise. Things are going on slowly because a lot of work. Two jobs and my kids taking a lot of my time. Still trying to complete the ´68 GTX rear end. But after all I finished the 77´s Ramcharger grill and the 80´s with round headlights for the 1/24 Revell kit. A grille for Moebius 69´s Ford F100 is also ready but not at my shop yet. On the other hand I´m working on the 84´s Ramcharger grille too. To your question: The first grilles were the 68 GTX and RR. They took me my spare time of about two complete months. The other ones I did only as variations so they took not so much time. Doing these things is still a learning process for me and I´m happy if you all are satisfied with my parts. Now I have a question for you and any other guy who has purchased parts from my shop. Do you have some pics of your finished parts for me. Would like to see some finished. King regards, Rico
-
69 Camaro Convertible resin up top
camaro69 replied to mchalal's topic in Car Aftermarket / Resin / 3D Printed
Sure I can... https://www.shapeways.com/shops/ra-sti-acute-s-scale-accessories -
69 Camaro Convertible resin up top
camaro69 replied to mchalal's topic in Car Aftermarket / Resin / 3D Printed
Sorry guys, hadn´t any time last weekend. Because of your feedback I will finish this one. If it´s done I will do a testprint for checking how it fits. Once the dimensions are correct I will offer the uptop at my shapeways shop so anybody who want´s can order it. Thank you all for your confidence. Rico -
69 Camaro Convertible resin up top
camaro69 replied to mchalal's topic in Car Aftermarket / Resin / 3D Printed
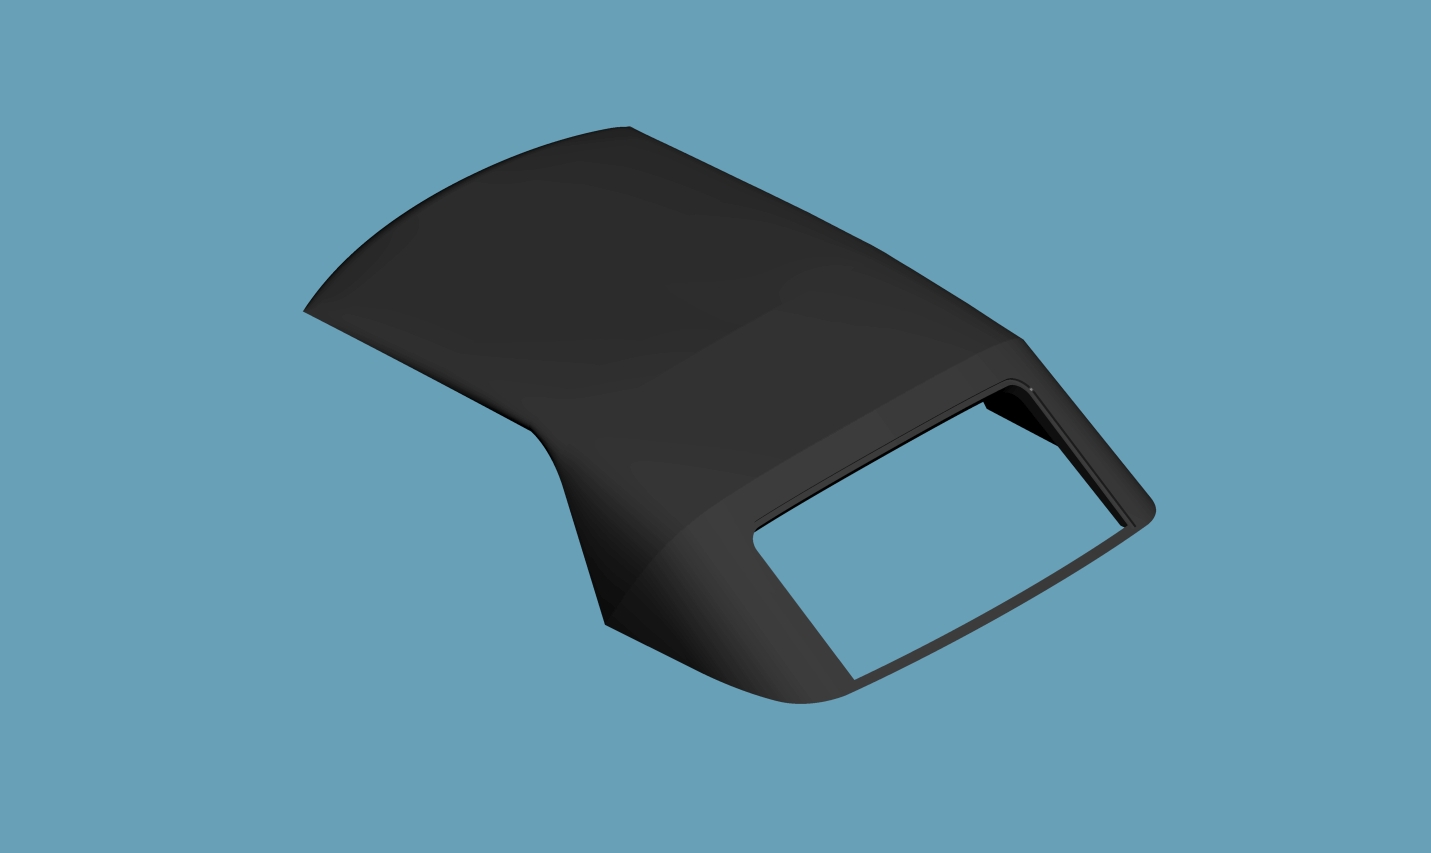
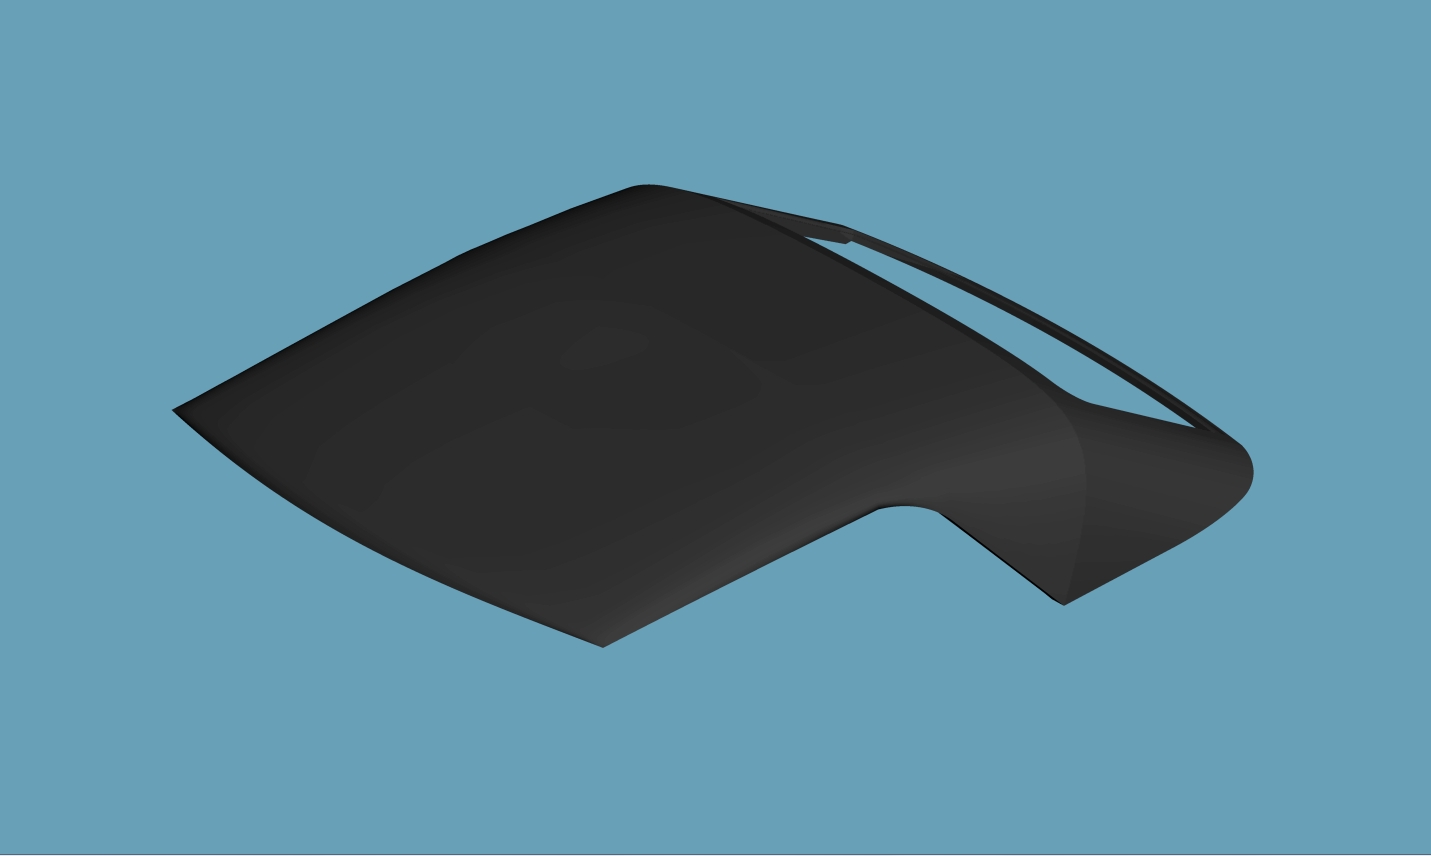
Hi Matt, because of the replies here I decided to draw an uptop for the Revell Camaro. It´s not accurate yet but a starting point. Greets, Rico
-
69 Camaro Convertible resin up top
camaro69 replied to mchalal's topic in Car Aftermarket / Resin / 3D Printed
Maybe it´s possible to draw one for 3d printing. After that it can be casted anyway... -
Looking for EMPI 8 spoke wheels / Beetle
camaro69 replied to christian-w's topic in Car Aftermarket / Resin / 3D Printed
PM sent. -
Thank you guys. @ george 53: The rear parts aren´t ready yet. Have the bracing on the trunk lid left to do. Will let you all know when it´s done. Want to do a testprint too. I don´t like to offer parts which don´t fit because 3d printed parts are more expensive than resin parts yet. Hope to get this all done soon. Rico
-
Hi Bill, thanks for your reply but sorry I will offer these parts only 3d printed at my shapeways shop. Resin casting I haven´t tried yet. Maybe someday I will do that but anyway the 68 GTX rear end will come in eight parts. Especially the smaller ones would be very hard to cast.
-
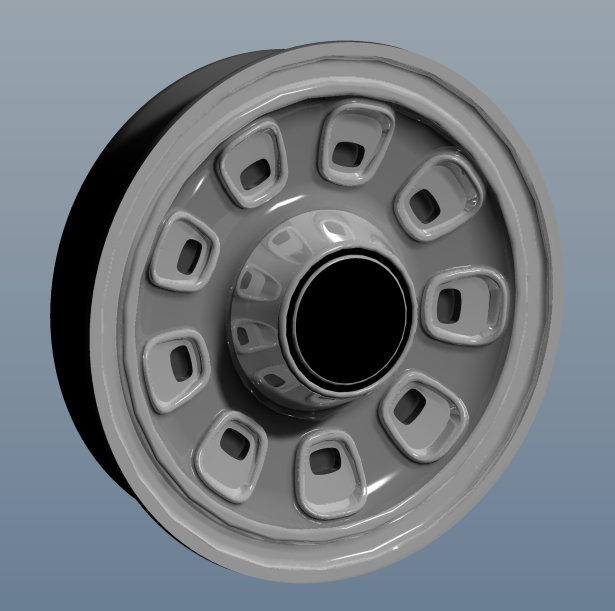
Hey guys, although it´s not really according to the topic I want to show you something new. After a request I´ve modeled a special Plymouth hubcap. It´s designed to replace the kit outer wheel of the 69 AMT Plymouth GTX. Hope you´ll like it. Any comments will be much appreciated. Thanks, Rico
-
Hey guys, had a little bit of time these days so tried to finish the rear end for the 68 GTX. Still have to do the bracing details on the trunk lid. Here some renderings of the progress. Like last time I will do a test print again for test fitting. Any suggestions and comments will be much appreciated. Thanks for looking. Rico
-
Hey guys, again thank you all for your support. I´m at fixing the issues on the trunk lid and doing the taillights at the moment. Then the other parts will come on my "bench". Sorry for the slow progress but I´ve been really busy. If there will be something new I will let you all know immediately. Rico
-
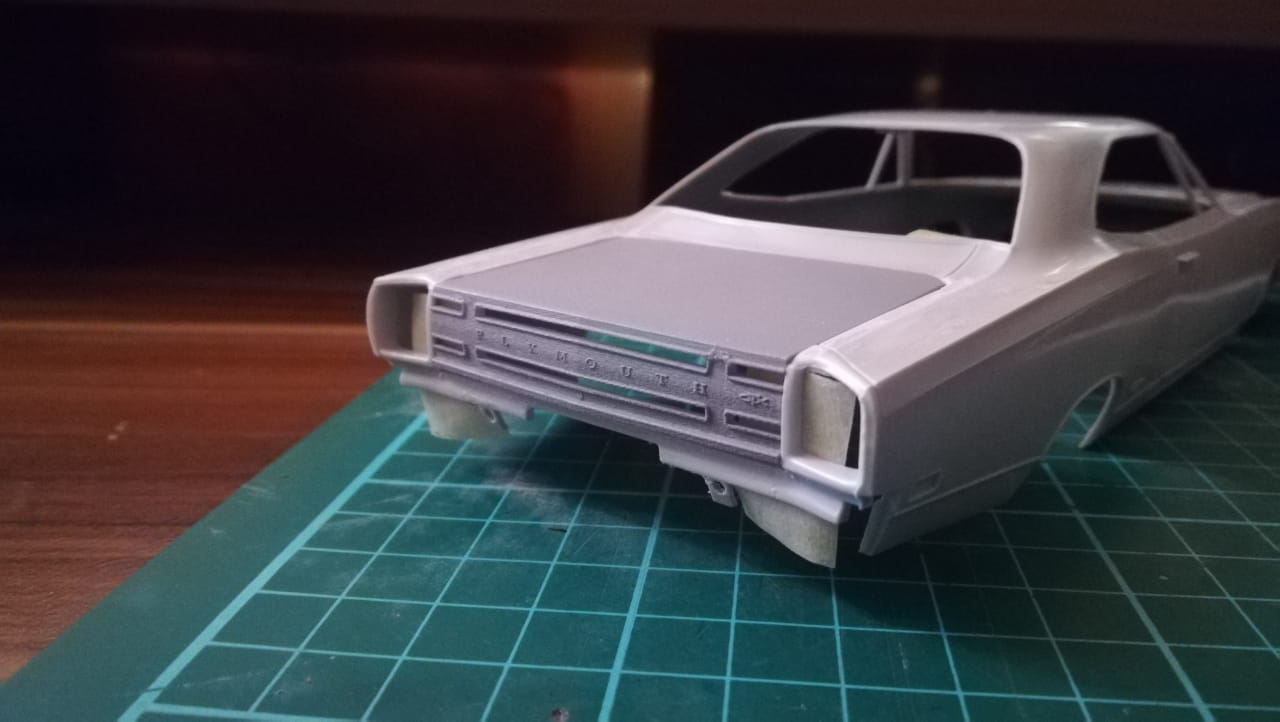
Hi there, thank you all for your support. After a very busy time I yesterday cut out the trunk lid of my 69 GTX to test fit the 68 one. There are still some issues. The openings for the reflecting parts have tomove down a little bit and the center of the front had to be sanded in shape. Also the top of the lid could be thicker in comparision of the kit plastic thickness. Anyway I´m pleased with the result till now. Will correct the issues in the near future to make this part ready to use. Here are some pics so you can tell me what you think. I want to do the taillights as a complete part set with the seperated rear fender areas. What you think about that? Rico
-
Hey guys, reshaped the rear of the hood. Hope it fits better now. Added underhood details too. Attached a pic I got from Scott comparing my drawing with the kit hood. Hope you like it. Rico
-
1975 Plymouth Trailduster
camaro69 replied to Oldmopars's topic in WIP: Model Trucks: Pickups, Vans, SUVs, Light Commercial
Thanks Patrick, if you have a special part to reproduce feel free to send me a PM like Scott did it before. I can also try to scale the grilles for the Trailduster and the Ramcharger. Would be great if you could send me a pic of the front end of the 1/25 scale kit. Rico