R. Thorne
-
Posts
1,276 -
Joined
-
Last visited
Content Type
Profiles
Forums
Events
Gallery
Everything posted by R. Thorne
-
1962 Pontiac 421 SD F/SA circa 2024 edition
R. Thorne replied to R. Thorne's topic in WIP: Drag Racing Models
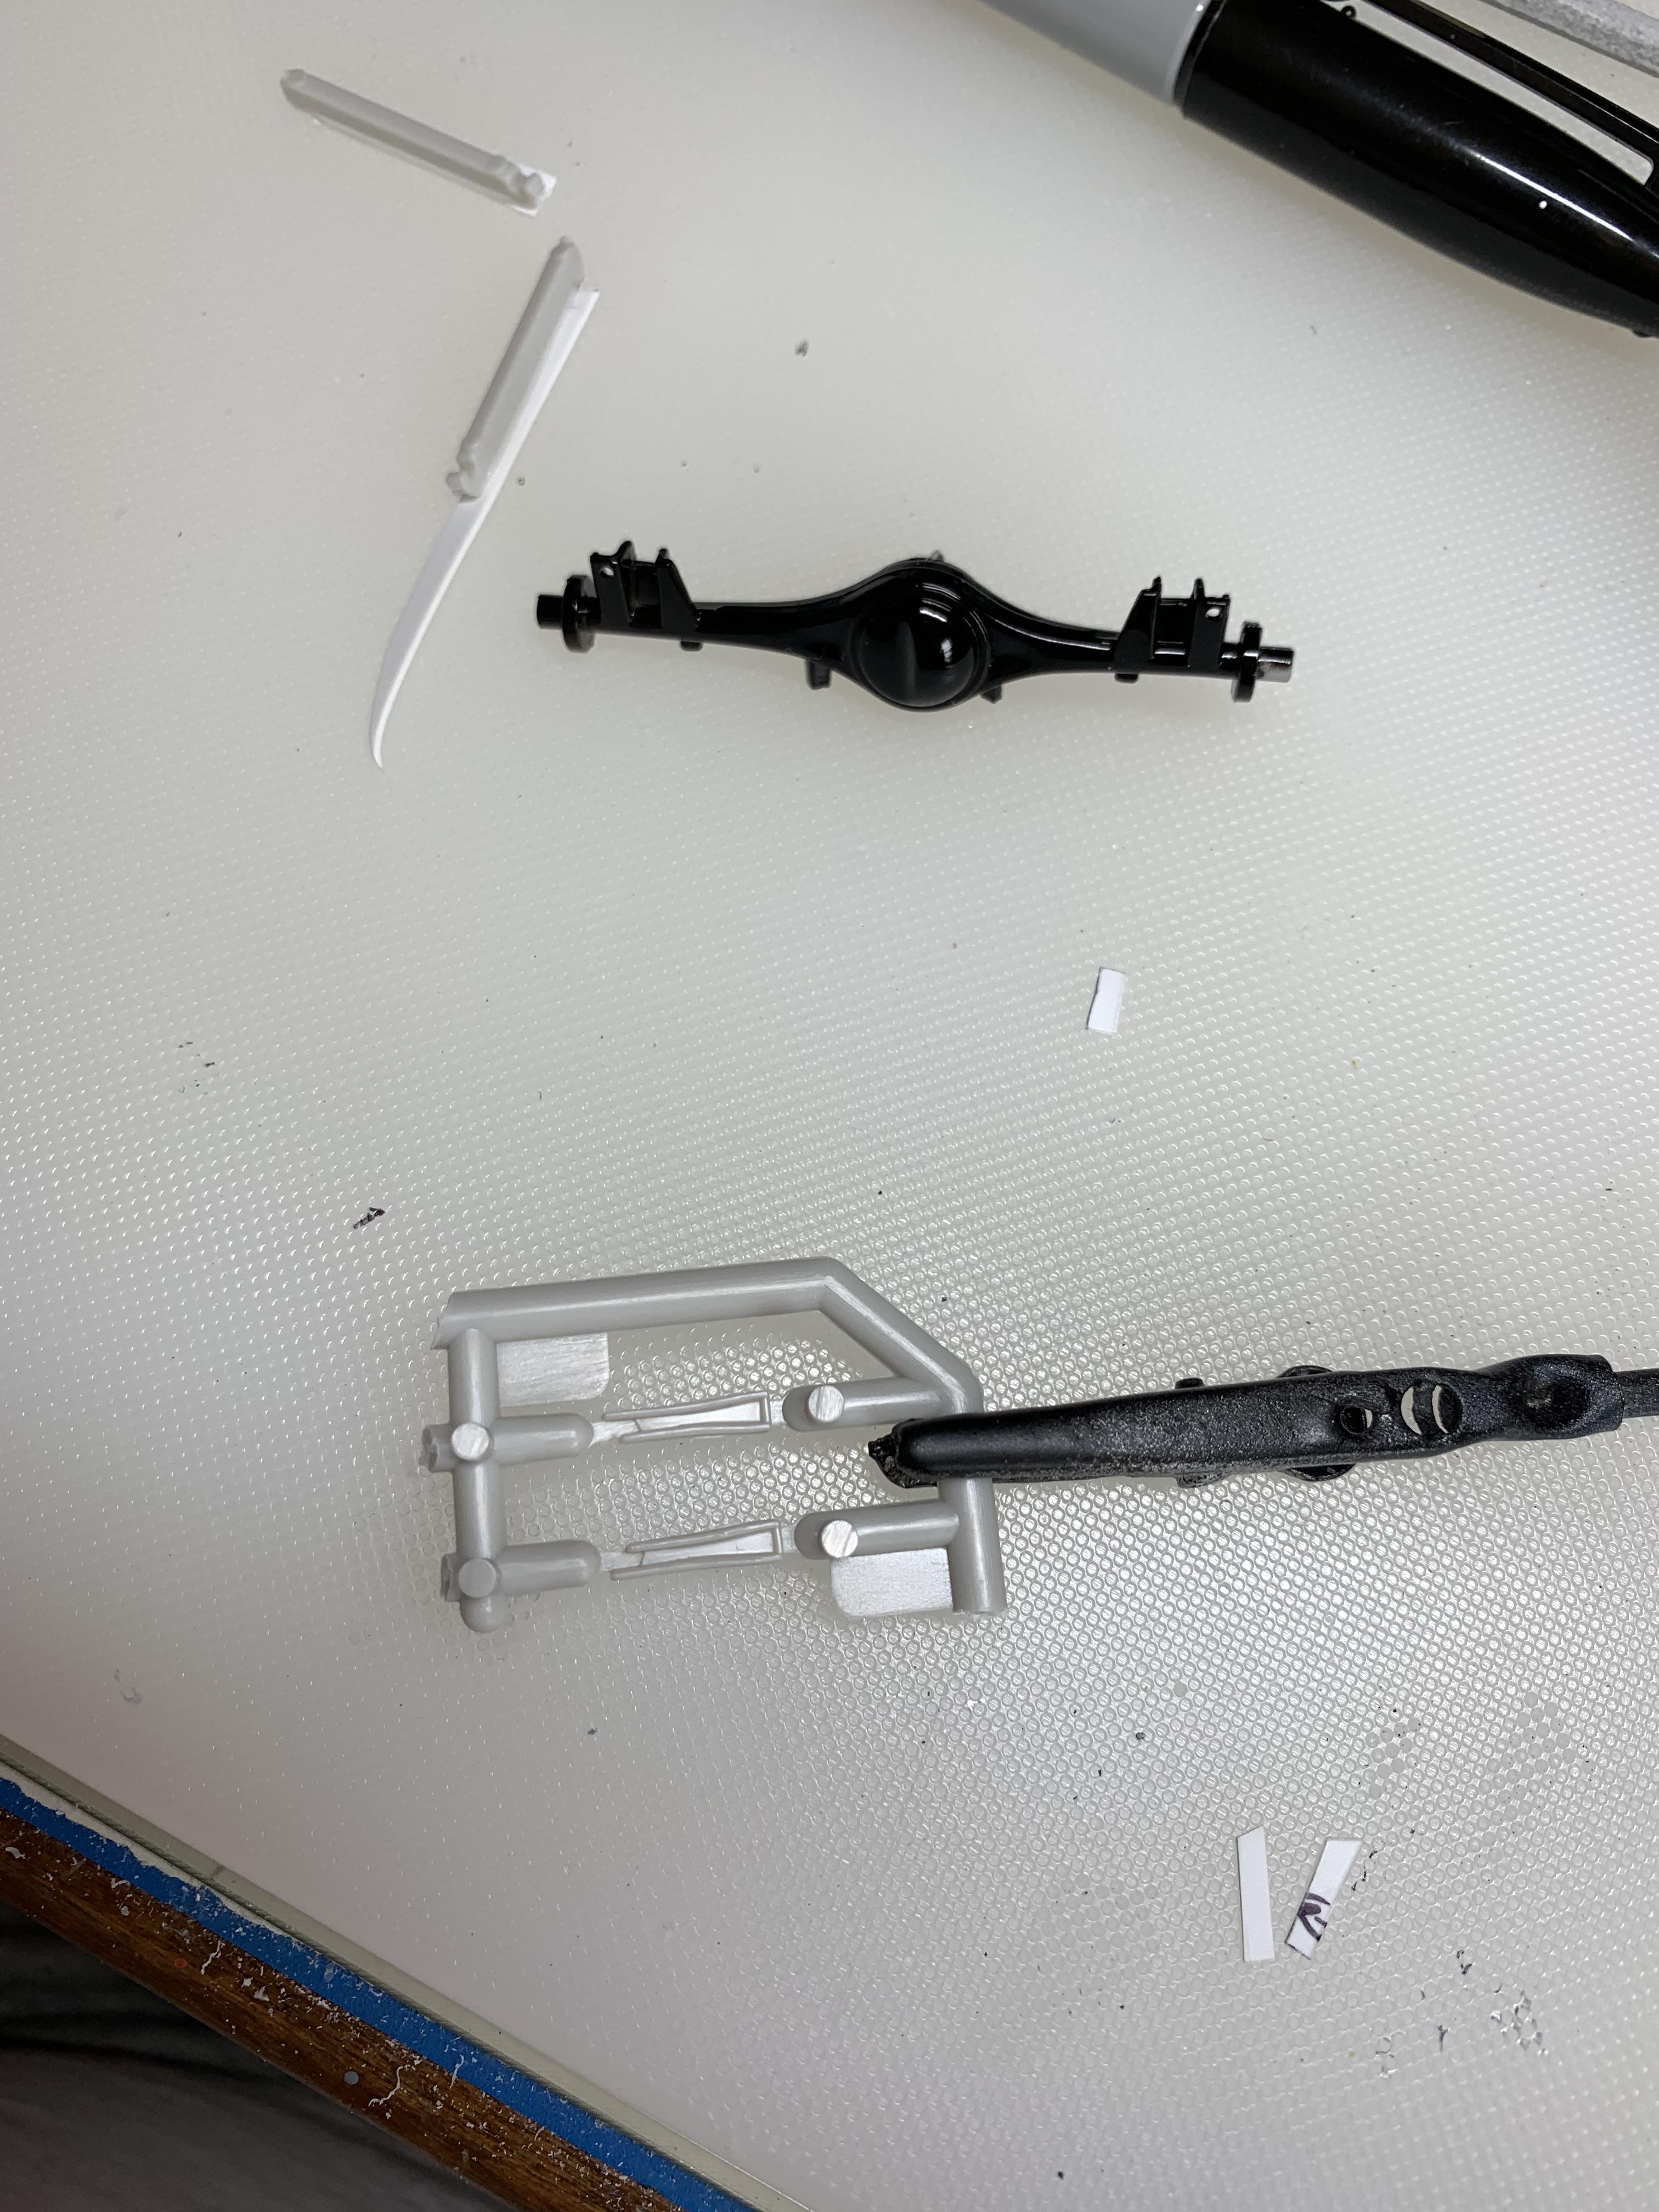
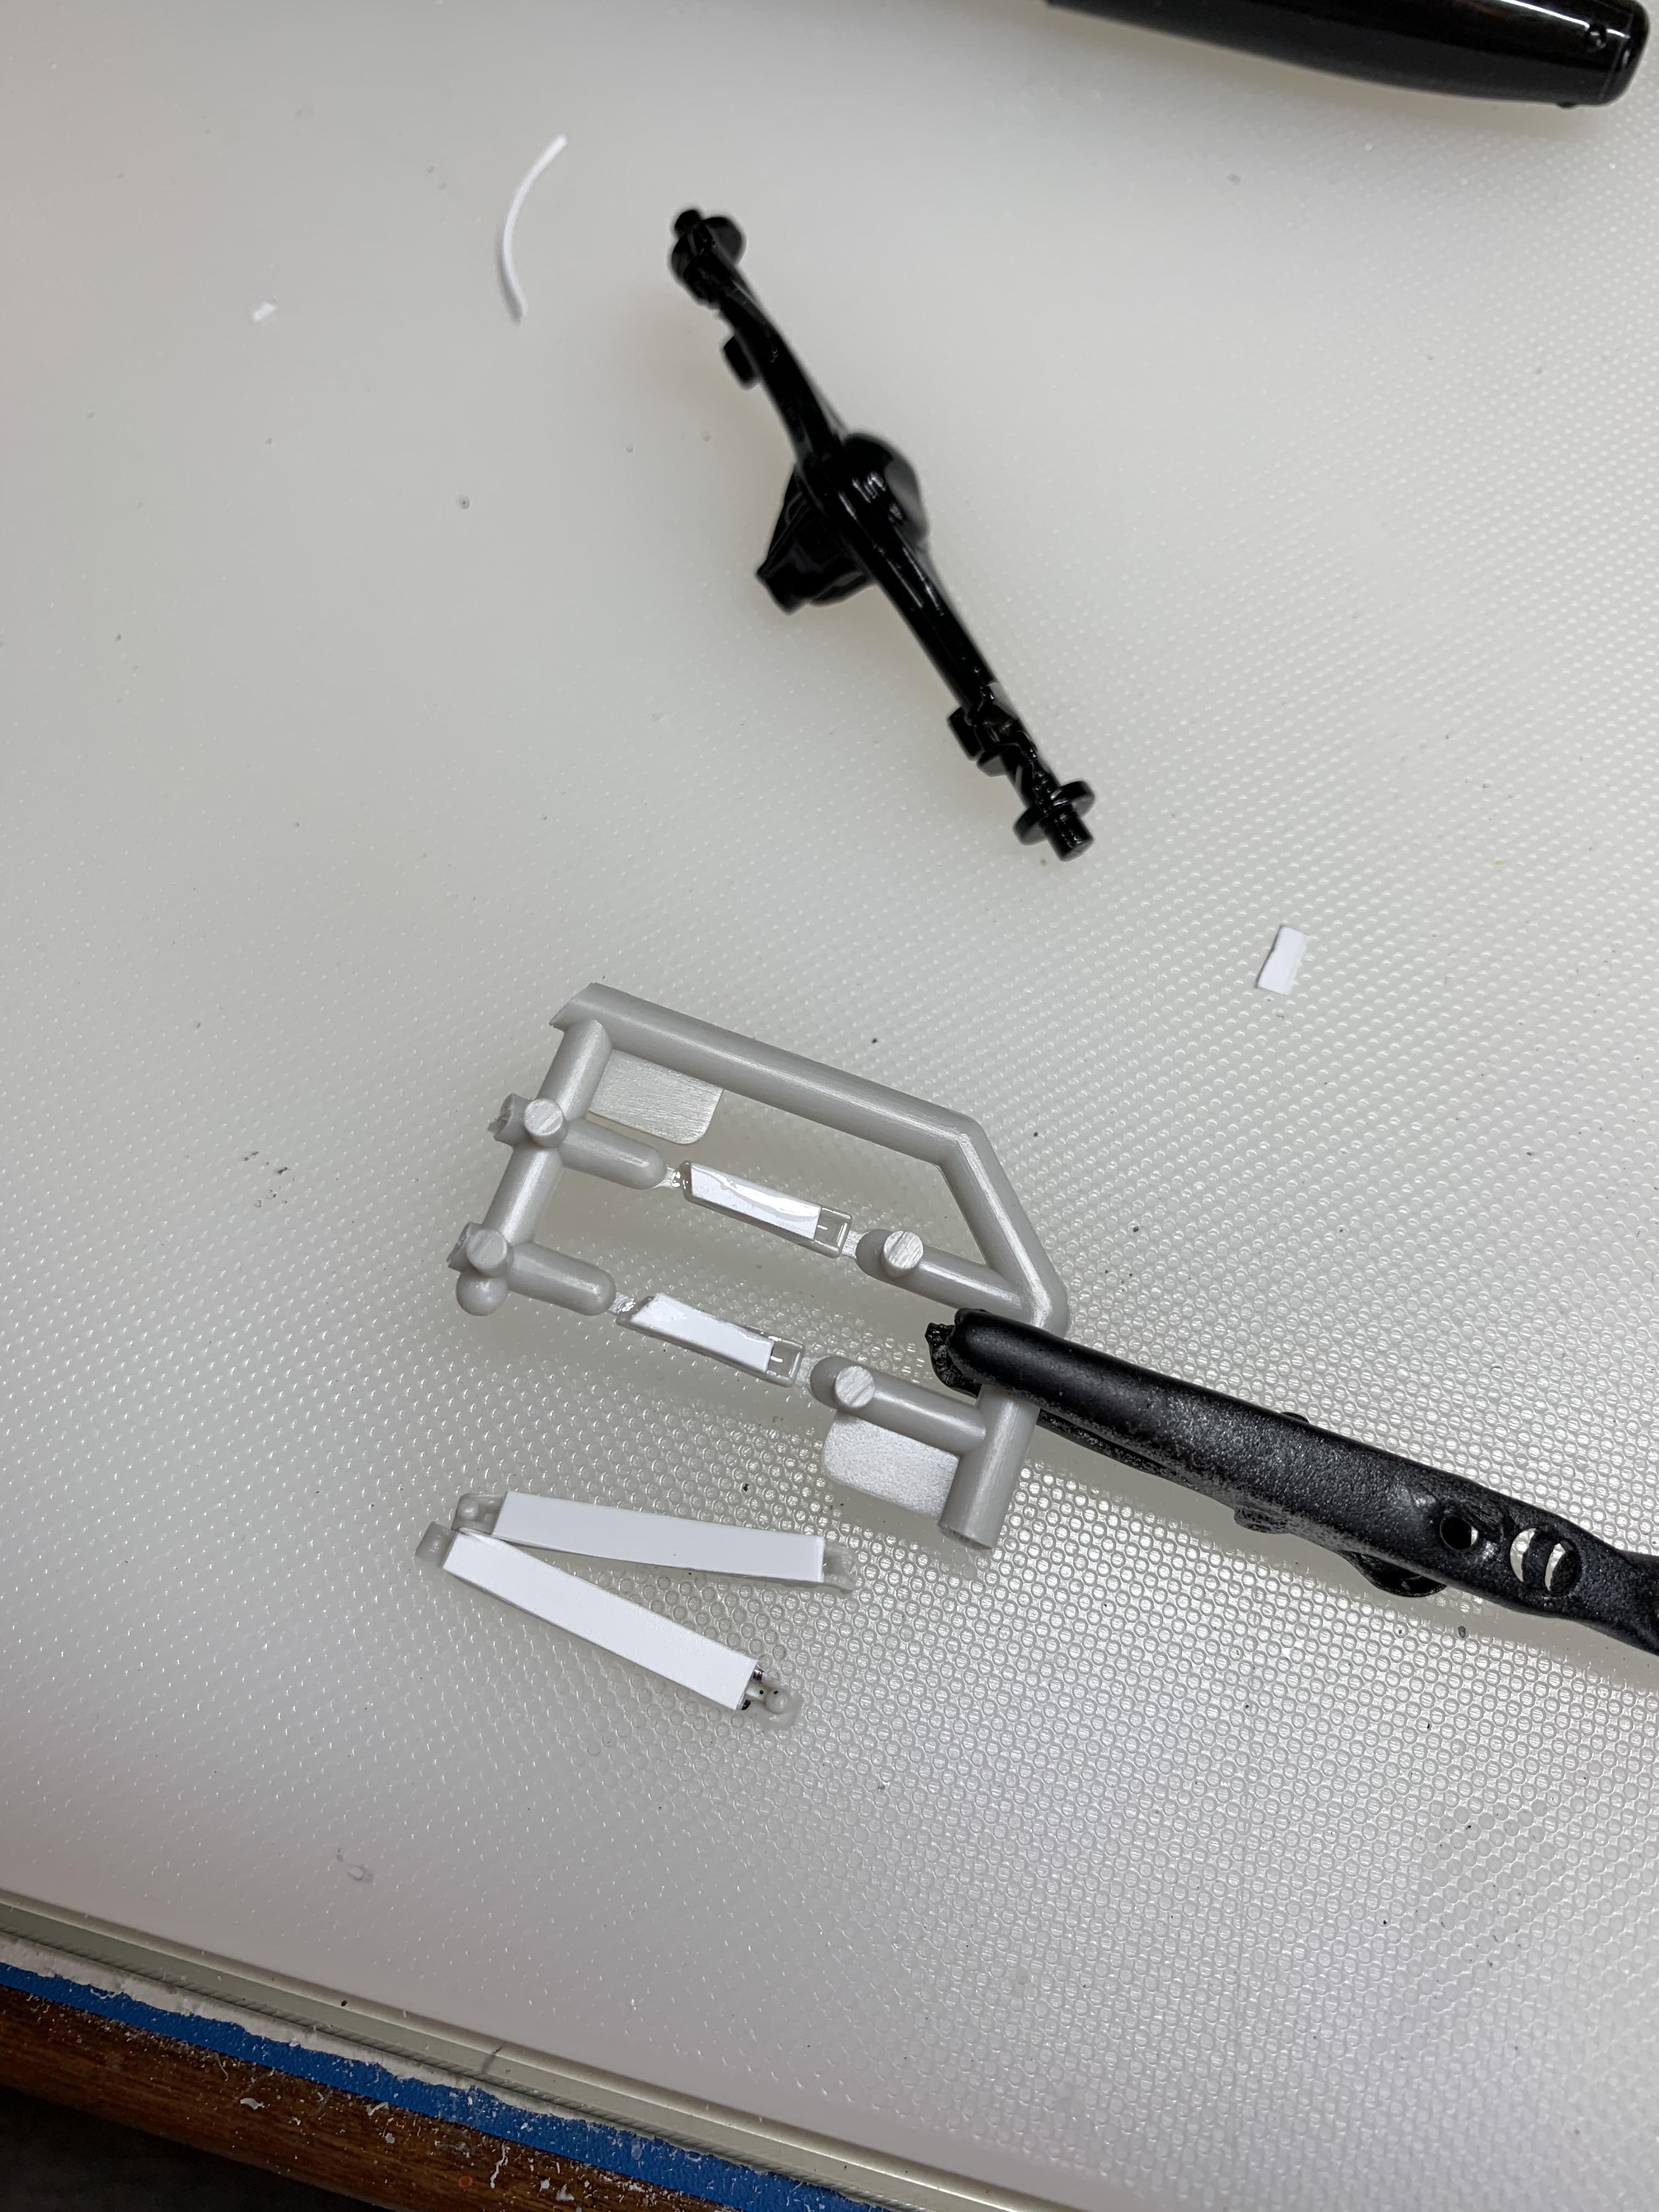
Made some upper and lower control arm reinforcements.
-
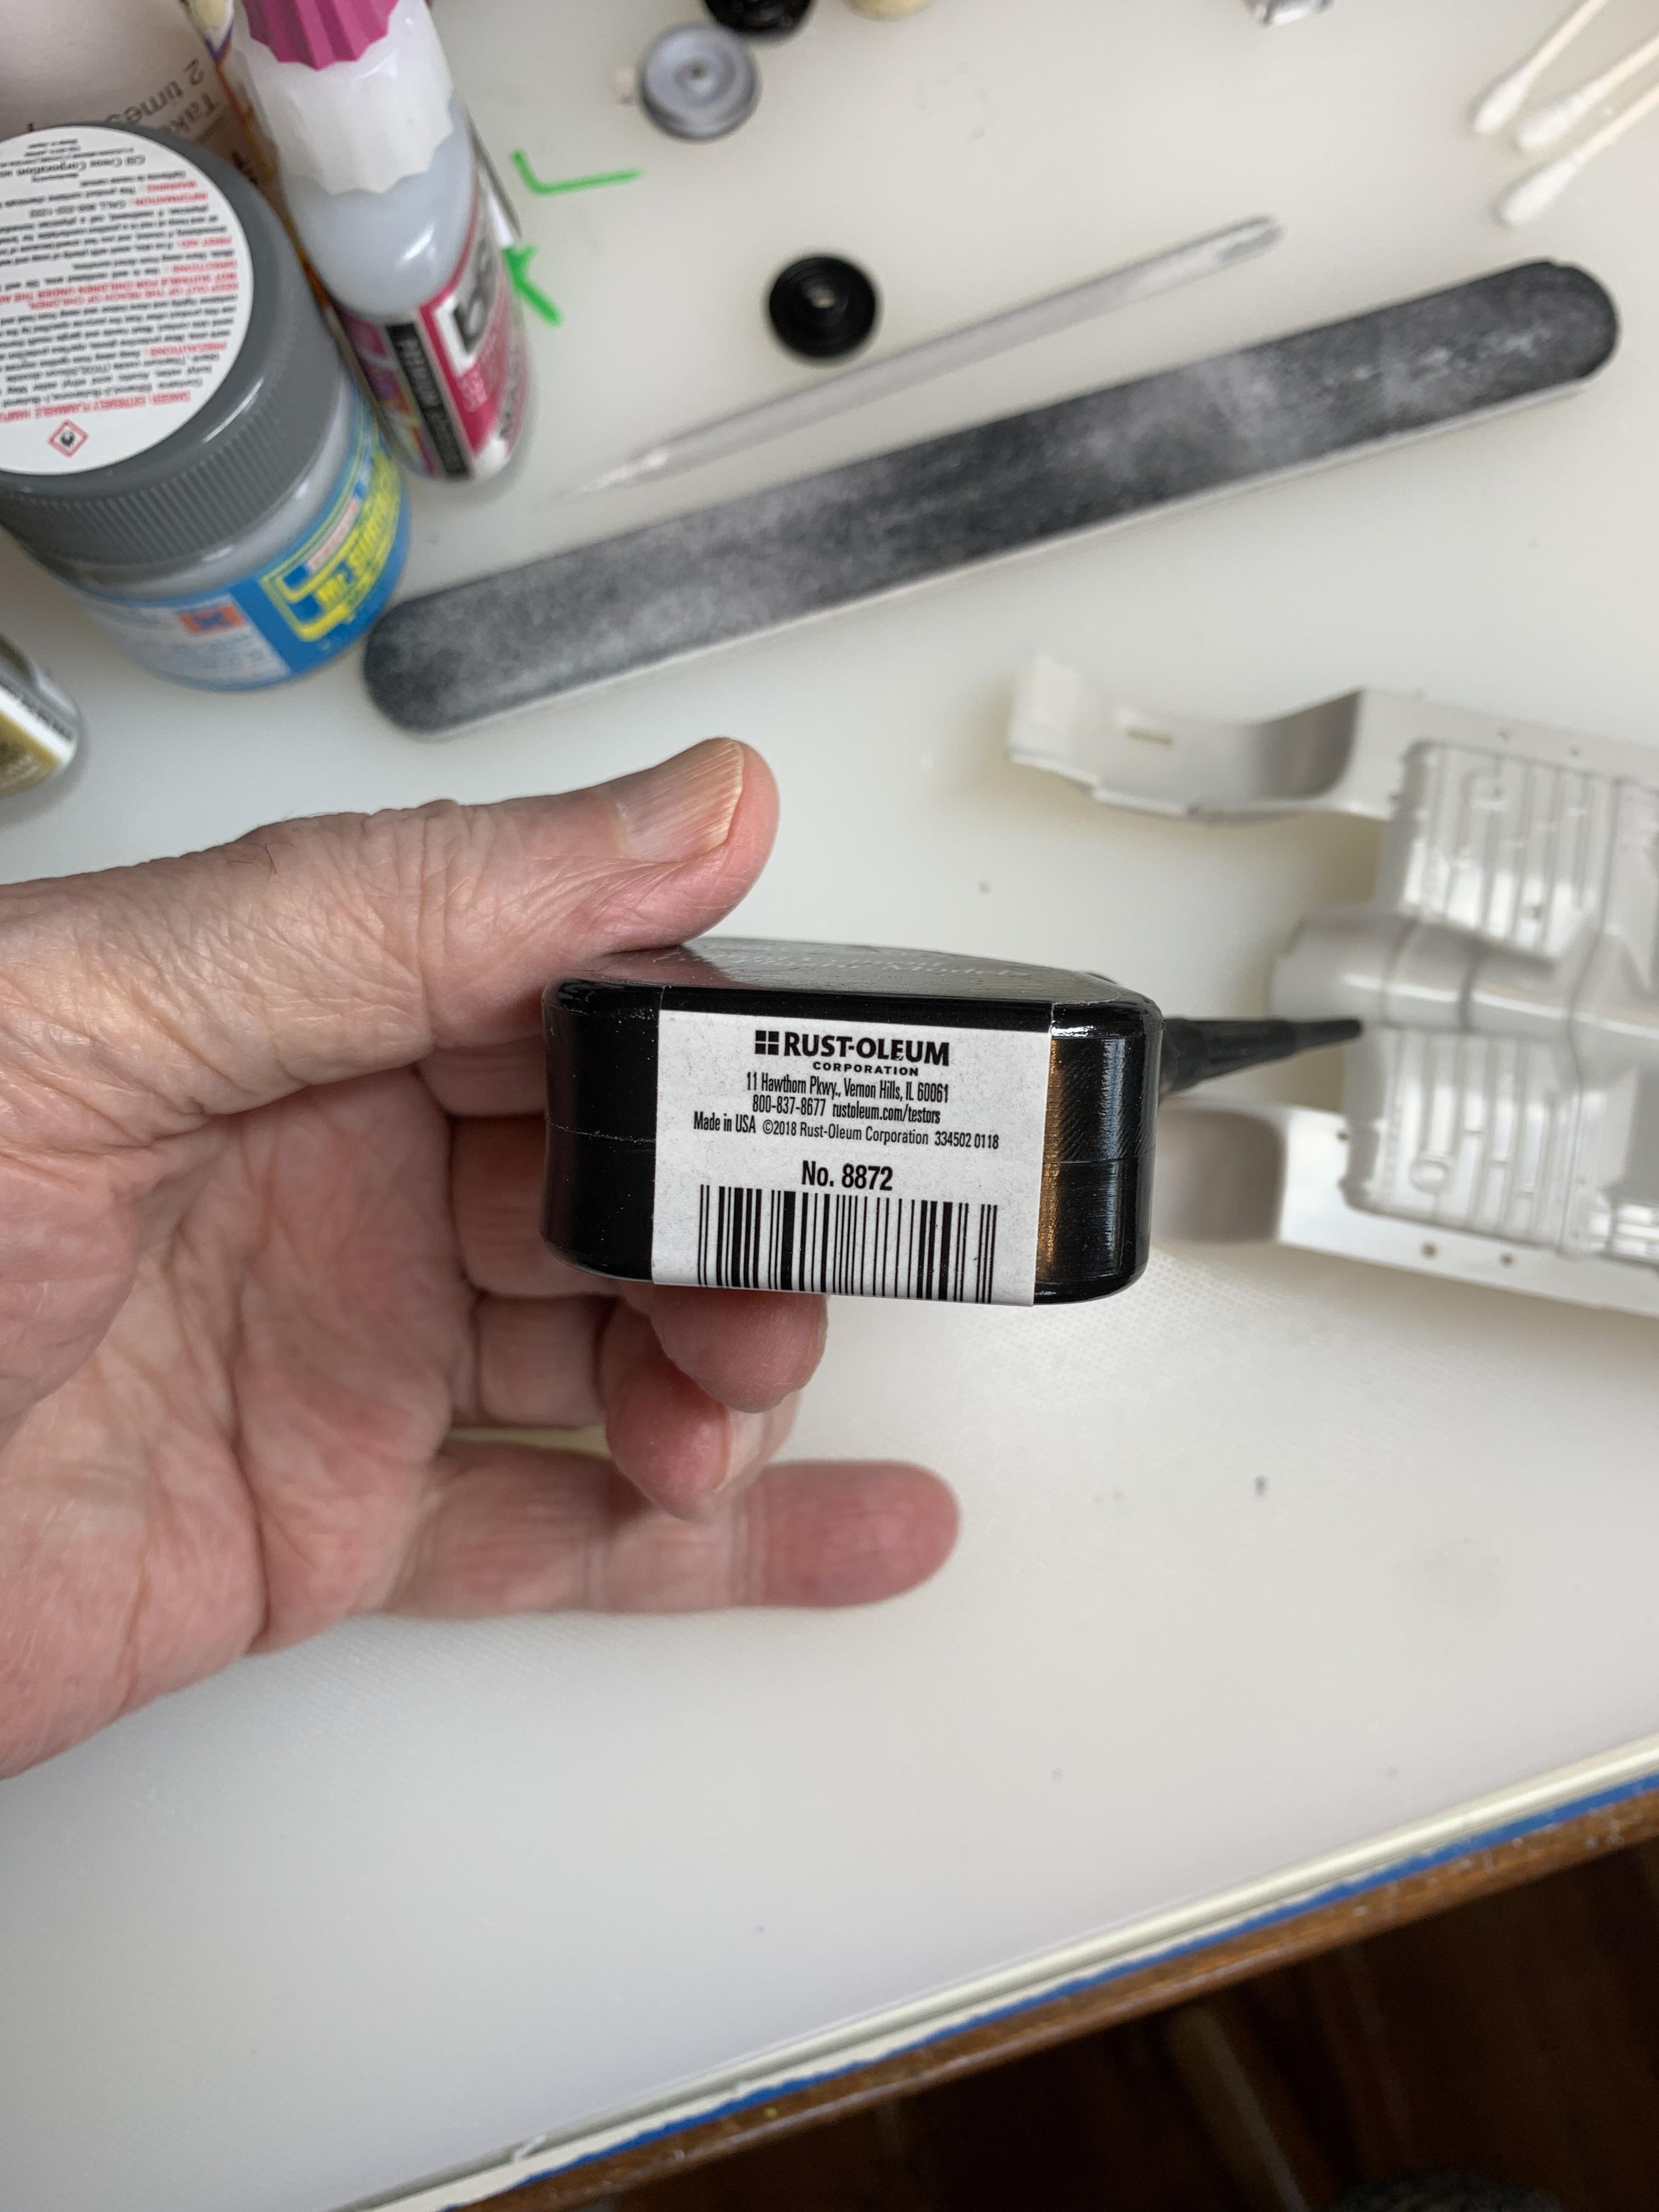
What’s your favorite glue or adhesive?
R. Thorne replied to slusher's topic in Model Building Questions and Answers
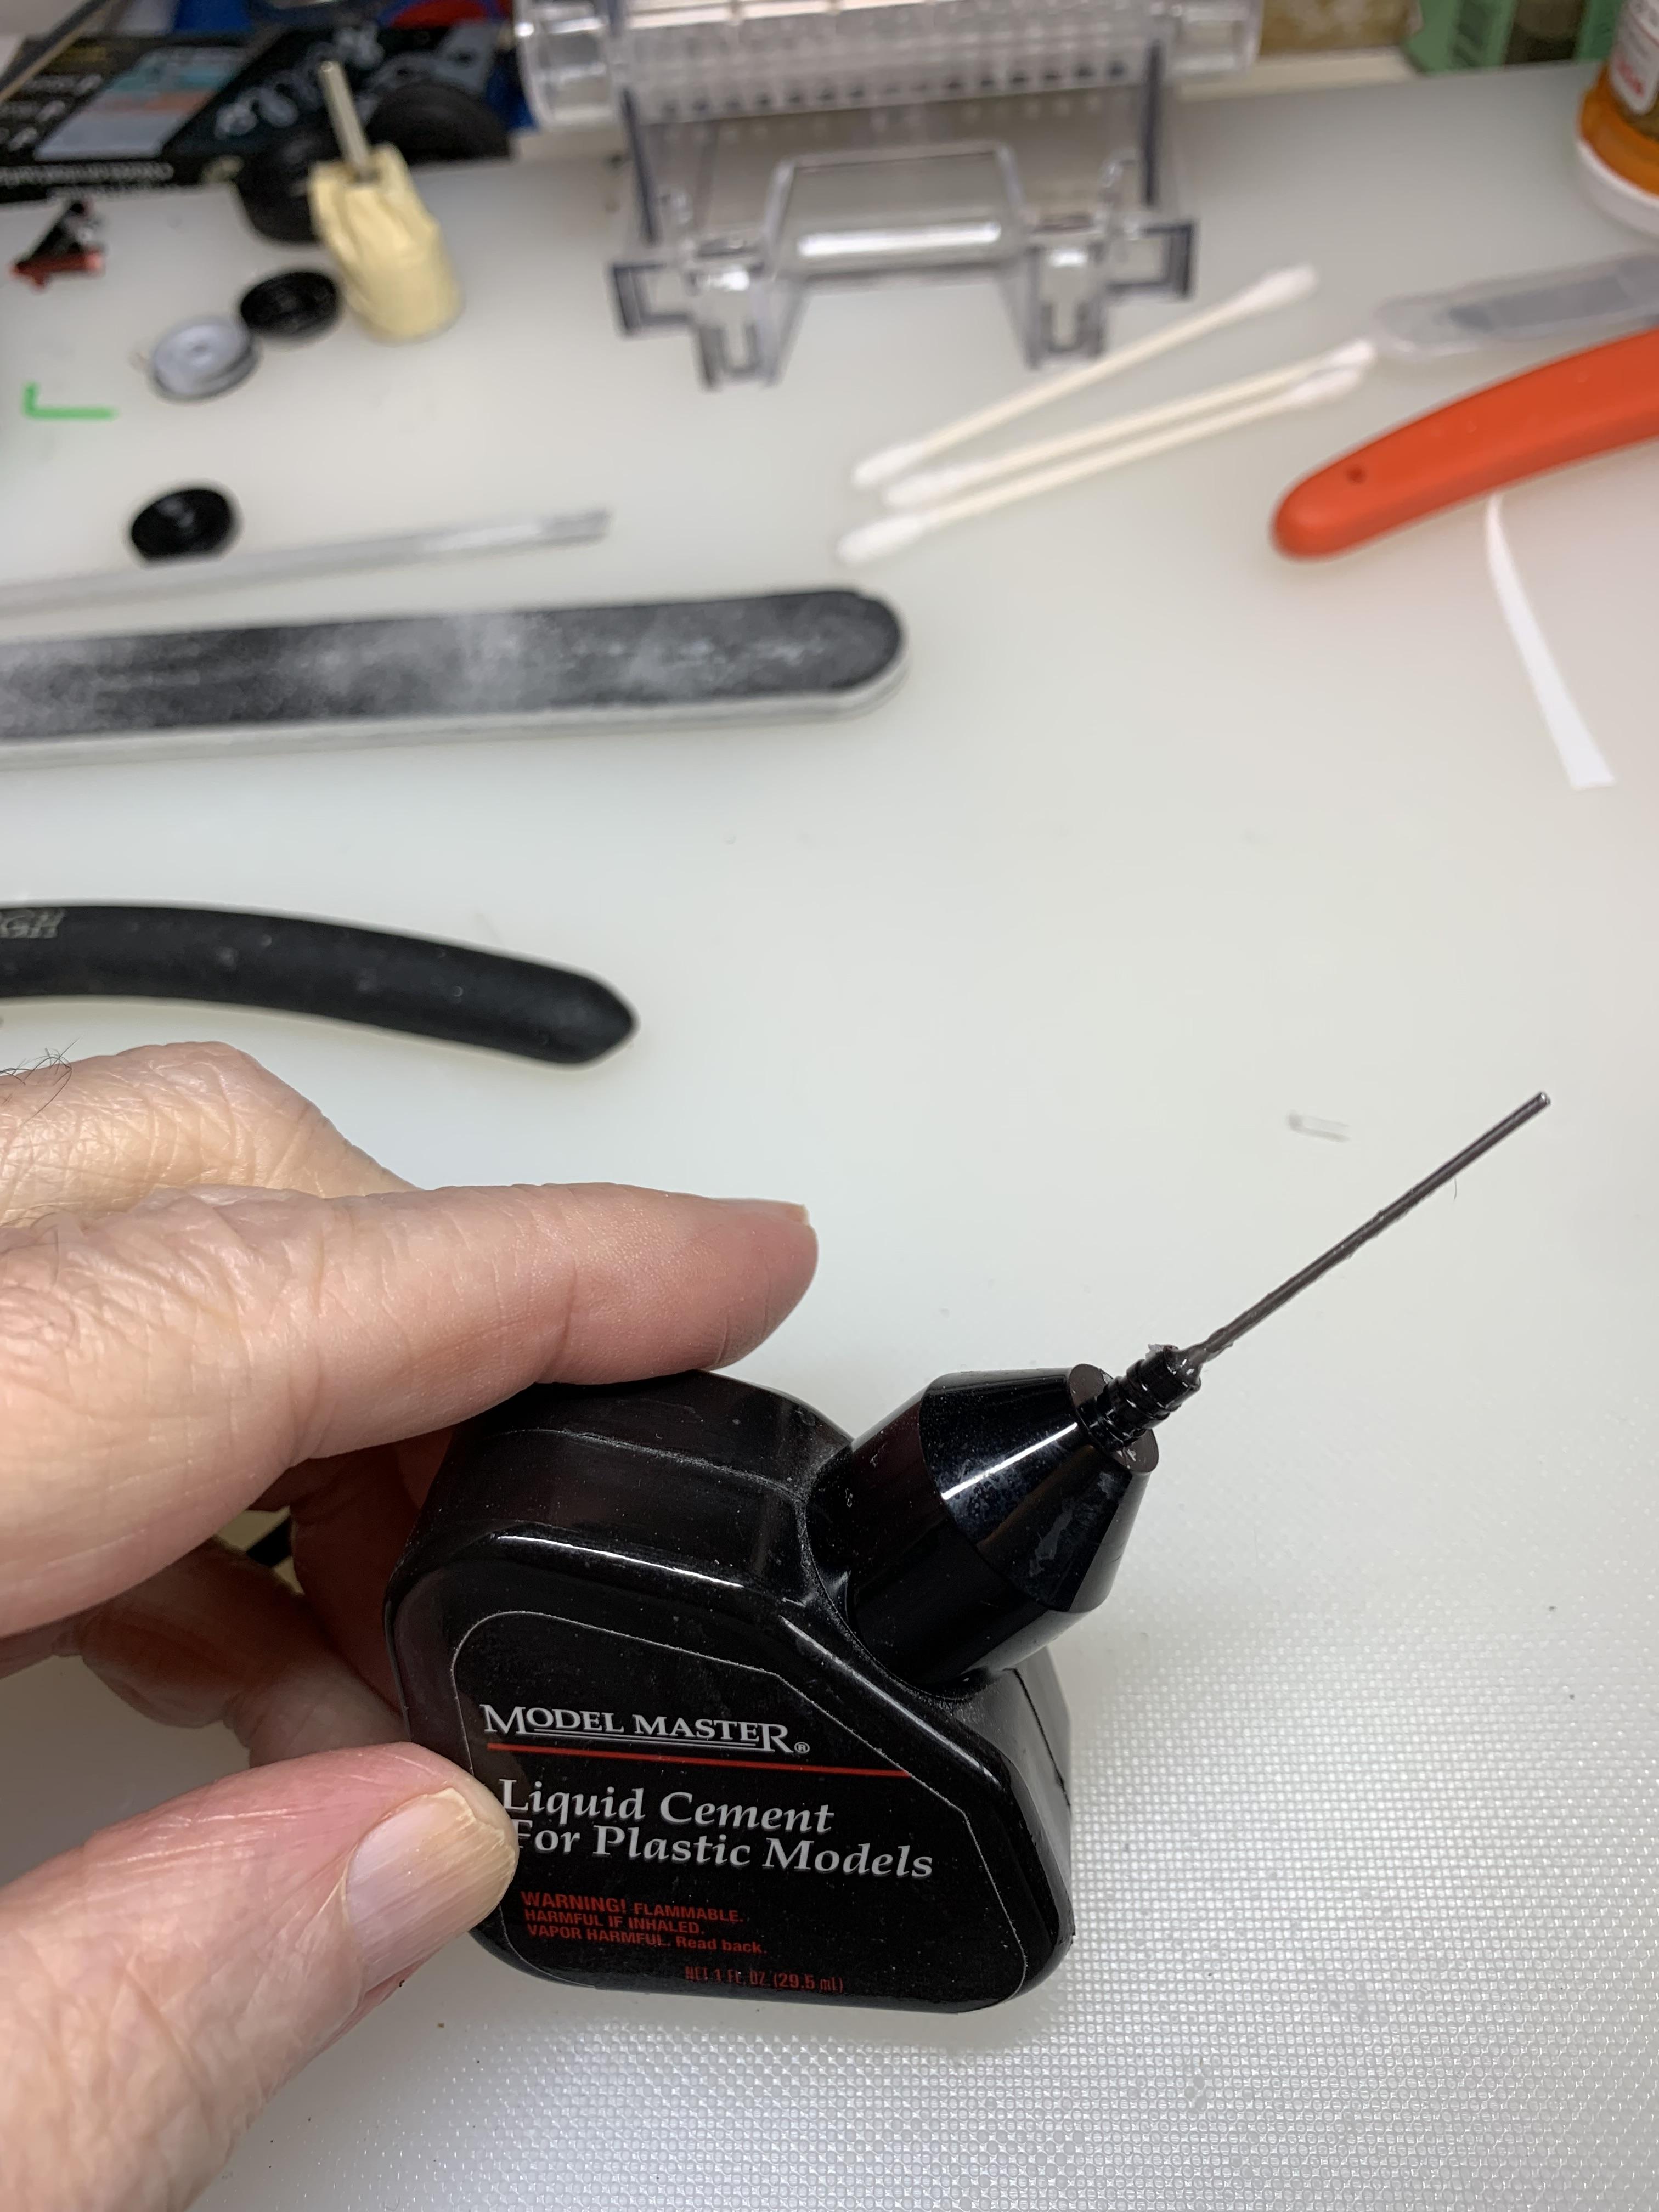
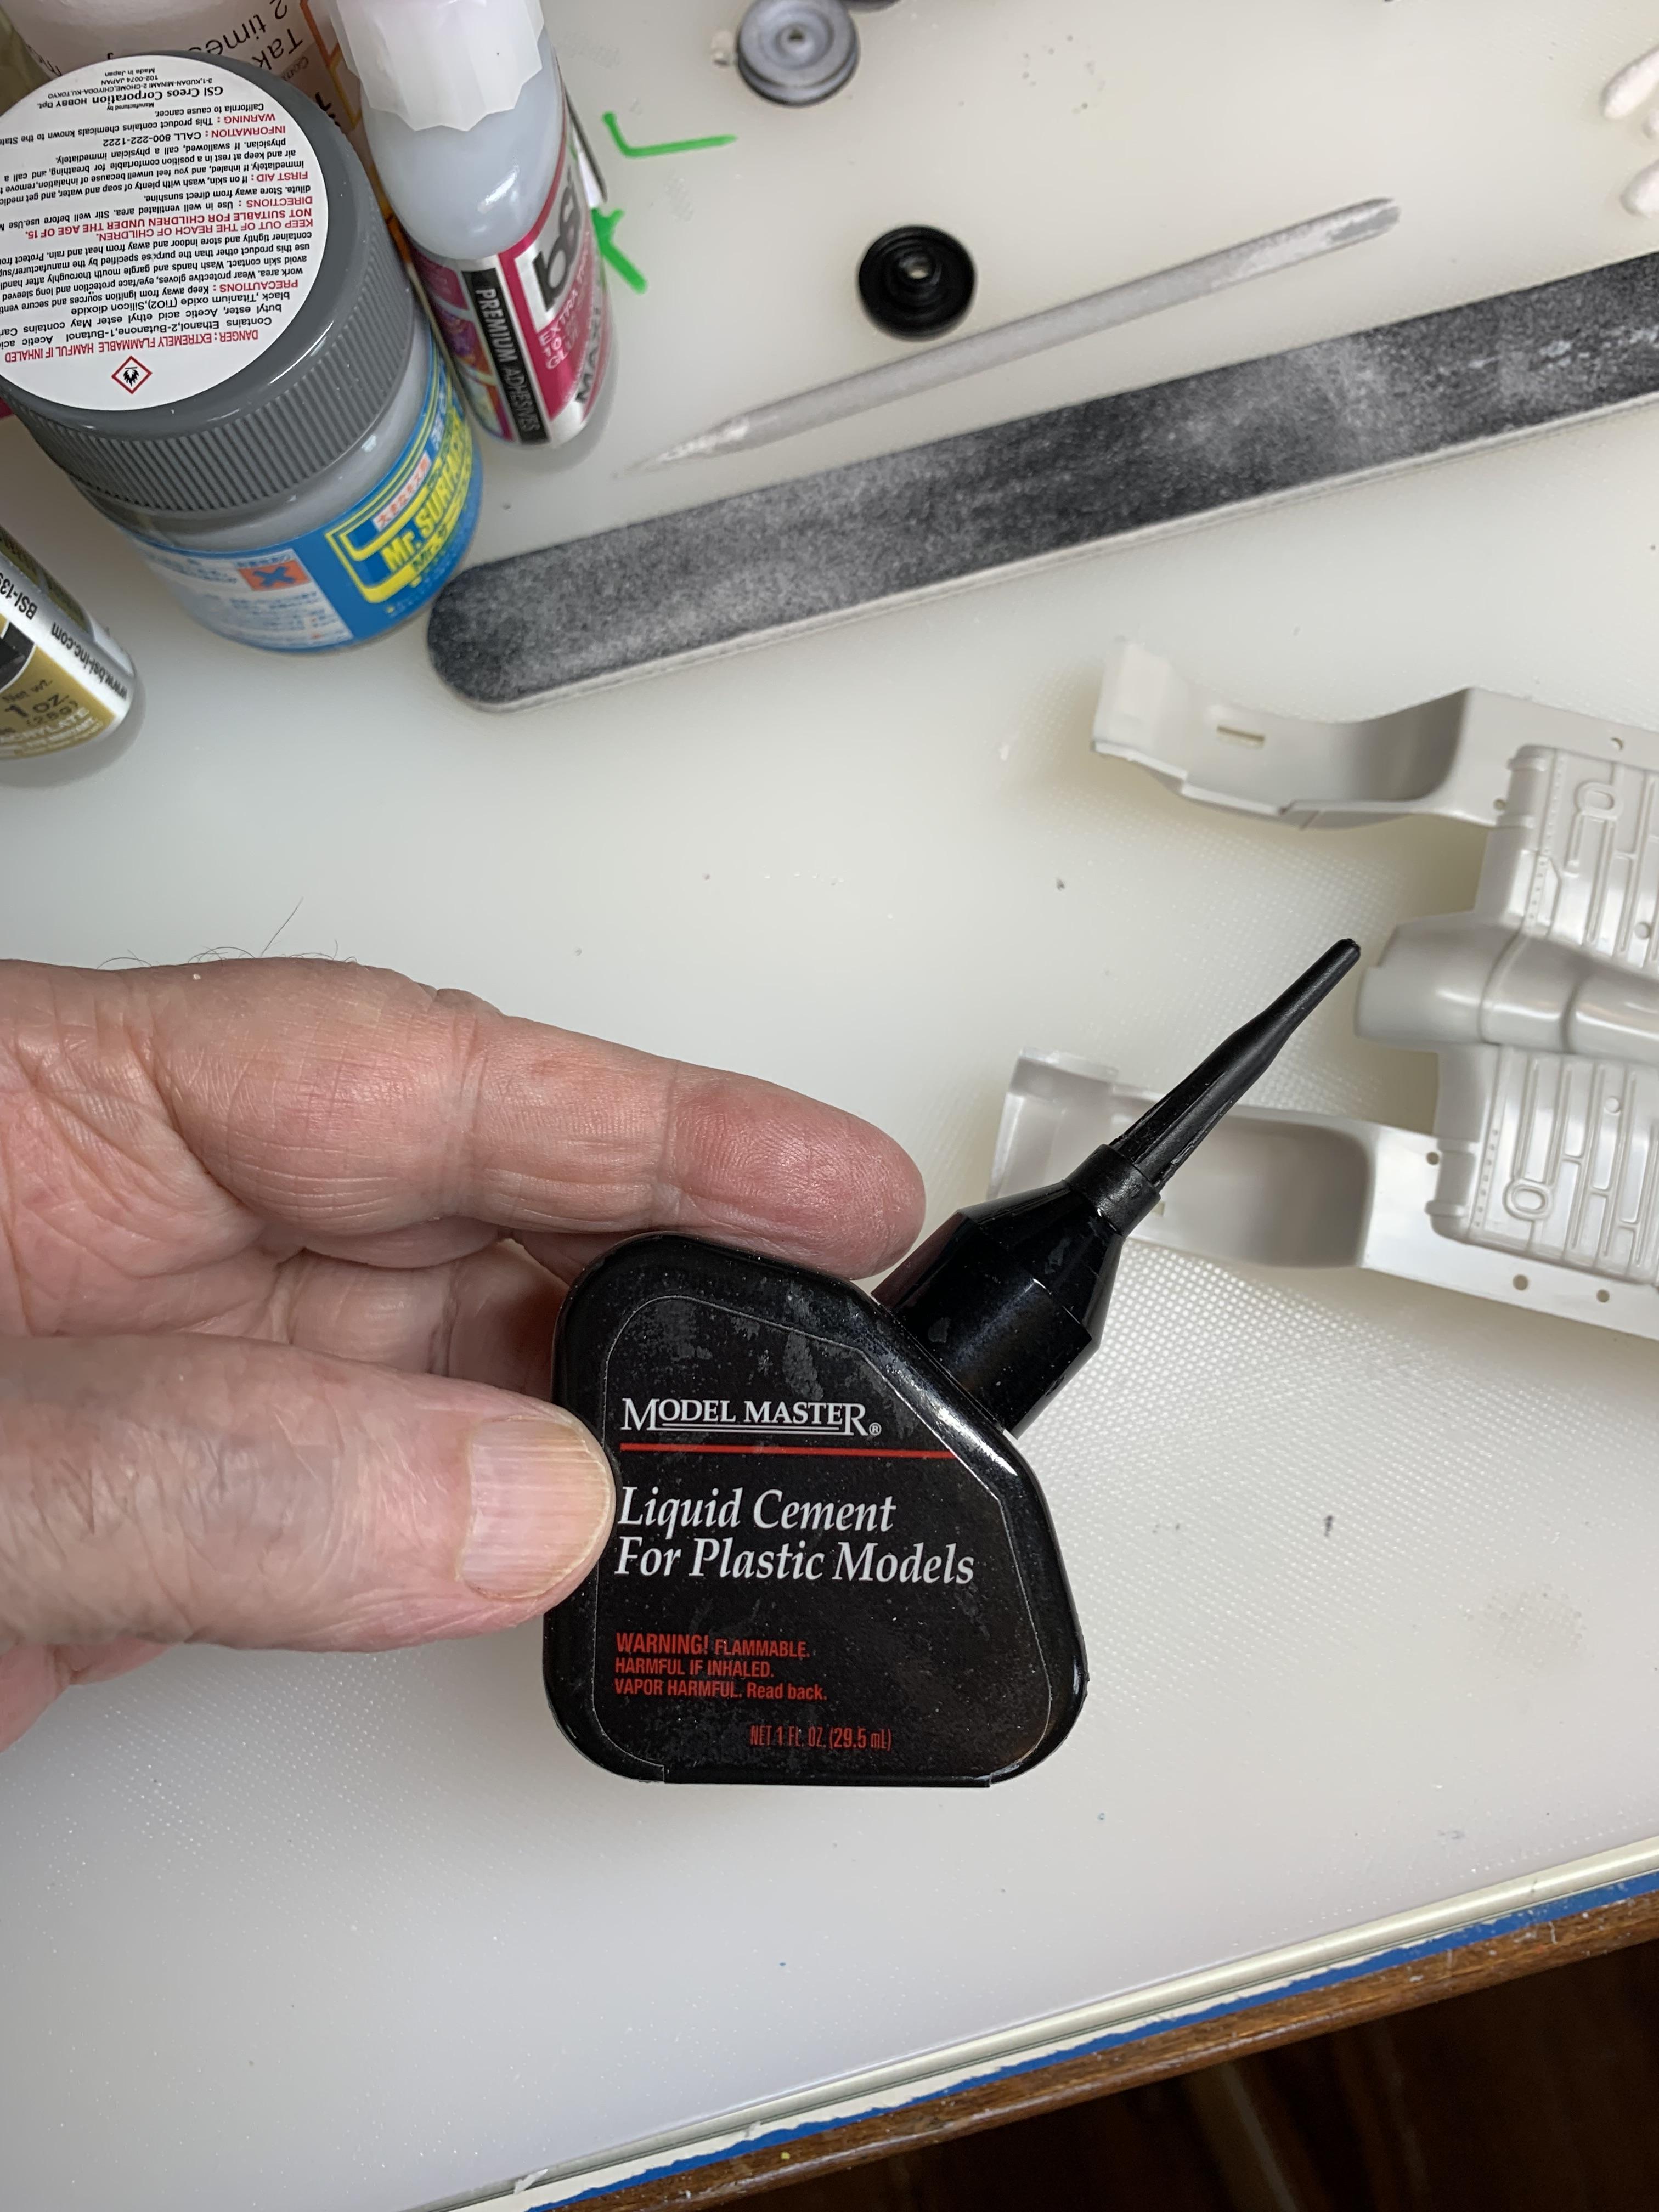
Just for Peter. It has the hypo type applicator.
-
1962 Pontiac 421 SD F/SA circa 2024 edition
R. Thorne replied to R. Thorne's topic in WIP: Drag Racing Models
Not much done today. Just a bit of painting.
-
1962 Pontiac 421 SD F/SA circa 2024 edition
R. Thorne replied to R. Thorne's topic in WIP: Drag Racing Models
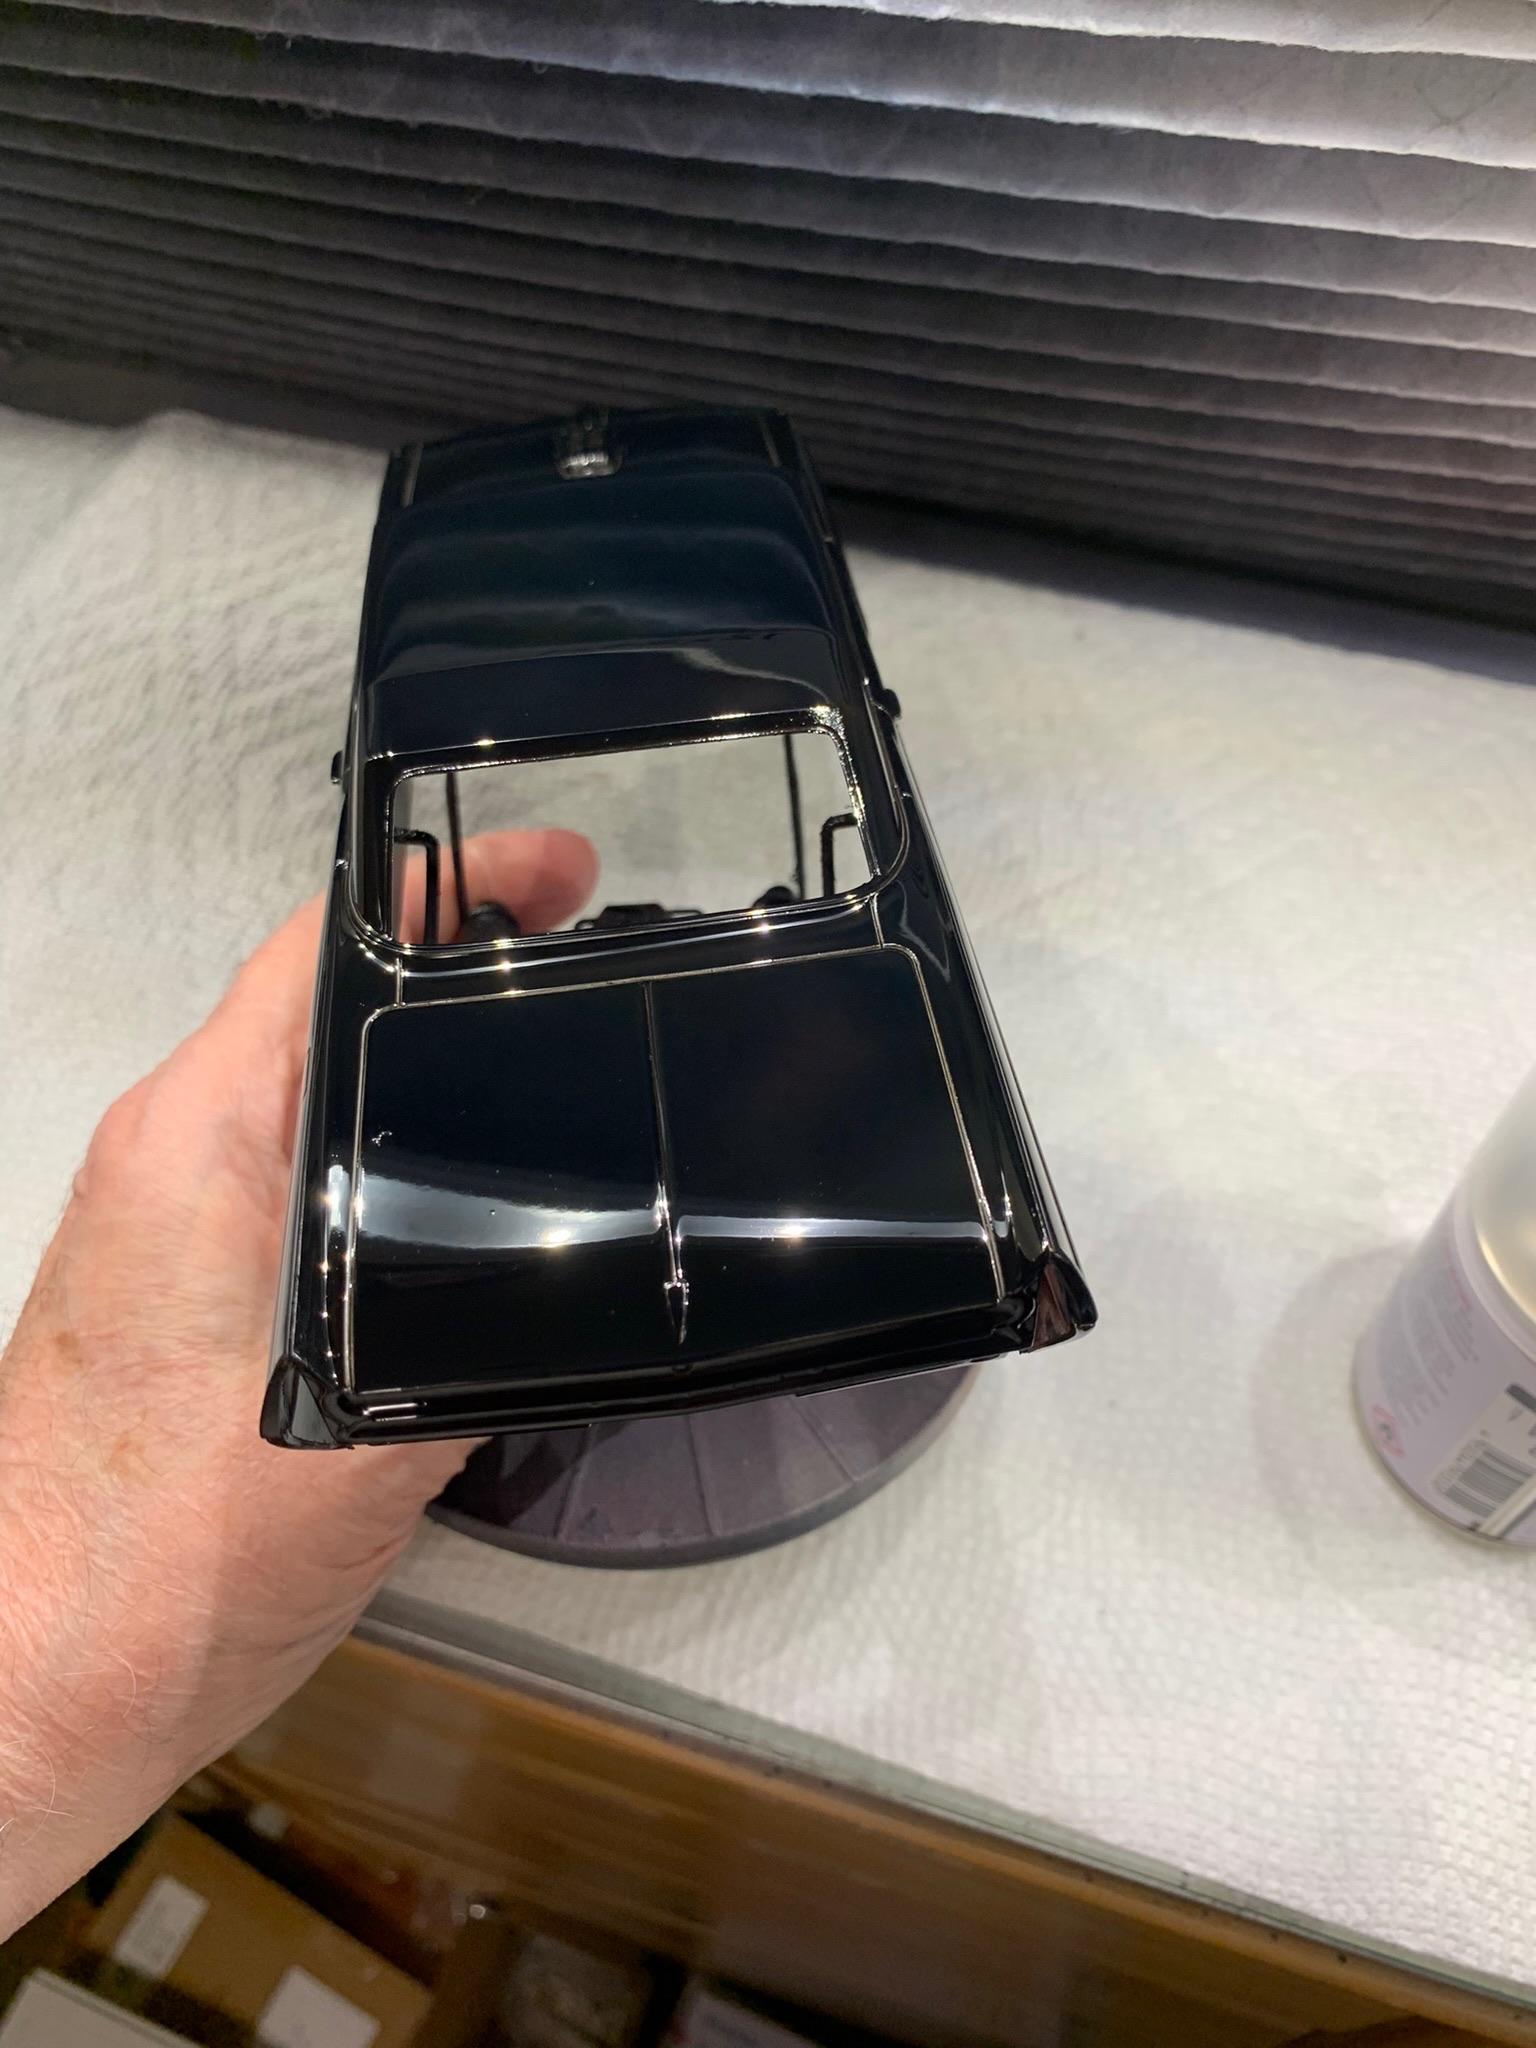
TS14 Tamiya black is what I painted the body with. I then applied TS13 Tamiya clear over that. I used the same procedure on both (1 light coat, then 1 medium coat). Nothing to do with the chassis. Hope that’s clear. -
What’s your favorite glue or adhesive?
R. Thorne replied to slusher's topic in Model Building Questions and Answers
This is what I use for strong welded type bonds and, yes, it is ModelMaster. I have had this for quite a while. Bought an extra when I heard it was being replaced by the Testors version. When it is gone, I guess I will try the Testors.
-
1962 Pontiac 421 SD F/SA circa 2024 edition
R. Thorne replied to R. Thorne's topic in WIP: Drag Racing Models
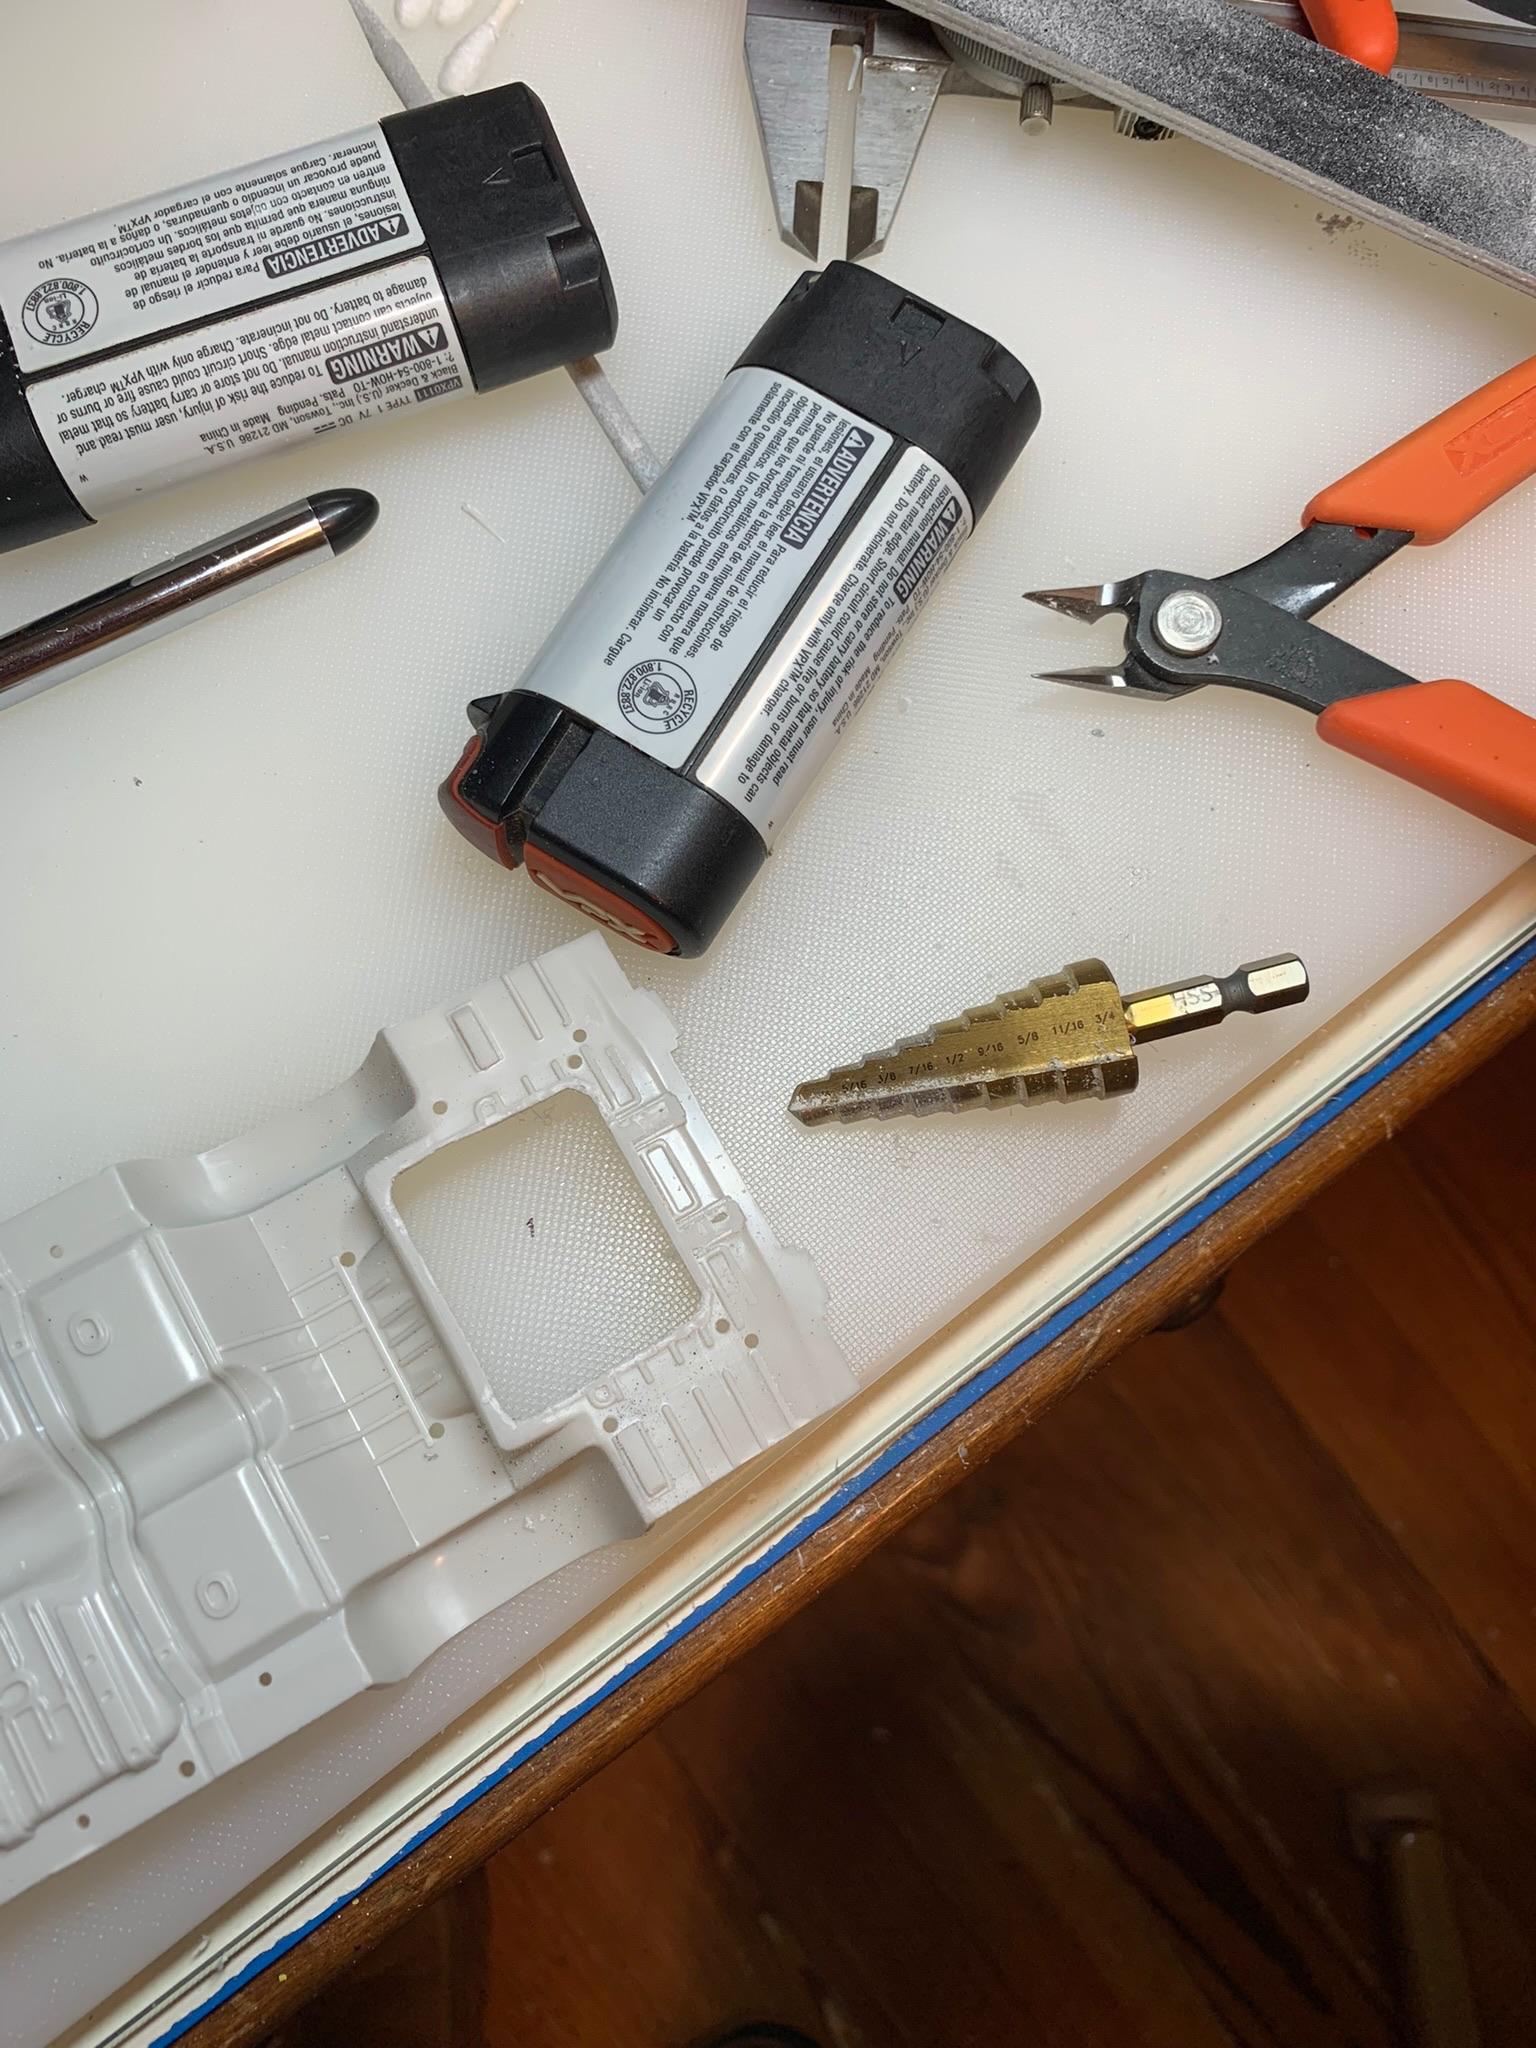
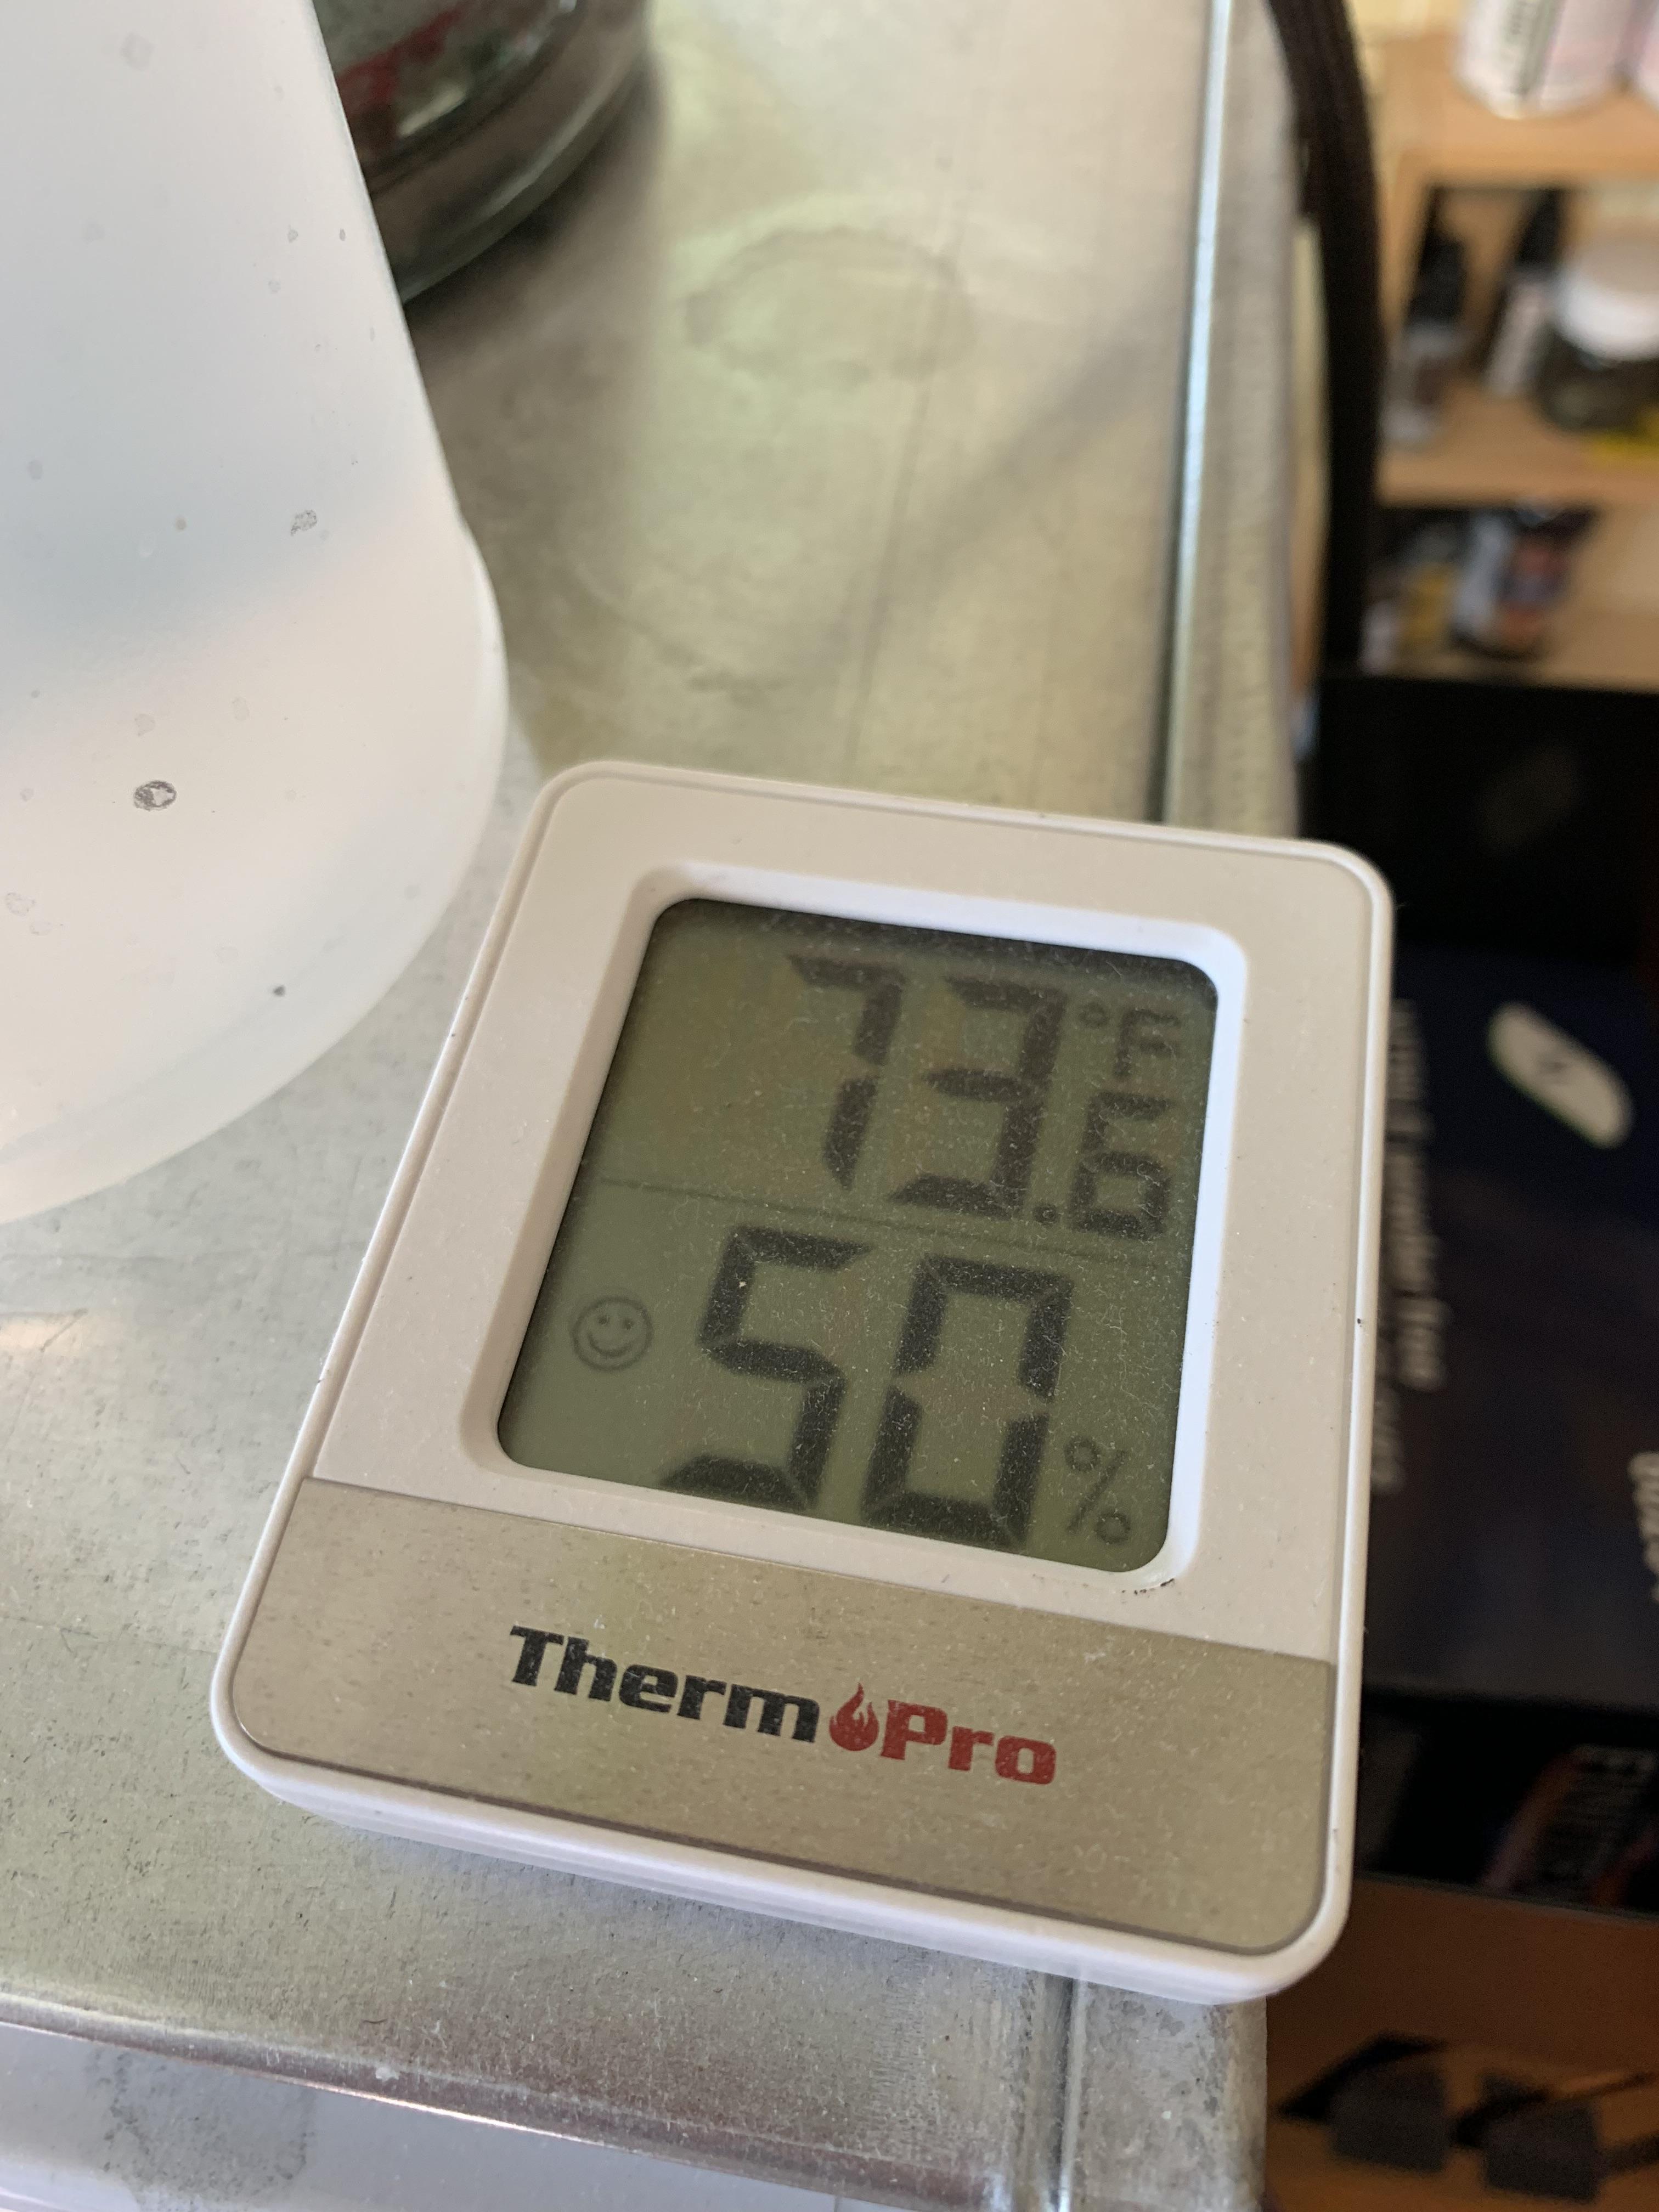
Cut out the fuel tank with the help of my drill and vari-bit, then my old faithful Xuron nippers. Put some TS-13 Tamiya clear on. Humidity was down to 48% today (inside the house, that is). Same process as with black paint. 1 light tacky coat, then 1 medium heavy shiny coat, then stop and cover it up and leave it alone. This is 3 hours later.
-
1962 Pontiac 421 SD F/SA circa 2024 edition
R. Thorne replied to R. Thorne's topic in WIP: Drag Racing Models
Thanks, Tom. It makes my hood scoop look bad. I almost hate to put some TS13 clear on it tonight. -
Thanks, Carl. The best to you.
-
1962 Pontiac 421 SD F/SA circa 2024 edition
R. Thorne replied to R. Thorne's topic in WIP: Drag Racing Models
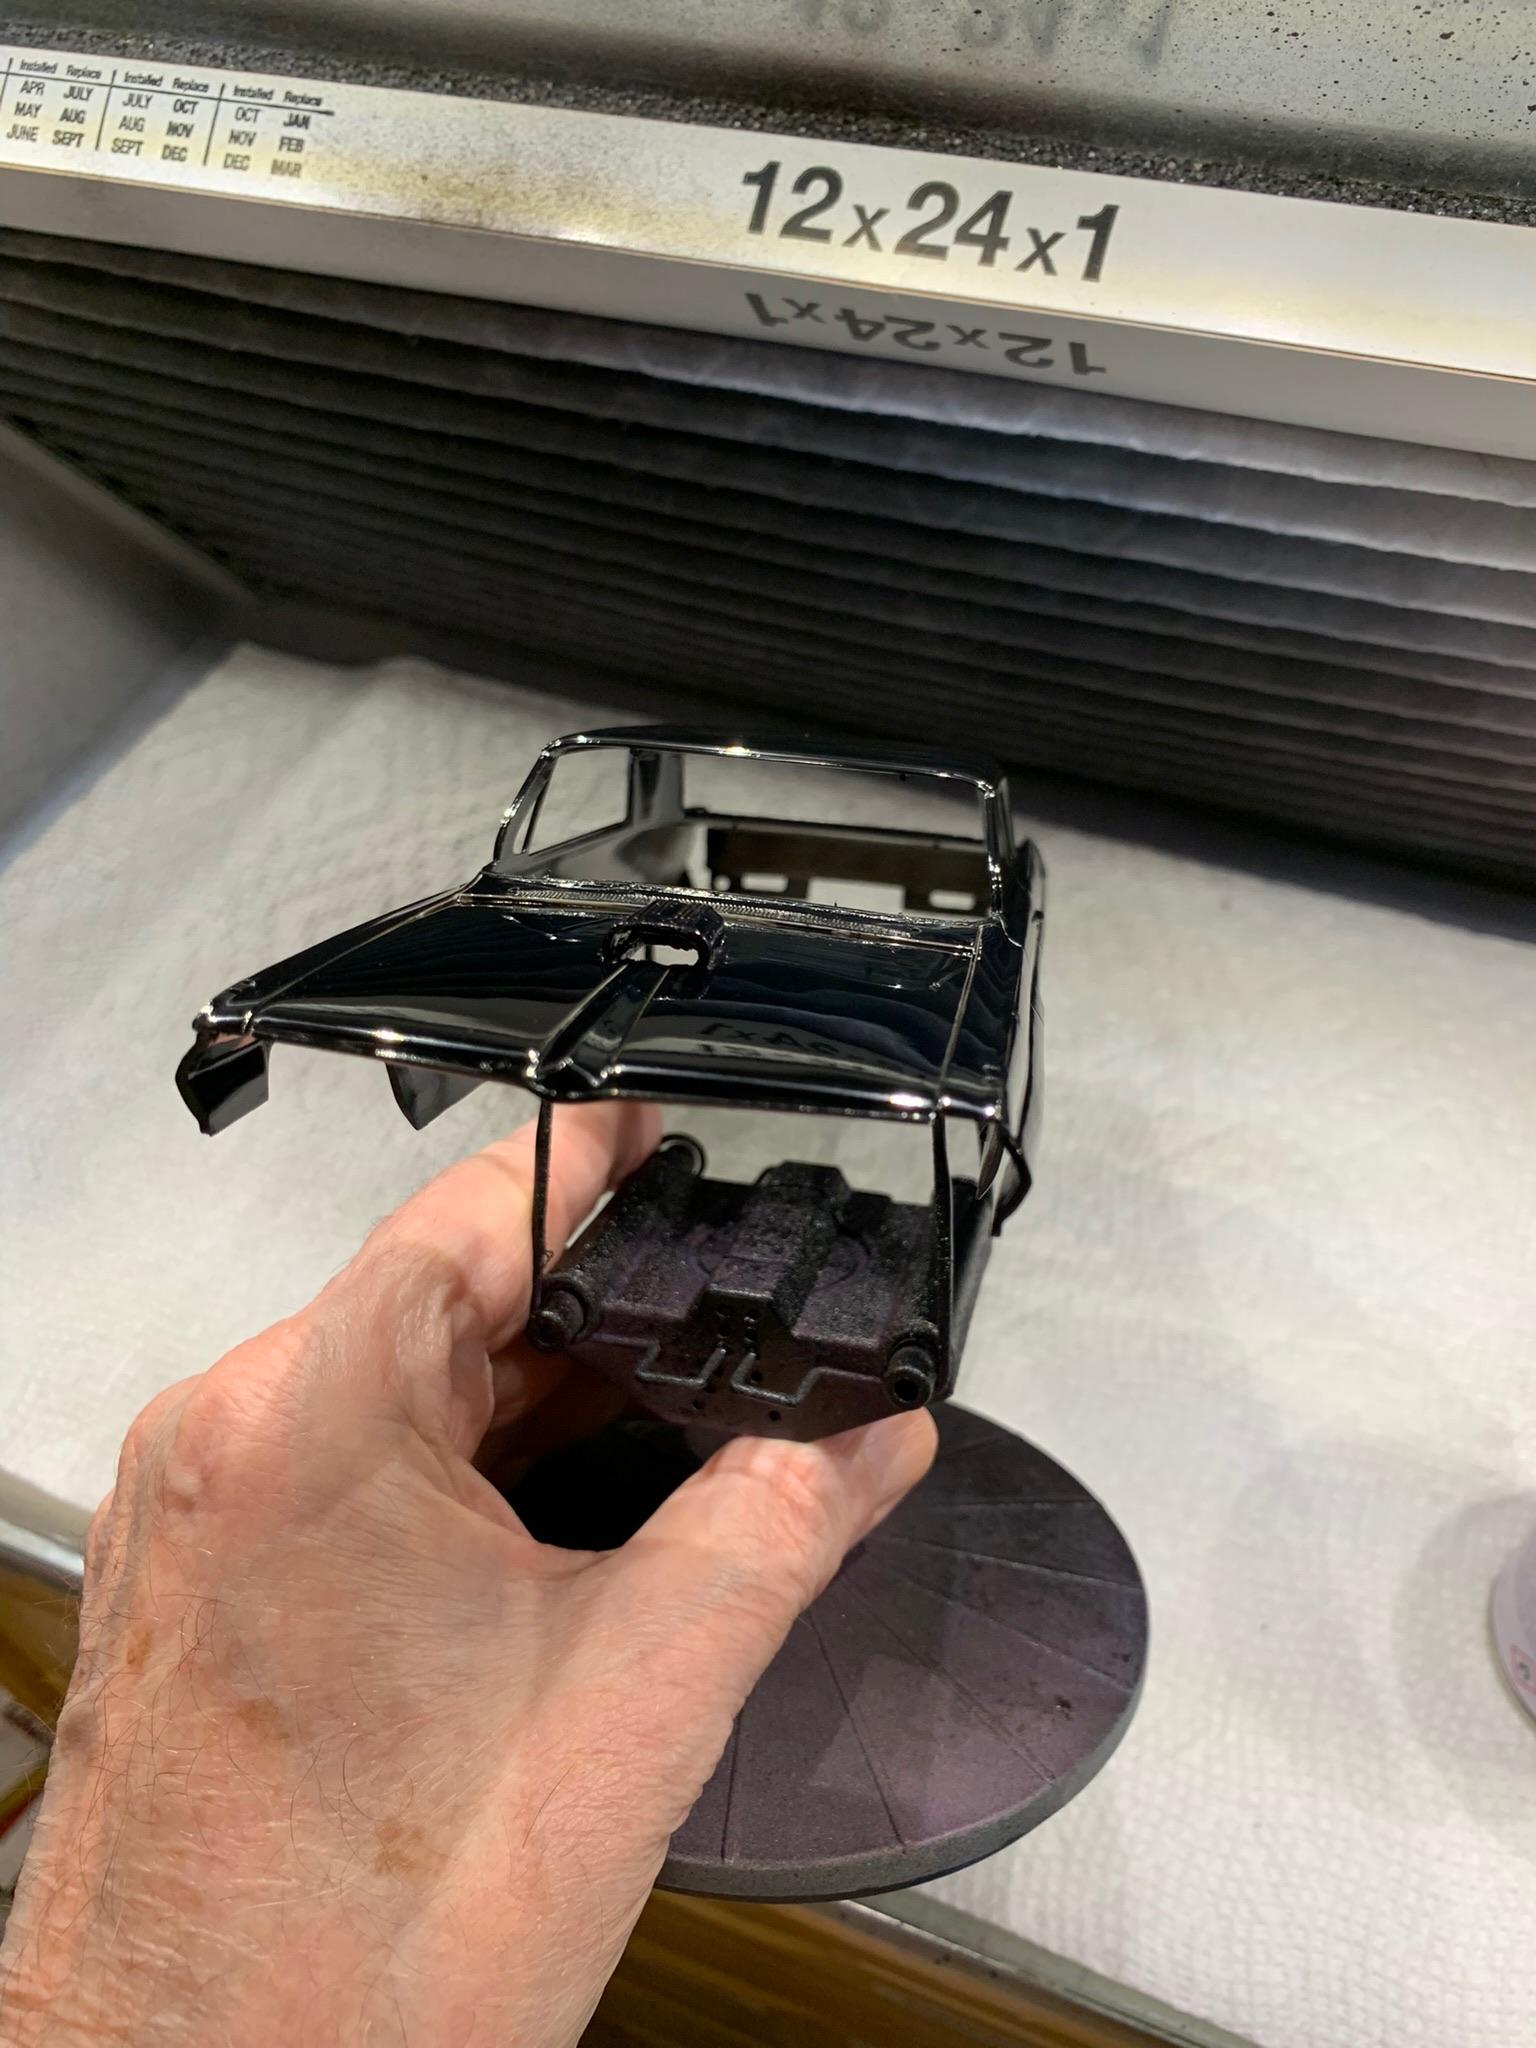
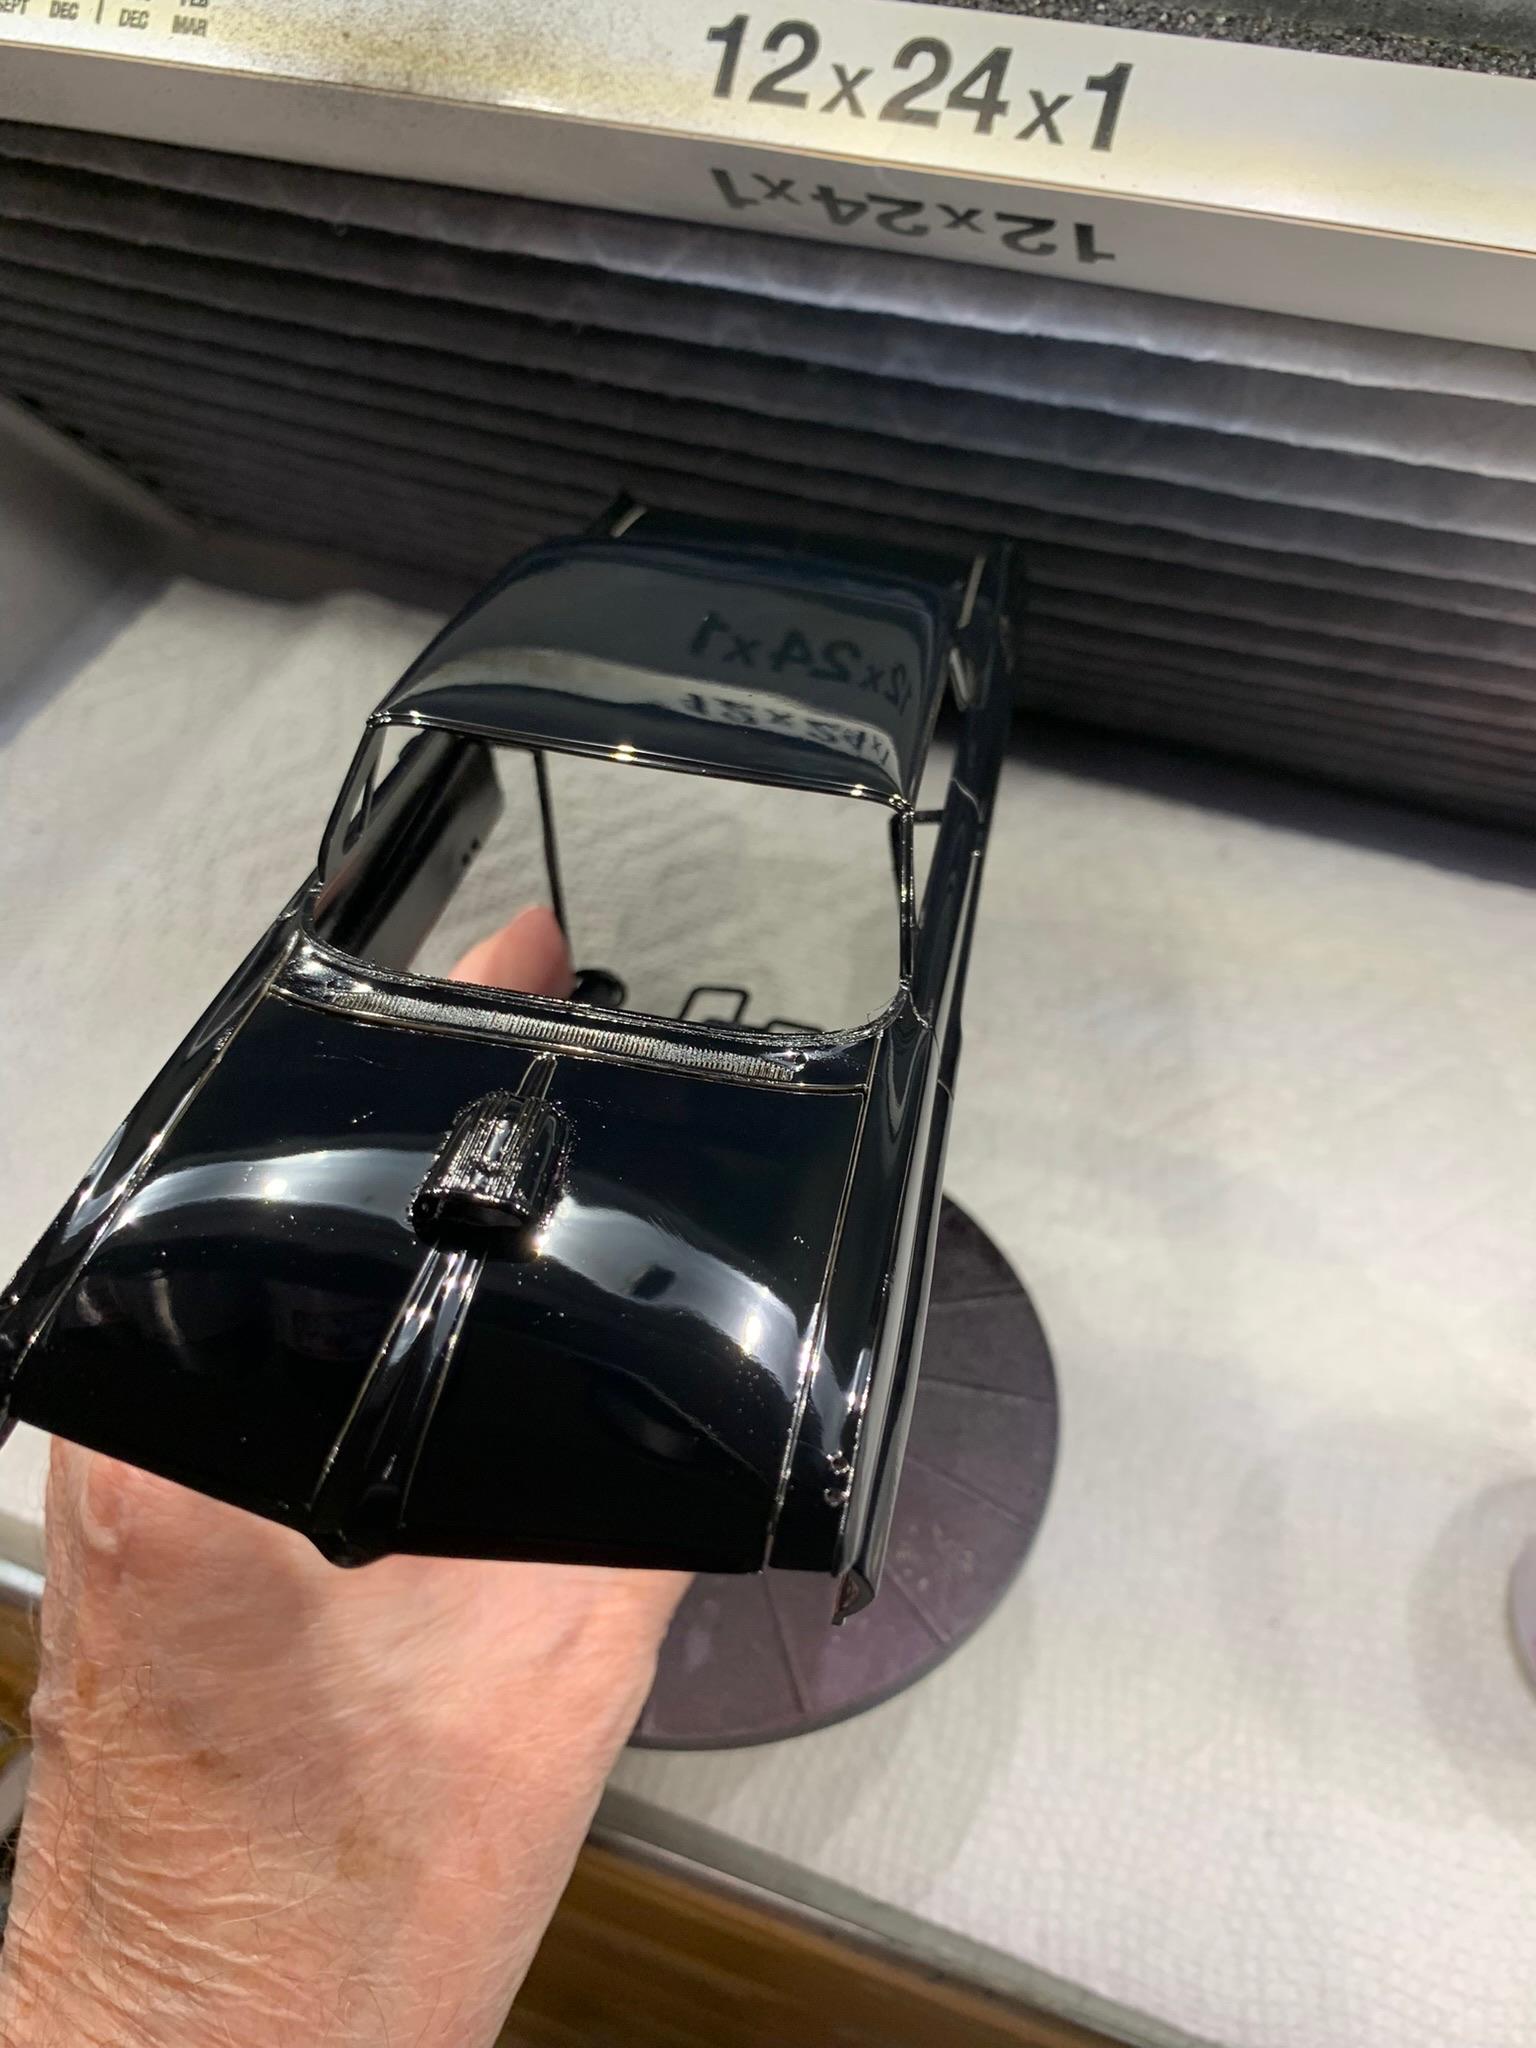
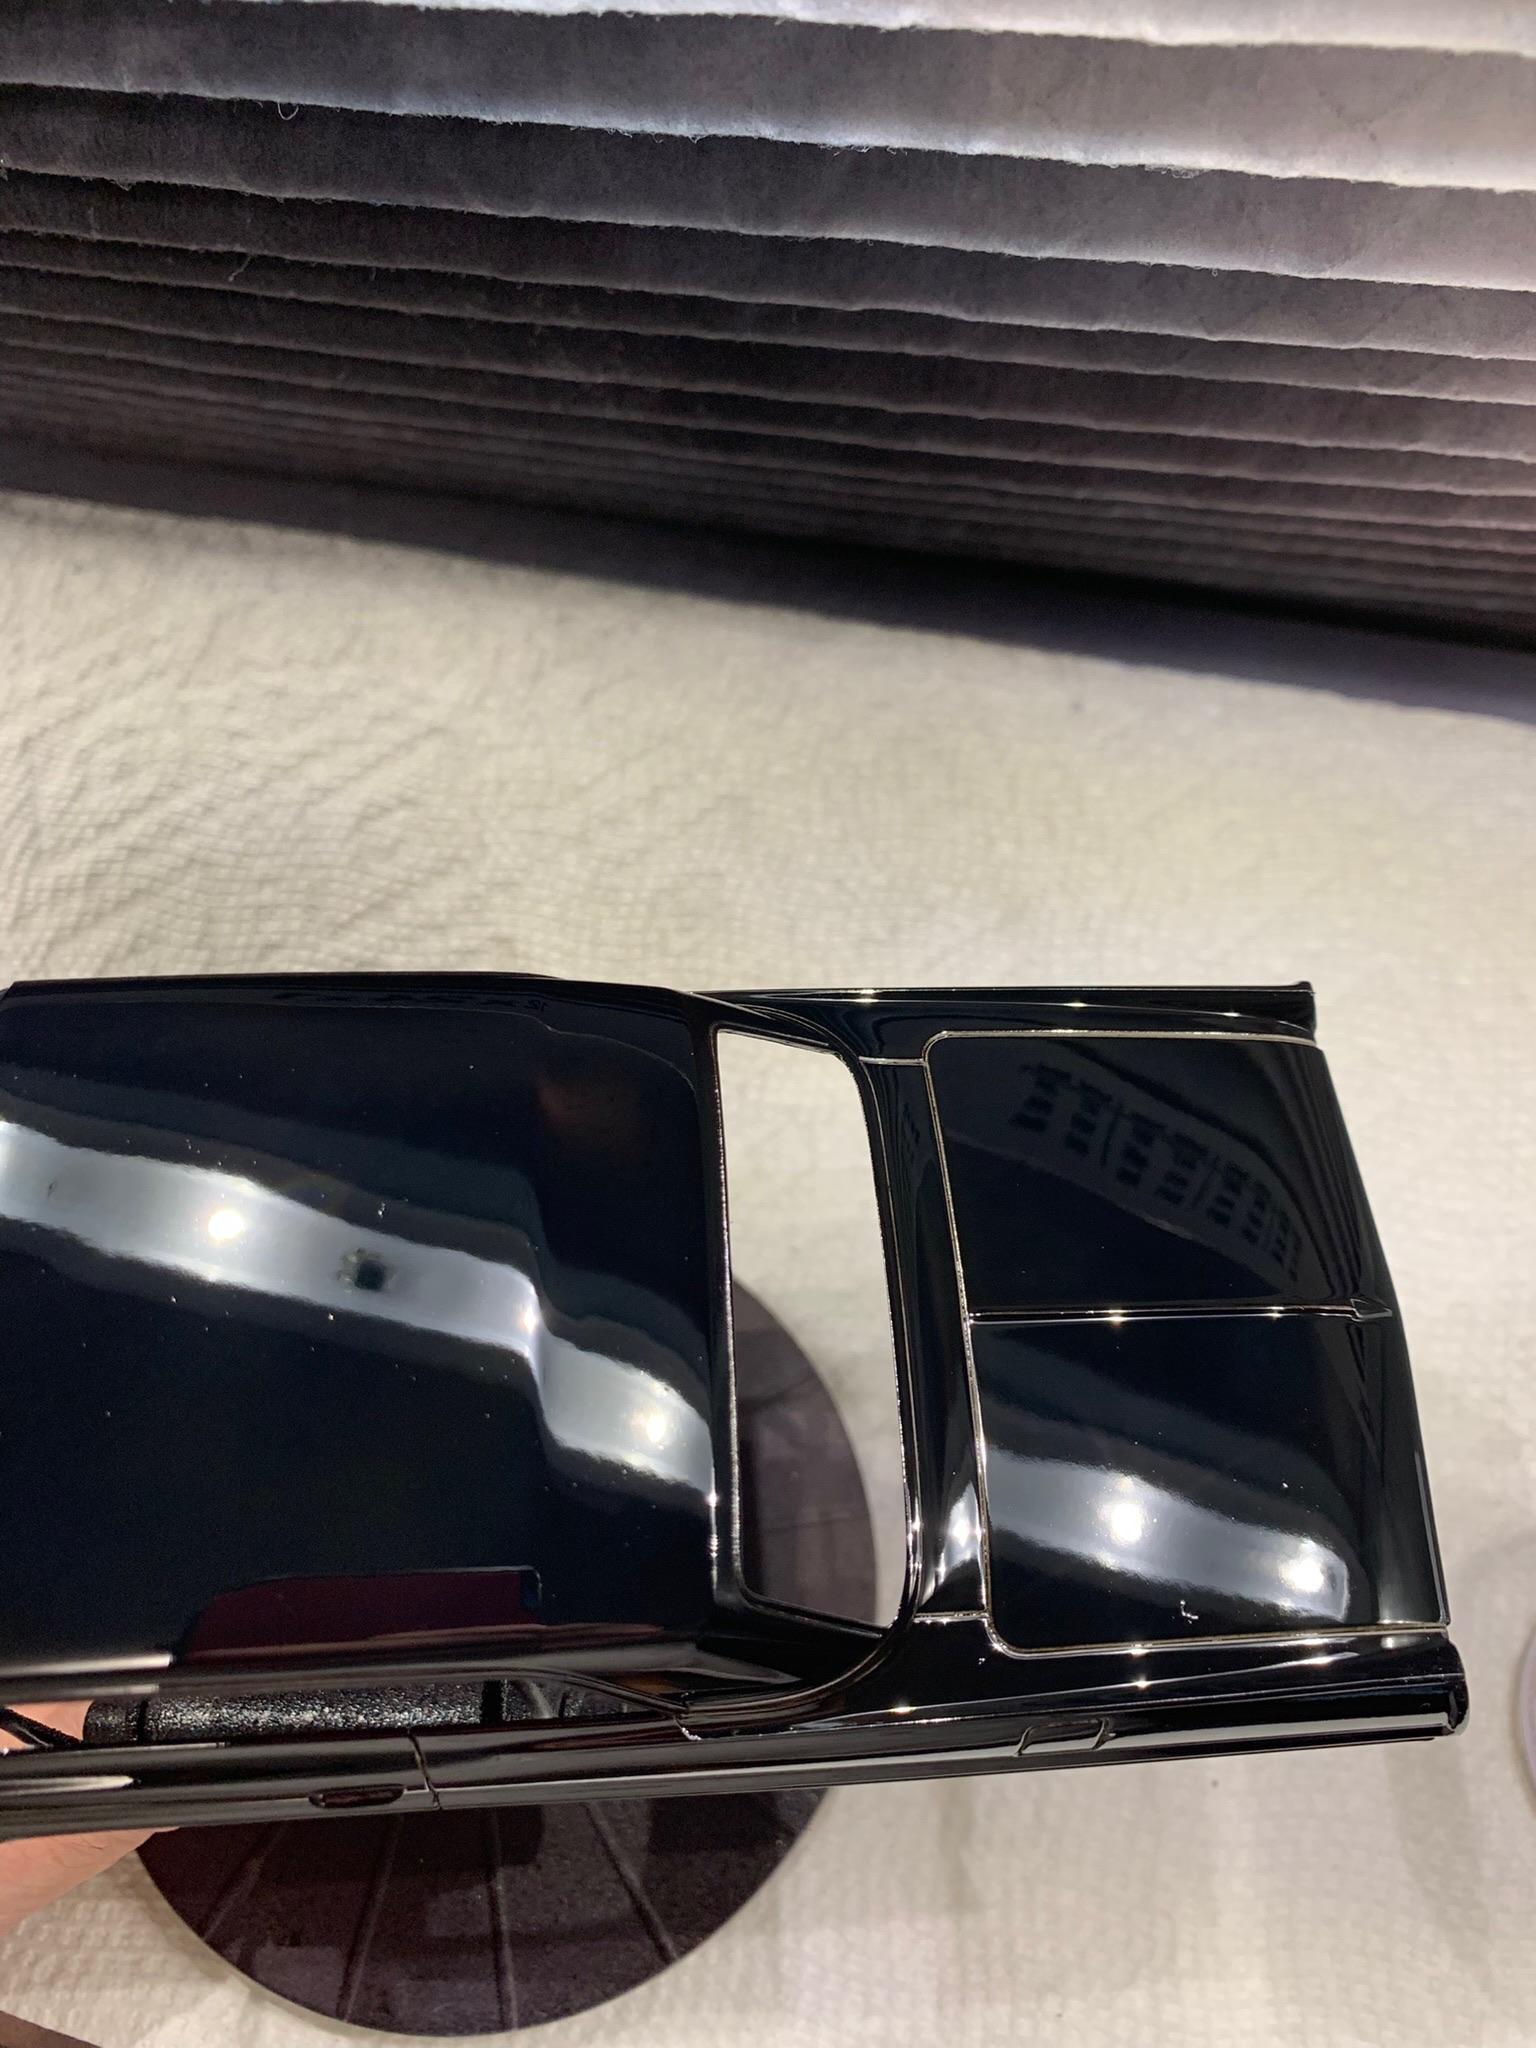
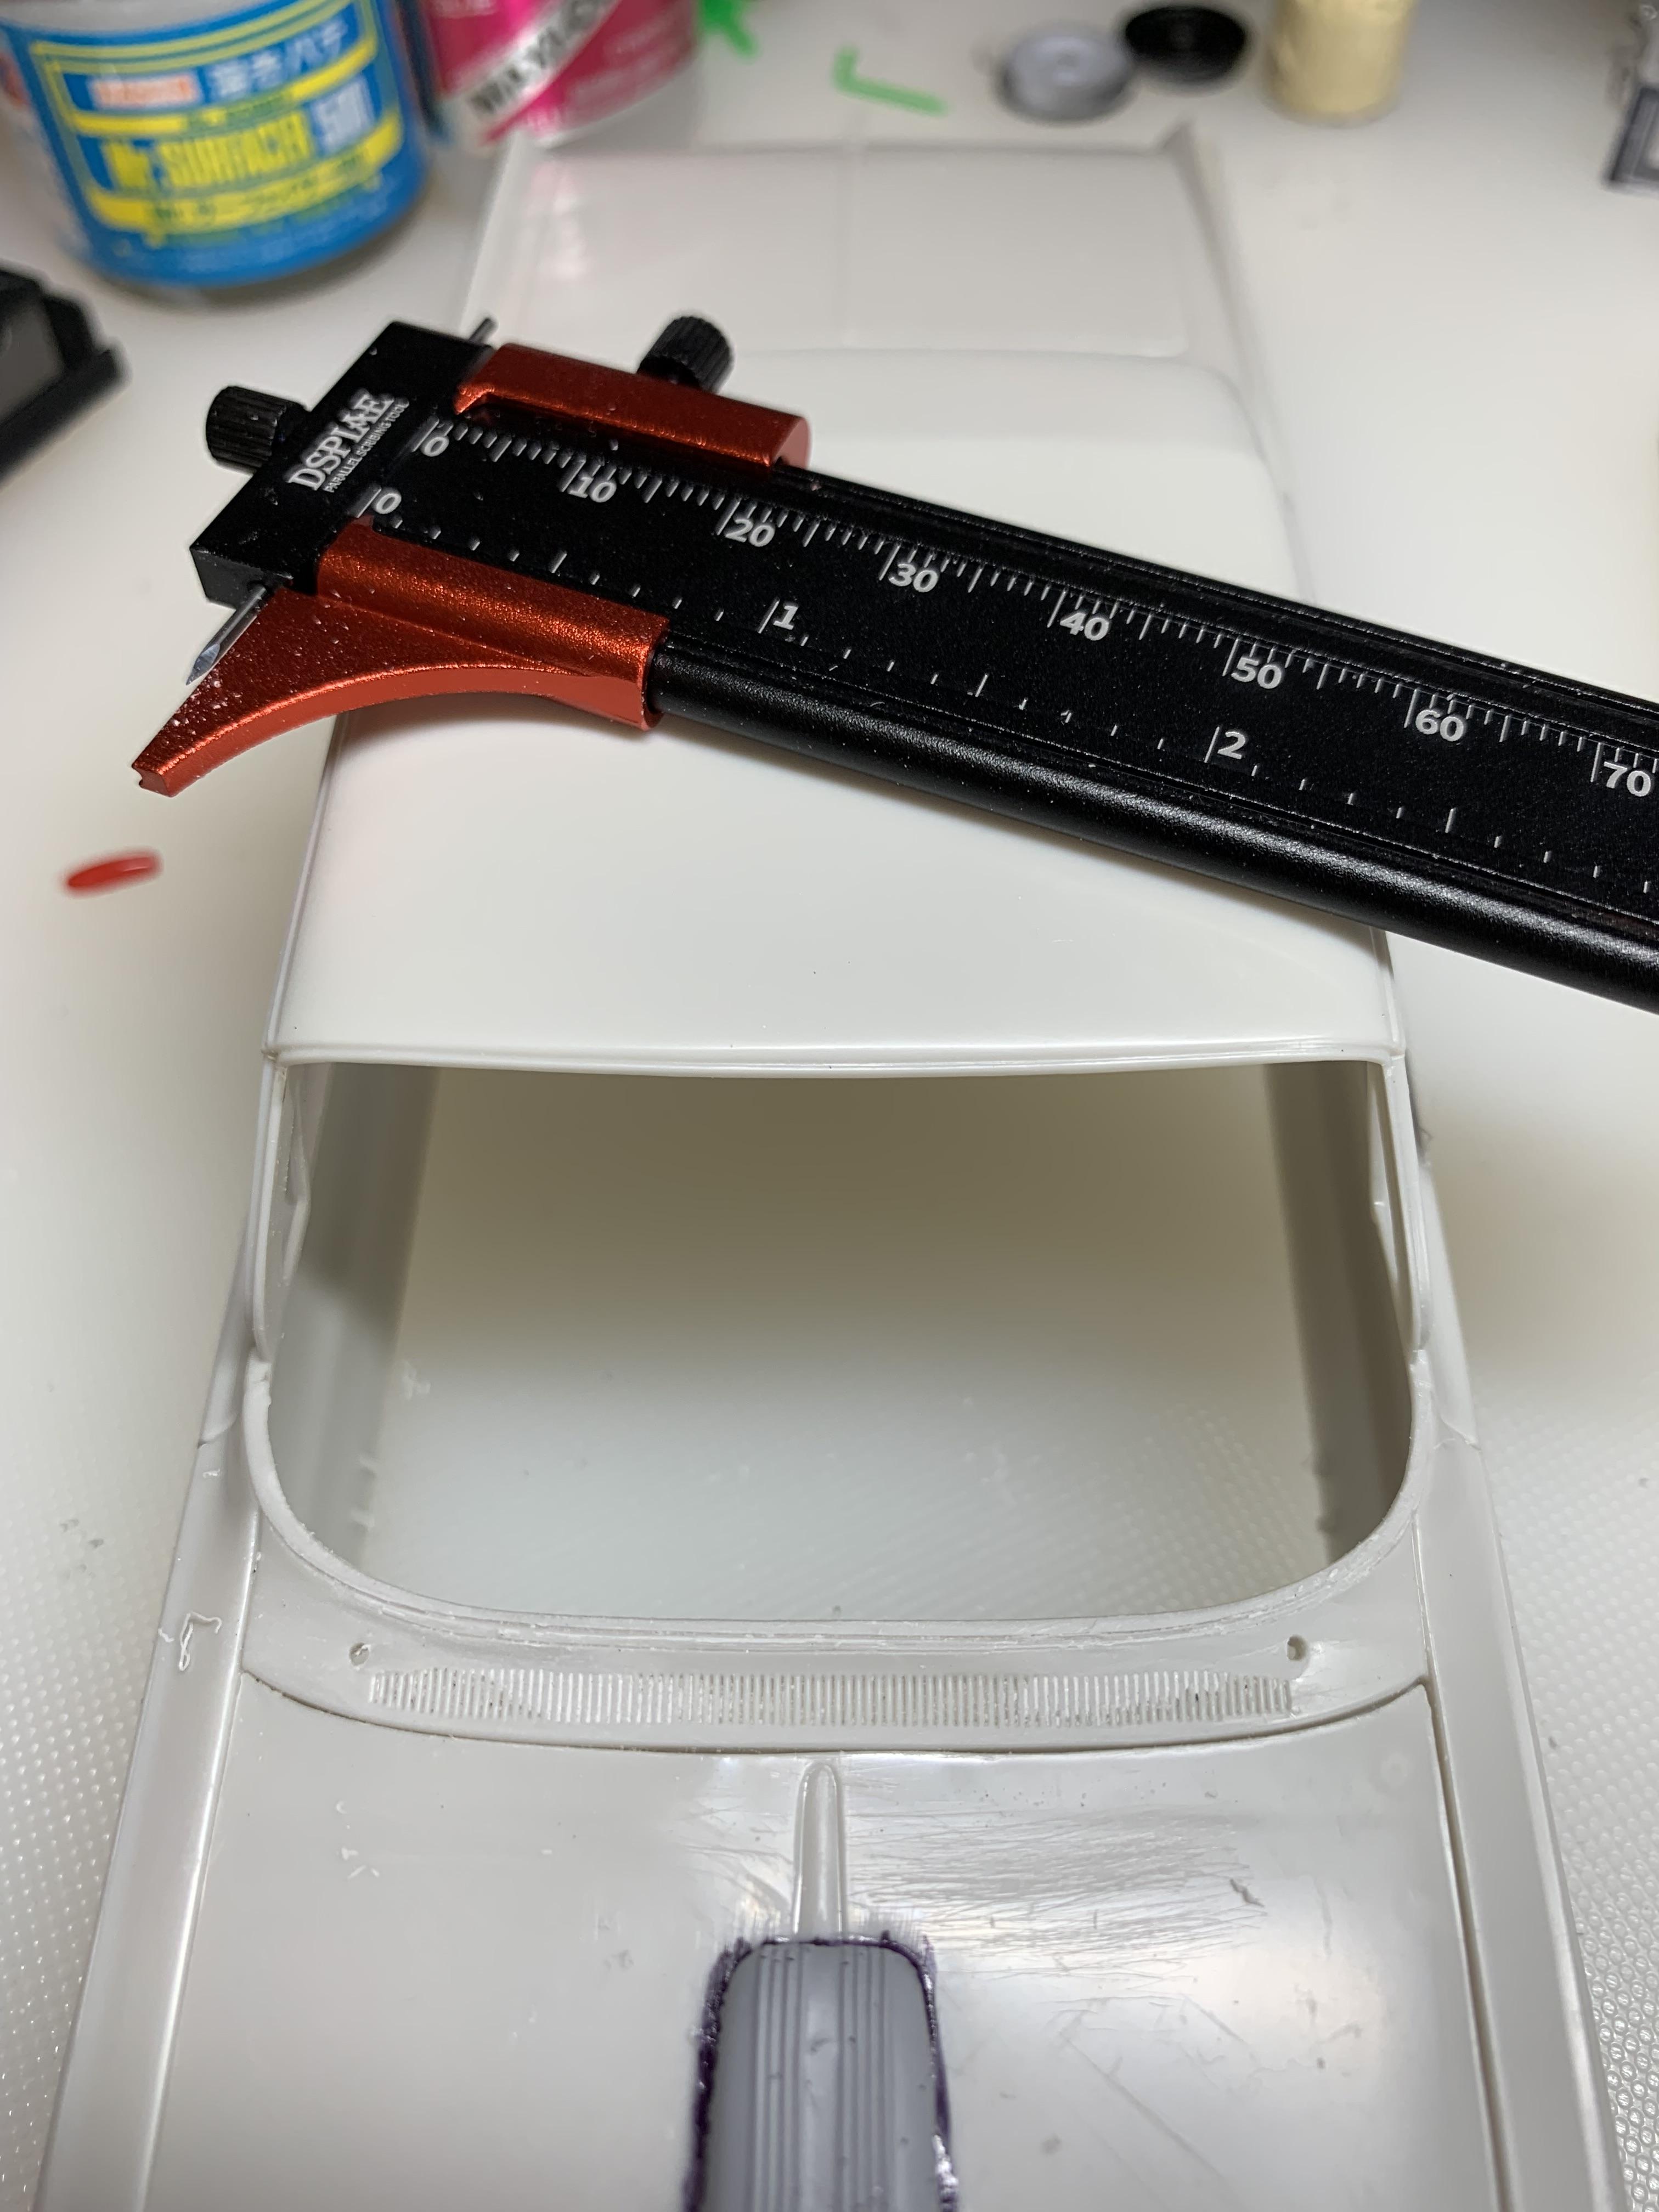
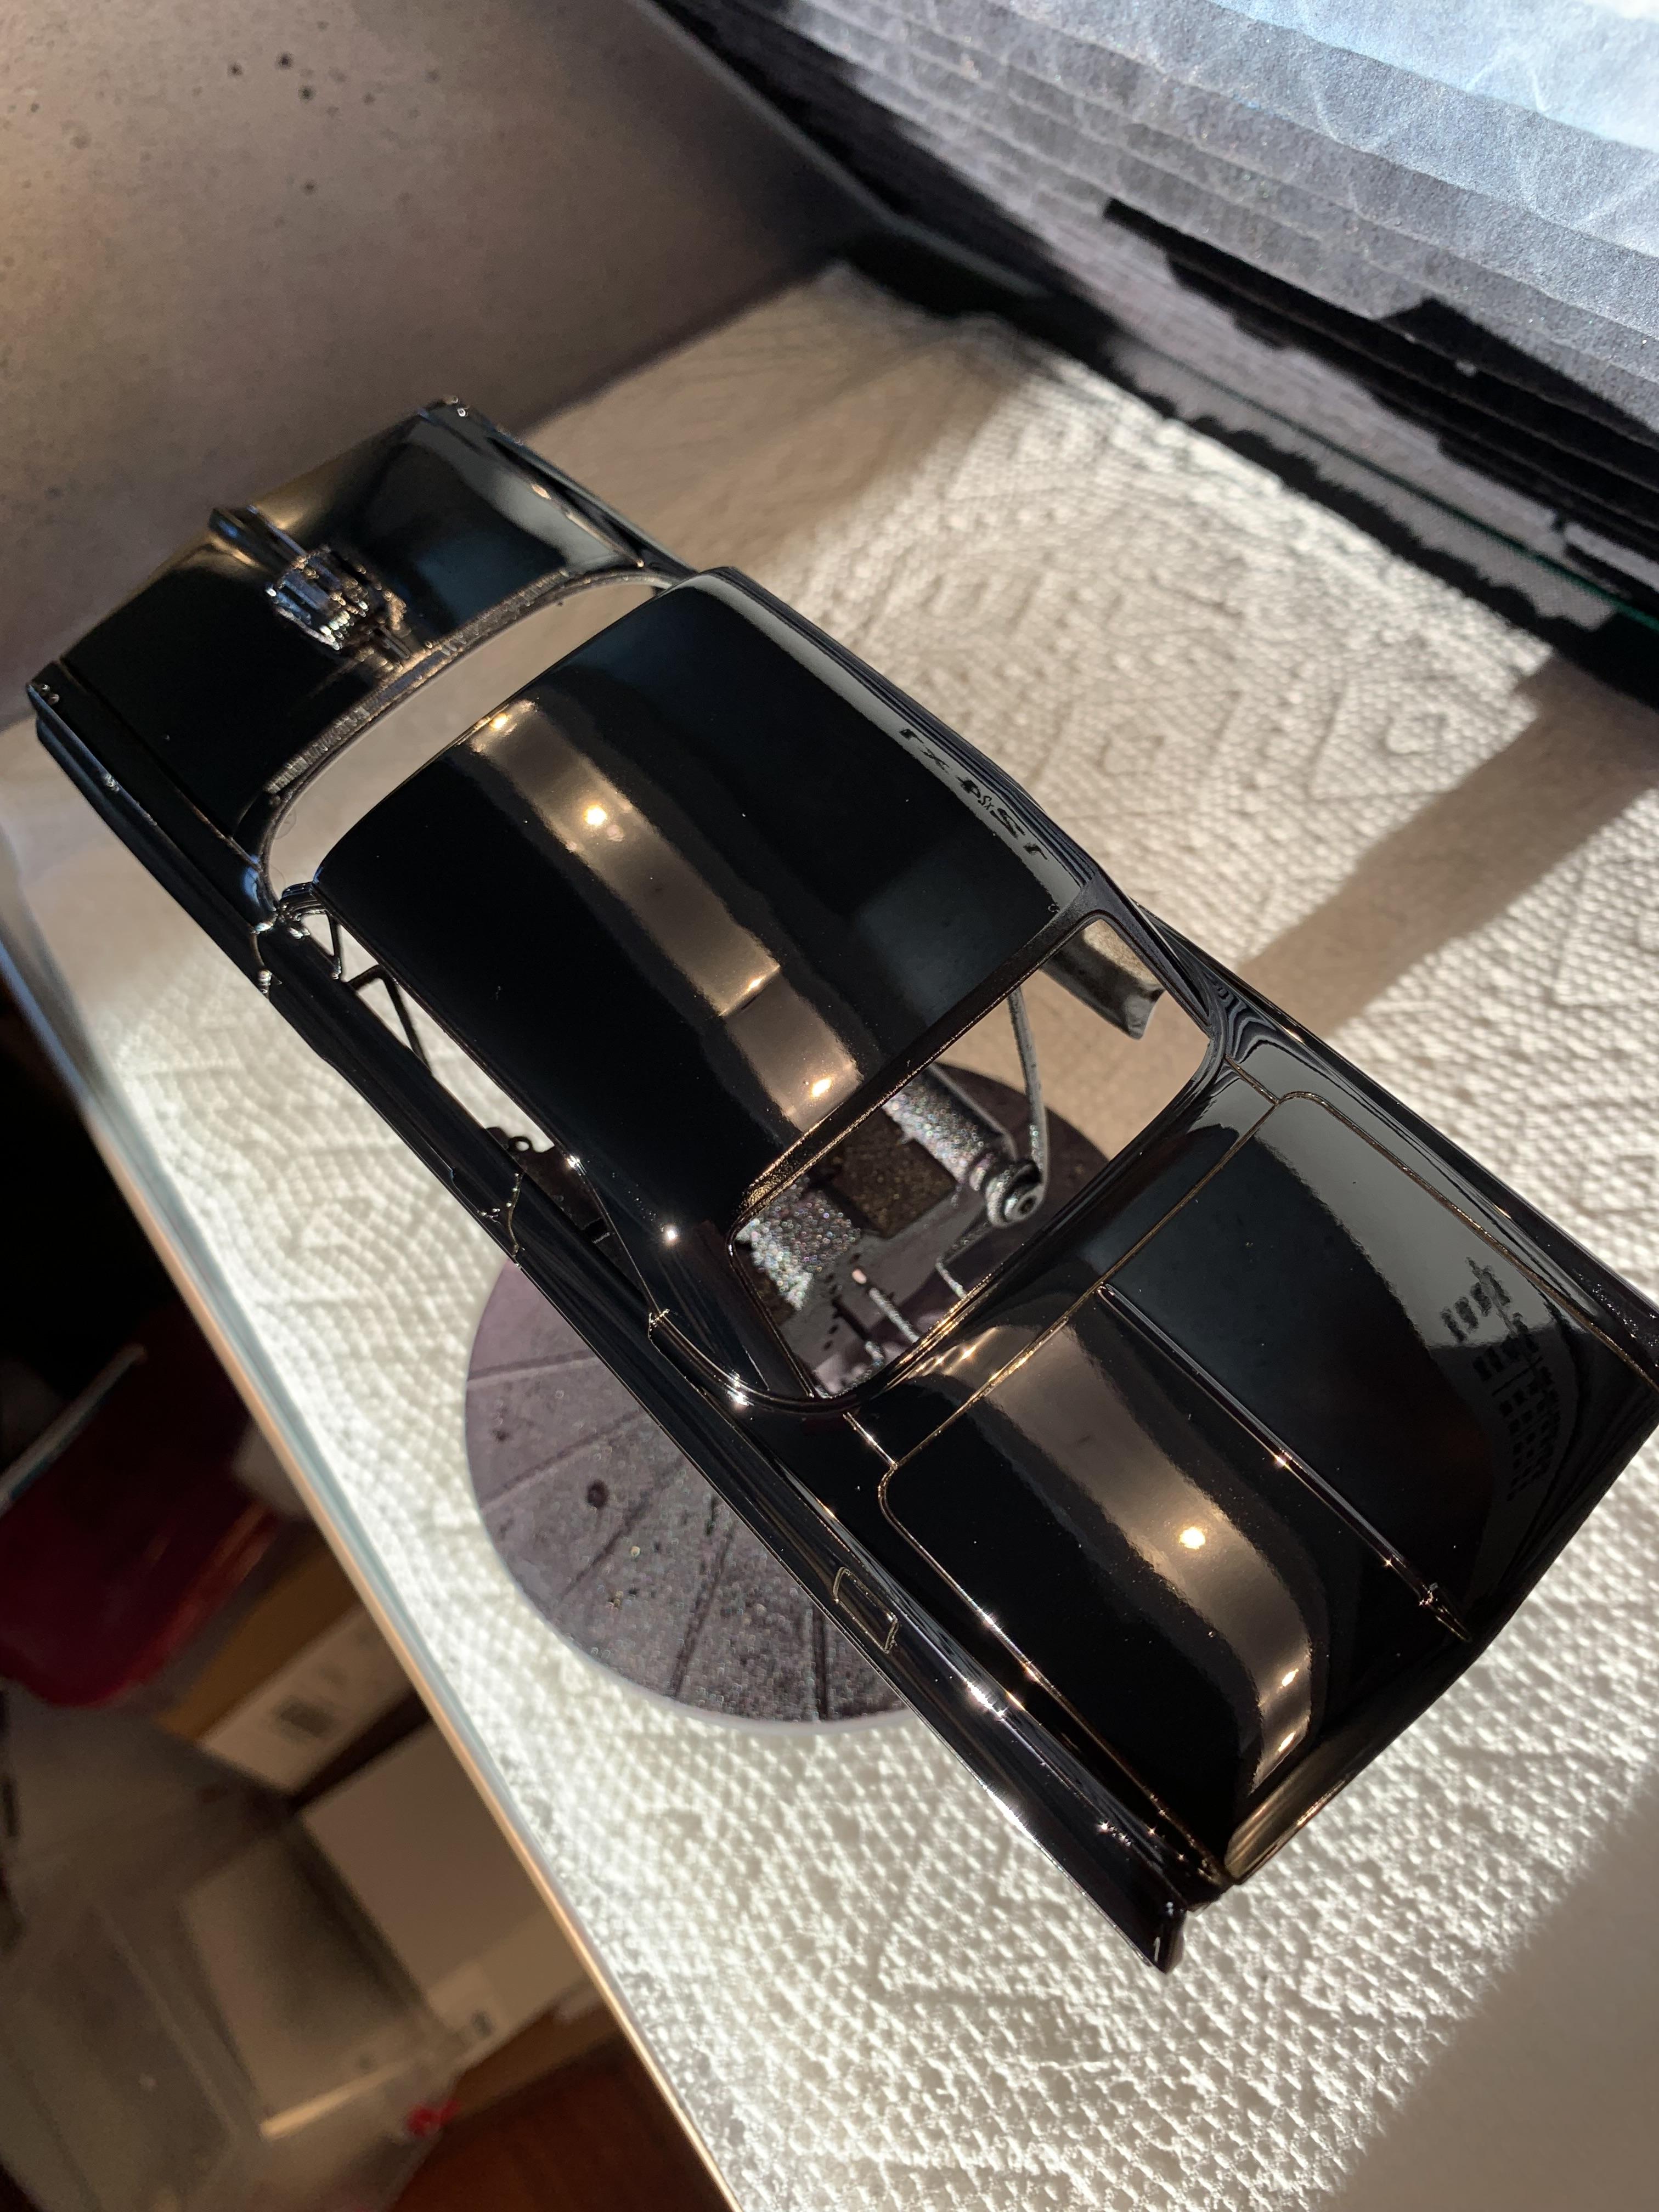
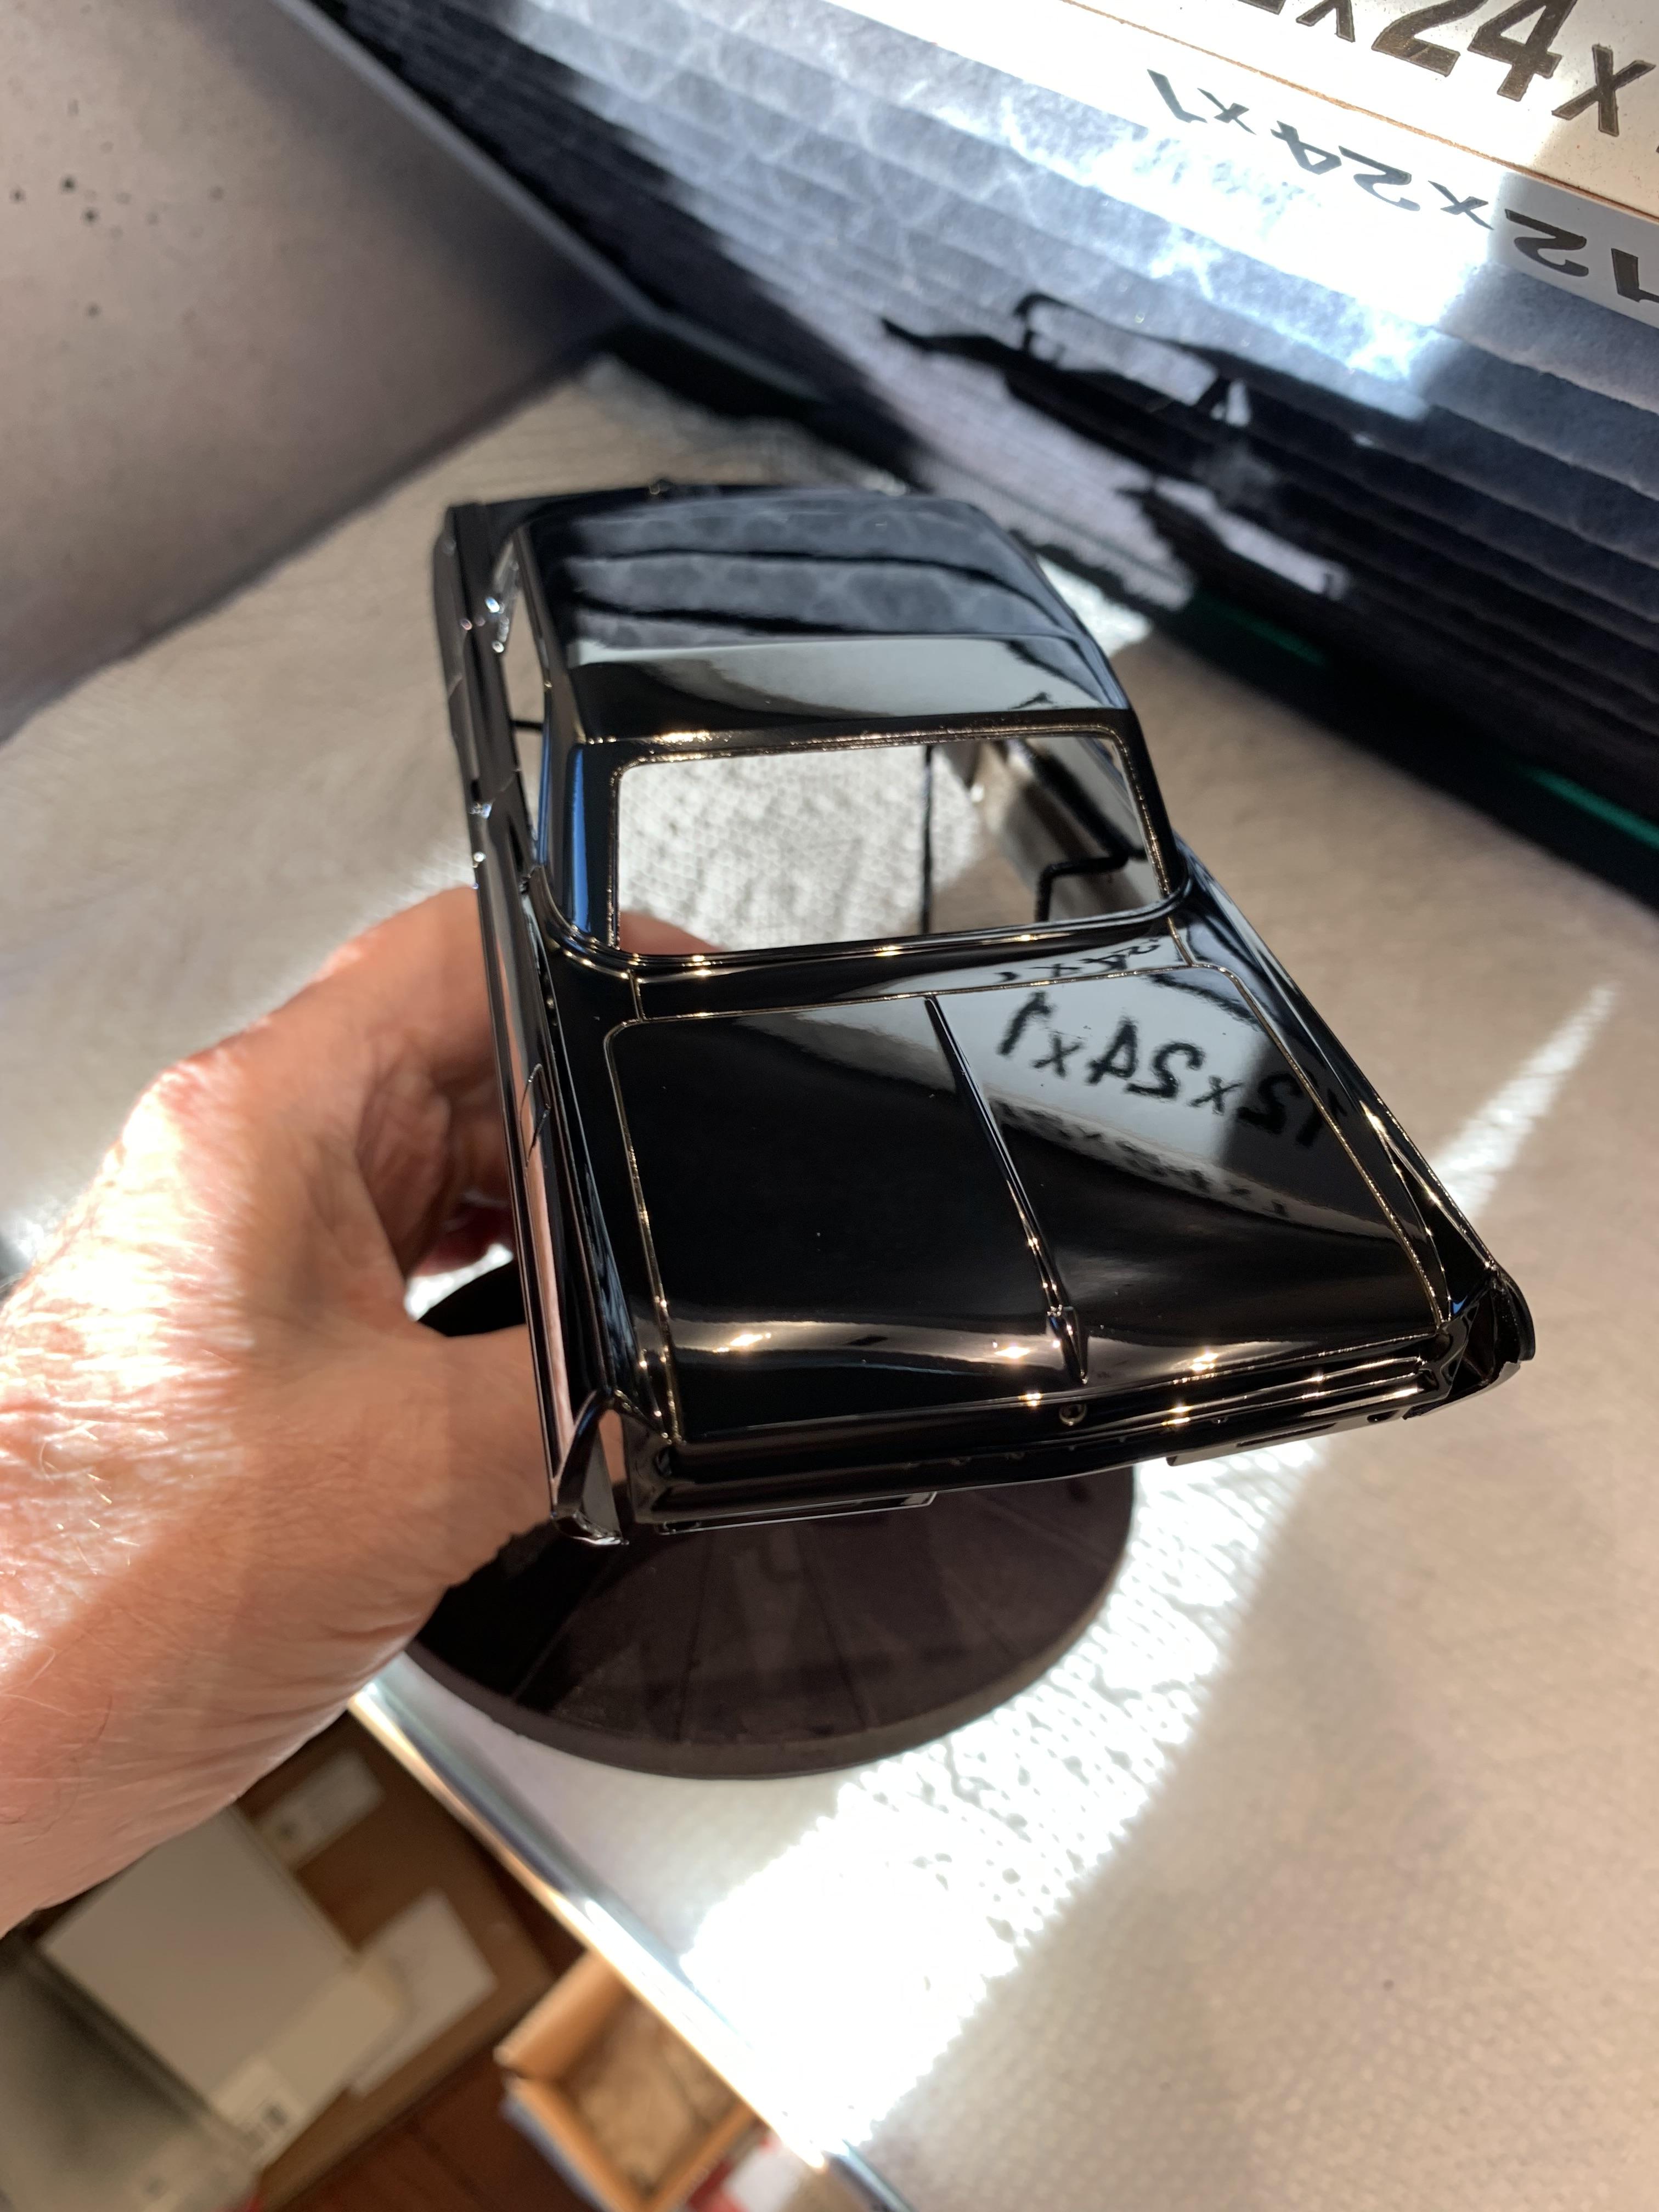
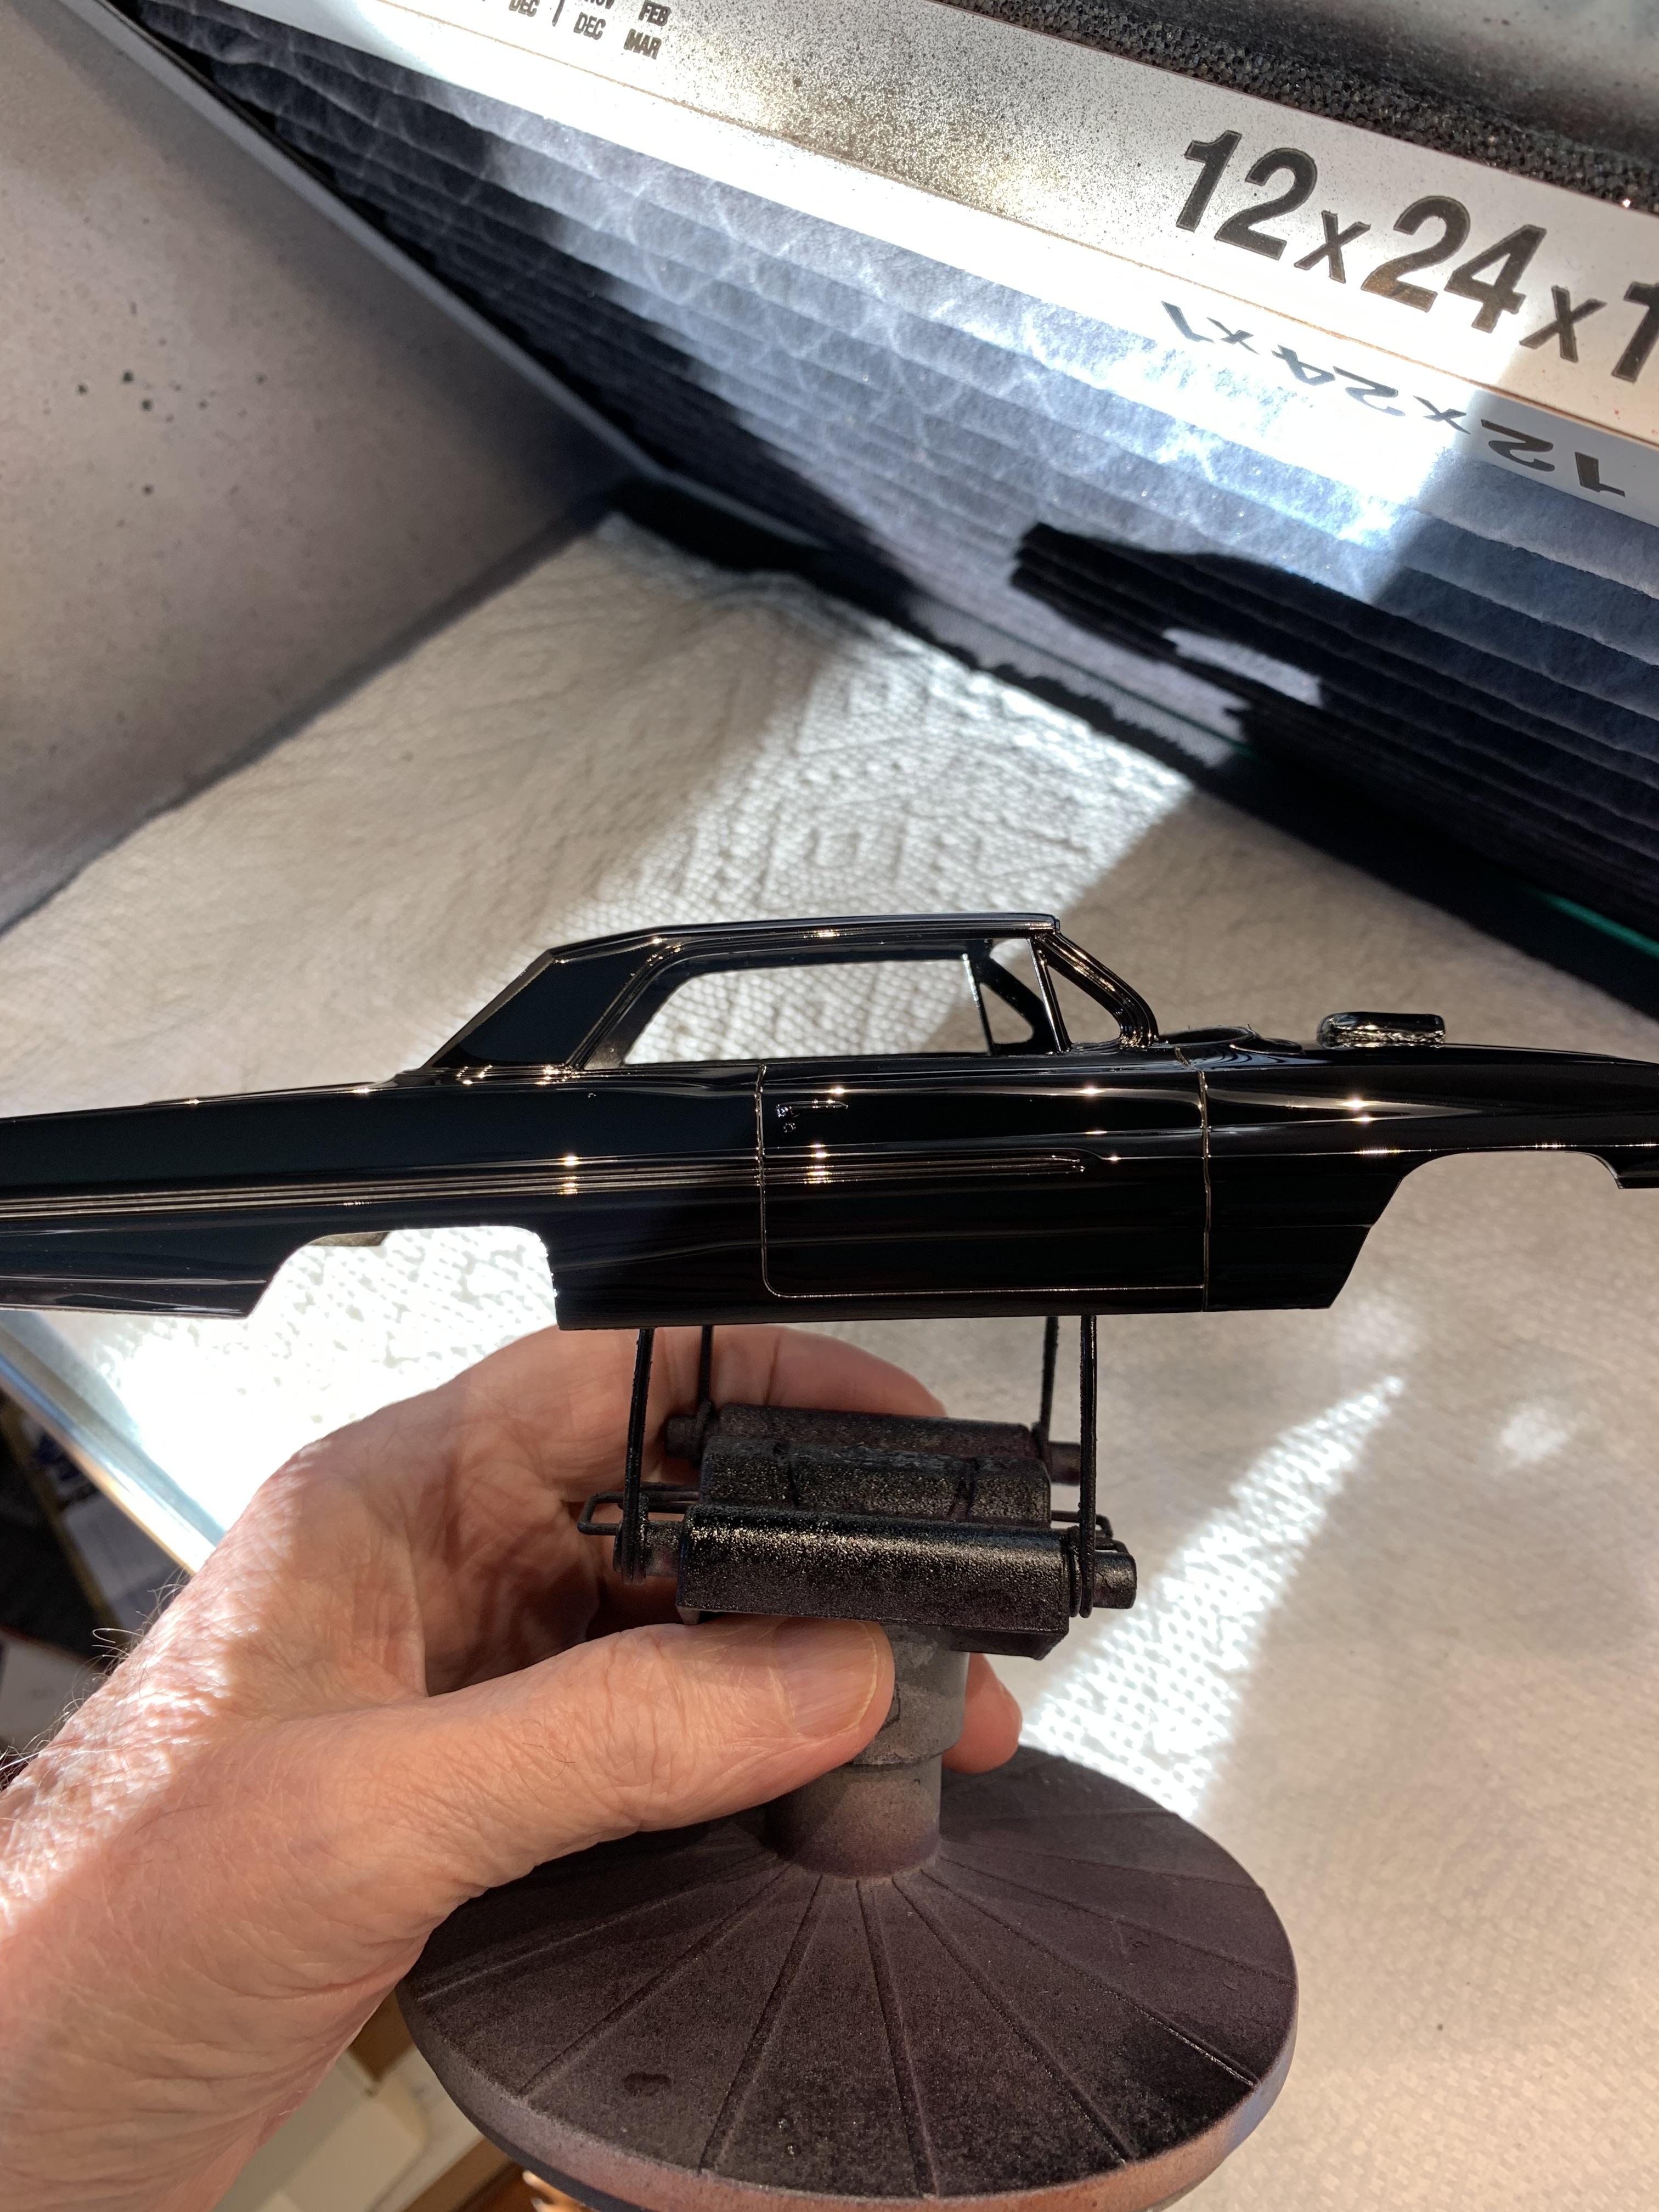
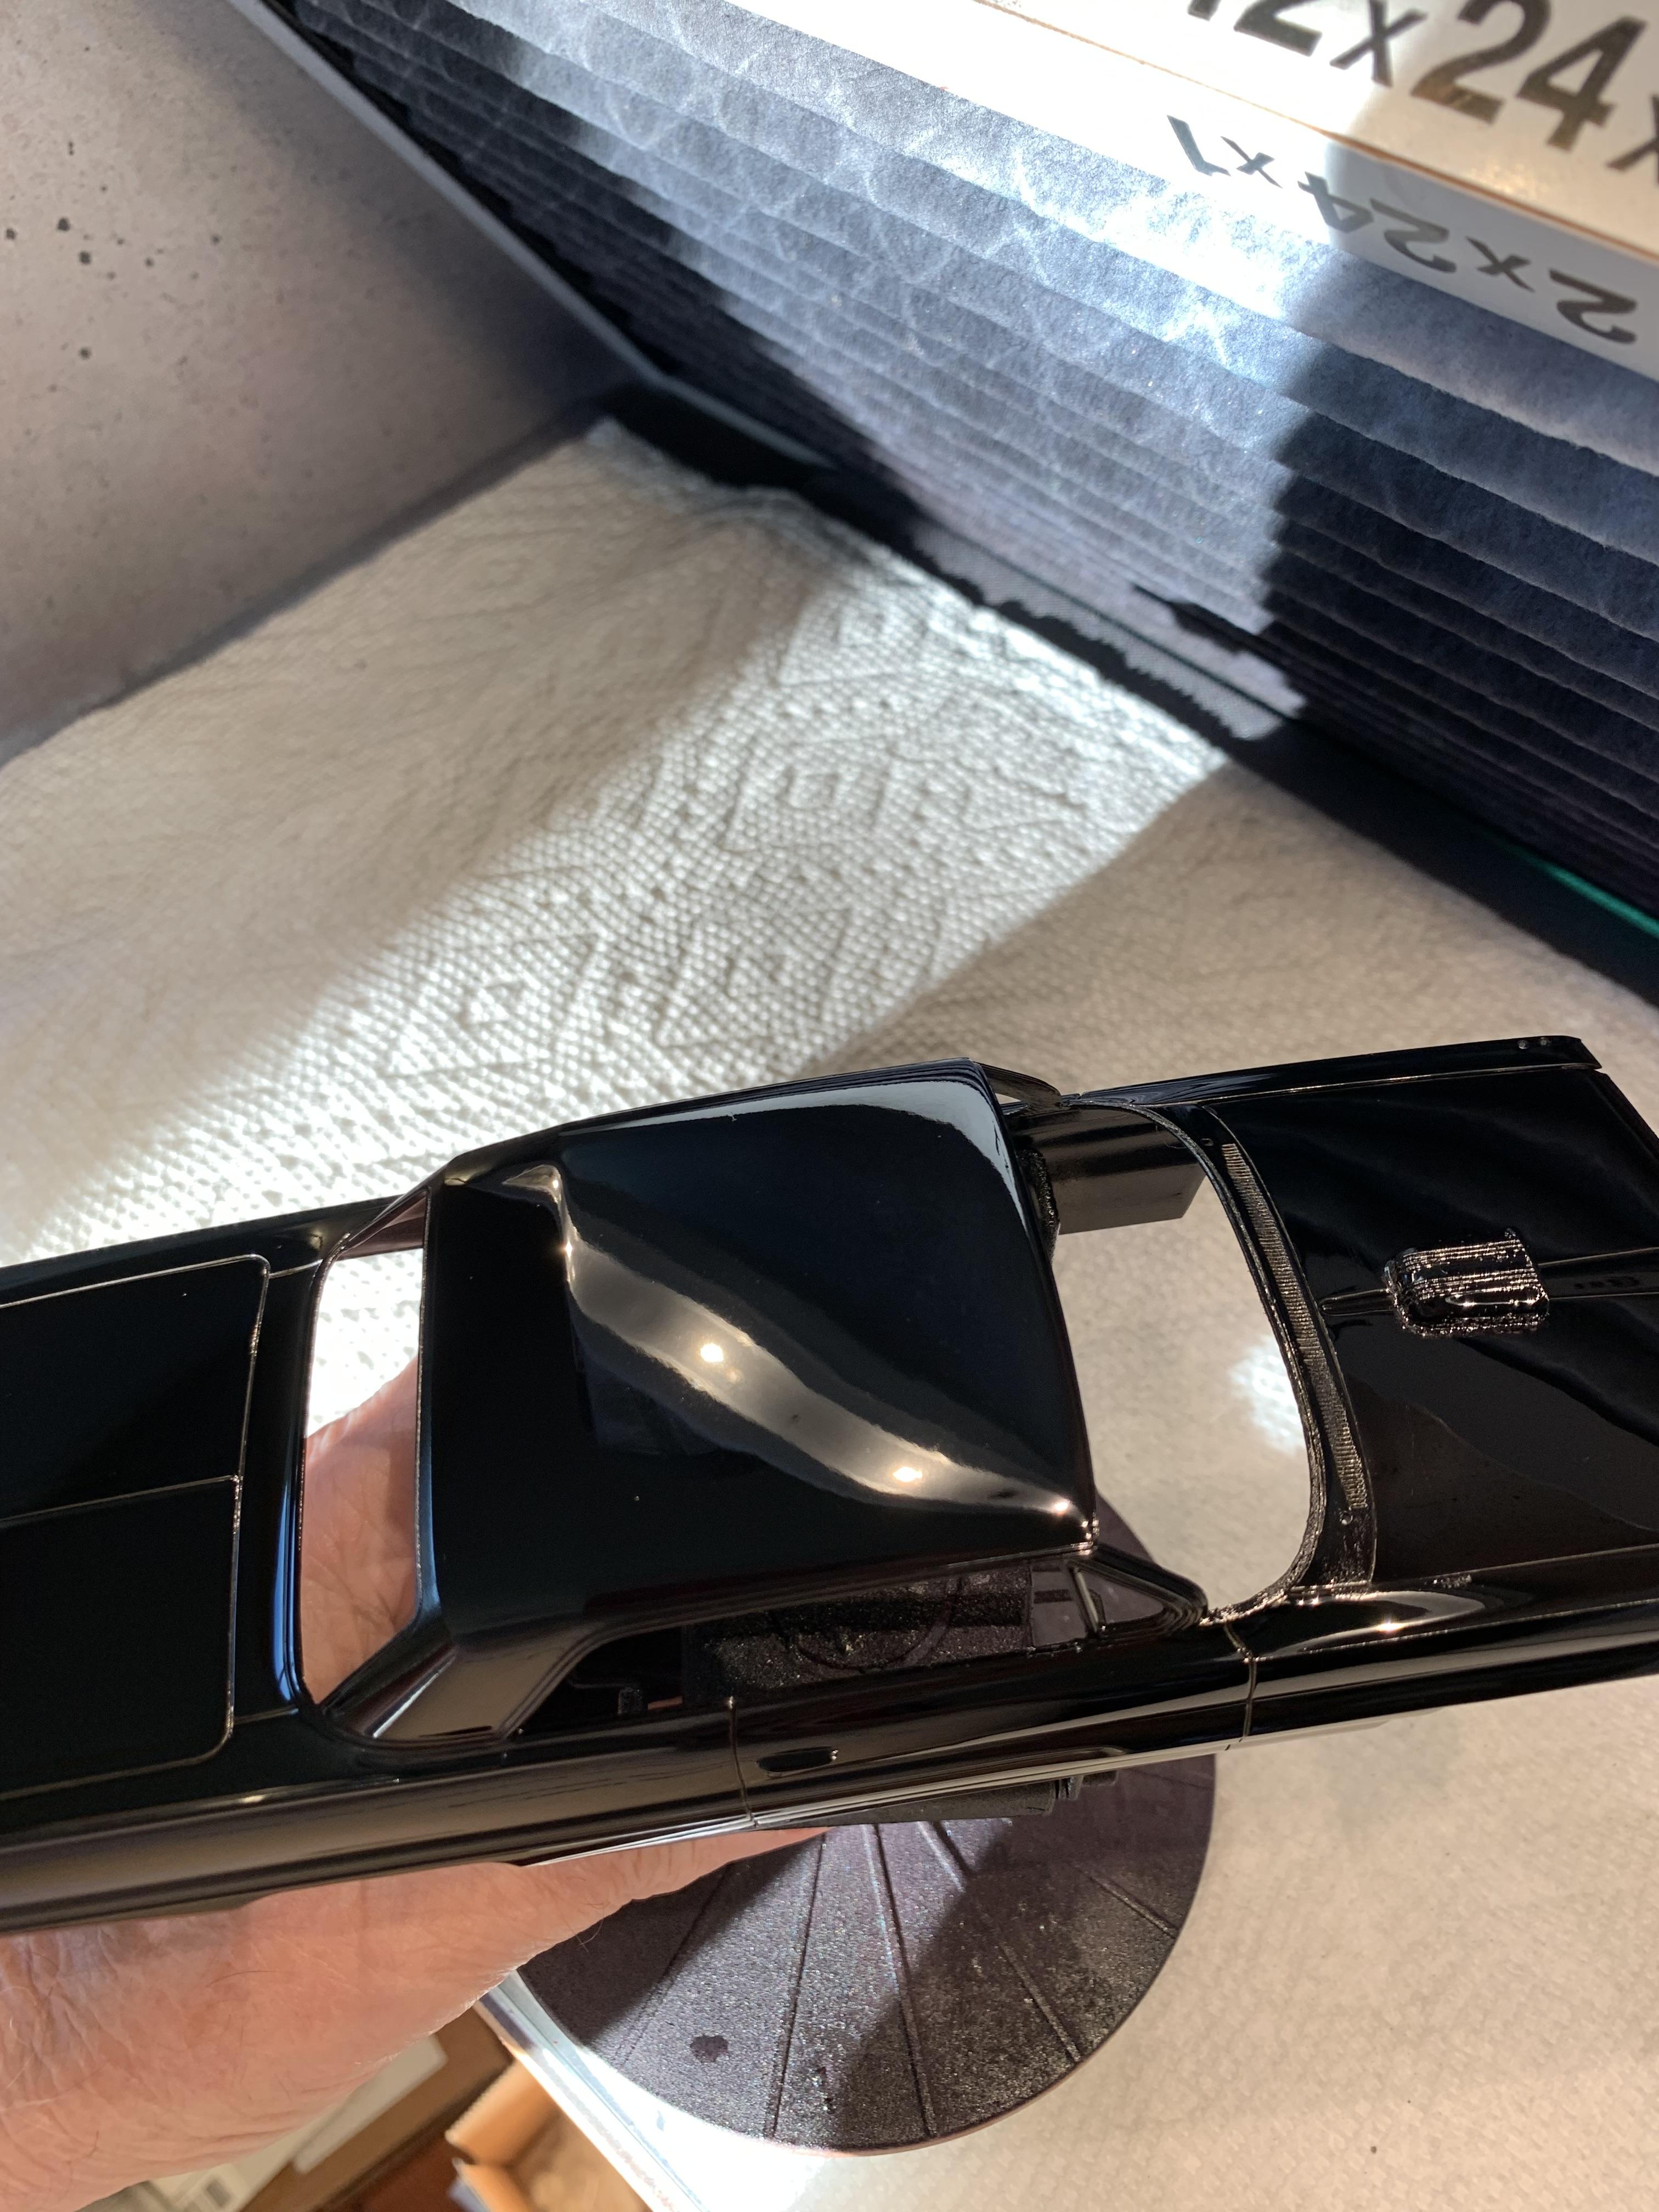
Windshield base scribed with Dspiae tool. No primer on body, just ts14 black. One light coat, waited 5 minutes, then 1 medium coat, then had to force myself to stop, because it looked flawless. These pictures were taken 3 hours later.
-
Very nice build. One of the few models (other than mine), that has had side windows made and installed.
-
1962 Pontiac 421 SD F/SA circa 2024 edition
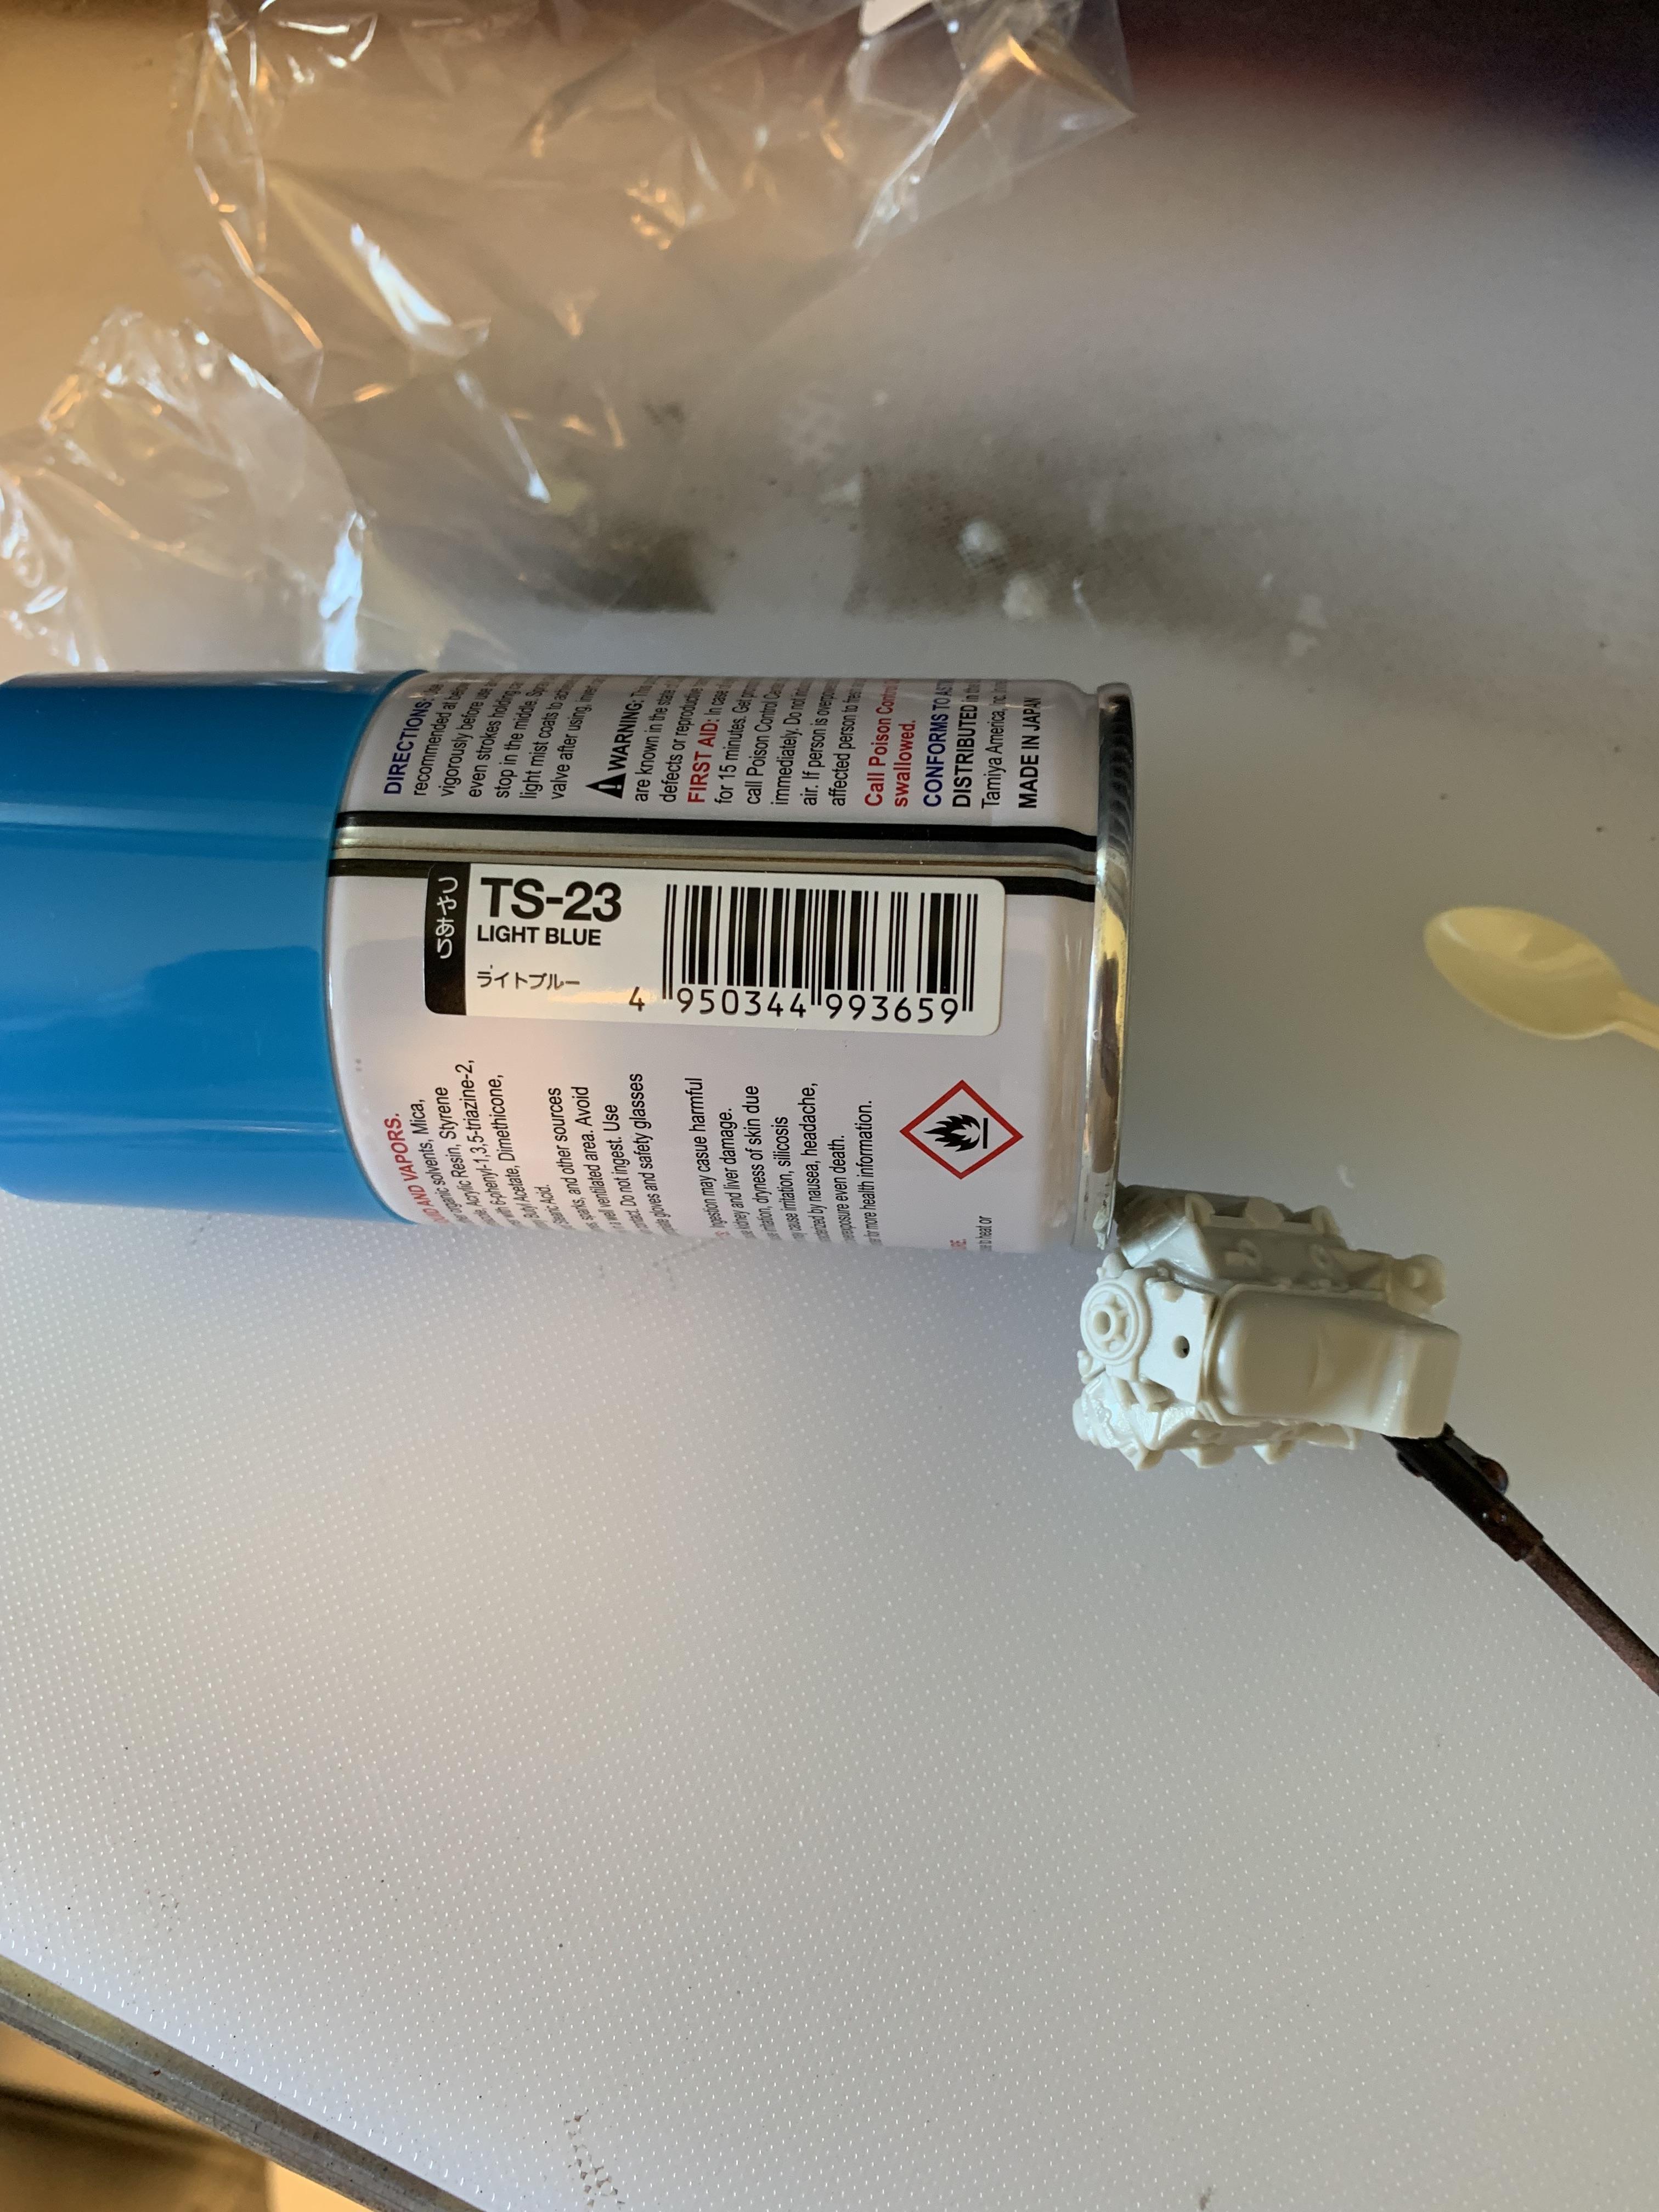
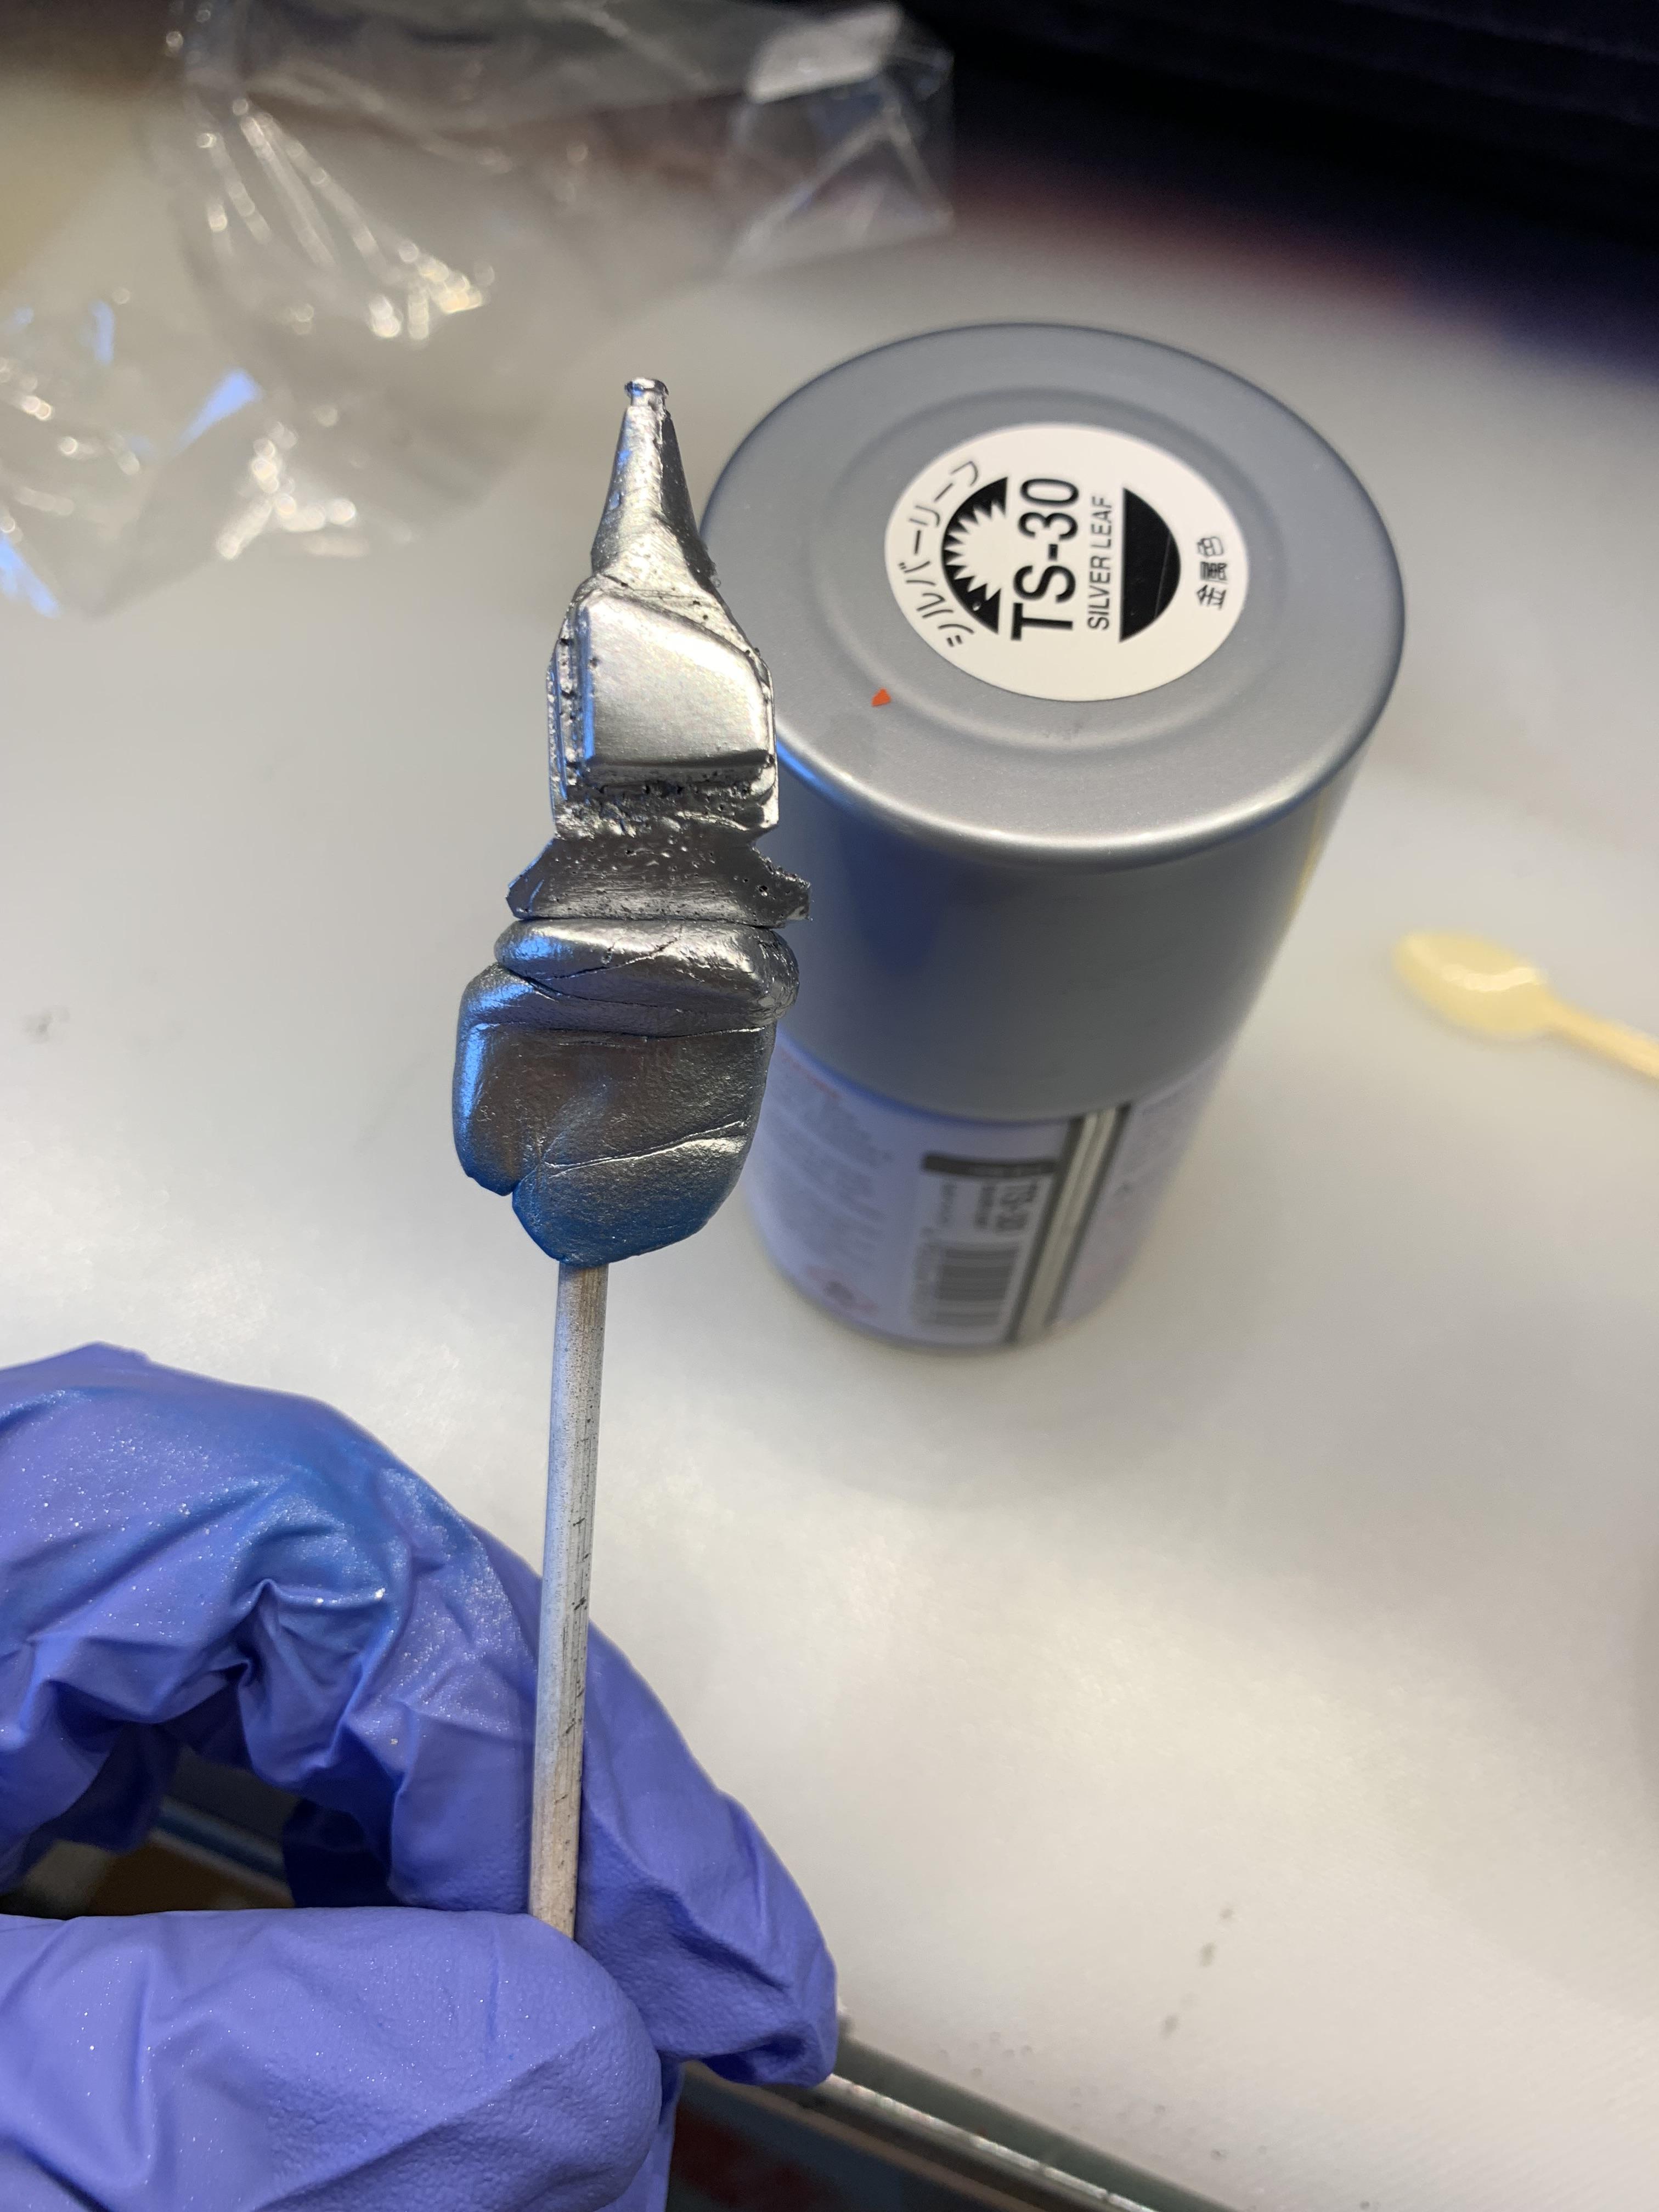
R. Thorne replied to R. Thorne's topic in WIP: Drag Racing Models
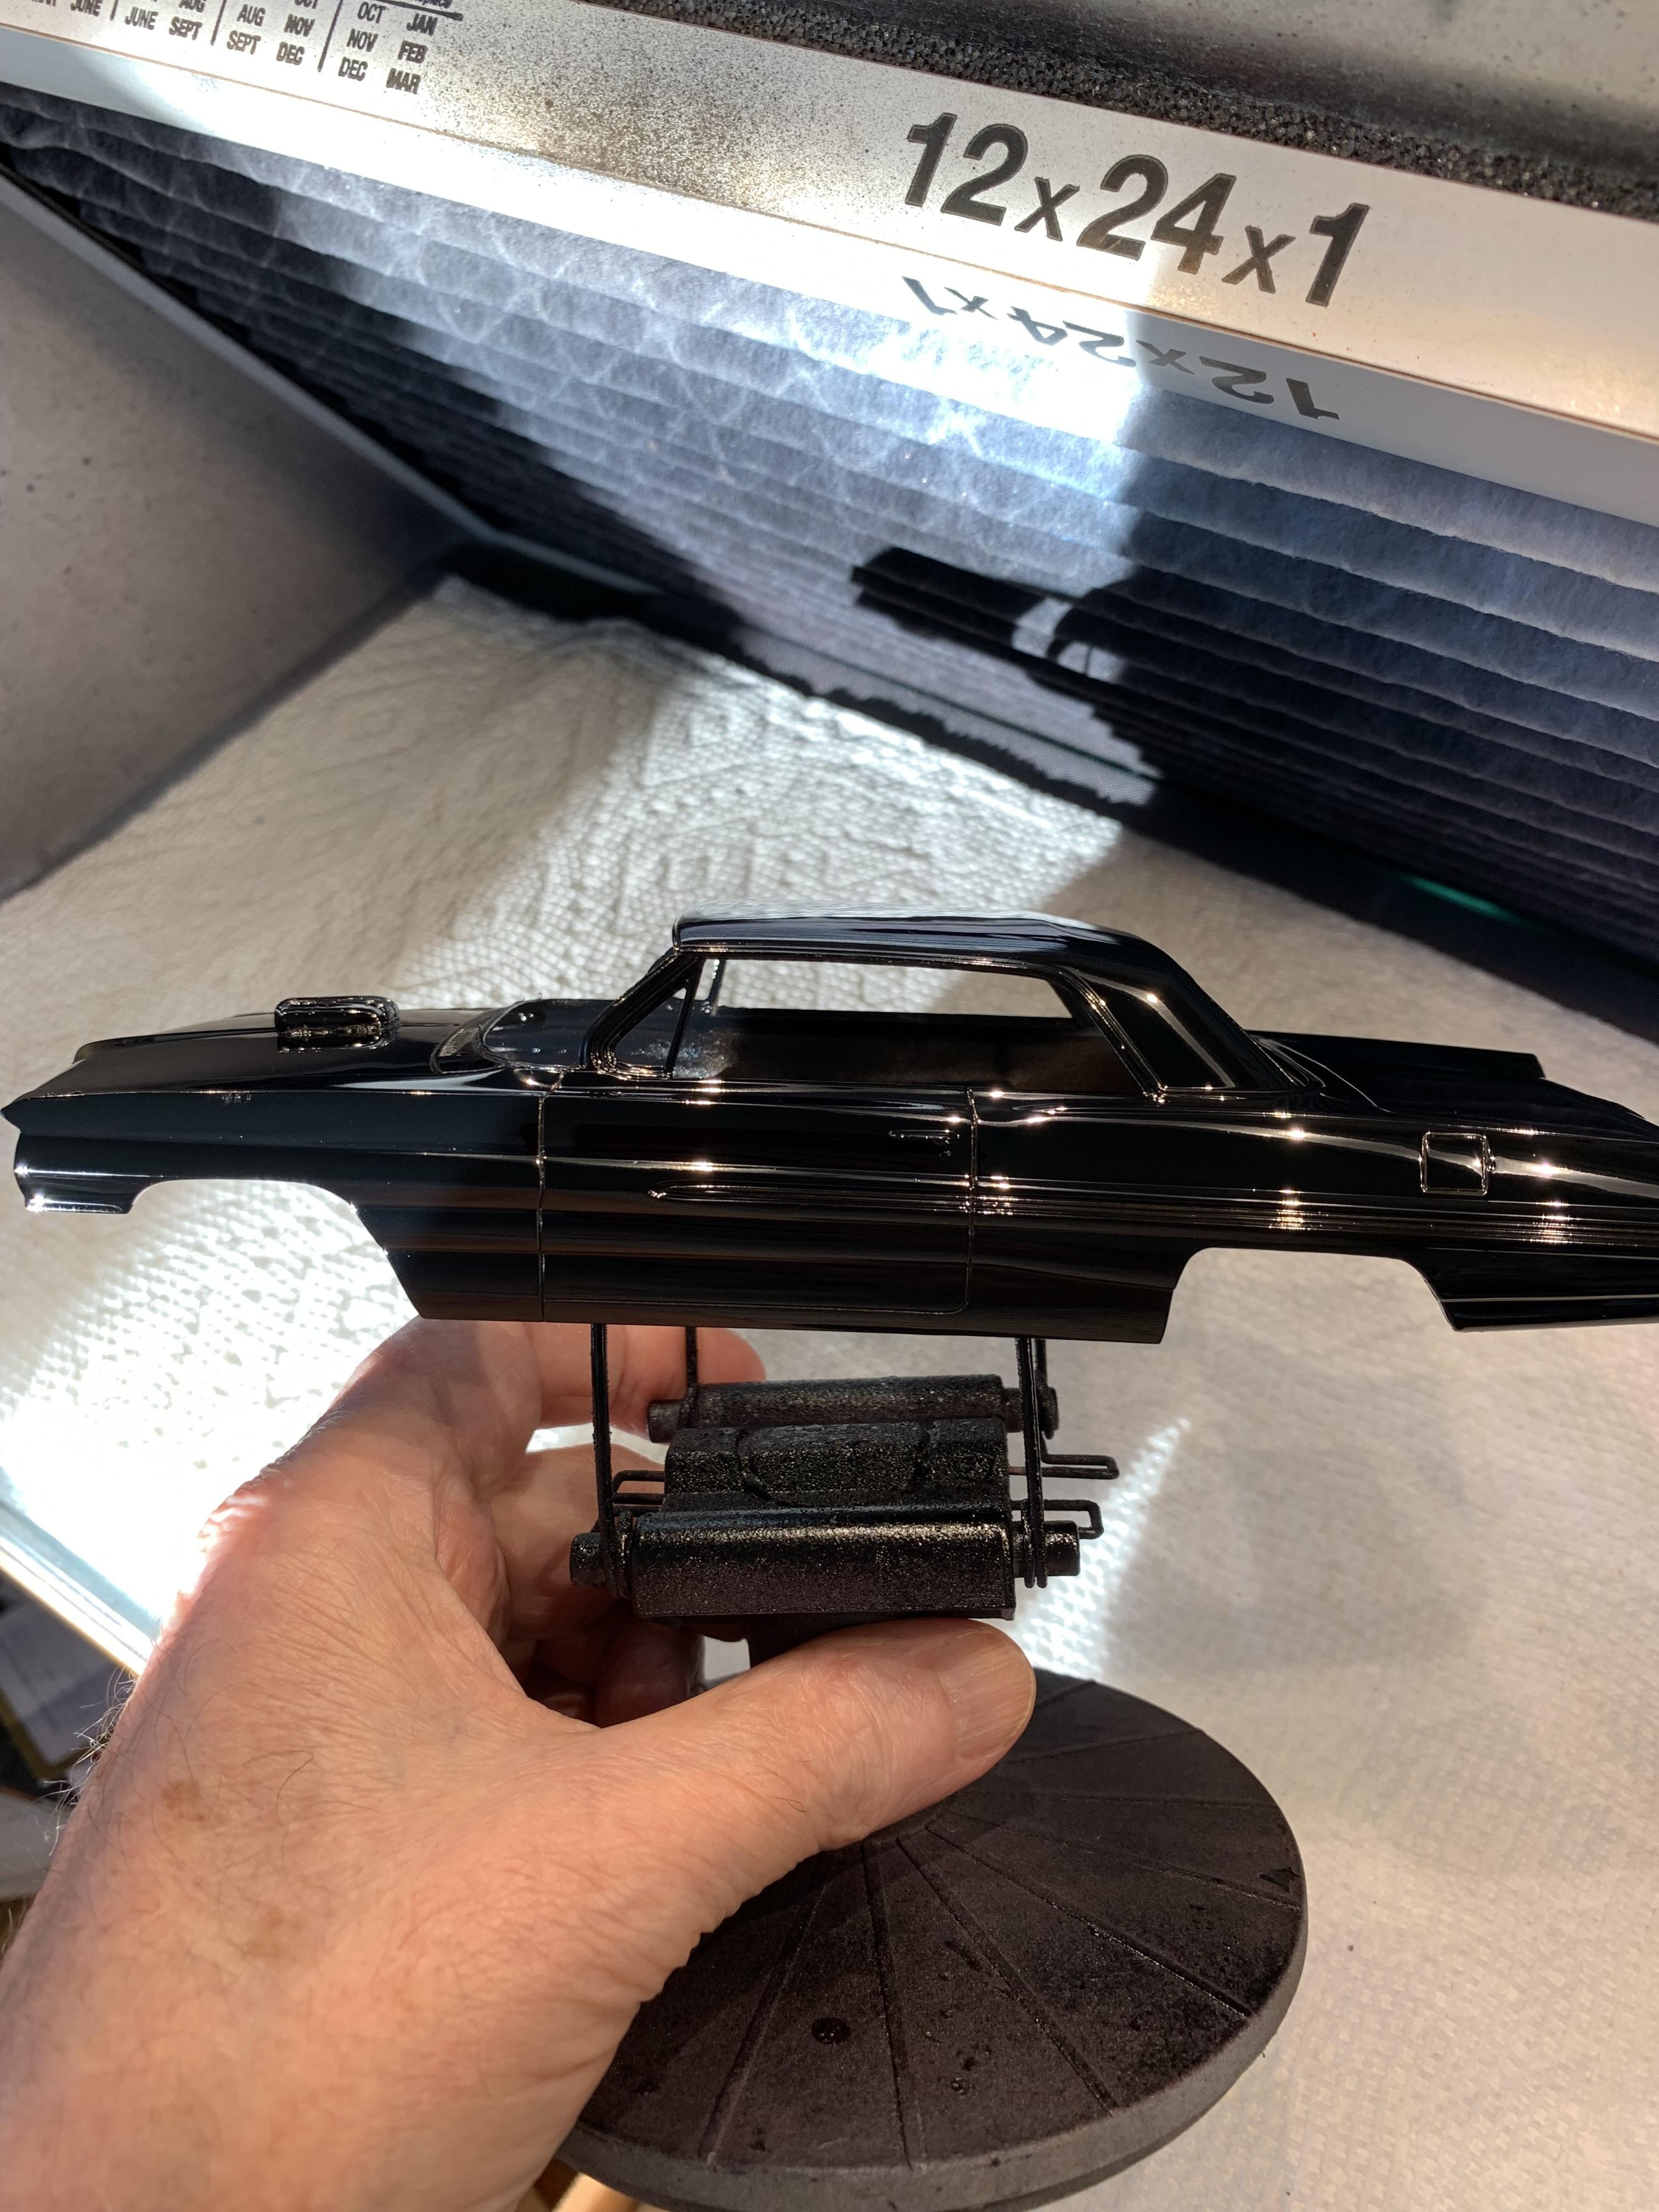
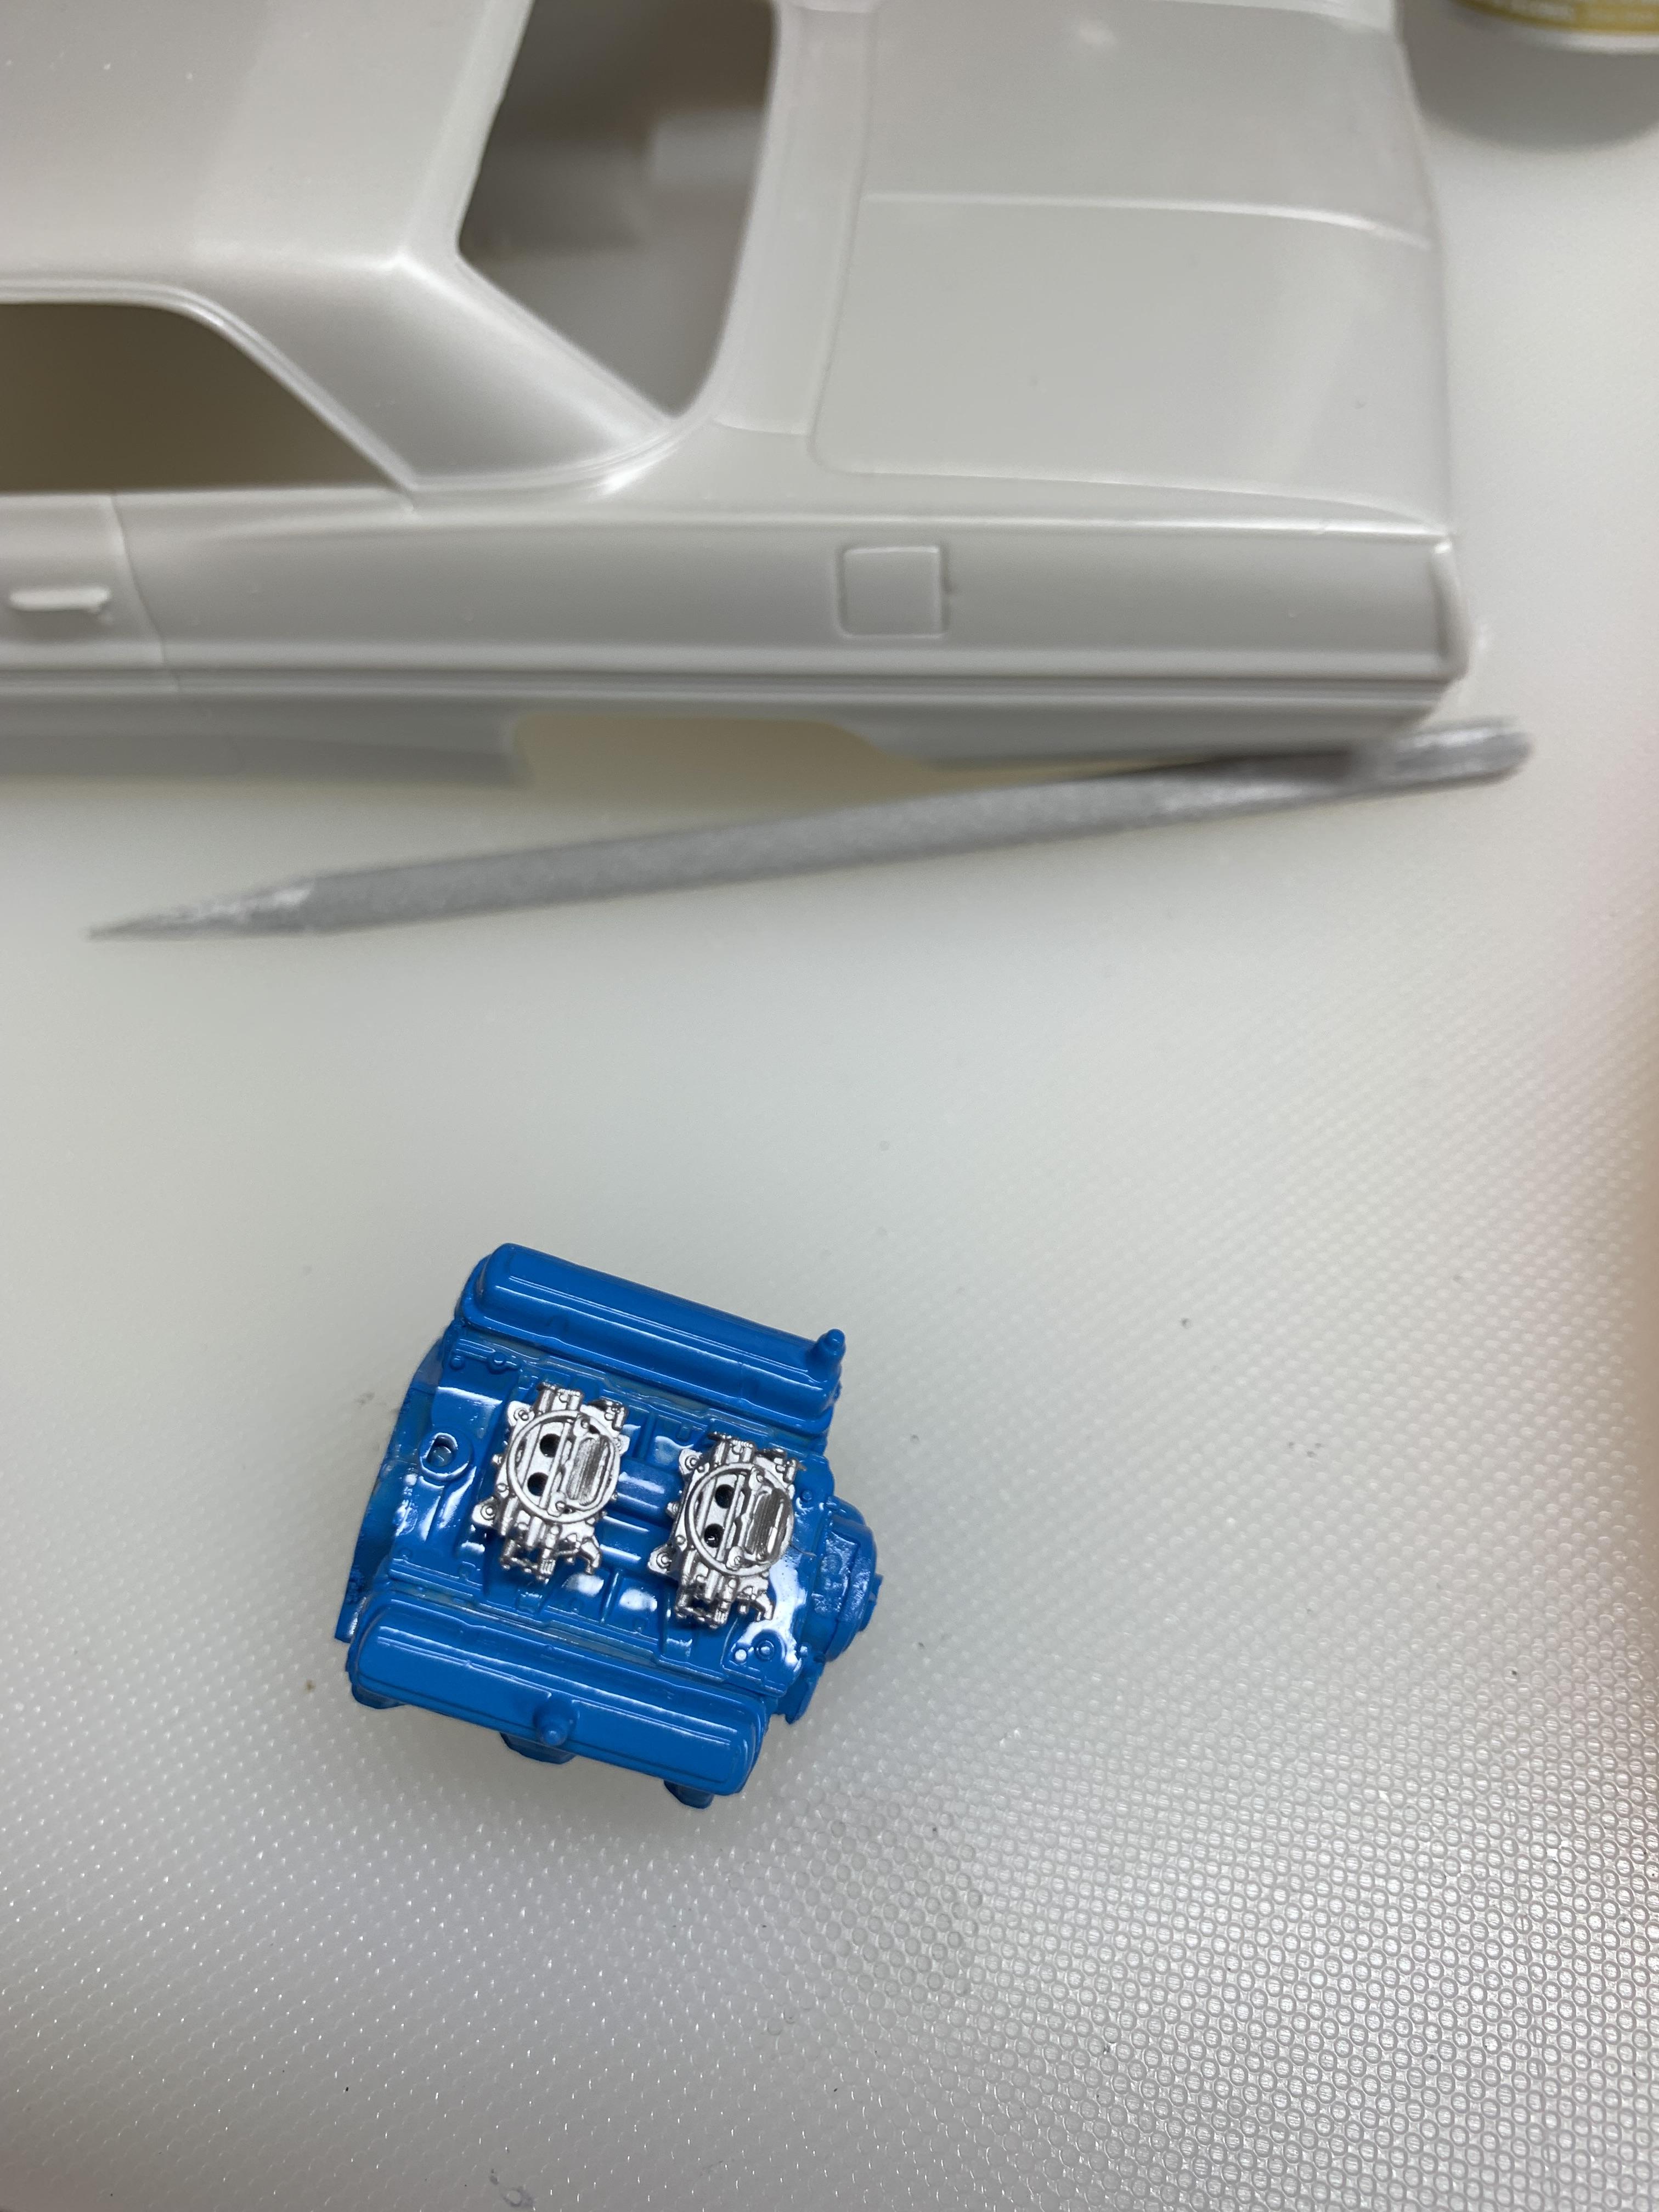
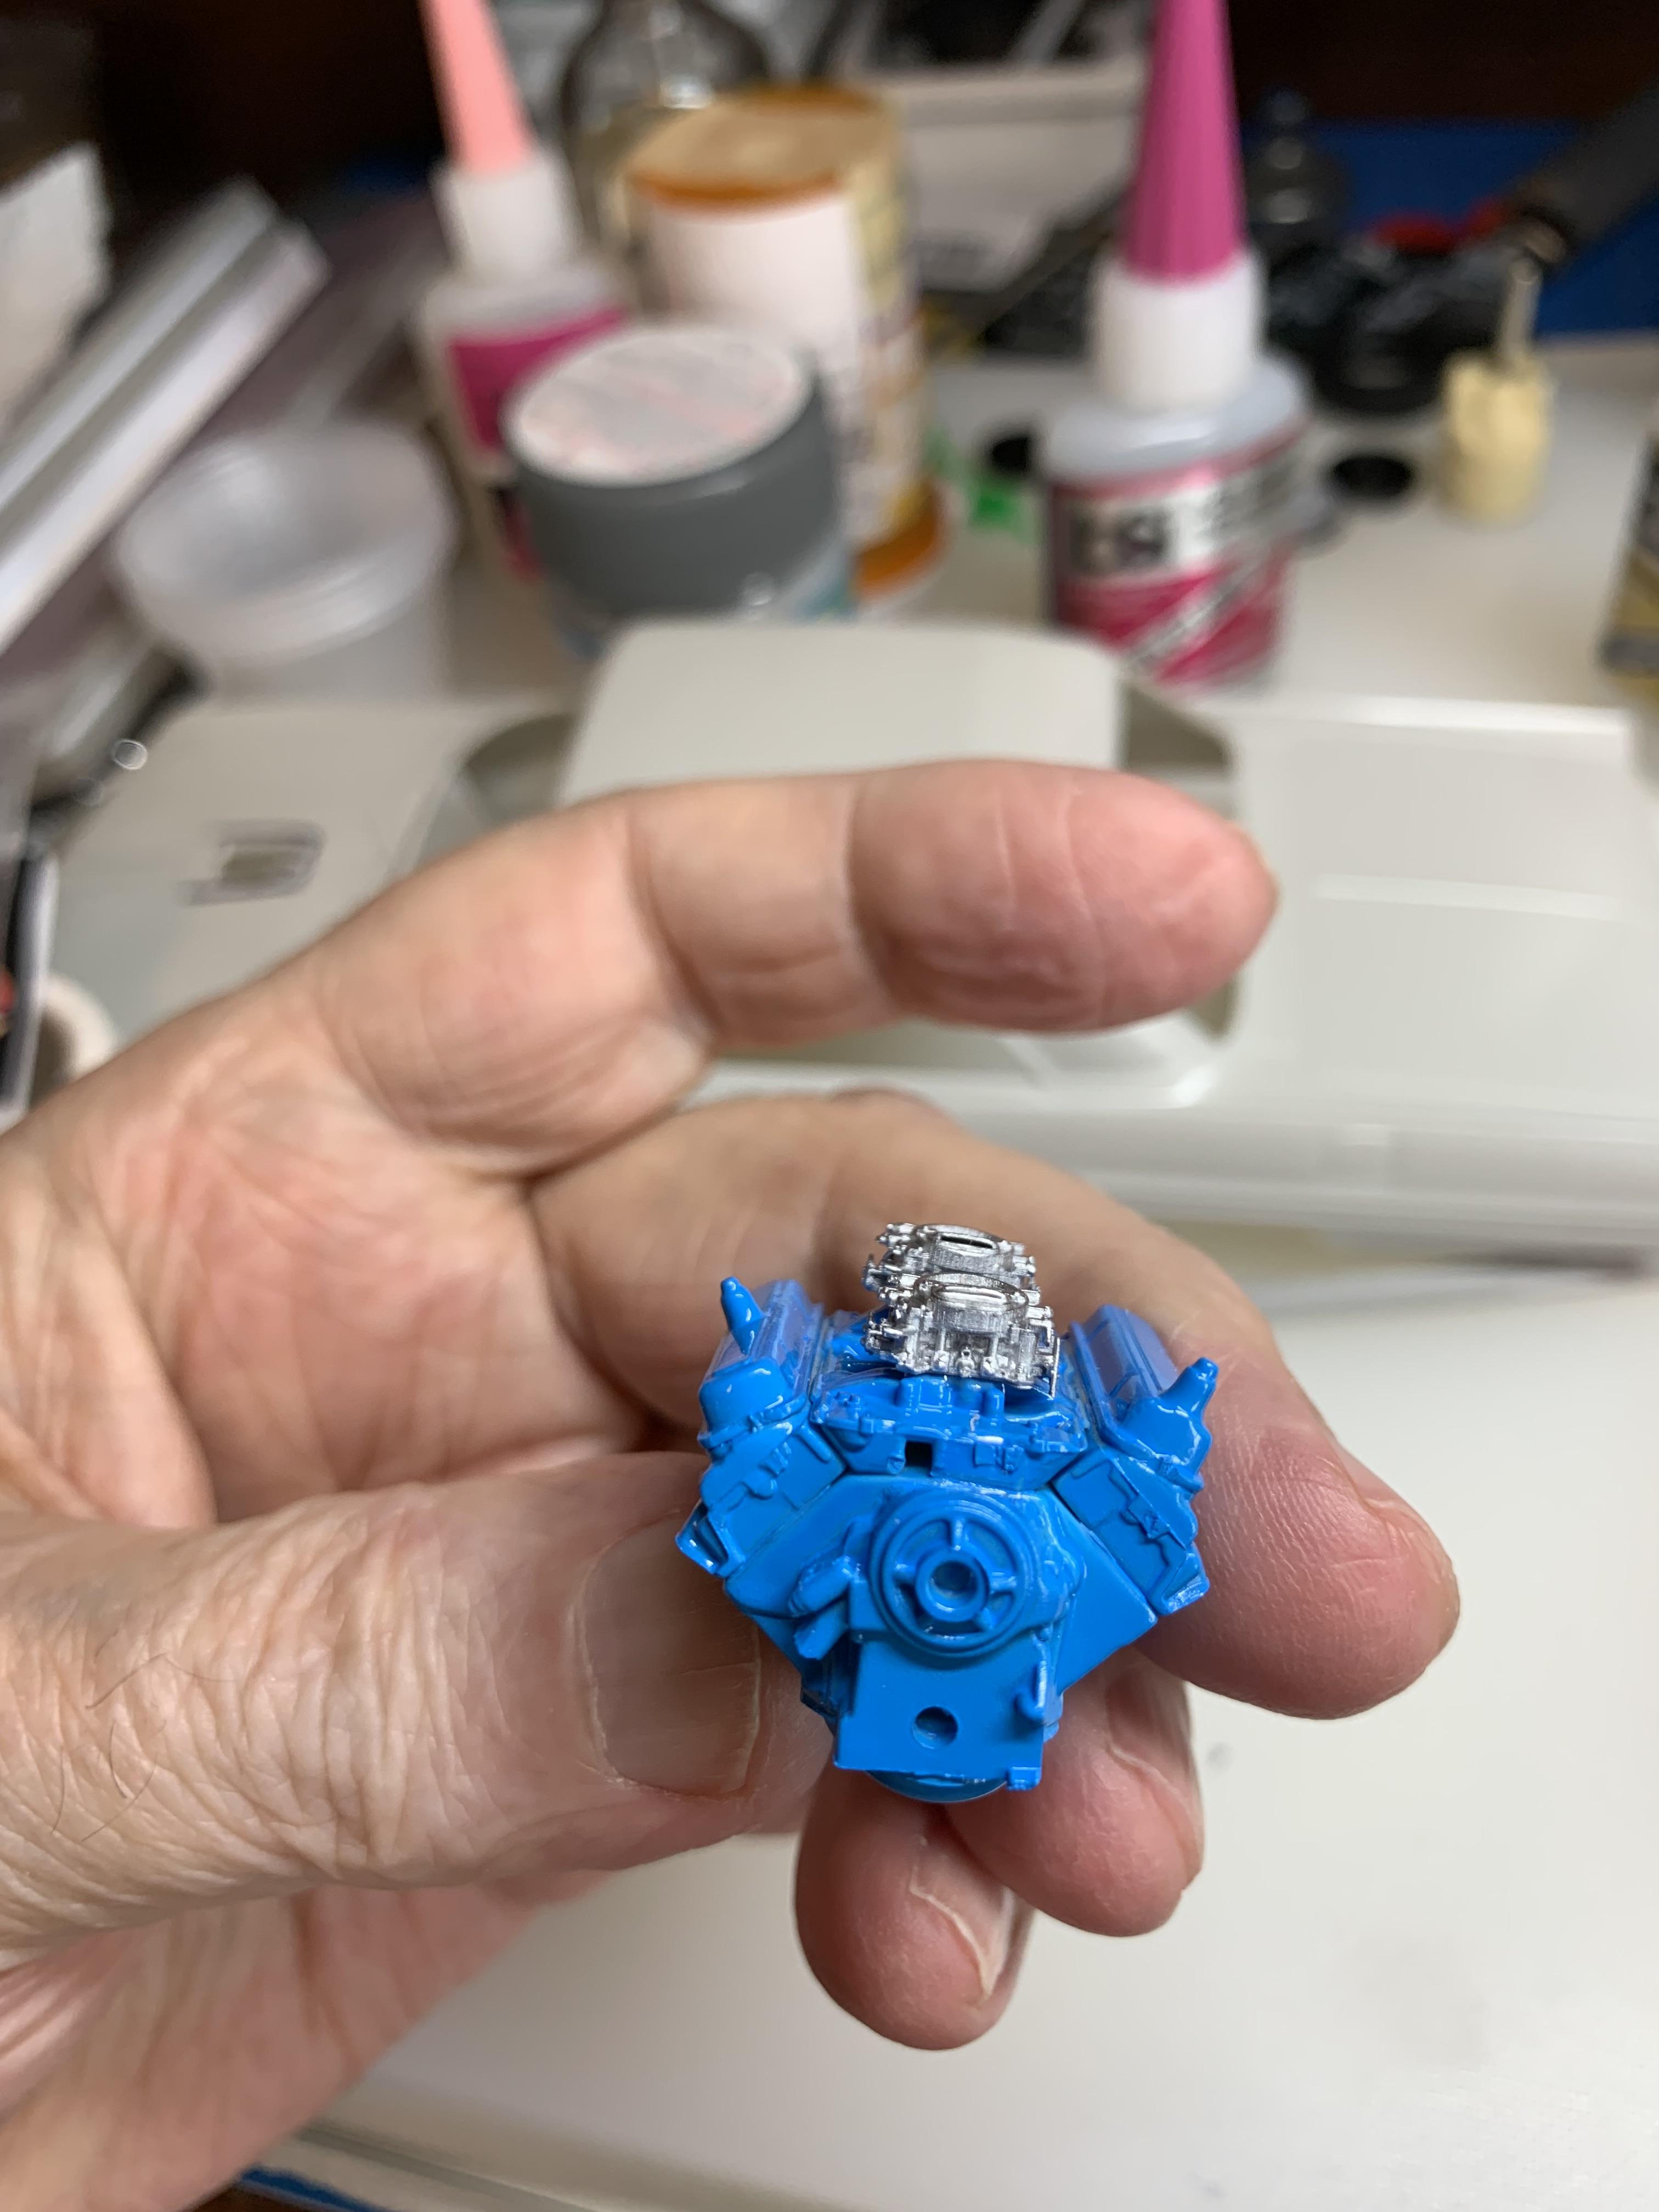
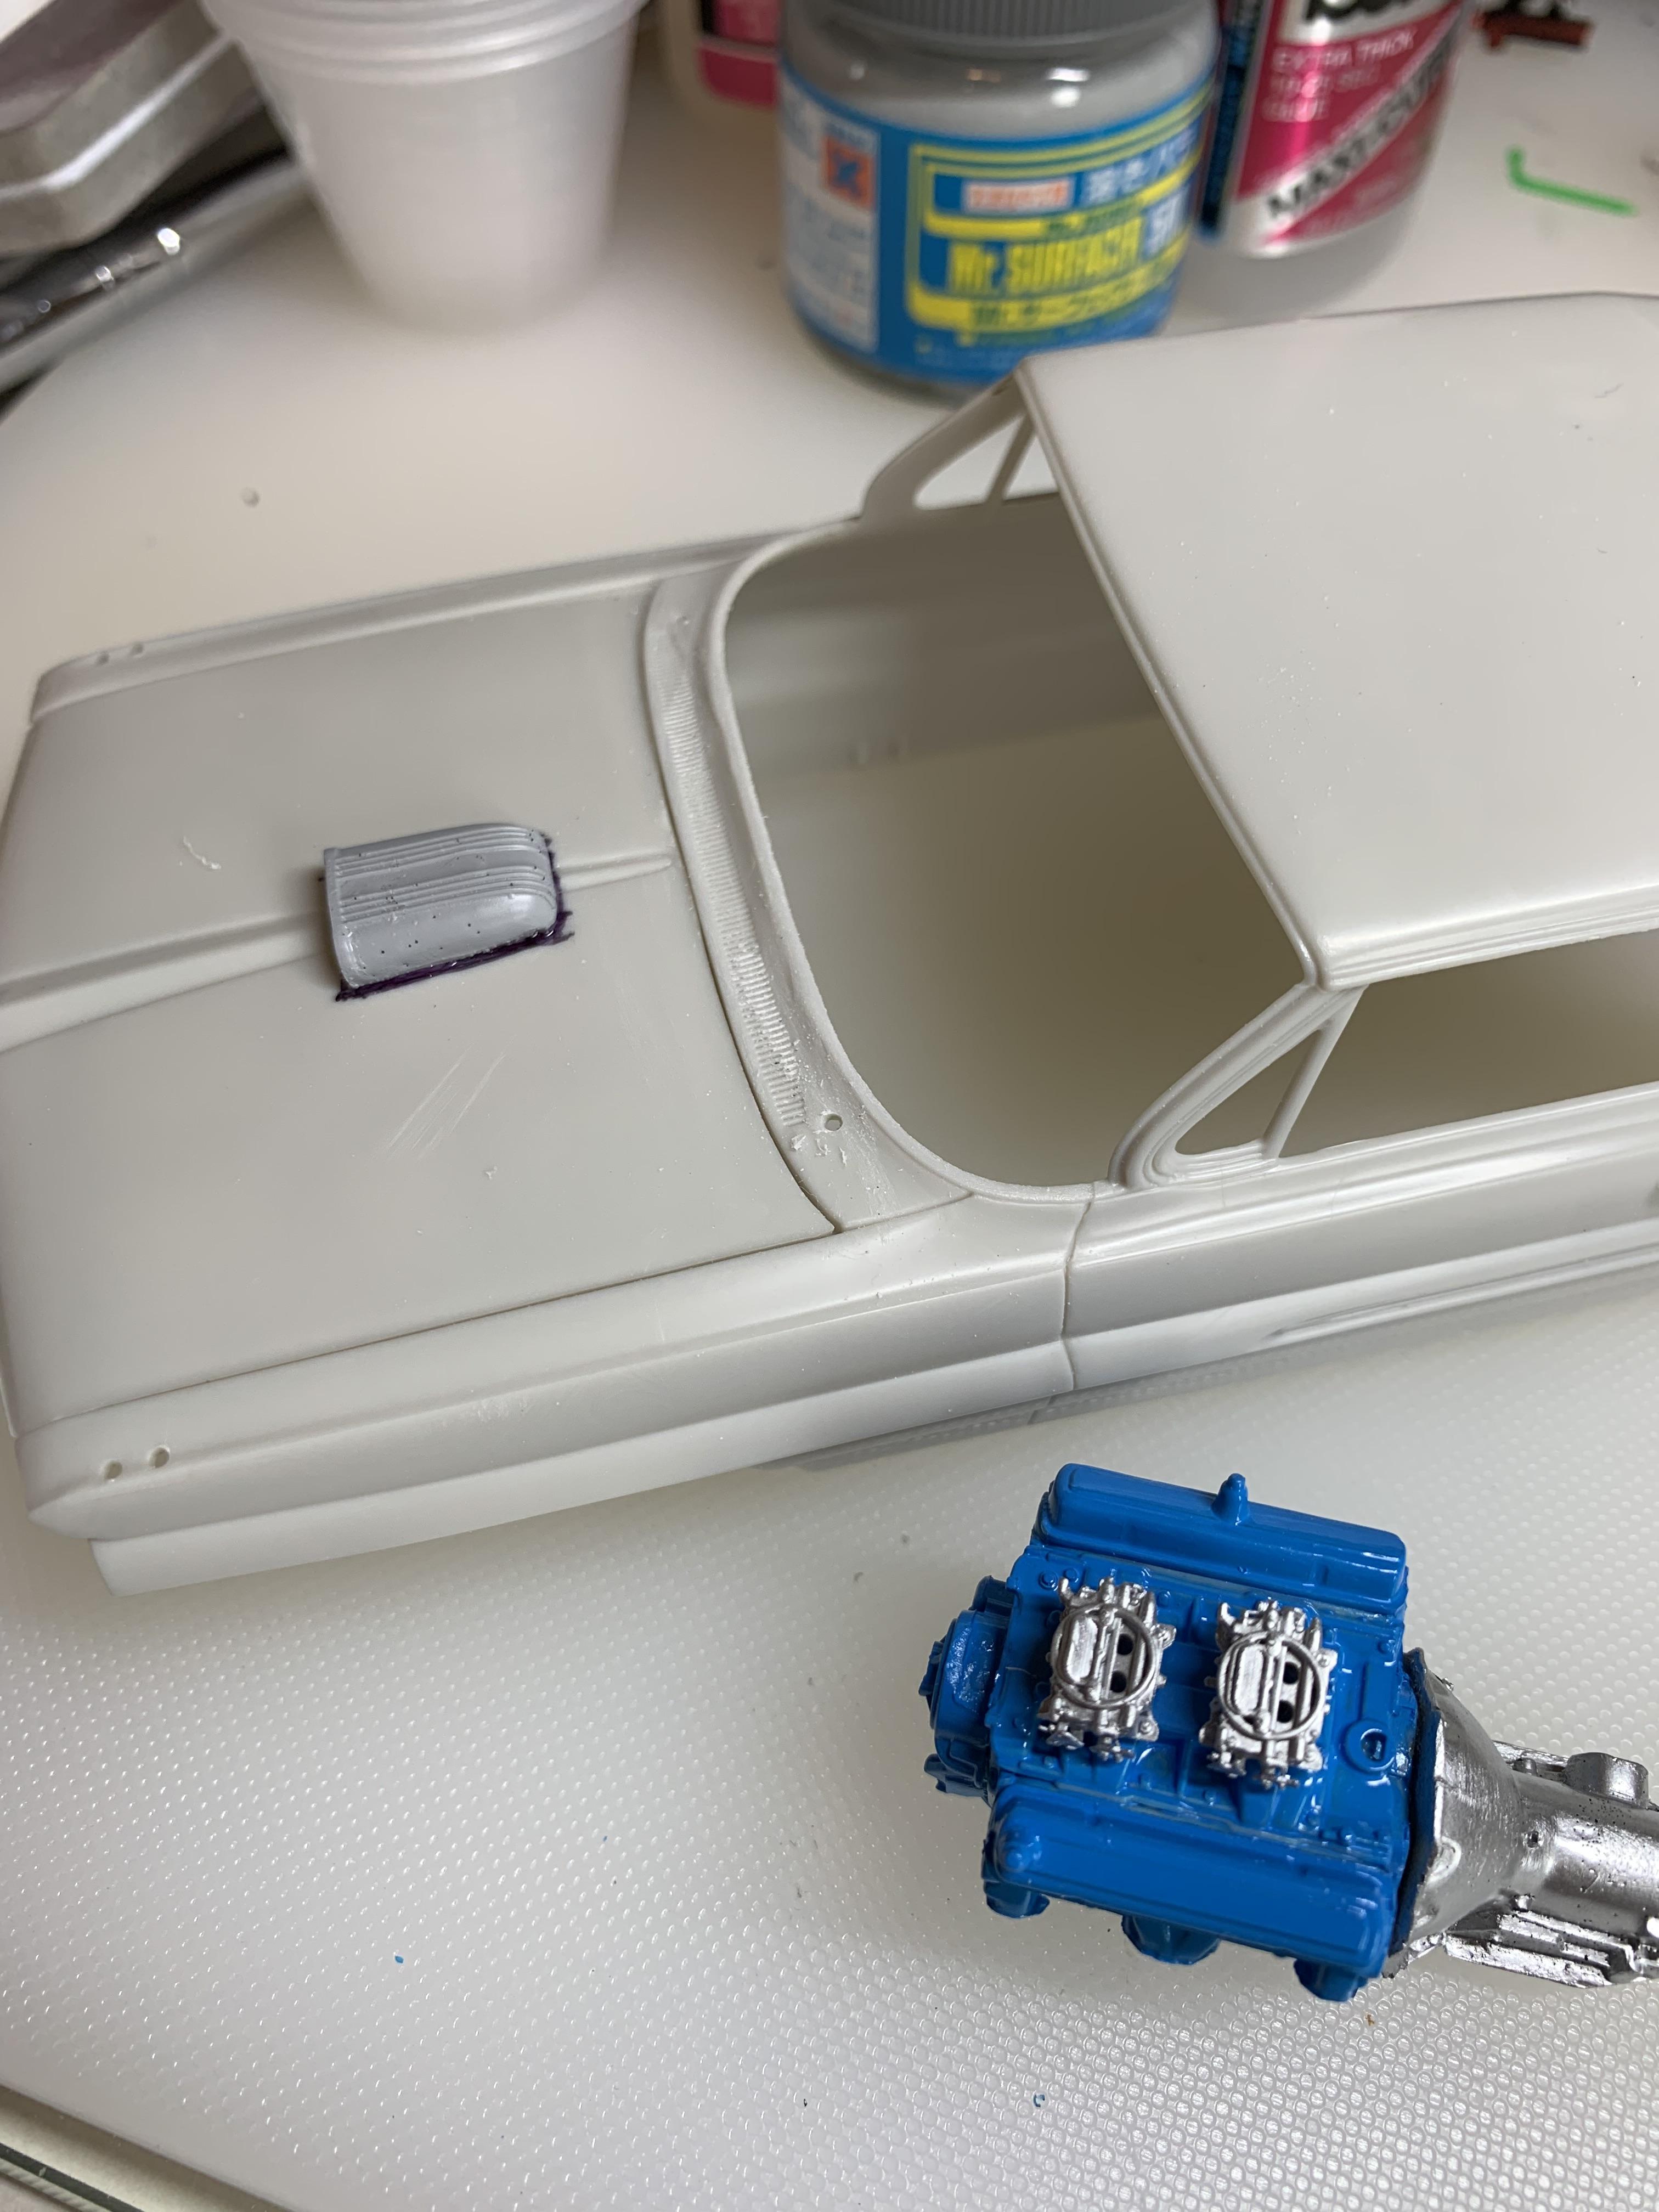
Did some more sanding and finish work on the trans, then sprayed with ts30. Primed the hood scoop as it is resin. Also, installed some afb’s and the hood scoop. Finally, glued the trans on with some thick ca glue, like I used on the carbs. Gives you a little more alignment time. Hopefully, get some paint on the body tonight.
-
1962 Pontiac 421 SD F/SA circa 2024 edition
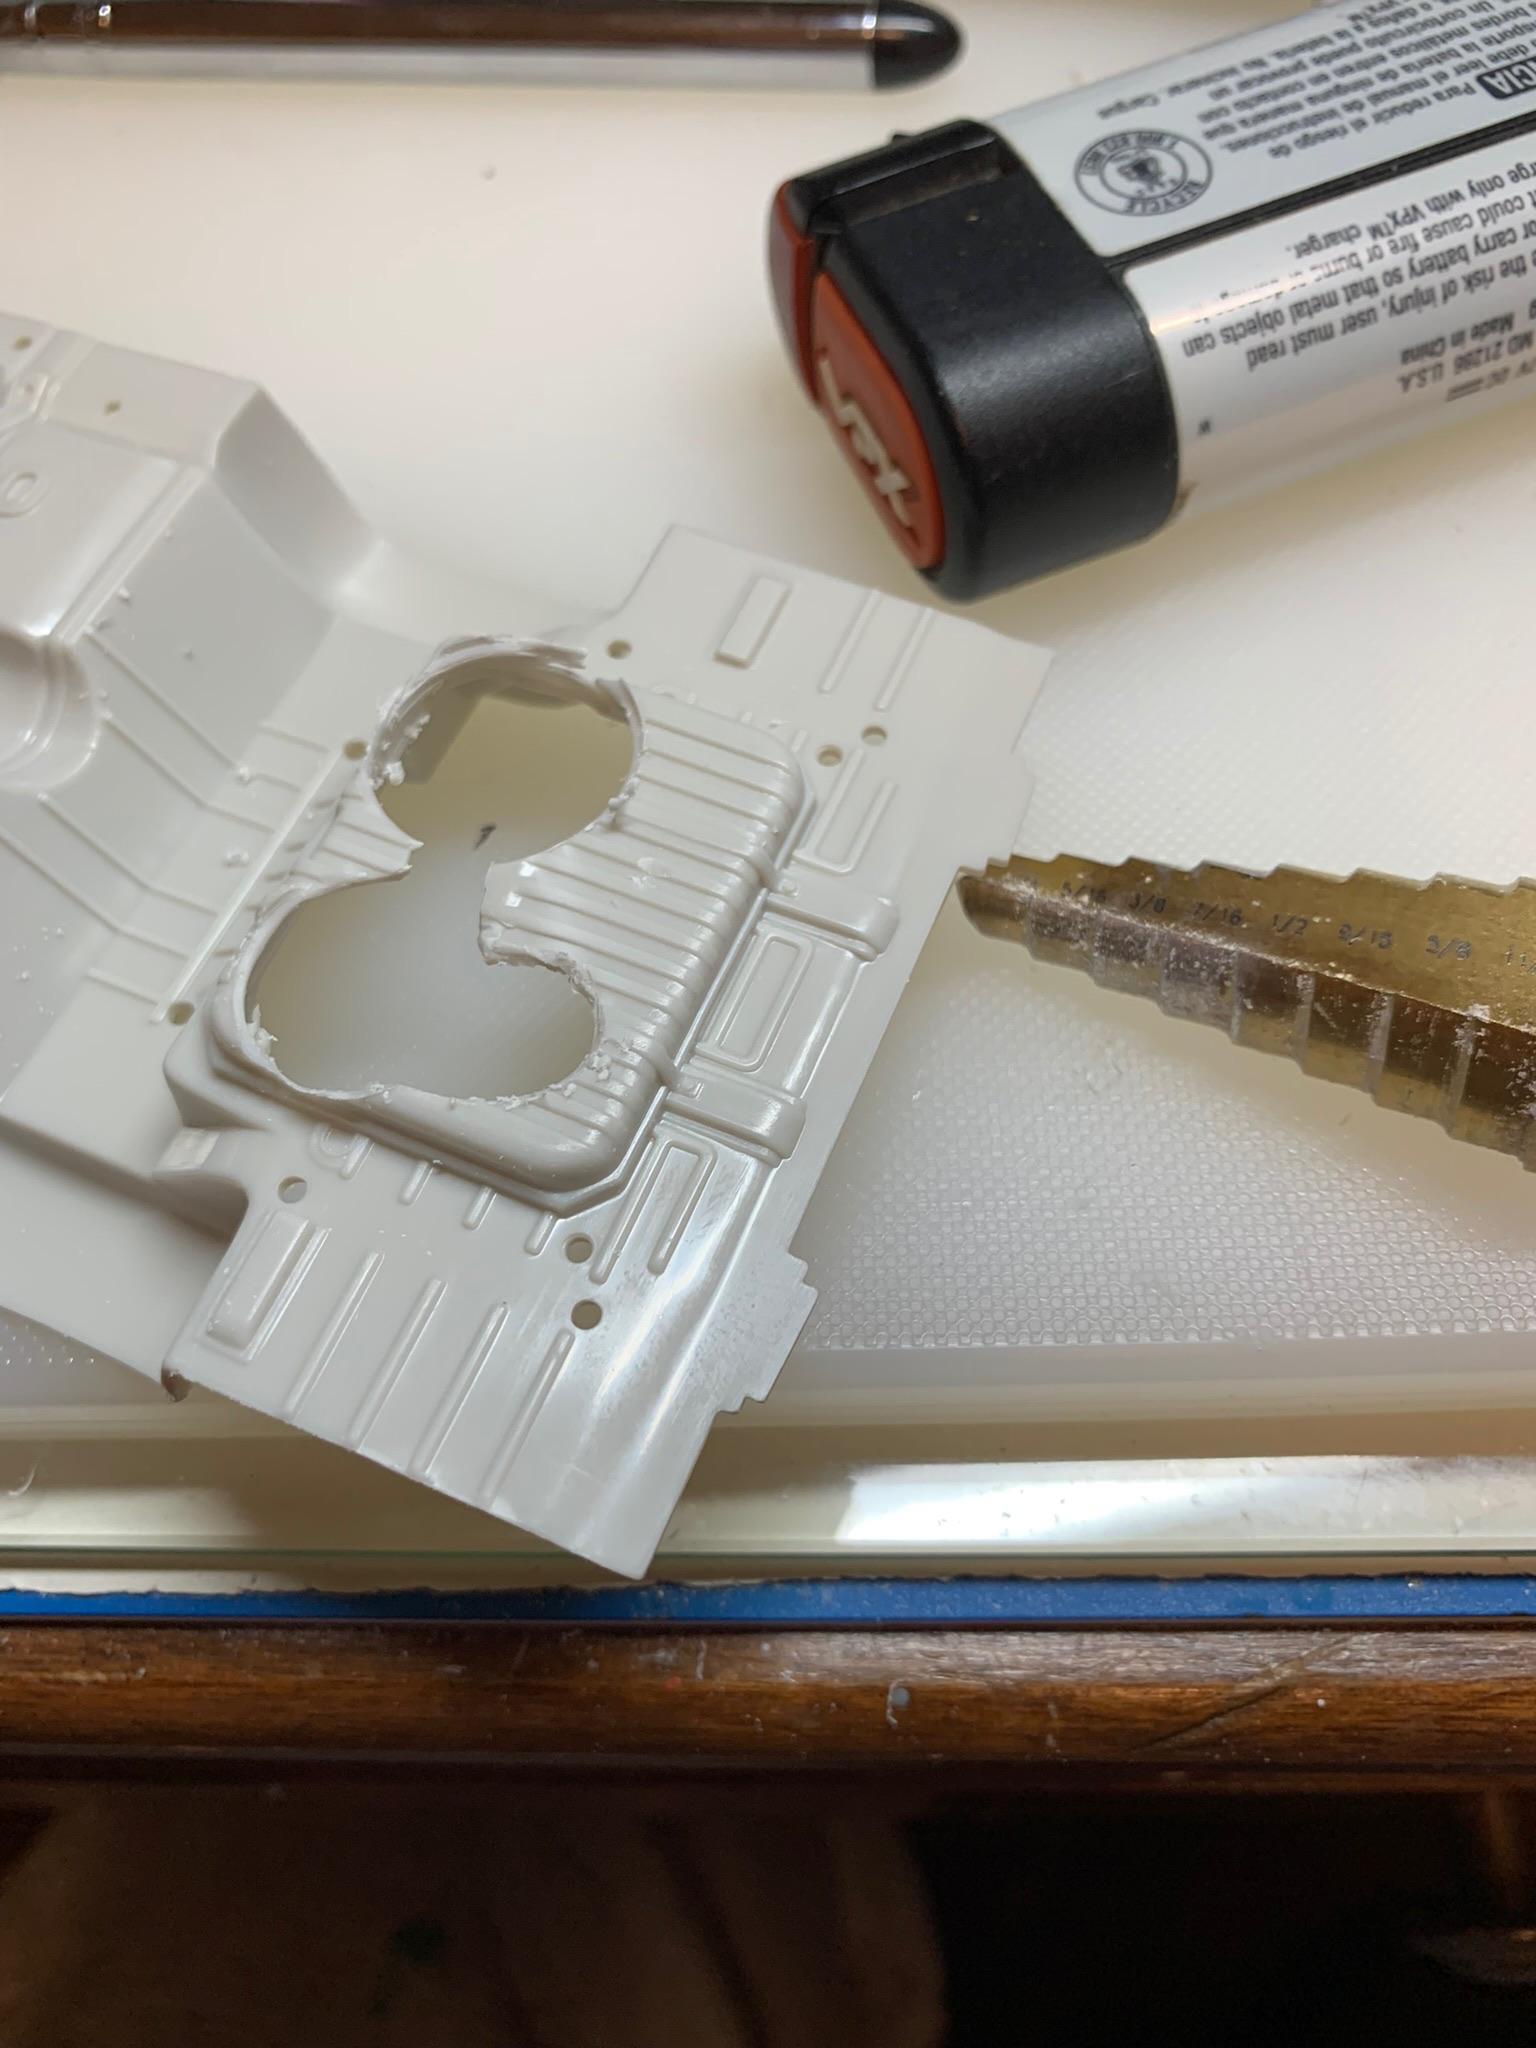
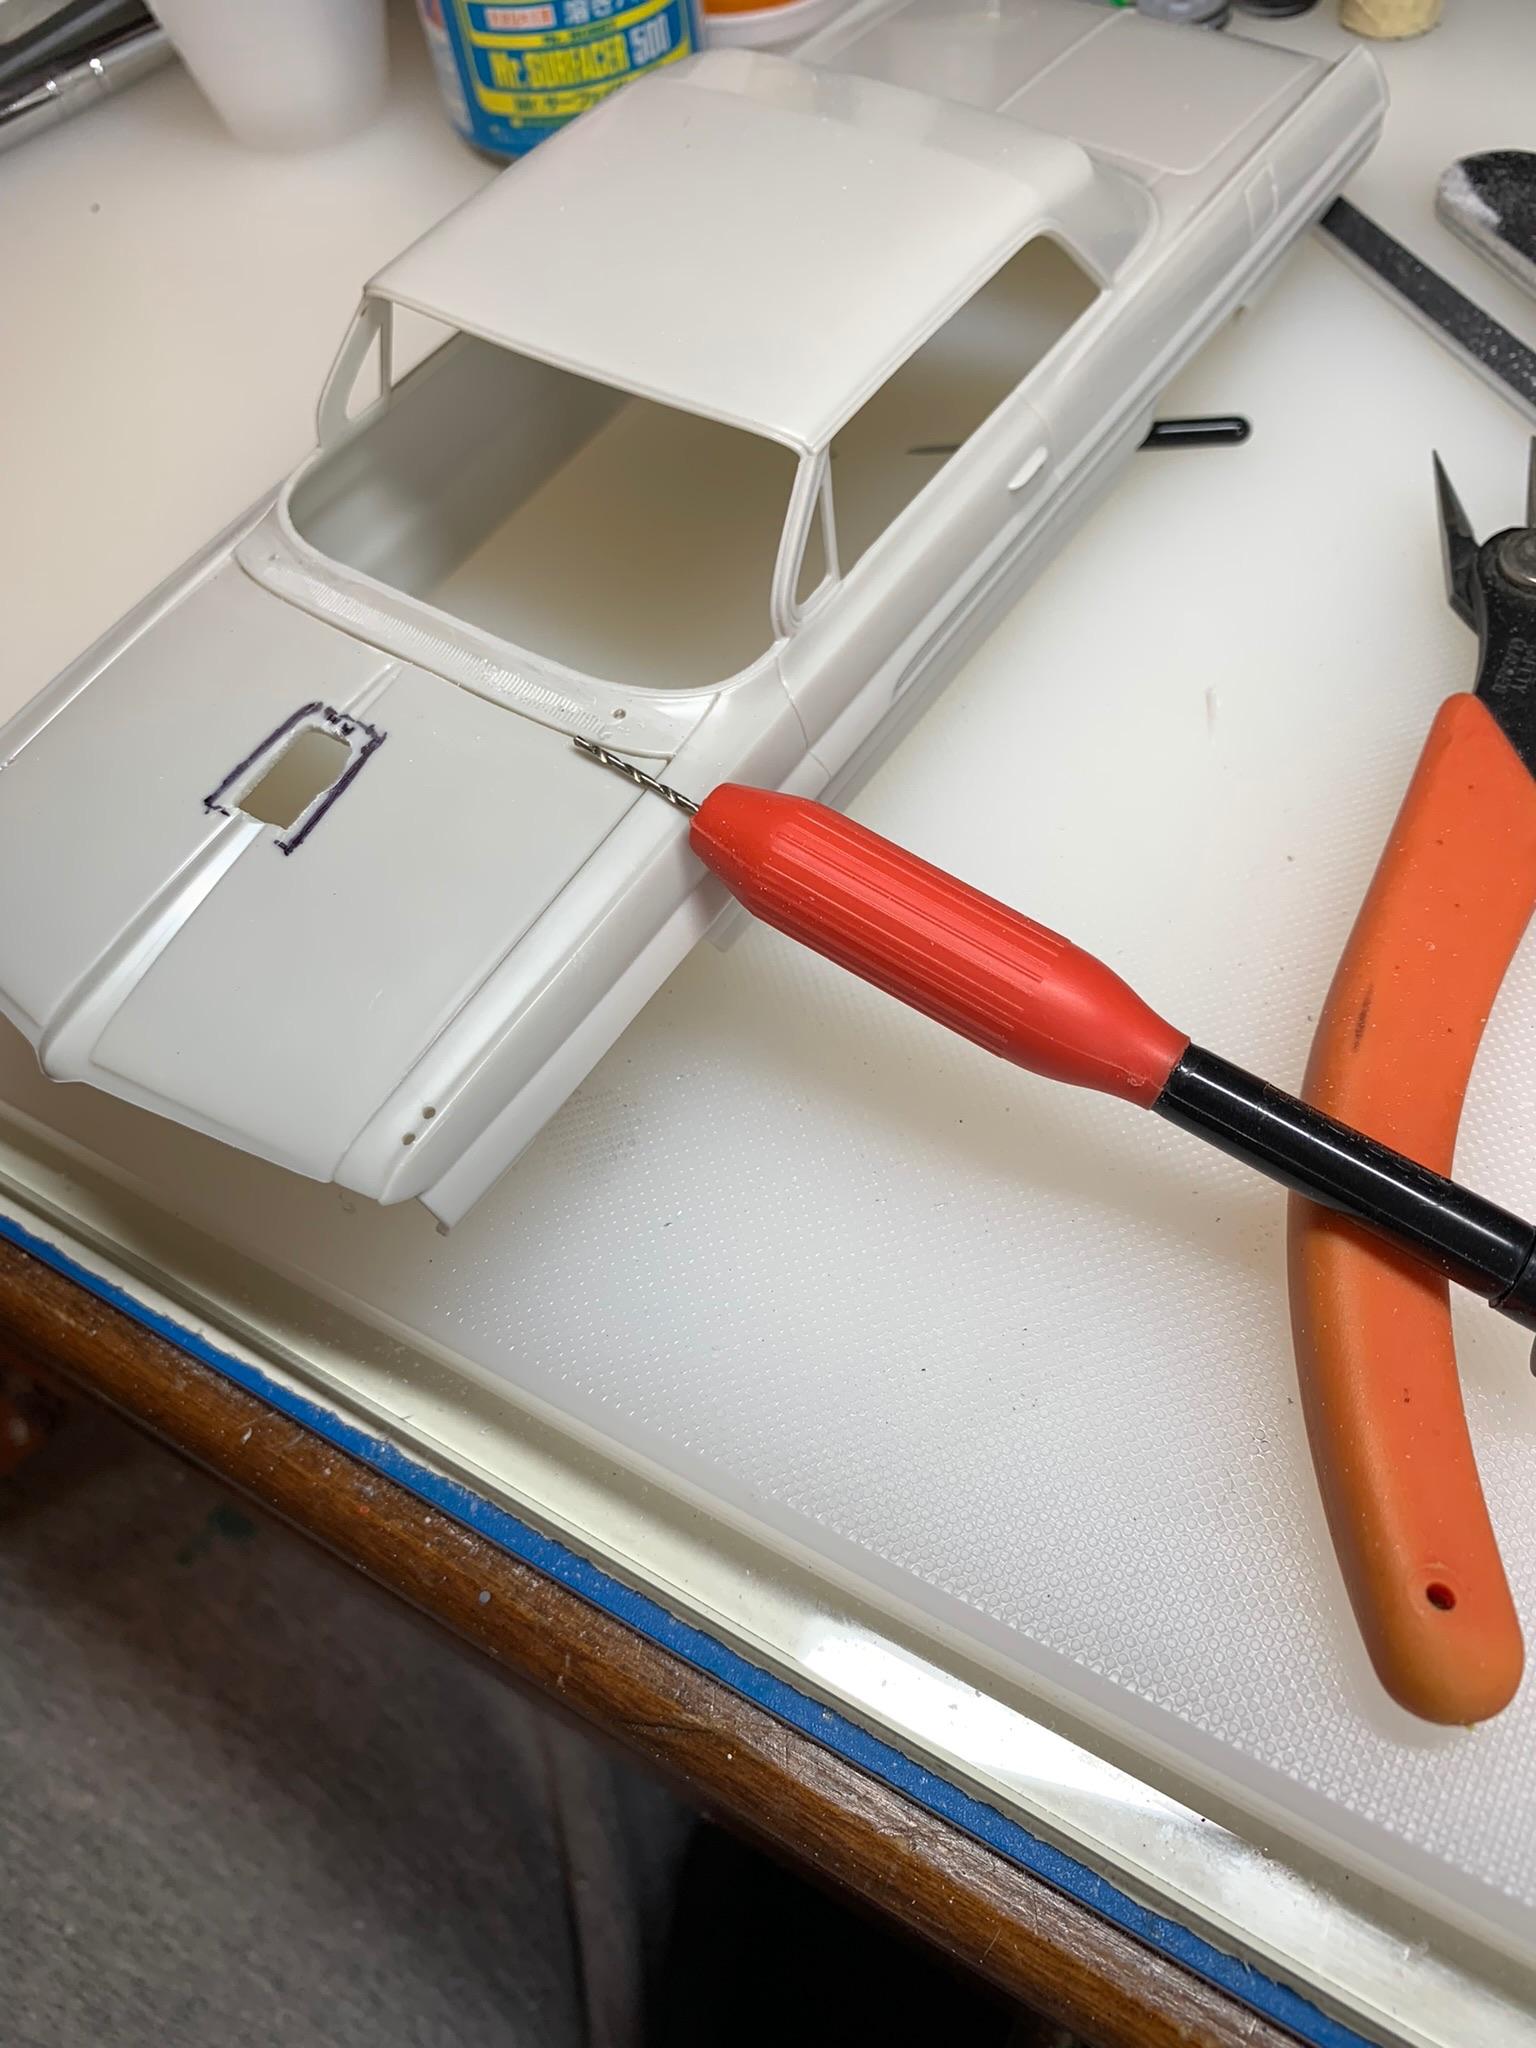
R. Thorne replied to R. Thorne's topic in WIP: Drag Racing Models
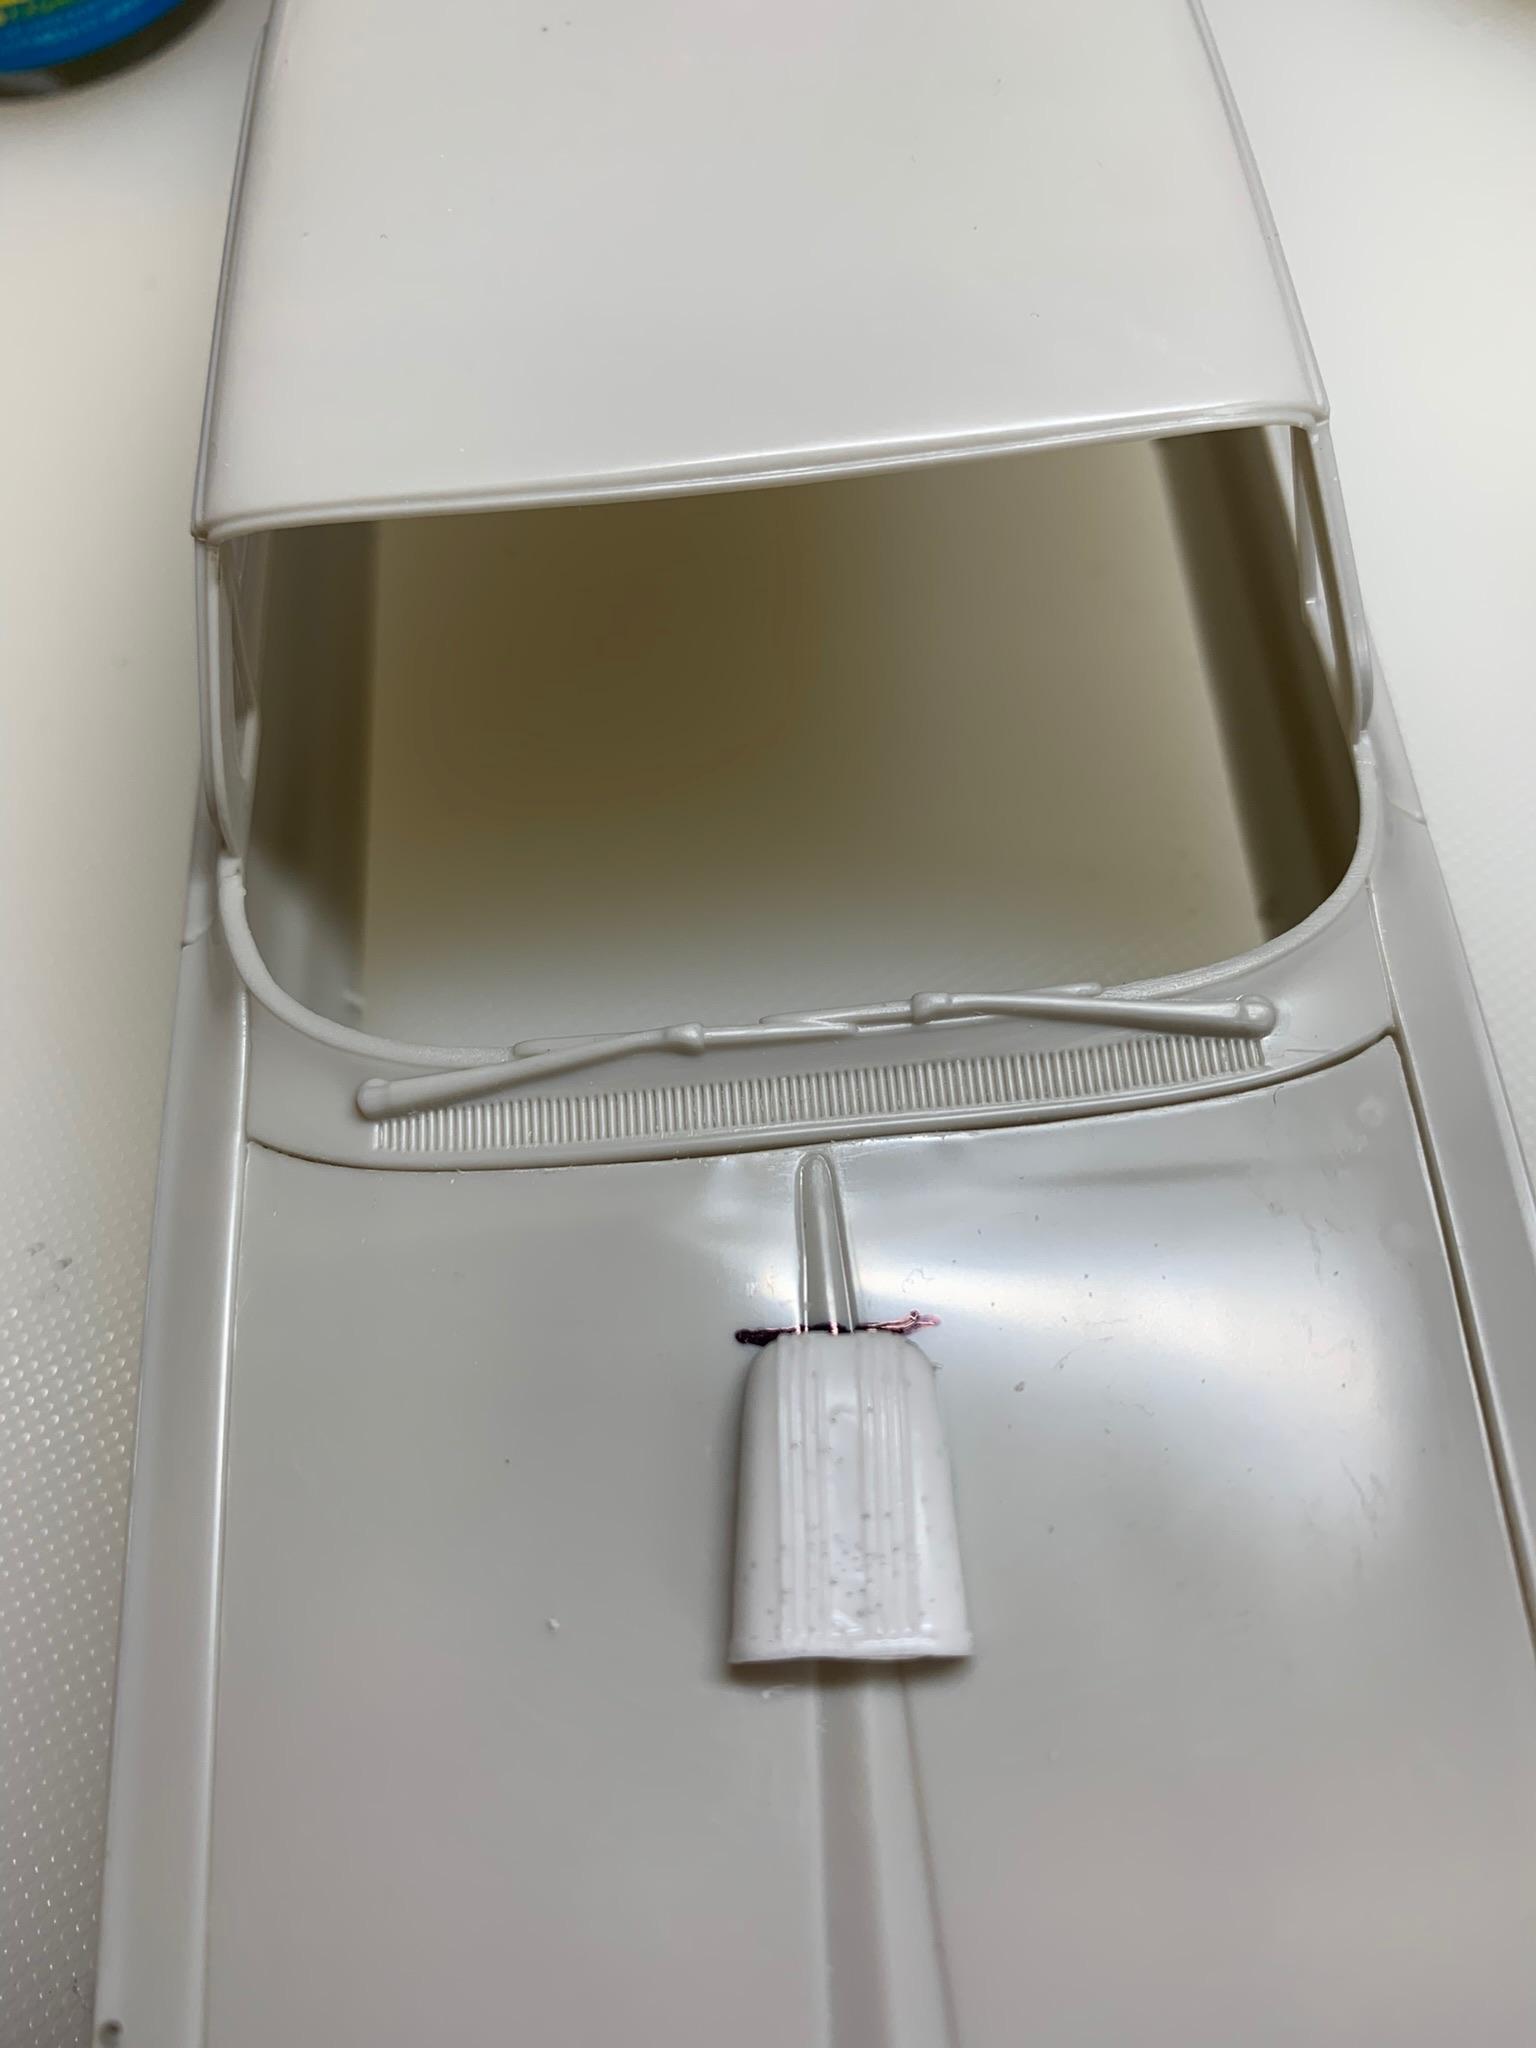
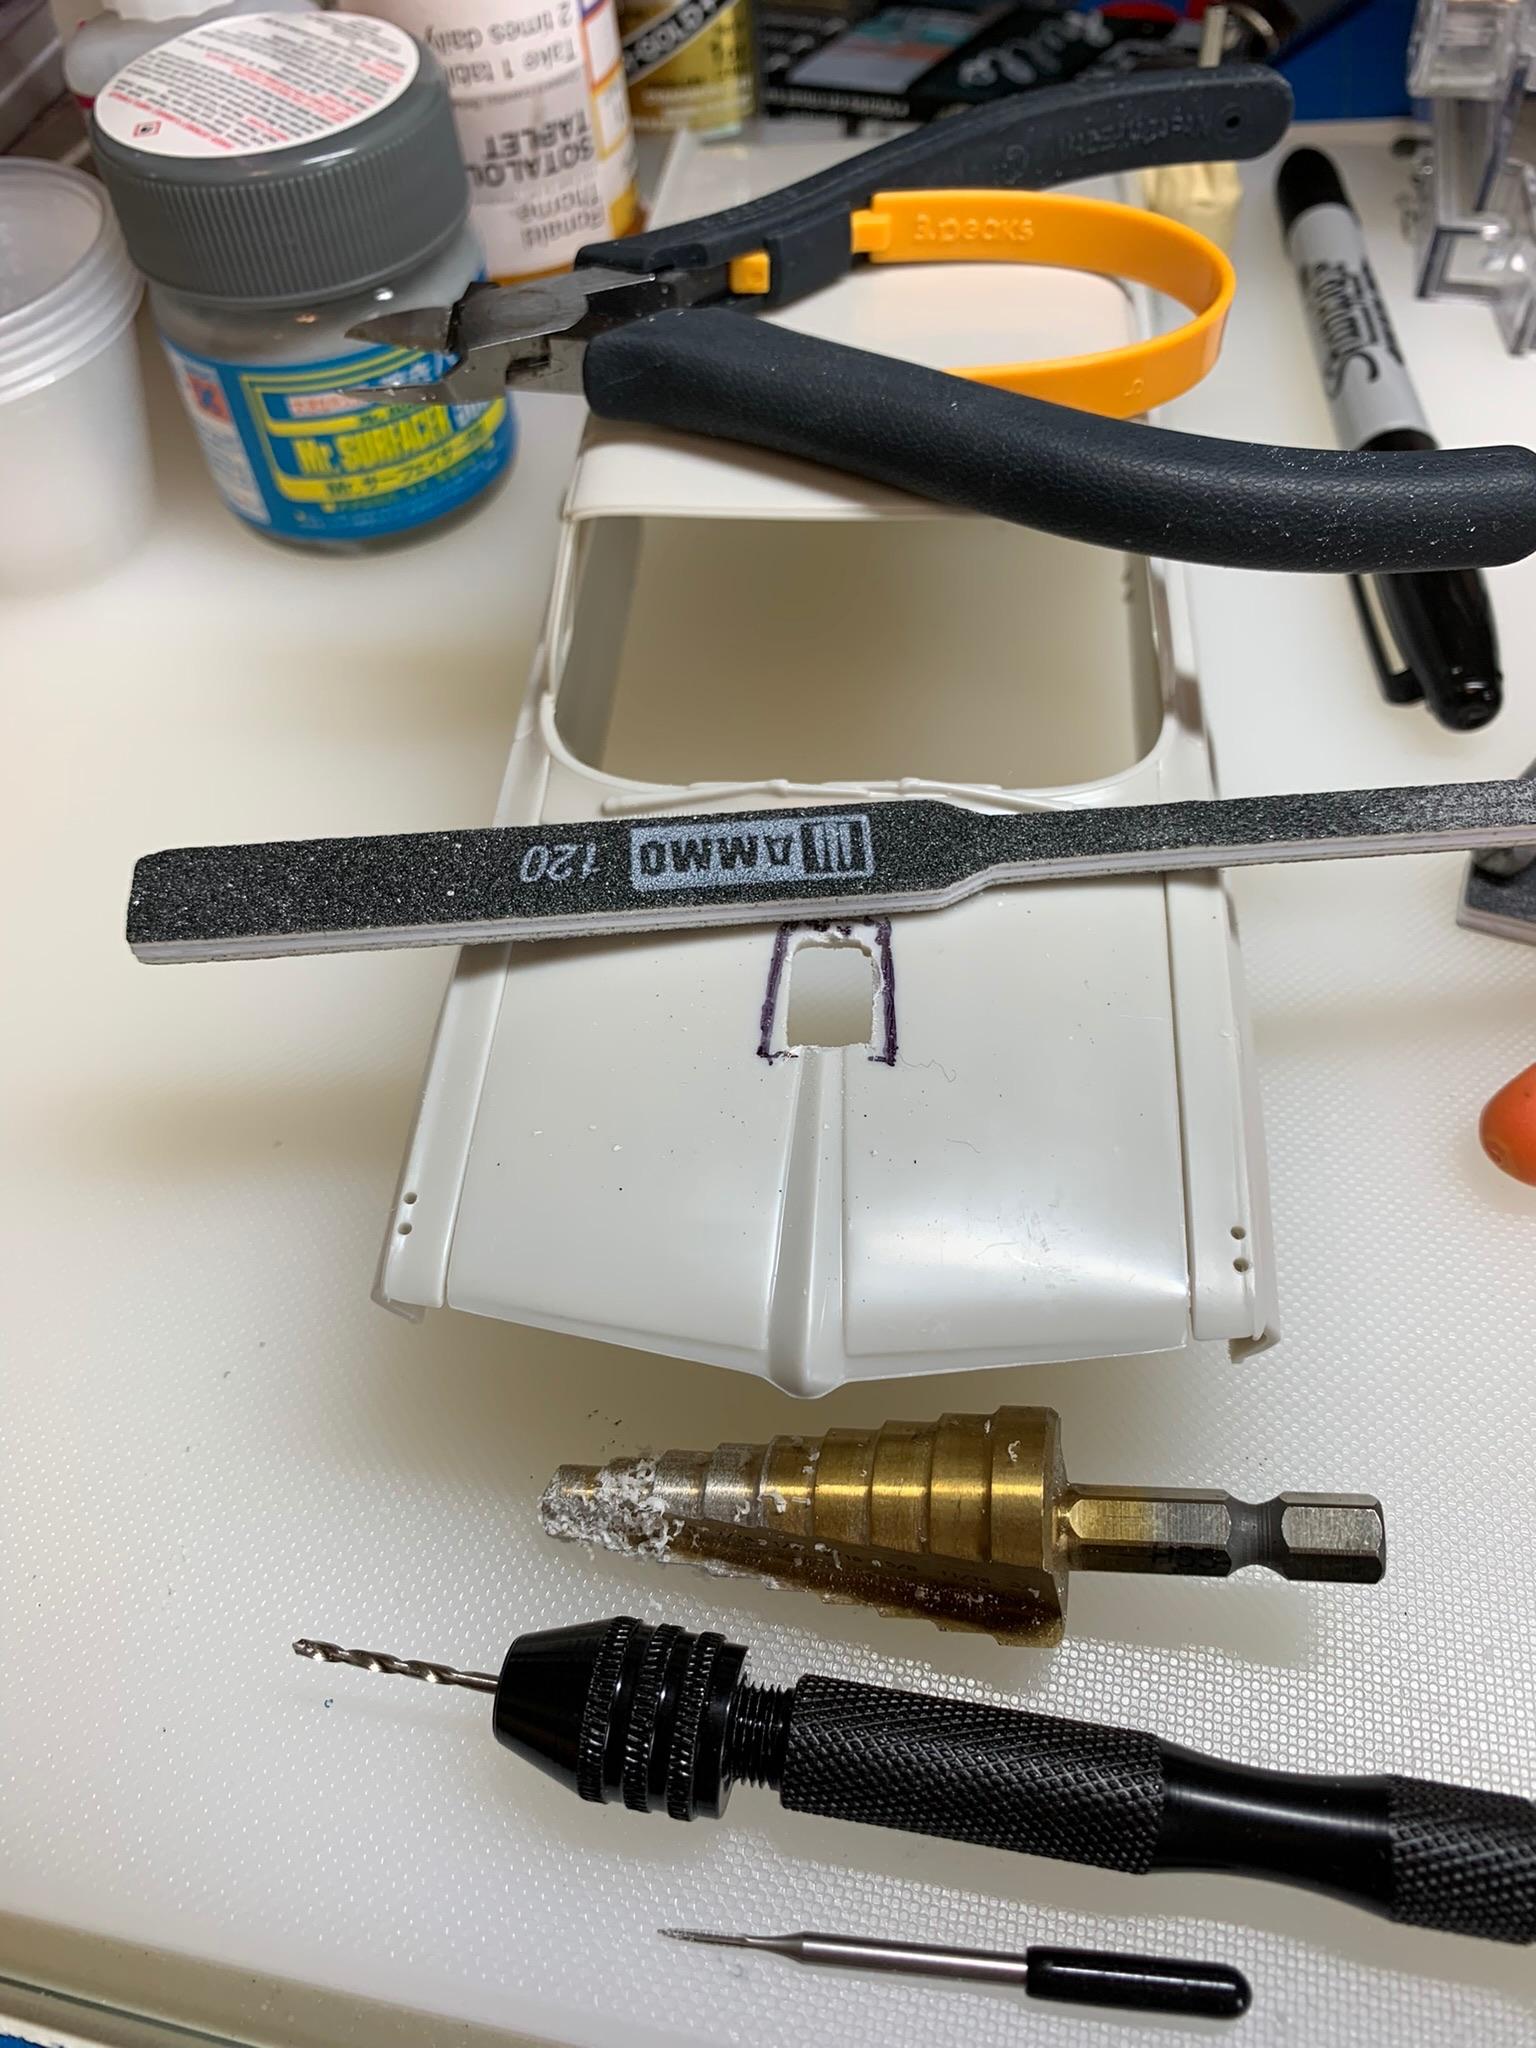
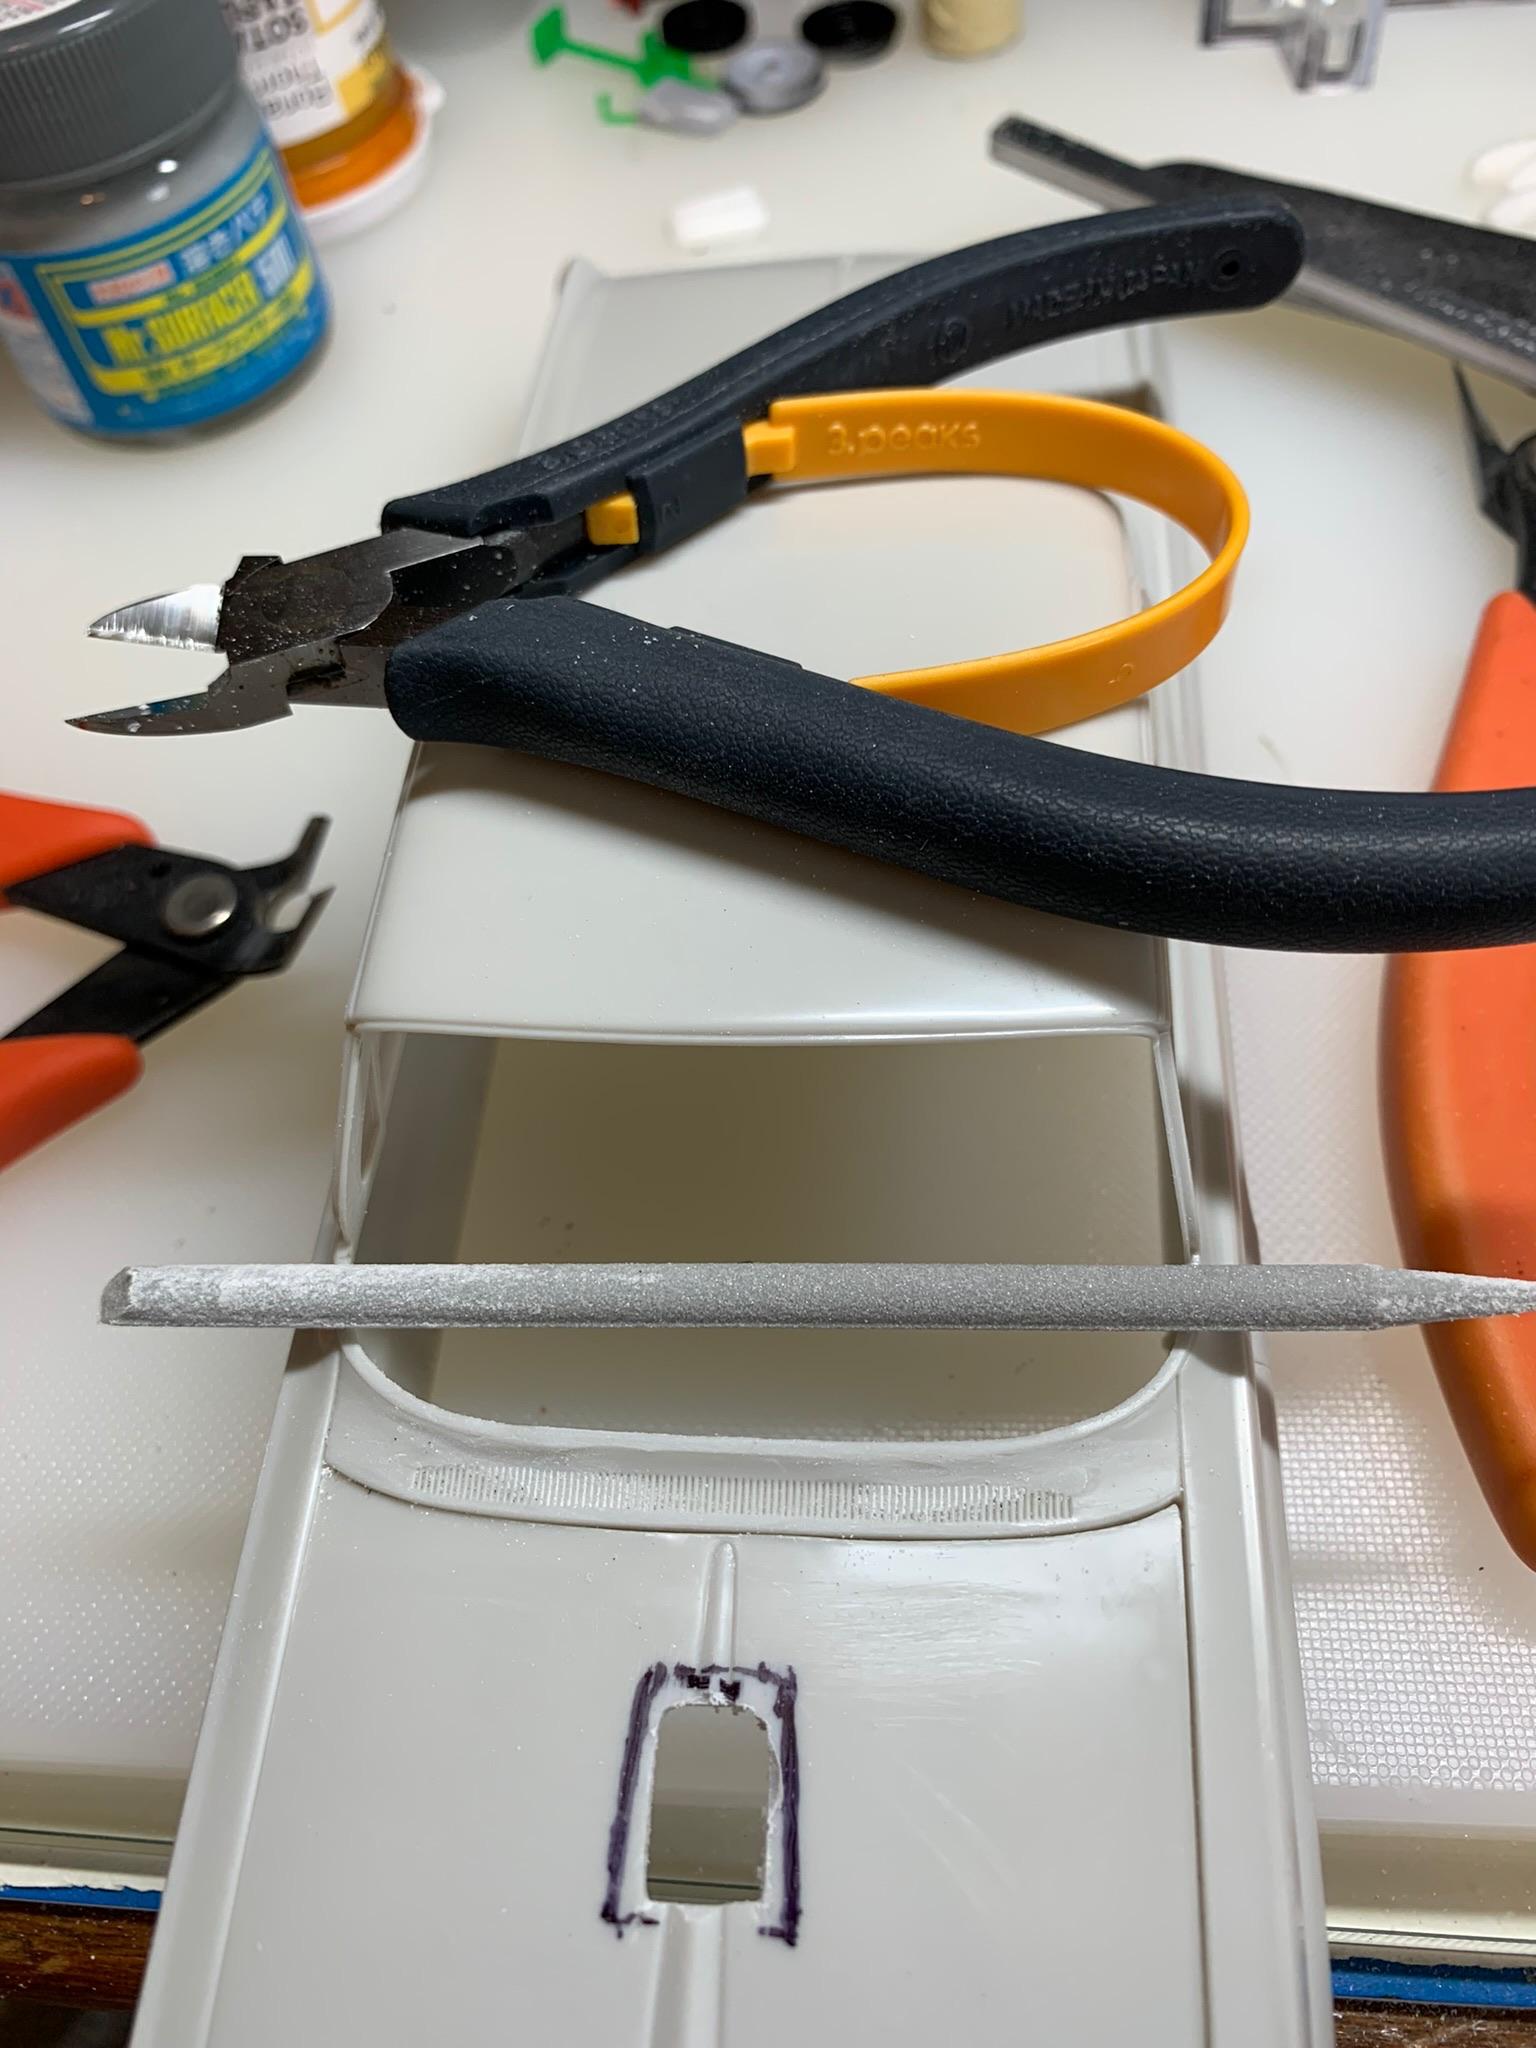
Cut hole for hood scoop, removed wiper blades (made hole for “stub”). Still have to scribe the windshield base.
-
Love it! How often do you see an upside down Hooker (err, headers, that is, on the door). Great job.
-
1962 Pontiac 421 SD F/SA circa 2024 edition
R. Thorne replied to R. Thorne's topic in WIP: Drag Racing Models
Thanks for the heads up. Strange. I will probably put side windows in anyway, as I do with most of my drag cars, so it won’t be a big deal, as you said. Painted the block and trans. Digging for headers.
-
1962 Pontiac 421 SD F/SA circa 2024 edition
R. Thorne replied to R. Thorne's topic in WIP: Drag Racing Models
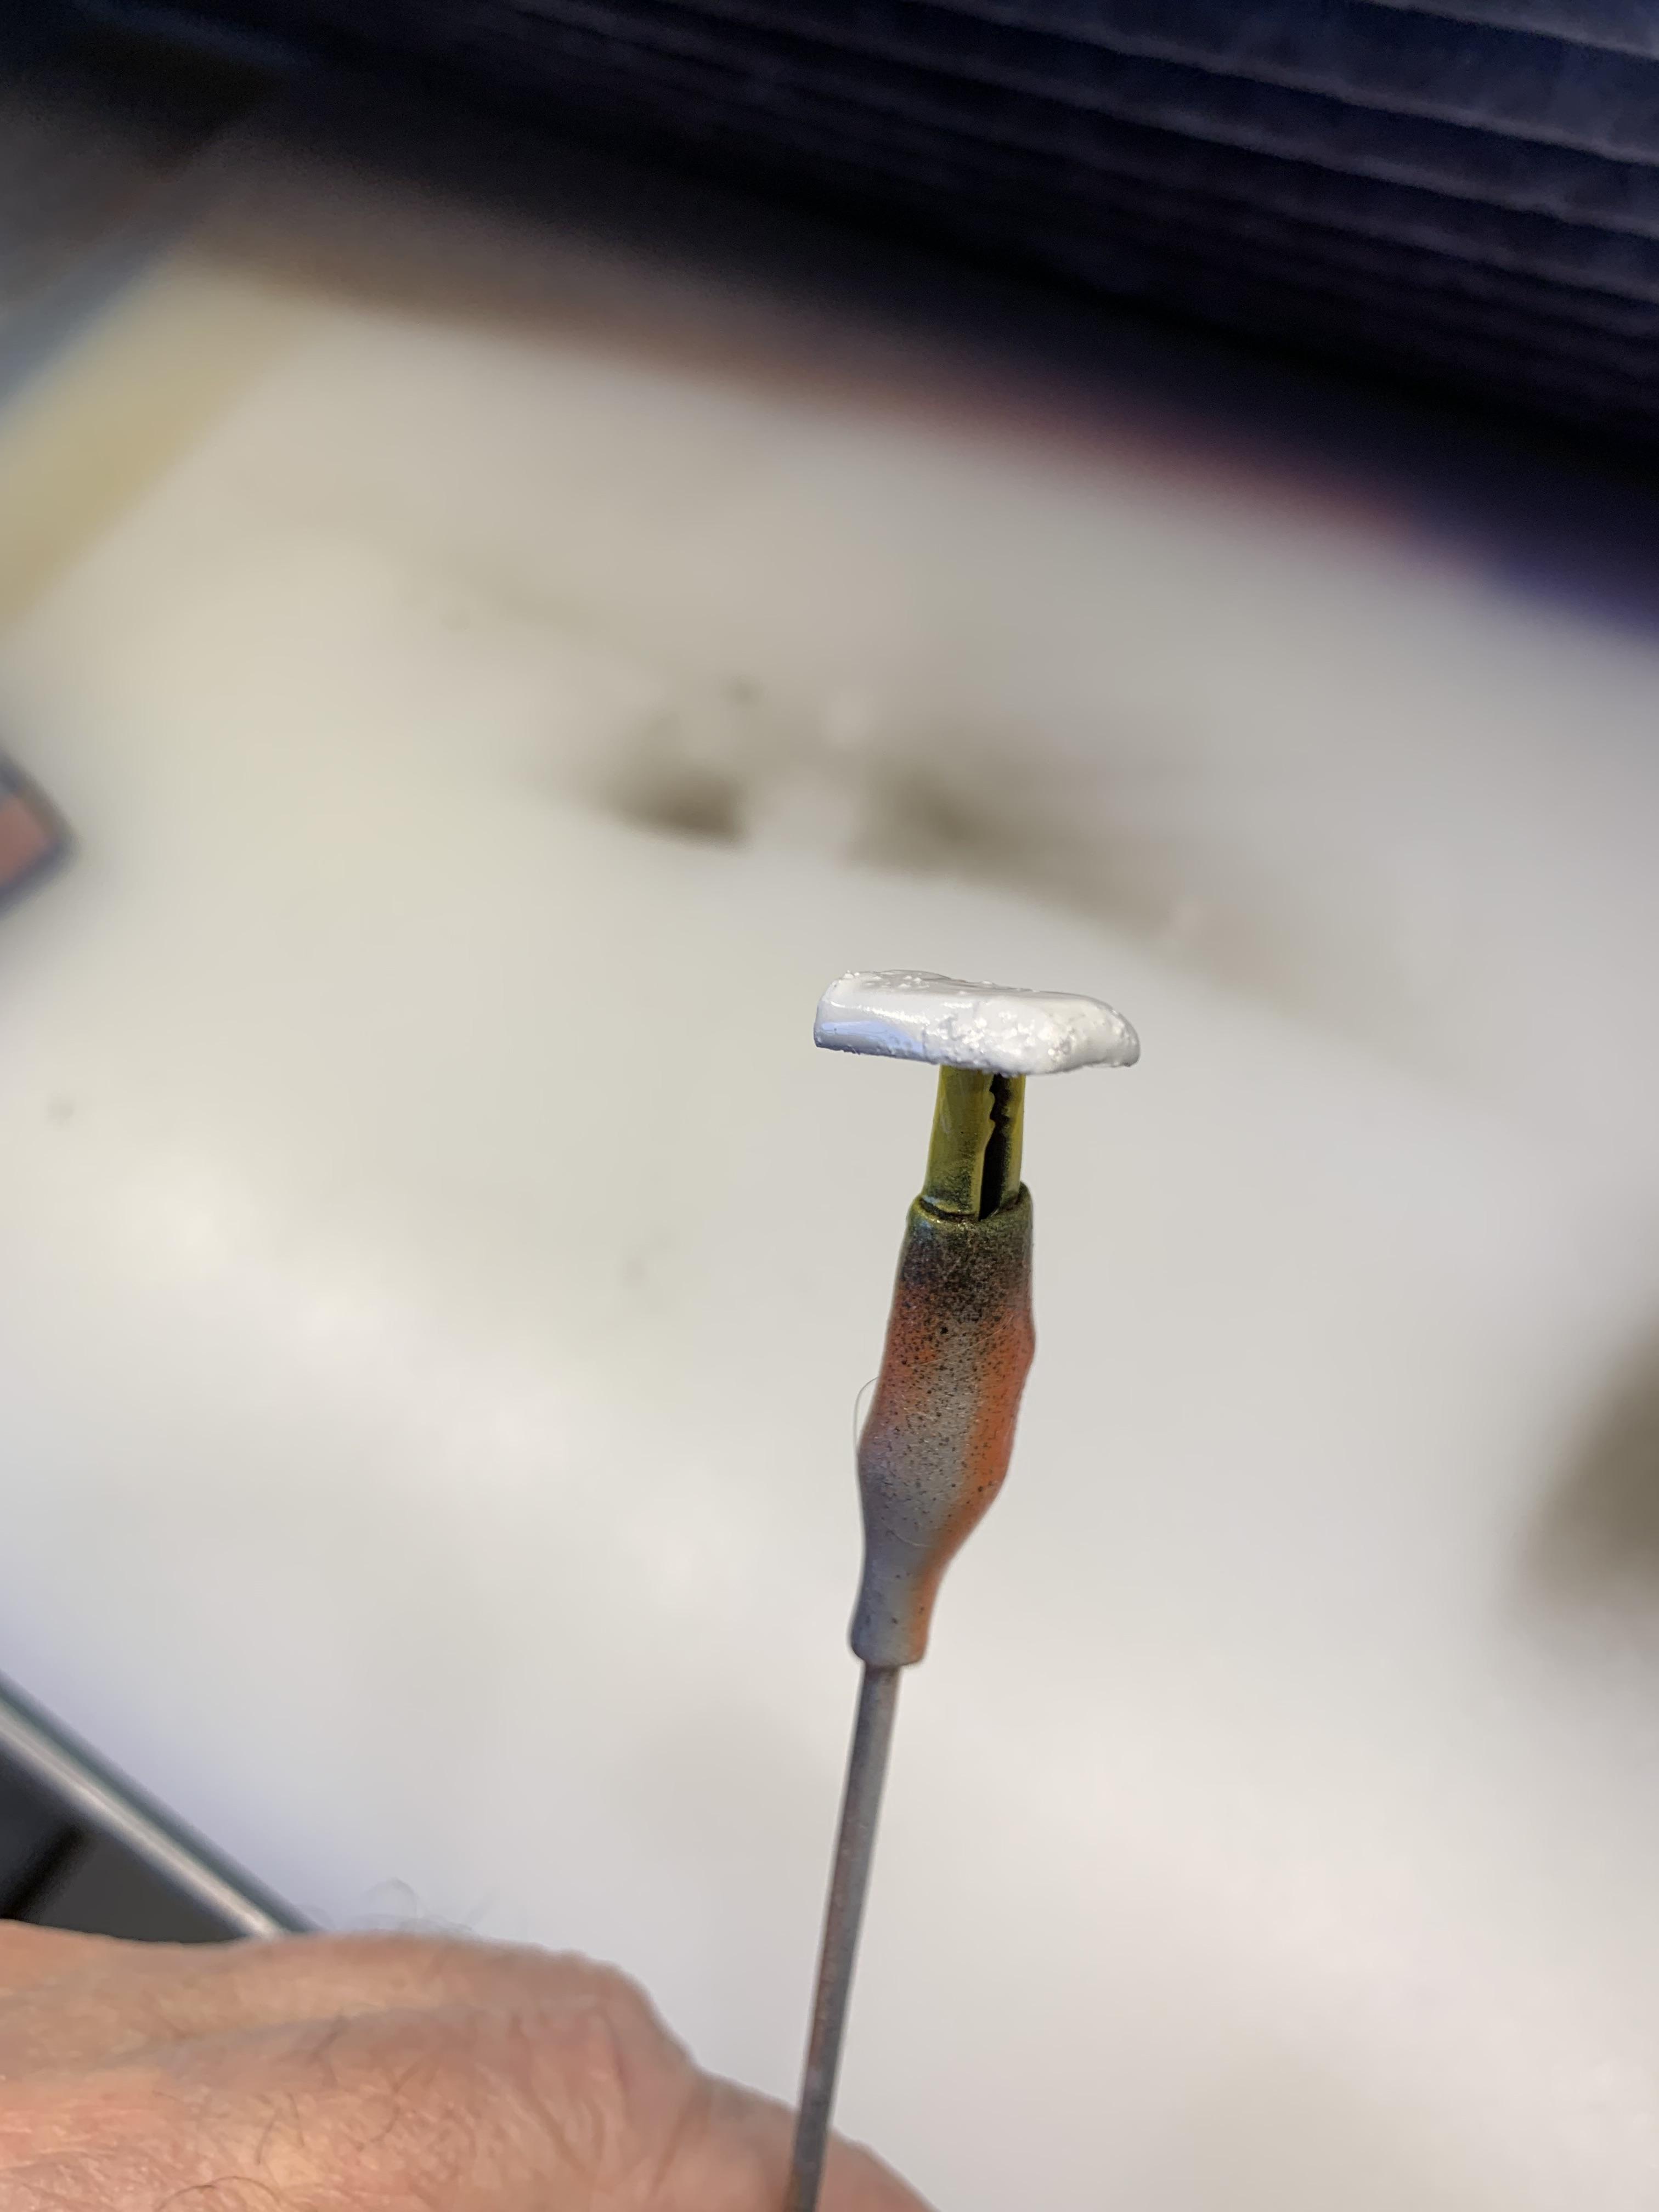
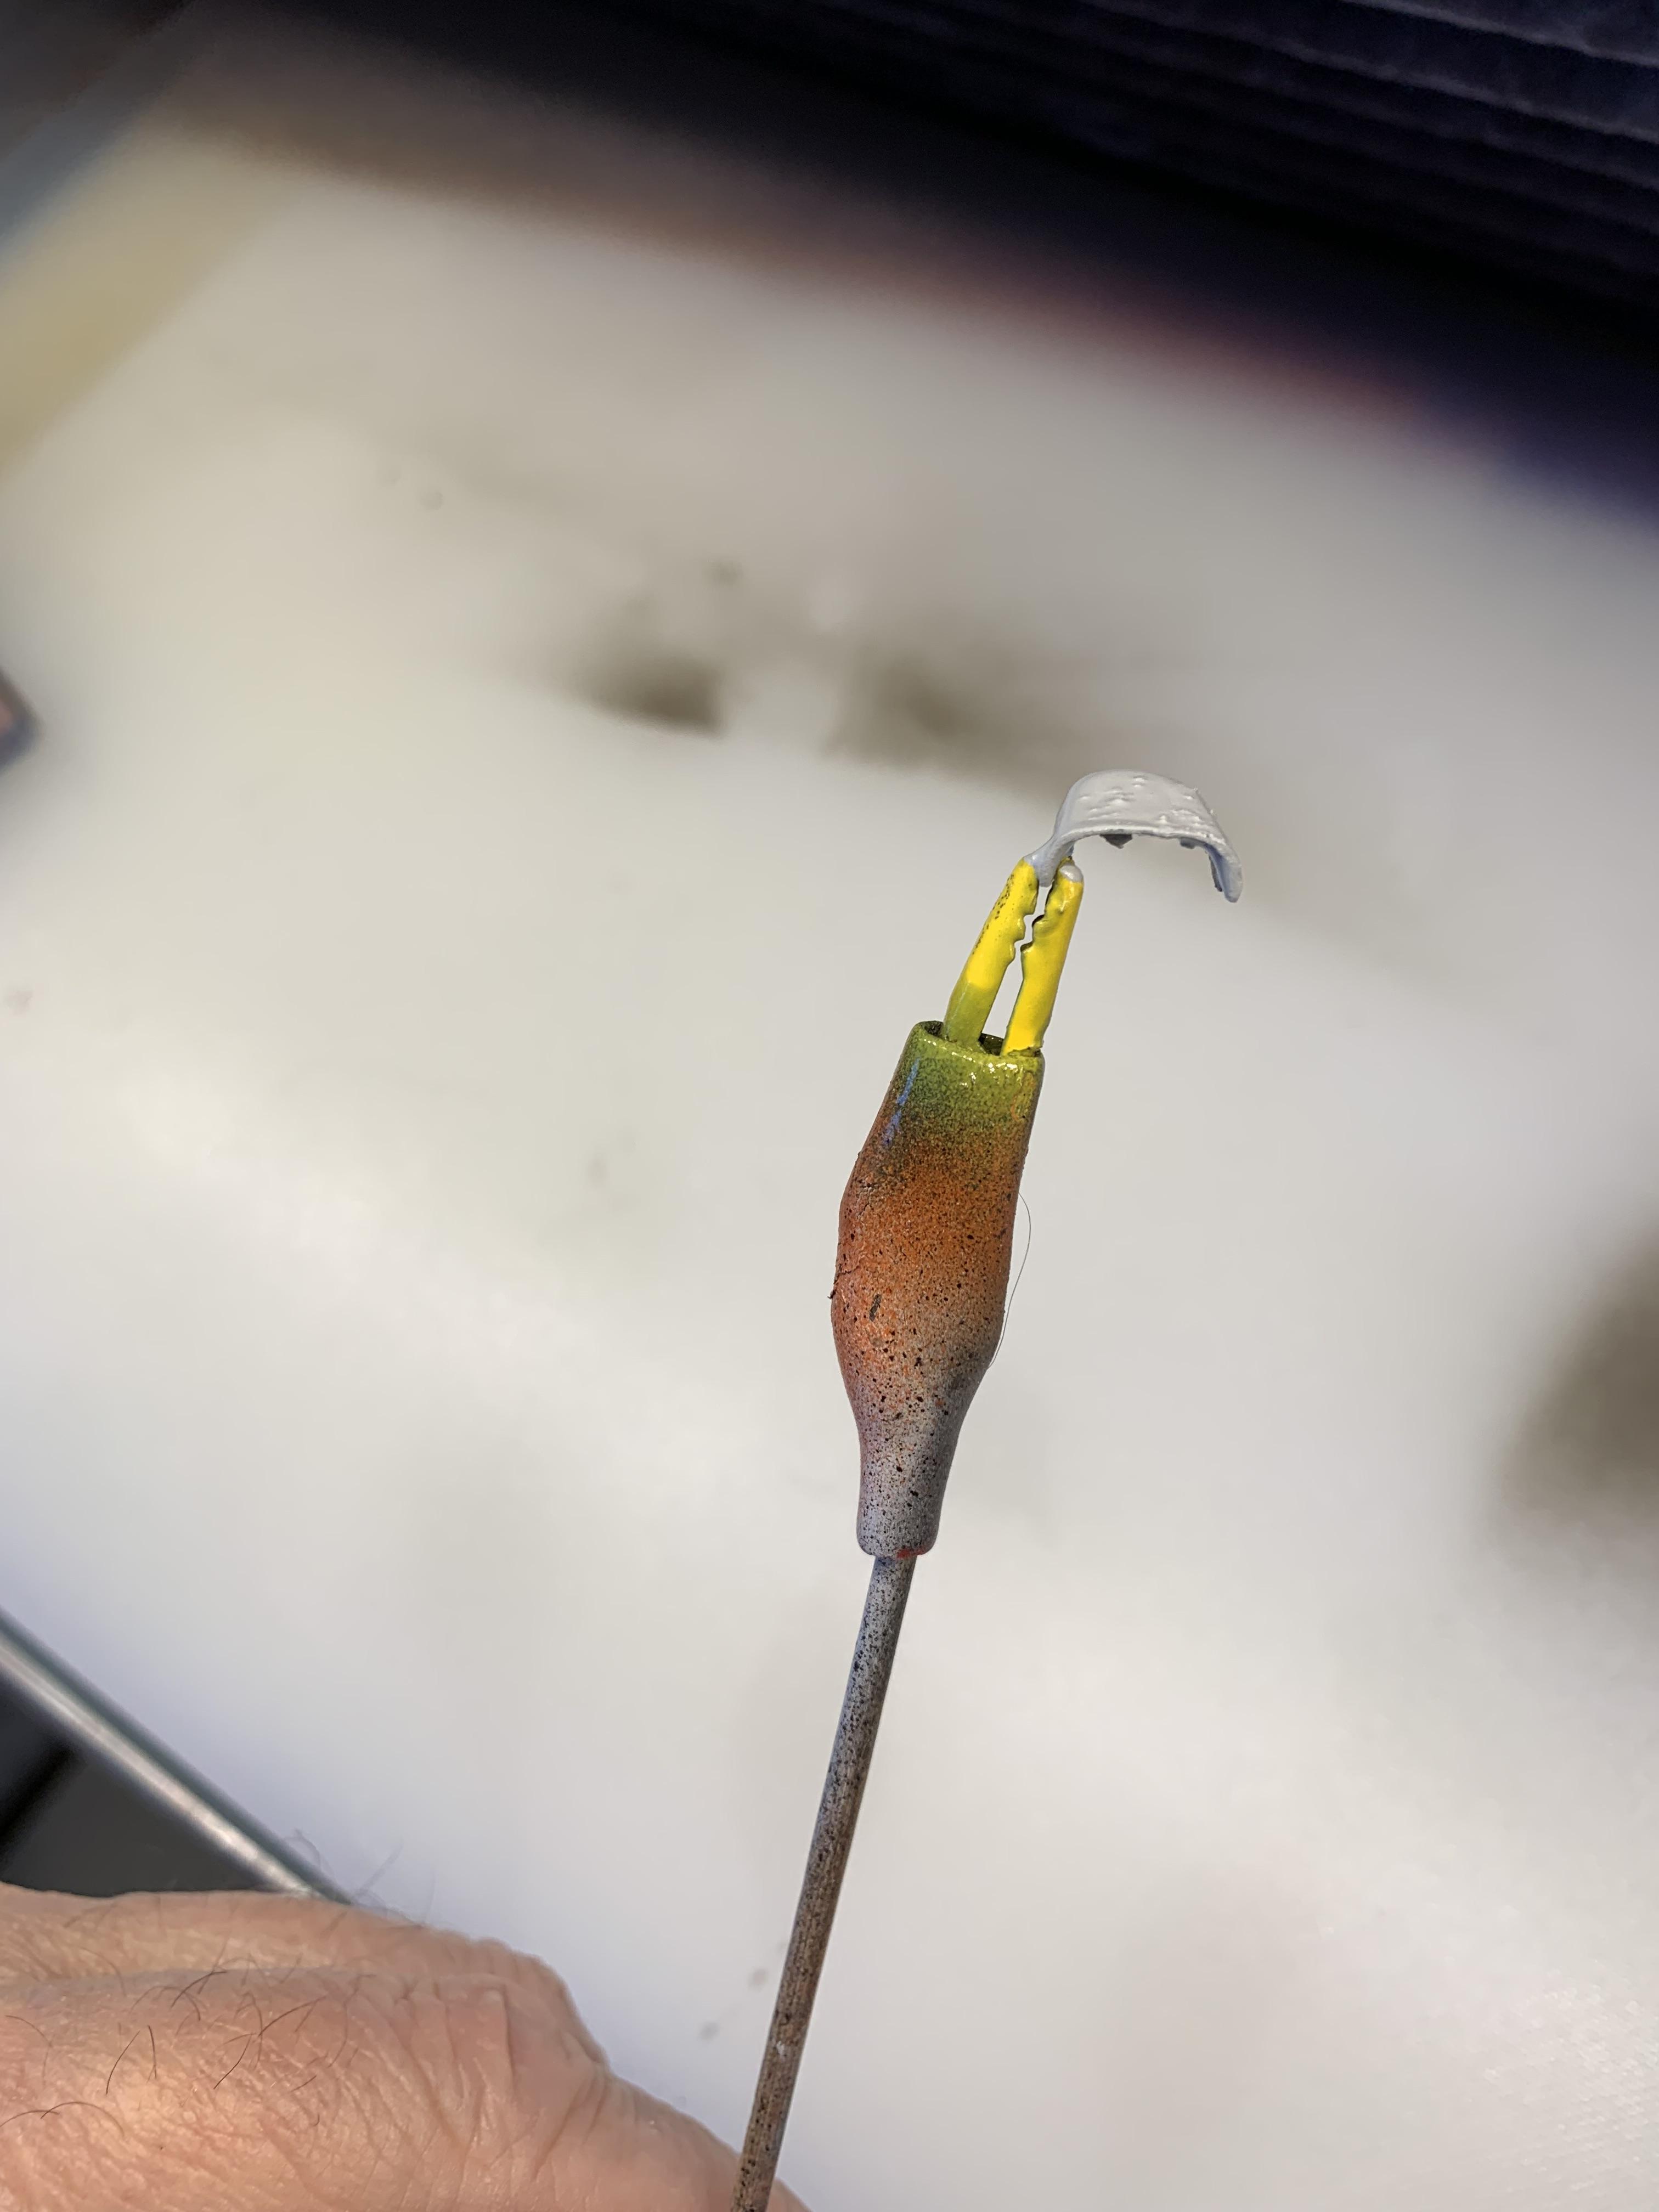
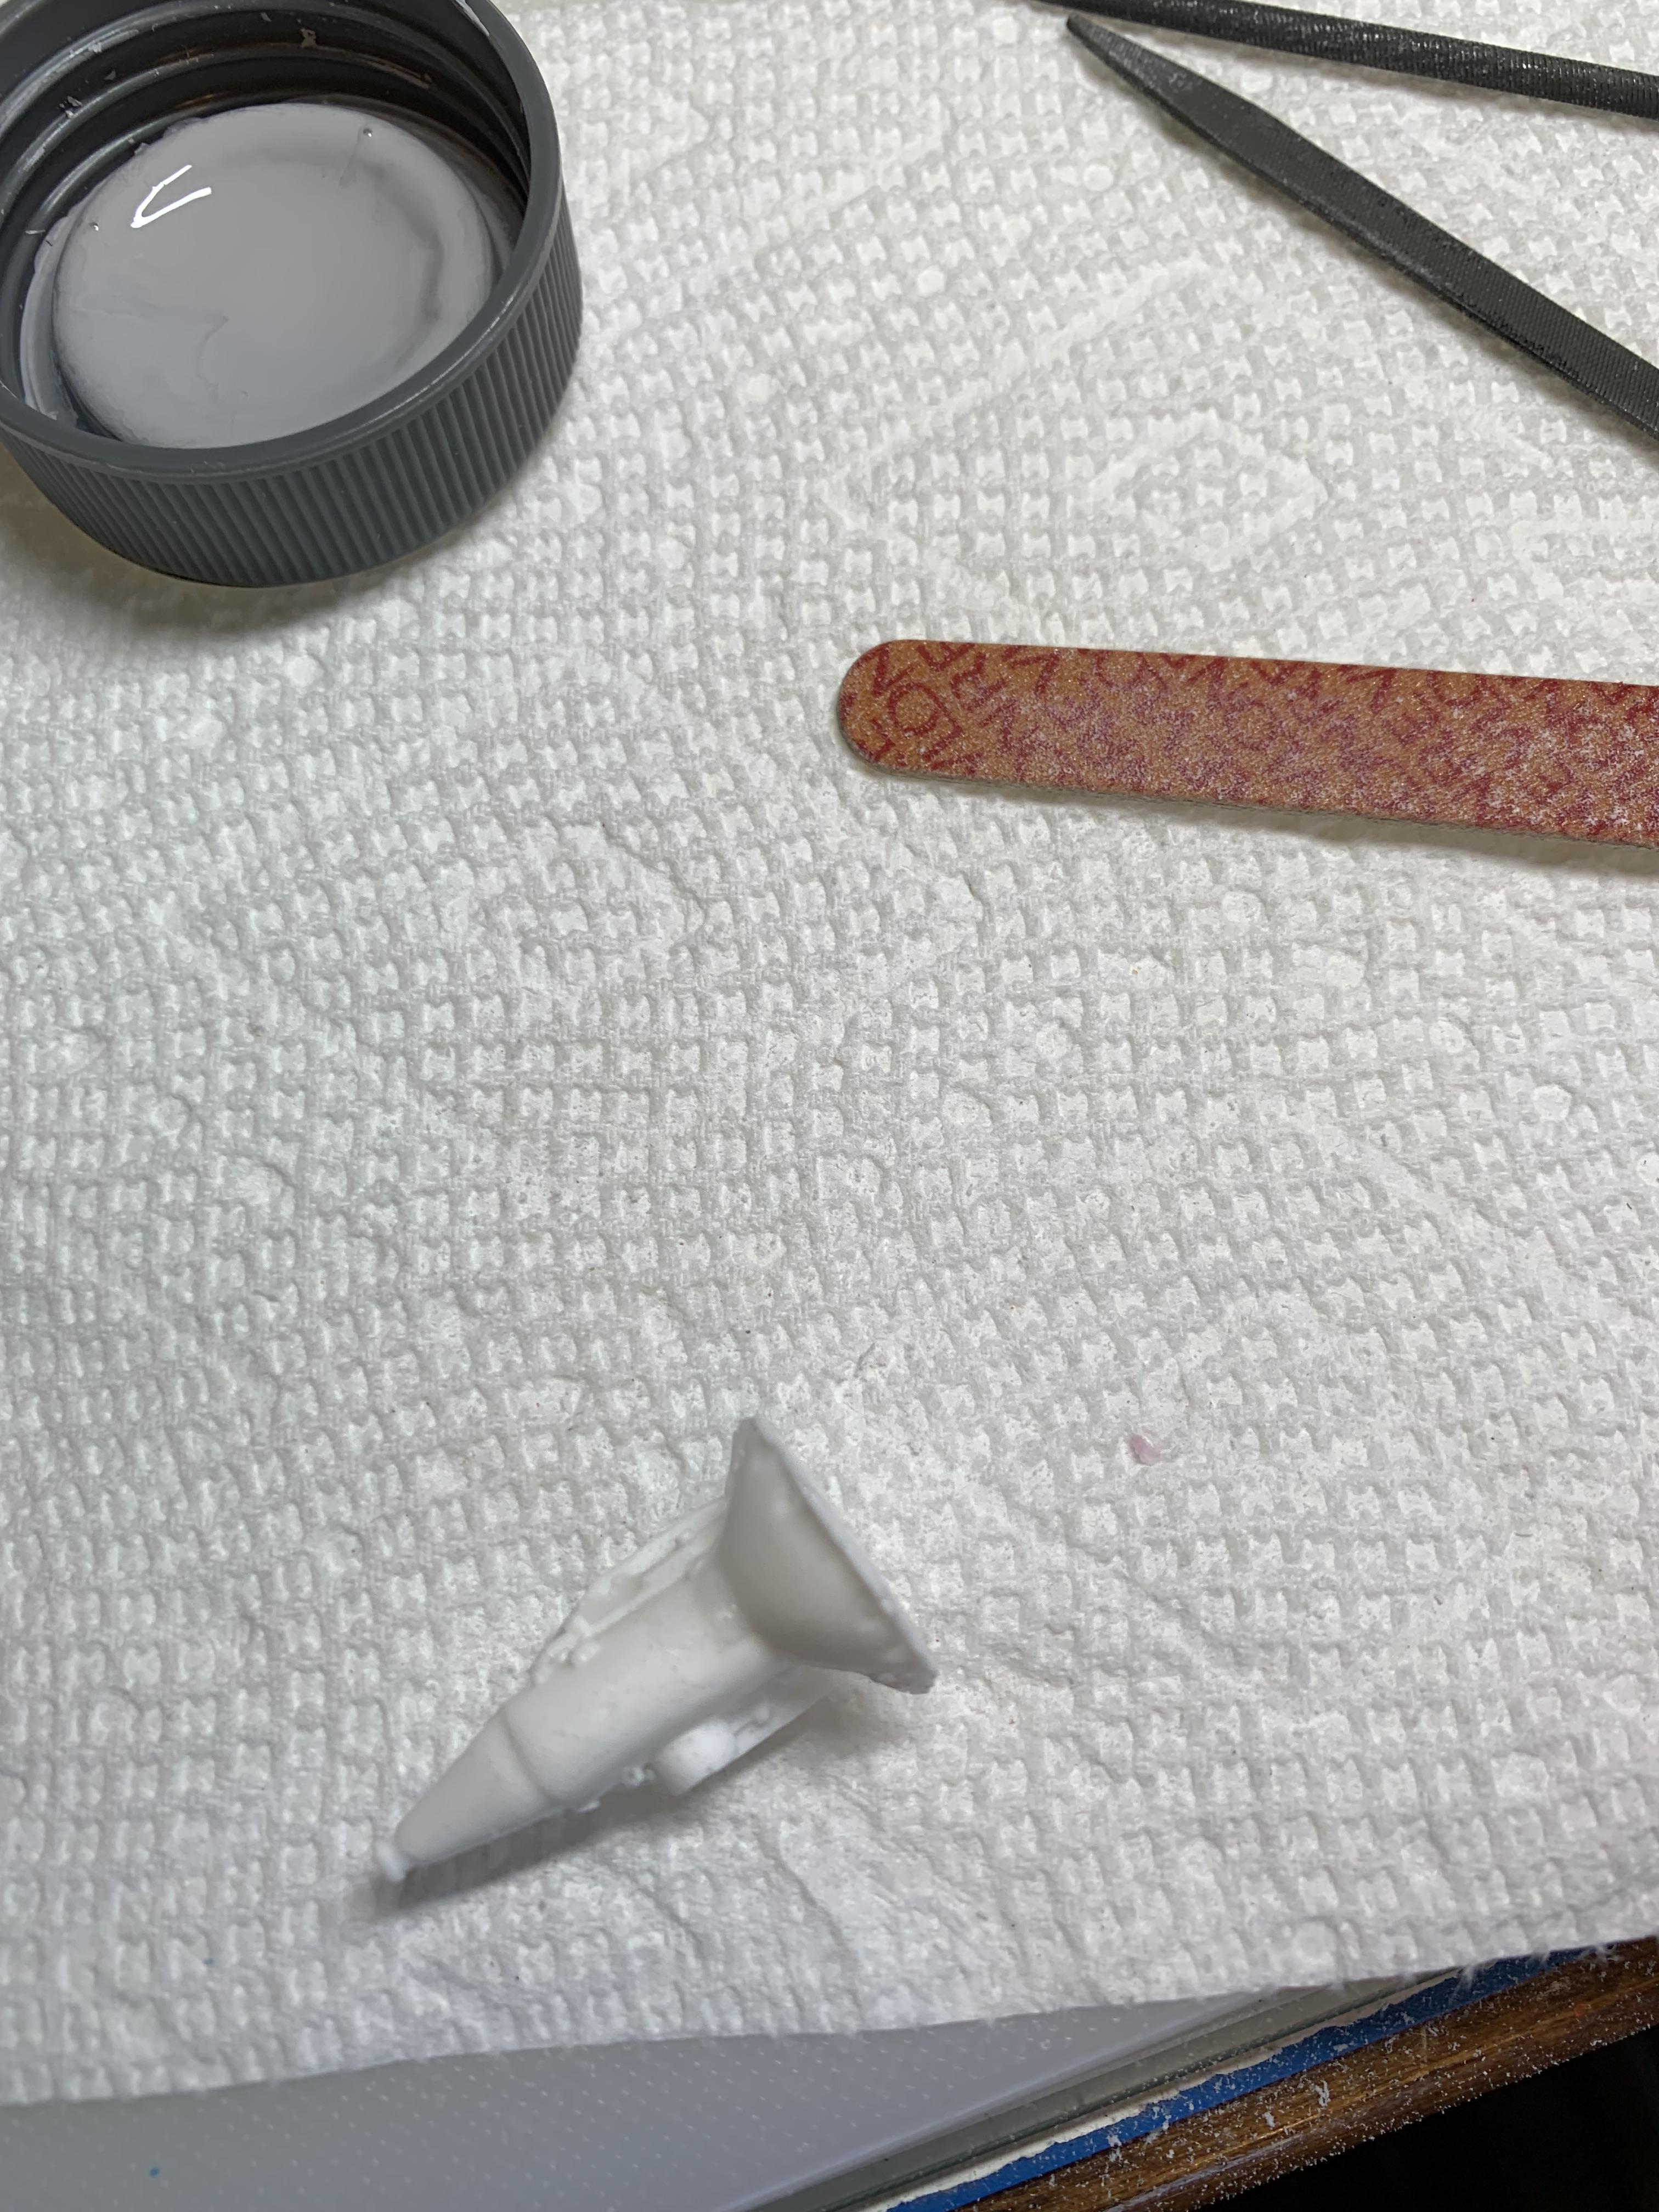
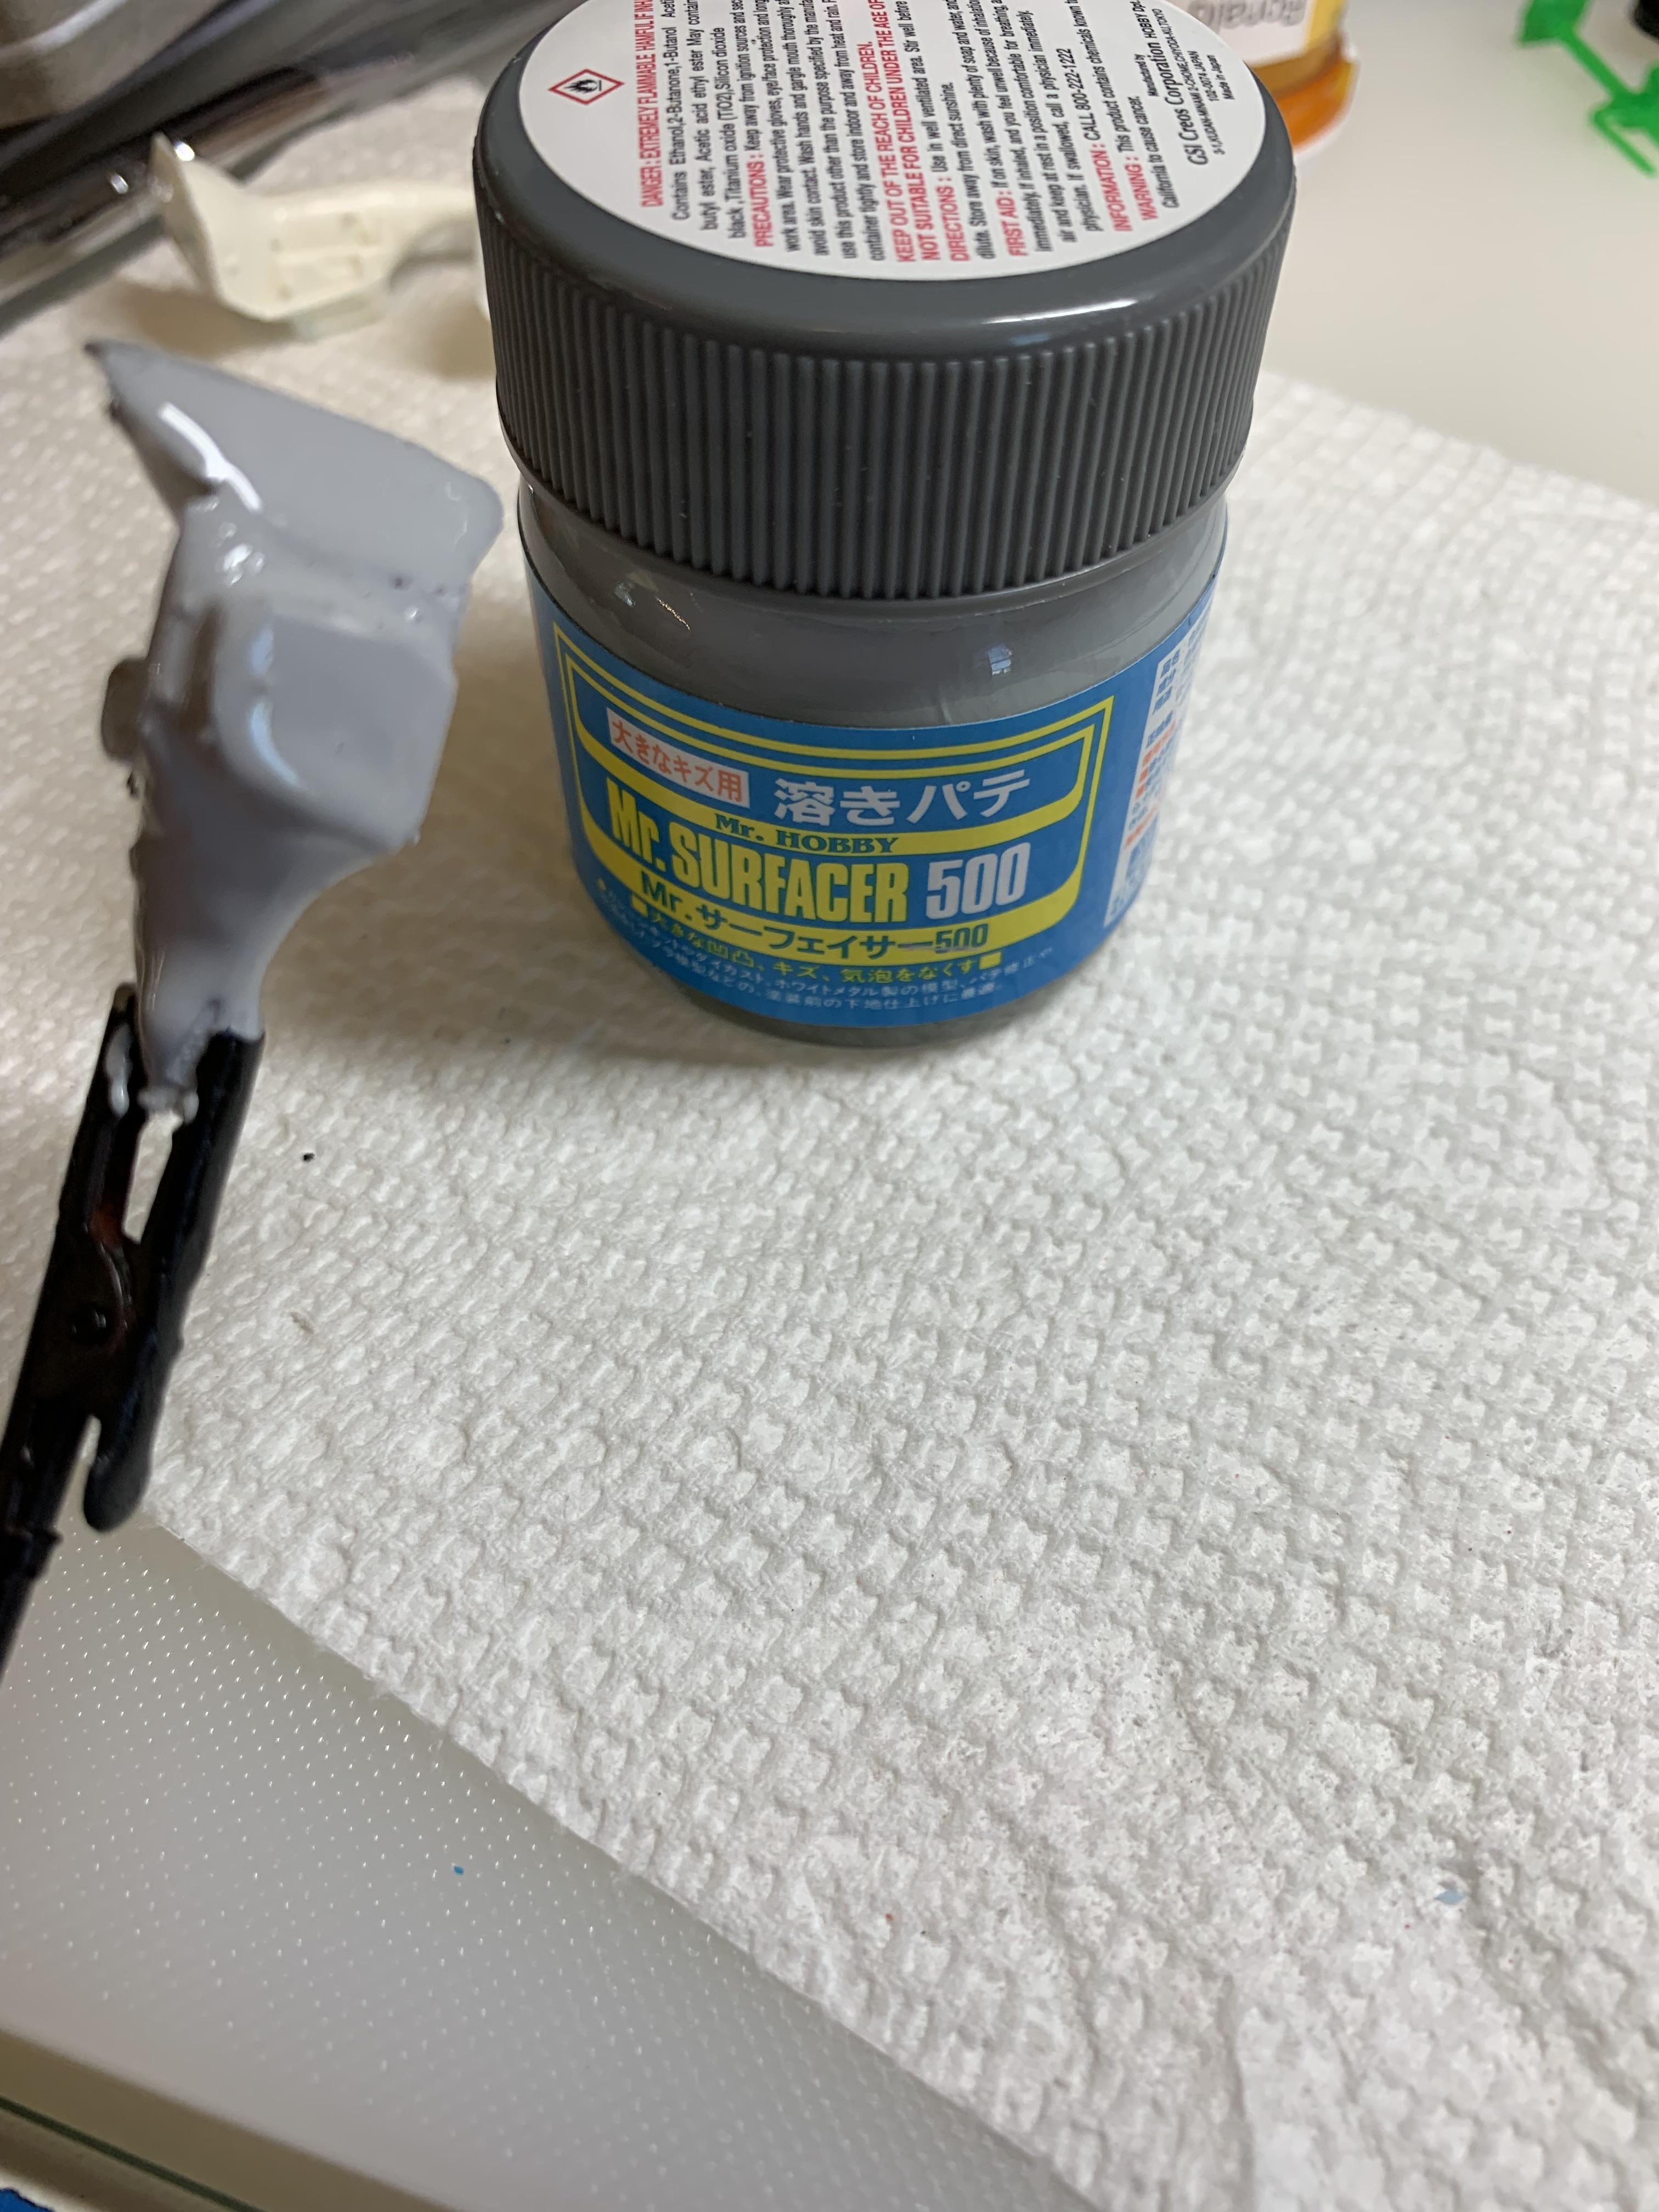
Tried to fix a hood scoop I had cast a while back. After spending way too much time adding thick super glue, then sanding and priming with Mr surfacer 500 , I just wasn’t happy with it or the th200 trans. I finally realized (duh!!), it was way easier to make more castings, which I did. Old habits die hard. I ended up casting a bunch of miscellaneous stuff, as I usually end up with lots left over in the mixing cup.
-
Keeping the "fuzzies" off the paint.
R. Thorne replied to Hi-Po's topic in Tips, Tricks, and Tutorials
I have tried to look at this idea through a glass half empty point of view, as some people do, and the only possible negative I can think of is “bounce back” when you are painting the lower part of the body with a spray can. I am definitely going to try your idea, though as my common sense says that this is a good idea. Sound thinking, Terry. -
Holloman & McKinney 1957 Chevy C/MP circa 1964
R. Thorne replied to R. Thorne's topic in Drag Racing
Thanks, Jeff. A byproduct of my always experimenting nature. -
Holloman & McKinney 1957 Chevy C/MP circa 1964
R. Thorne replied to R. Thorne's topic in Drag Racing
Your lettering looks superb. I have some decal paper that I considered using, but my ego got in the way, as I thought I could do a good job applying to the car, instead. Wrong. The main problem was having to go over the letters as there was a lot of skipping or inconsistent flow of the pen I was using. Next time, decal paper perhaps. Thanks. -
Holloman & McKinney 57 Chevy C/MP circa 1964
R. Thorne replied to R. Thorne's topic in WIP: Drag Racing Models
Again, thanks, Trevor. I appreciate it. -
Holloman & McKinney 1957 Chevy C/MP circa 1964
R. Thorne replied to R. Thorne's topic in Drag Racing
Thanks a lot, guys. I messed up some parts of this build, but learned a little, and enjoyed myself. -
1962 Pontiac 421 SD F/SA circa 2024 edition
R. Thorne replied to R. Thorne's topic in WIP: Drag Racing Models
Thanks, Daniel. Believe it or not, I have two more drag cars I am currently working on and will post here in a couple of days. -
1962 Pontiac 421 SD F/SA circa 2024 edition
R. Thorne replied to R. Thorne's topic in WIP: Drag Racing Models
Thanks, Tony. They are nice kits, for sure. I don’t think I will have to do much of anything to the body to prepare it for paint (except cast and install the scoop). -
1962 Pontiac 421 SD F/SA circa 2024 edition
R. Thorne replied to R. Thorne's topic in WIP: Drag Racing Models
This is a current type build, so headers would have been used for better performance, not to mention the sound of a present day stocker. -
1962 Pontiac 421 SD F/SA circa 2024 edition
R. Thorne replied to R. Thorne's topic in WIP: Drag Racing Models
I modified a Compresins turbo 200-4r while working on the Winchester Corvette Stocker, then made a mold and cast a few for future builds like this one. It’s not perfect, but it will have to do, for now. -
Holloman & McKinney 57 Chevy C/MP circa 1964
R. Thorne replied to R. Thorne's topic in WIP: Drag Racing Models
Thanks, Tony. I am calling this one done.