R. Thorne
-
Posts
1,276 -
Joined
-
Last visited
Content Type
Profiles
Forums
Events
Gallery
Everything posted by R. Thorne
-
Geez! Another Stocker! 70 Formula Firebird B/SA
R. Thorne replied to R. Thorne's topic in WIP: Drag Racing Models
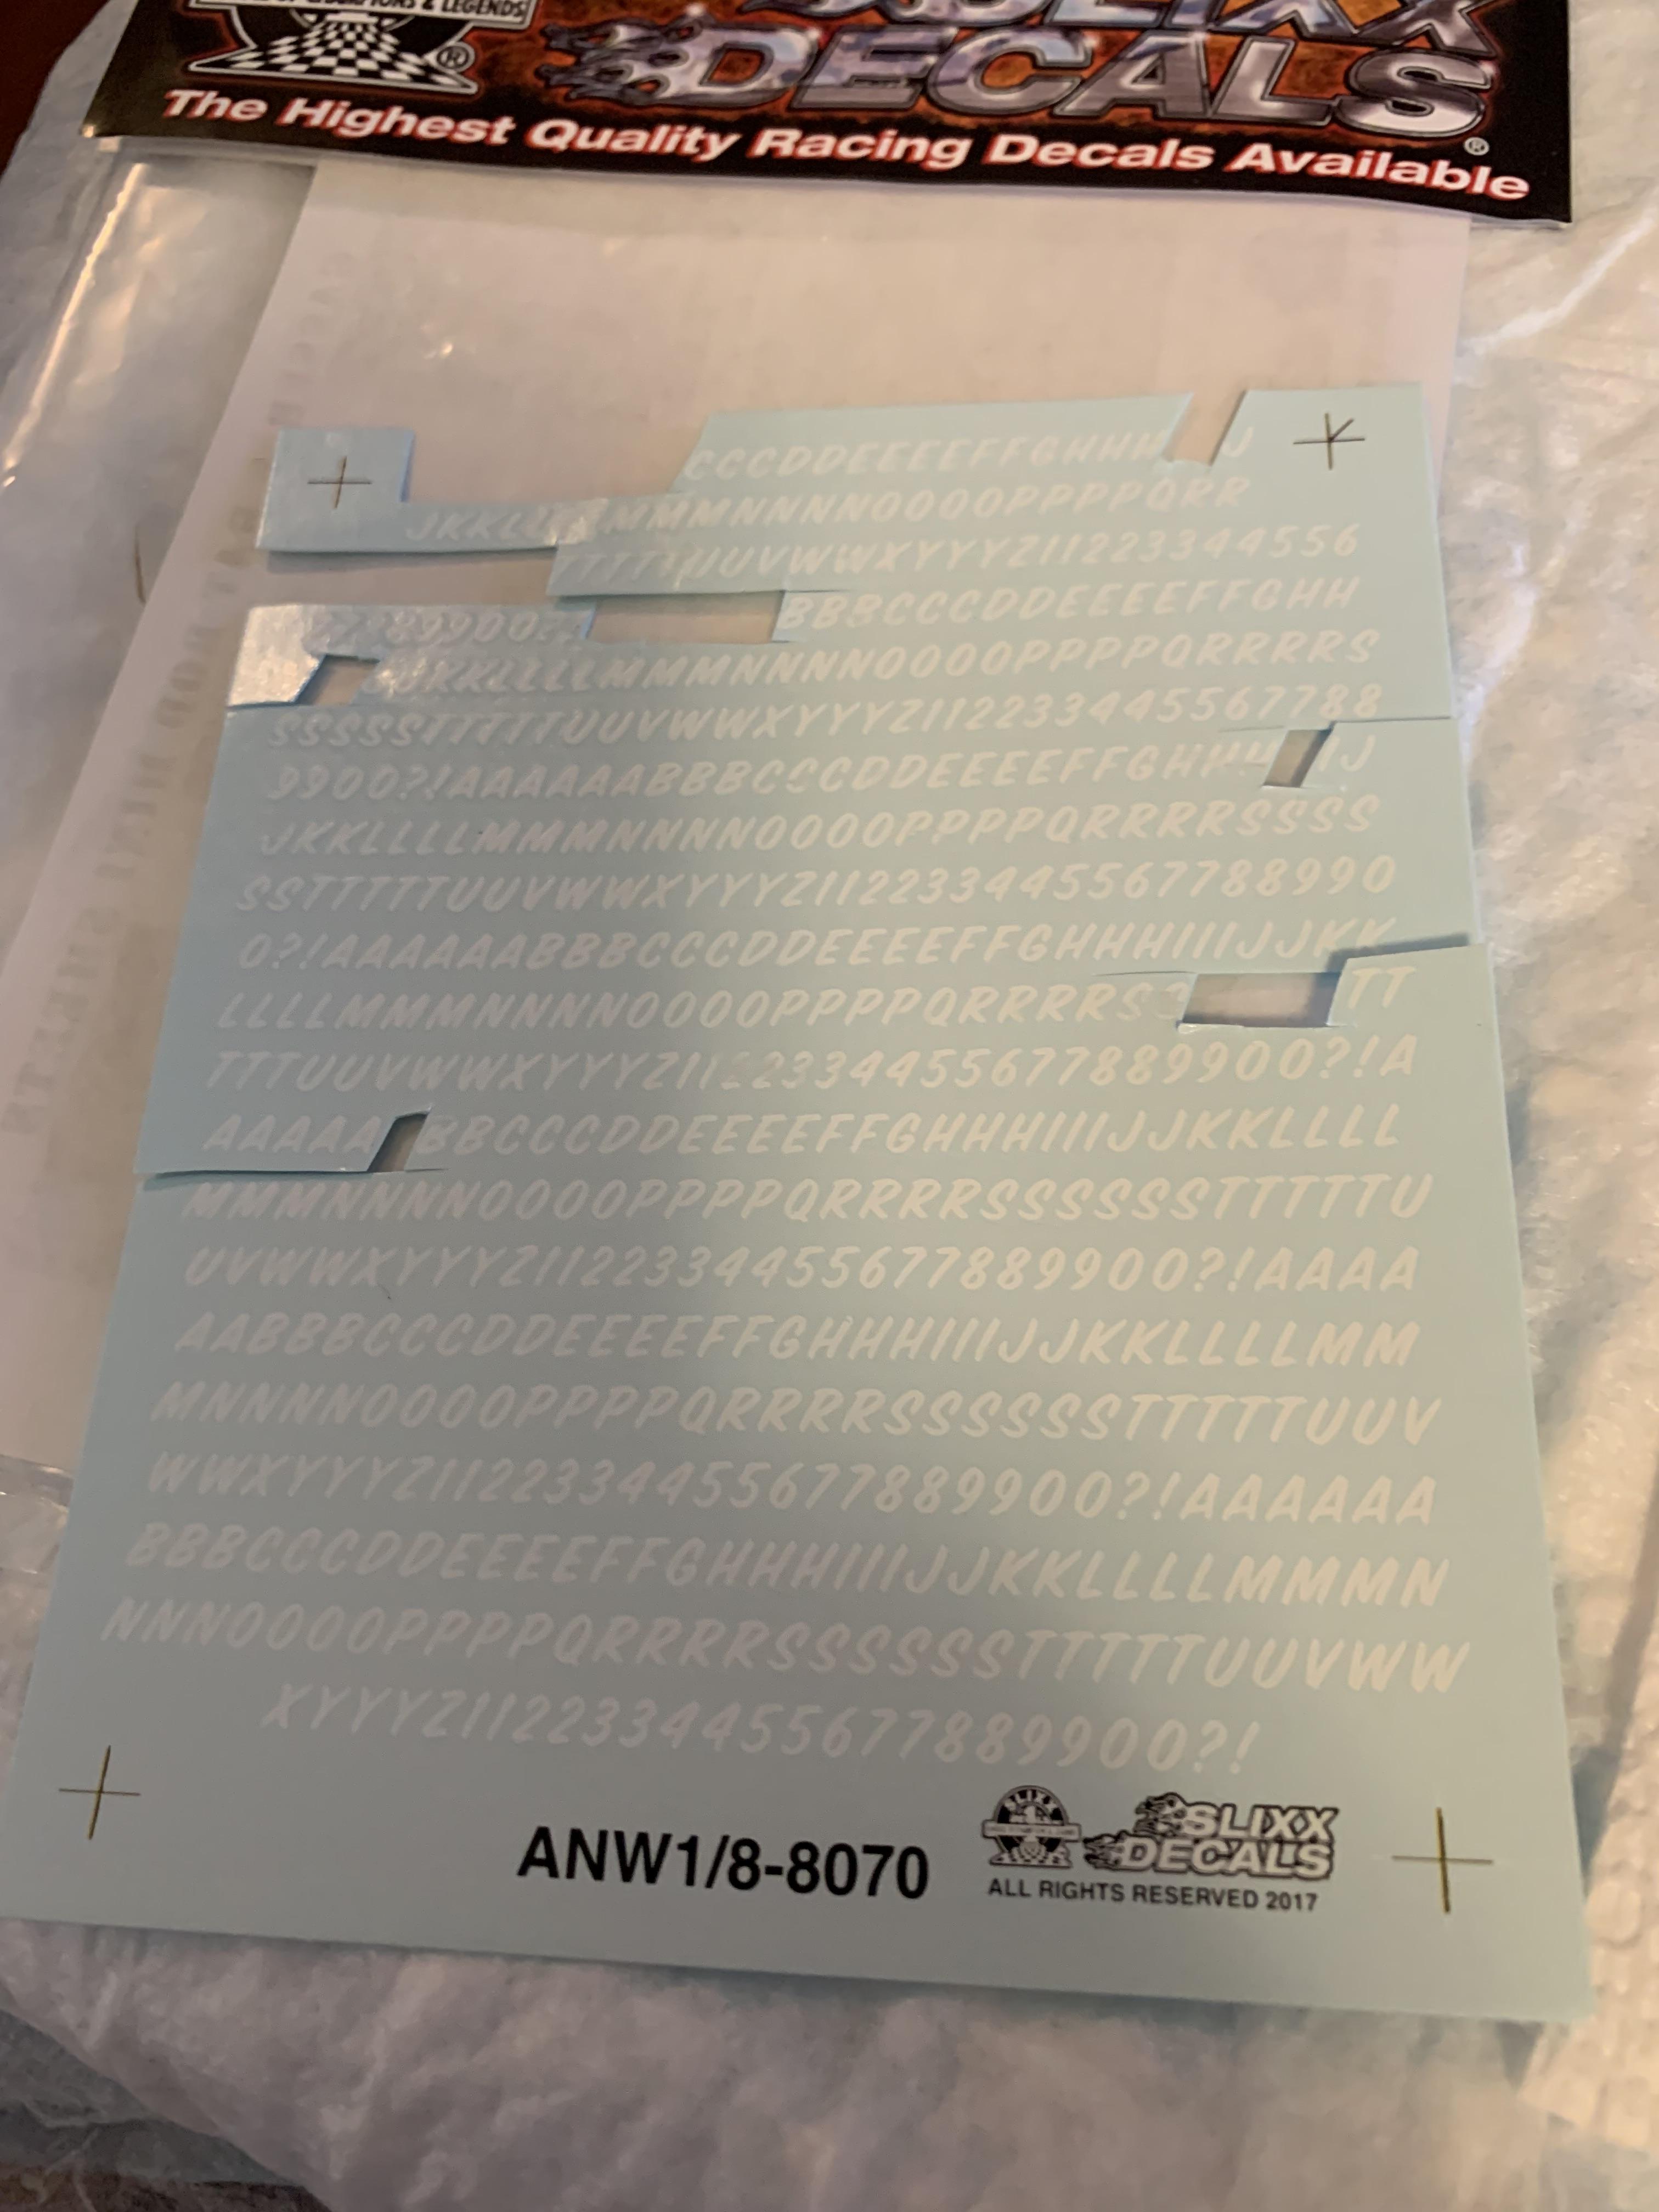
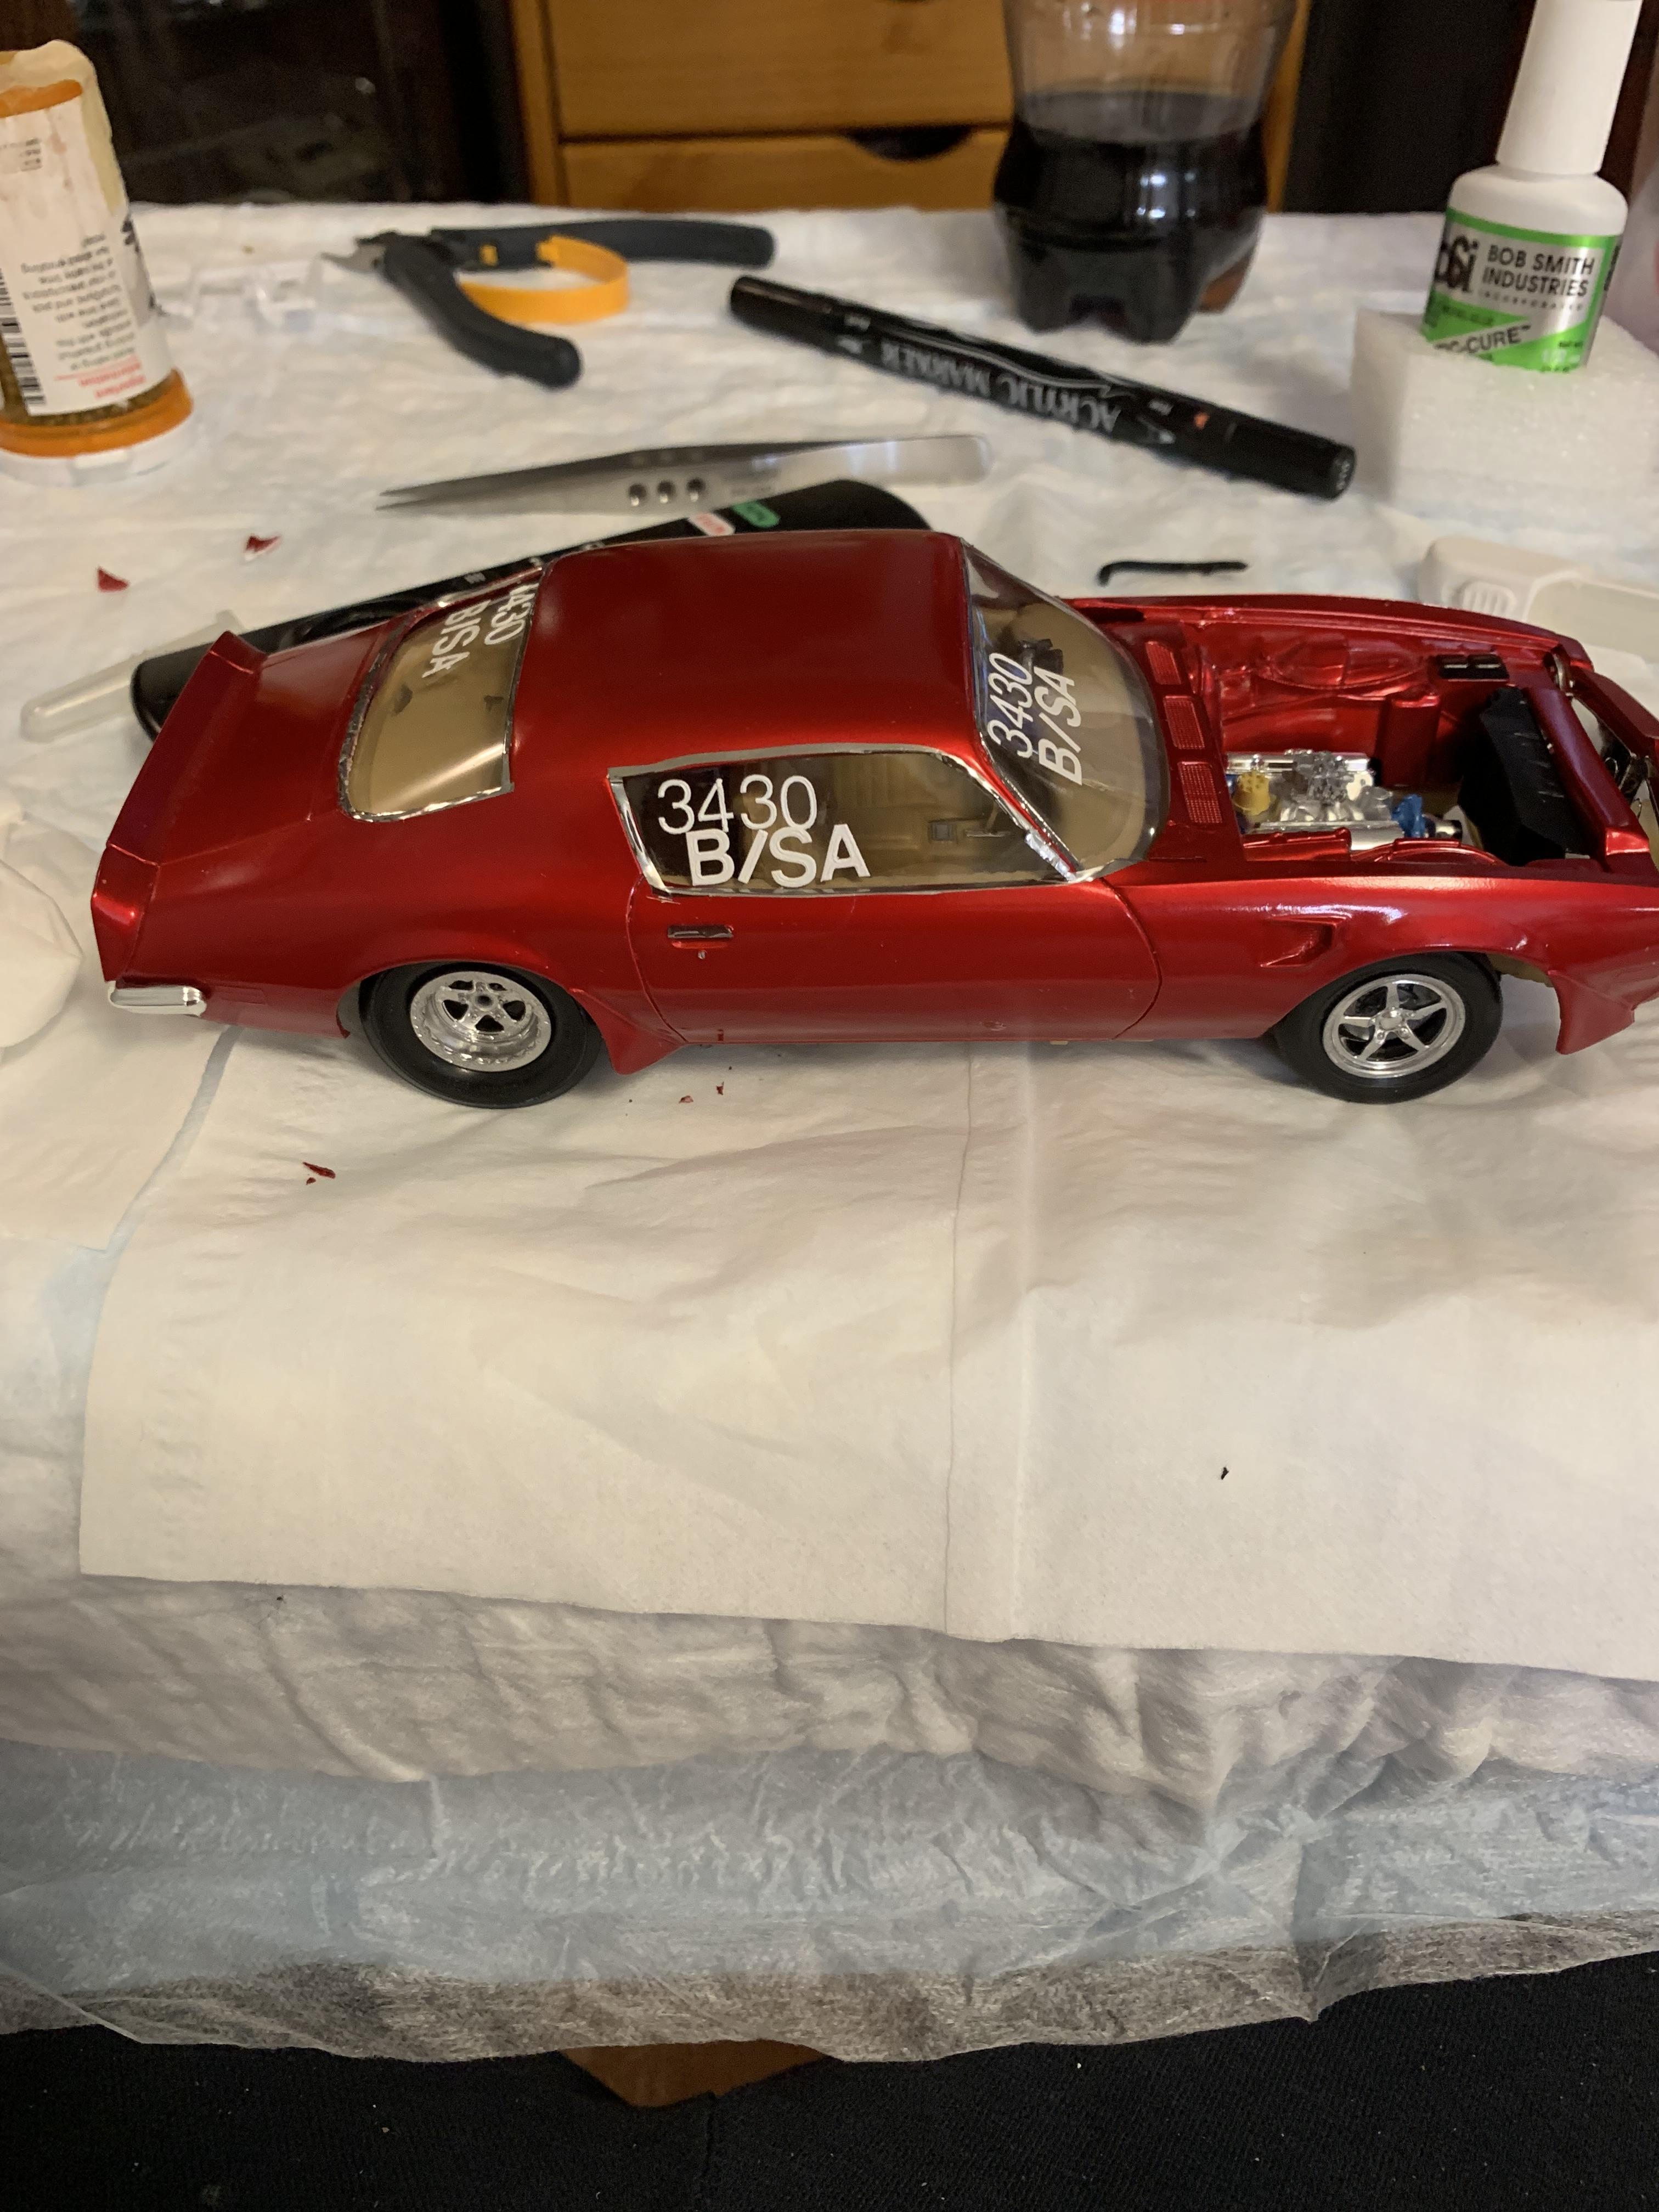
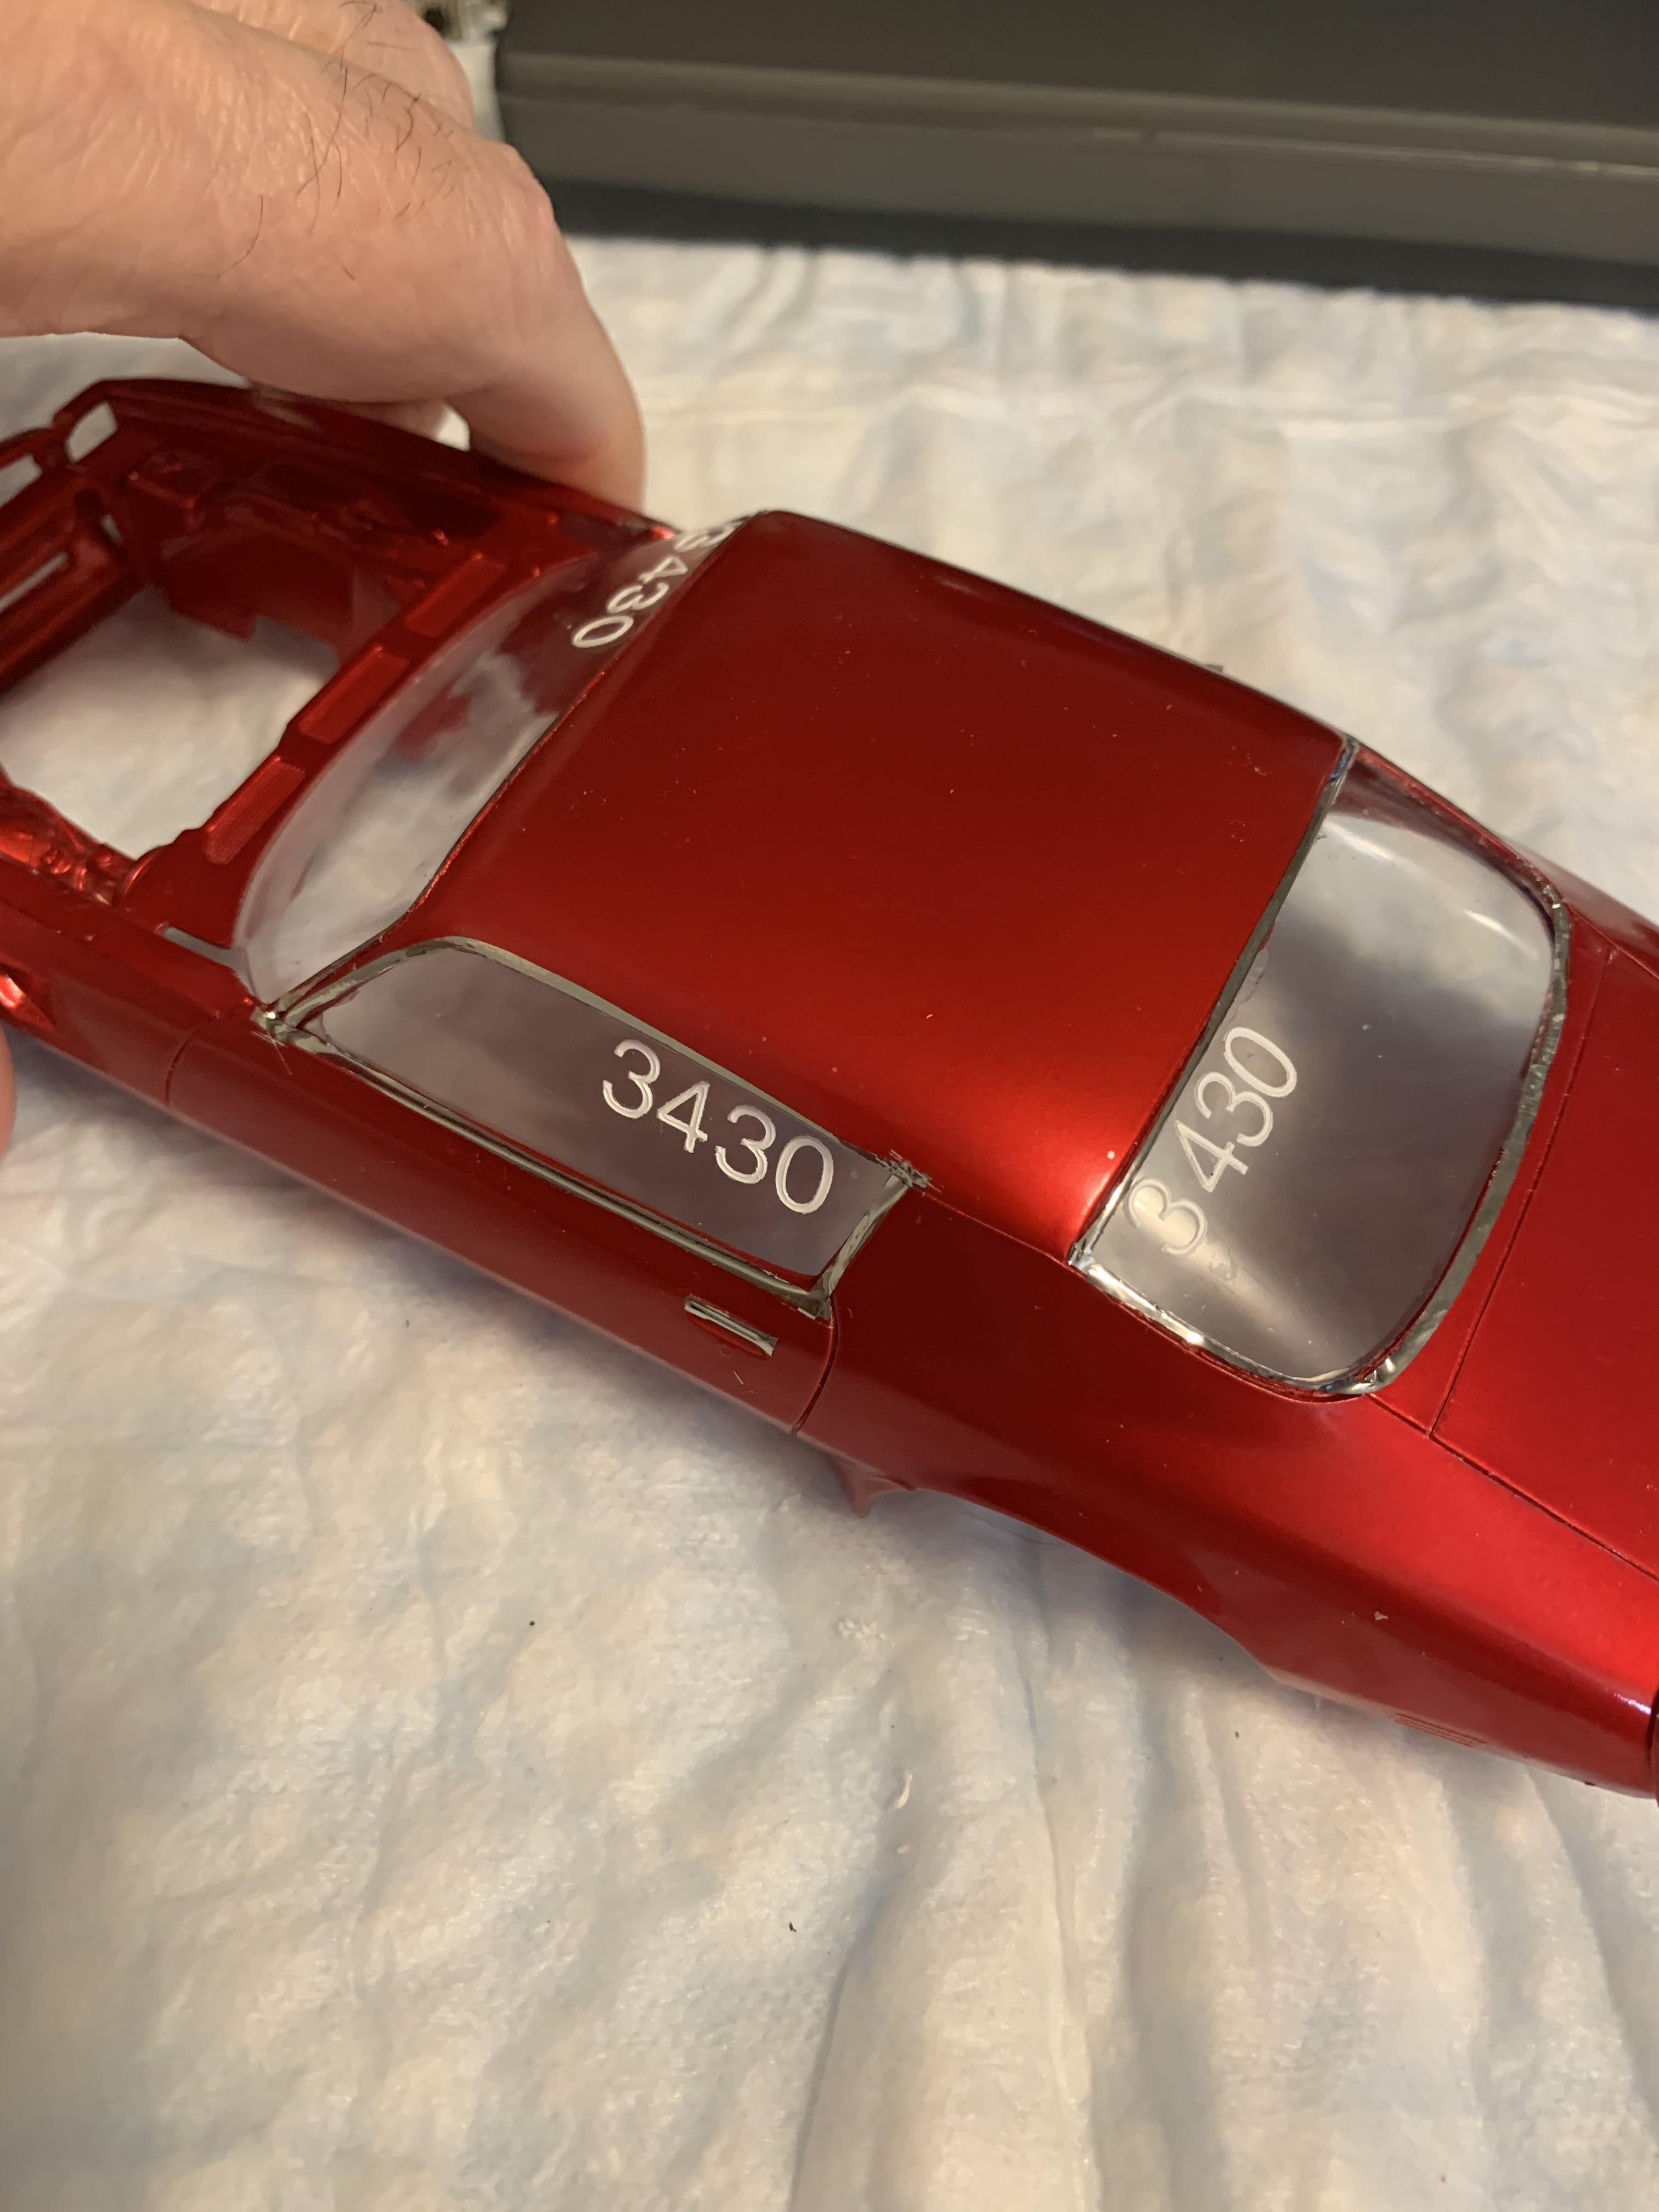
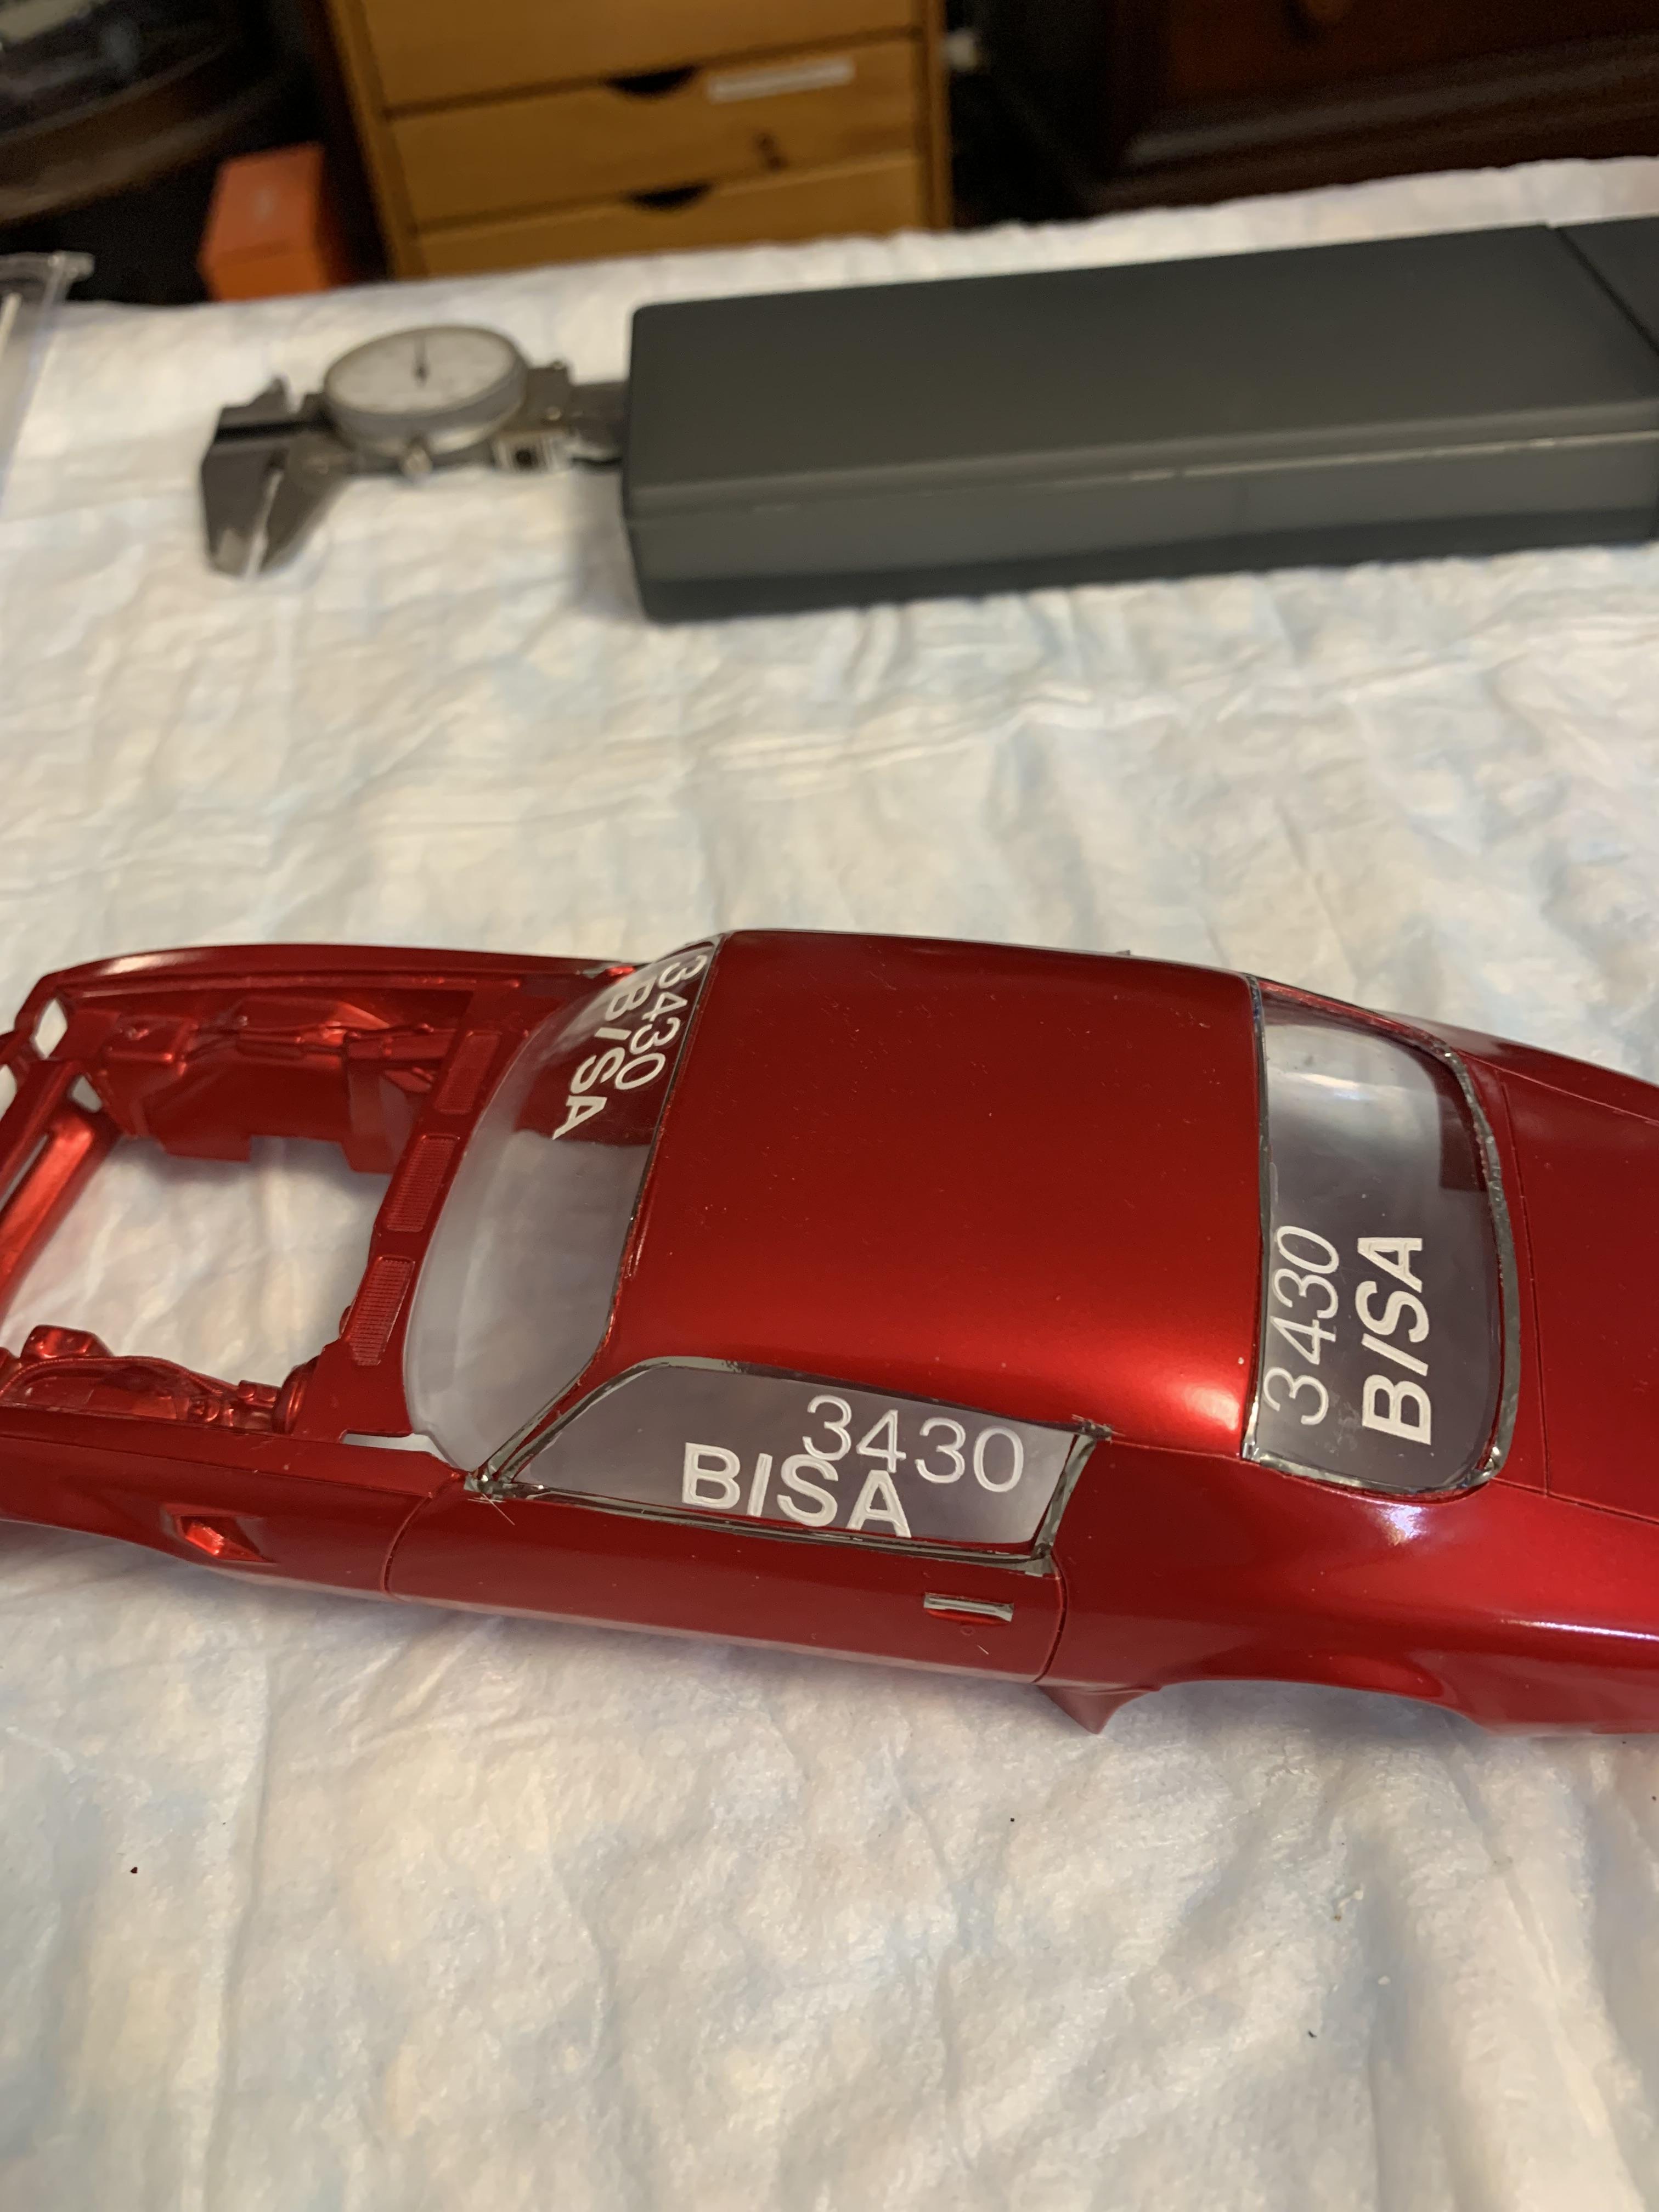
I compromised and took off the class designations and used the Slixx 1/8” waterslide decals. More tedious work, but looks better. Anybody know where I can find 1/8”, 5/32”, or 3/16” stick on letters/numbers?
-
Geez! Another Stocker! 70 Formula Firebird B/SA
R. Thorne replied to R. Thorne's topic in WIP: Drag Racing Models
The lettering is just too big and I think I will take it off and use smaller waterslide decals. It sure went on fast, though. I have searched for 1/8” stick on vinyl lettering/numbers to no avail. -
Geez! Another Stocker! 70 Formula Firebird B/SA
R. Thorne replied to R. Thorne's topic in WIP: Drag Racing Models
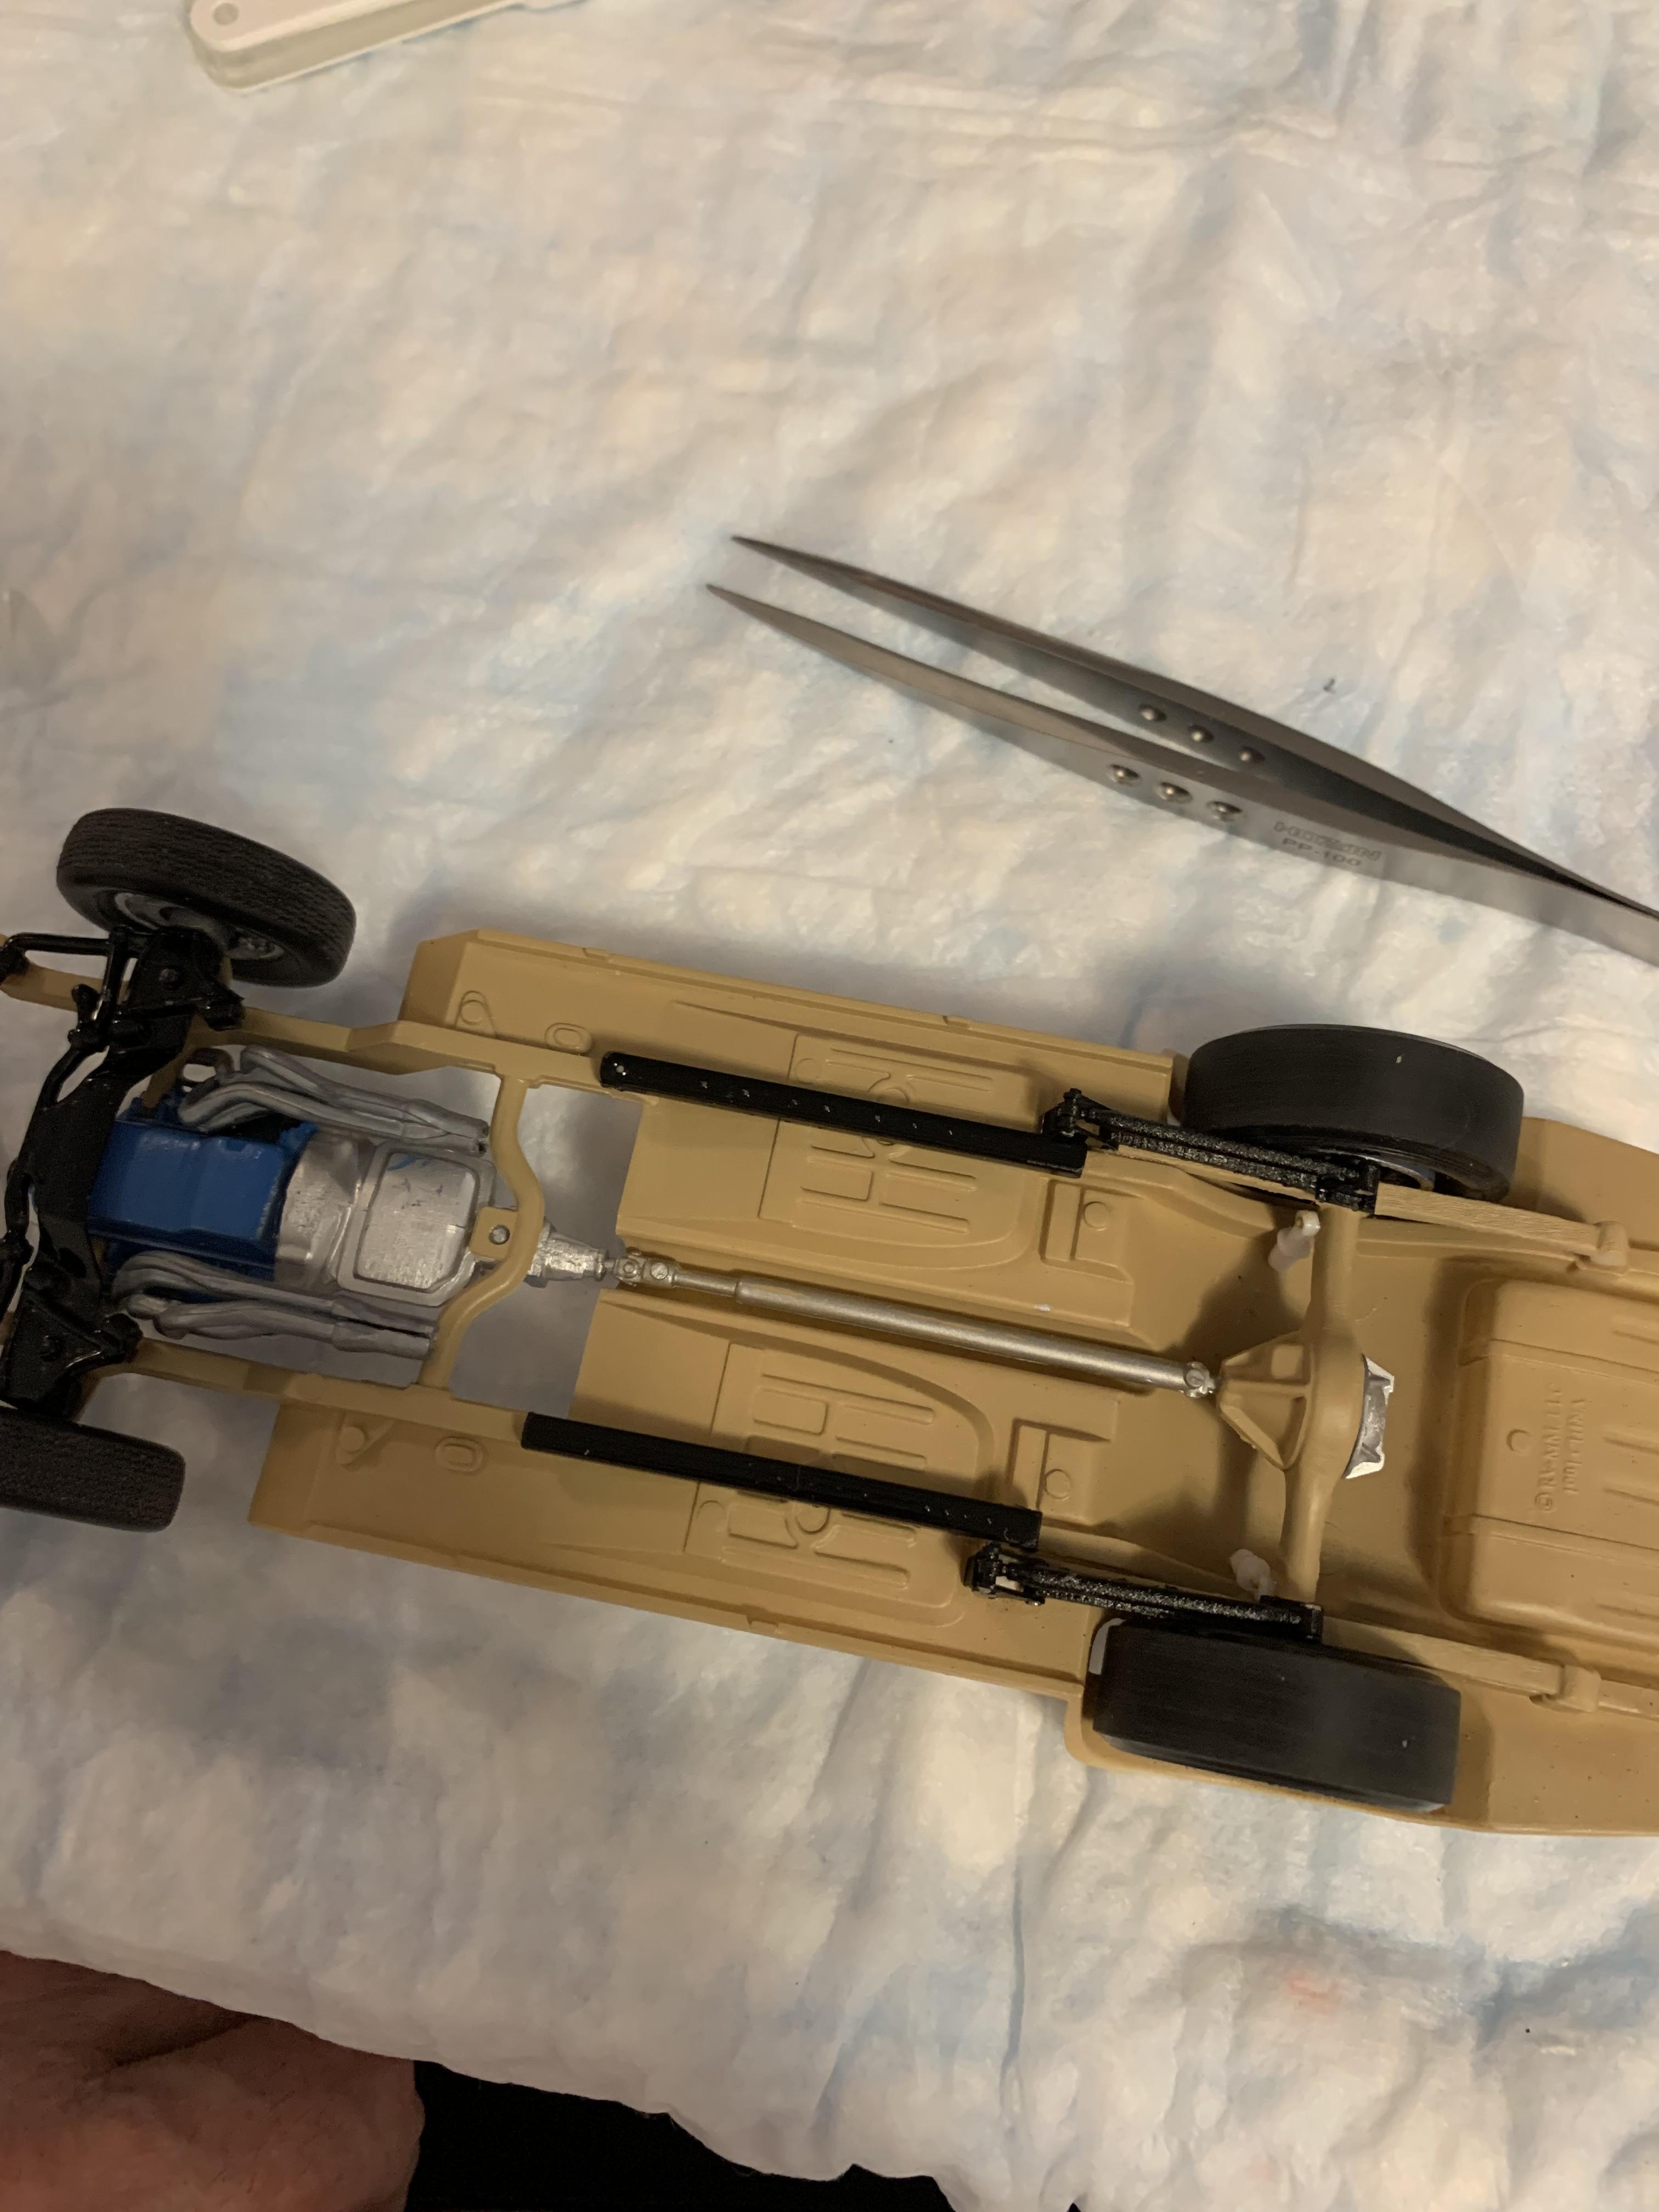
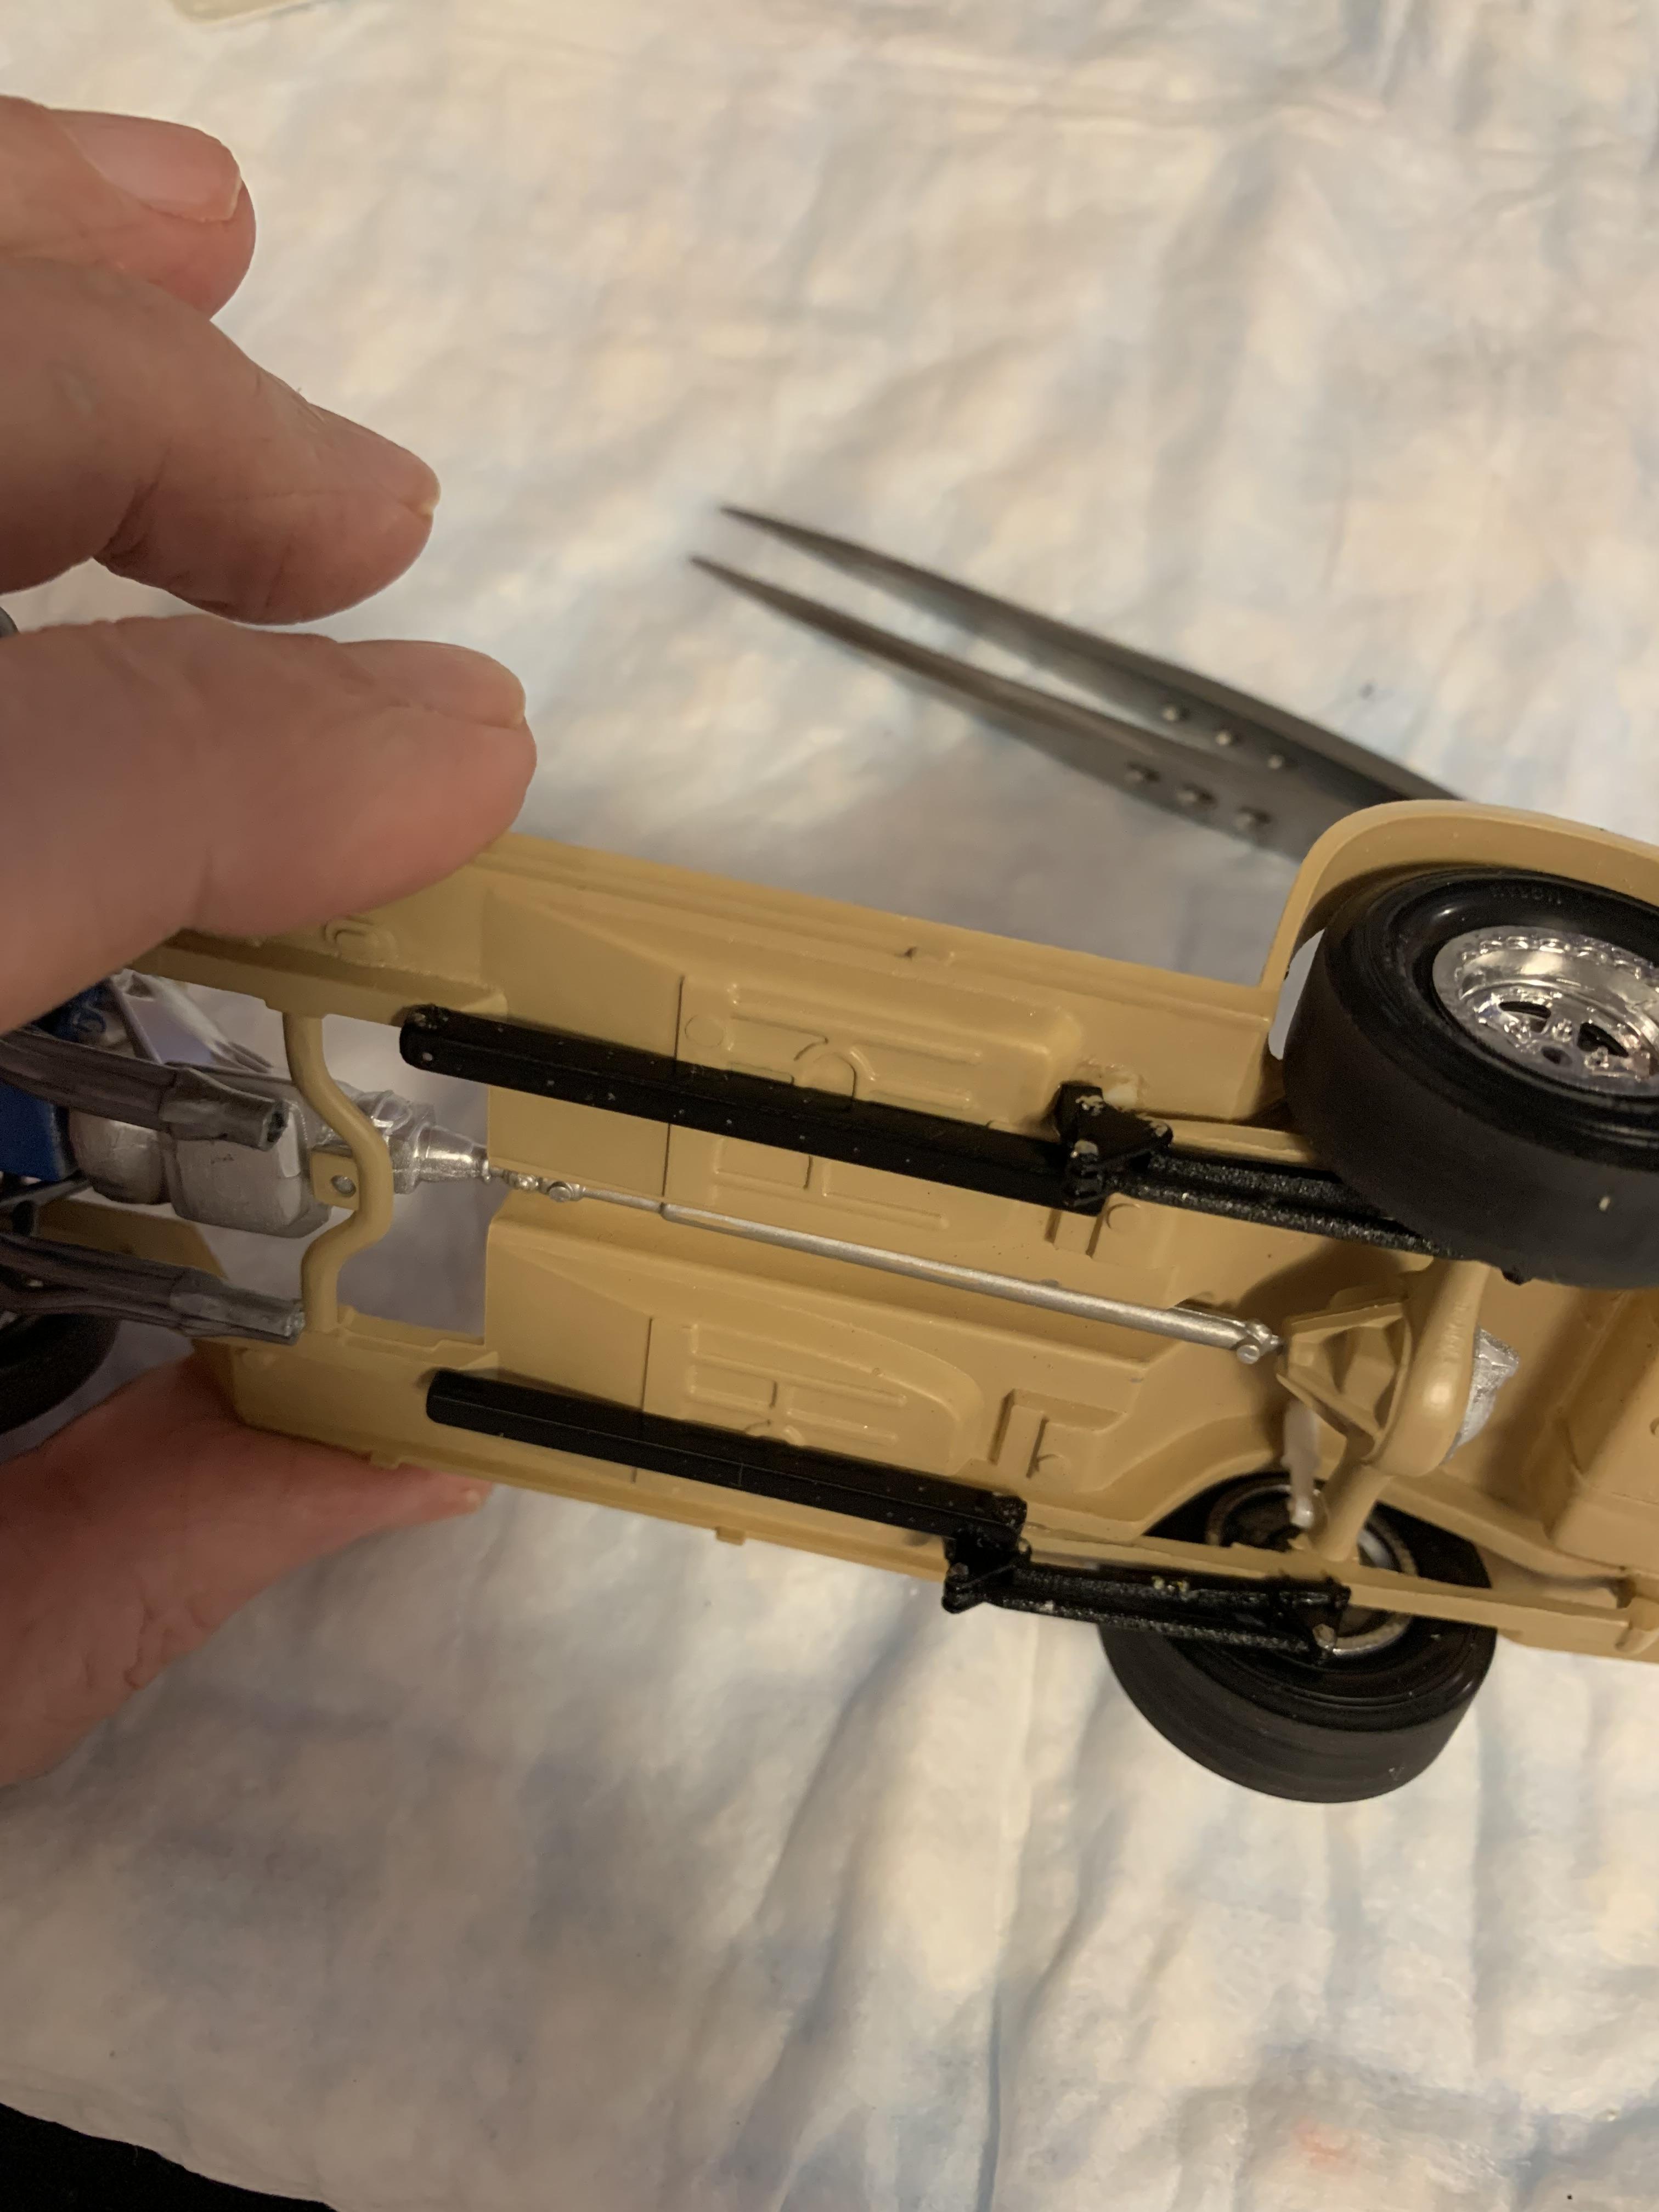
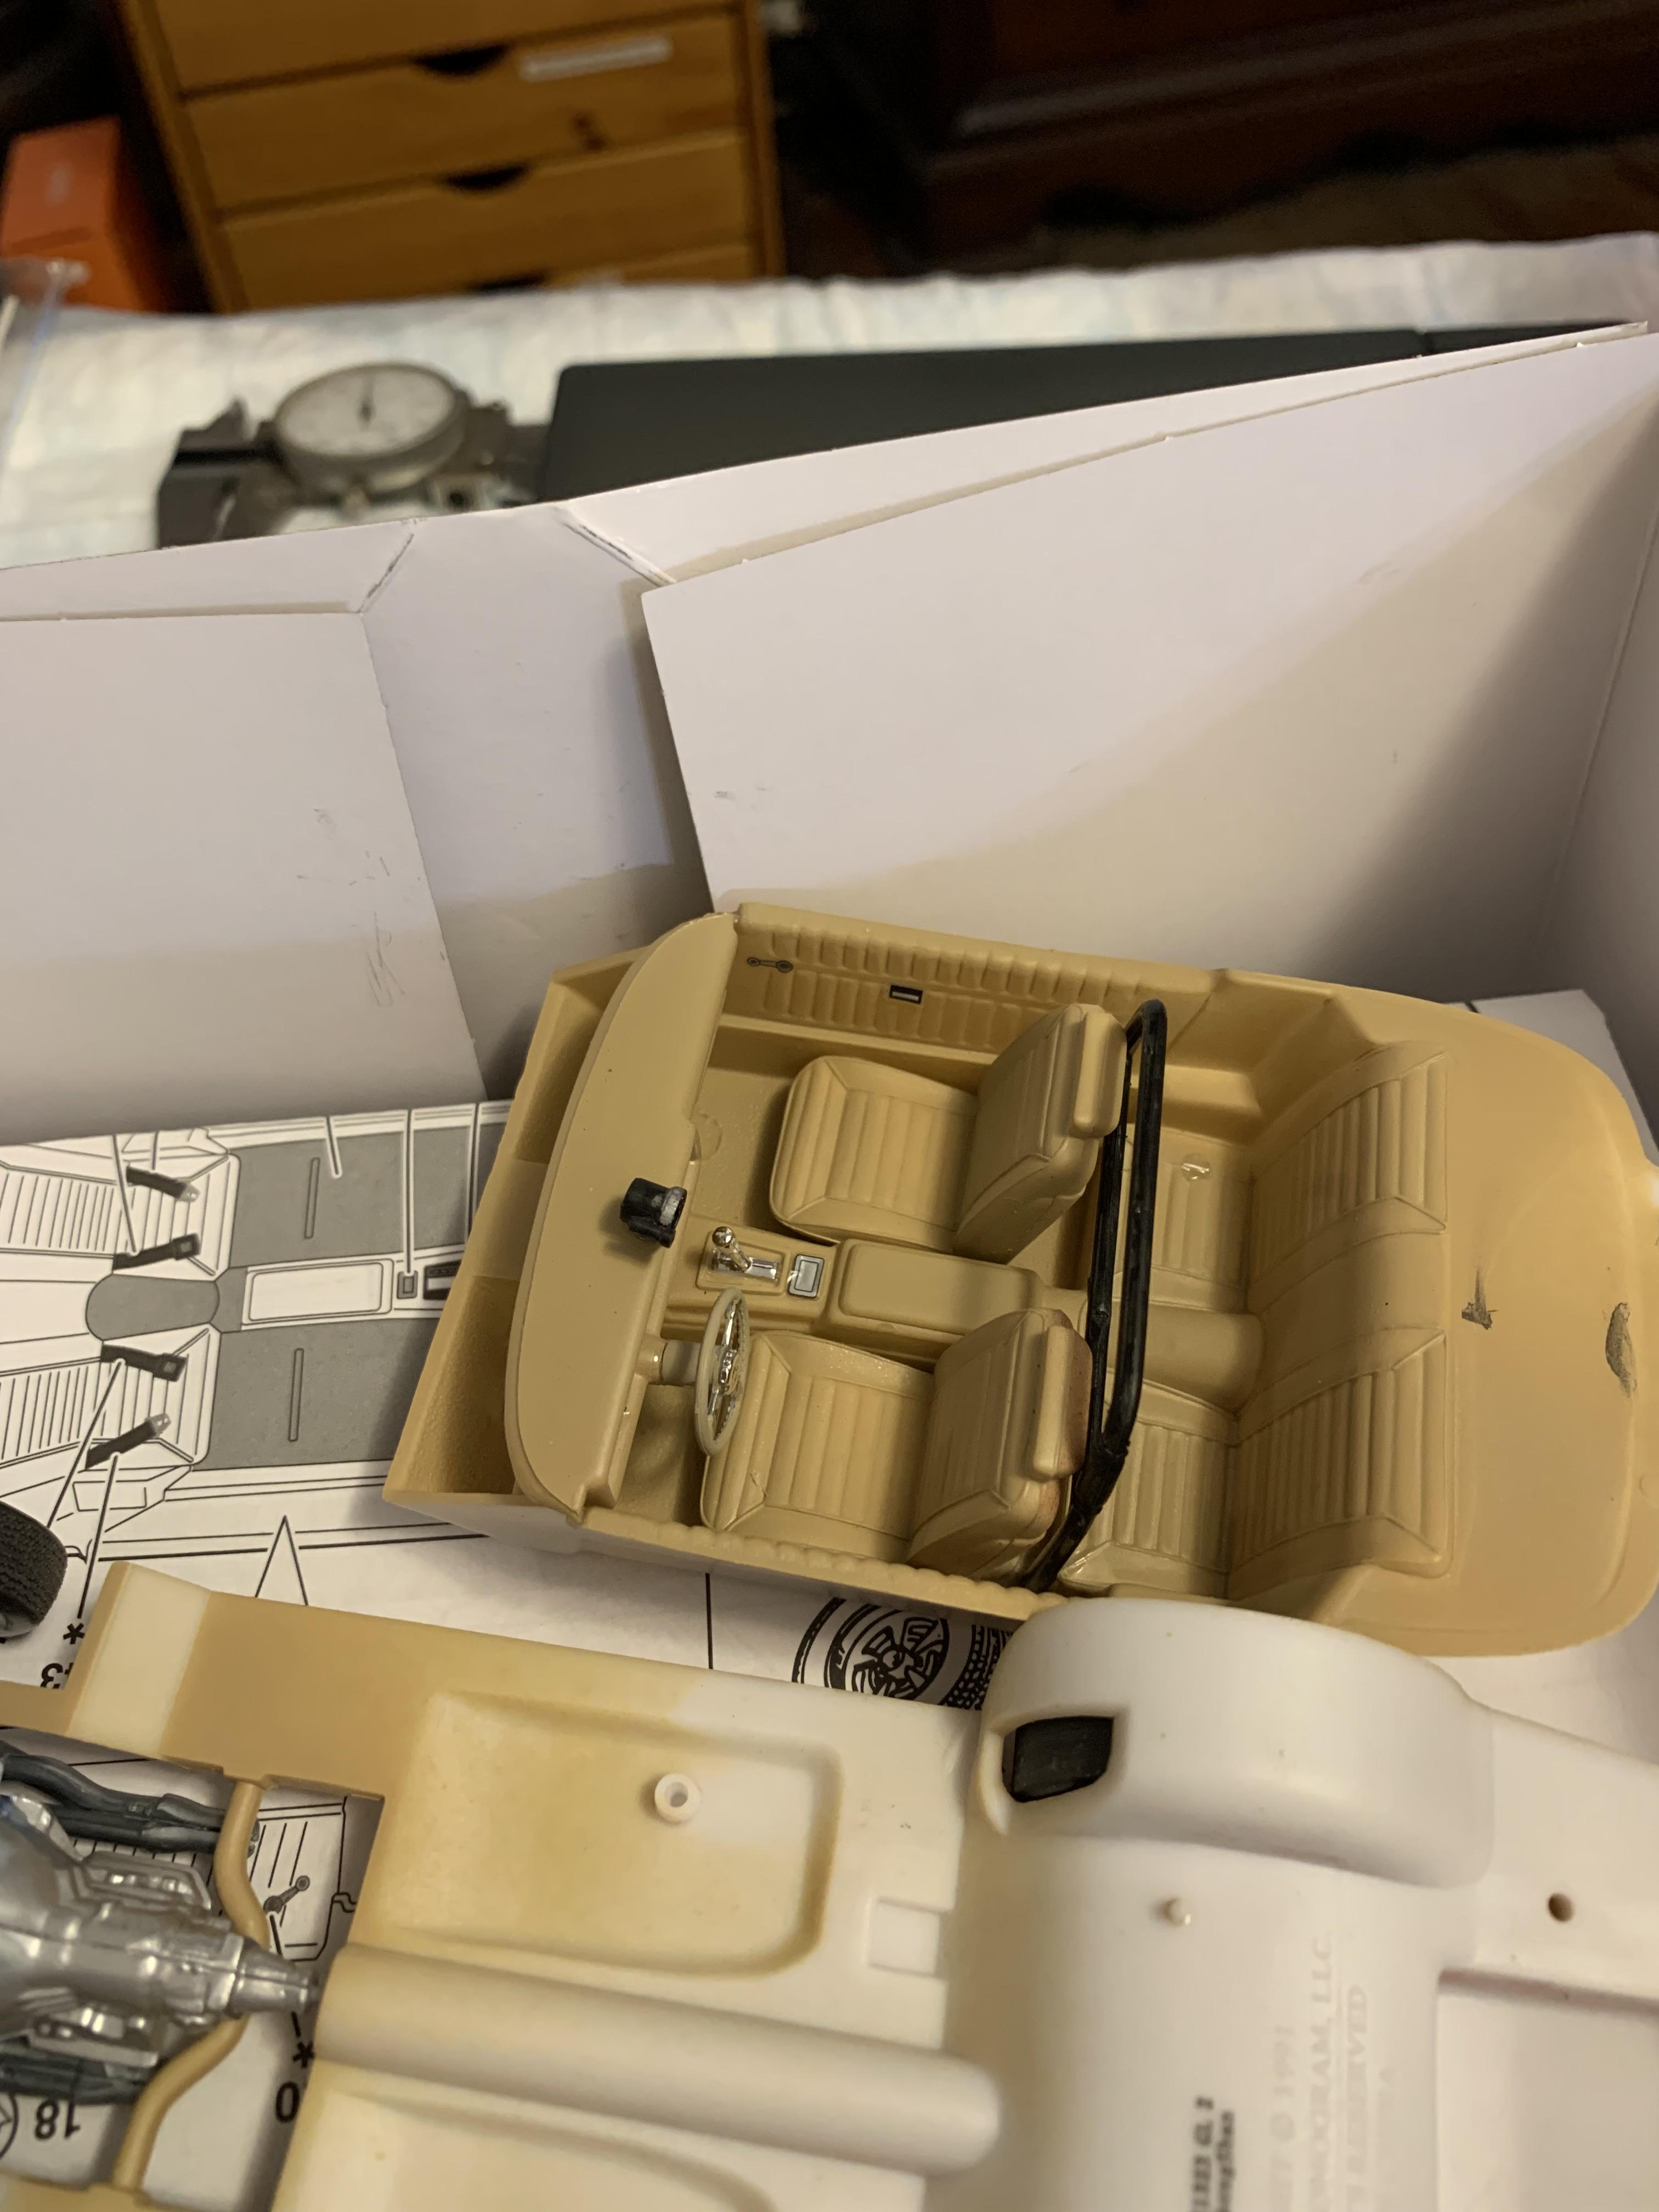
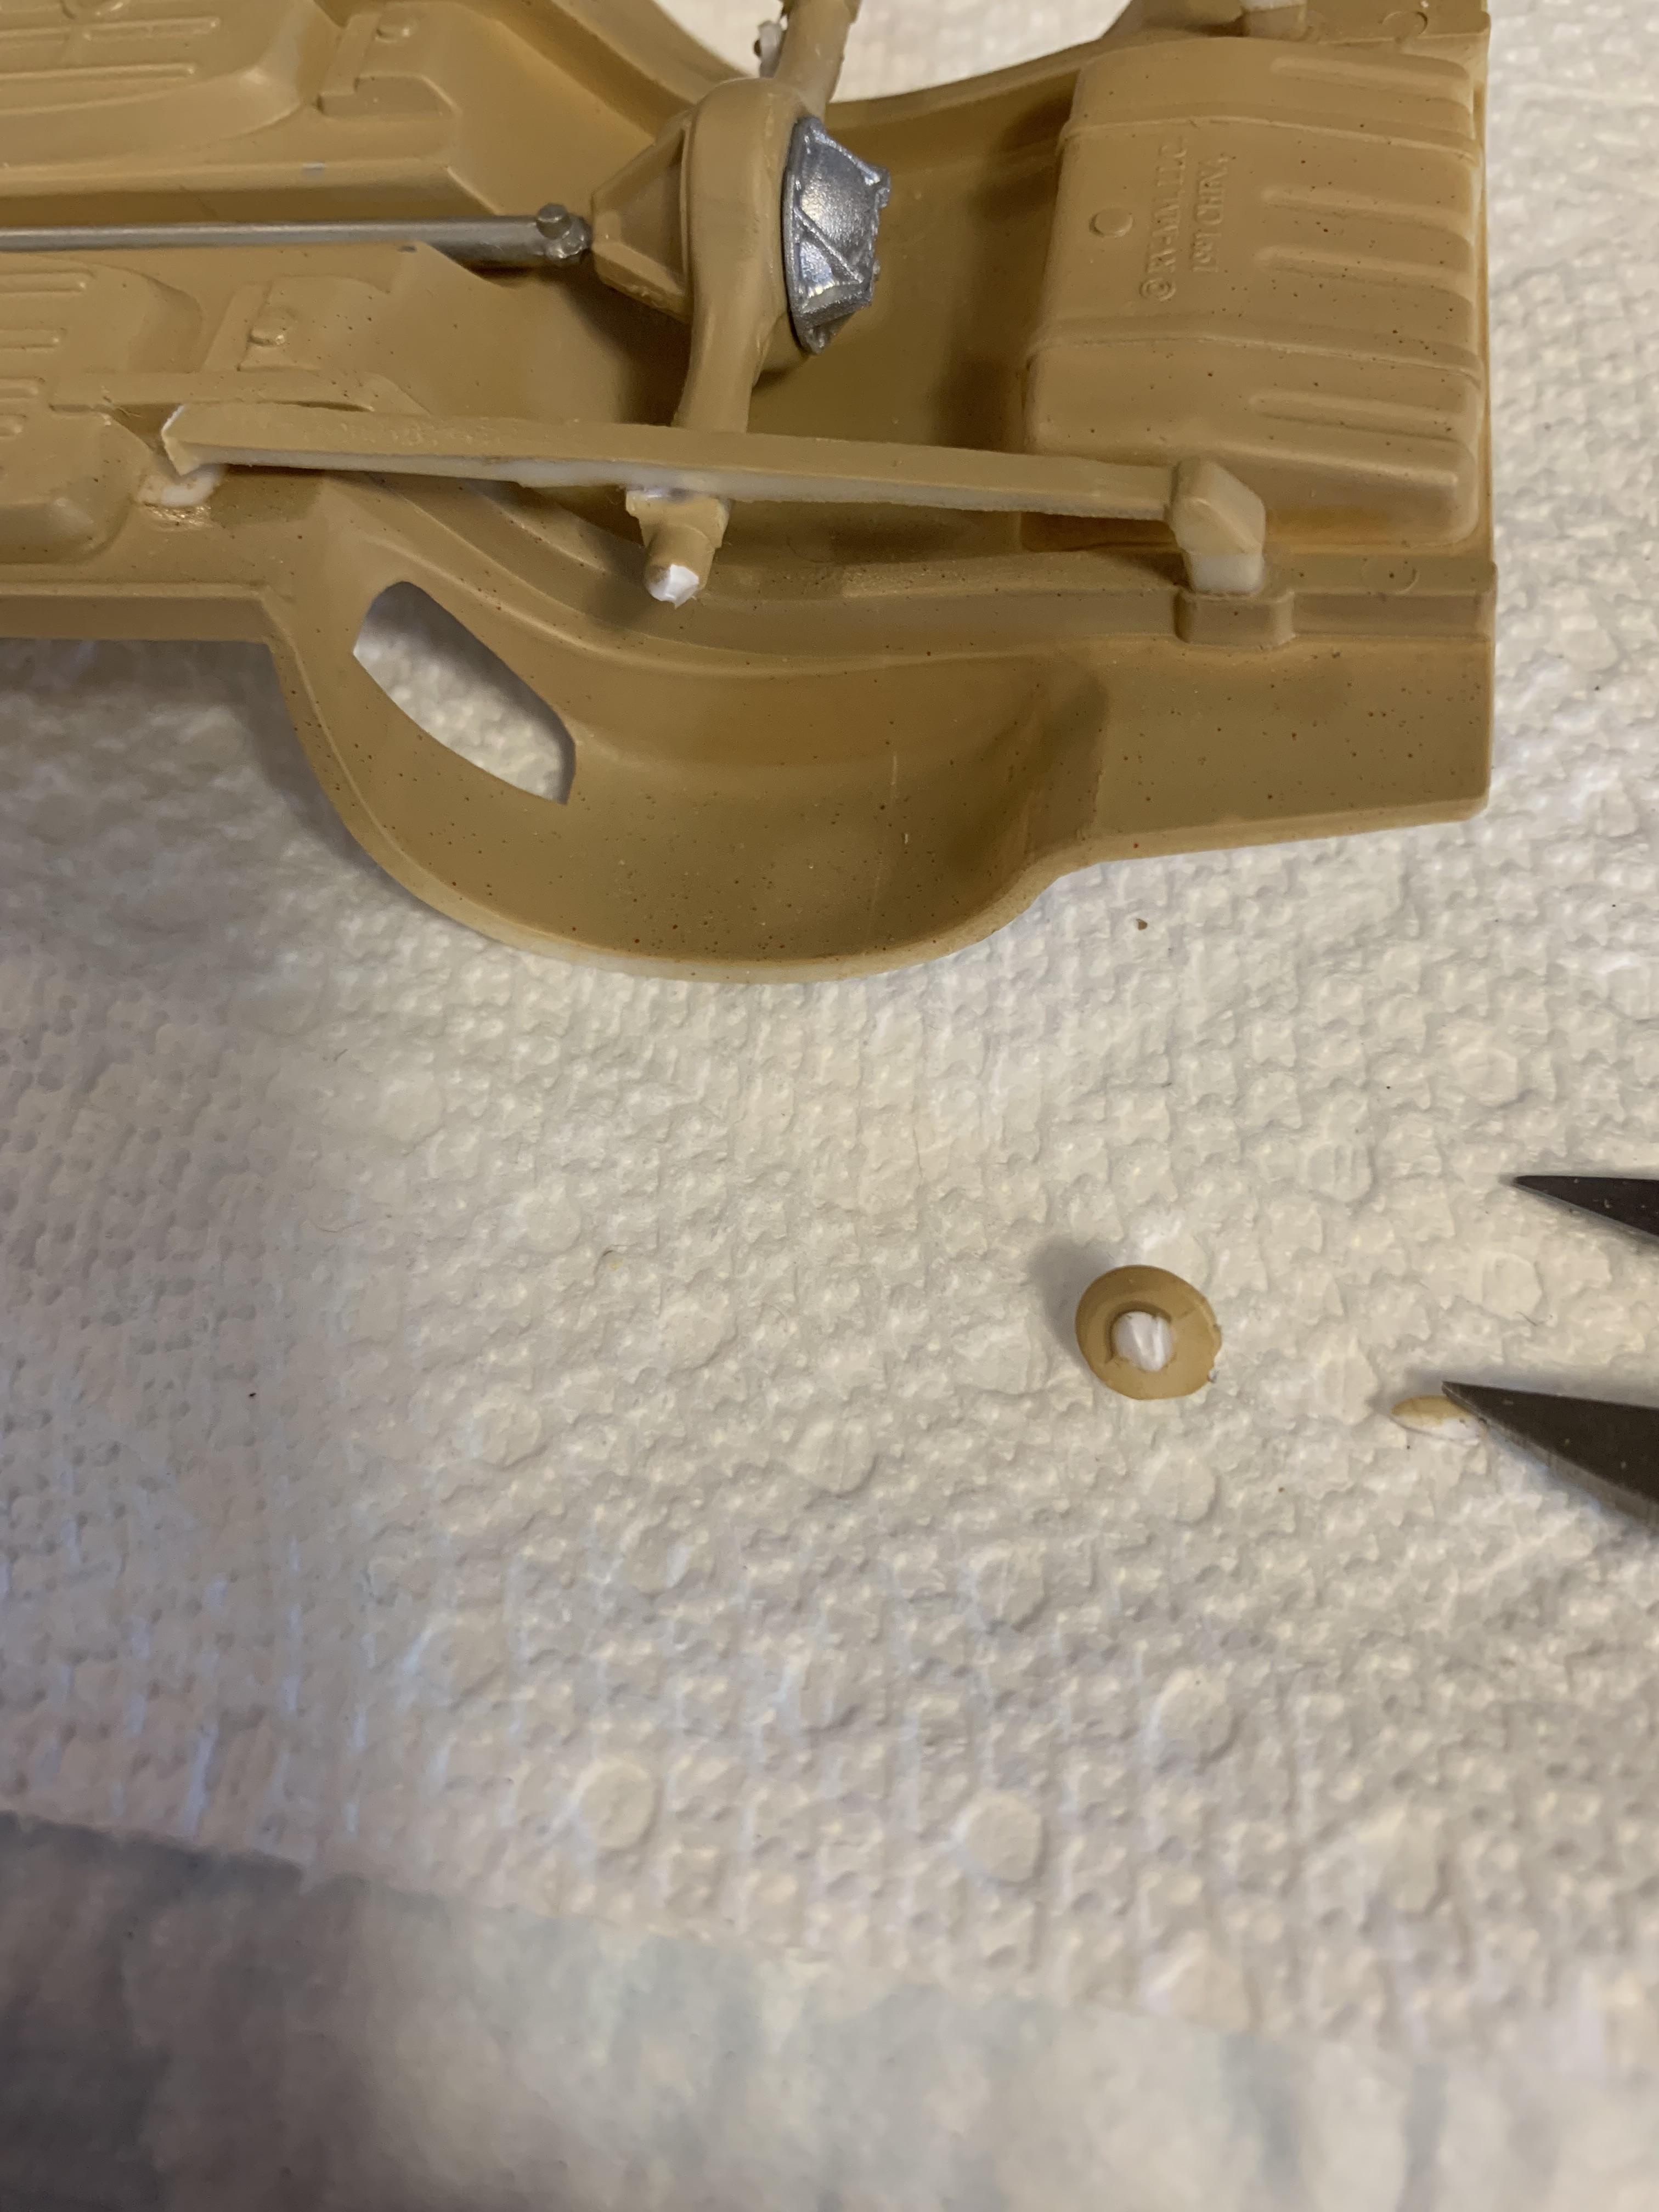
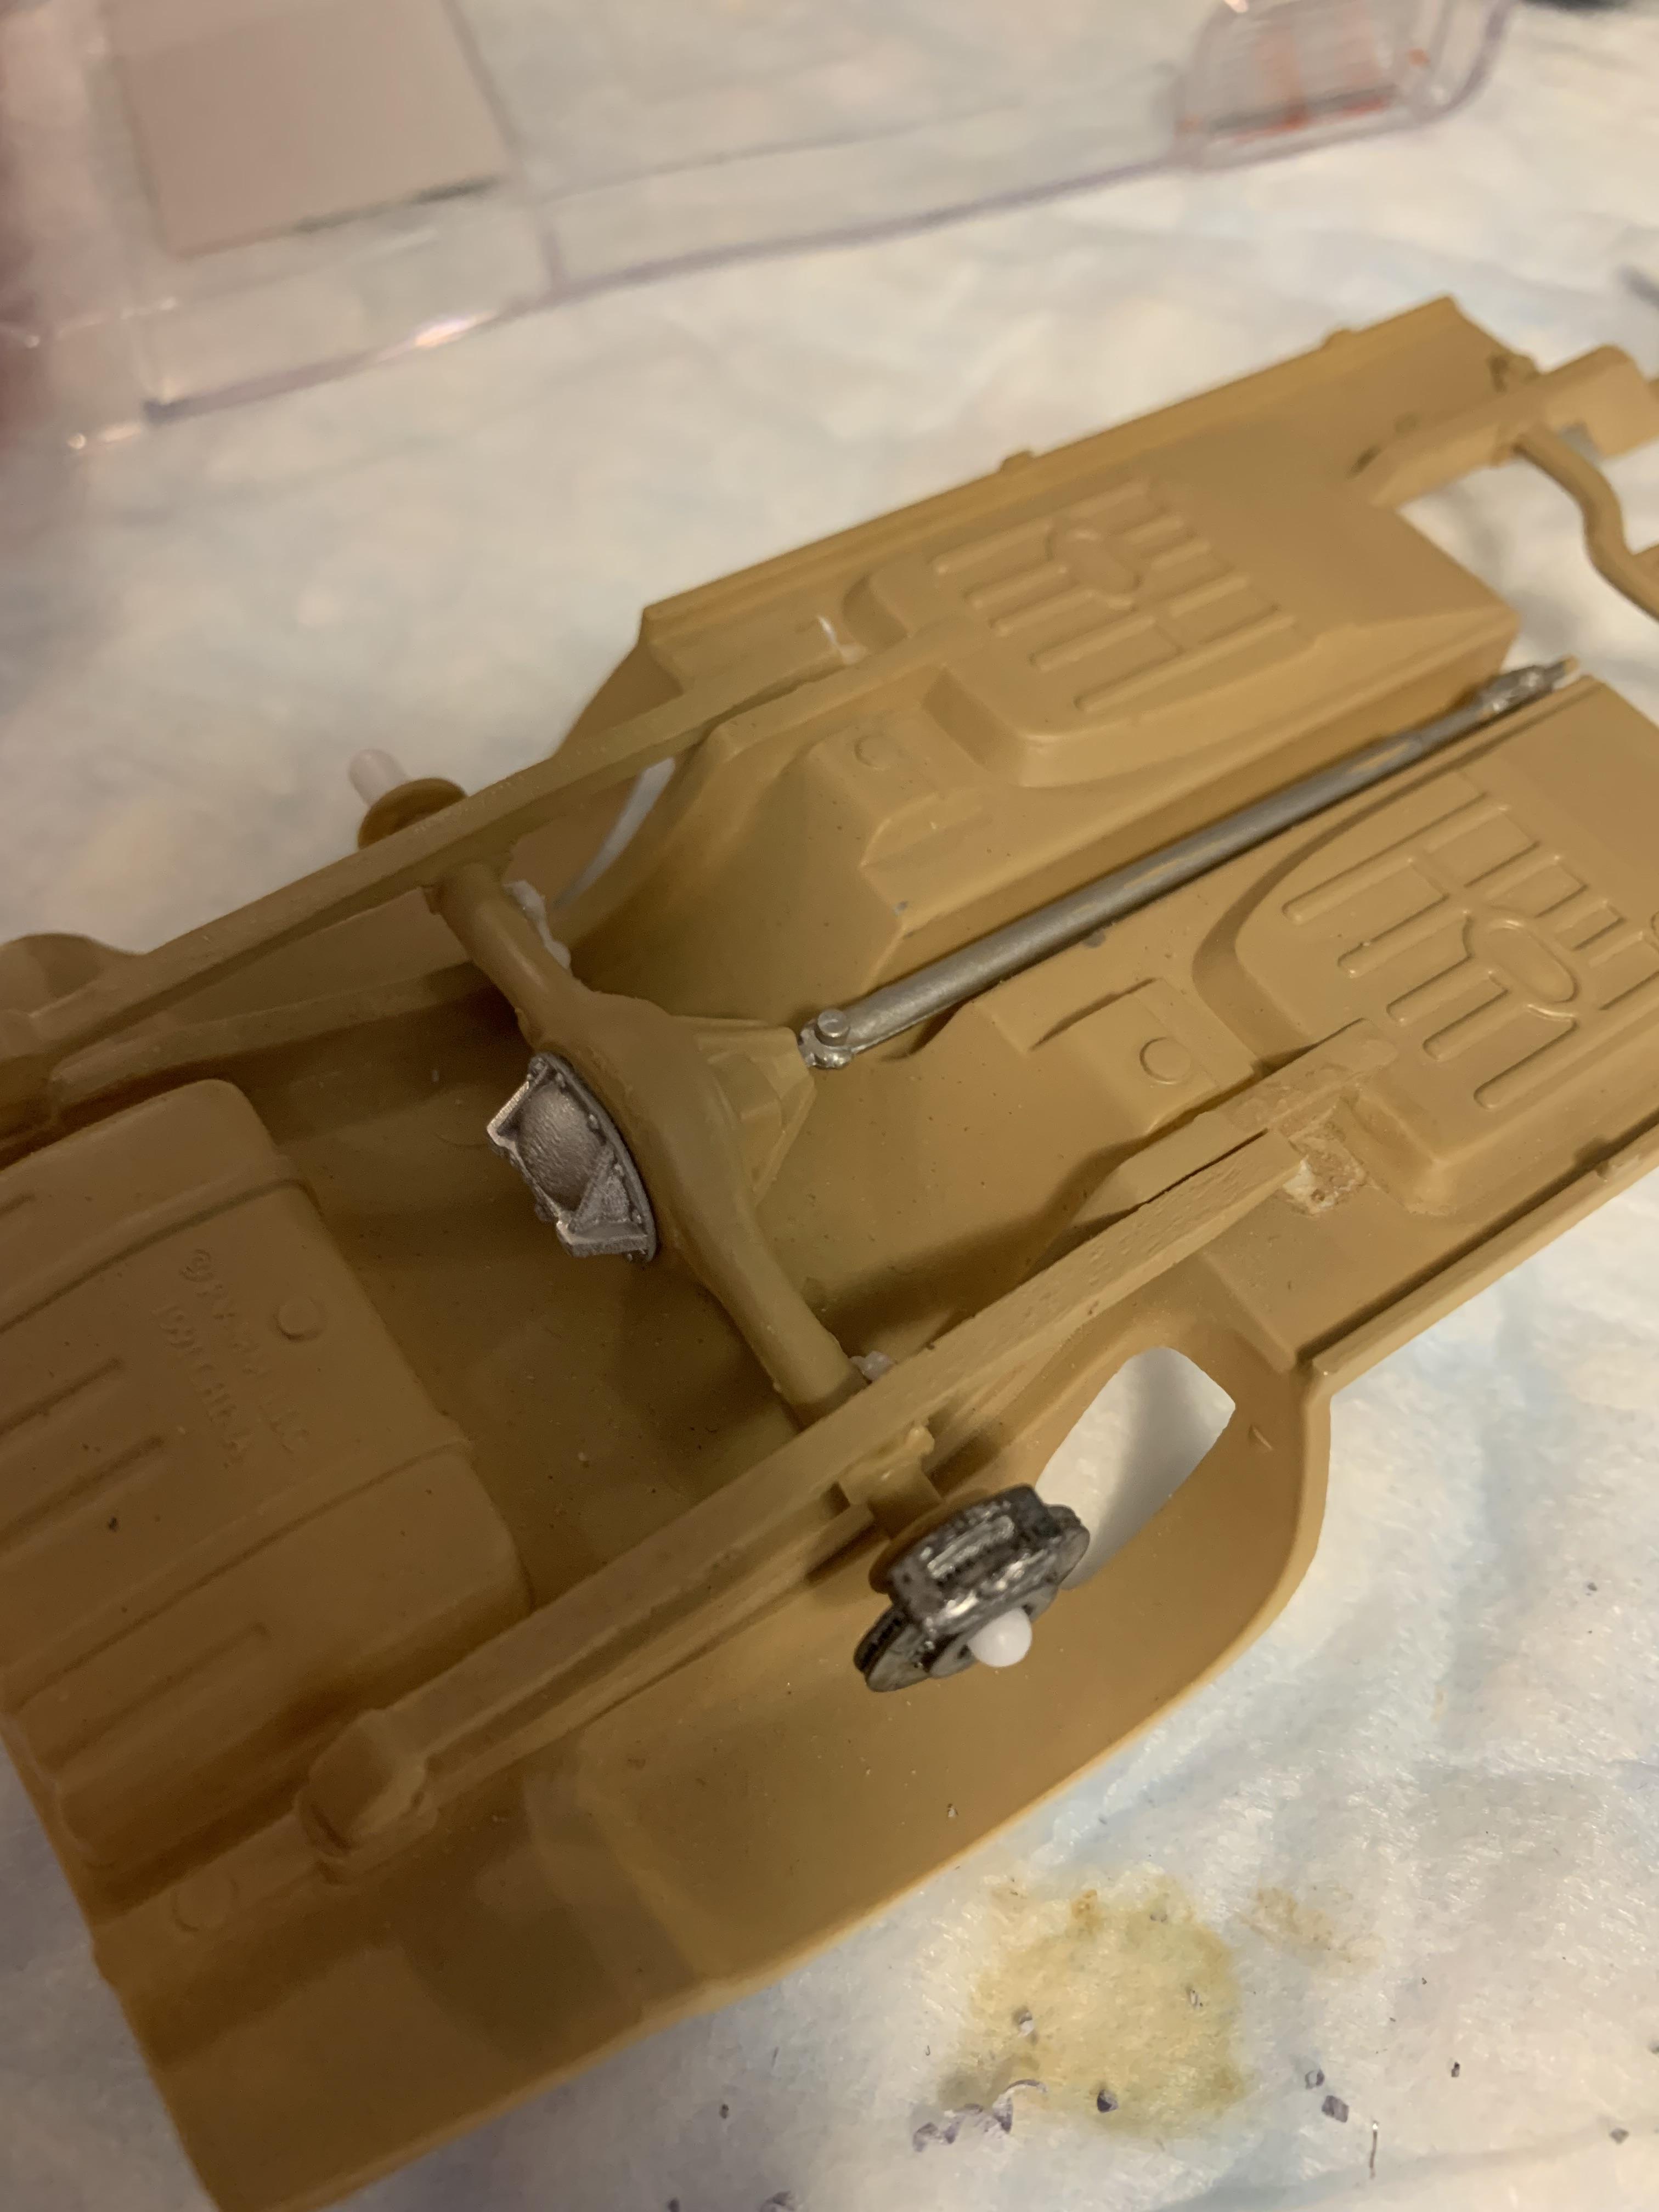
Closer and closer. Installed Caltracs and sub frame connectors. Cut off bosses for pins? that are supposed to be on the bottom of the seat frame. Not my first bogus instructions. Trimmed the inner front fenders so the grille would go in. Instructions say to install that before the body section is installed, but I always, if possible, install all body parts before painting. Helps to eliminate mismatched painted parts.
-
Geez! Another Stocker! 70 Formula Firebird B/SA
R. Thorne replied to R. Thorne's topic in WIP: Drag Racing Models
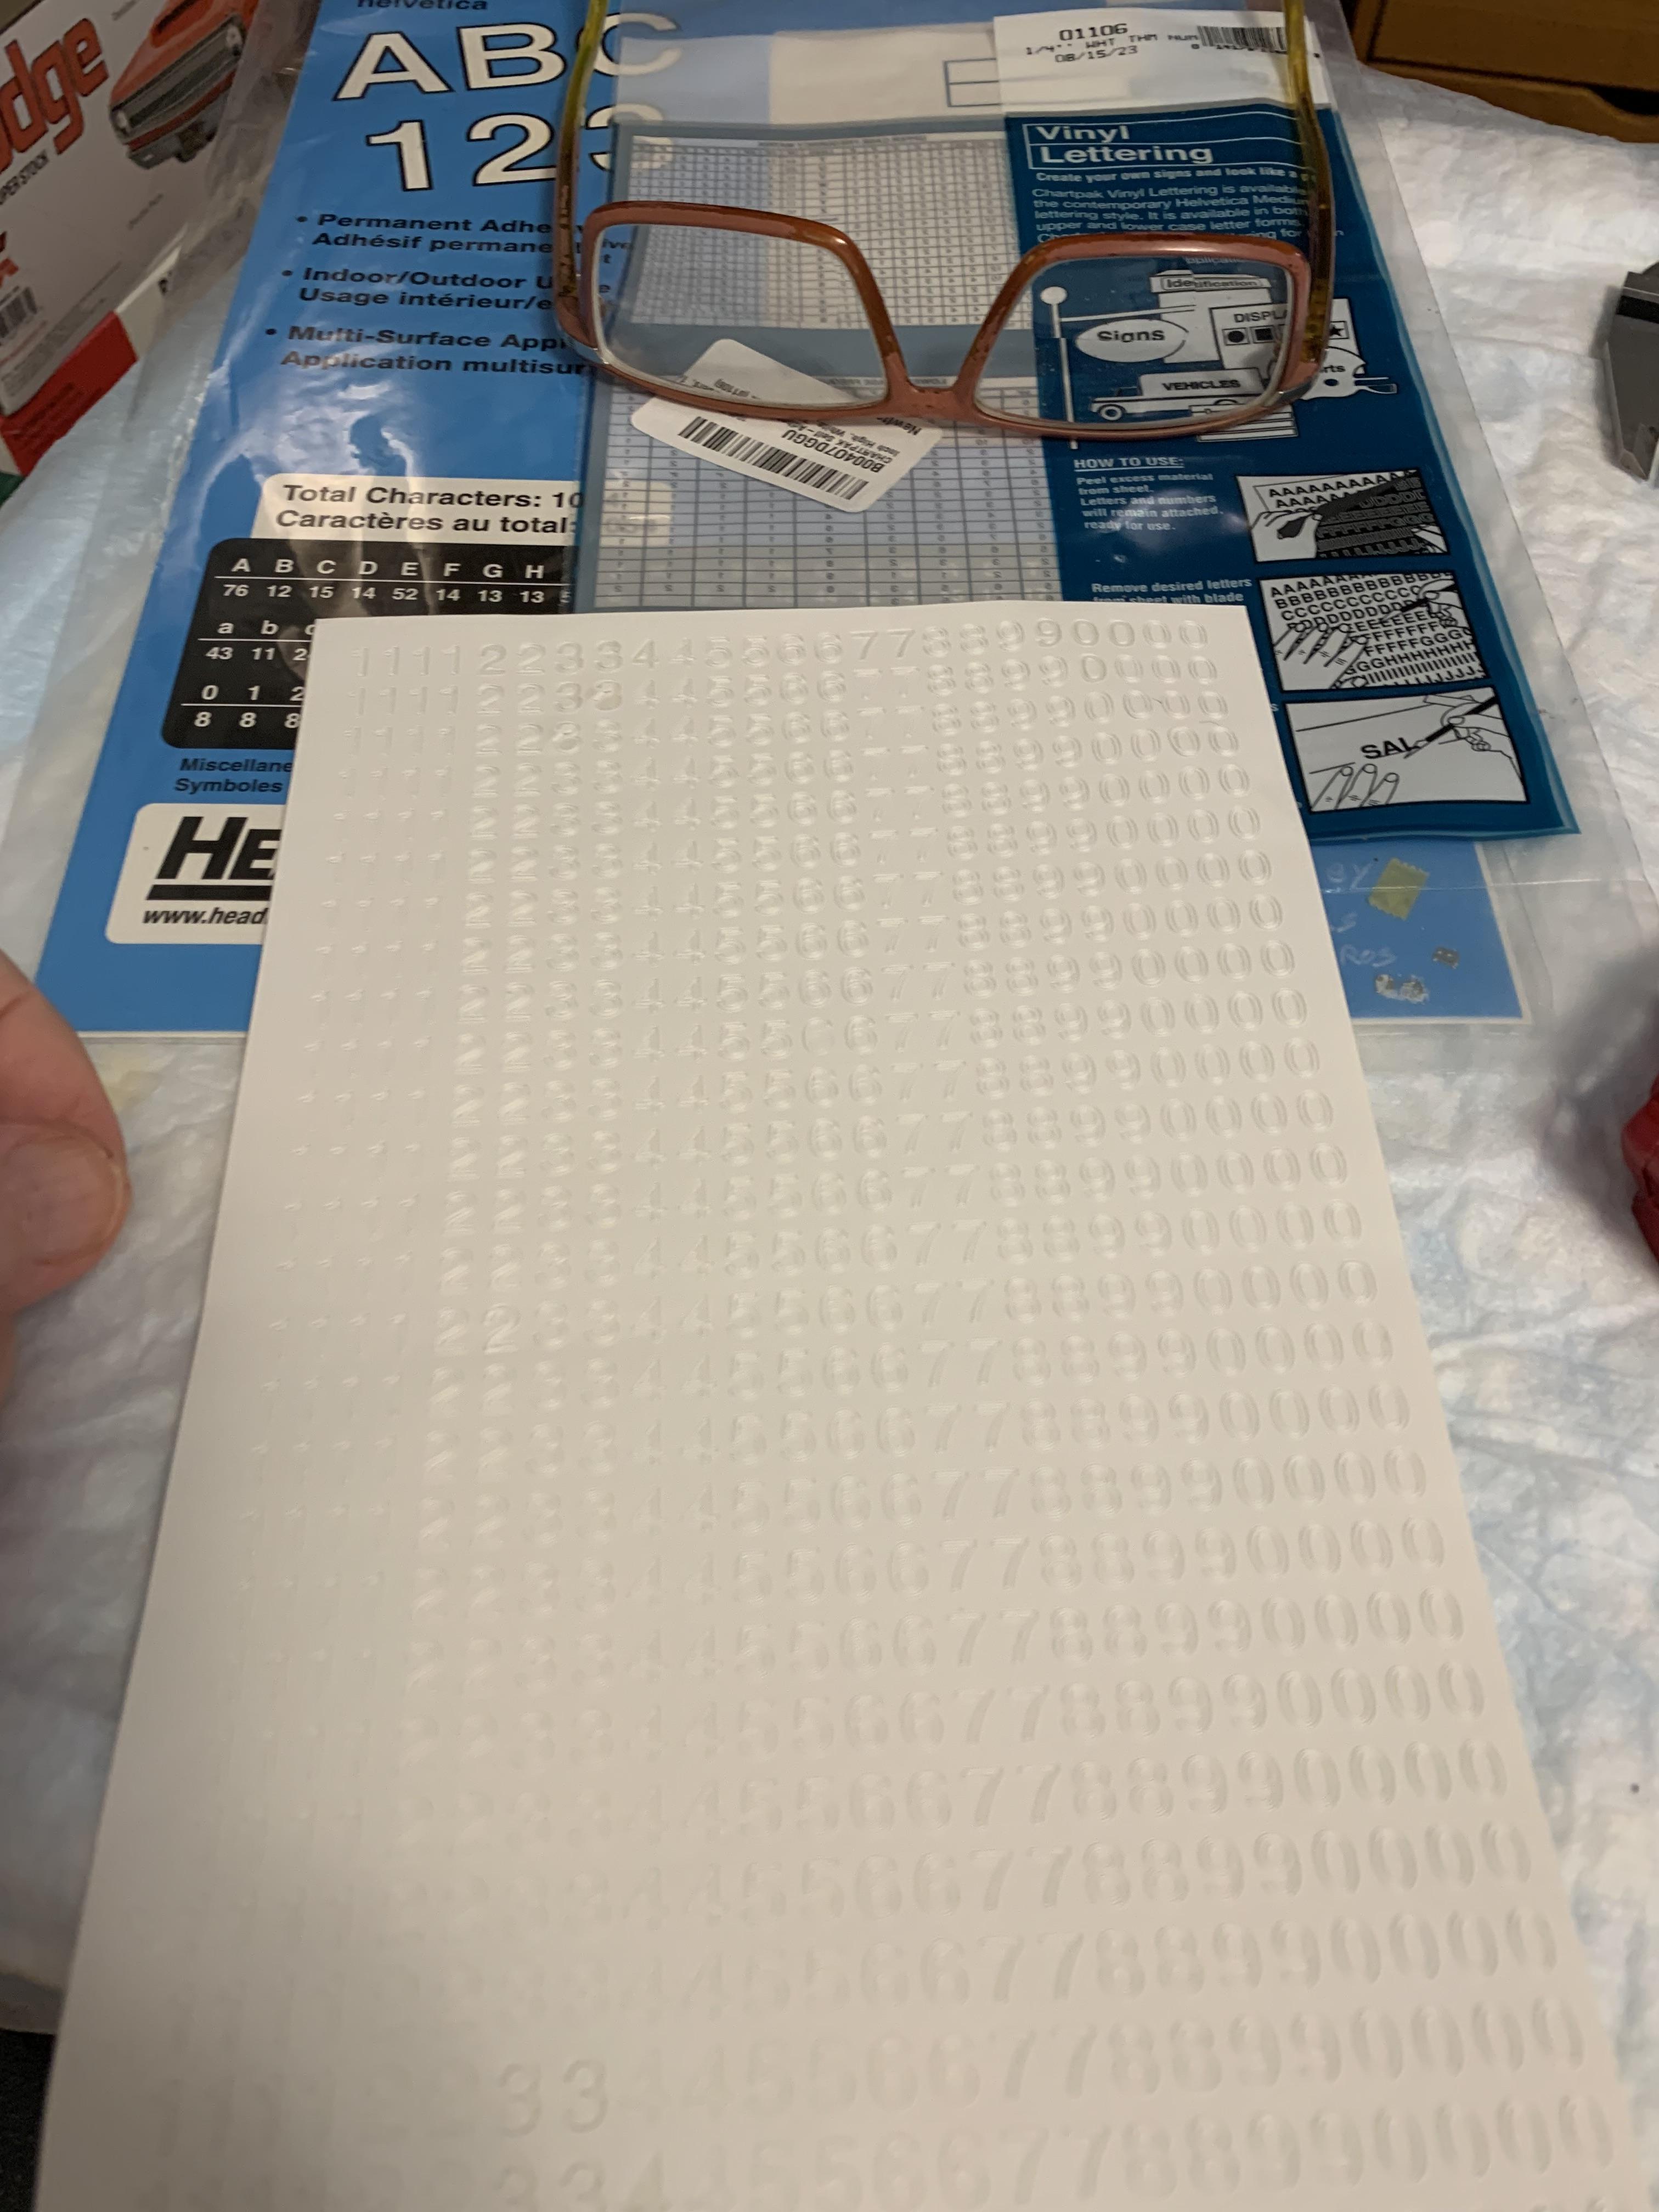
Hey, every build is an experiment, right? I have used these vinyl stick on letters before, but have not been able to find 1/8”, only 1/4”. Since this is really a “C” build (not my best), I decided to use these vinyl letters 1/4”. I also used a simple roll bar left over from a 1968 Firebird kit.
-
Geez! Another Stocker! 70 Formula Firebird B/SA
R. Thorne replied to R. Thorne's topic in WIP: Drag Racing Models
After the second coat of paint, then after some buffing with a q-tip.
-
My Formula Firebird is almost done, then back to my 1953 Oldsmobile, then, hopefully, the Ramcharger.
-
Geez! Another Stocker! 70 Formula Firebird B/SA
R. Thorne replied to R. Thorne's topic in WIP: Drag Racing Models
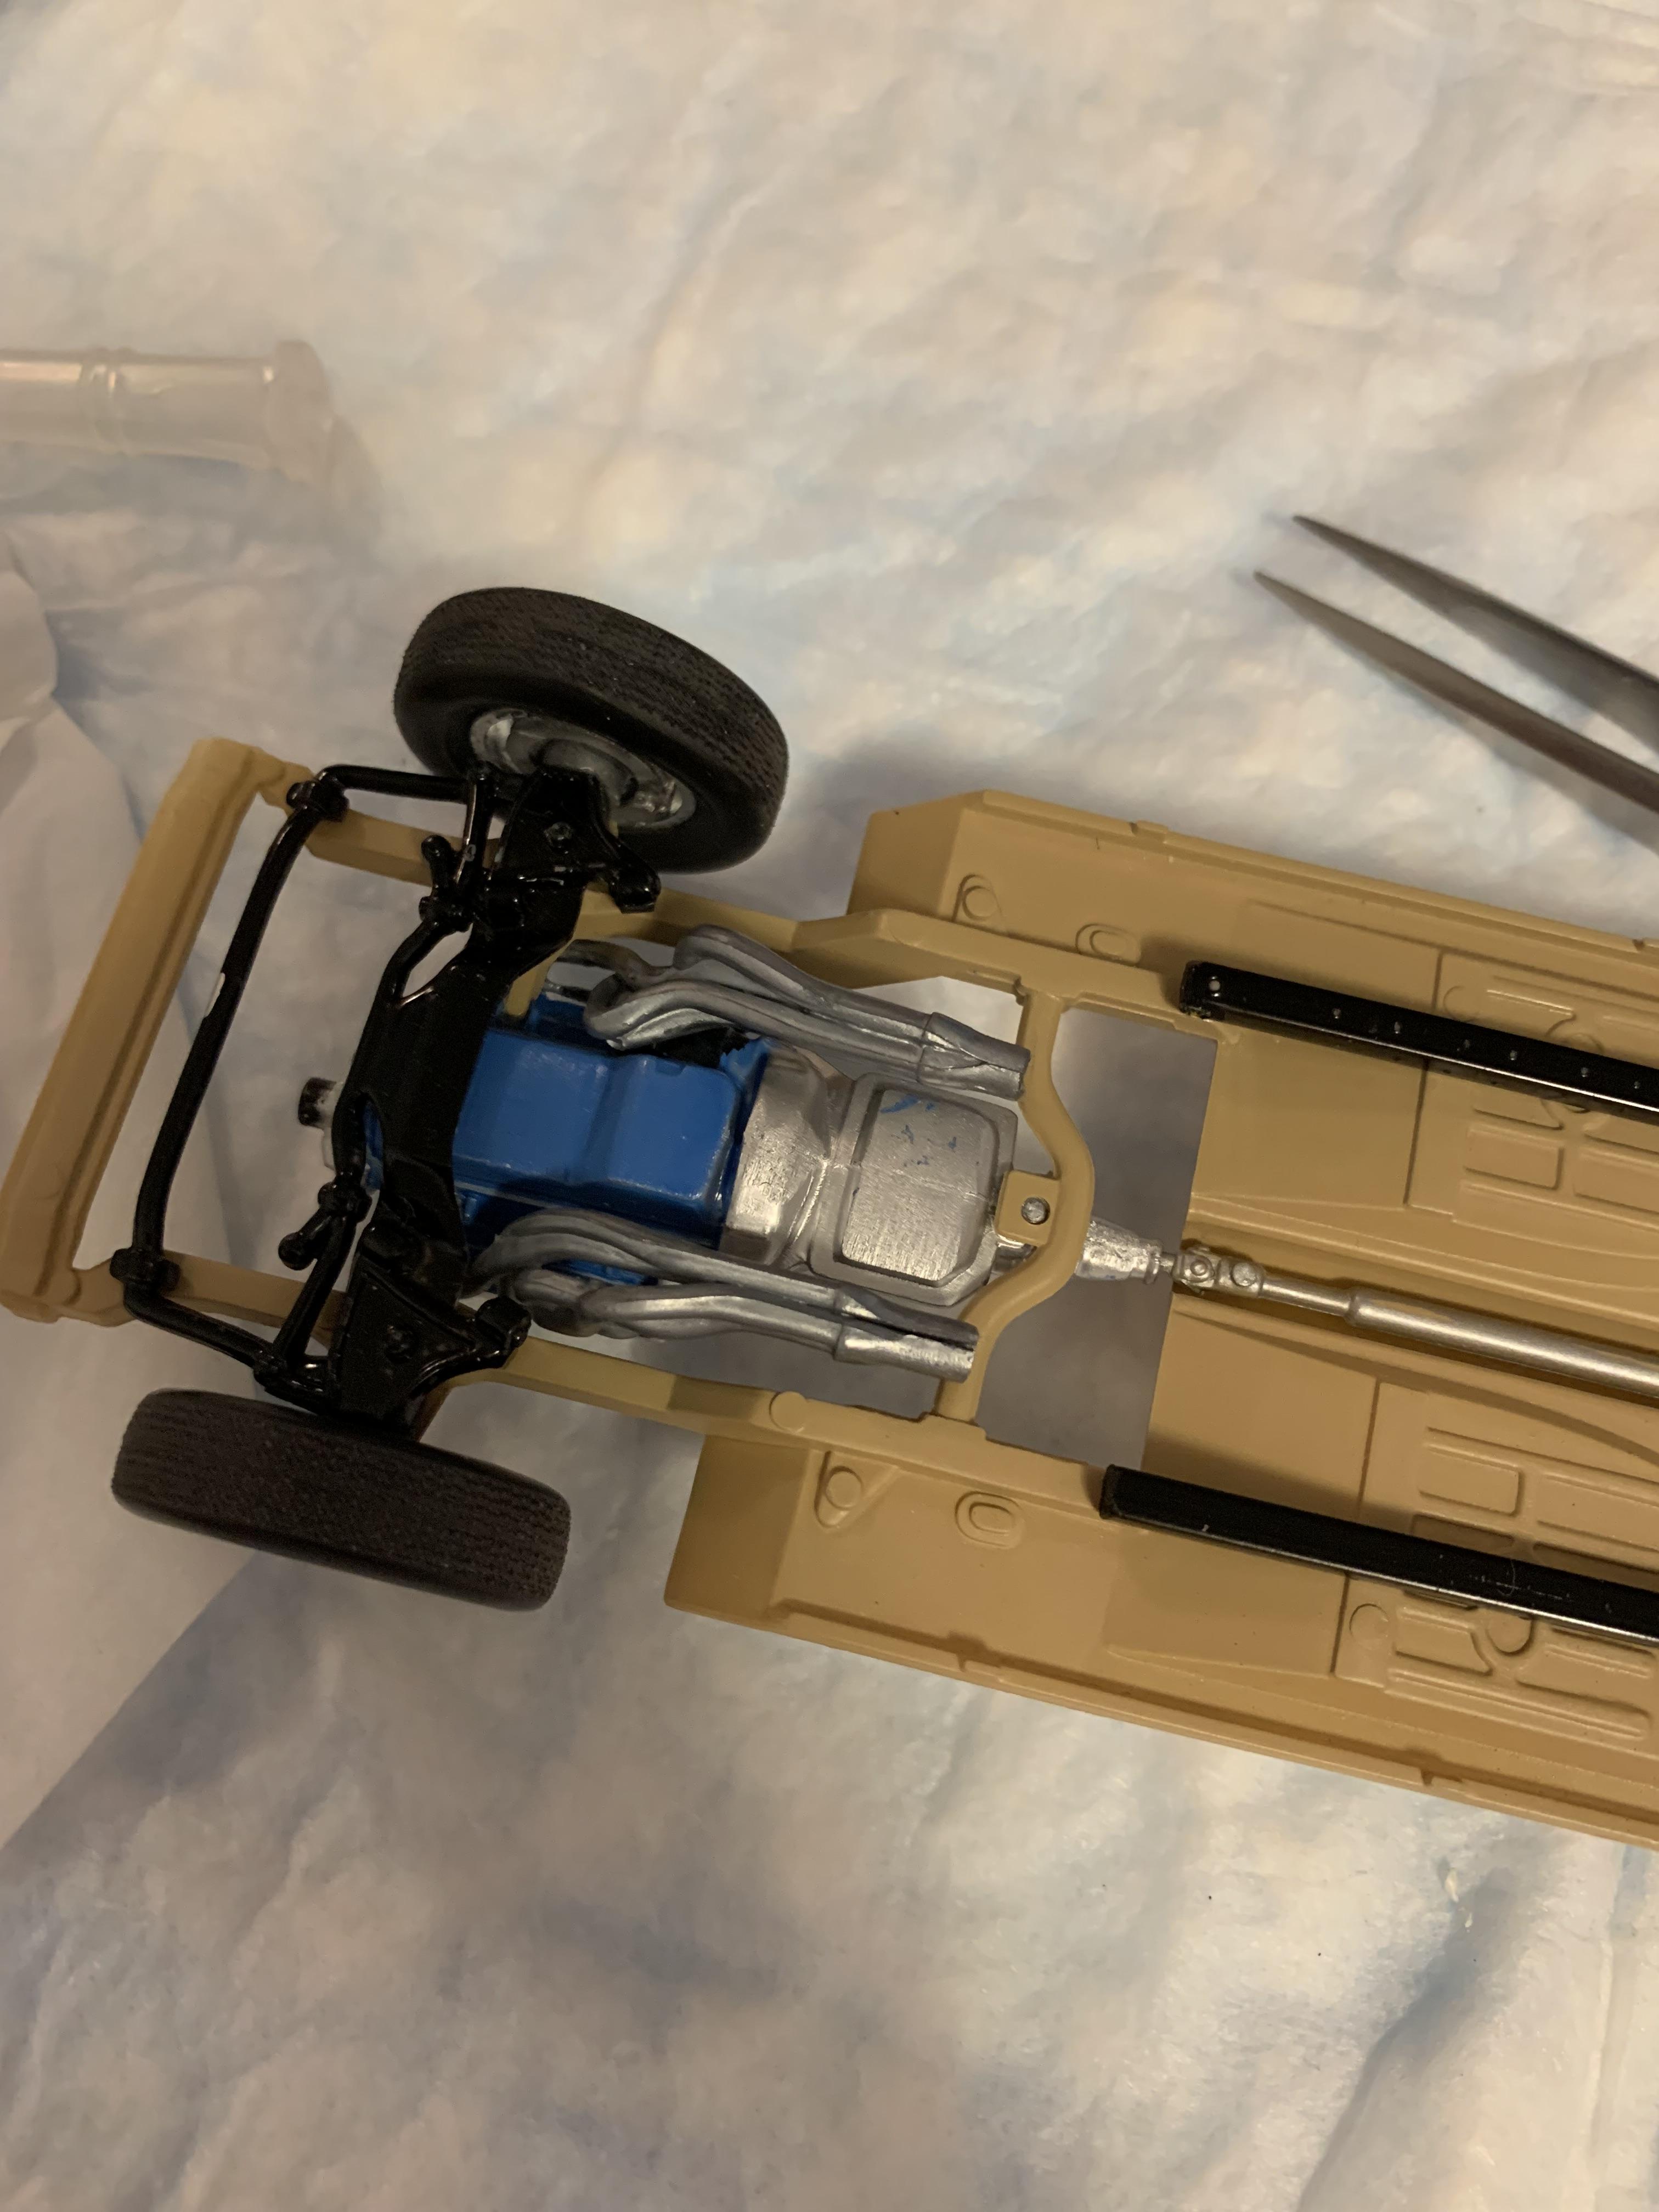
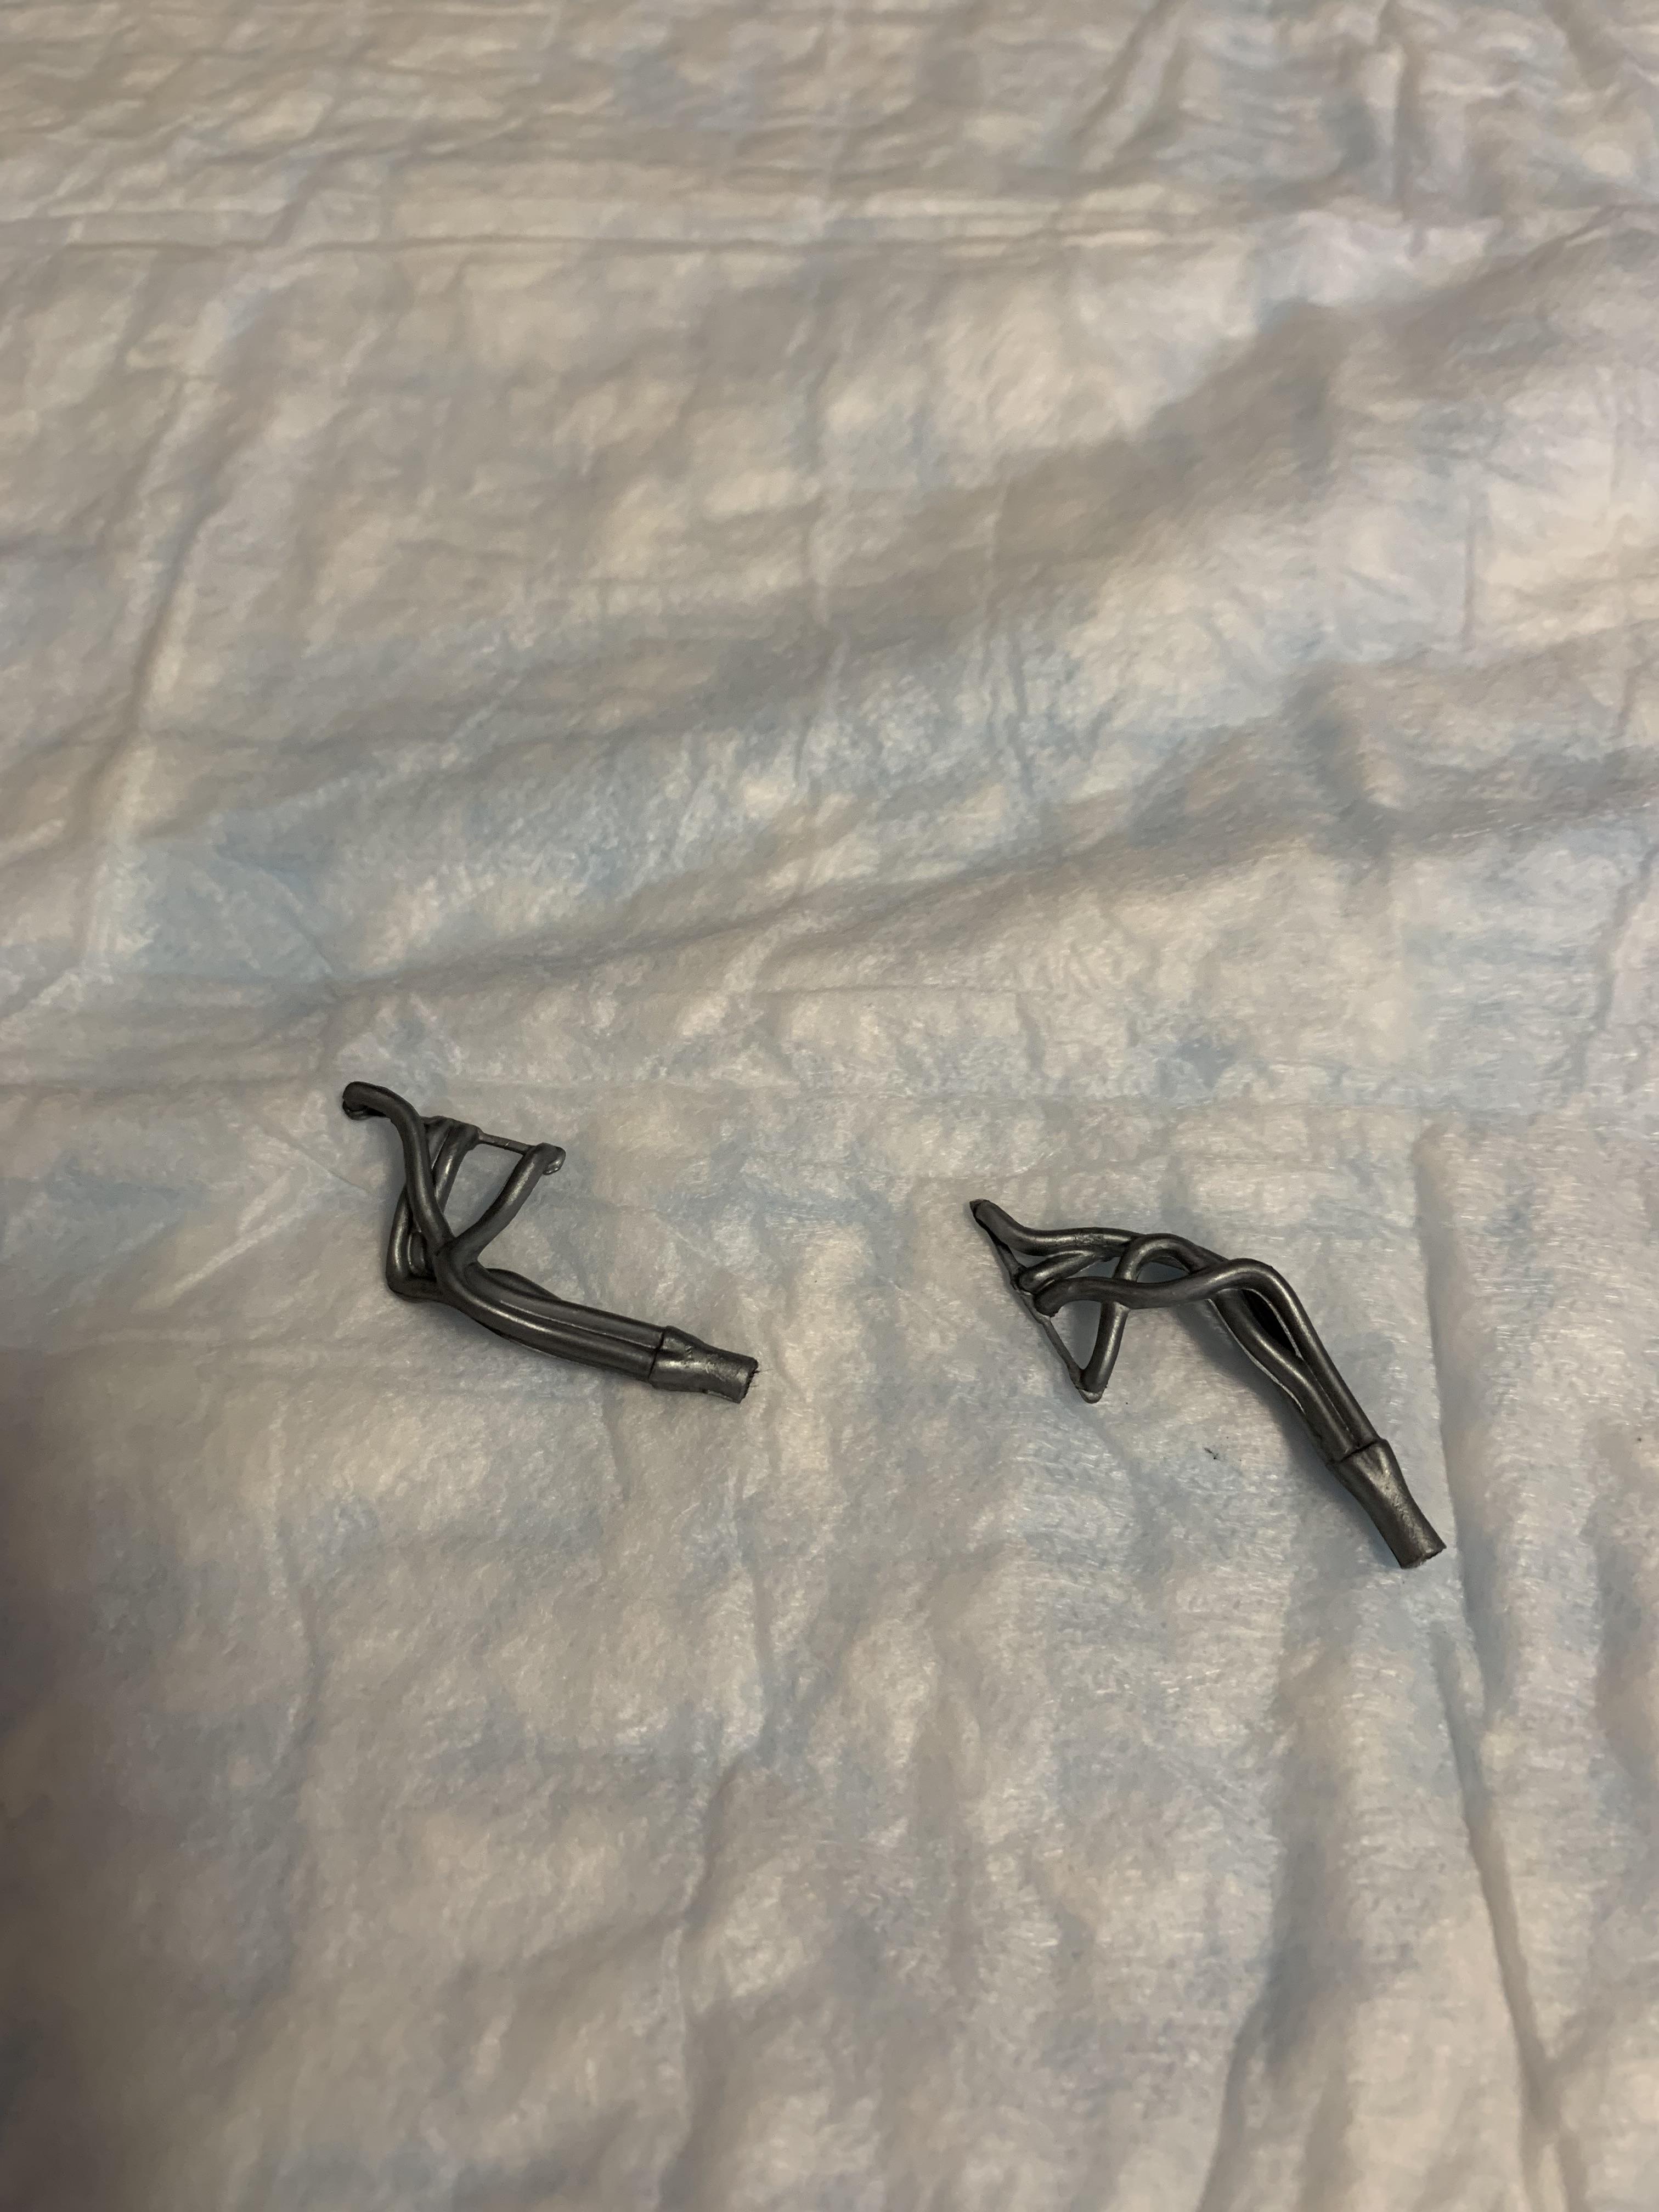
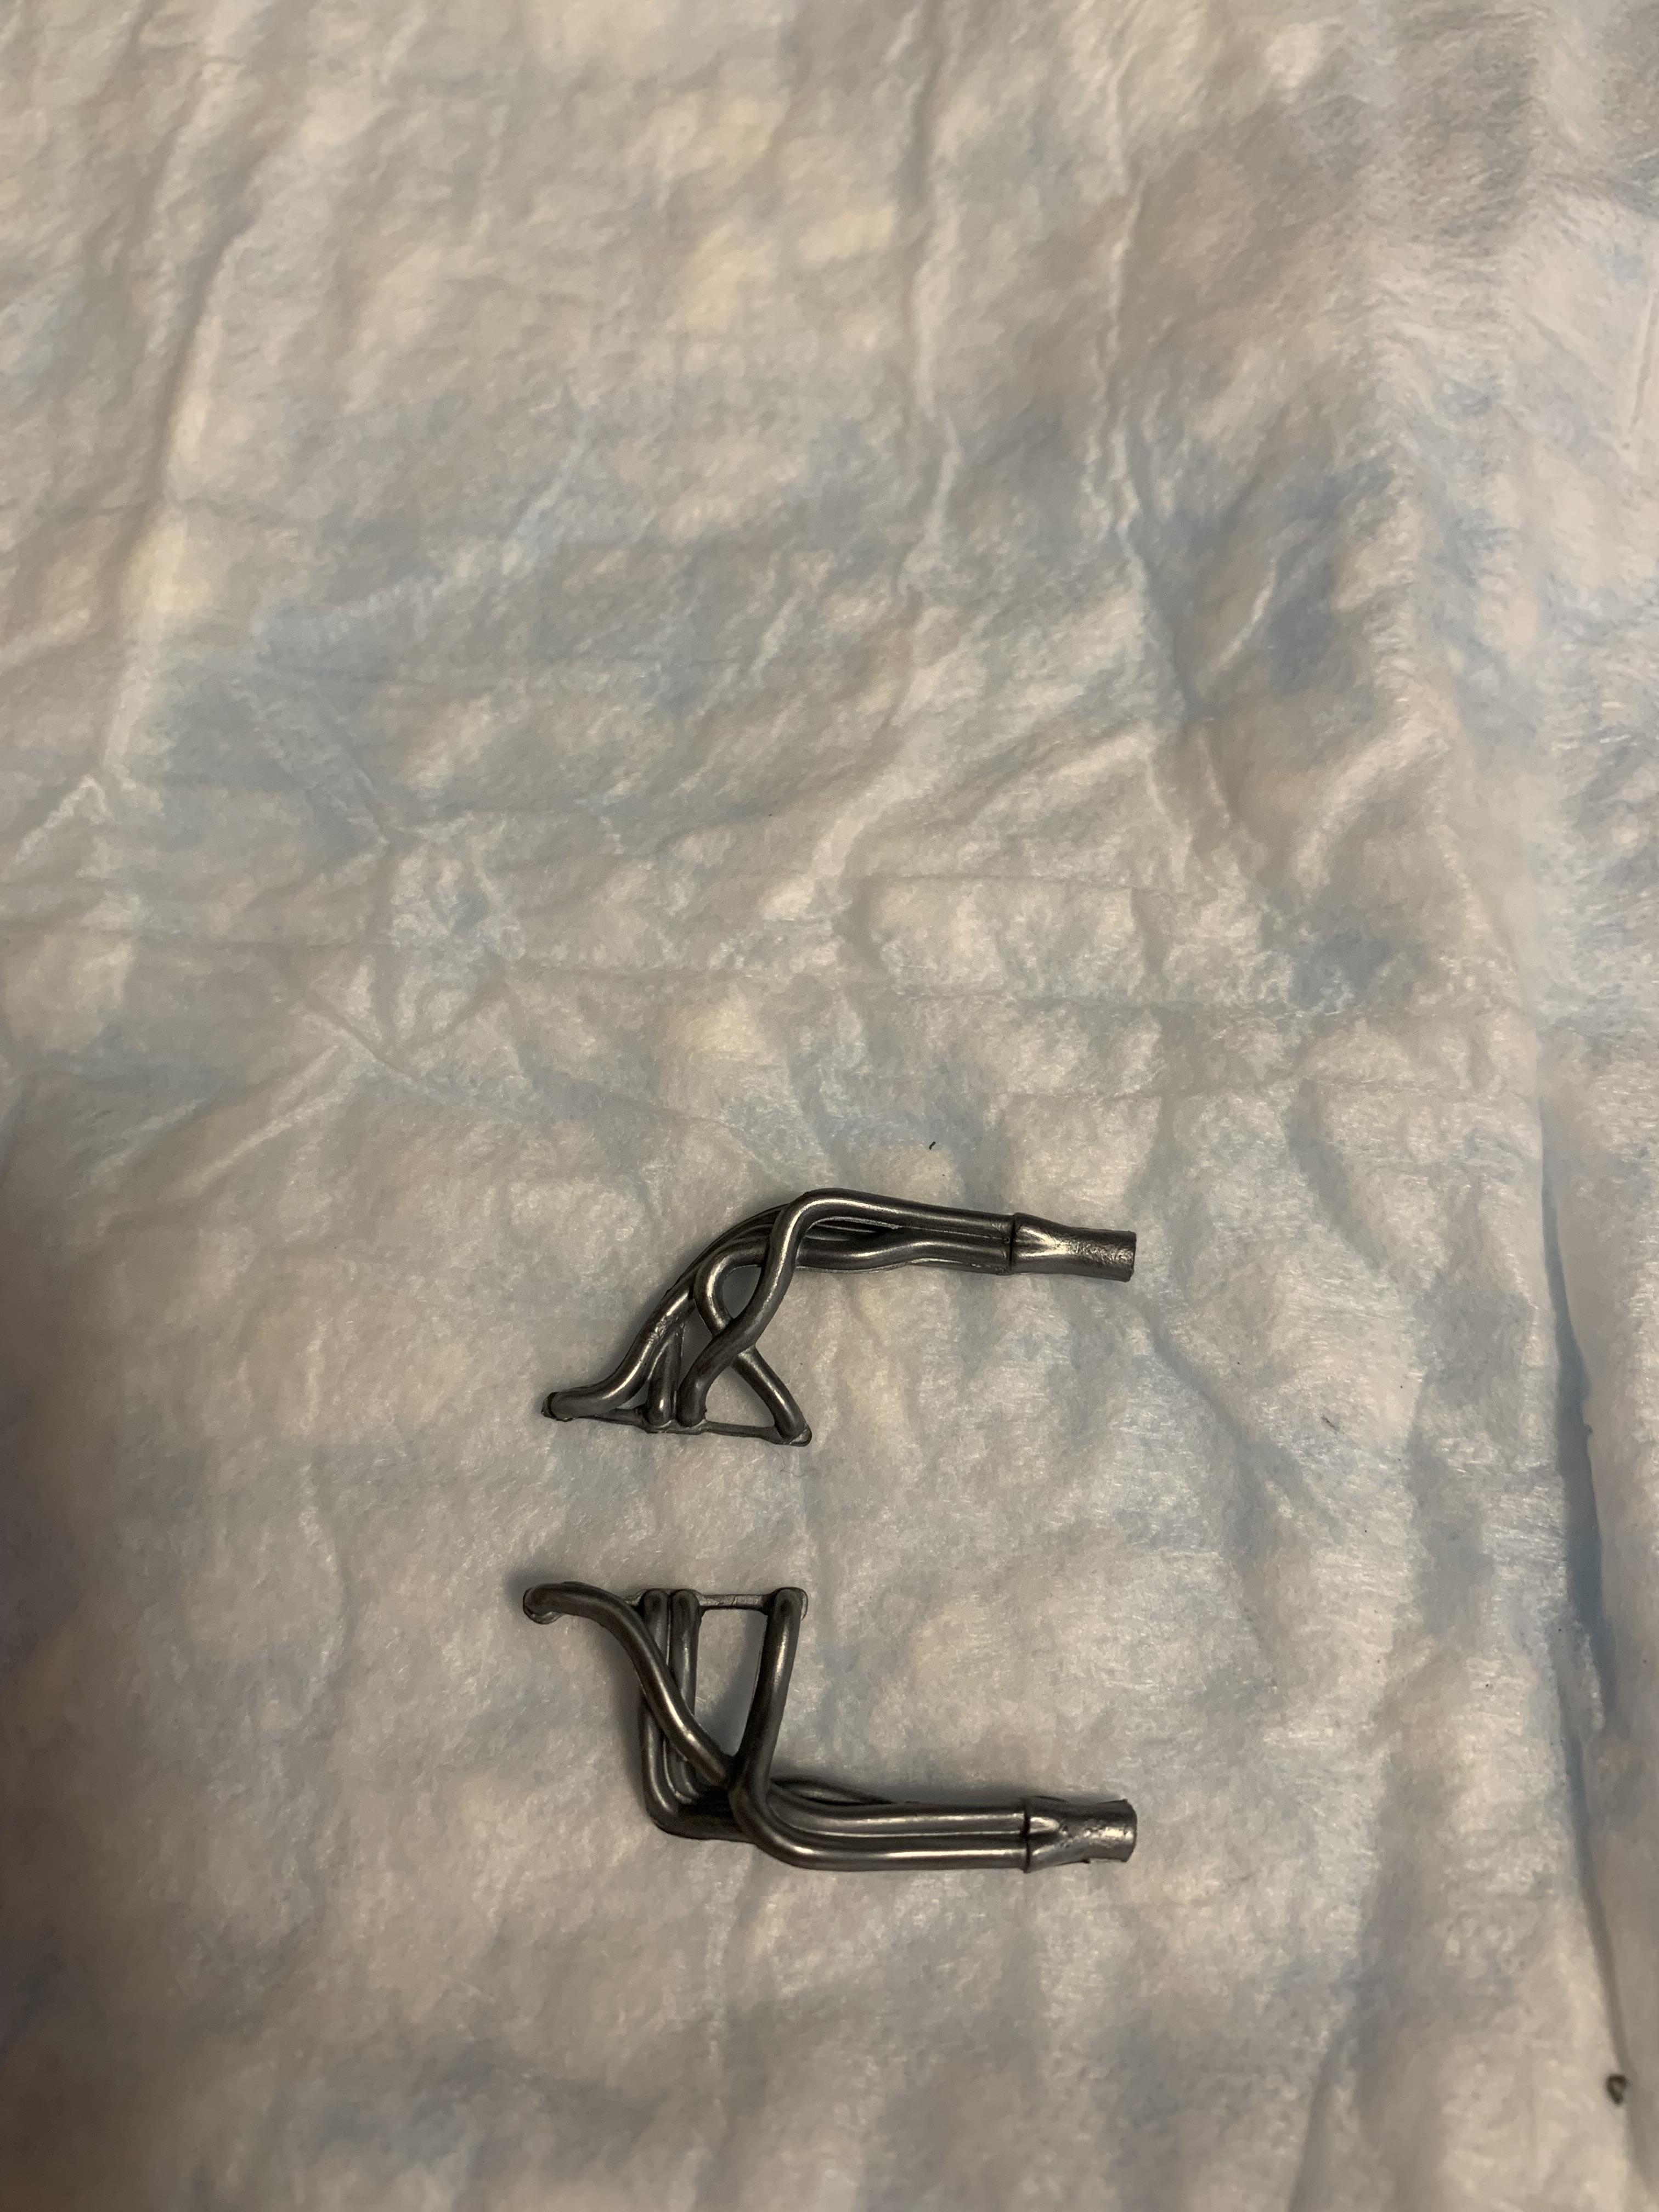
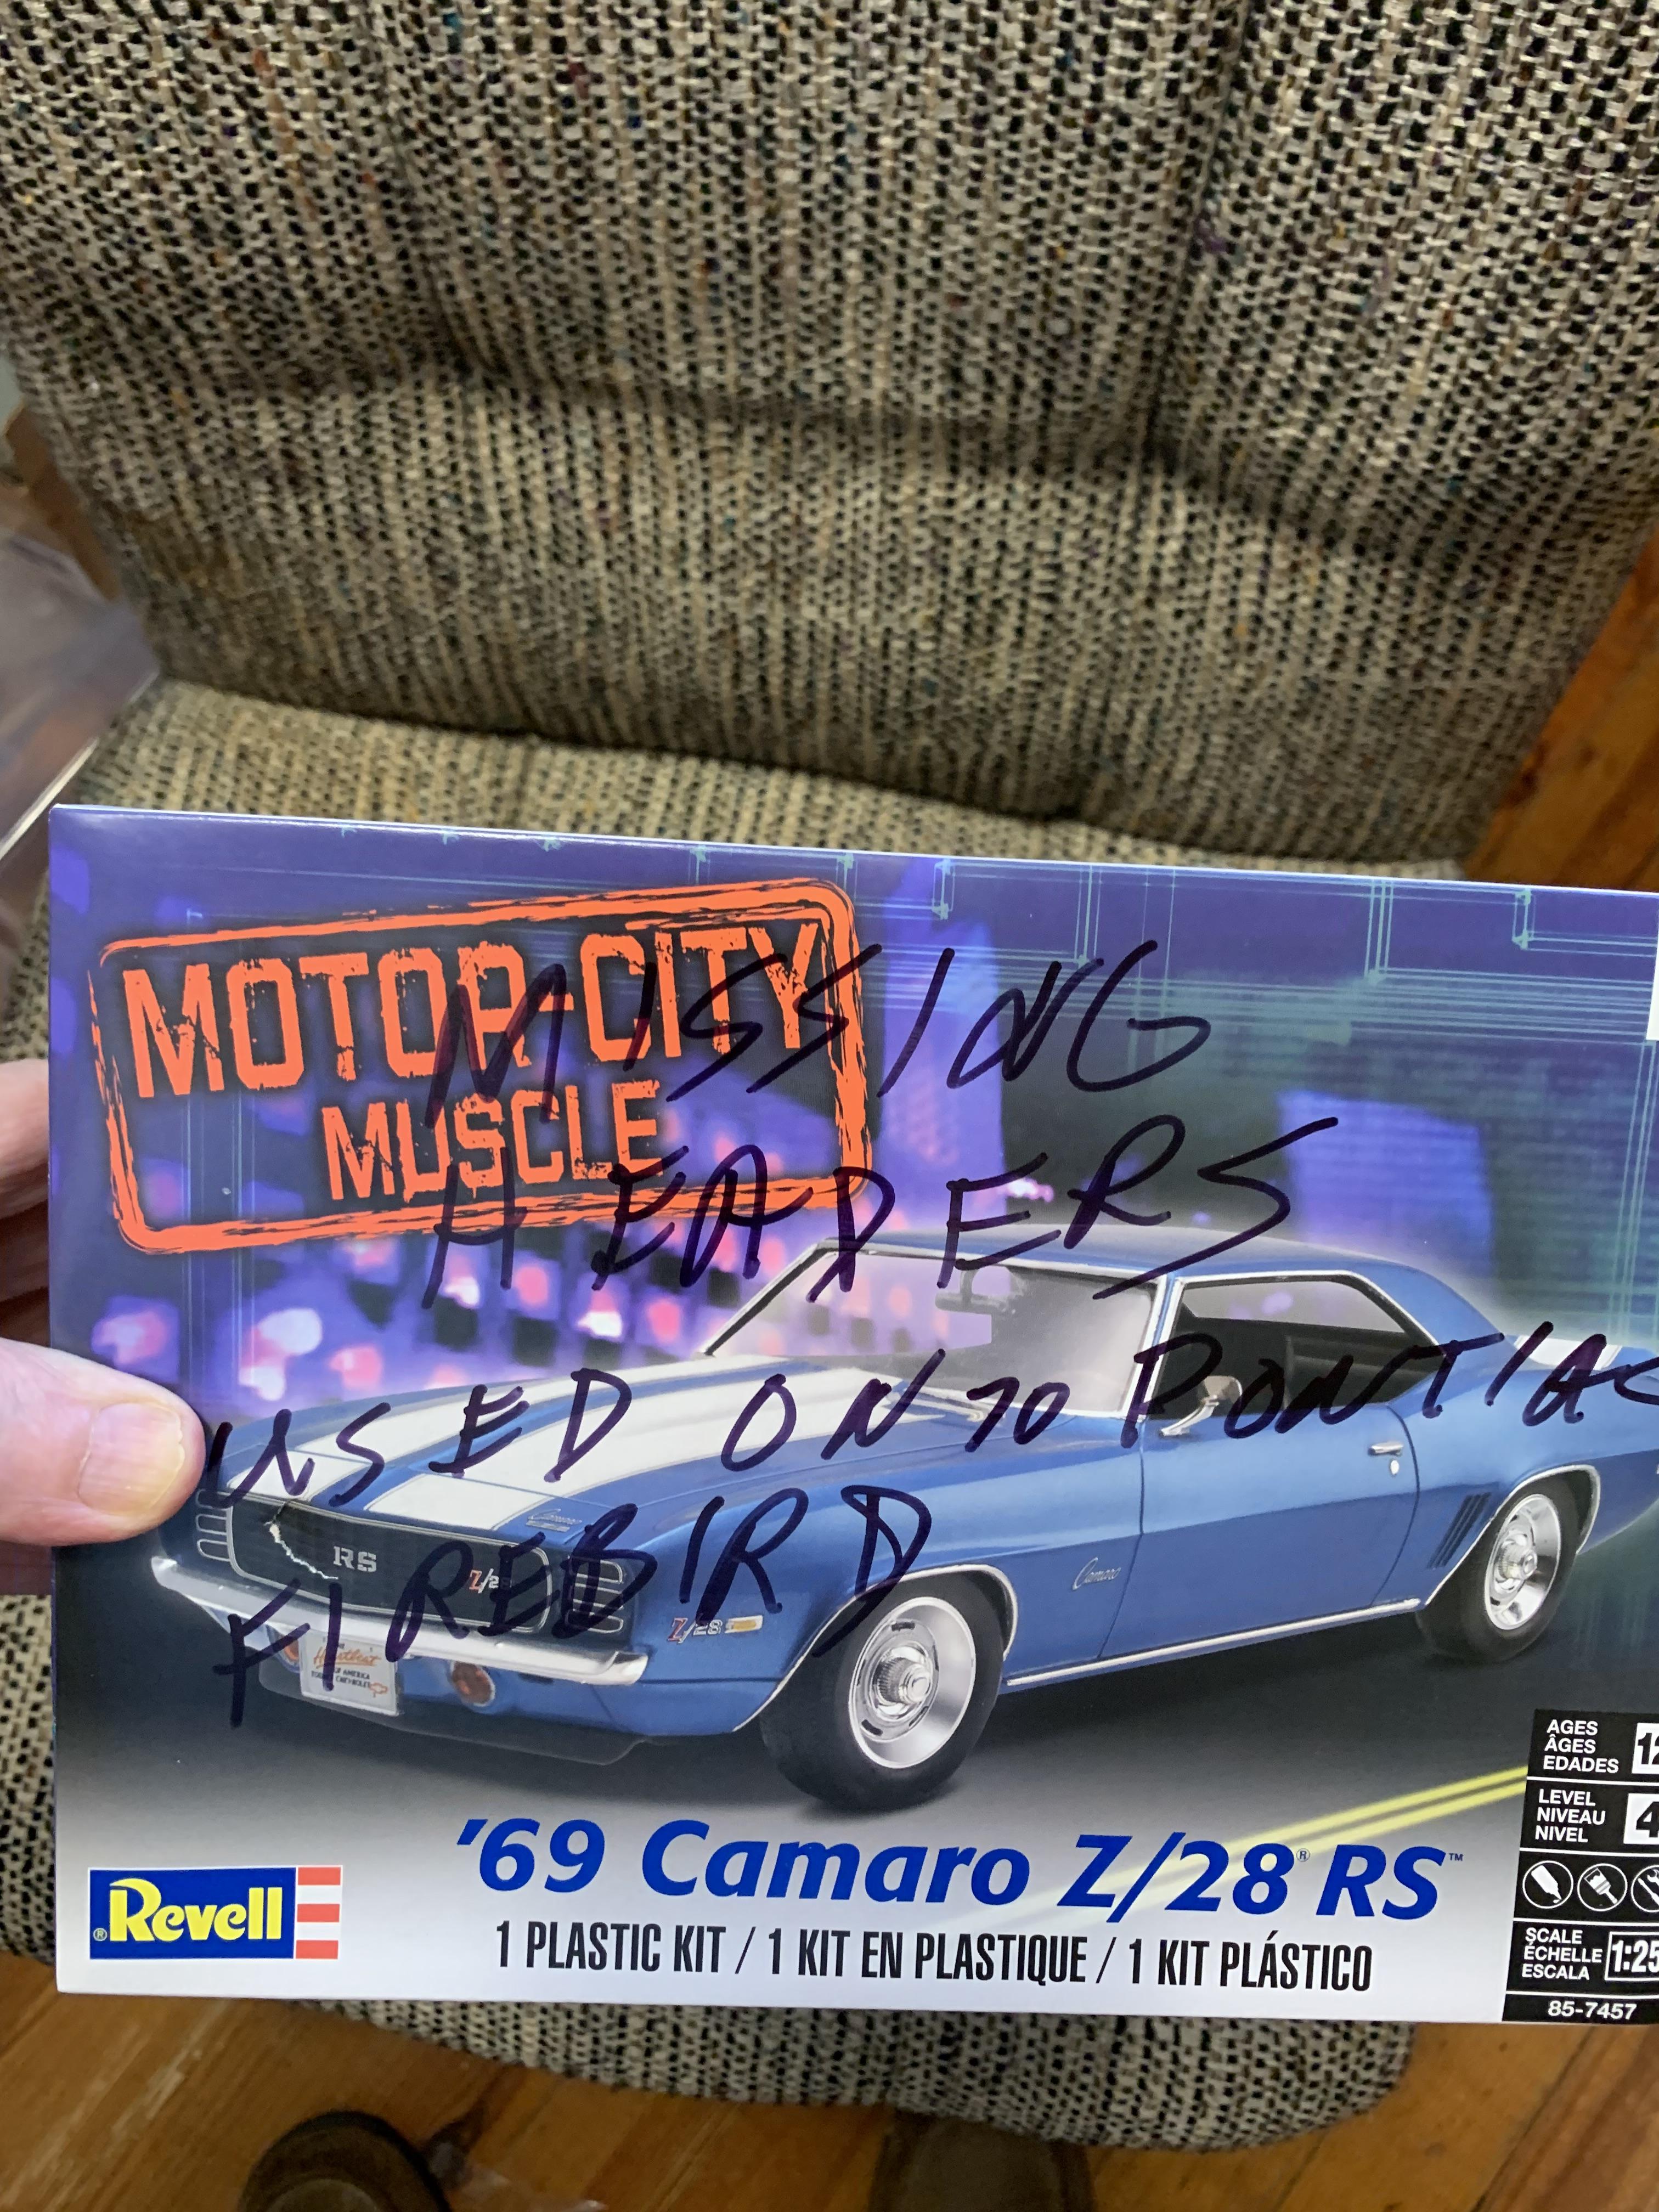
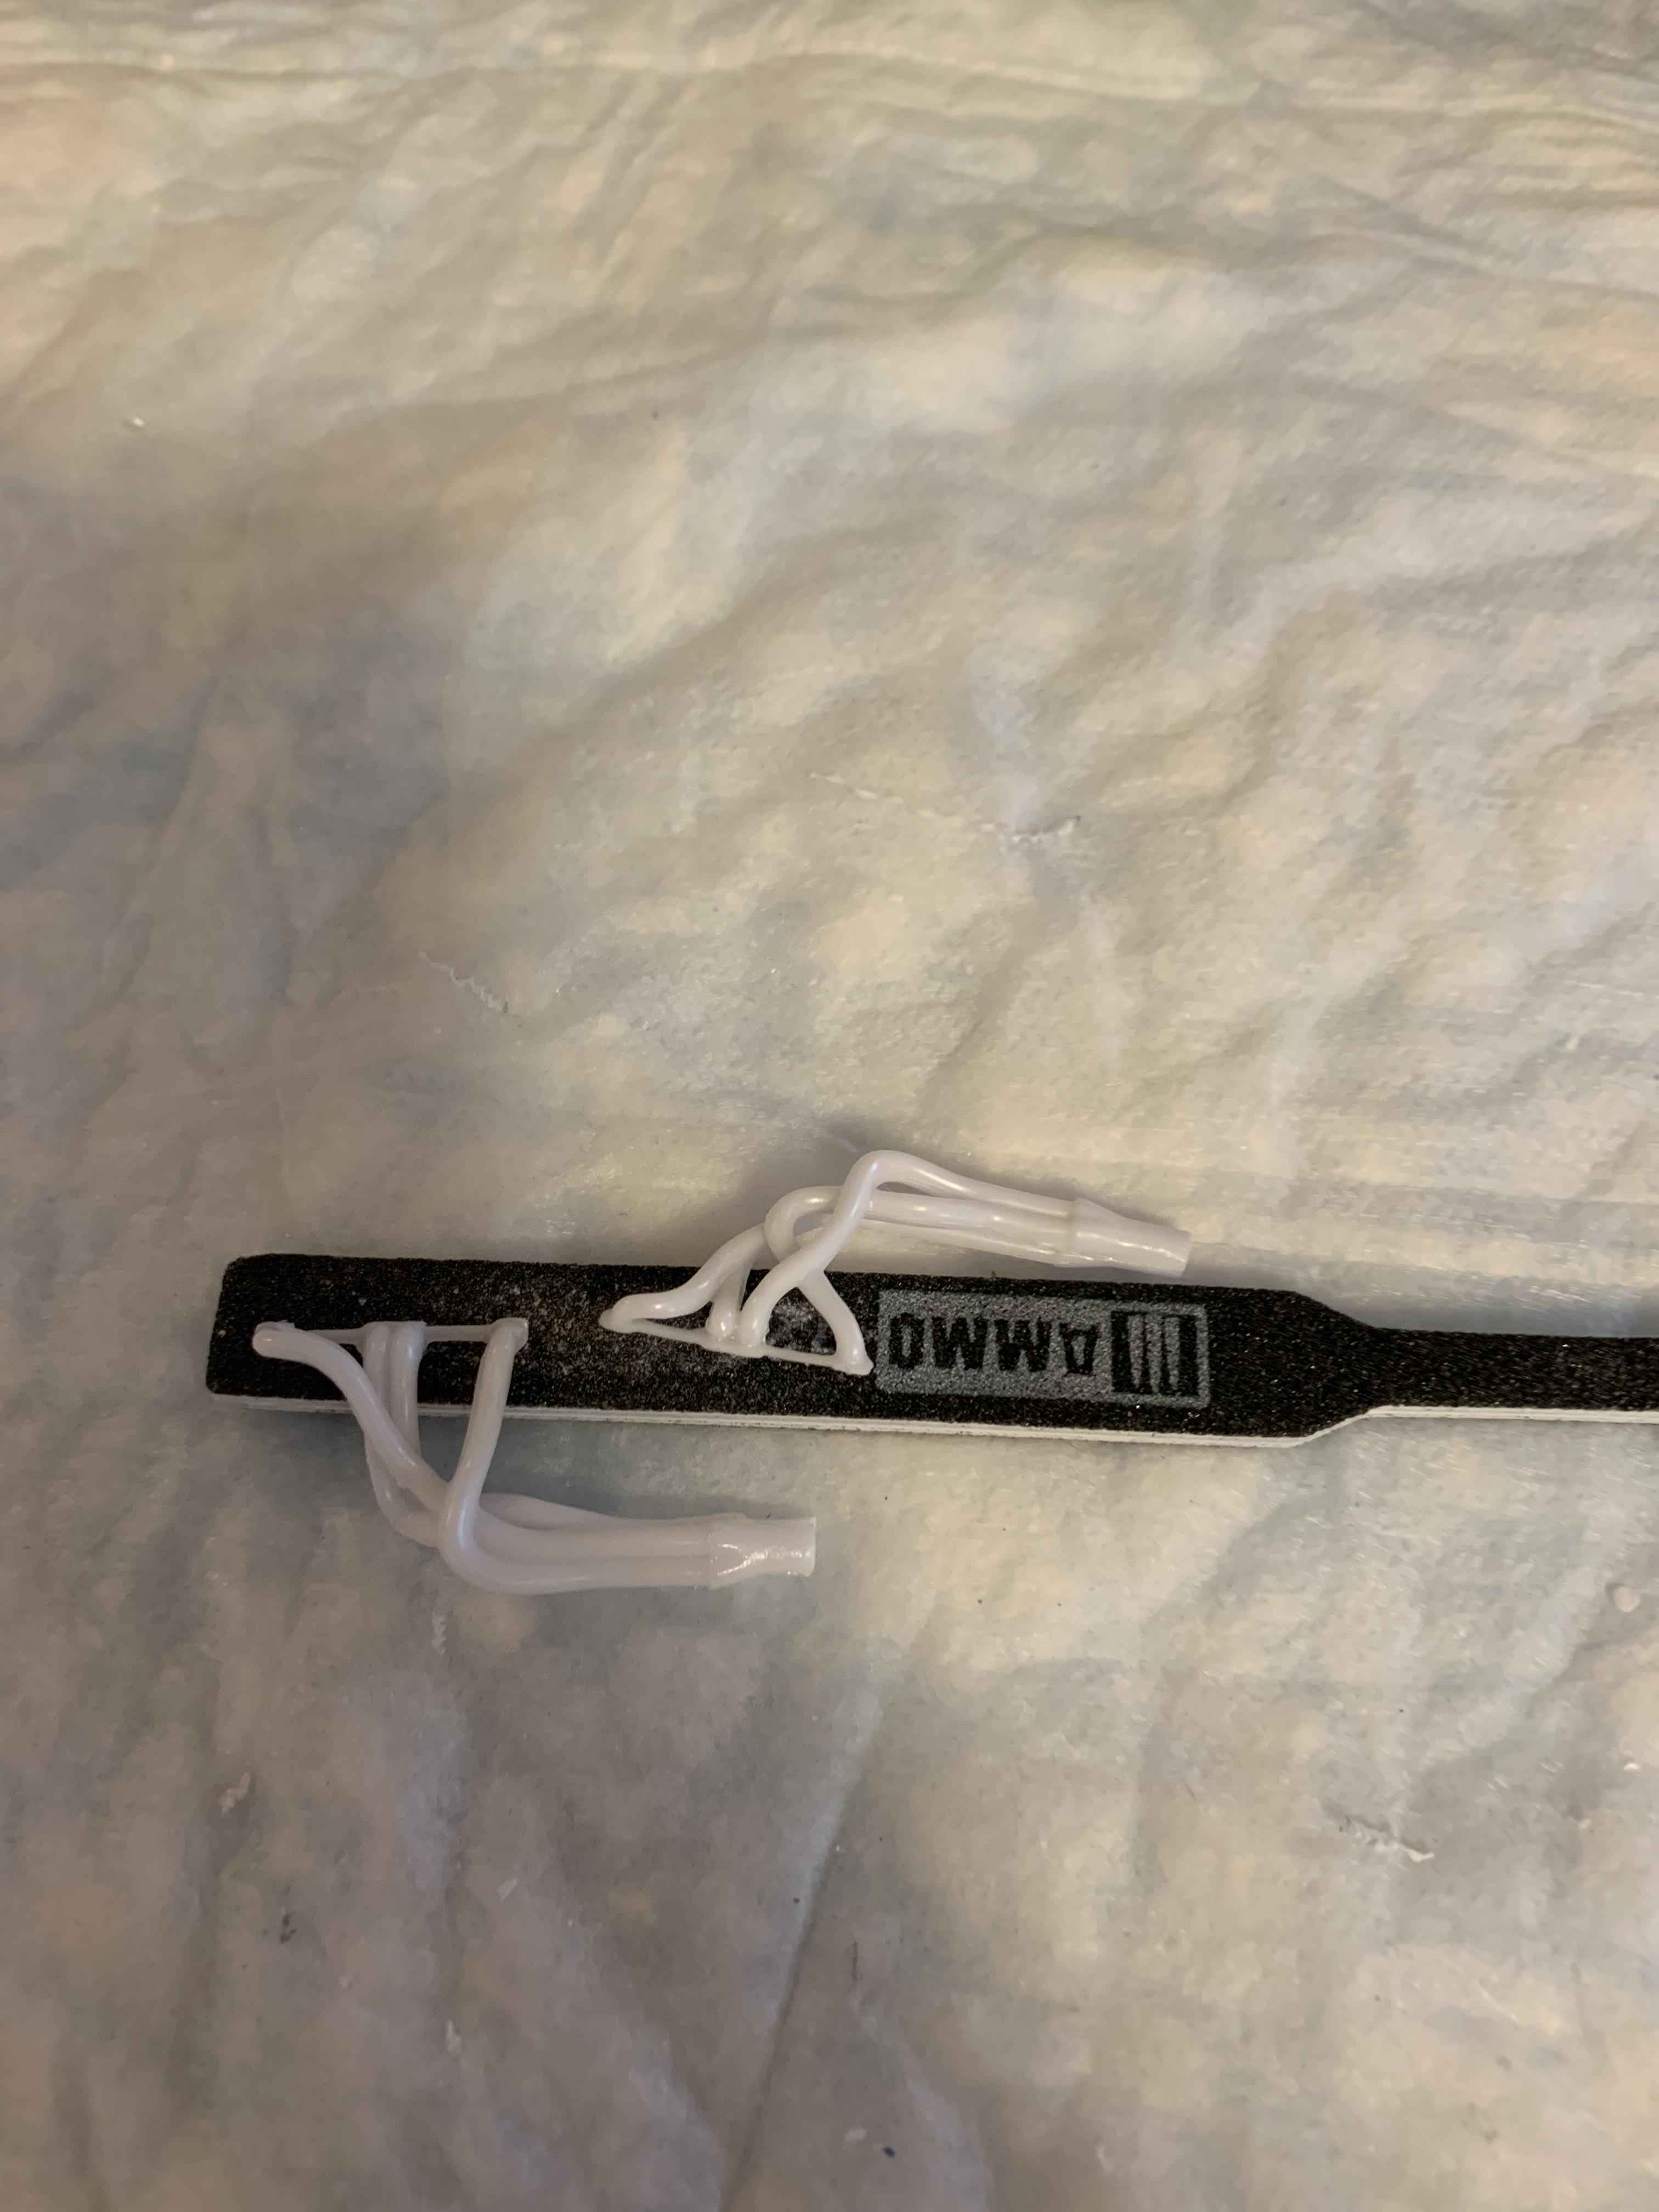
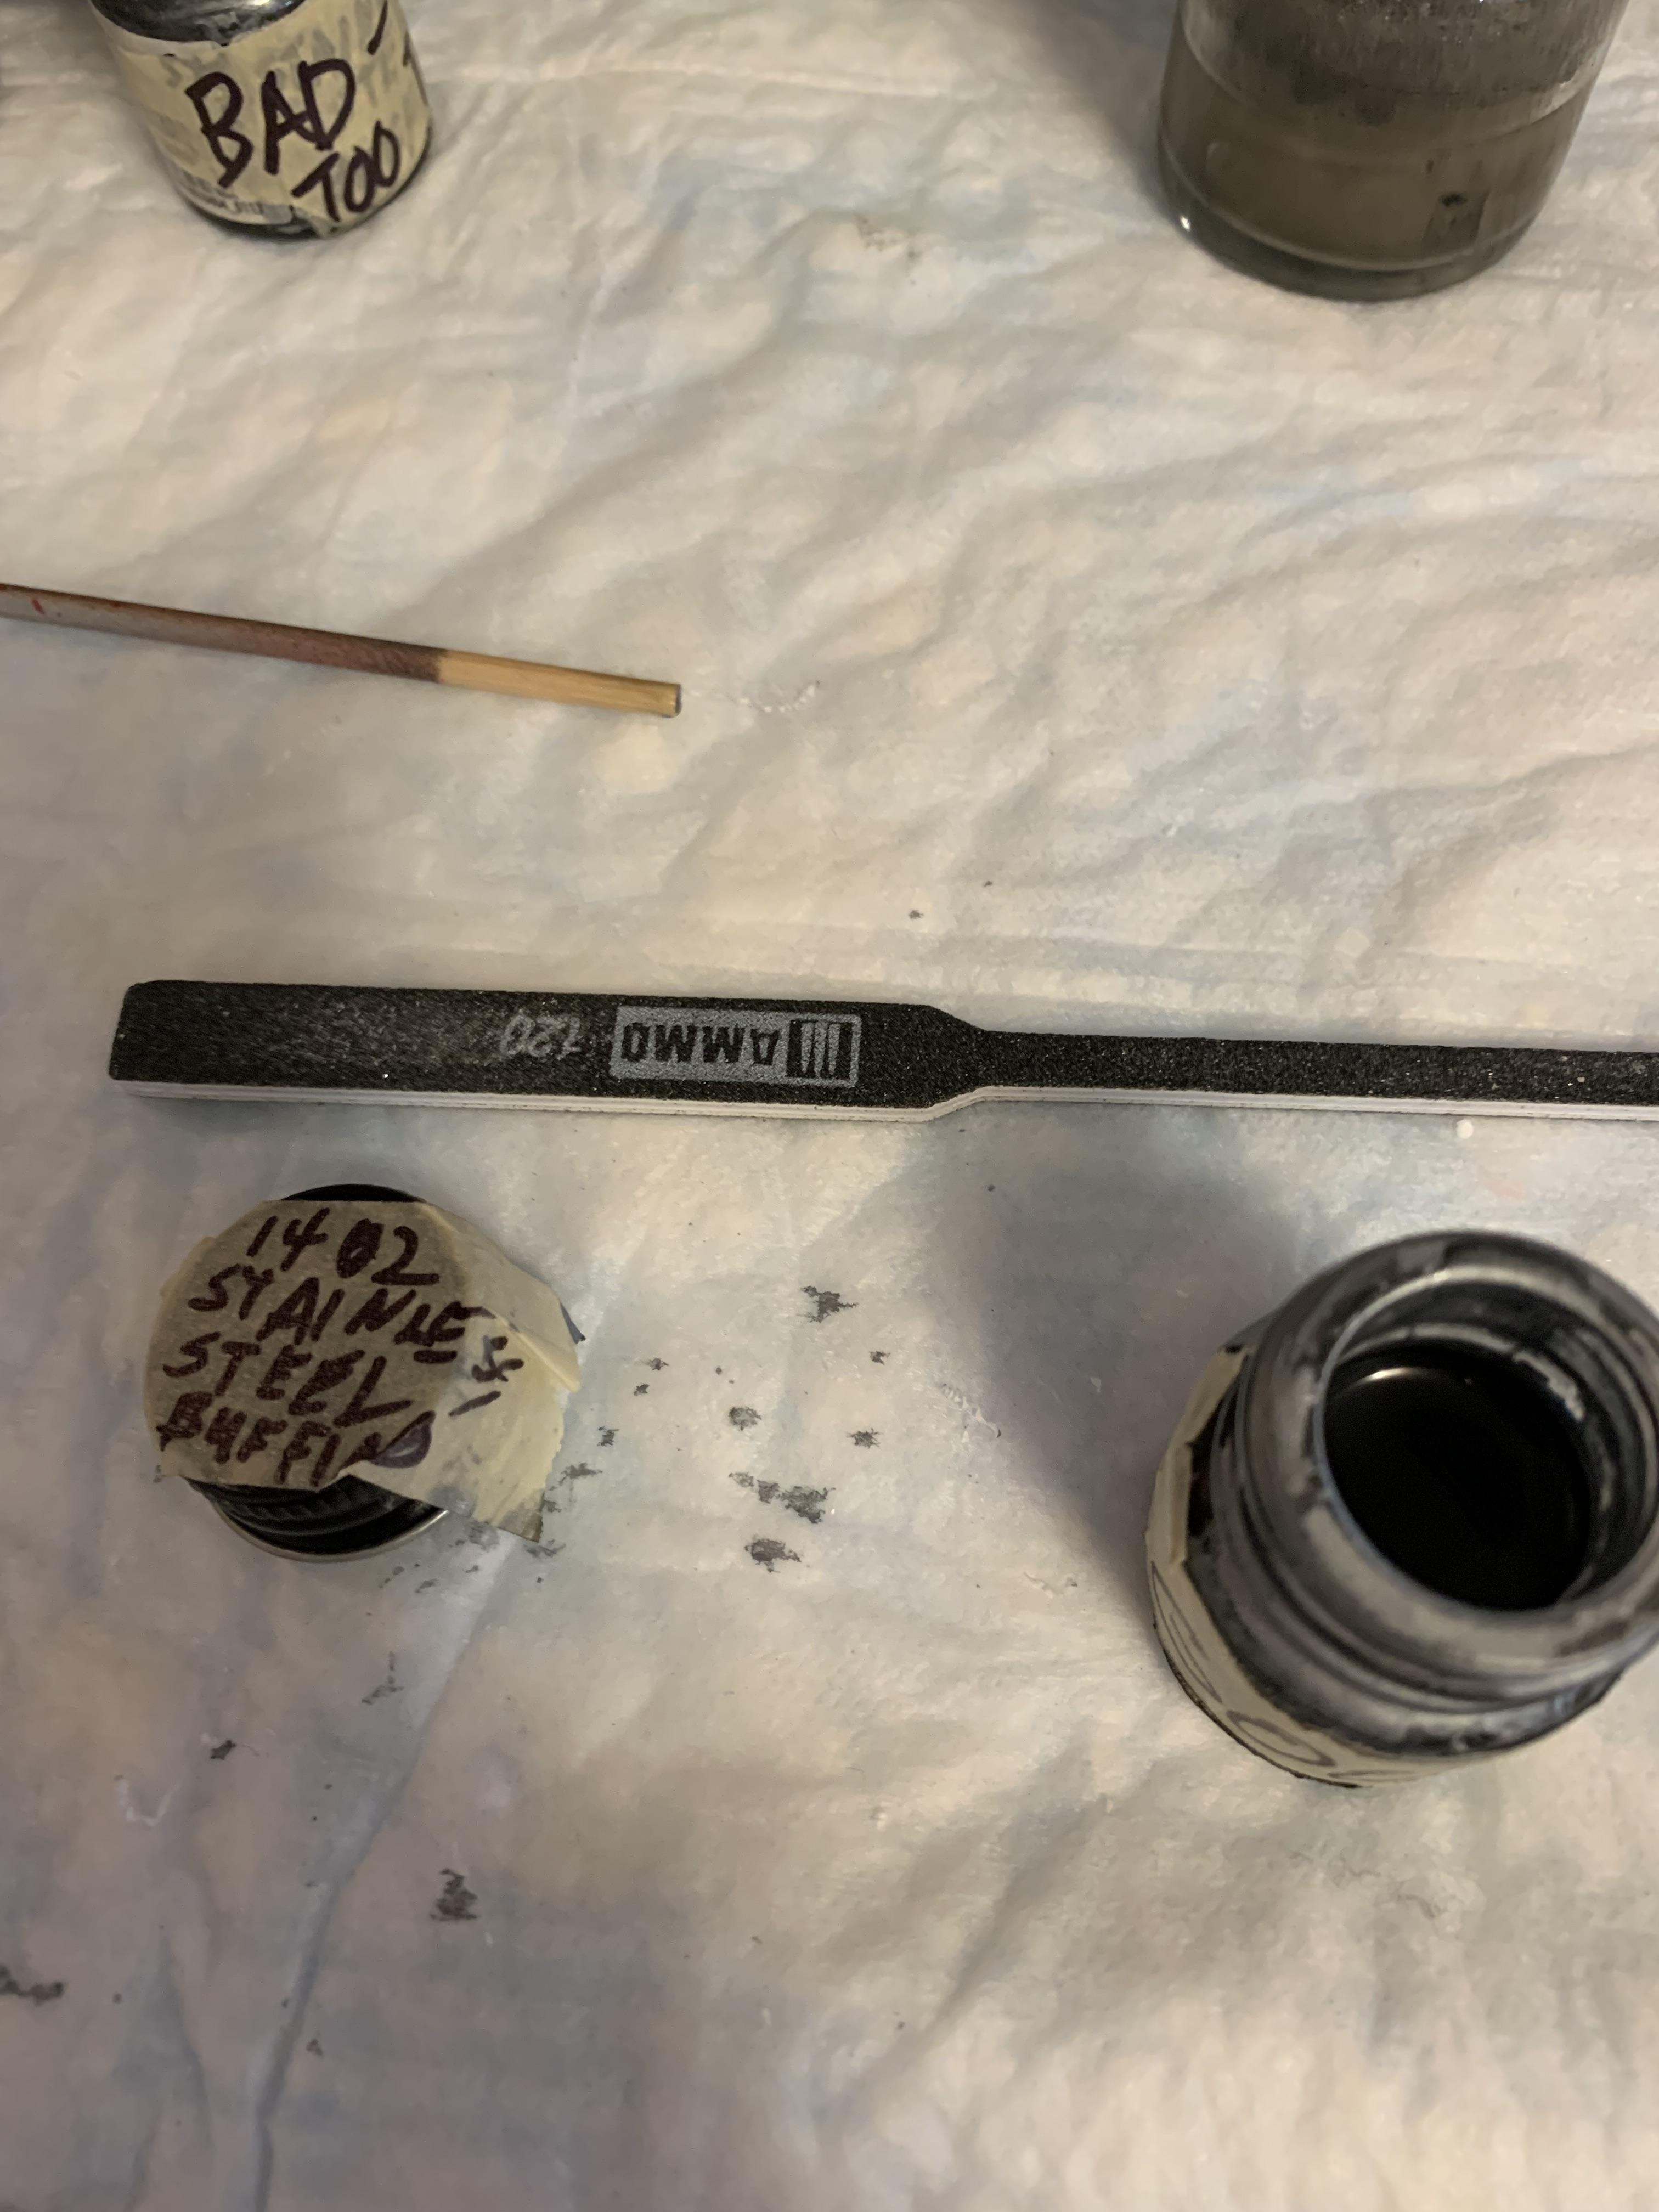
Last big stumbling block: headers. Got all the materials out to scratch build a set. This was gonna be my second try at building headers and the memory of my first try 7 years ago still haunts me as I was not happy with the way they turned out. Anyway, as a last resort, I looked in my casting bin and saw a driver’s side header that seemed to fit all right and more resembled a “tuned” header. After some research, I realized it was from a Revell 69 Camaro and/or a Revell 69 Nova kit. After some digging, I found a kit in my room and stole the headers out of it. I put them together, trial fit them and they fit great. Don’t tell anybody they are for a sbc. Then I dug up some stainless steel buffing model master, put one coat on, will put another coat on later. Oh, btw, I realize the shape of the 2 center ports are shaped differently on a Pontiac, but they are difficult to see once installed. My ocd be damned, I am moving on.
-
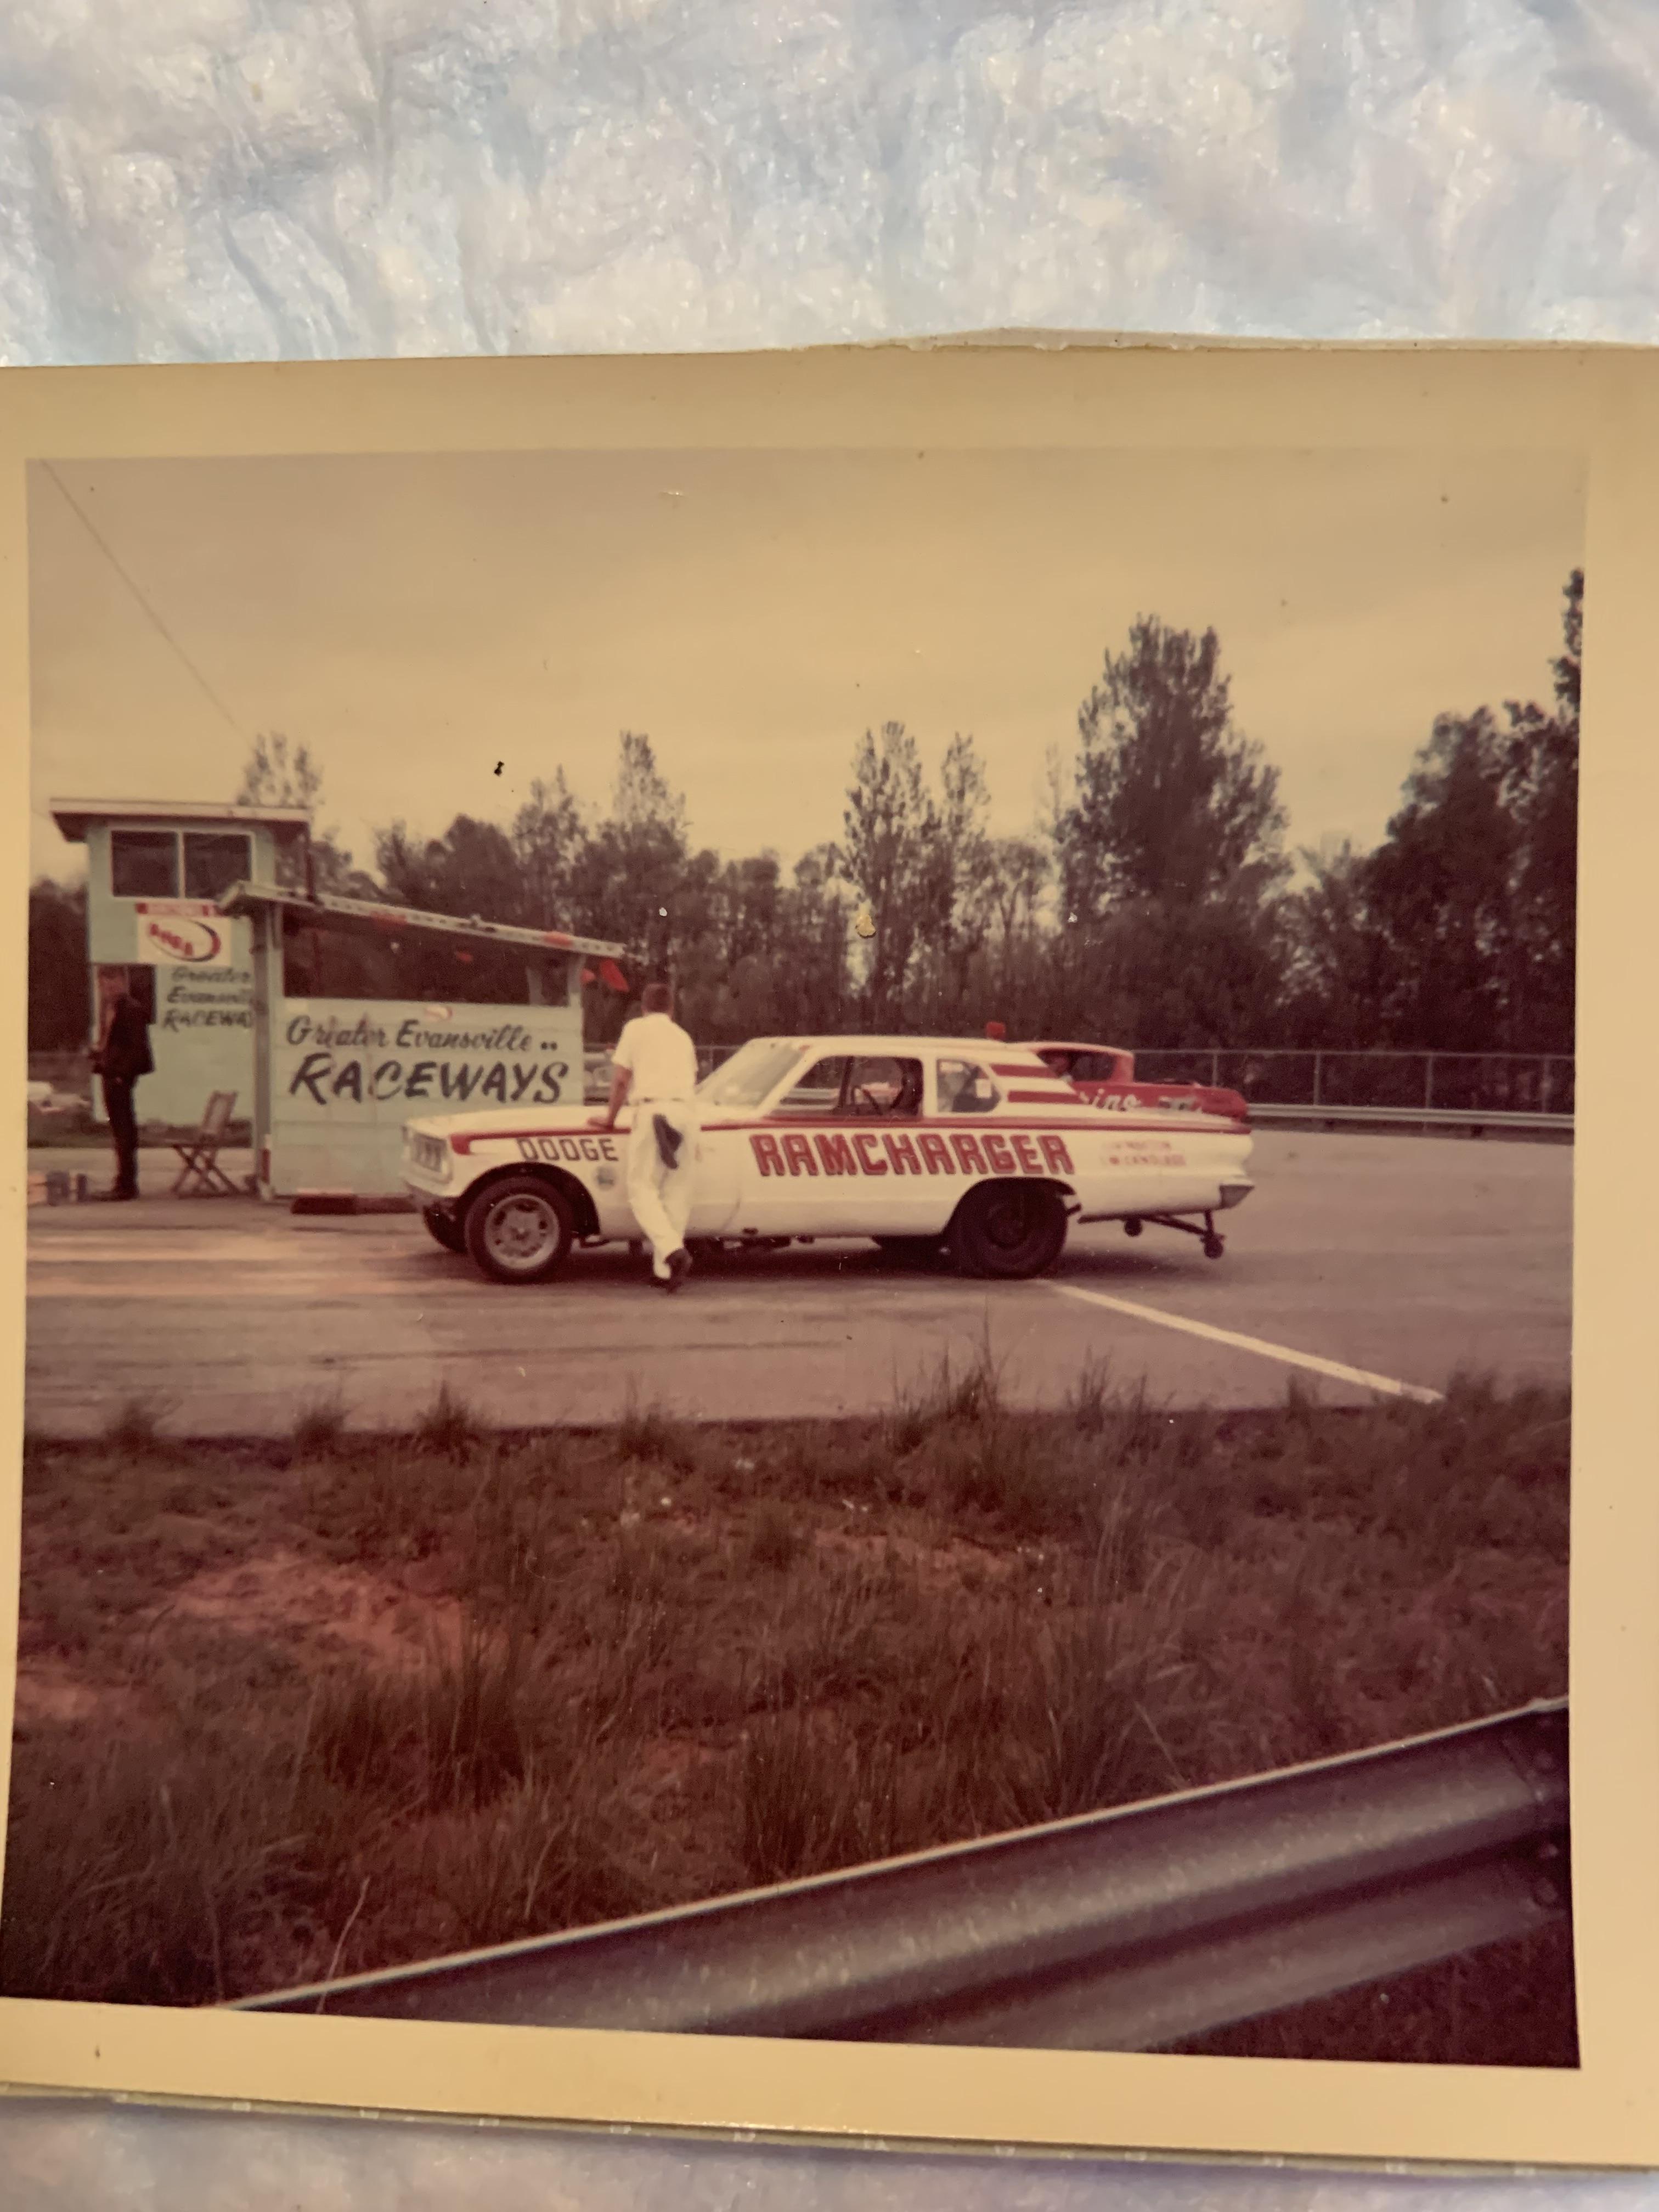
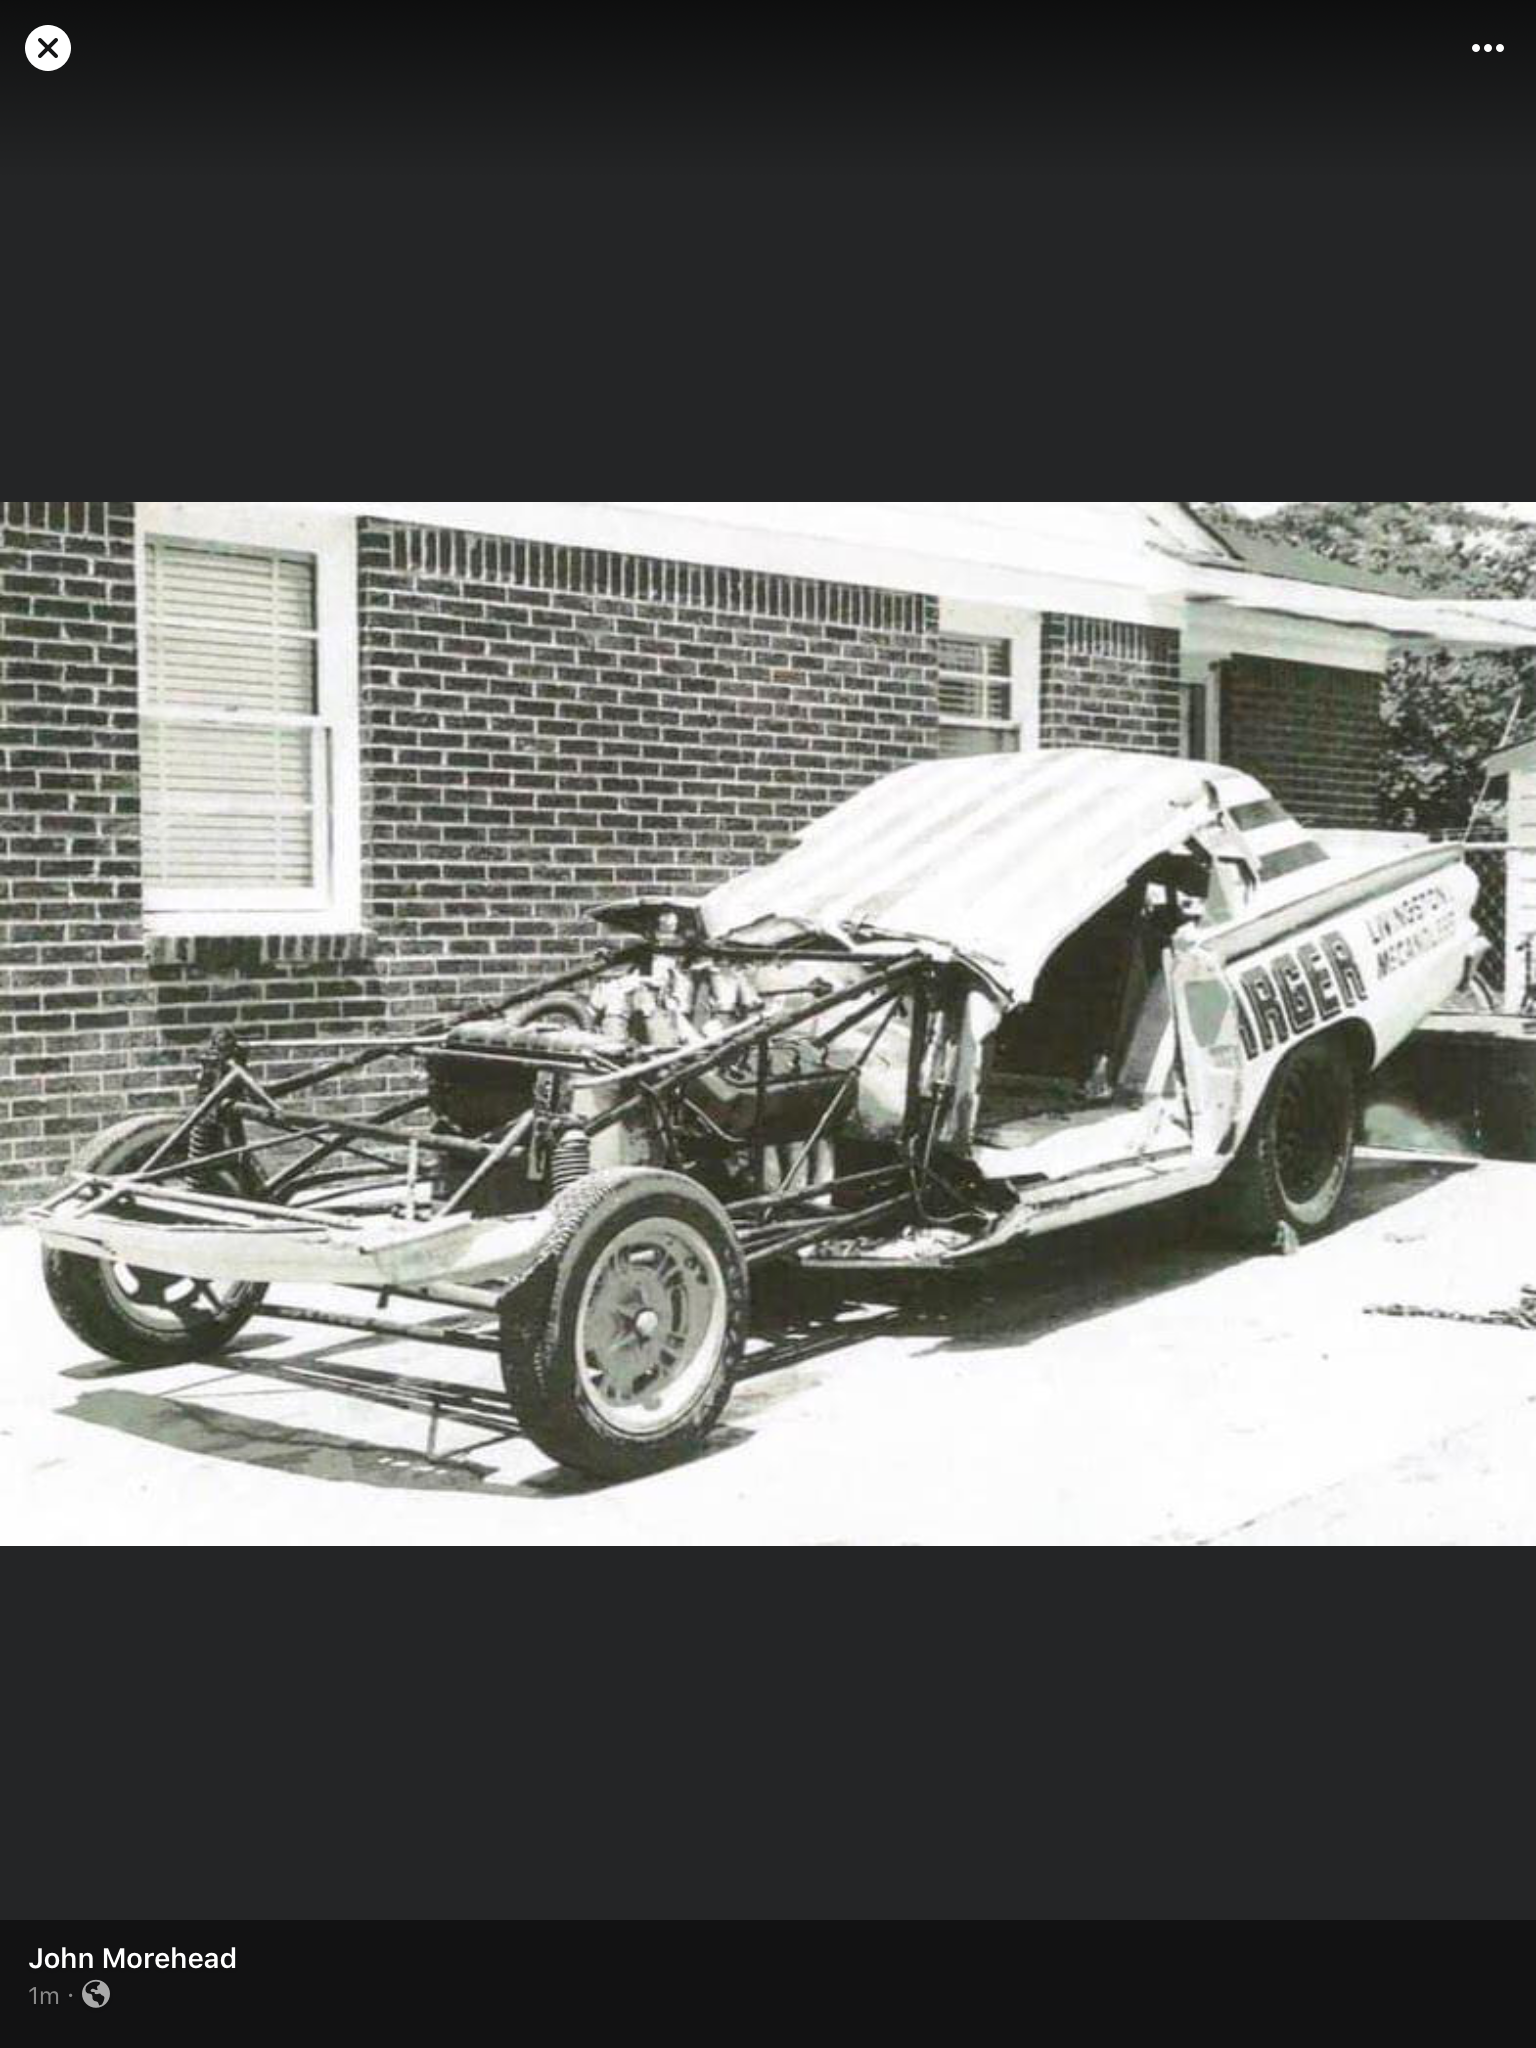
Very nice! Is there a WIP of this build? Oh, yeah, let’s get some oil sorb on that plywood floor and clean her up (lol). An extraordinary group of individuals. Their groundbreaking 66 Dart is on my list. A picture I took at Chandler, In. In 1966. This was after Herb McCandless and John Livingston had purchased it (note the singular Ramcharger denotation on the body. Livingston crashed it a few months later.
-
Geez! Another Stocker! 70 Formula Firebird B/SA
R. Thorne replied to R. Thorne's topic in WIP: Drag Racing Models
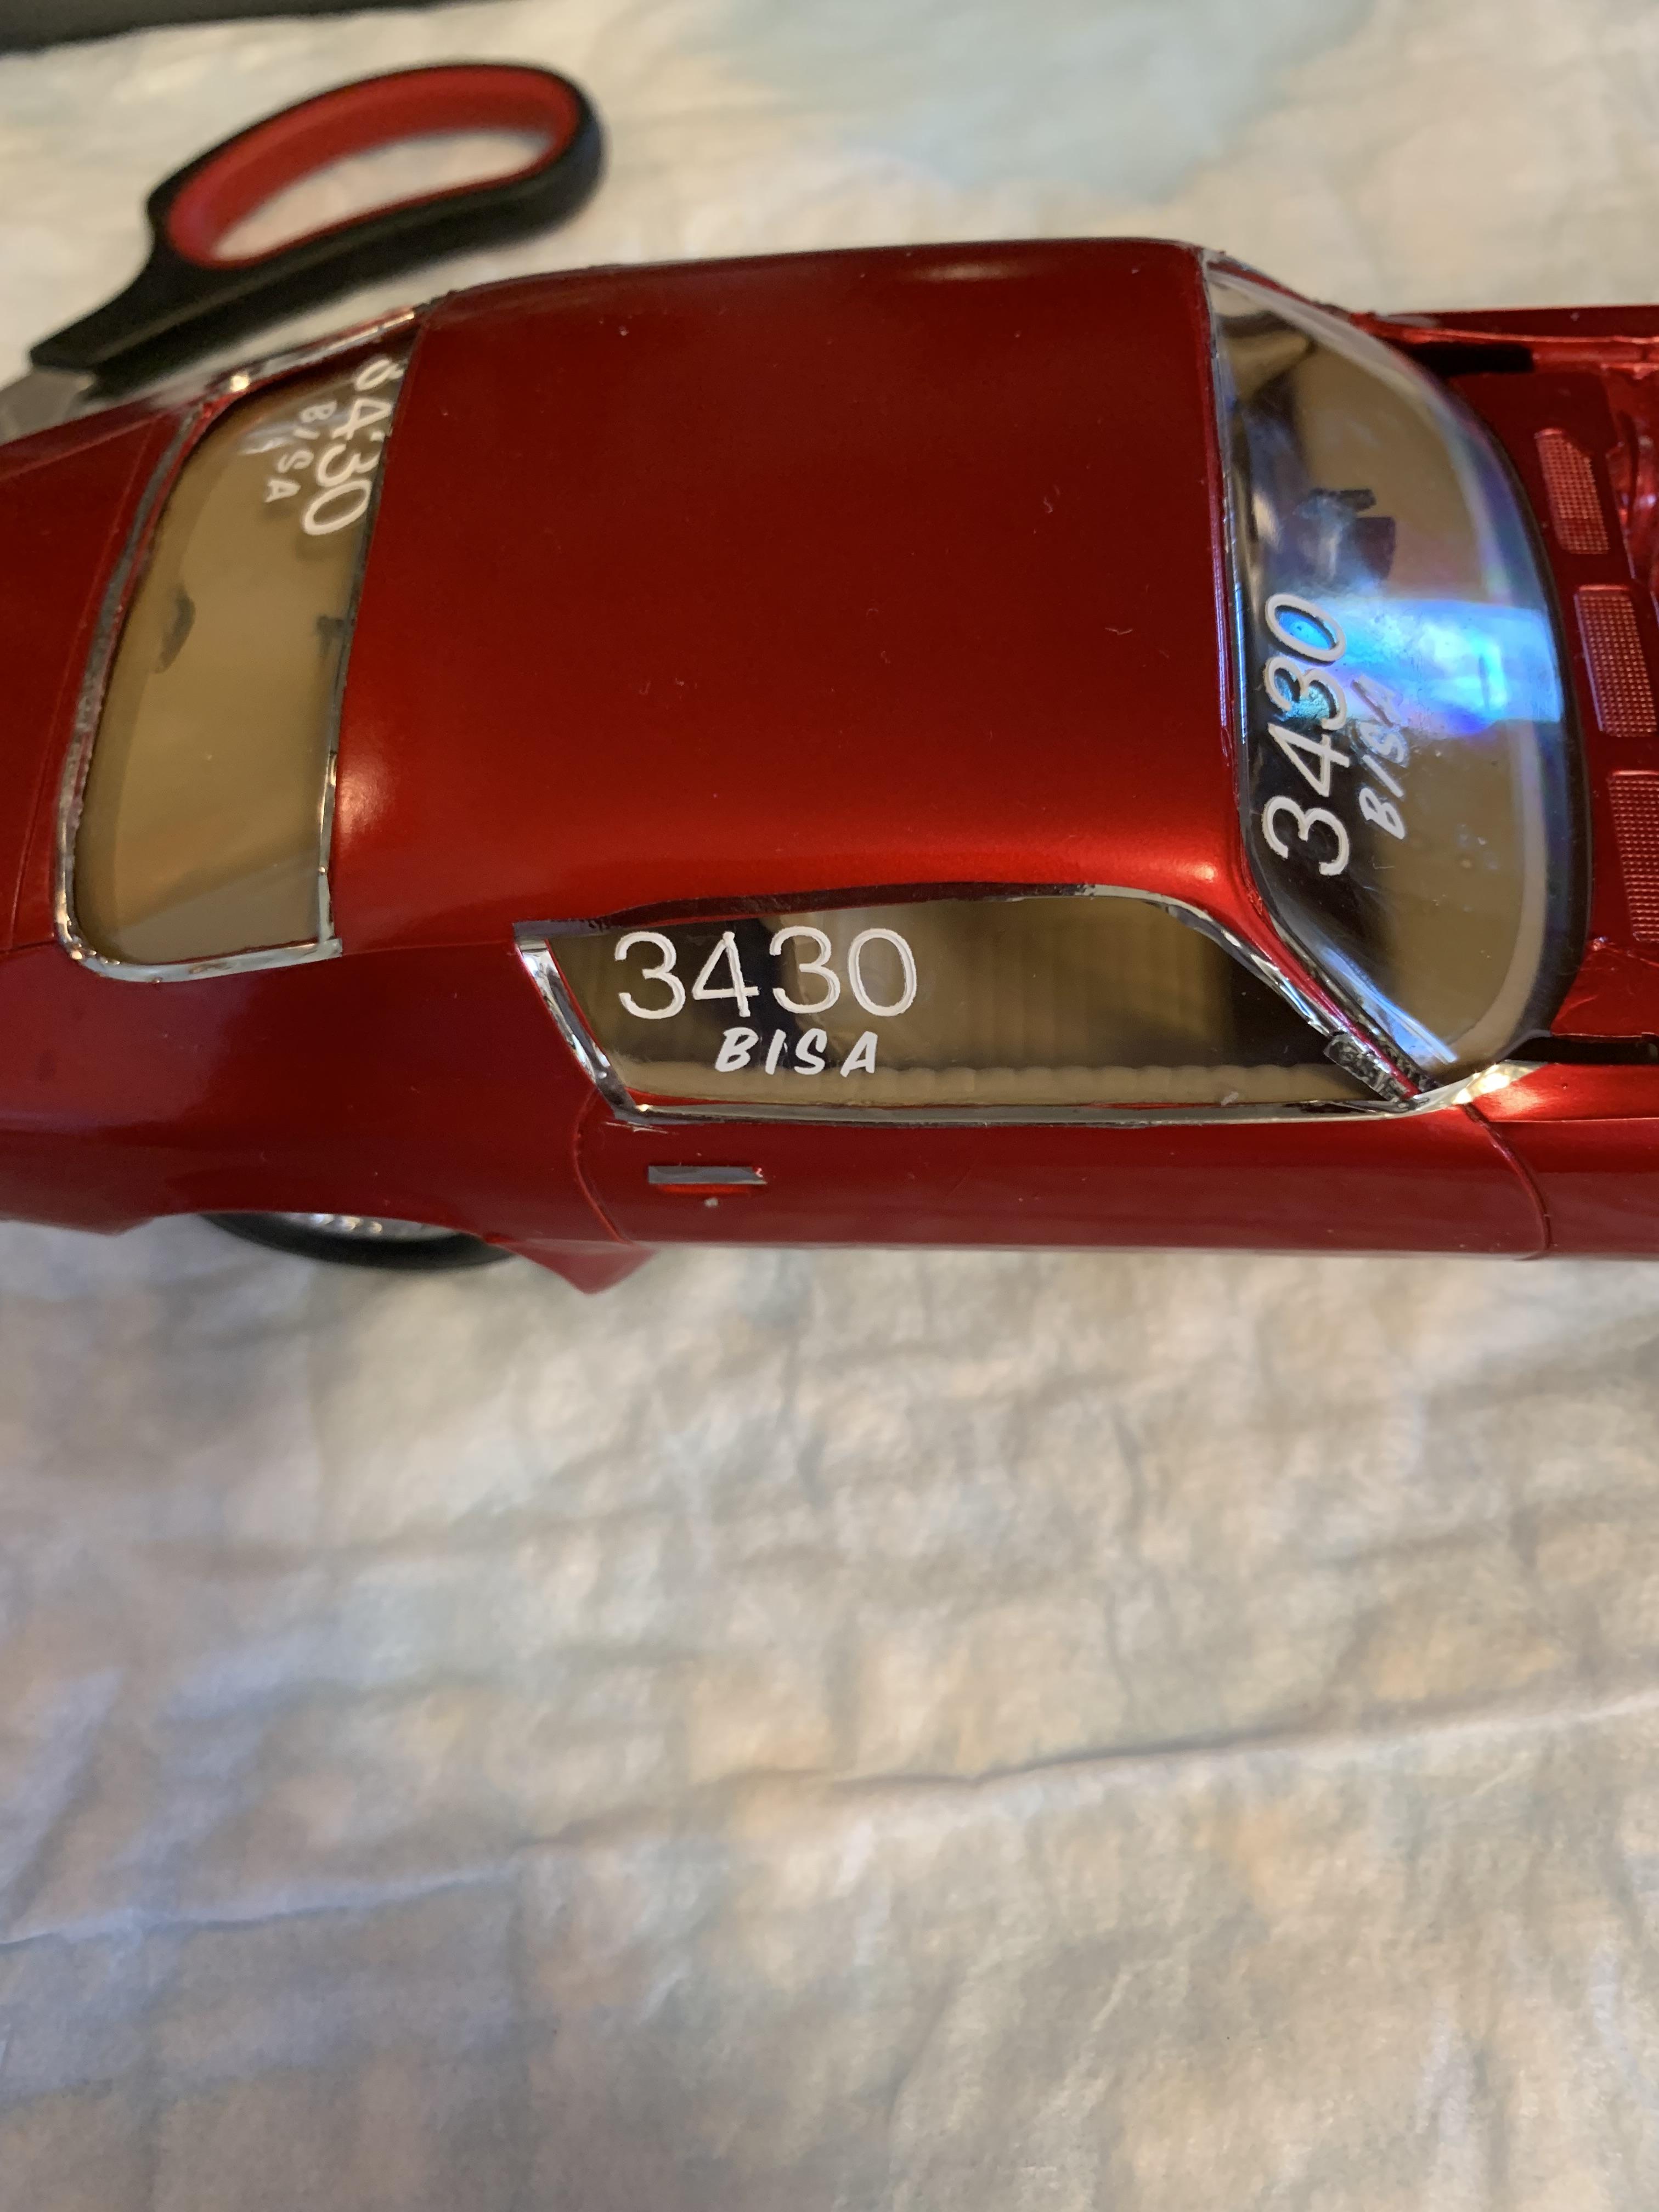
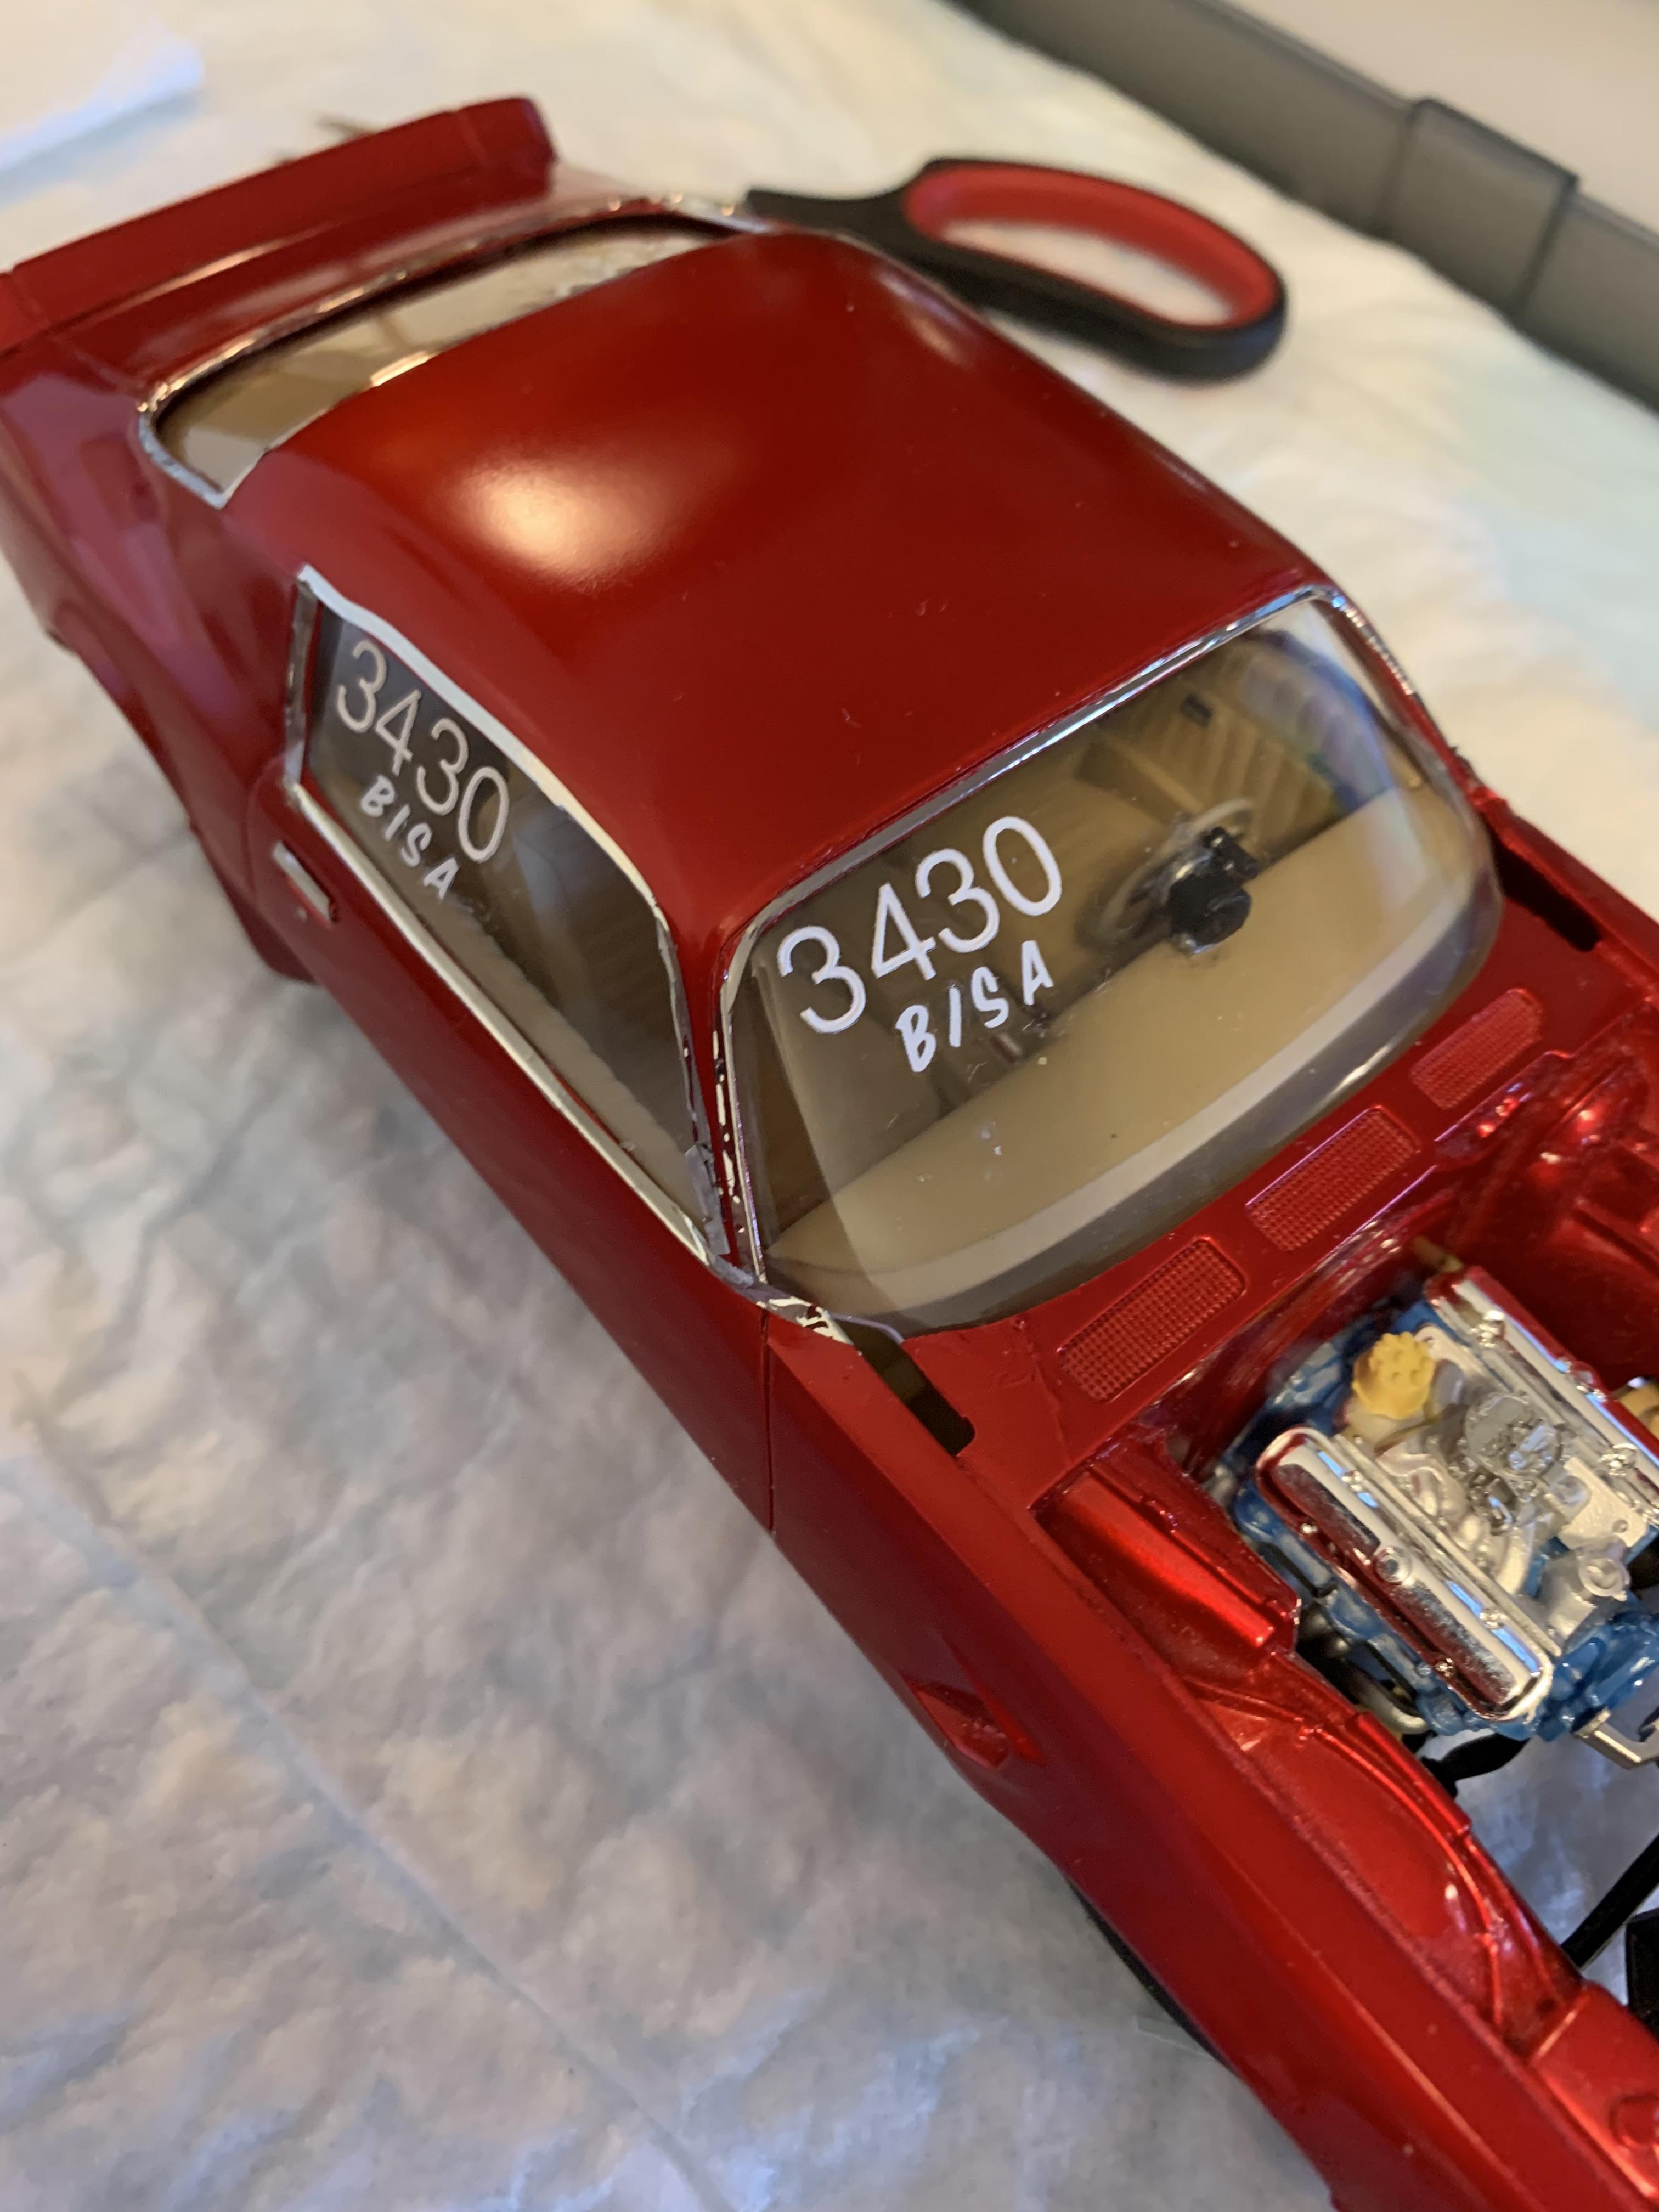
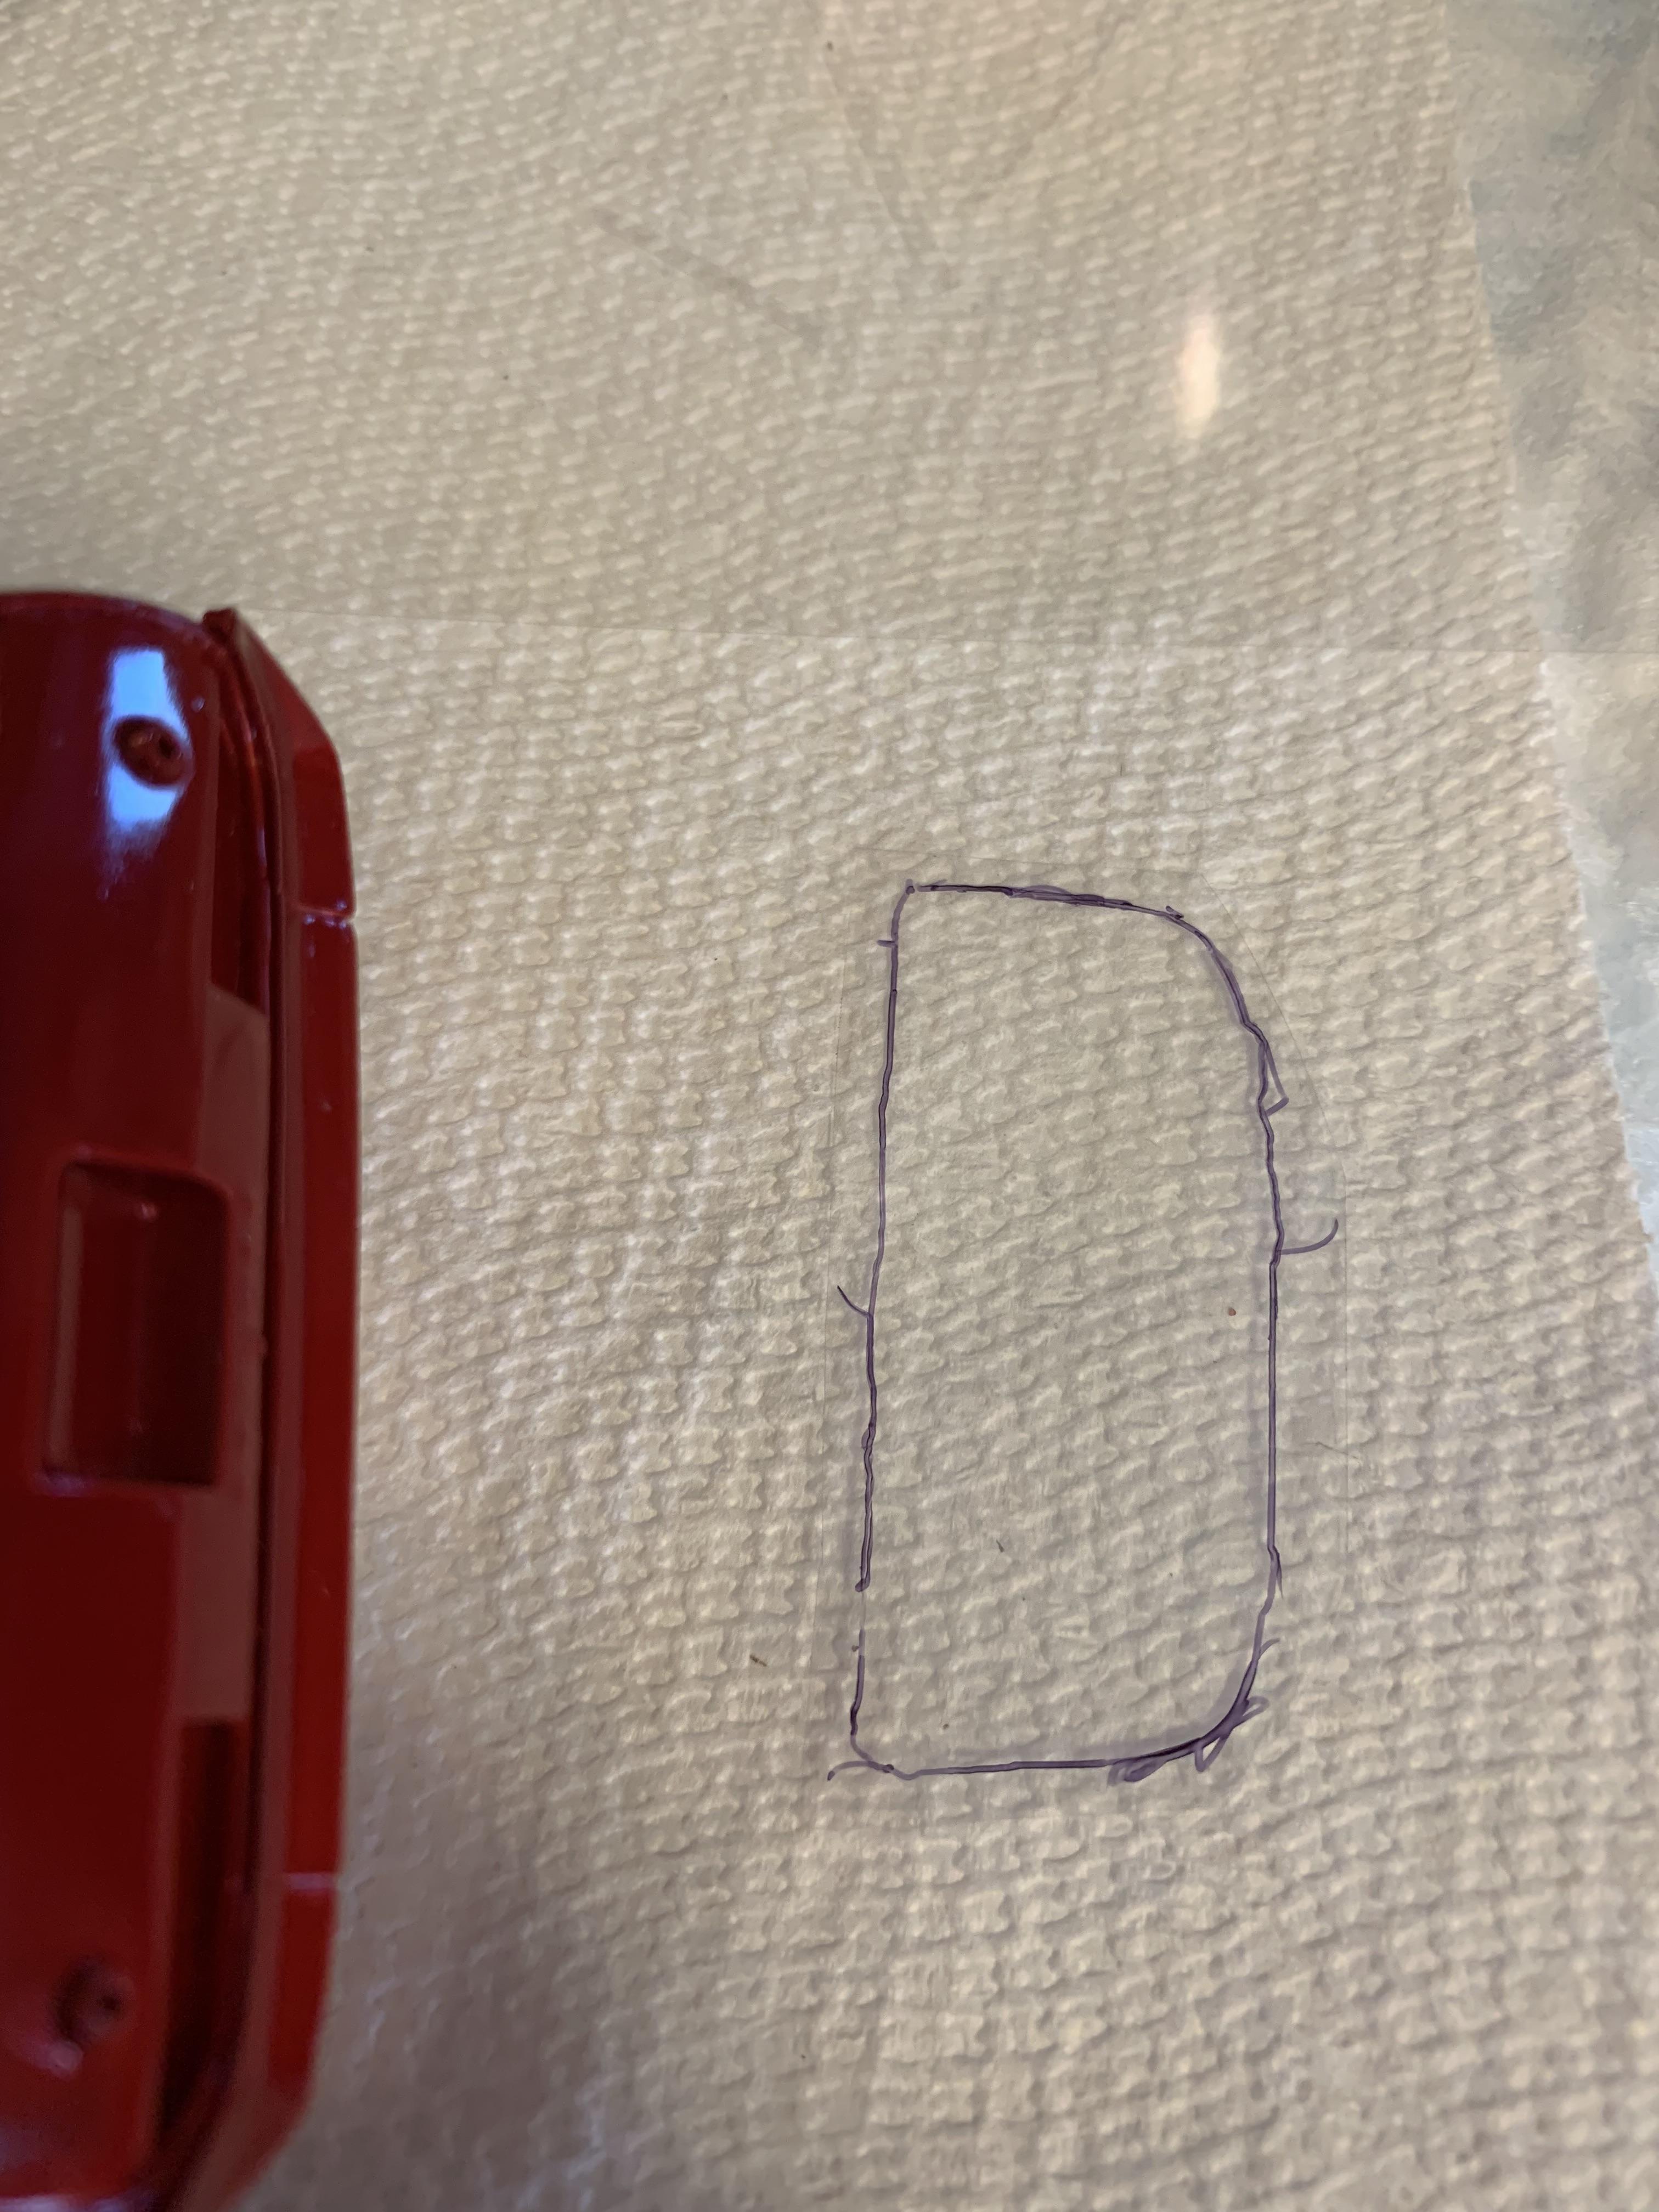
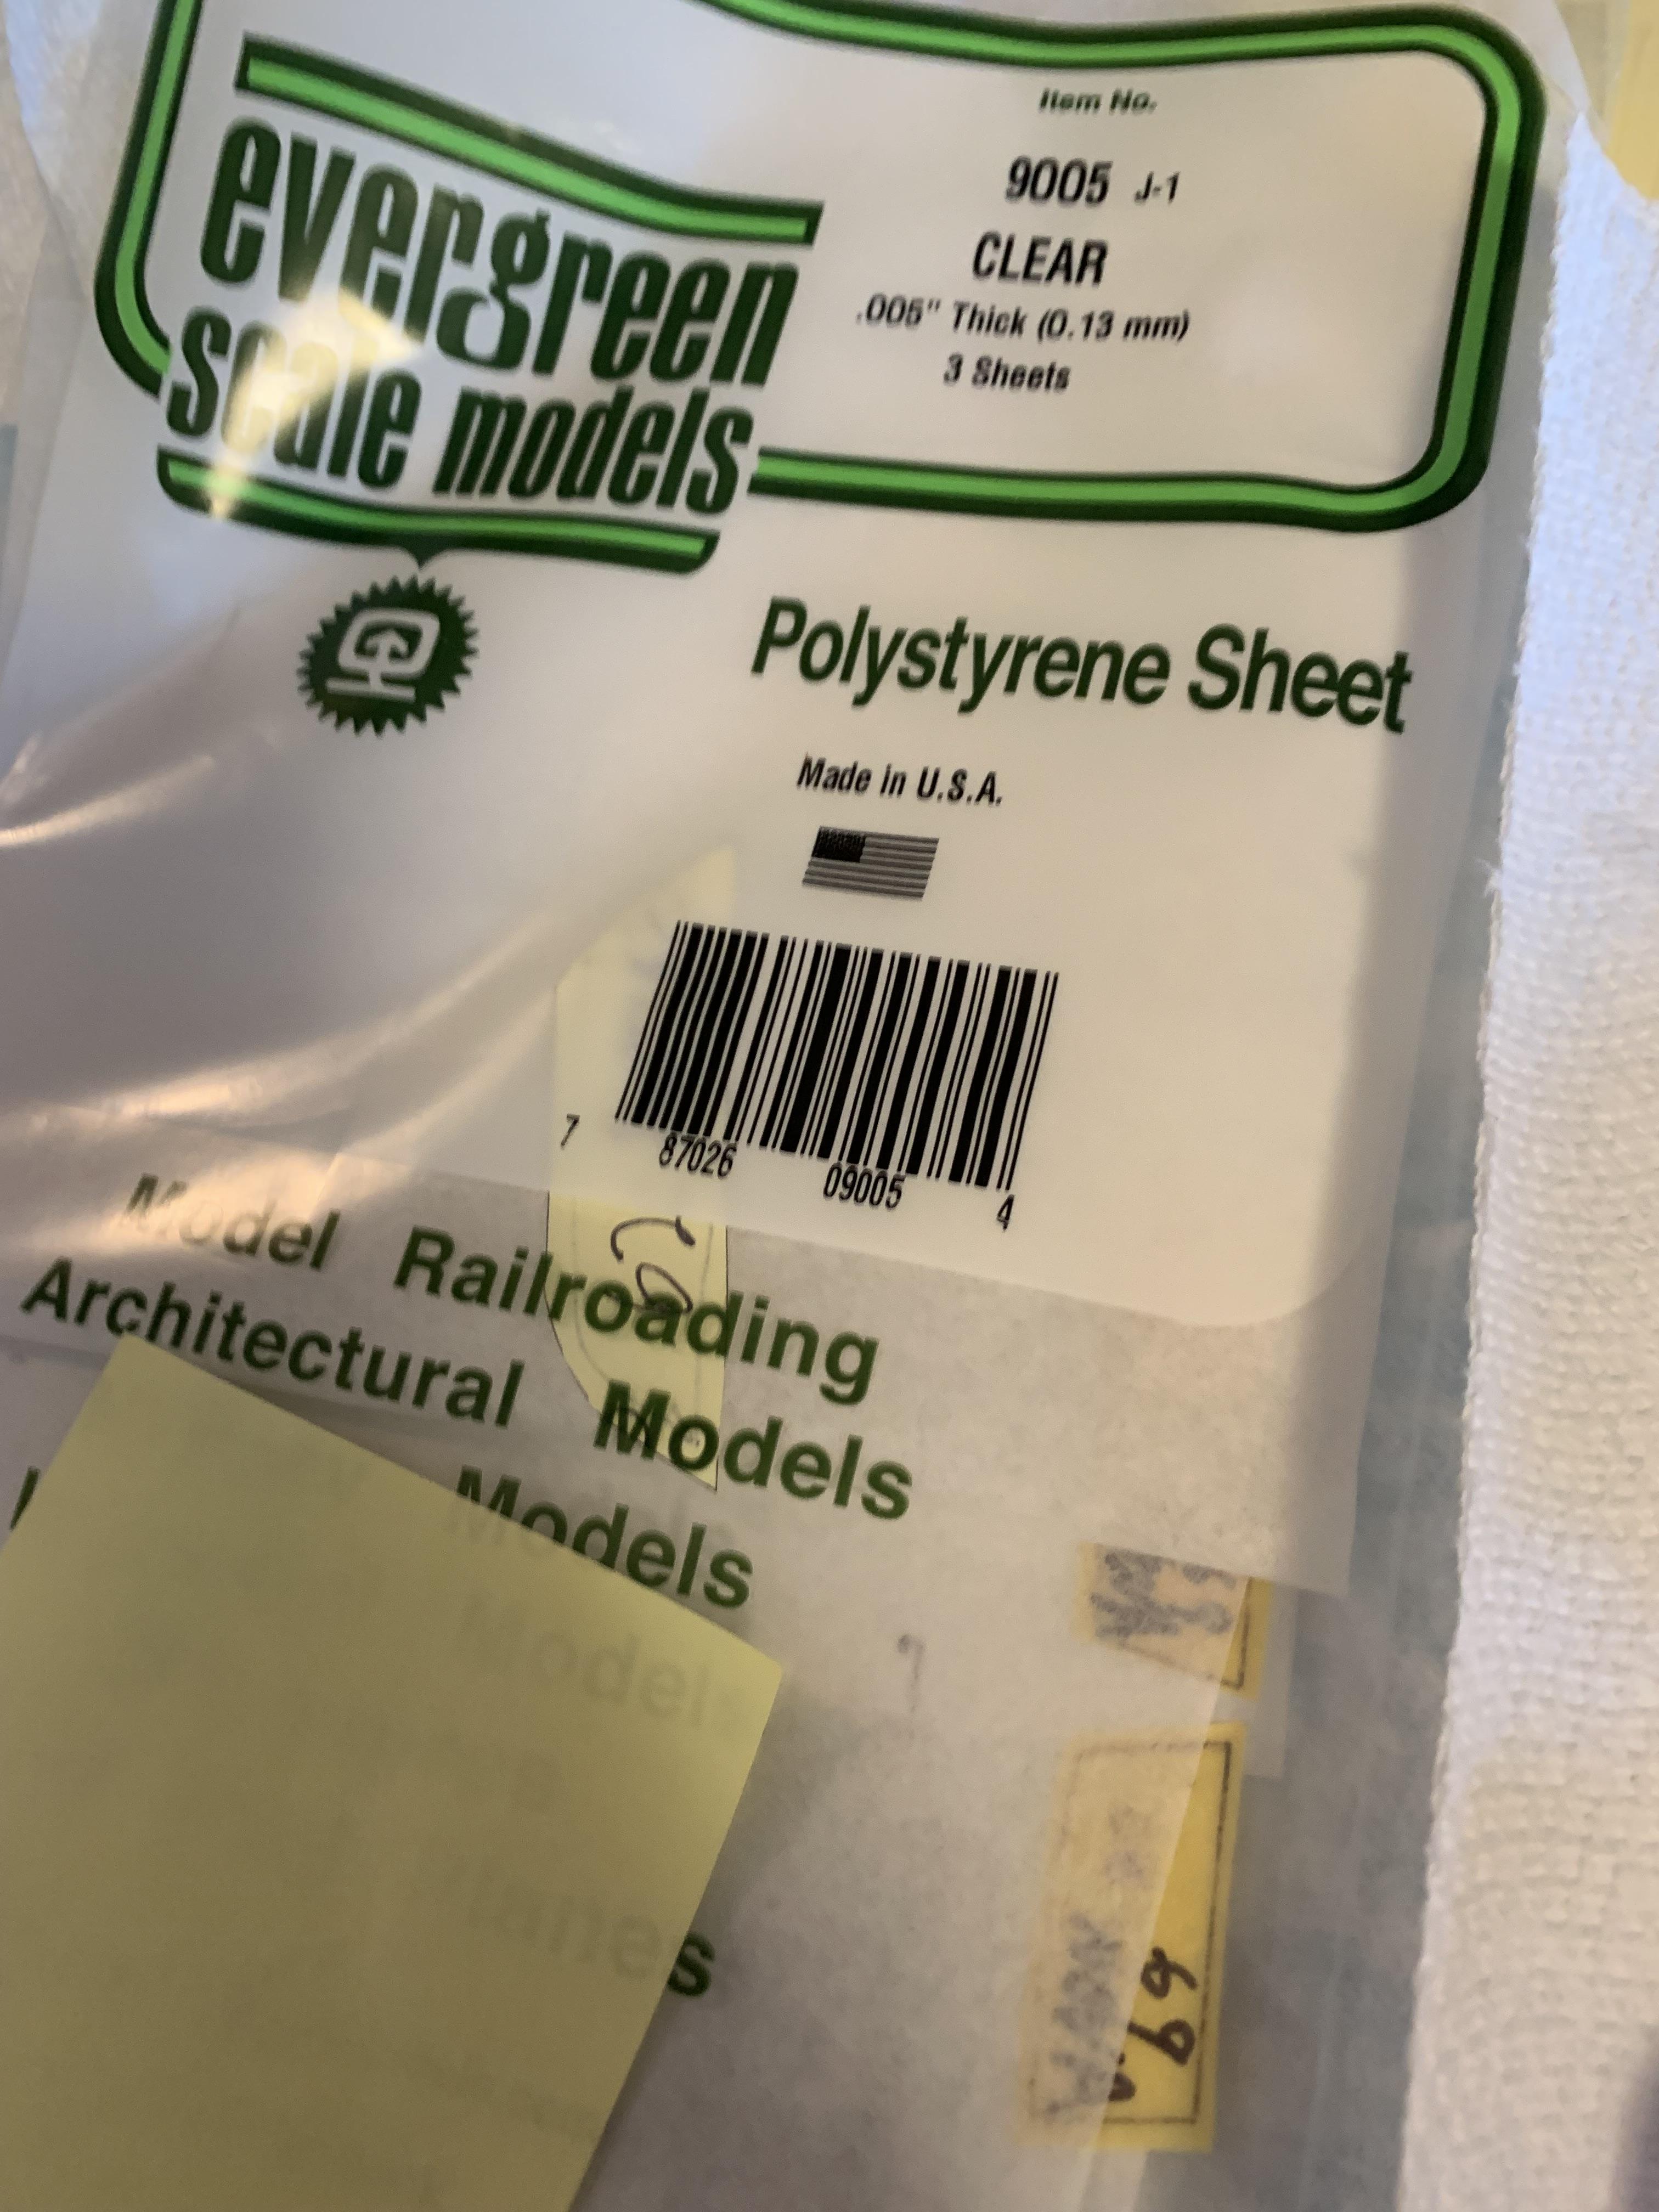
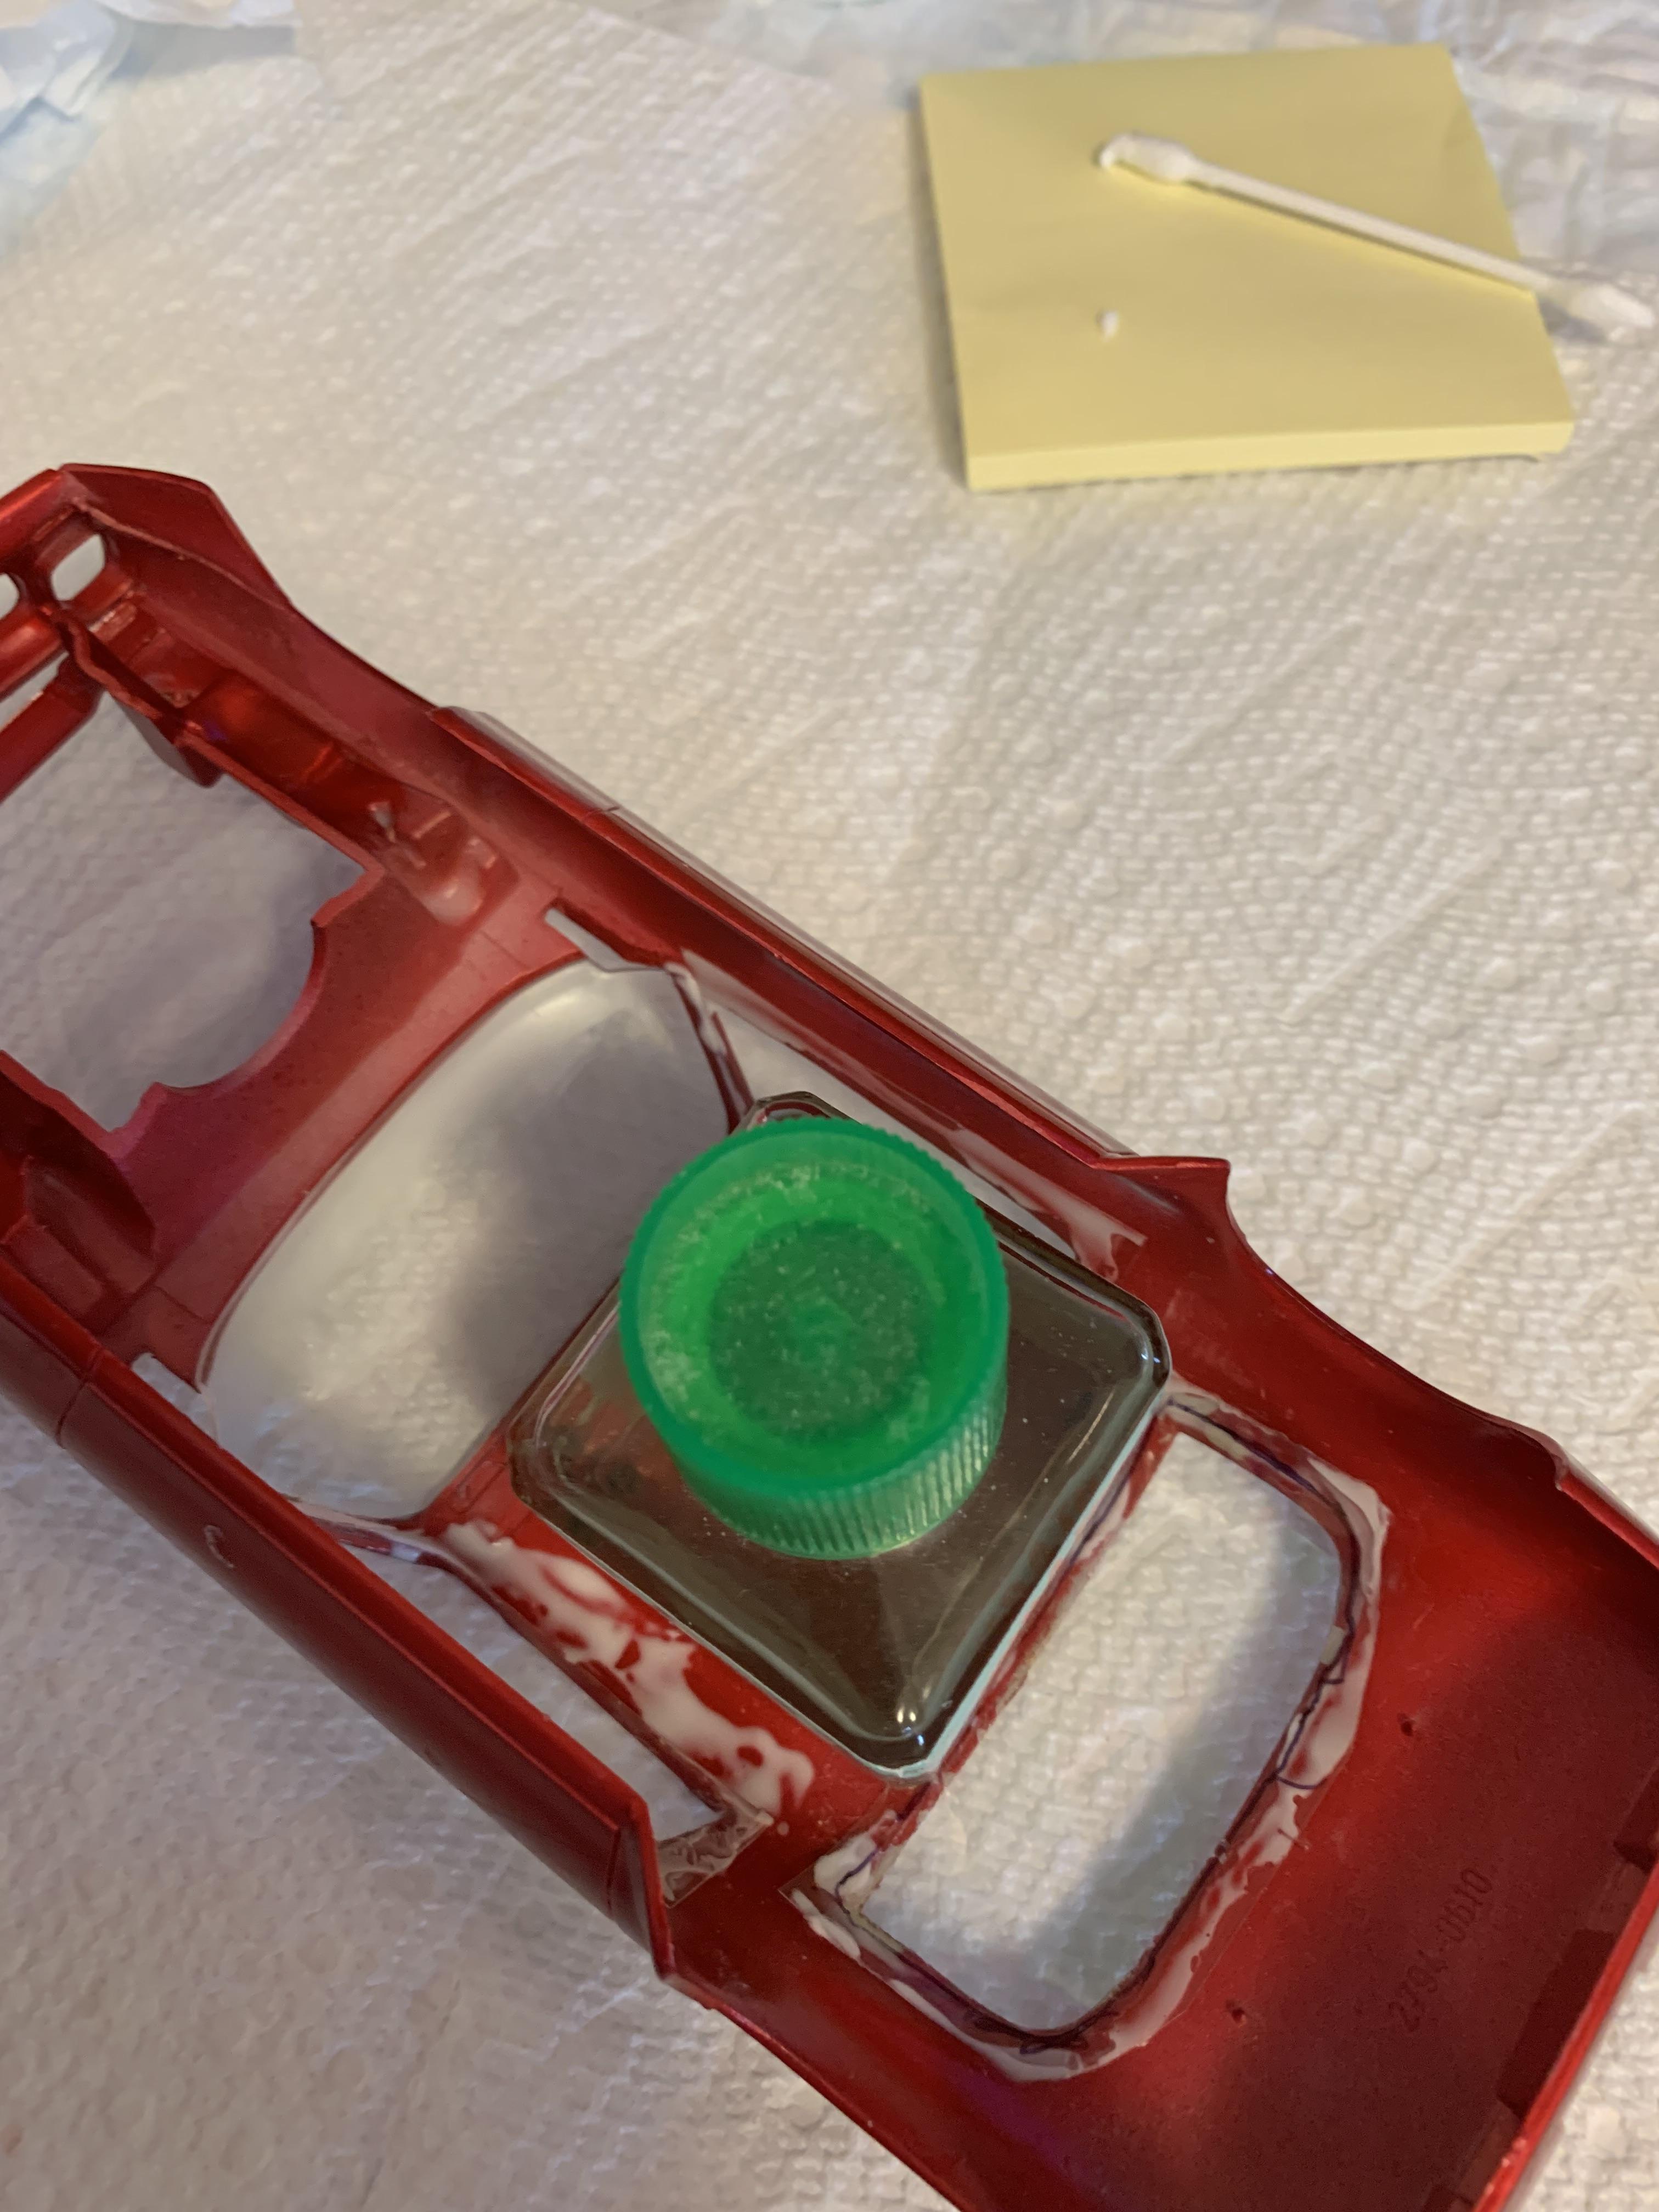
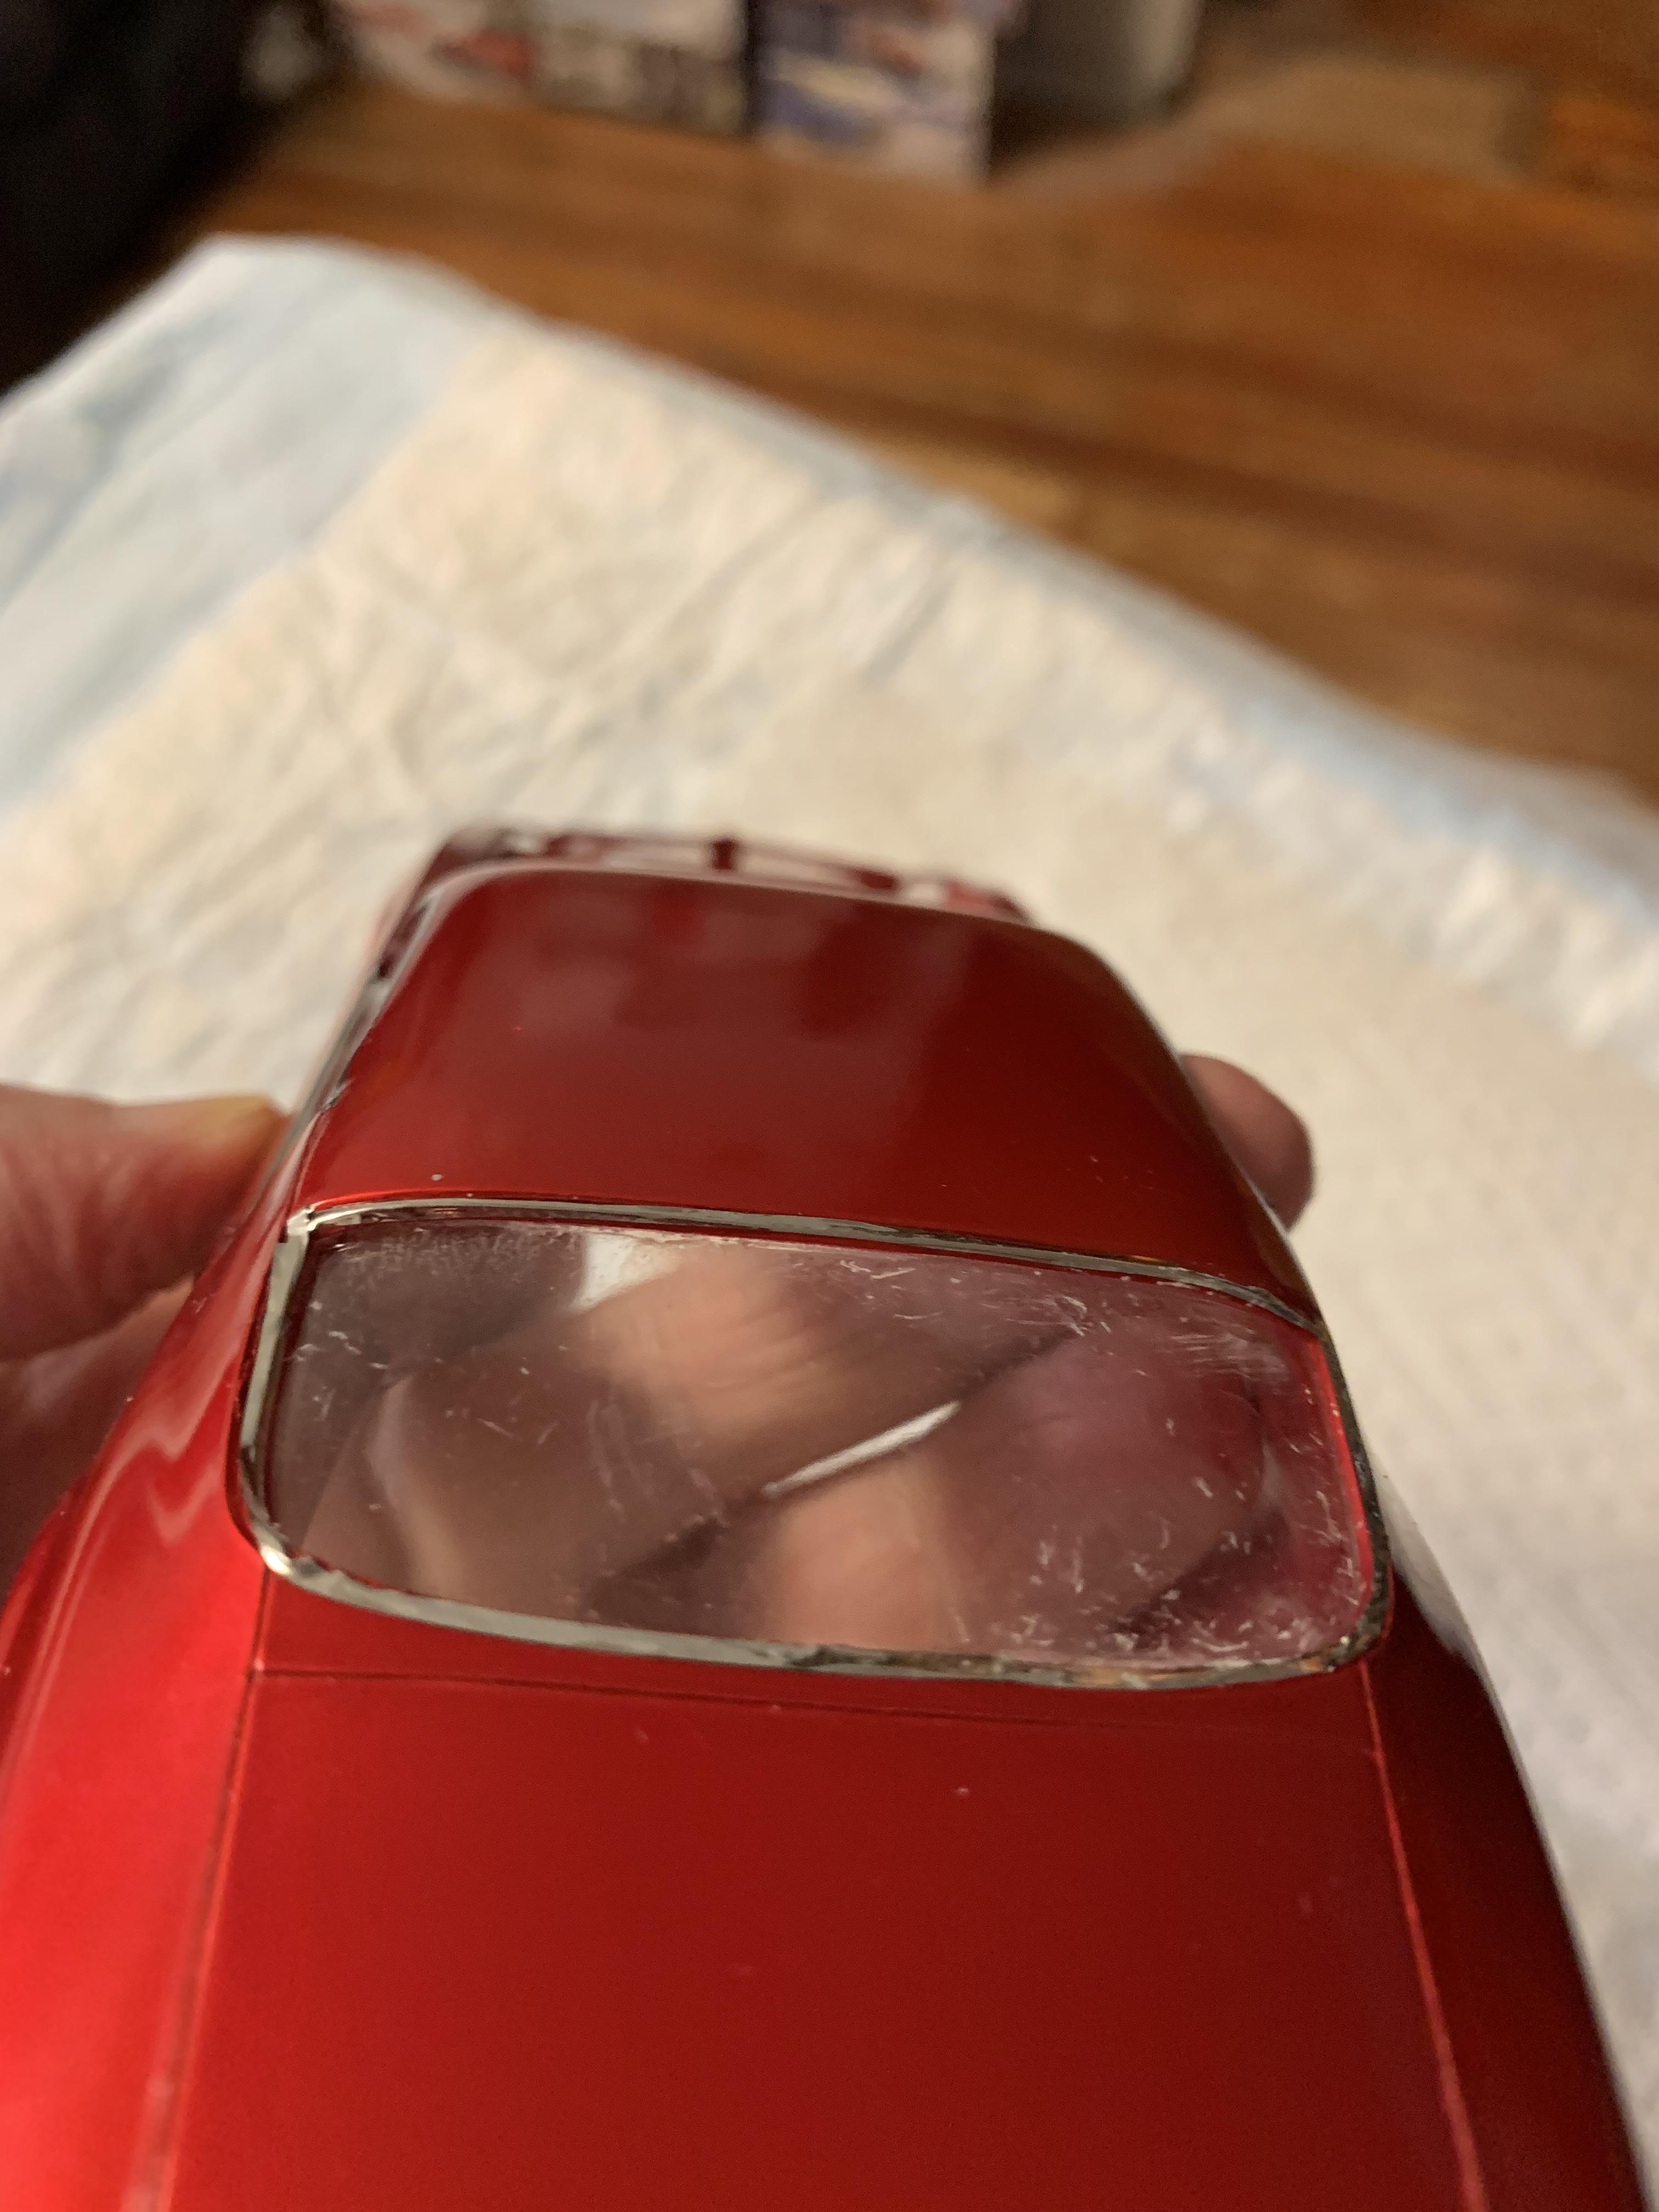
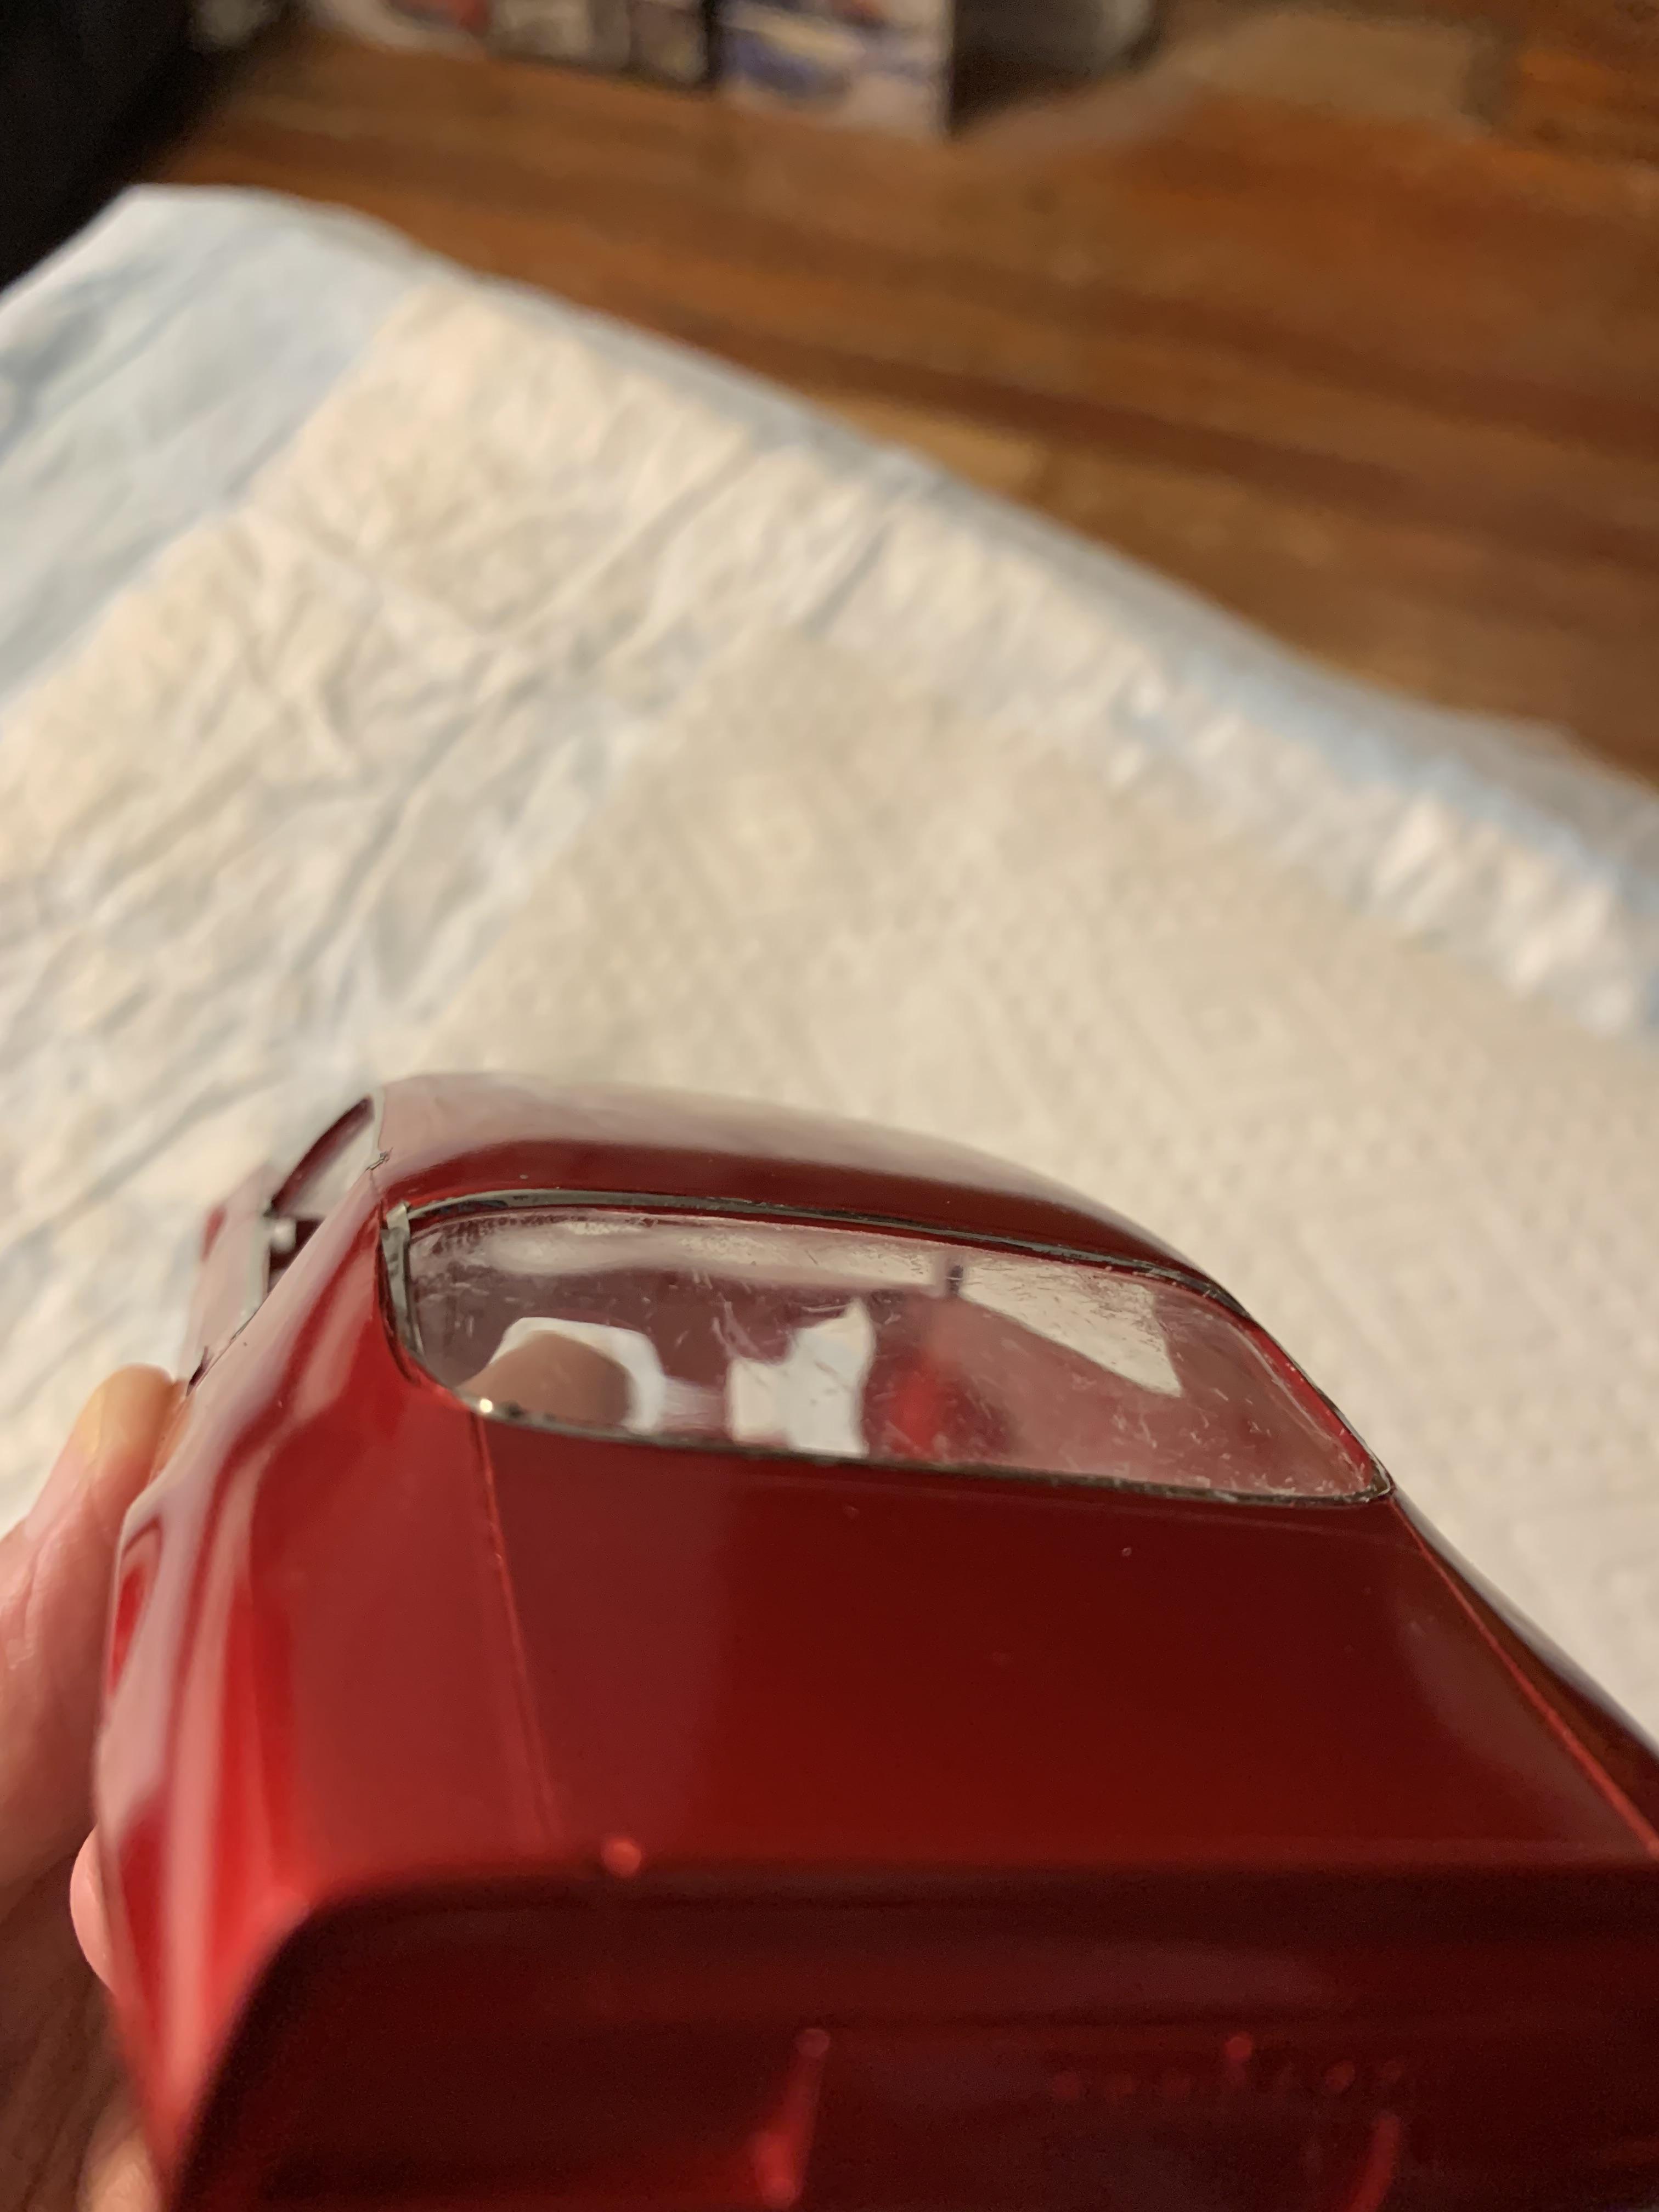
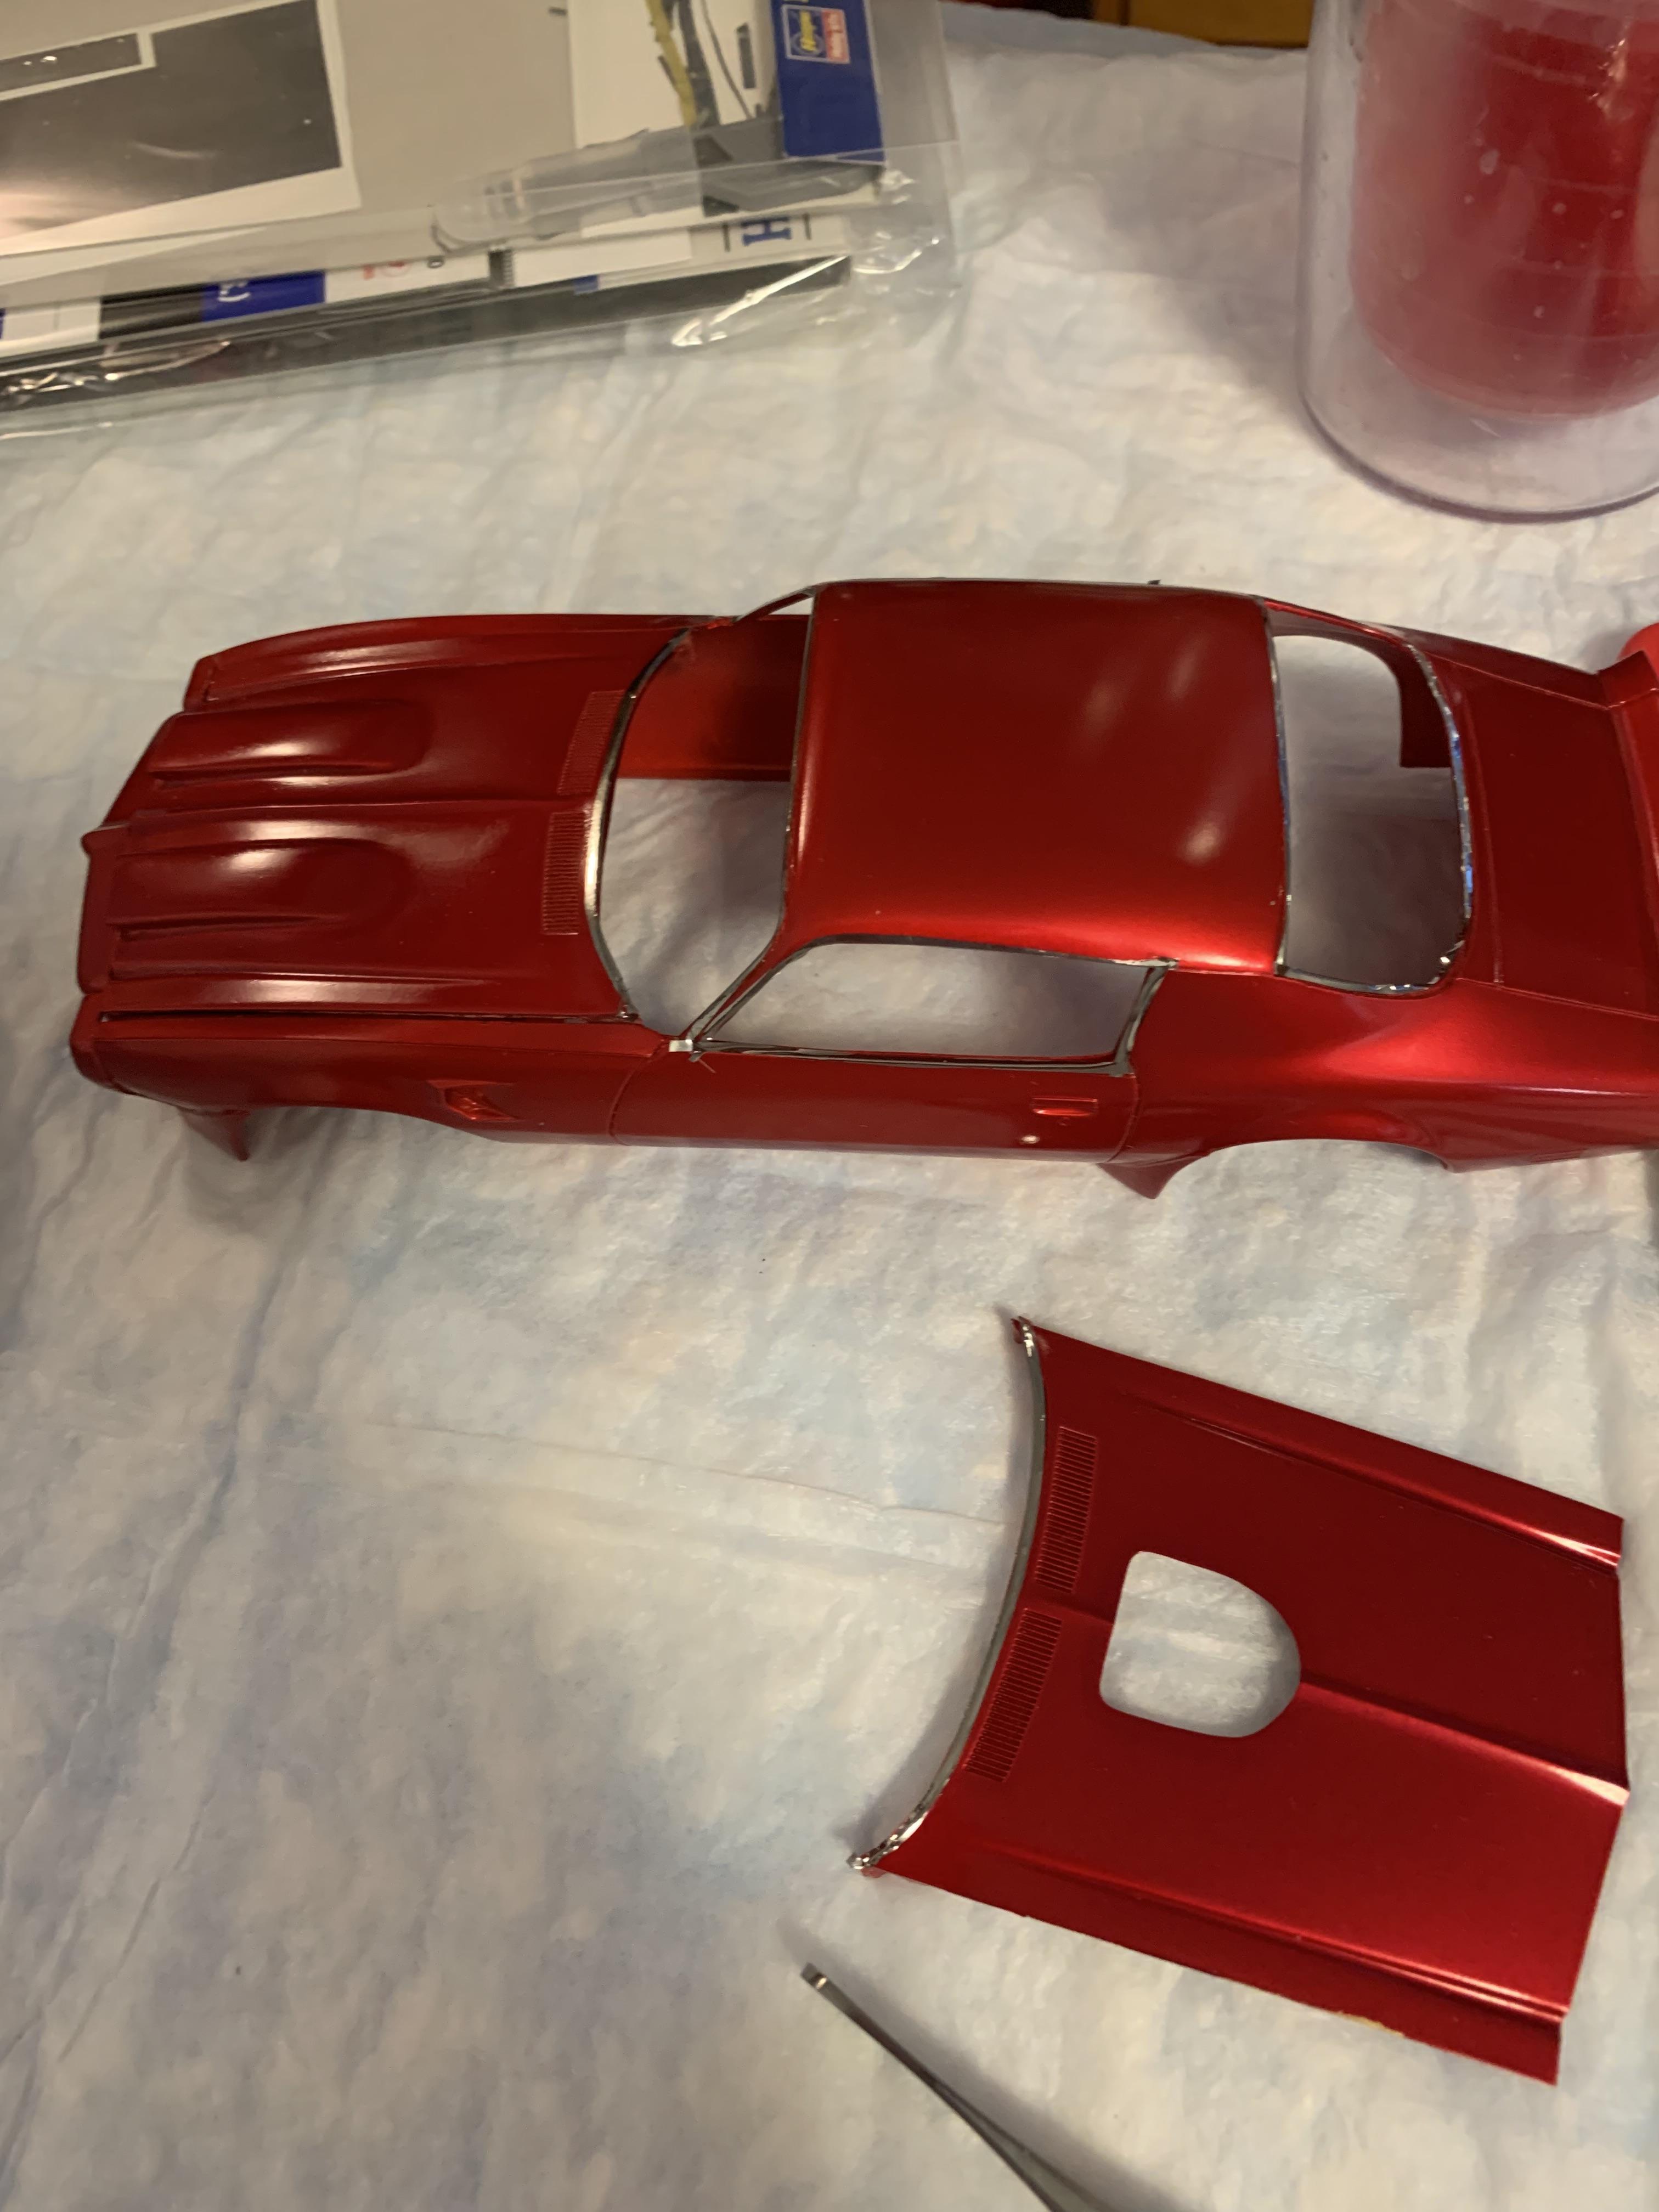
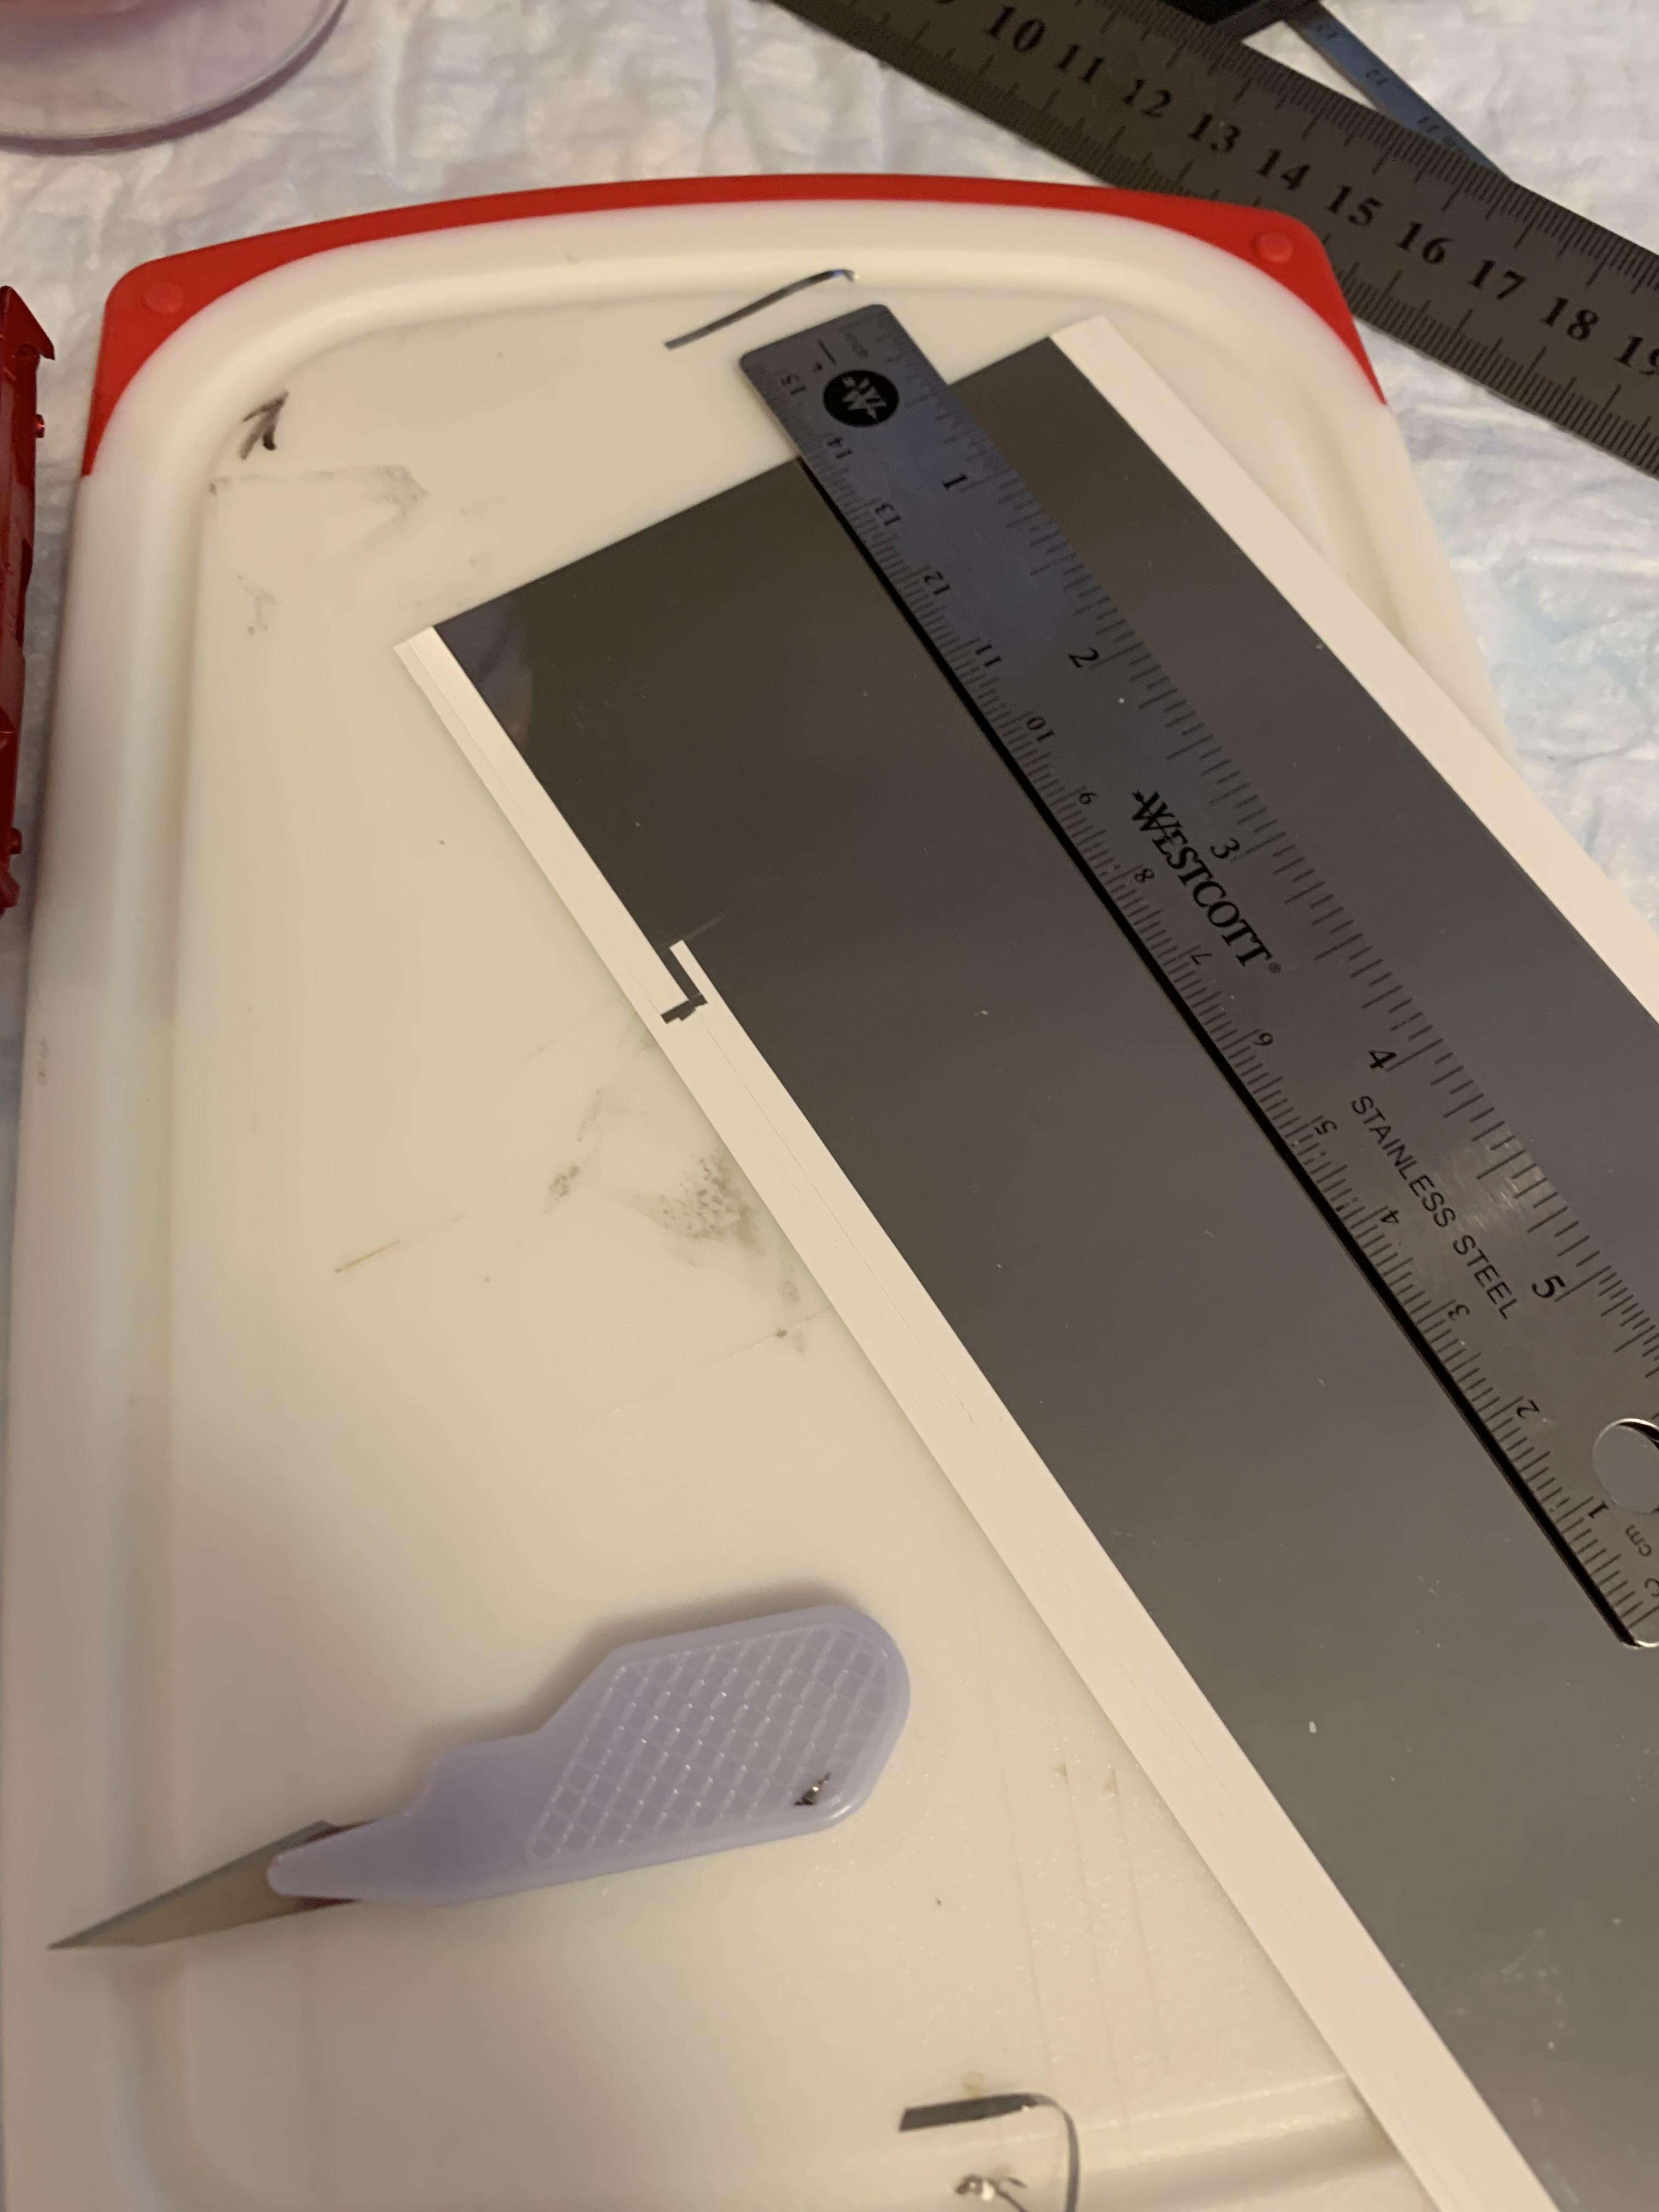
Cut some windows and a new back glass out of .005” clear styrene (used Alene’s quick dry tacky glue this time) and found another use for Tamiya cement.
-
Geez! Another Stocker! 70 Formula Firebird B/SA
R. Thorne replied to R. Thorne's topic in WIP: Drag Racing Models
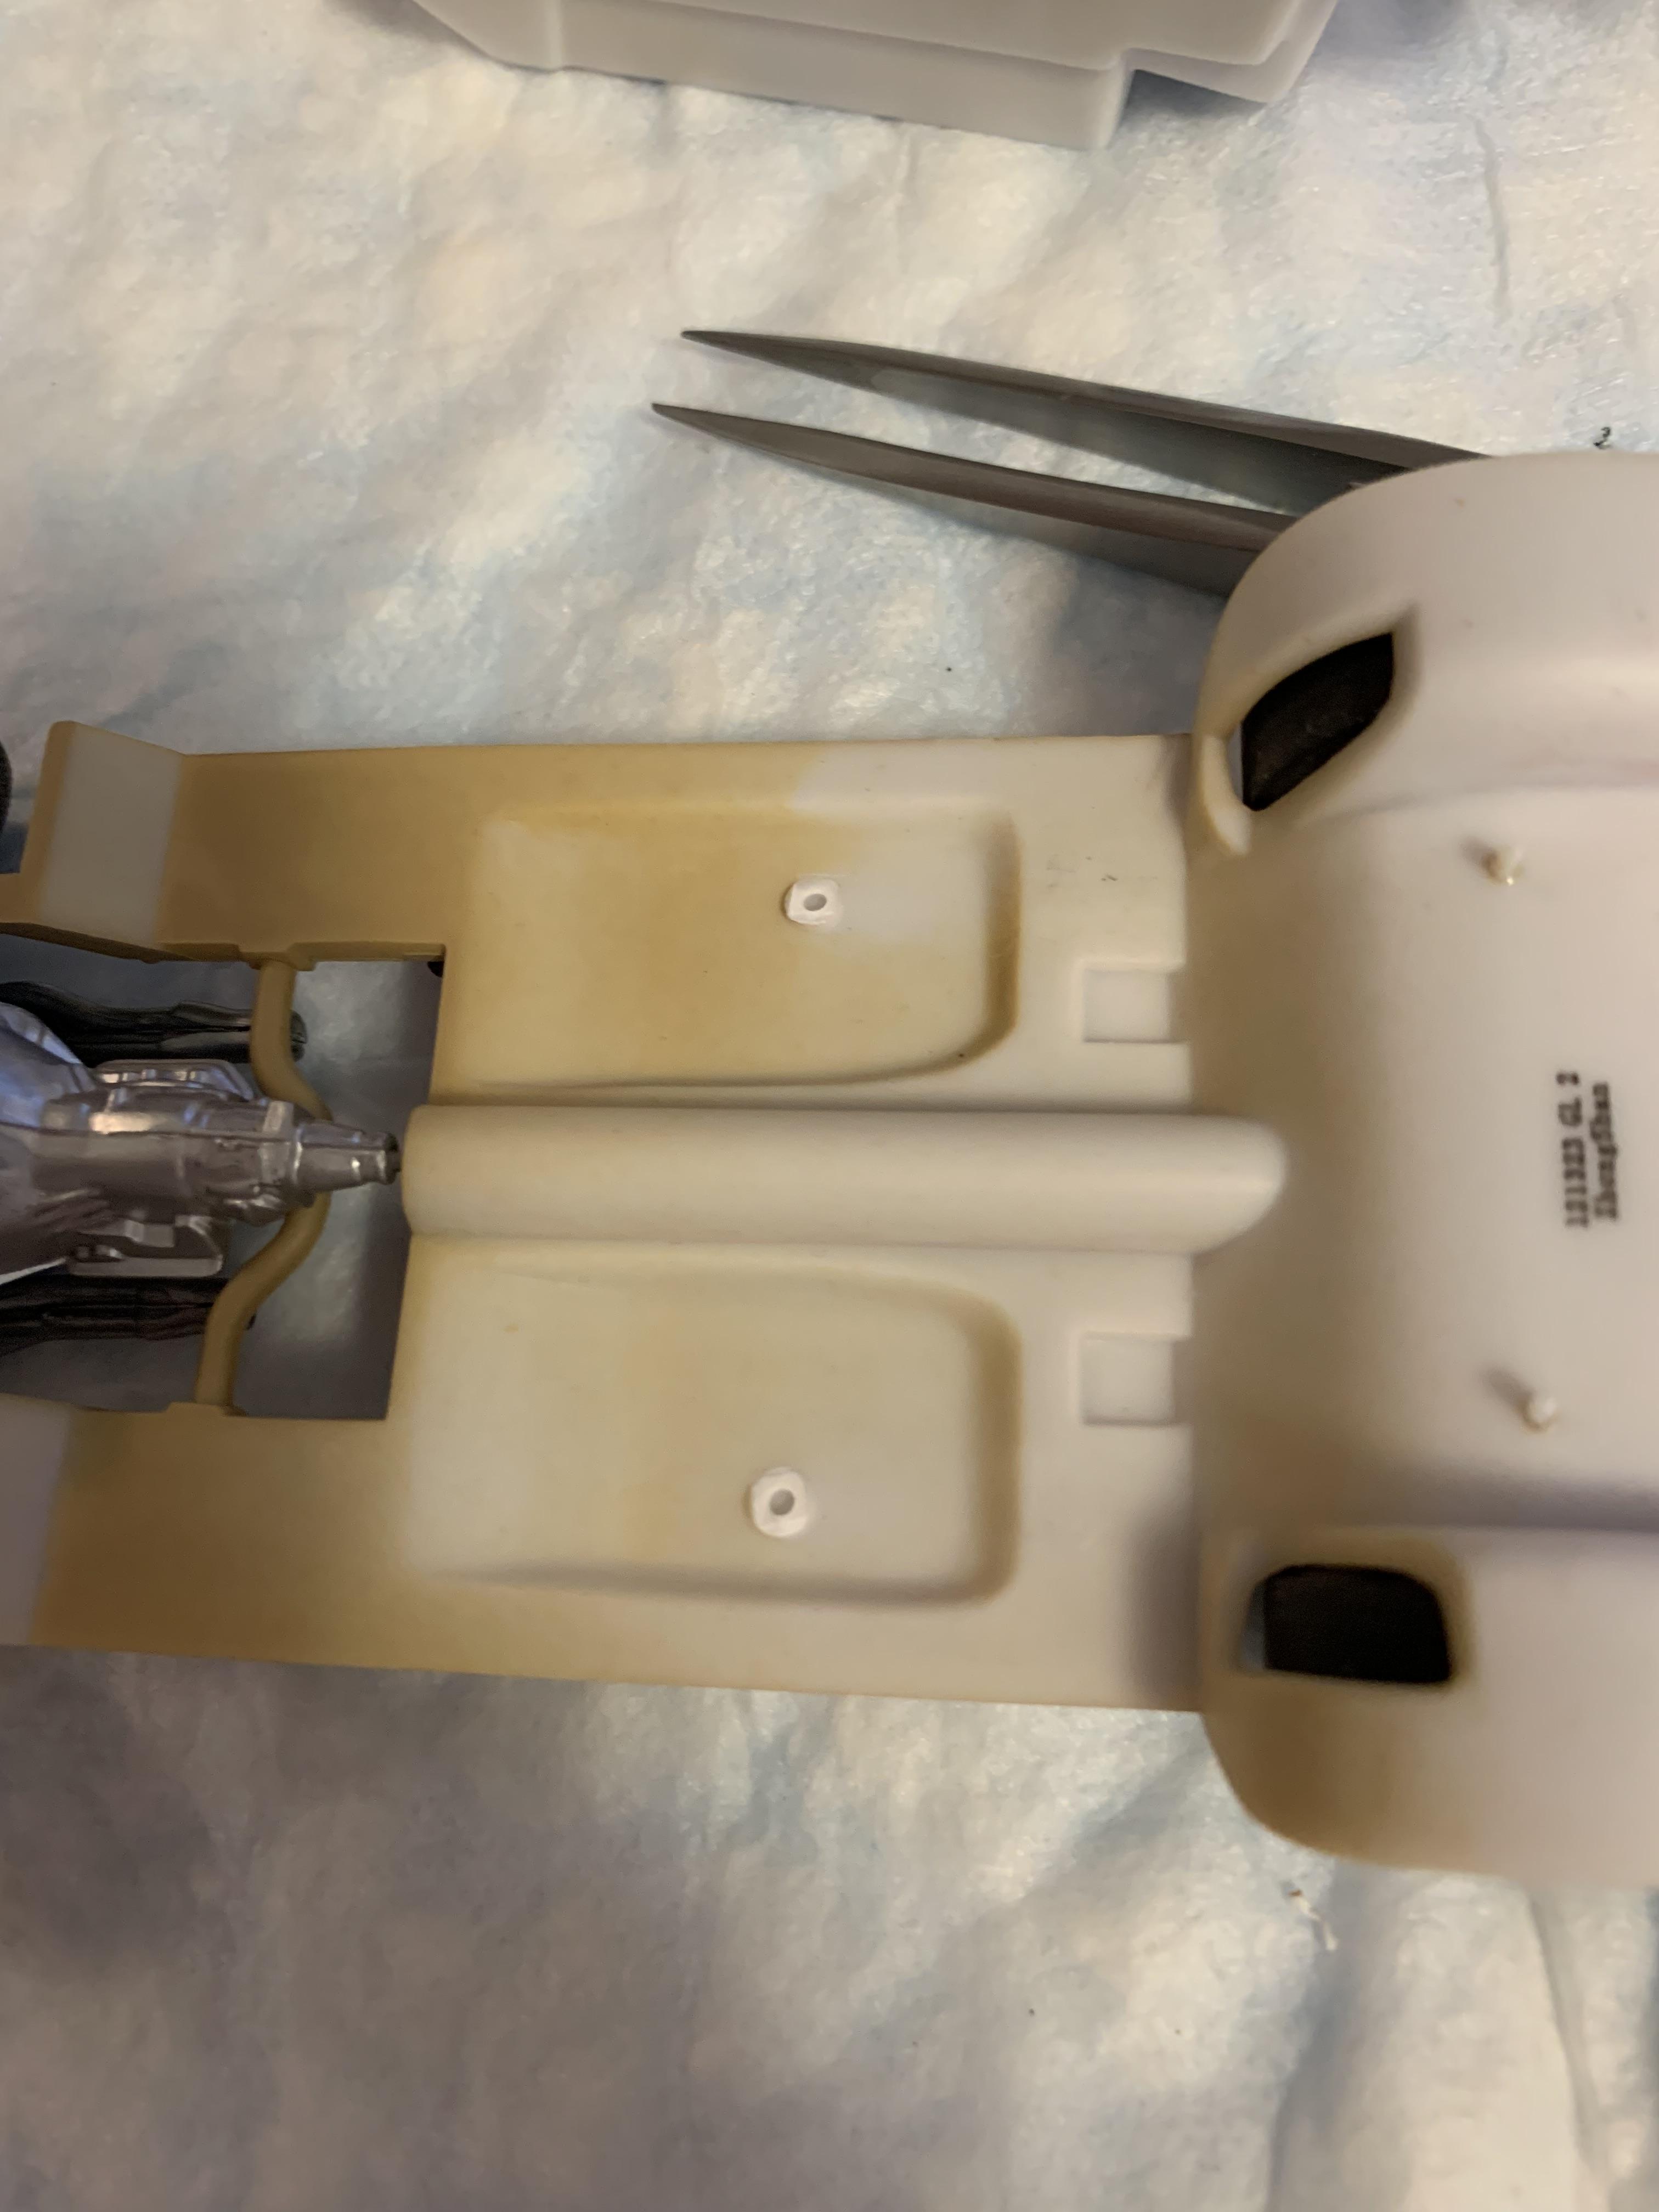
Well, succeeded in messing up the rear window installation. It is a fiddly install , as the glass is quite small for the inner framework it fits to. It fell out as I was installing it. Not sure if I will try to fix it, or just make one out of .005” clear styrene. Did some interior work and put some aluminum on the grille.
-
Tooth picks.
-
Geez! Another Stocker! 70 Formula Firebird B/SA
R. Thorne replied to R. Thorne's topic in WIP: Drag Racing Models
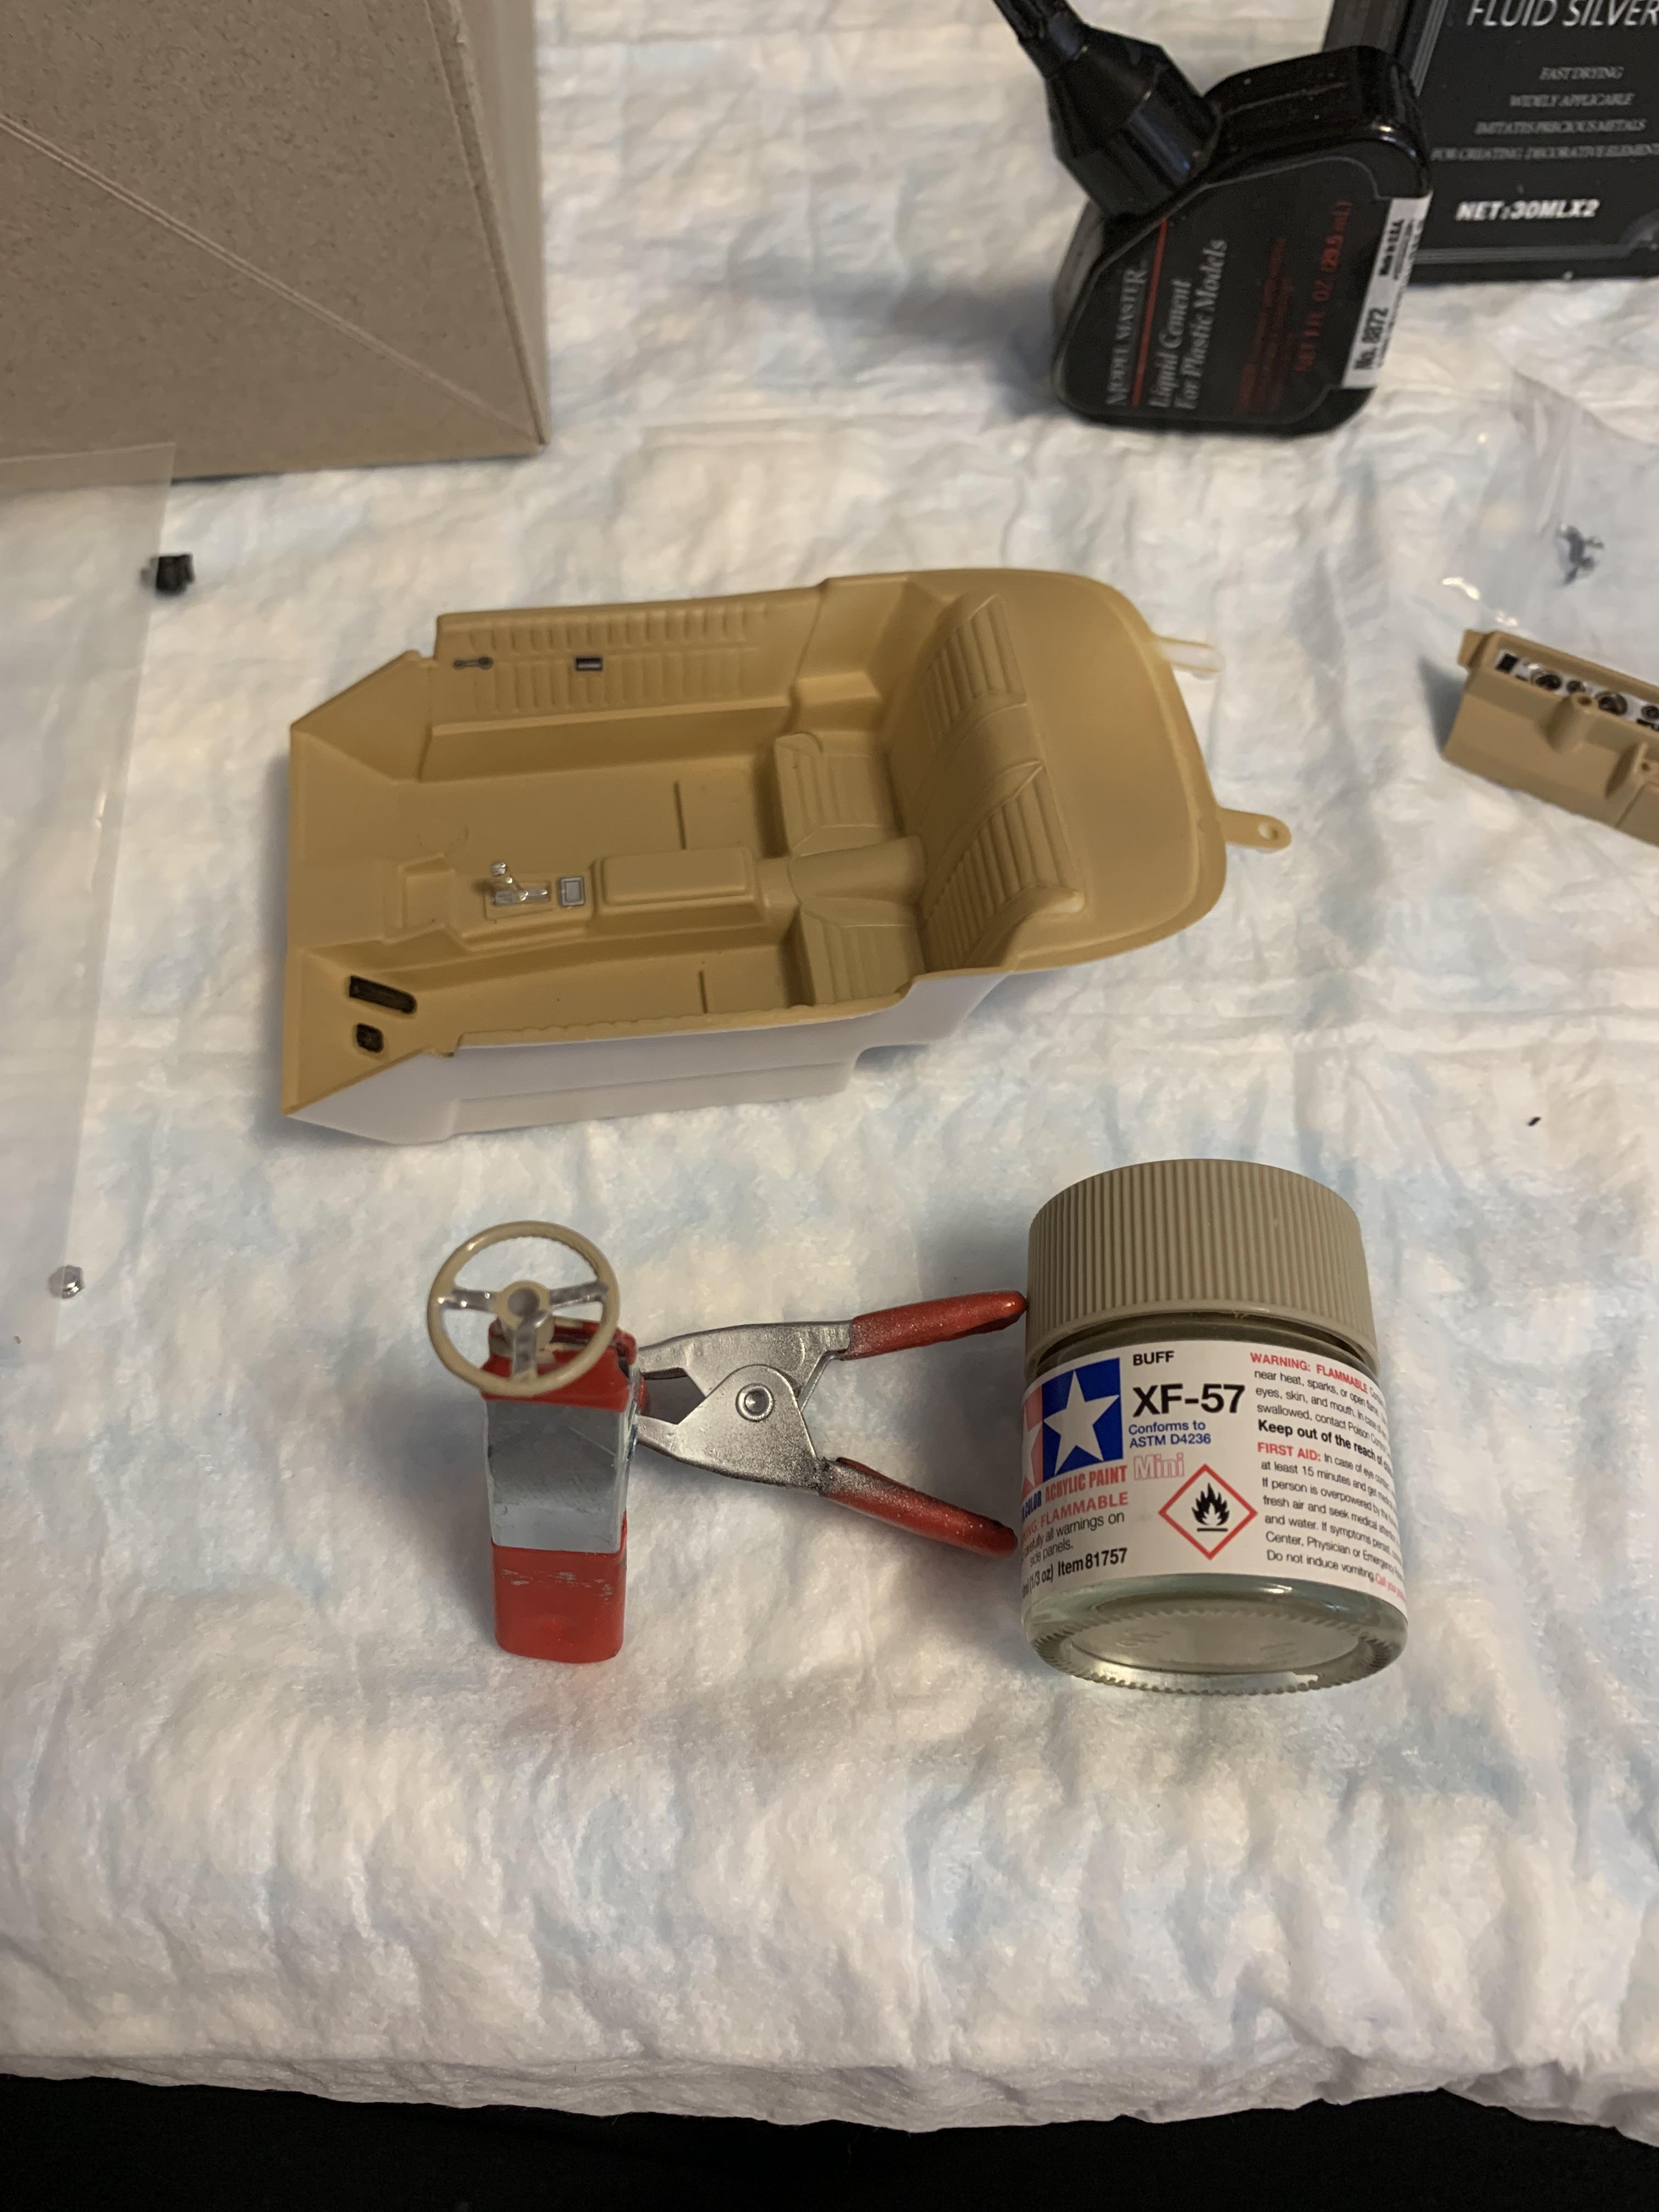
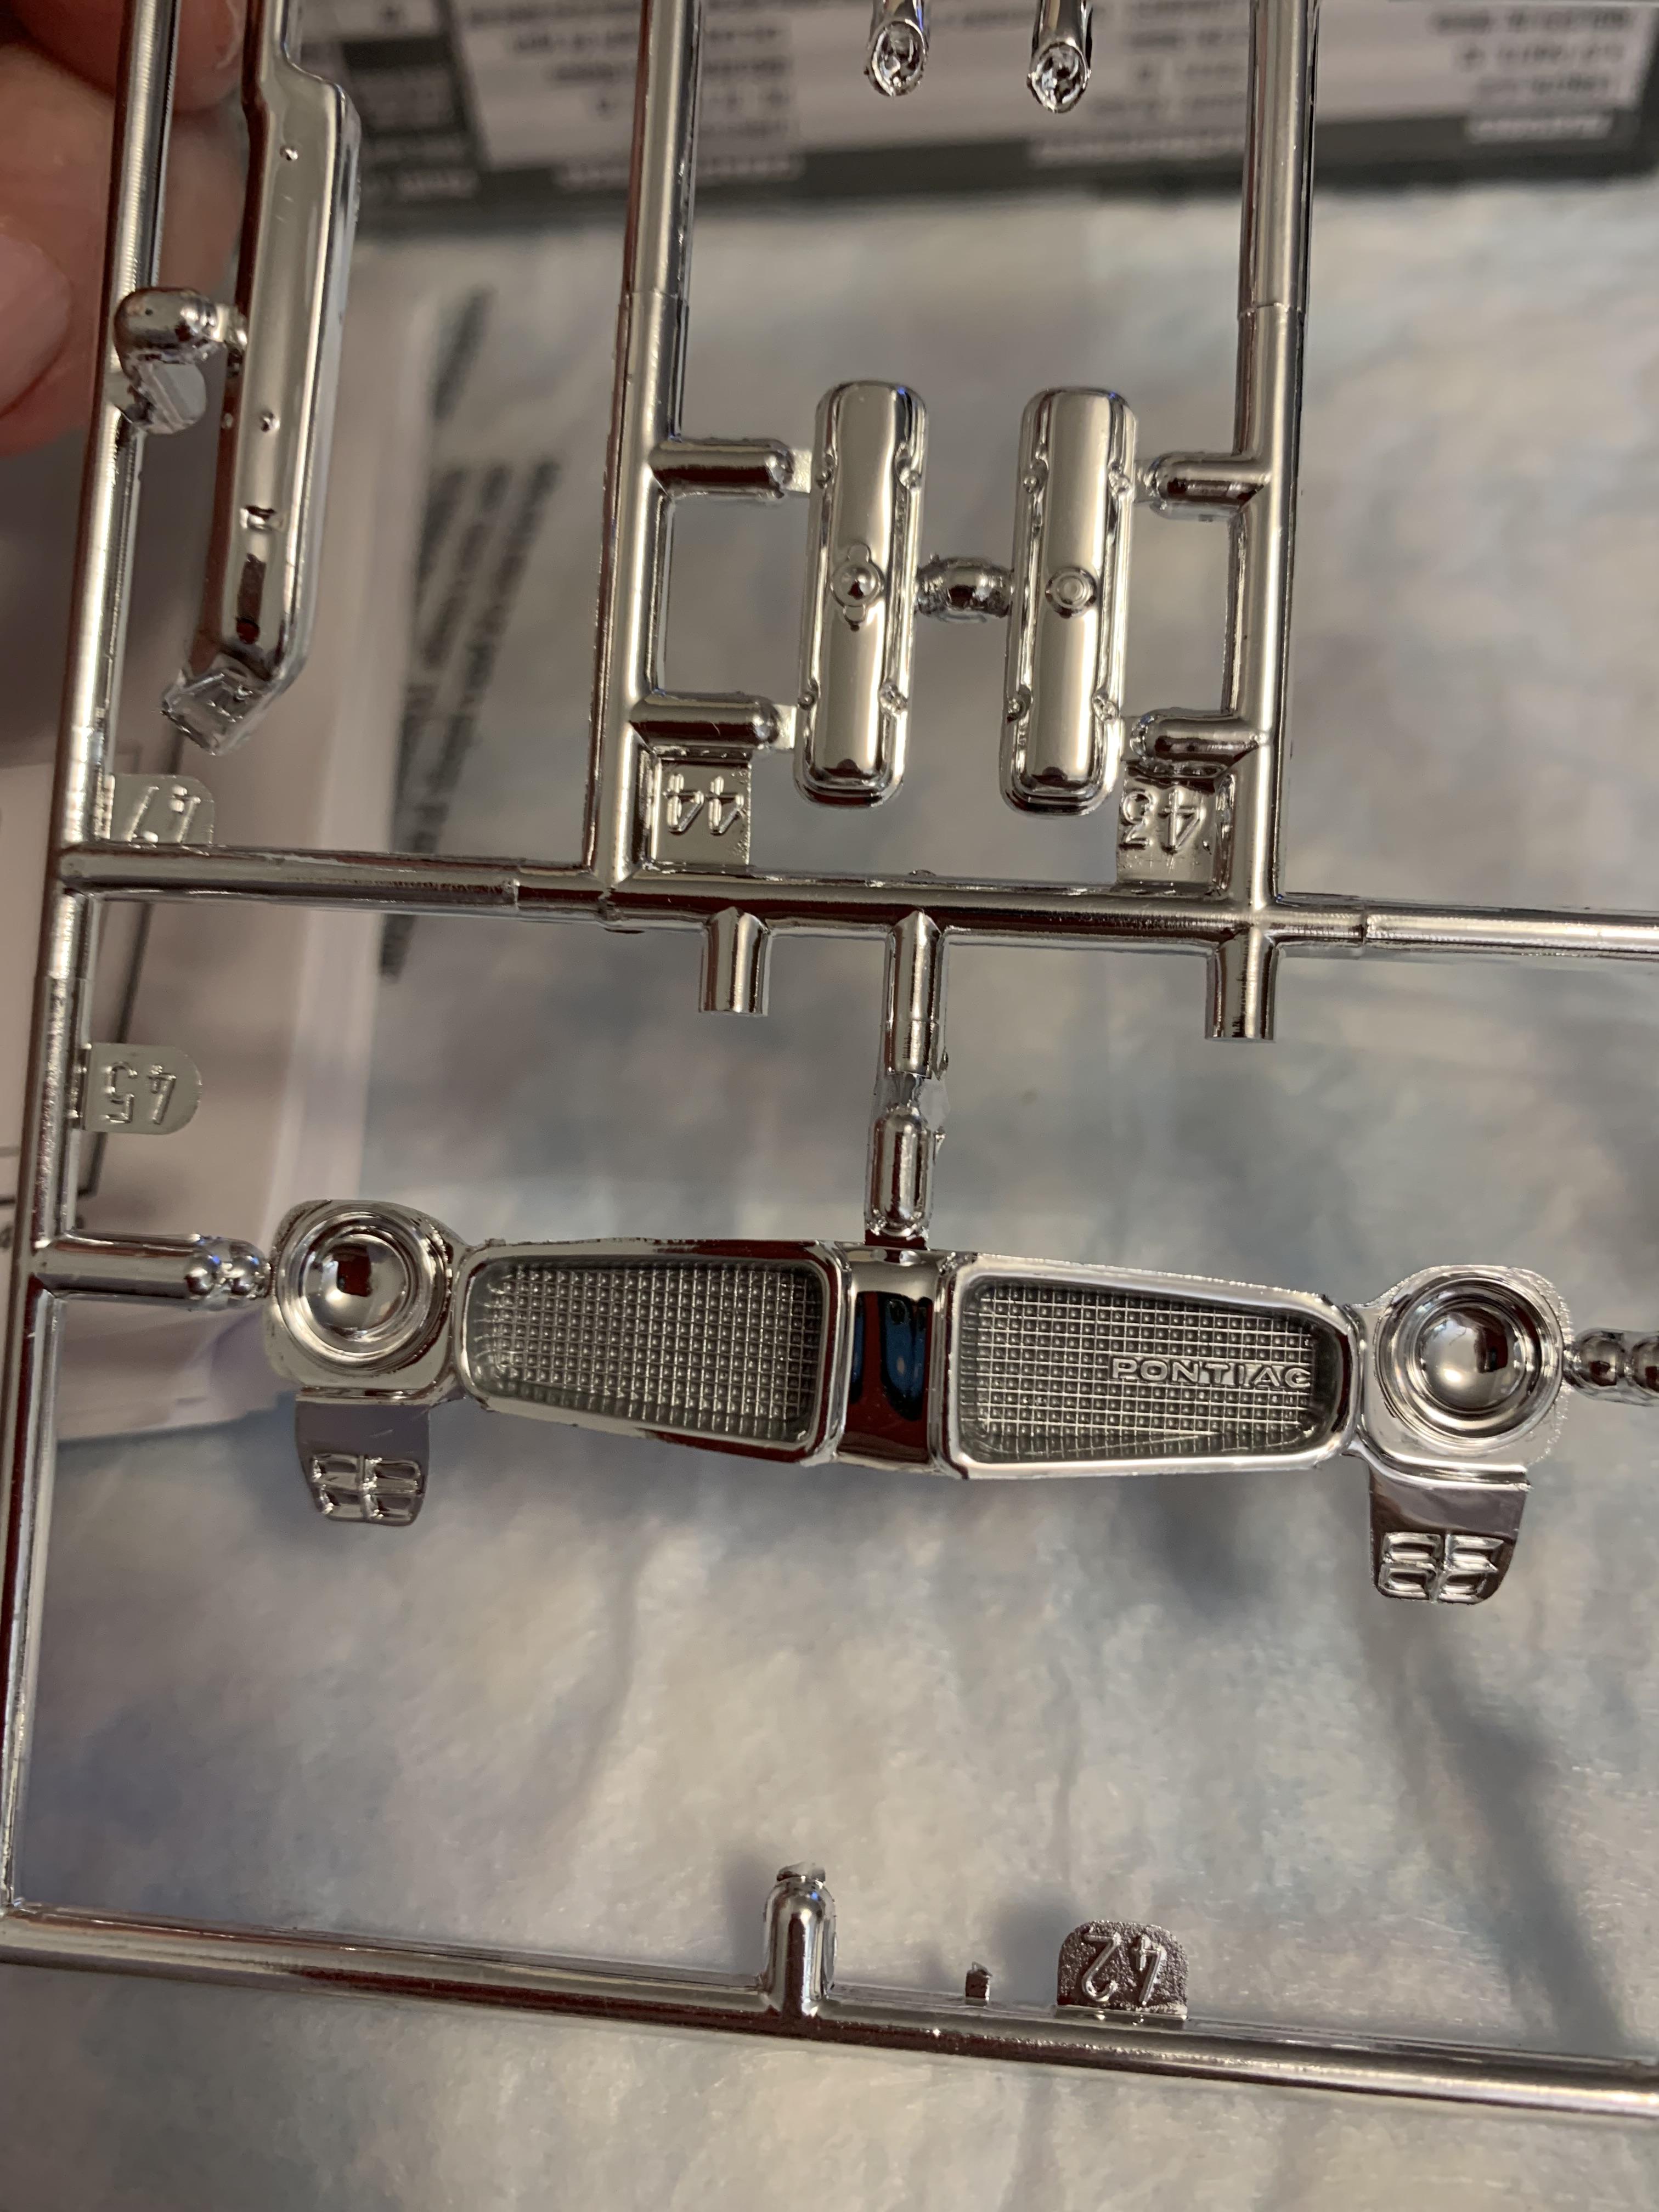
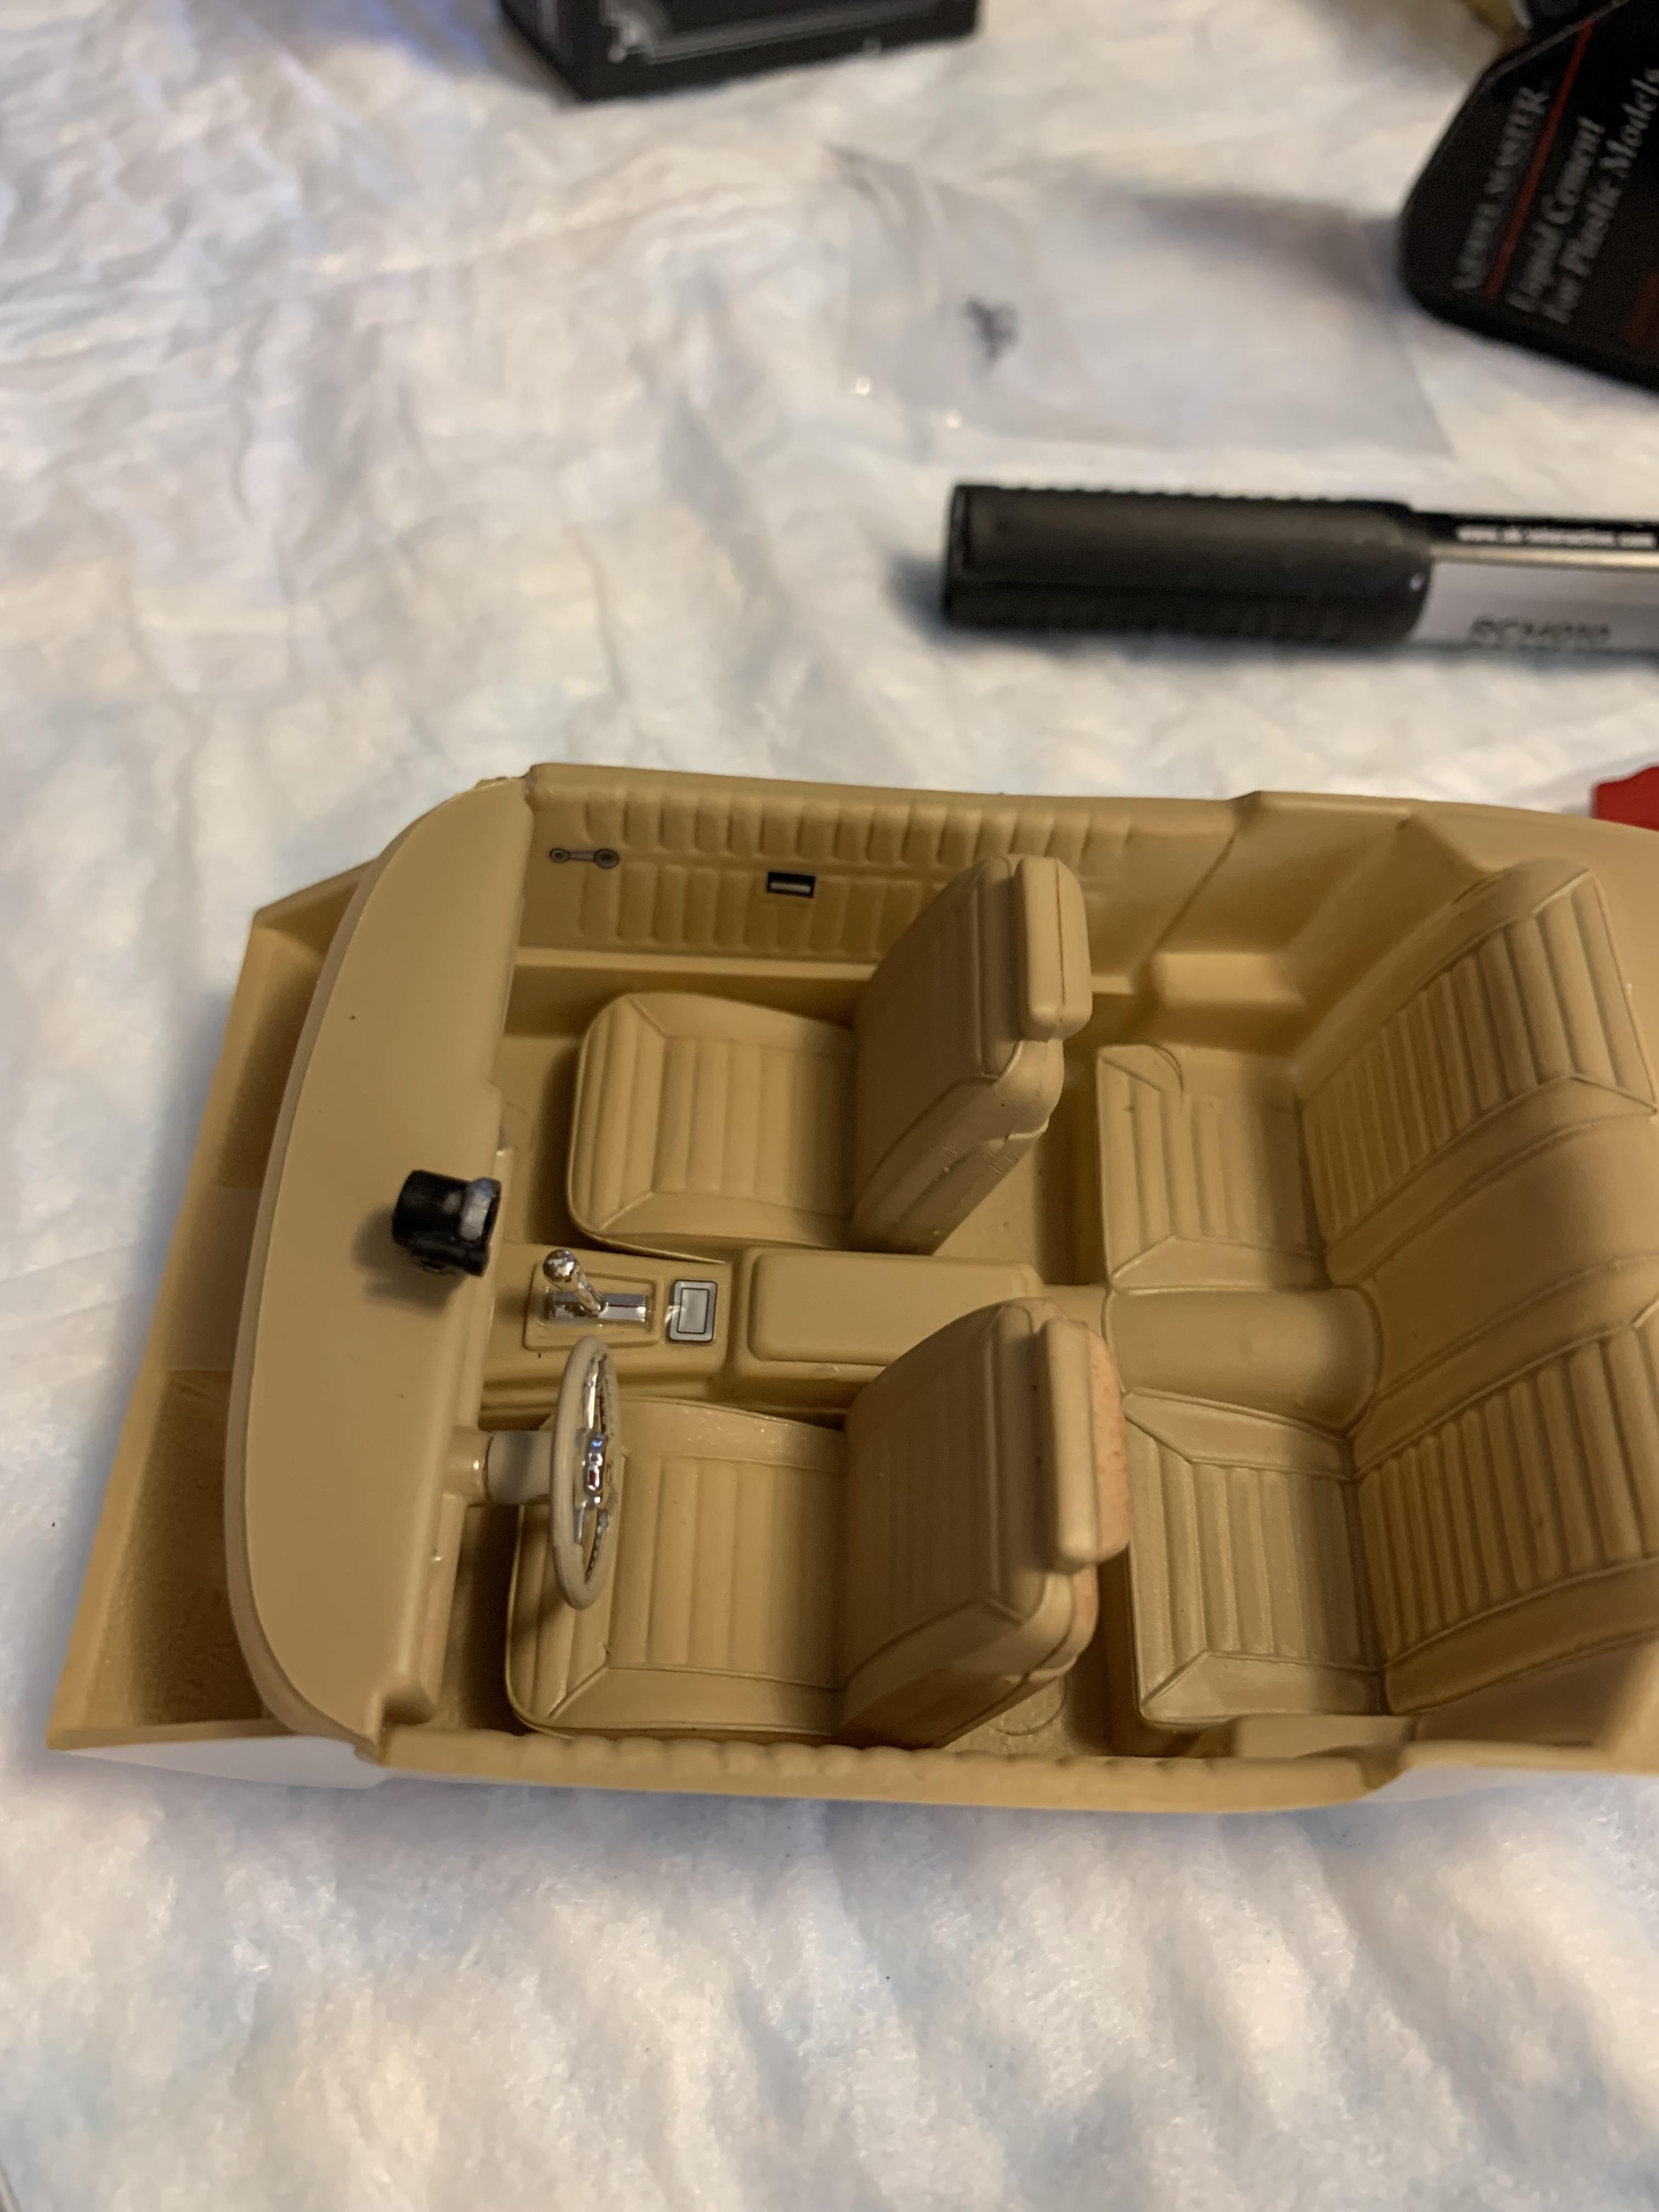
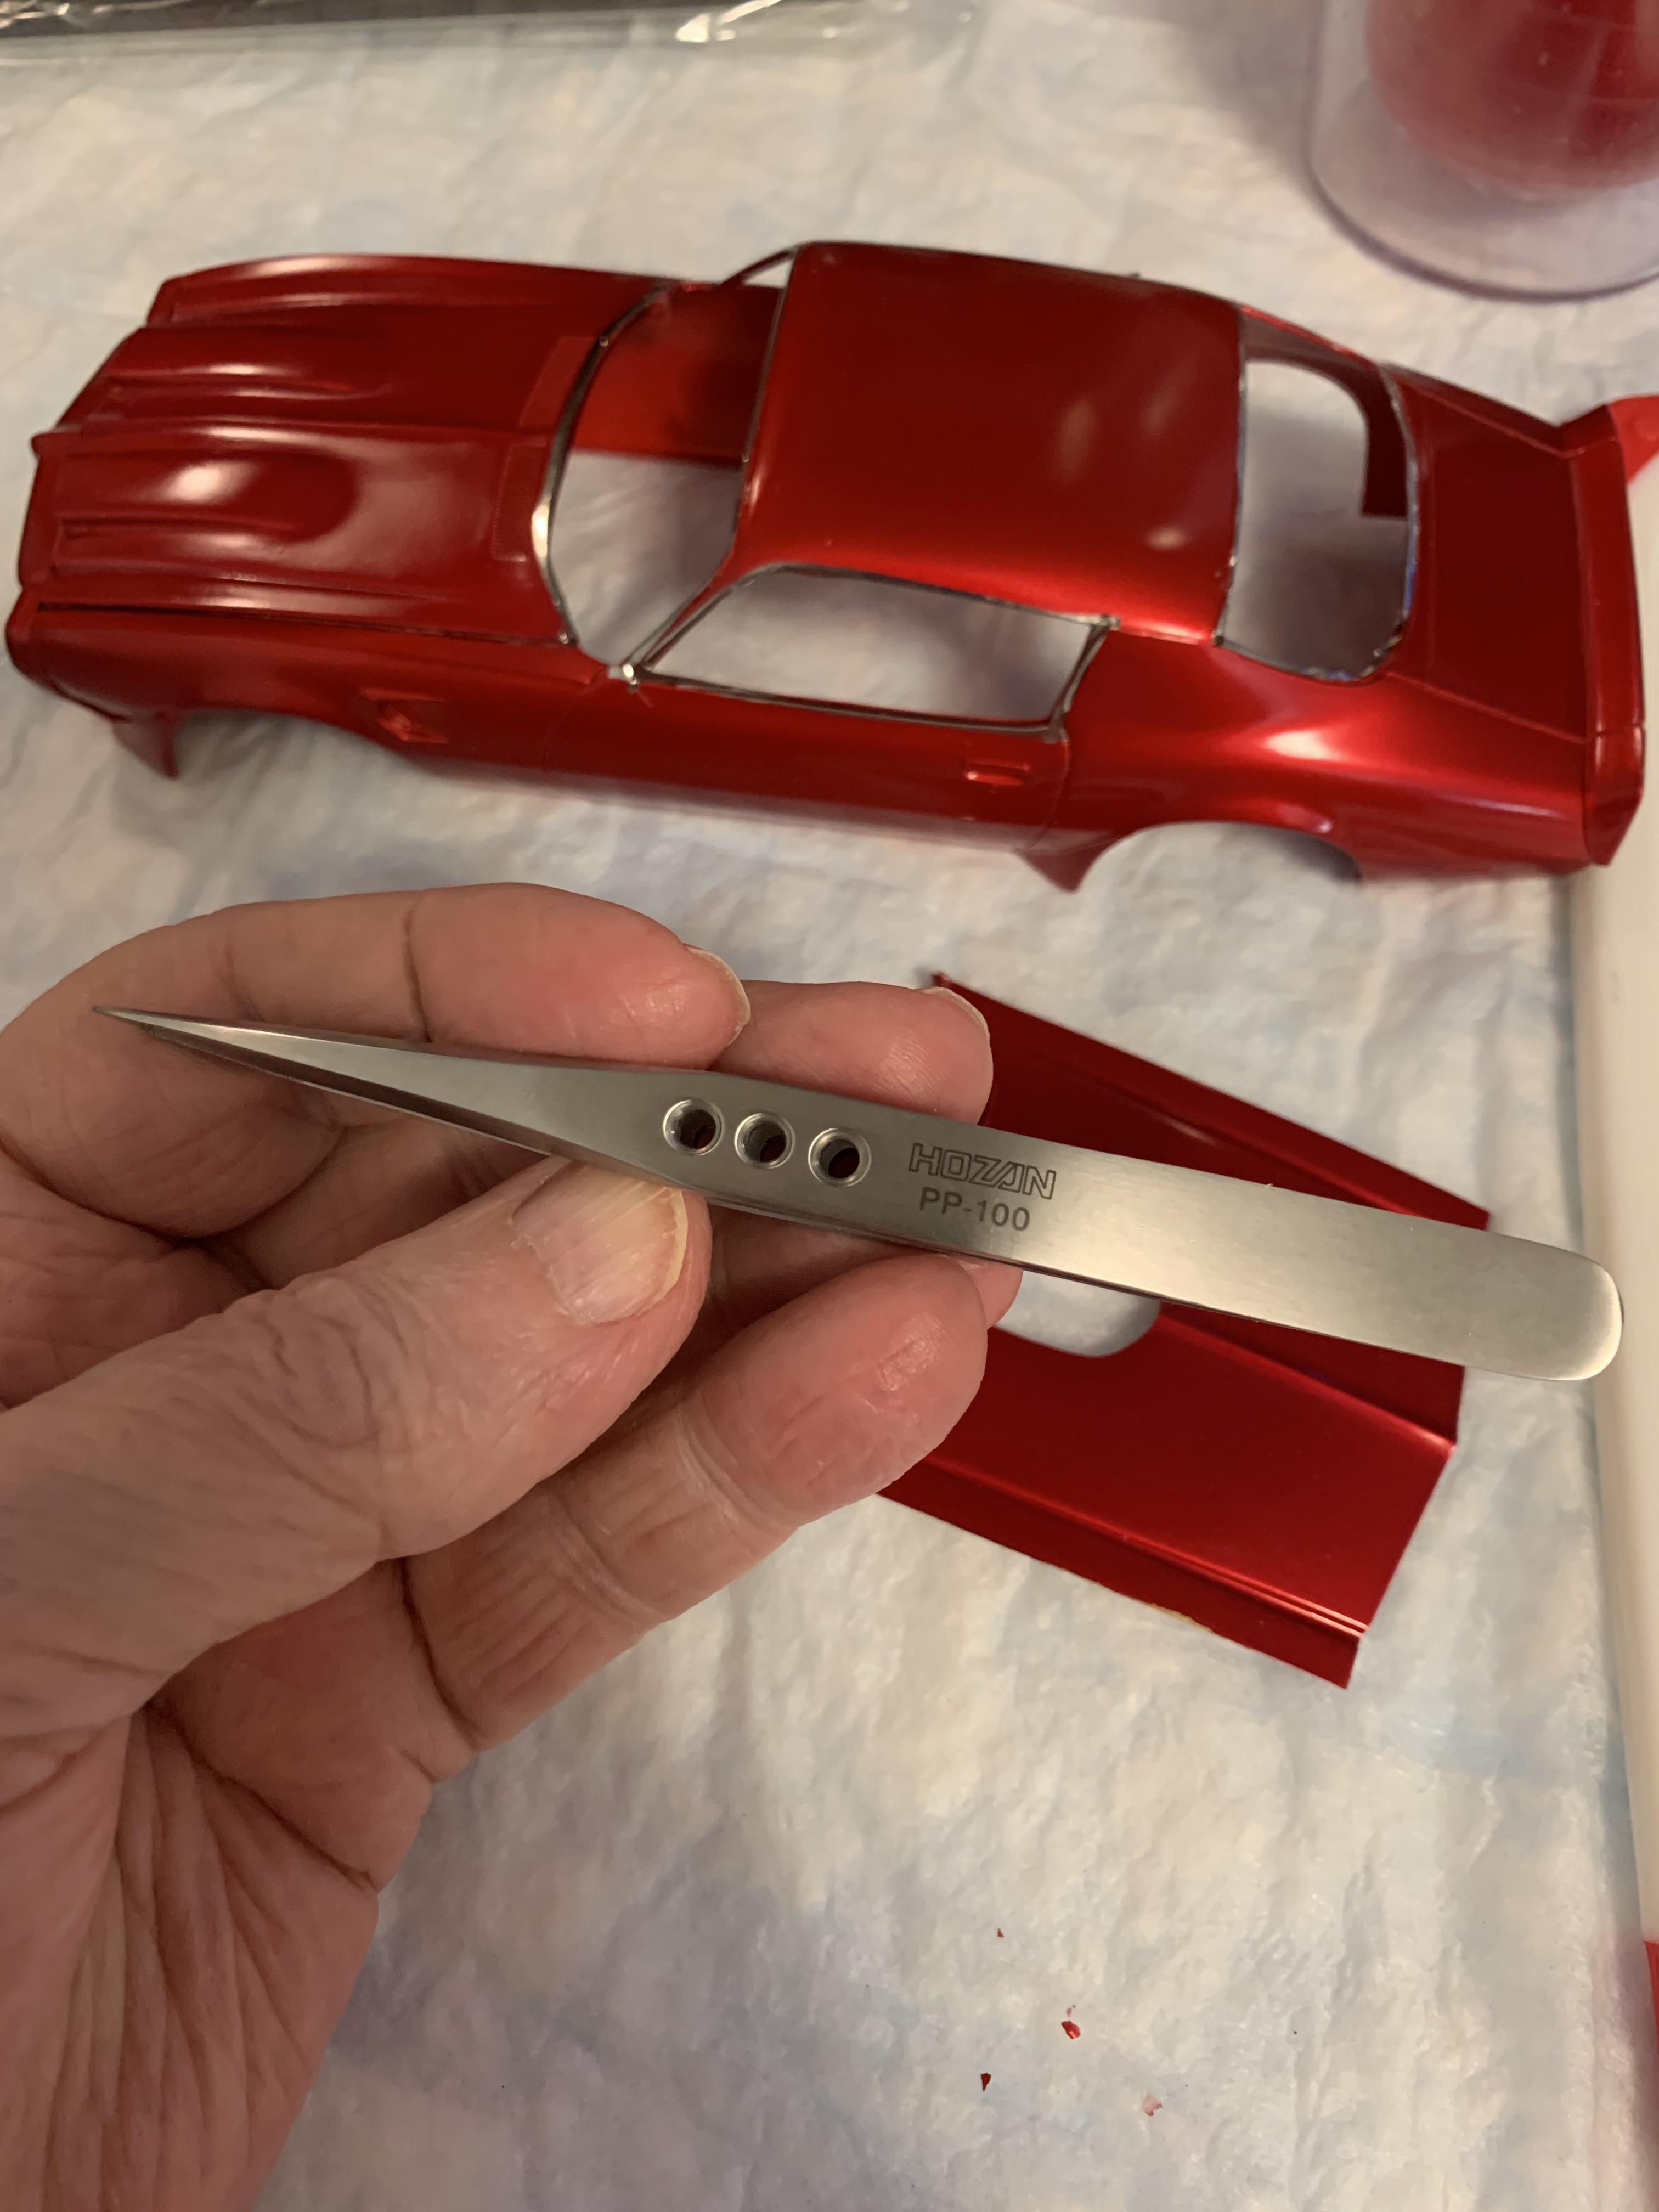
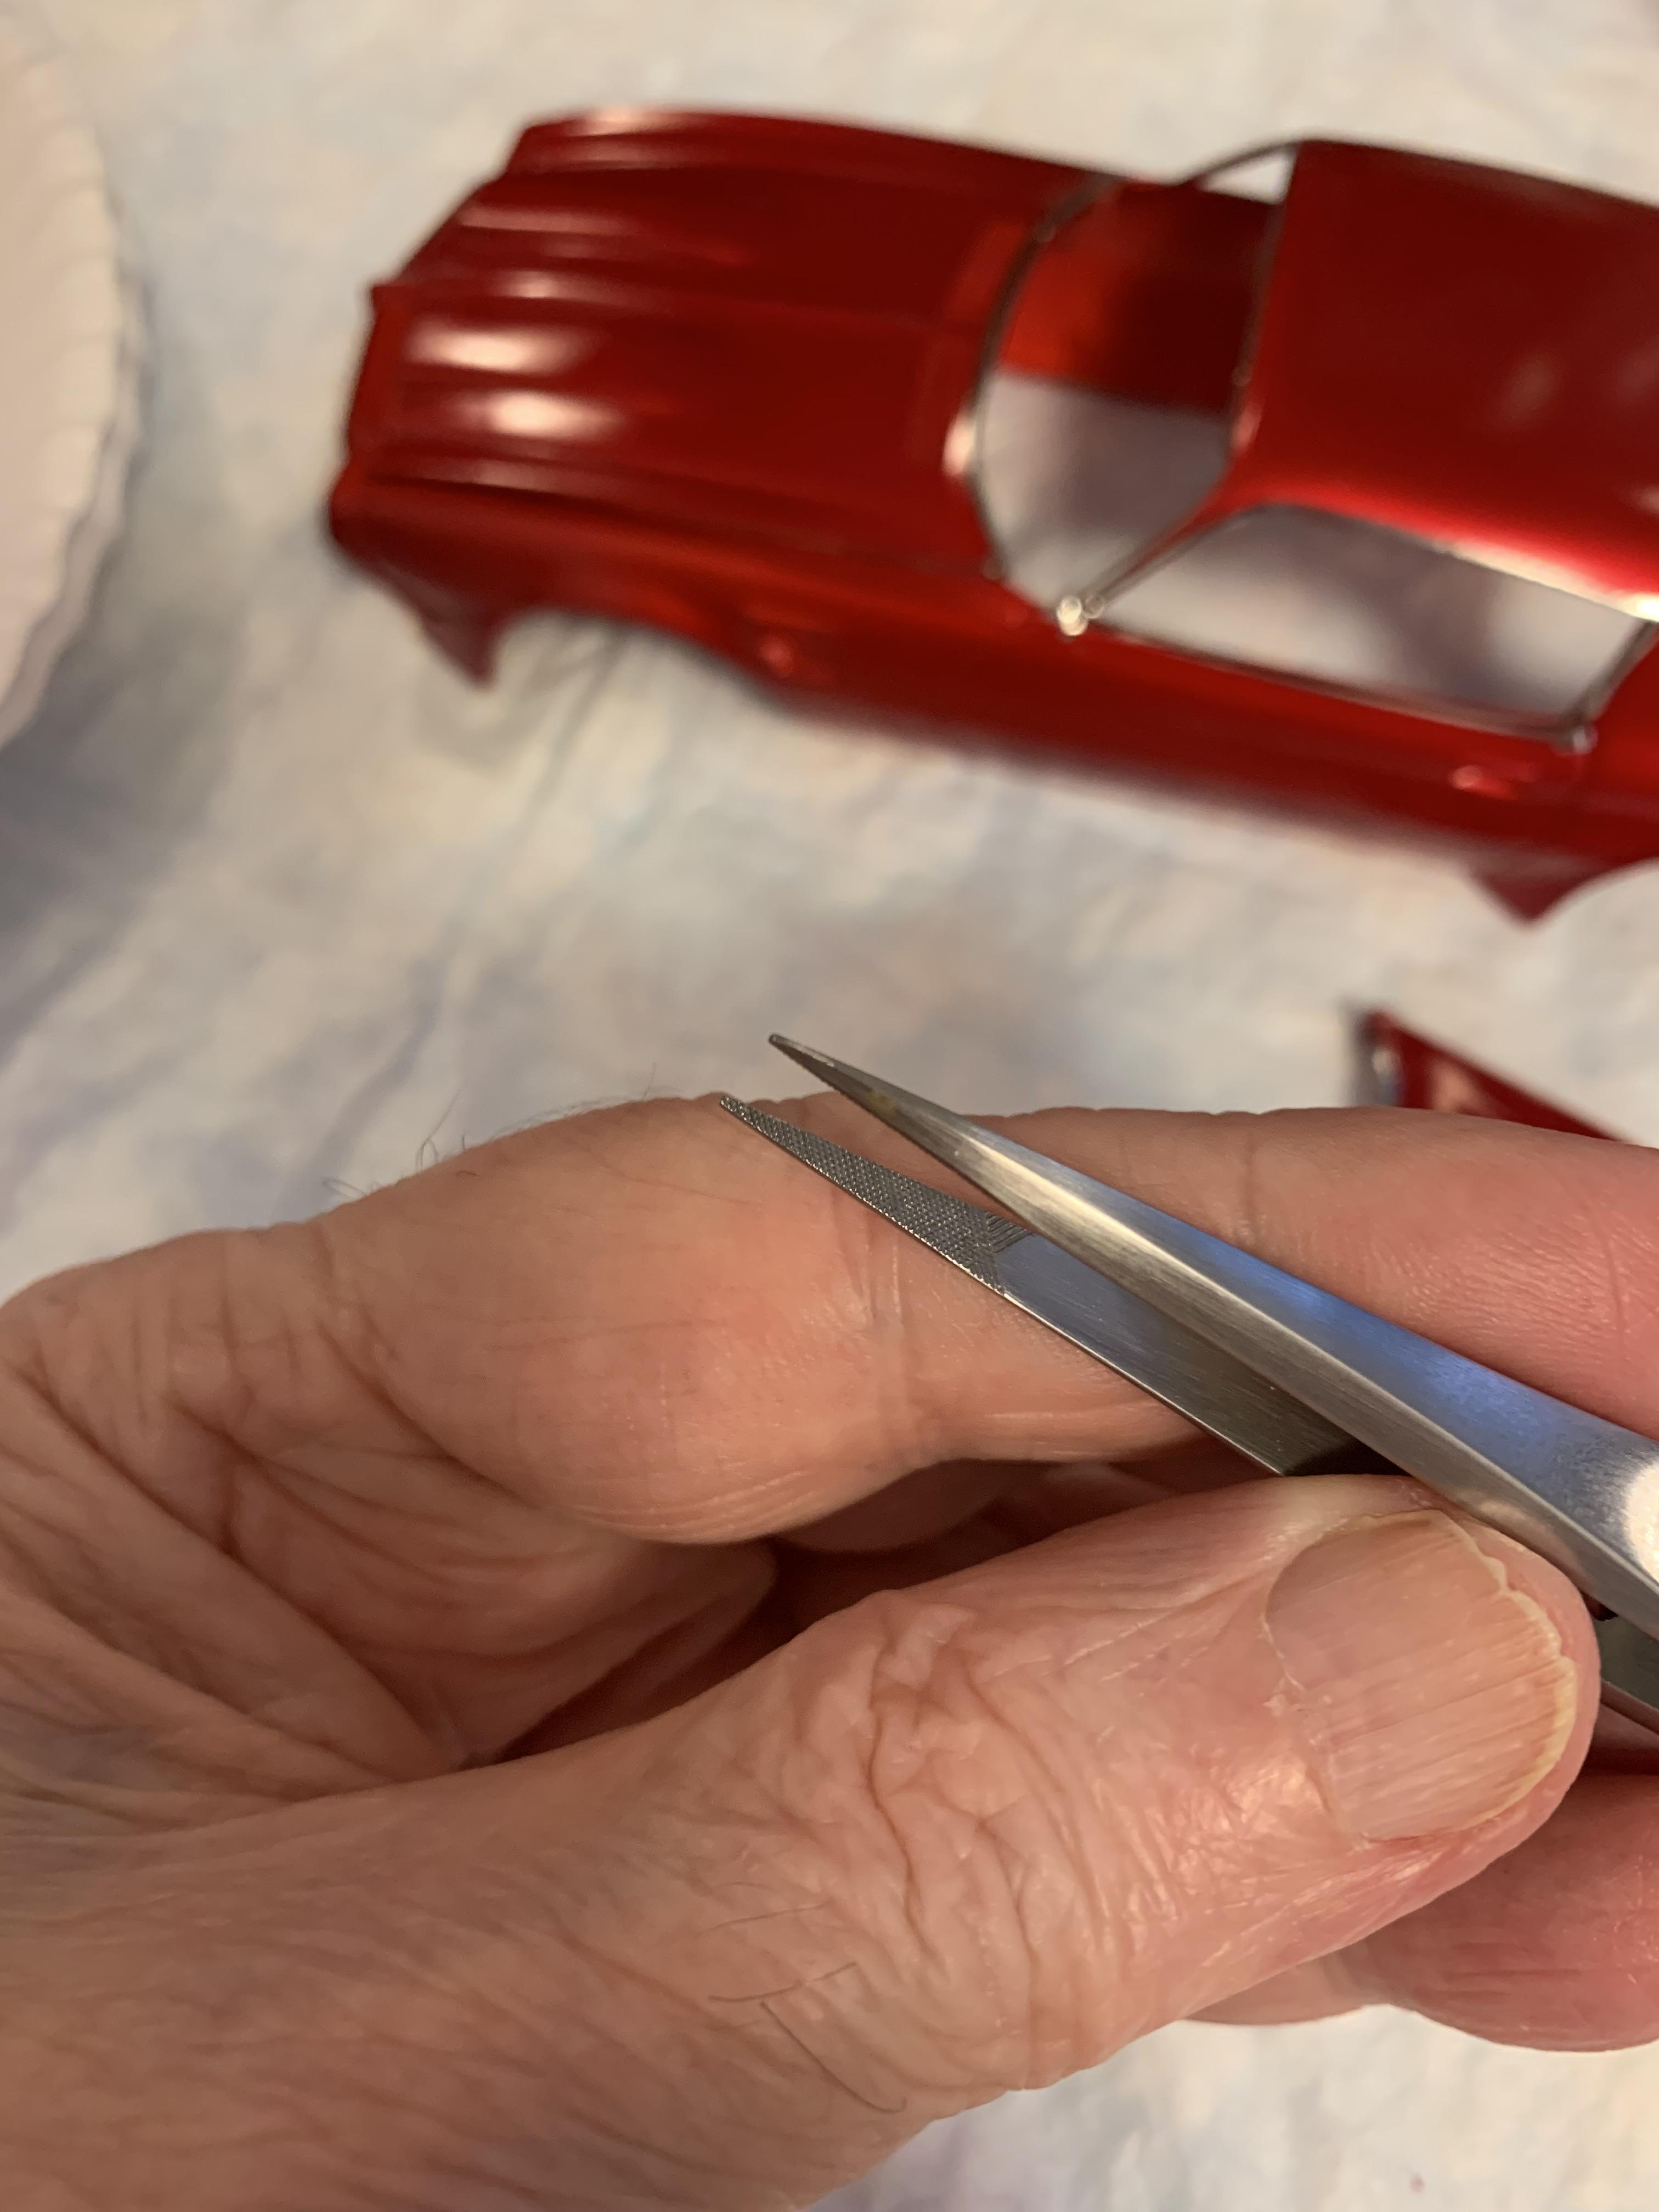
Thanks, I try to make them representative of most 1:1 present day Stocker cars. Worked some on the interior, then put some Hasegawa chrome on. Did both hoods. I like my new Hozan tweezers as they are knurled and grab the decals and strips of chrome better than my Dspiae. Still need some trimming, but enough for today.
-
Geez! Another Stocker! 70 Formula Firebird B/SA
R. Thorne replied to R. Thorne's topic in WIP: Drag Racing Models
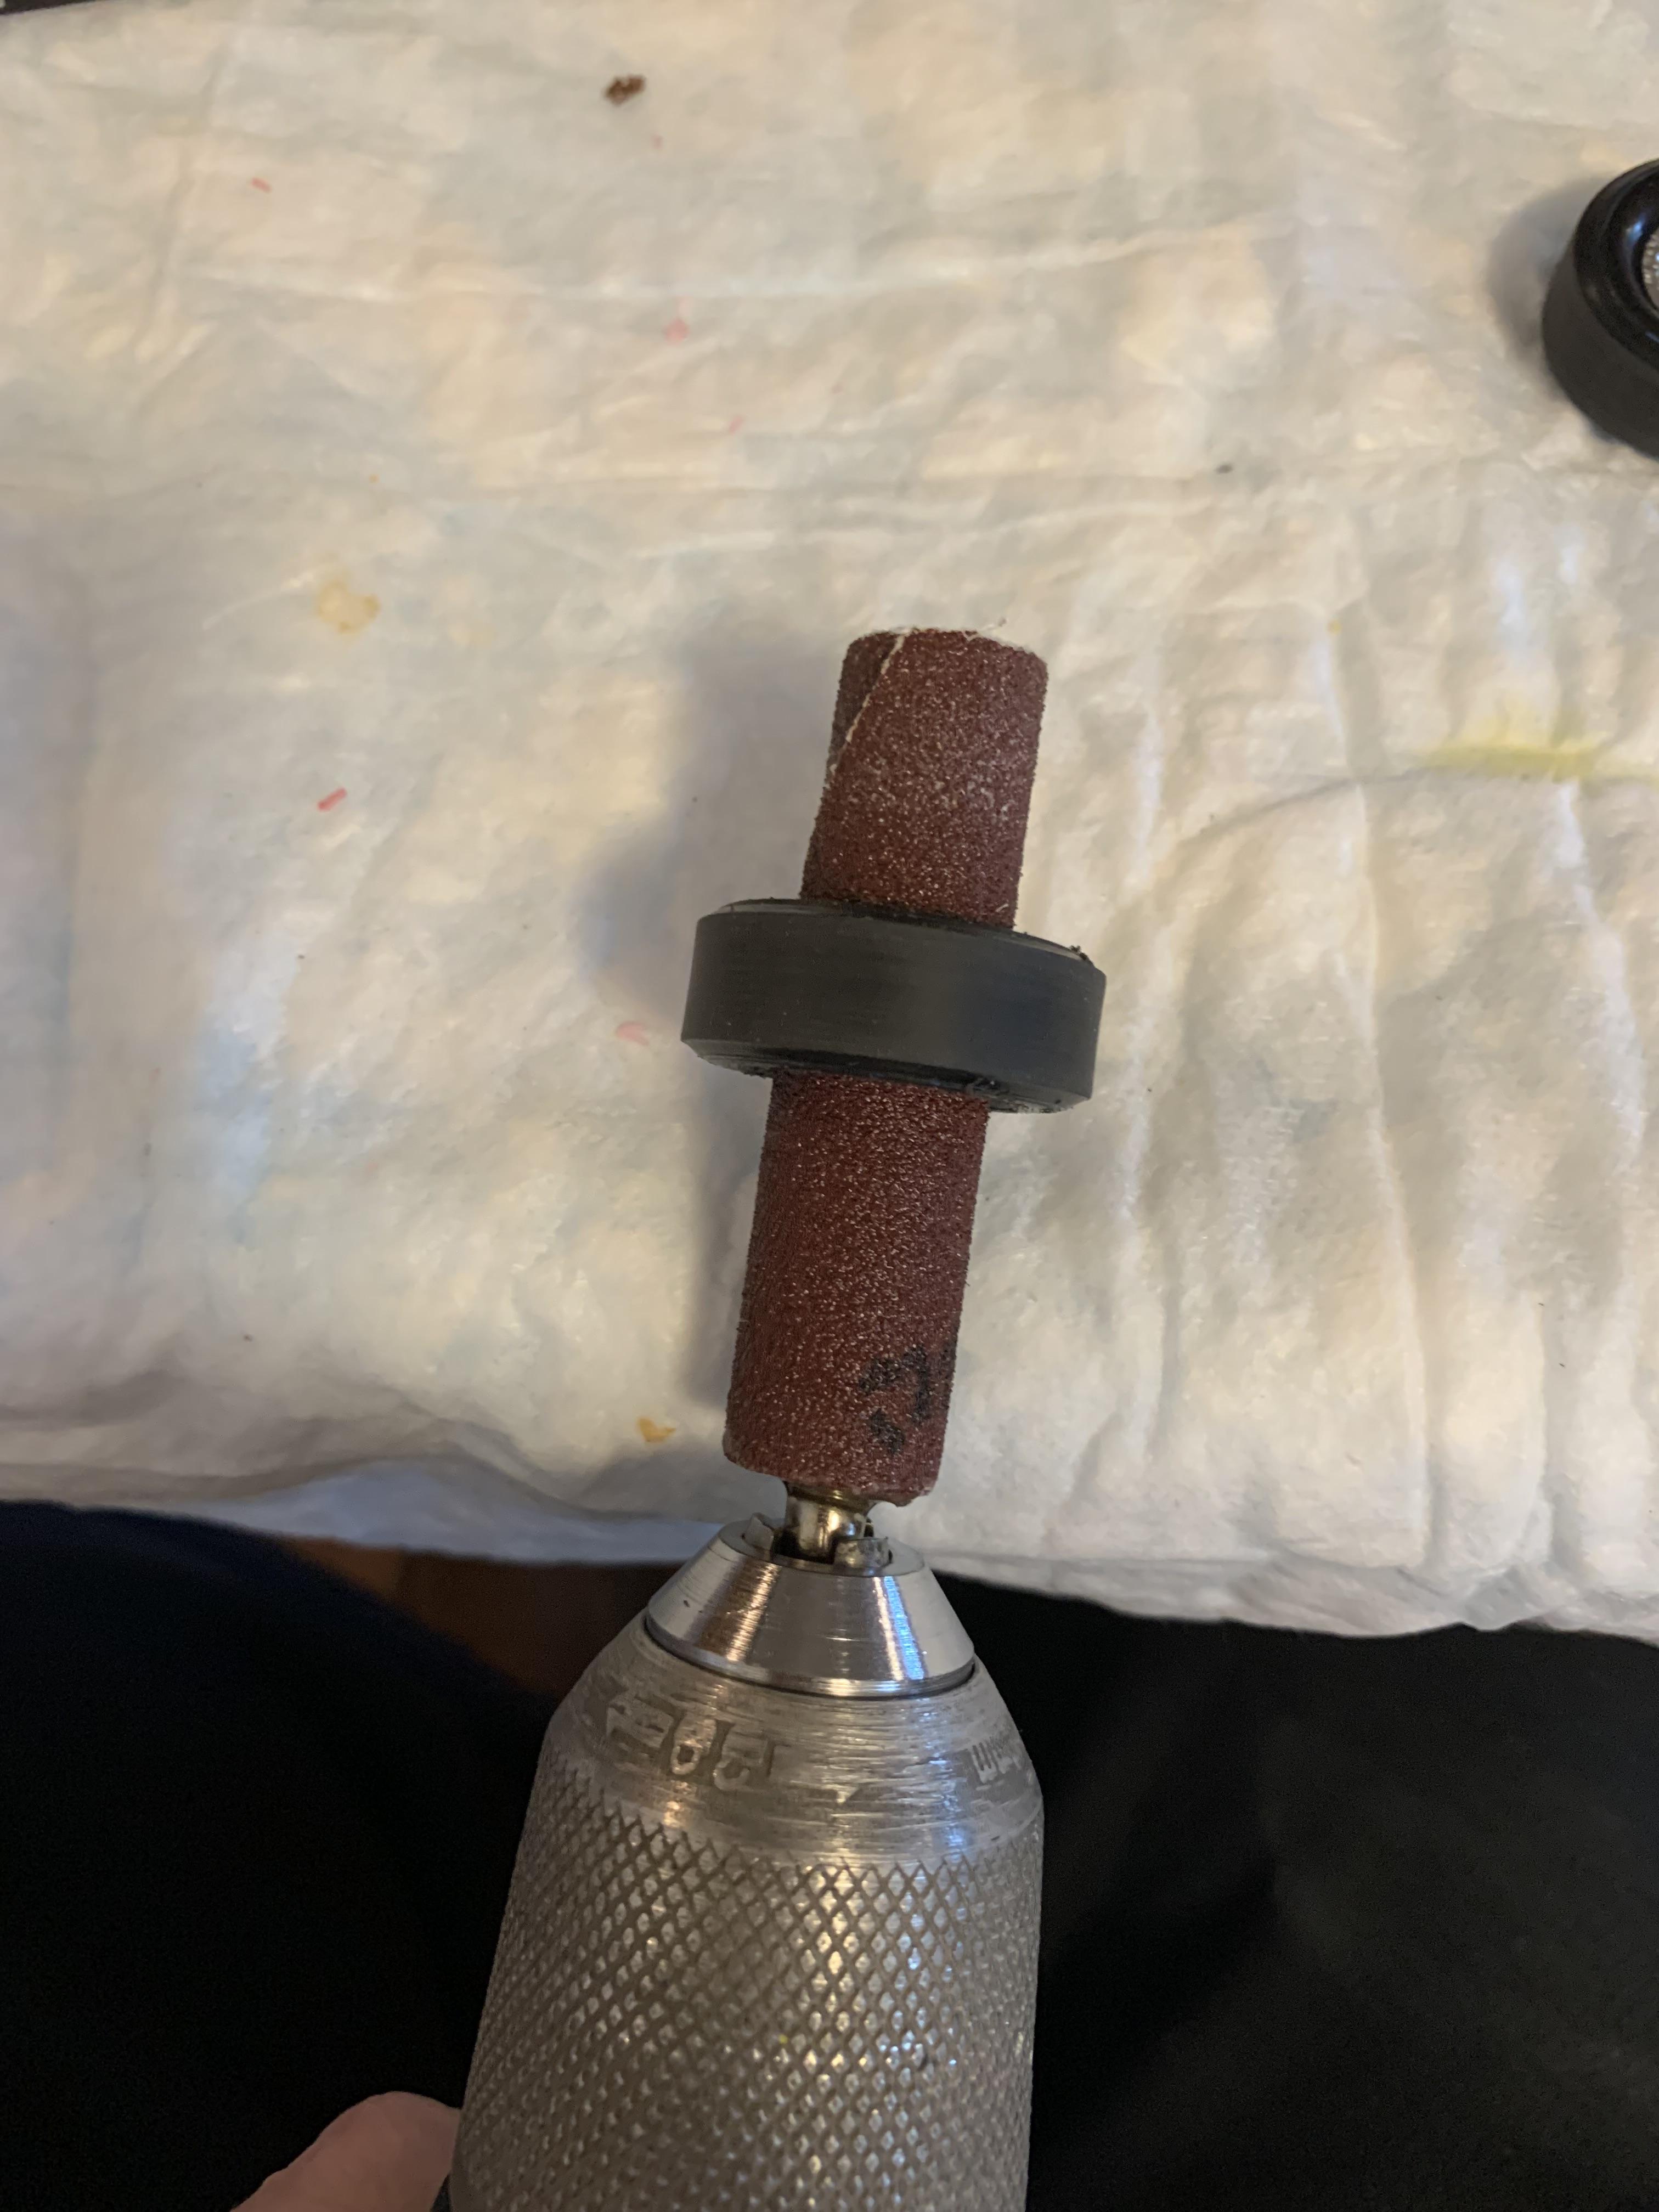
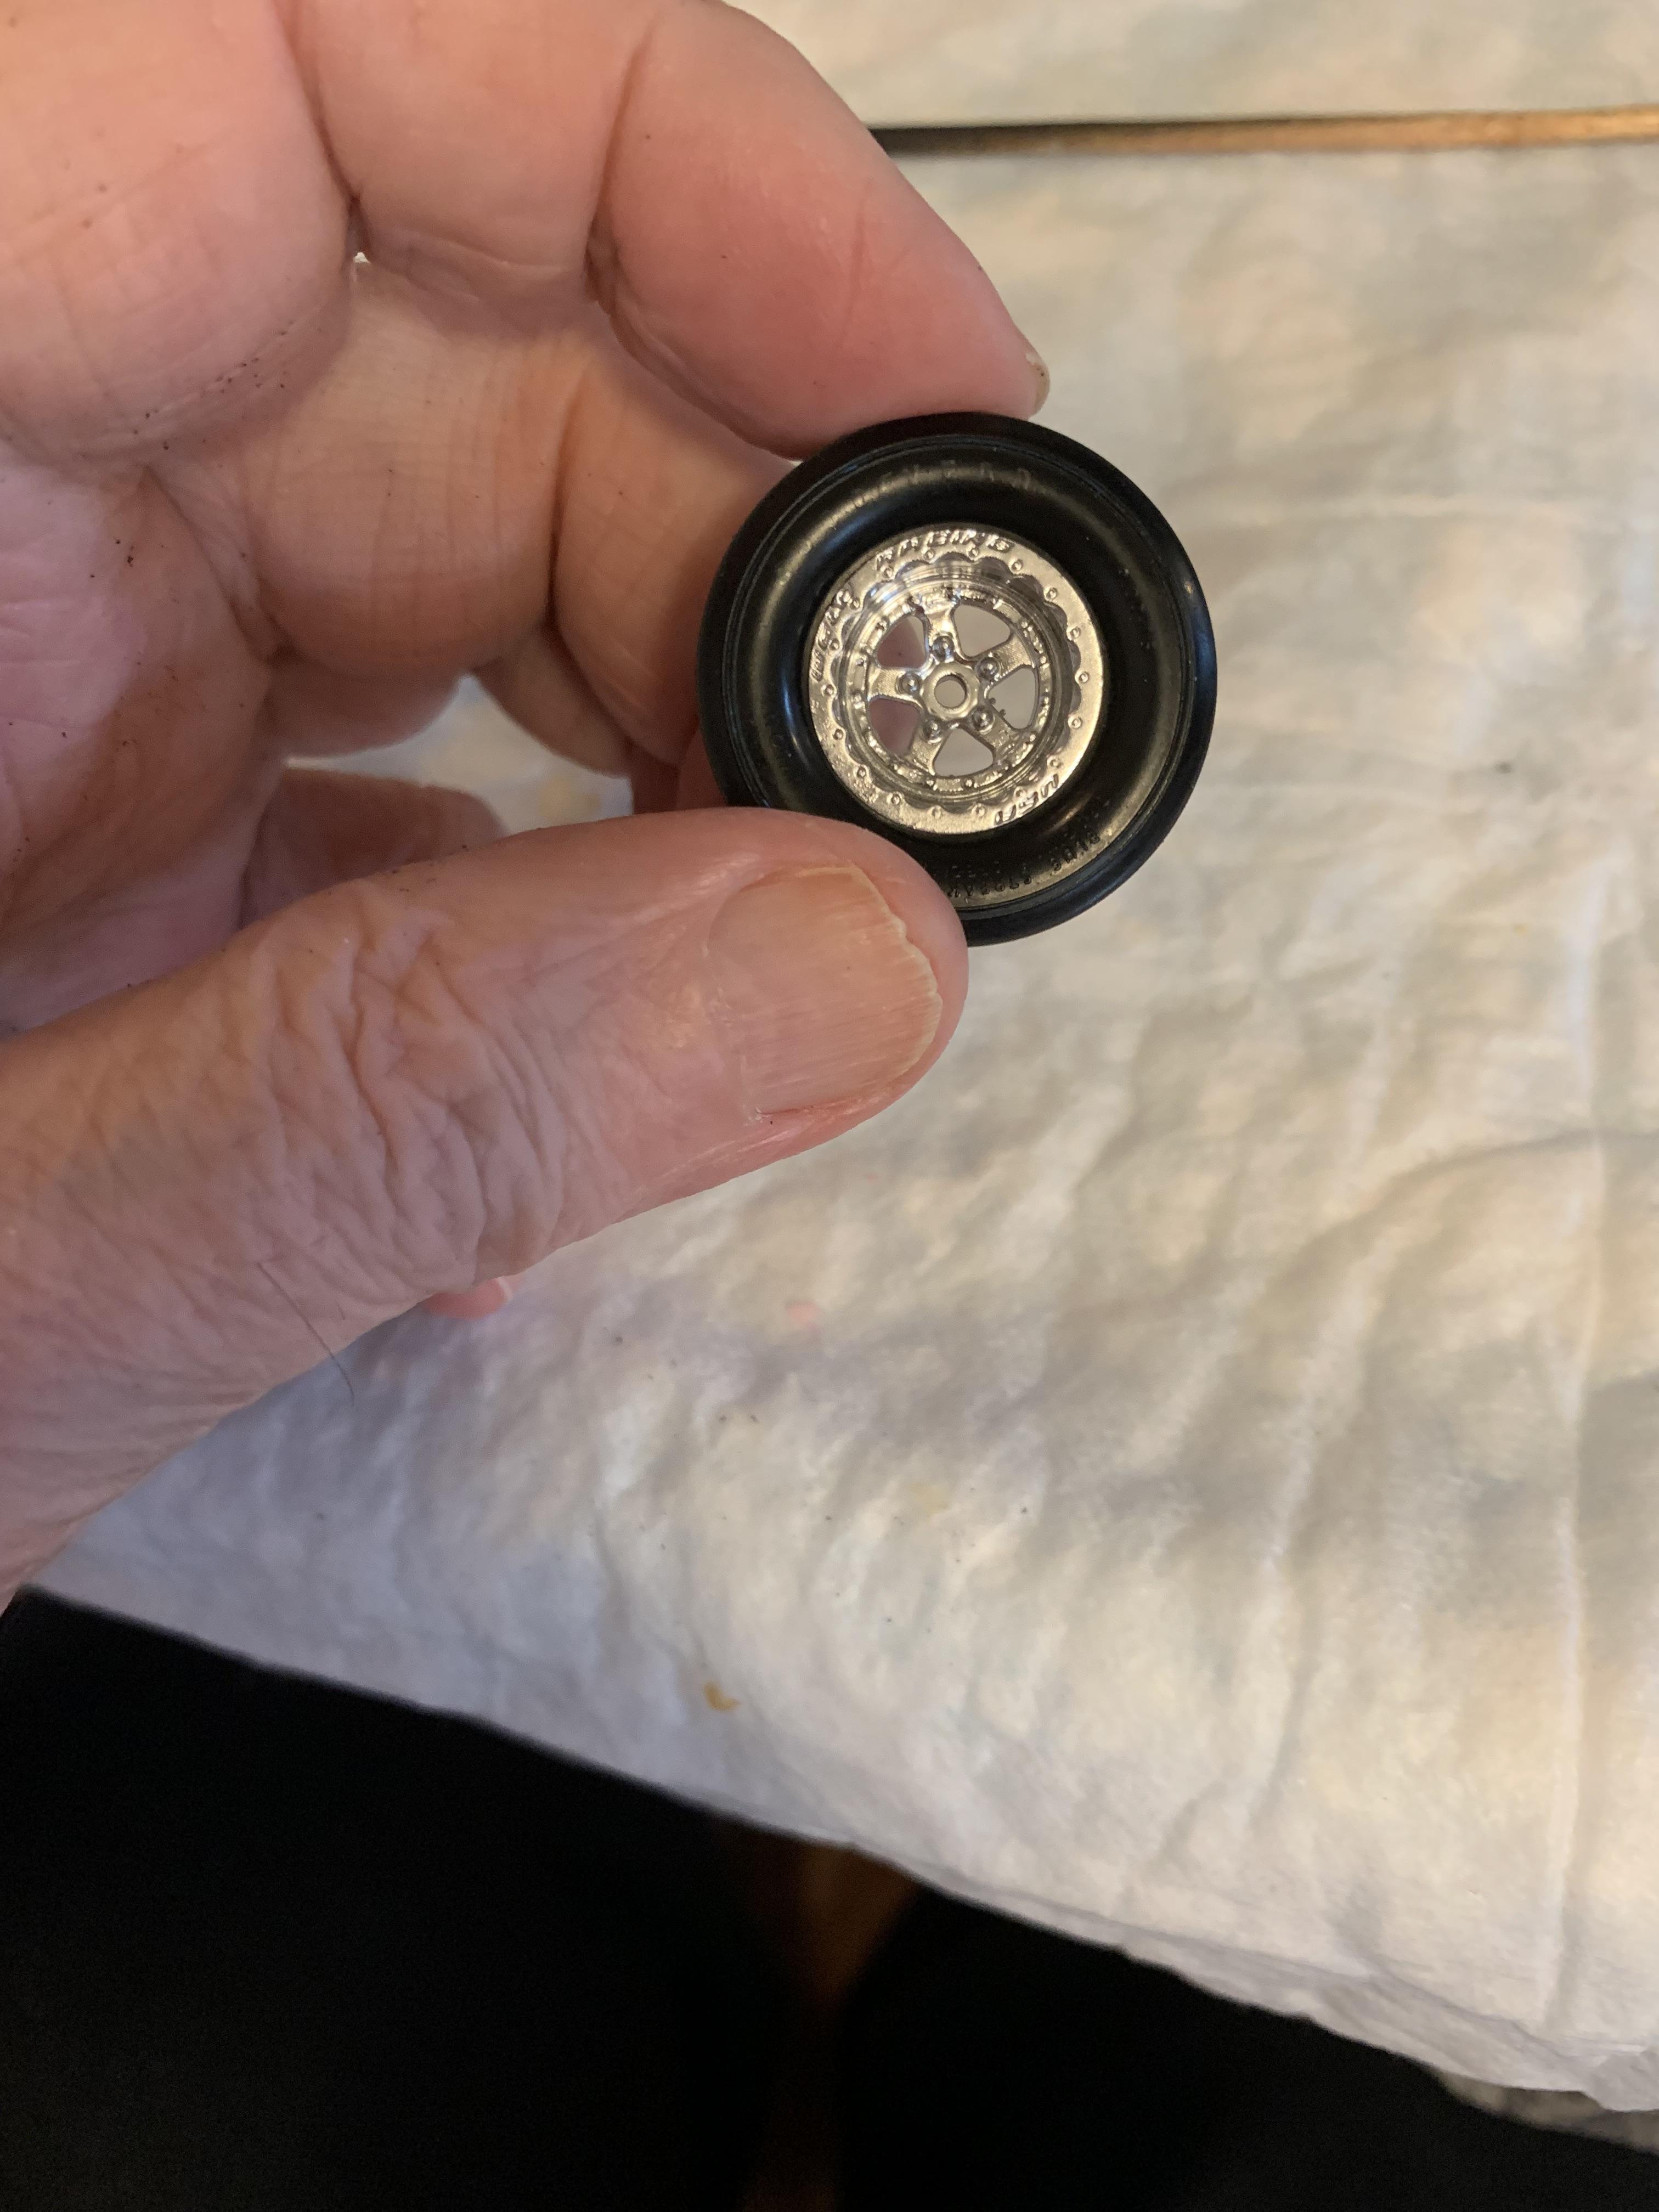
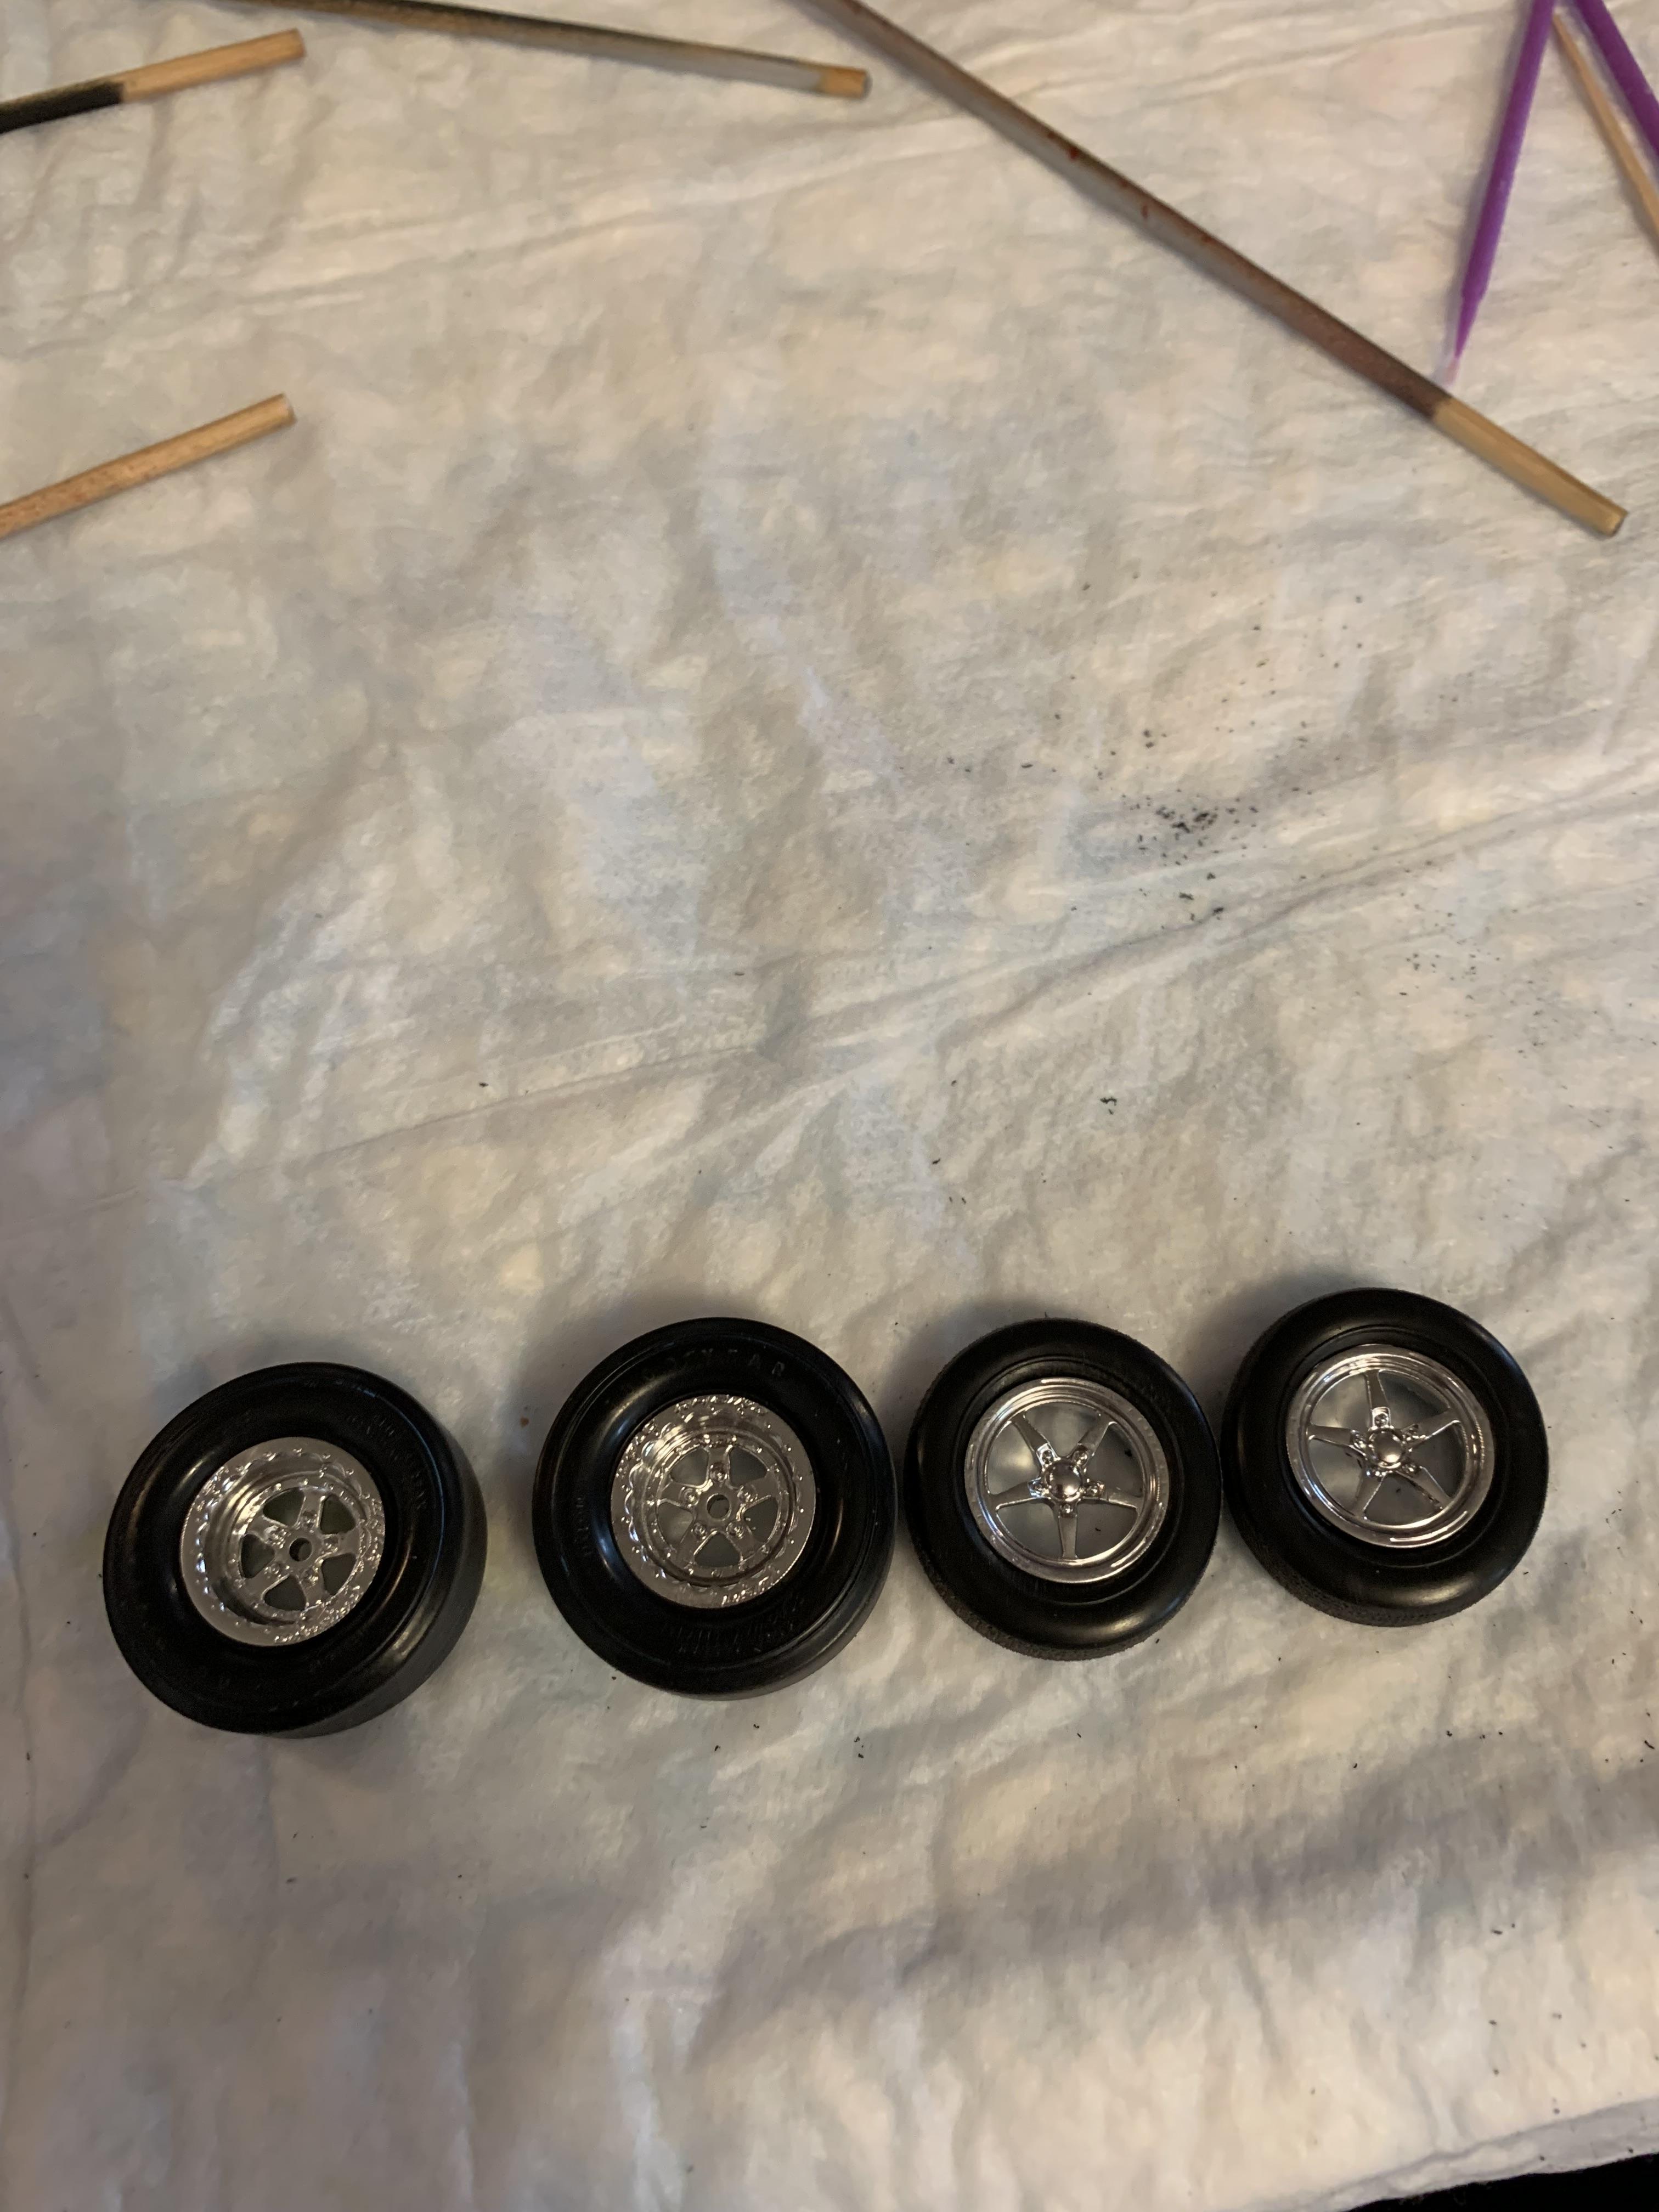
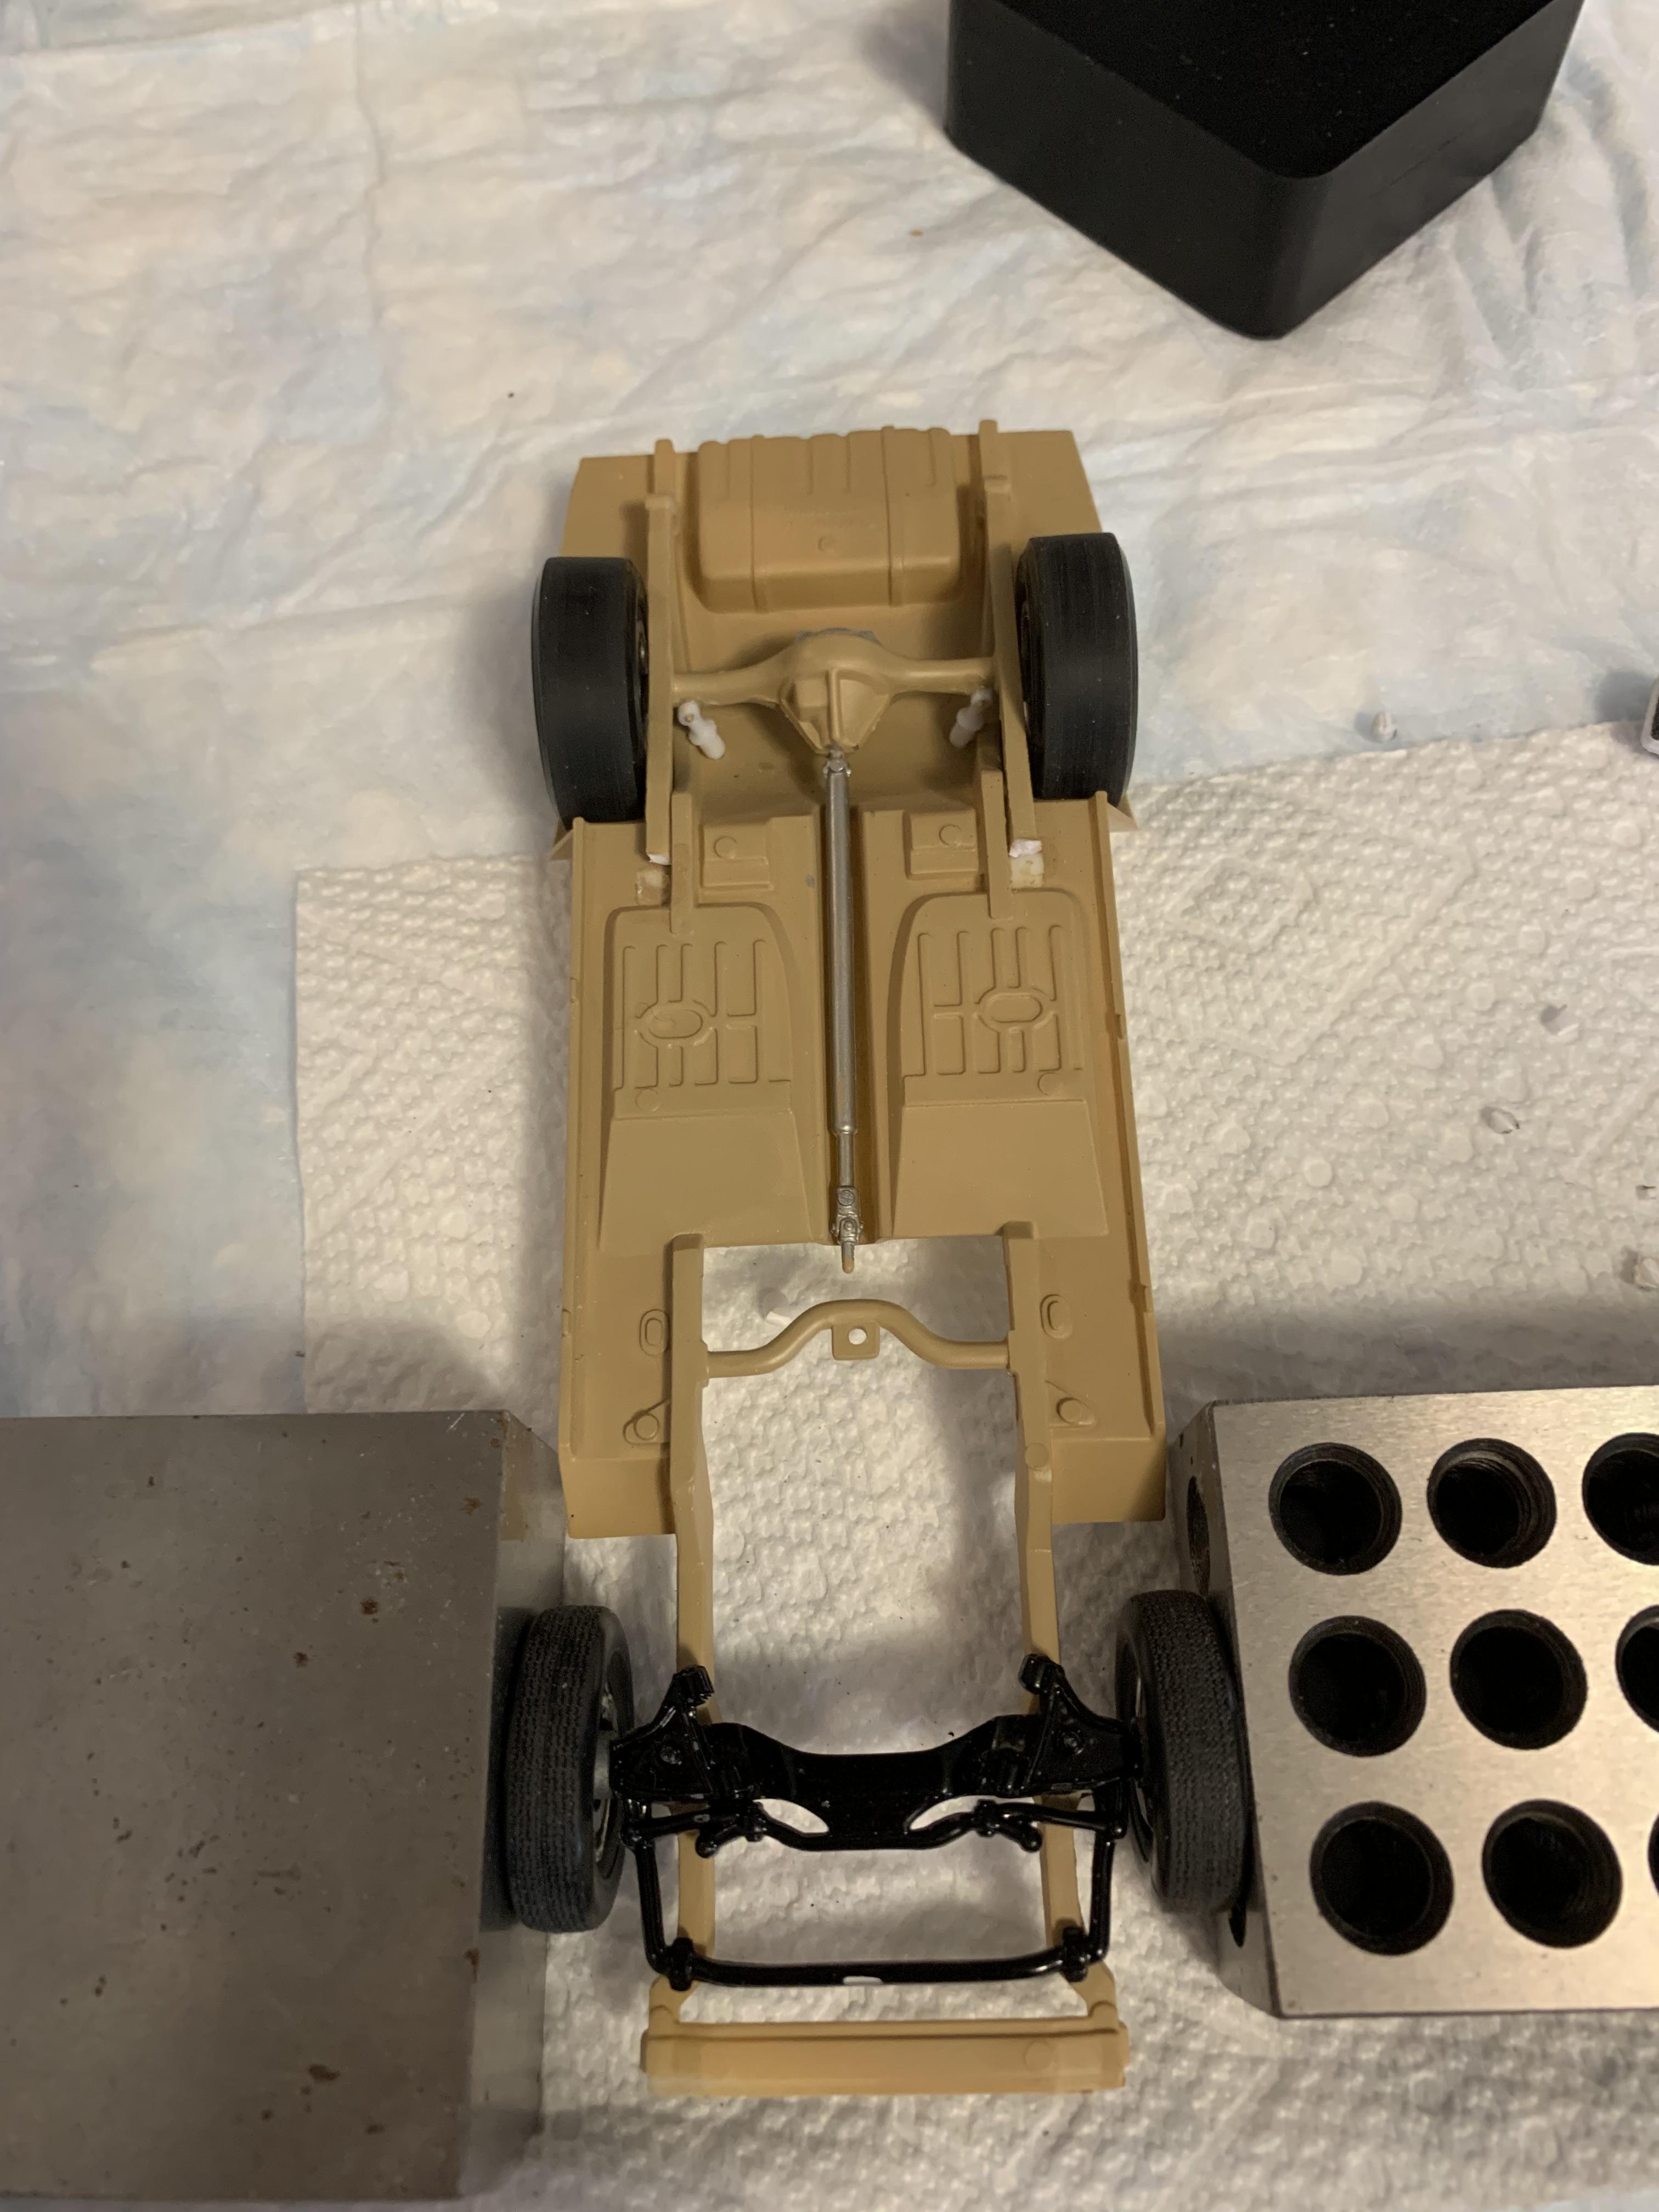
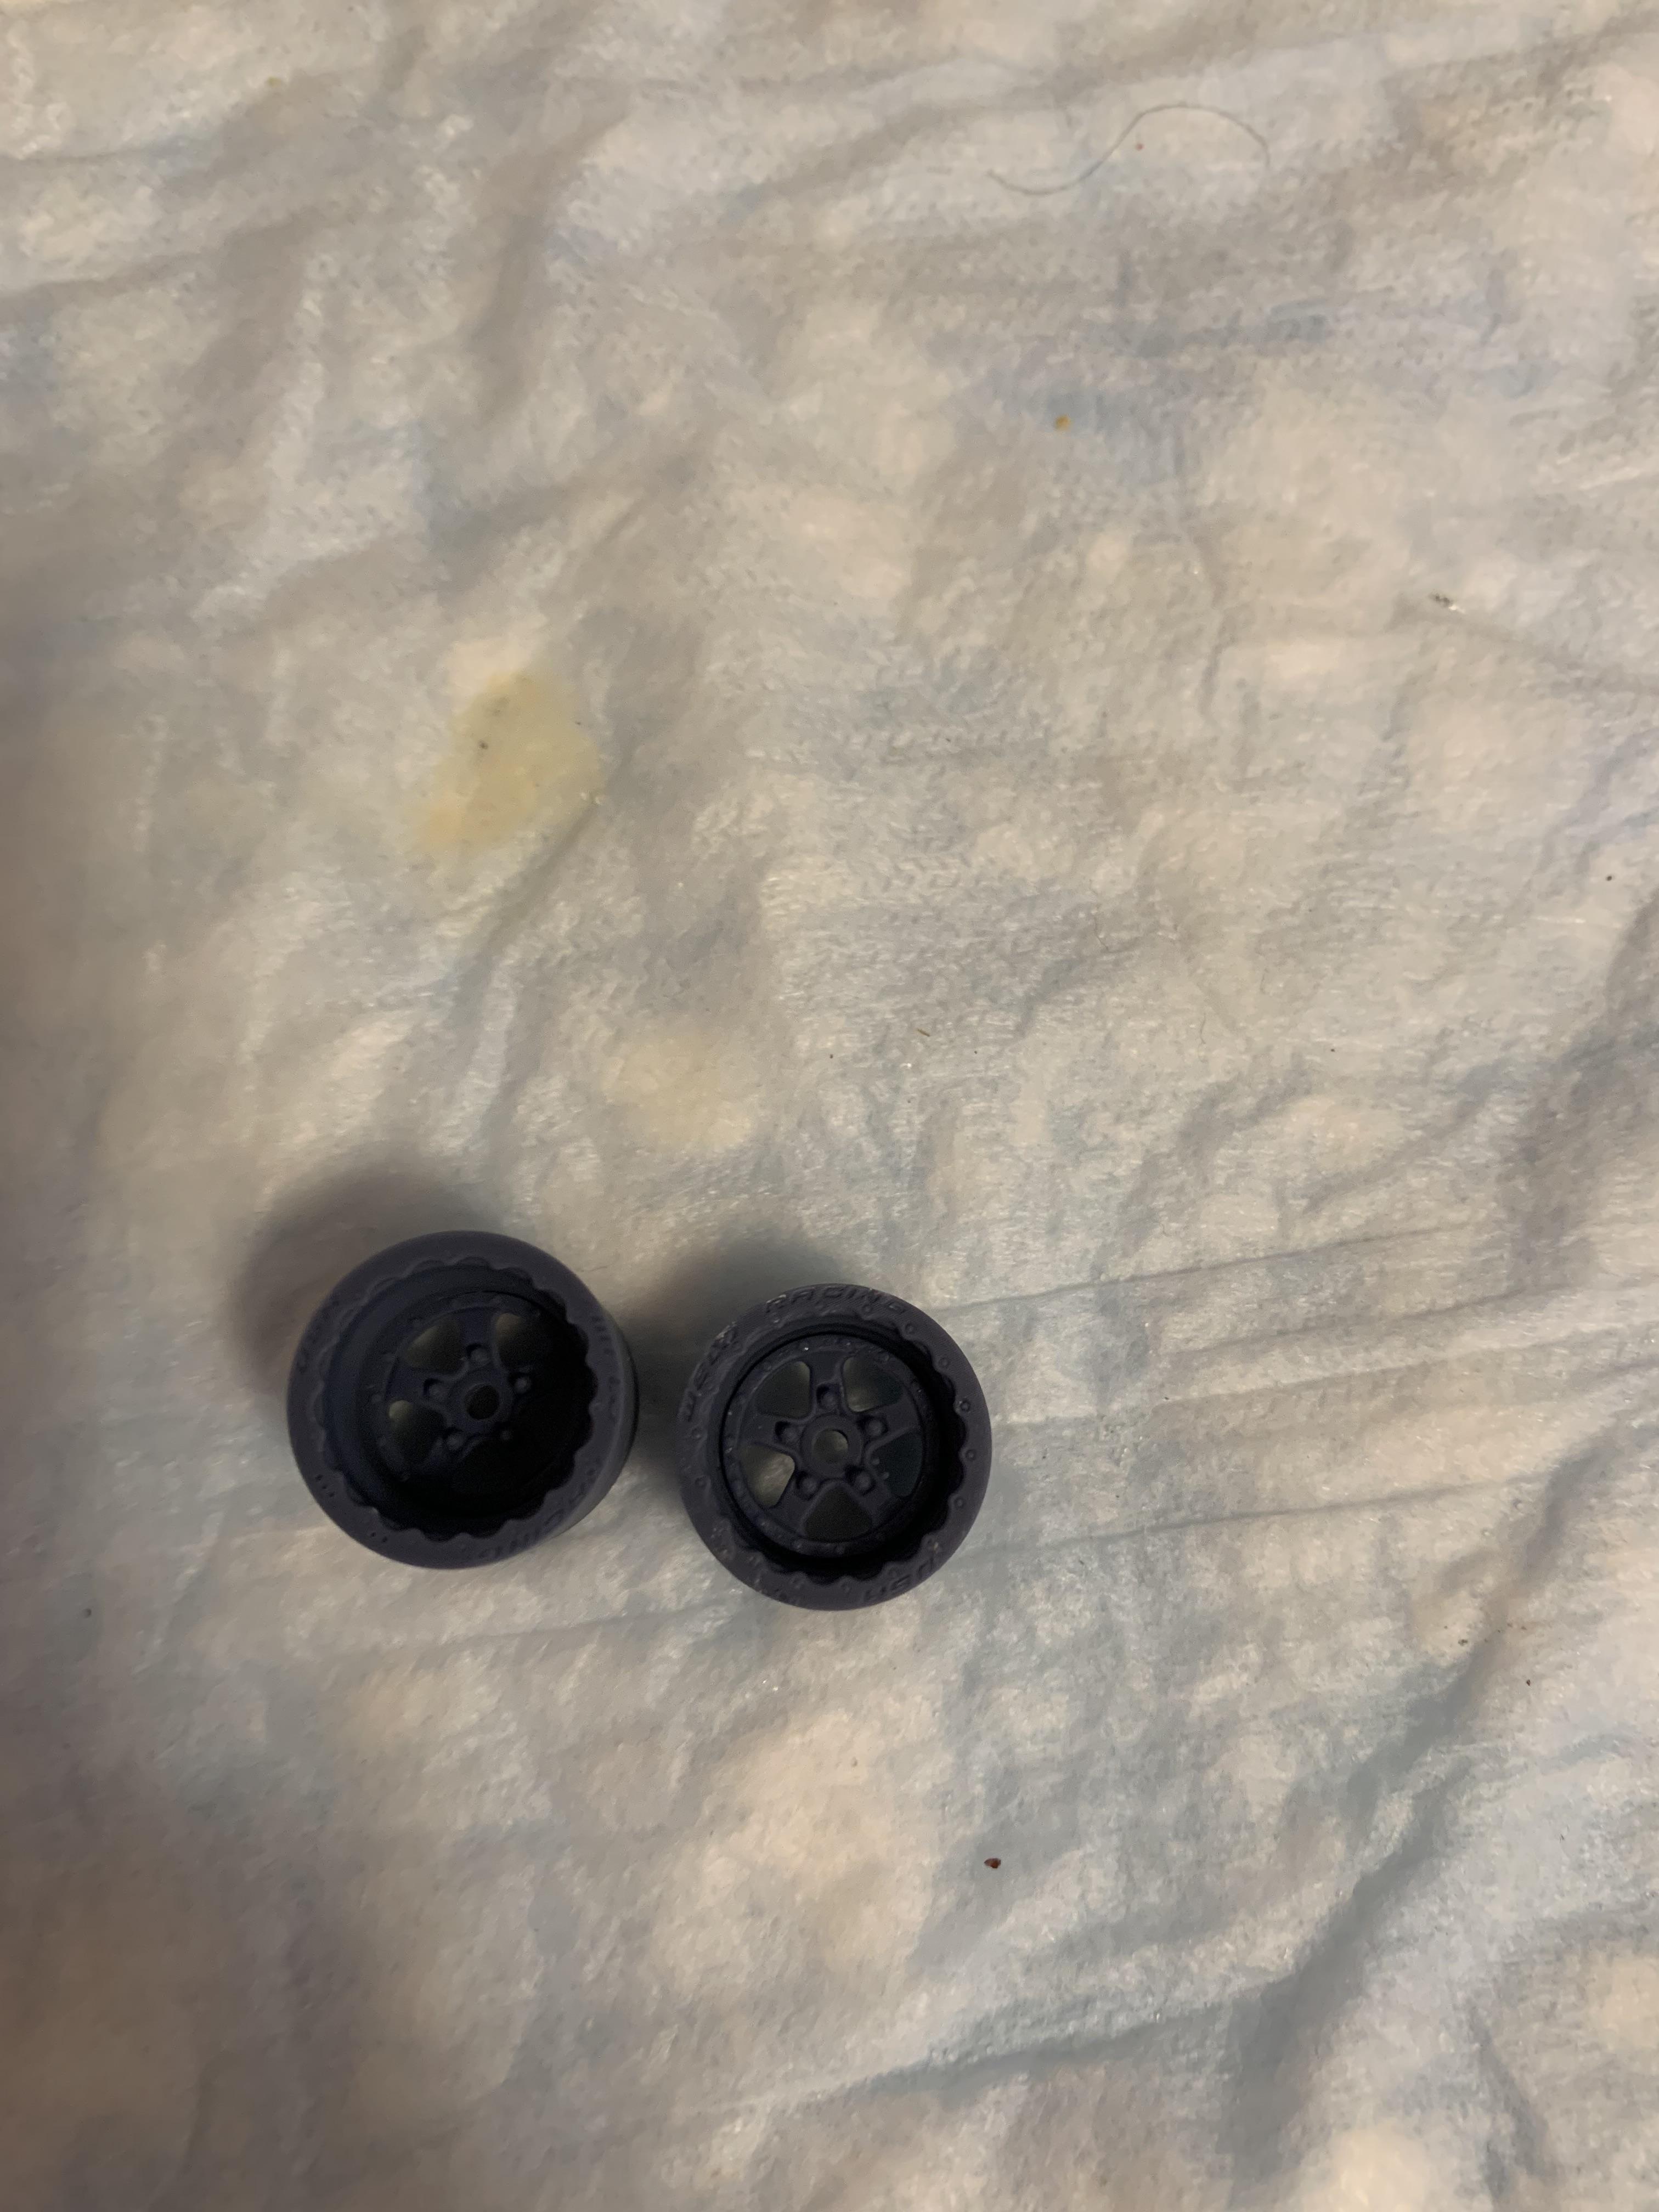
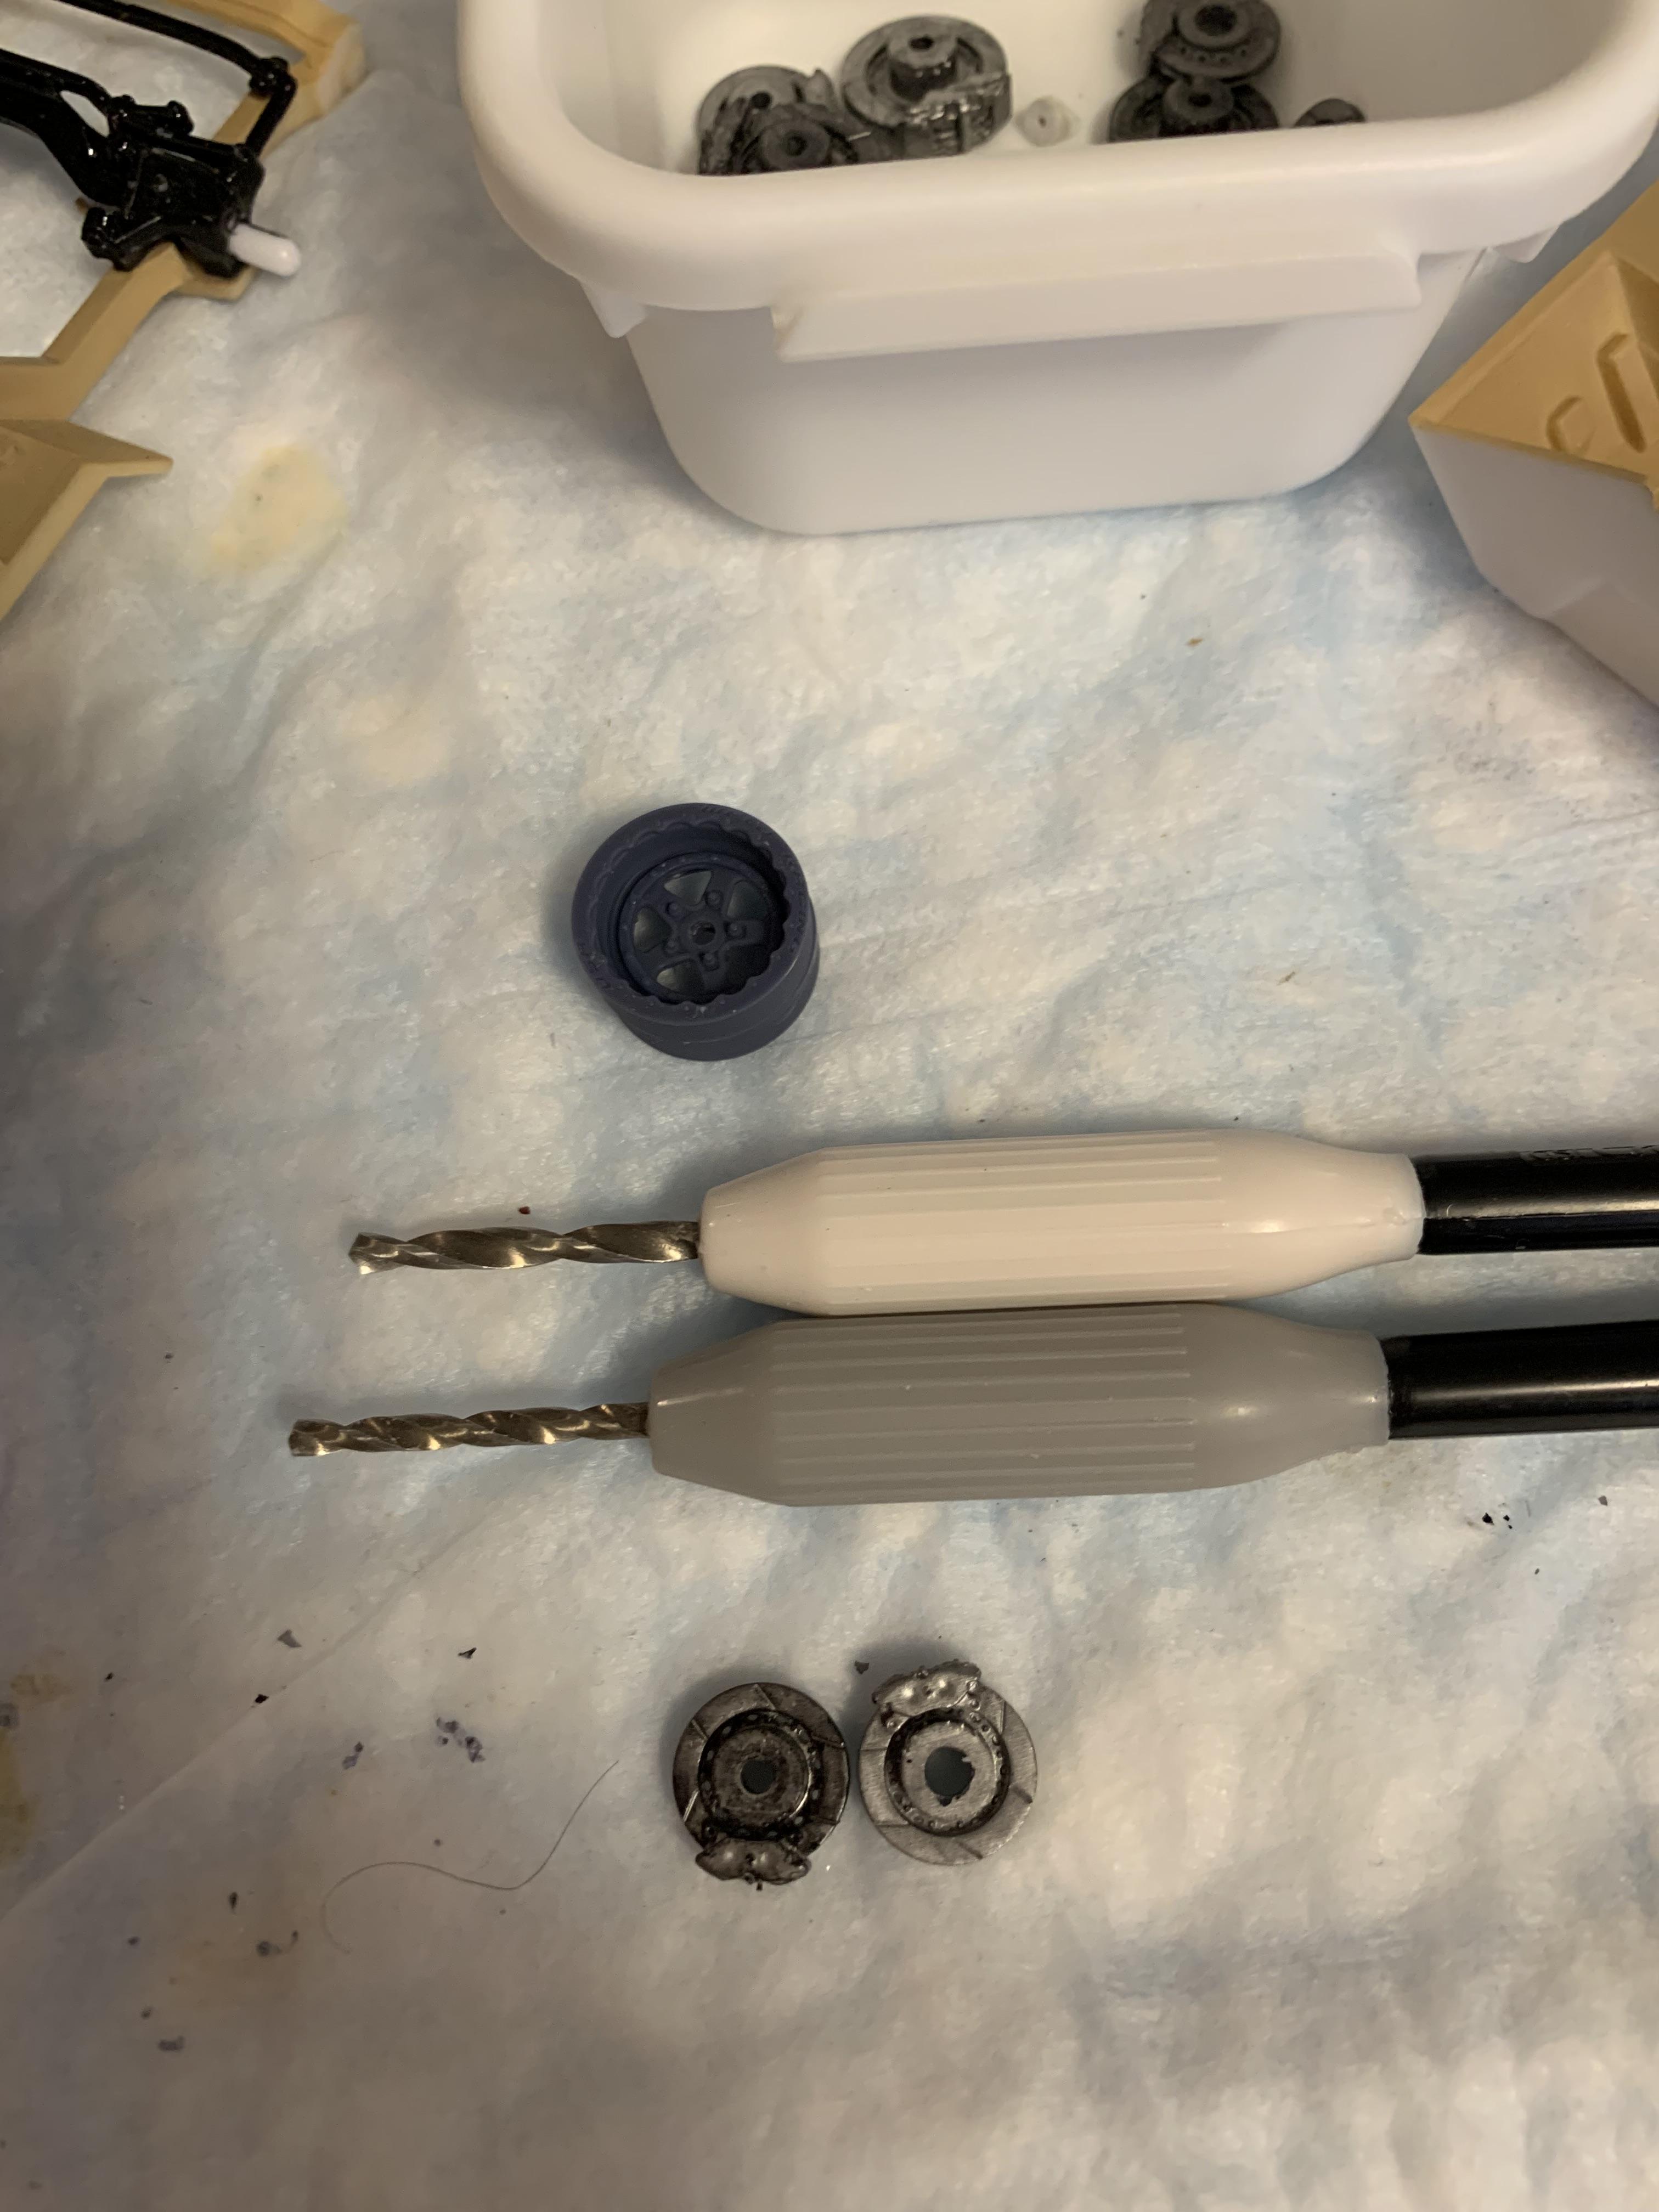
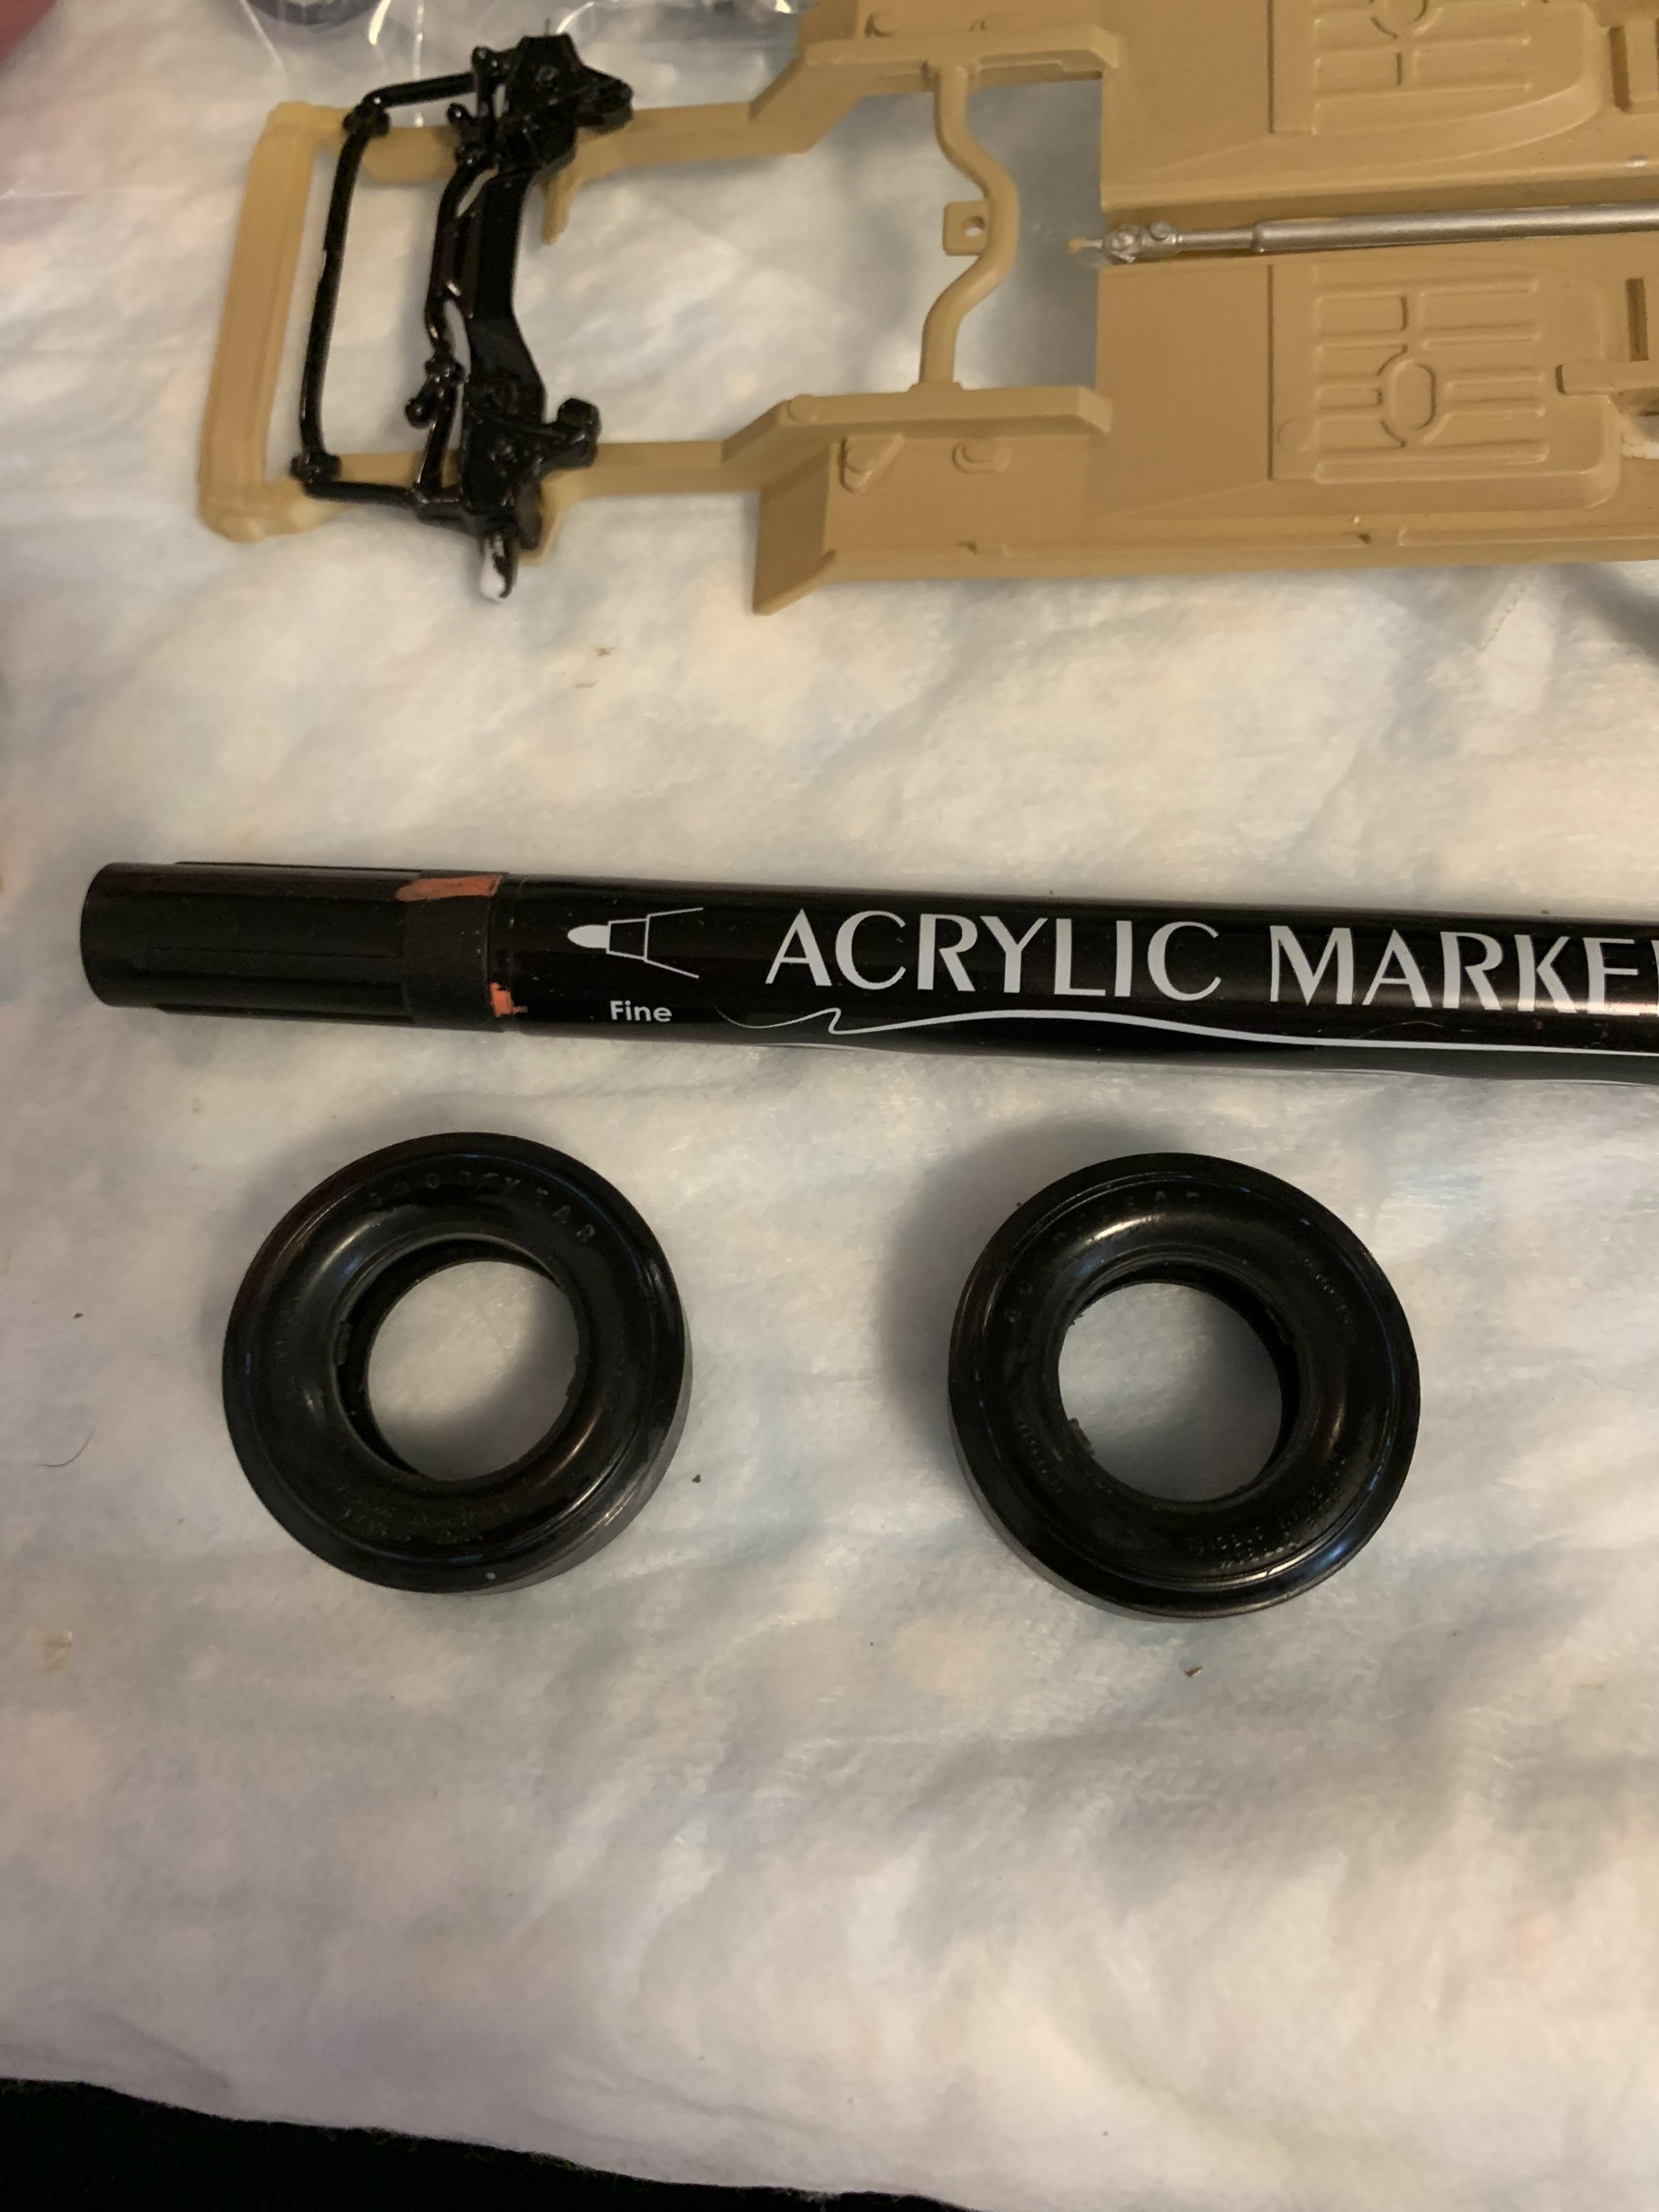
Trimmed the ends off the rear axle and front spindles so the wheels would fit farther in. Used hollow front tires on the front as these wheels are .667” and most tires are considerably smaller. Sanded the inside of the tires out slightly then the outside of both the front and rear tires. ca glued the disc brakes on then the assemblies.
-
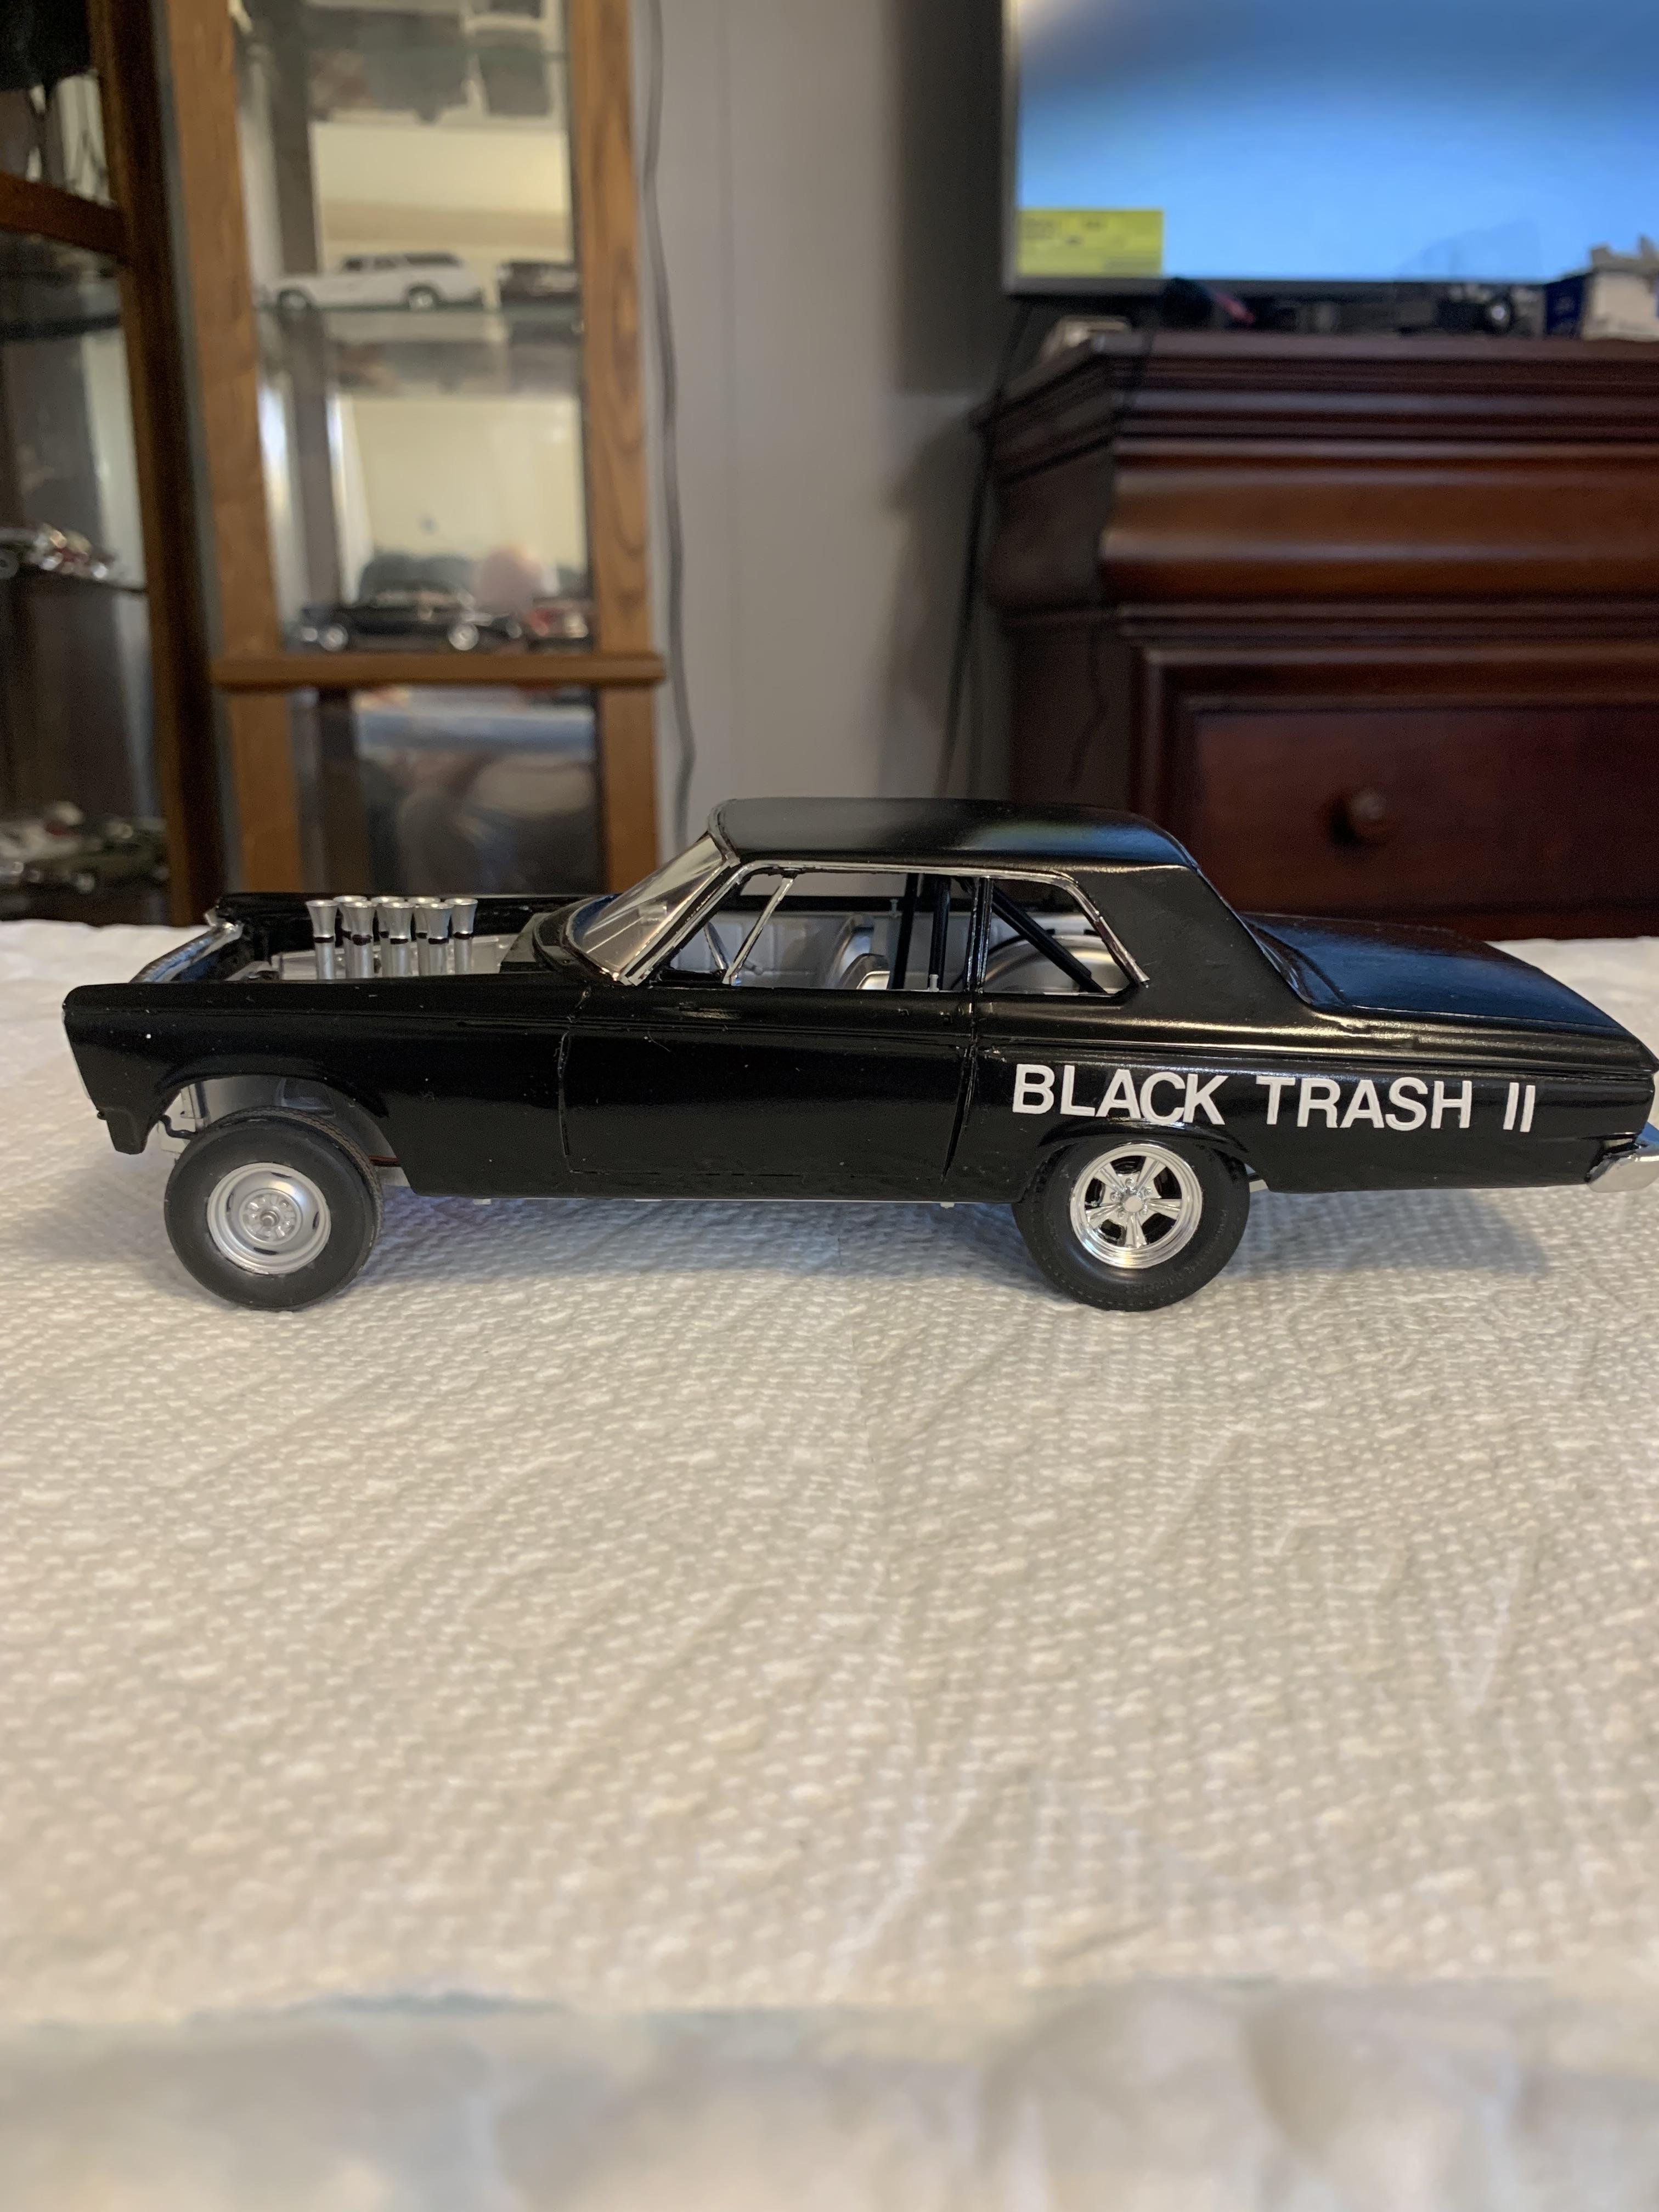
Grooms Bros awb 1965 Plymouth sedan Black Trash II
R. Thorne replied to R. Thorne's topic in Drag Racing
Thanks, Carl. Have a good day. -
Geez! Another Stocker! 70 Formula Firebird B/SA
R. Thorne replied to R. Thorne's topic in WIP: Drag Racing Models
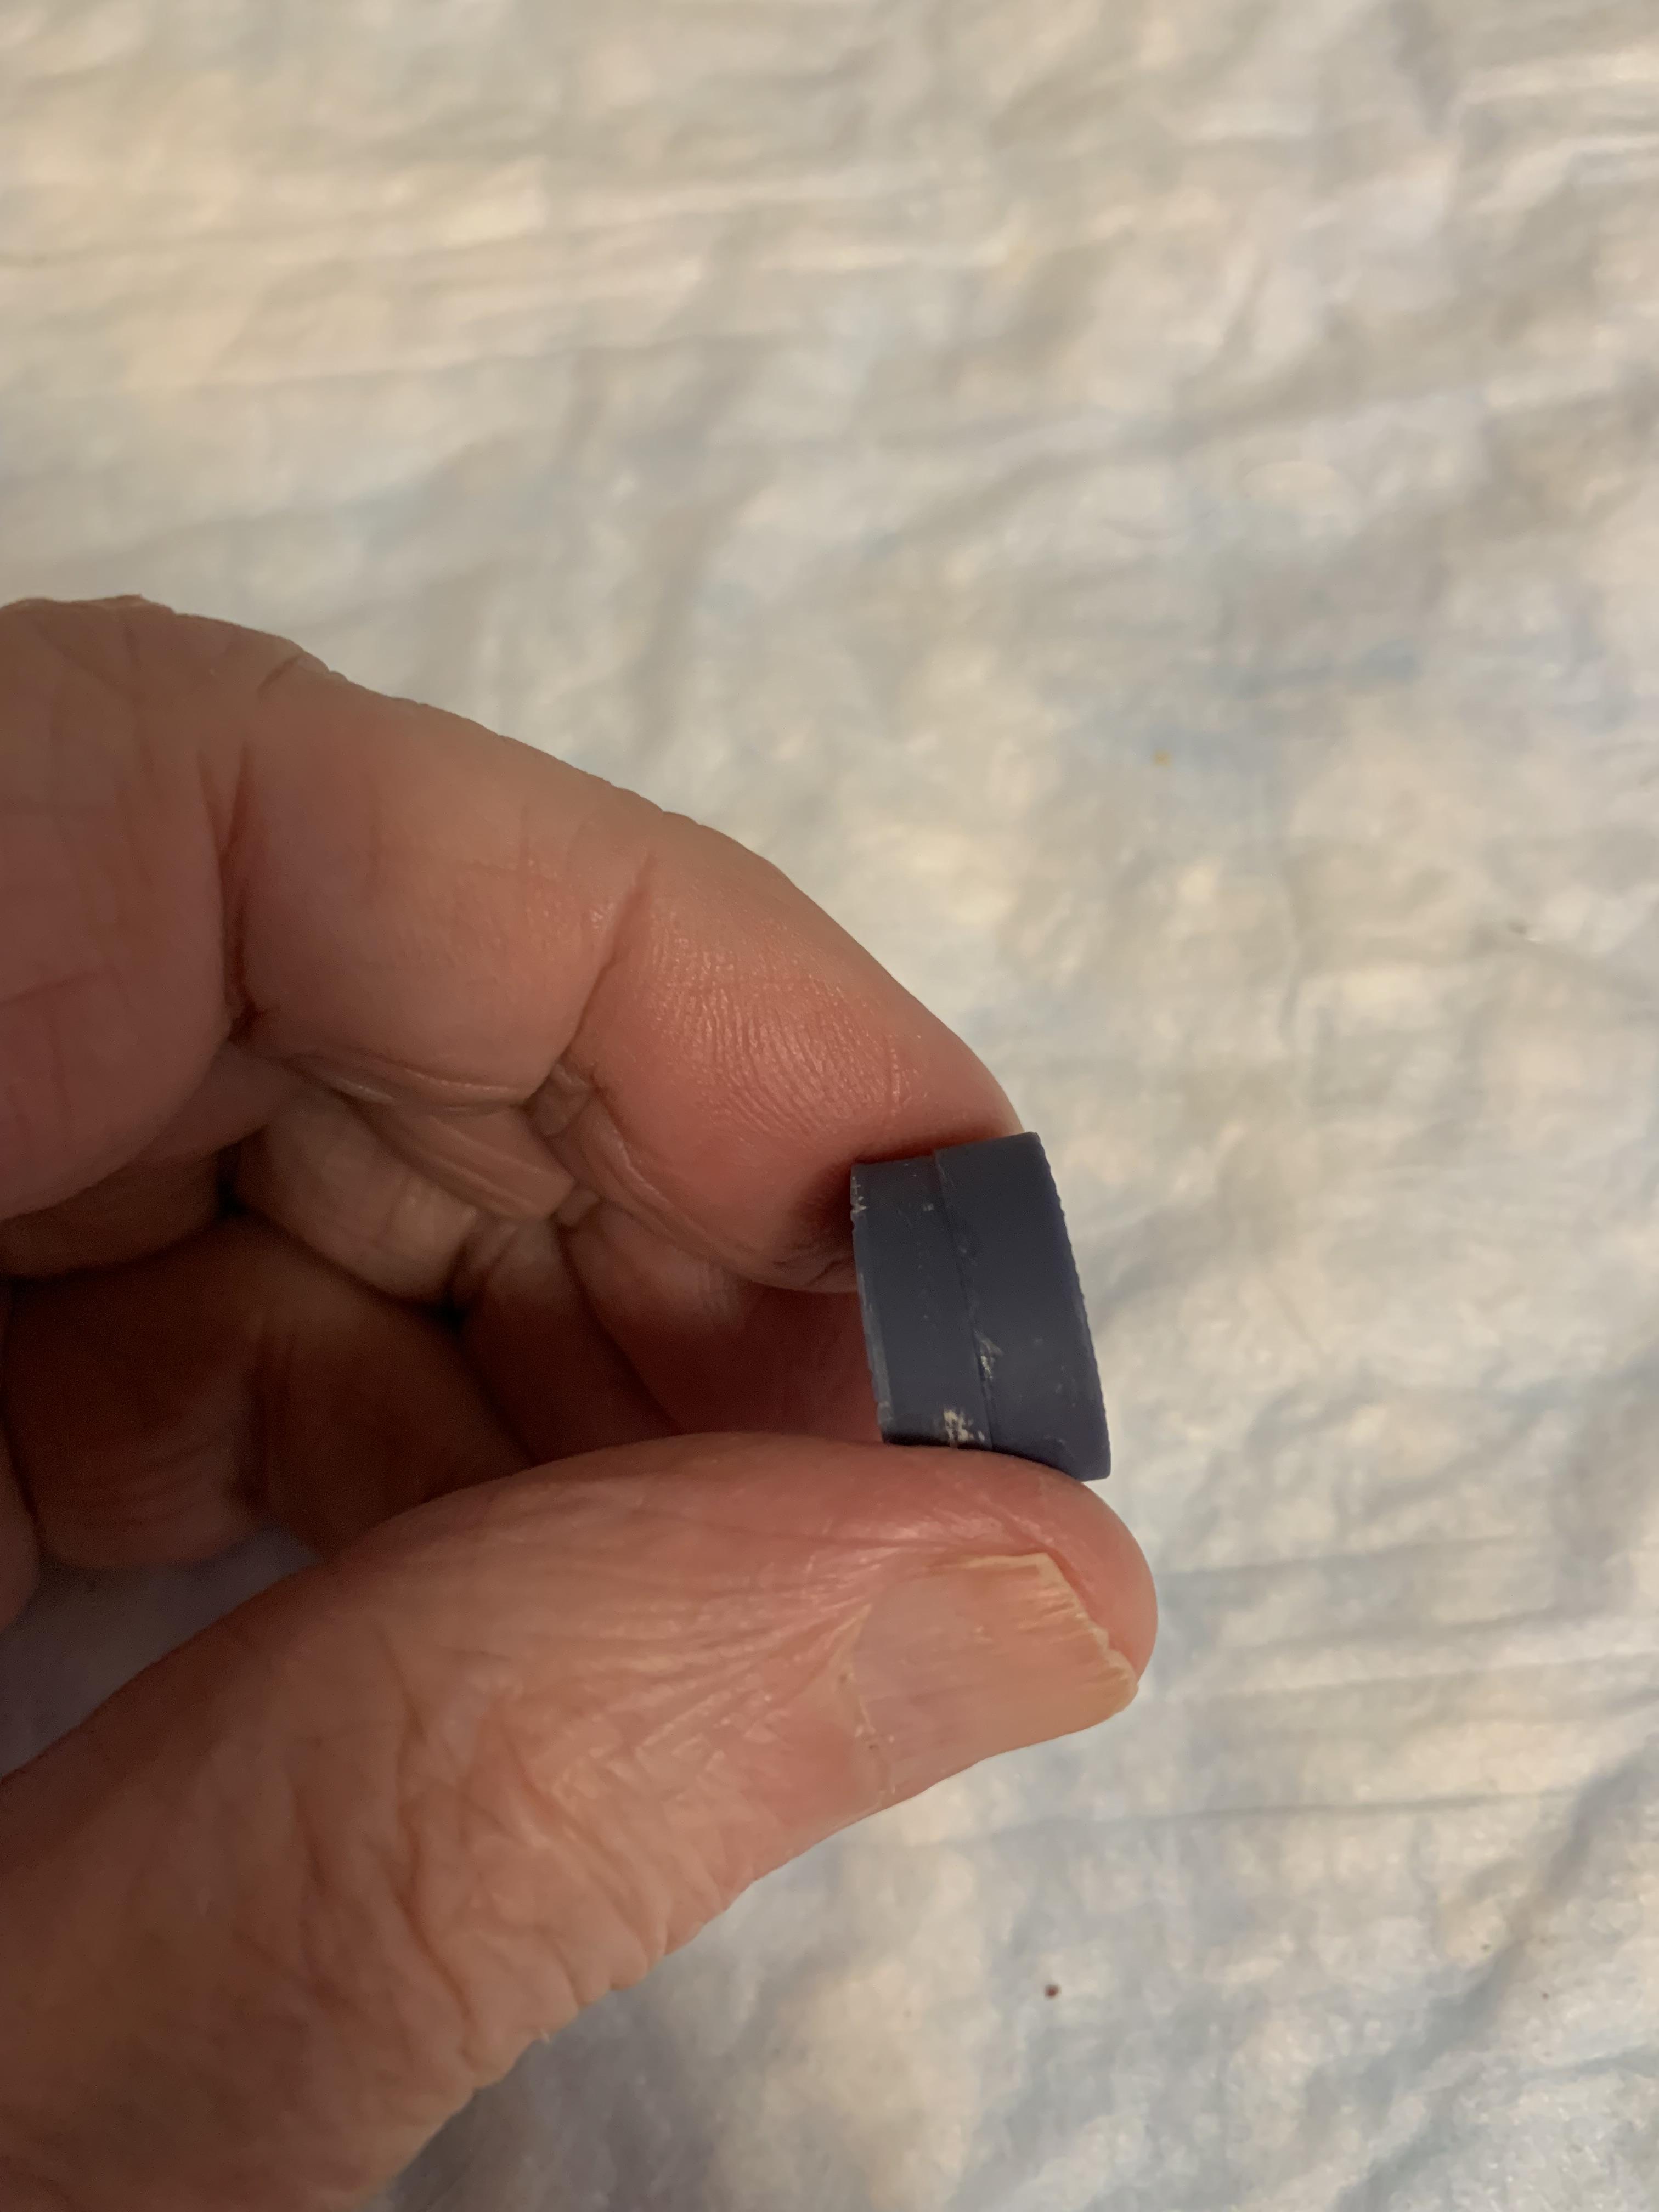
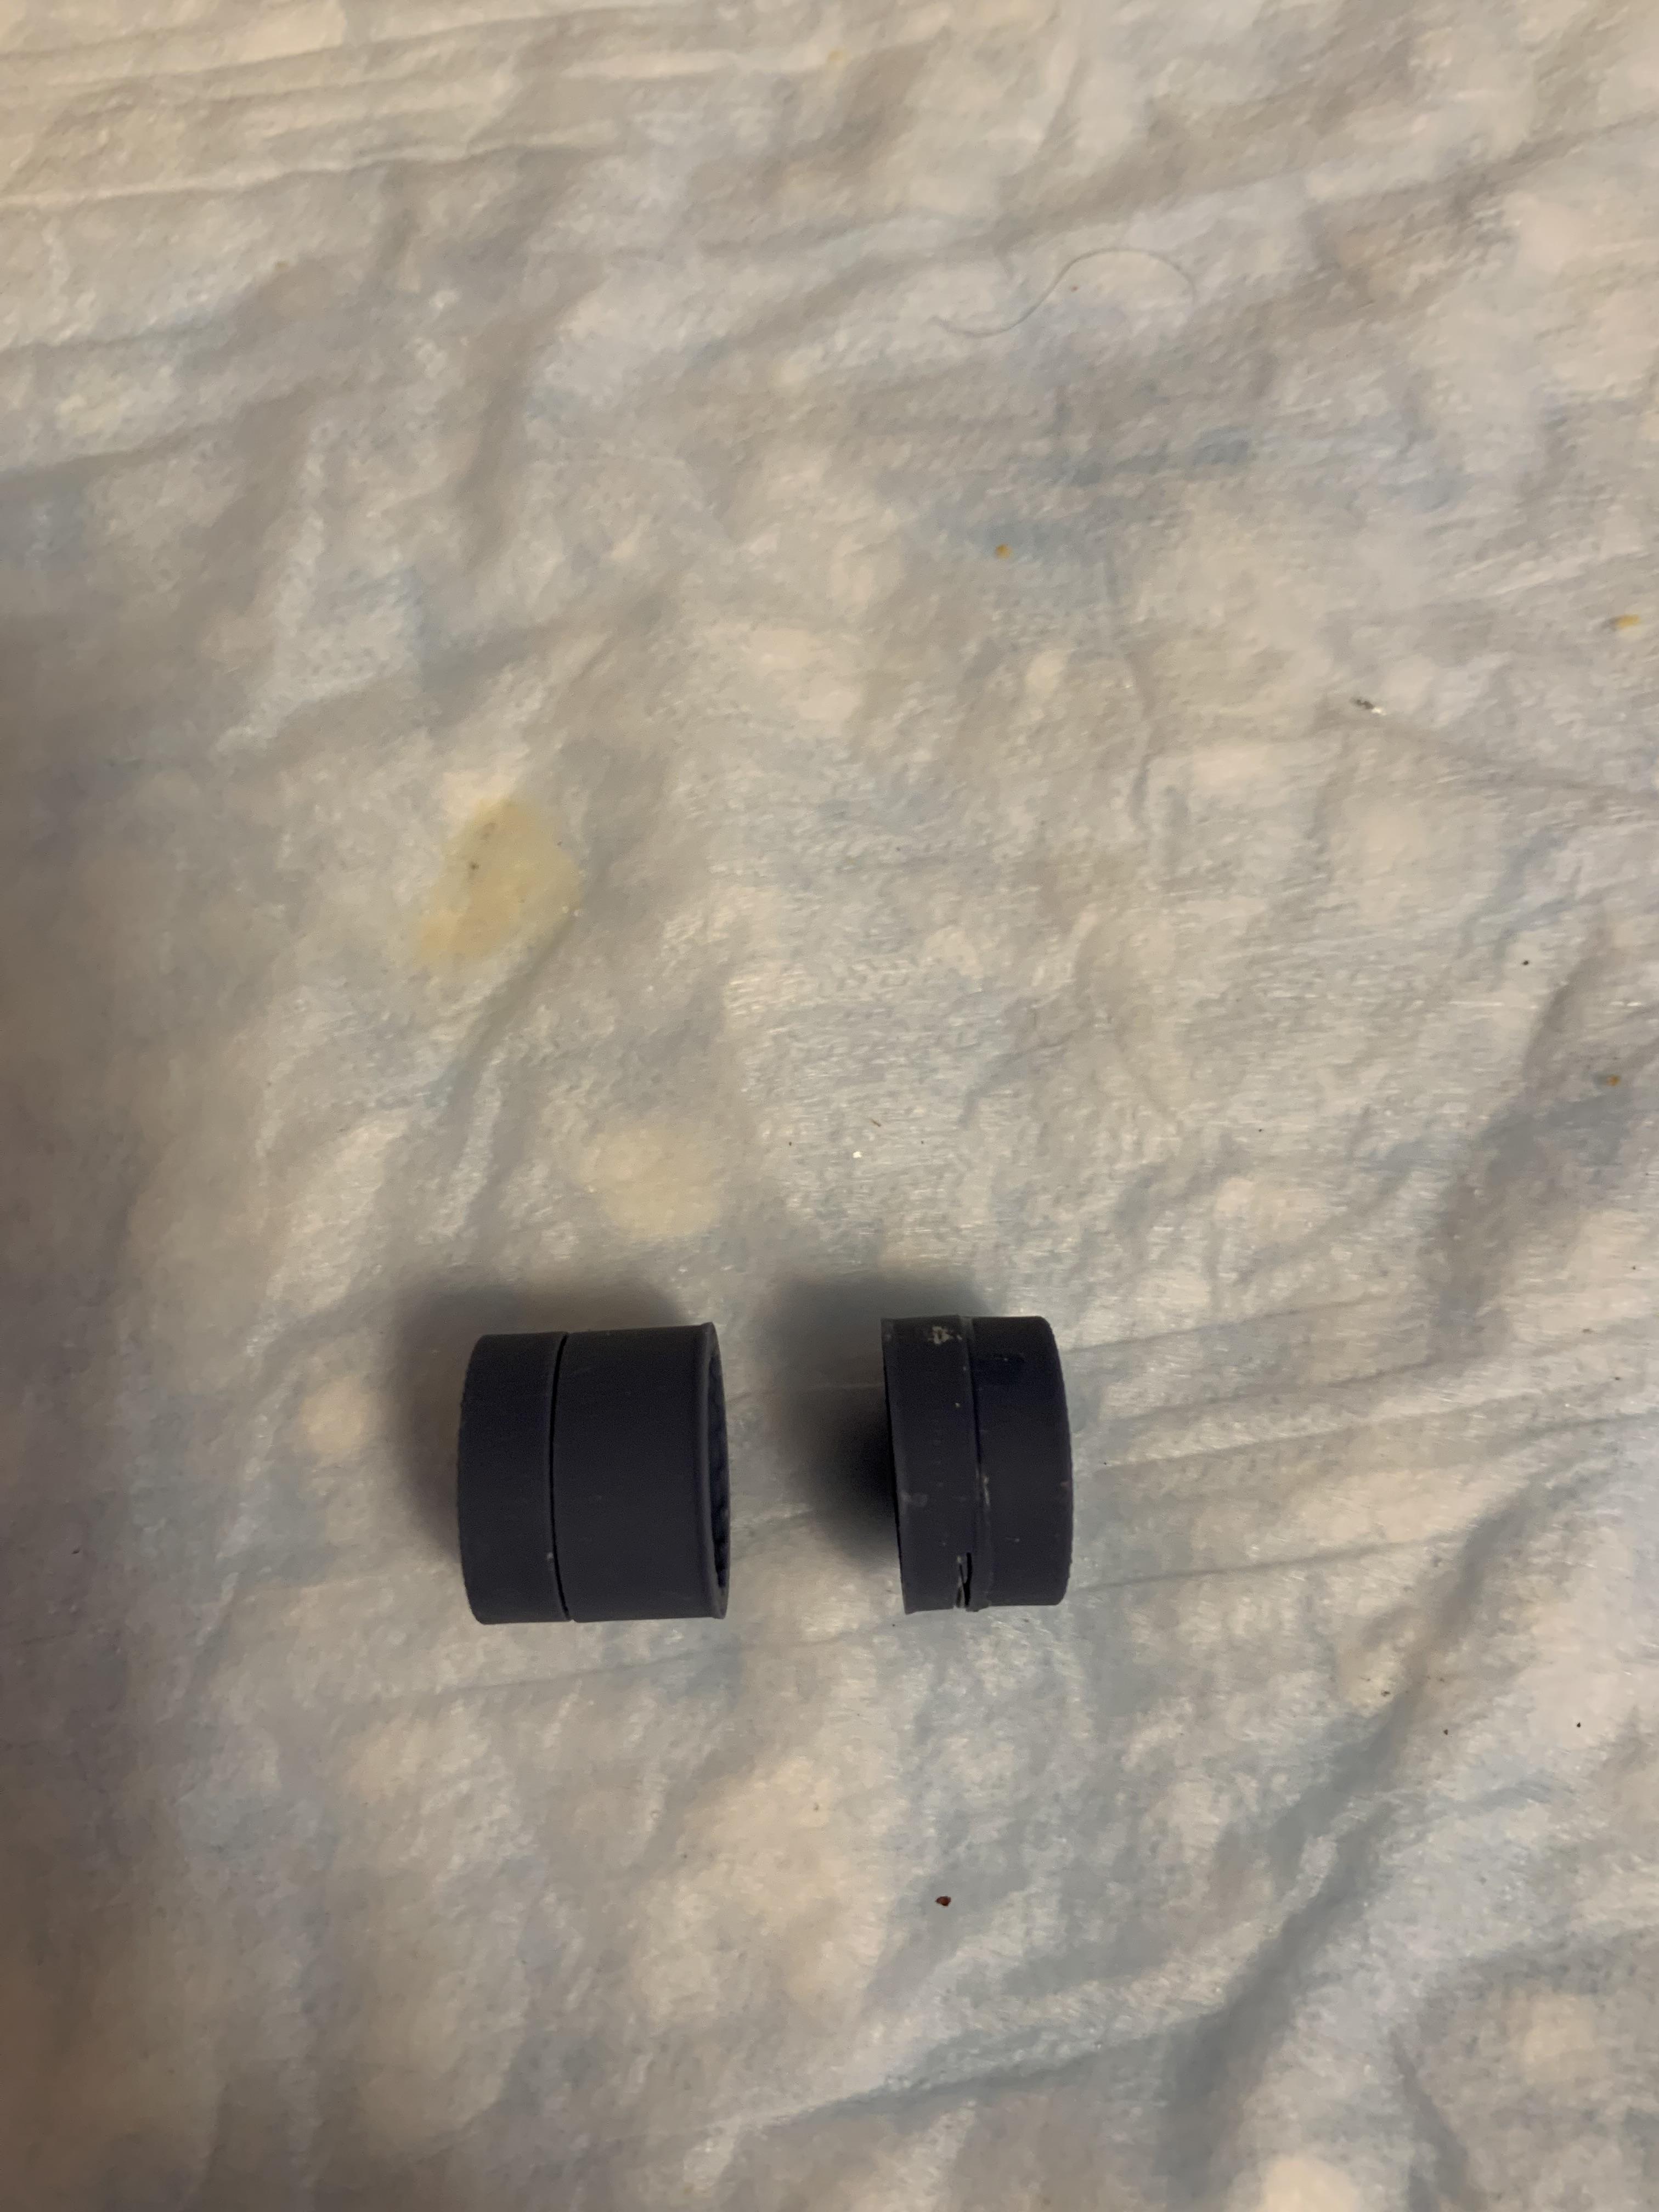
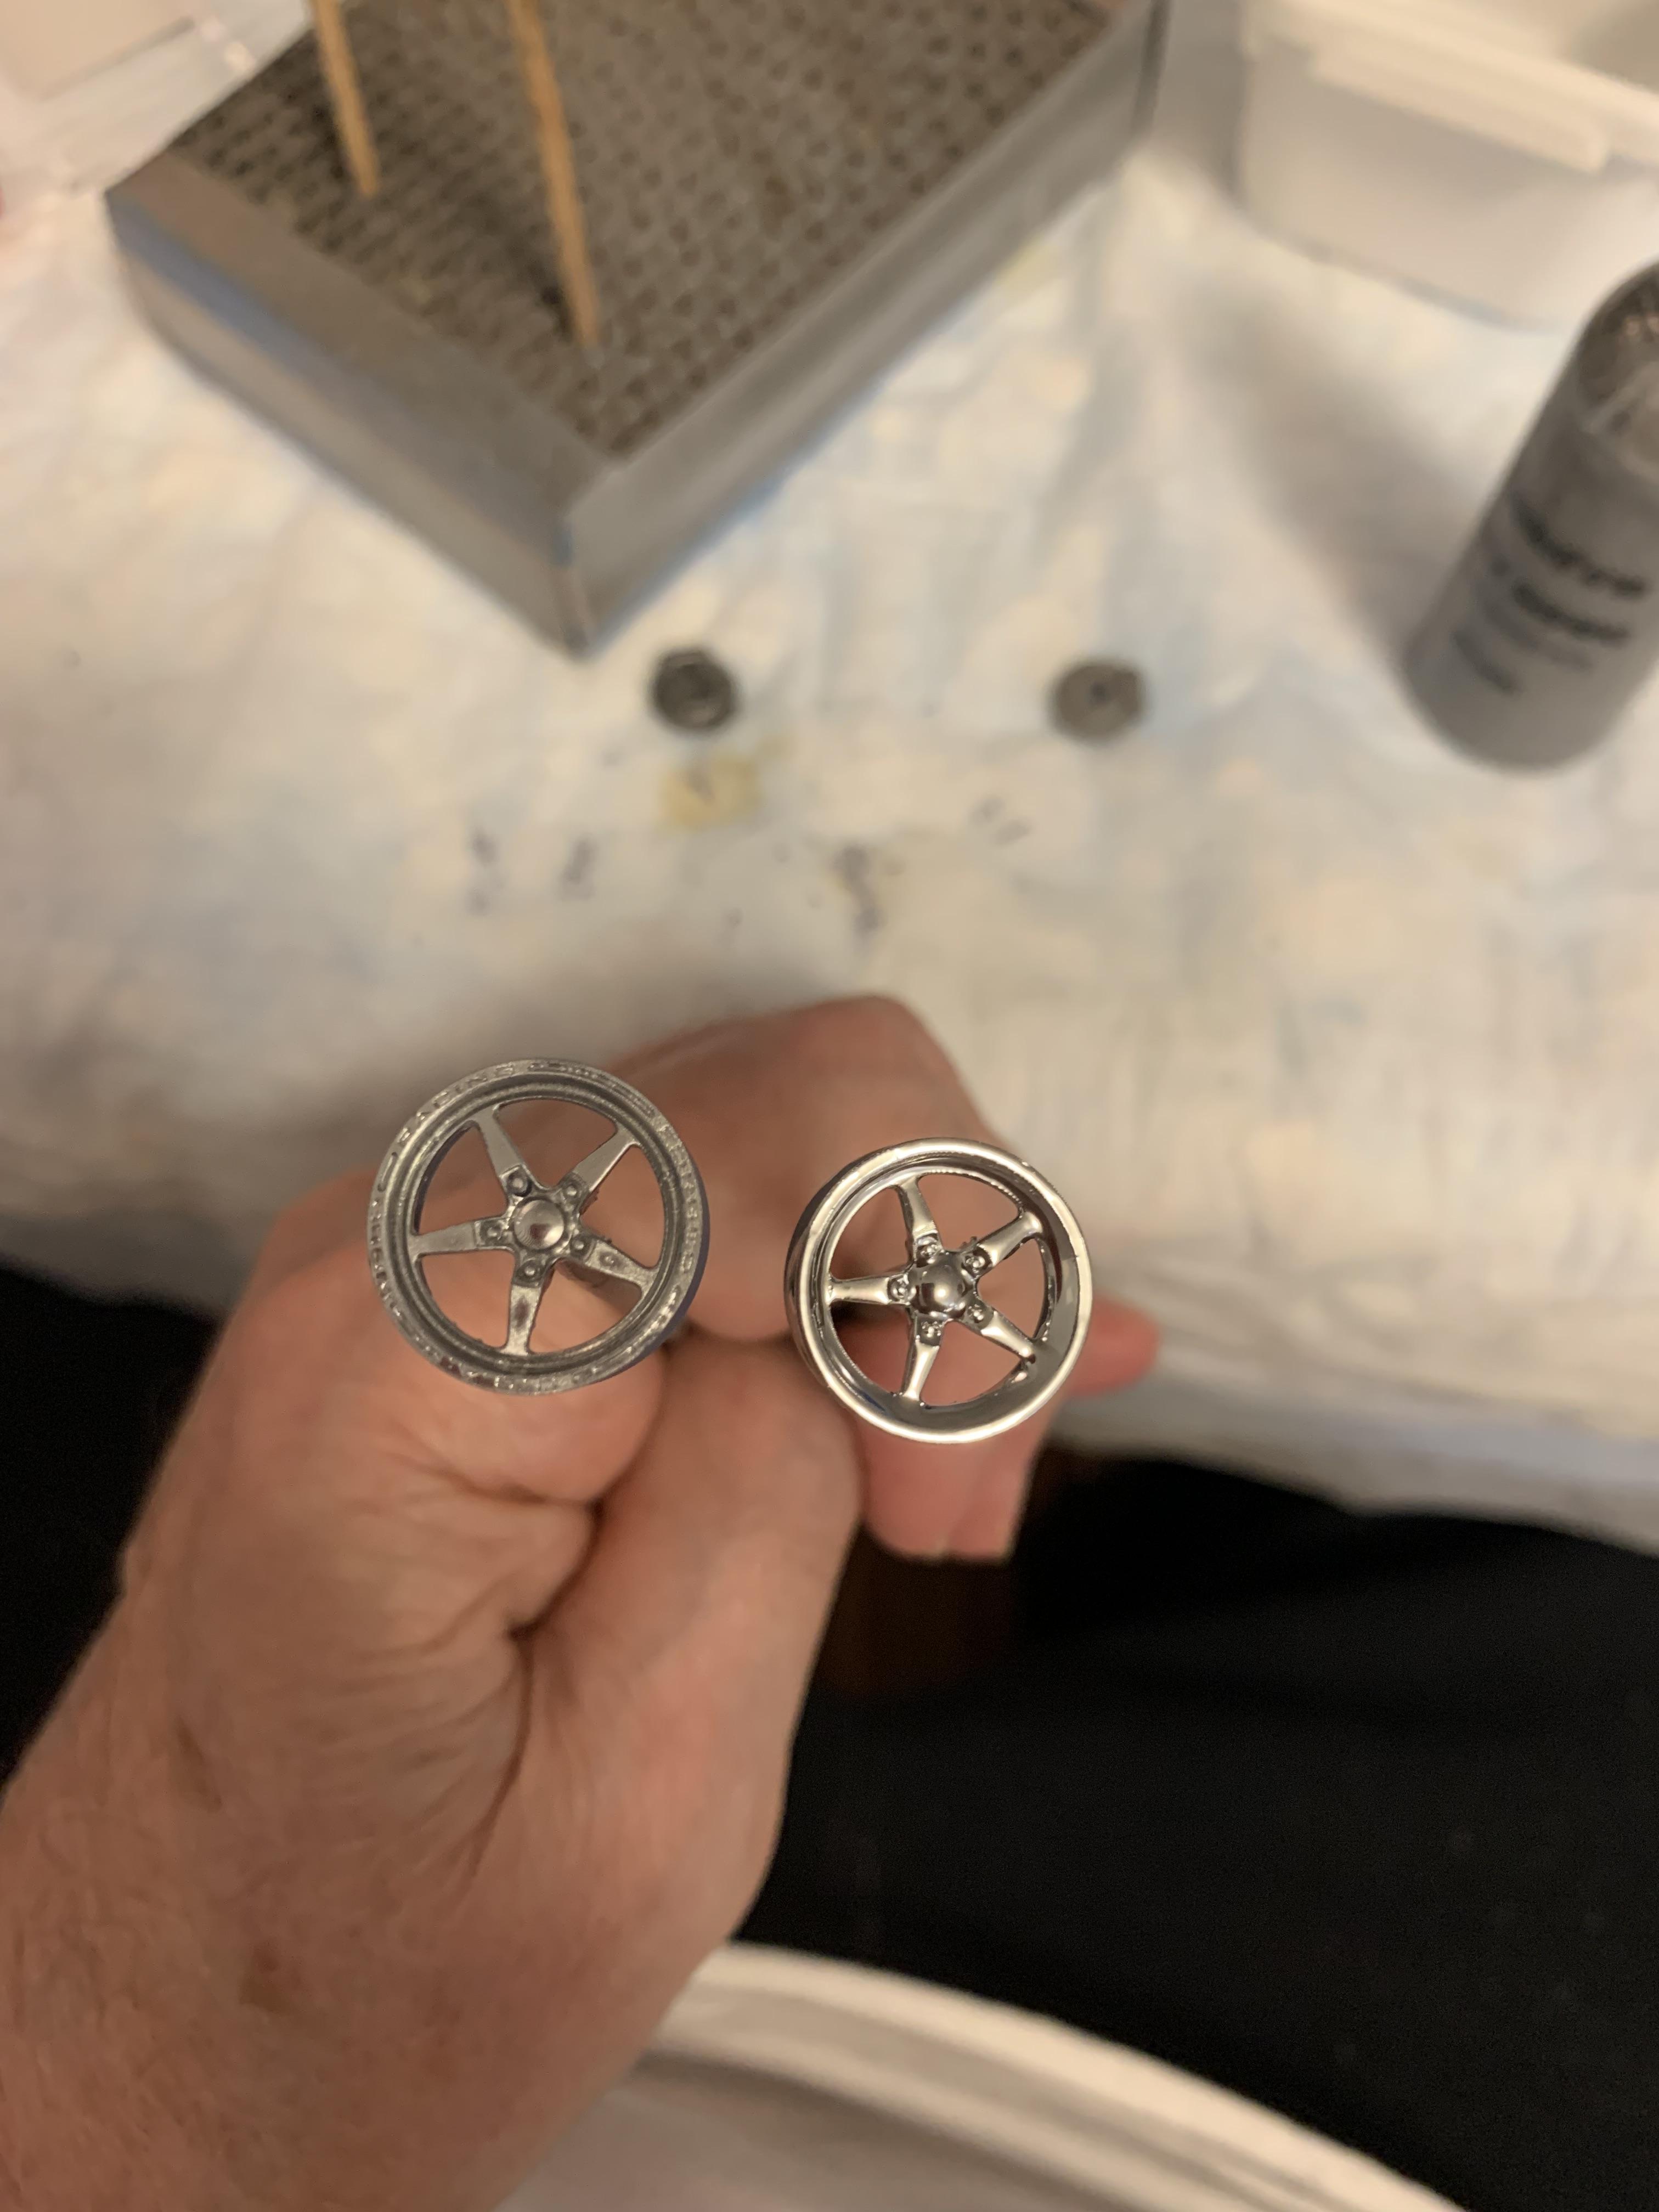
Thanks, Michael, it’s coming along, albeit slowly. Some wheel work front and back. Narrowed the aftermarket wheels from a scale 12” to about 9”, more appropriate for Stock Eliminator racing. Then drilled out the aftermarket disc brakes to fit the kit stubs. Then applied some Fusionfirm to the wheels. The wheel on the left had been painted with GreenStuffWorld and the right wheel is FusionFirm.
-
Geez! Another Stocker! 70 Formula Firebird B/SA
R. Thorne replied to R. Thorne's topic in WIP: Drag Racing Models
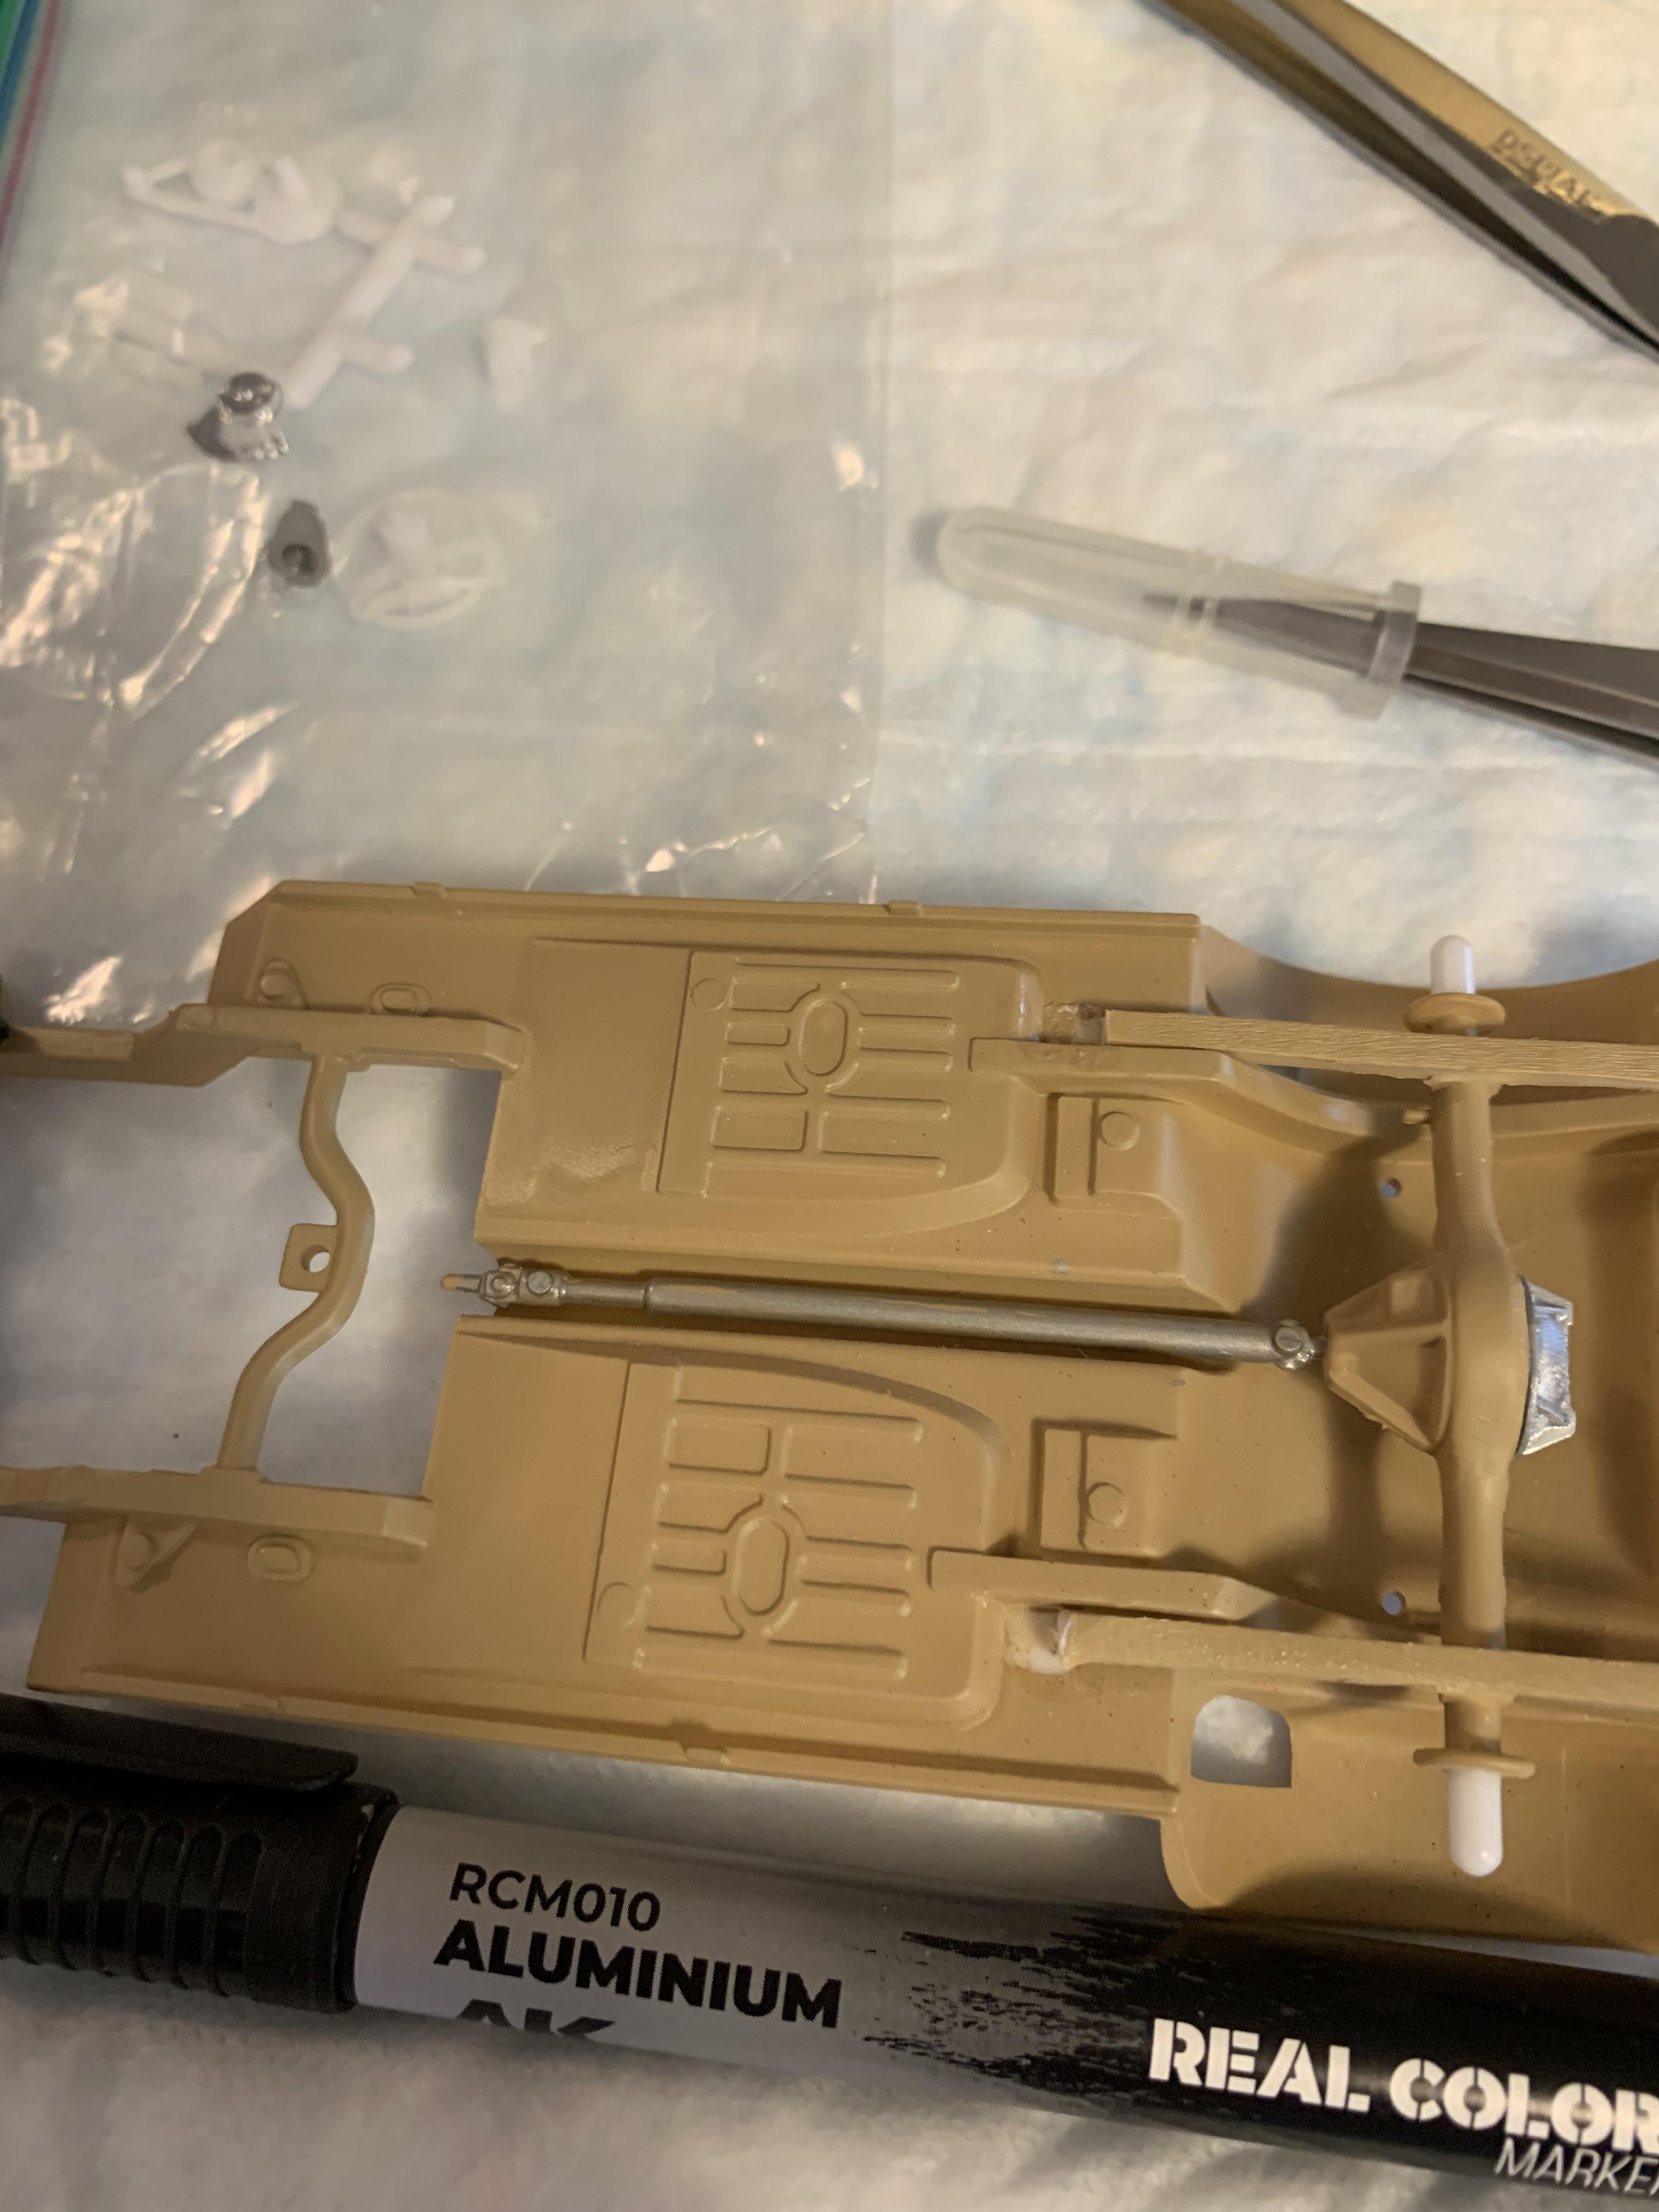
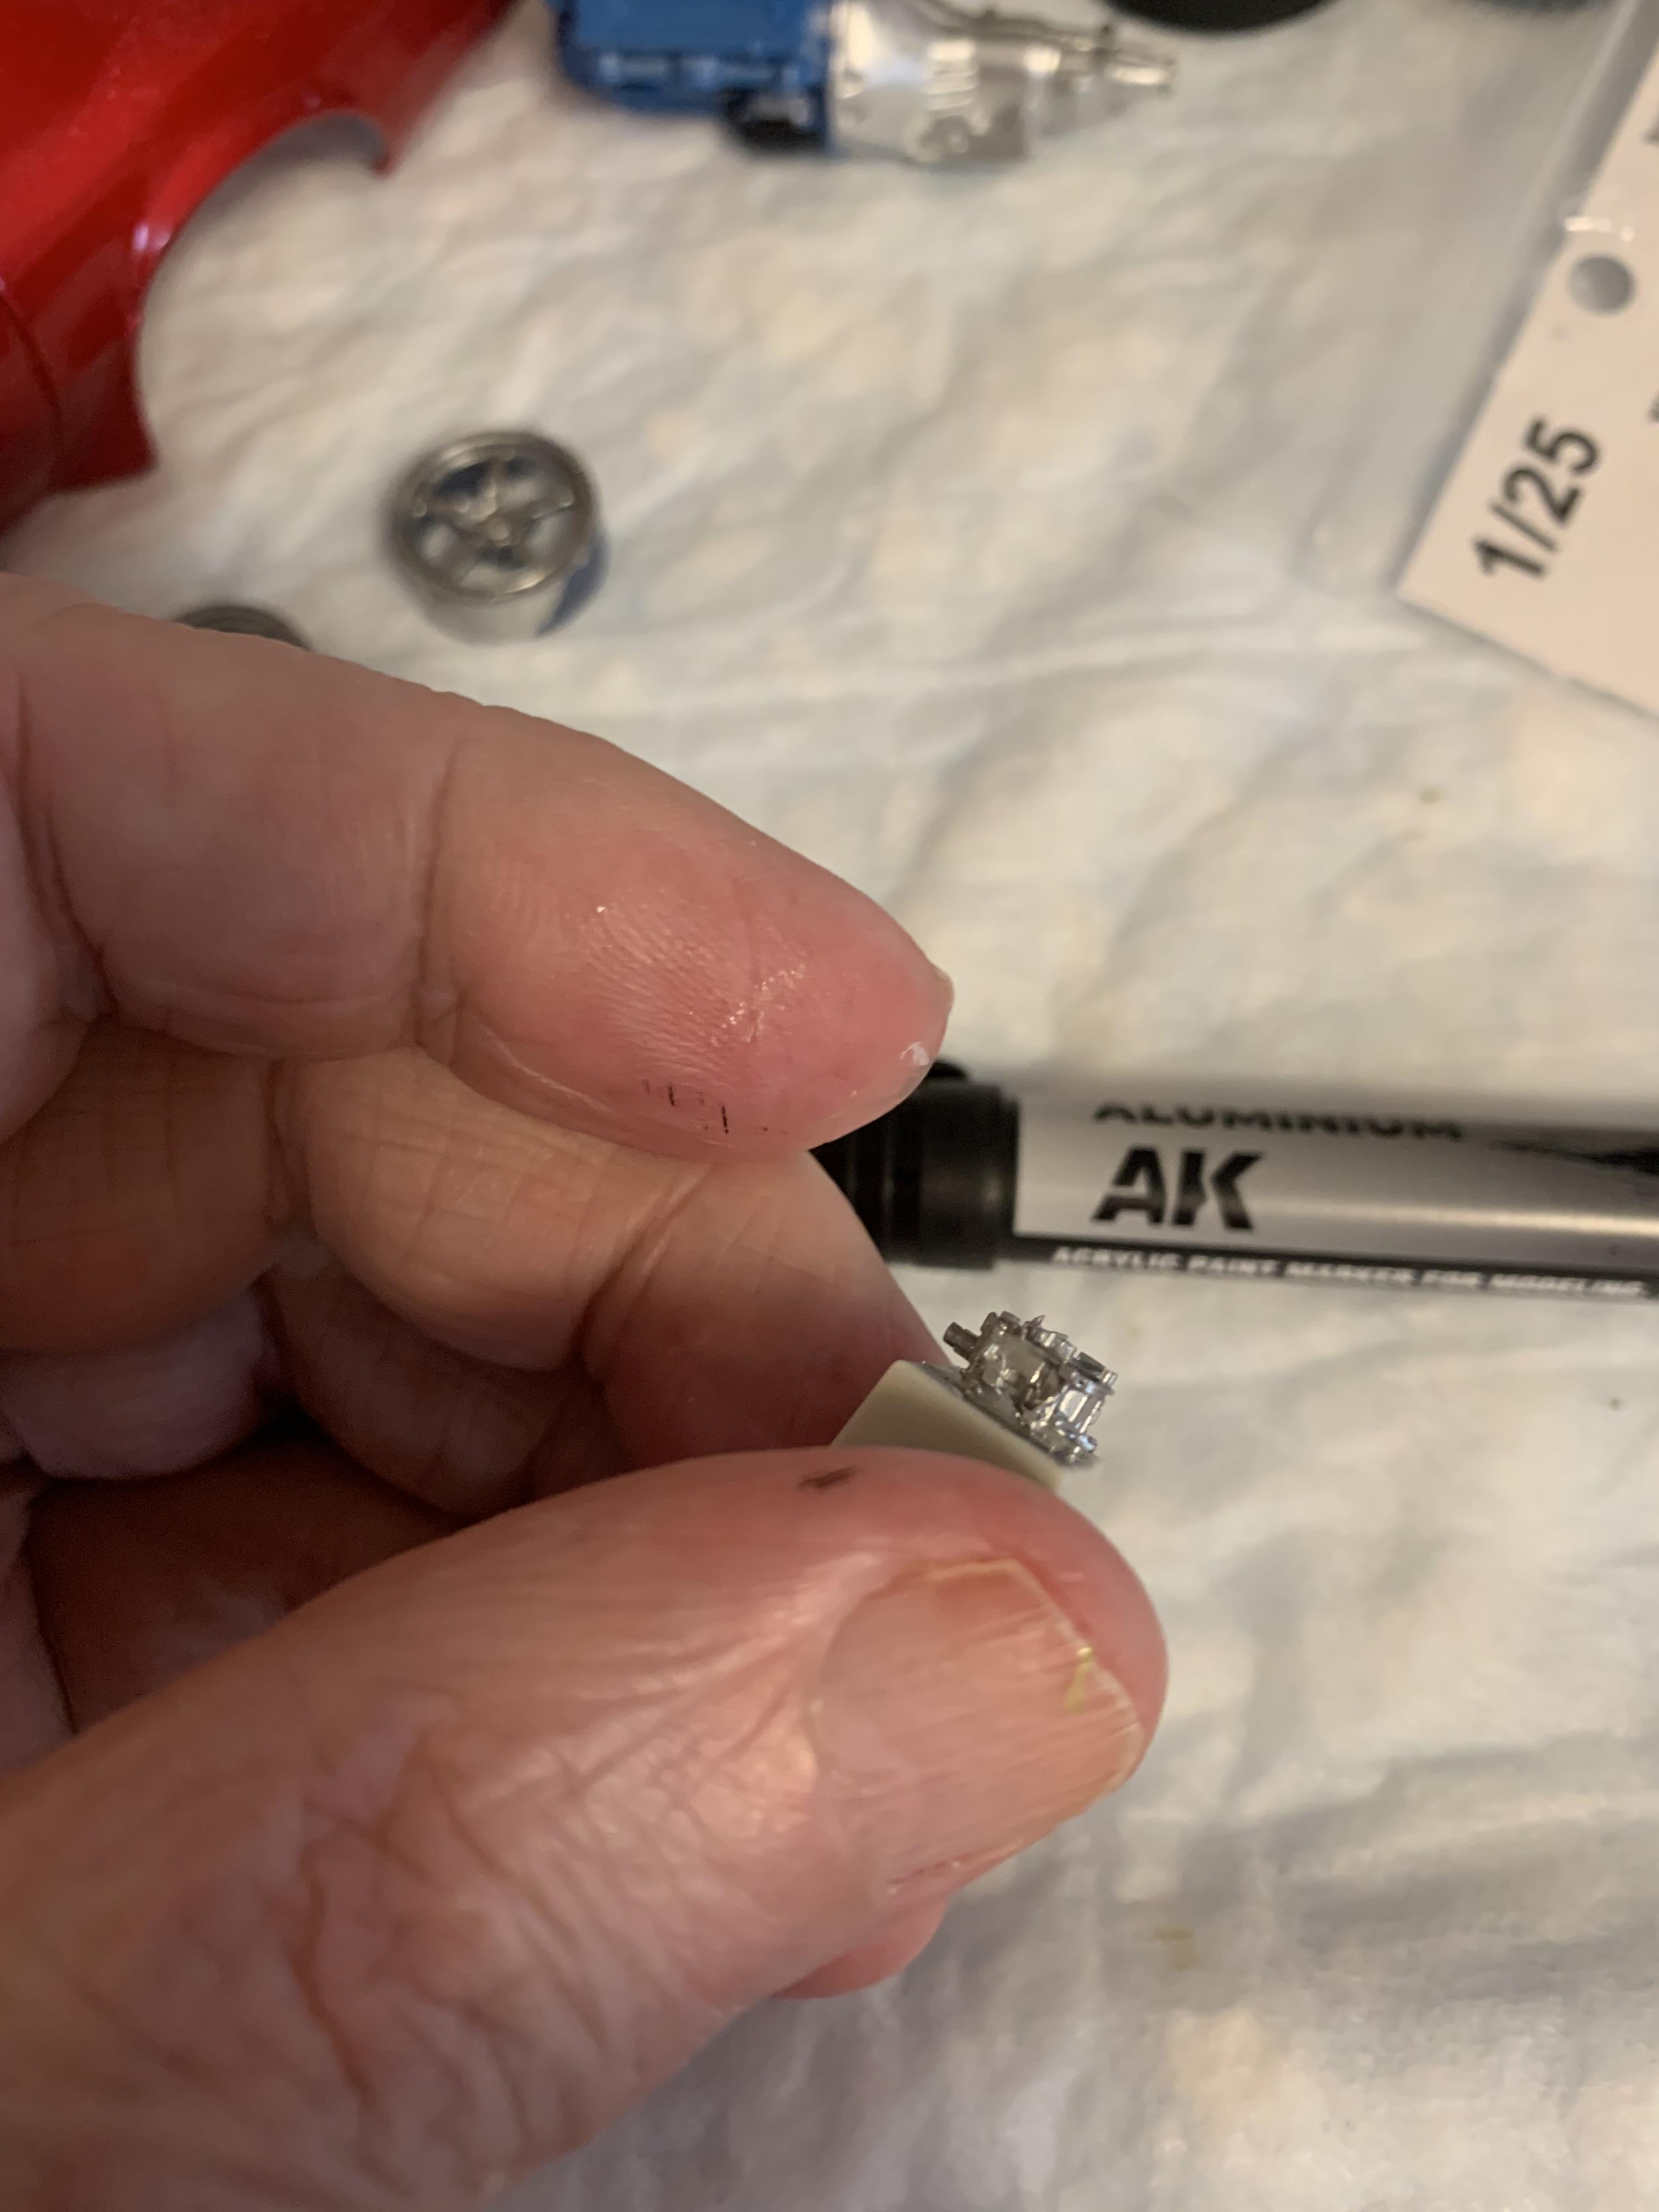
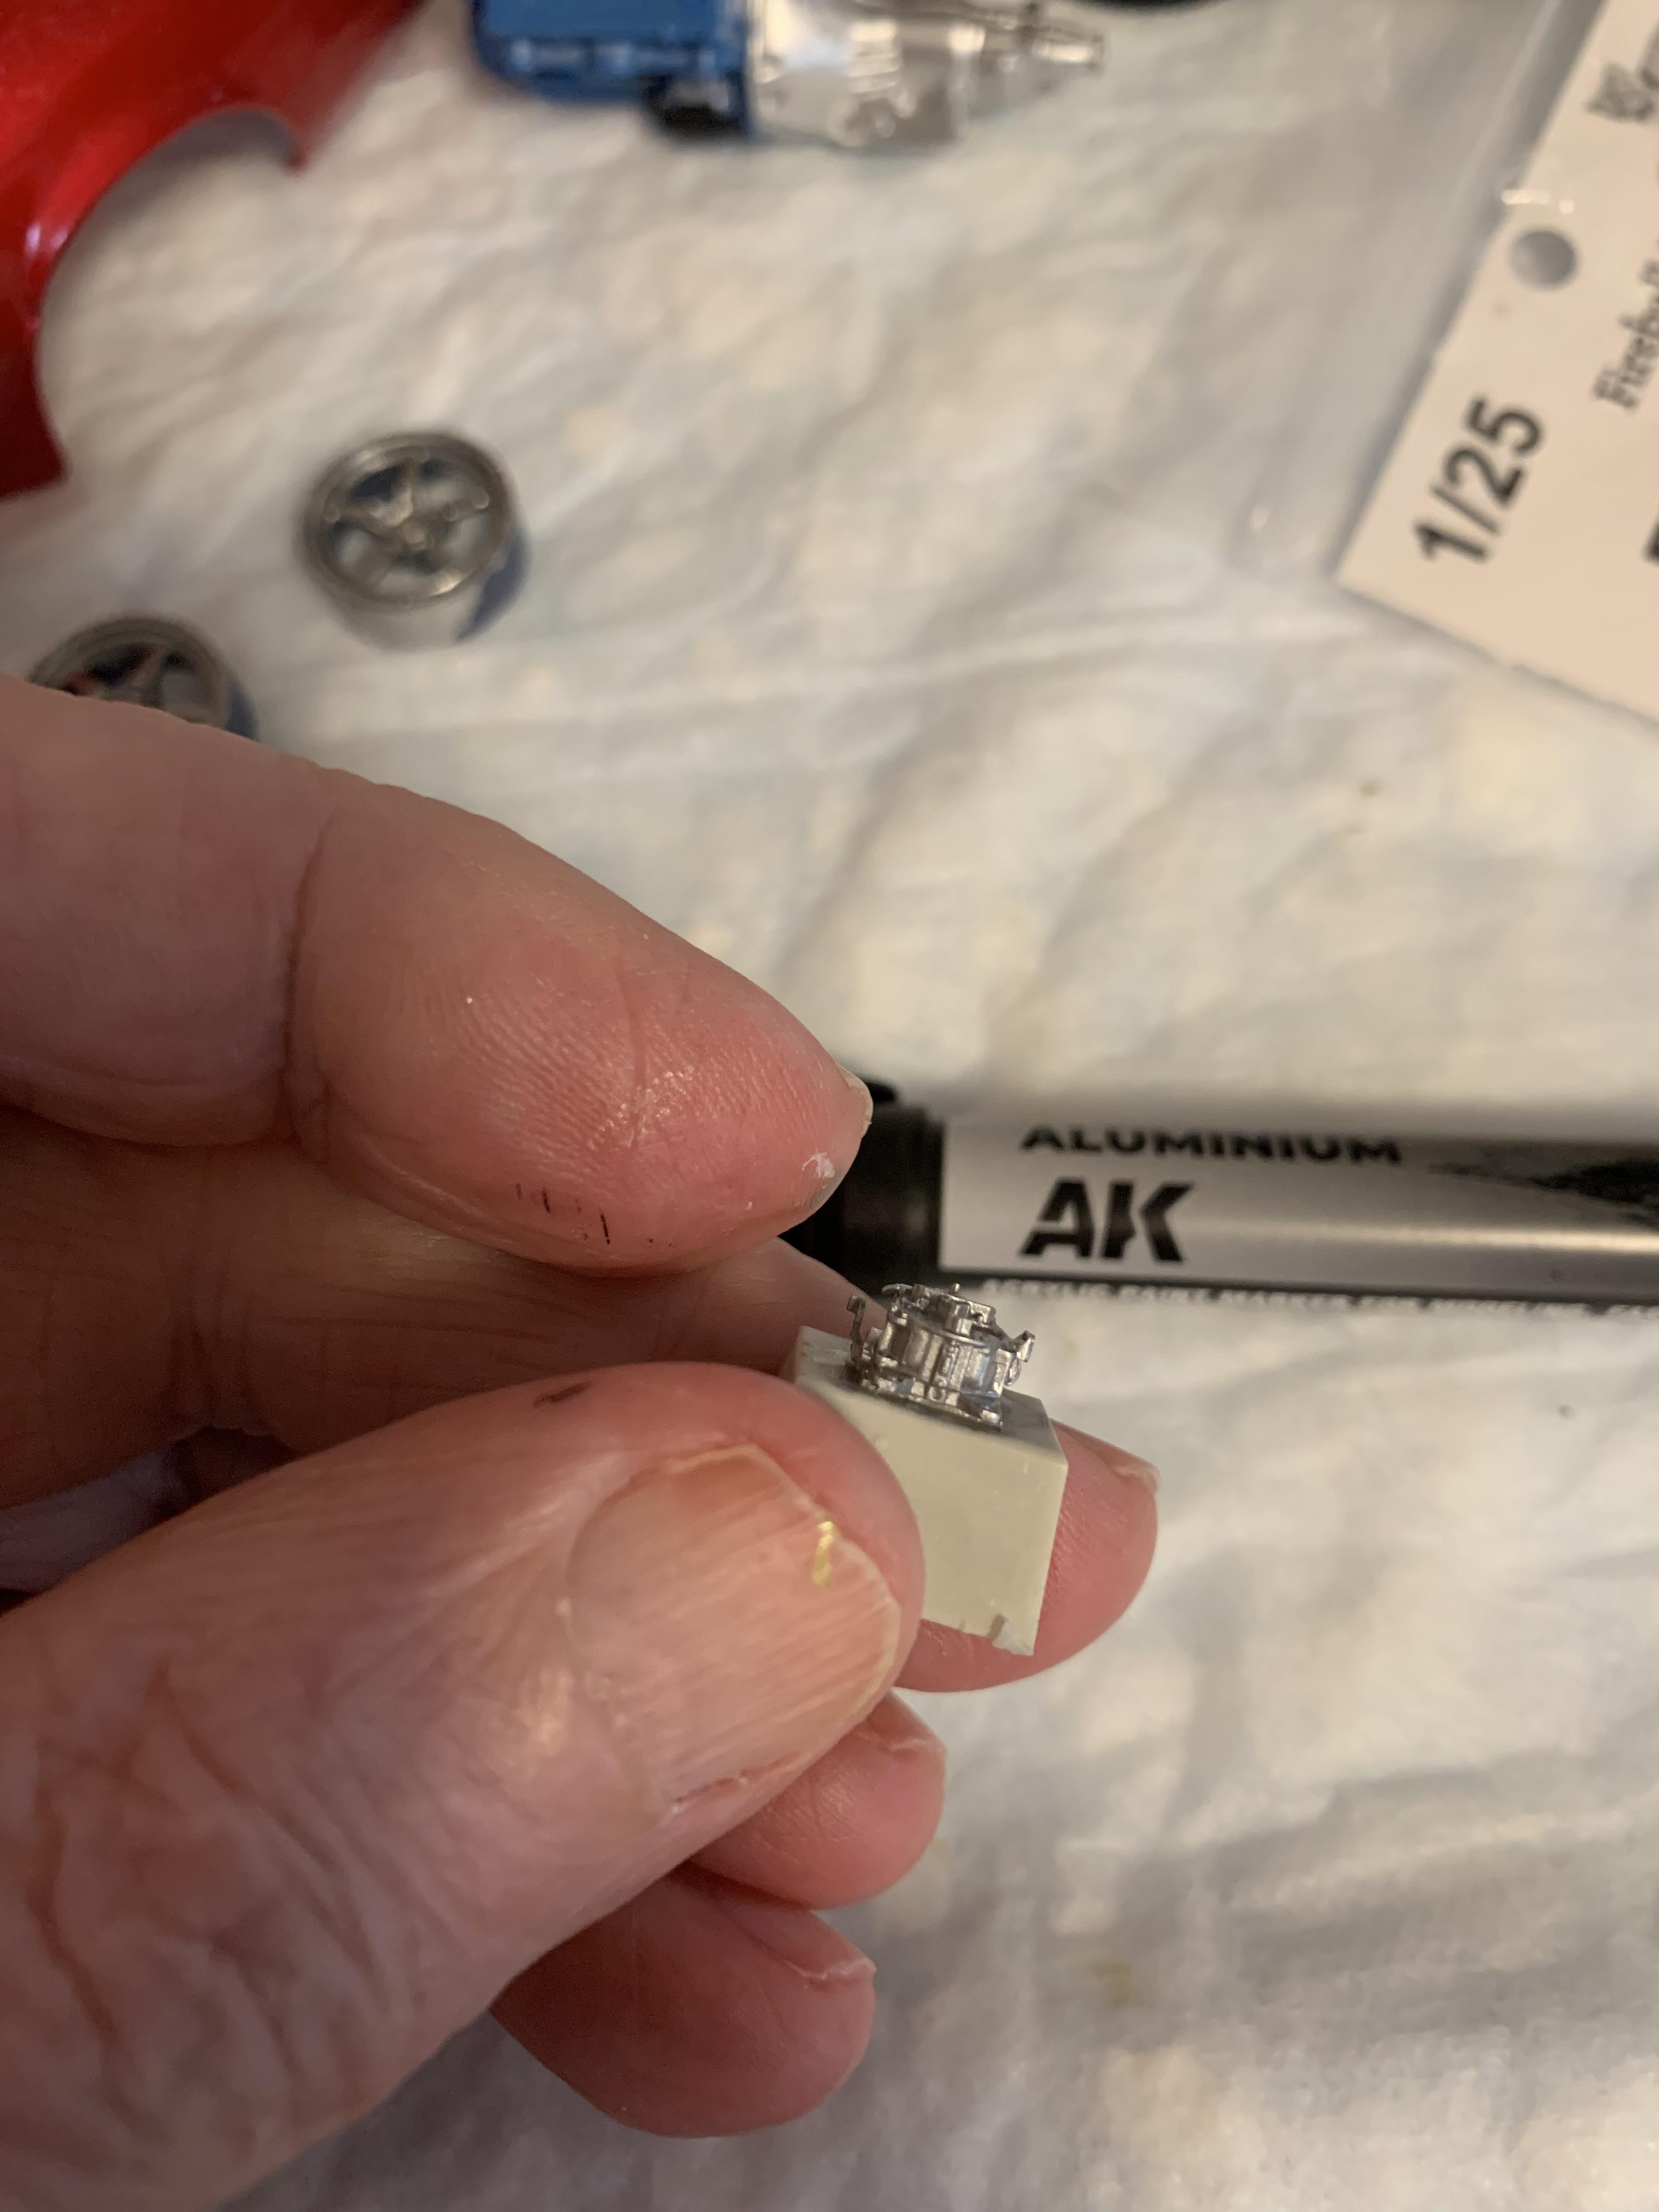
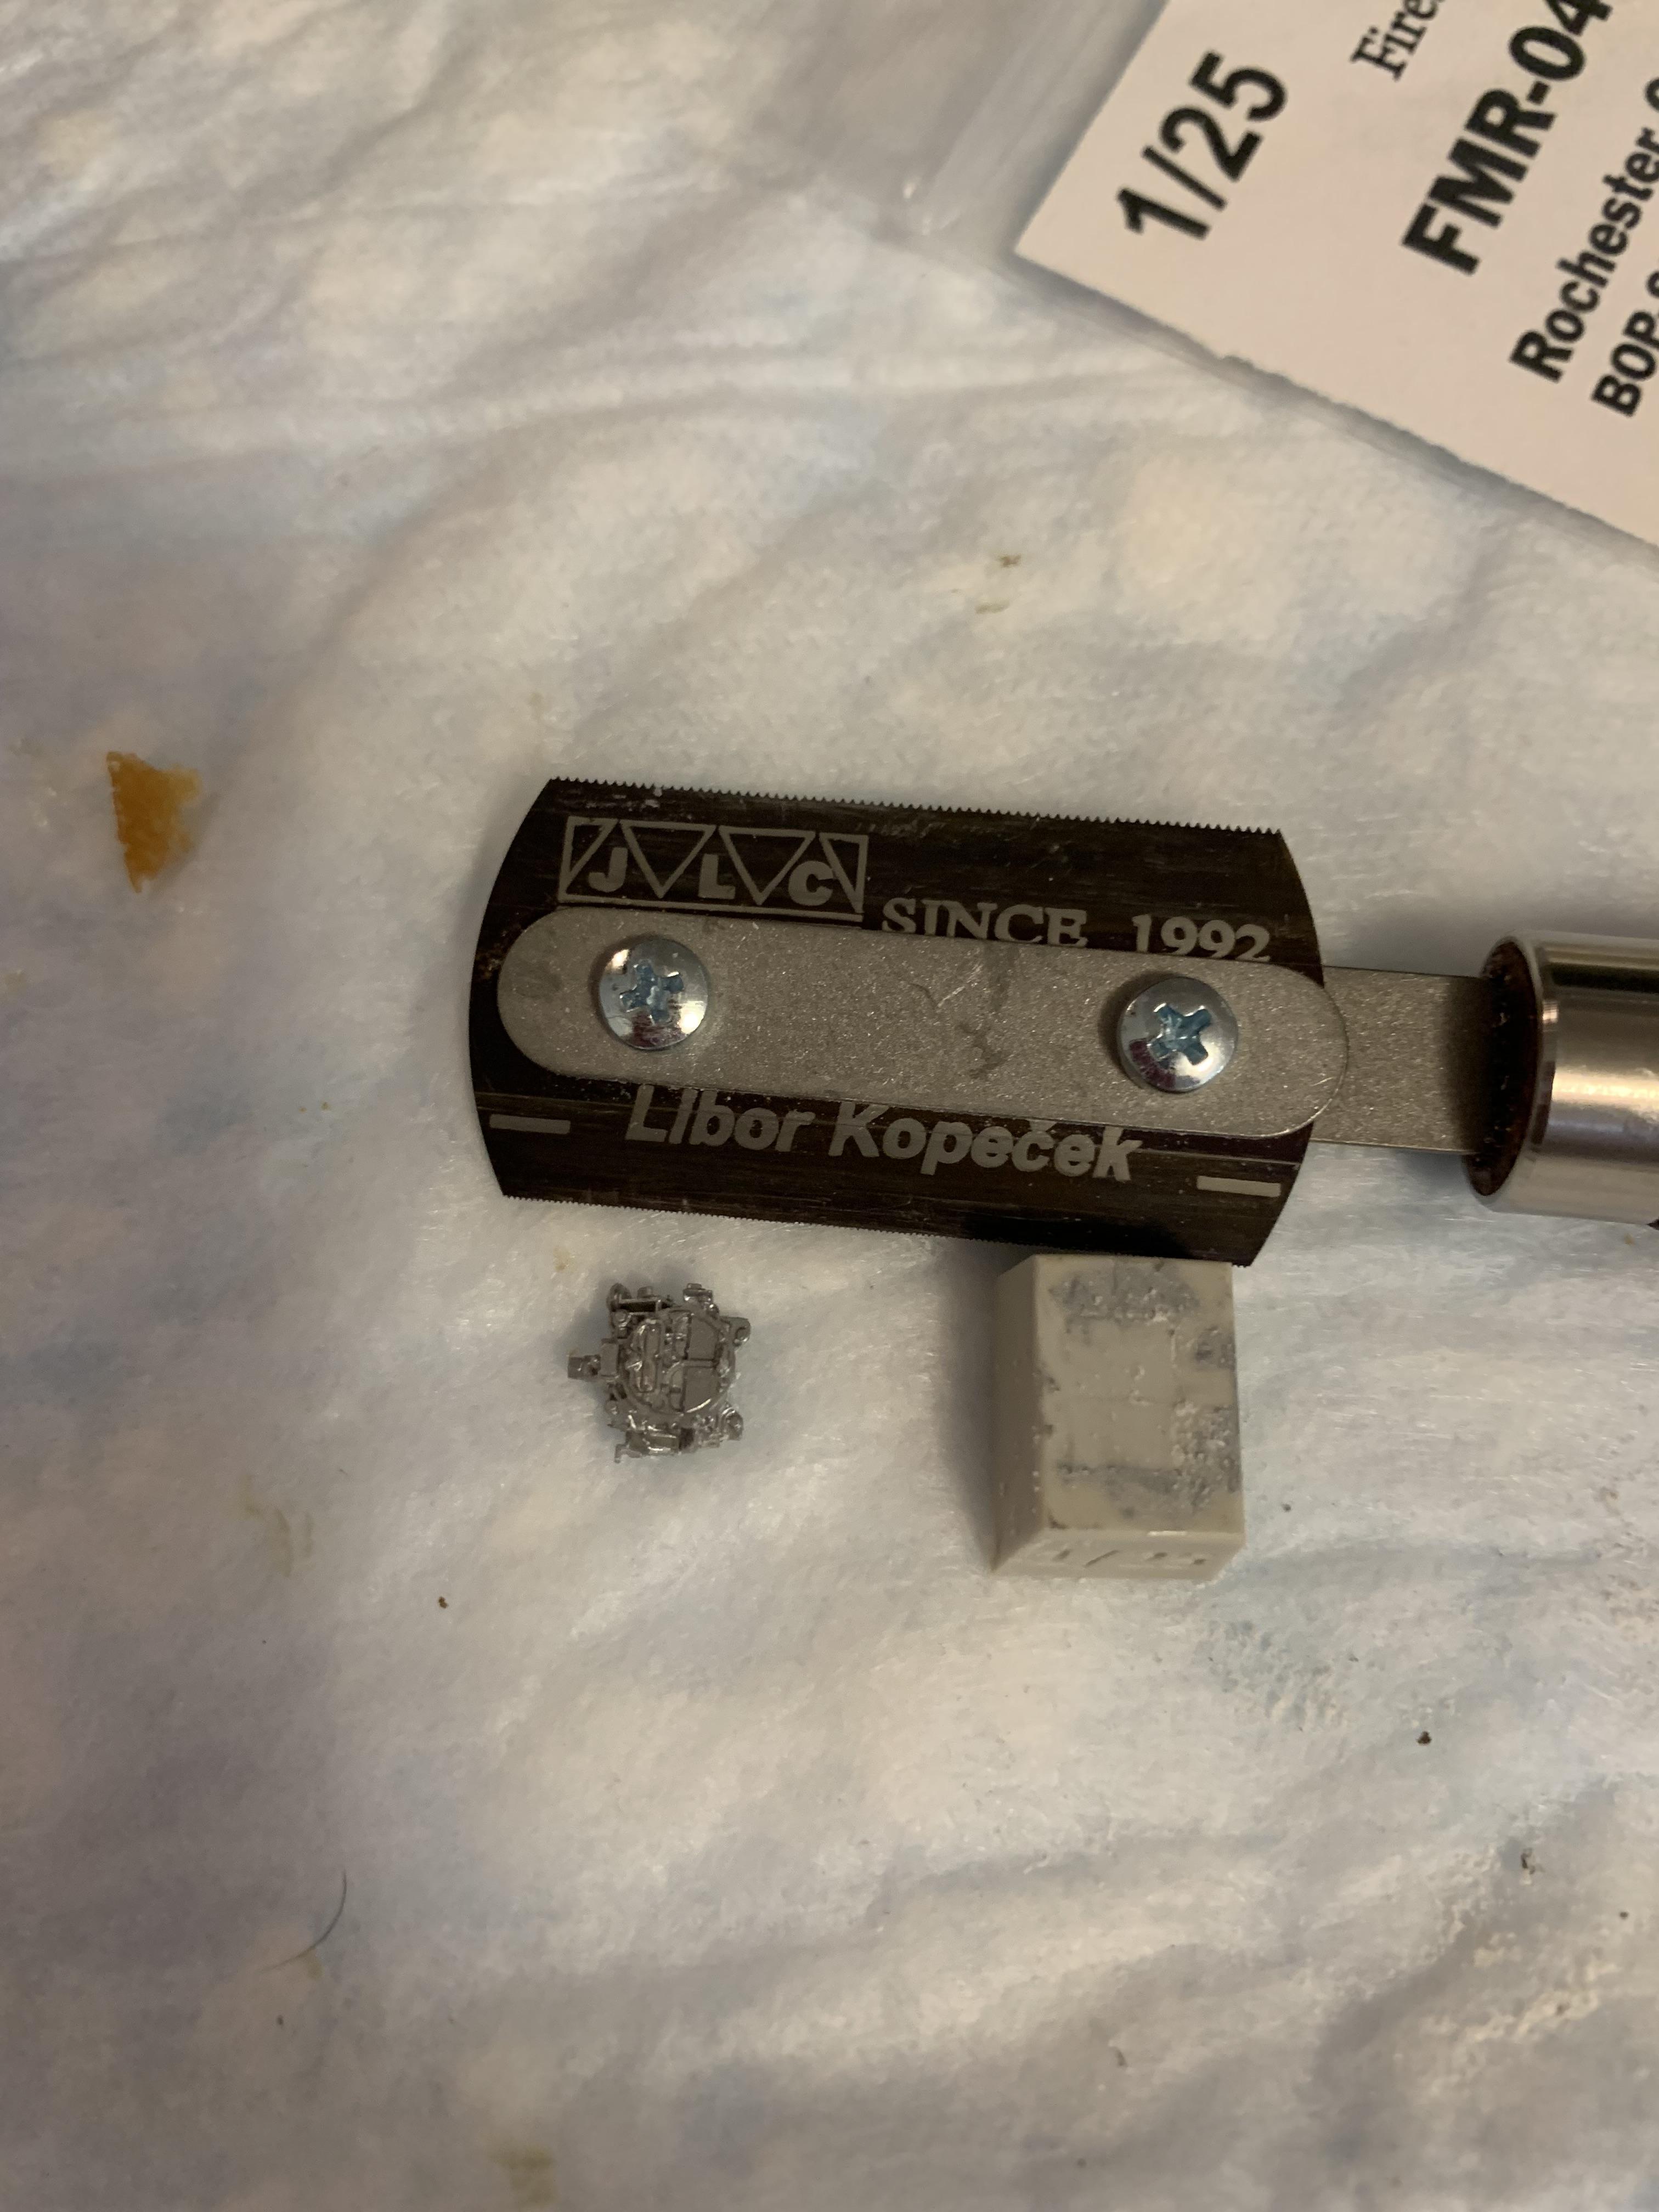
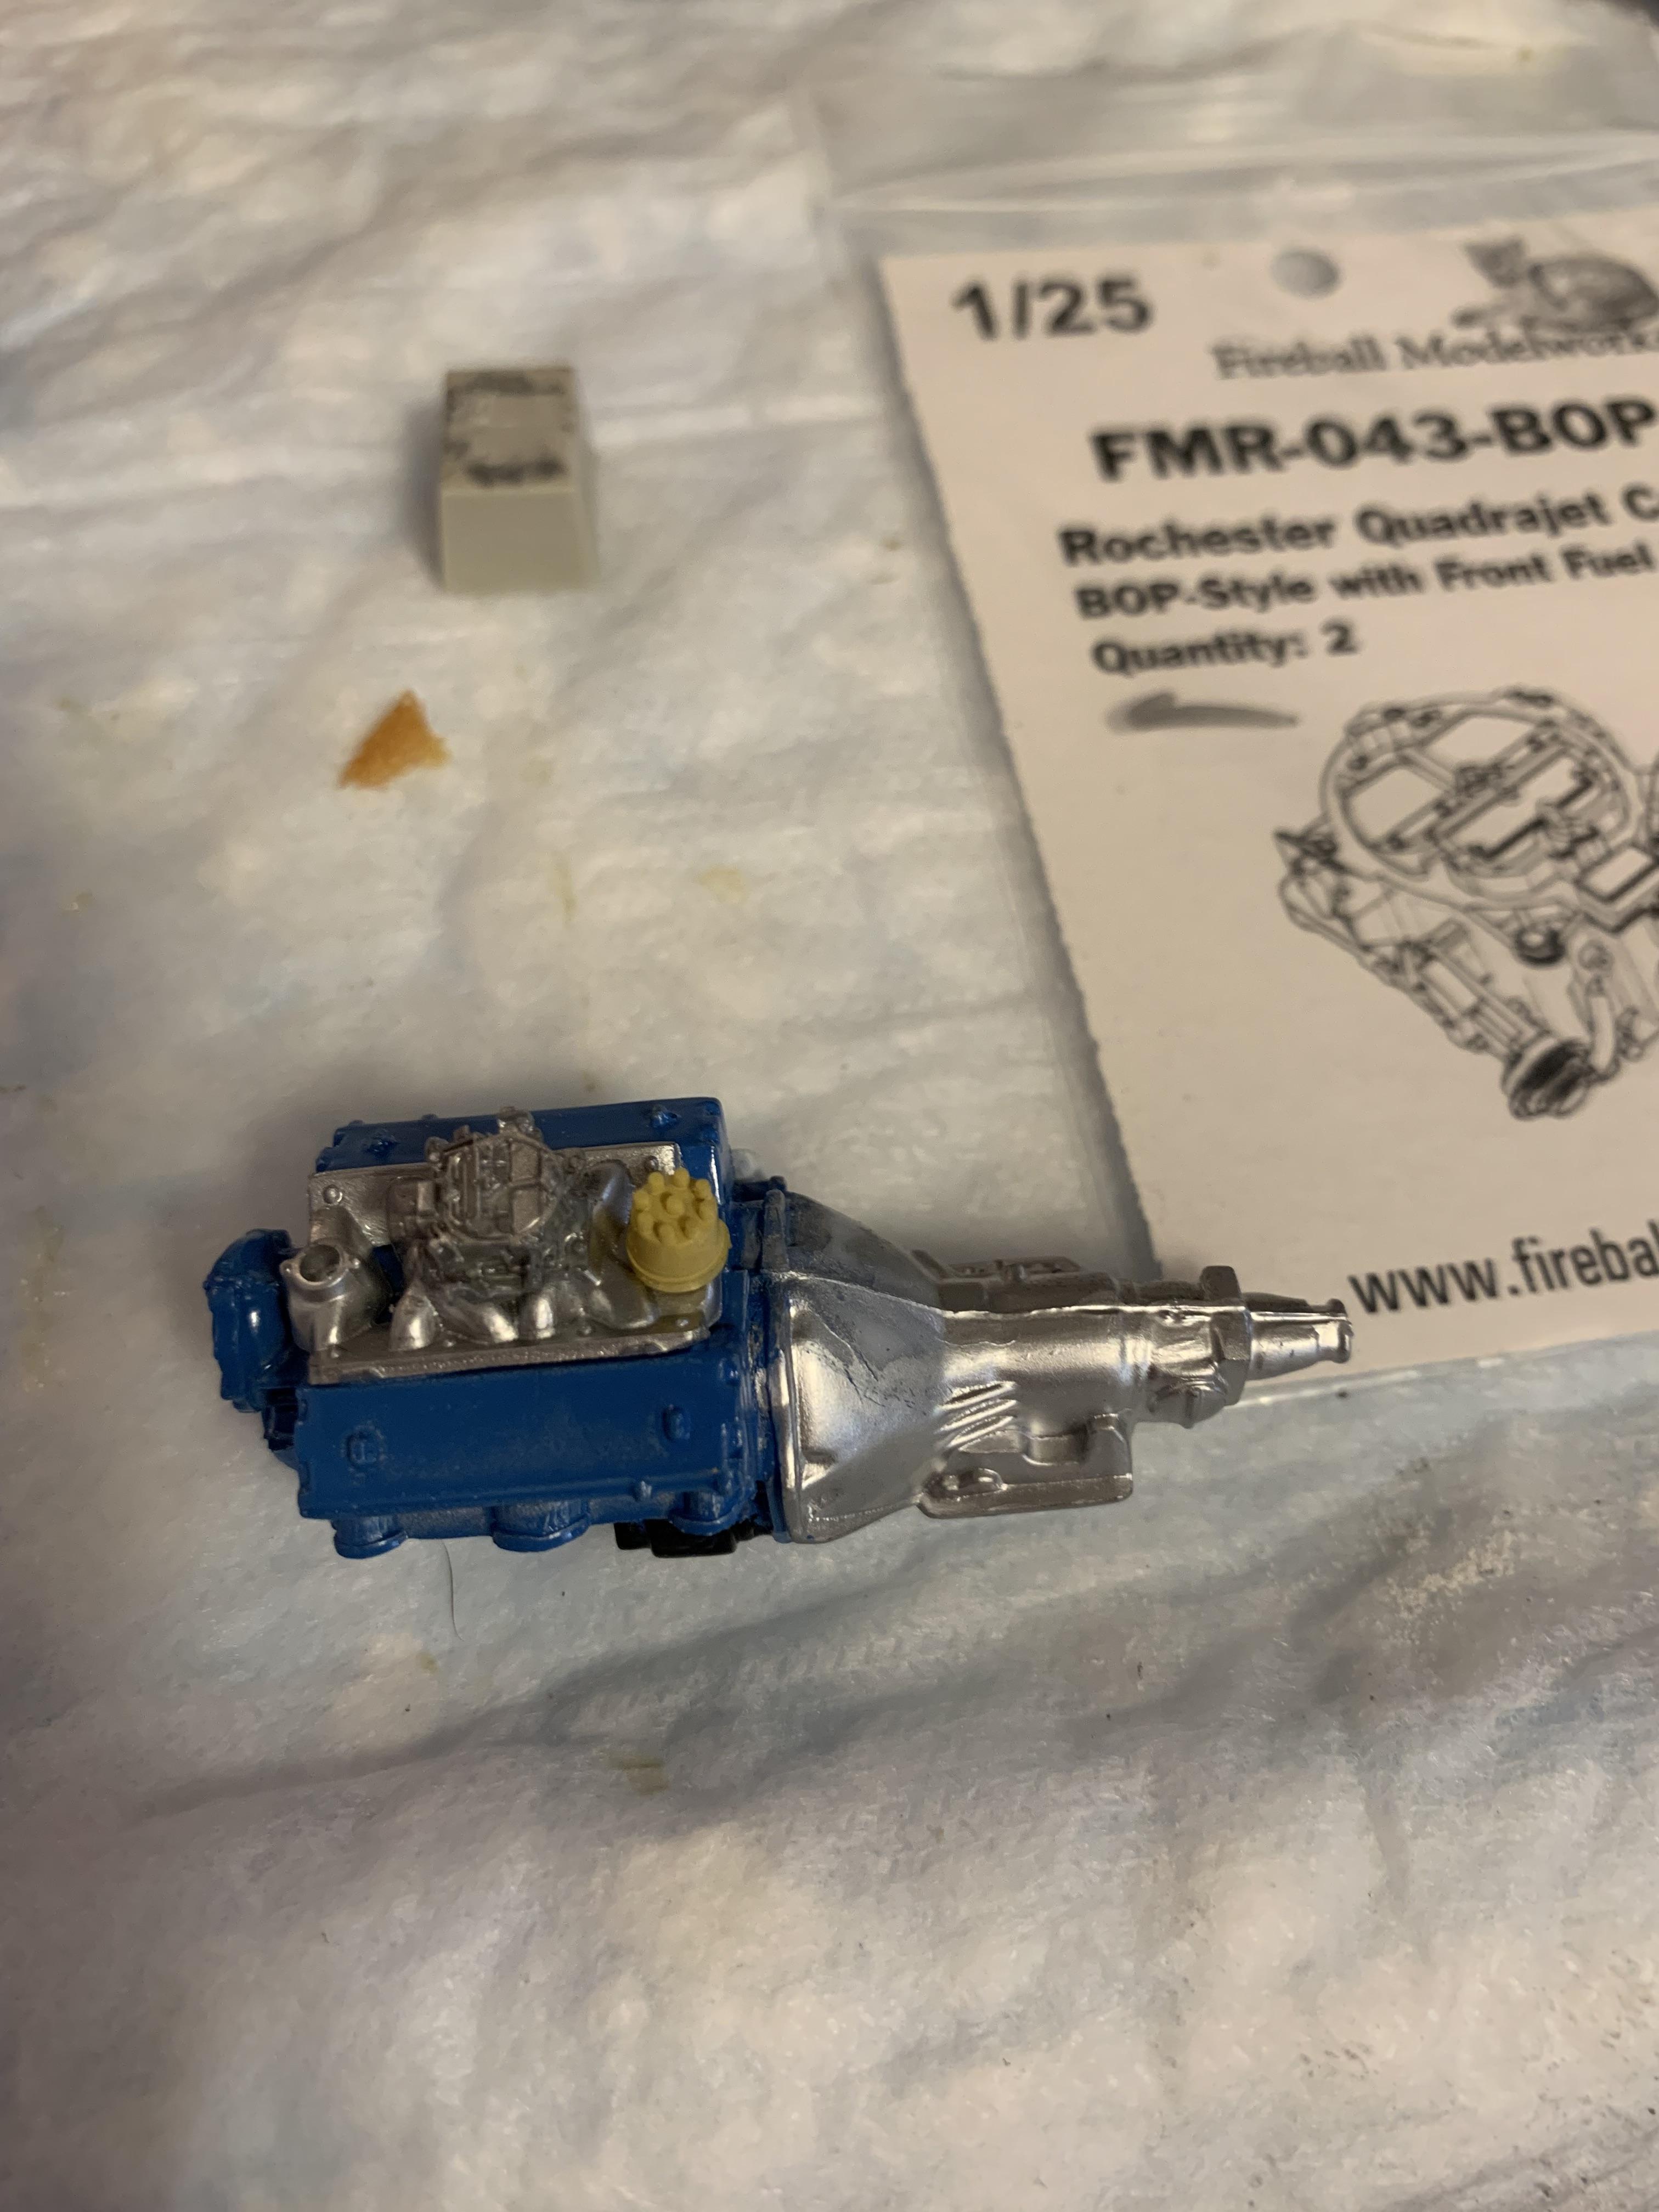
A belated thank you, Kevin. I am finally back on this build. “Painted” the driveshaft with one of my “new” acrylic markers. Also, the distributor cap and quadrajet carb. I then blocked out the Goodyear and blue stripes on the slicks. The markers make it easy and fast. Thank you, Chief Joseph, for your great carbs.
-
All of Brian Lohnes’s stuff are interesting and about as honestly factual as it gets. Required viewing for students of drag racing history. Some intriguing tractor stuff, too.
-
Grooms Bros awb 1965 Plymouth sedan Black Trash II
R. Thorne replied to R. Thorne's topic in Drag Racing
Thank you, gentlemen. Not my best work, but learned the value of assembling everything before paint. Especially with aftermarket resin bodies. These Mopars (awb and stock) are definitely addictive. -
Grooms Bros awb 1965 Plymouth sedan Black Trash II
R. Thorne replied to R. Thorne's topic in Drag Racing
Thanks, guys. -
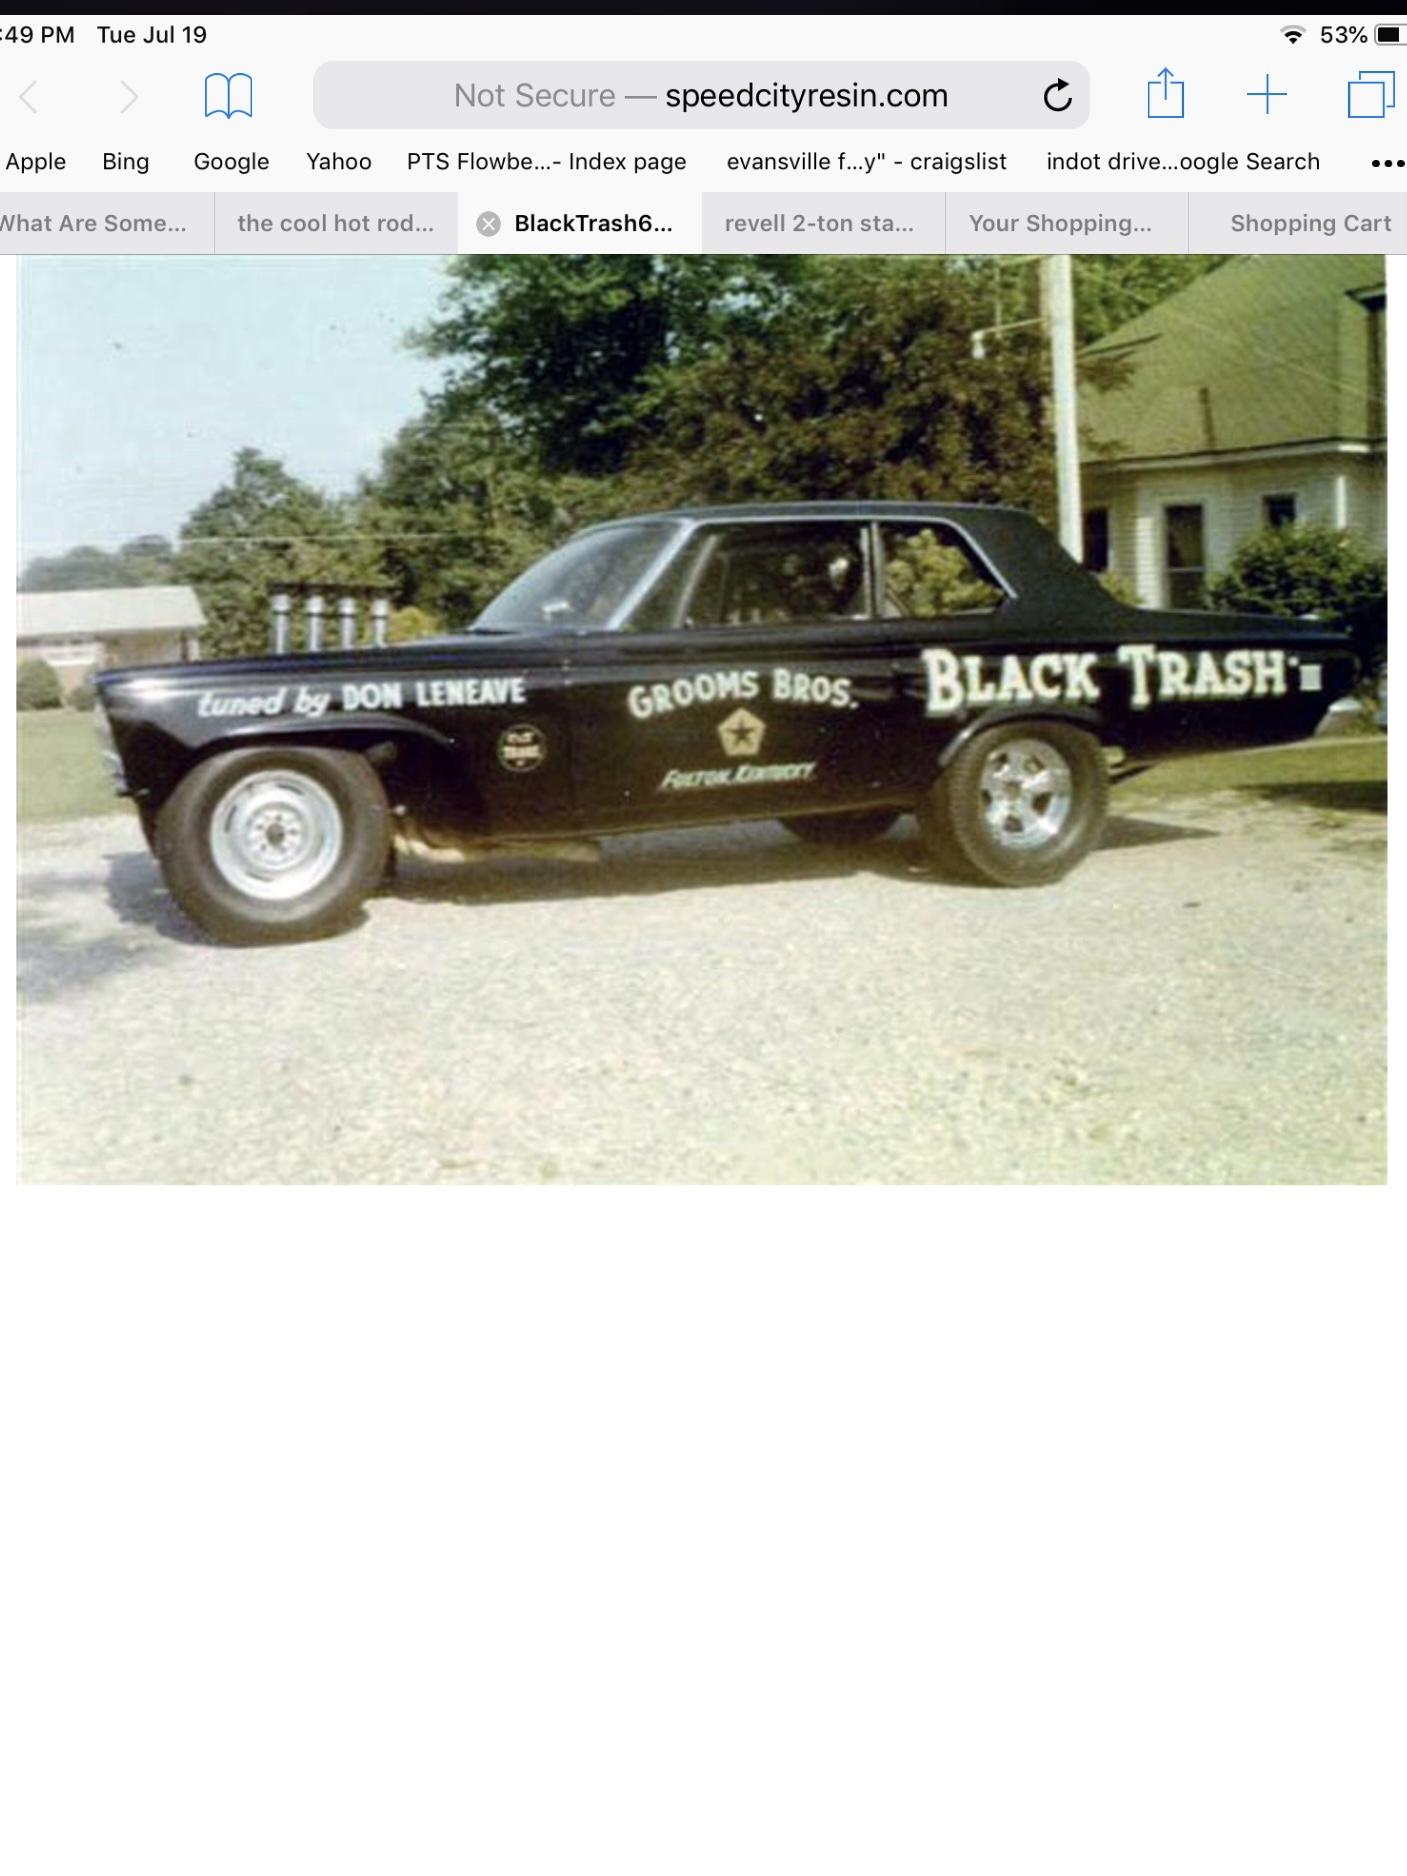
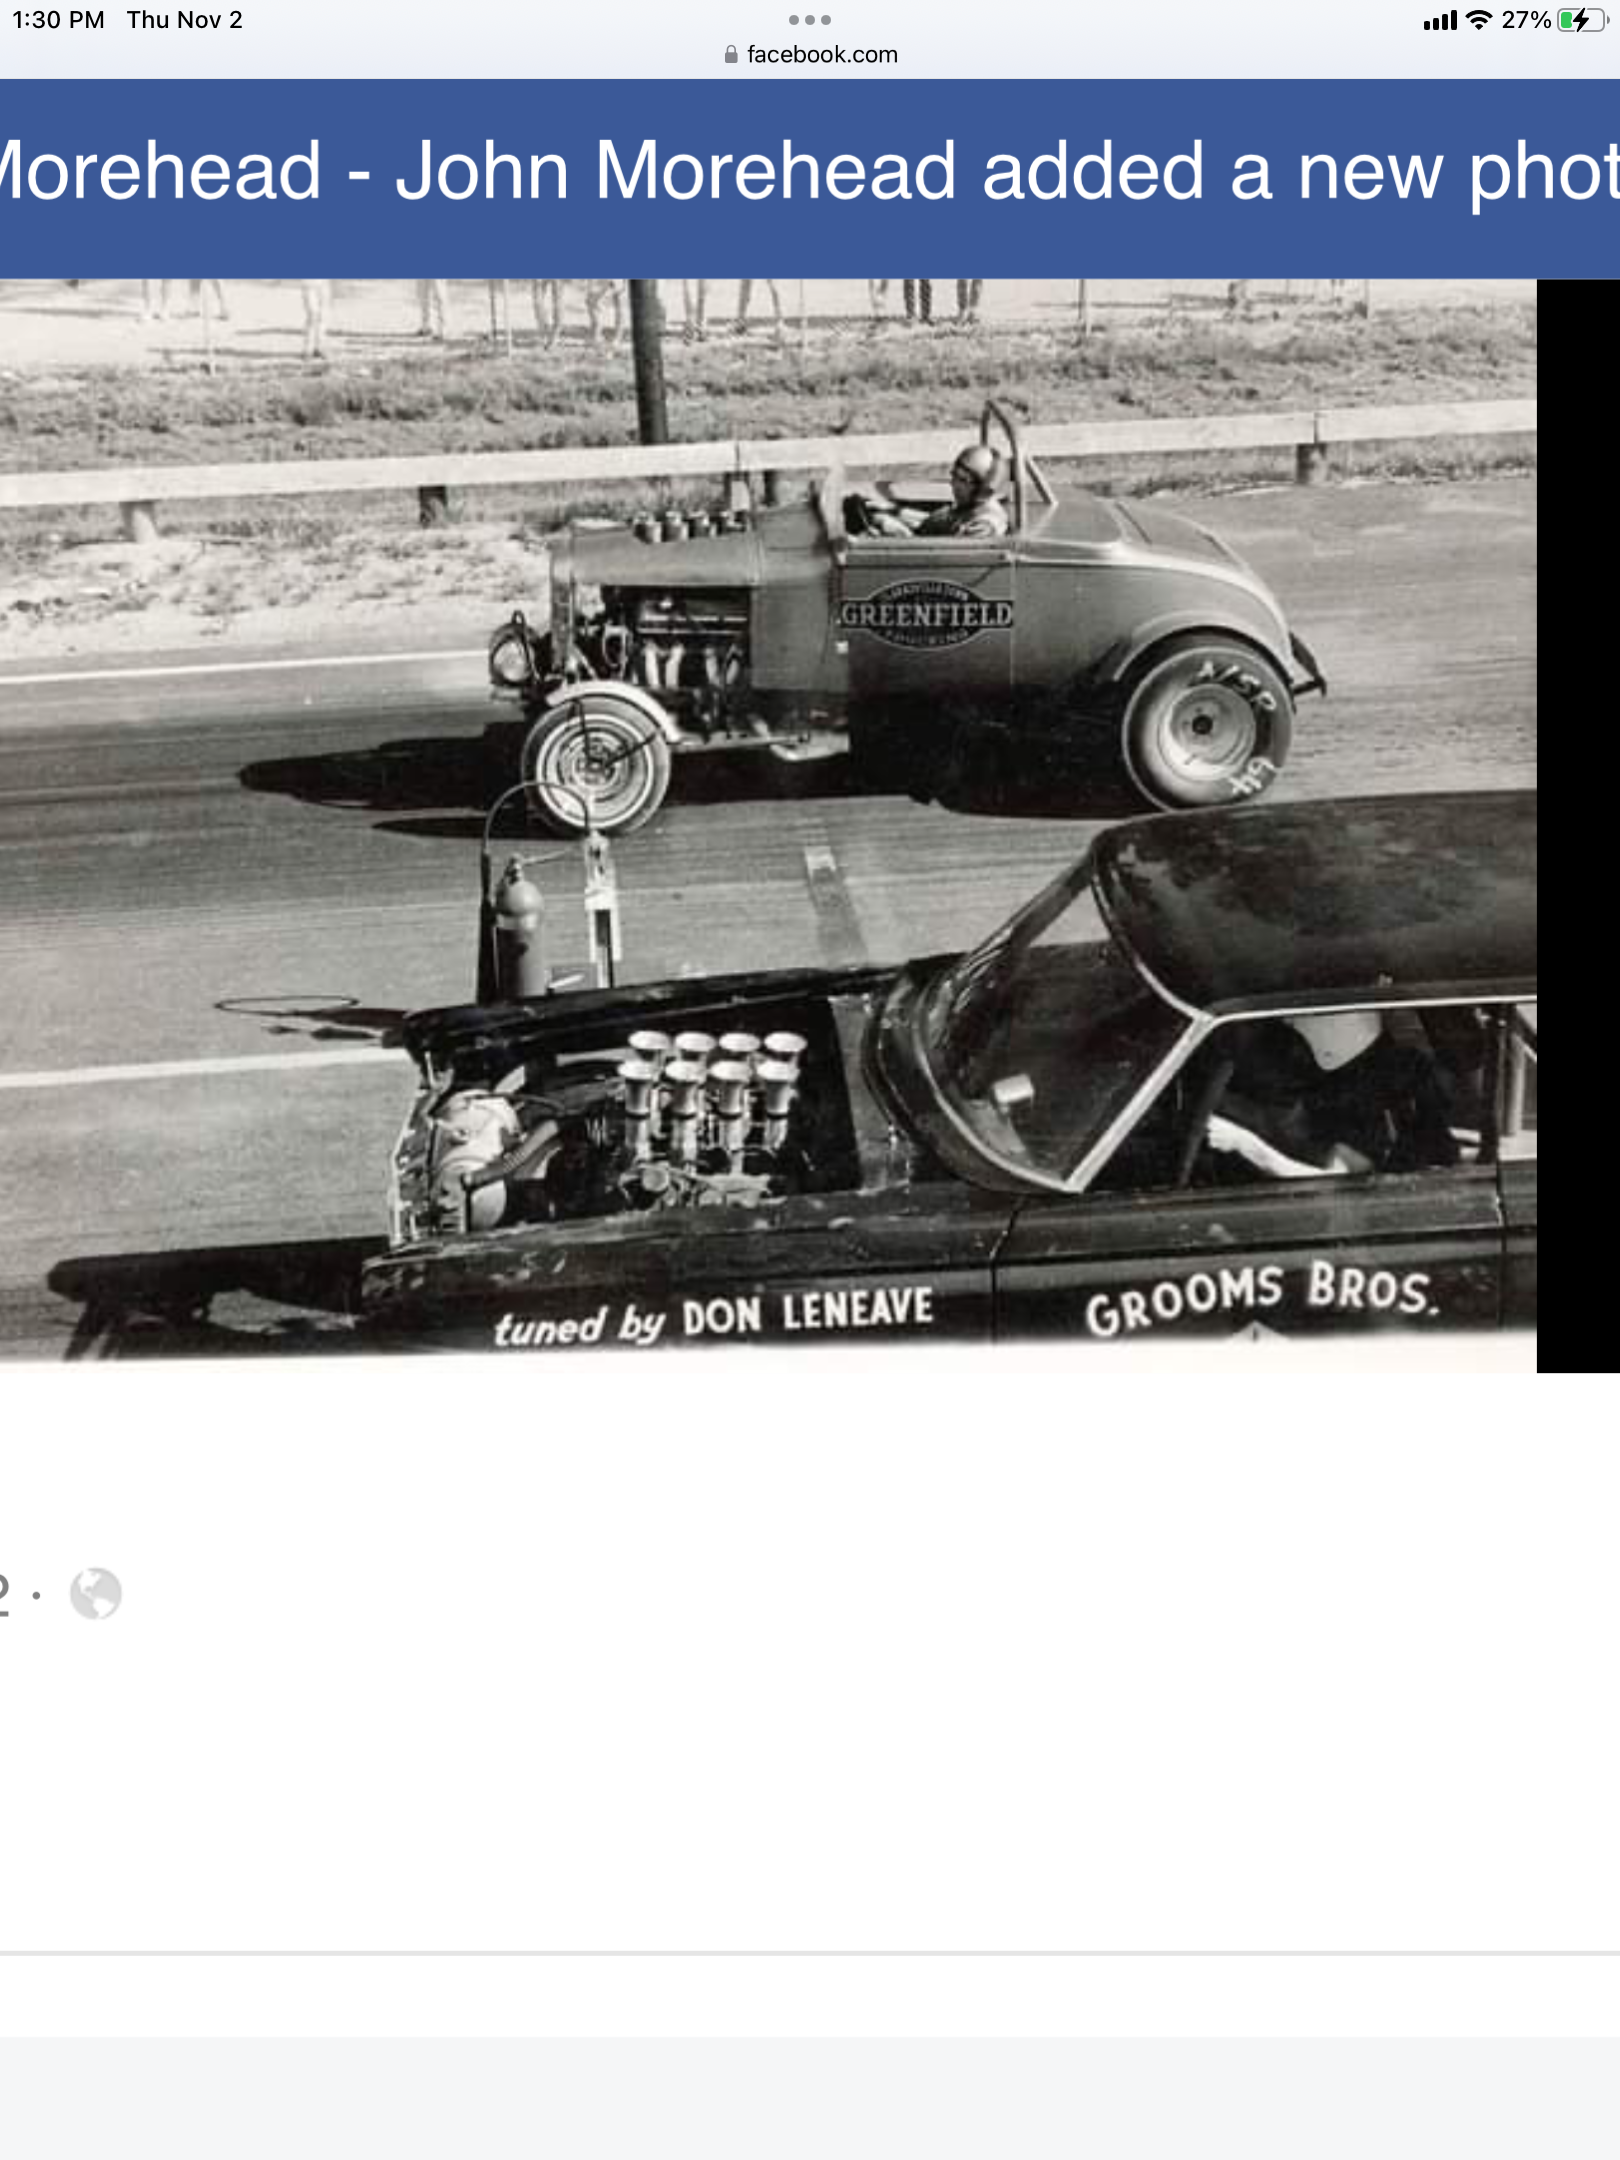
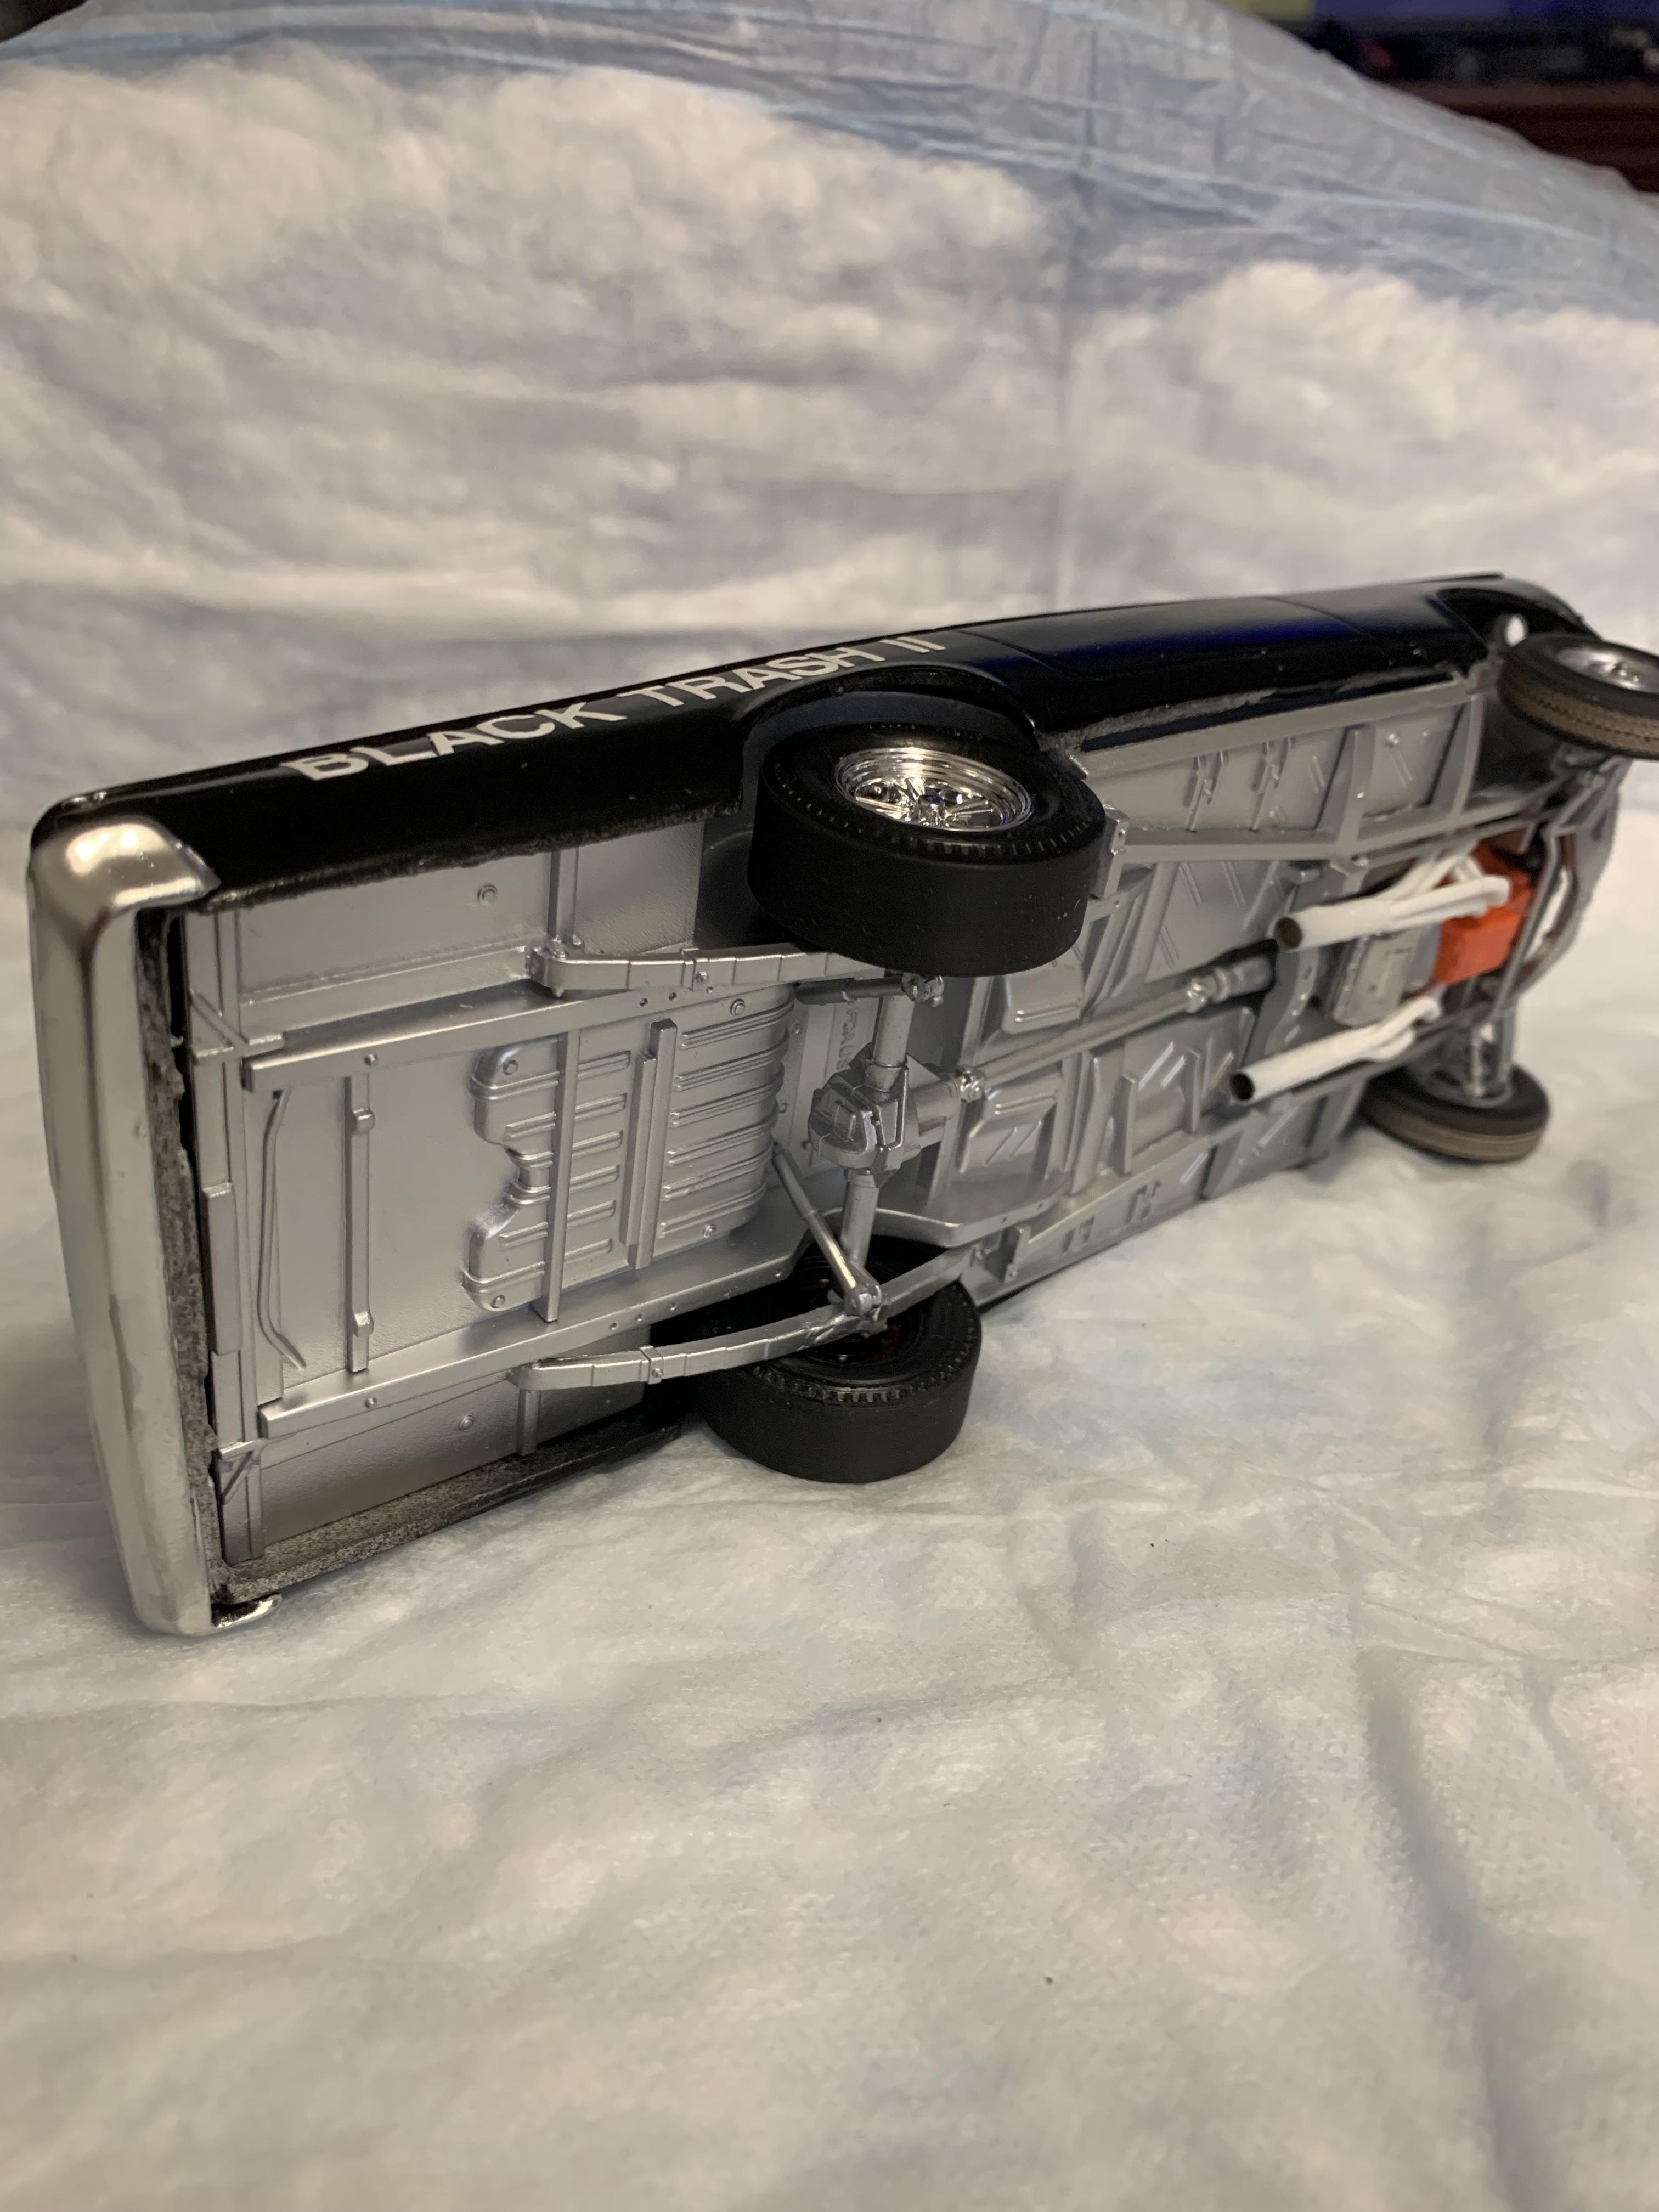
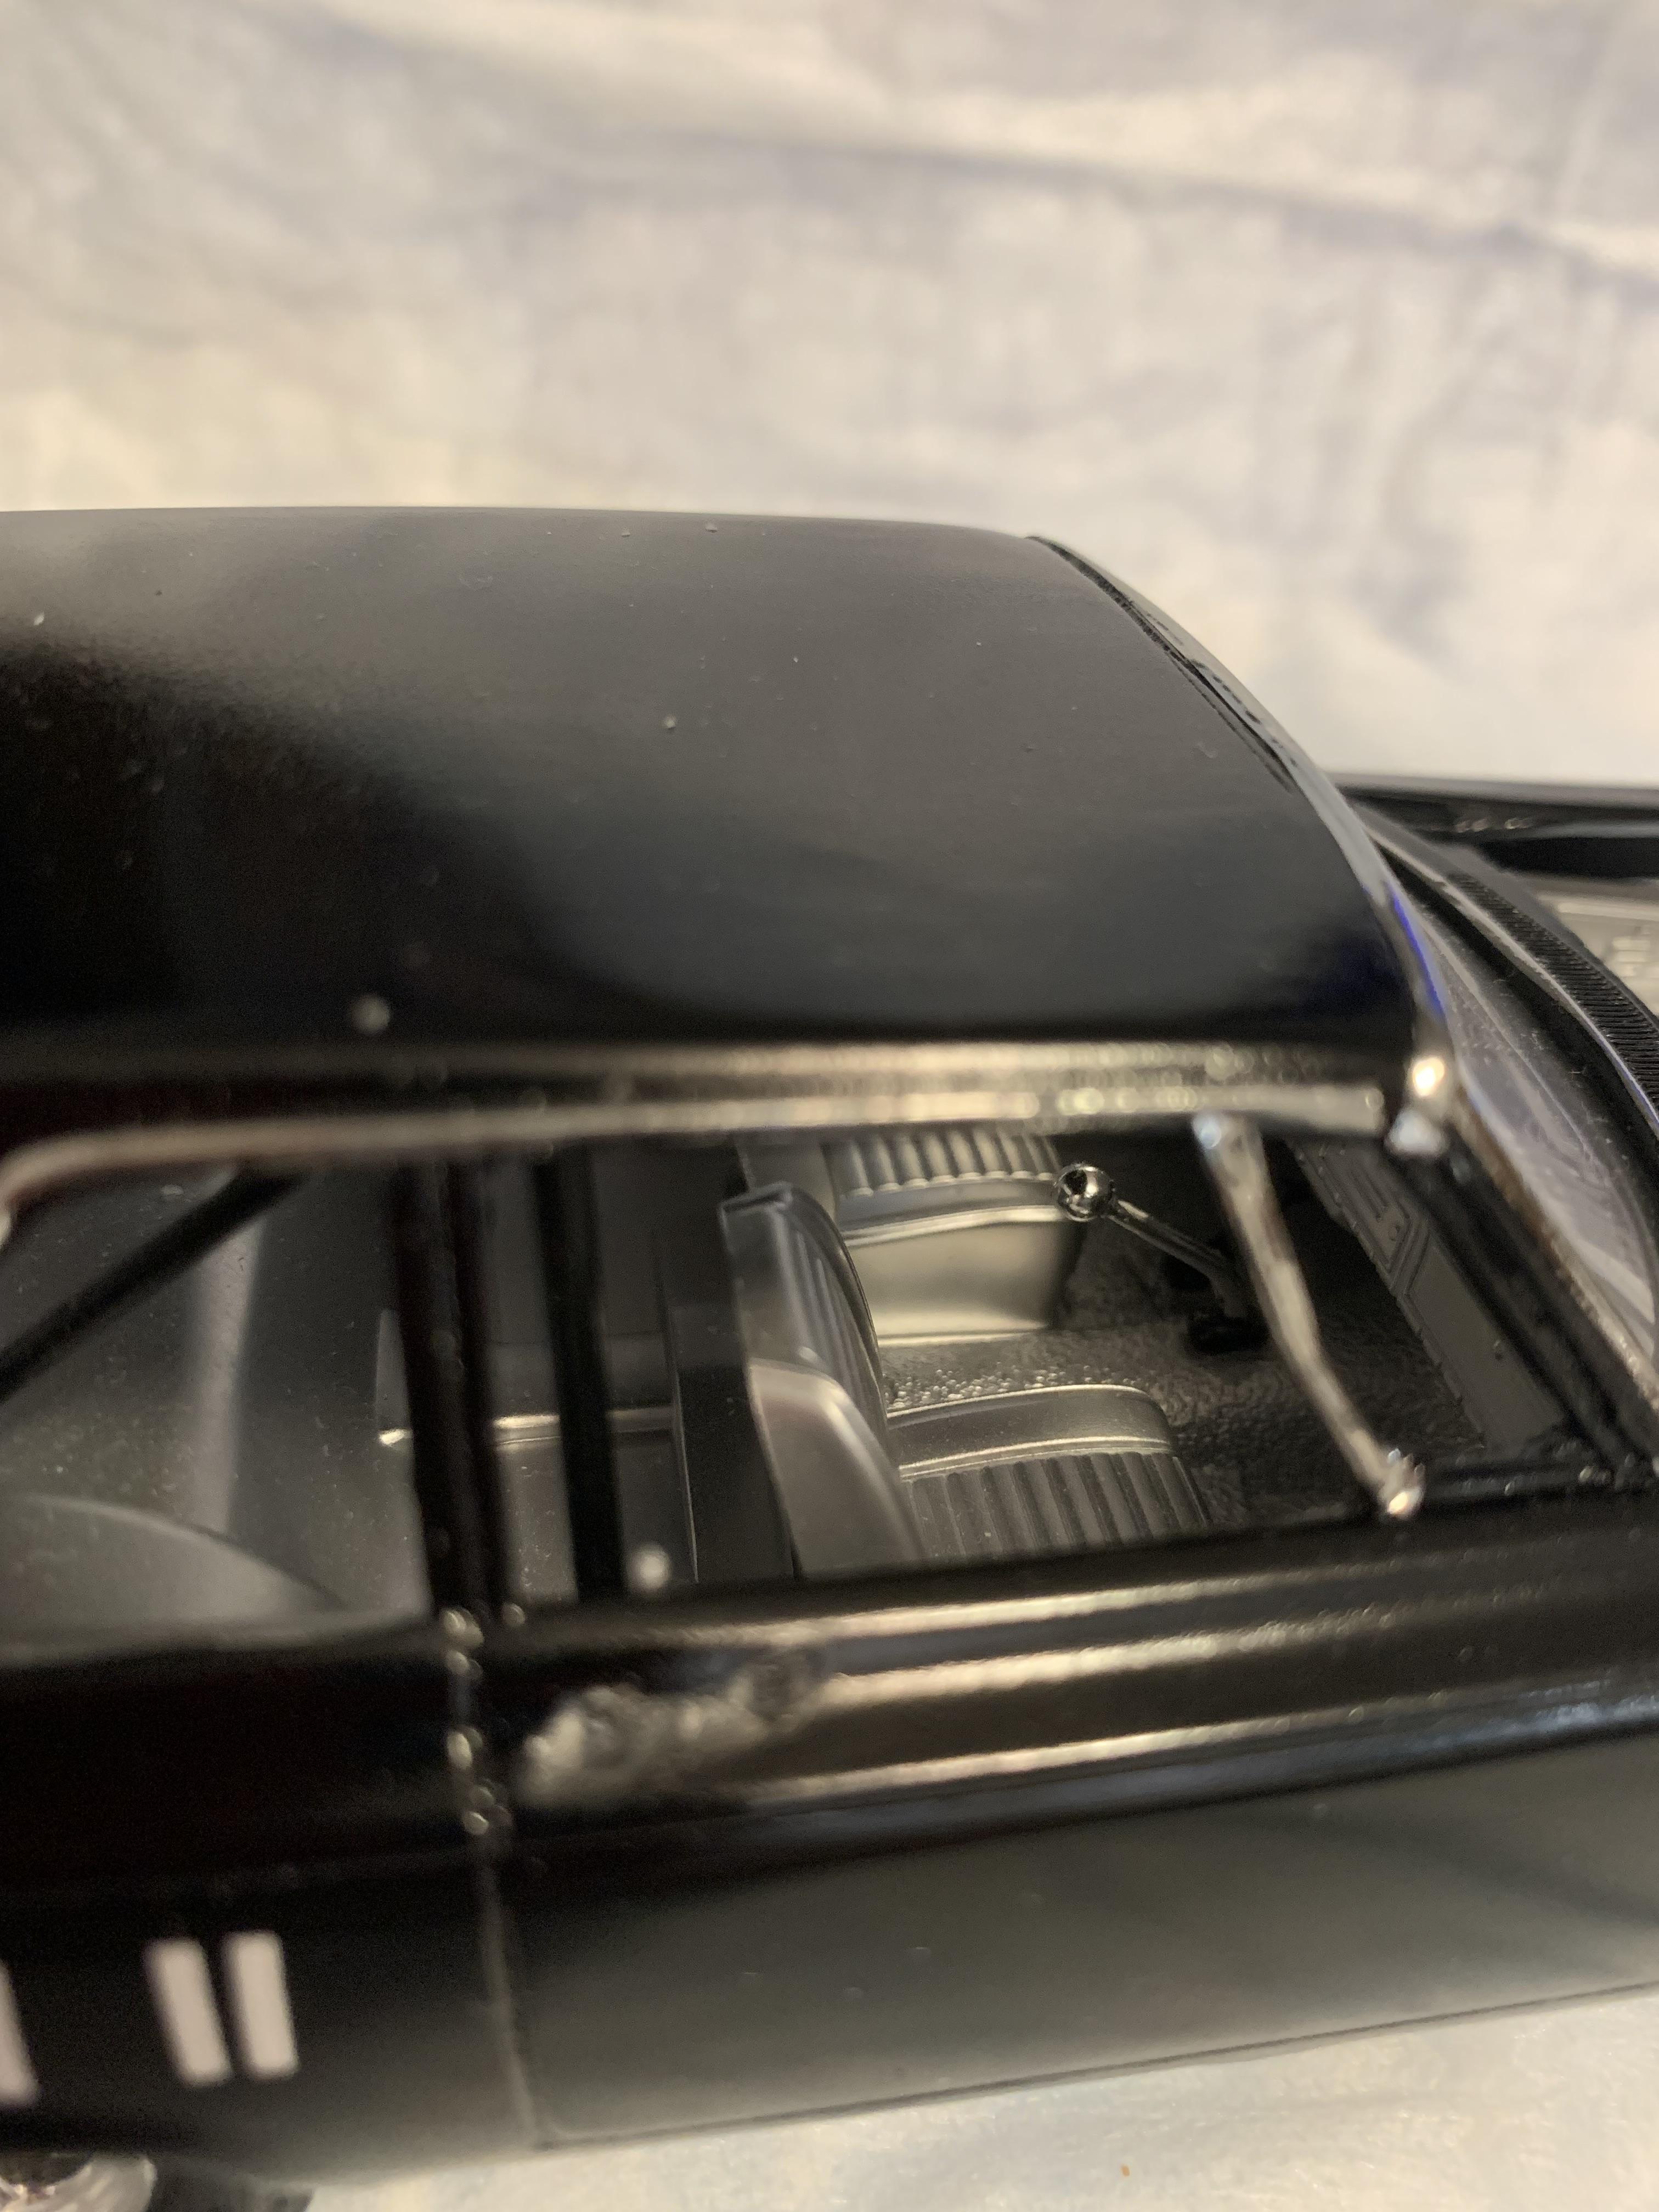
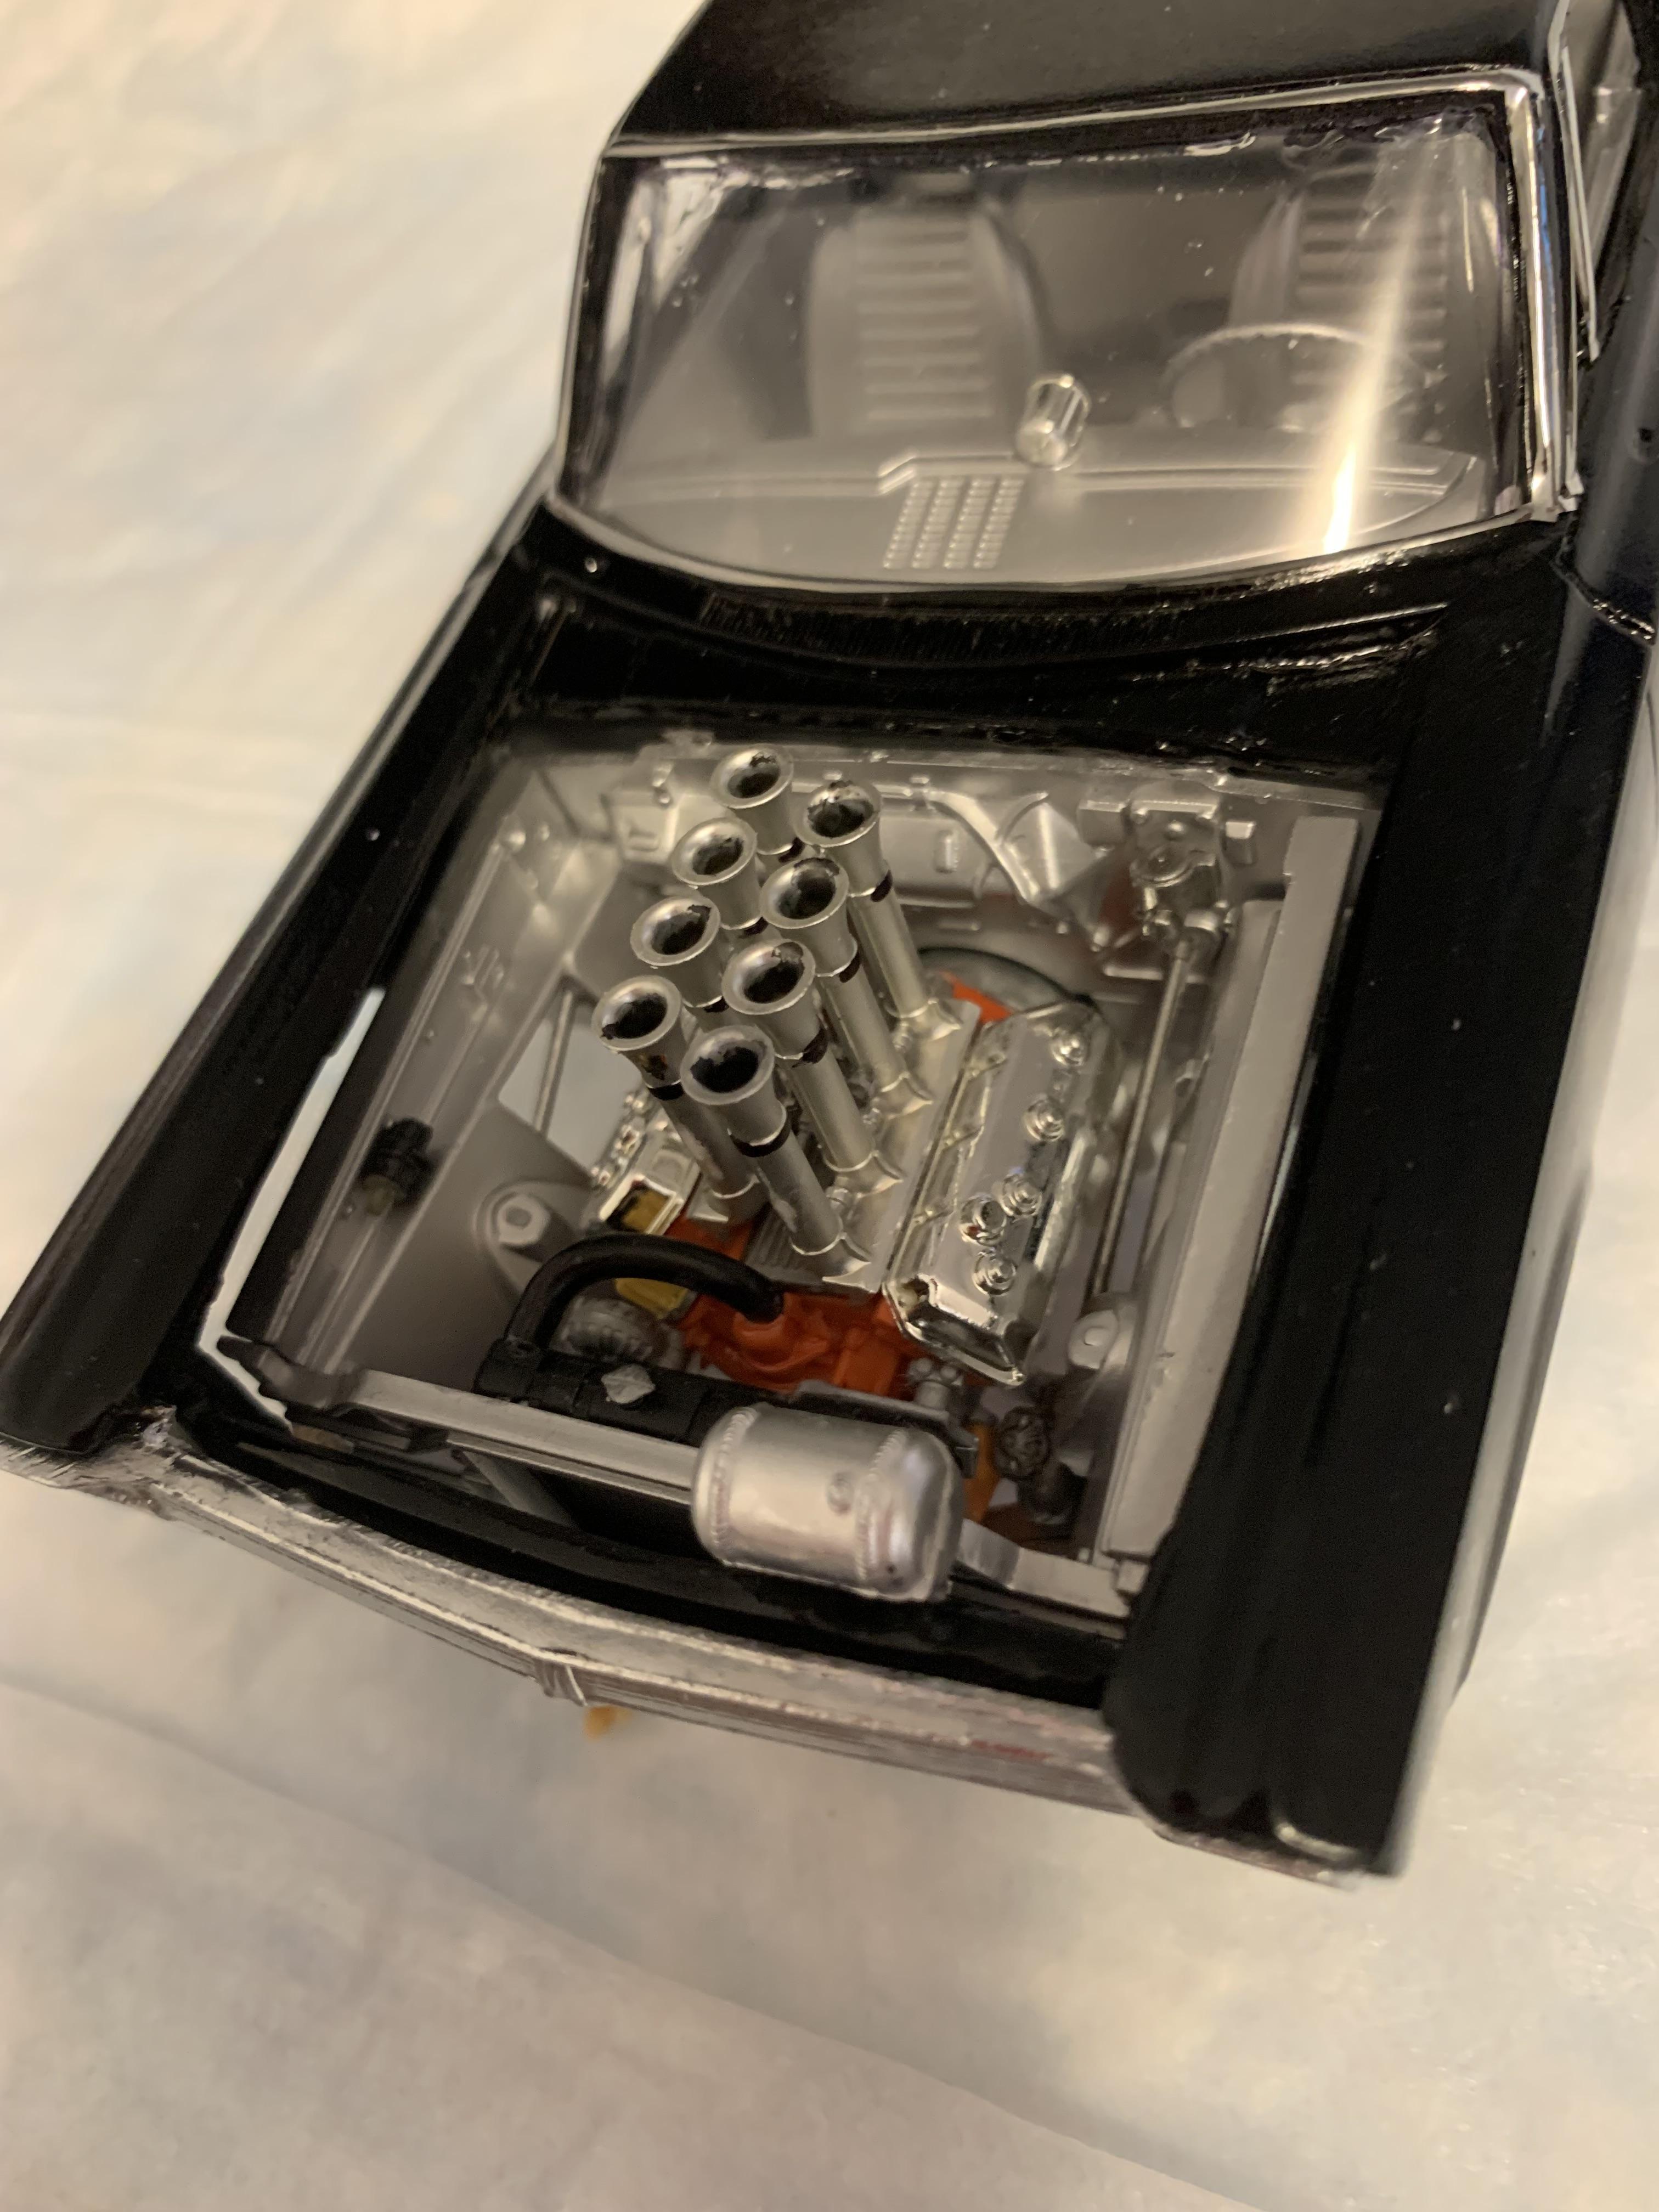
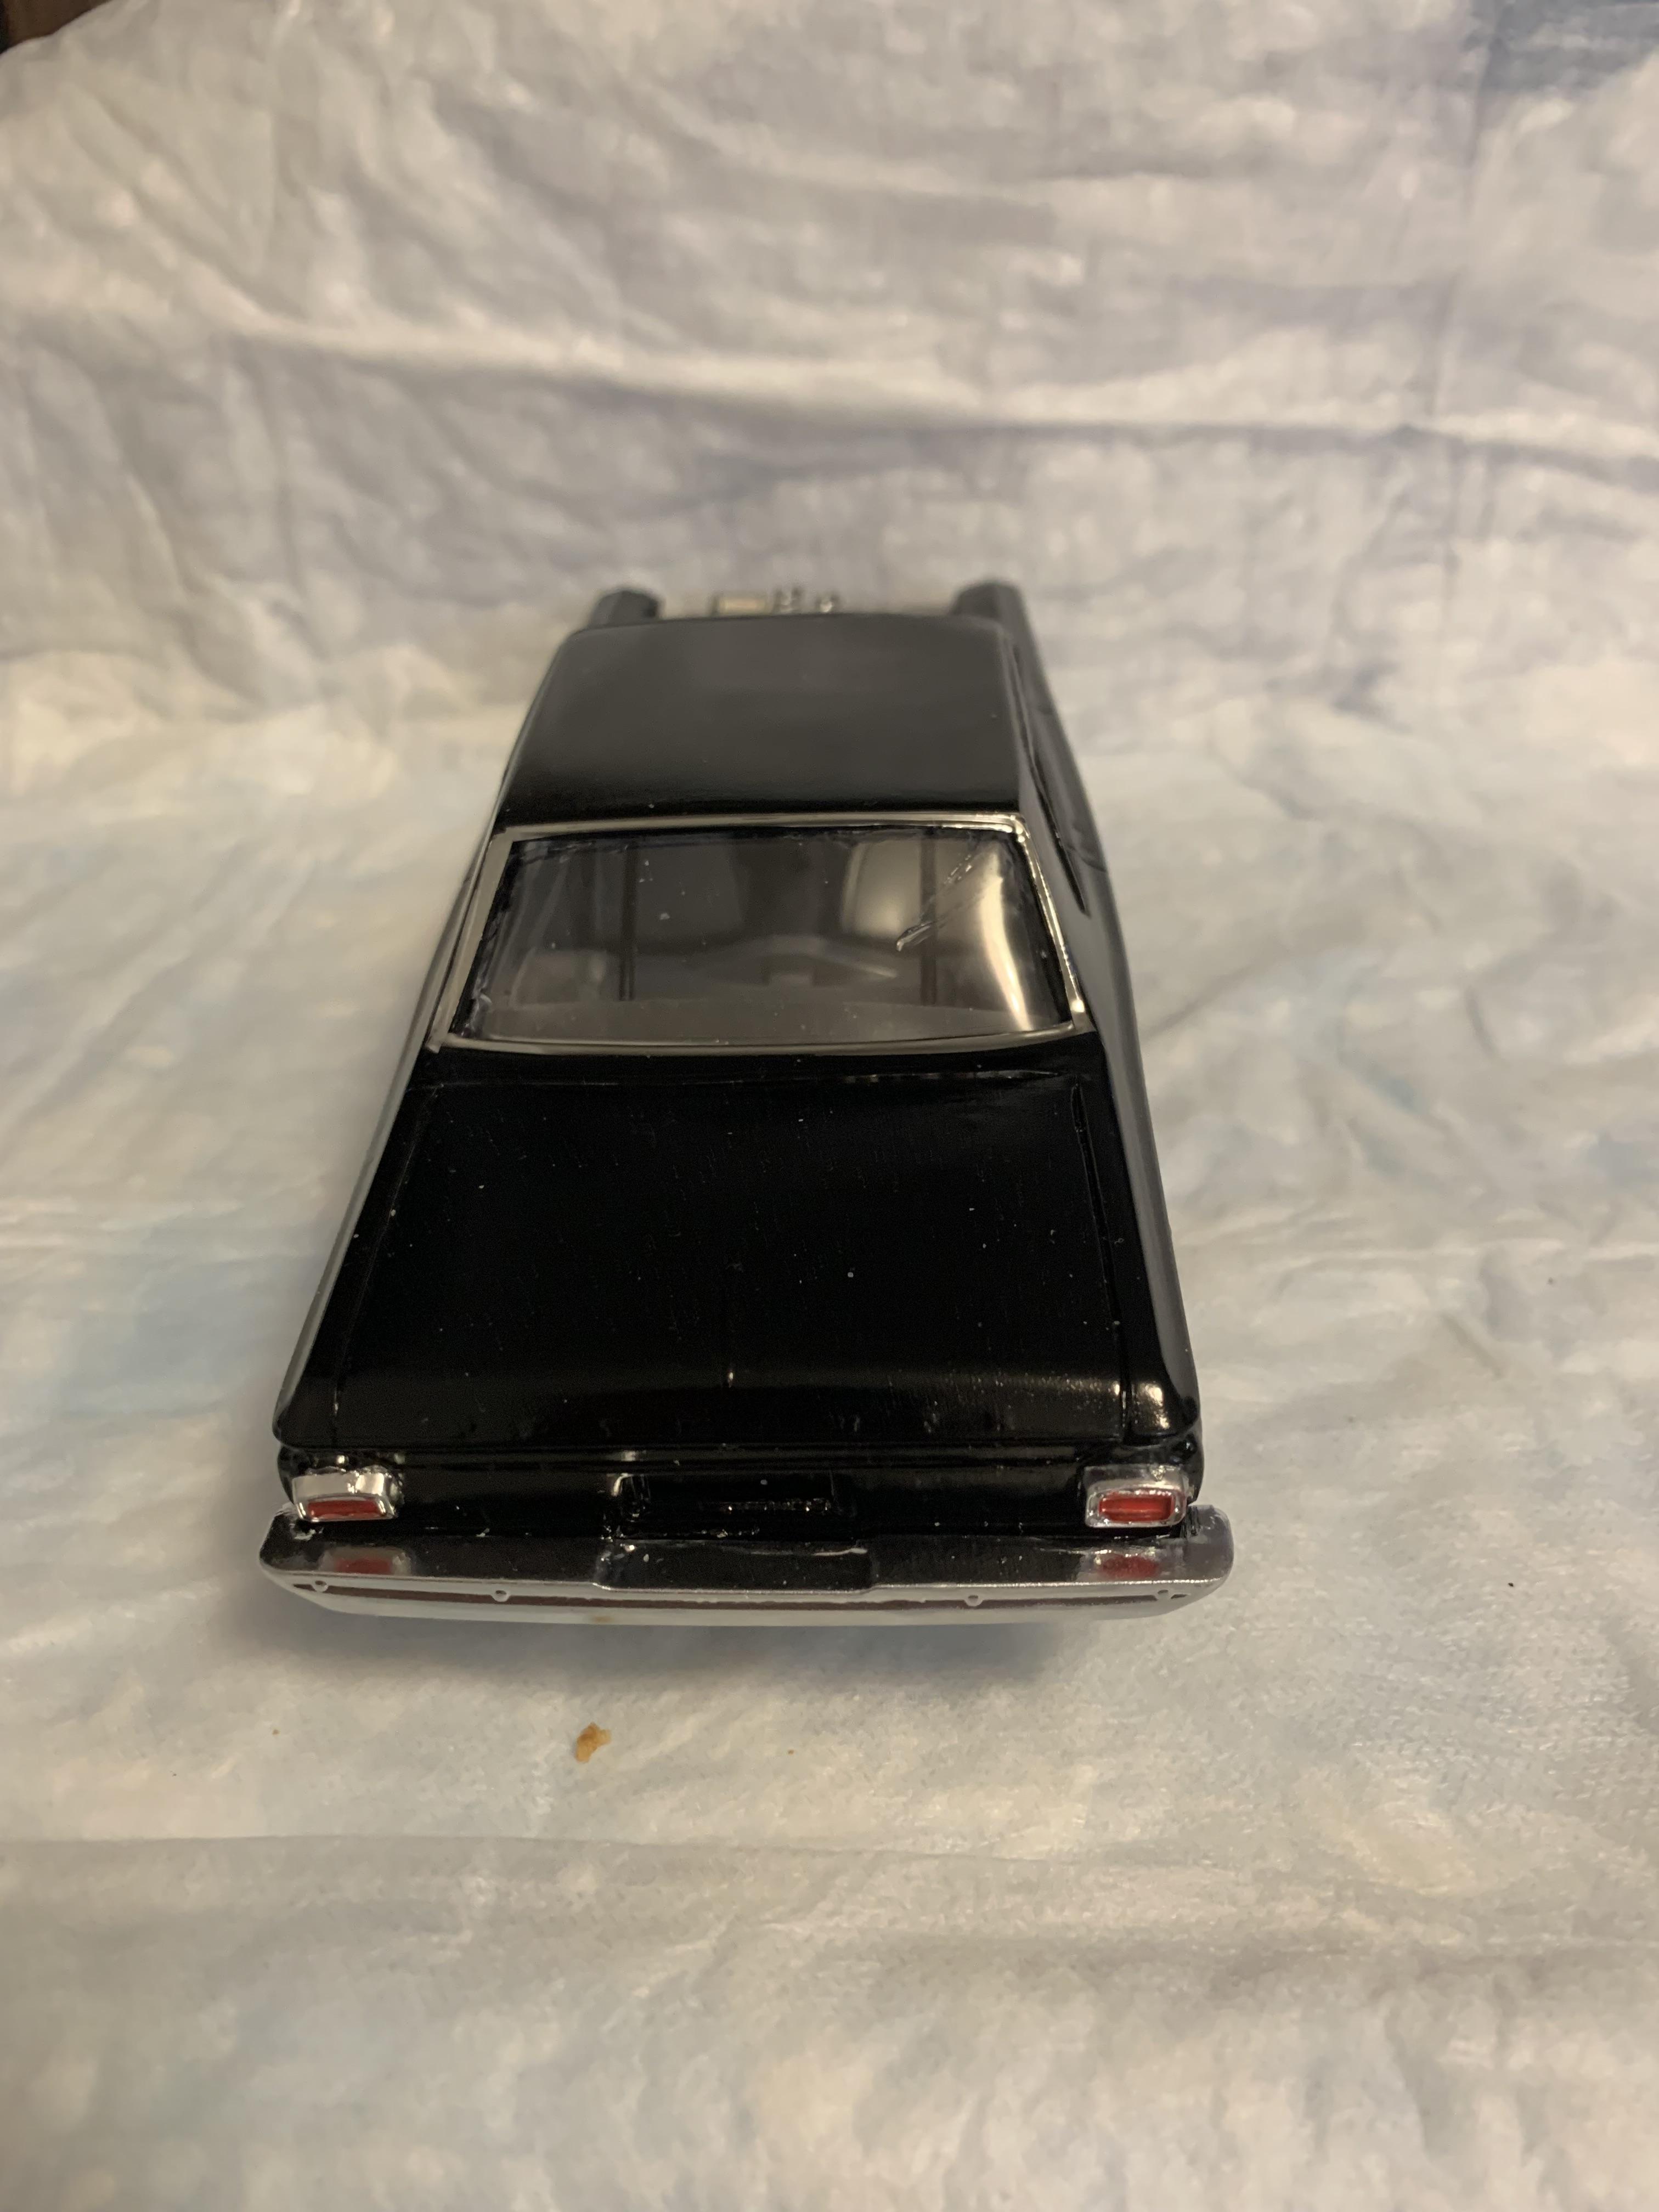
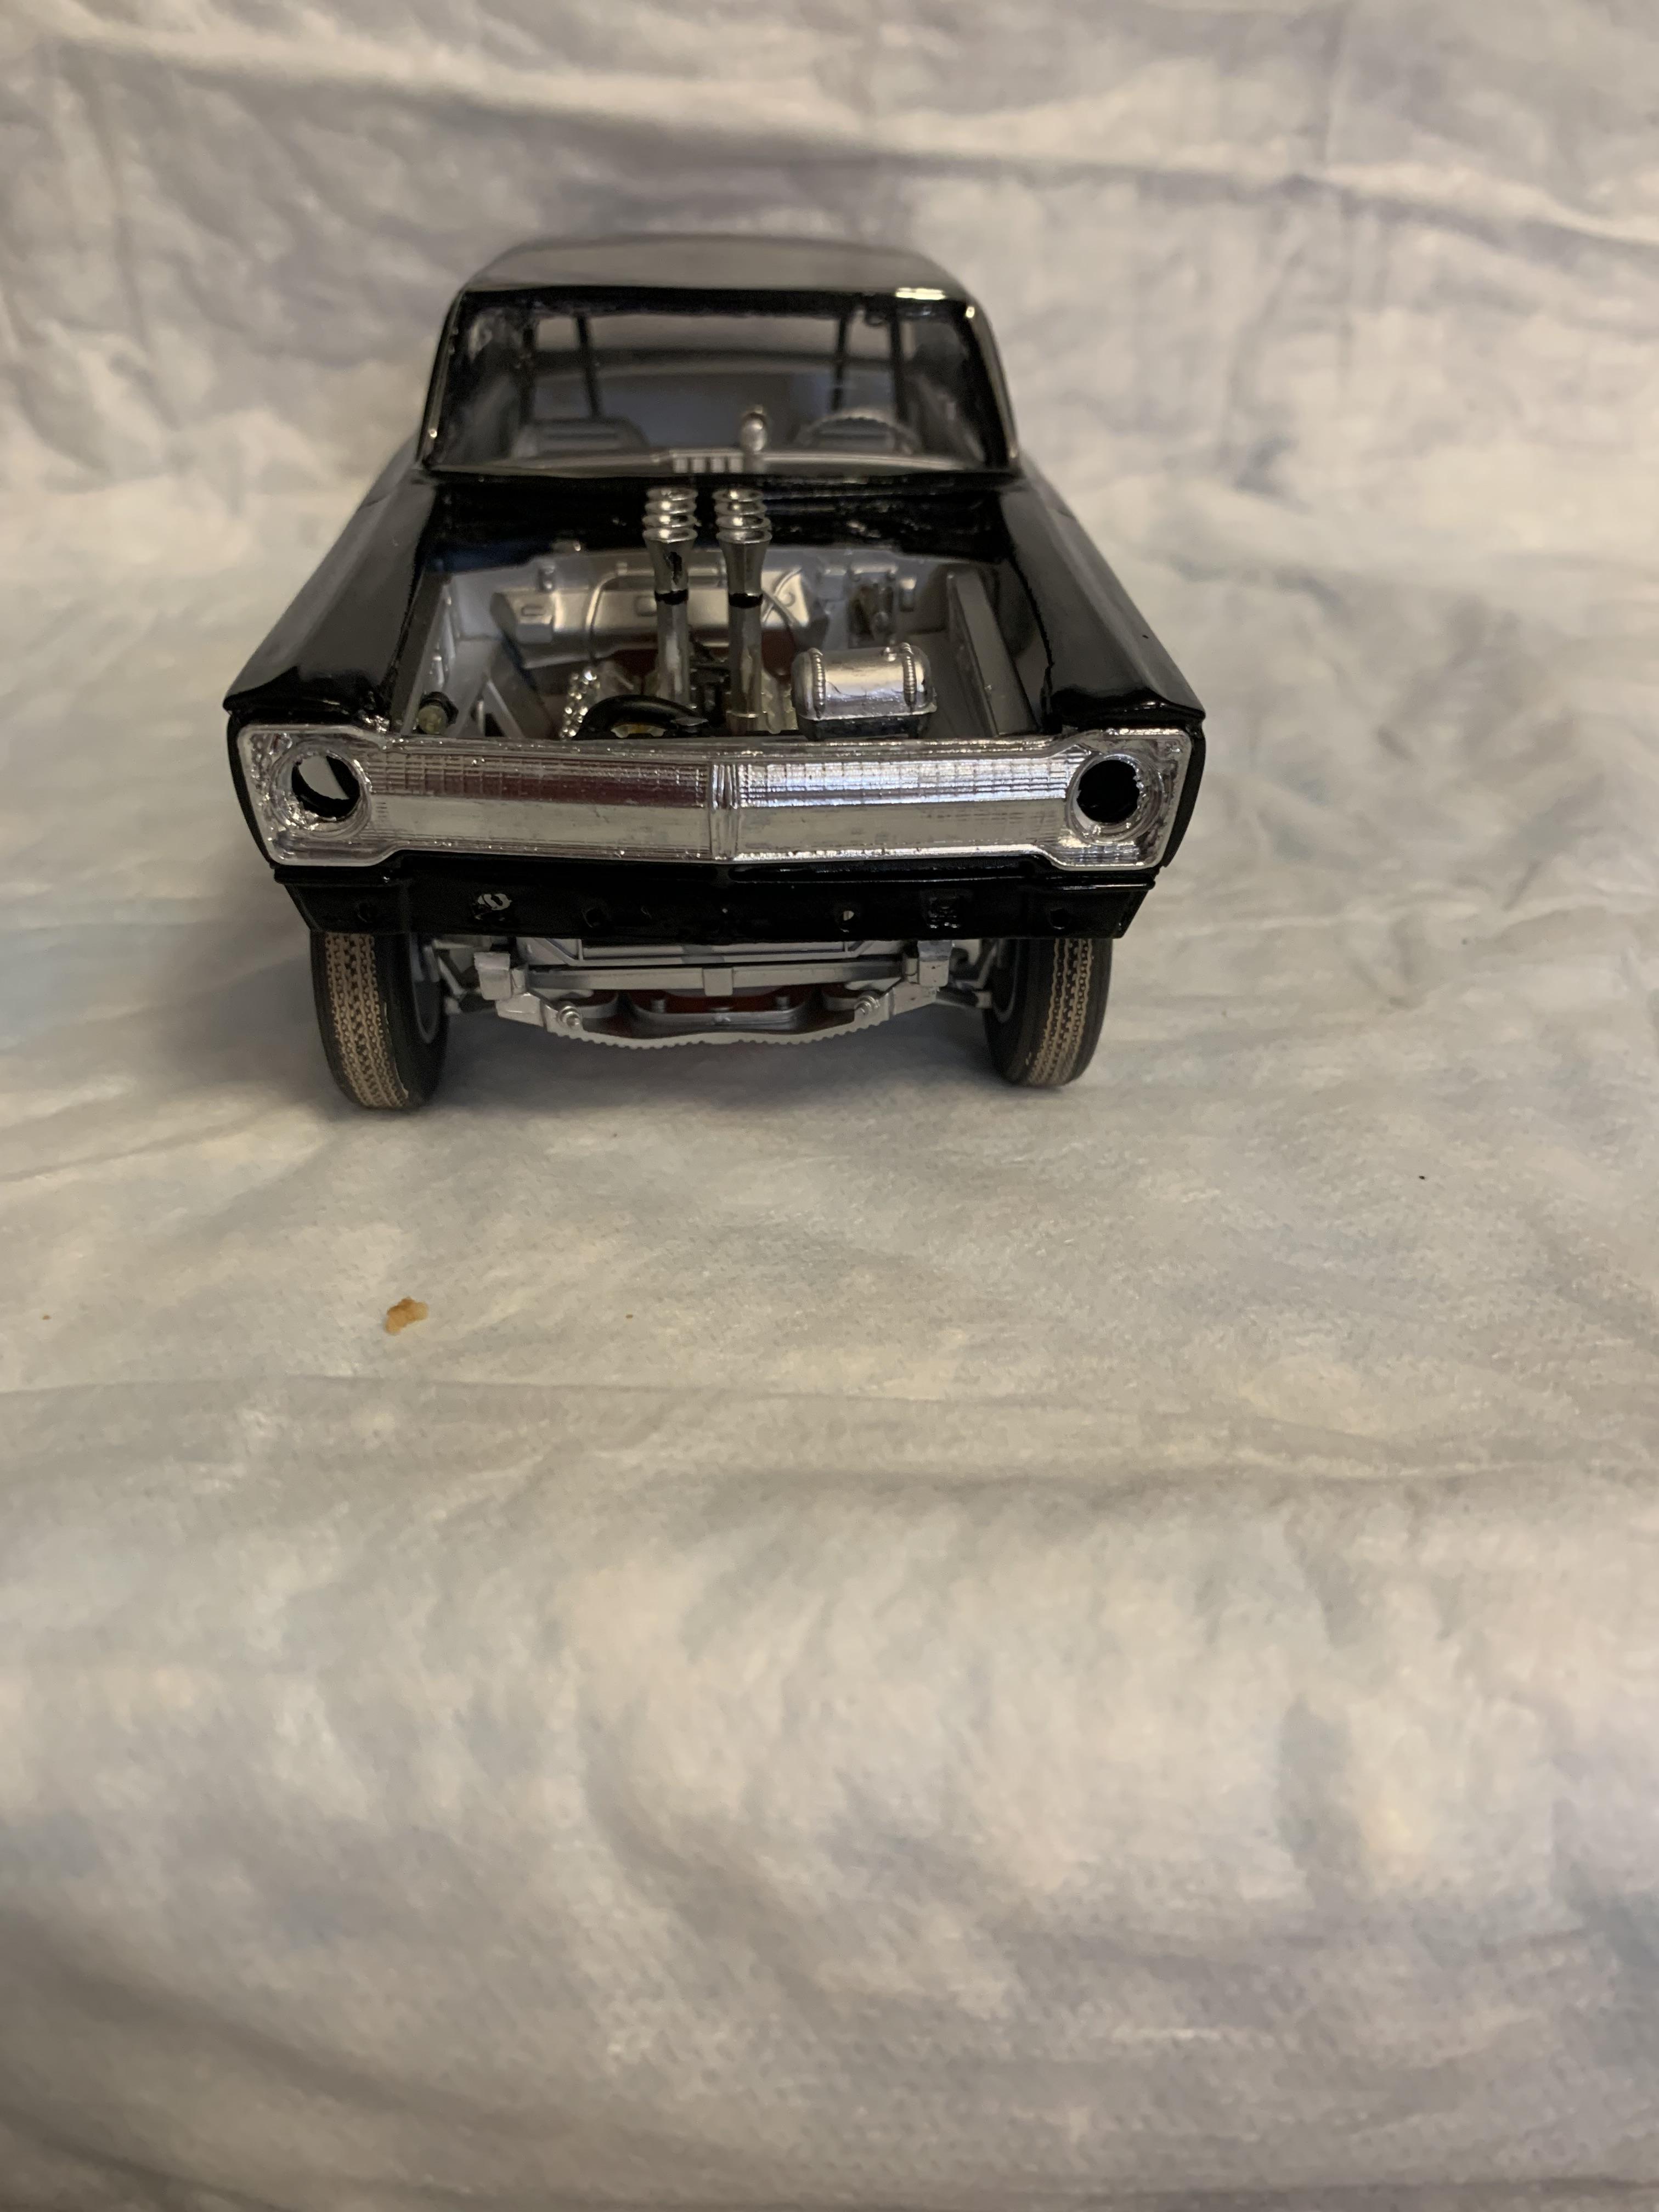
Built using the Moebius Dave Strickler kit and a Fremont Rosins body. Not the best turnout, but suitable for the shelf and I learned a little about resin bodies. I had paint problems, made windshields from clear .005” styrene, but messed up the installation, sits too high, etc. This car was run in the mid sixties out of Fulton, Ky. and was a stripped down version. Further details and pics in the WIP section. Comments, criticisms, questions, are always welcomed.
-
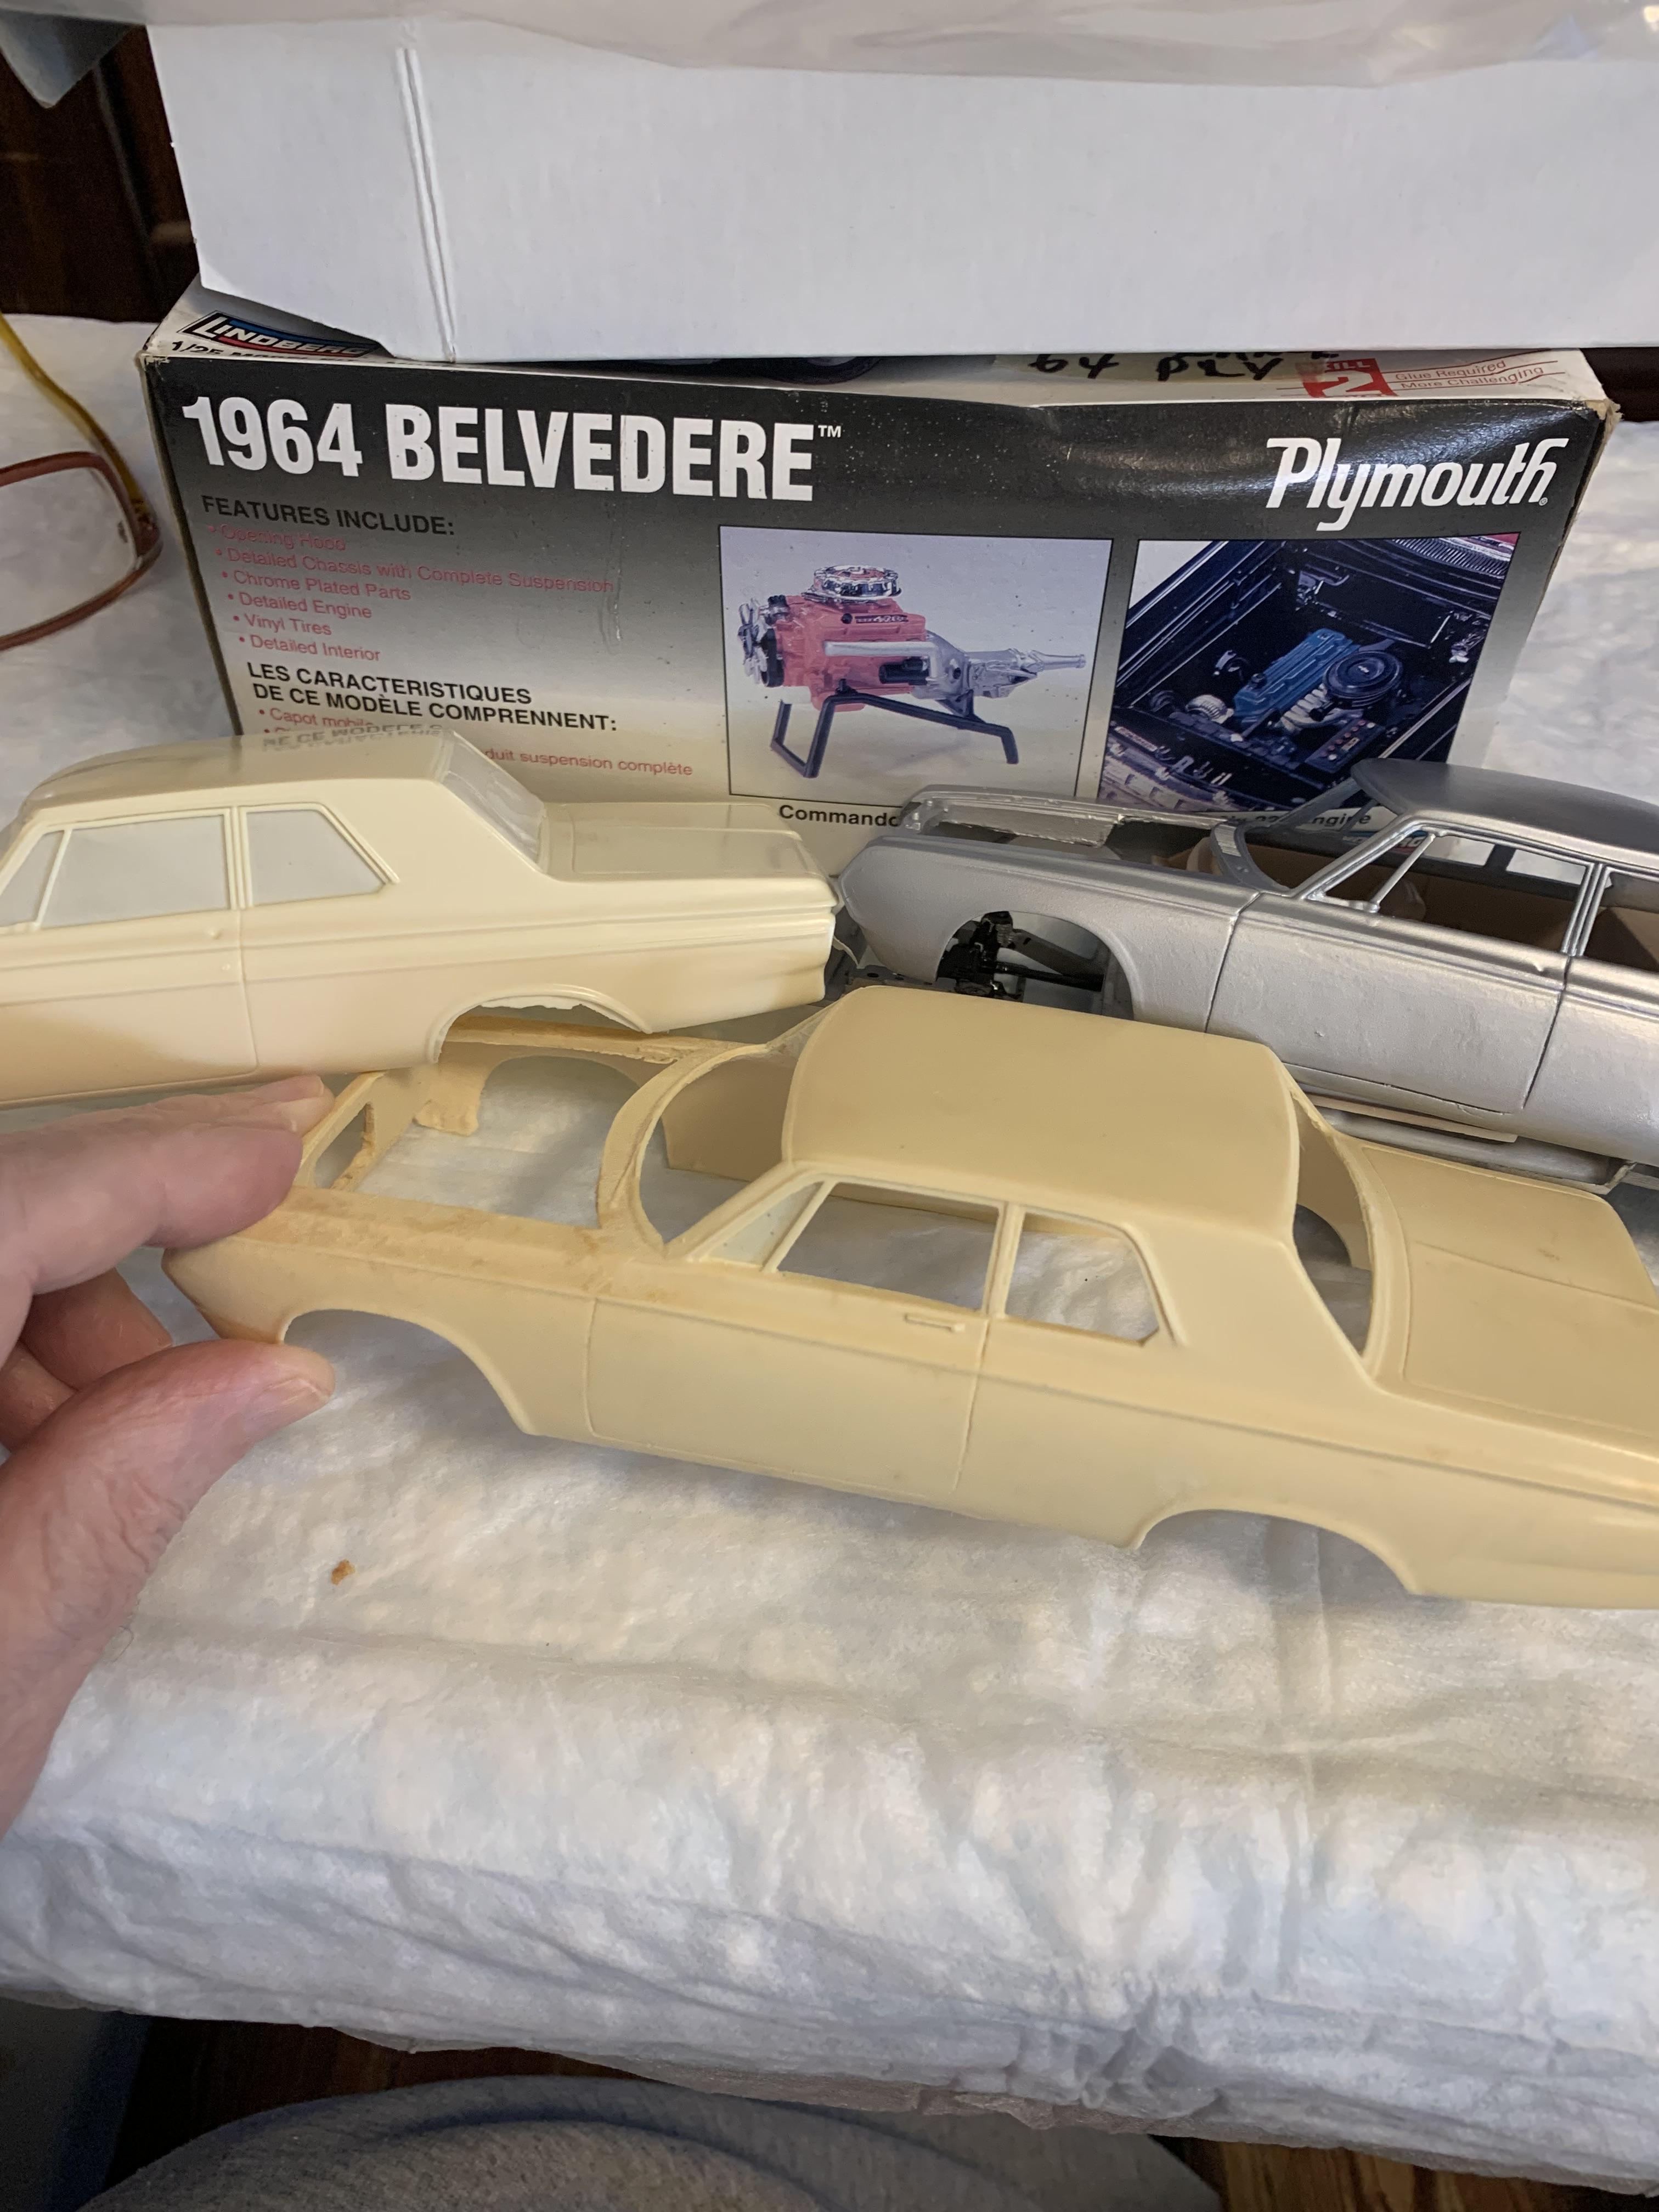
Options for THIS car. Golden Commandos 1964 Plymouth
R. Thorne replied to gtx6970's topic in WIP: Drag Racing Models
Attaboy! -
Options for THIS car. Golden Commandos 1964 Plymouth
R. Thorne replied to gtx6970's topic in WIP: Drag Racing Models
Just to be clear, I was referring to the side trim, which I removed on this in progress silver car. The golden commandos car does not have it, also. I believe this signifies a Savoy model like mine. OK, I promise not to interrupt any more.
-
Options for THIS car. Golden Commandos 1964 Plymouth
R. Thorne replied to gtx6970's topic in WIP: Drag Racing Models
Another consideration: the Flintstone body has the Belvedere trim to remove in order to resemble the Savoy versionand the SMH doesn’t appear to come with that trim. -
Options for THIS car. Golden Commandos 1964 Plymouth
R. Thorne replied to gtx6970's topic in WIP: Drag Racing Models
Thanks, guess mine were simply boxed wrong. Sorry. -
Grooms Bros. 1965 Plymouth Sedan awb Black Trash II
R. Thorne replied to R. Thorne's topic in WIP: Drag Racing Models
Well, I finished it. Messed up my windshields, didn’t go any farther on the lettering, it sits too high in the front, etc. On the bright side, it has an apt name from a modeling point of view. Put some fusionfirm on the tailights, will wait for that to dry, then post on the finished builds.