R. Thorne
-
Posts
1,276 -
Joined
-
Last visited
Content Type
Profiles
Forums
Events
Gallery
Everything posted by R. Thorne
-
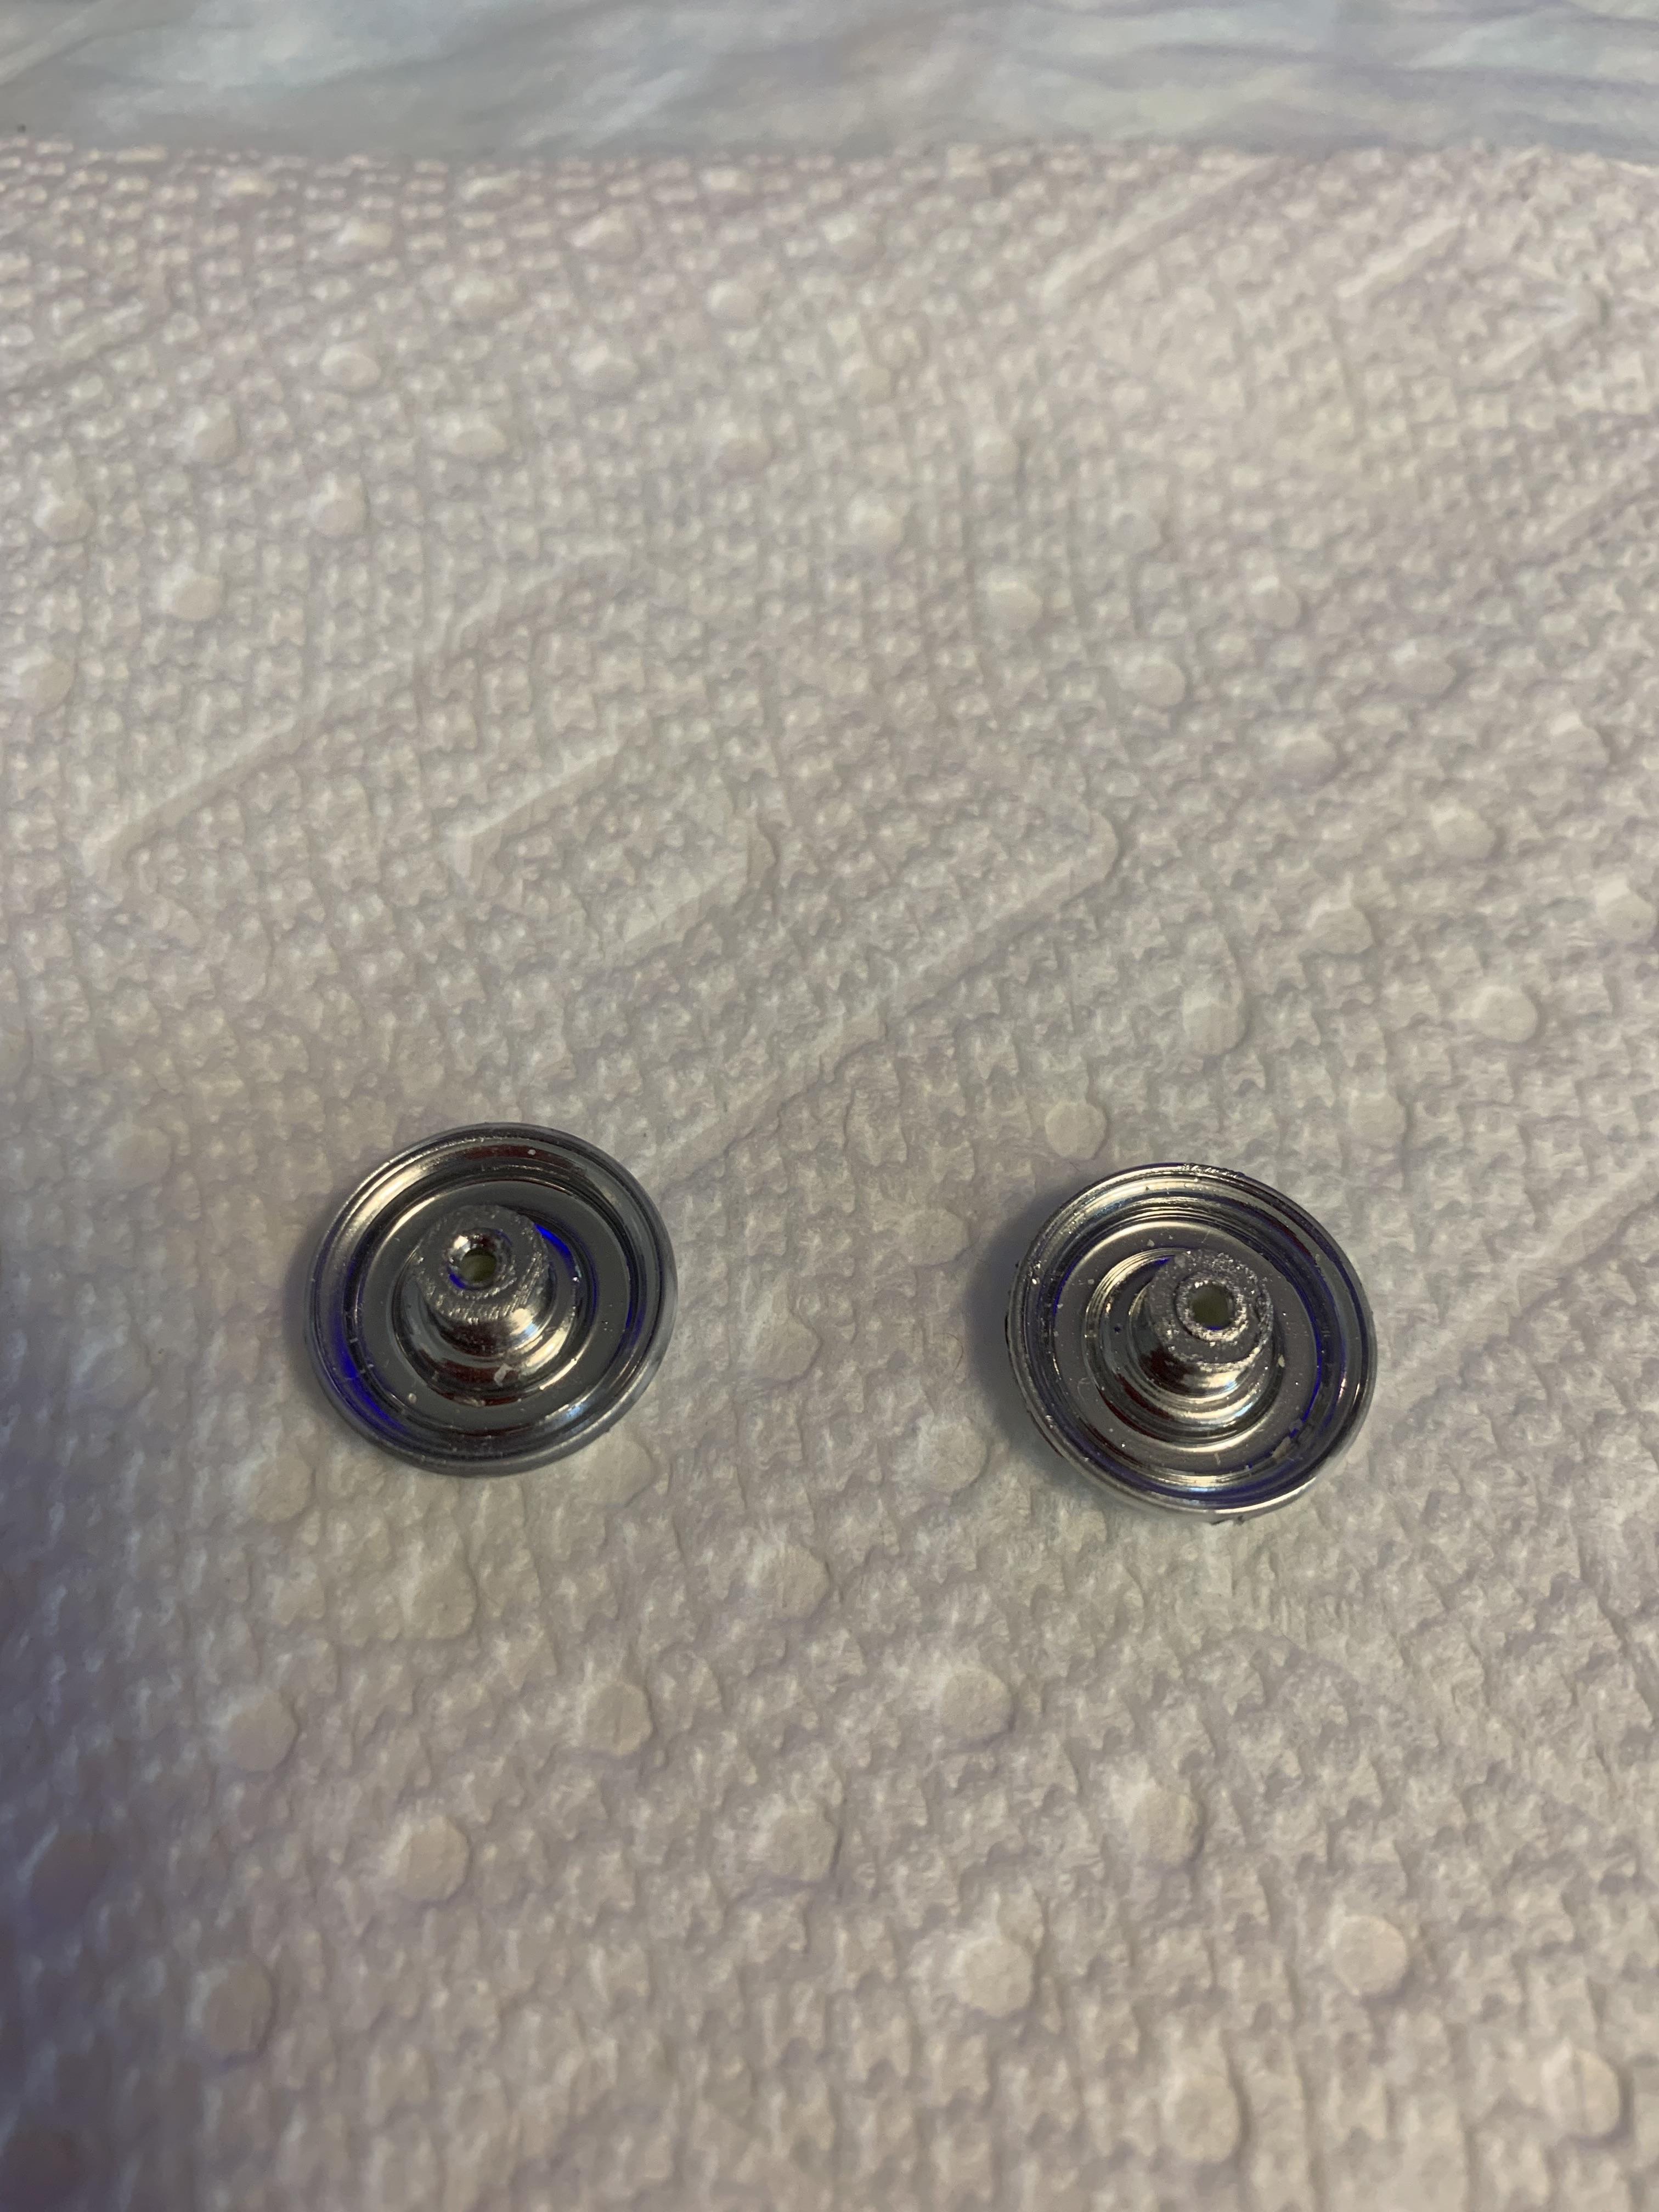
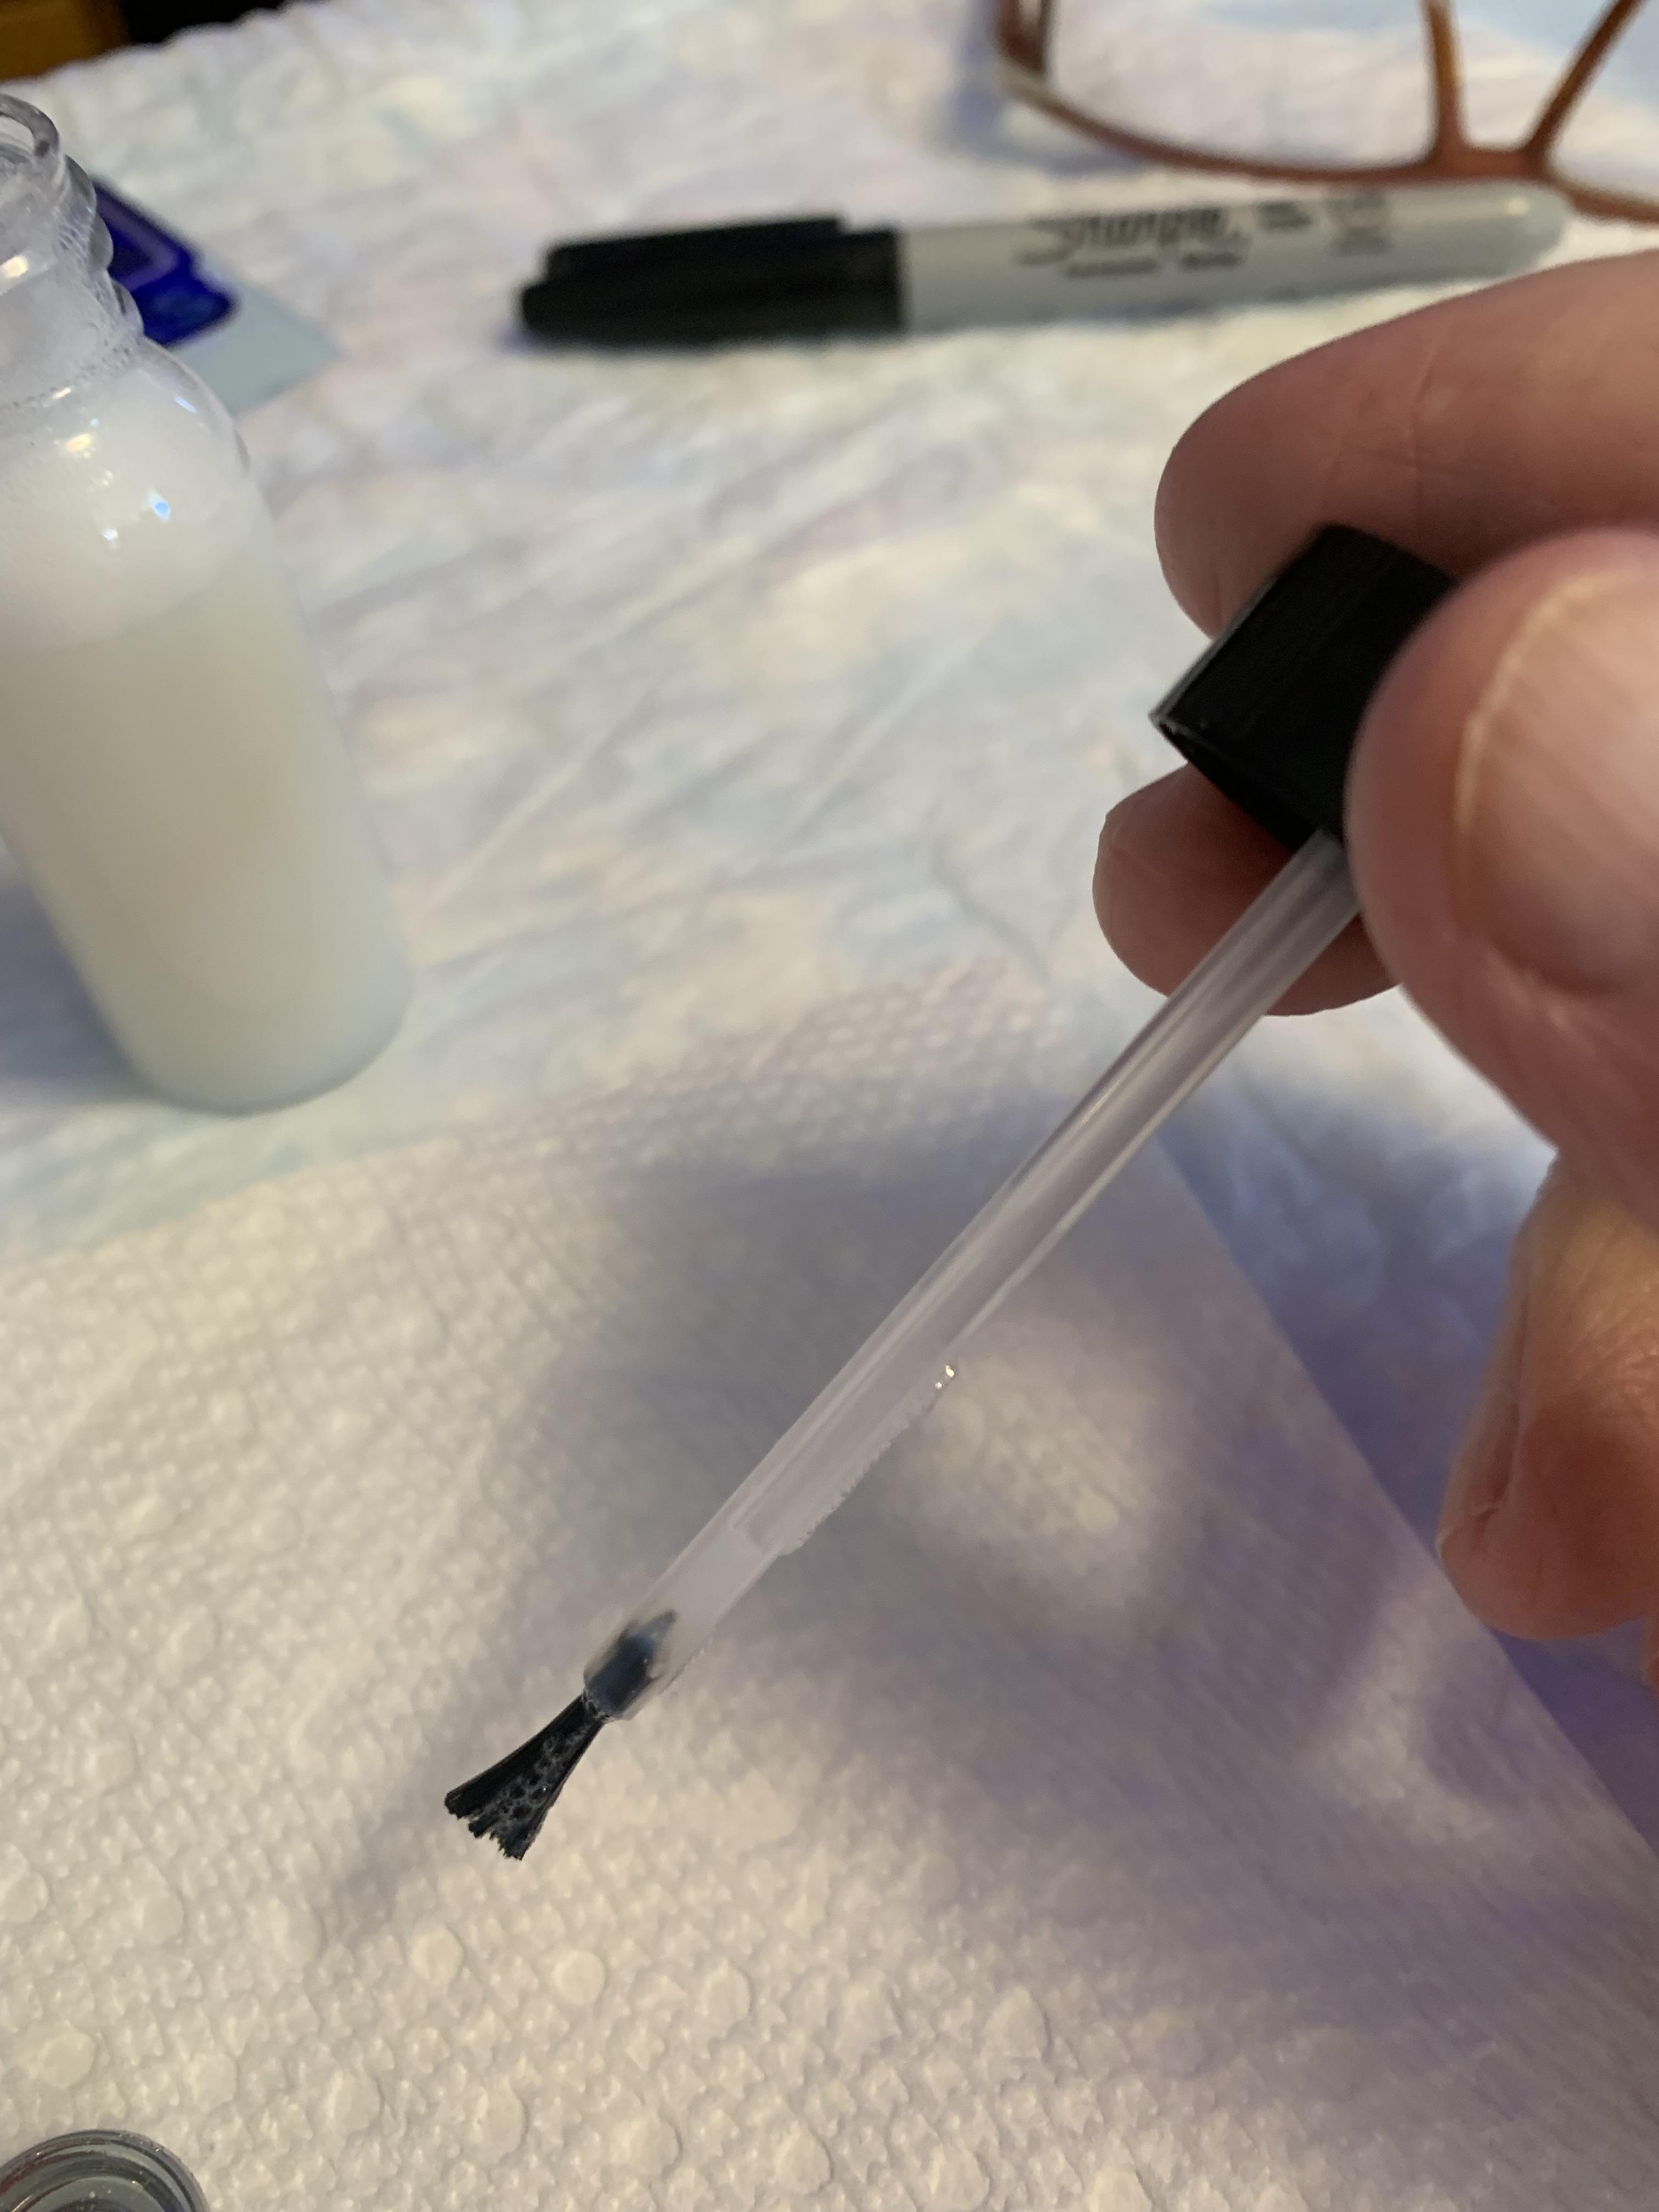
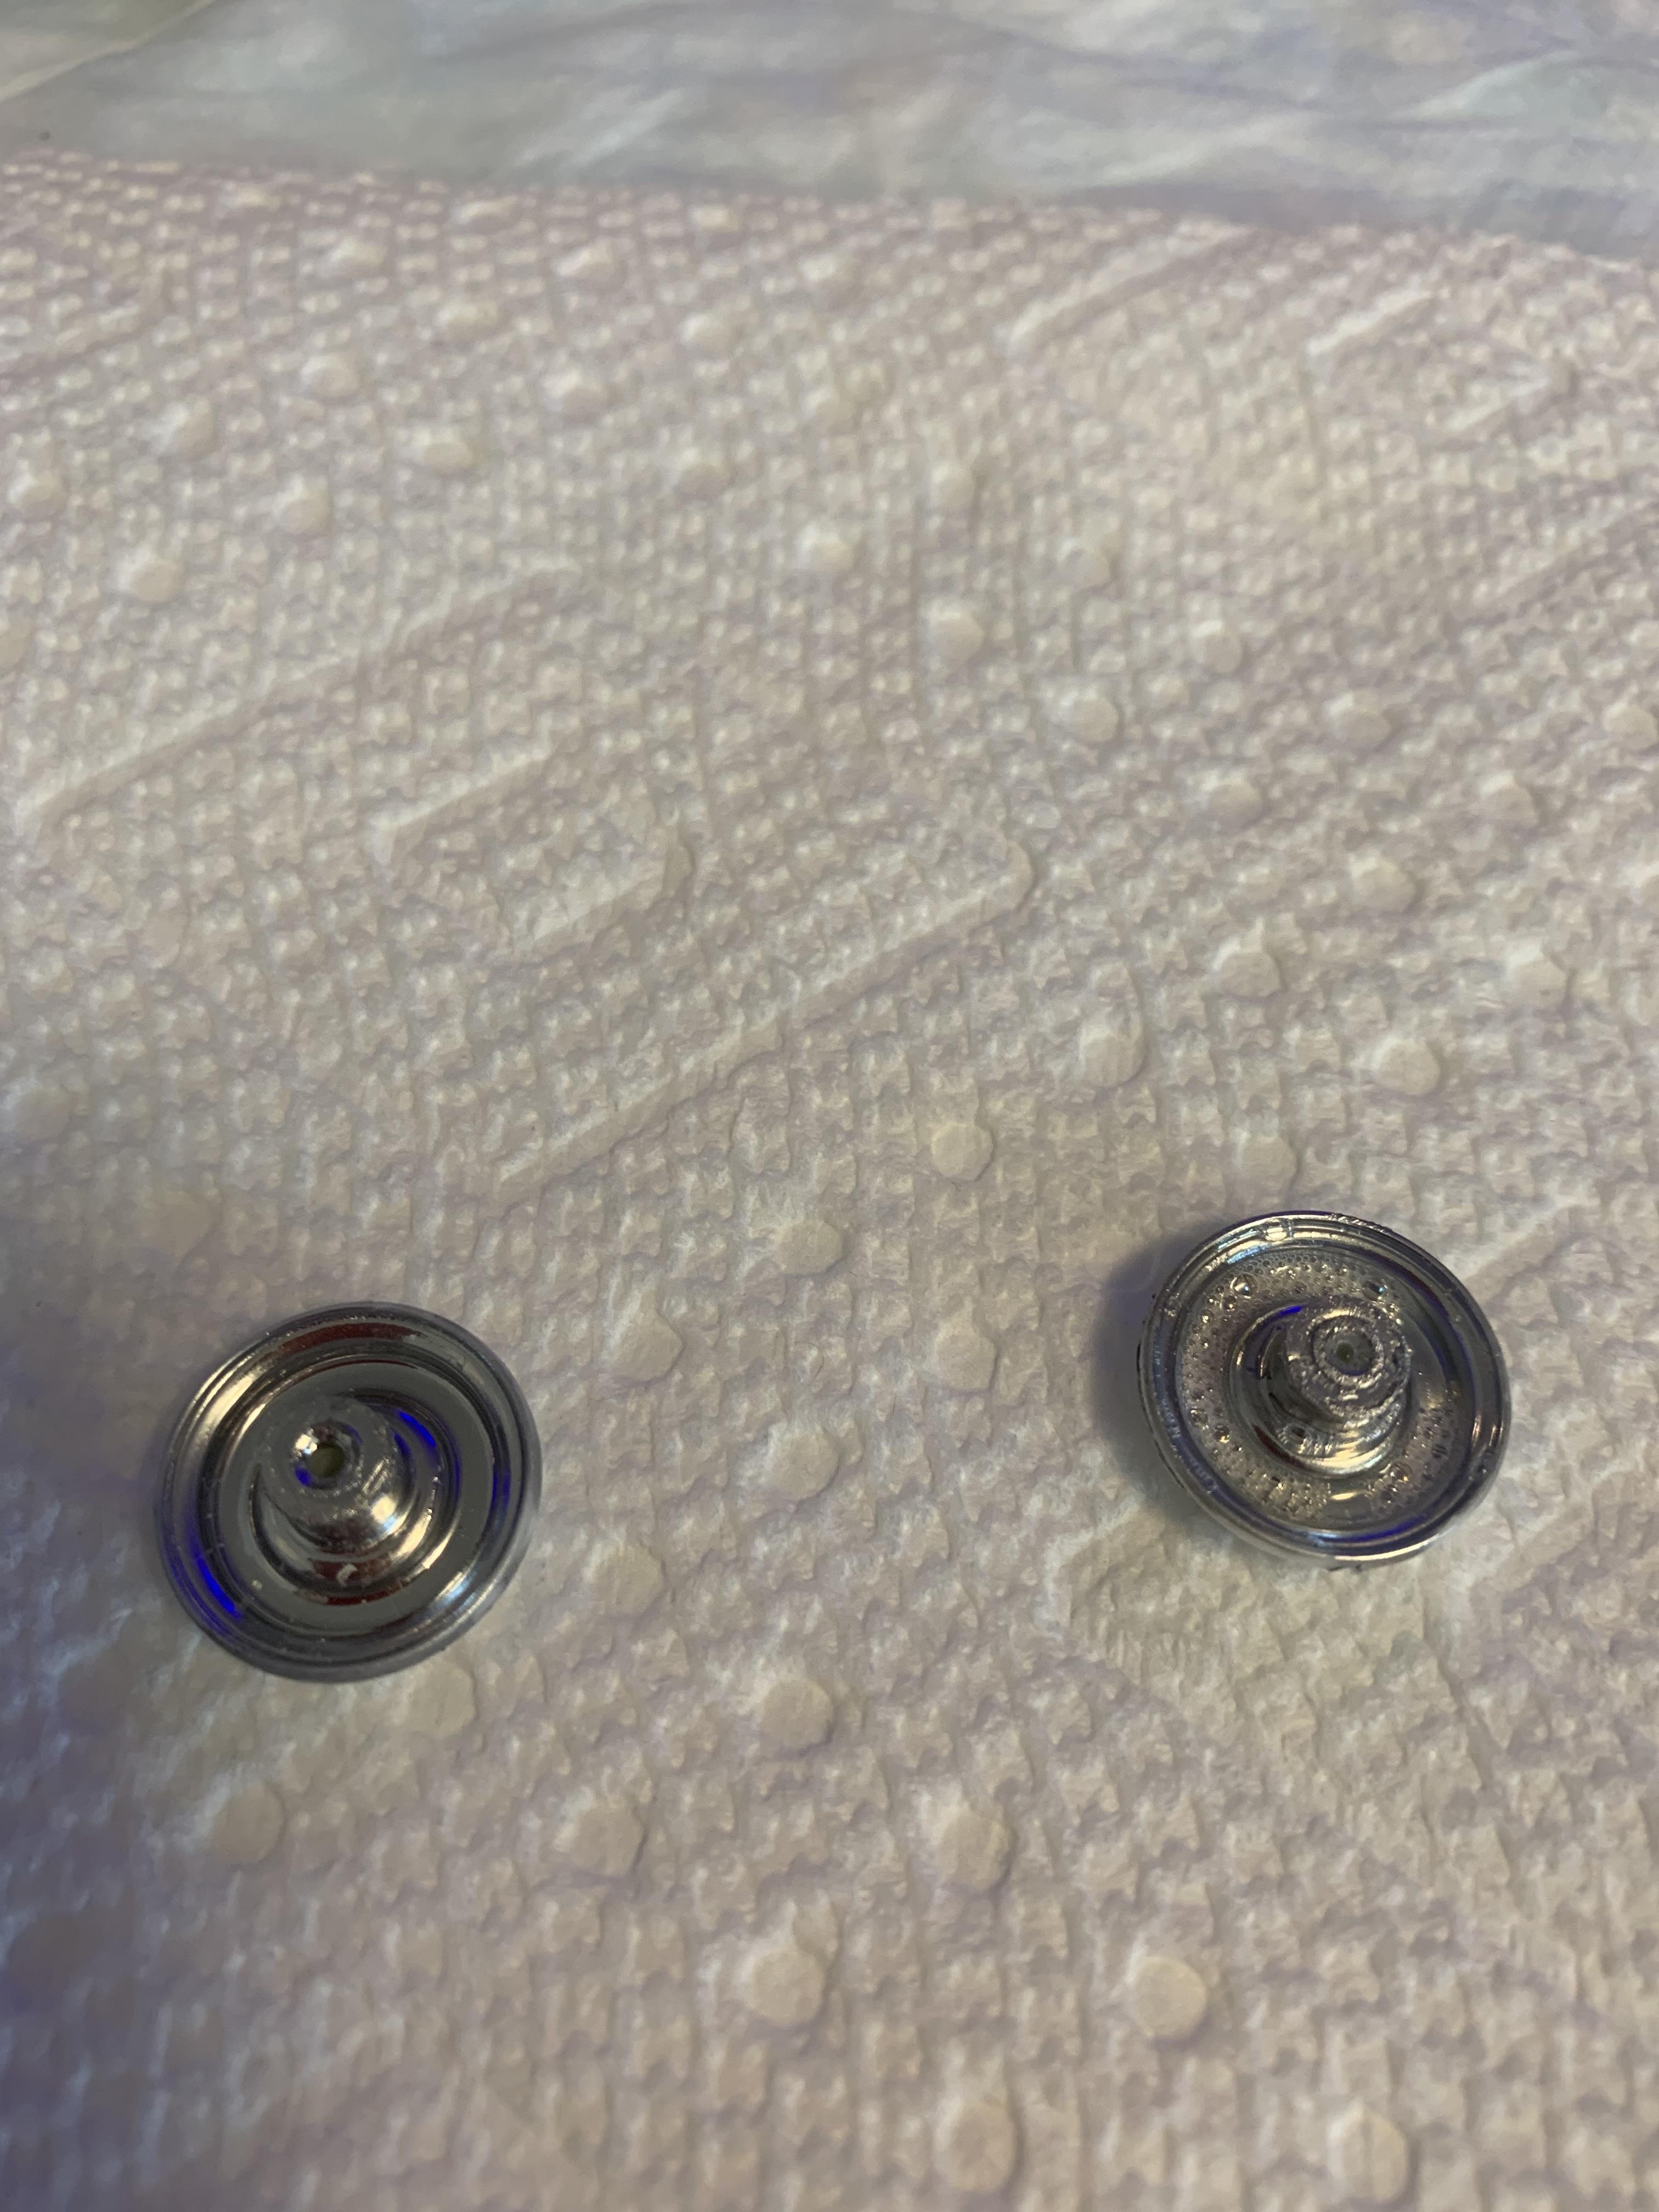
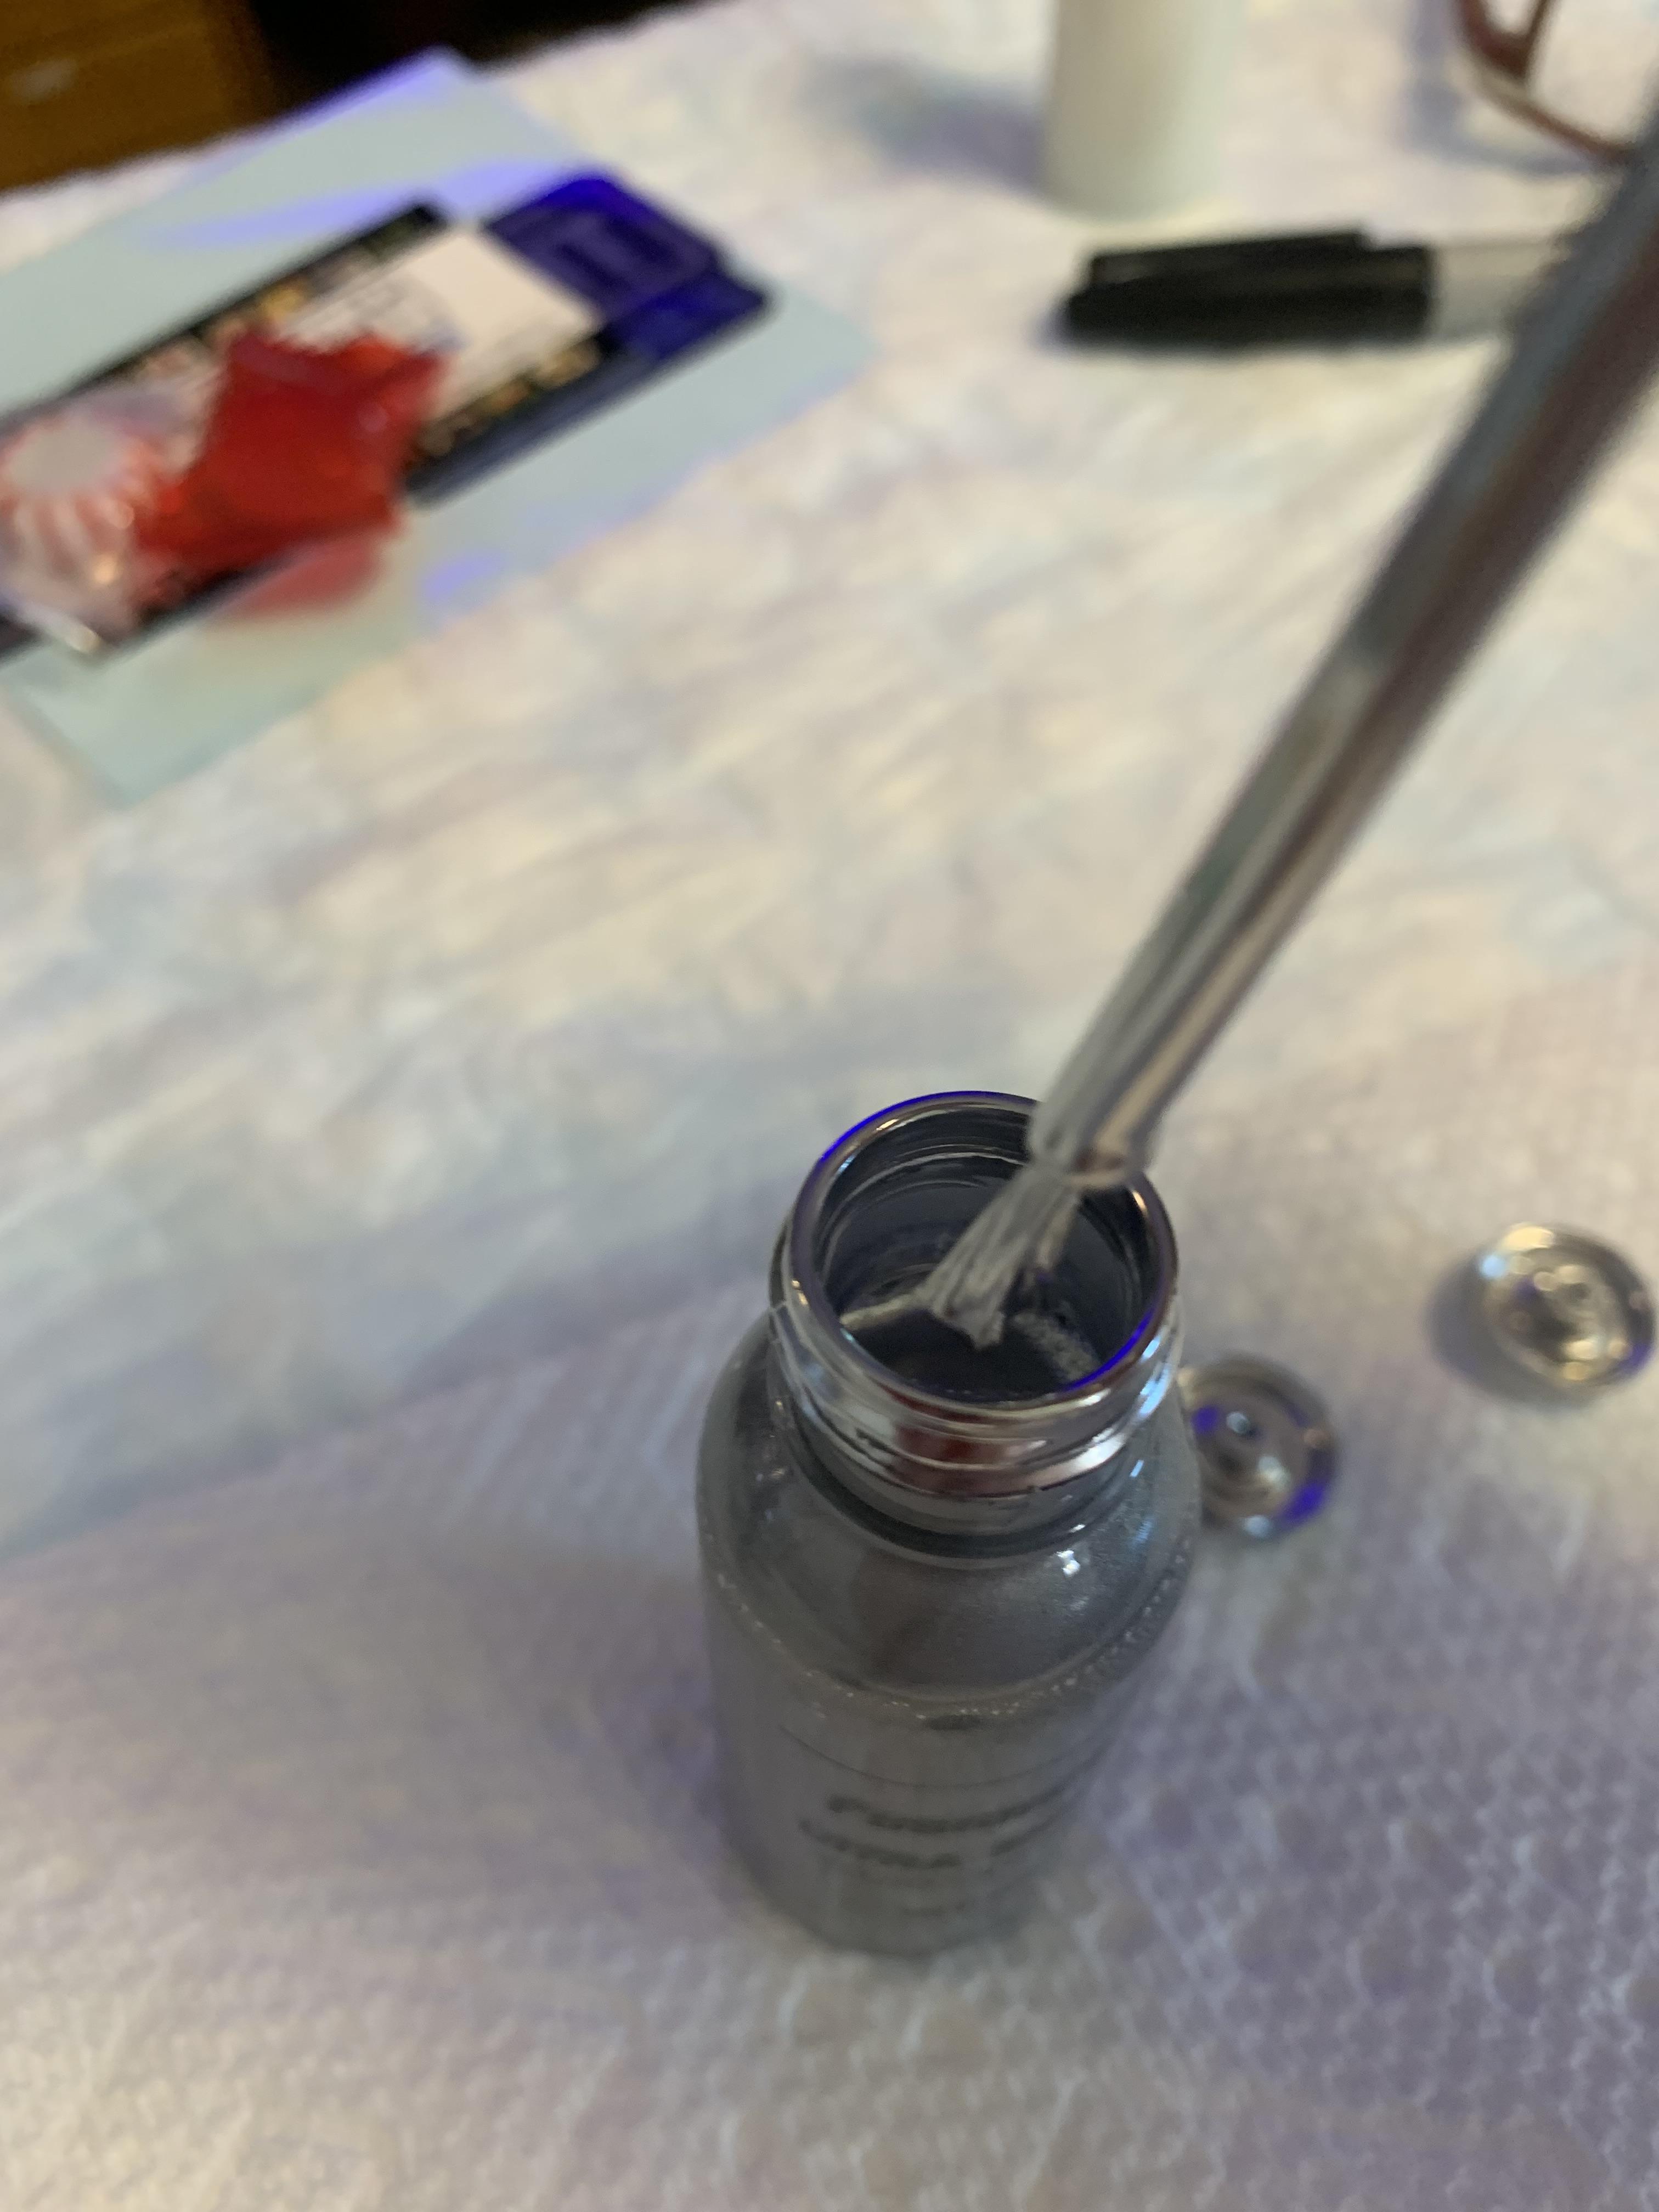
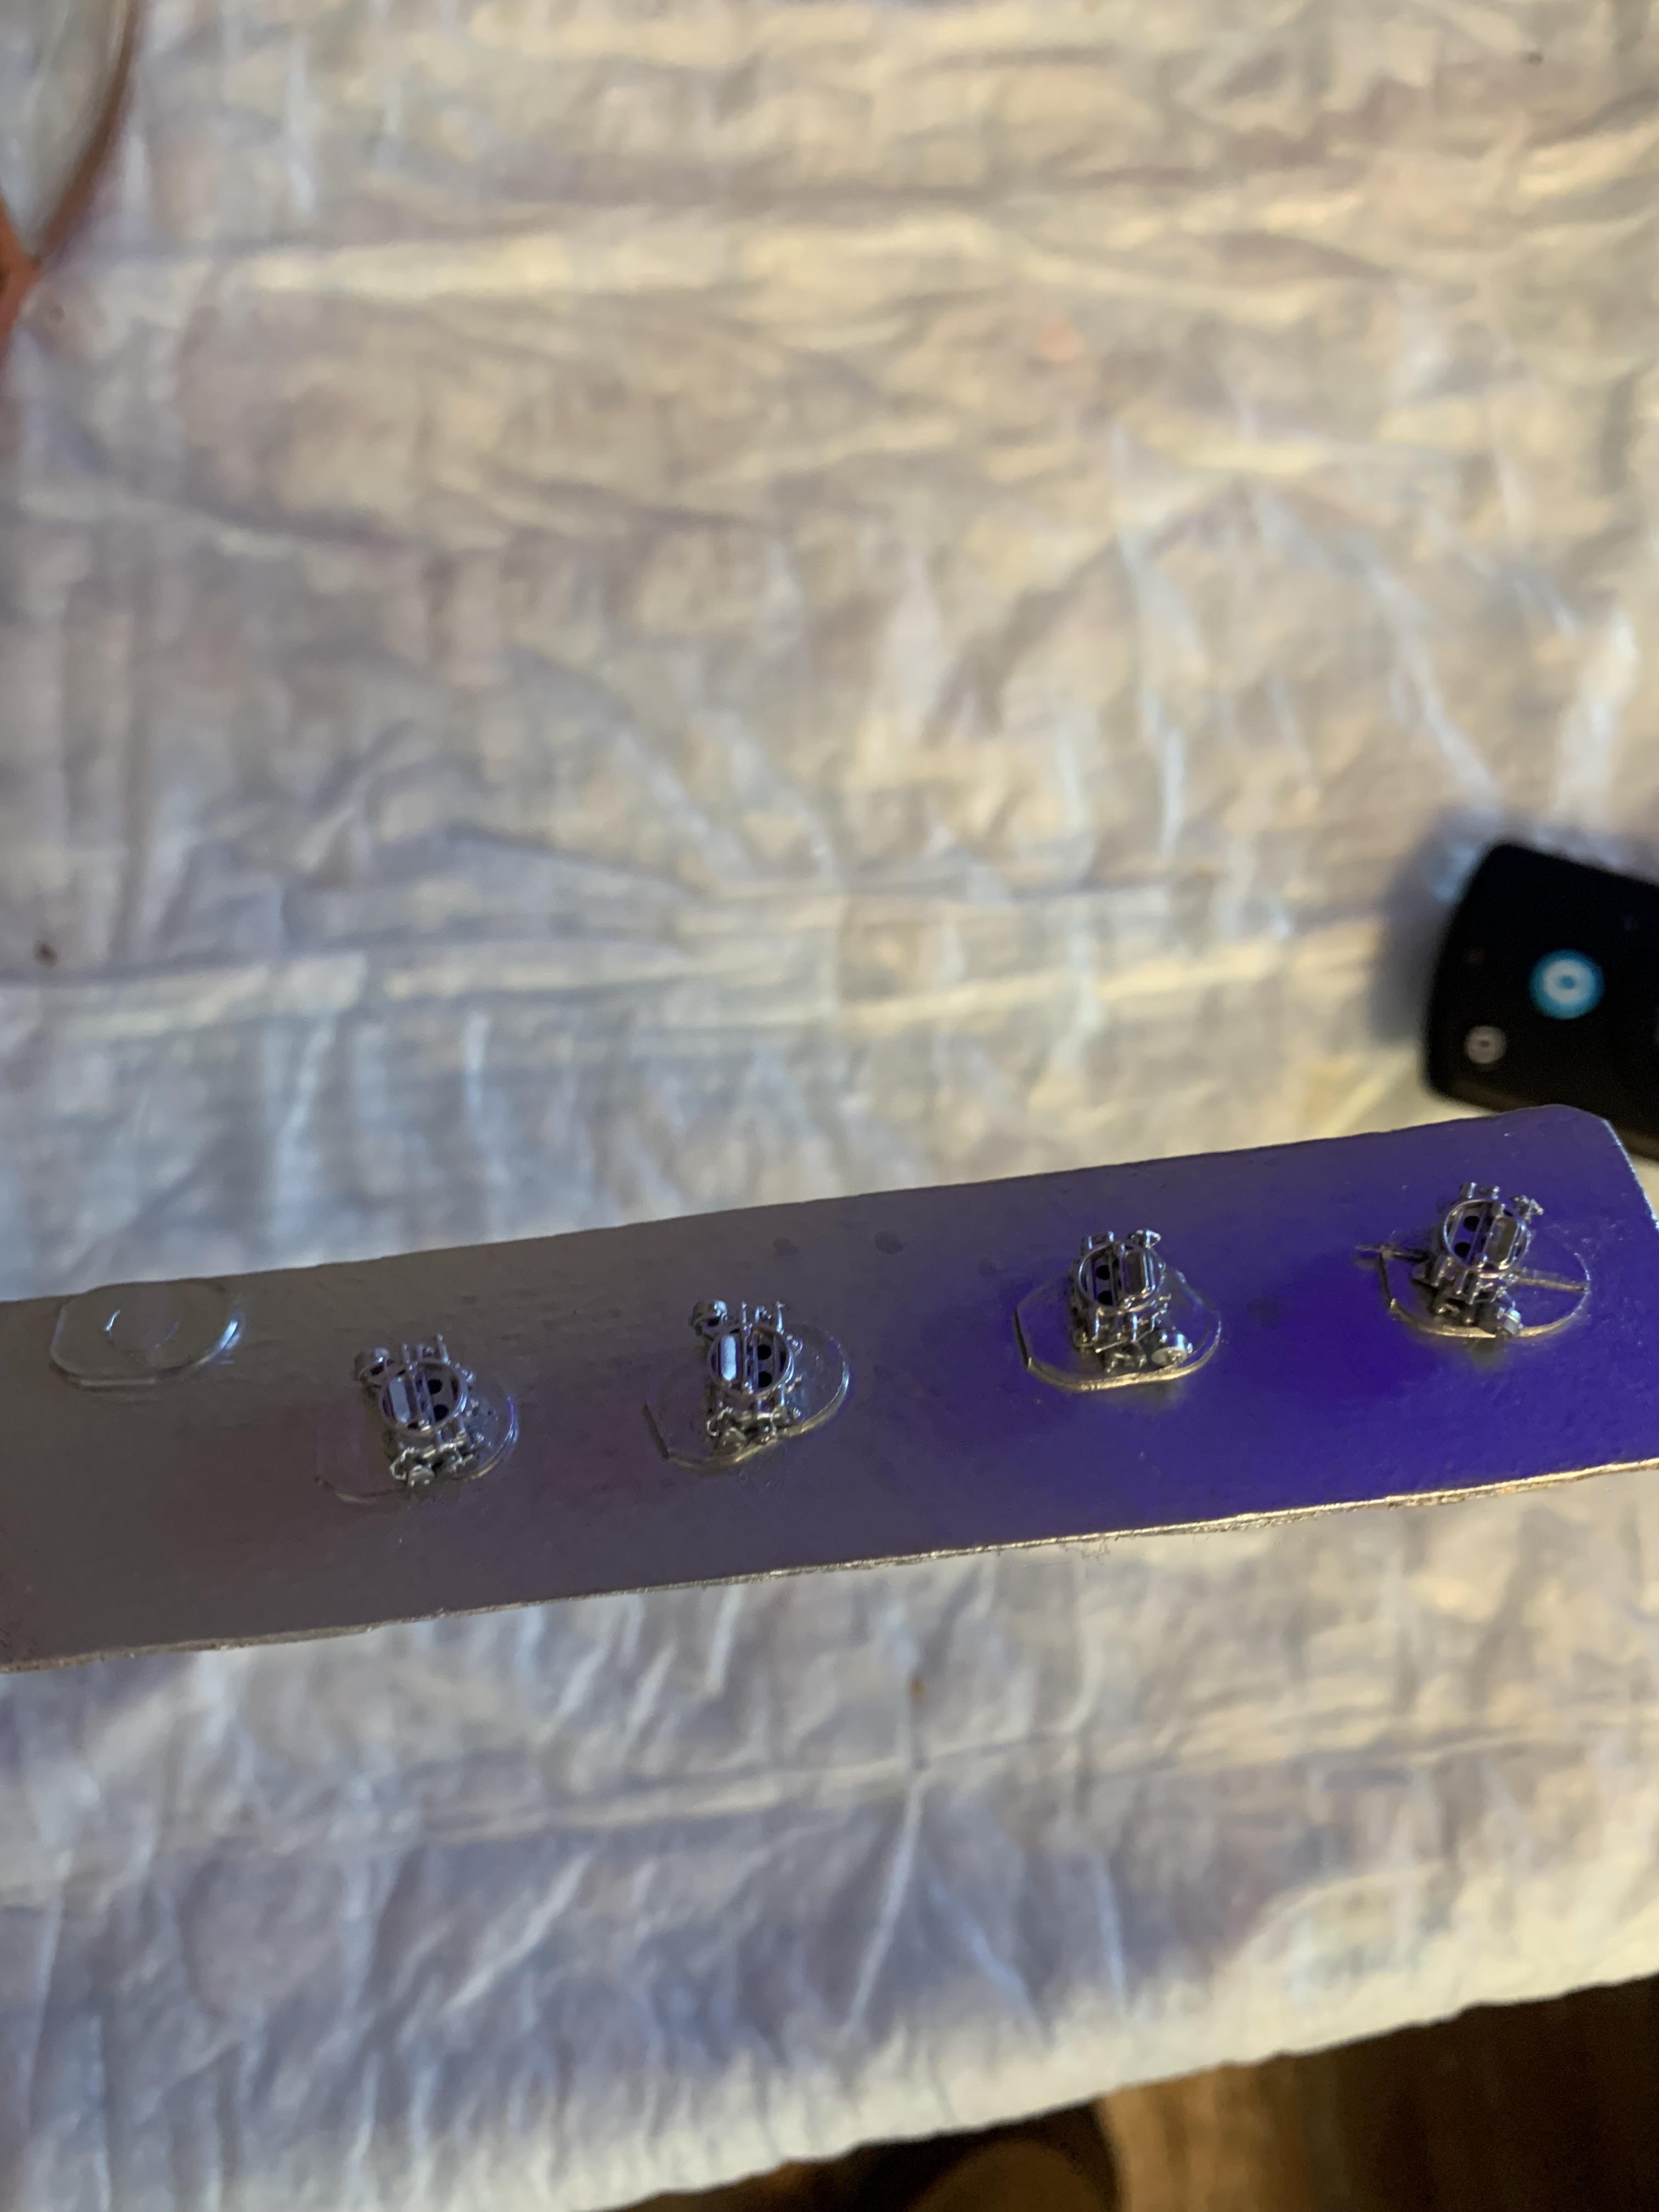
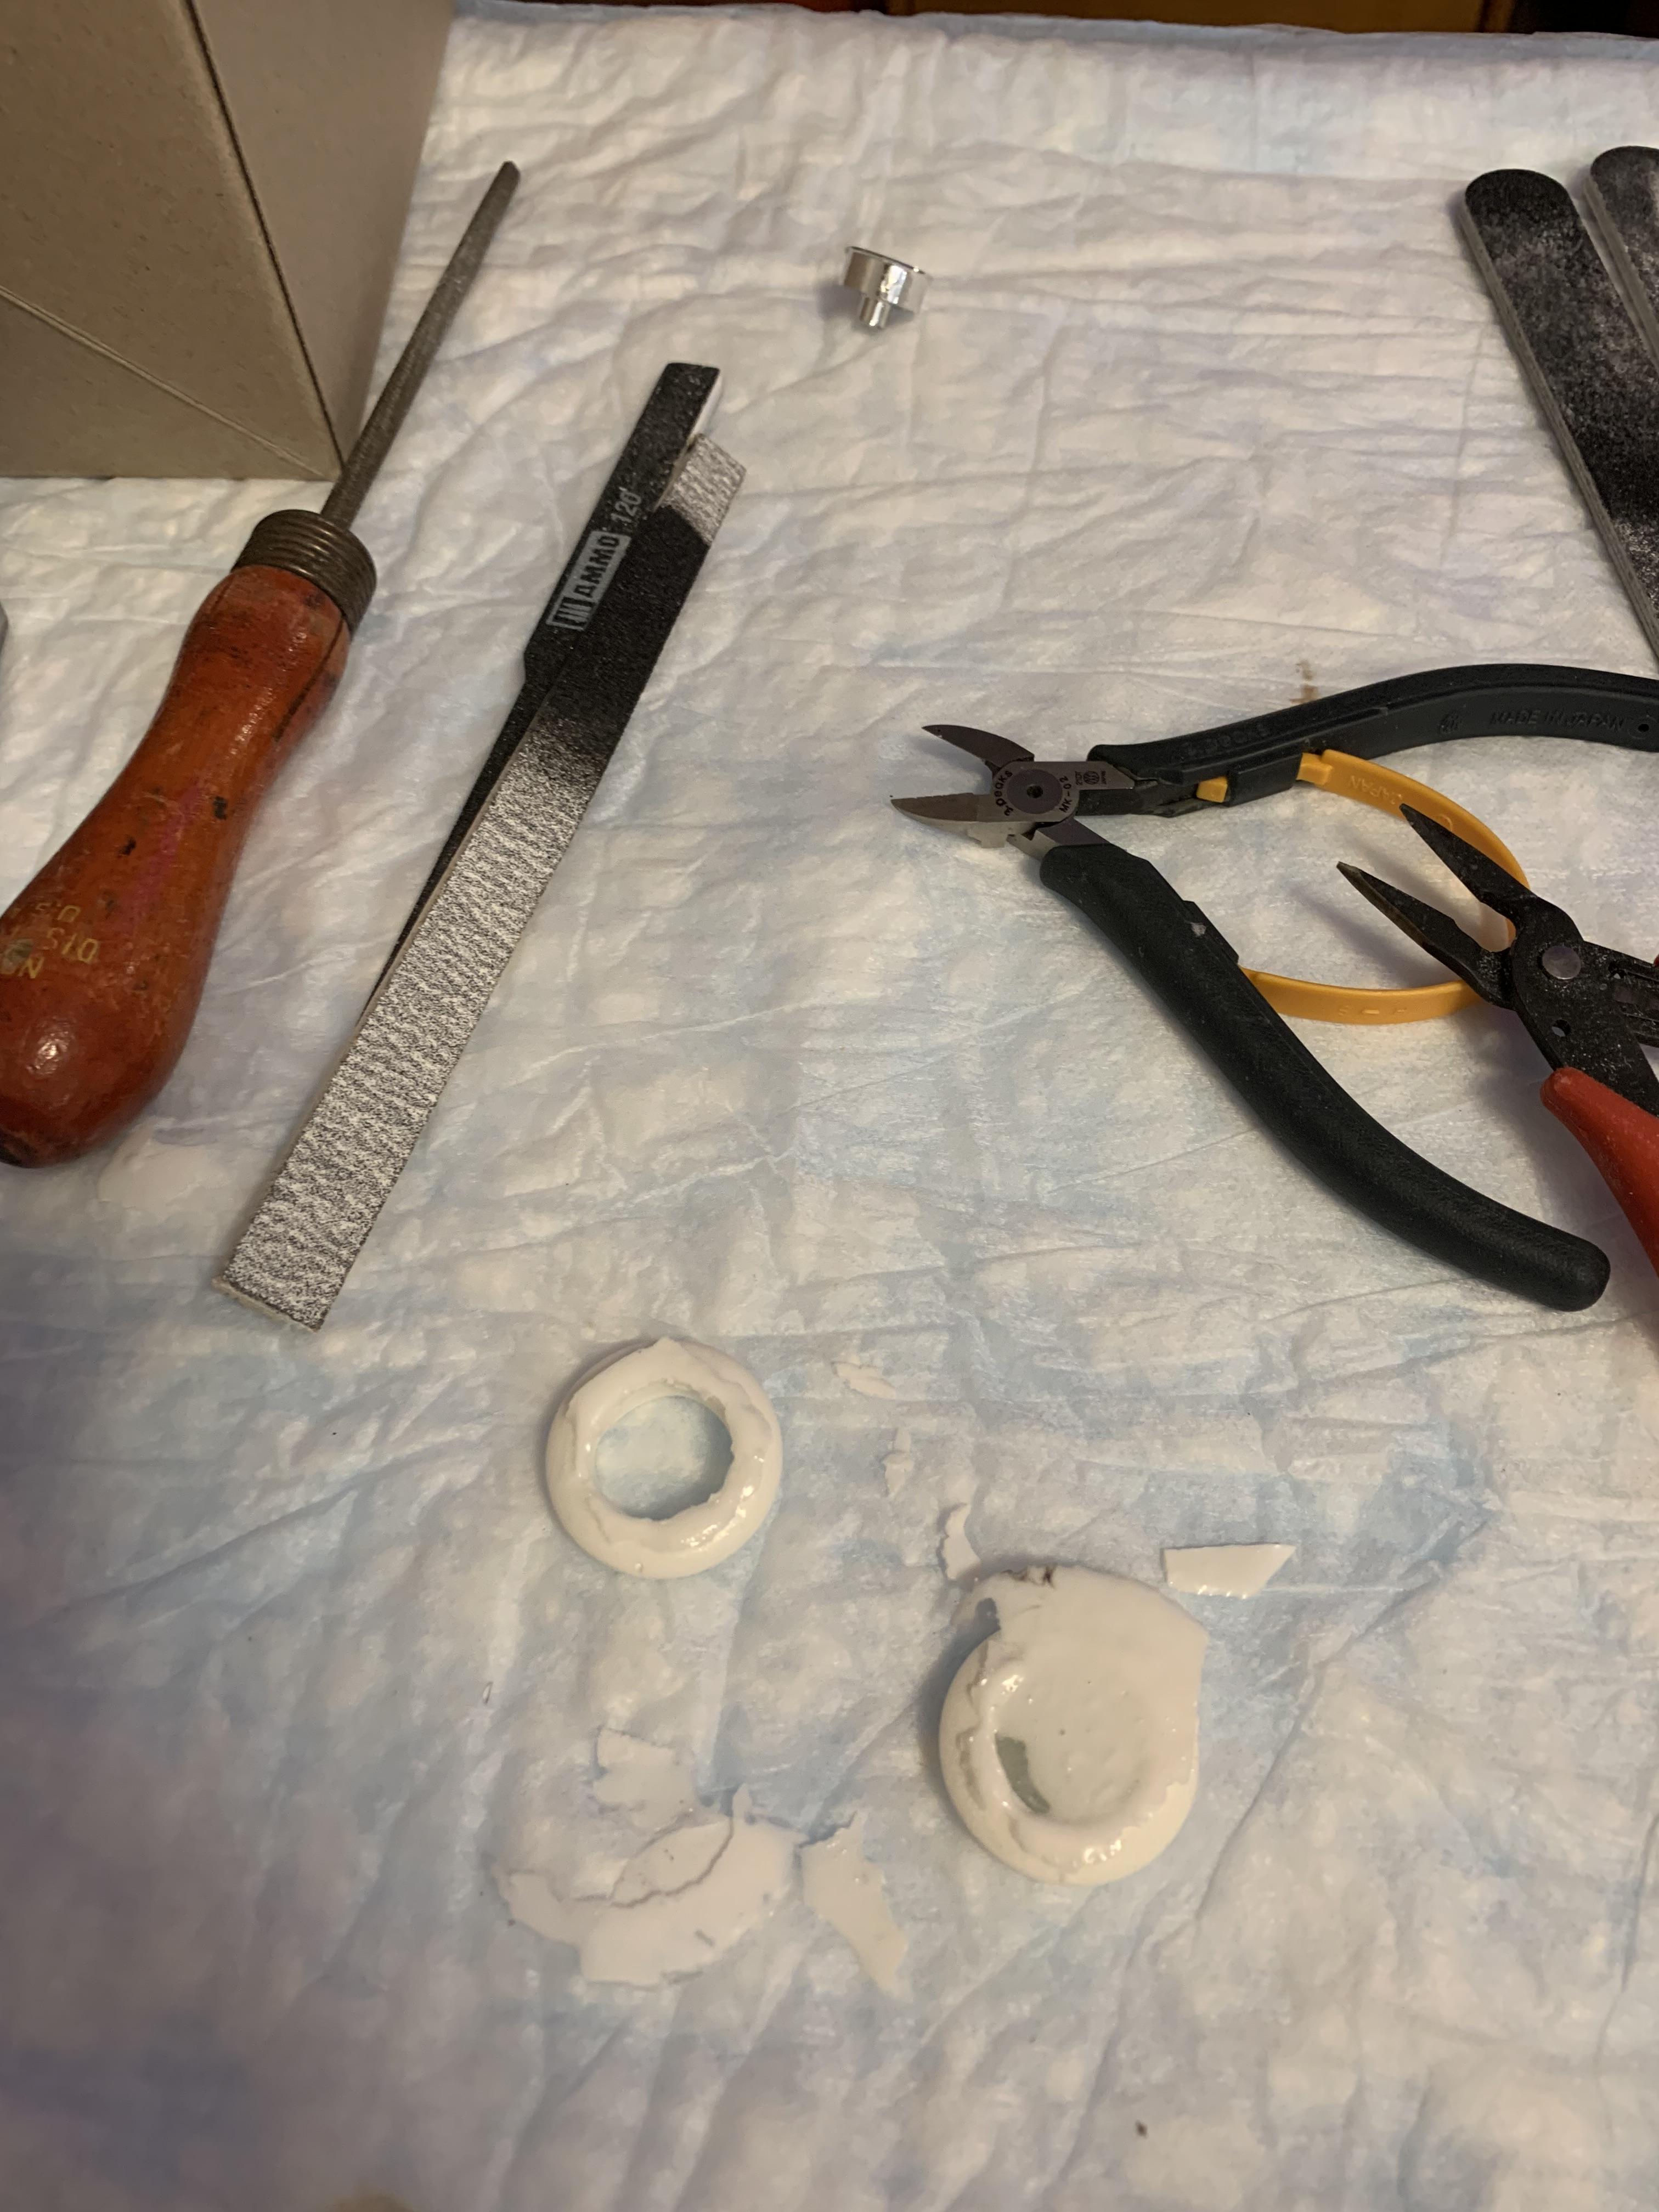
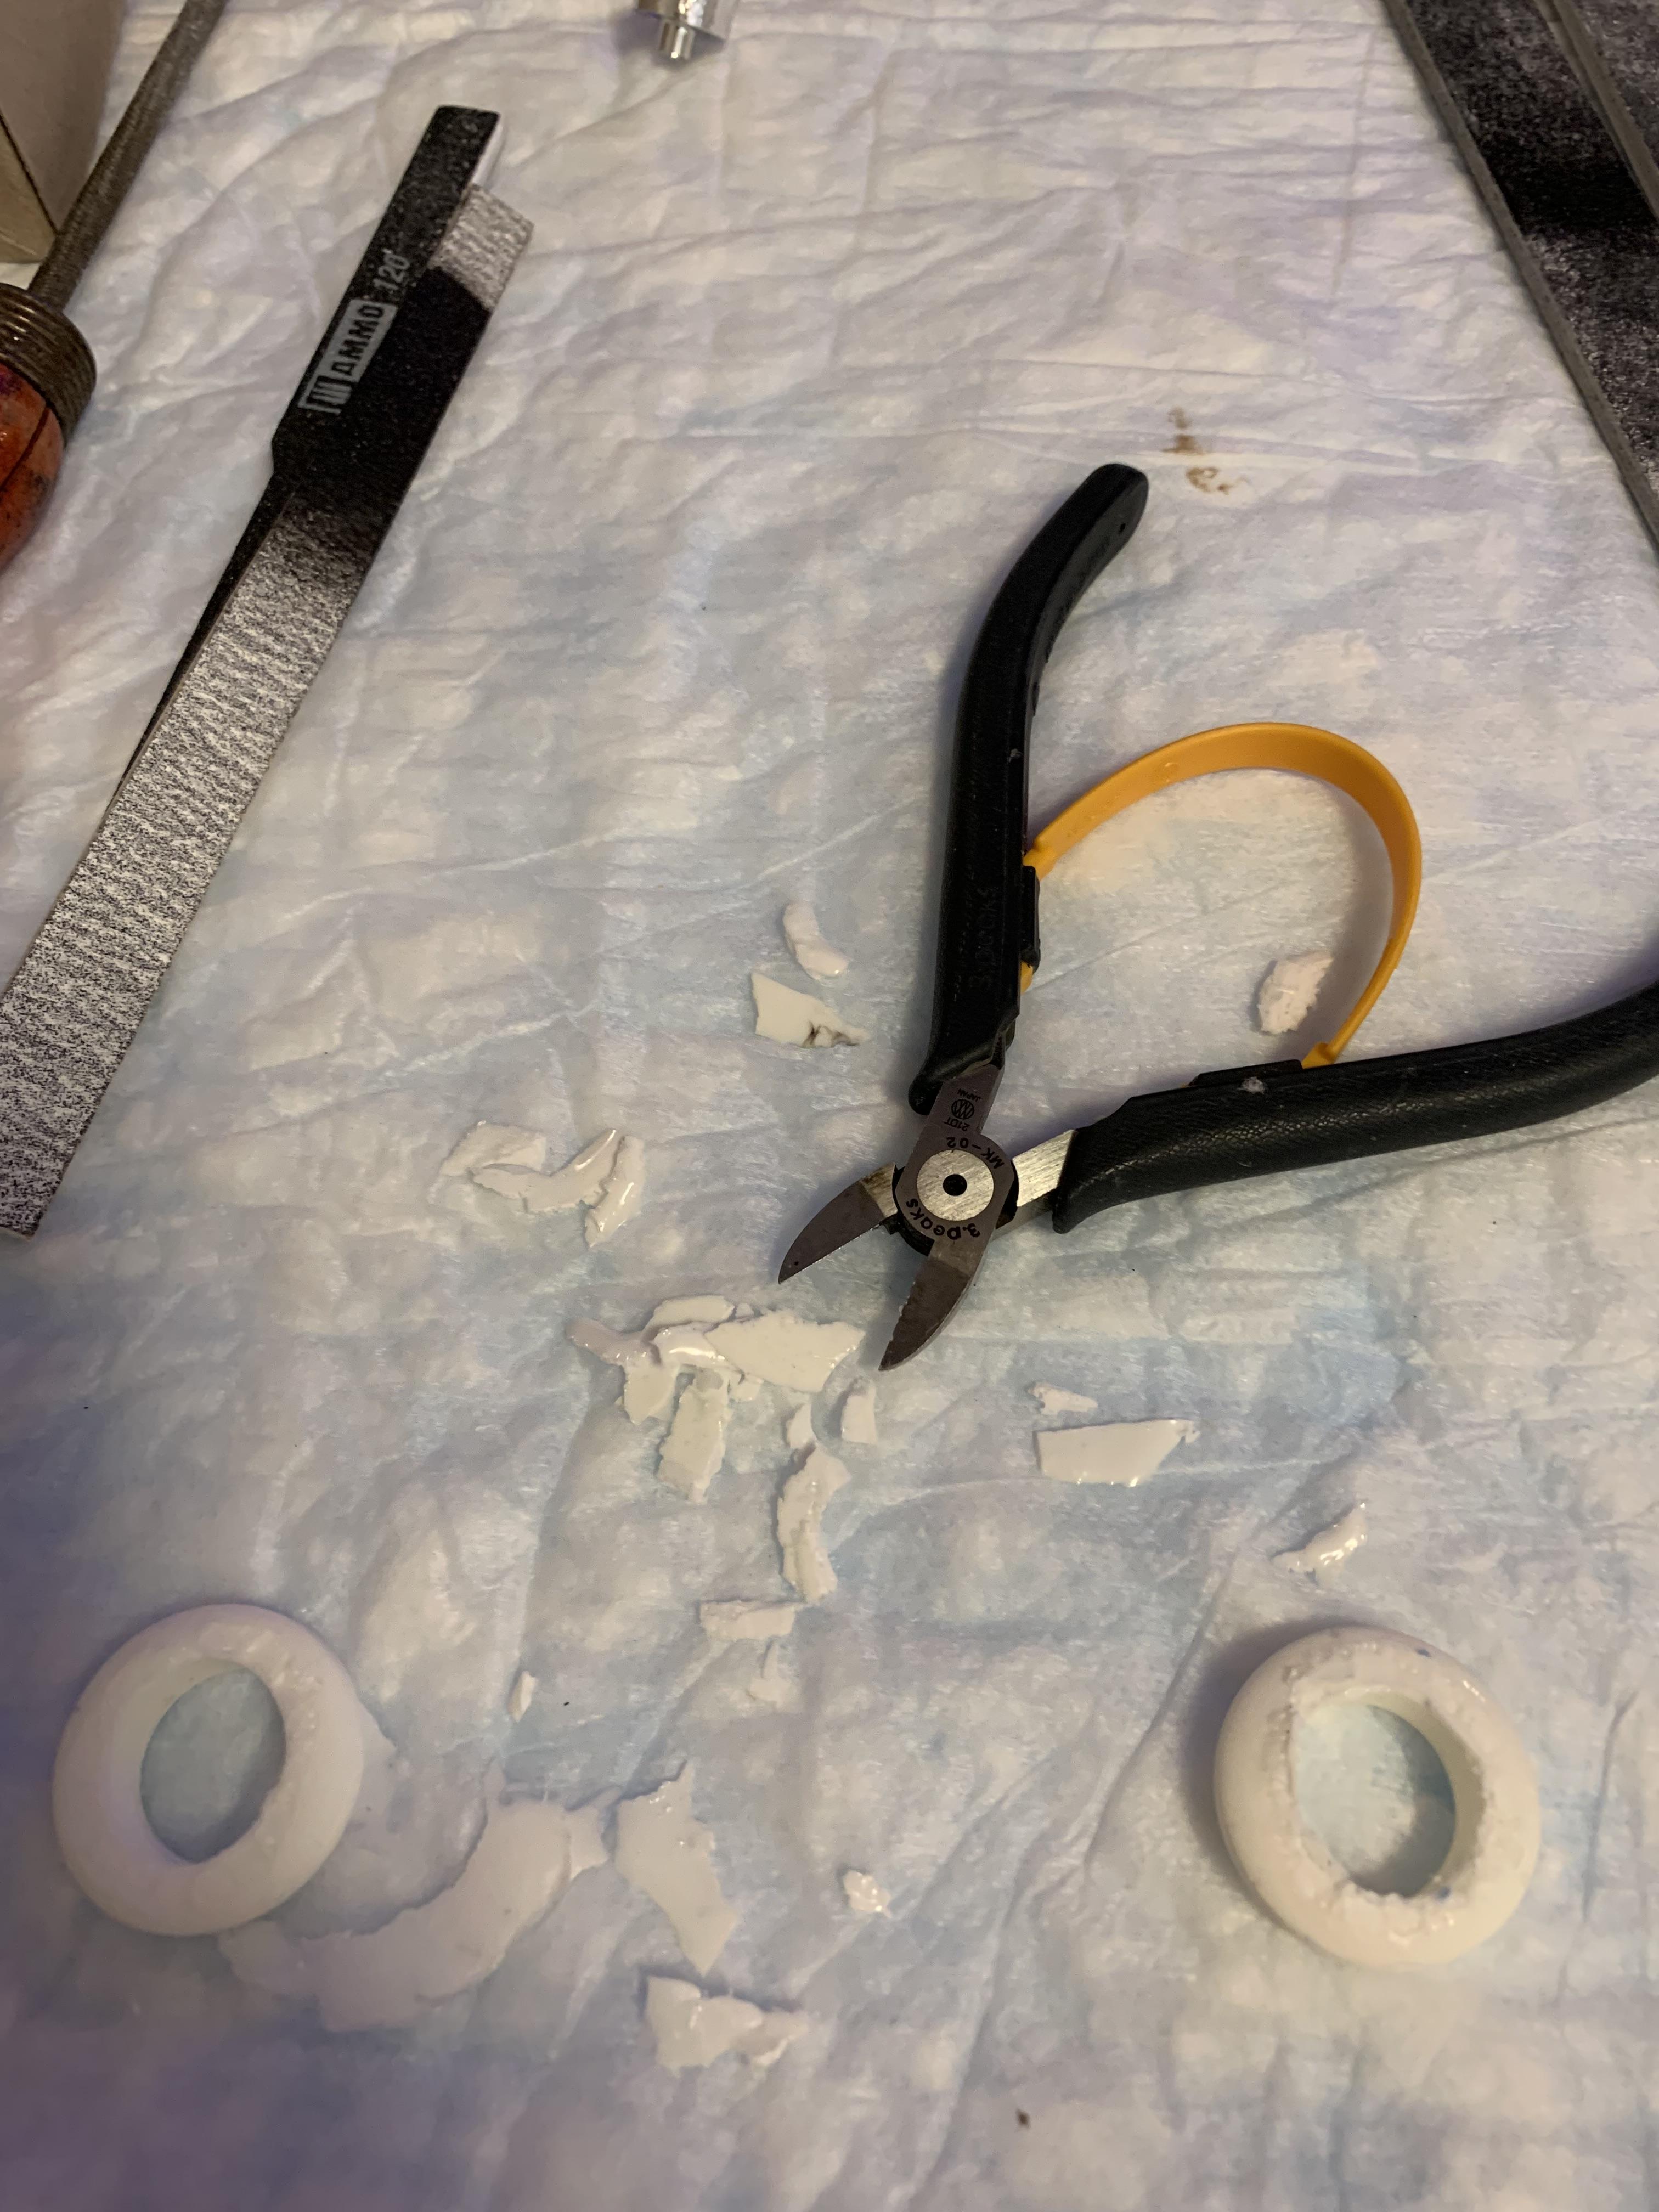
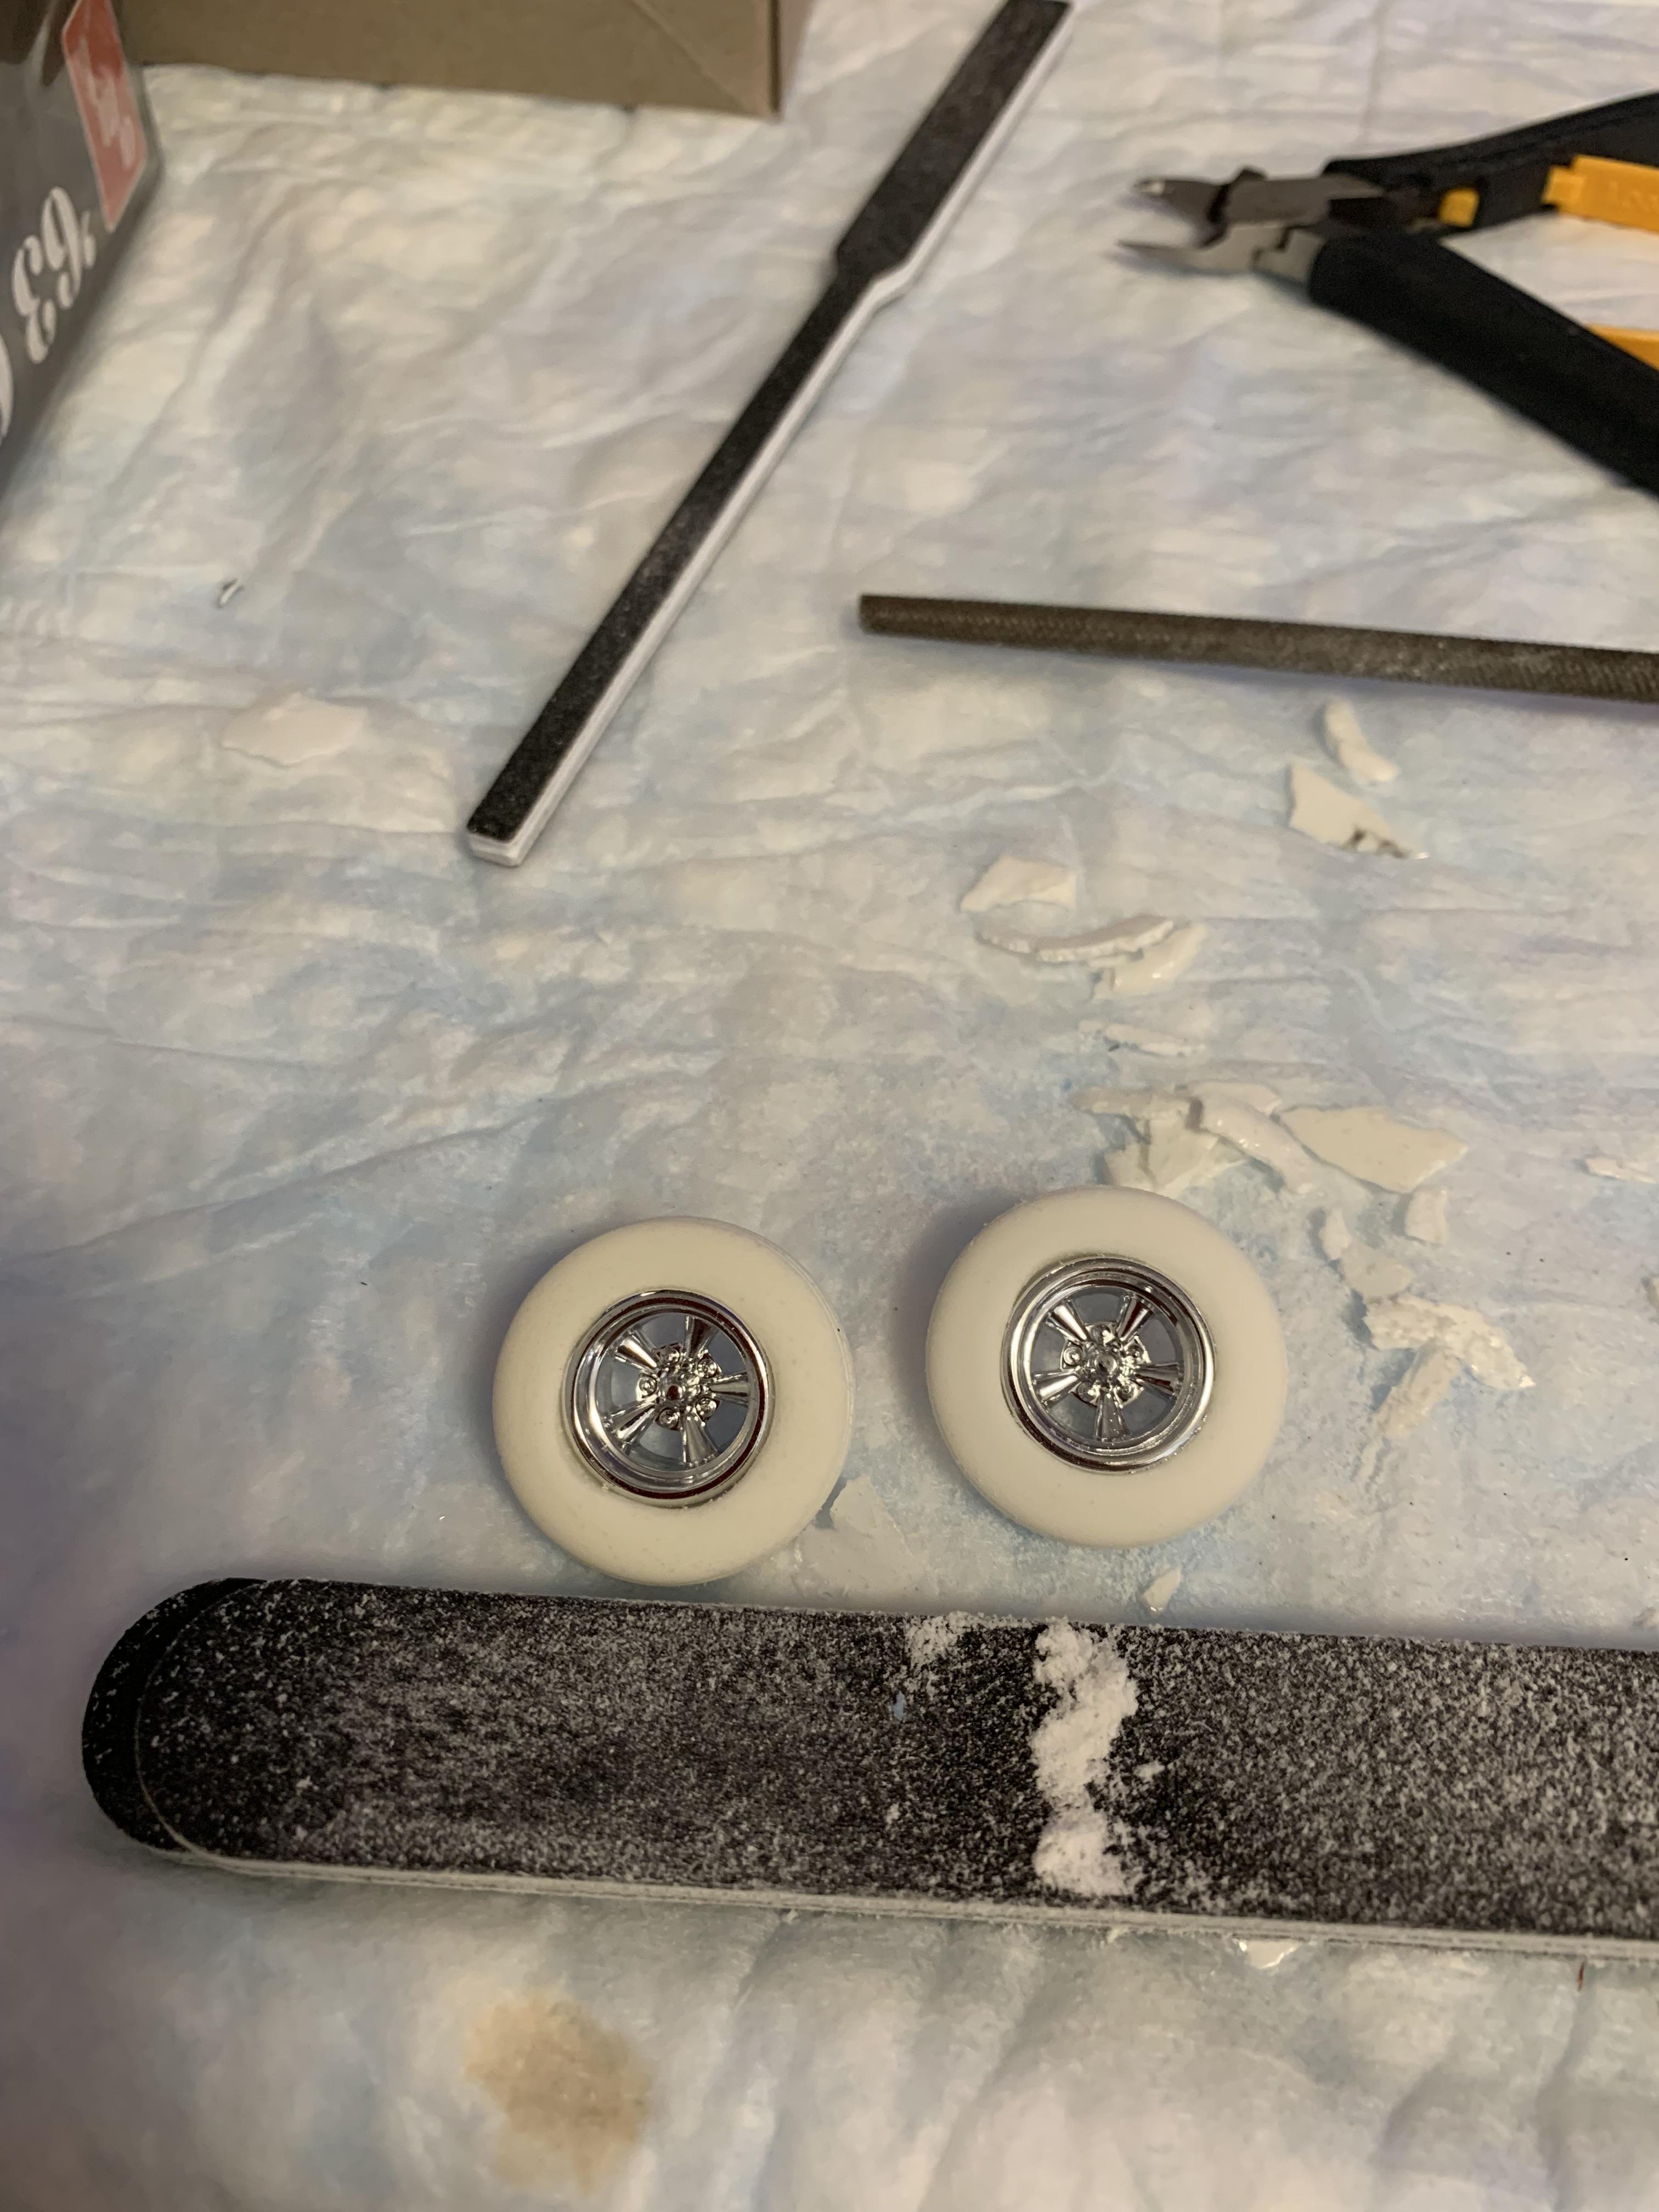
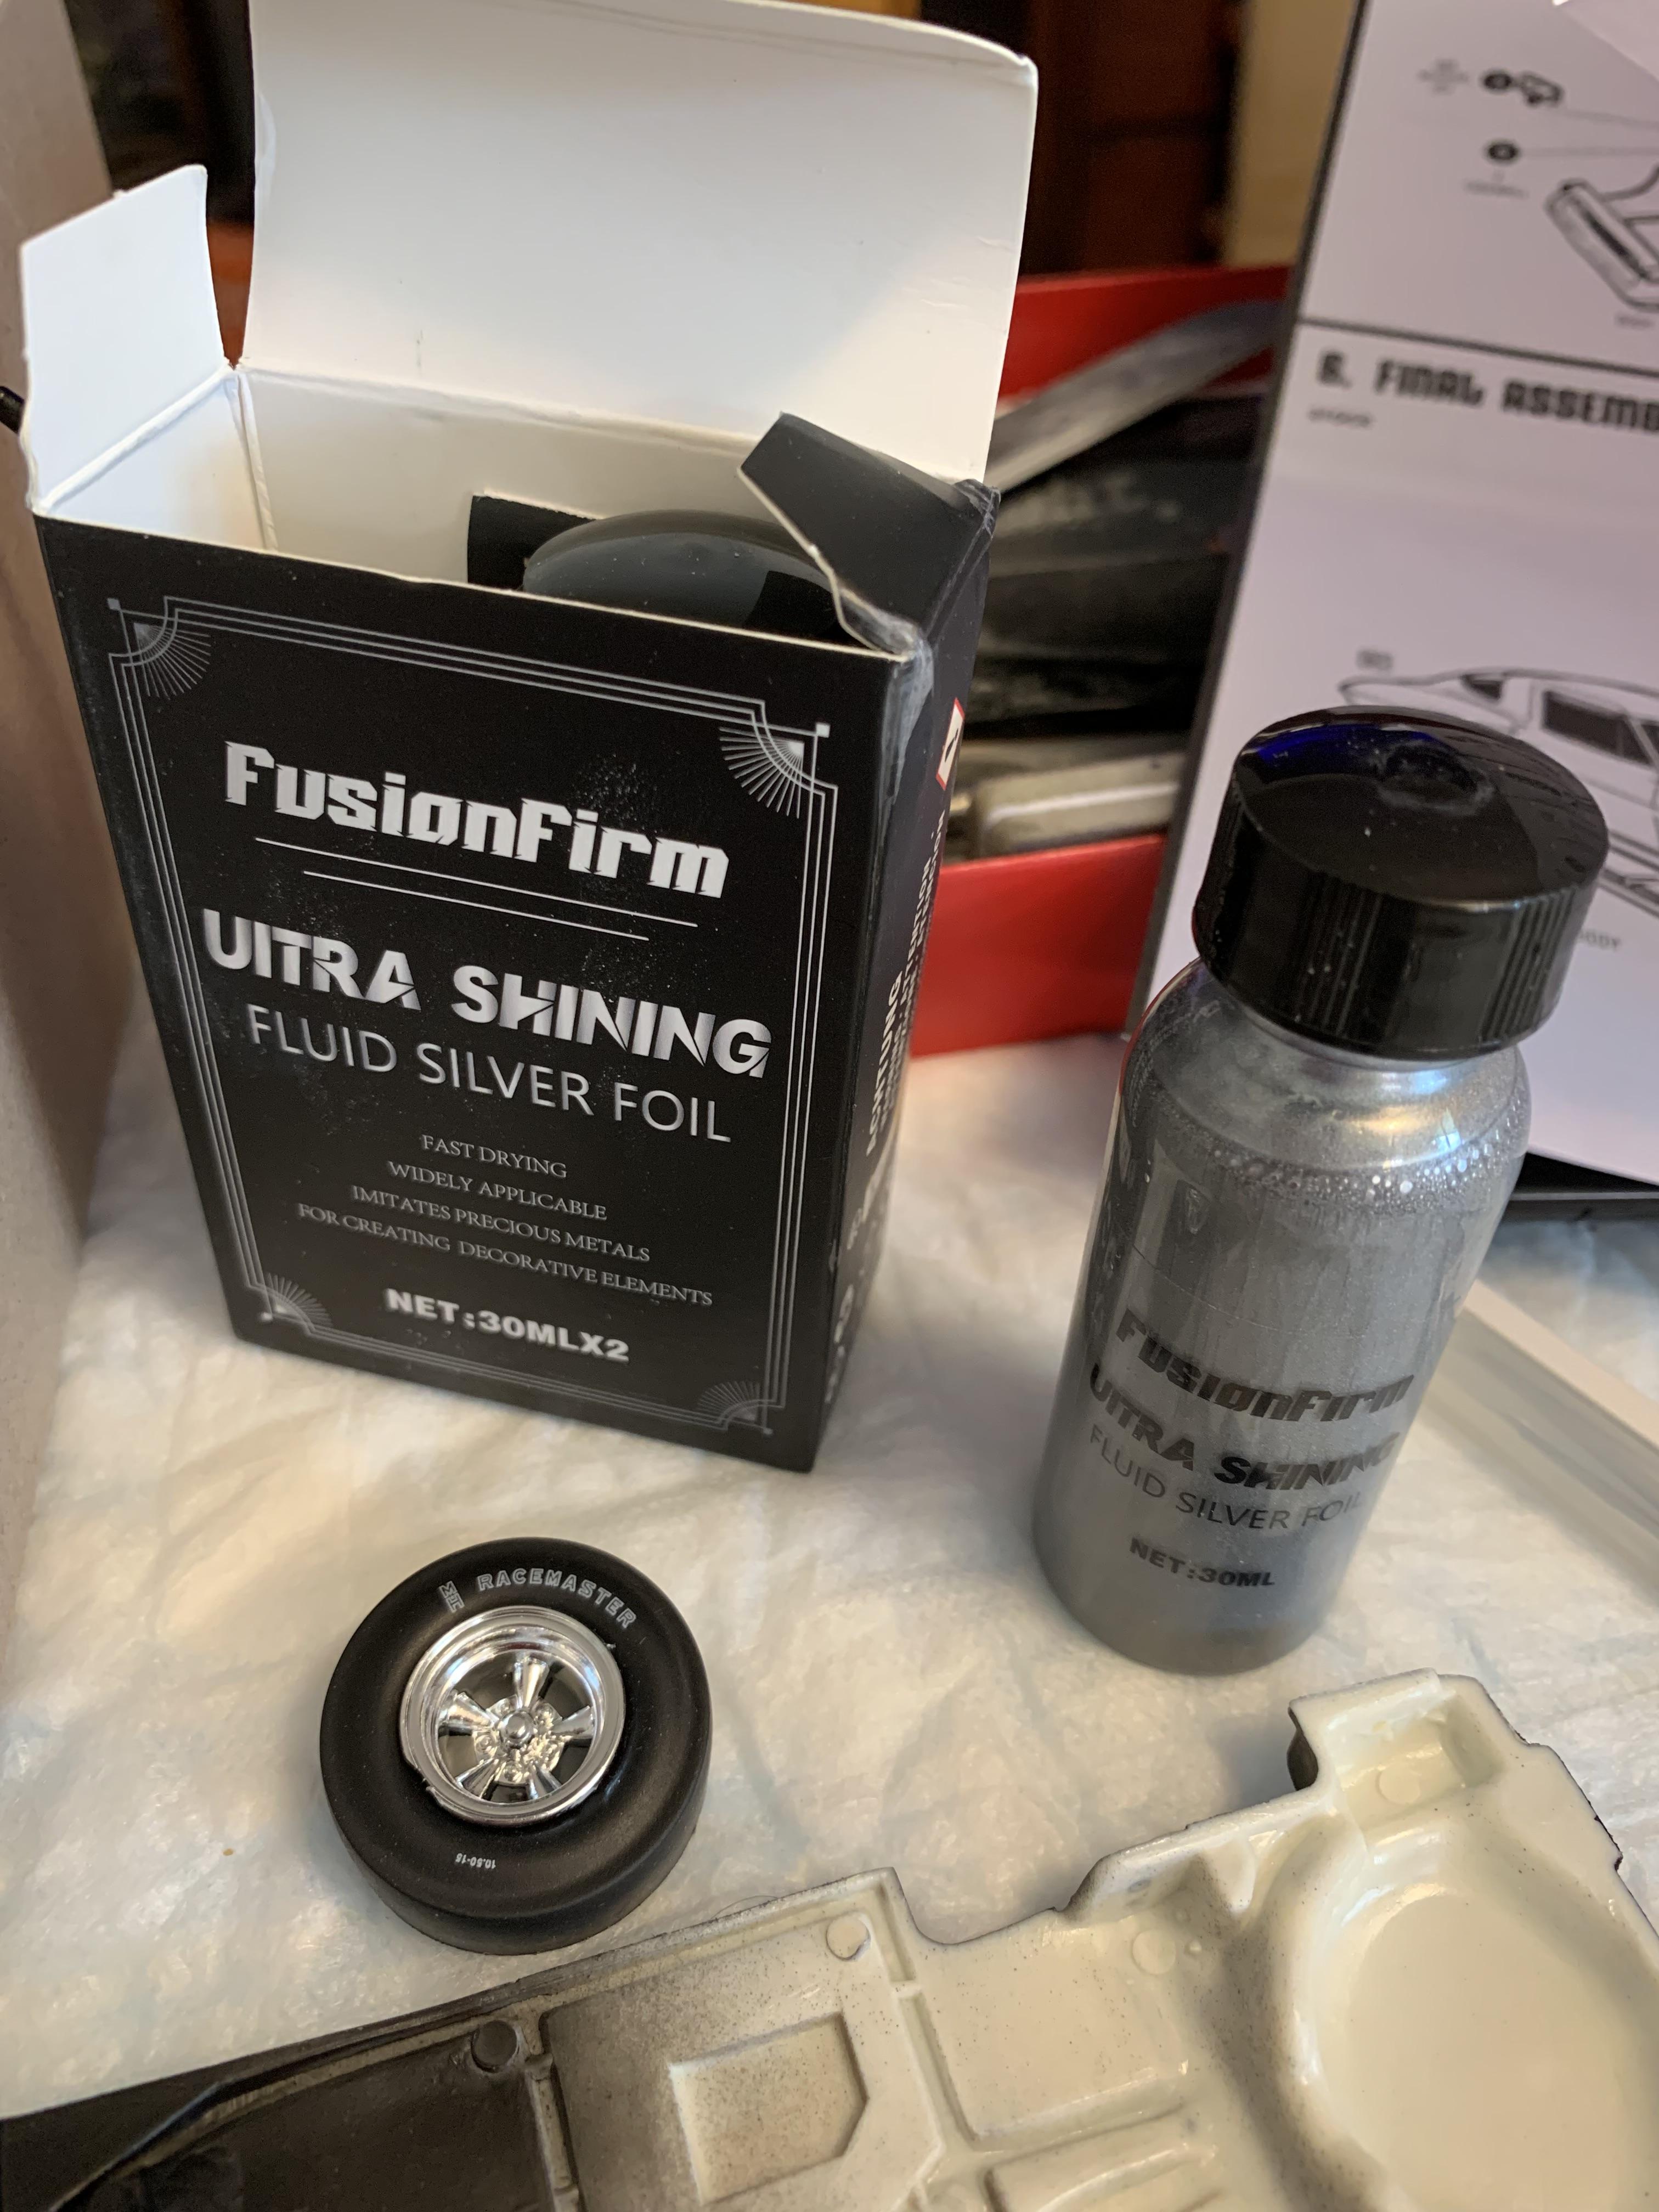
To clarify a couple things: yes, it comes with 2 bottles; one is the “chrome” and one is the clear; the brushes are made into the cap; the chrome is supposed to dry for 48 hrs before applying the clear. I applied the chrome on these wheel backs a month ago and have intentionally handled them roughly, pressing my finger onto them with a lot of pressure, installing tires on them, etc., with no deleterious effects. This was without the clear. Today, I coated one of the wheel backs with clear (the one on the right with bubbles). I shall leave it alone for a couple days then compare it to the uncoated one. I also painted a couple resin wheels just as they come.

-
Have not tried the clear yet, but I like the chrome. I brushed it on with the enclosed brush. I also like that it has an agitator ball included in the bottle. Very easy to use and holds up to handling better than the other products I have tried.
-
Difficult to tell in these pictures, but most colors are semi gloss to flat.
-
These make my job a lot quicker and easier than painting with a brush.
-
Thanks, Melvin. I forgot to post a pic of the neat looking Hernandez Stocker.
-
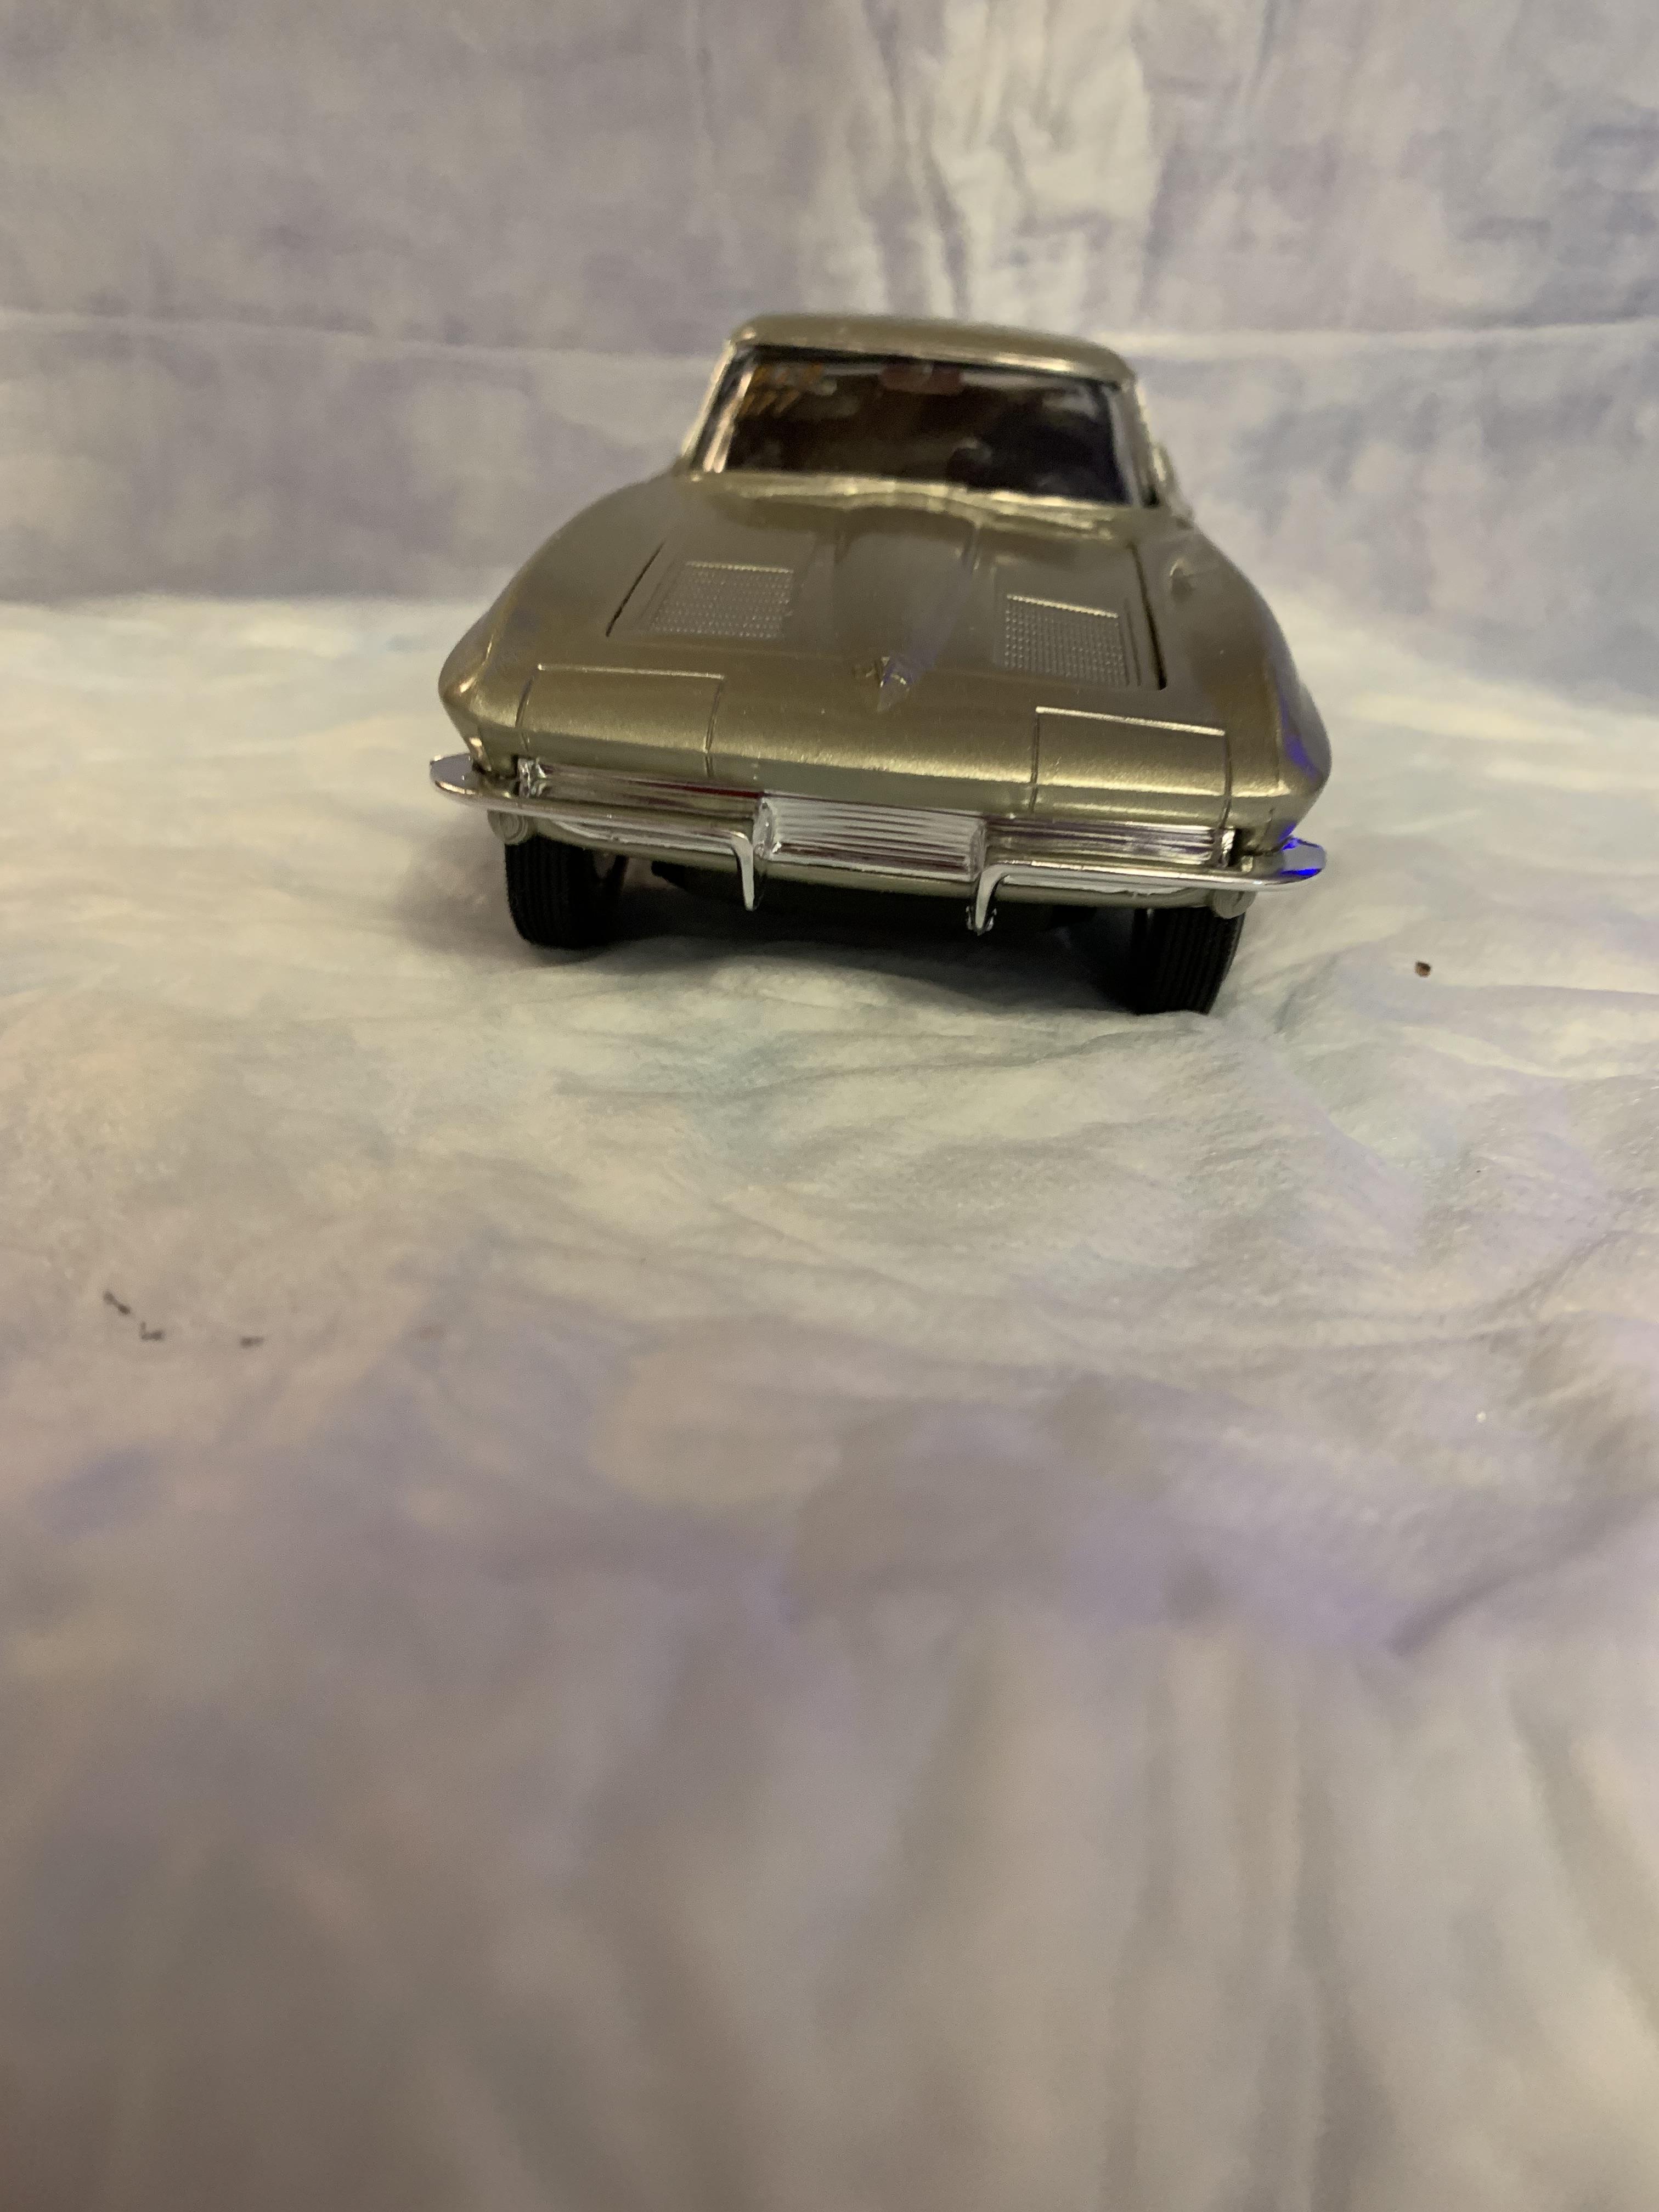
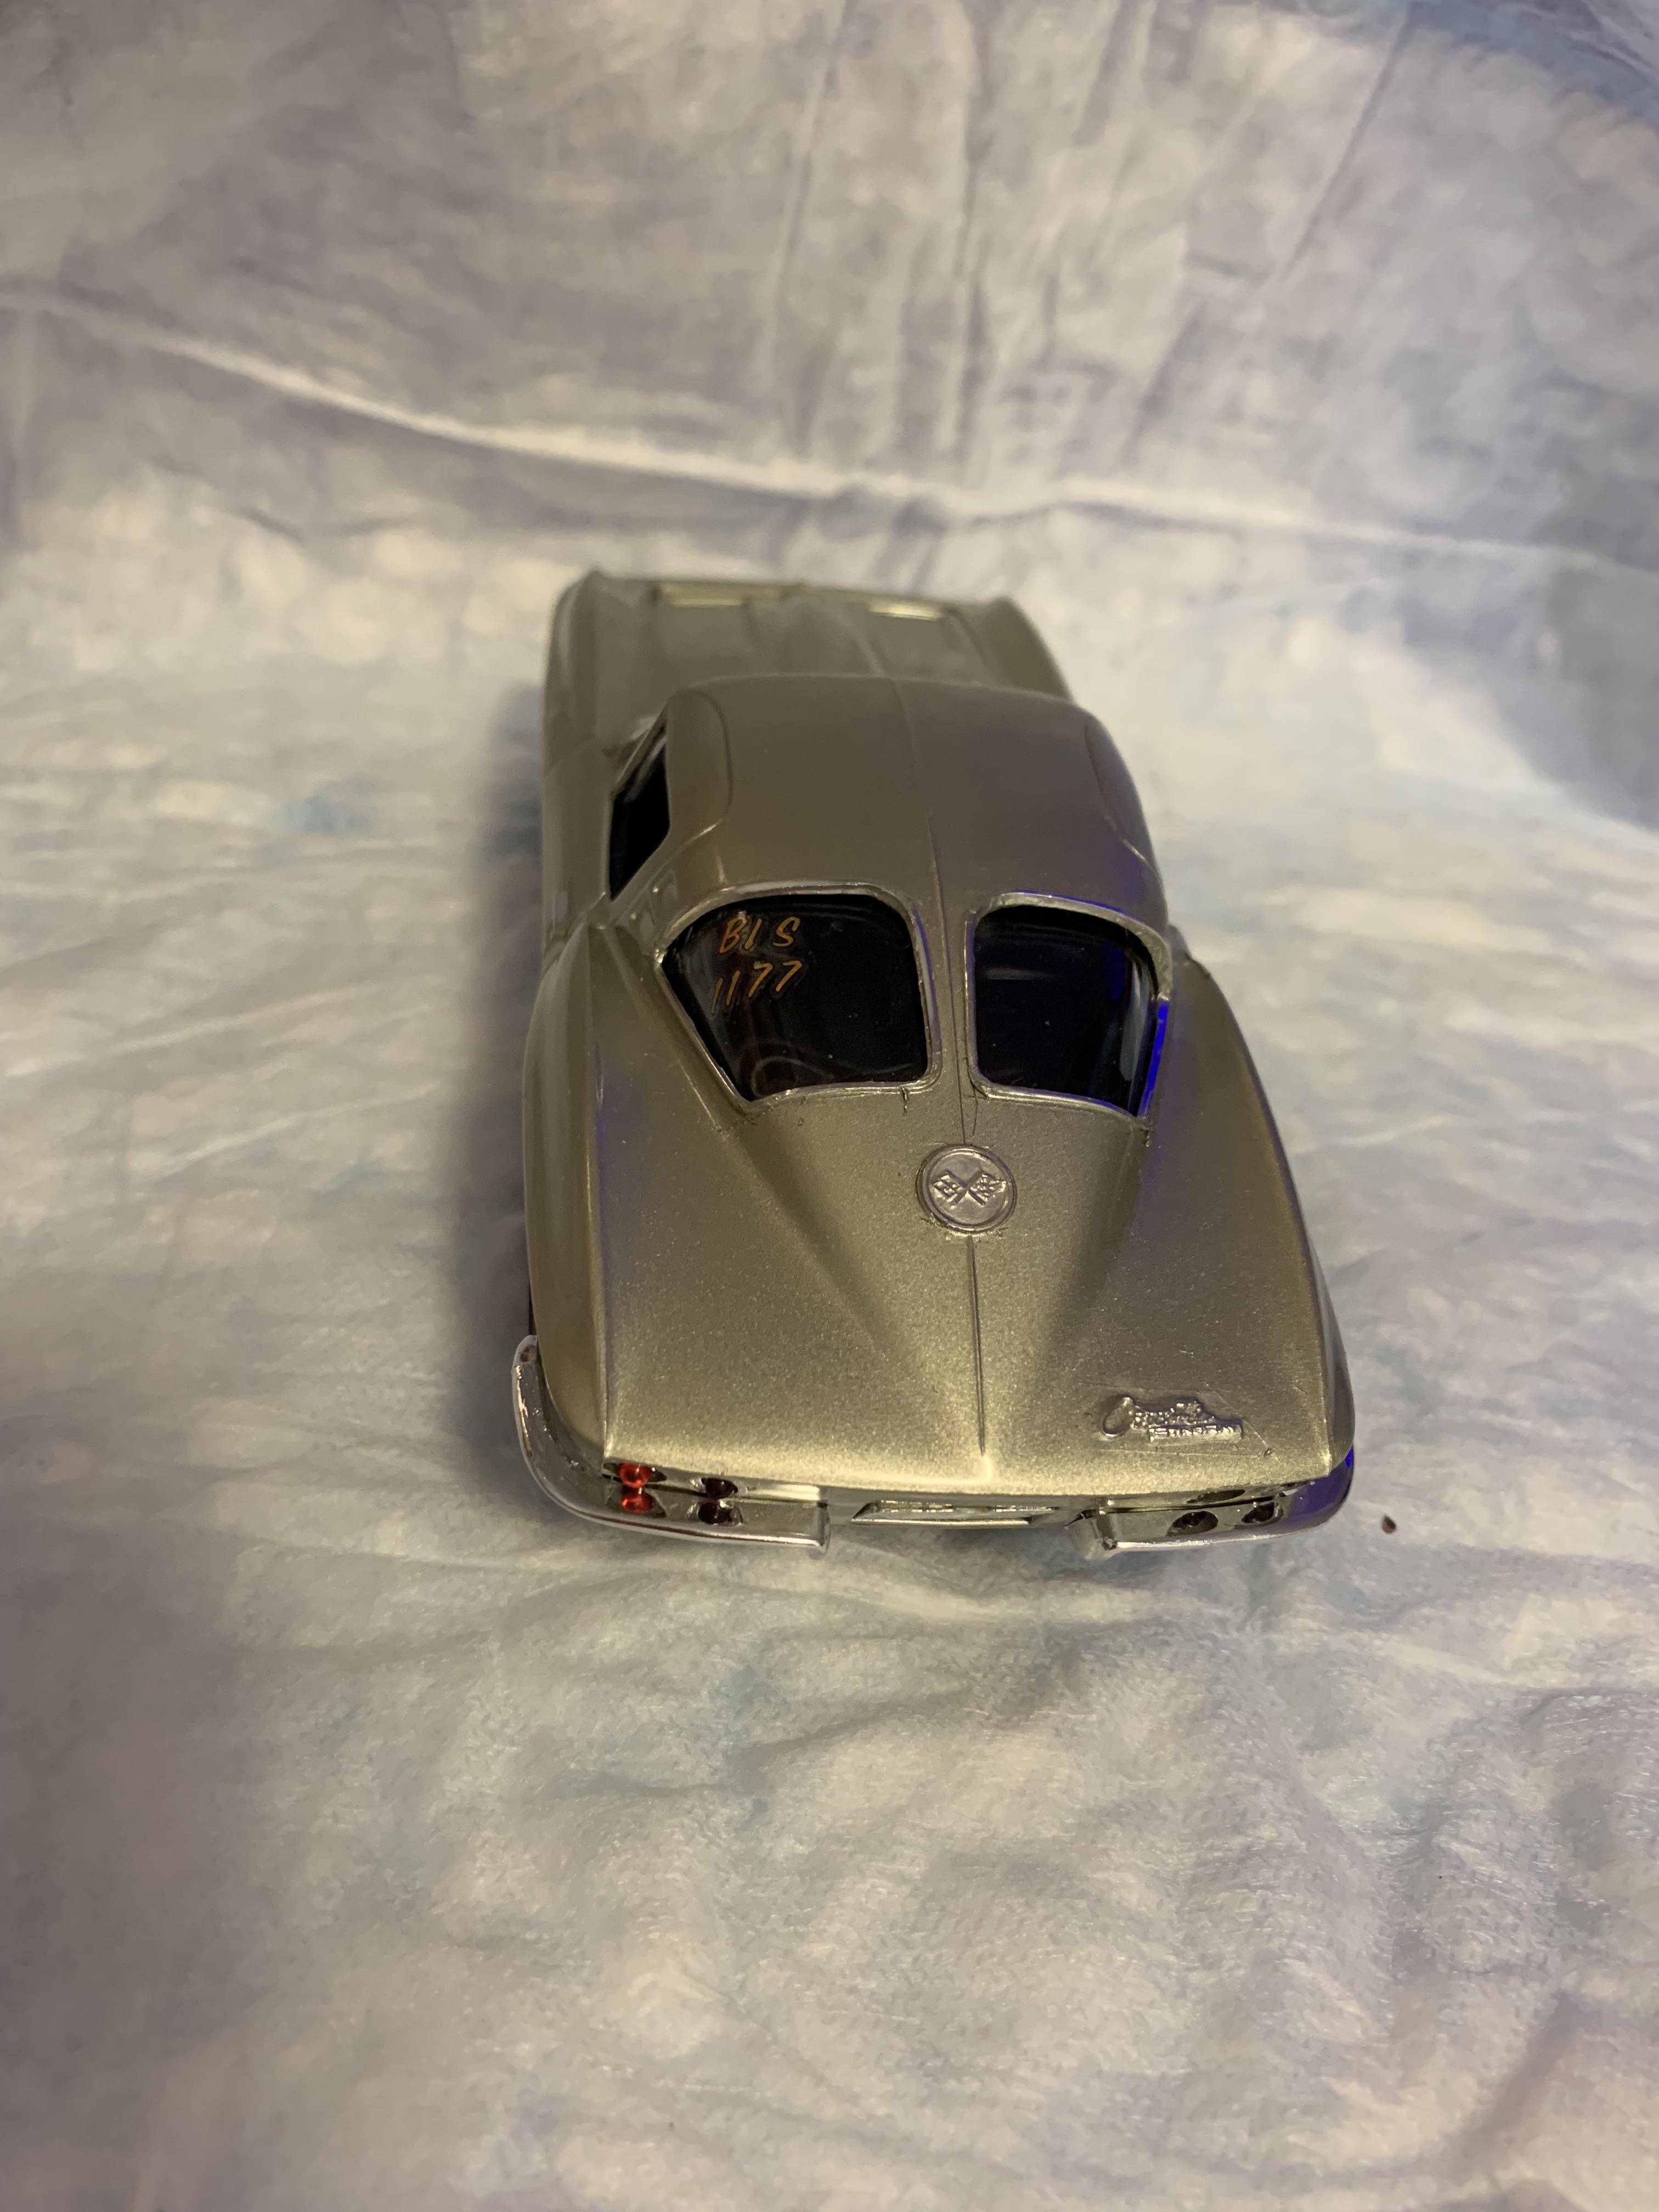
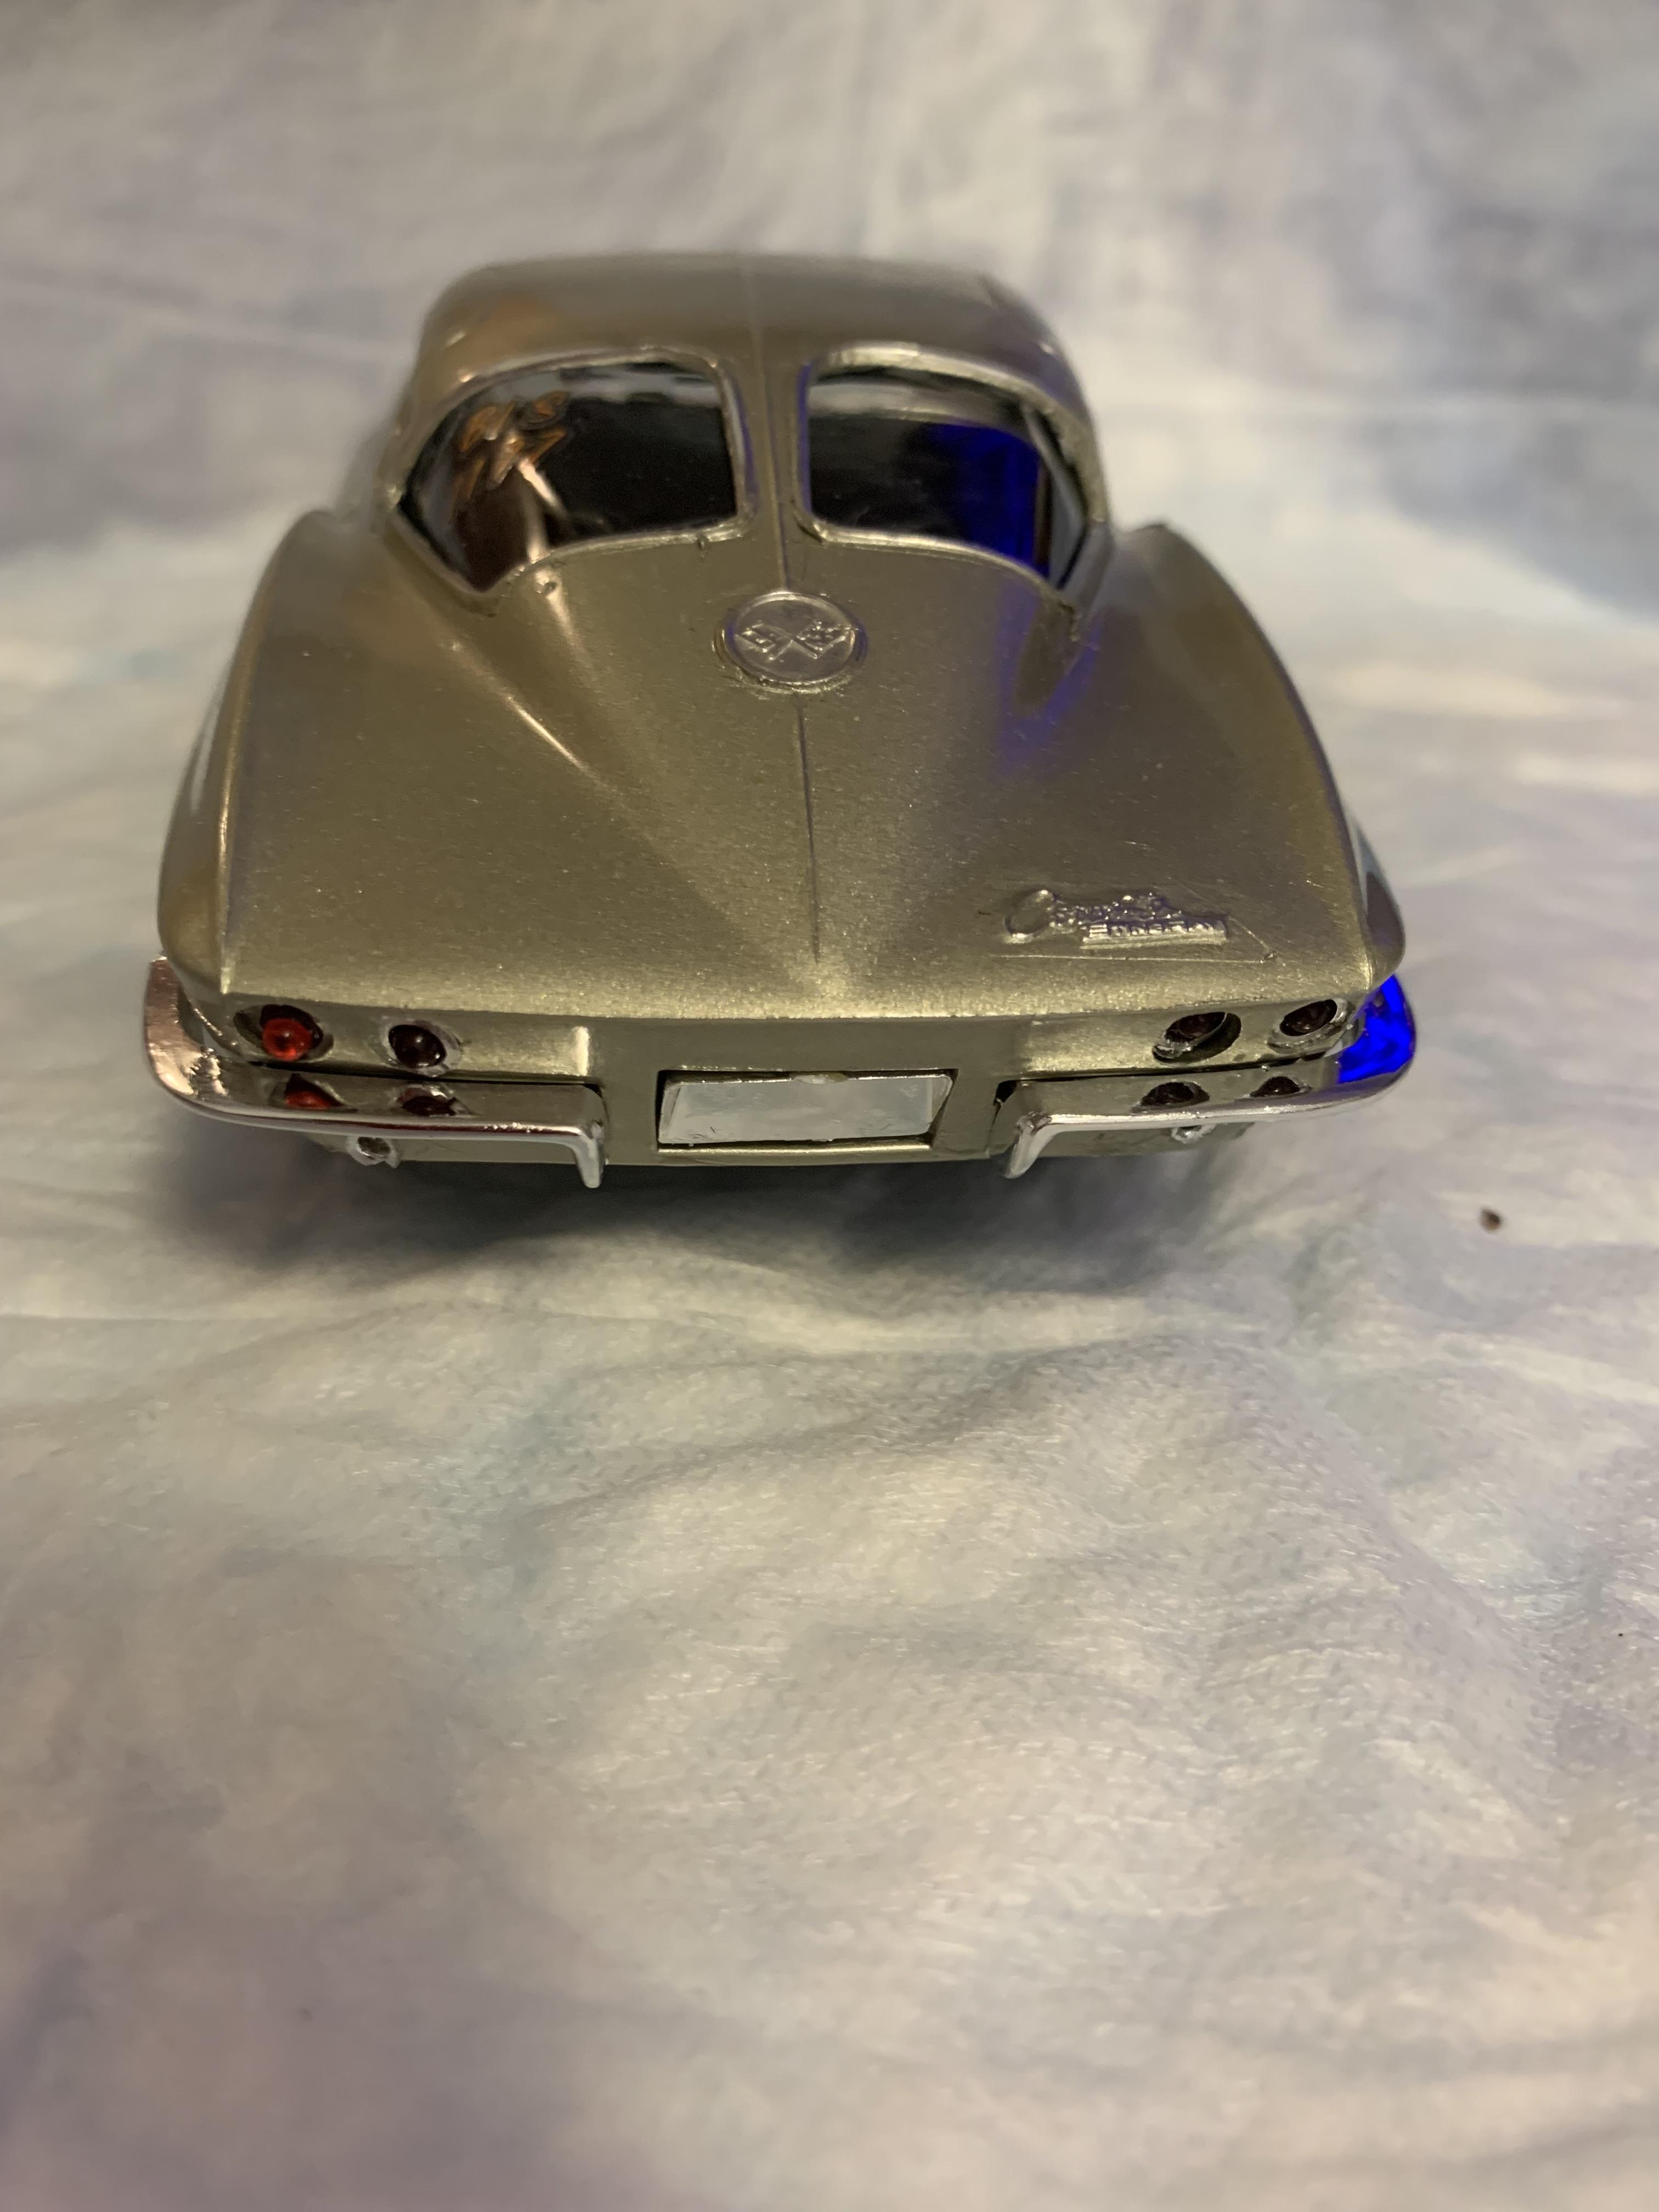
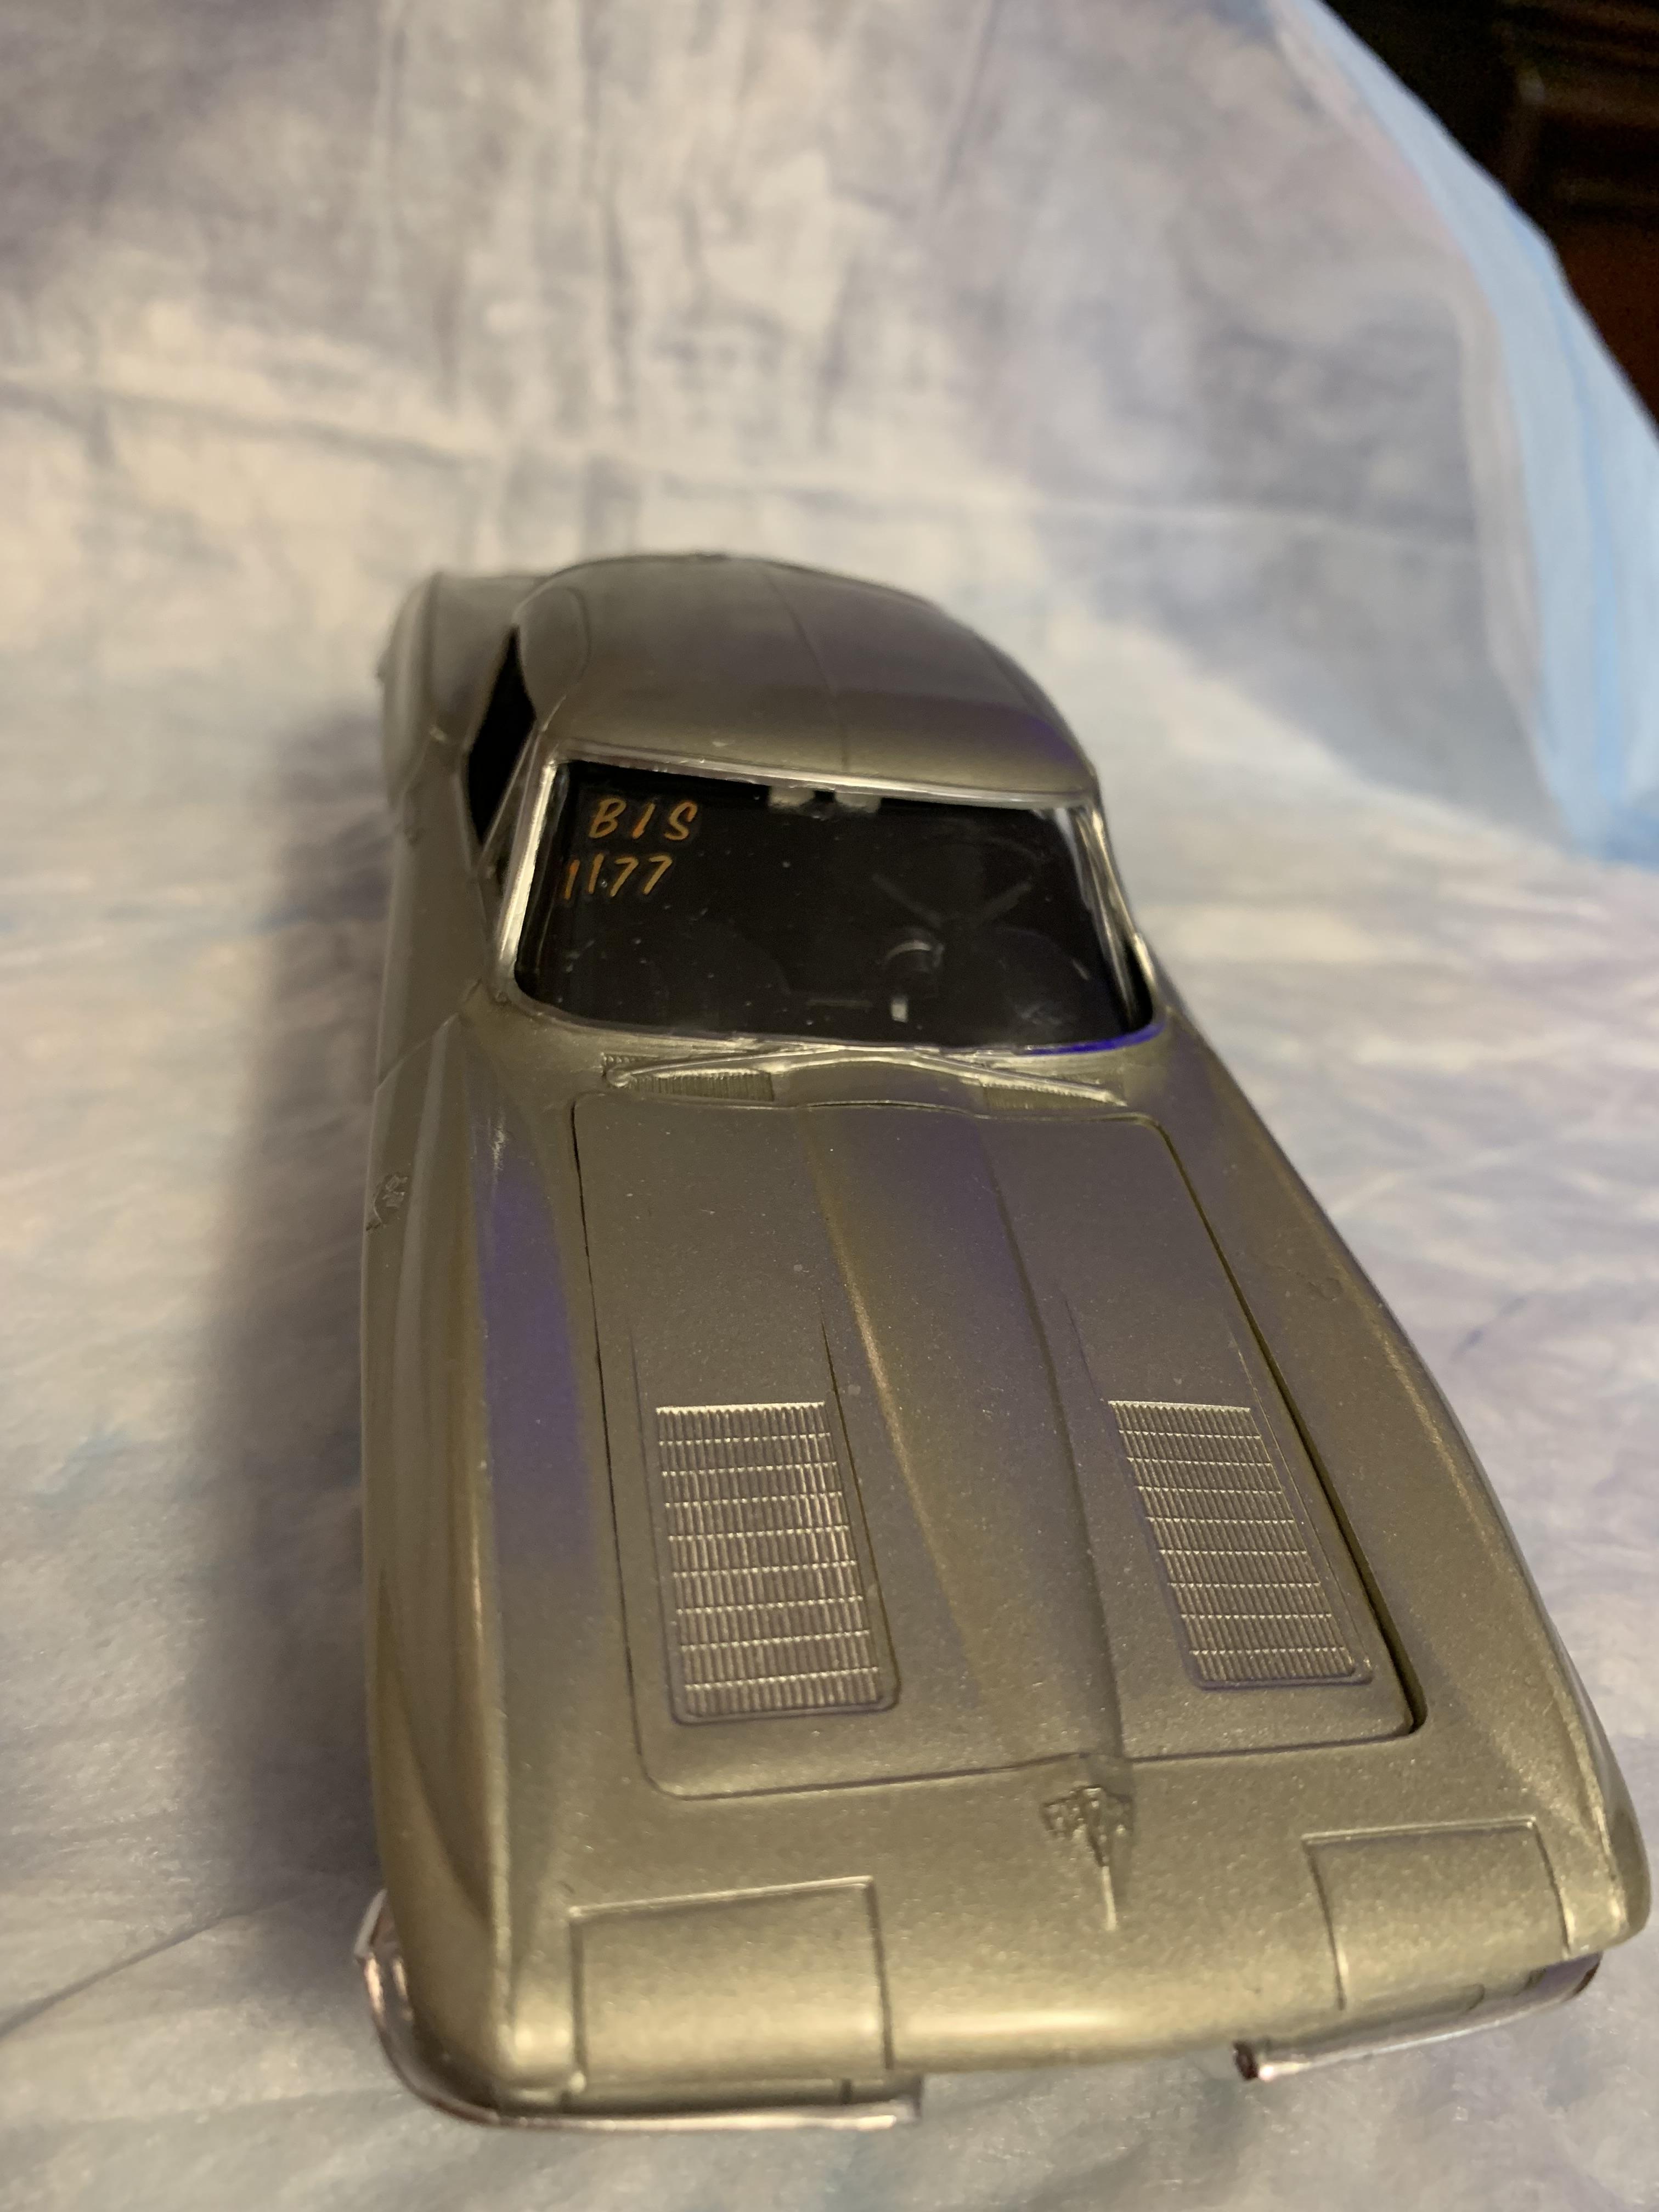
Thanks, Bob. Nice color, but needed the gloss coat to bring out the shine. Thanks, Mike. Actually, the 1177 is the (fictitious ) permanent number required on all class cars. Most cars in the B/S class would run in the low ten second area.
-
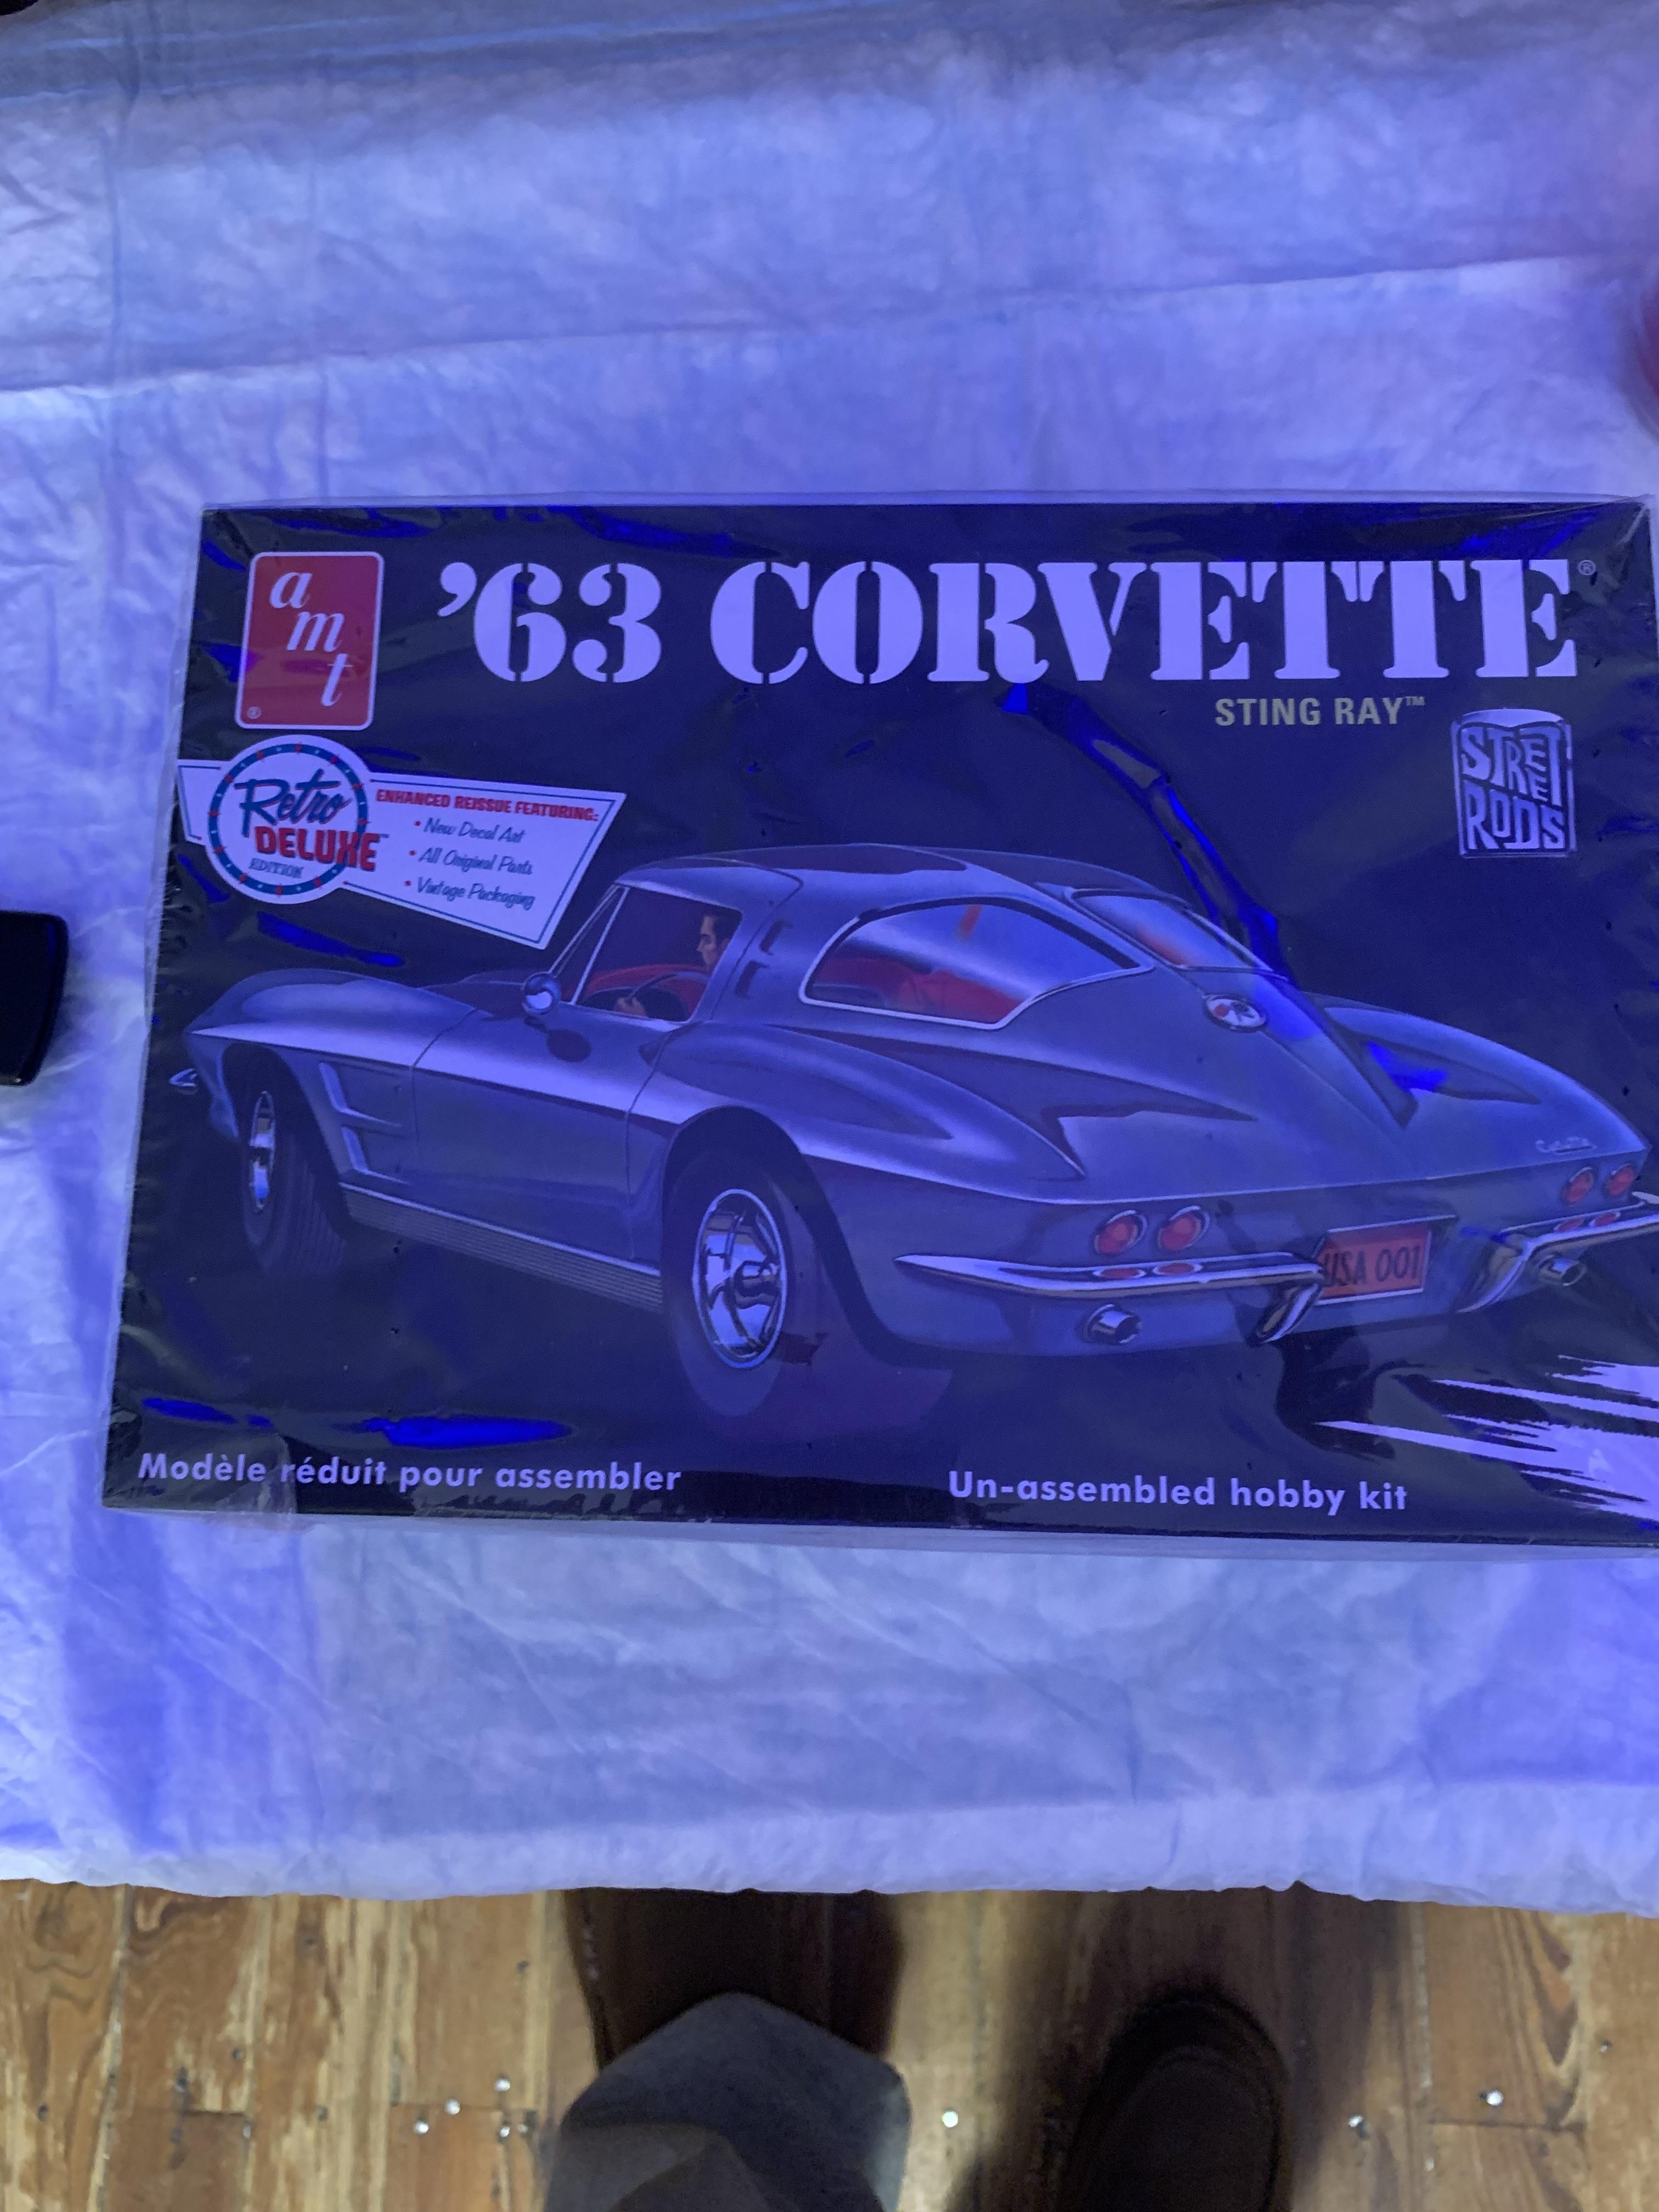
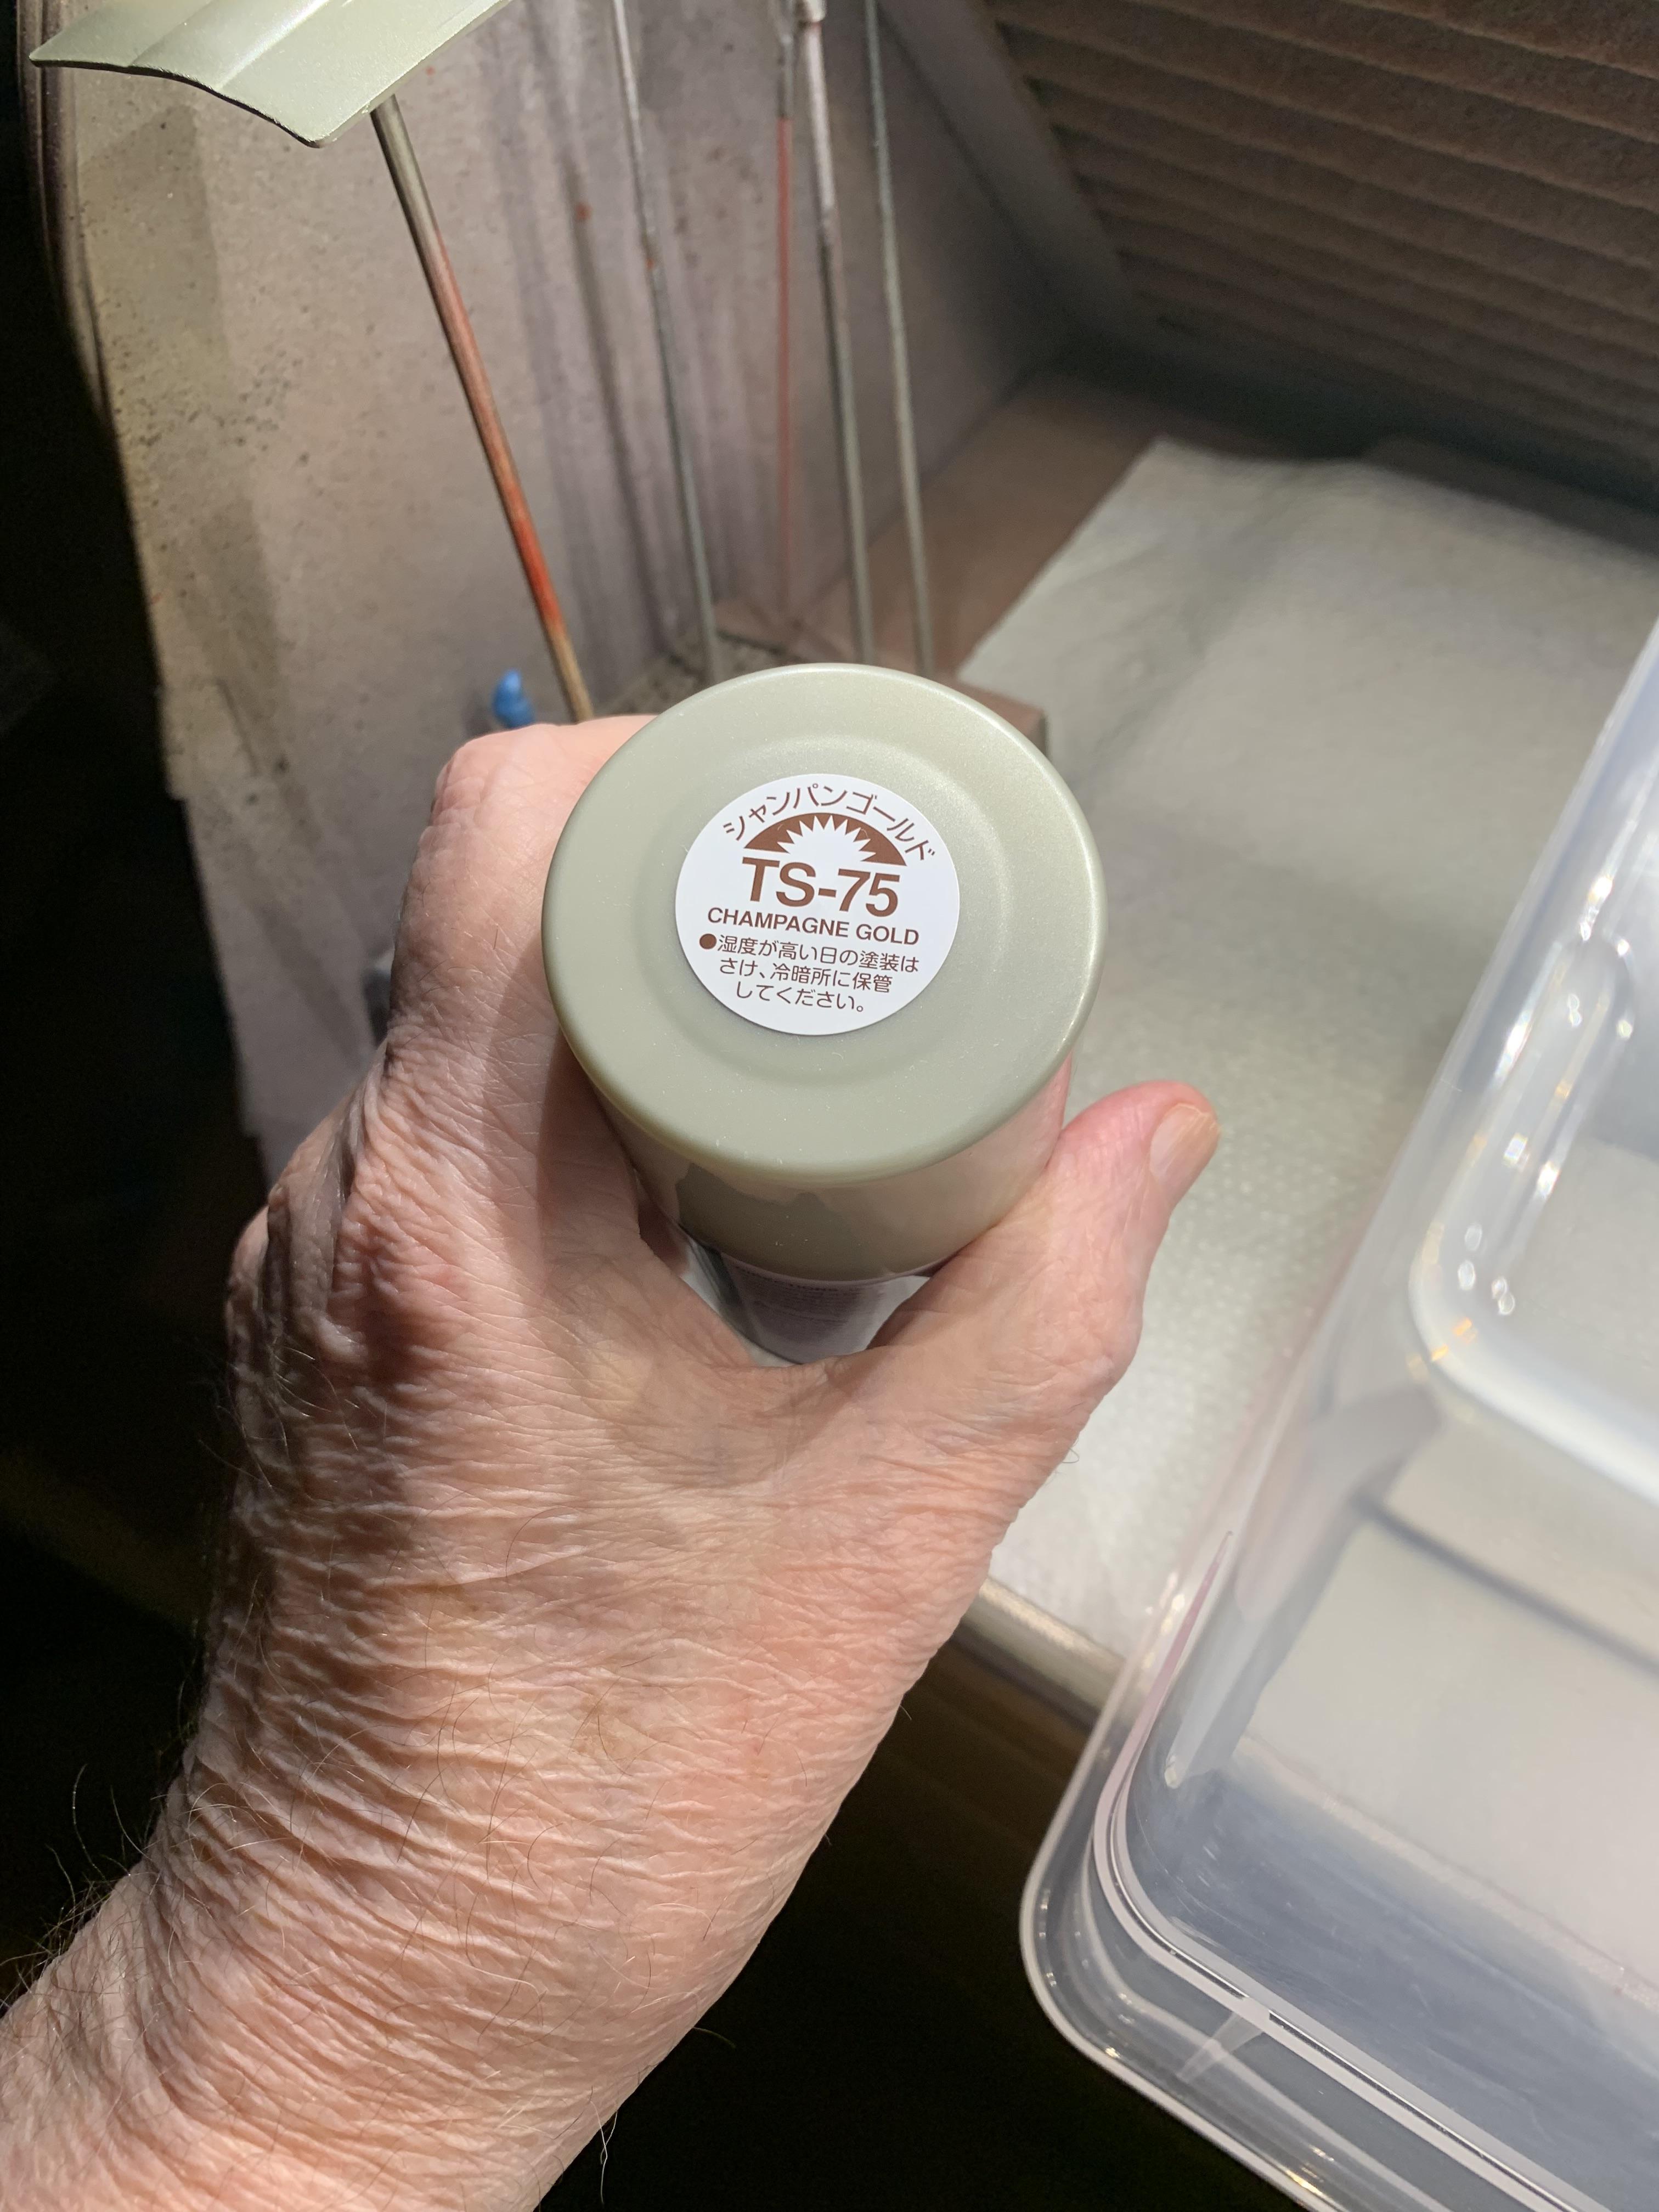
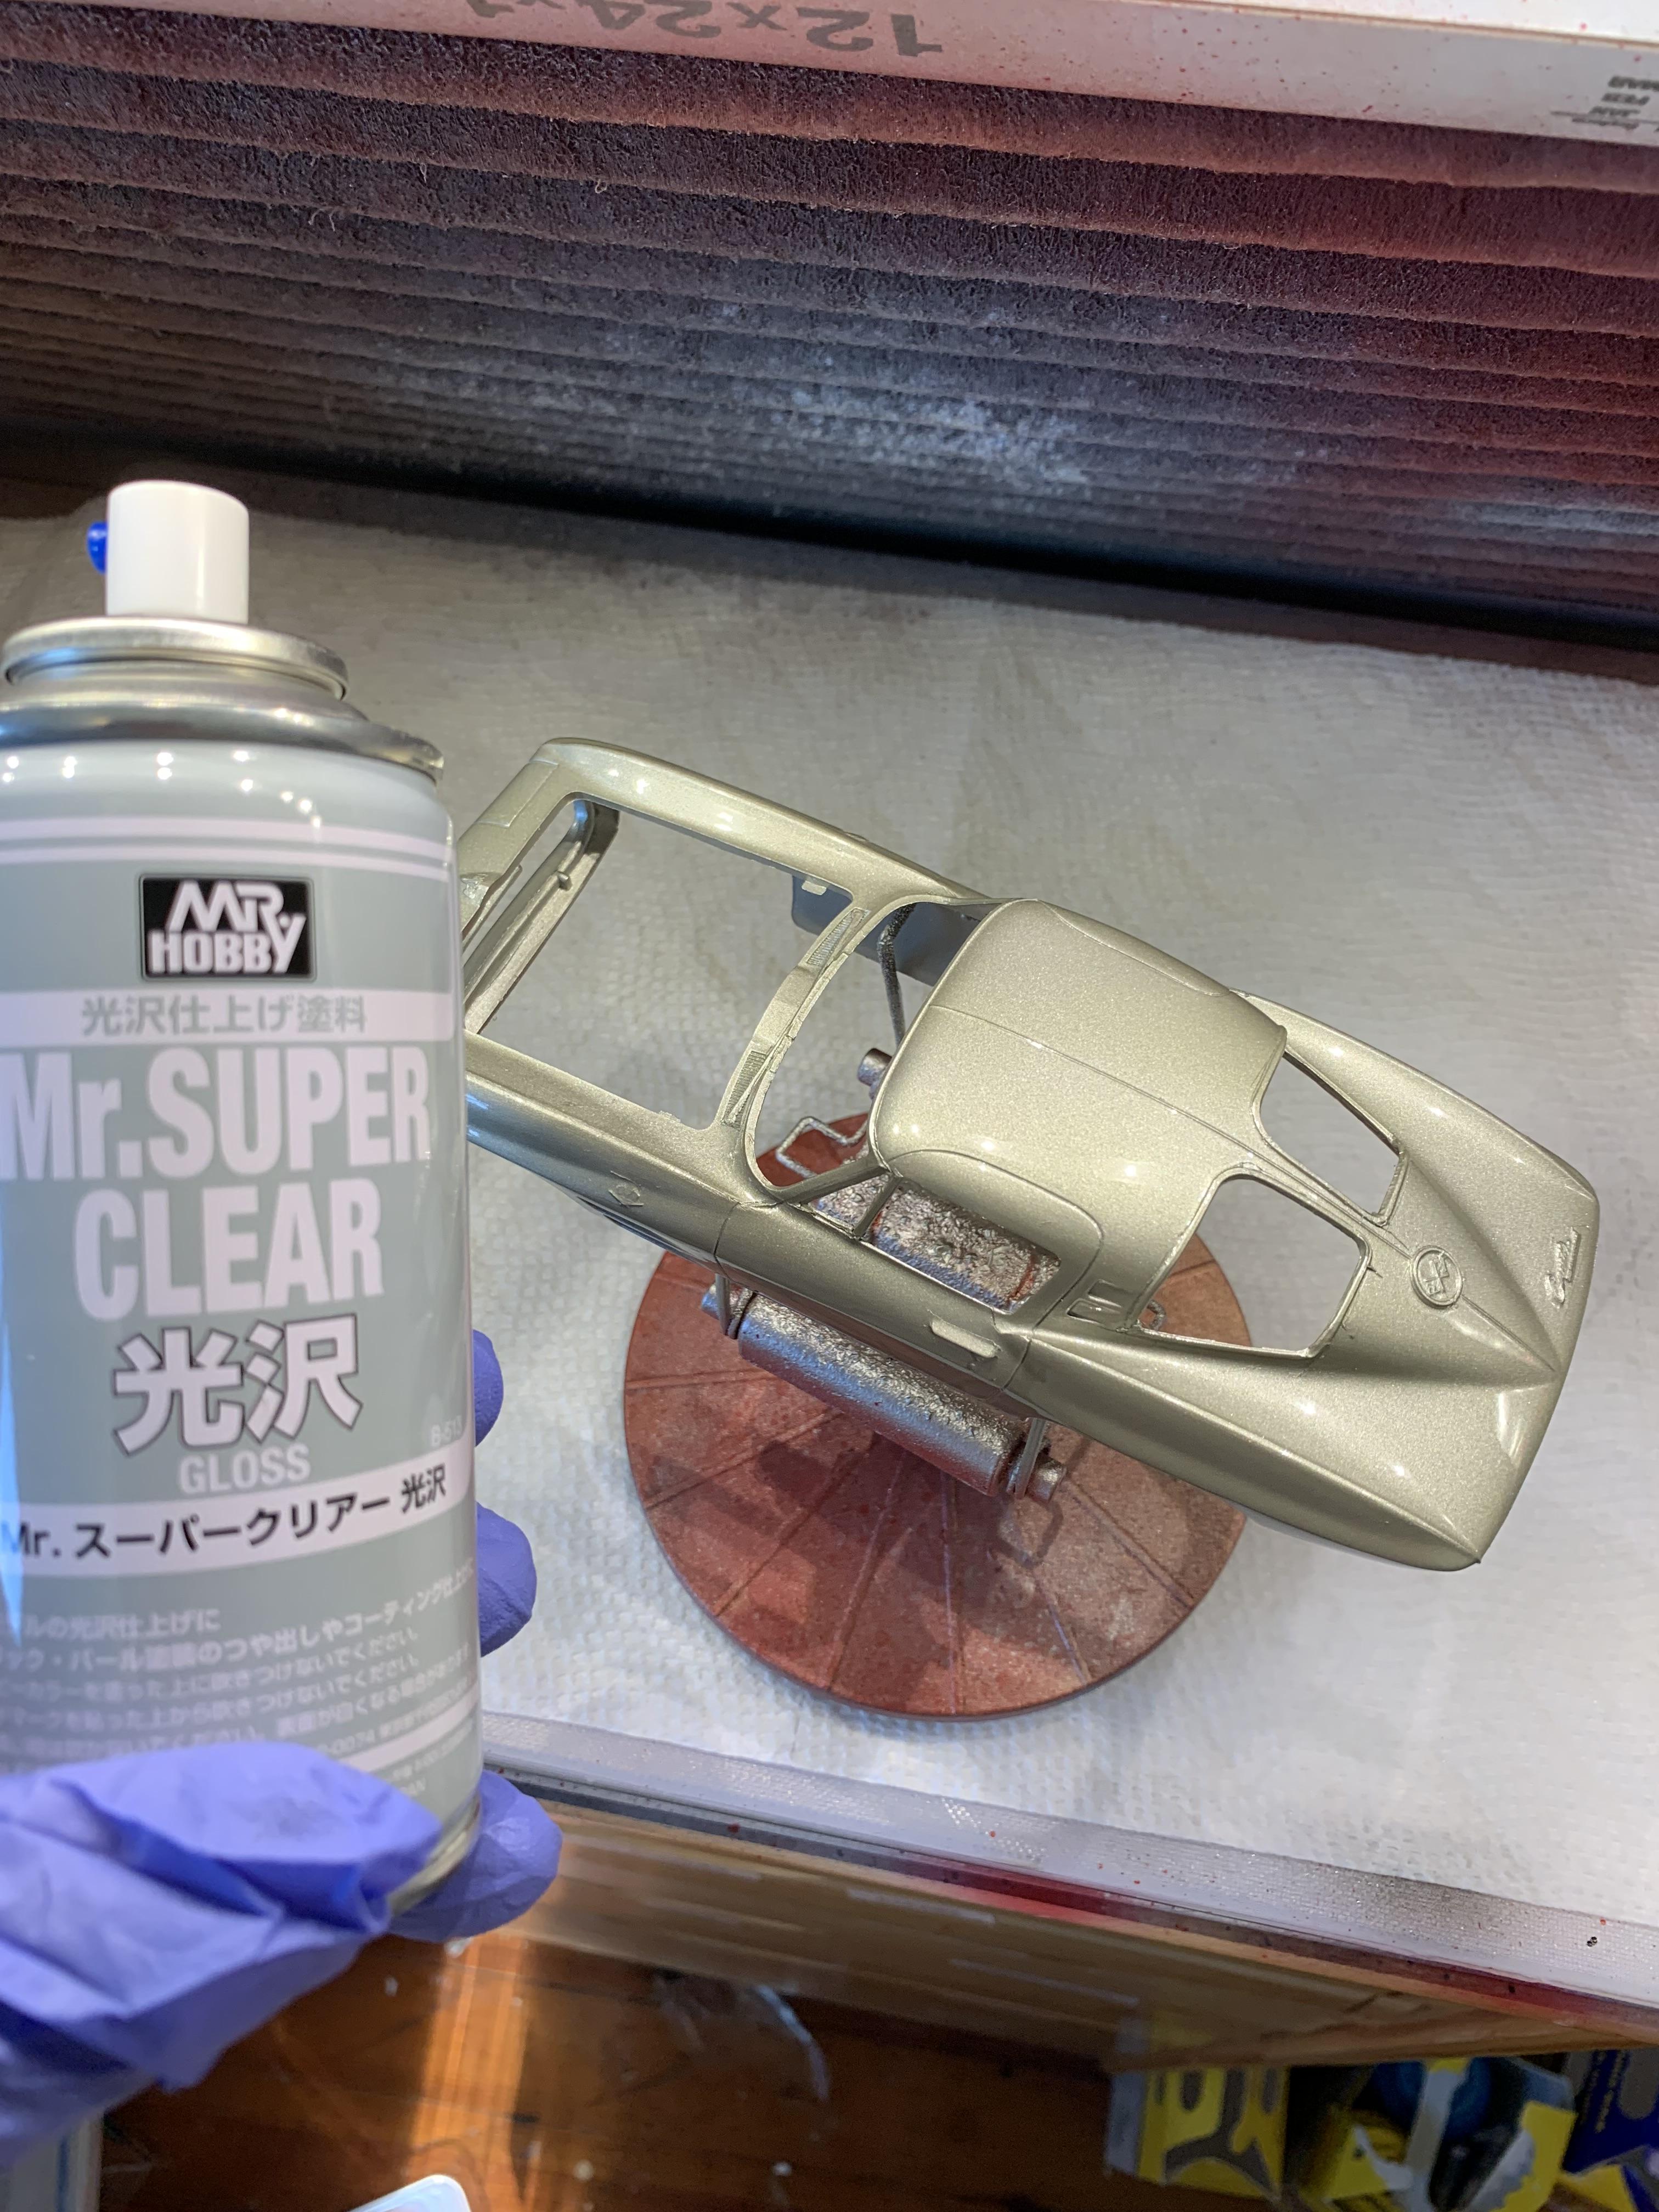
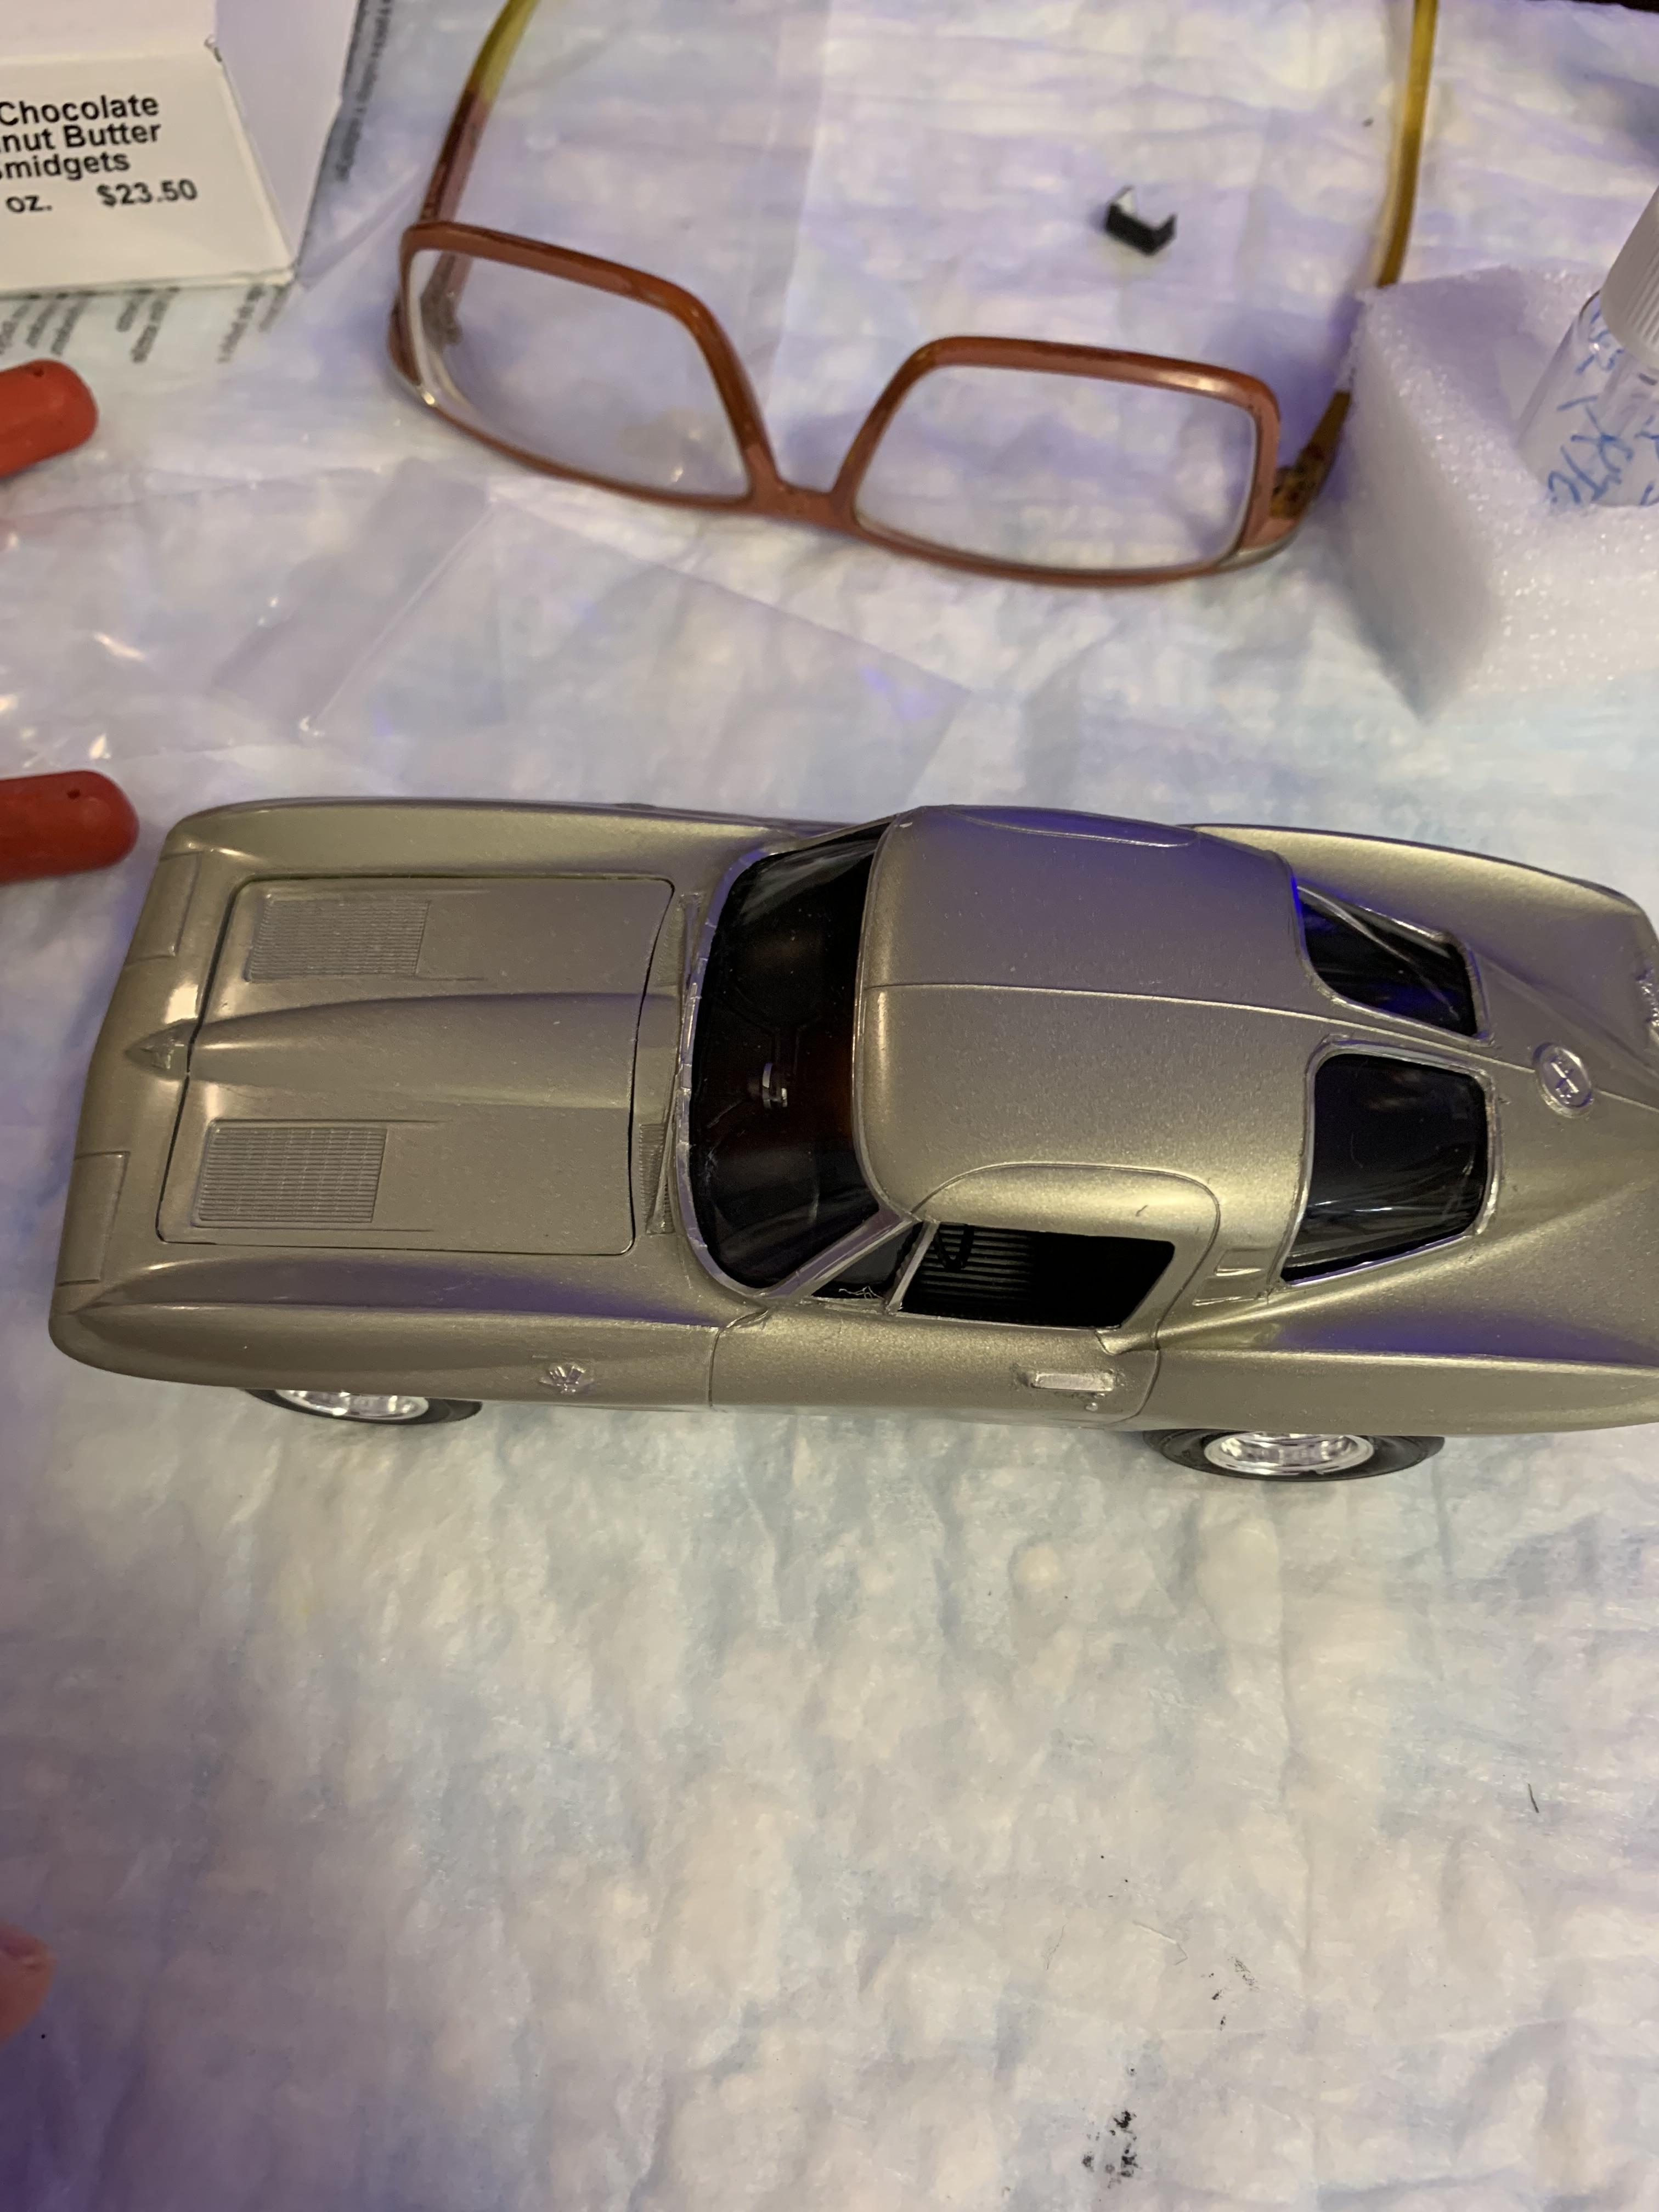
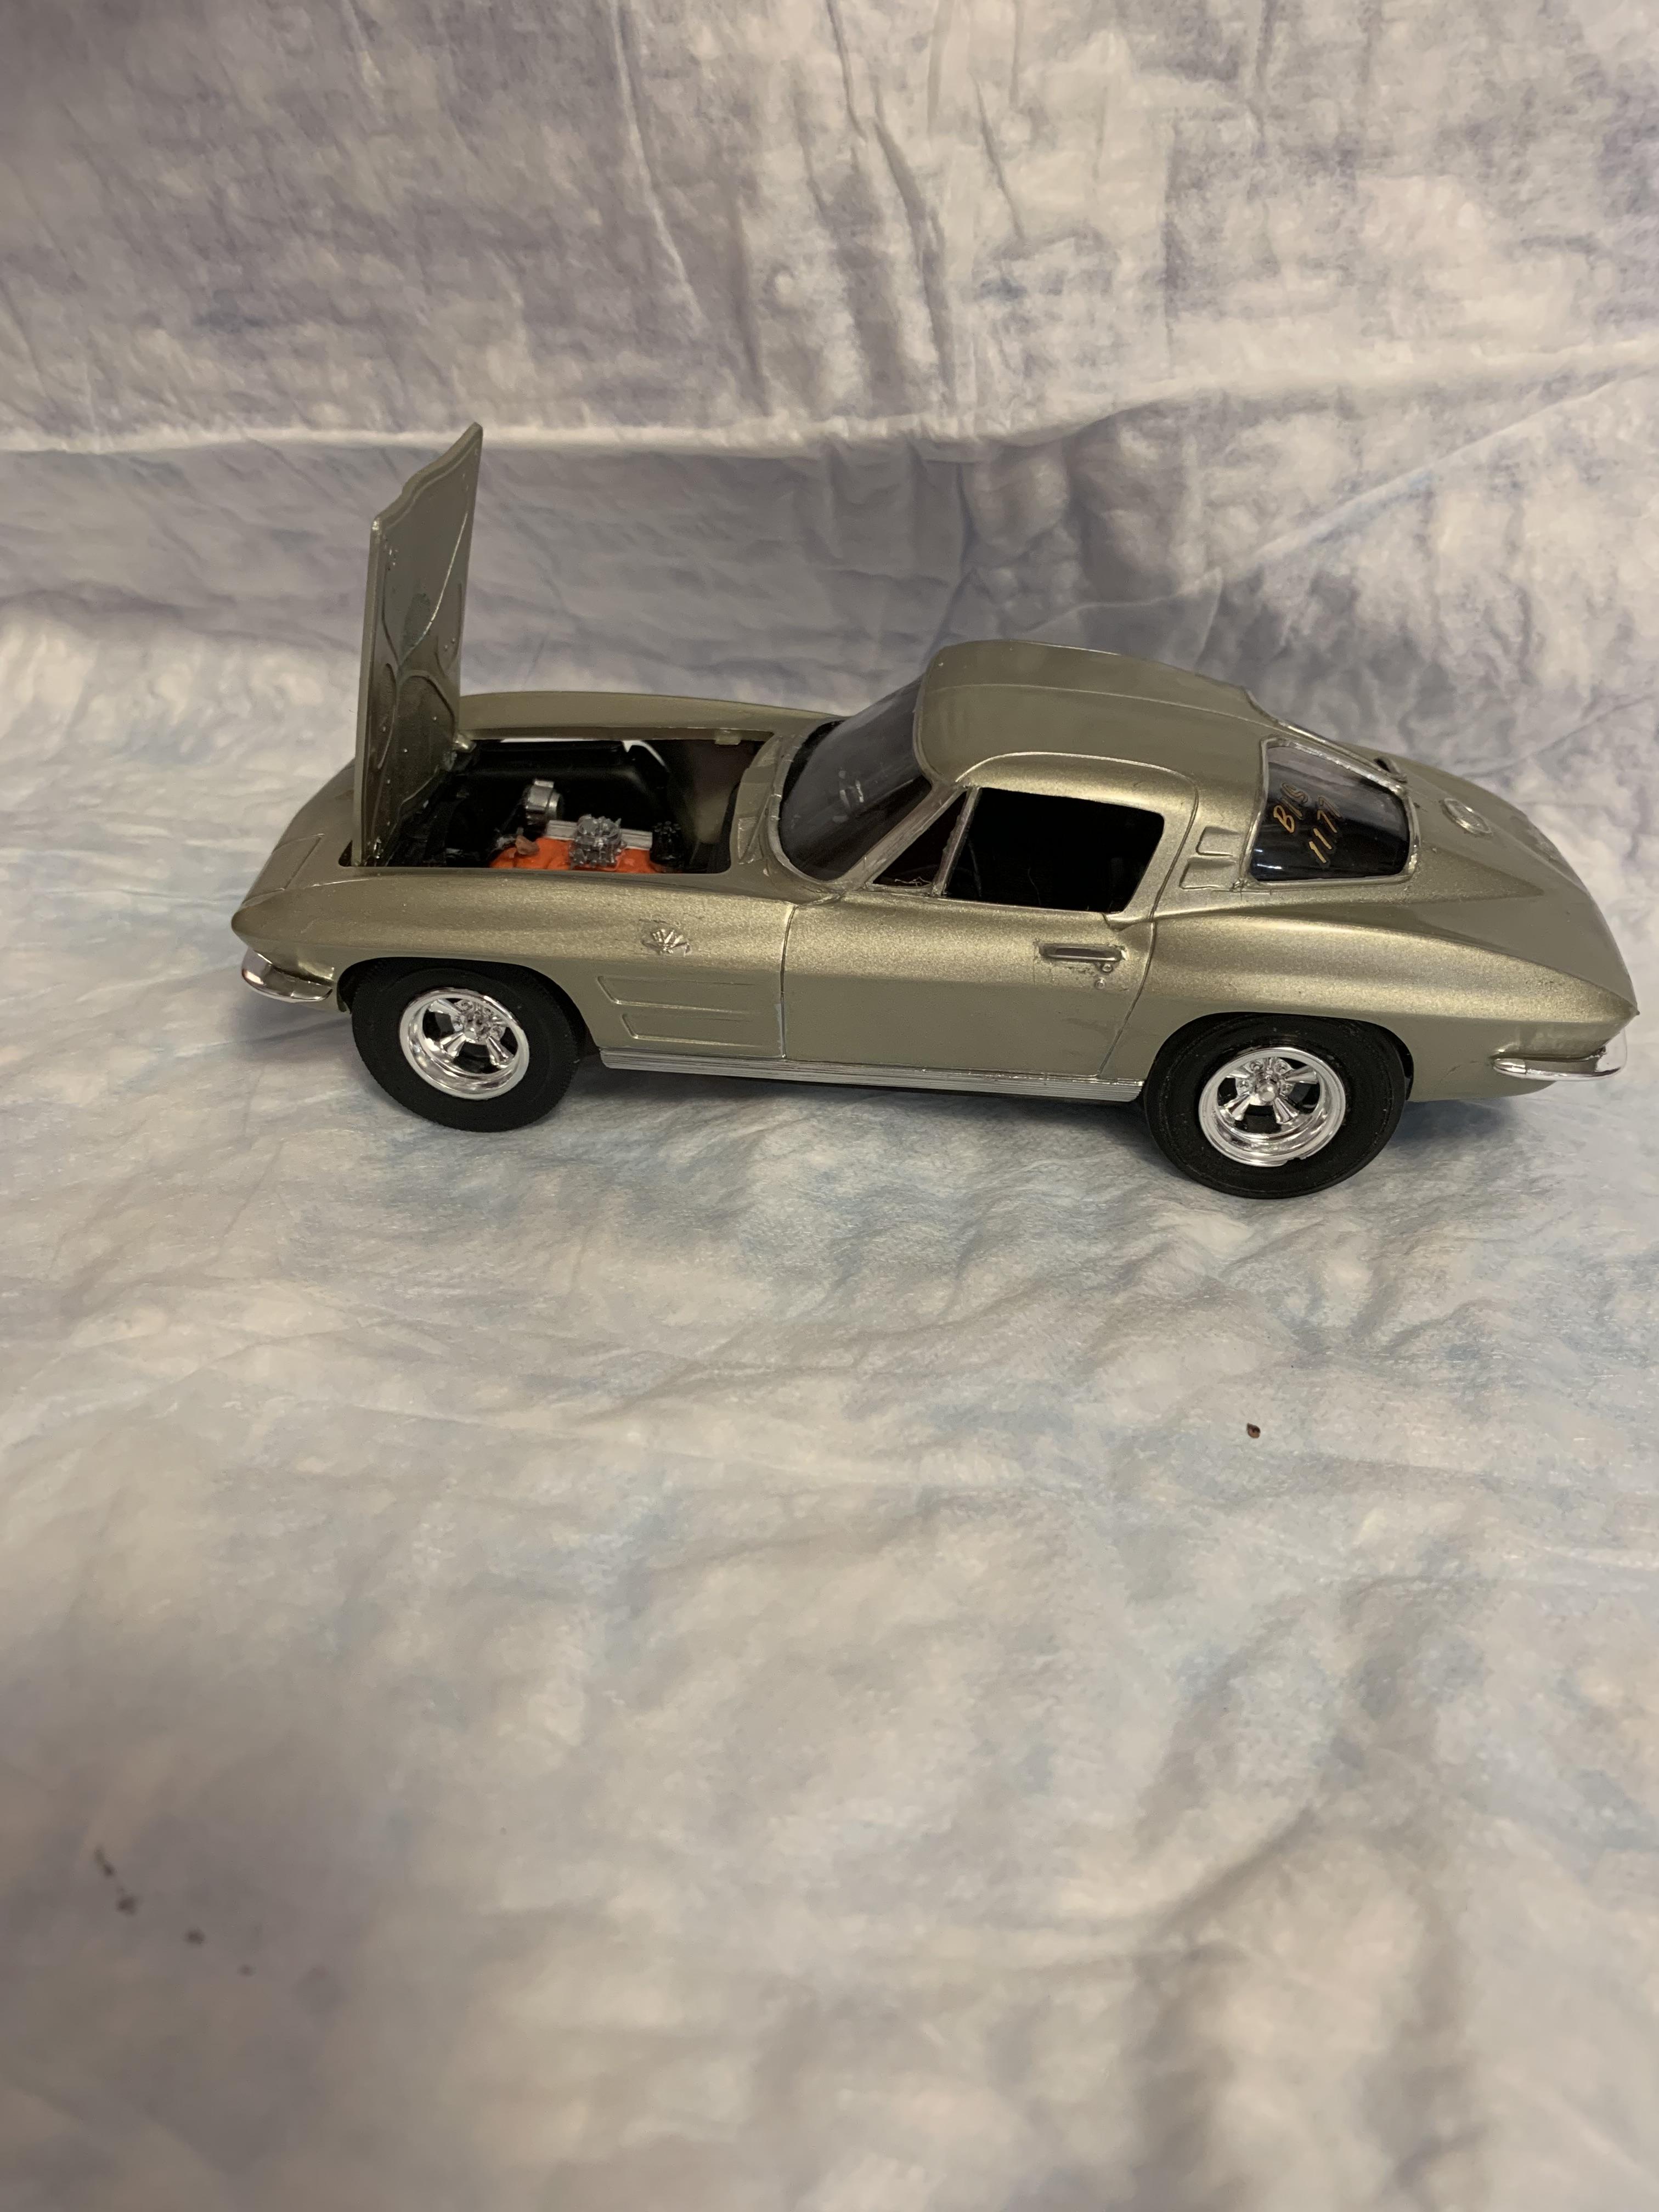
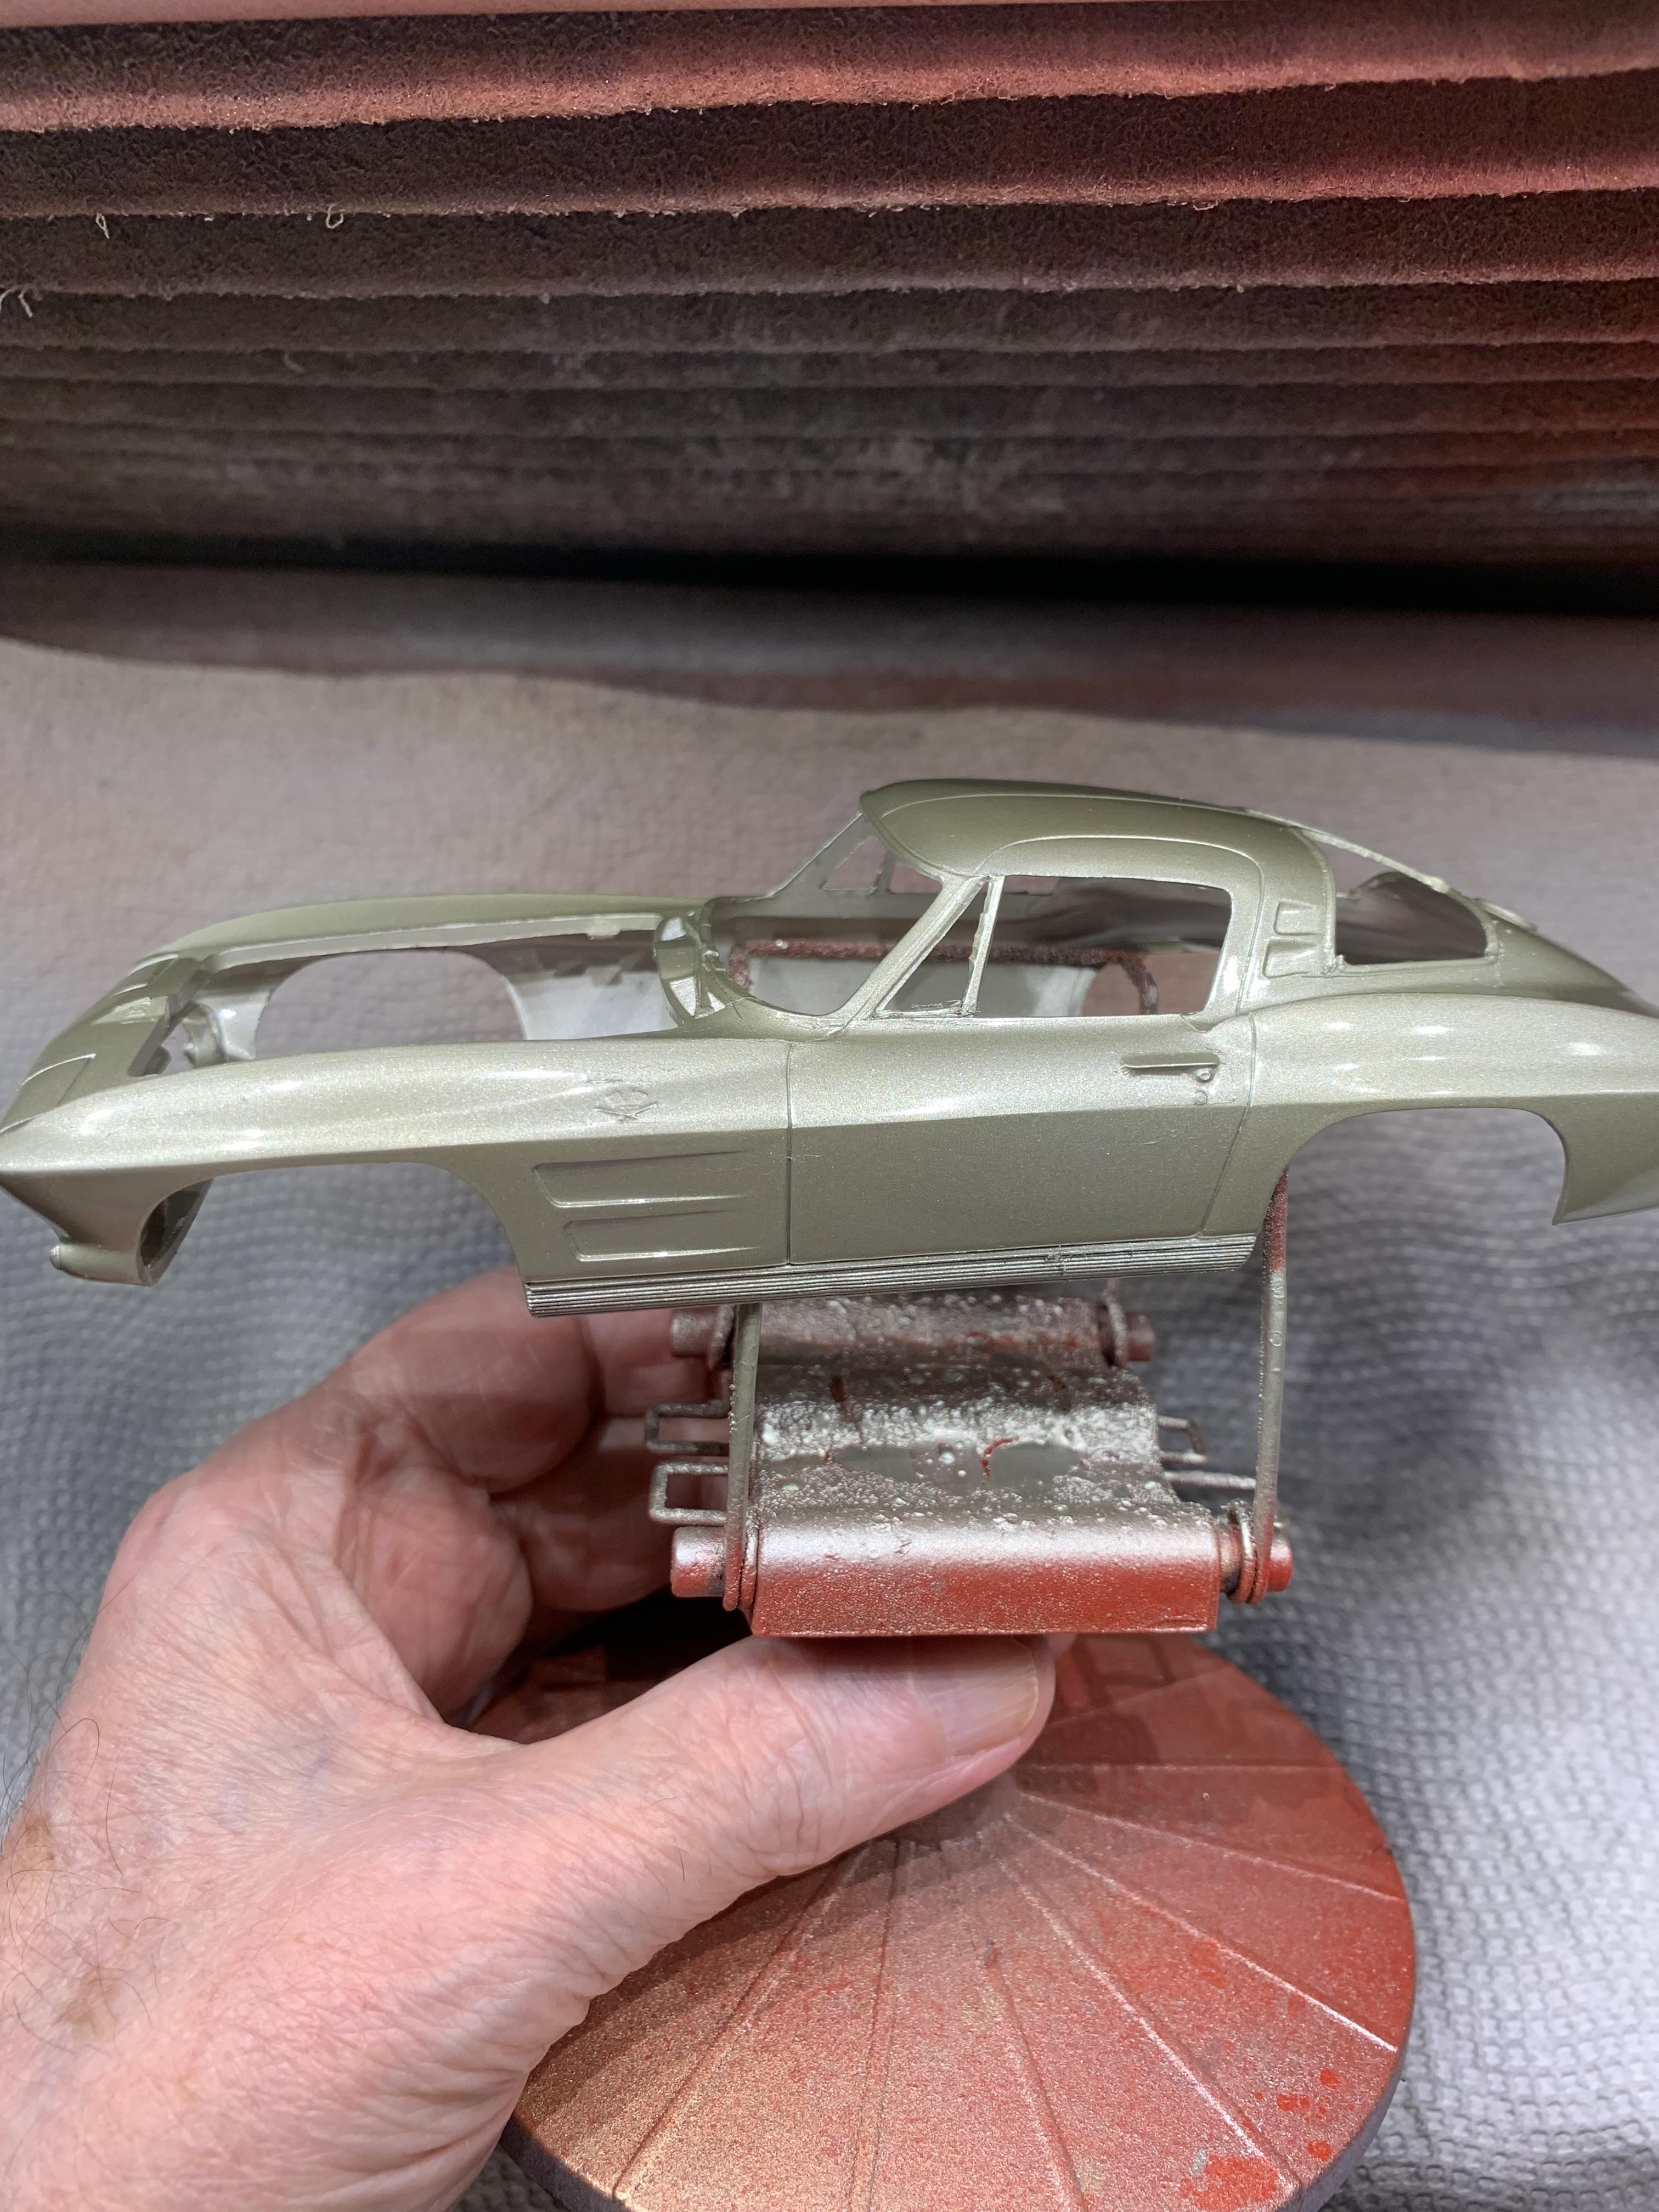
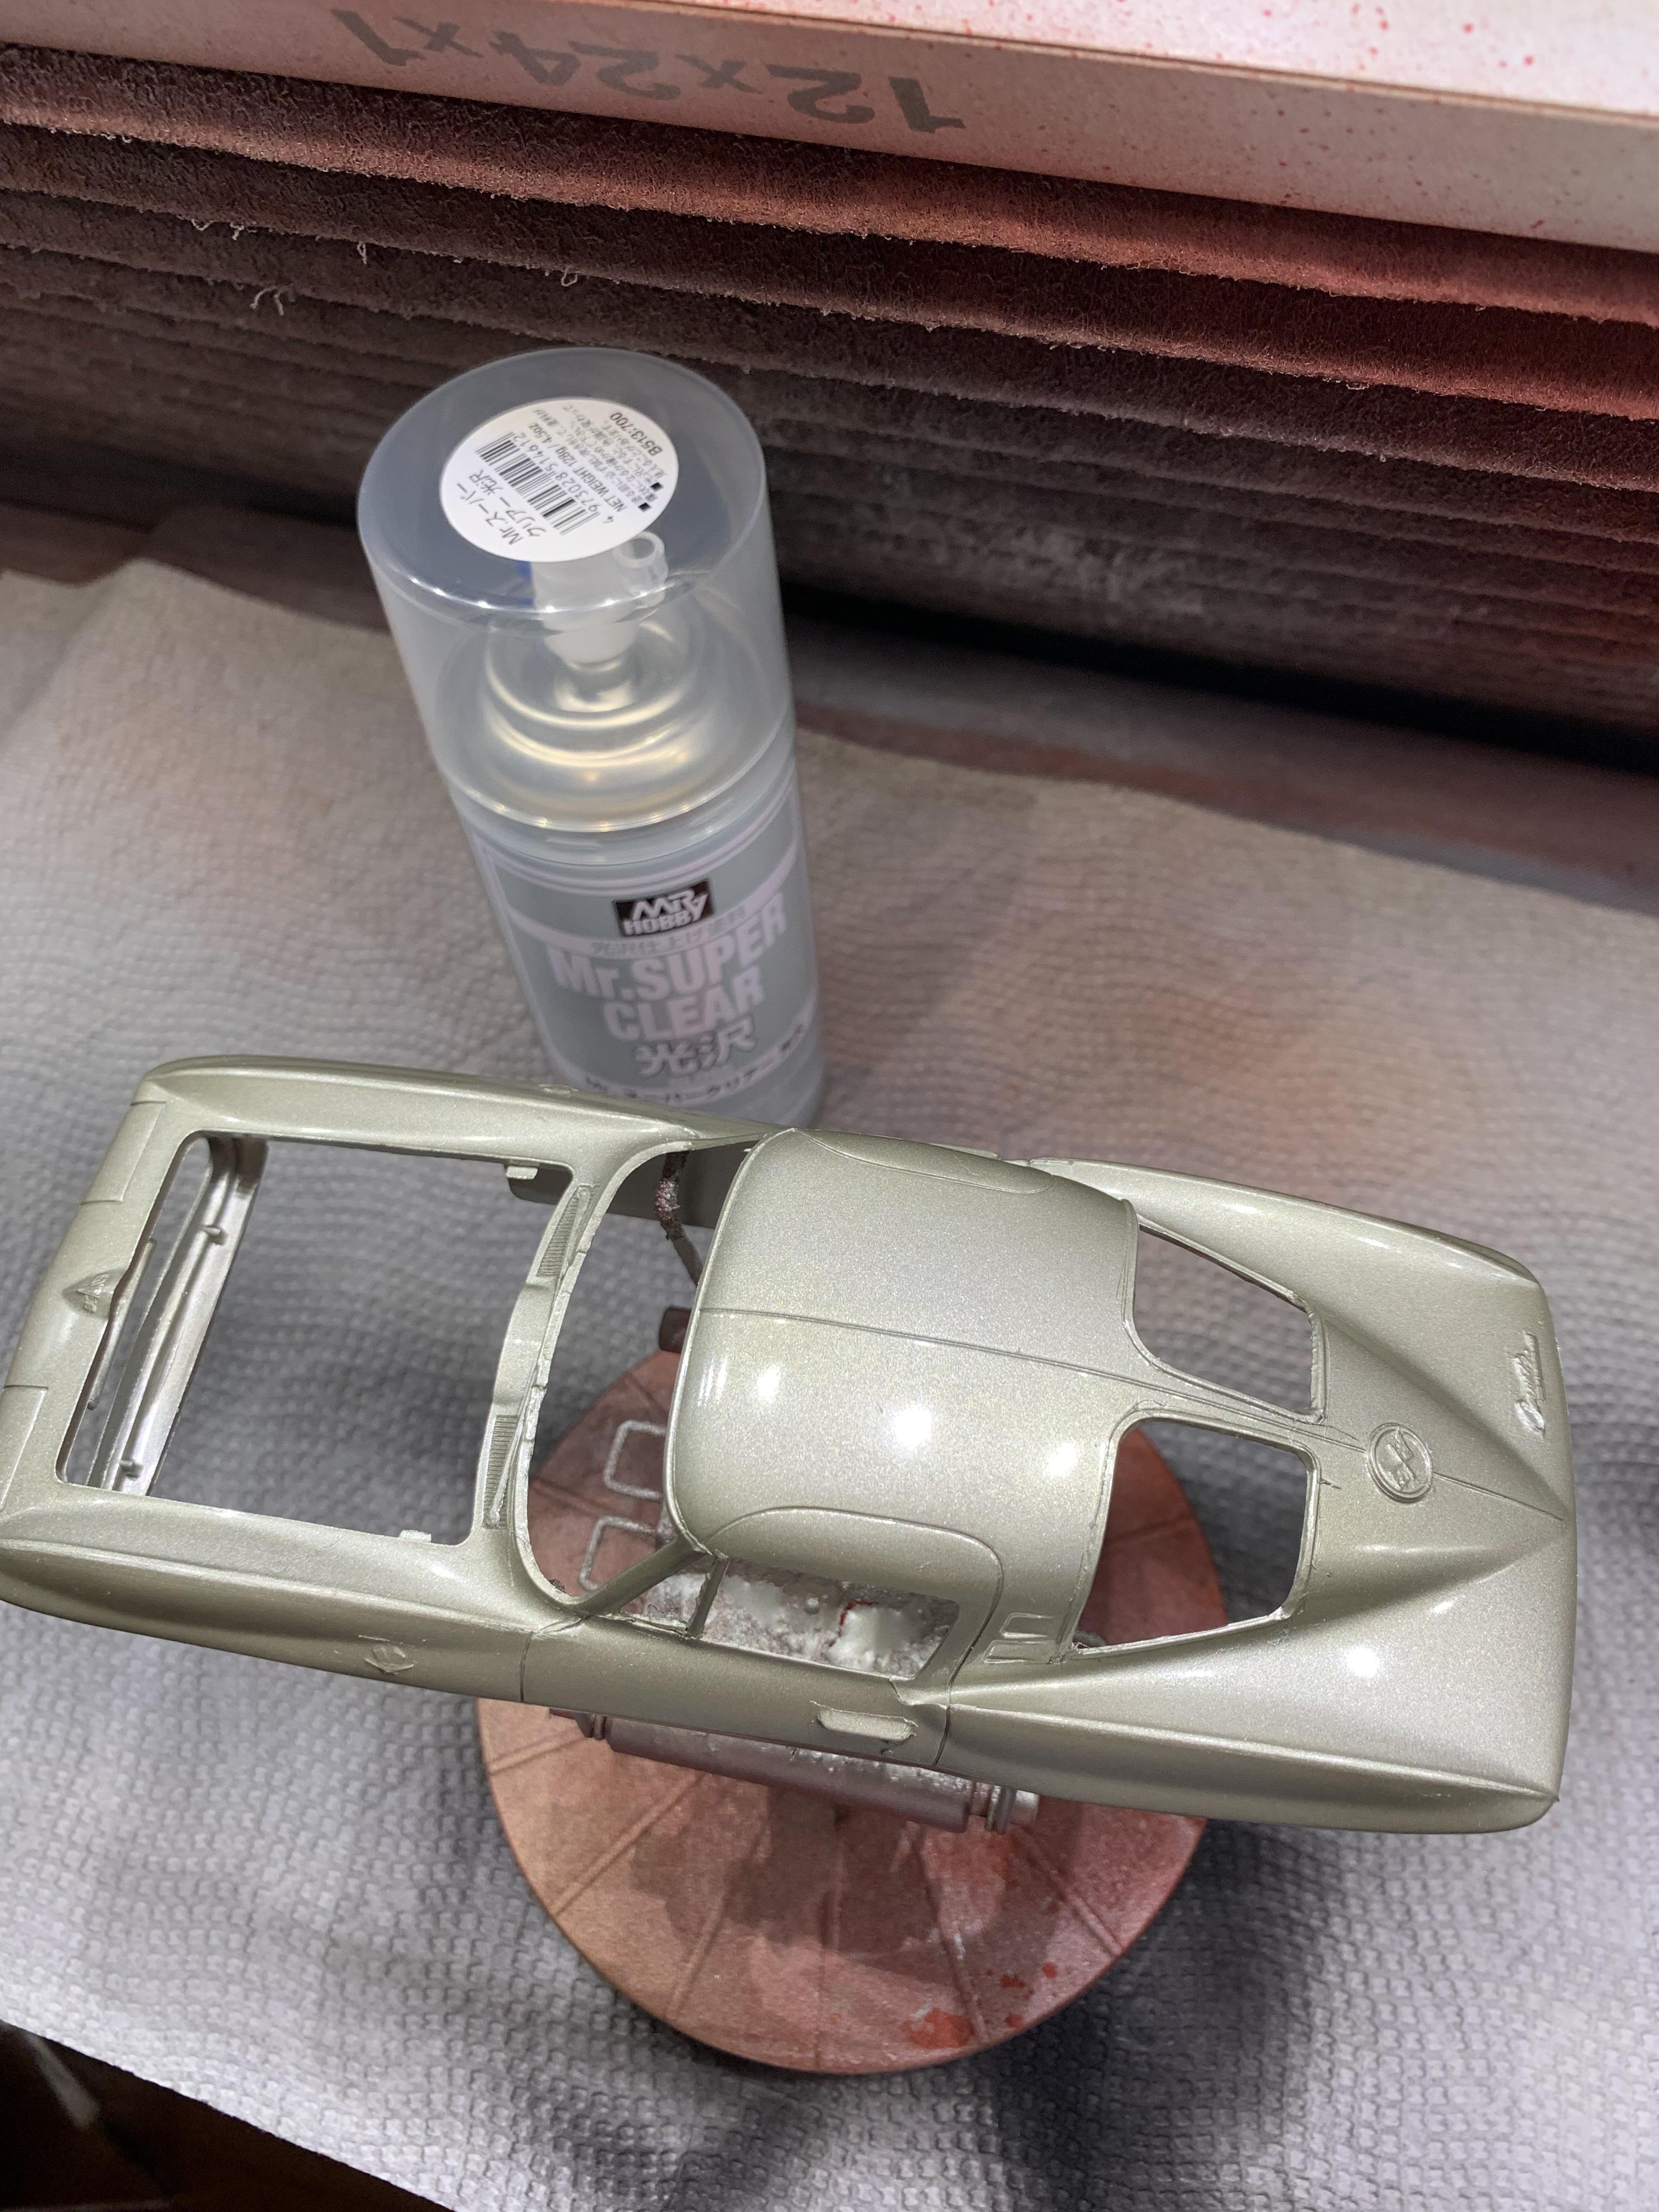
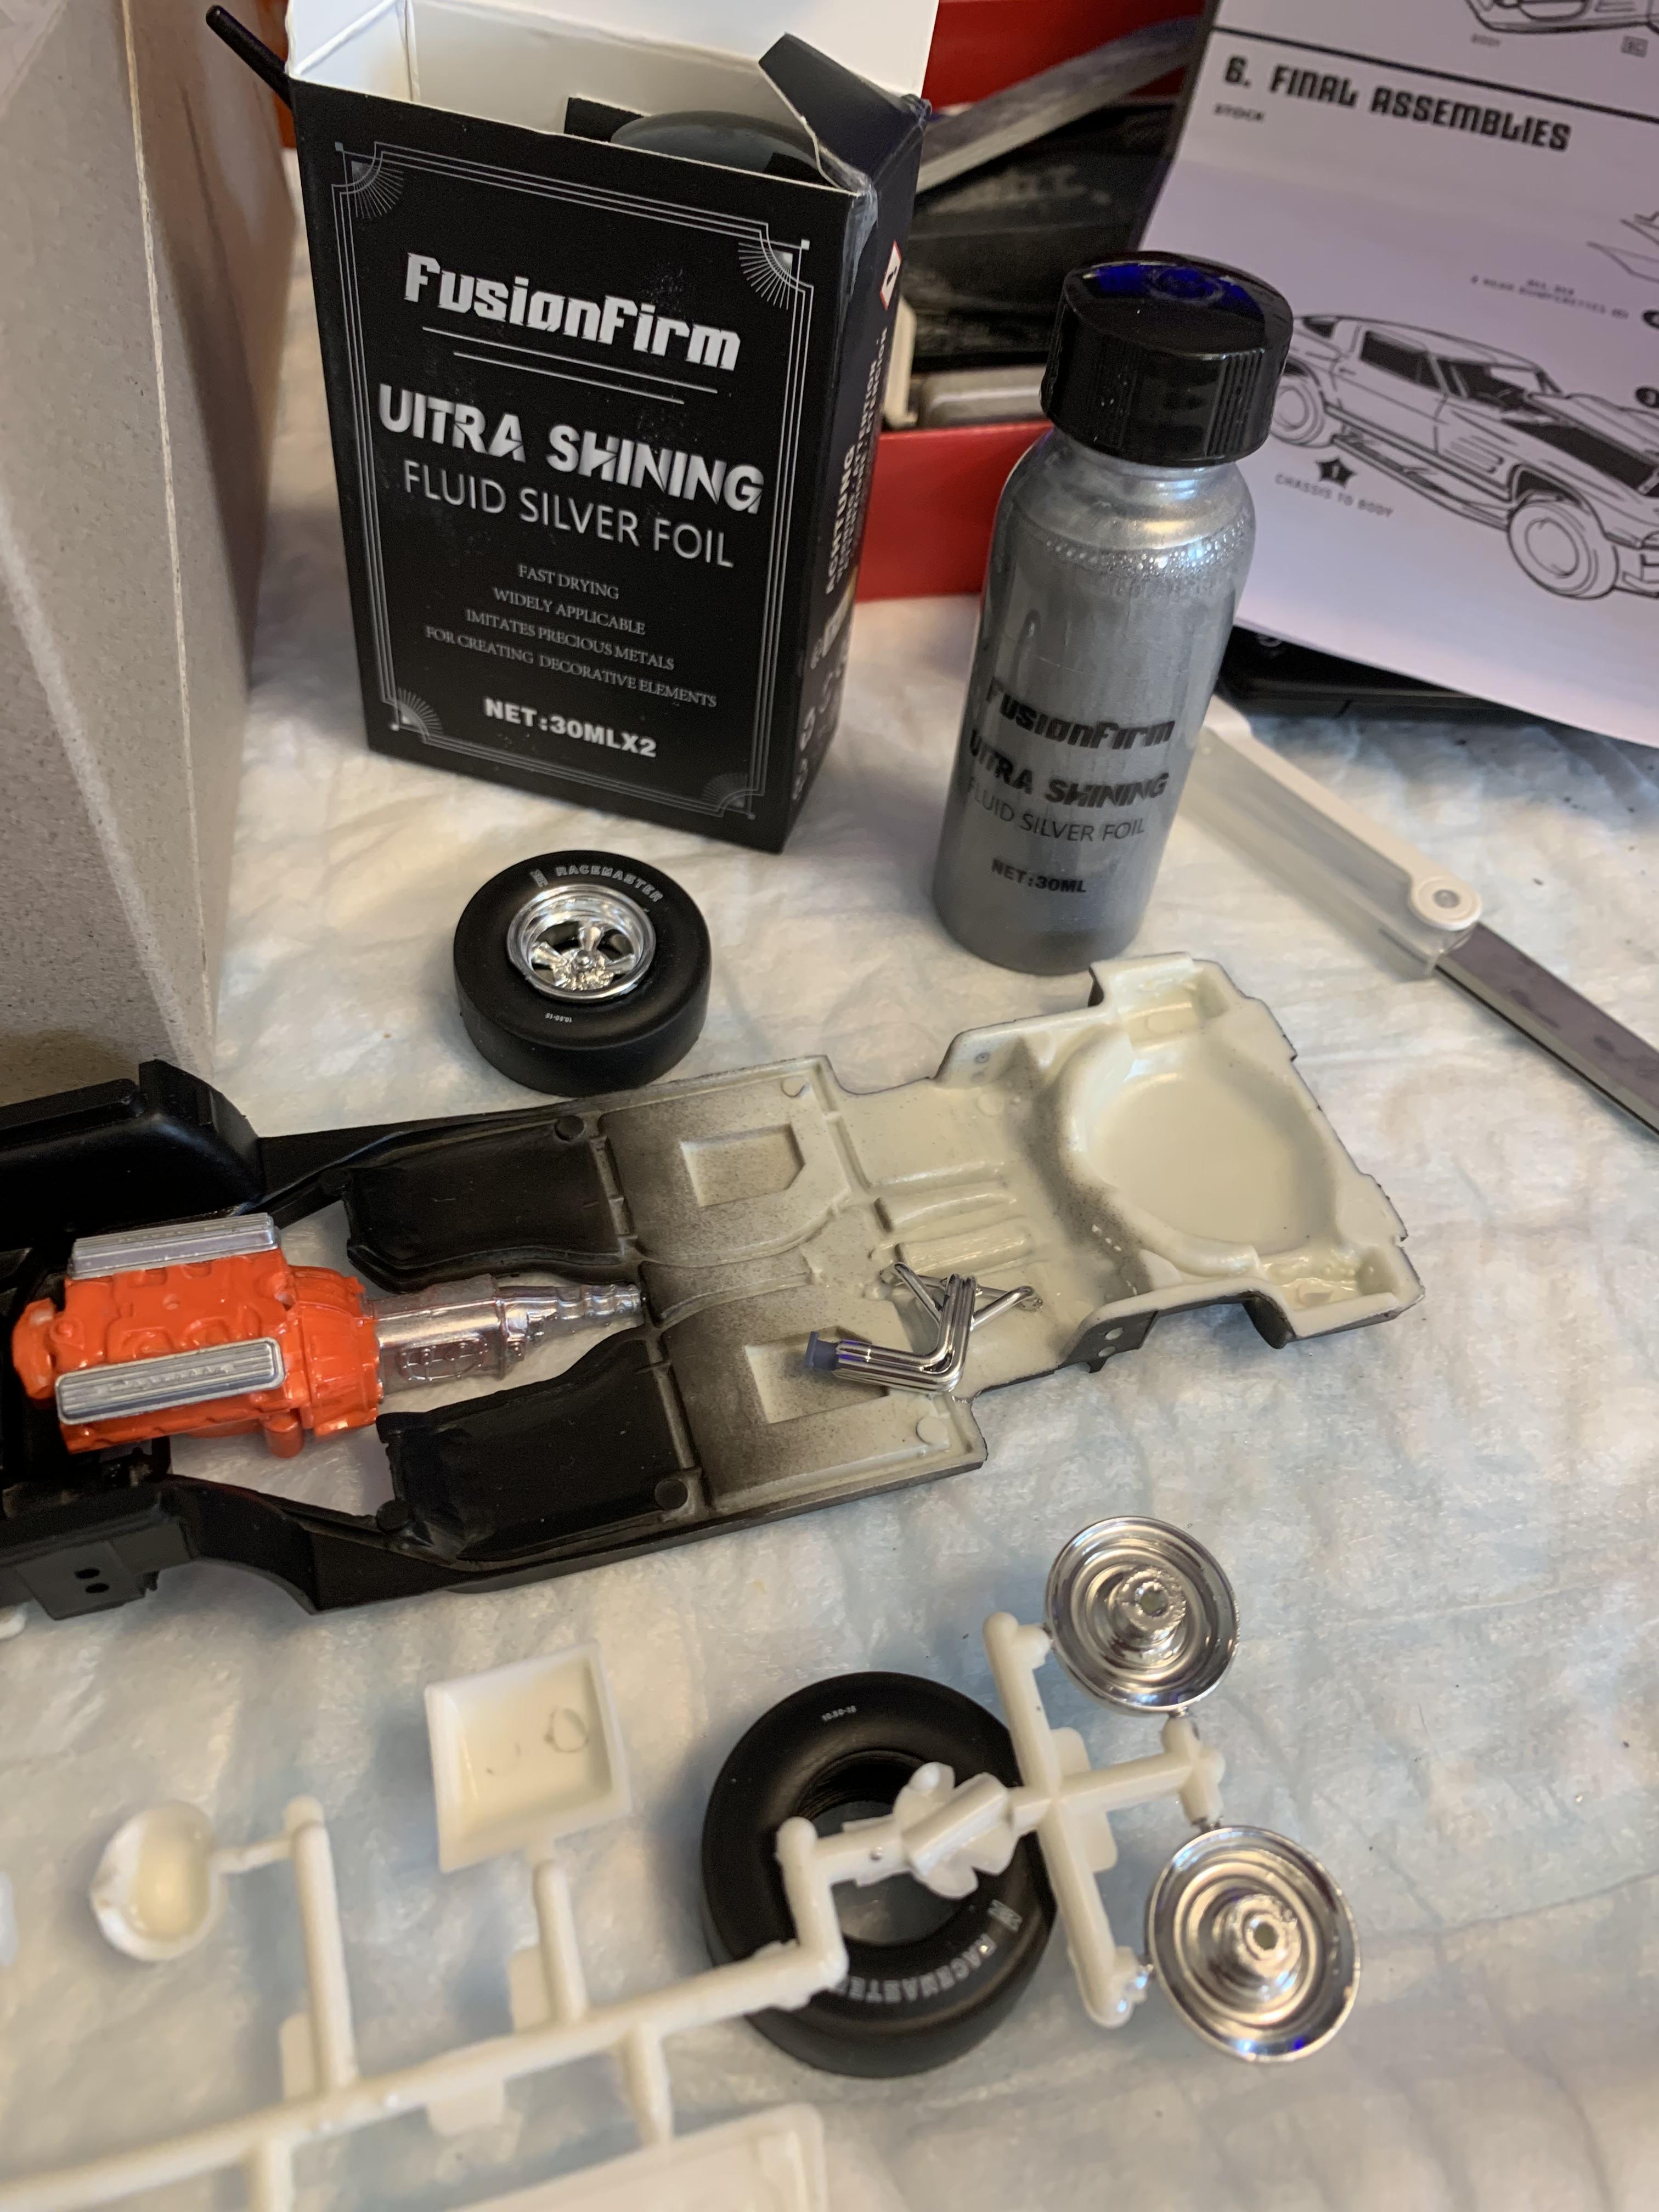
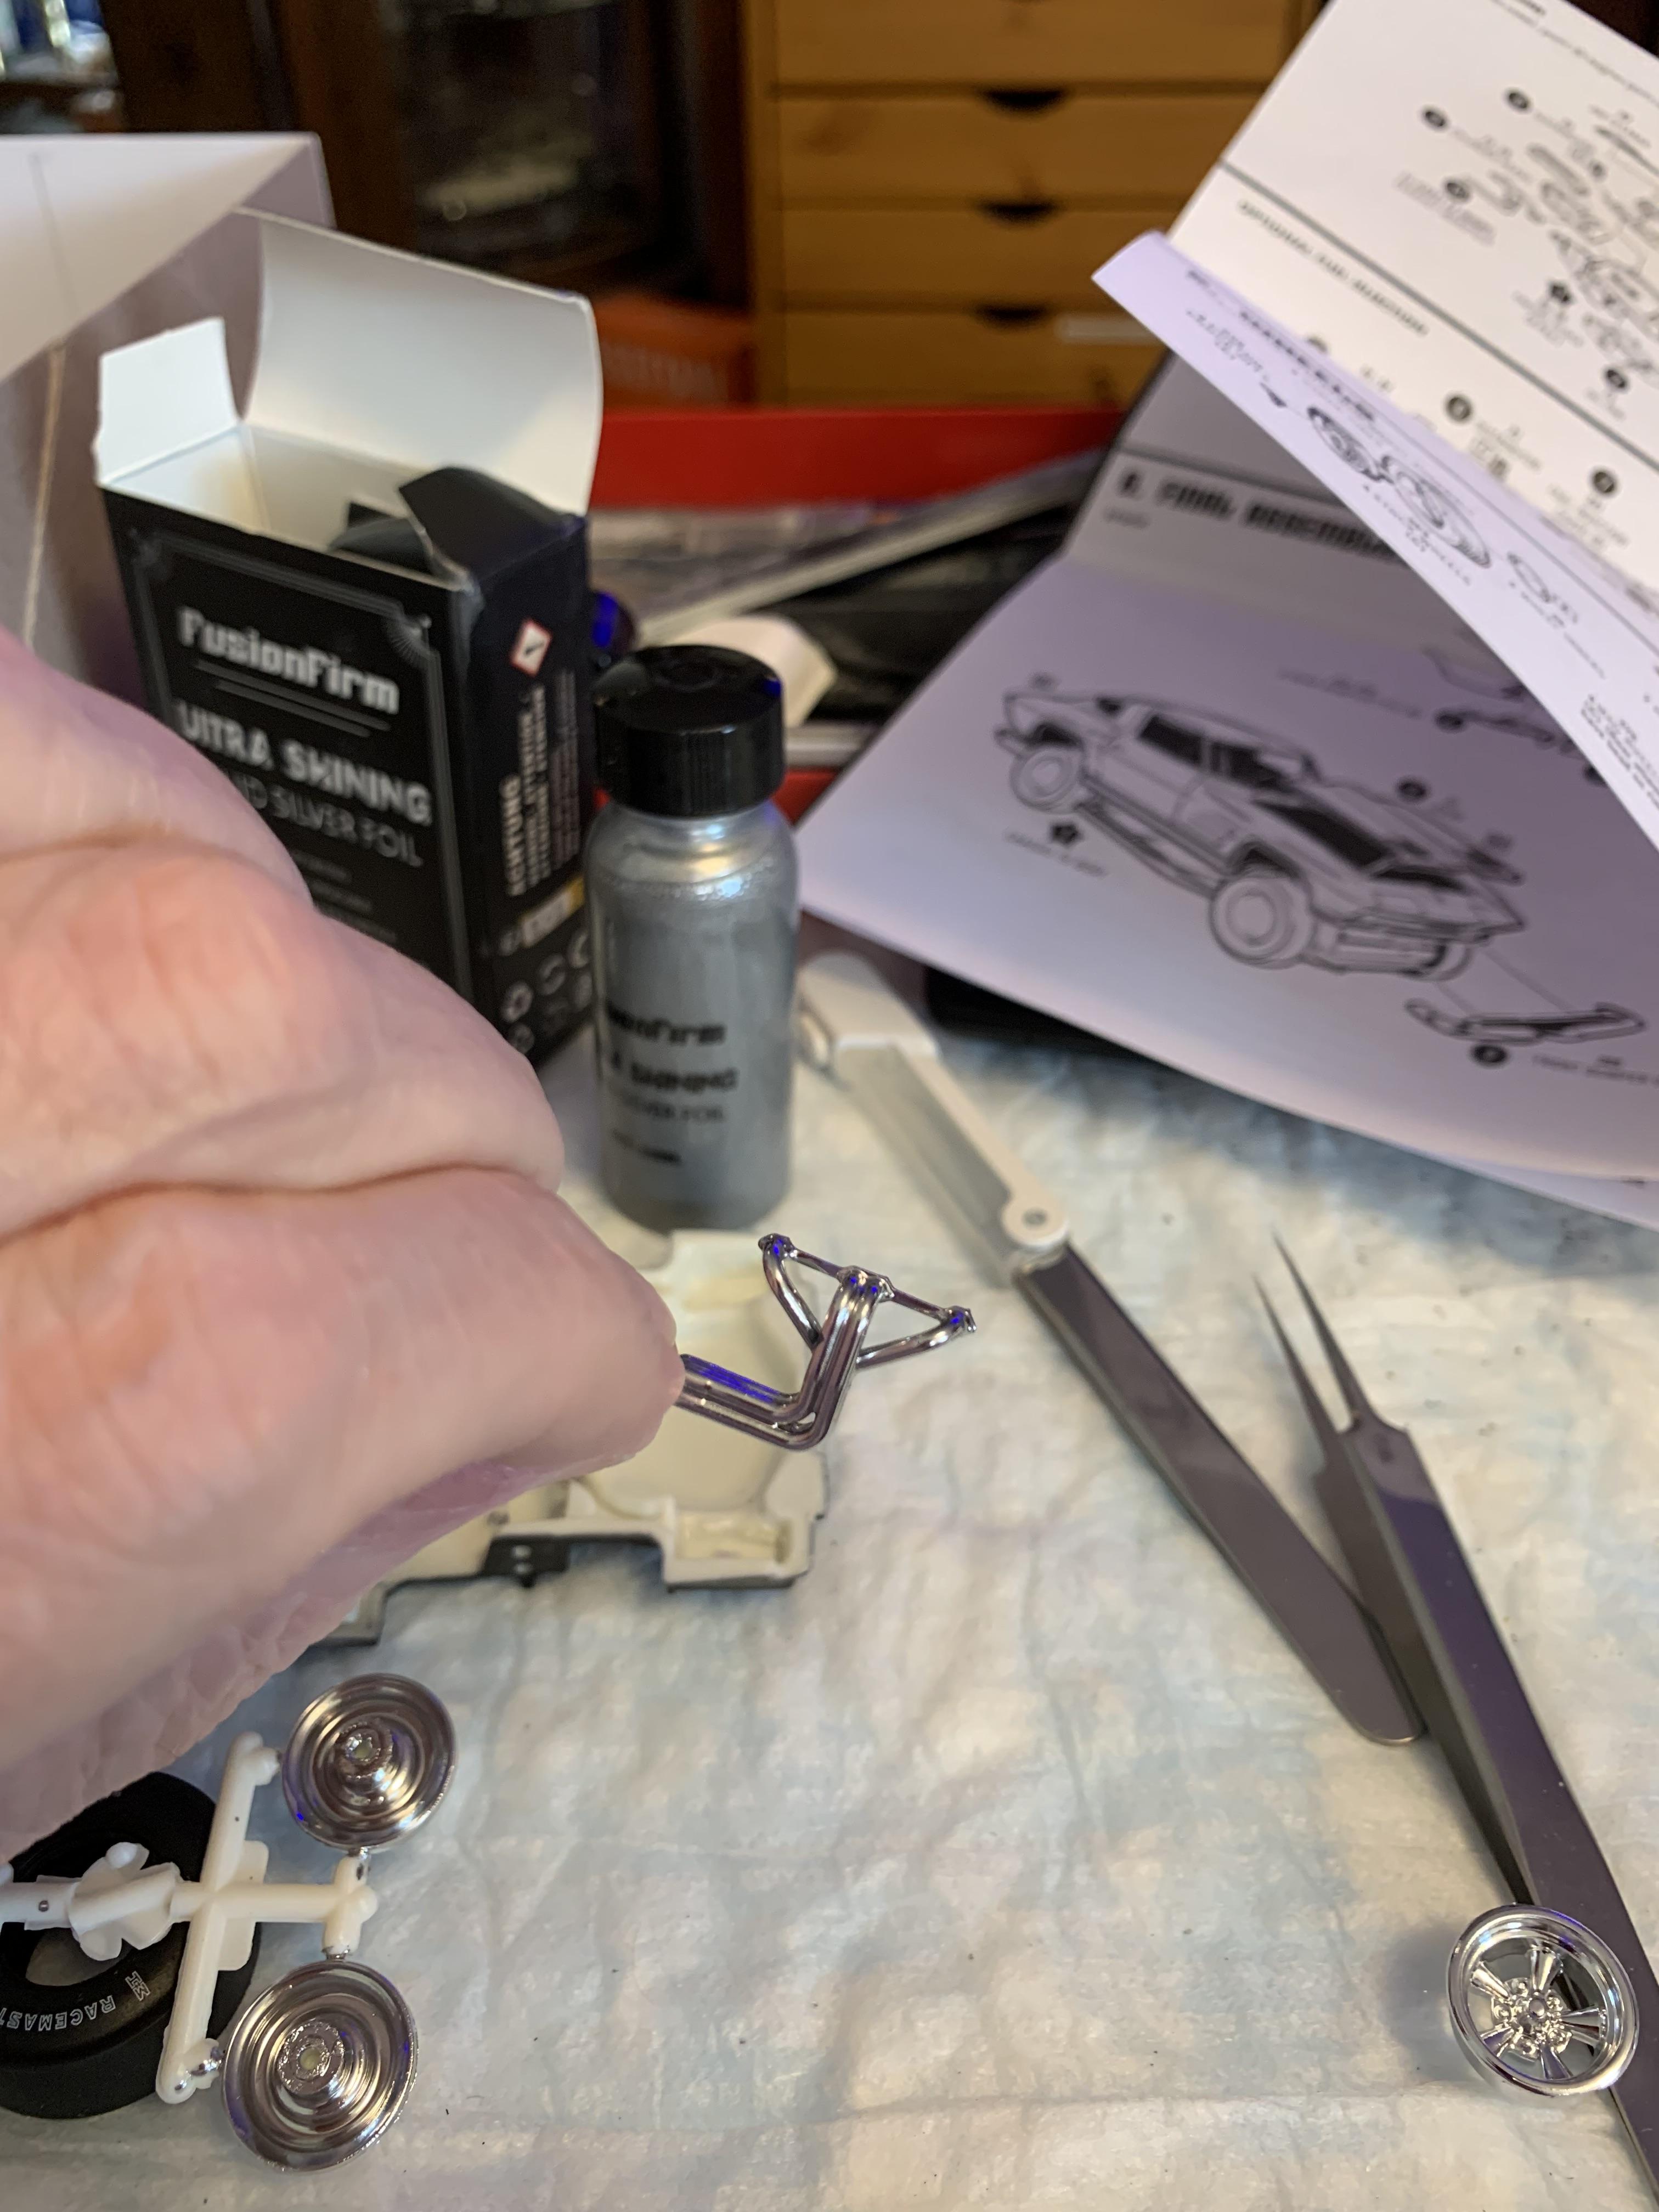
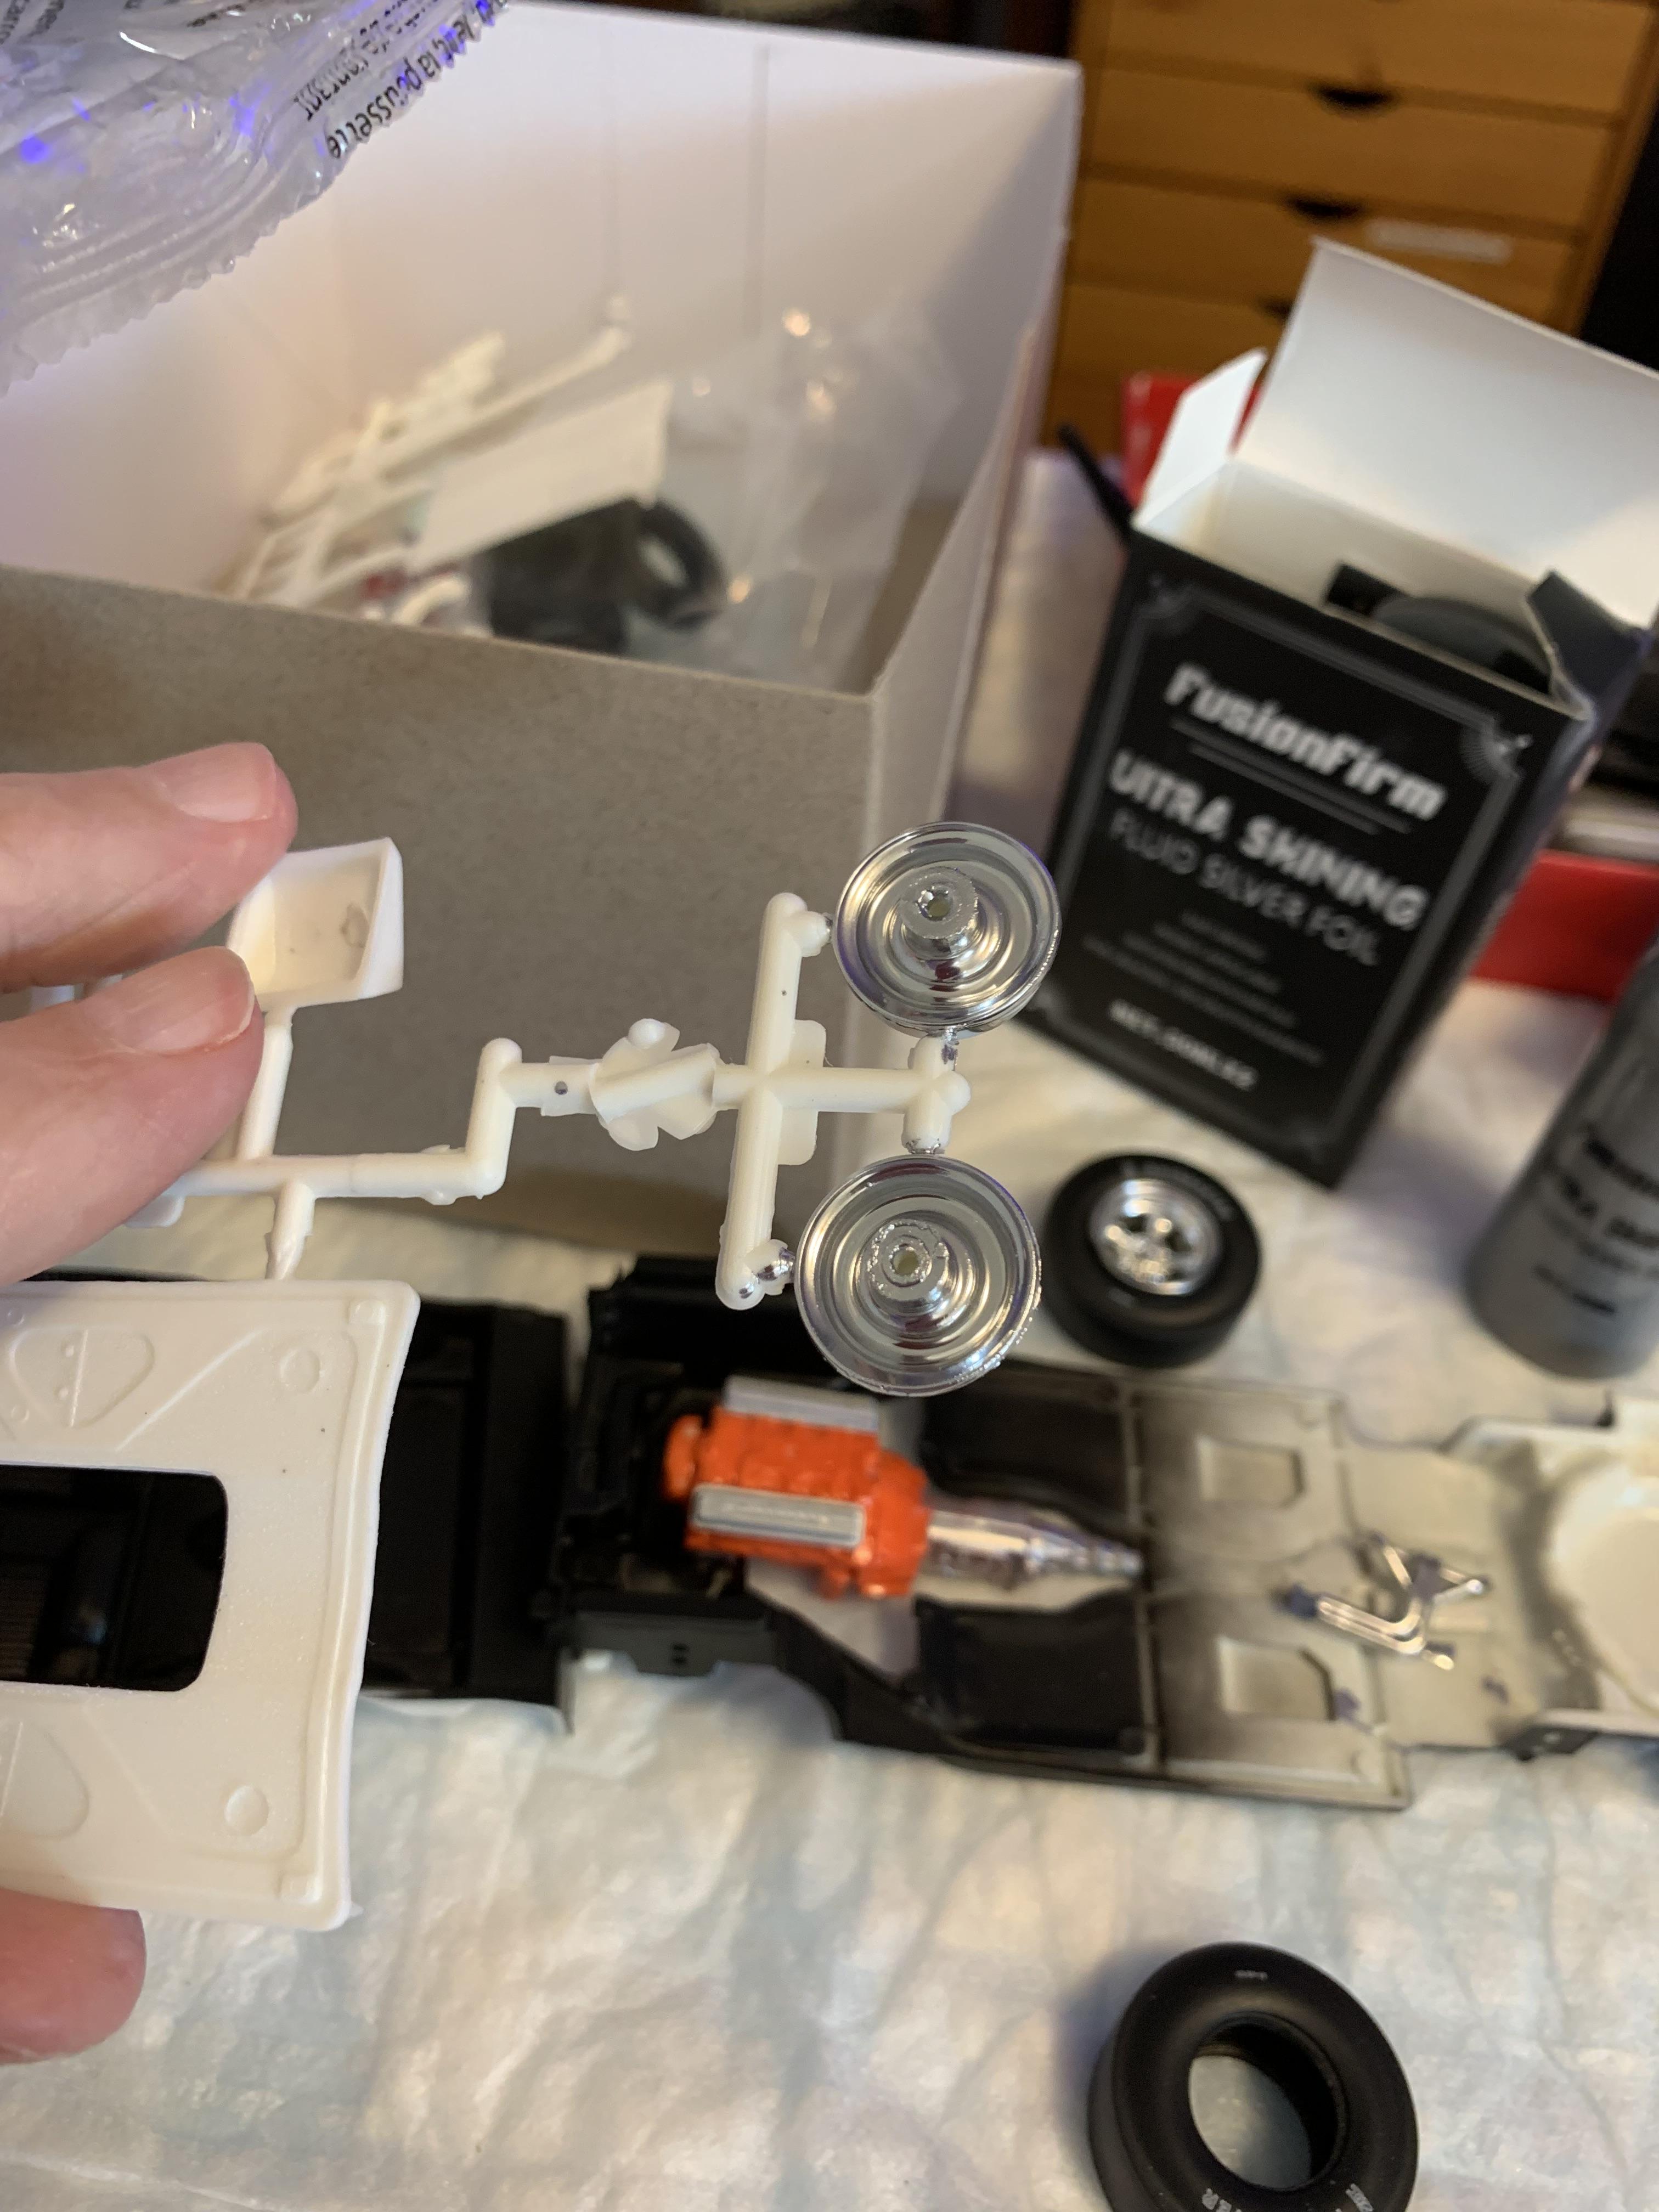
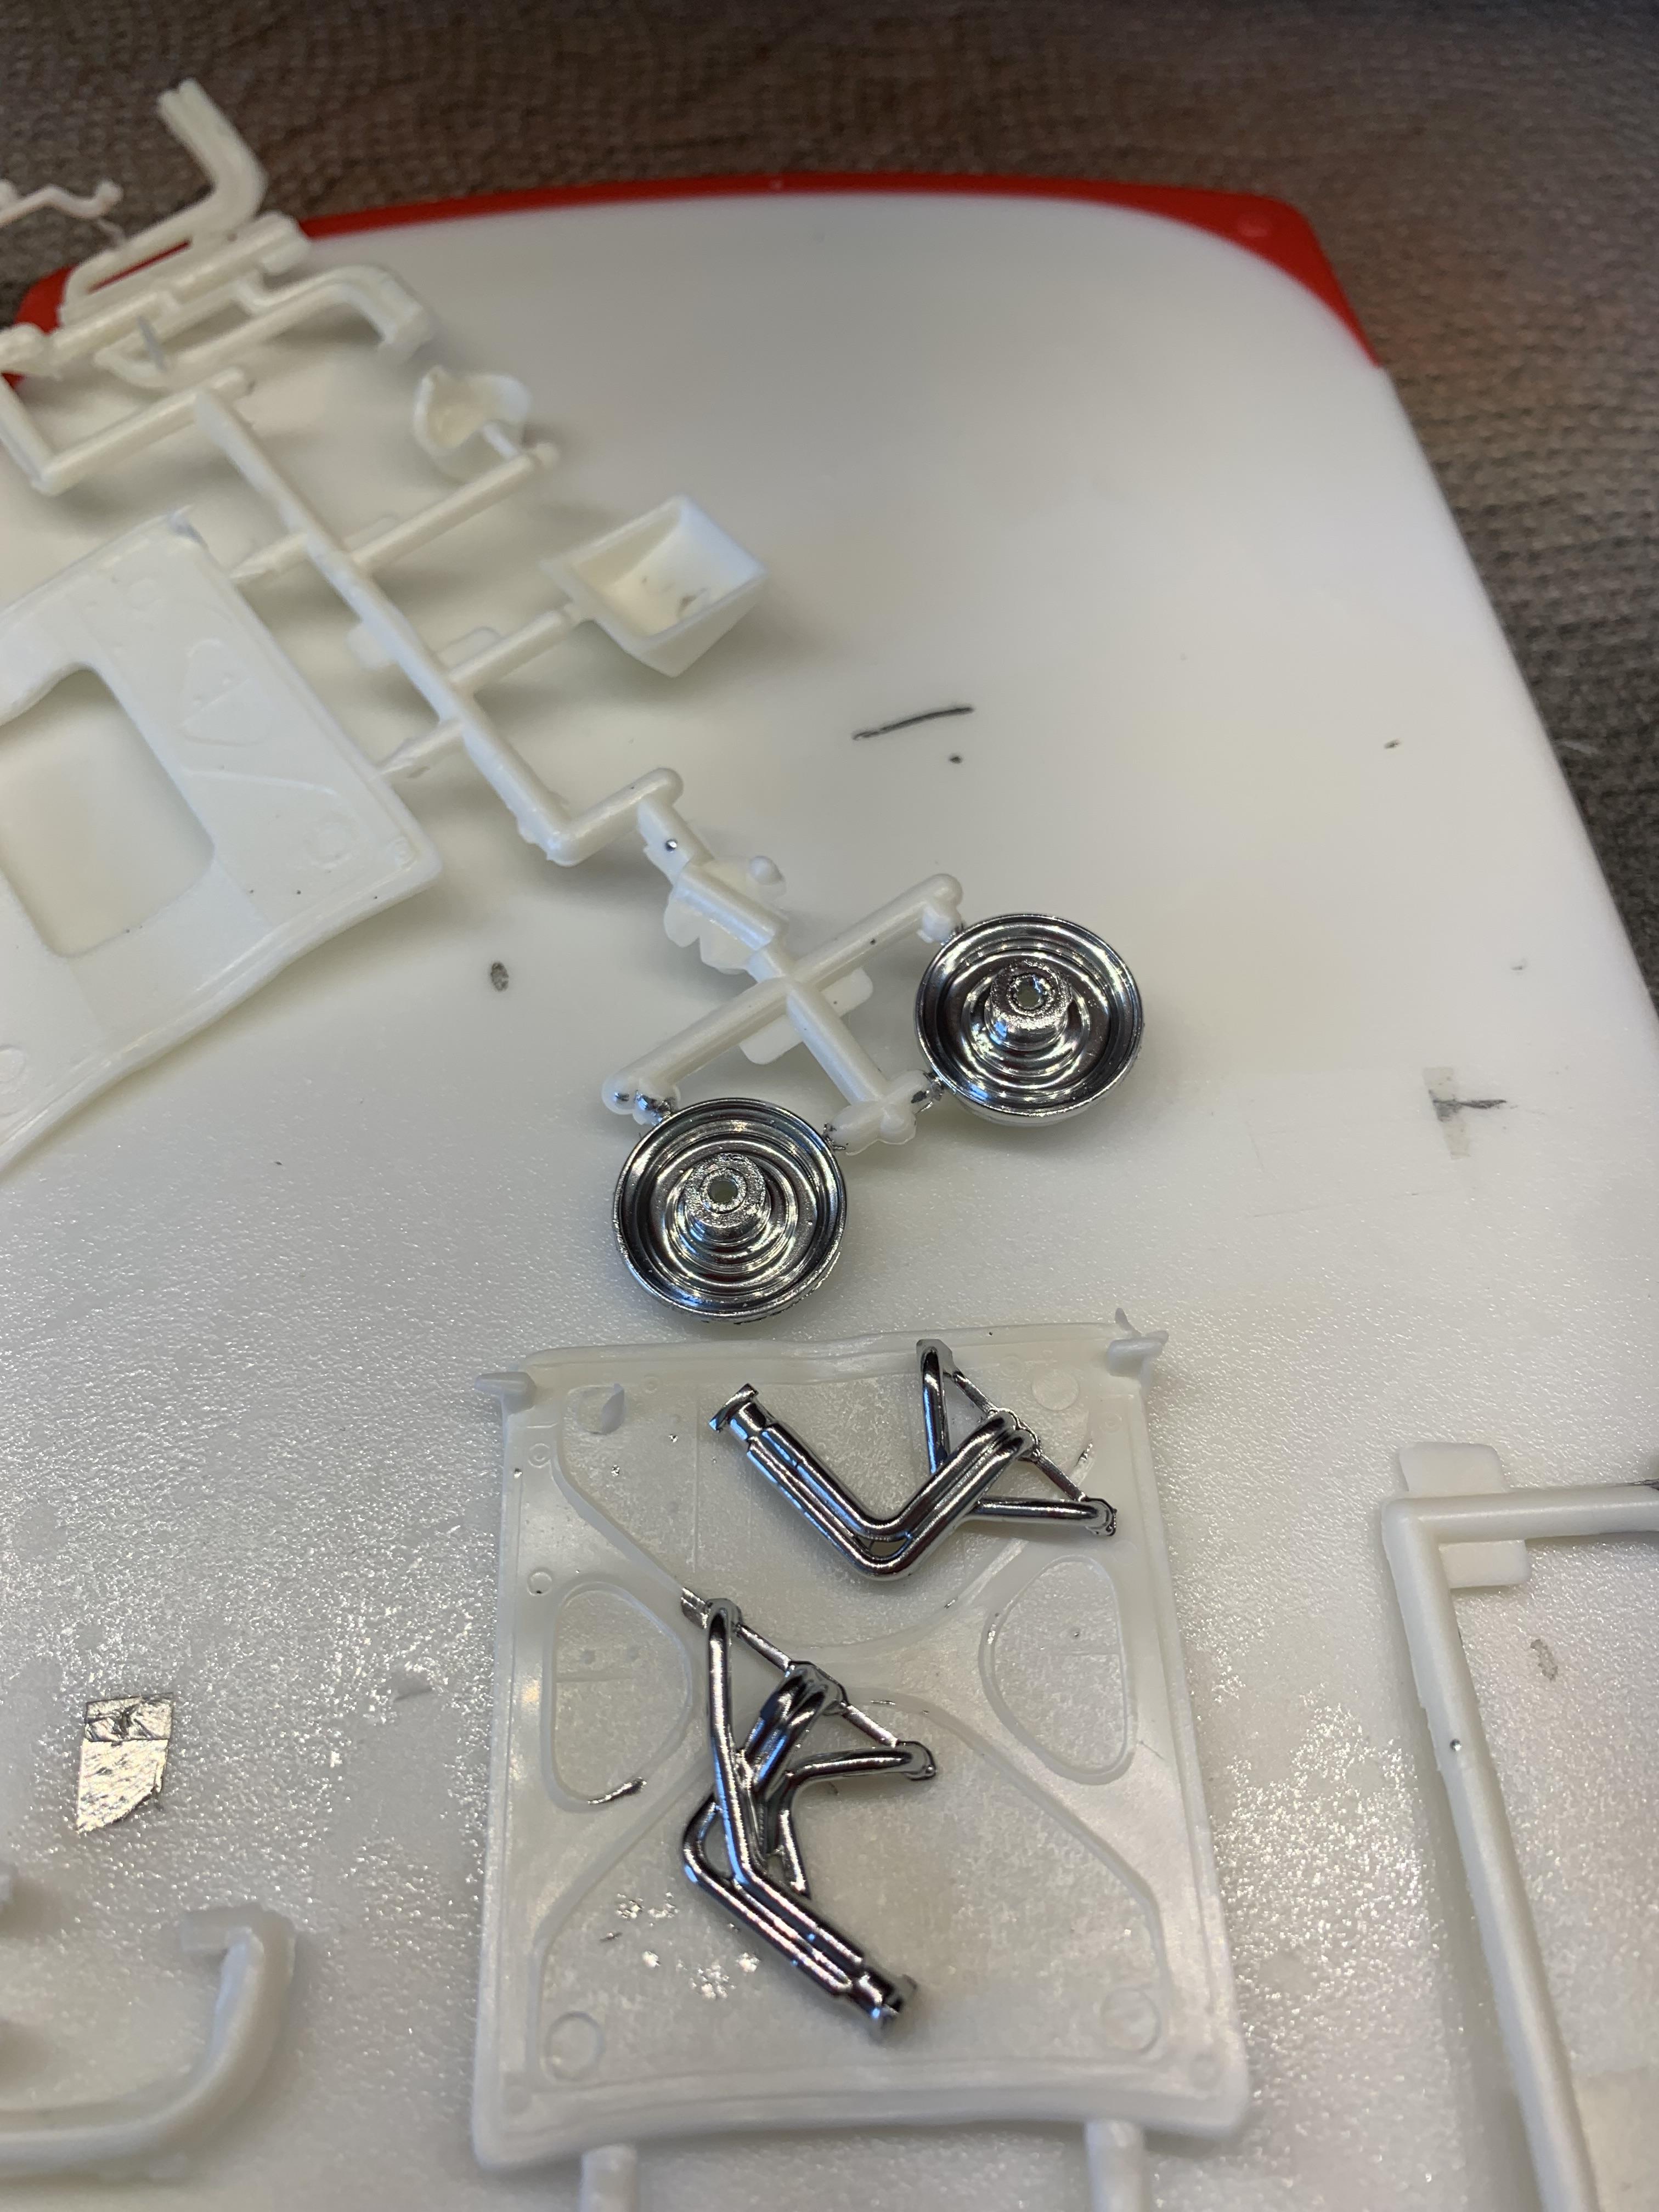
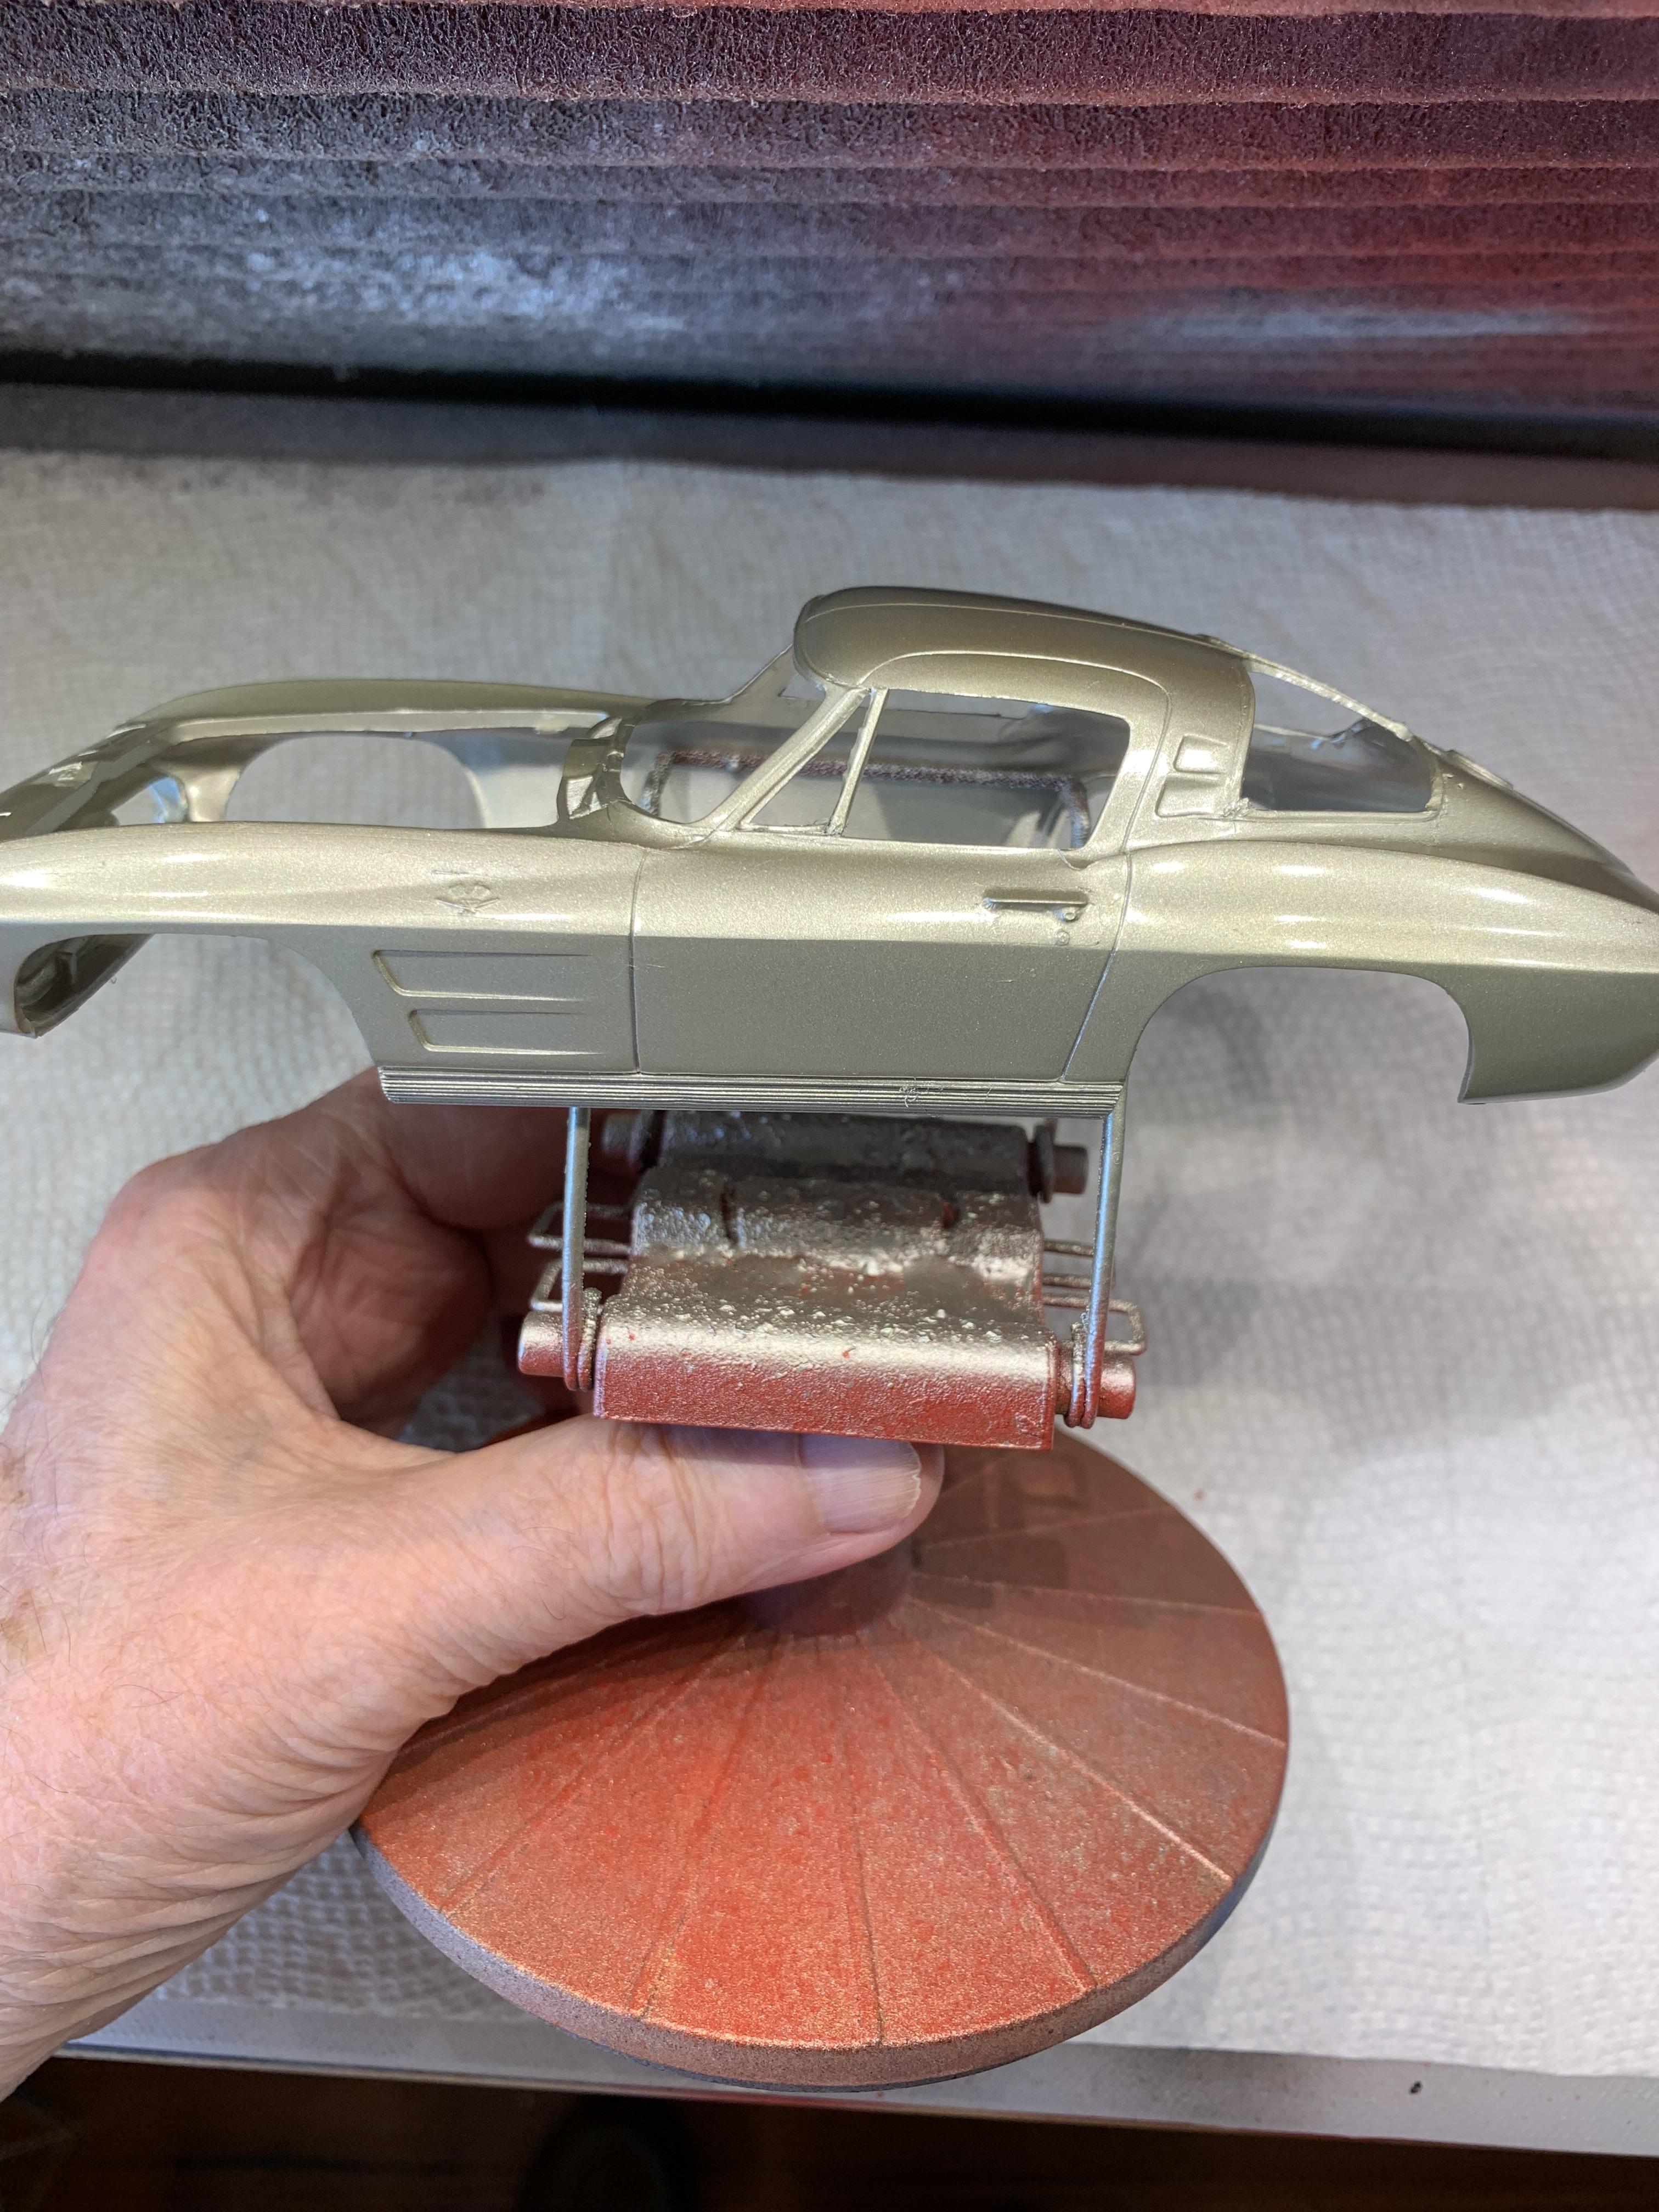
More pics and details on this overly long build in the WIP Section. Similar to, but not as pretty as Tony Hernandez’s real life Stocker, this was a change of pace build for me not being nearly as well detailed as most of my models. Based on the venerable AMT kit and almost out of the box, I had forgotten how beautiful the body on these cars were. Painted with TS75 Tamiya Champagne gold spray can (no primer) topped with a couple coats of Mr. Super Clear spray can, I also experimented with vcgresins Hooker headers (brush painted with FusionFirm). I used mcvproducts Afb carb and tachometer.
-
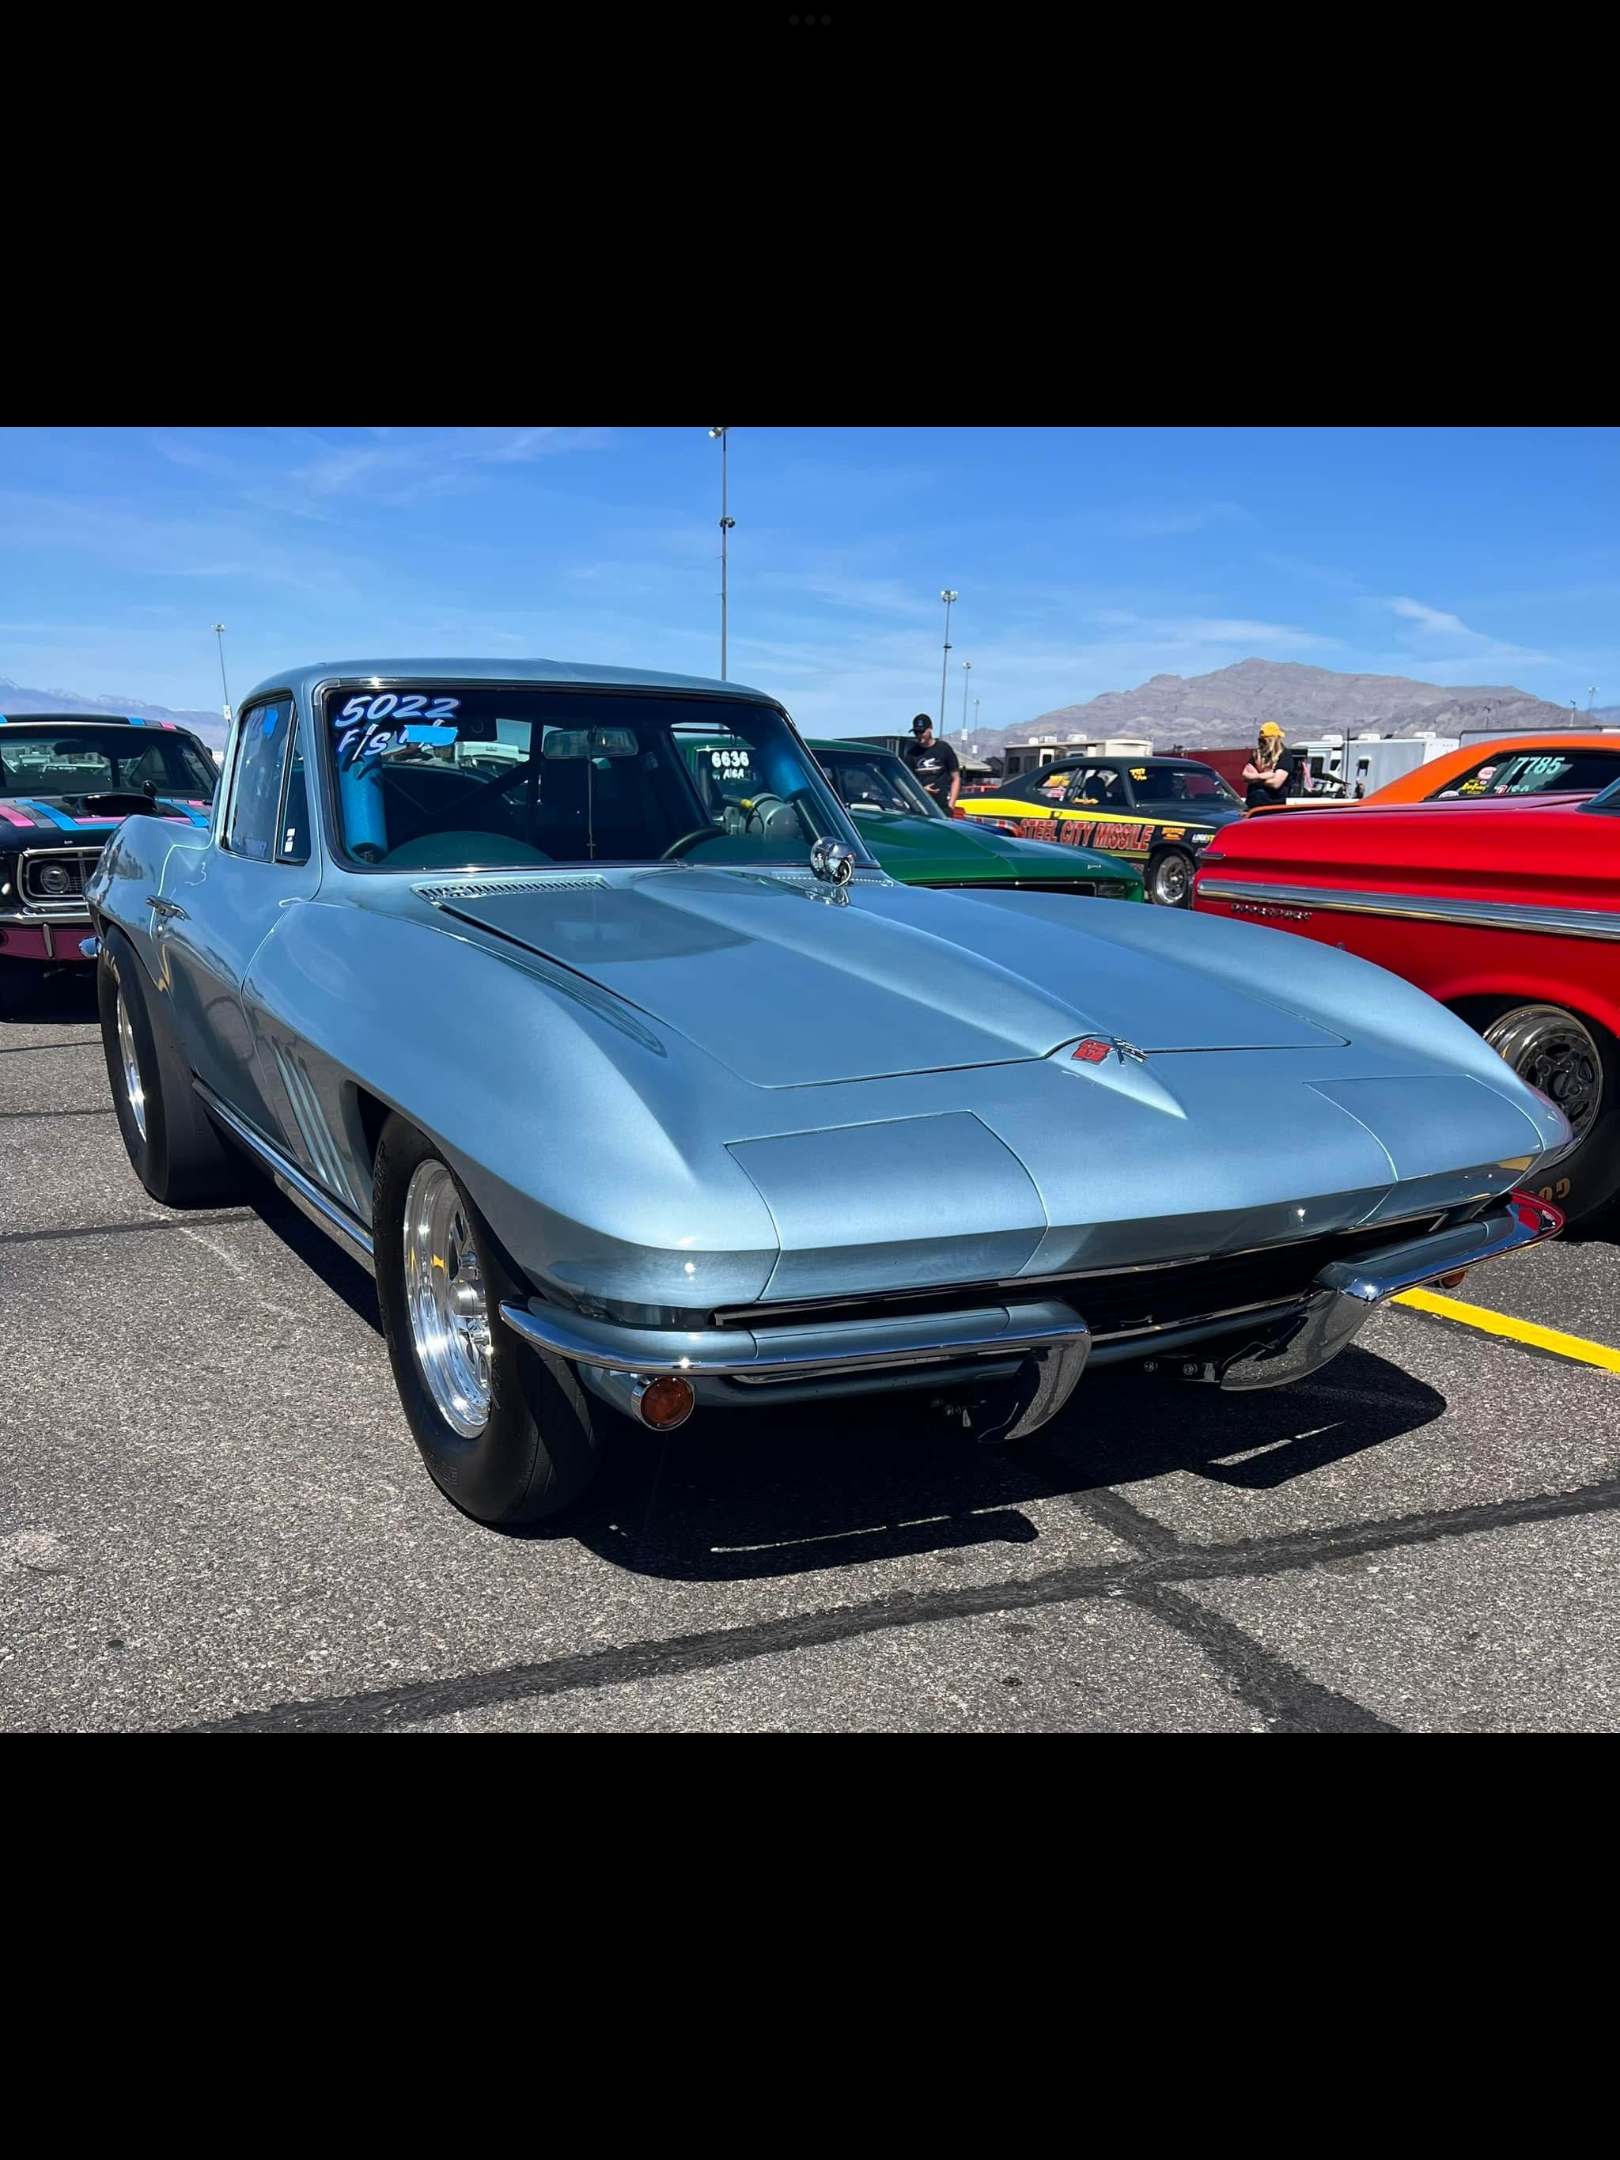
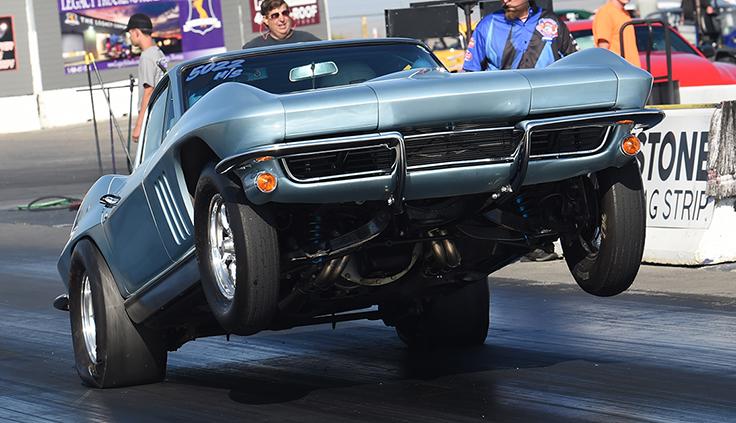
1963 Corvette current day nhra Stock Eliminator
R. Thorne replied to R. Thorne's topic in WIP: Drag Racing Models
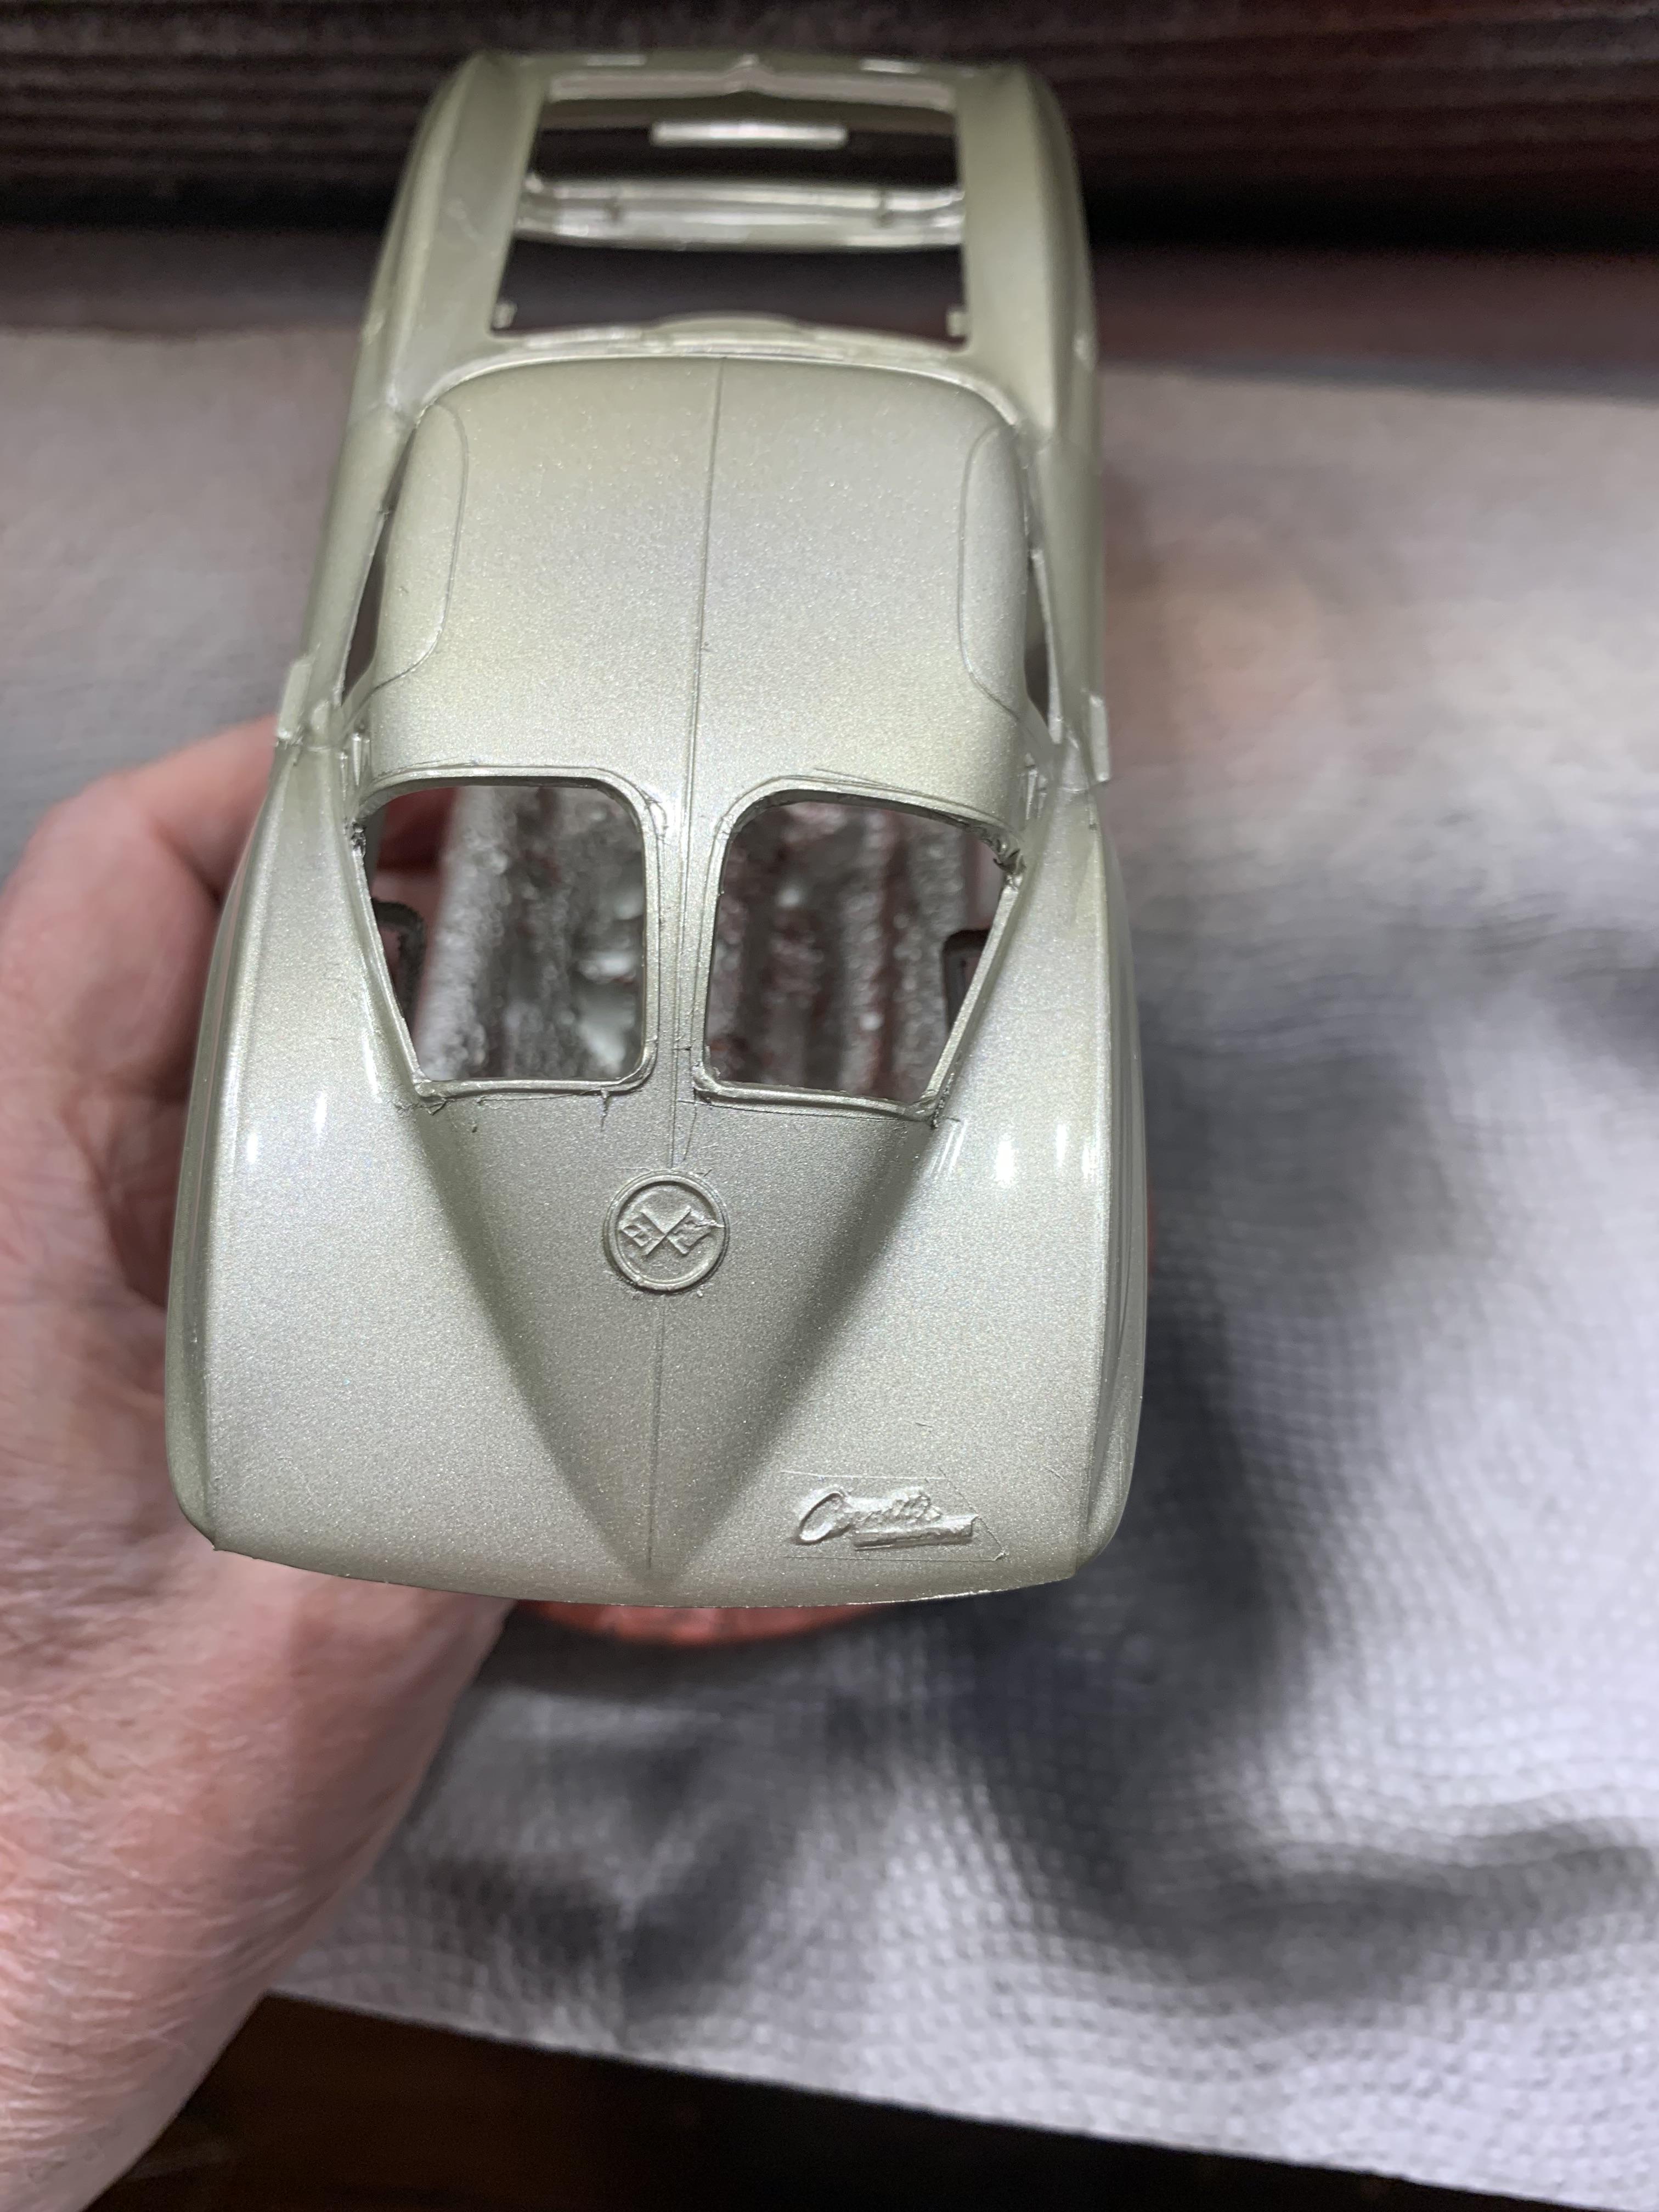
Thanks, guys. Comments, critical or supportive, are always appreciated. Put the top radiator hose on and some class designation and numbers decals on. I am calling it quits on this interesting kit. Couple more pics in the under glass section.
-
1963 Corvette current day nhra Stock Eliminator
R. Thorne replied to R. Thorne's topic in WIP: Drag Racing Models
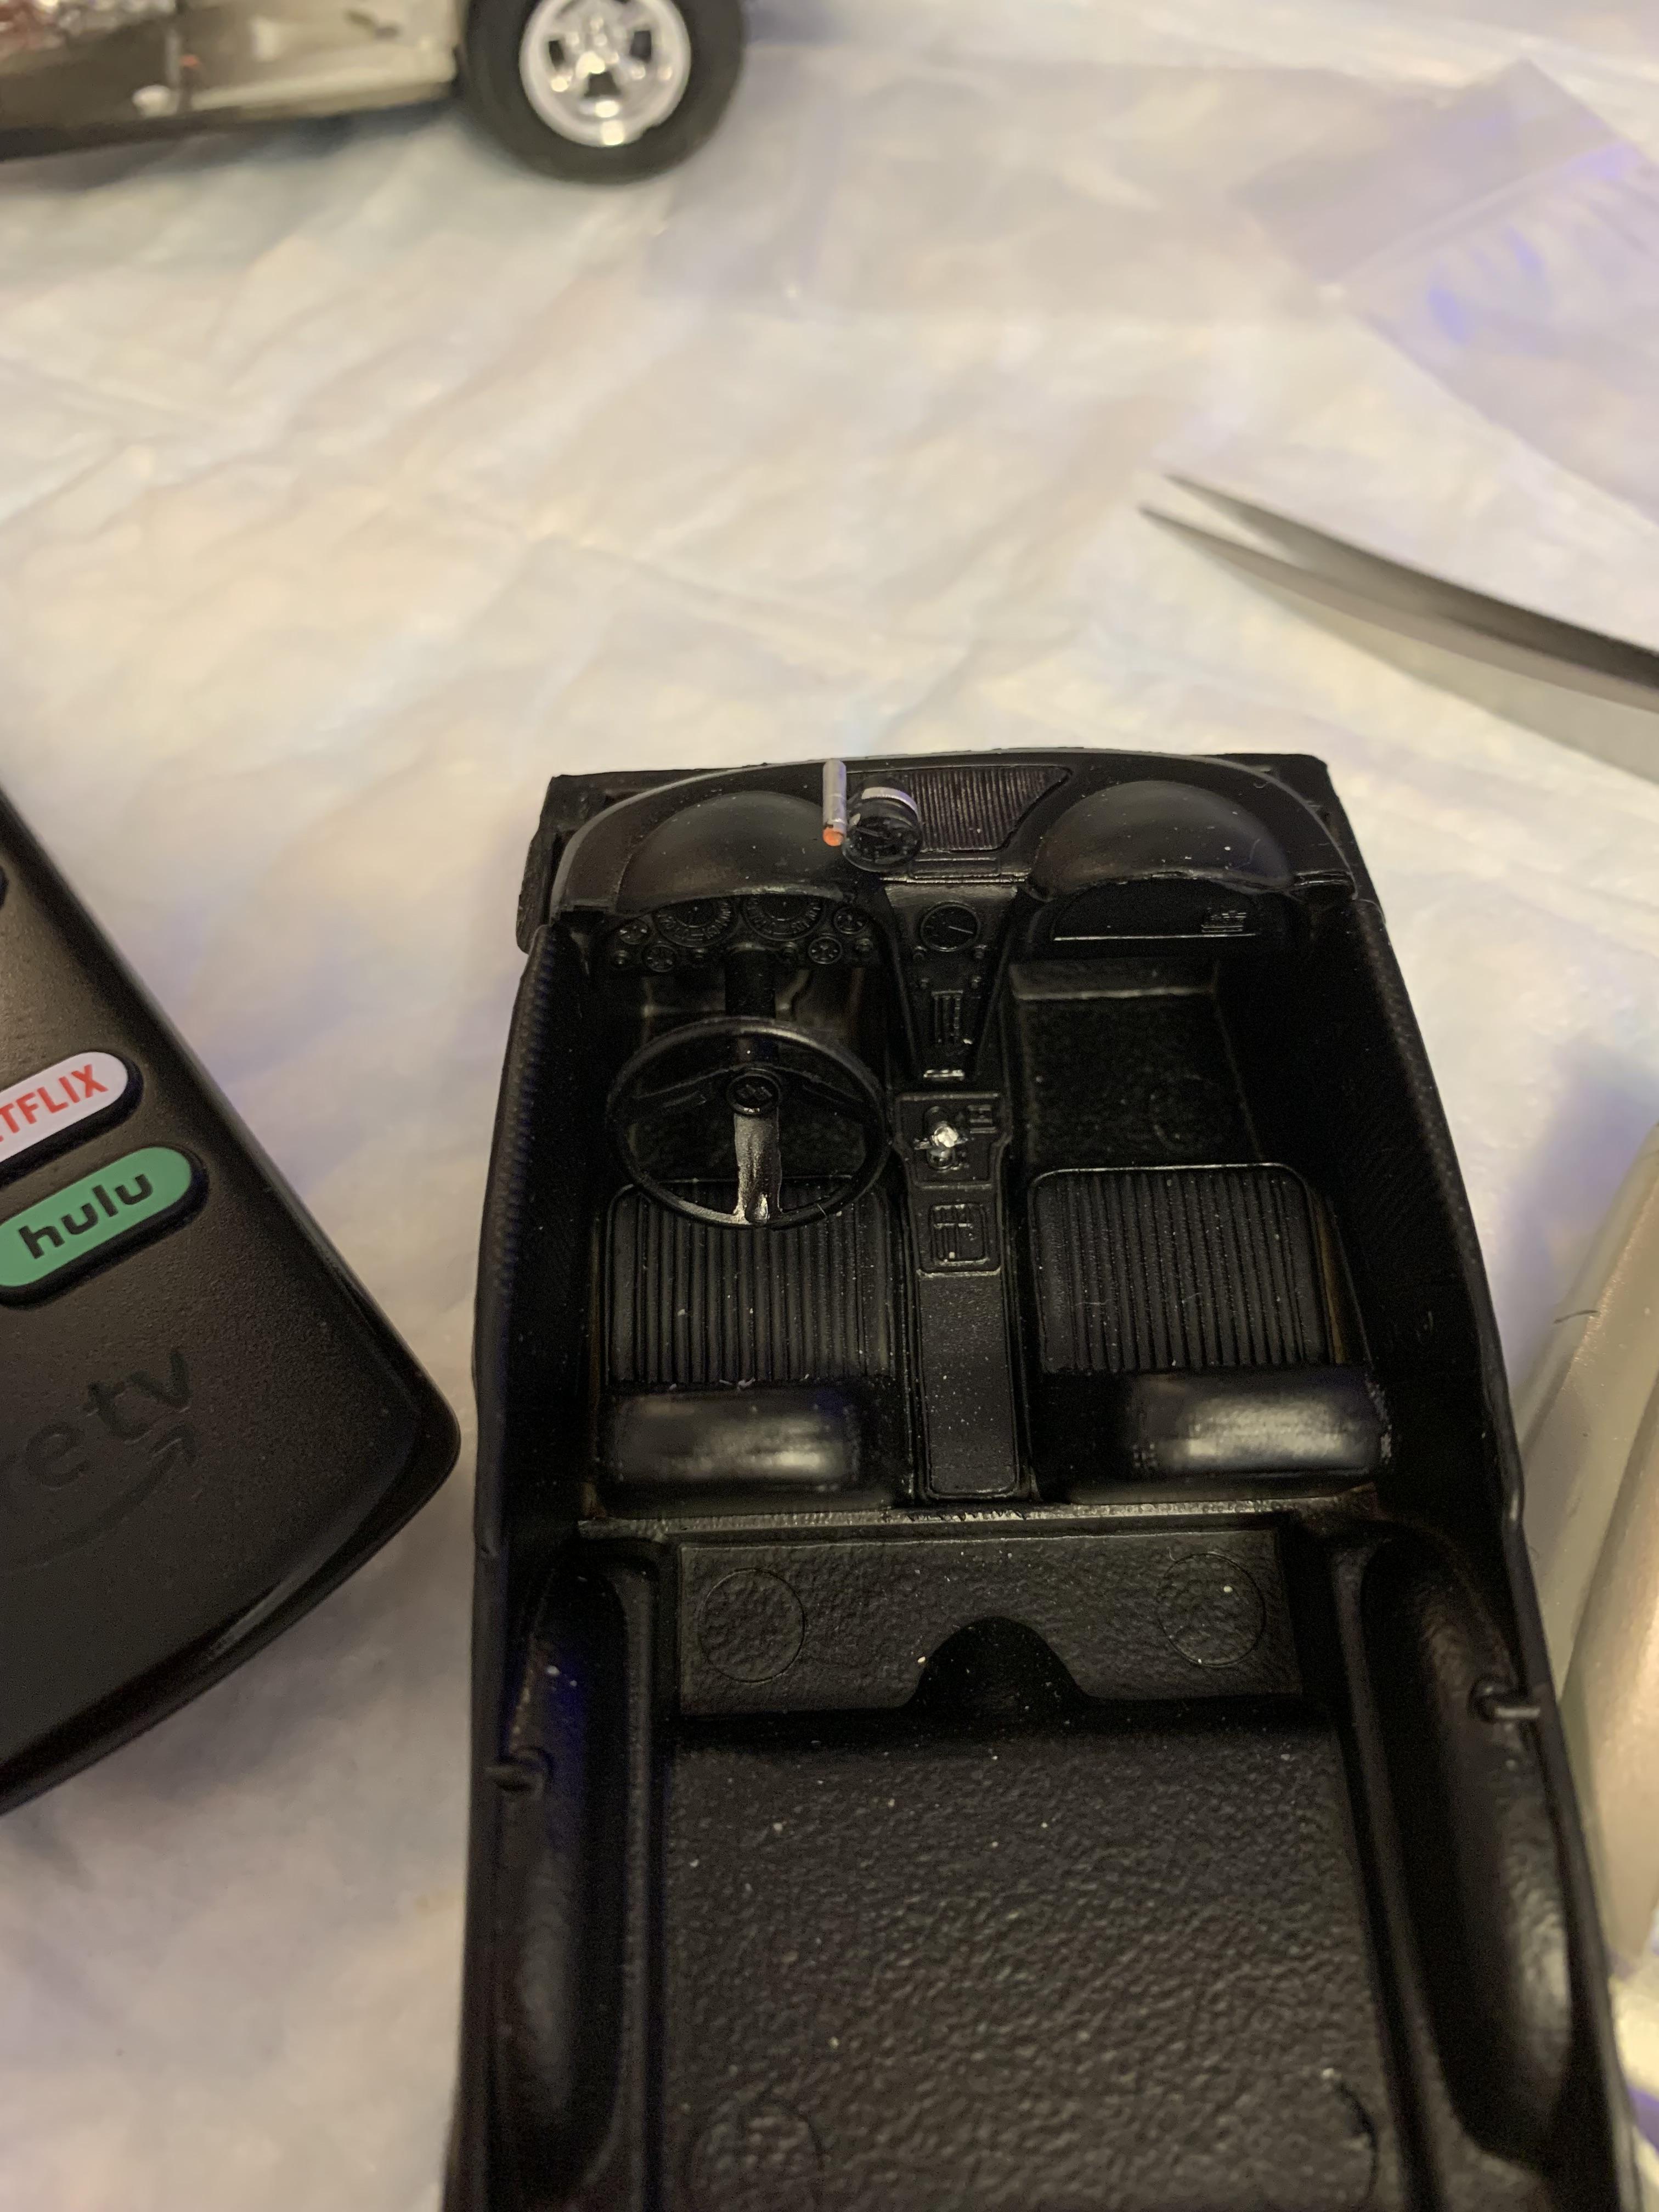
Installed shifter, tach, firewall, and put it together.
-
1963 Corvette current day nhra Stock Eliminator
R. Thorne replied to R. Thorne's topic in WIP: Drag Racing Models
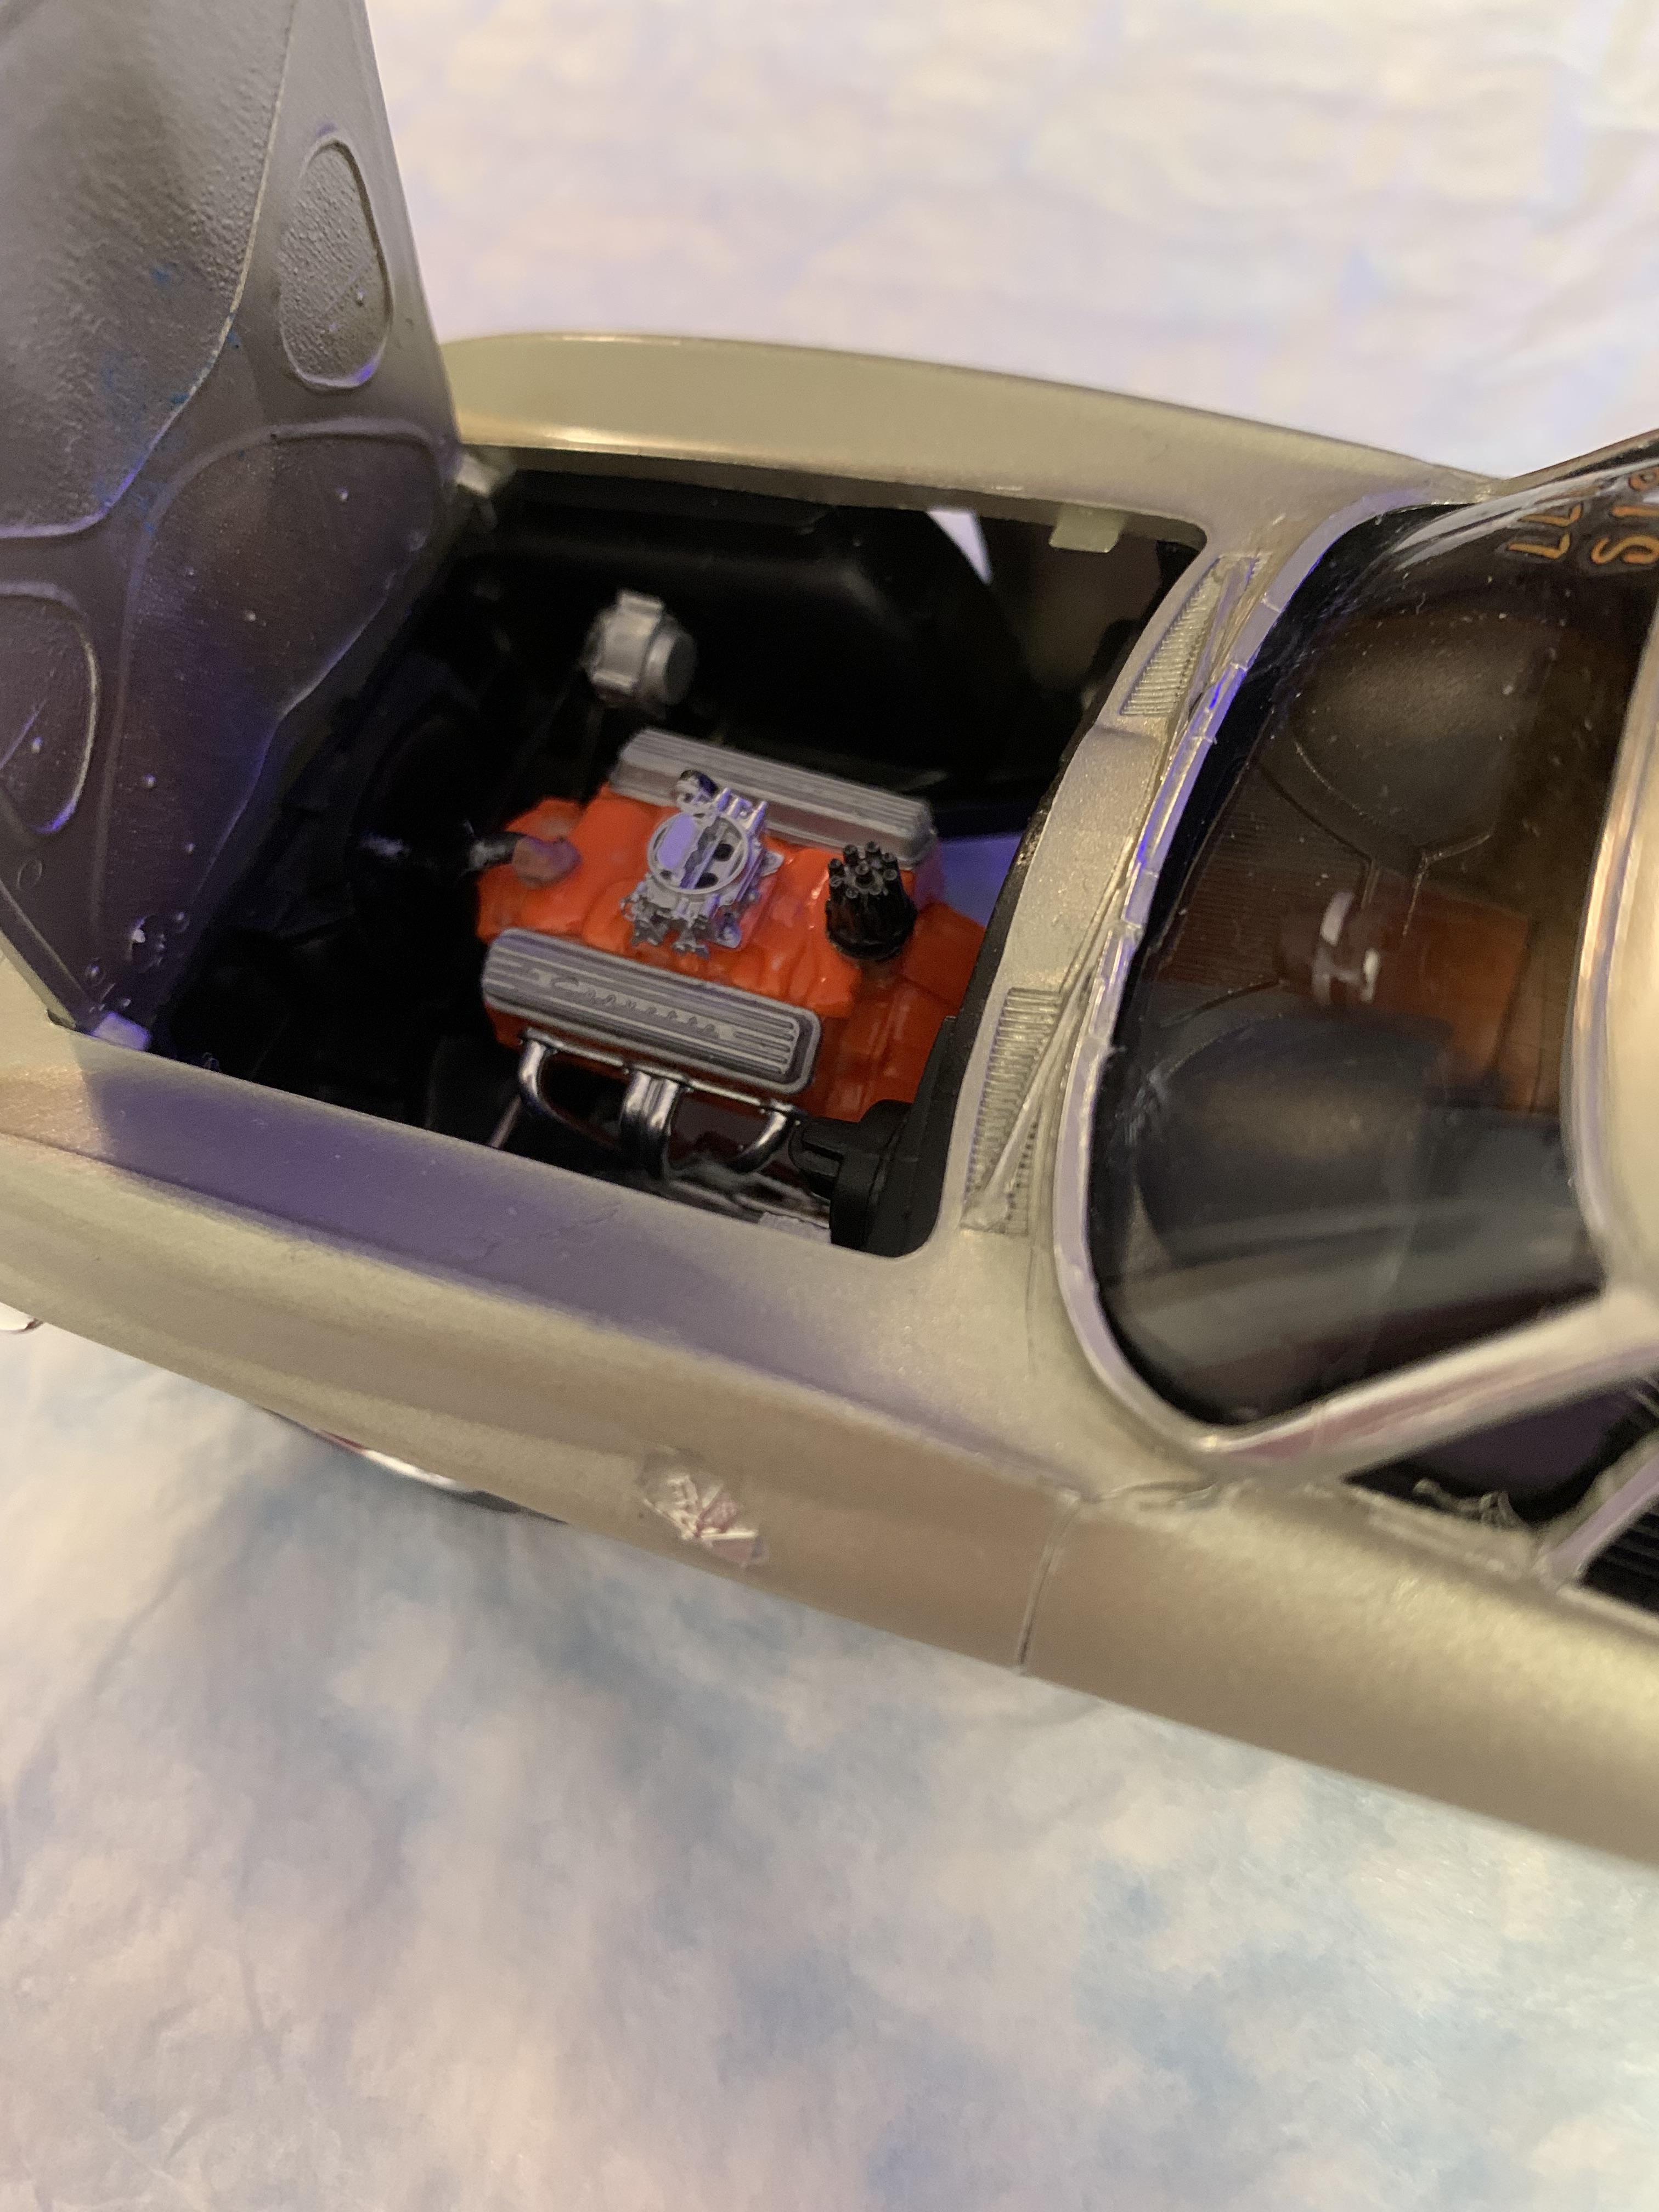
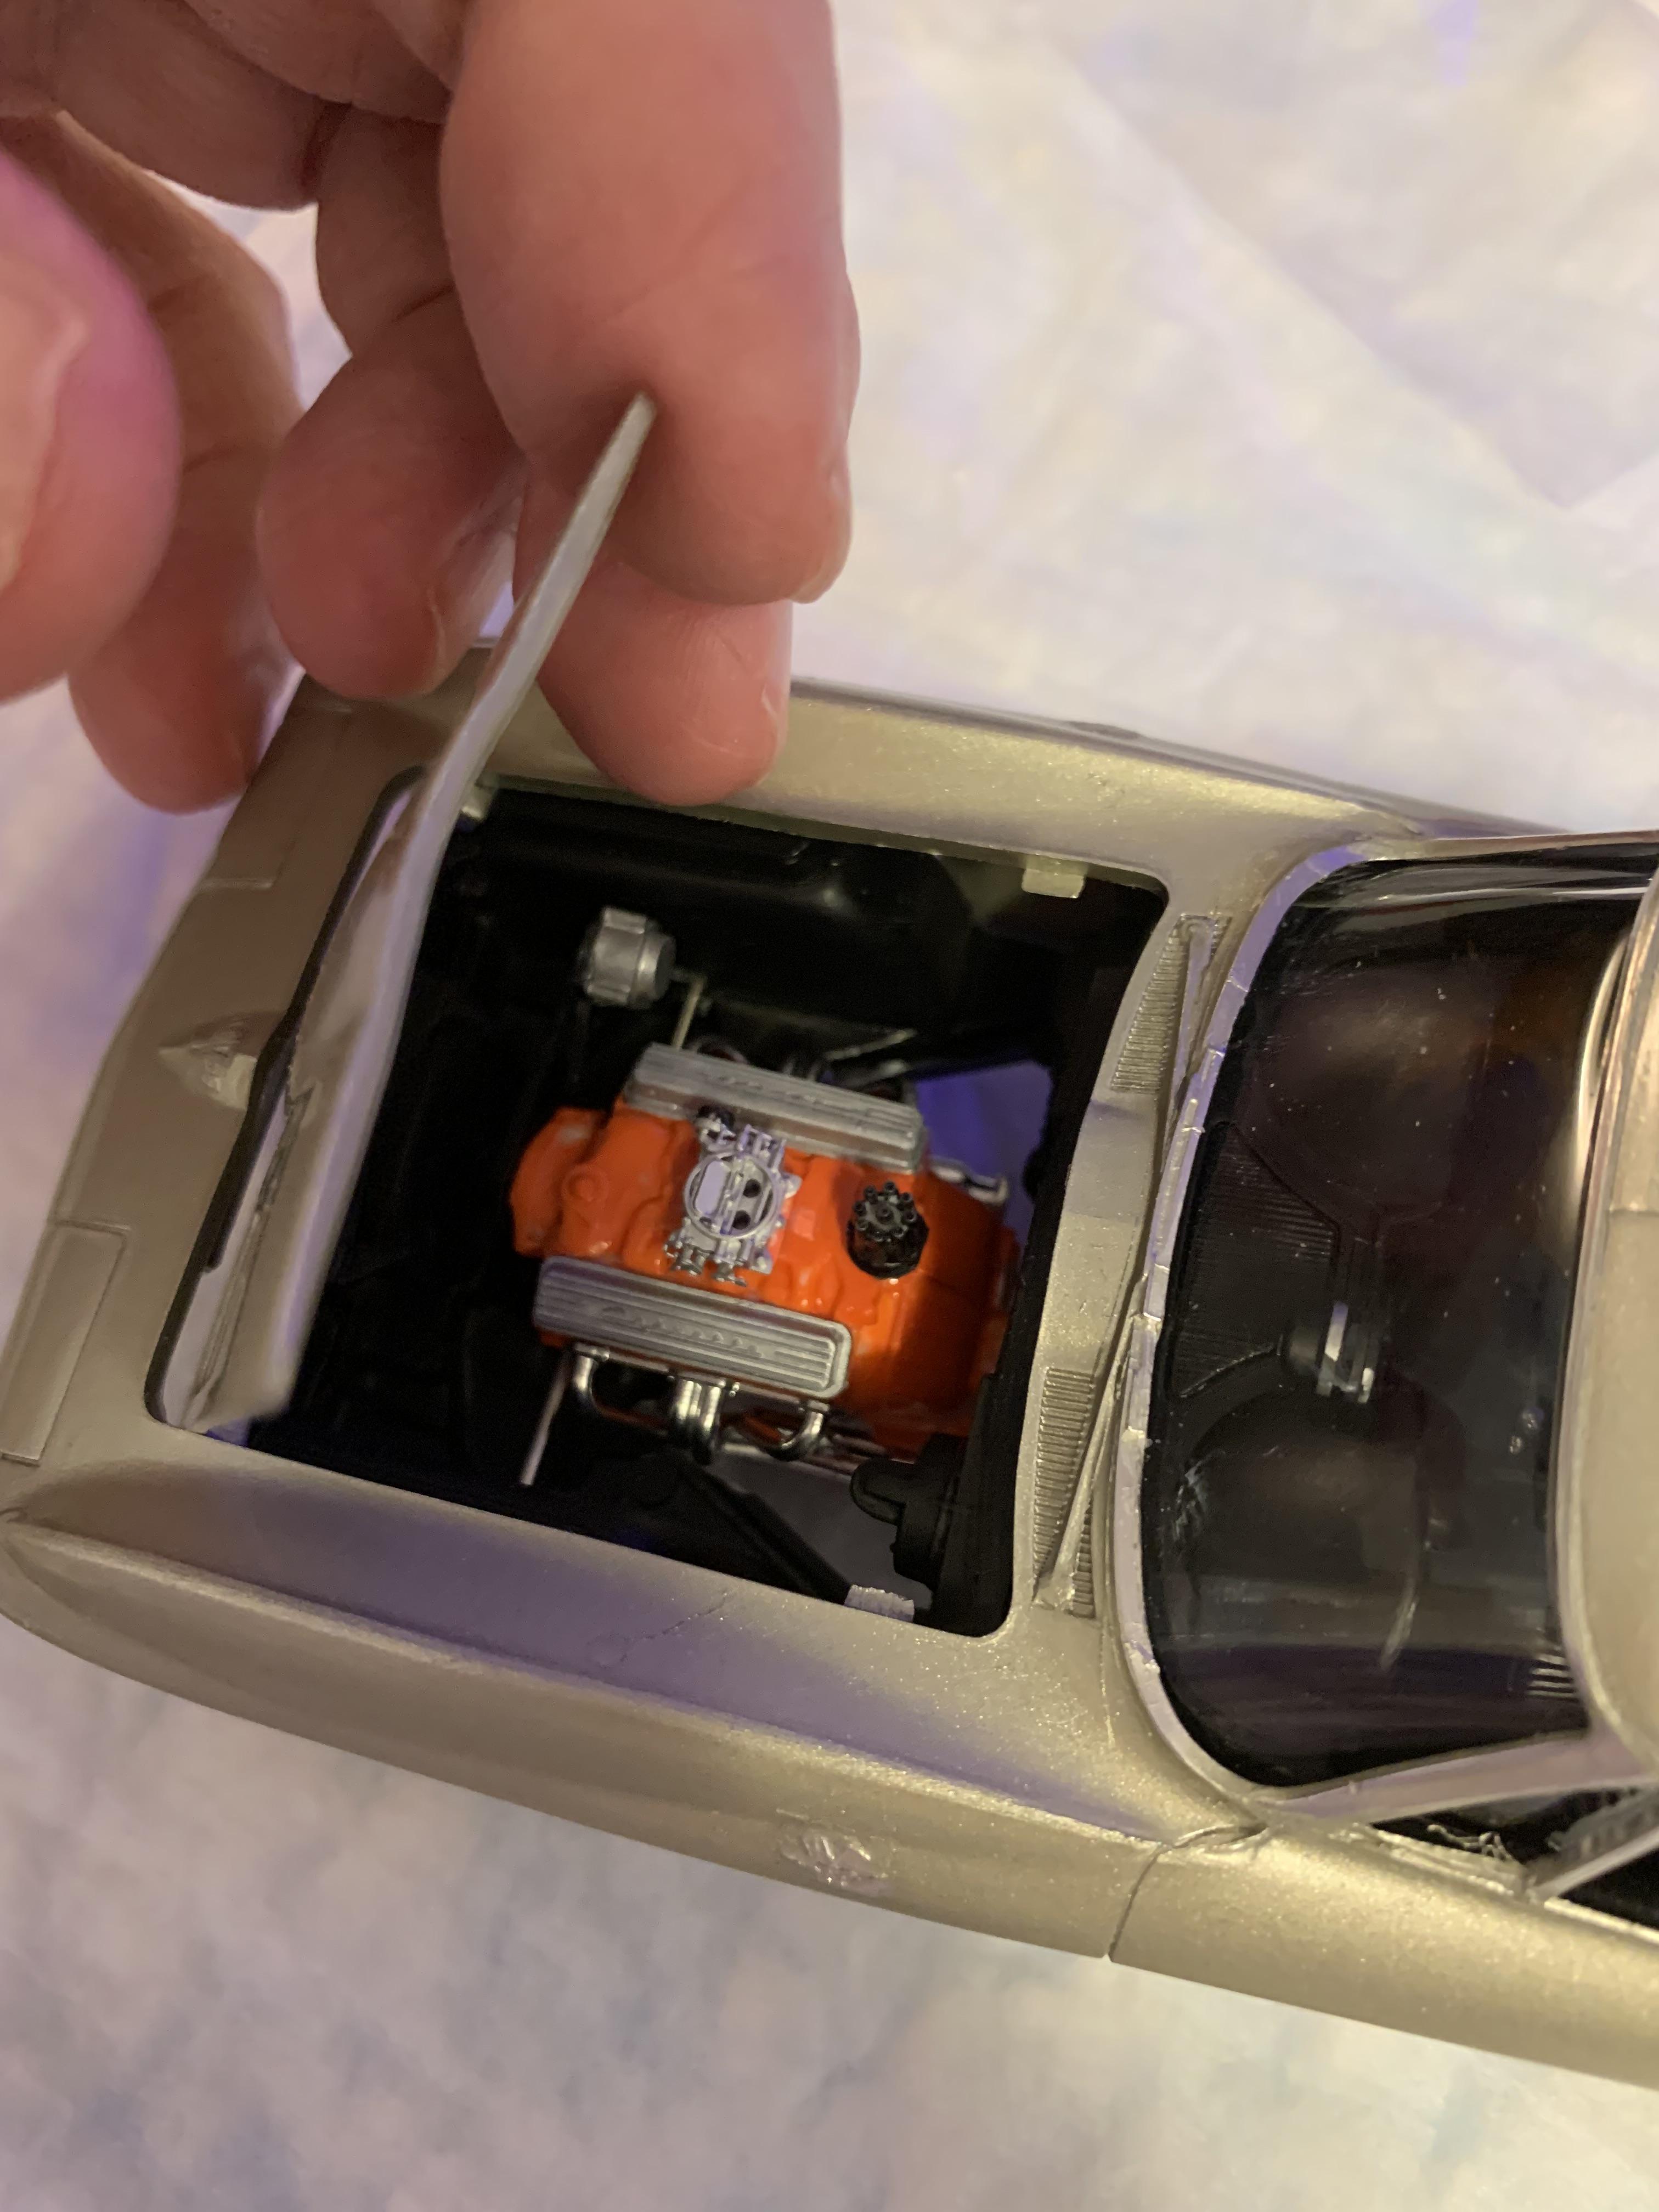
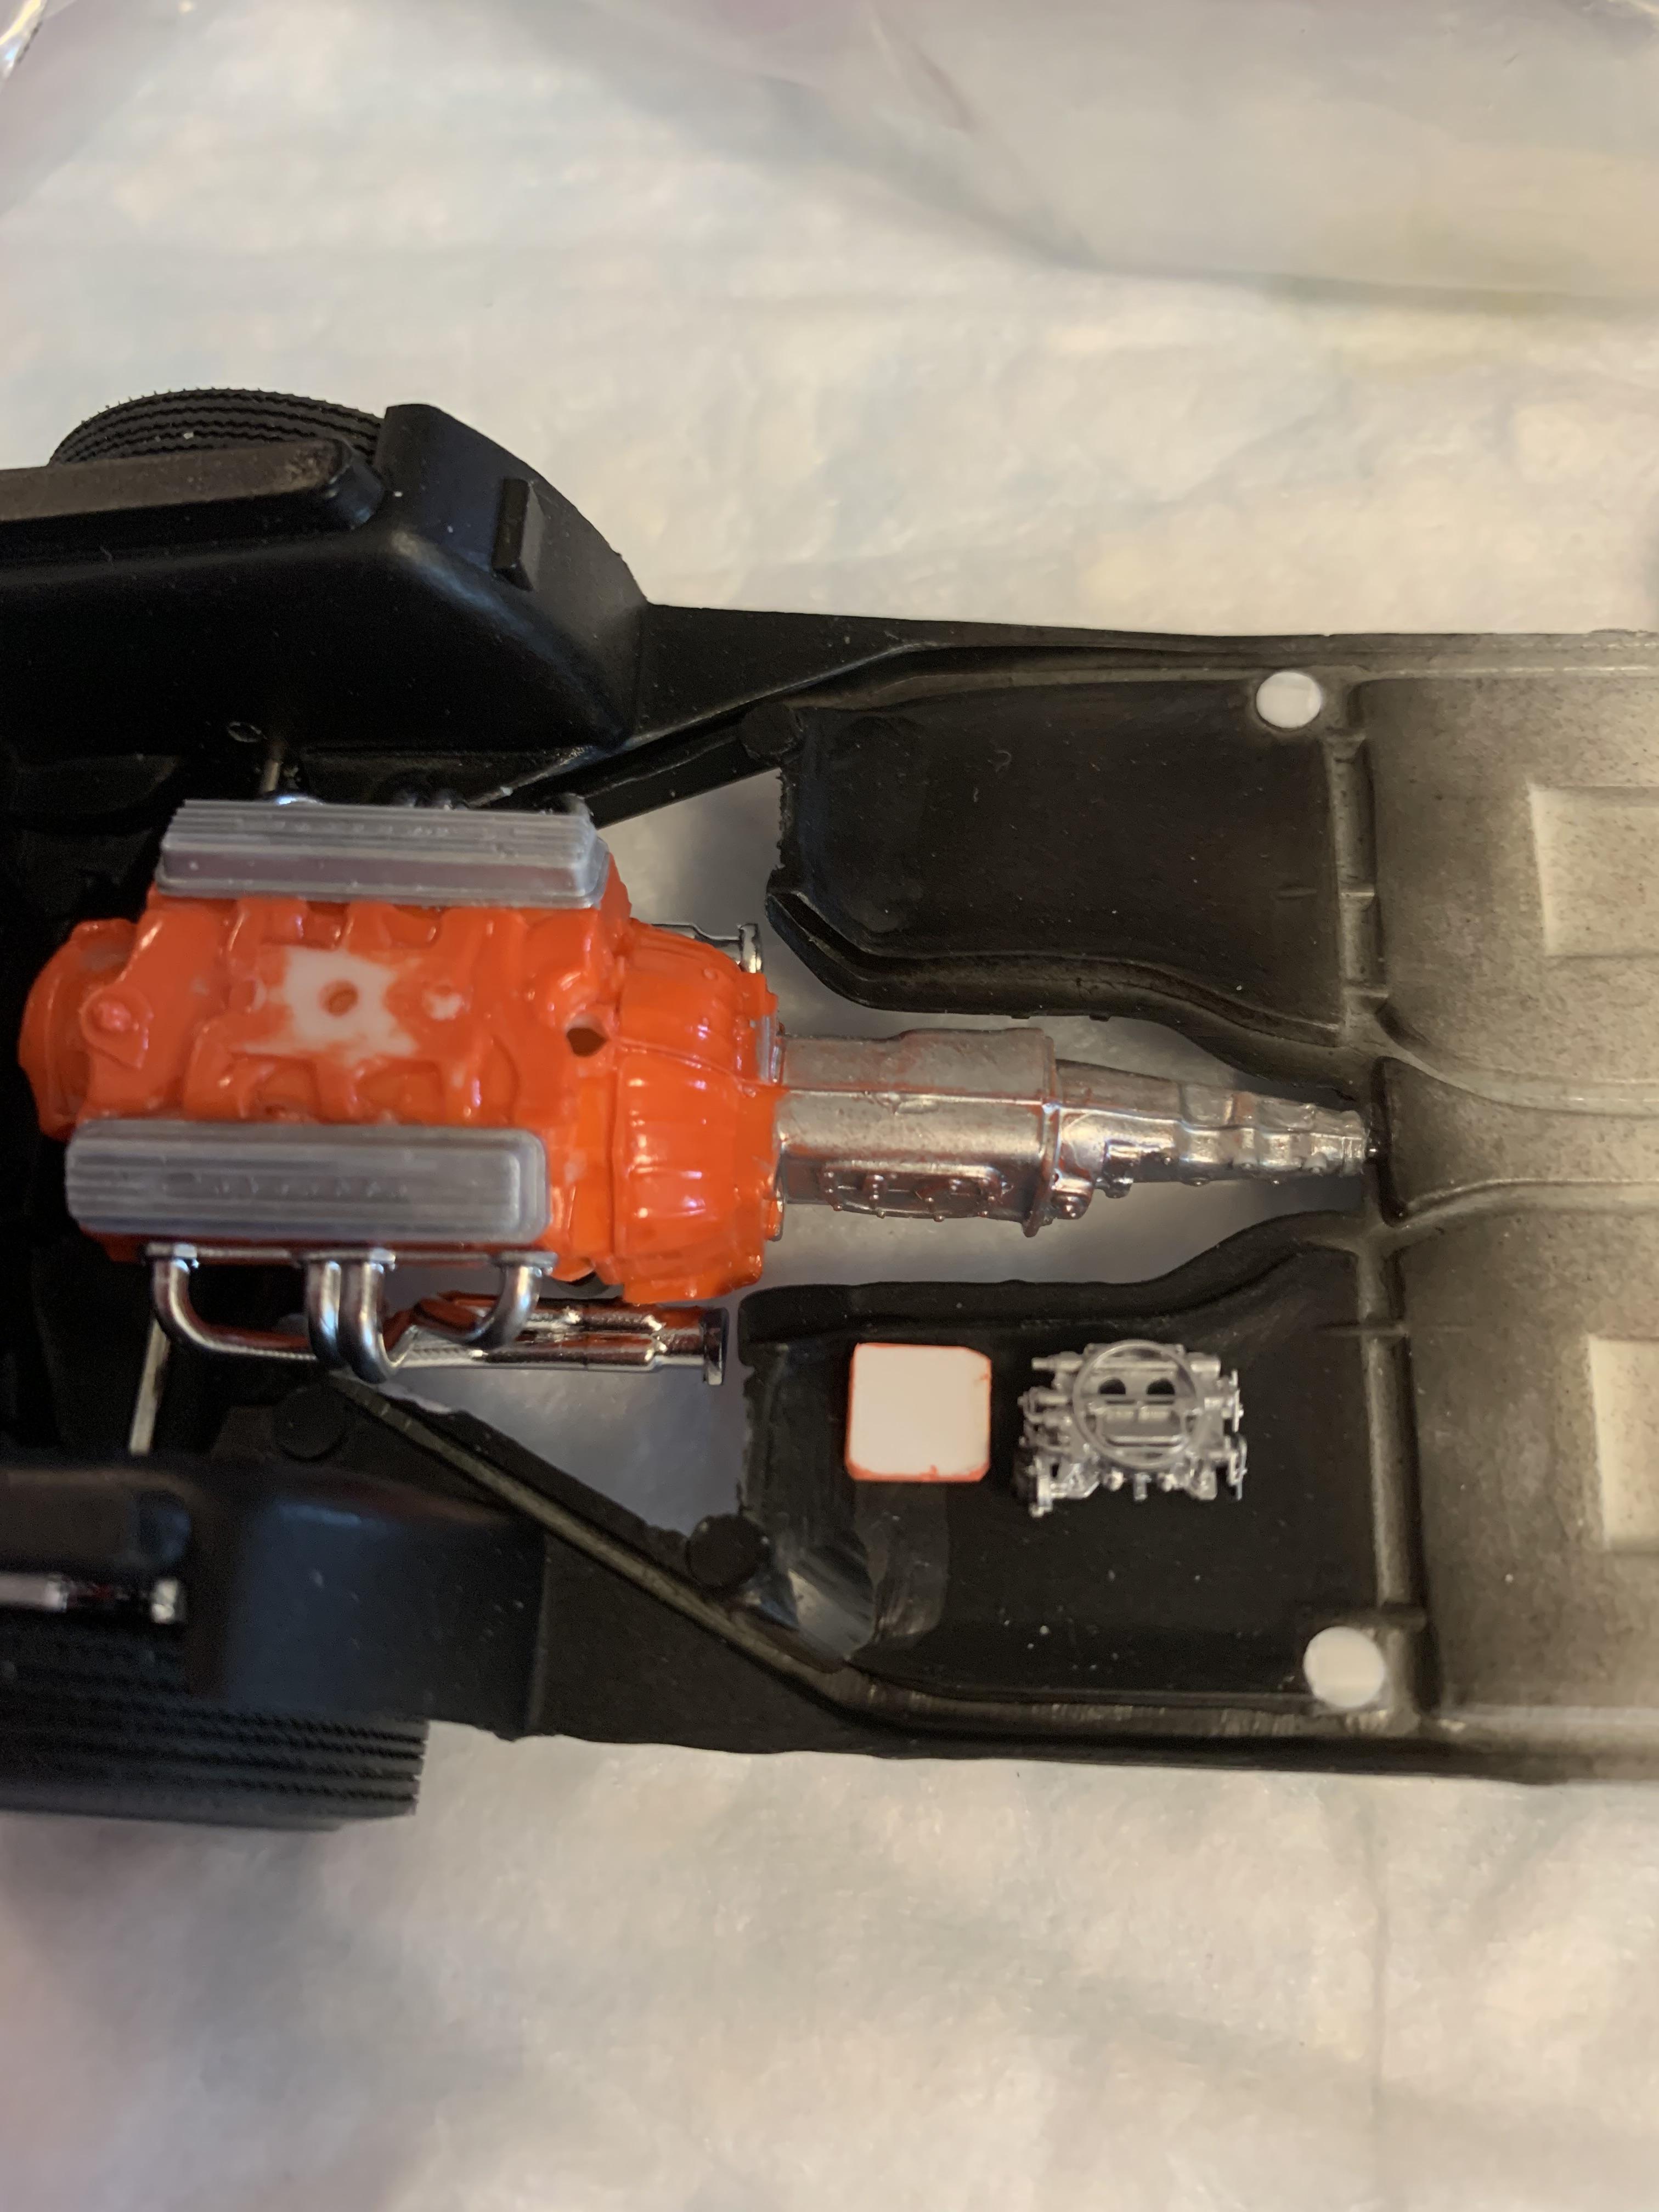
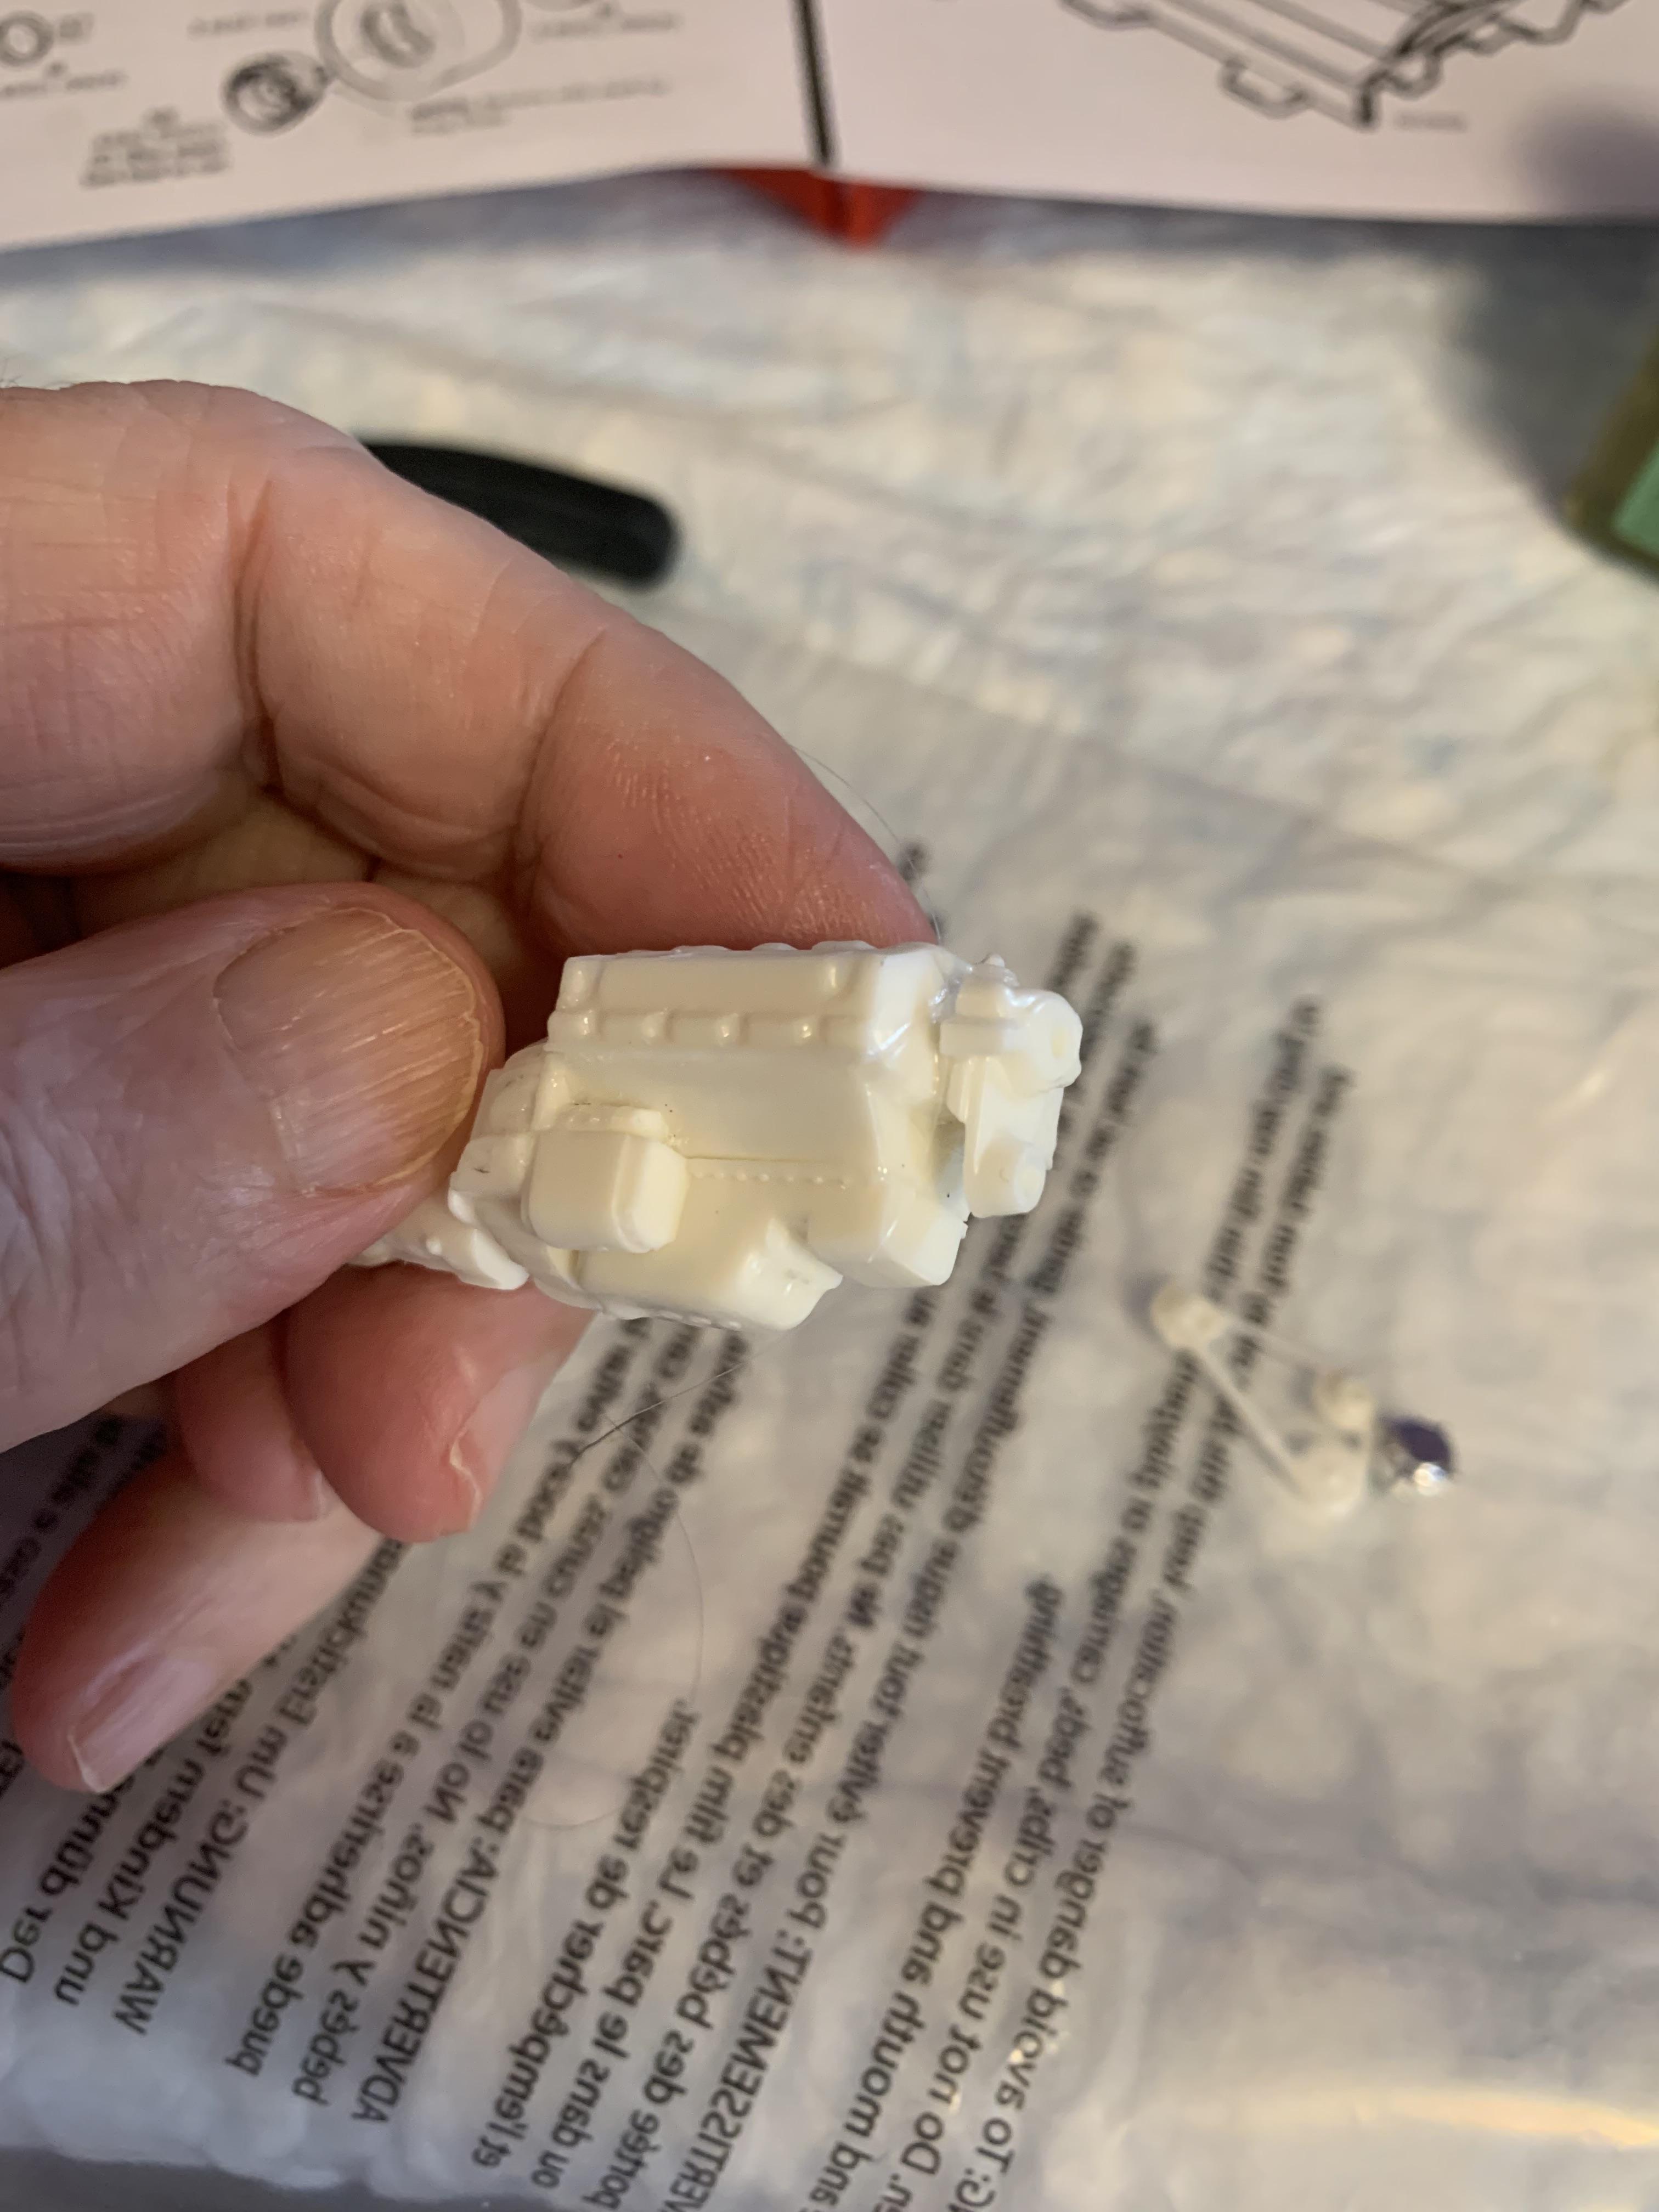
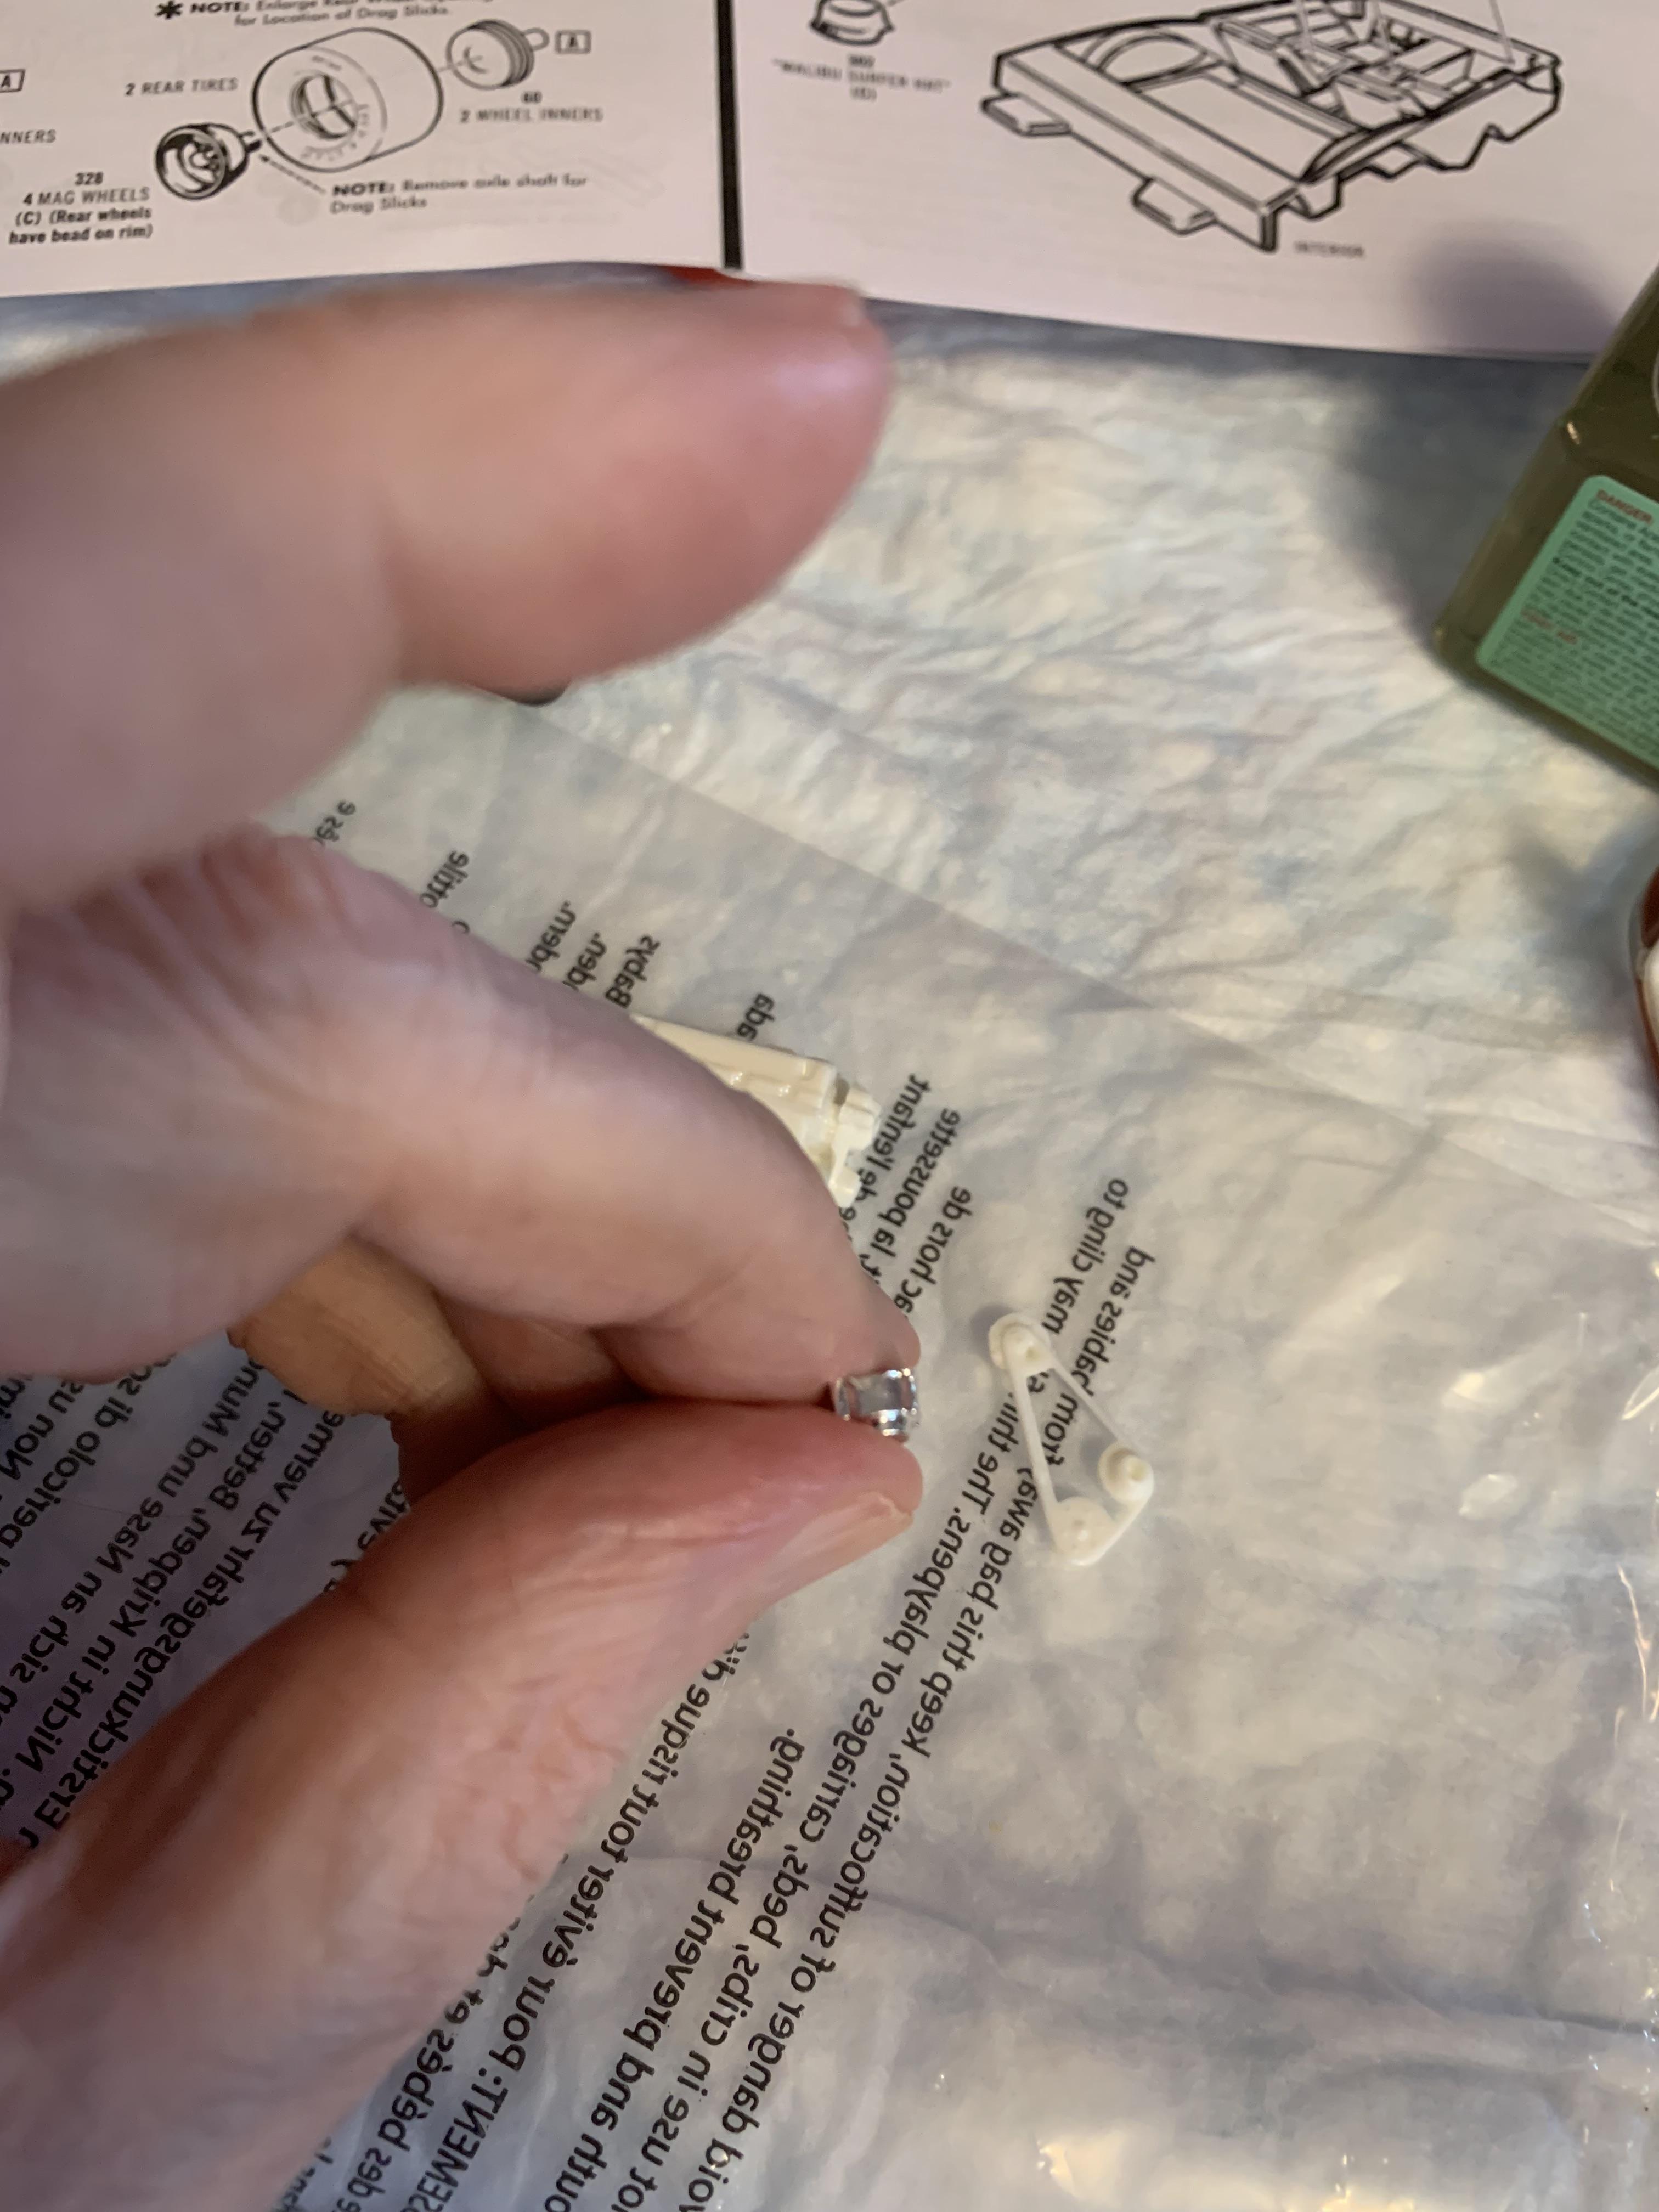
Am I indecisive or what? Got some Afb carbs from mcvproducts, painted with ts30 Tamiya, and made a spacer to install it instead of the Rochester 4gc. This will make the engine a 340 hp instead of the 250 hp 4gc version. Anyway, used markers to paint the distributor and tach. Obviously, this is not one of my more detailed builds, as there are no roll bar, harness, plug wires, more correct wheels, electric water pump, etc. Oh yeah, the chassis is less than average, too. Although, by nature, I am allergic to inauthenticity, sometimes you just have to coast along.
-
He states in the intro that the rear wheels came from a 64 Ford Thunderbolt kit.
-
1963 Corvette current day nhra Stock Eliminator
R. Thorne replied to R. Thorne's topic in WIP: Drag Racing Models
Used BSI Gold super glue to install the windshields, tail lights, and the tires/wheels. Blocked them to align and set aside to dry.
-
1963 Corvette current day nhra Stock Eliminator
R. Thorne replied to R. Thorne's topic in WIP: Drag Racing Models
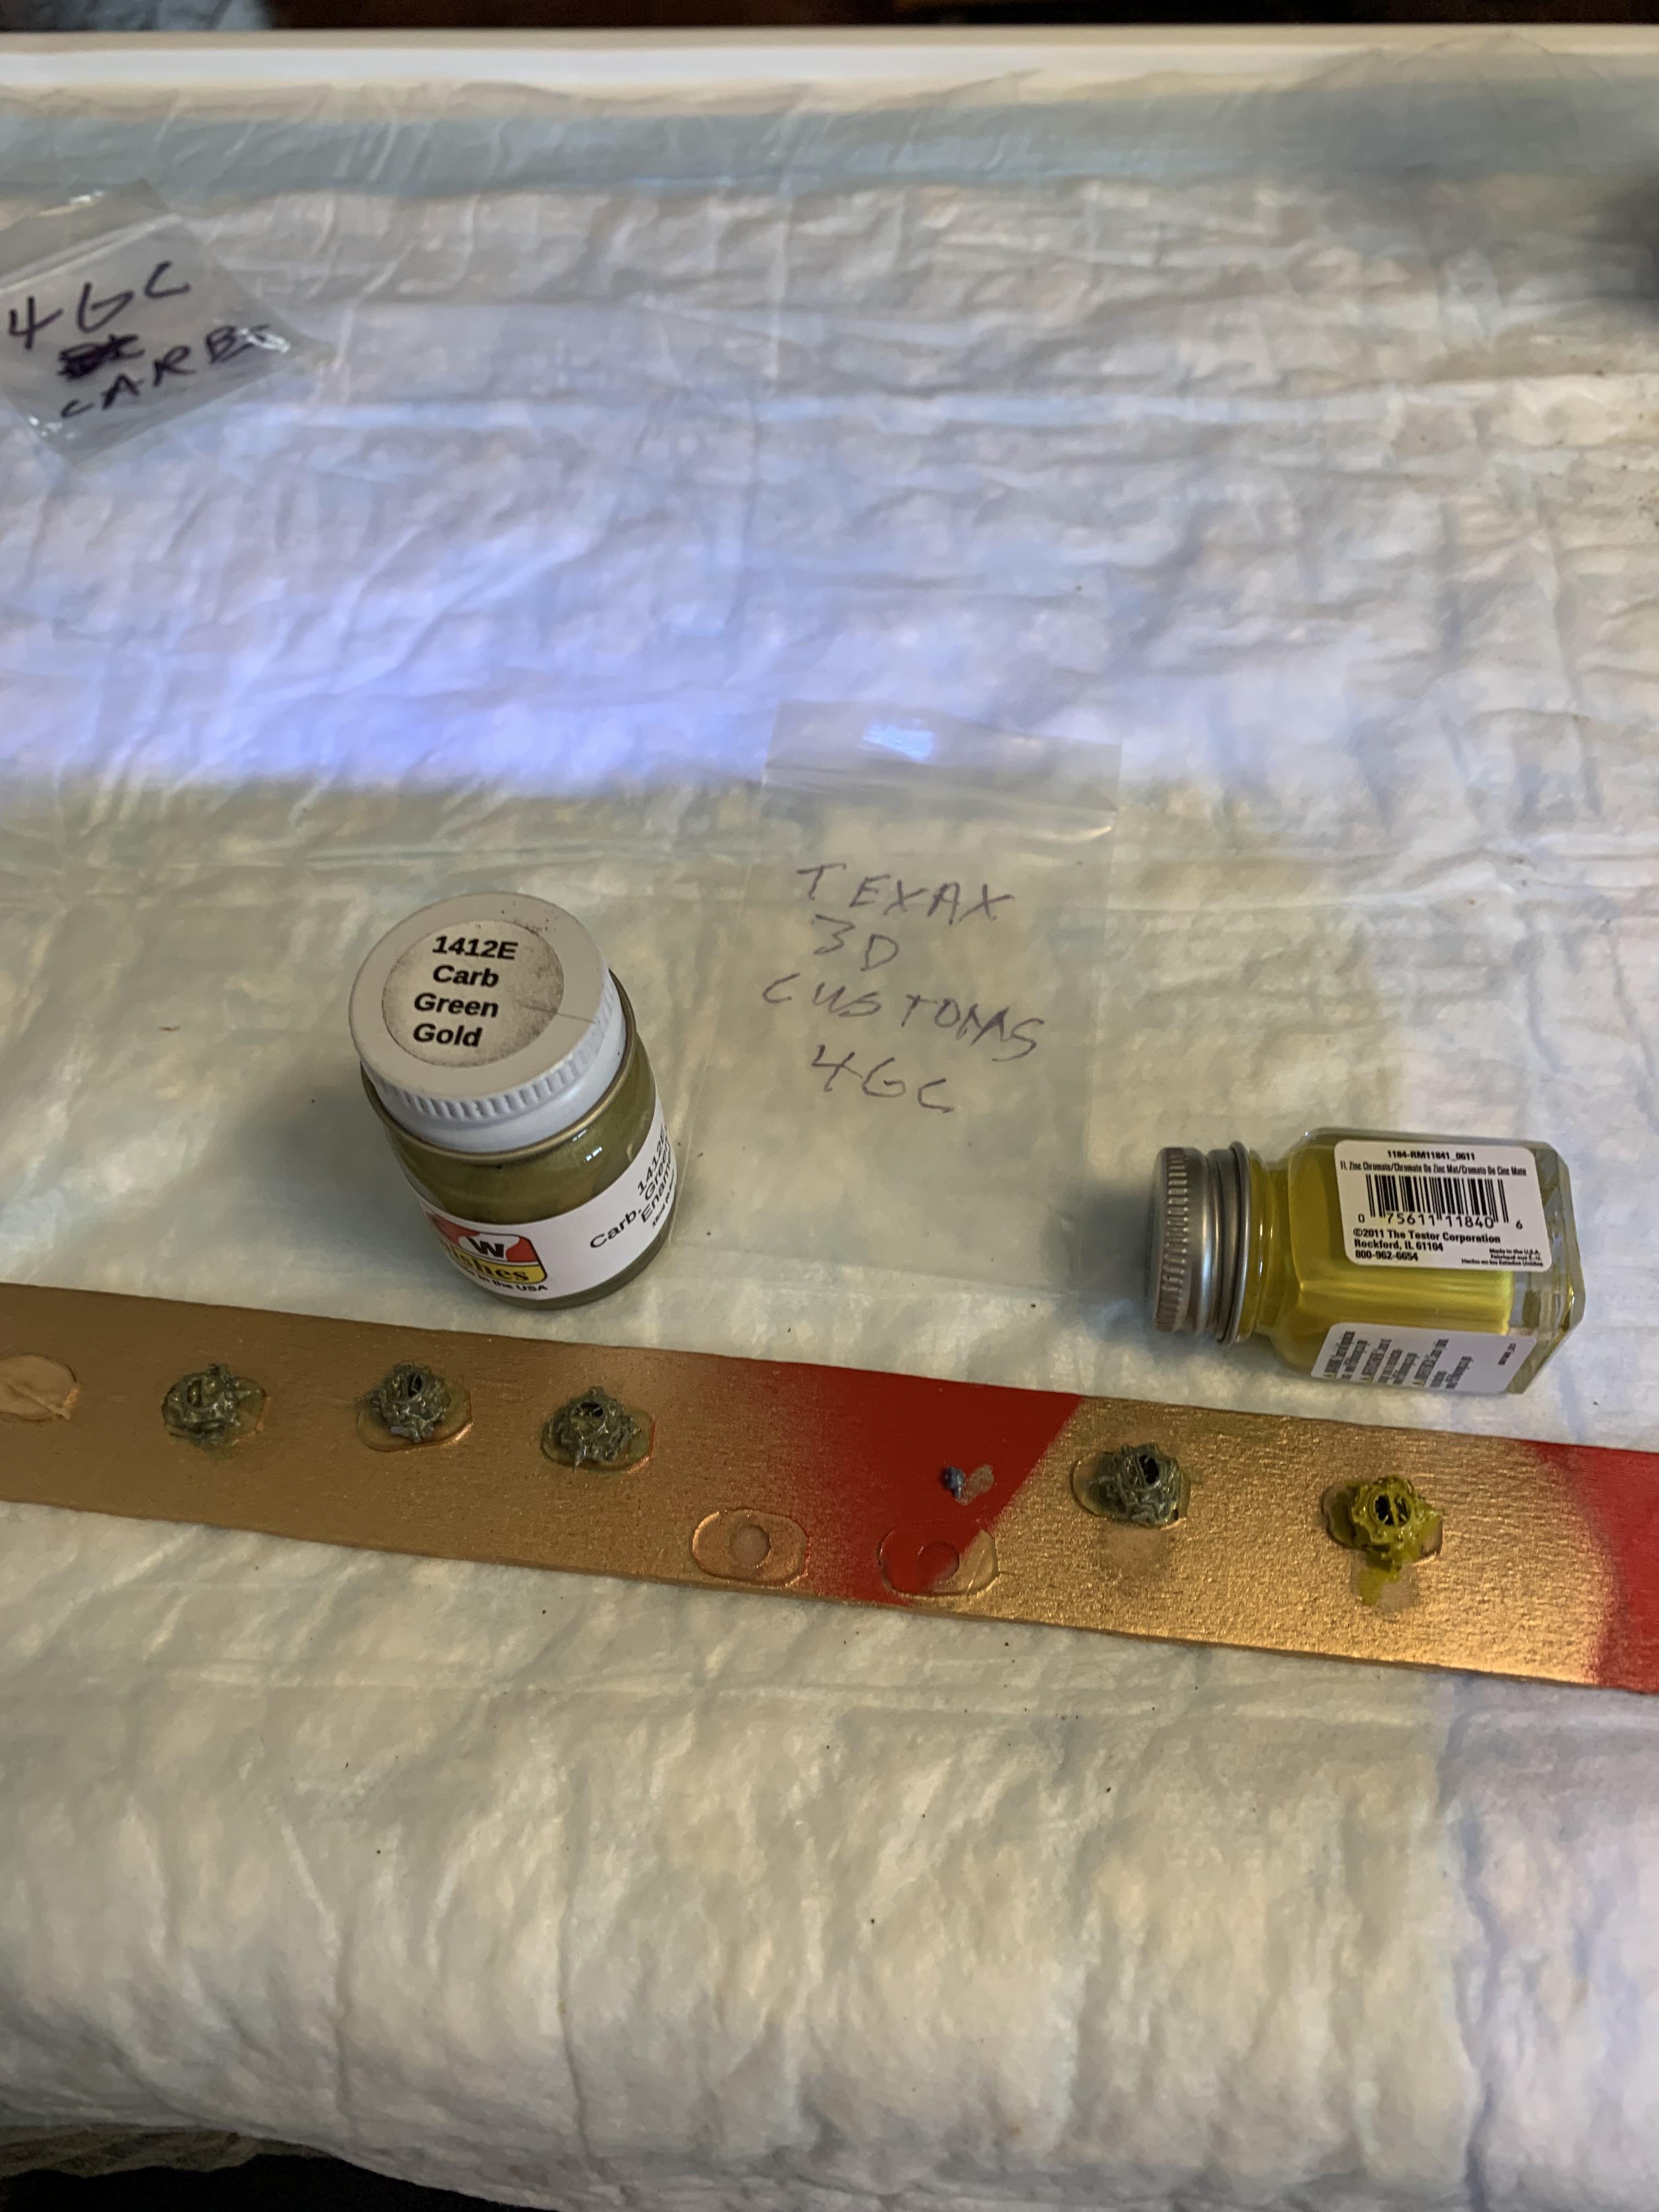
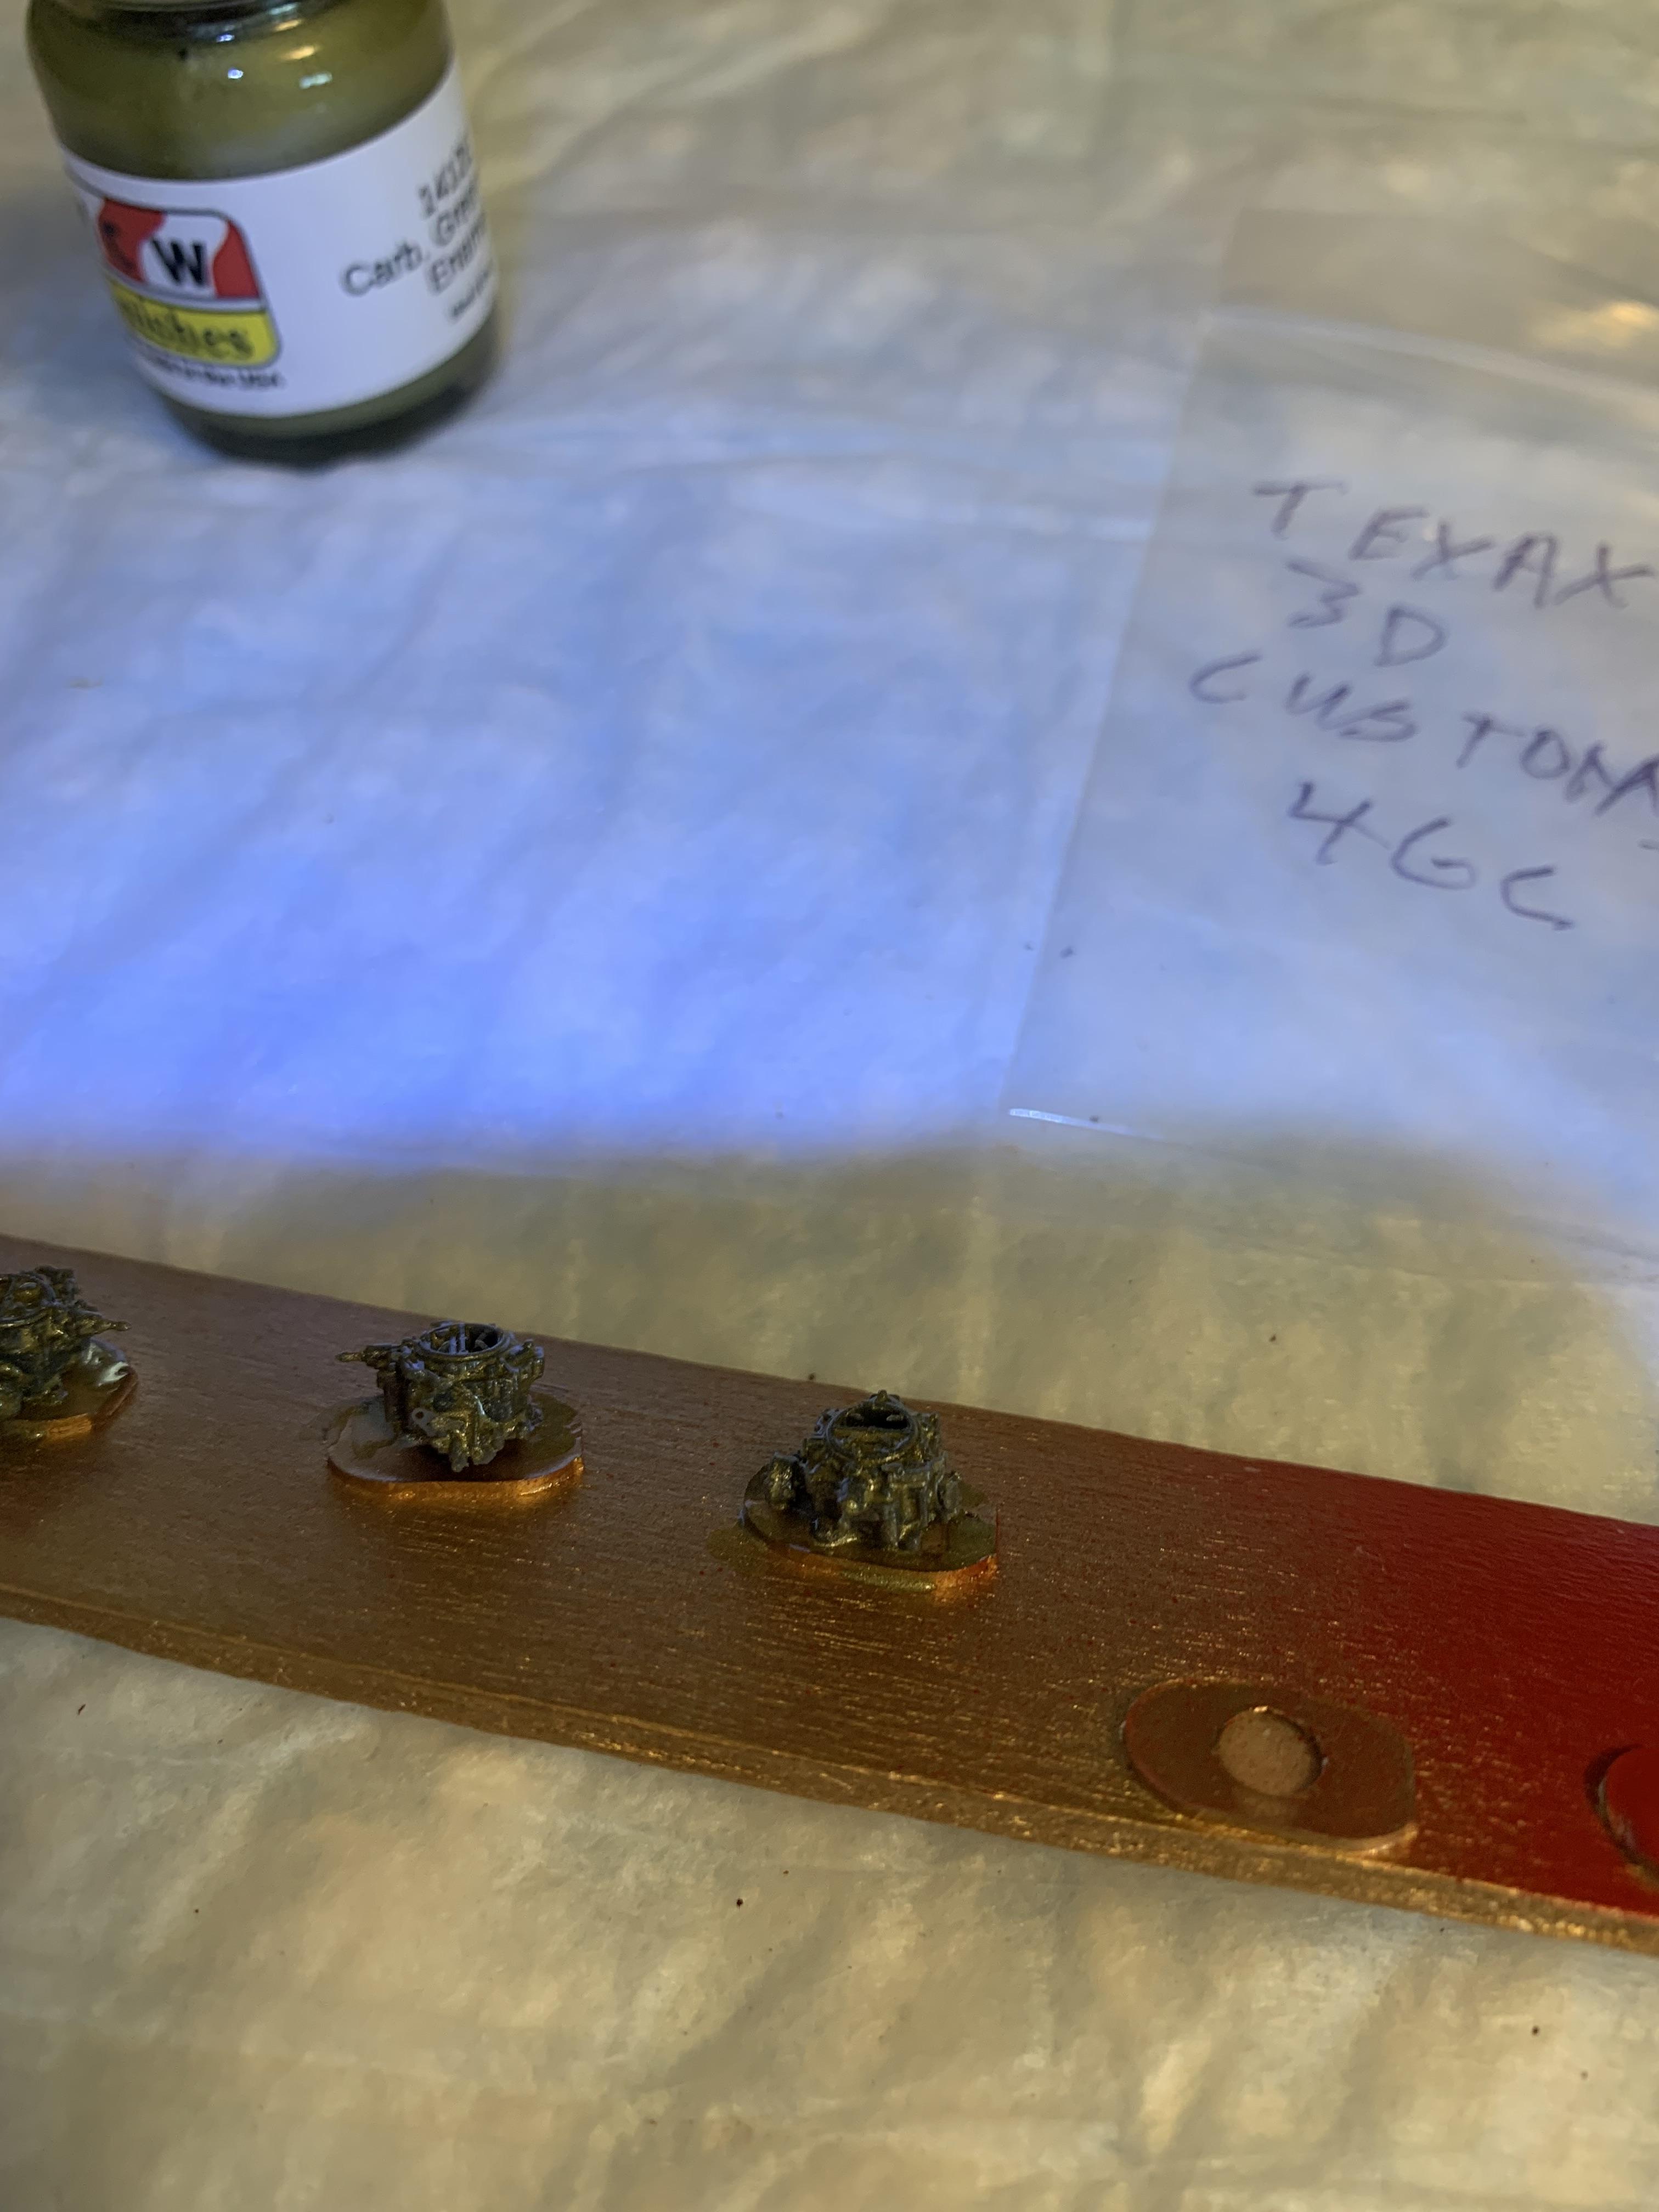
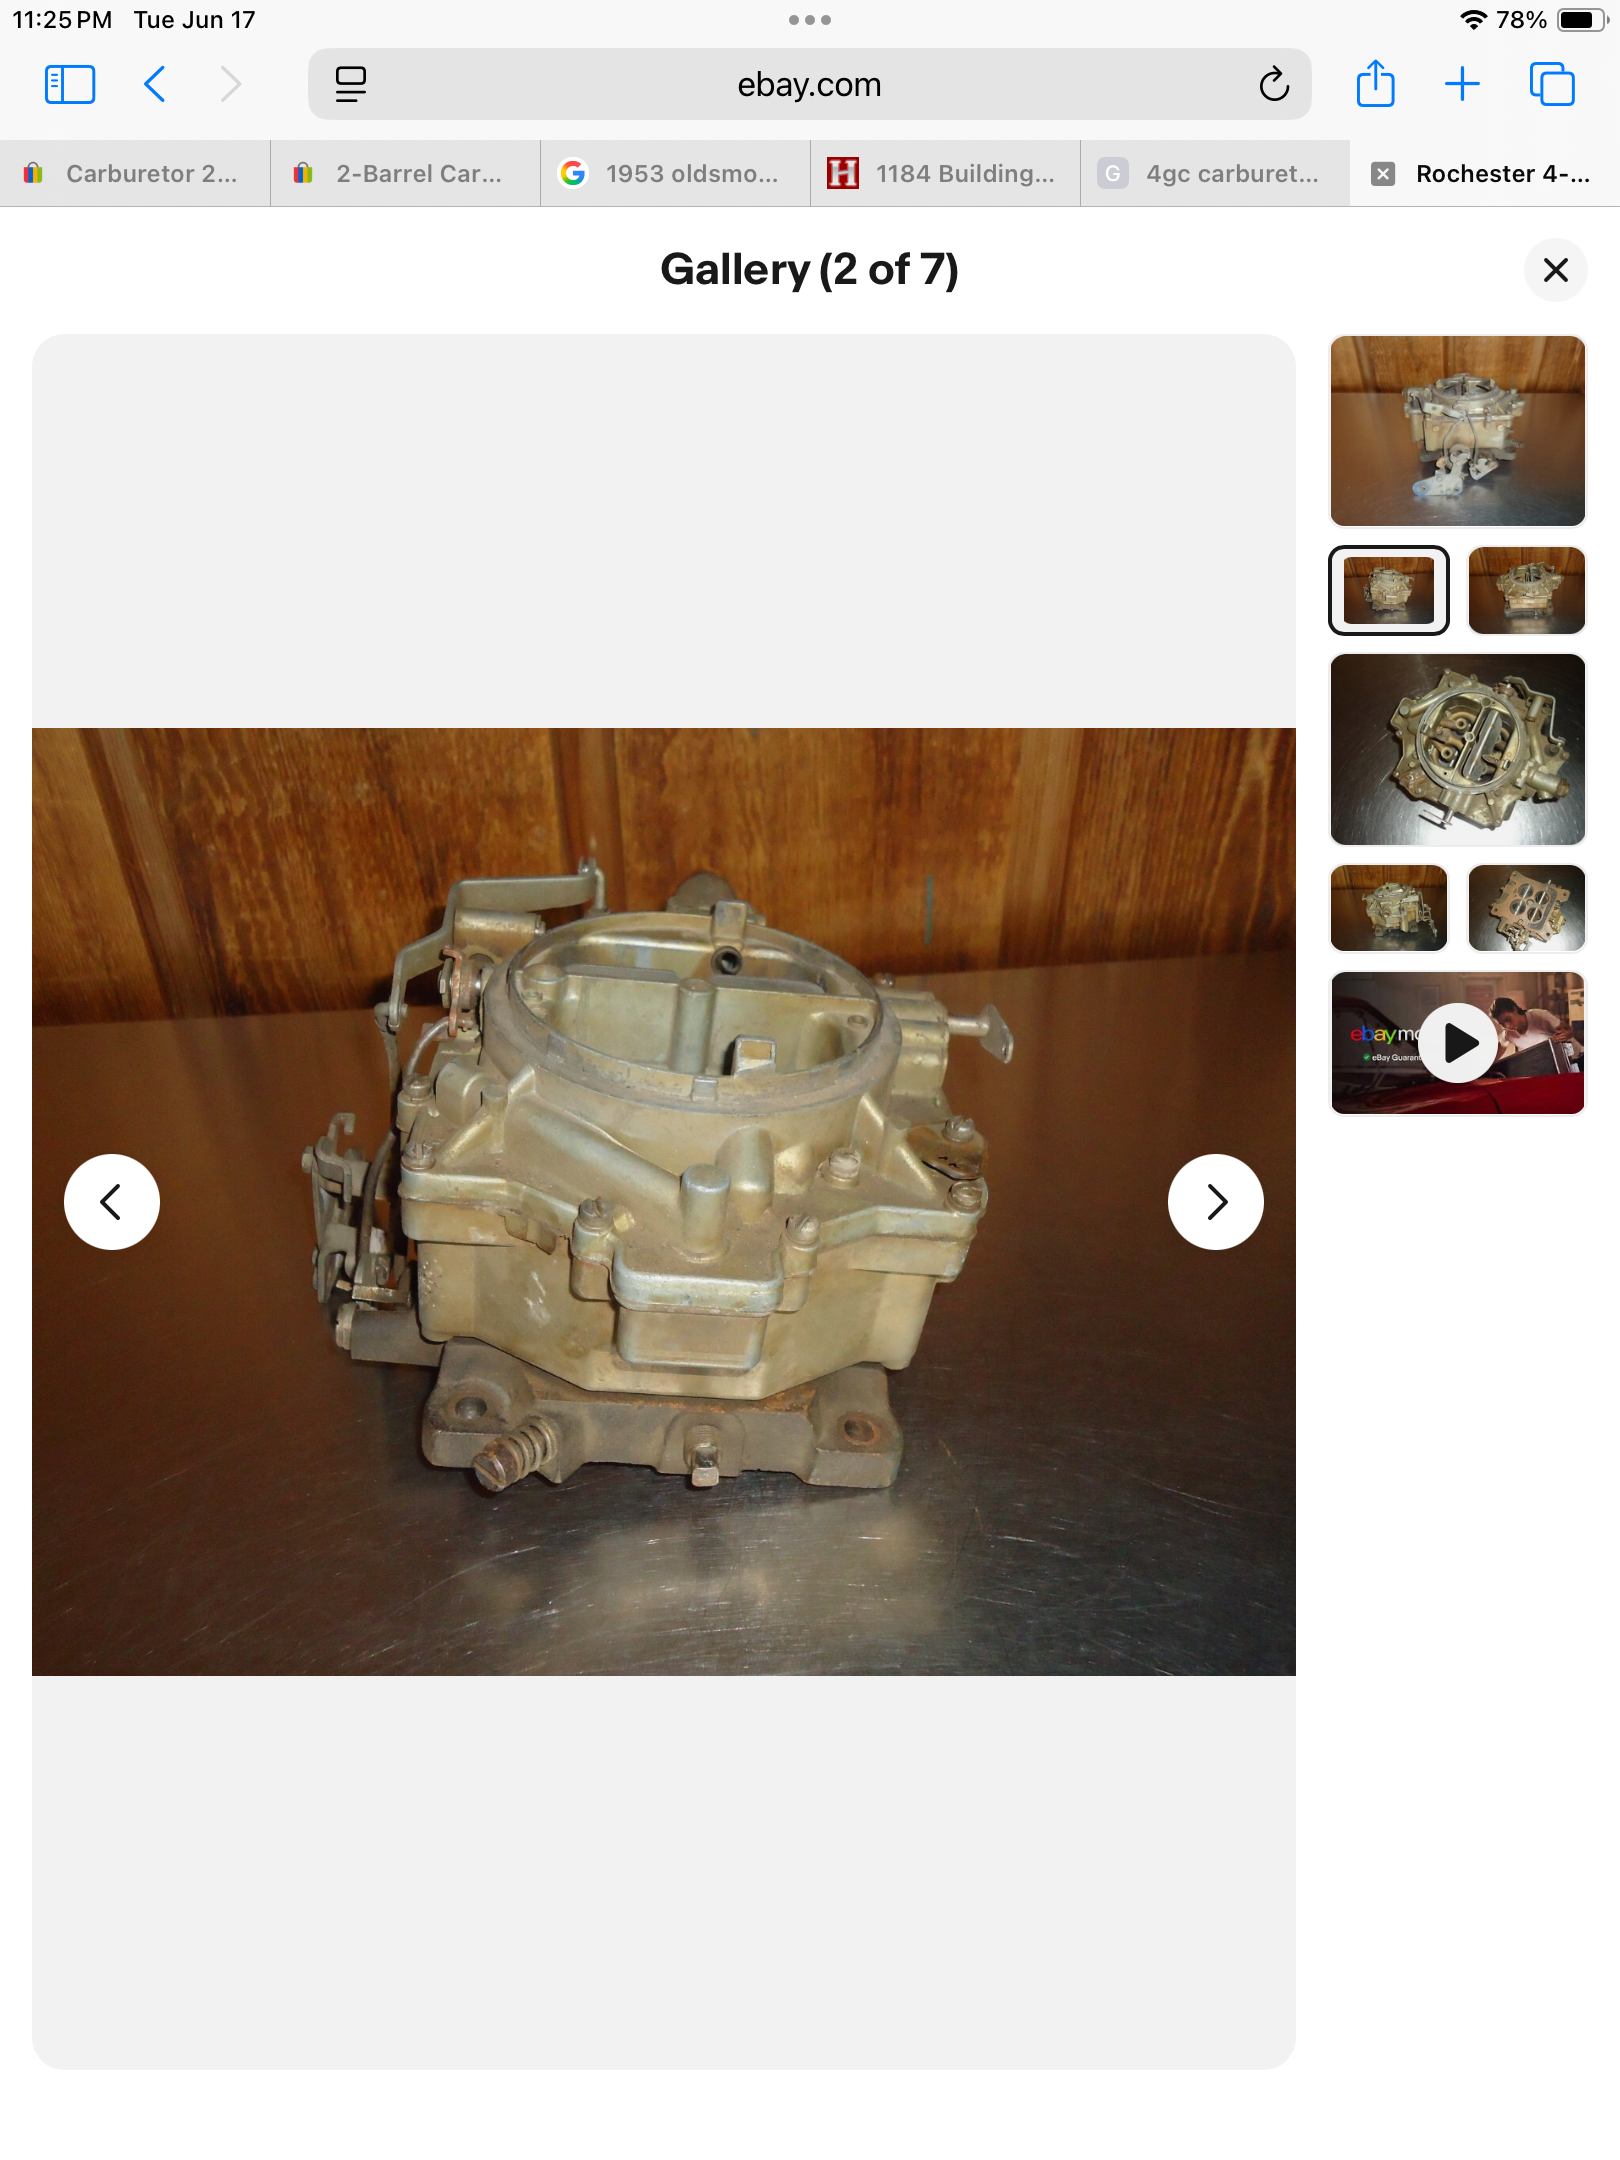
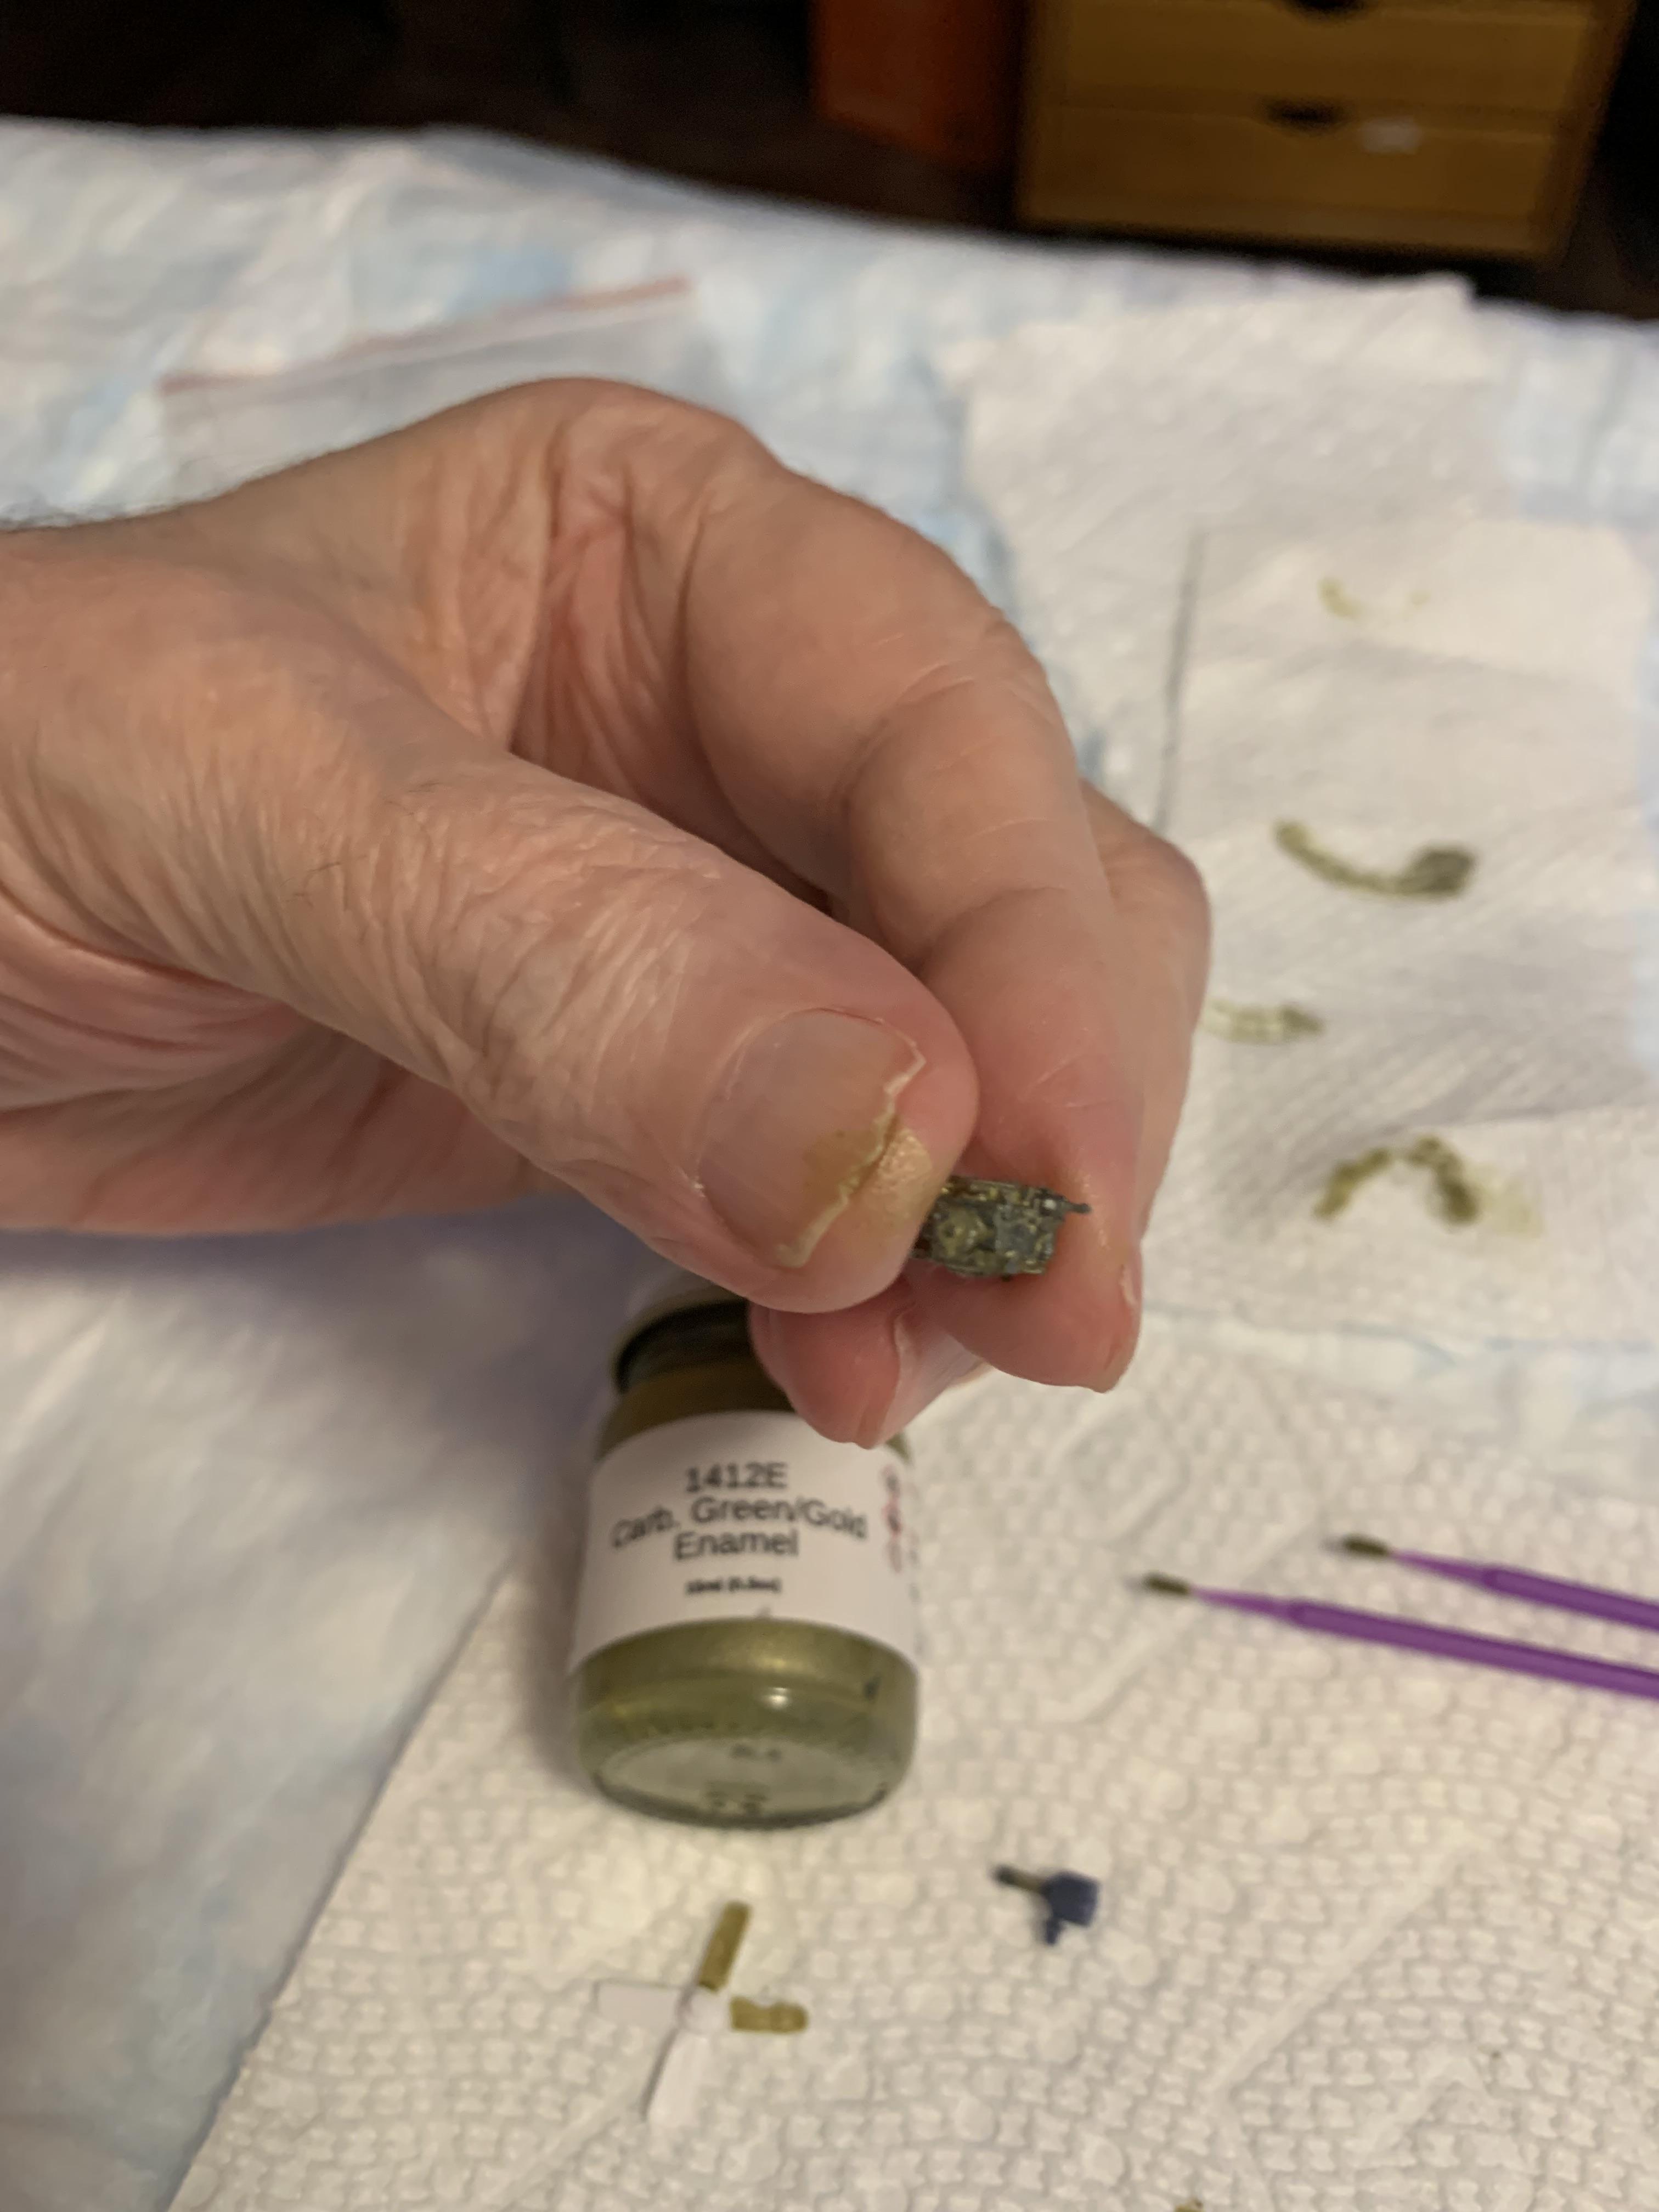
I had noticed that previously, but thanks. Hopefully, the glass will fit ok. Decided to go with the 4gc carb (250 h. P. ) , and painted a few extras. Those Texas3dcustoms are spot on. The testors zinc paint is a little to yellow, but the MCW is spot on. A pic of the real thing.
-
1963 Corvette current day nhra Stock Eliminator
R. Thorne replied to R. Thorne's topic in WIP: Drag Racing Models
First, I am always appreciative of suggestions, critiques, etc. Yes, I have tested the fit a couple of times, but I will take a closer look tomorrow, as I don’t want to mess with the body much while the Fusionfirm is drying. Thank you, Kevin. -
1963 Corvette current day nhra Stock Eliminator
R. Thorne replied to R. Thorne's topic in WIP: Drag Racing Models
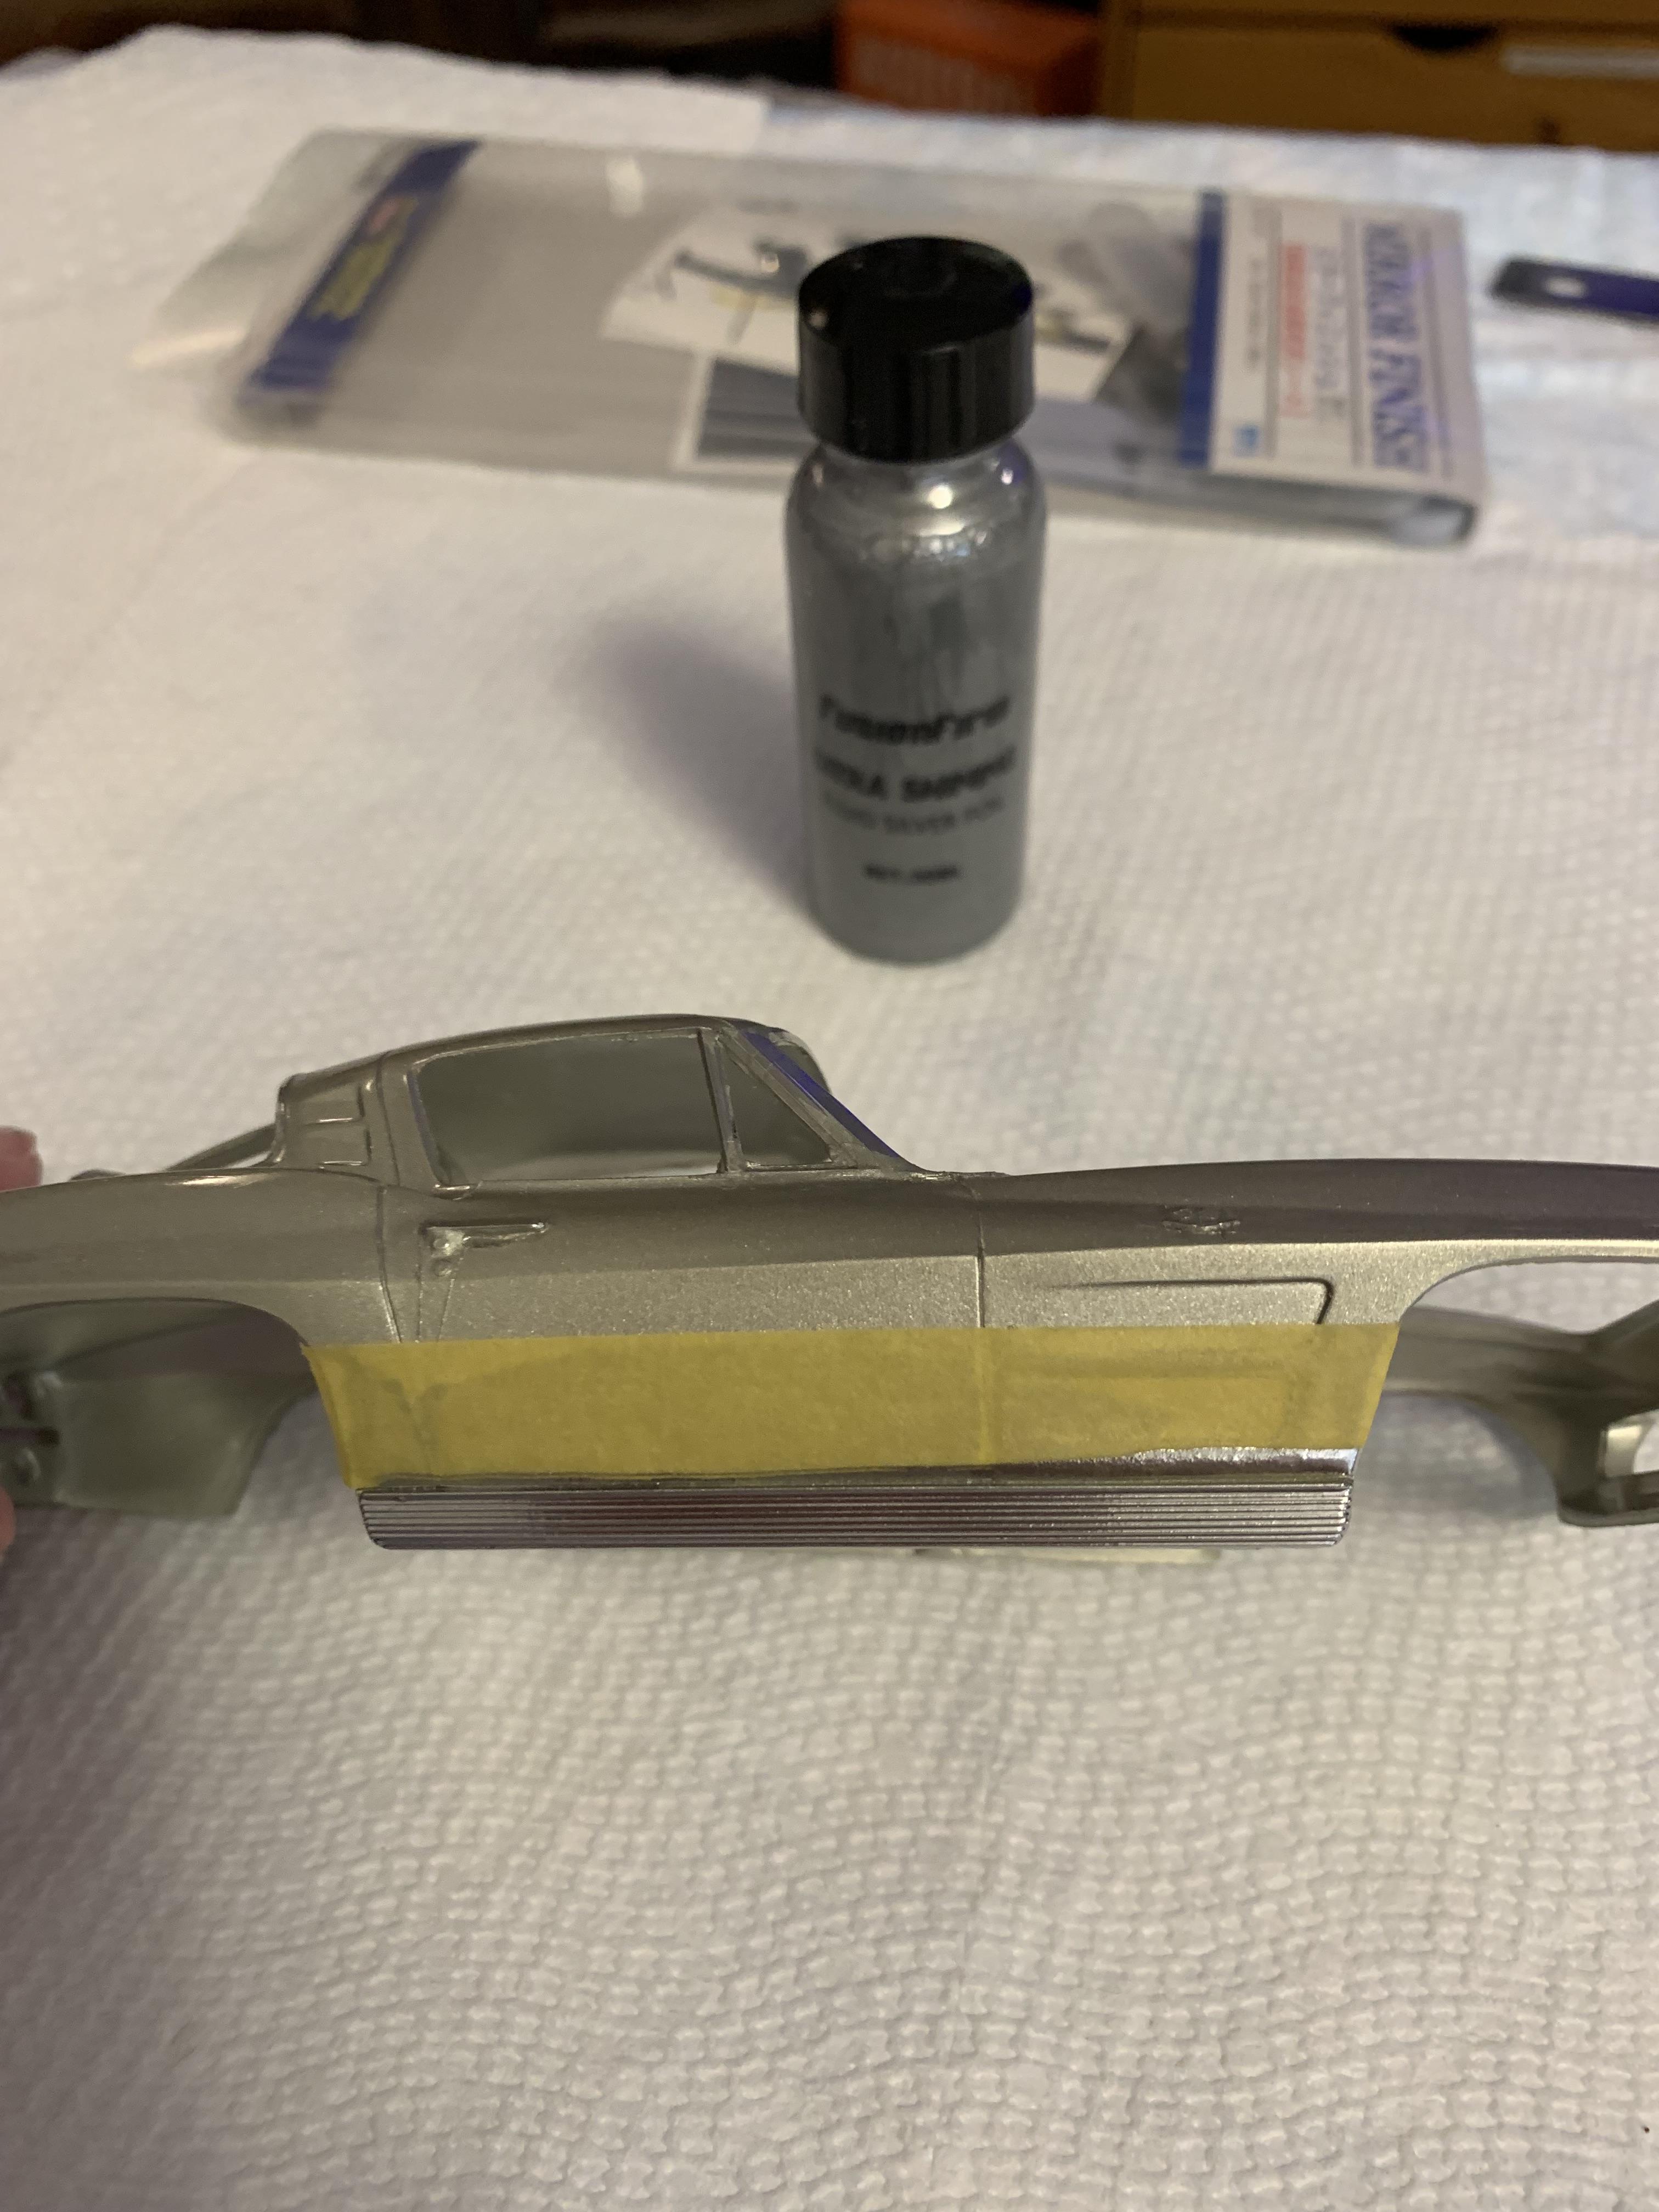
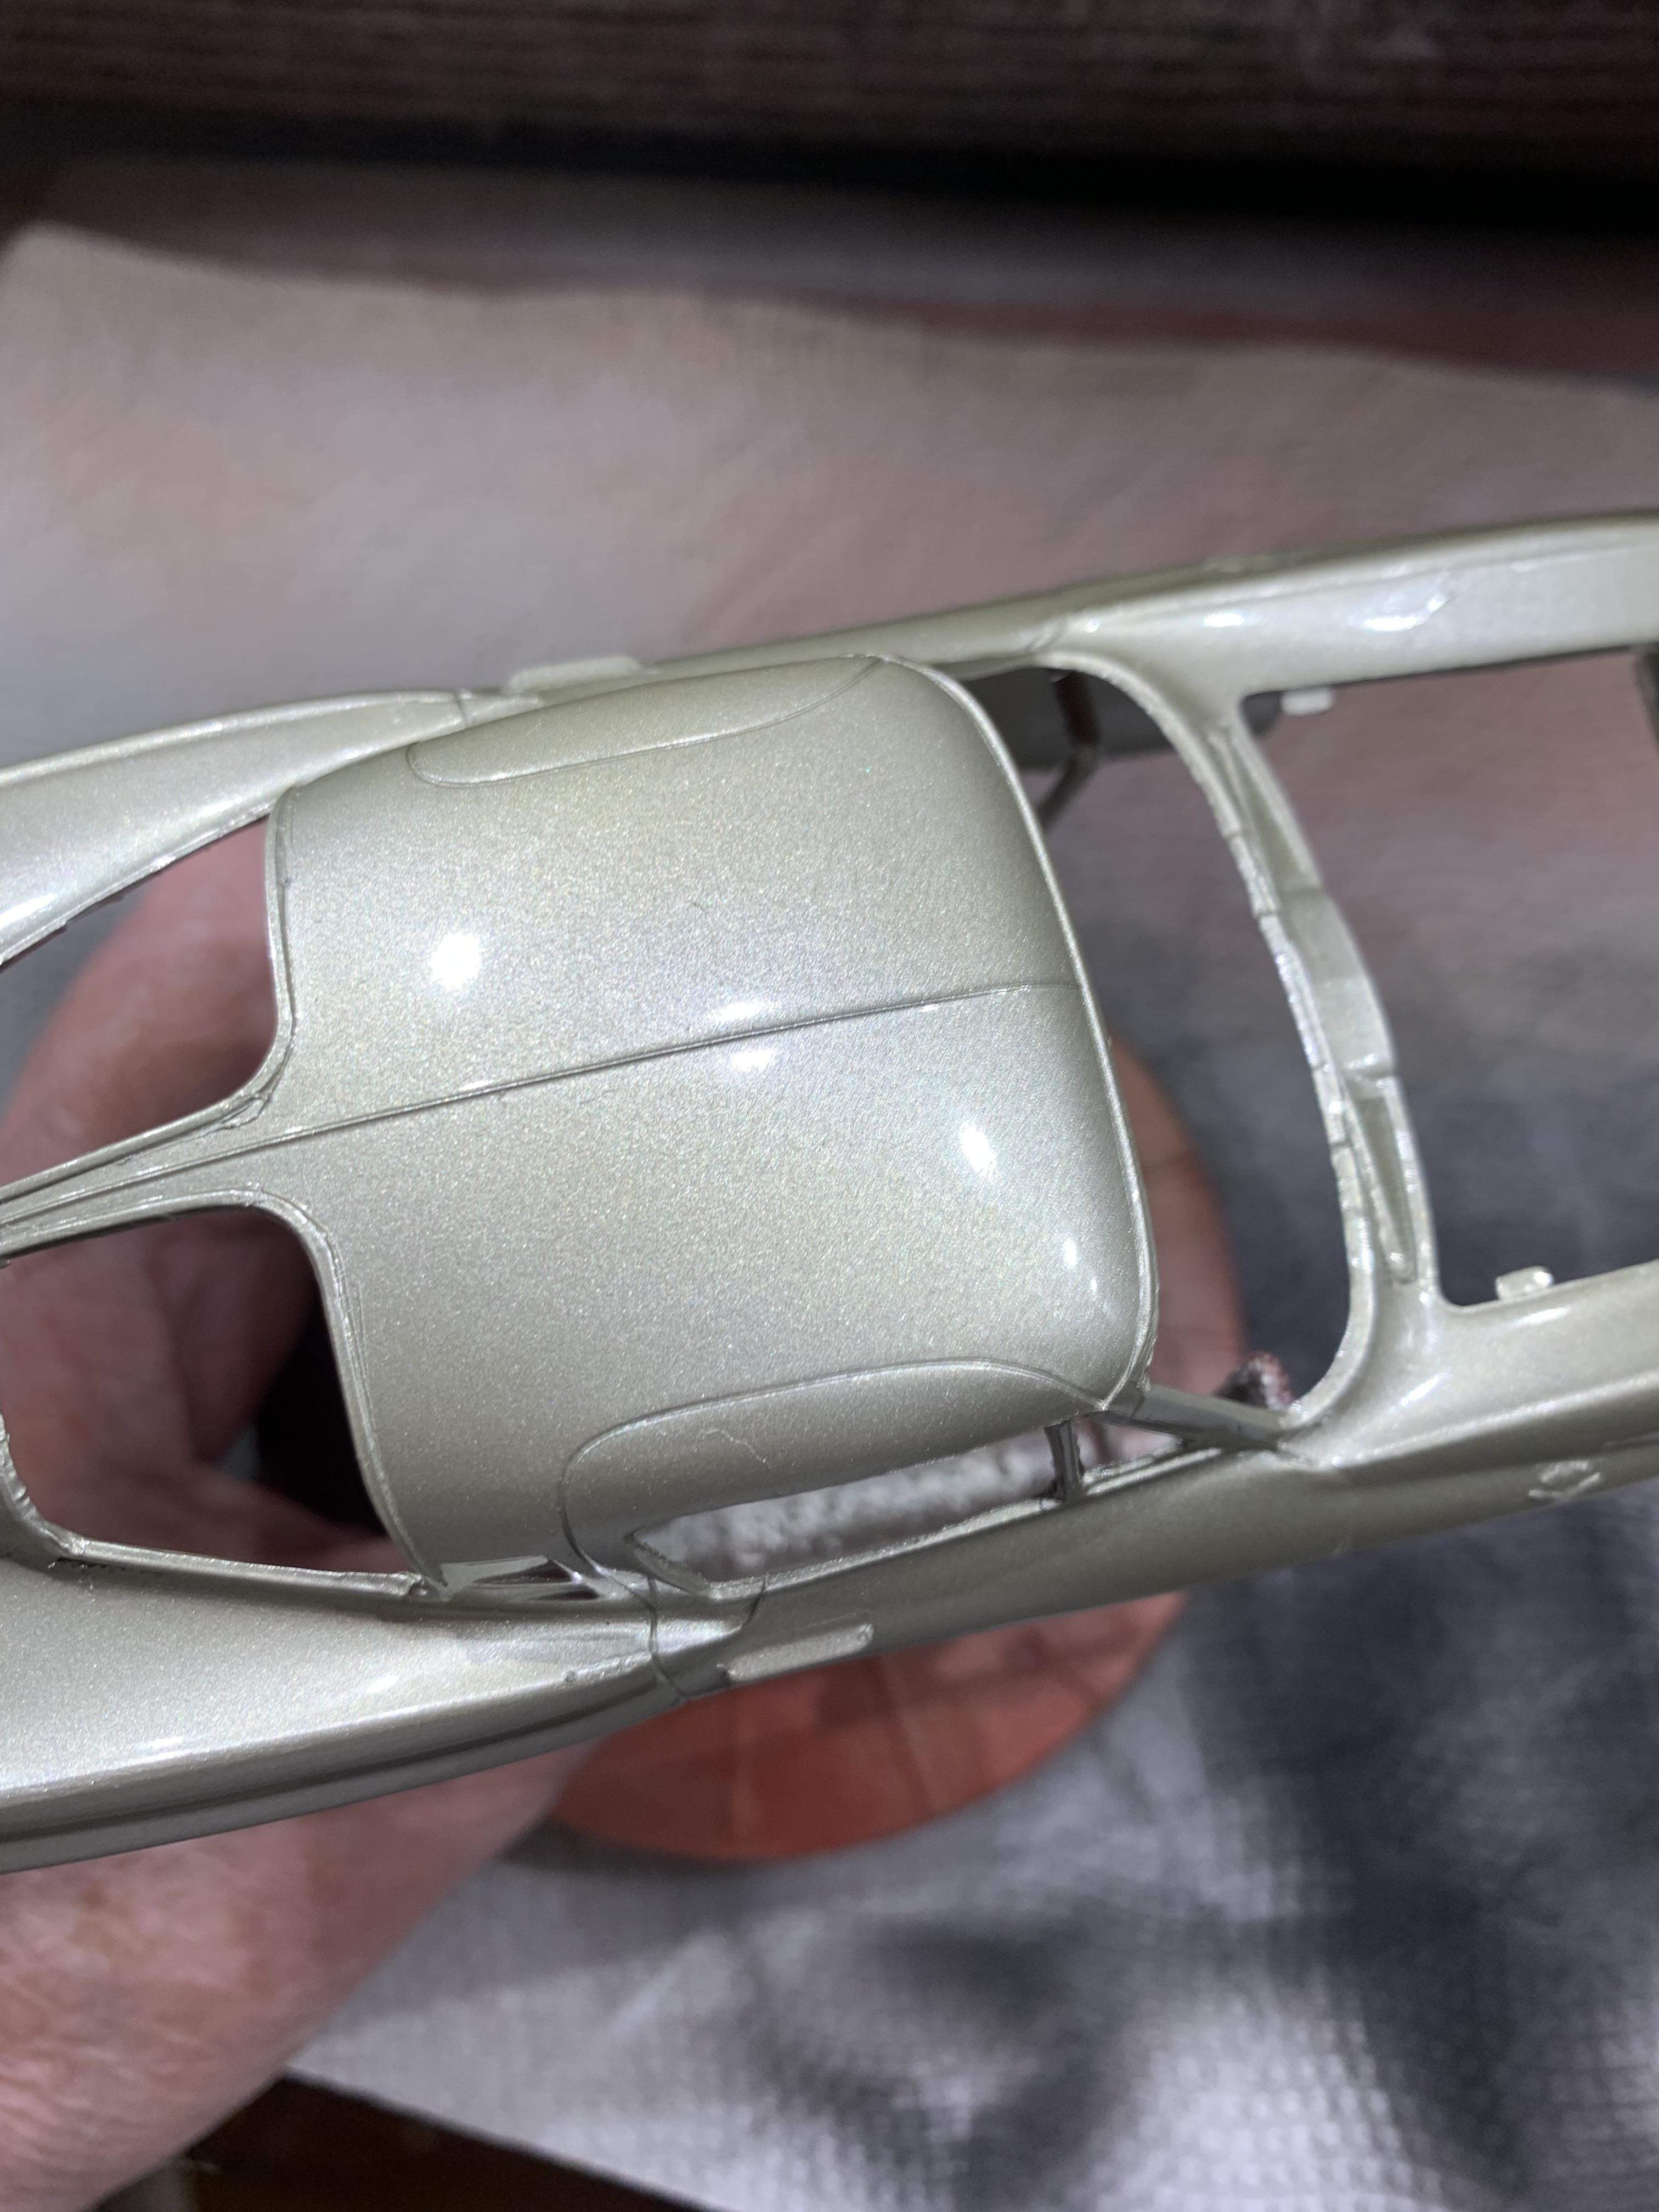
Masked off lower trim and put some Fusionfirm on it. Took masking tape of after about 5 minutes. Had one bleed thru at the door scribe. Cleaned up with alcohol wipe. Set body aside to dry.
-
1963 Corvette current day nhra Stock Eliminator
R. Thorne replied to R. Thorne's topic in WIP: Drag Racing Models
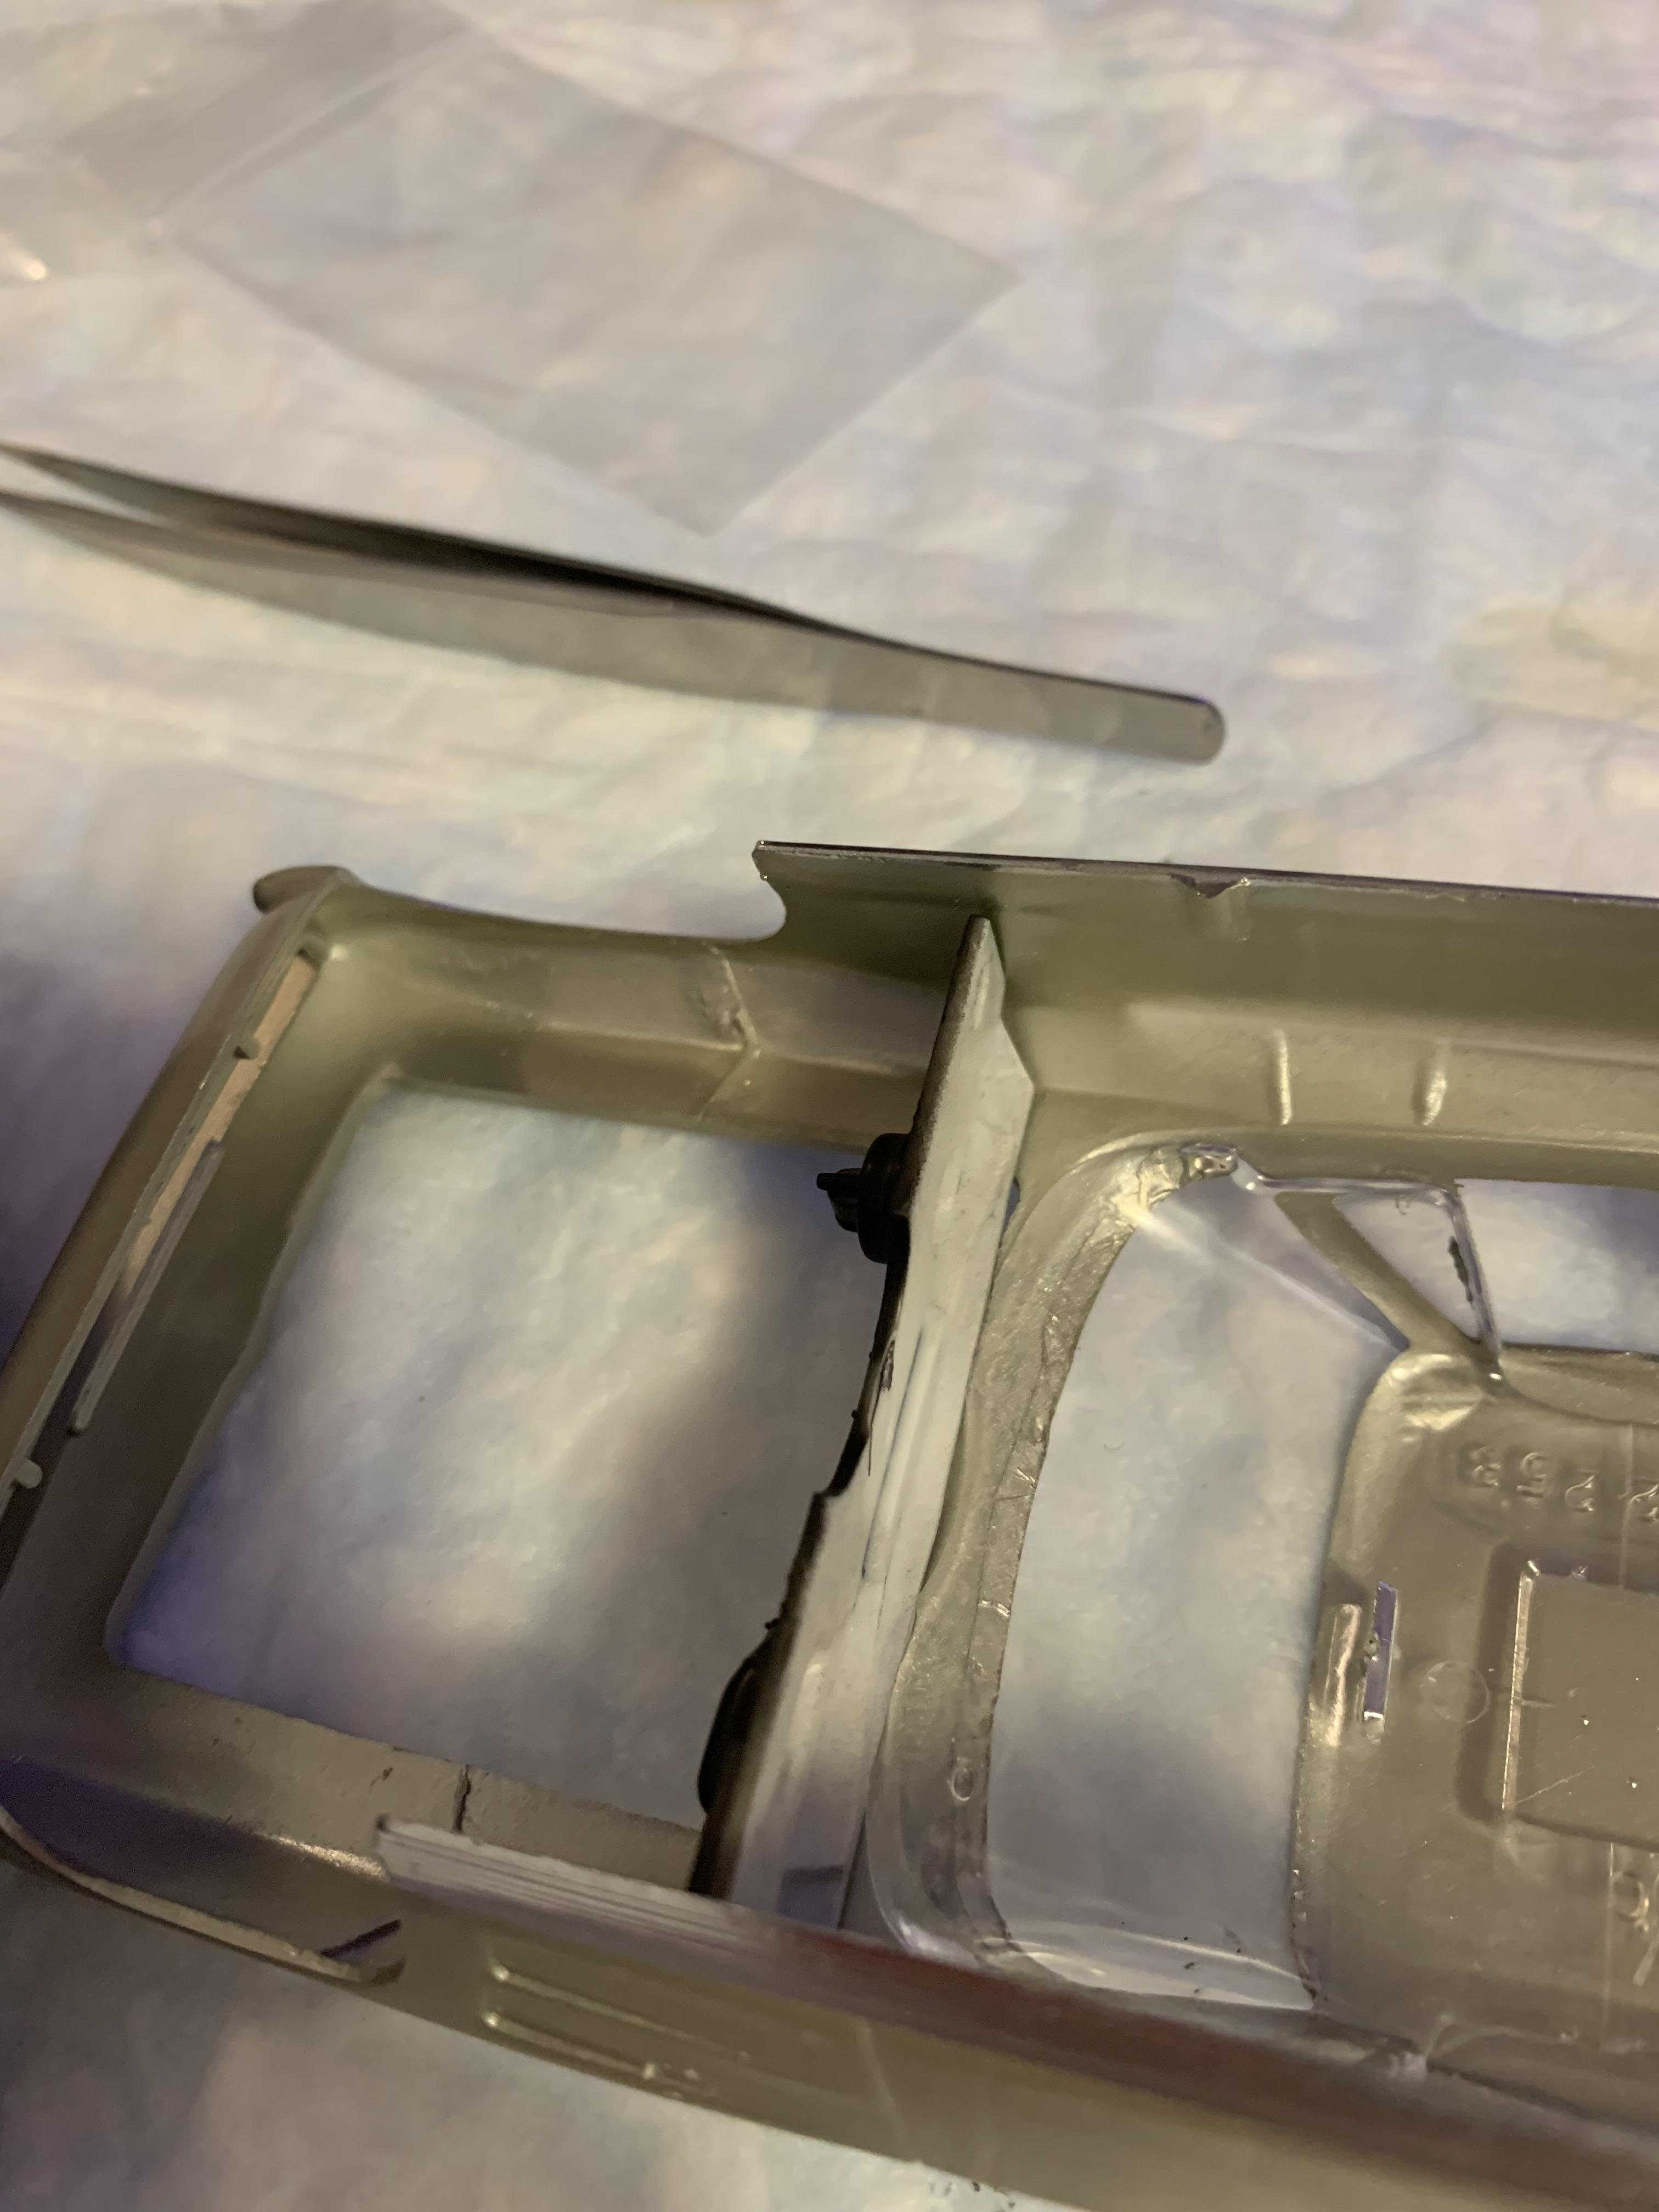
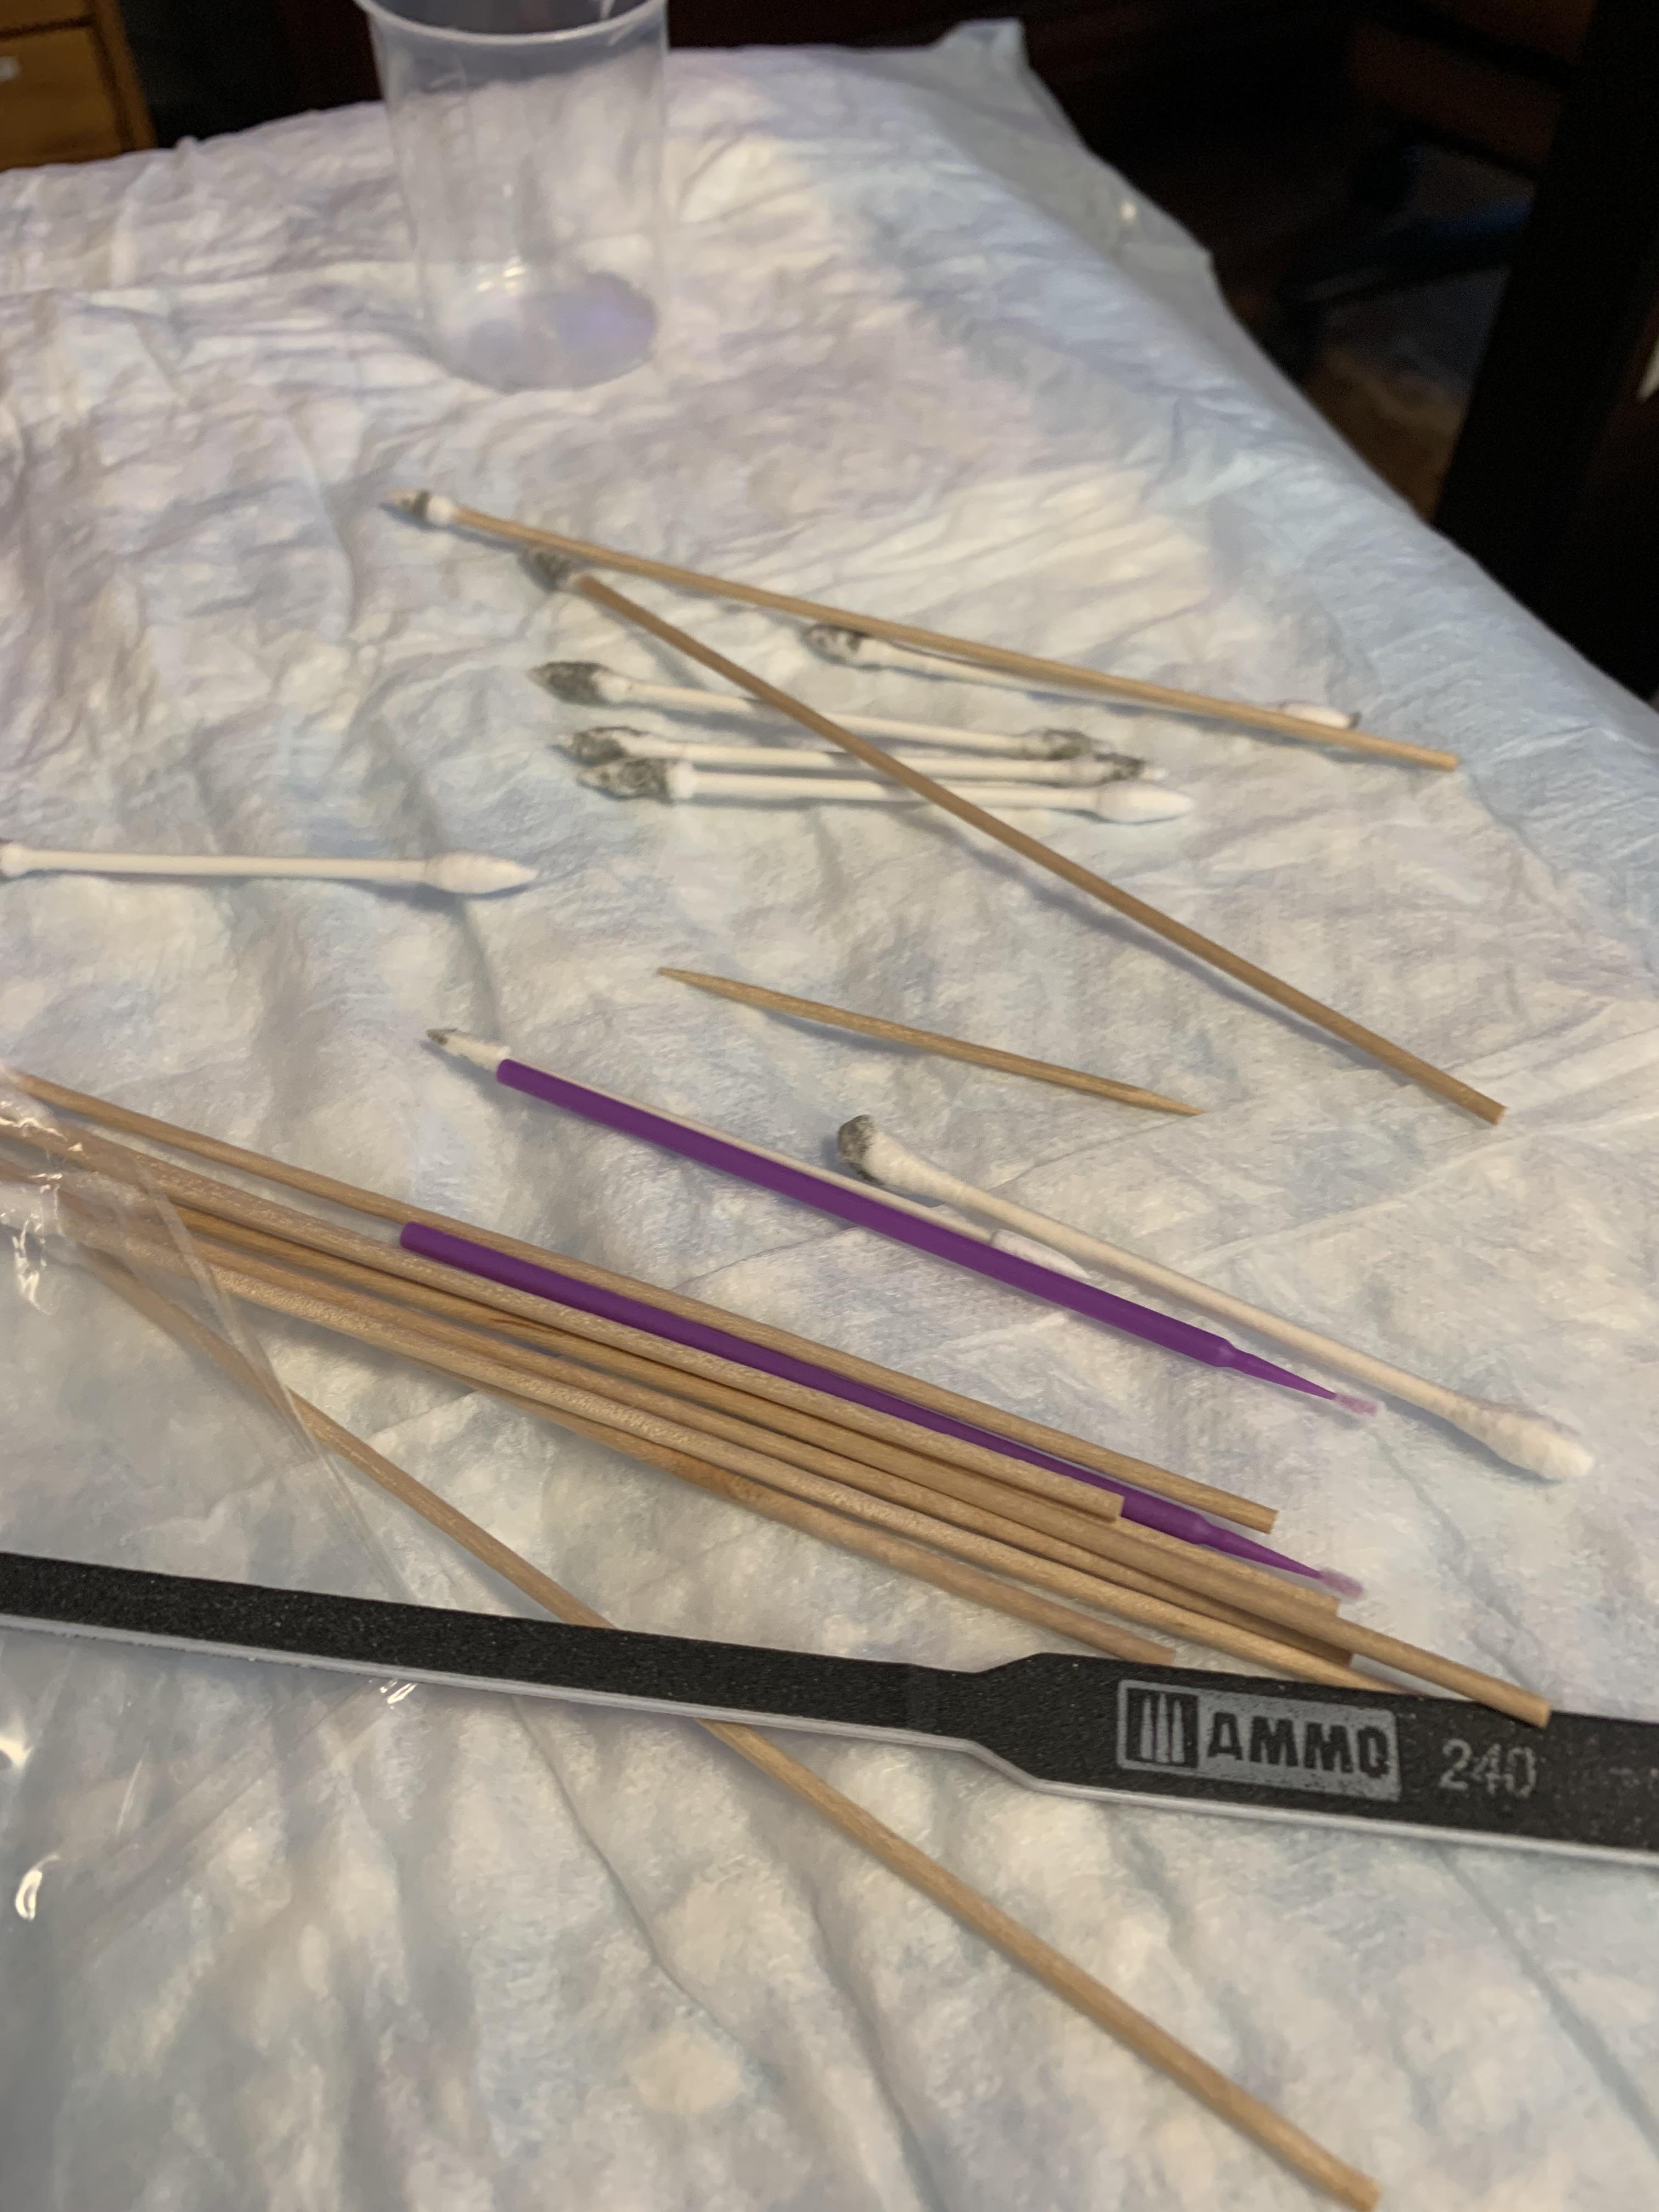
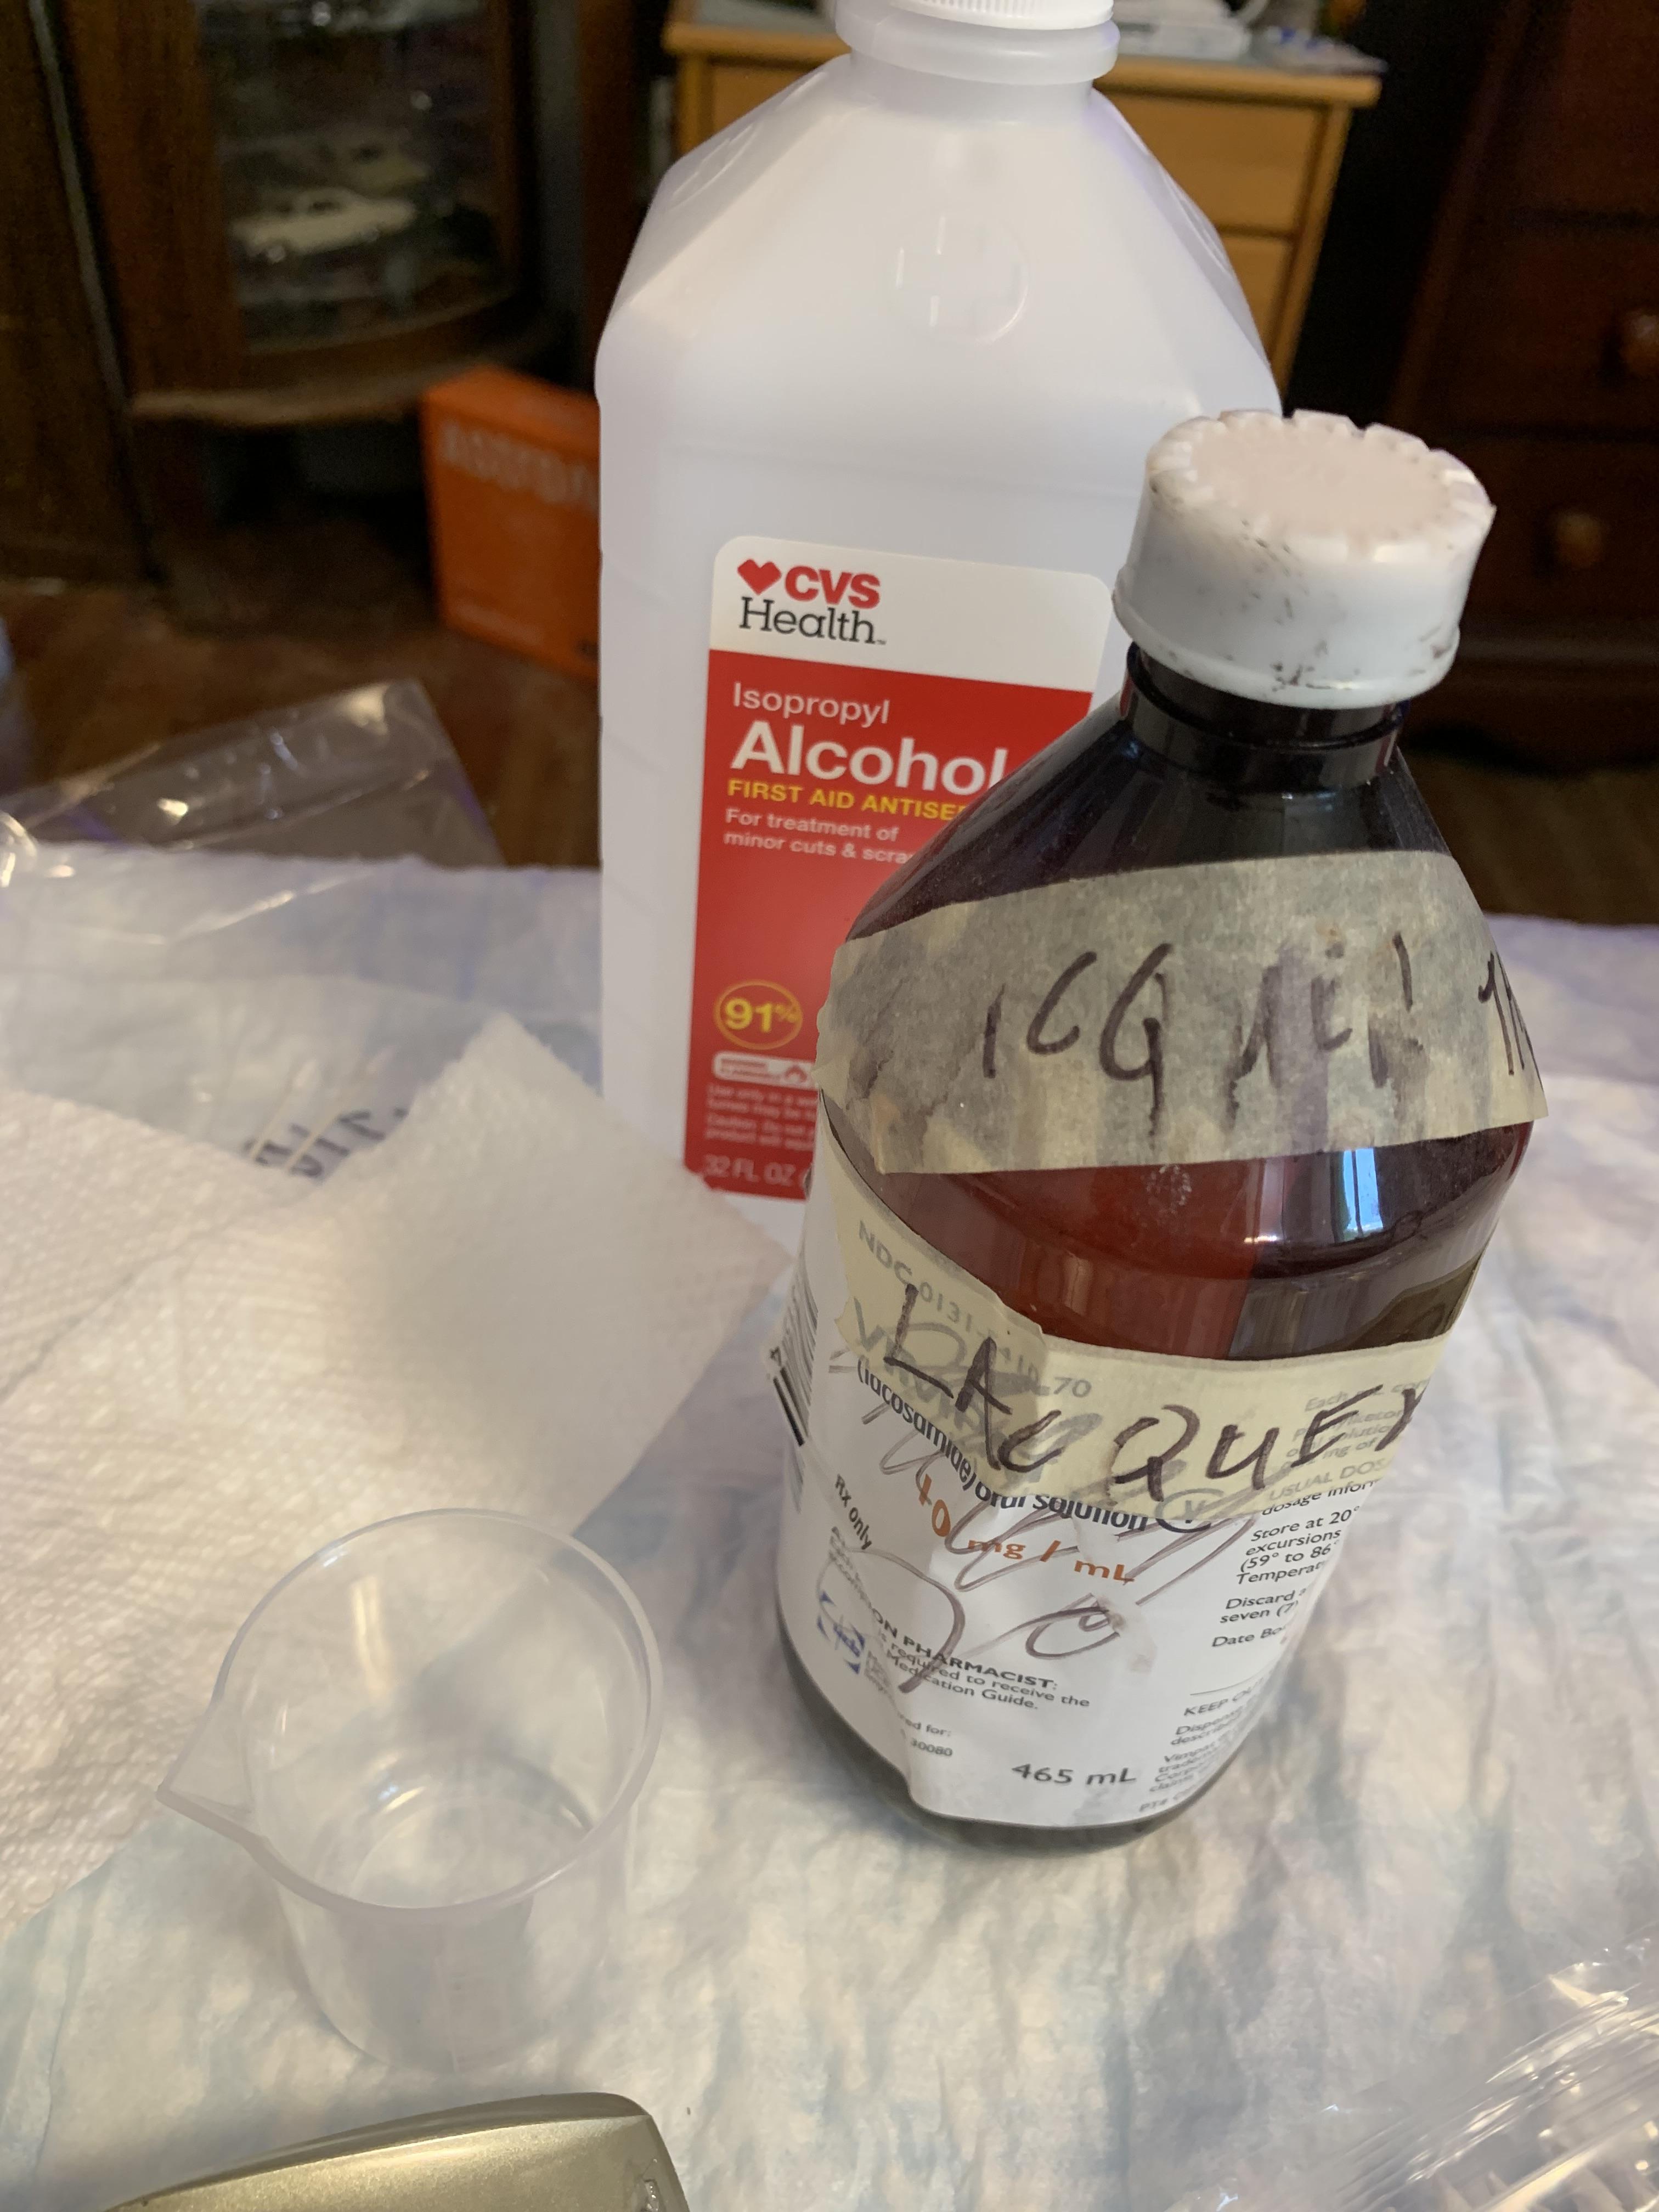
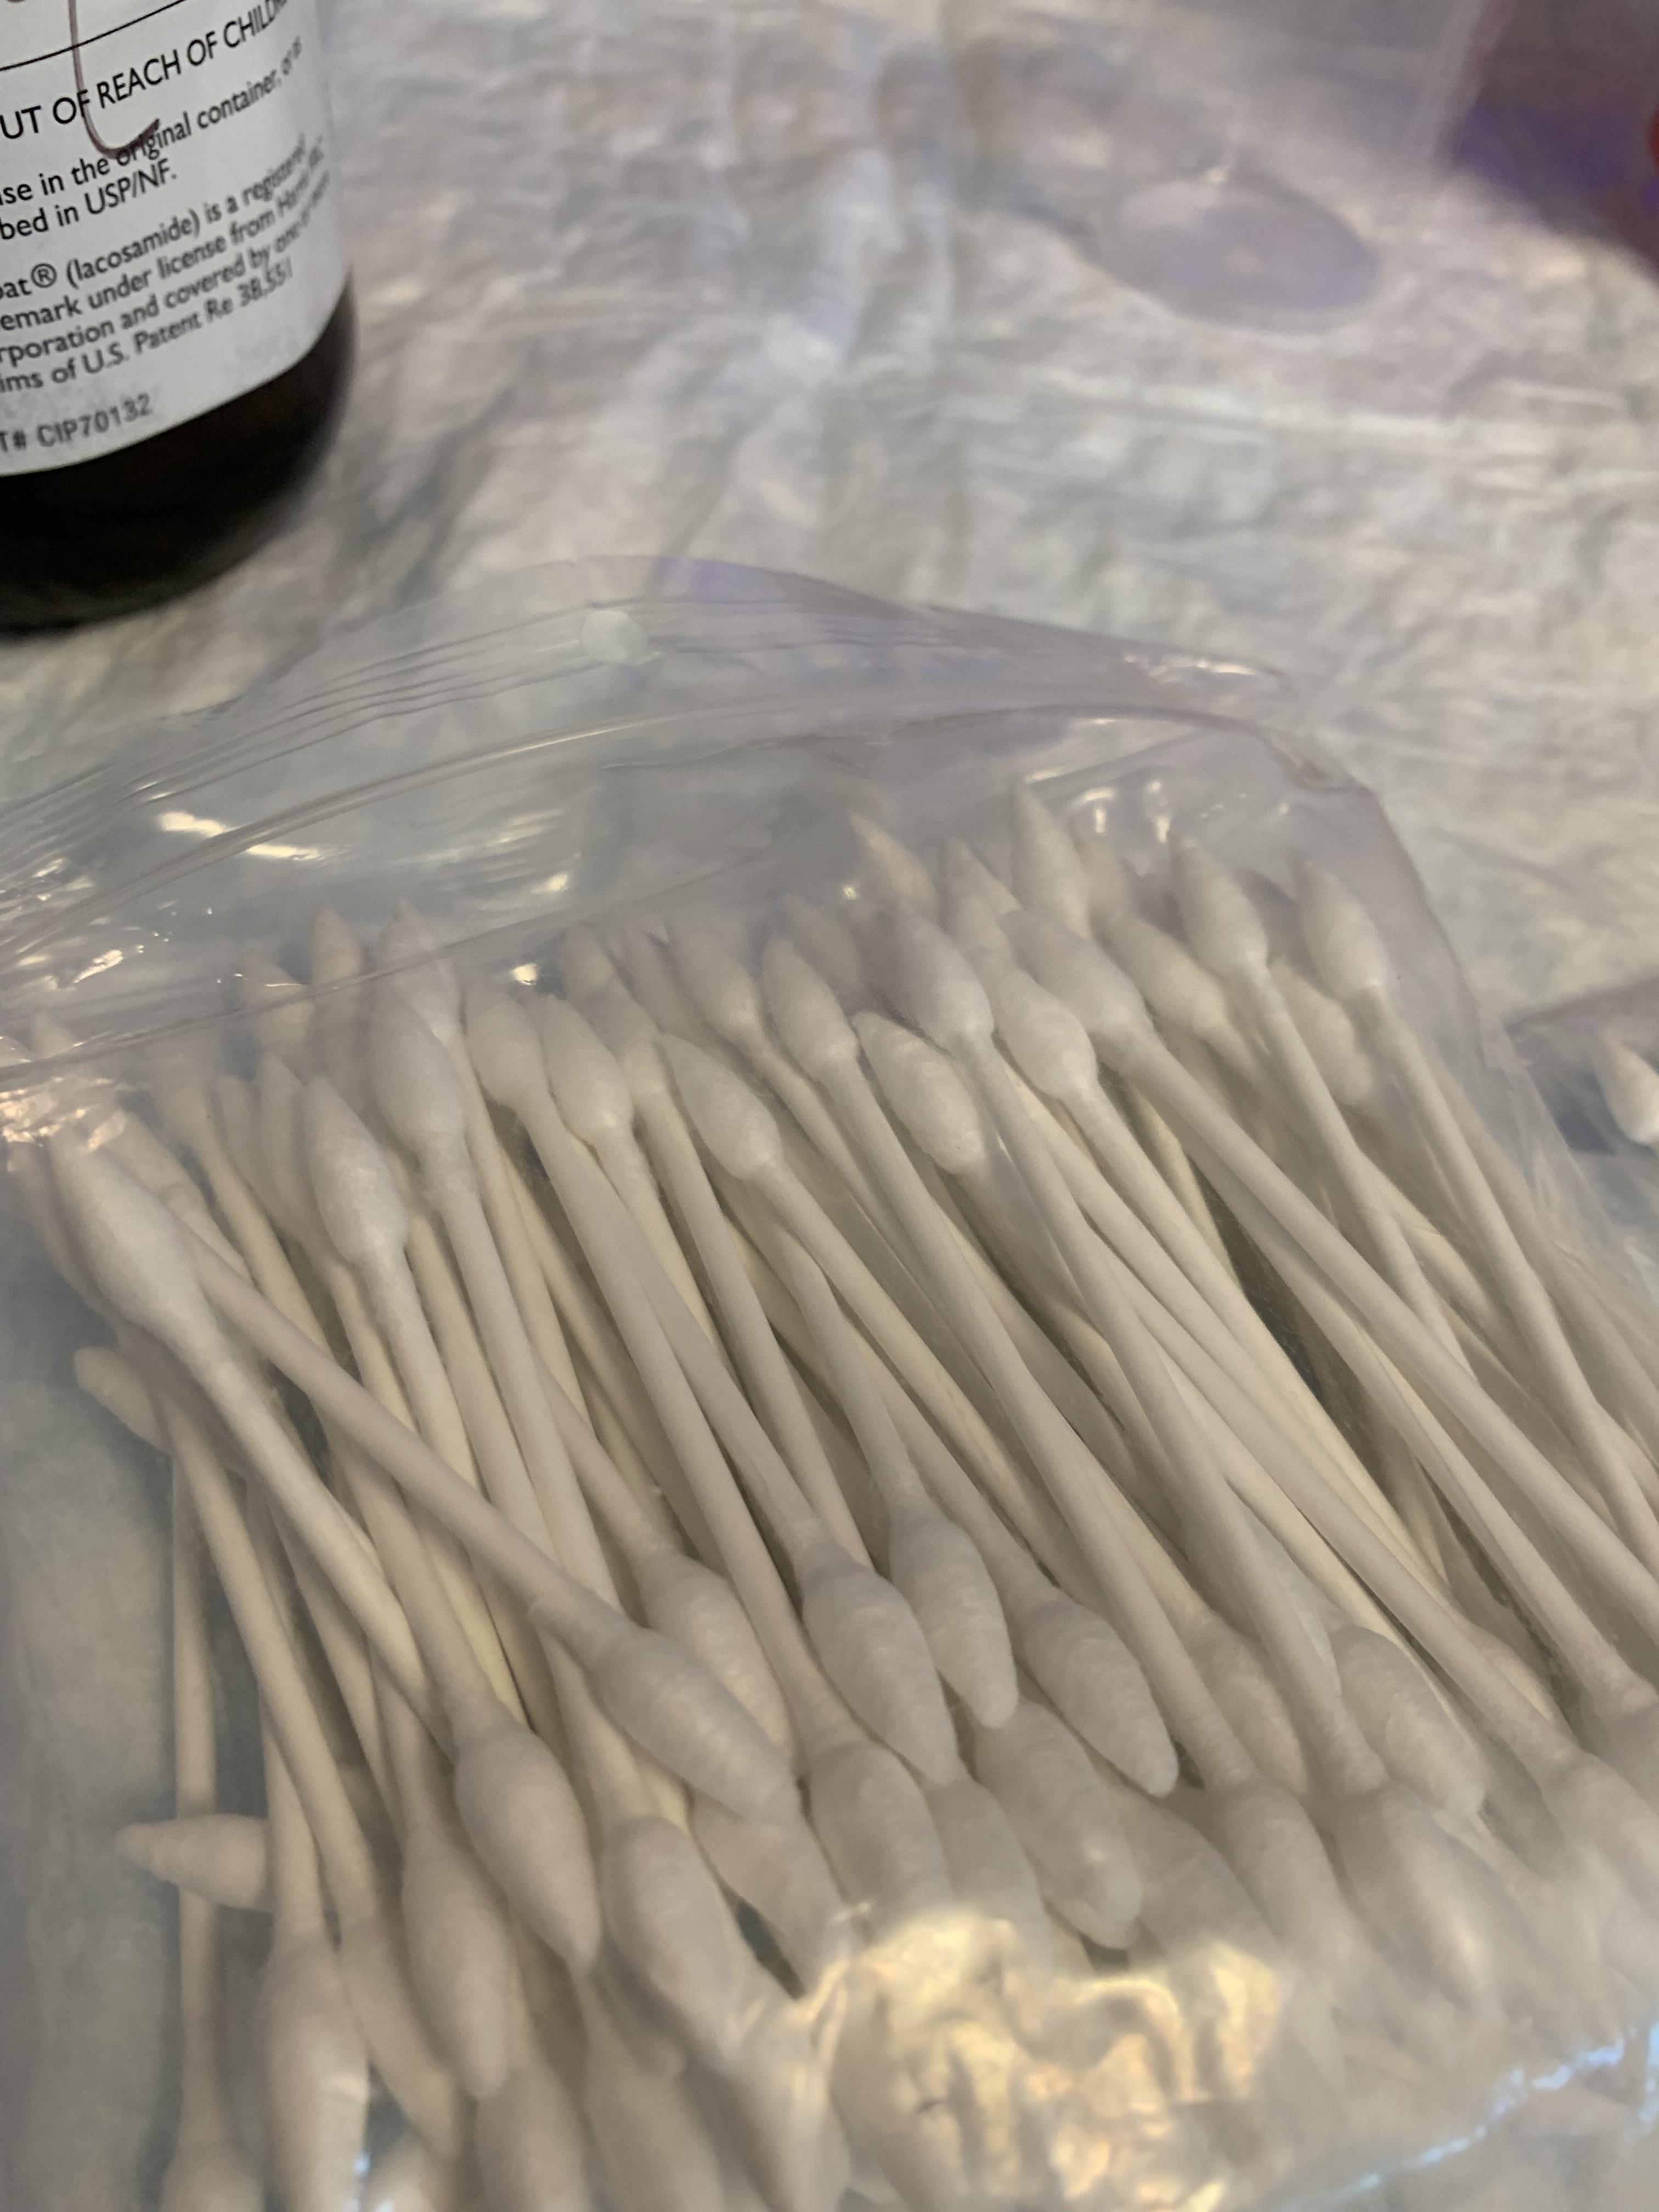
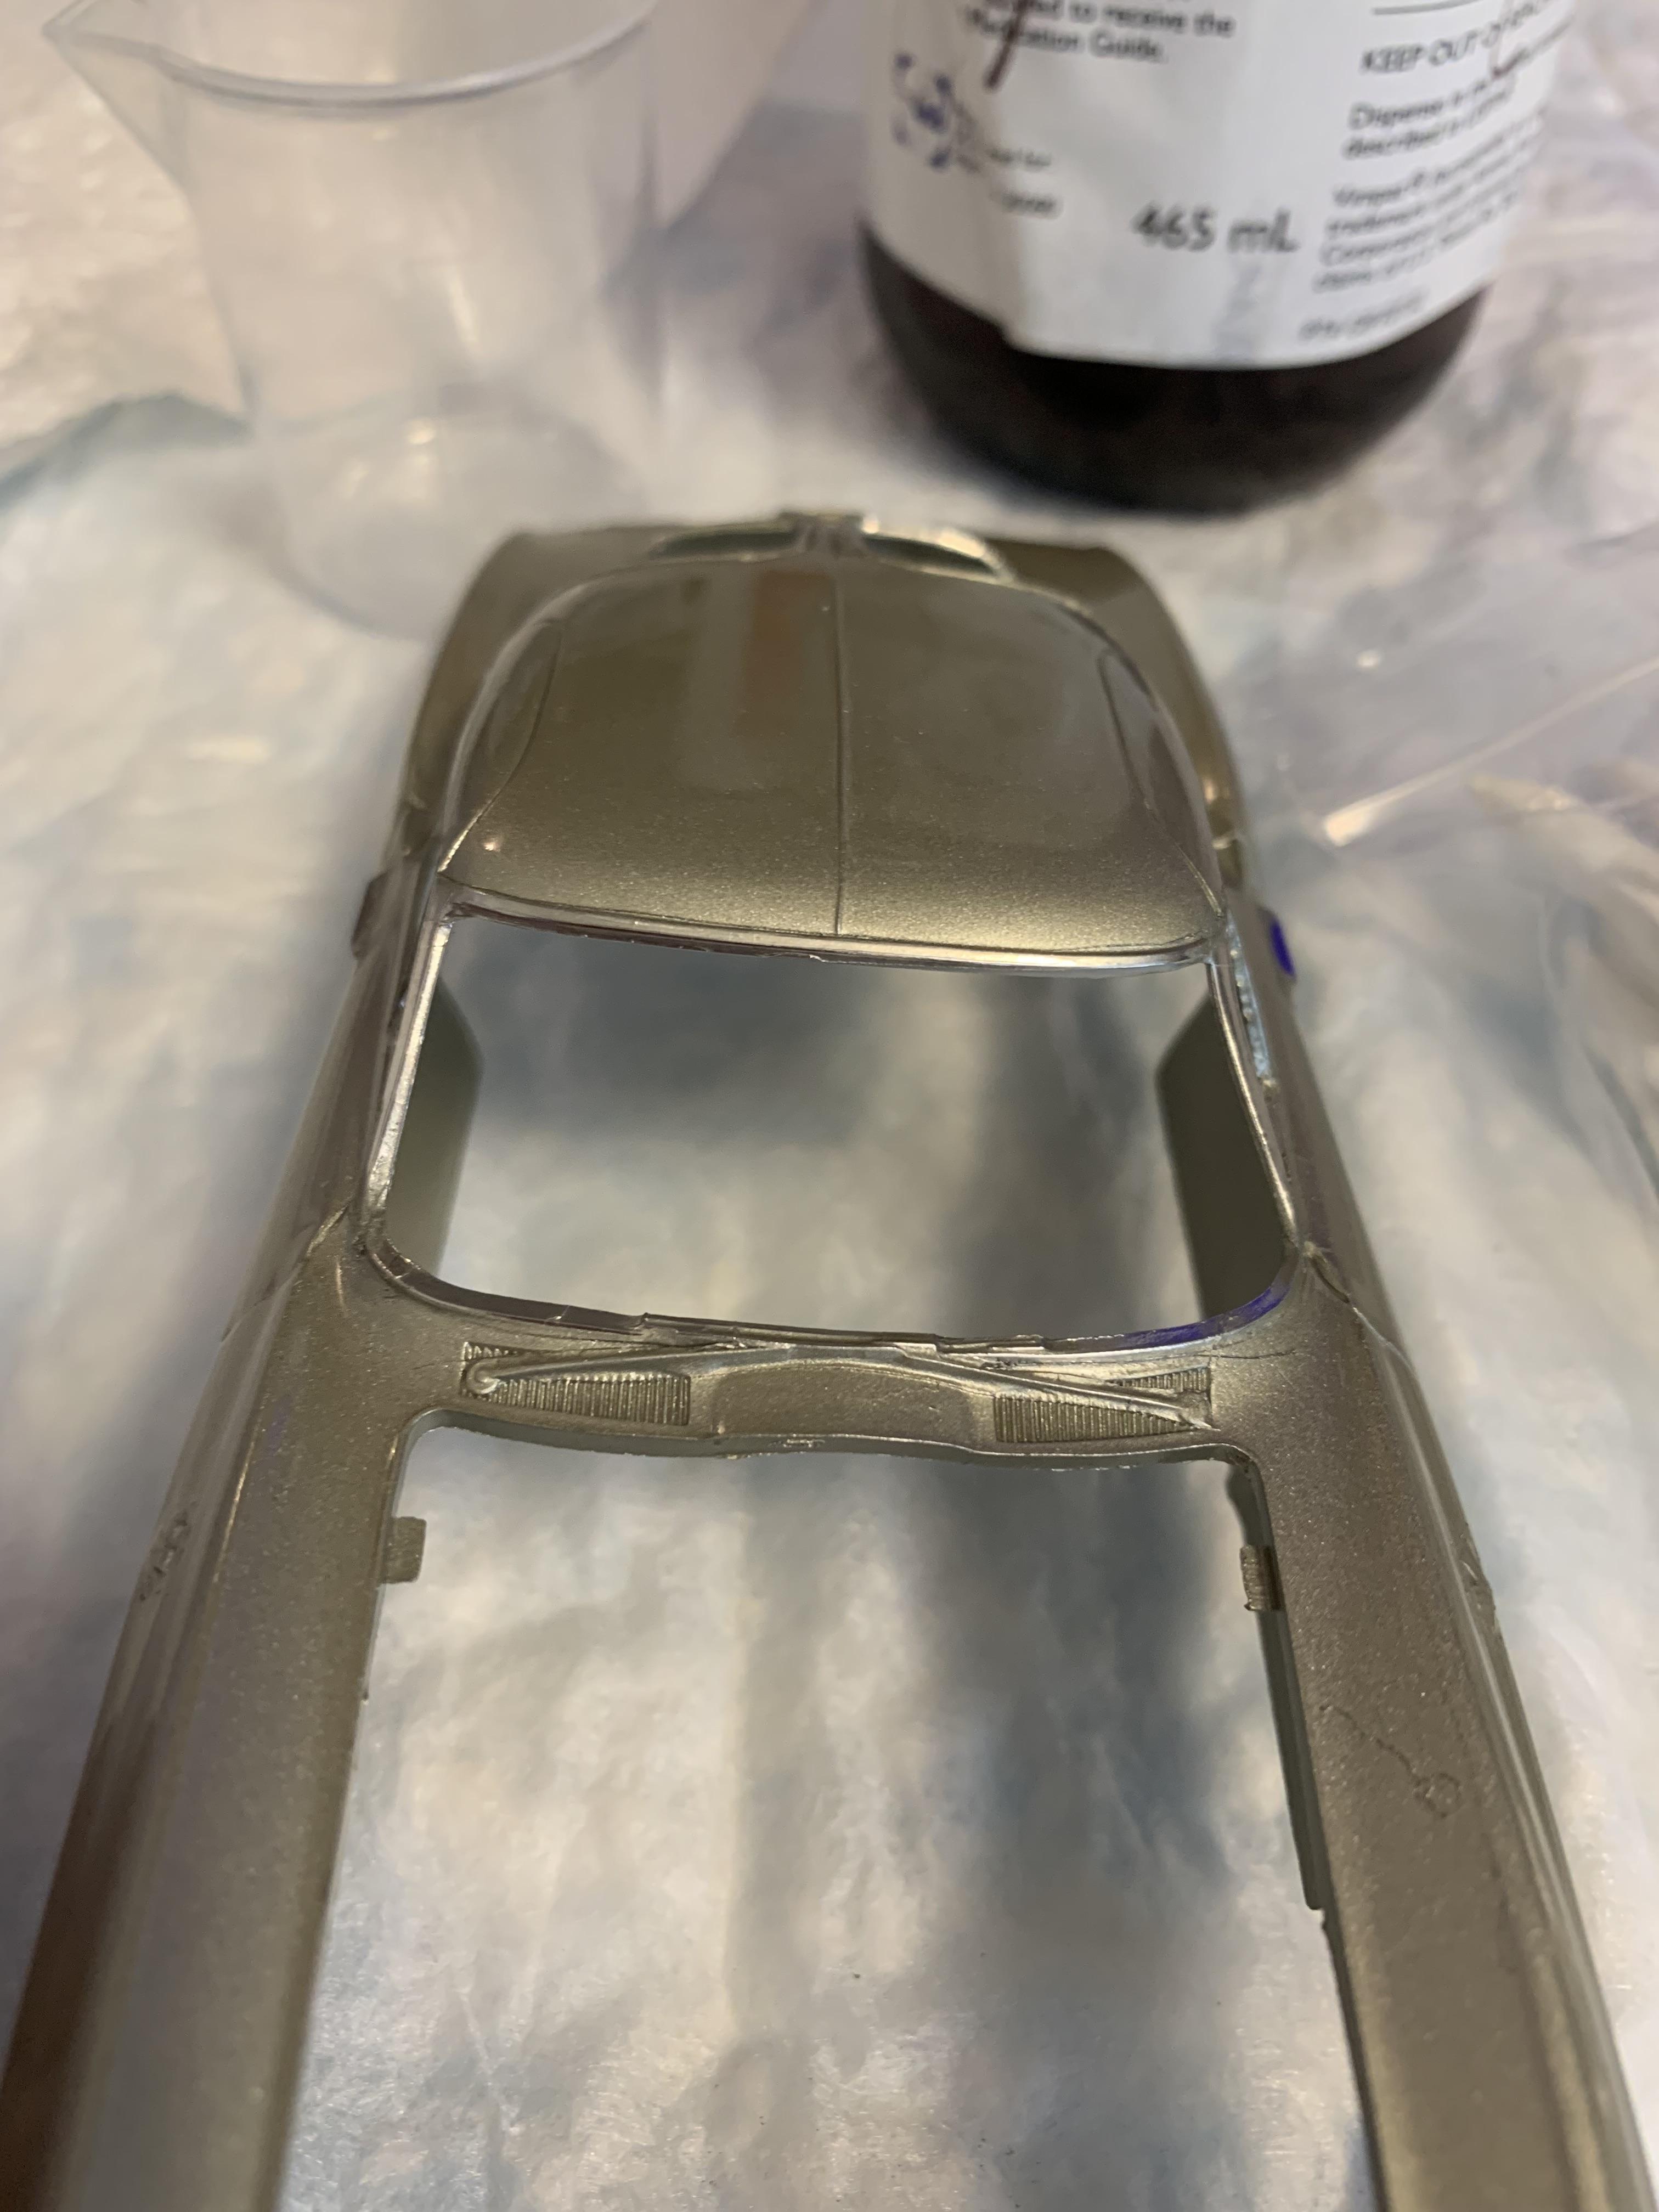
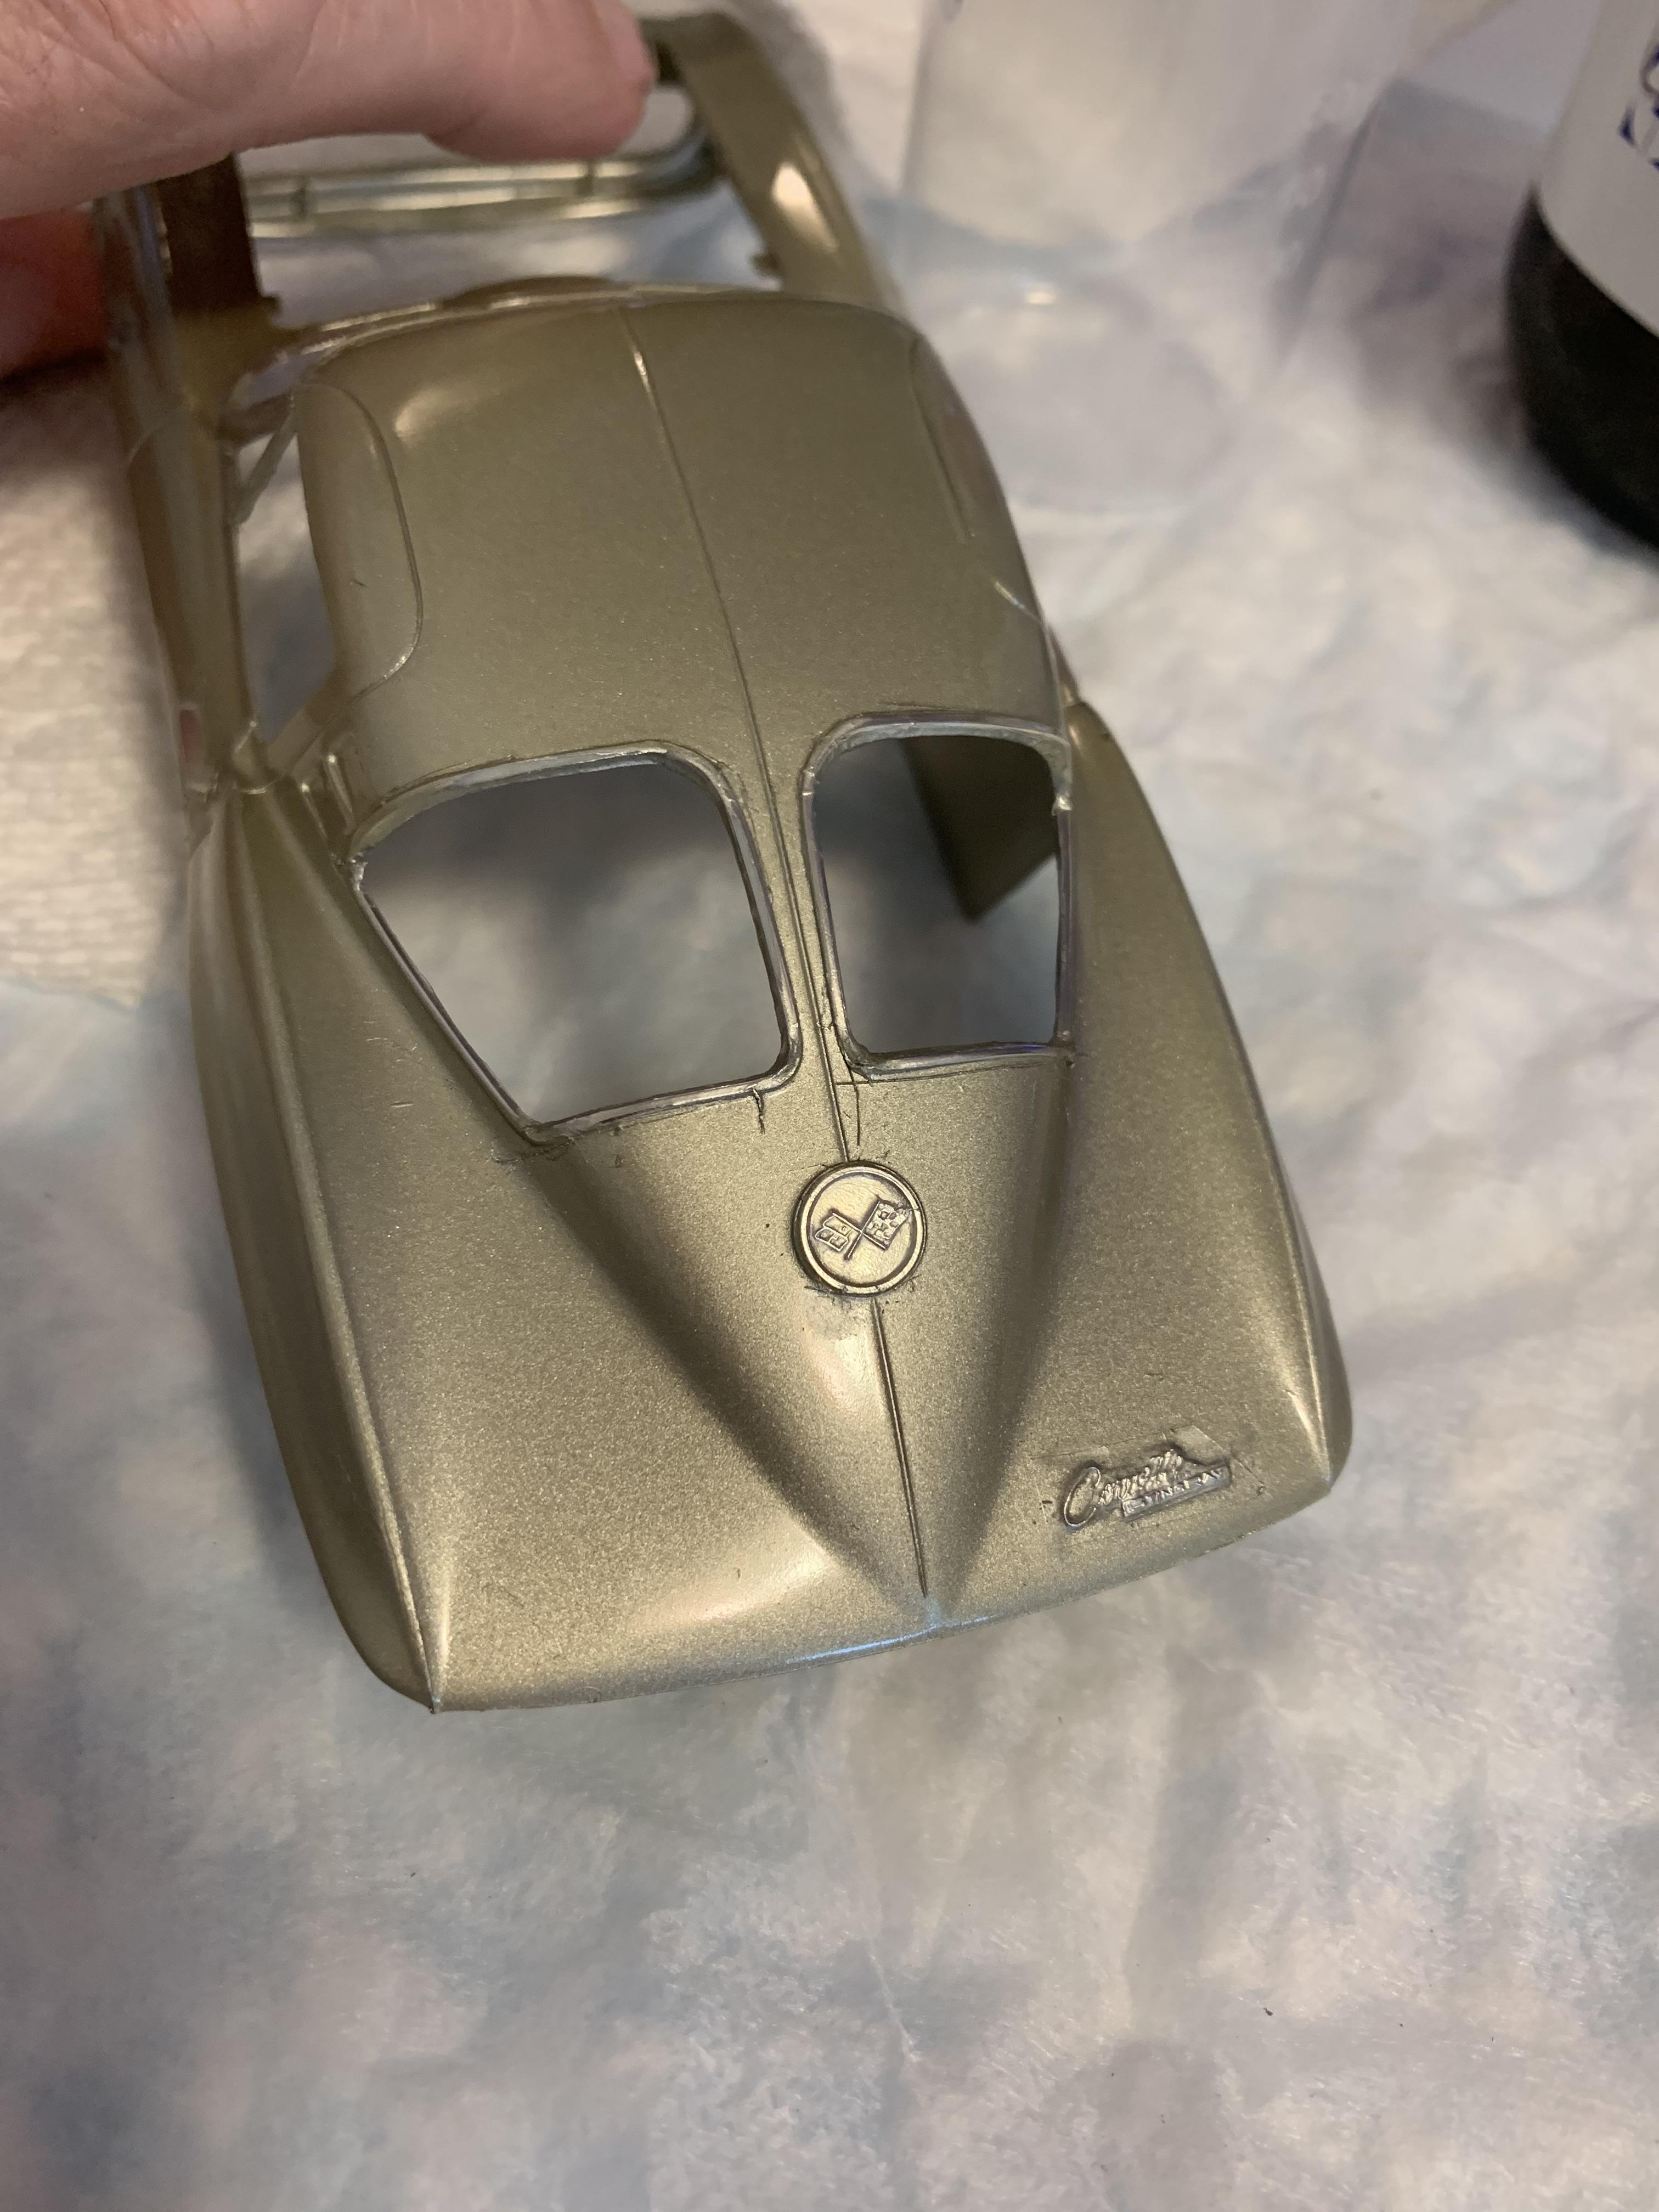
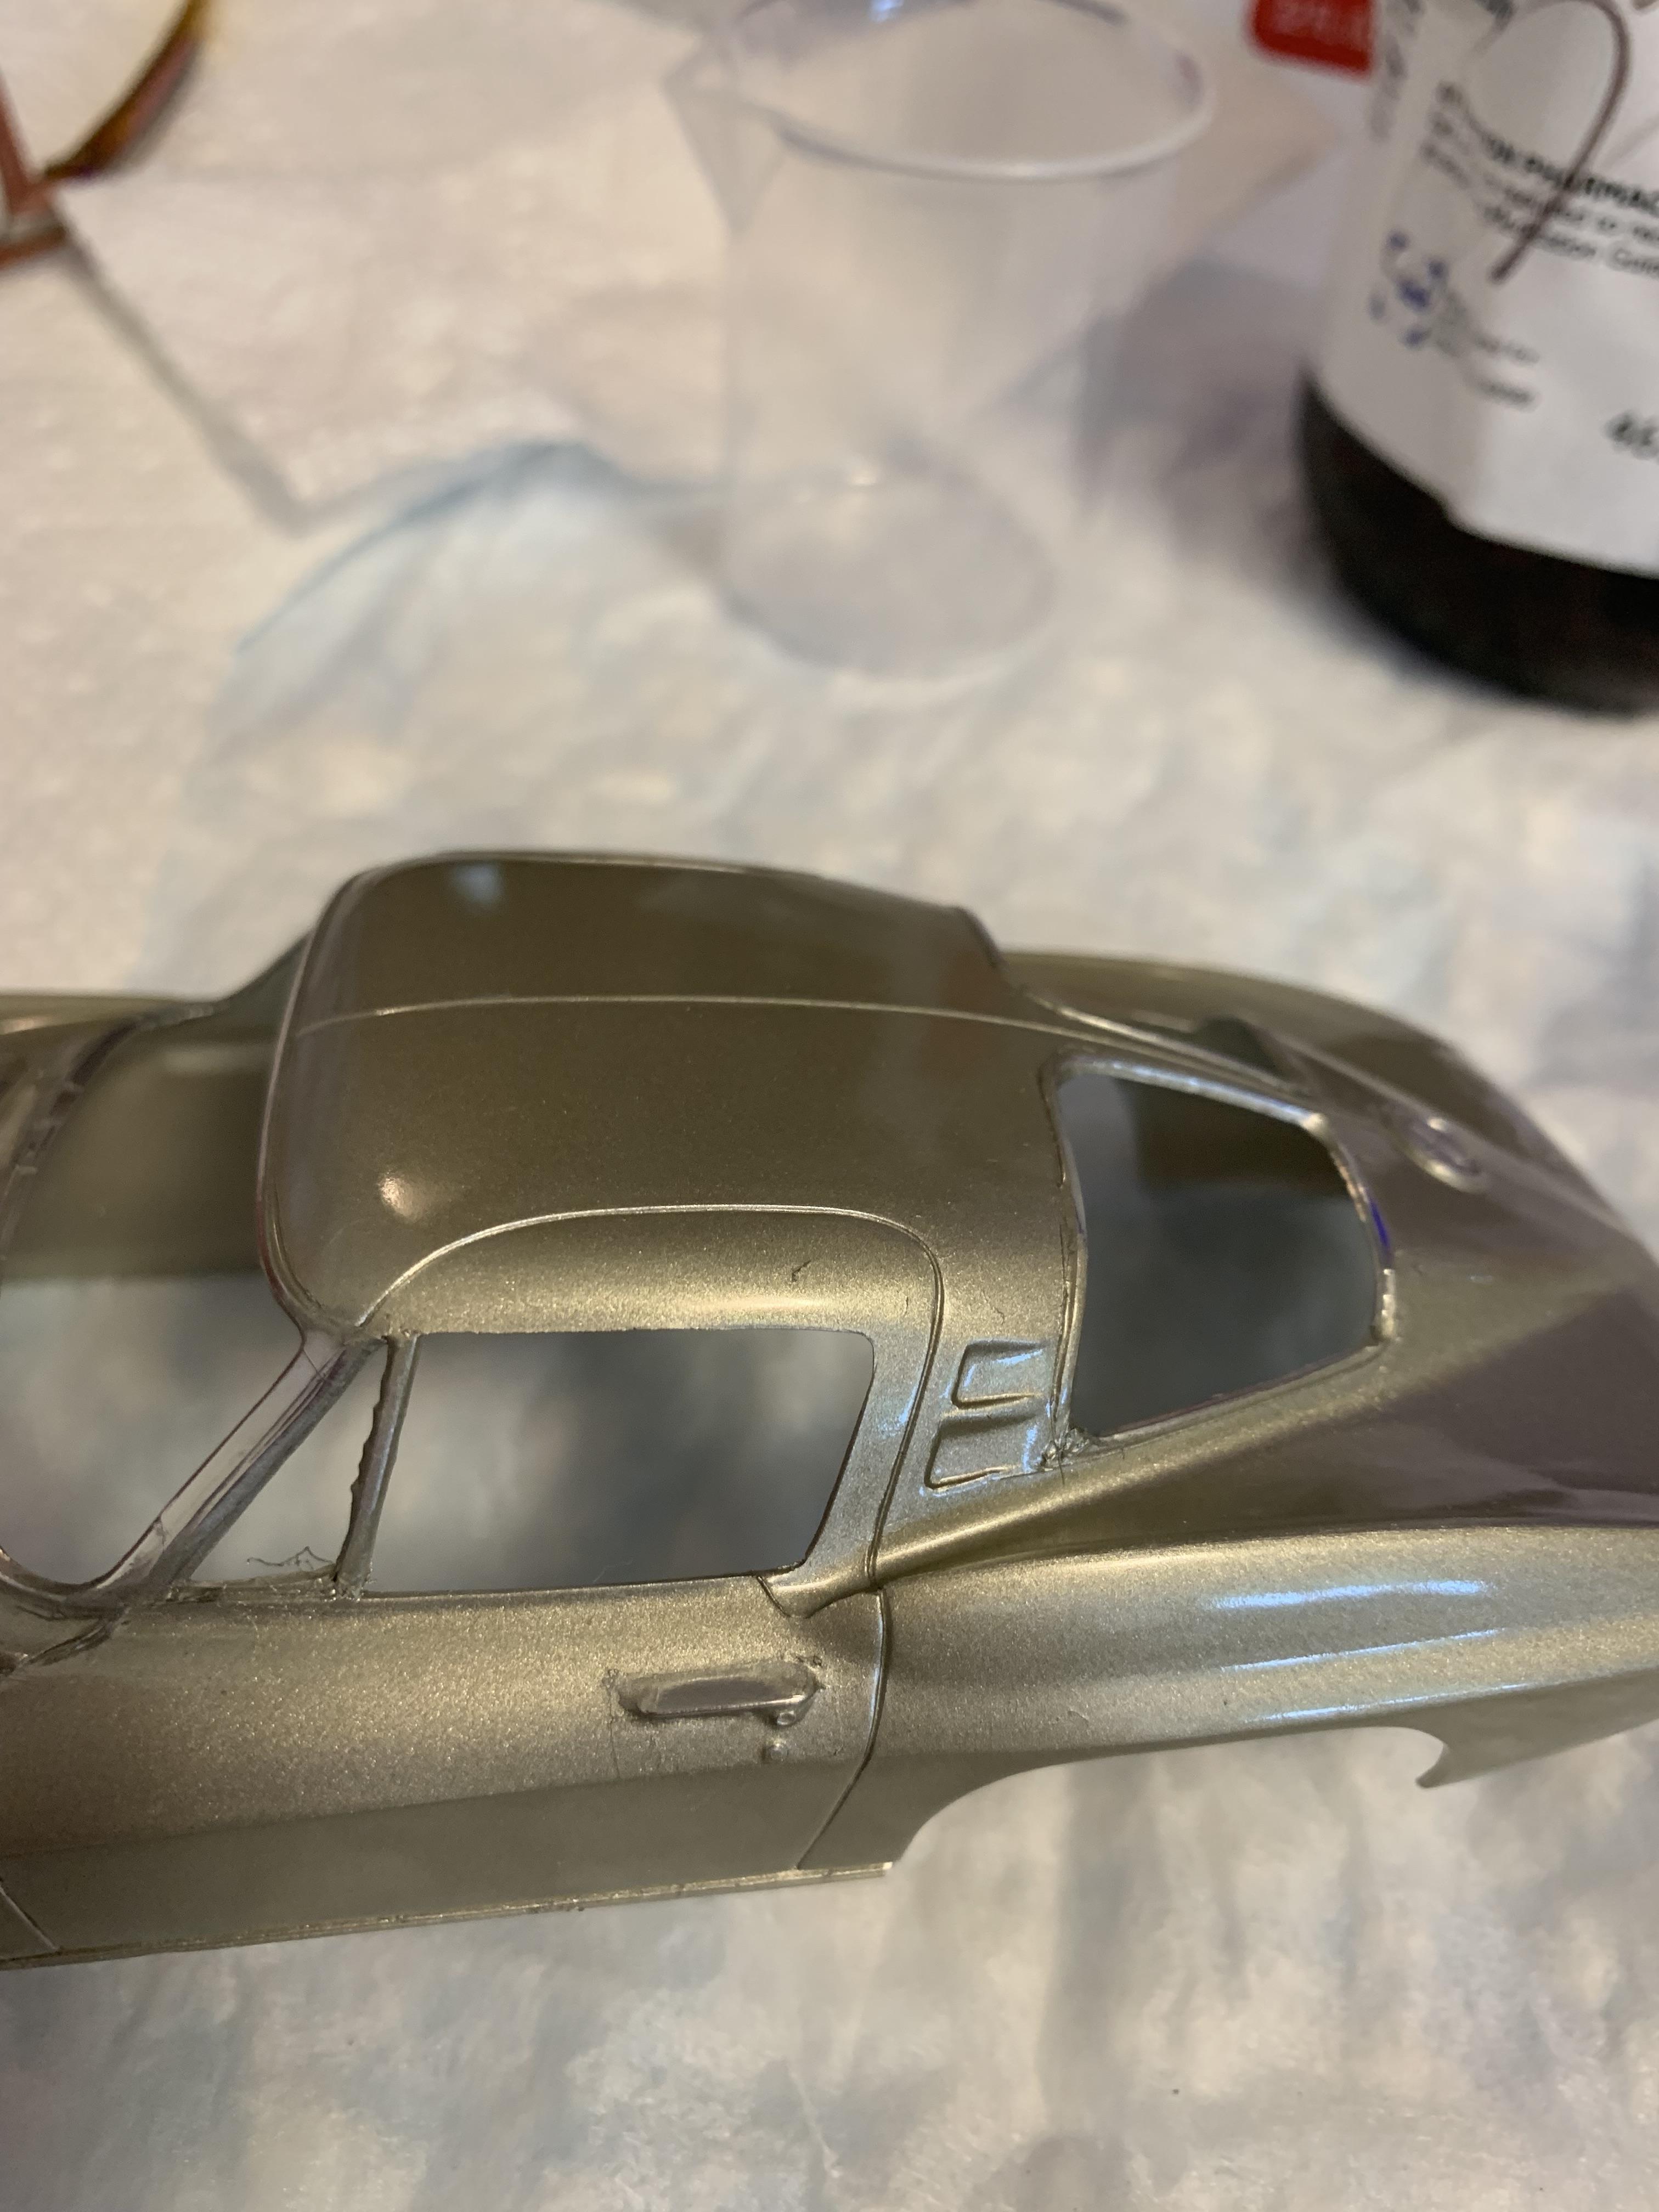
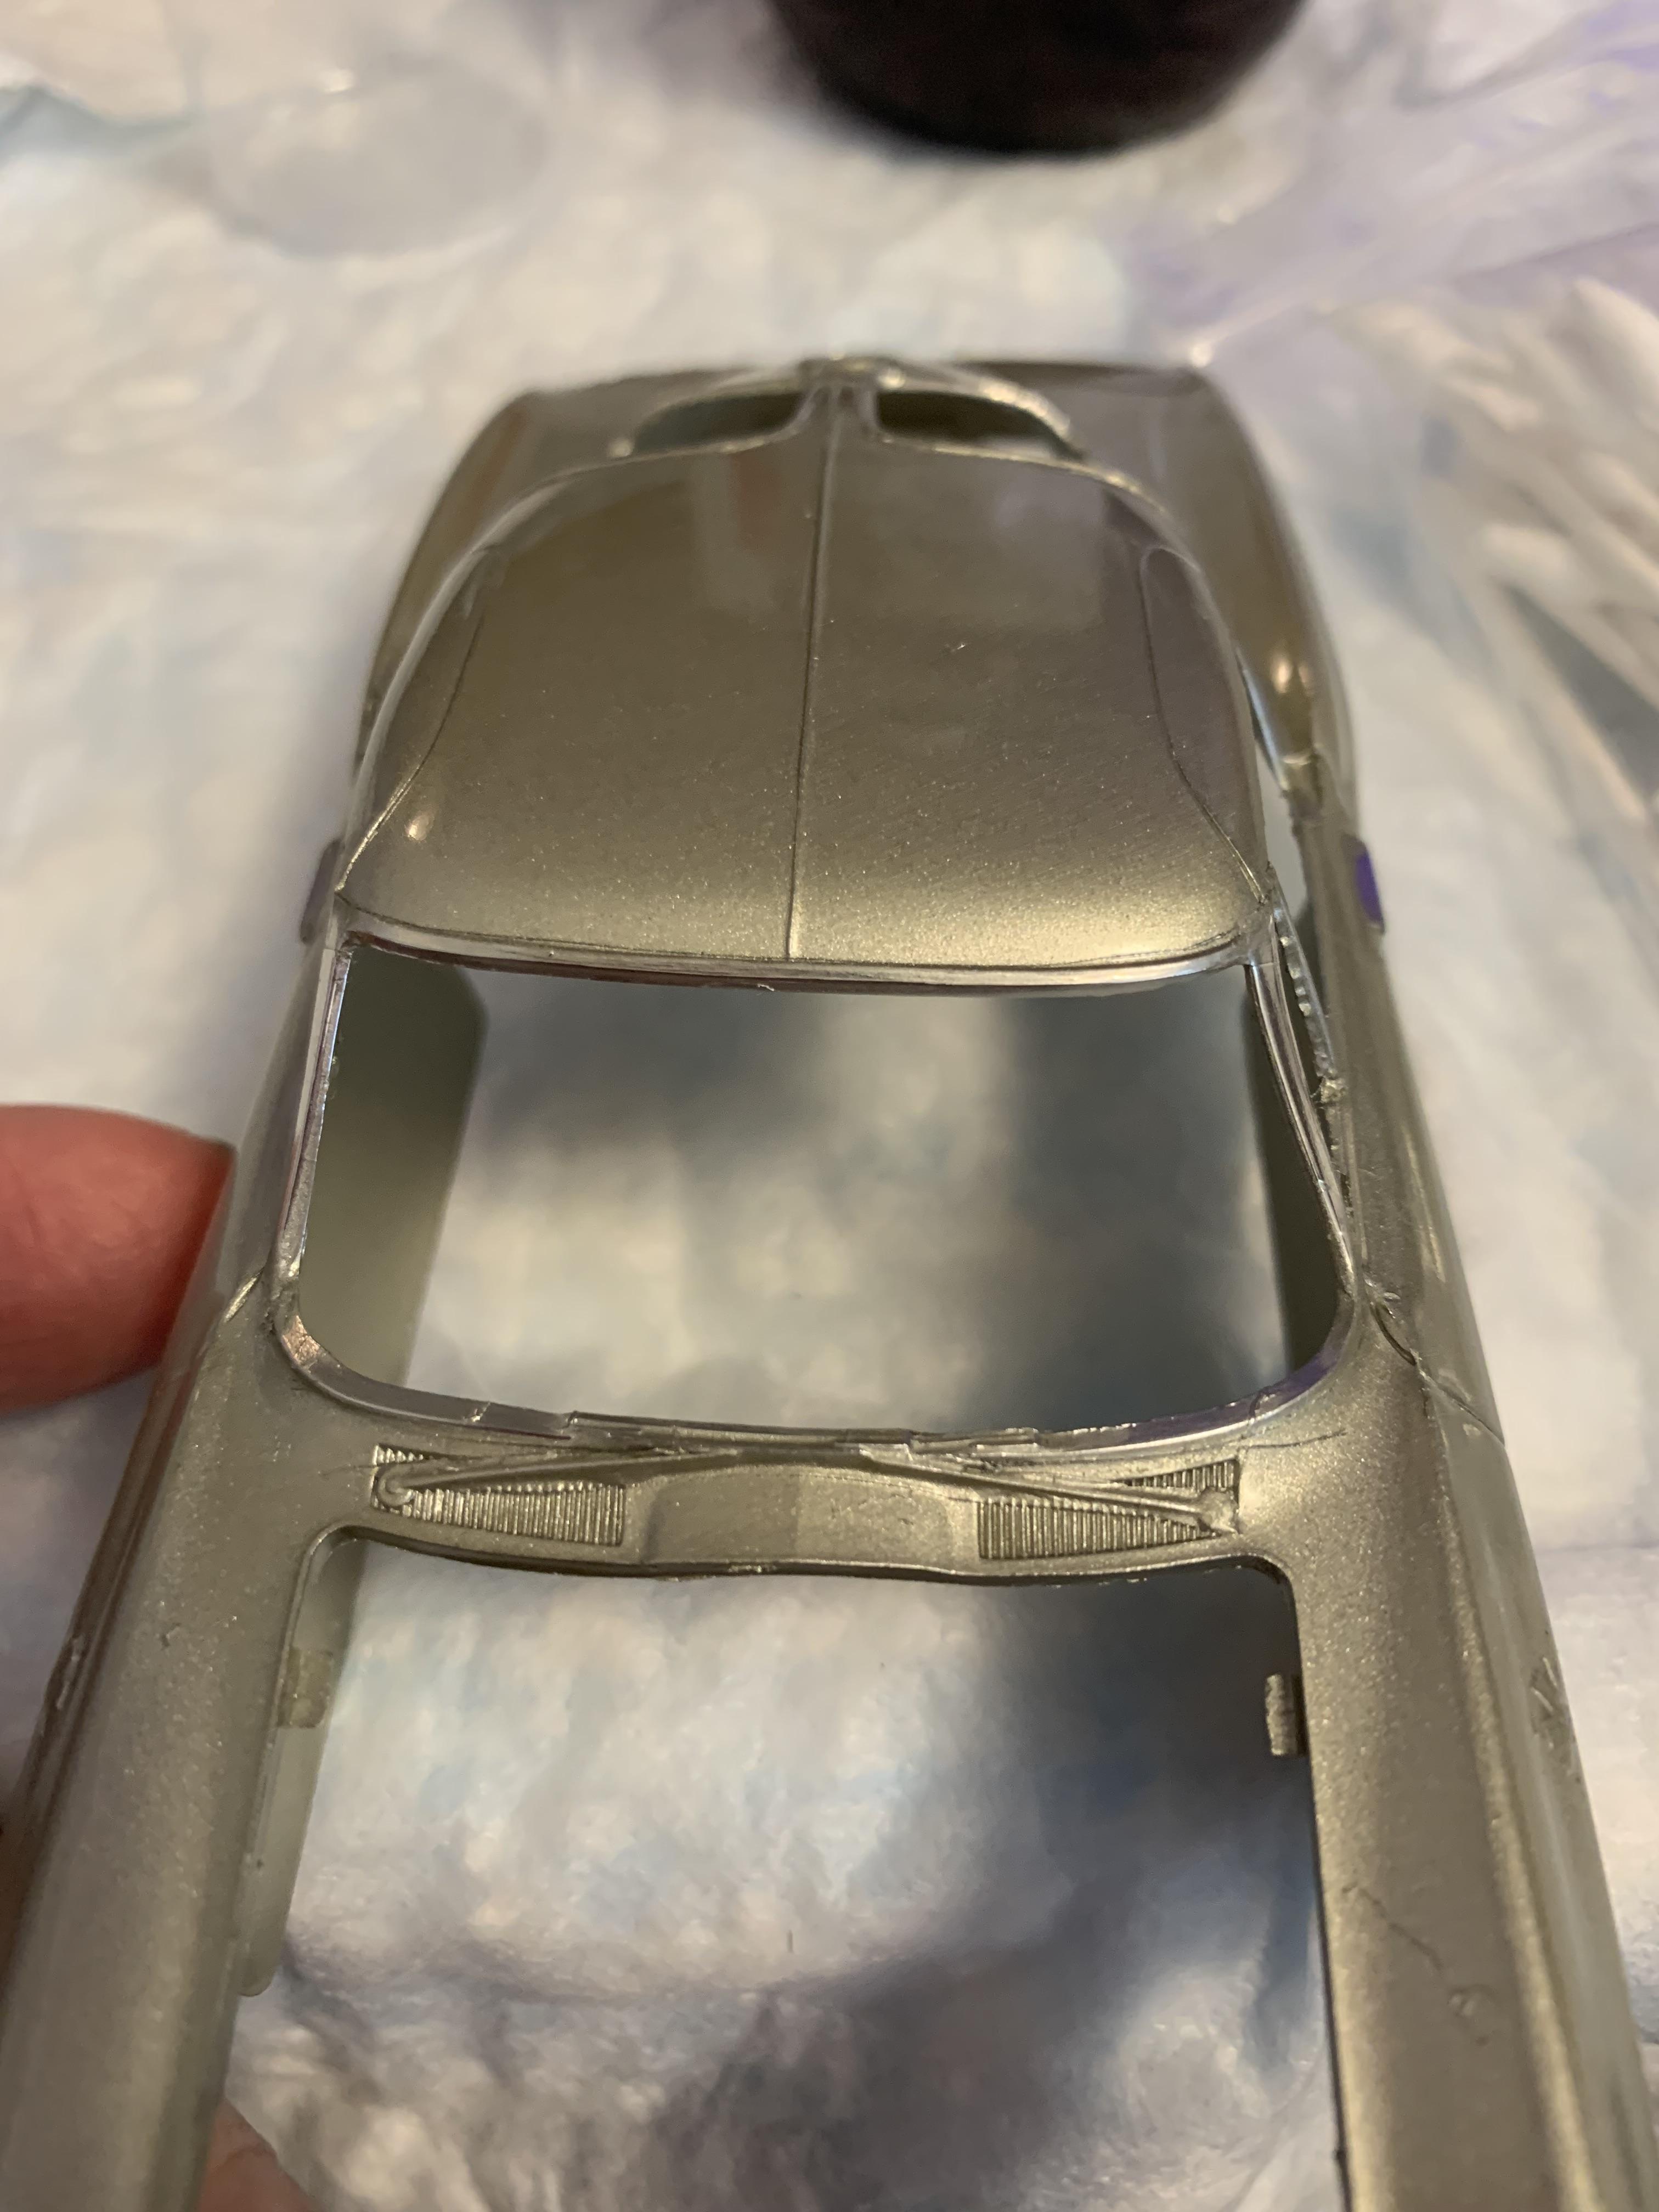
Then spent some time (too much) removing the paint off the bmf on the windshield, back glass and emblems with lacquer thinner and various types of q-tips. The soft tapered ones worked the best as I believe they retained the most thinner for gentle scrubbing. Overall, applying foil before painting turned out ok, I guess. Tried sanding it off with less than stellar results. Probably hard to see the chrome with this color, anyway.
-
1963 Corvette current day nhra Stock Eliminator
R. Thorne replied to R. Thorne's topic in WIP: Drag Racing Models
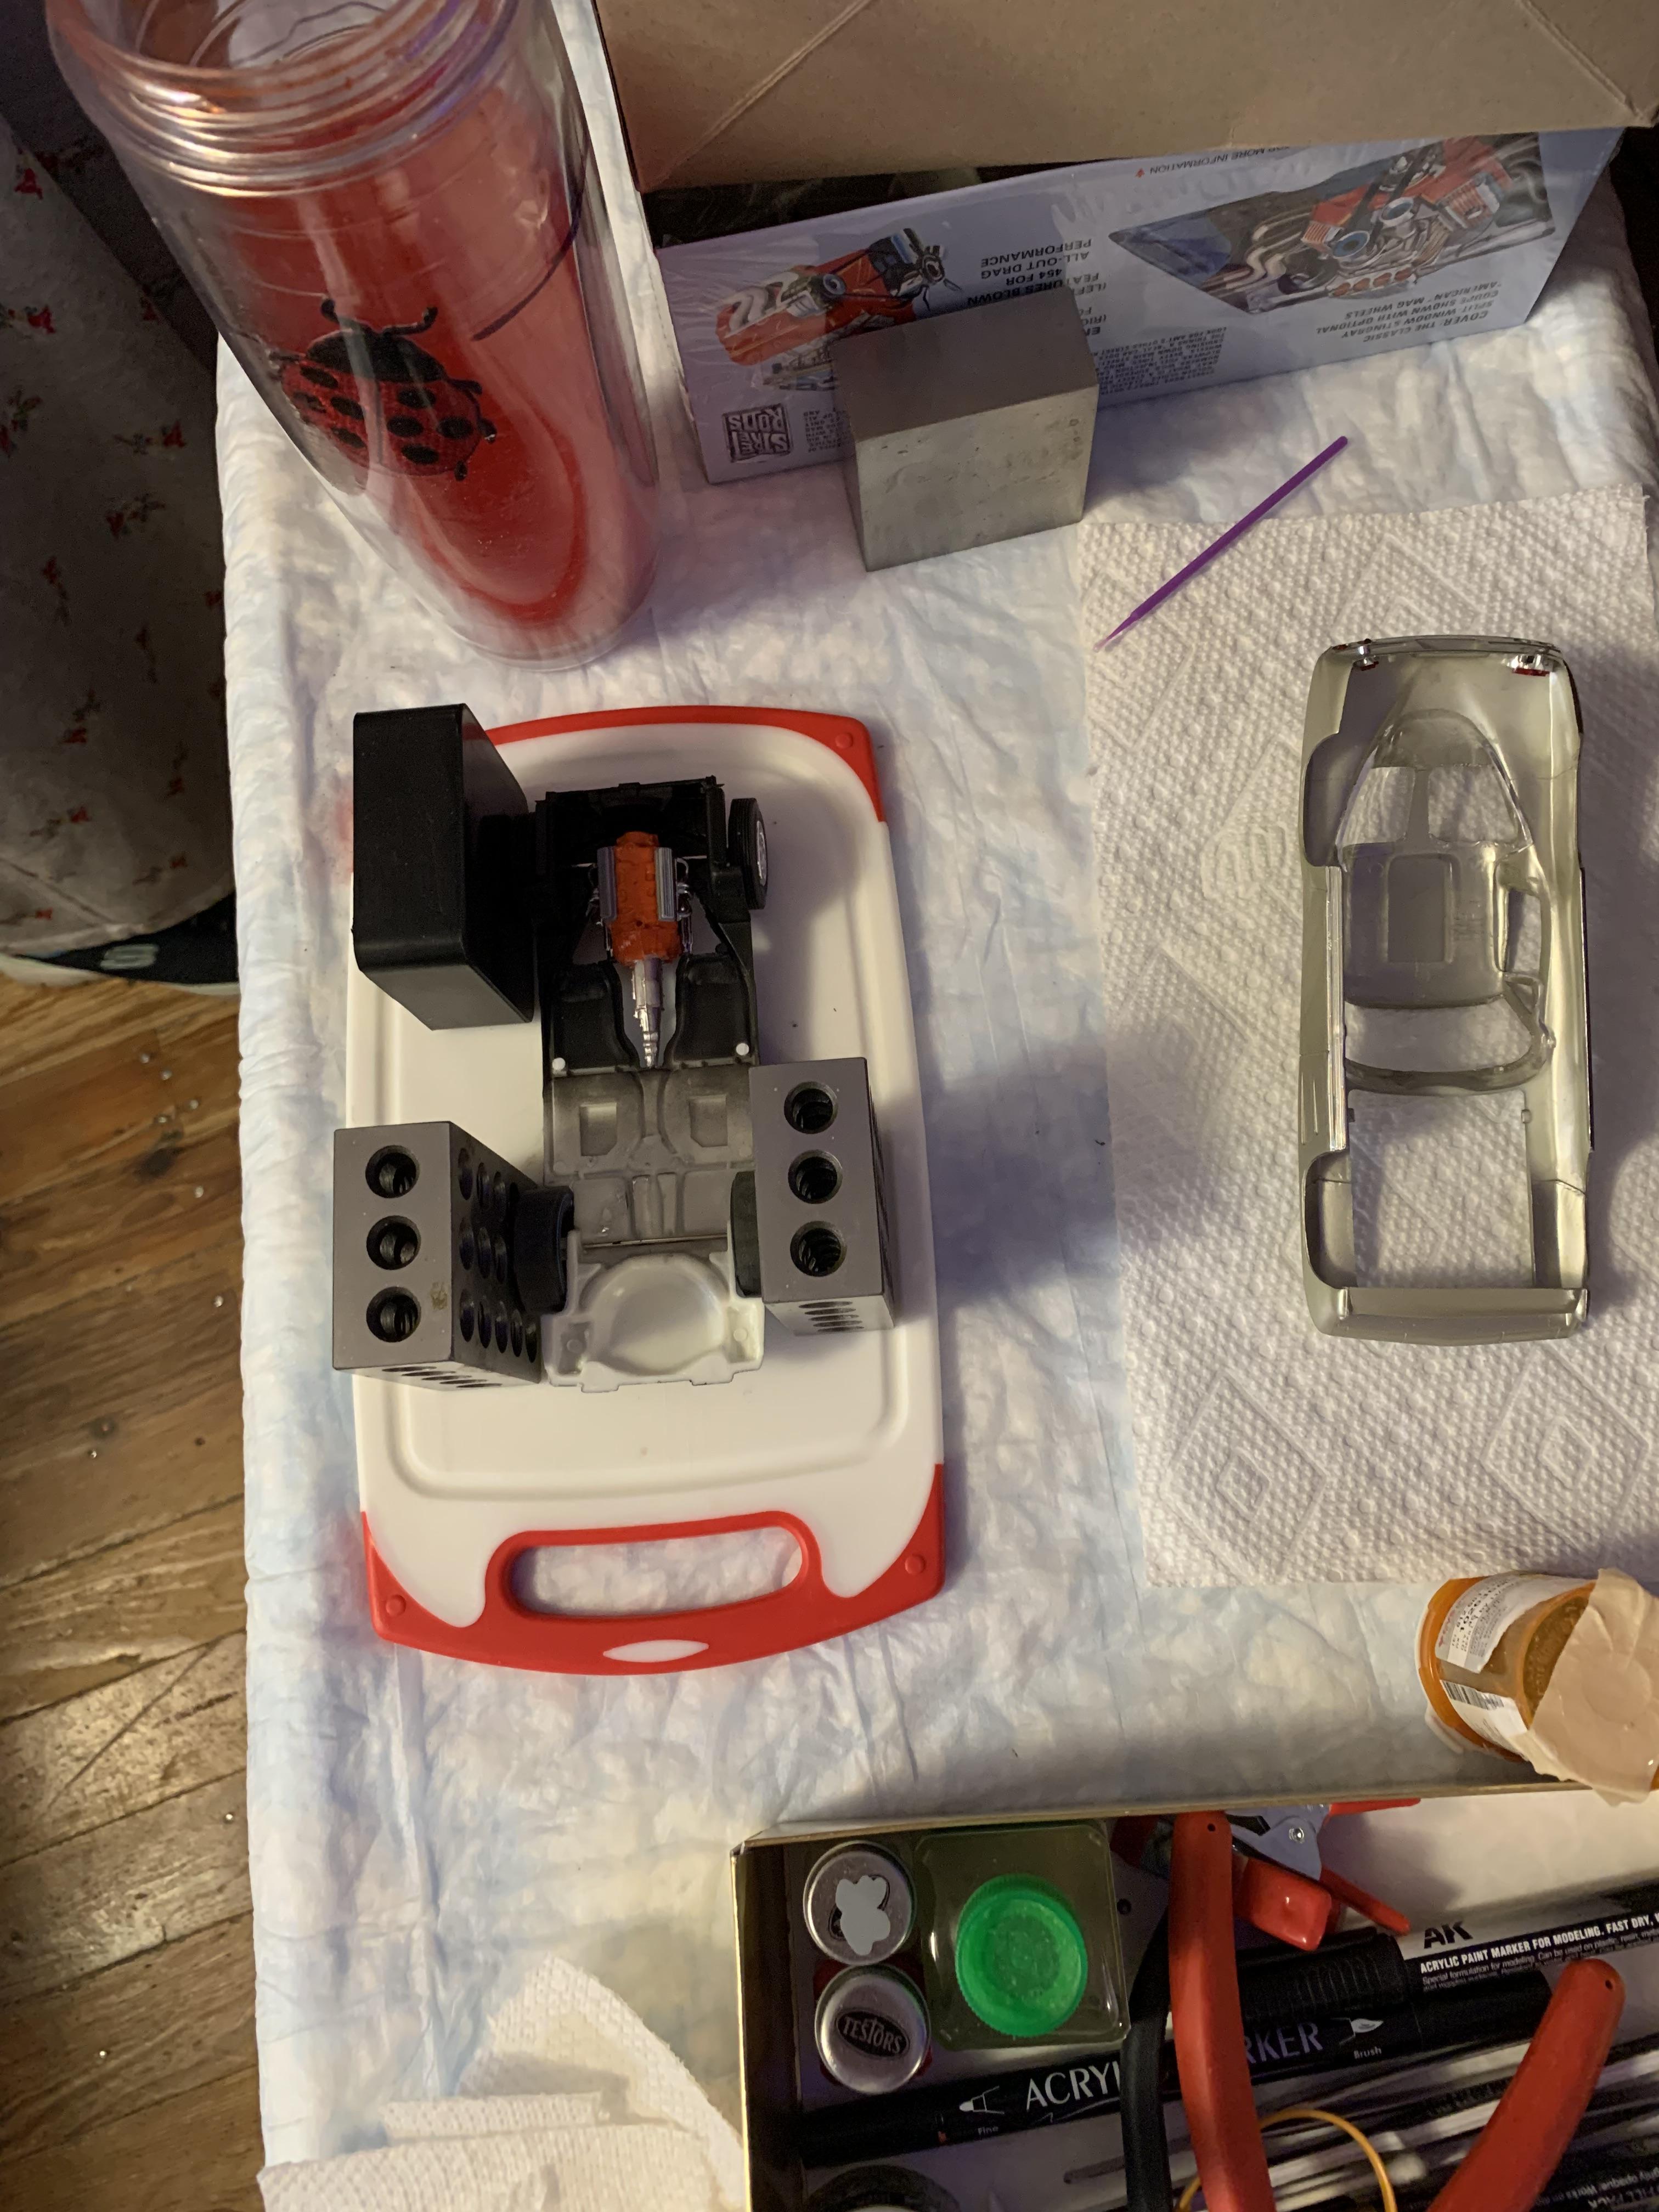
Well, after painting the cast tires, didn’t like the looks of them. So, dug some out of the parts box. Then, shortened the metal axles and trial fit the tires and wheels. Also, was going to use the slicks that came in the box, but, not enough clearance, so went with my normal Stocker (9”) Goodyear tires. Blackened the blue streak. There wasn’t enough gloss on the paint, so put a couple medium coats of Mr. Super Clear on.
-
1963 Corvette current day nhra Stock Eliminator
R. Thorne replied to R. Thorne's topic in WIP: Drag Racing Models
Thanks, Ace. I need to stay focused and finish what I start (sigh). -
1963 Corvette current day nhra Stock Eliminator
R. Thorne replied to R. Thorne's topic in WIP: Drag Racing Models
Clipped and sanded some front tires I made and cast with no sidewall markings. Decided to use the wheels and rear tires that come in the kit. Next is rubber black paint. Will post pics tomorrow.
-
1963 Corvette current day nhra Stock Eliminator
R. Thorne replied to R. Thorne's topic in WIP: Drag Racing Models
Mike, I got it on July 2 from Amazon, but it is not currently available. Wait a few days, but be careful, as they will try to sell you the gold instead of the liquid silver leaf. -
1963 Corvette current day nhra Stock Eliminator
R. Thorne replied to R. Thorne's topic in WIP: Drag Racing Models
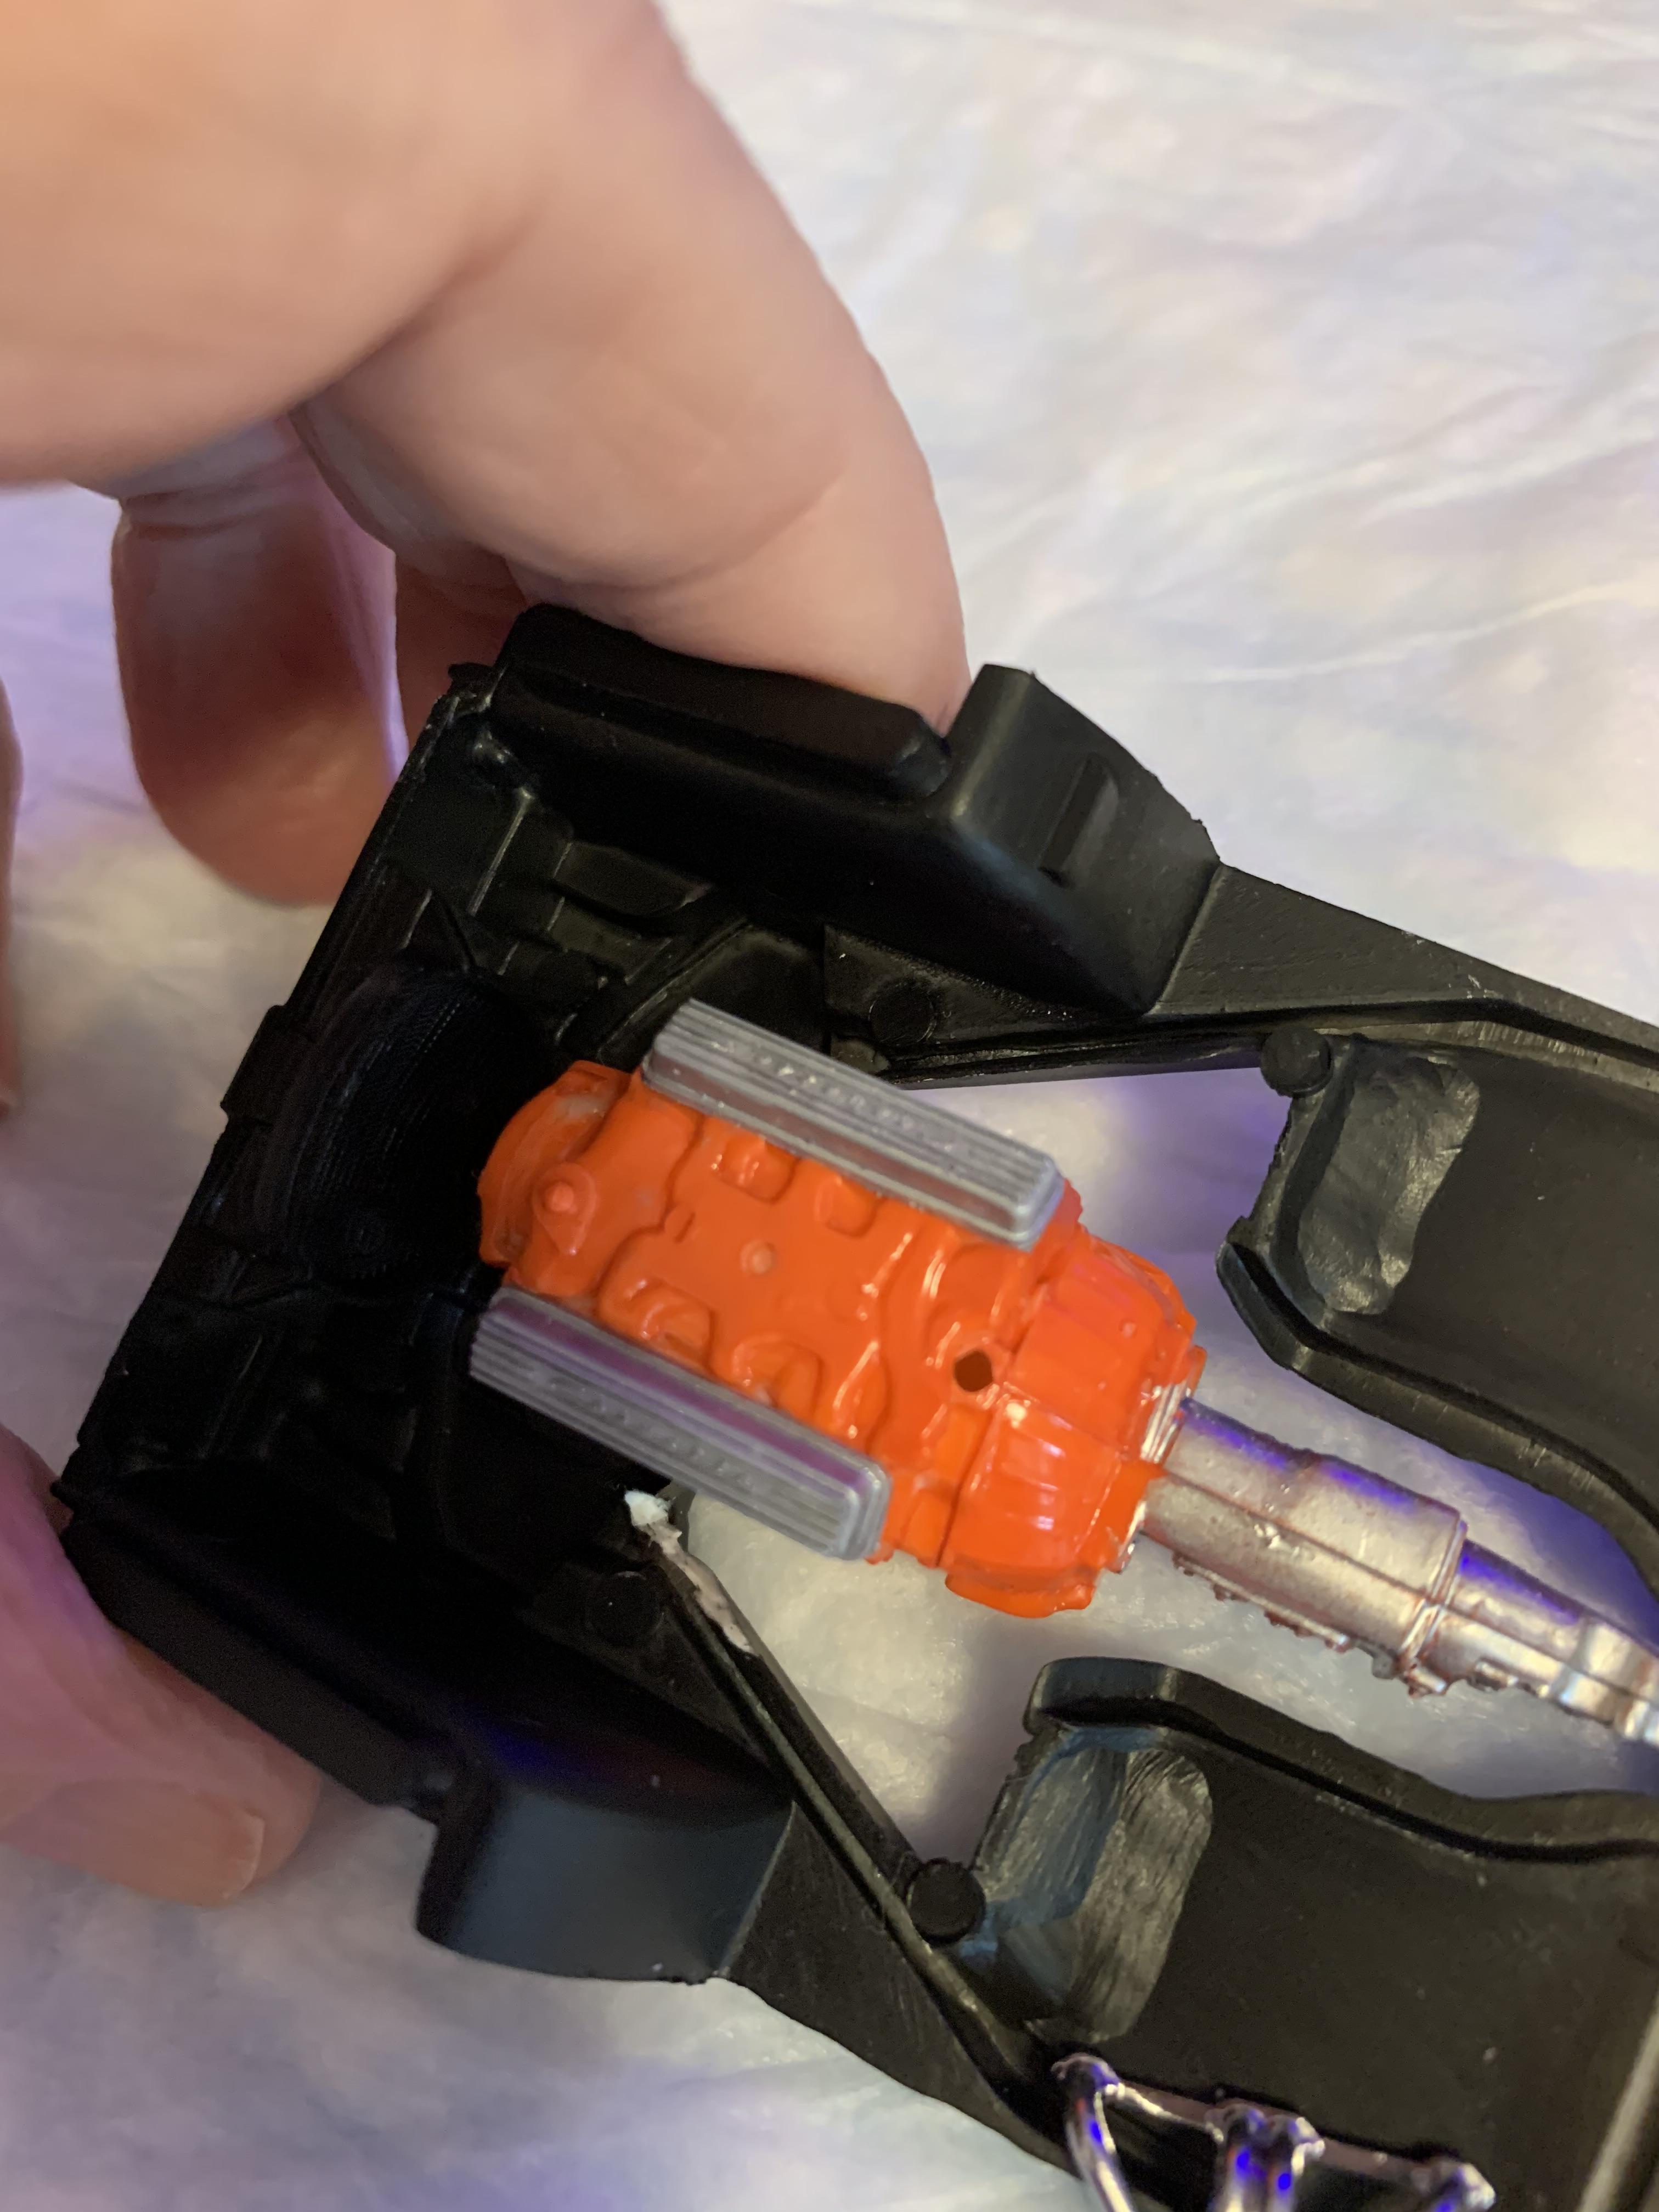
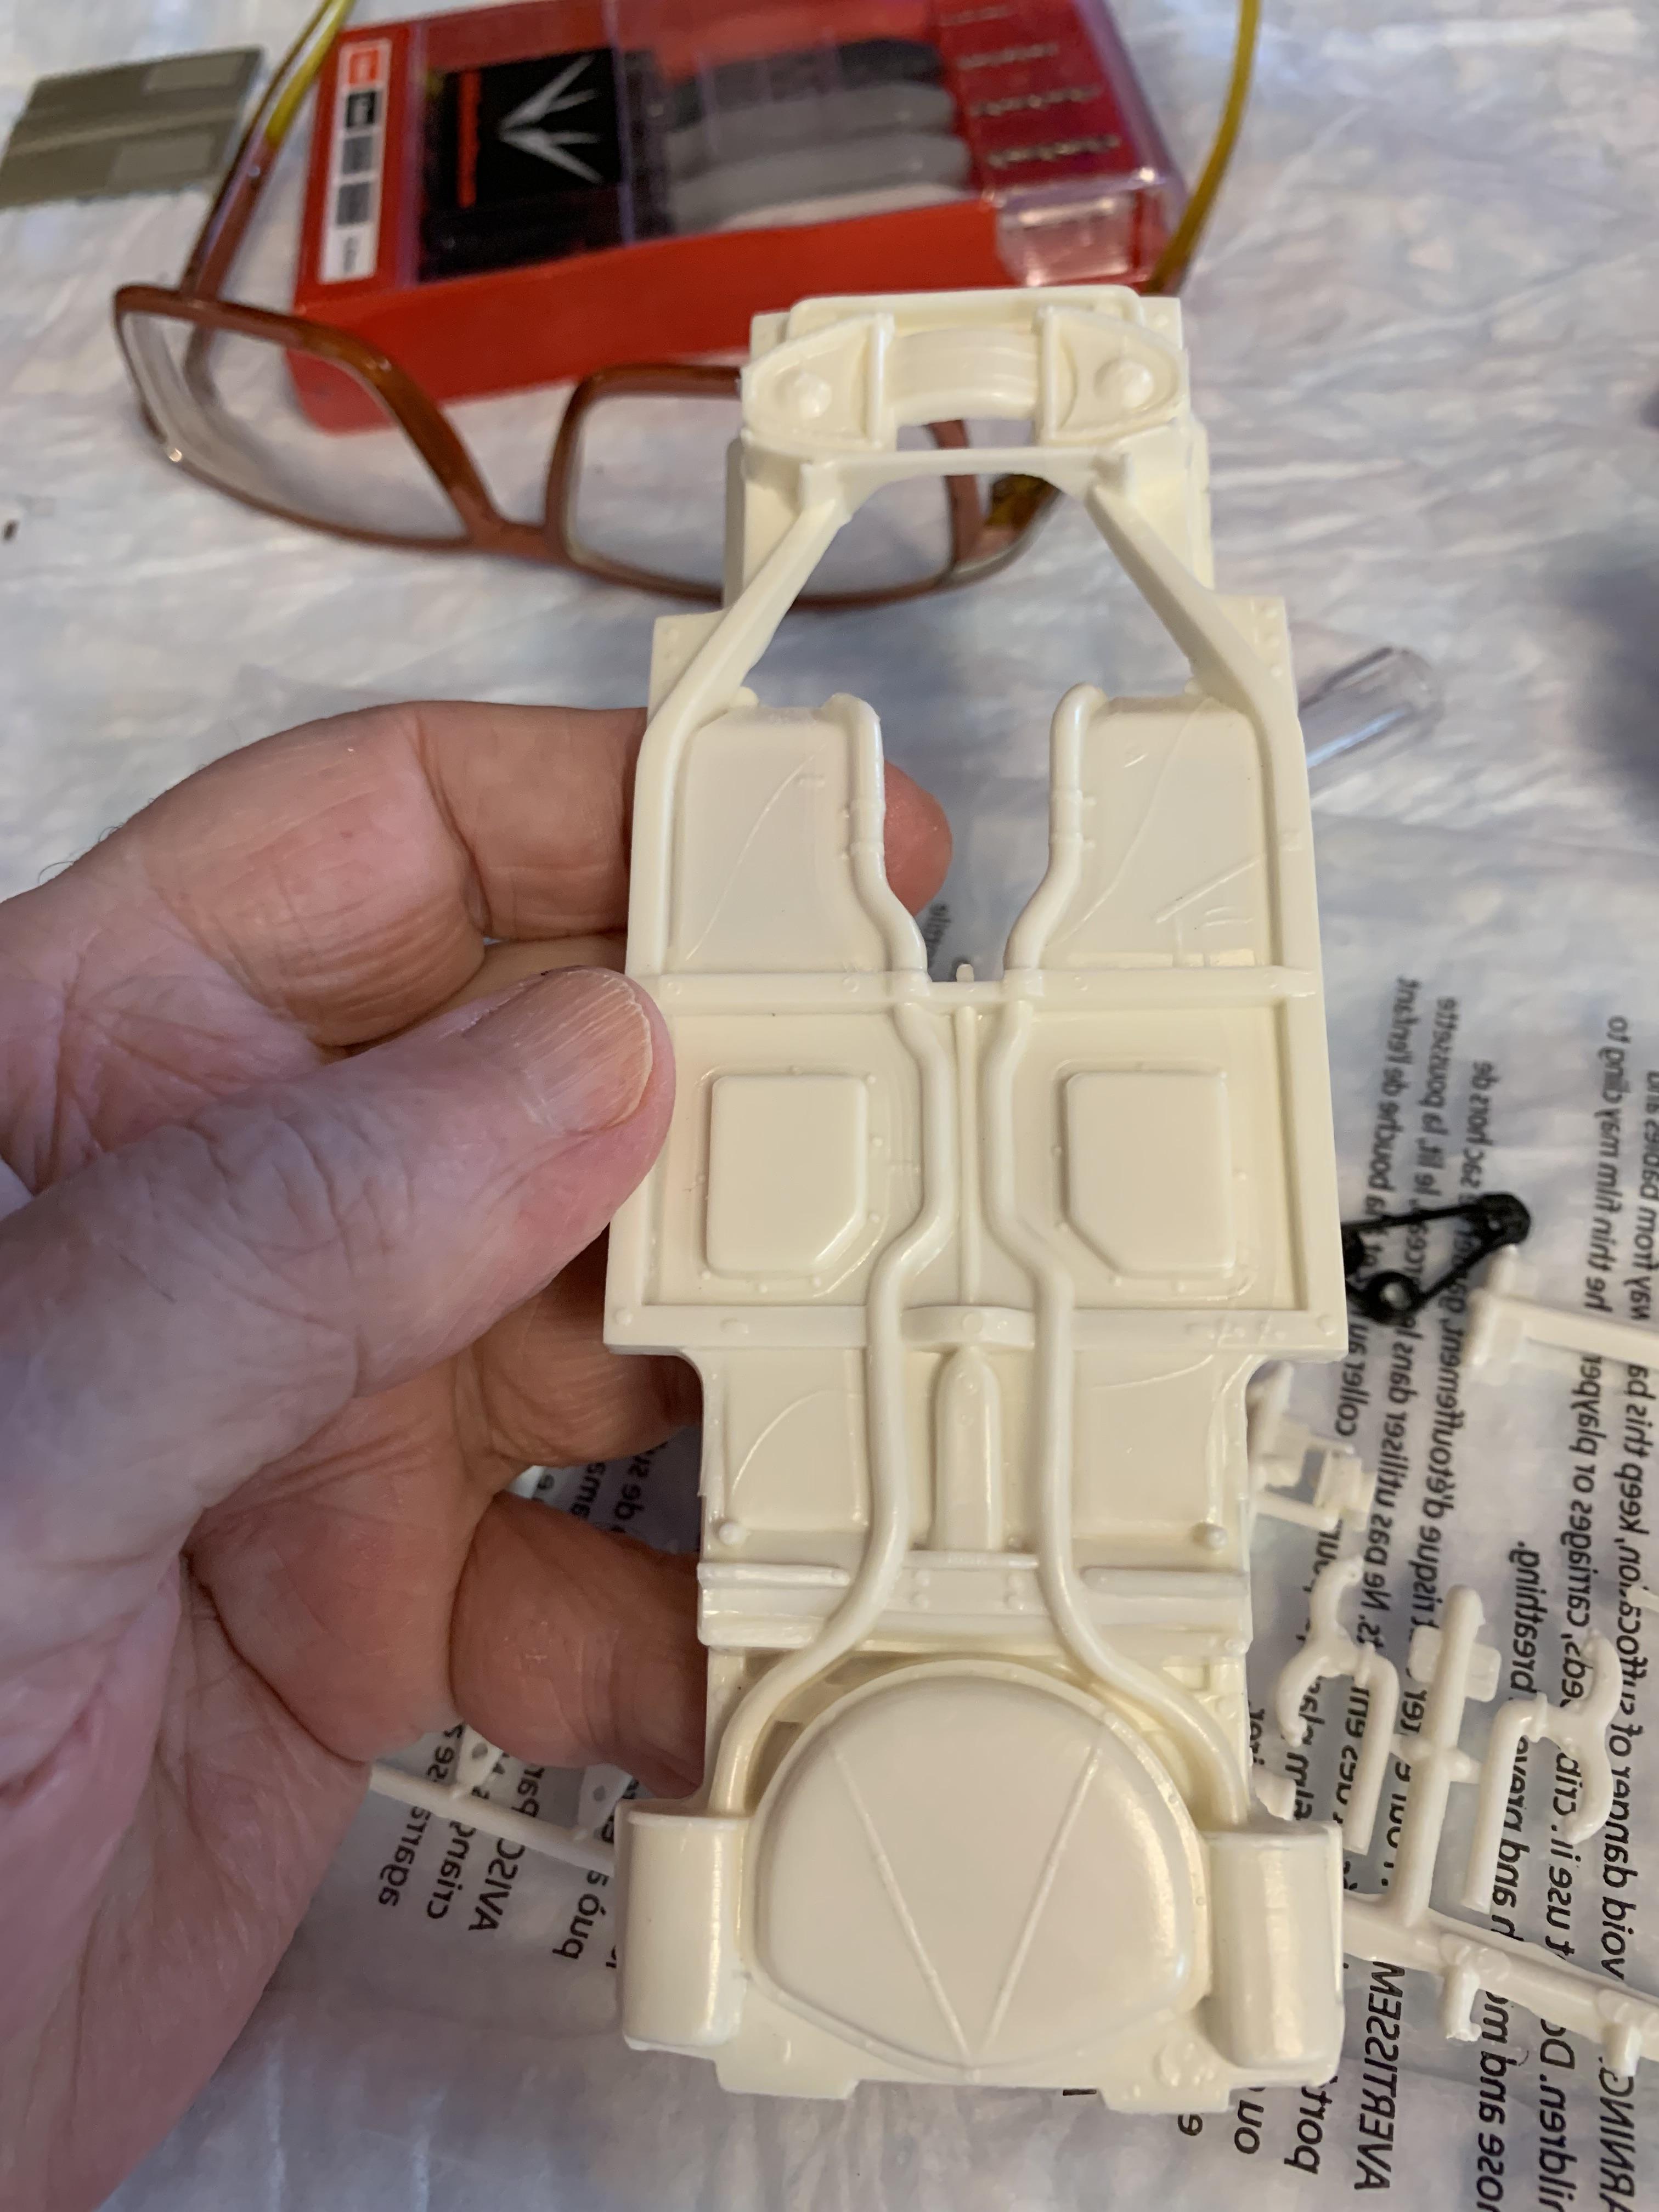
Thanks, Mike. Back after a lull. Some engine work and trimmed the frame for some vcgresins Hooker Headers after experimenting (there’s that word again) with some Fusionfirm chrome. The brush came with it as did some clear (didn’t try that). Very impressive stuff.
-
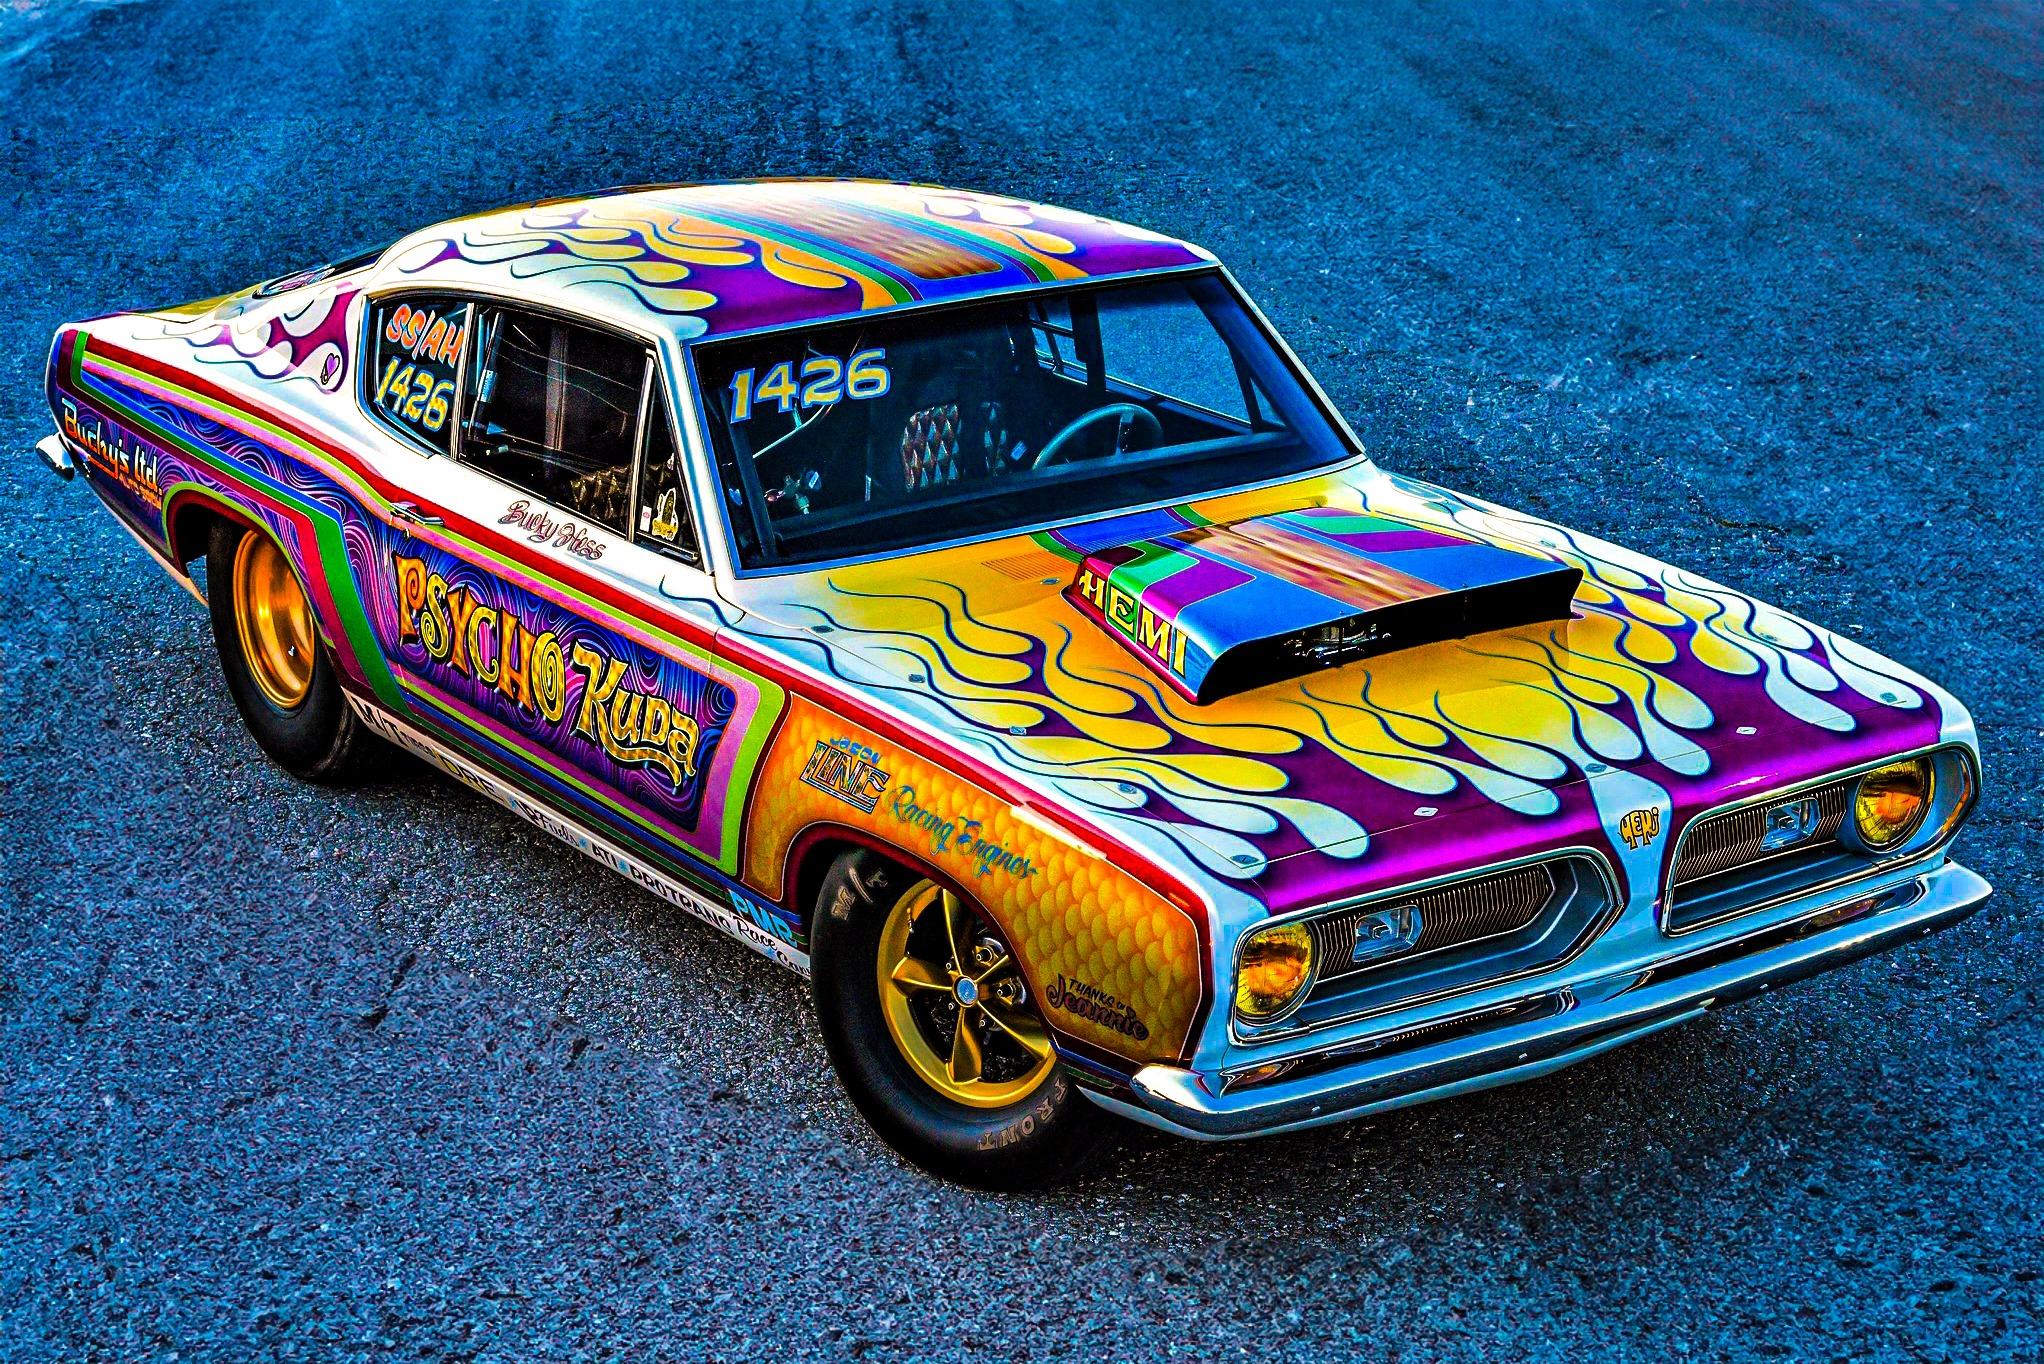
High Anxiety,Tuki Hess 64 Dodge
R. Thorne replied to Scott Eriksen's topic in WIP: Drag Racing Models
Is this one next?
-
High Anxiety,Tuki Hess 64 Dodge
R. Thorne replied to Scott Eriksen's topic in WIP: Drag Racing Models
Lots of work there. Sweet! -
Ohhh!! I like ‘em!
-
1963 Corvette current day nhra Stock Eliminator
R. Thorne replied to R. Thorne's topic in WIP: Drag Racing Models
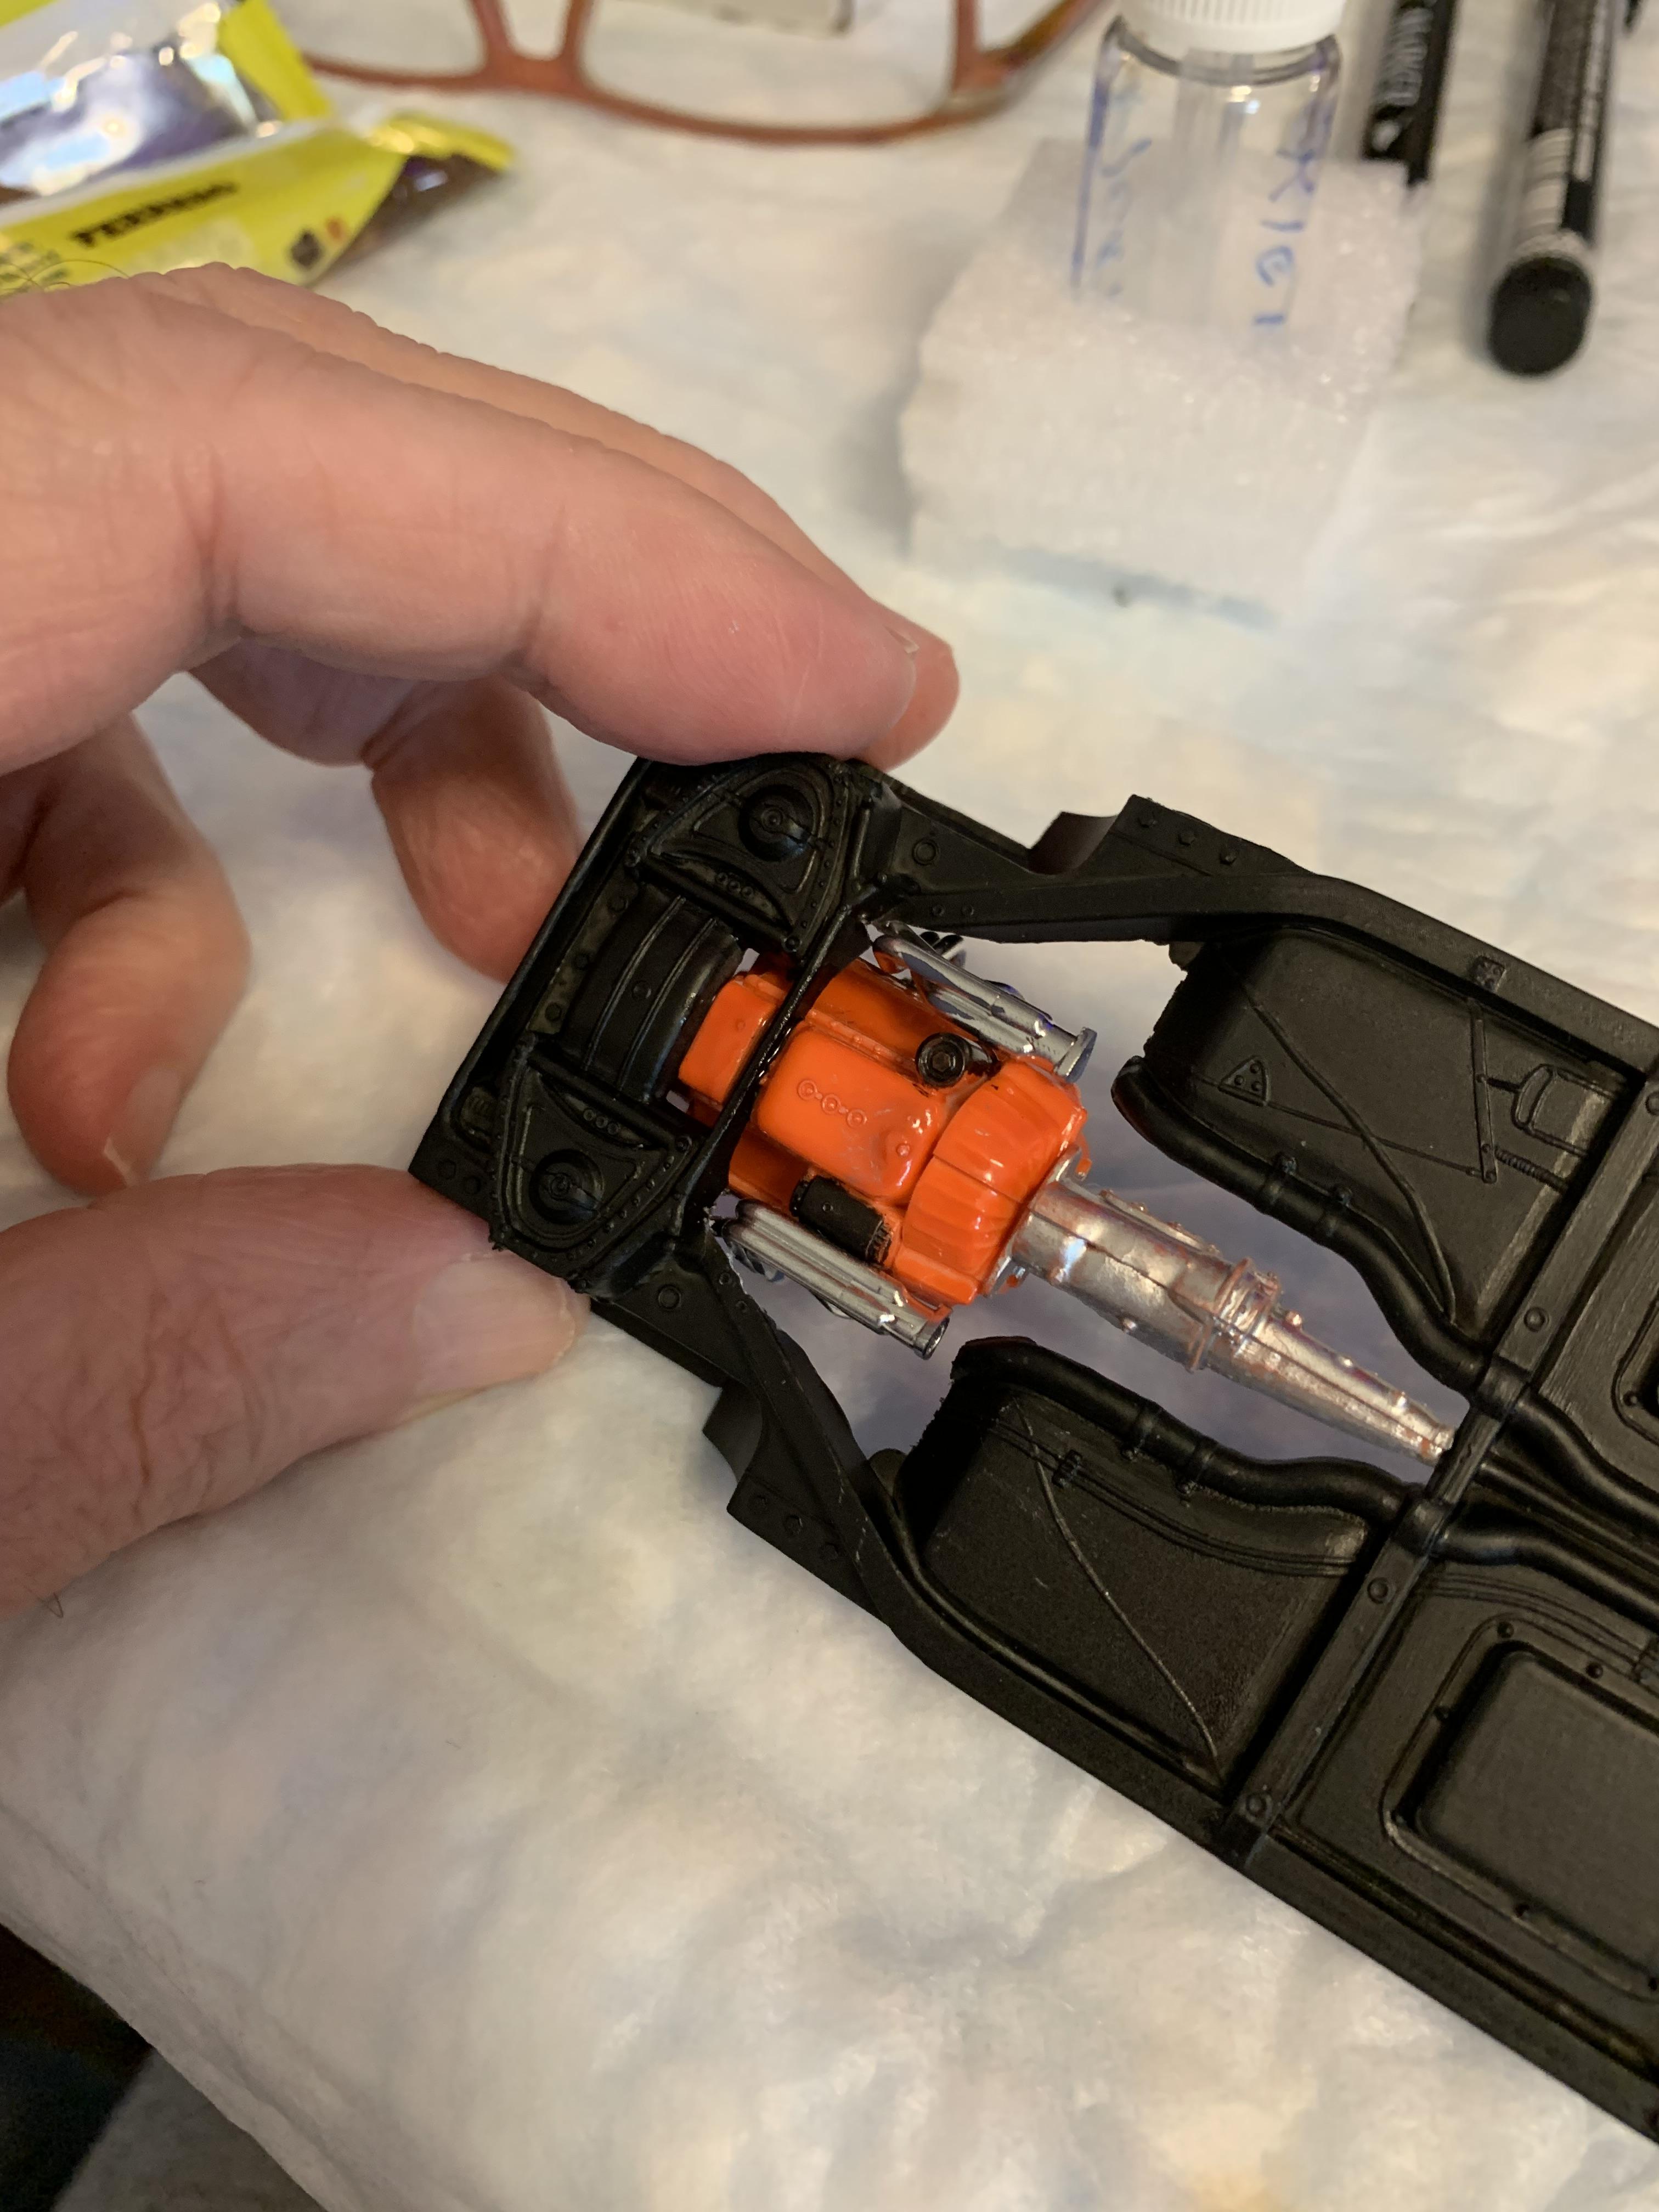
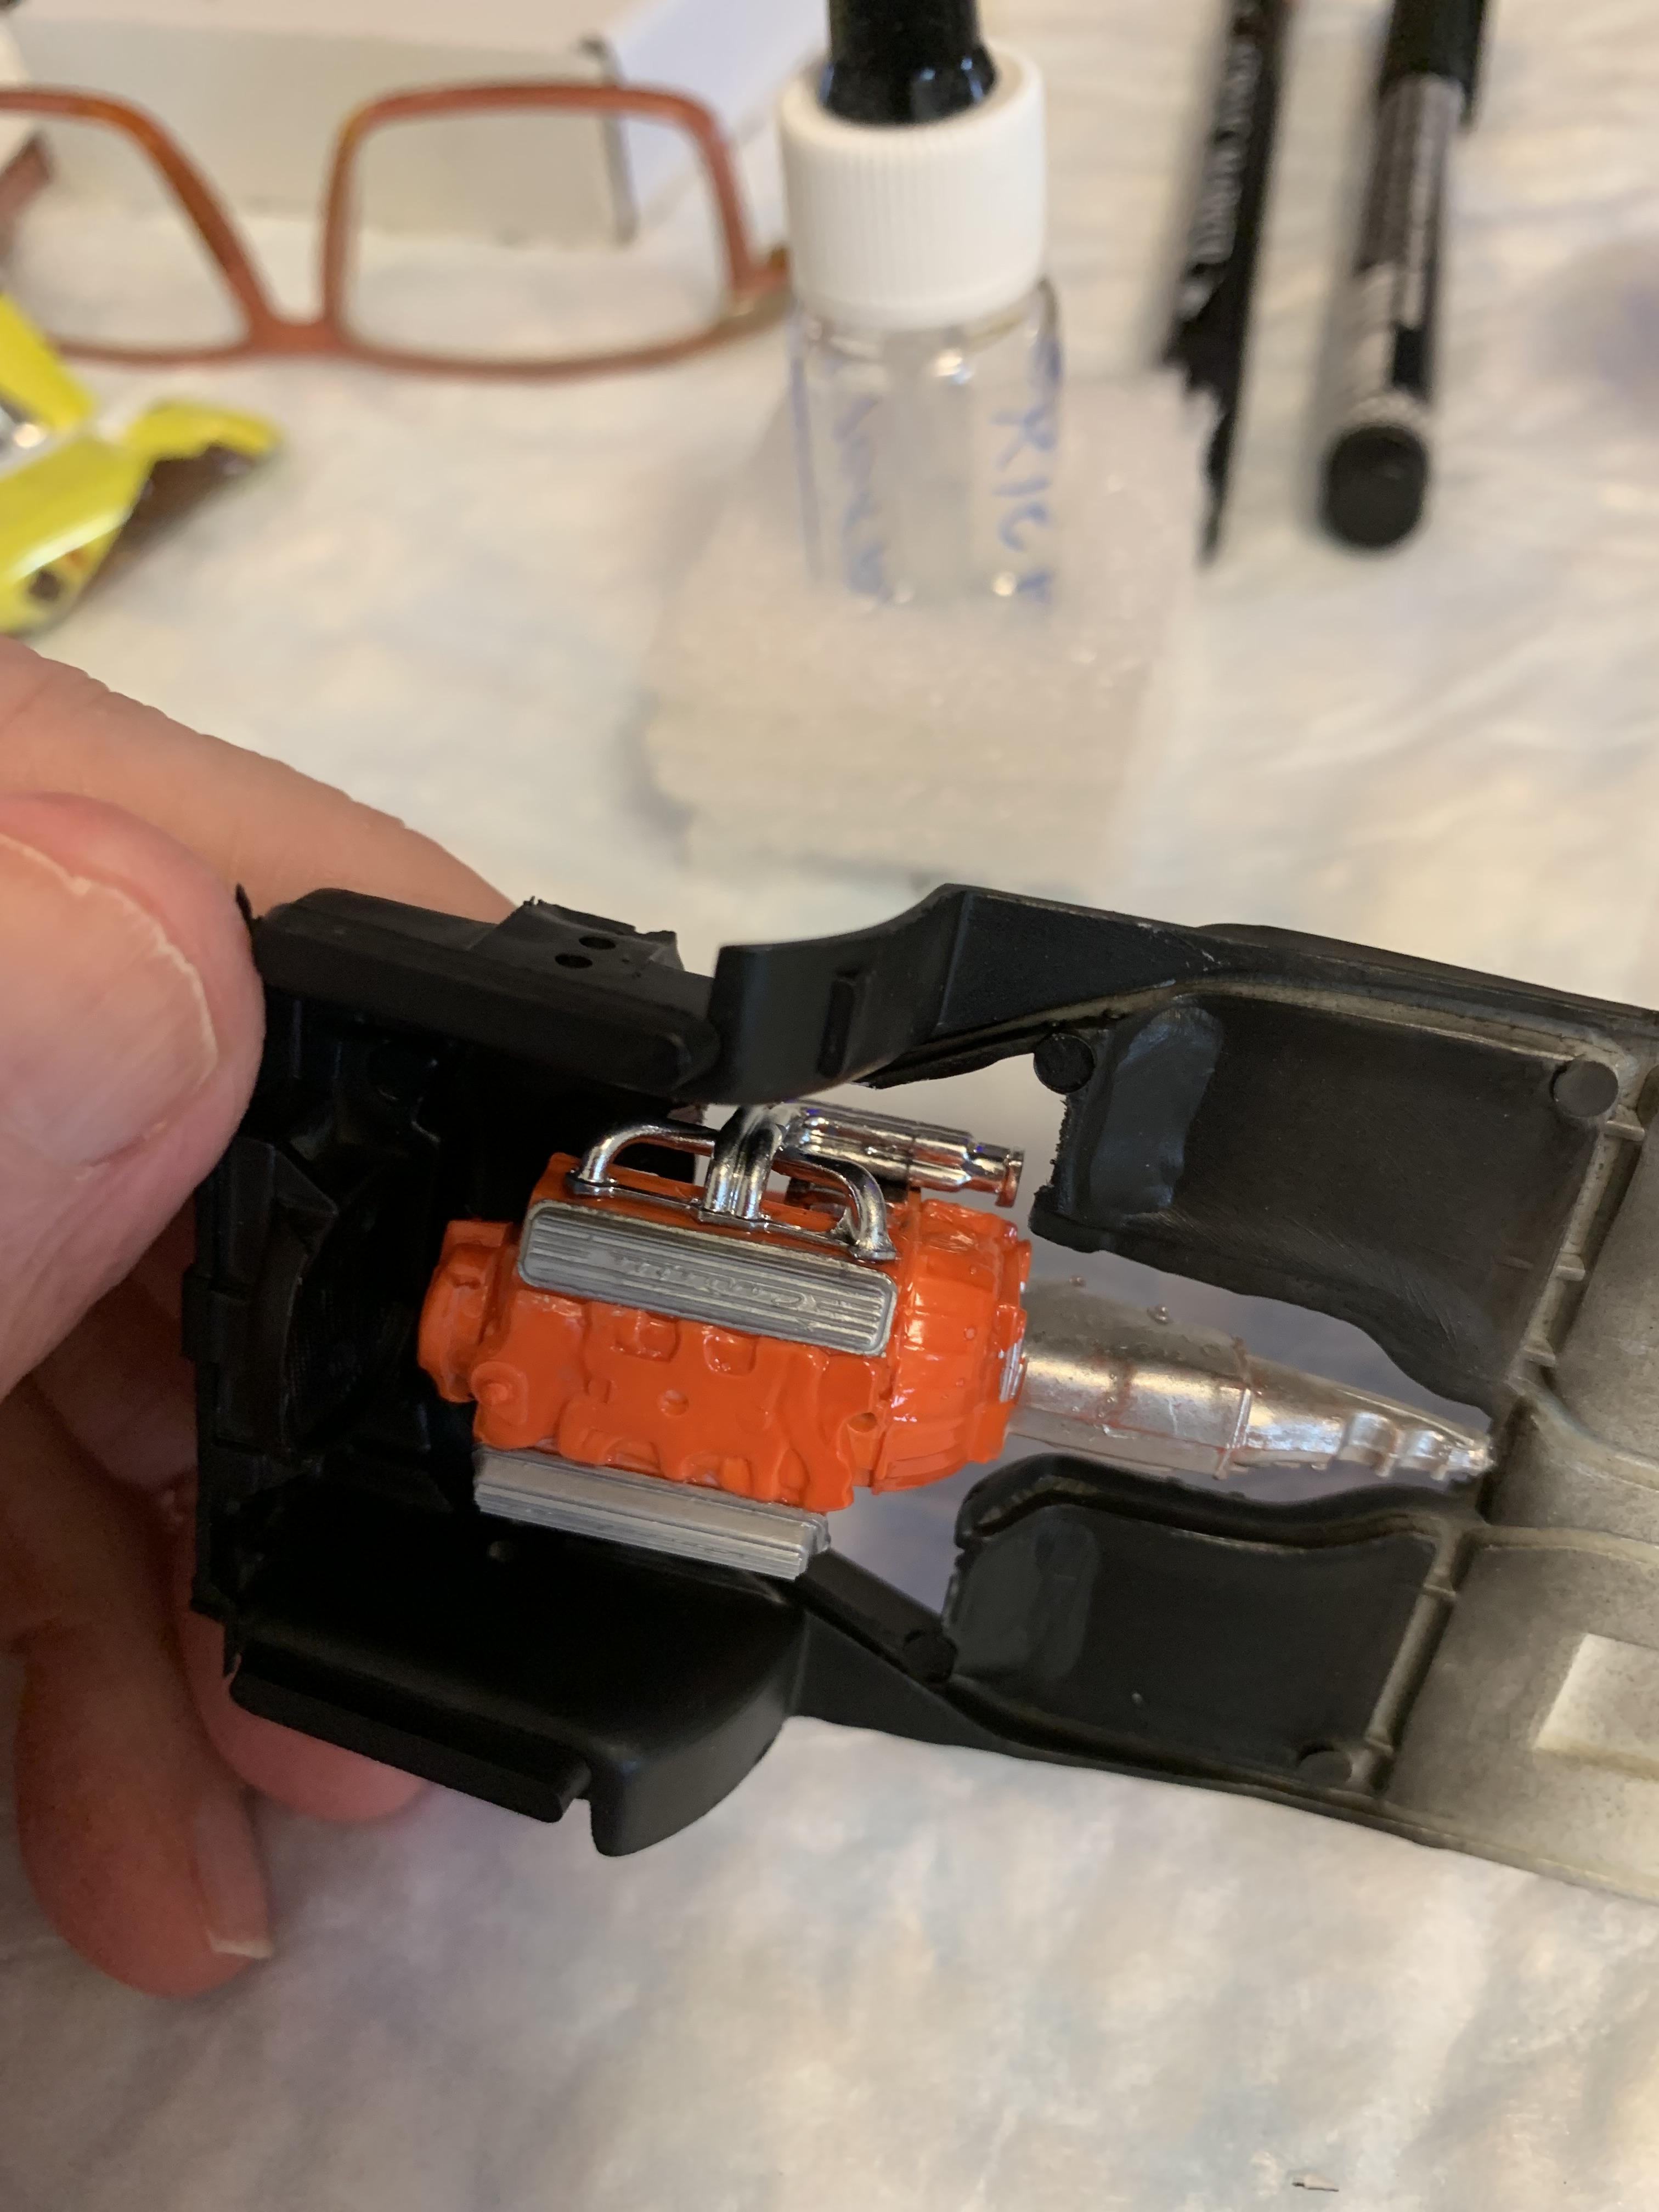
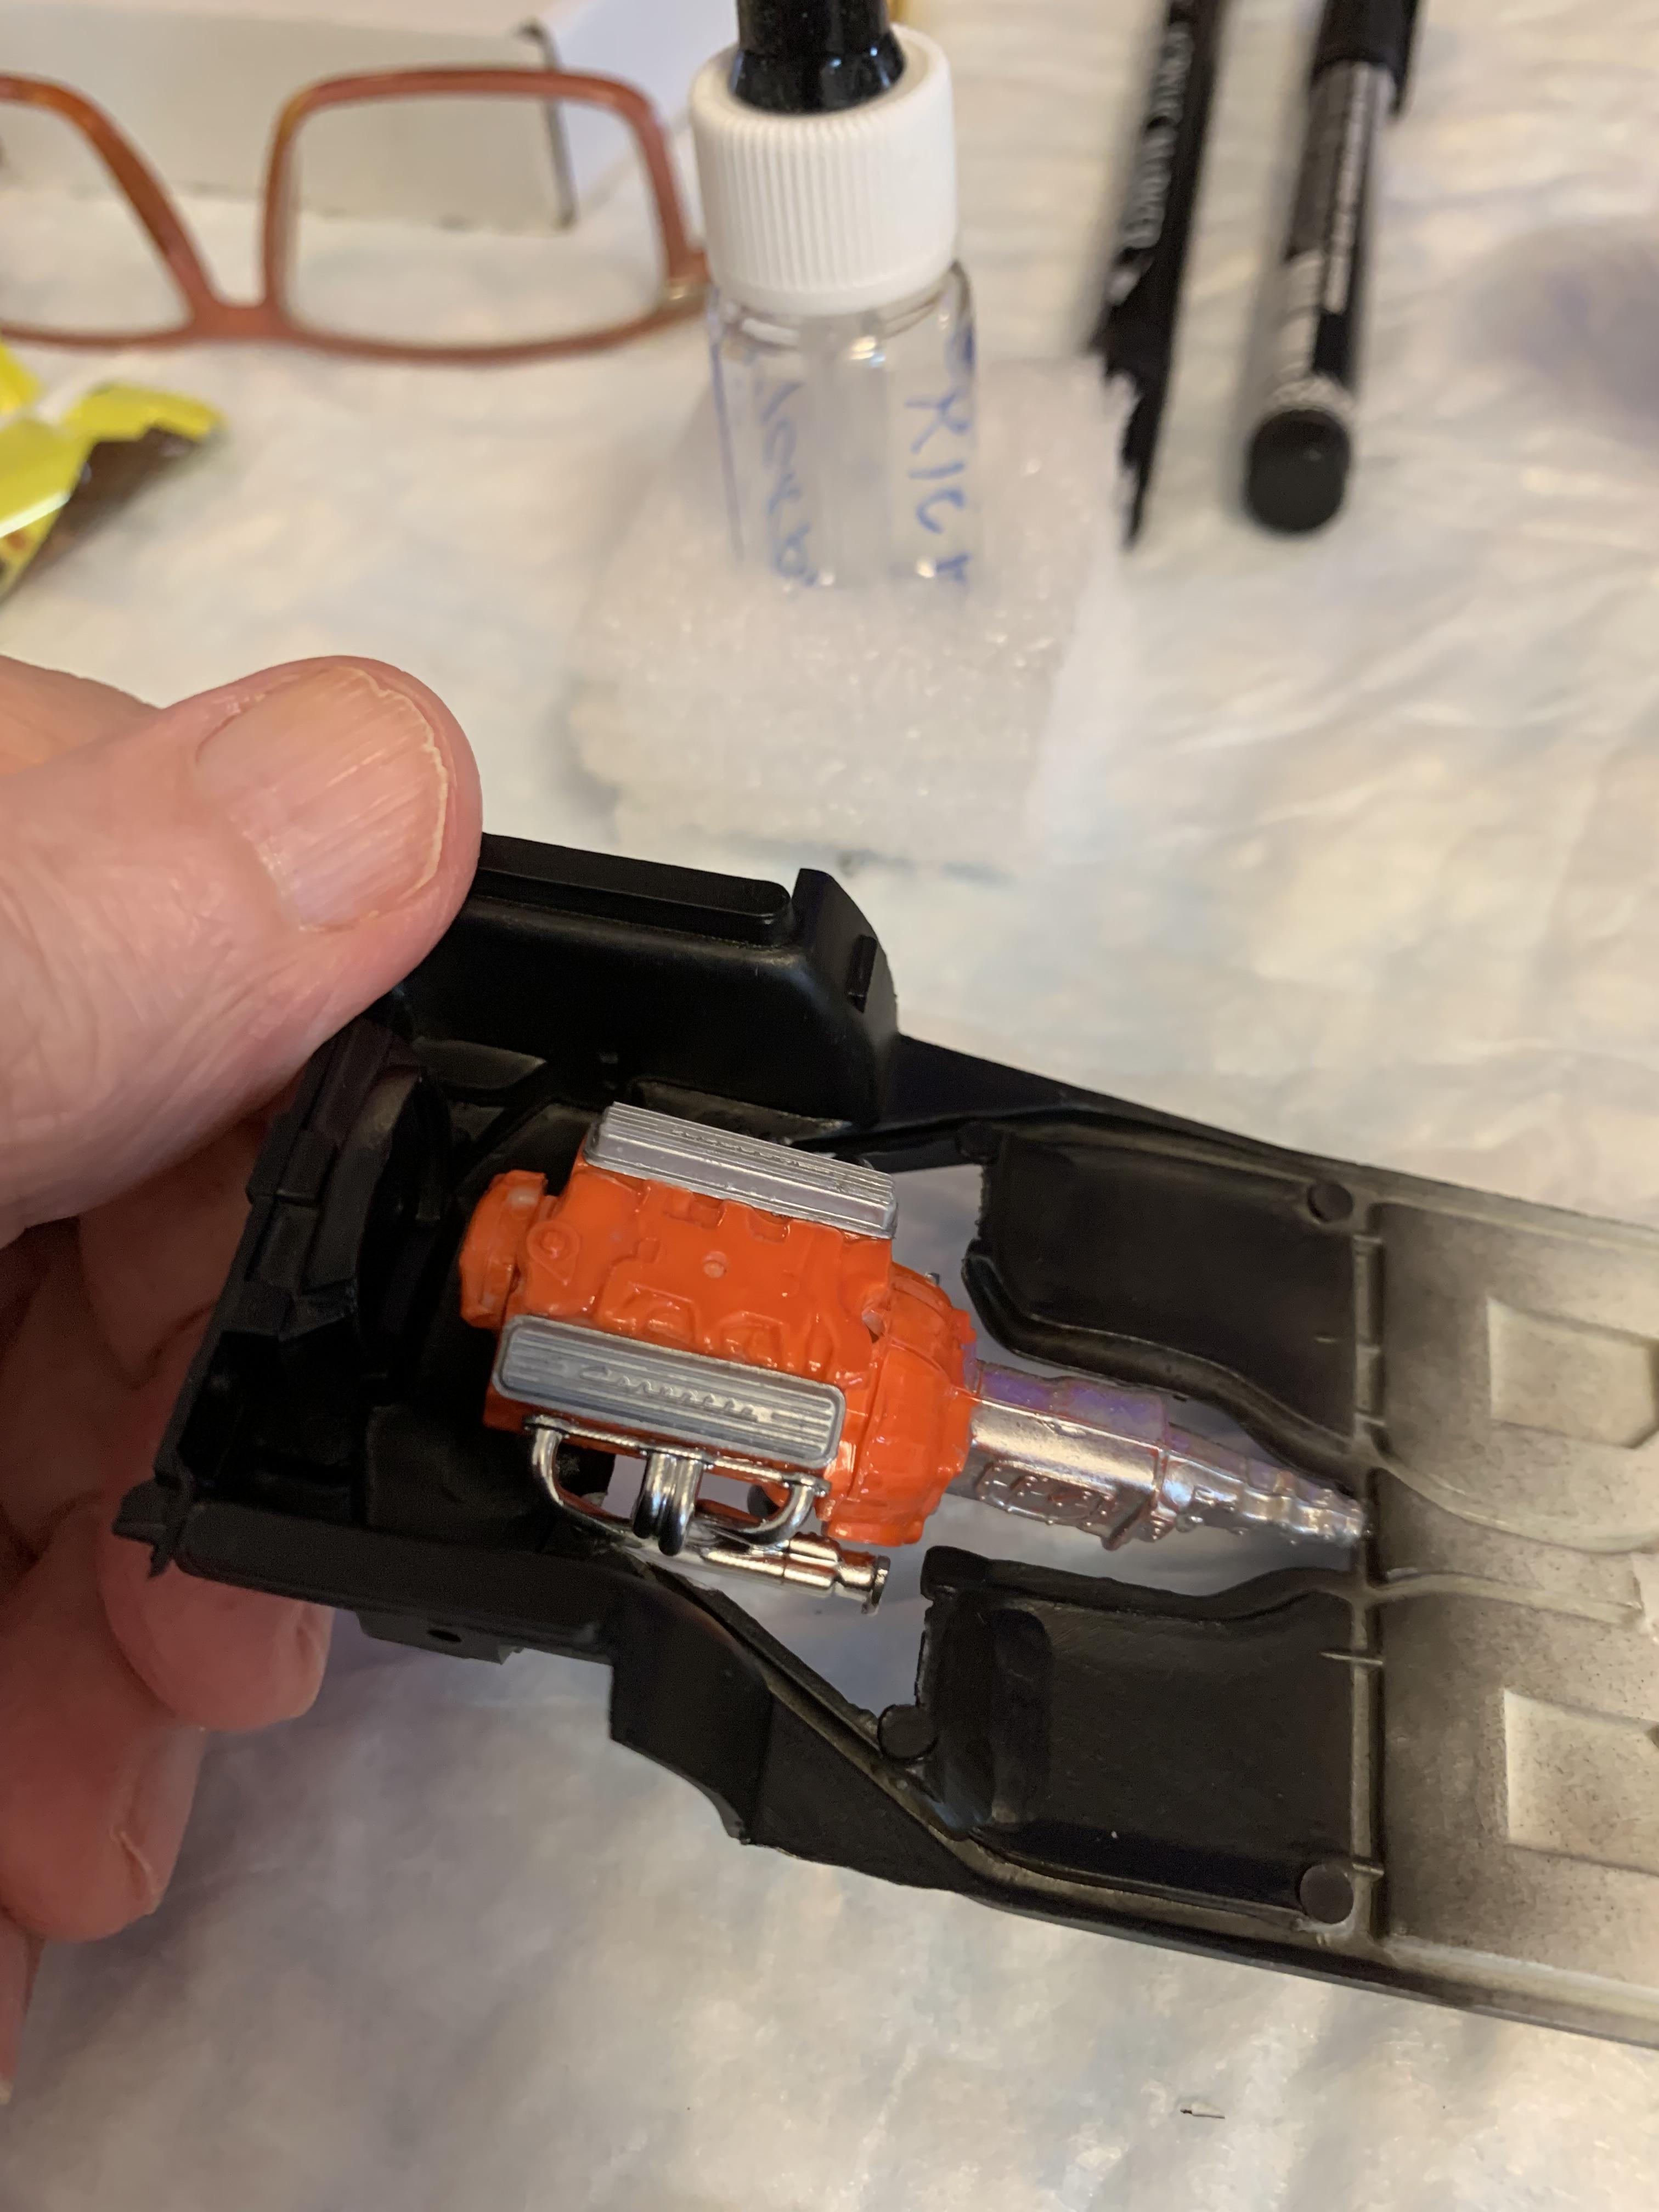
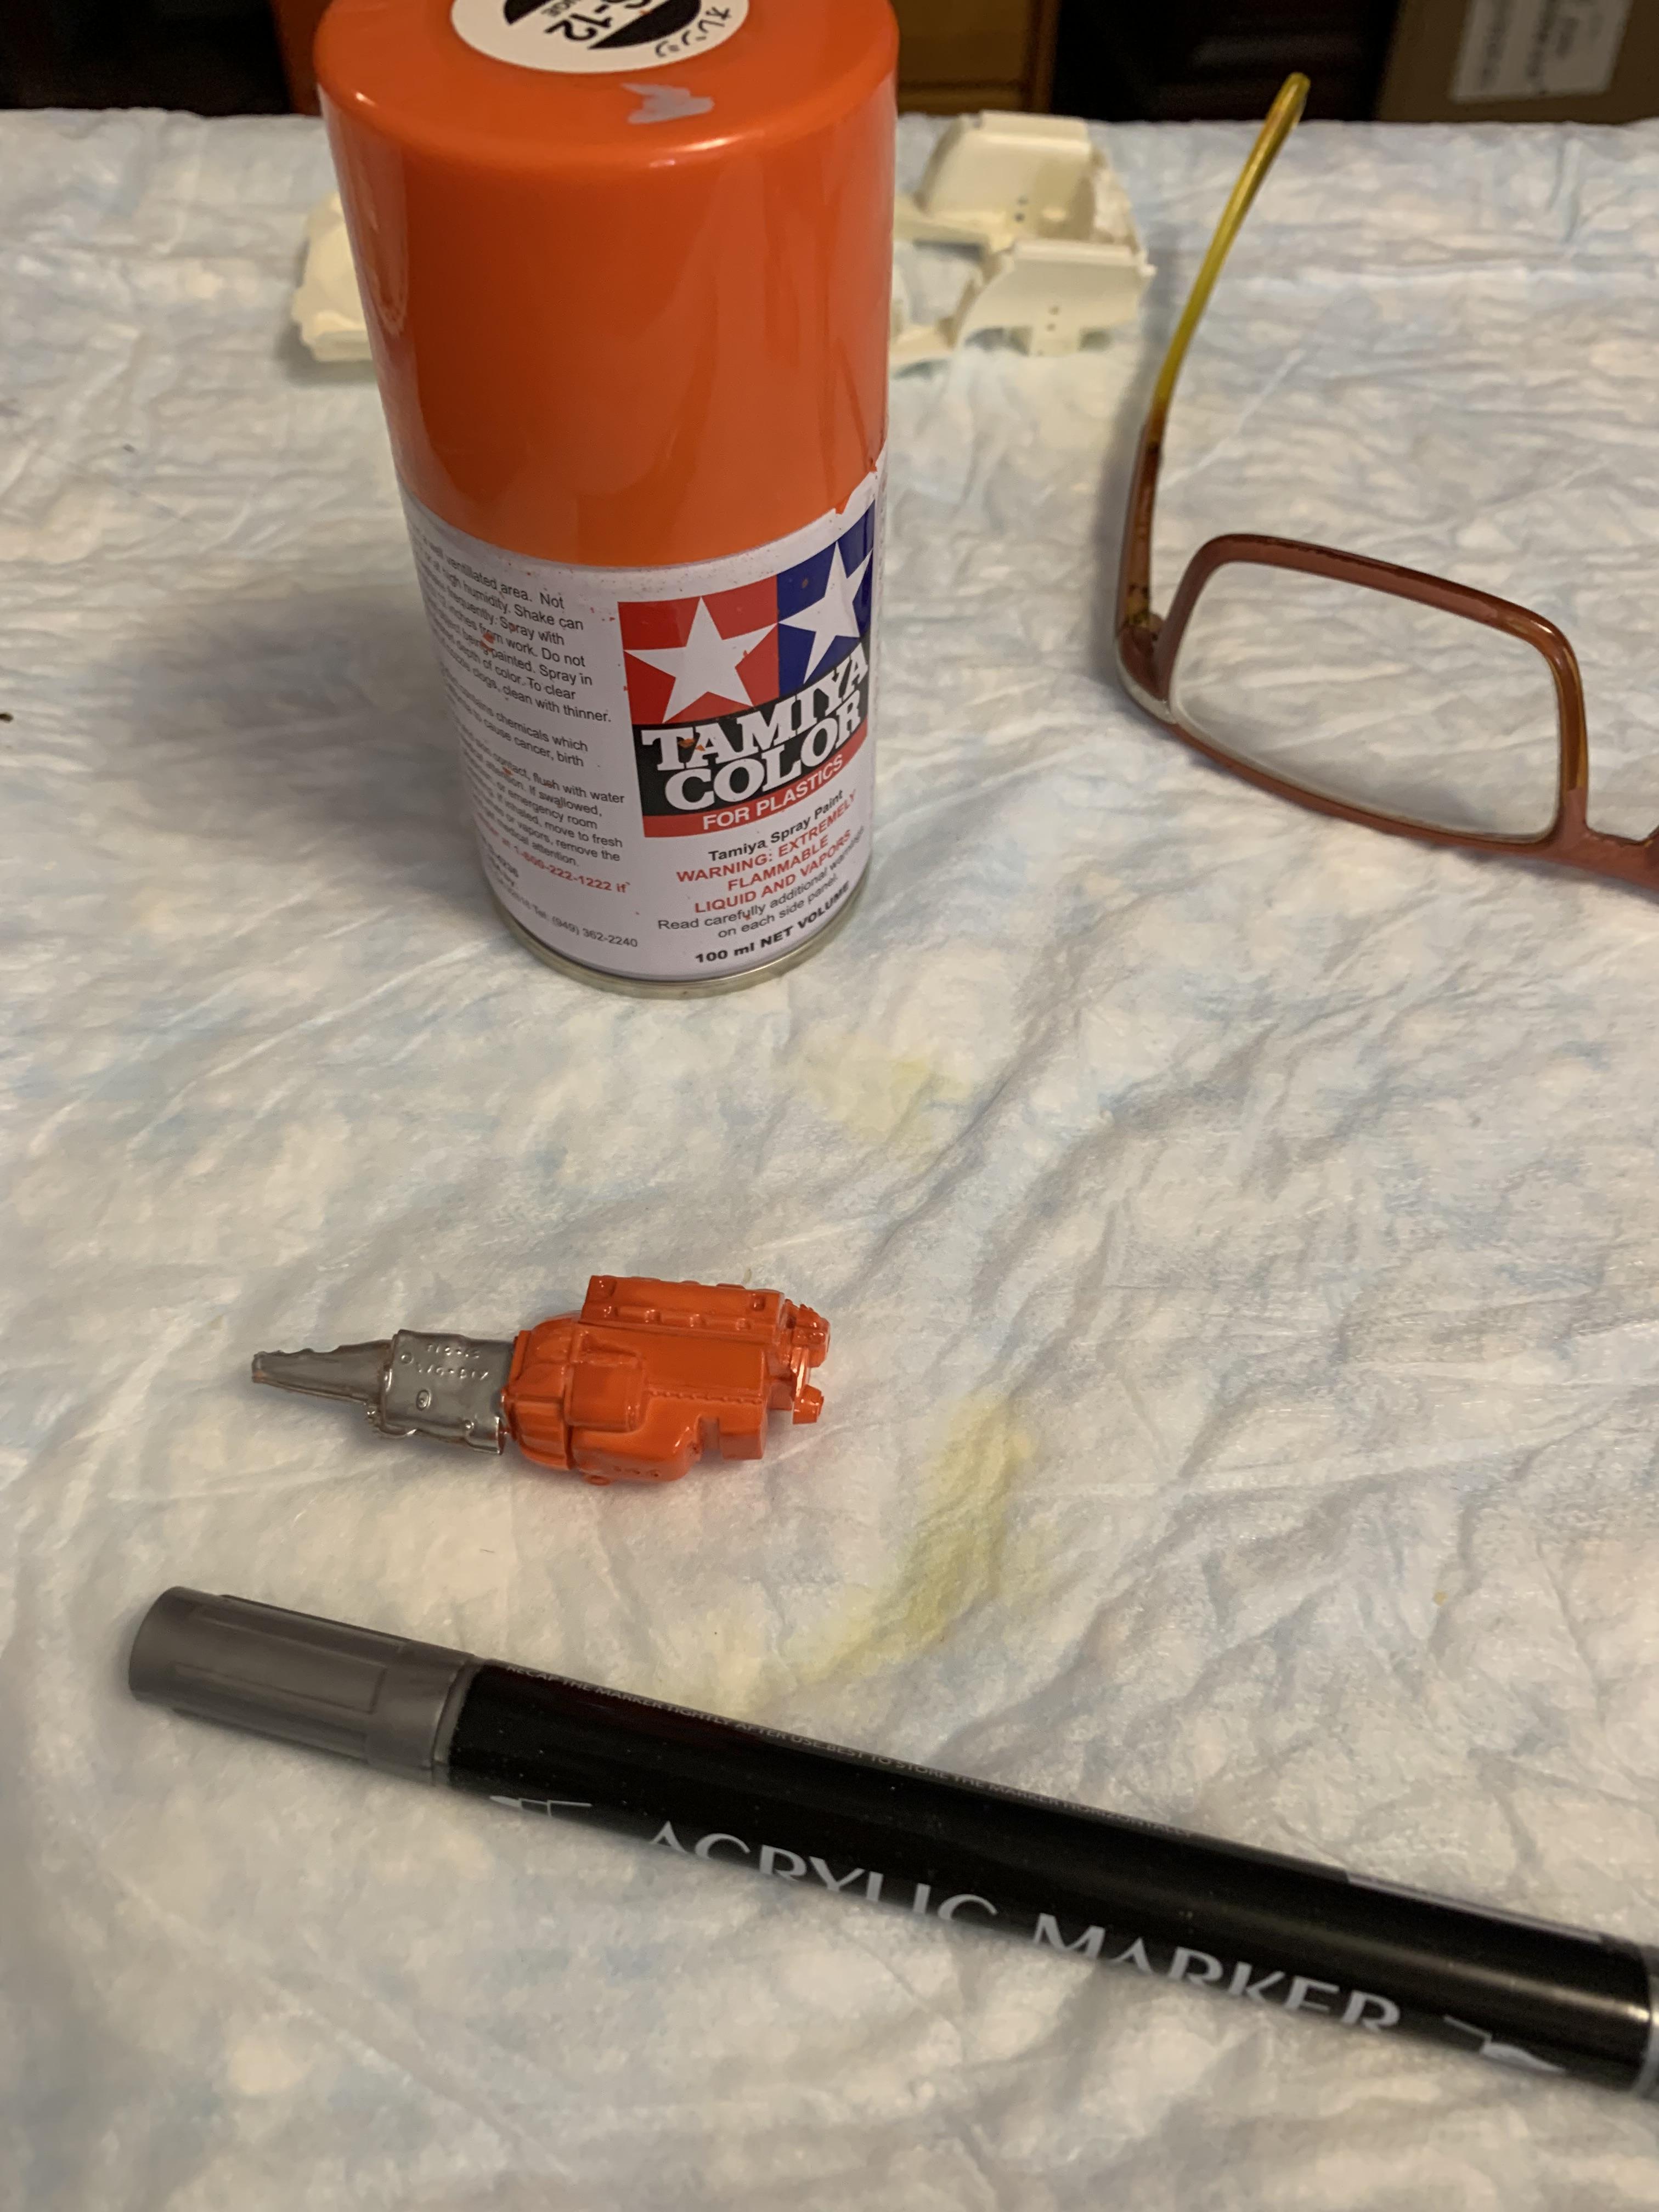
We shall see, Bill. I hope so, Mike. Not going to put a lot of time and money into this one. Put a little Mr. Hobby clear on, looked at the chassis, and decided against trying to remove the exhaust system. Not thrilled with the small block that came in the kit, but it will have to do. Put some orange Tamiya on, then a silver marker on the trans.