R. Thorne
-
Posts
1,276 -
Joined
-
Last visited
Content Type
Profiles
Forums
Events
Gallery
Everything posted by R. Thorne
-
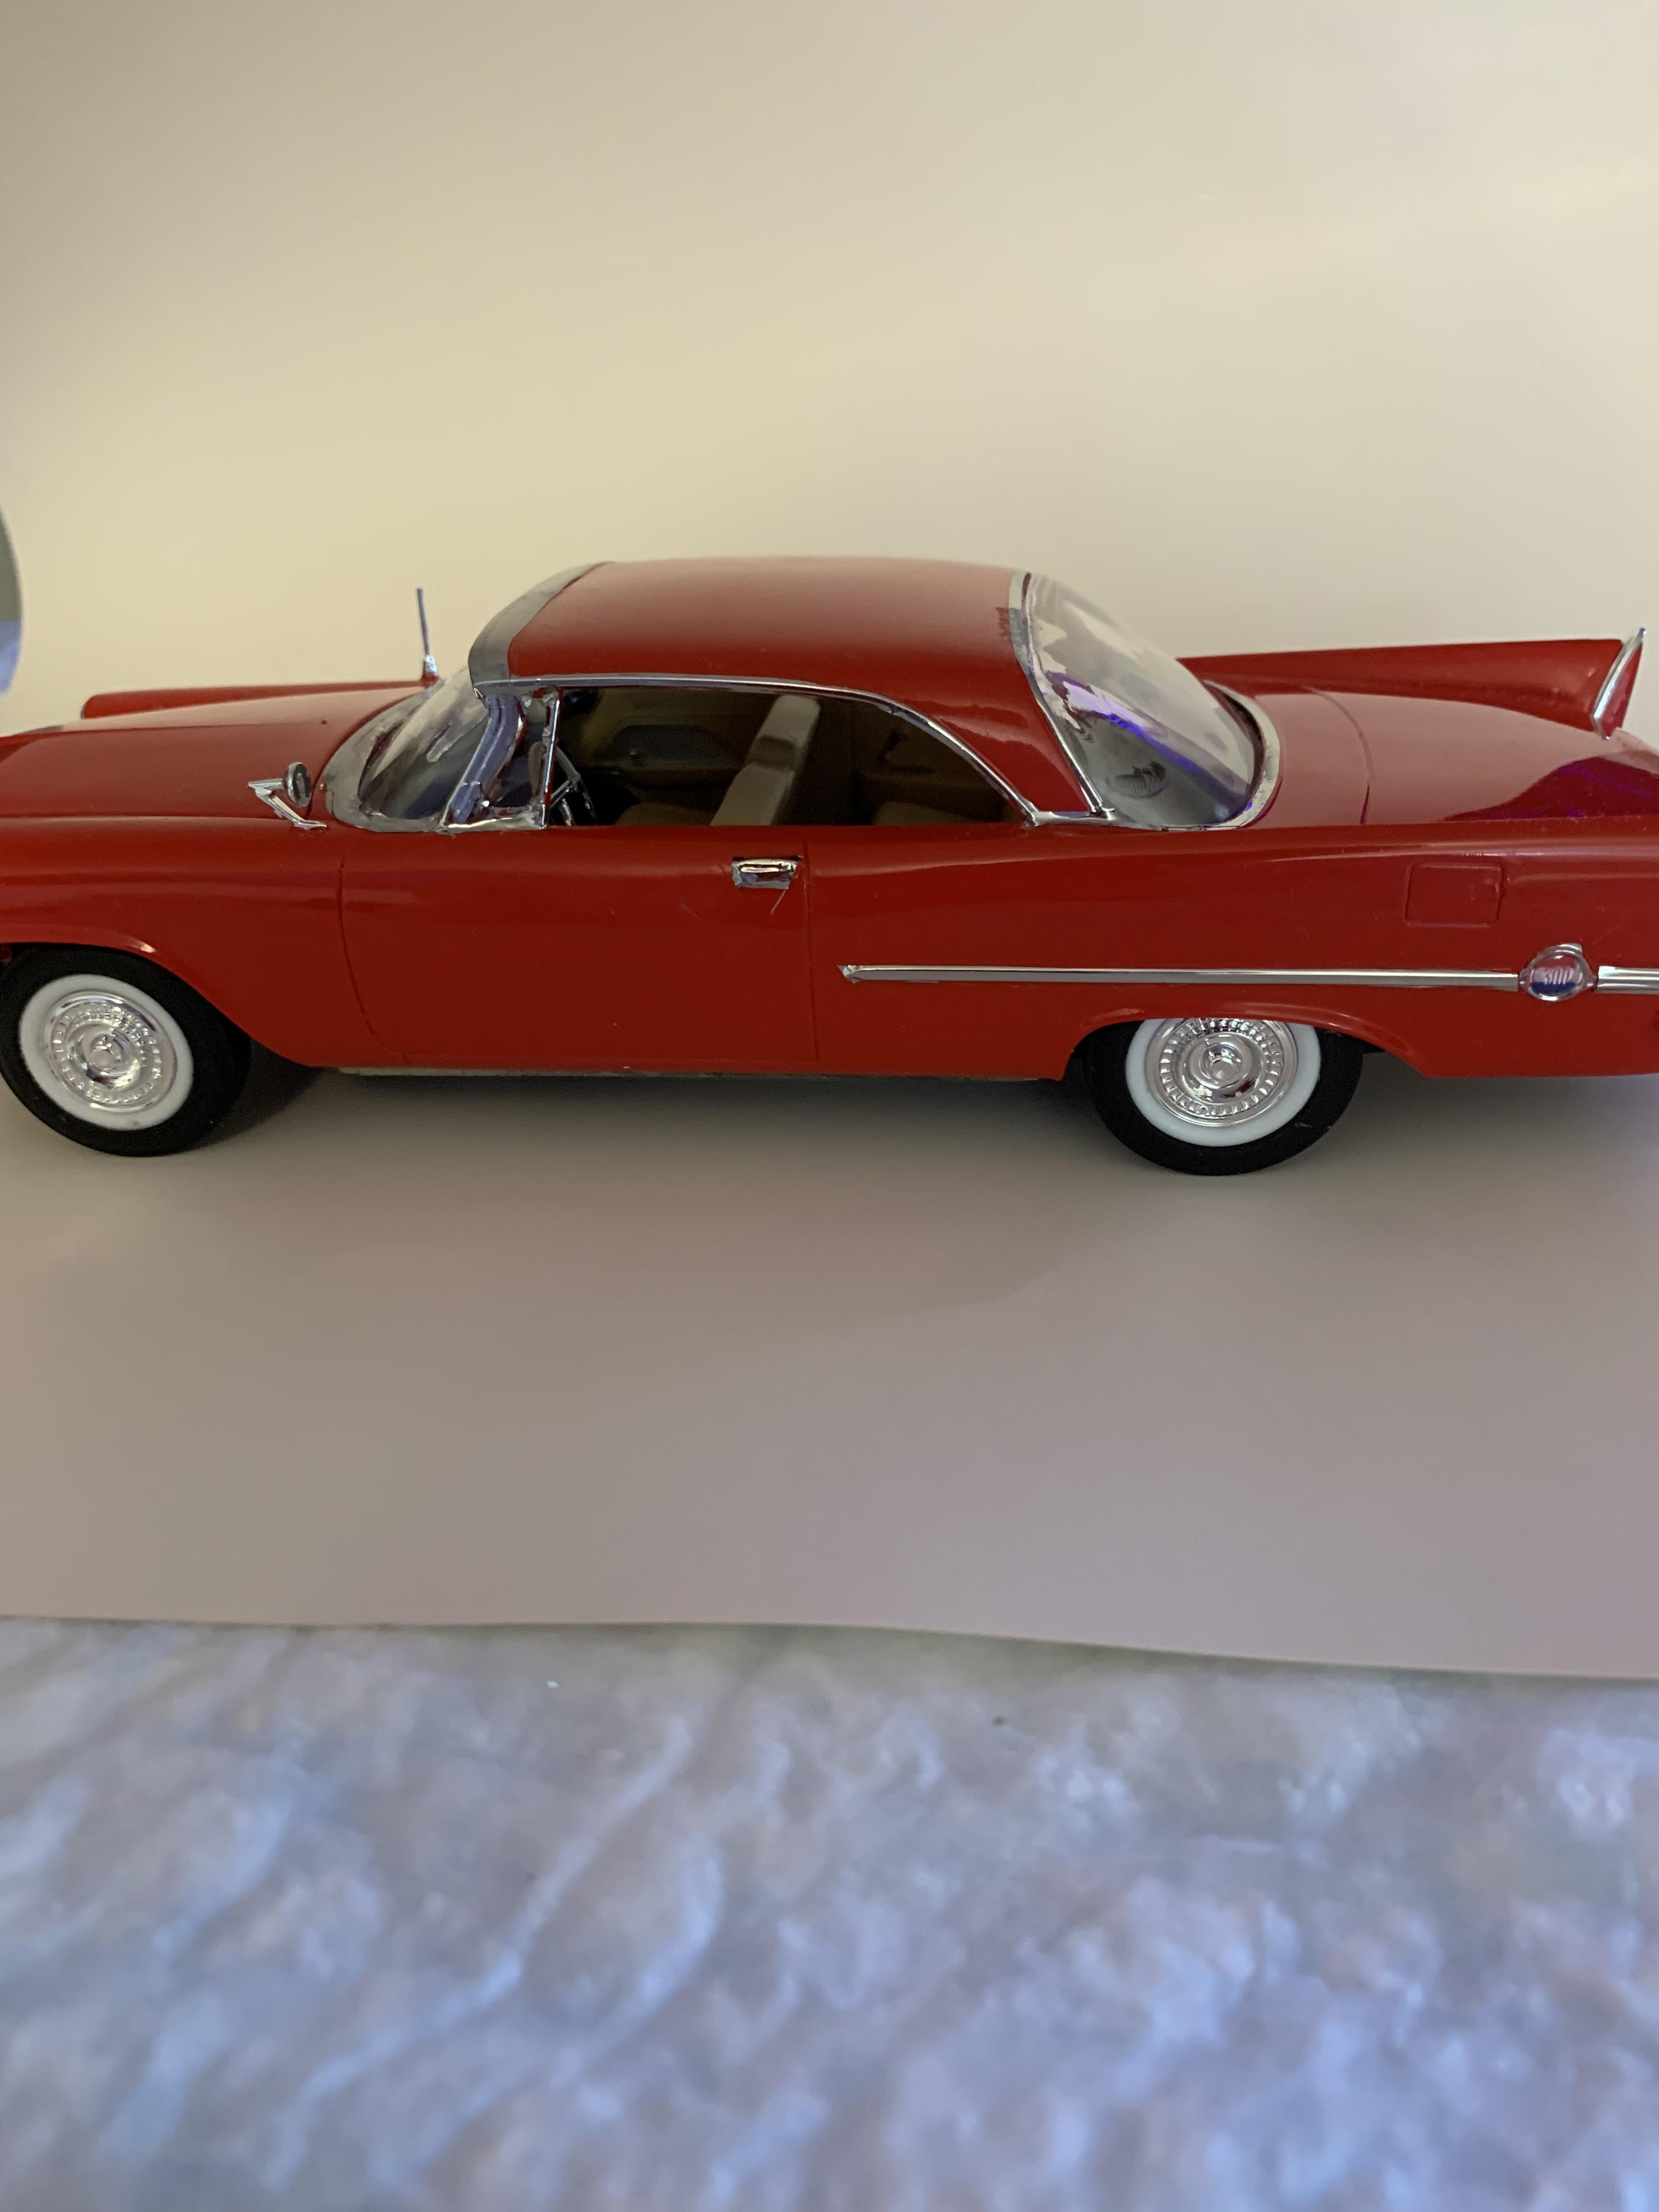
Nothing extraordinary here, just an interim build for fun. Tamiya spray can, no primer, Hasegawa chrome trim. Biggest gripe was the chassis/interior fit. Also, discovered too late a body warpage on the front windshield that complicated things. Some fiddly bits, but a fantastic engine, trans, and rear end that made up for it. More details are in my WIP section. As always, critiques good and bad, suggestions, questions, are appreciated.

- 8 replies
-
- 11
-

-
Ca glued some small stuff on today to complete this learning experience. Finished pics in the Under Glass section.
-
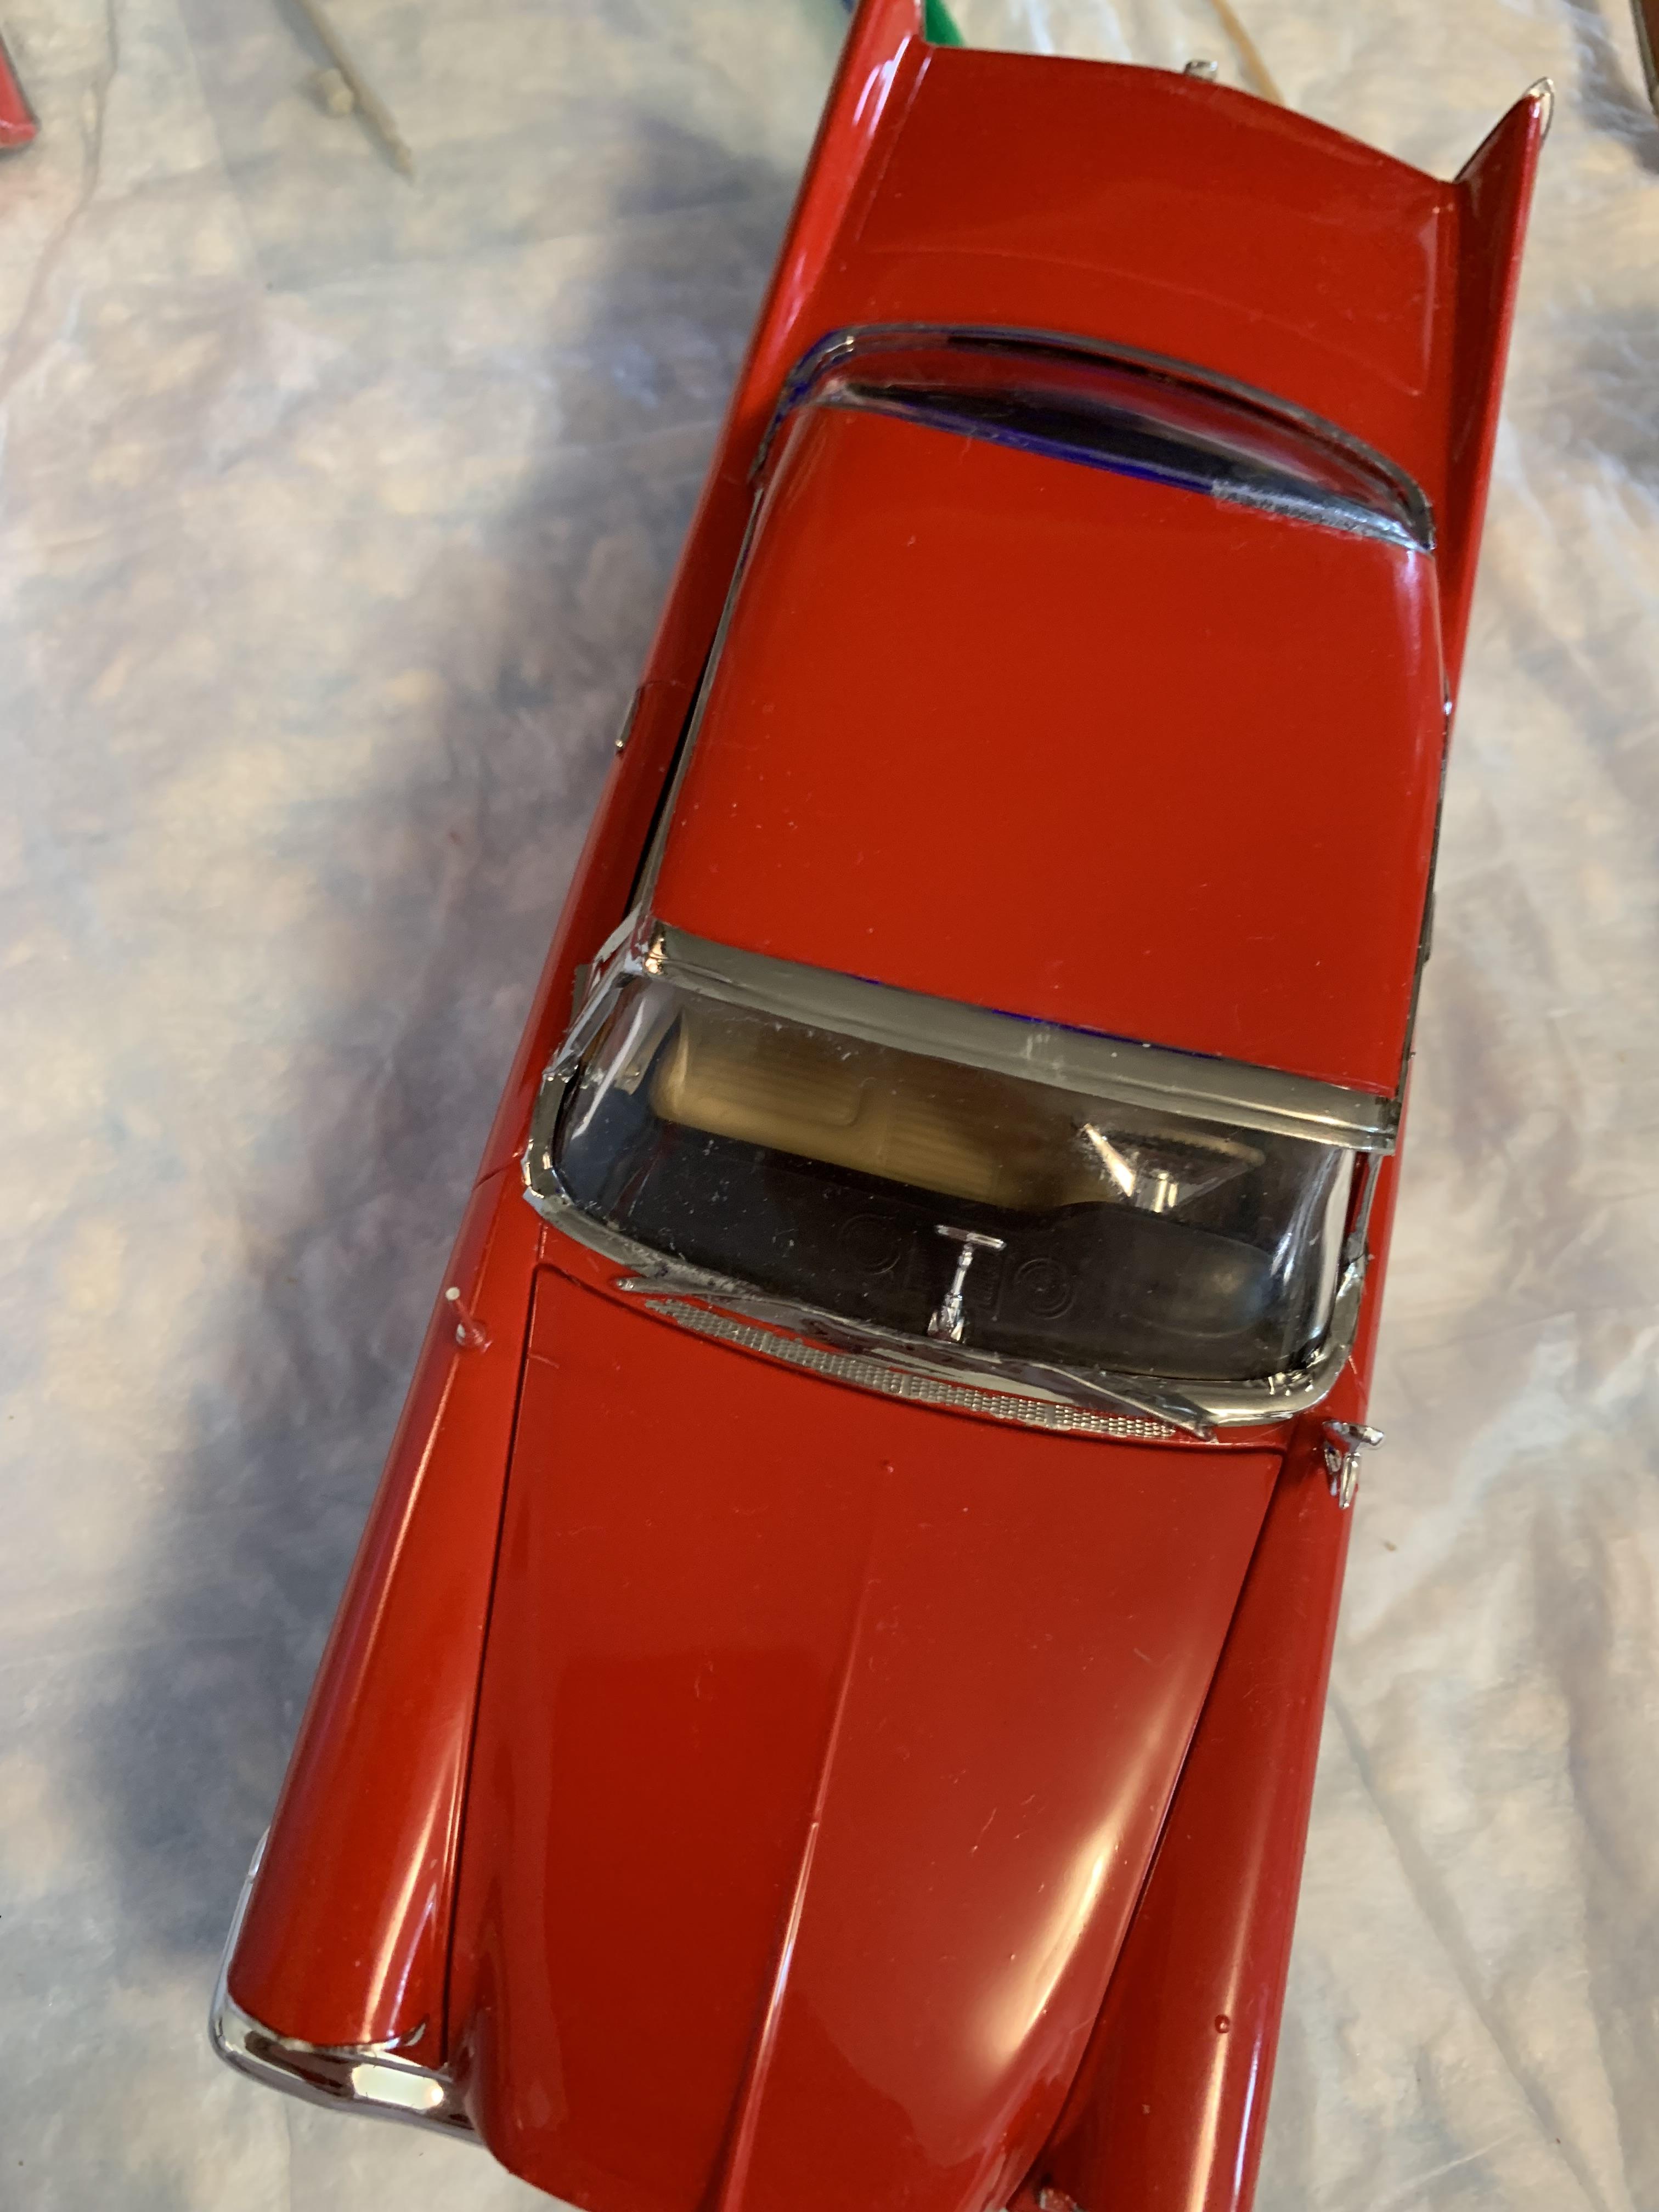
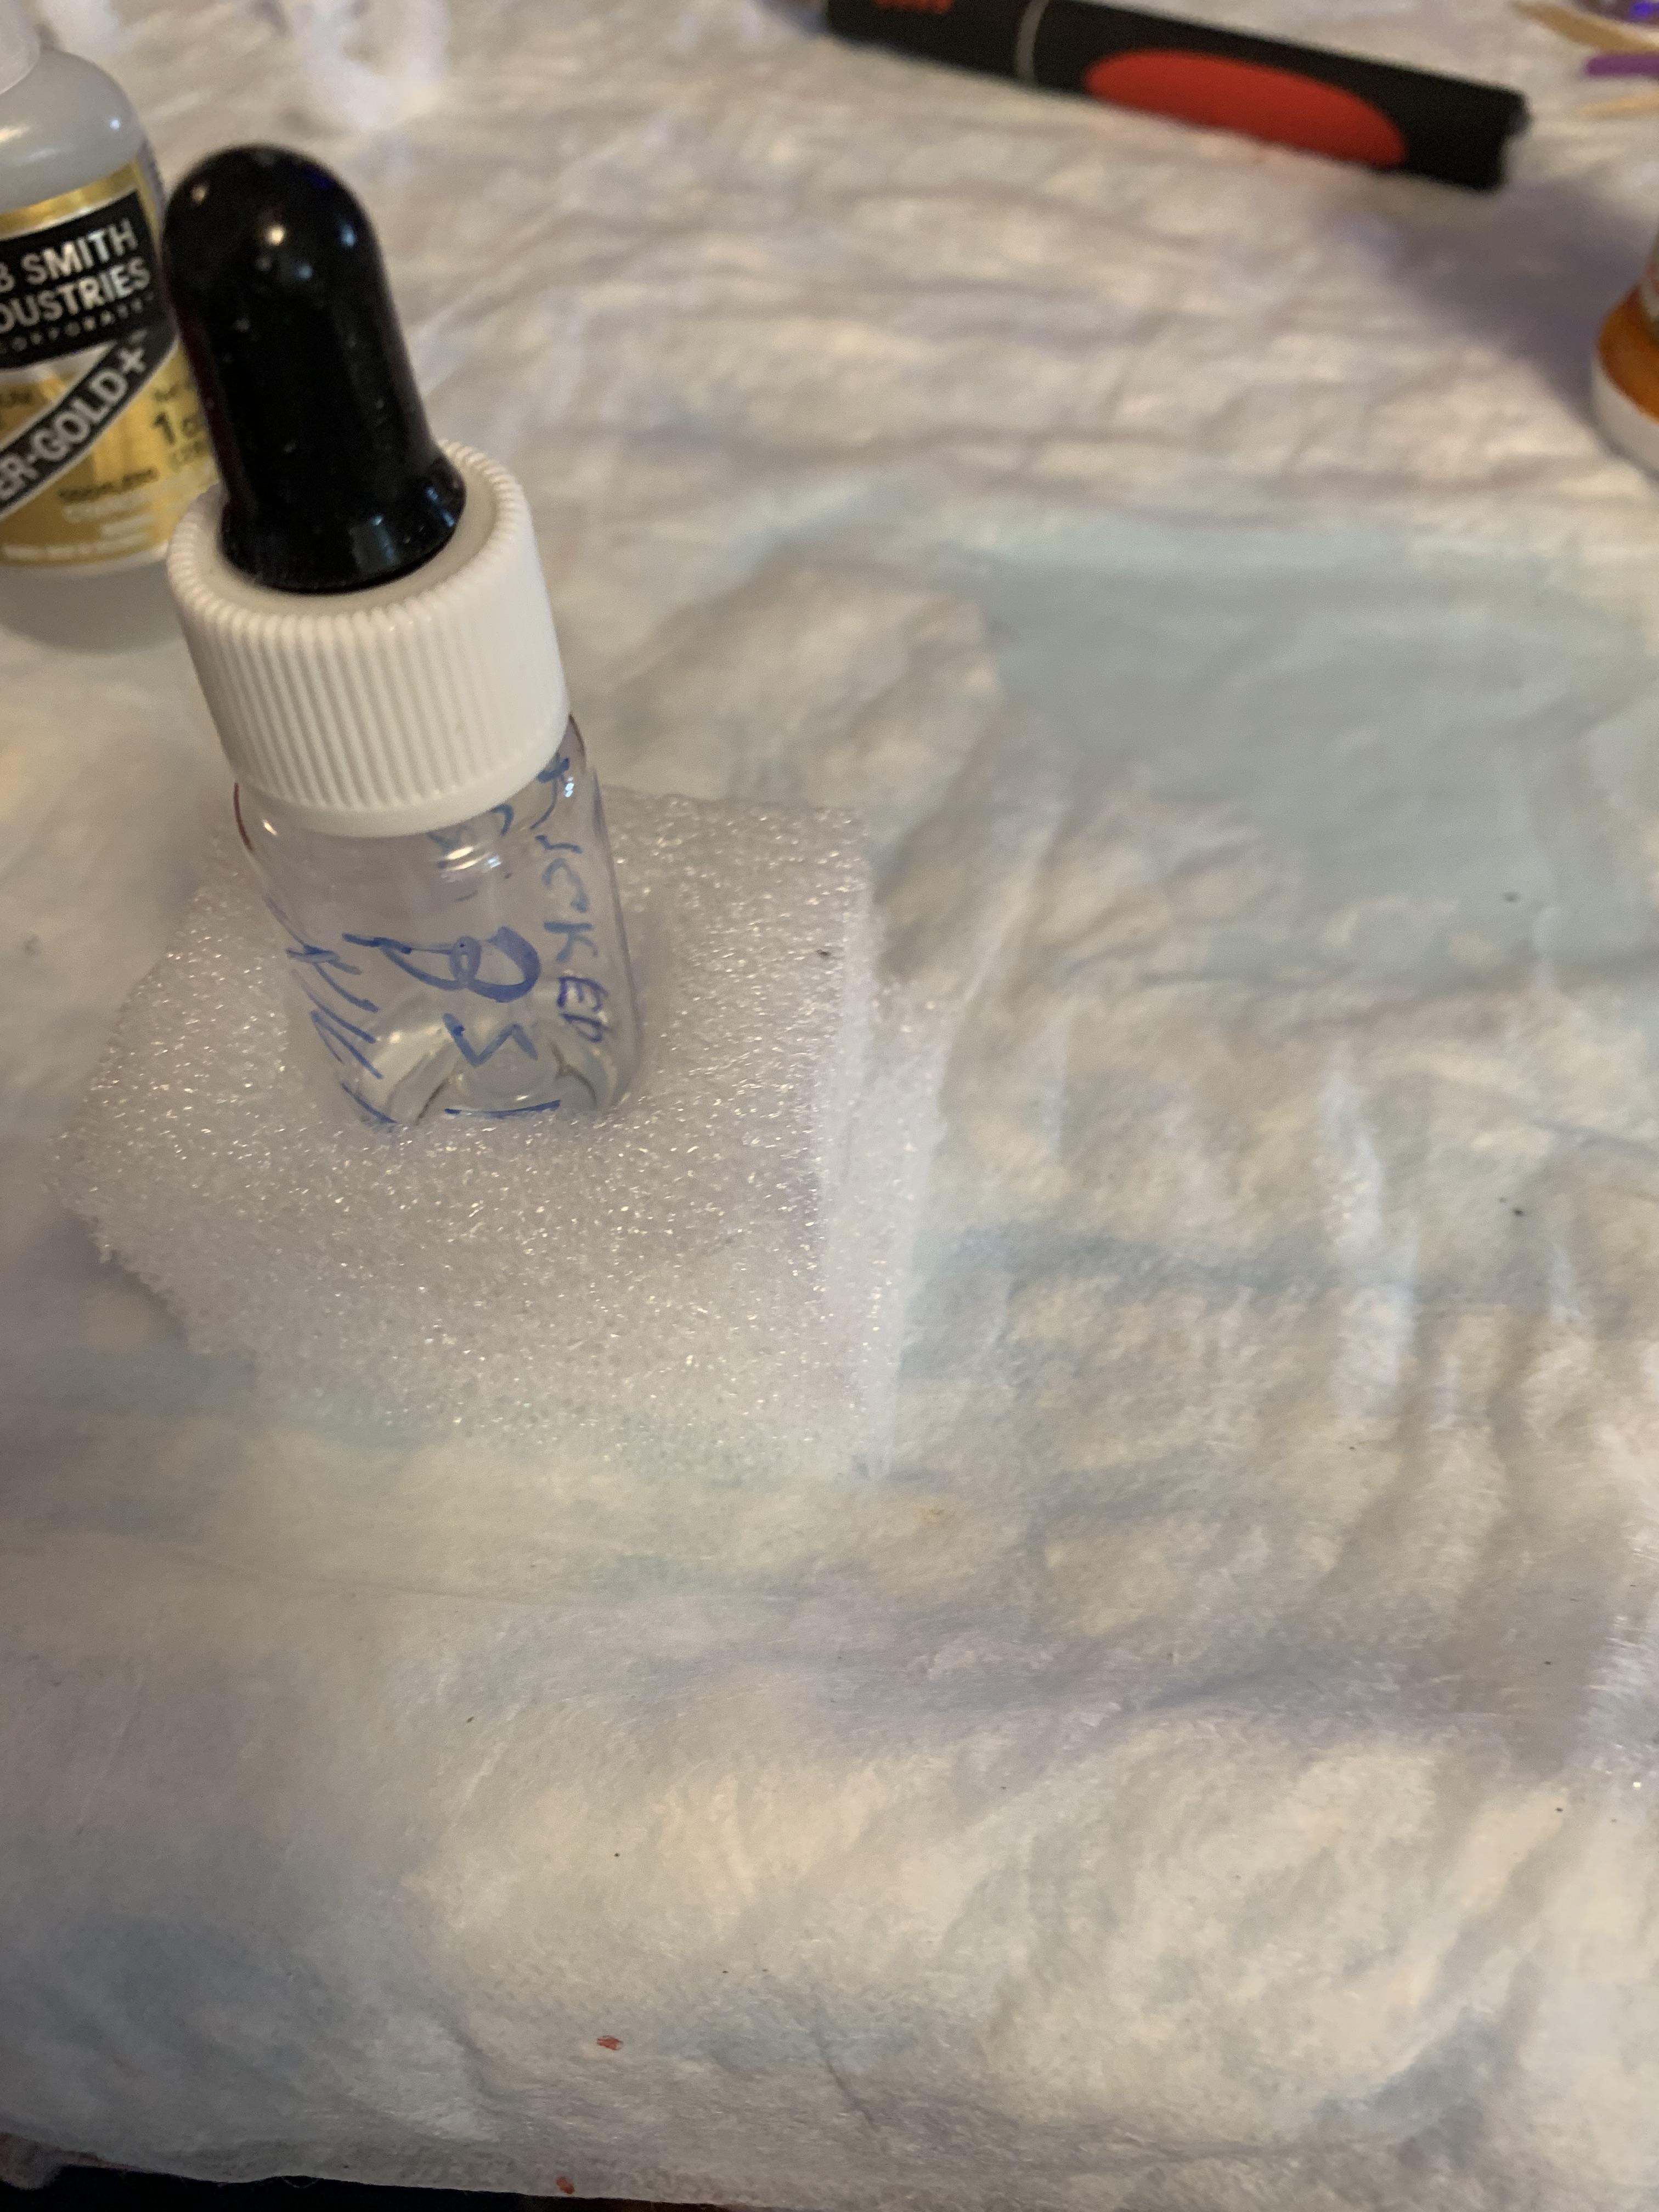
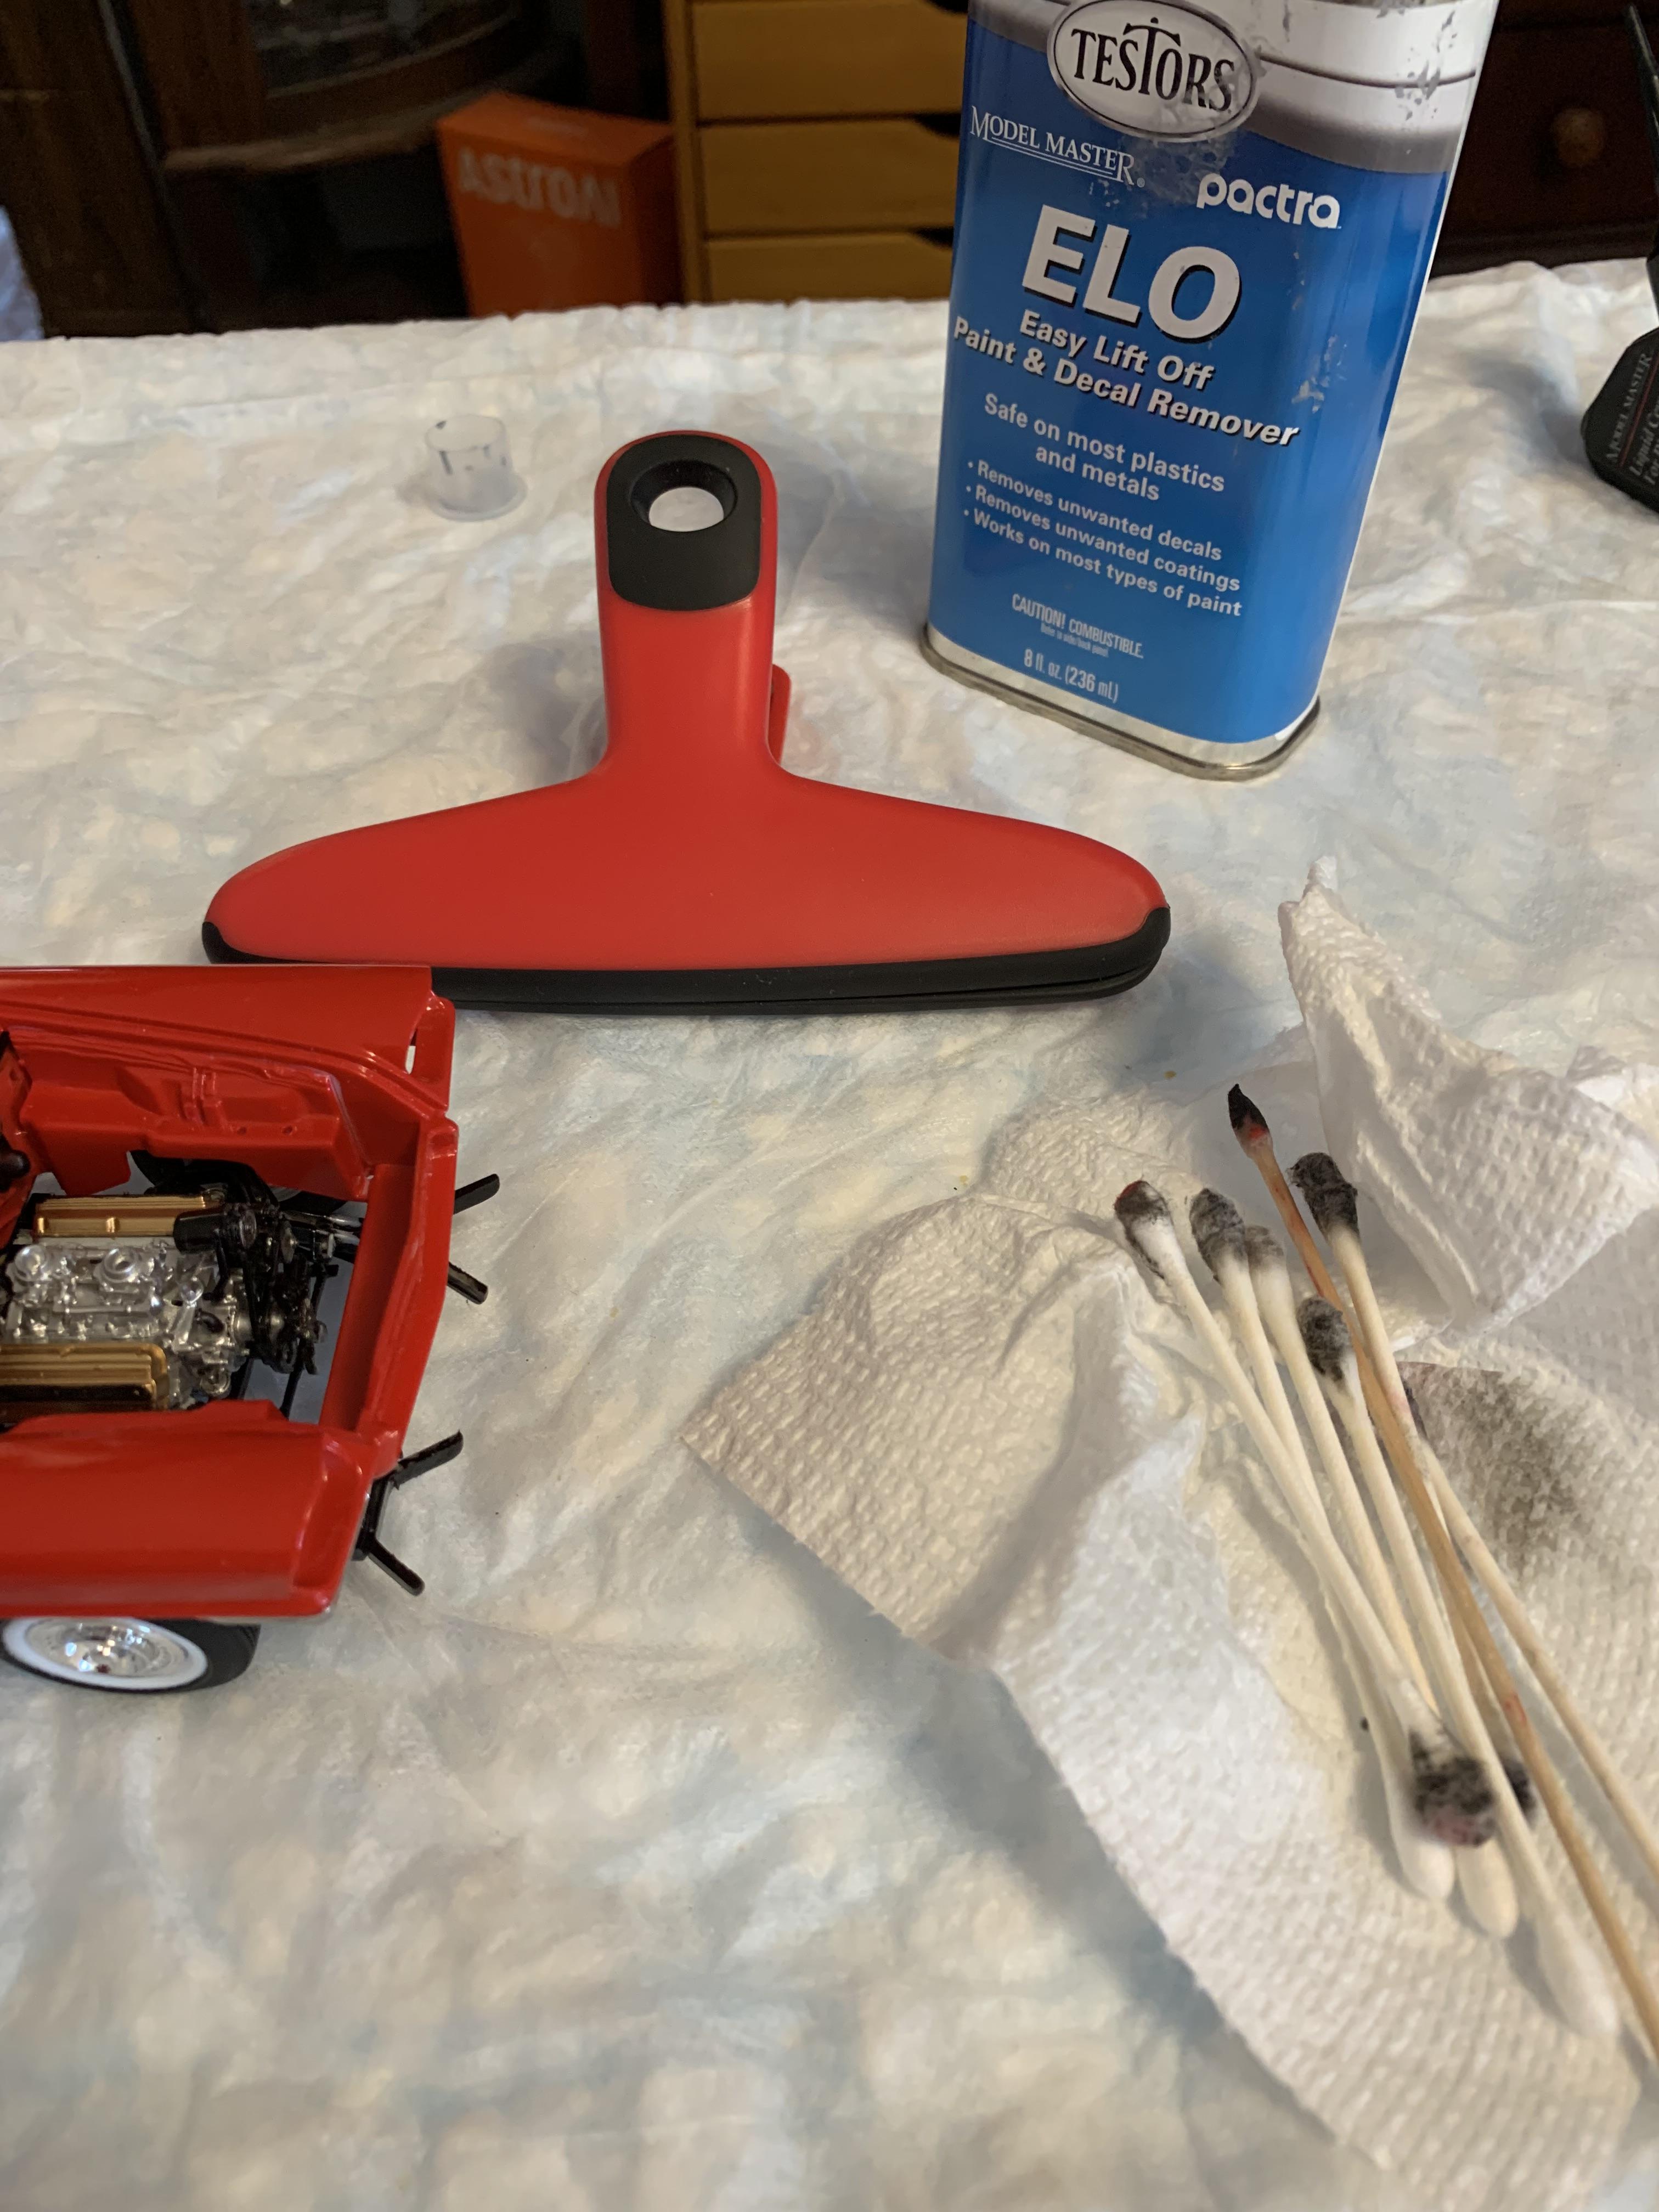
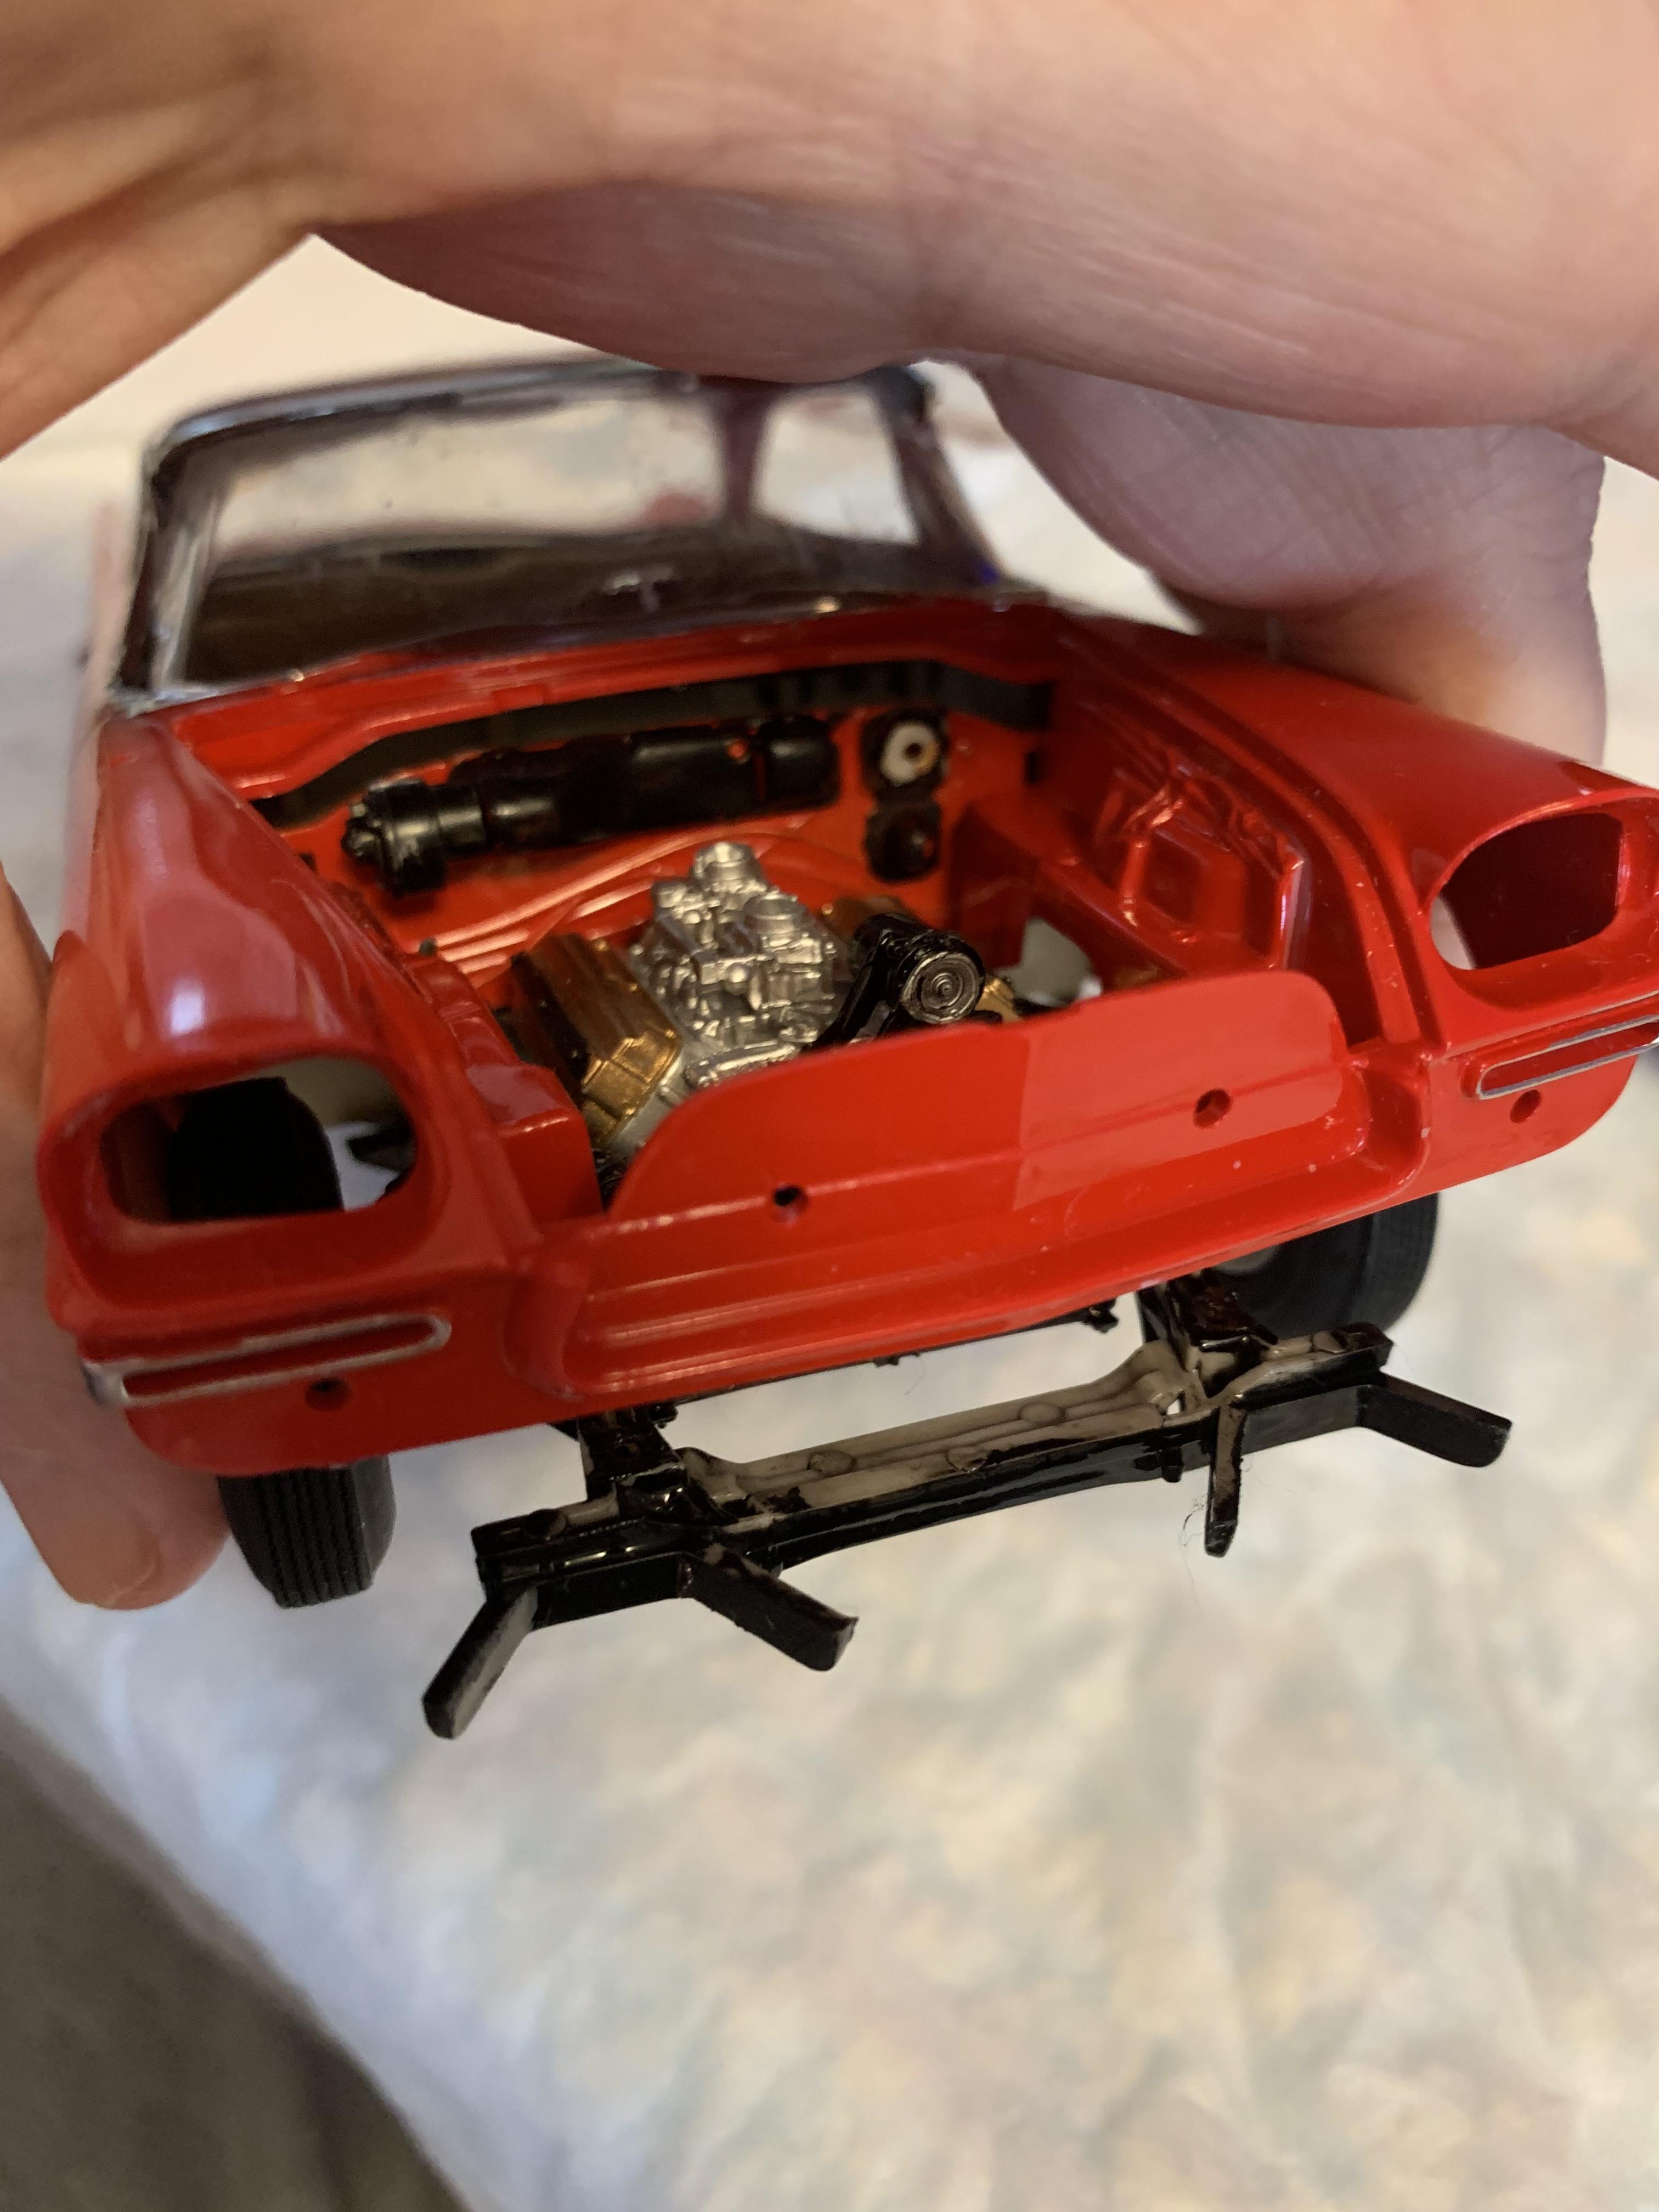
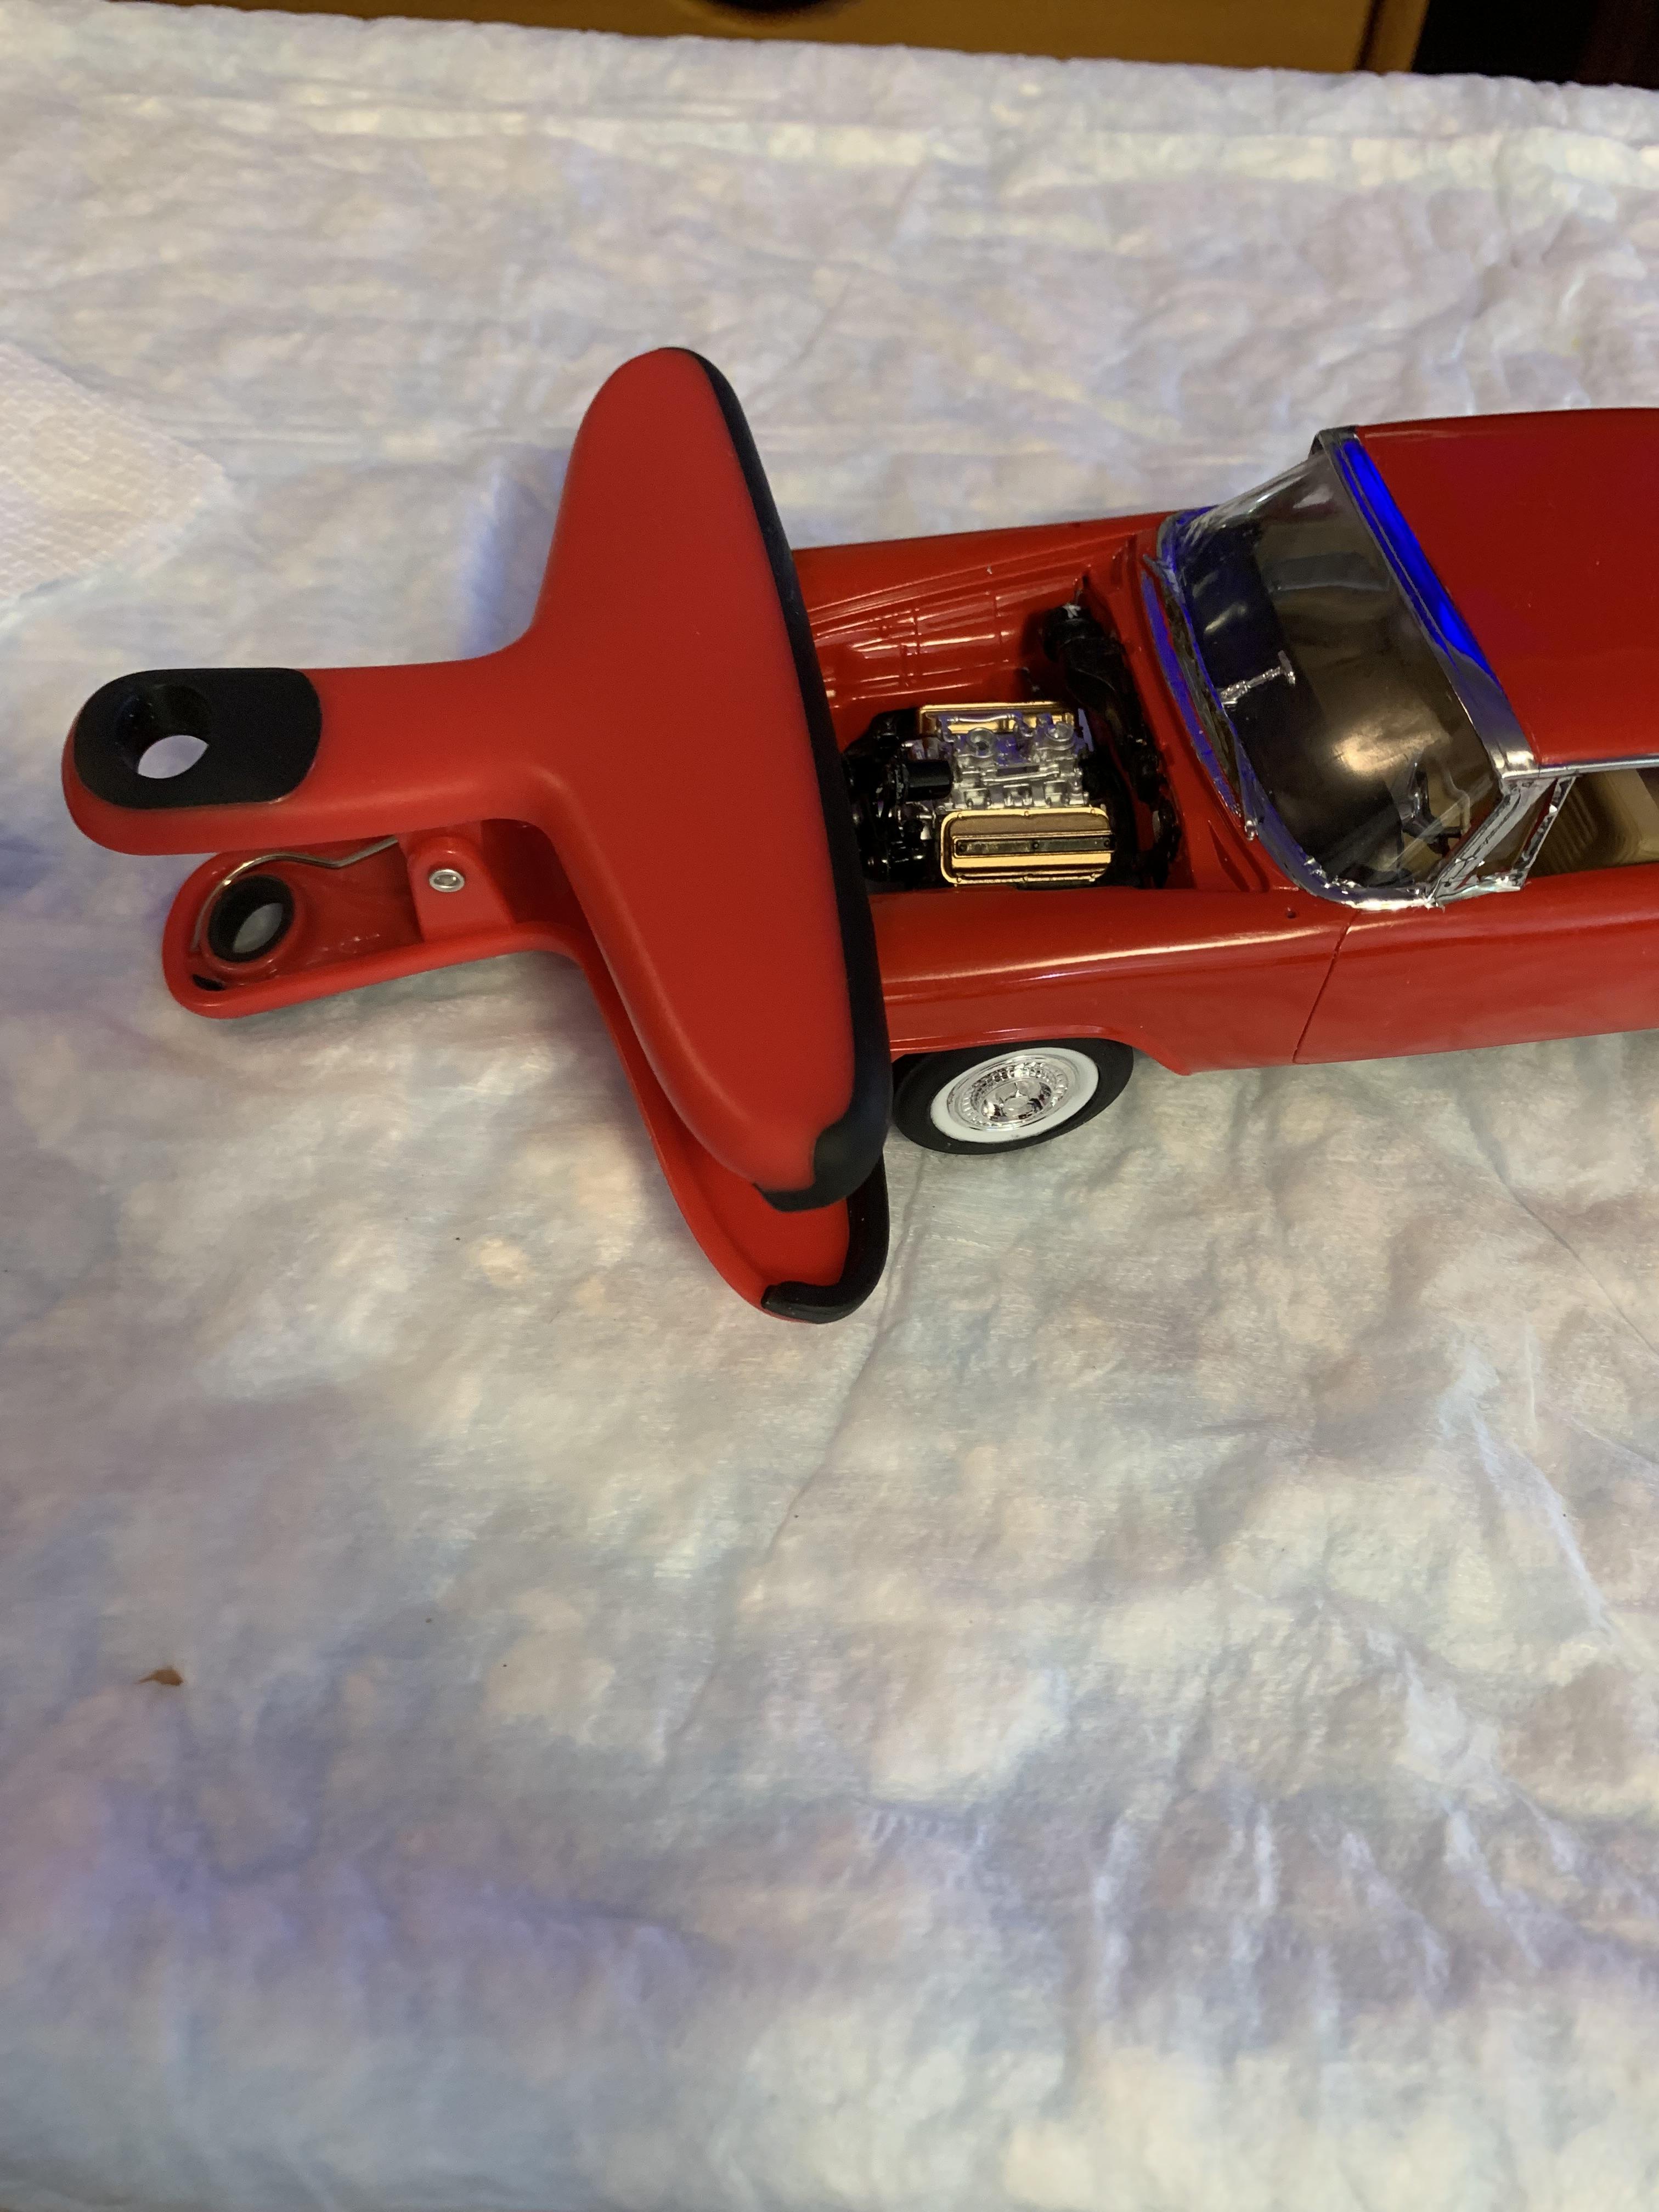
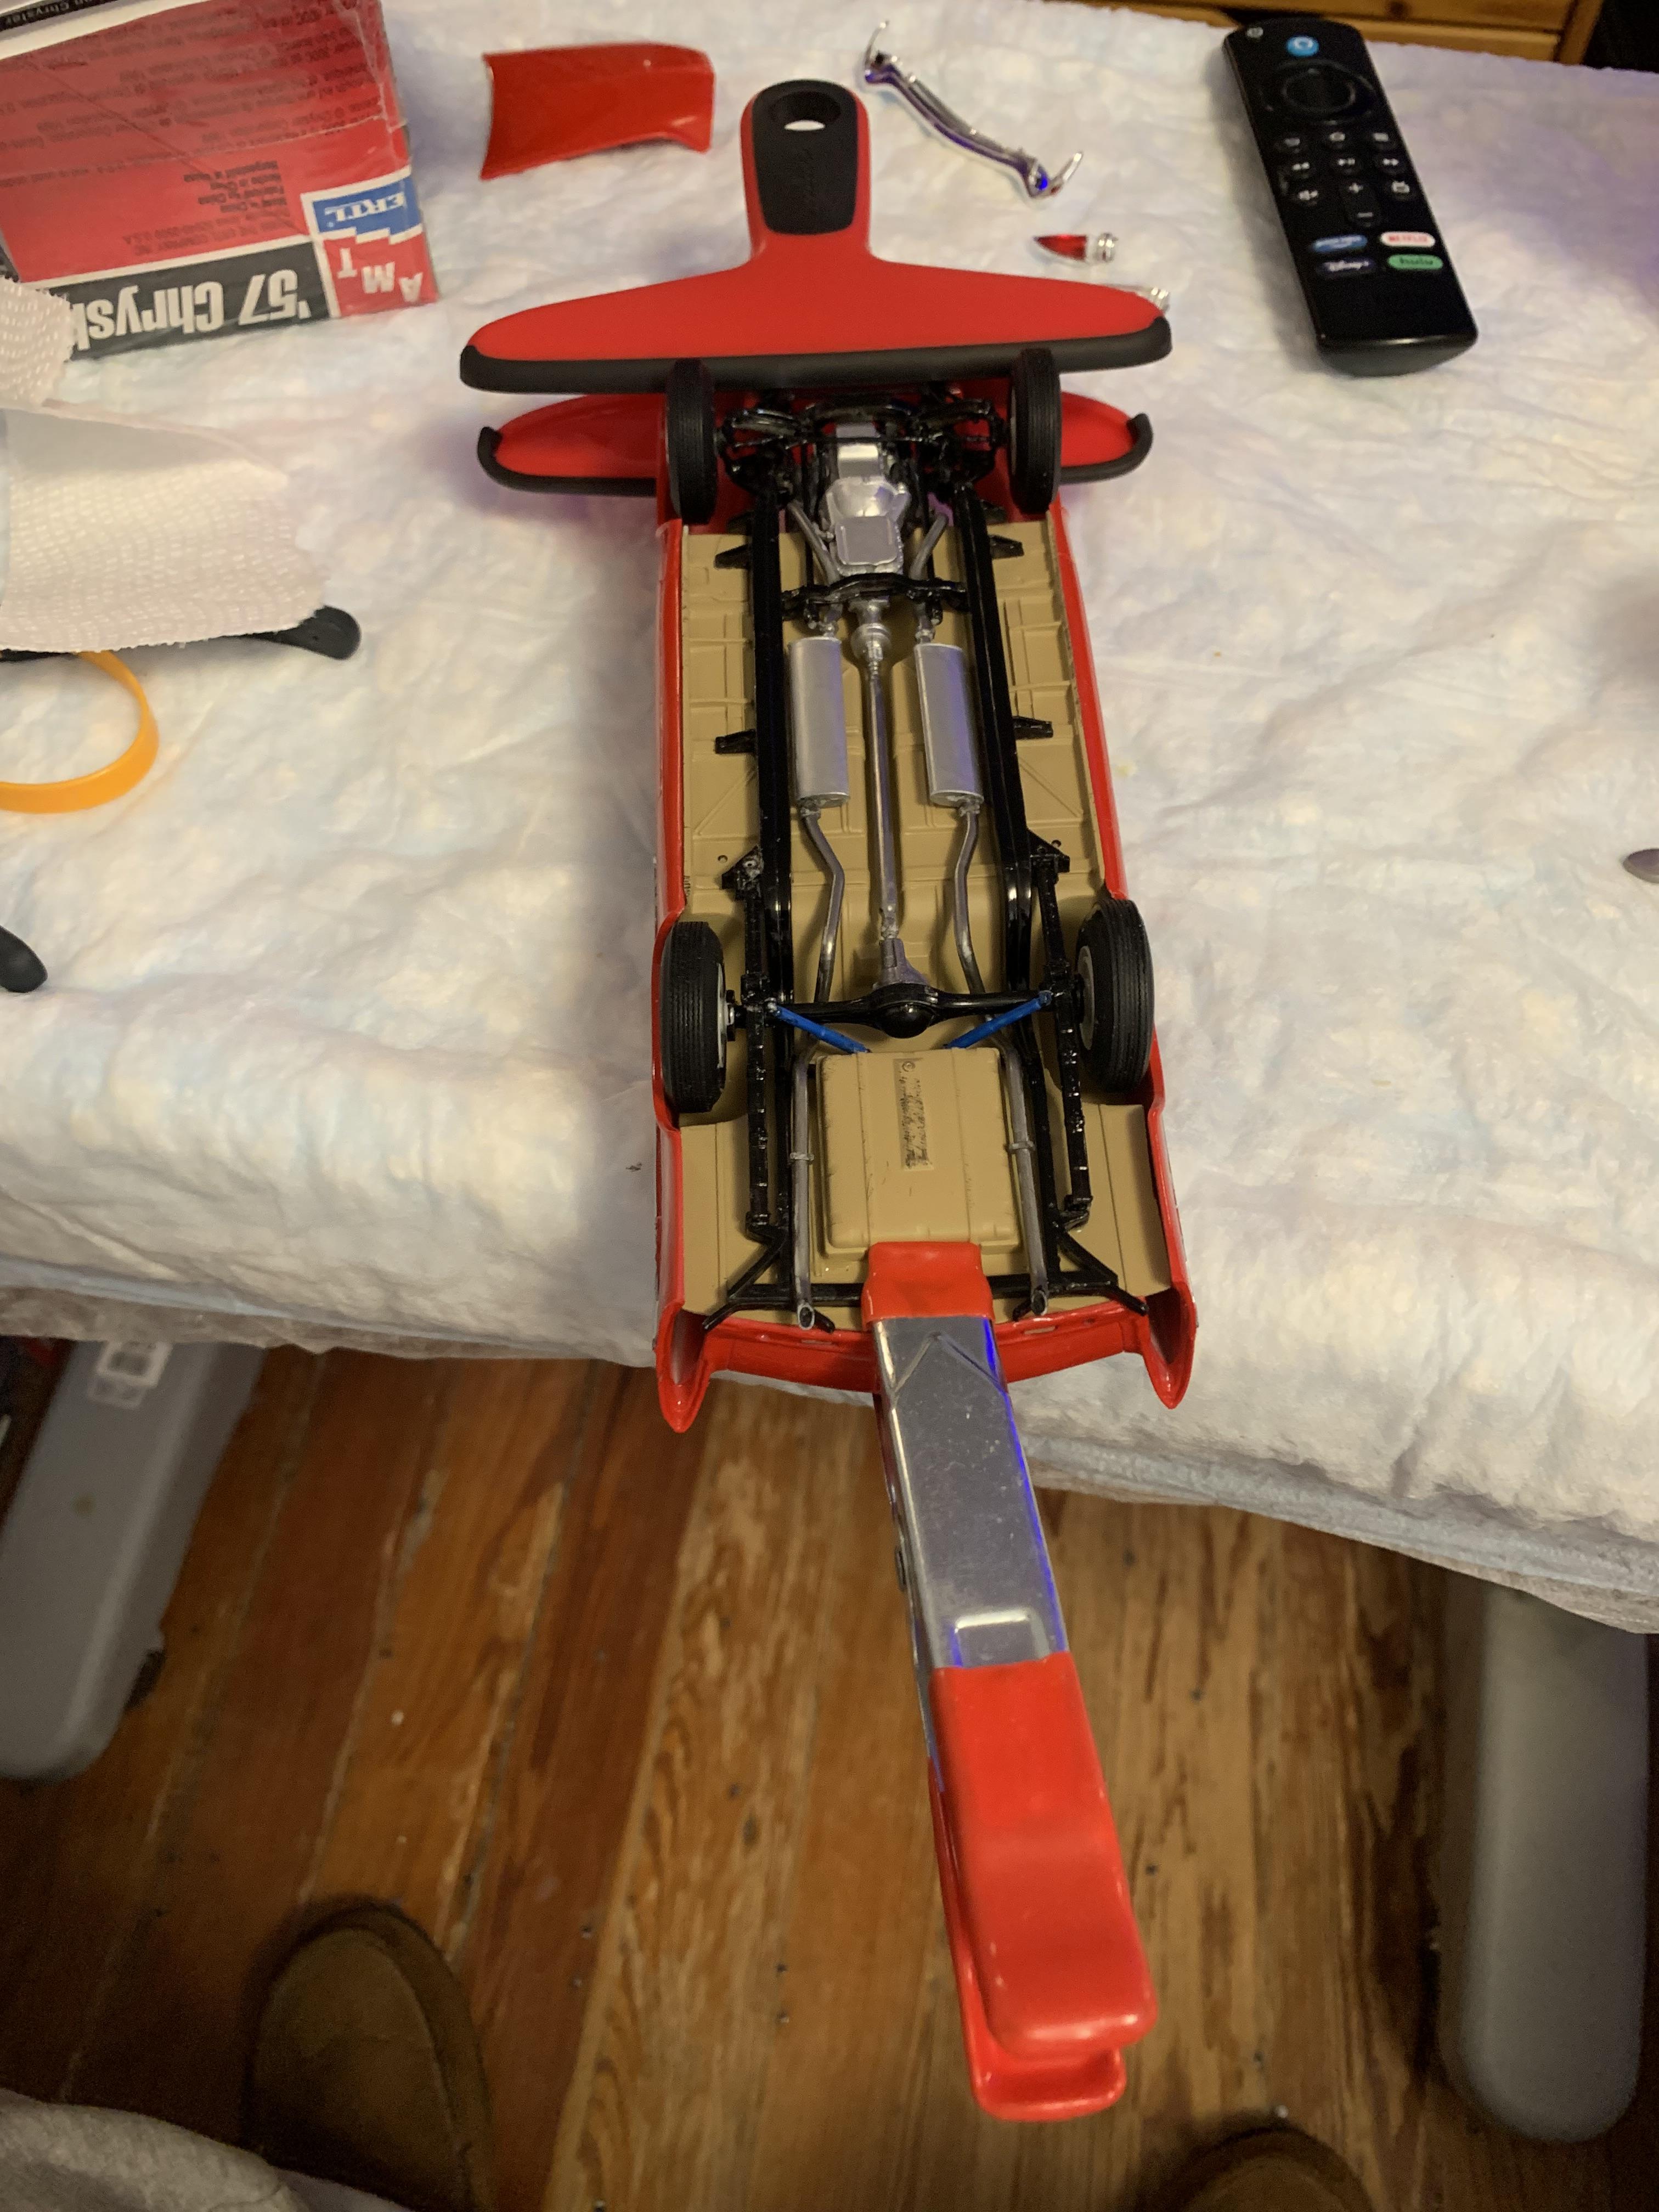
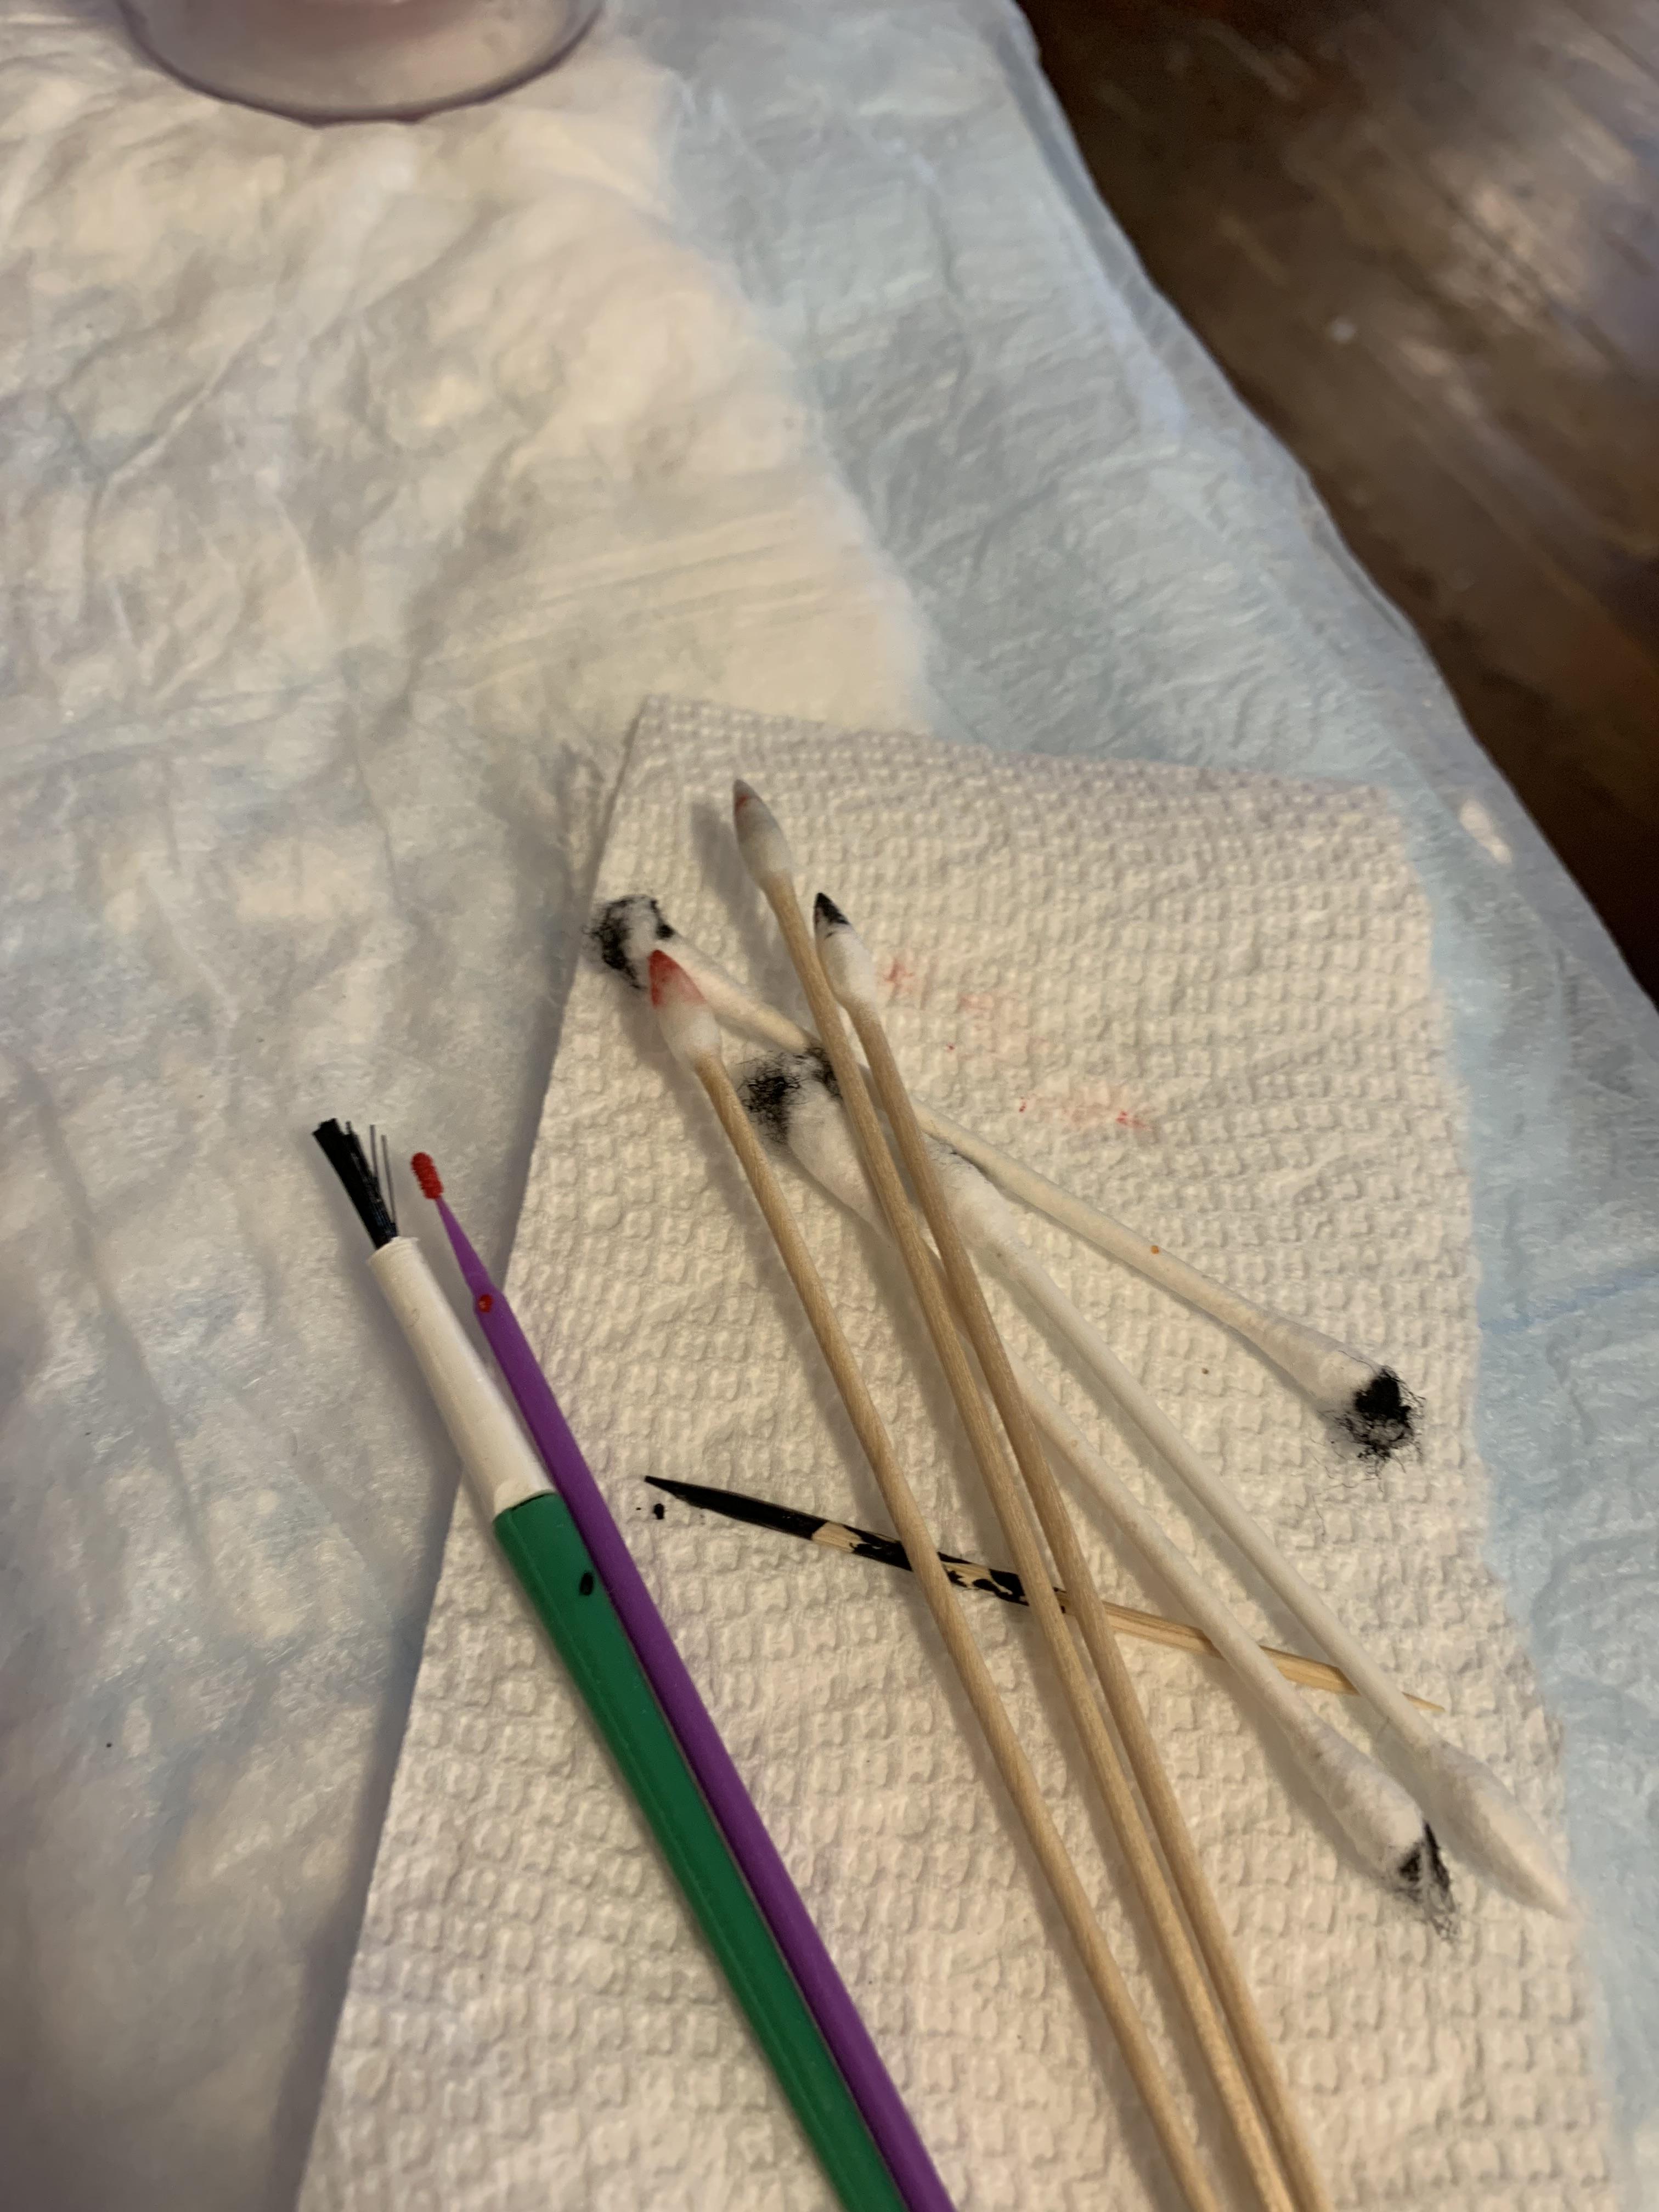
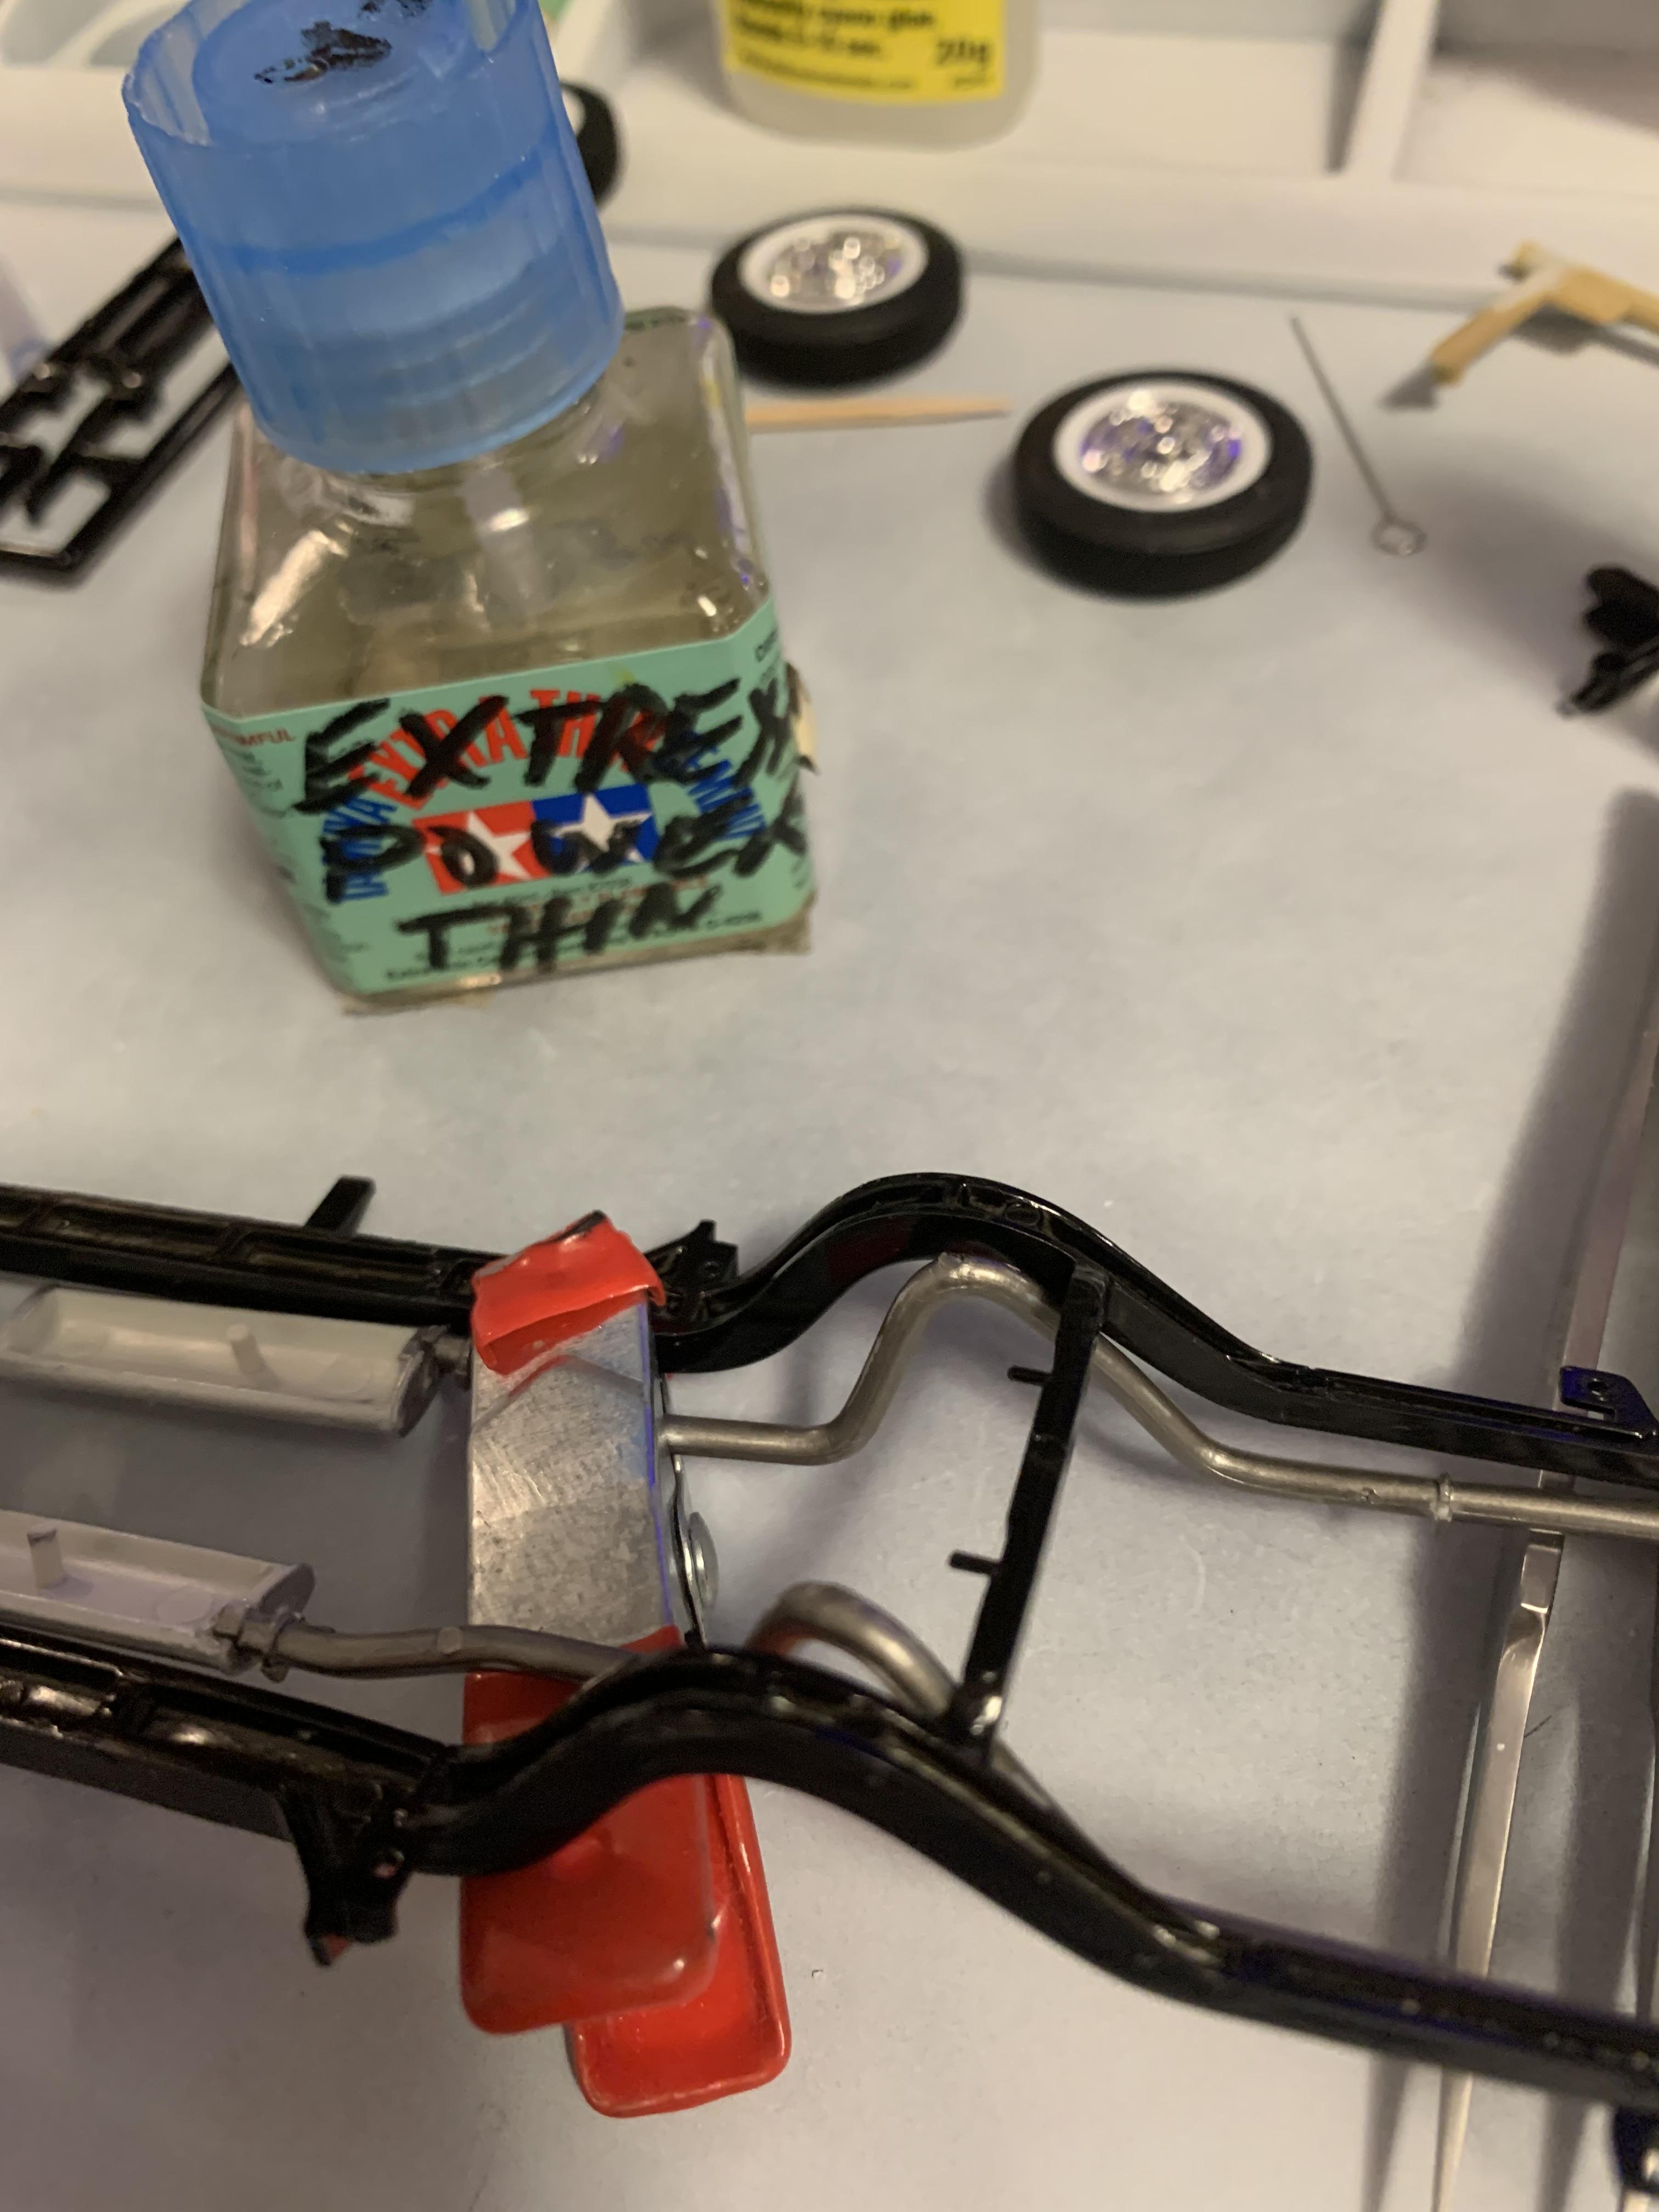
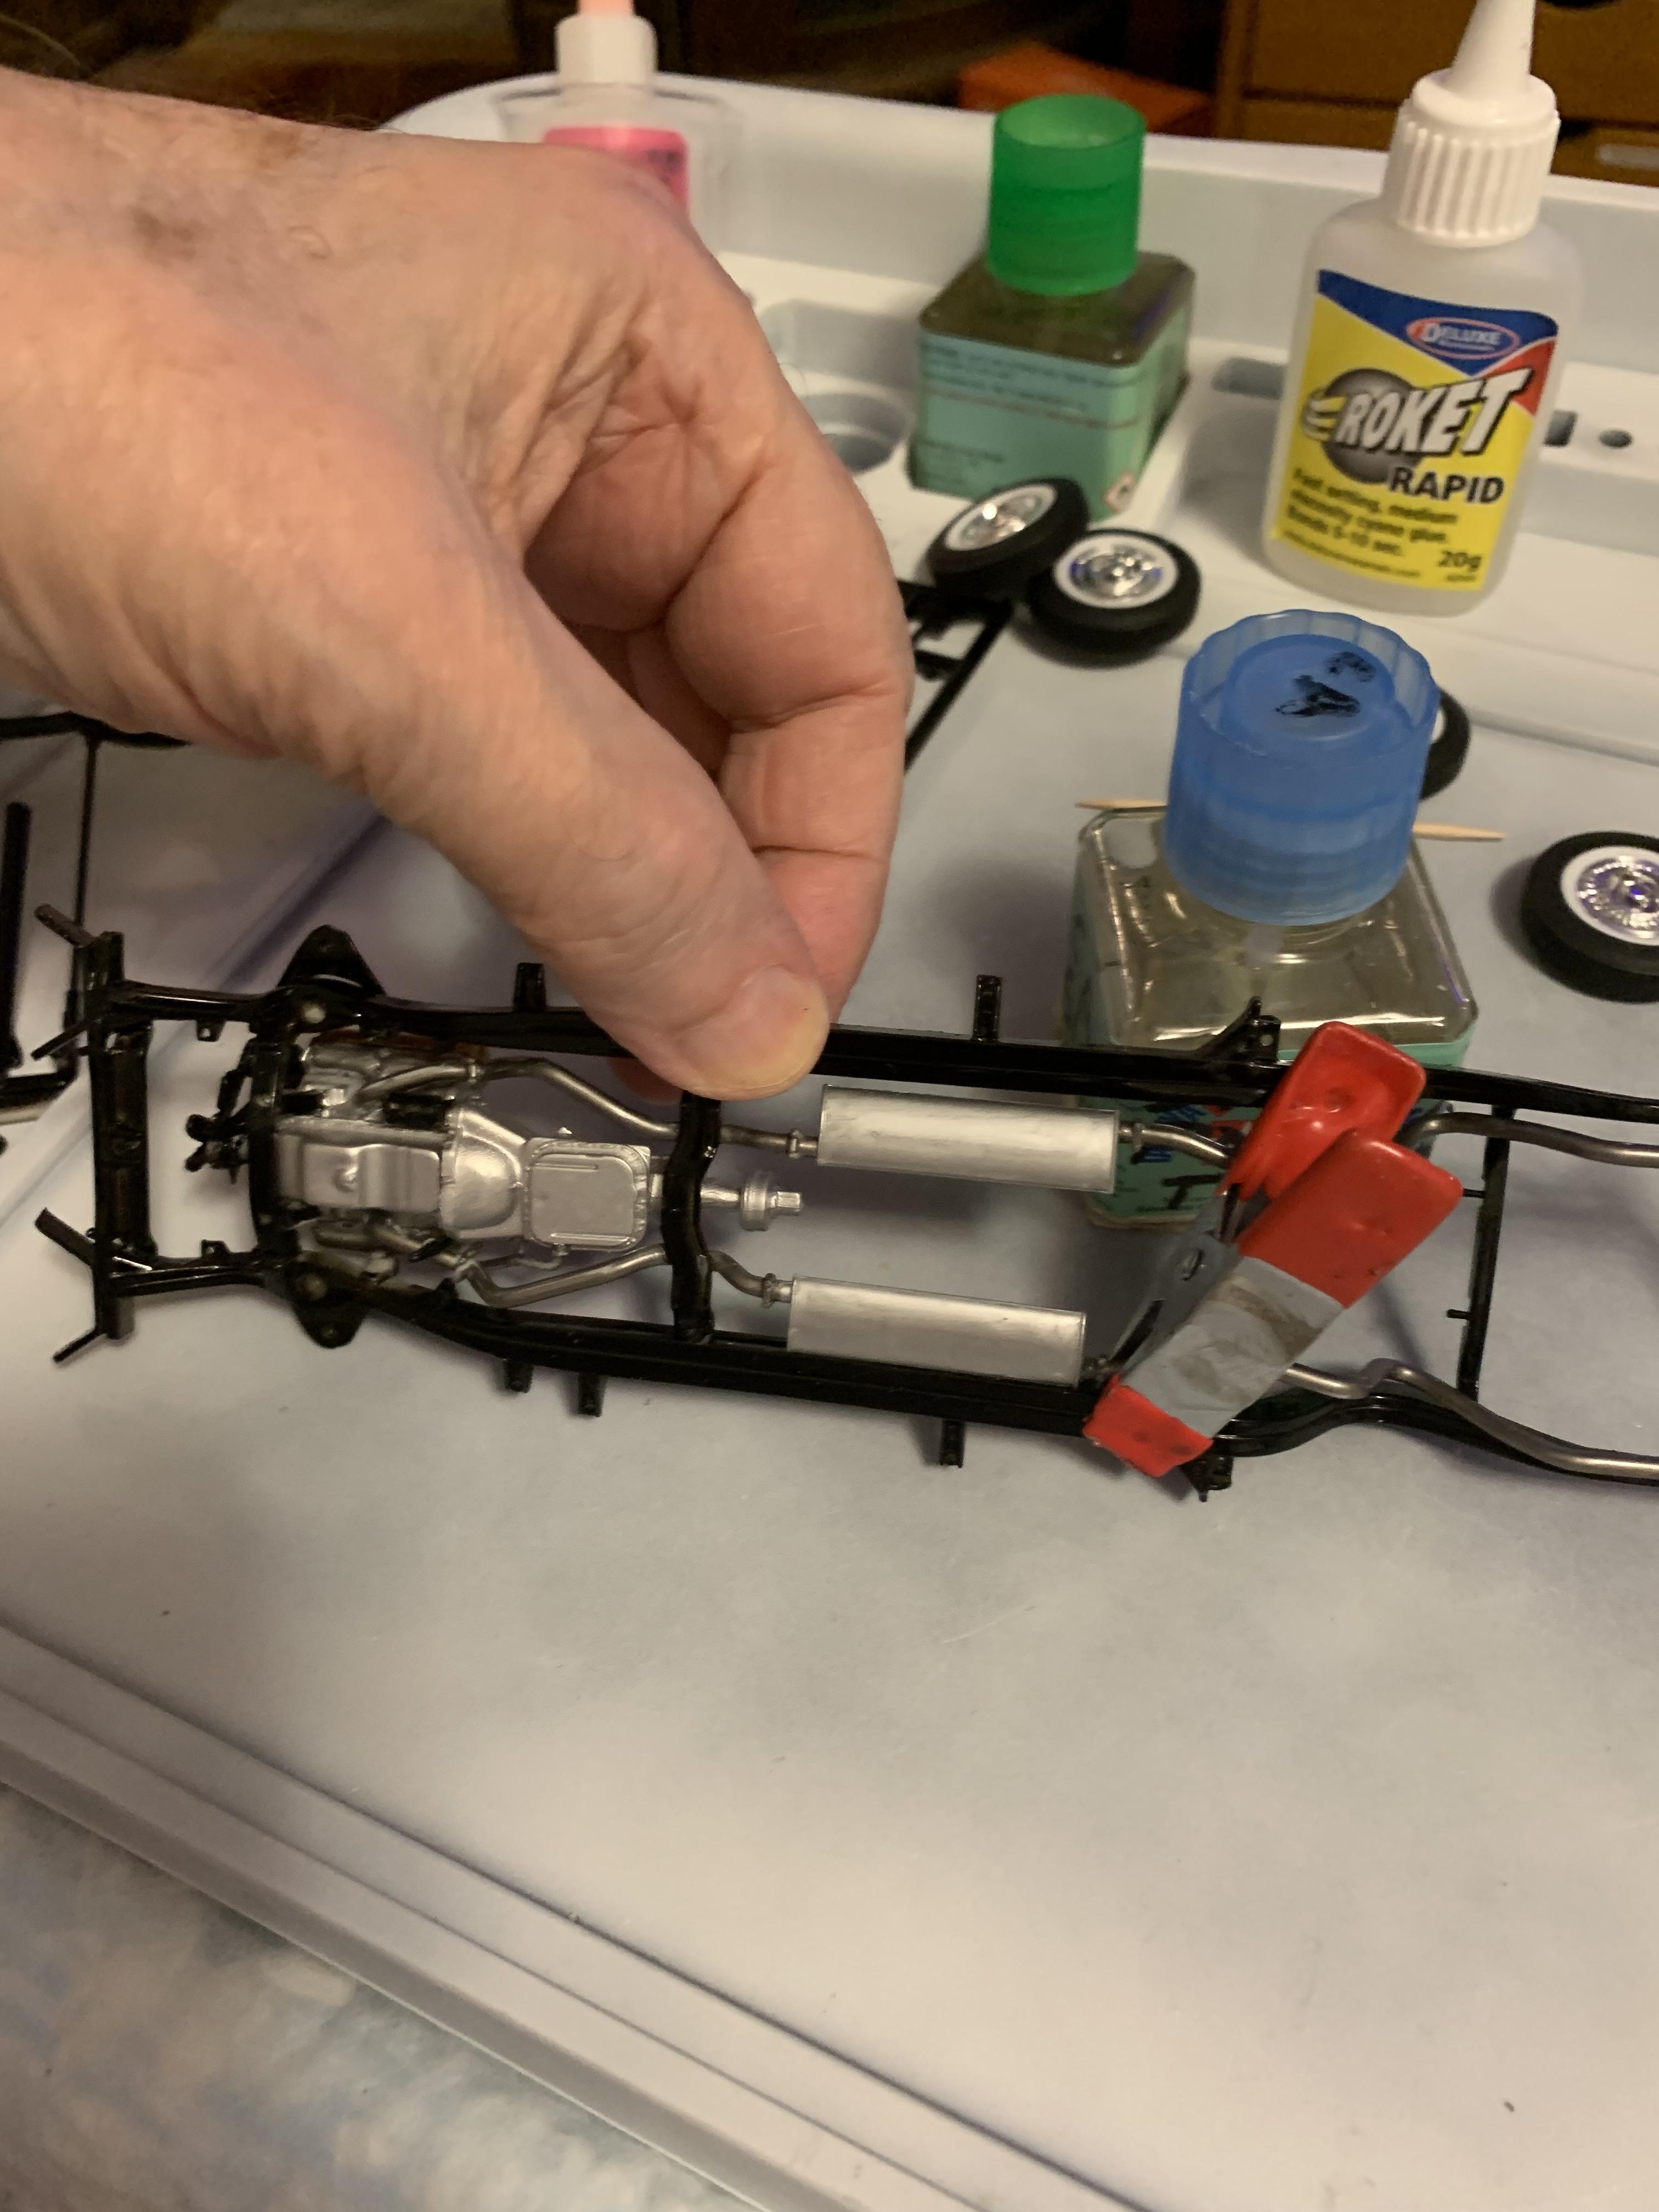
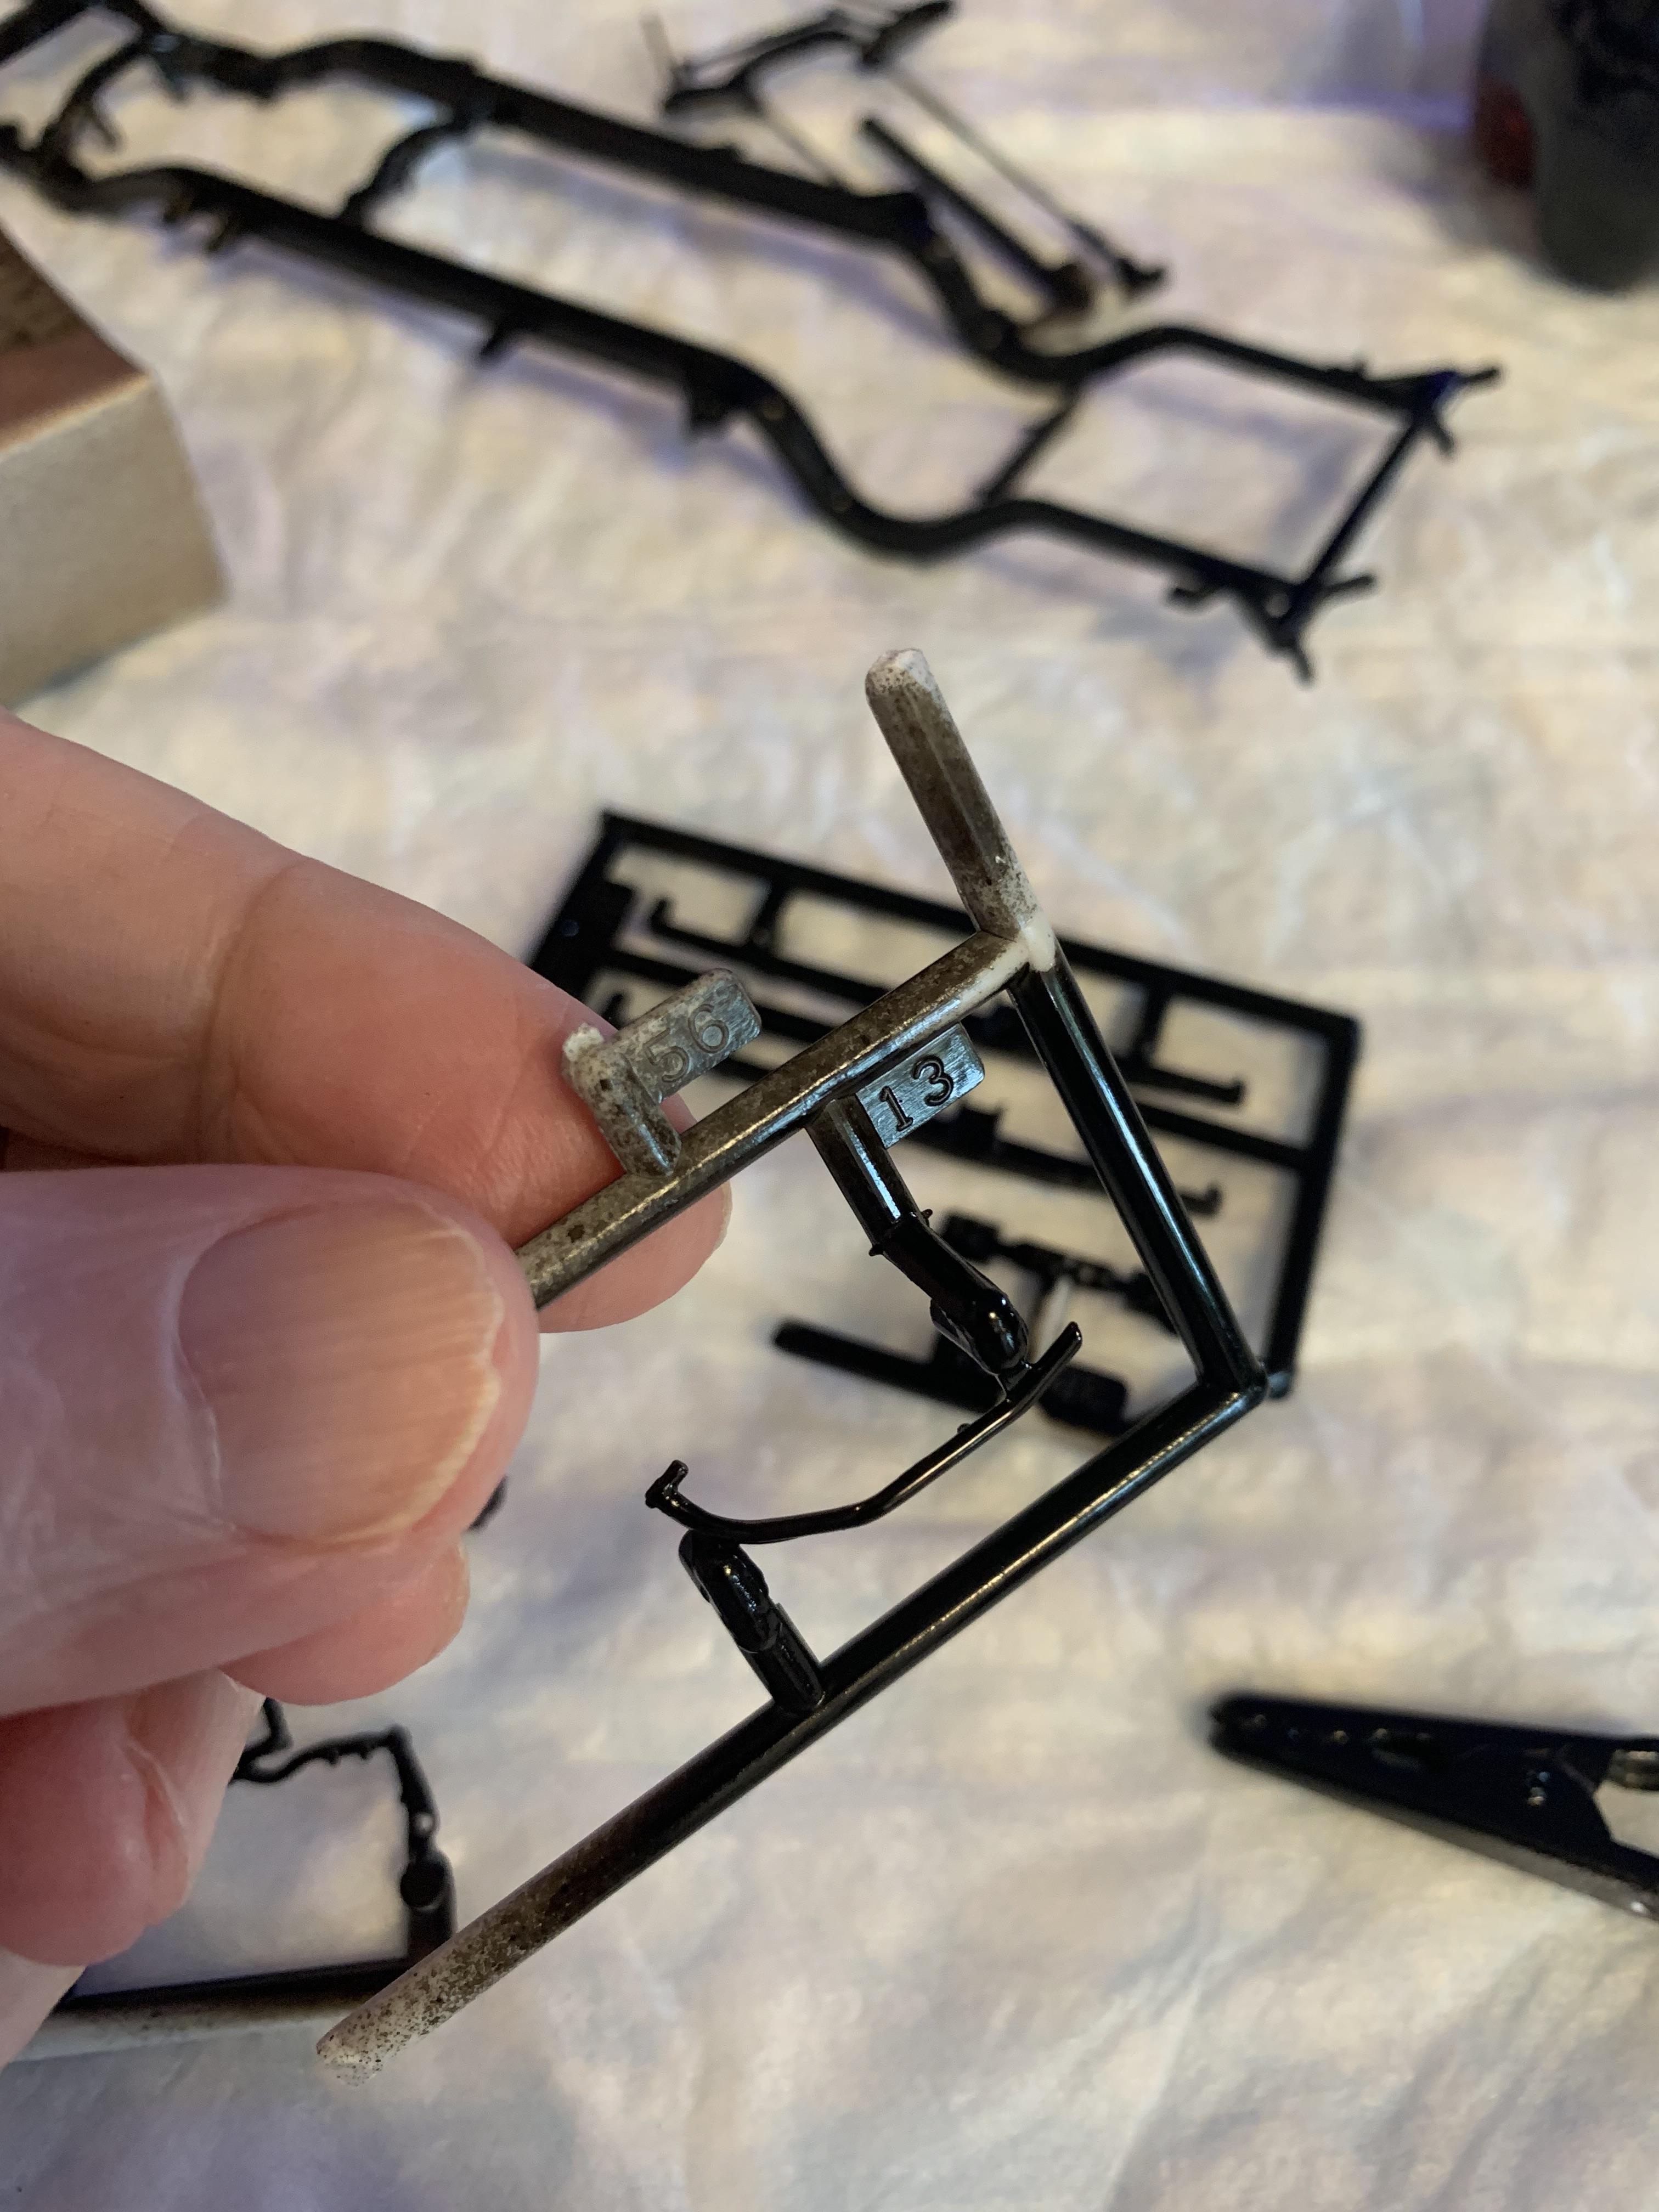
Slow going on this build, for some reason. Cut out a hunk of styrofoam after spilling my little kicker bottle. Tried to ca glue the front of the frame on, but came back 5 minutes later and it had come loose. Decided to remove the paint with some paint remover and q-tips. Then put regular cement on with a nice clamp I “borrowed “ from the kitchen. Will let it dry overnight. So, decided to install the rear tailights and bumper. After installing, I noticed the clamping of the front end had dropped the rear frame down away from the bumper. Grrr. Took them off and put ca glue on with a nice big clamp. Yes, I realize the poor fit of the chassis is due to the windshields being too thick. Hopefully, that issue can be circumvented with the clamps and glue. Time to quit for the day.
-
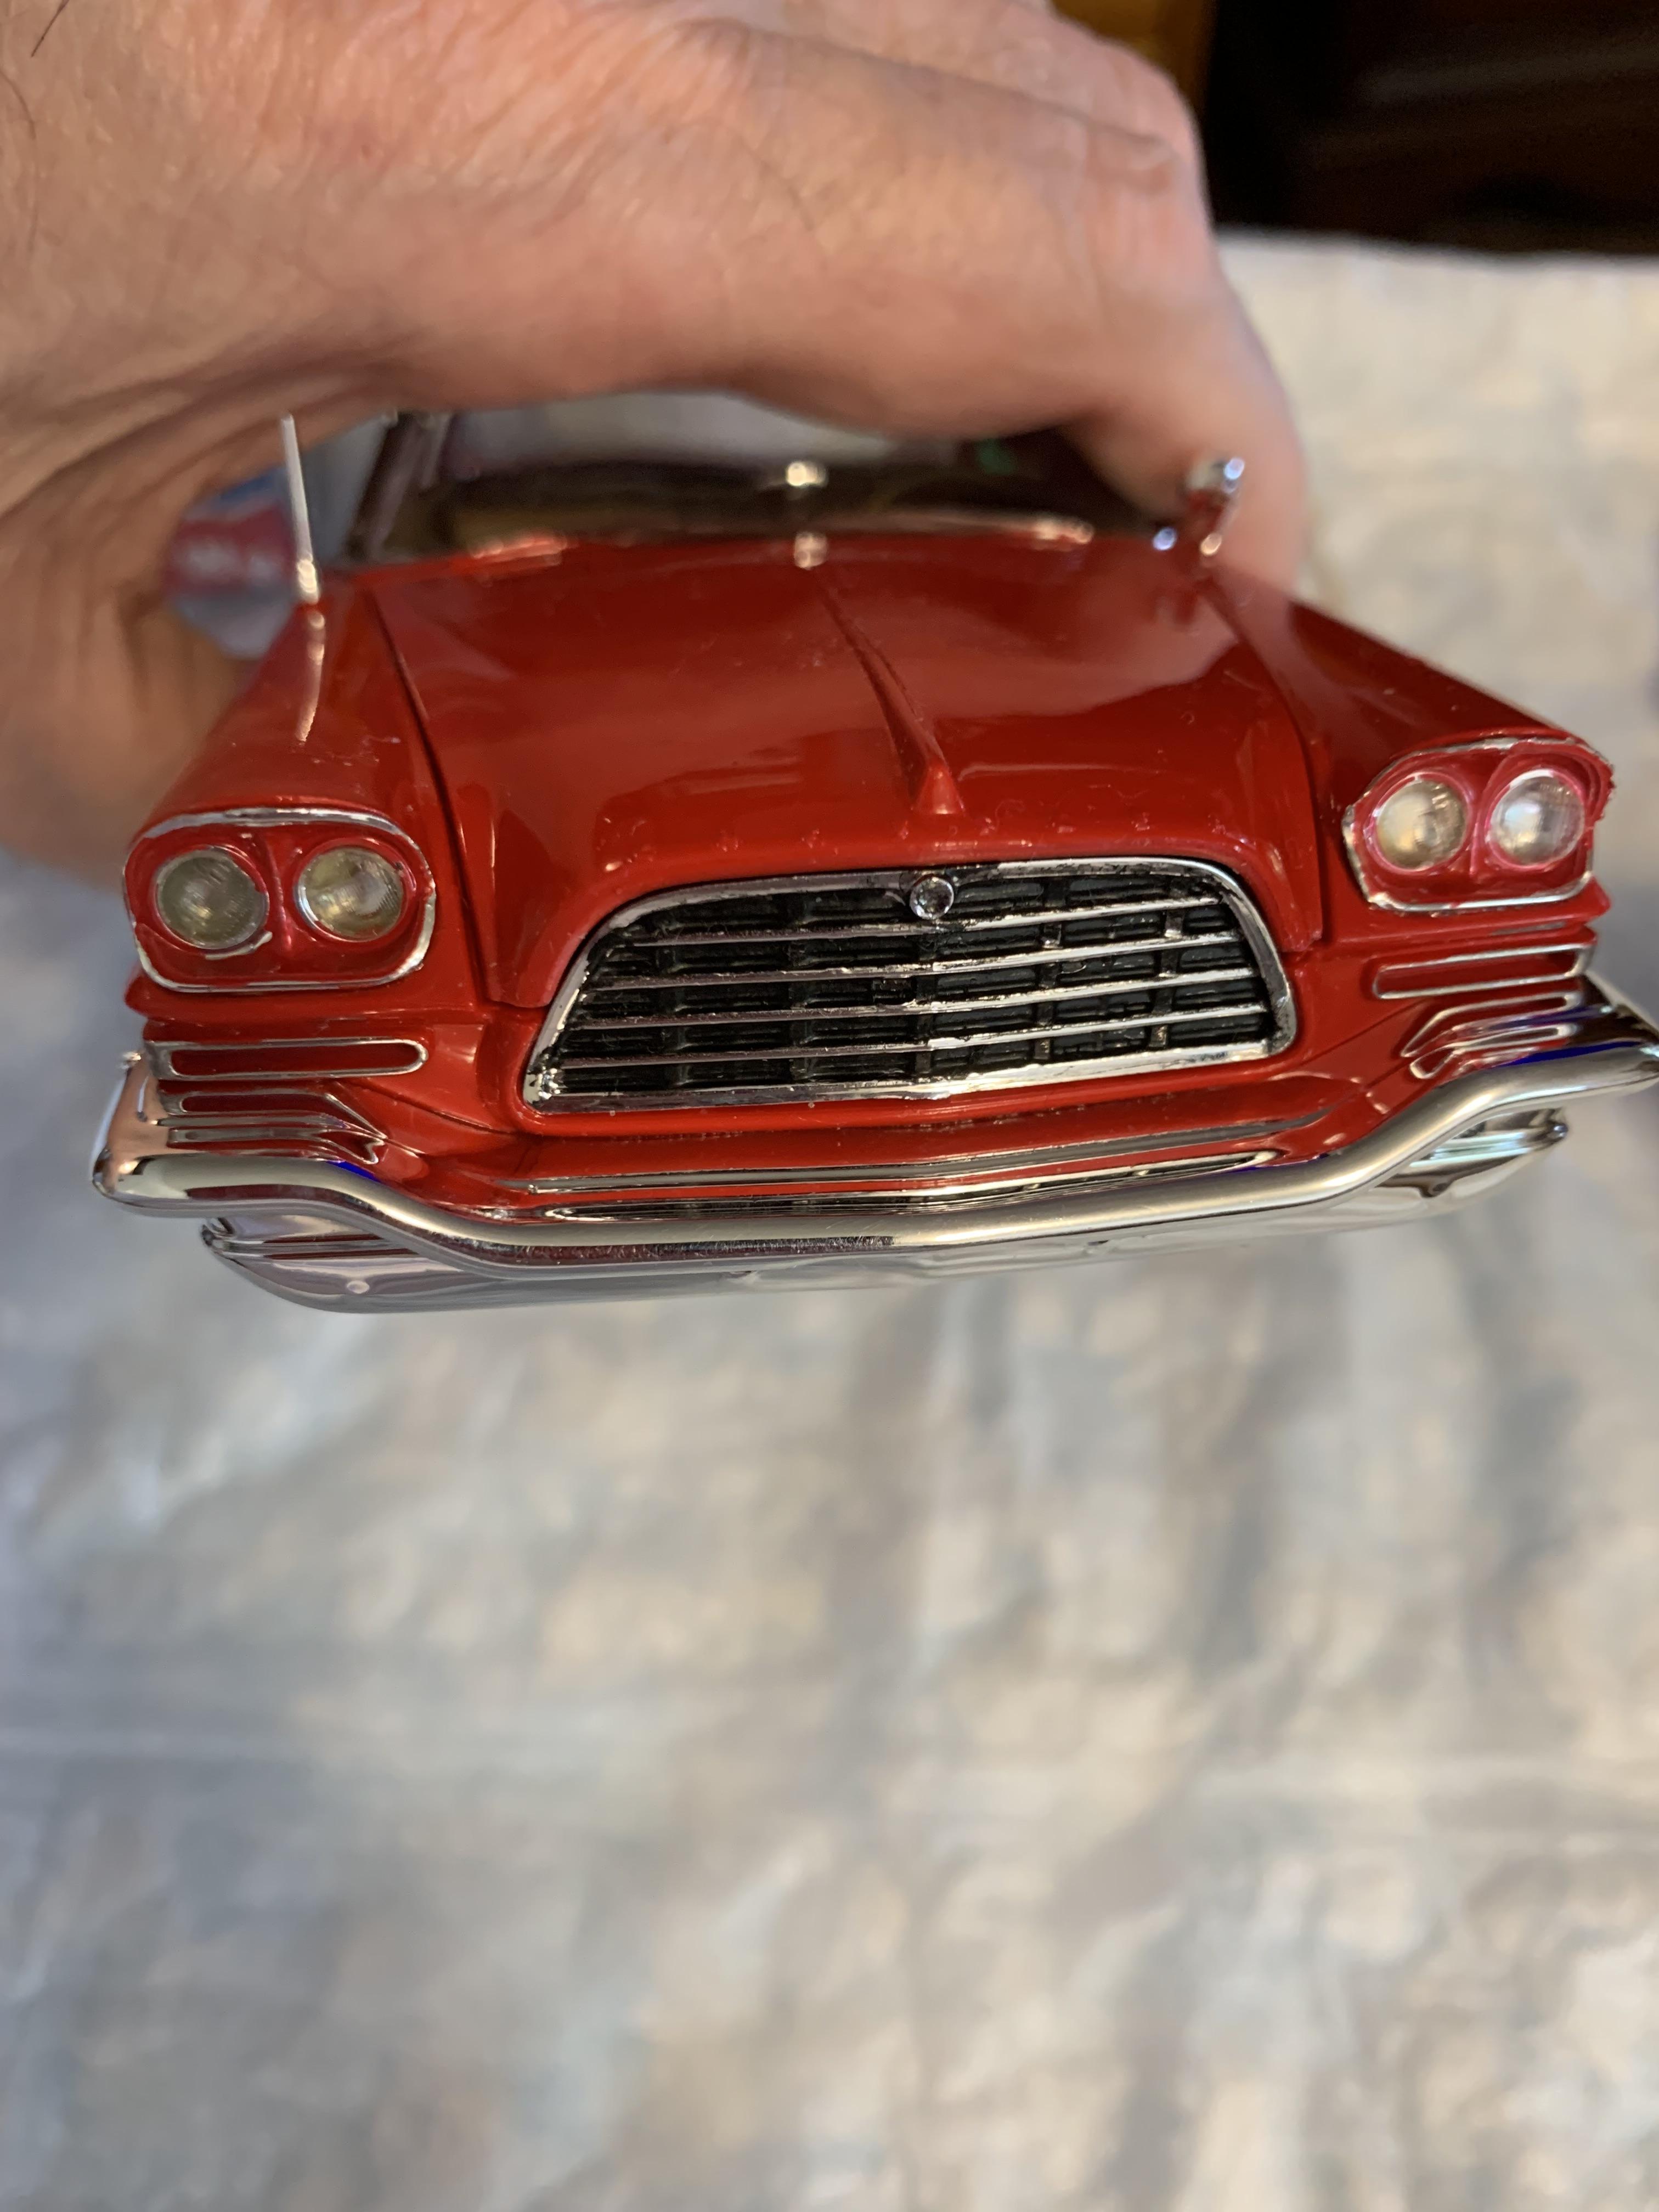
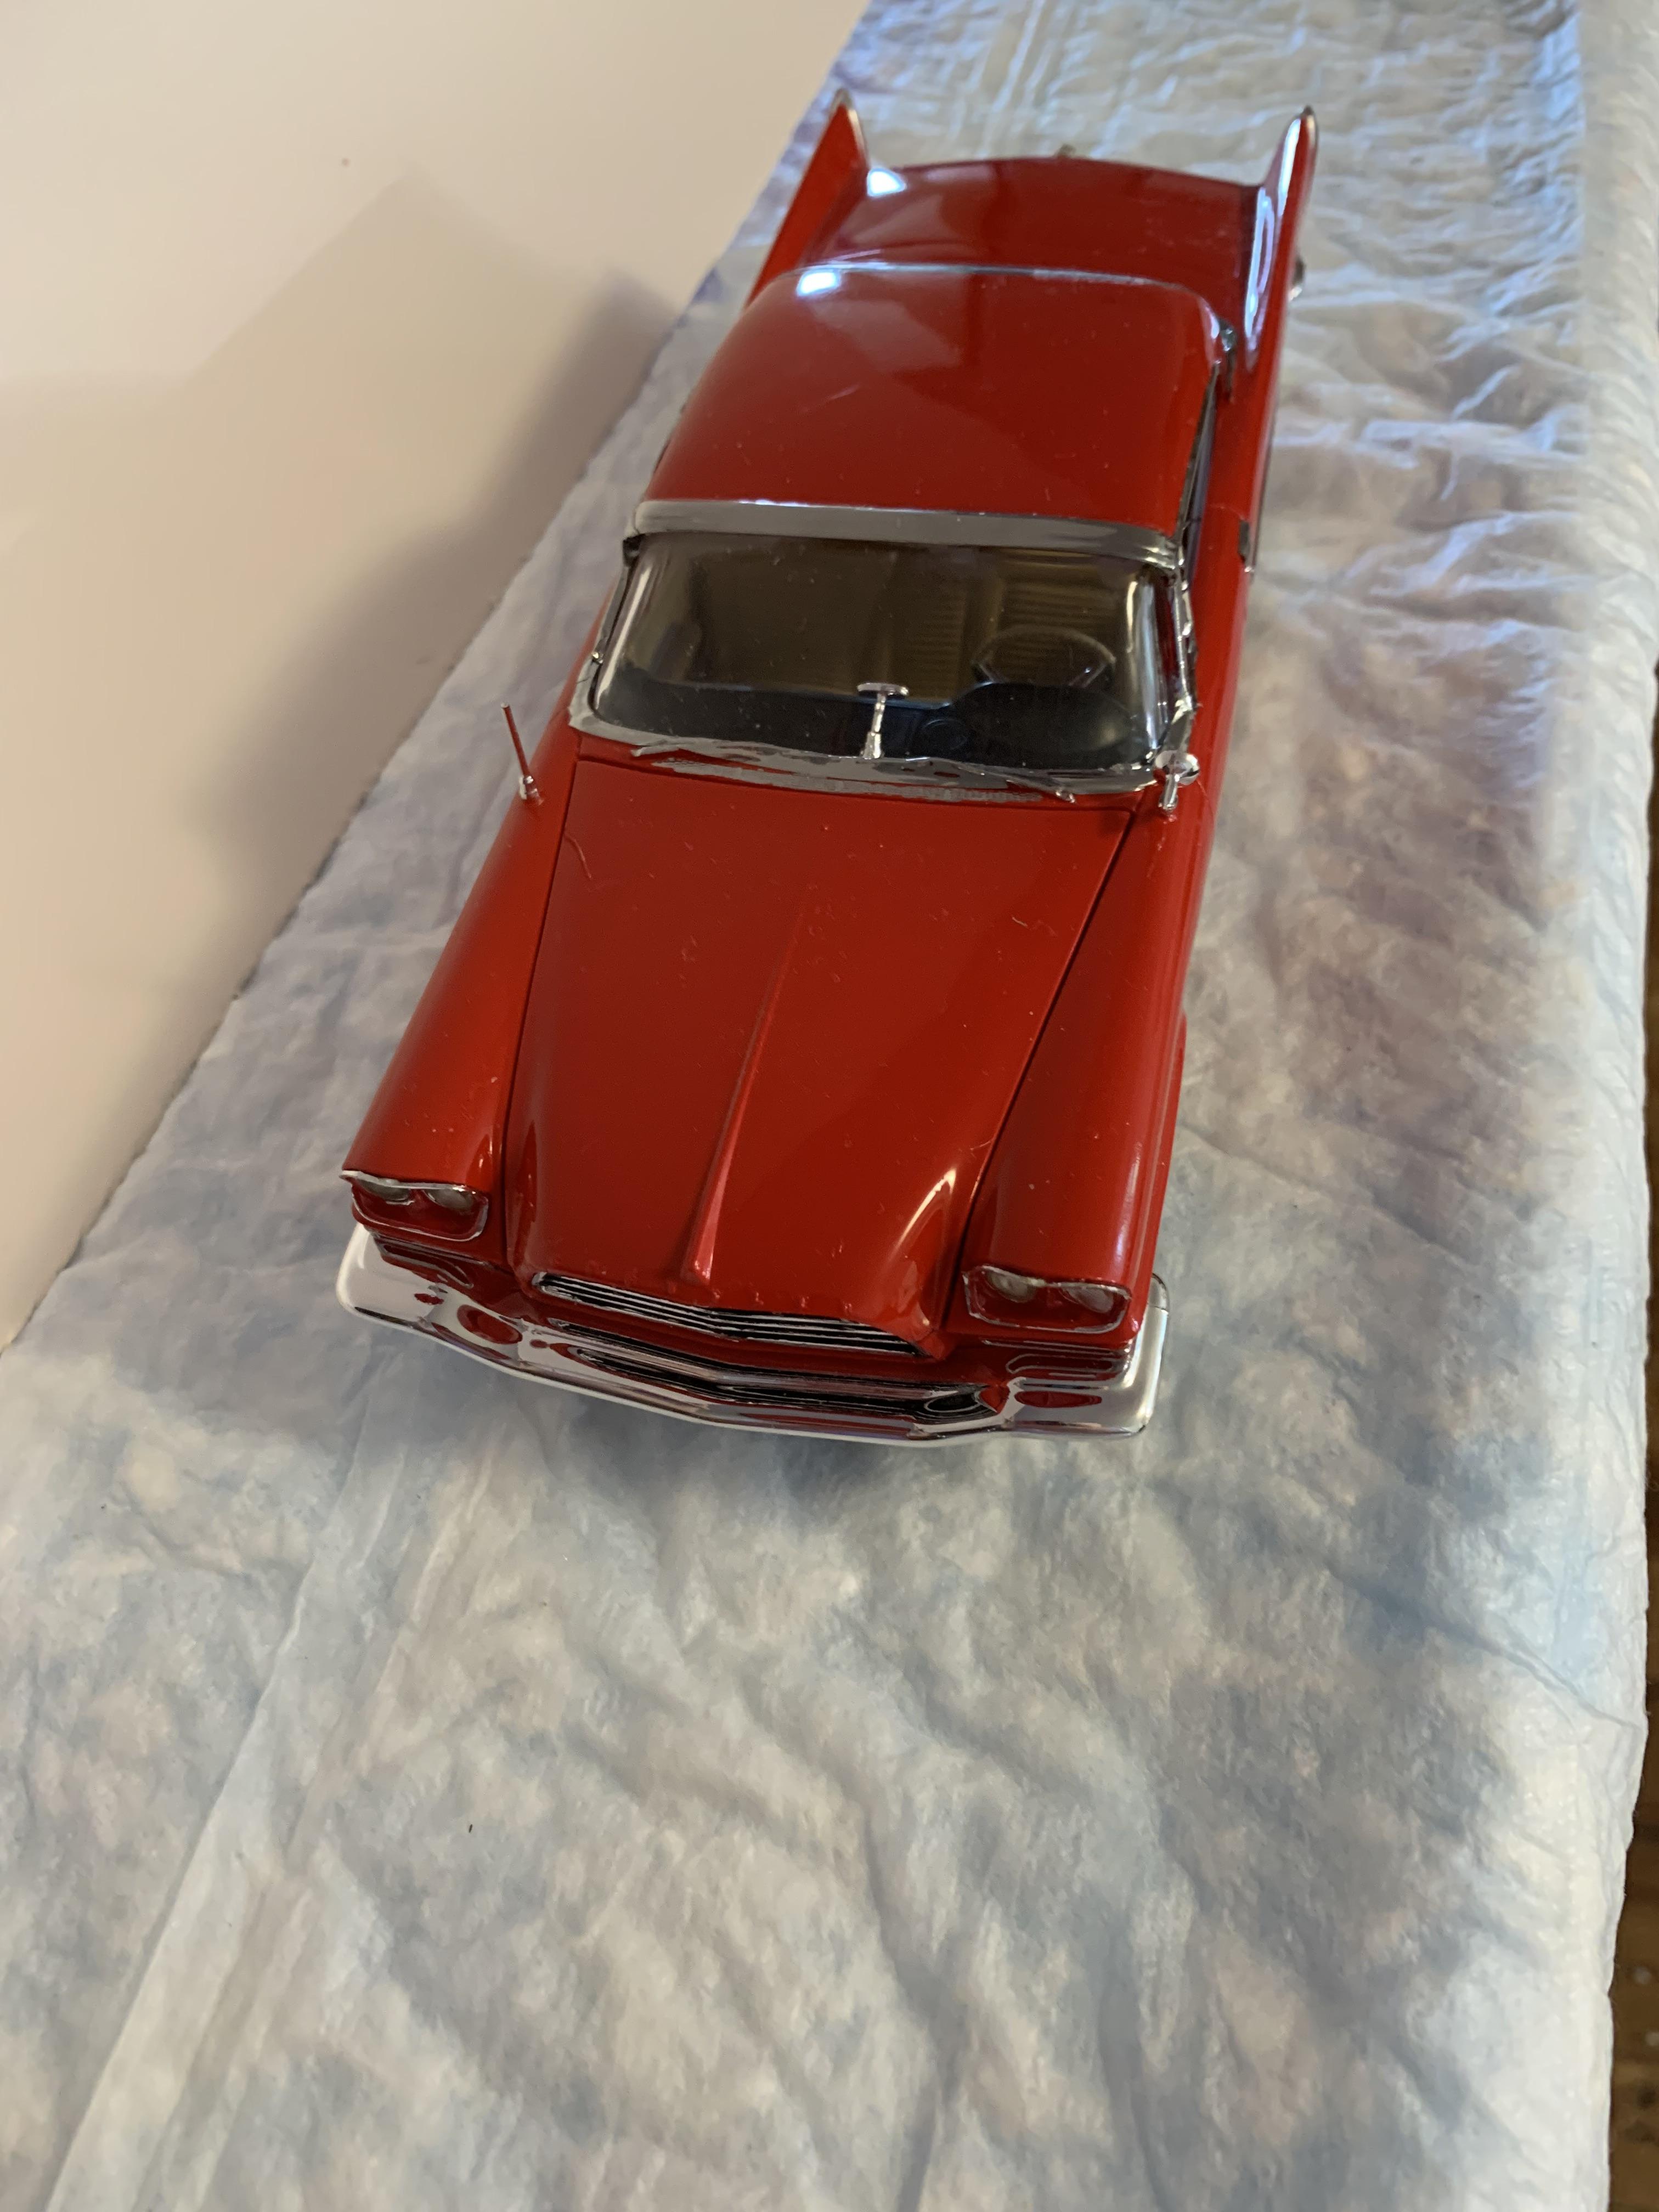
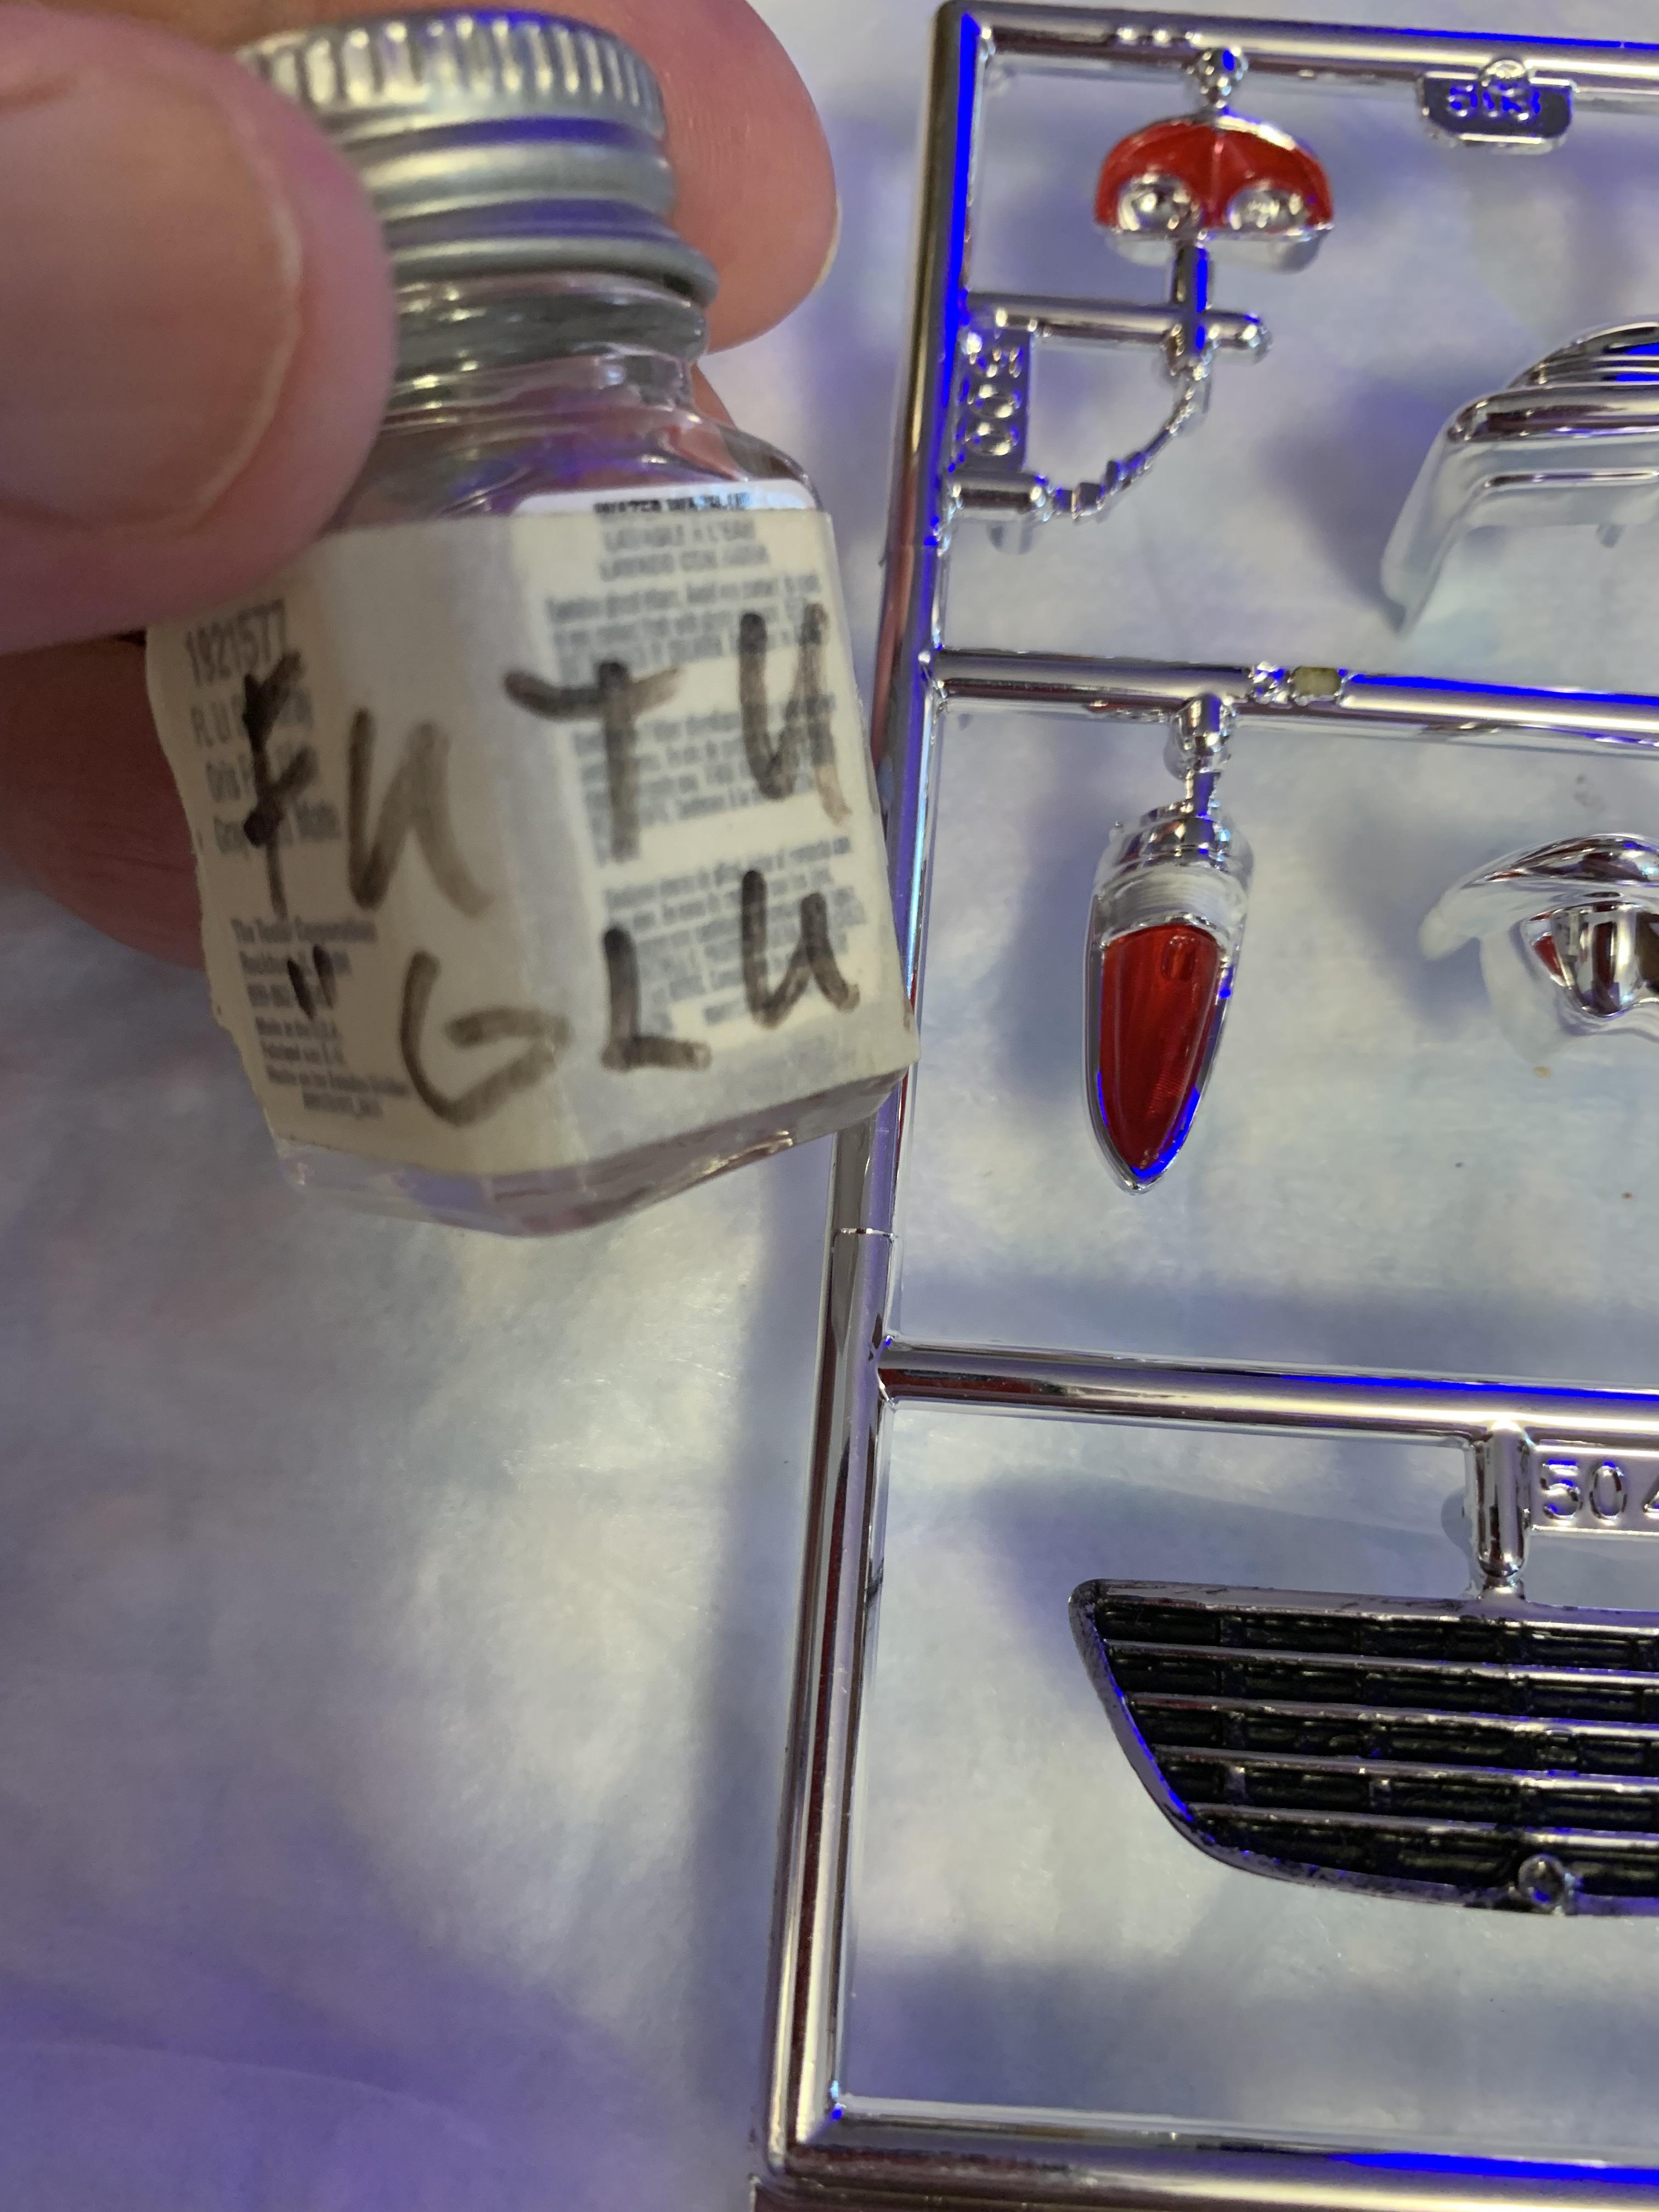
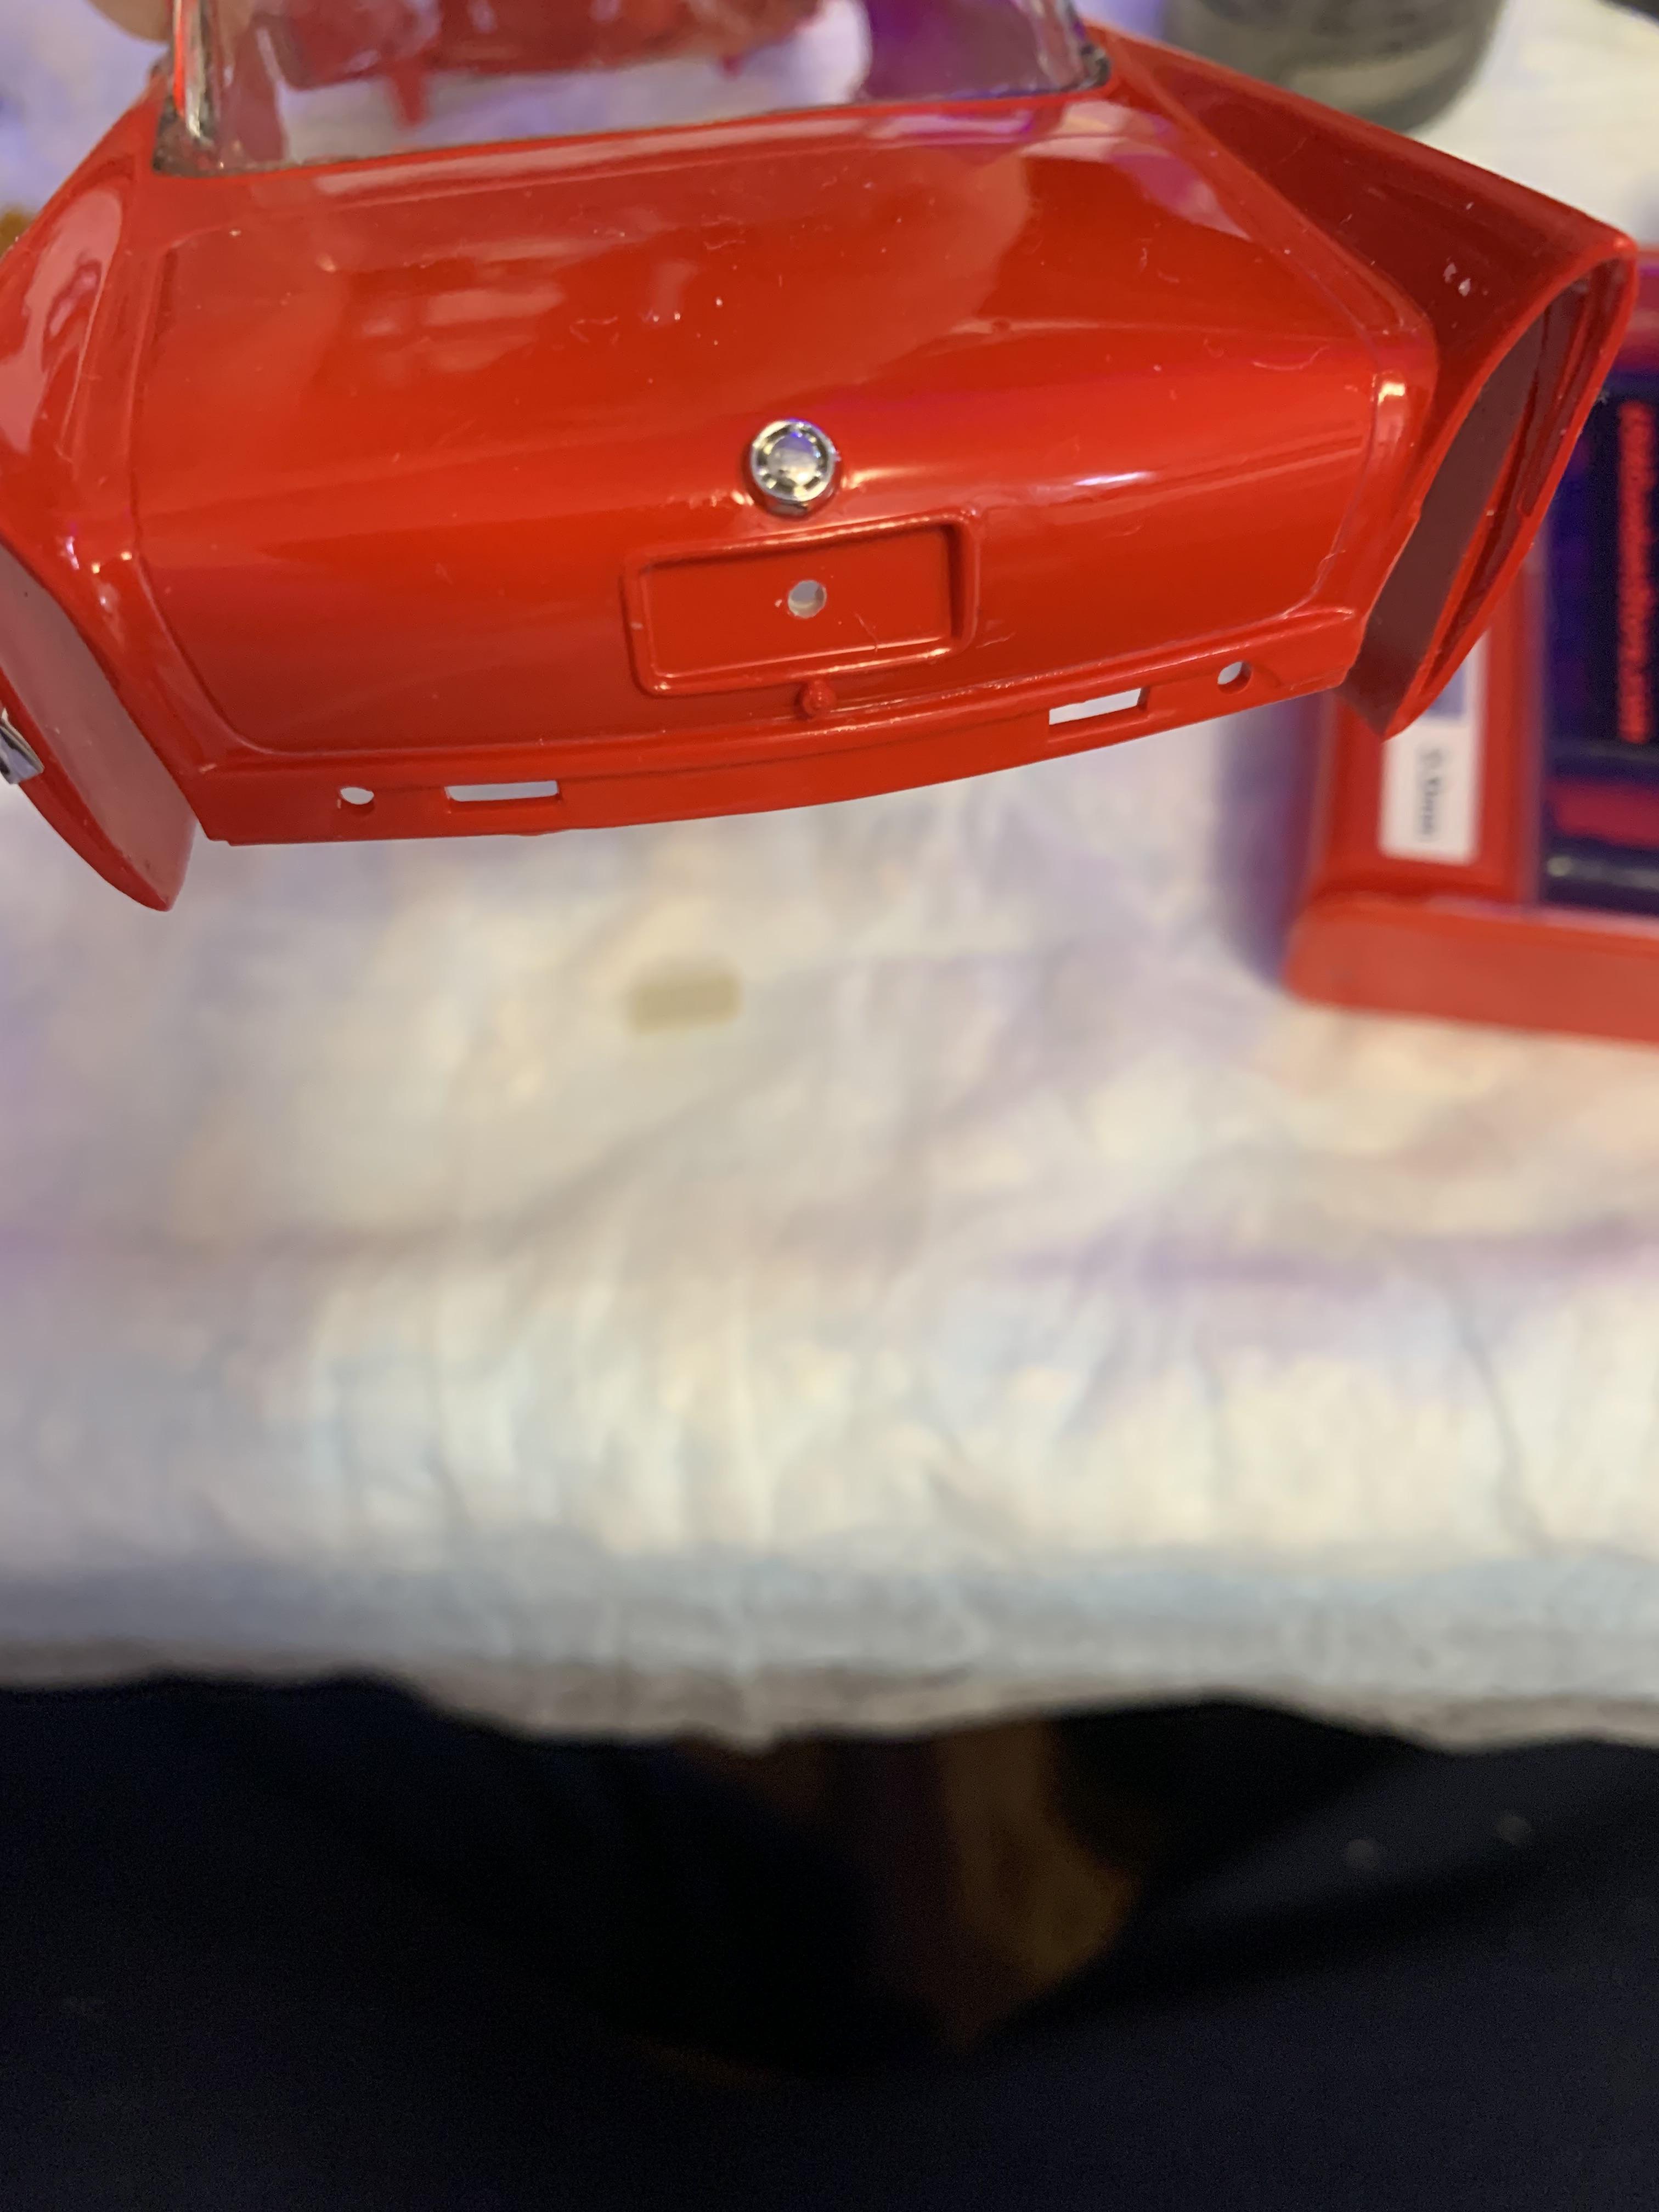
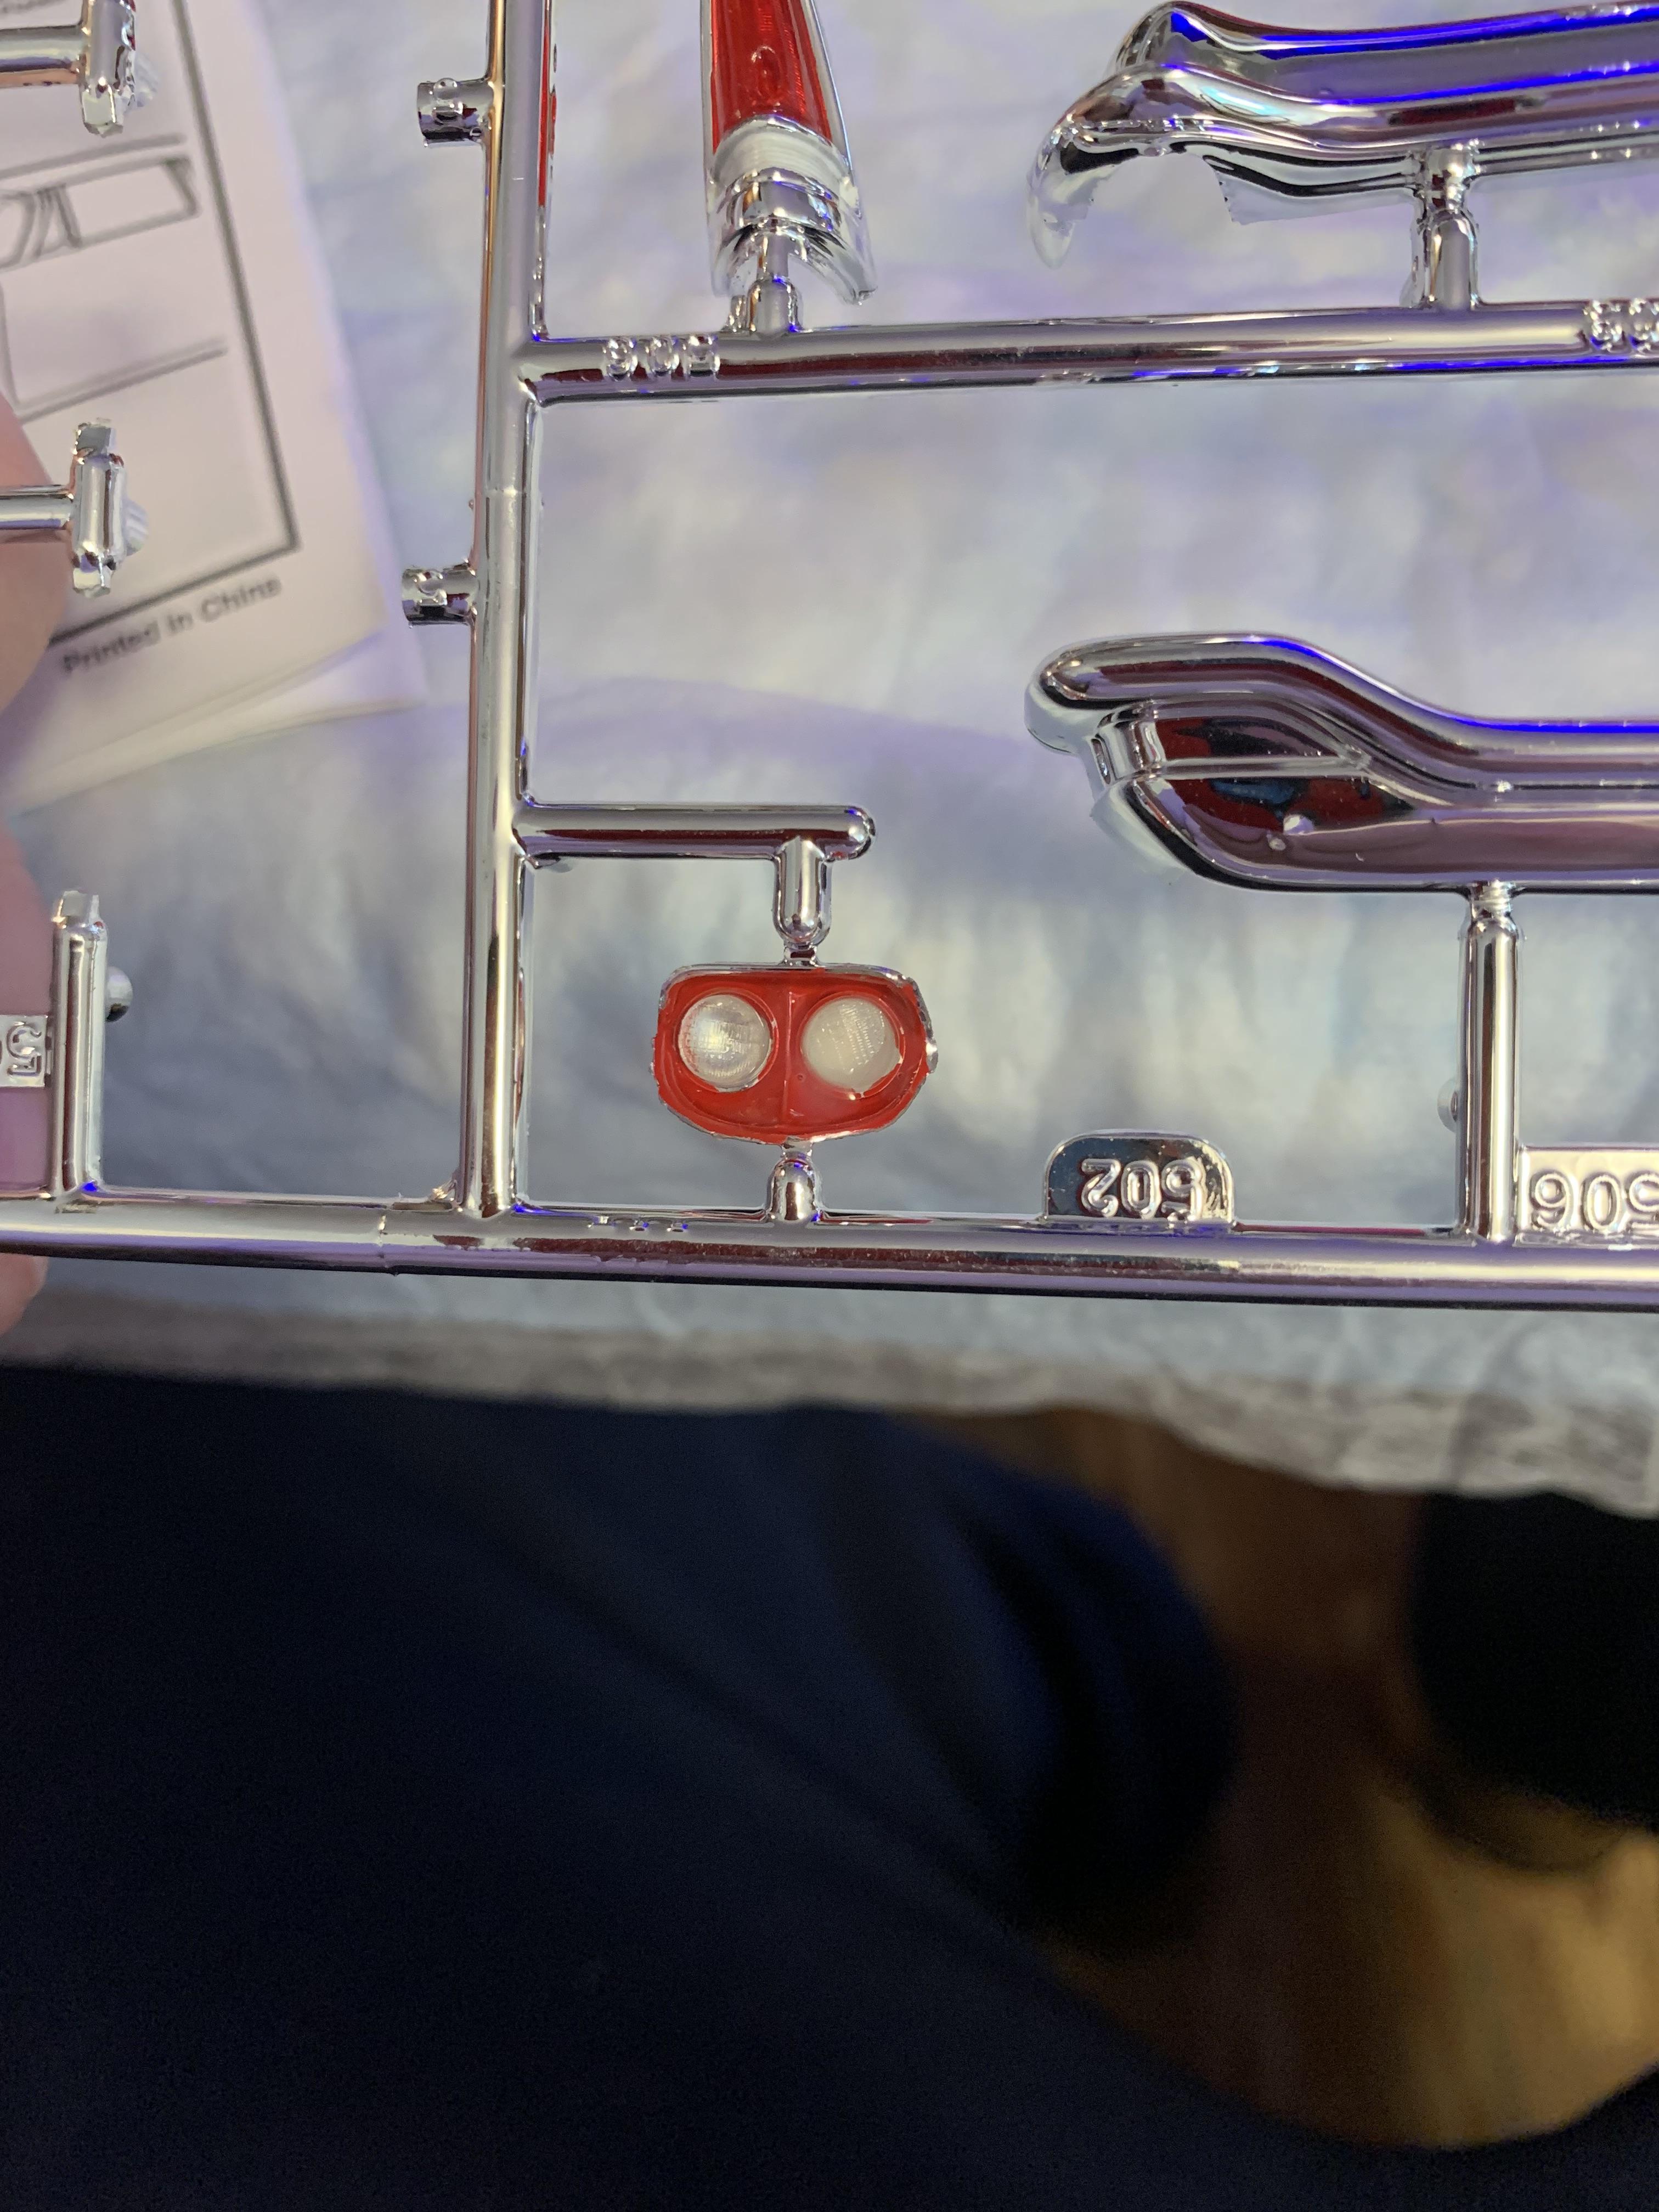
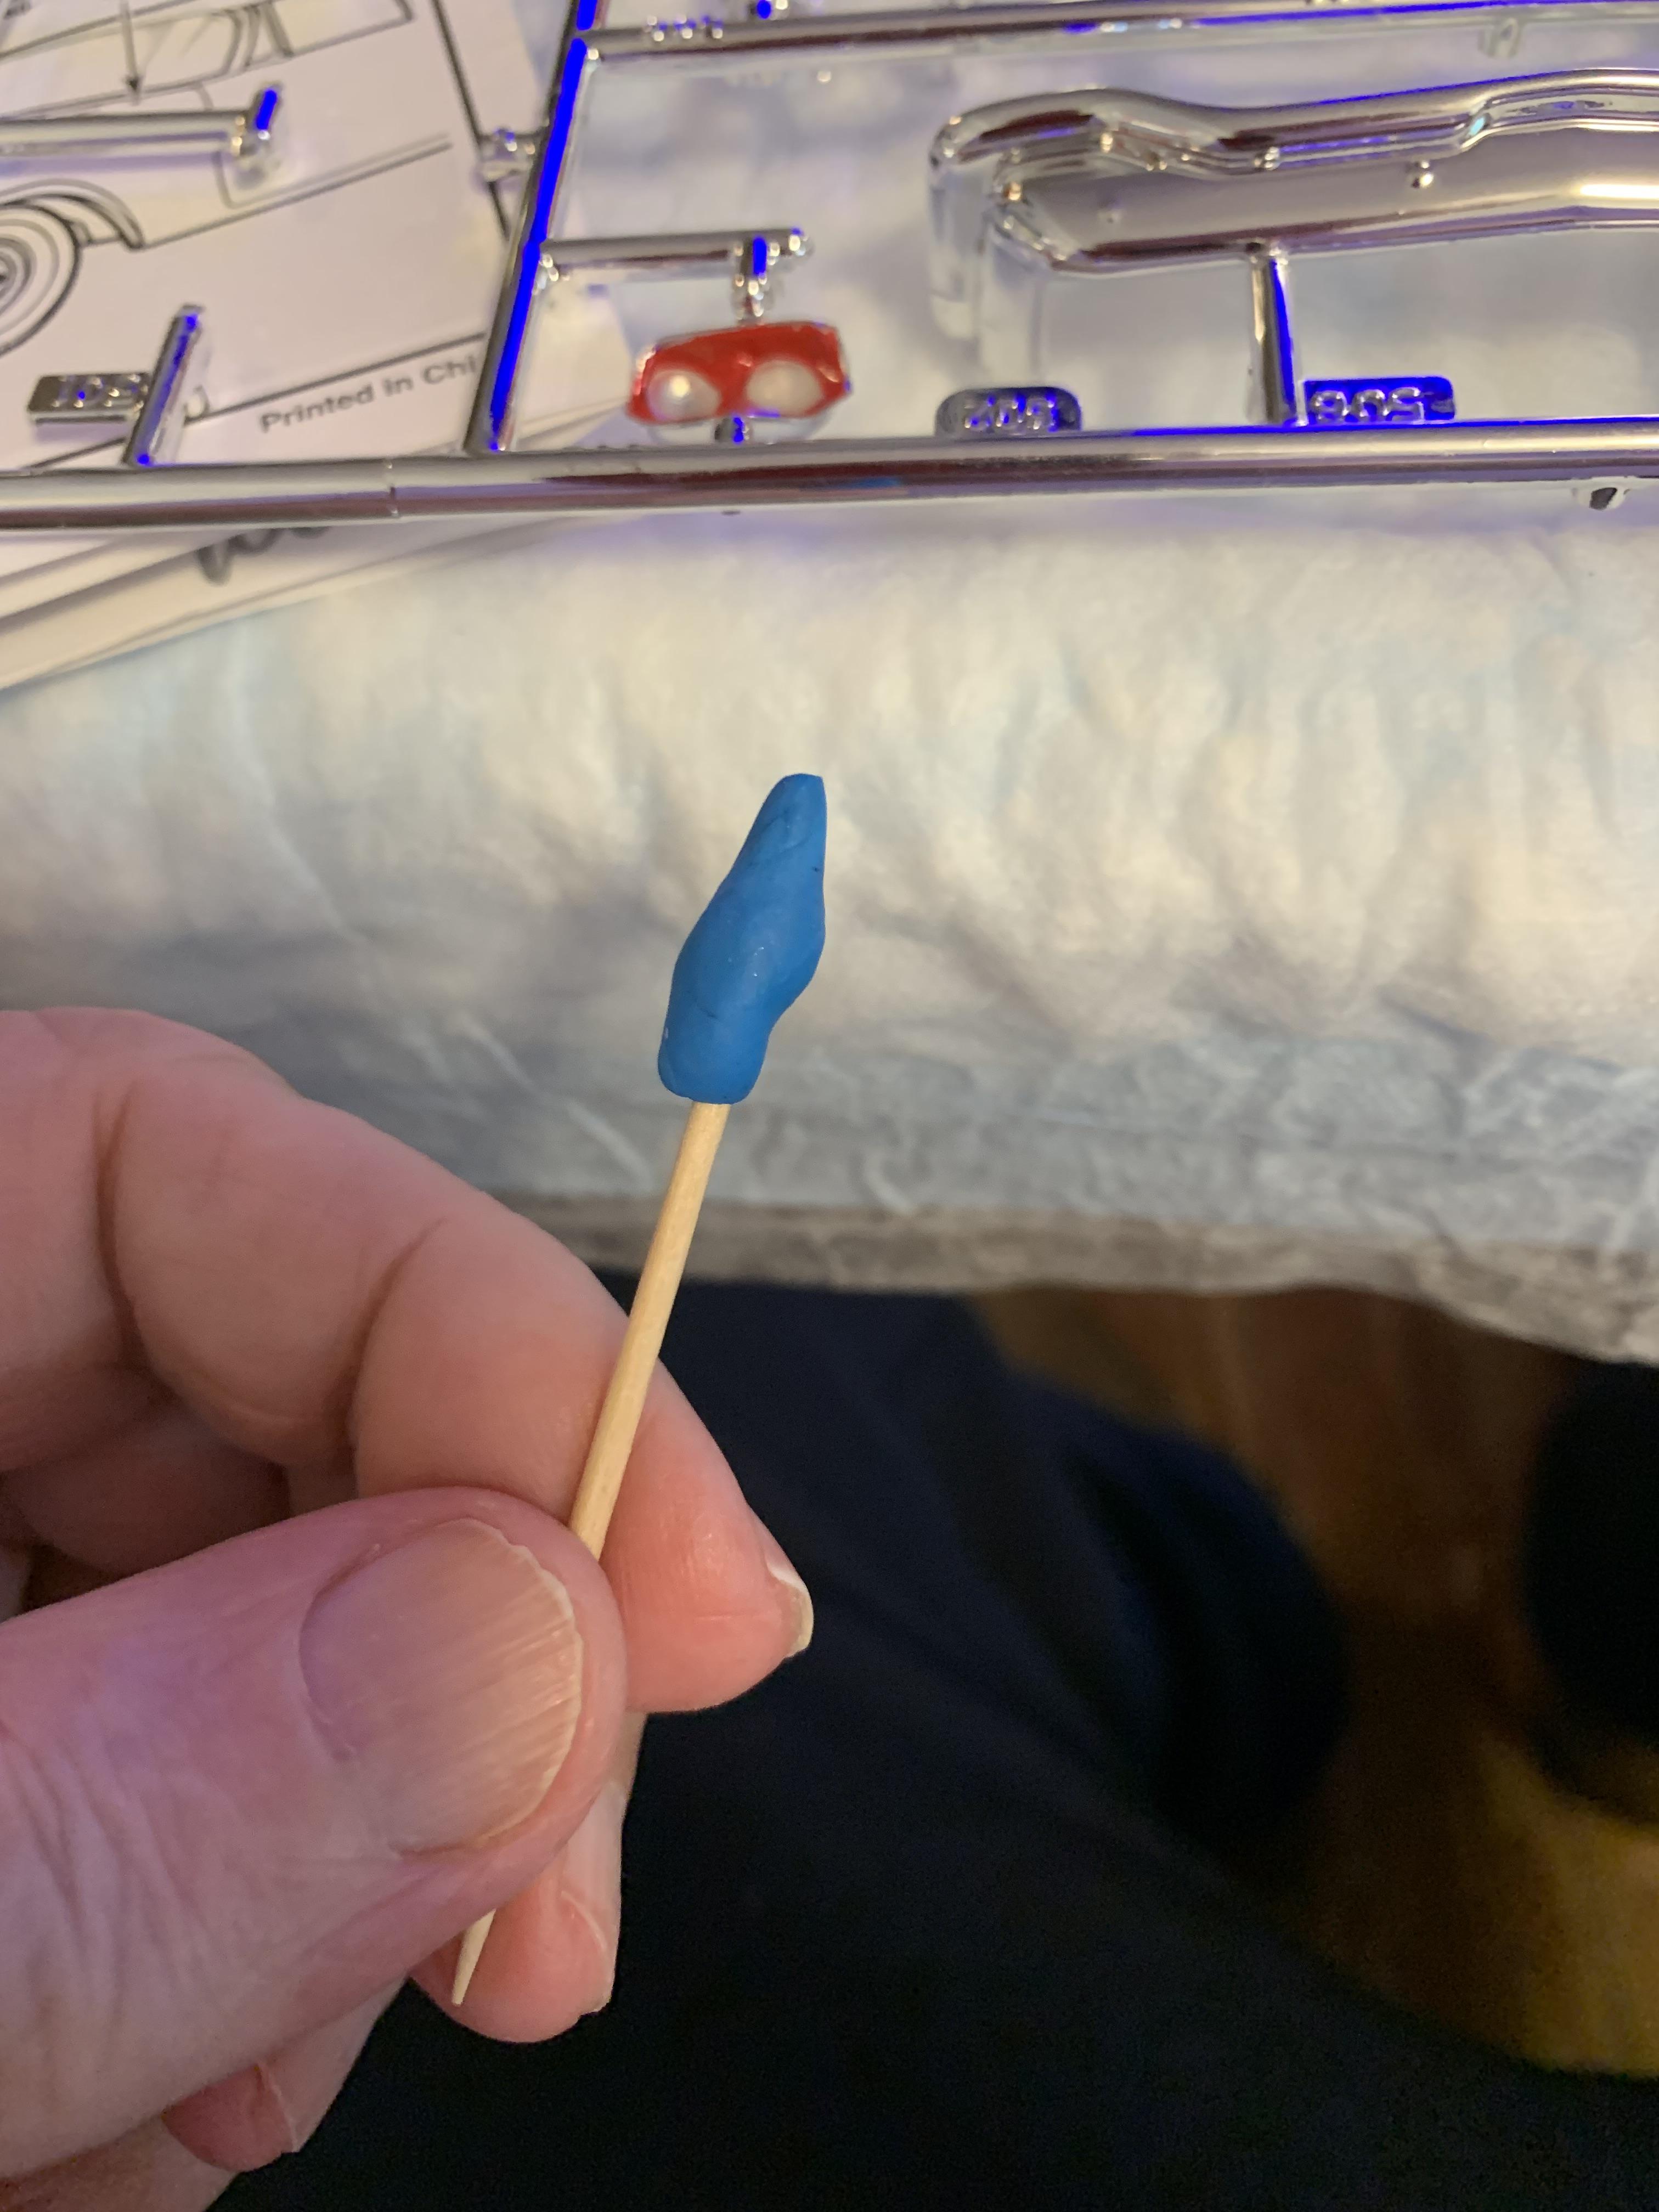
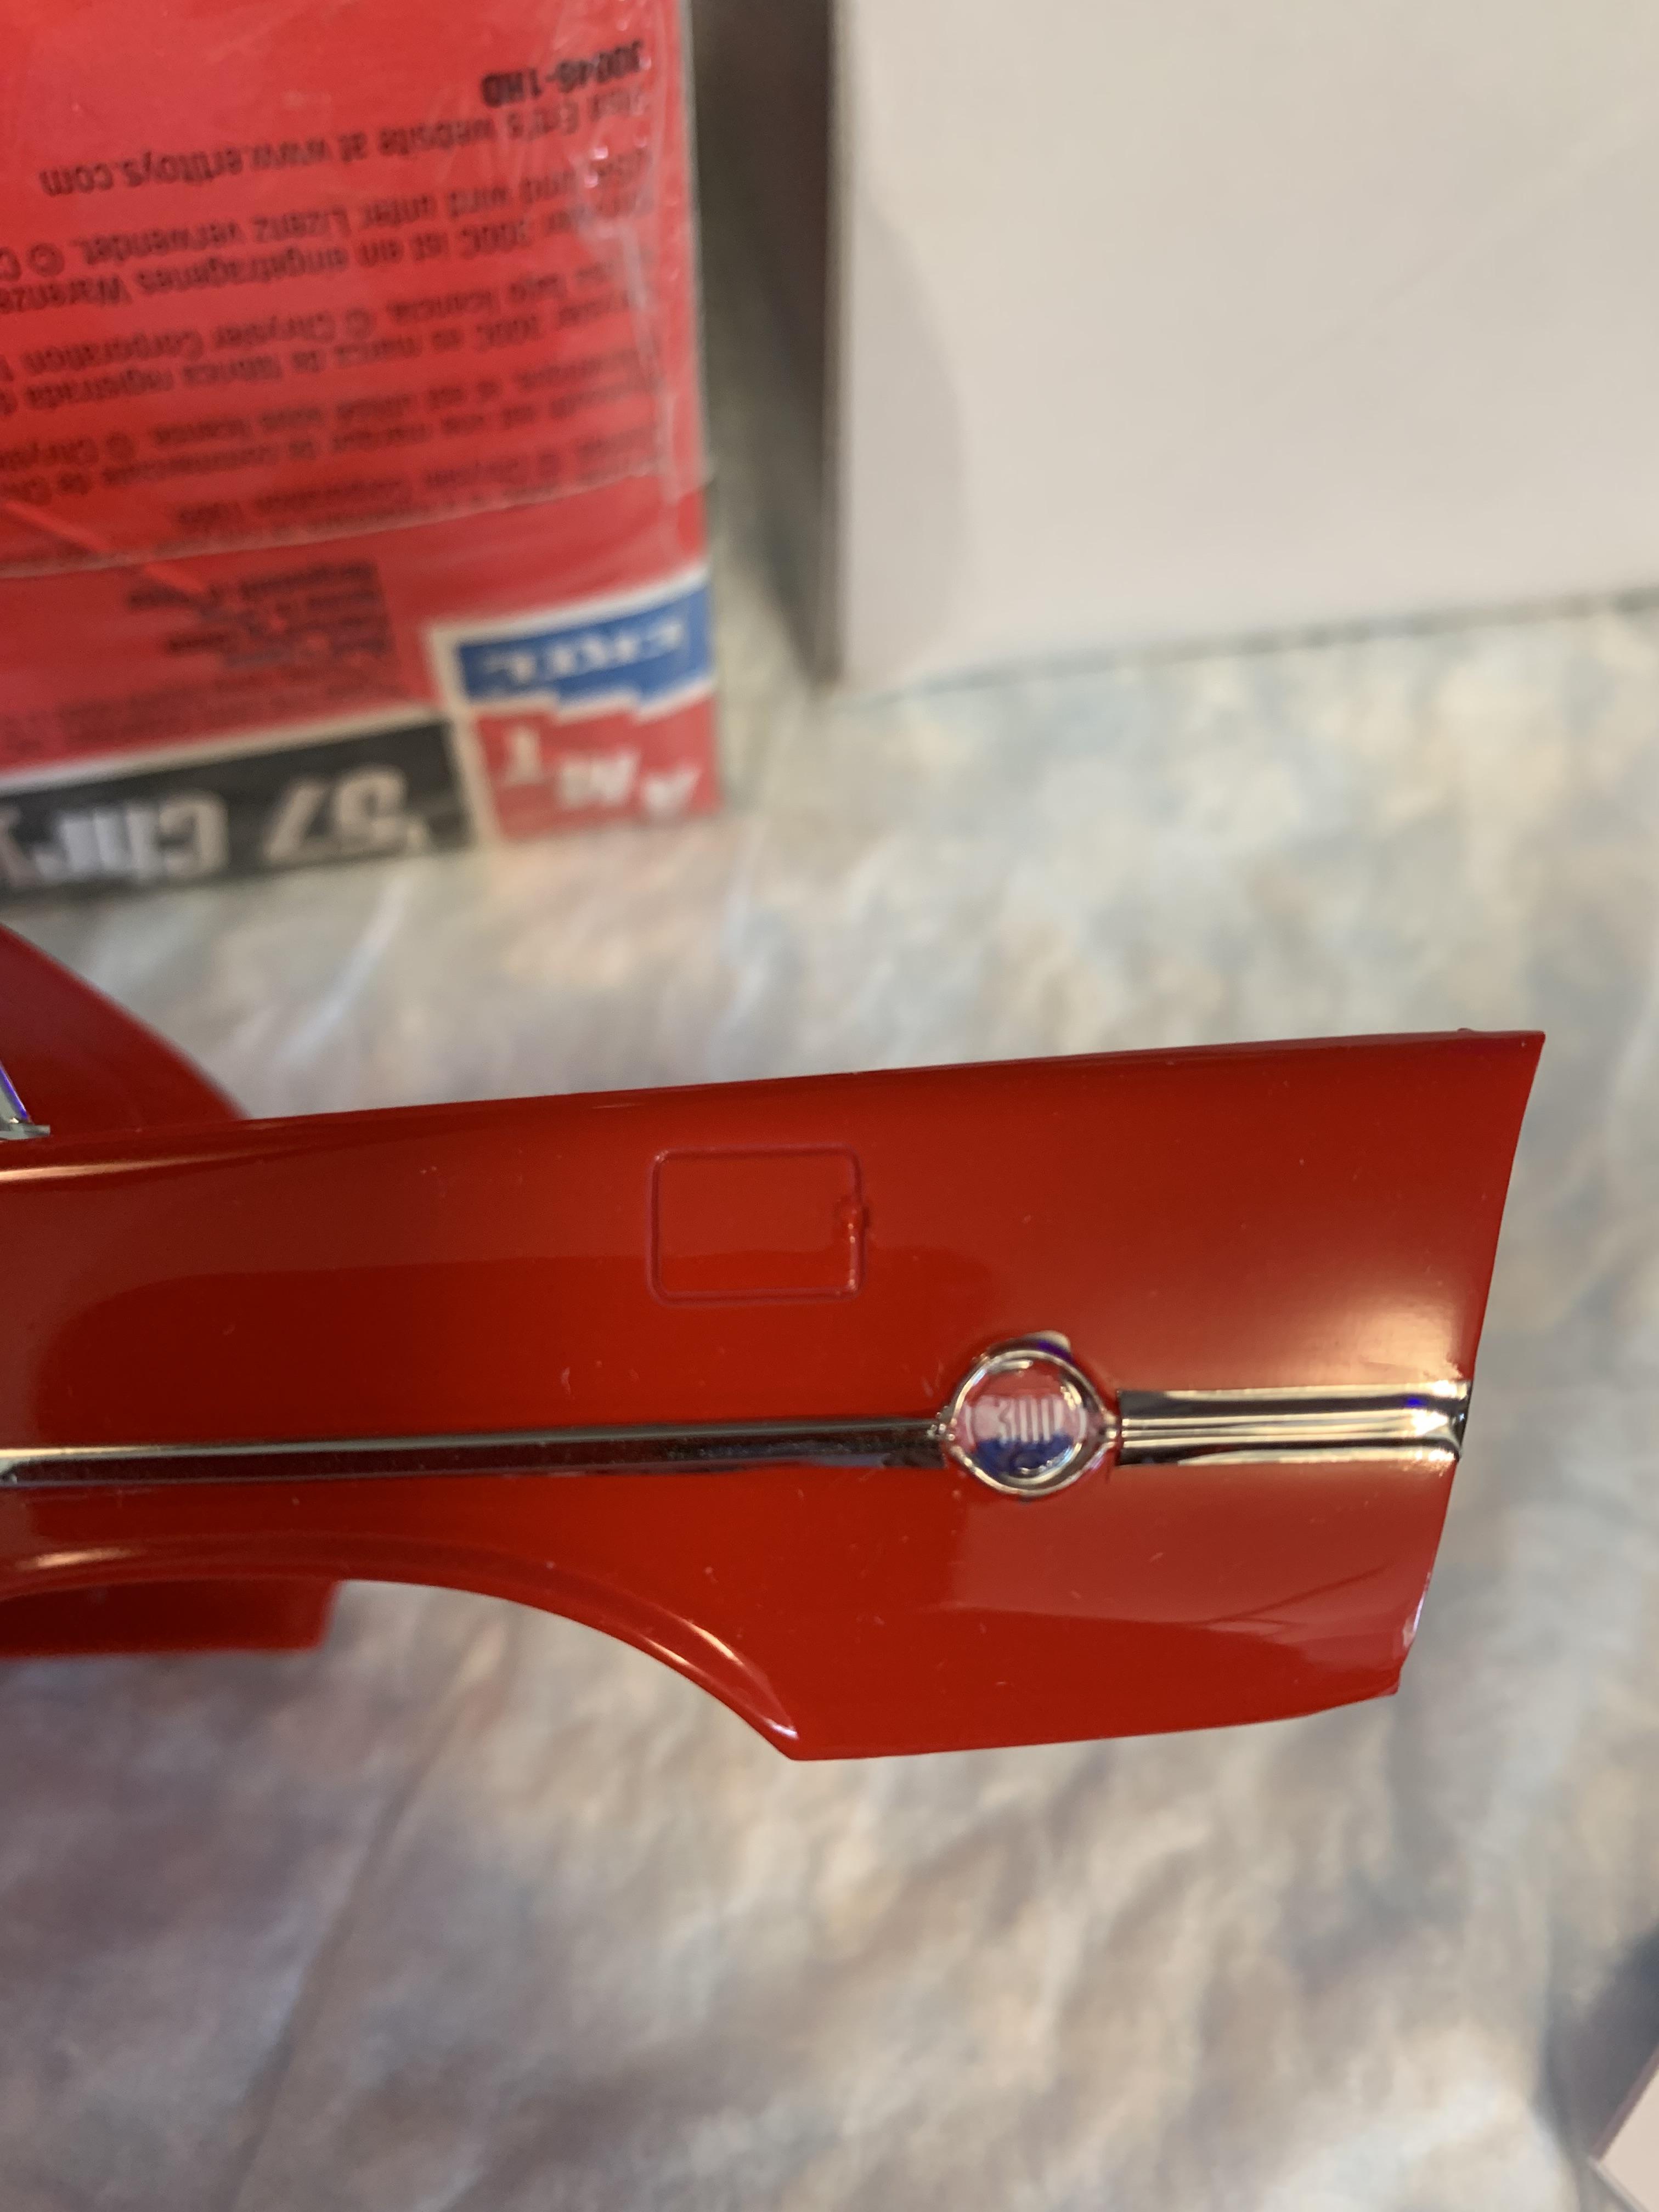
Decided to use some thickened Future floor polish that I had made 5 or 6 years ago. I had forgotten about it. It was almost too thick because it was old, but it worked quite well. Mounted trunk emblem, headlight and tailight lenses with it and a toothpick. This is the high tech tool I used to install the headlight lenses (broken toothpick with funtac installed on end).
-
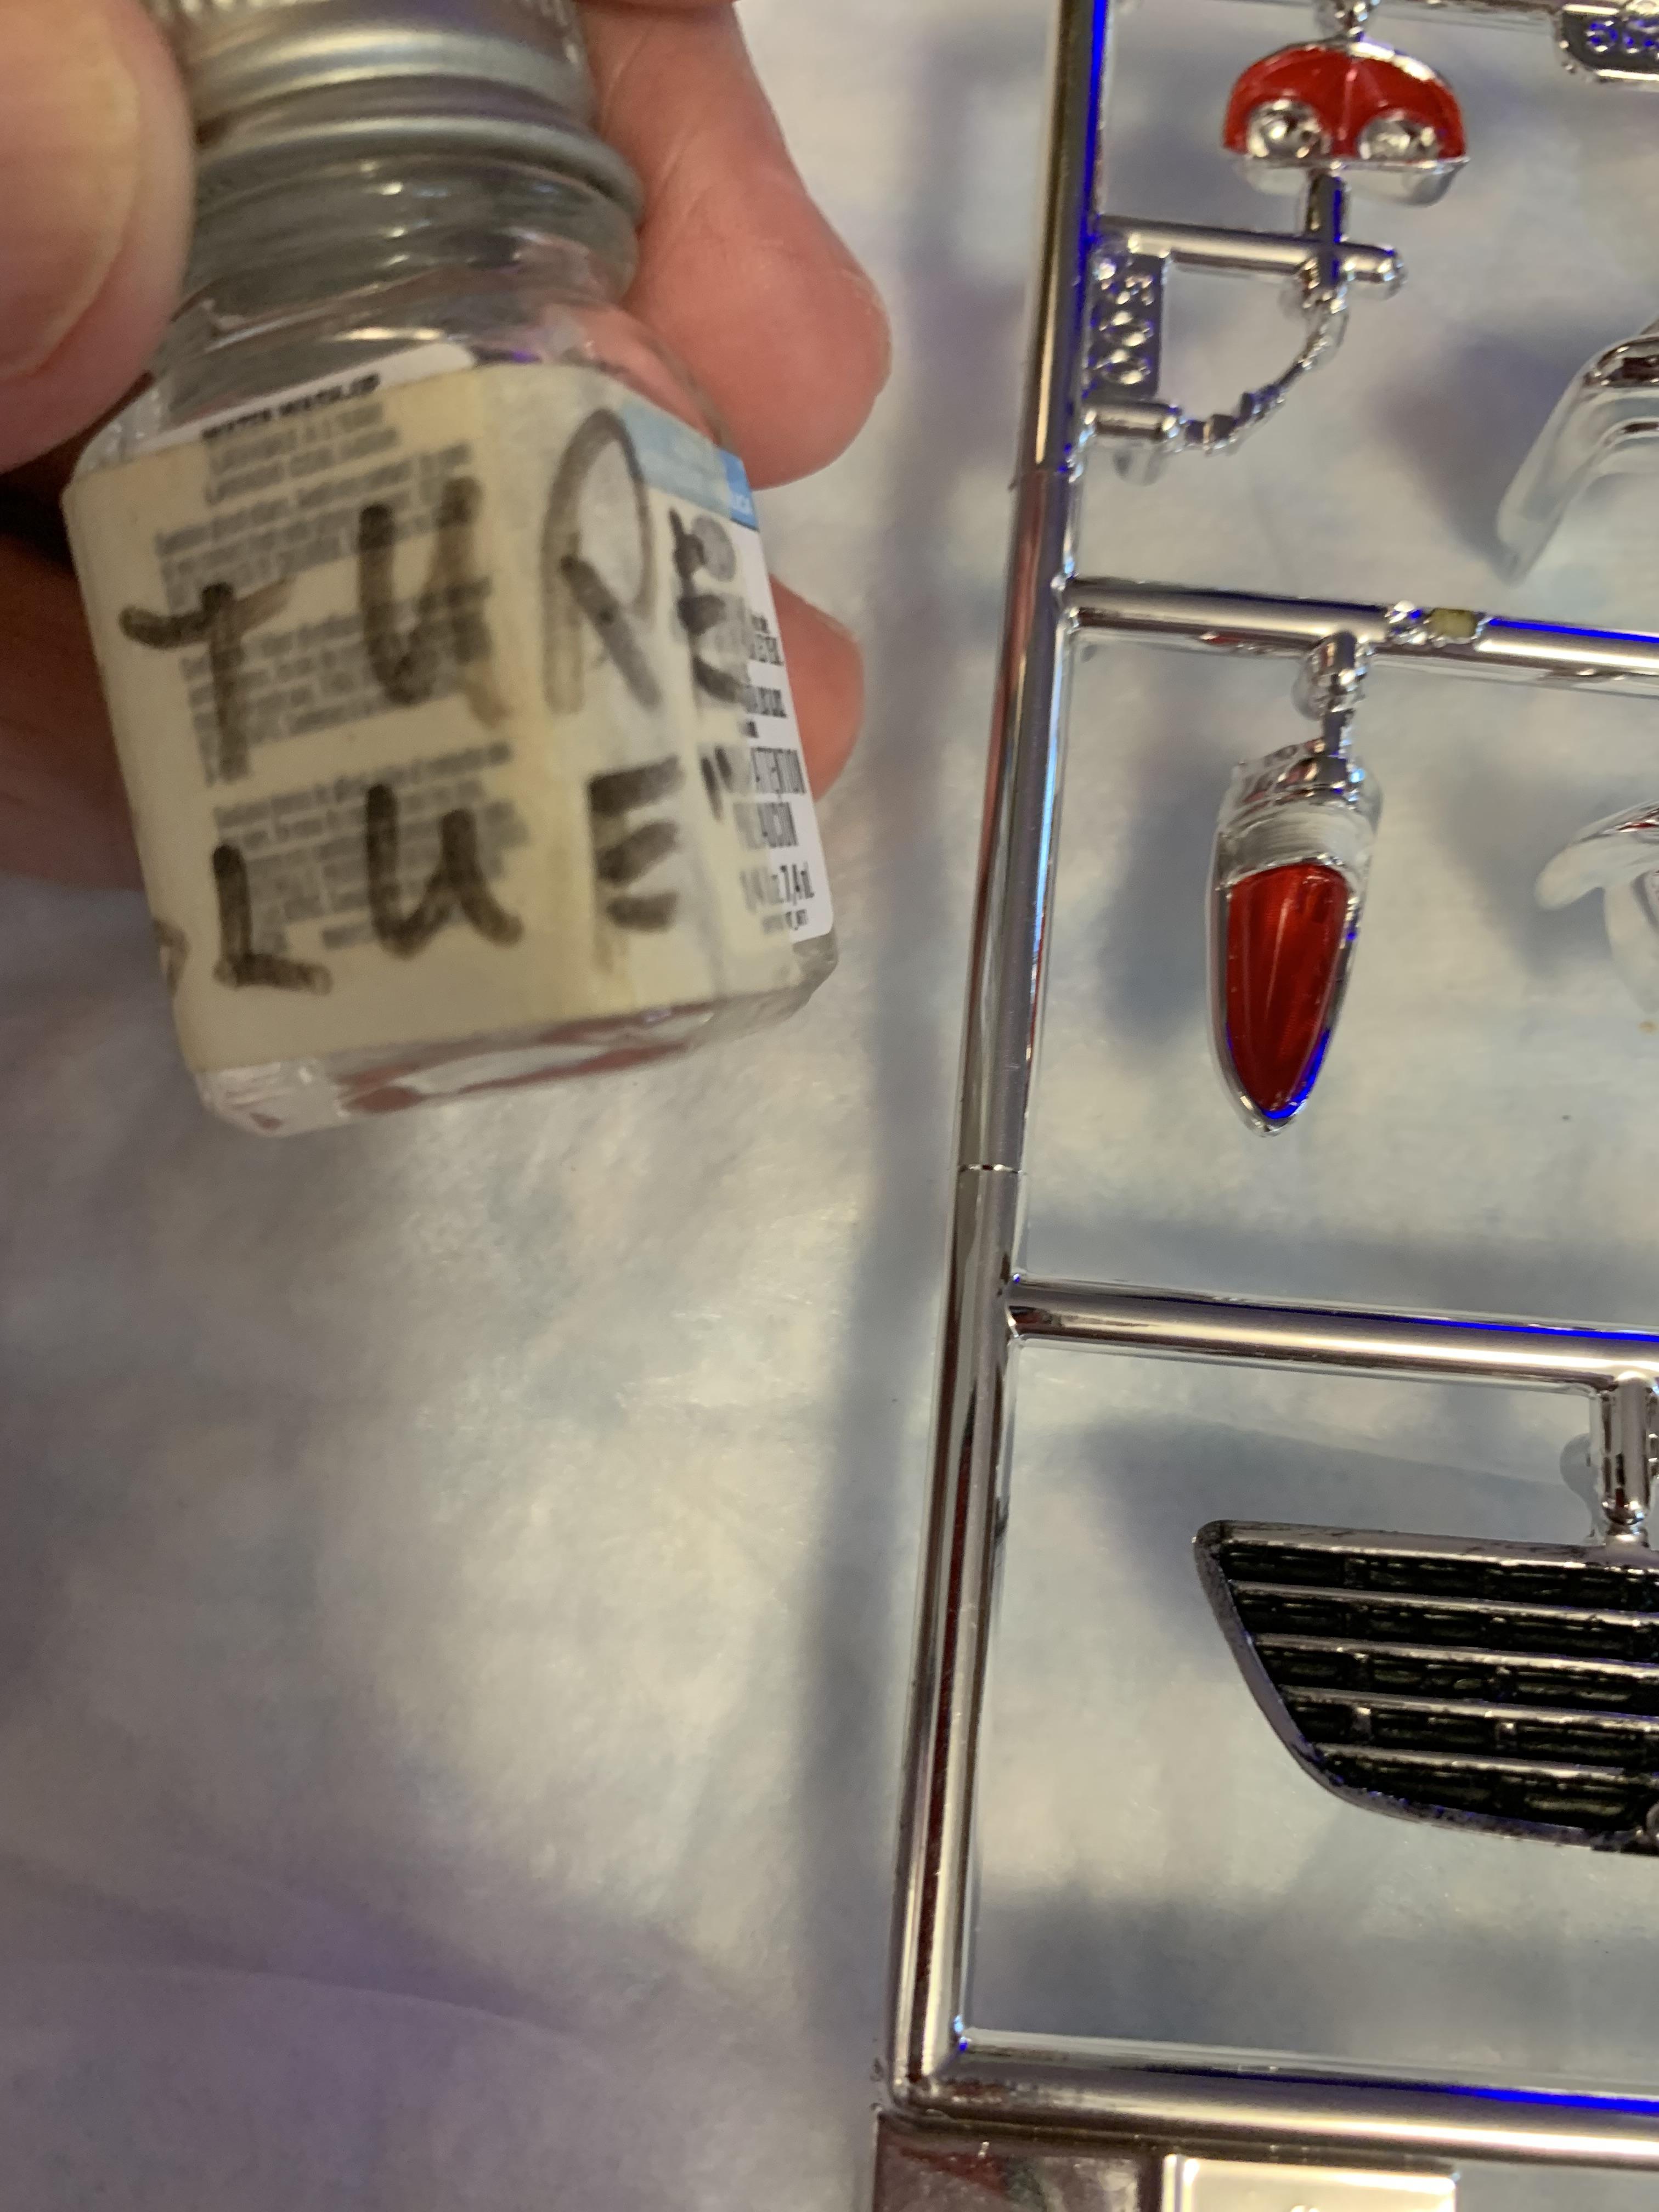
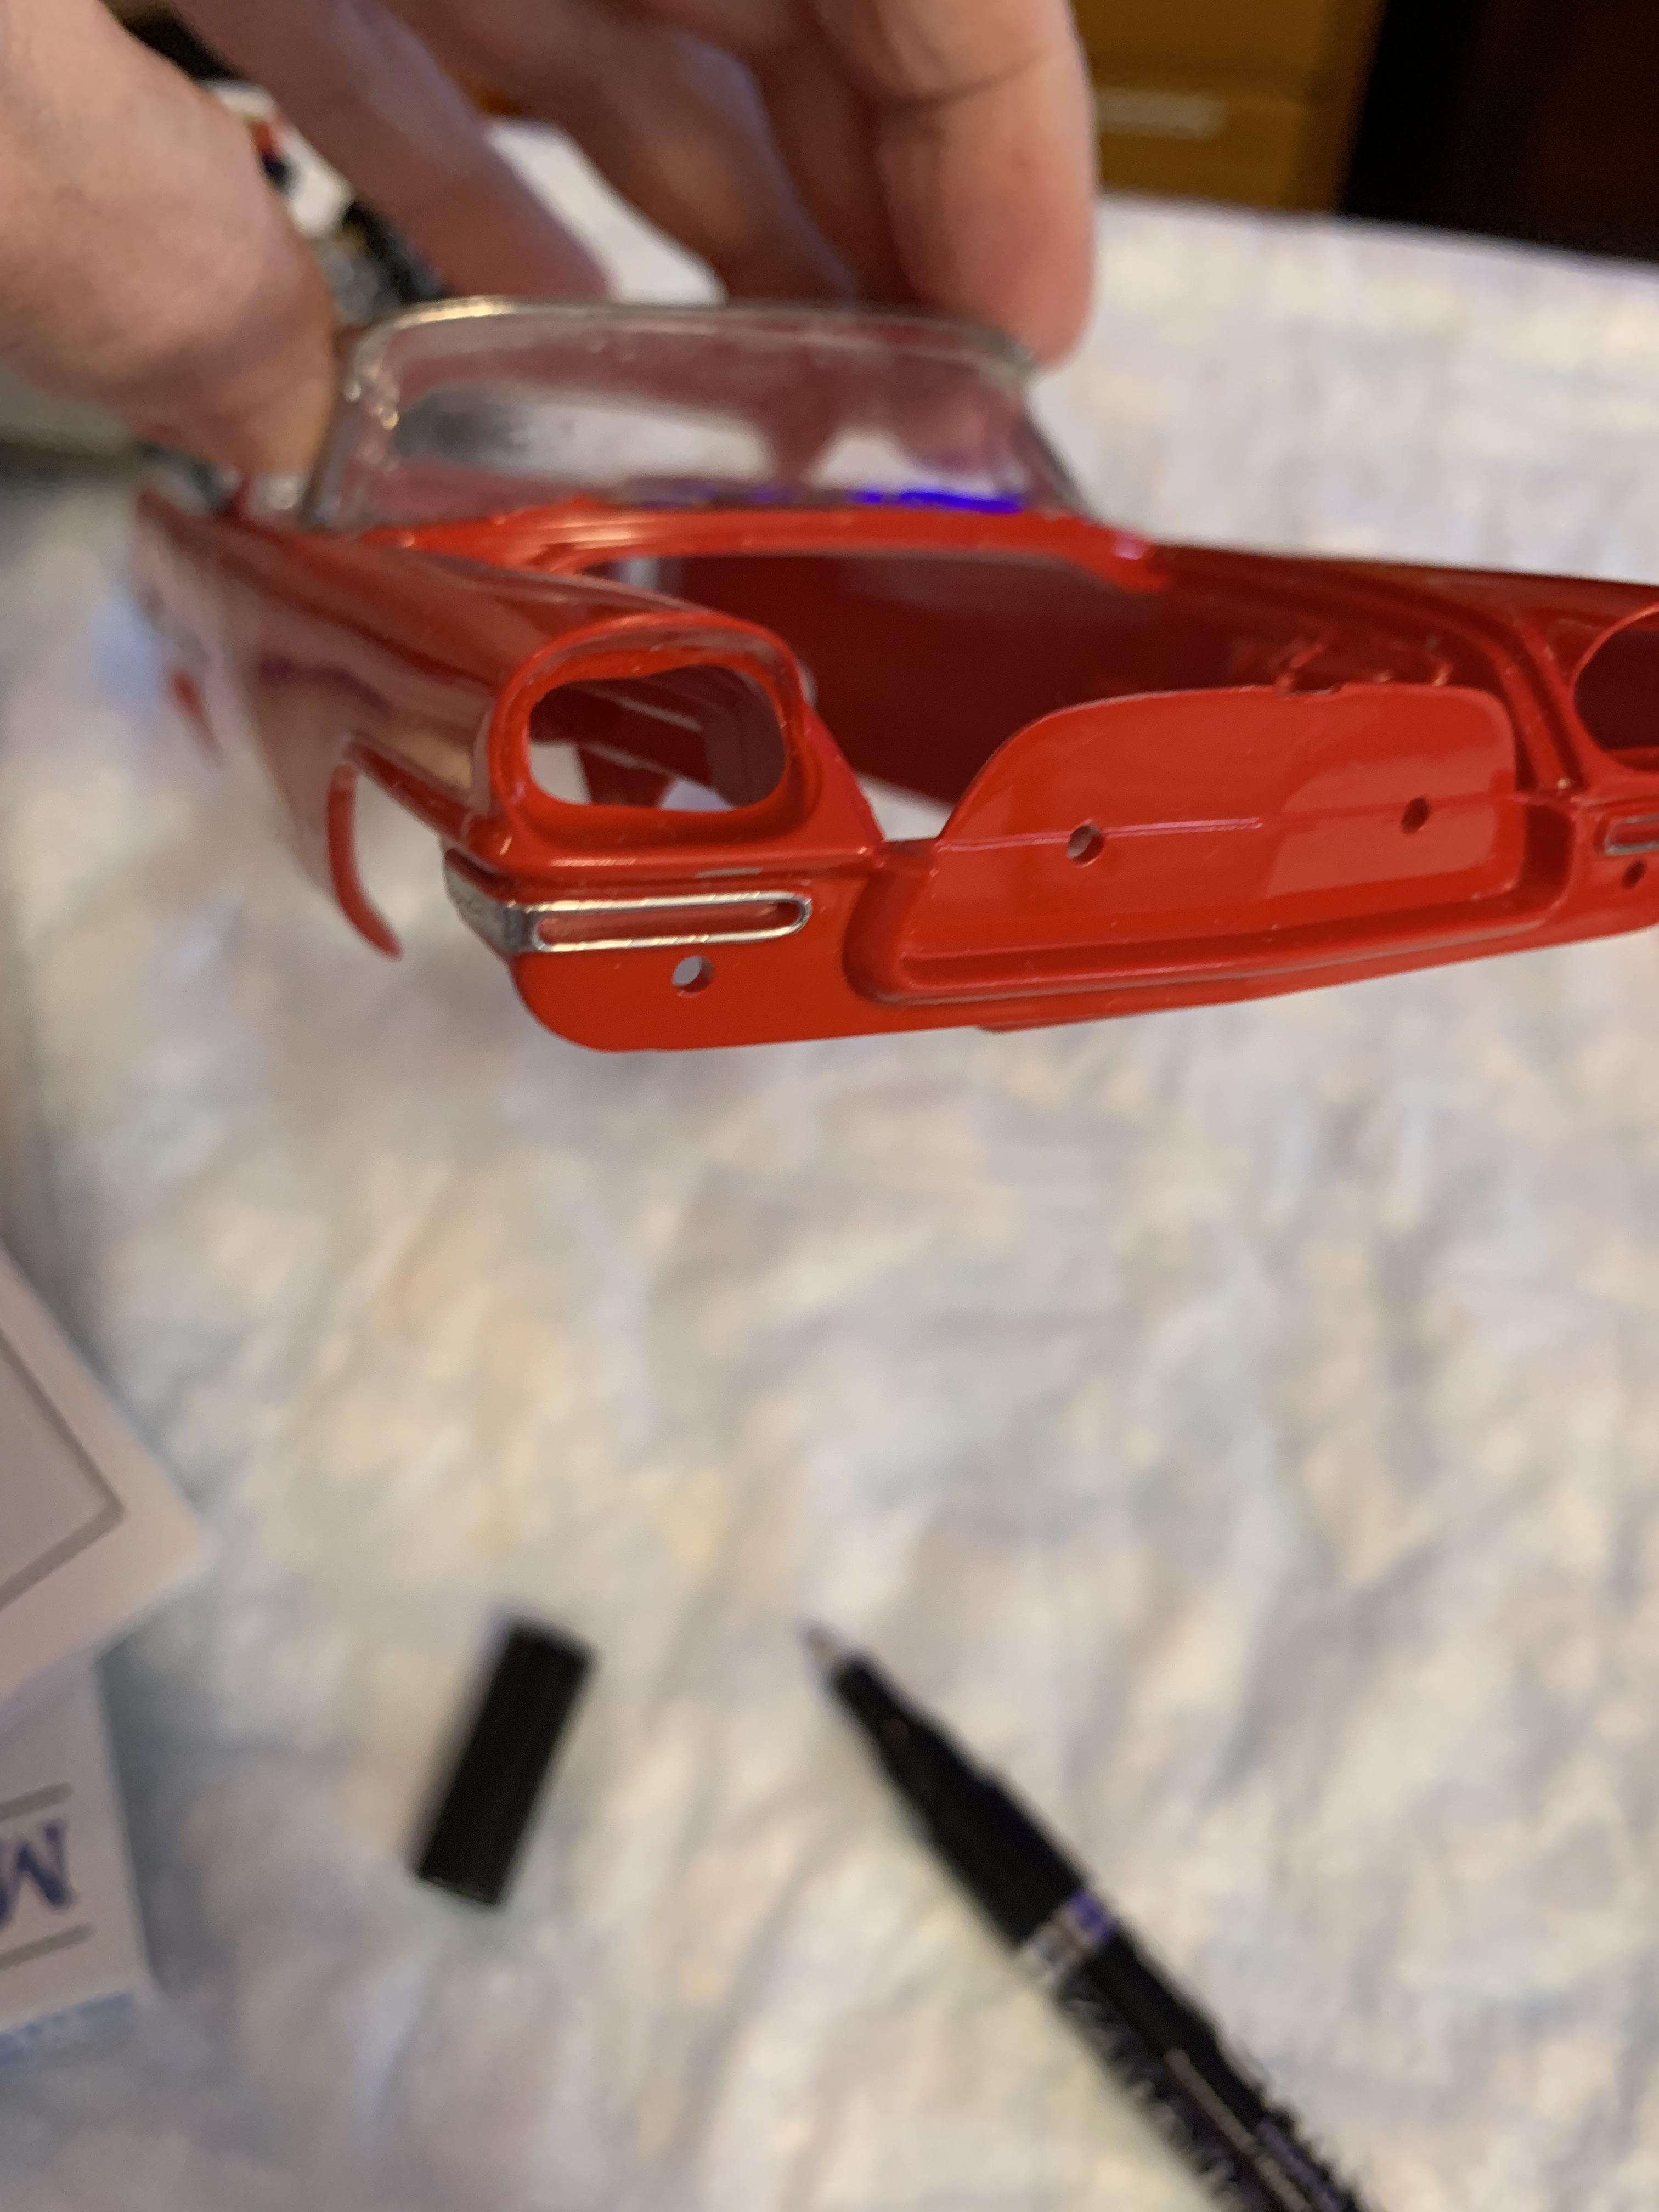
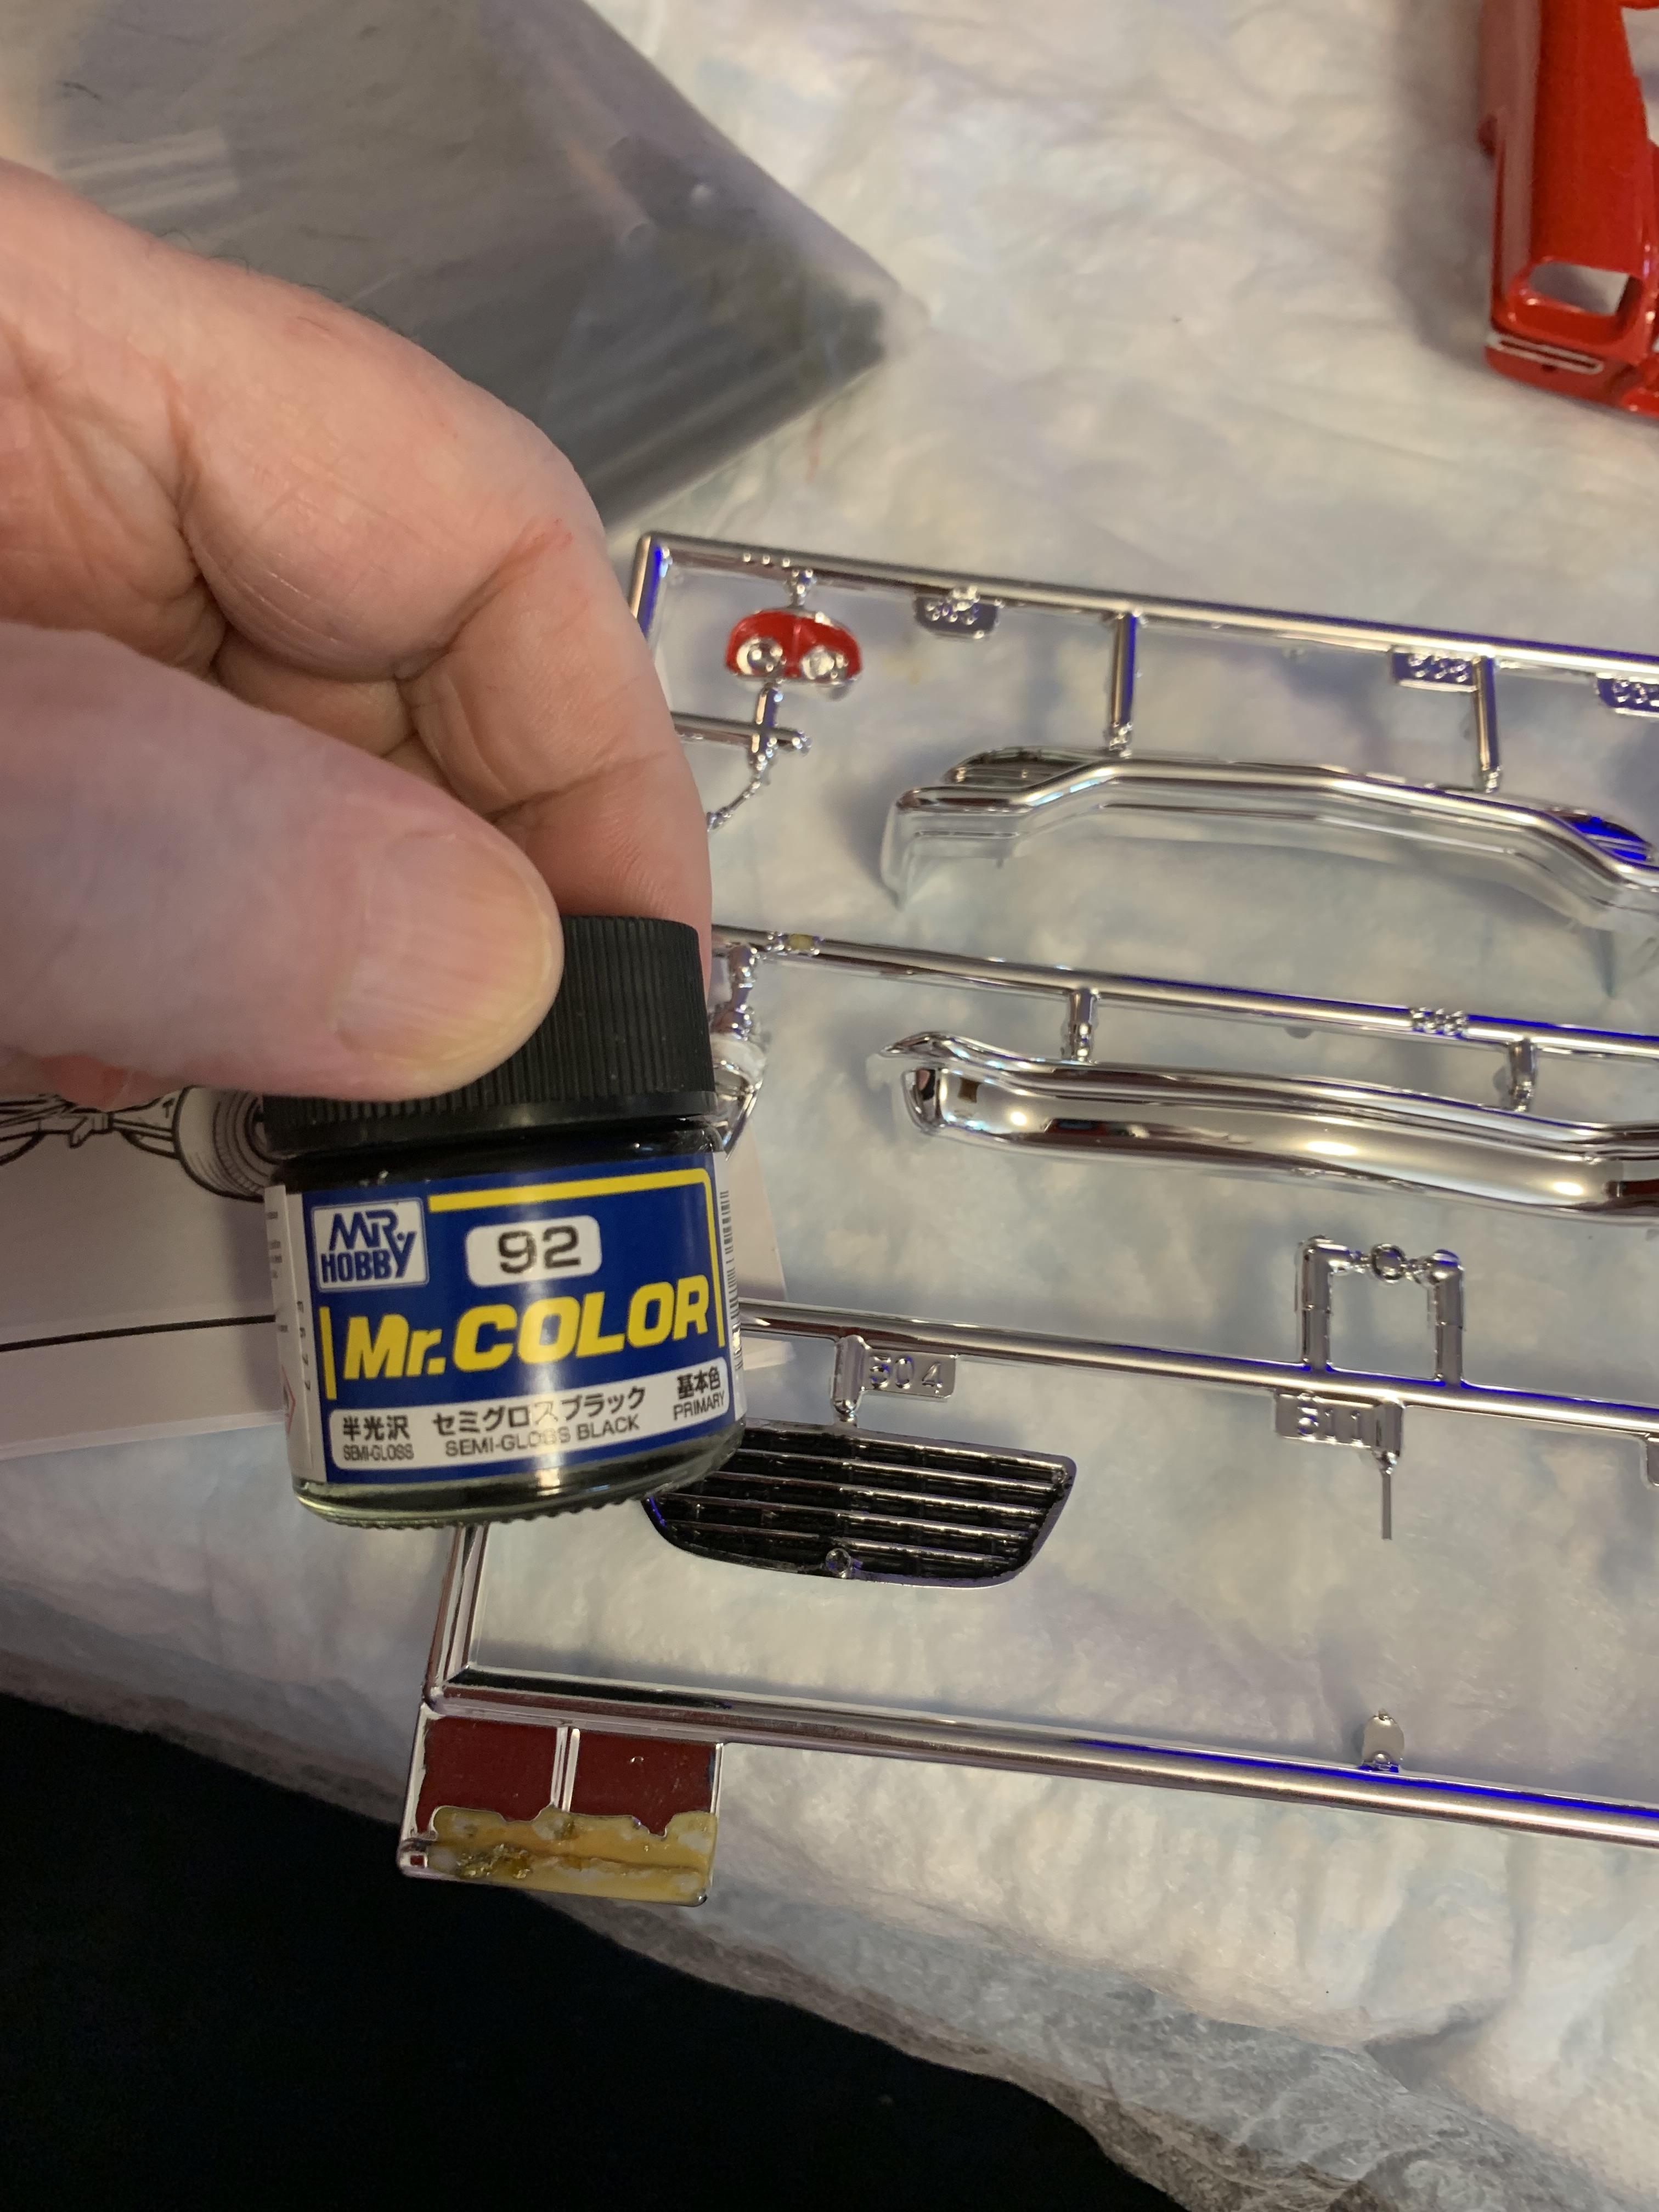
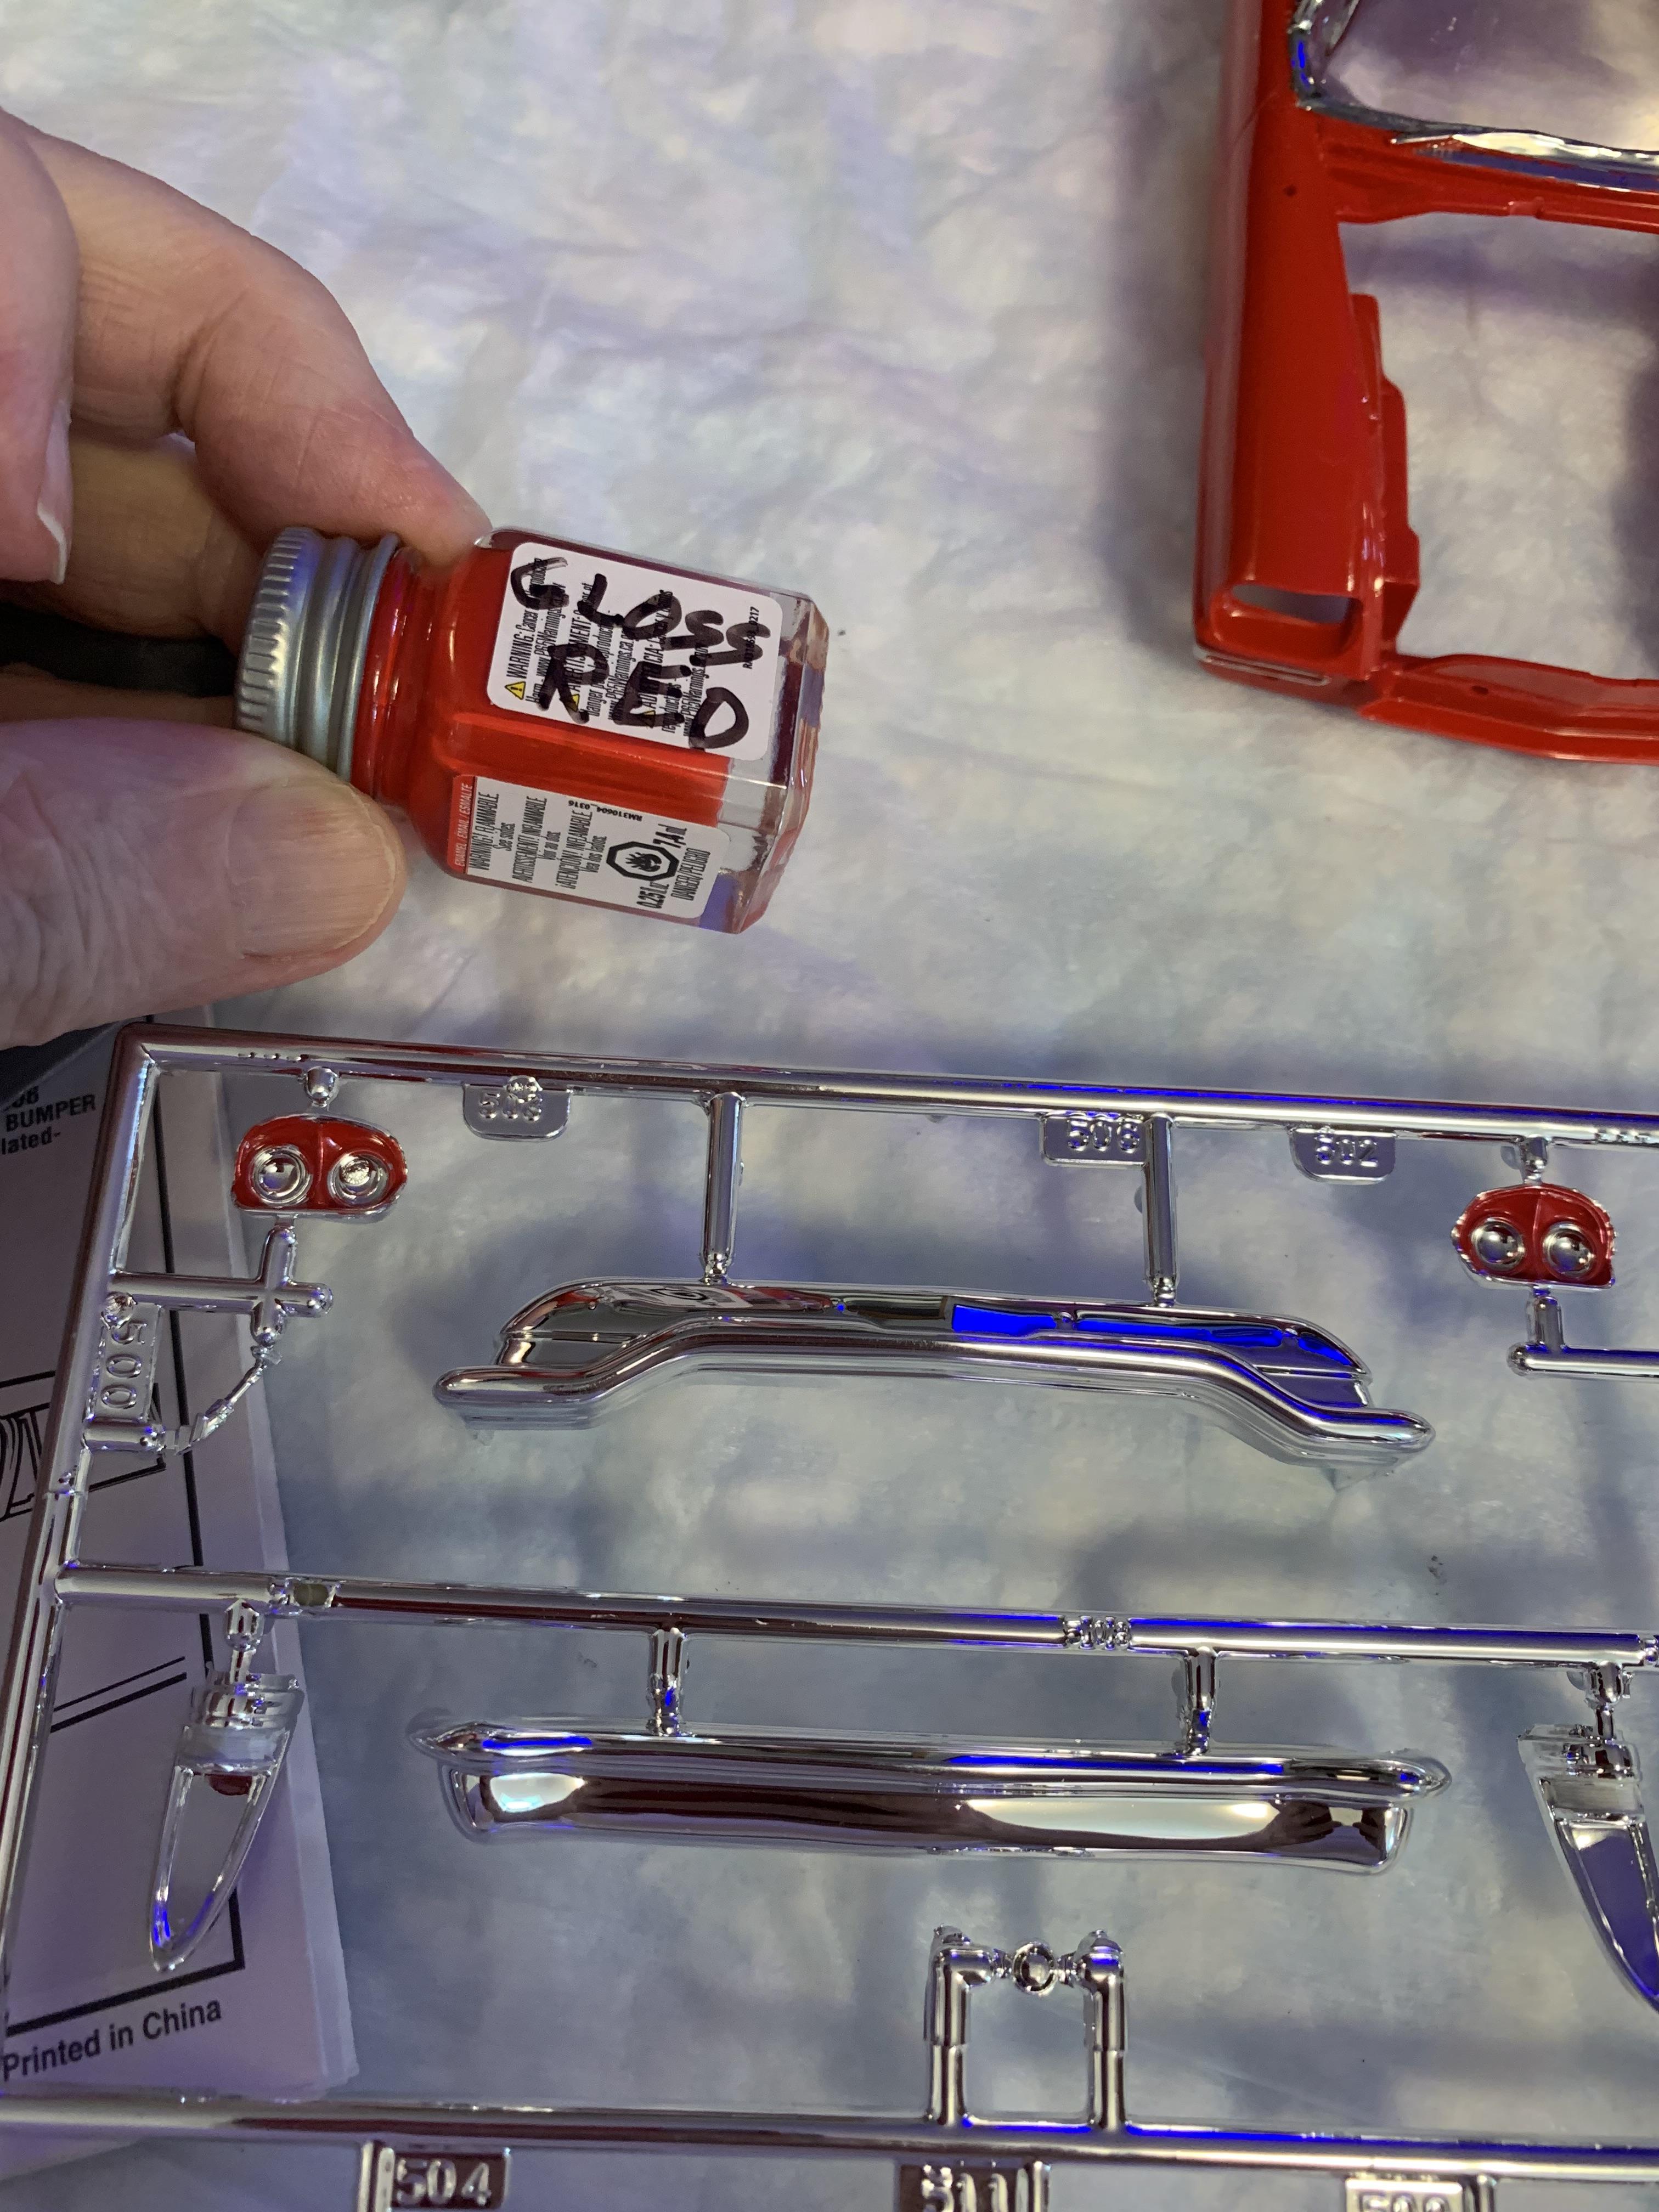
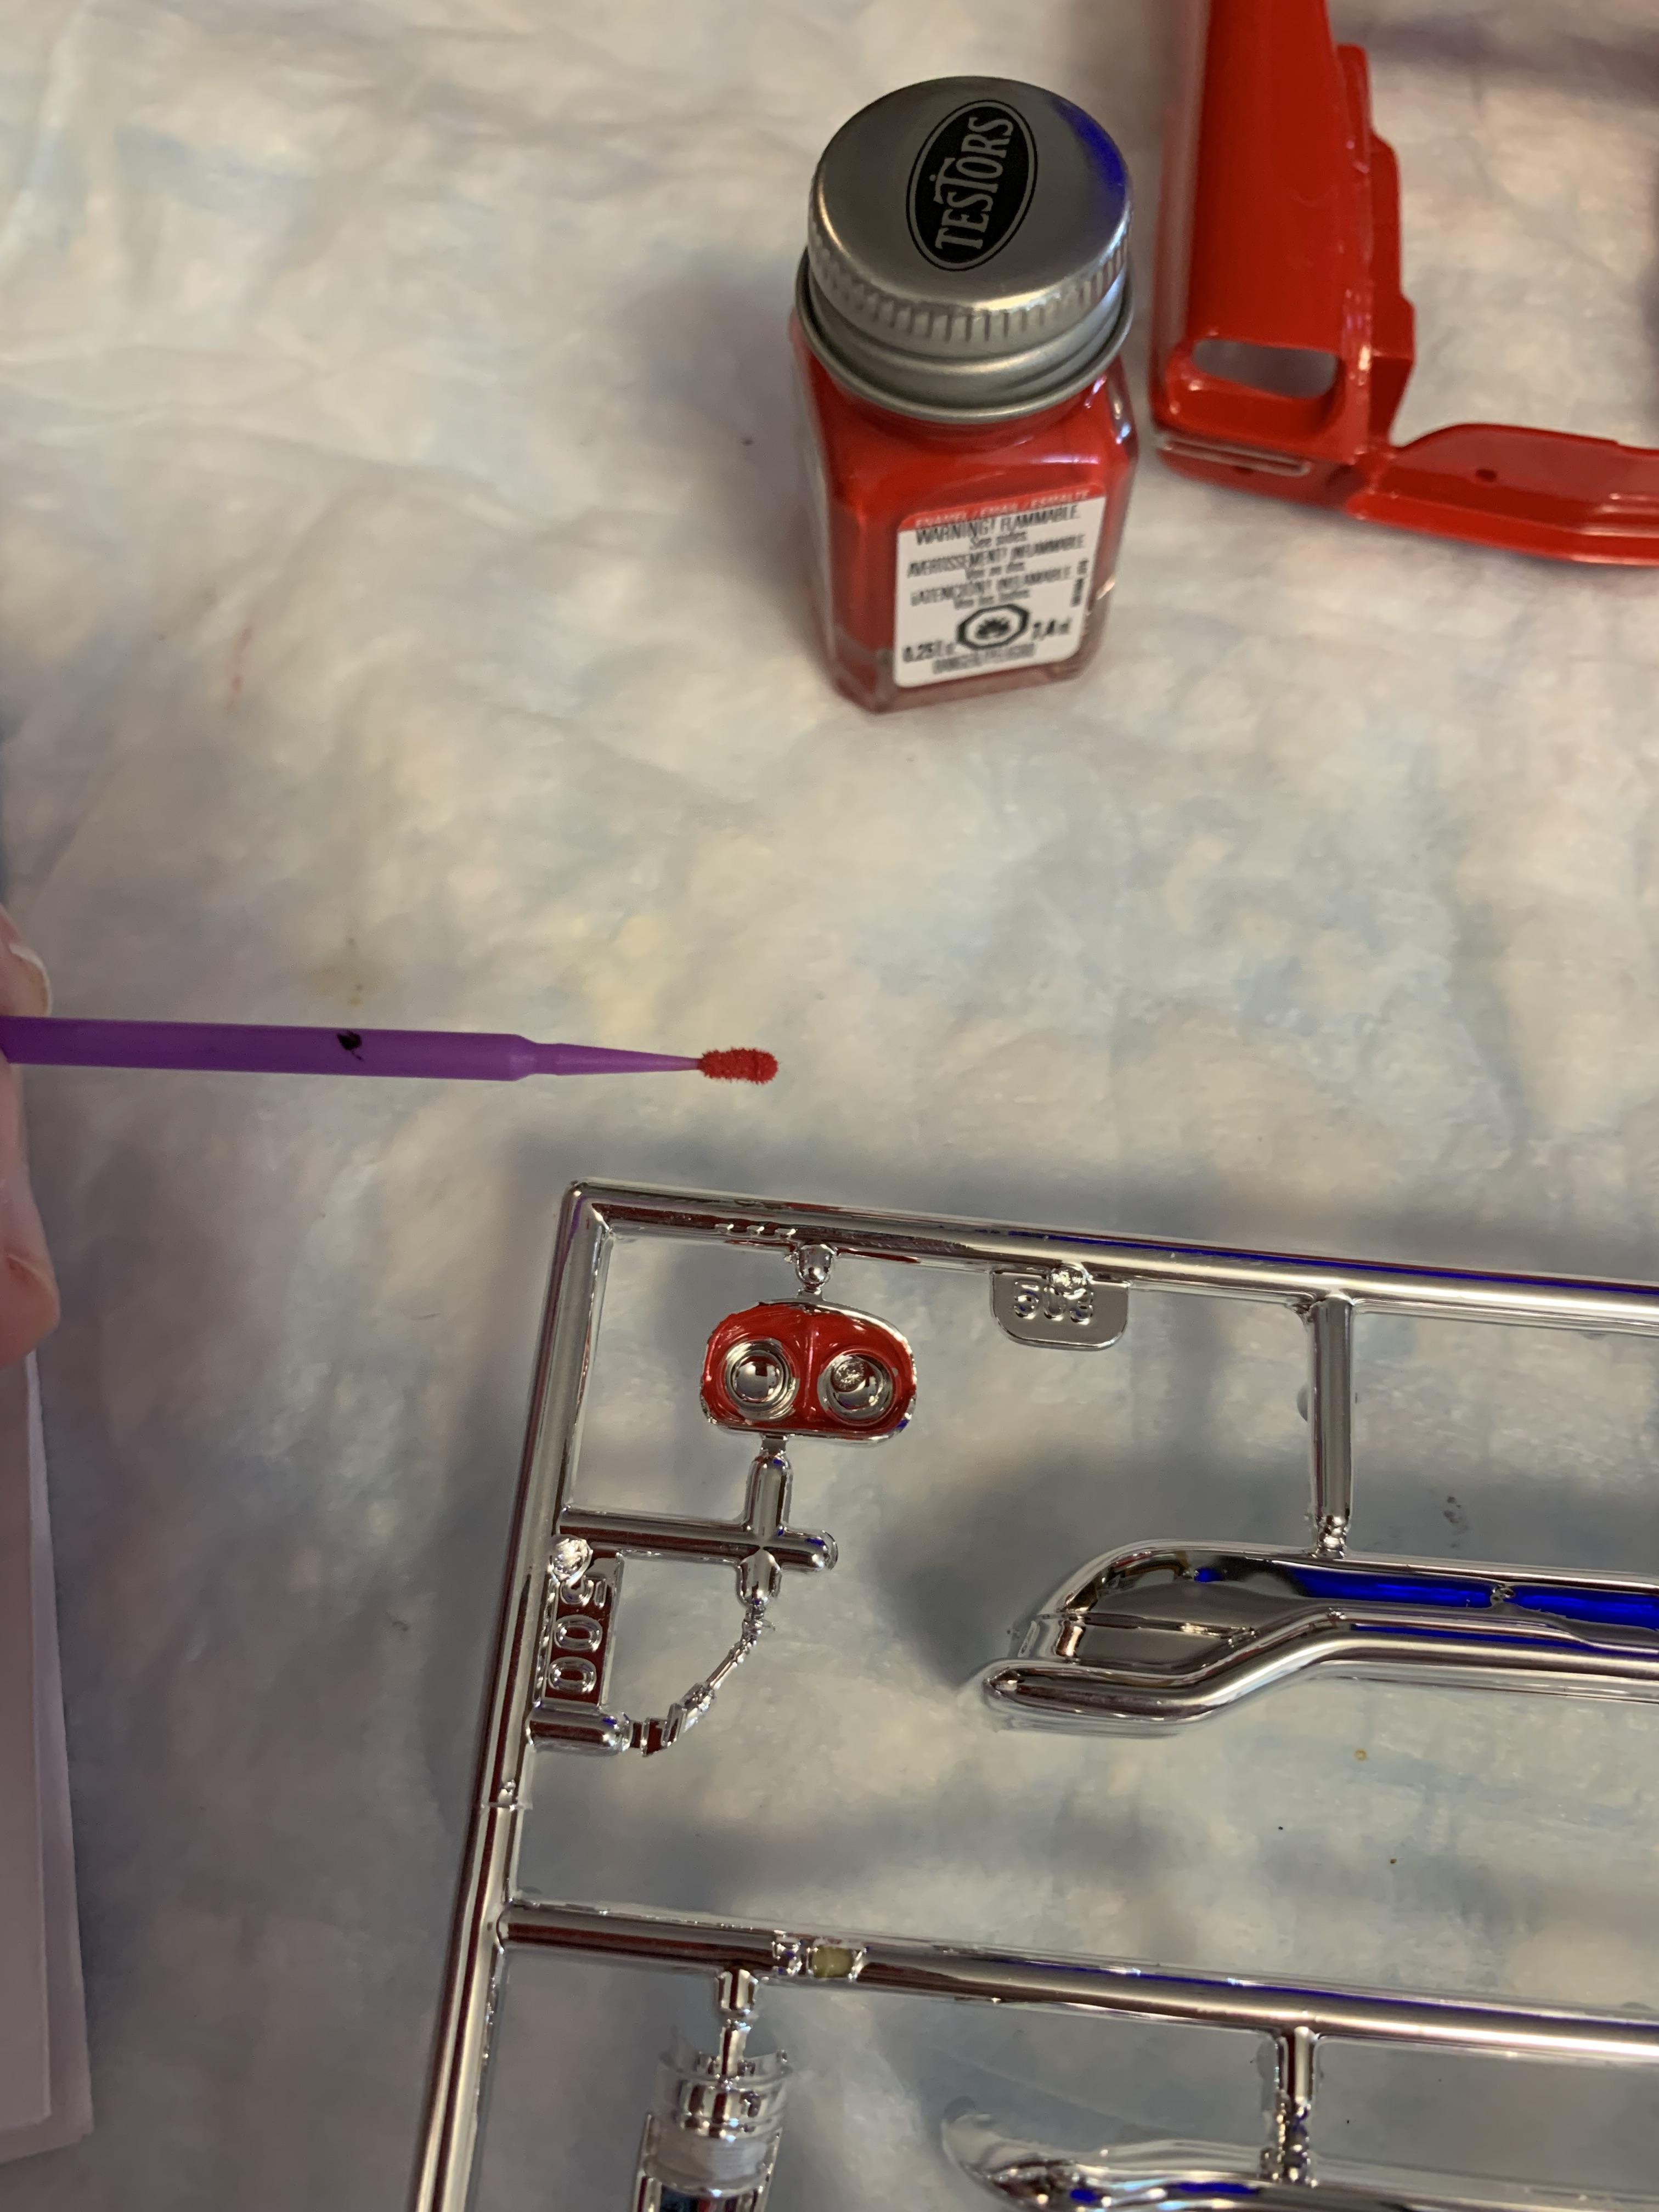
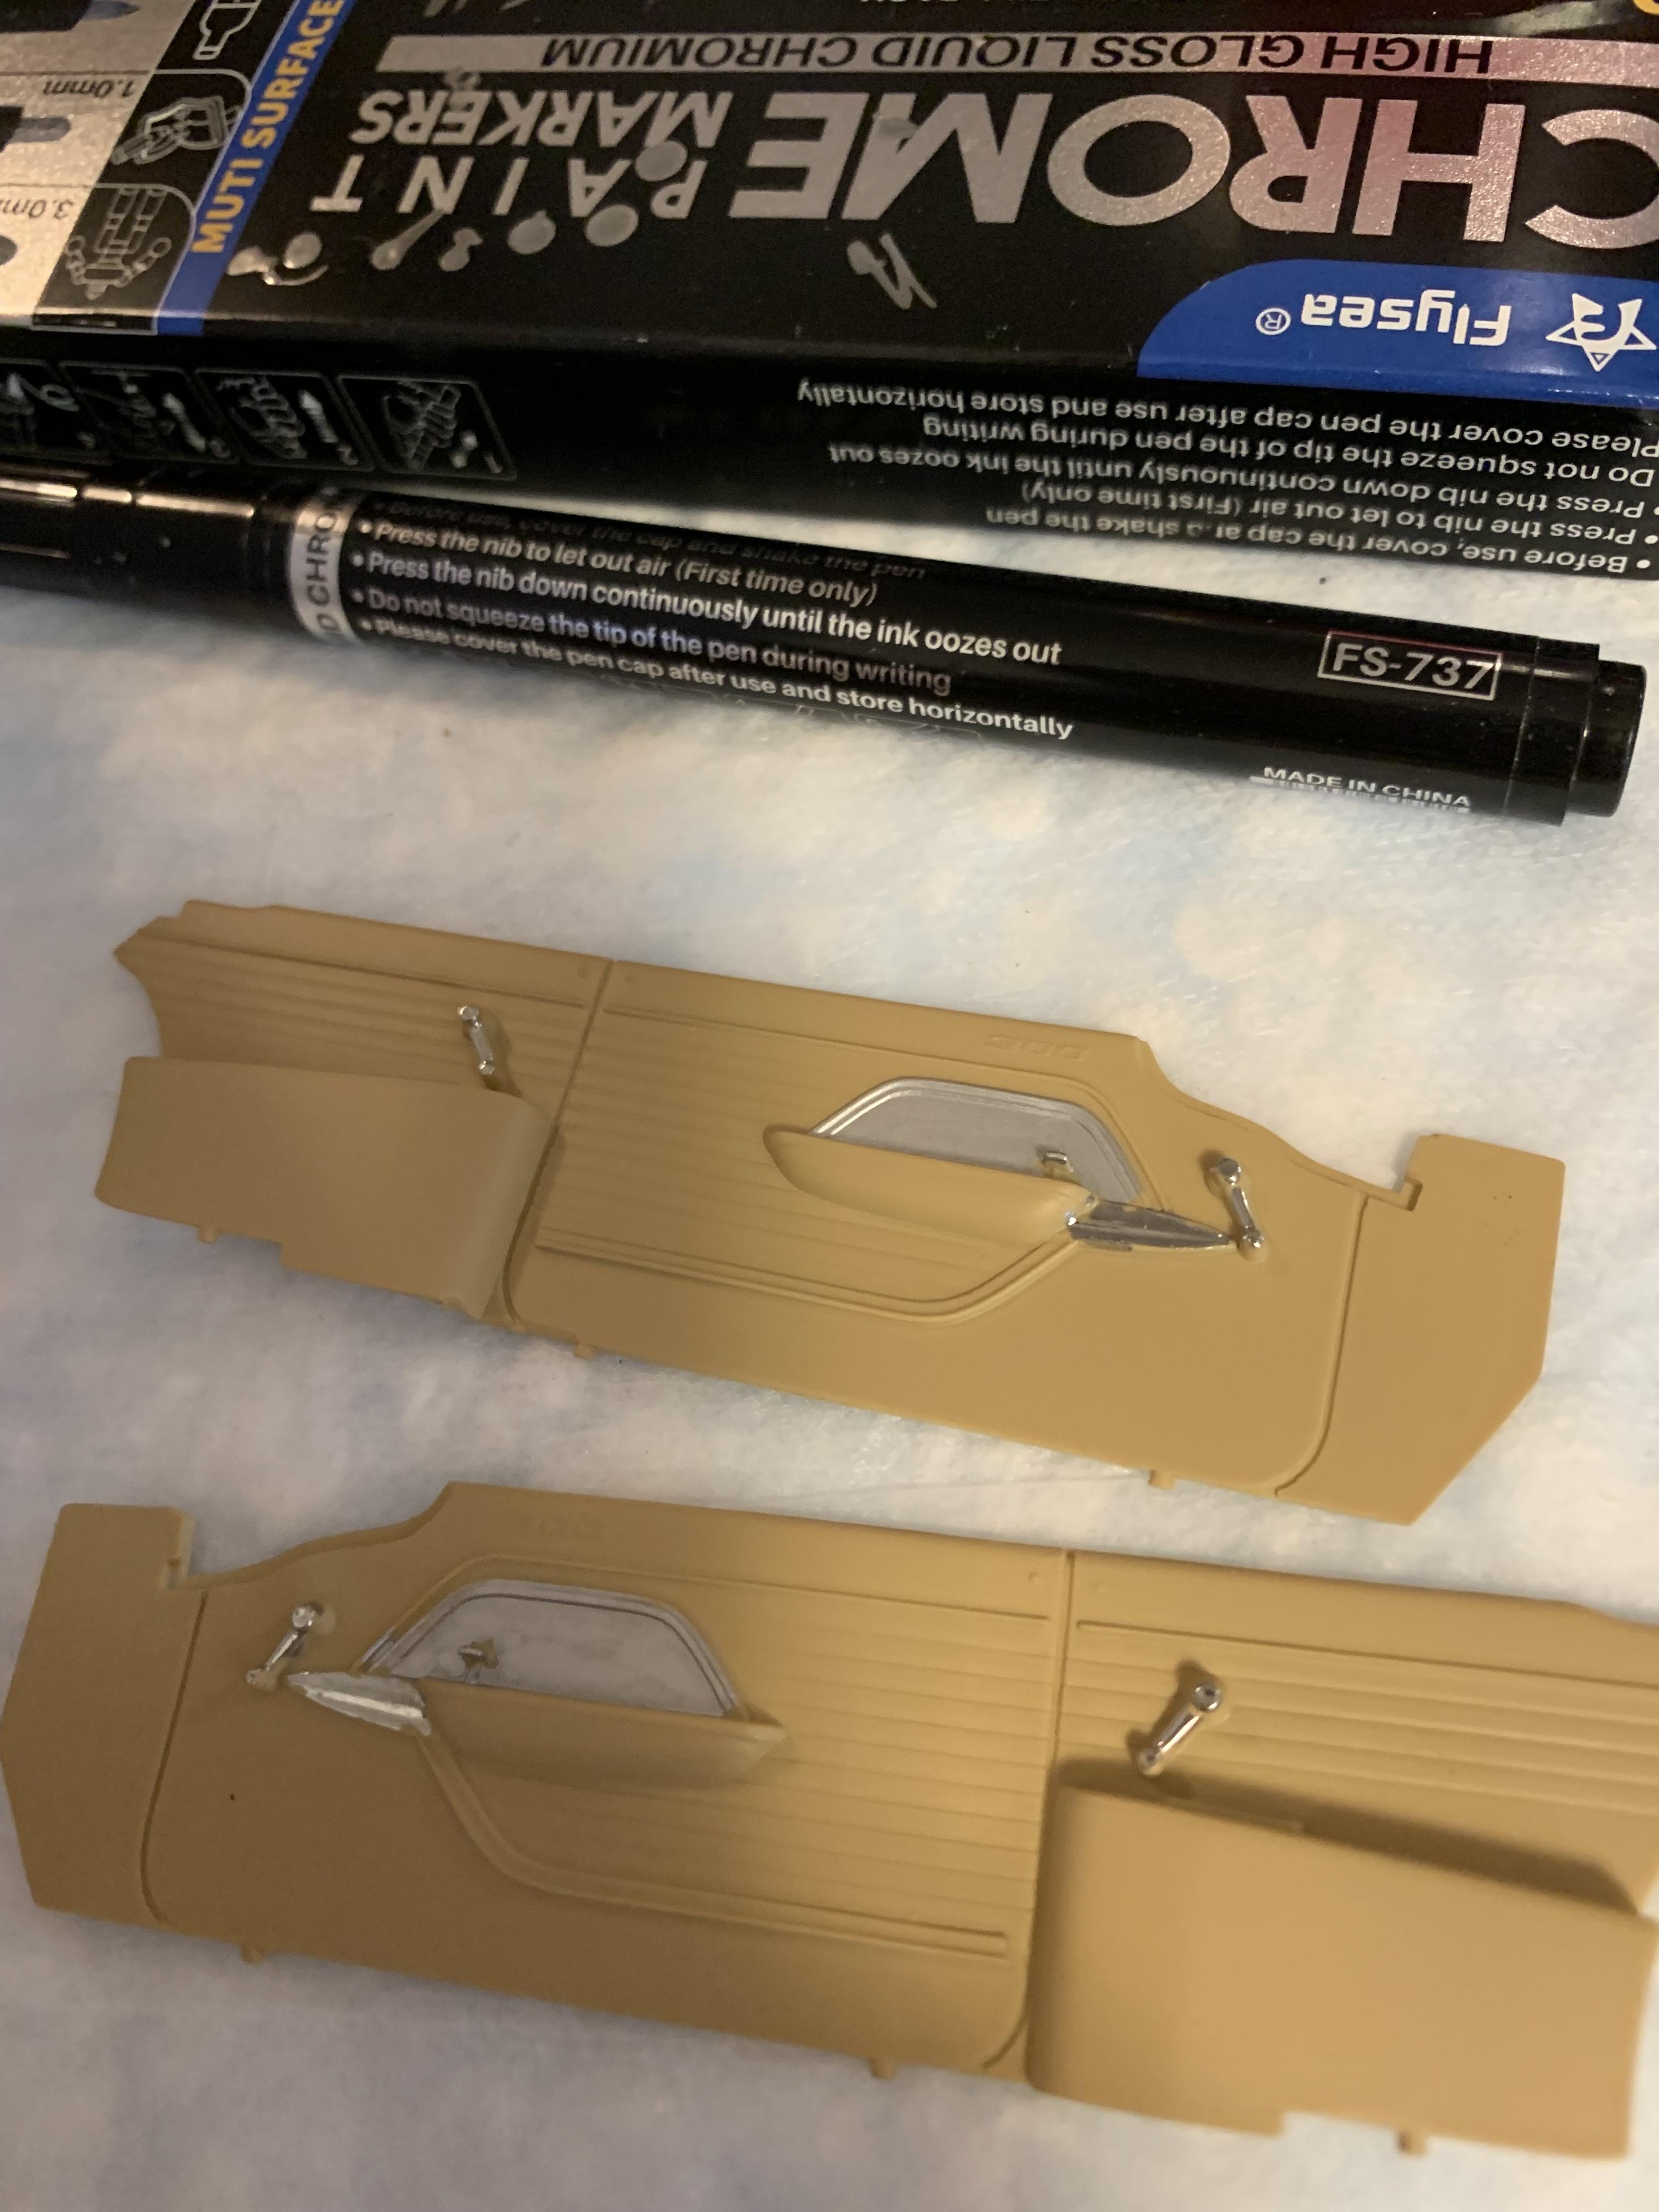
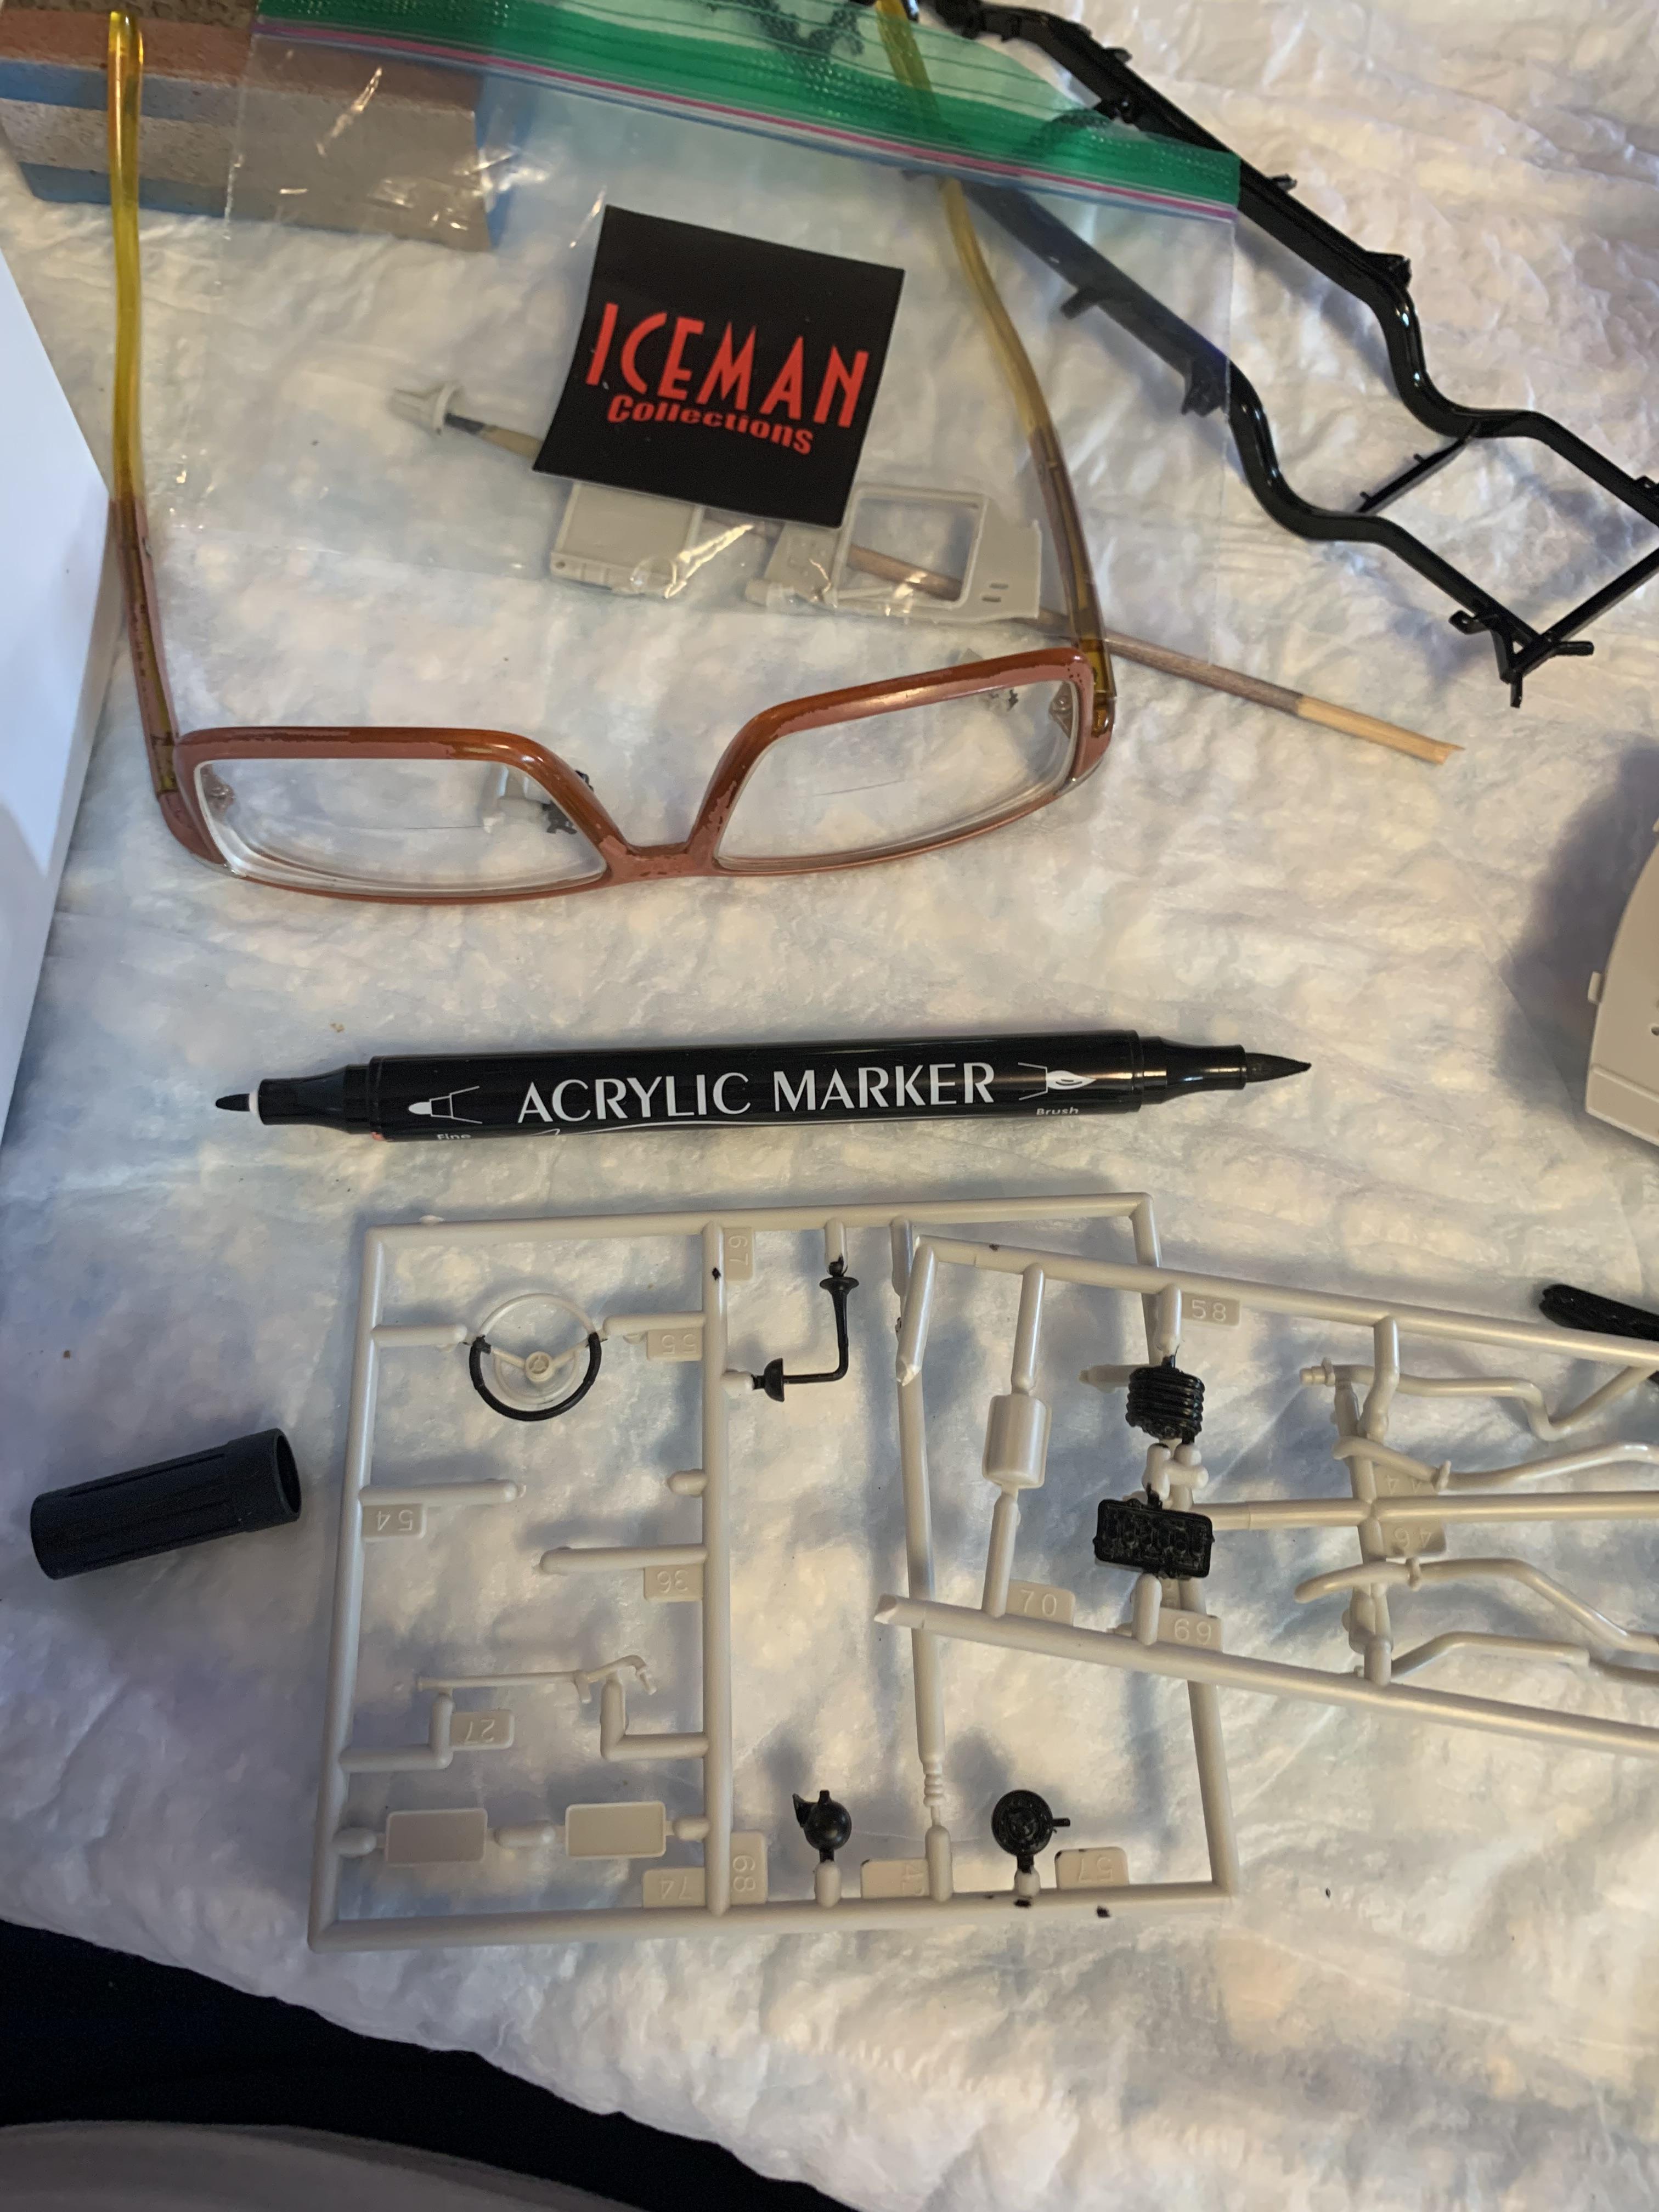
Some small stuff today. Chrome pen for the sides, semi gloss black for the grill, red testors enamel for the headlight surrounds, and the miscellaneous stuff to apply it.
-
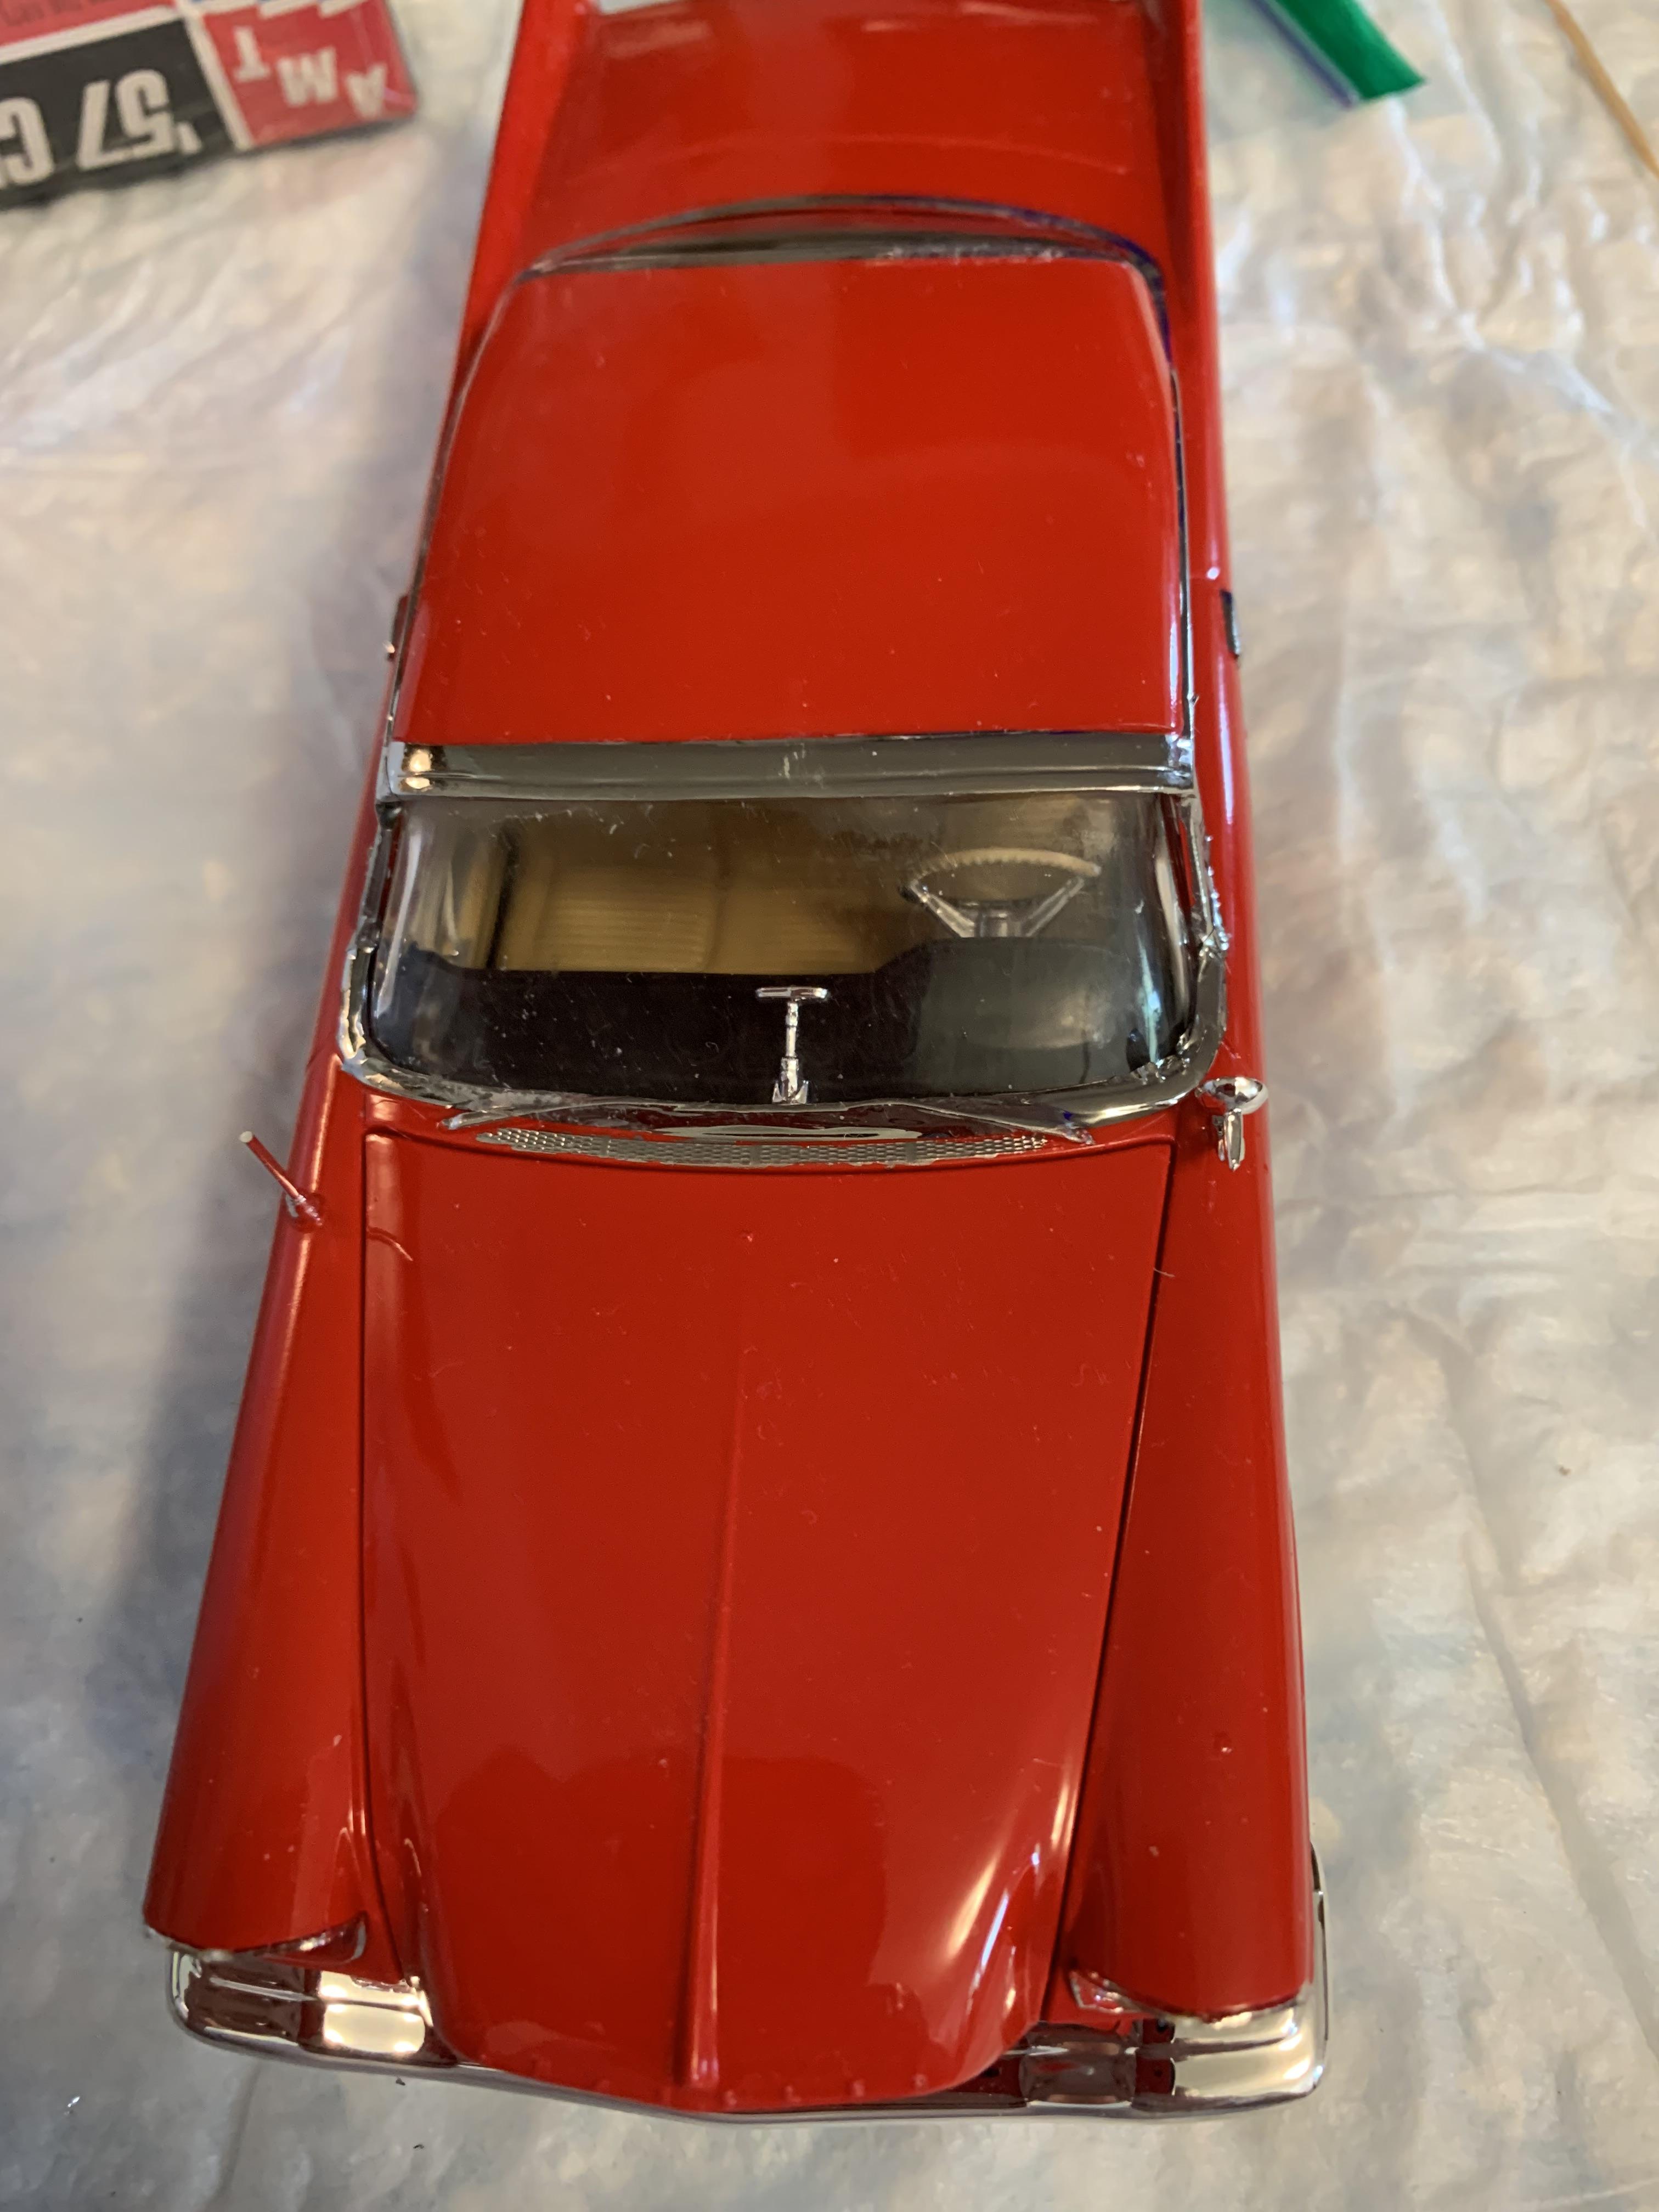
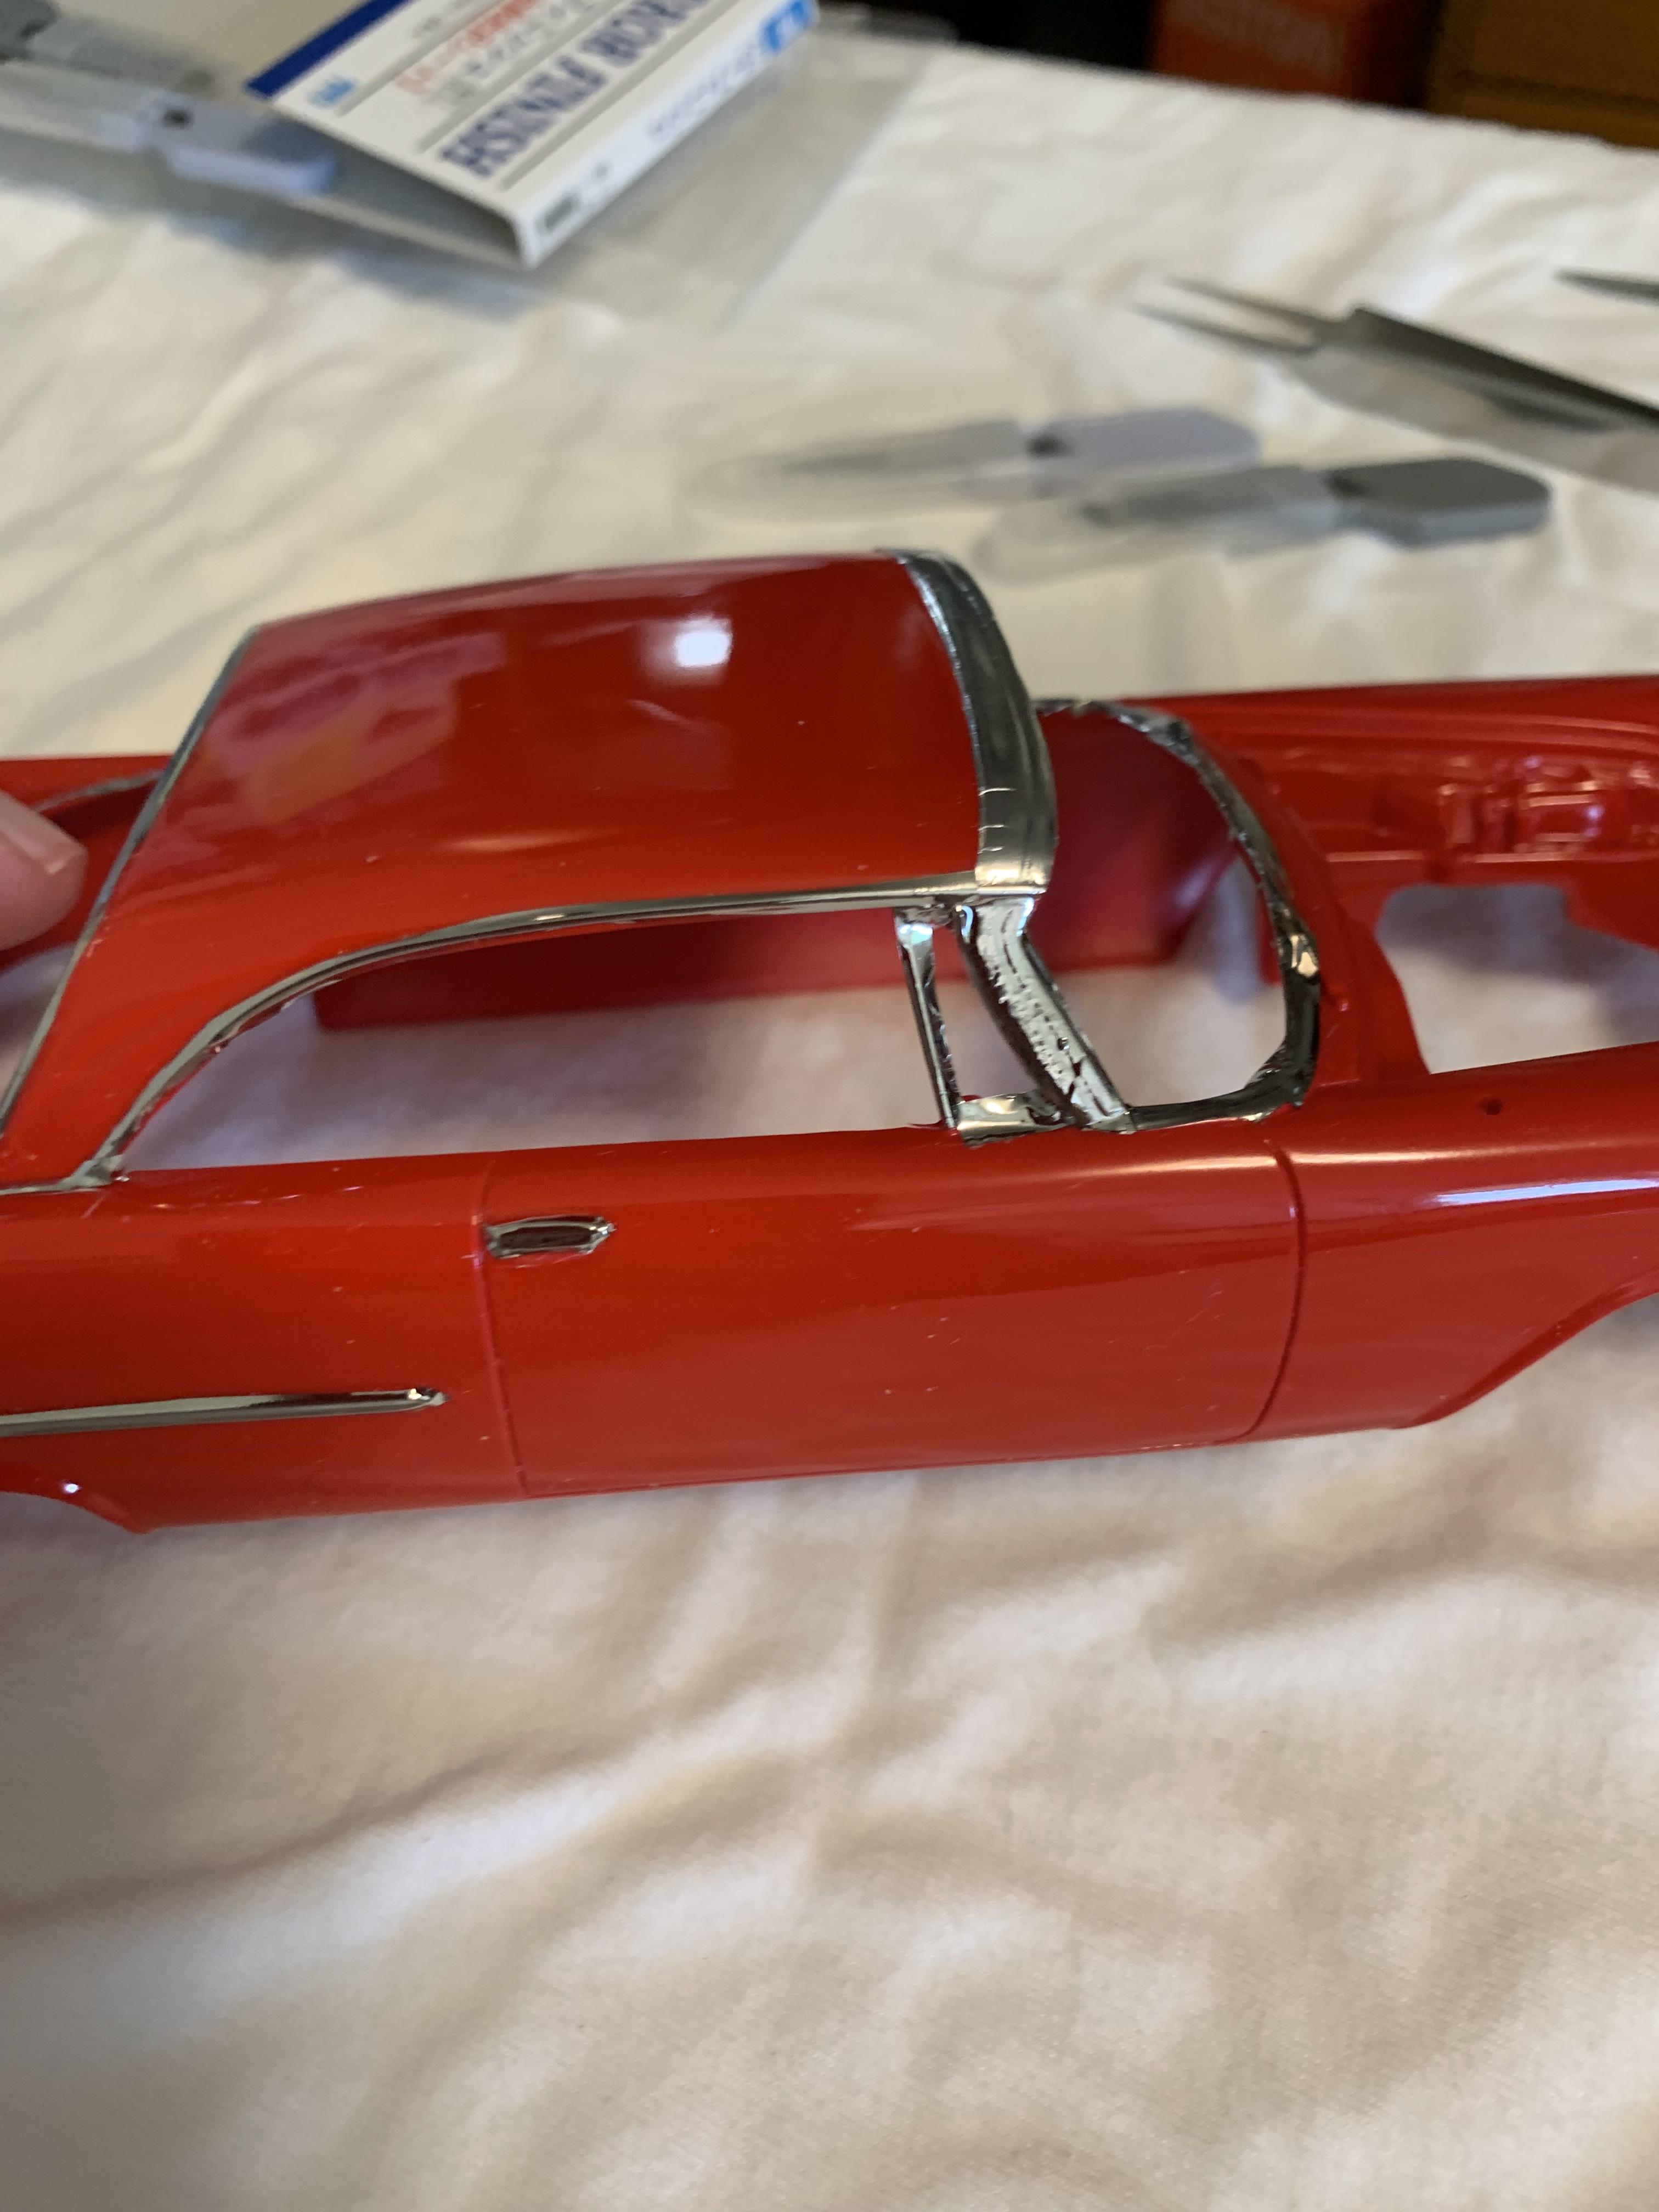
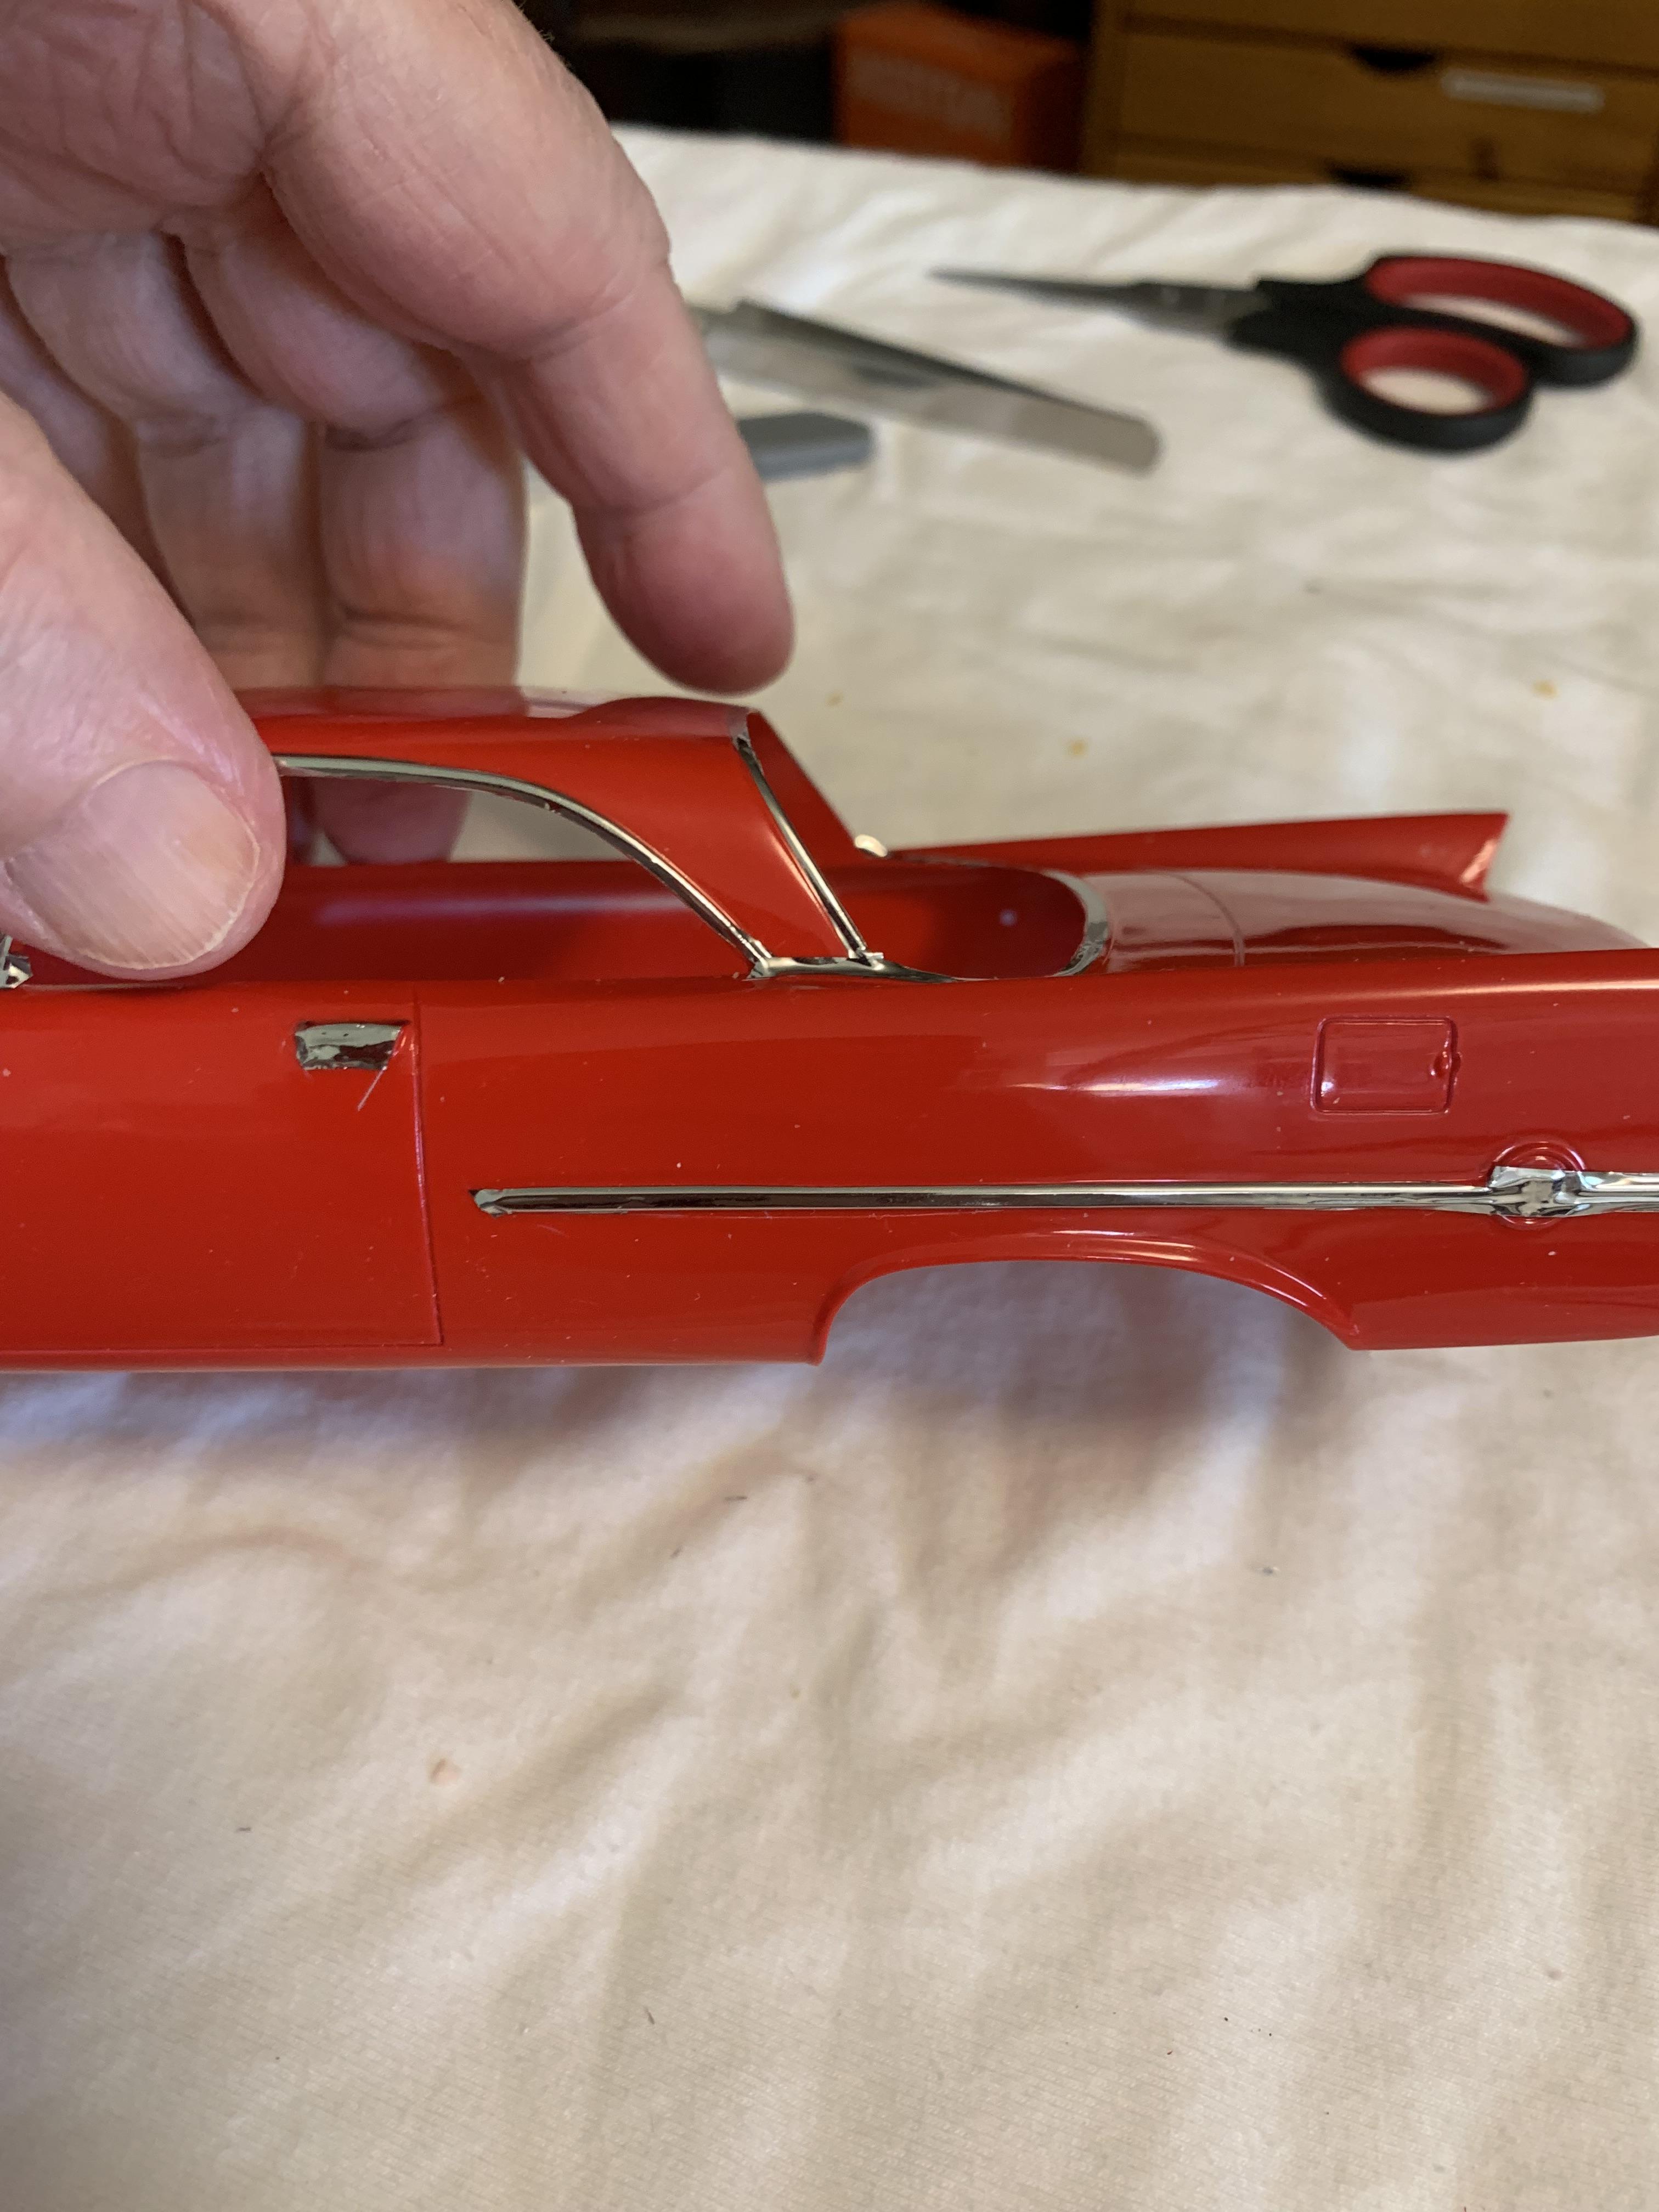
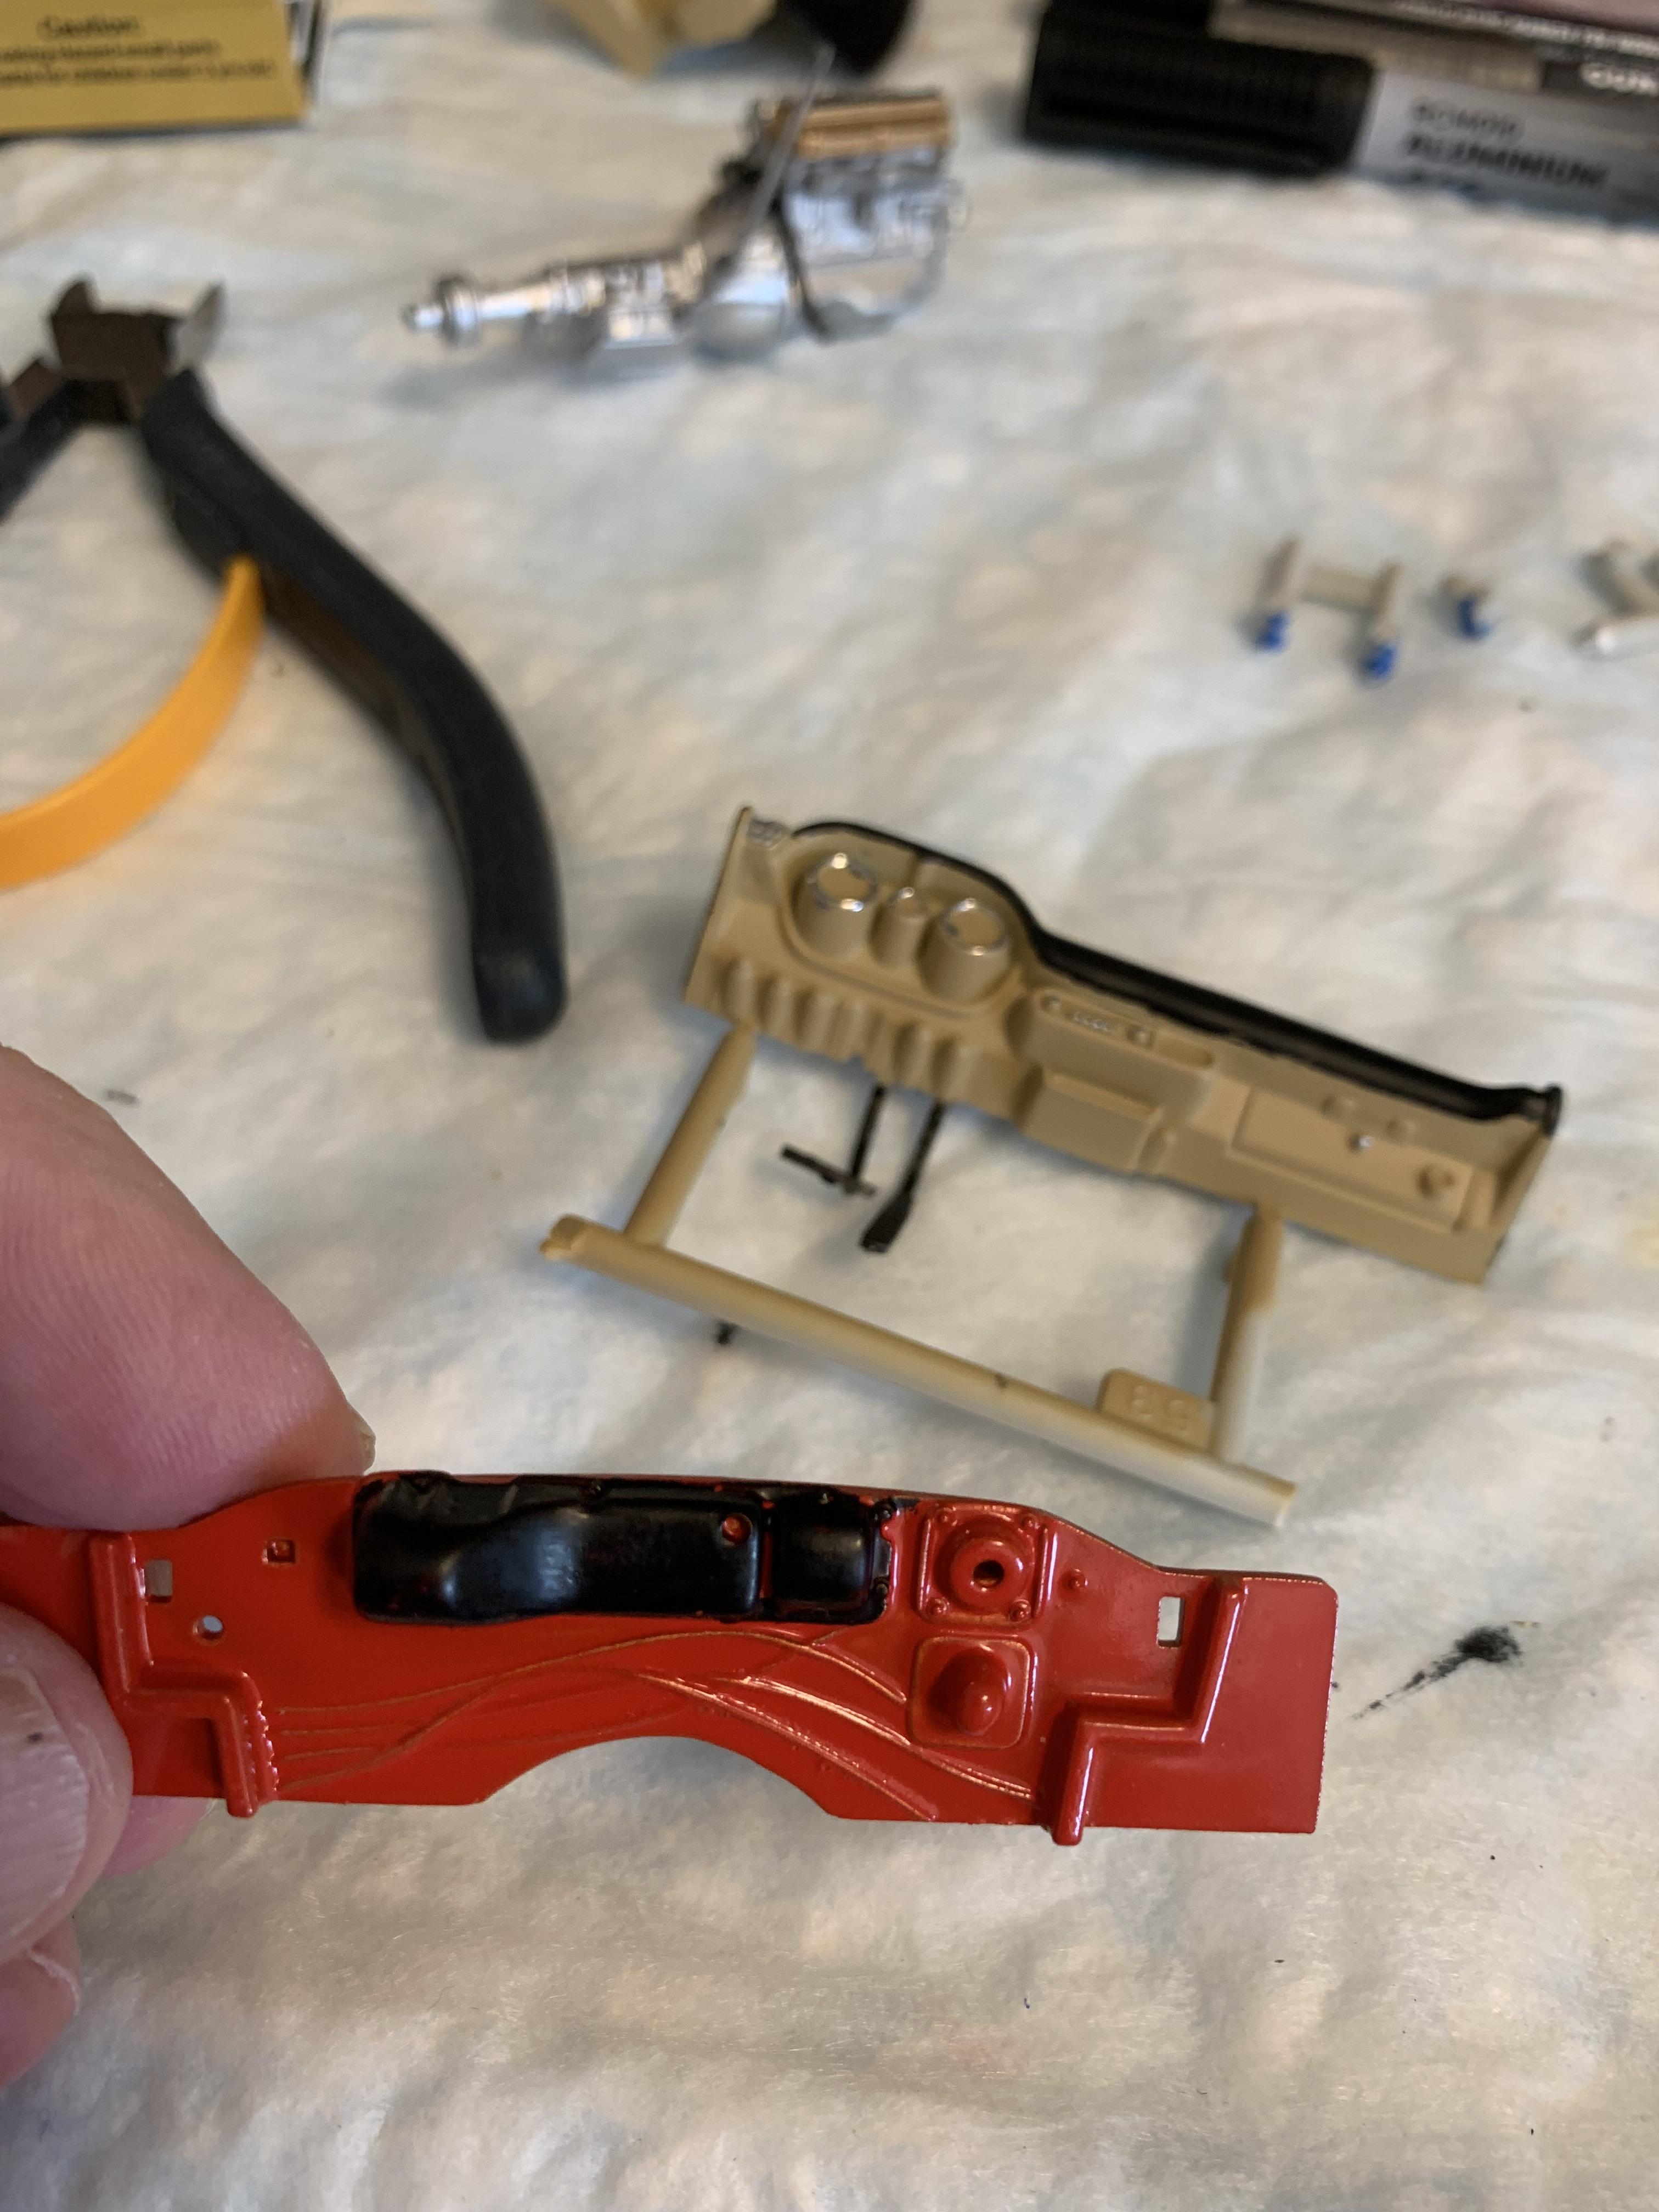
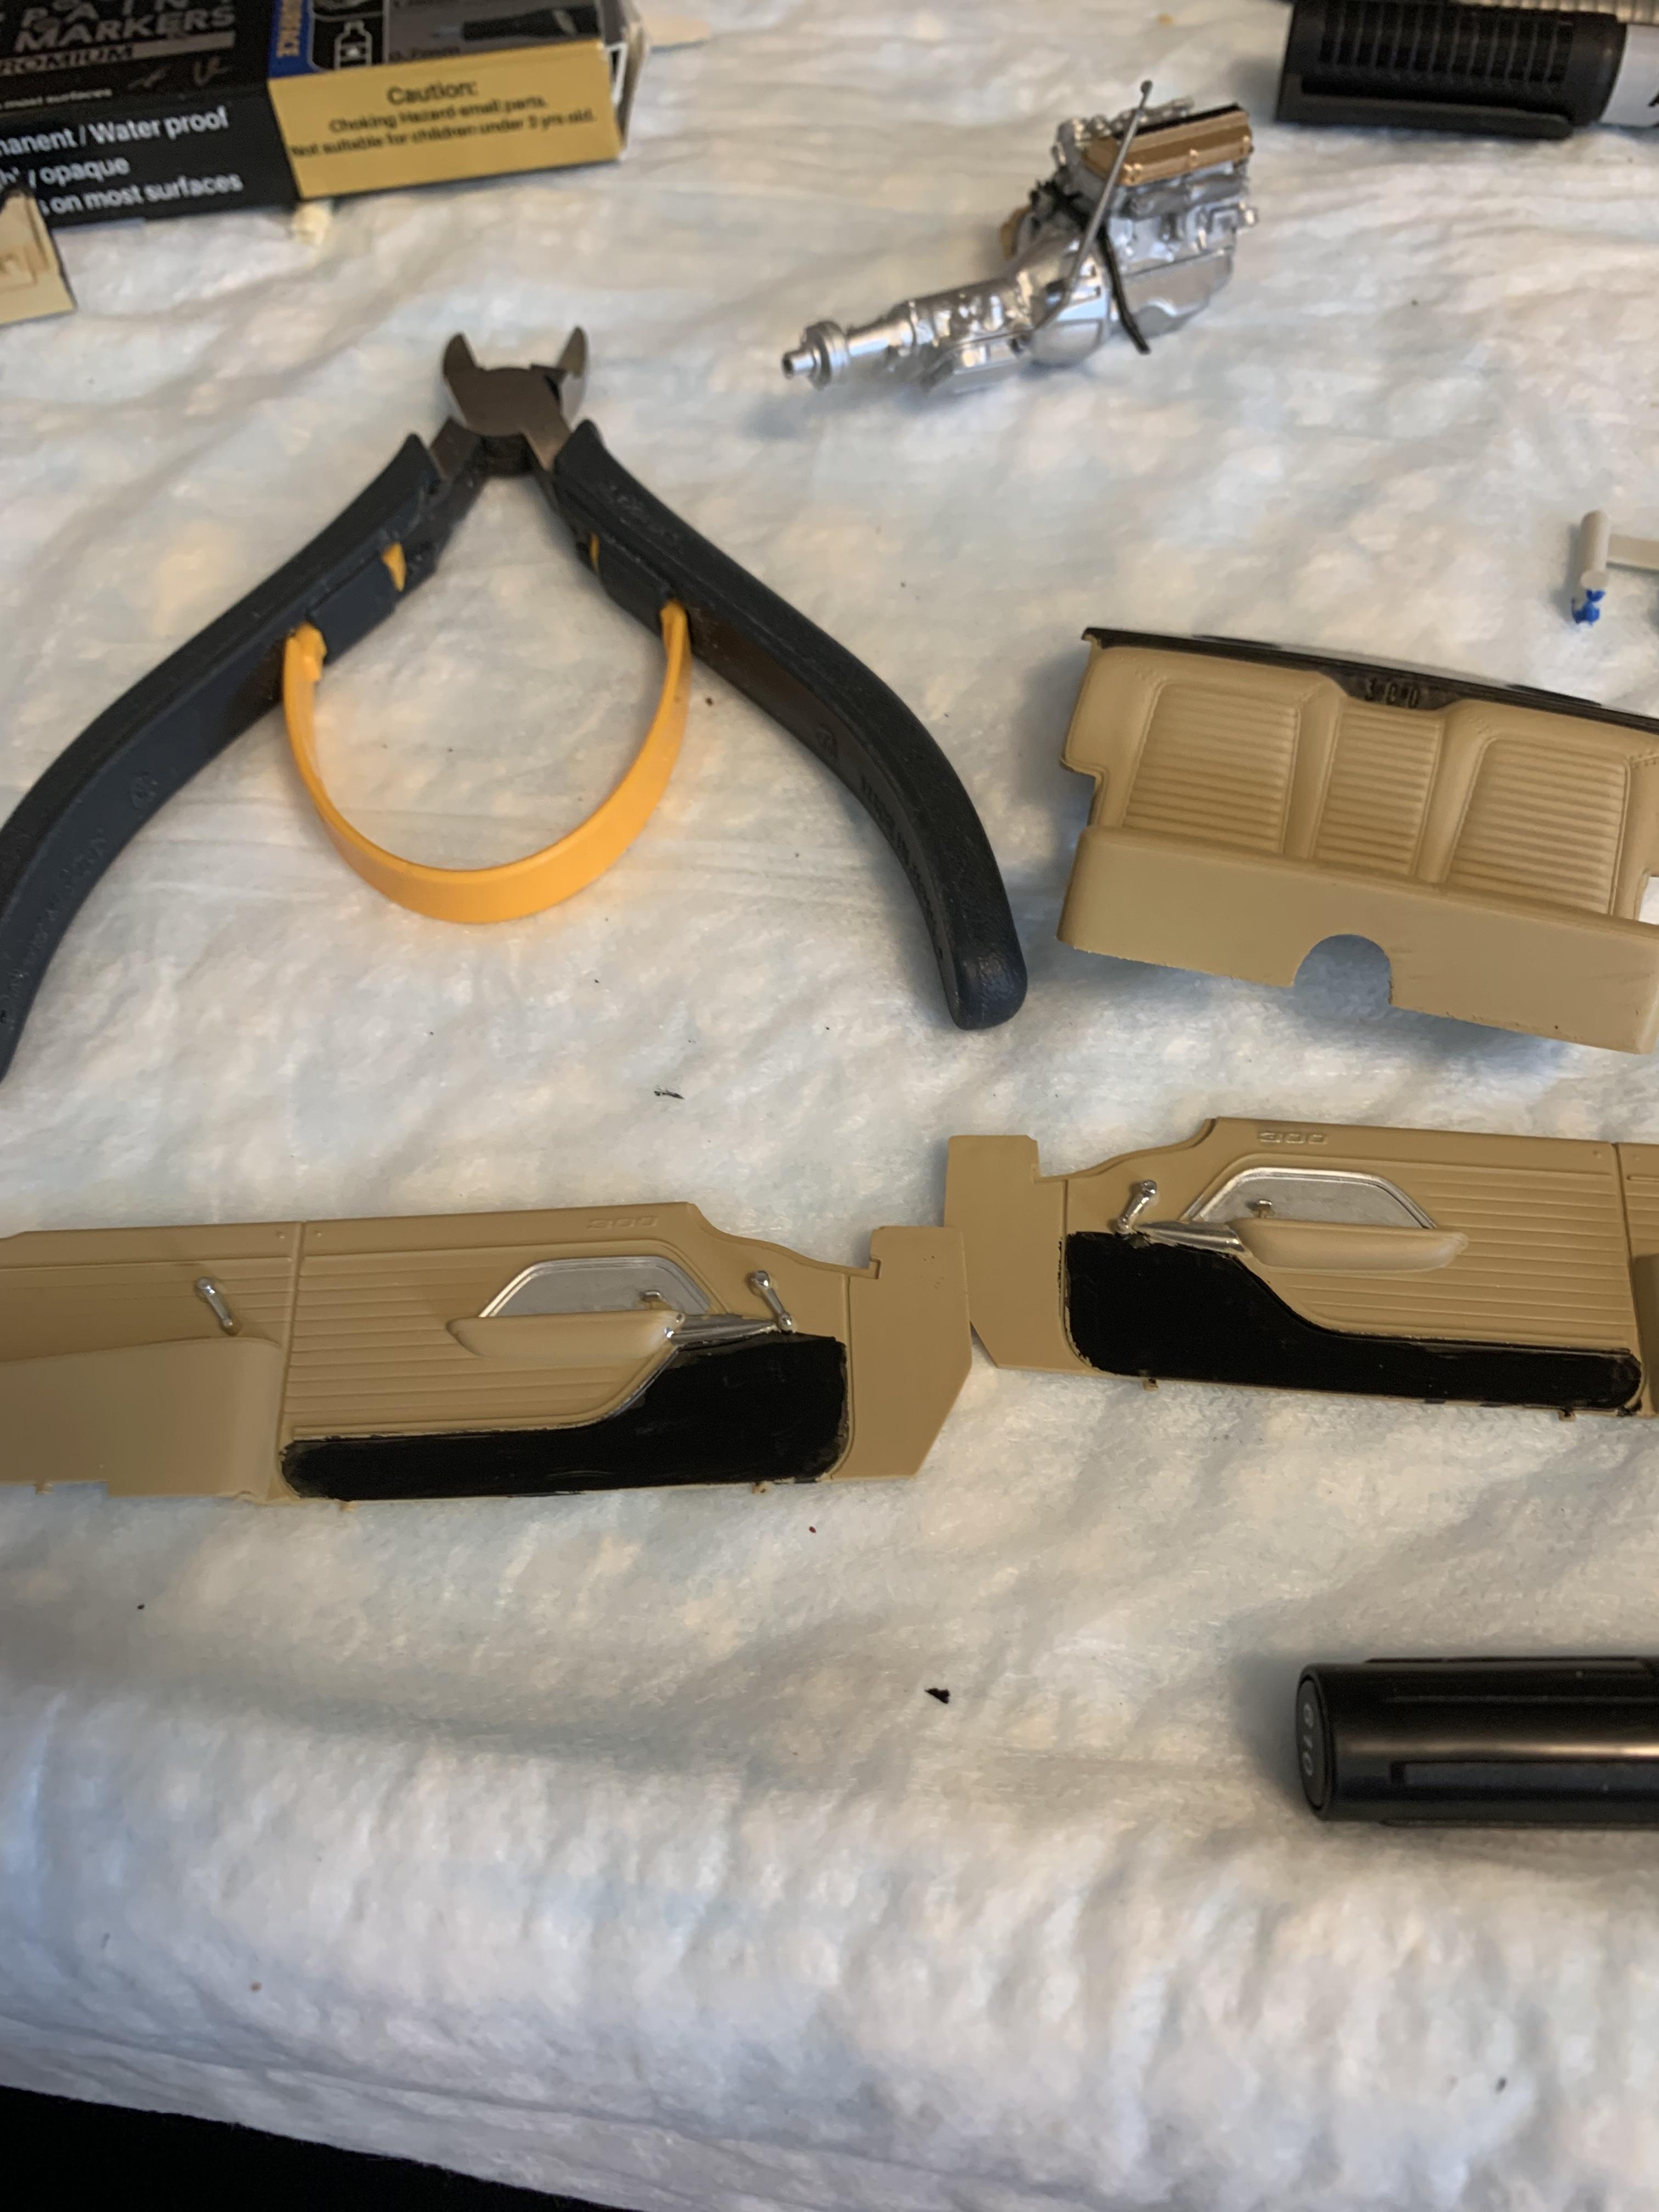
Thought there might be decals for the side trim. Nope. So, used some acrylic markers and cobbled them up. Not pretty, but moving on. Used a chrome pen to finish up the wipers and the vents. Installed some firewall parts and glued it on along with frame to the interior.
-
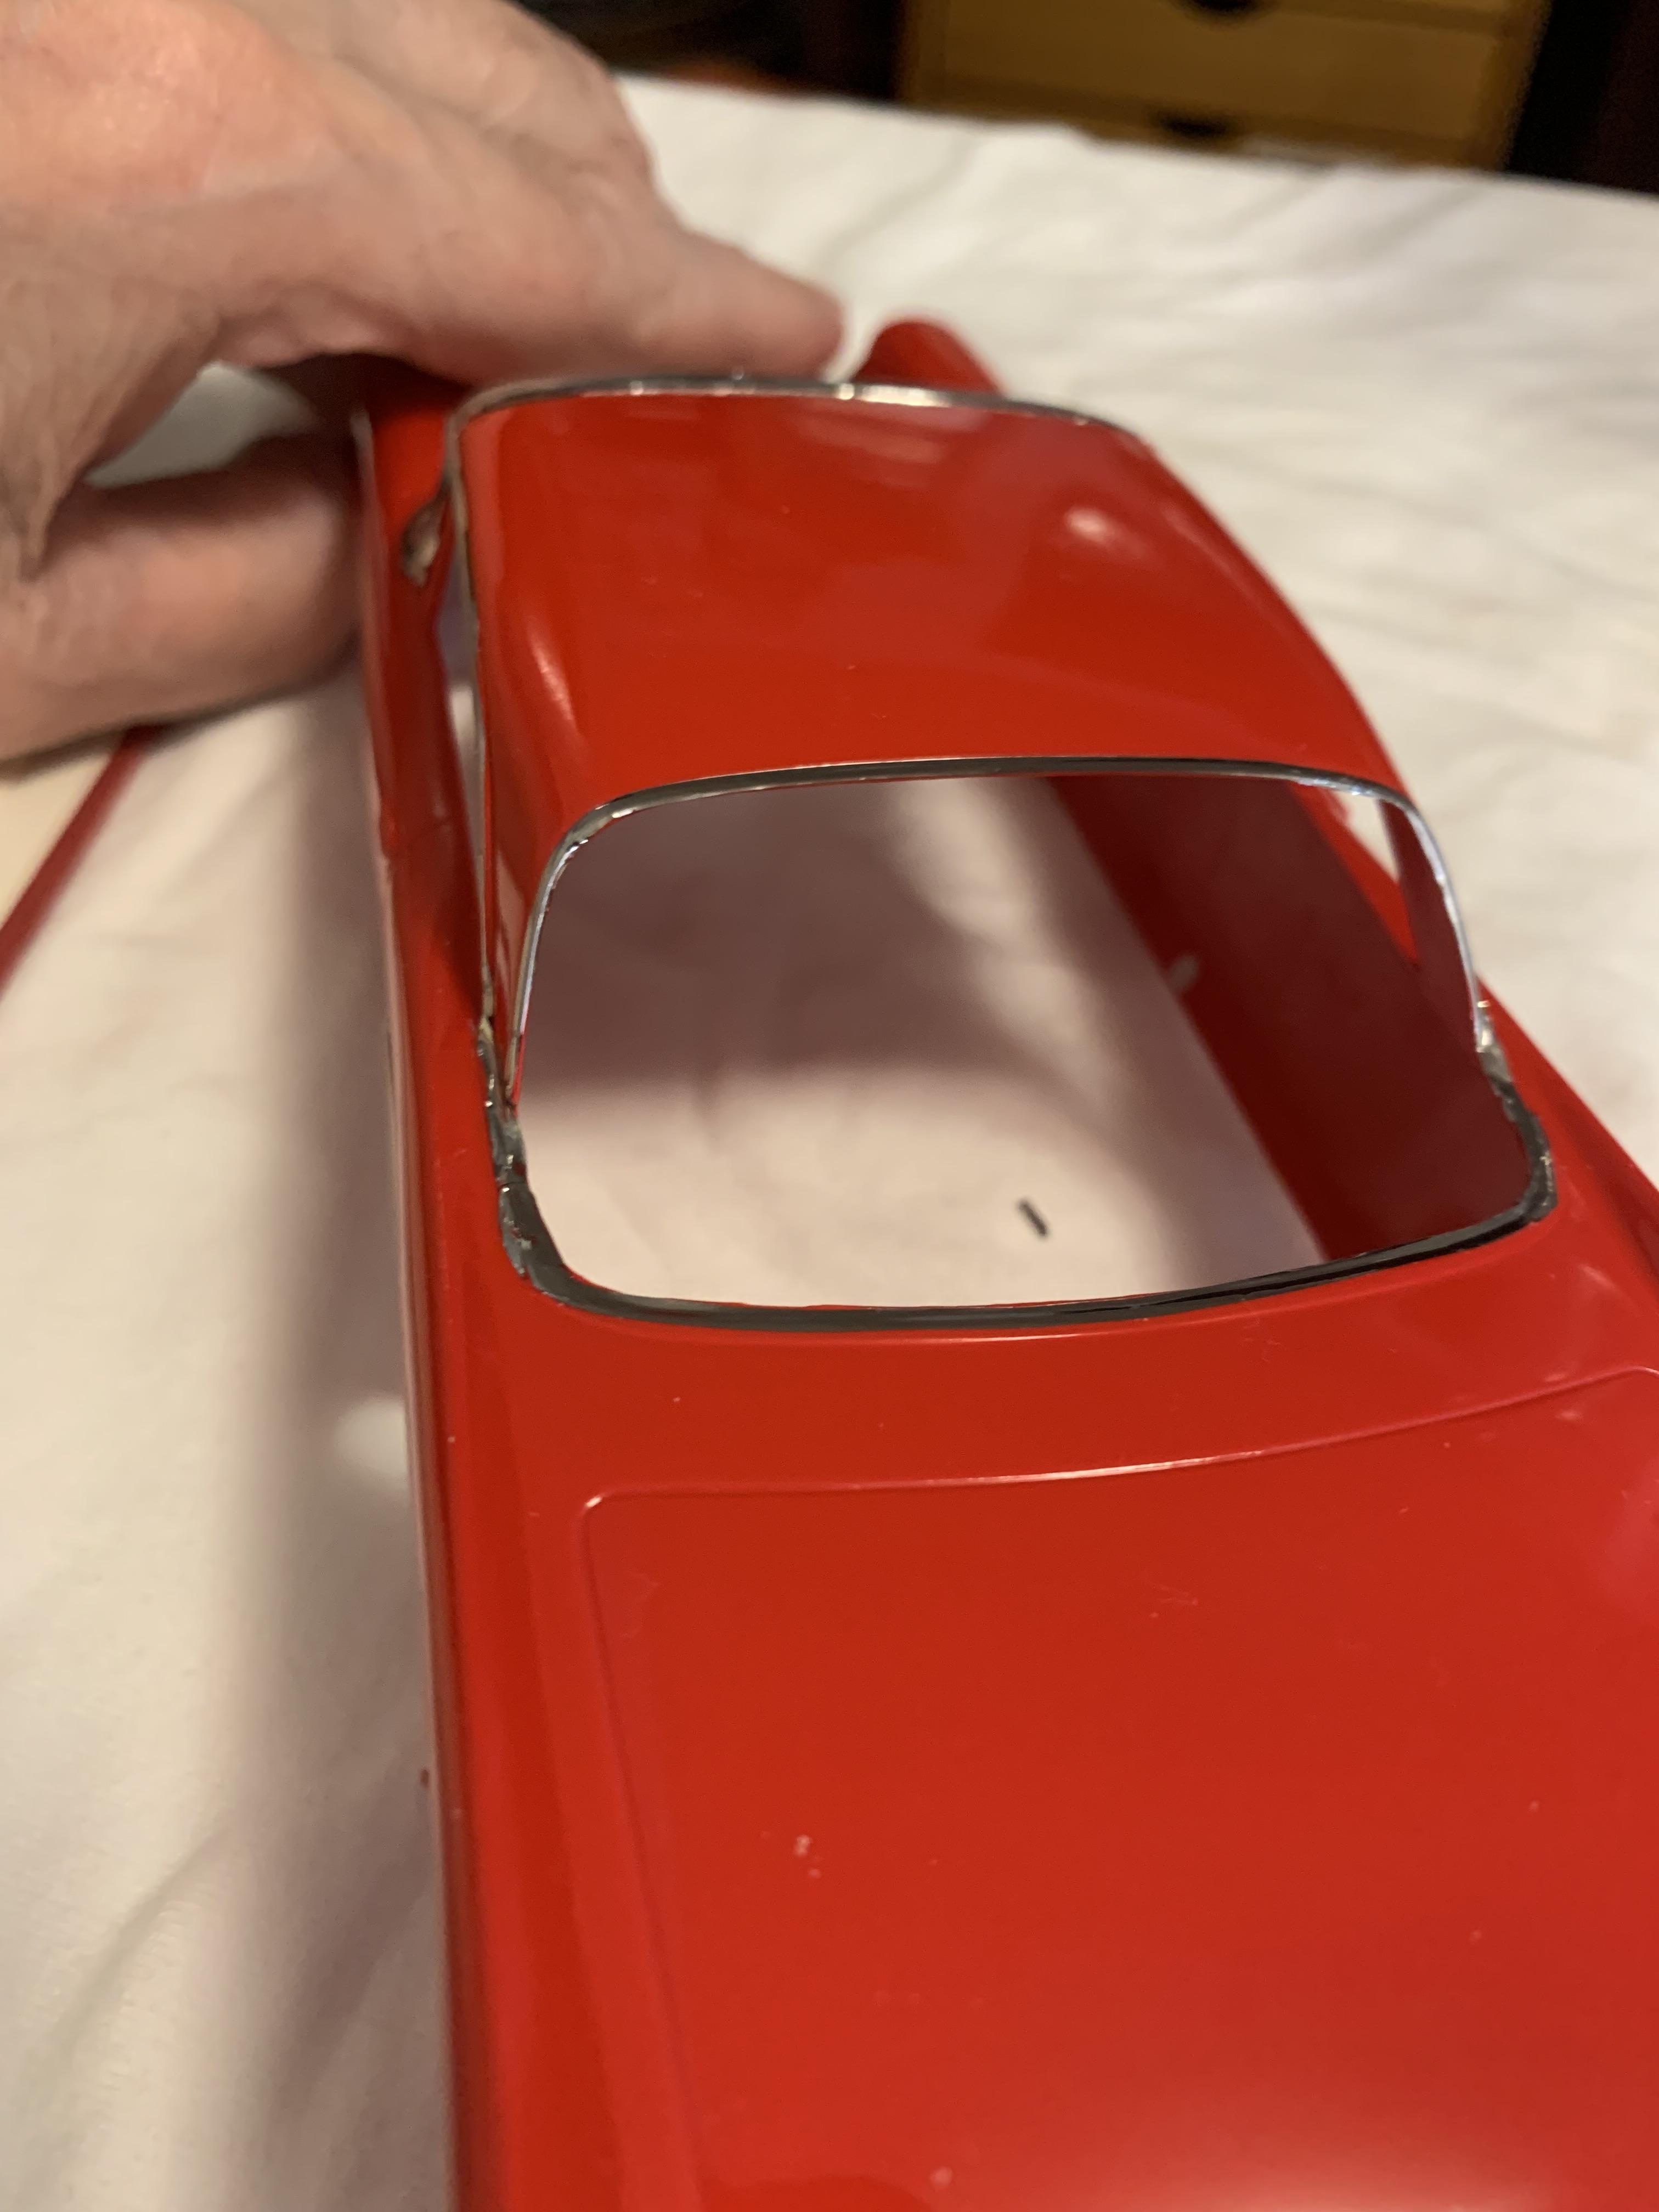
Thanks, gentlemen. Not much done today. Had left the Tamiya stuff on the top and decided I didn’t like it today. So took it off. Sorta hard to get off being so thin, but finally, my fingernail finished the job. Then I applied the Hasegawa.
-
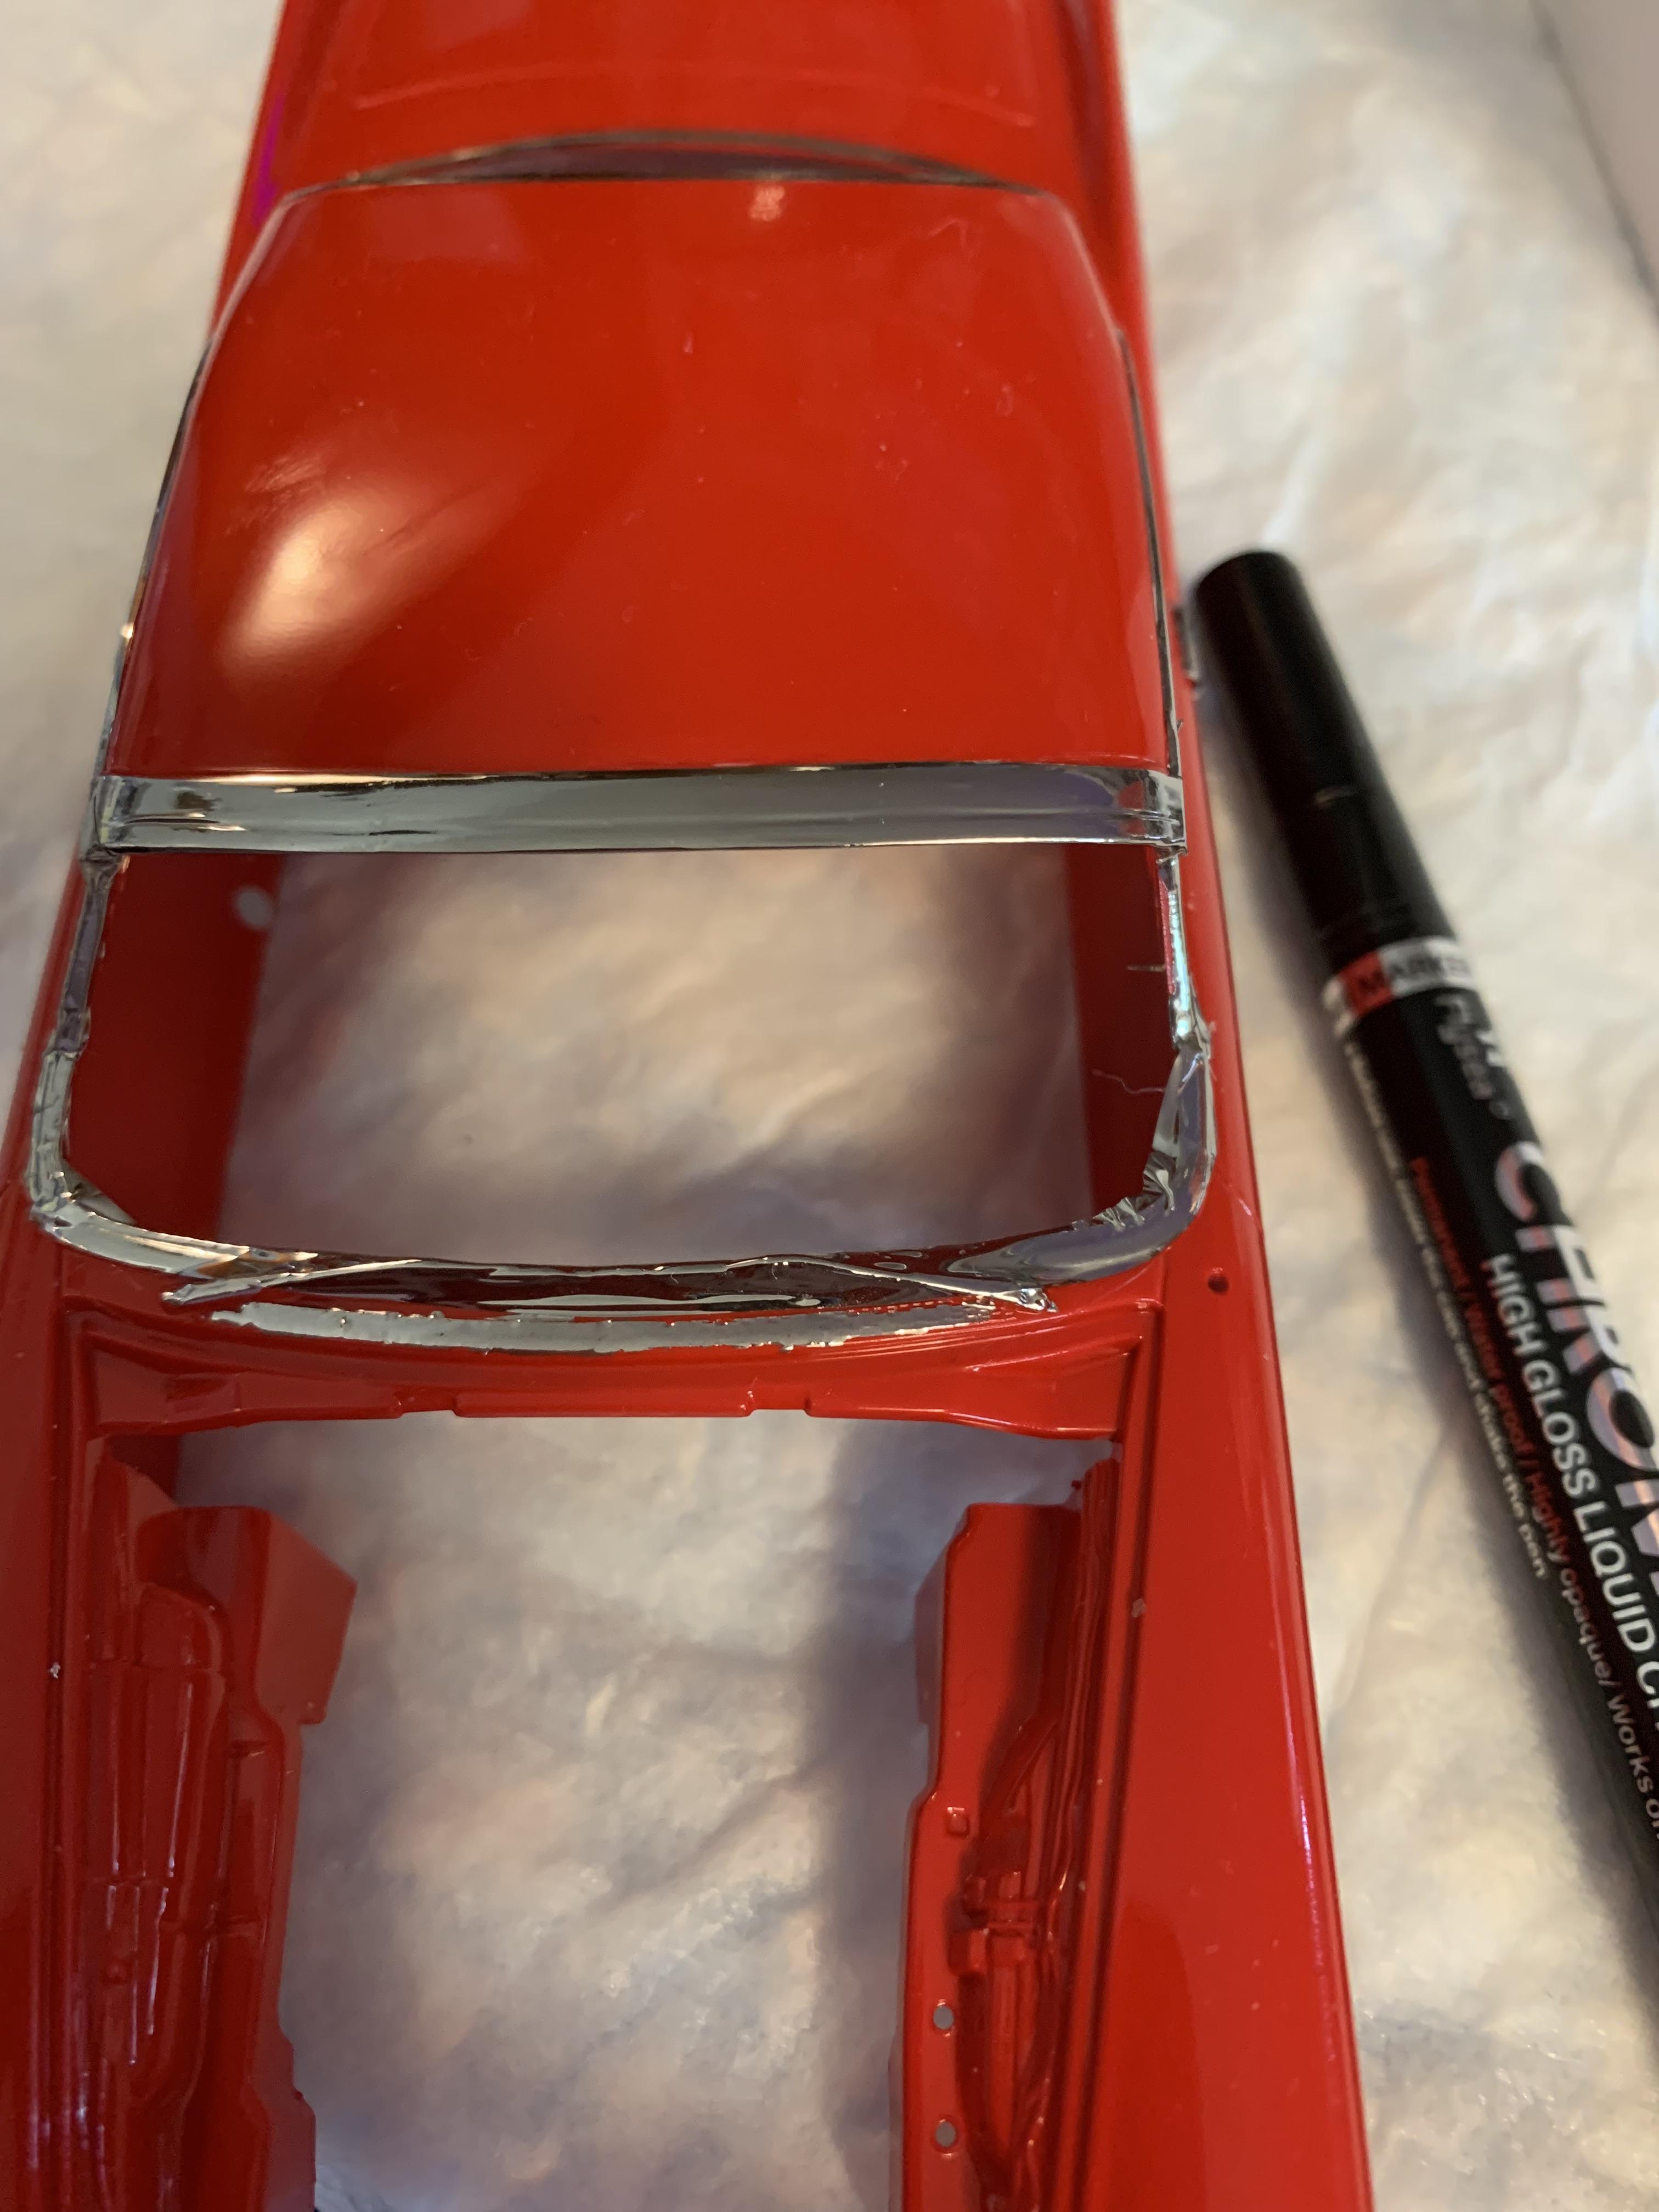
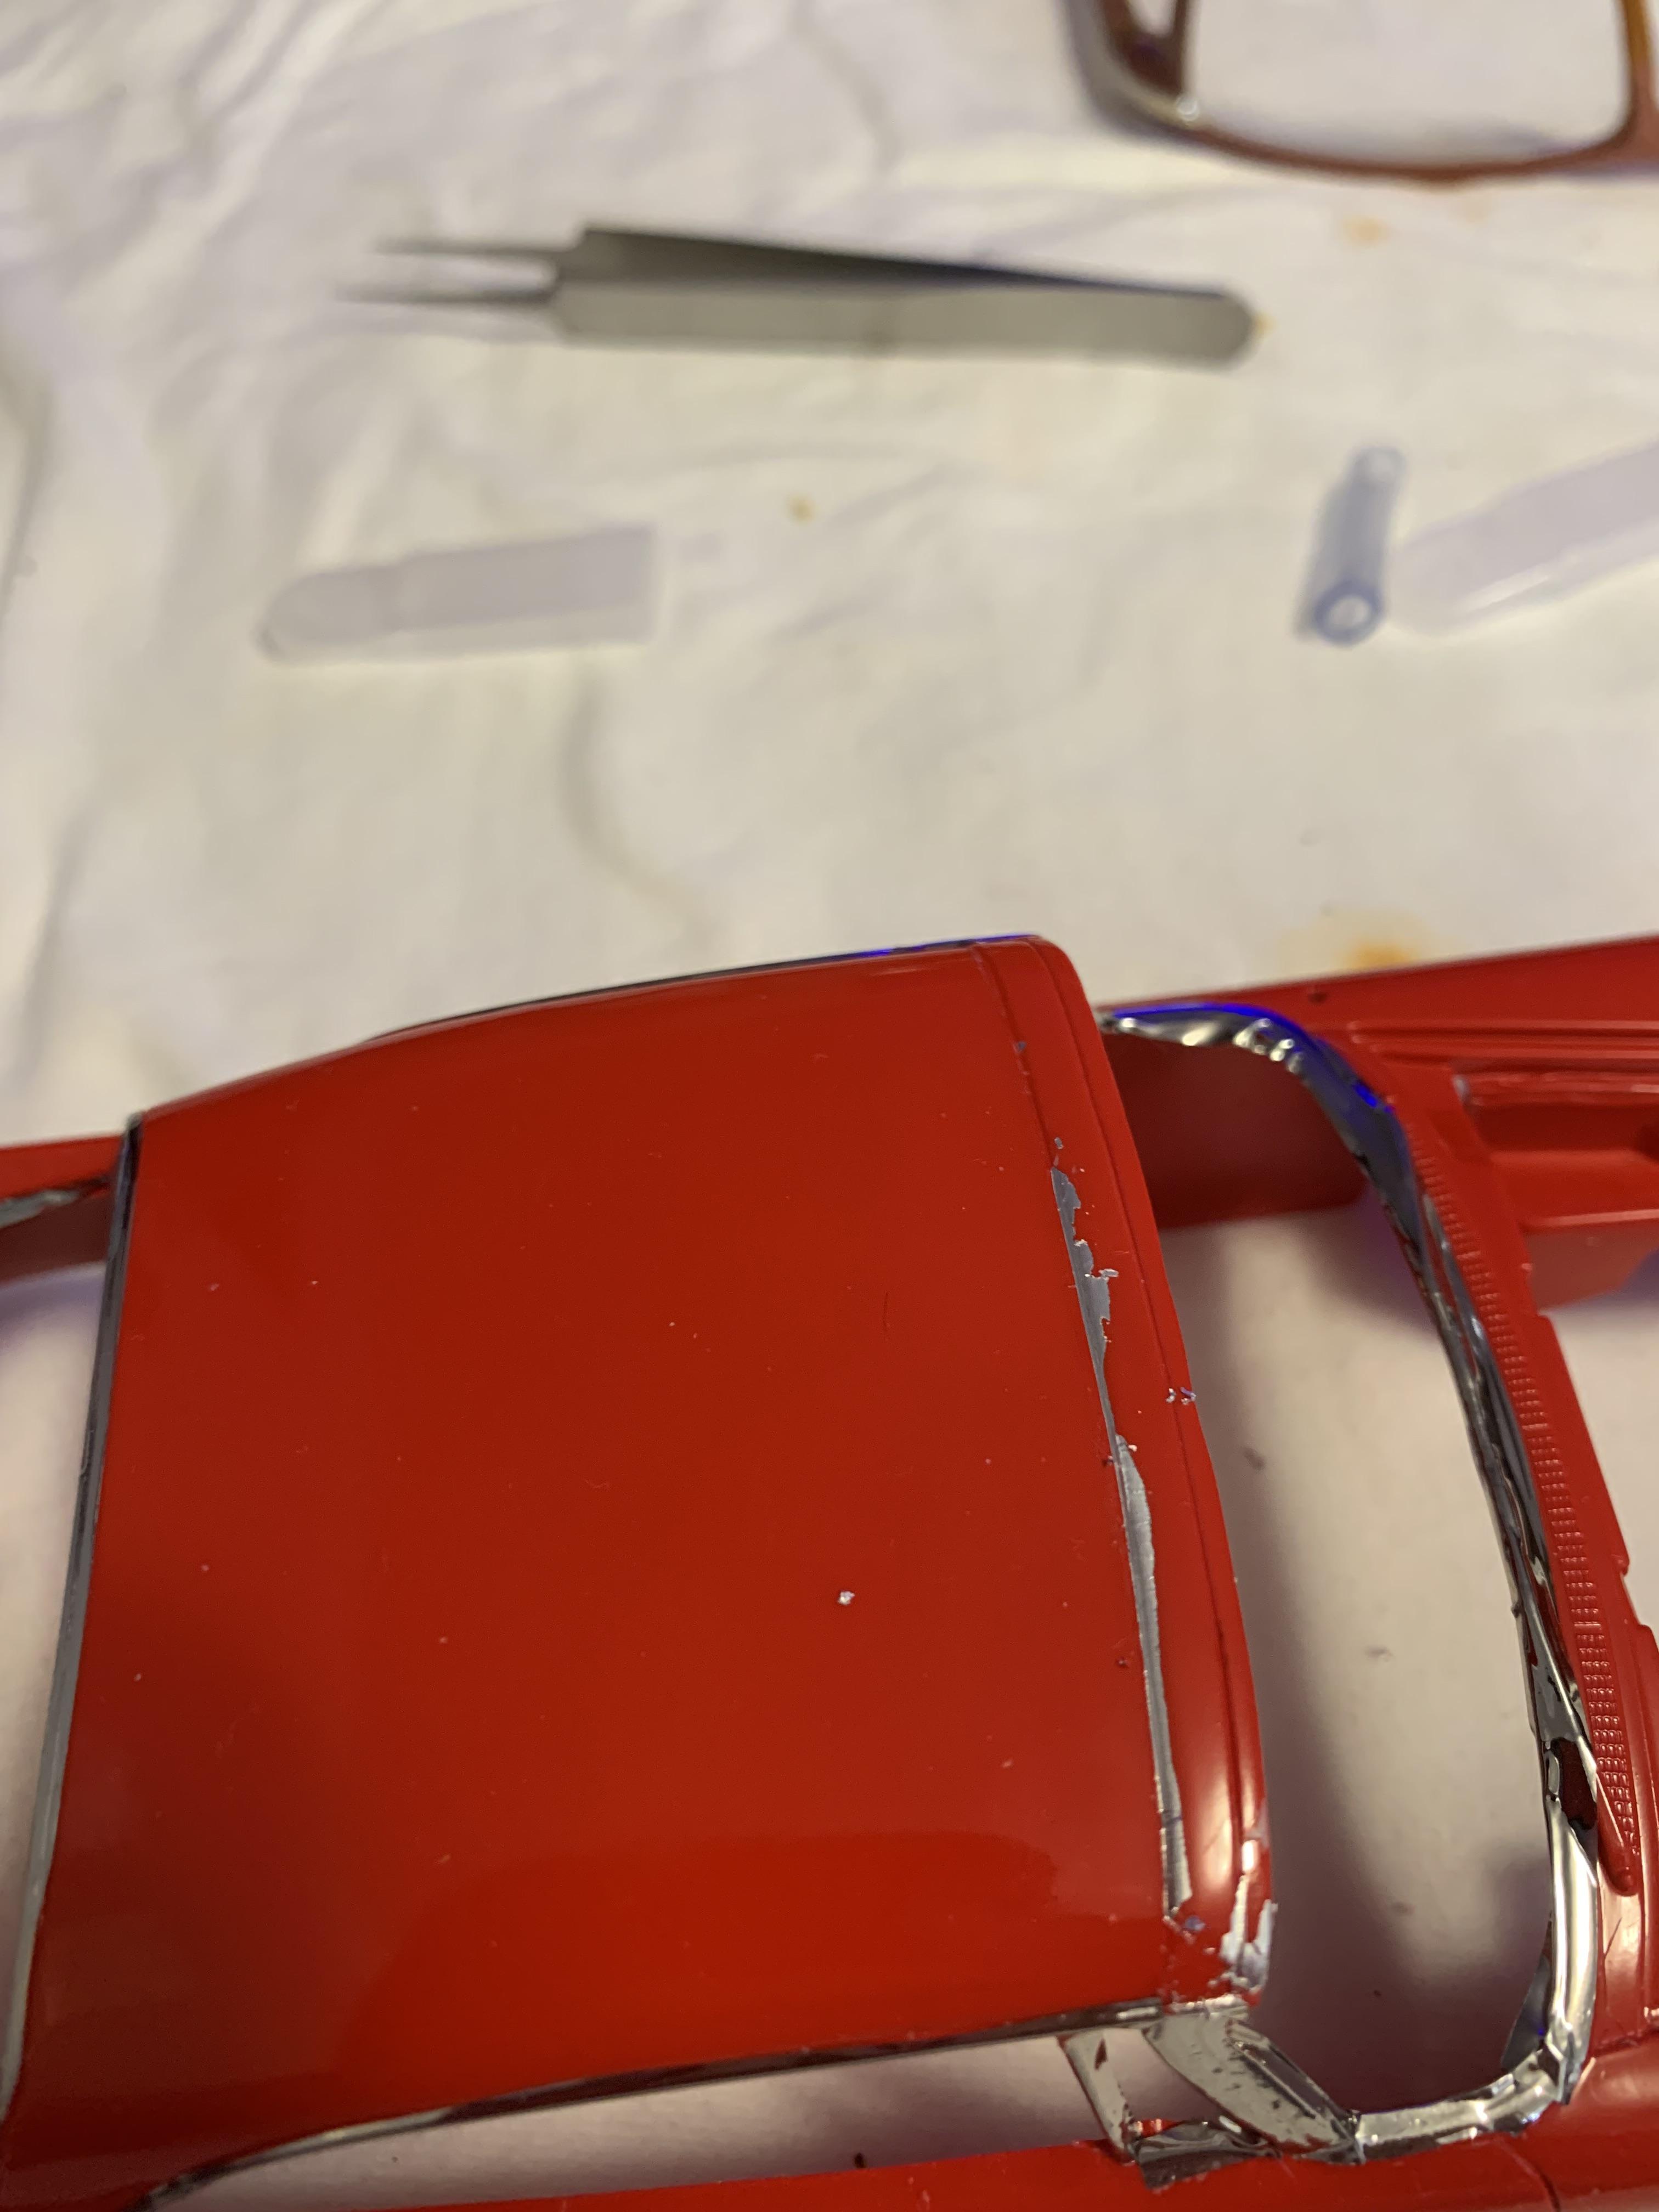
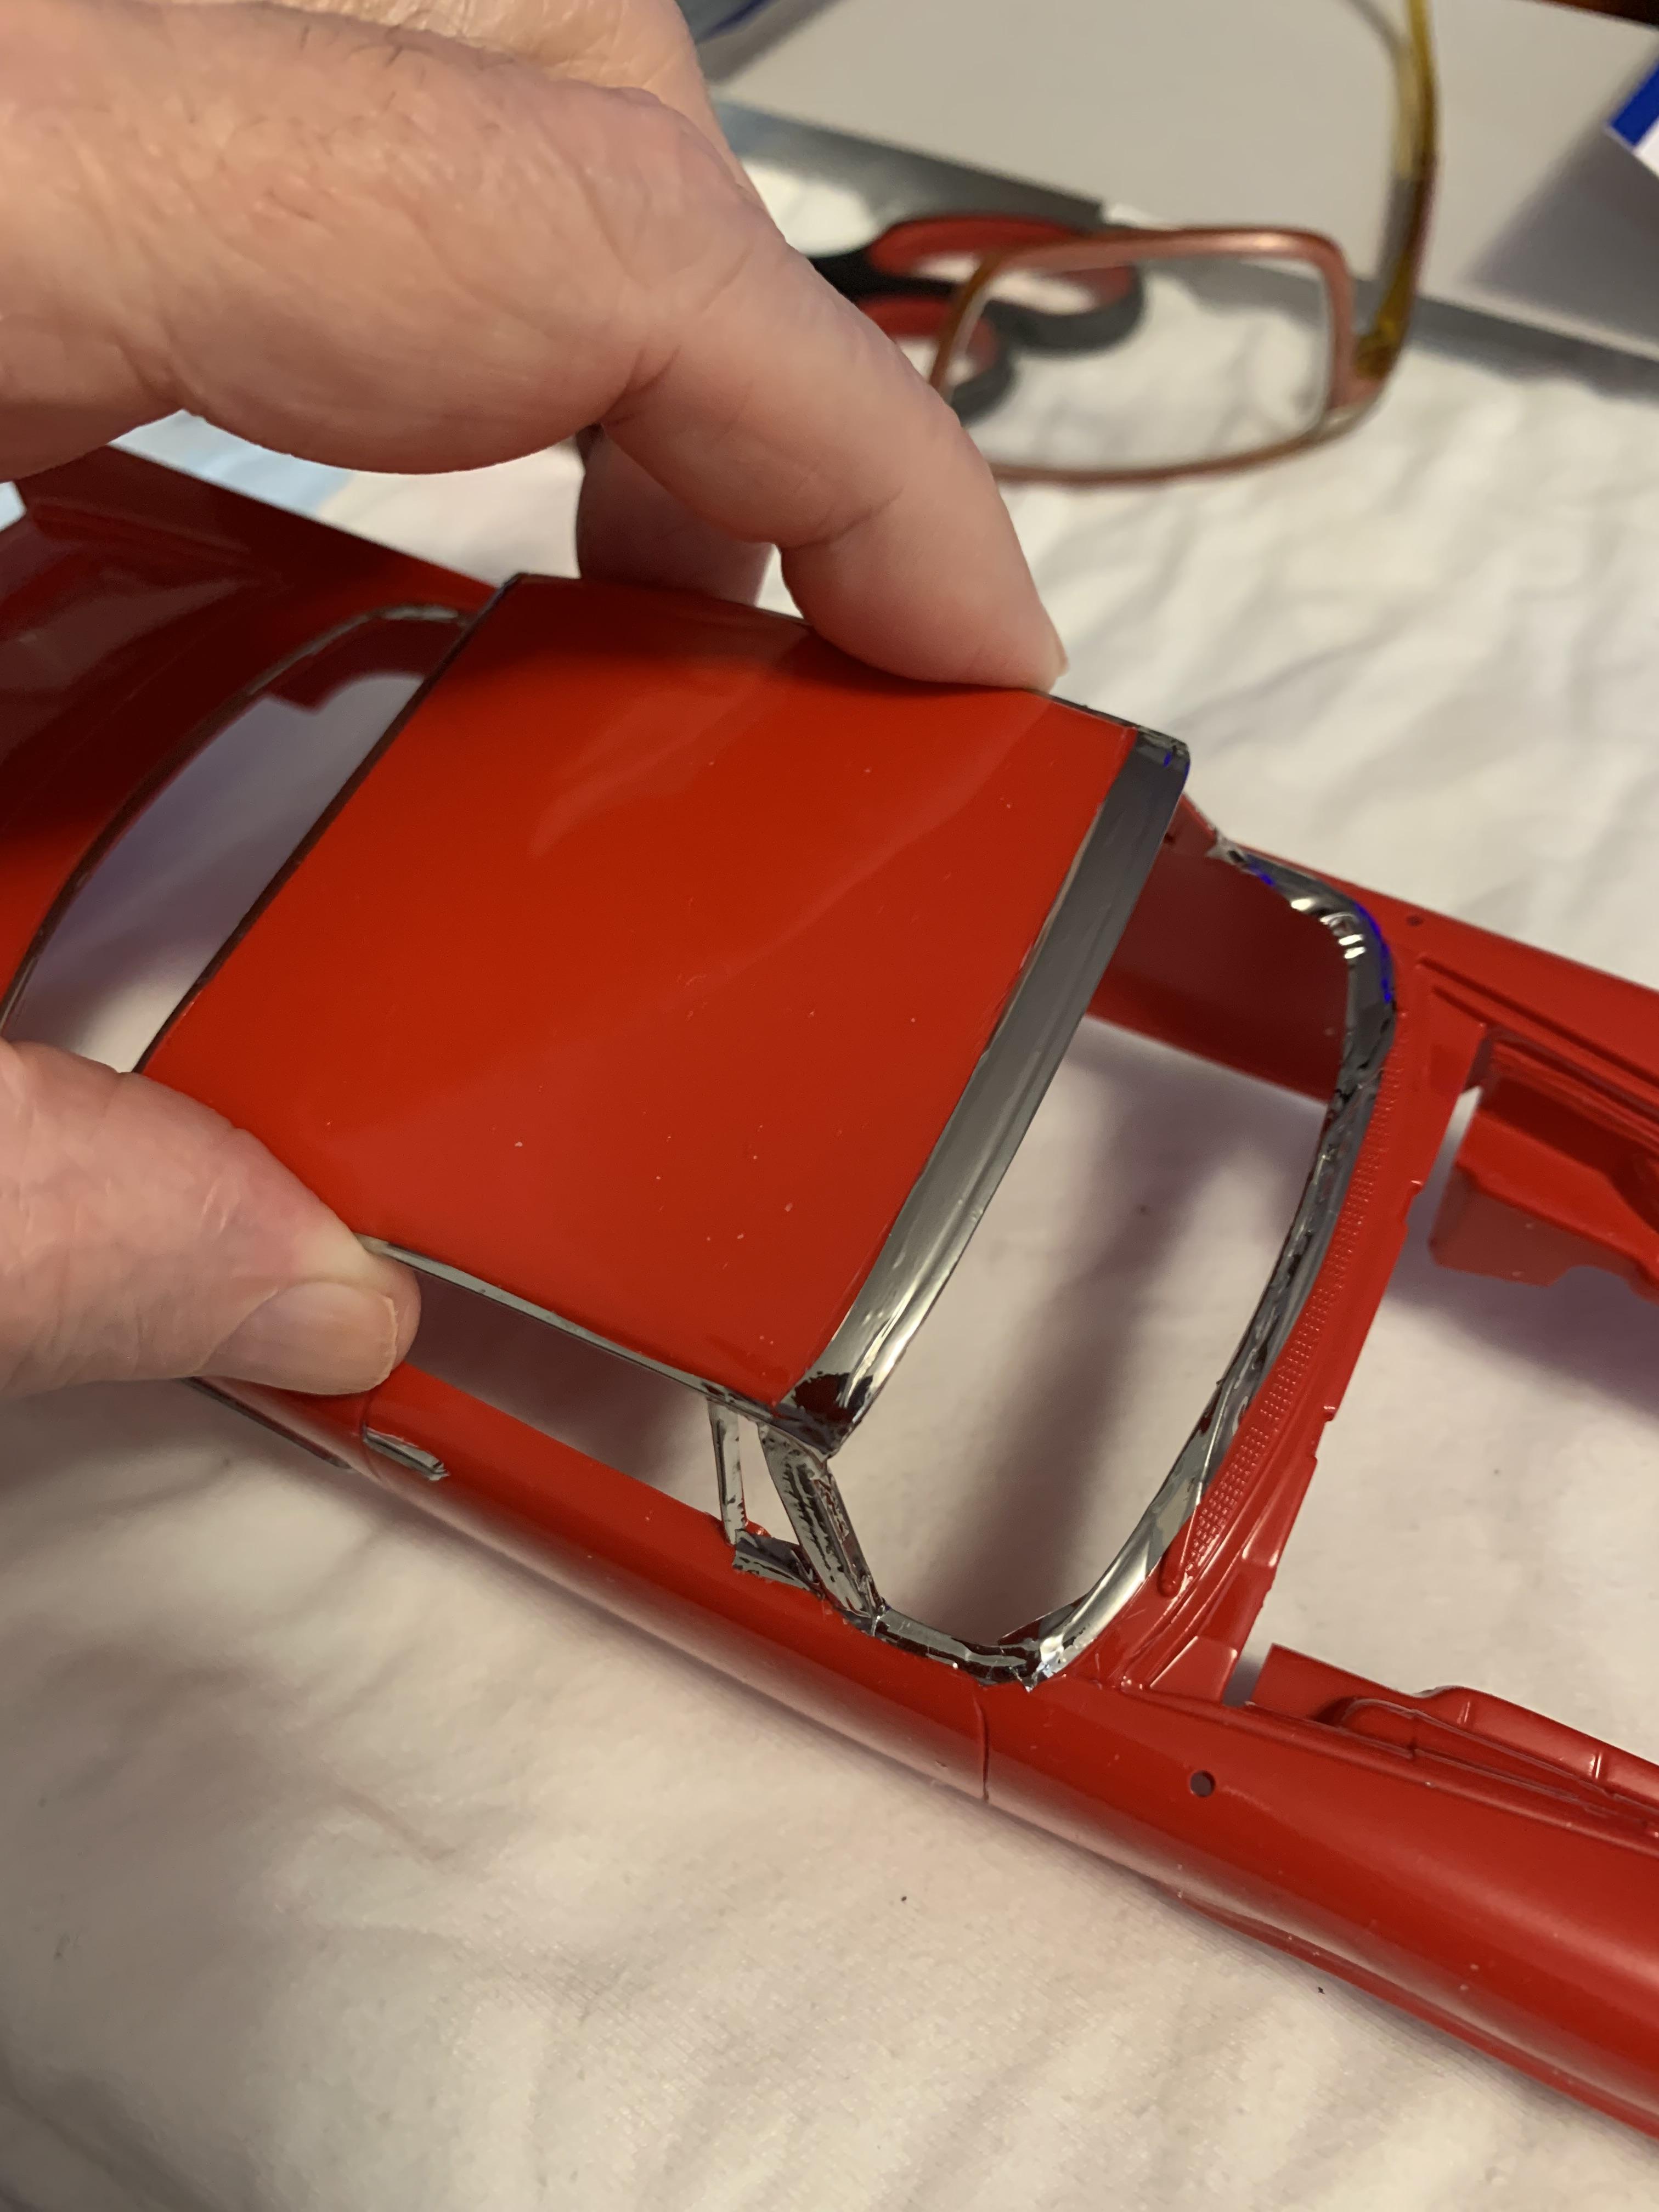
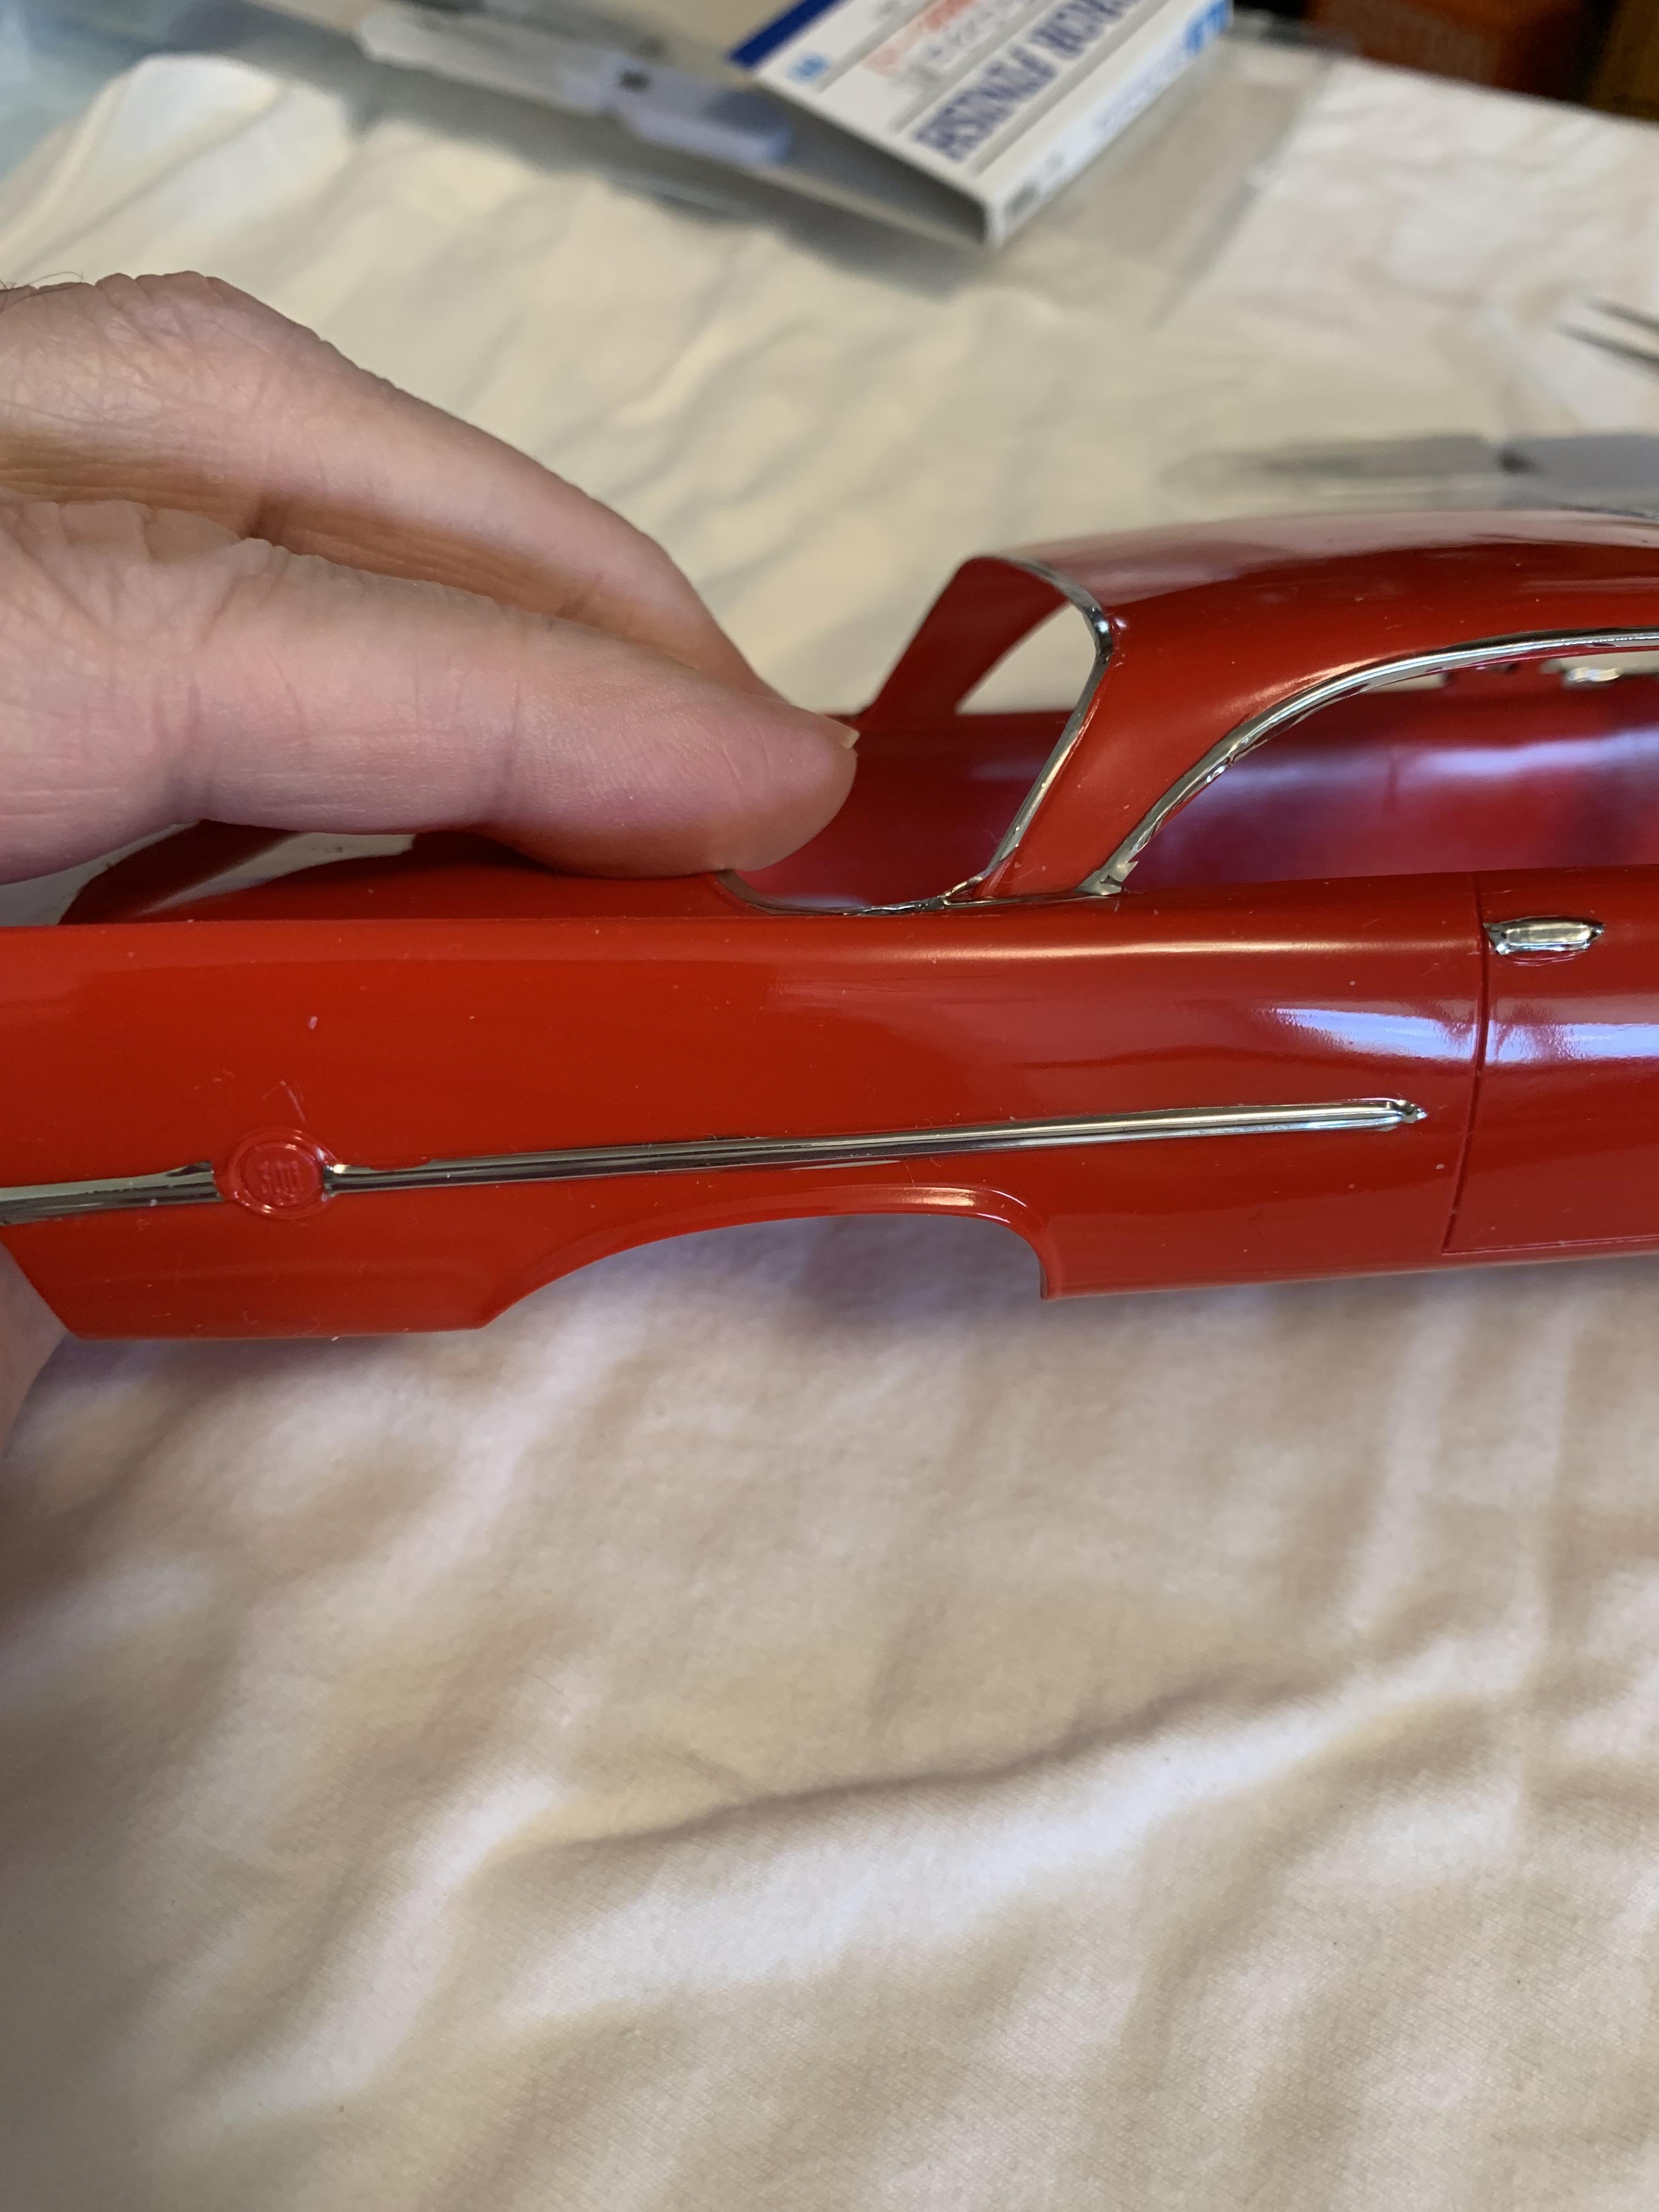
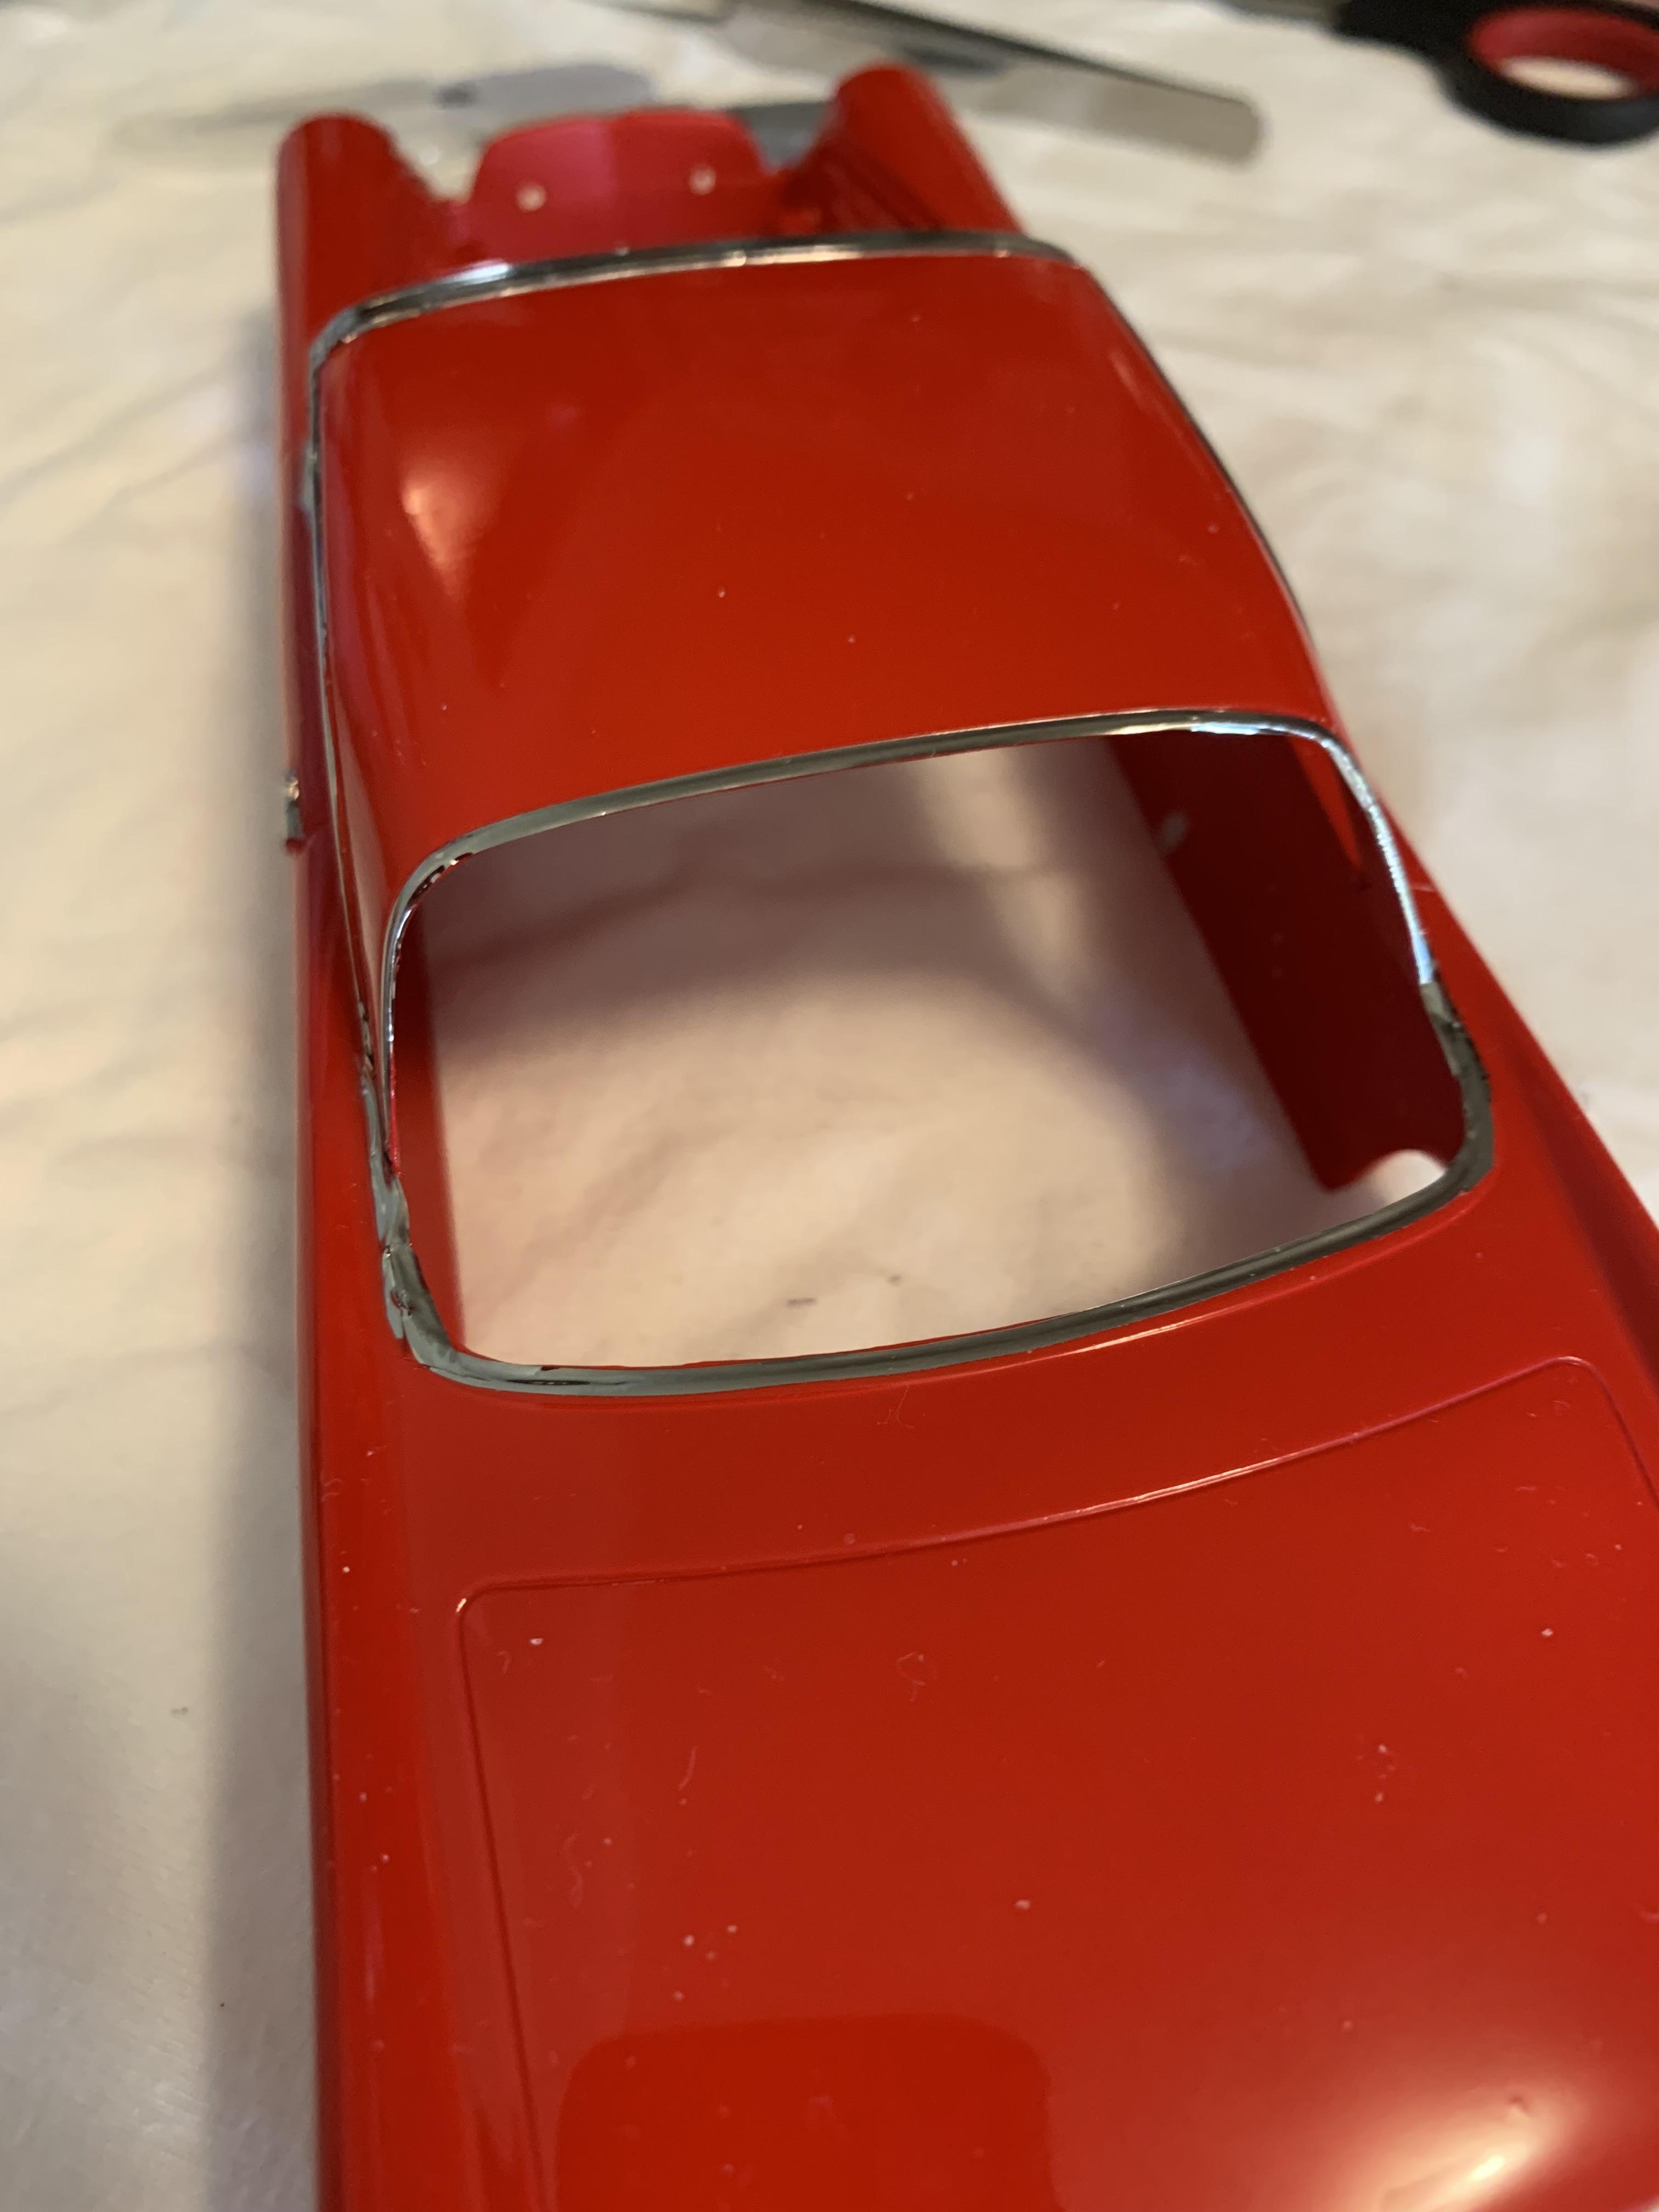
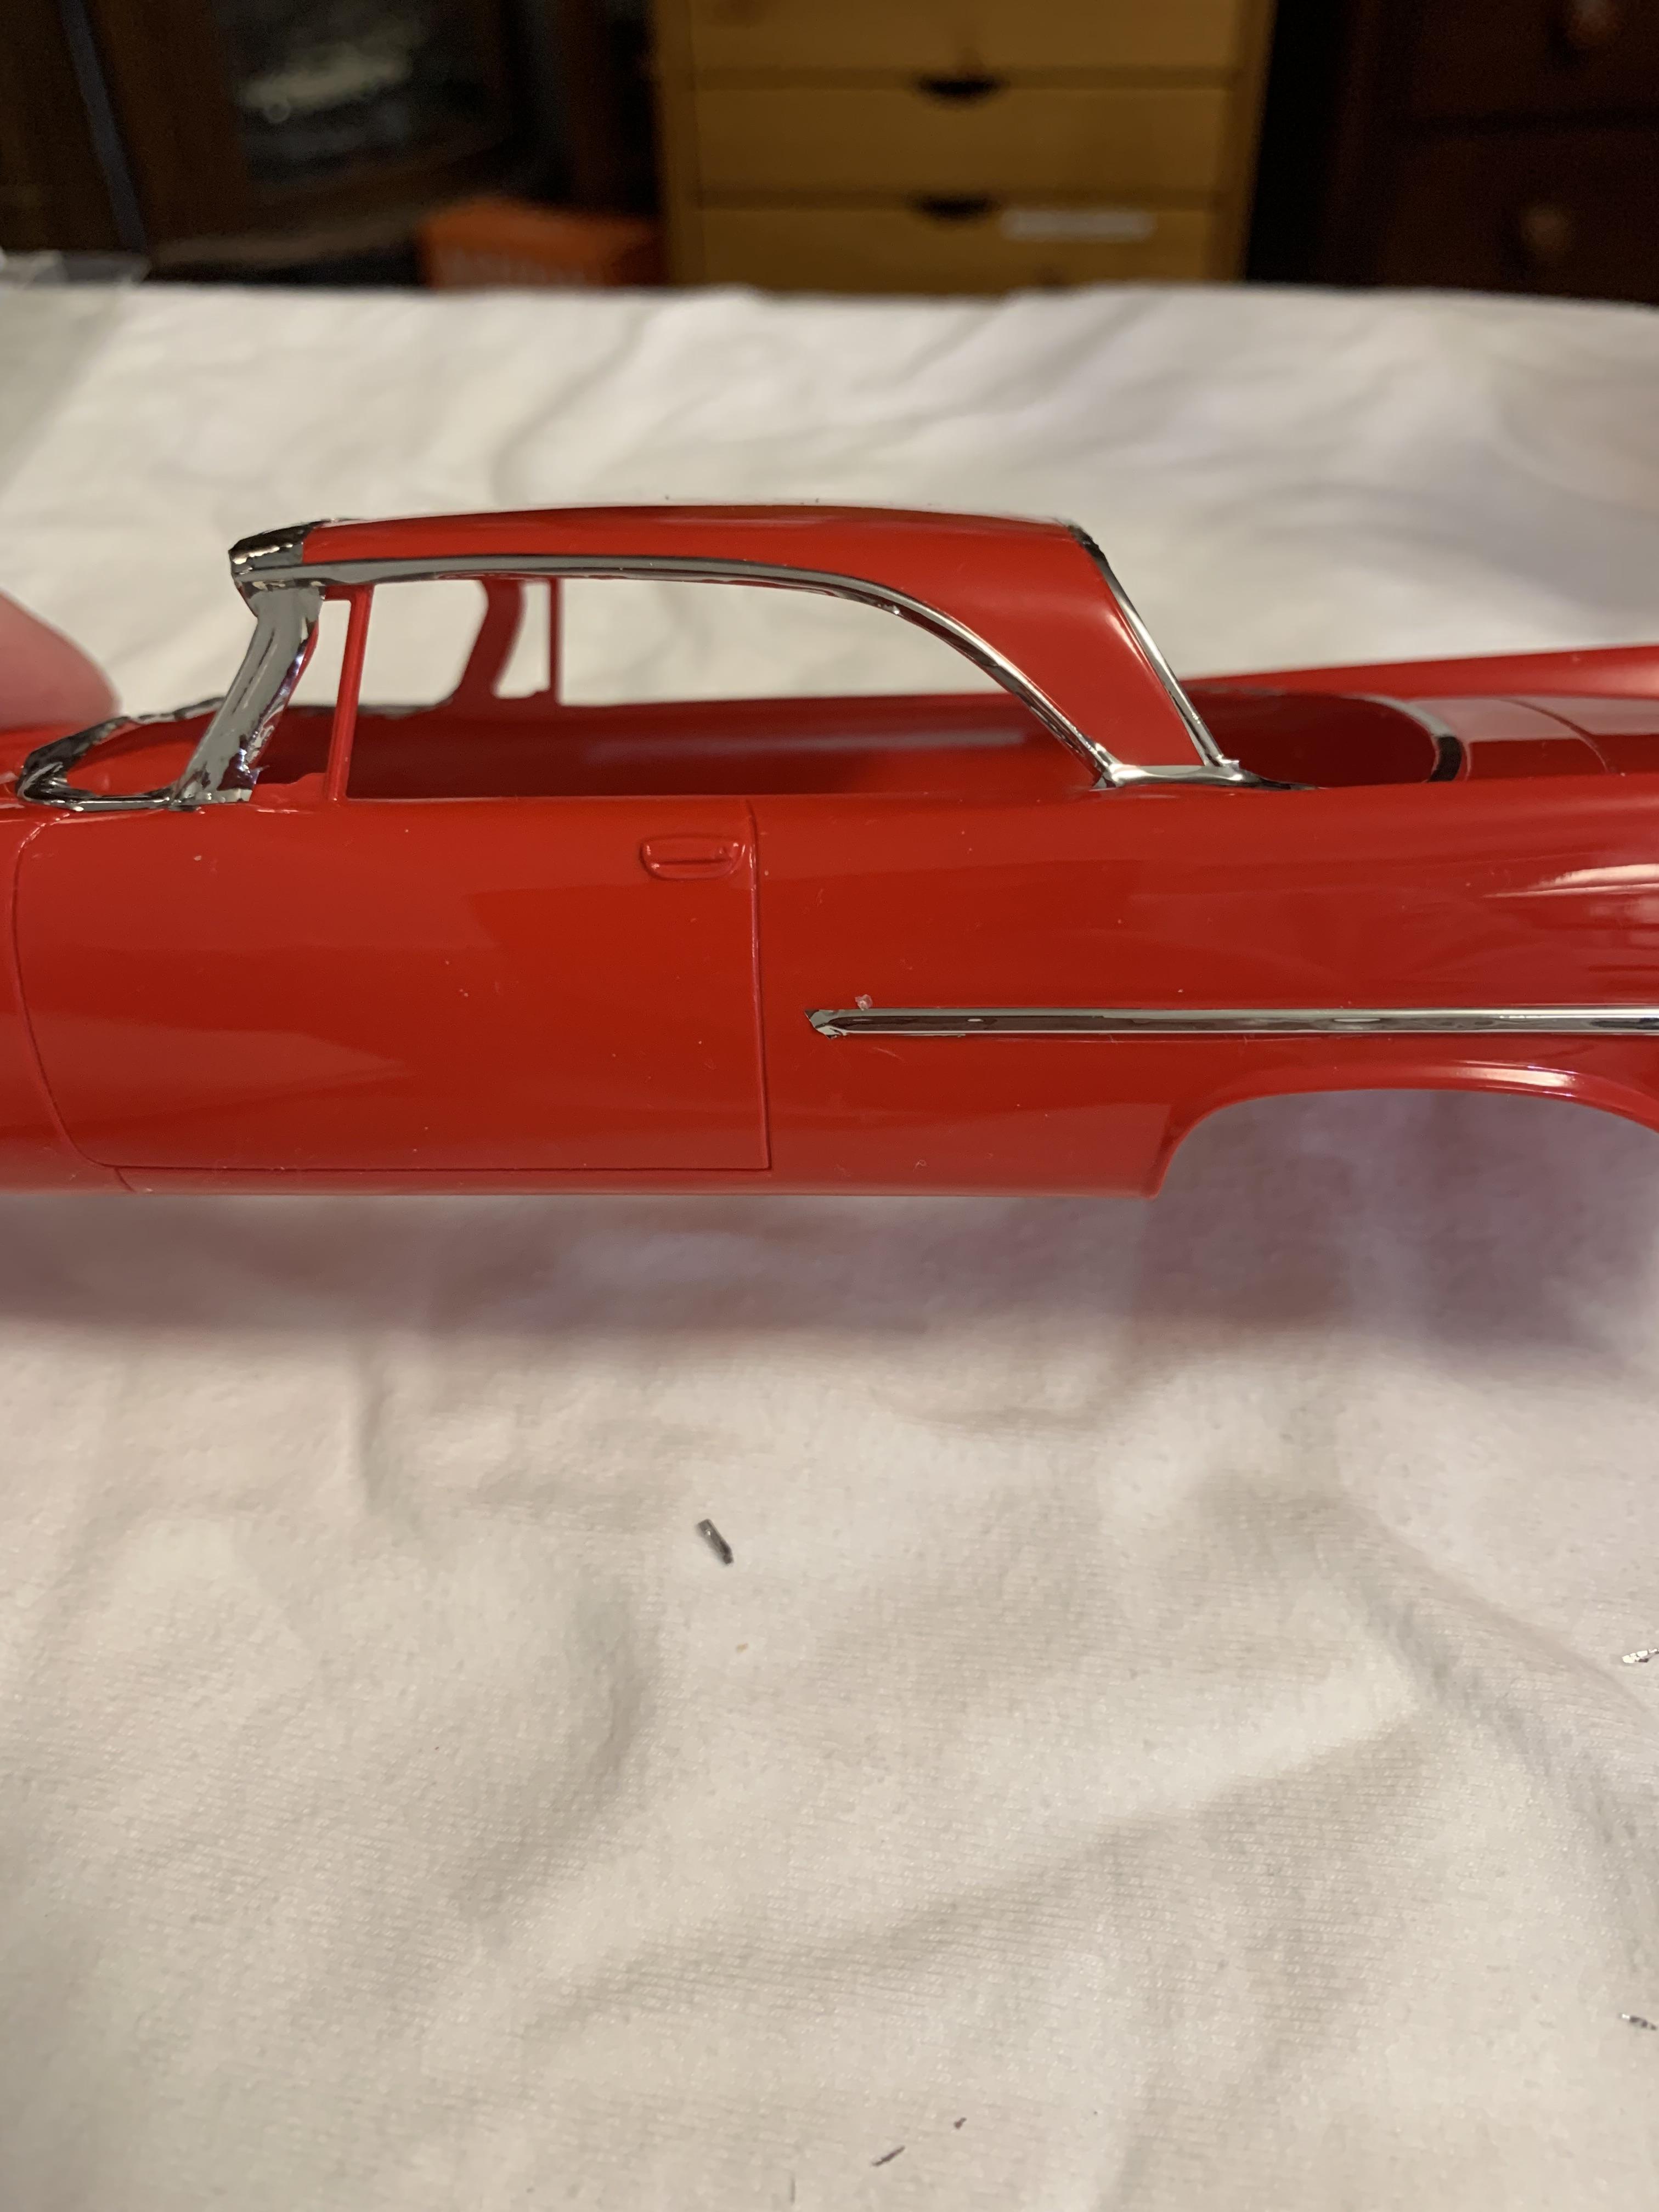
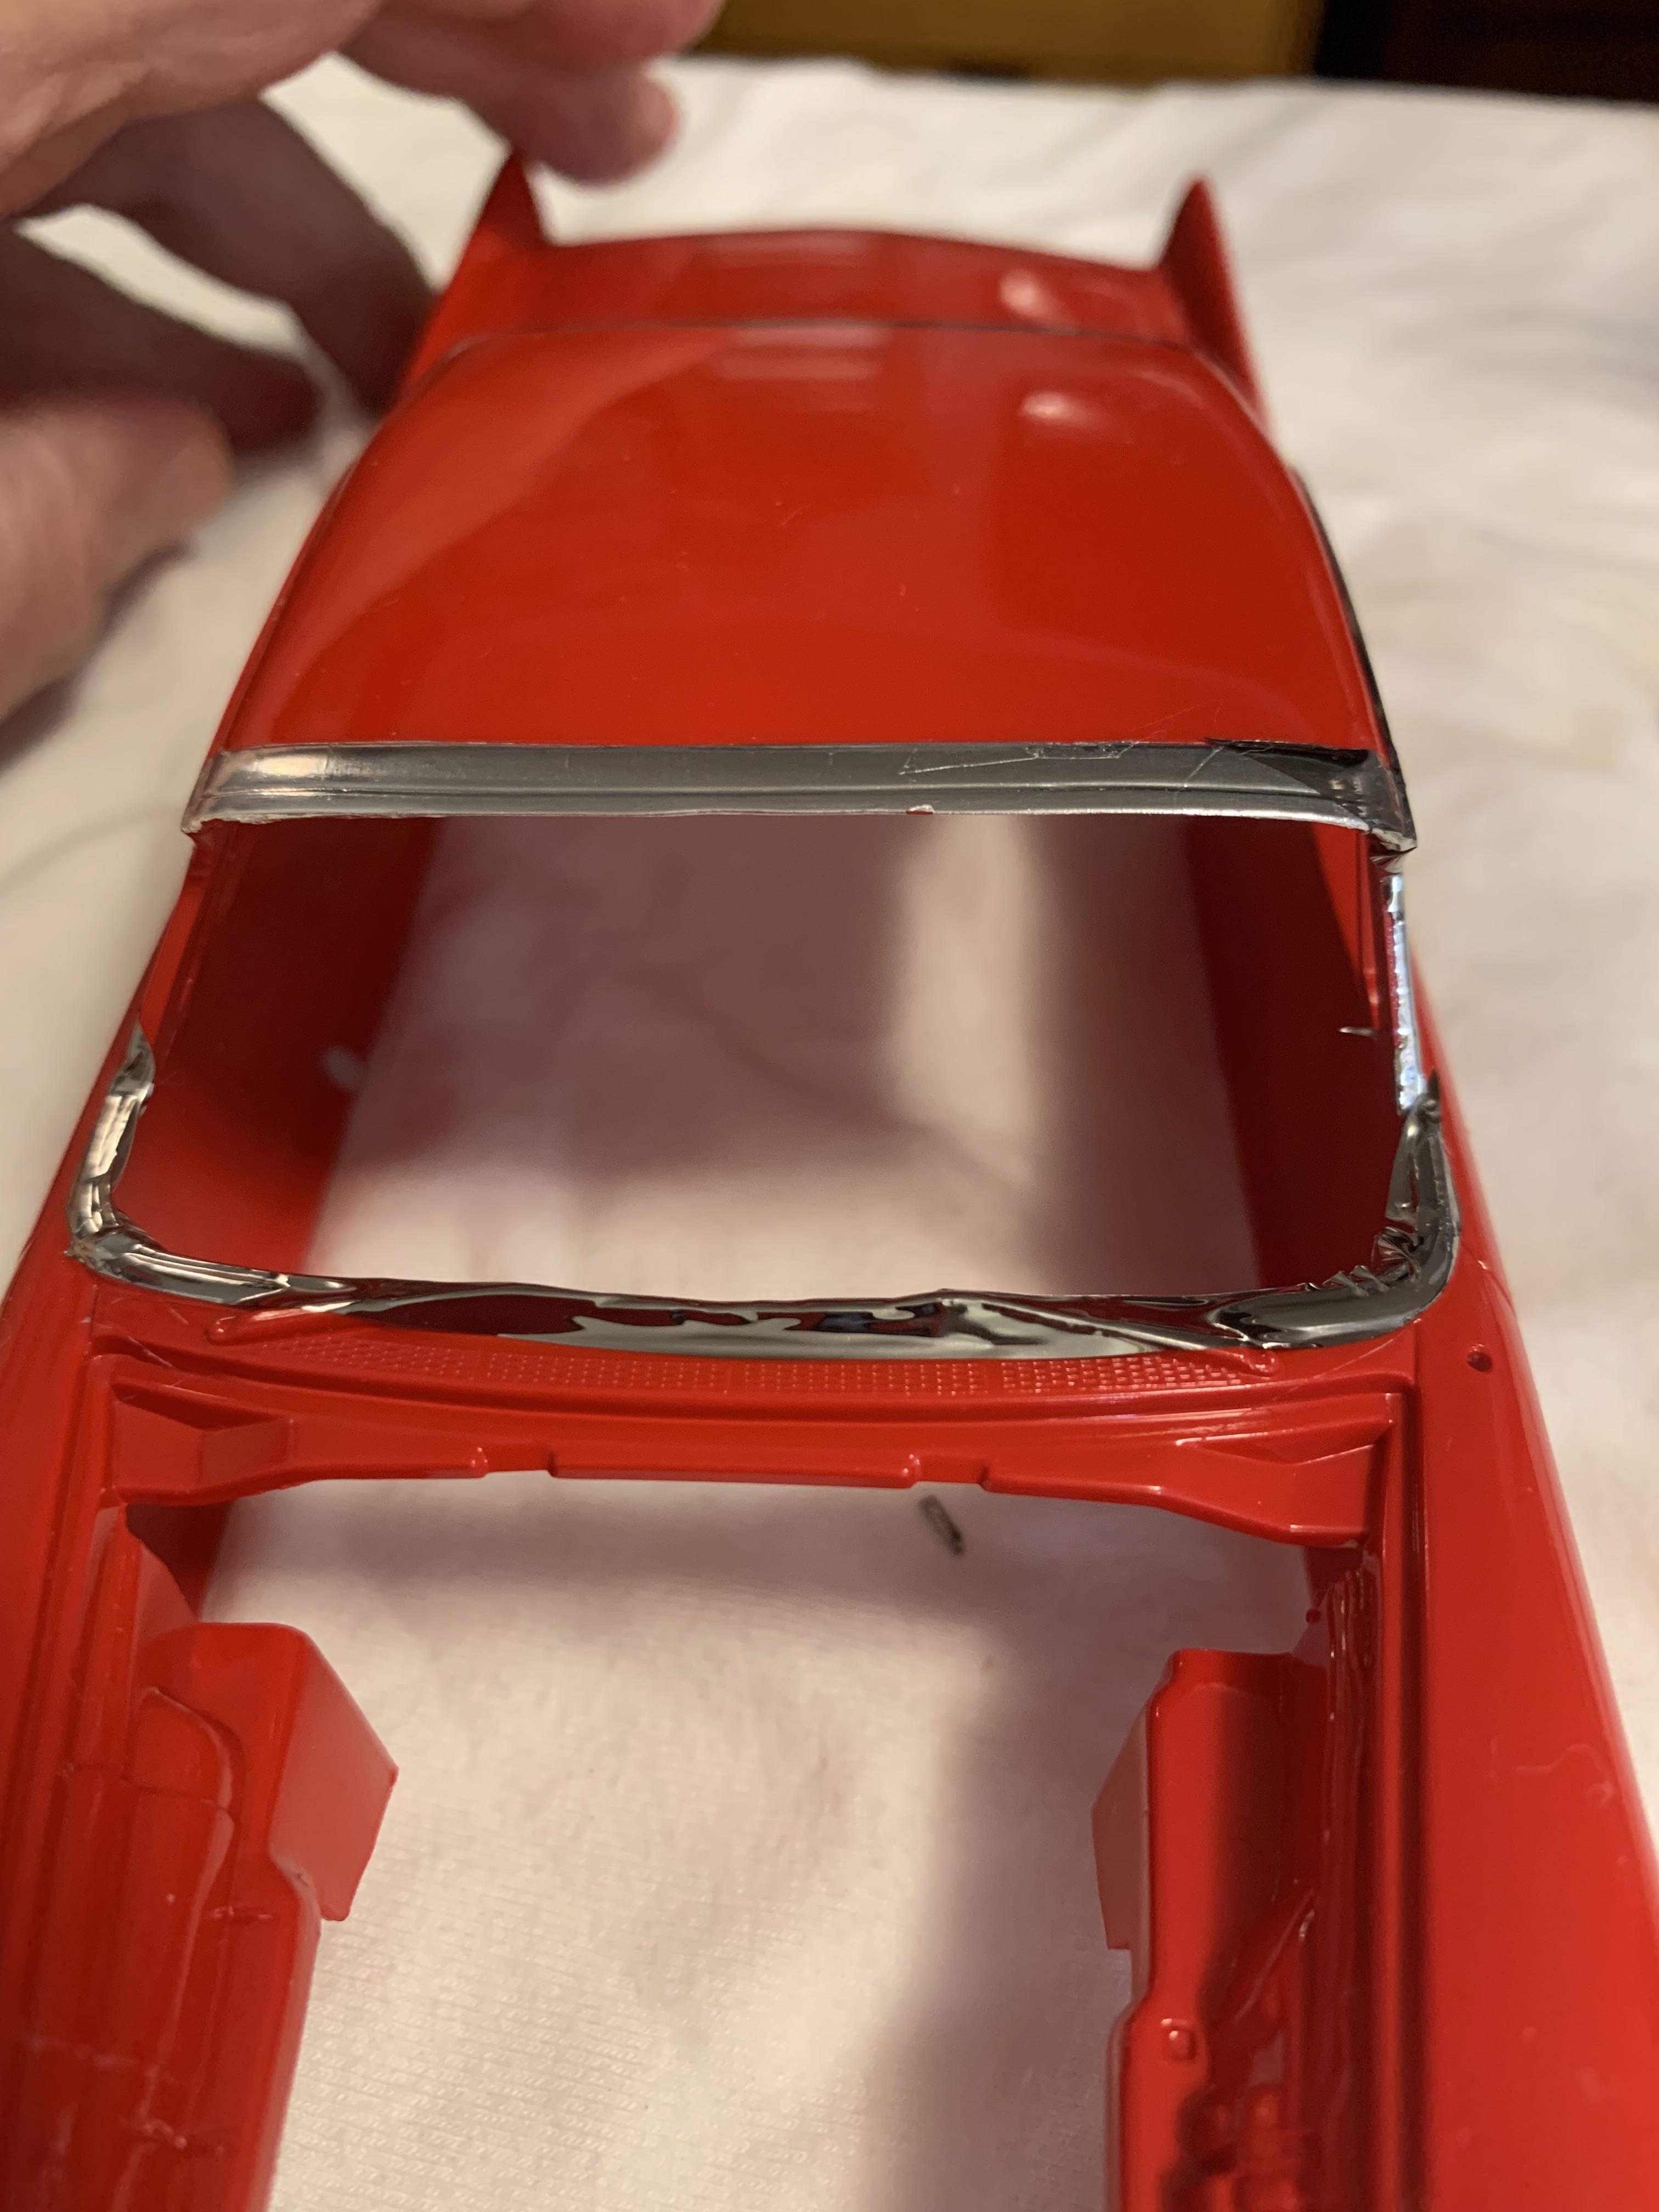
Trying to finish up the foil work. Nothing beats Hasegawa for the shine, but more difficult to cut and shape into crevices.
-
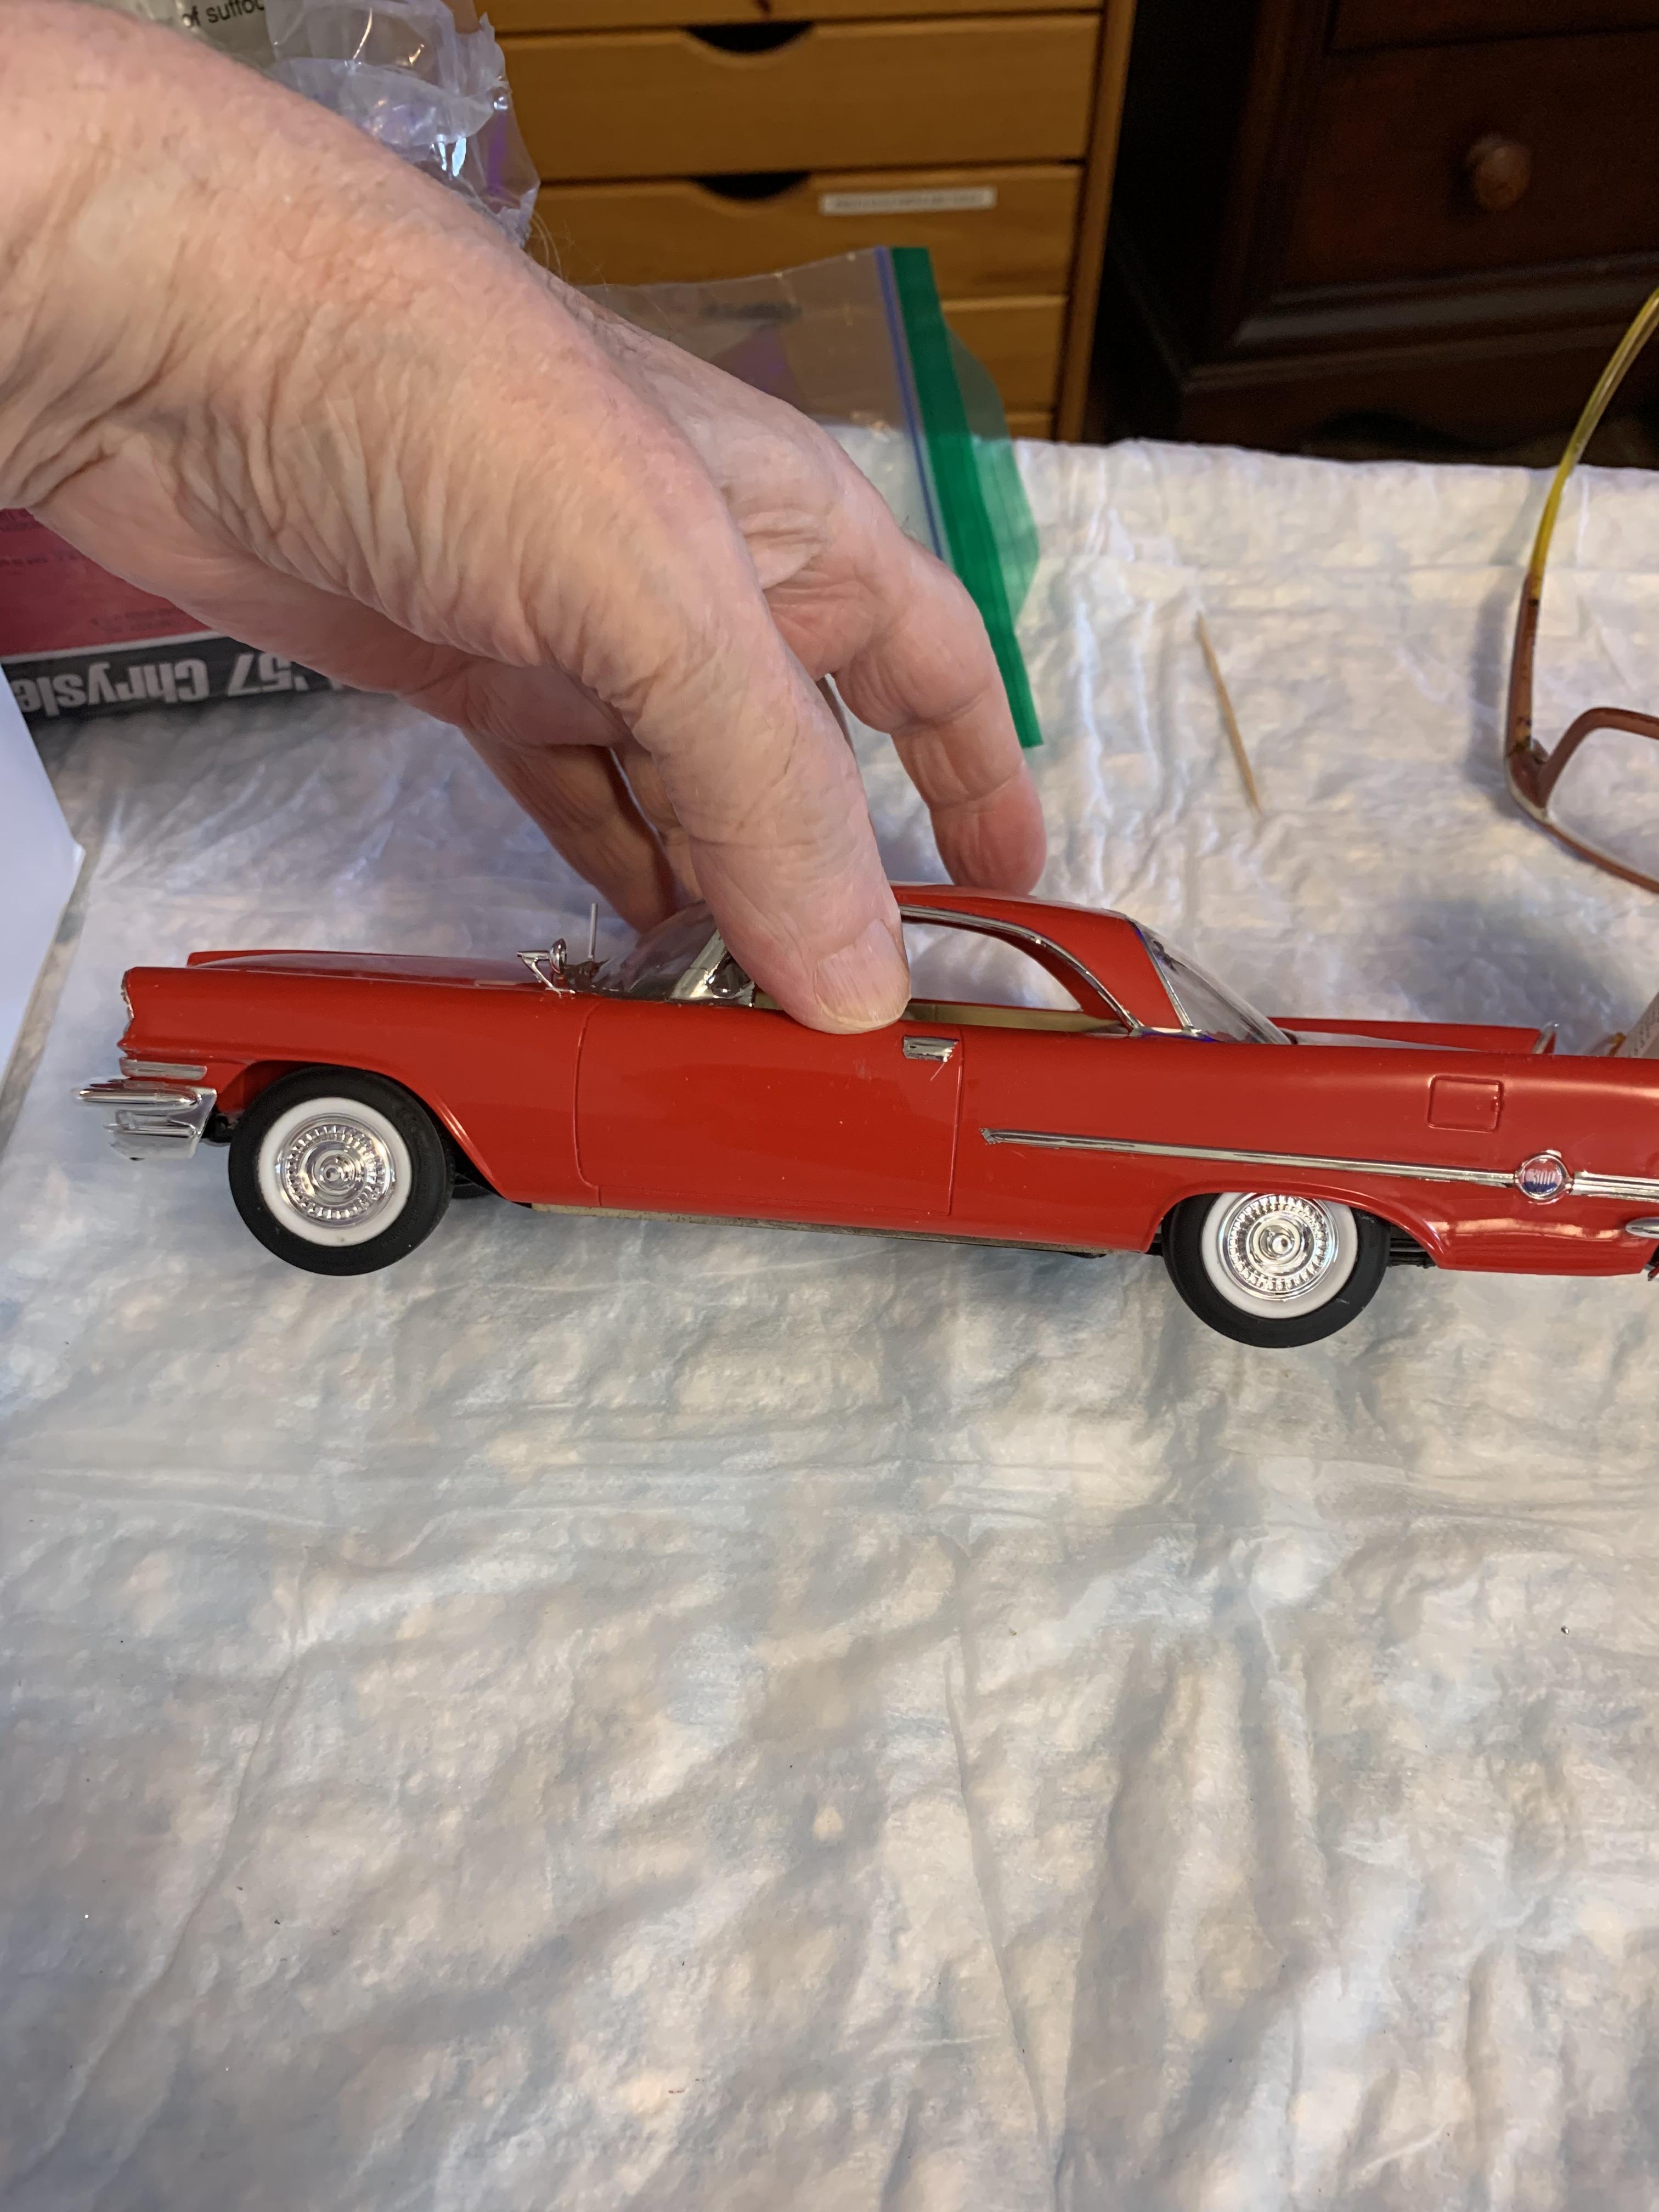
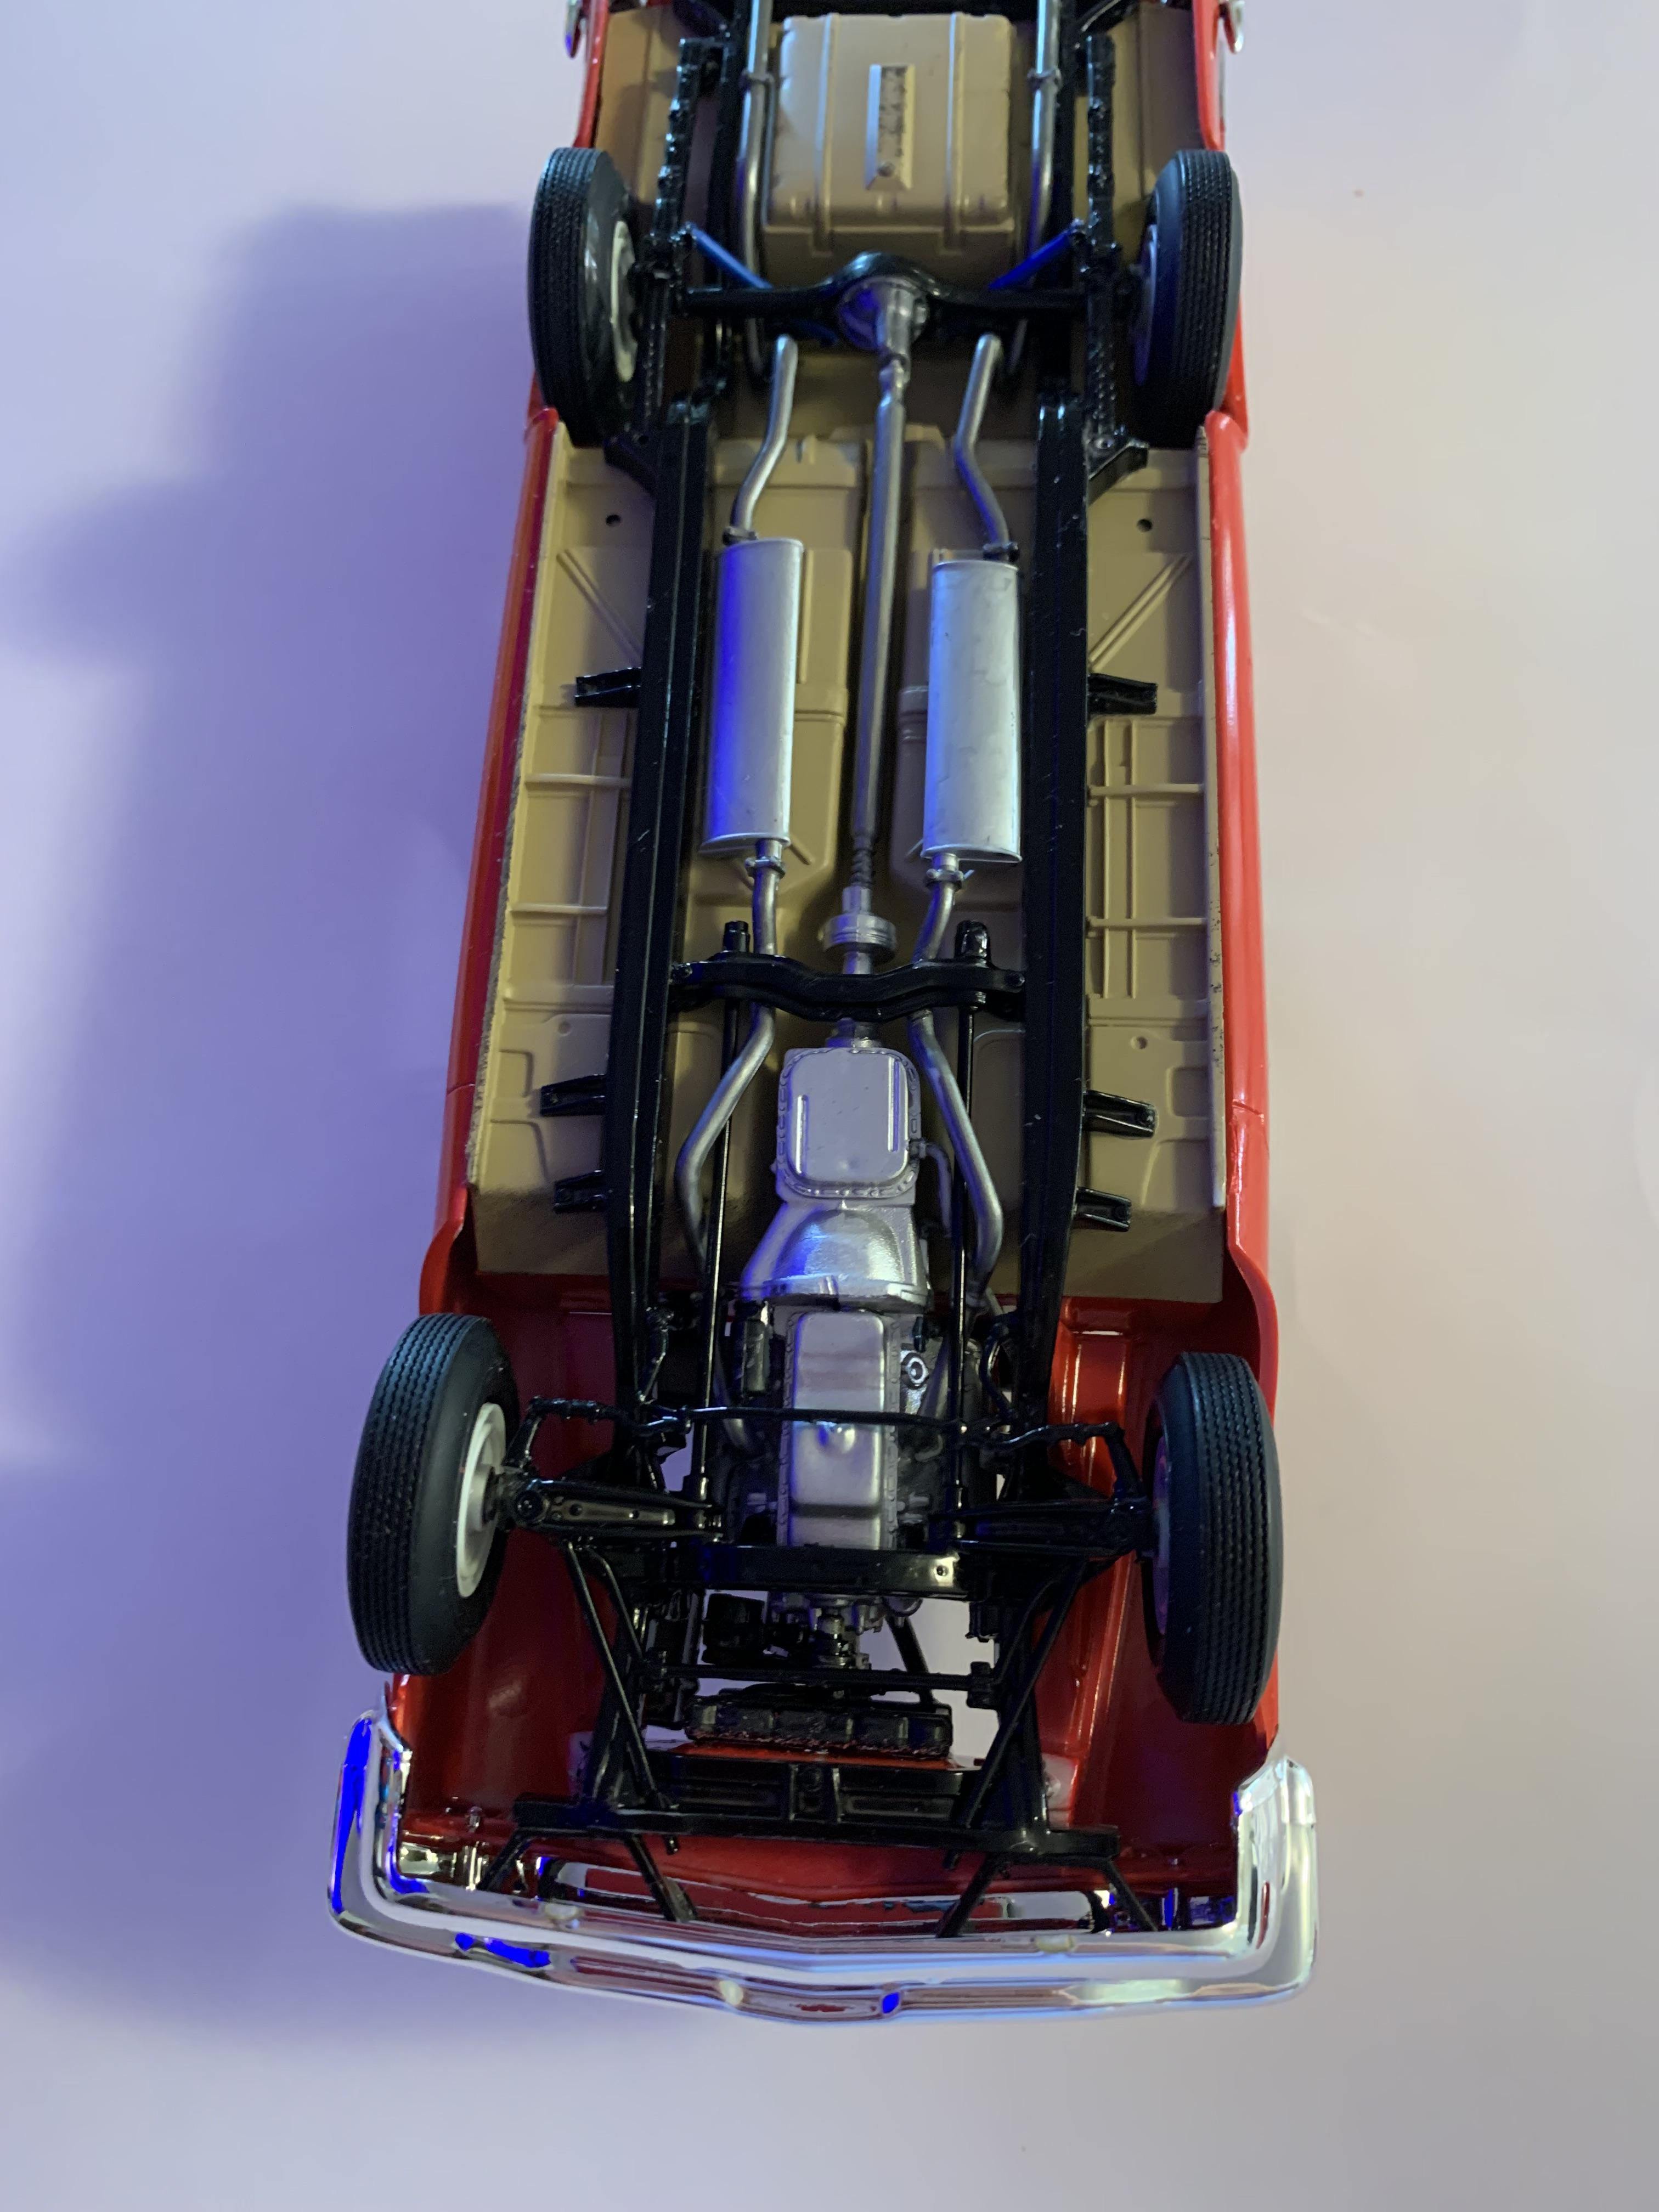
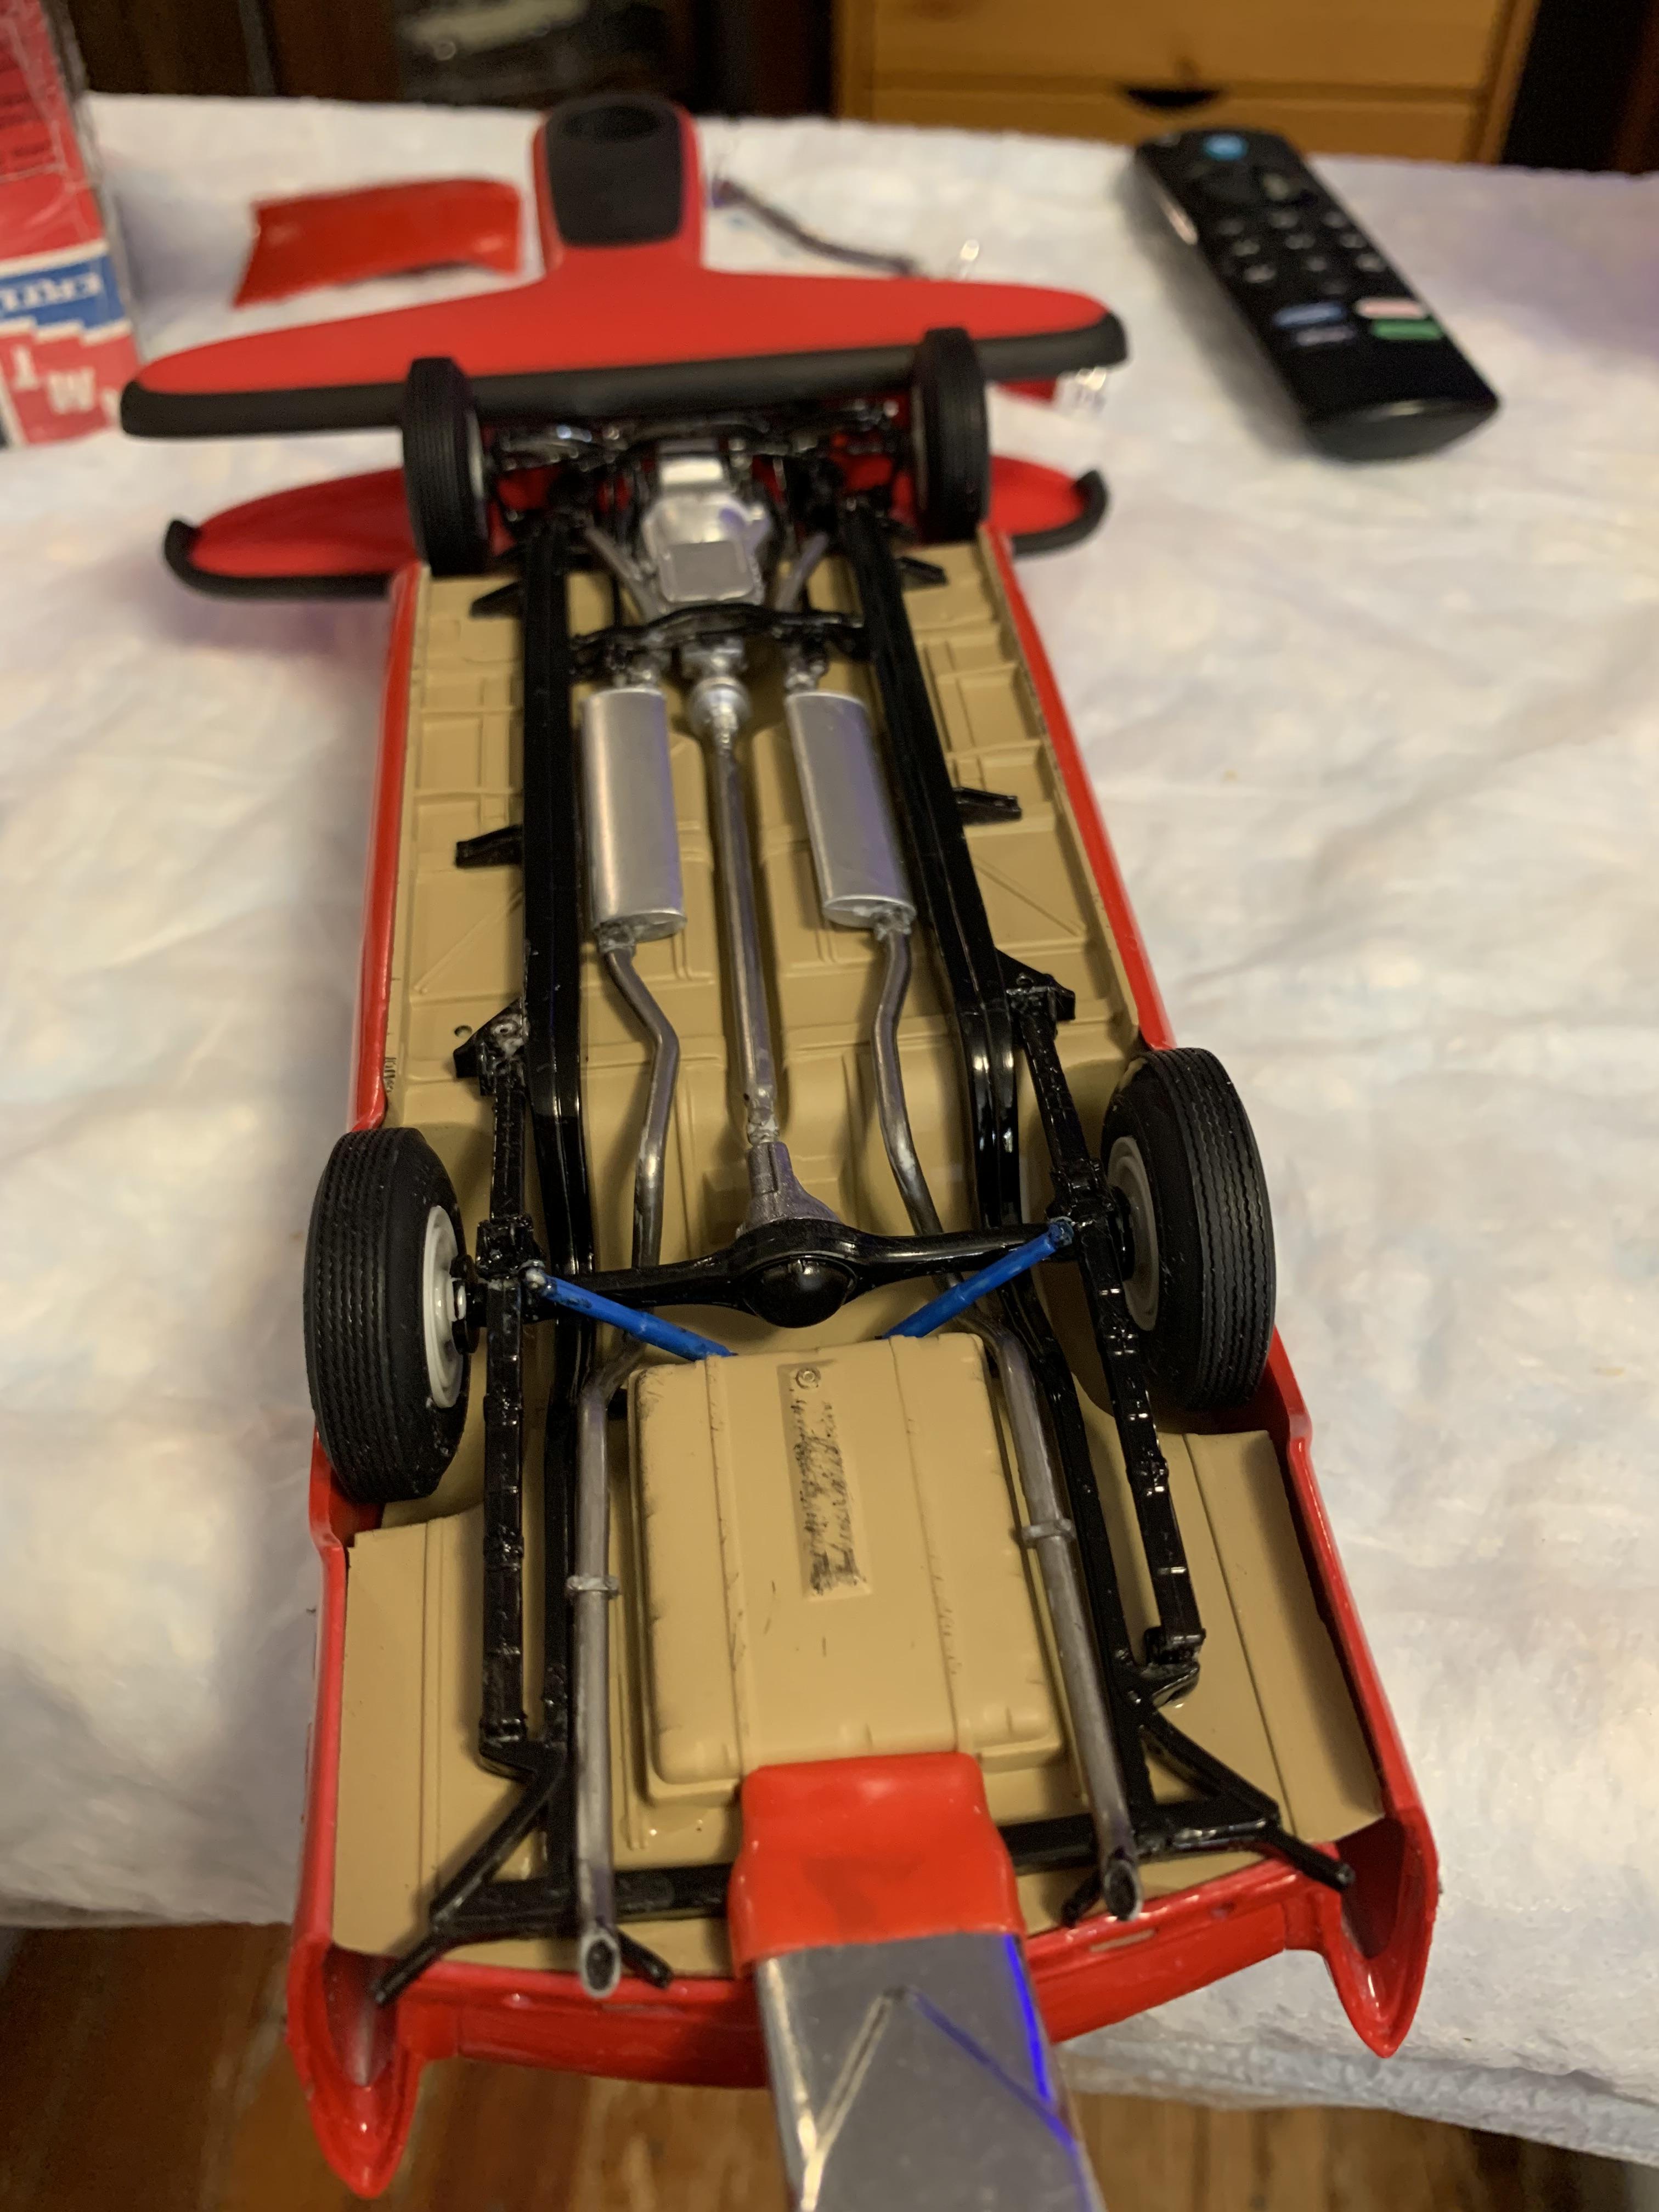
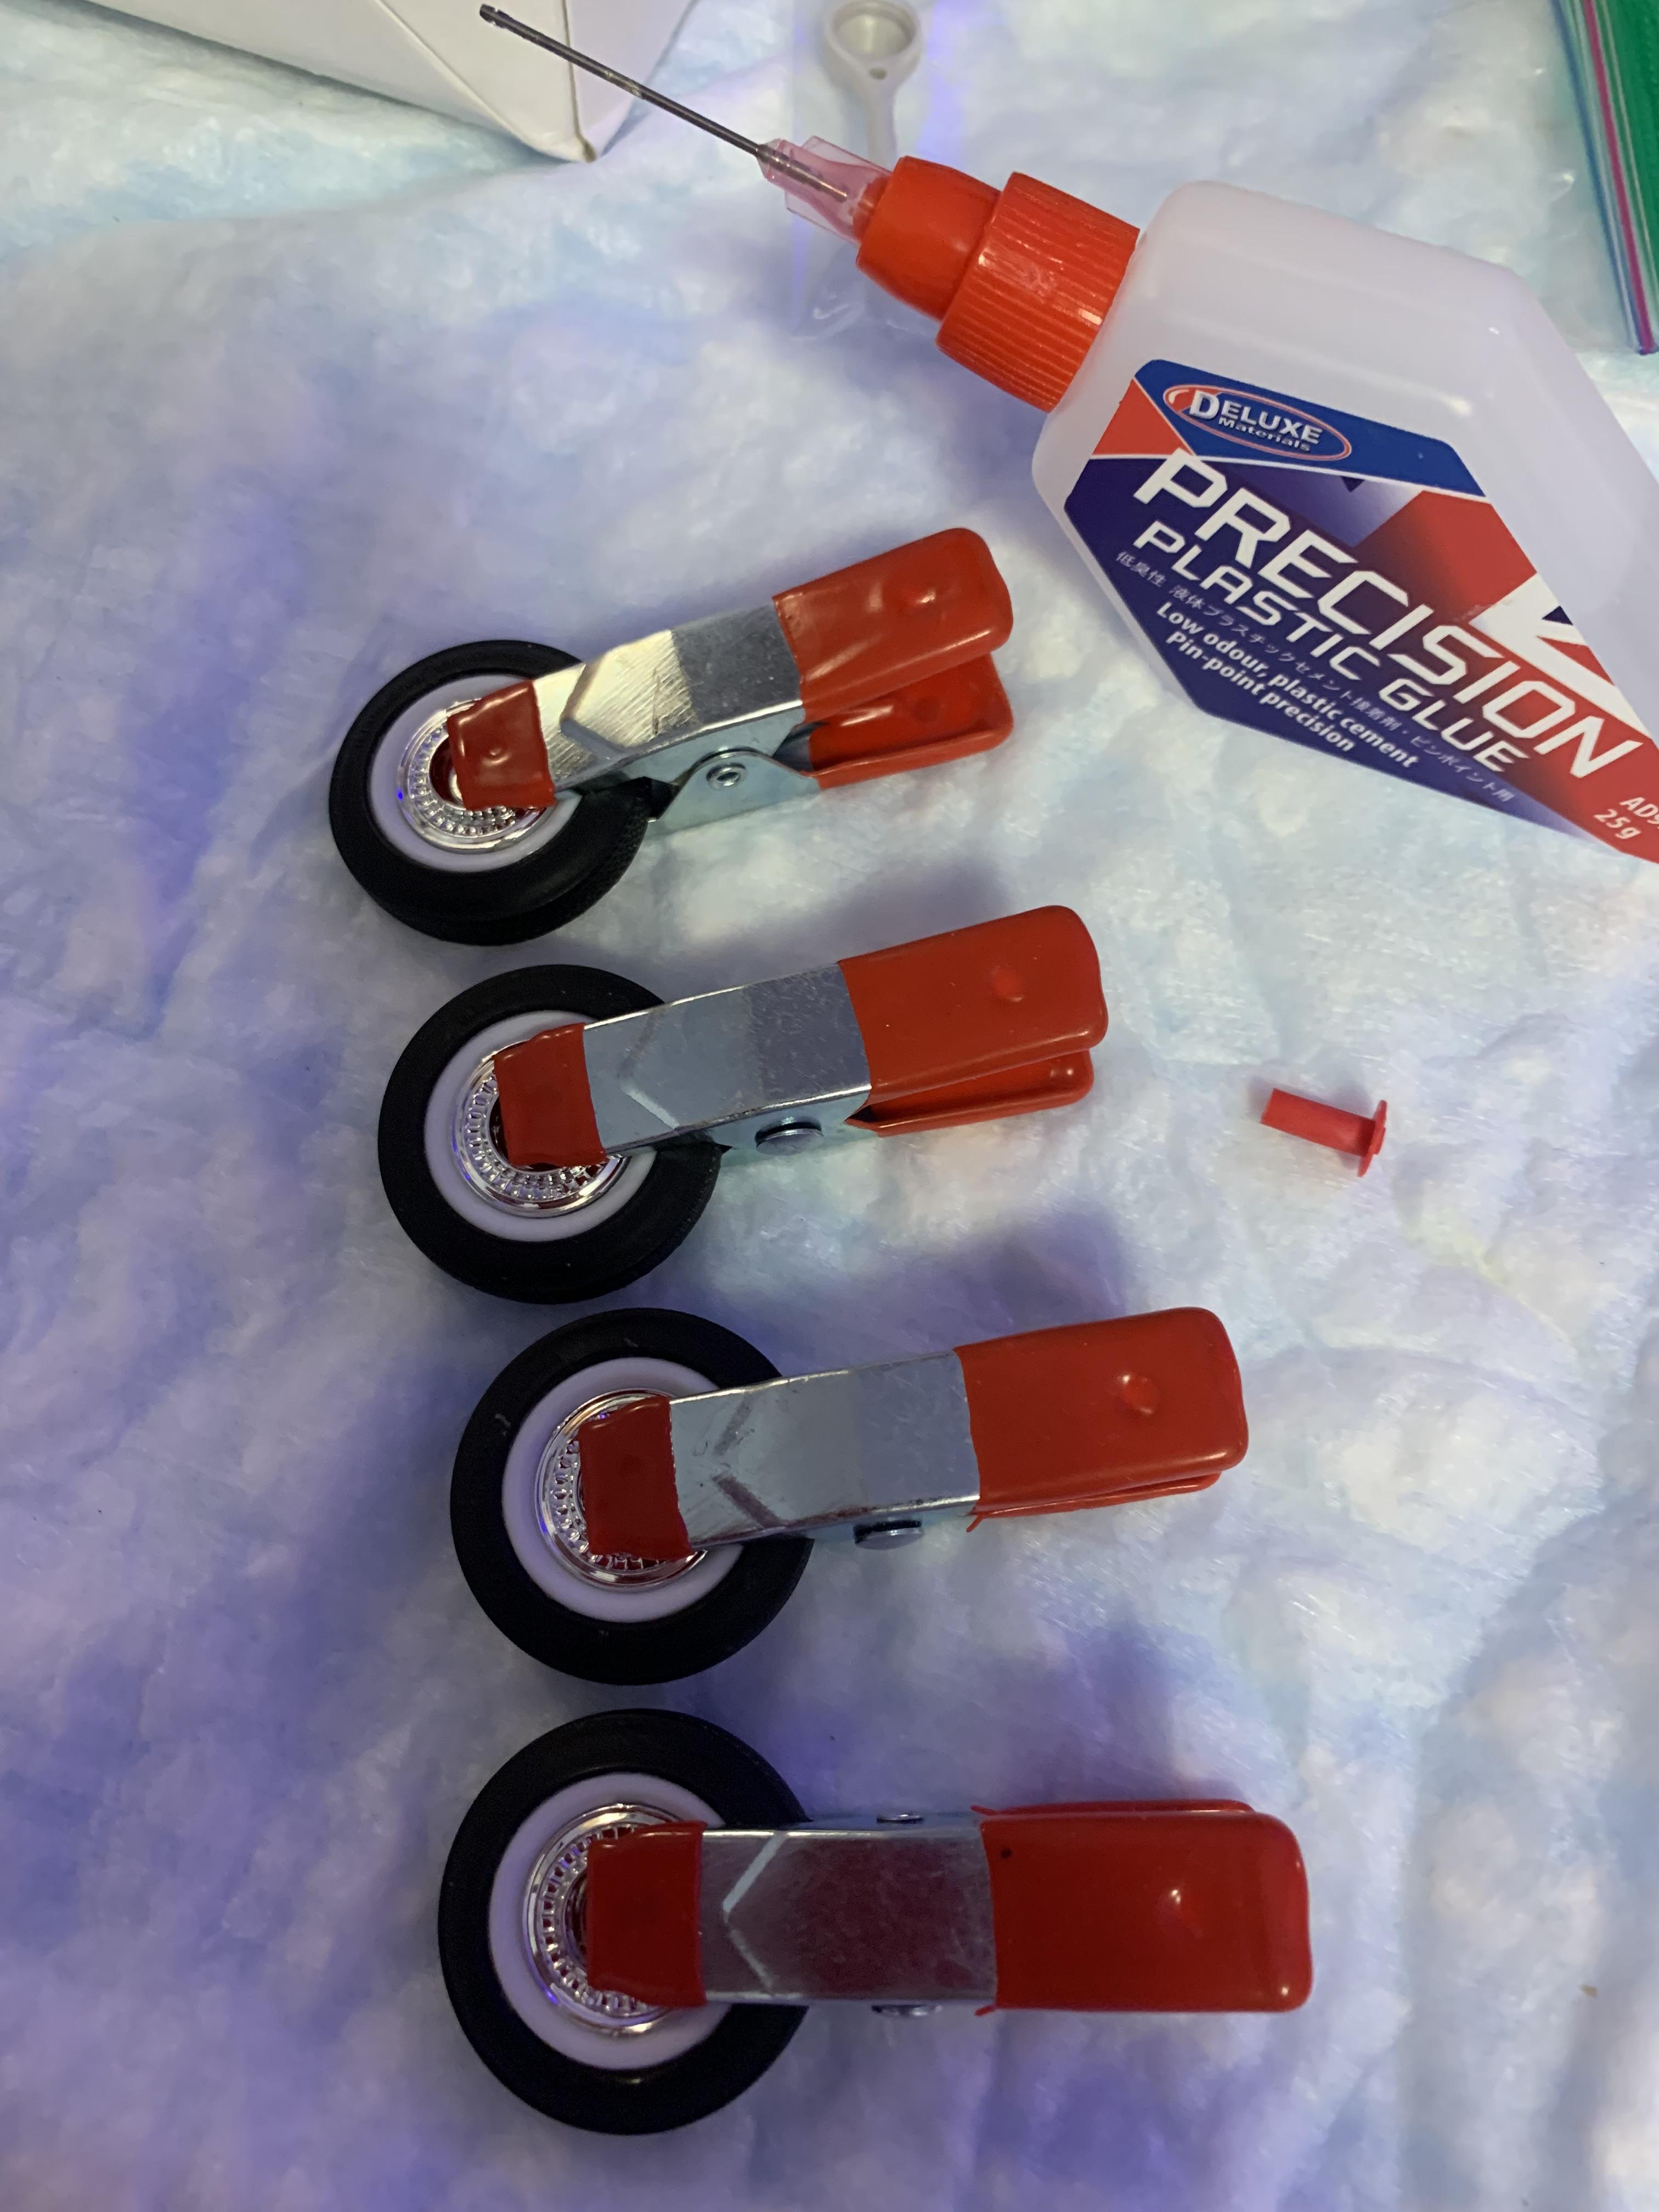
Rear axle and tires installed. Tried some thin Tamiya sheets. Too thin and delicate for me. Went back to the Hasegawa. It’s coming along. That’s enough for today.
-
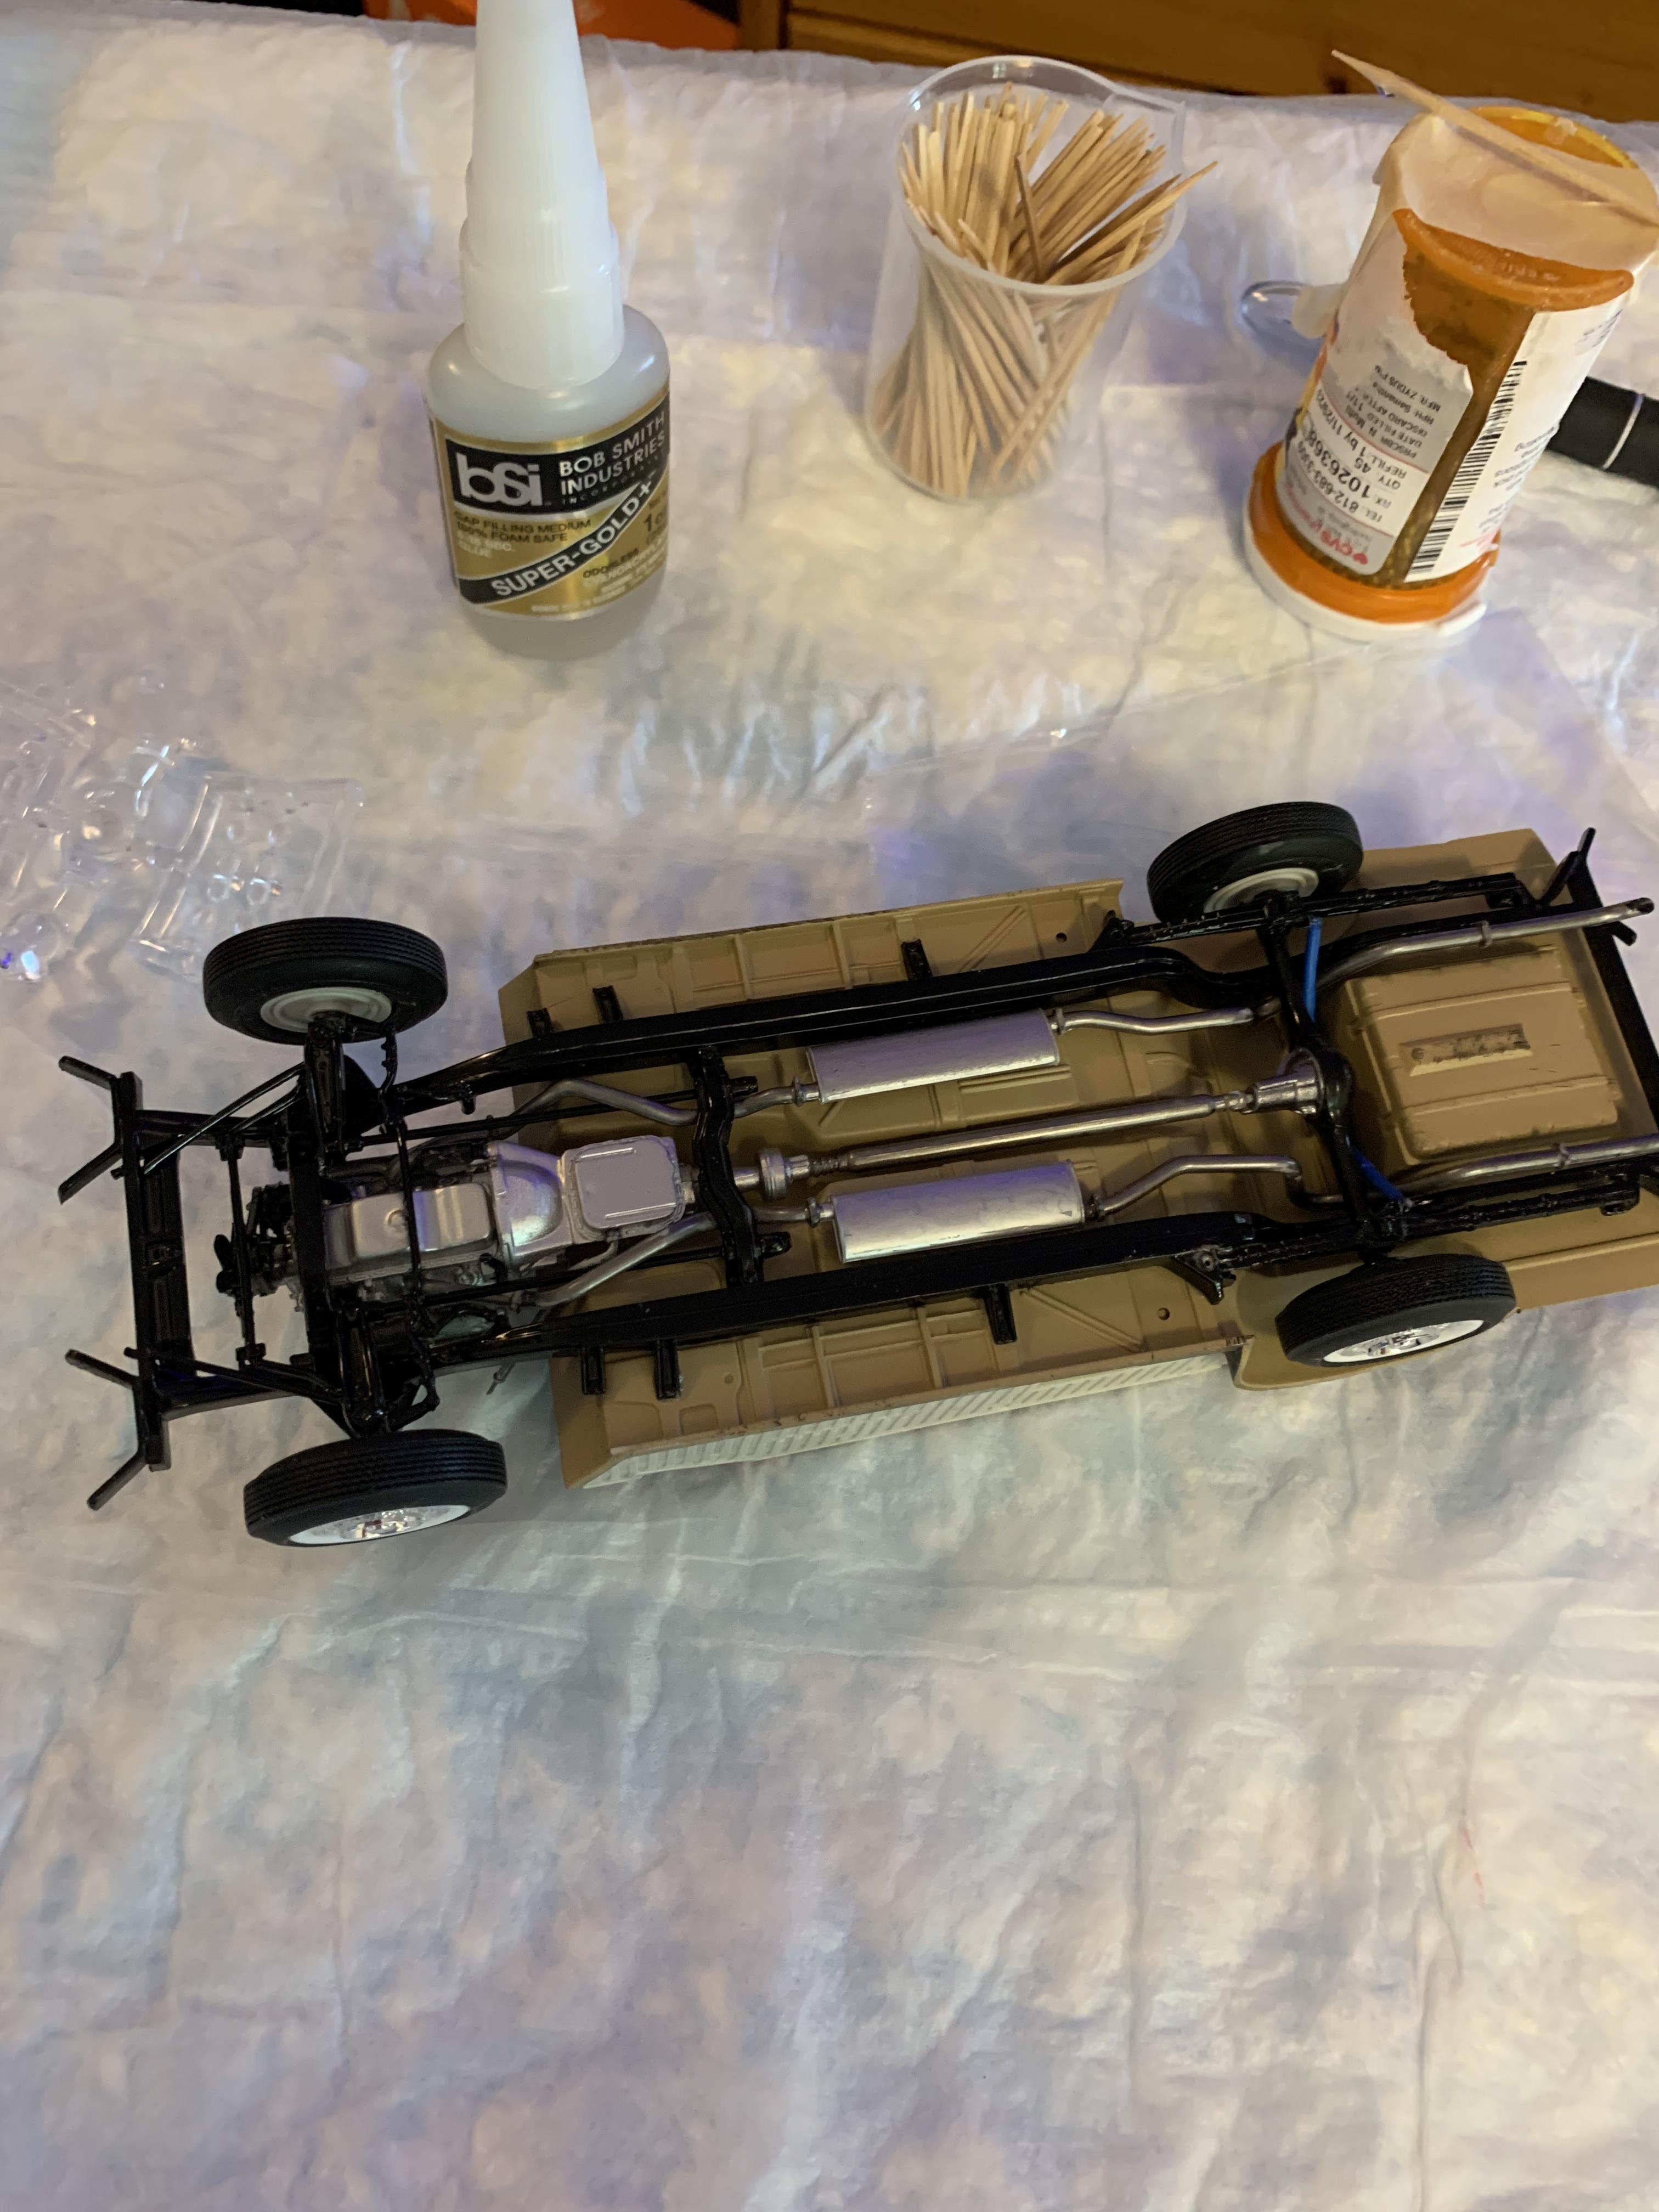
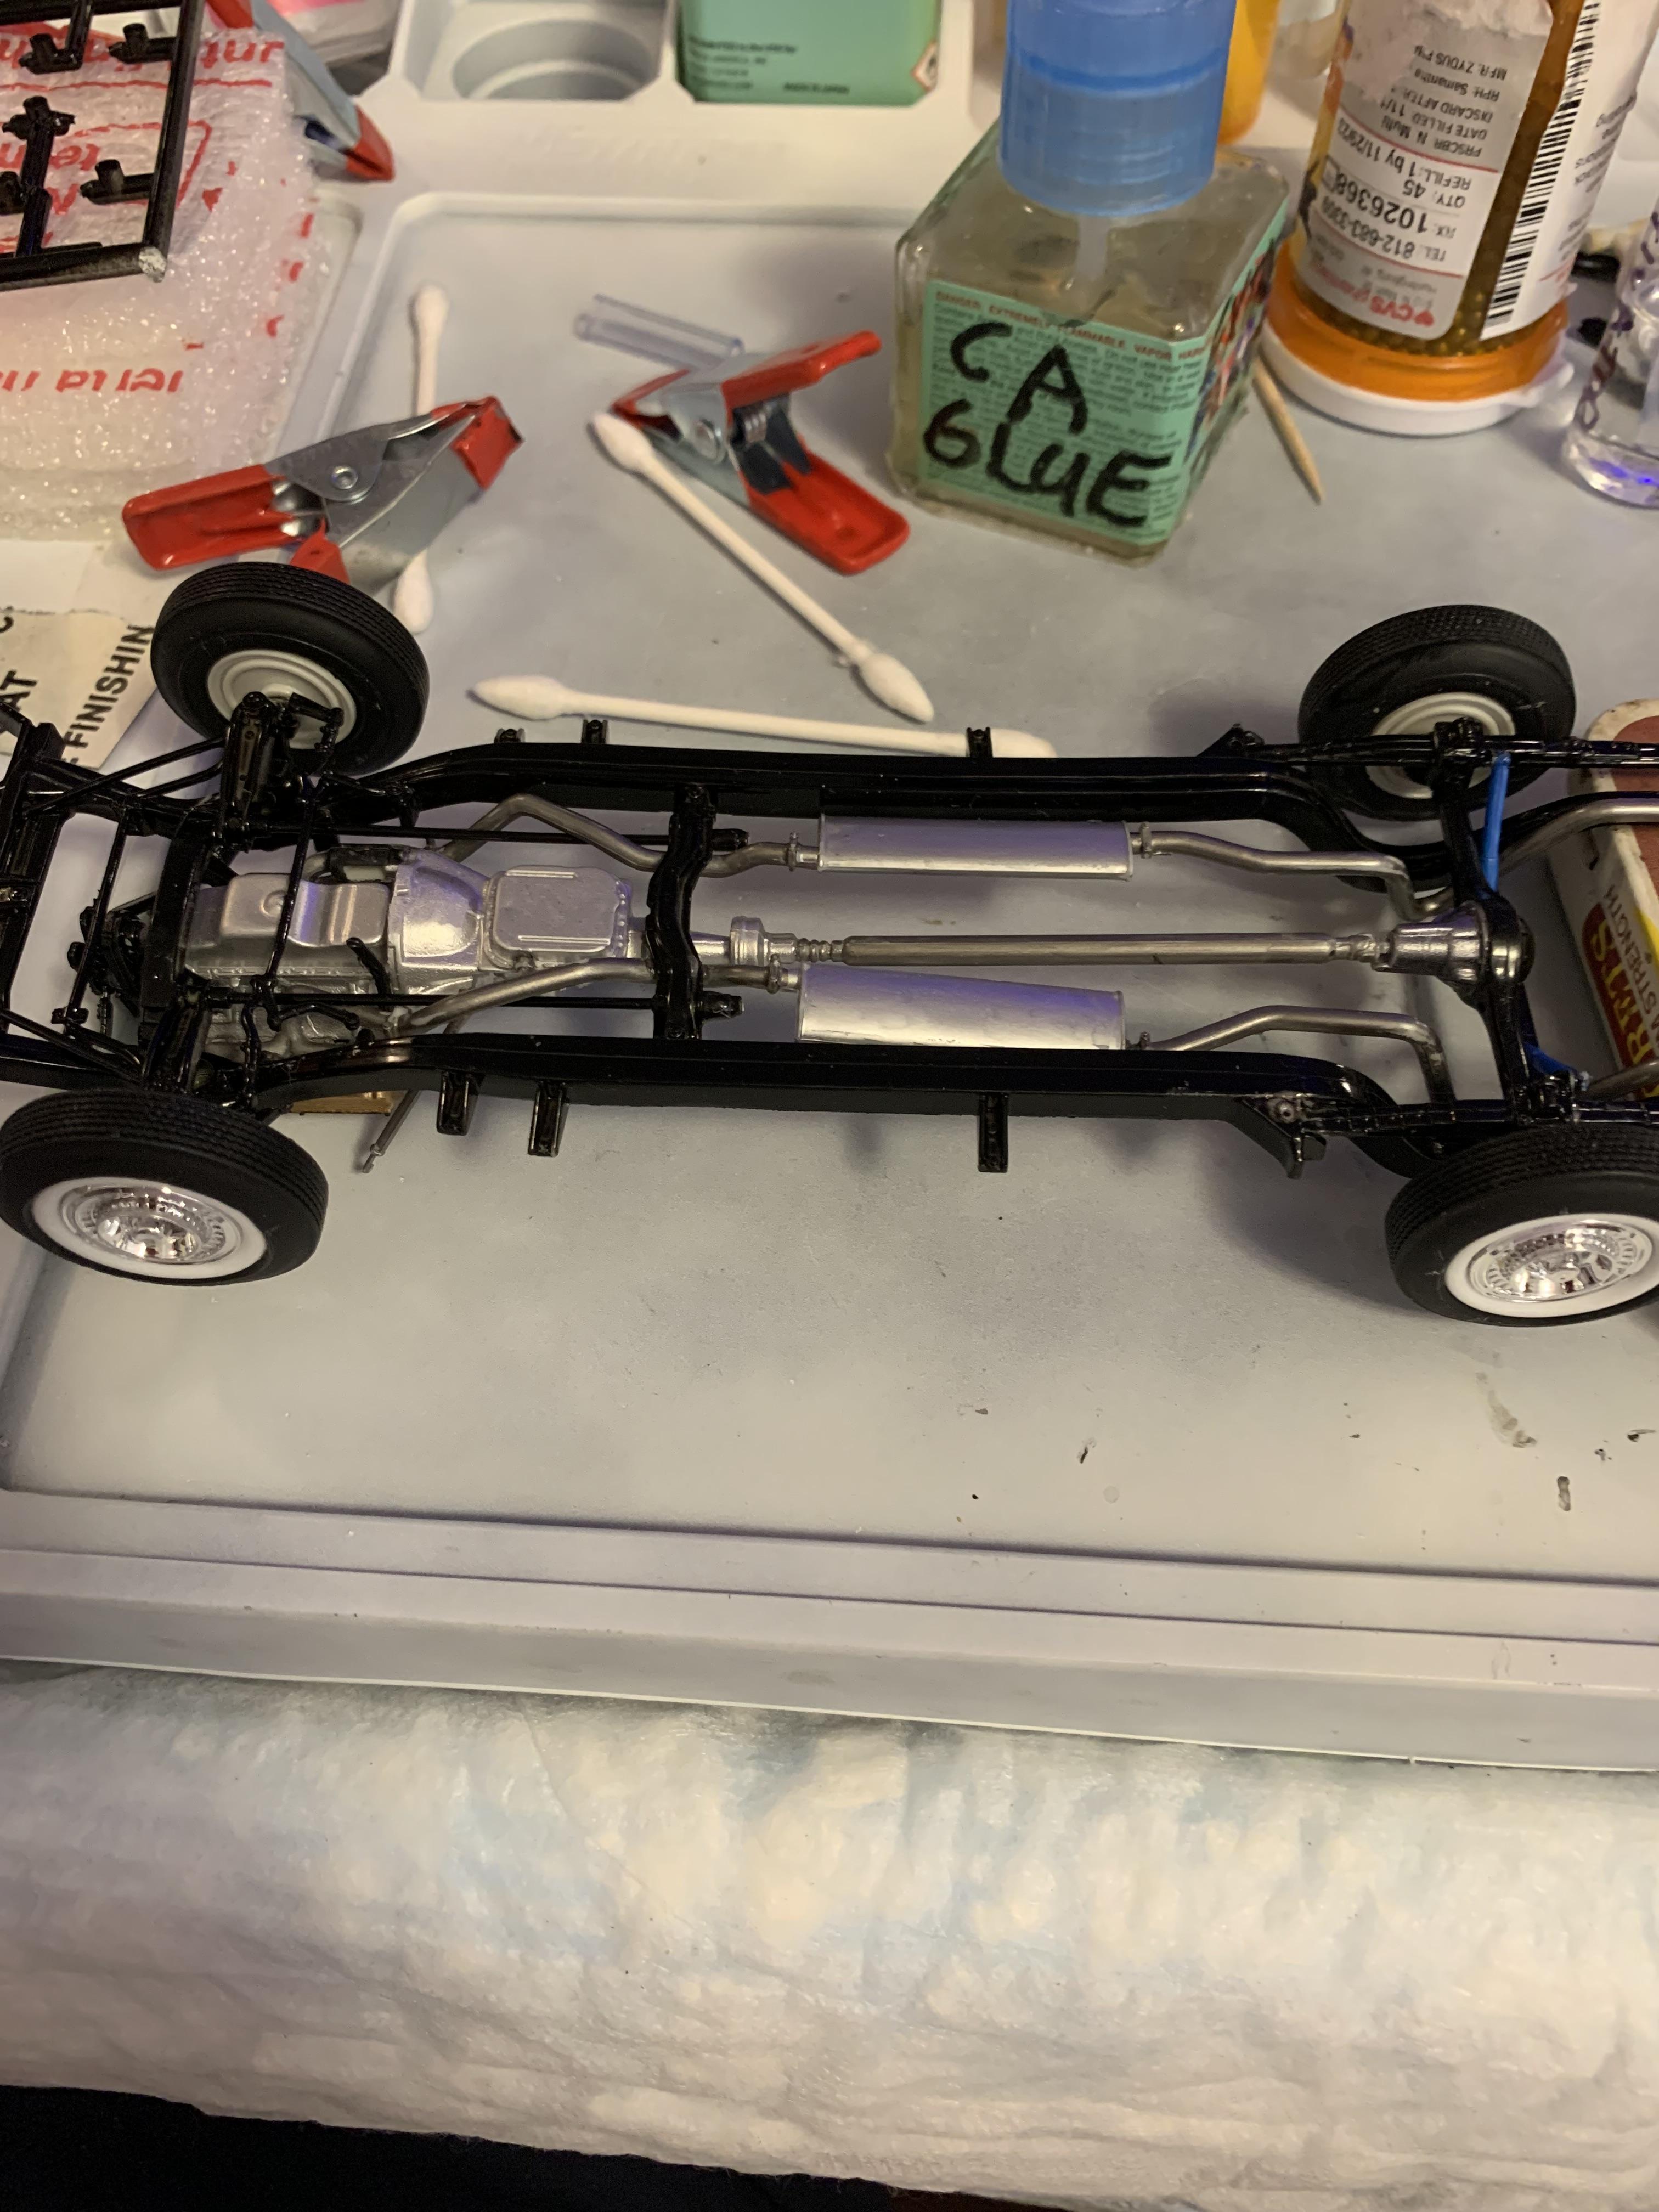
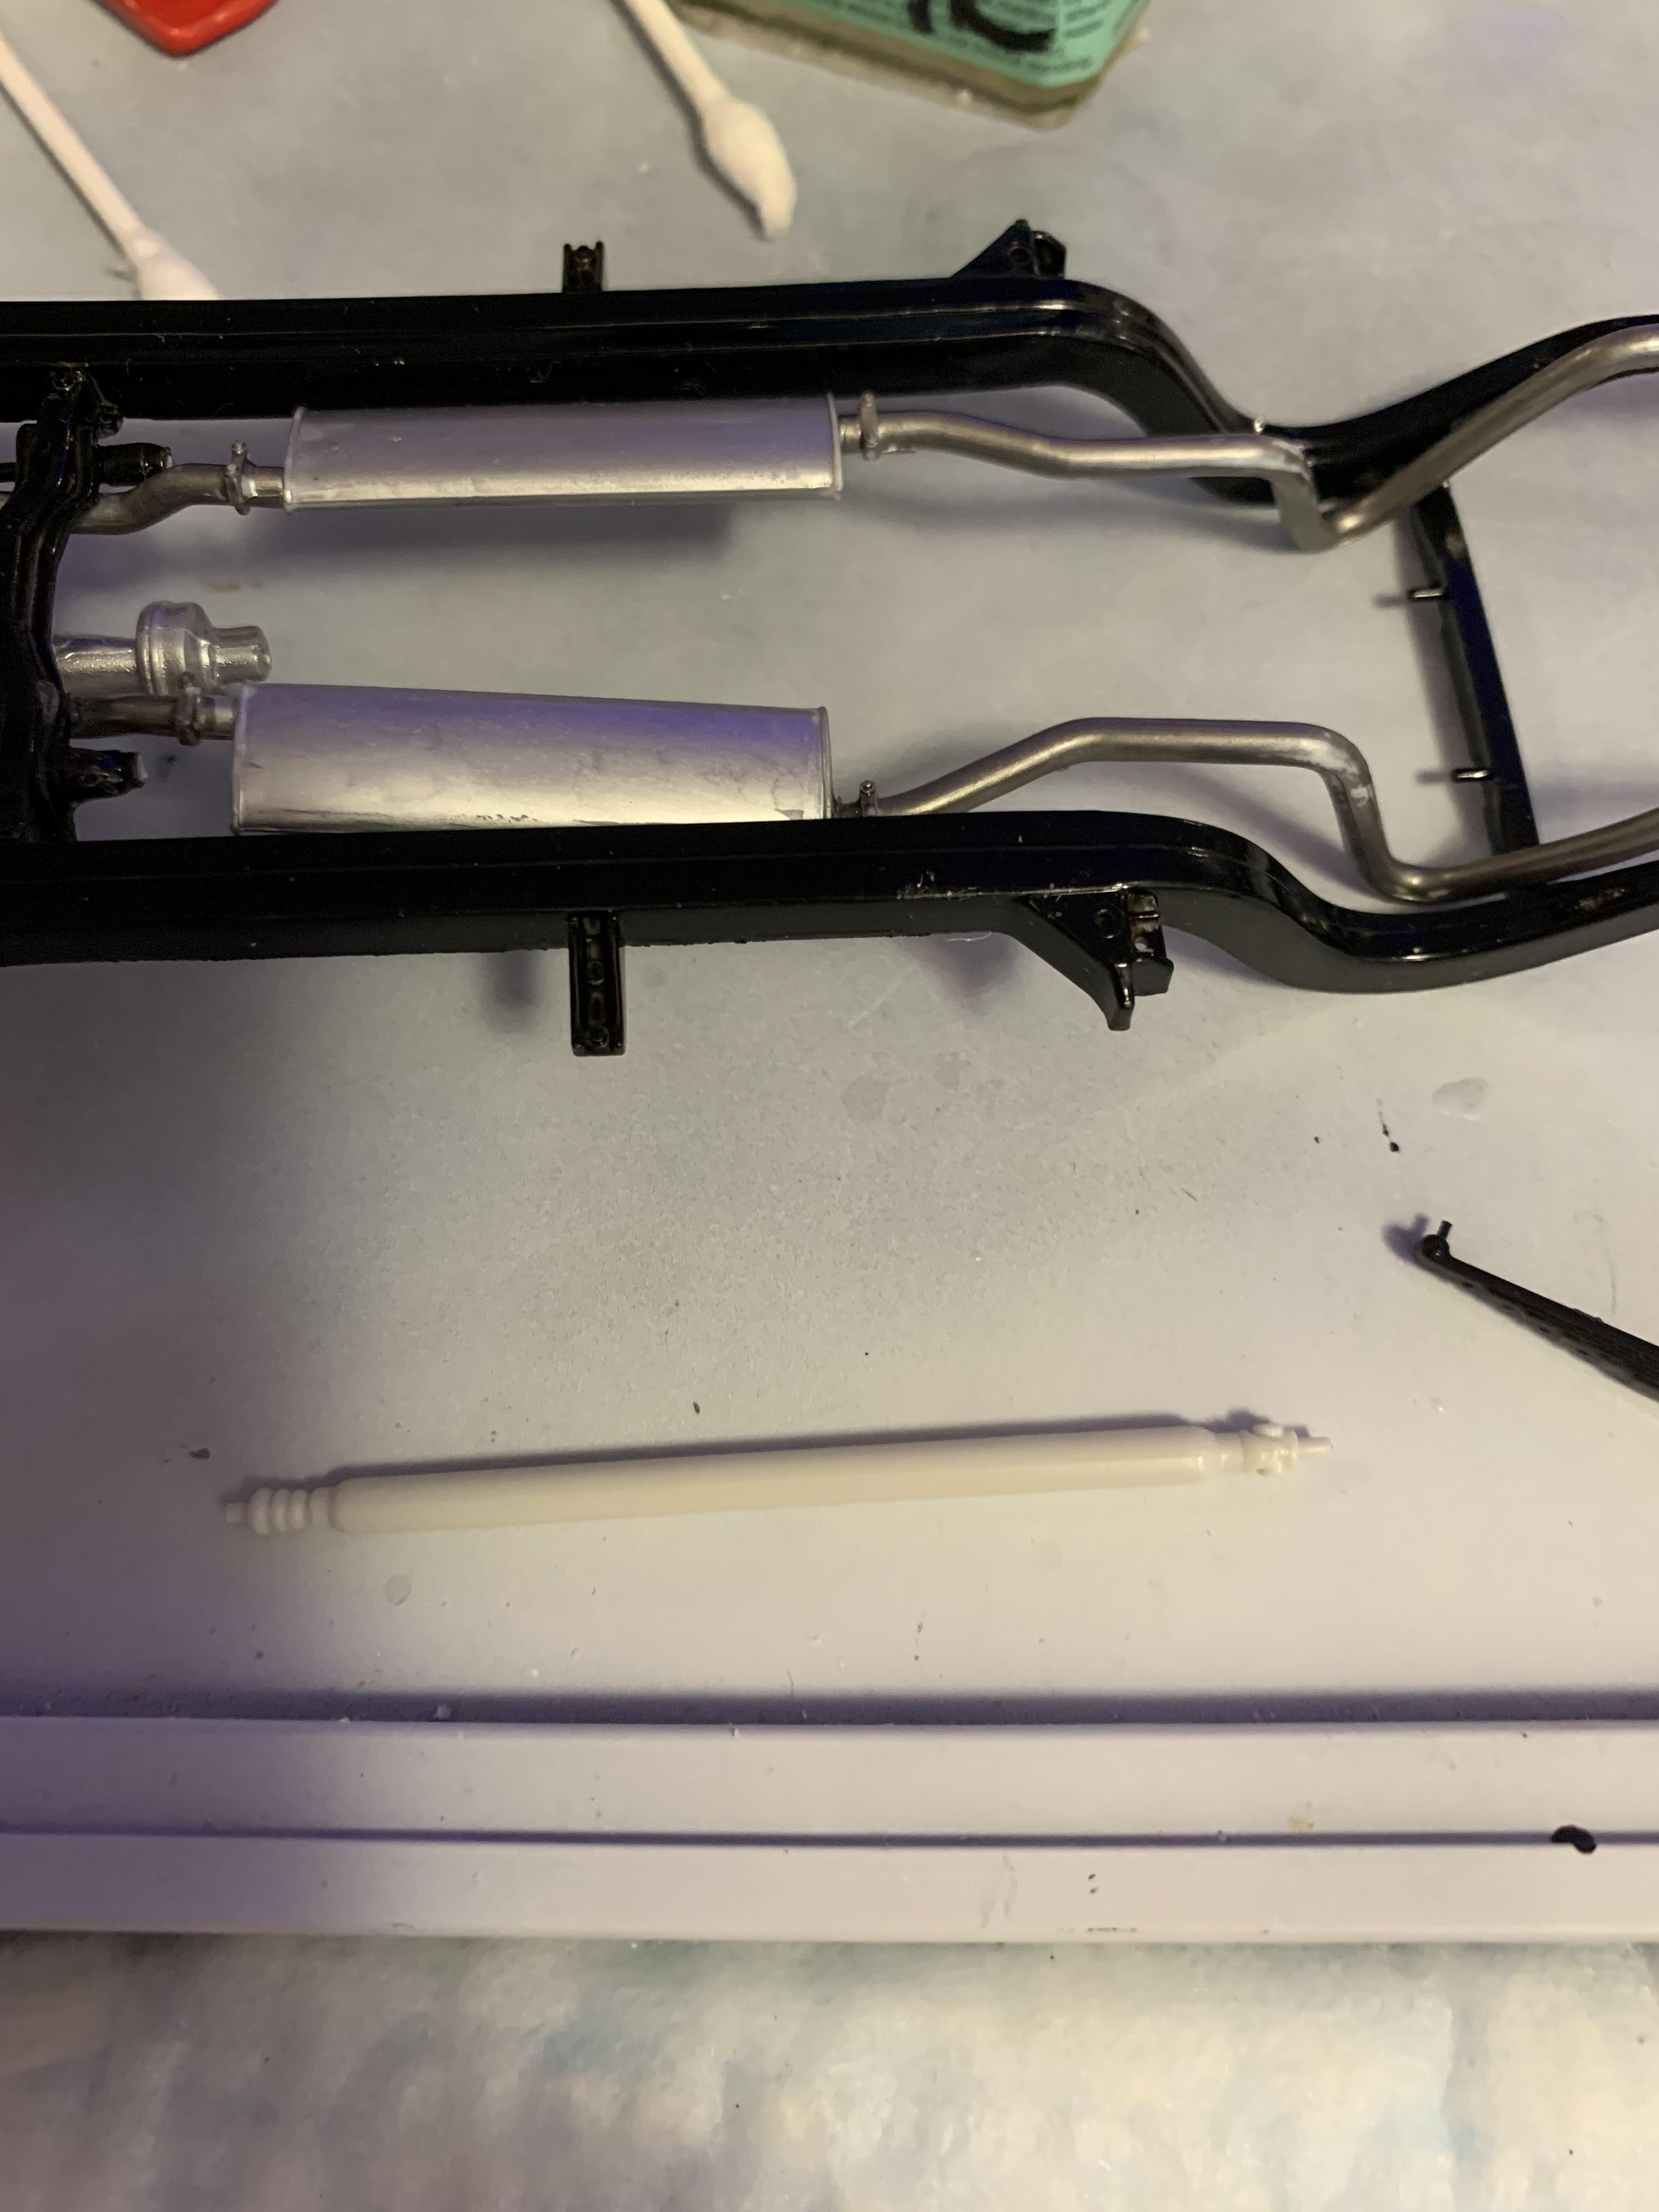
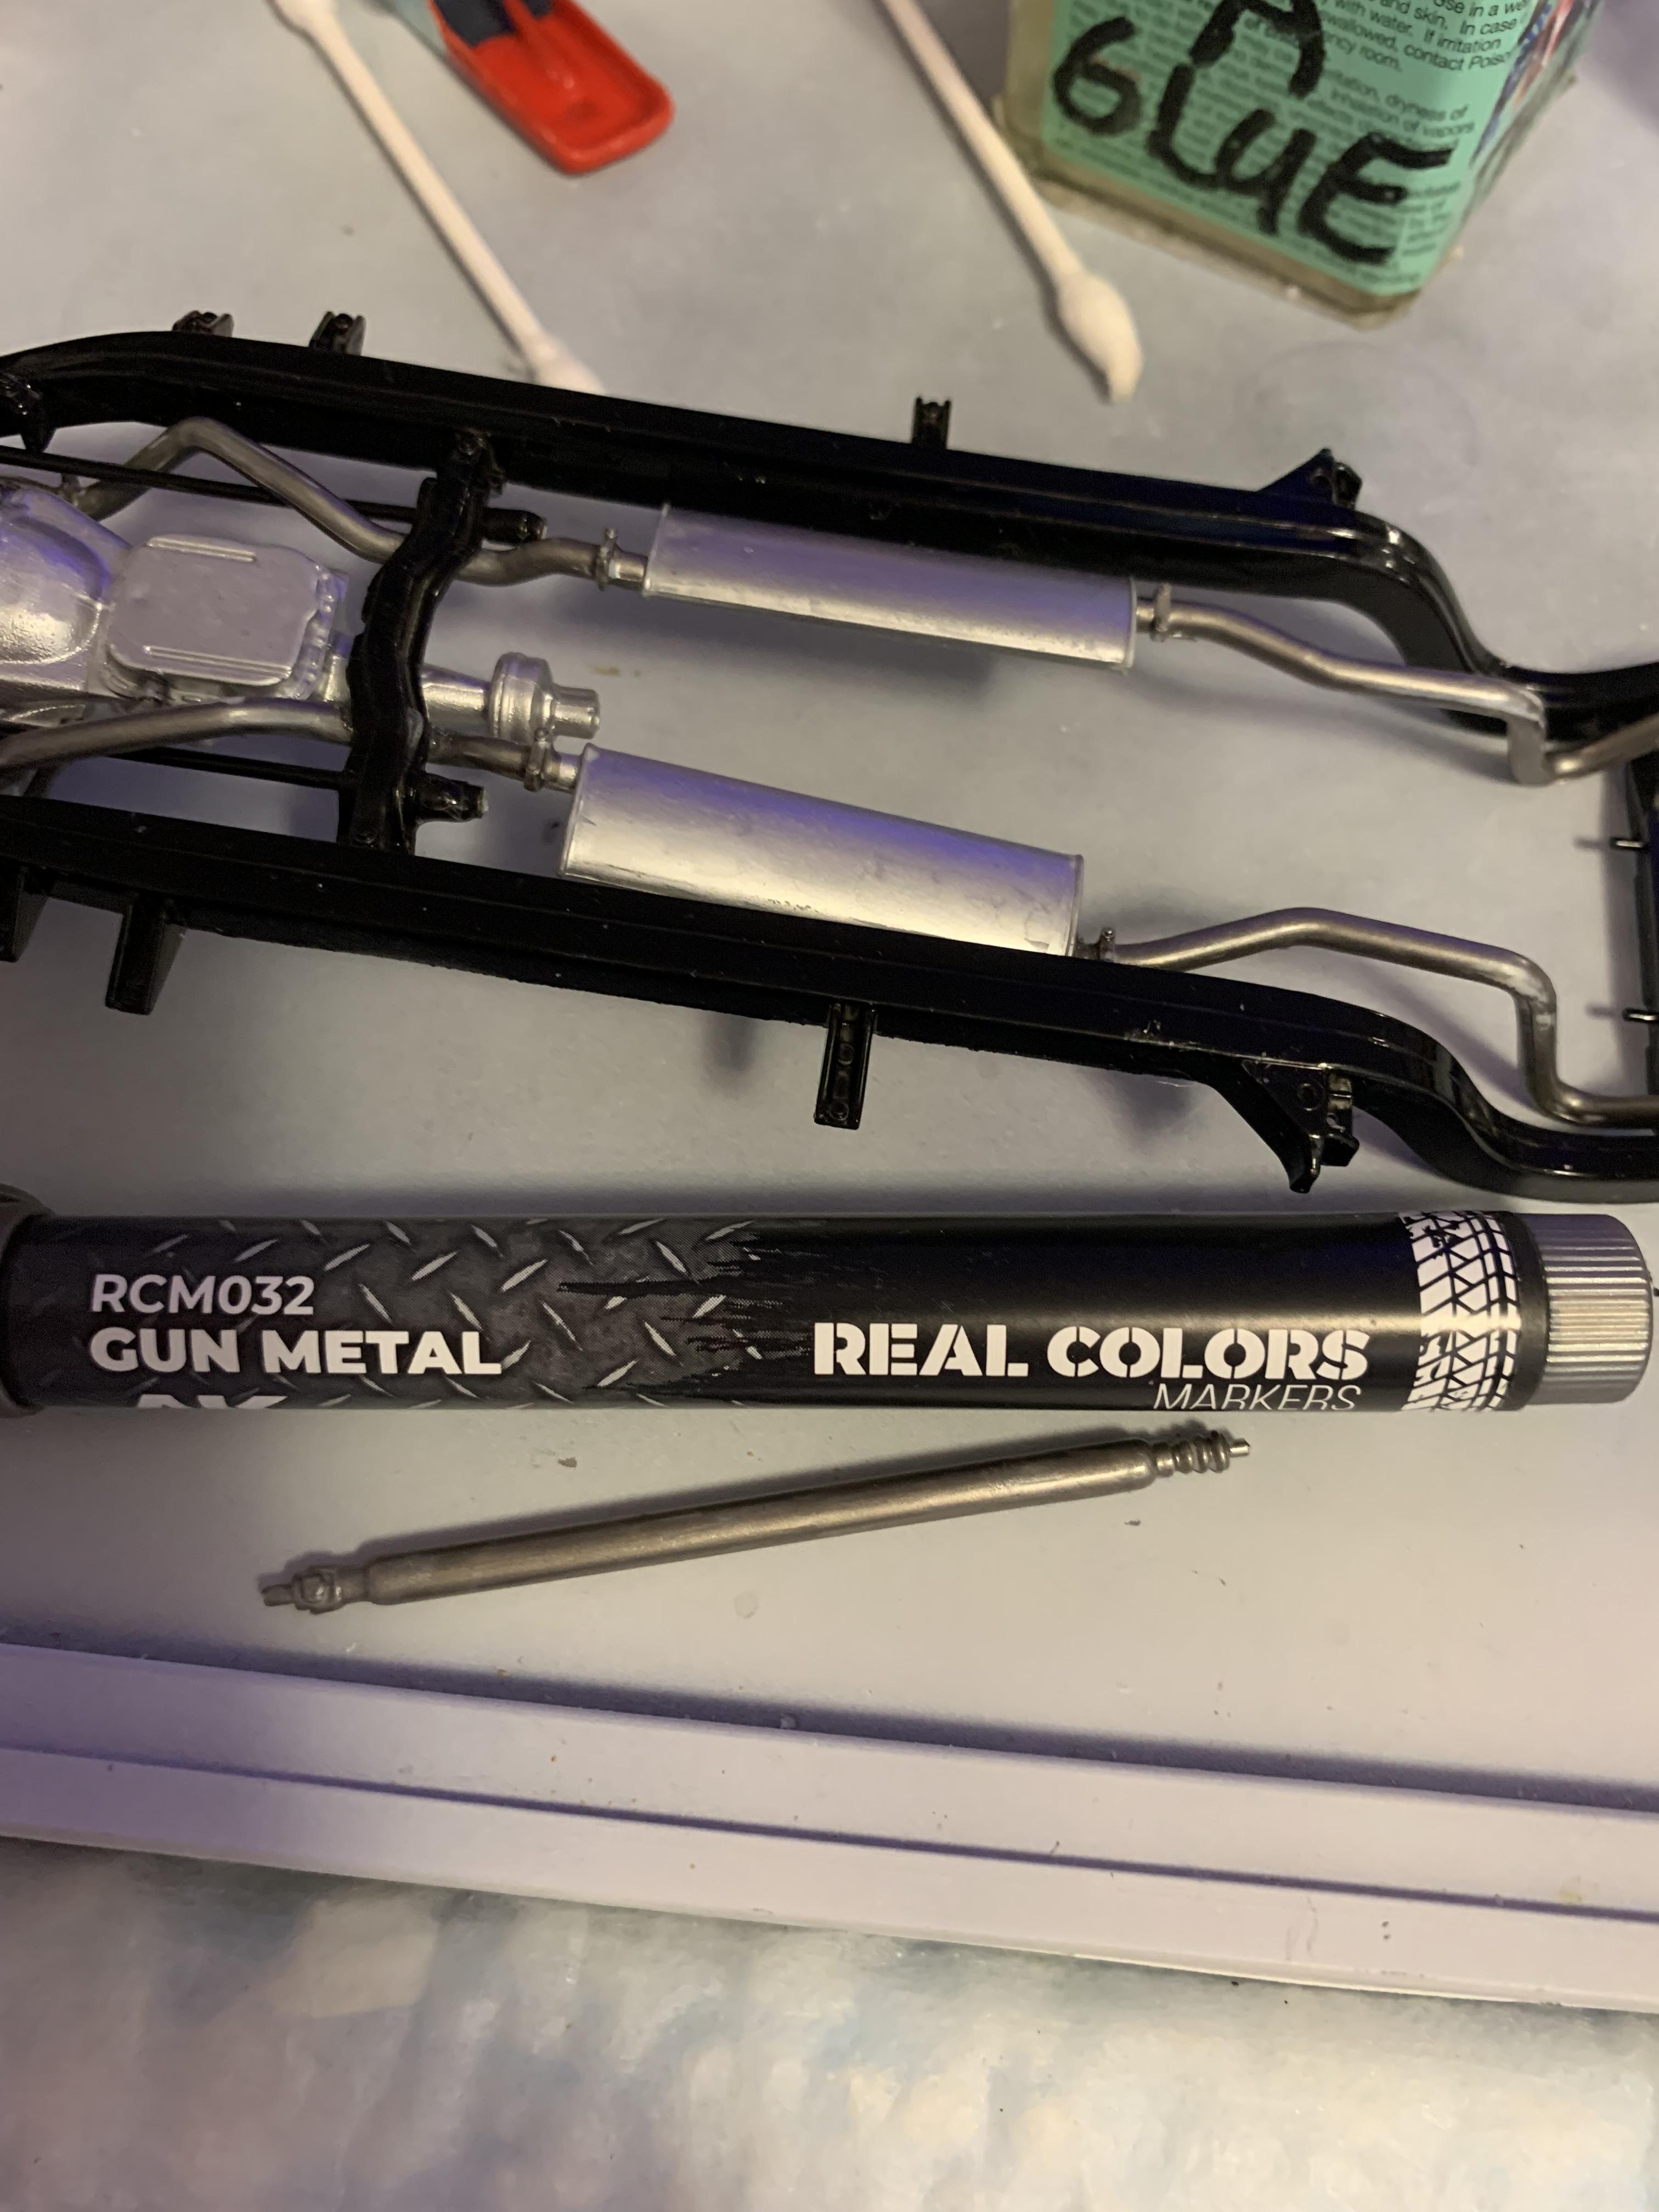
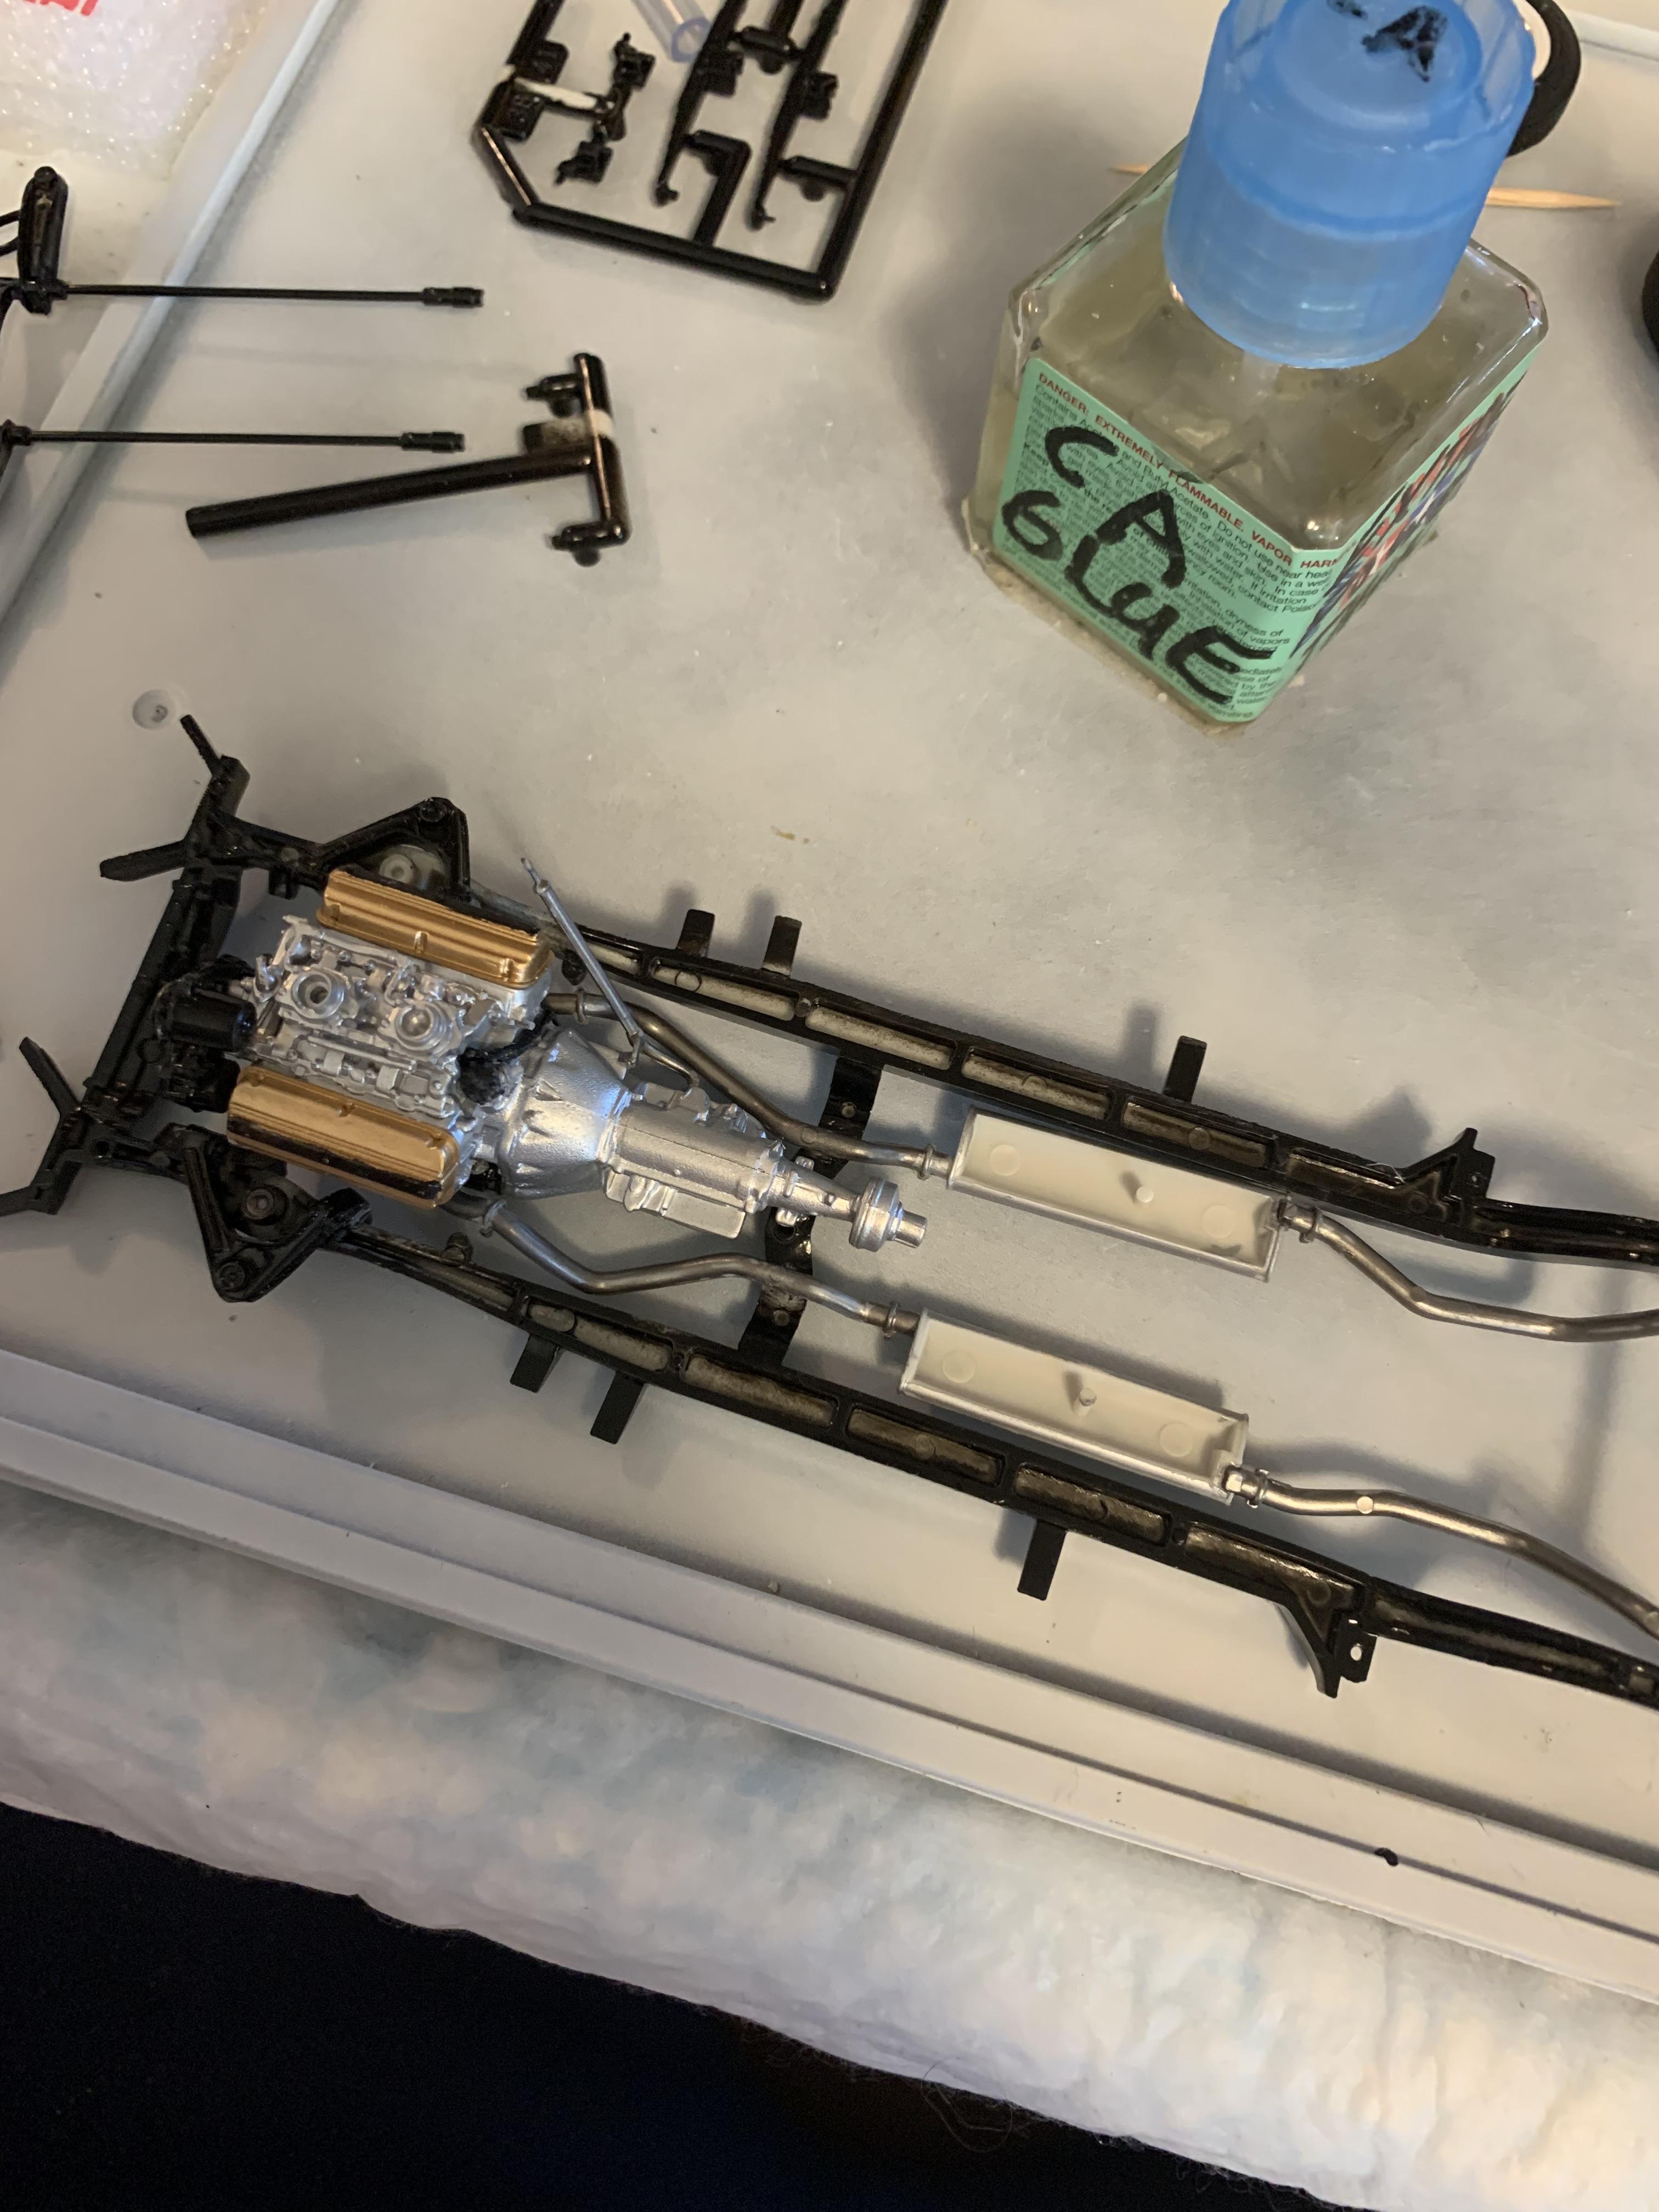
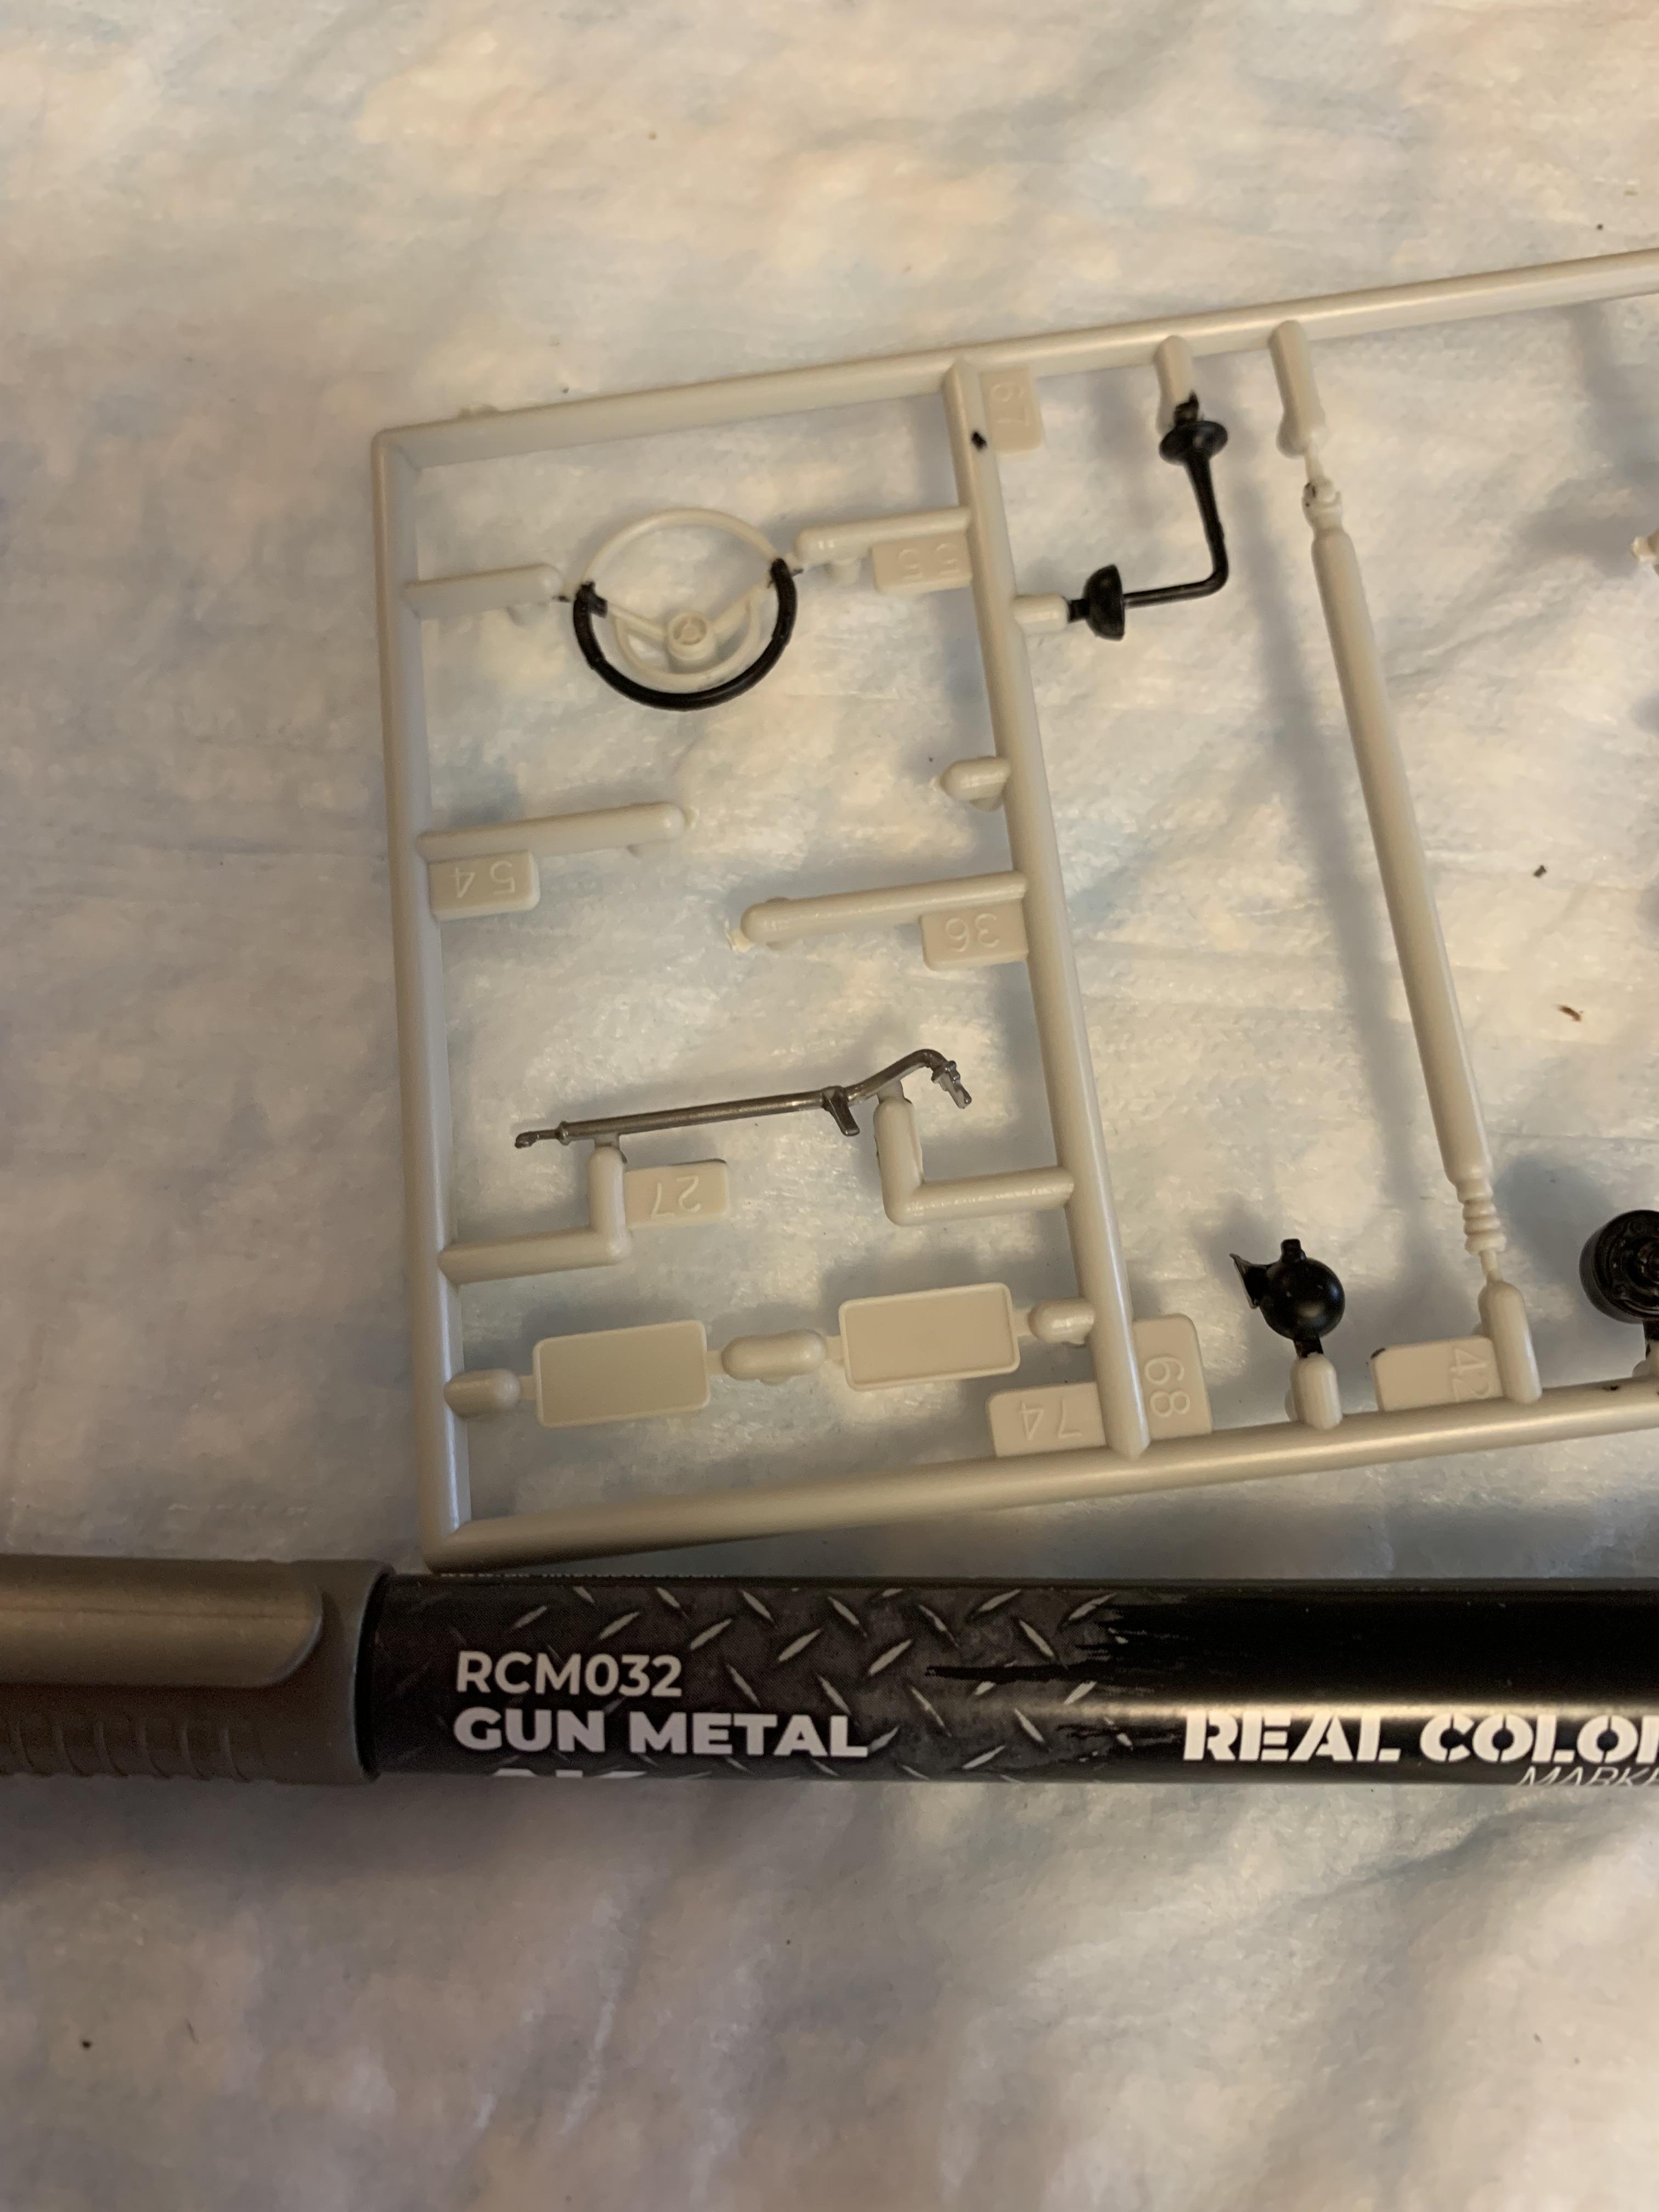
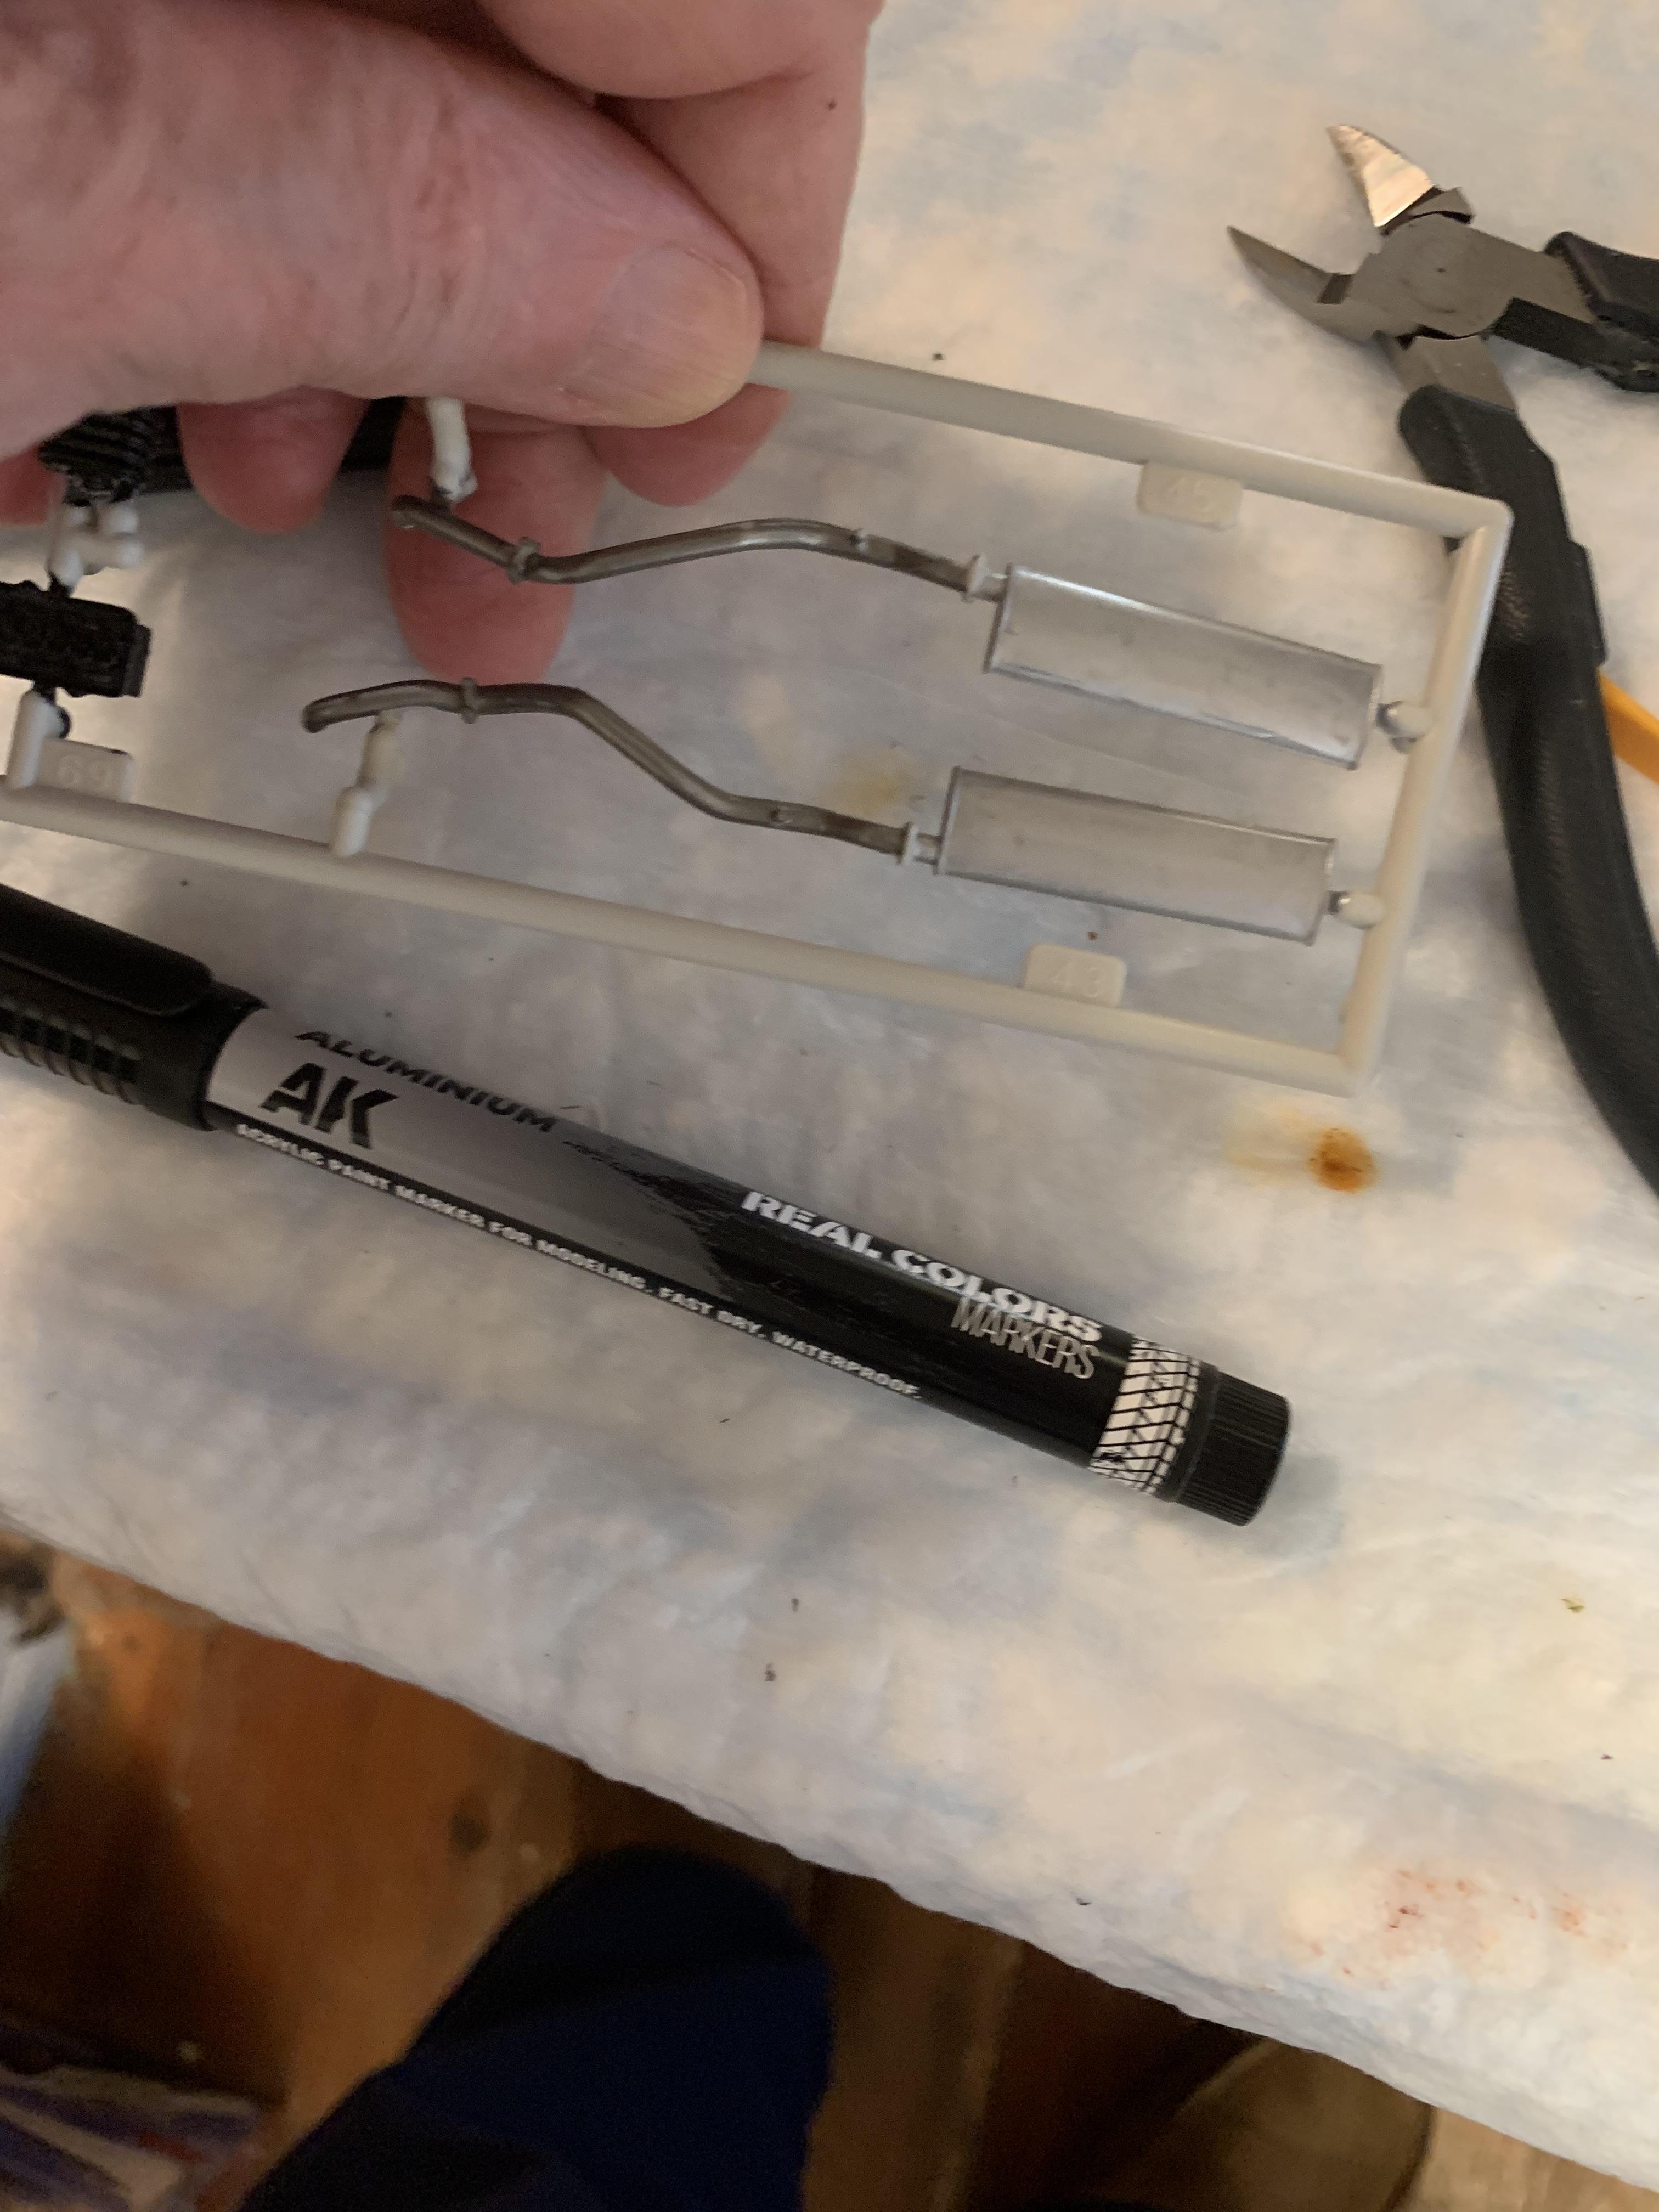
Another pic of the installed exhaust. Was planning on using some thick ca for longer assembly time as the rear end installation is also somewhat fiddly , but the Hobbylobby and BSI stuff had both hardened up, so went into the trash. Decided to remove the painted mounting areas (tedious work), of which there are many, and use regular thick type plastic cement (Perfect Plastic products in this case). Oh, yeah, the driveshaft walked away, so robbed one out of the new kit, and put some gun metal on with one of my new markers (how did I do without these acrylic markers?).
-
This is what I topped it off with, but most of it was about 5 year old Castrol branded superclean, which is no longer available.
-
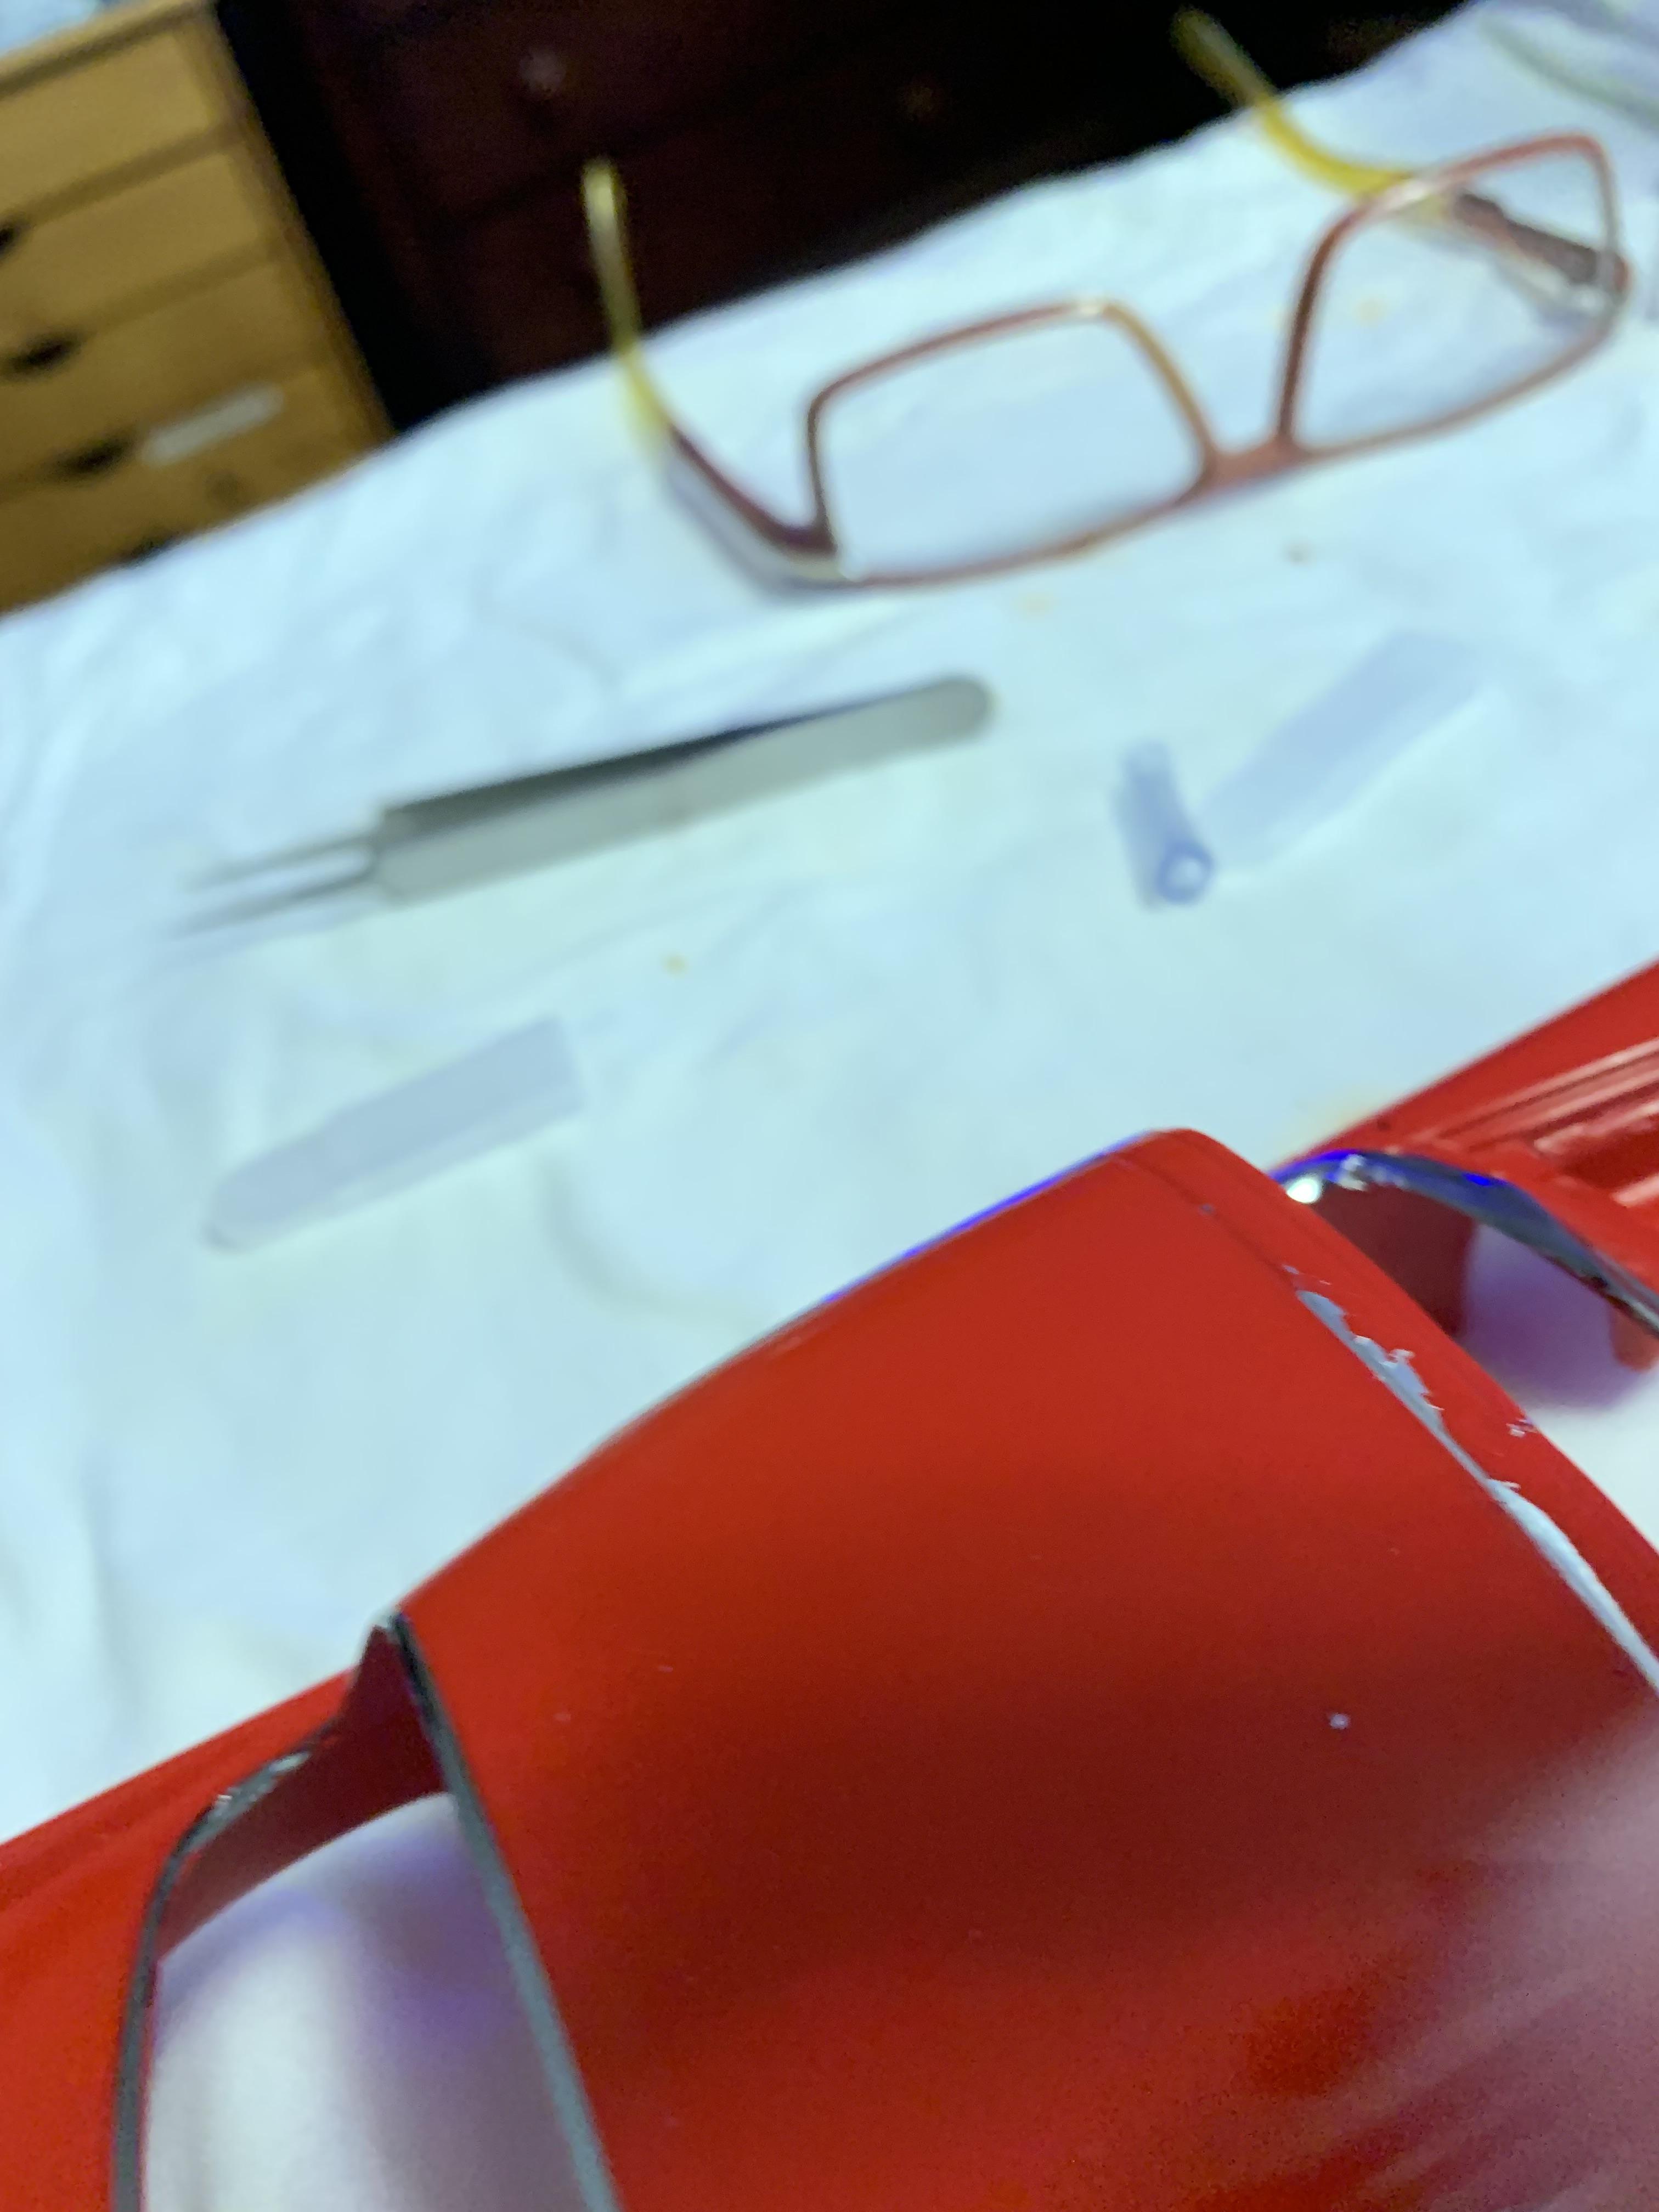
This drill bit set is convenient for reaming out tight fitting holes. It doesn’t fit all holes, obviously, but quite a few common ones.
-
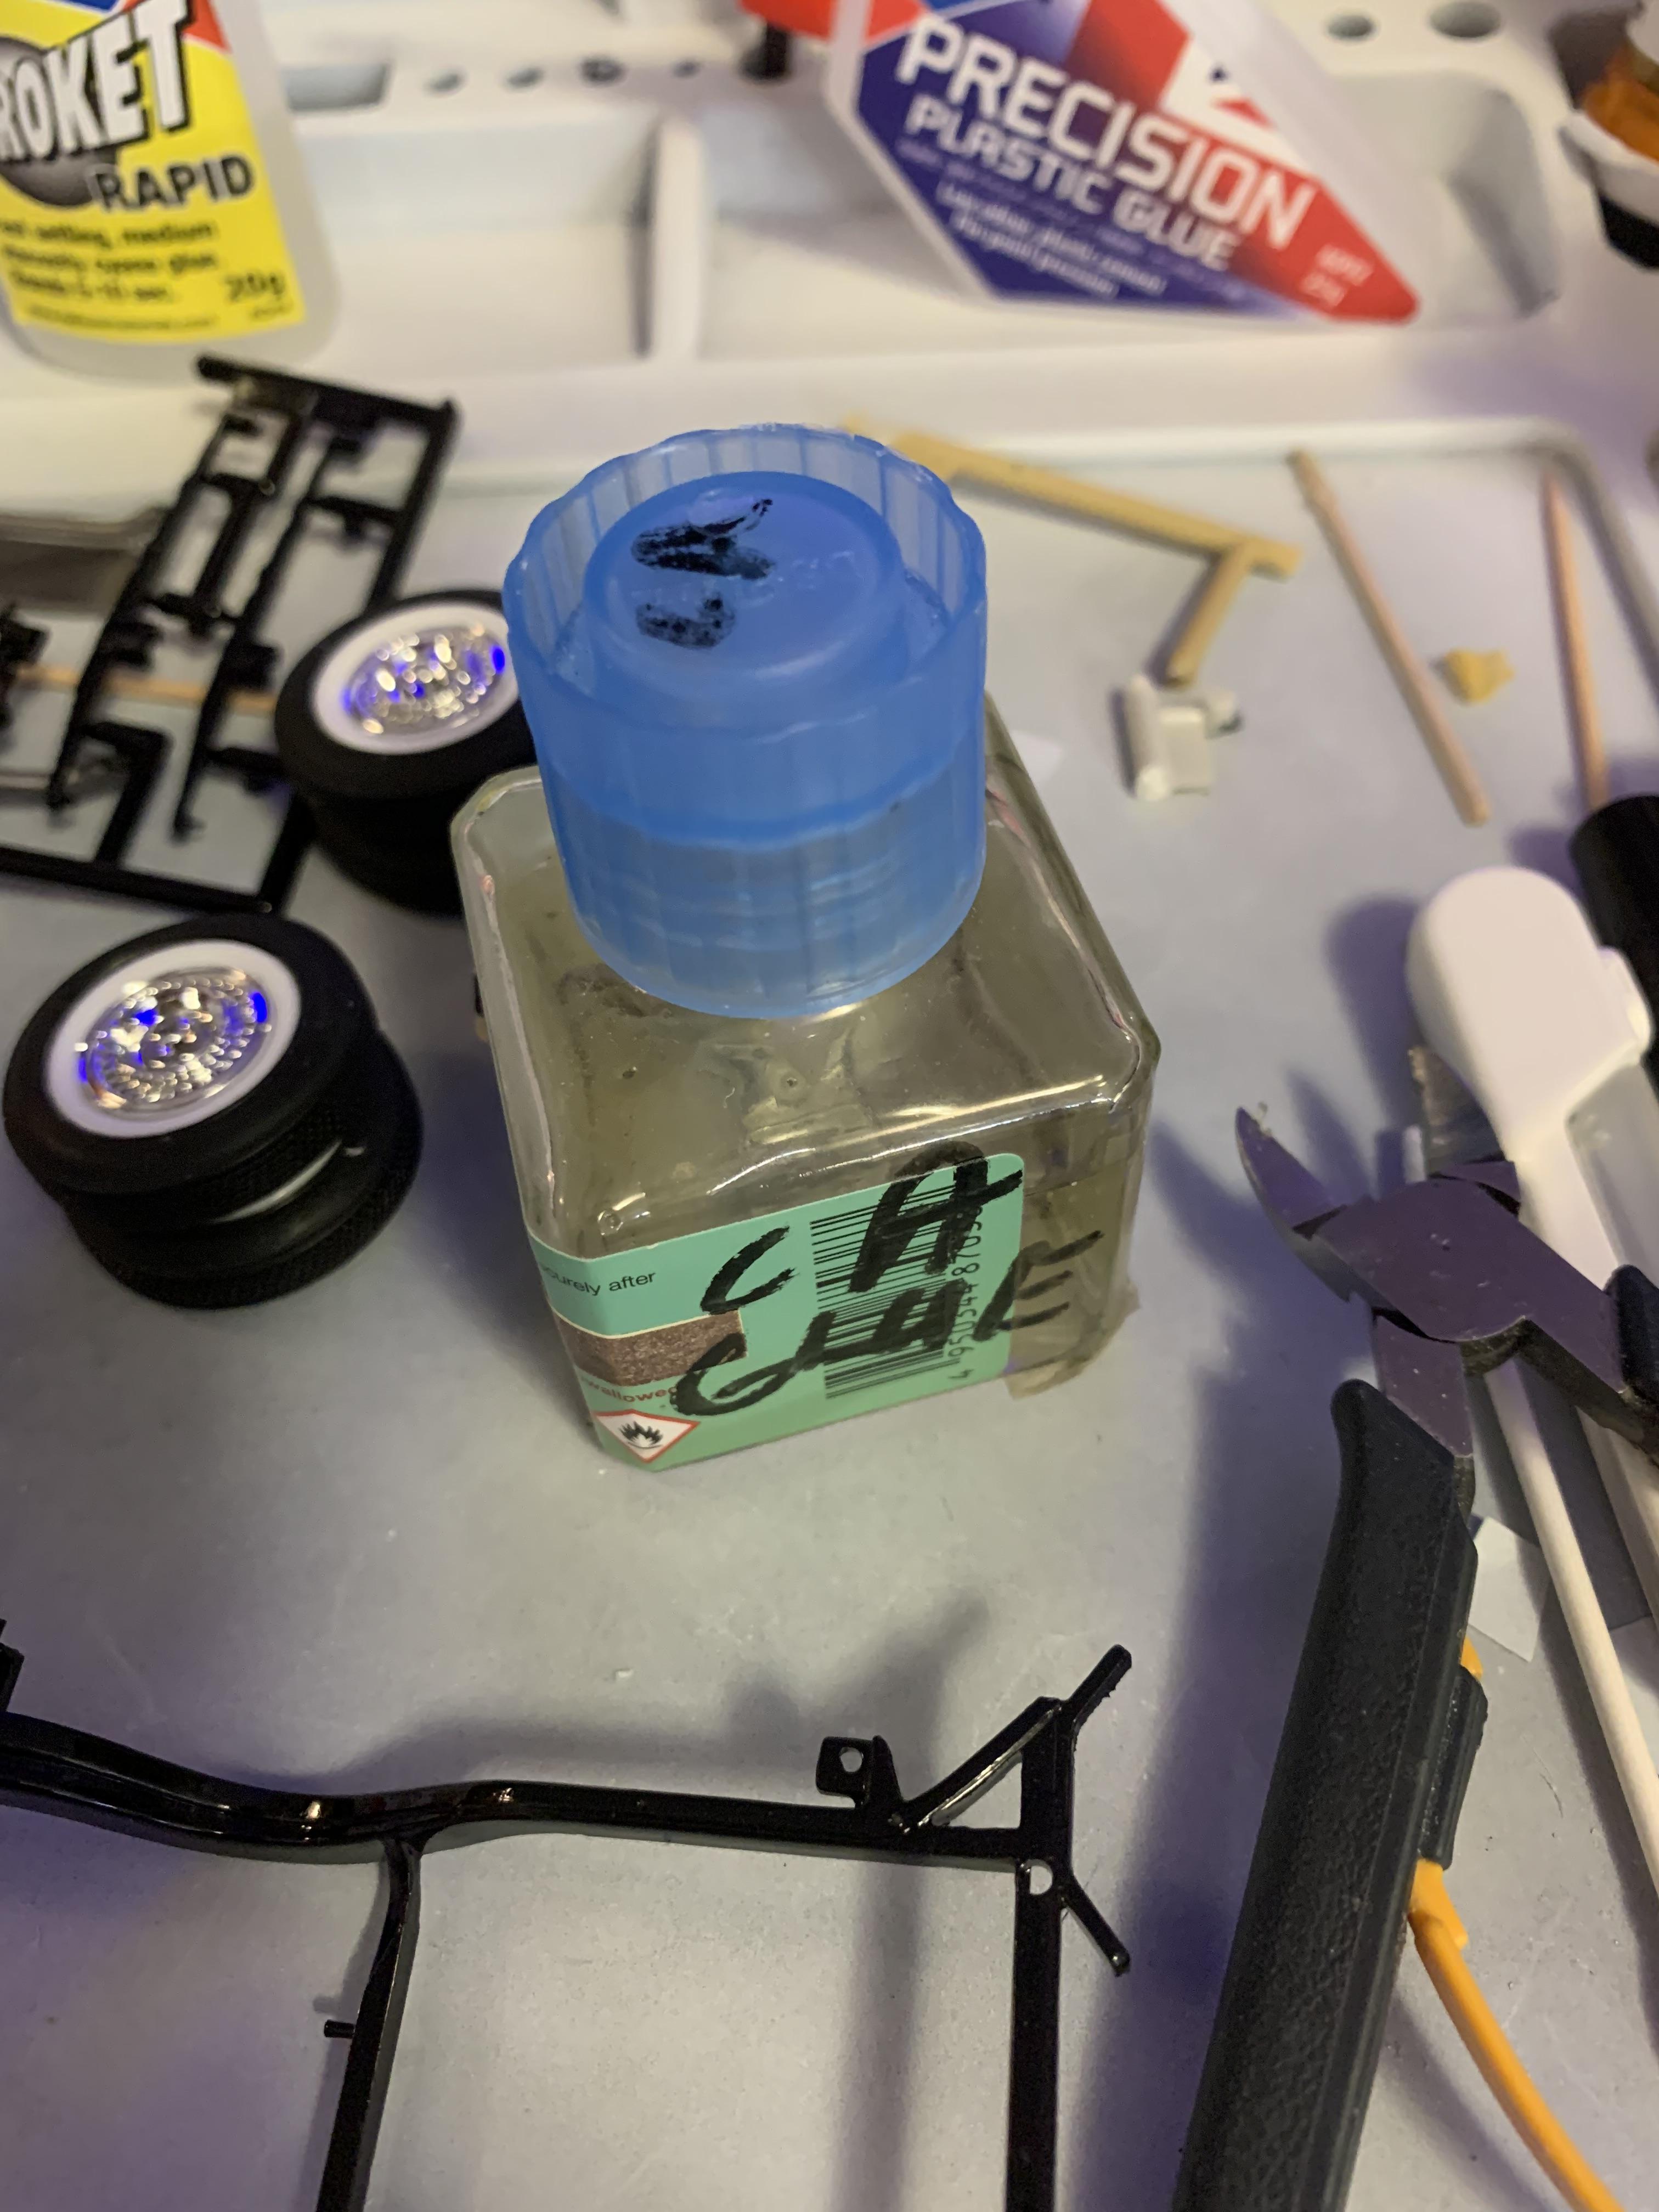
I am always experimenting, Jim. Sometimes, it doesn’t pay off. Got the “old” body looking good as new after soaking in purple stuff for about a week with some tooth brush scrubbing a couple times. Put some thin ca glue in an old Tamiya bottle with their small brush. Put the parts together, then applied the ca using capillary action. Used it on the somewhat fiddly exhaust system installation along with some kicker in a small bottle with eye dropper. So far, so good.
-
I’m kinda partial to the 37’s.
-
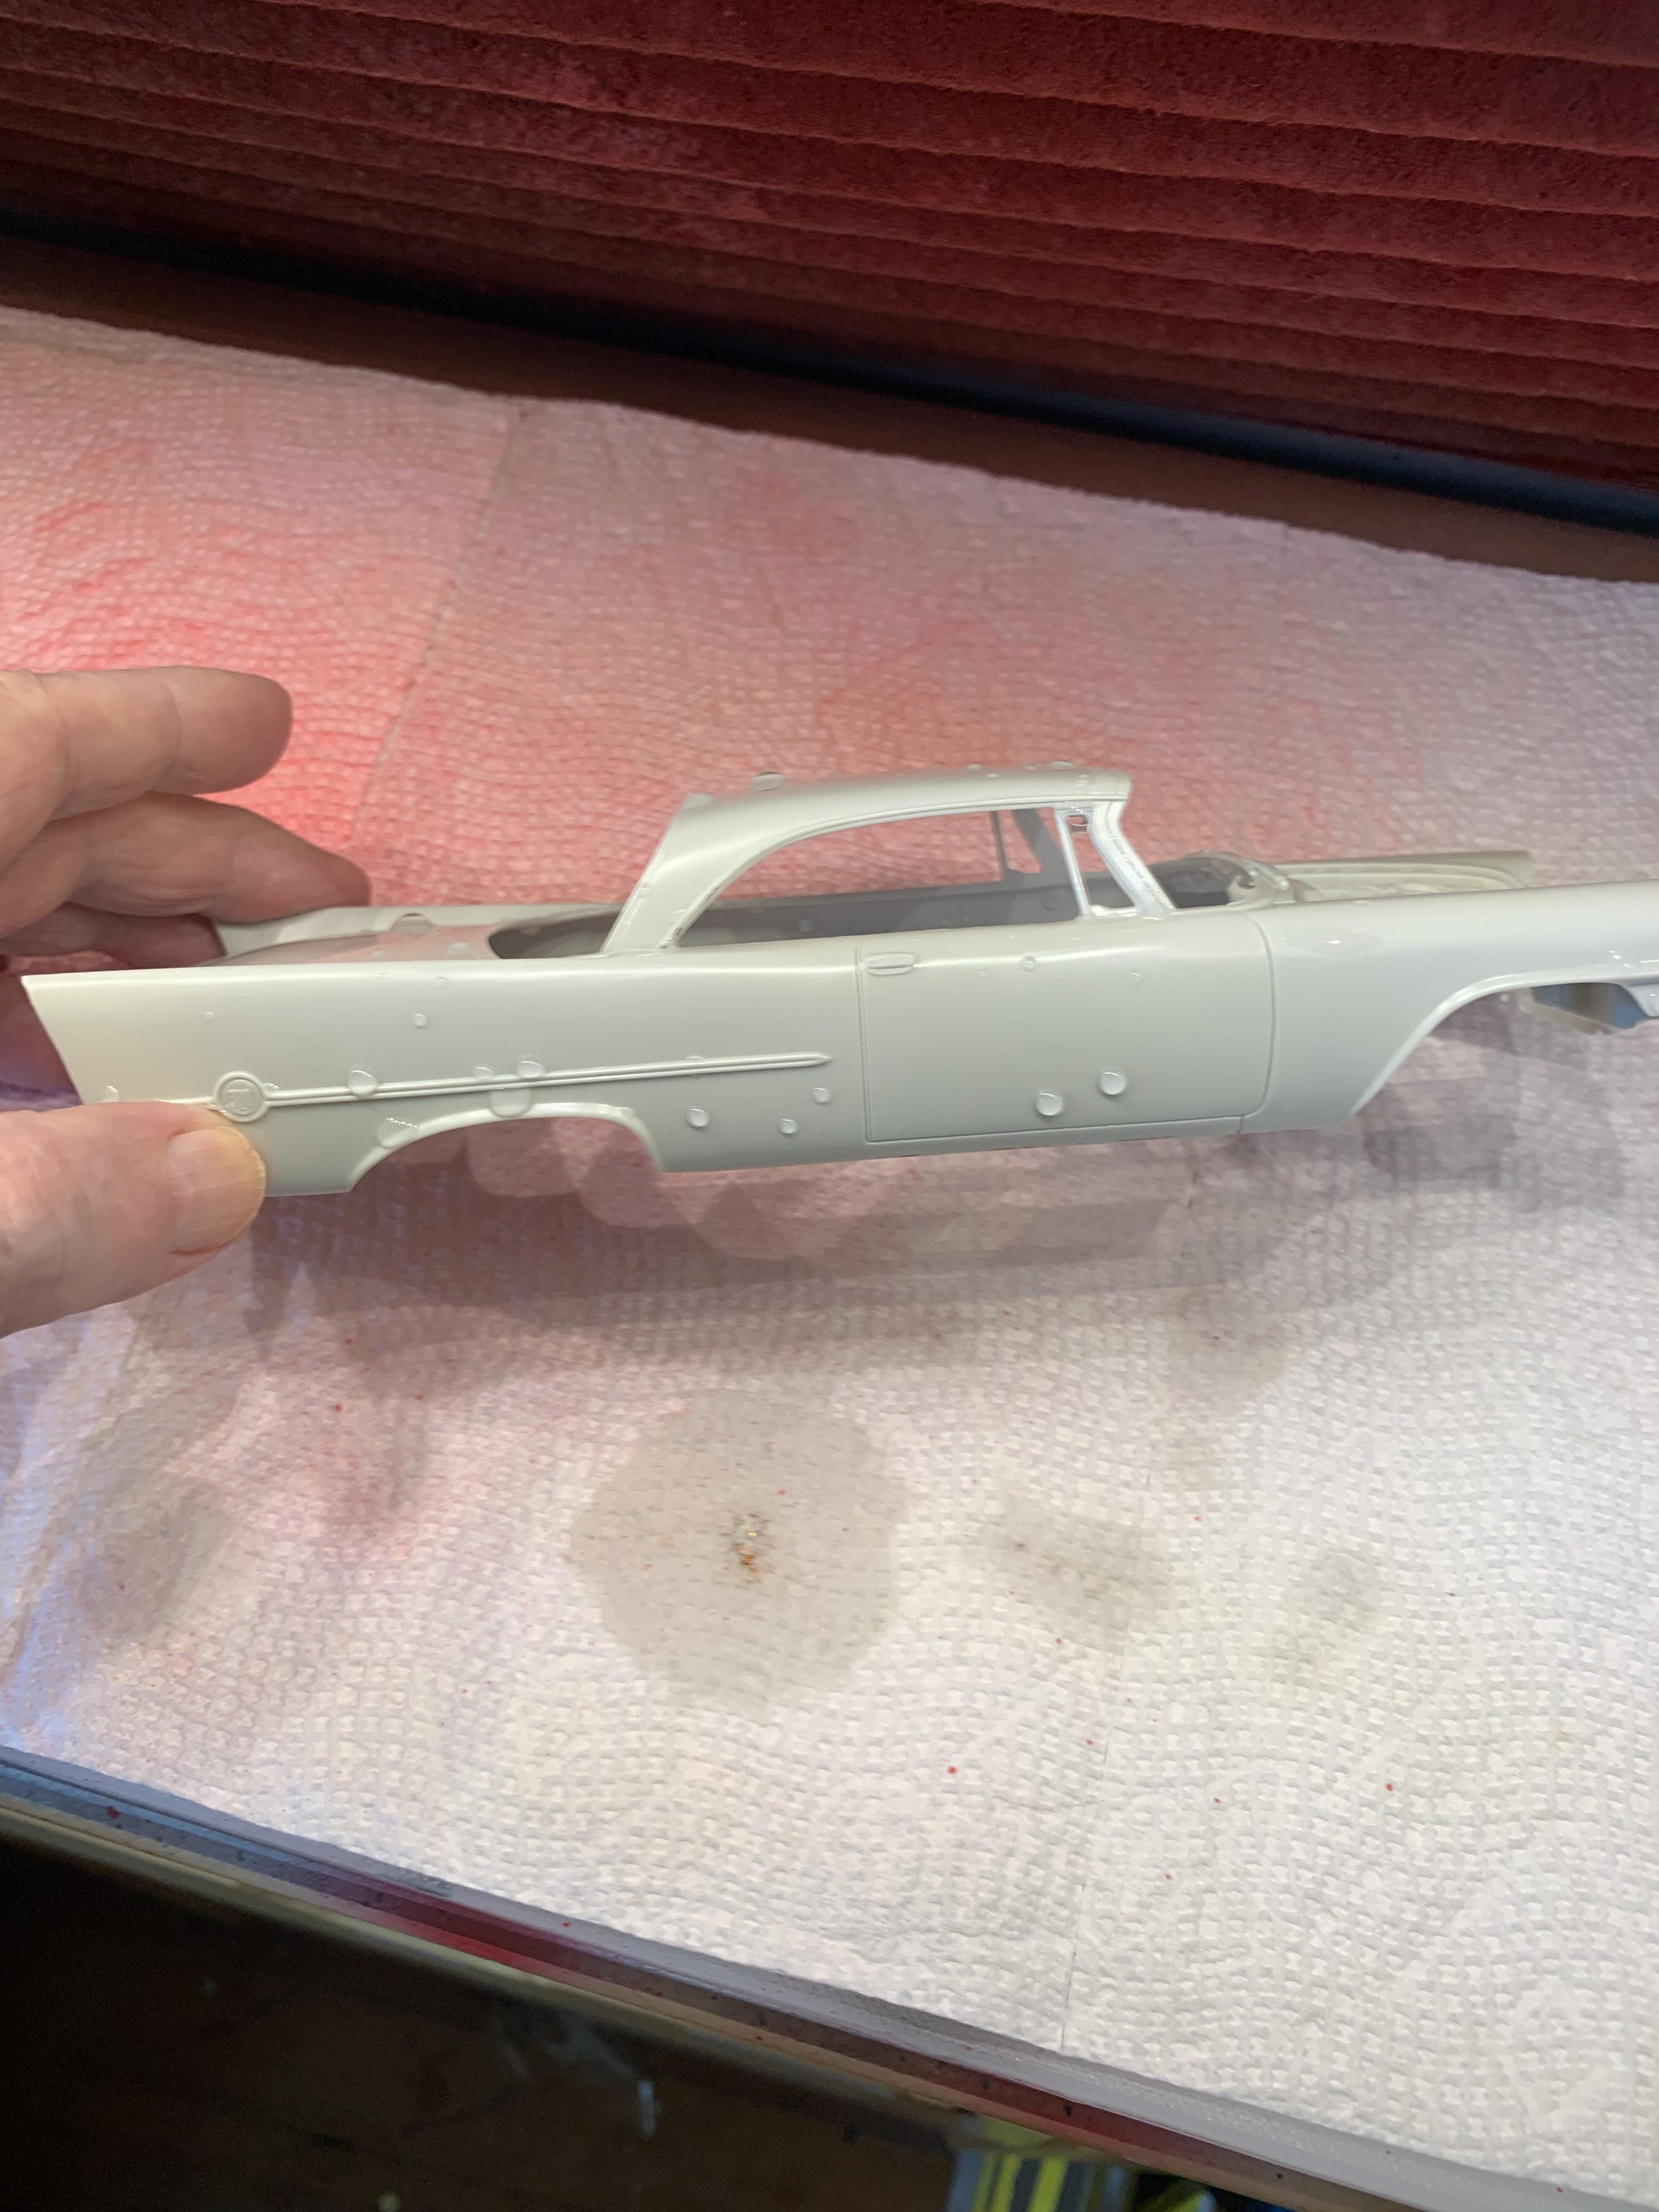
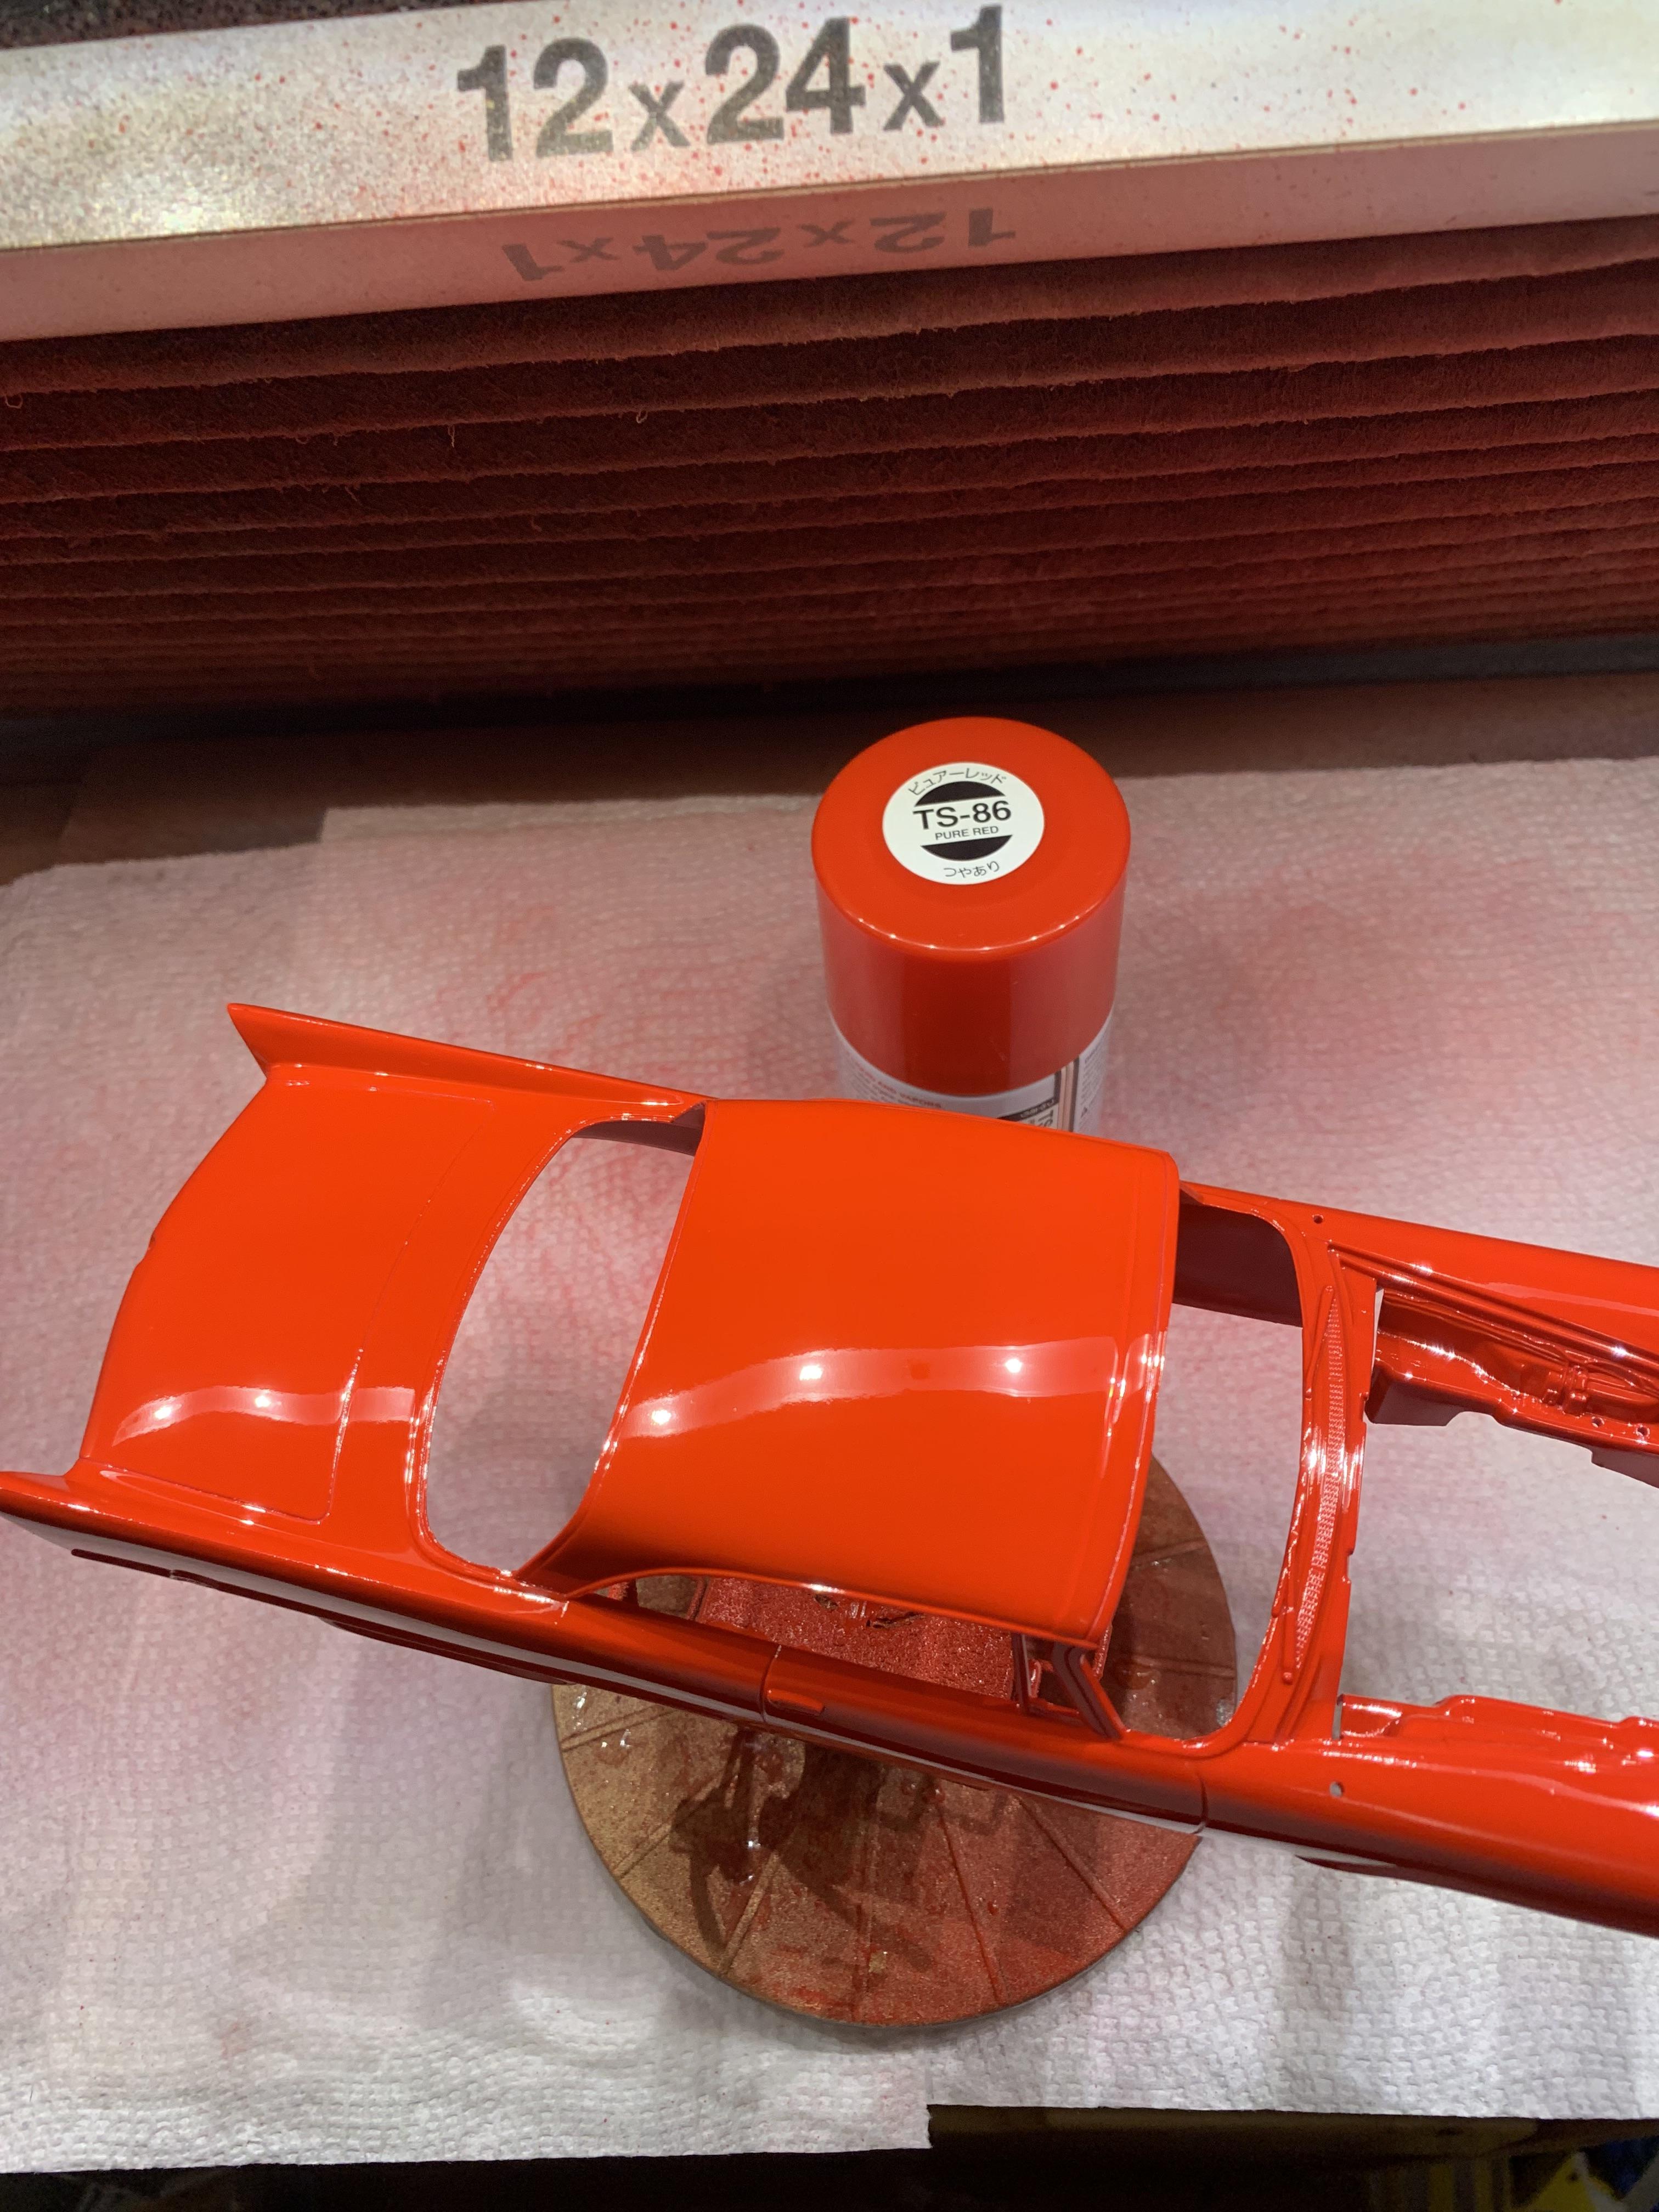
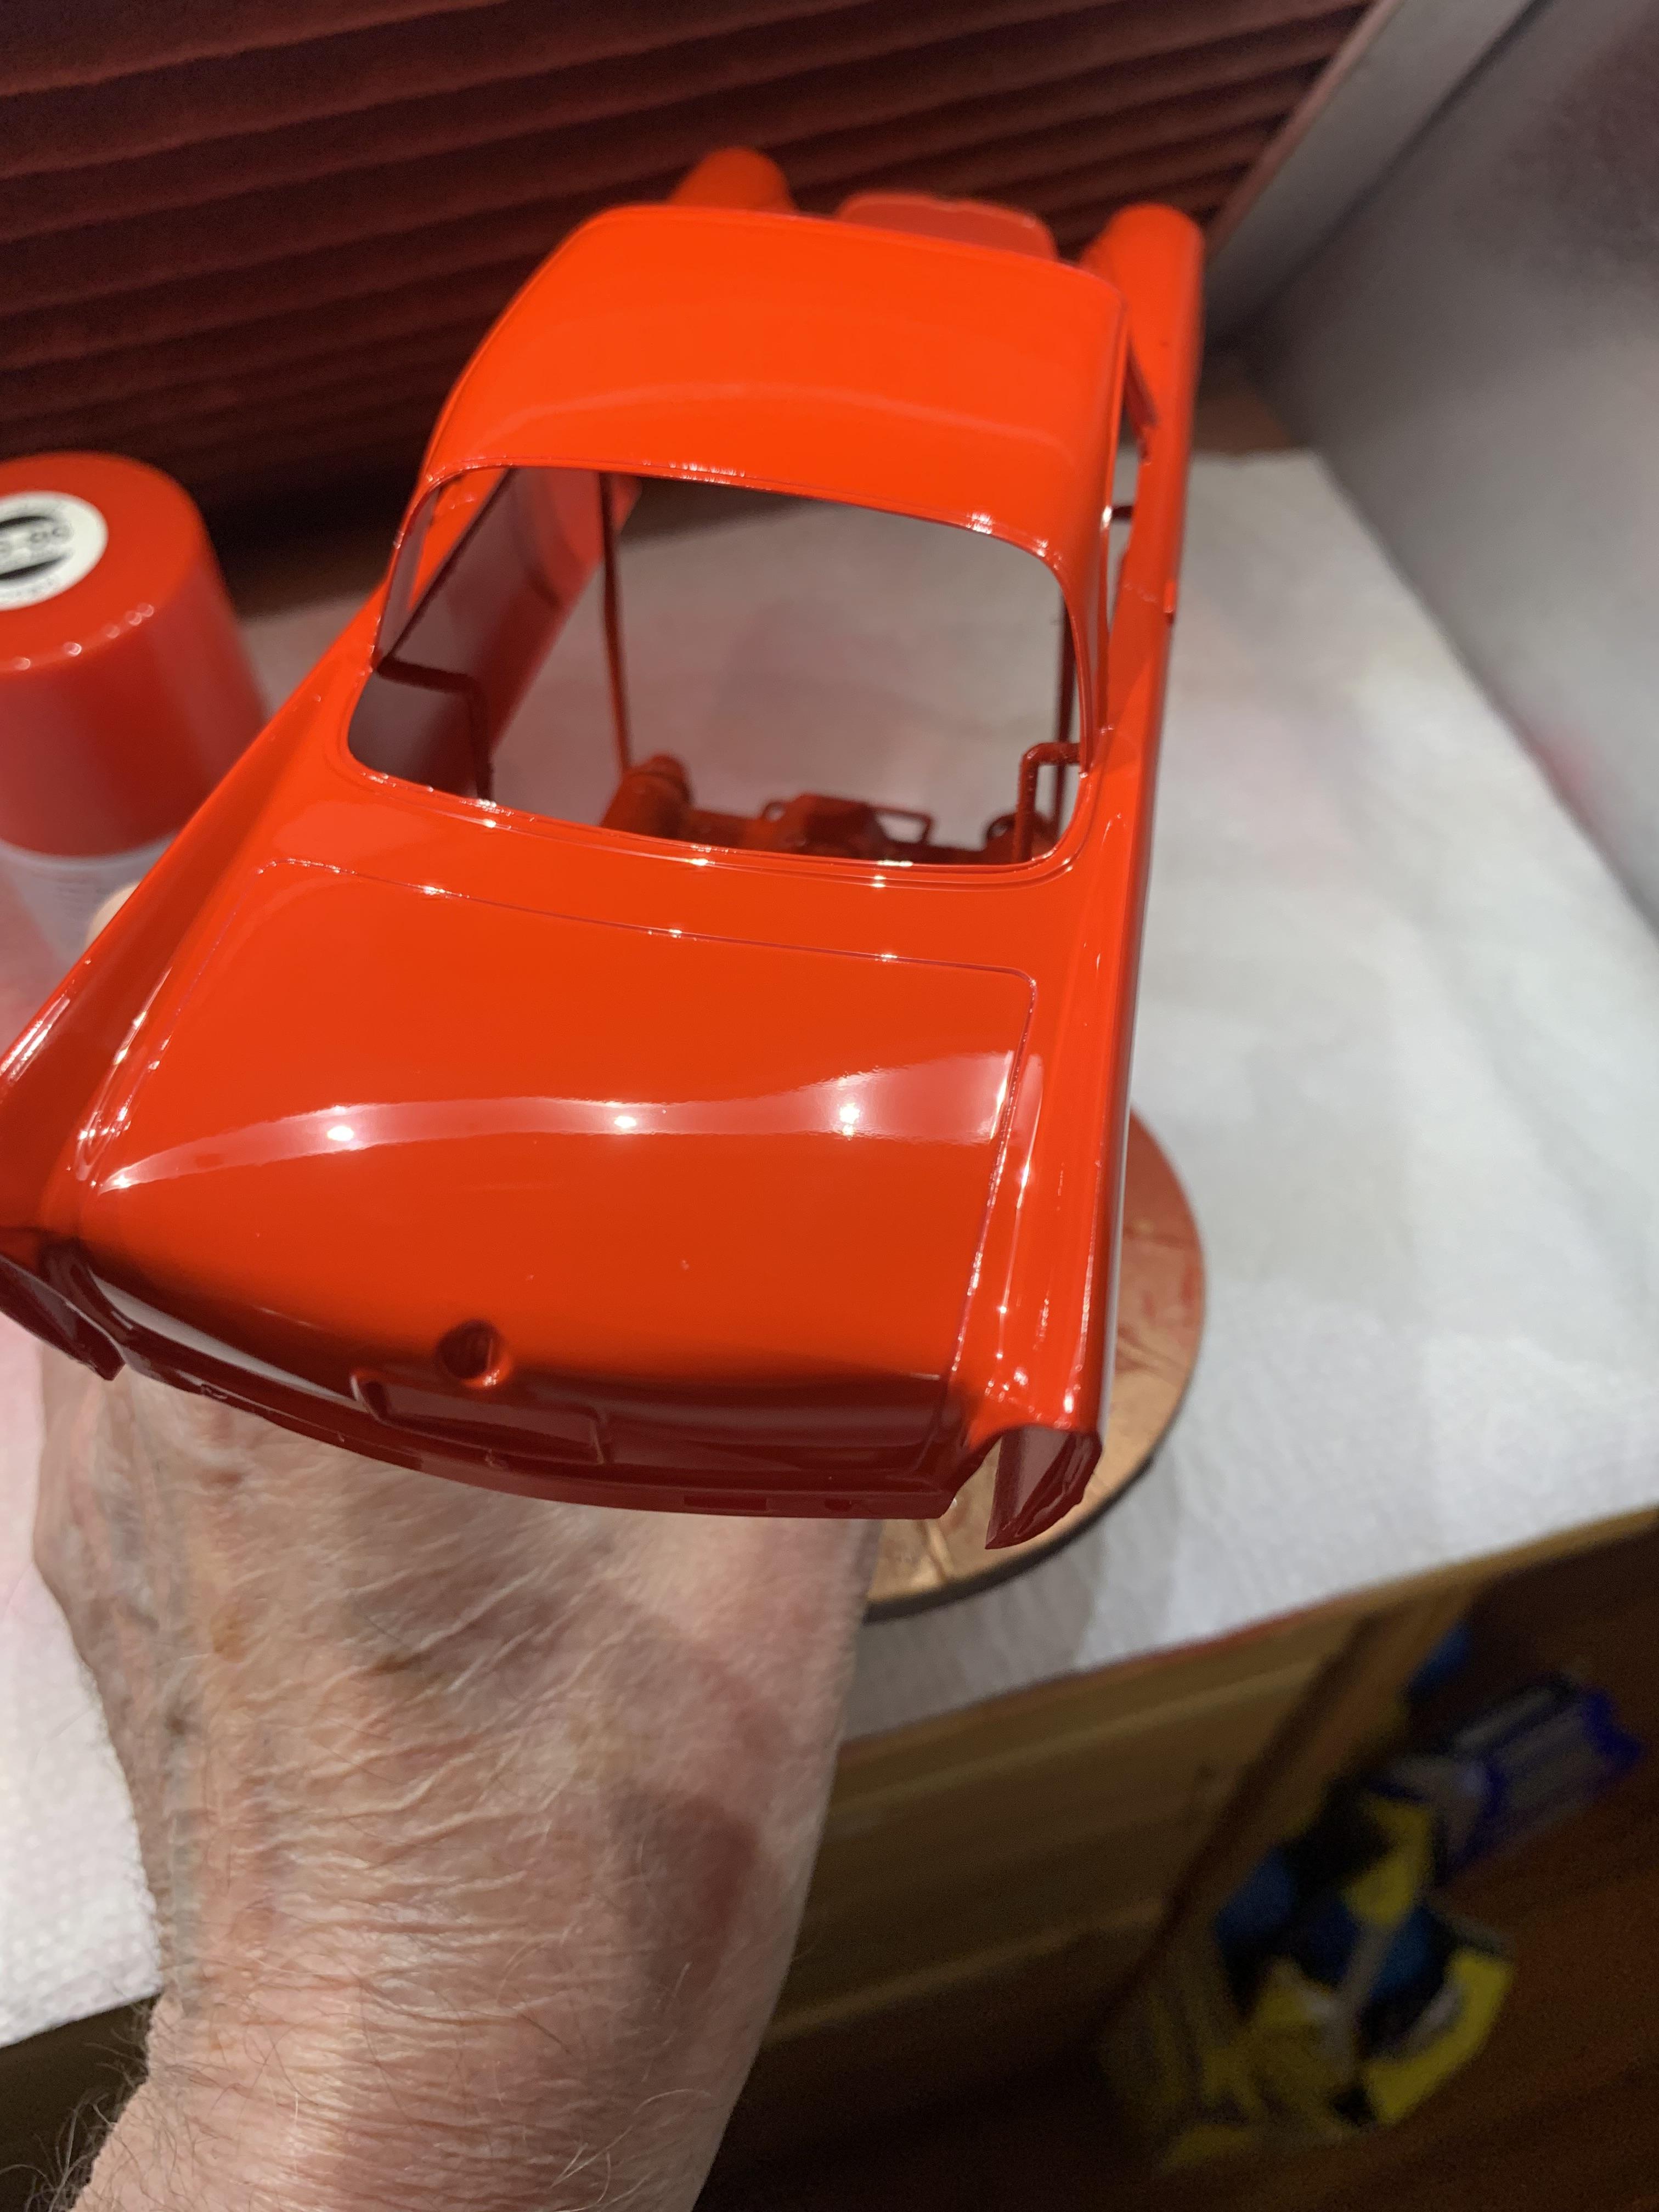
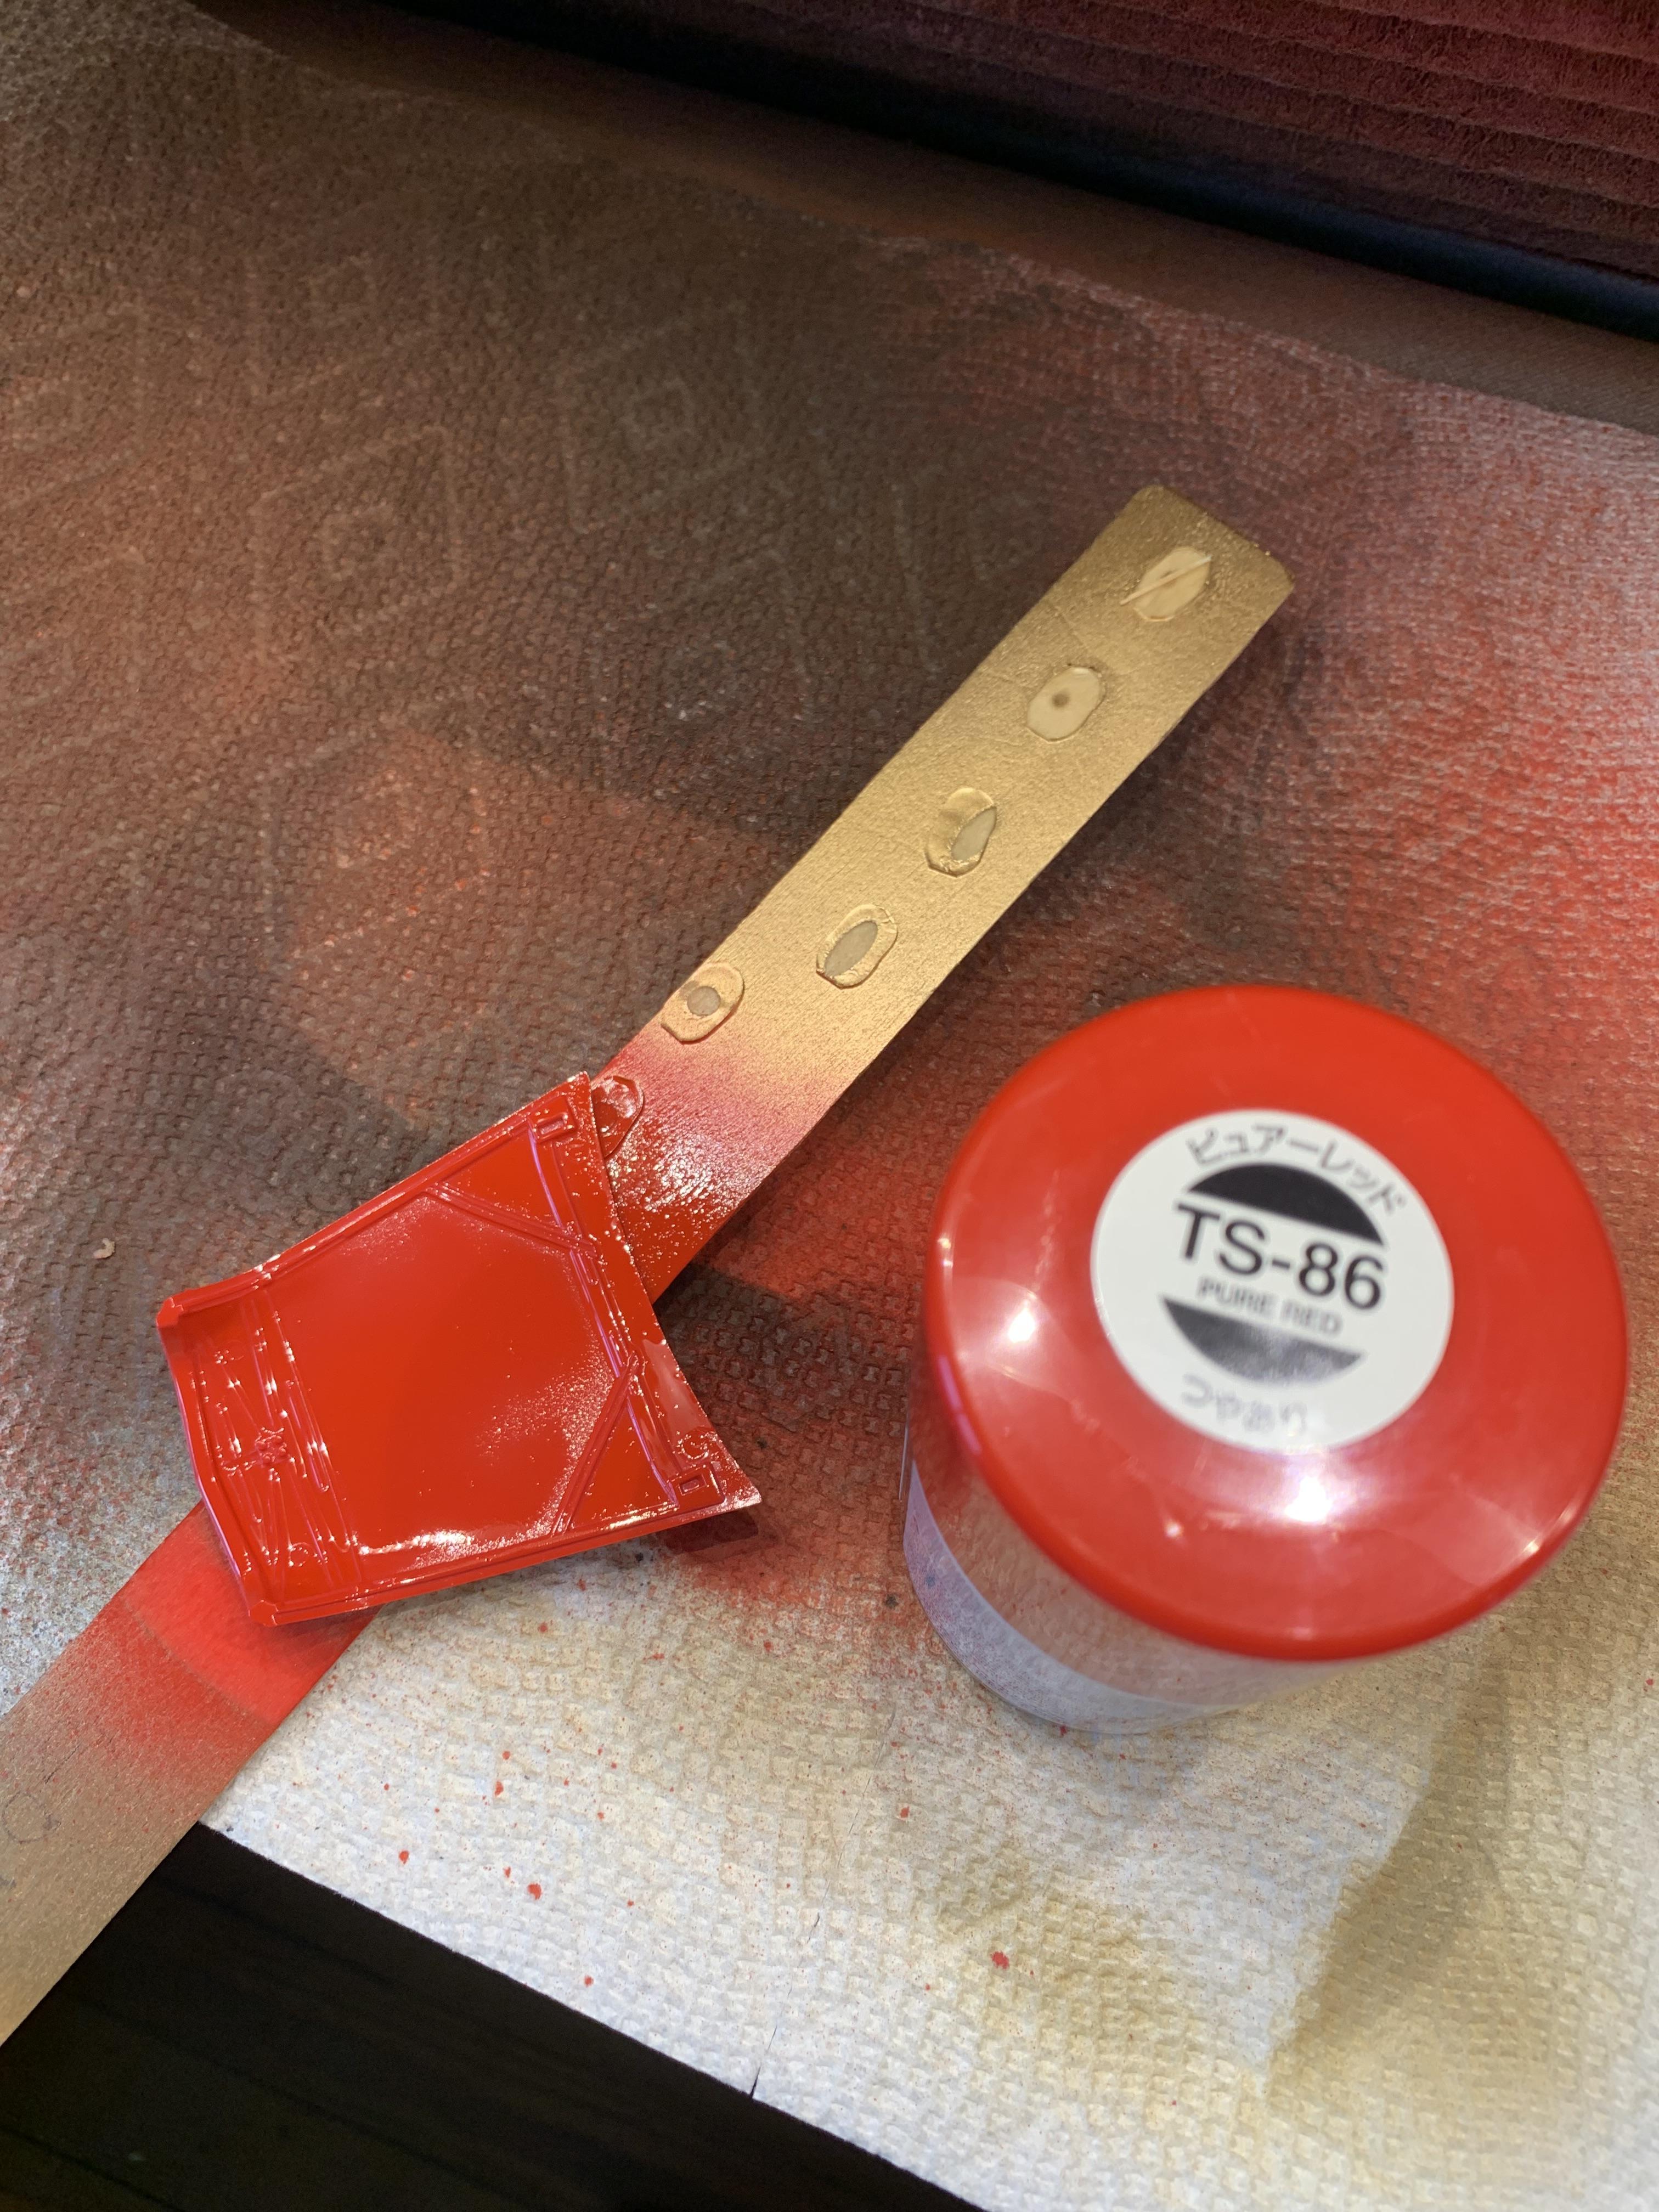
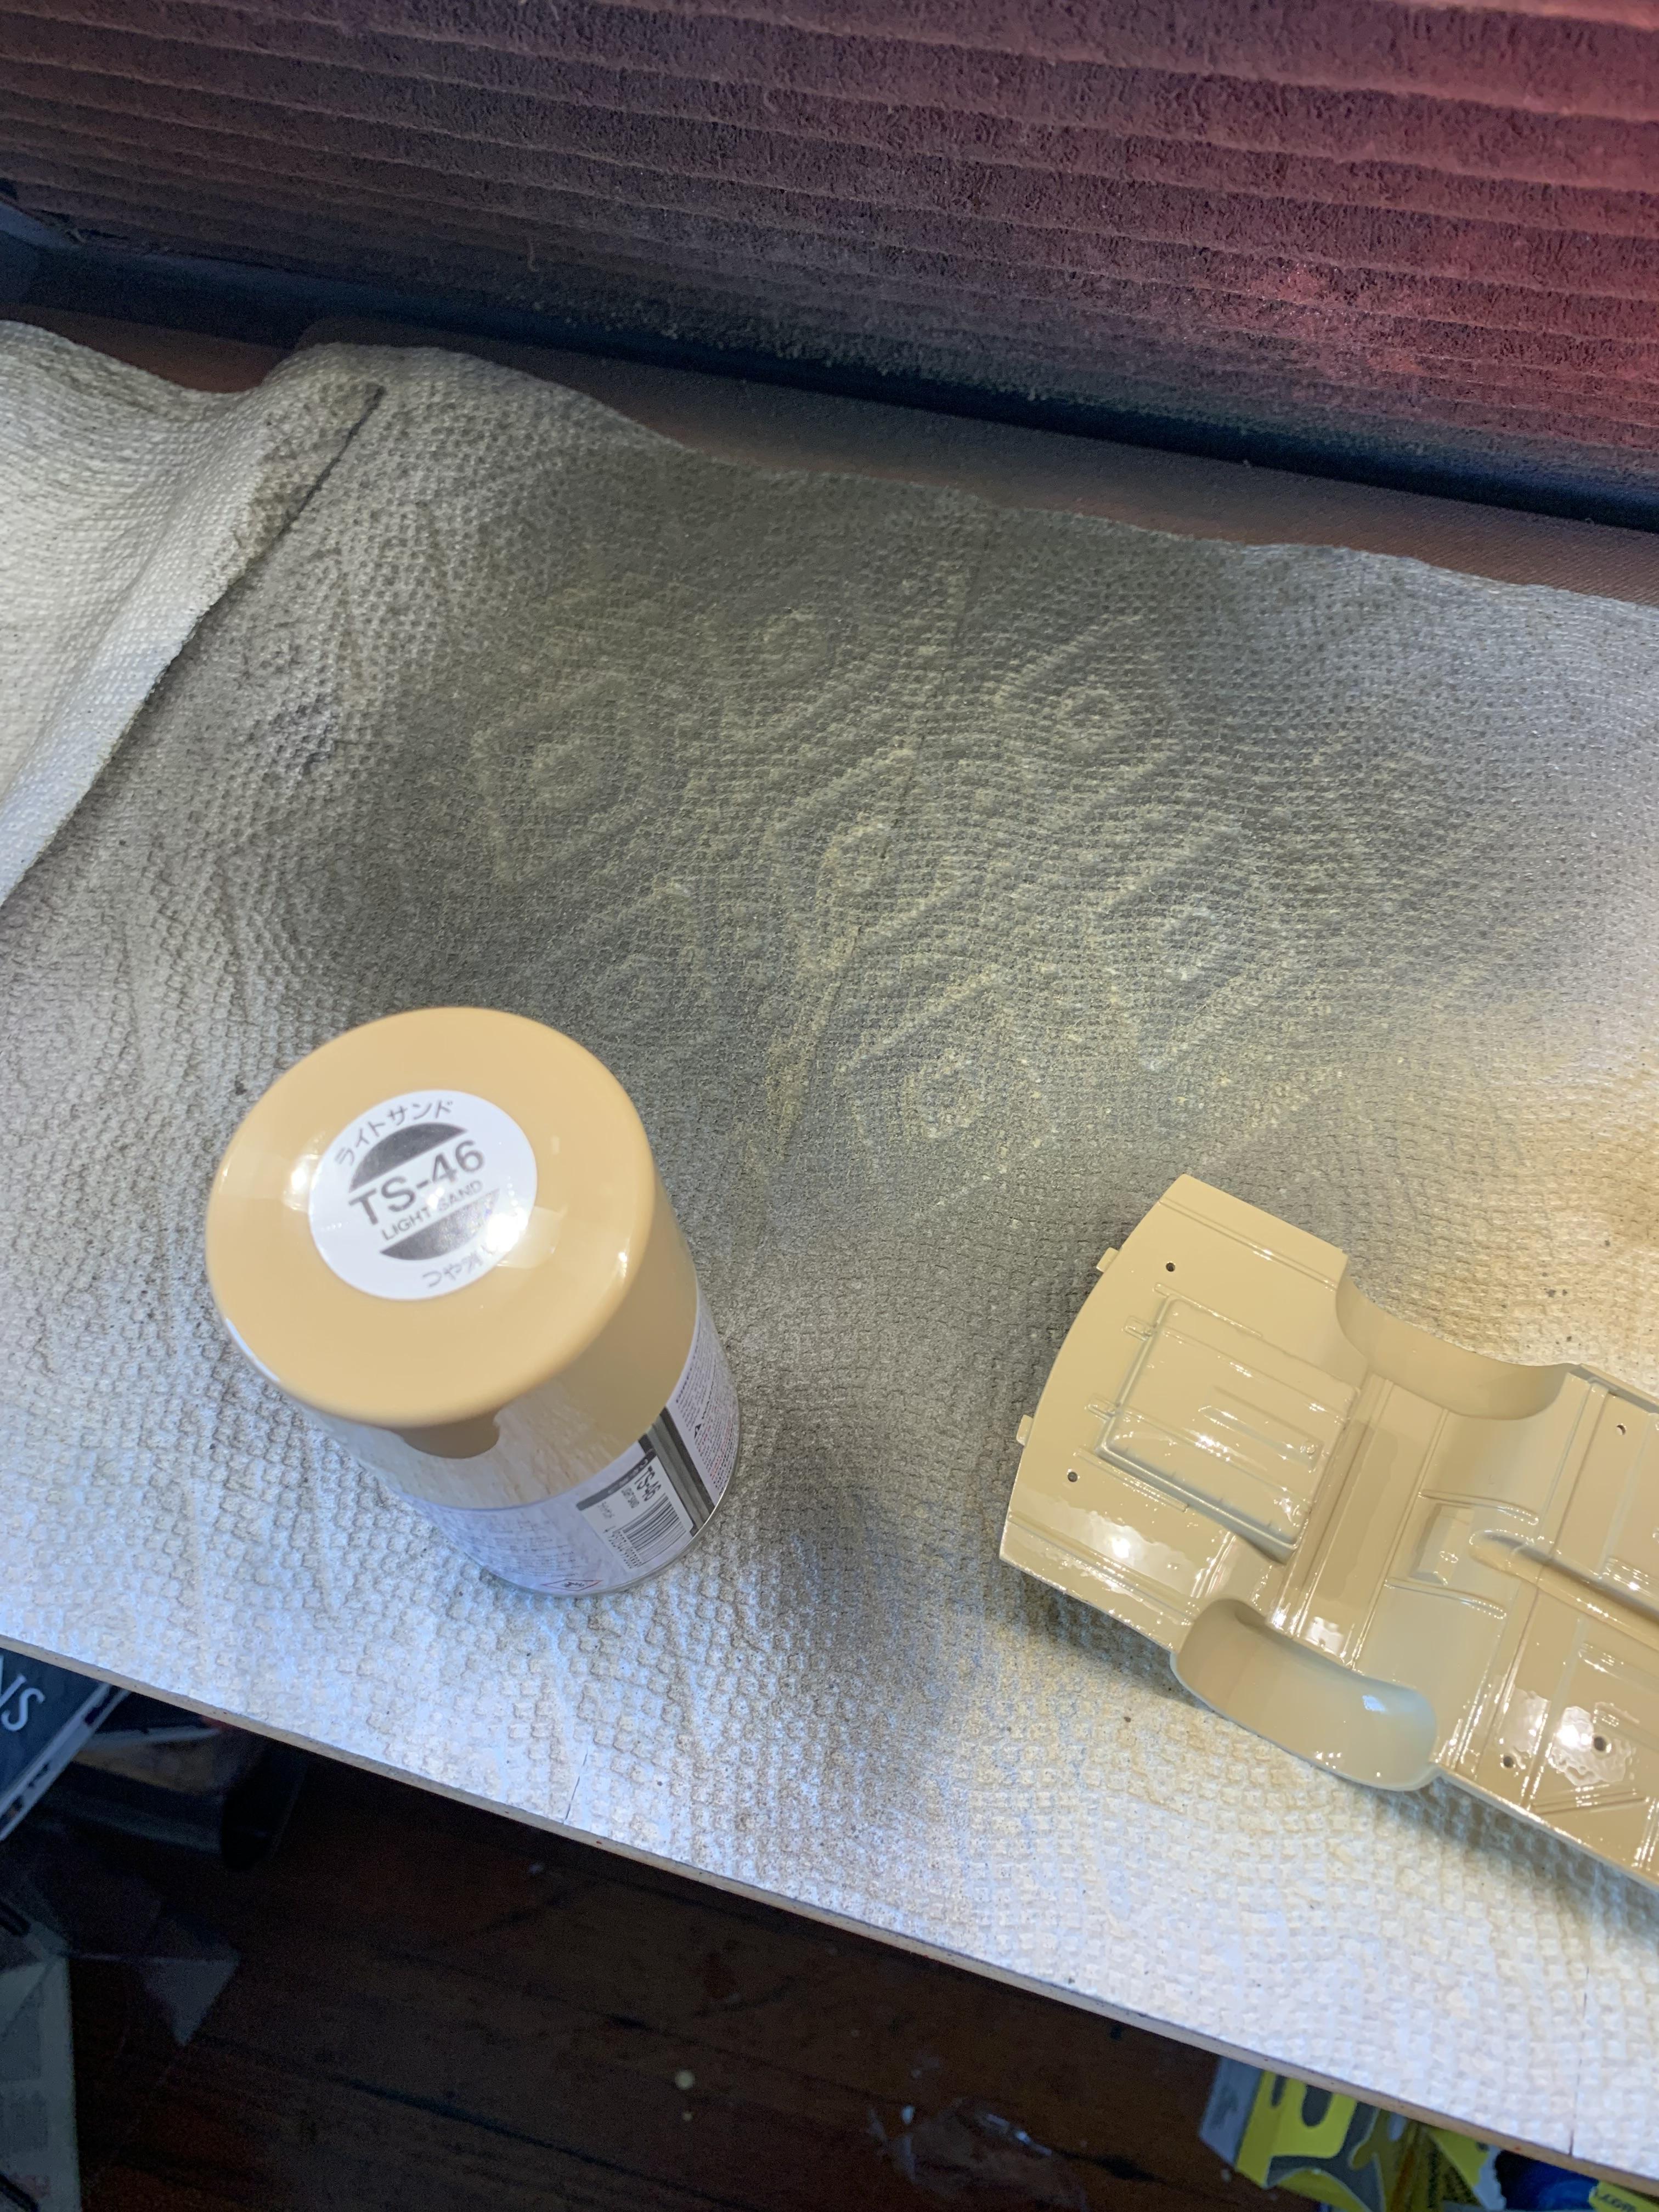
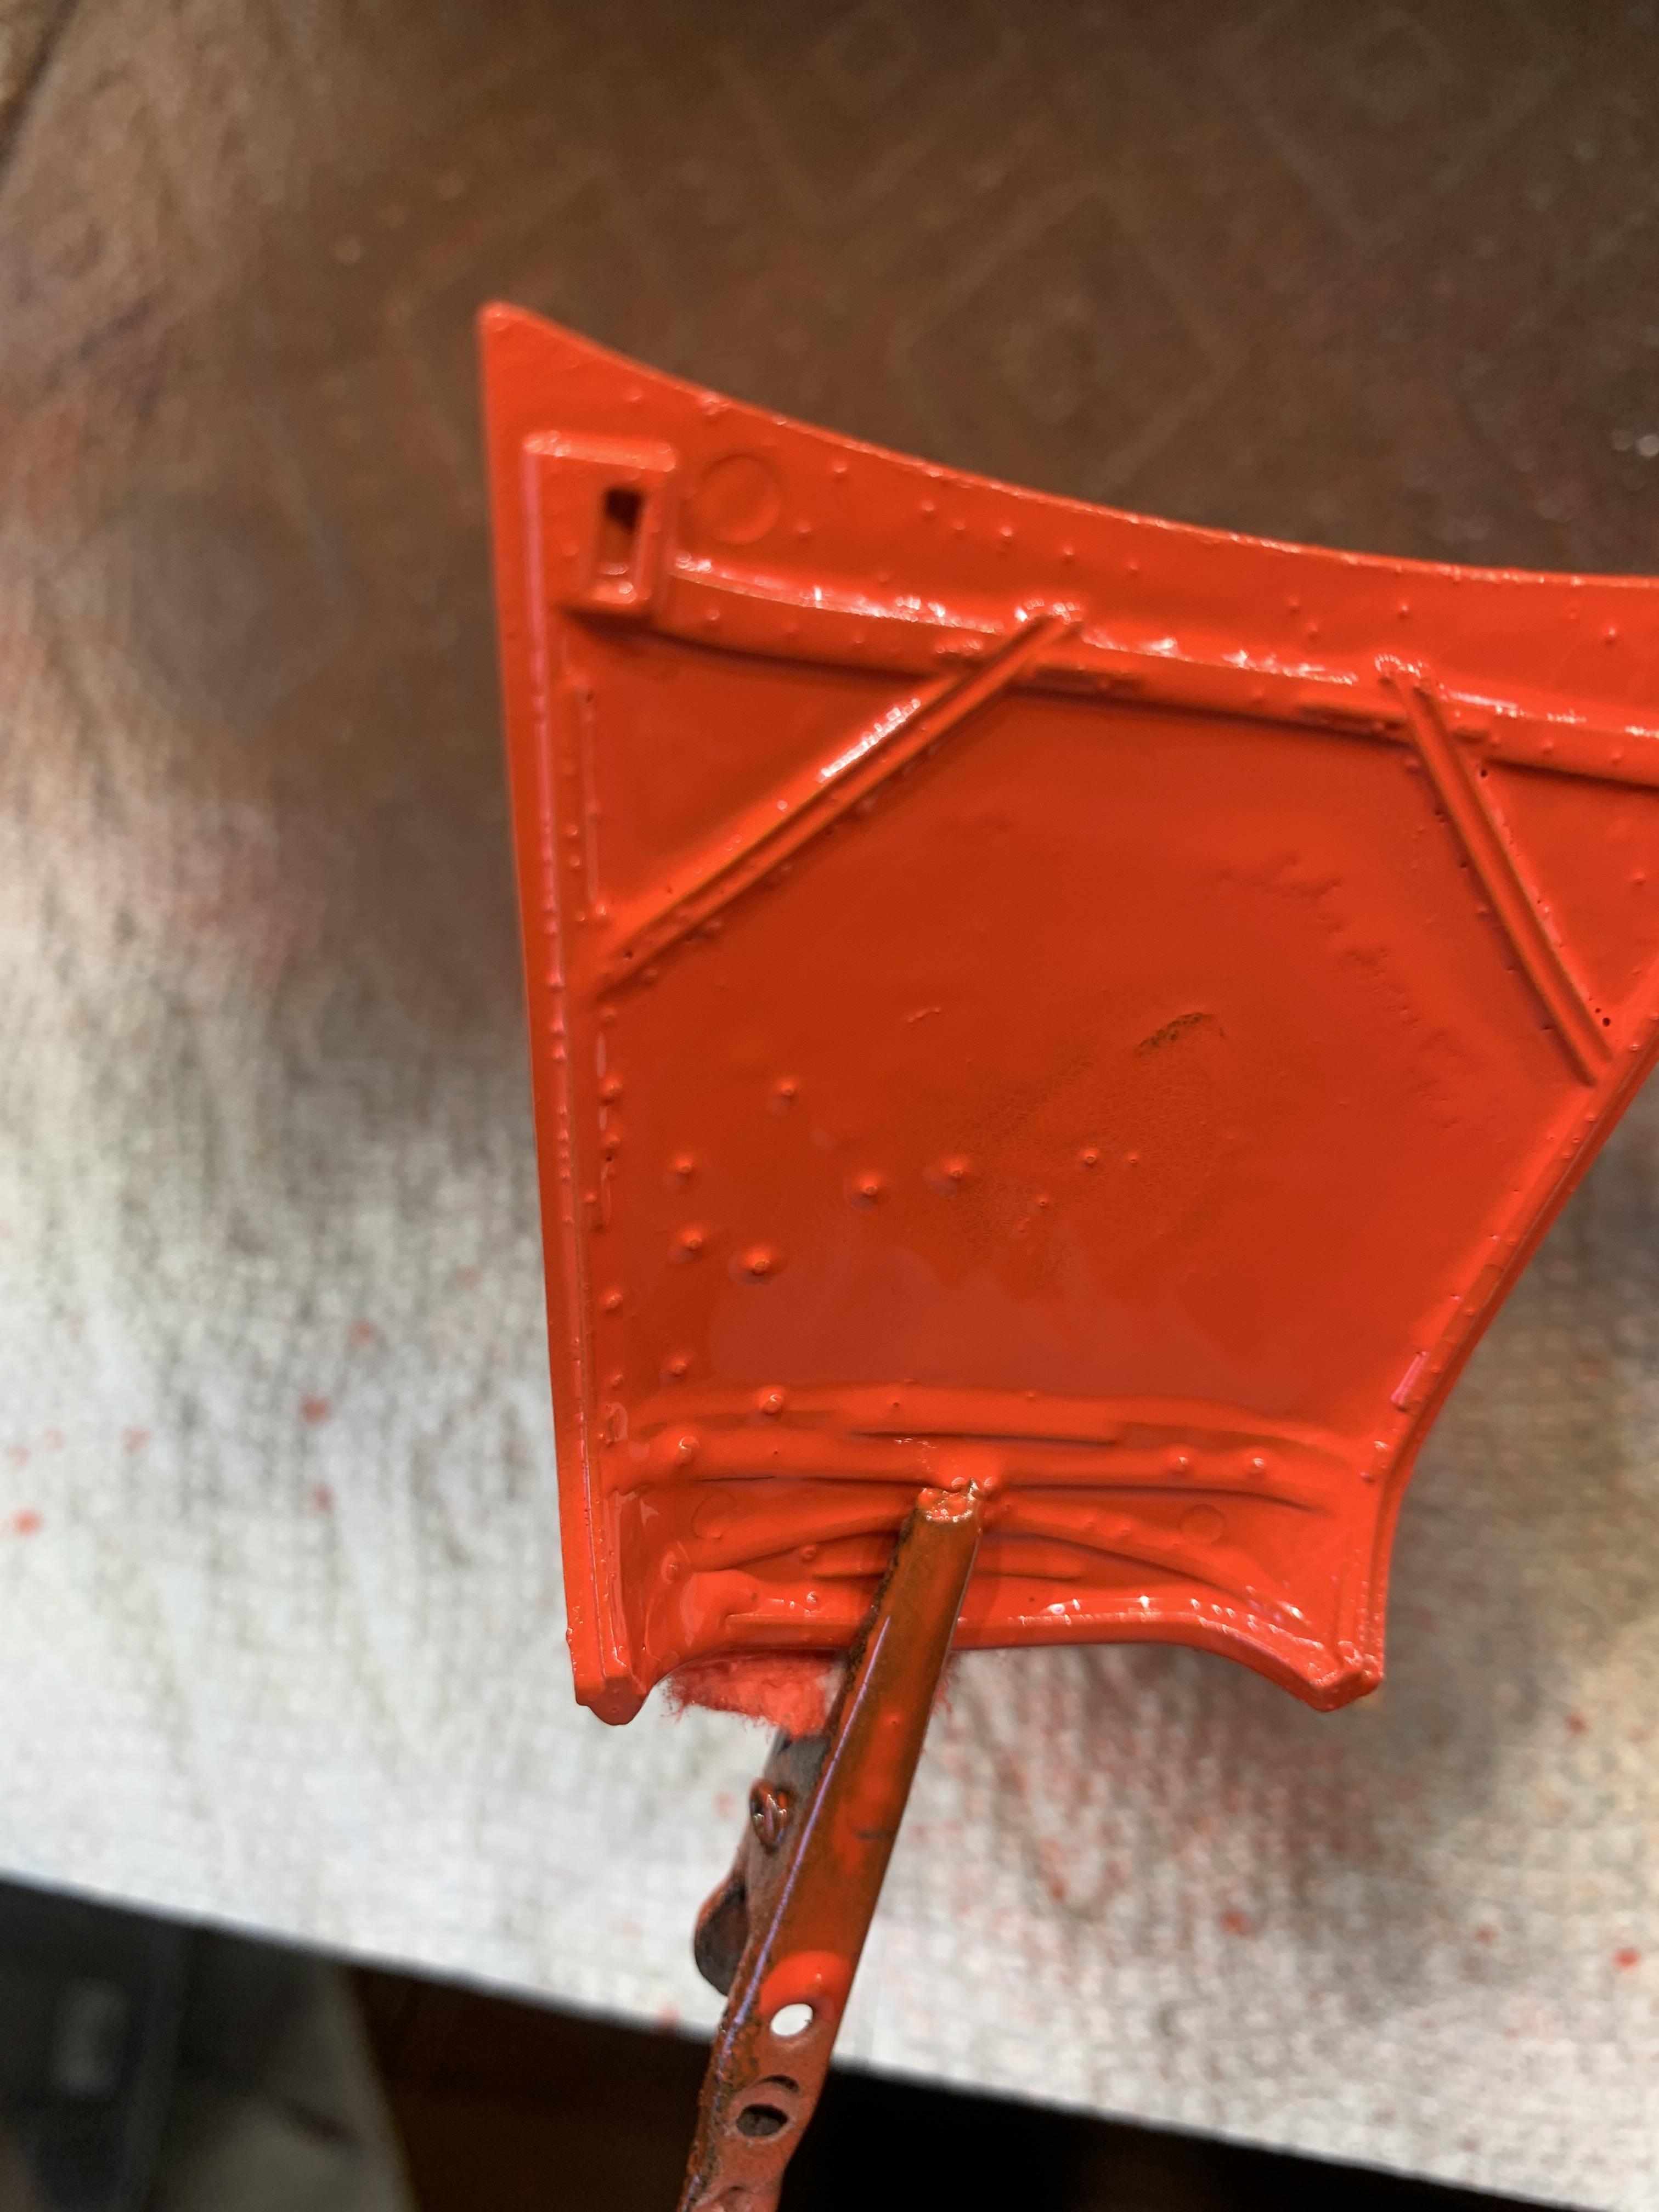
Finally got around to painting the “new” body. Some sanding to eliminate a few minor spots, no primer on body, 1 light coat, wait 5 minutes, then 2 medium coats, done. Turned out very good. Put a lid on it overnight.
-
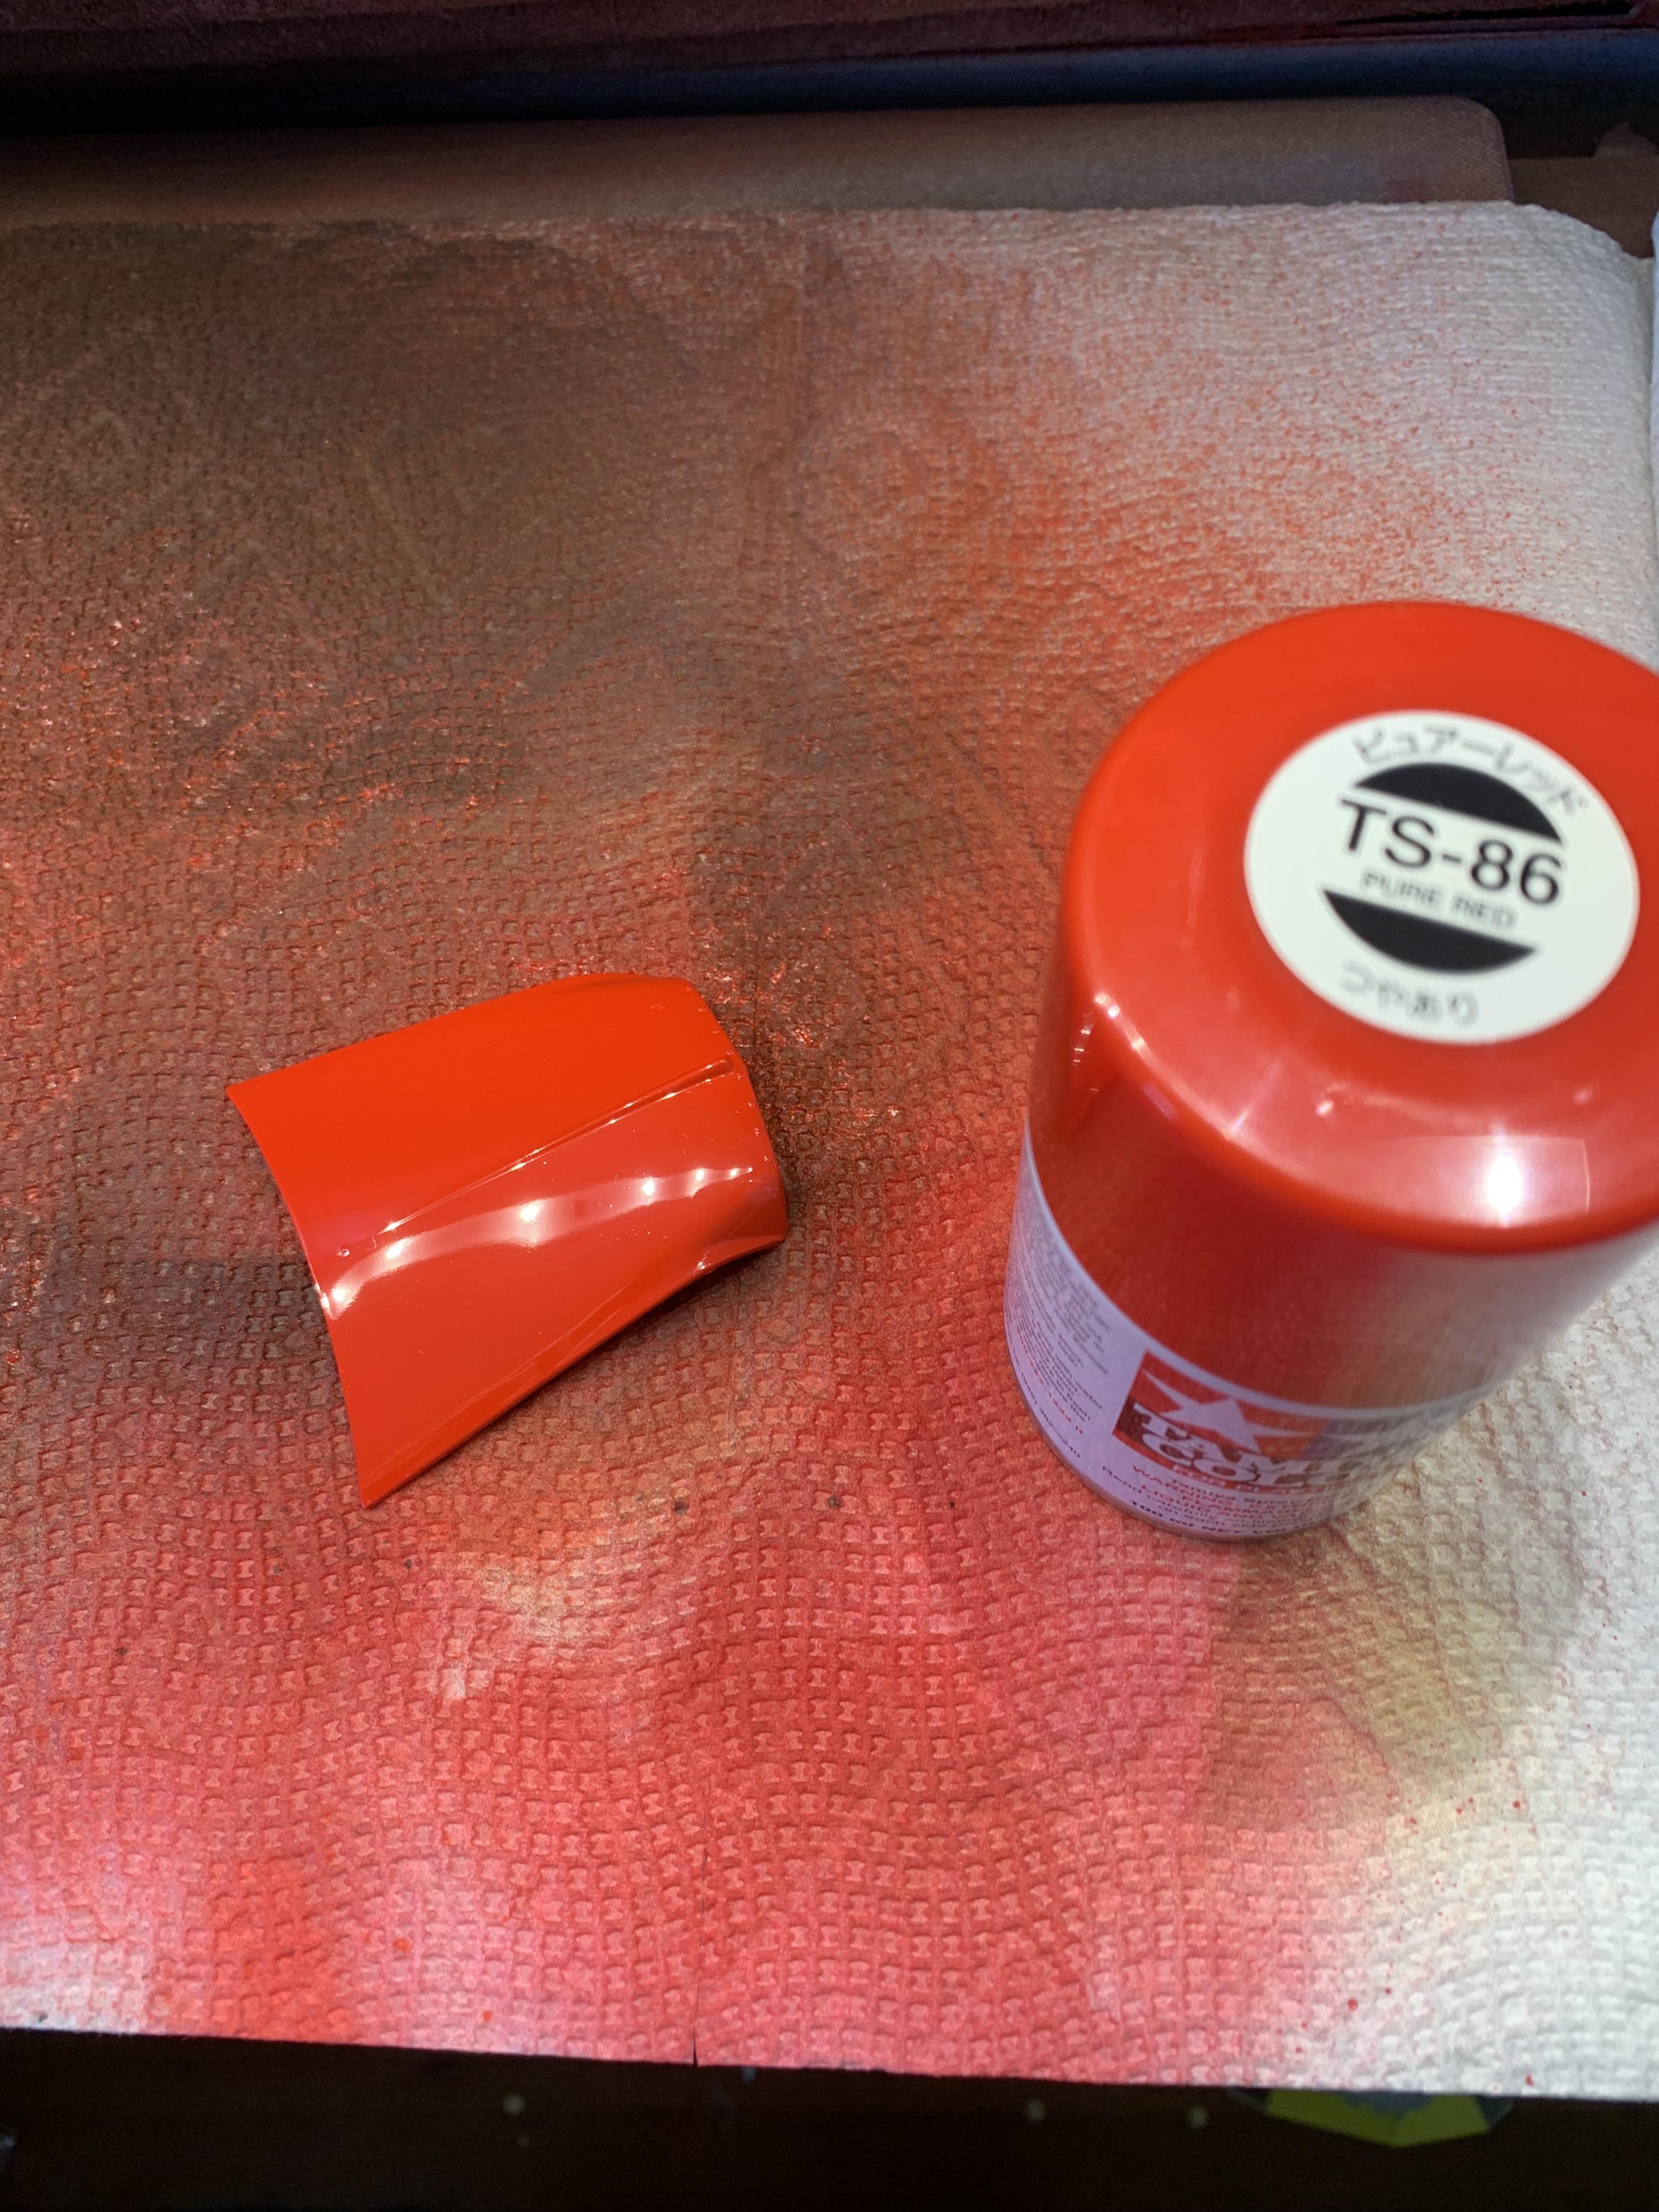
Well, a couple pictures of the difference between the paints. It is going in the tank and the “new” body is to be painted Tamiya red after some slight clean up. No primer, of course.
-
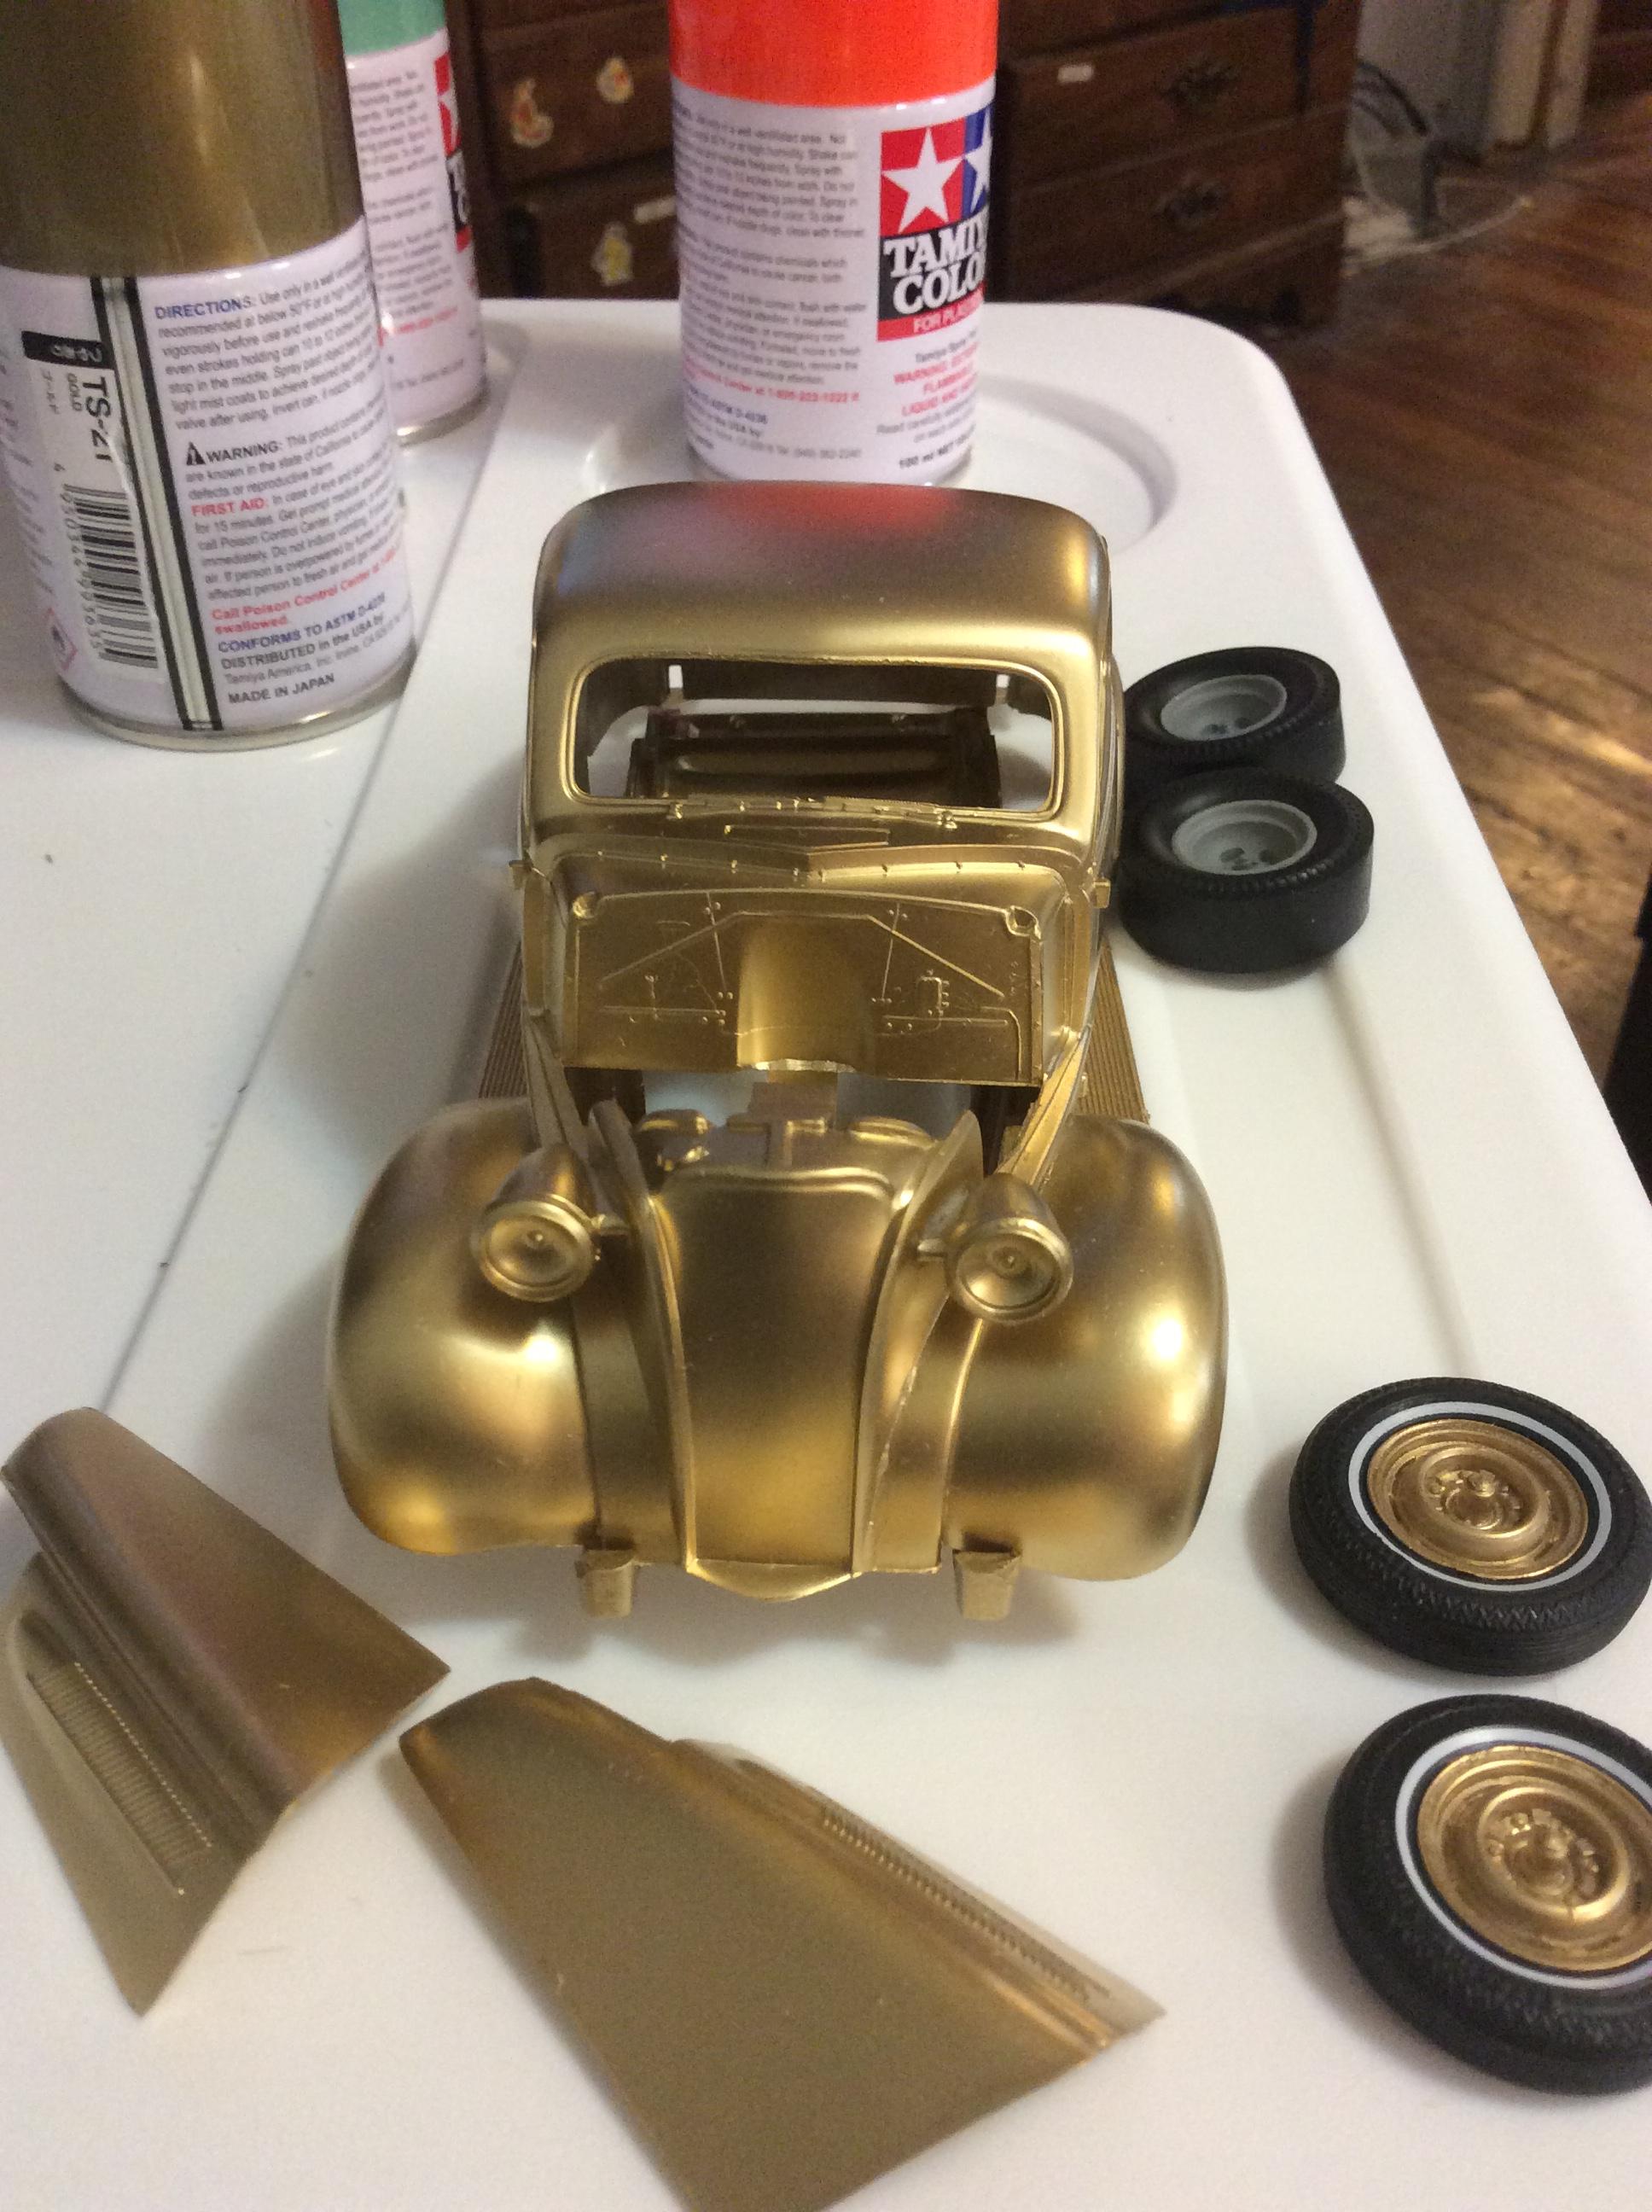
A little more detailing and, since I received another kit today, I stole the hood out of it and put some Tamiya paint on it. It looks so good I may just throw the whole body in the tank. Then, paint the “new” body with Tamiya. Decisions, decisions.
-
Easy door handles and window cranks
R. Thorne replied to NOBLNG's topic in Tips, Tricks, and Tutorials
Bully! More good stuff from Greg. Thank you for taking the time to help others. -
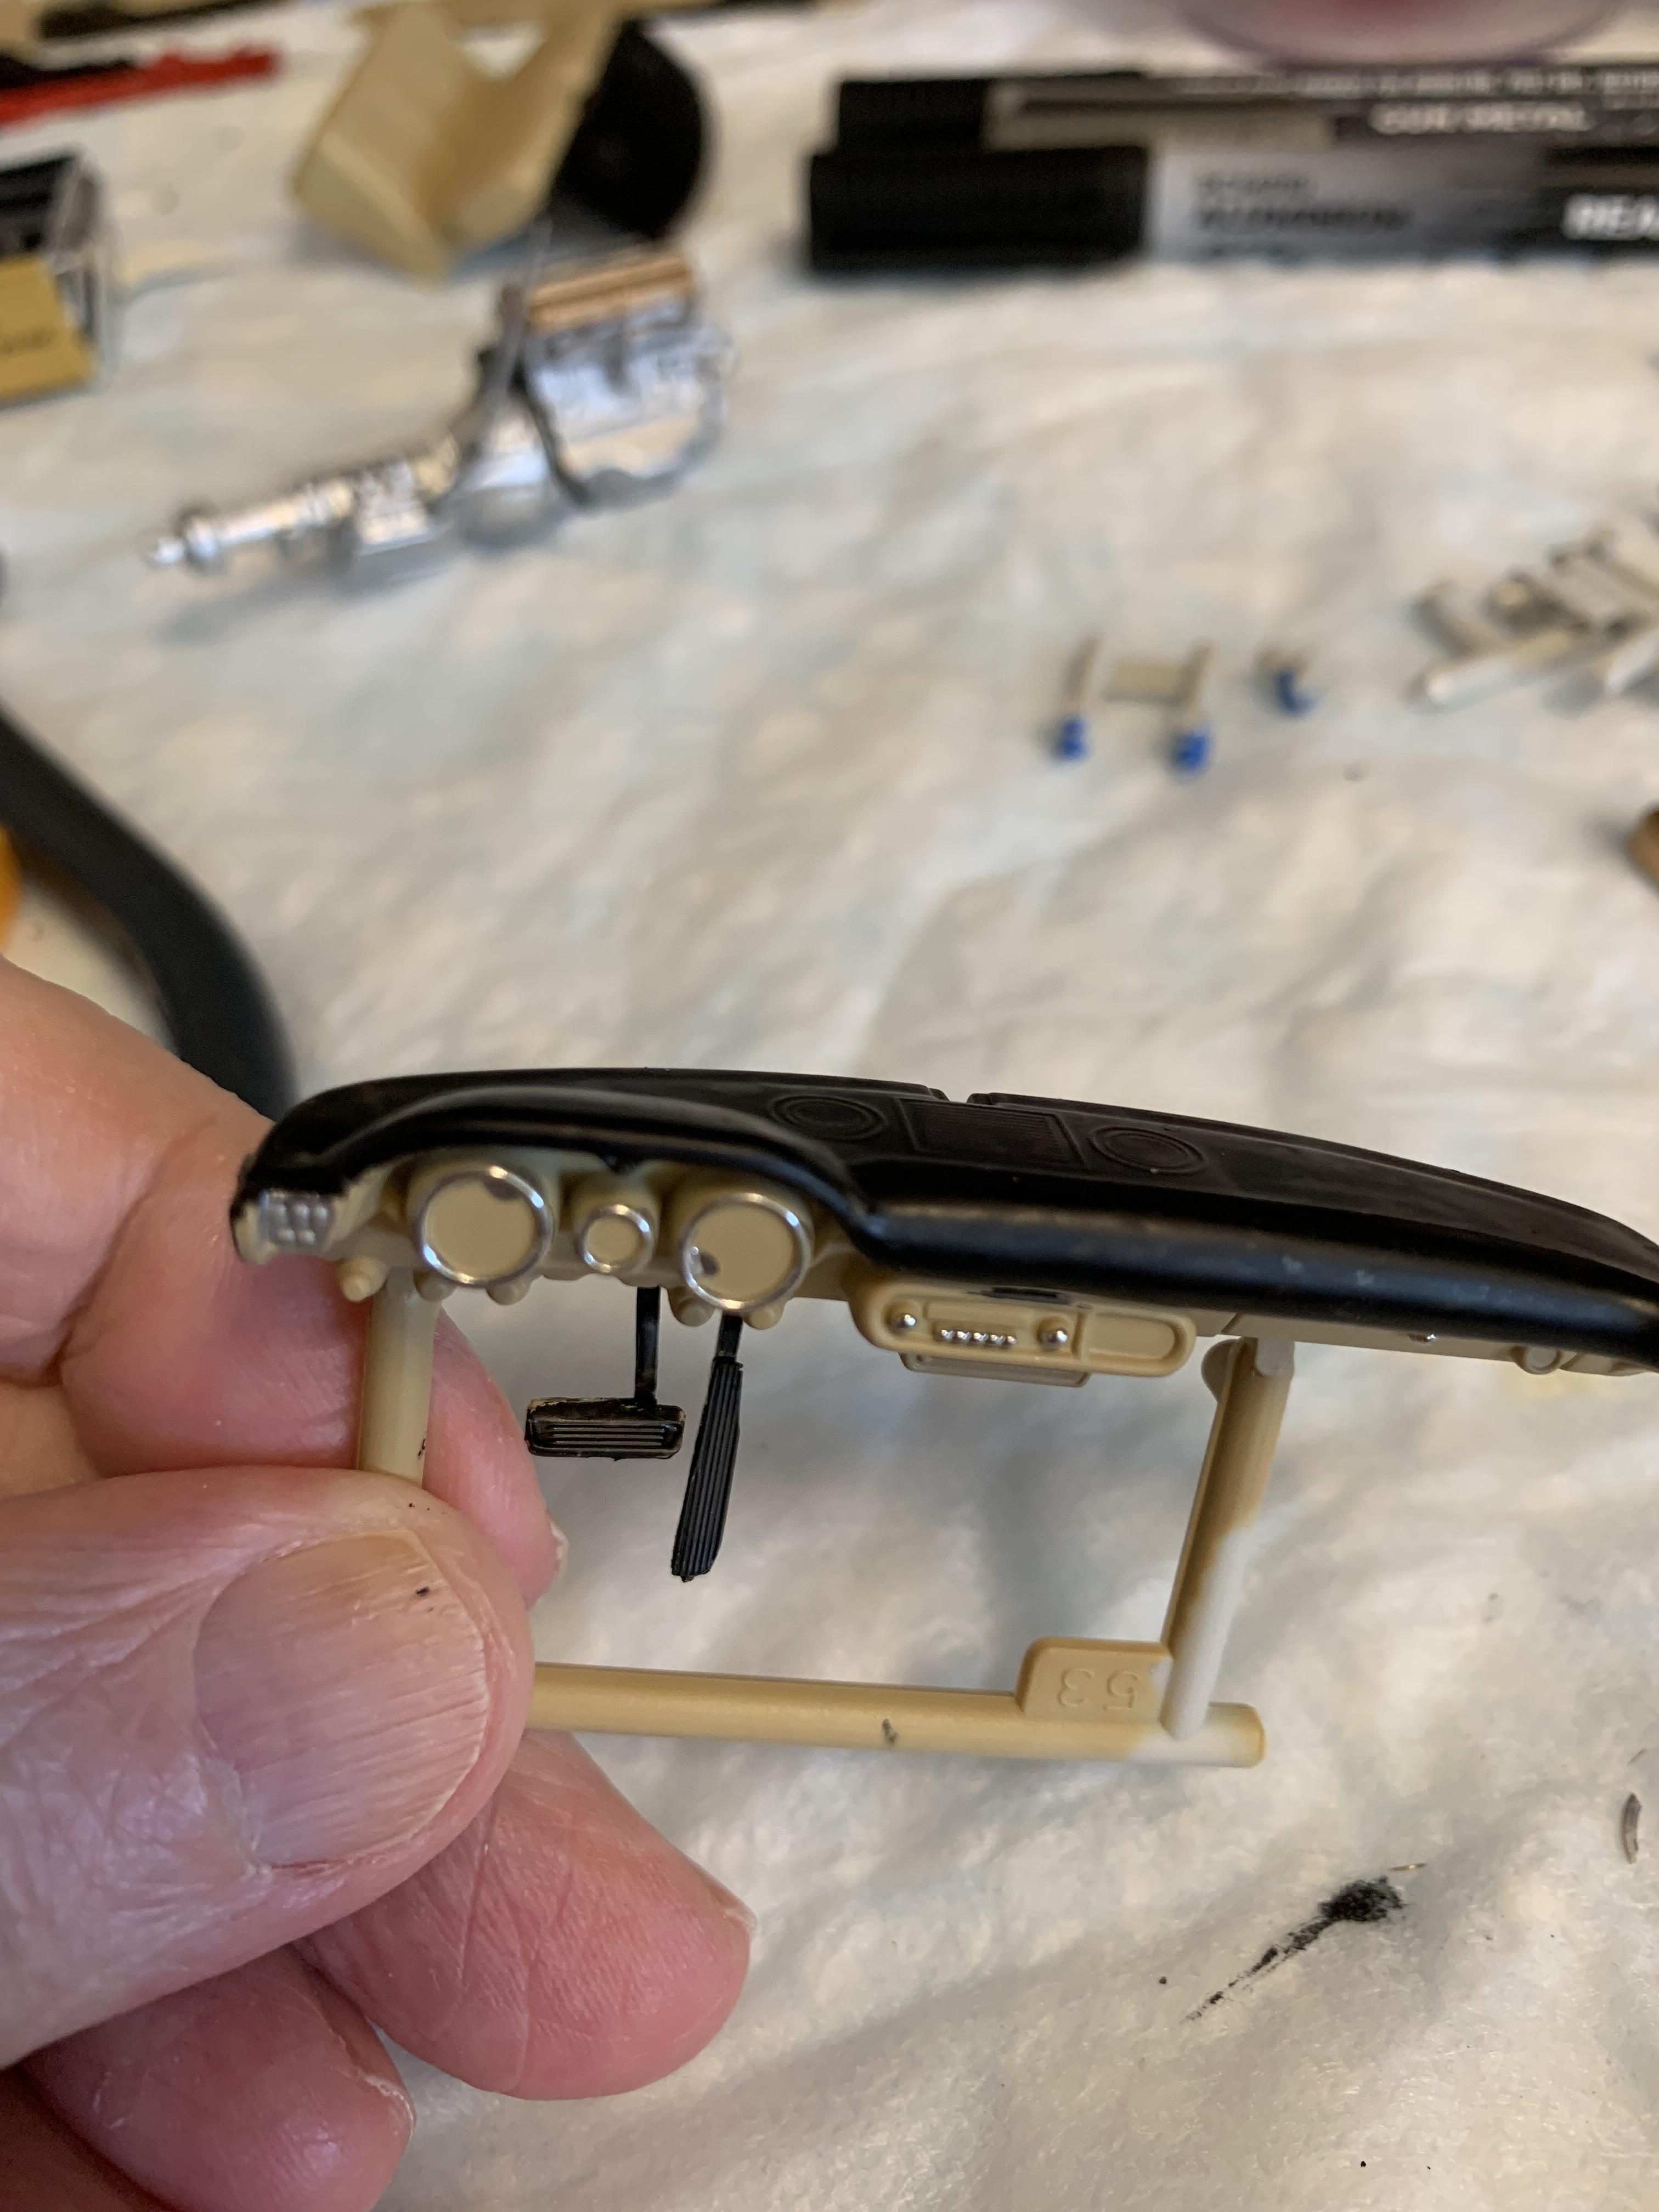
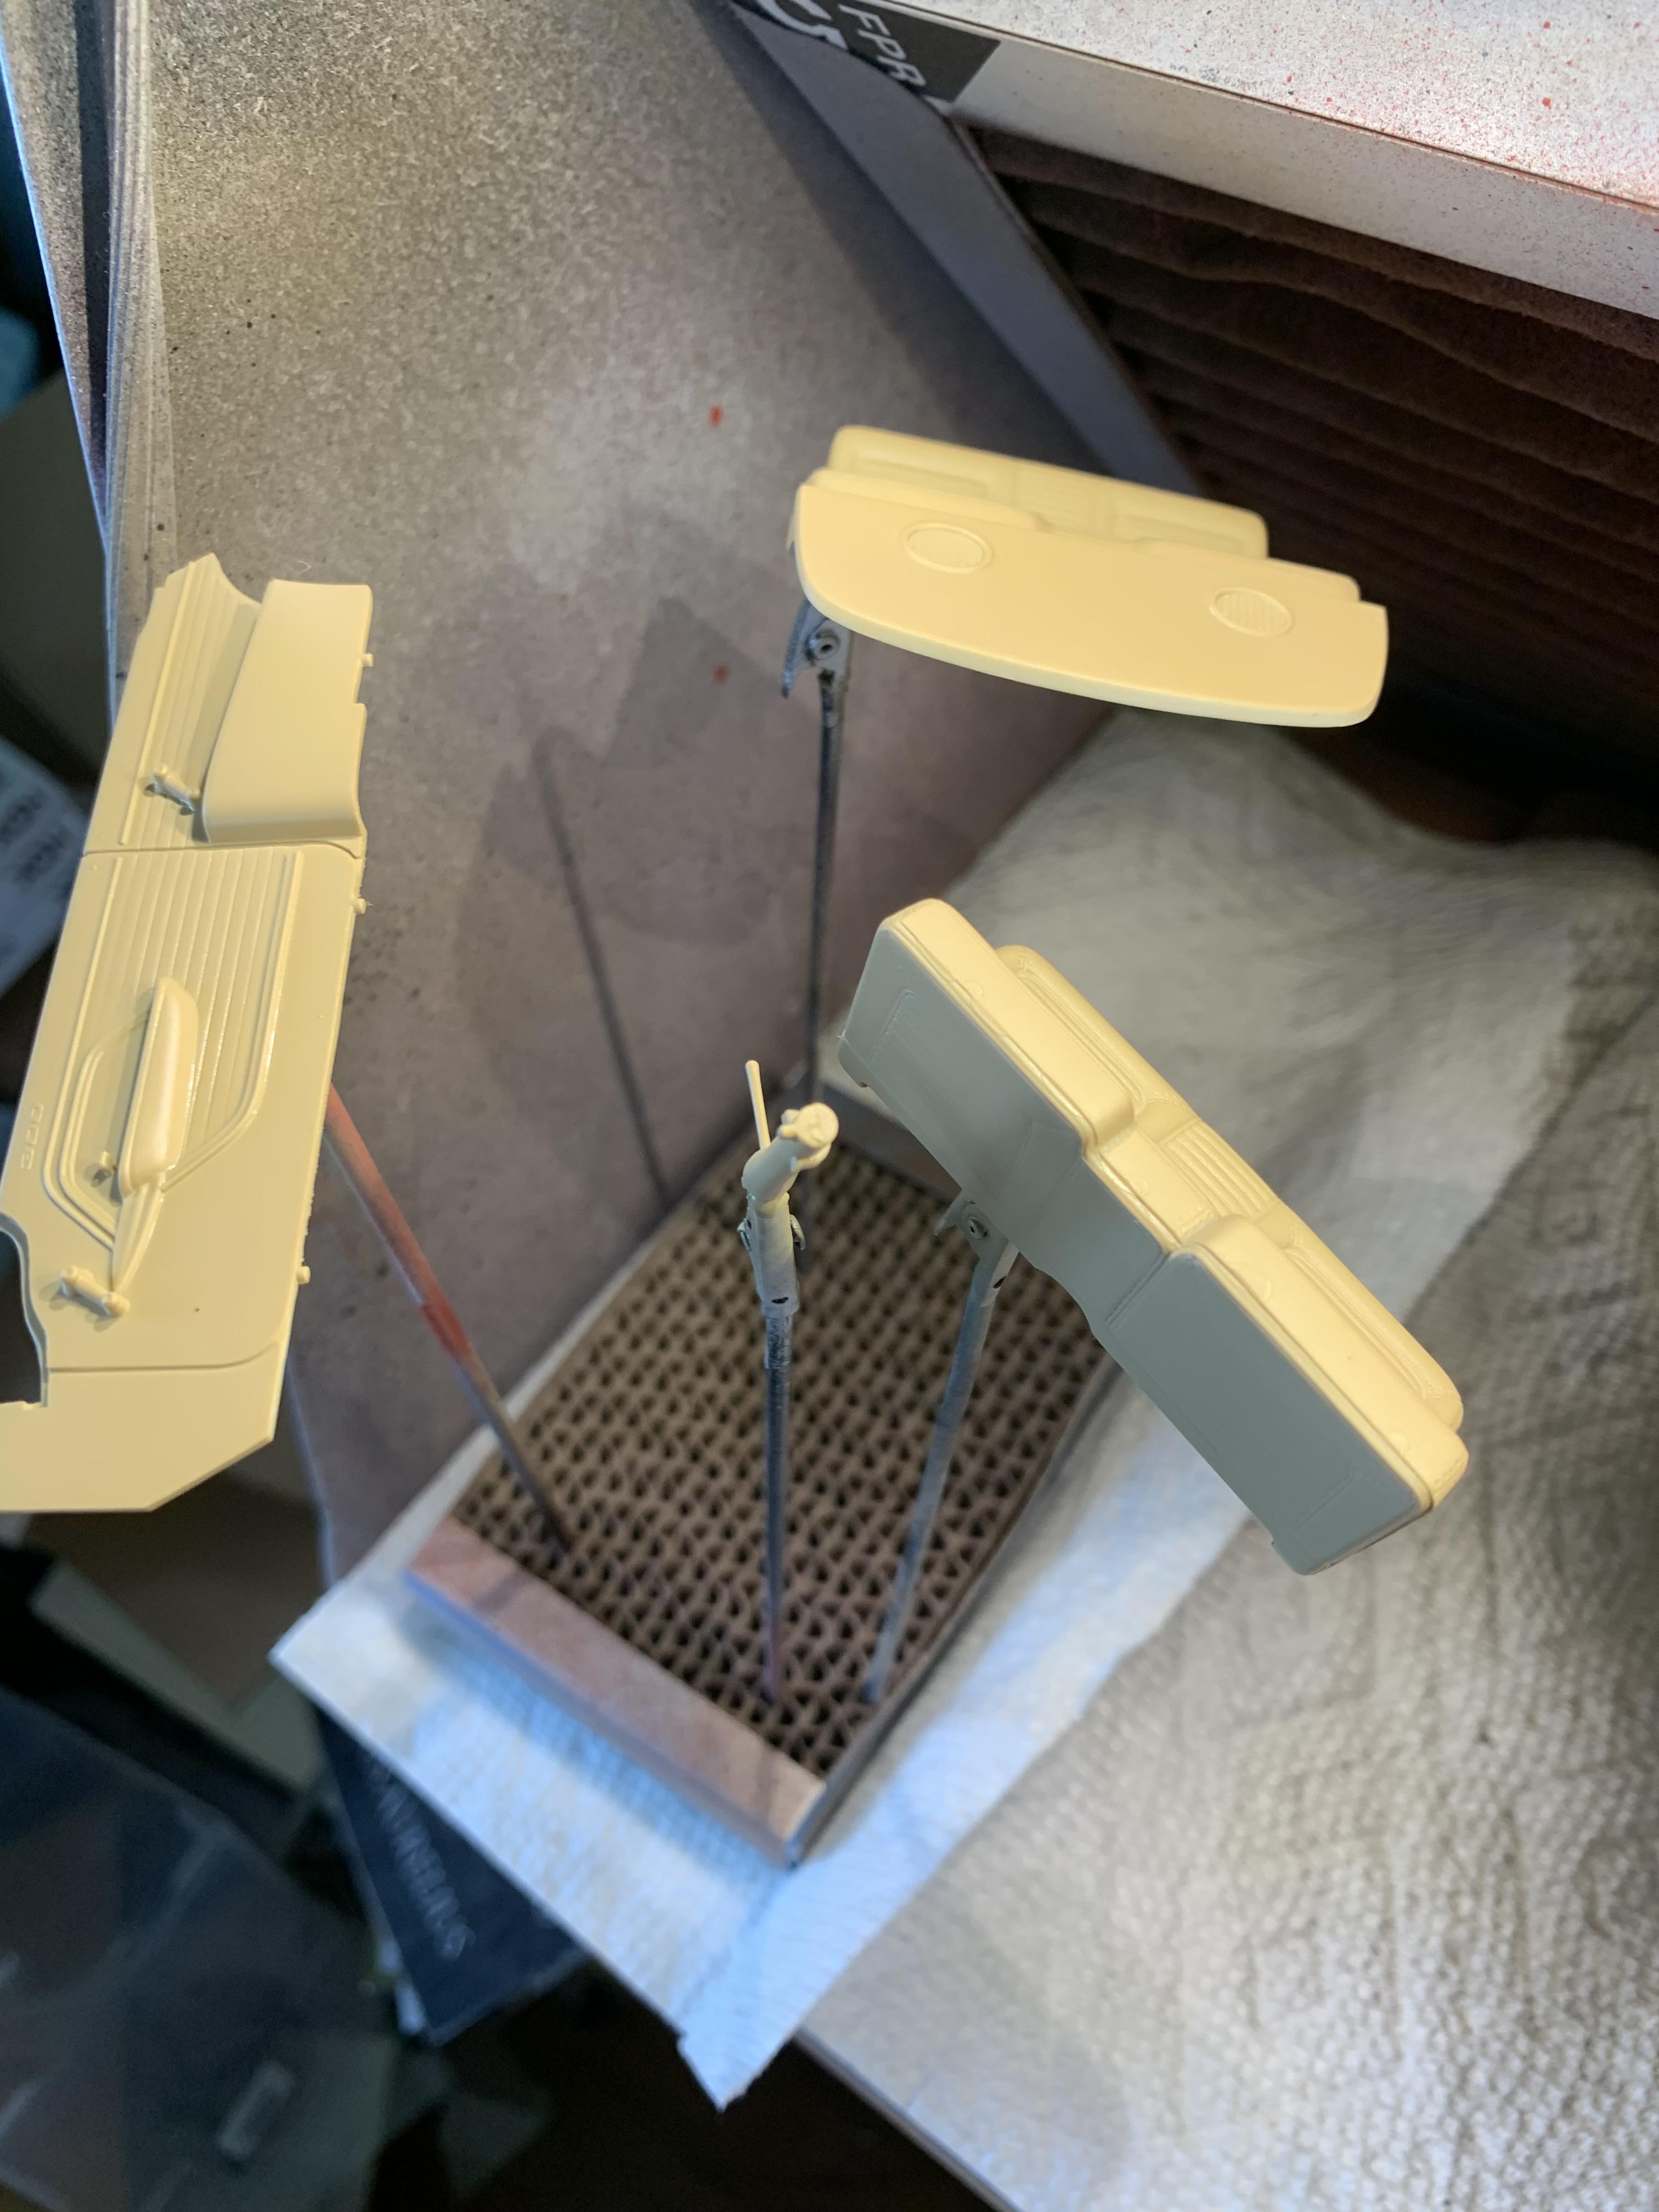
Did some detail painting with my new acrylic markers. The dash is gonna take 2 coats , as do most parts for good coverage.
-
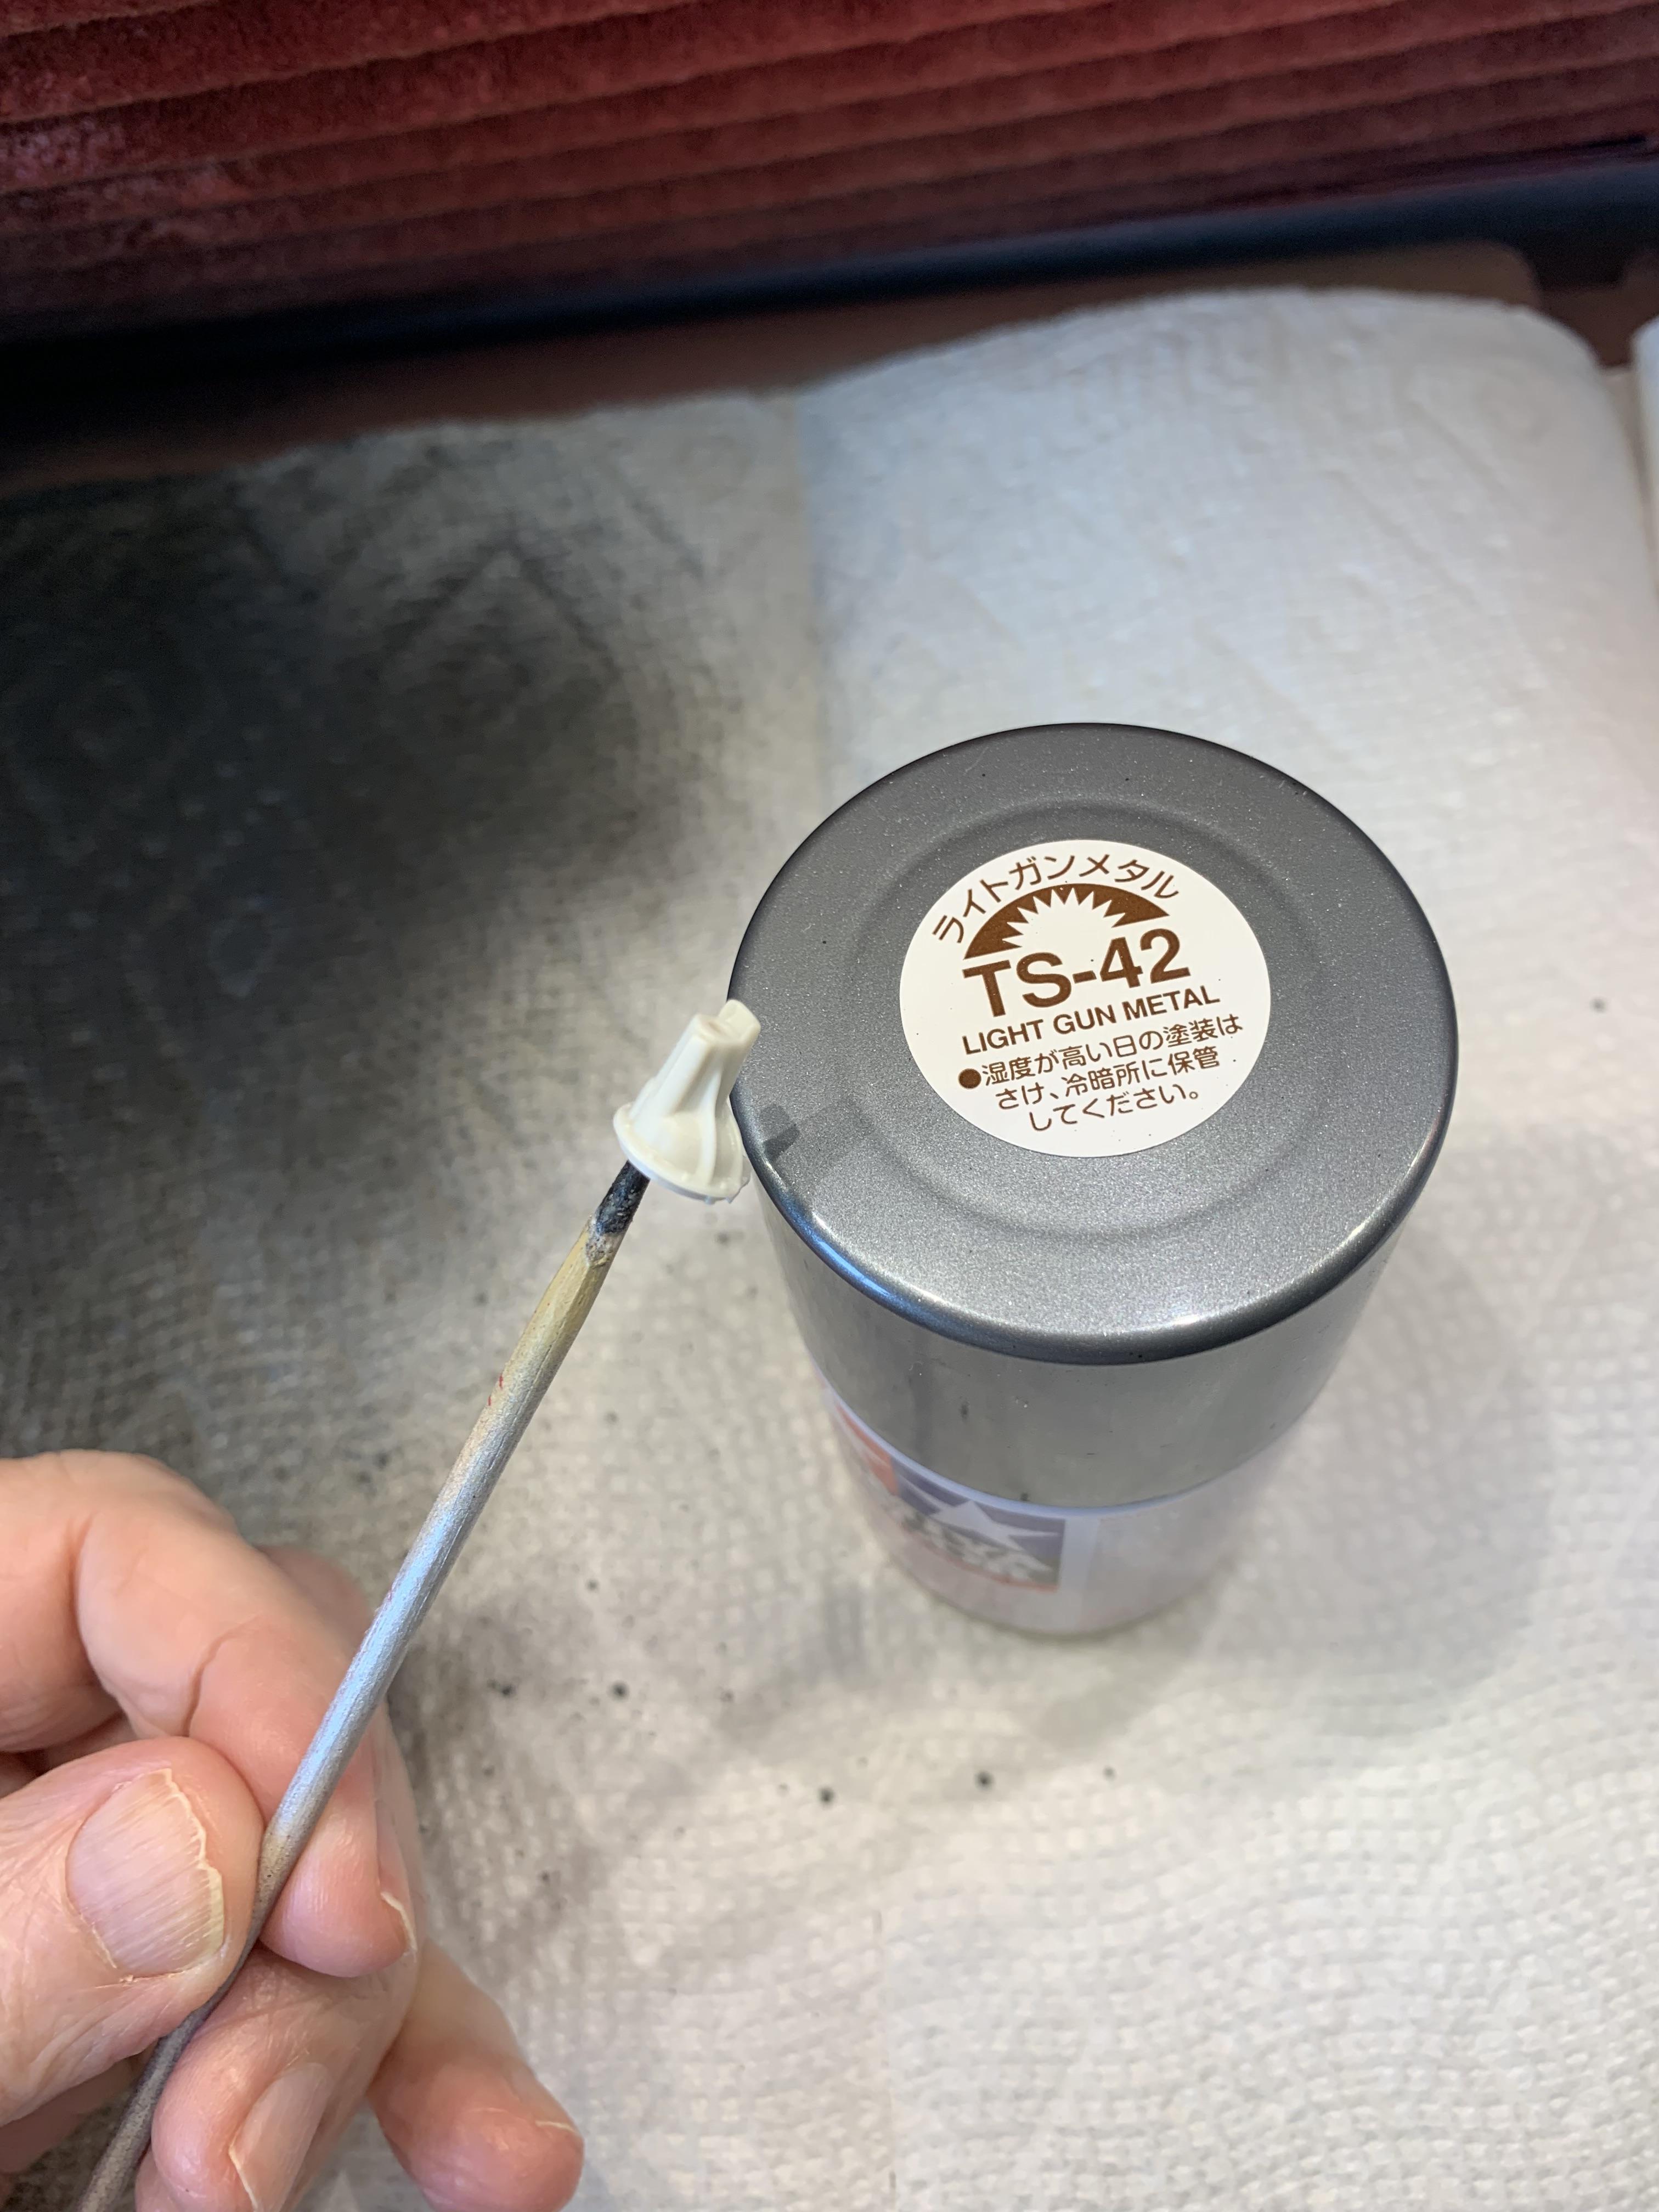
Same can (about half full) that I had painted the body with. Warmed with hot tap water and spun in my drill fixture as usual. I believe the nozzle partially clogged painting the body and hood previously. I have never had this issue with Tamiya ts series paints perhaps because their paint is thinner and, of course, has a better nozzle.
-
Available from HomeDepot in a 3 oz tube.
-
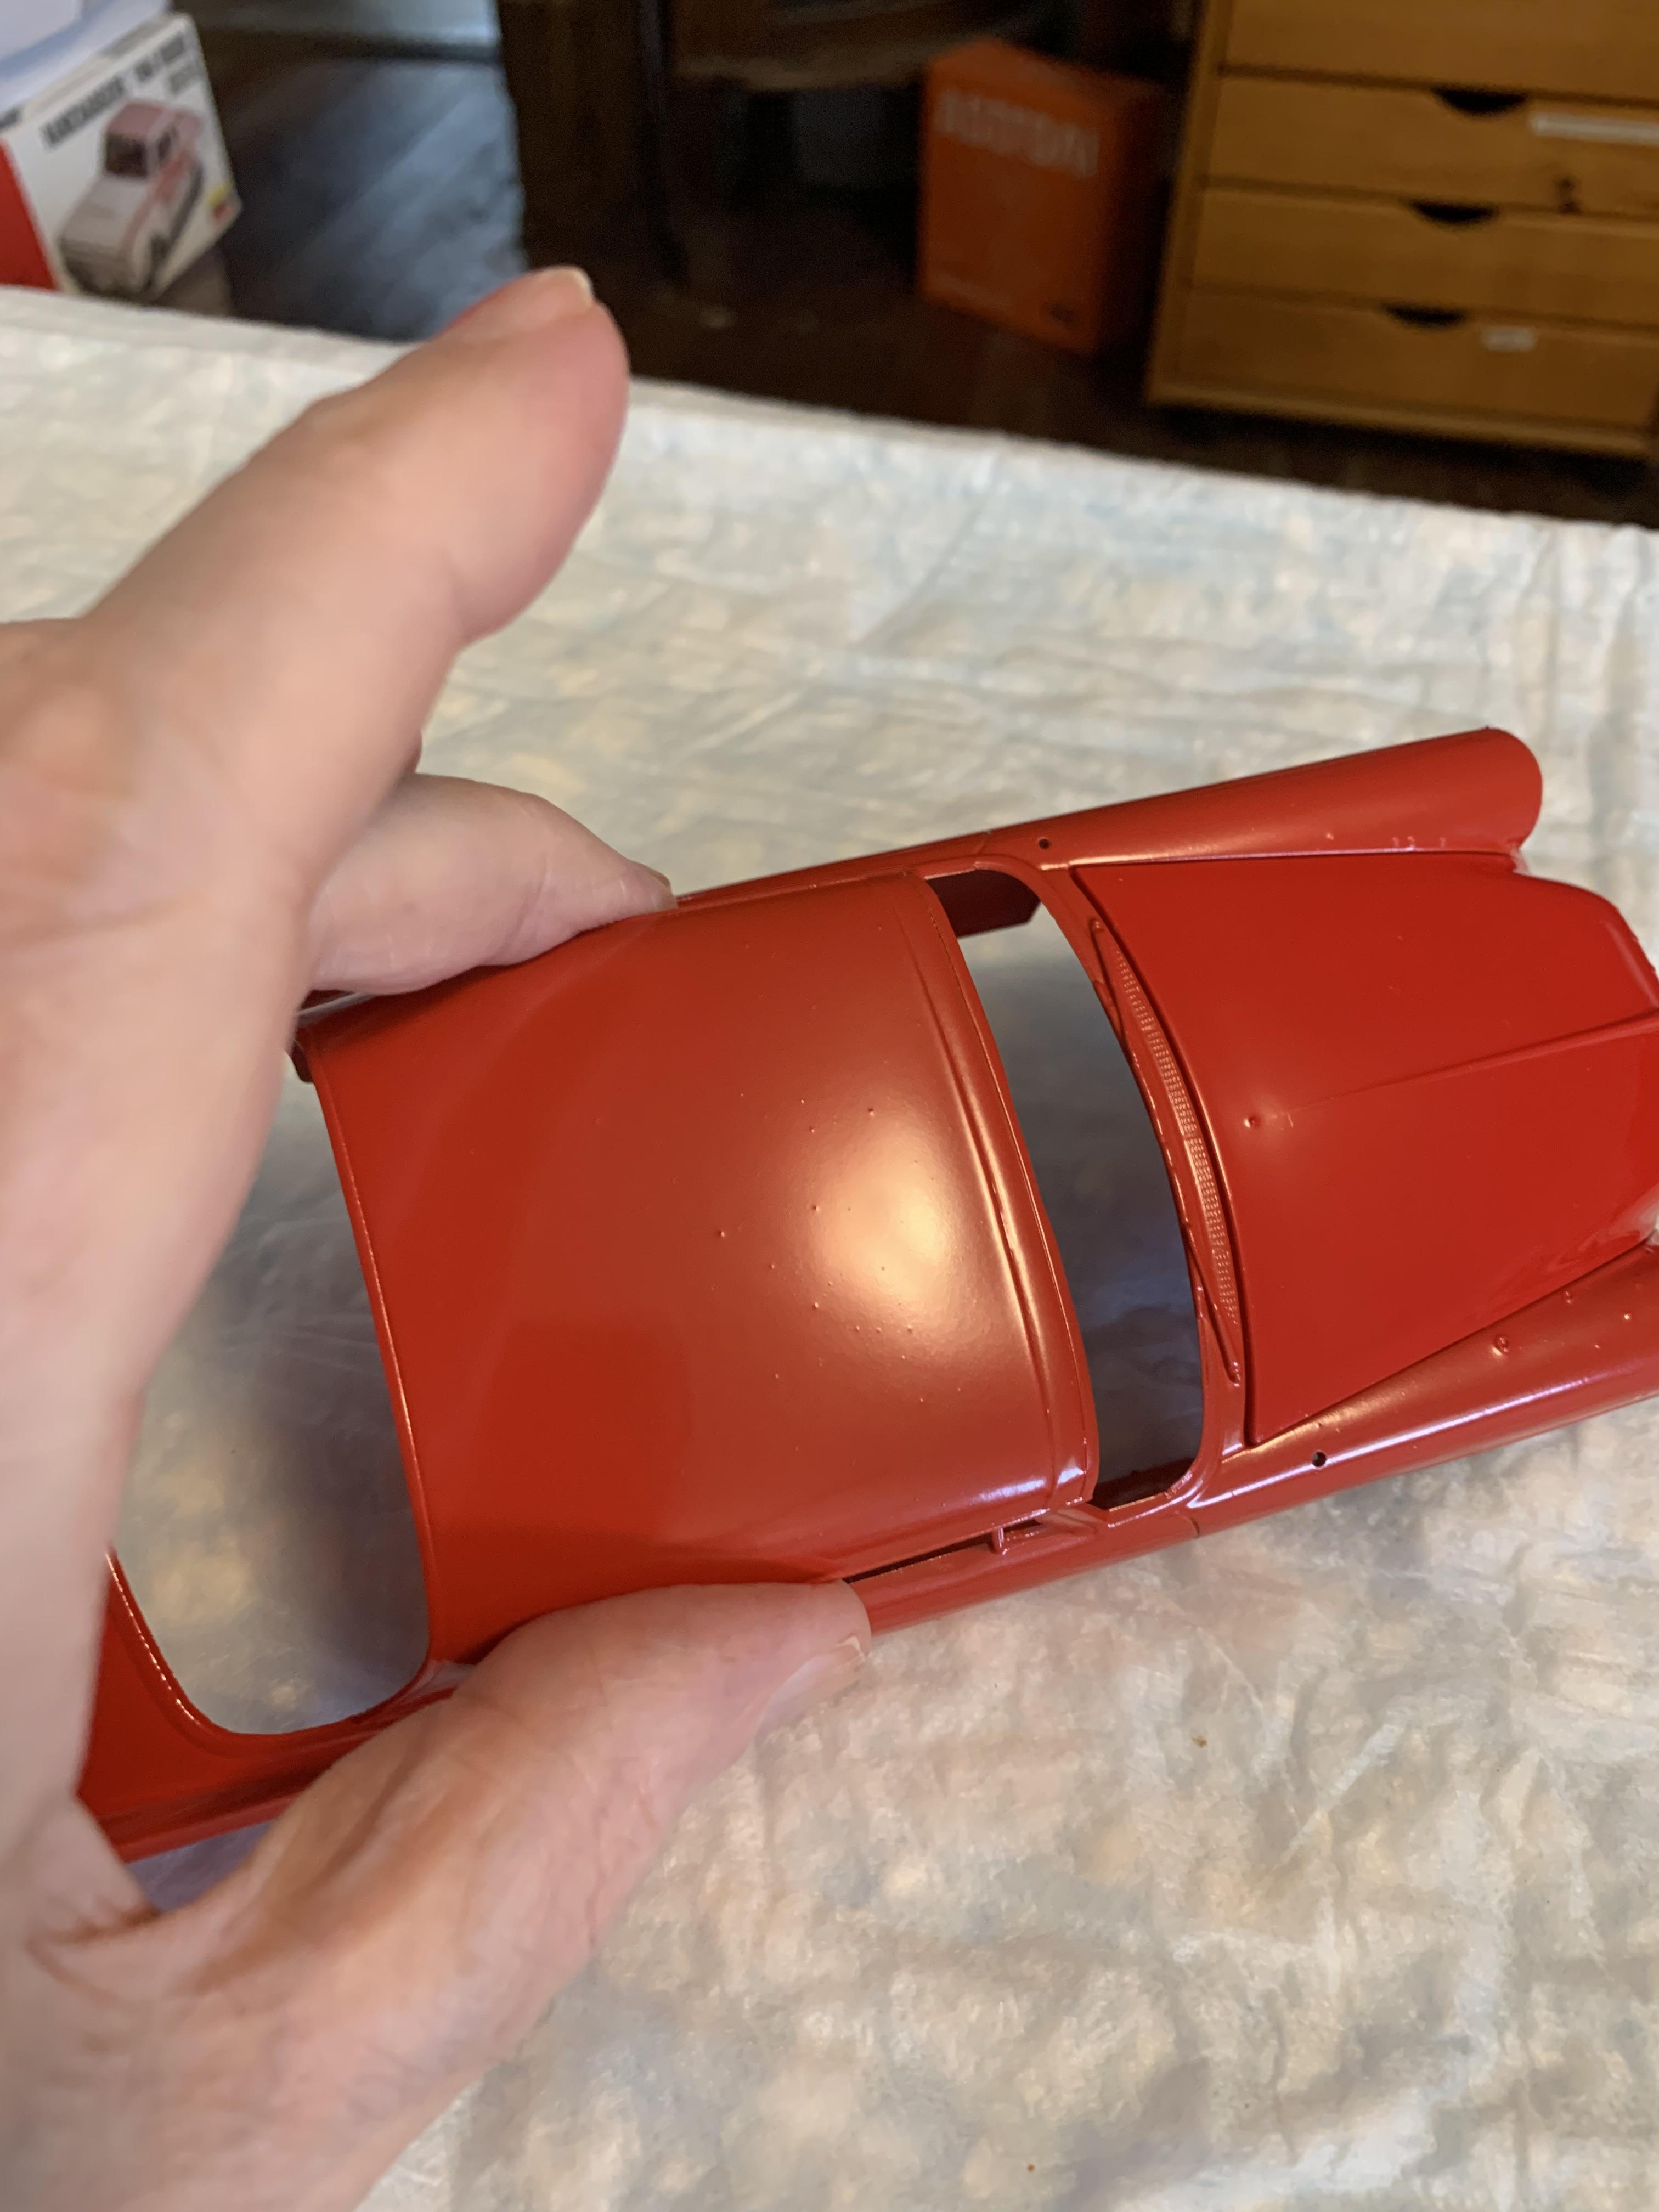
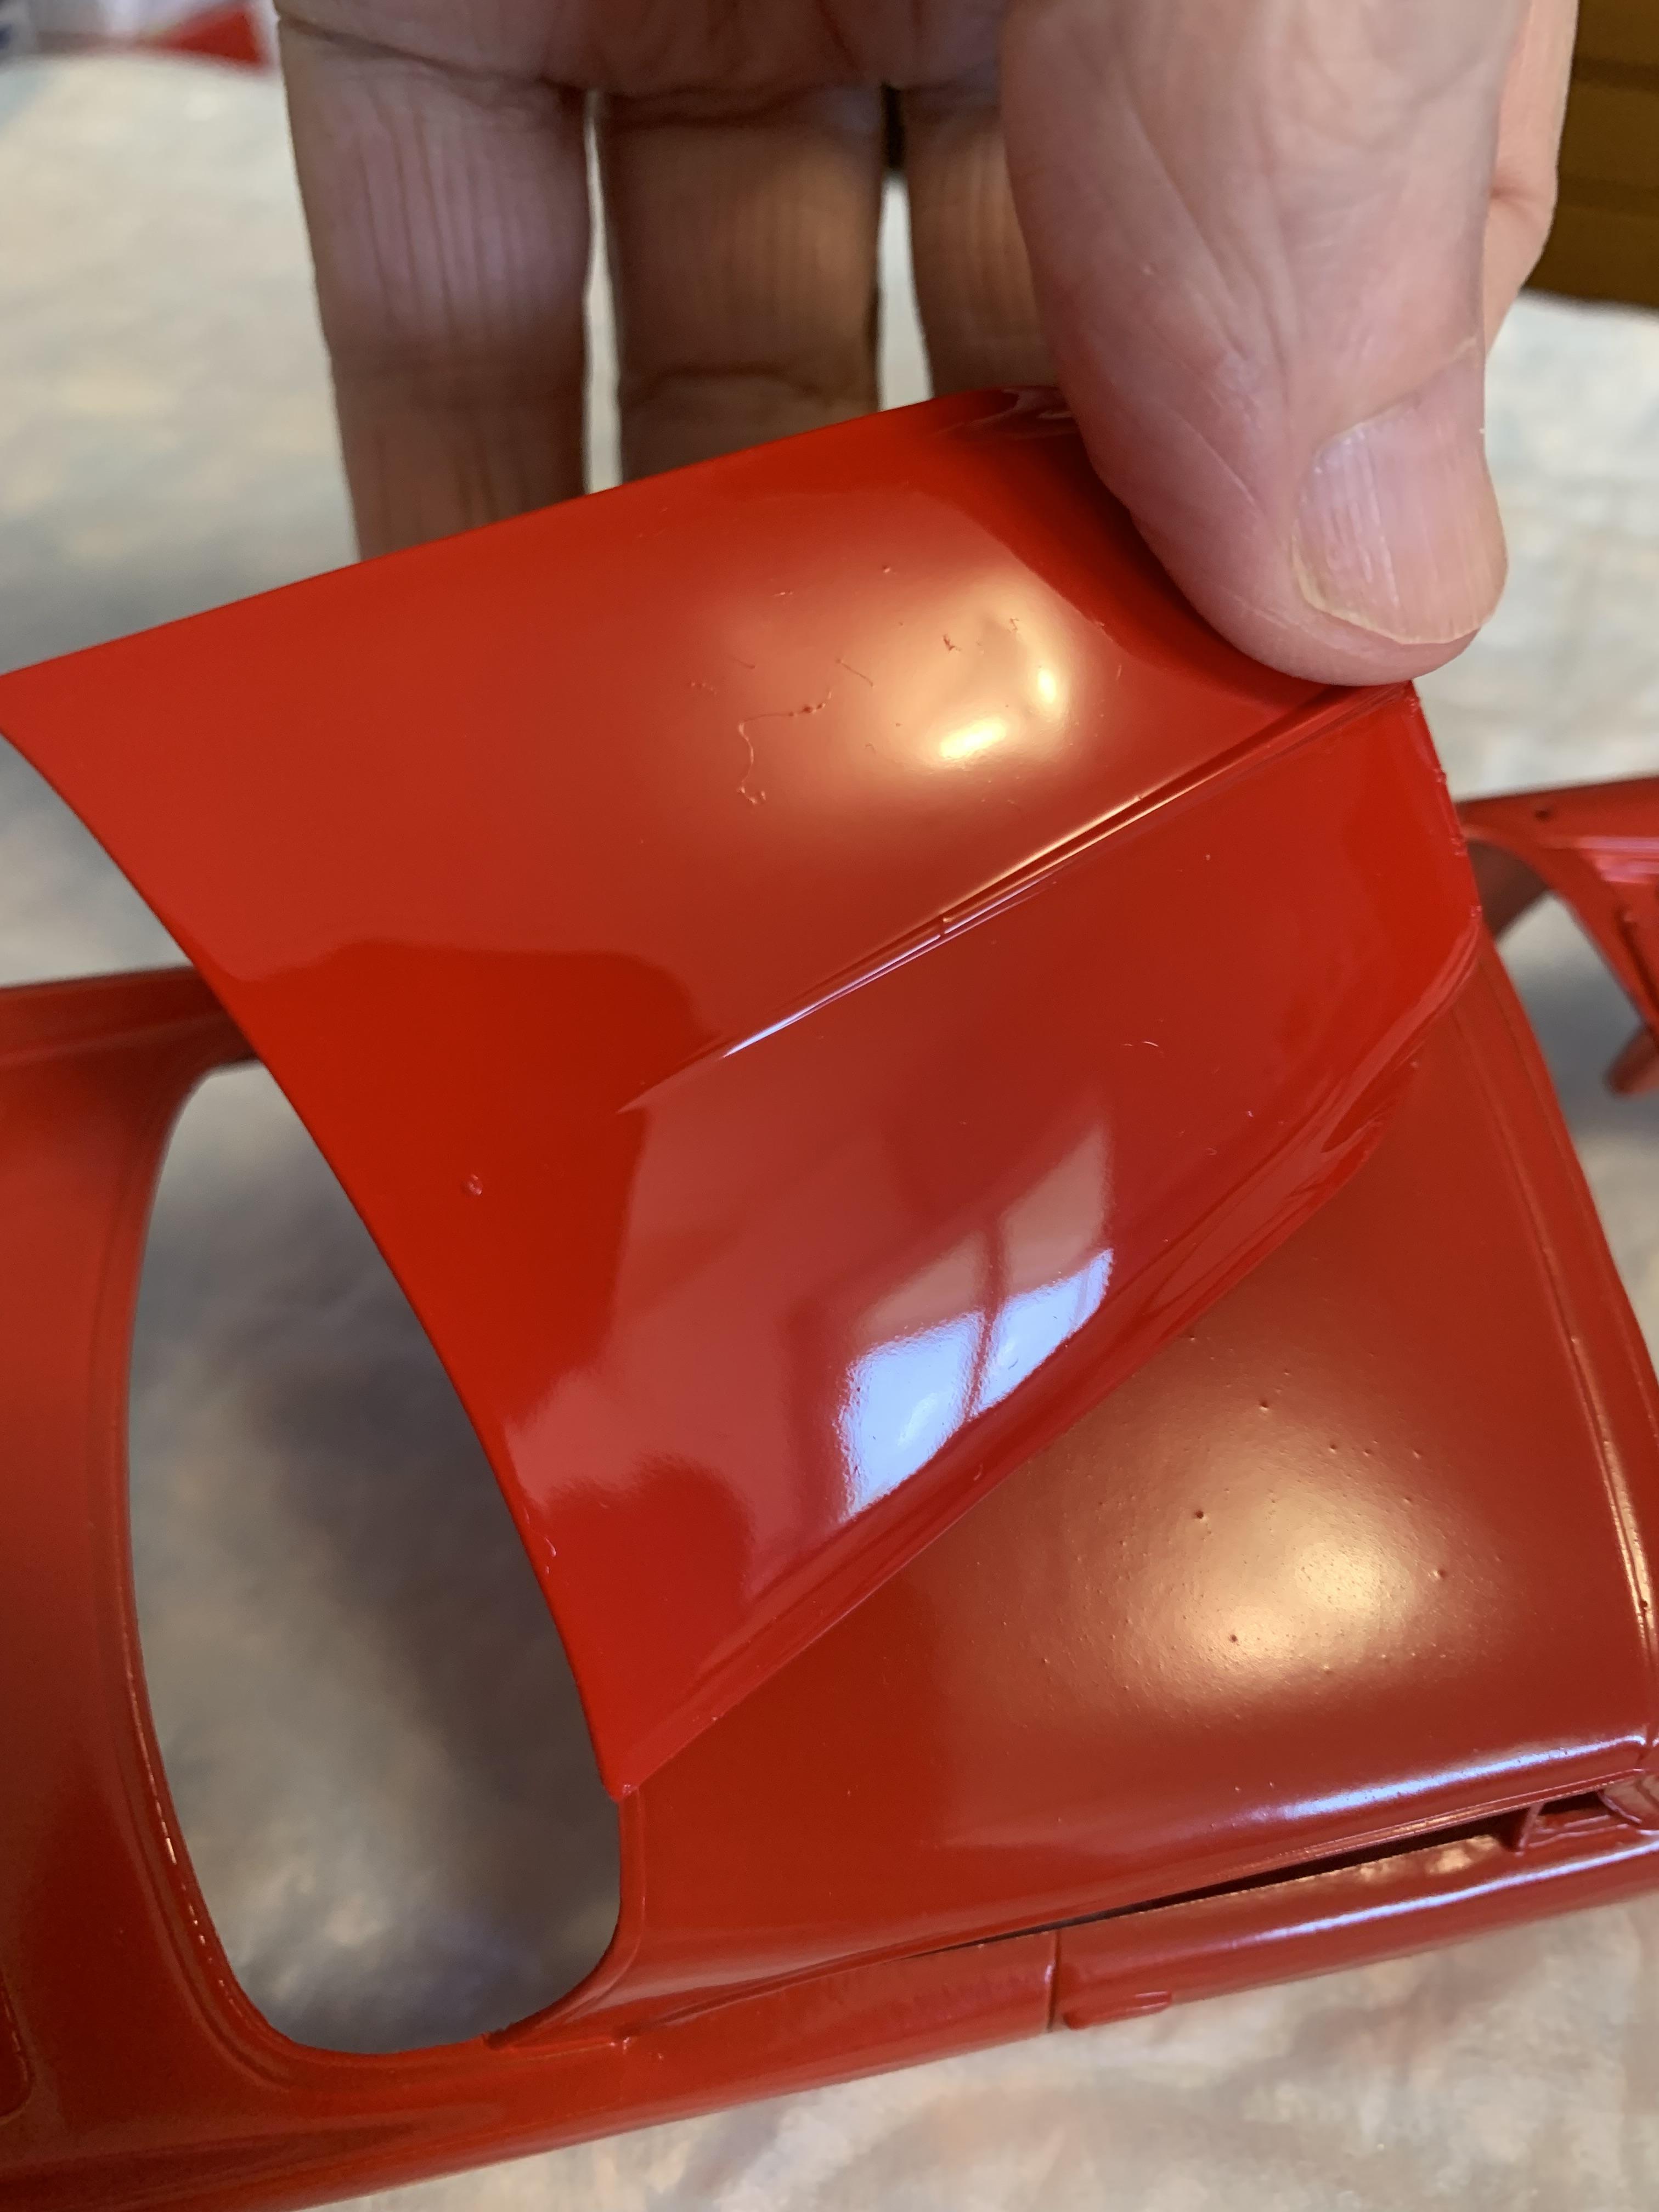
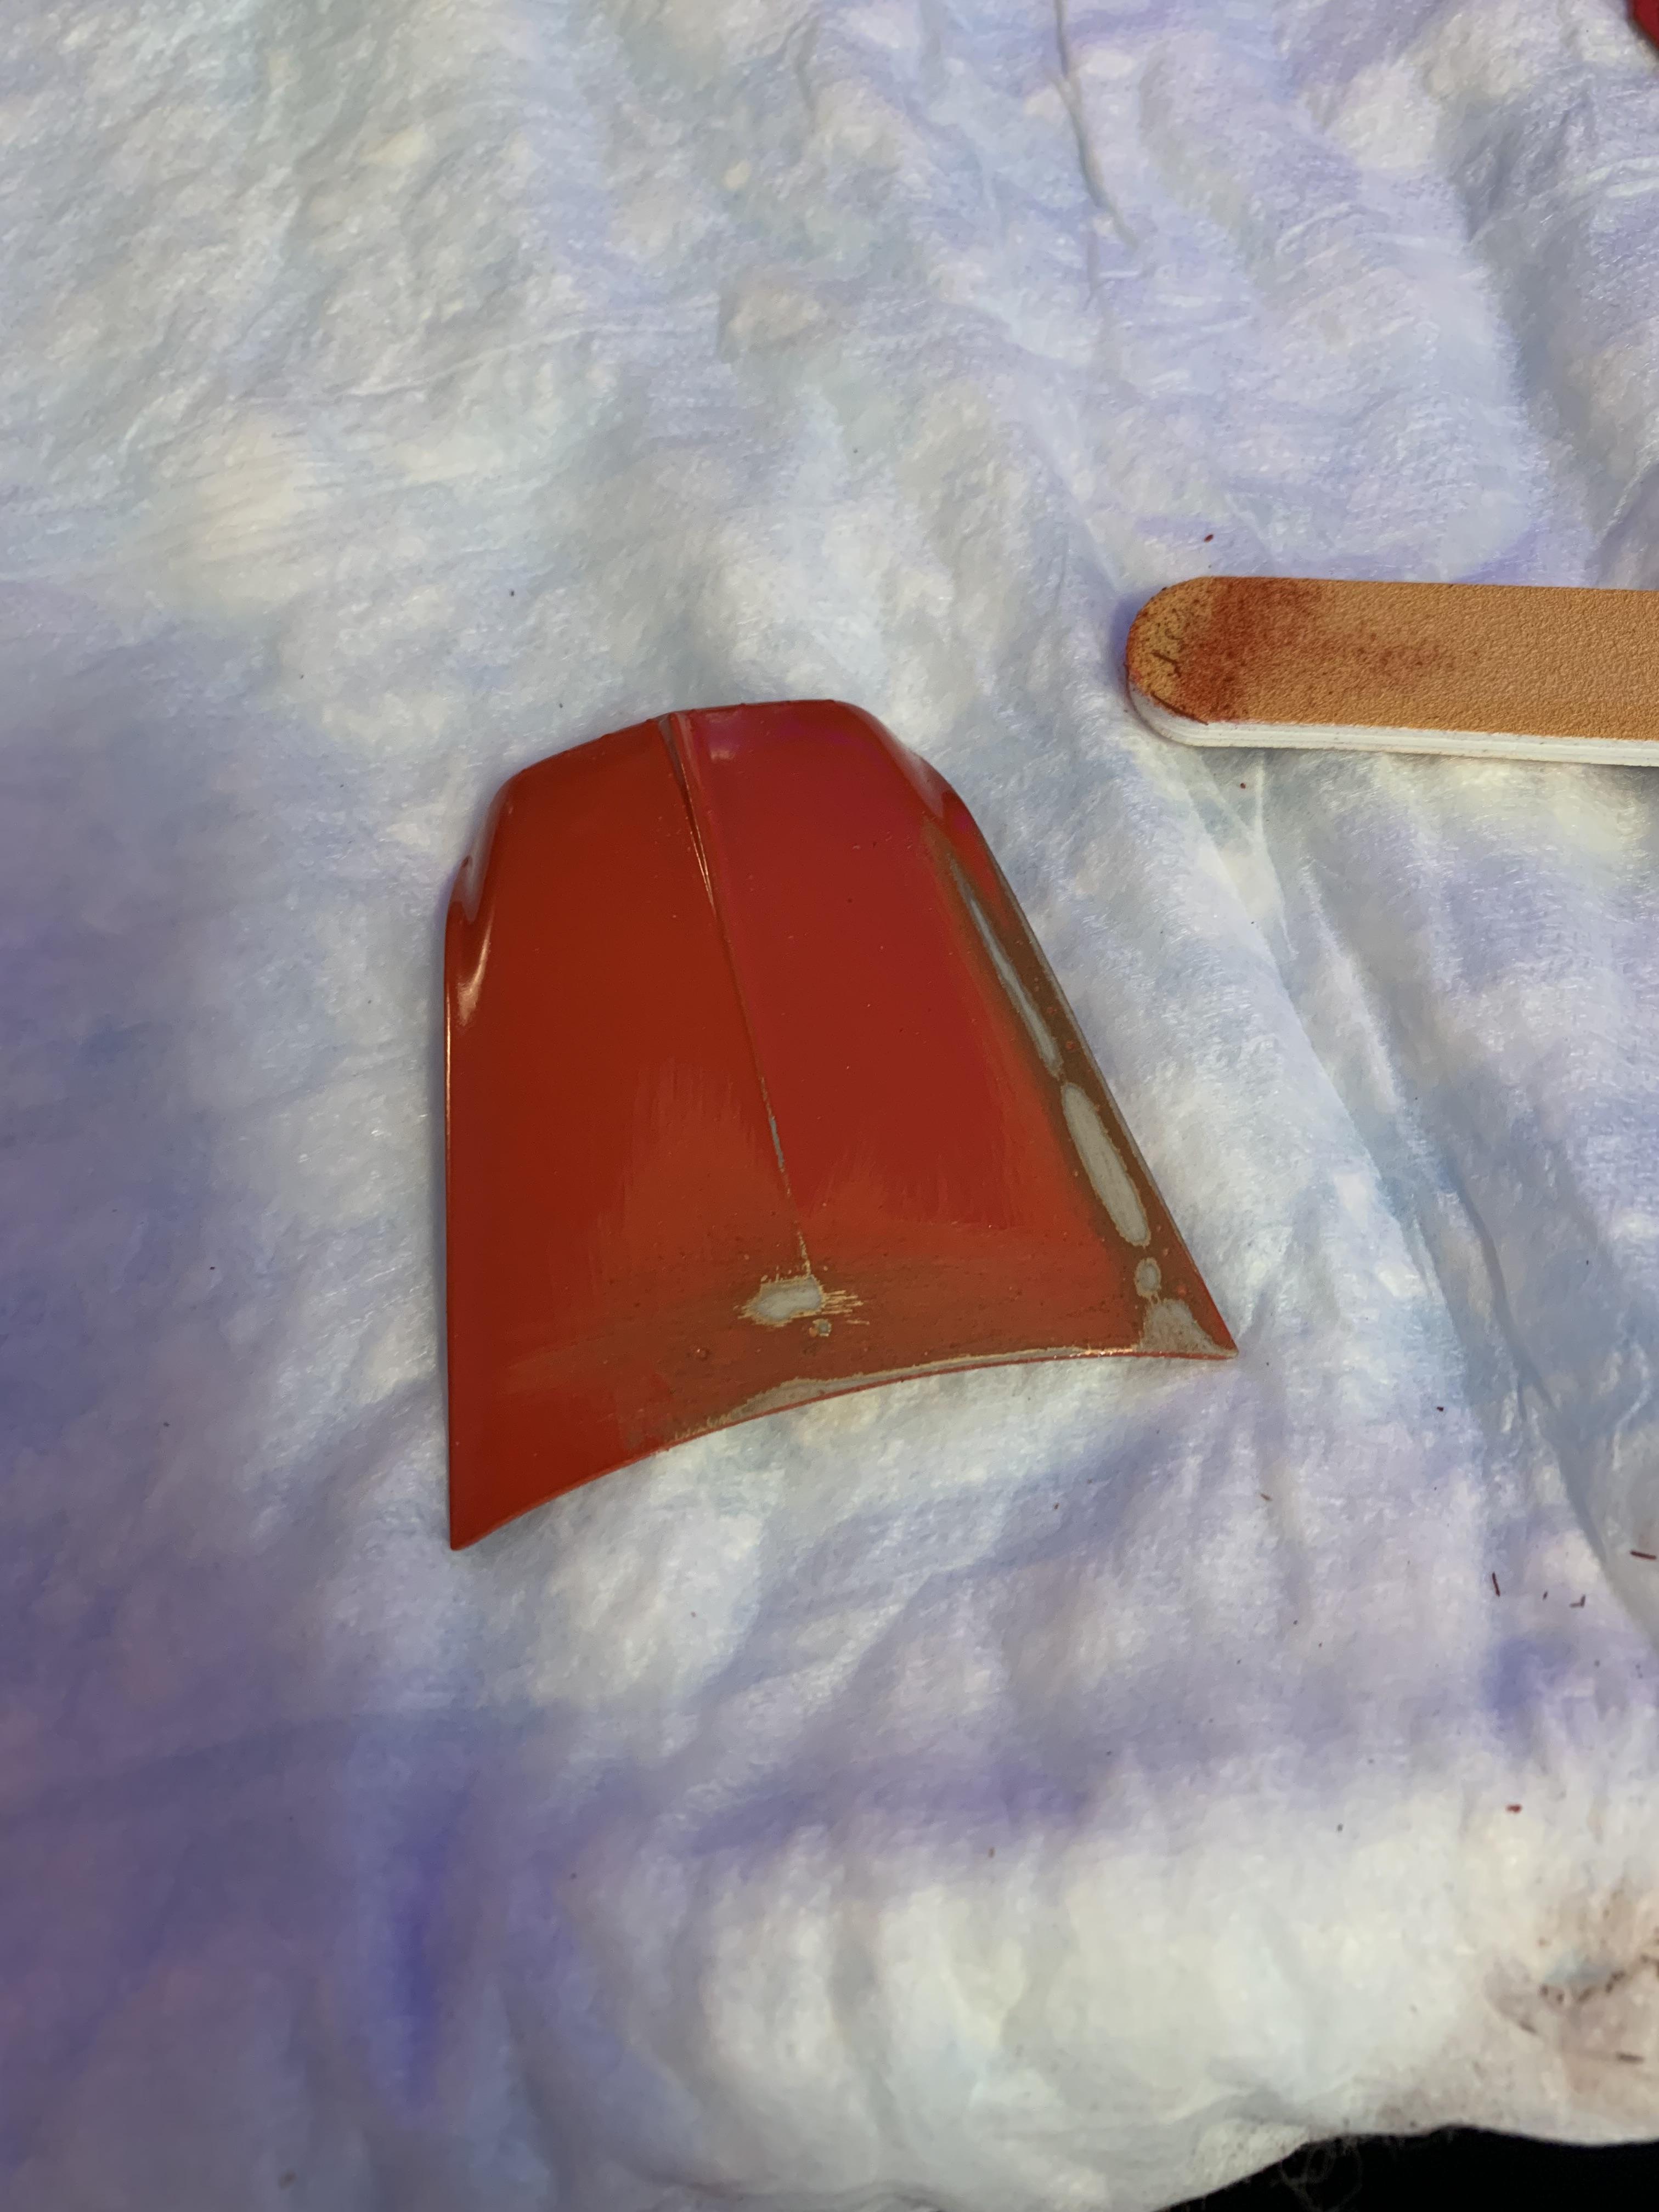
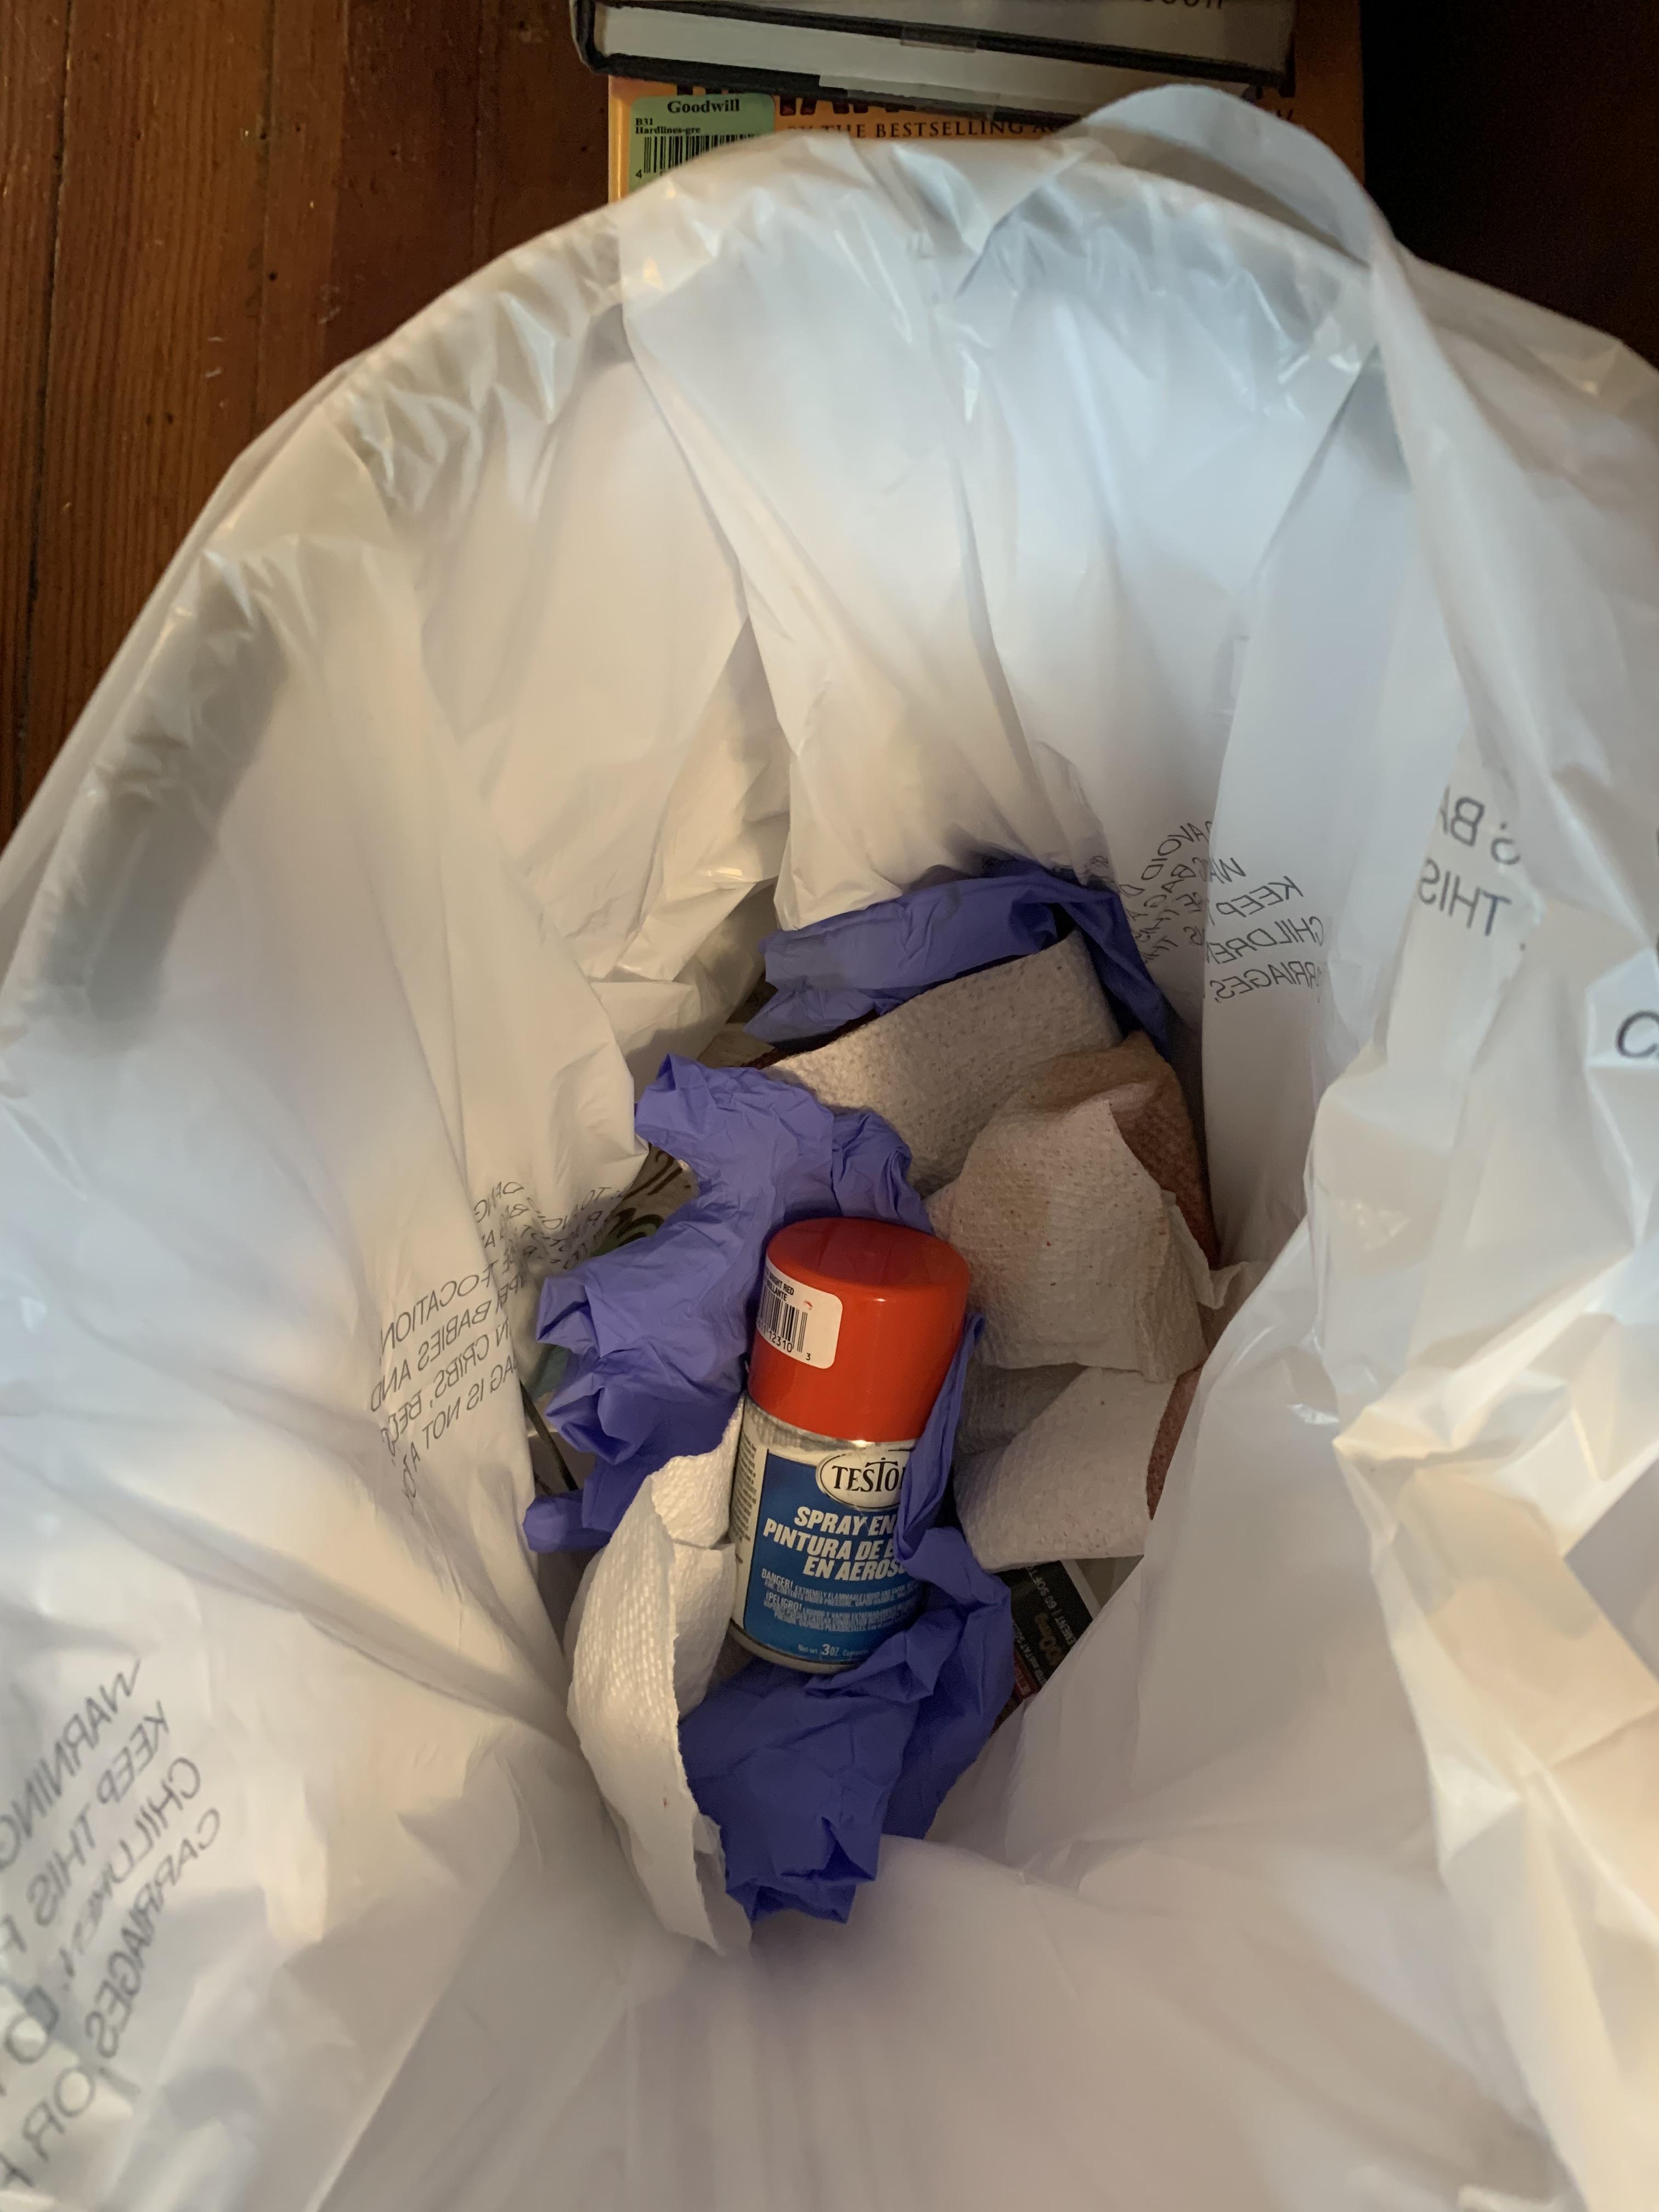
Painted the hogshead and interior parts and chassis, then noticed the hood had paint bubbles on it. Sanded it down, cleaned it up, then sprayed it again. This time, worse bubbles (even showed on the sprue with the hood hinges) rendered the can into the trash (followed Bob’s sage advice) and the hood into the paint remover. When it’s clean, the hood will be painted with a Tamiya pure red and hope it matches the rest of the car. I have been so impressed with this kit that I ordered another kit off EBay.
-
How many models are you working on at one time?
R. Thorne replied to rossfox's topic in Model Building Questions and Answers
2 or 3. -
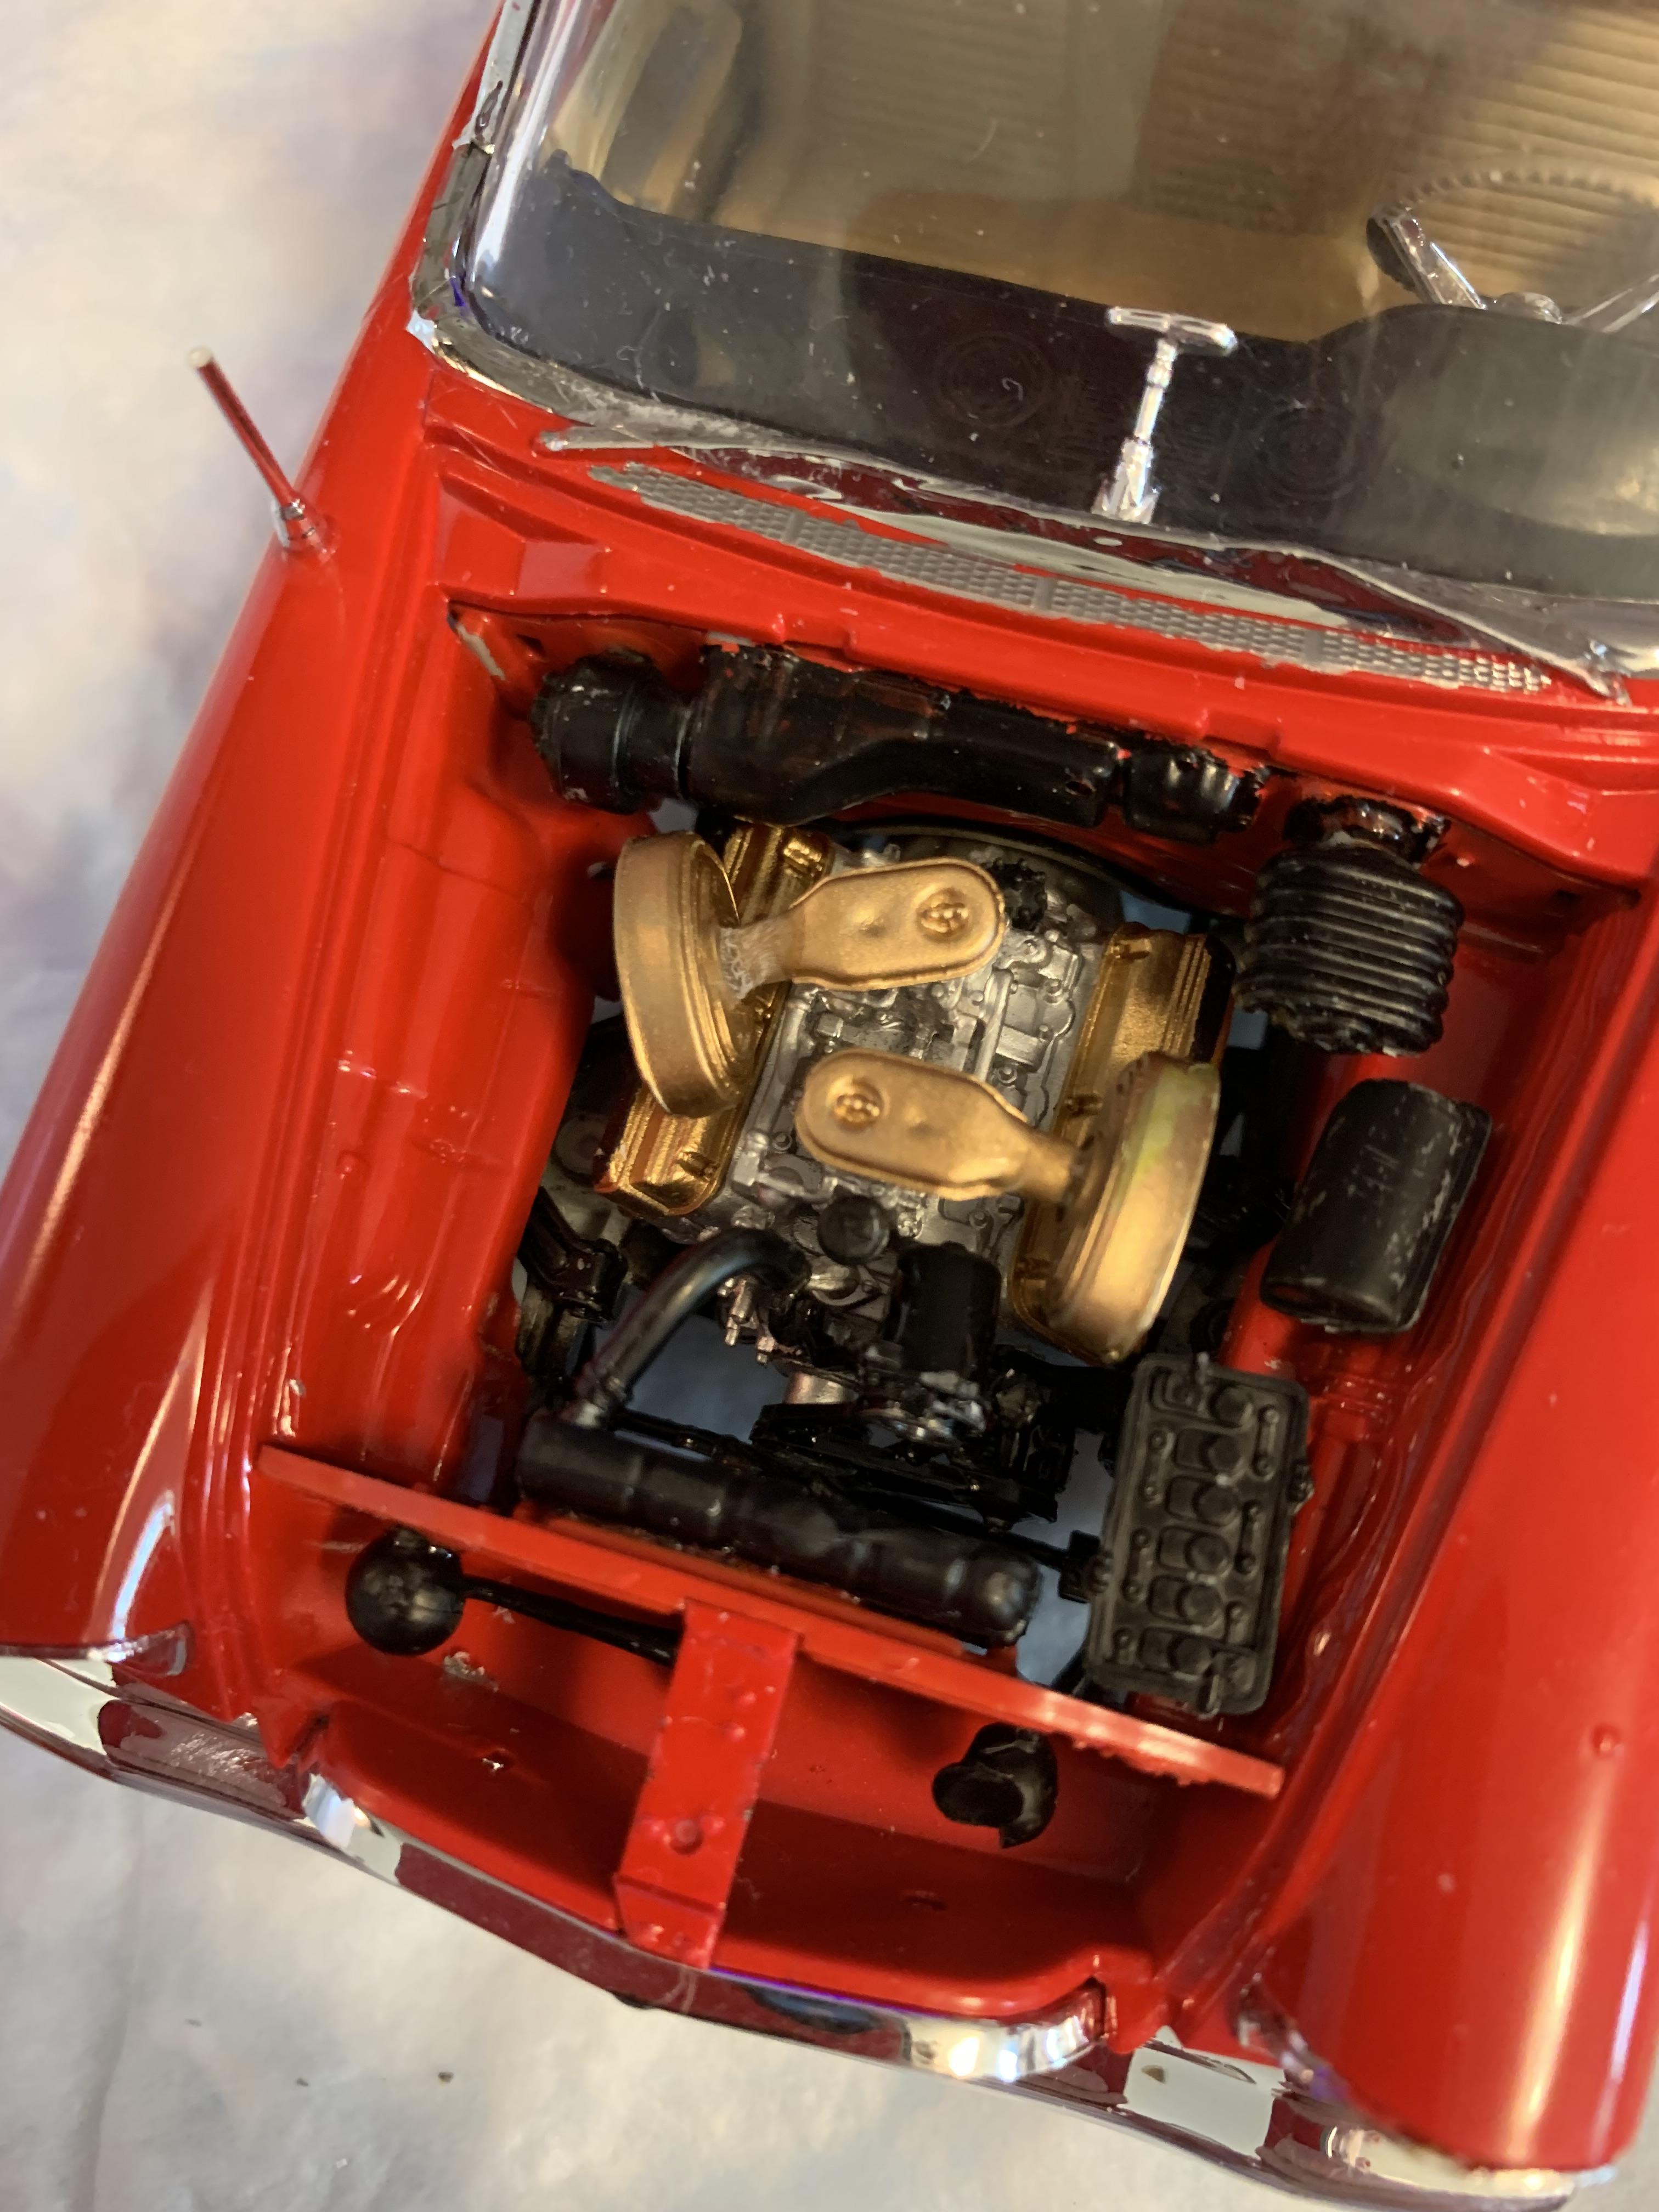
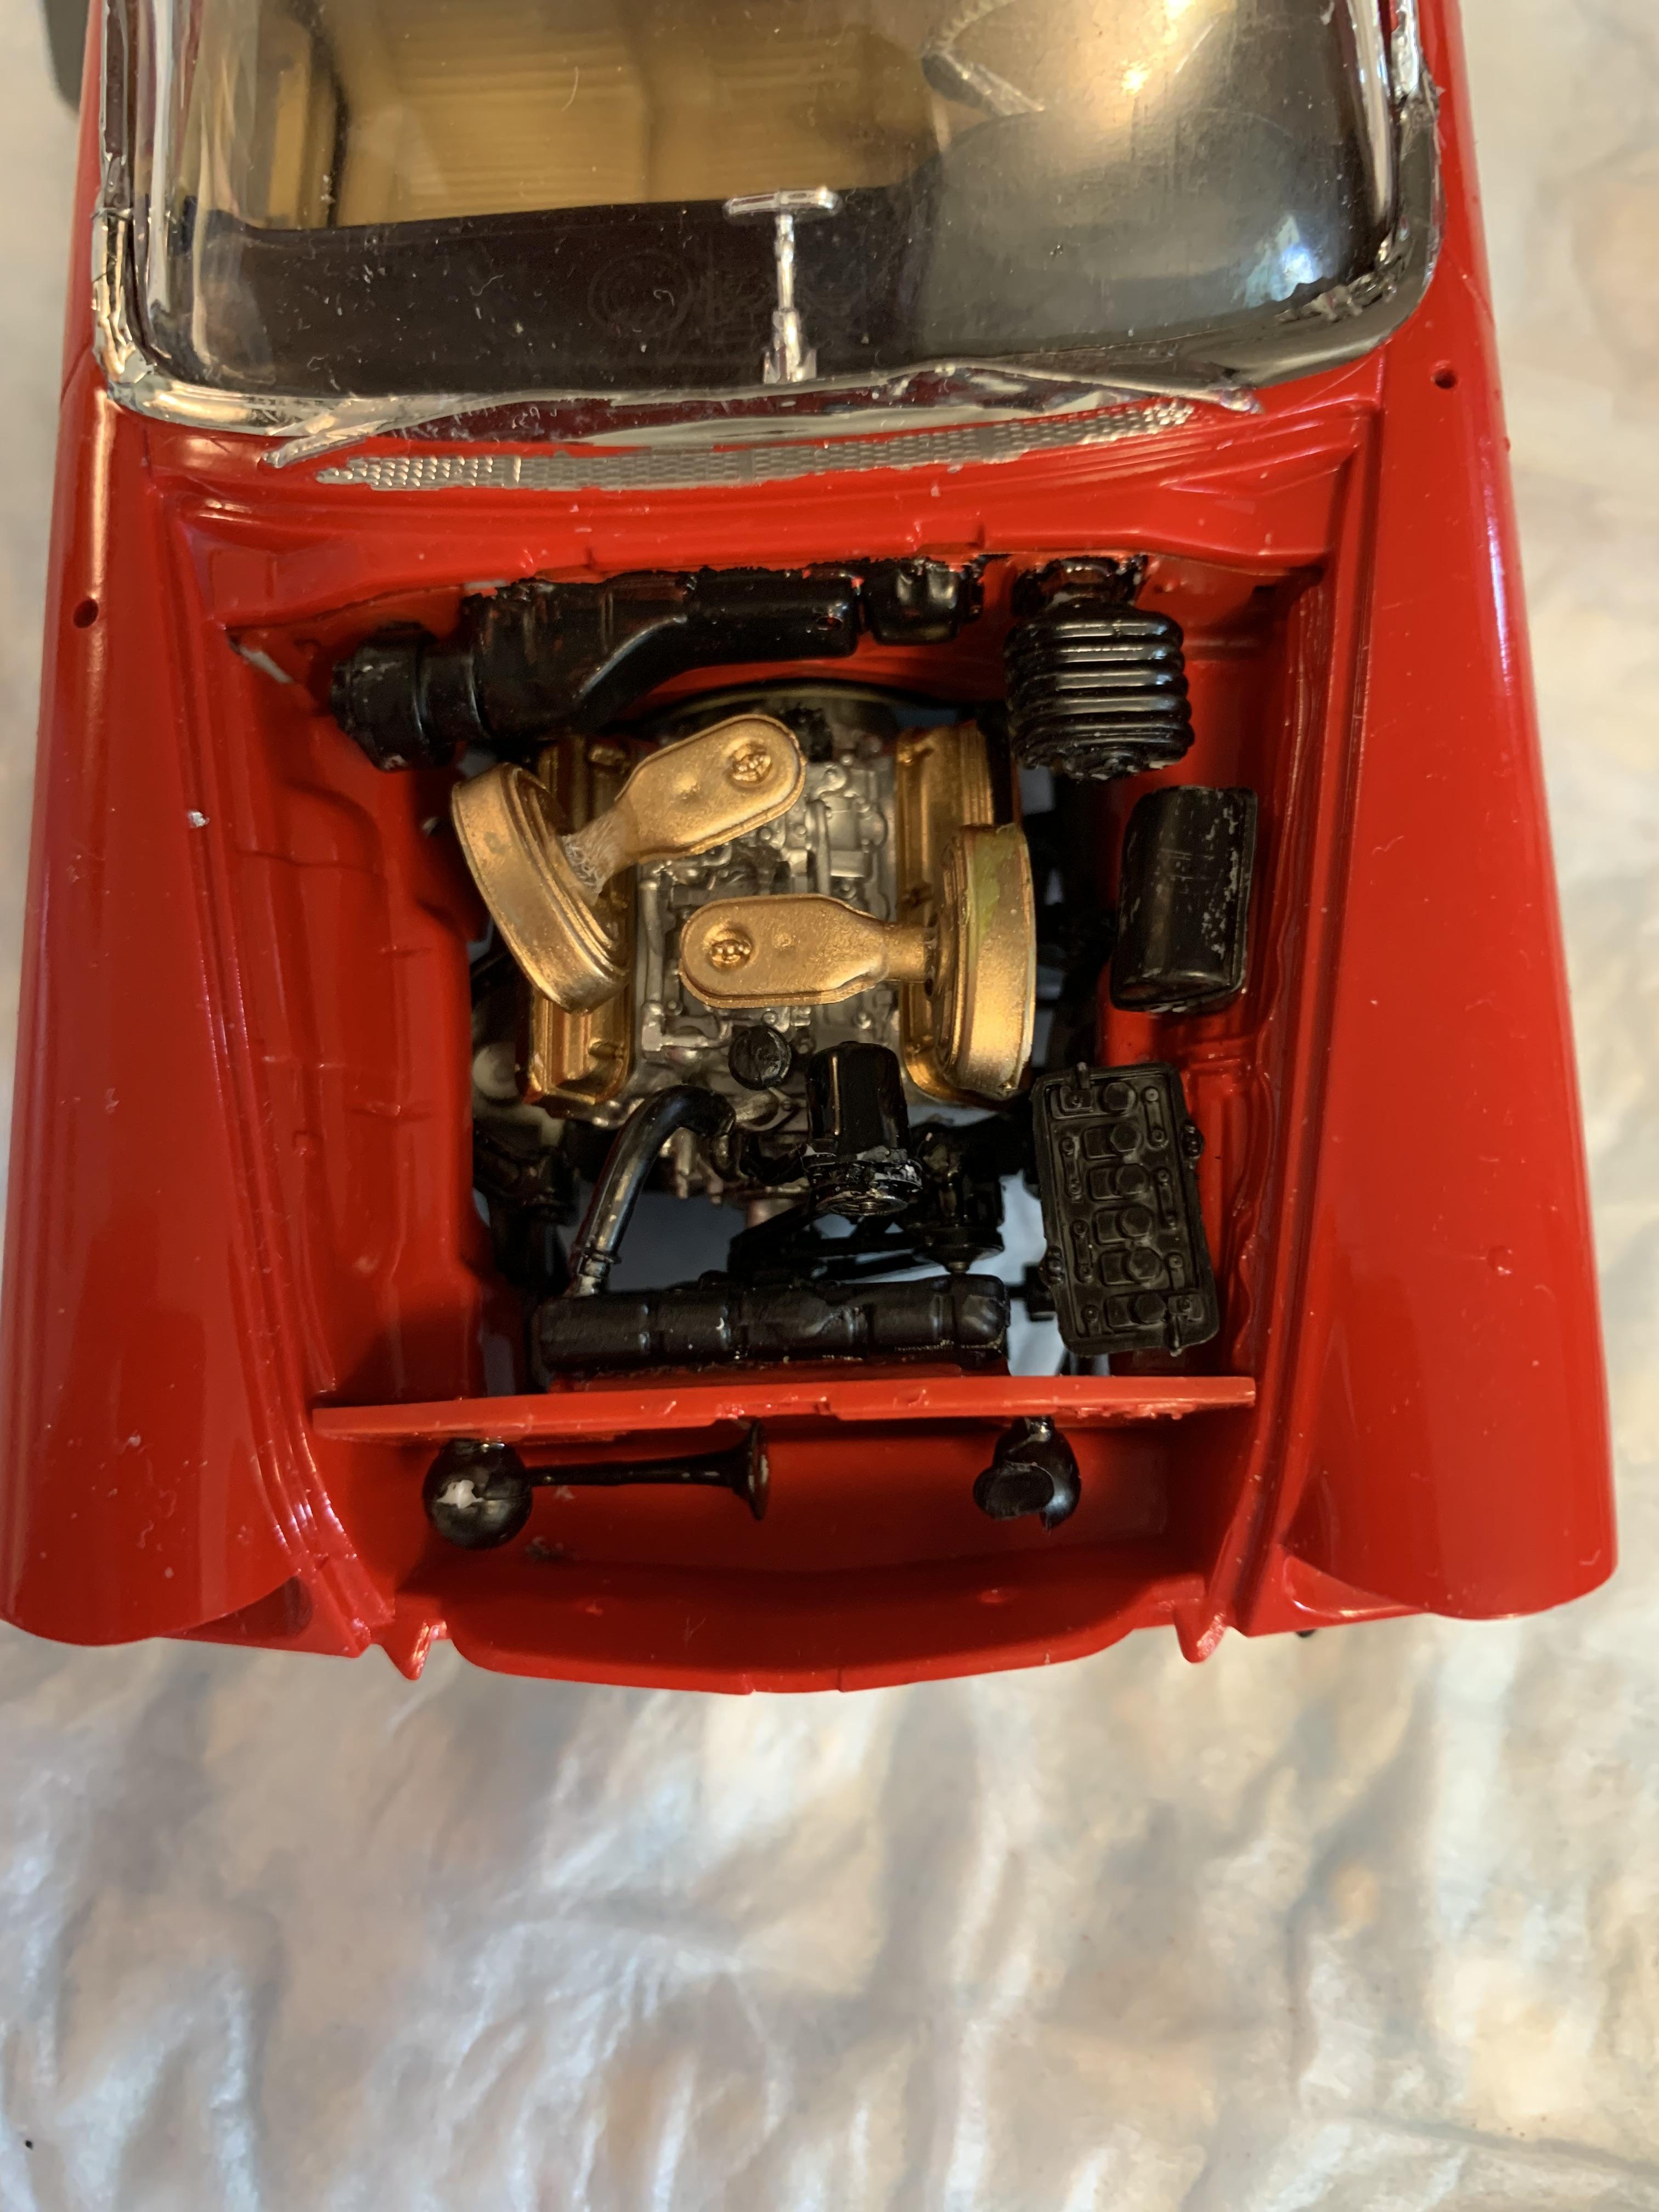
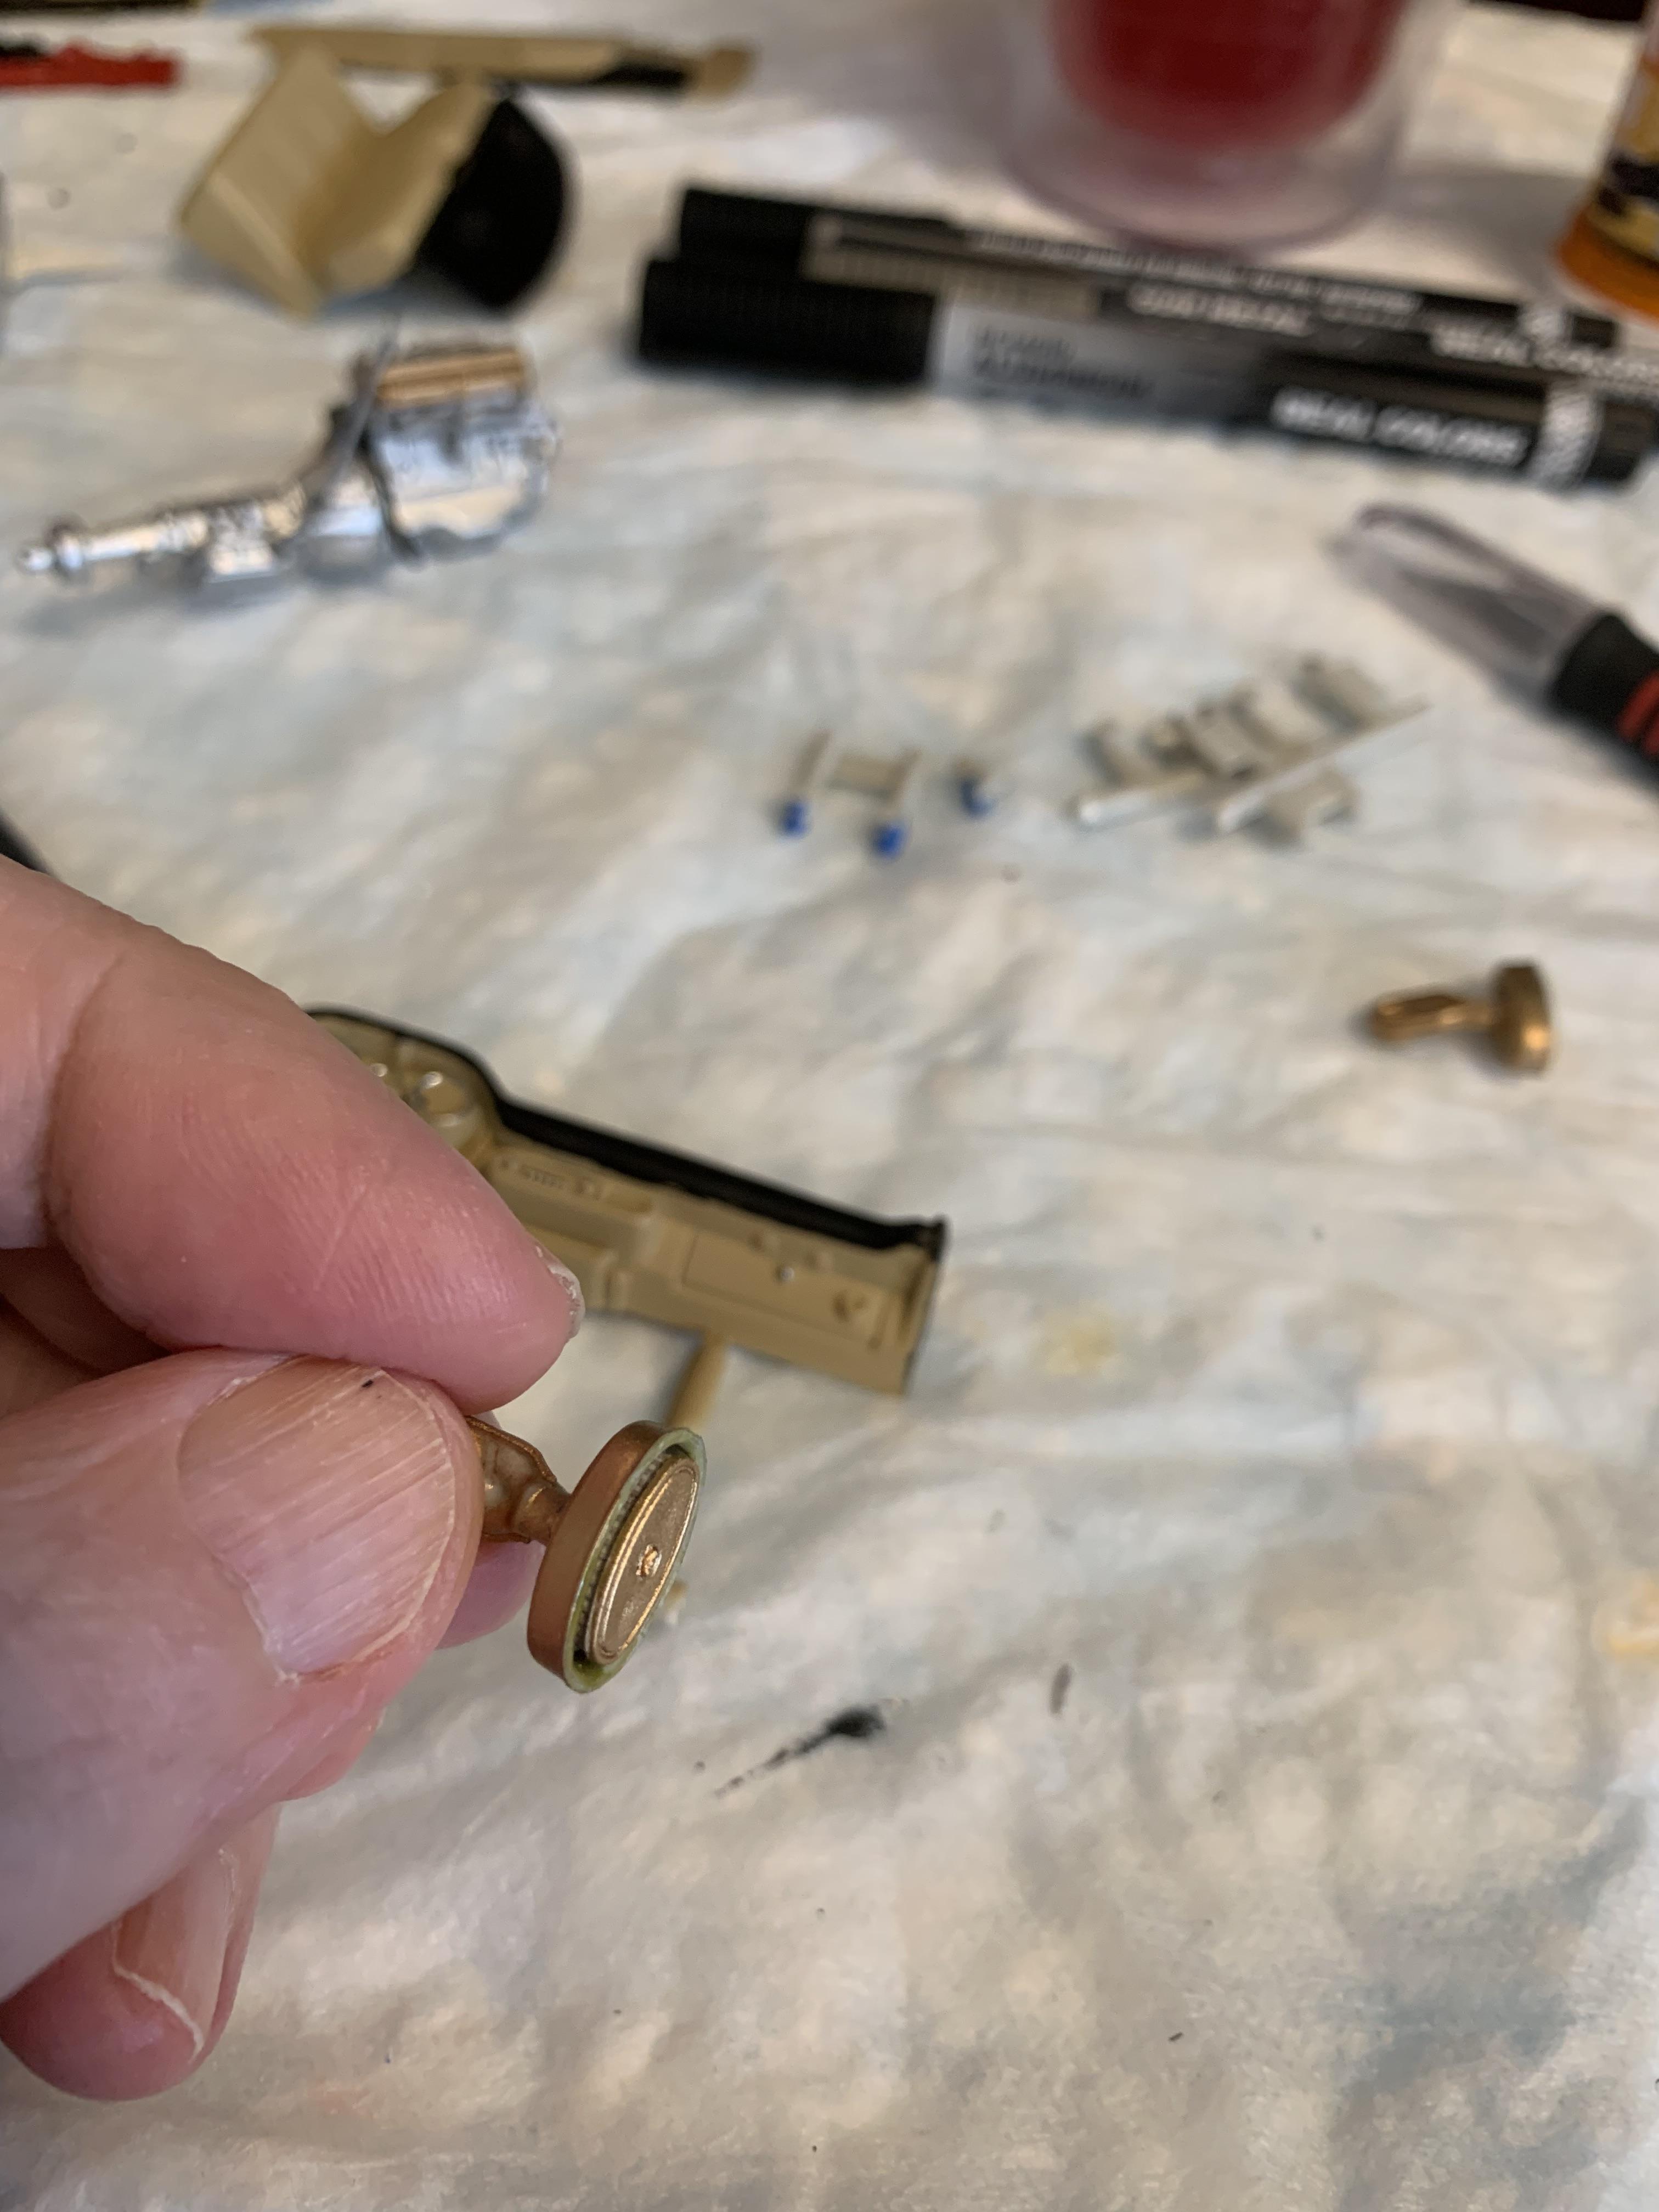
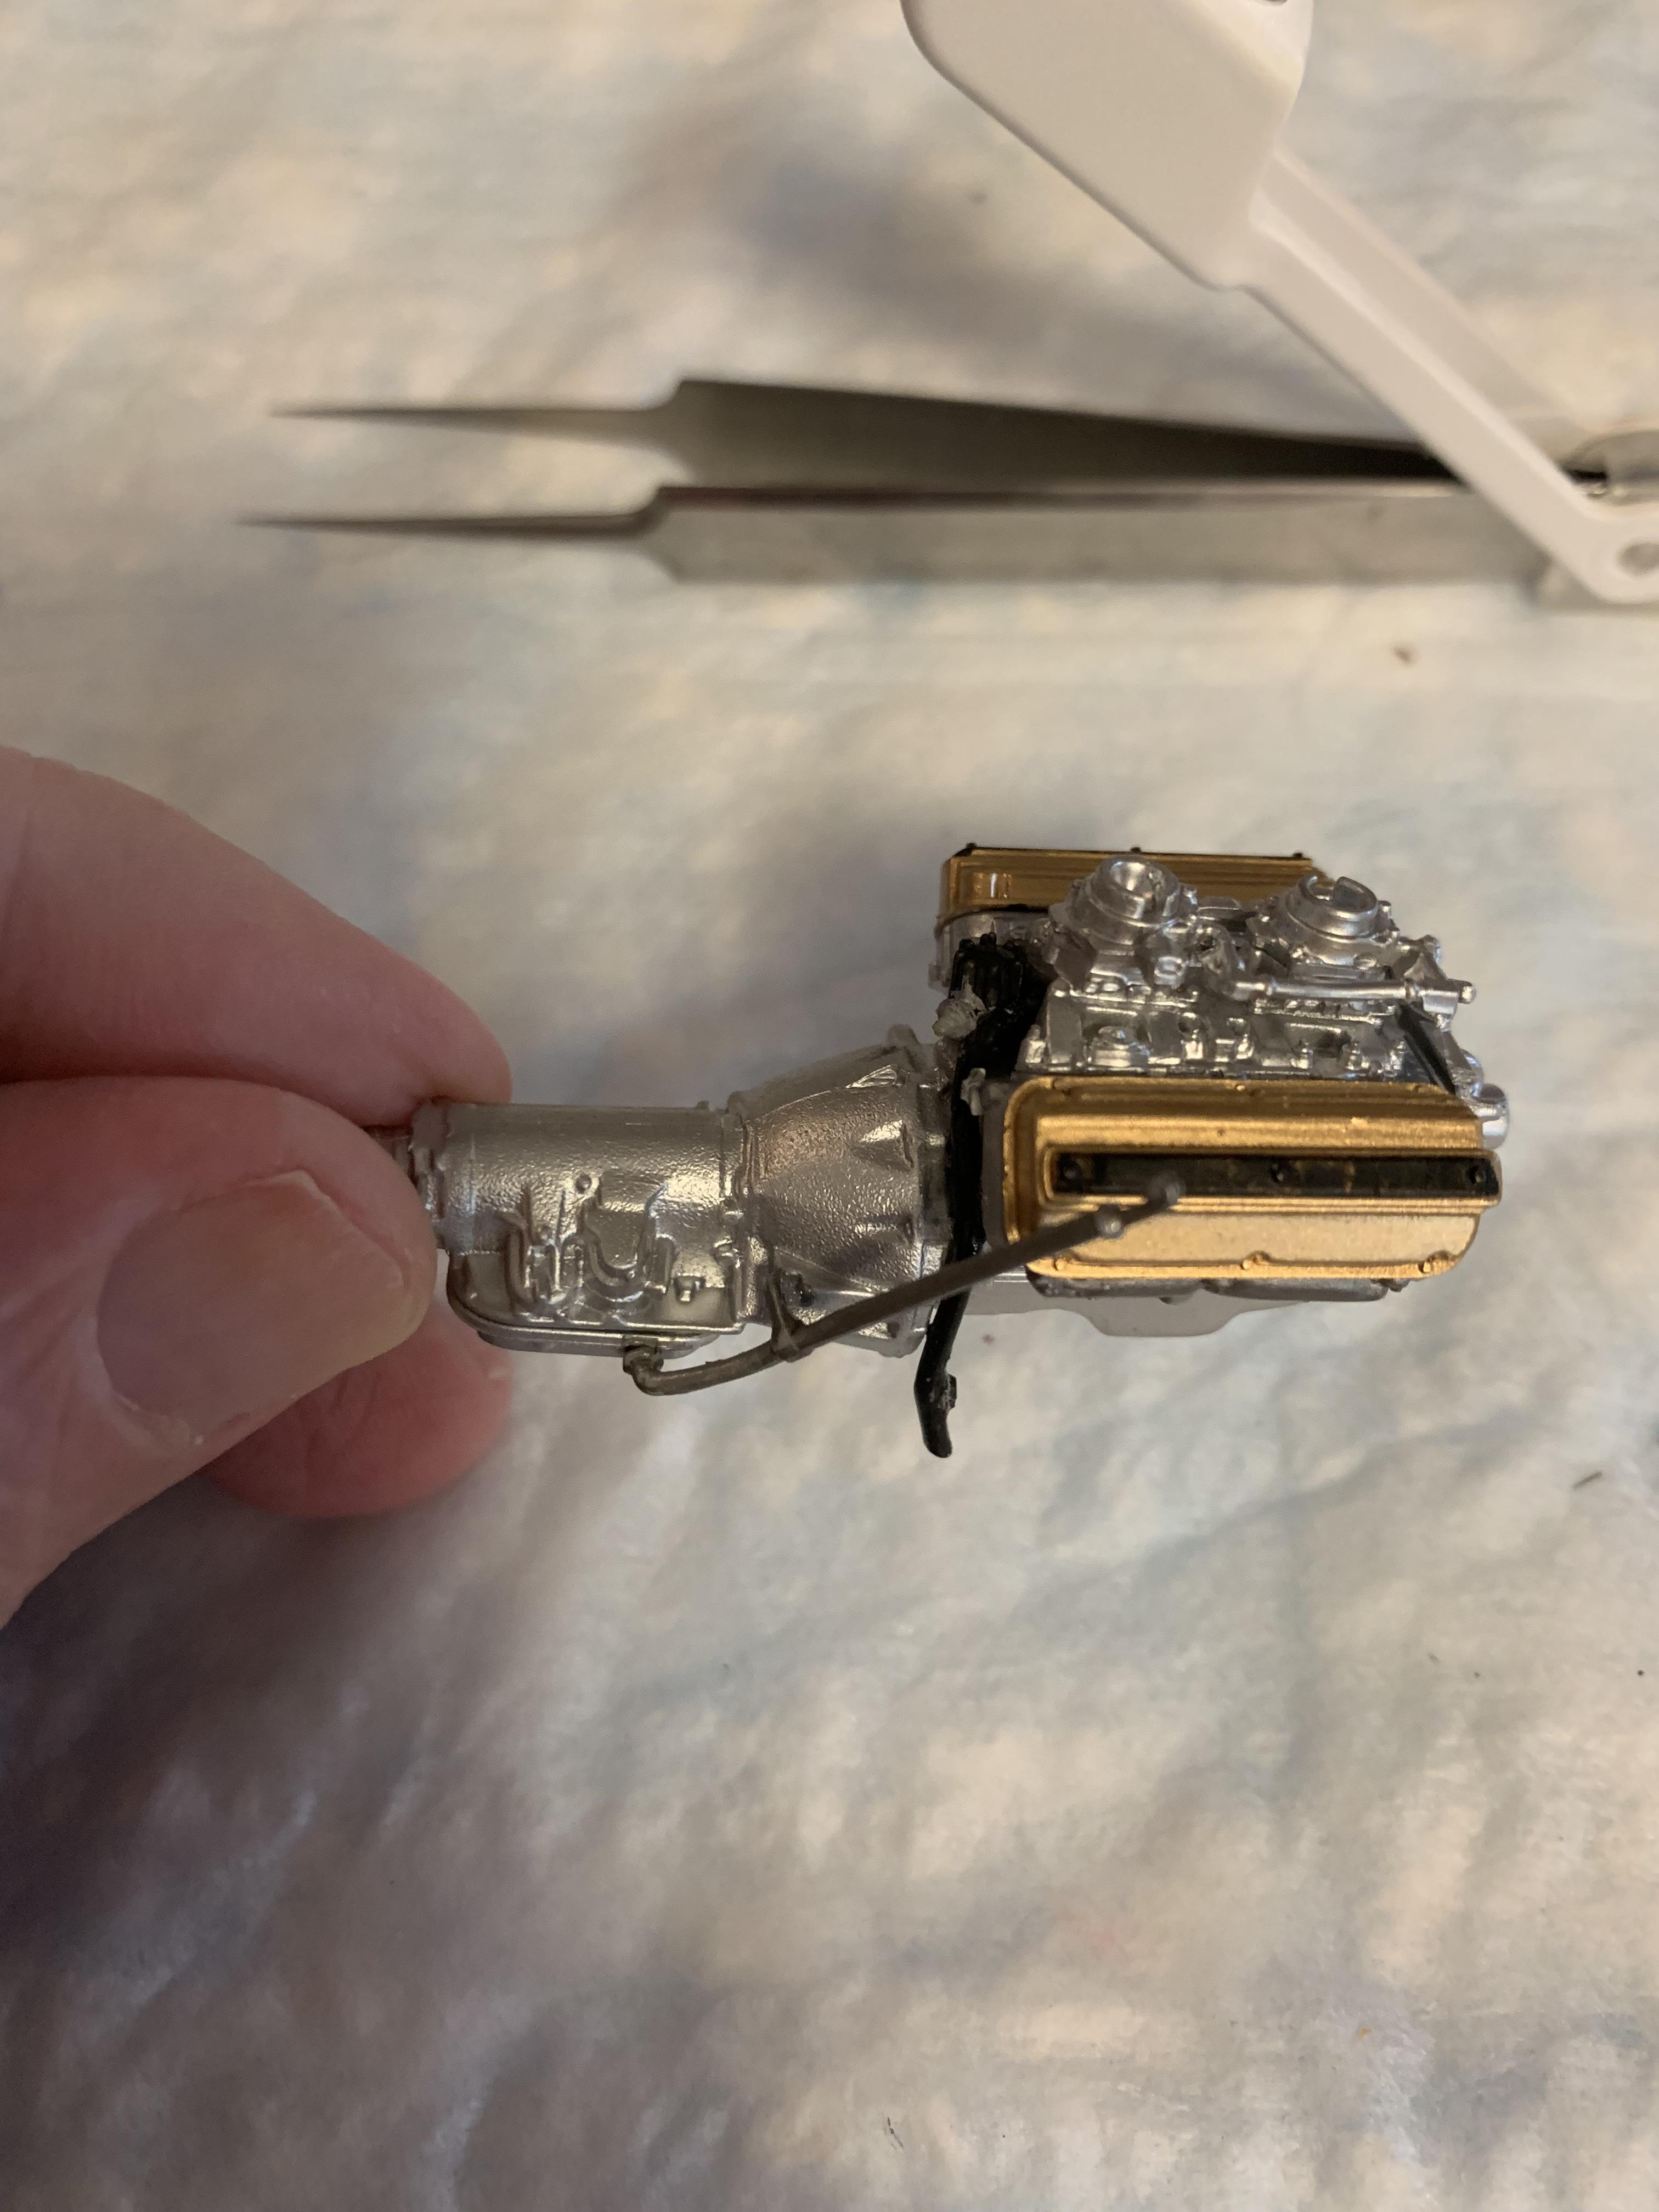
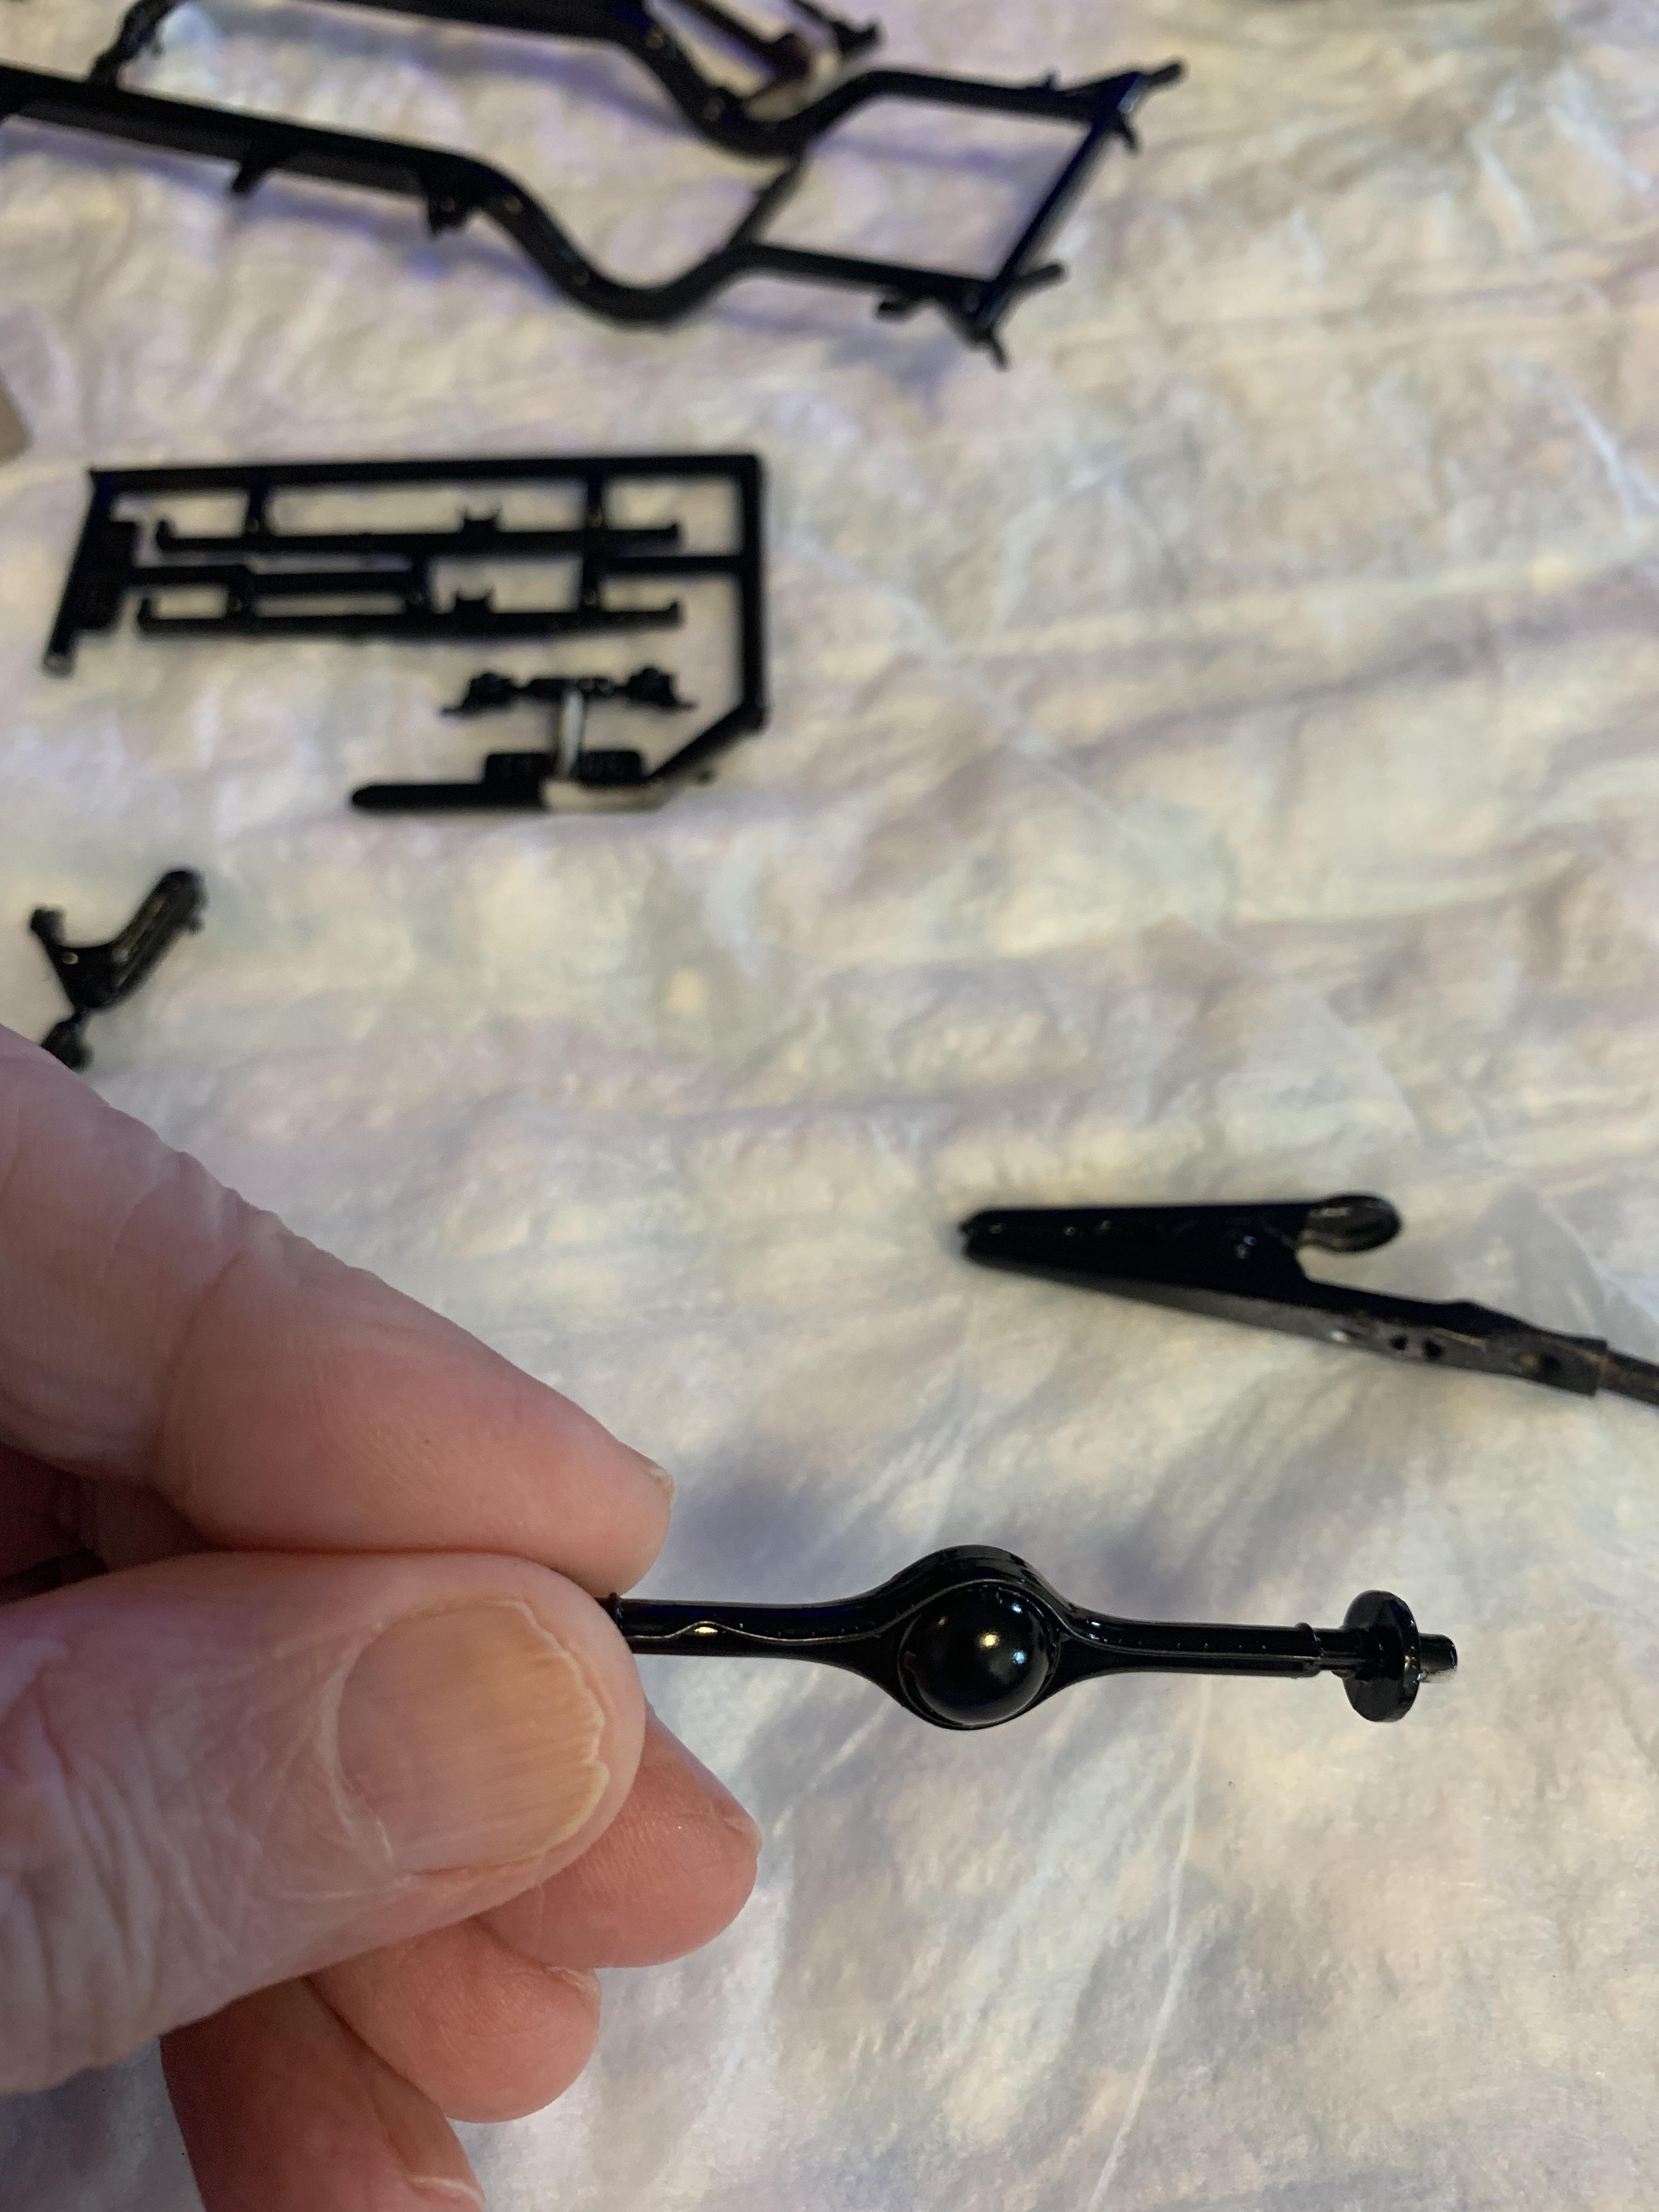
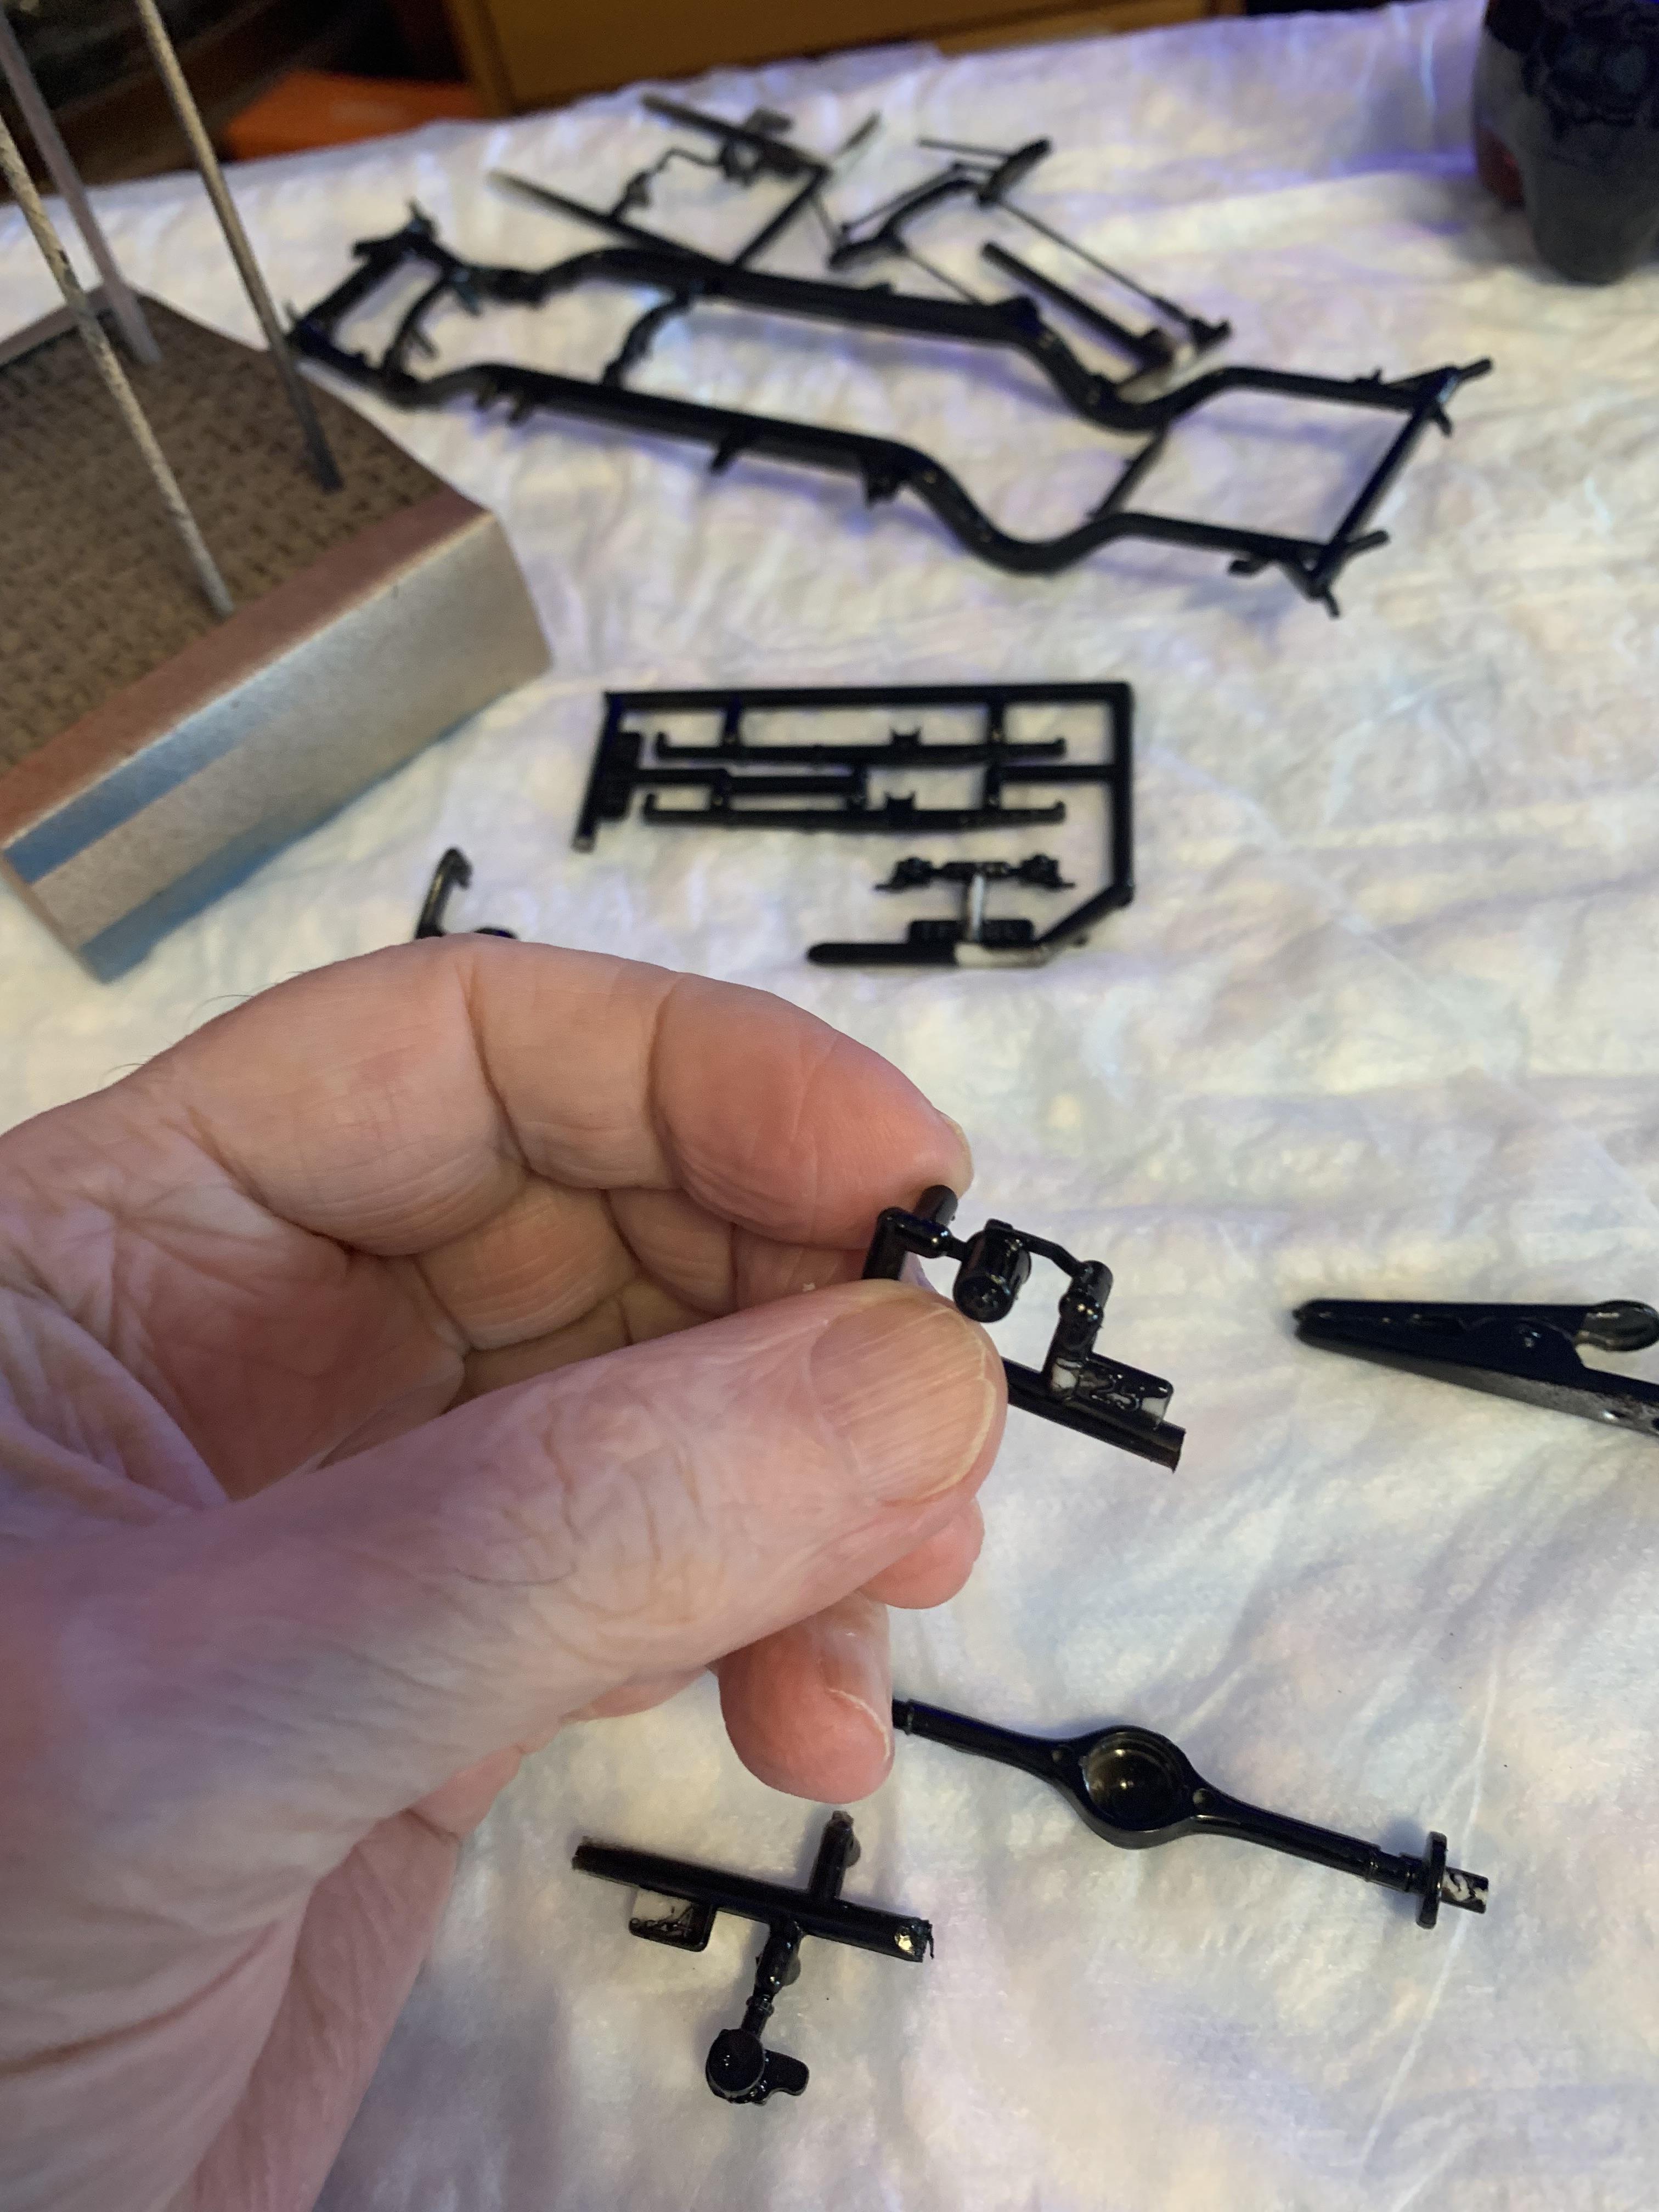
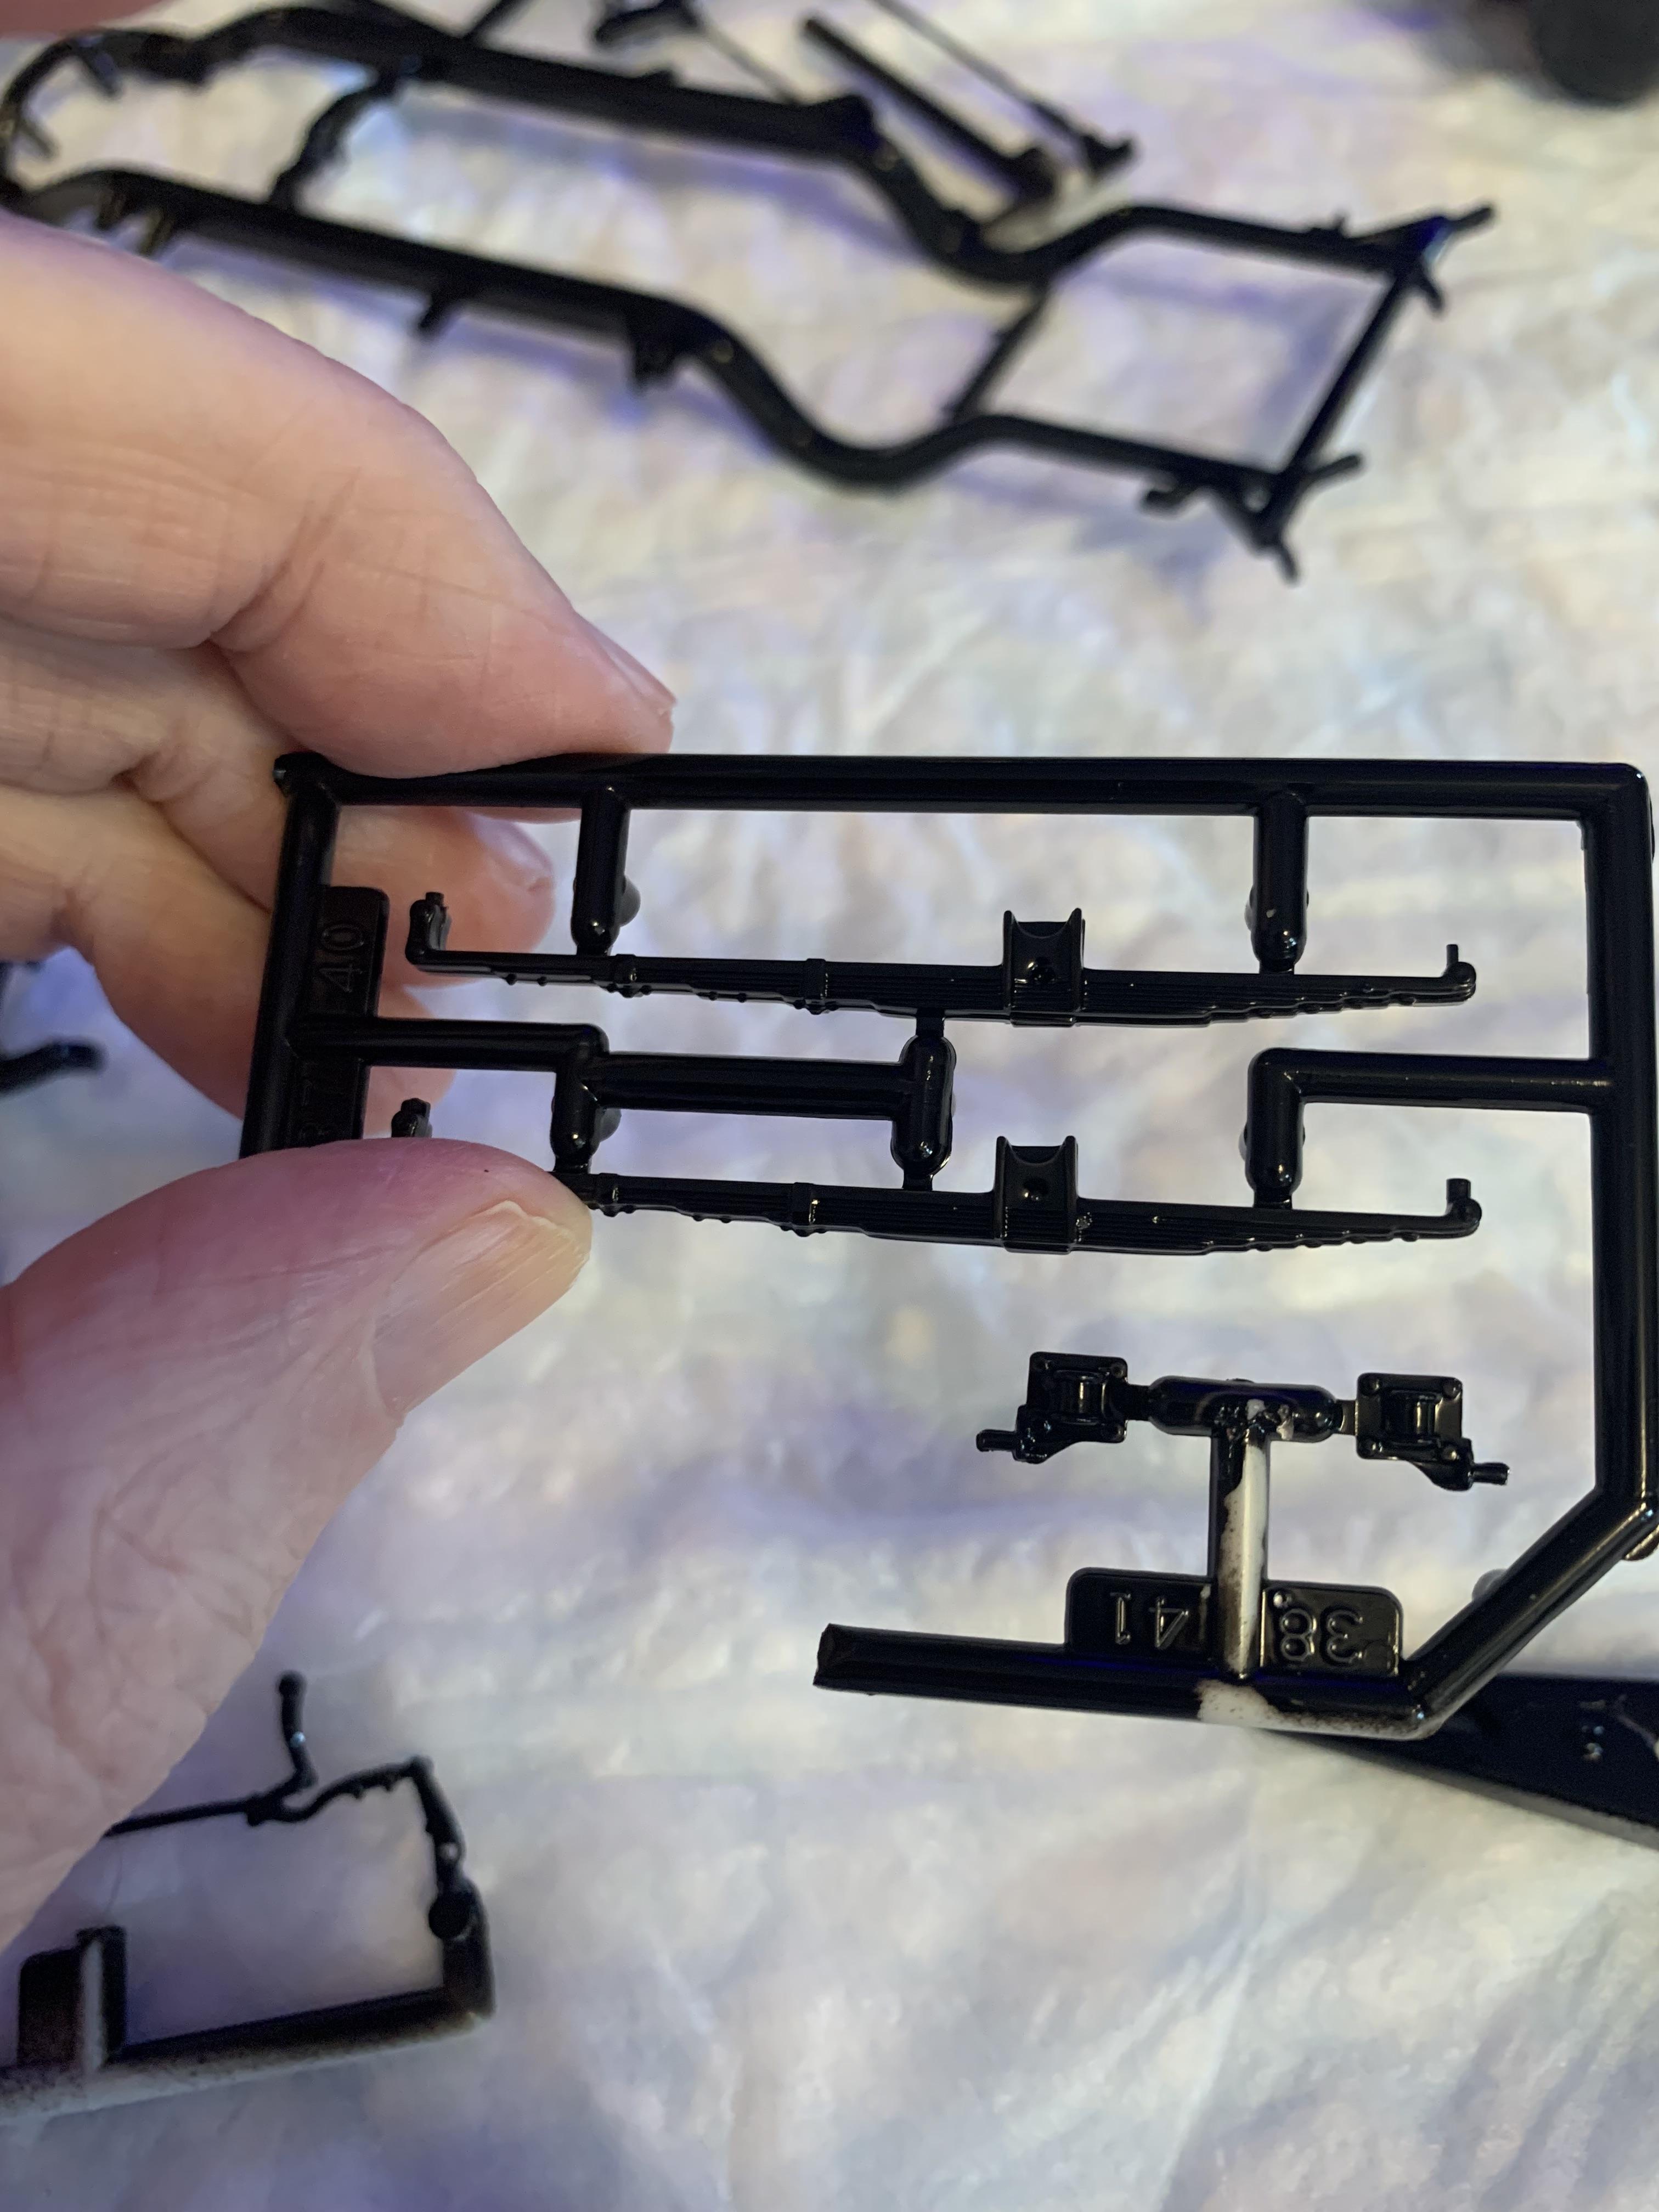
After painting some more parts, I decided to try to show some of the details in this above average kit. The rear end actually has a visible brake line molded in, the generator has a bracket, the rear springs don’t have any arch to them, it has a road draft tube. I used my acrylic marker (brush end) to paint some of the smaller pieces.
-
Above average, Elliot. Crispy, as opposed to leafy. It’s what I deserve for trying to use up some old paint that I didn’t like before. Insanity: doing the same thing over and expecting different results. Glued the tires/wheels together and painted a bunch of small parts (that’s what you get with a highly detailed engine/chassis/interior).