R. Thorne
-
Posts
1,276 -
Joined
-
Last visited
Content Type
Profiles
Forums
Events
Gallery
Everything posted by R. Thorne
-
"The 777" Tasca Ford '63 lightweight Galaxie
R. Thorne replied to customline's topic in WIP: Drag Racing Models
Nice work. Shows a lot of careful thought and attention to detail. -
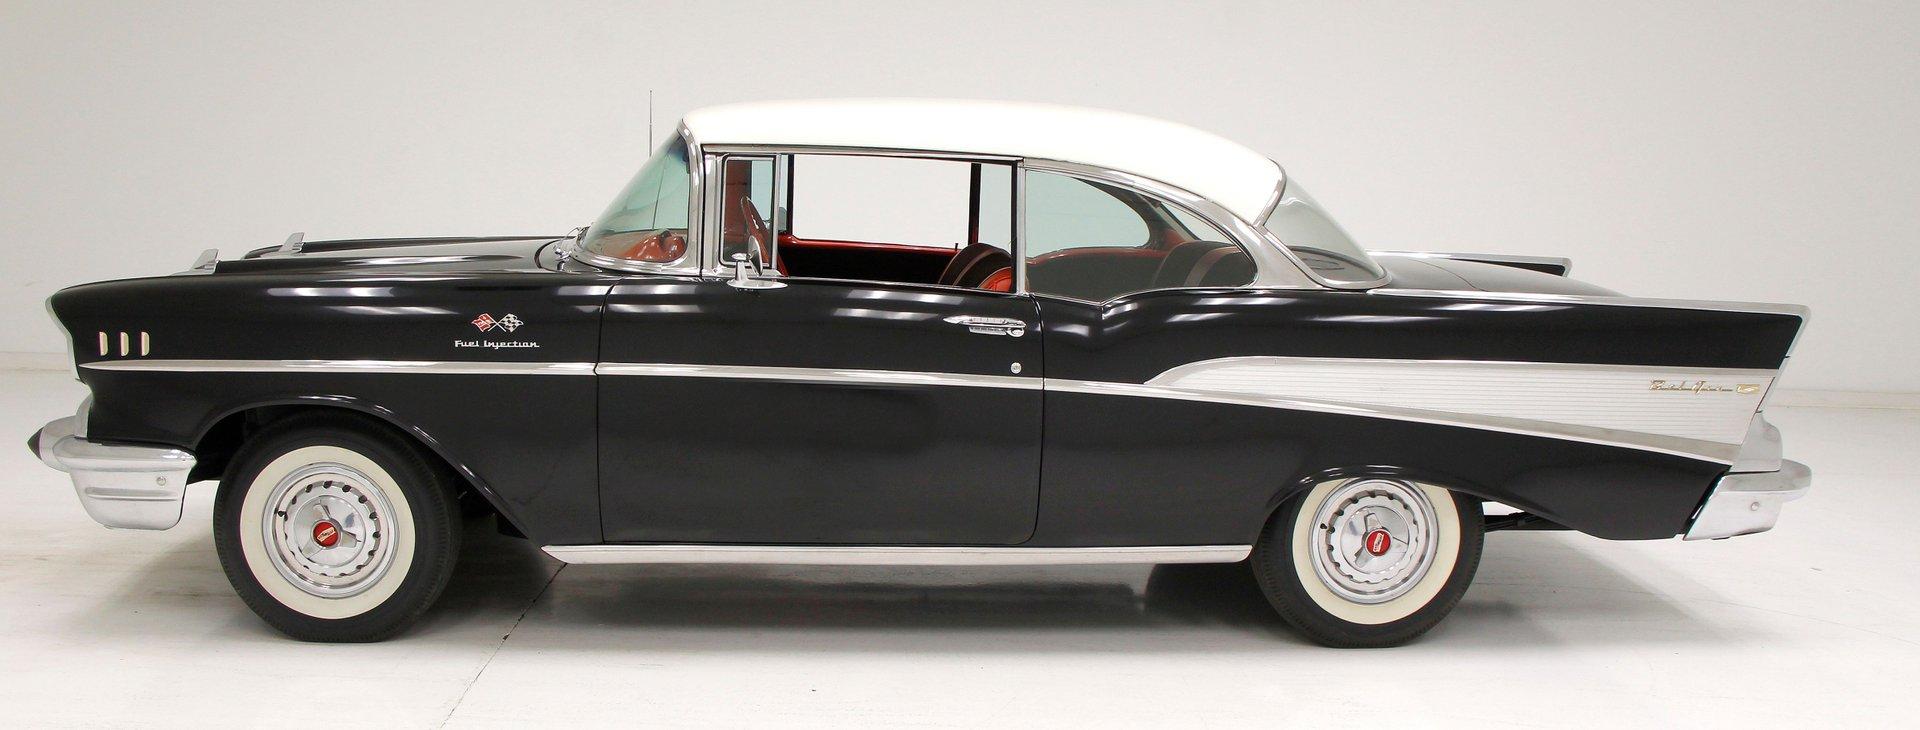
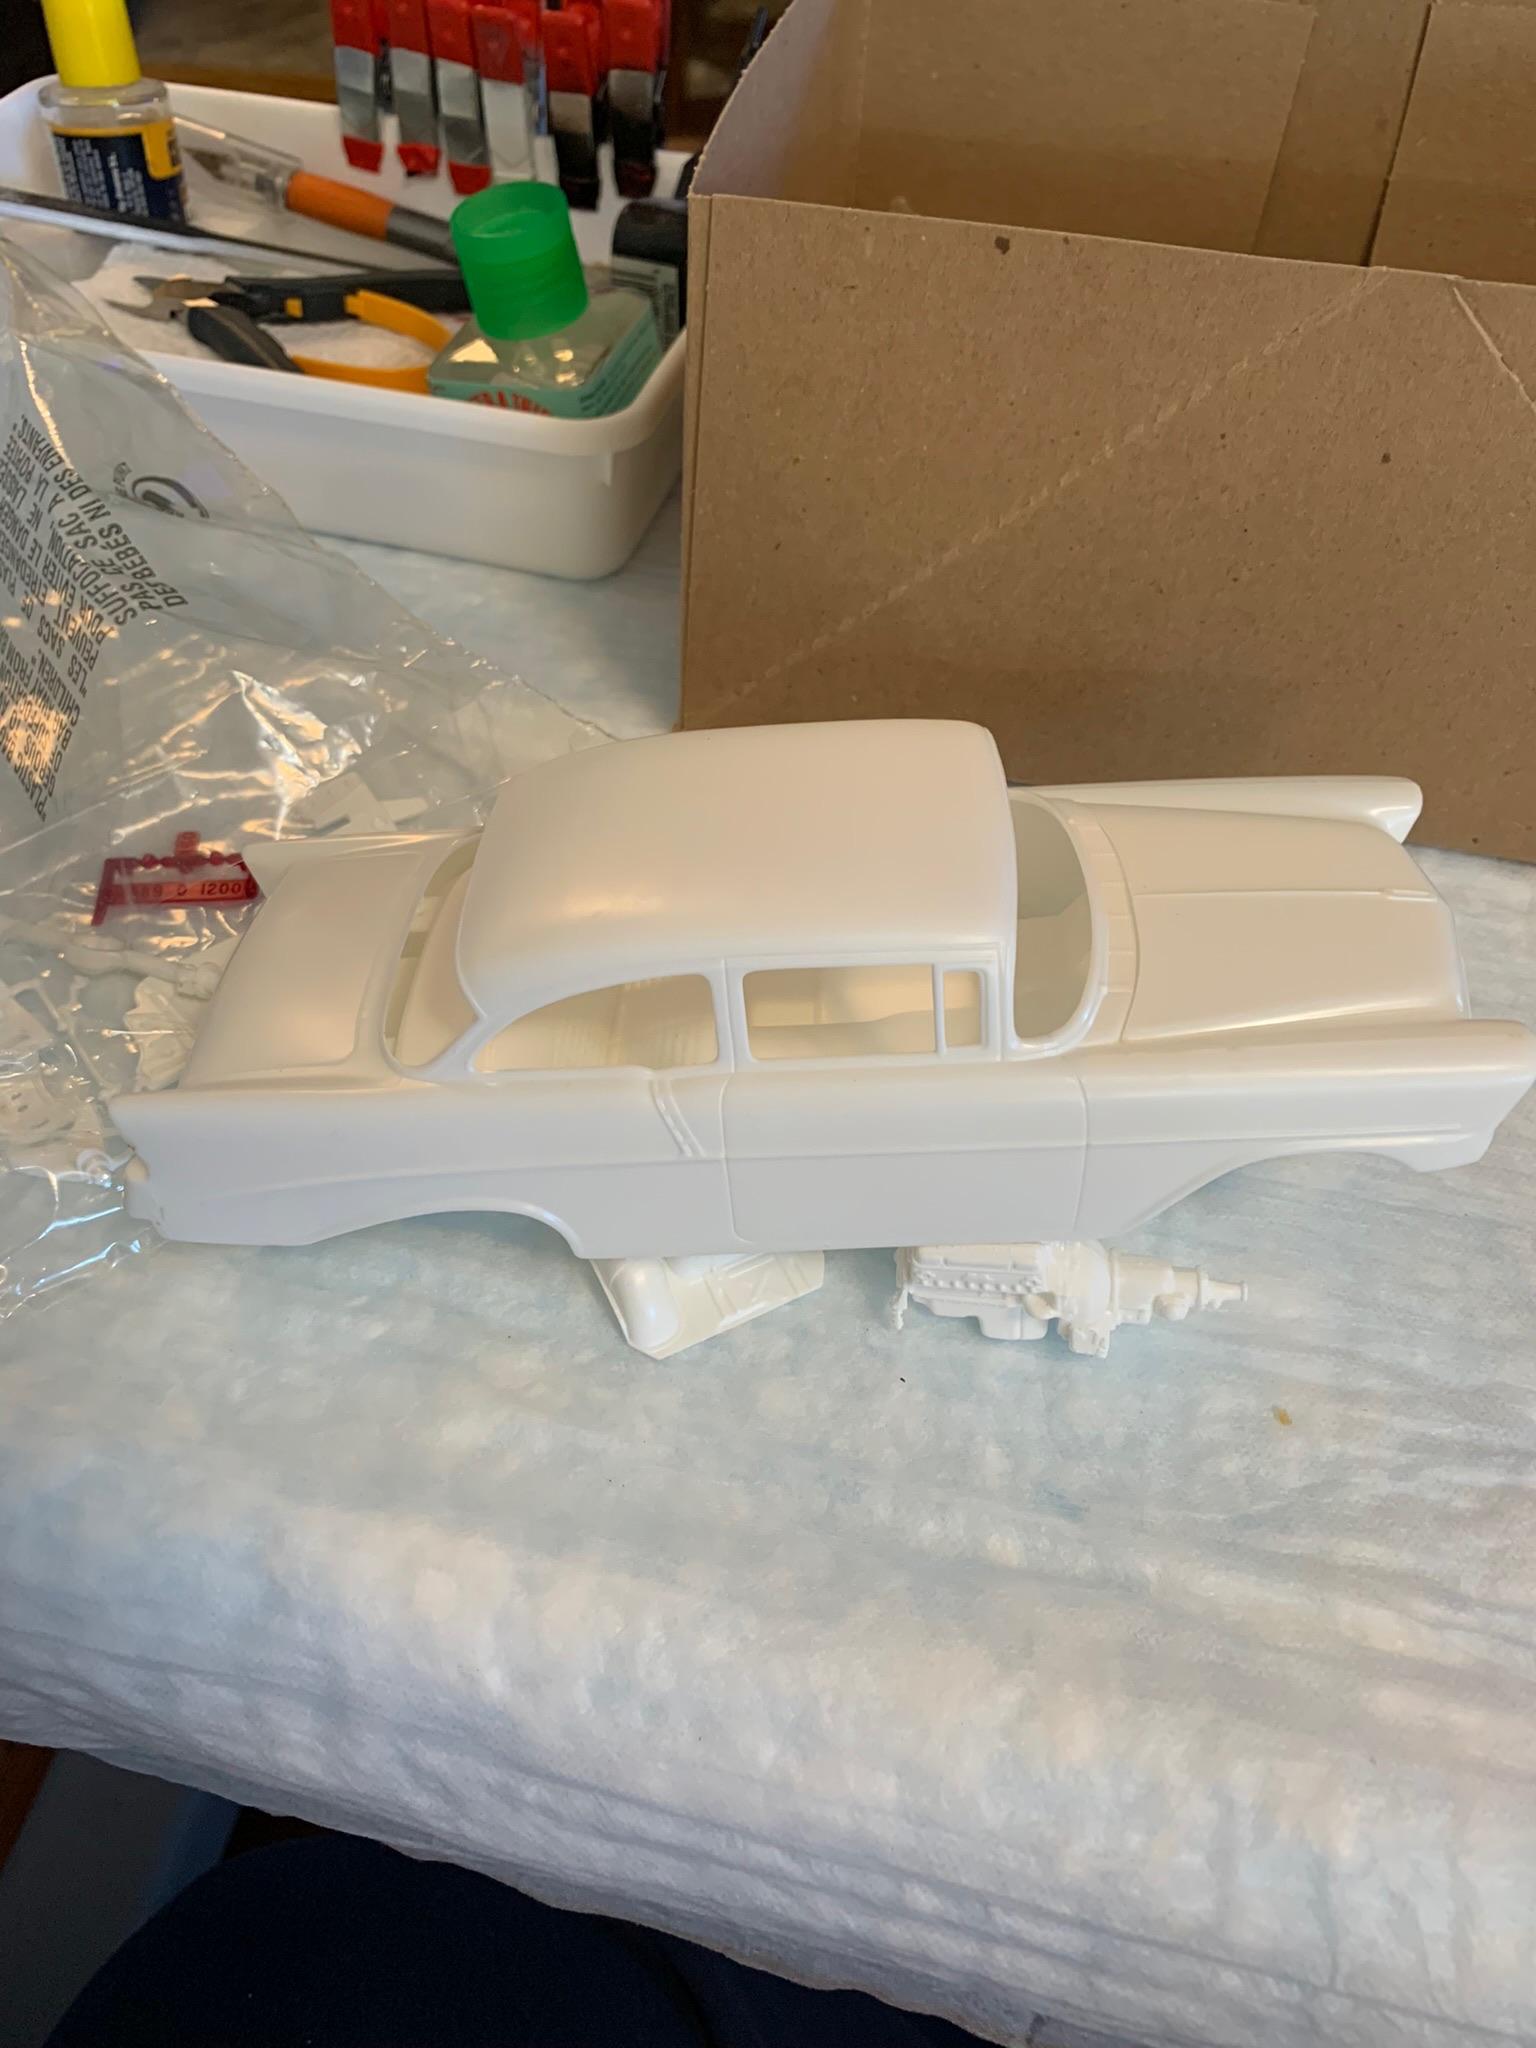
56 Chevy Junior Stocker circa 1960’s
R. Thorne replied to R. Thorne's topic in WIP: Drag Racing Models
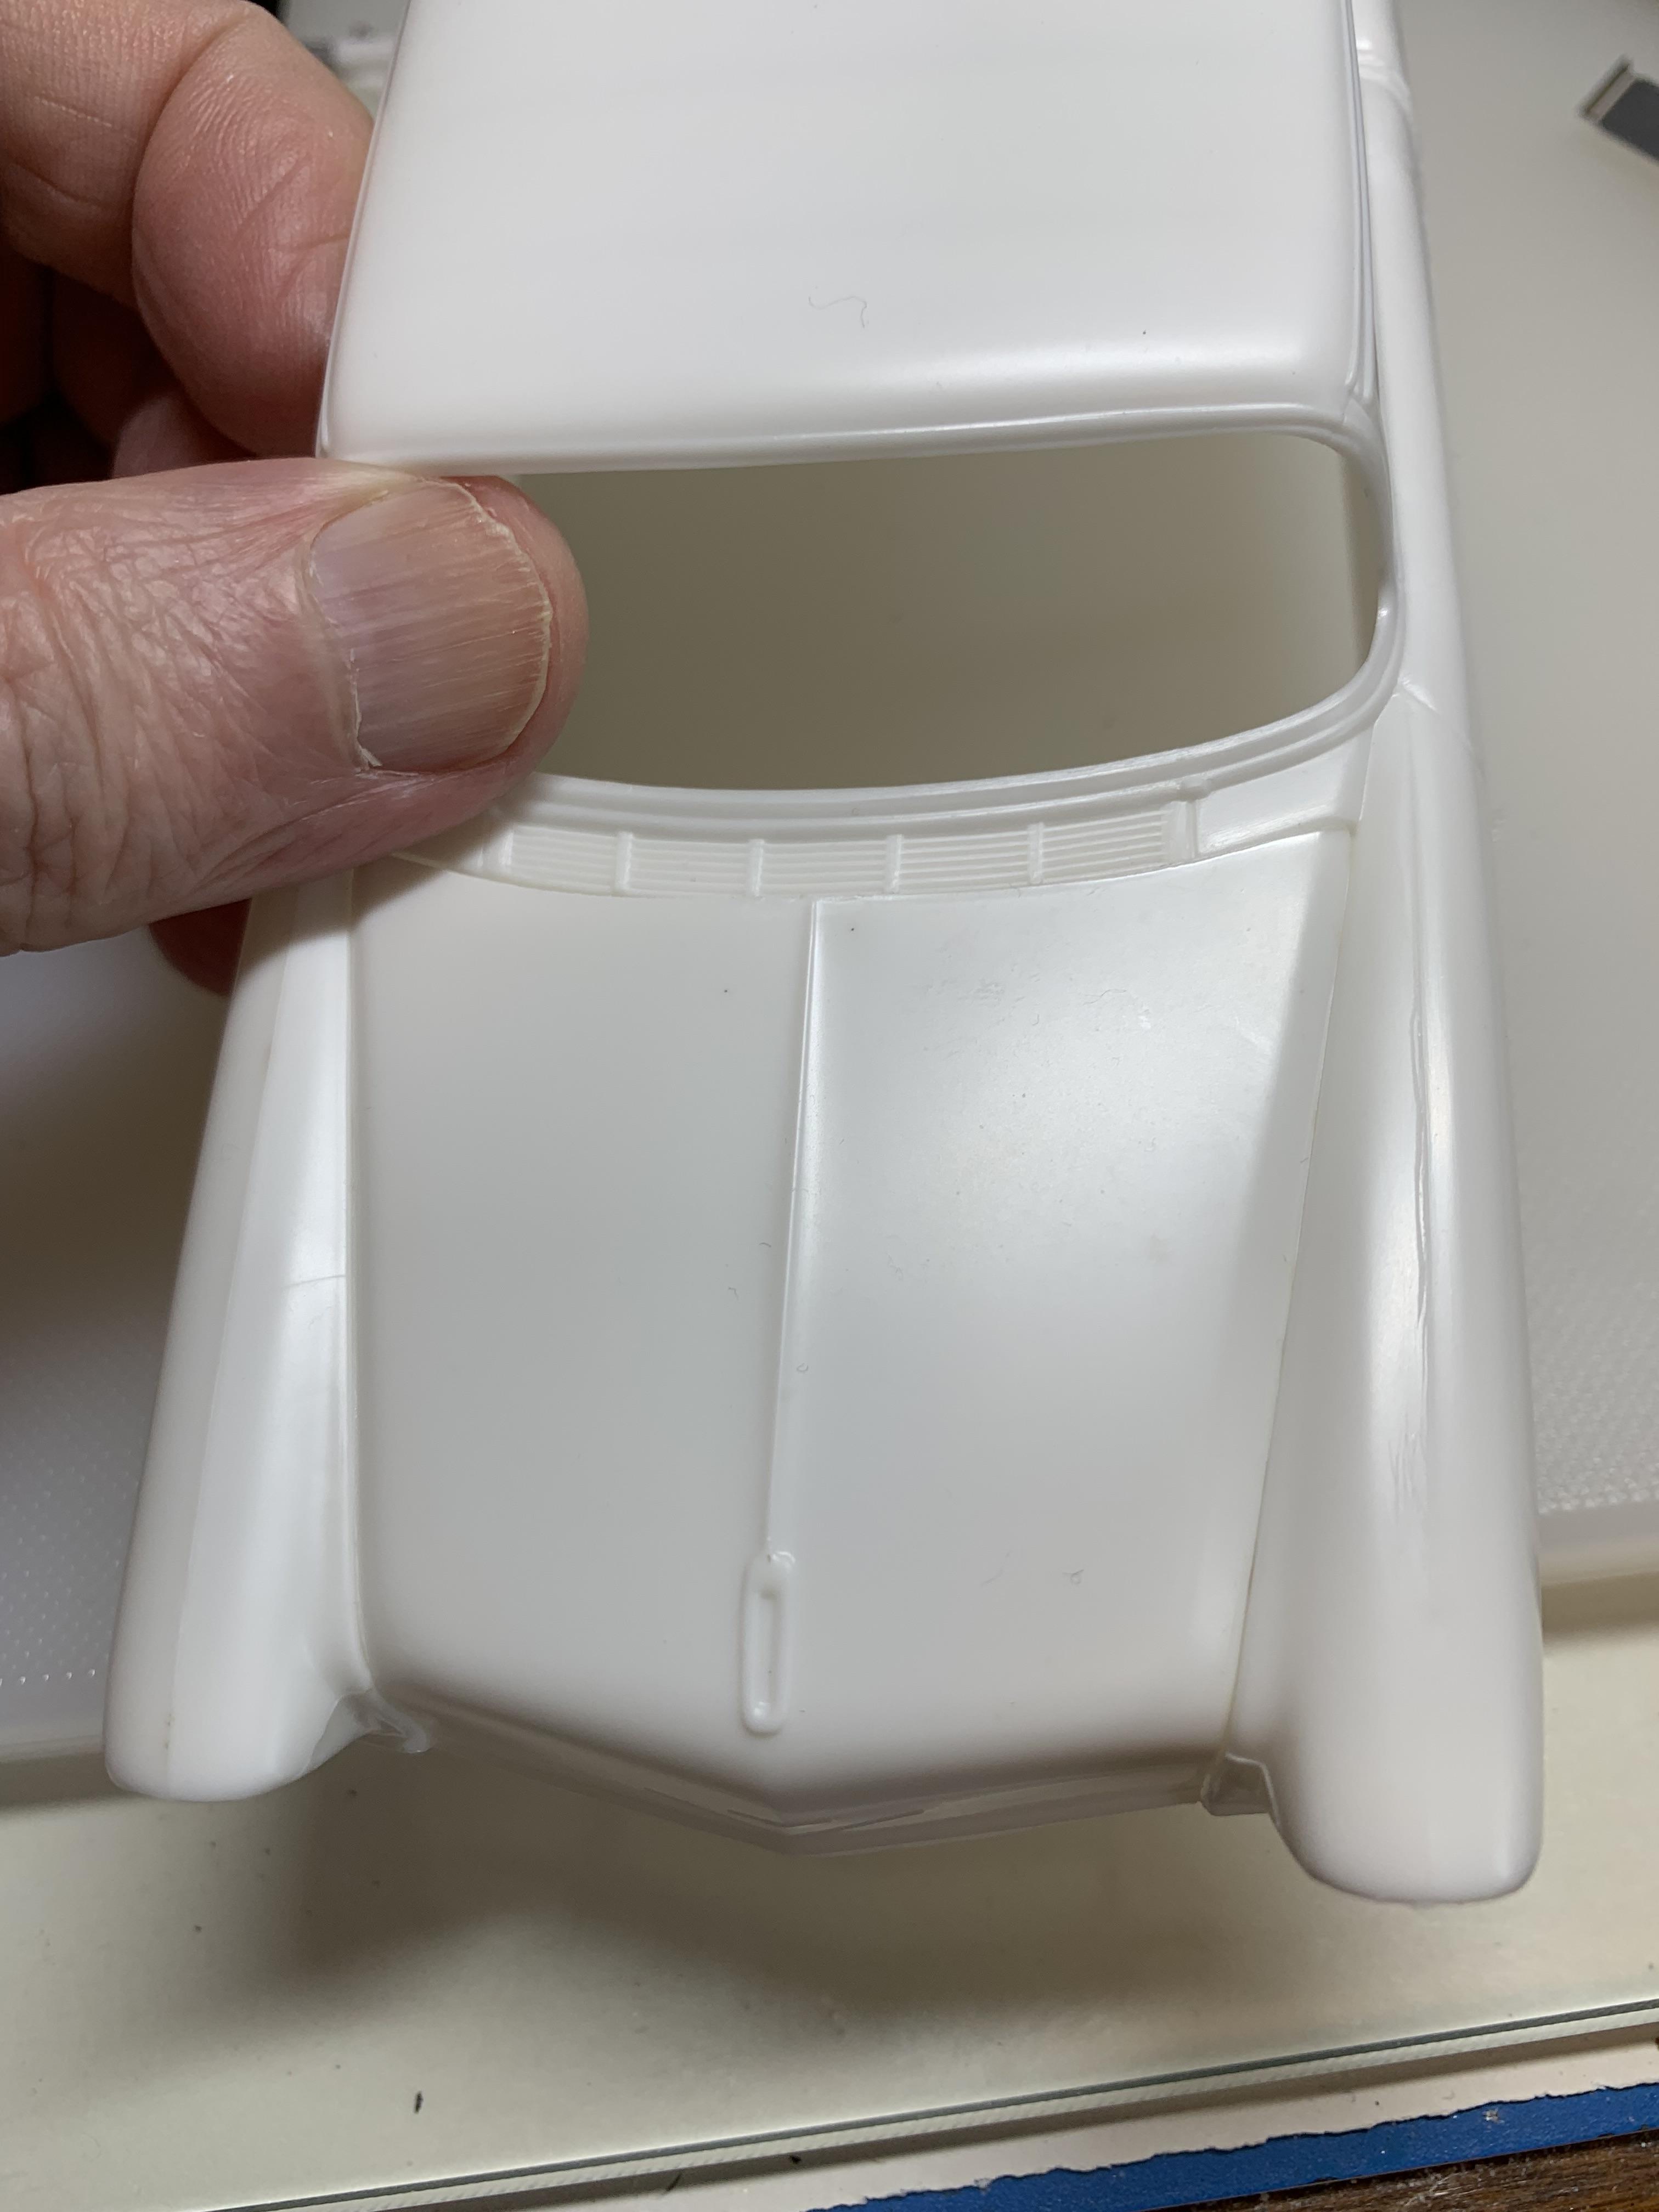
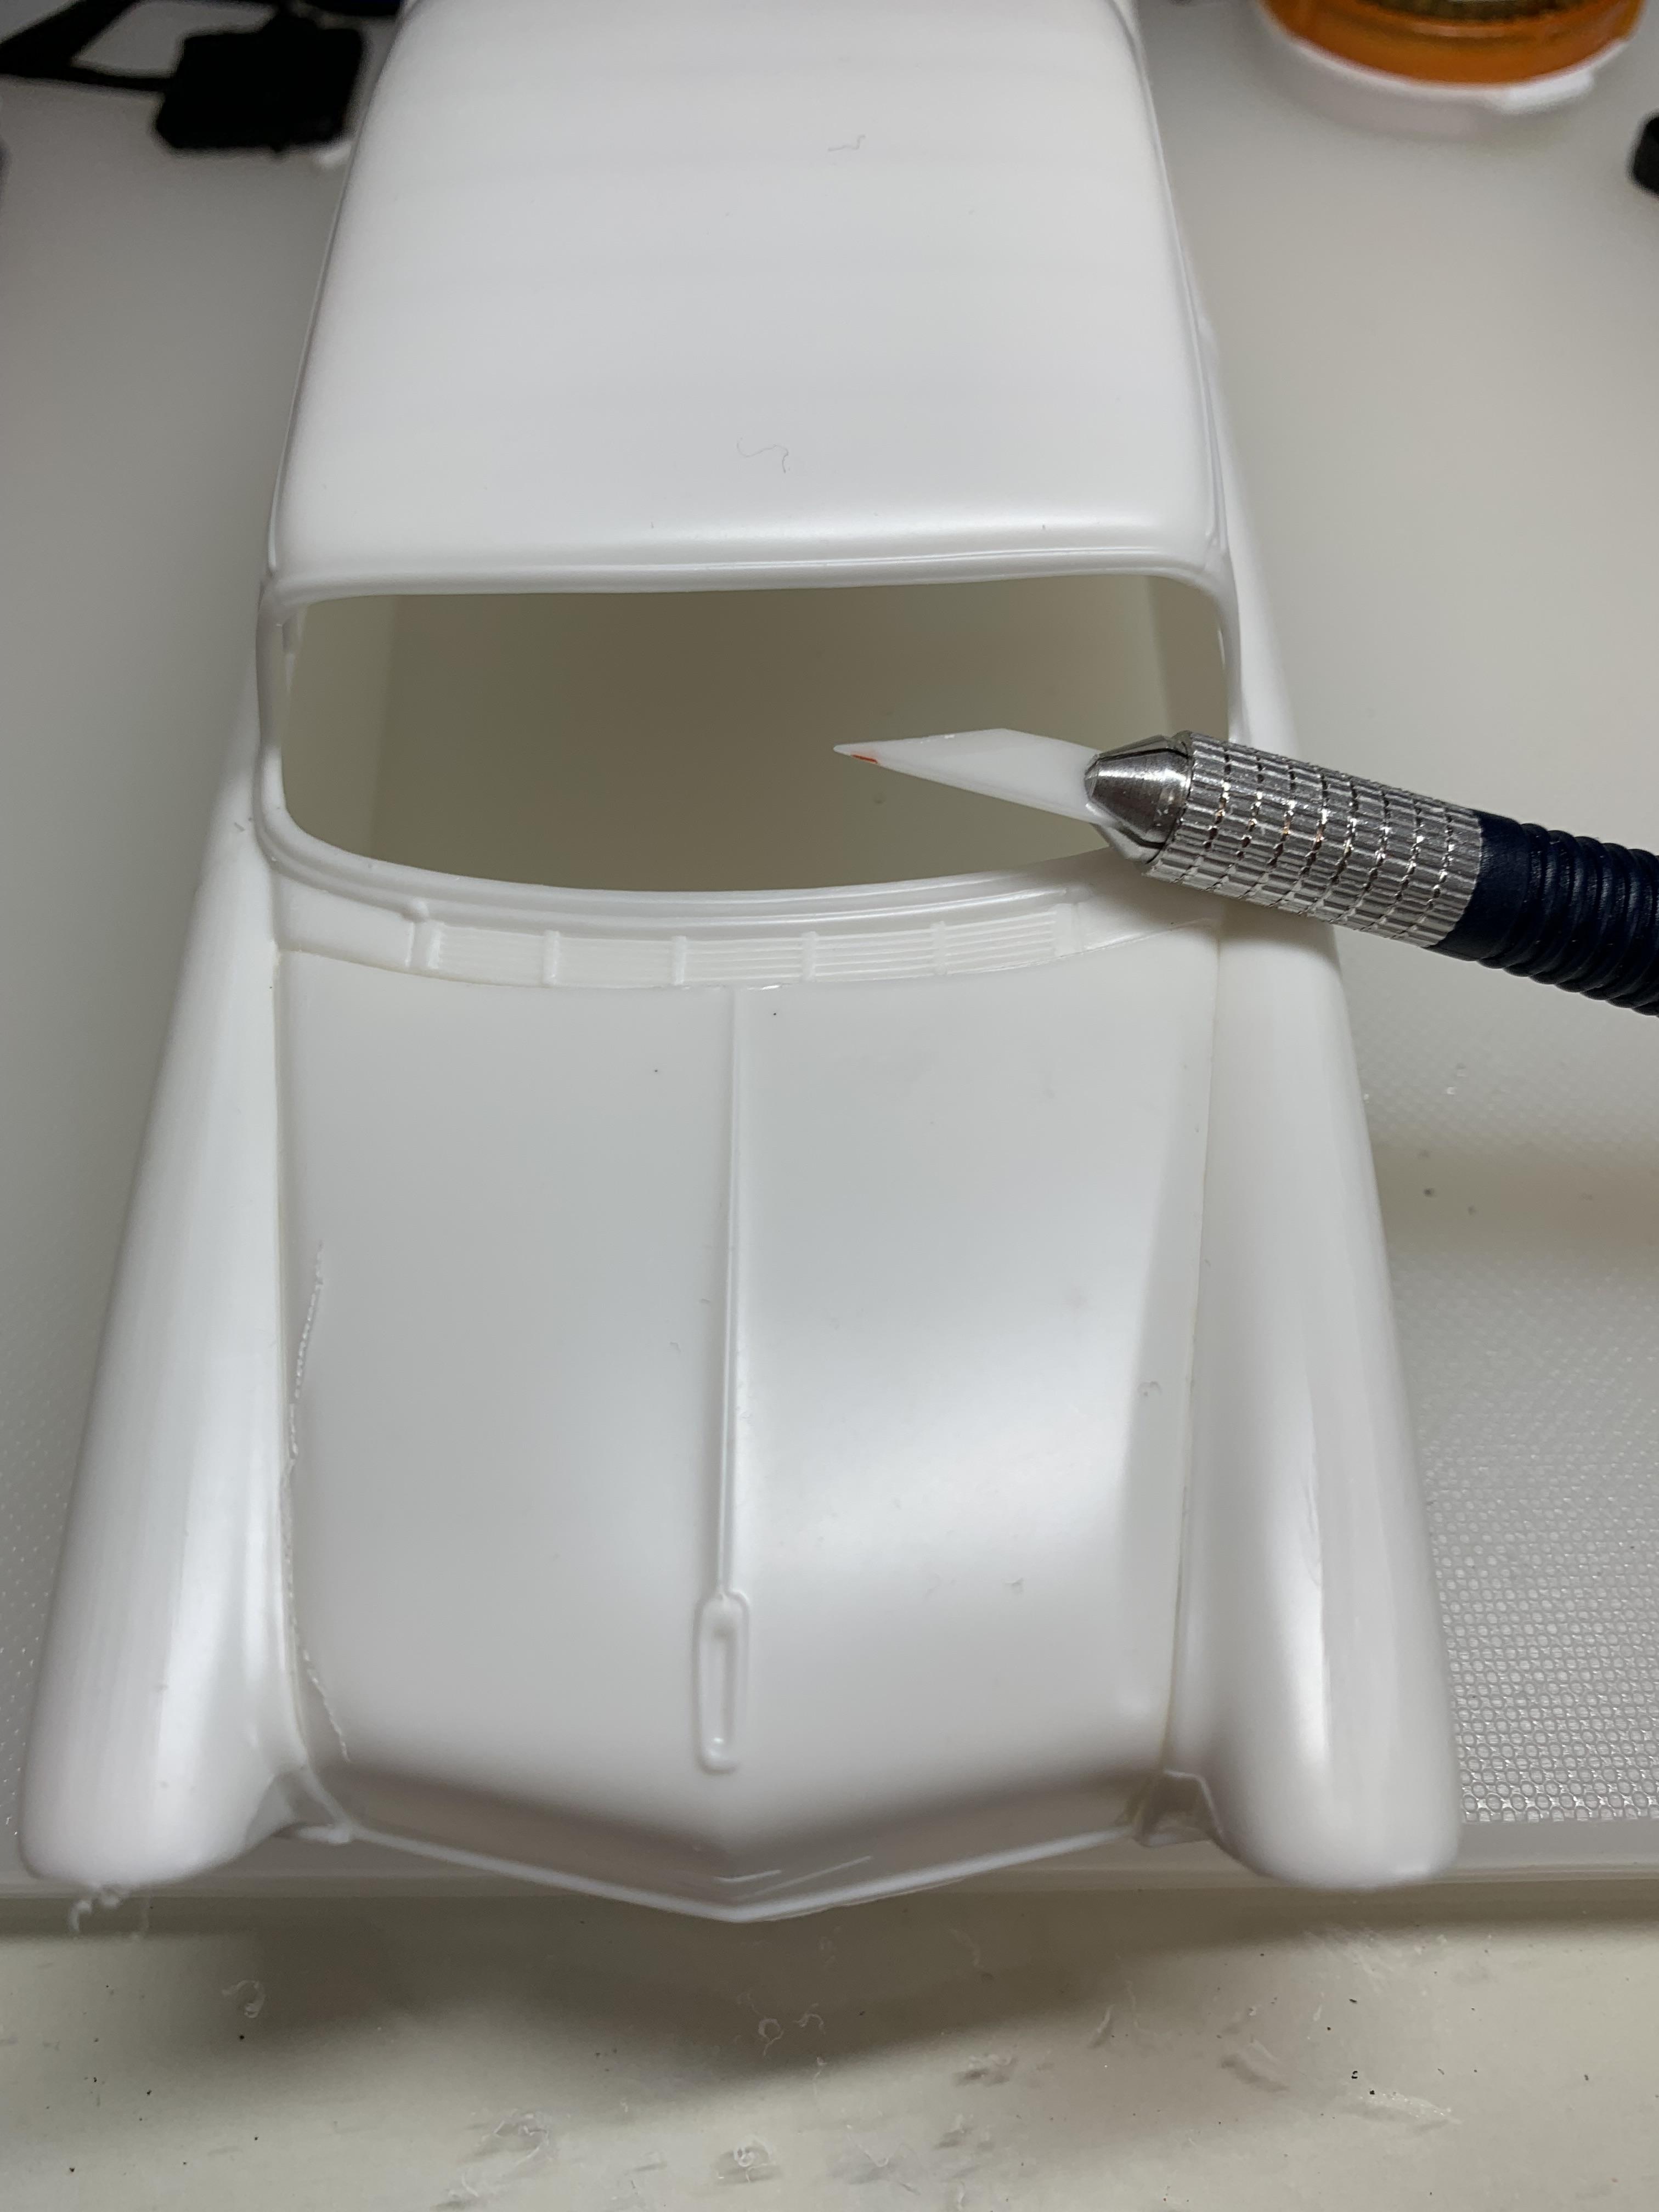
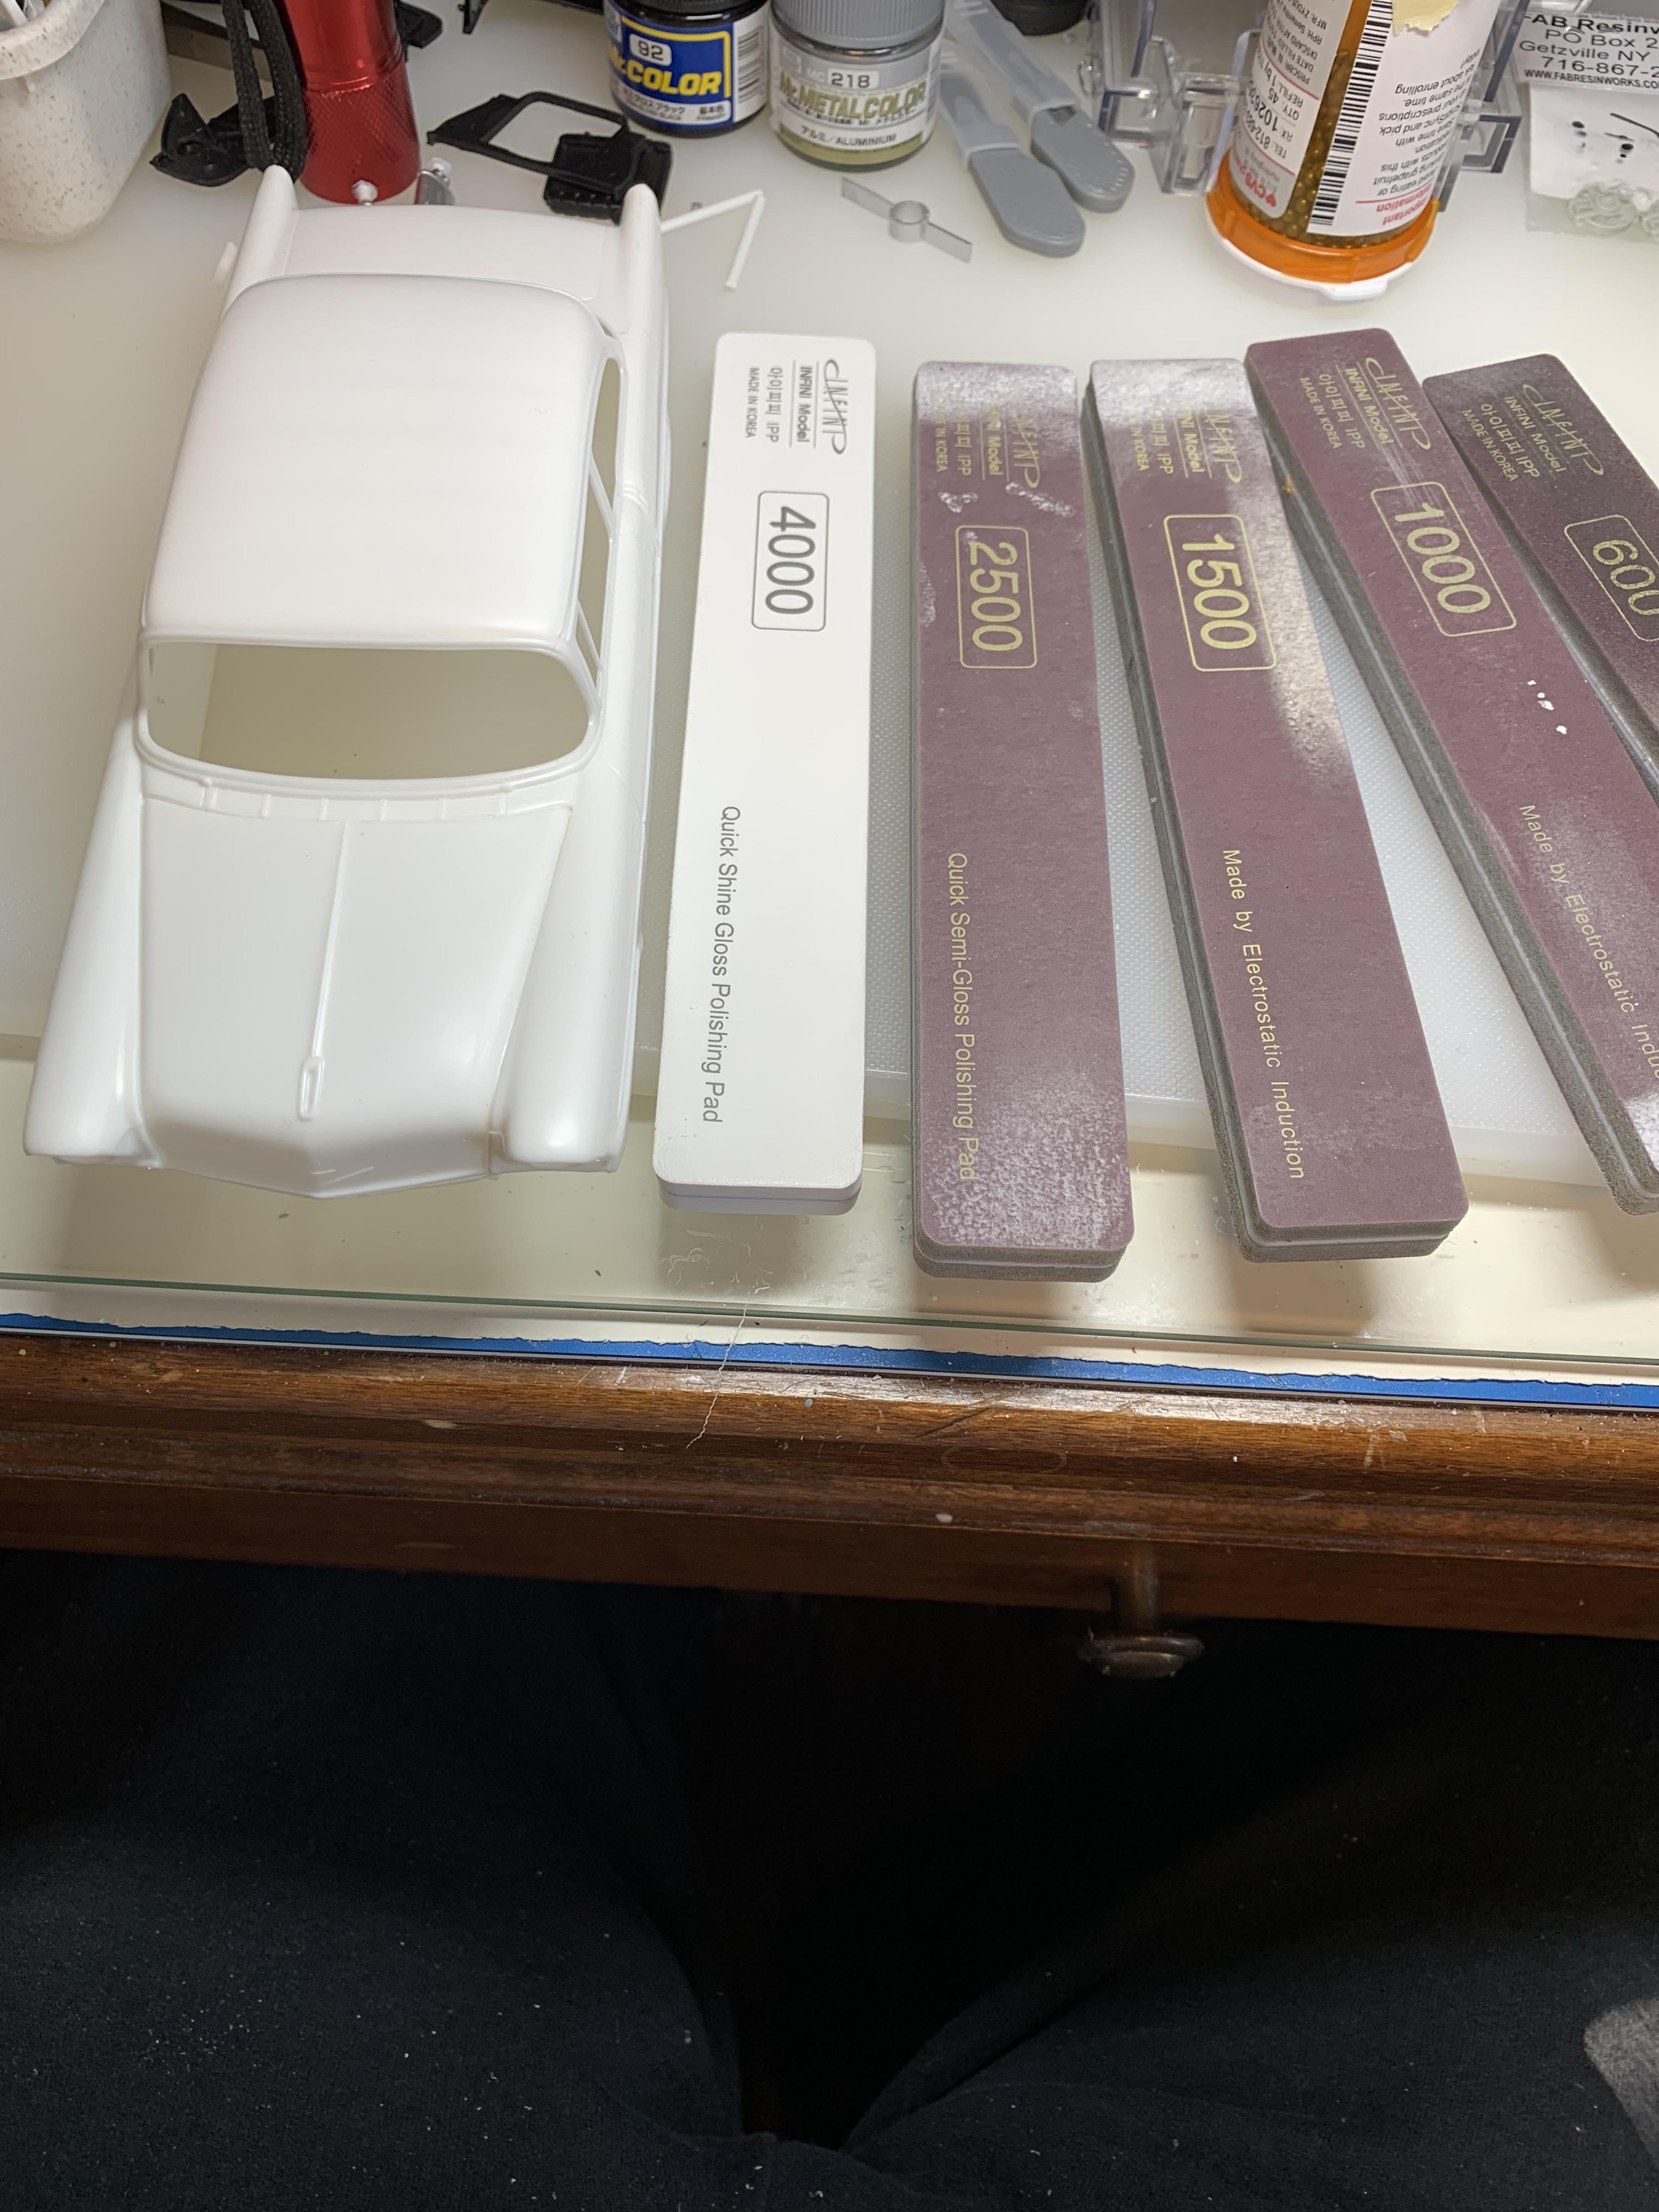
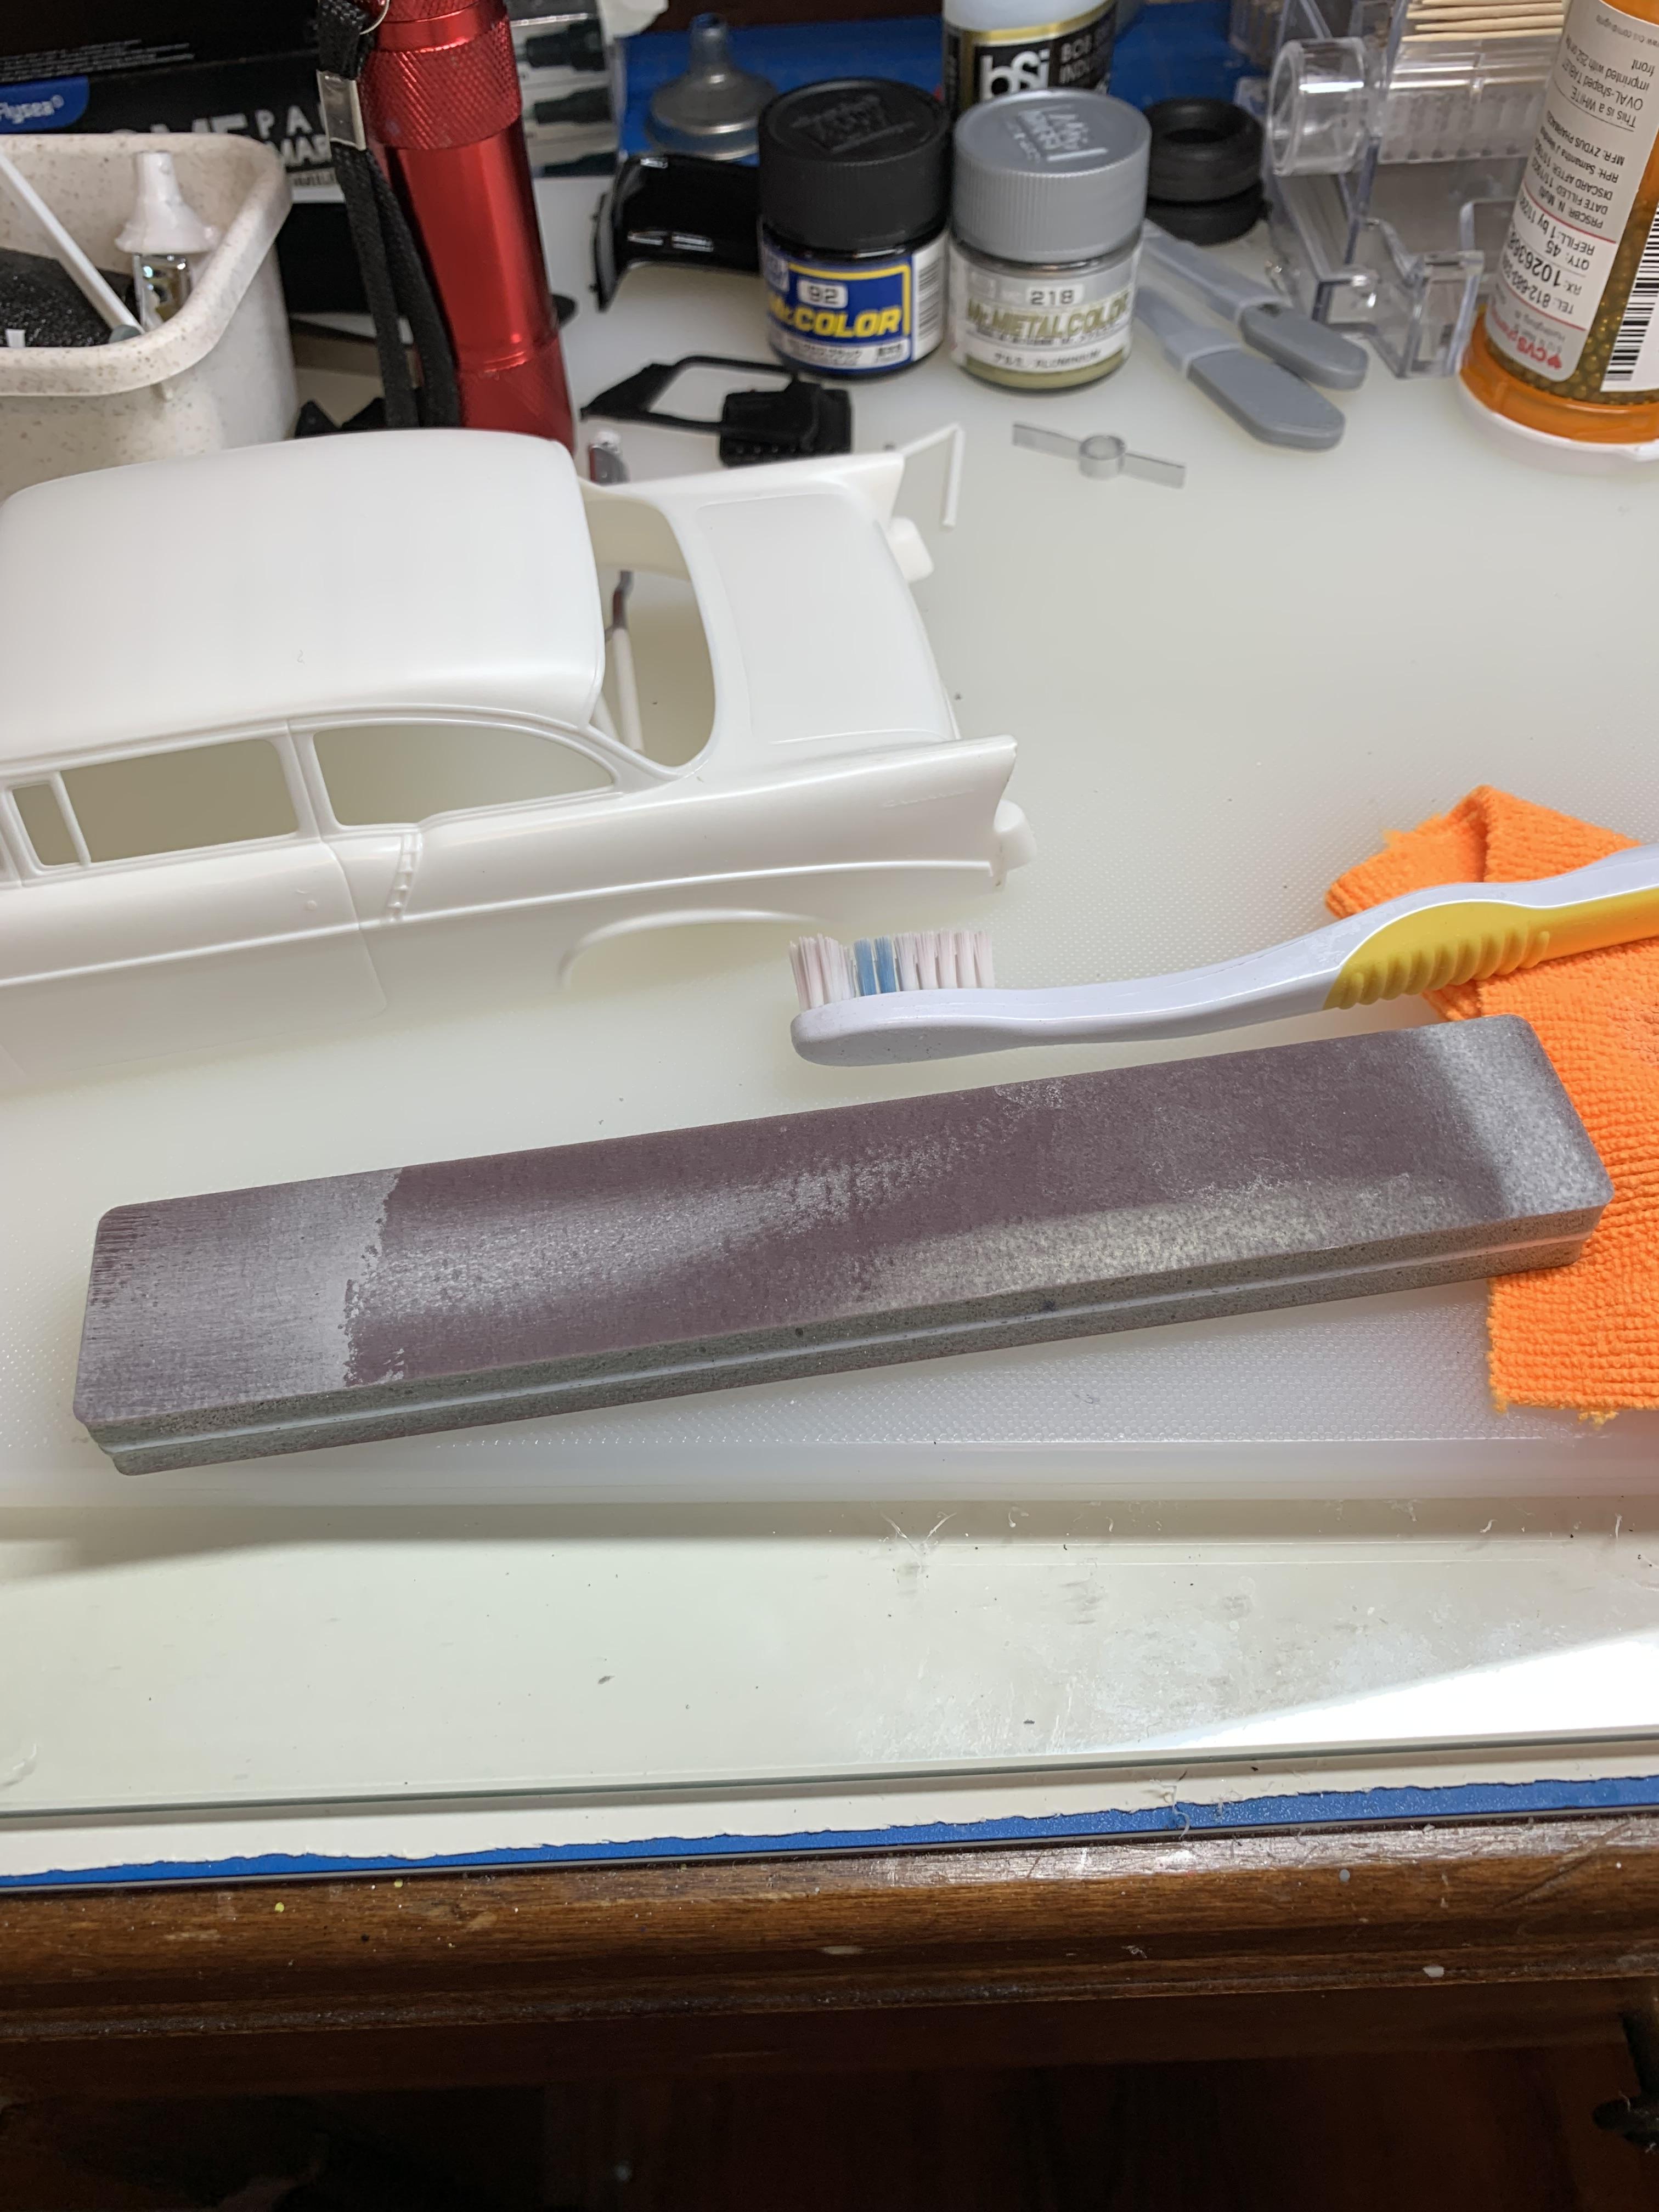
Finally got a little work done. Scraped and sanded the fender seam line and put some primer on .
-
Holloman & McKinney 57 Chevy C/MP circa 1964
R. Thorne replied to R. Thorne's topic in WIP: Drag Racing Models
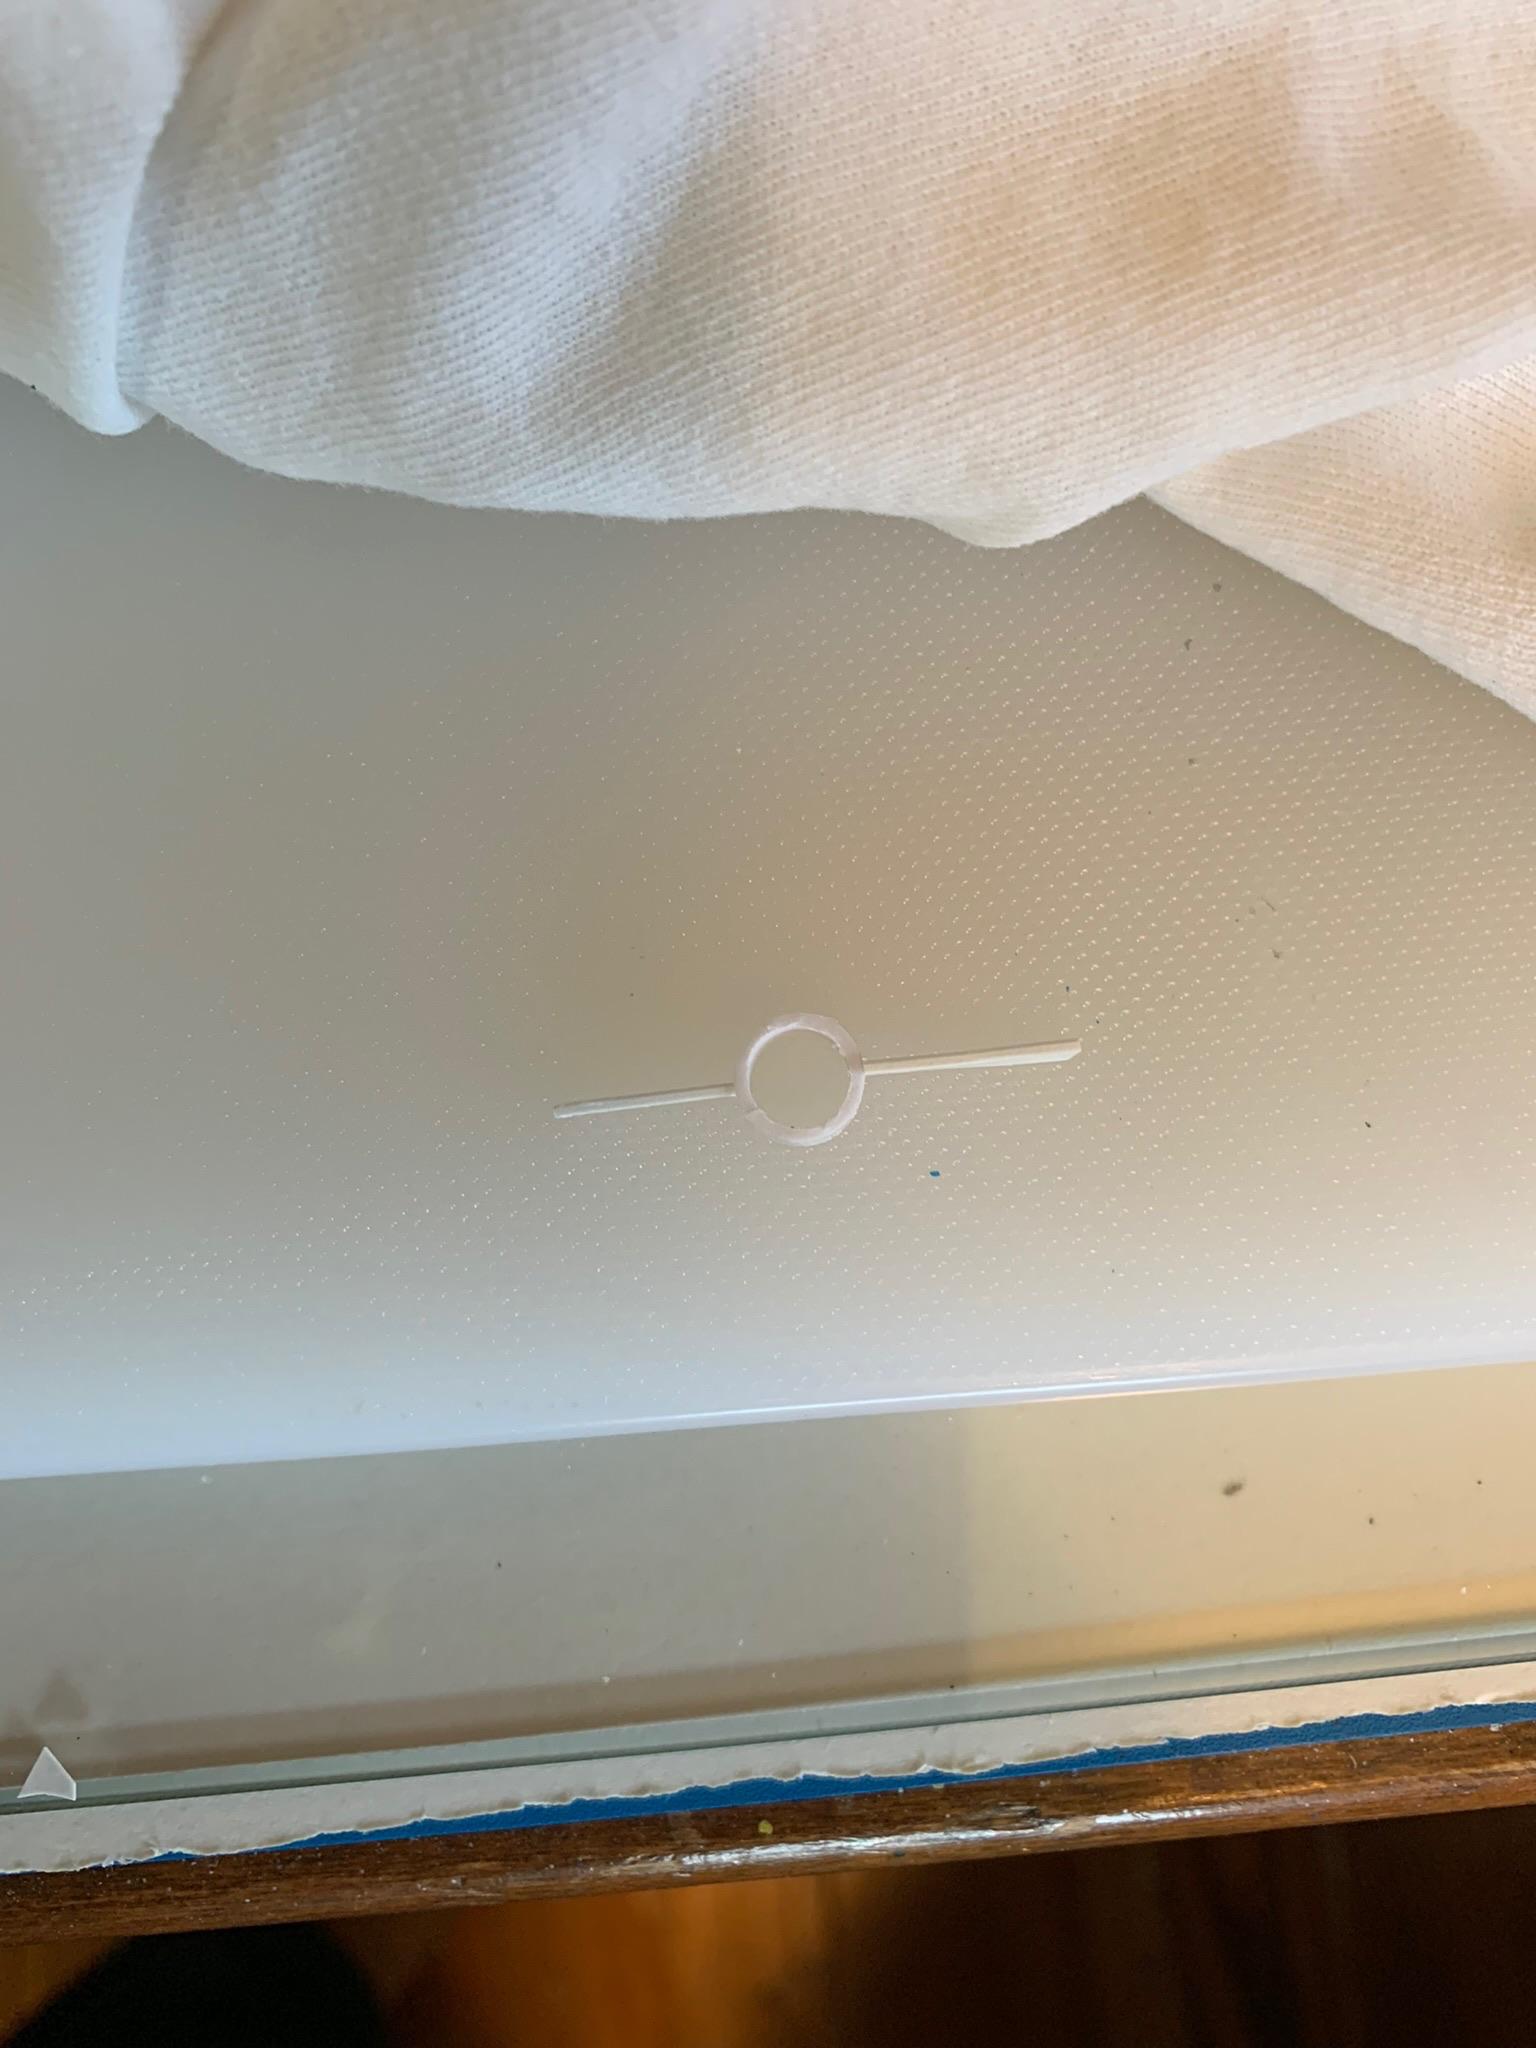
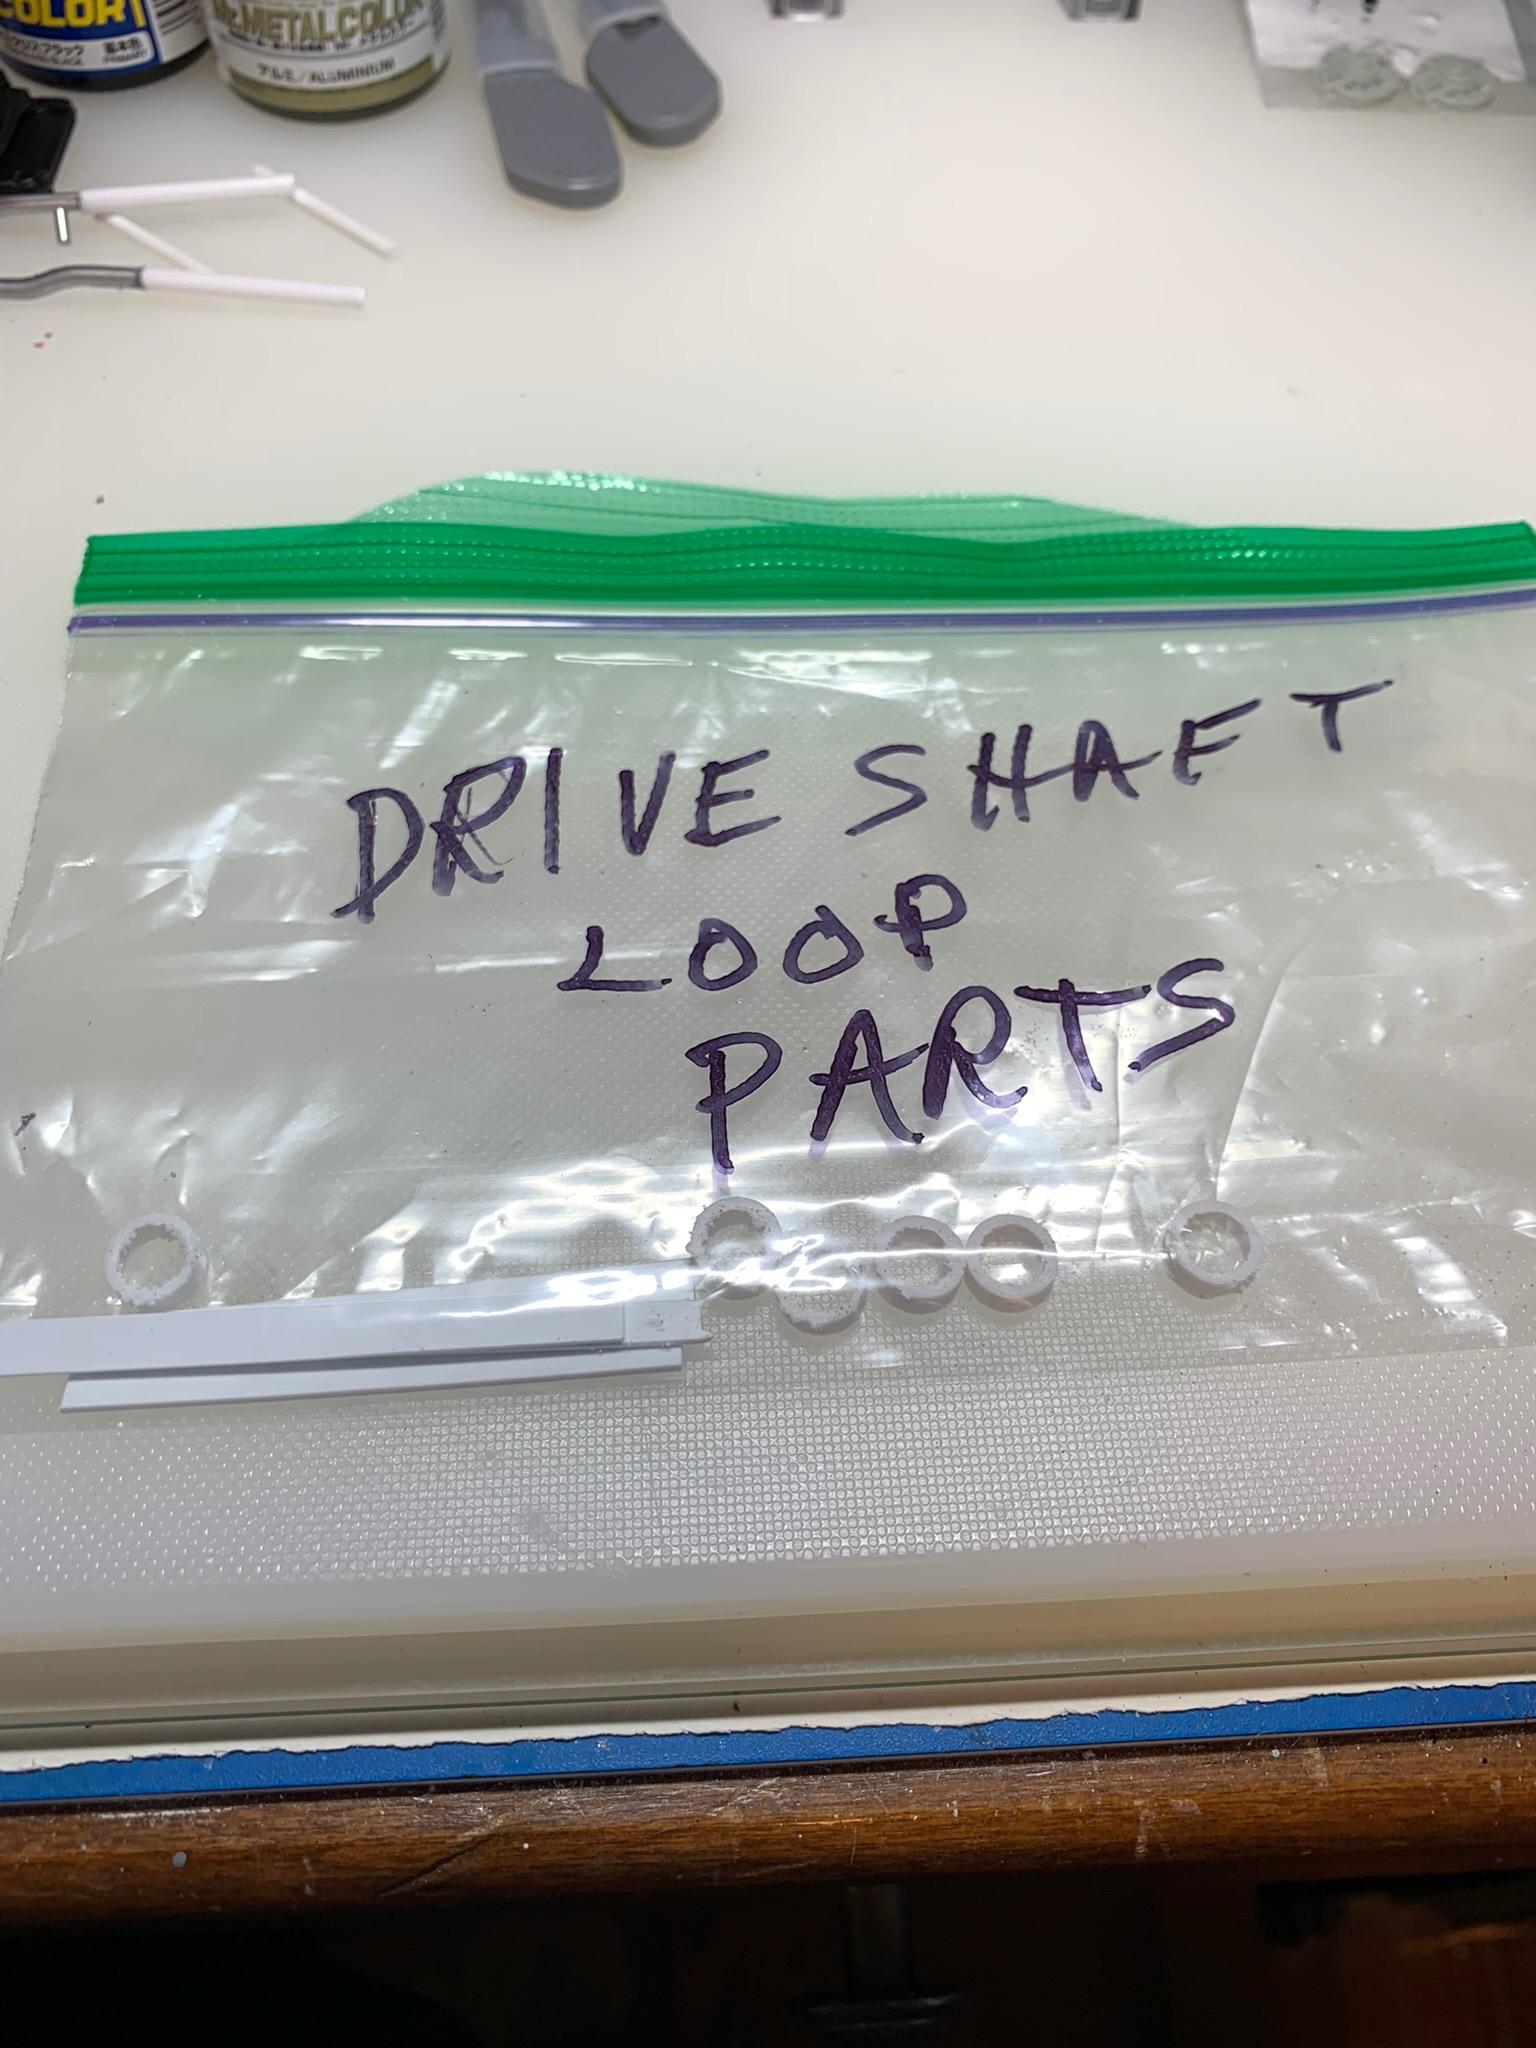
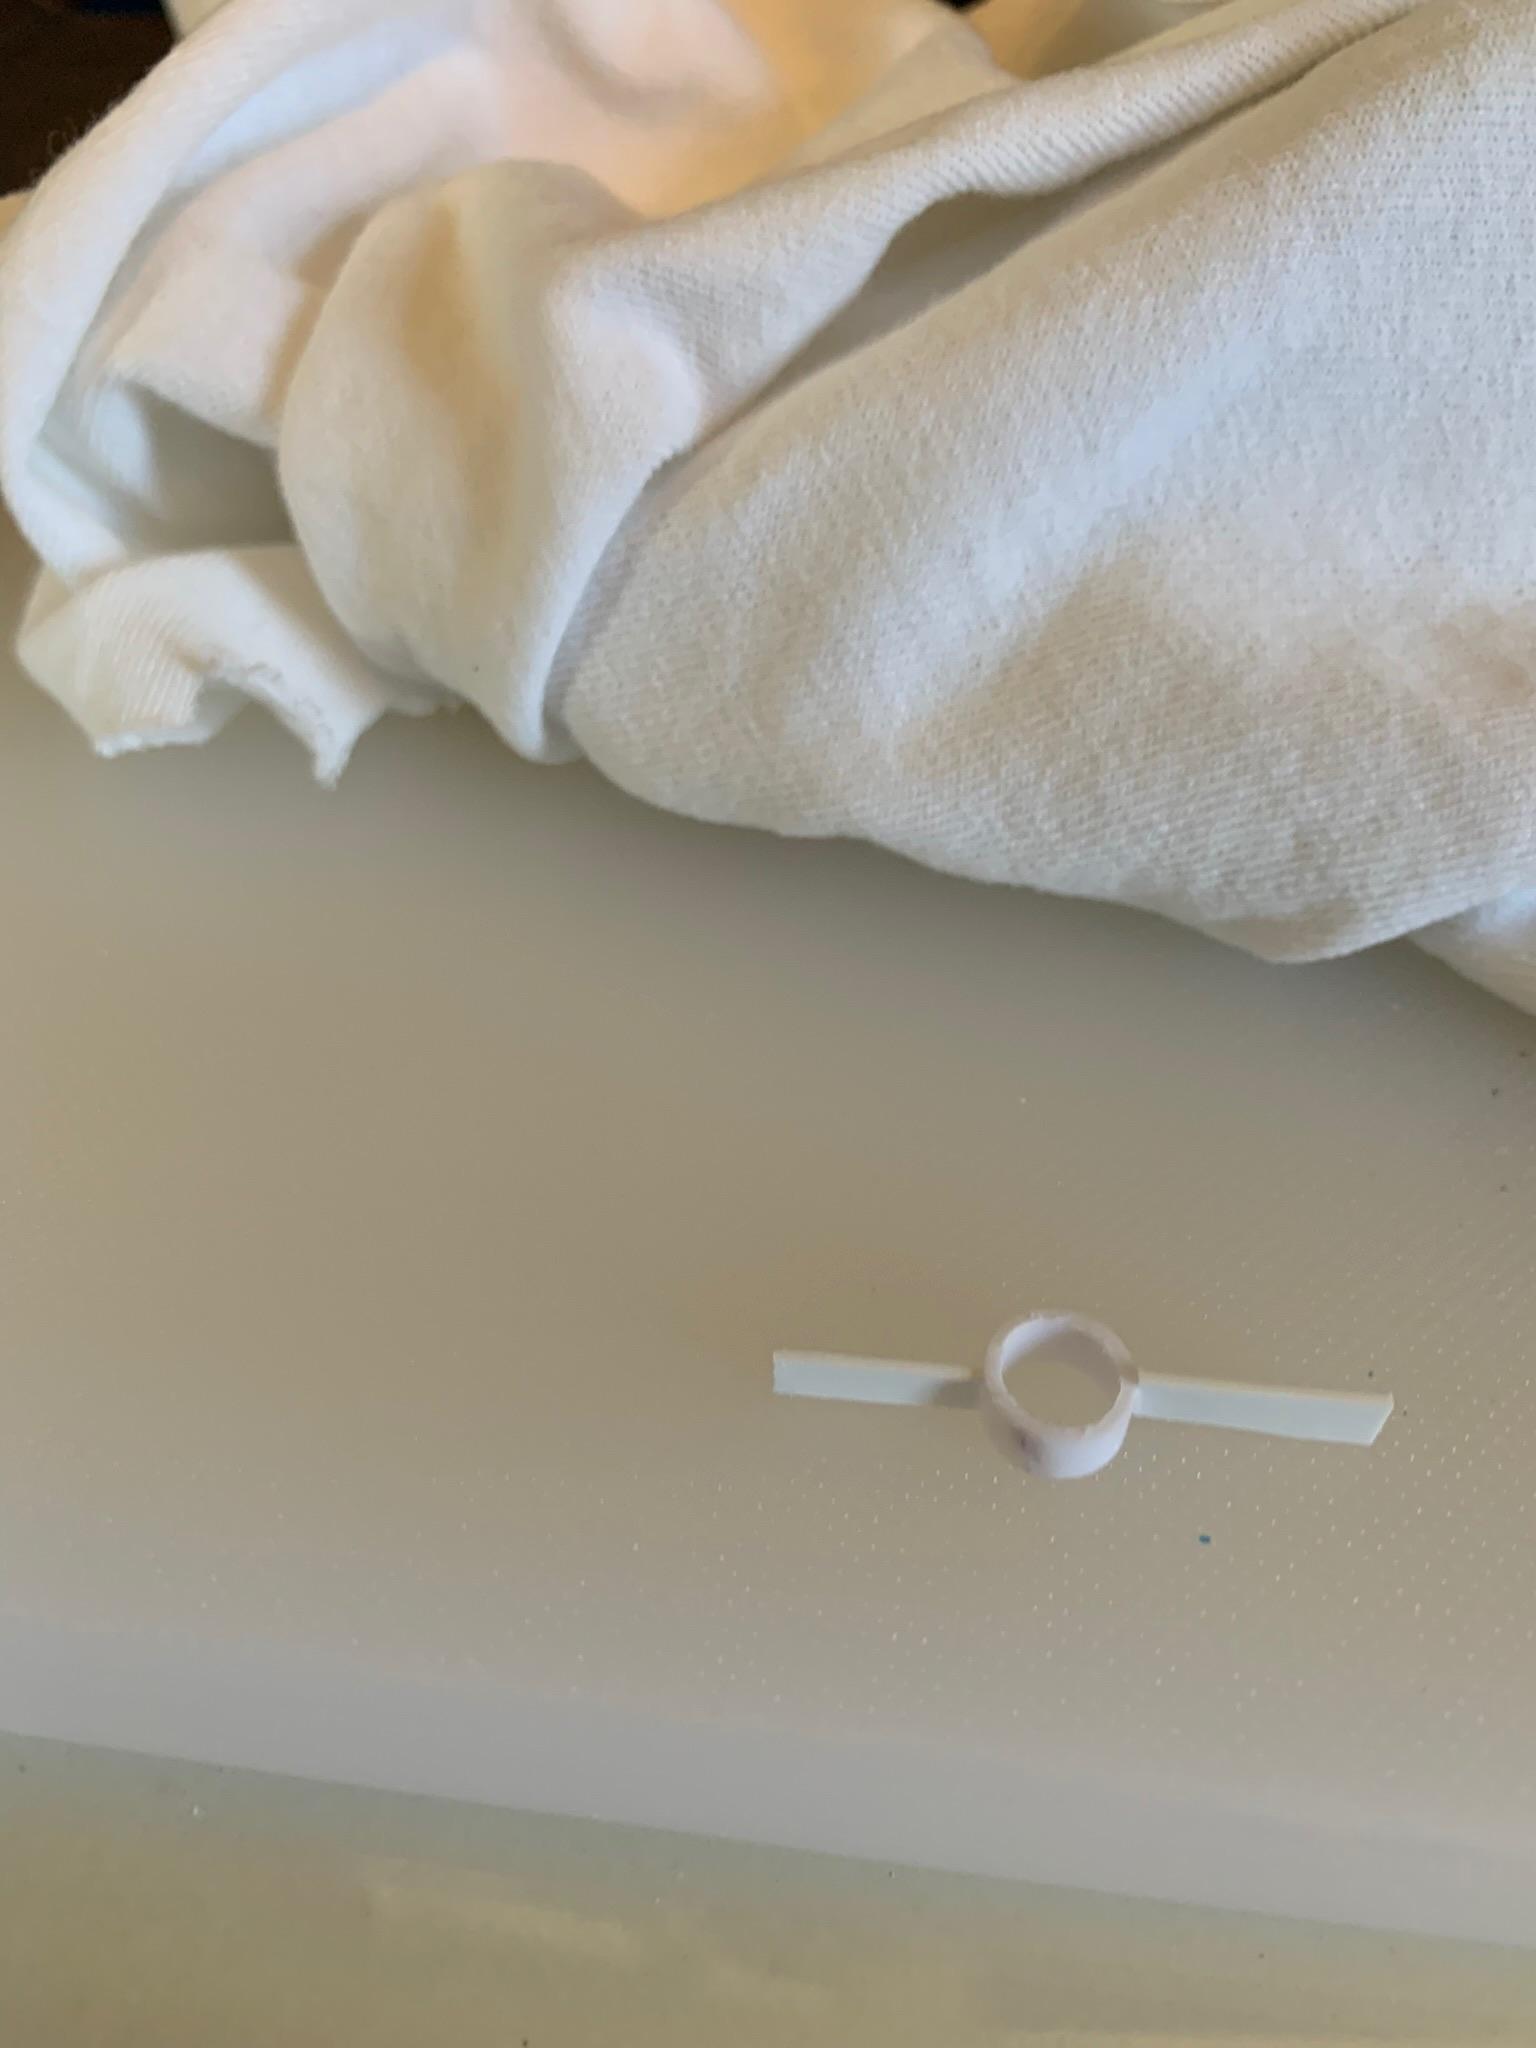
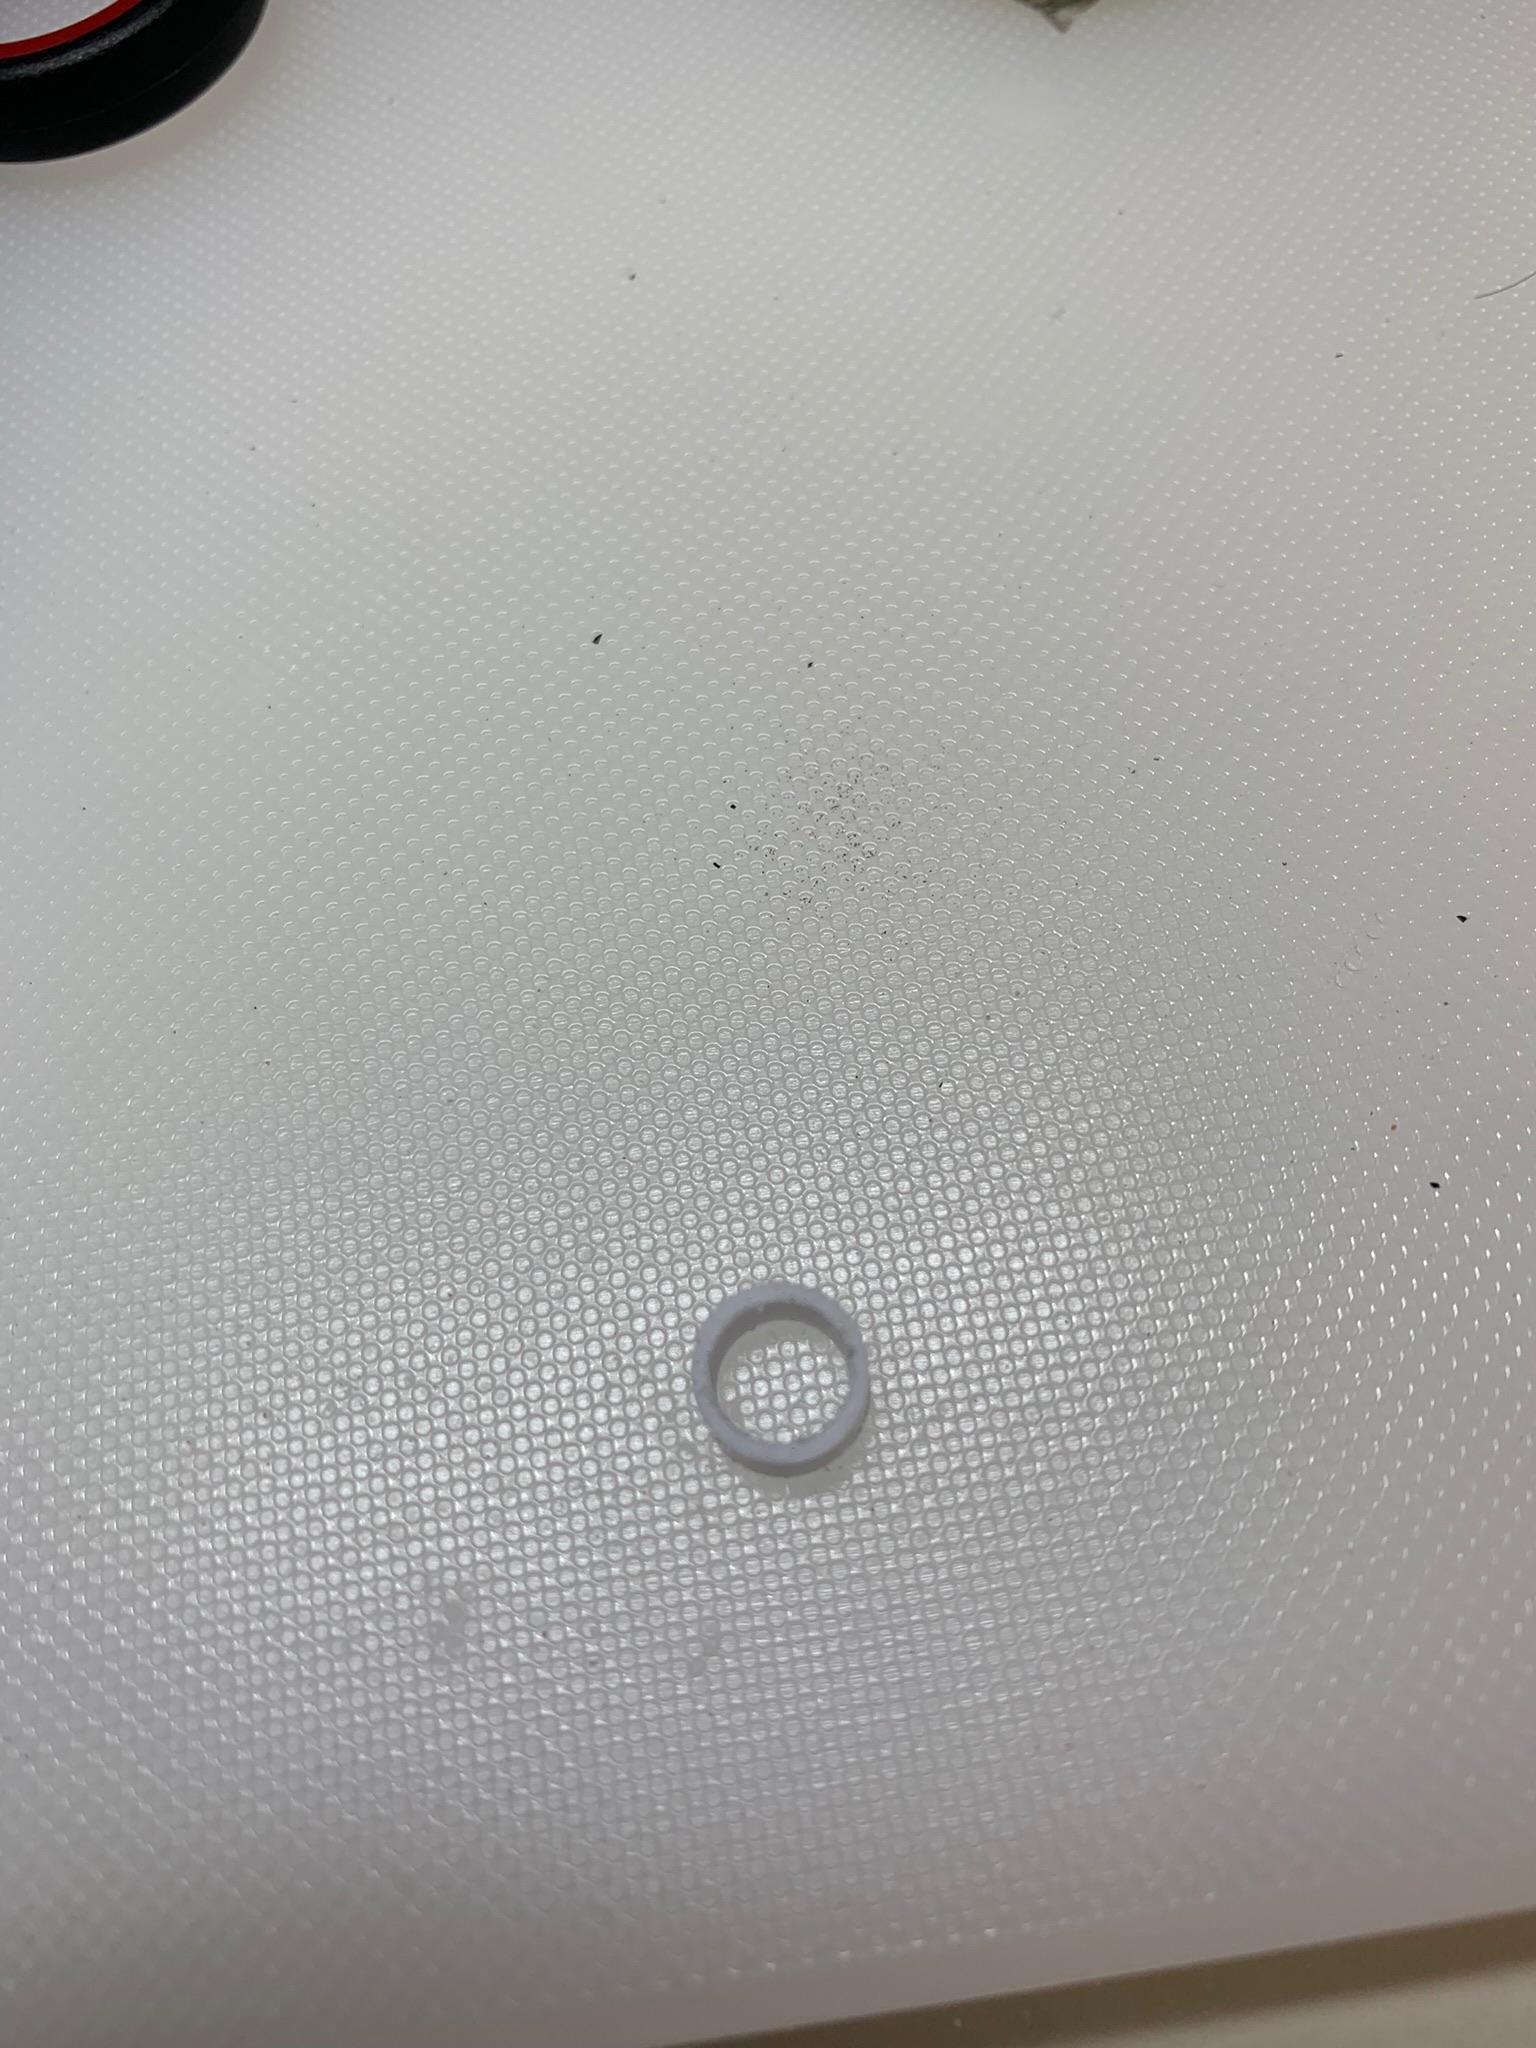
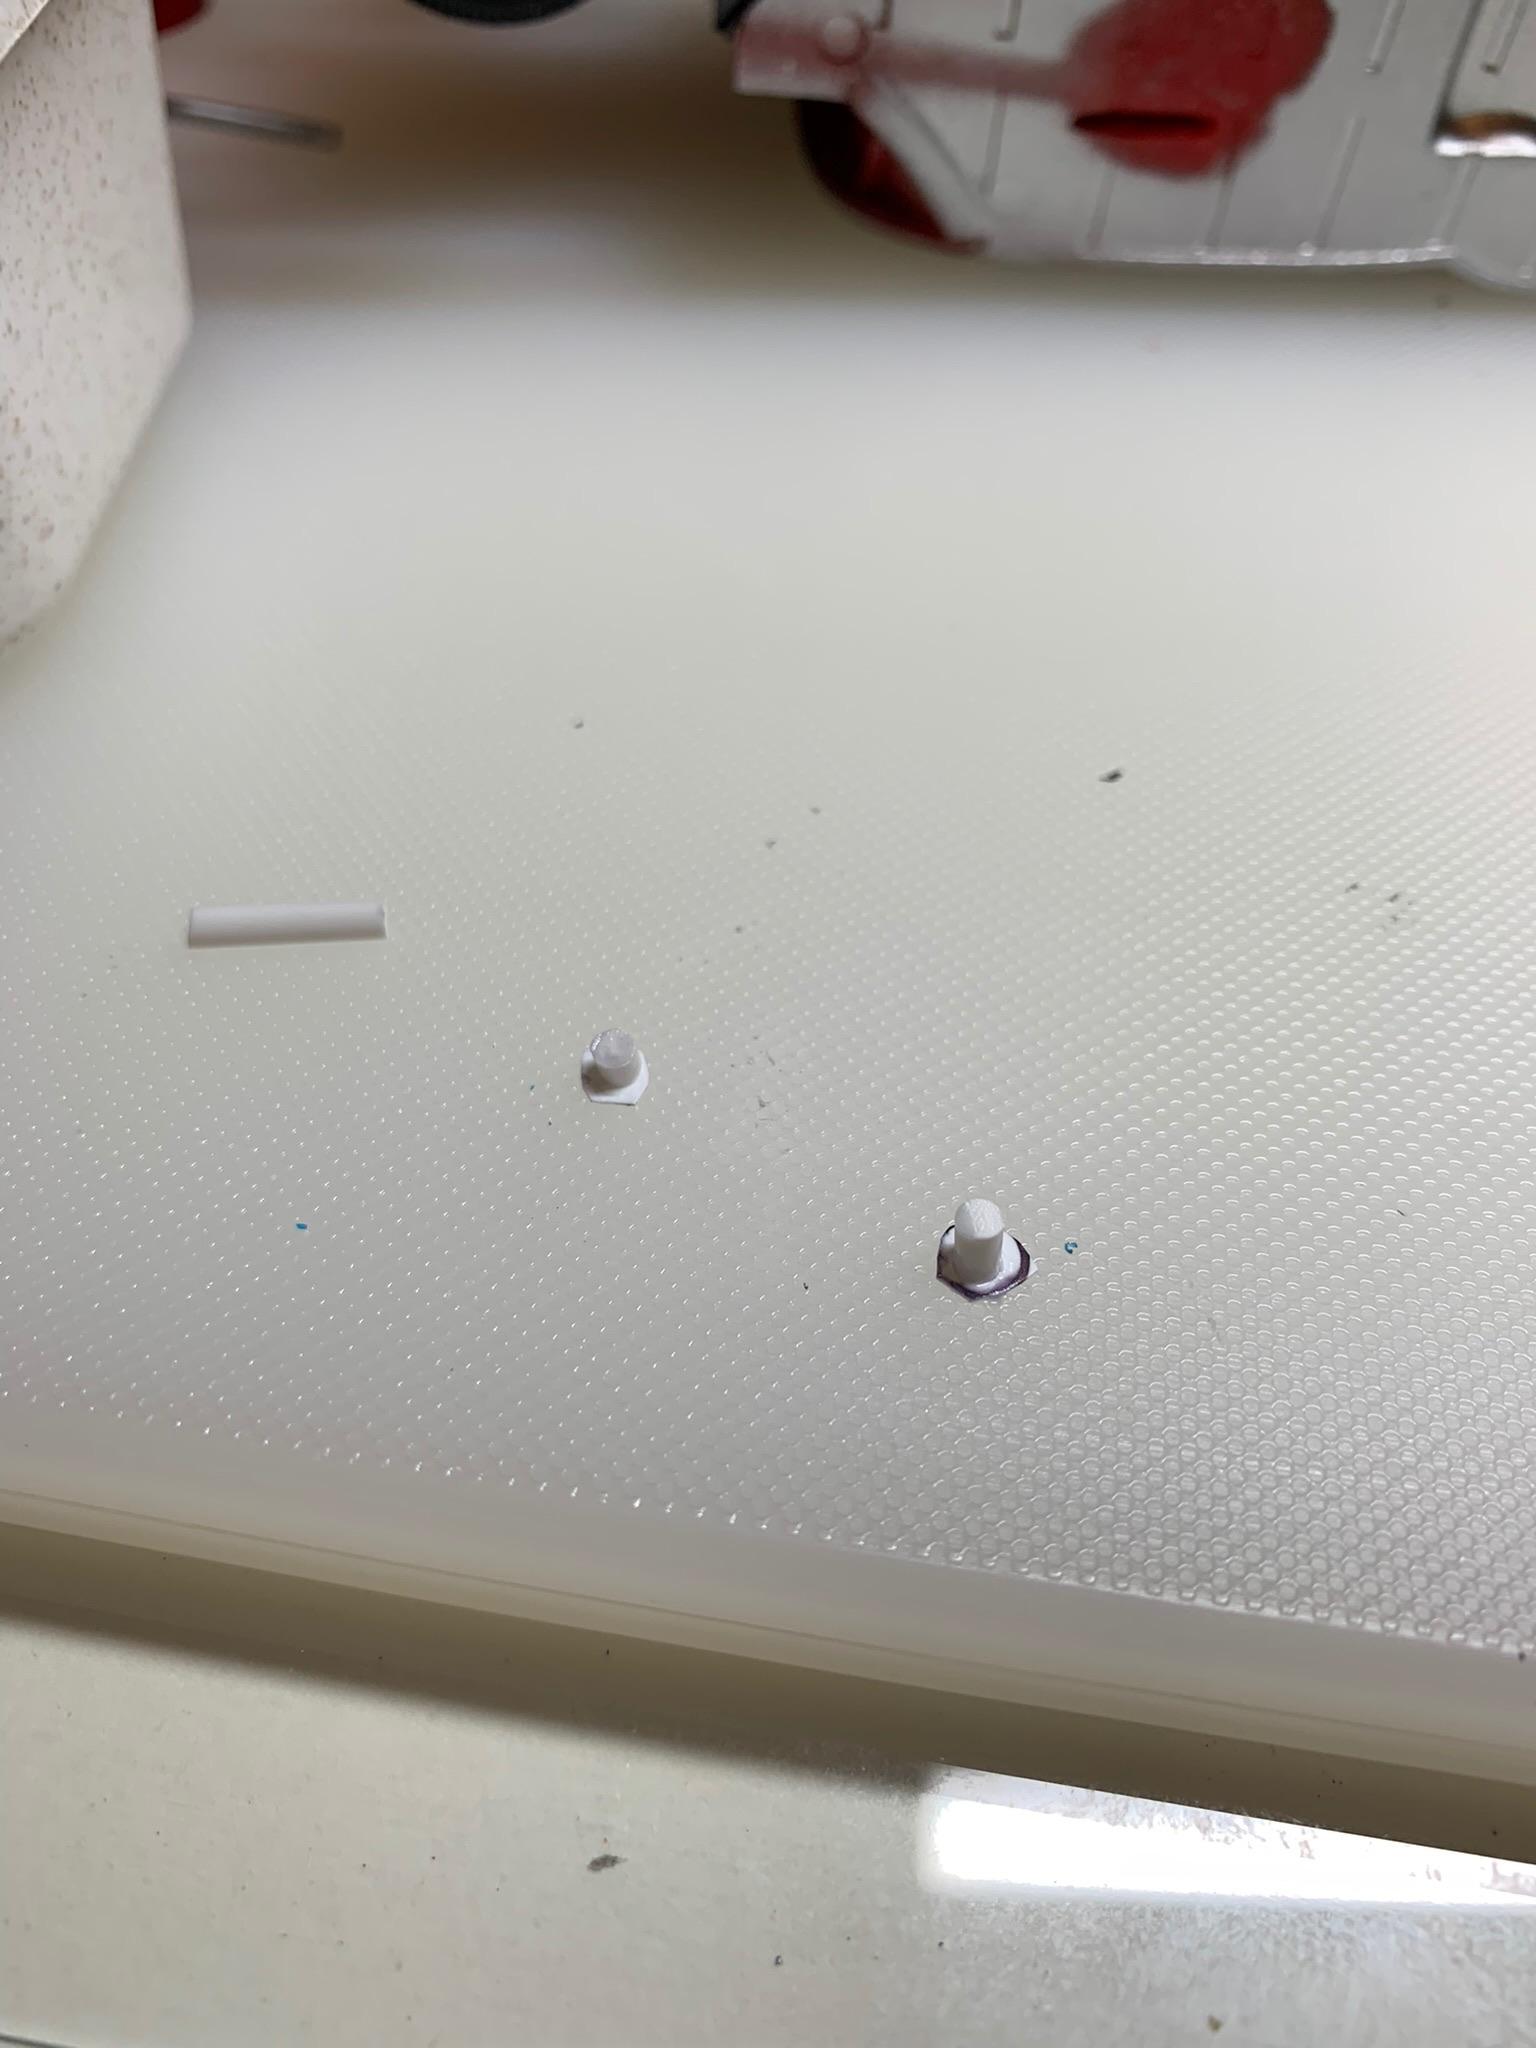
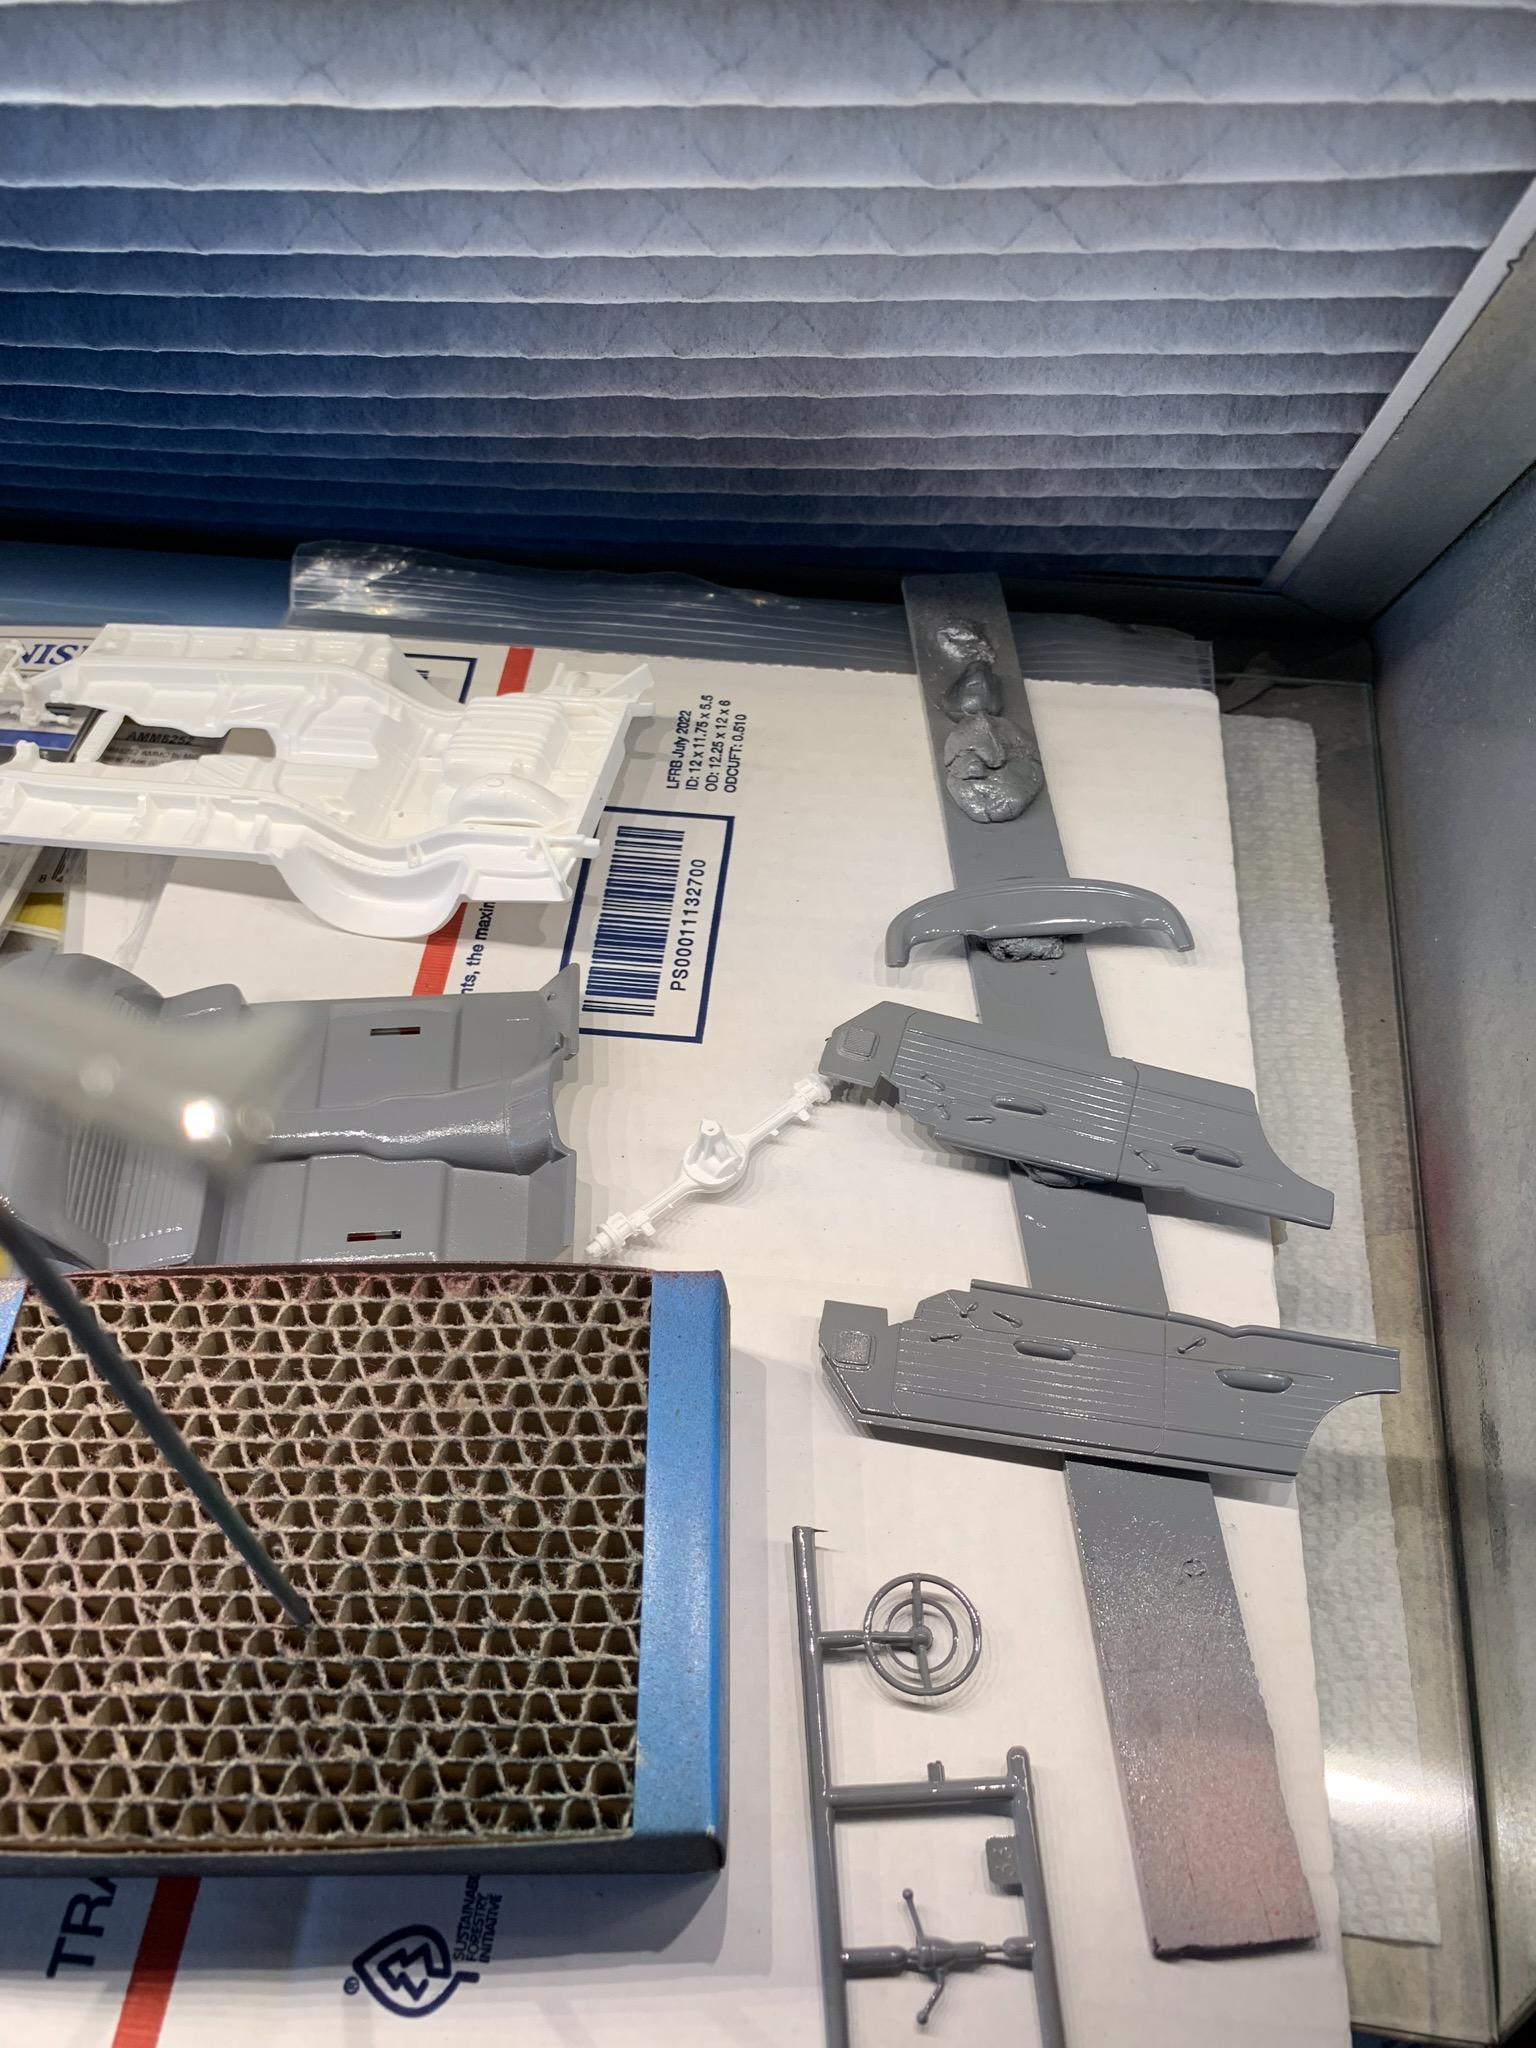
Made up some extra parts for the next race cars. Finished loop.
-
Holloman & McKinney 57 Chevy C/MP circa 1964
R. Thorne replied to R. Thorne's topic in WIP: Drag Racing Models
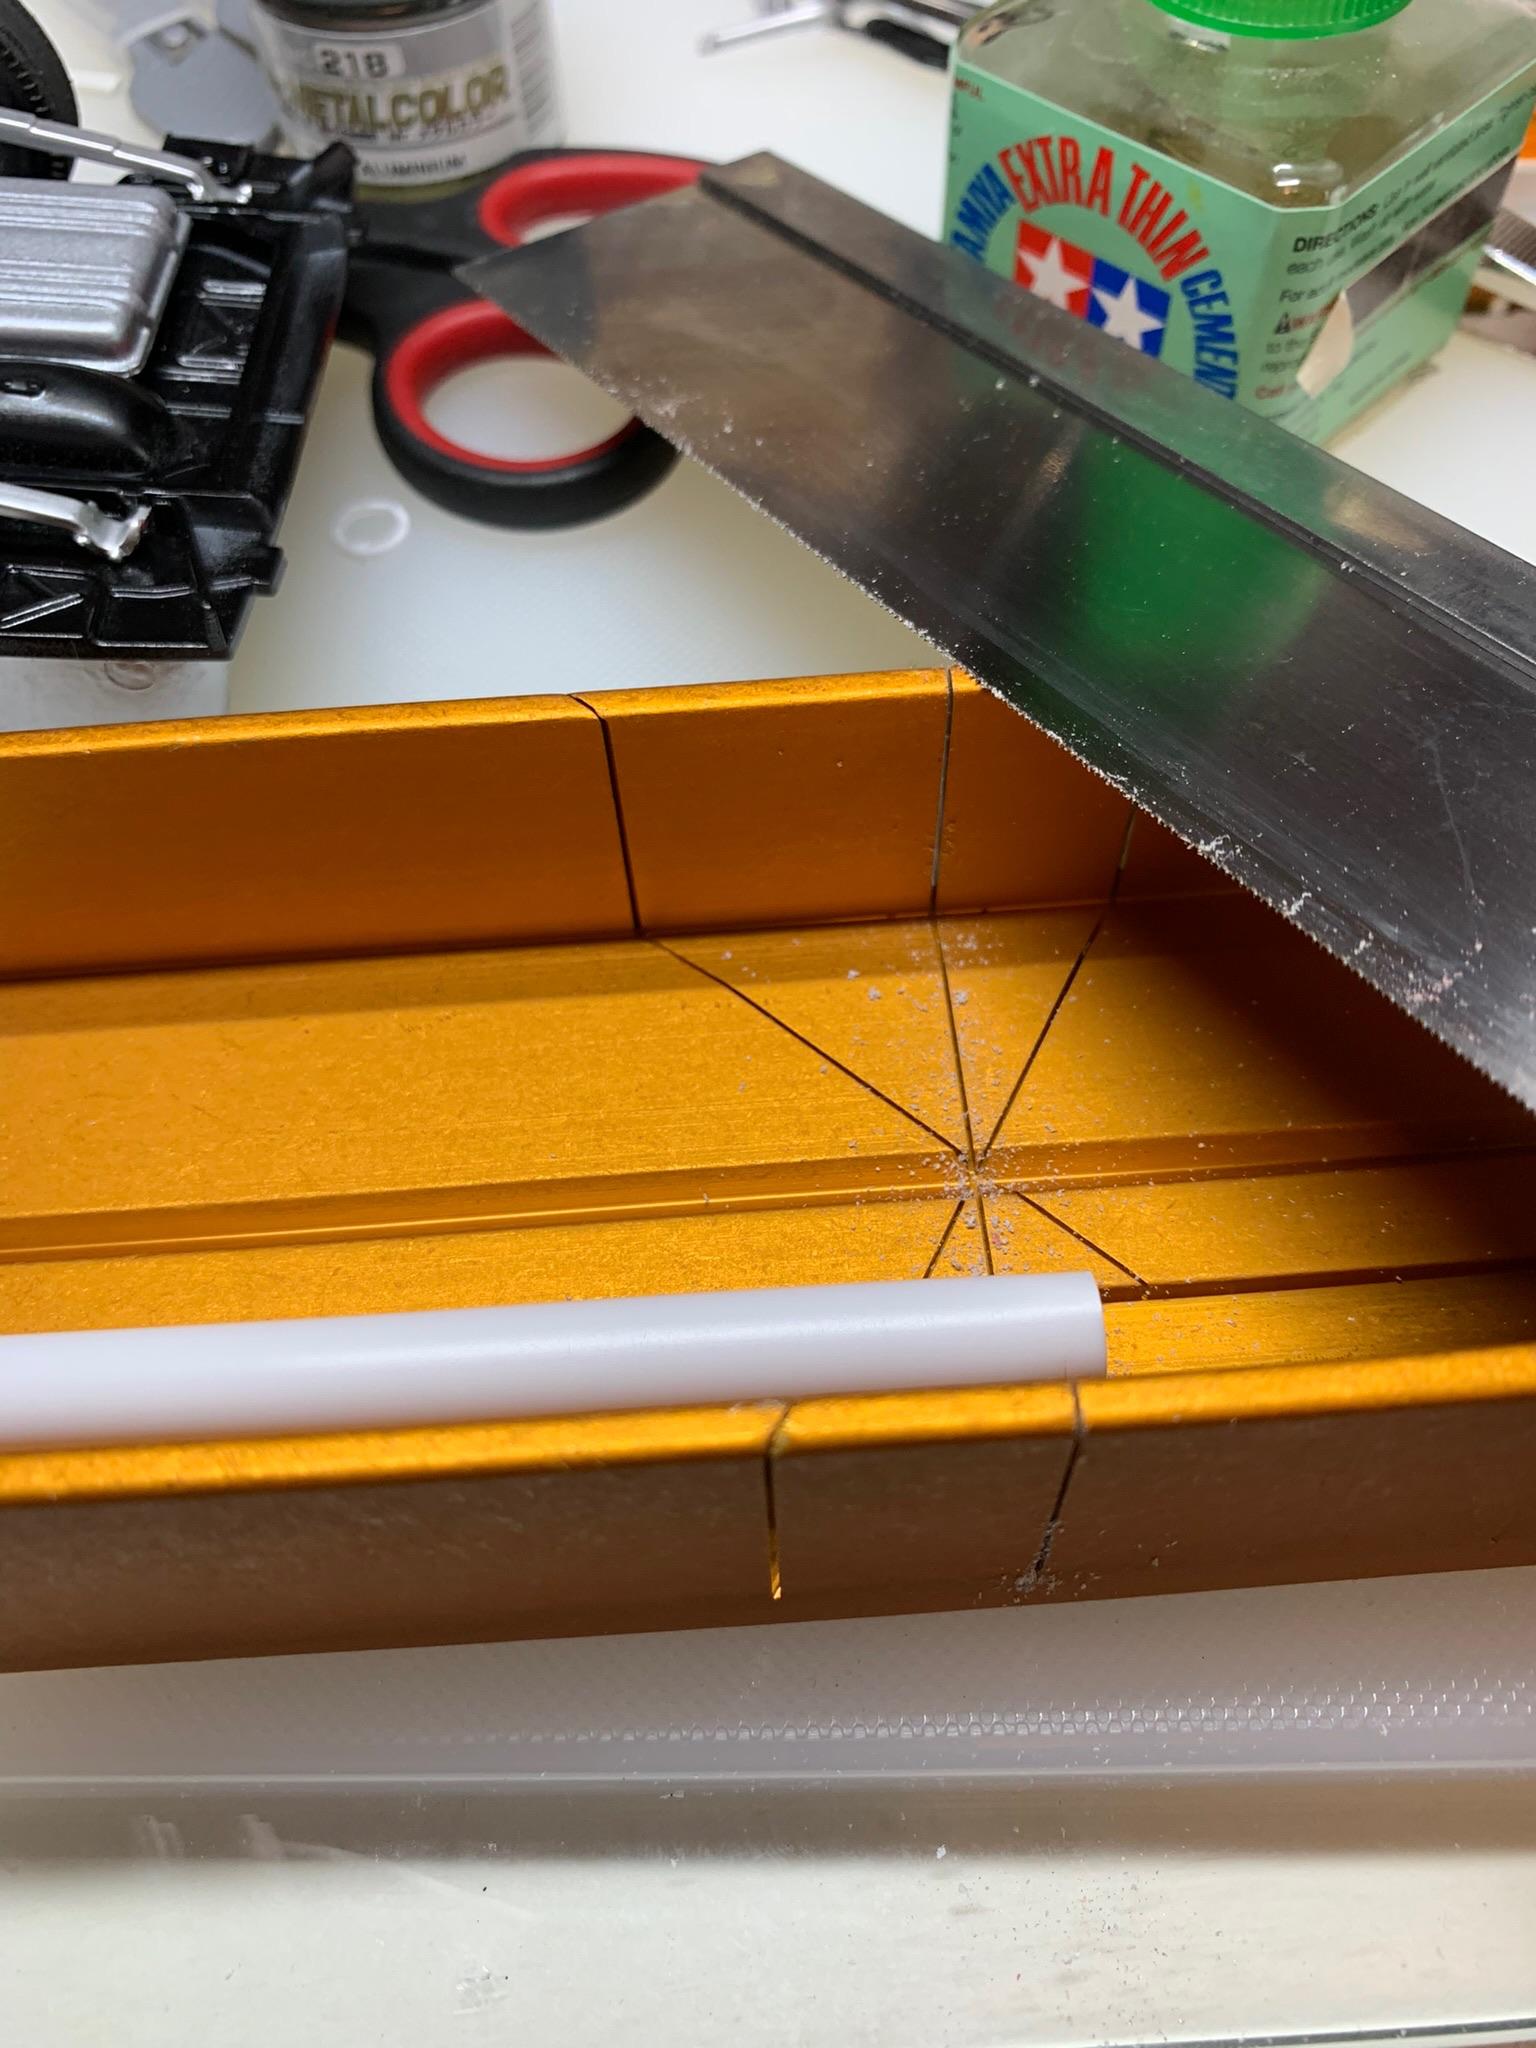
Forgot about driveshaft loop, cut driveshaft off of tail housing, cut some round tubing, and making some flat stock.
-
Holloman & McKinney 57 Chevy C/MP circa 1964
R. Thorne replied to R. Thorne's topic in WIP: Drag Racing Models
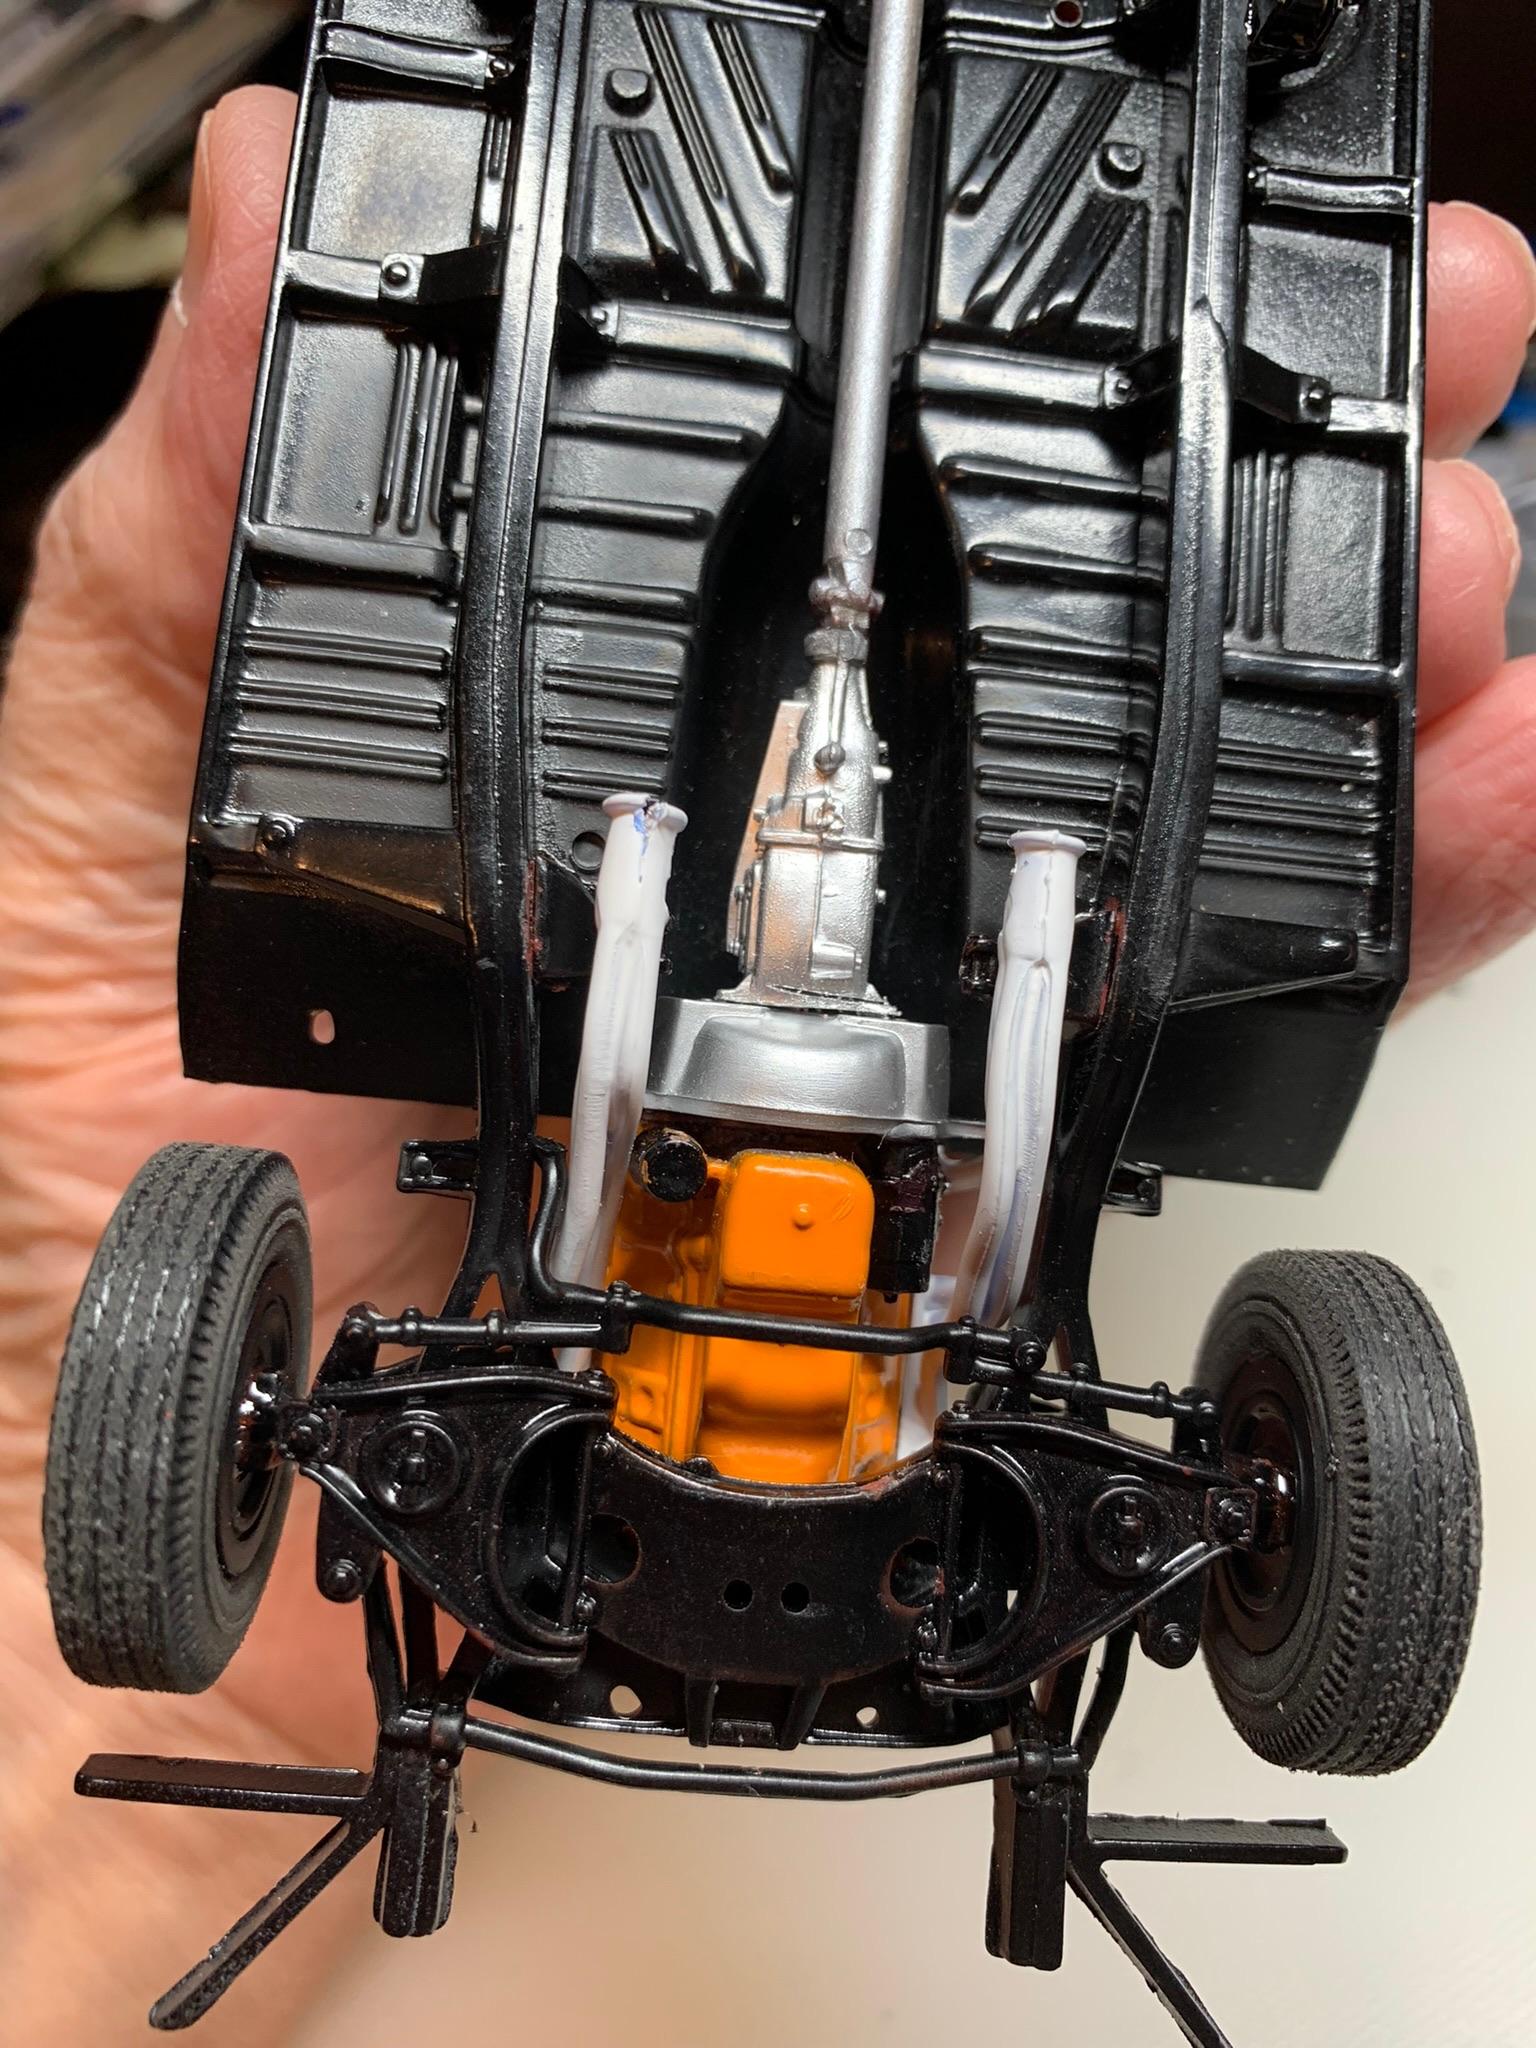
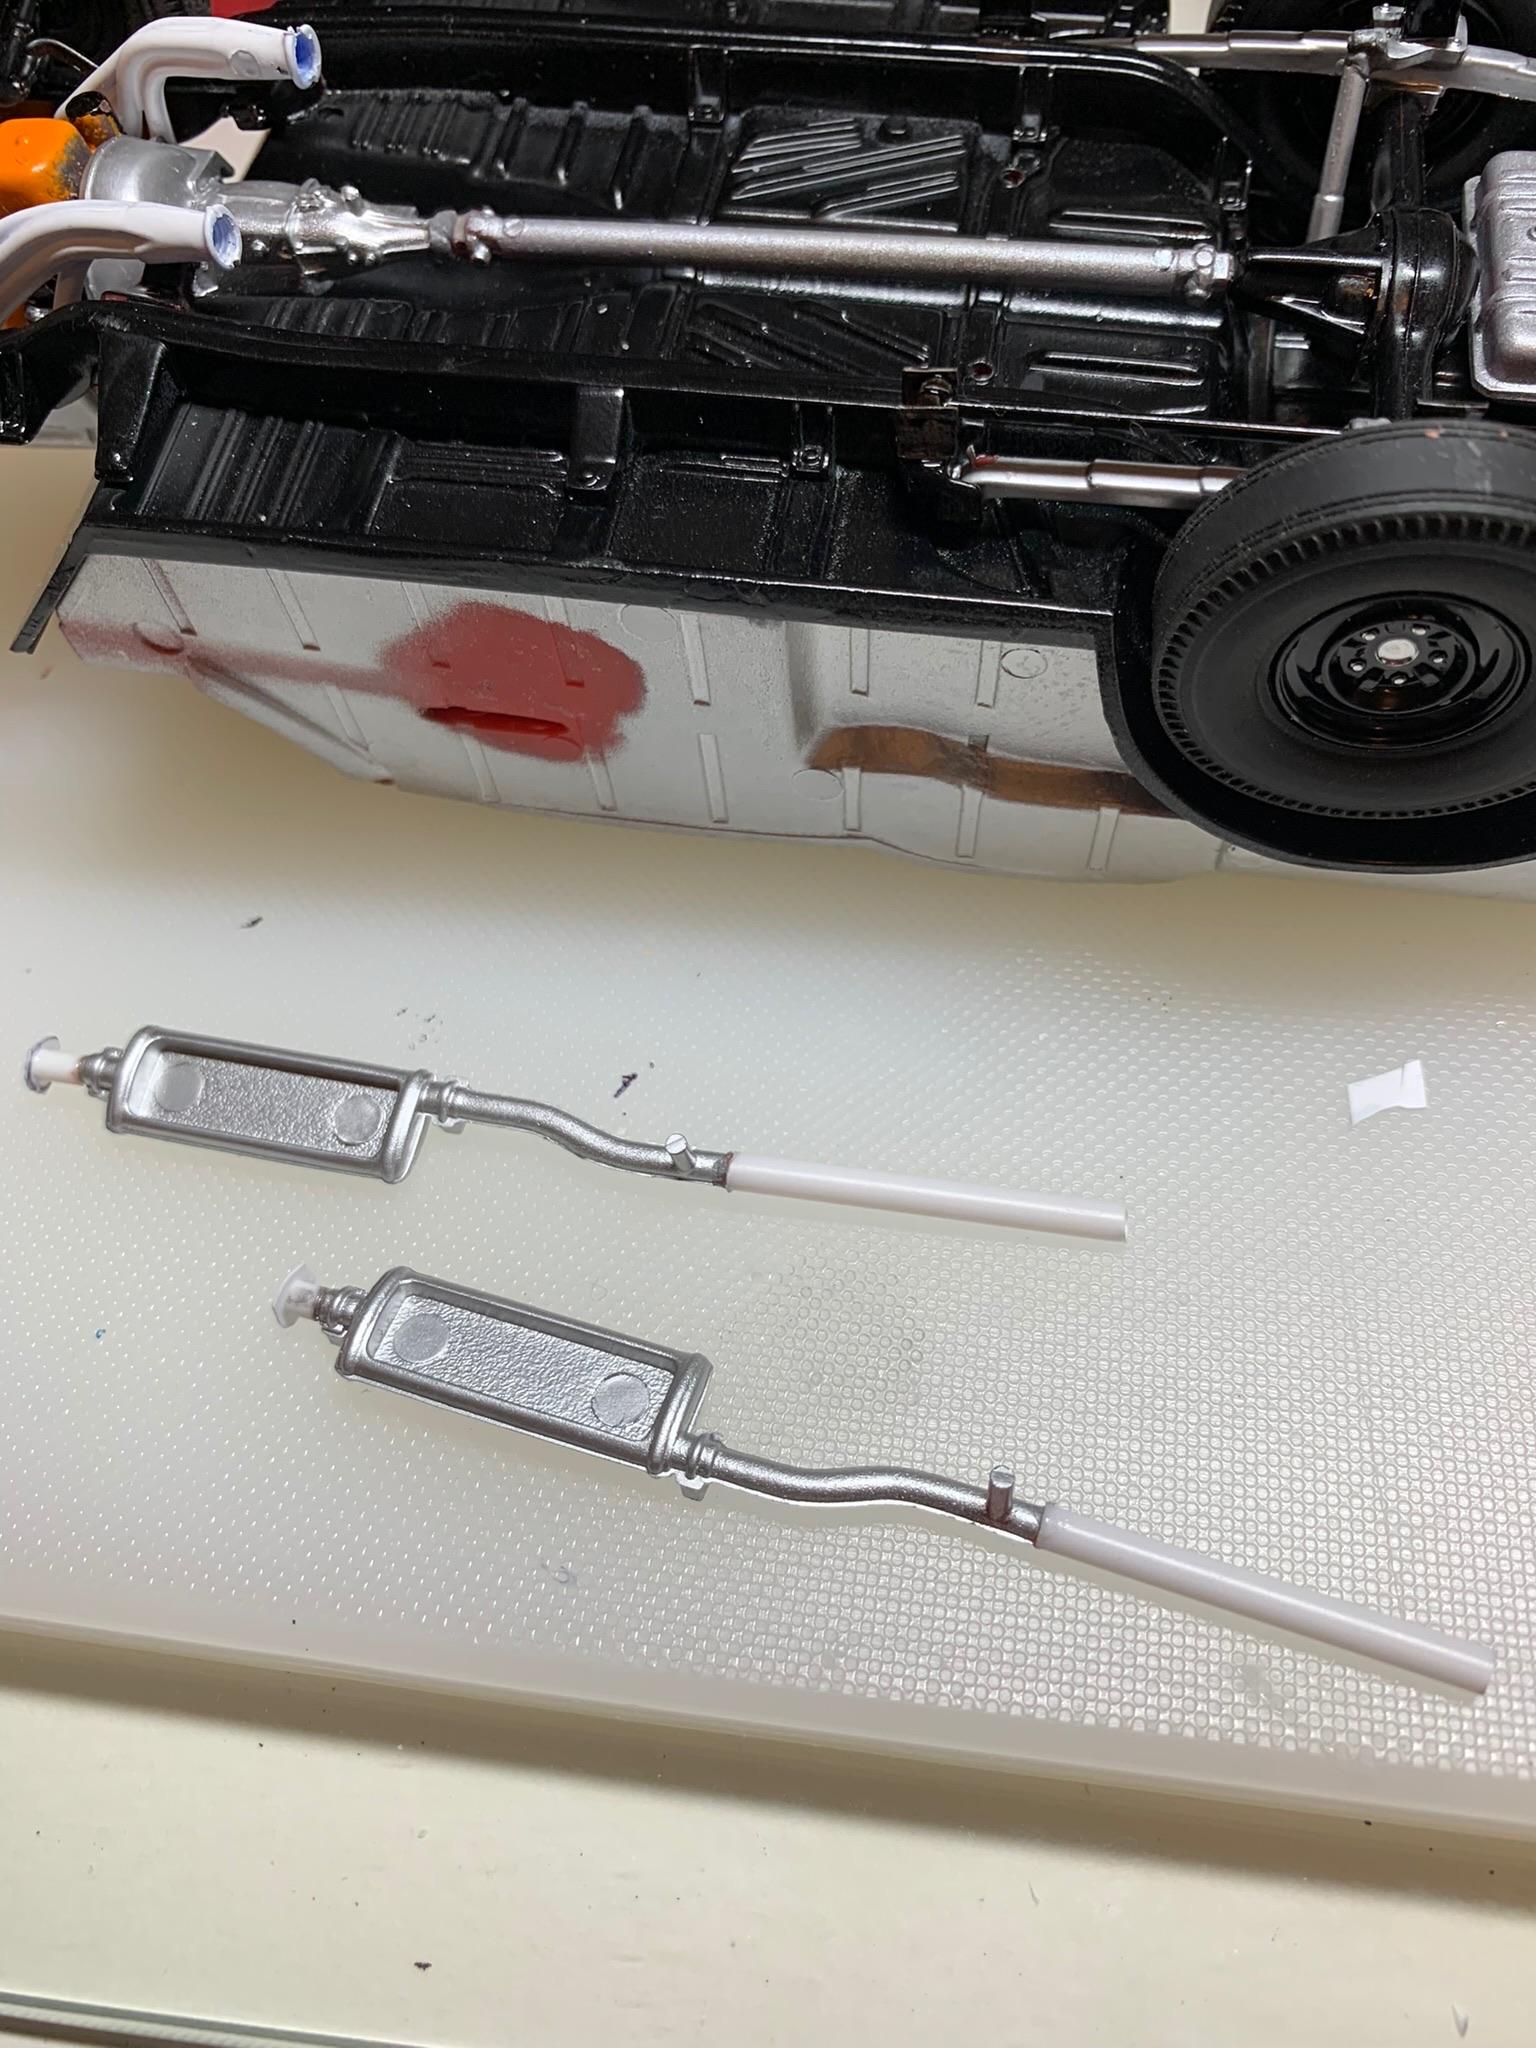
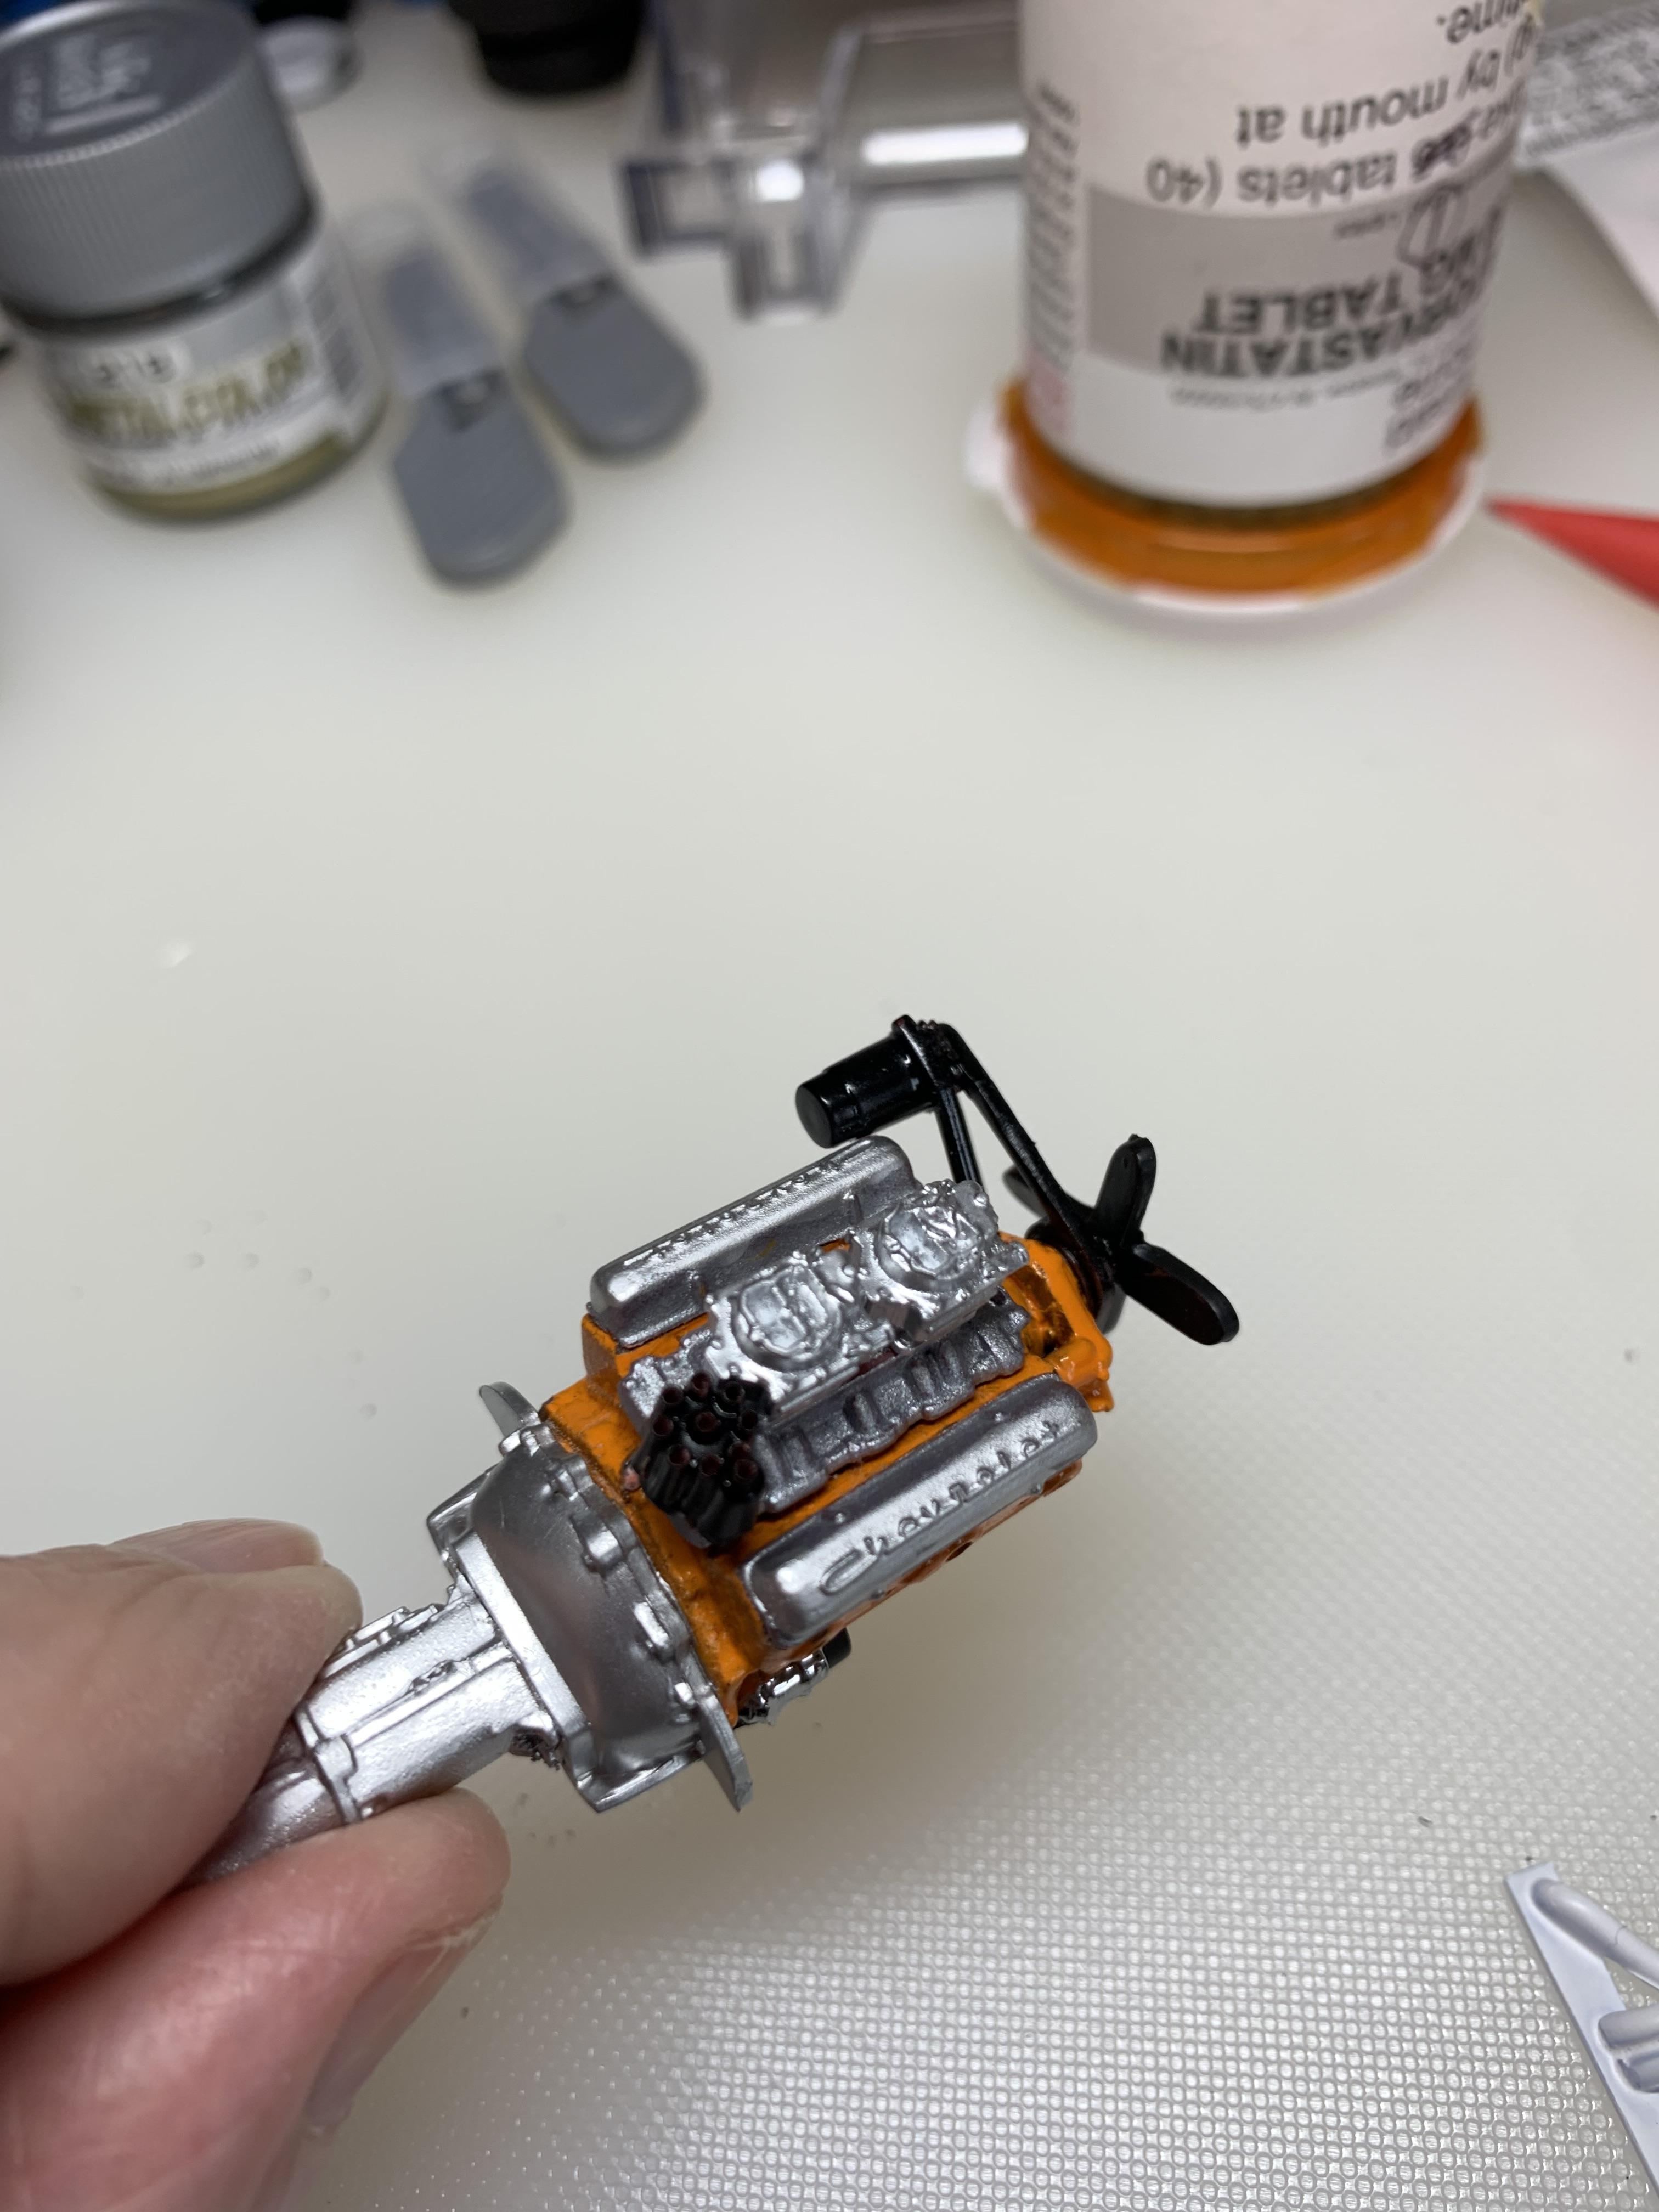
Engine installed, windshield installed, modifying the exhaust to simulate cutouts, no over axle pipe, just straight pipe to rear axle, per NHRA rules.
-
Holloman & McKinney 57 Chevy C/MP circa 1964
R. Thorne replied to R. Thorne's topic in WIP: Drag Racing Models
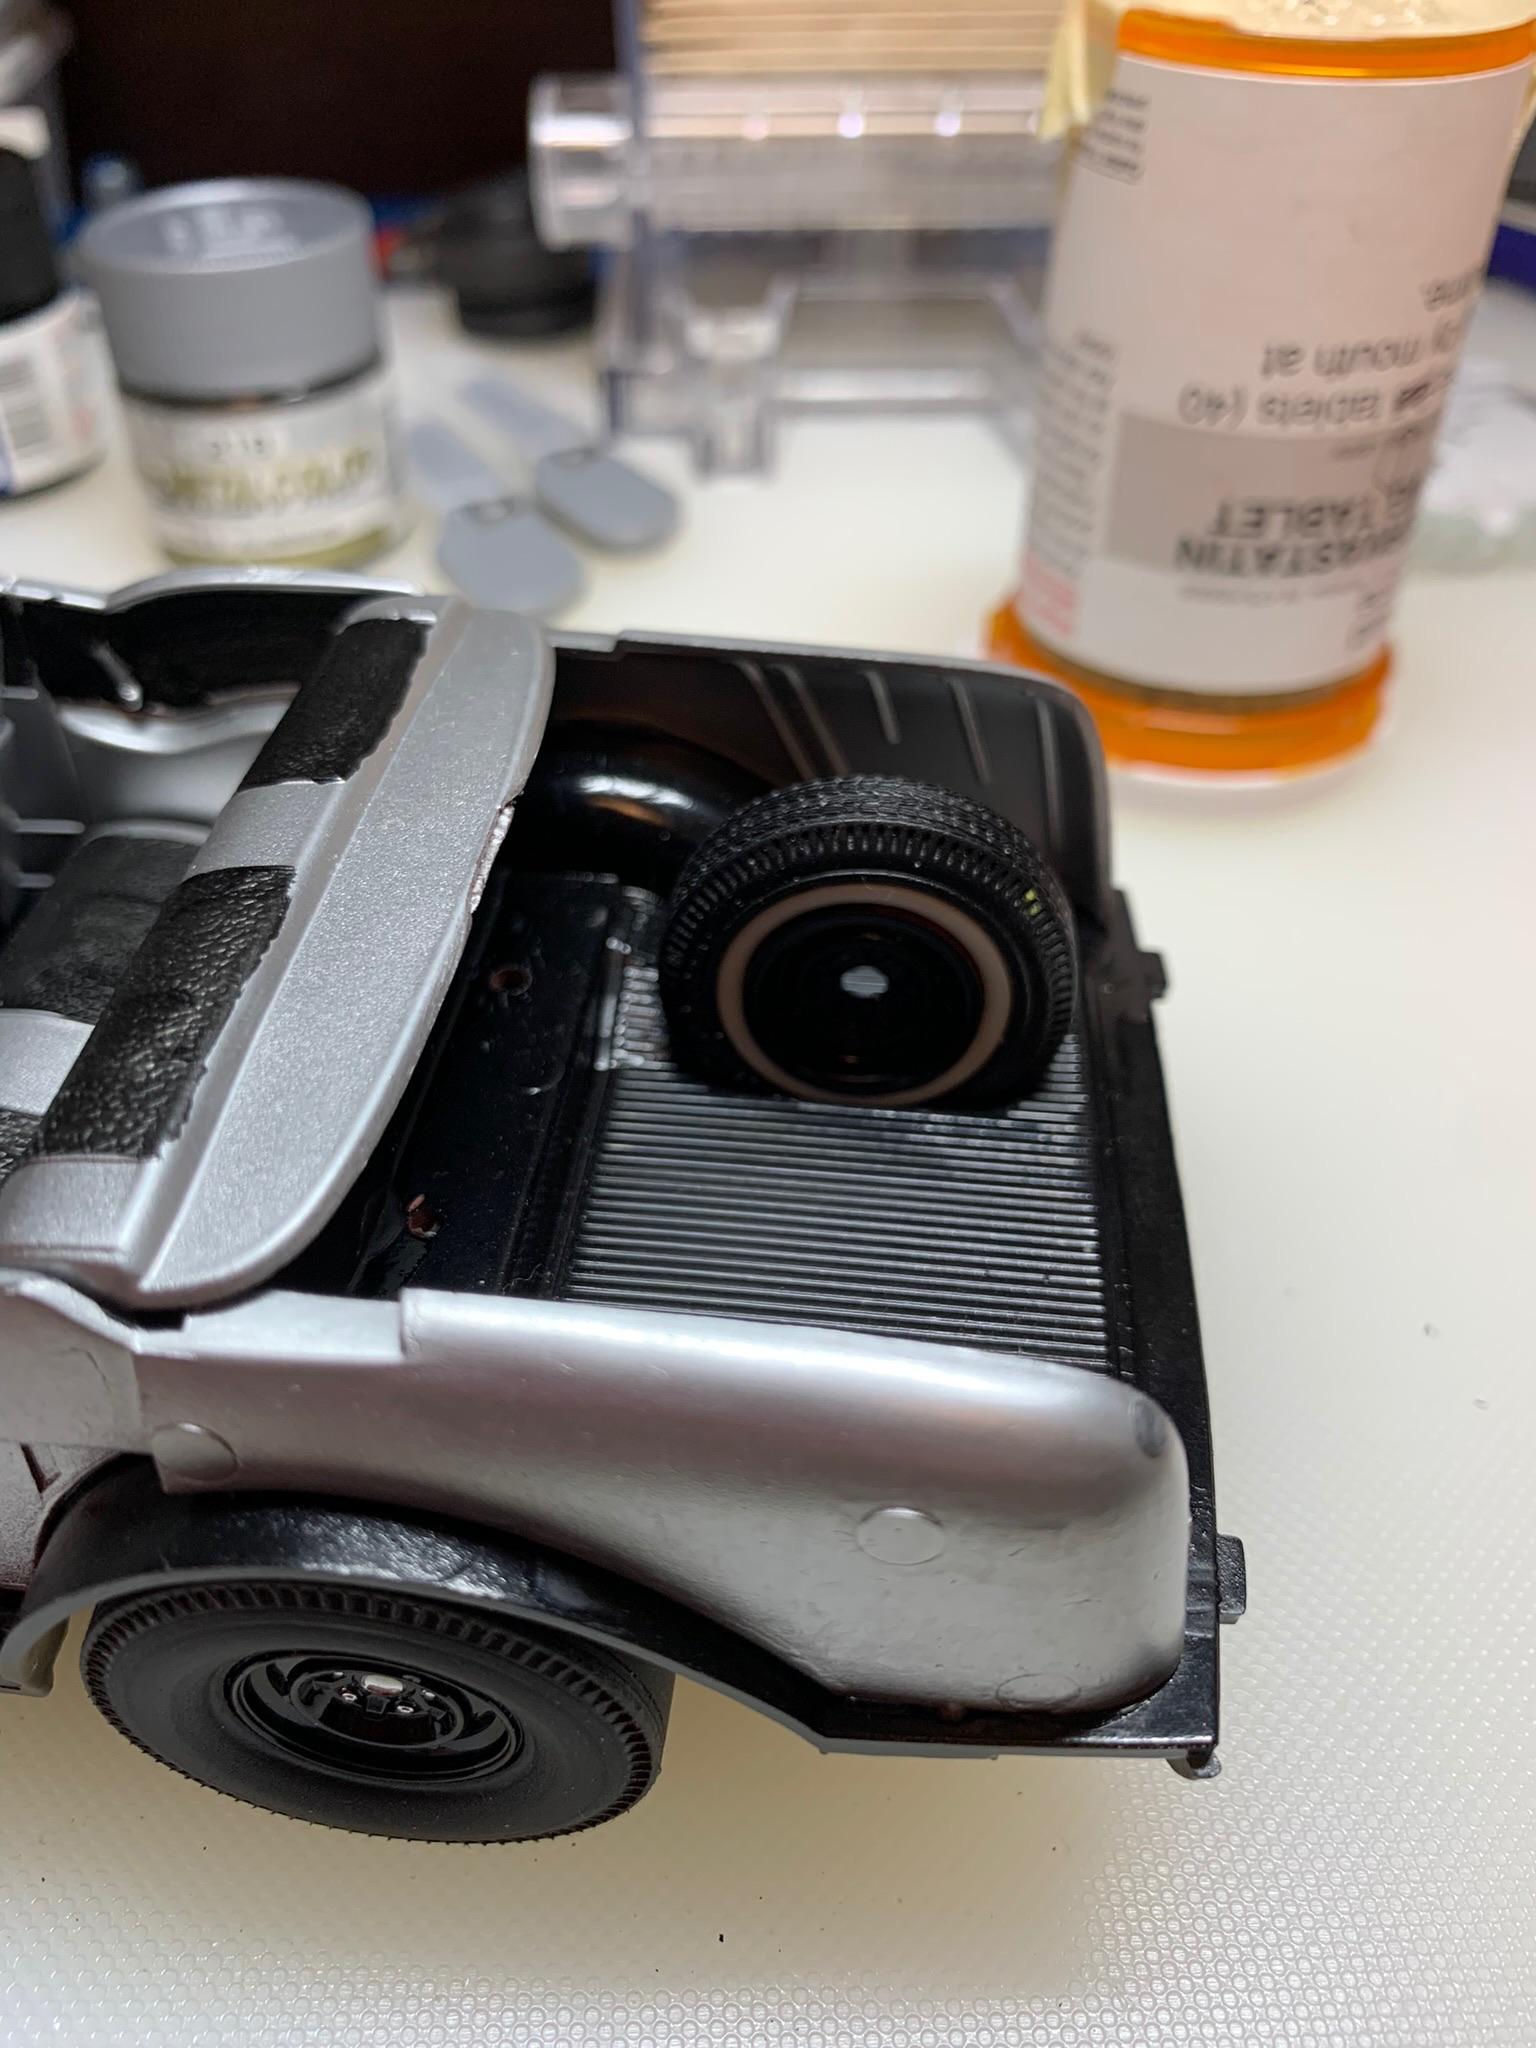
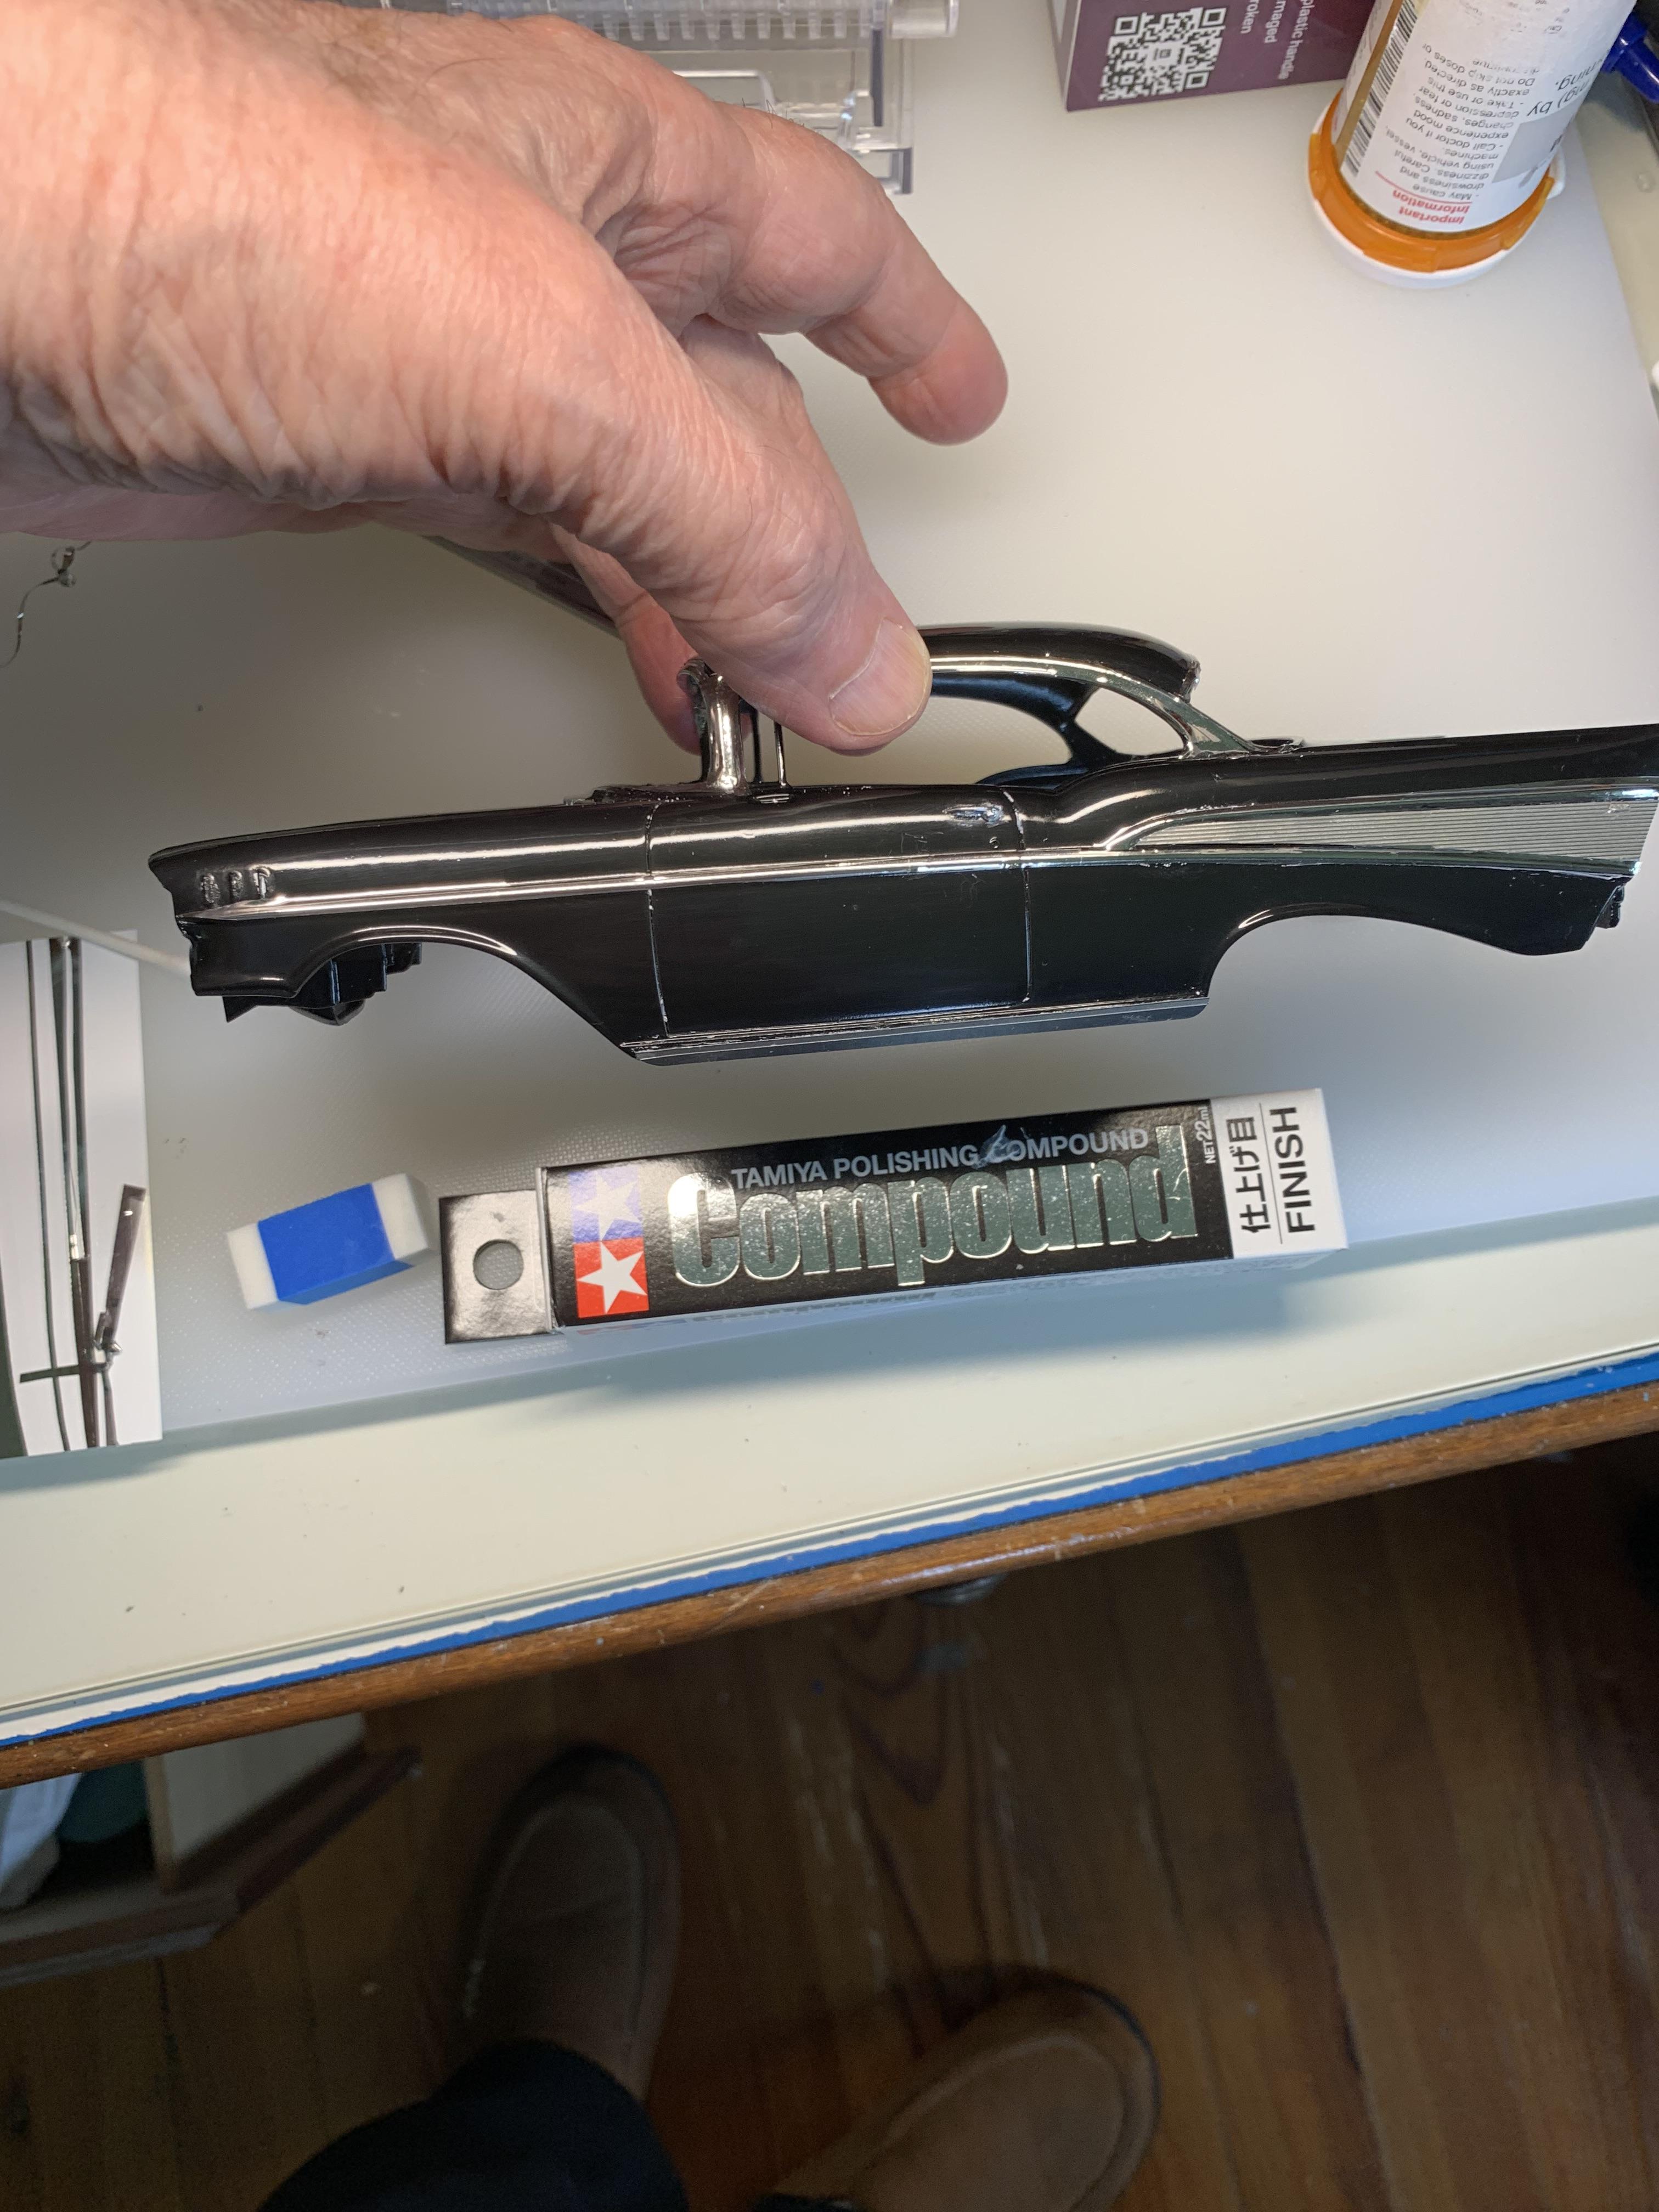
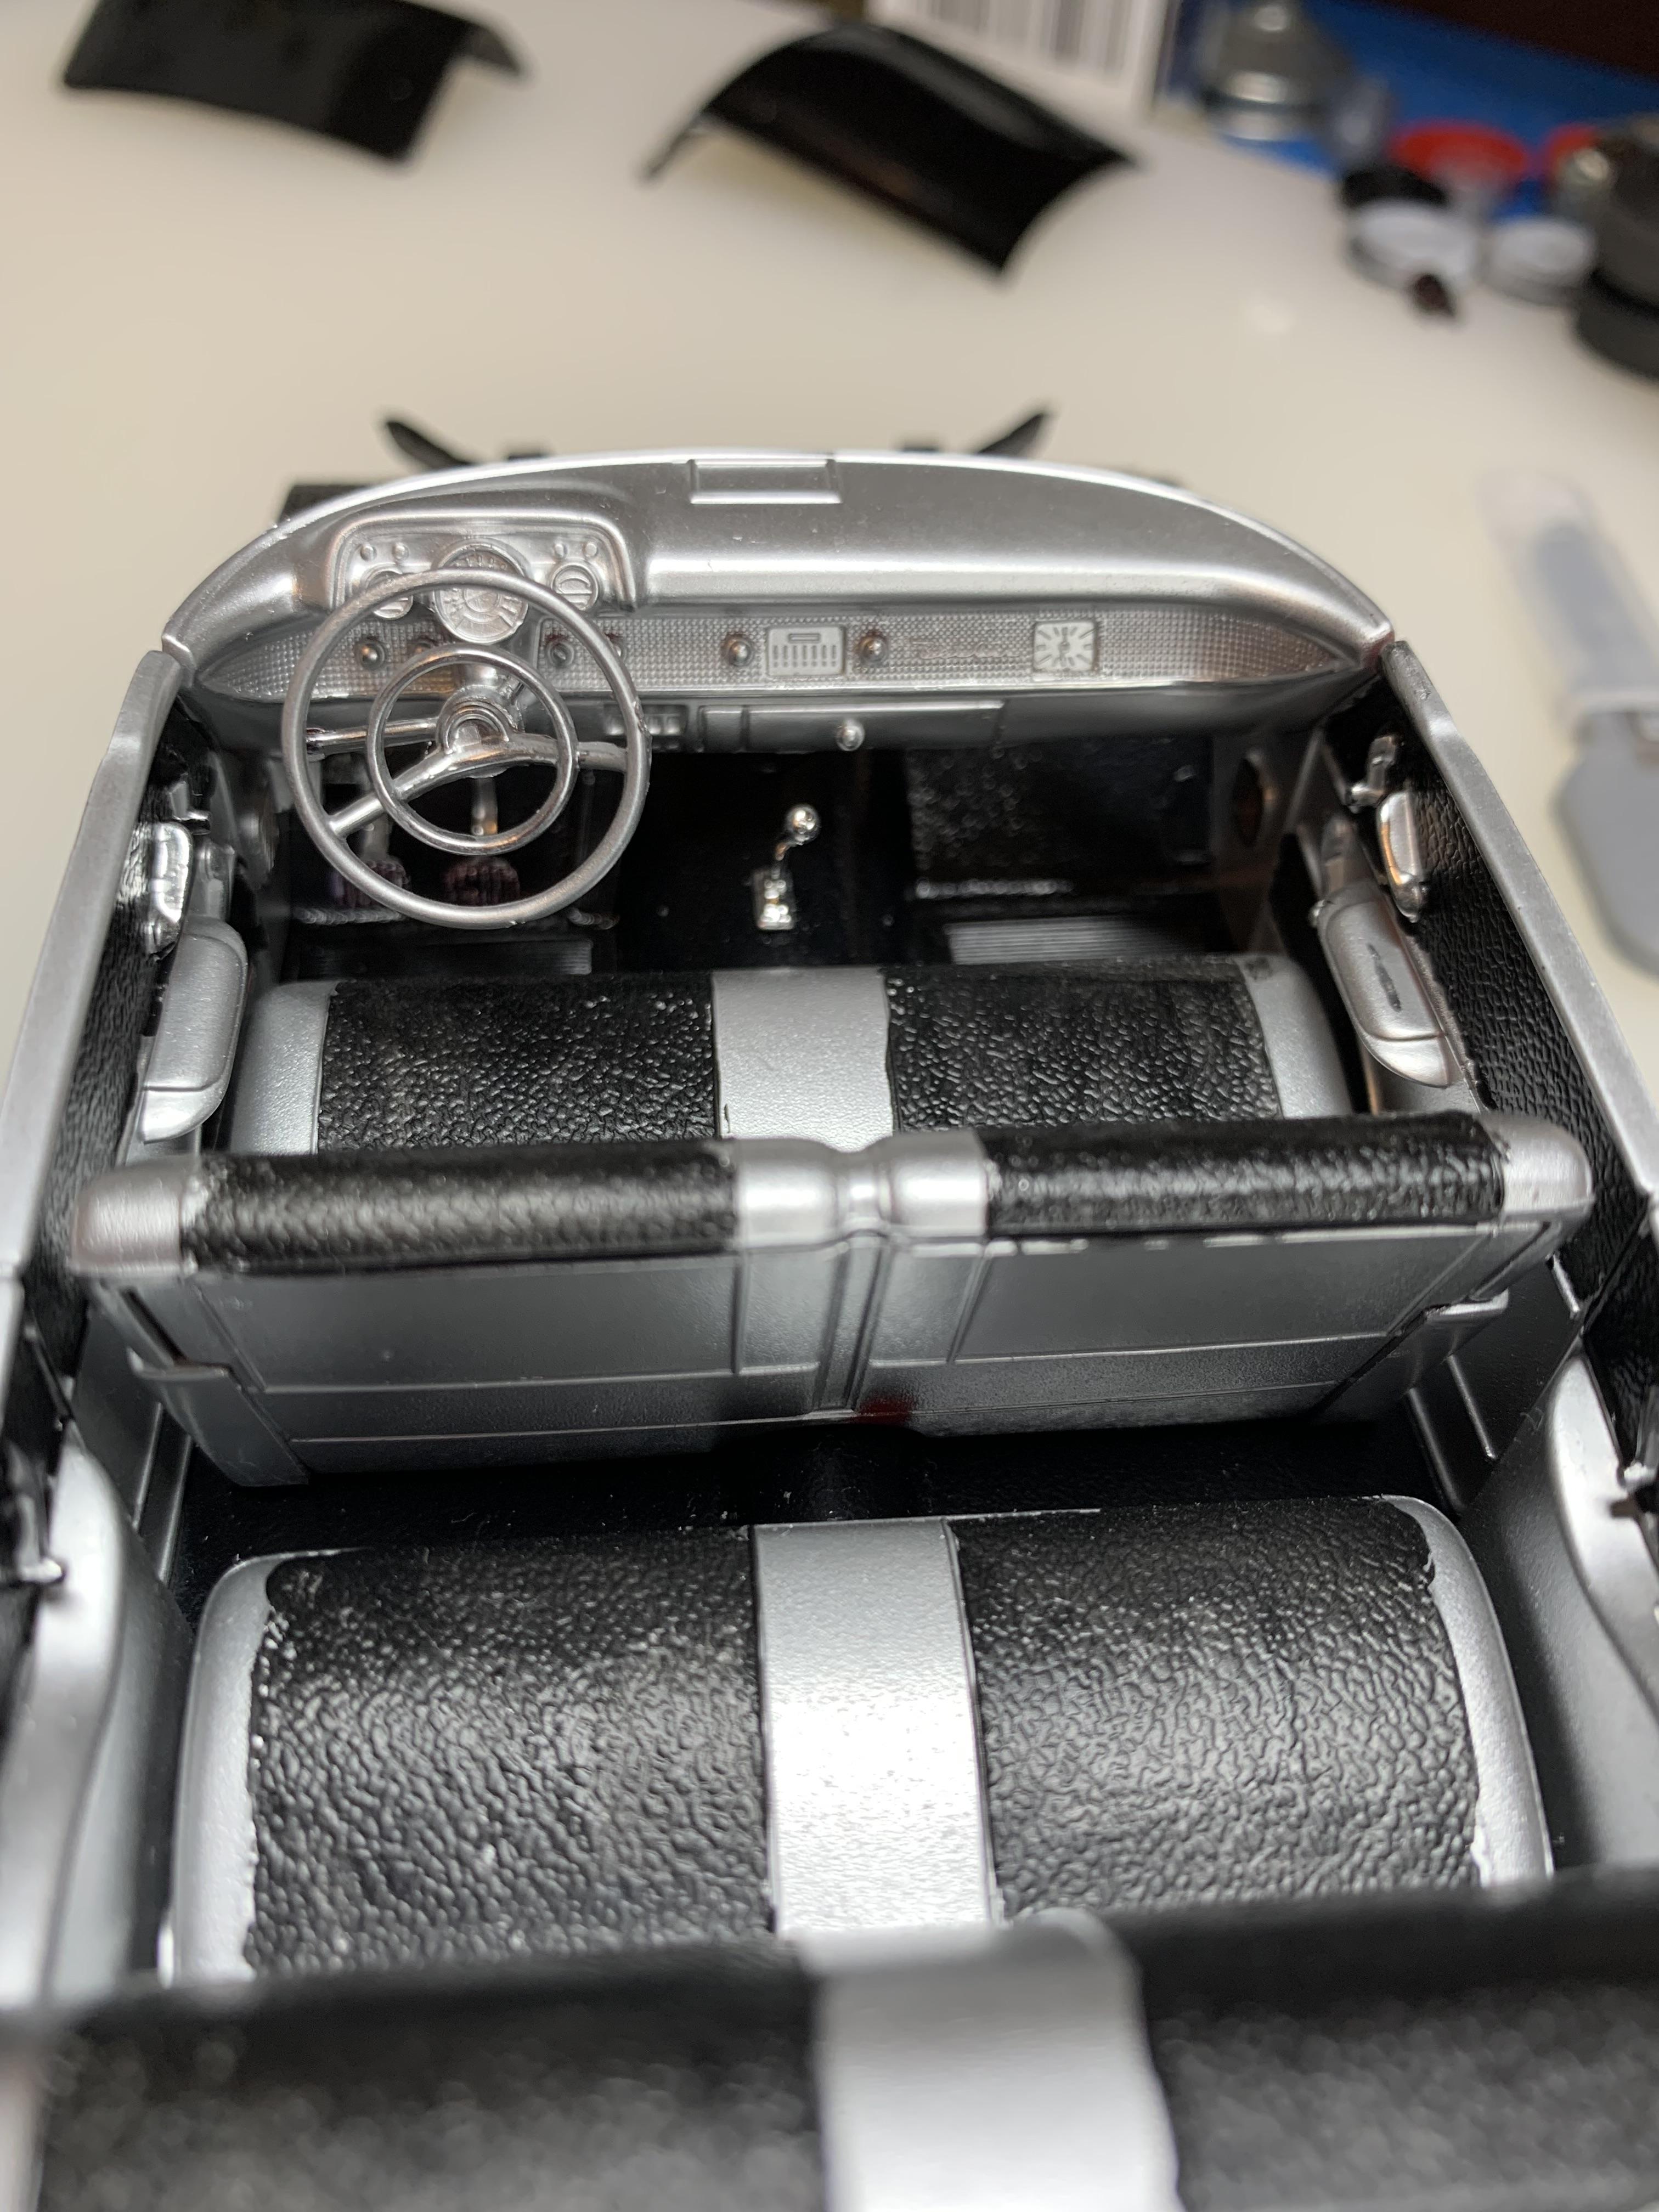
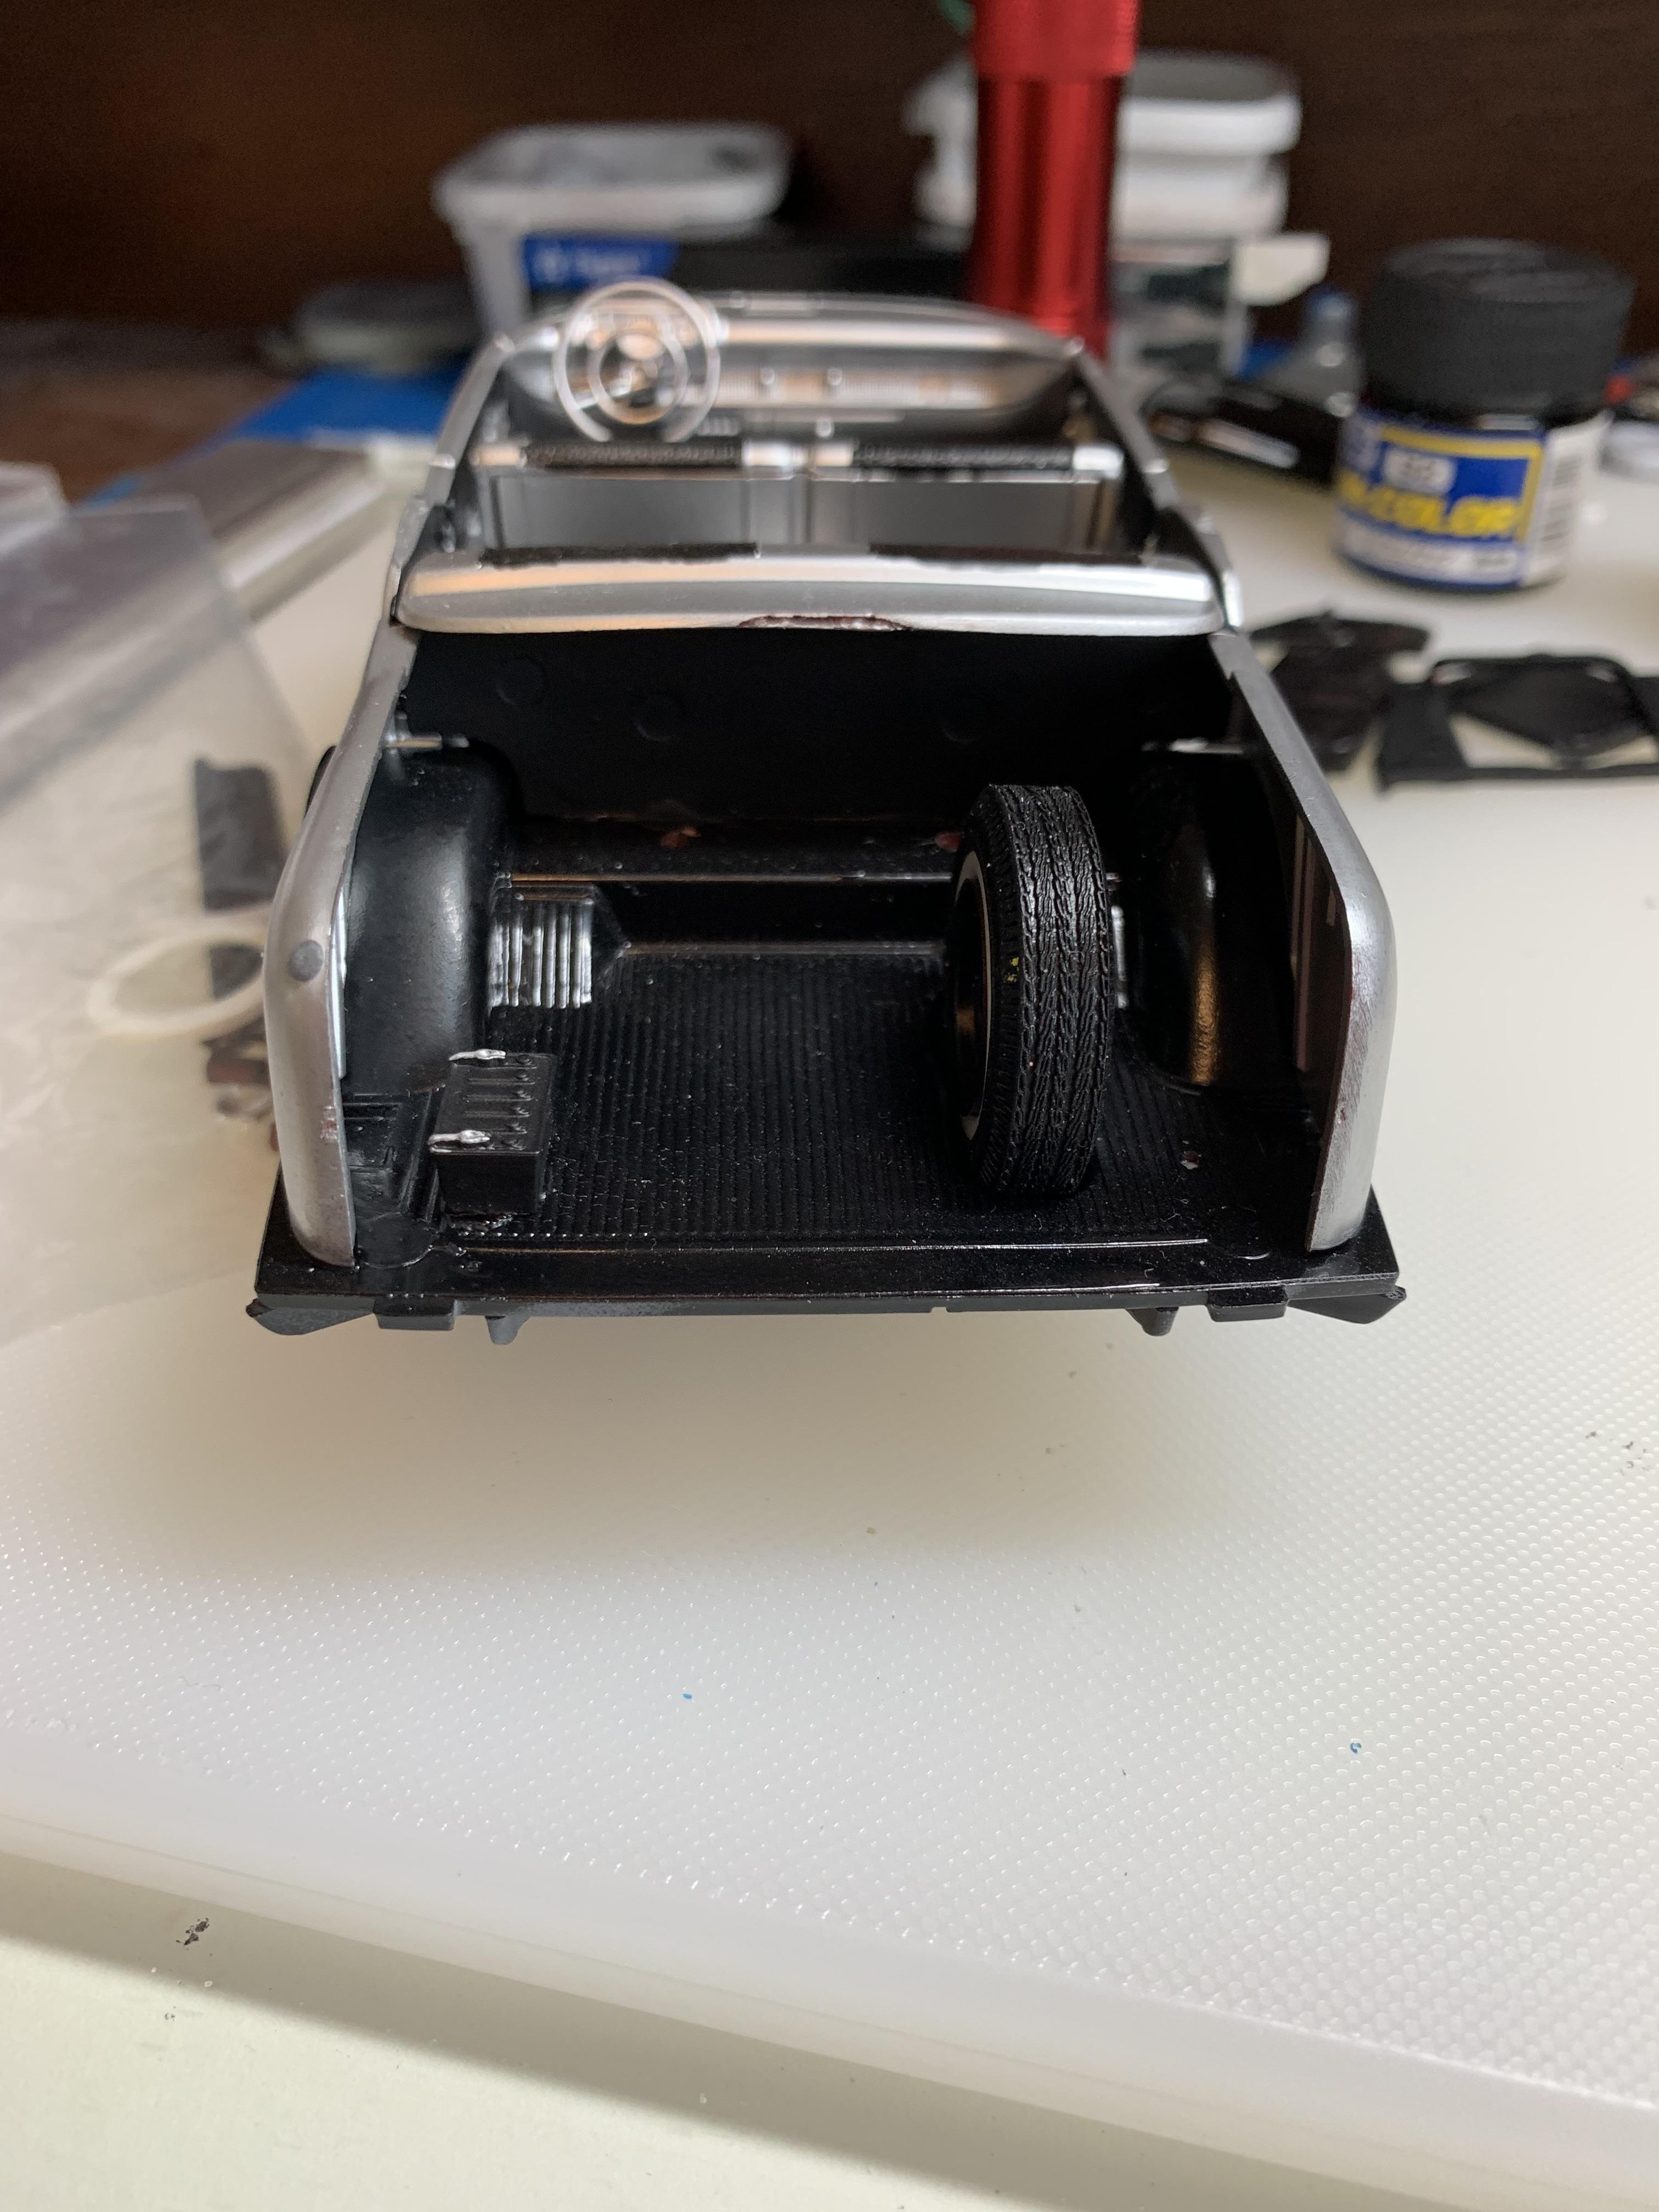
Put a quick coat of polish on, shifter installed, some final engine work (decided against plug wires), and installed battery in trunk along with spare tire (unfortunately no hold down bracket).
-
Holloman & McKinney 57 Chevy C/MP circa 1964
R. Thorne replied to R. Thorne's topic in WIP: Drag Racing Models
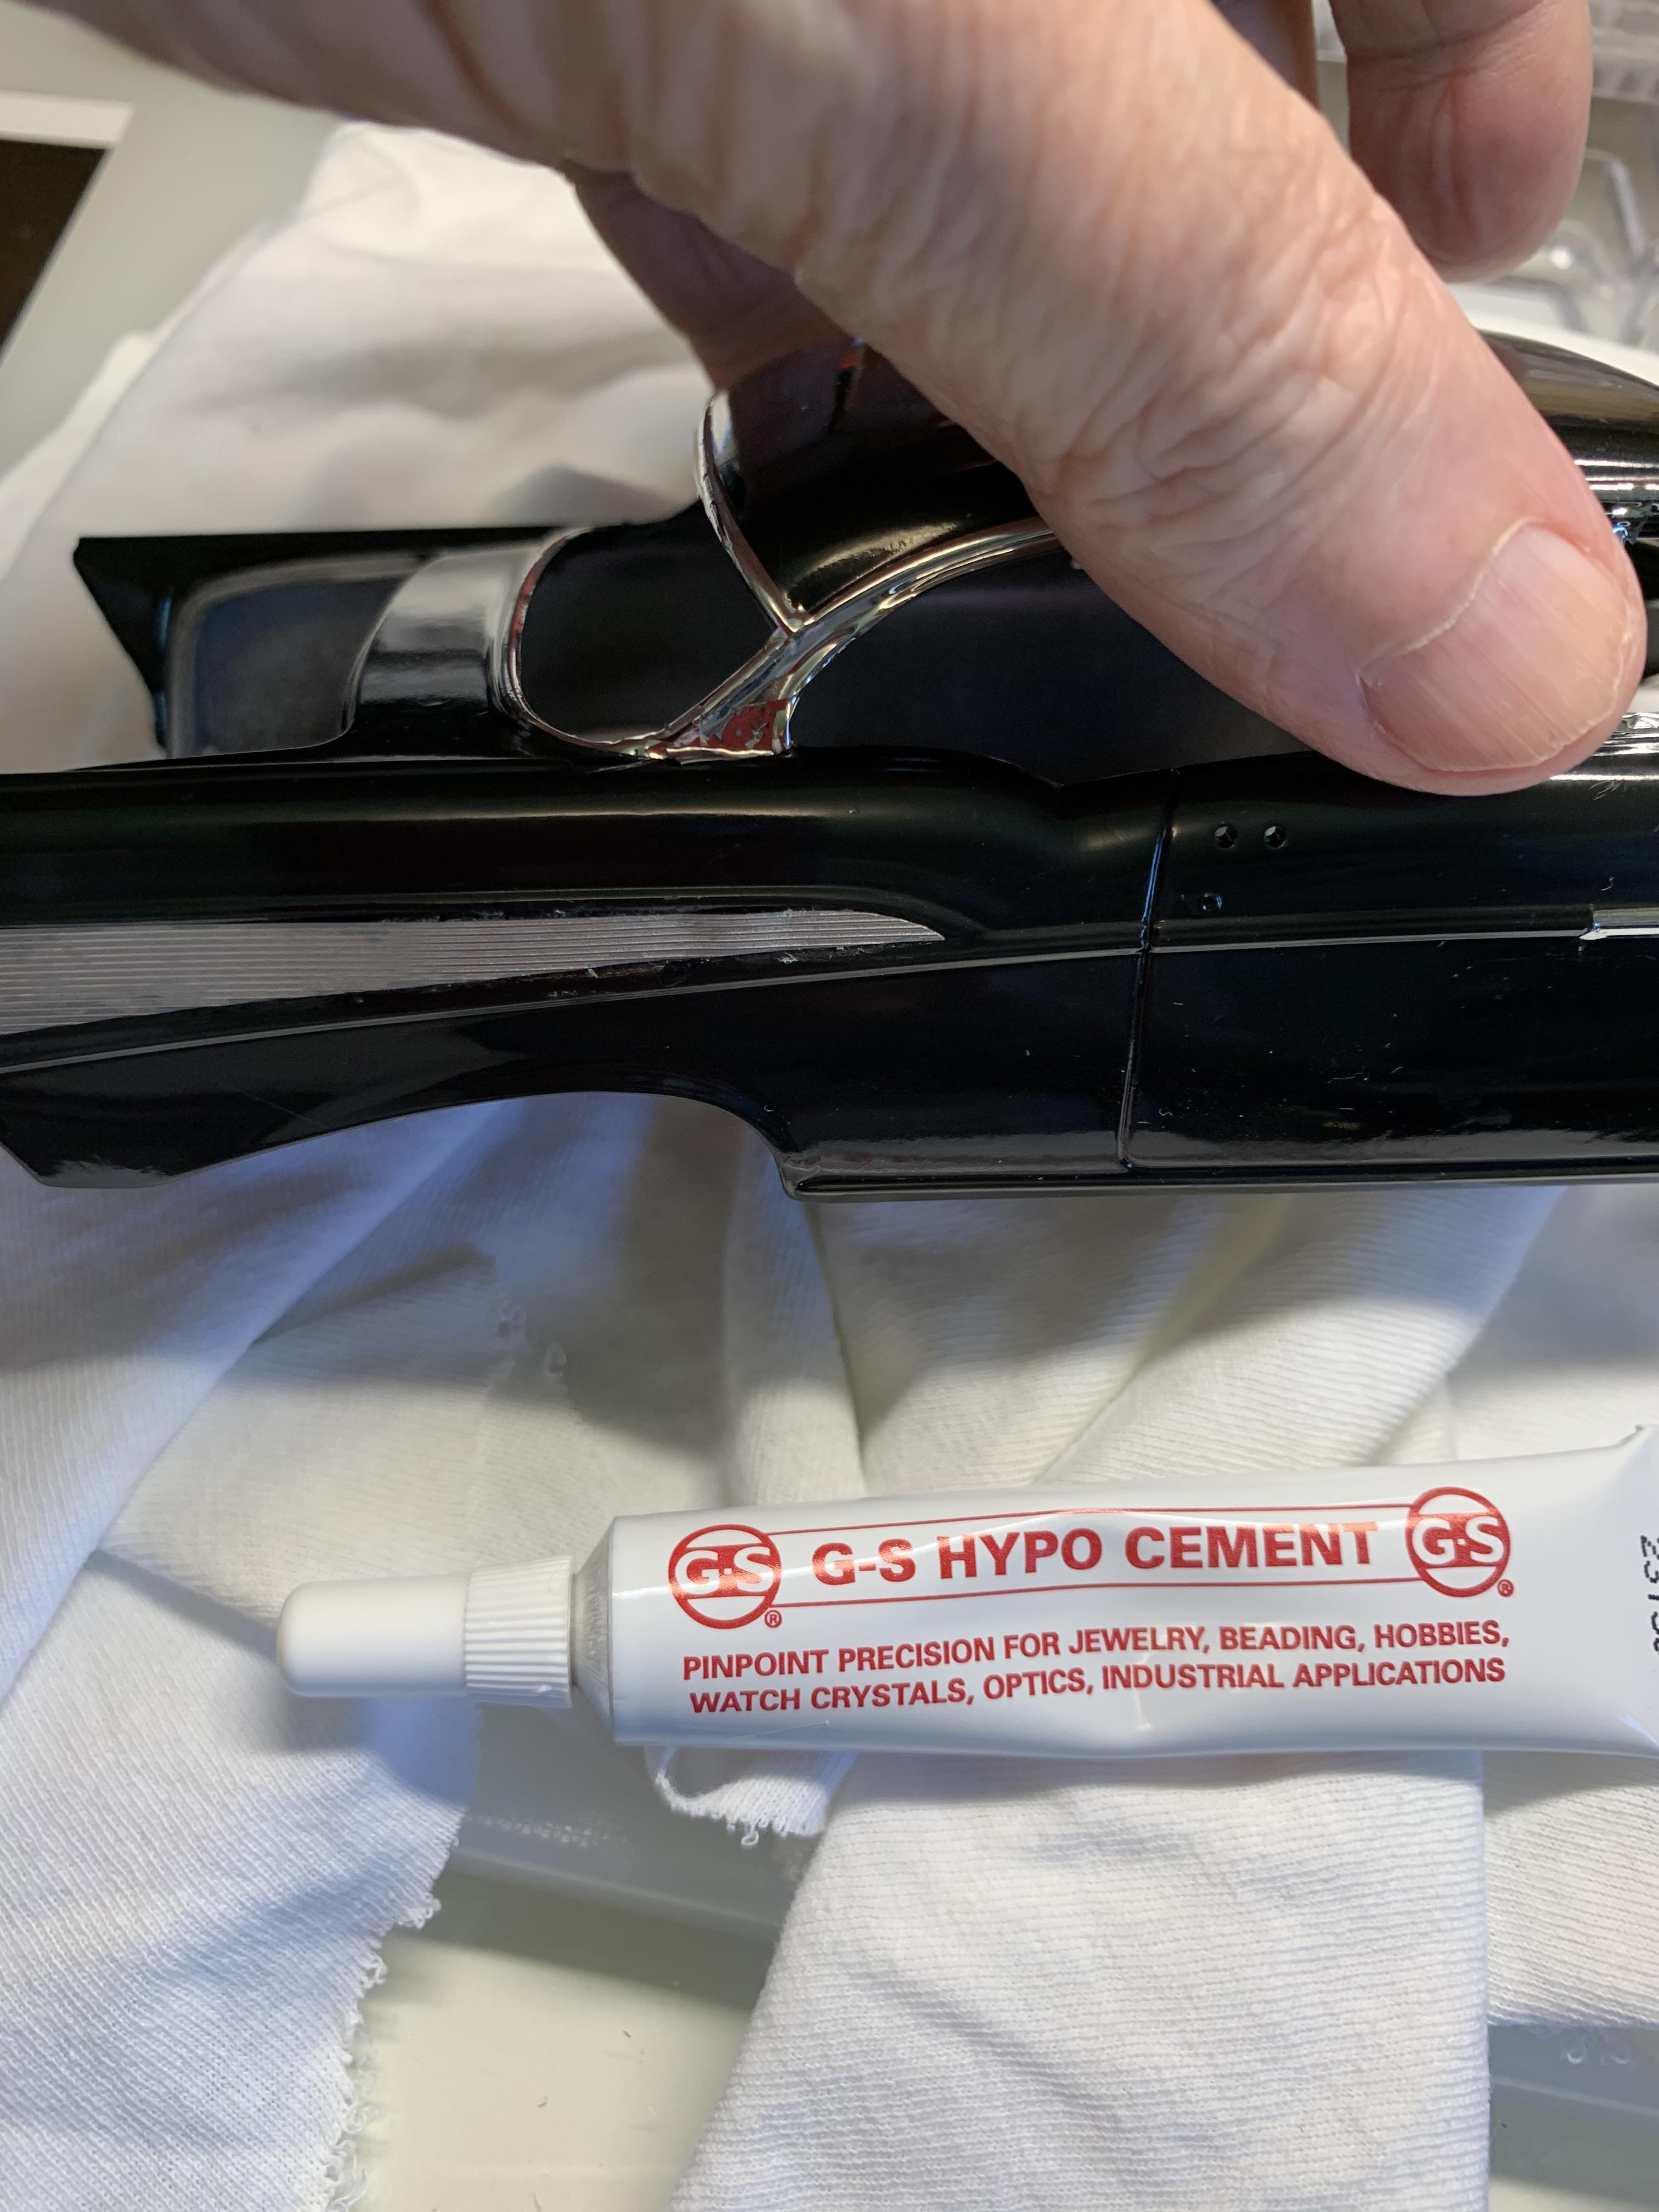
Thanks, Ace. I think last night the glare was affecting my trimming and cutting. Better in daylight today. You almost need sunglasses on with this stuff. -
Holloman & McKinney 57 Chevy C/MP circa 1964
R. Thorne replied to R. Thorne's topic in WIP: Drag Racing Models
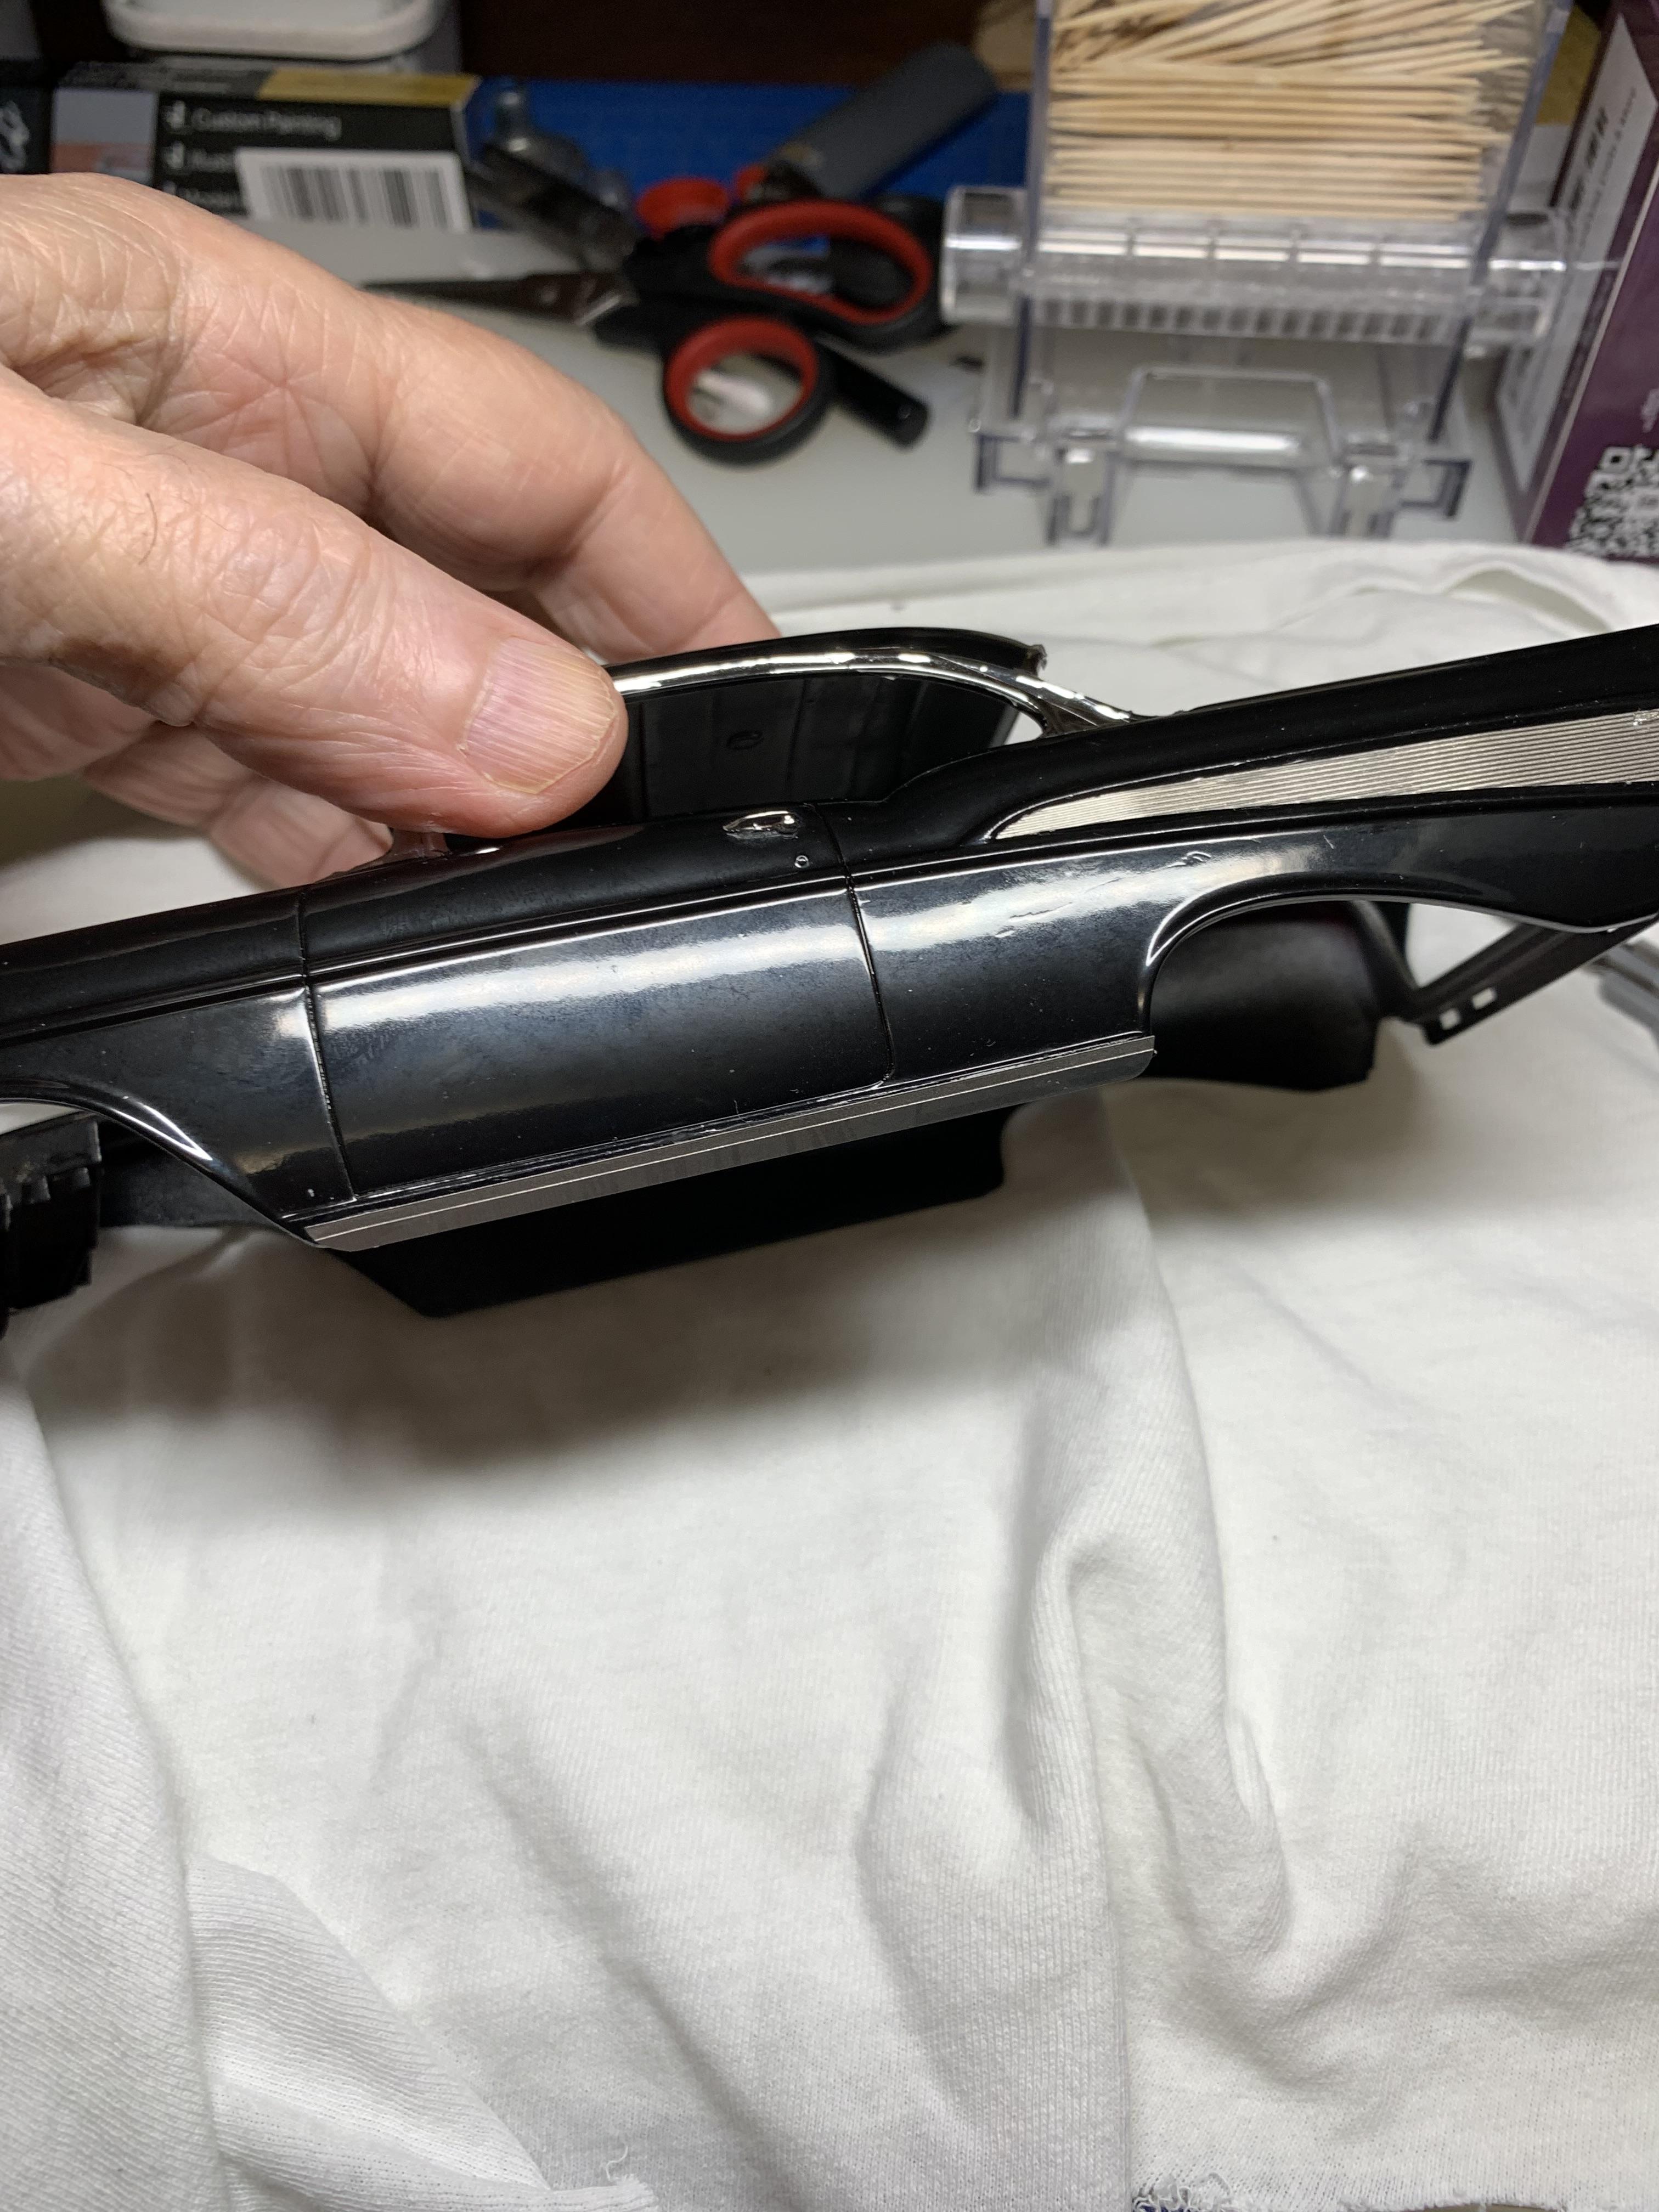
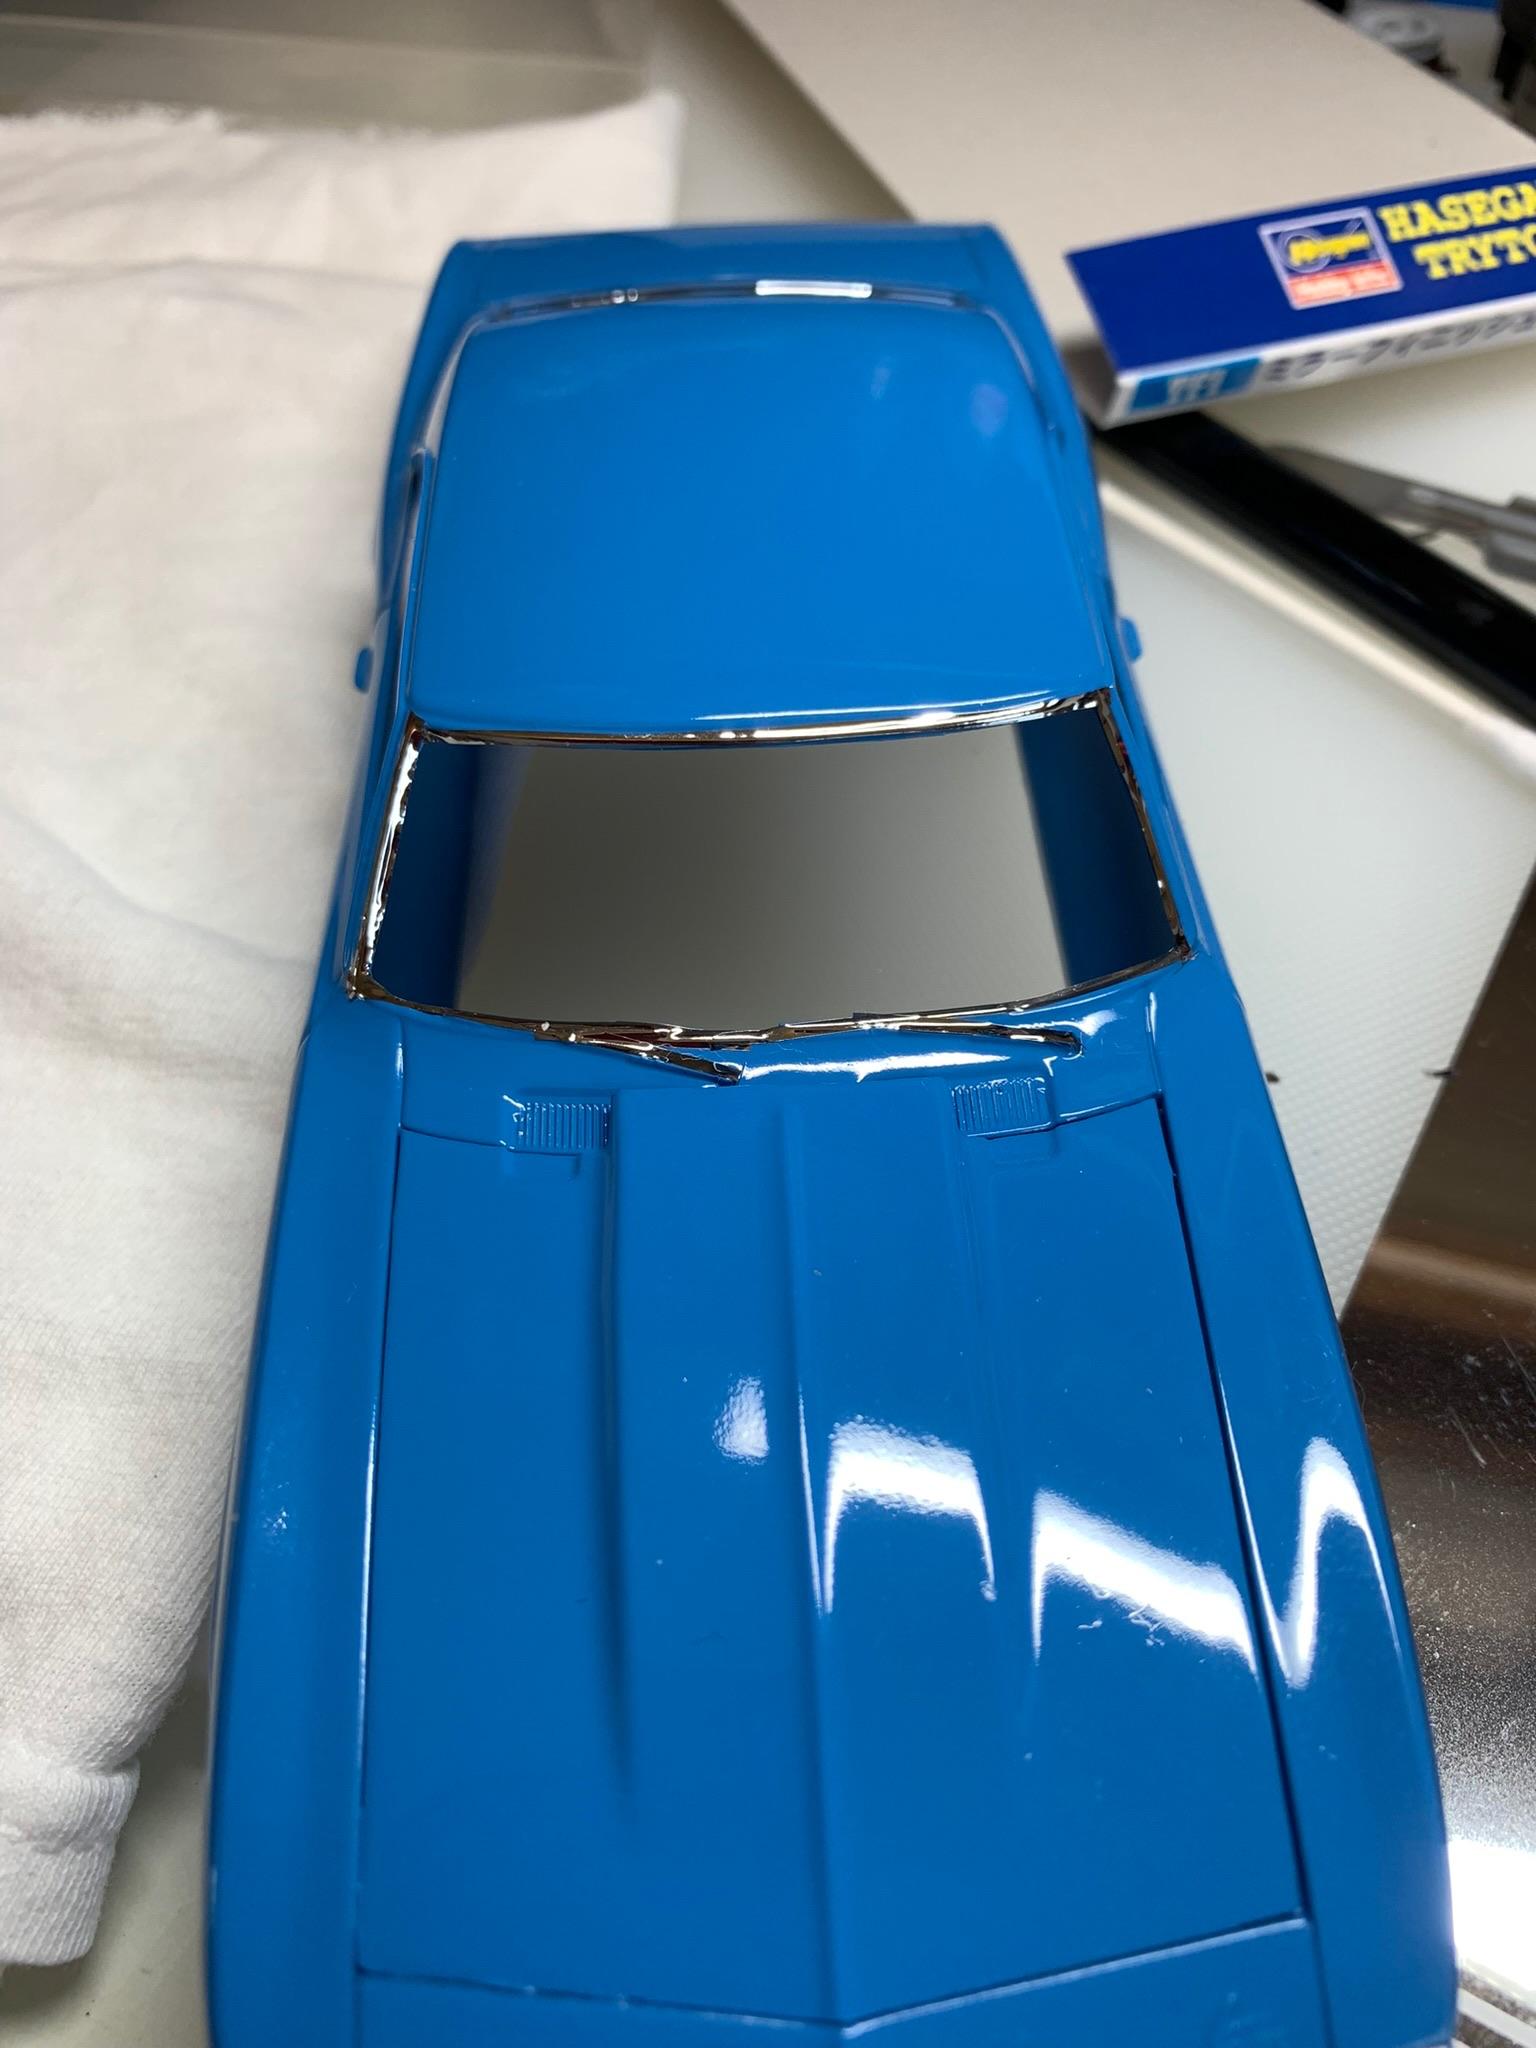
Did the left side today with much better results. Experience counts. Am I going to redo the right side? Maybe later.
-
Holloman & McKinney 57 Chevy C/MP circa 1964
R. Thorne replied to R. Thorne's topic in WIP: Drag Racing Models
By the way, comments (good, bad, indifferent), suggestions, critiques are always appreciated. -
Holloman & McKinney 57 Chevy C/MP circa 1964
R. Thorne replied to R. Thorne's topic in WIP: Drag Racing Models
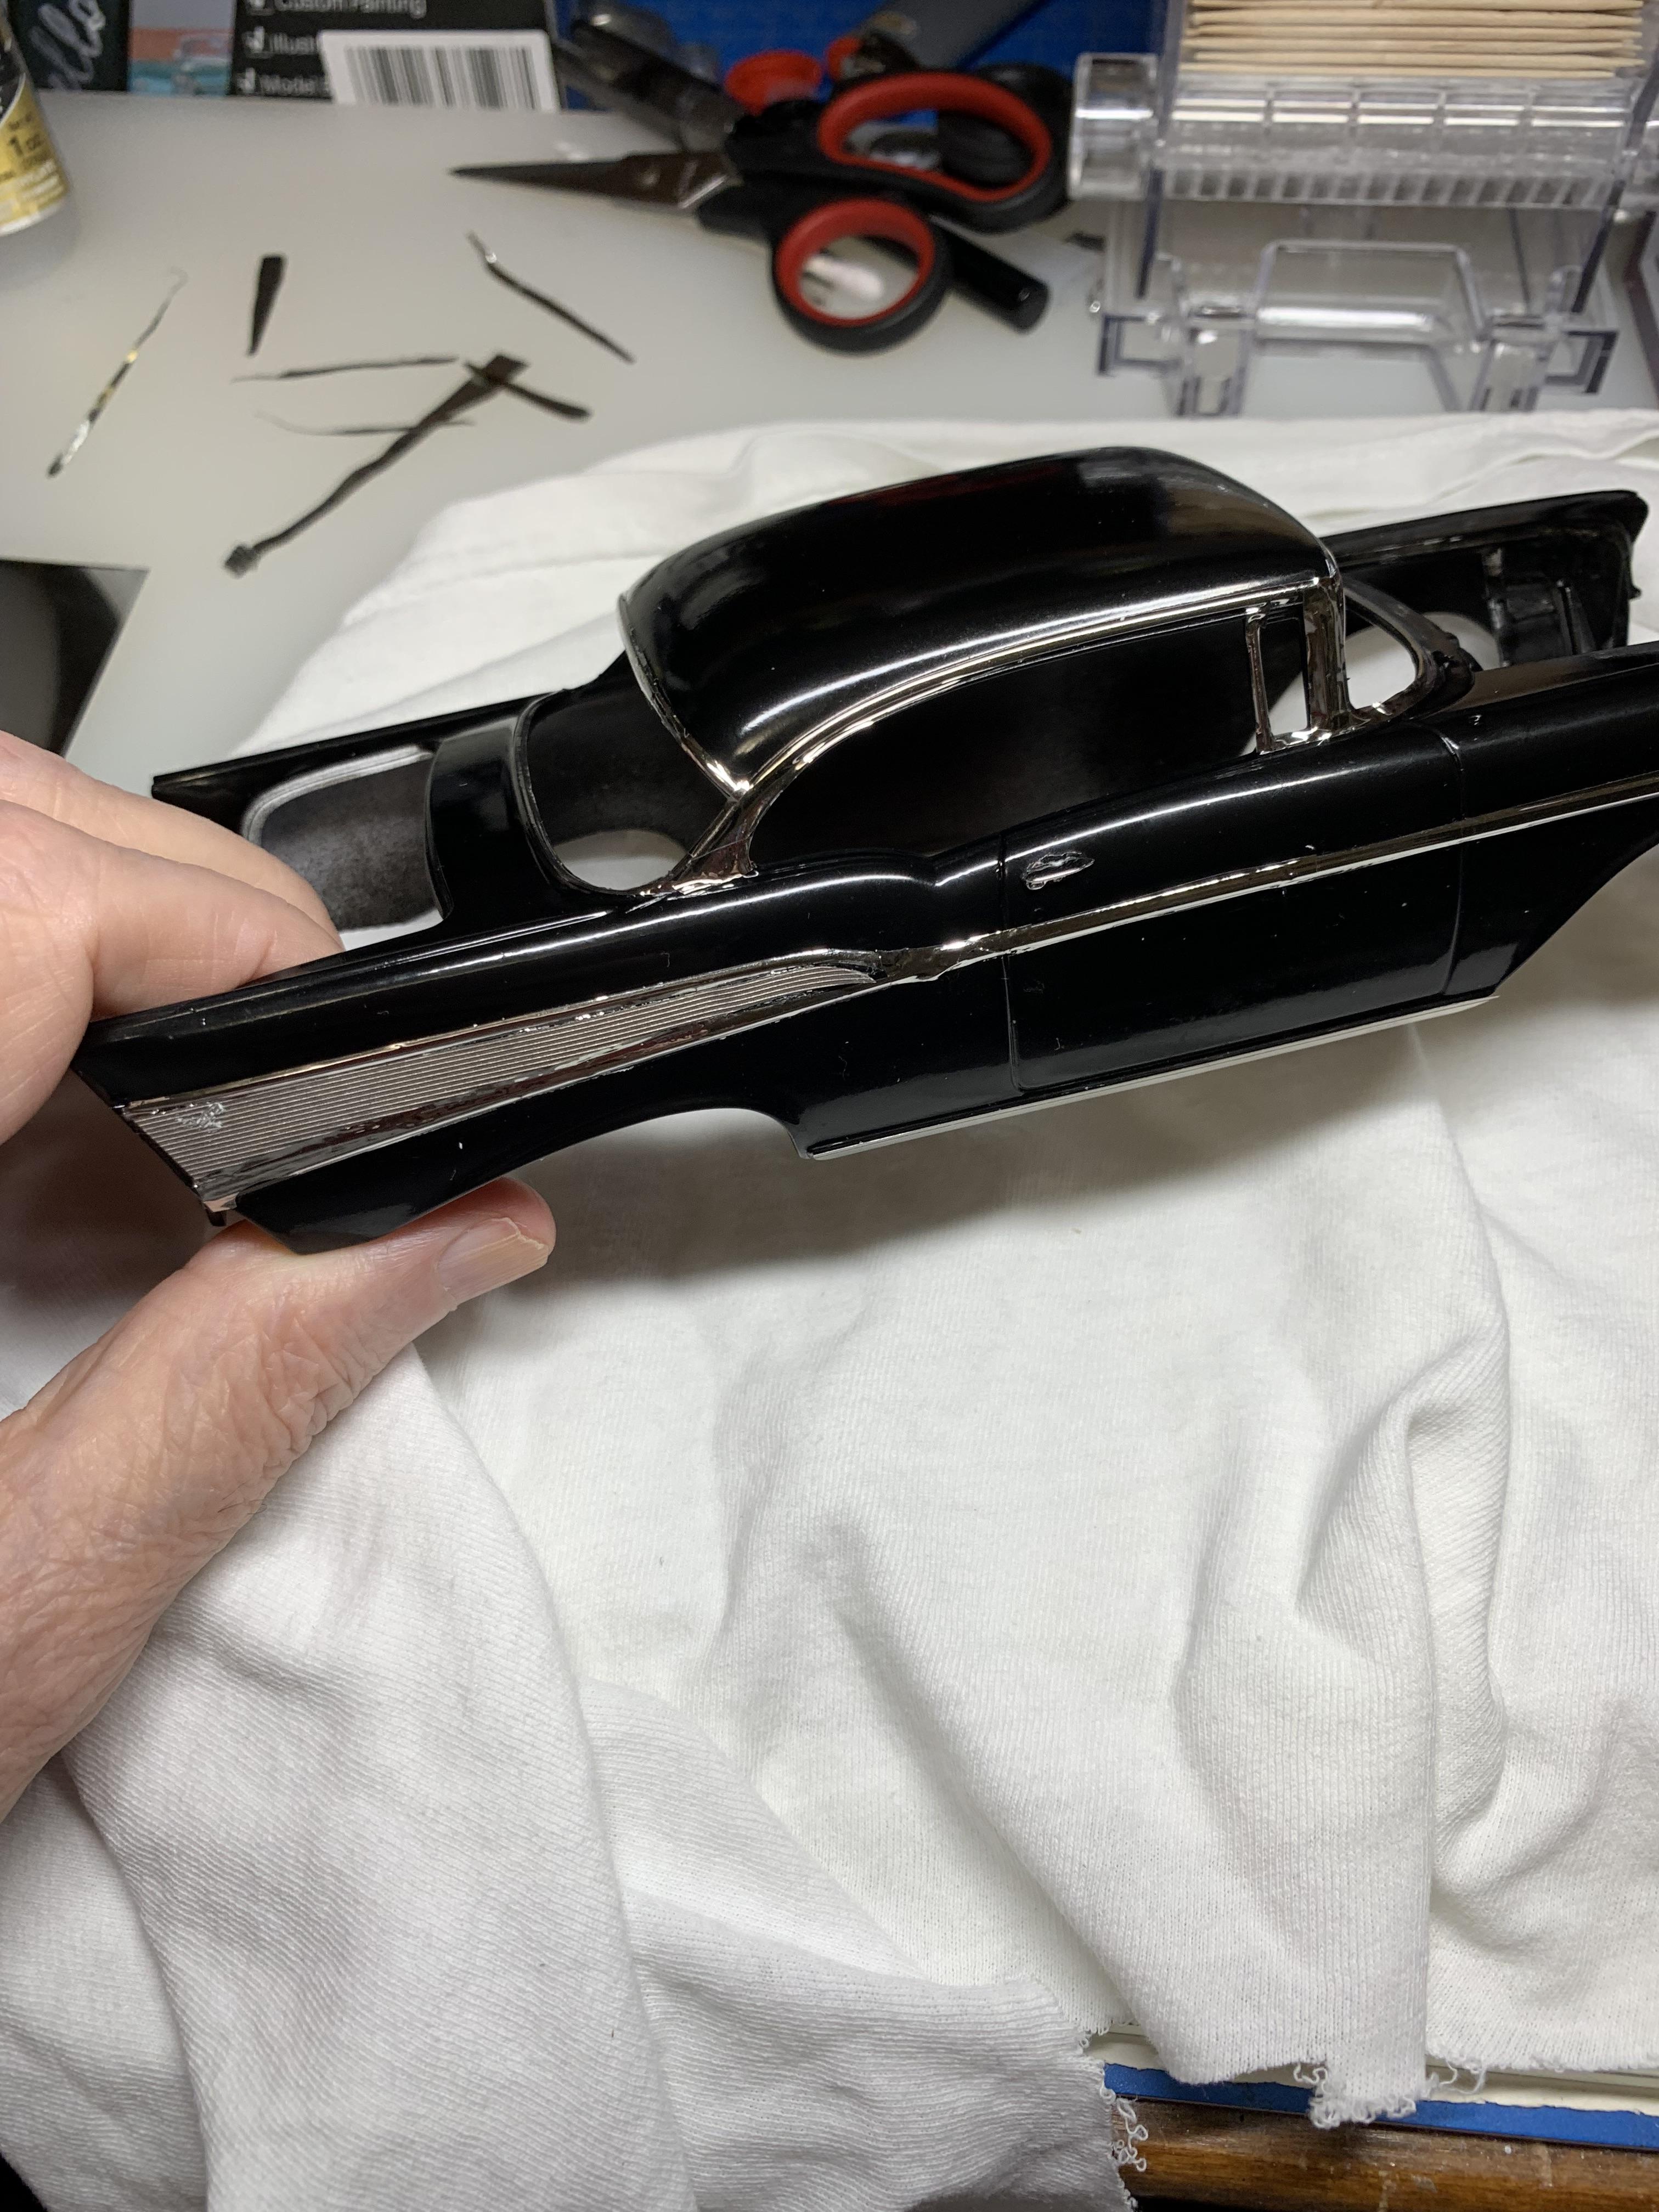
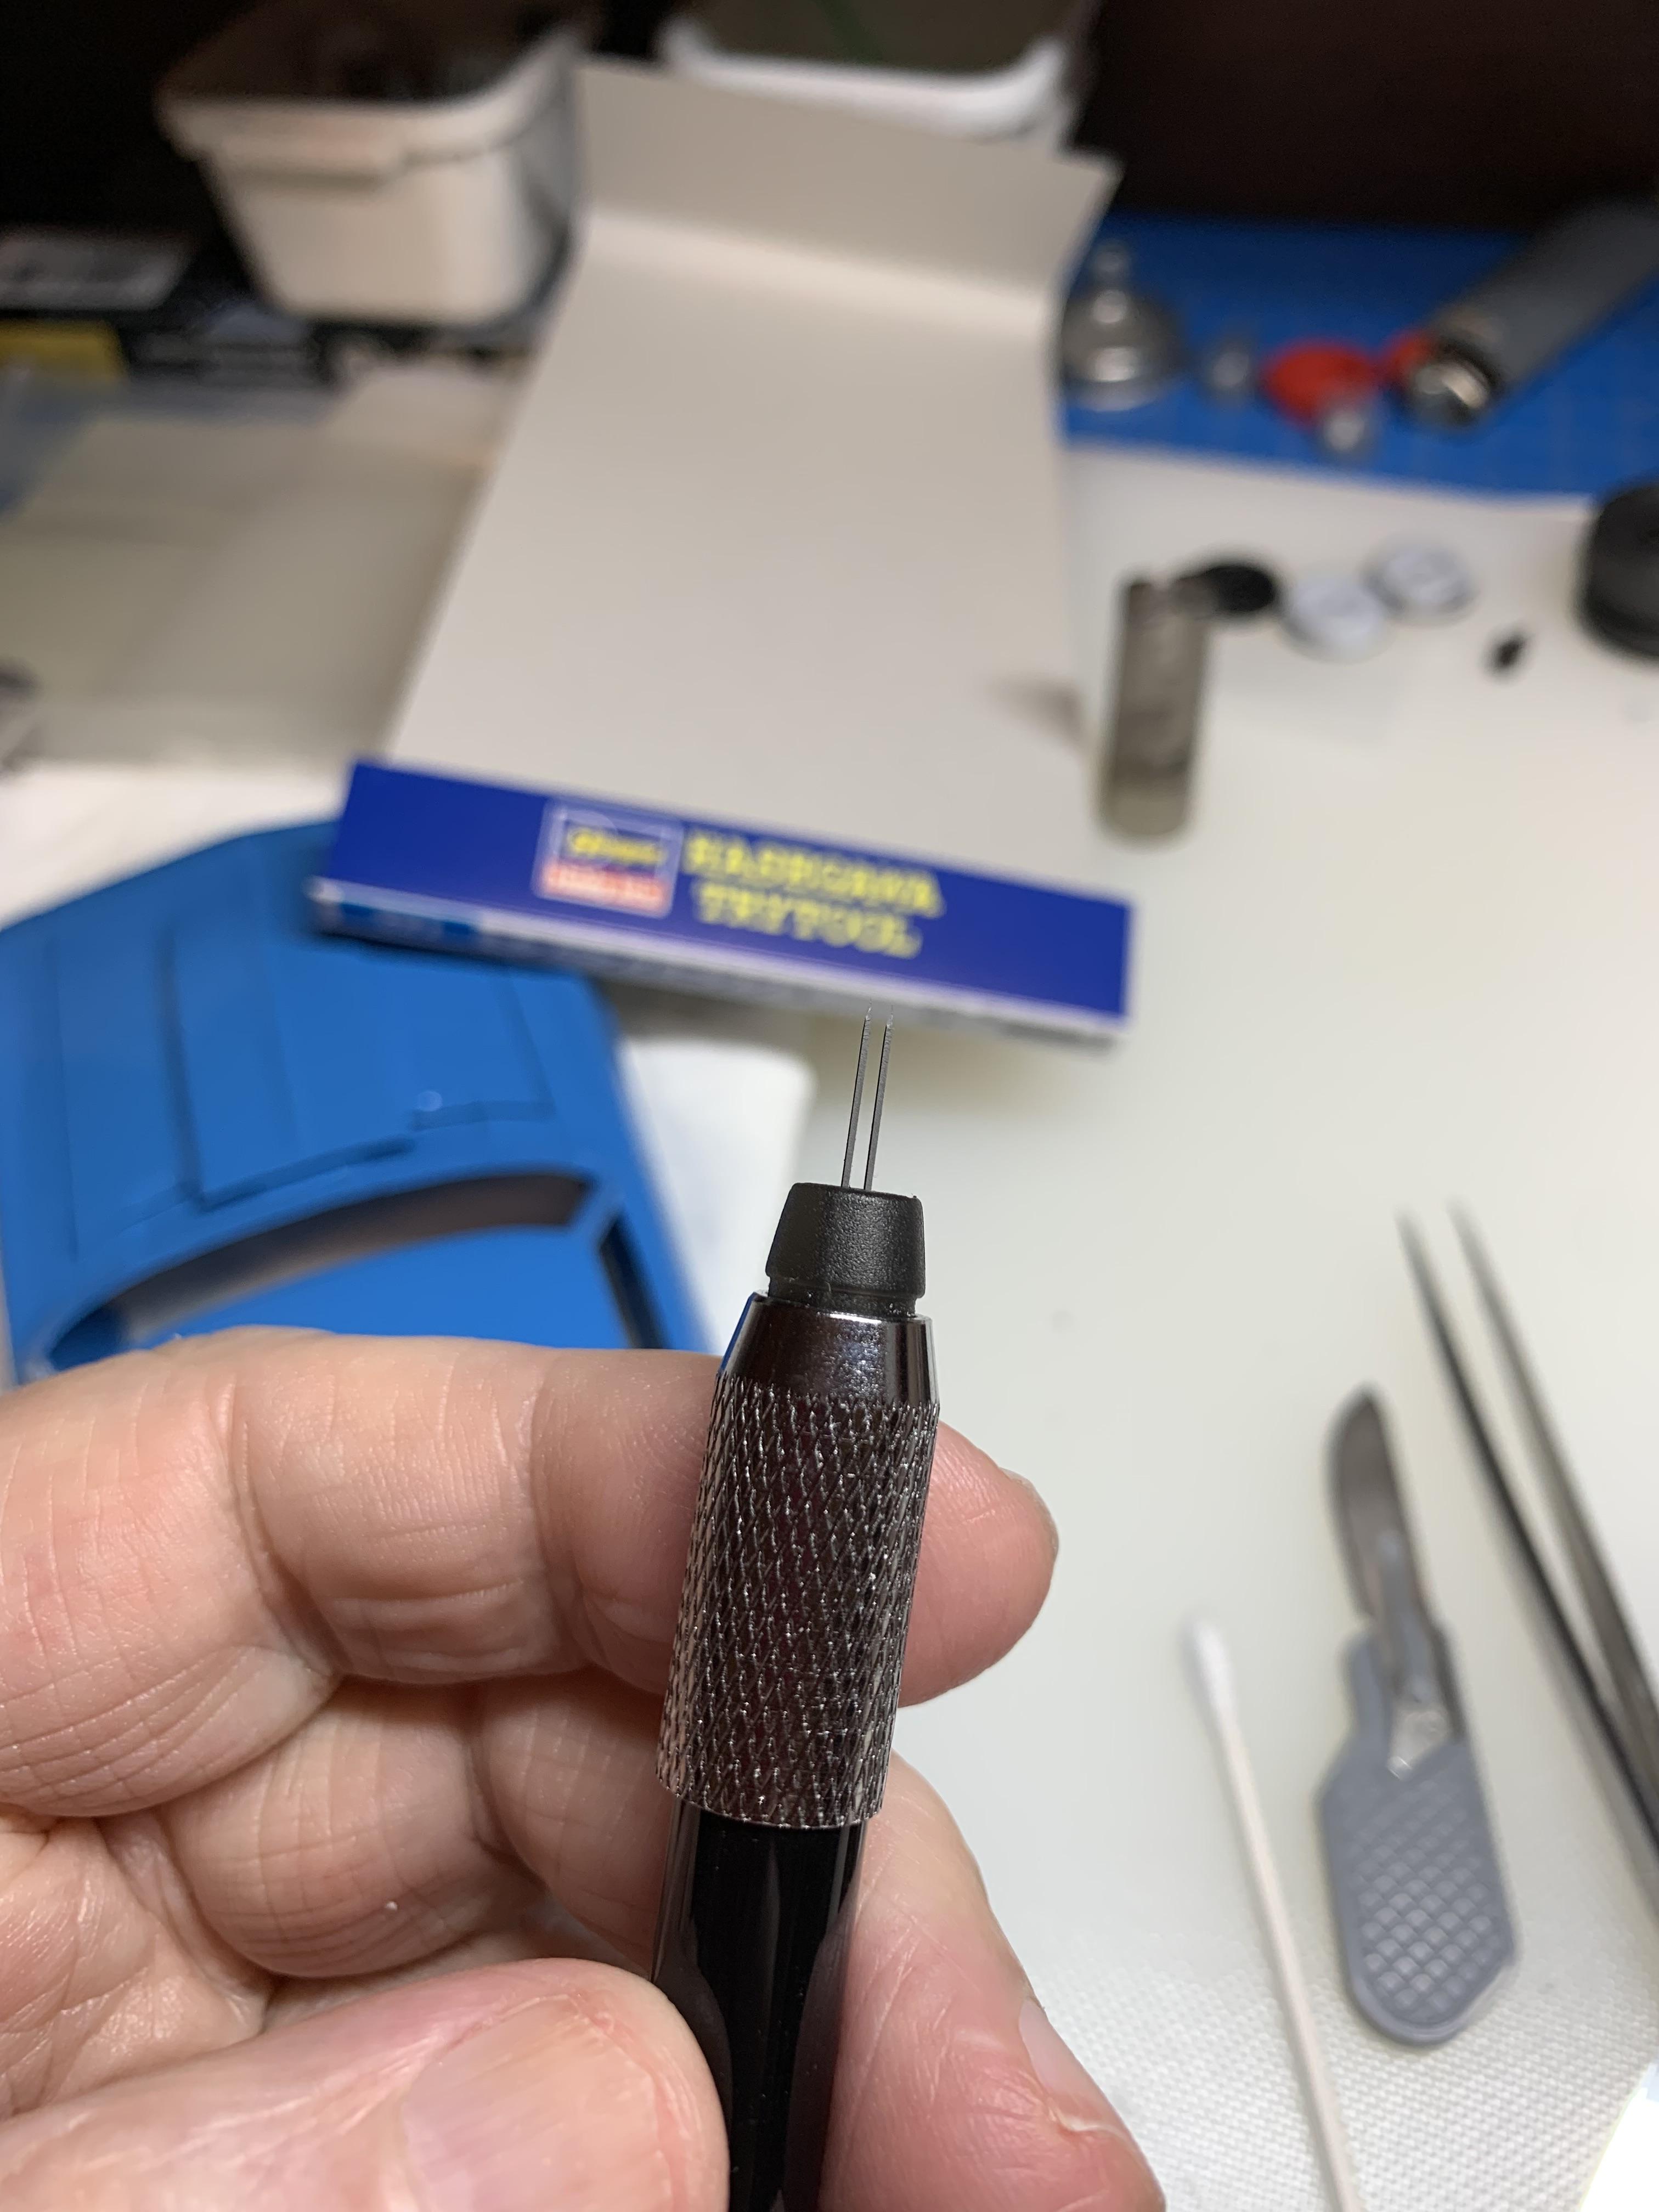
First time dealing with photo etch stuff and it shows. Too much ca on the door handles. The Hasegawa is shiny, but almost impossible to trim after it is installed (for me, anyway). I tried different type scalpel blades with the same result. Overall, chalk it up to experience and move on. Gonna do the other side and, maybe, try to trim closer before installing.
-
Tribute to Snake45
R. Thorne replied to bobthehobbyguy's topic in General Automotive Talk (Trucks and Cars)
RIP. -
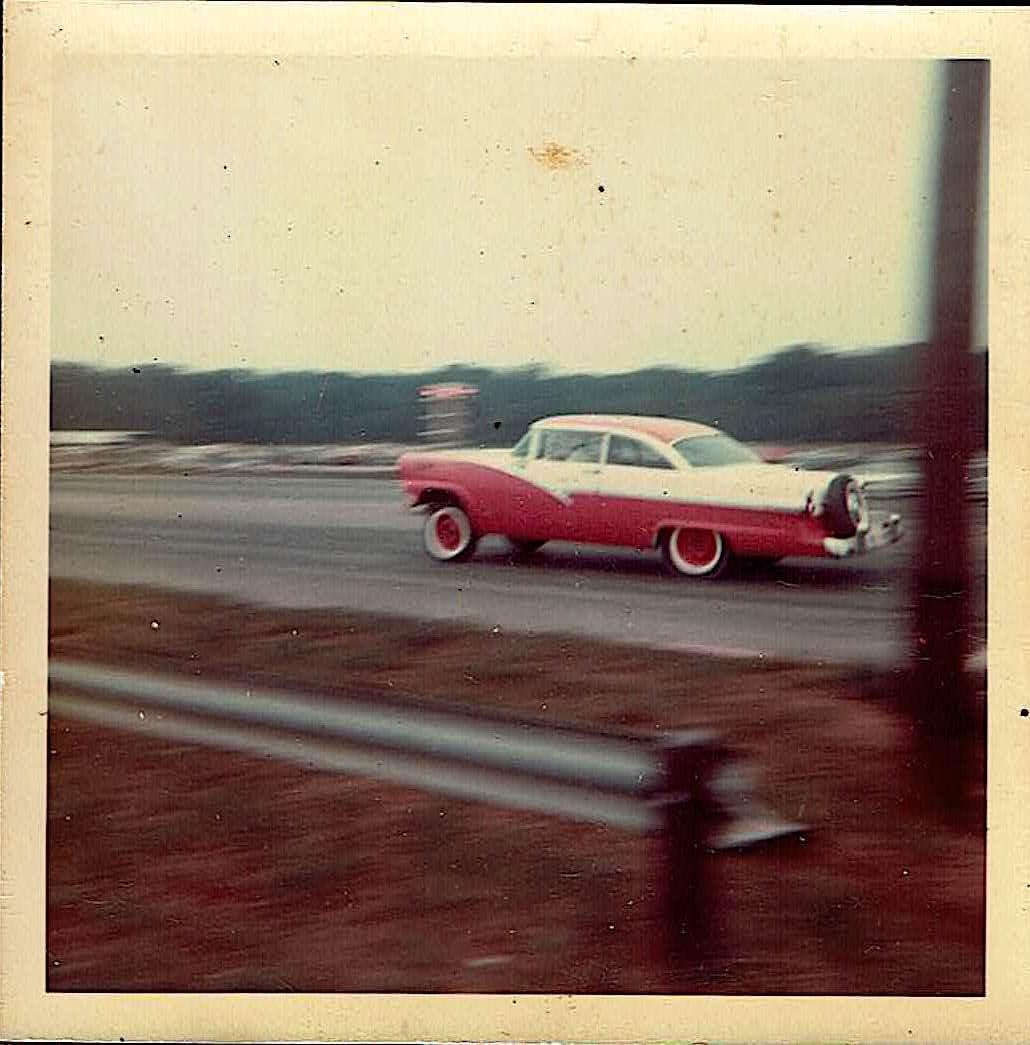
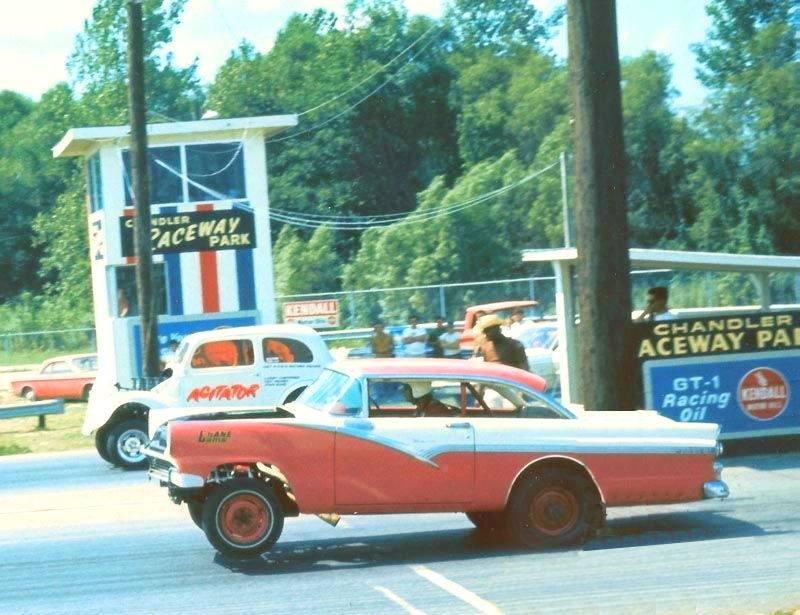
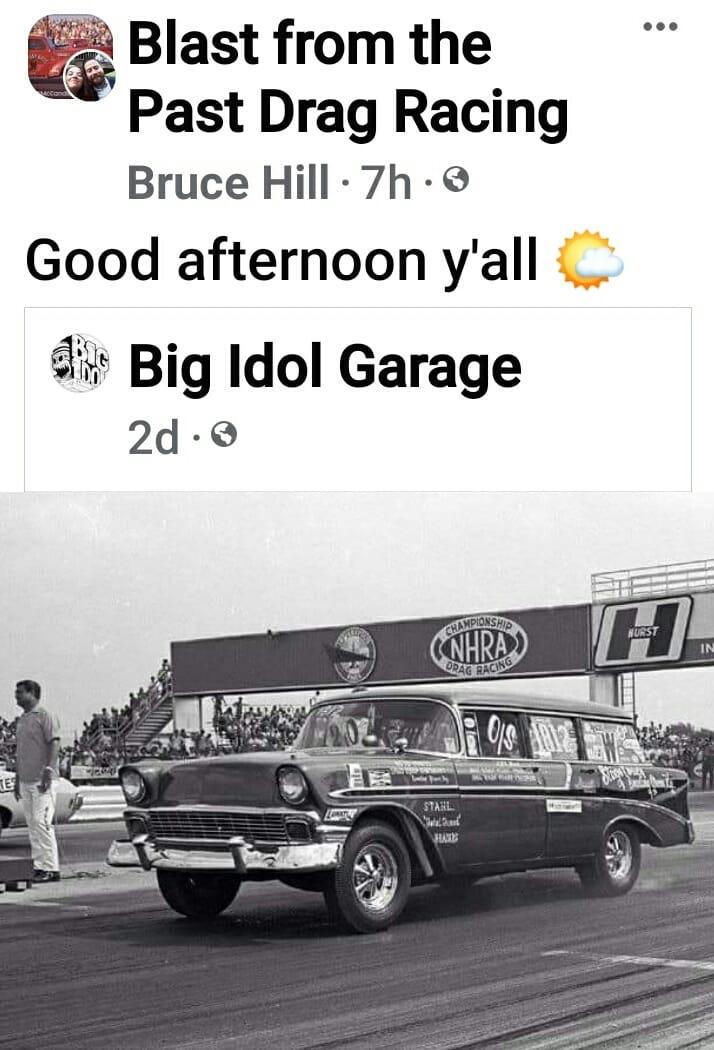
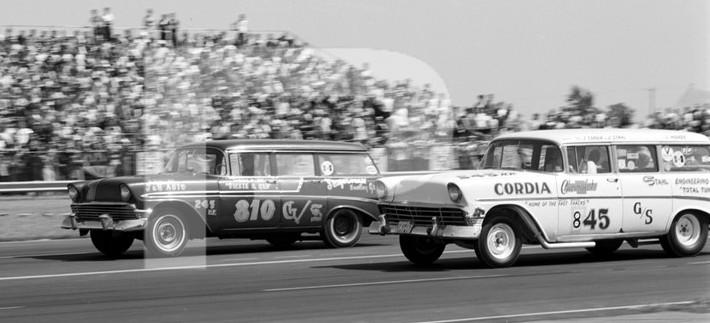
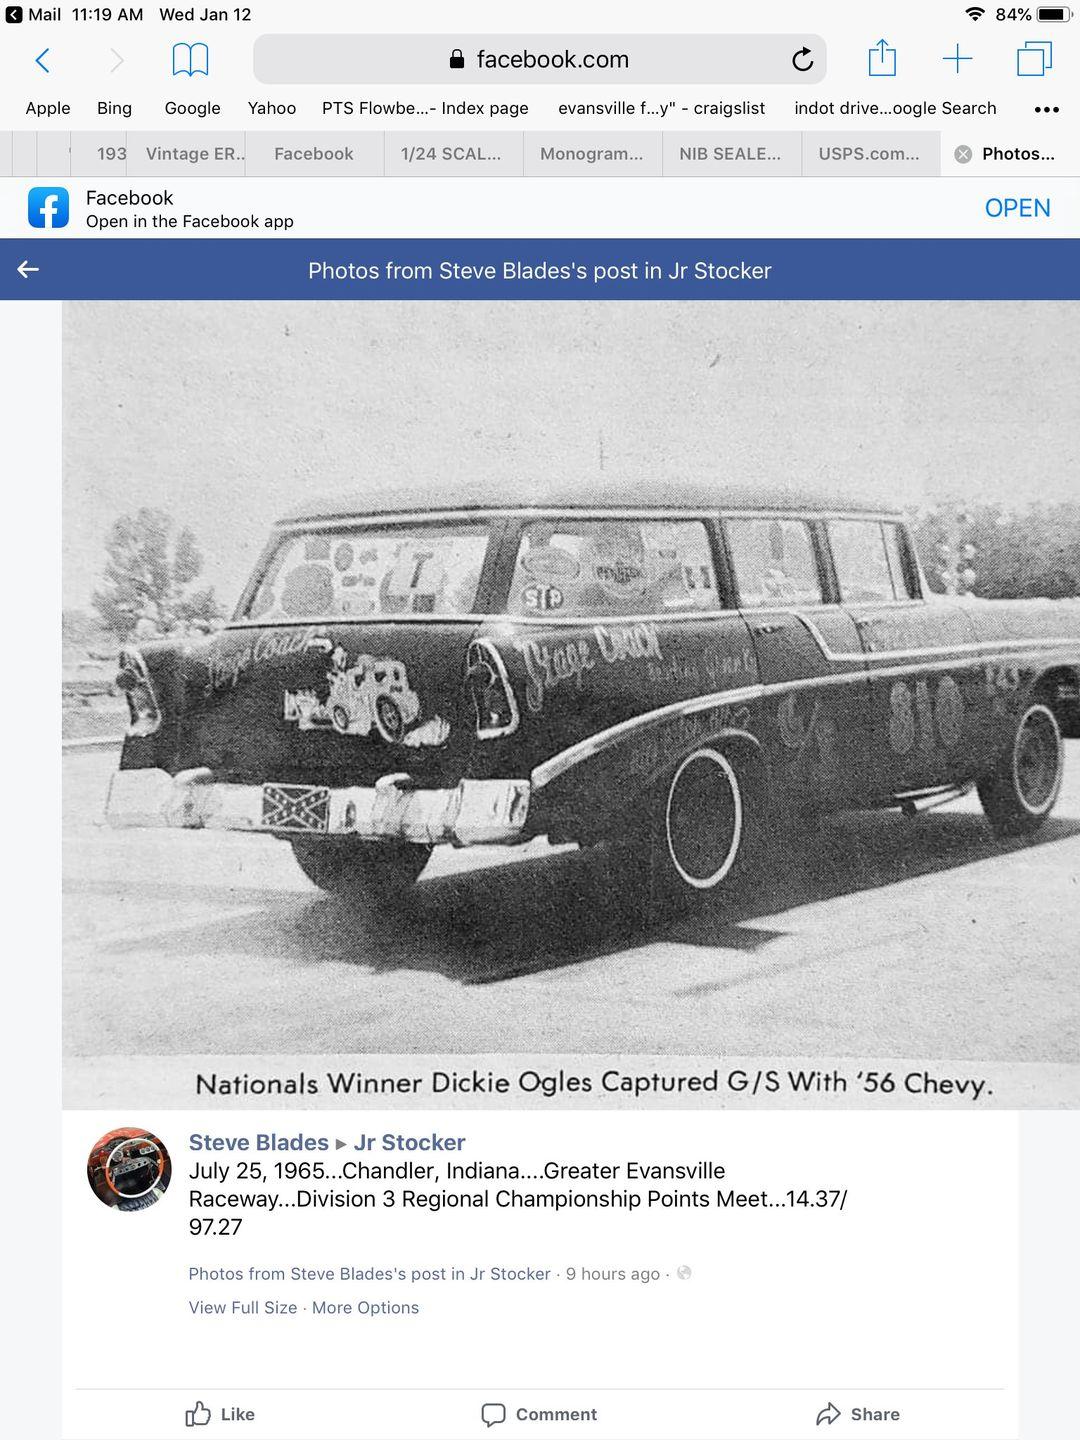
Any guesses what engine is in this car?
R. Thorne replied to larman's topic in WIP: Drag Racing Models
My guess is most guys were brand loyal back then and the sbc was still relatively new. I would say a 312 (or maybe claimed a 272 lol) . I watched Gene Heidorn (lived 20 miles from me) race many variations of his Ford eventually with a big block and altered wheelbase.
-
Holloman & McKinney 57 Chevy C/MP circa 1964
R. Thorne replied to R. Thorne's topic in WIP: Drag Racing Models
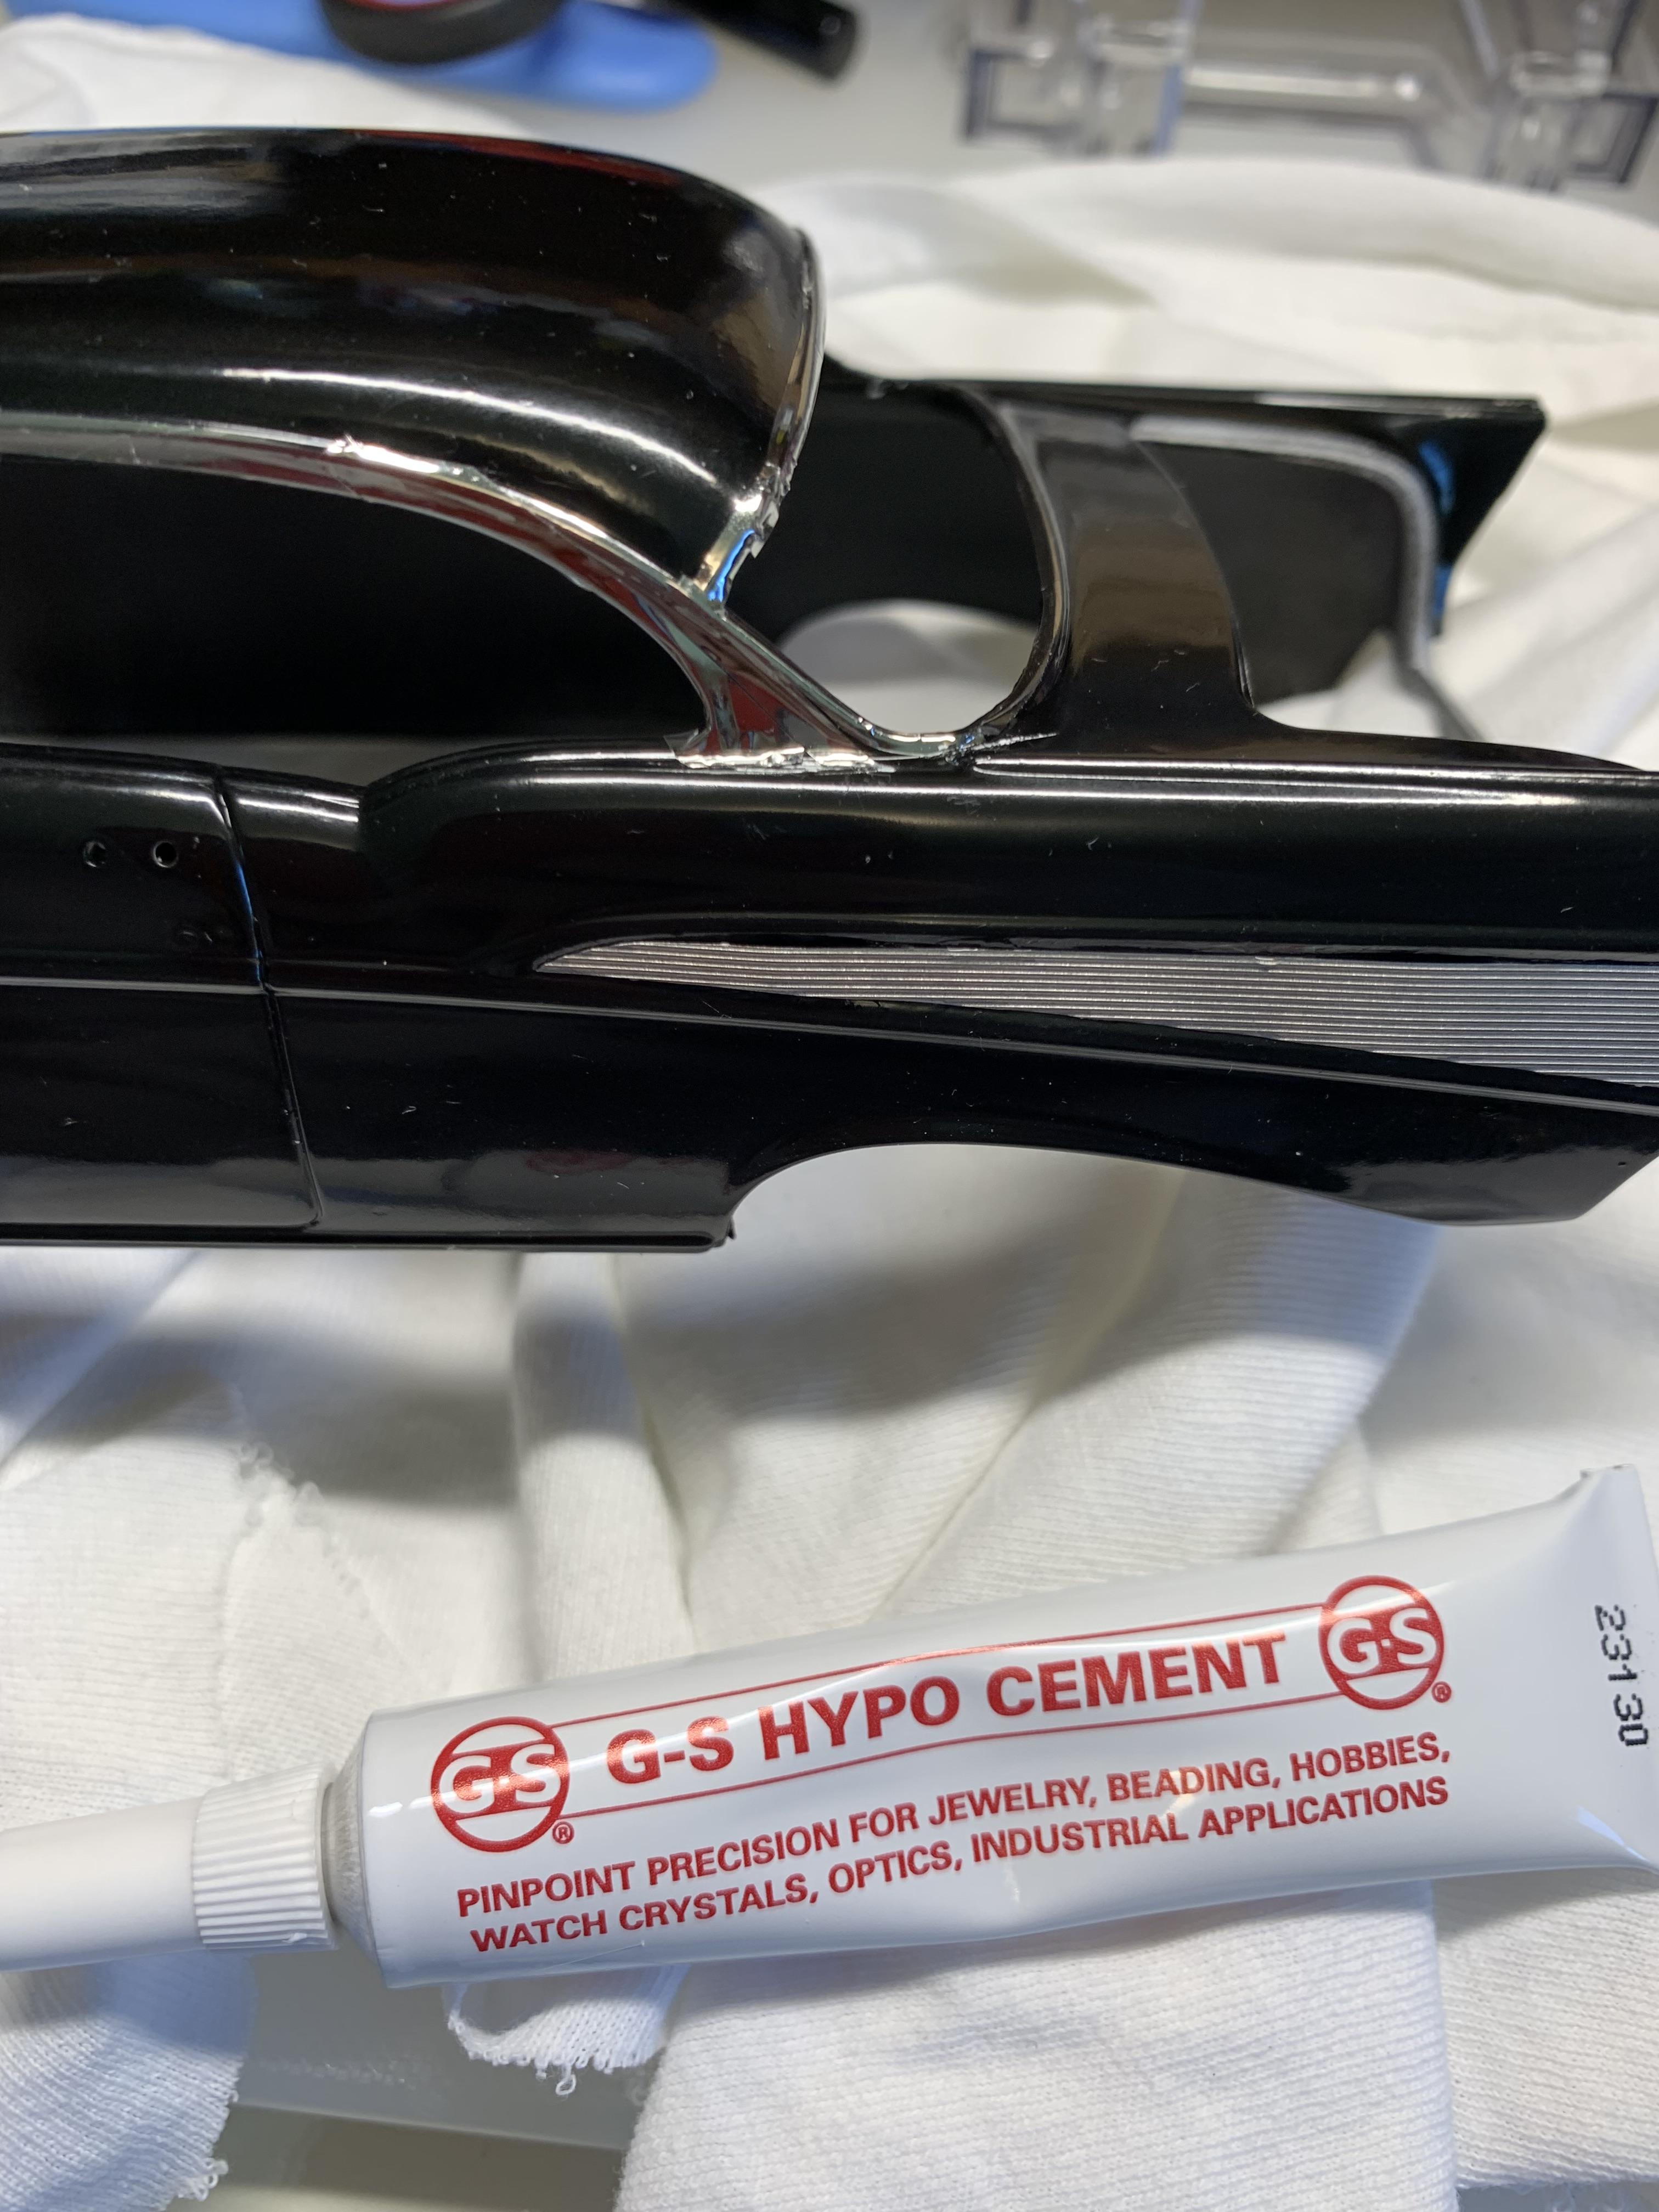
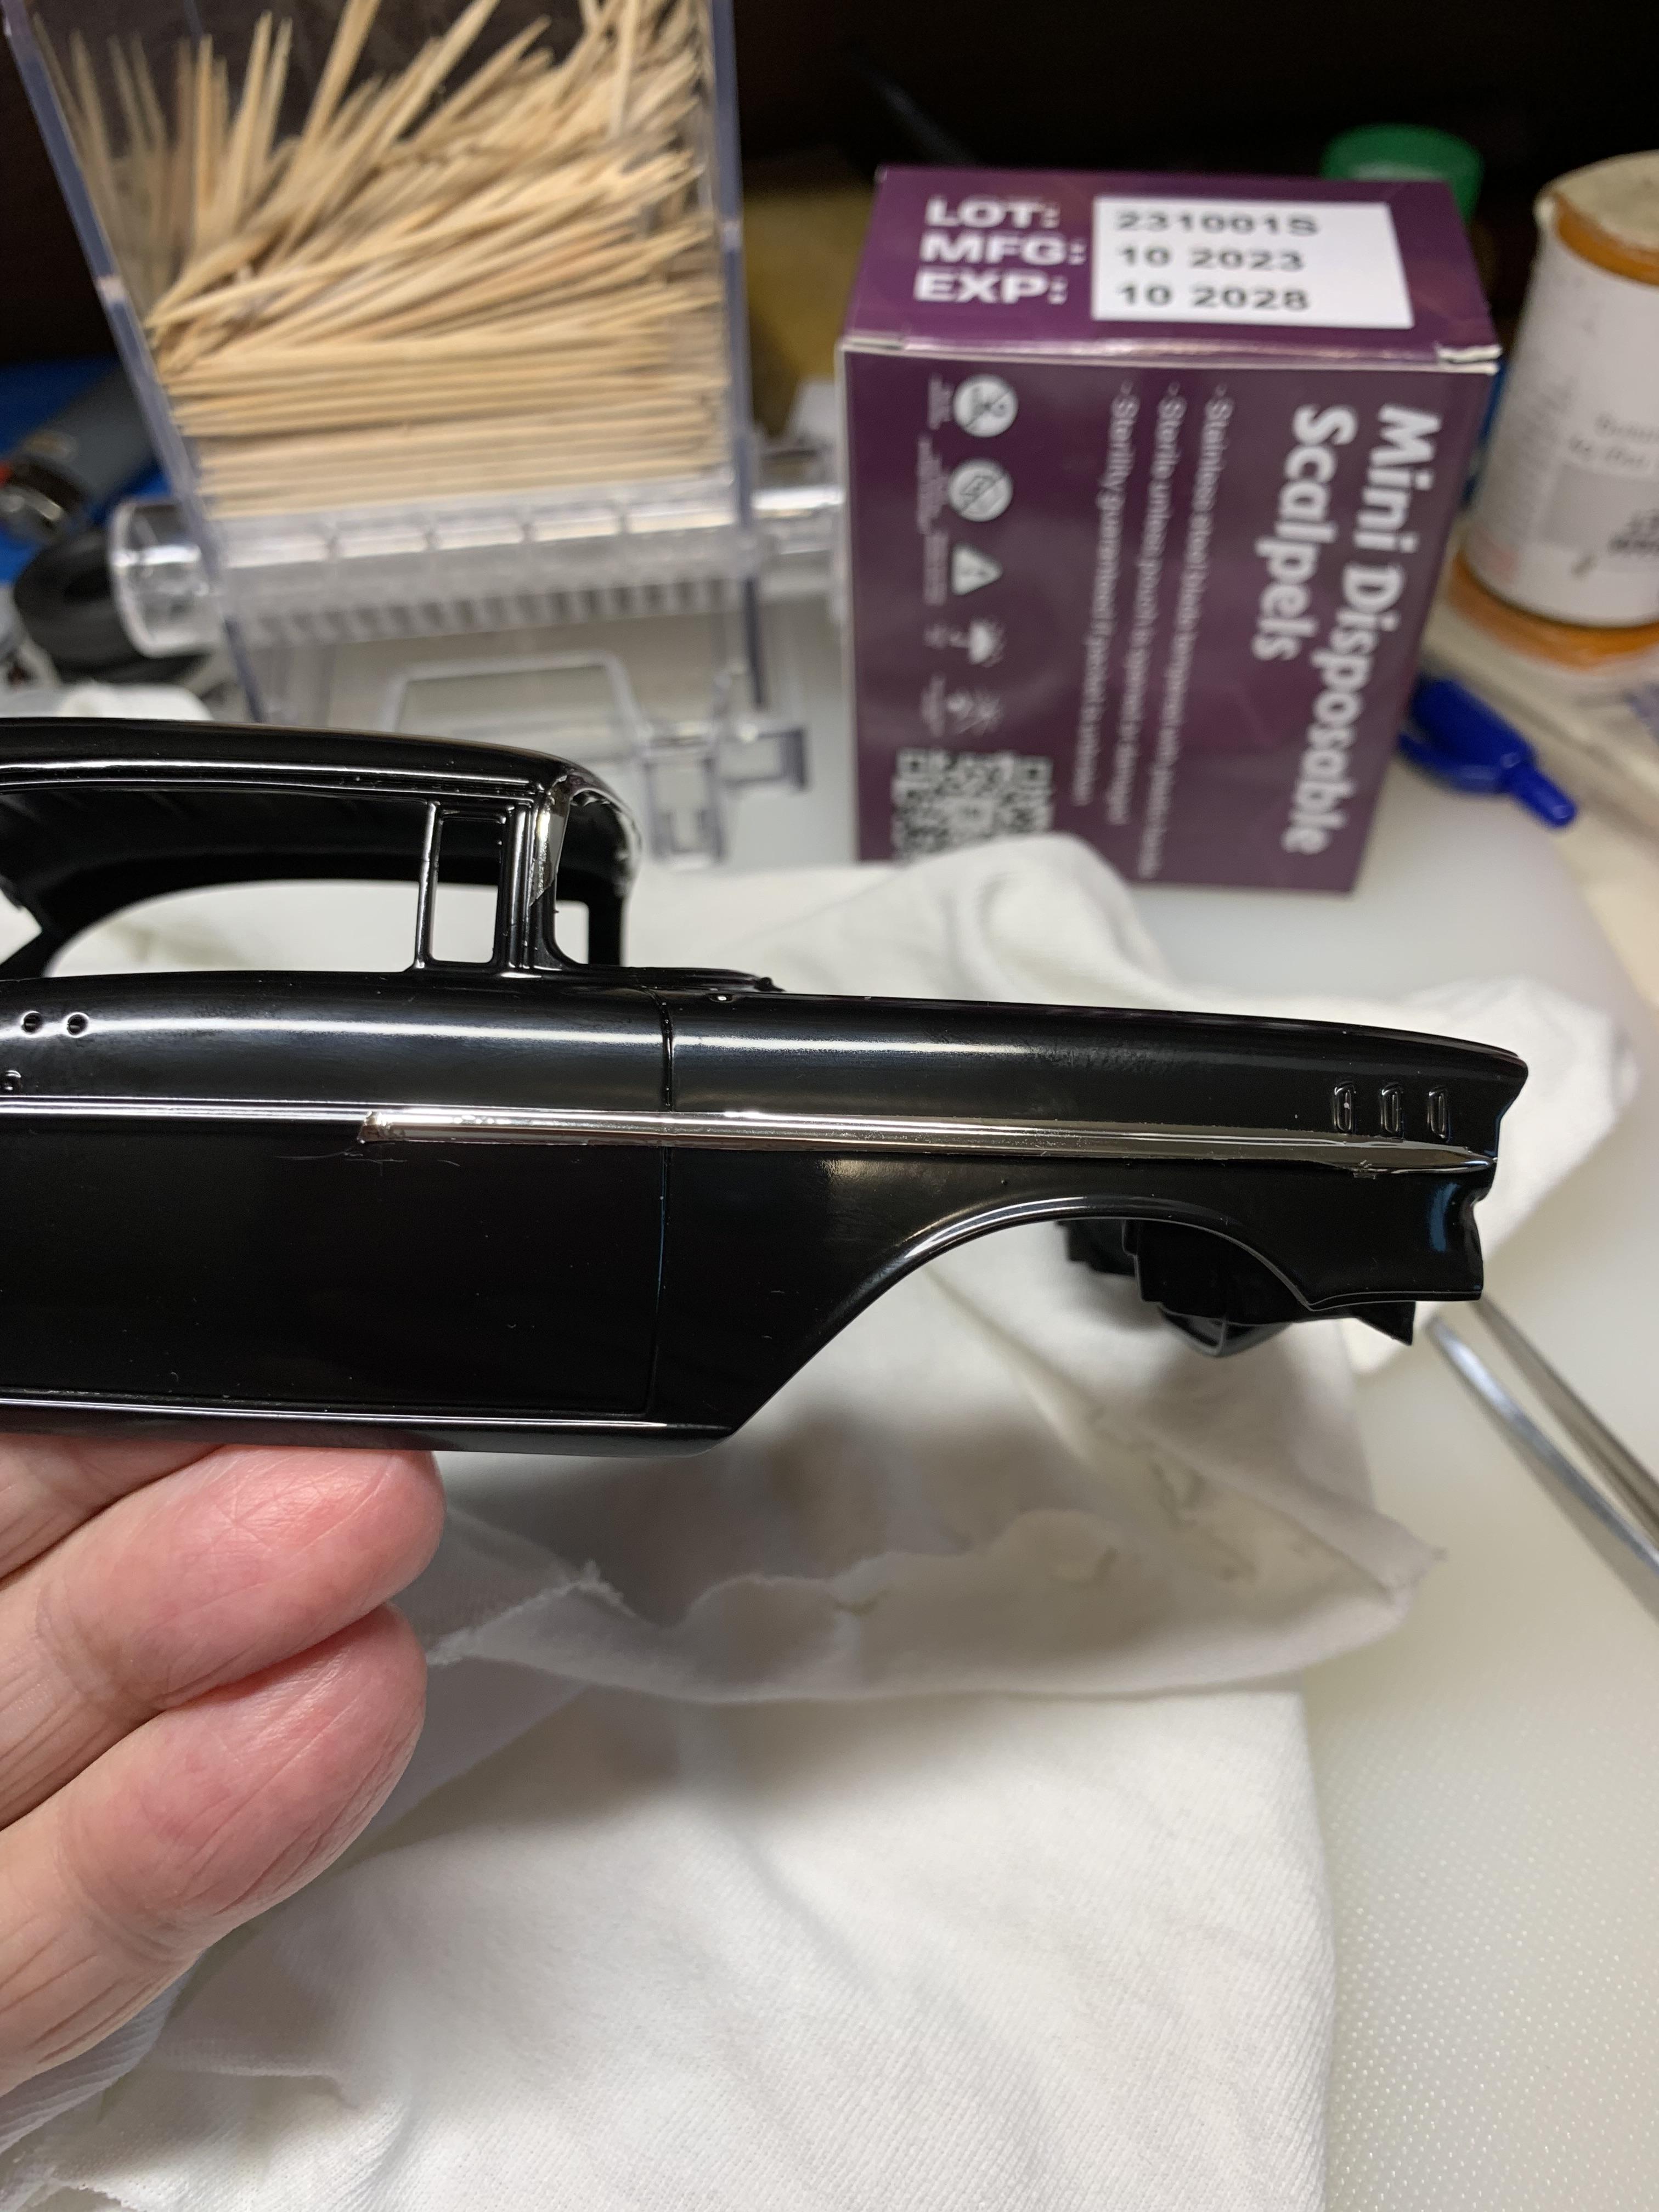
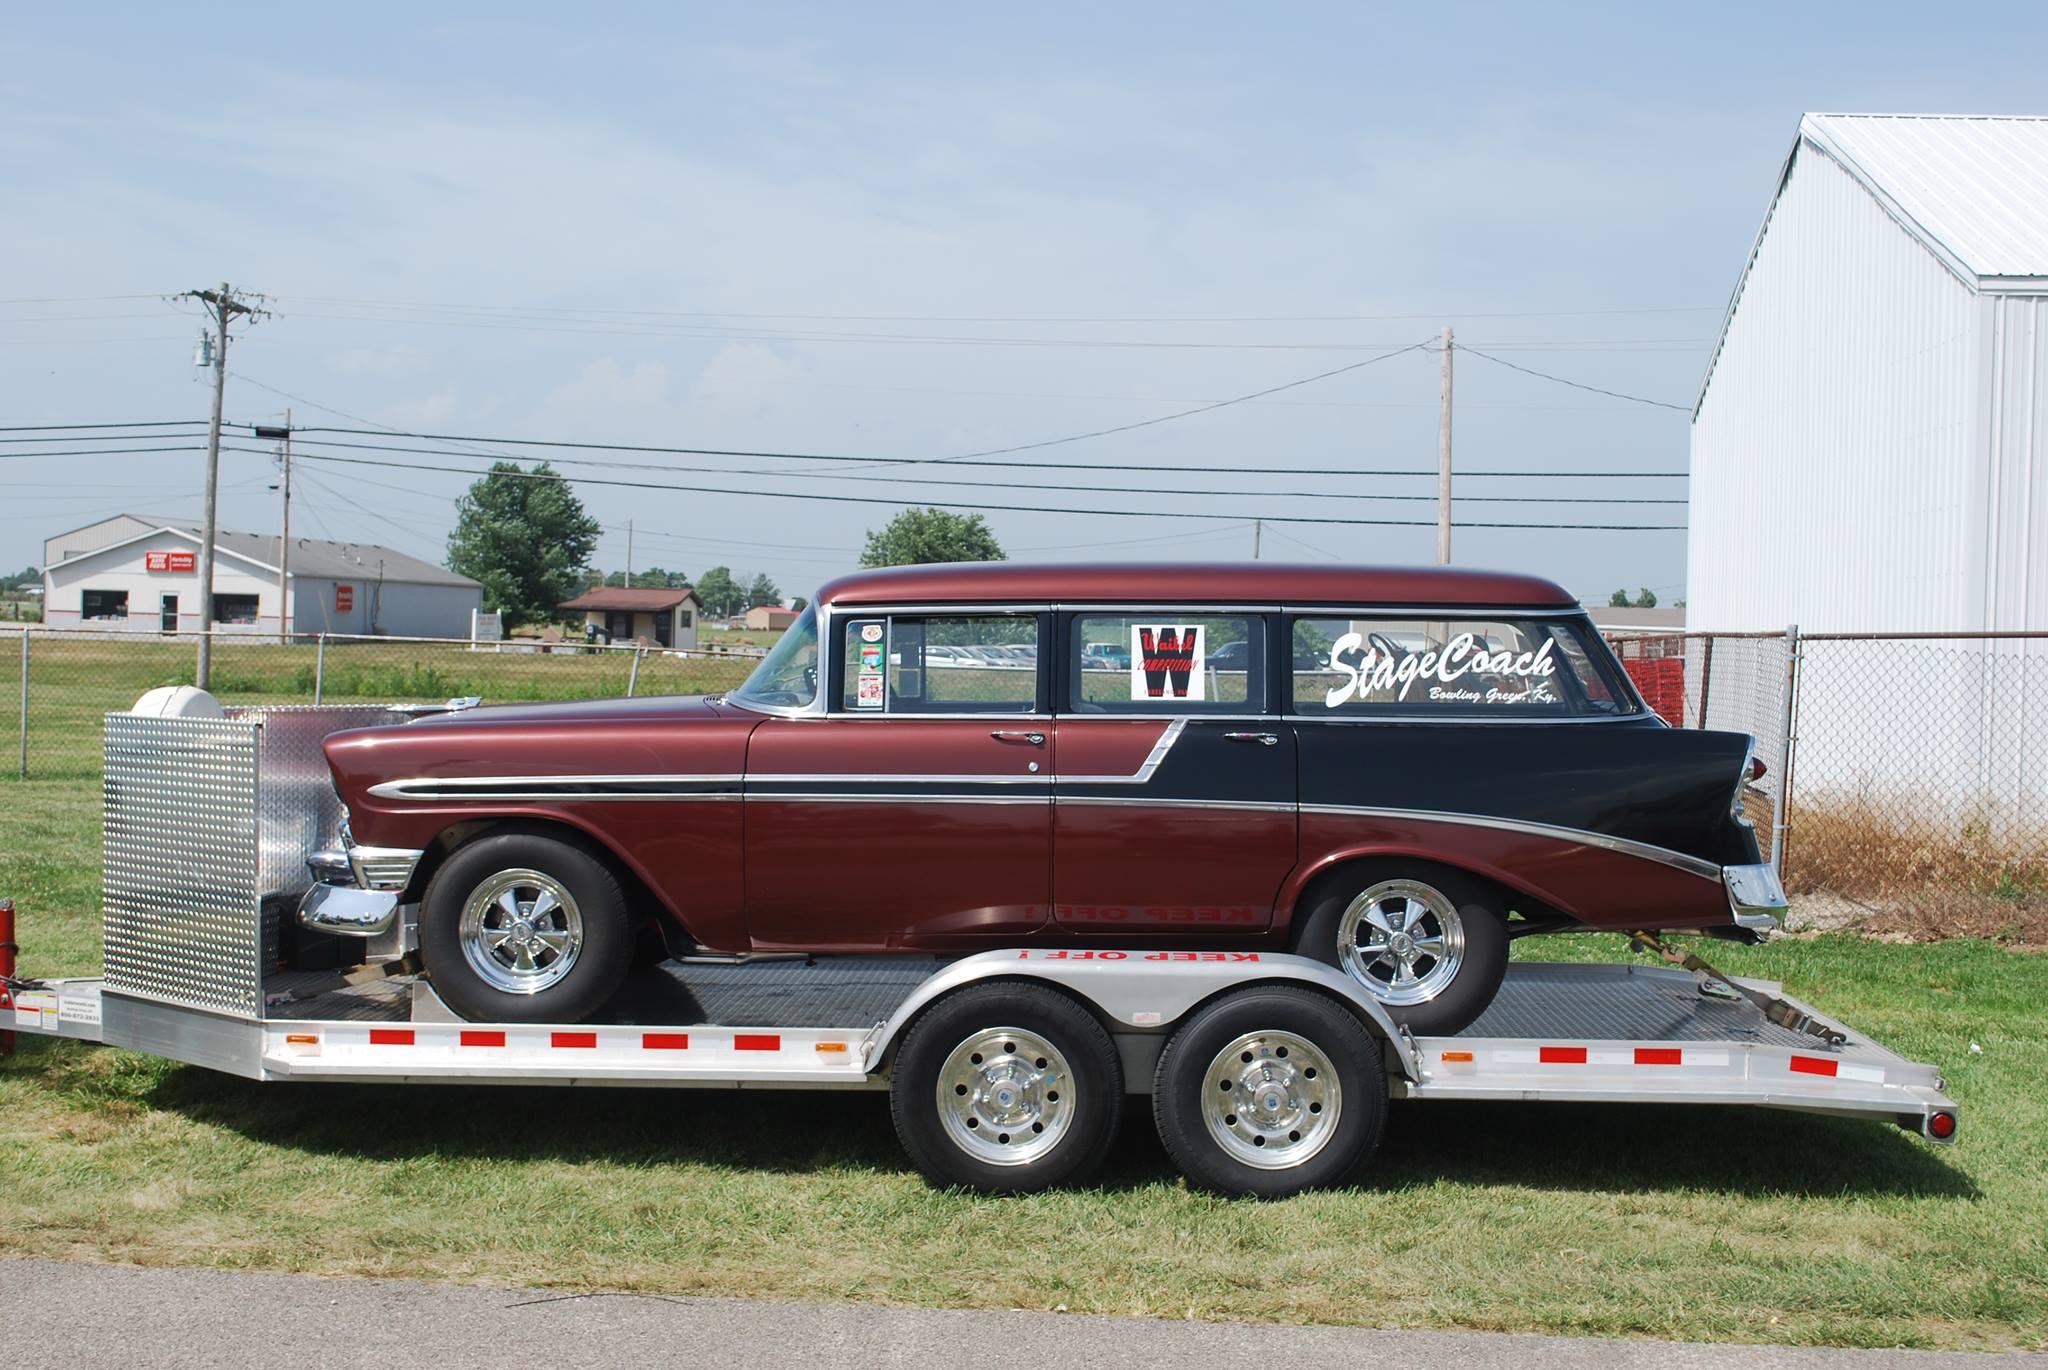
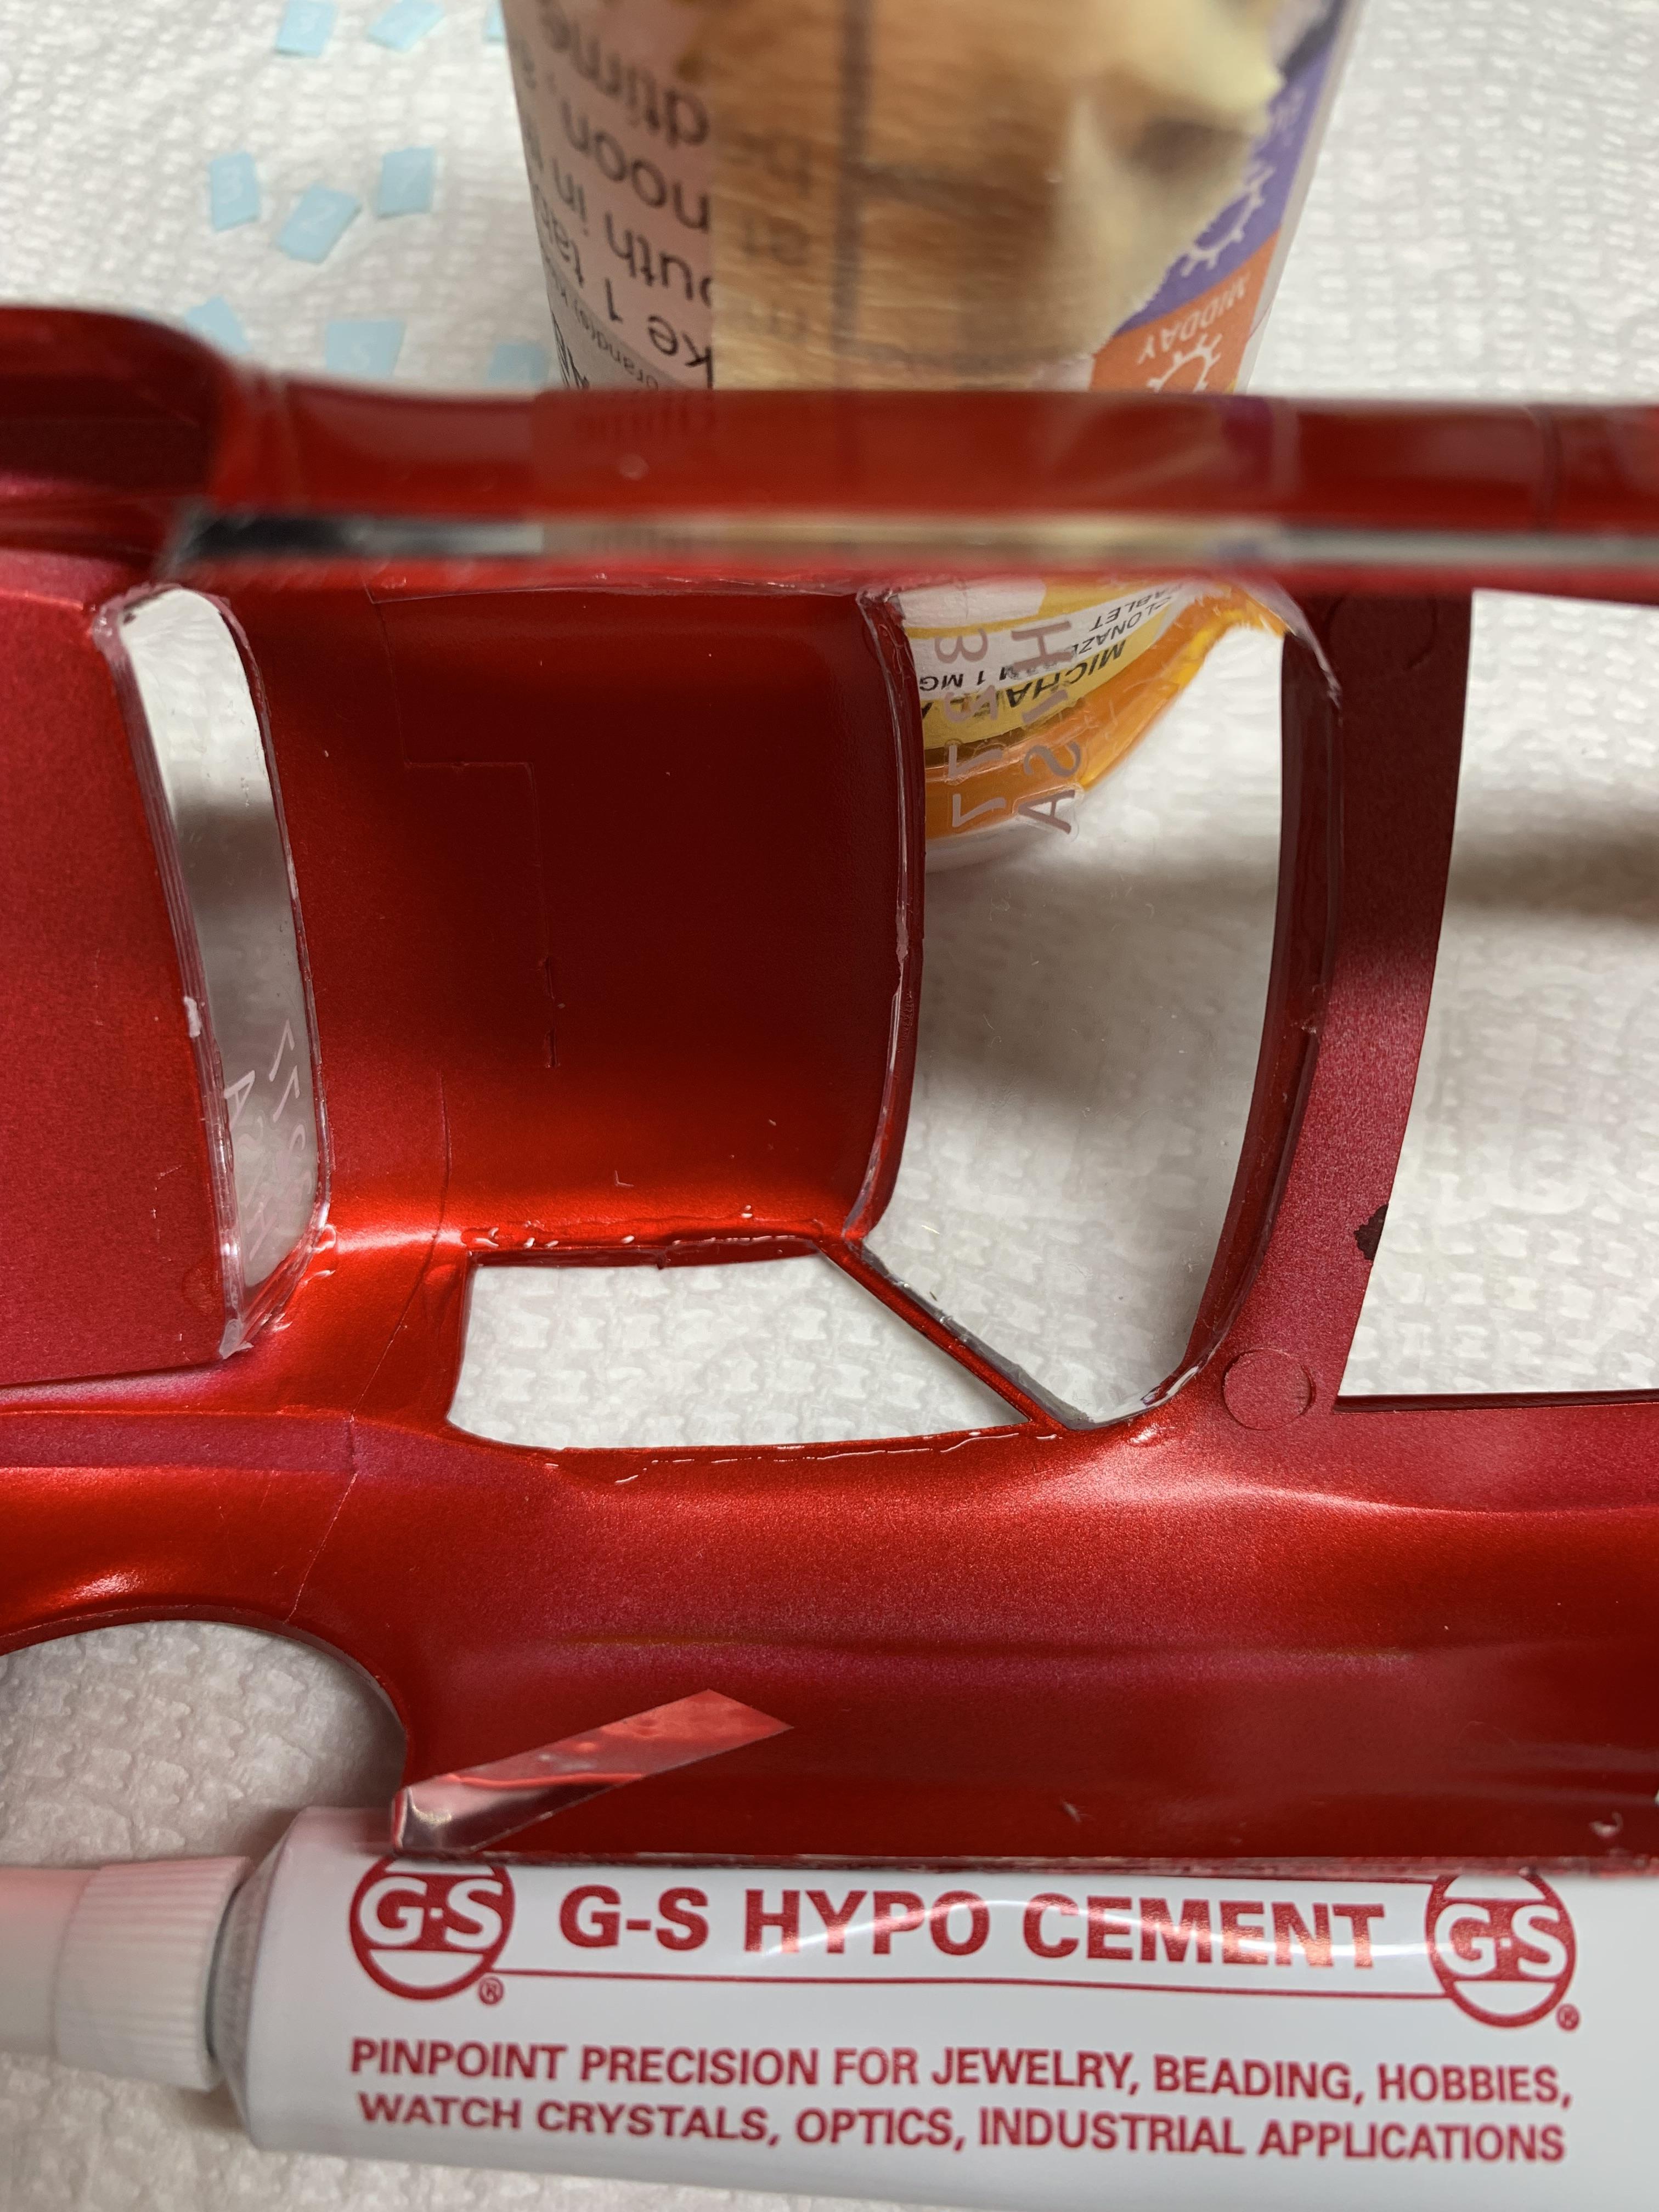
Dug out a pic of the side view of a 57 belair. Put the photo etch side trim on. First with some Future glue, then gs Hypo worked better and quicker.
-
Holloman & McKinney 57 Chevy C/MP circa 1964
R. Thorne replied to R. Thorne's topic in WIP: Drag Racing Models
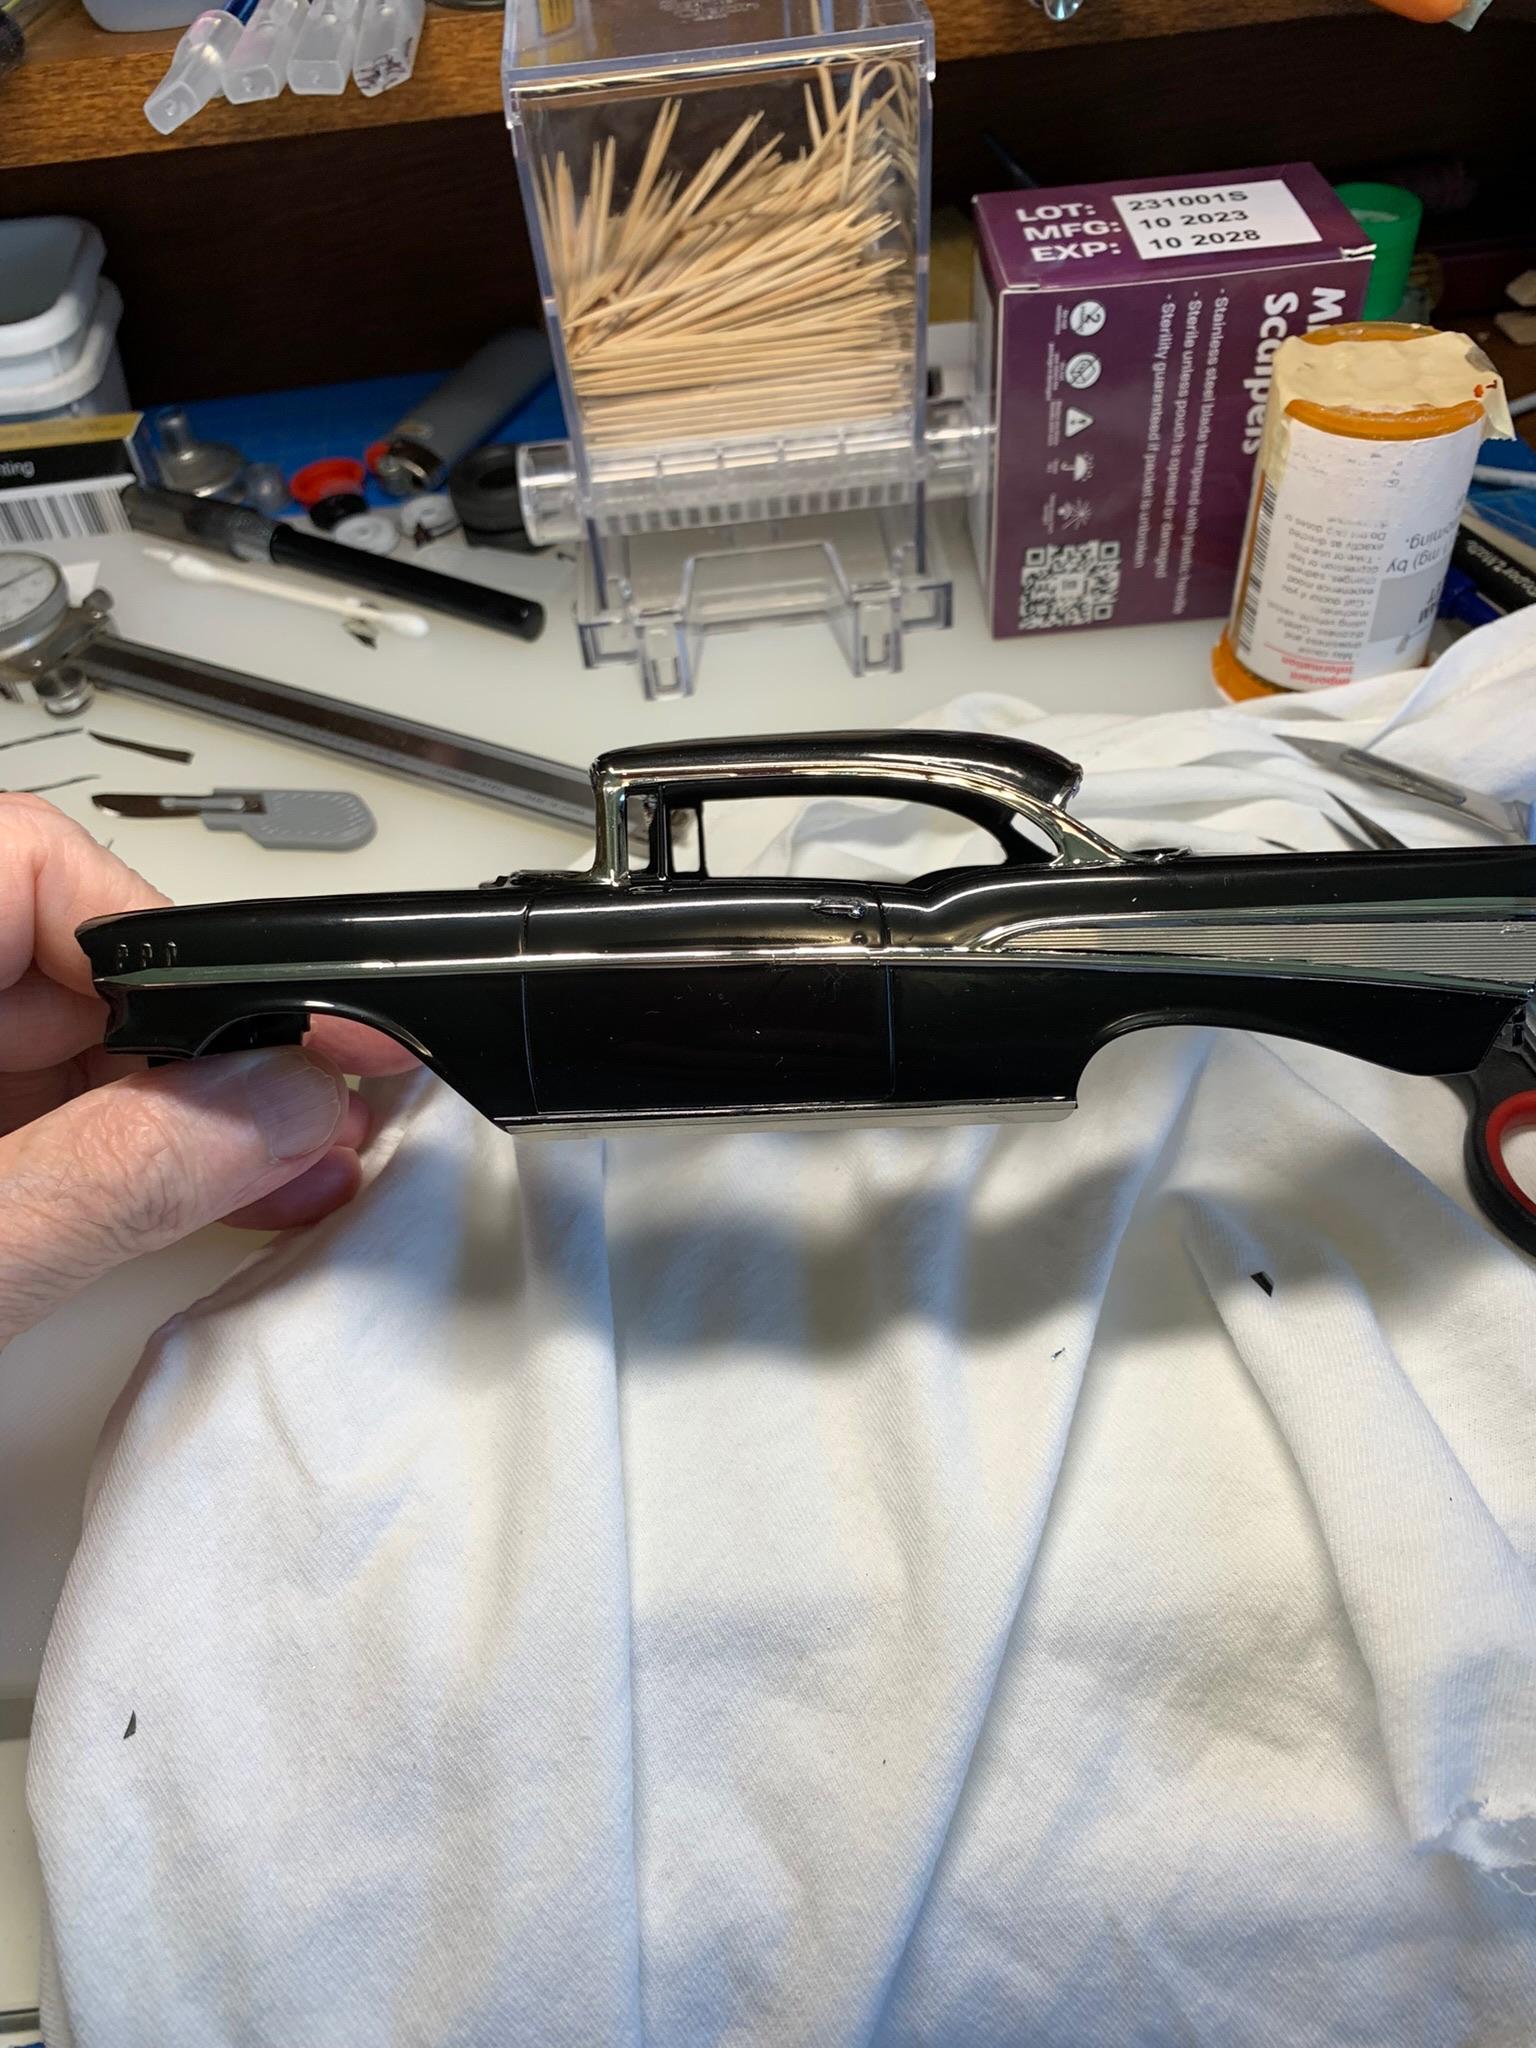
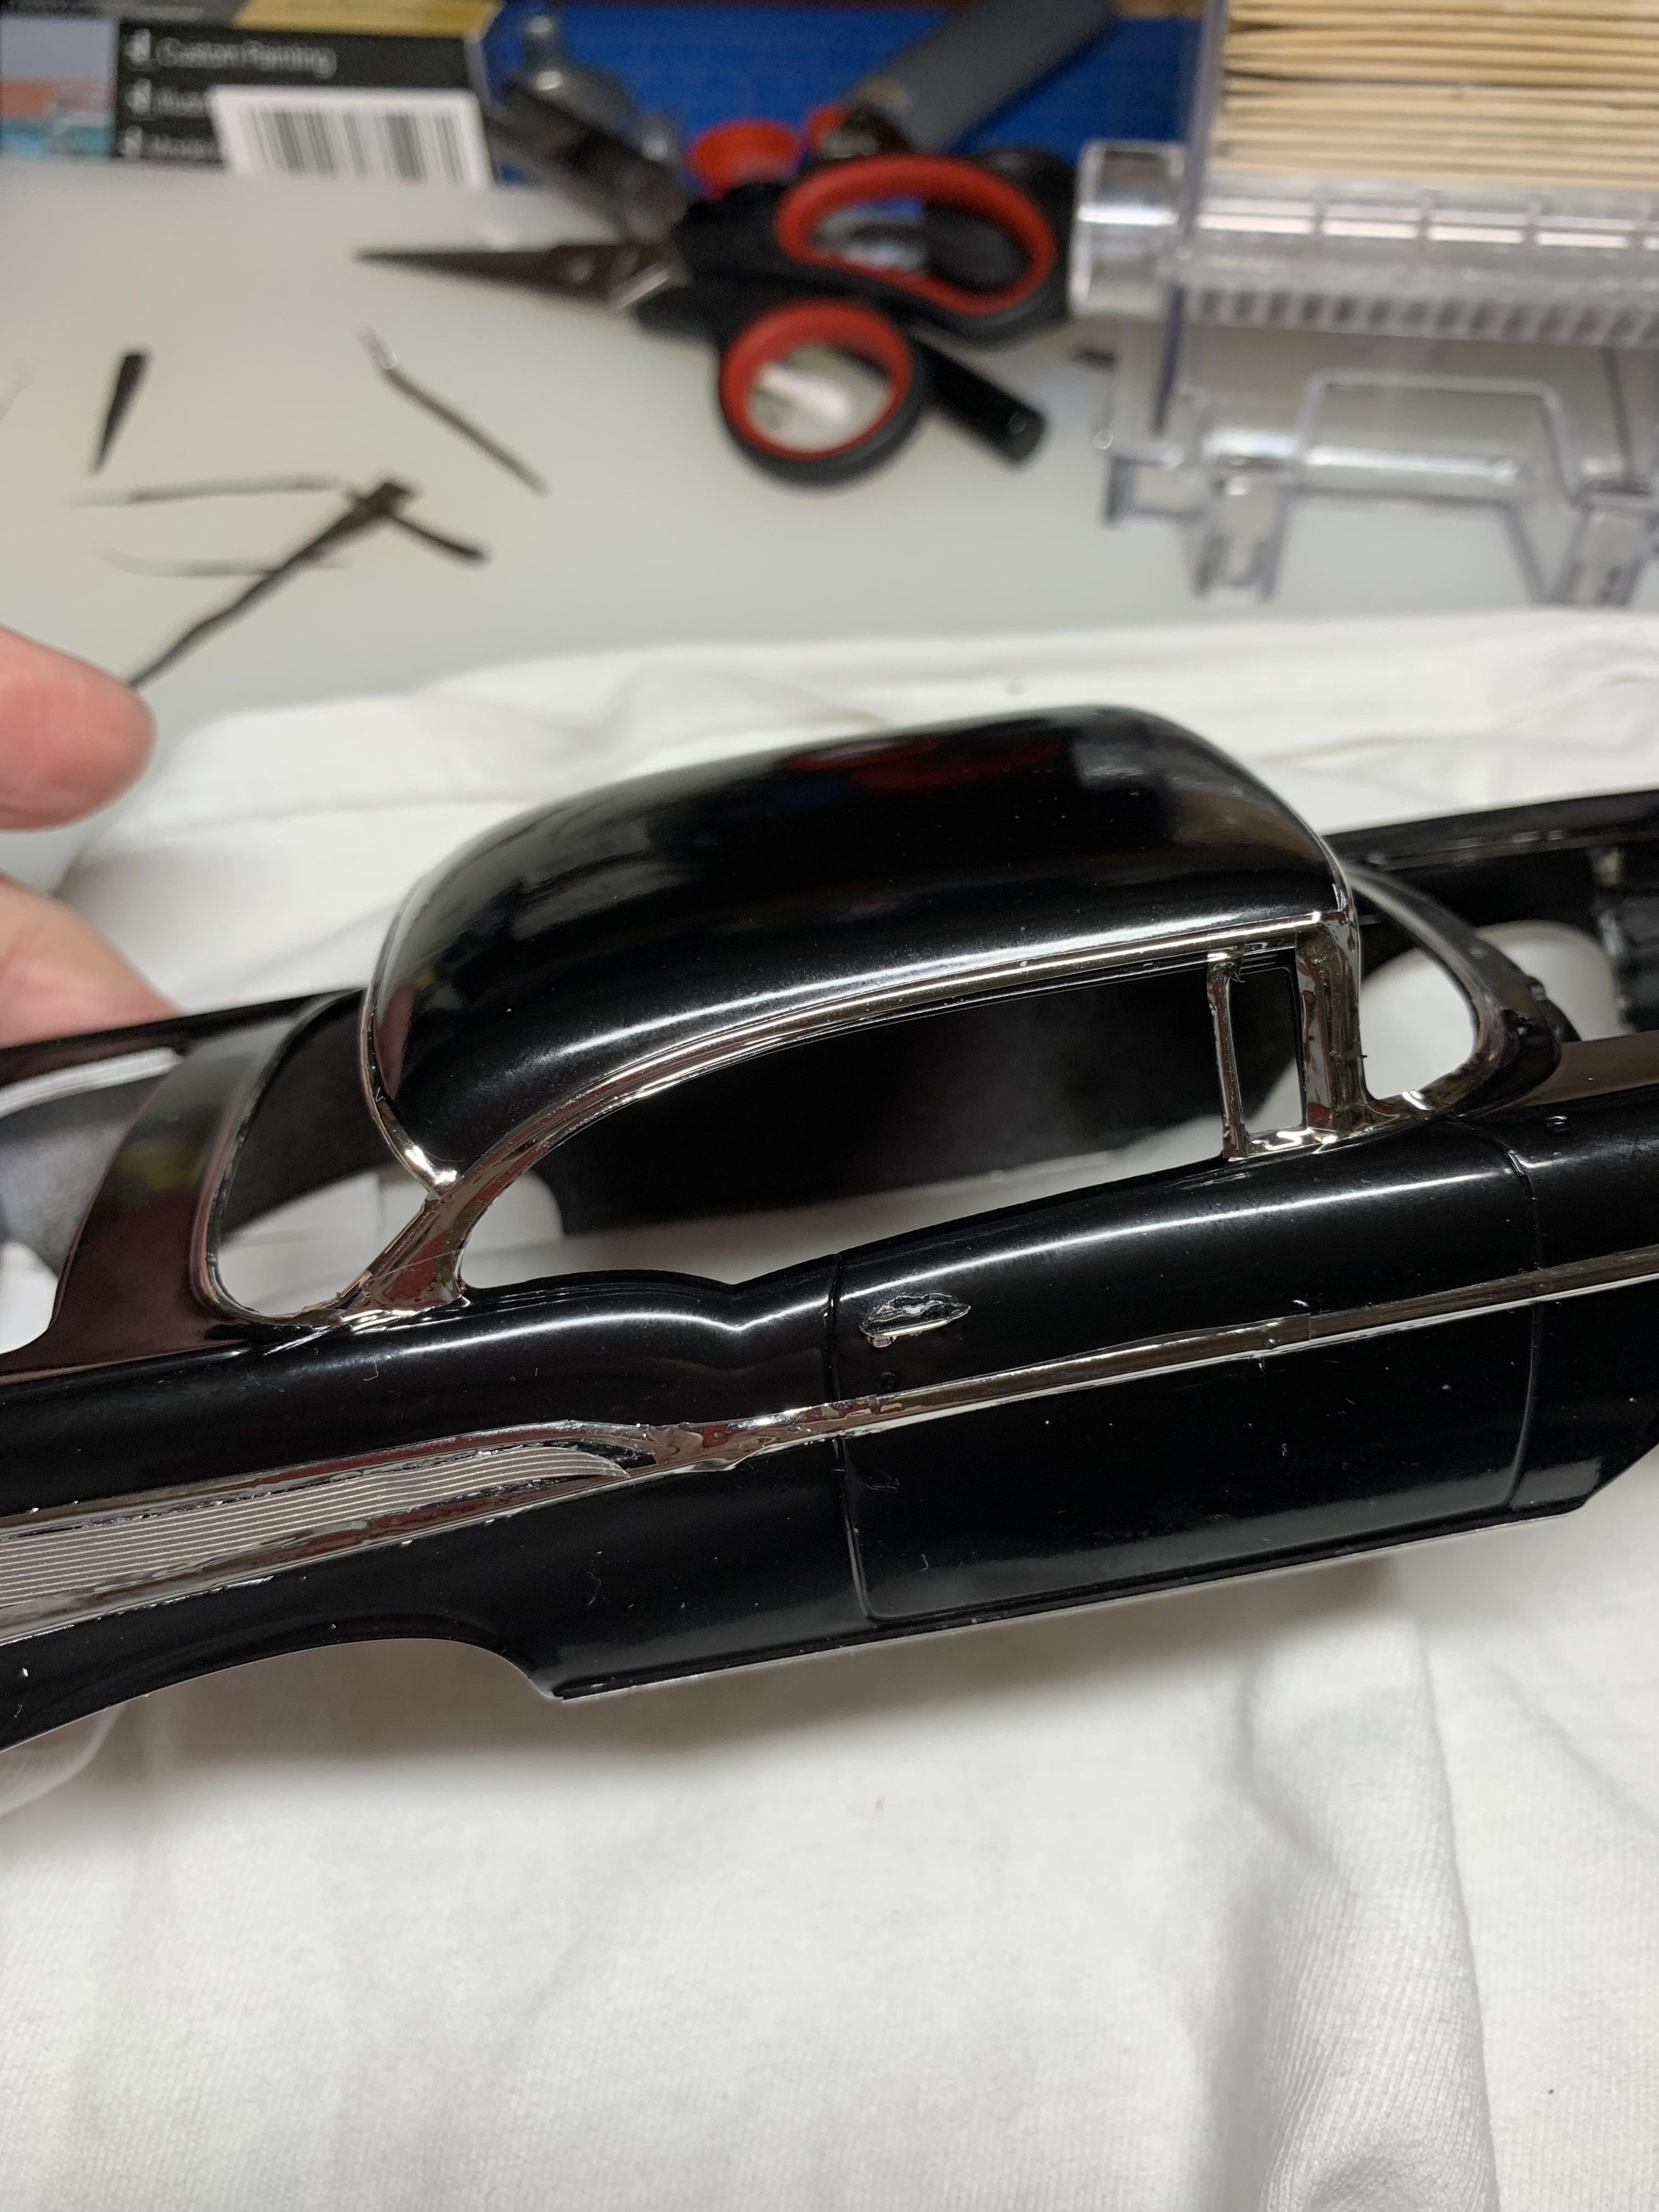
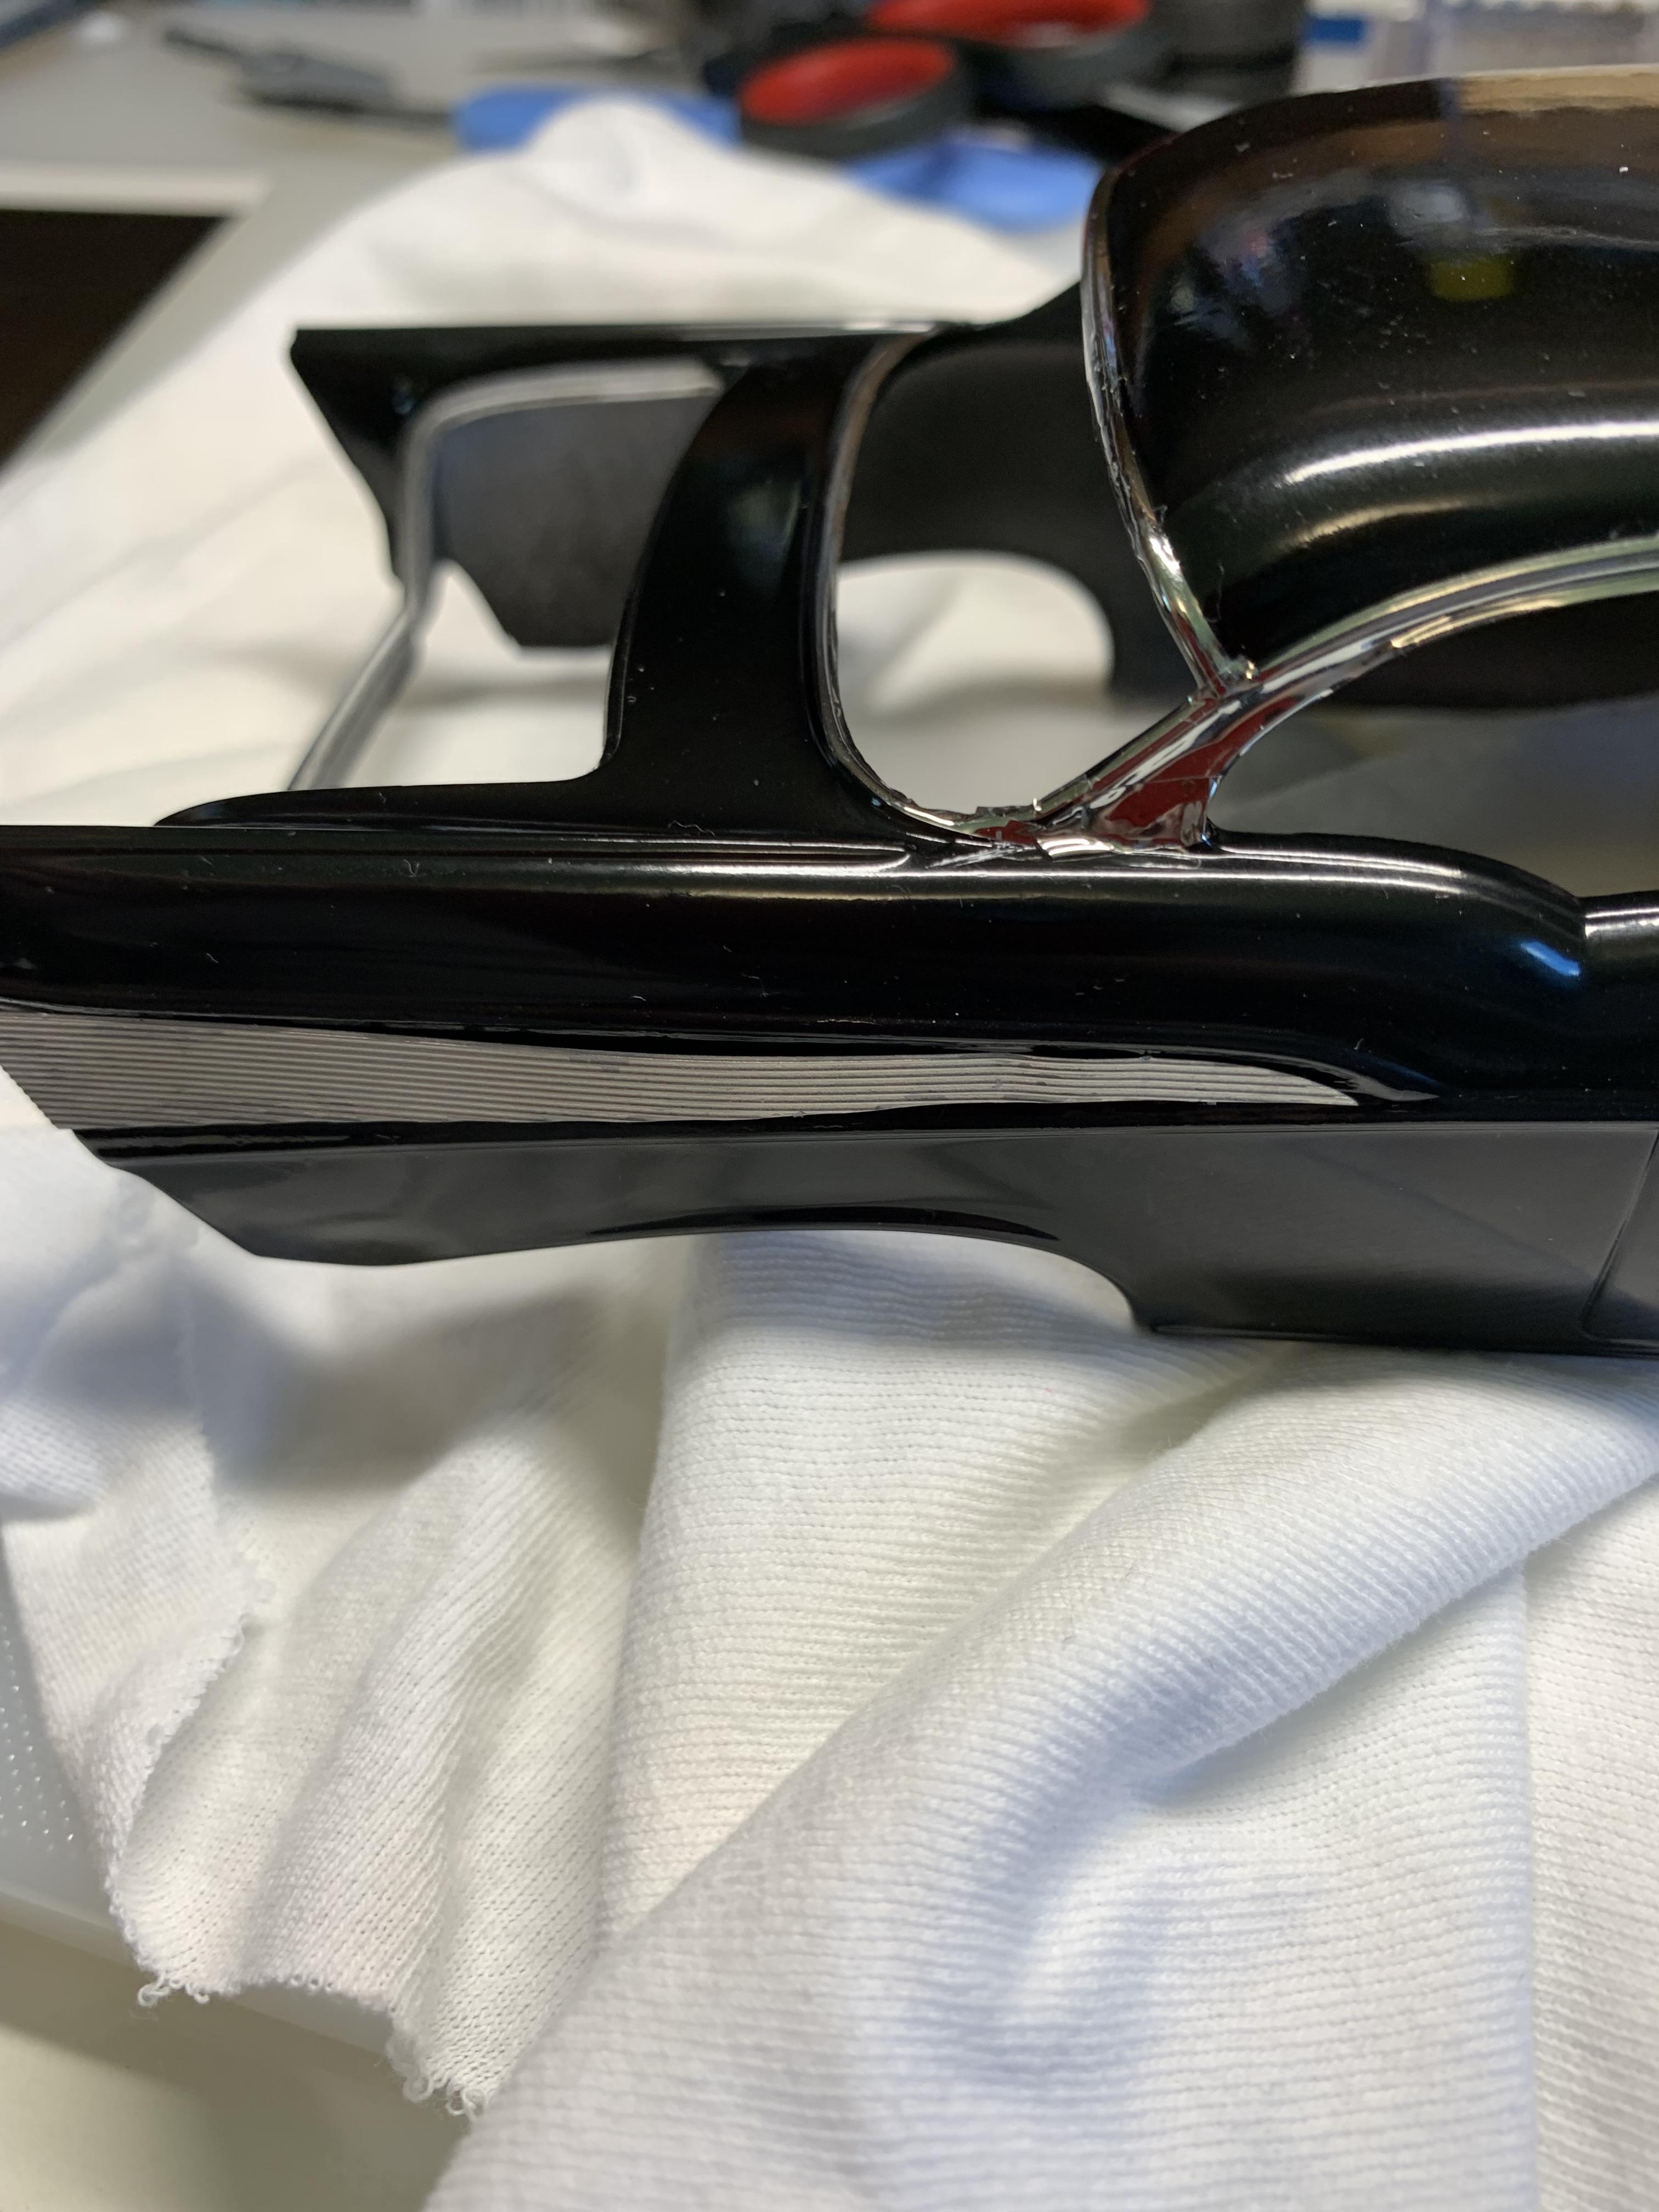
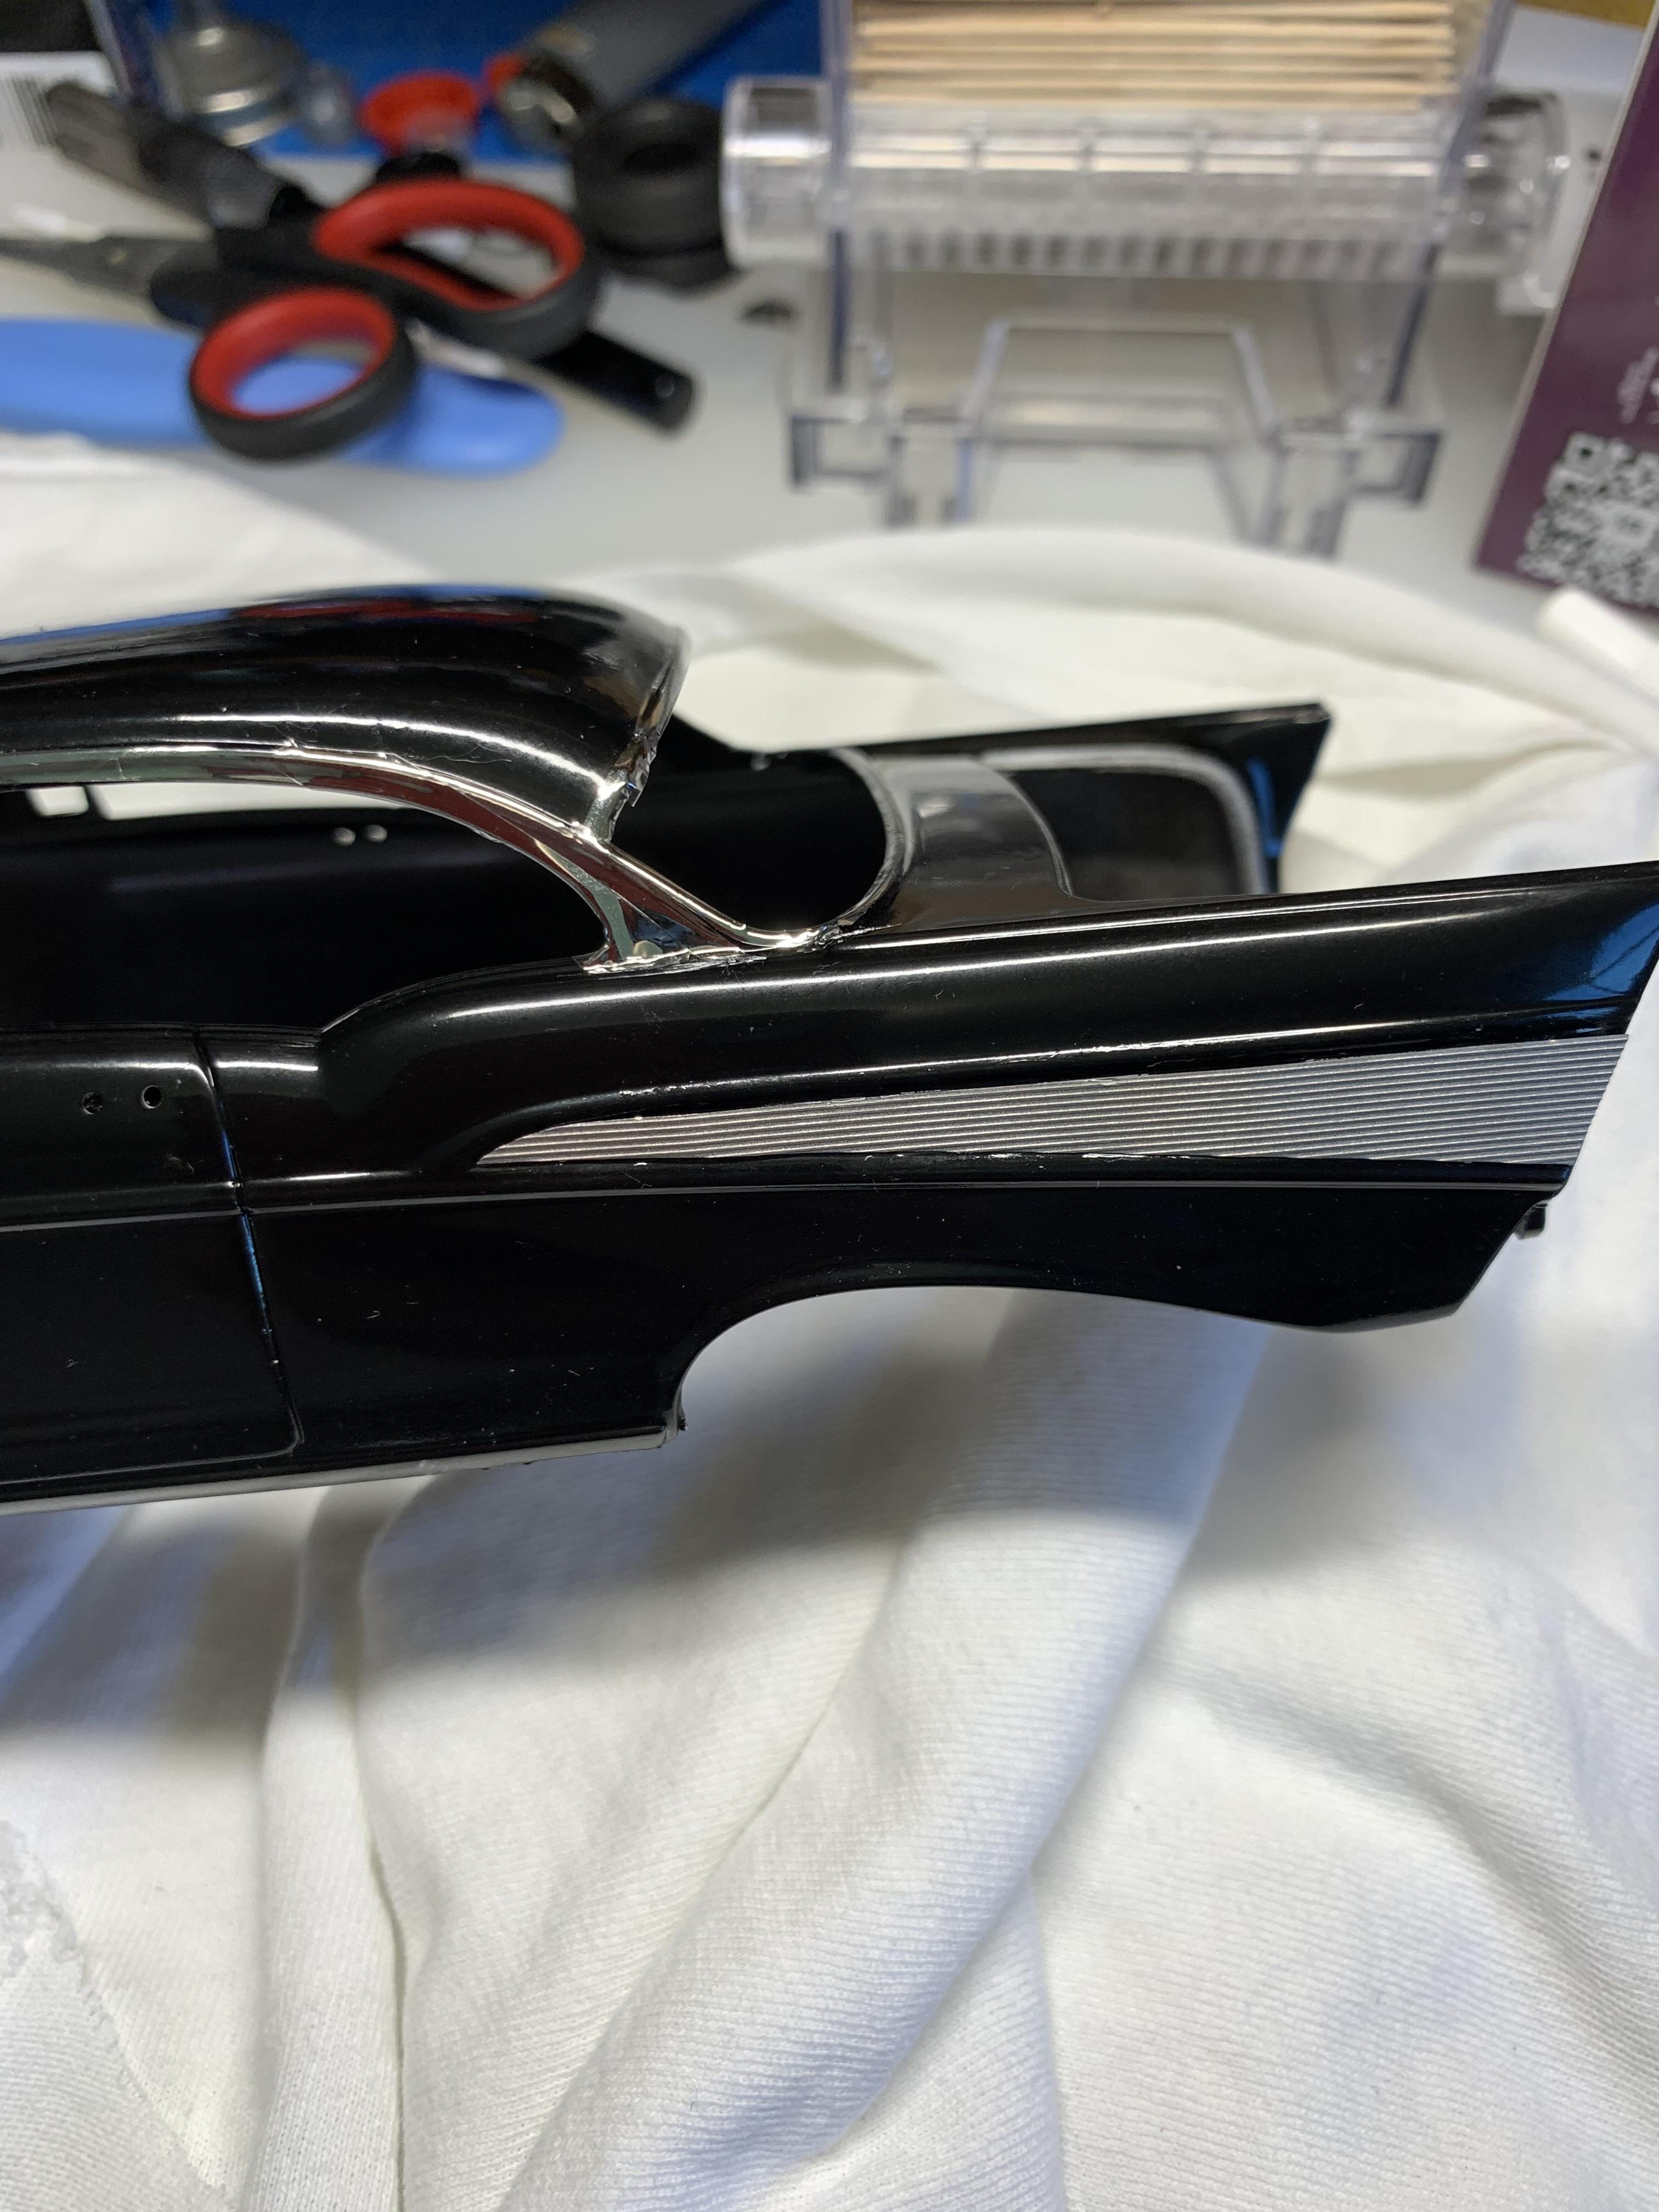
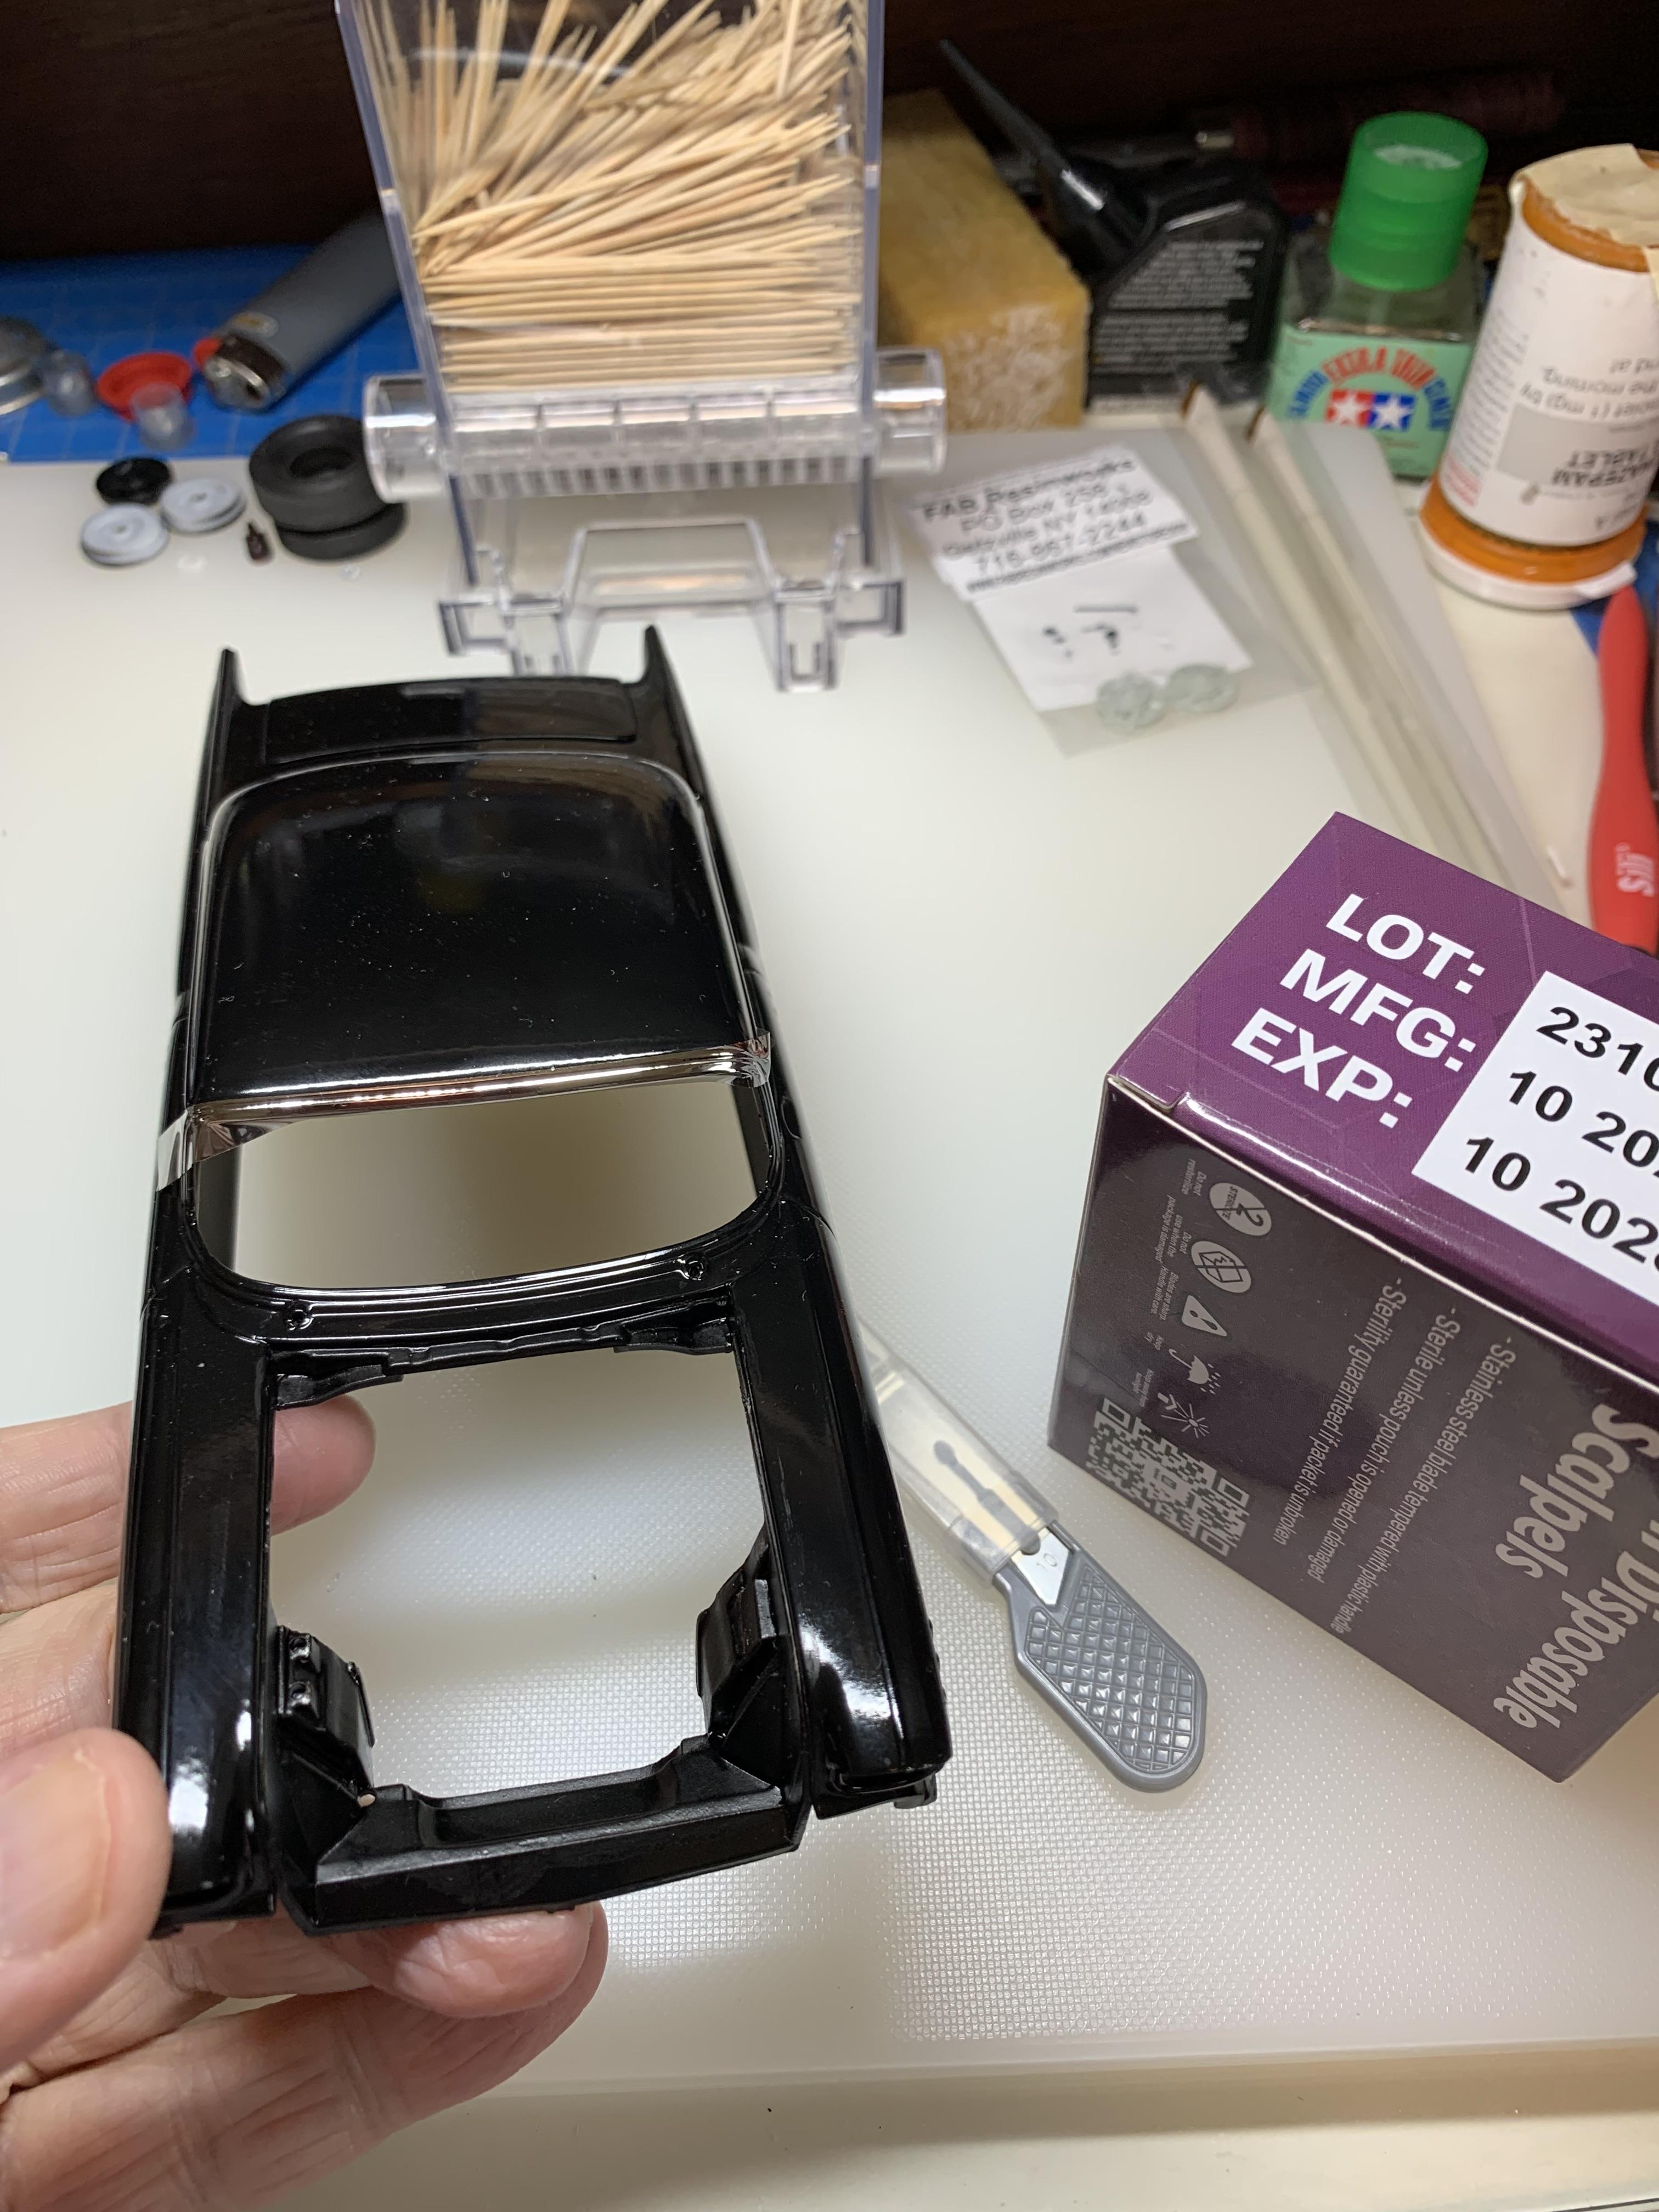
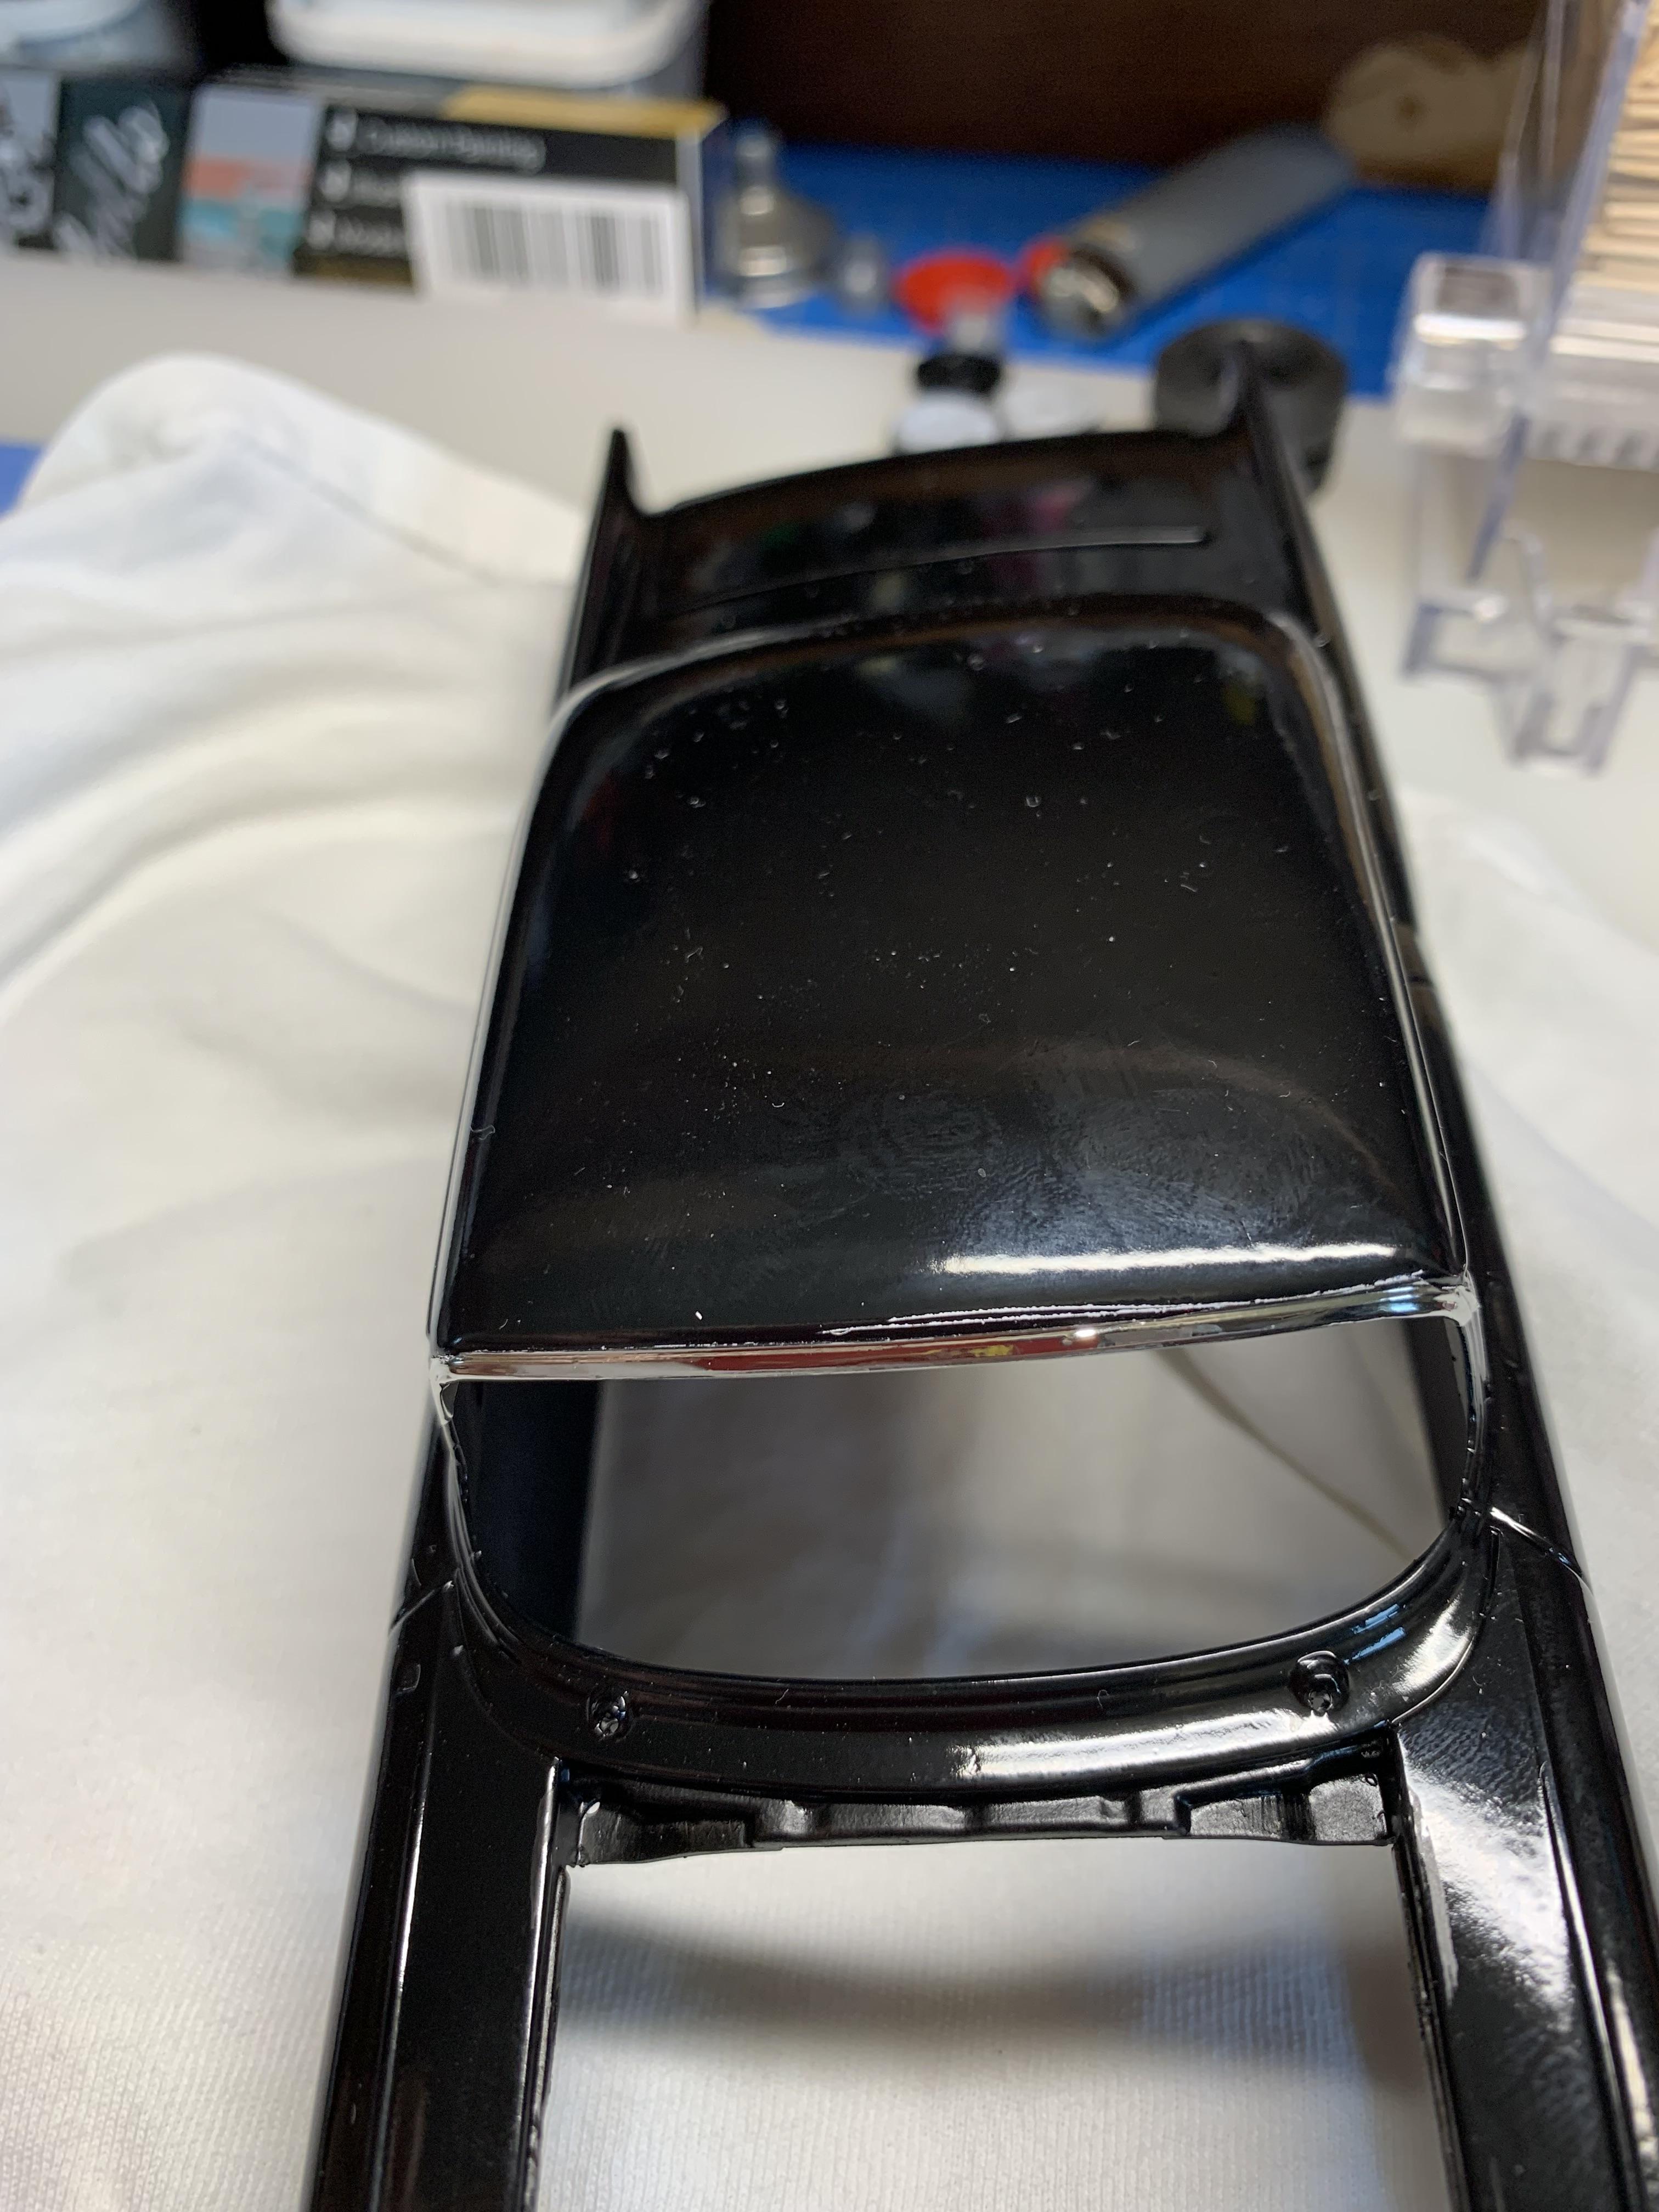
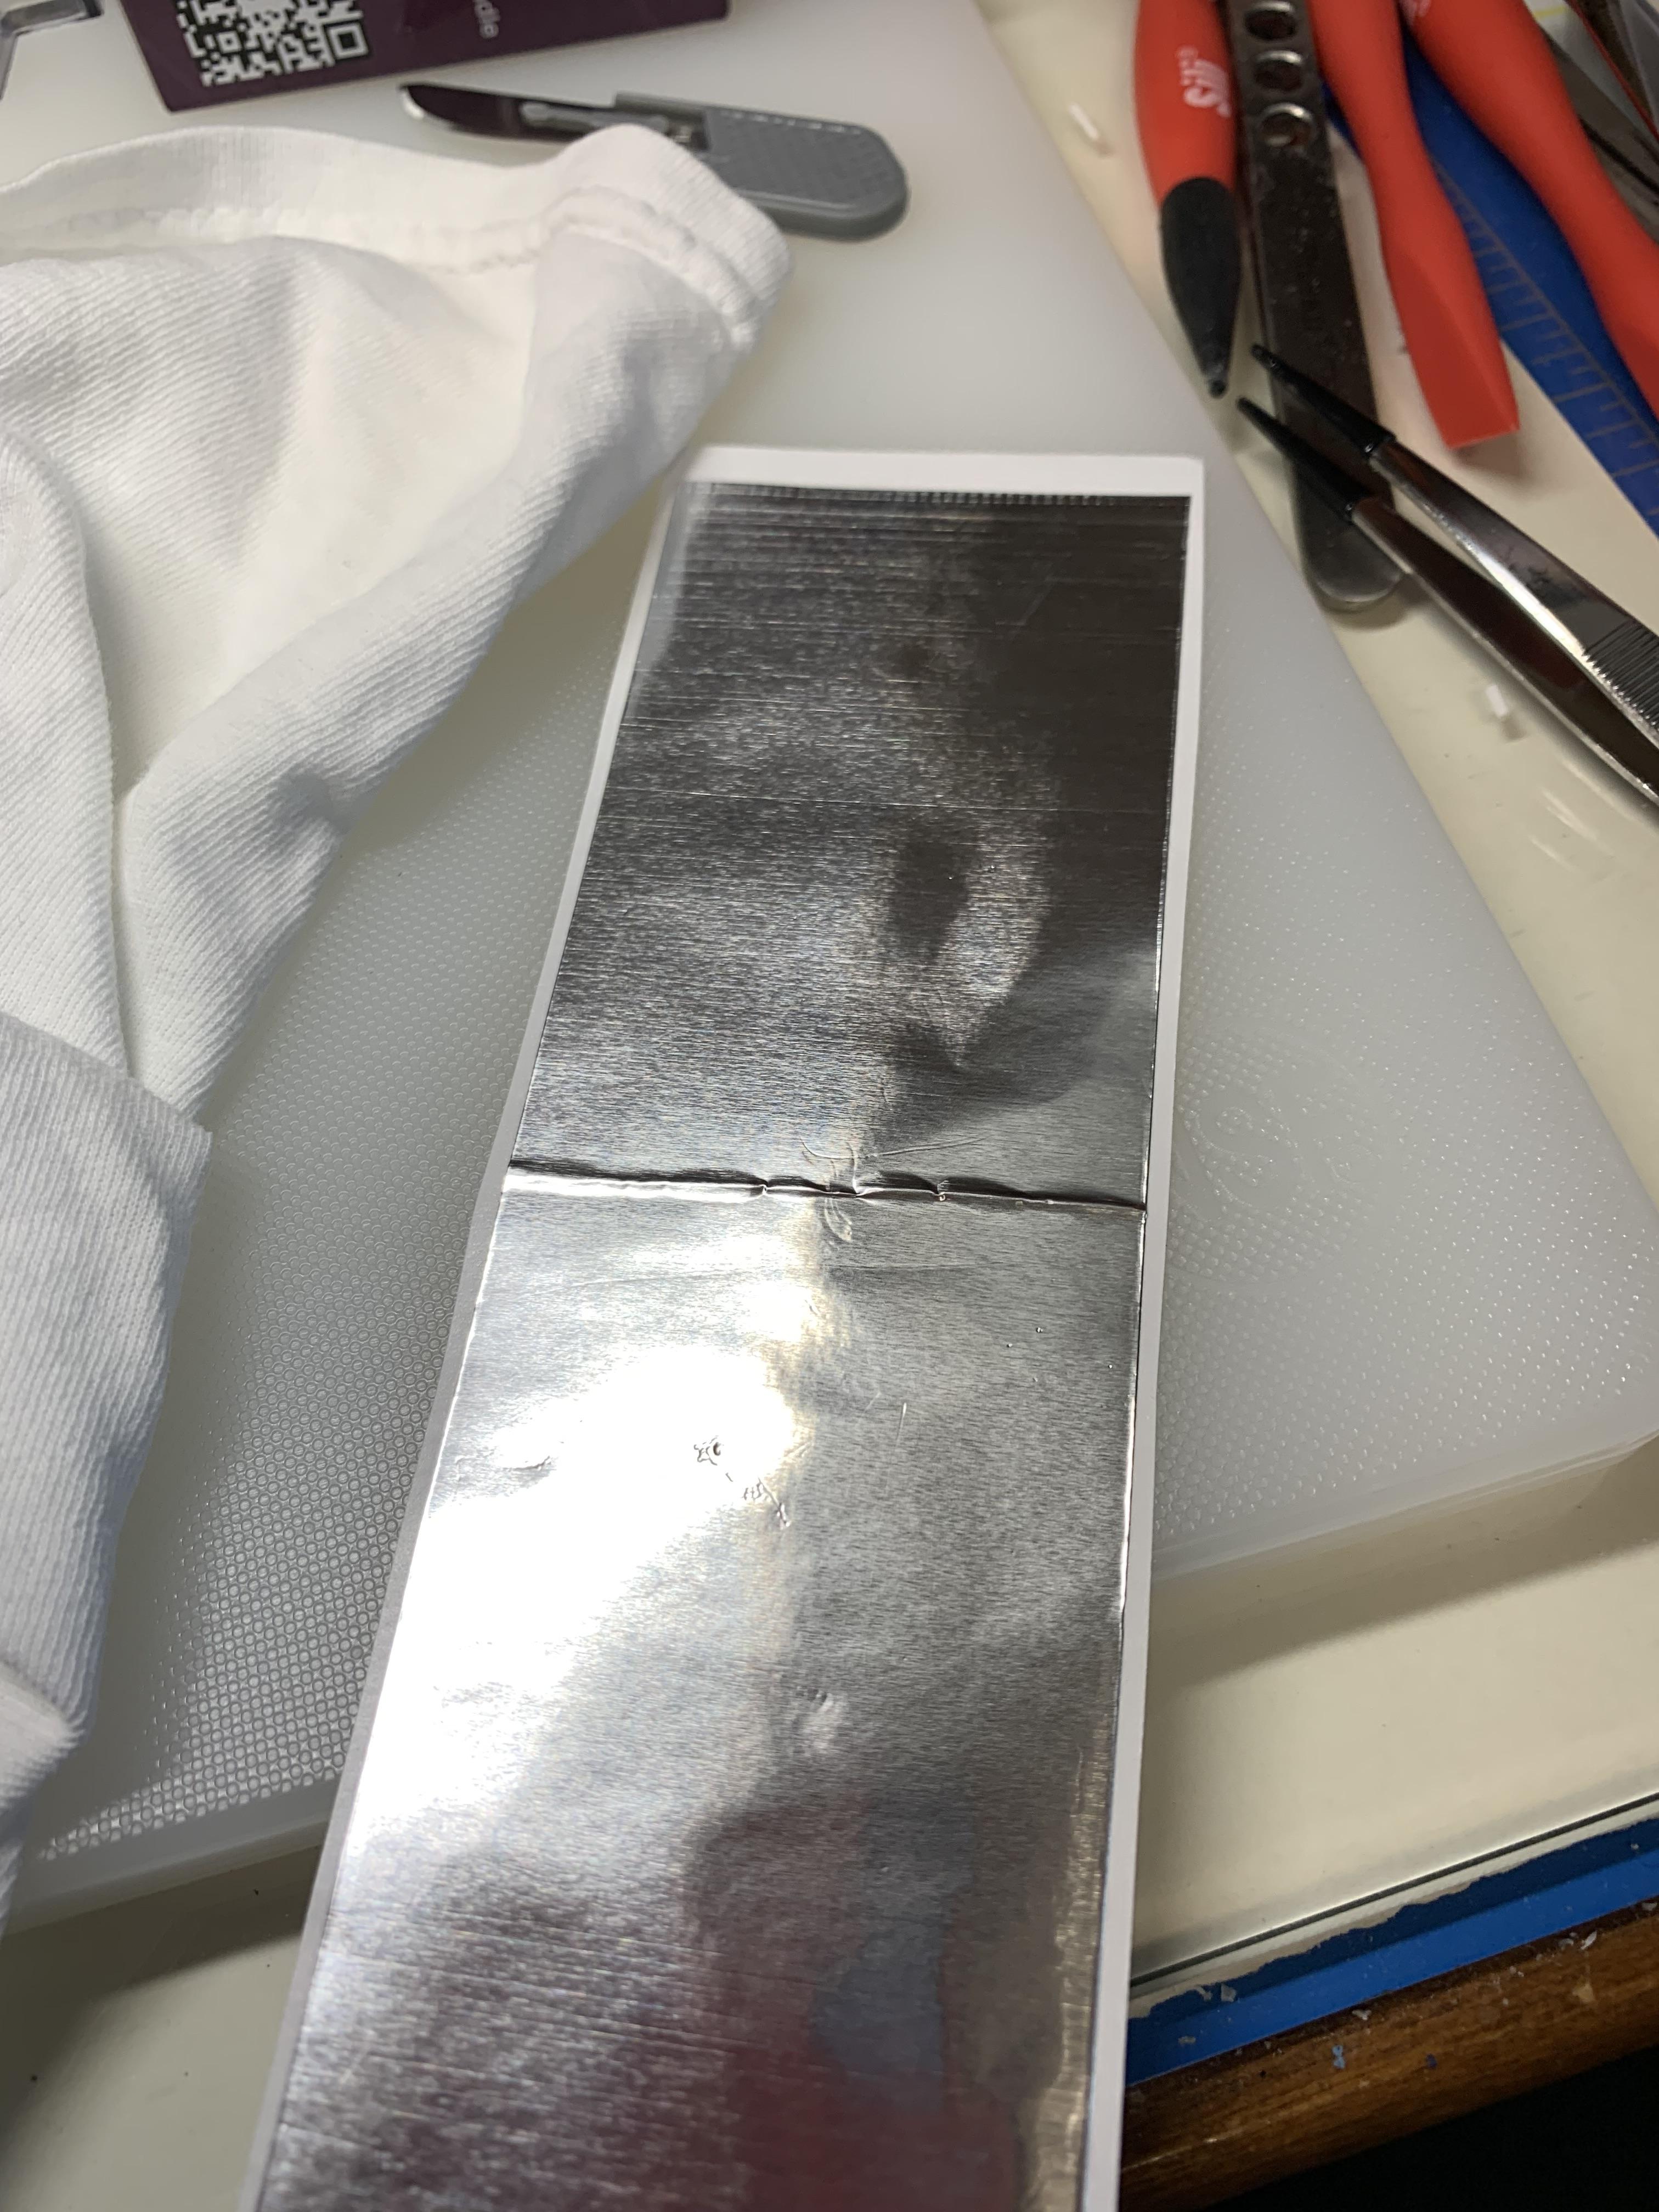
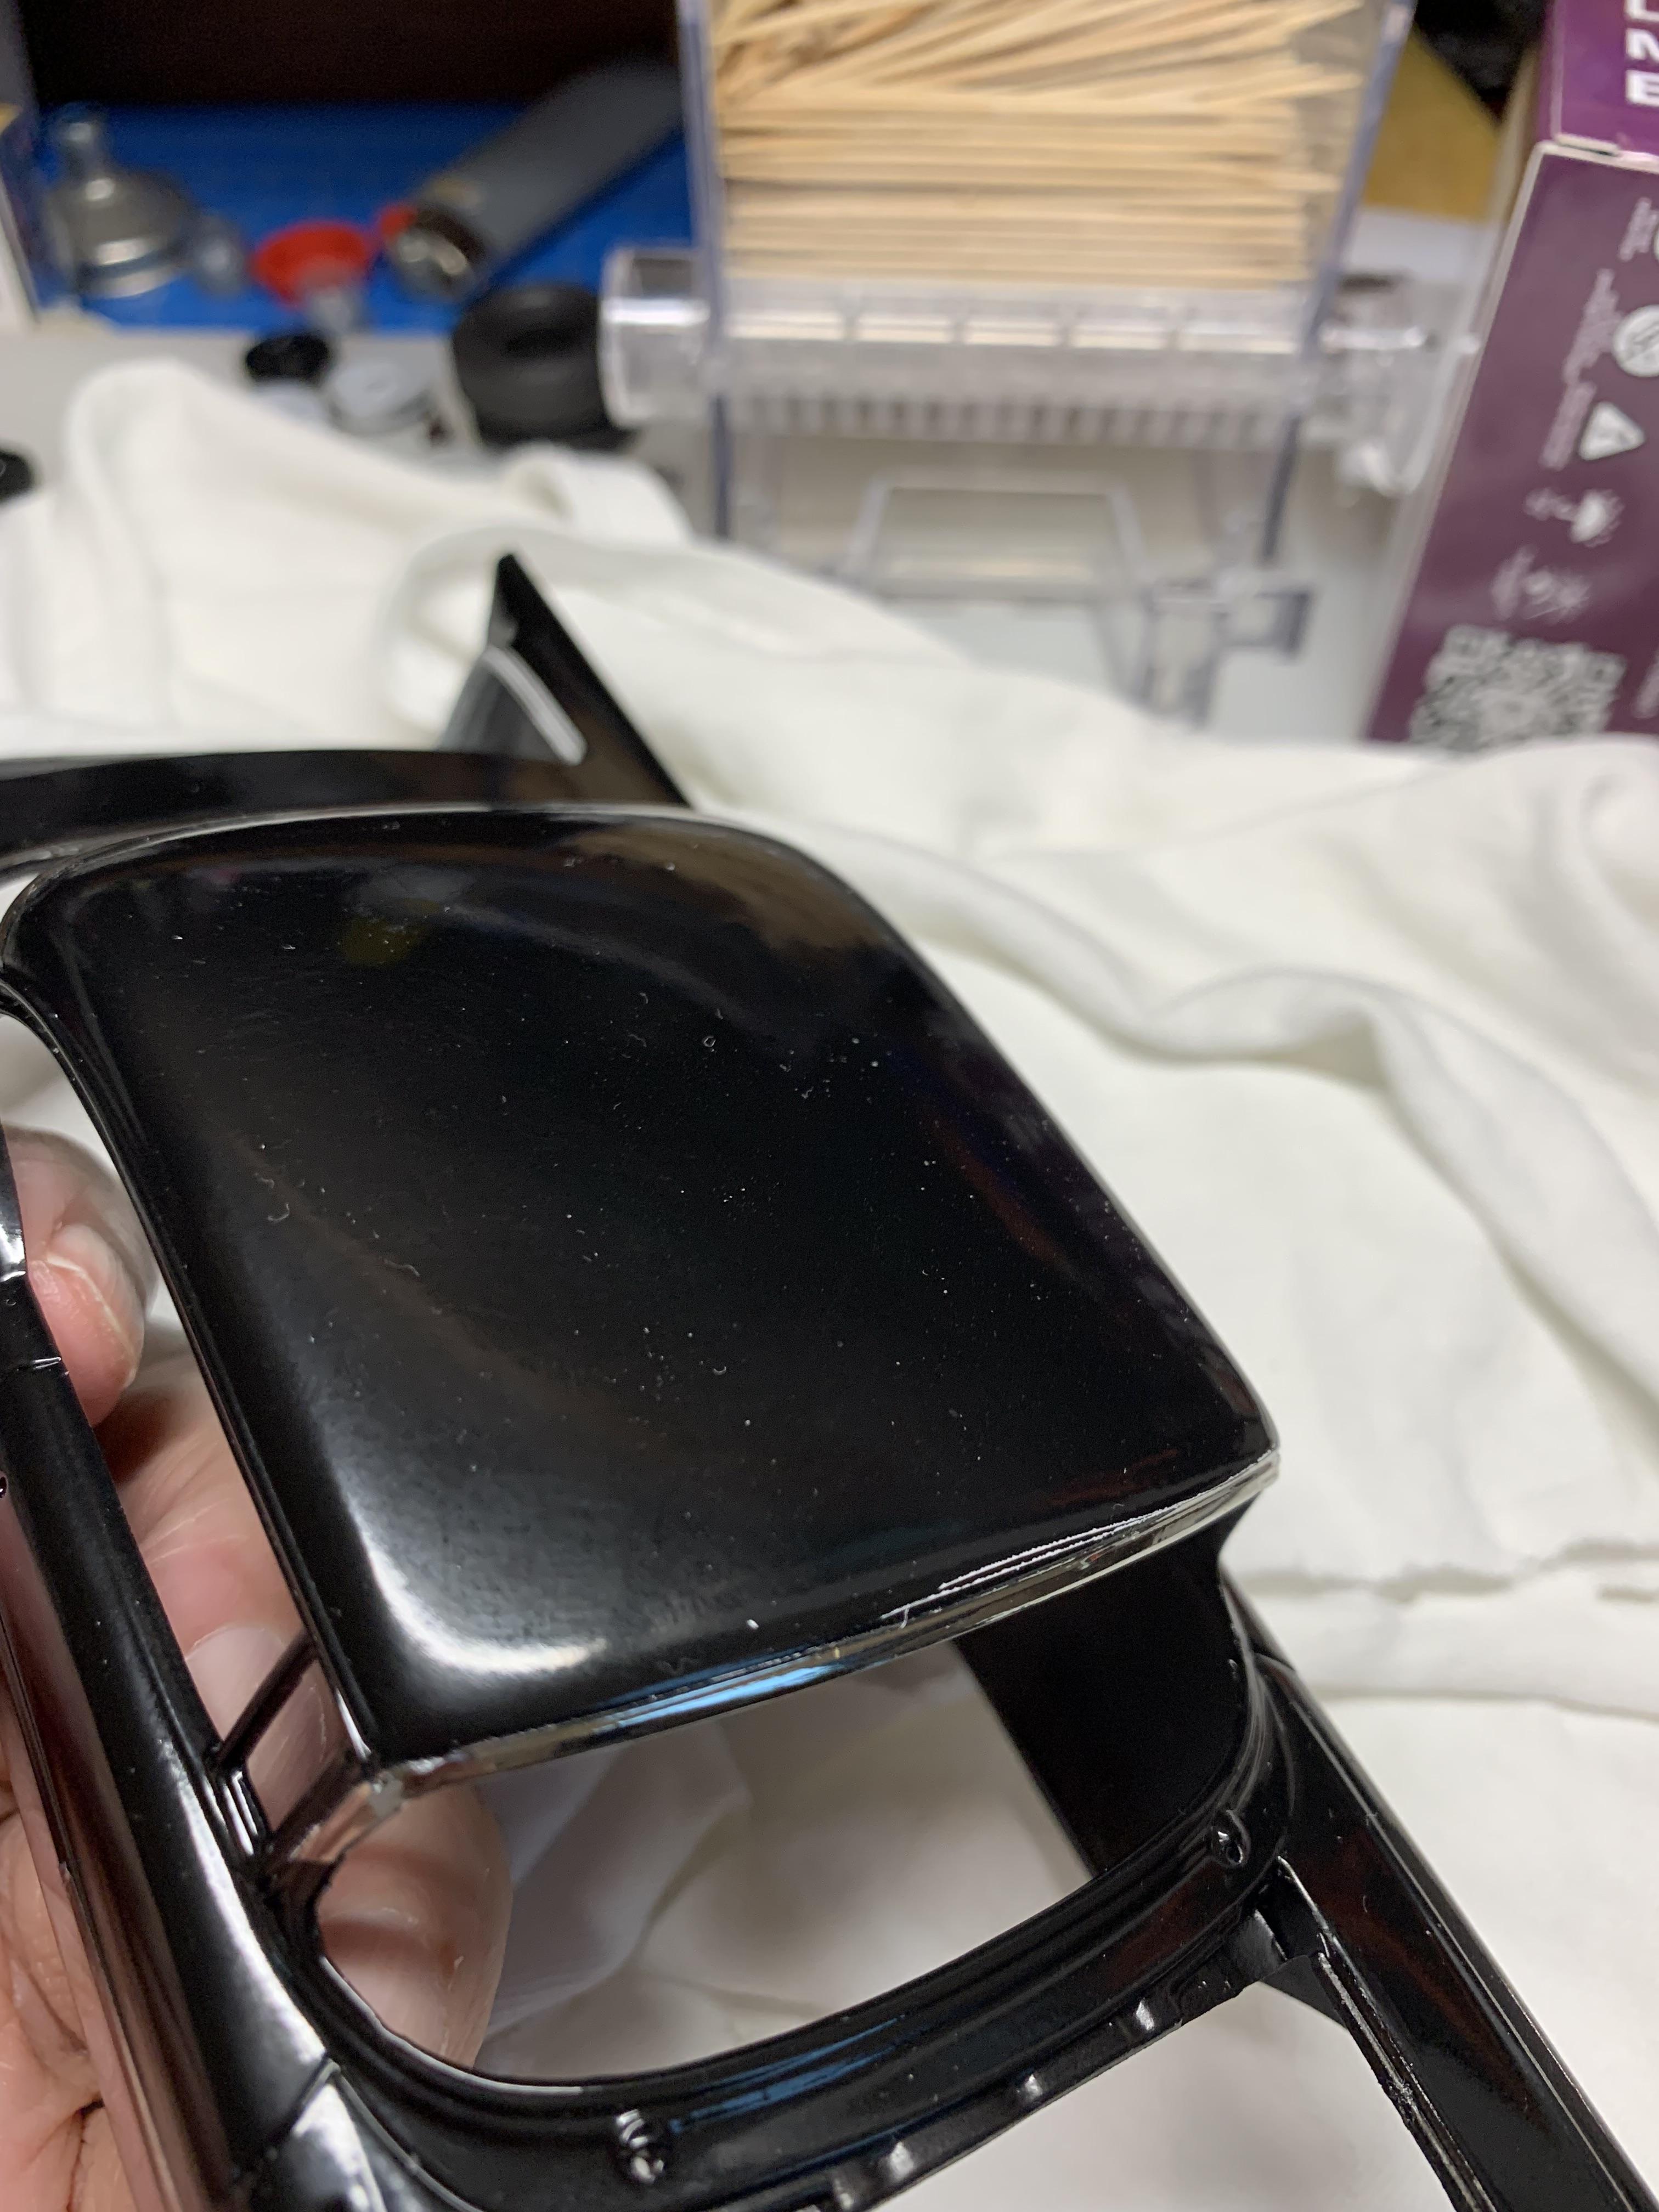
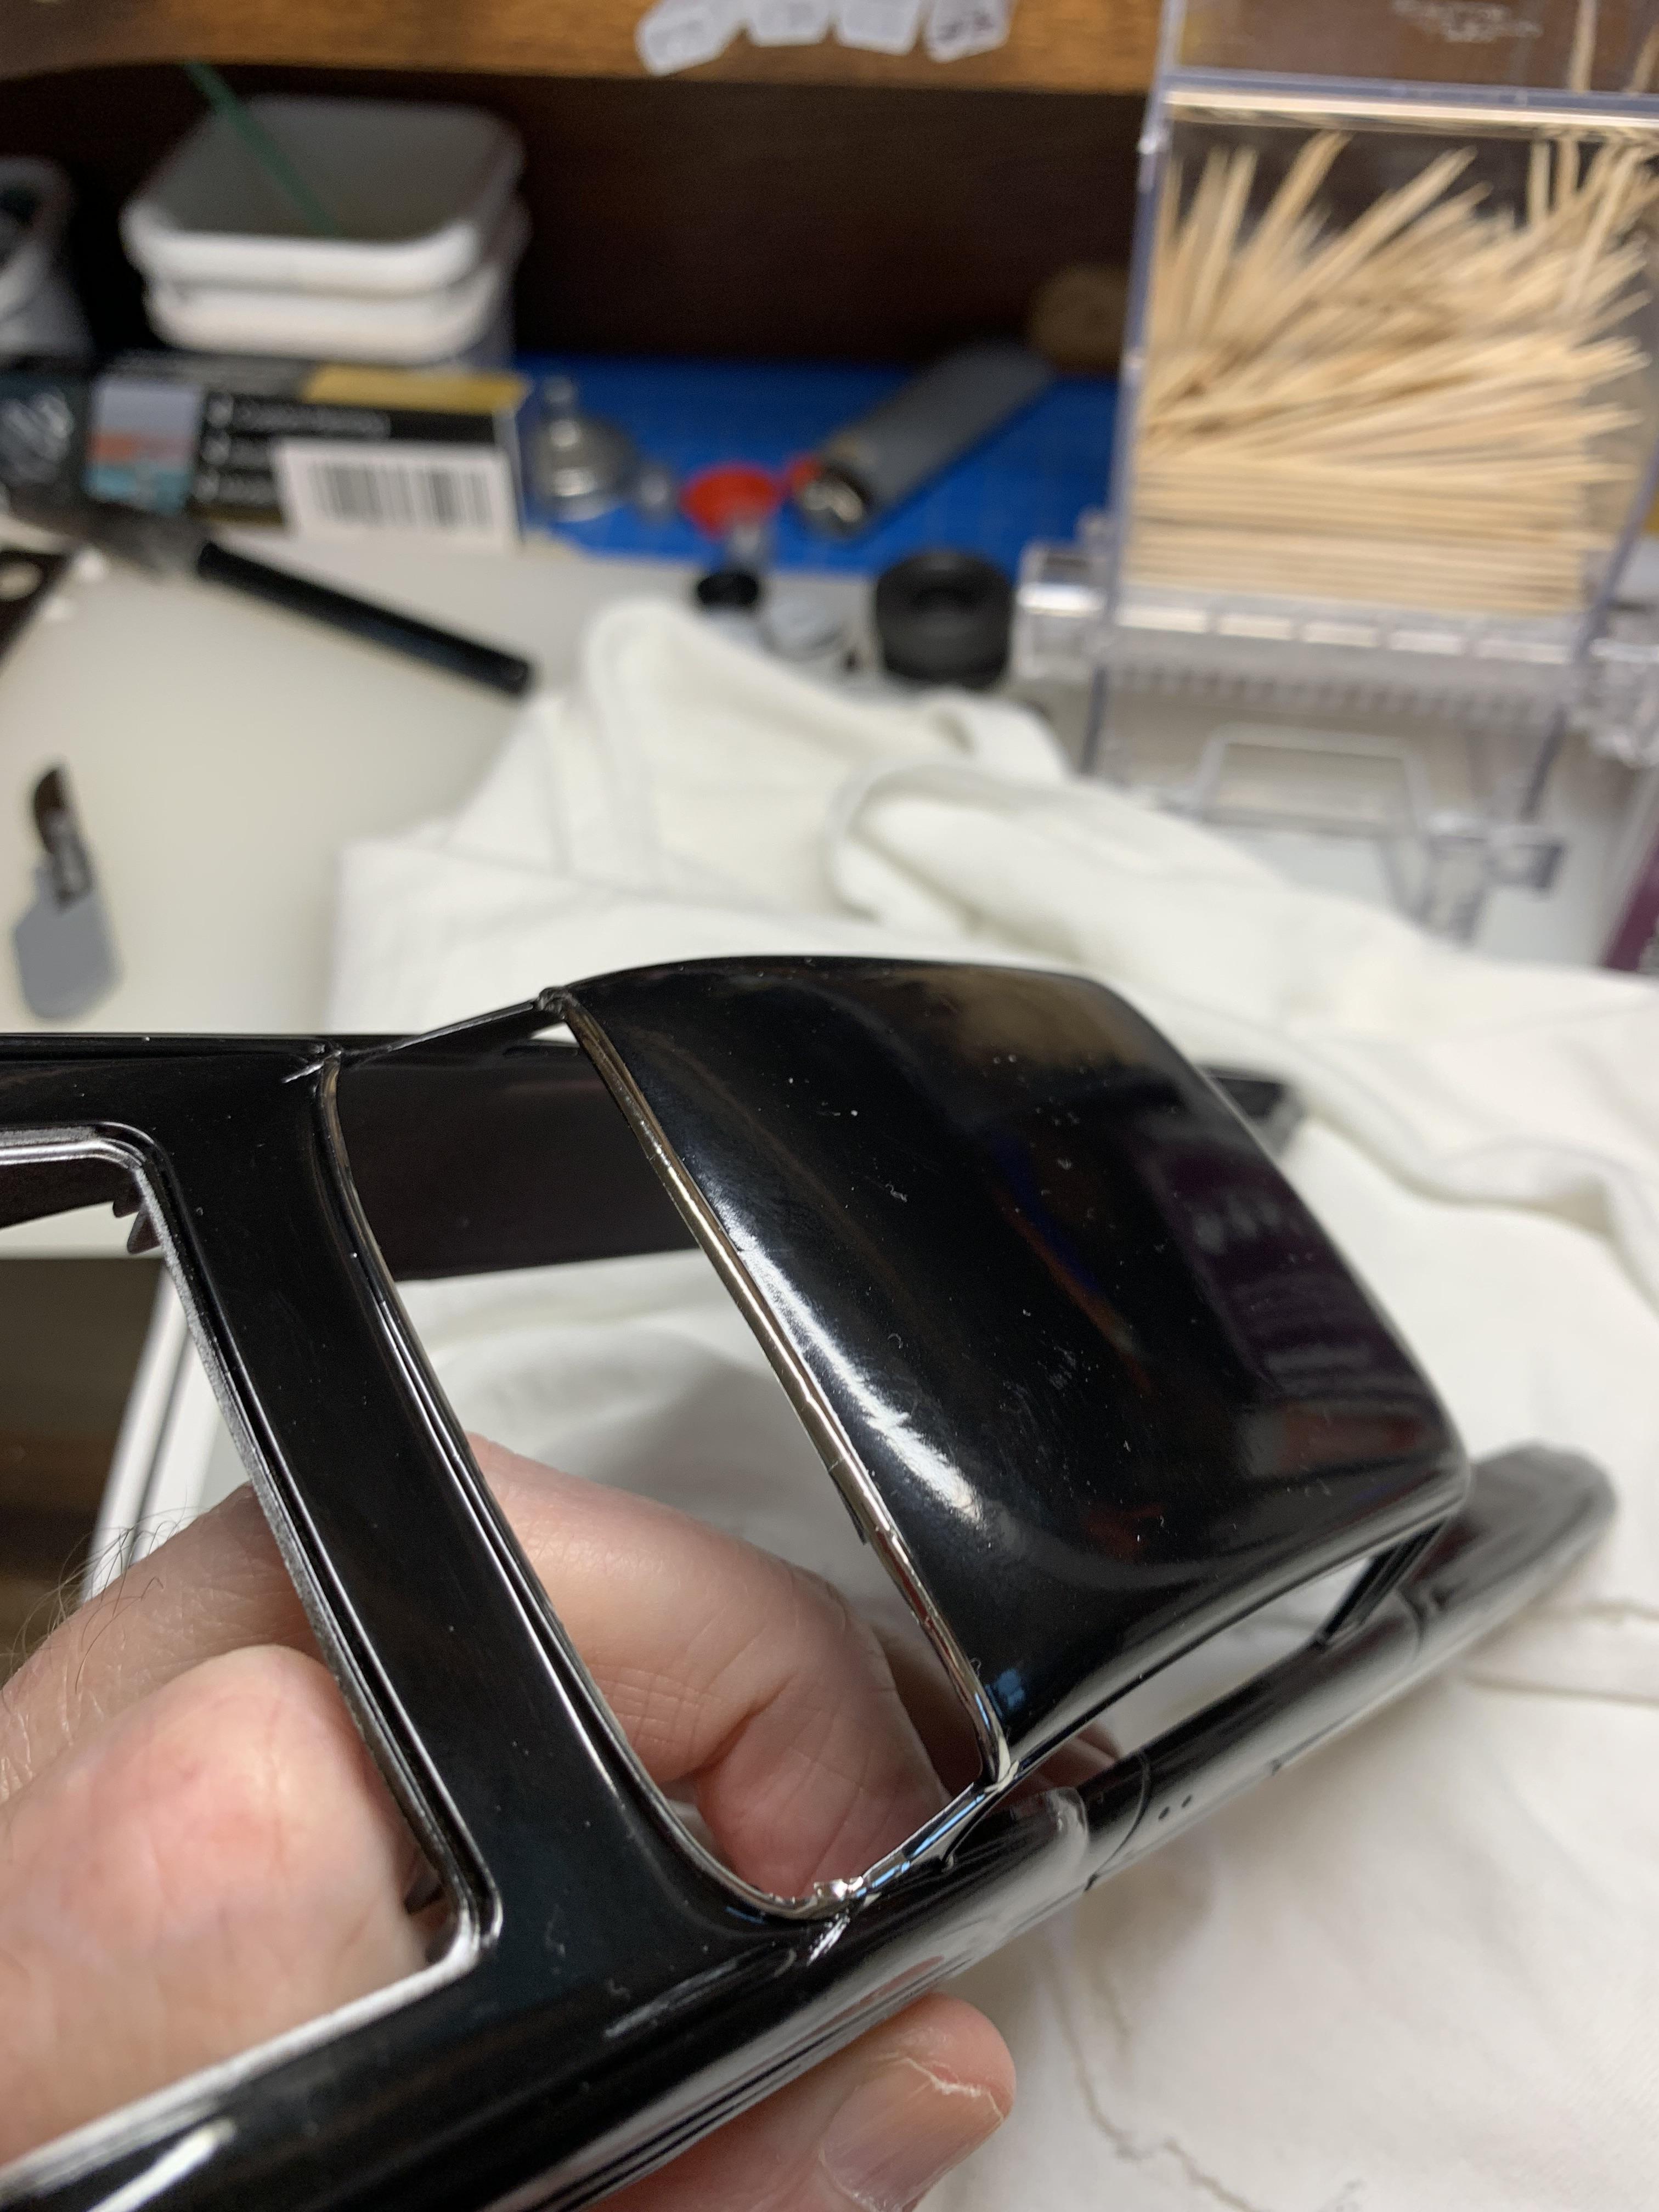
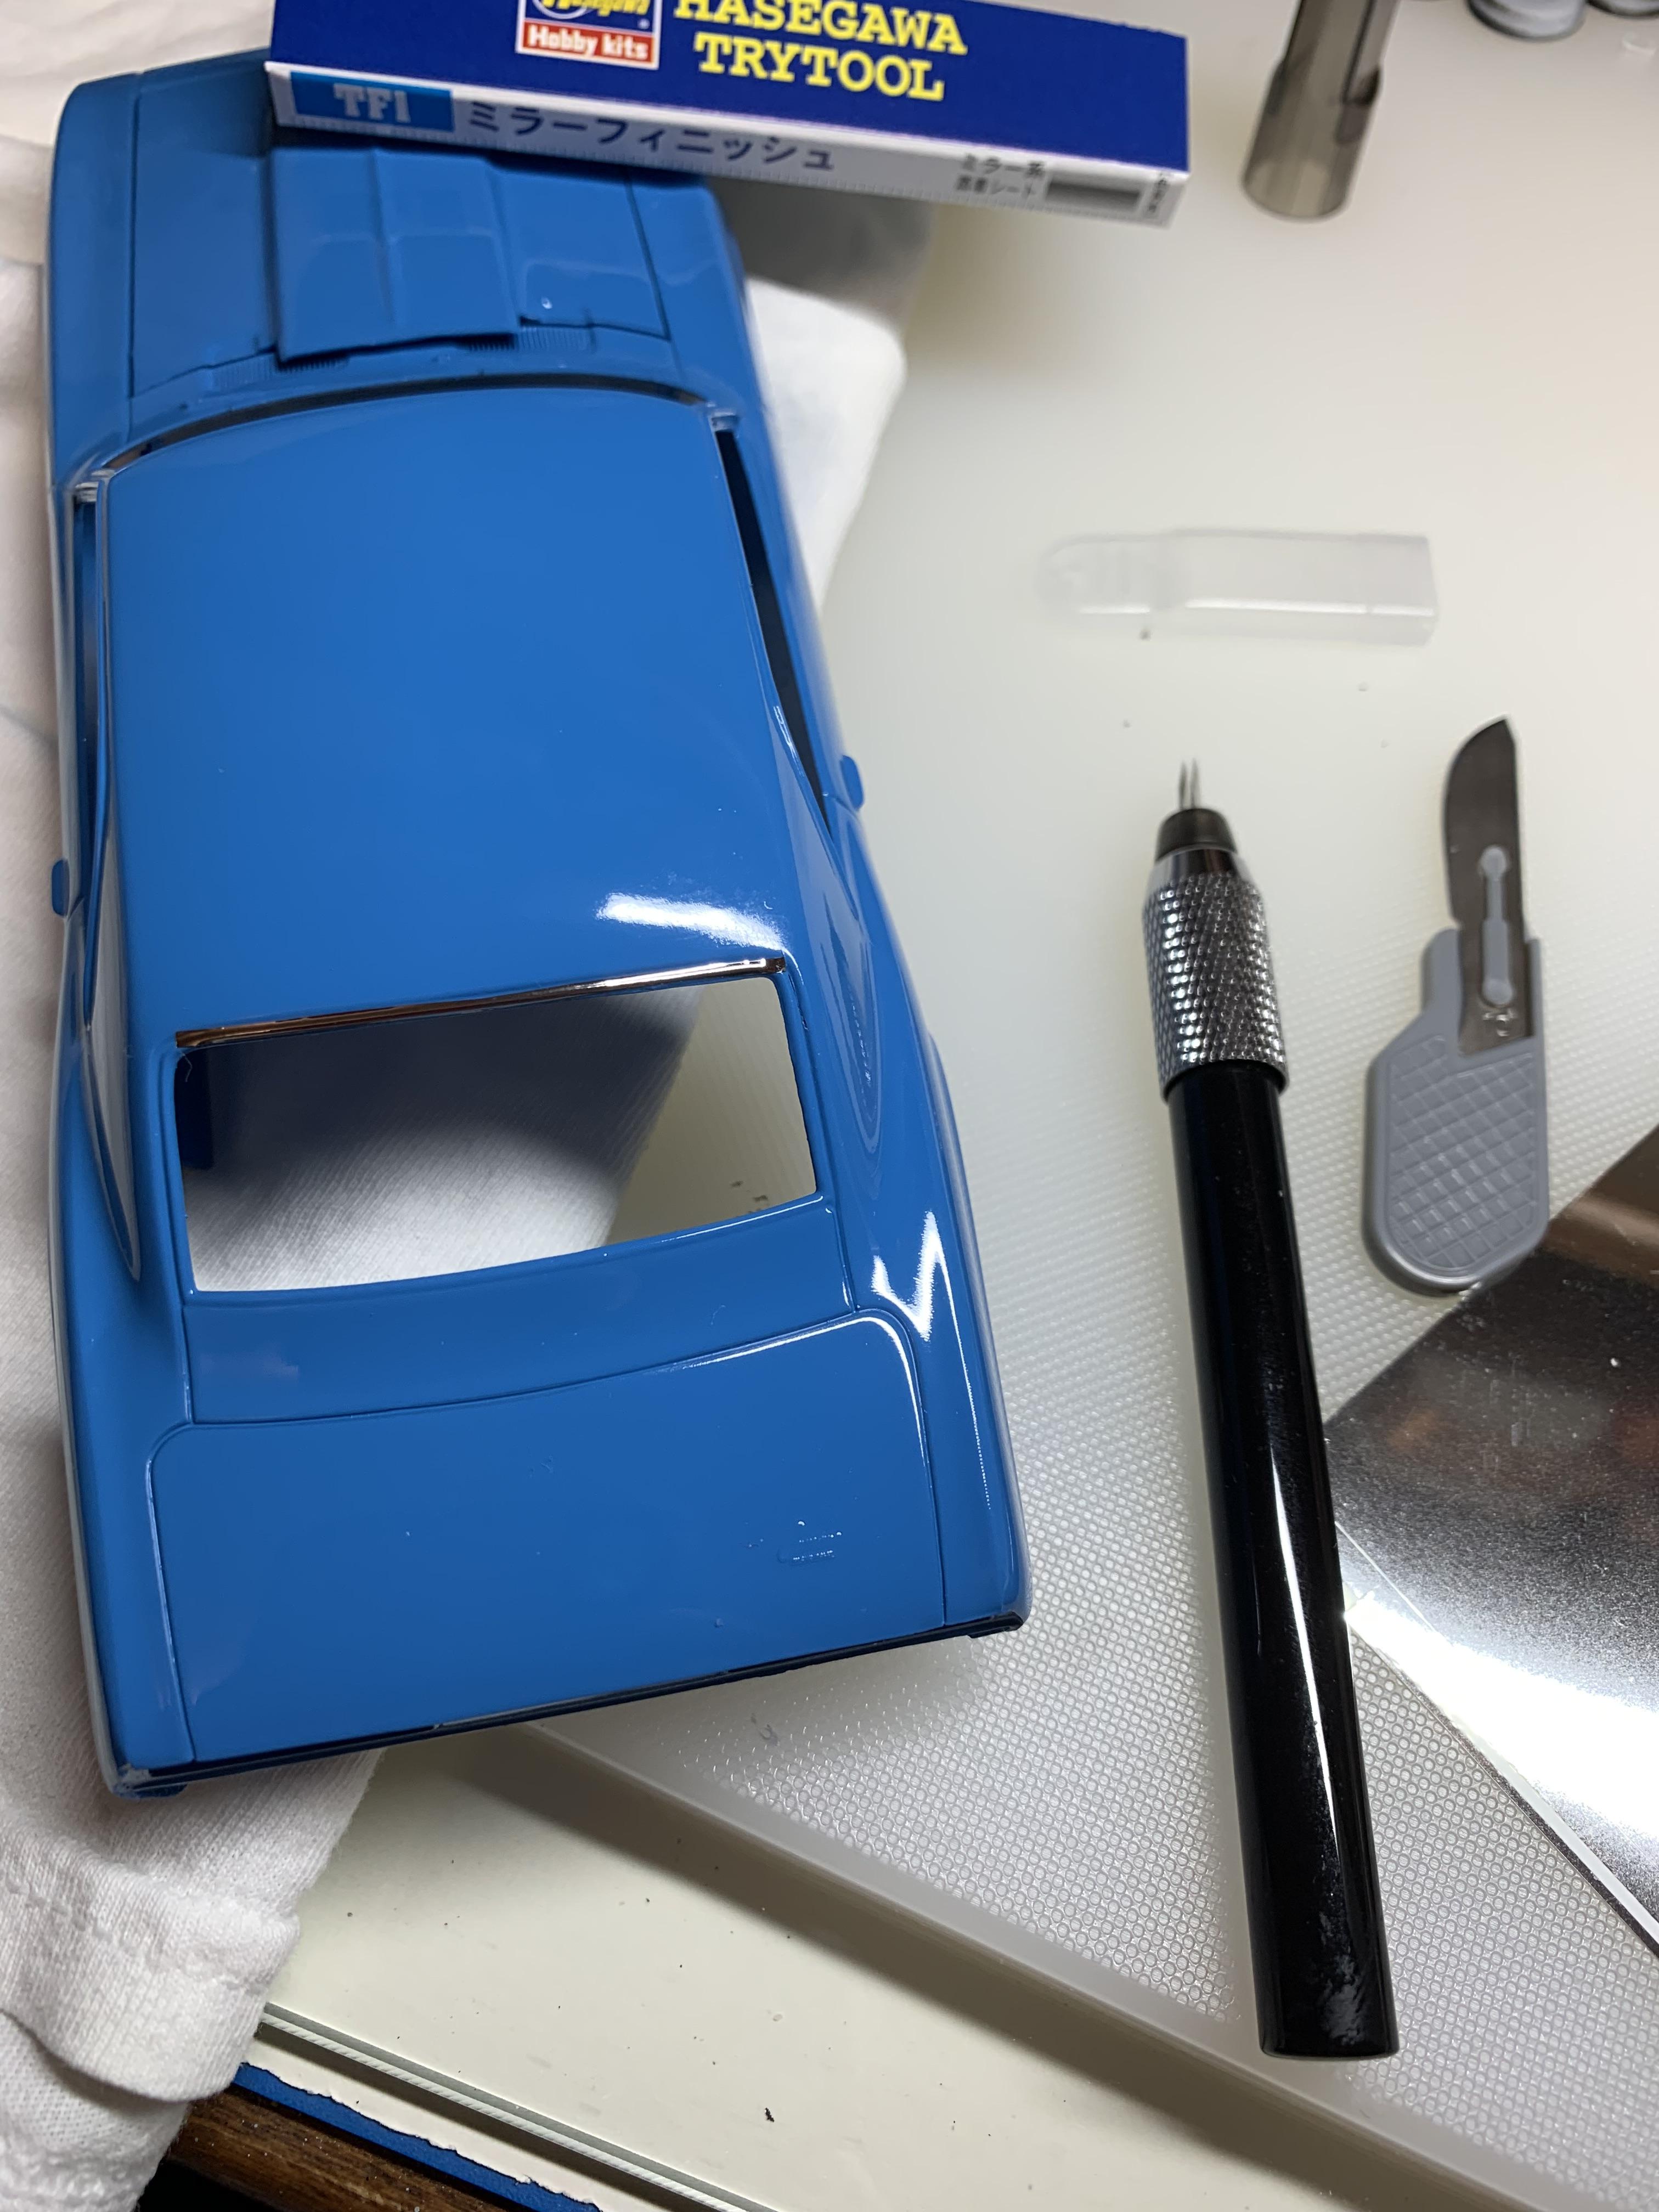
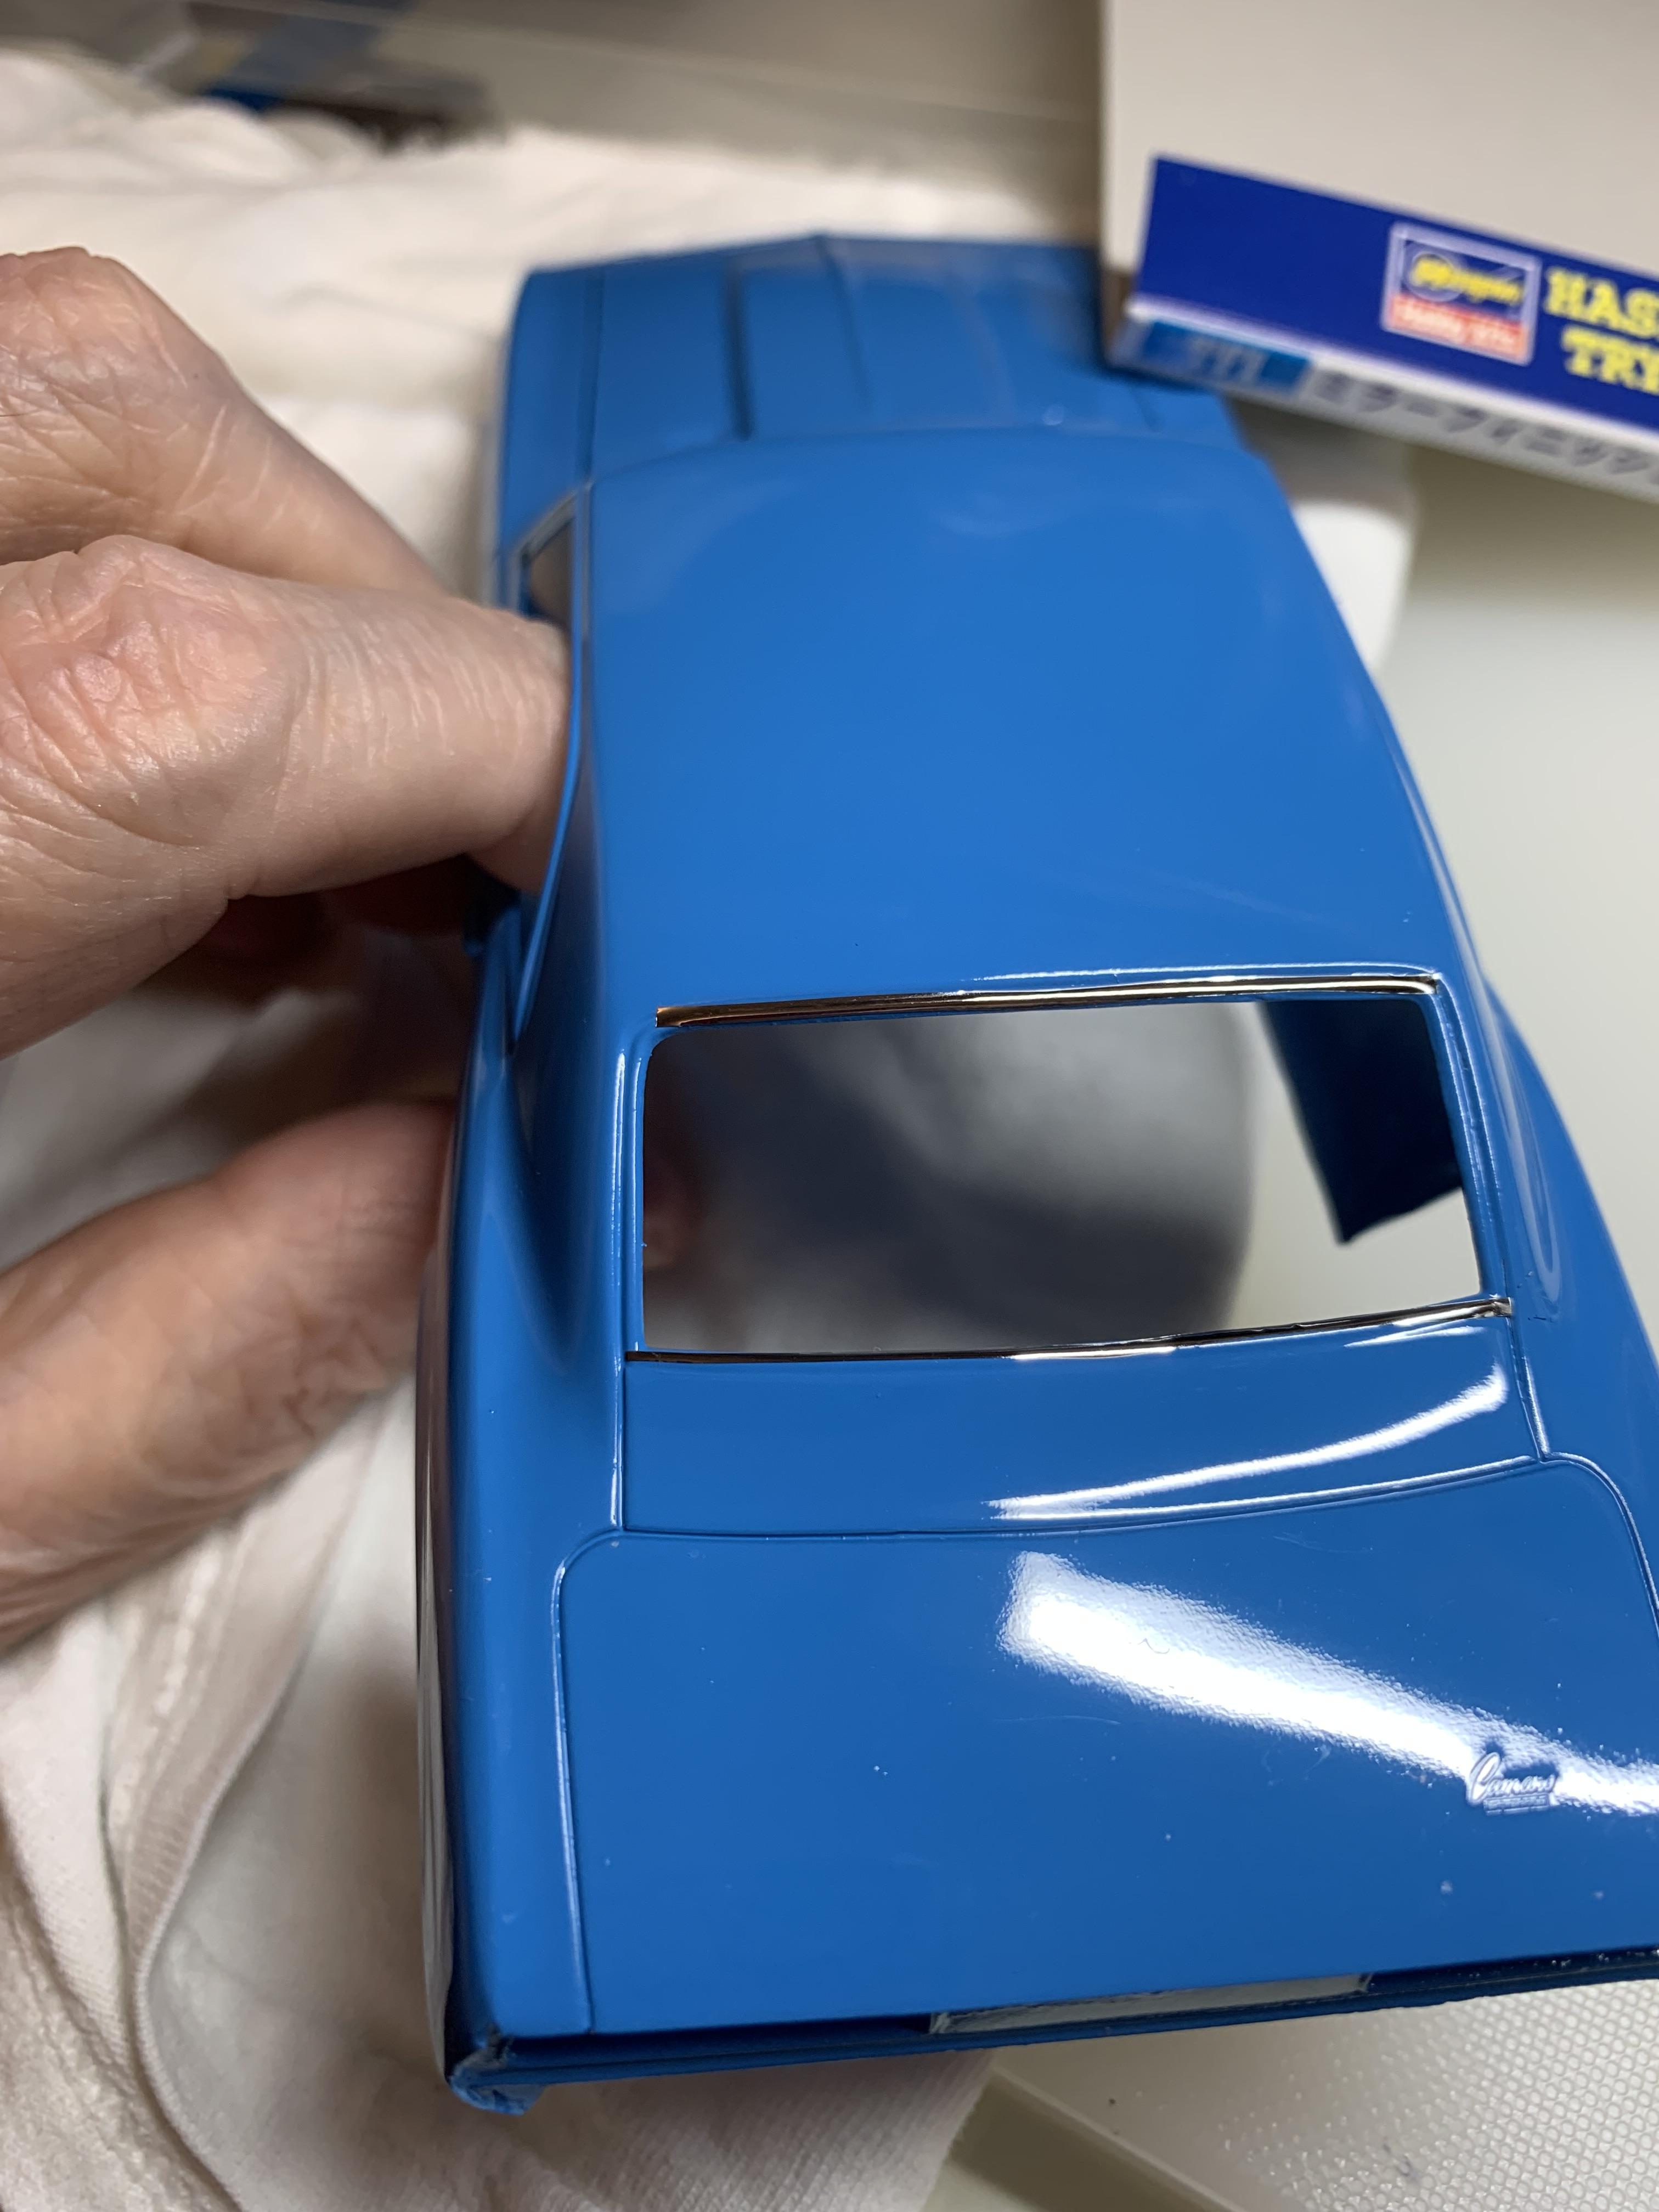
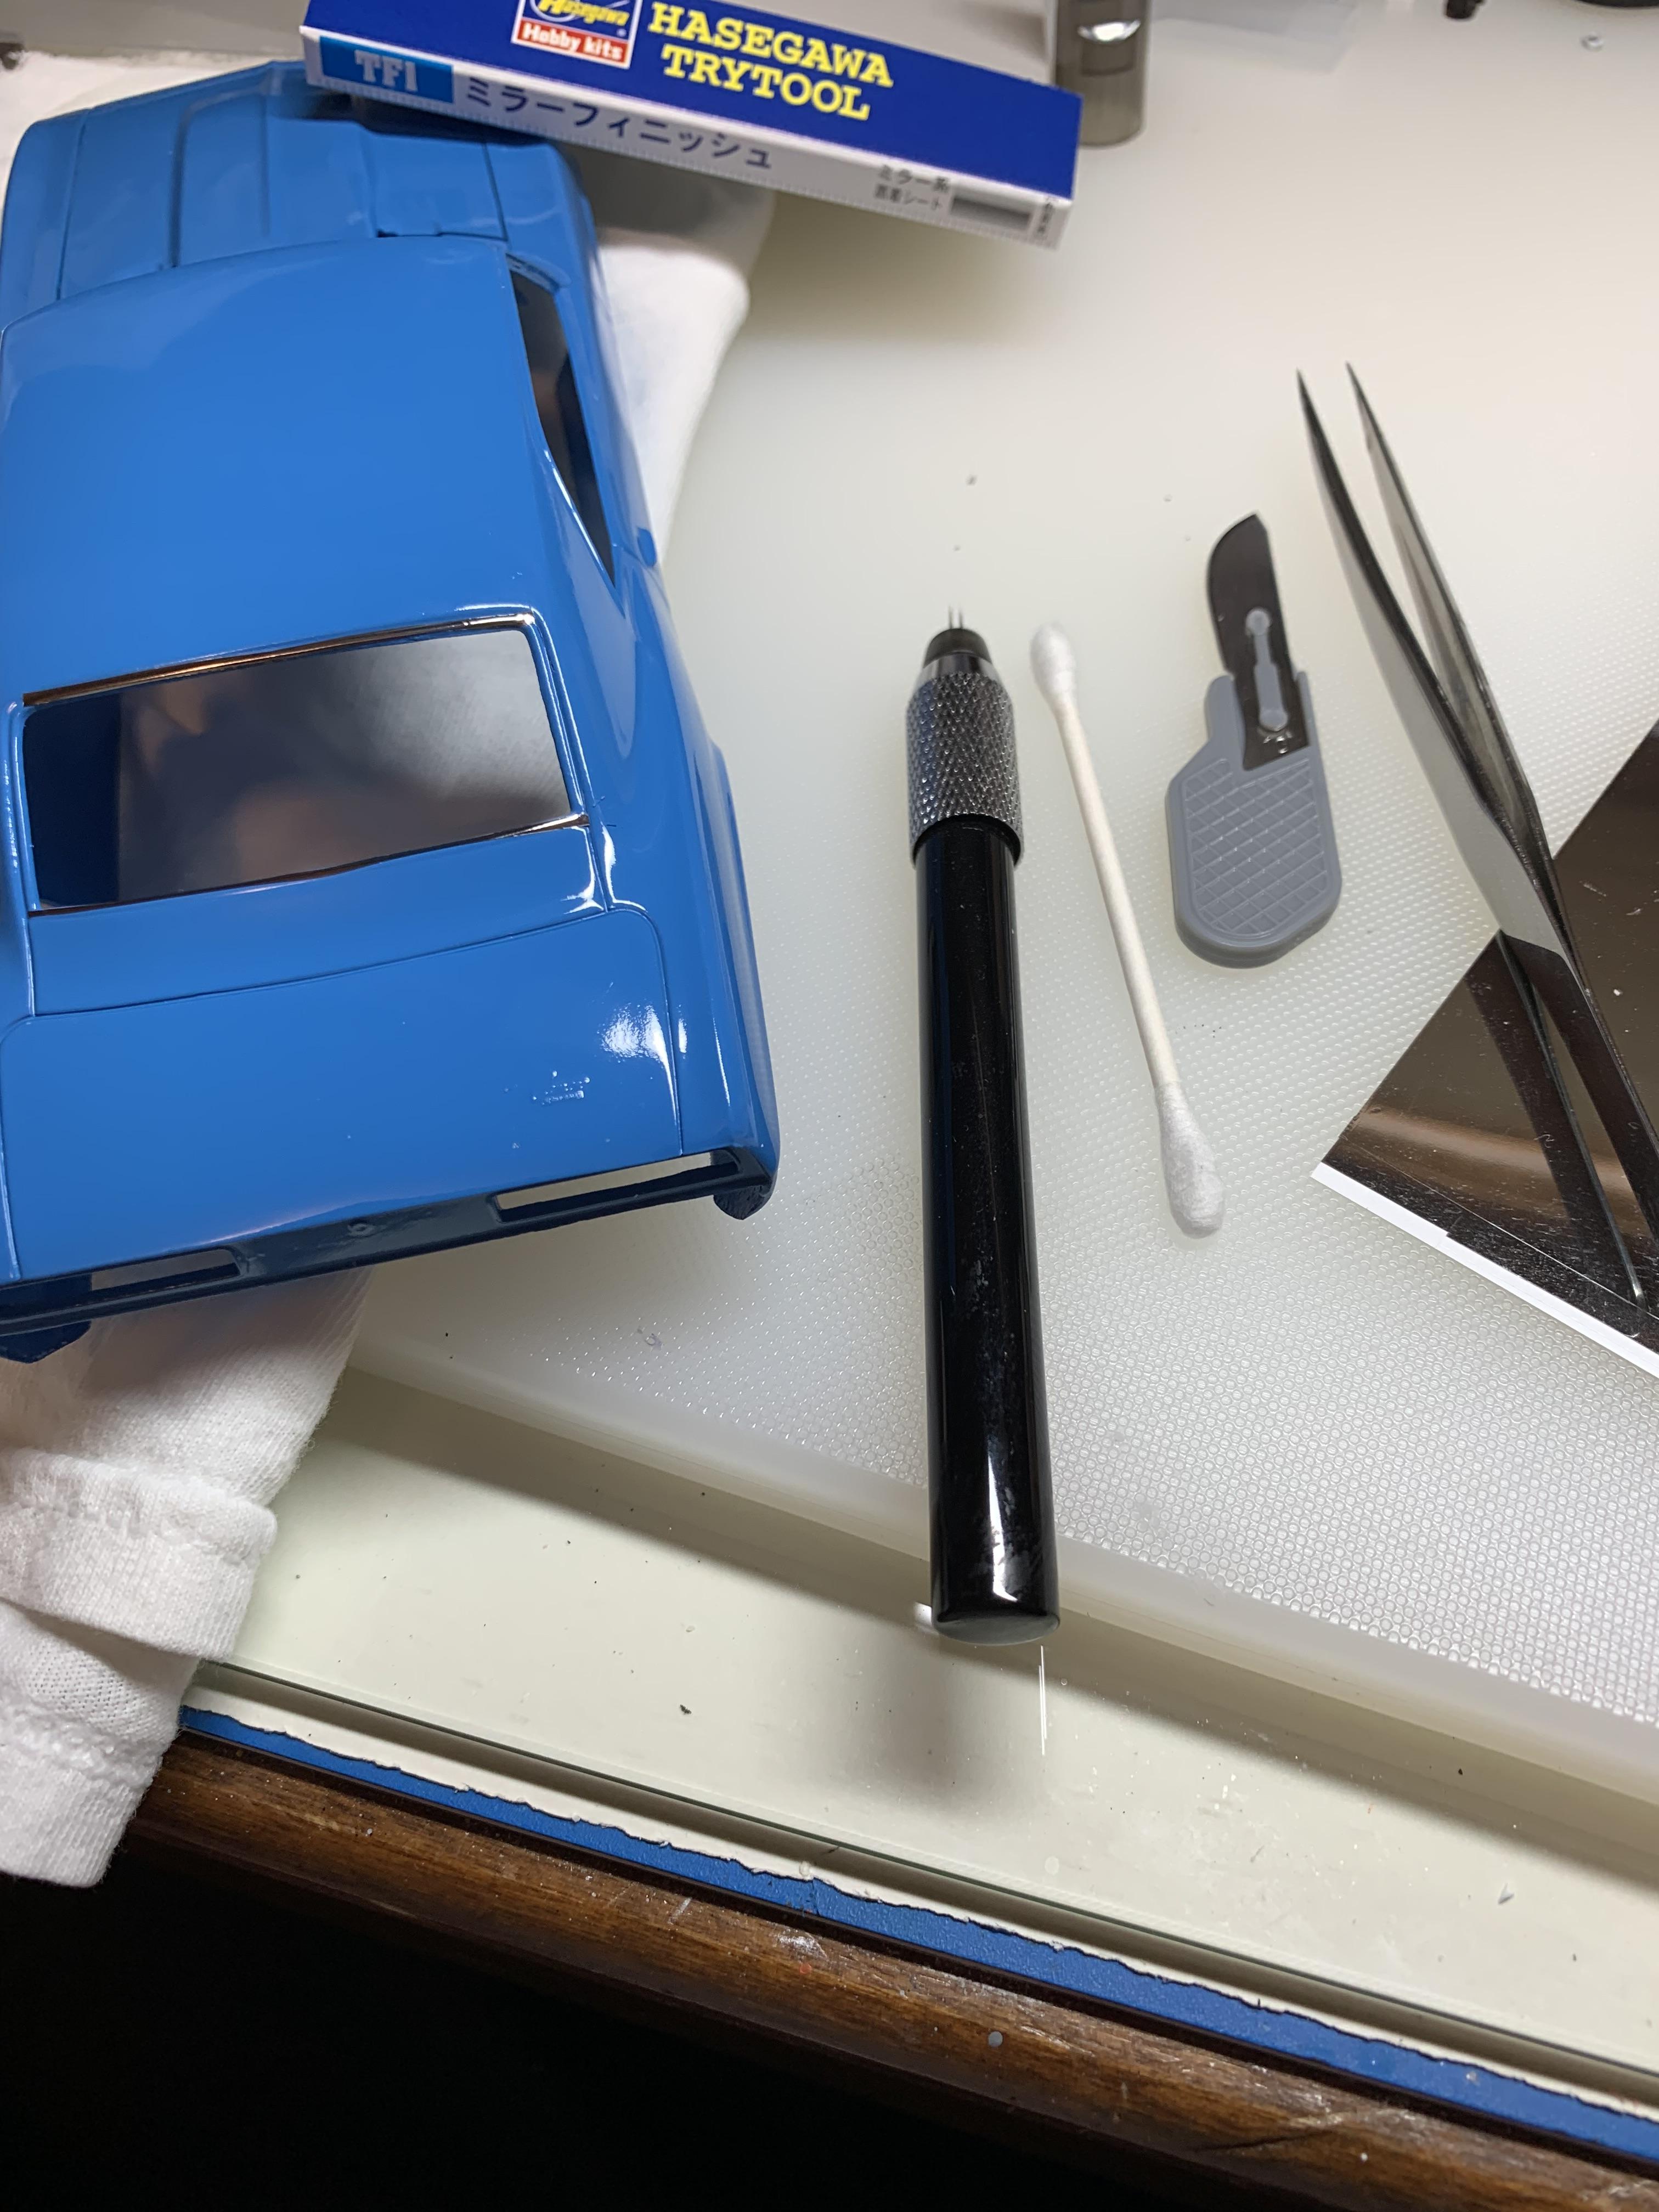
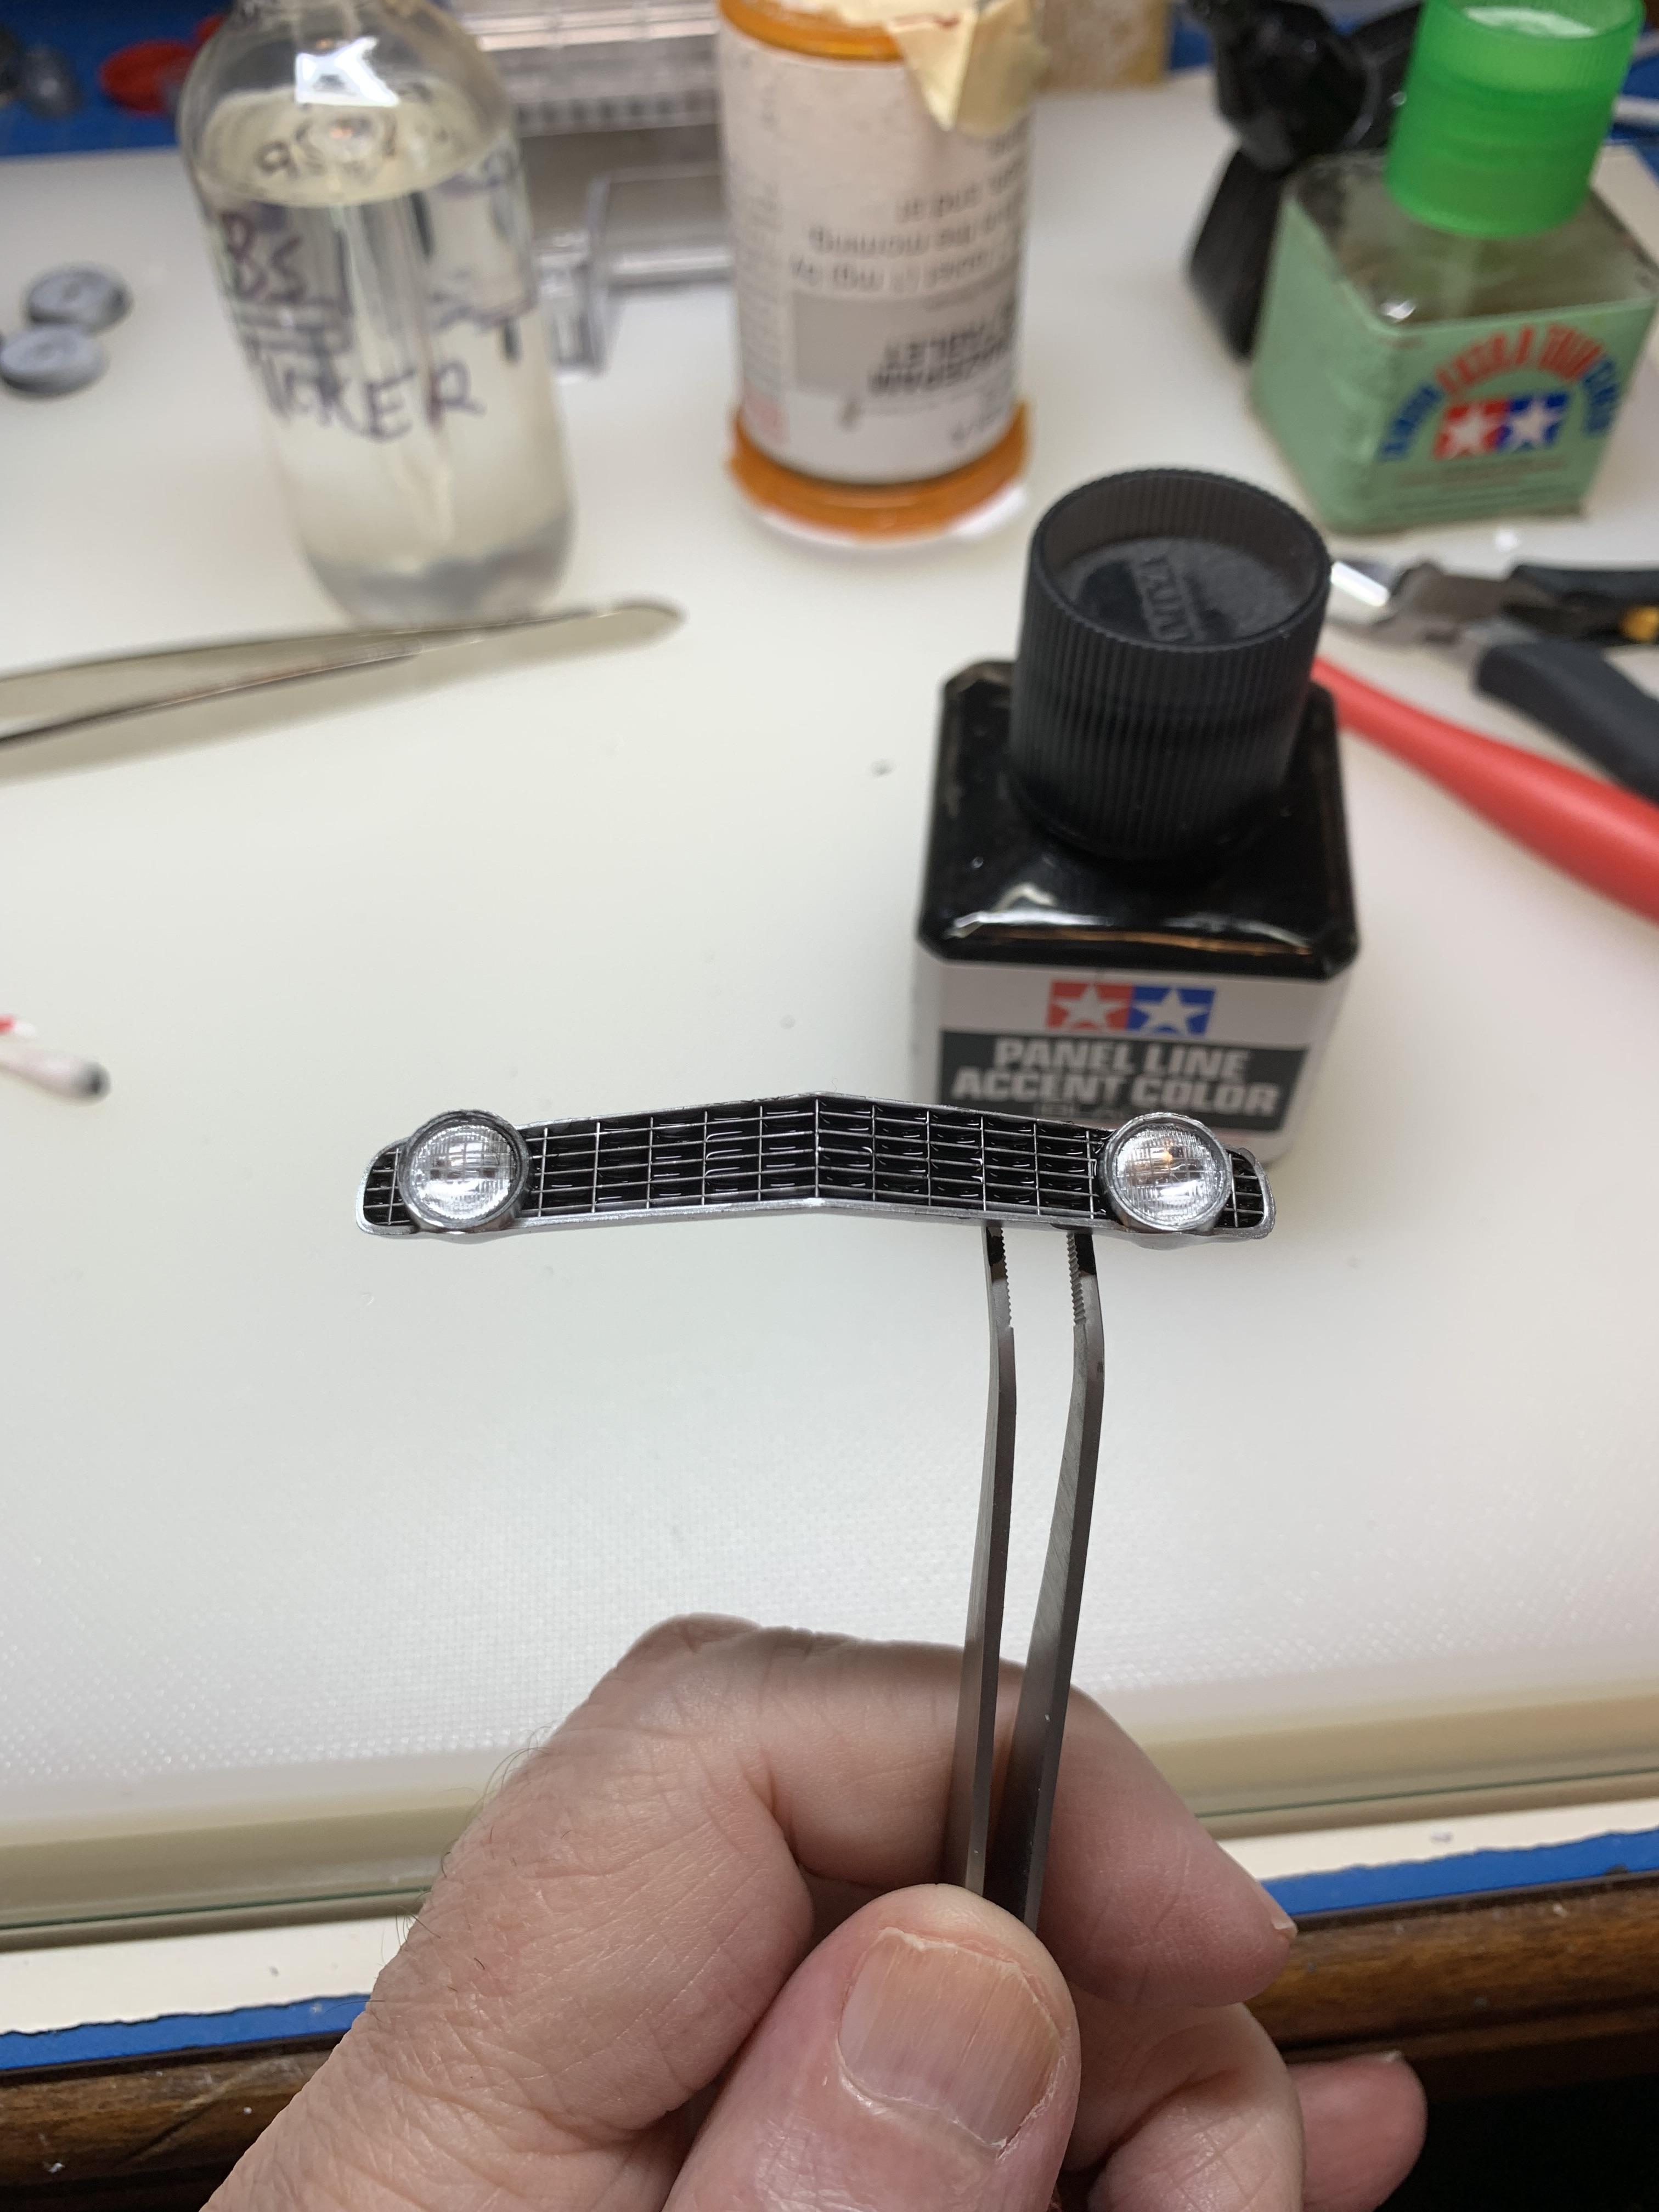
Finally, back on the 57. Working on the bright stuff with Hasegawa chrome. Experimenting with short scalpel to trim the edges with. Screwed up on the top front by cutting into the plastic too hard. Will try to fix that later. Better off cutting the thin strips first, then installing, as this stuff is harder to cut. Definitely different experience than bmf. A pic of the bmf type stuff that came in the Pro Modeler kit, which I decided against using ,along with some photo etch stuff.
-
56 Chevy Junior Stocker circa 1960’s
R. Thorne replied to R. Thorne's topic in WIP: Drag Racing Models
-
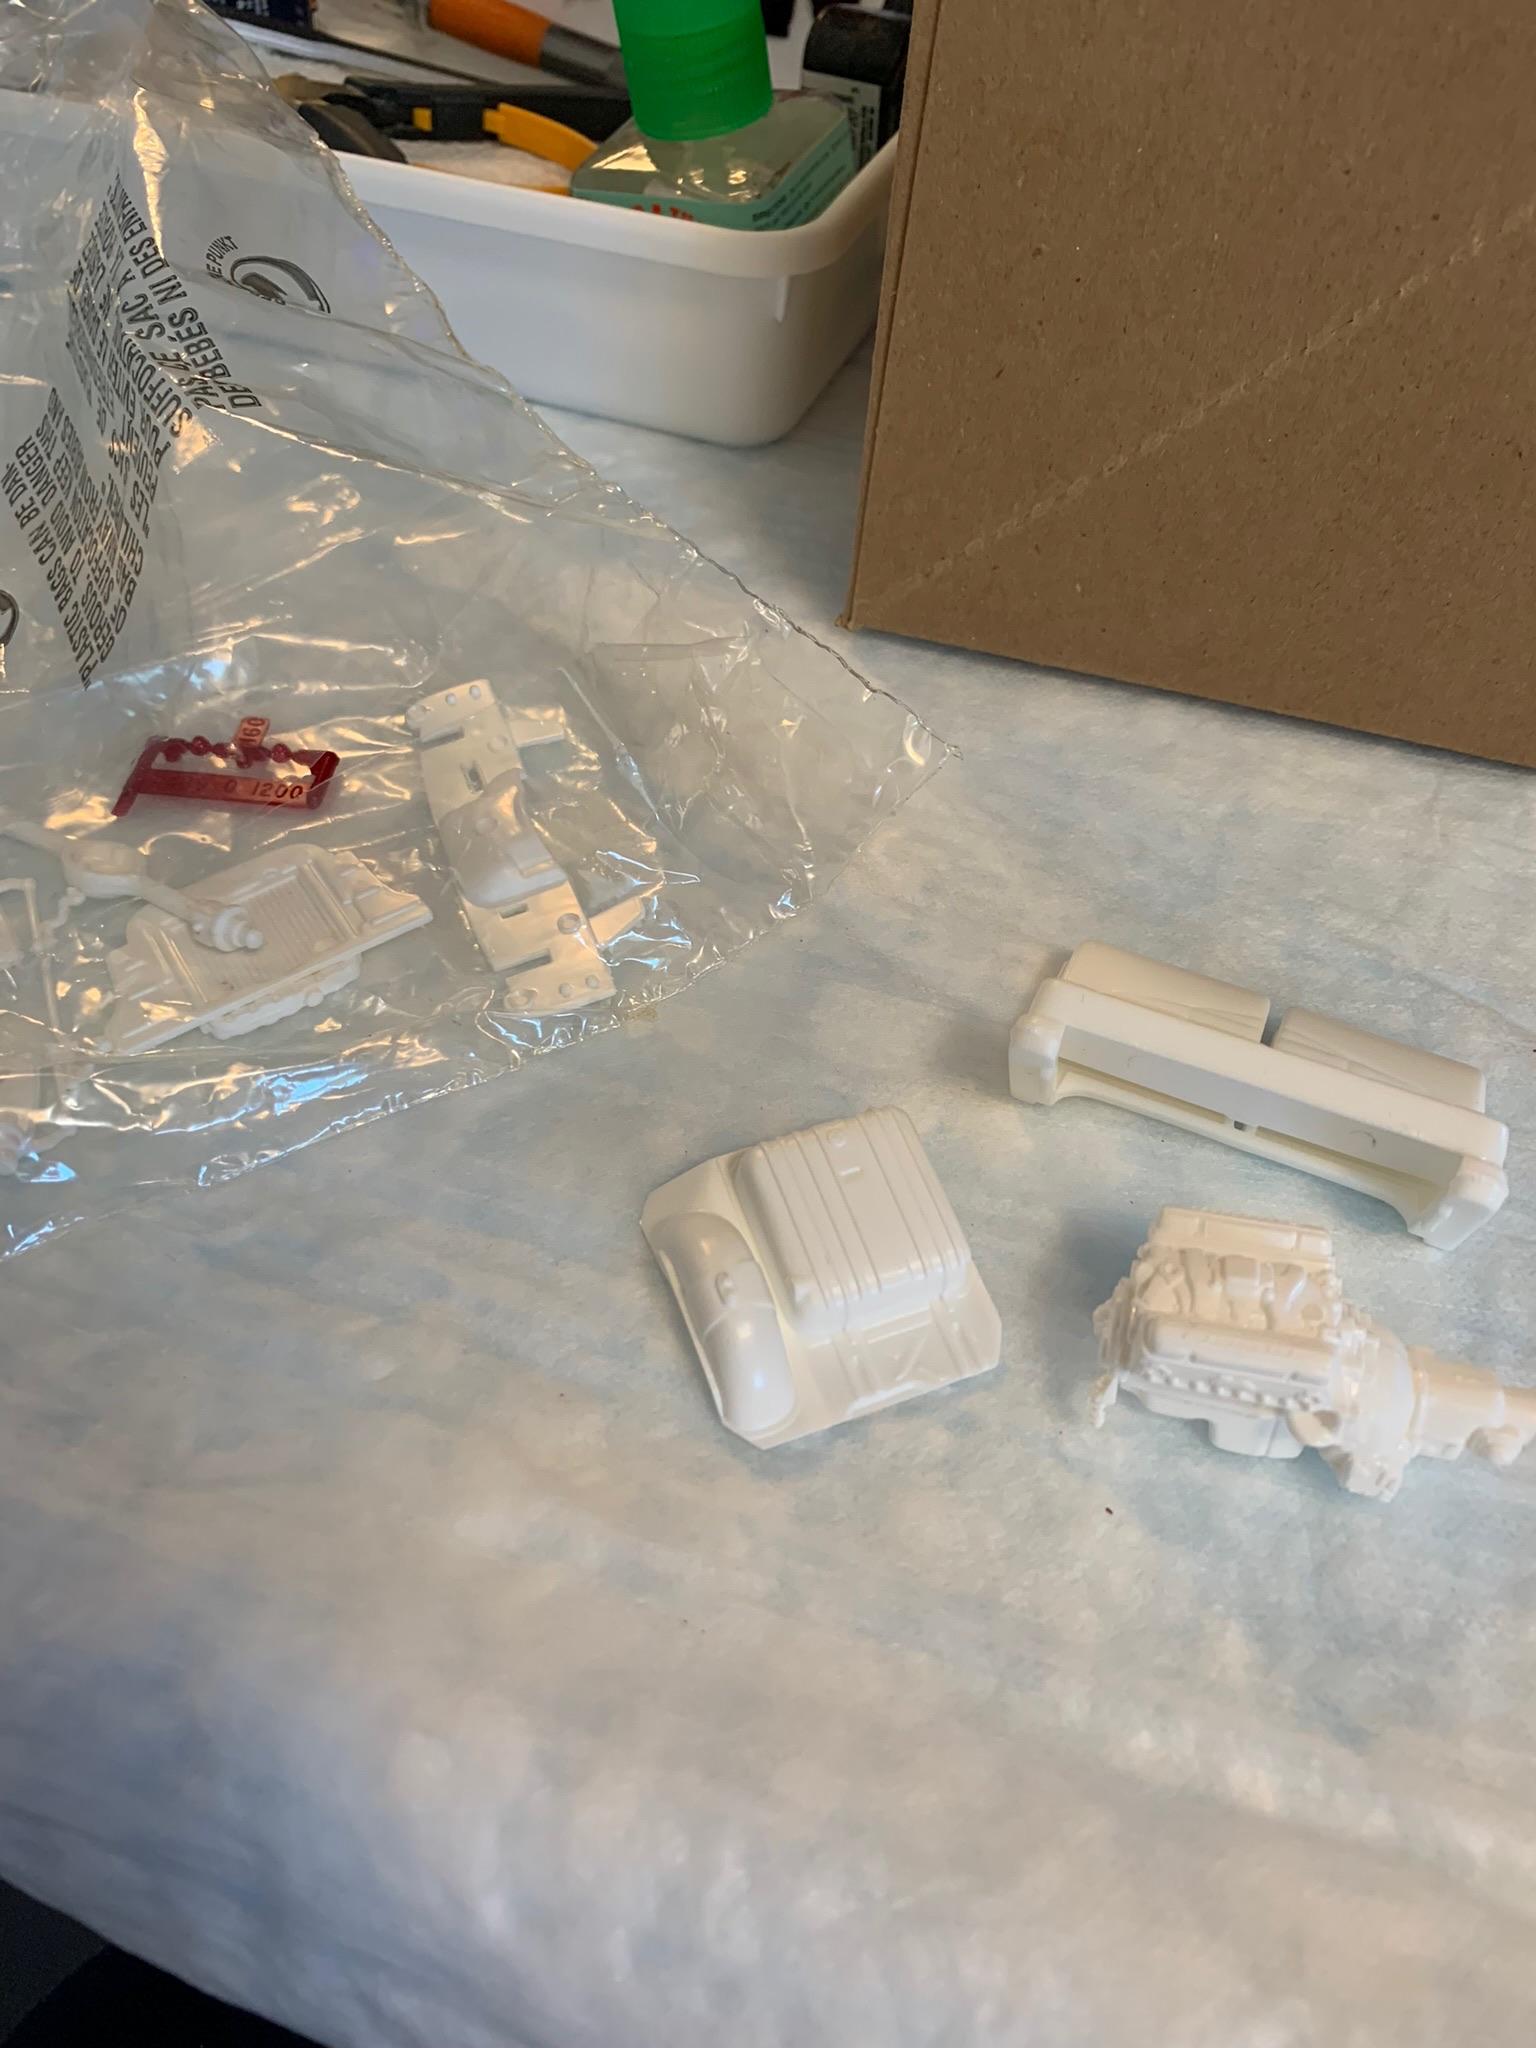
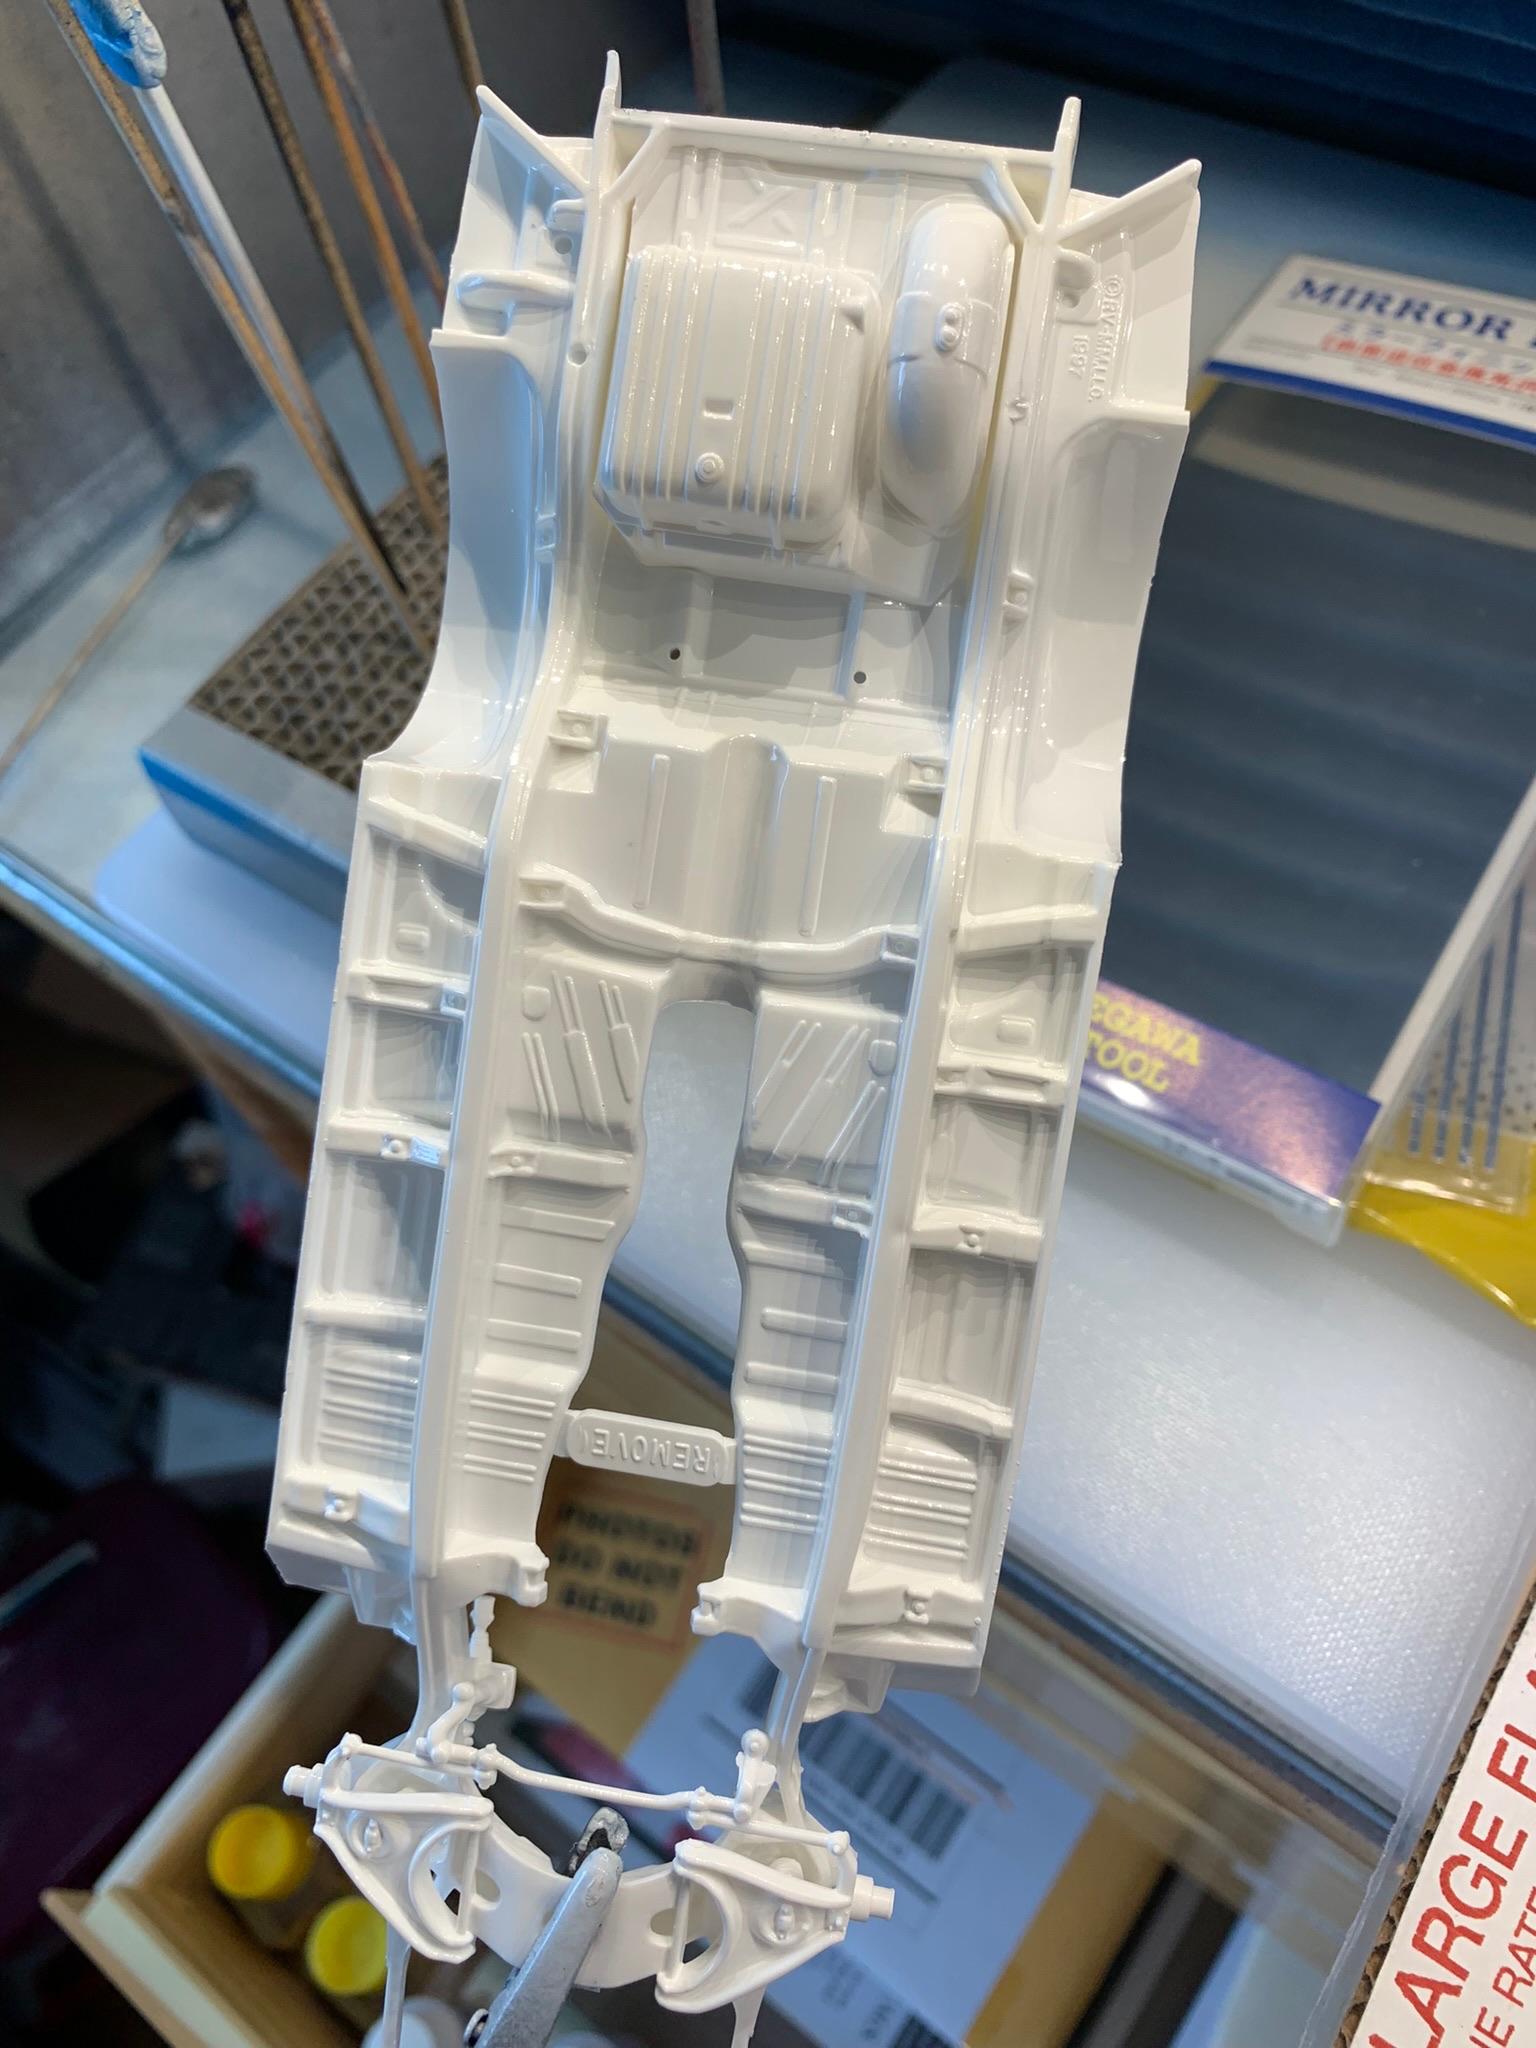
My third build on here at the same time. Seems like I am always held up by parts or tools. Well, anyway, I wanted to build a replica of Bruce Wilkinson’s station wagon (one of the guys I ran against in those days), but since there is no practical way of obtaining a wagon, I decided to build something like Buddy Ingersol ran, but with a Wilkinson type of paint job. Clear as mud, huh? This is the kit and some assembly pics. Got the interior painted Rustoleum grey and the chassis painted Tamiya pure white. Some more pics later.
-
1969 Camaro A/SA (possibly Thomas Arnett’s)
R. Thorne replied to R. Thorne's topic in WIP: Drag Racing Models
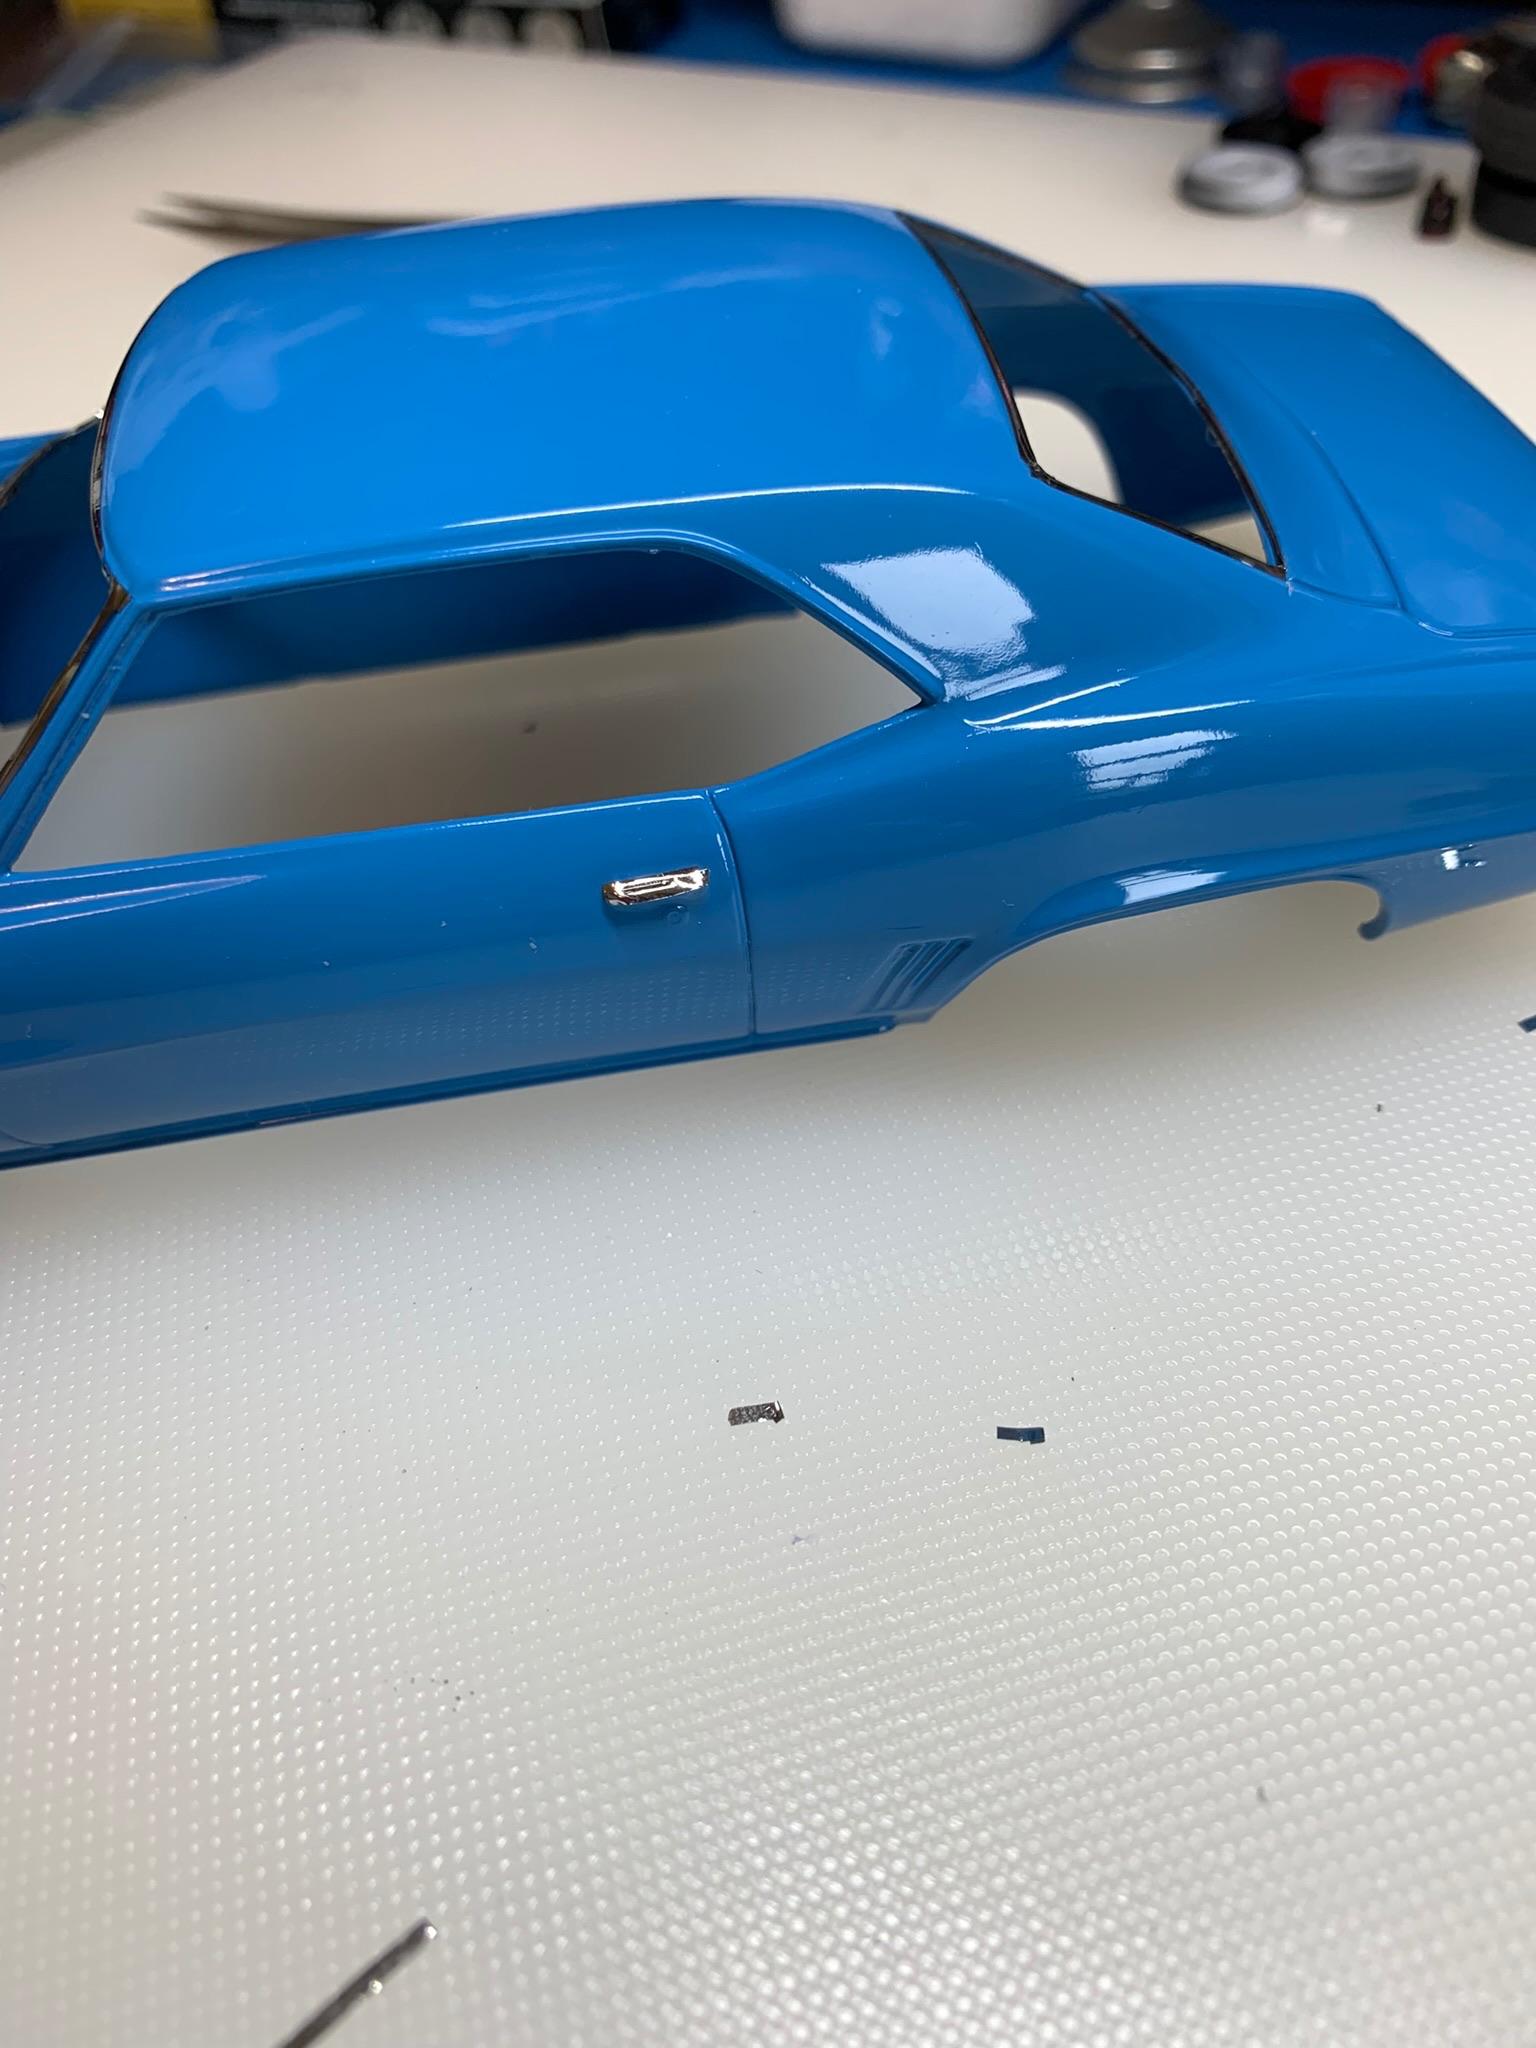
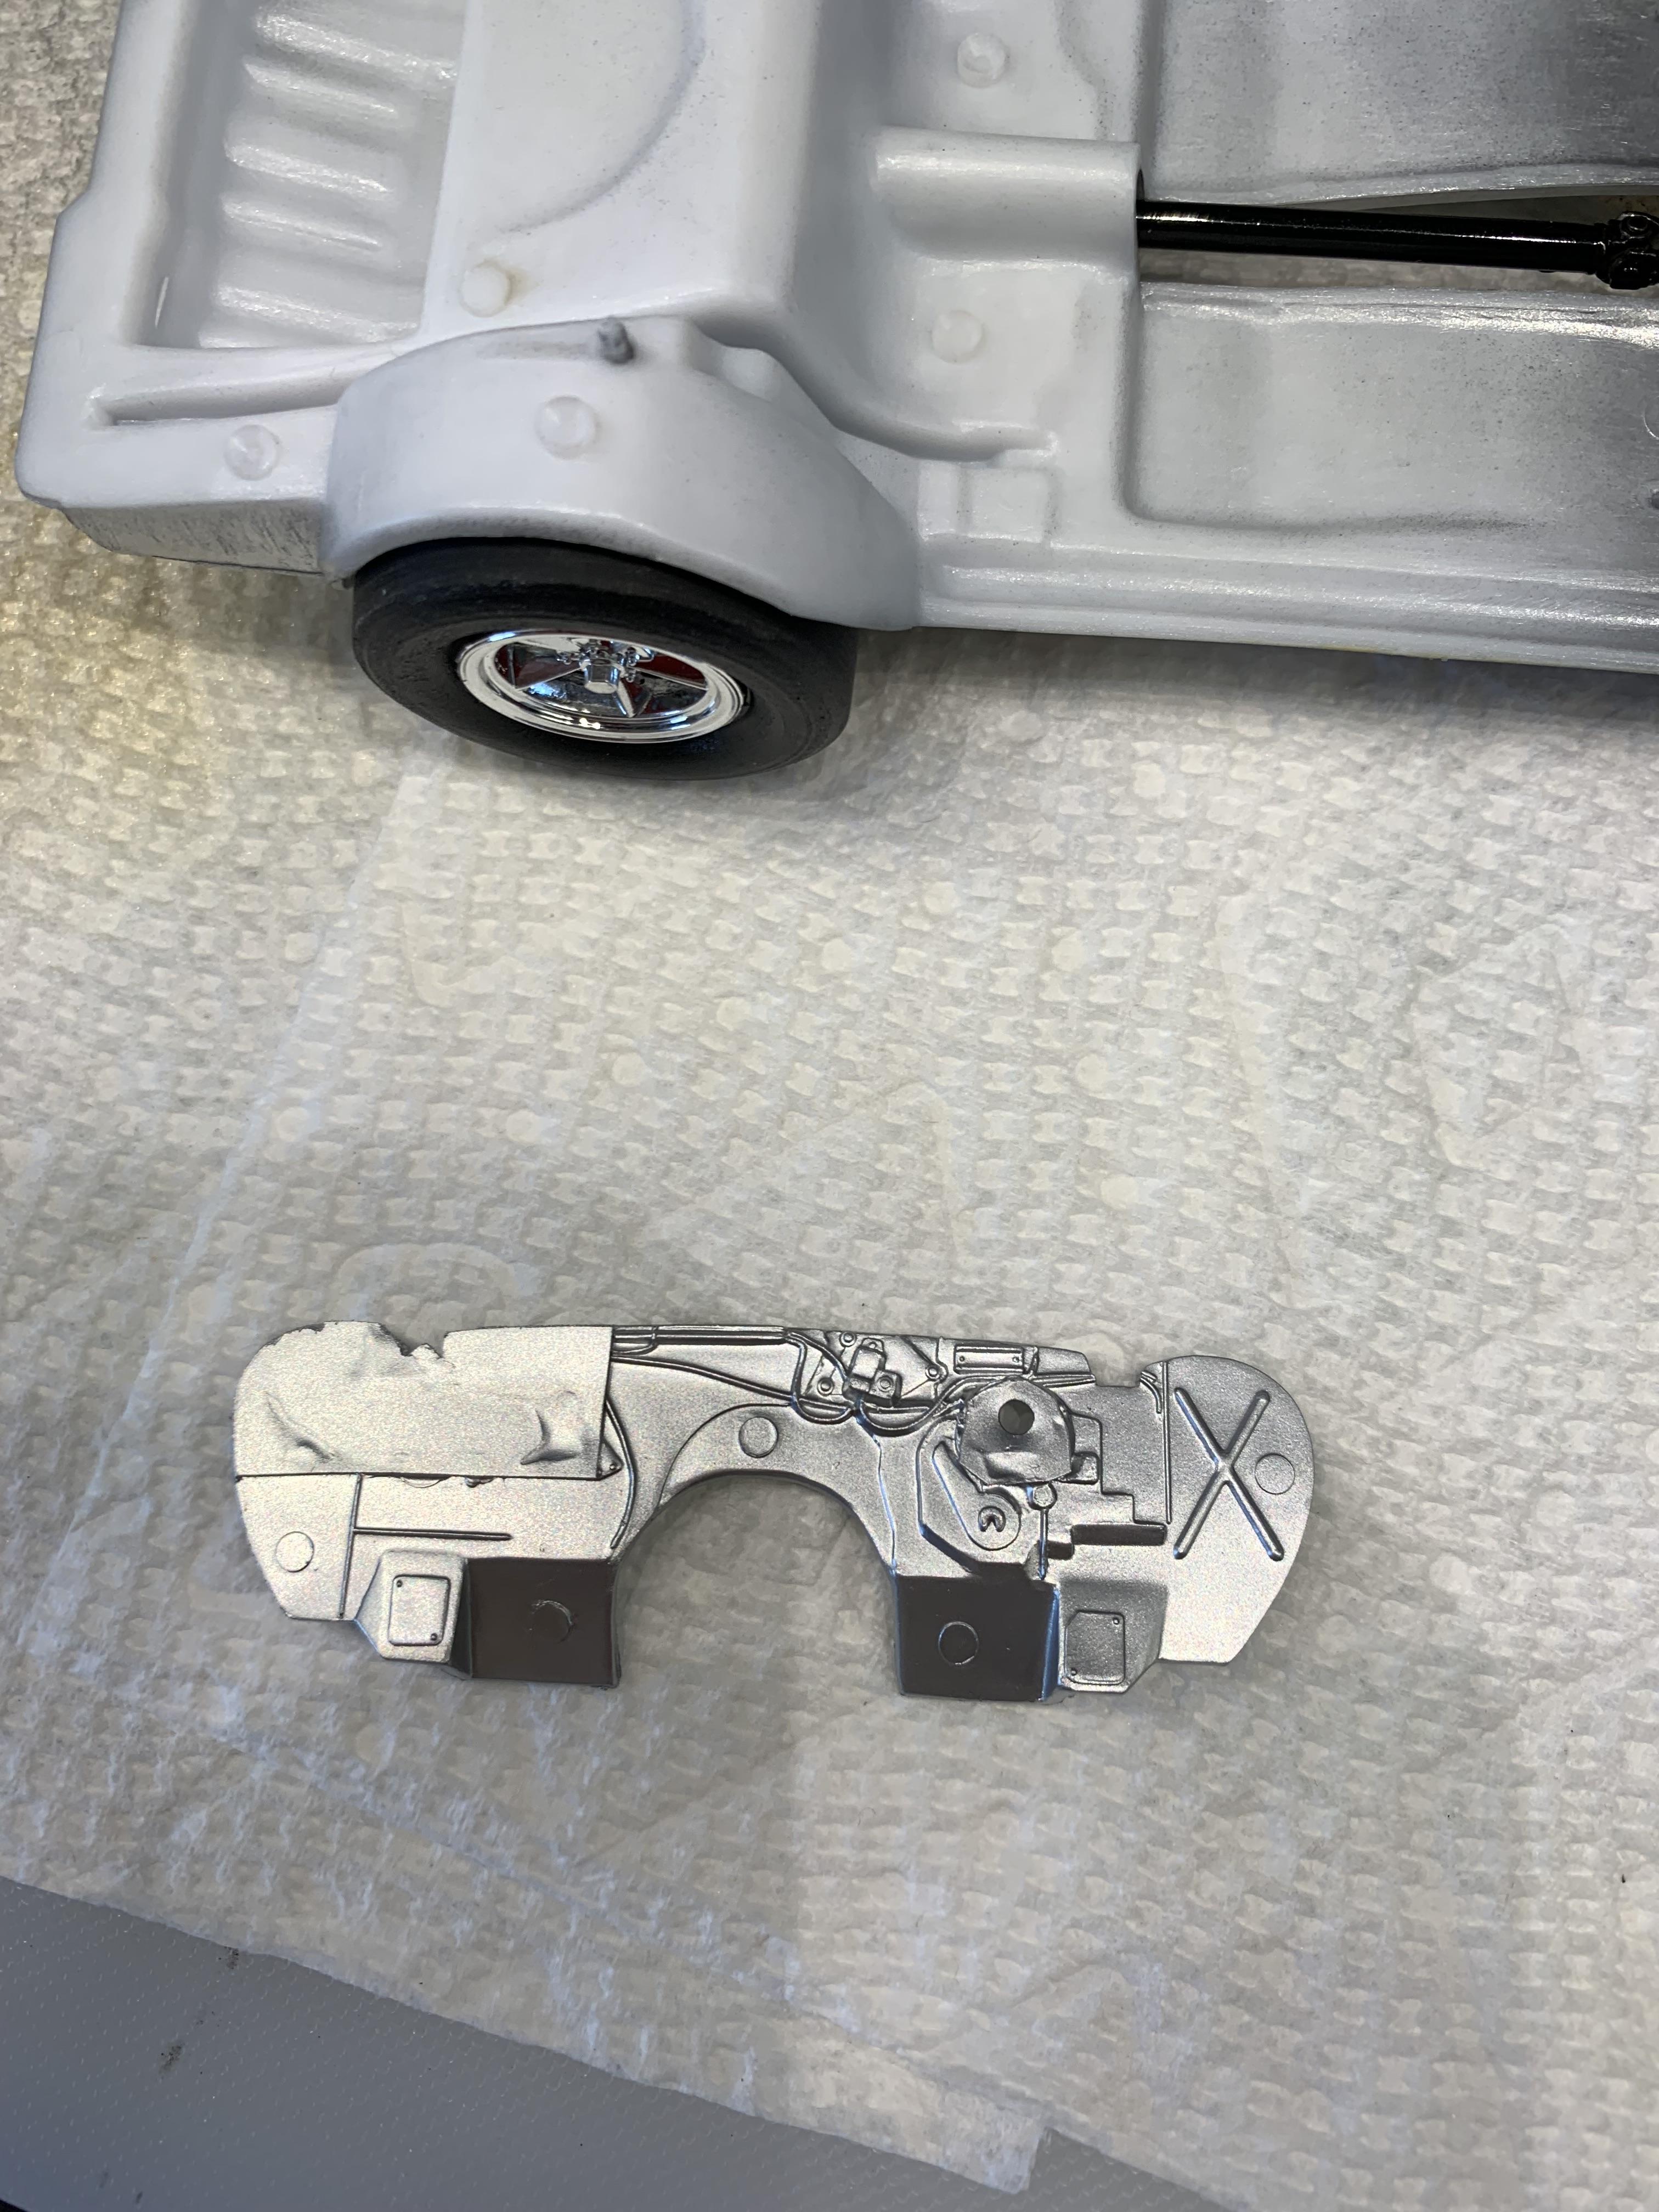
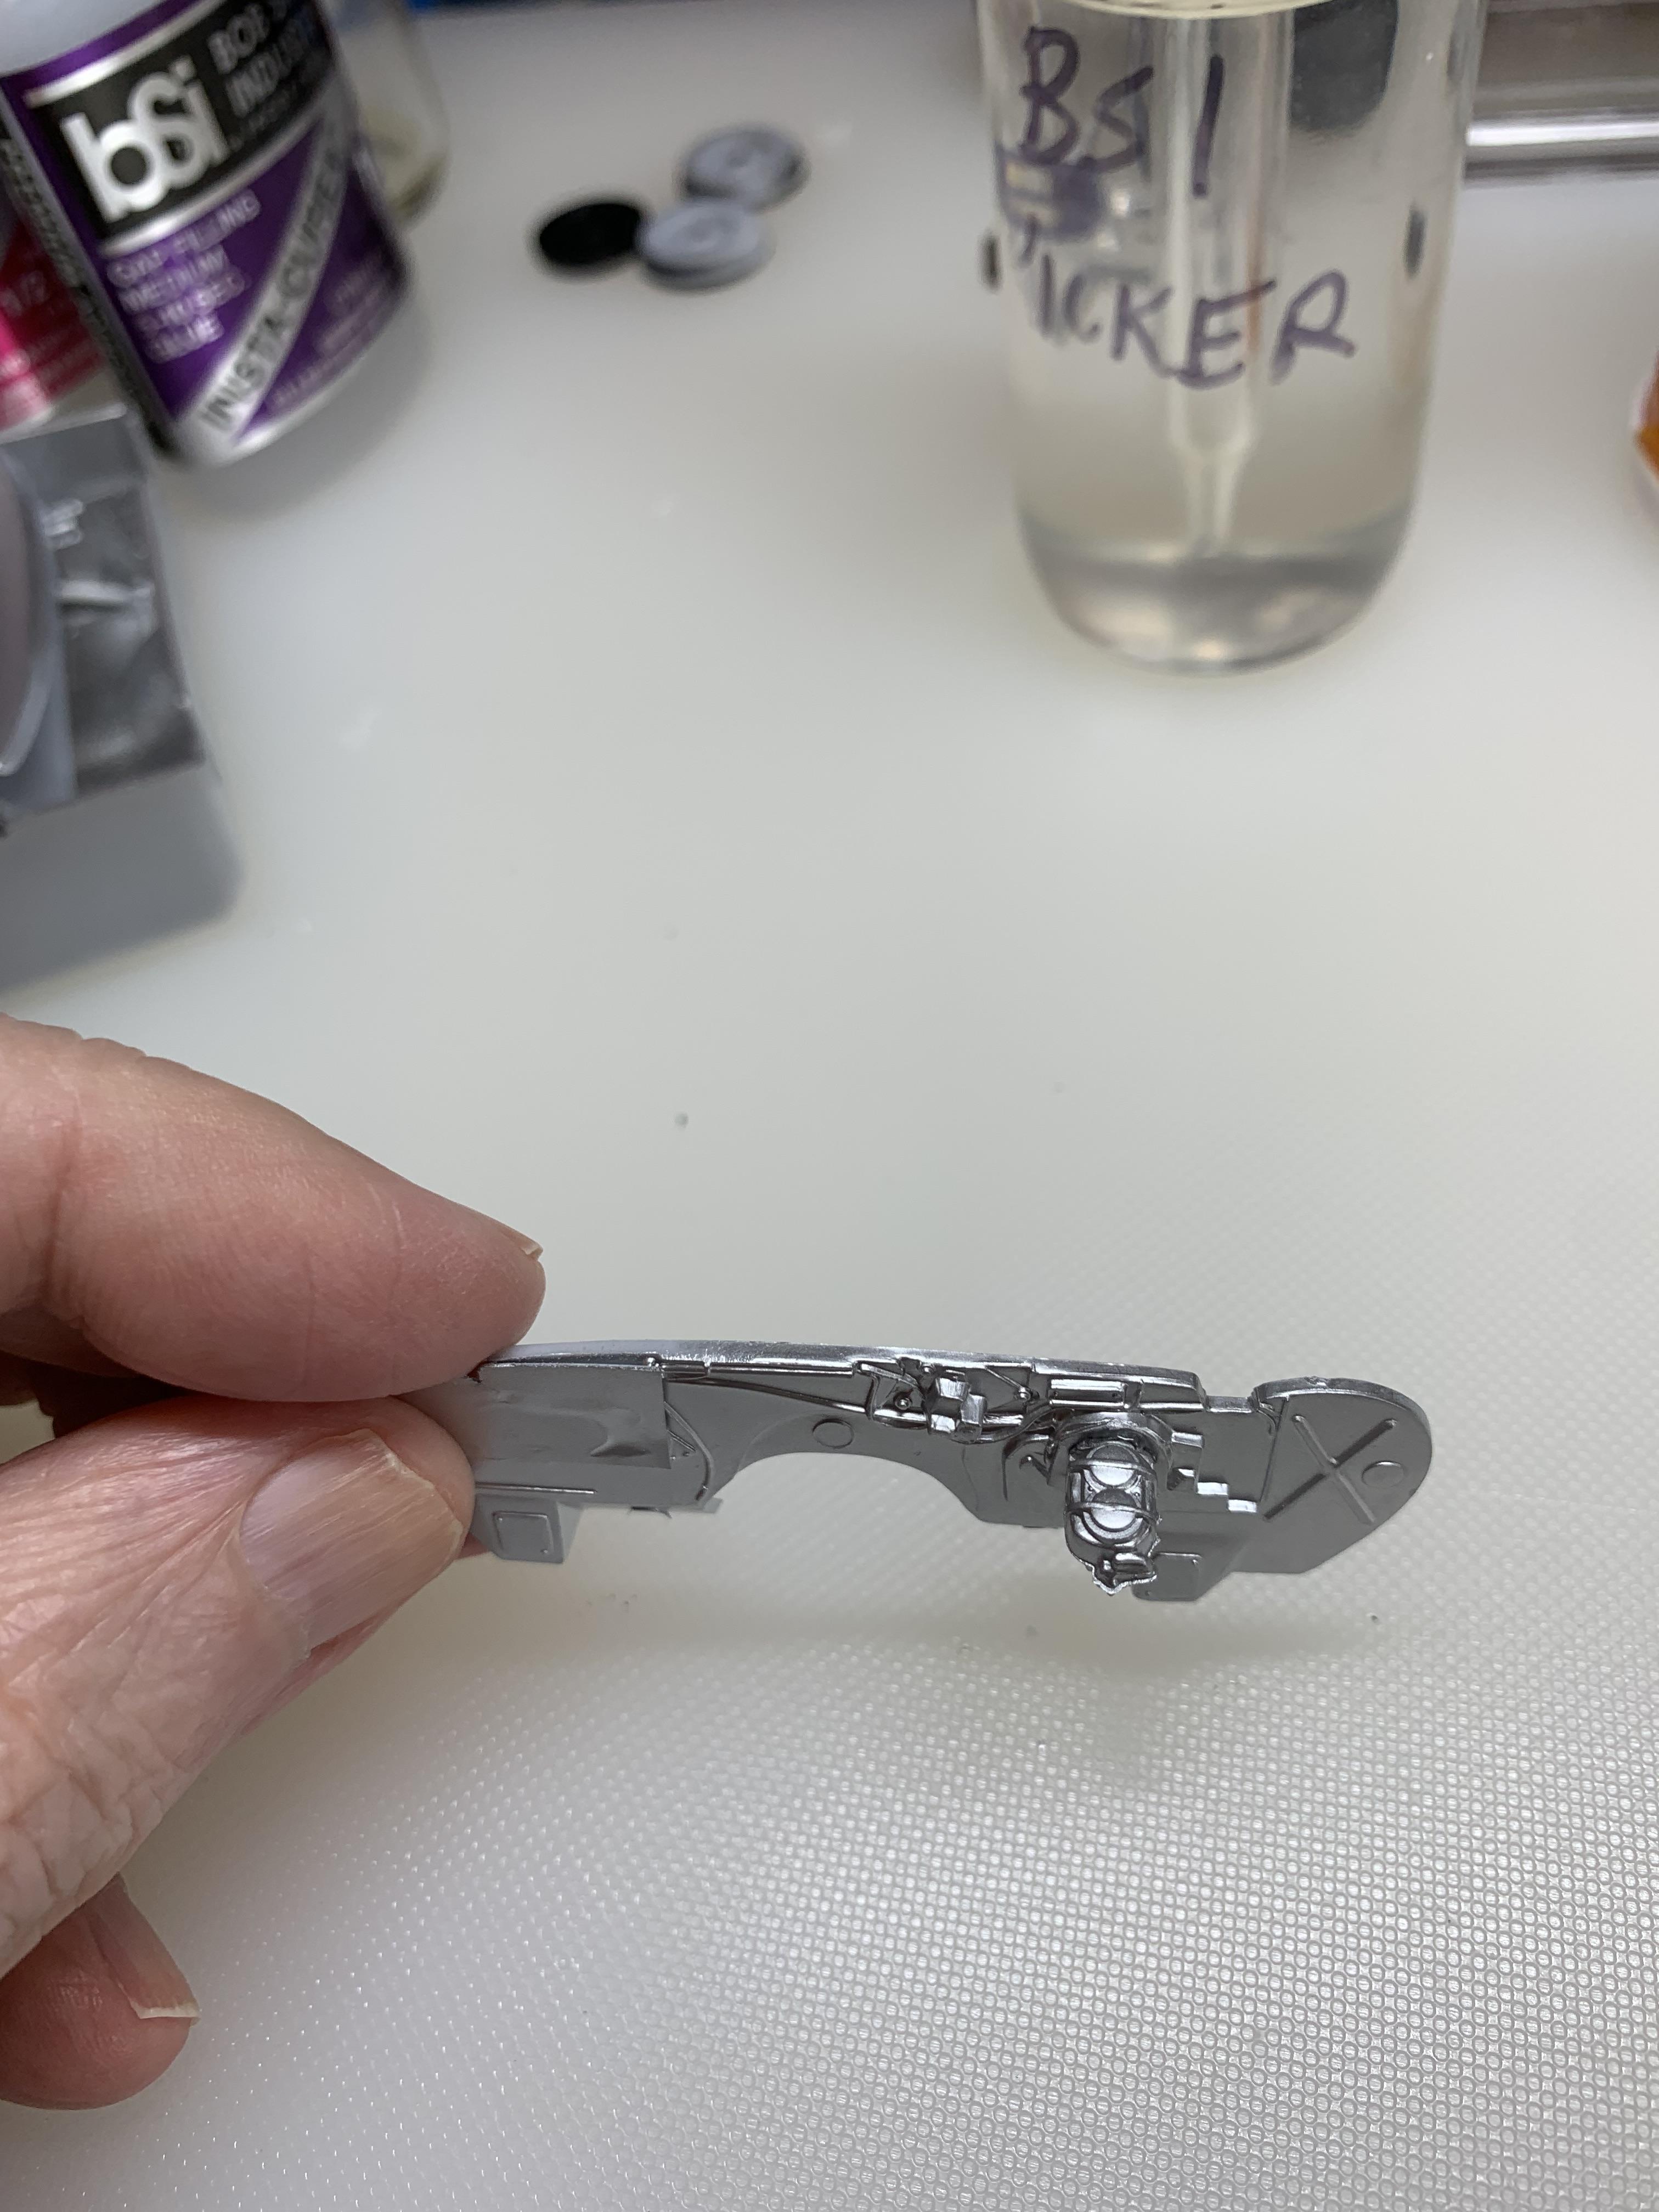
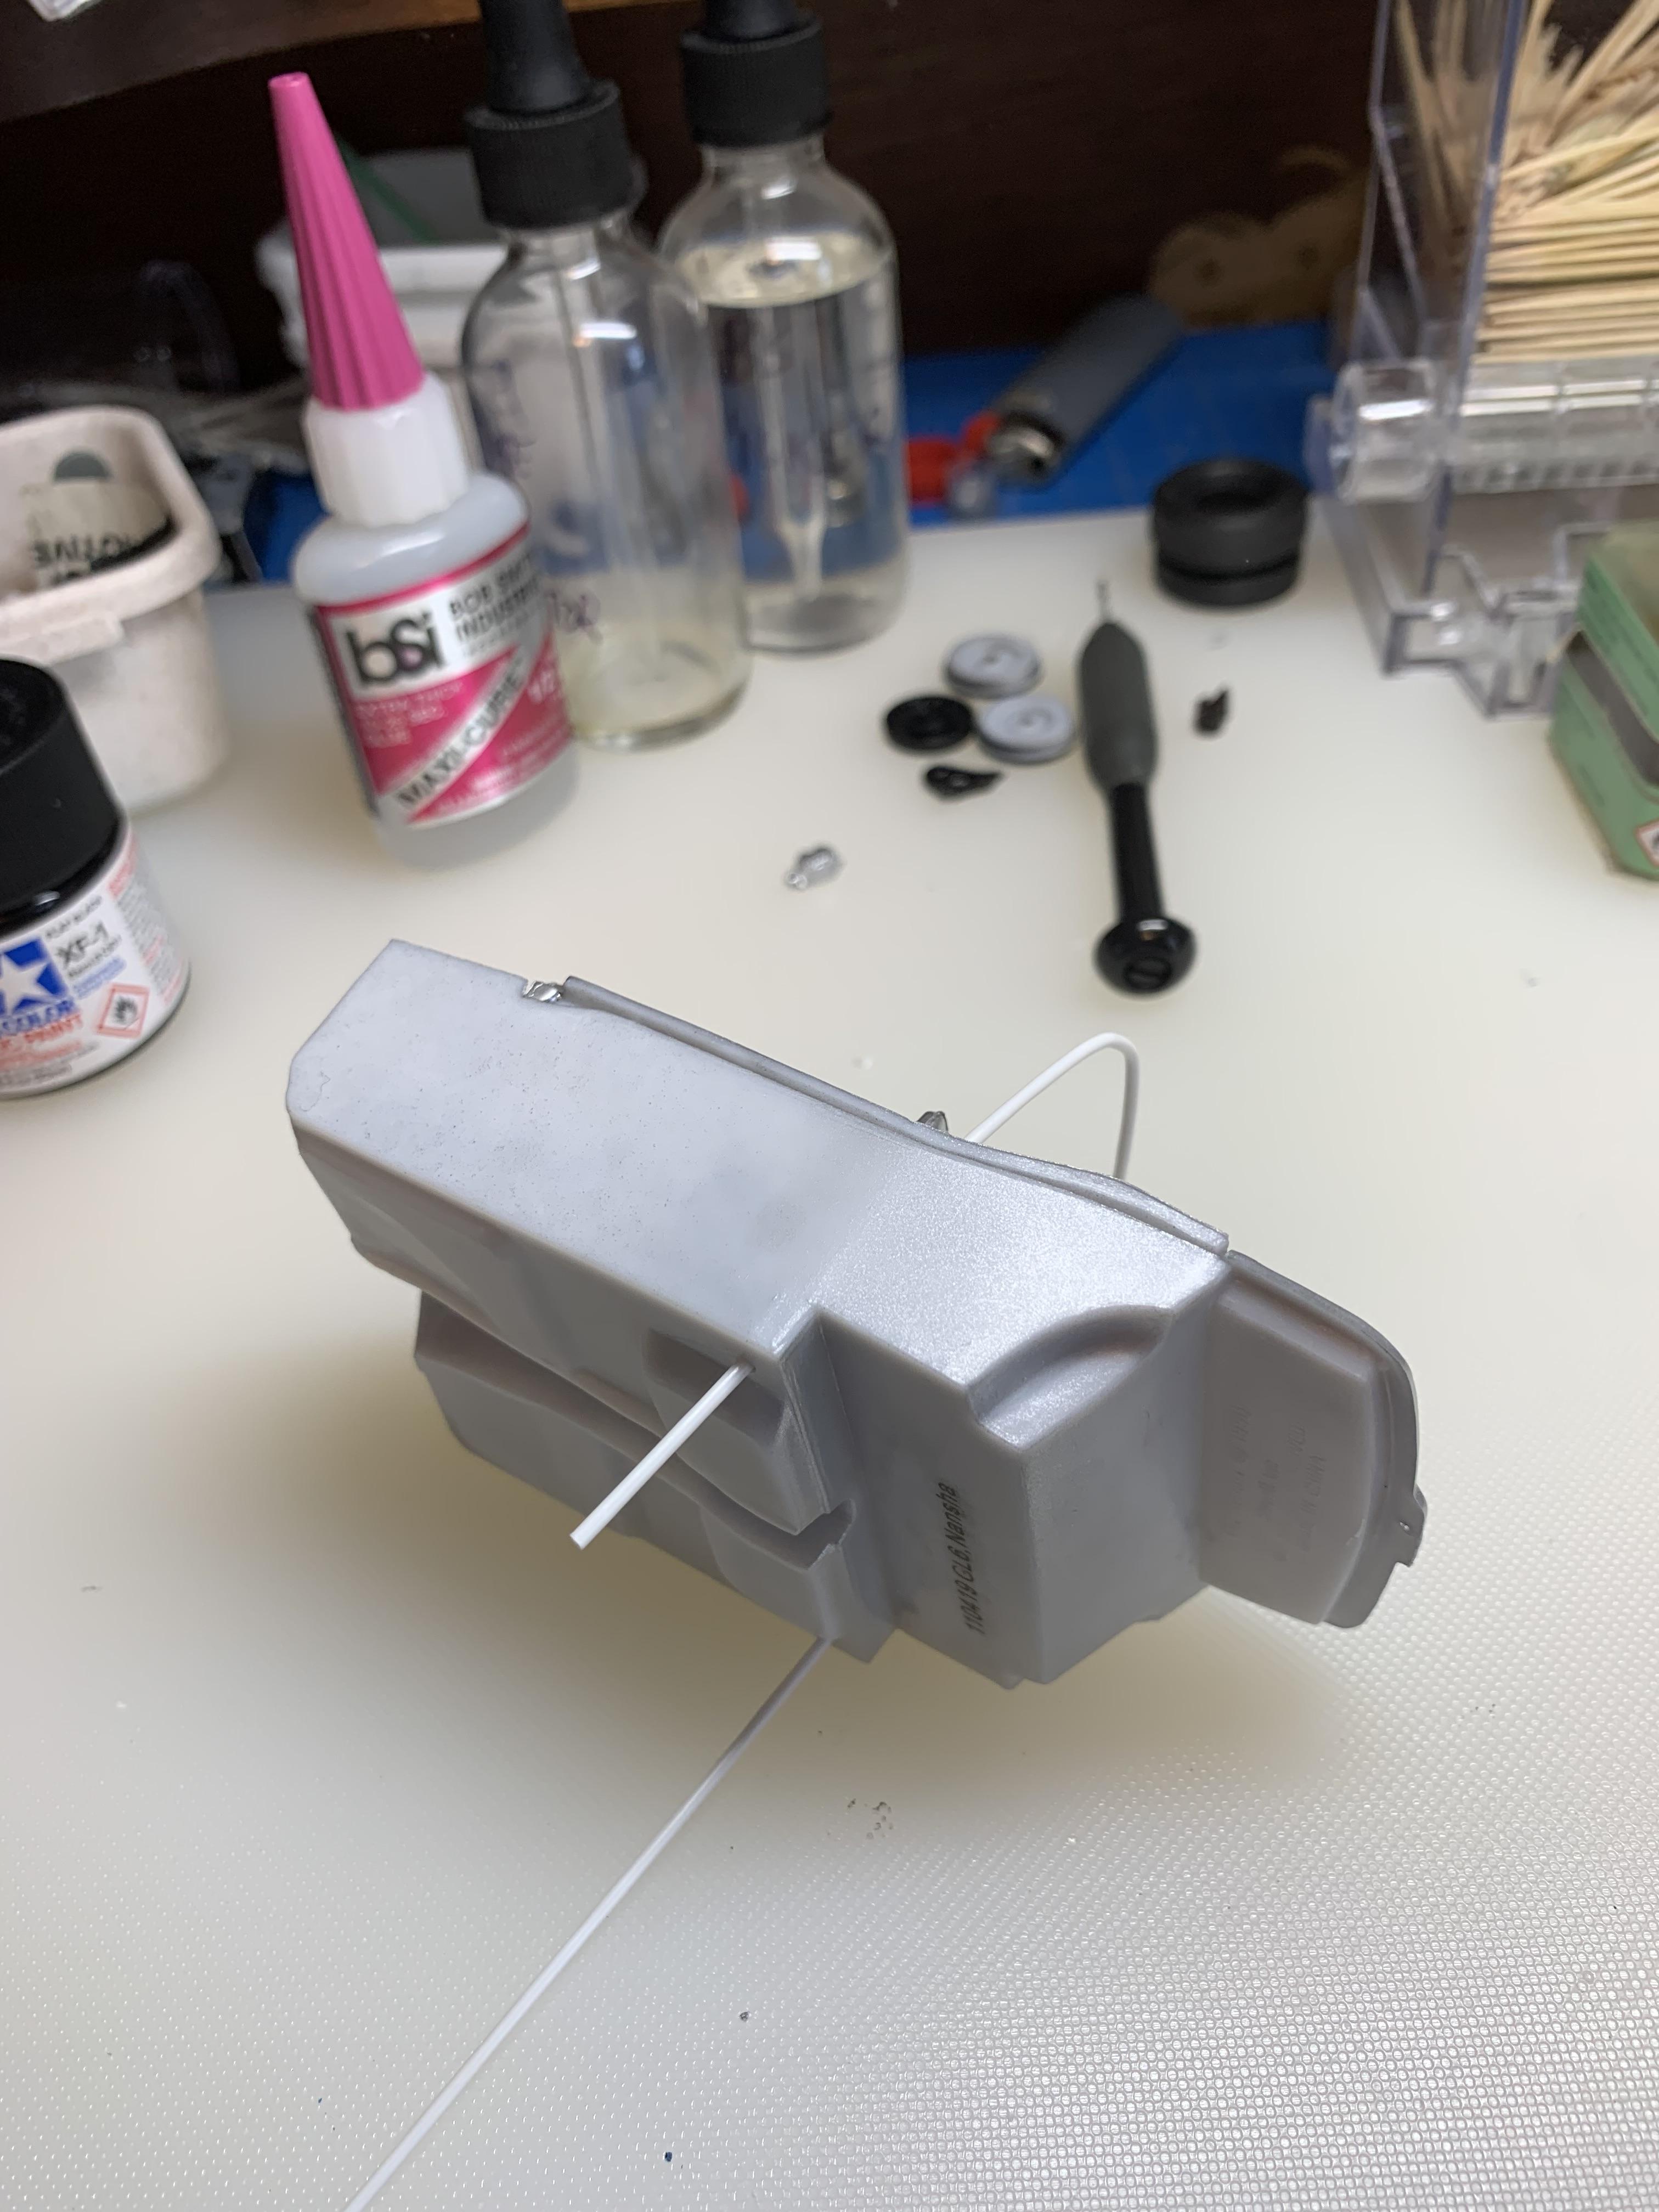
Stuck some chrome on the door handles with scrap pieces. Looks like I am gonna be held up on this build for a few days. Had to order some class designation letters and numbers. I will work on the 57 Chevy C/MP or start a new build on a 56 Chevy jr. stocker.
-
Gluing in Acetate Windows
R. Thorne replied to DoctorLarry's topic in Model Building Questions and Answers
I liked the g-s hypo needle type applicator.
-
1969 Camaro A/SA (possibly Thomas Arnett’s)
R. Thorne replied to R. Thorne's topic in WIP: Drag Racing Models
Well, another day, another error. Forgot to sand off the wiper blades, as very few stockers keep them on. A few more strips of Hasegawa chrome and they will have to do. Windshield chrome looks ok. The stuff is harder to cut than bmf,but, luckily, there is very little trimming to do with the narrow strips I use. Now, on to making some side windows, installing windshields, and making some class numbers and letters. There is a 25 watt bulb at the end of this tunnel.
-
1969 Camaro A/SA (possibly Thomas Arnett’s)
R. Thorne replied to R. Thorne's topic in WIP: Drag Racing Models
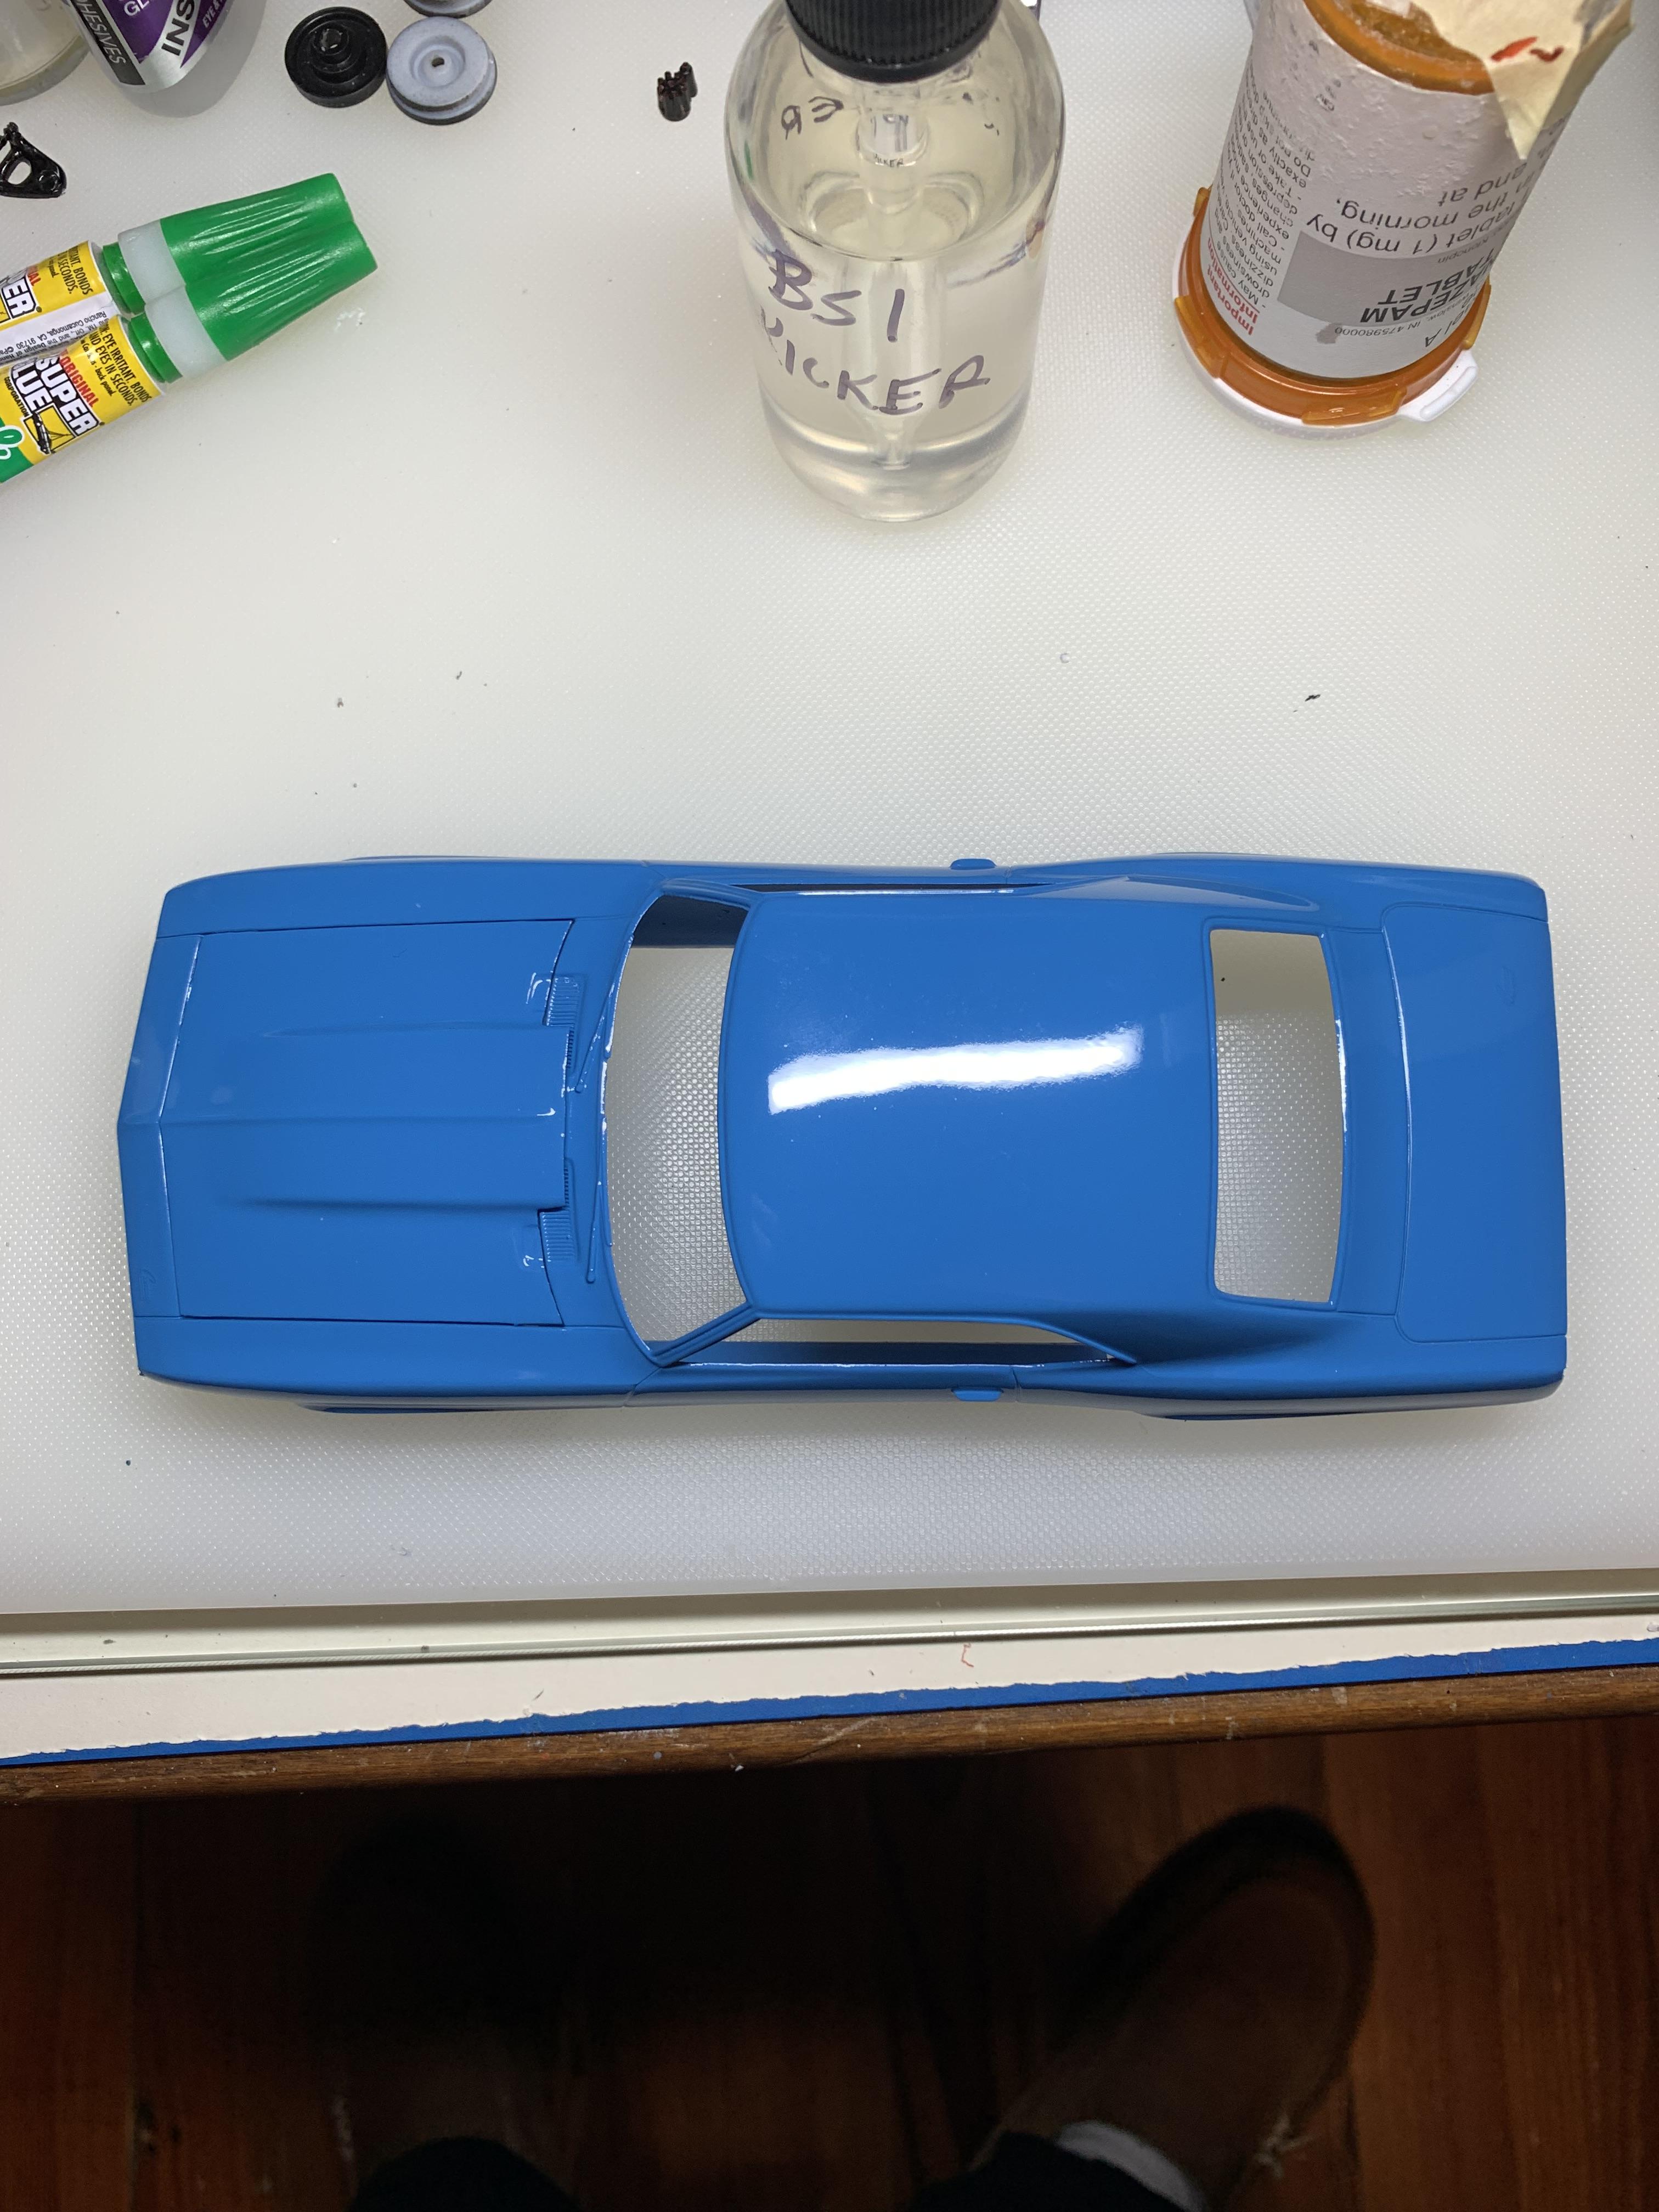
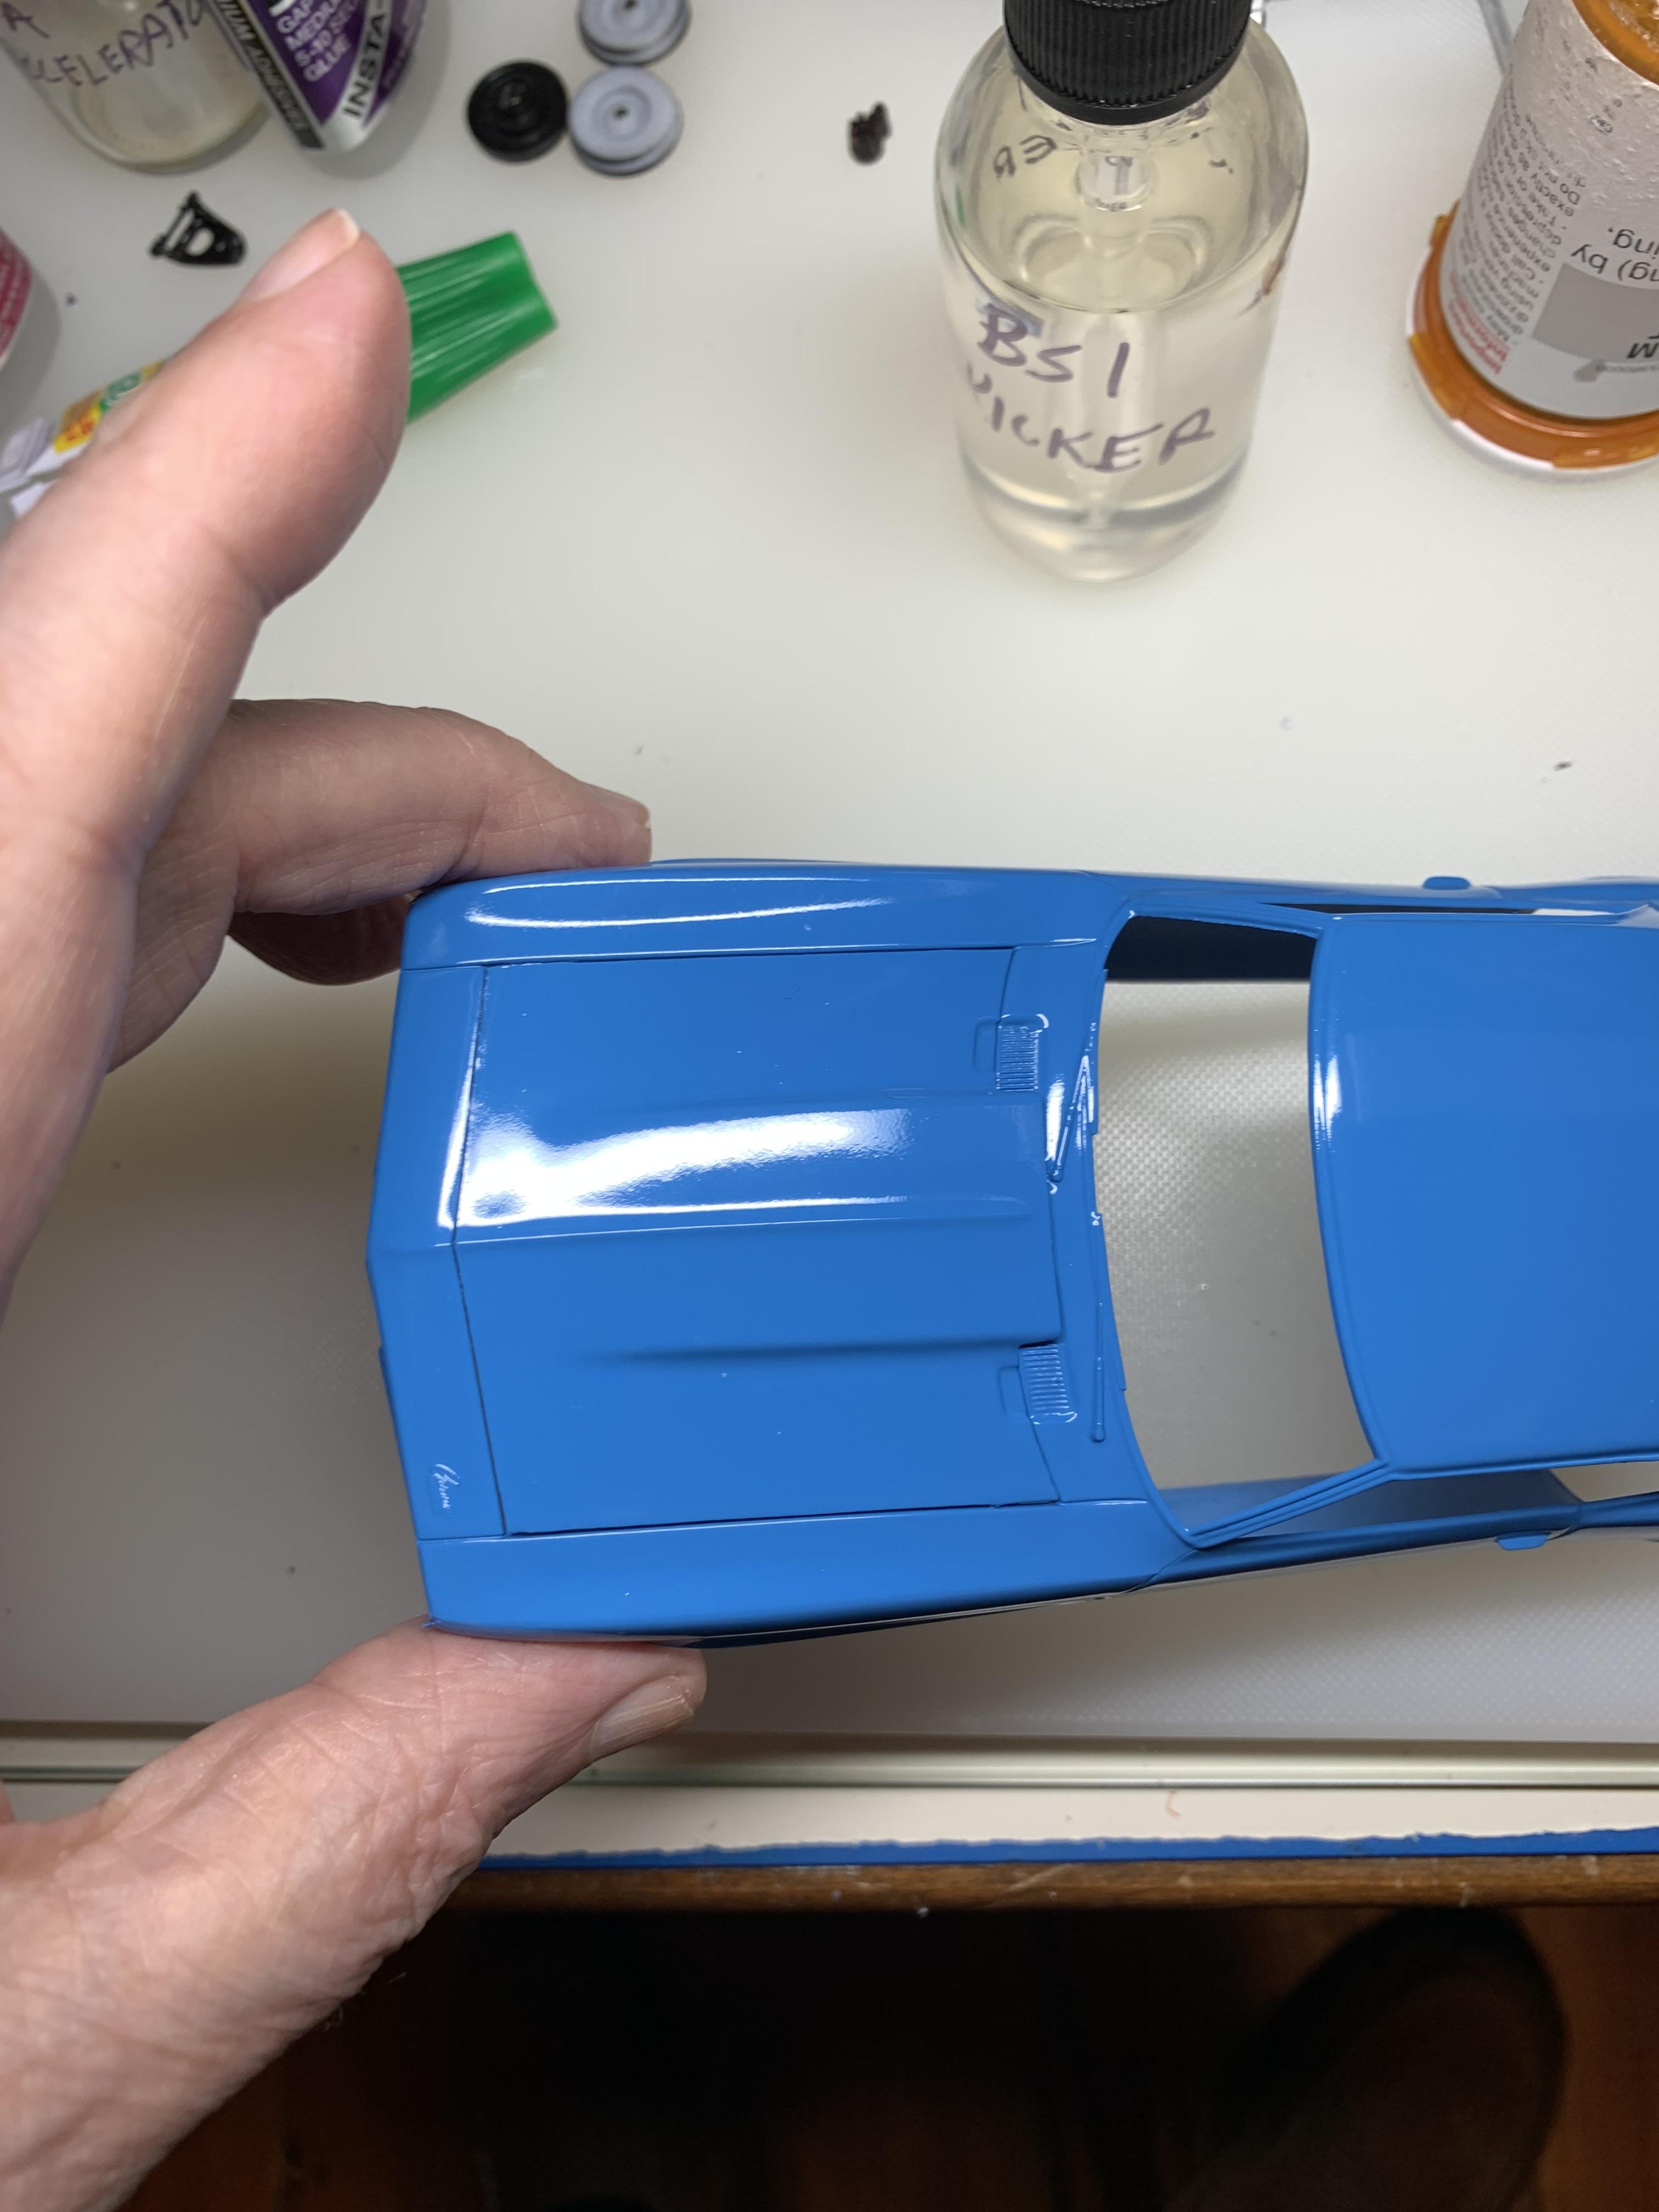
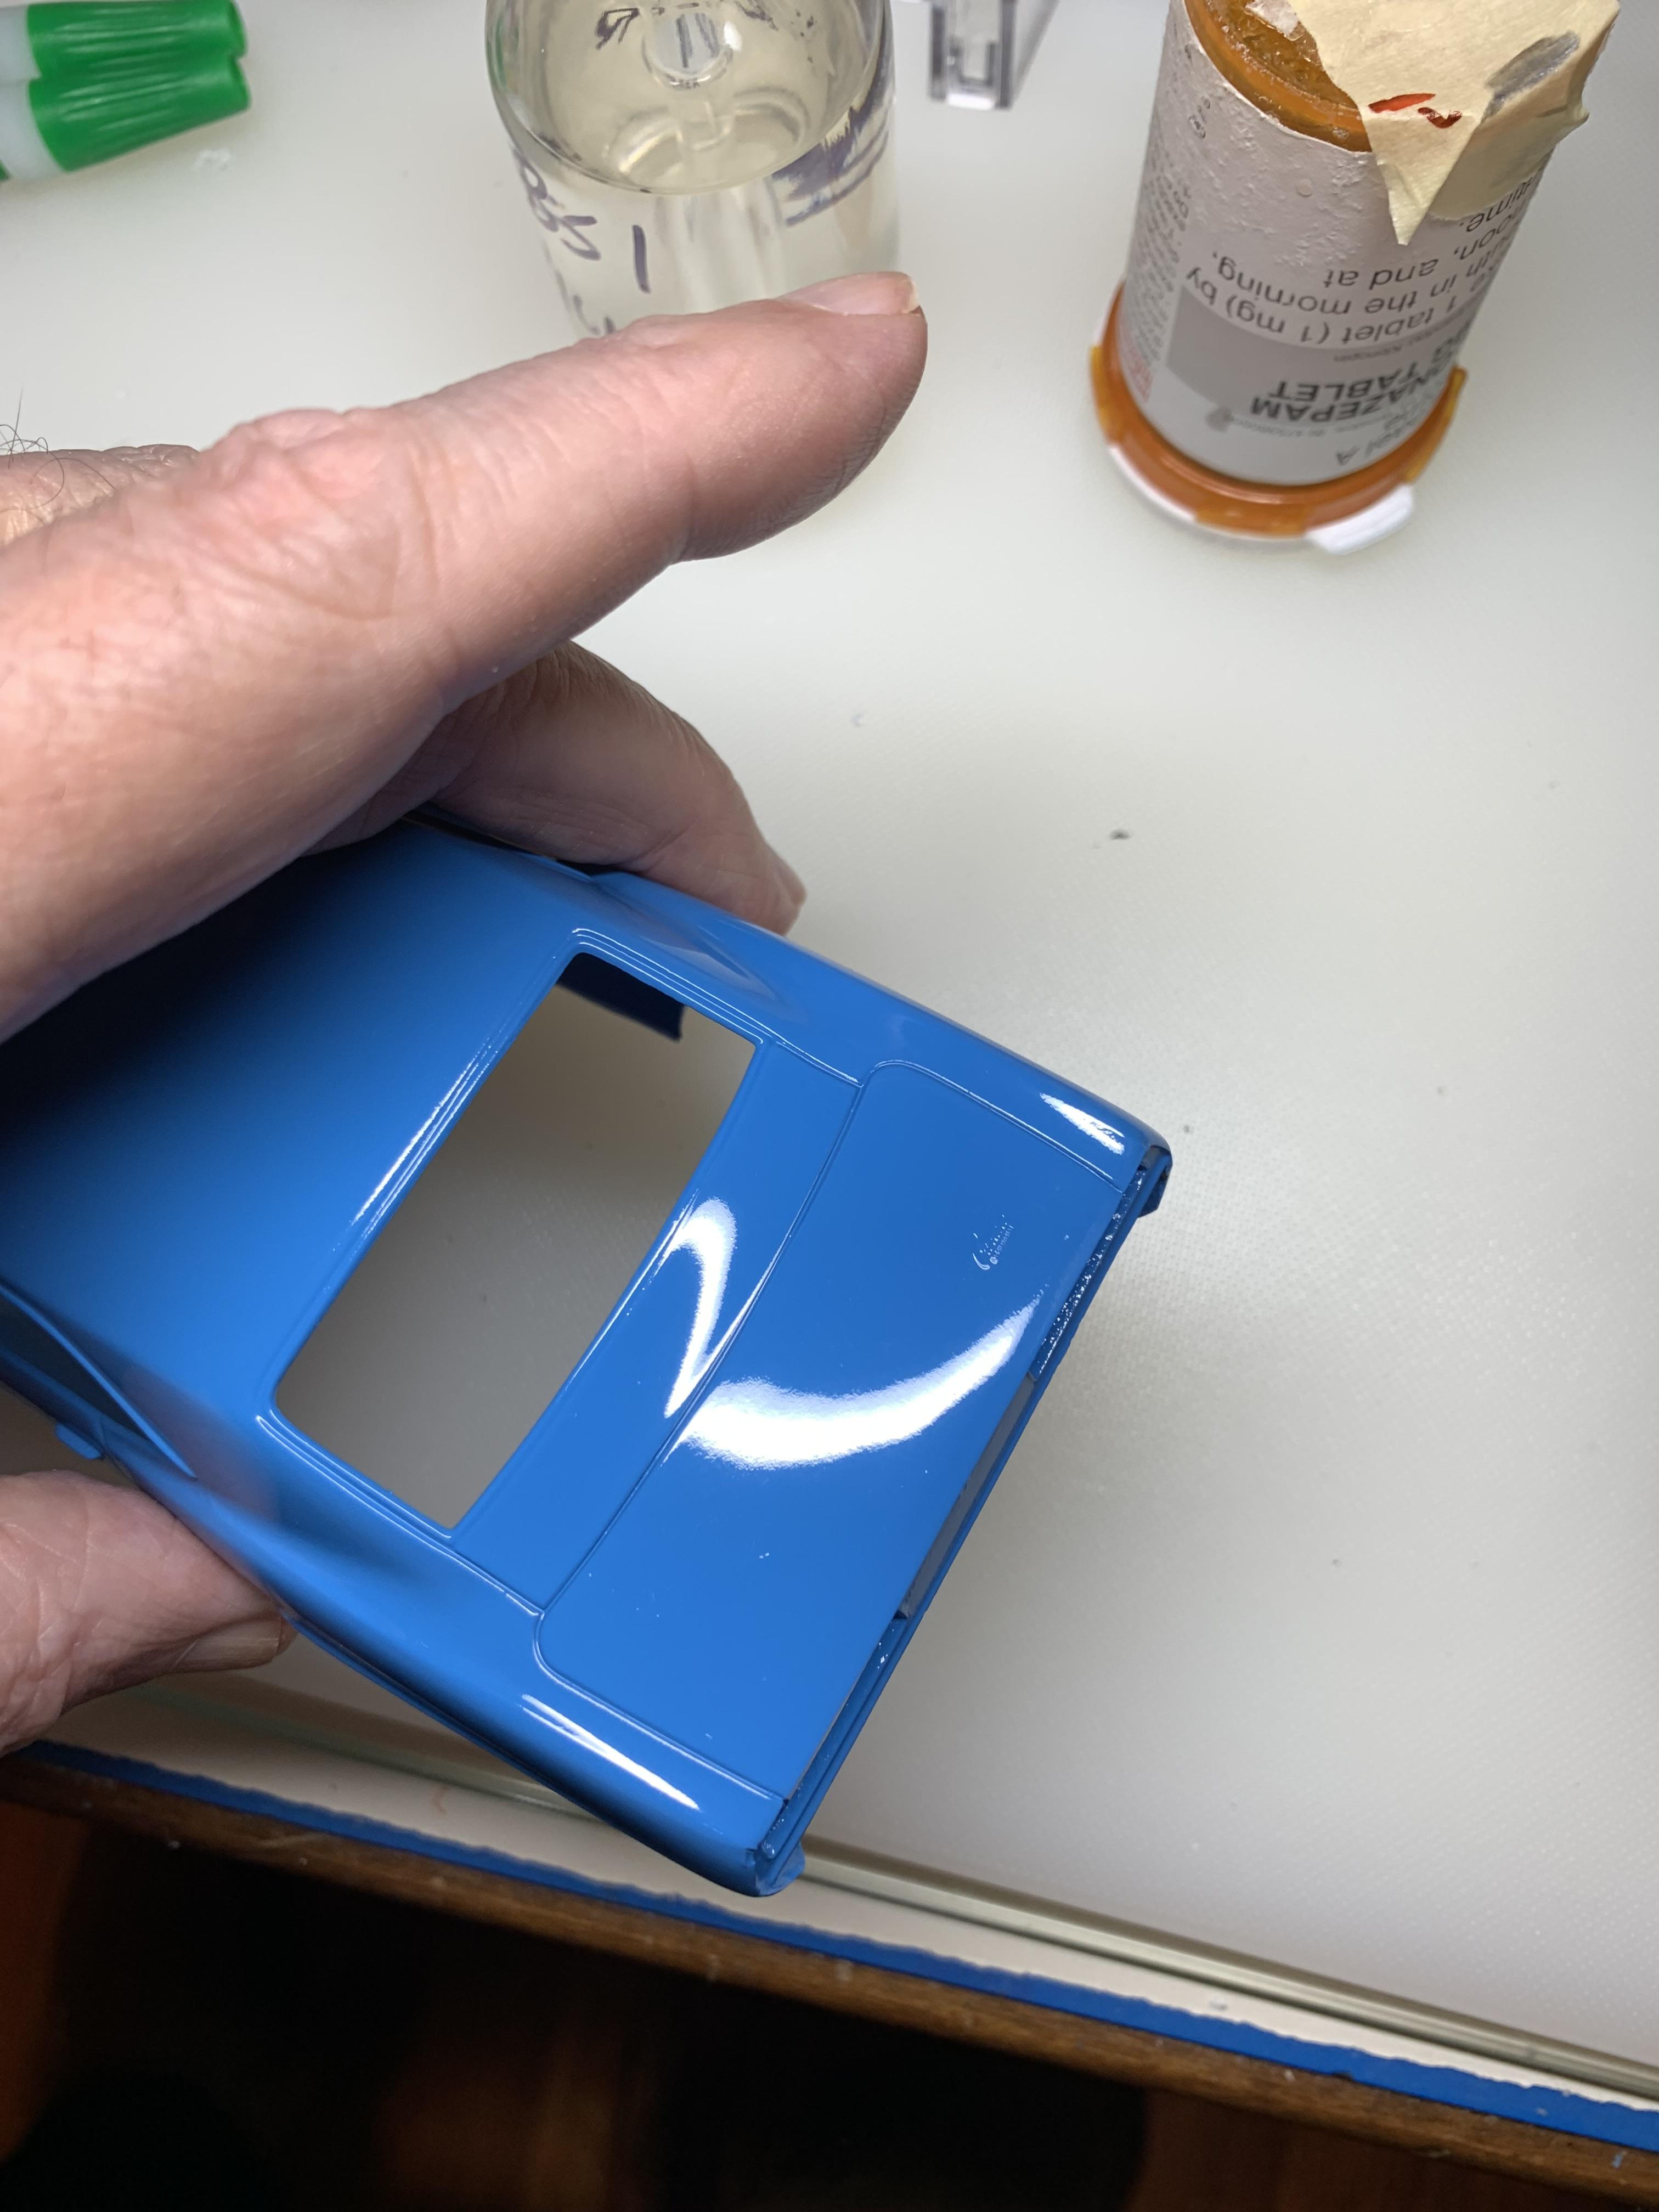
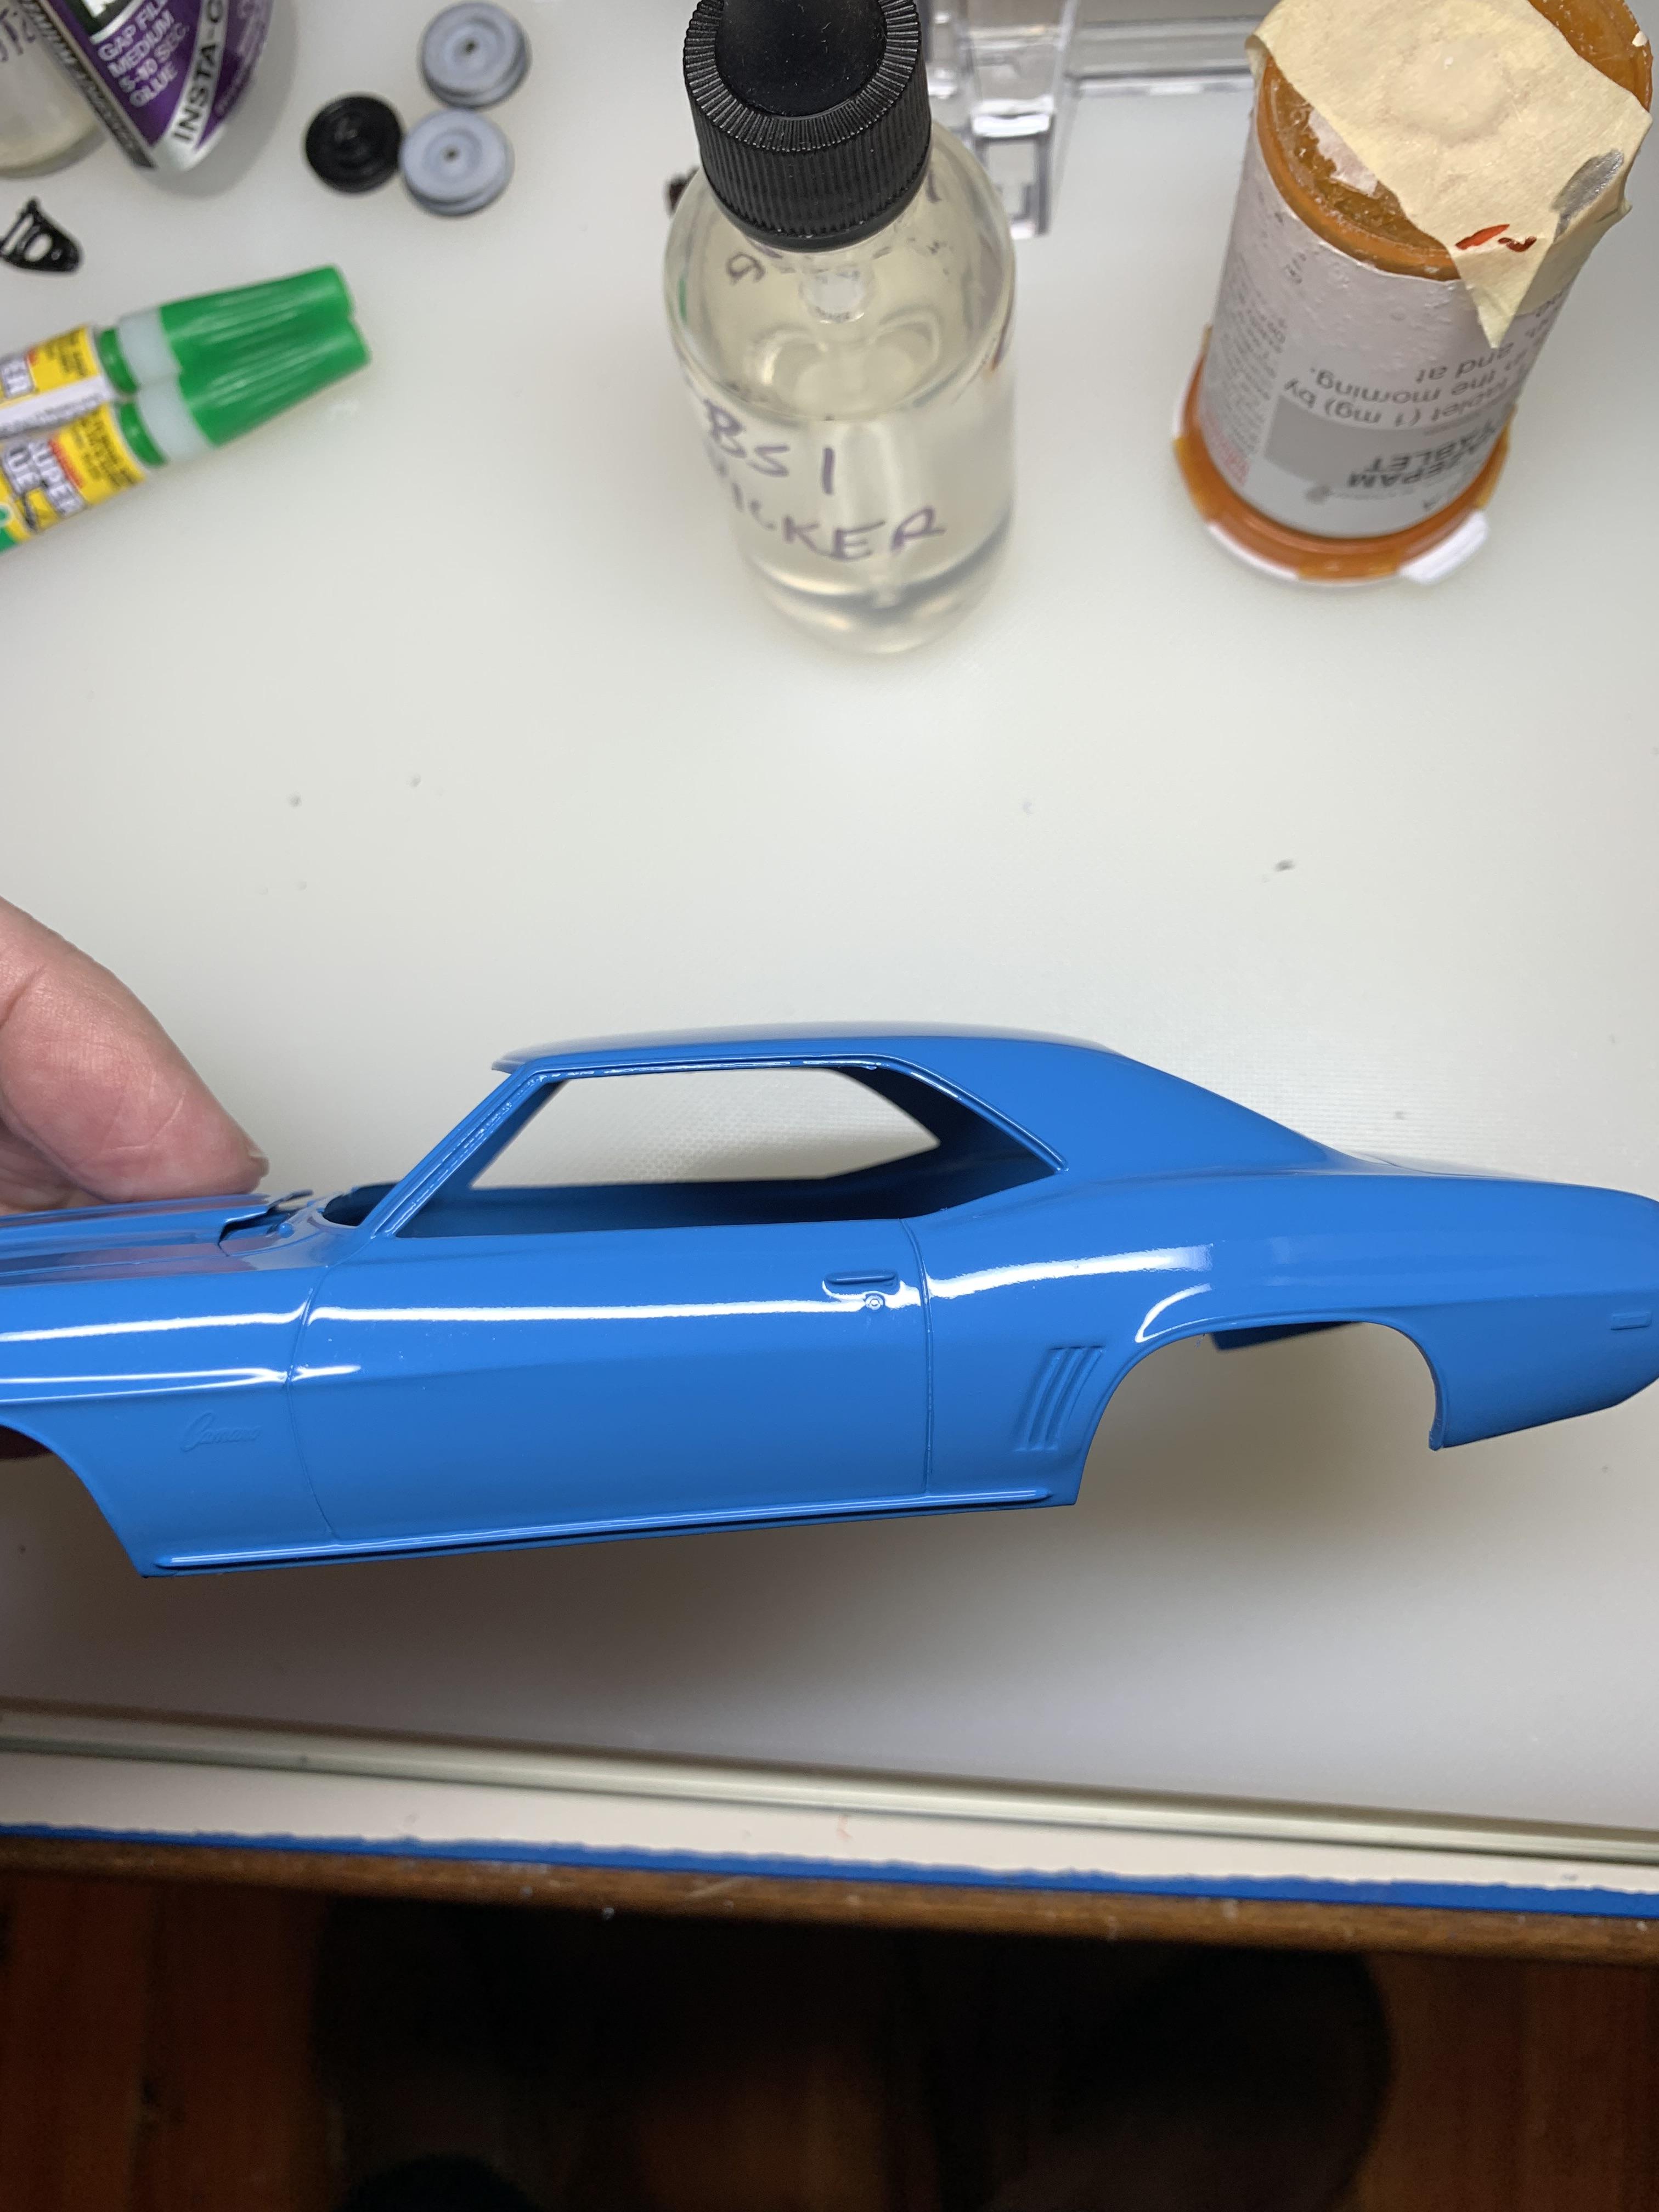
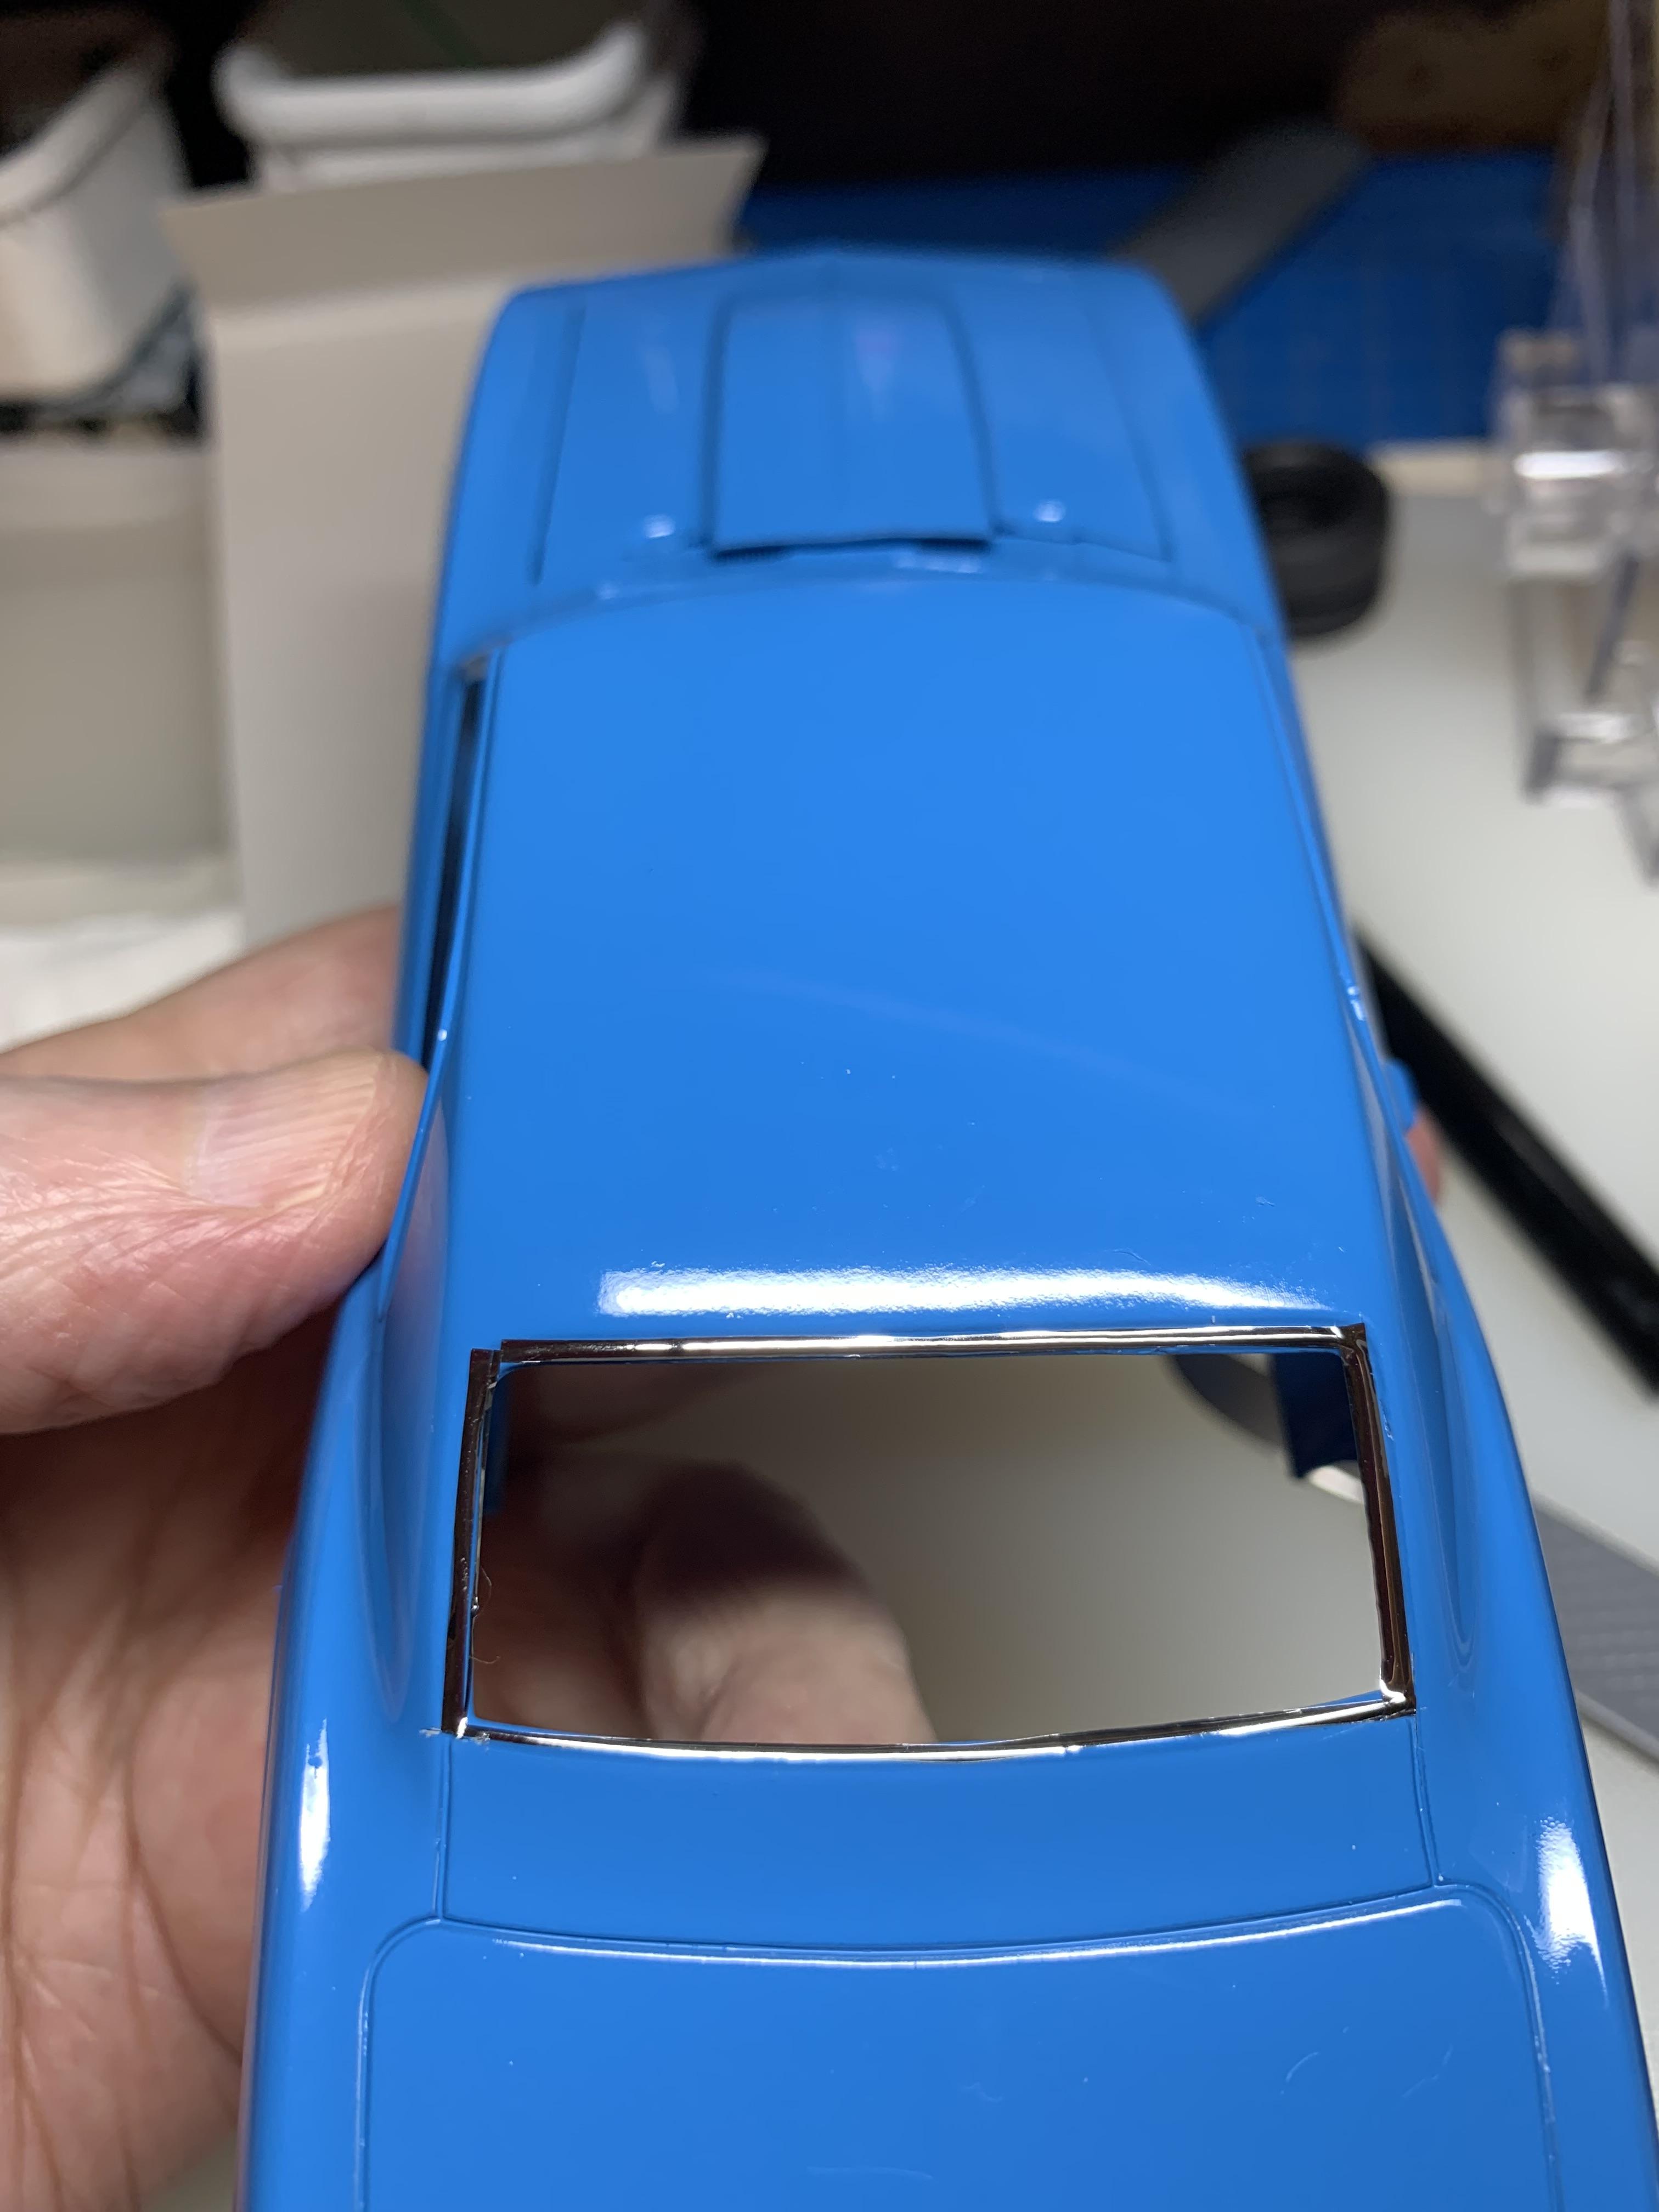
Thanks, Tony. As I have mentioned before, I am a ceaseless experimenter. It is time for the “chrome” trim. My second time using the Hasagawa stuff. My first time with the short scalpel with the curved blade. I also use the 1 mm double hobby knife blade and cut out narrow strips as opposed to trimming on the car. A couple of pictures that, hopefully, will allow you to see the results. I like it, myself. Relatively easy to apply this way, little buffing, definitely less wrinkly than bmf, and shiny. Took some pics of the car before I started to give you some idea of what it looks like before.
-
1969 Camaro A/SA (possibly Thomas Arnett’s)
R. Thorne replied to R. Thorne's topic in WIP: Drag Racing Models
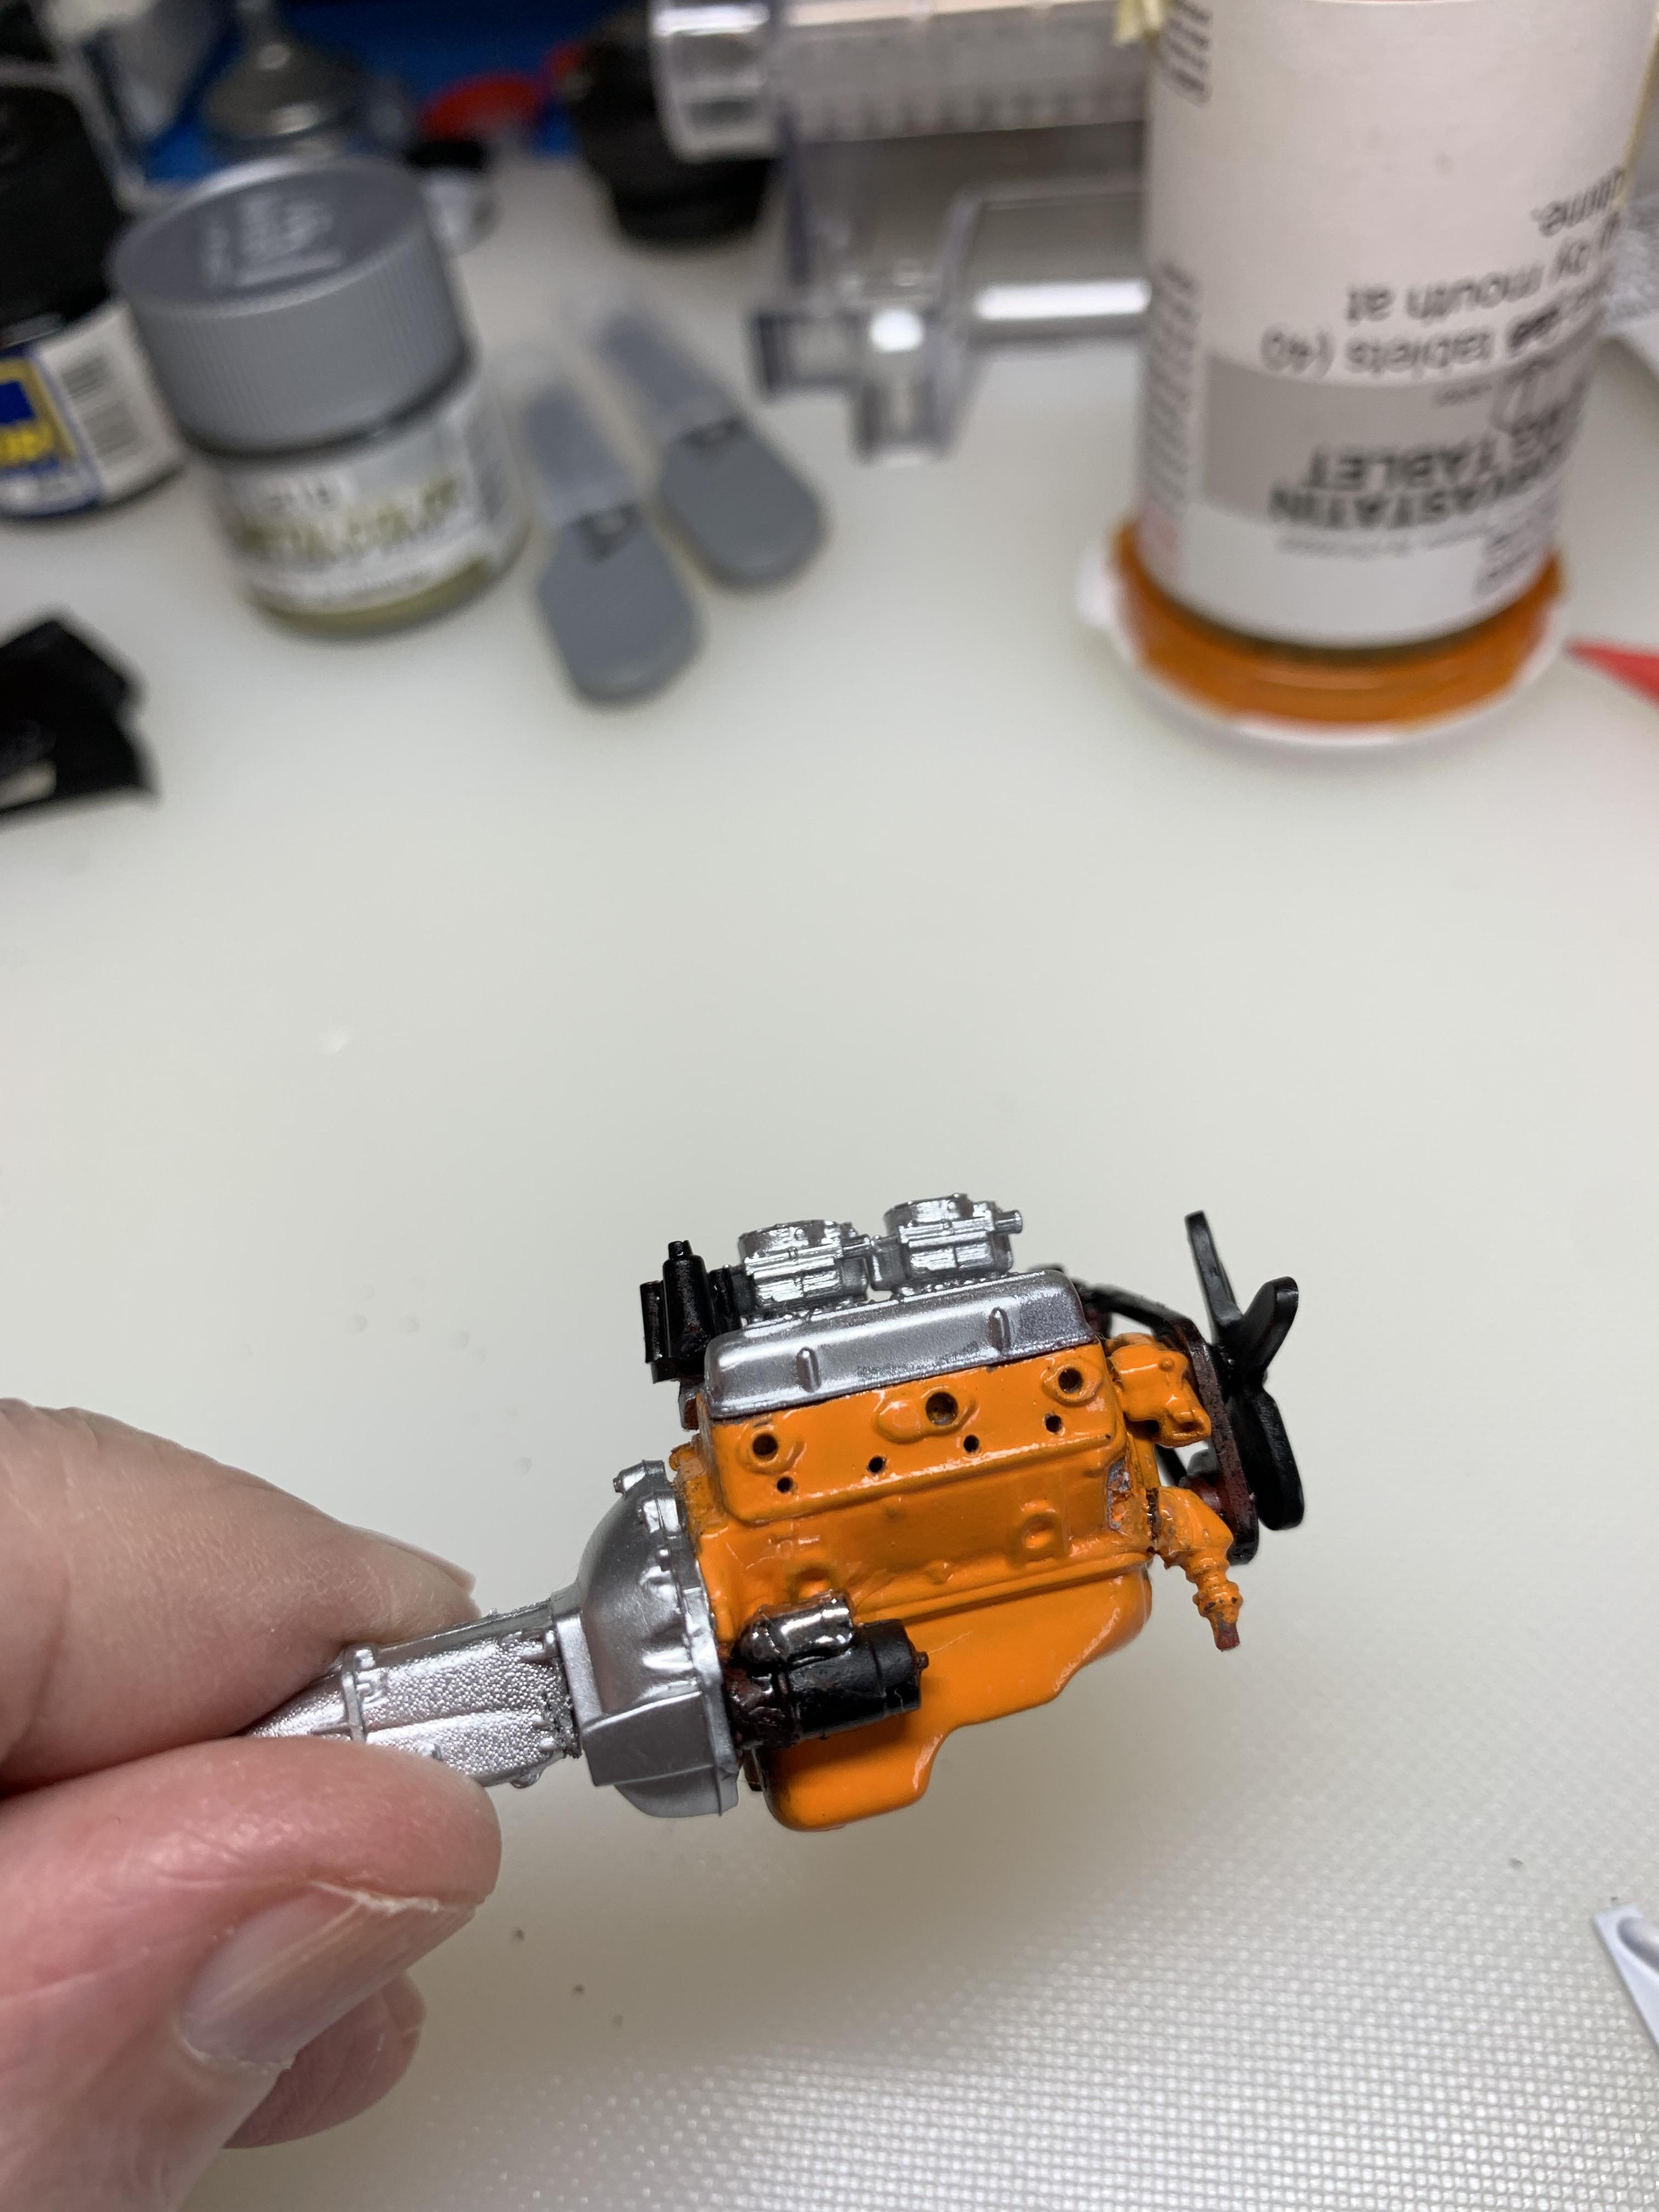
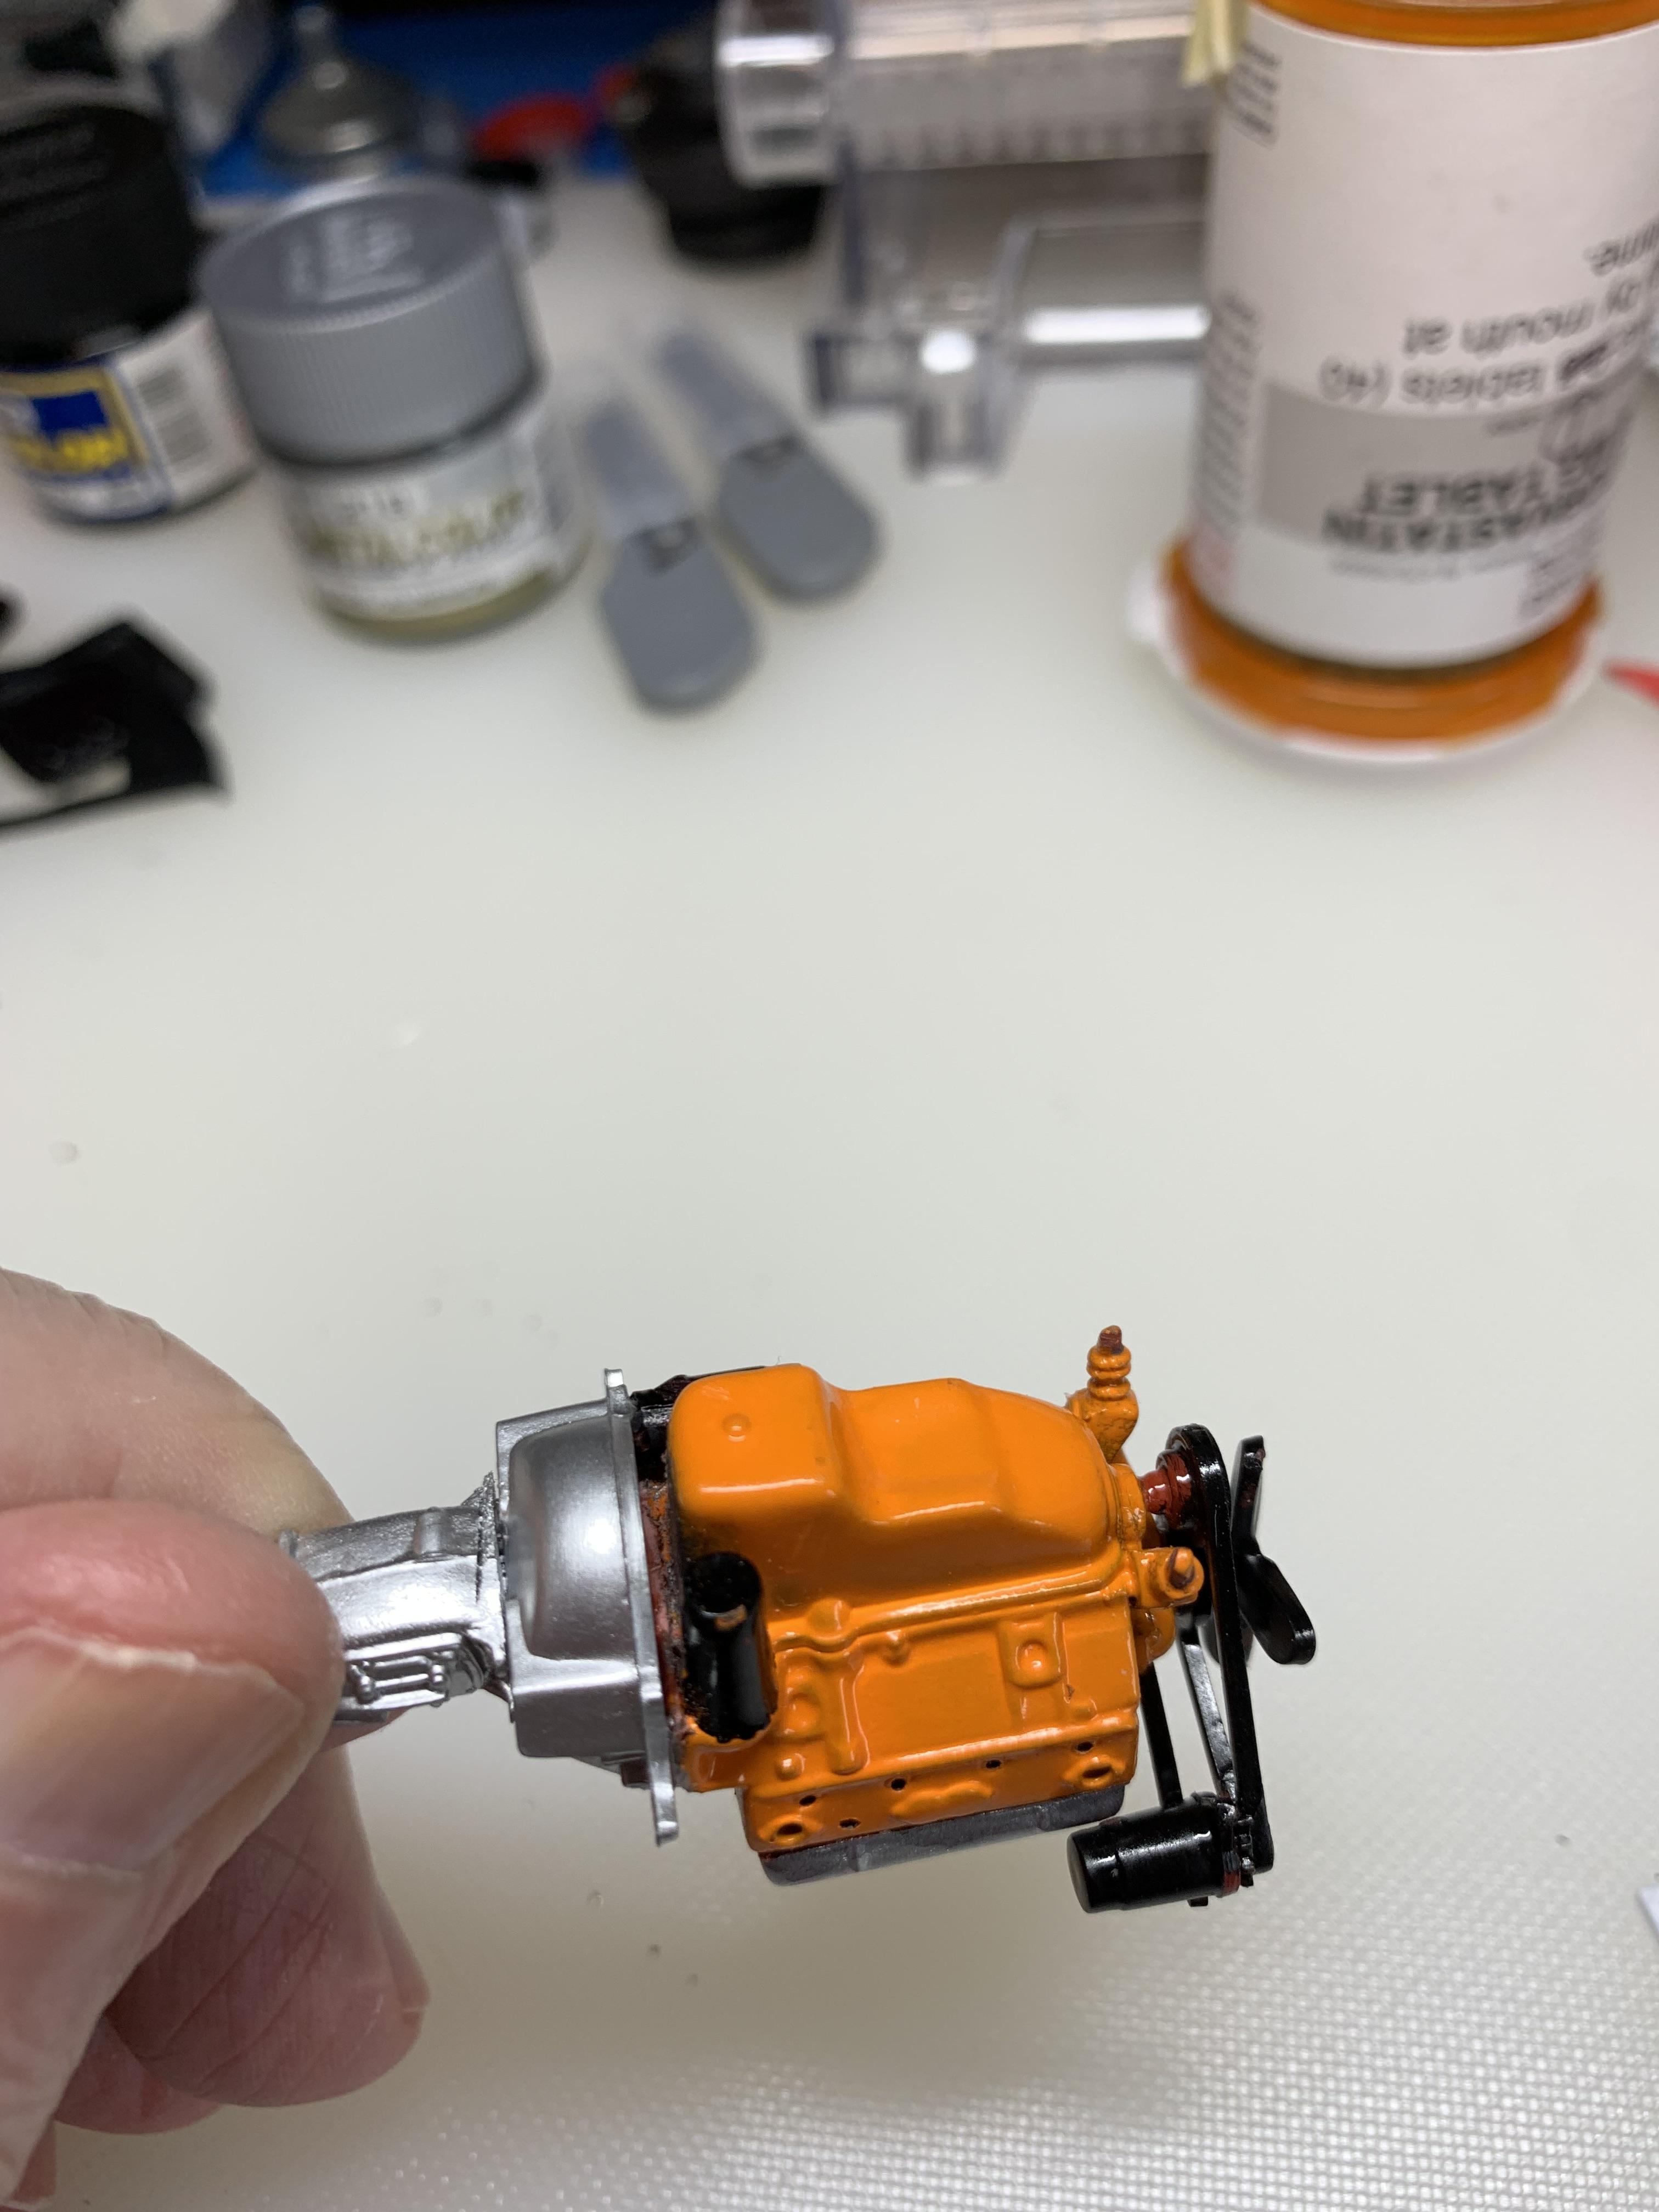
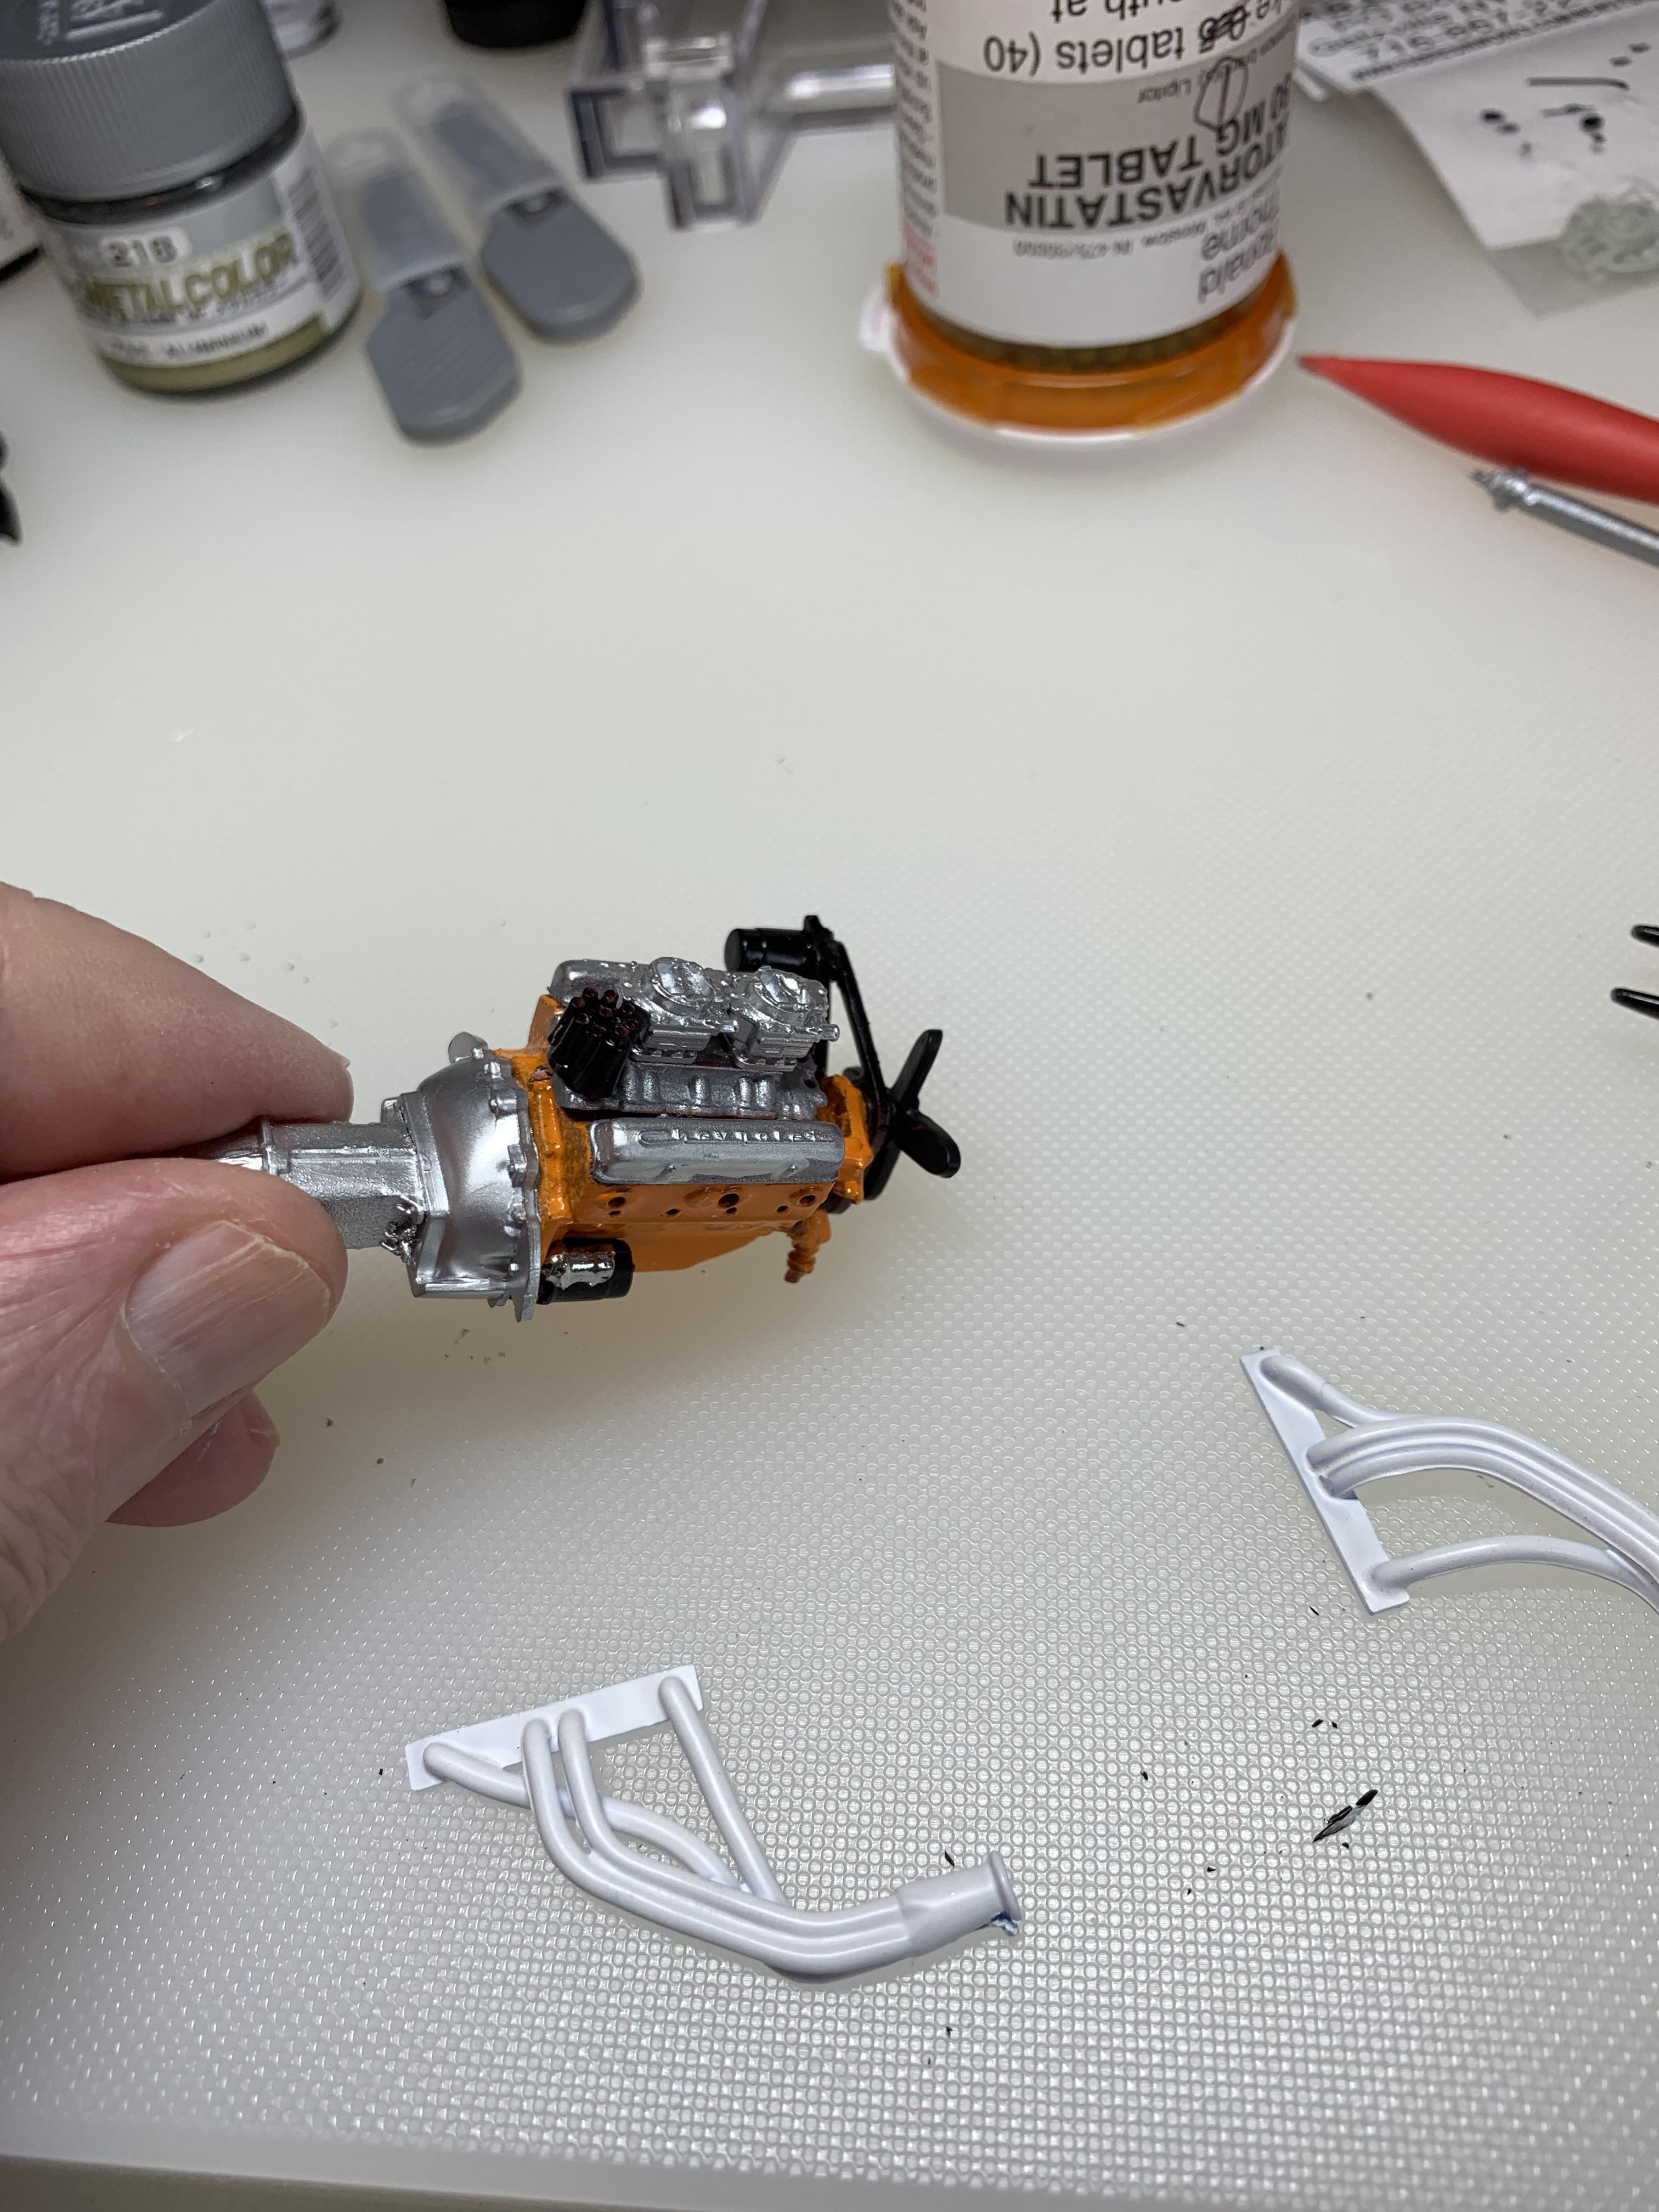
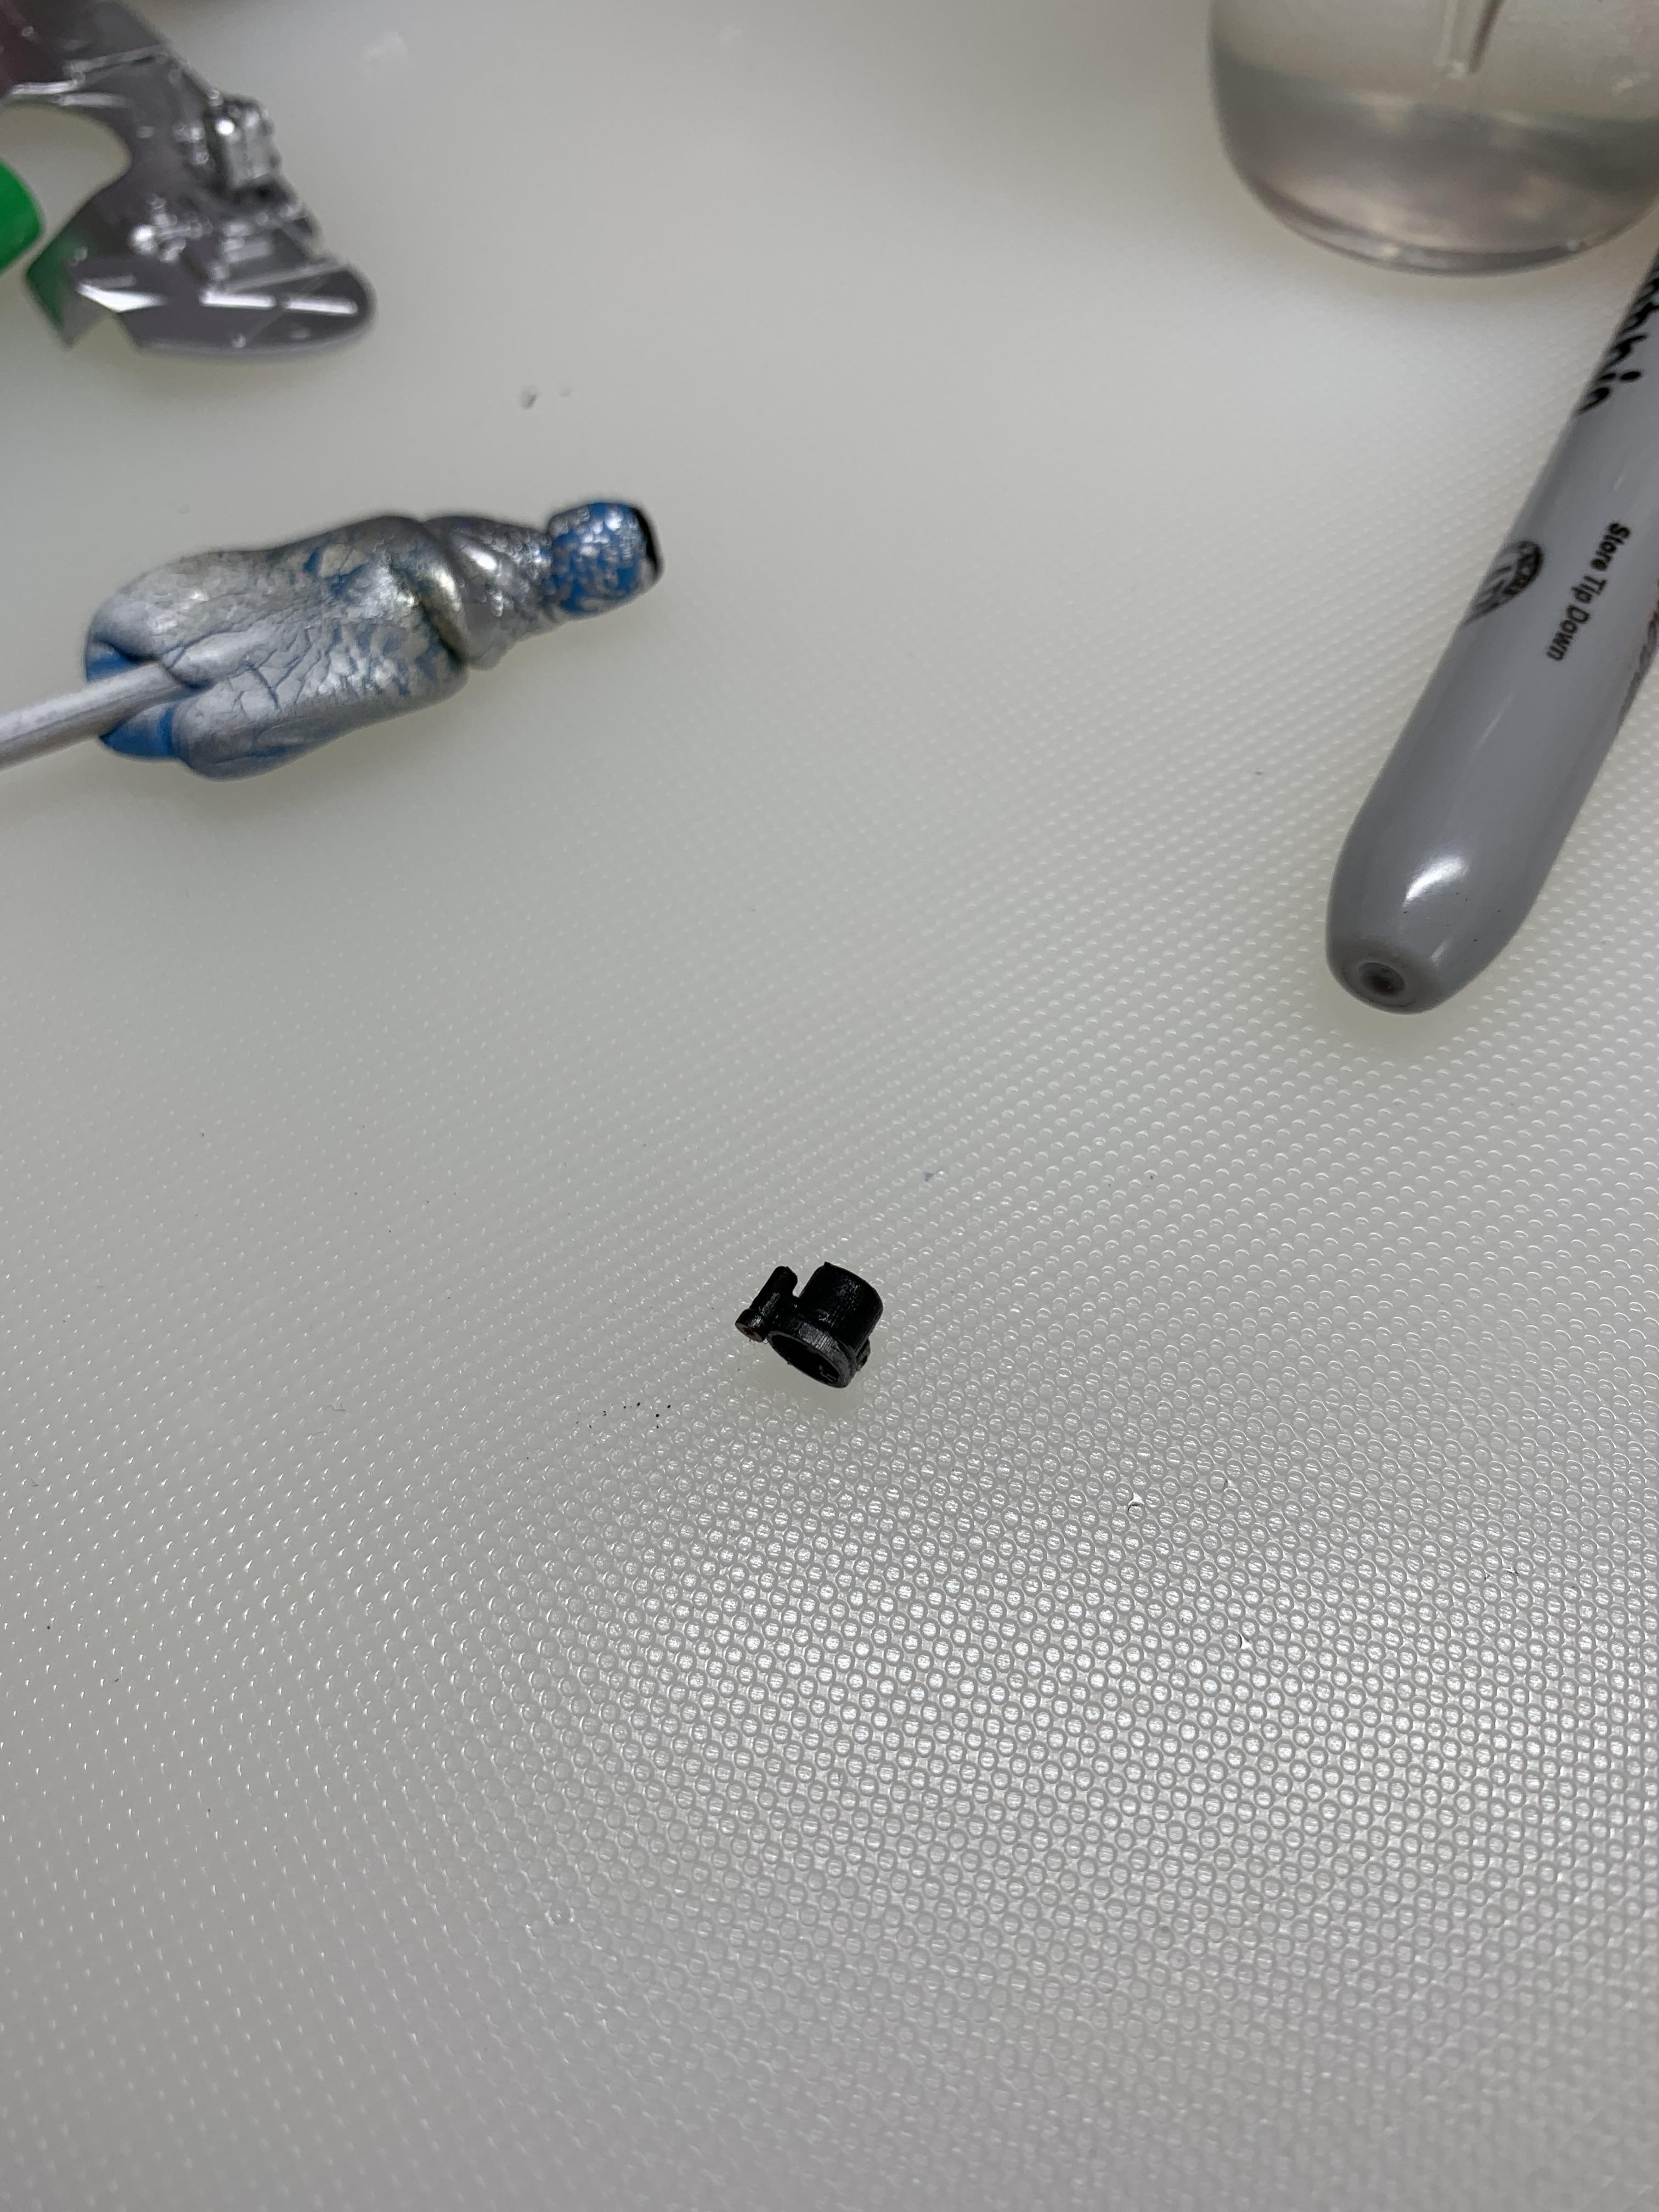
Master cylinder, tach, and grill work.
-
How do you prep your glue surfaces???
R. Thorne replied to Vinny G's topic in Model Building Questions and Answers
I used to scrape the paint off with various devices but, now I just use ca glue in thin, medium, or thick, to vary the drying time. If strength is a major factor (seldom for me), then scraping and model cement is the answer. -
How about this for a companion piece?
-
1969 Camaro A/SA (possibly Thomas Arnett’s)
R. Thorne replied to R. Thorne's topic in WIP: Drag Racing Models
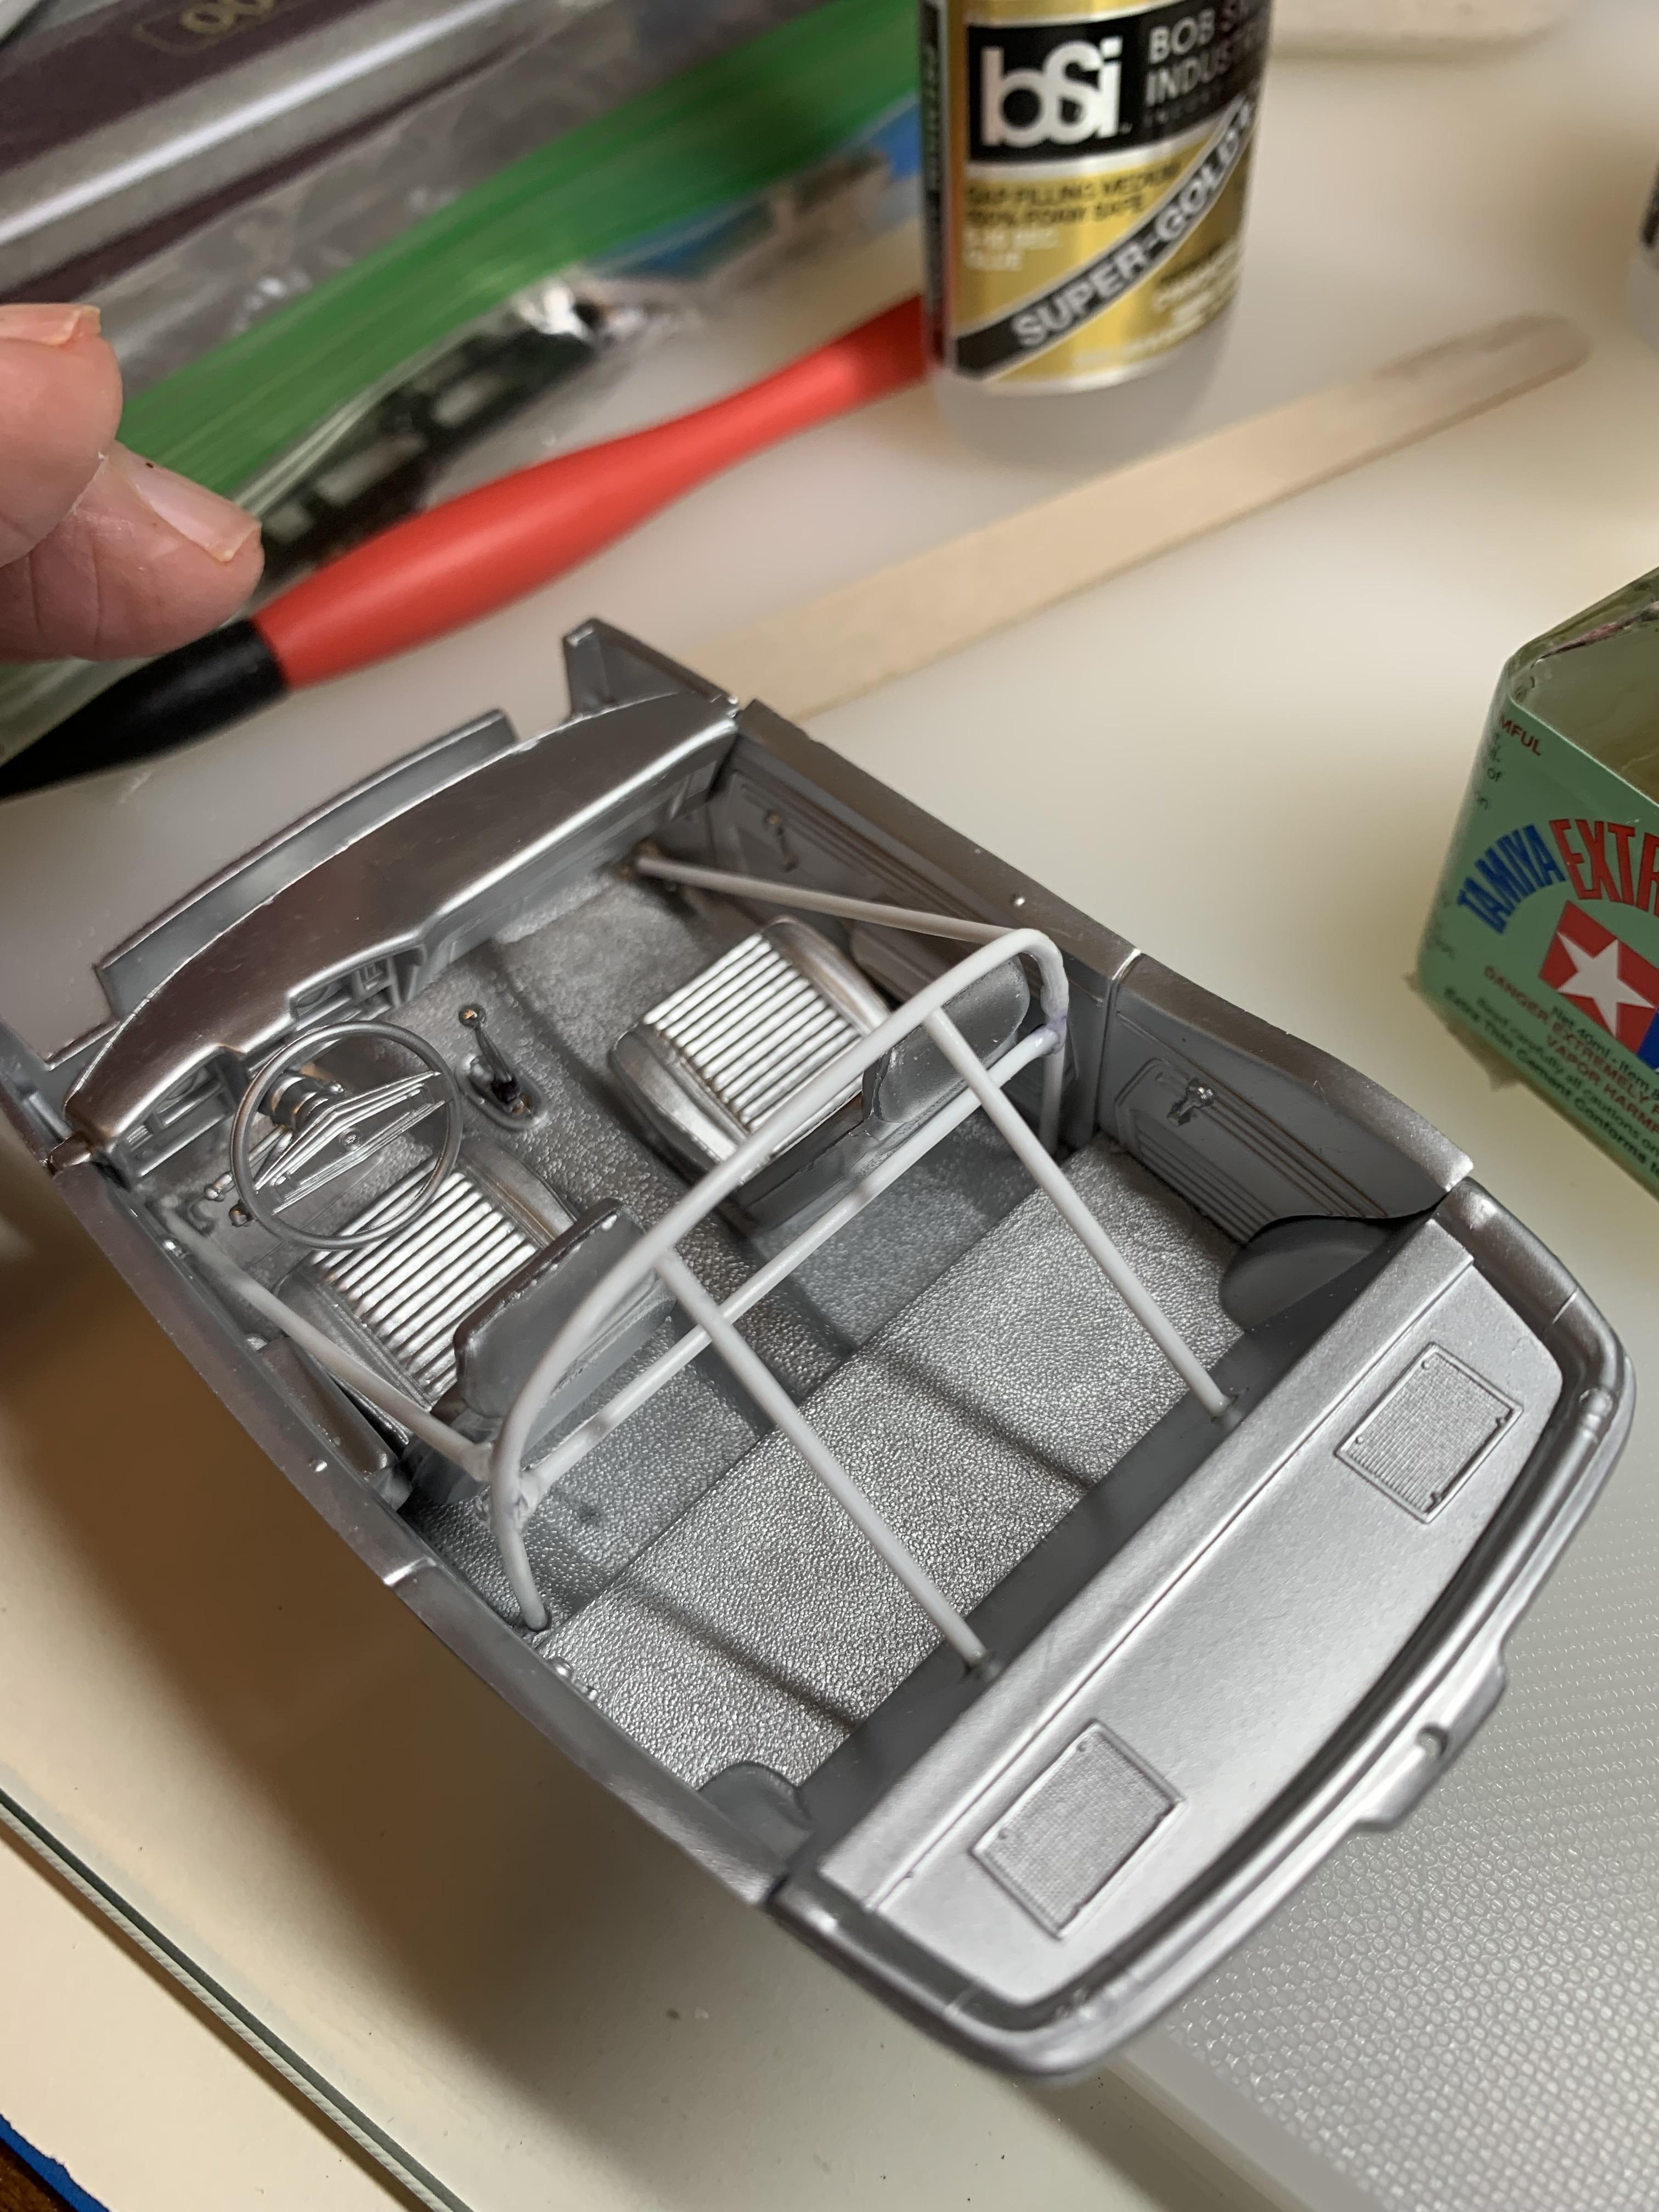
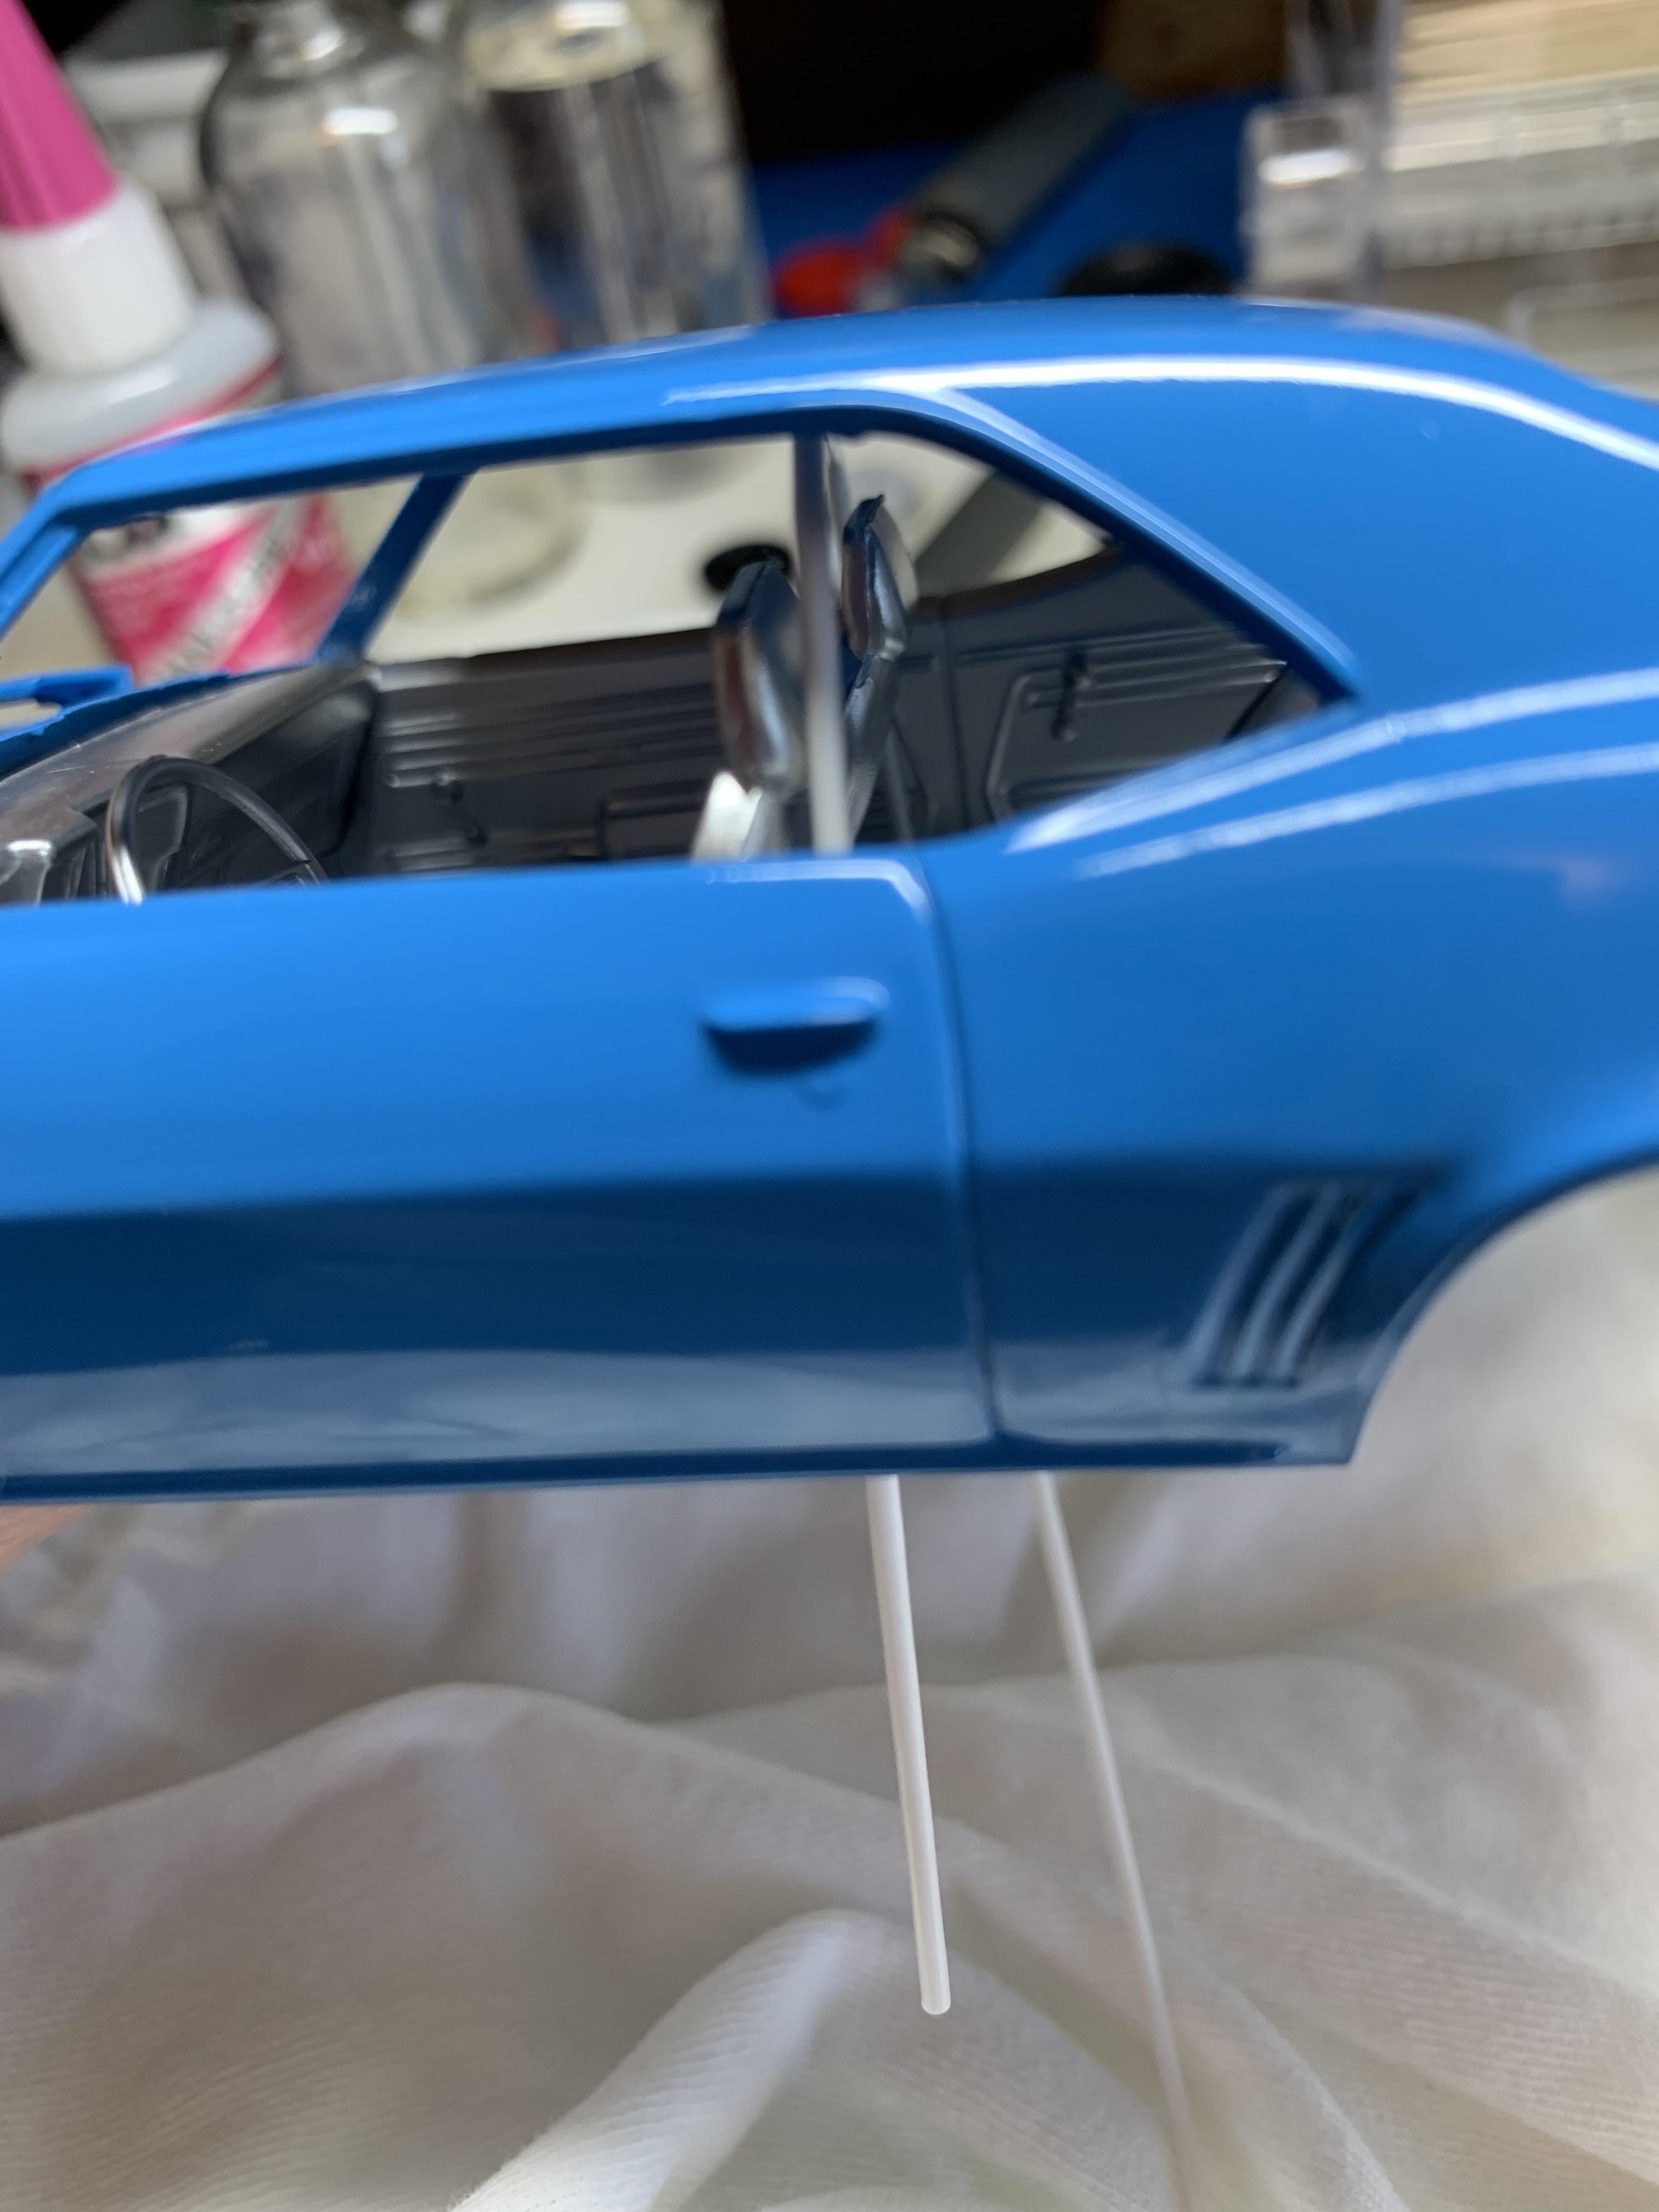
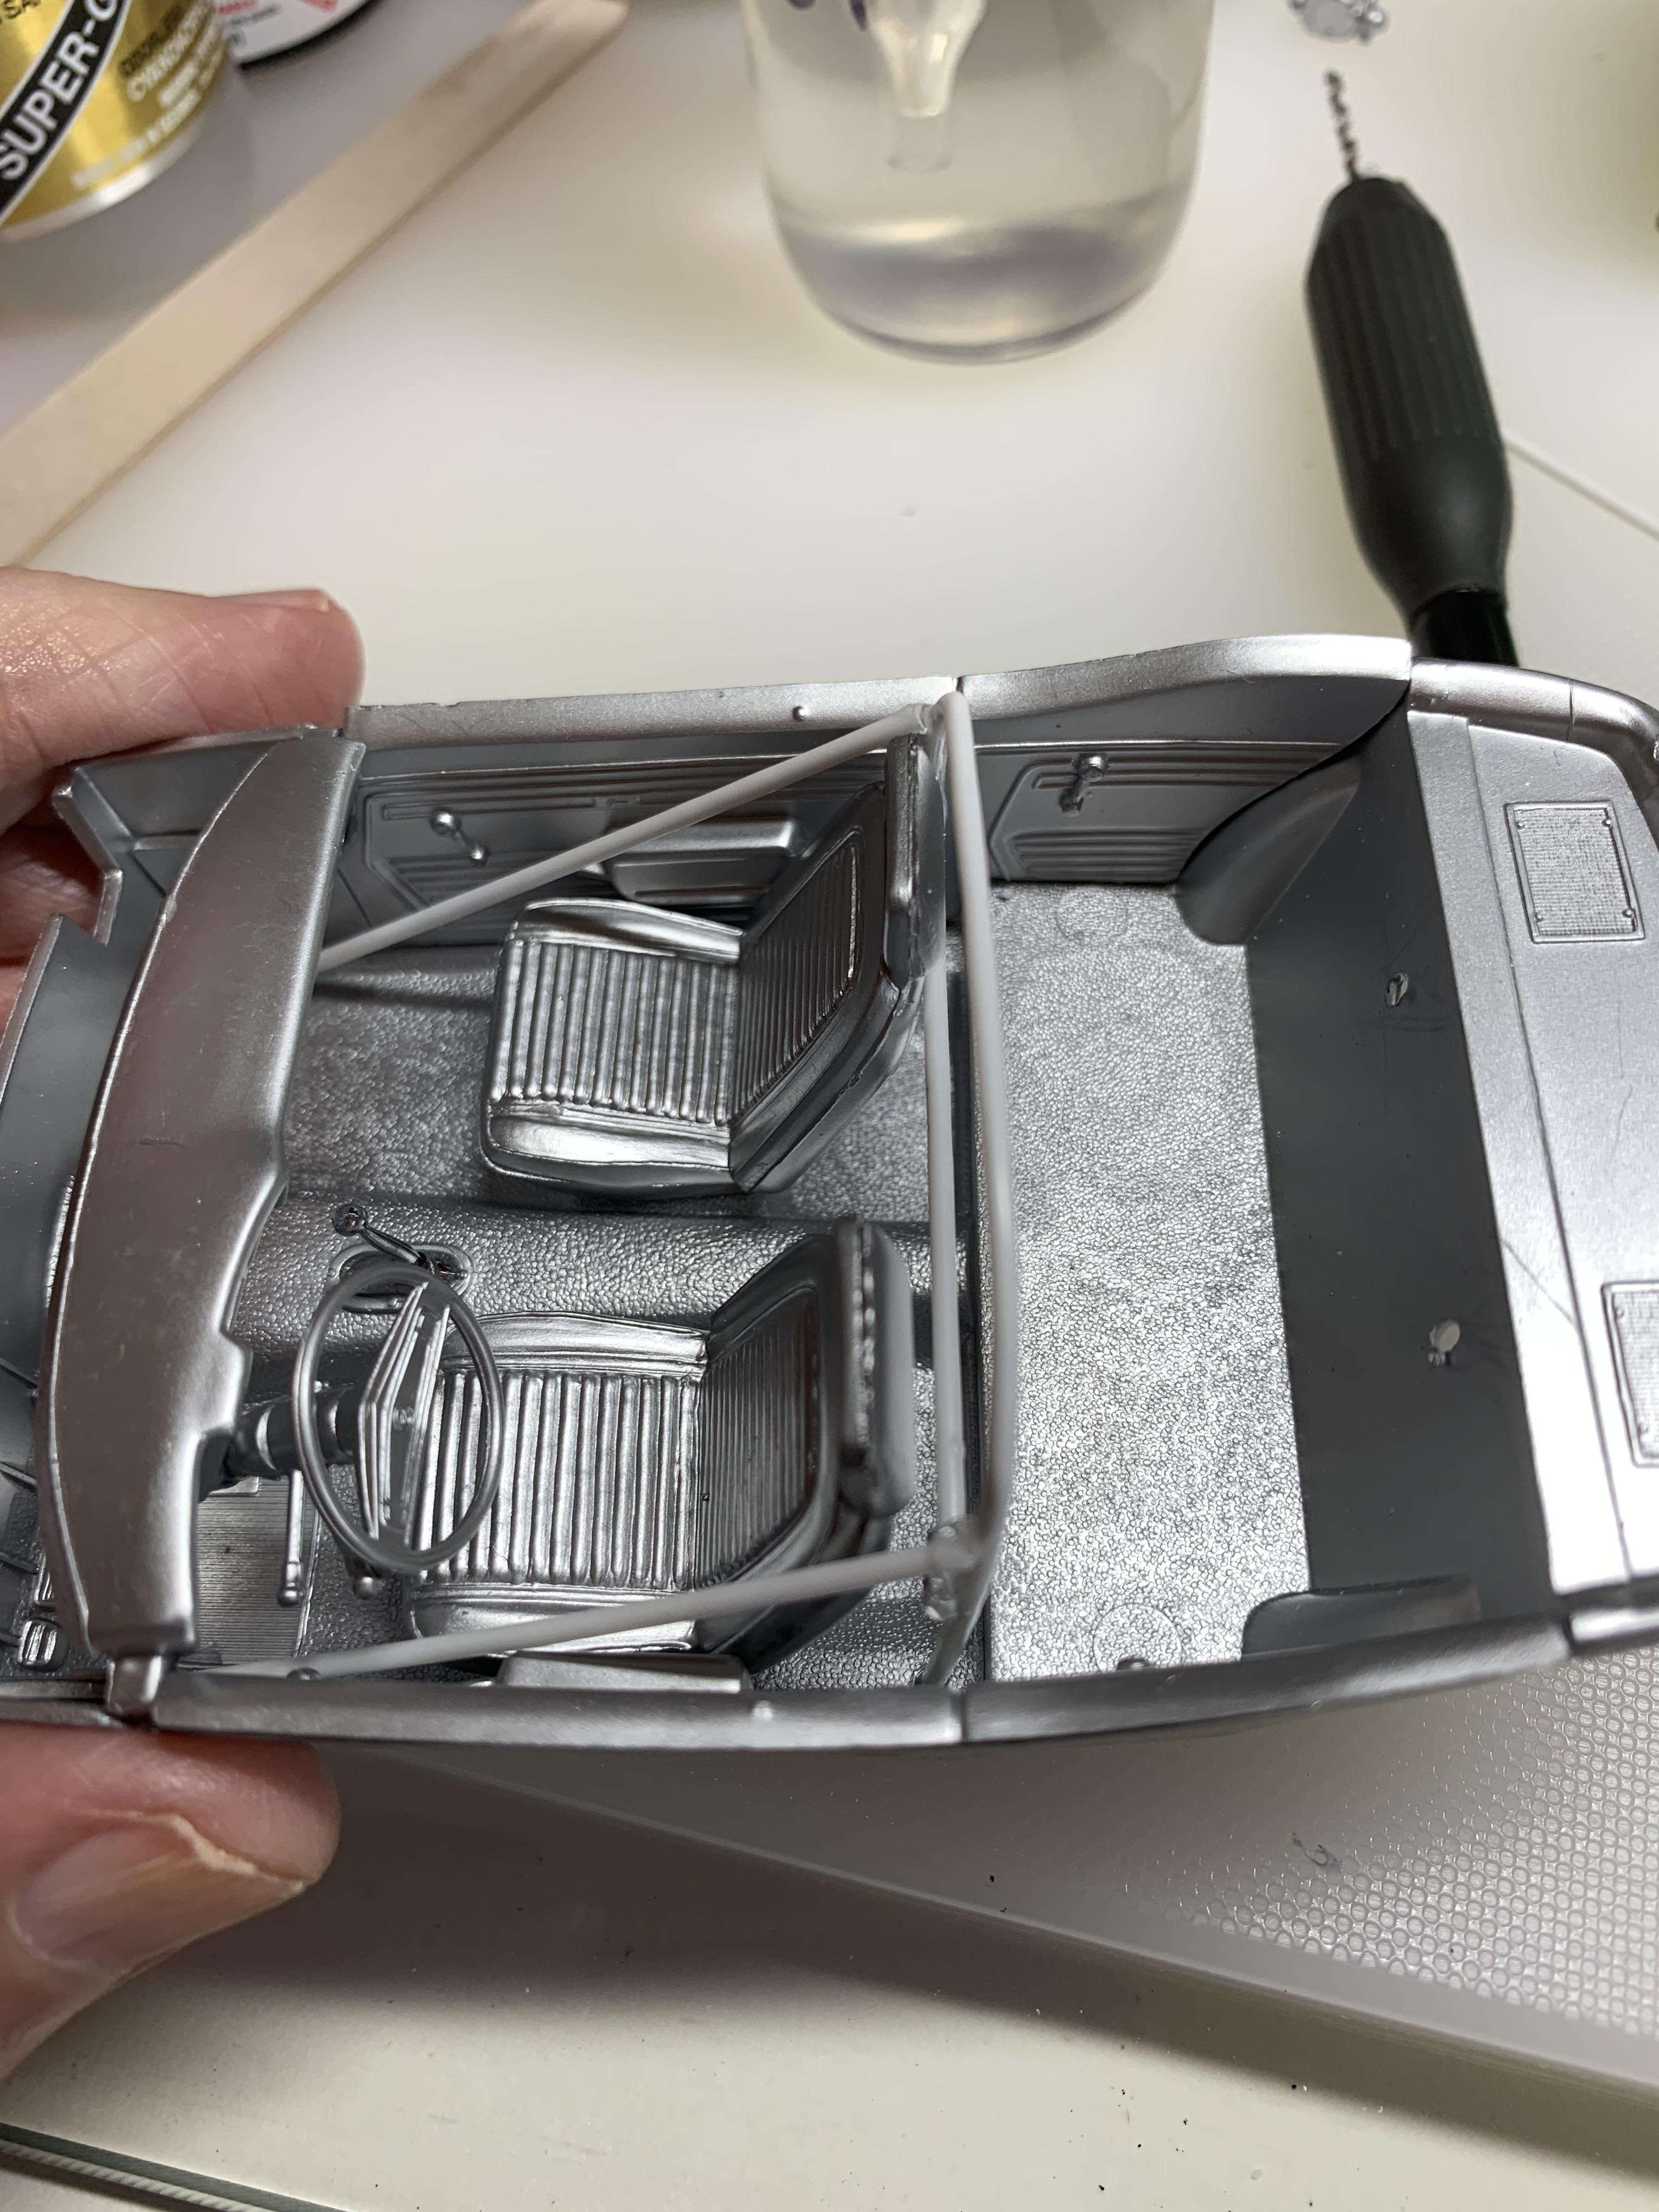
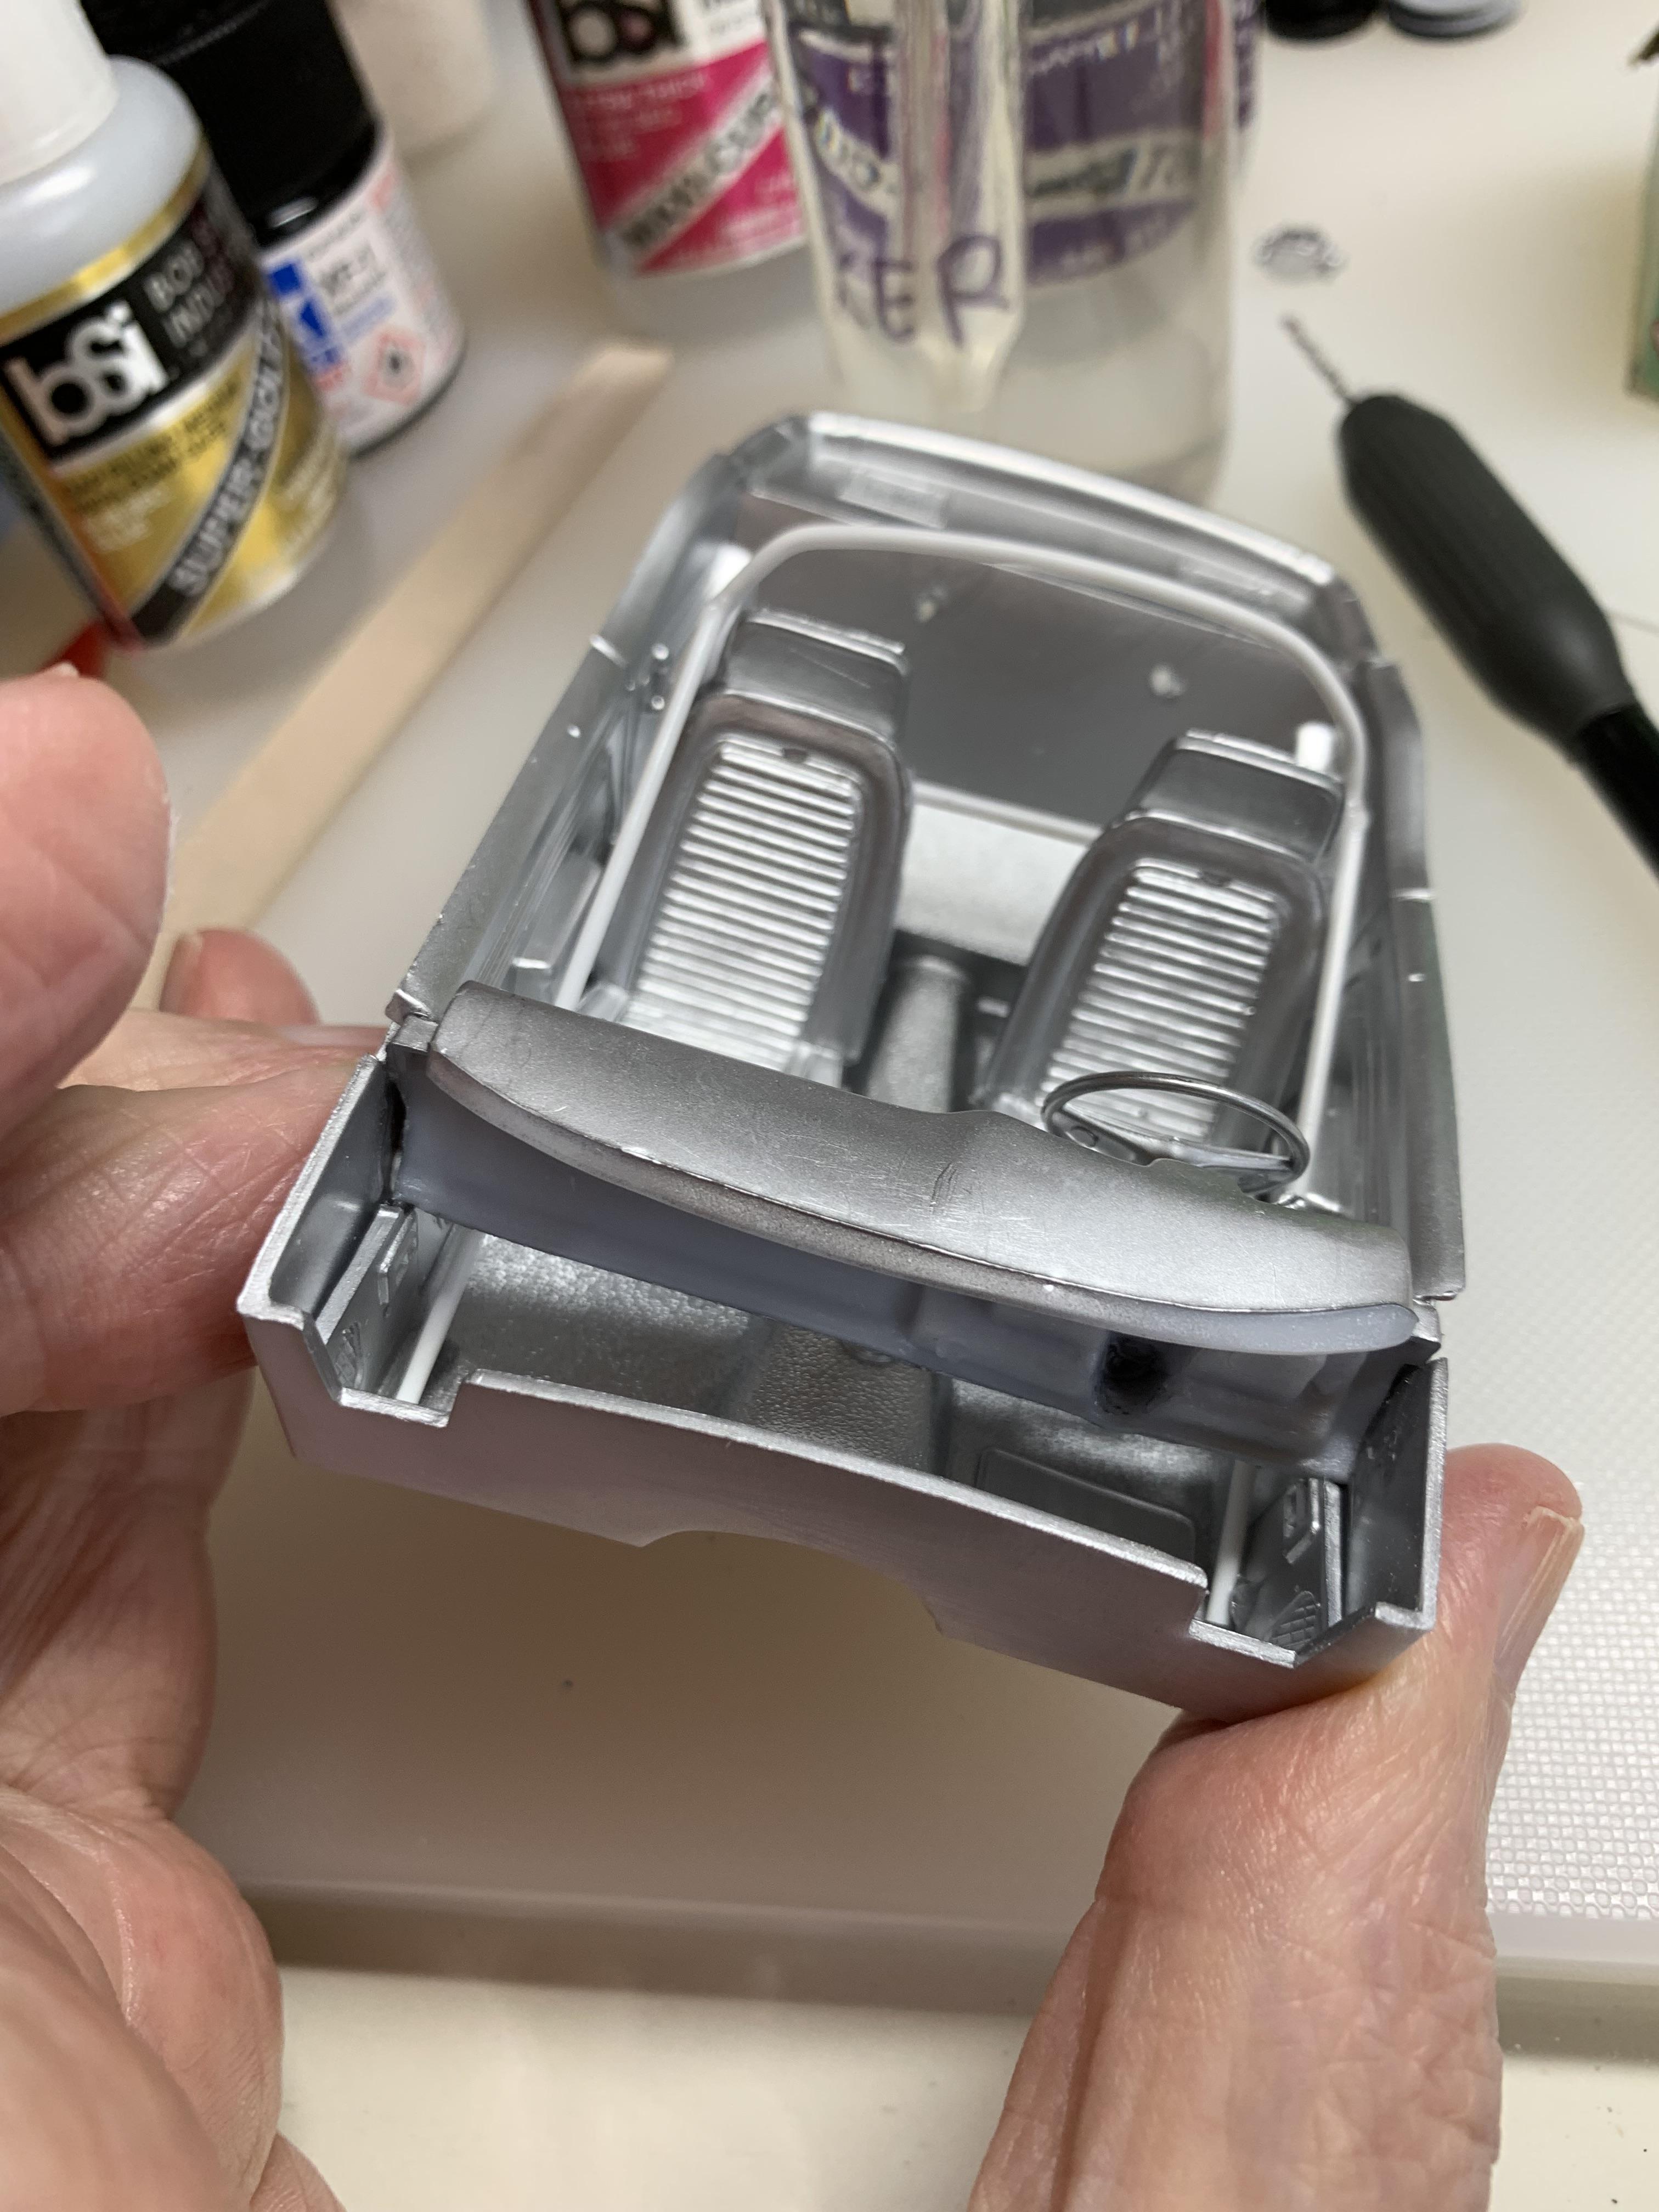
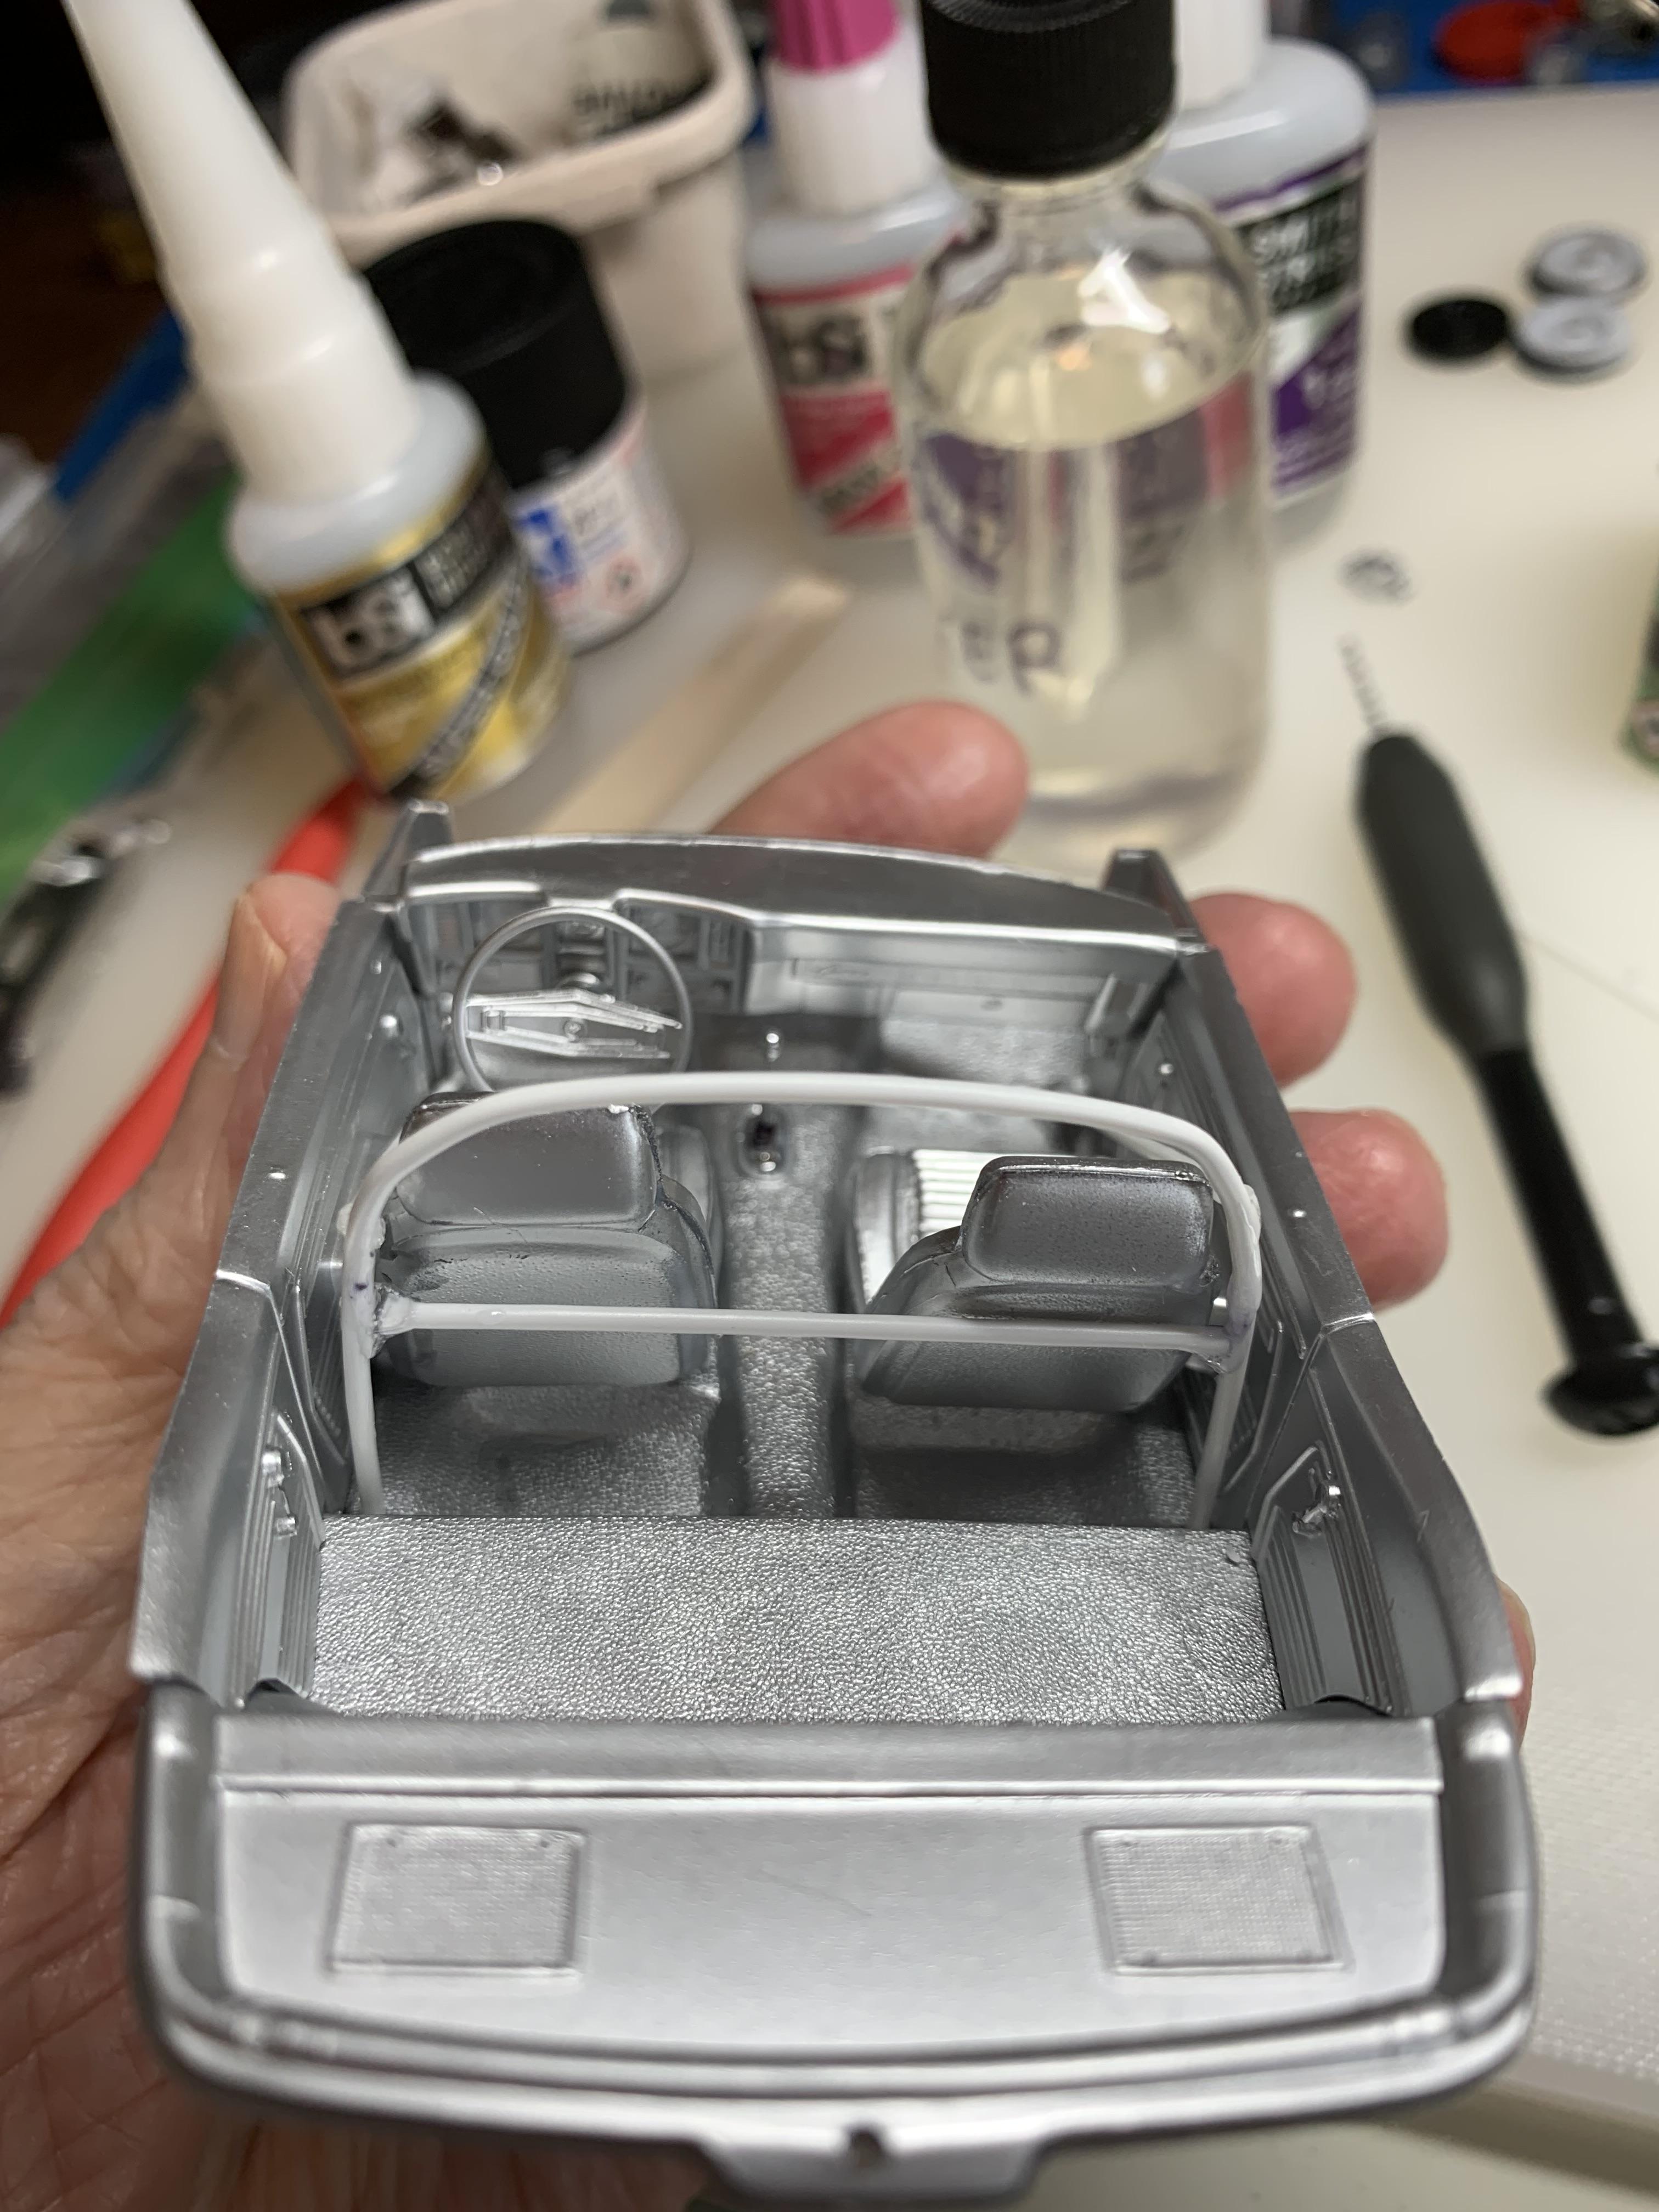
Cobbled (and I do mean cobbled) together a 6 point bar with some super glue resulting in the ugliest “welds” I have done on a model. The super glue was not cooperating, so some kicker was used, also, and my shaky hands didn’t help, either. Every model is an experiment for me. Sometimes you learn what doesn’t work. This model has gone on too long and my impatience is showing. Though tempting, I try not to hide my errors.
-
Obviously dedicated to accuracy. What Super Tricks and front tires are you planning to use? 1/16” styrene rod for the six point bar? Putting one in my Camaro stocker today. I make the main bar way too tall, then install the interior tub temporarily, and it finds its correct height as the holes in the floor board allow the bar to slide down. Keep up the good work.