ShakyCraftsman
-
Posts
796 -
Joined
-
Last visited
Content Type
Profiles
Forums
Events
Gallery
Everything posted by ShakyCraftsman
-
 Hey all I got a start on the front equalizer rods (torsion rods). This view shows the equalizer rods on the passenger side sitting in place. I still have to make the other side plus the mounting brackets. I my get this painted...eventually...lol Ron G
-
Hey Six Pack Do you mean these. Yes, these will be added. I have planned for this. Ron G
-
Not sure what you mean, can you post a picture. Ron G
-
Hey all Small update today. I now have all of the shocks made. 4 front and 4 rears. These we're a real pain in the rump, because of having to make them identical. This view shows the 4 rear shocks. This view shows the frame shock mount bracket. Have to make 8 of these. This view shows the real shock. This view shows the decals I need to have made for the shocks. Anyone interested in printing them? Hint...hint This view shows the front shocks. Now I just need to paint them, add the decals, add the mounting bolts and then mount them. Ron G
-
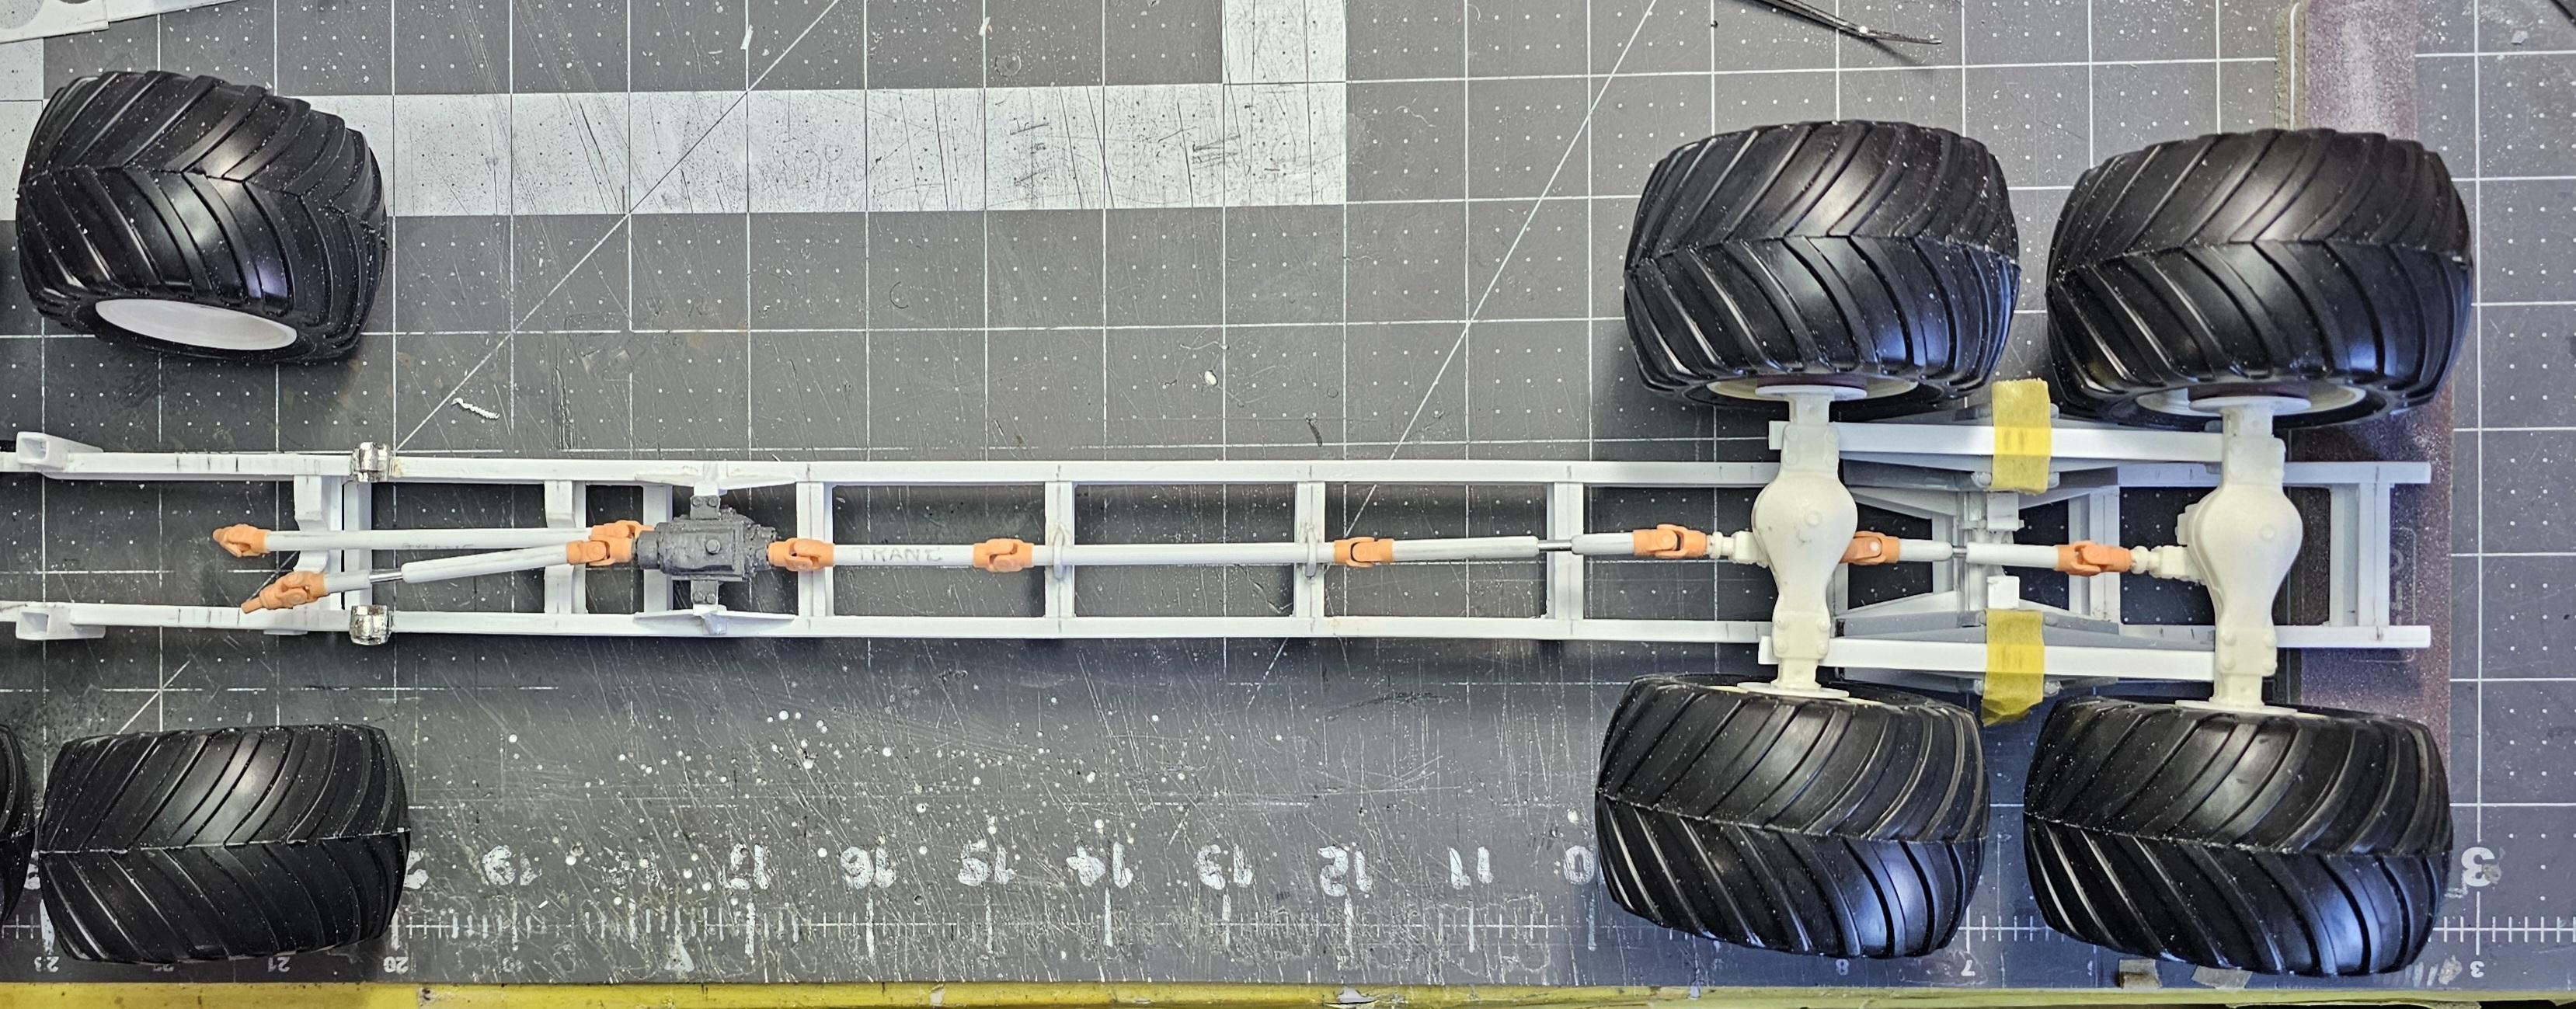
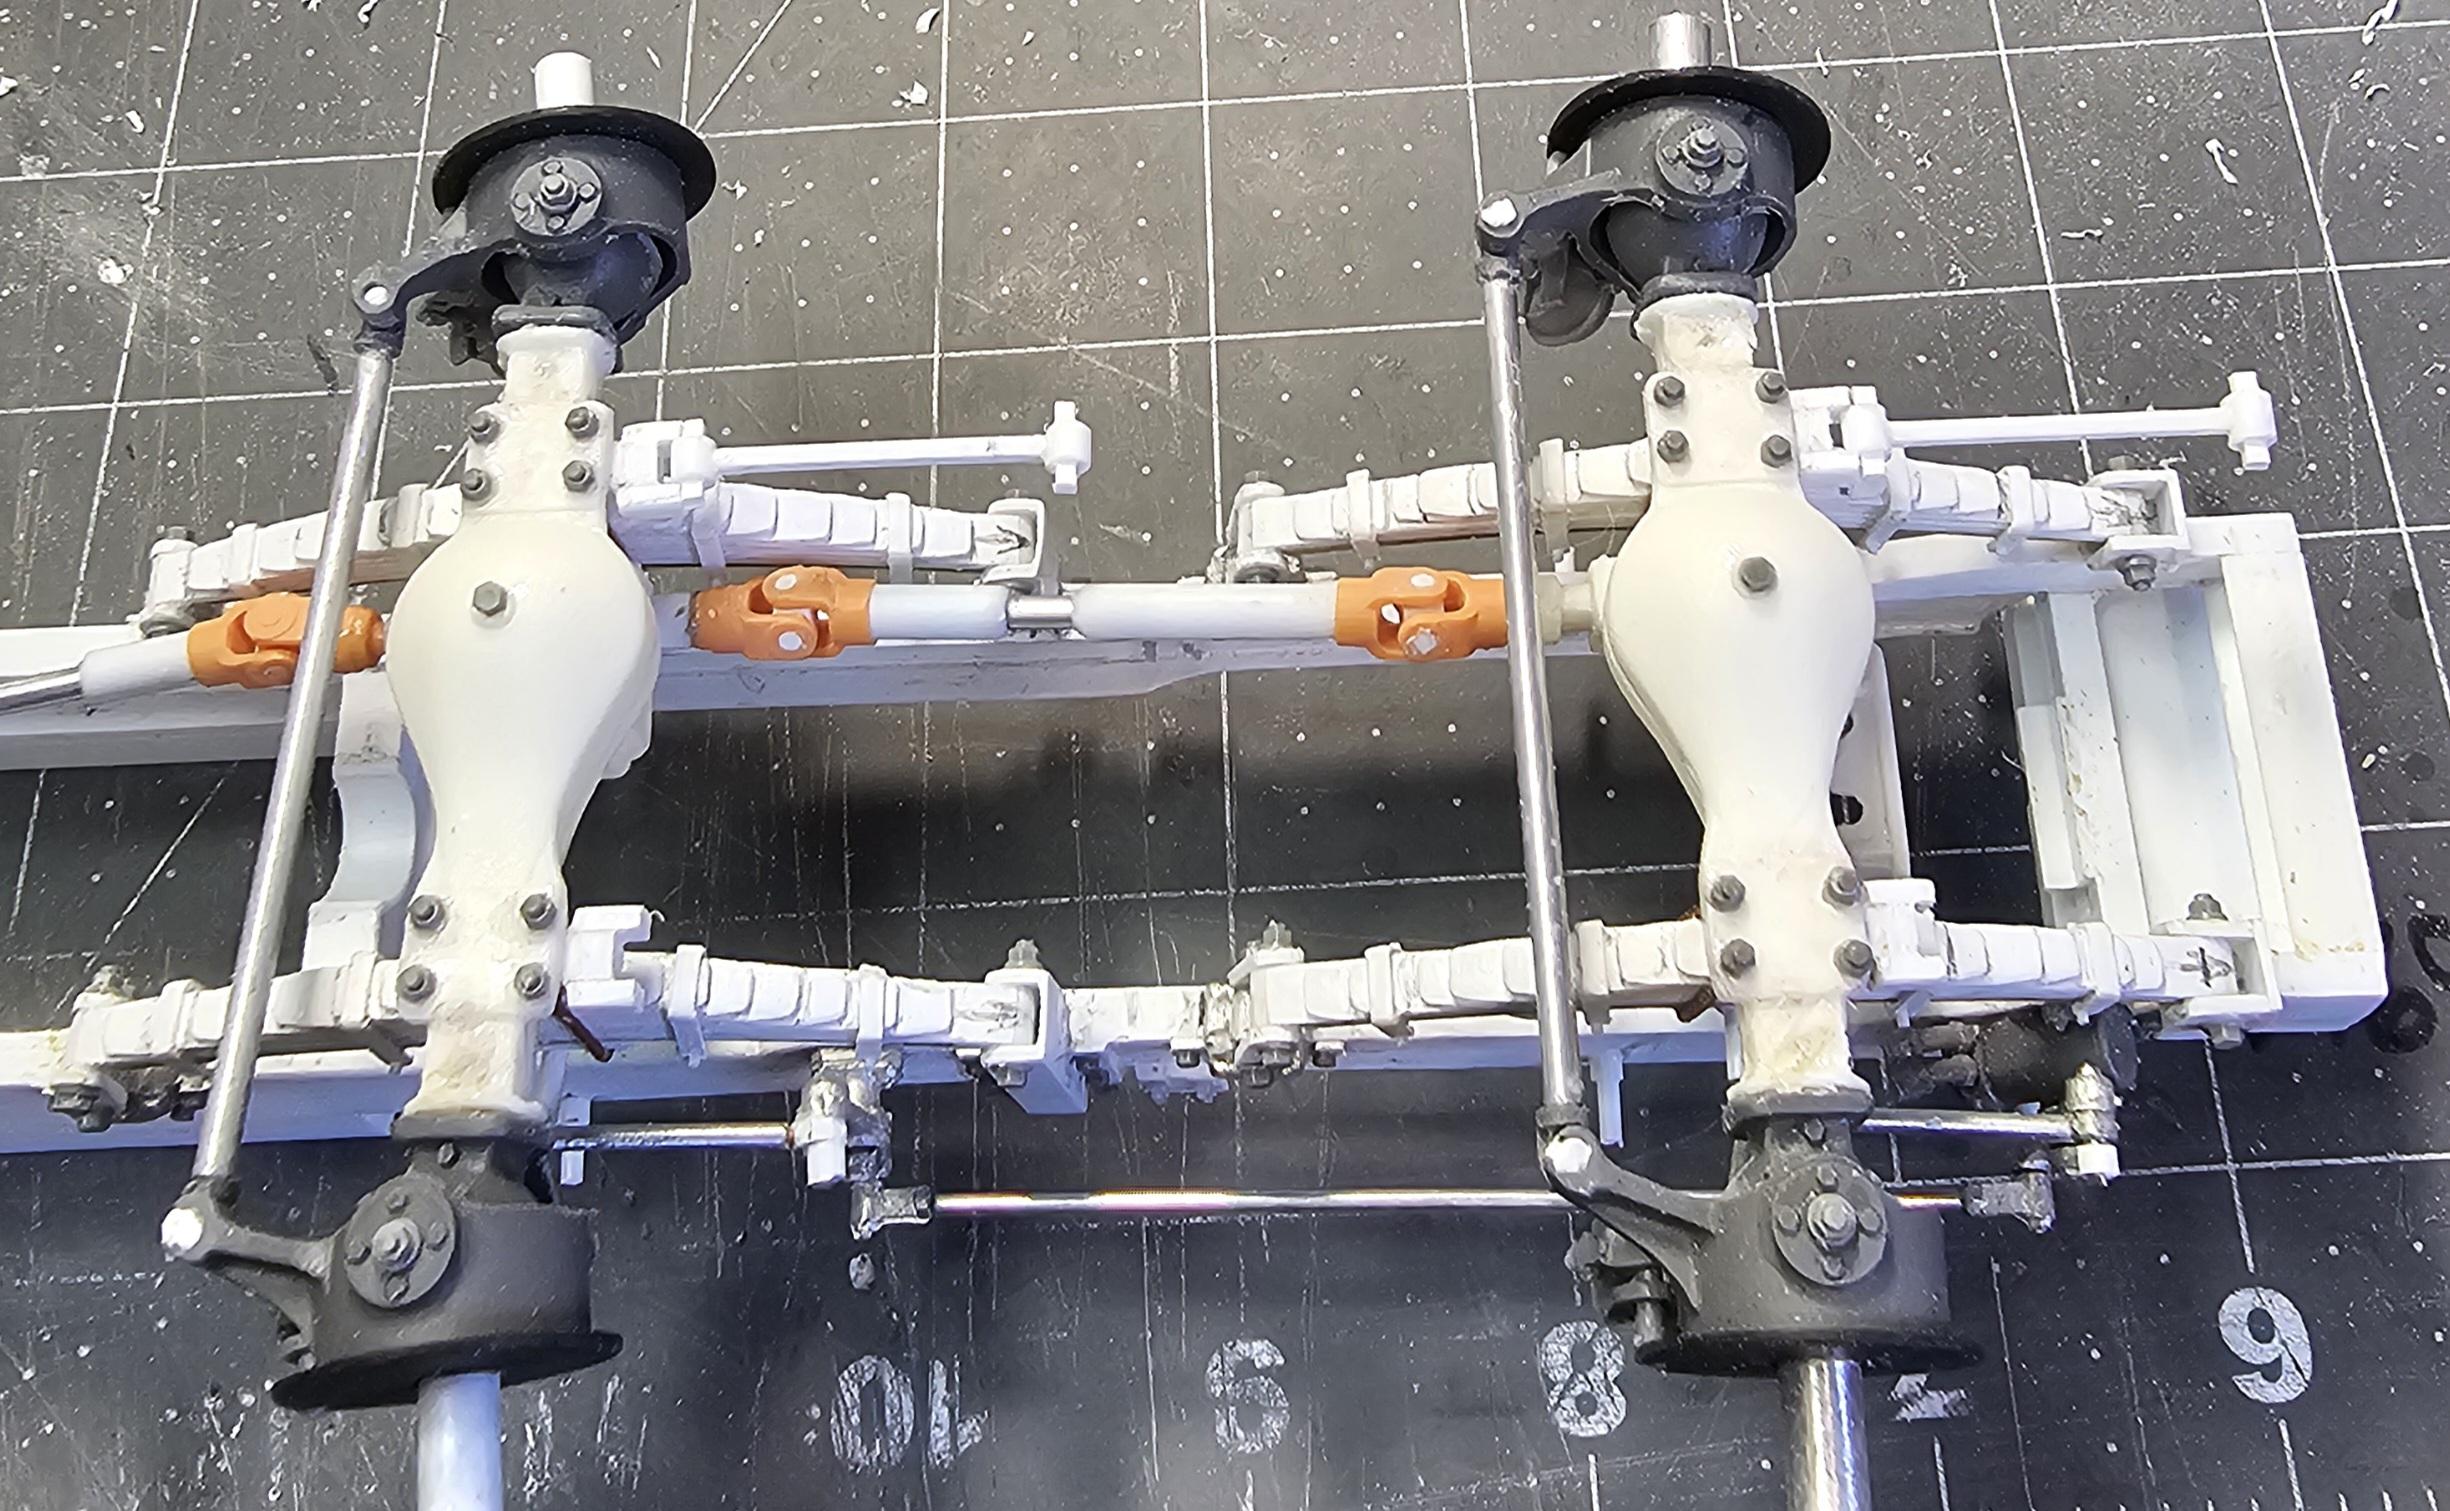
Hey all Got some more work done on this build. I now have all of the front suspension, rear suspension and "U"joints installed permanently and ready for paint. Because this is Sooo big. I'm going to paint the rear first, then the front. It won't fit in my paint booth. It will all be semi gloss Tamiya black. Thought I would start with a little mock-up. This view shows the engine, radiator and trans drive shaft. This view shows the center drive shafts from the top. This view shows the rear drive shafts and rear suspension. This view is looking down through the engine compartment. This view shows the center drive shafts from the top. This view shows the rear drive shafts from the top. This view shows the front drive axles, drive shafts transfer case. View of the drive shafts from the bottom. View of the rear suspension and drive shafts from the bottom. This view shows the nuts/bolts/washers I added to the front differentials. I did the rear ones also, but didn't get any pictures. This view shows the left side of the frame and the bolt heads I added to the front suspension mounting brackets. This is a view of the other side bolt heads I added. Well that's it for today I'll be back soon with more updates. Ron G
-
MACK SUPERLINER HEAVY HAUL
ShakyCraftsman replied to Swamp Dog's topic in WIP: Model Trucks: Big Rigs and Heavy Equipment
It's looking great David. I like your winch cable. Dry brush a little silver or steel over it,then it will be perfect. Ron G -
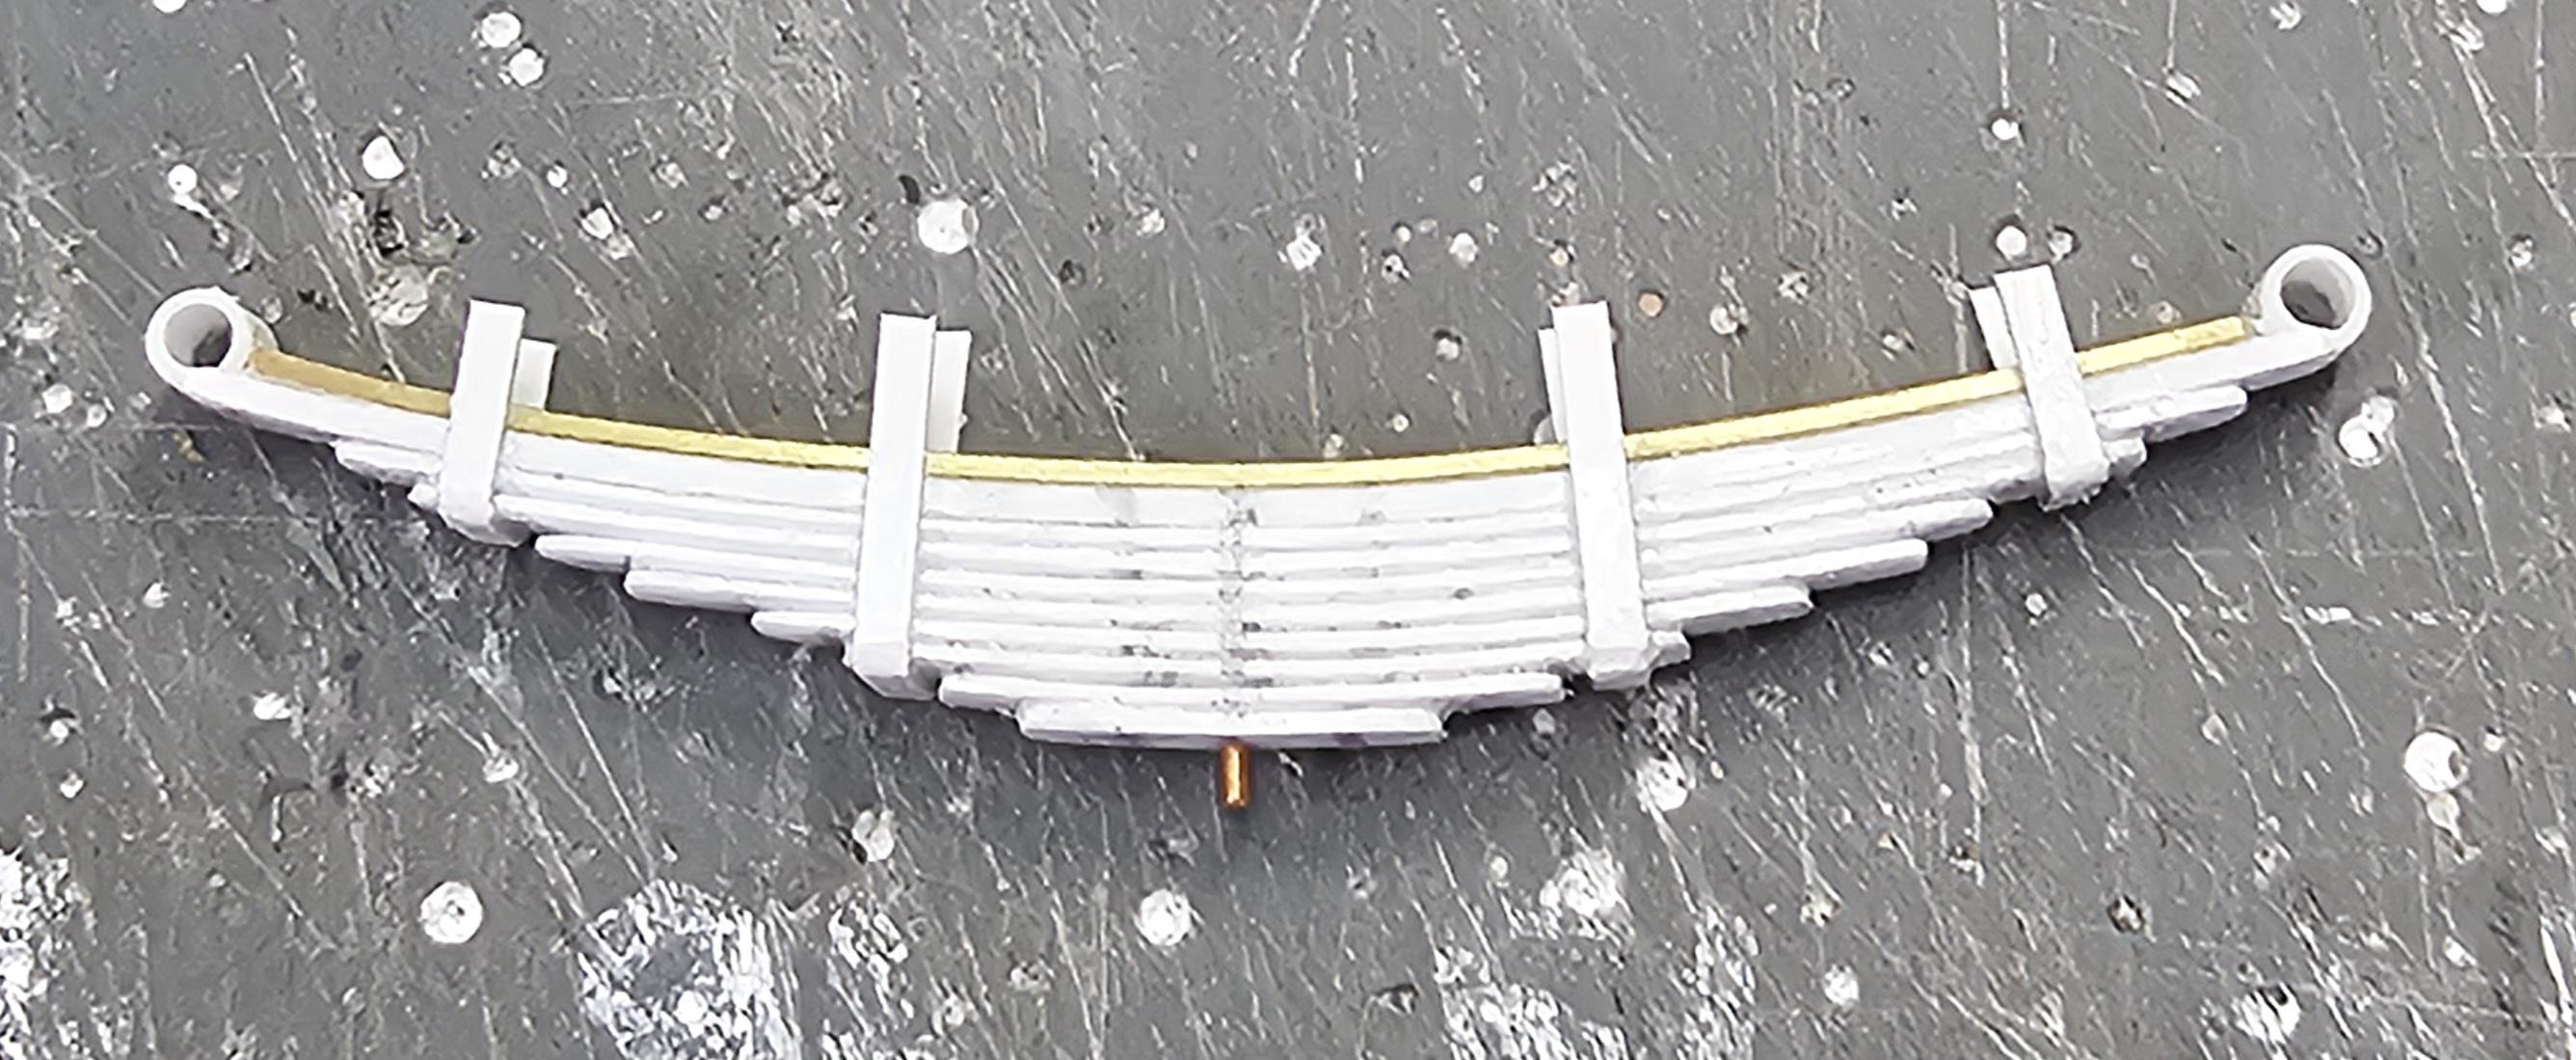
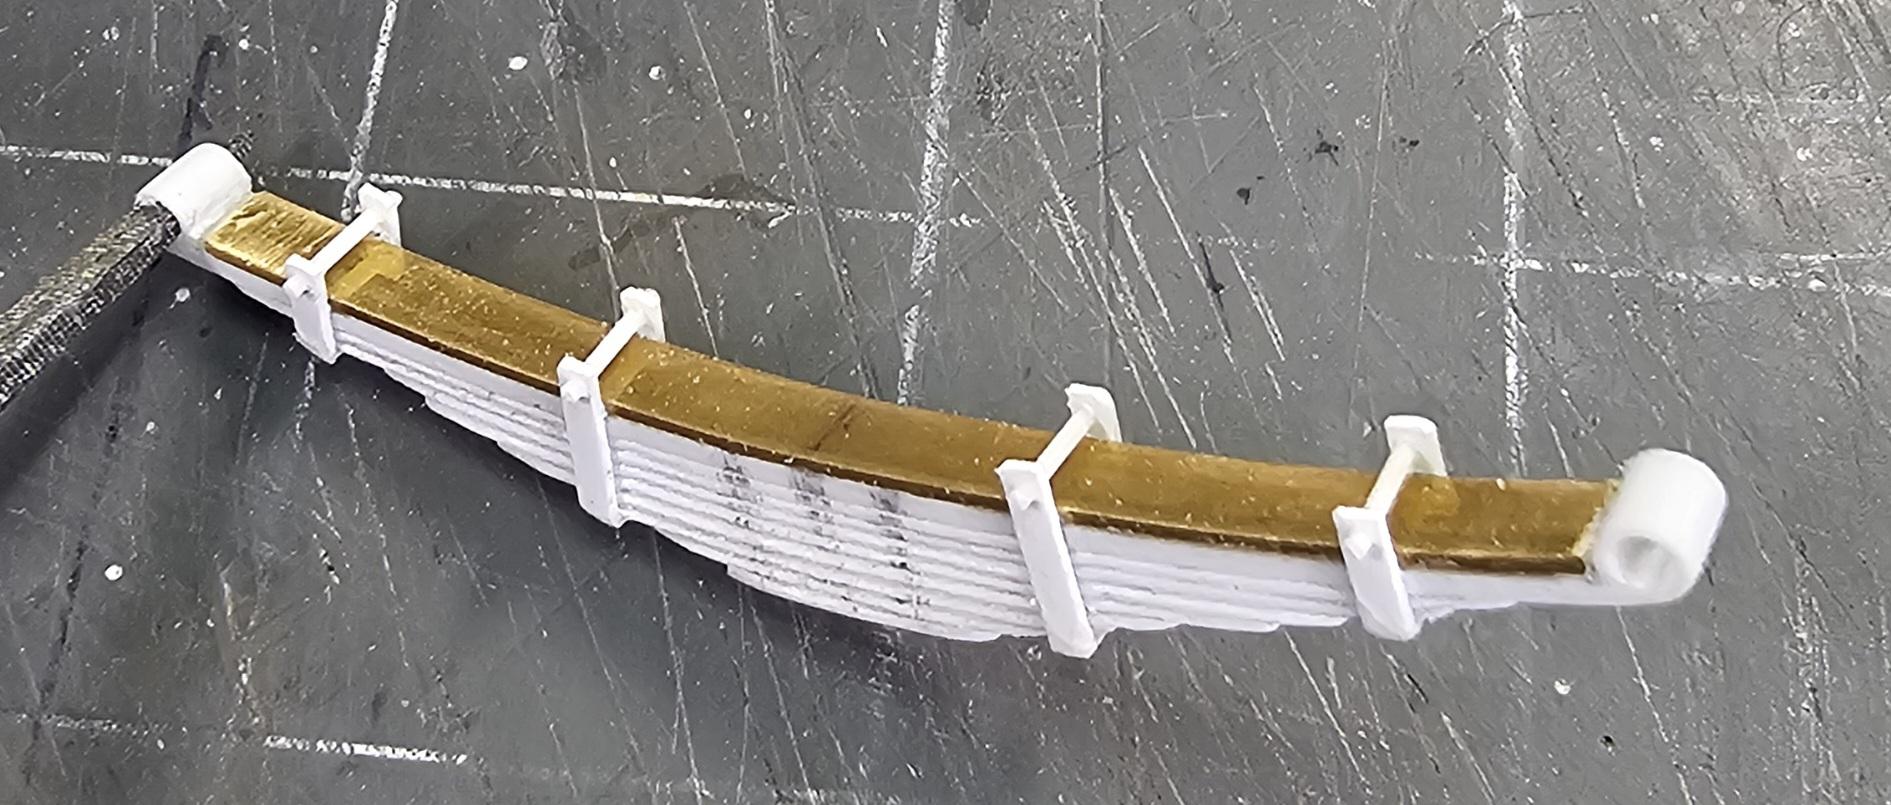
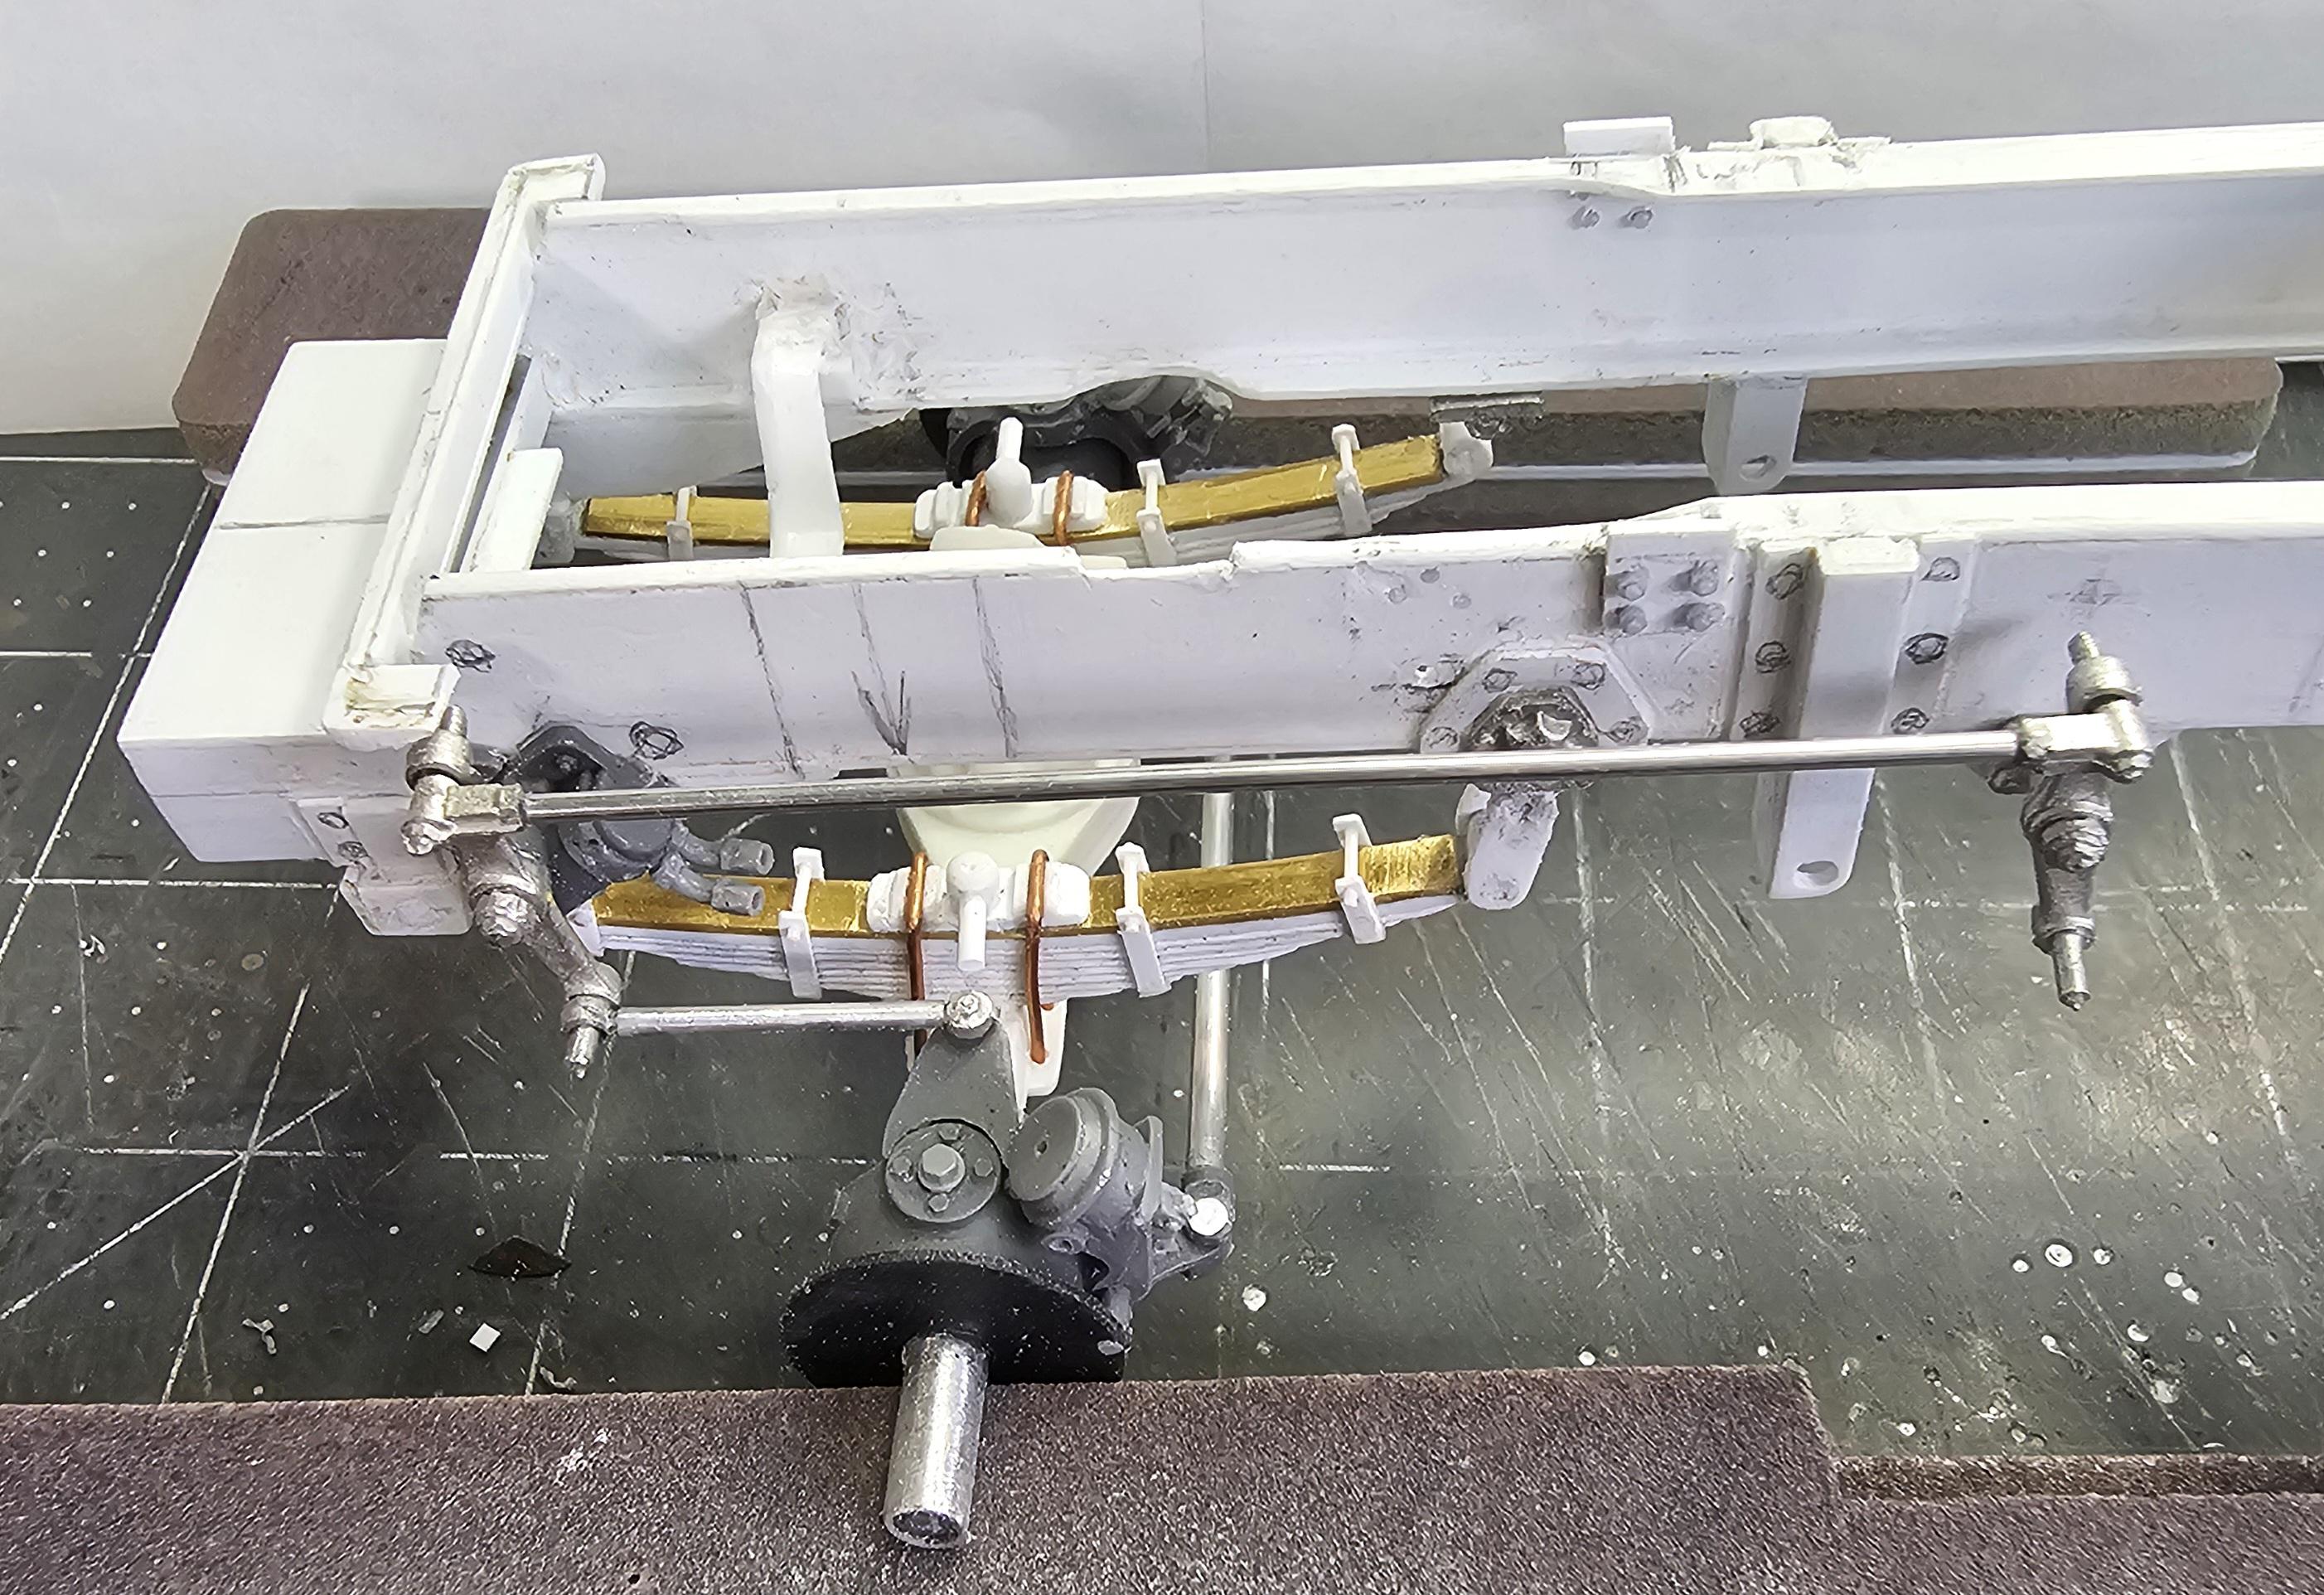
Hey all Got some more done on this build. I've been working on the front springs and steering system. This view shows the spring "U" bolt & shock mounts. This view shows the spring with the start of the spring clamps. This view shows one of the completed front springs. The other side of the front spring. This view shows the steering box and linkage in the neutral position. This view shows the steering turning left. This view shows the steering turning right. This view shows the springs on the first front axle along with a shock. This view shows the front axle and springs mounted with the tires. This view shows the front suspension from the side. This view shows the front from the top. Closer view of the front springs, "U" bolts, shock mount and steering linkages. Well that's all for now be back soon with more updates. Ron G
-
Hey Steve The air cleaner isn't to big, but the top & screen are a bit small. Everything else is fantastic. Ron G
-
Hey Gary Those are nice, but my only complaint is the sides are a bit thick. They are large, and a good fit for a KW 925. Ron G
-
They are really great tanks. I think they would be a good fit for your custom Pete. I'm using a pair on my Alberta oilfield bed truck build. Ron G
-
Hey Gary Have you checked out the cool Pete tanks from Casey at Model Truck Builders. He has several sizes plus he has hood swans. Ron G
-
Thanks cifenet Yeah, the repetitive items make it difficult to keep going for sure,but I'm determined to finish this beast. Ron G
-
Thanks Gary, we do have to do our part...lol😁😉 Ron G
-
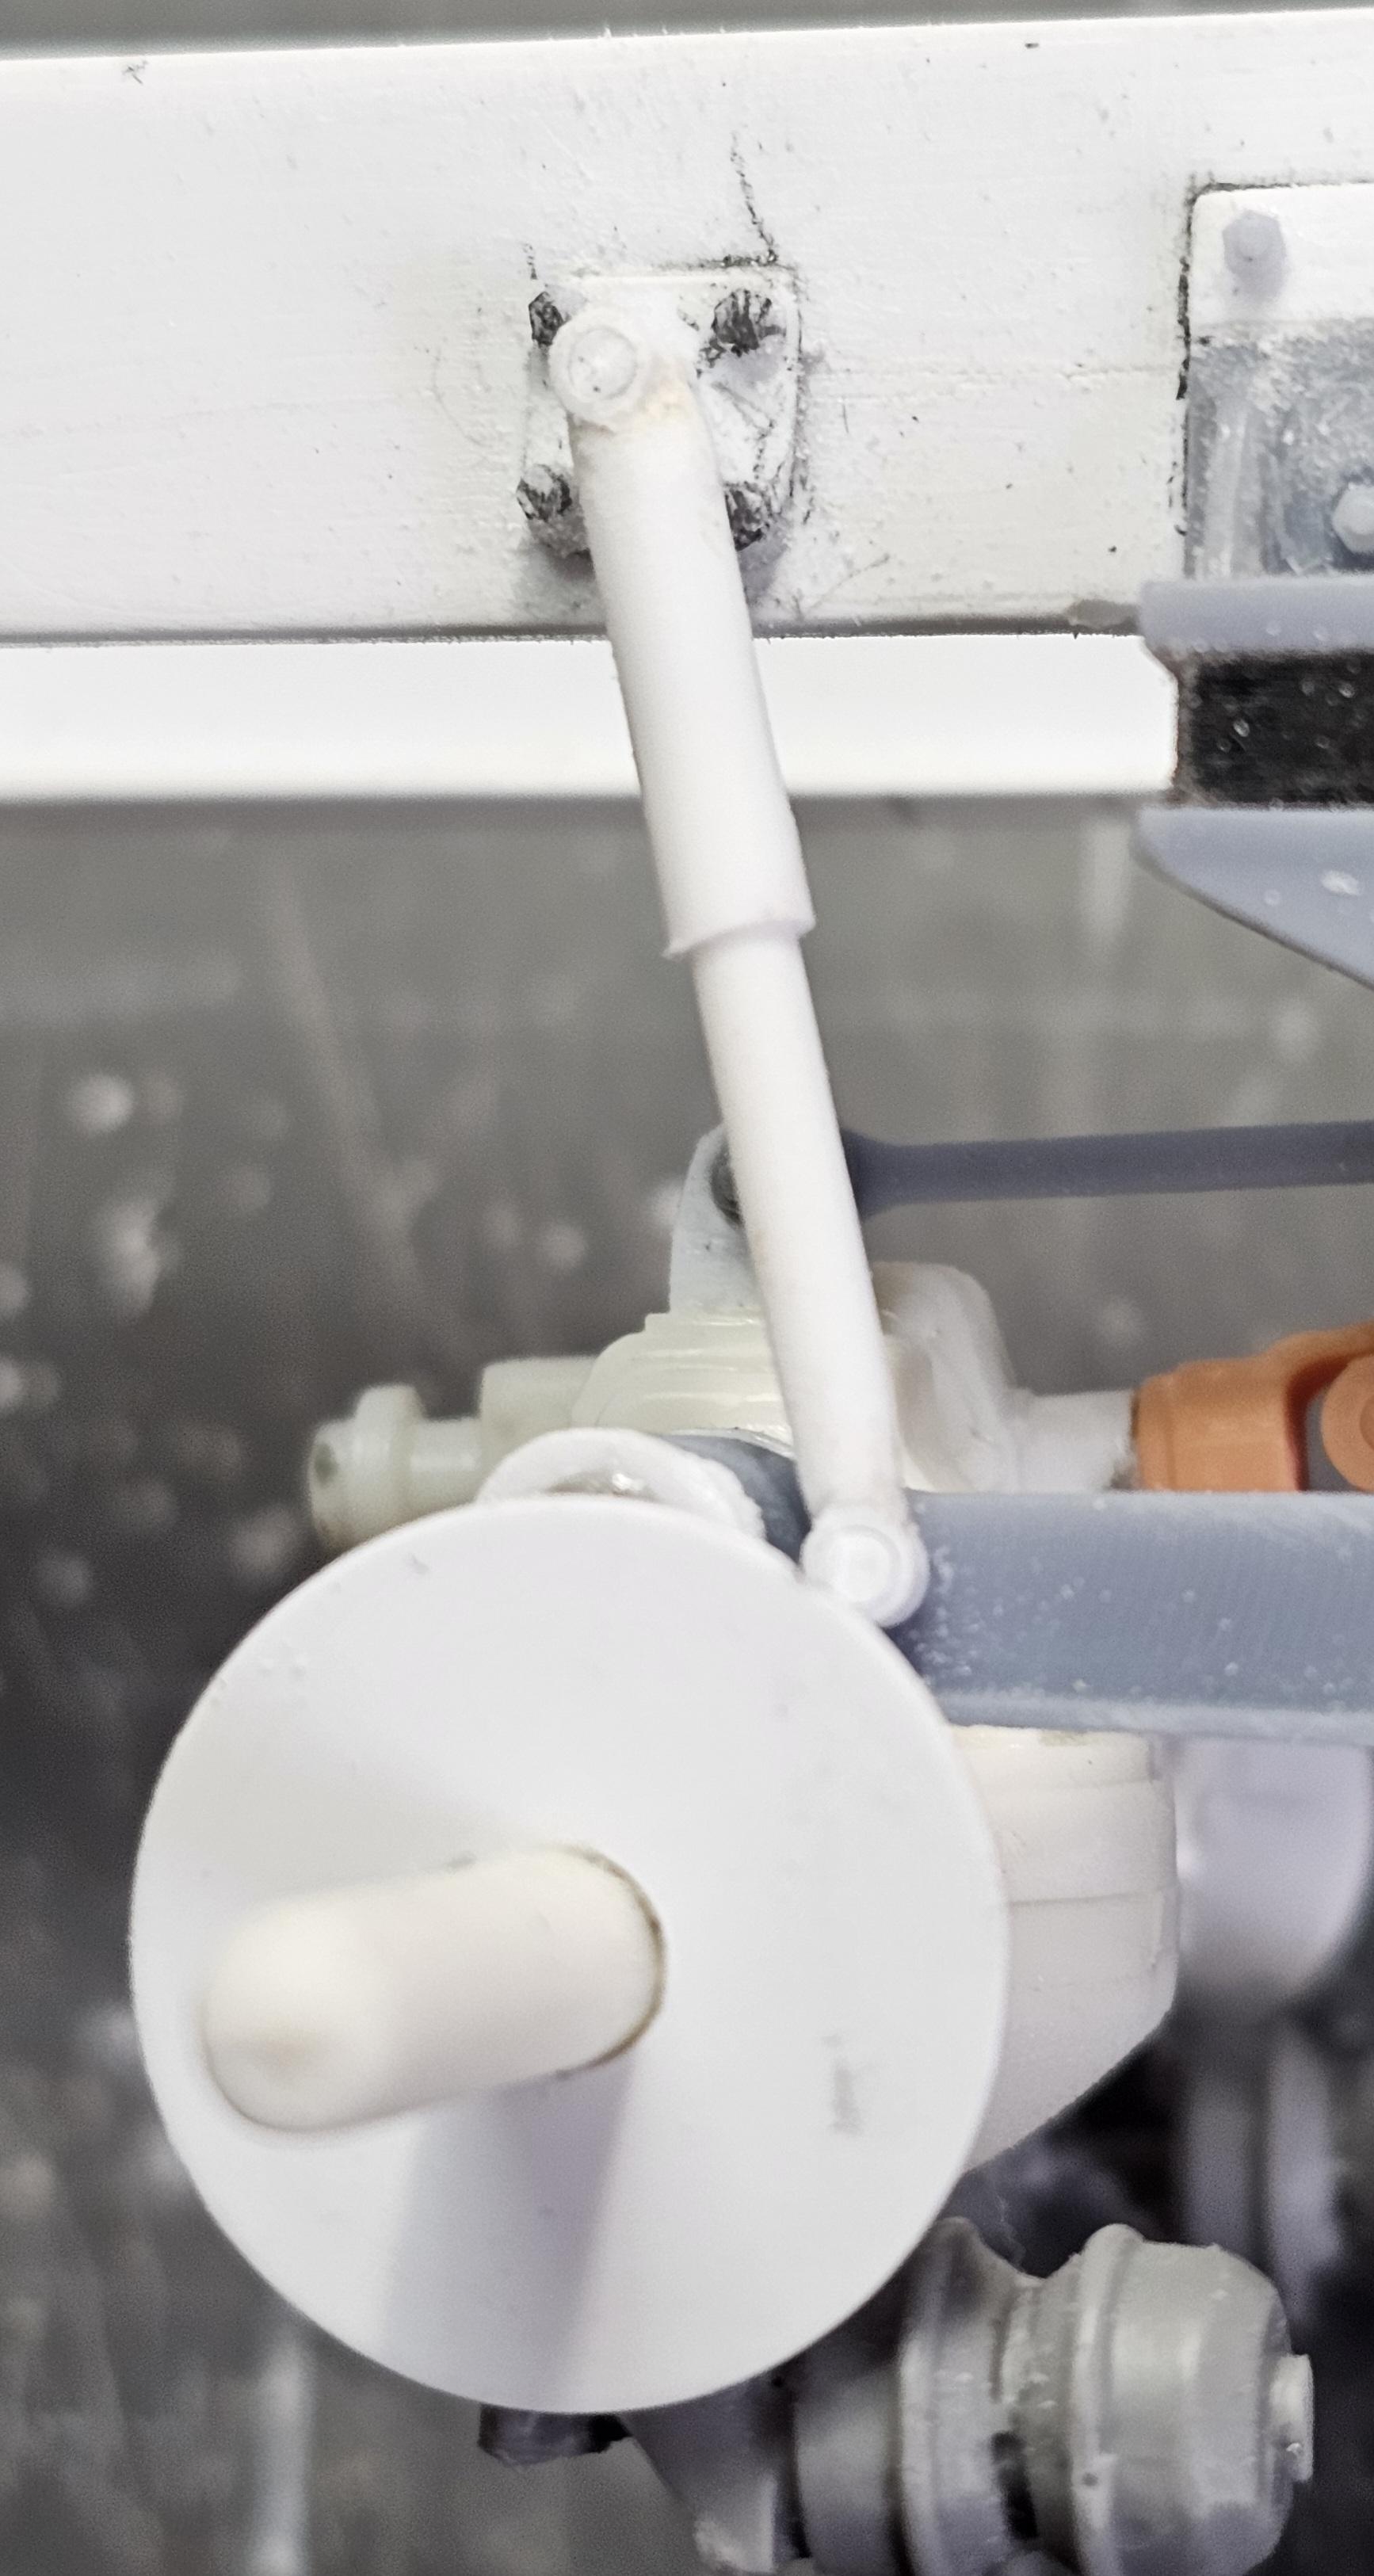
Hey everyone Well, I've been trying to get these done for over a week, but those pesky squirrels have been driving me nuts!..lol. The front springs. This view shows the front springs completed. This view shows the copper "U" bolts for the front springs. This view shows the upper "U" bolt mount with a shock mount pin. One done three more to do. This view is a closer look at the upper "U" bolt mount. That's one of the shocks on top. A little mock-up of the chassis. Another view of the chassis. This view shows the front springs are now done. I still have to make the four clamps for each spring. 16 altogether. I also have to figure out the front steering. That's it for now be back soon with more. Ron G
-
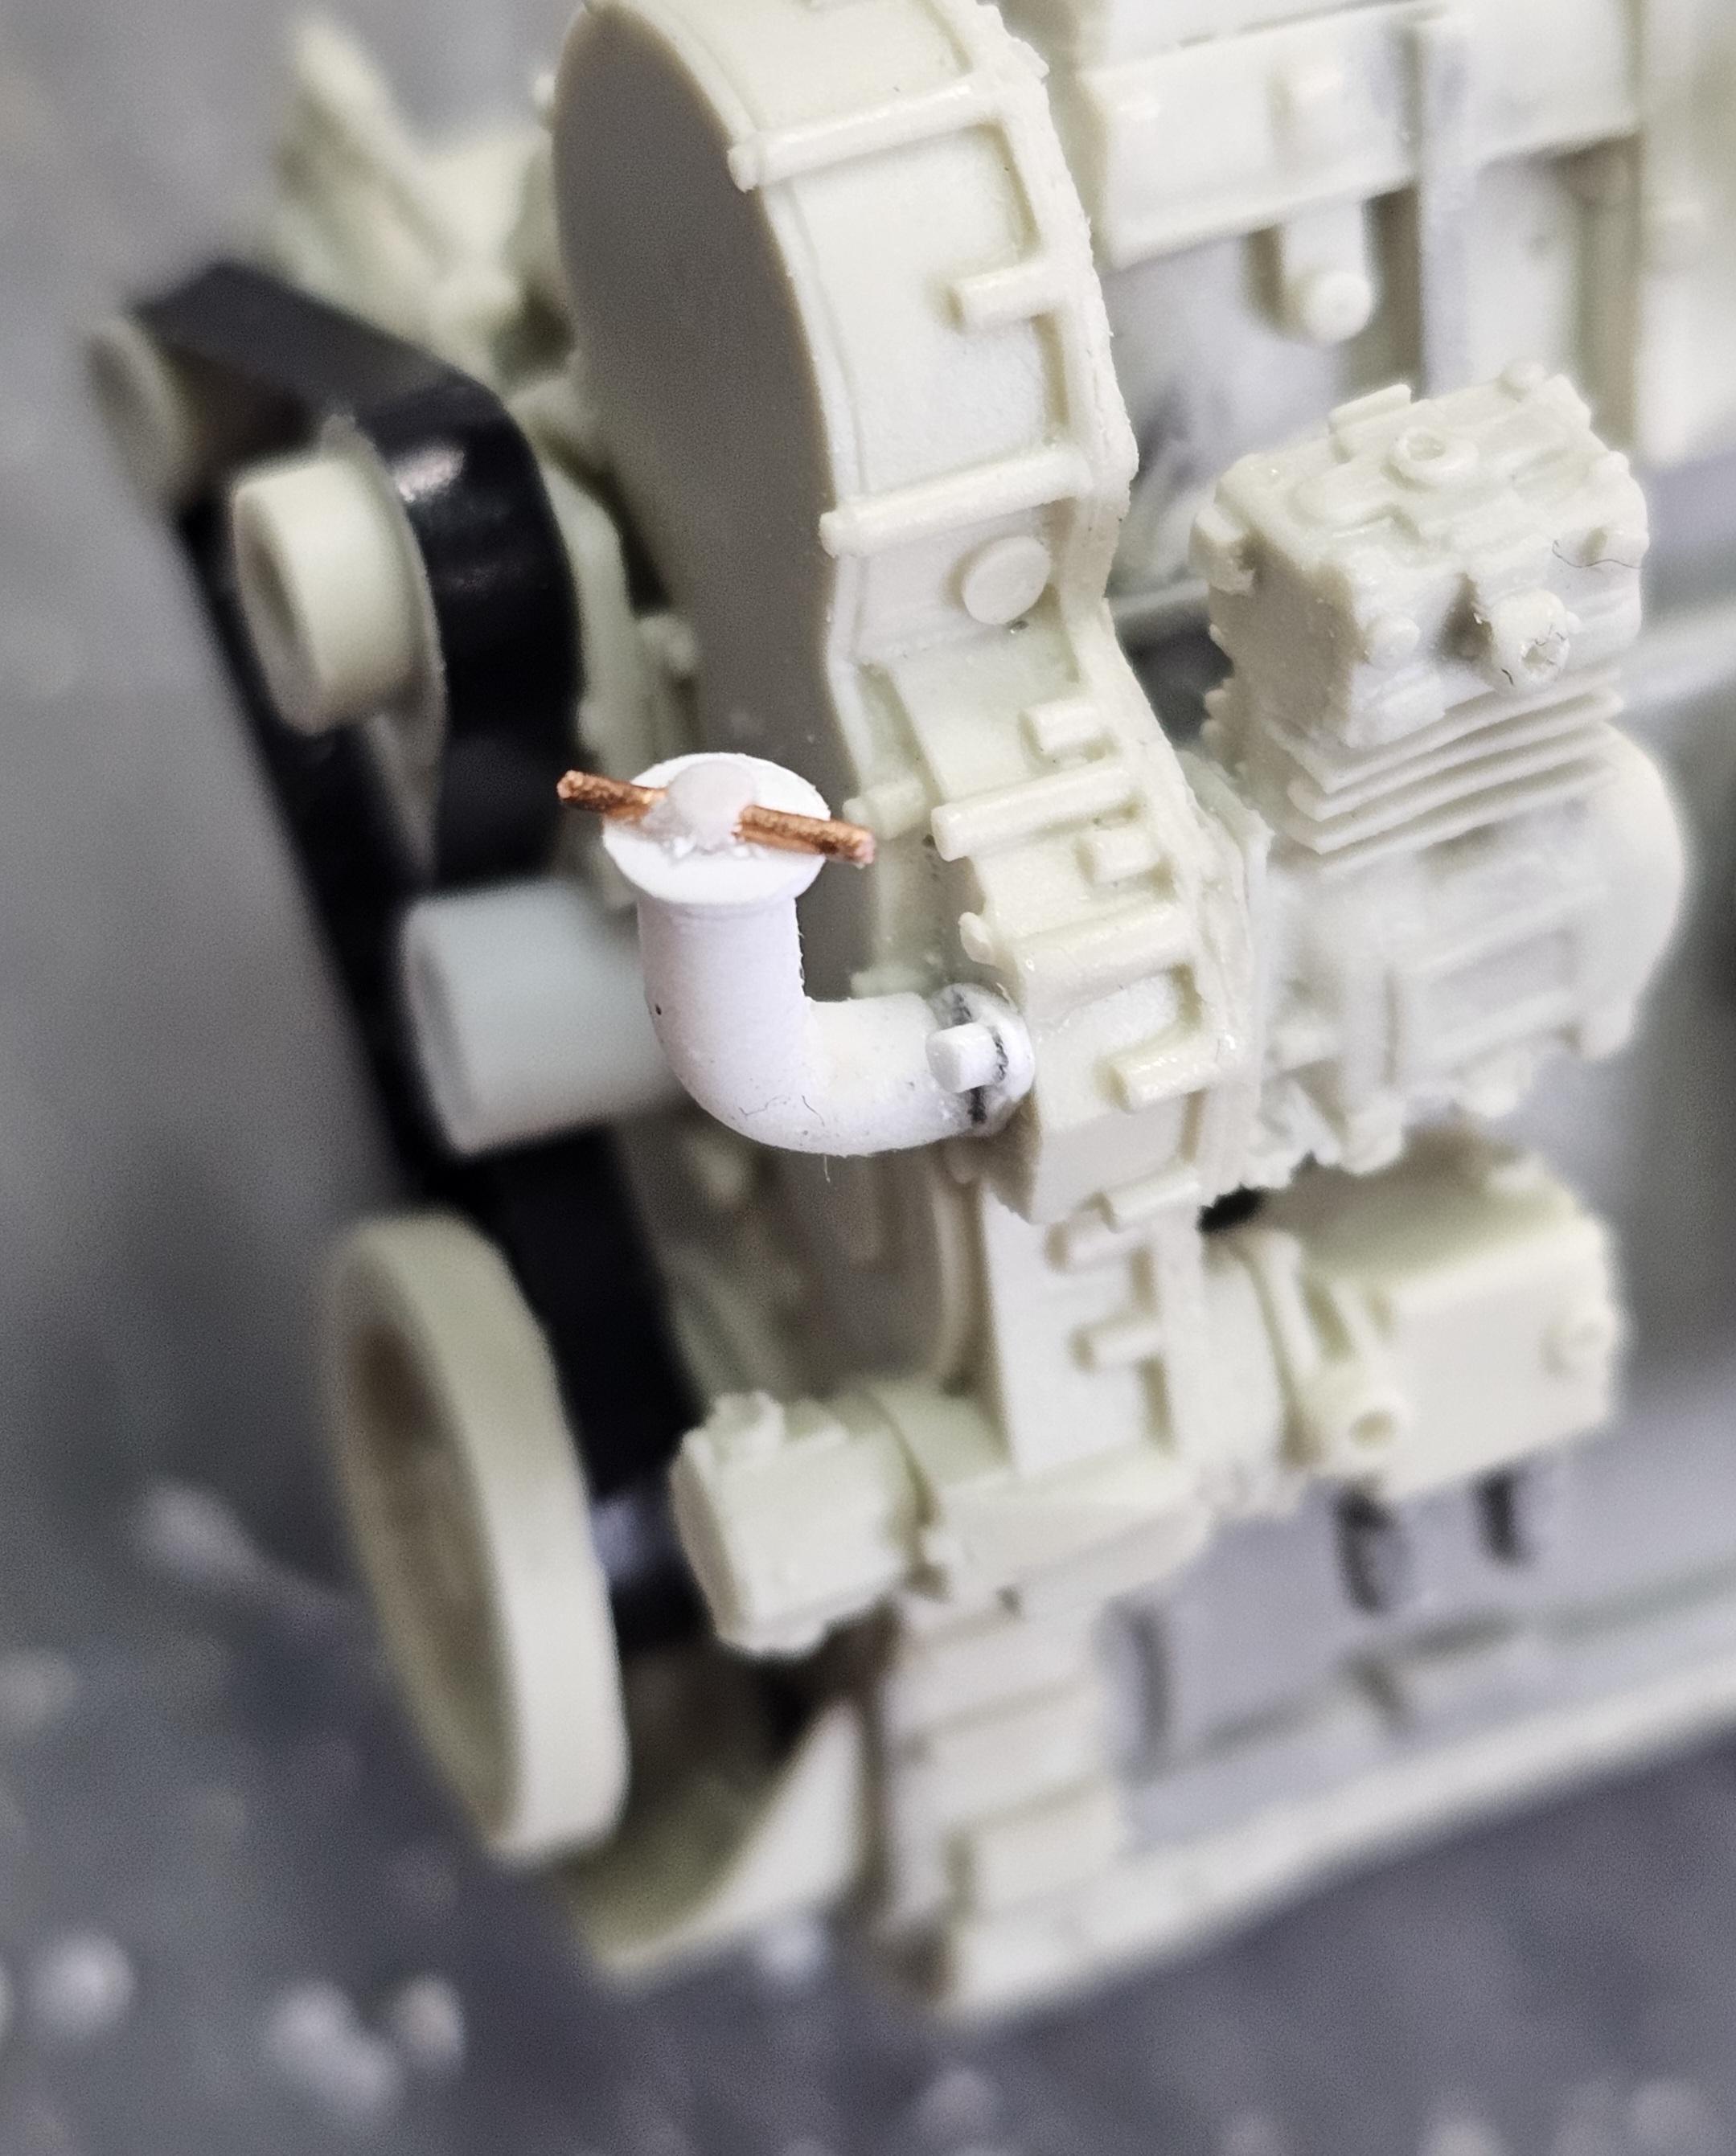
Hey all Well I used up some of that 985.5' of cable. 😁😂🤣 I wound it around the main winch 5 times. I did some more work on the Cat C15 6NZ and started making the shocks. This view shows the main winch with the cable attached. Back view of the winch. This view shows the oil dipstick that I added to the engine block. Just under the exhaust turbo. This view shows the oil fill tube I added to the front cover. Closer view of the fill tube, the cap is removable. This view shows one of the rear shock absorbers & mount that I scratch built. Just need to make three more, plus the four front shocks. I need to add the bolt heads to the mounting points of the shock, but not till it's all painted. Well that's it for now be back with more updates soon. Ron G
-
Hey all Small update today. I changed out the 18spd transmission for an Allison Automatic trans. Because the cab sits so high up on the frame trying to make the manual trans shifter work was impractical, so it now has a Automatic. Drivers side view of the engine & trans. Passenger side view of the engine & trans. This view shows the fuel tanks that I'm going to use for this build. There from model truck forum. This view shows the fishing line I'm using for the winch cables. That's a lot of cable, 985.5 feet of it!😱😱😱😱😁😉 it's 1.2mm diameter which works out to 1 1/4" in 1/24 scale. That's it for now I'll have more later. Ron G
-
This is assume Jim! Love that big 12V71N! I just got my R685ST kit, but I won't be going crazy with it mostly stock, just W/T's and a few do dads. Ron G
-
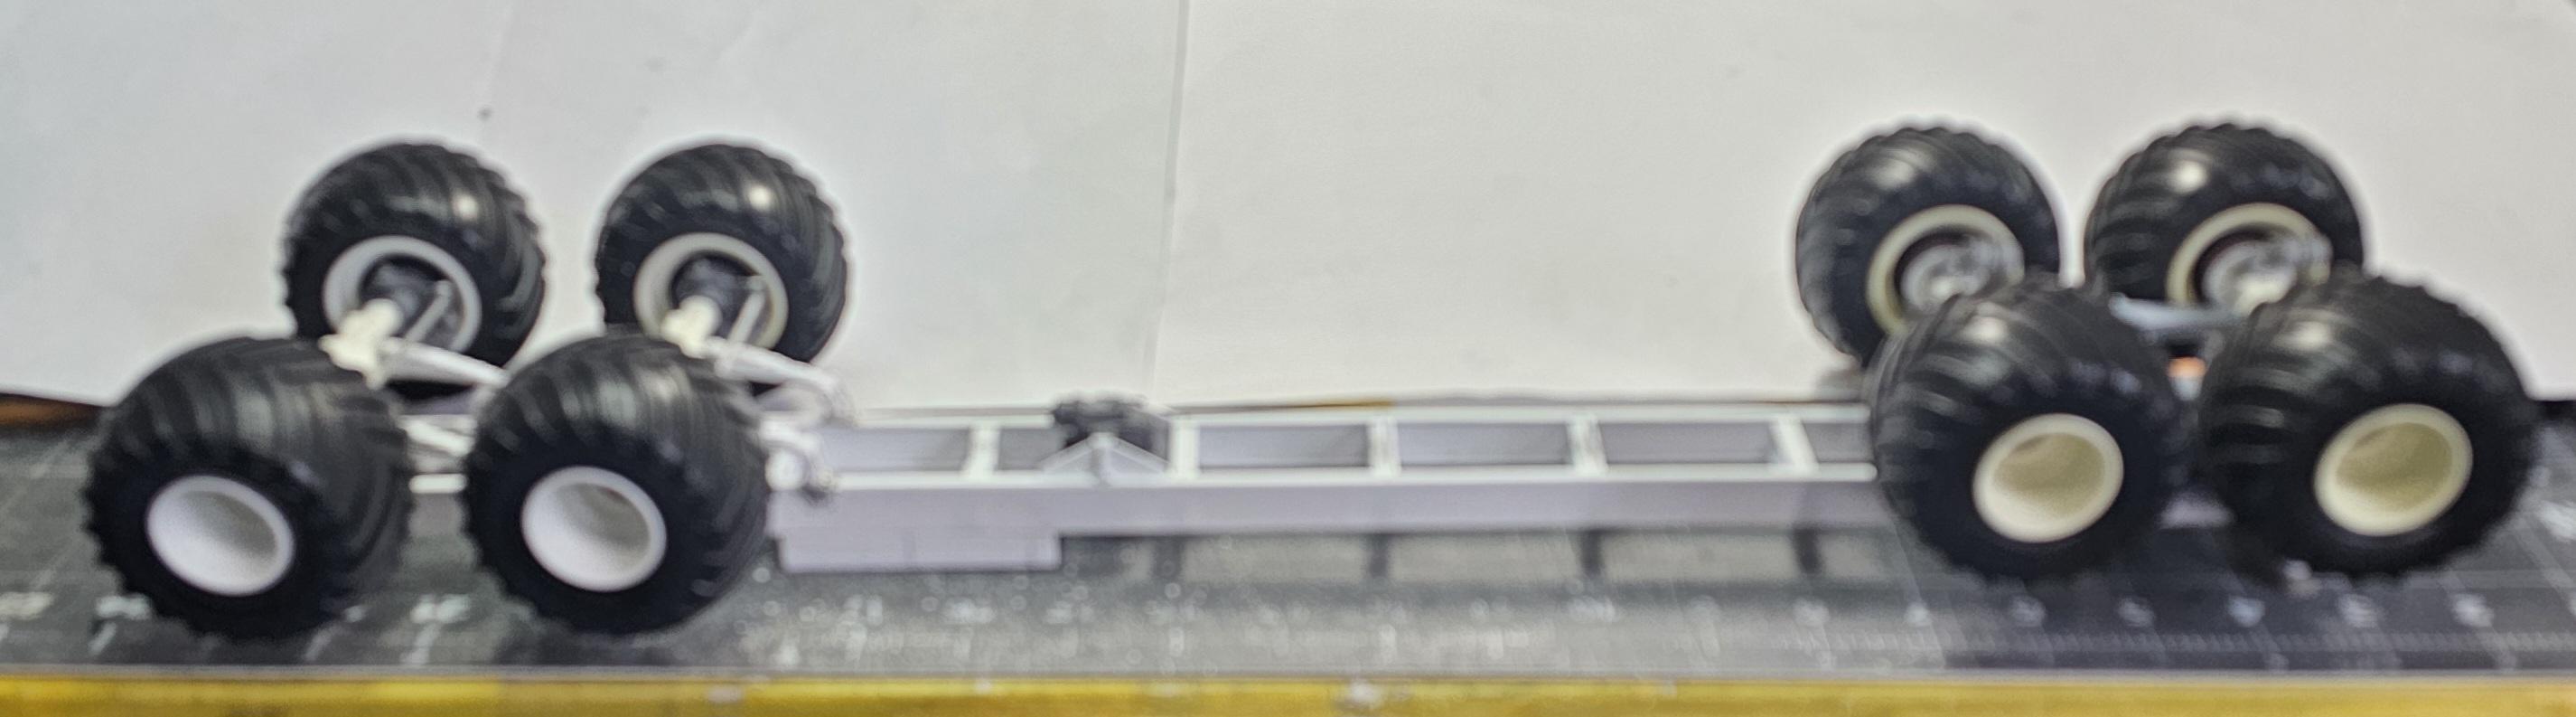
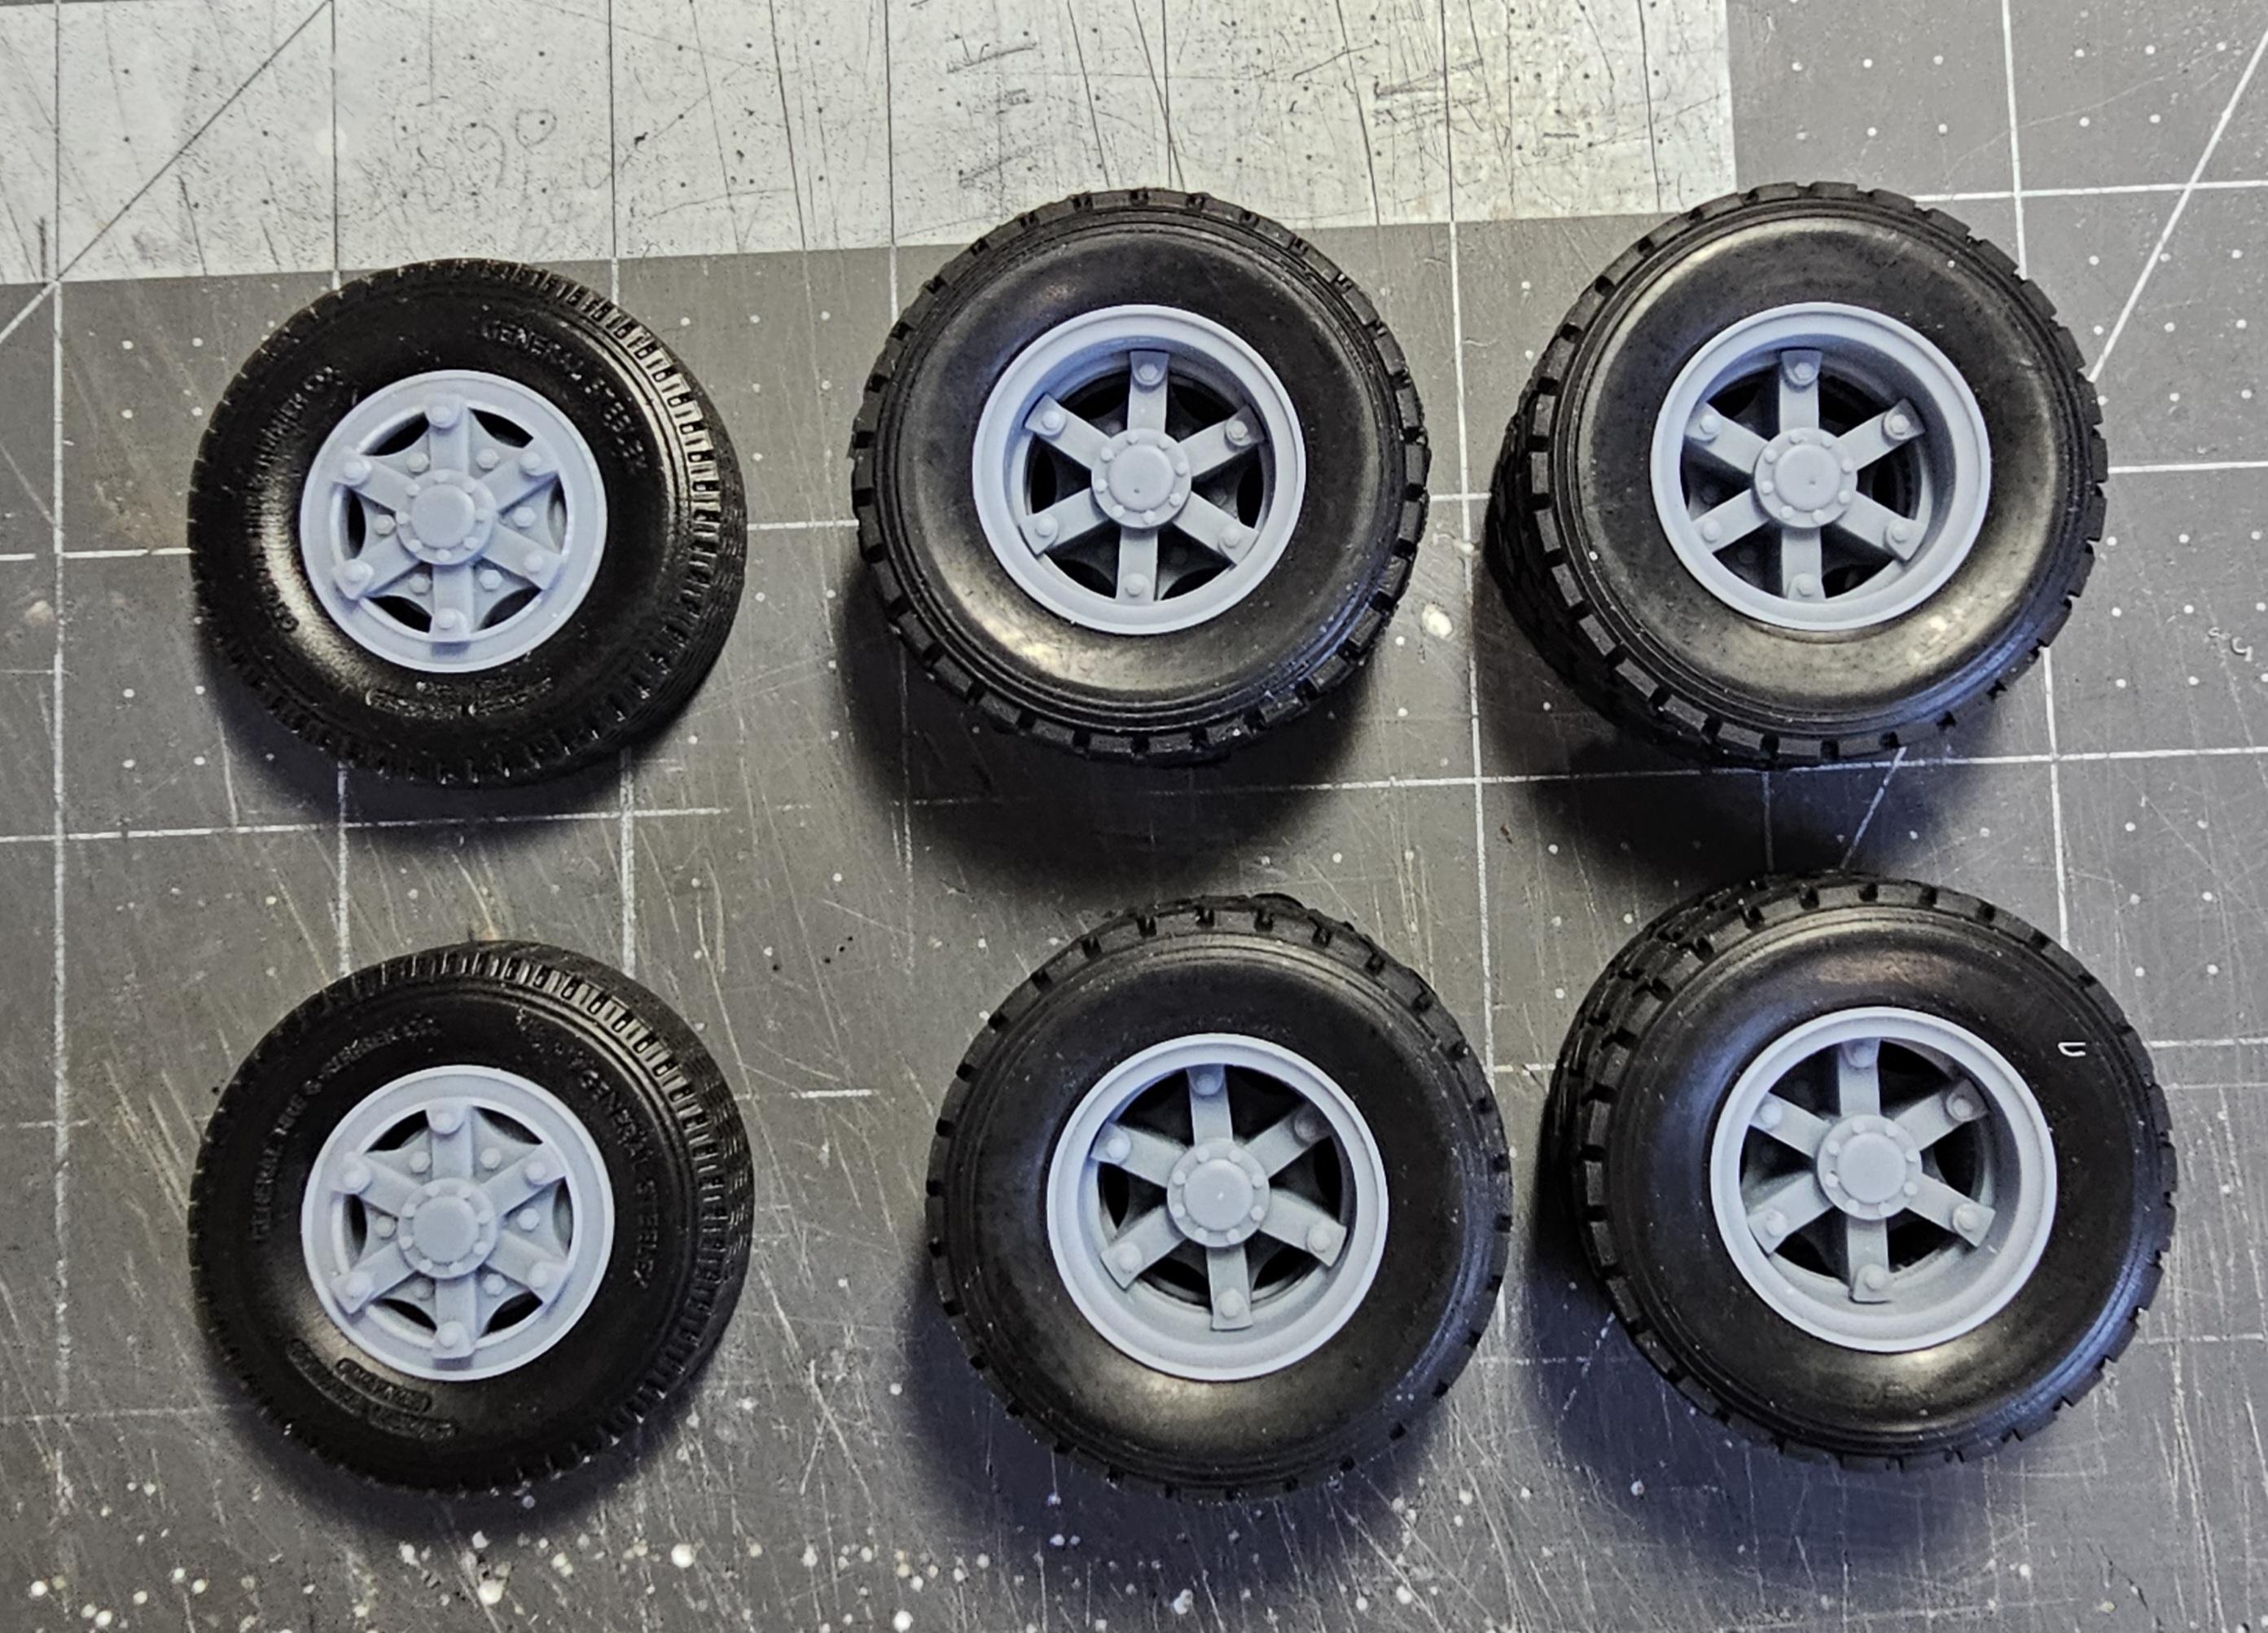
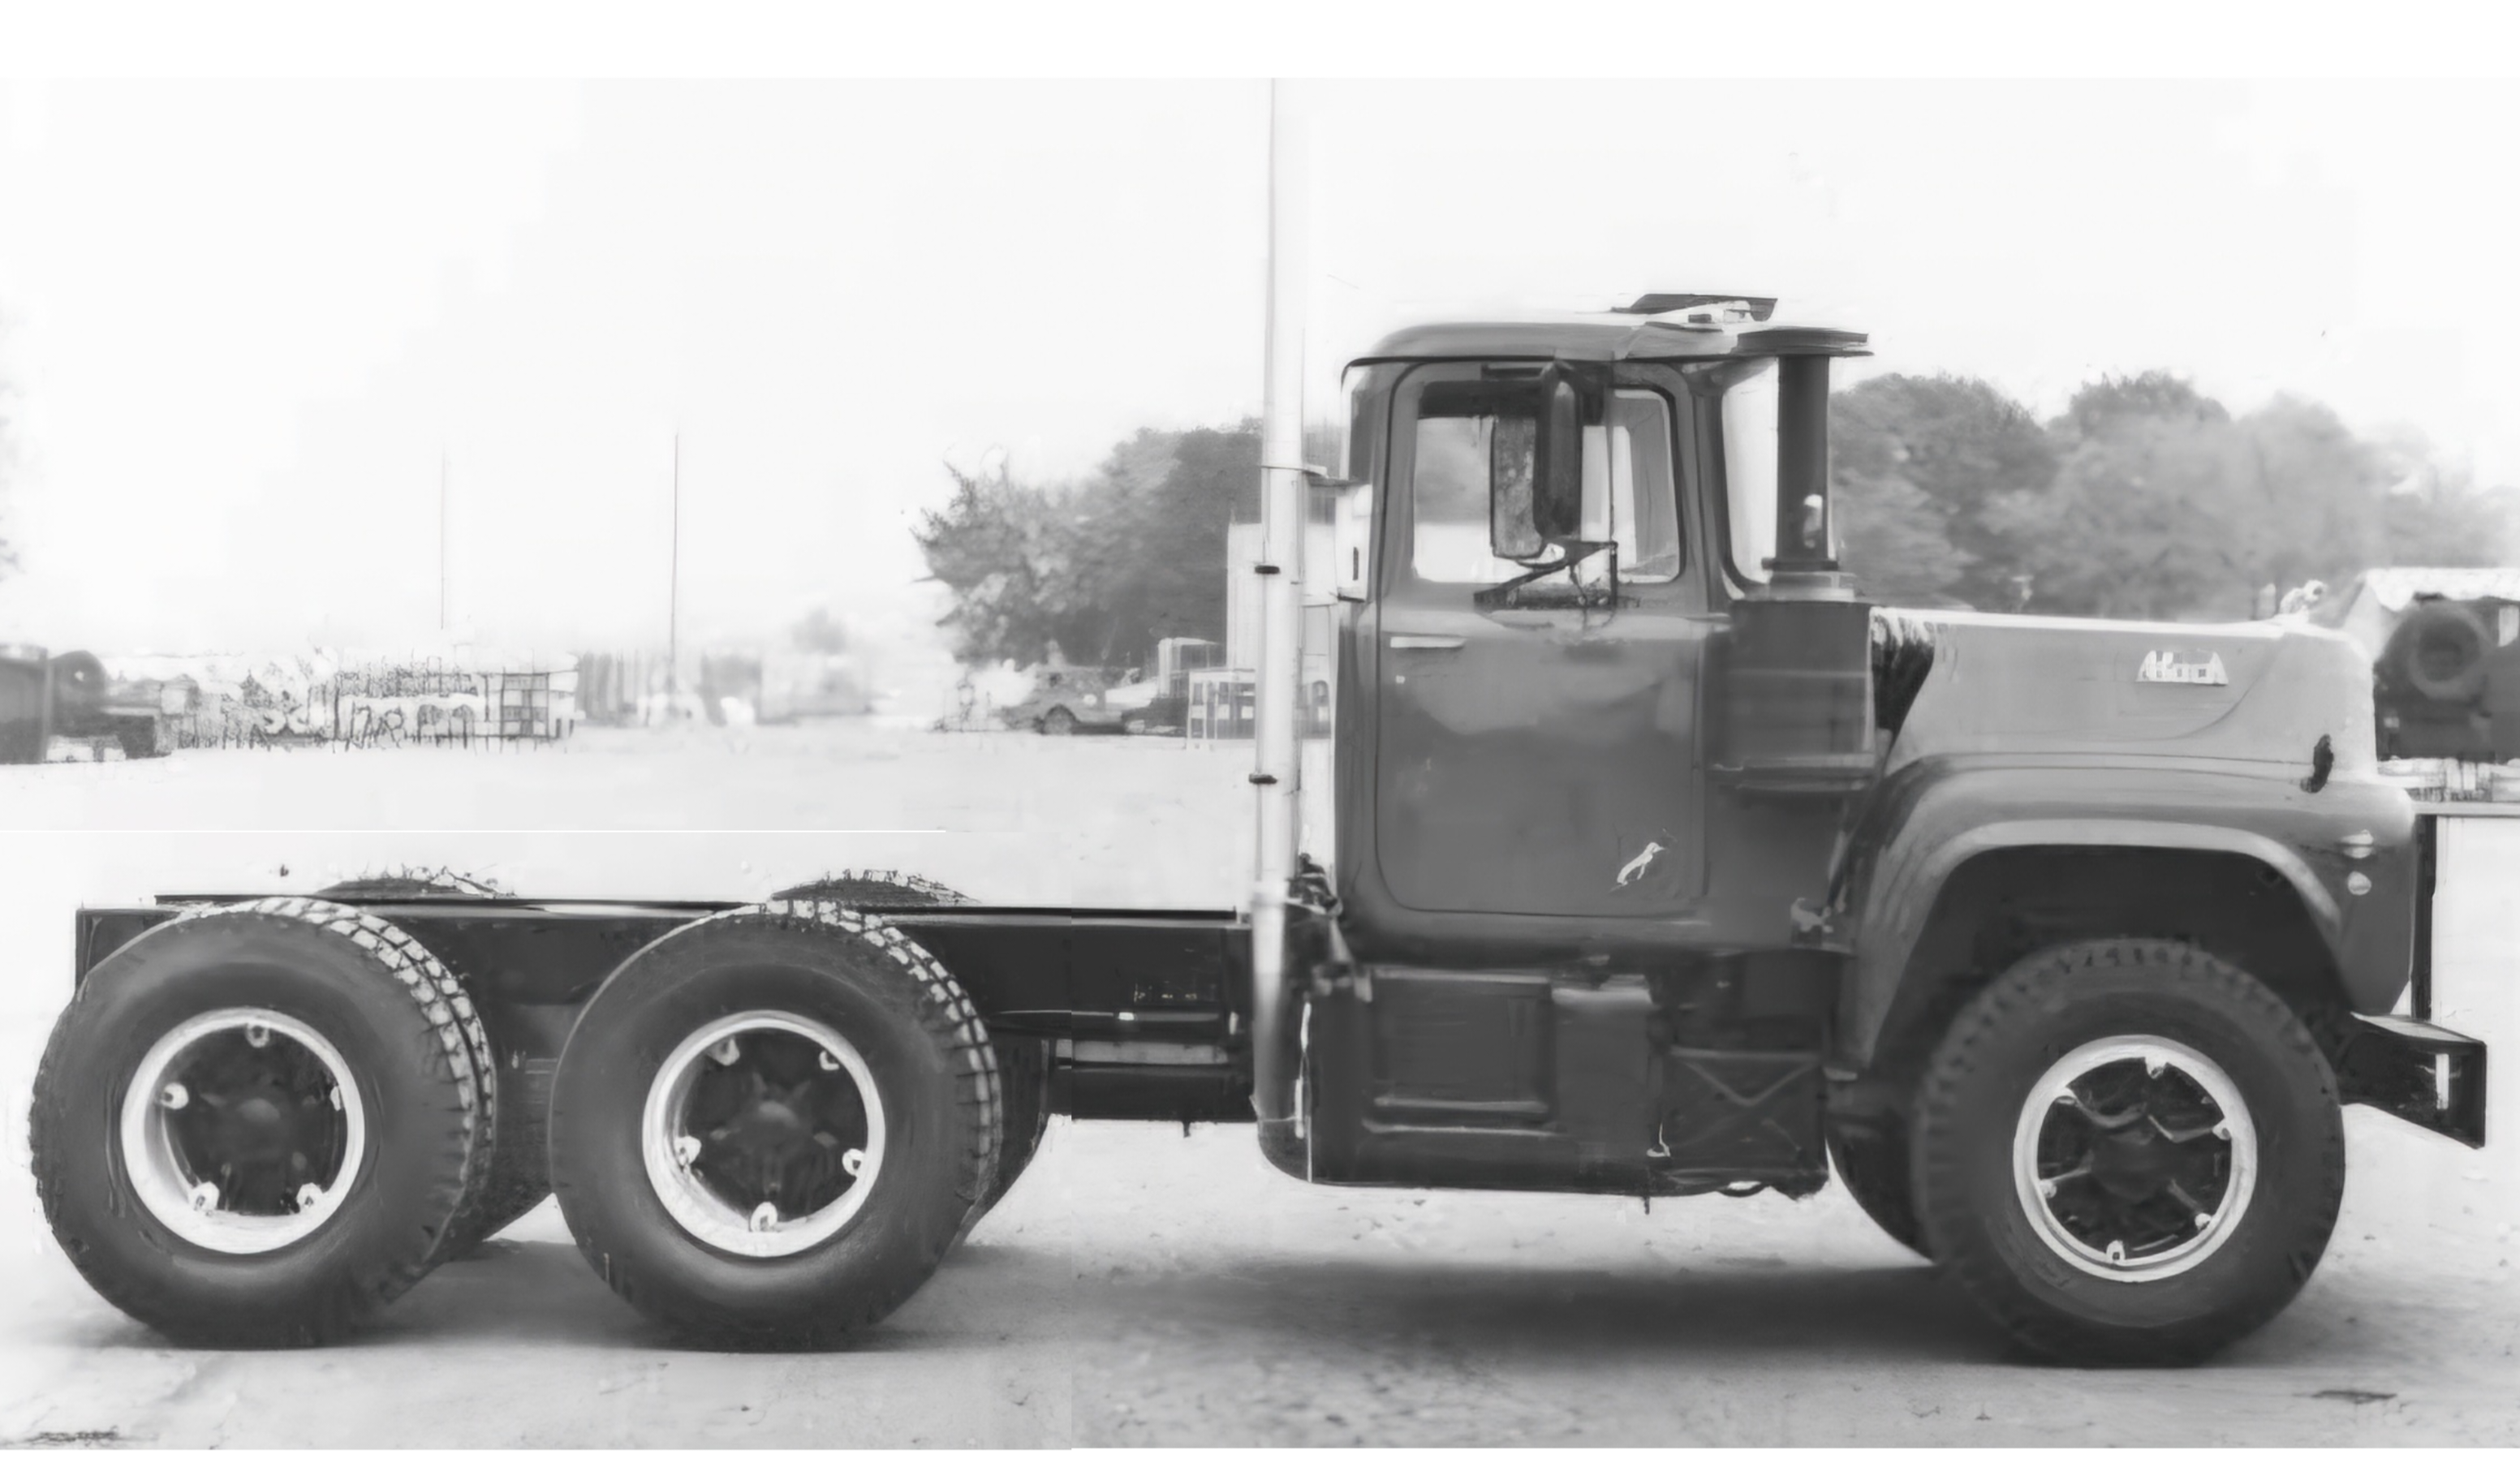
Hey all Don't panic, this isn't another build post, not yet anyway. I got this from Paul at ST Supply along with a few other items. As of now I'm still in the design mock-up stages. I still have to do alot of investigation on this truck. Colors, equipment, engine, transmission, etc. I'm hoping for all of you guys help...hint...hint...lol This is the kit AMT Mack R685ST. This view shows the batteries from Paul at ST Supply. This are the wheels and tires I'll be using. Side view of the tires. This is kinda what I'm shooting for. This view shows the front float tires I'm going to use. I modified the front wheels from Paul into floats. The tires are Italeri 385/65 R 22.5's at least that's what it says on the sidewalls. They are more like 24.5's or 25's which is how I'm using them. This is a mock-up of the truck. Not sure if I'm going to use the square or round tanks yet. Front view of the floats on the axle. I'm going to add rubber fender mud guards (half round) I also have a CTM metal front workable axle coming from Saurkruts. Well that's it for now I'll be back with more updates when I find time to work on this. Ron G
- 1 reply
-
- 3
-

-
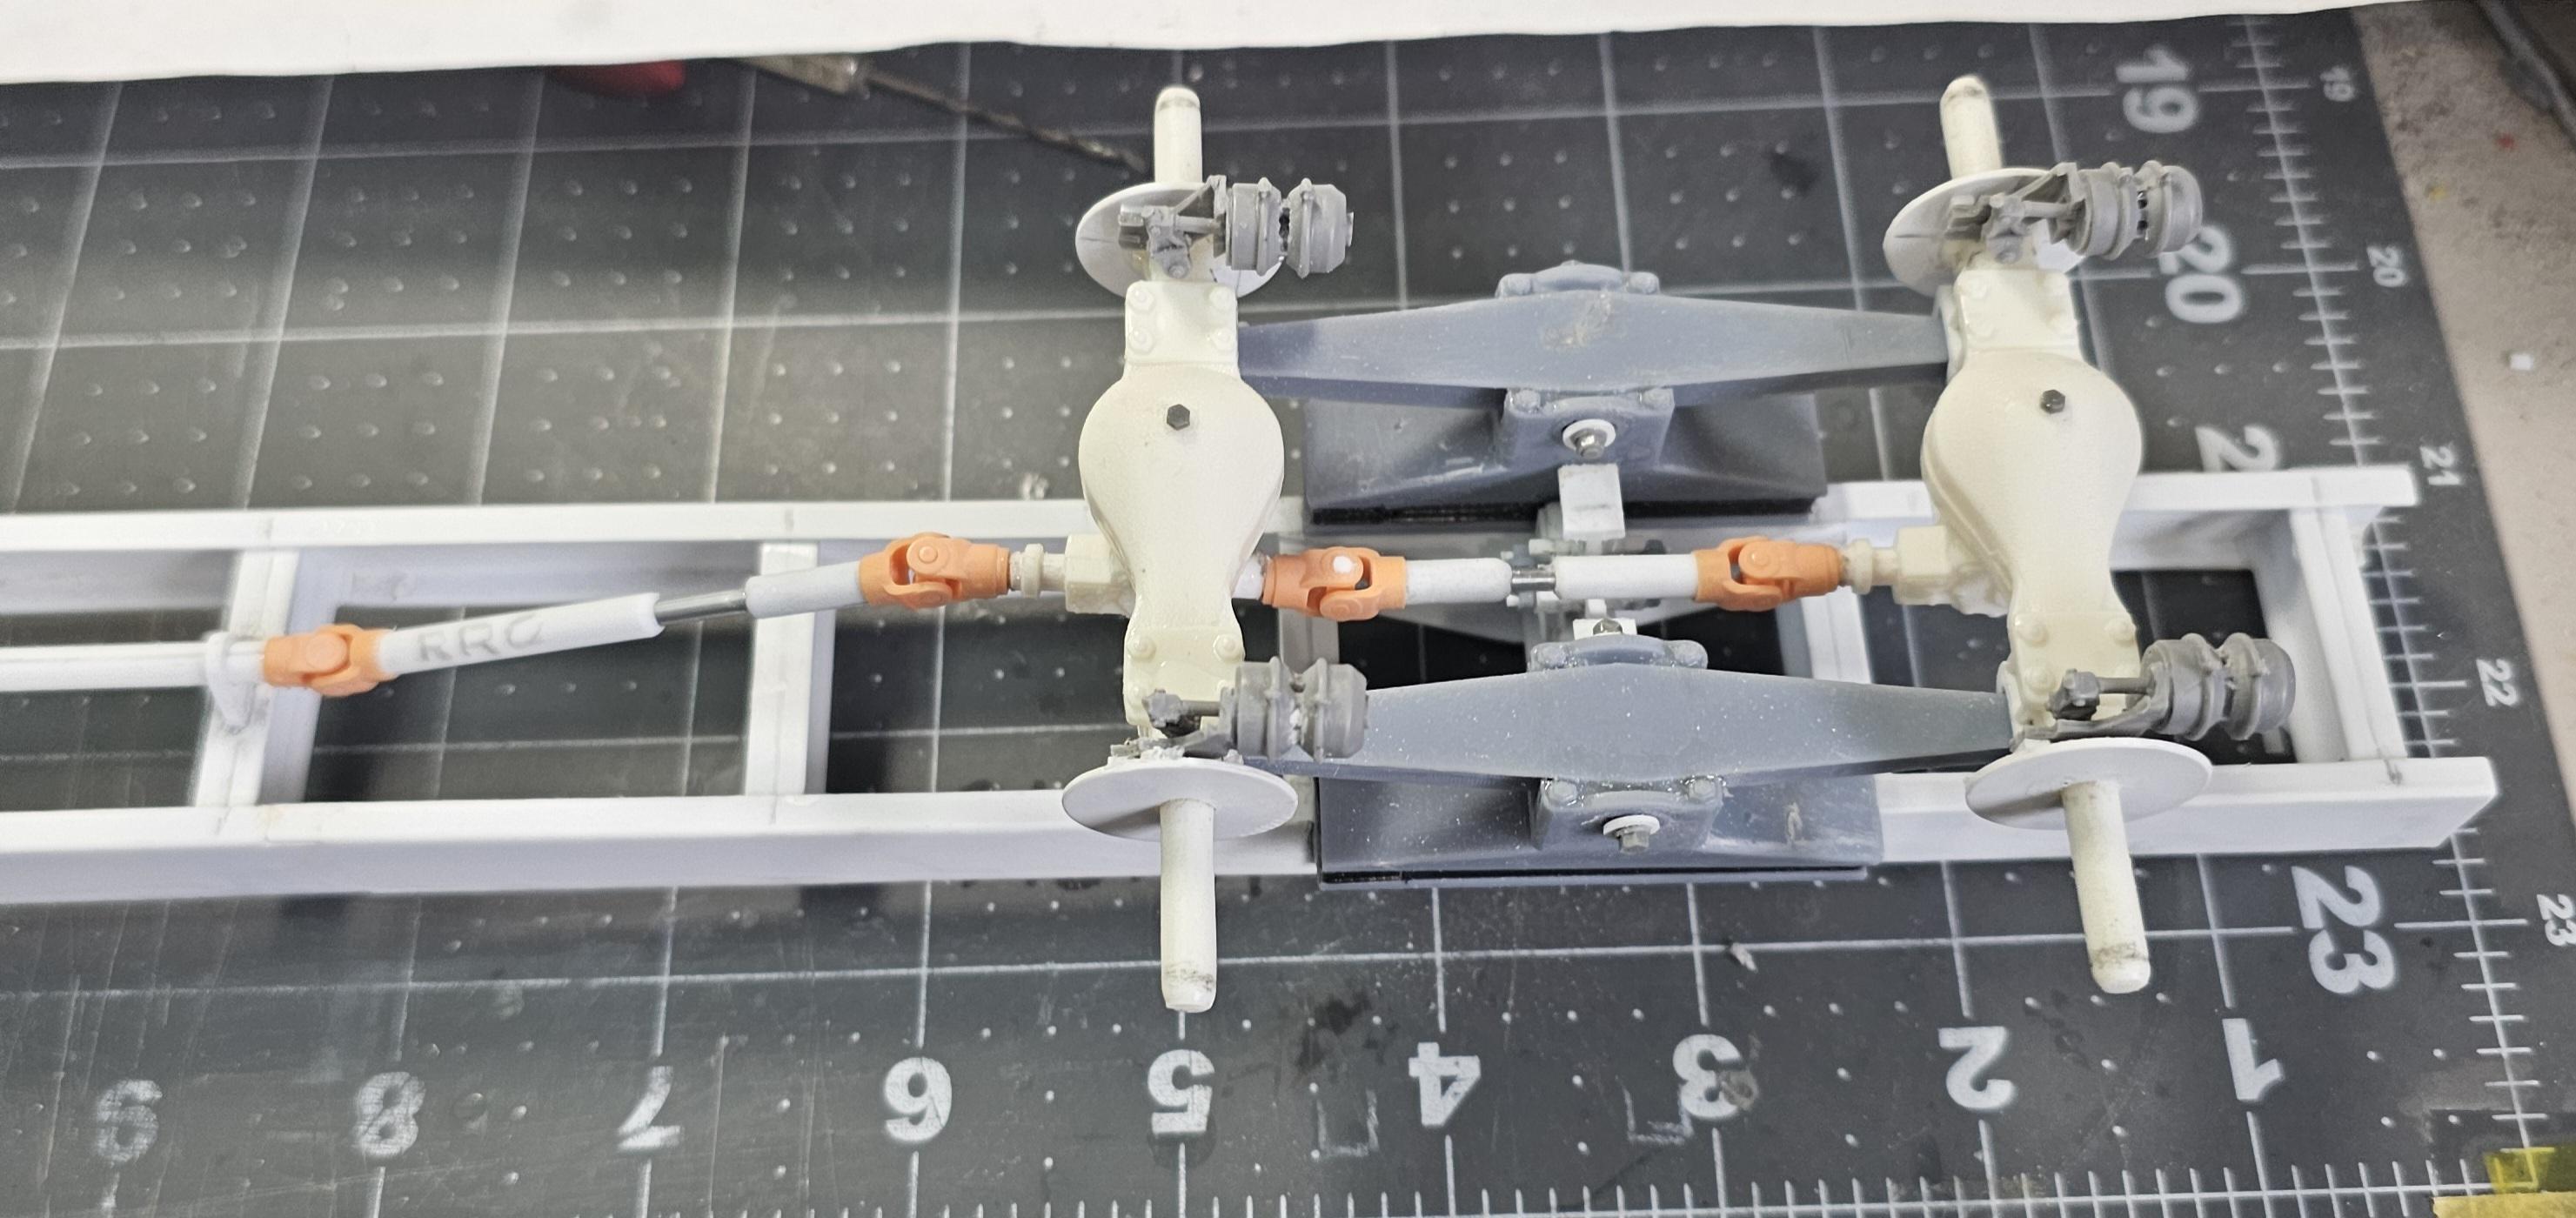
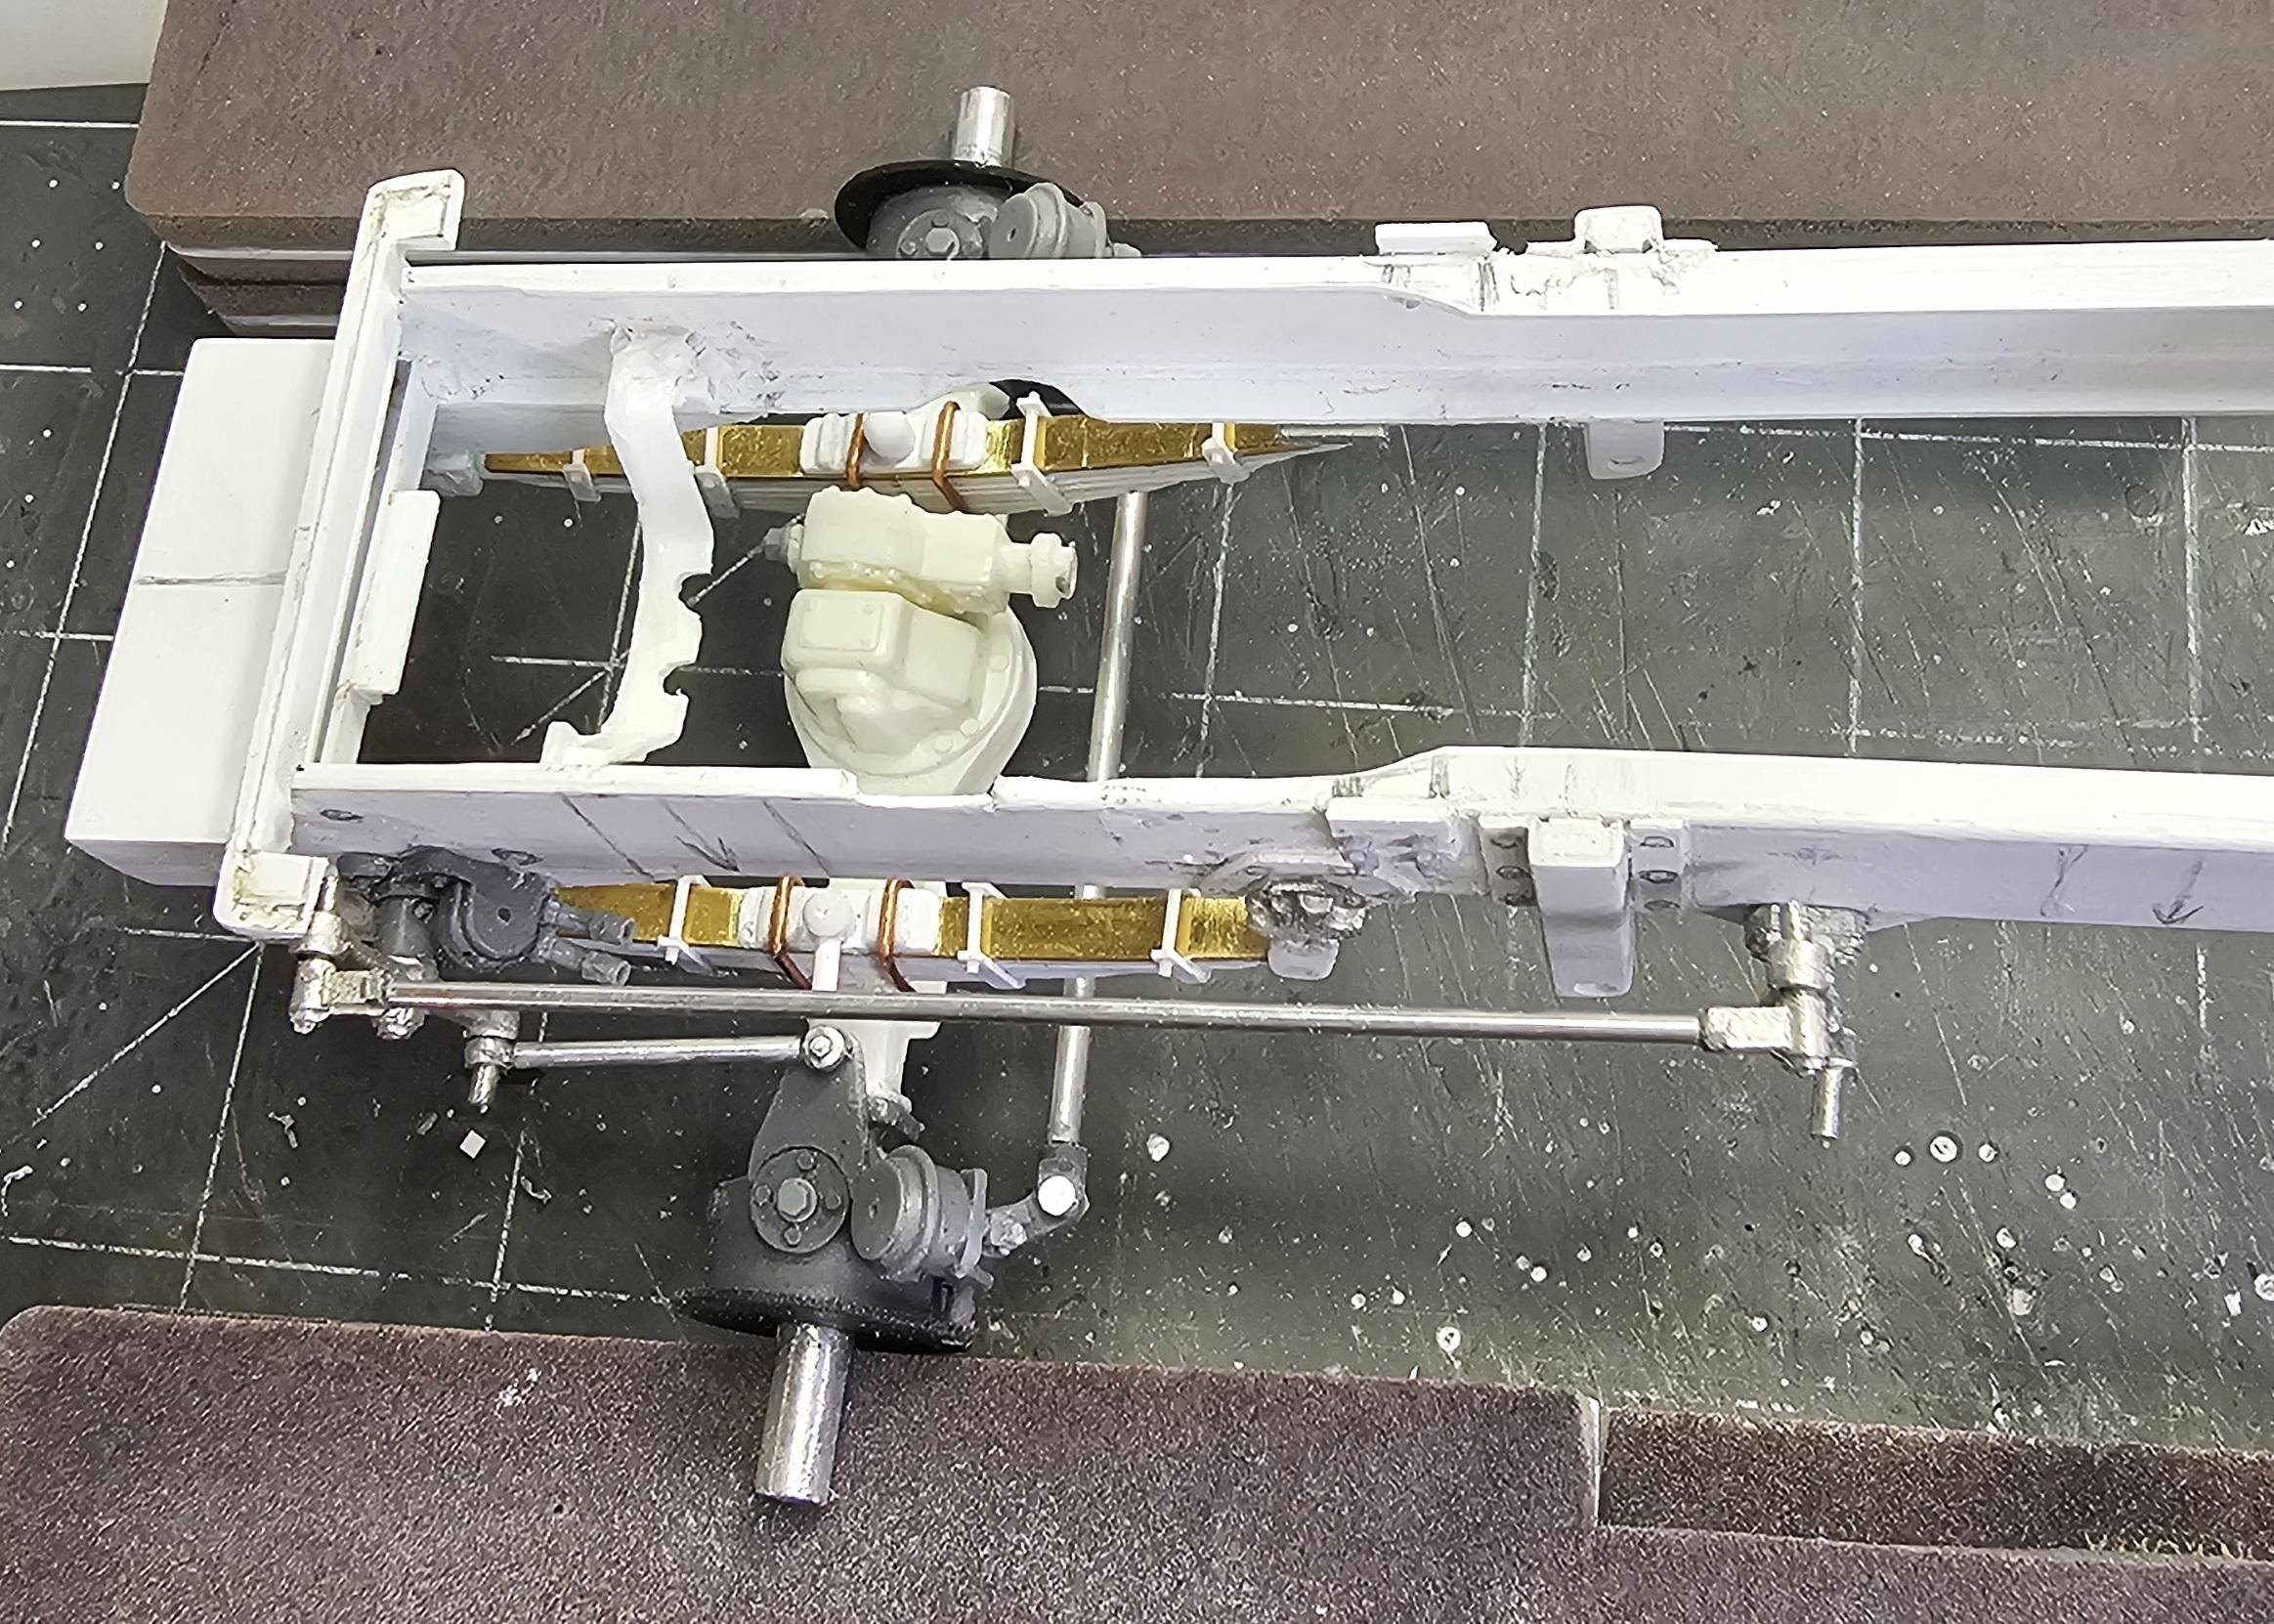
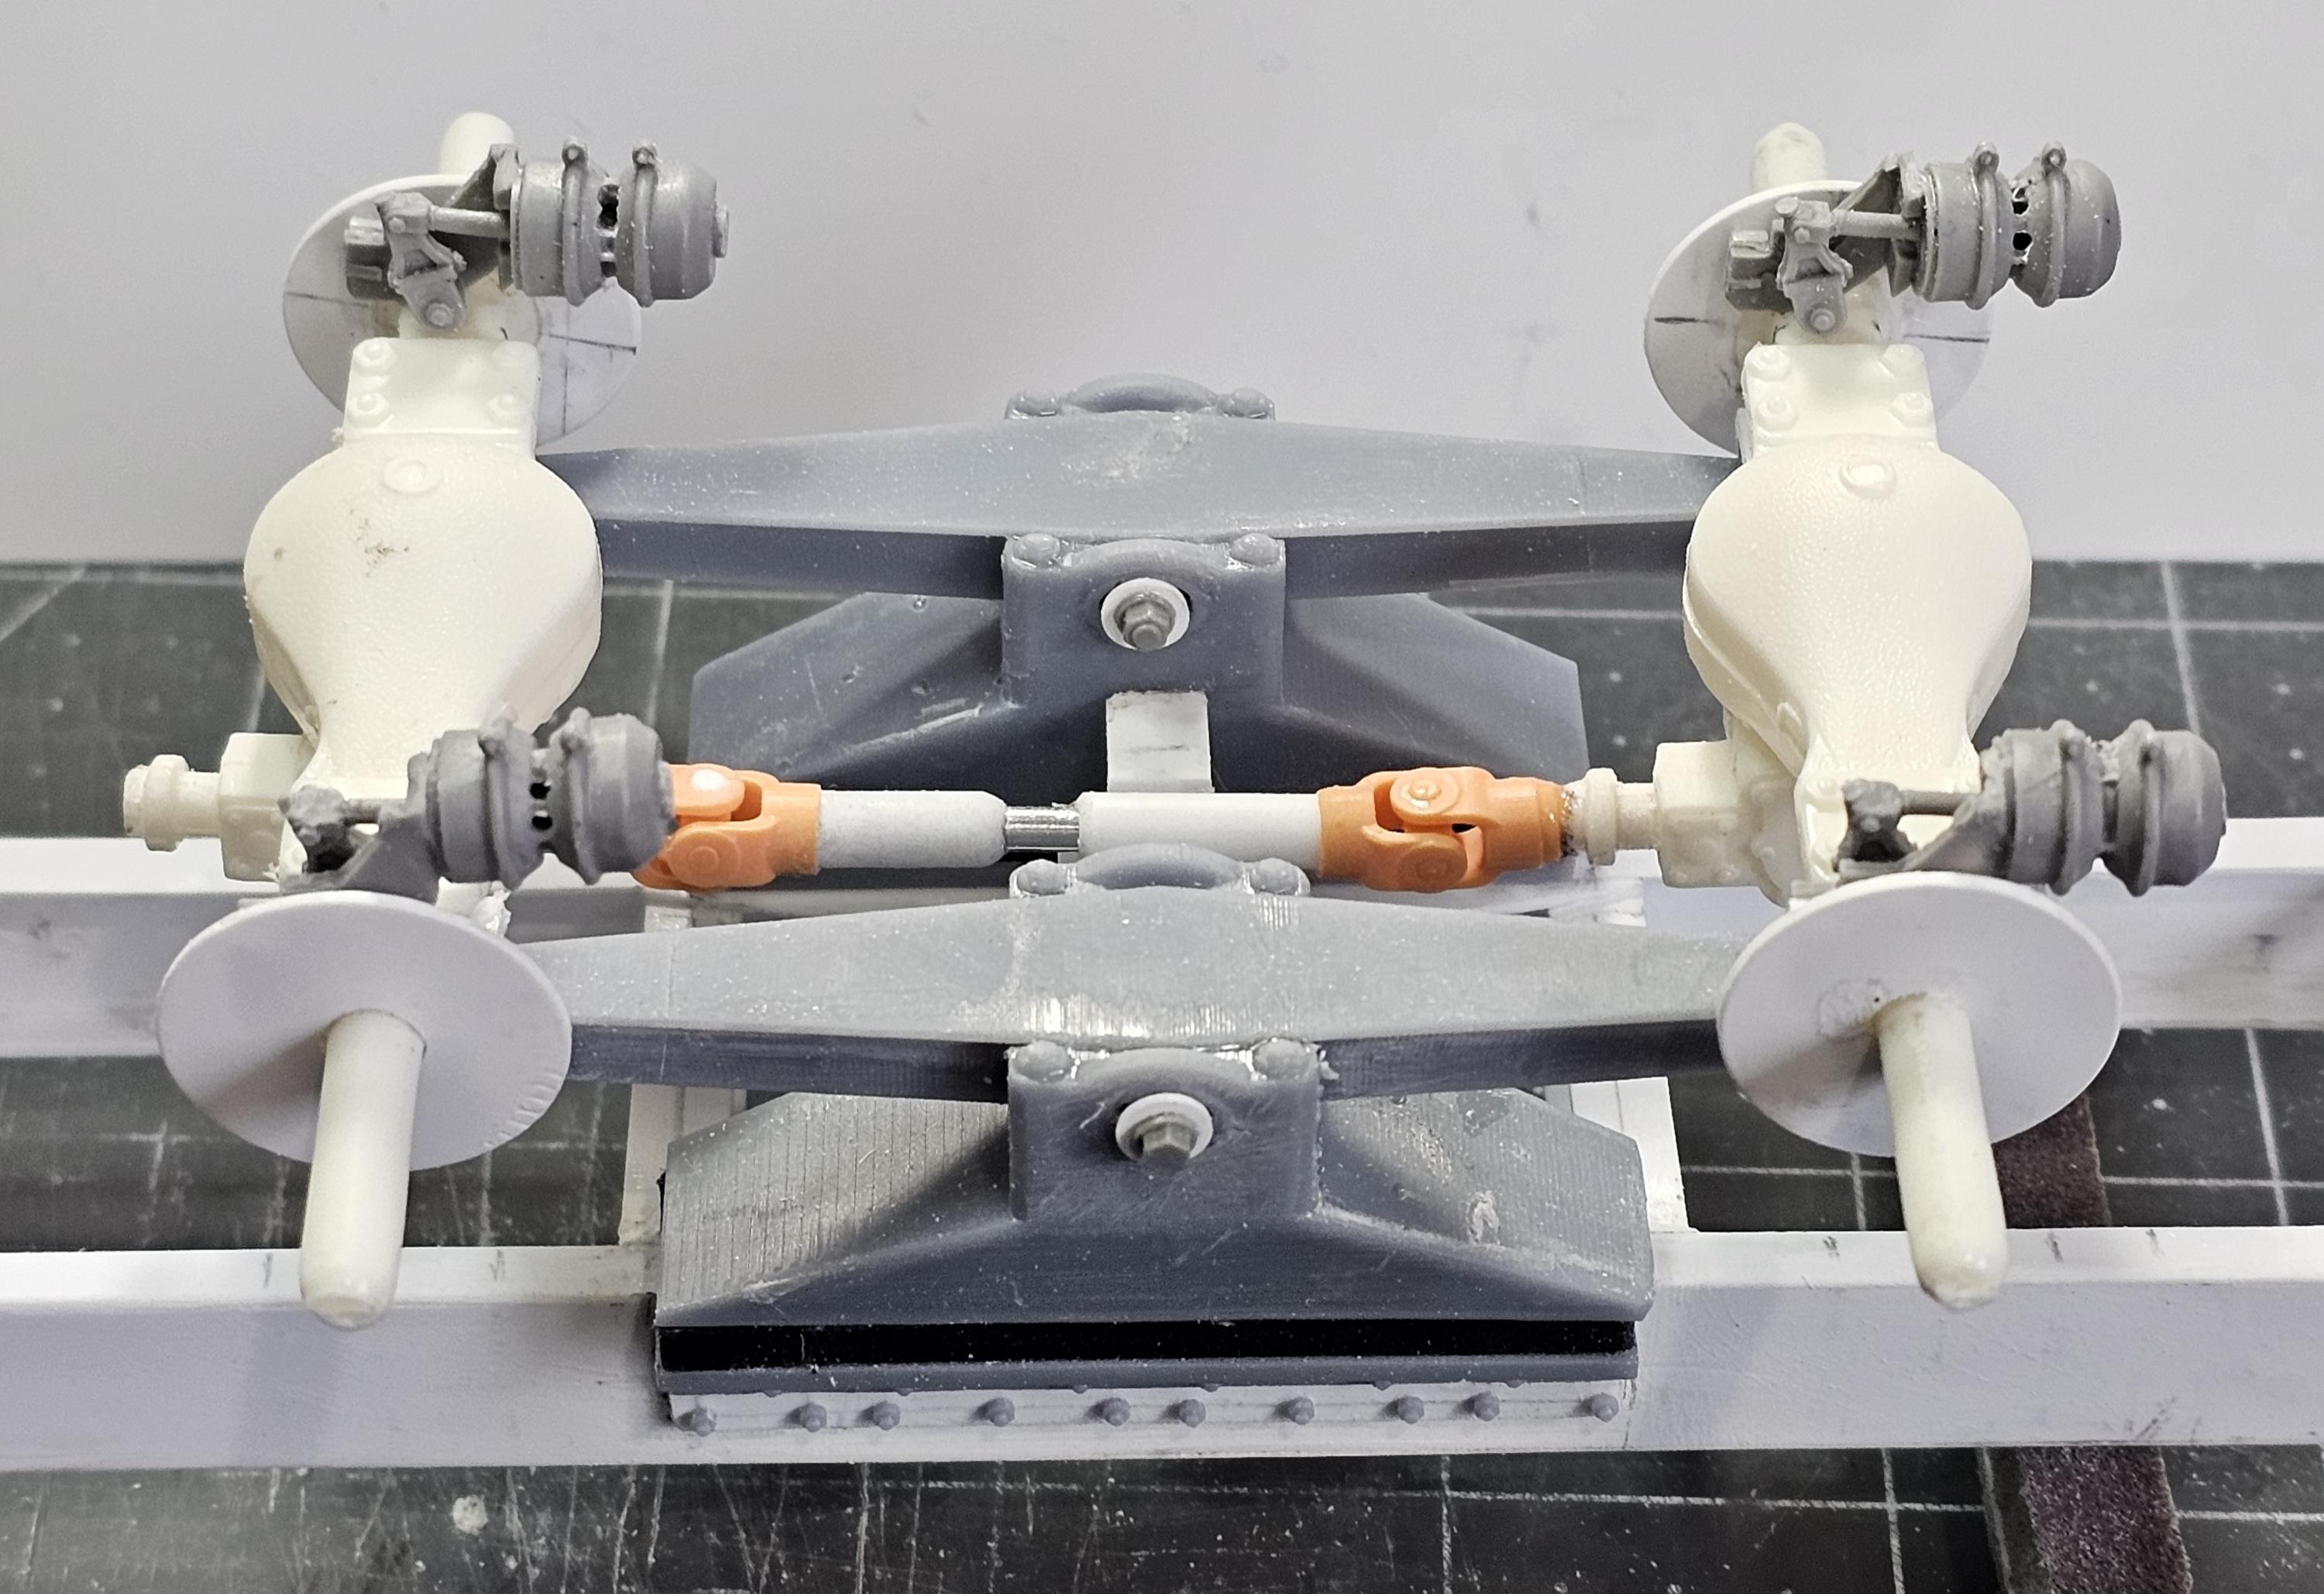
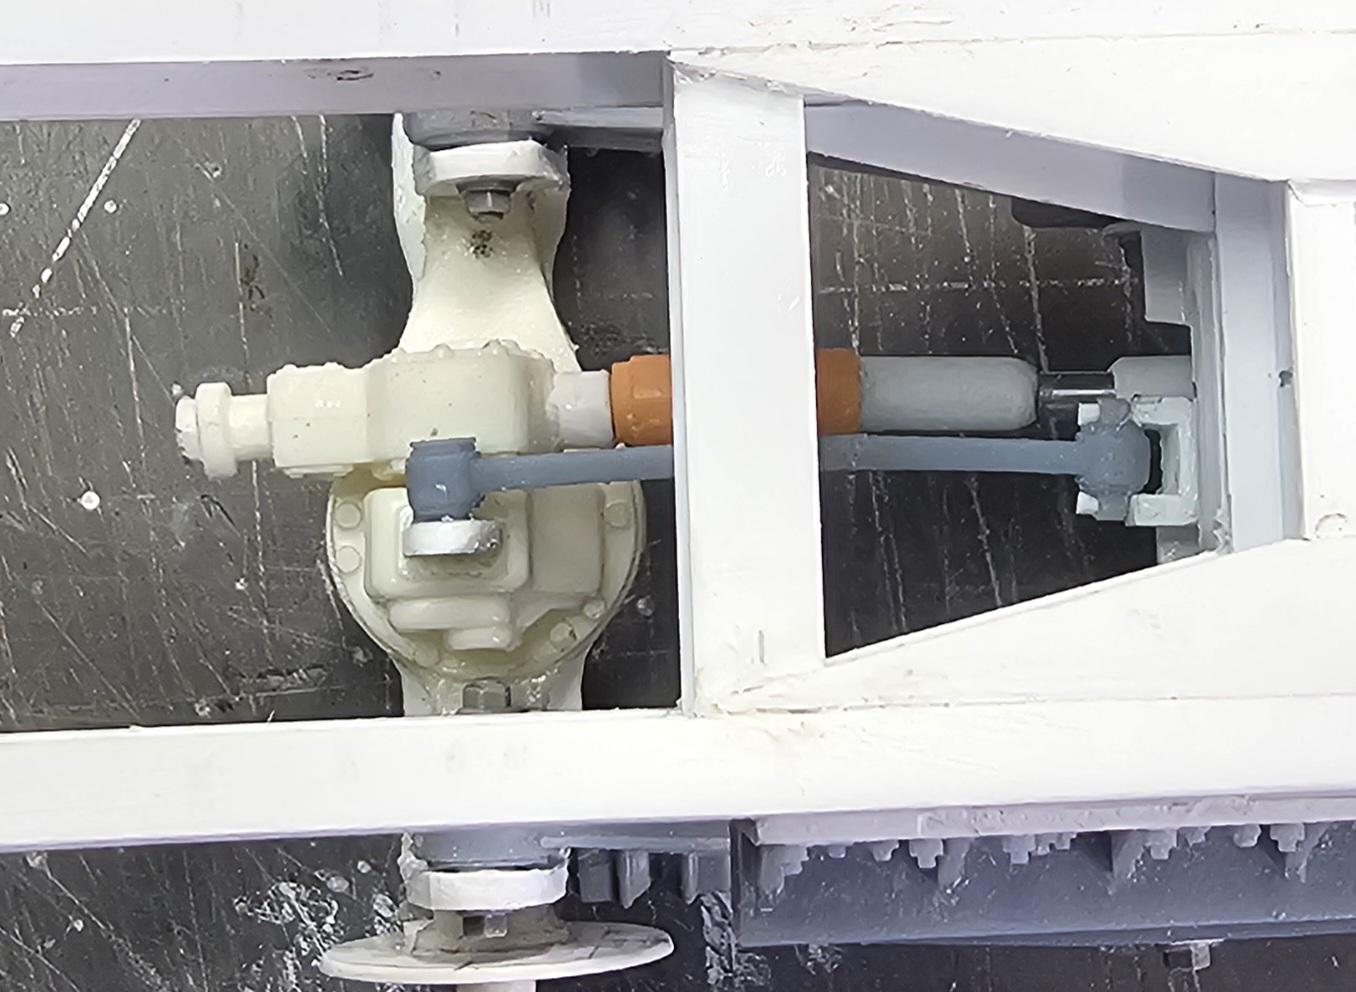
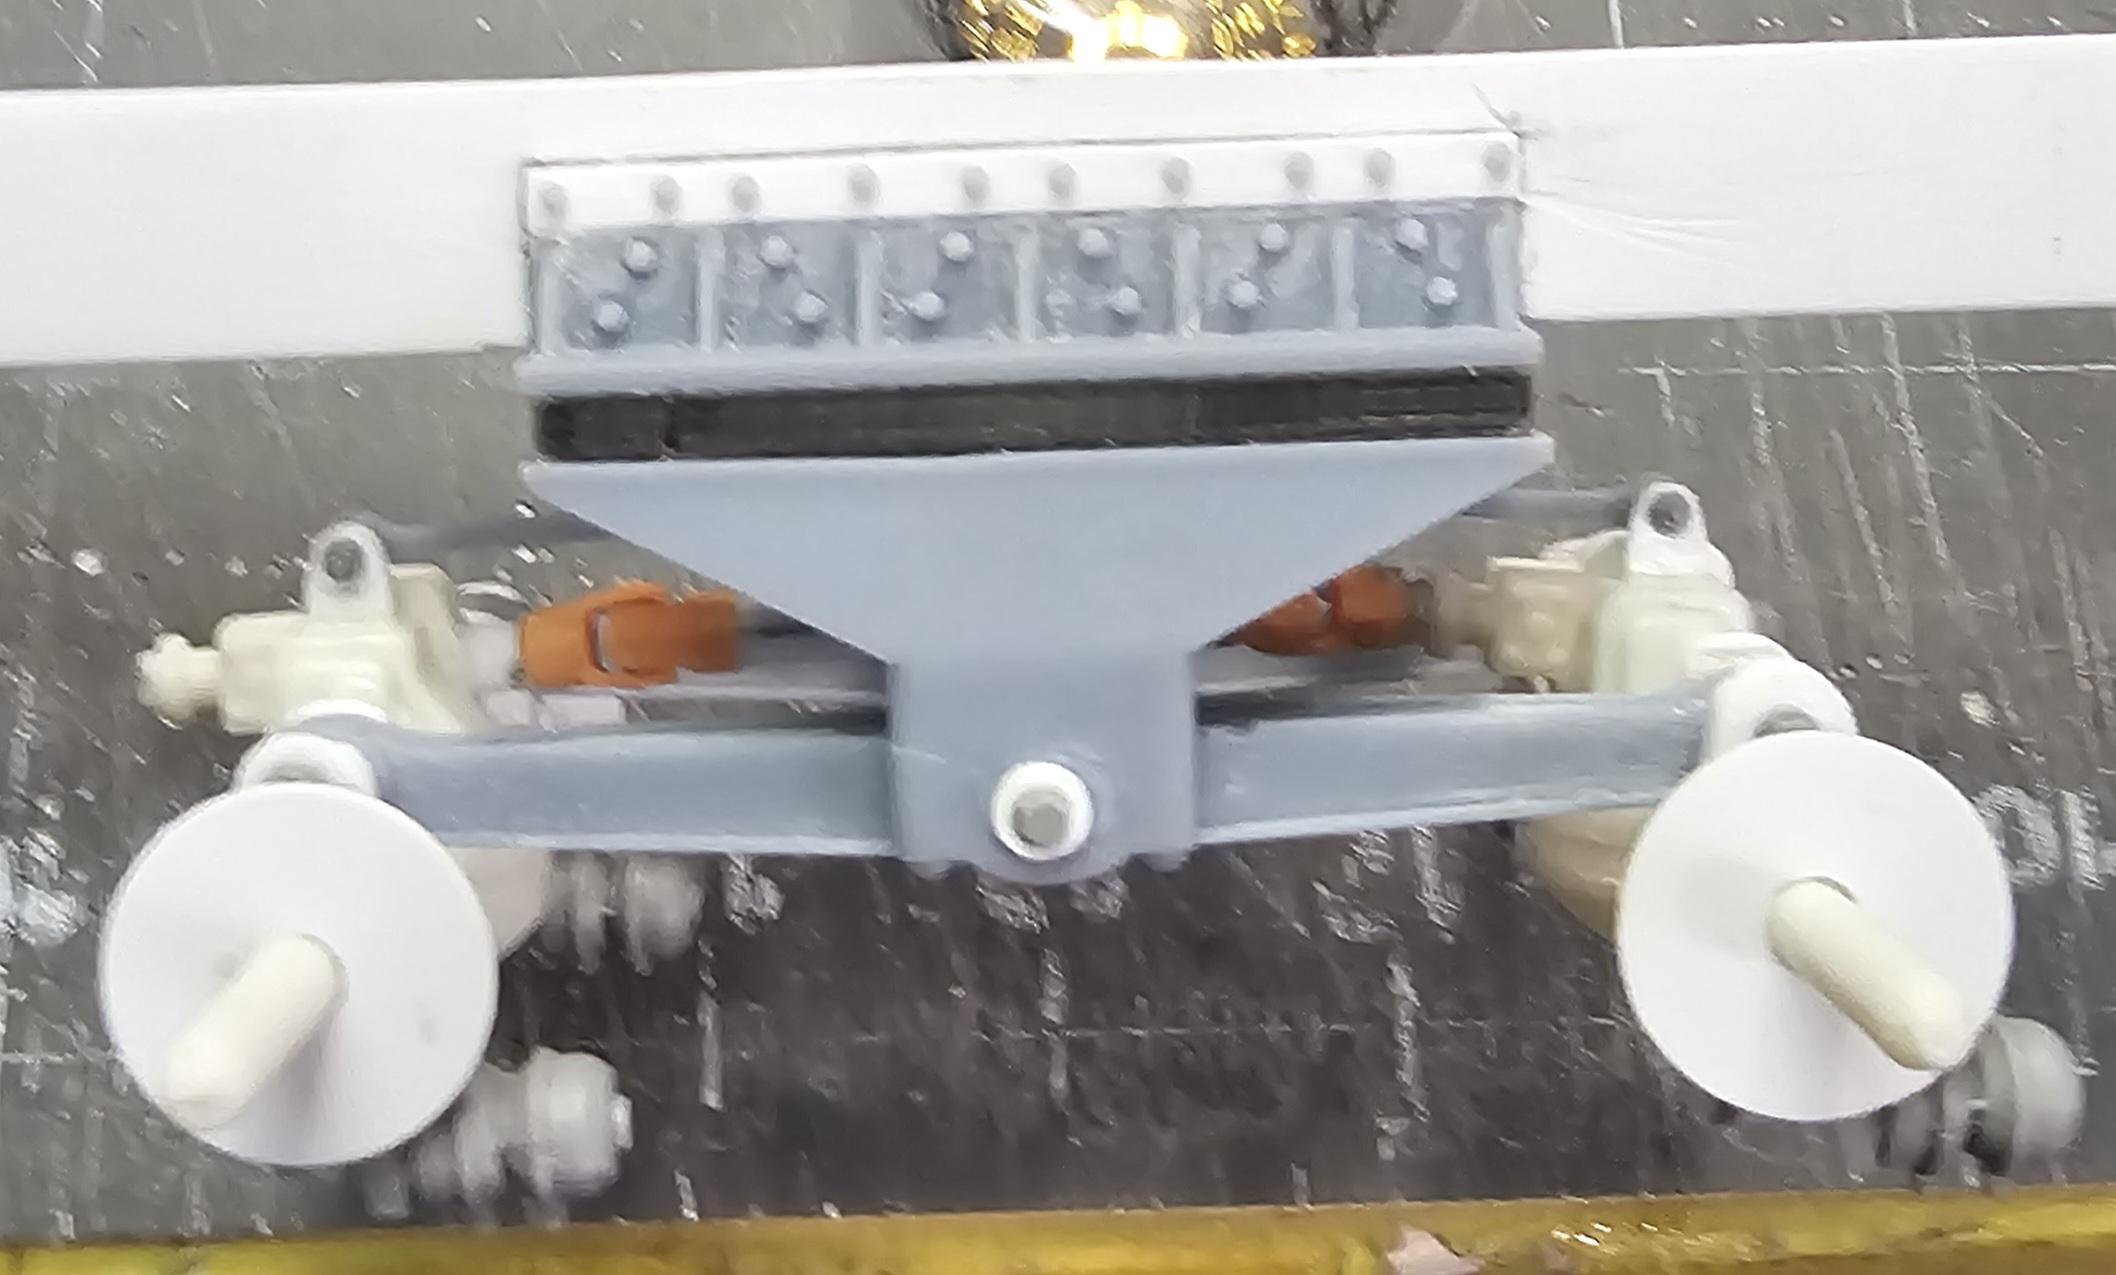
Hello Everybody I have been working on the rear suspension and I now have it almost done. I just need to add a few nuts and bolts and paint it black and it will be complete. This view shows all the holes I drilled in the mounting bracket. I had to replace the top portion on both sides because the resin broke when I tried to drill it out. This view shows the bolts that I used for the mounting brackets. They are from Paul at ST Supply. This view shows the bolts added to the bracket. This view shows the rear axles and drive shaft mounted to the walking beam suspension it also shows walking beam mounting bolts. This view shows the scratch built axle mounting brackets and there bolt heads. This view shows the set-up with the wheels/tires added. This view shows the front torsion rod installed. This view shows the rear torsion rod installed. This view shows the bolt heads added to the torsion rod mounts. Well that's it for now be back with more updates soon. Ron G
-
Yes, I still have alot of fittings, pipes, valves and caps to add Gary. Ron G
-
Hey all I have the oil field tank almost finished. This view shows the tank with the top installed. This view shows the bottom of the tank installed. This view is a mock-up of the tank assembly and a figure for size comparison. This view shows the side skid and ladder of the tank. This view shows the bottom of the tanks skid. This is the bottom skid. This view shows the ends where you hook the winch cable around. This view shows the side skid. This view shows the skid ends where the winch cable attaches. This view shows the ladder and safty cage. A veiw looking down through the safty cage. Still have to add all of the piping and valves, etc. Well that's it for now be back soon. Ron G
-
Small update. This view shows the brake chambers added to the backing plates. Closer view of the brake chamber. This next five pictures are some items that SwampDog (David) sent me to put on this build. He just sent them, no charge, how nice is that!😇 Well that's it for now be back soon. Ron G
-
There made by a guy on Facebook named Brain, but I got them from Paul at ST Supply. He ran out and shorted my last order, waiting for them to come back in stock so he can fill it. Ron G
-
Hey all Got some more work done on the rear drive axles and wheels/tires. Still a long way to go. This view shows the brake backing plates added to the rear axles. The brake cans will mount to these. This view shows the brake drums. Painted them a rusty color. This view shows the rear wheels painted an off white. This view shows the brake drums in the rear wheels. This view shows what the finished wheels/tires will look like. Another view showing the planetary hub better. This view shows how the brake drums fit to the backing plates. This view shows both W/T's on the axle.Bottom view of the rear suspension, rear axles and the drive shafts. This view shows all the rear "U" joints. Well that's all for now be back with more updates soon. Ron G
-
6" is there largest size tube Gary. Ron G


.png.ae0ef51938d9b9ccbbb7e17c8e95875d.png)