ShakyCraftsman
-
Posts
796 -
Joined
-
Last visited
Content Type
Profiles
Forums
Events
Gallery
Everything posted by ShakyCraftsman
-
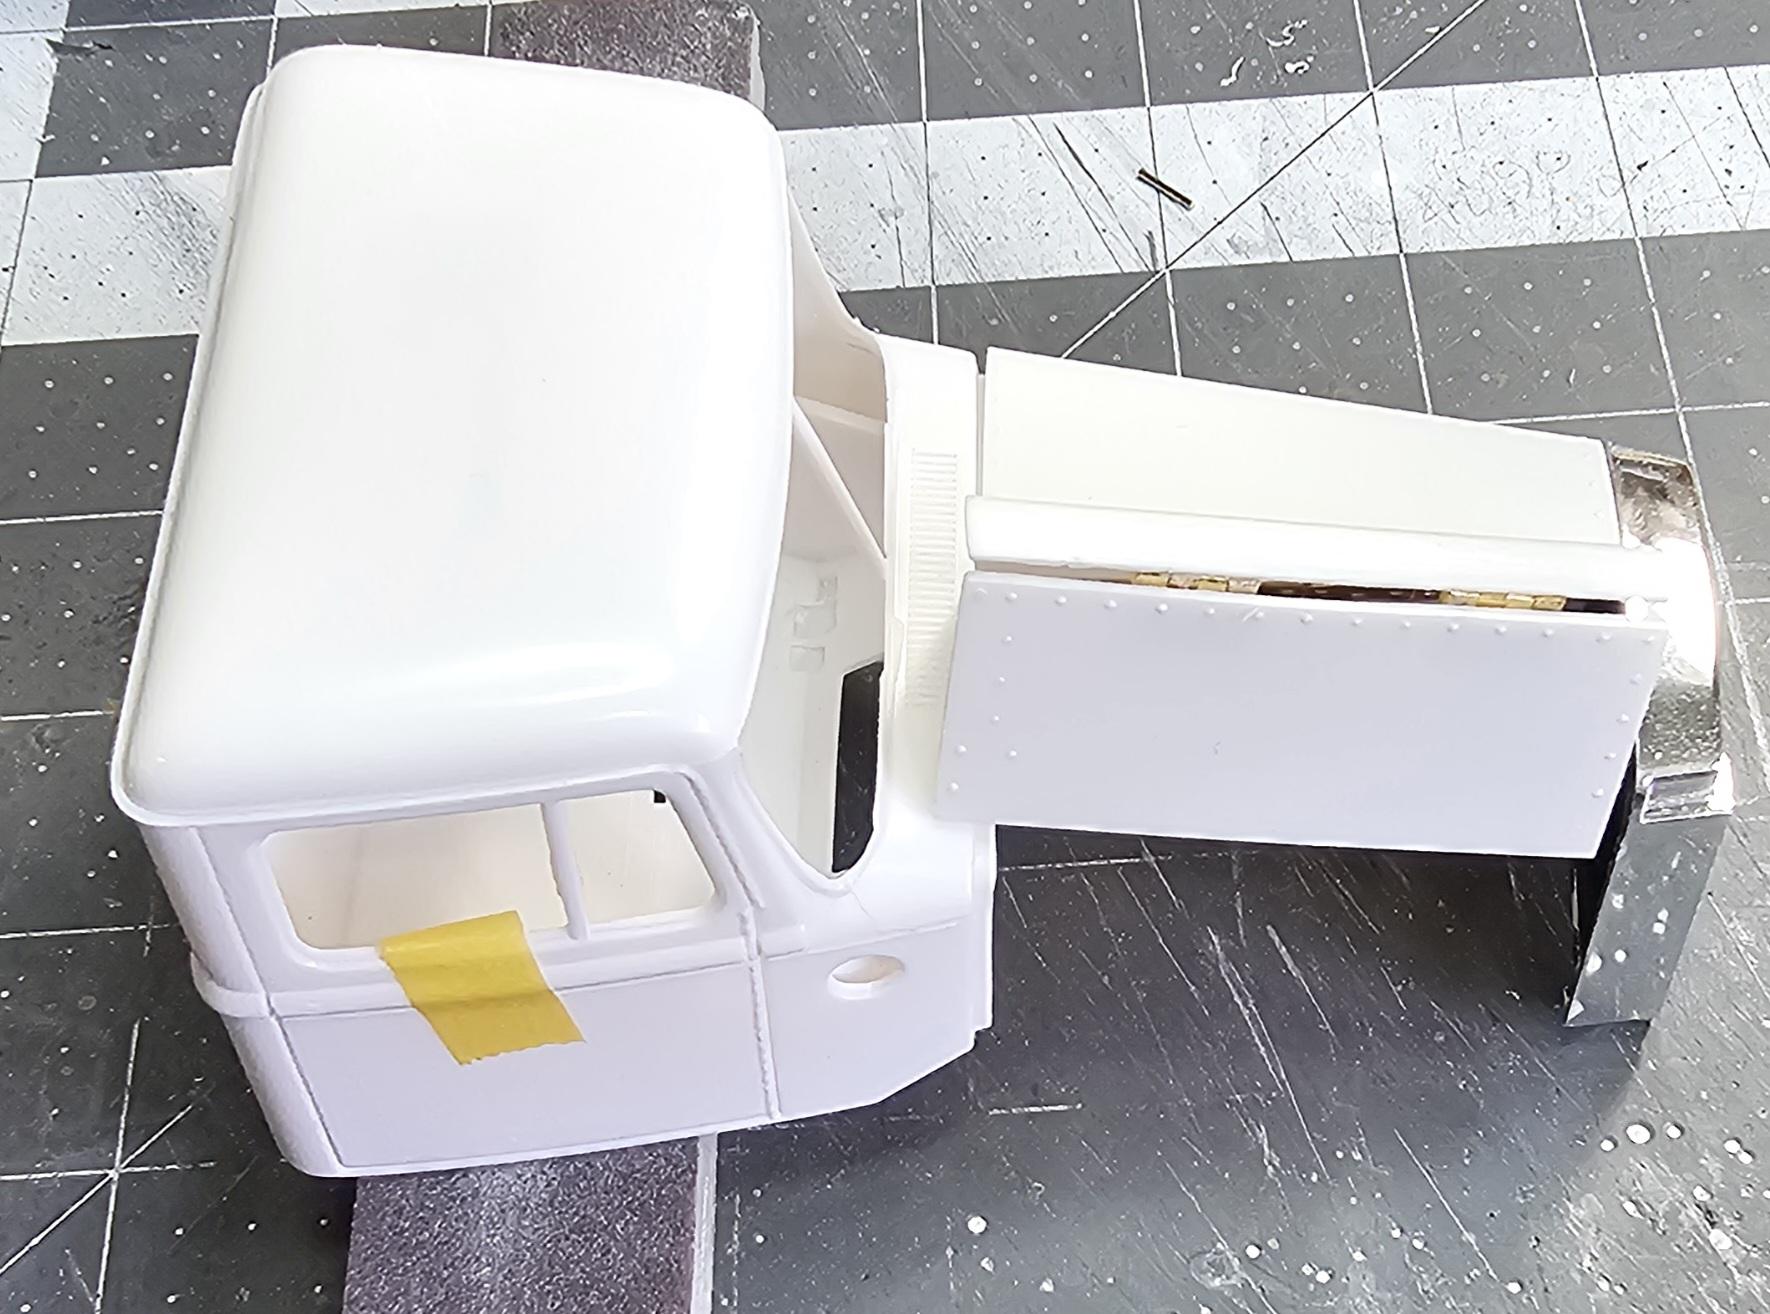
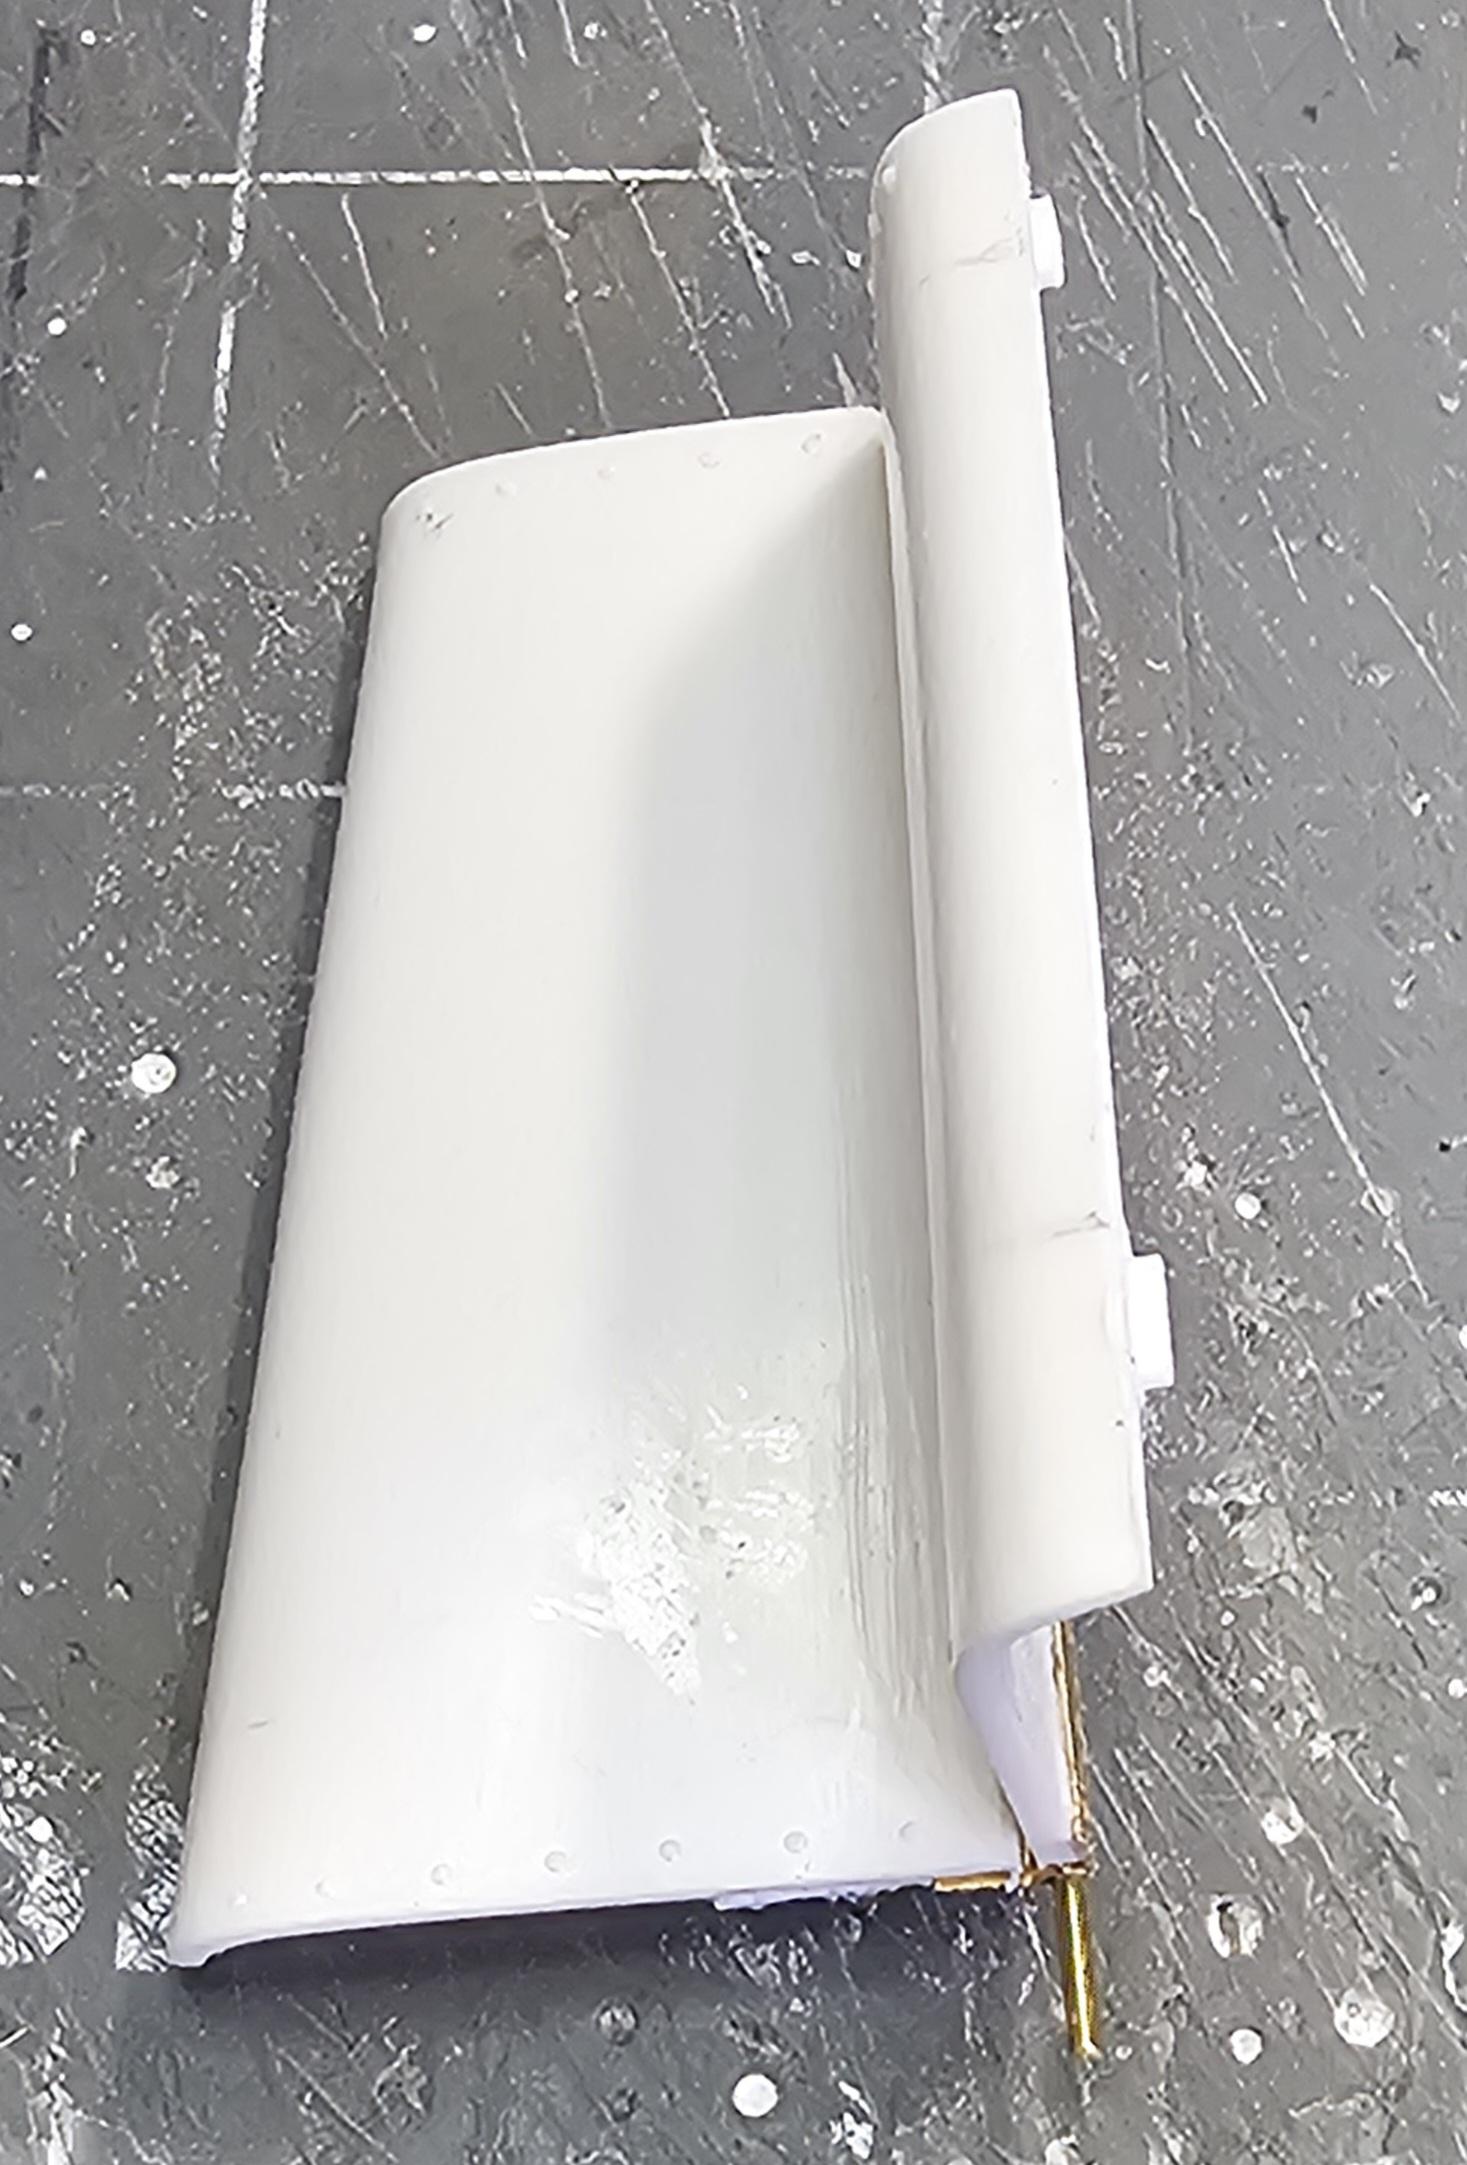
 Hey all Well let's try this again. I added the side pieces to the hood. As I tried to say in my previous post this was inspired by redneckriggers link belt crane build. This view shows the hood closed. This view shows the hoods left side open. This view shows the hoods right side open. We'll that's it for now be back soon with more Ron G
-
Thanks Gary
-
Hello Why can't I edit my posts? It's in the large truck WIP section. It ket me load the pictures, then when I went to added text (edit) It said I could no longer edit it. Said it might have been moved or timed out. Why is this happening. If this keeps up your going to loose people. Respectfully Ronald G Gardner
-
Hey all This forum won't let me edit my post.🤬😡 Sorry everyone,I tried to add to my post but it won't let me.🤨 Ron G
-
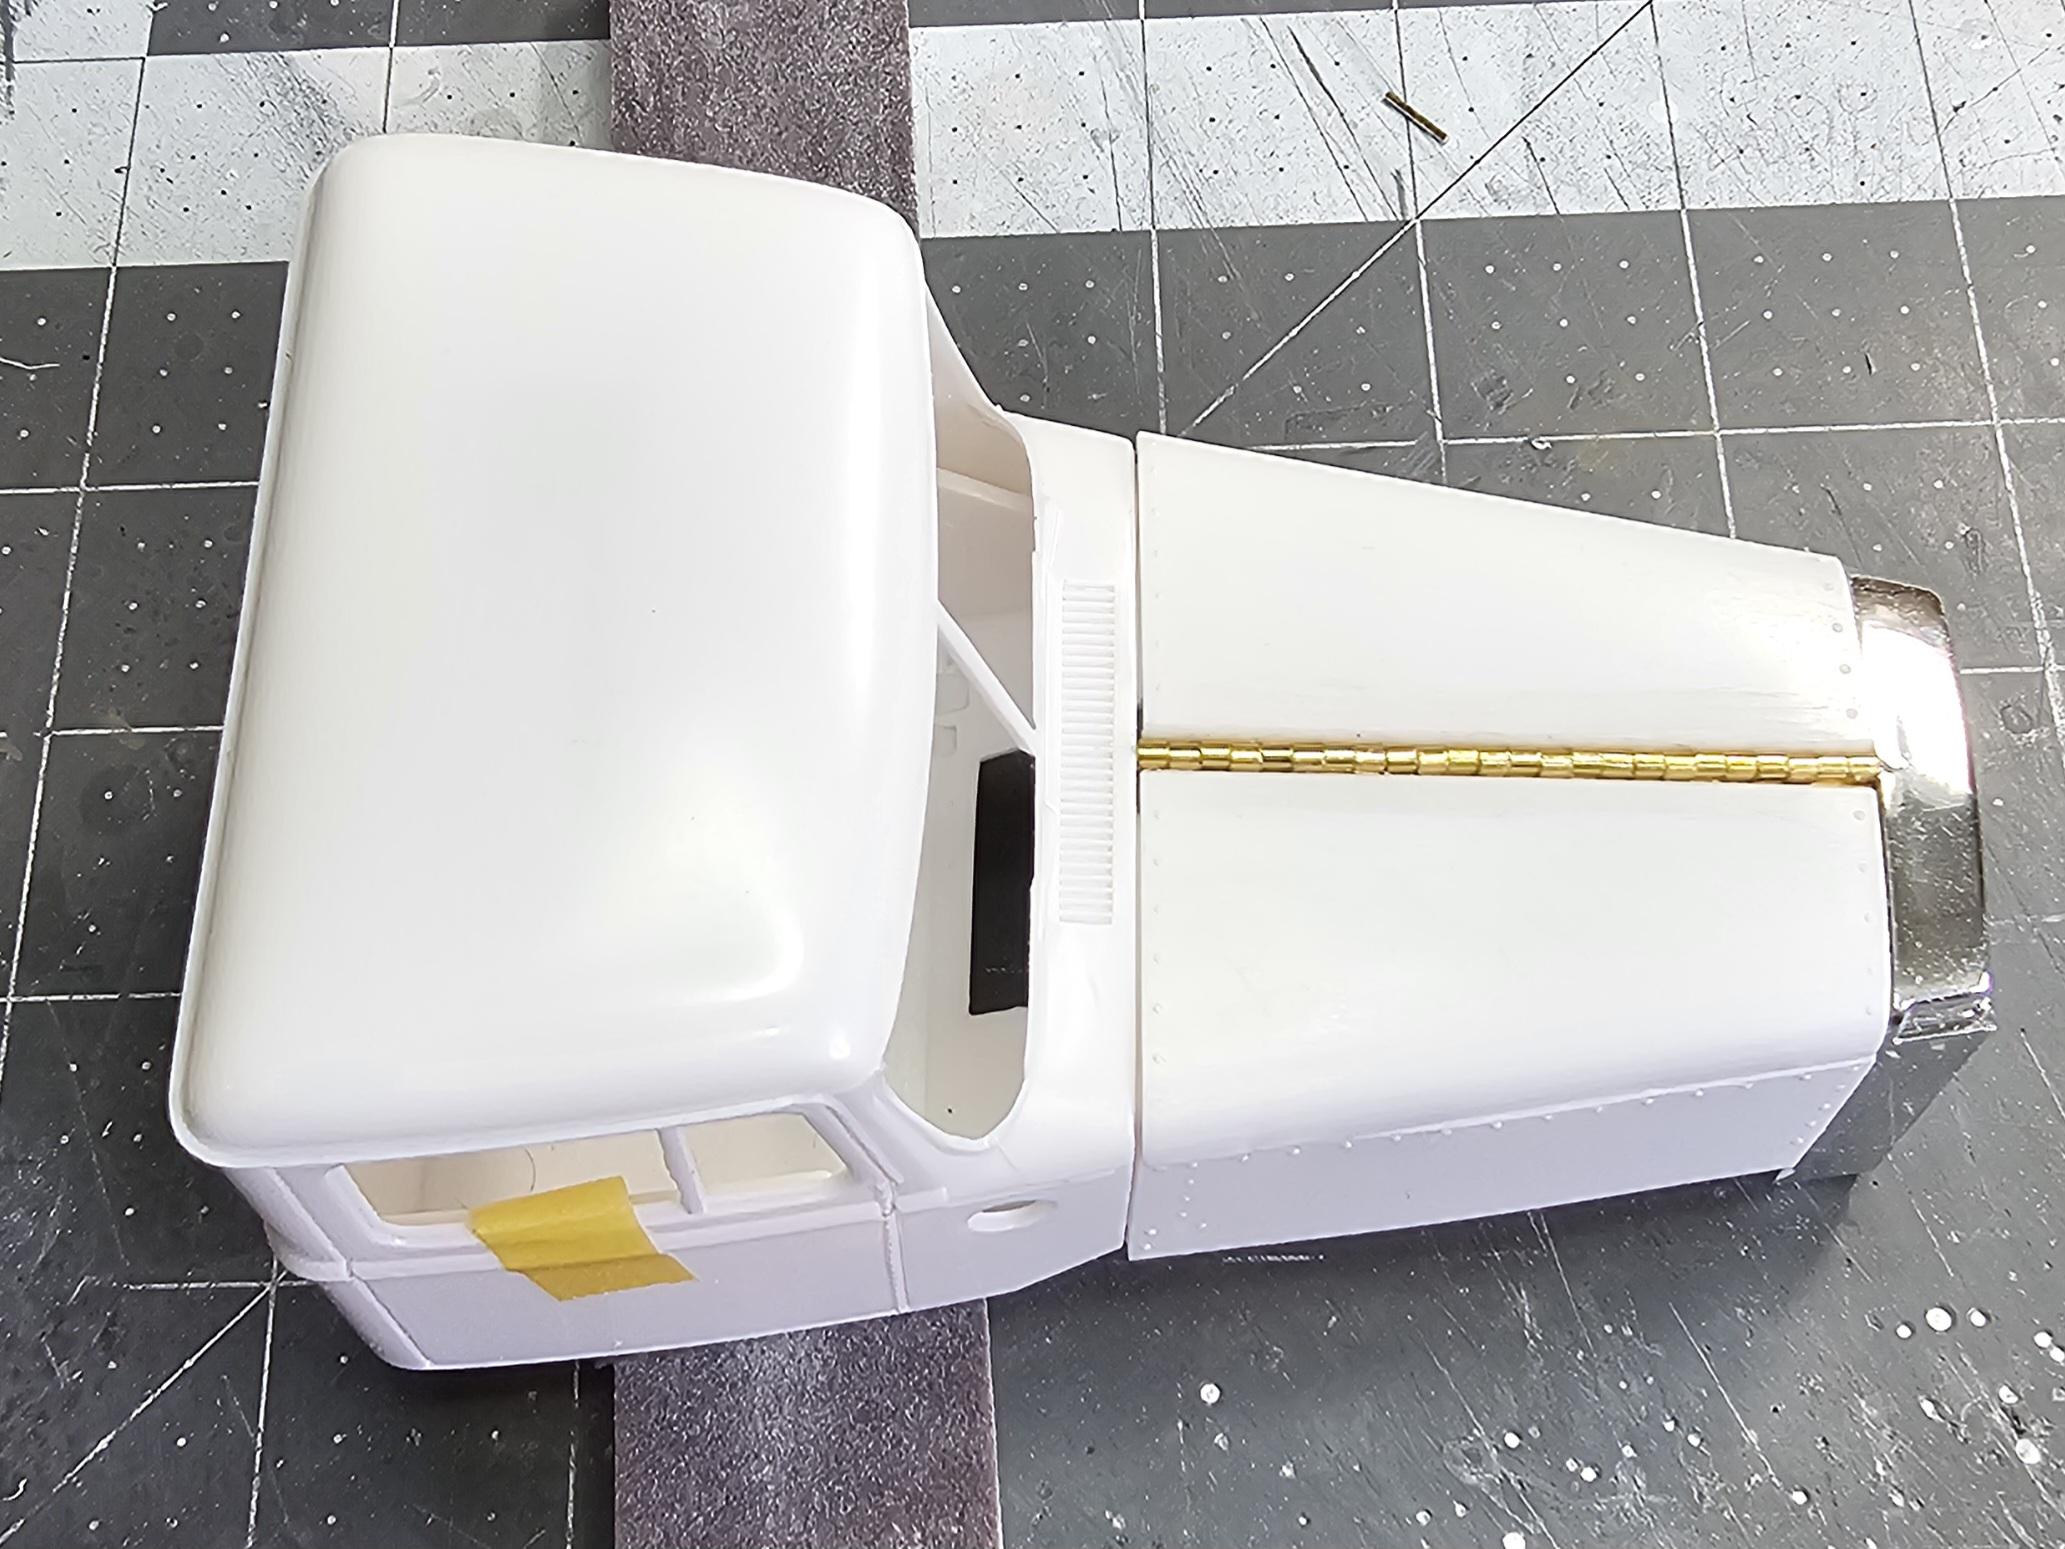
Hey all Okay, this update is on Redneckrigger. He inspired me to attempt this. I am going to make the hood on the Autocar work! That's right a fully working hood. So let's get i to this. This view shows the little hinges
-
Hey Brenton I meant the Revell spray chrome, not the kit chrome. Ron G
-
Hey all Got some more work done on this build. Here are some pictures for yous all to look at. This view shows the Italeri rear backing plates I added to the front axle. They will represent the brake drums. It's all you can see when the wheels are attached. This view shows the kits axle pin retainers This view shows them mounted to the axle. This will allow the W/T's to rotate. This view shows the front axle looking down on it. This view shows the new front floats that I'm going to use. They are Bridgestones from Paul at ST Supply. This view shows them temperaly in place on the front axle. This is a mock-up picture of the truck. Another mock-up view with the engine, cab & tank. Bottom view of the front axle and the Italeri front shocks I added. (Black items) This view shows the front steering mechanism added. I've done this so it looks like it's attached to the front axle, but it's not, this way the steering still works. You can see the front shocks I added in this picture also. Top down picture of the frame and the rear brake chambers that I added. They are the ones from Paul at ST Supply. (Revell level 5 copys) This view shows the brake chambers I added better. Well that's it for now be back soon with more updates. Ron G
-
Hey Brenton Glad you want to get an airbrush, but that Revell chrome looks just as good or better then Alclad. And it's way easier to do with out screwing it up. Alclad takes alot of practice to get right, just saying. Ron G
-
Hey Brenton If you want to chrome something and you don't have an airbrush you can use Revell spray chrome in a can. I know it's kinda pricey at $39.00 + a can, but the results are as close as you are going to get with out an airbrush. Ron G
-
English Imperial all the same. Potato patato. Depends on what country, county, city you are from. No problems only part. Ron G
-
Hey Gary Yes, those are the kit axles (rear) I added the bolt heads to them. Front axle is a CTM axle. Ron G
-
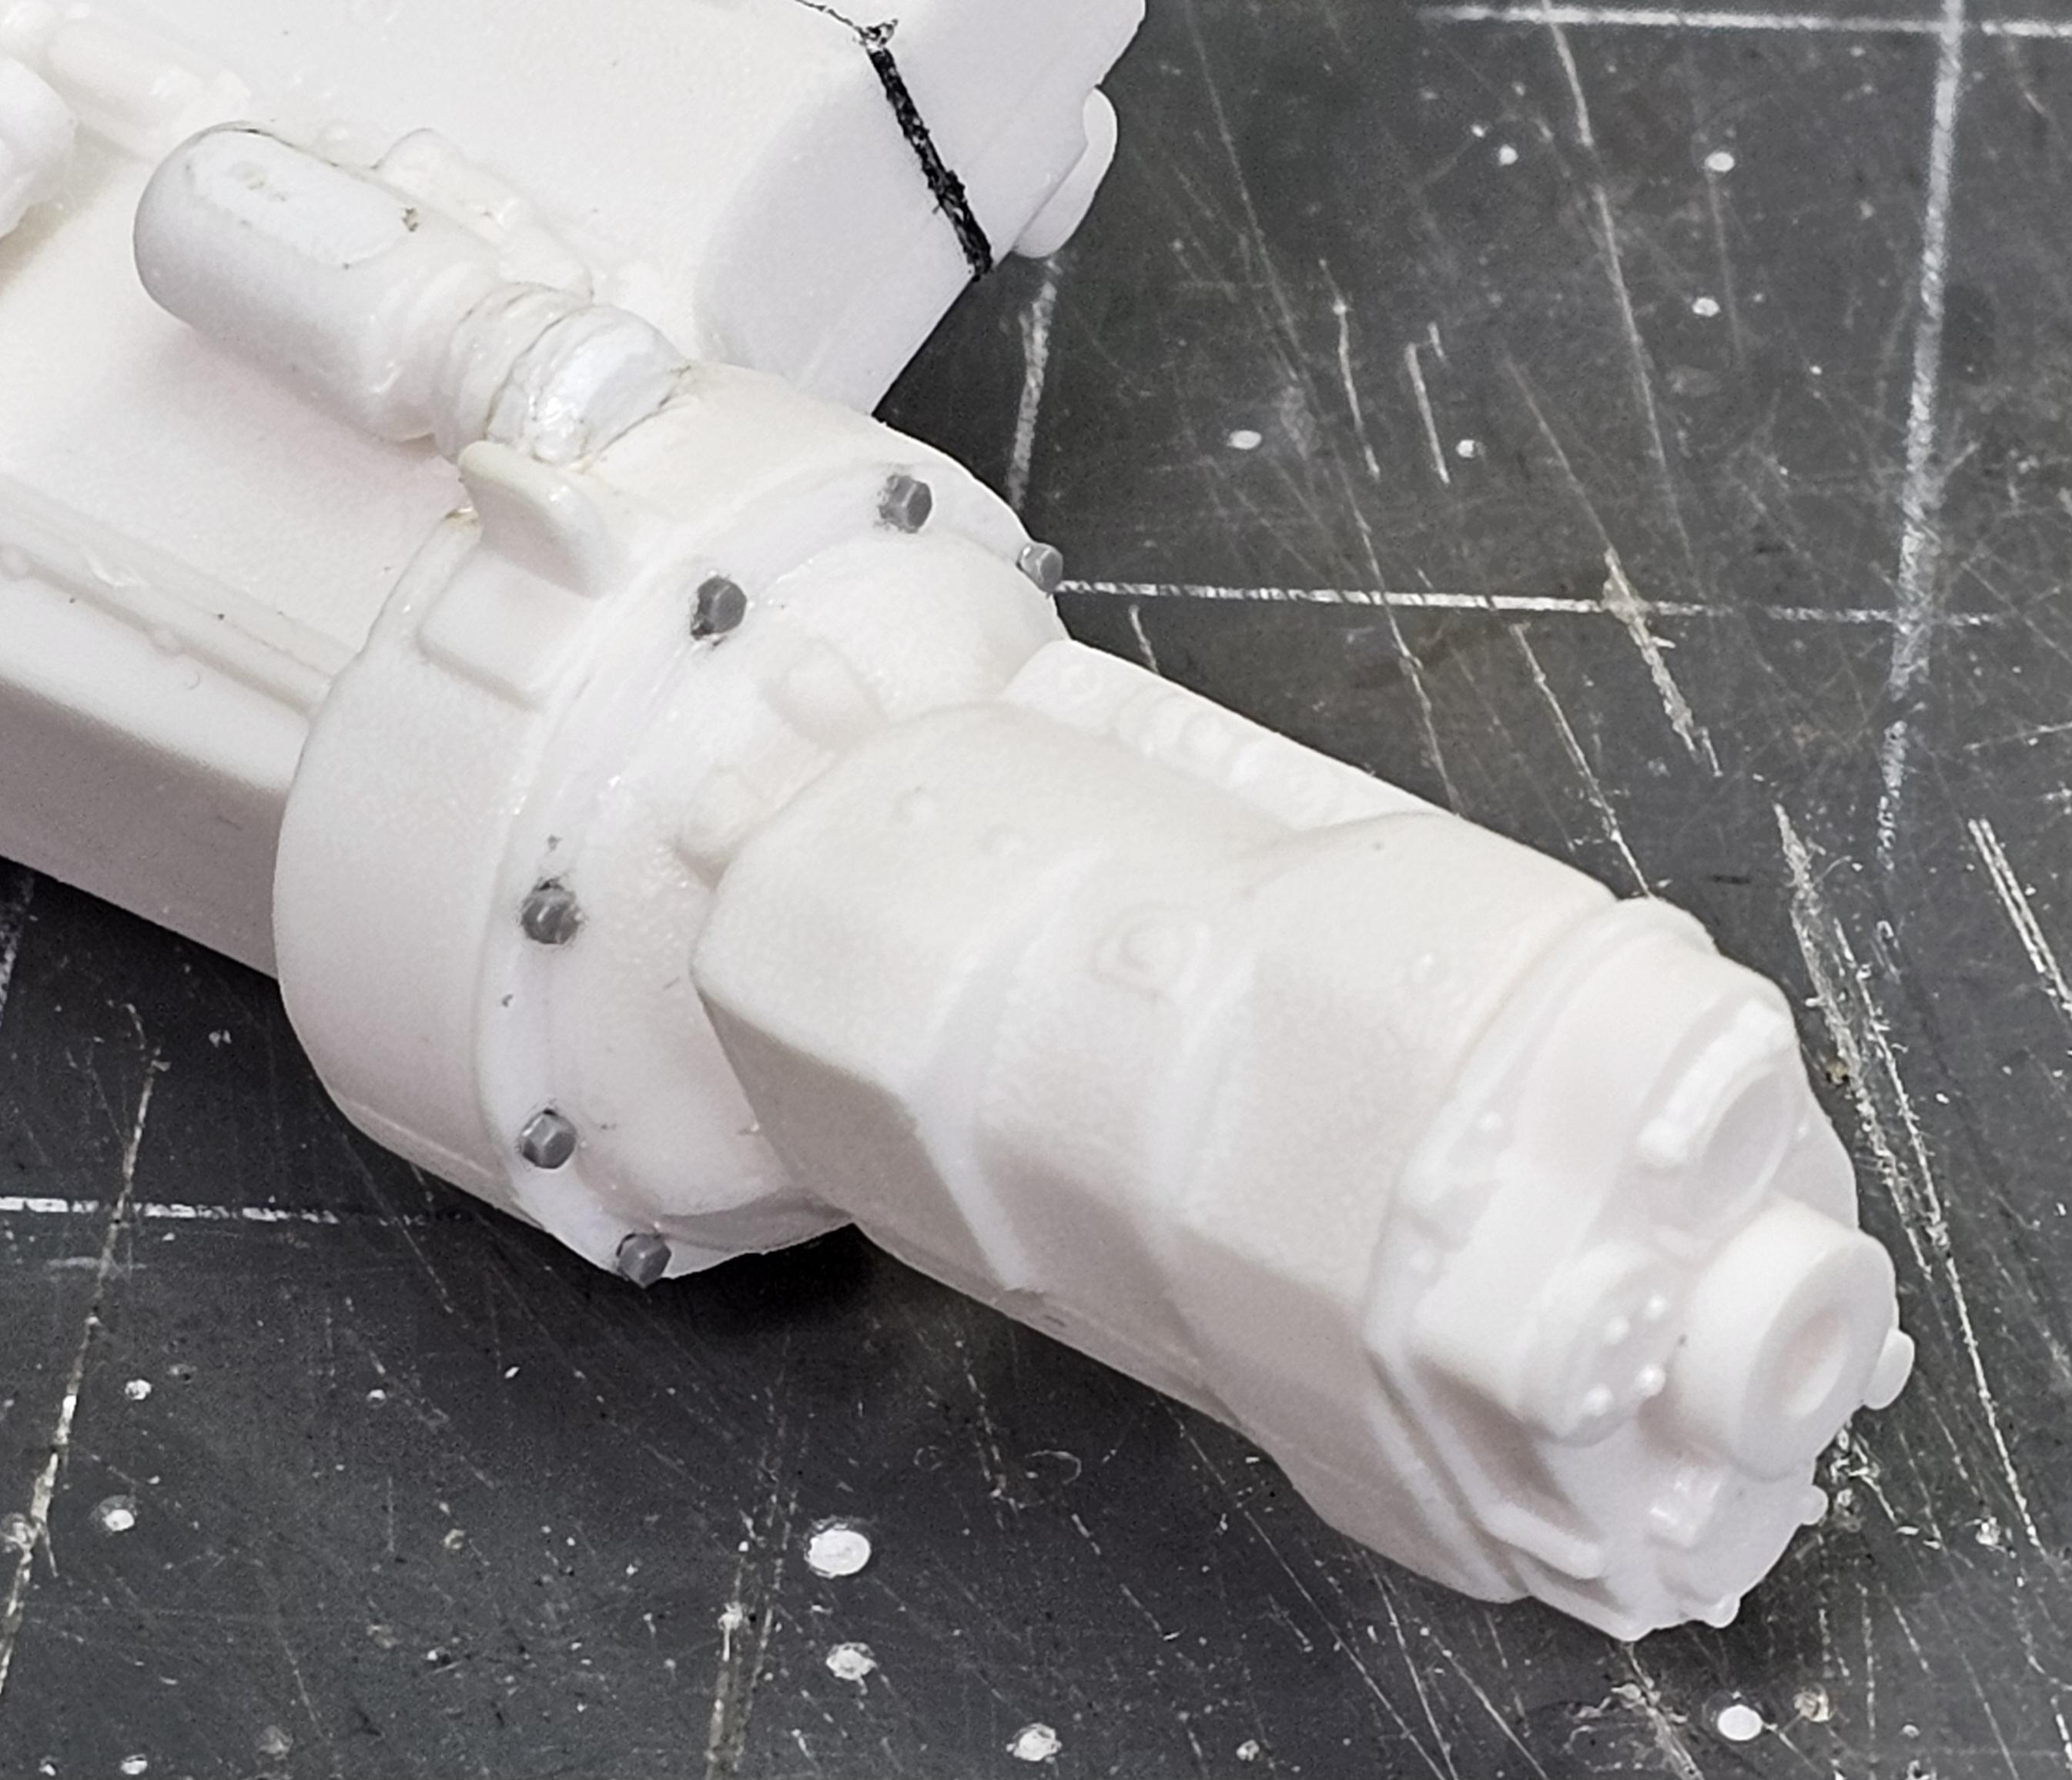
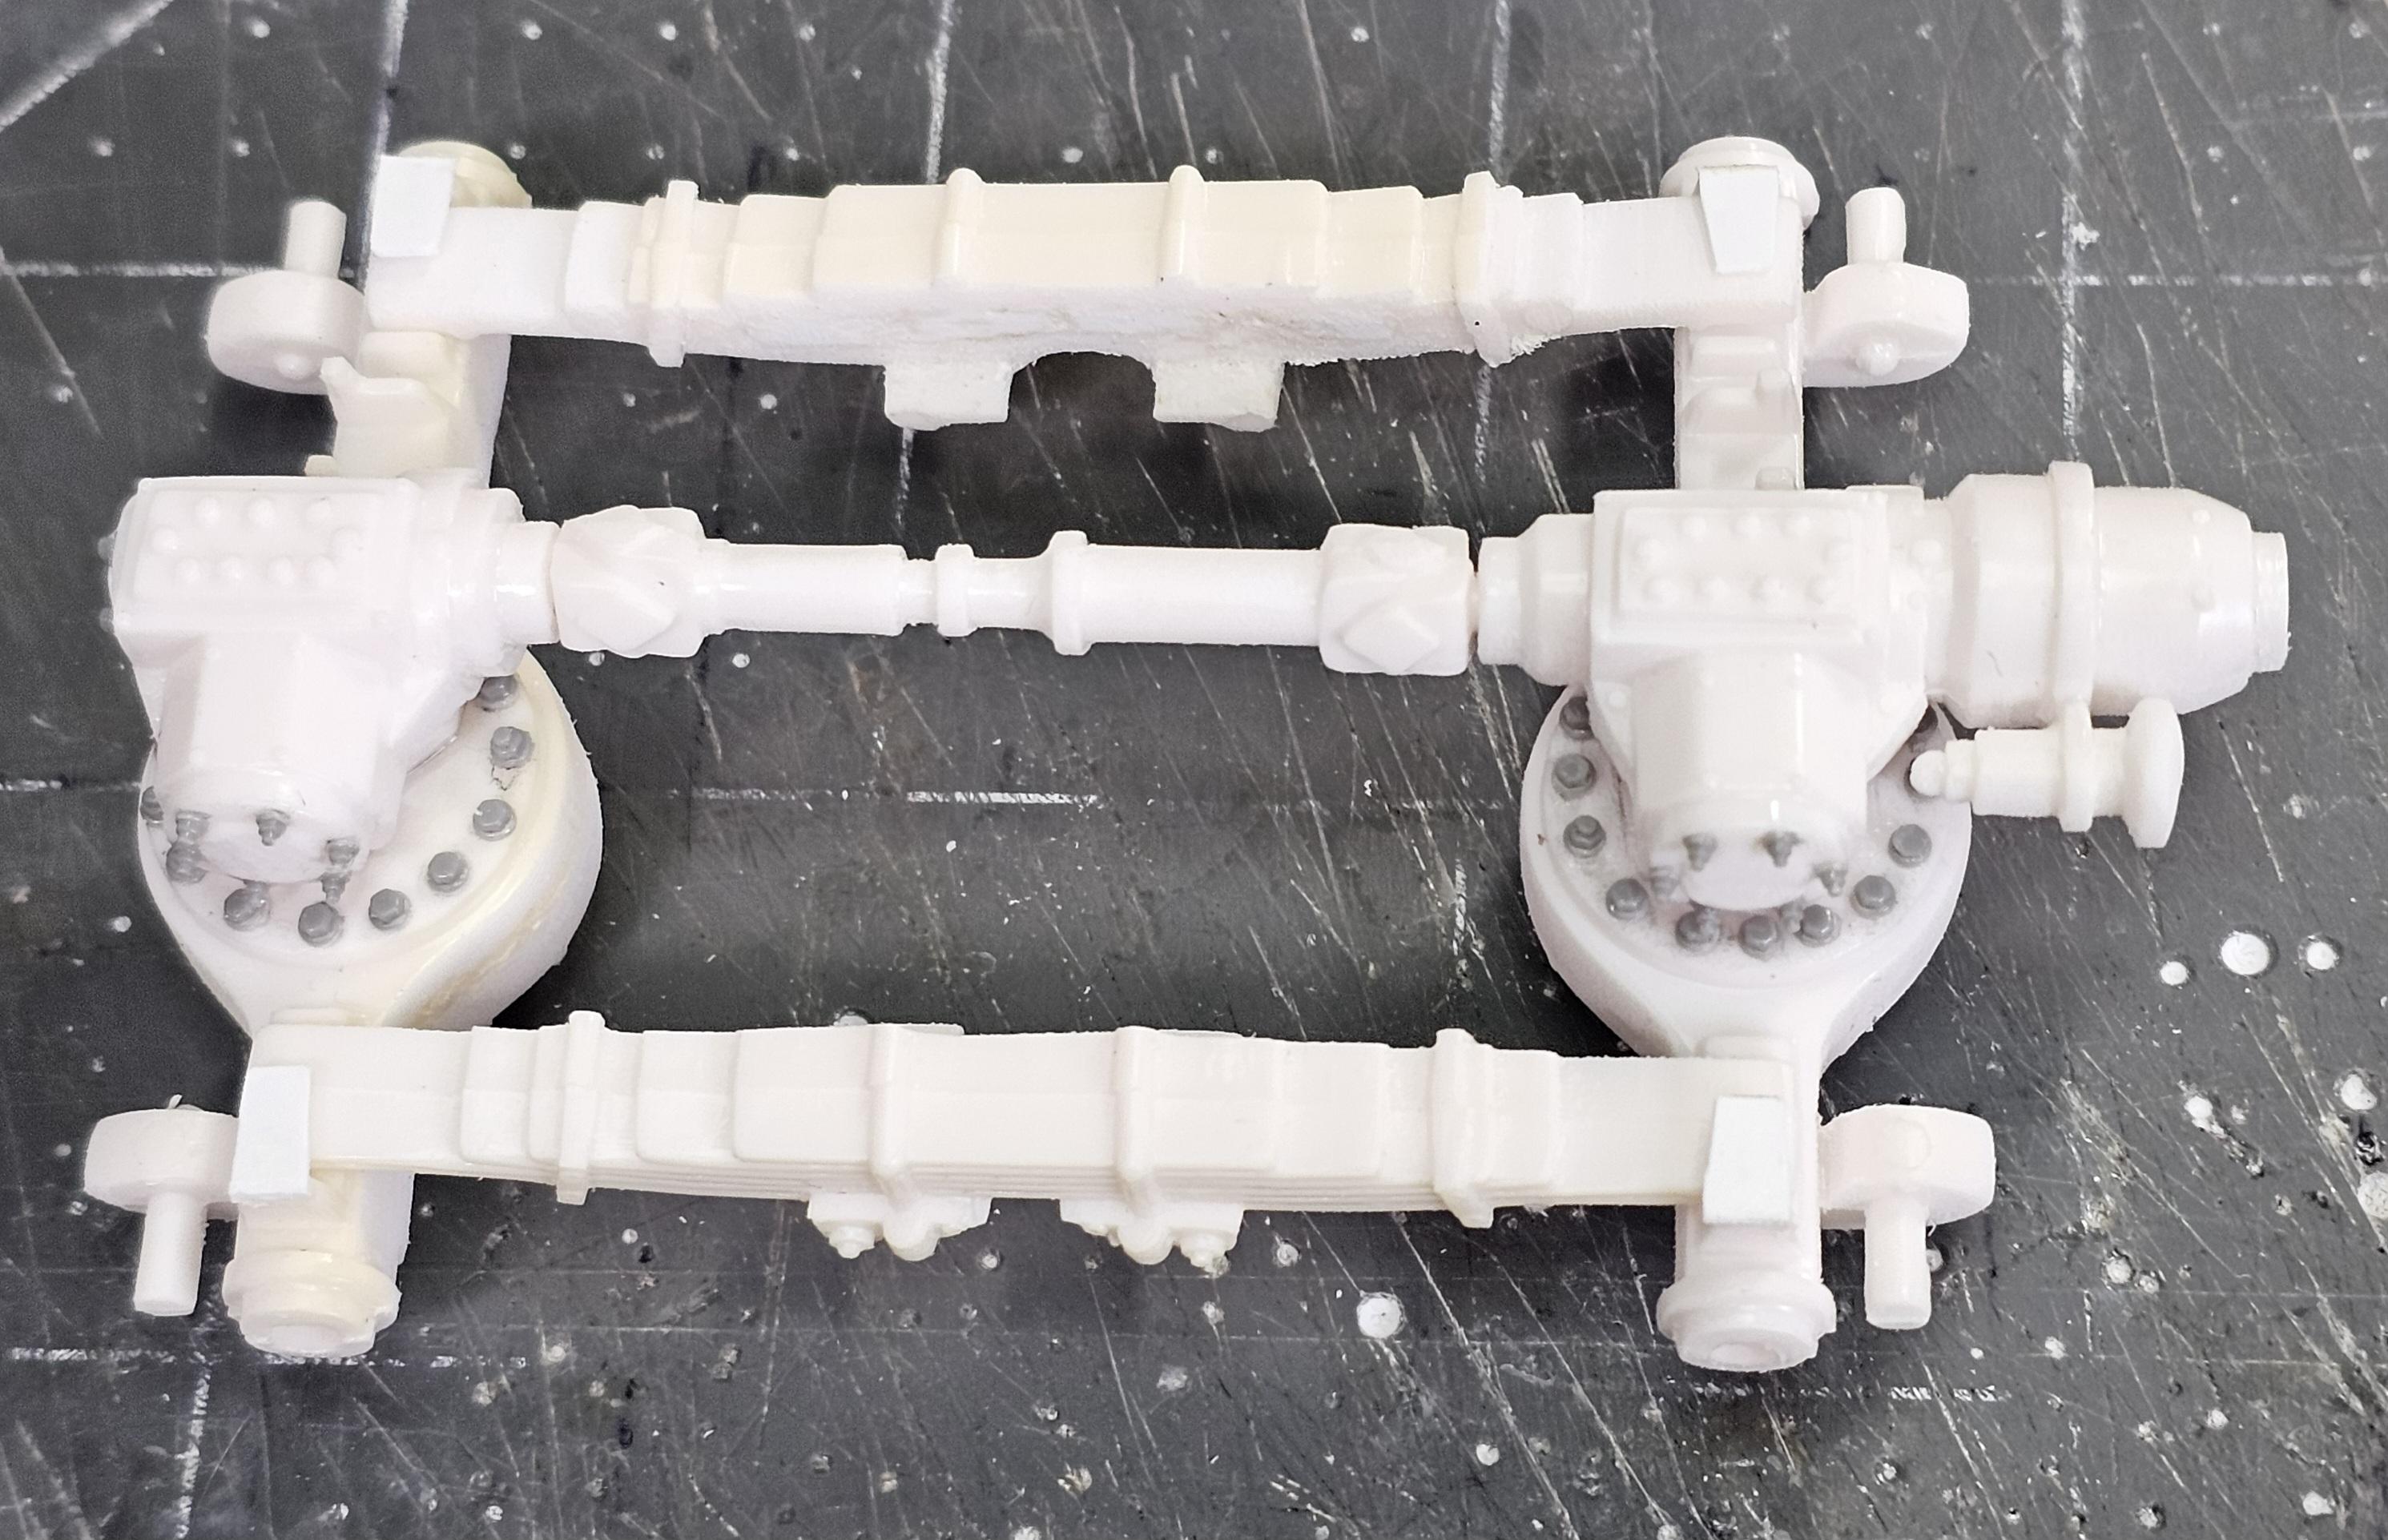
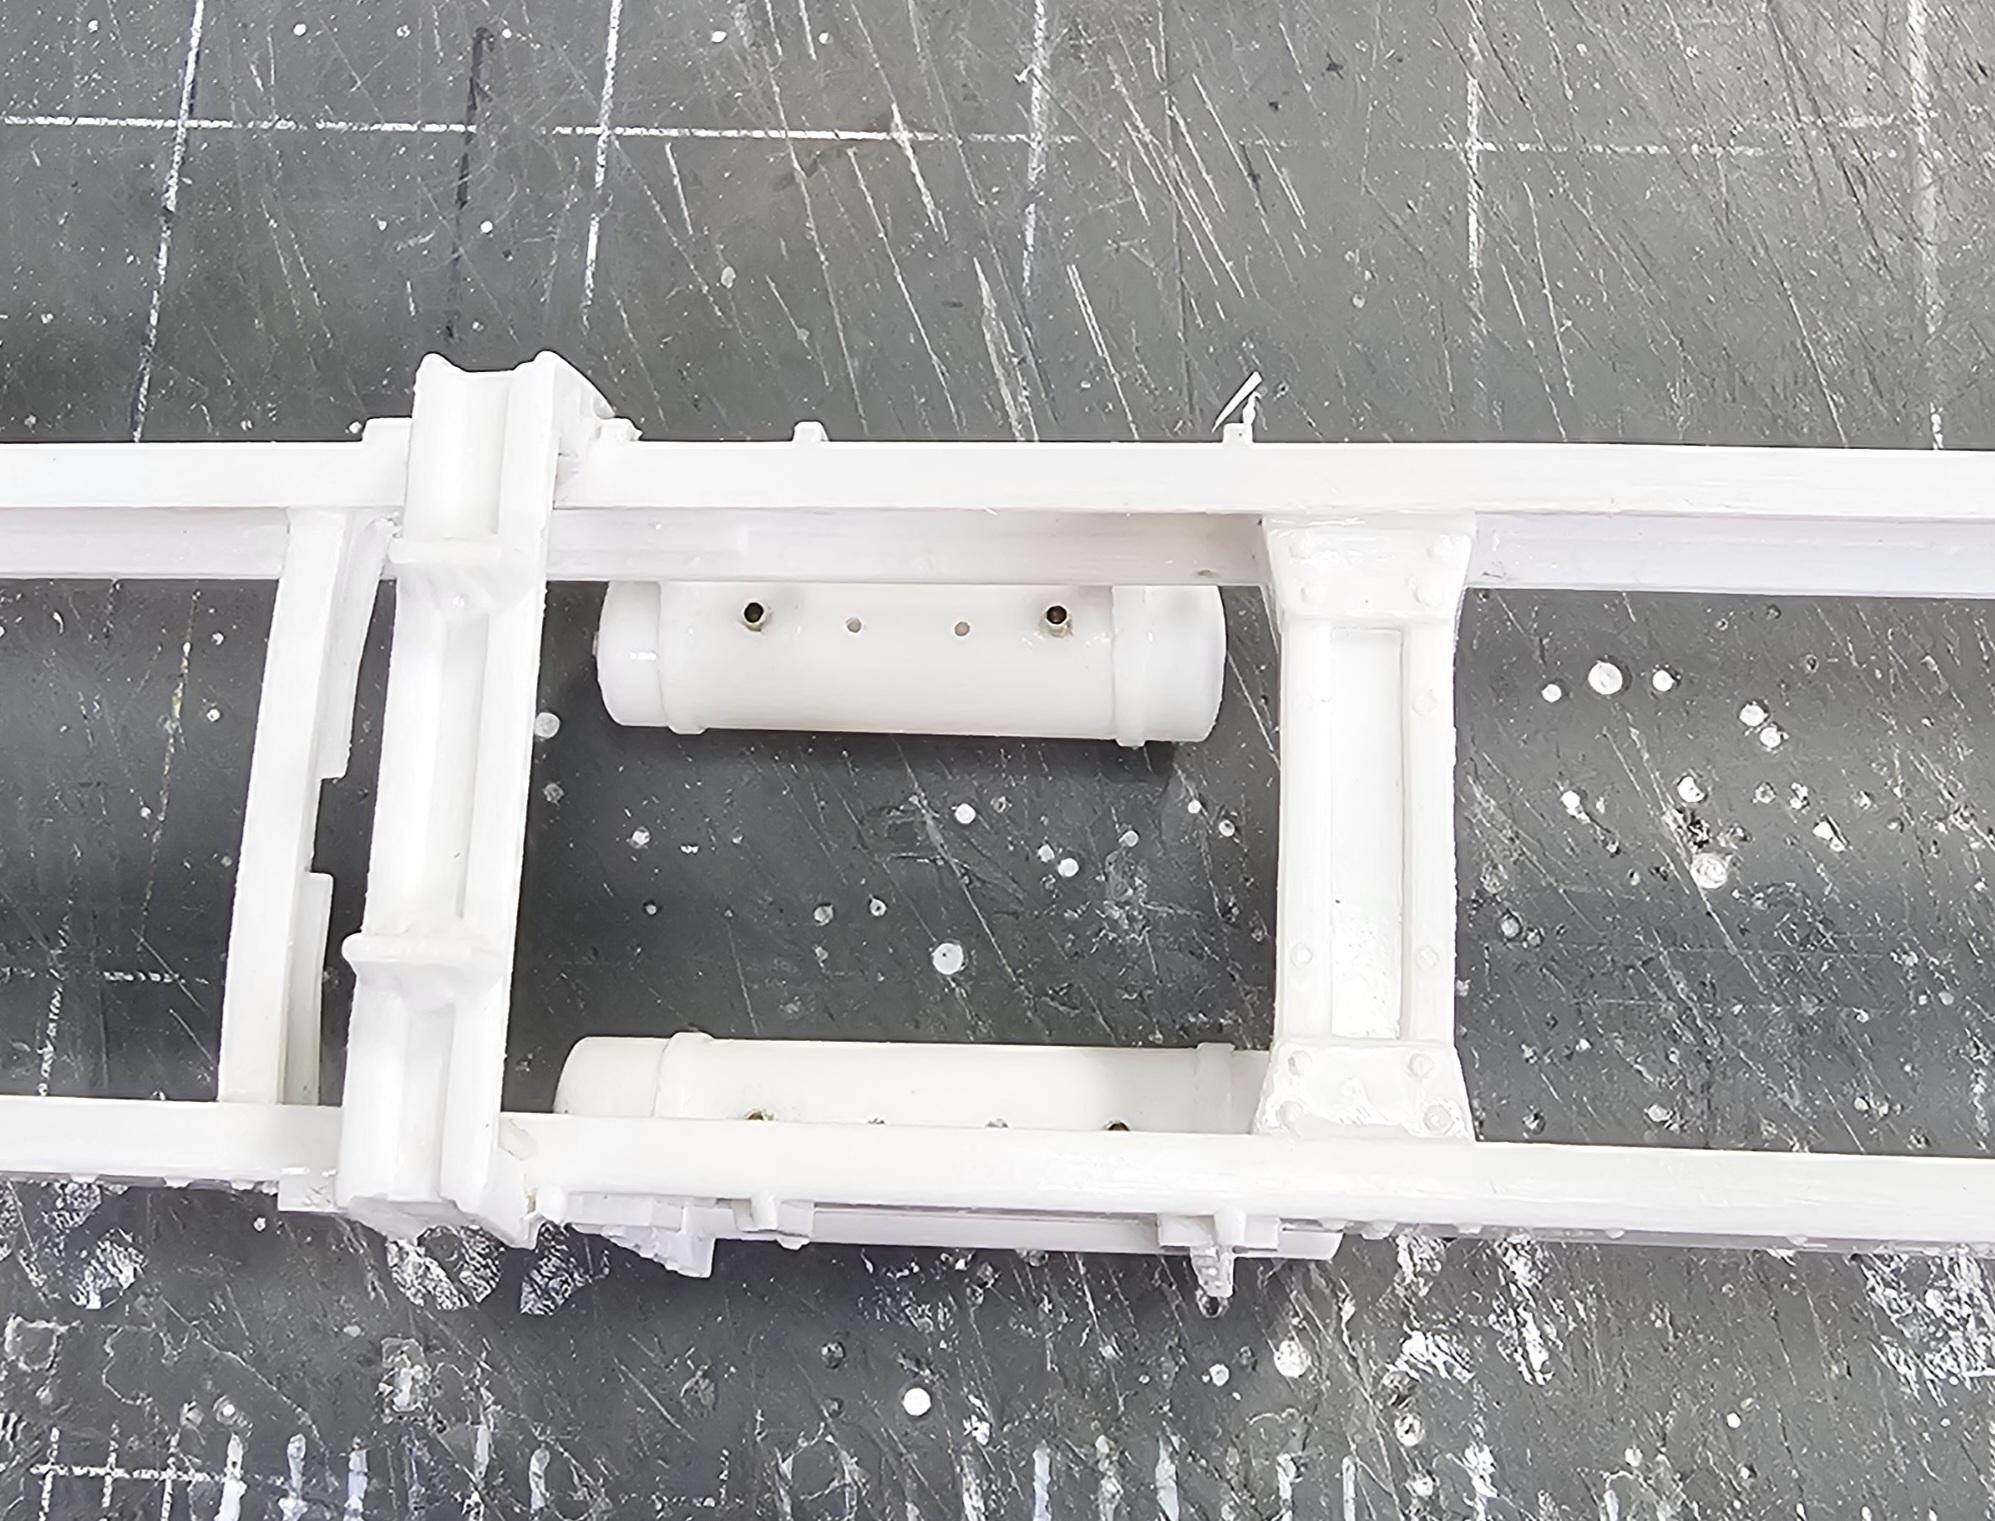
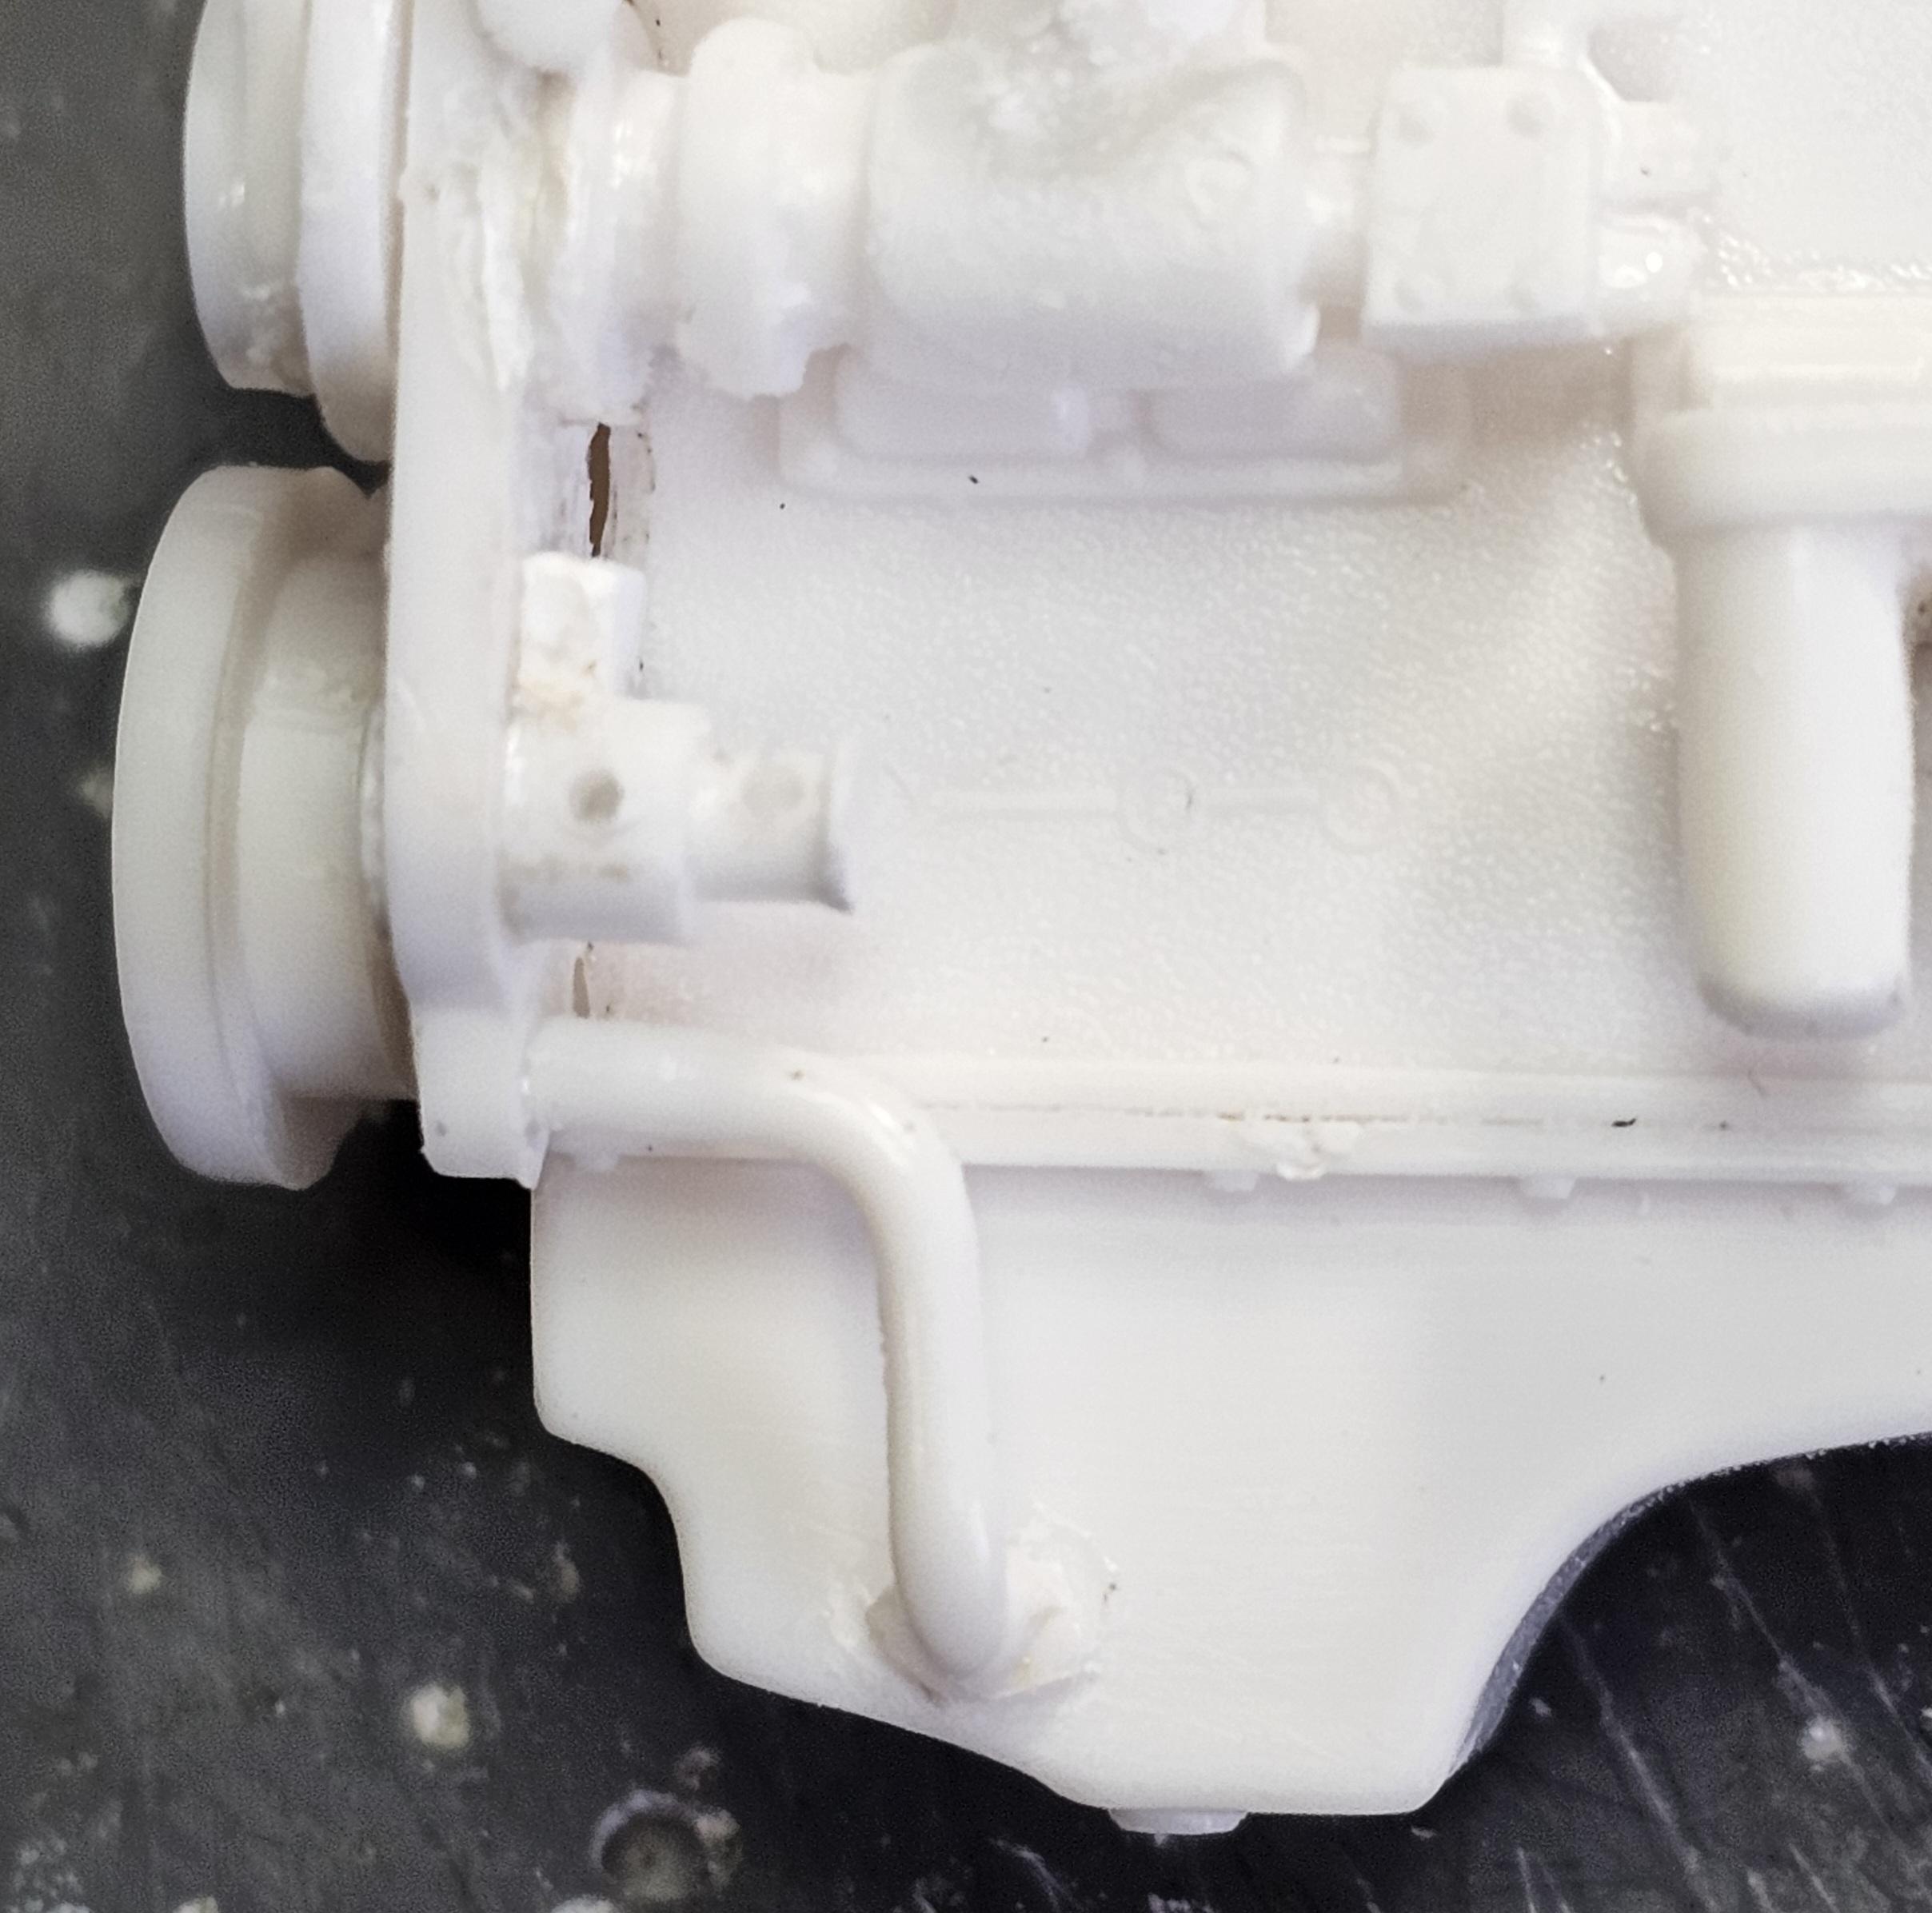
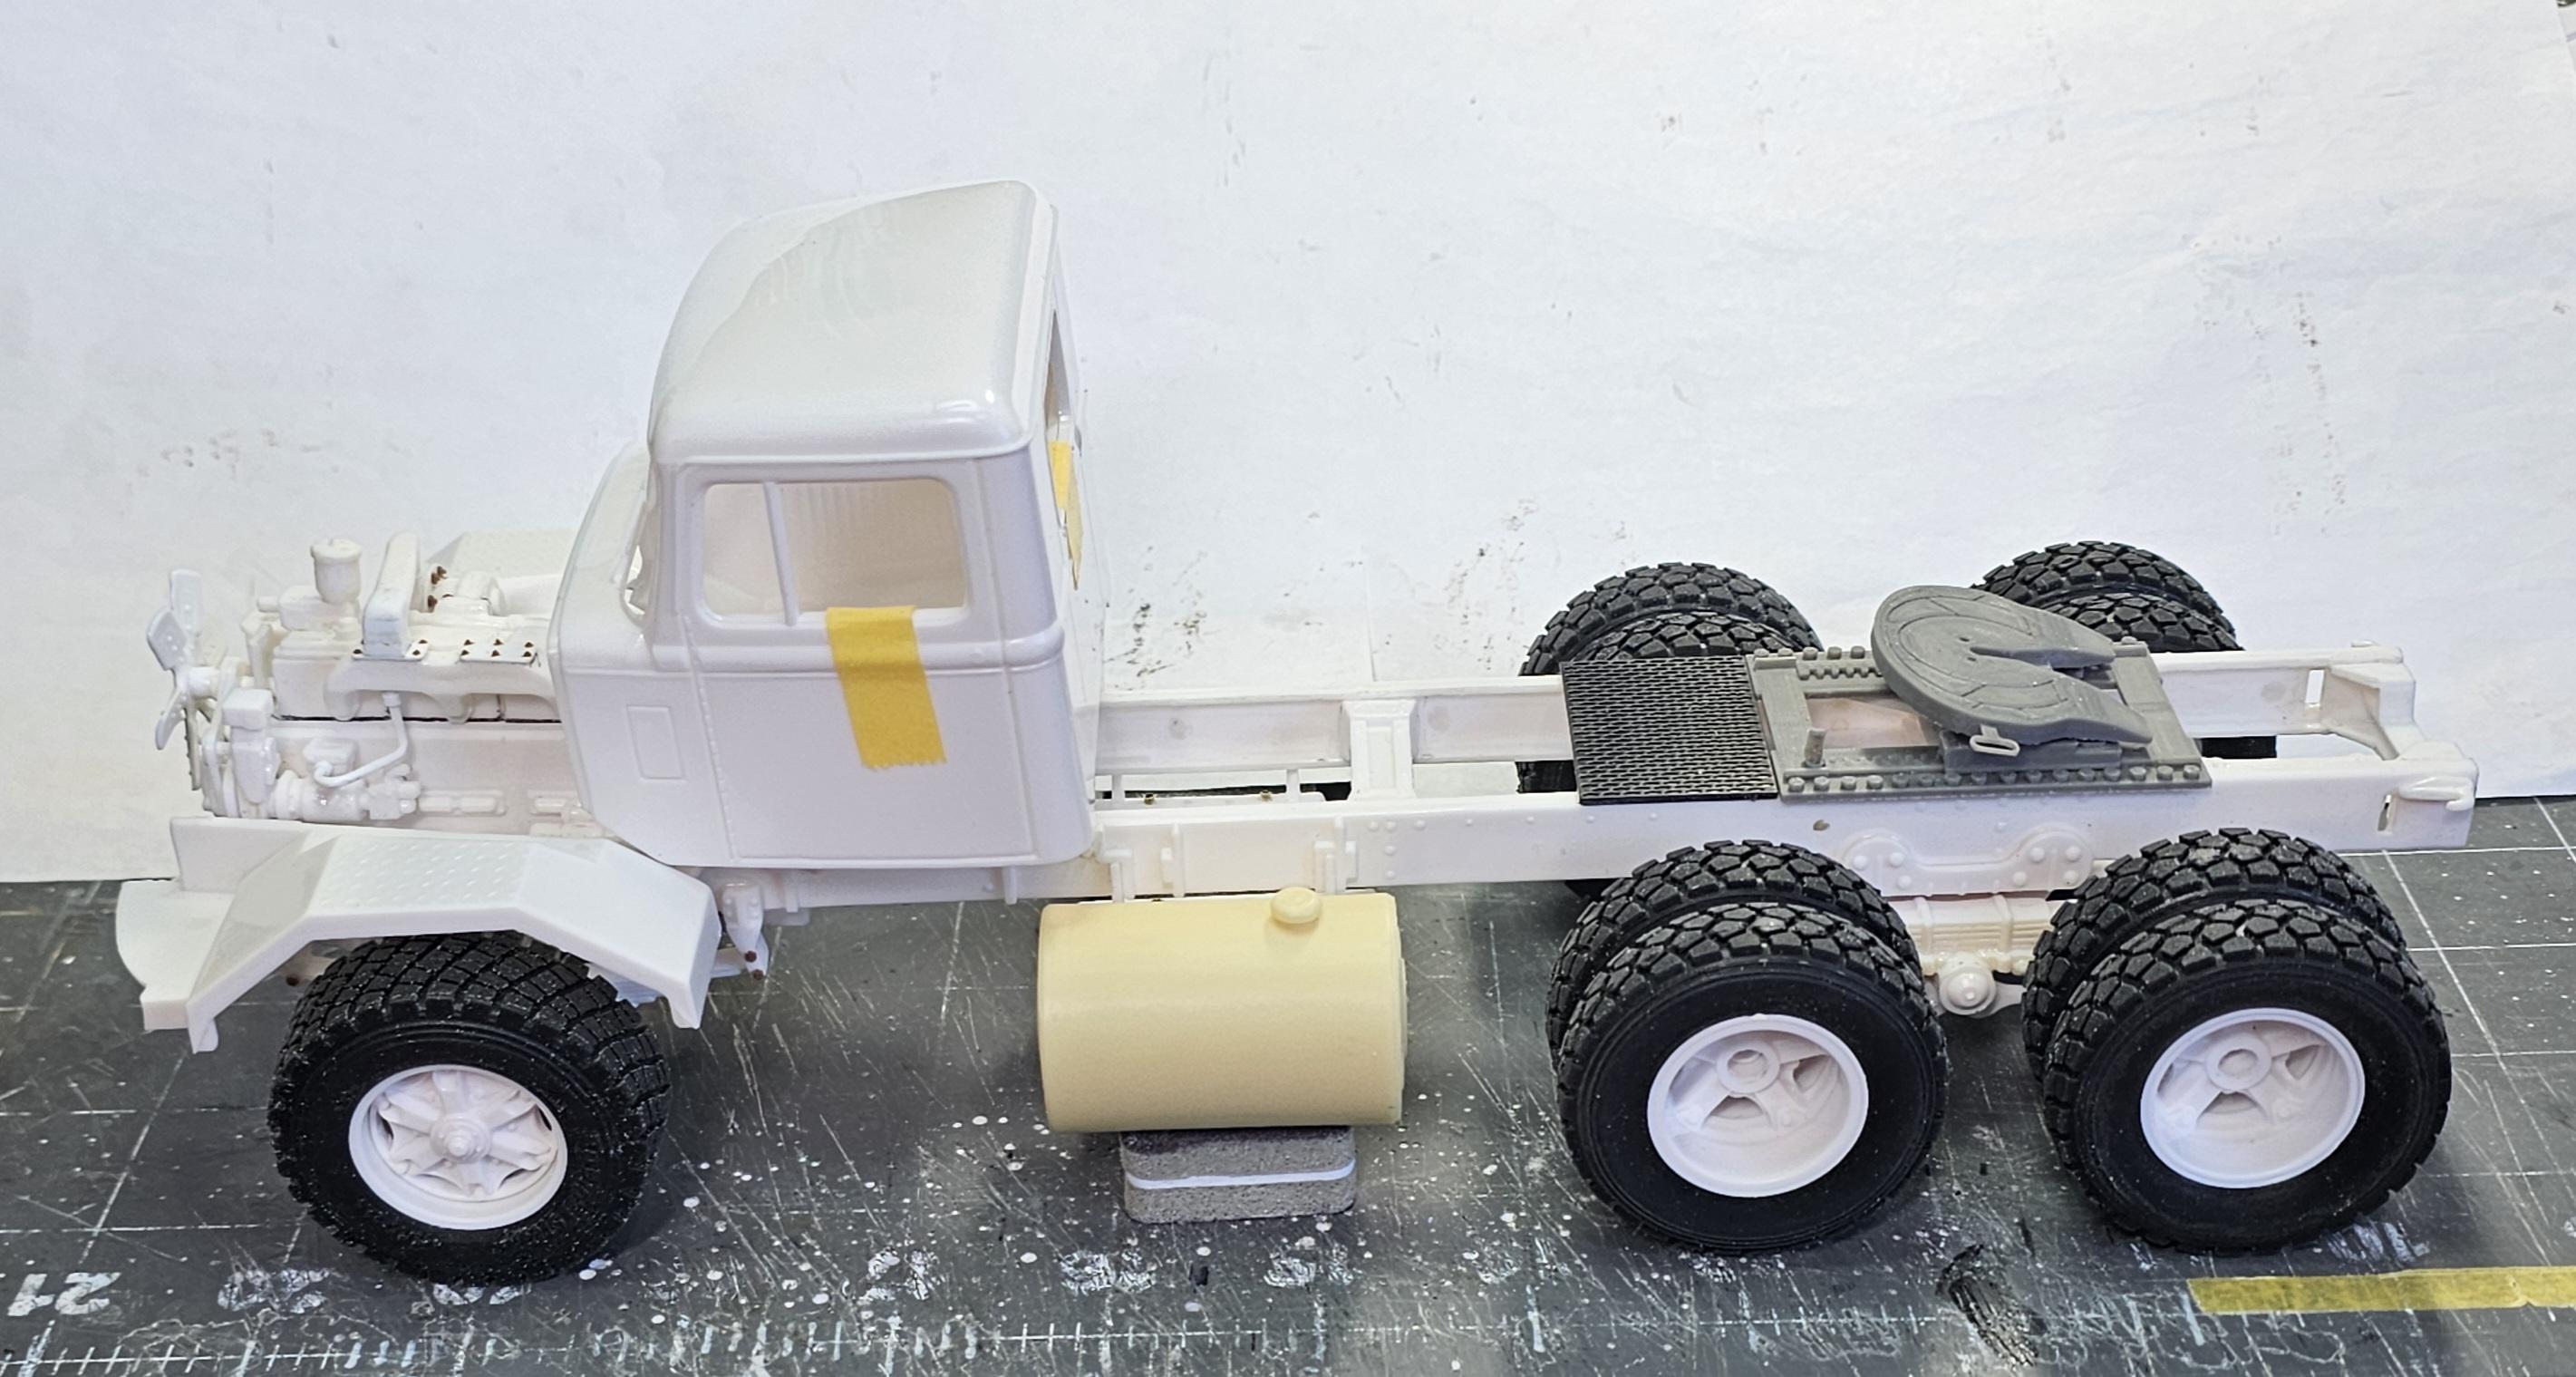
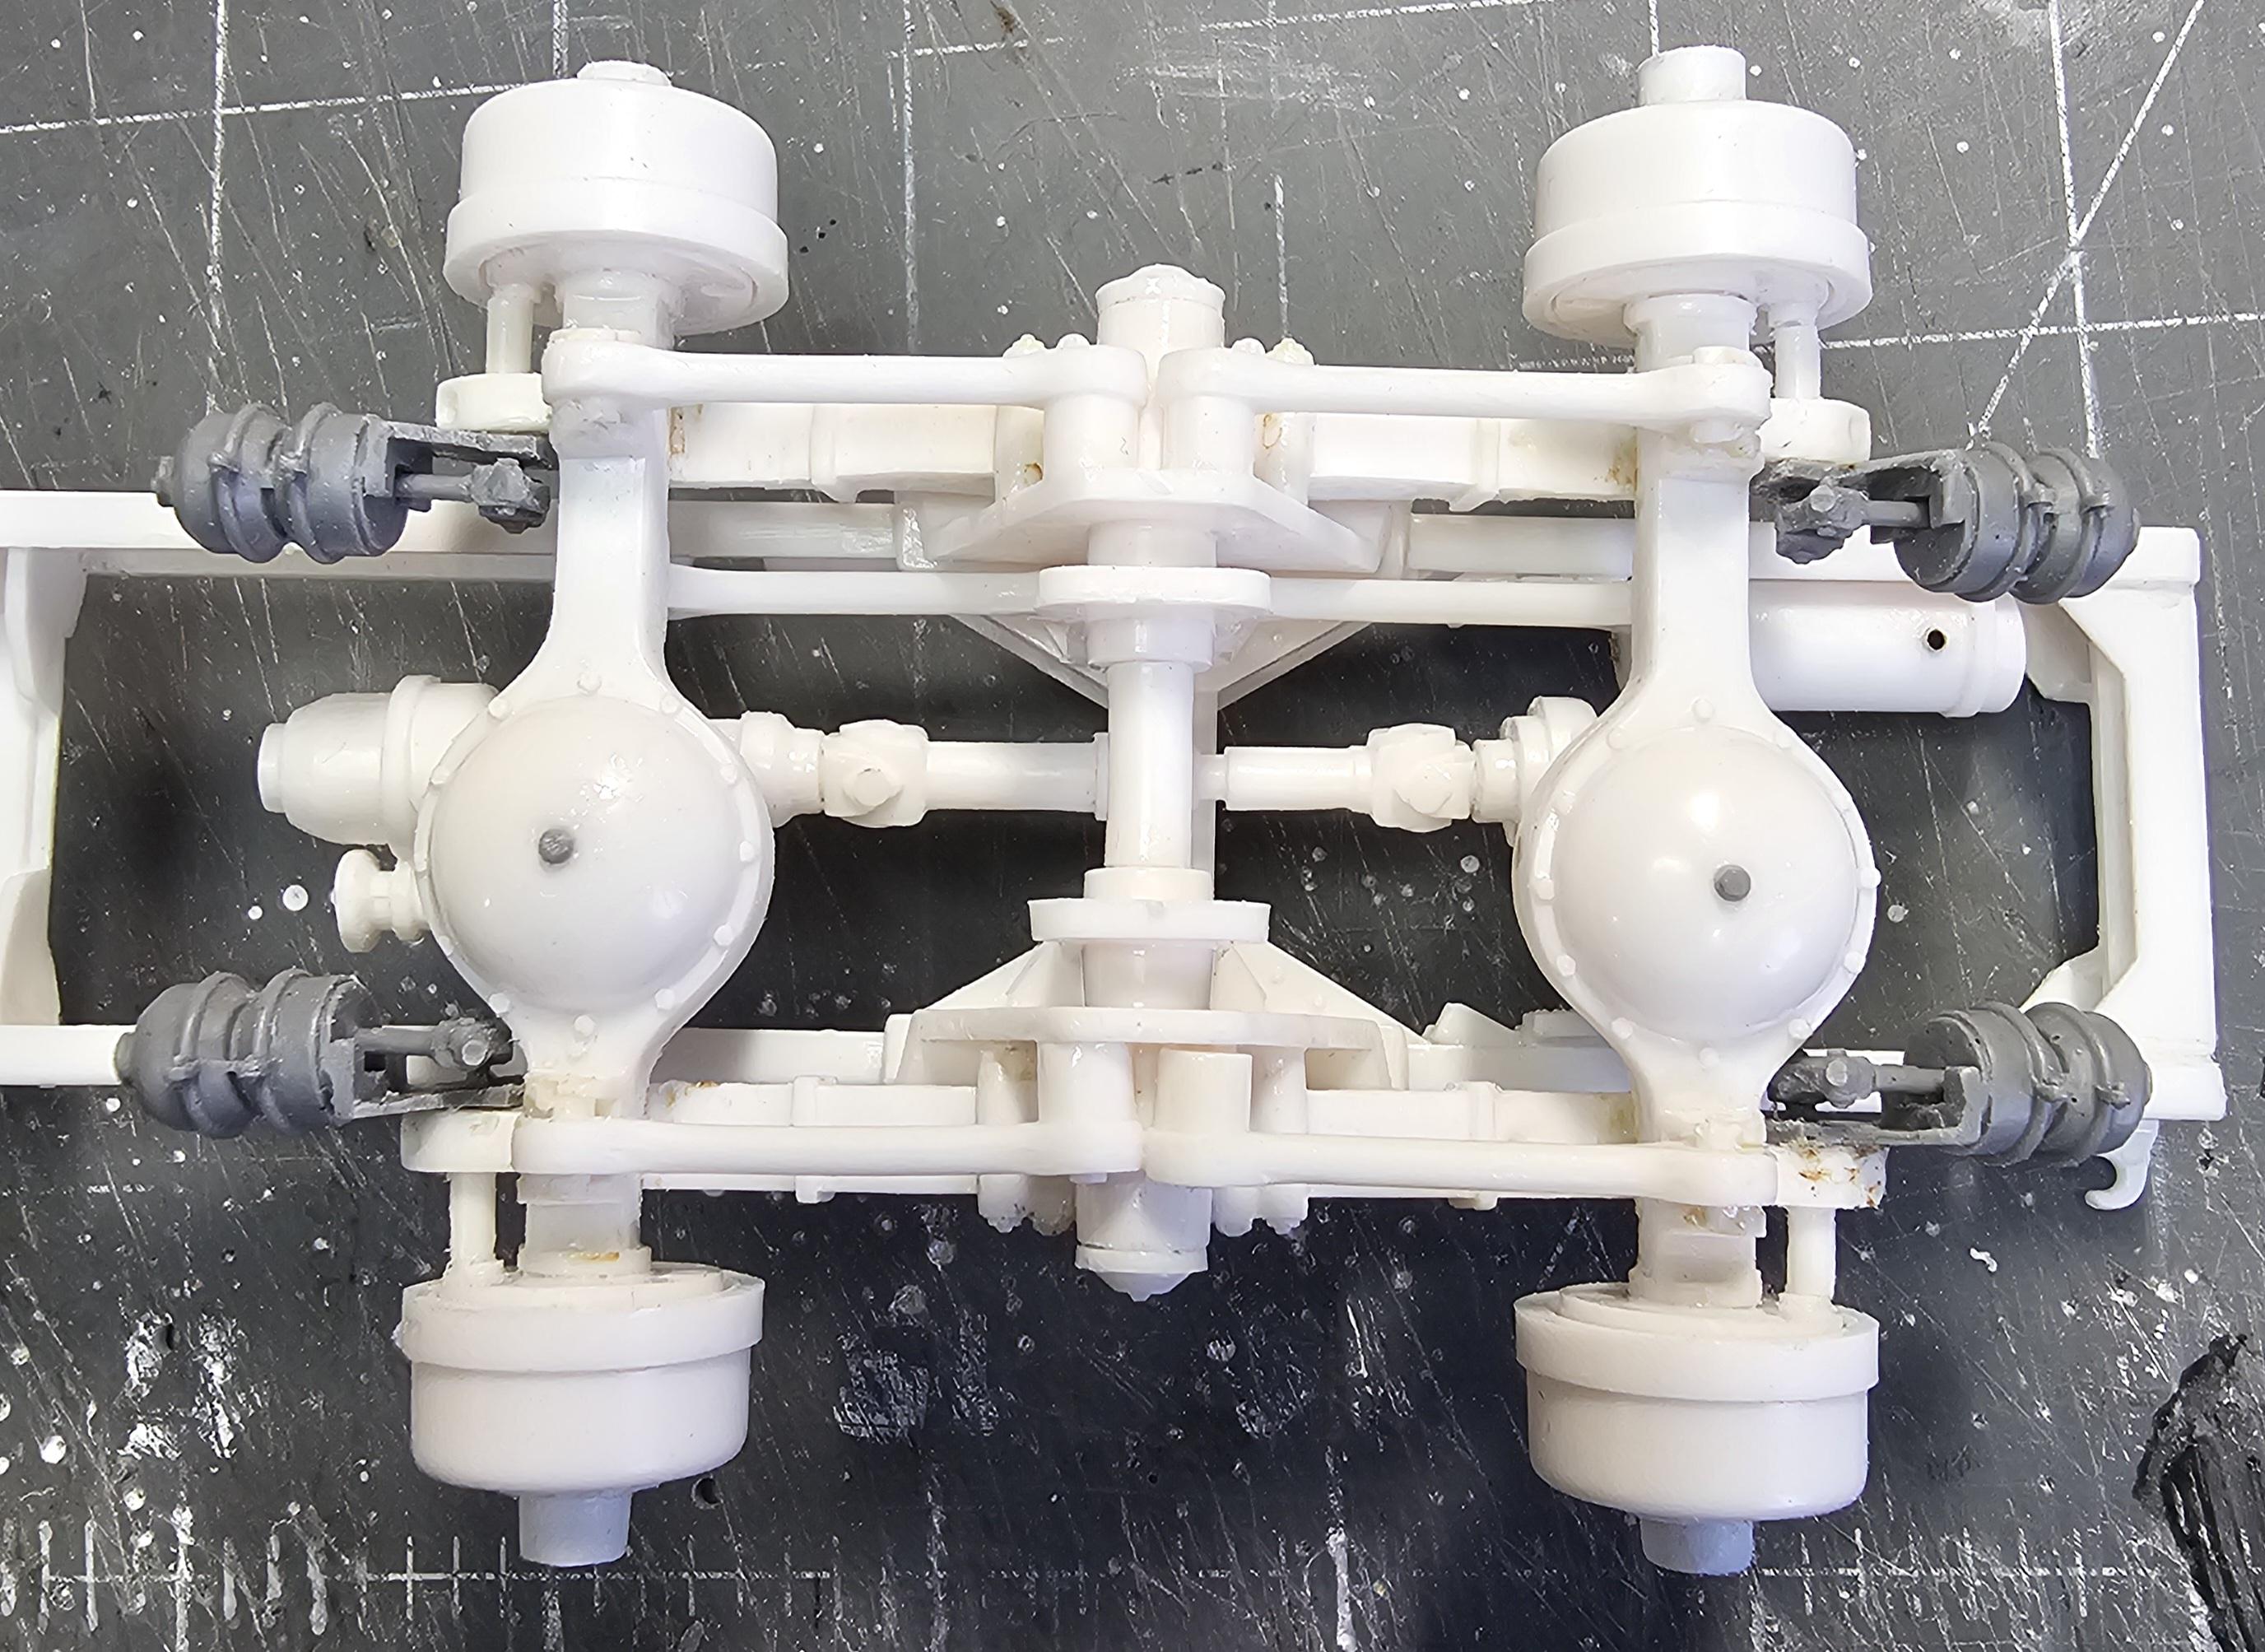
Hey everyone Got some more work done on this Autocar DK-64B tractor. The rolling chassis is about 80% done. I have the frame and suspension finished all I have to do is add the battery box, fuel tanks, etc. I added bolt heads to the bell housing. I still need to make a top cover with bolt heads and shifter tower. Another view of the bell housing bolt heads. I added bolt heads to the rear axle housings. I also added some more bolt heads to the rest of the rear ends. I also added the two thin pieces on each side to the axle housing that trap the rear springs. These were missing from the kit. This view shows the rear ends together with the rear springs and drive shaft. Drivers side air tank installed. This view shows the air tank fittings. This is how I'm going to plumb the tanks. Another view of the right and left air tanks. I added some Tichy bolts to the front springs. Another view of the front springs. This view shows the fifth wheel set up I'm going to use for this build. This view shows the peices to the fifth wheel. I bought this for my Mack build. It says it's a dropped axle but it was a regular straight axle. So I'm going to use it for this build. View looking down on the front axle. This view shows the front axle turned to the left. This view shows the front axle in place on the front springs and frame. This view shows the rolling chassis temporarily together. This is a little mock-up of what the finished truck will look like. Well that's it for today be back soon with more. Ron G
-
That's what we called them her in the states.
-
Yes, that is what I mean.
-
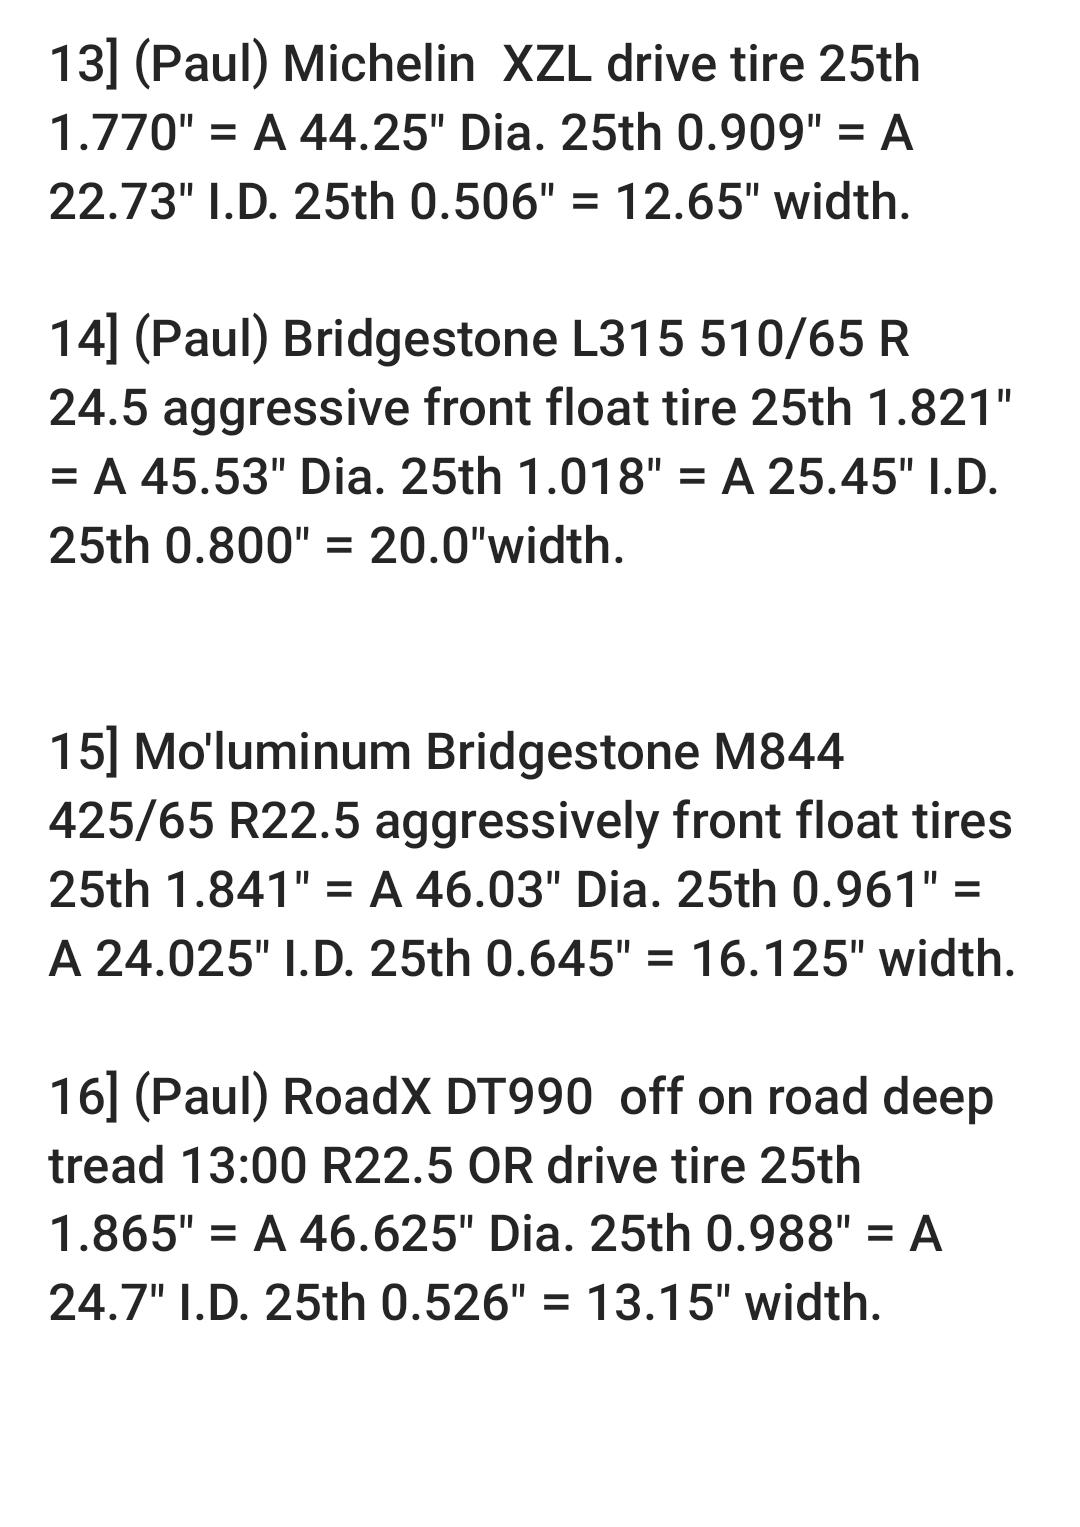
Yeah, I did it in English units because most of the tires were in English. So for those that don't know if you have English dimensions multiply by 25.4 and you get metric dimensions. And with Metric dimensions divide by 25.4 to get English dimensions. I did this all day long when I was doing auto engineering, 40 years ago. Ron G
-
Okay, I did this on my phone with the note app, so it ain't the greatest. I am eventually going to do it on a computer with a word processing program so it will hzve more info per tire and possibly pictures of each tire. This is organized by the smallest diameter tire to the largest diameter tire. Like I said I will eventually improve this. But for now here you go. Oh, (Paul) is St Supply
-
Okay, Gary as soon as I get it done I will post it up. Ron G
-
So nobody is interested in this. Inner diameter (wheel opening), width and diameter. Really! I would think everyone would be interested in this. It's great for planning a build so you know what fits and what doesn't. Ron G
-
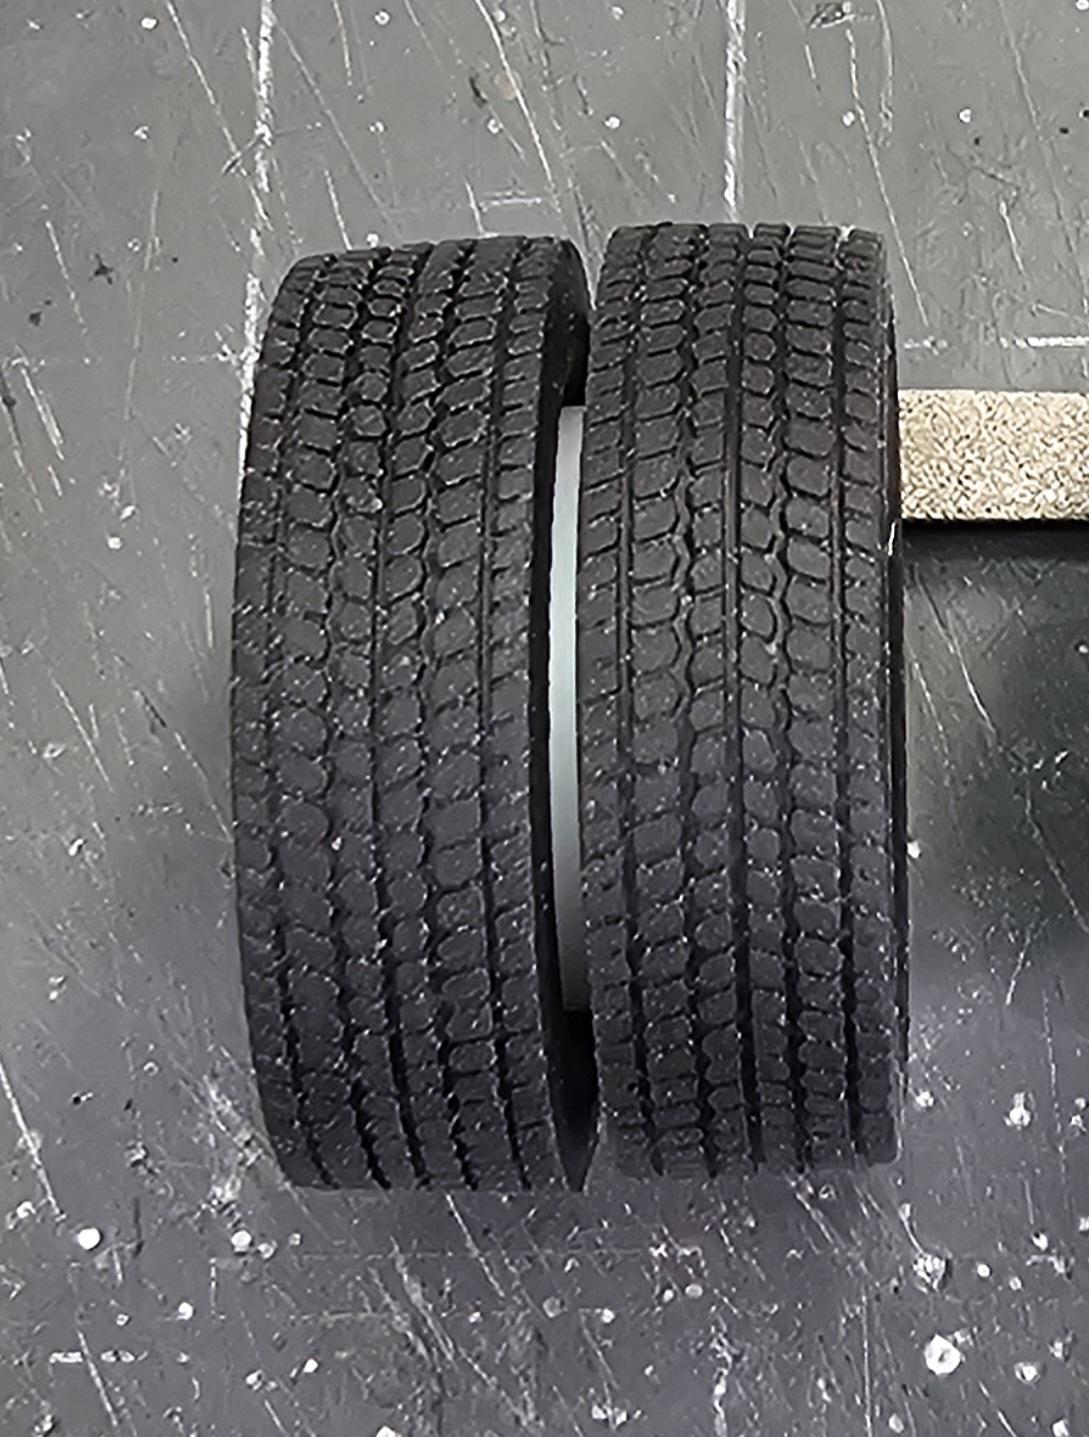
Hey all After conversing with my buddy (Jeff) I decided to change to a more aggressive drive tire that actually fits the rims better. They are unbranded Michelin XZL's. This view shows the fronts and rears. This is kinda of a look down on the truck view. Ron G
-
Any interest In a compiled list of available different rubber tires in 1/25 & 1/24 scale? I have 18 right now, all that I have on hand at the moment. 🤔🤔 Ron G
-
That's because that's what it probably is. Ron G
-
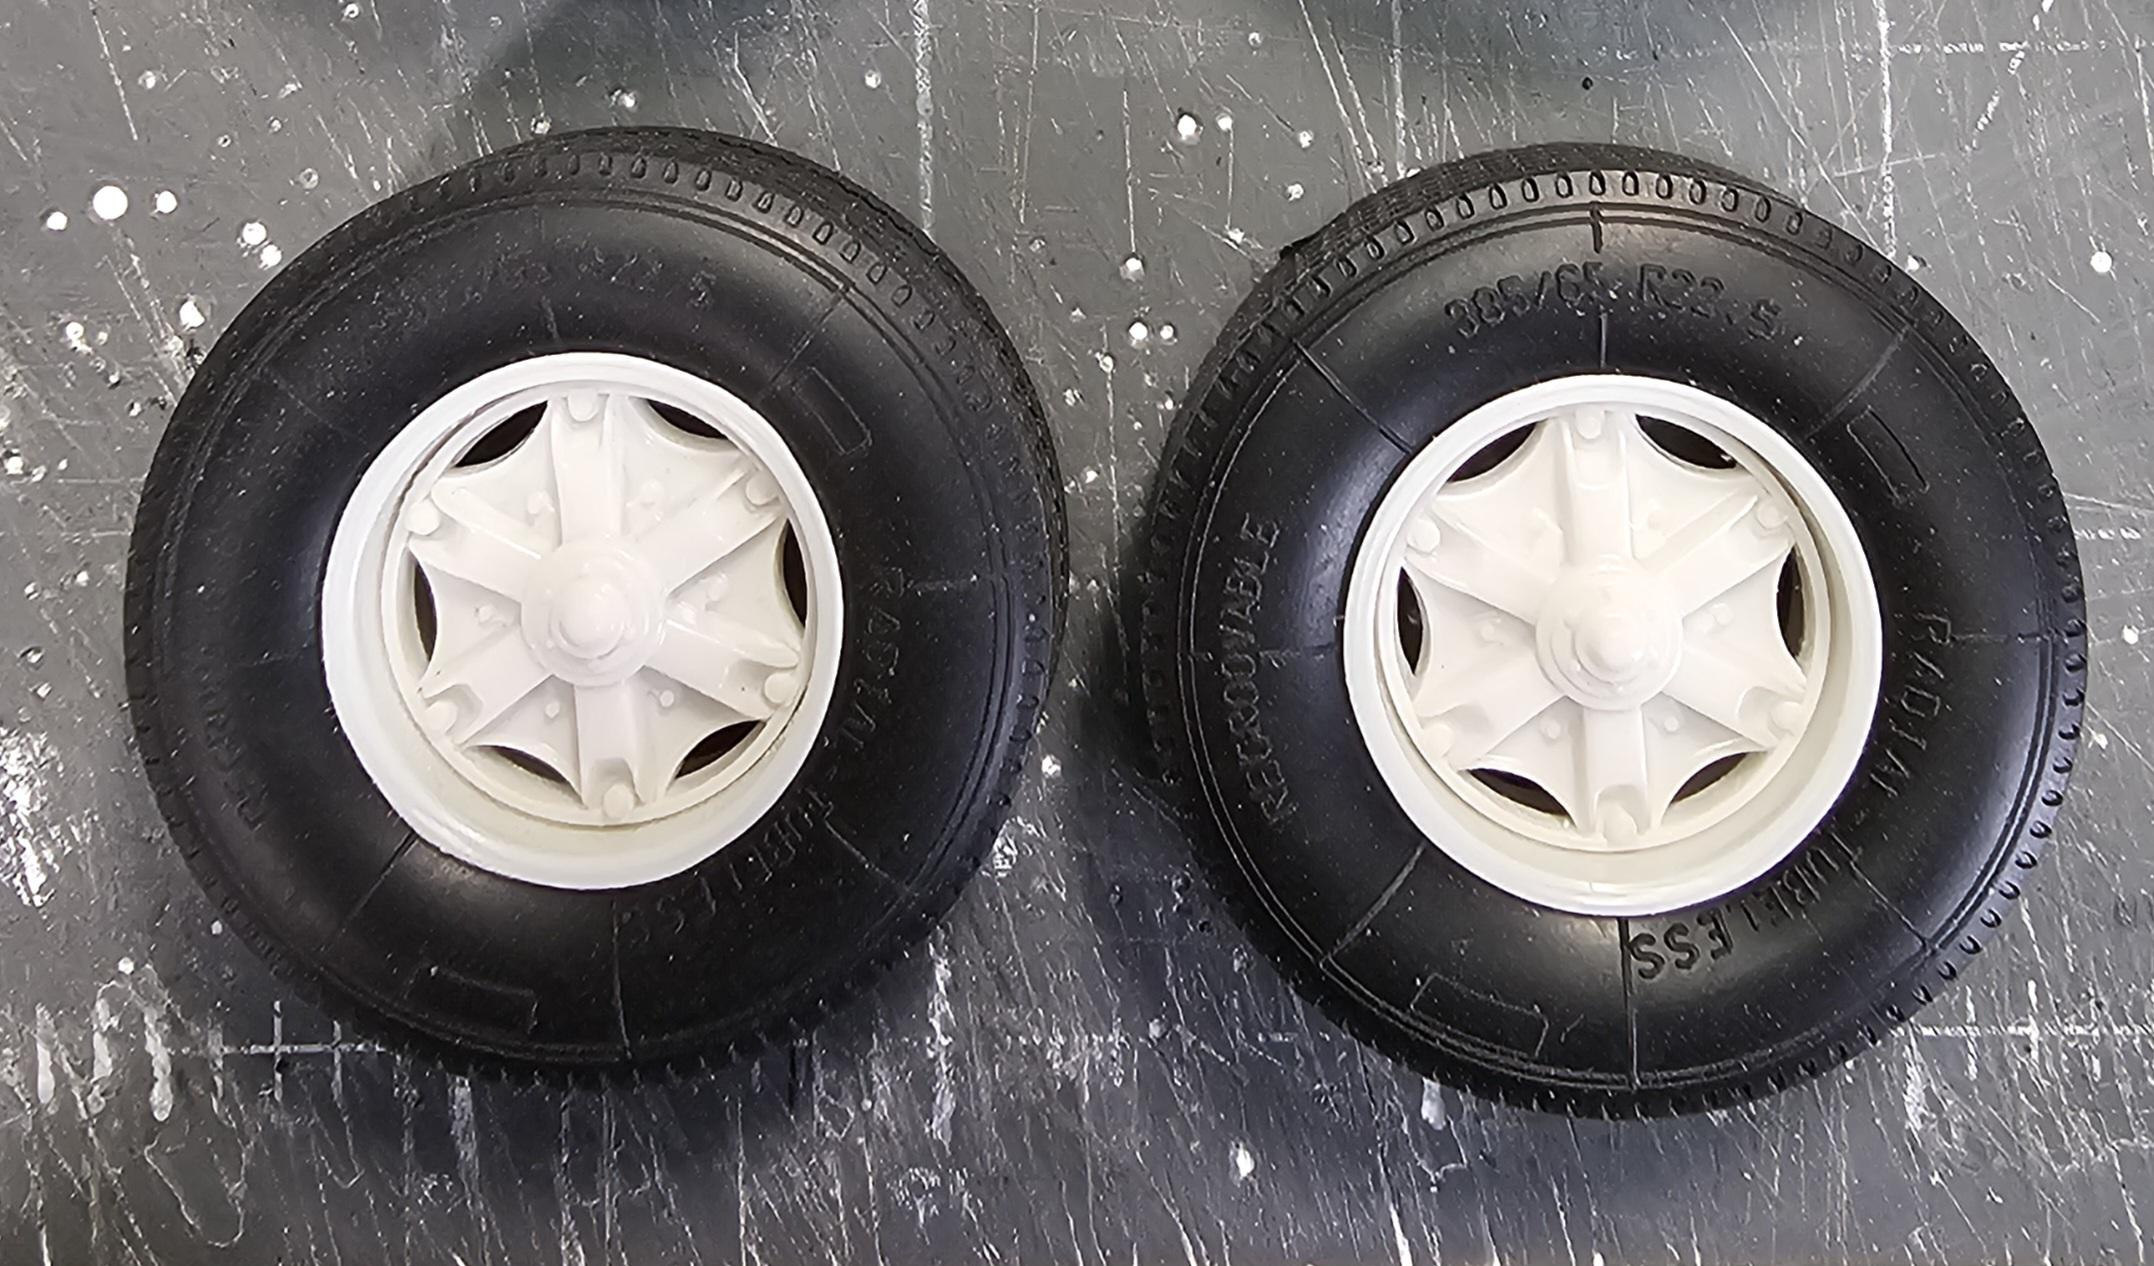
Hey all I got a little done on this build today. Got the frame assembled. This view shows the frame assembled. These are going to be the final front float tires and wheels. Kit wheels with Italeri 385/65 R22.5's. Front tires. These are going to be the final rear tires and wheels. Kit rims with Italeri 315/70 R 22.5's. End view of the rear tires. Okay that's it for now be back soon. Ron G
-
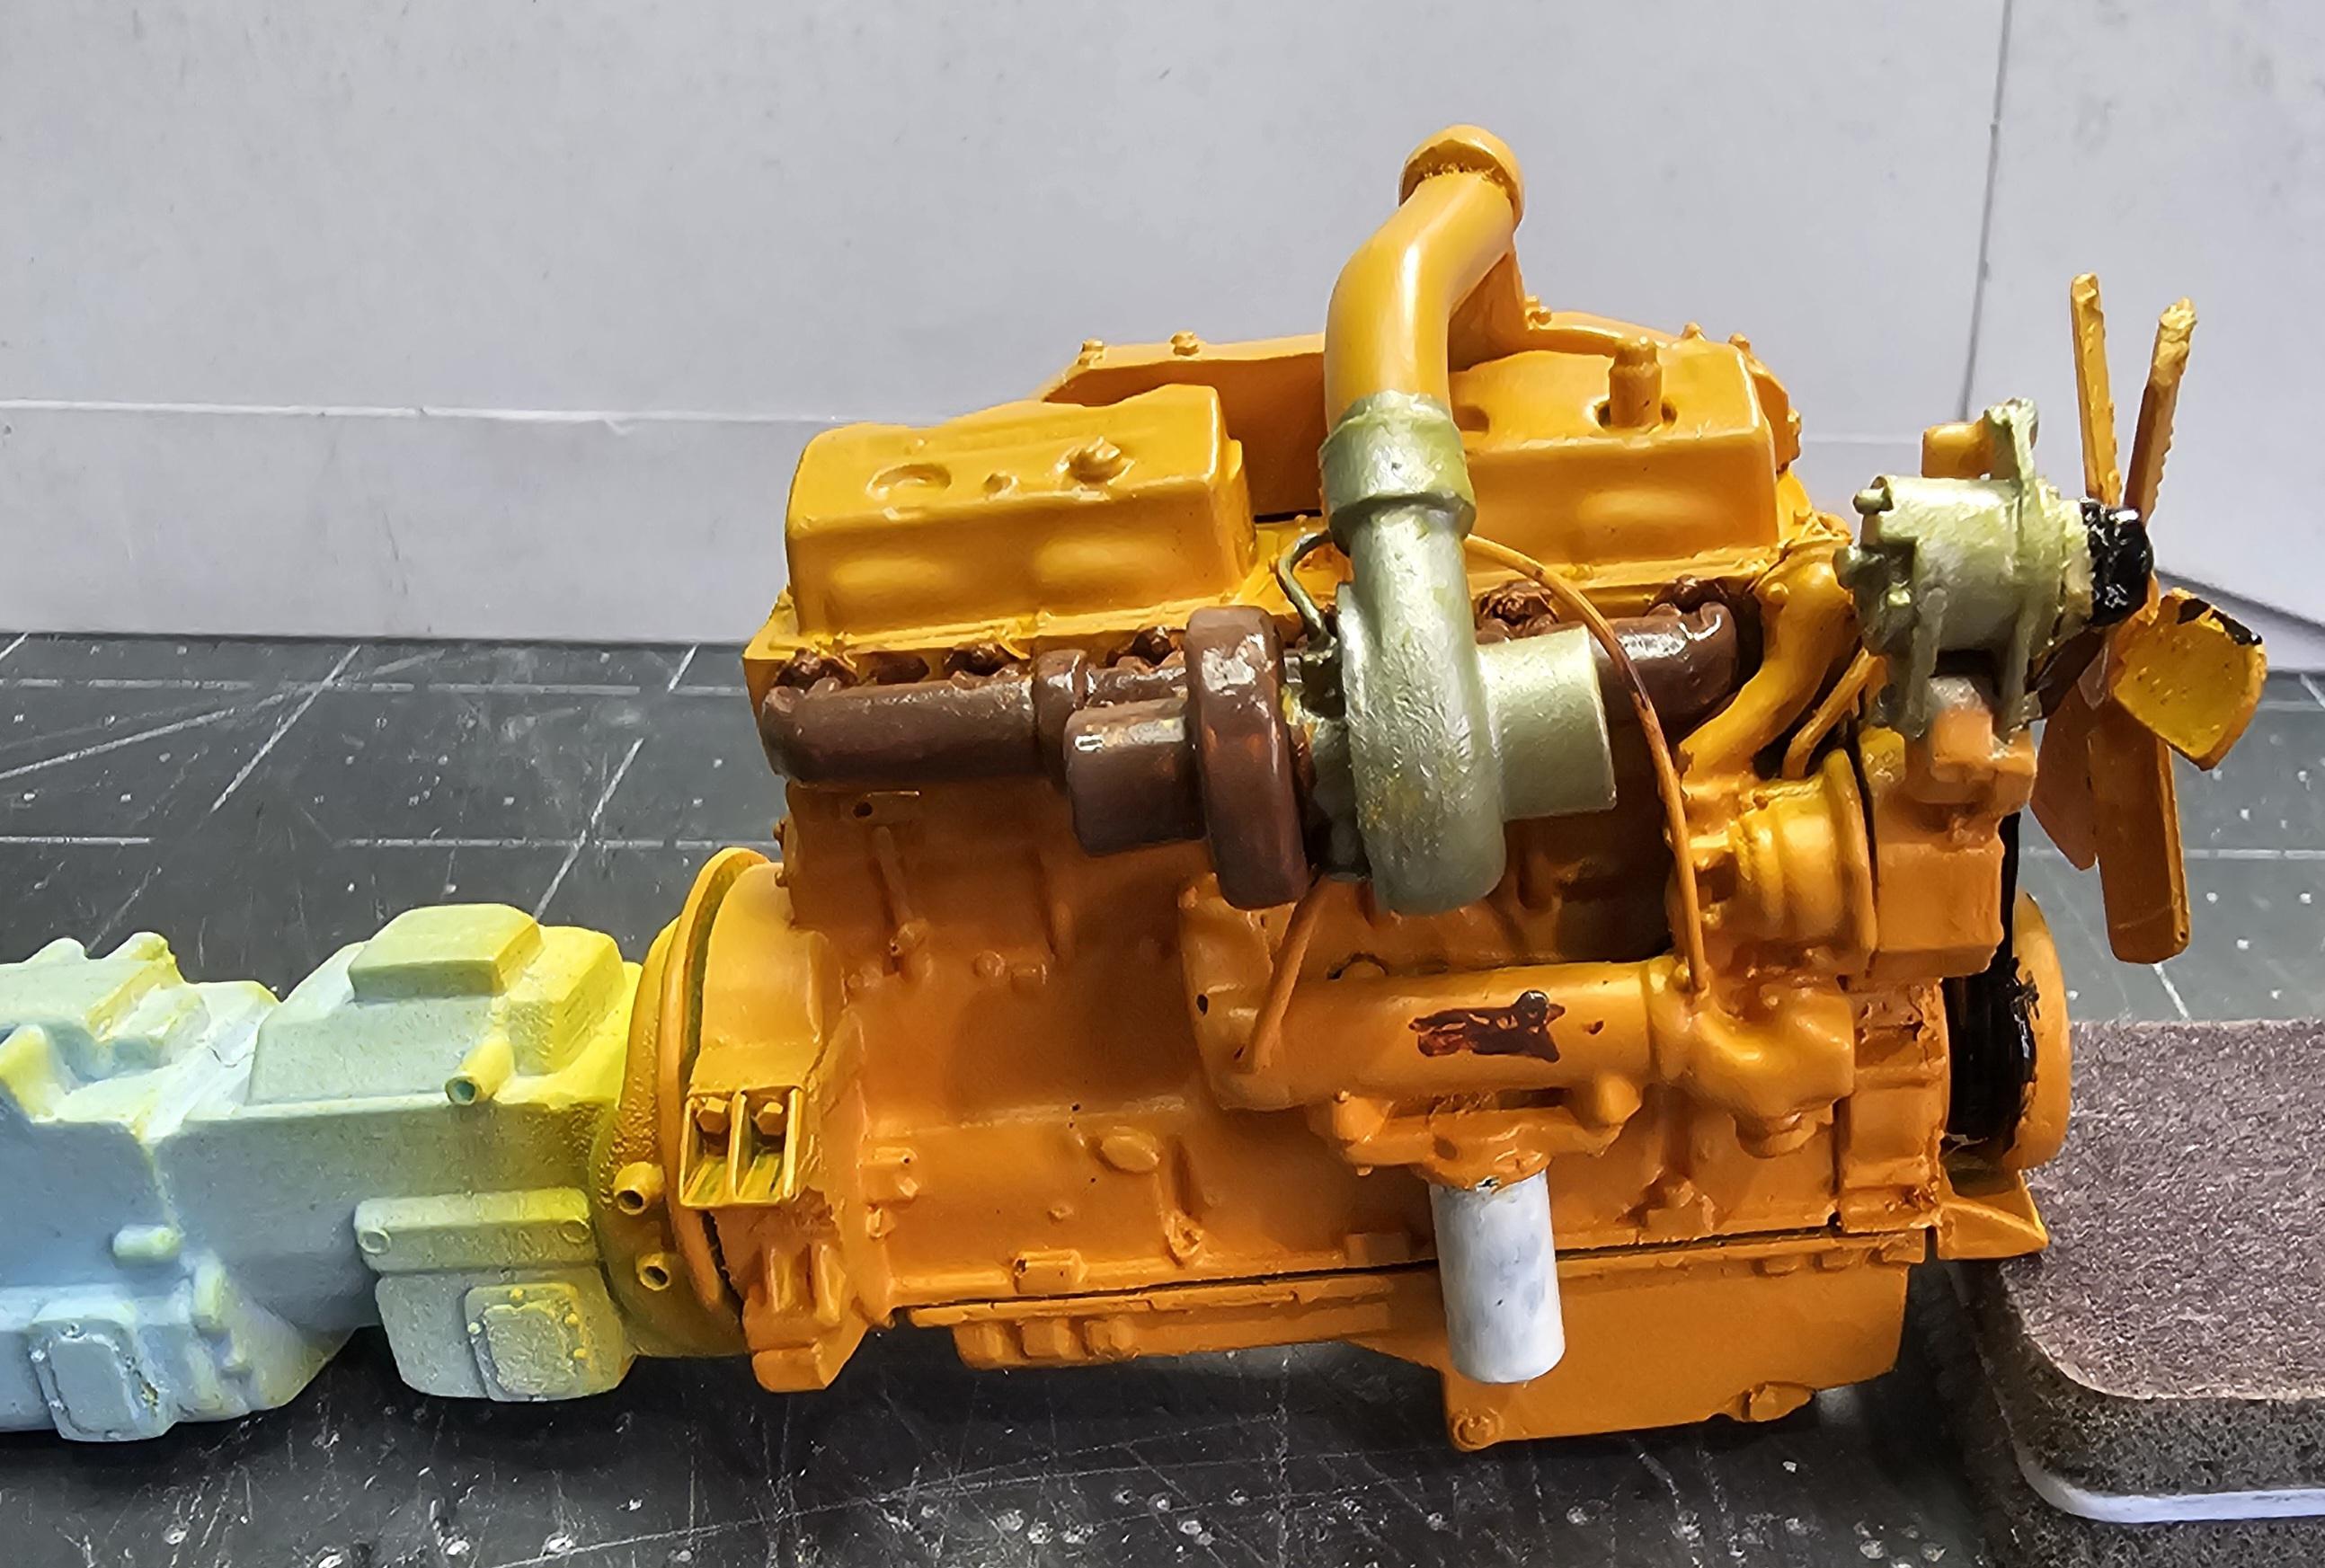
Hey Brenton The engine in those Revell kits is a Caterpillar 3406A. That was an early engine with the fuel pump to the rear. But most trucks with Cats had the 3406b with the fuel pump up close to the front cover. Here are some pictures of my engines that I have done. This is a 3406A. You can see the fuel pump is to the rear of the air compressor just under the top filter. This is the engine in my 1/24 Kenworth W900 heavy haul tractor. This view is of the other side of the engine. It's not done, still in the works.😁 This View shows the turbo side of the 3406b this side is pretty much the same between the two. This view shows the scratch built (stole it from a D8H Cat dozer kit) fuel pump, filter, nose cone (yellow) and I moved the air compressor up so everything fits together. This one is in the works also. It's not dead on accurate, but it's pretty damn close, and under a coat of paint it will look the part. Ron G
-
Hey Brenton Make sure what ever you do. DON'T CHEAP OUT on an air brush! You will just get frustrated with the cheap one and end up getting a good one anyway. You don't have to get a Harder-Stenbeck at $300.00 bucks. There are some nice Chinese ones that come with 3 different needles & seats, wrench, 3 different cups,etc. Yeah I know I said no cheap ones, but these are good and have great reviews. I have two of them (one was my sons😪 rest in peace) and one is mine. My sons actually came with a battery operated compressor, hand held! I have two H&S airbrushes and they are great, but EXPENSIVE! the cheap Chinese one sprays just as nice as the H&S one and it was only $40.00 bucks on Amazon! My only criticism with it is it has very tiny needles, like a Iawata, and can easily get lost to the dreaded carpet monster! If you have any questions on airbrush equipment feel free to ask away. Ron G
-
Hey Brenton Your rig is looking real nice, like the maroon color. On the rims & tanks you can add a lite coat of dull coat to tone down the bright chrome. I use a semi gloss clear acrylic (Tamiya), not sure if you can get it in a spray can?🤔. On the tires the AMT tires (newer ones) are a 10:00-20 or 11:00-20 tire, there an older style. The Revell ones are probably 12:00R-22.5's so yeah they are bigger. Any other questions feel free to ask, this forum is good for that. Ron G


.jpg.8f9ec8dcd852ca56850eb87d6935dfdd.jpg)