ShakyCraftsman
-
Posts
792 -
Joined
-
Last visited
Content Type
Profiles
Forums
Events
Gallery
Everything posted by ShakyCraftsman
-
 Hey all Small update. I'm working on the transfer case now, trying to figure out how and where to mount it.🤔 And here it is mounted. Ron G
-
Thanks Gary, that's the one that I was leaning towards. Ron G
-
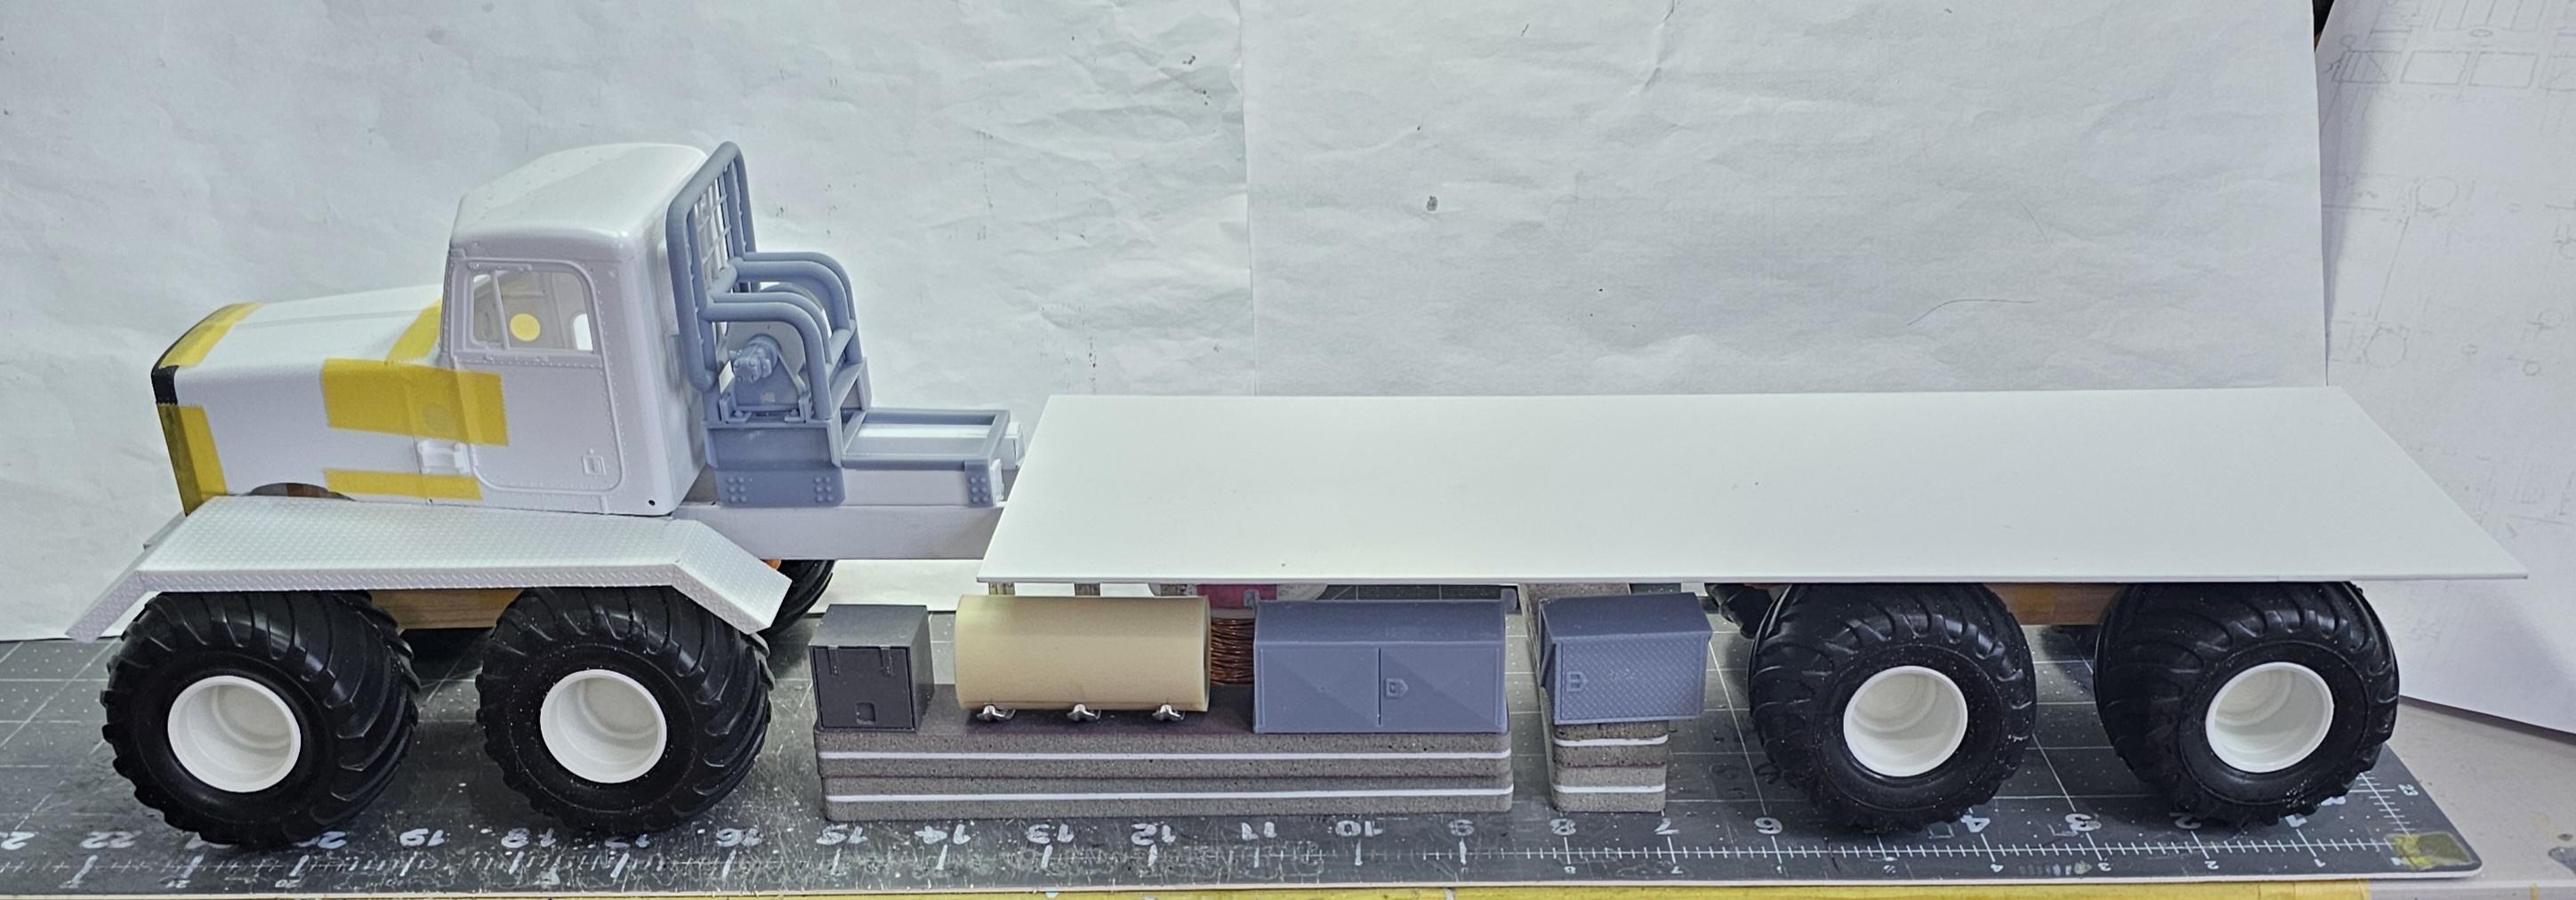
Hey all Just a little mock-up. Side layout option "A" small tool box, fuel tank, large tool box, medium tool box. Side layout option "B" Small tool box, fuel tank, chain rack and large tool box. So what do you guys think? A or B. Ron G
-
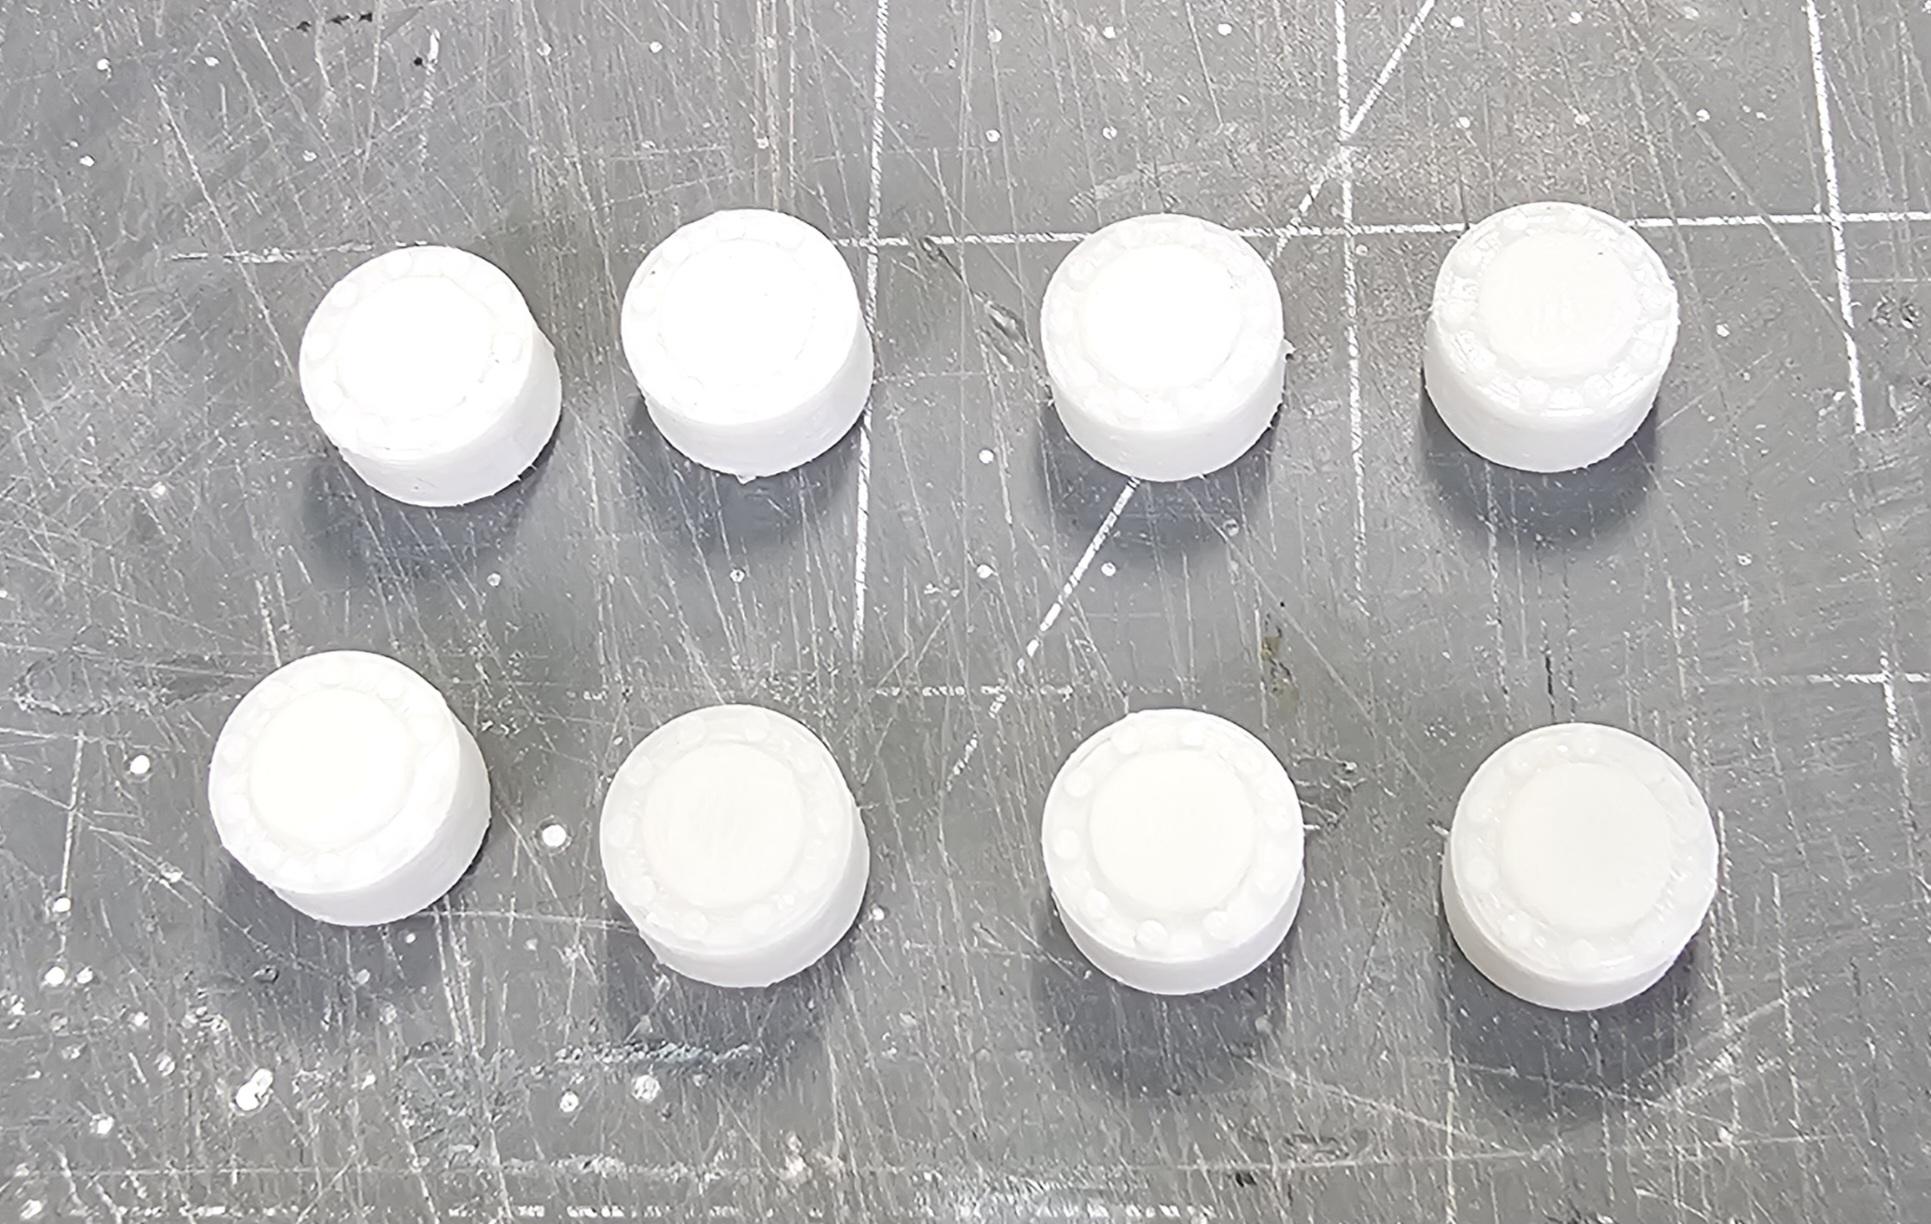
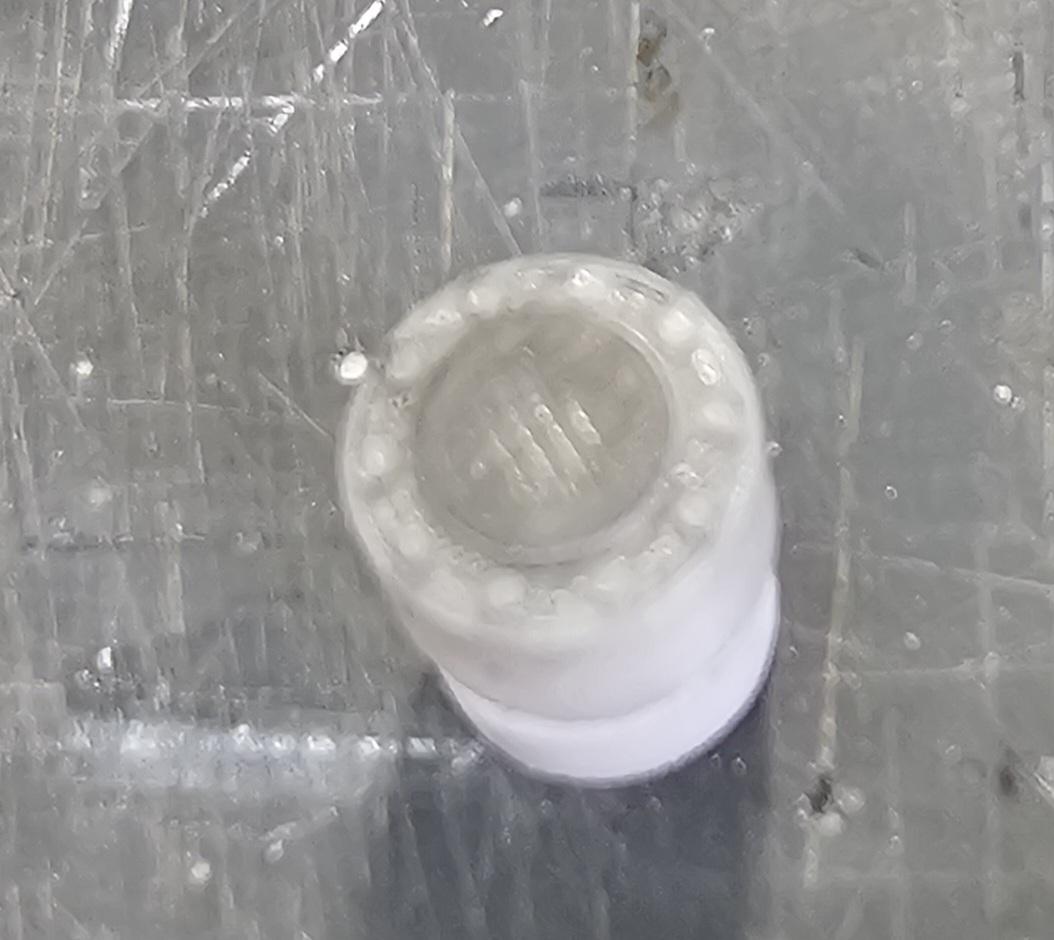
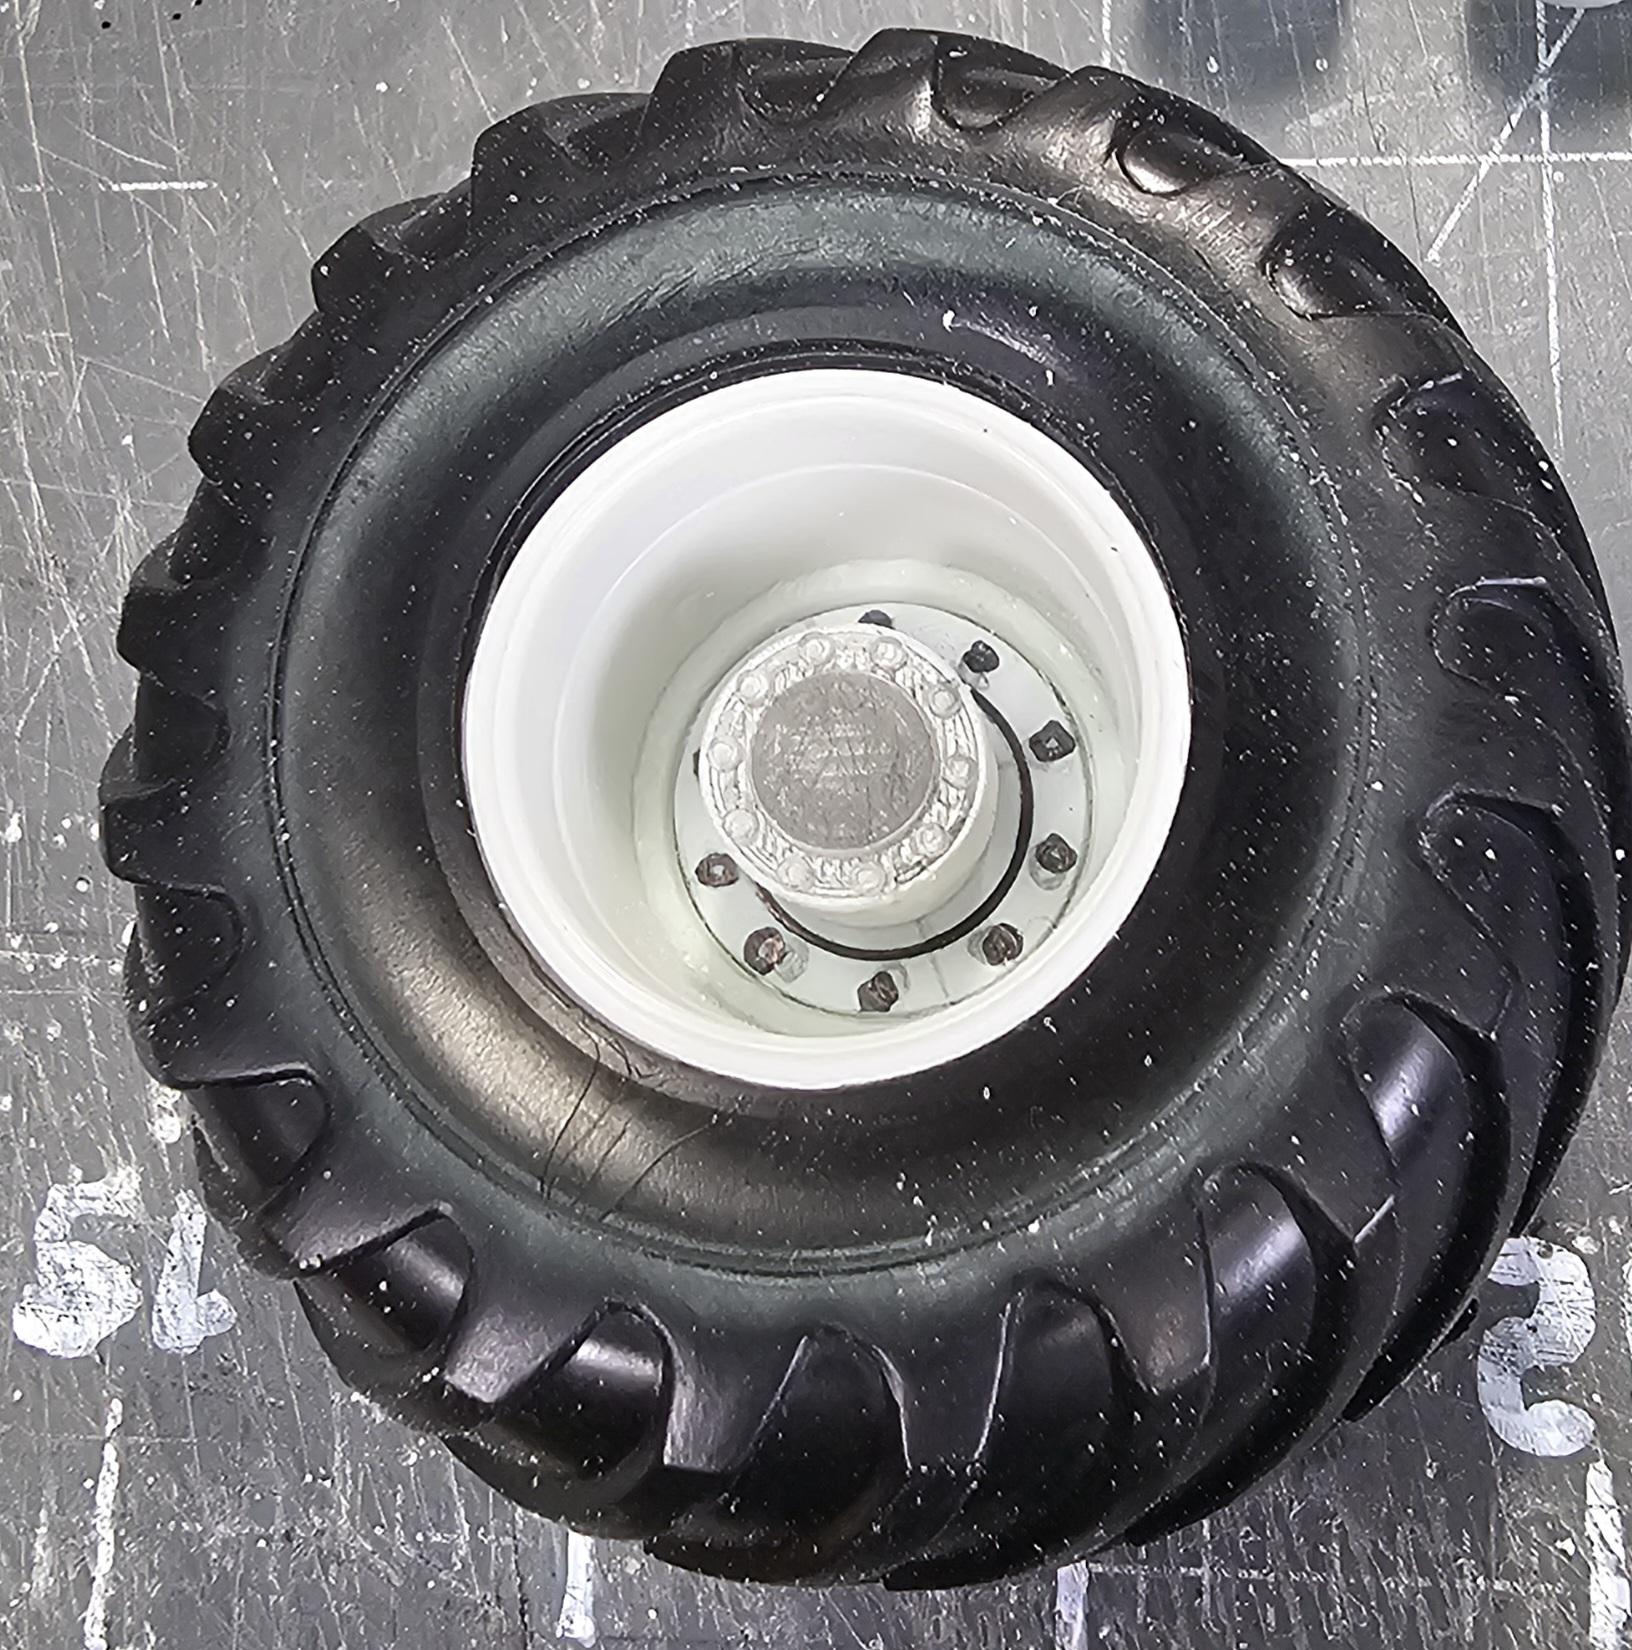
Hey all Okay, I shortened the frame from a 411" WB to a 366" WB. I think it looks much better. It still will have a up to 28' bed, so still big. I also got some 1/24 scale planetary hubs from a guy on Ebay. They are 3D printed and look great. Here are some pictures for yous all to look at. This view shows the frame now shortened to 366"WB. This view shows the front of the frame and the modifications I made to accommodate the Cat C15 6NZ and the radiator. This view shows the rear of the frame at the rear axles cross member. I added the webbing braces to both sides of the frame. There will be bolt details added later. This view shows the Cat C15 6NZ and 18 spd transmission with the radiator sitting in place in the frame. The tank on the side is for the power steering and hydraulic cylinder for steering. These are the 3D printed planetary hubs from Ebay. Closer view of the hubs. This view shows the complete hub on the right, the hub next, then the two pieces of styrene tubing to make up the complete hubs this view shows the two pieces of tubing to make up the hubs. The bigger diameter one is 7/16" and the taller one is 3/8" diameter. I made 8 of them 4 for the fronts, 4 for the rears. this view shows the hubs as they will look when done. This view shows the hub in place on the bolt mounting plate. I still need to add all of the bolt heads all 80 of them!!!😱 And this view shows the set-up in place in the wheel/tire. The wheels will be painted a white/off white, the hubs will be black and the bolt heads will be a dark gun metal color. Well that's it for now be back soon with more updates. Ron G
-
Okay, I'm looking for some help from anyone on here that is familiar with these bed trucks. As you can see from this picture it's kinda long, I'm thinking to long. Right now the way it sits, the bed is 30.0' long. I'm thinking it should be more like 24' to 26' long. So all those with knowledge of these kinda trucks please chip in and let me know what you think. Please all help will be greatly appreciated. Thanks Ron G
-
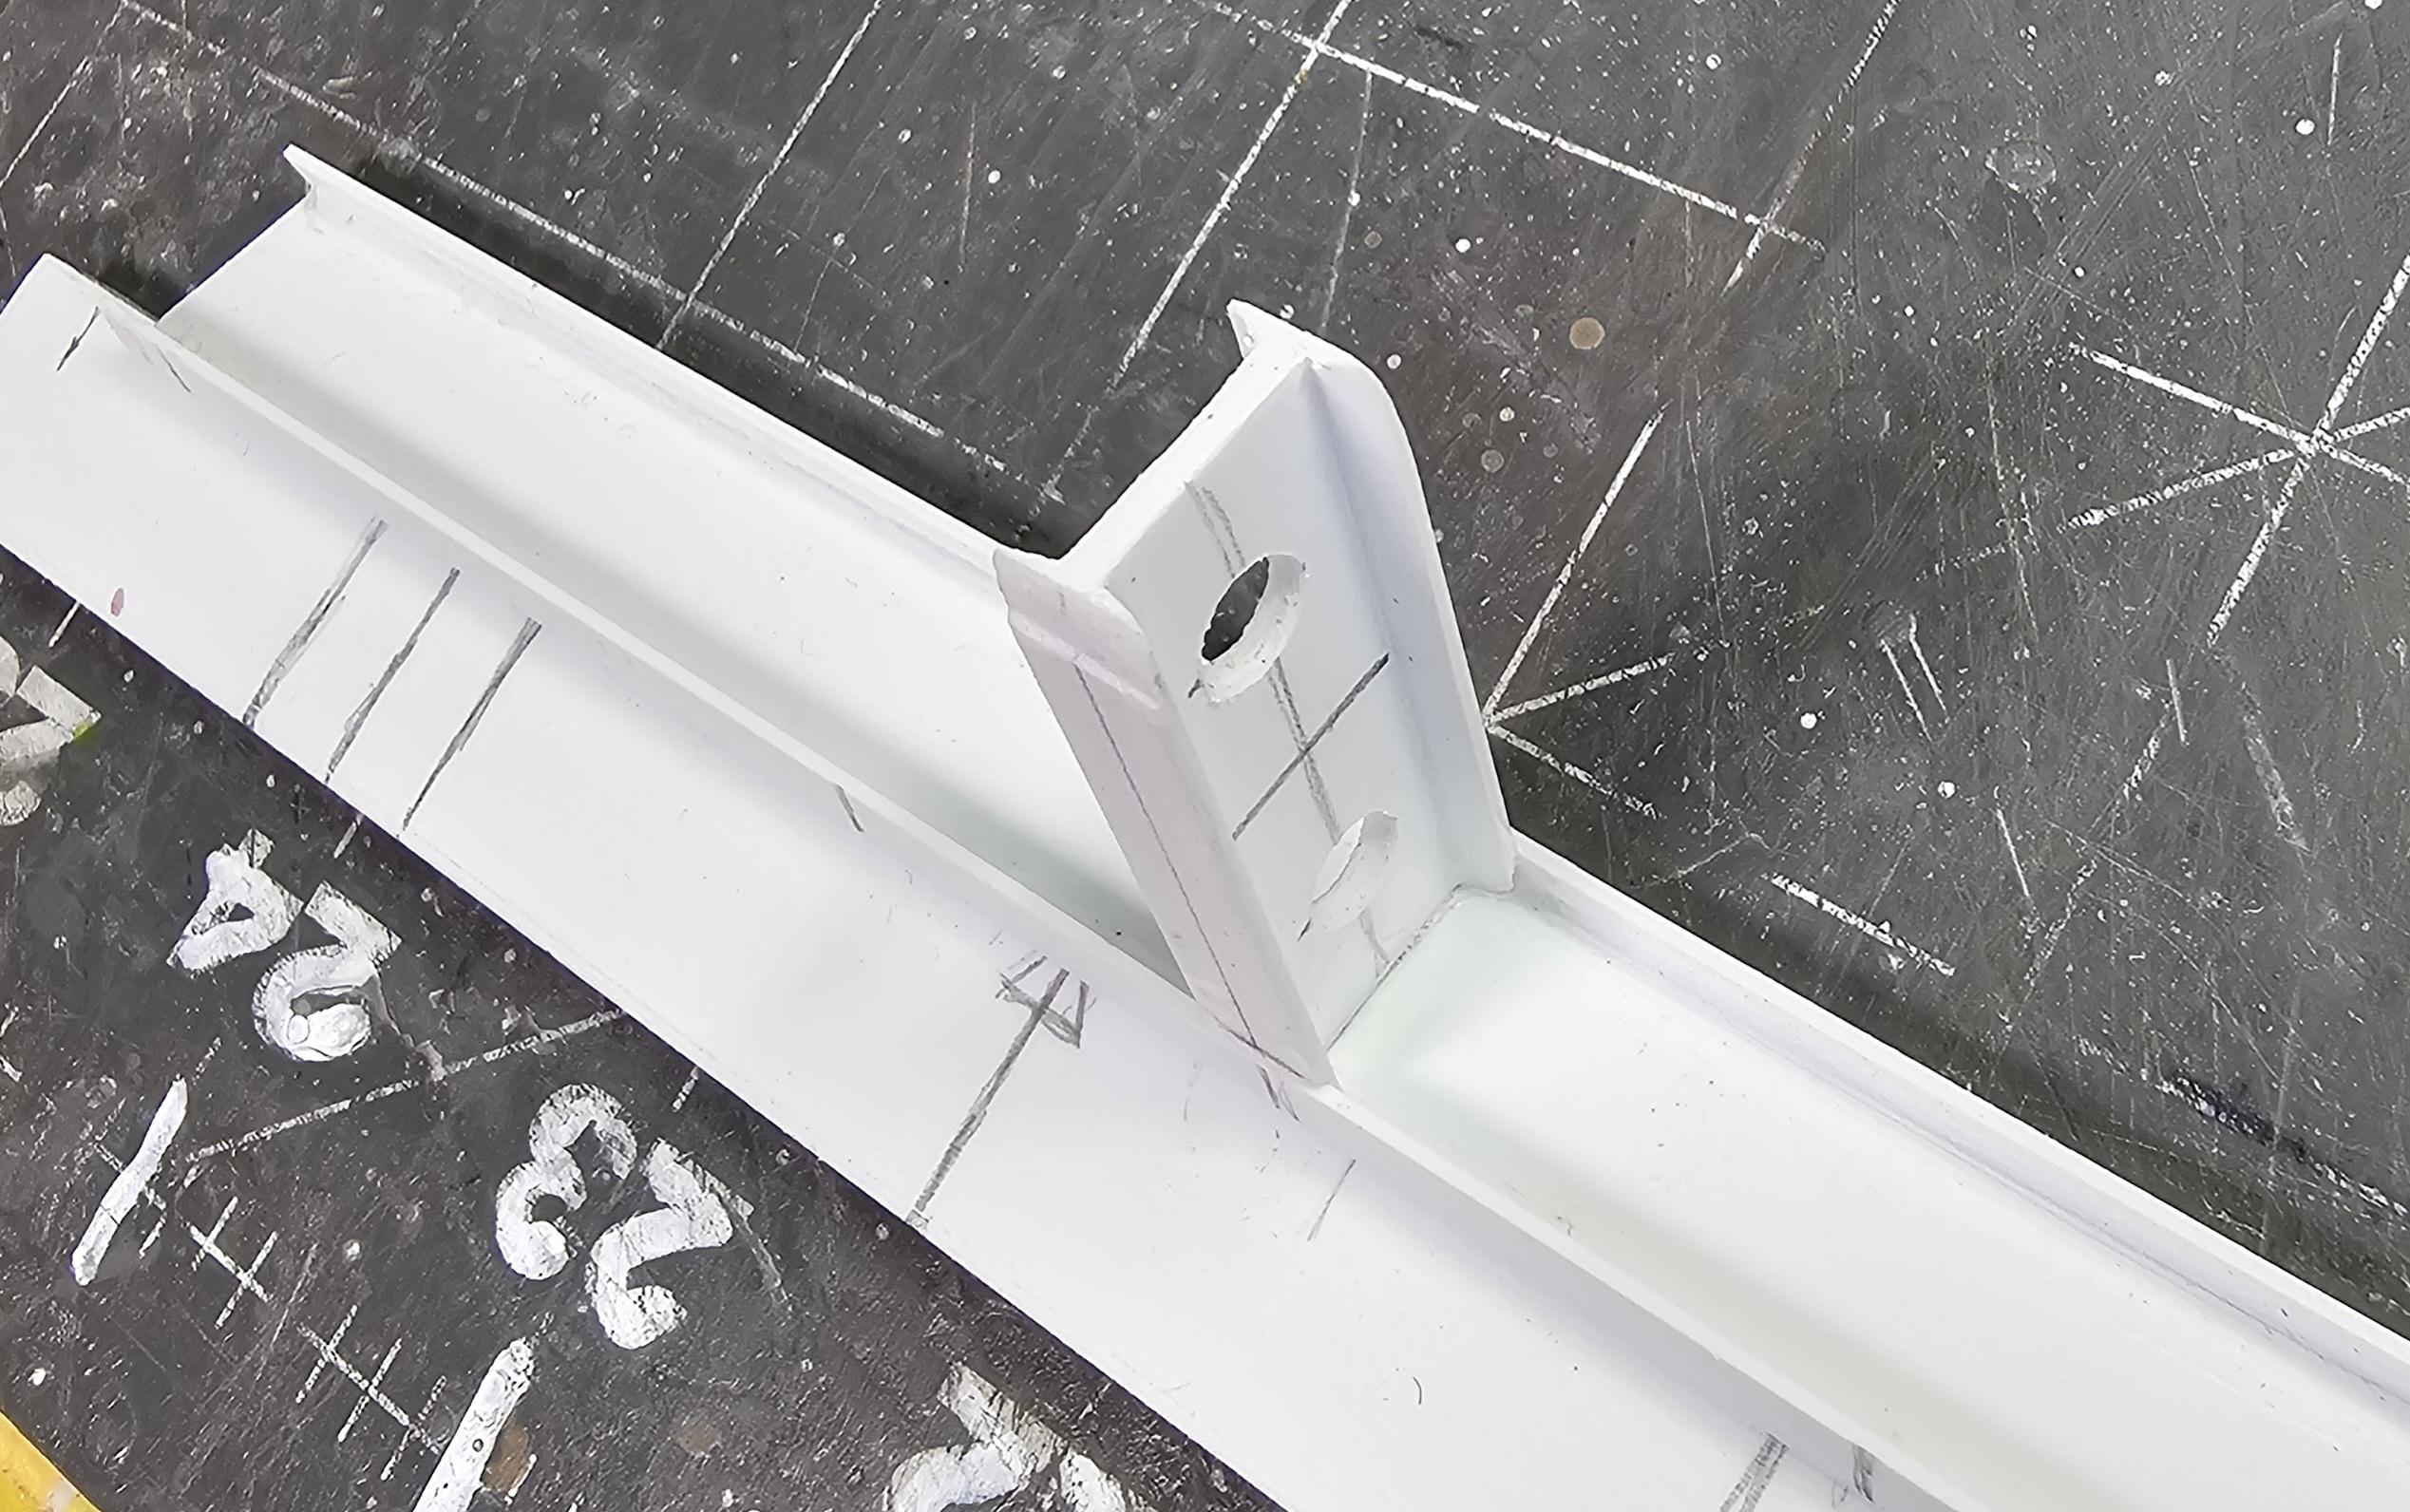
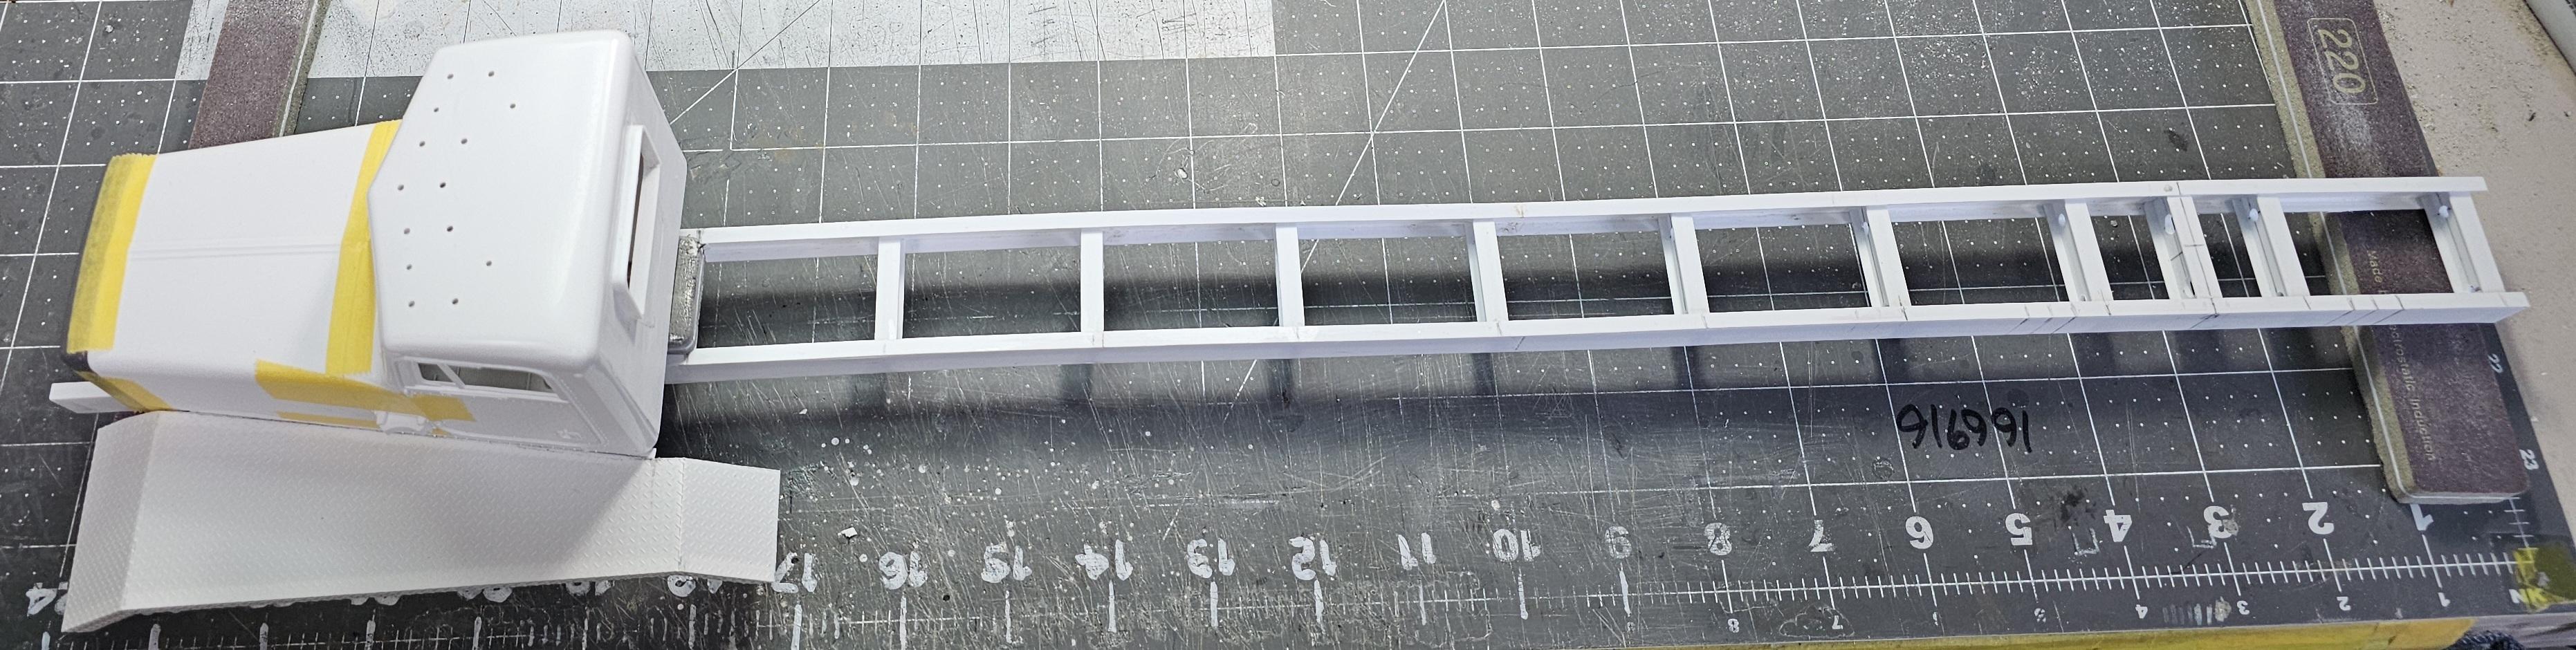
Hey all I have the frame rails created. I made them from 0.03" thick plastic sheet and strips. The cross braces are 7/16" "I" beams and one 1/2" "I" beam thats for the rear axle torsion rods to attach to. This view shows the frame rails and cross members. This view shows the "C" channel shape and one of the "I" beam cross members. This view shows the frame assembled with the Cat C15 6NZ sitting in place between the frame rails. This view shows the frame with the cab sitting in place. This is a mock-up of the bed truck. Right now it's 24.0" long (576.0" scale). It has a 411.0" WB. But, I'm thinking this is to long. 🤔 Ron G
-
That's pretty damn close to it! Thanks for the picture. If you have anymore pictures of it please let me know. Ron G
-
Brake chambers.....HELP!
ShakyCraftsman replied to ShakyCraftsman's topic in WIP: Model Trucks: Big Rigs and Heavy Equipment
Thanks everyone, but I got a bunch from Paul at ST Supply. Ron G -
Thanks Randy Yeah, she's going to be something alright, as long as I can get everything to work together.😉 Ron G
-
Yes they are. Ron G
-
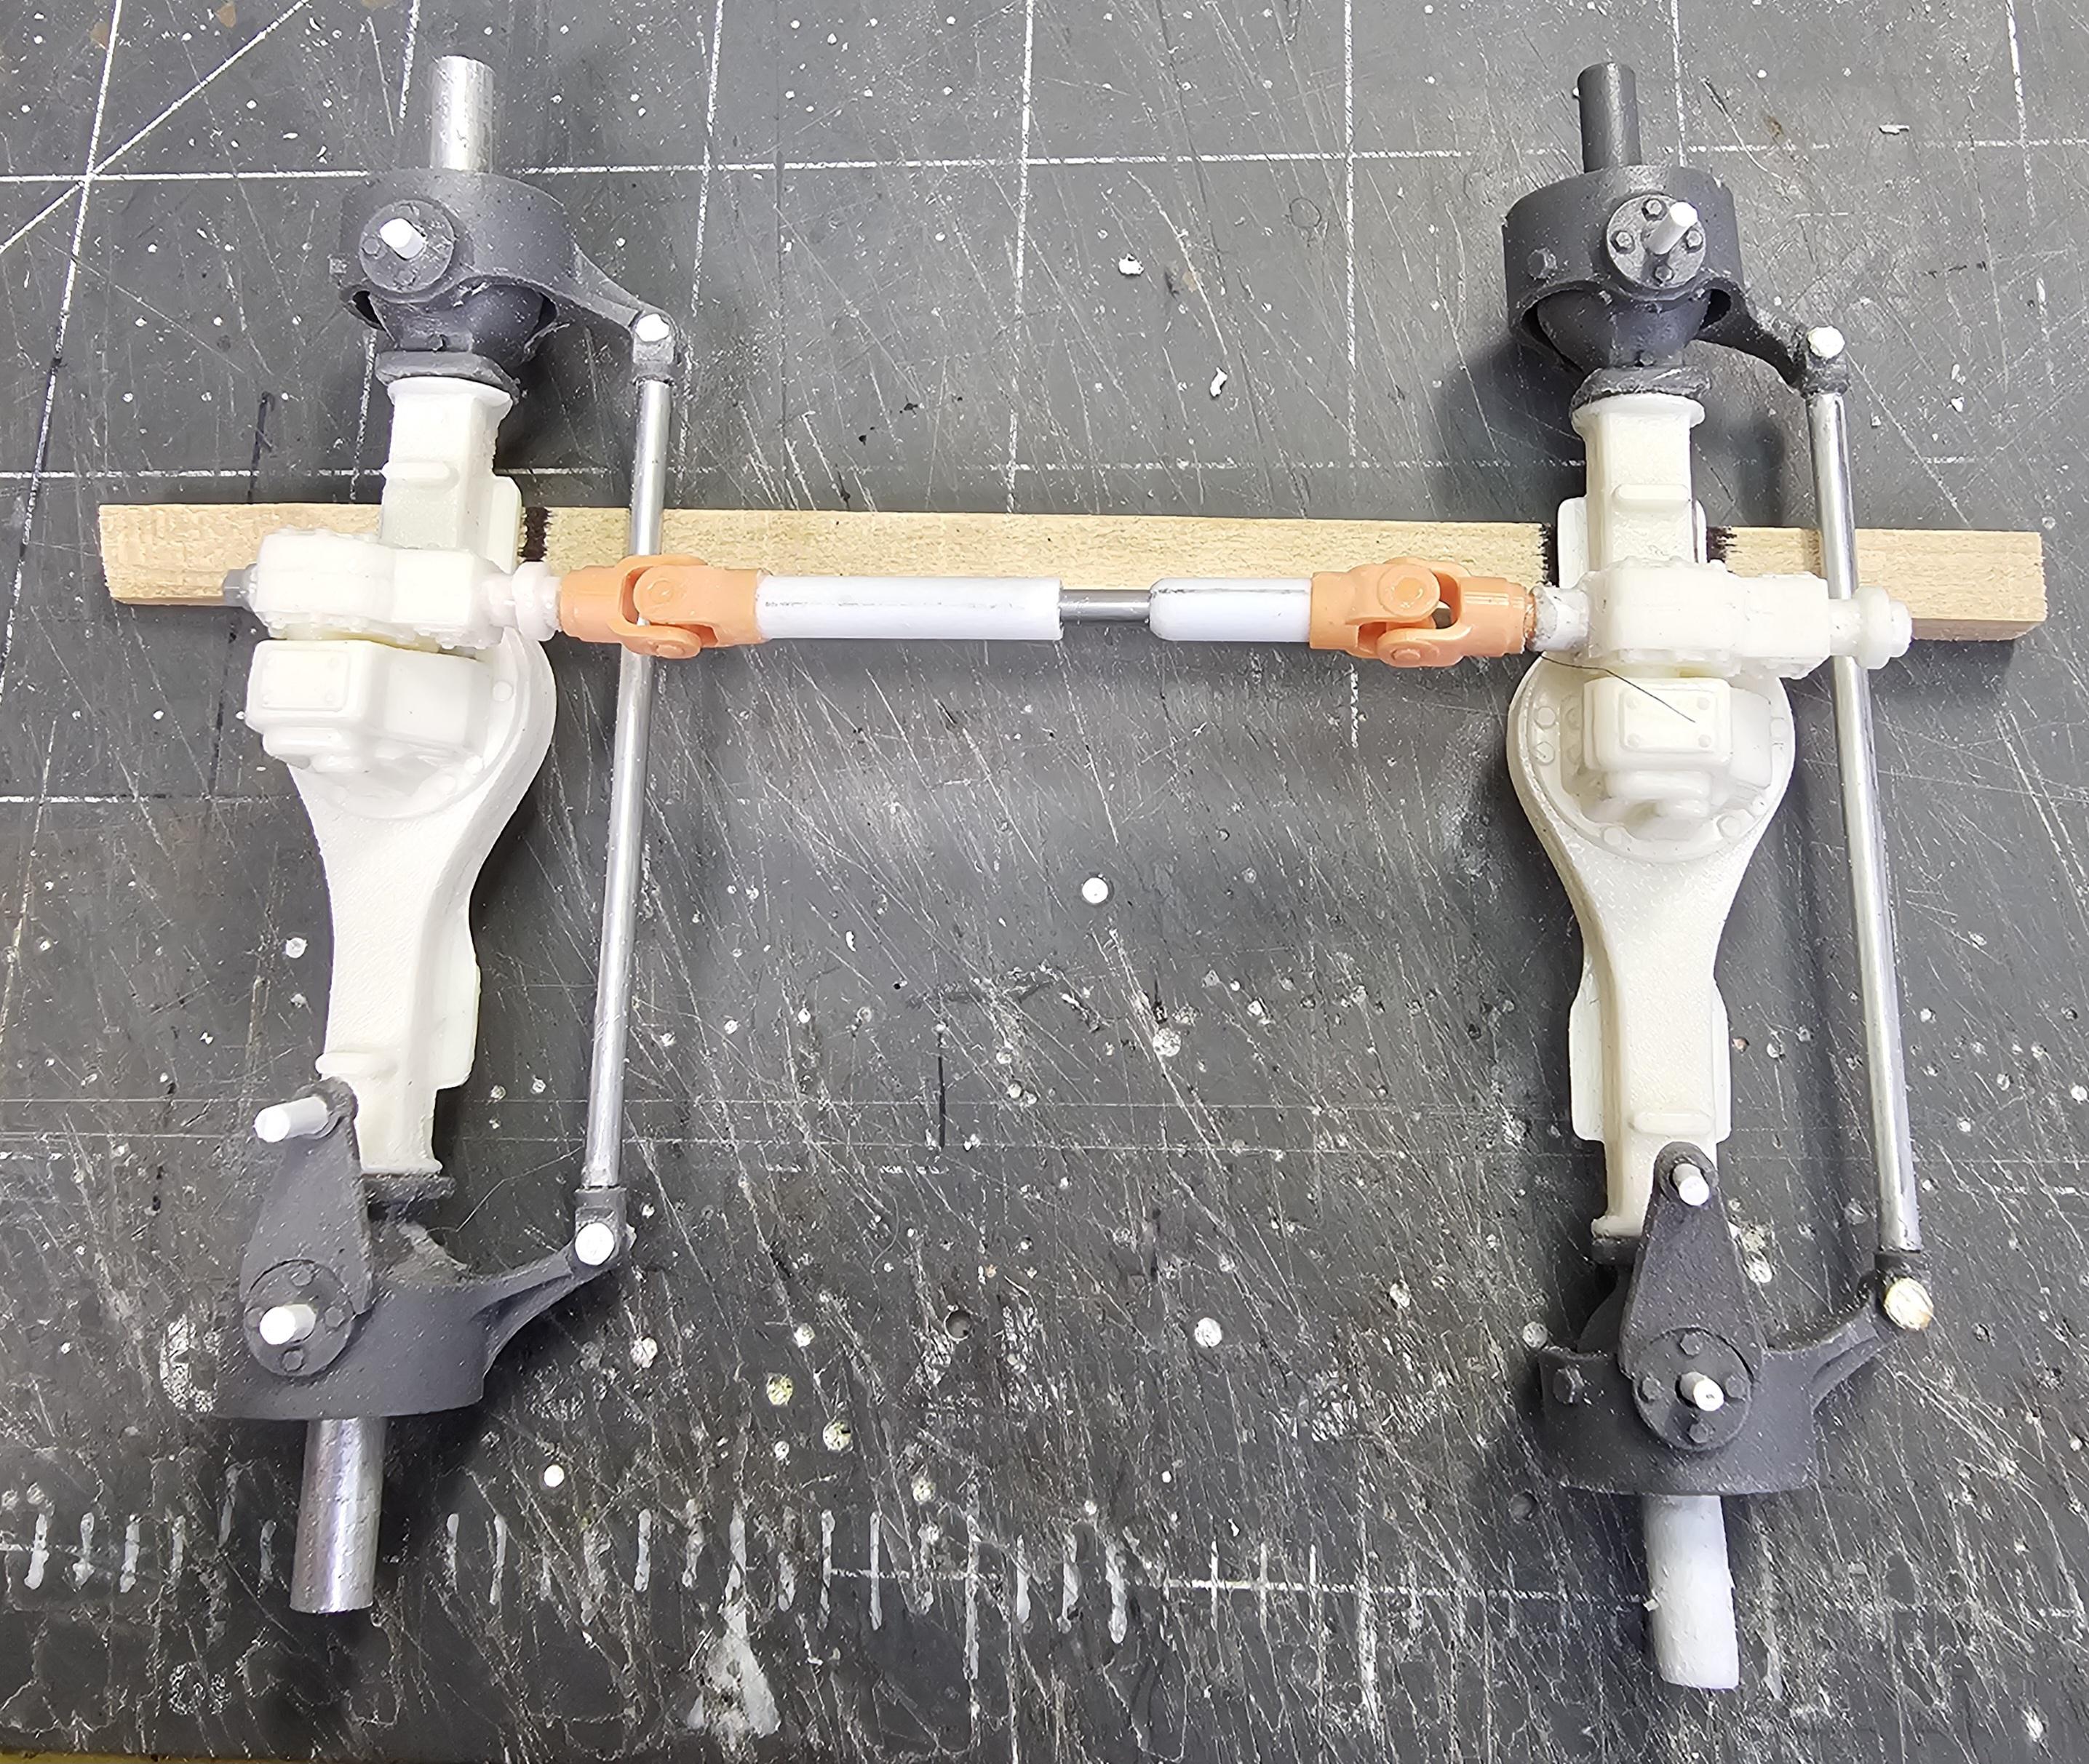
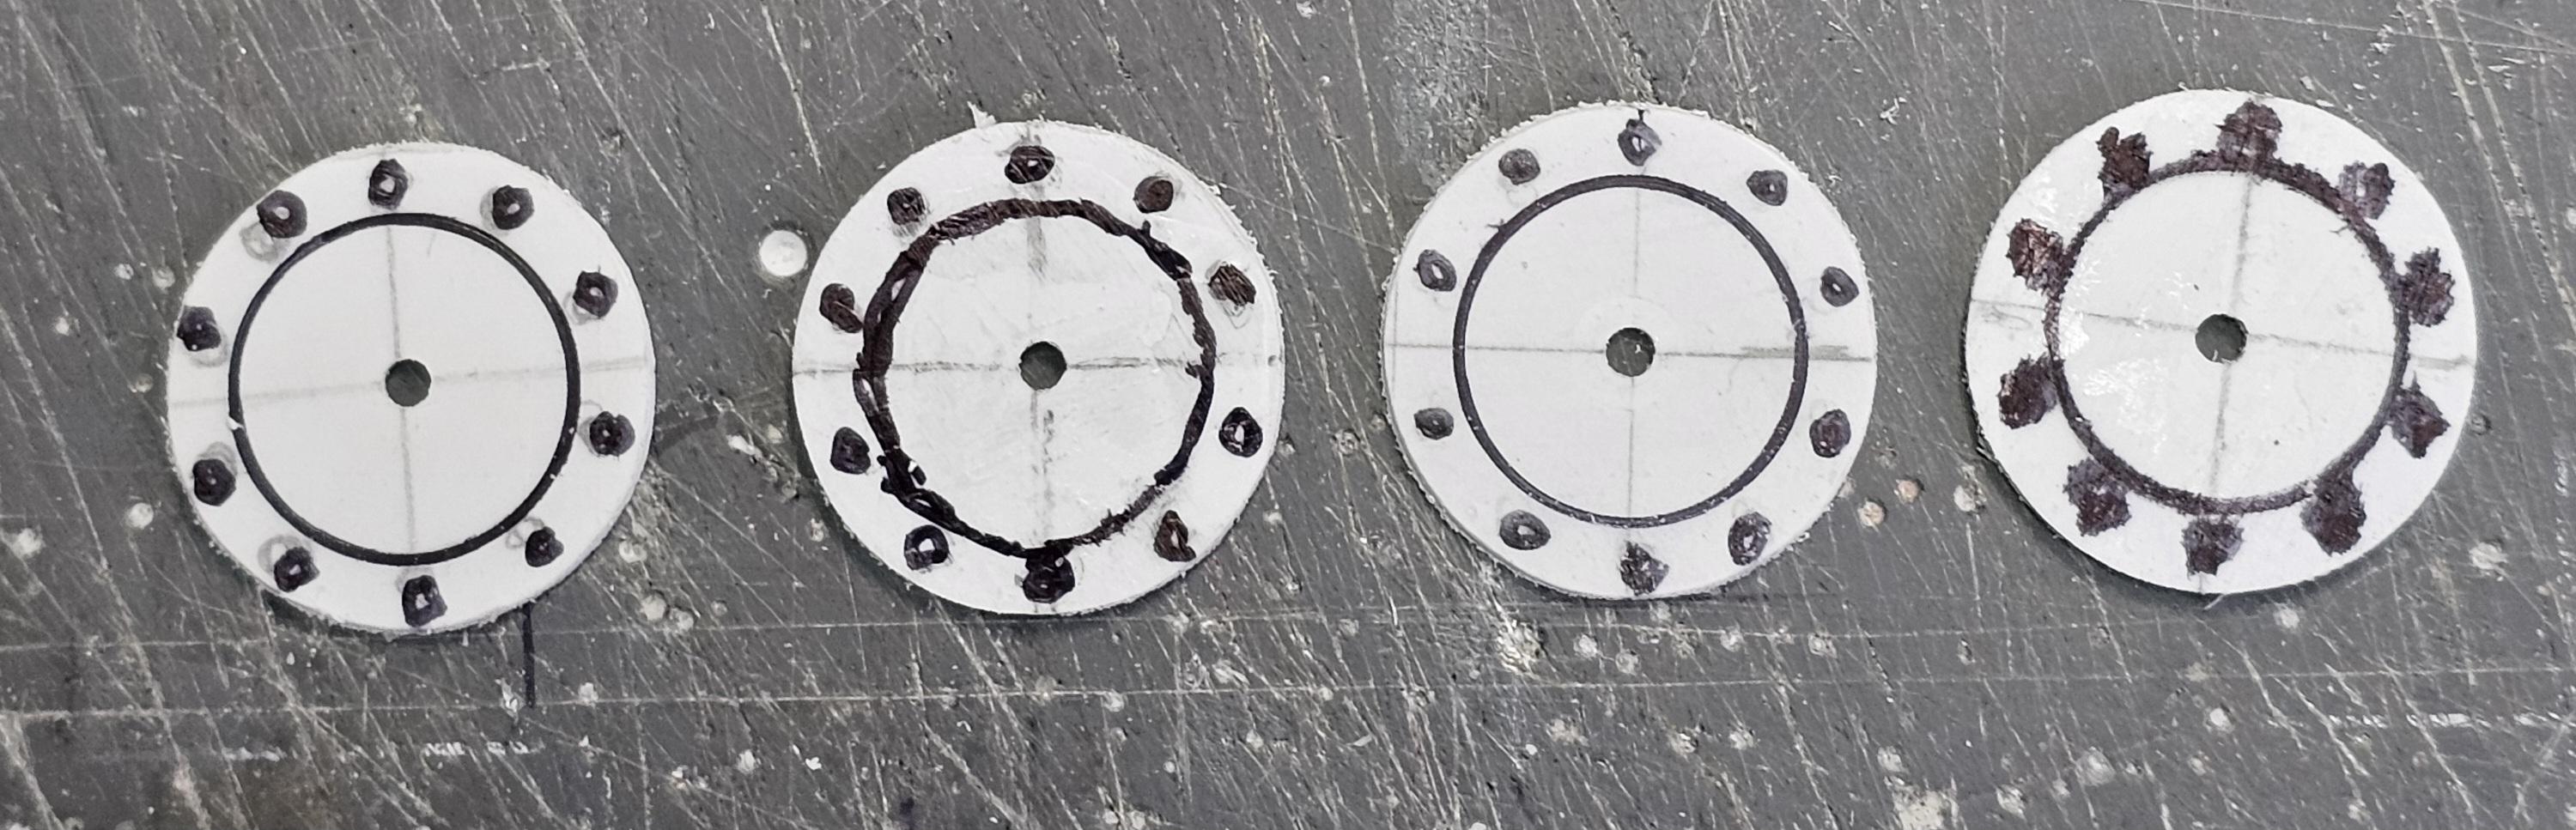
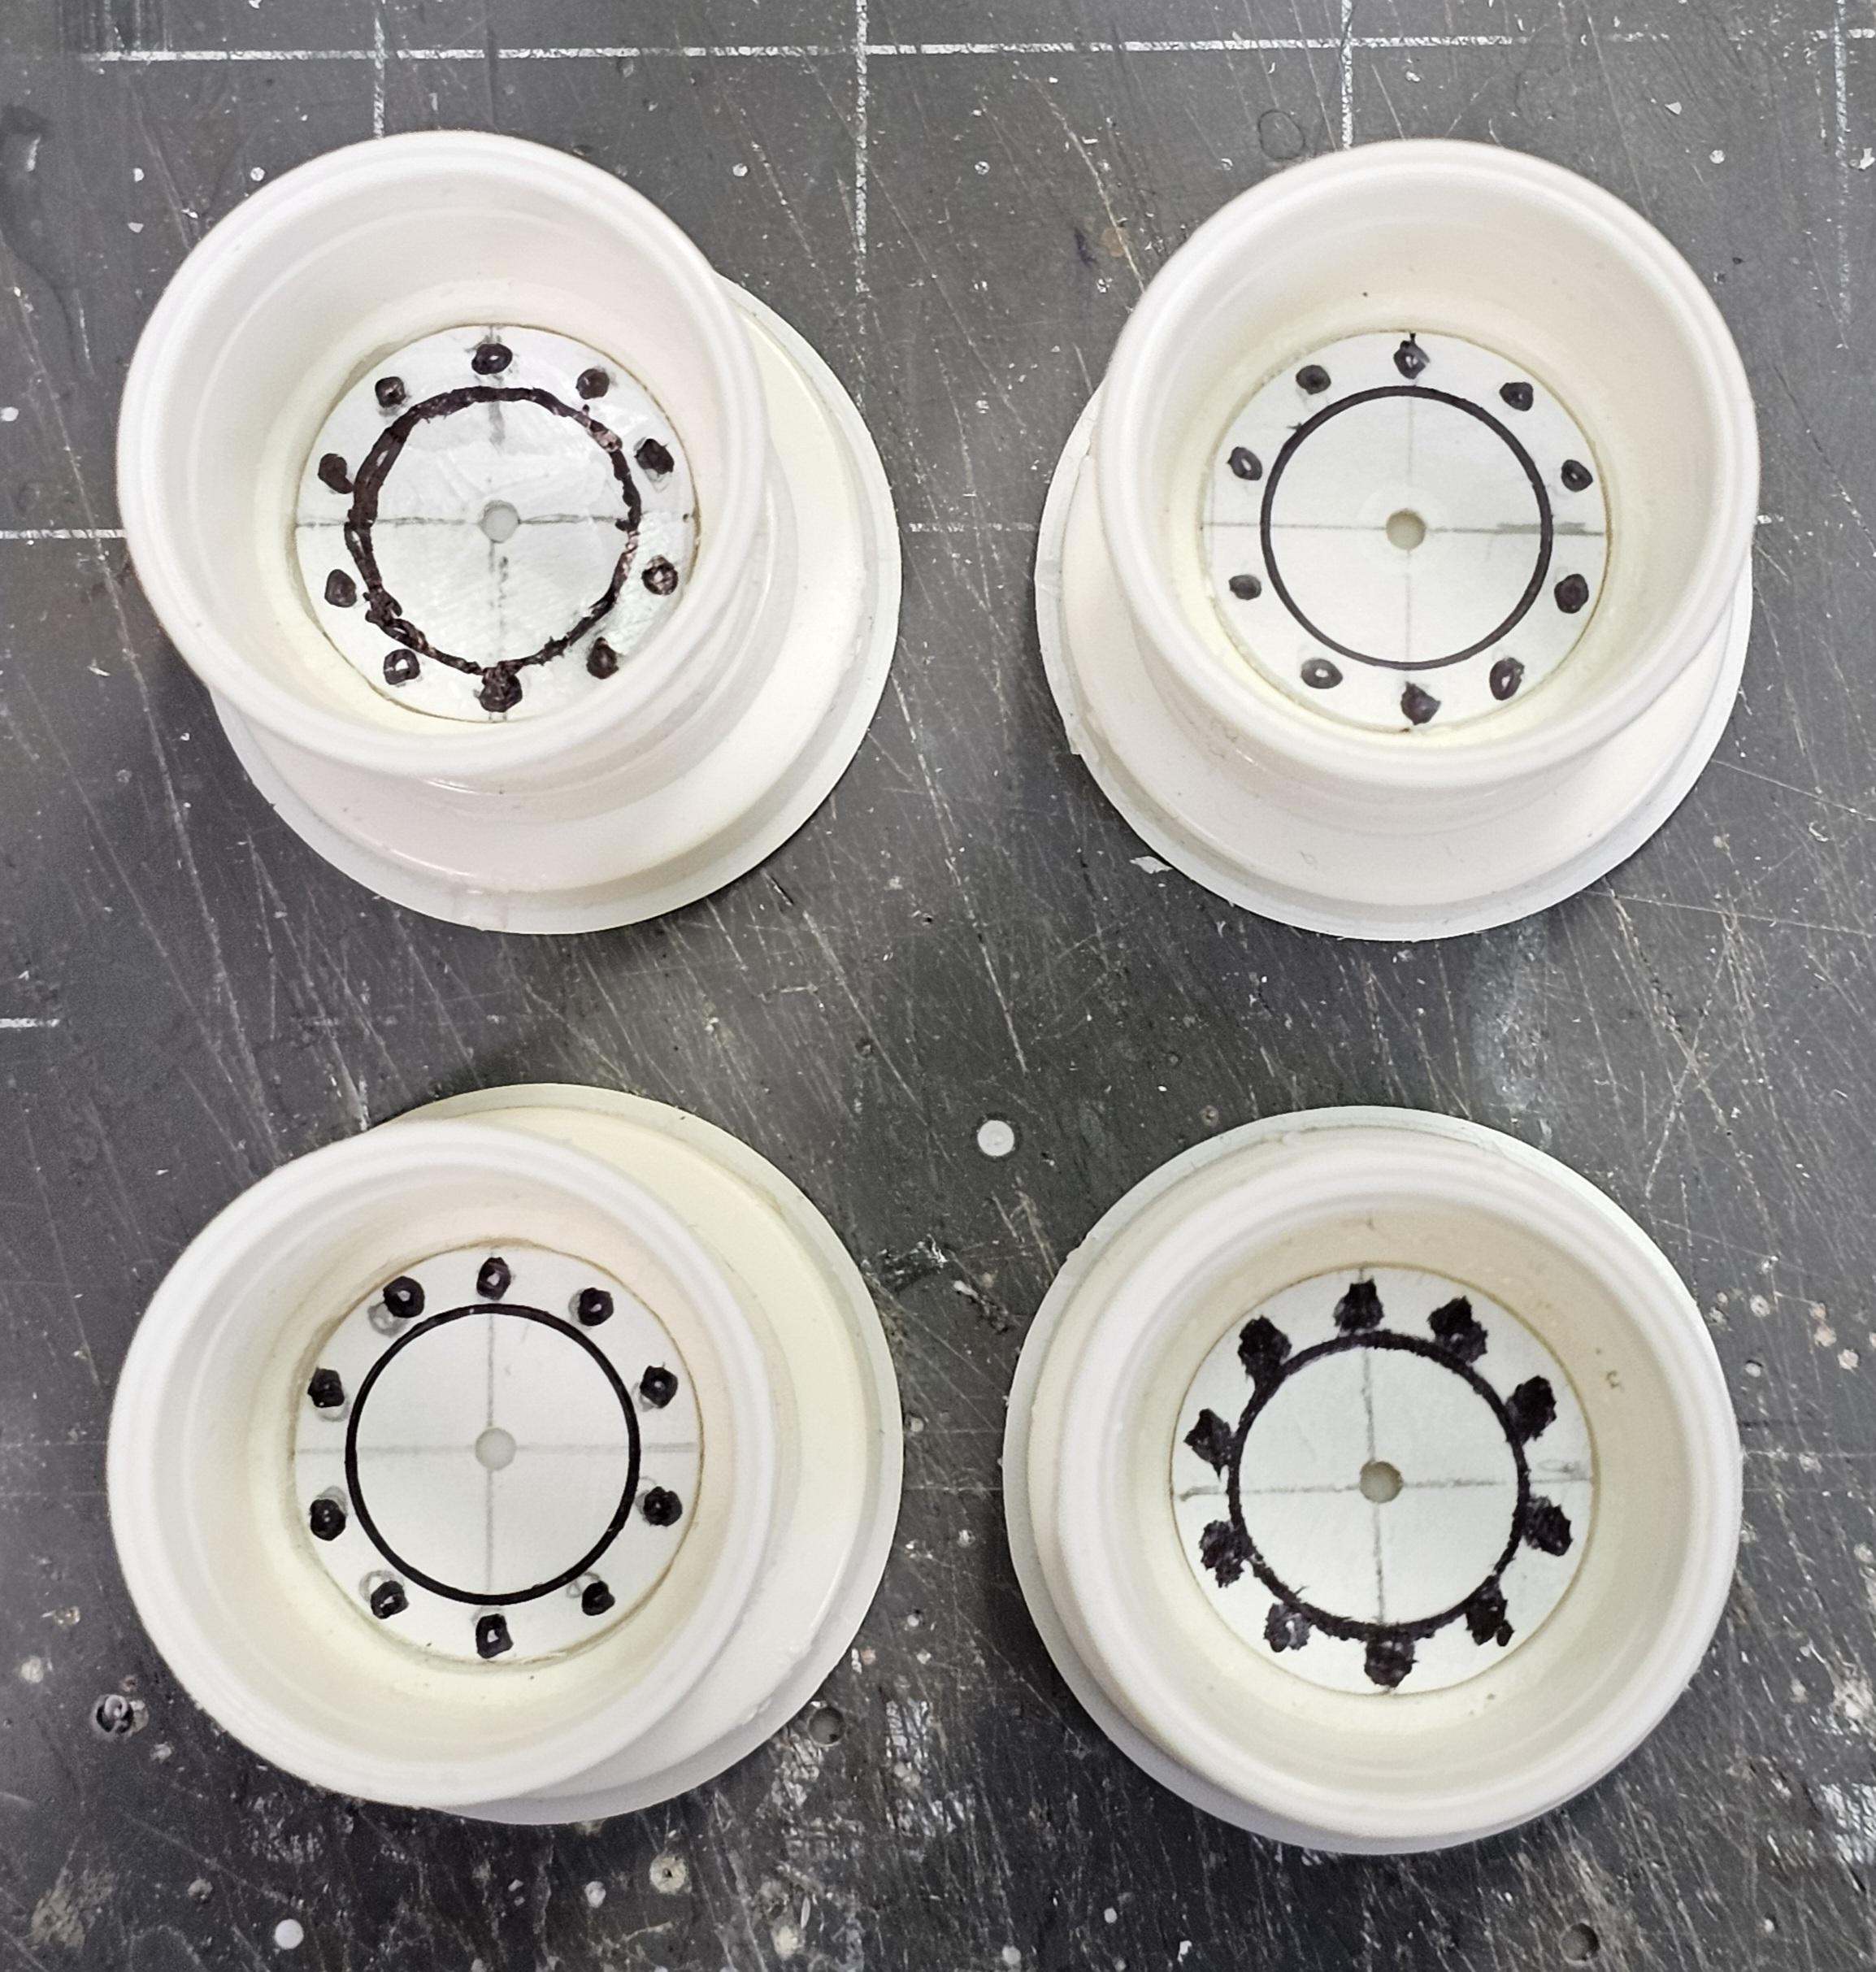
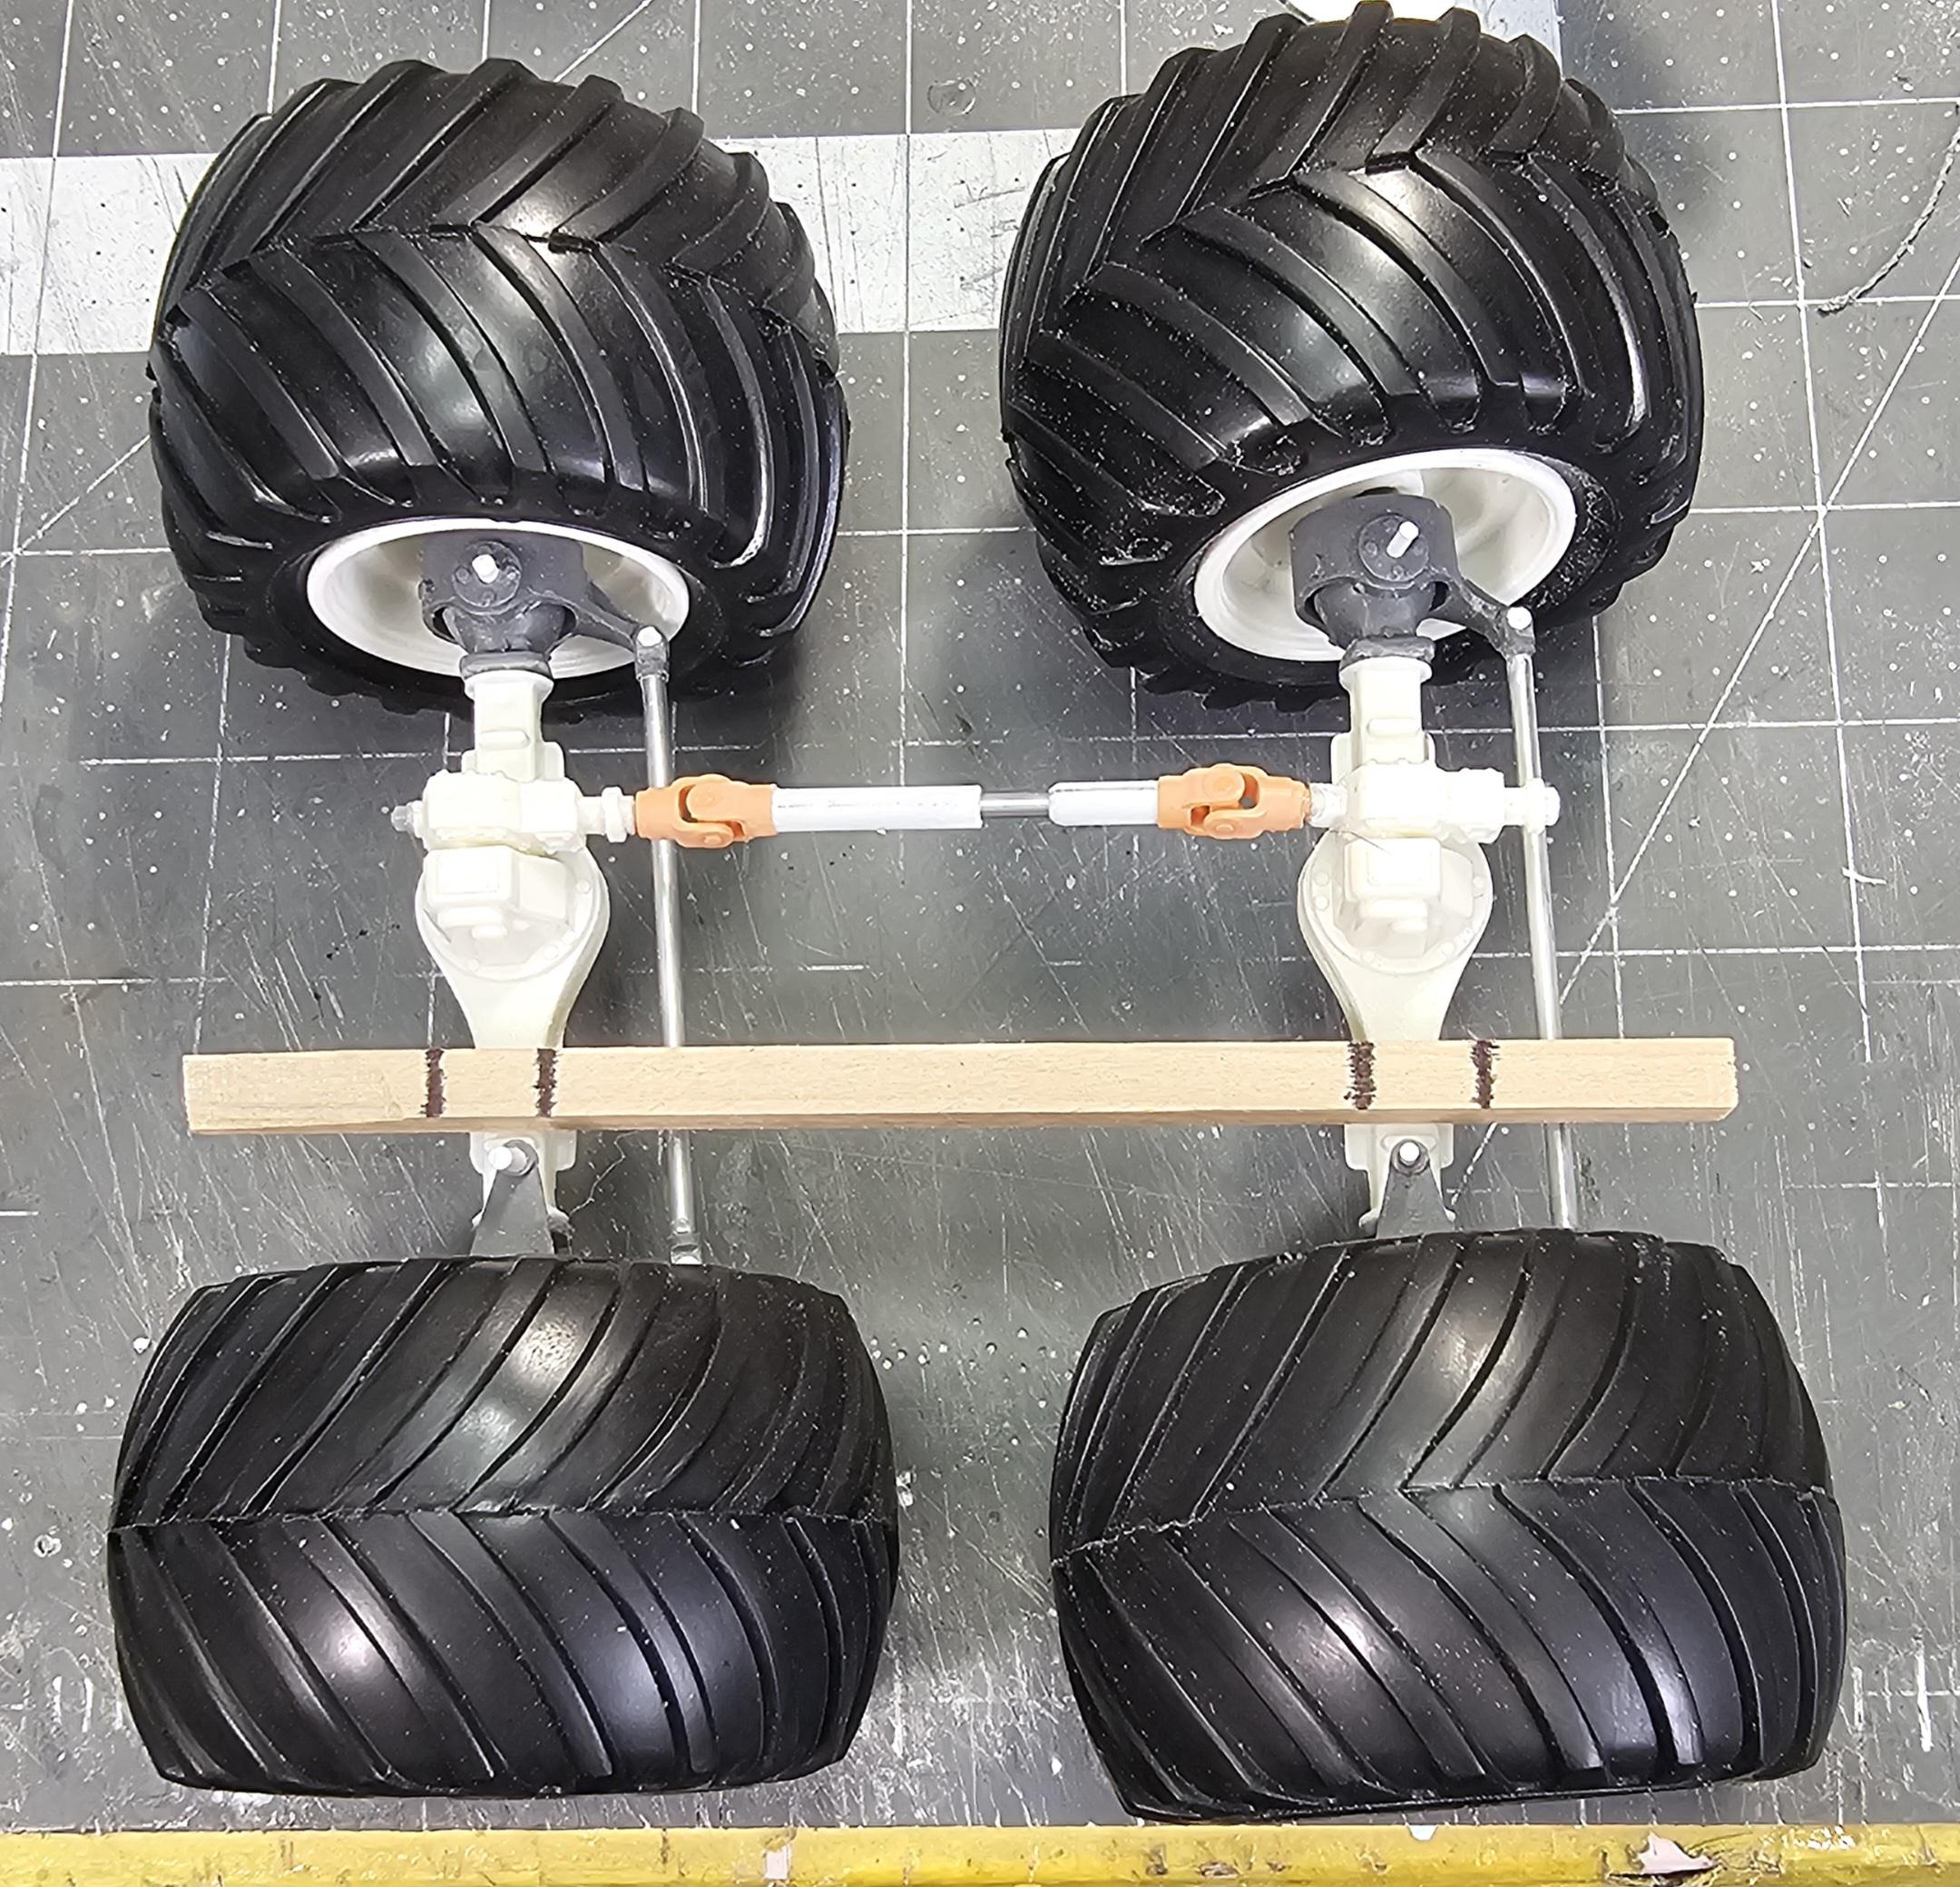
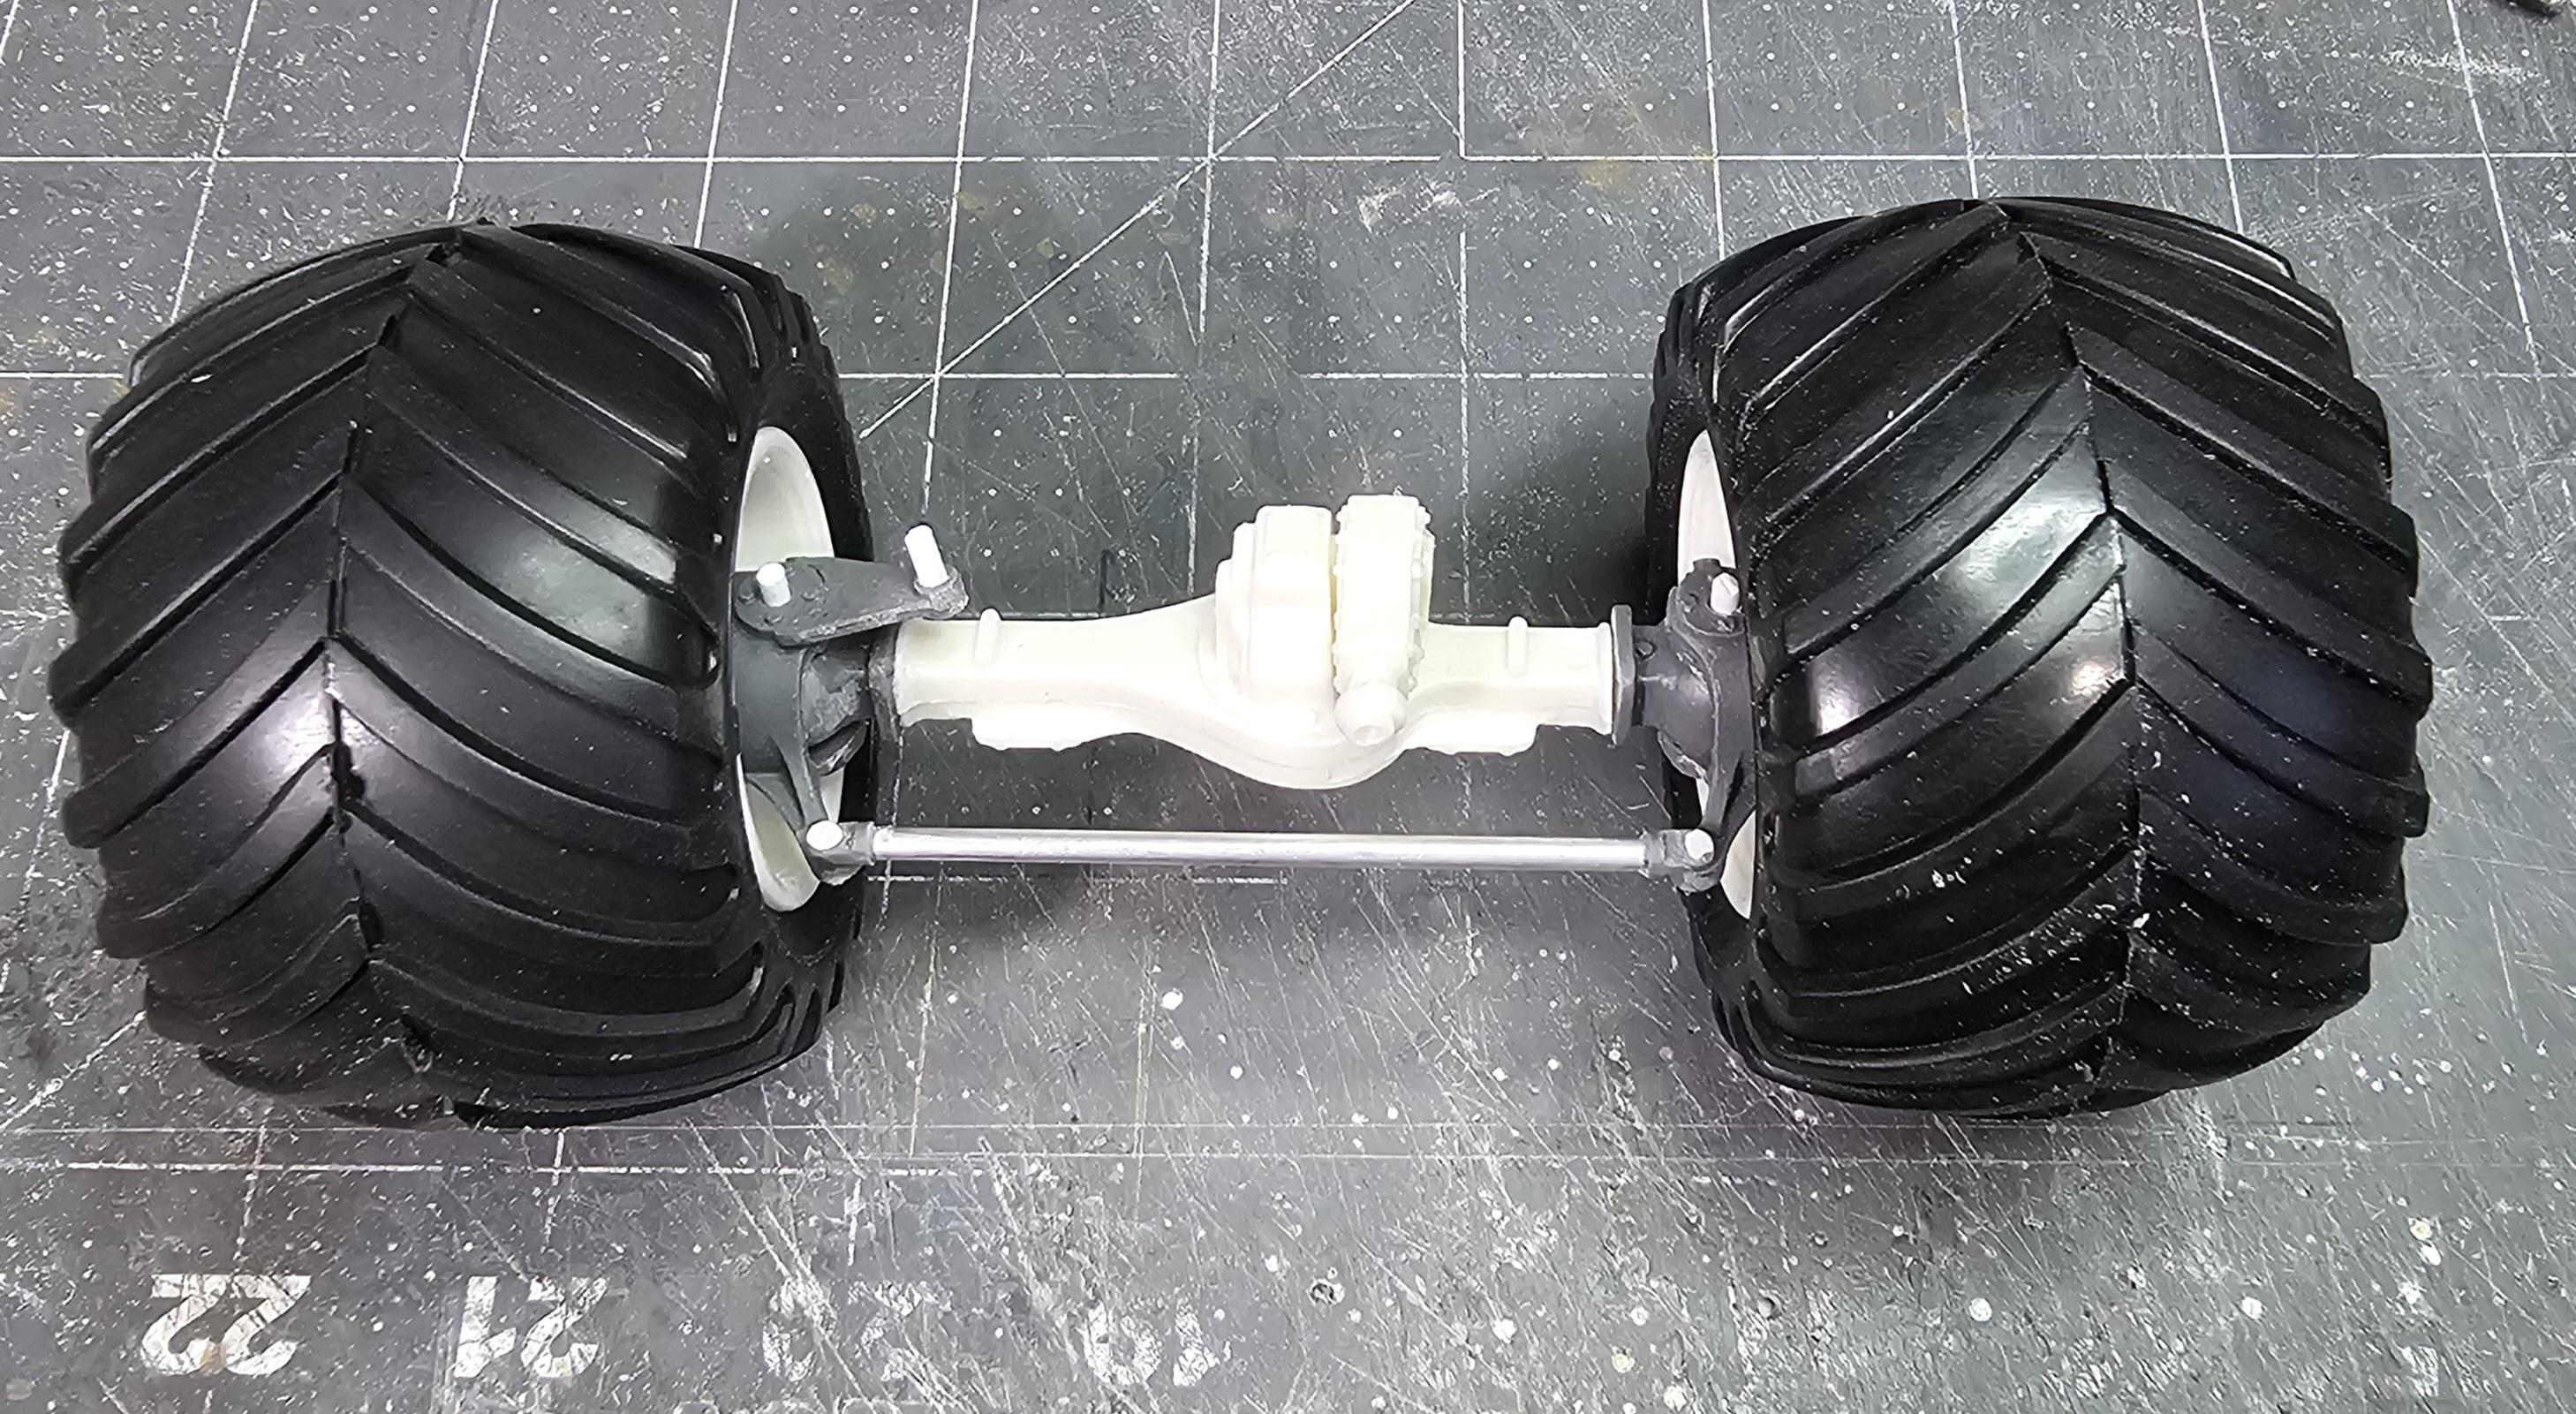
Hey all Small update. I have both front drive axles mostly complete. I also have been working on the front wheels prepping them for all the bolt heads (10 per wheel) and planetary hubs. This view shows both front axles with there connecting drive shaft. This view shows the wheels as they come in the kit. These are my scratch built bolt head plates. They will also have the planetary hubs mounted to them. This view shows the plates in the wheels. This view shows the whole front assembly. This is a front twin steer kit from KFS via Paul at ST Supply. I hope to use these portion of the KFS kit for this build. I'm still investigating weather this is going to work or not. As a bonus I got two 1/24 metal front axles. This is how the KFS steering is supposed to be set up. Still investigating if this is going to work also. Well that's it for now be back soon with more updates. Ron G
-
Mack DM600 log truck
ShakyCraftsman replied to Bronzekeg's topic in Model Trucks: Big Rigs and Heavy Equipment
Hey Ken Looks great. I just finished mine. Here is a picture. Ron G
-
Okay buddy Updates, updates we're dying here, no seriously any further progress Jeff. 😁😁😁 Ron G
-
Mack DM600 log truck
ShakyCraftsman replied to Bronzekeg's topic in Model Trucks: Big Rigs and Heavy Equipment
Isn't that actually a DM600? Ron G -
ongoing oilfield project
ShakyCraftsman replied to cdntrucking's topic in WIP: Model Trucks: Big Rigs and Heavy Equipment
Nice! You are making a very cool rig. I hope mine turns out as nice. Ron G -
No,it's on the shelf of whoo...😒 Ron G
-
Hey Gary Thanks 1/25 AMT USA 1 monster truck kits (two) Ron G
-
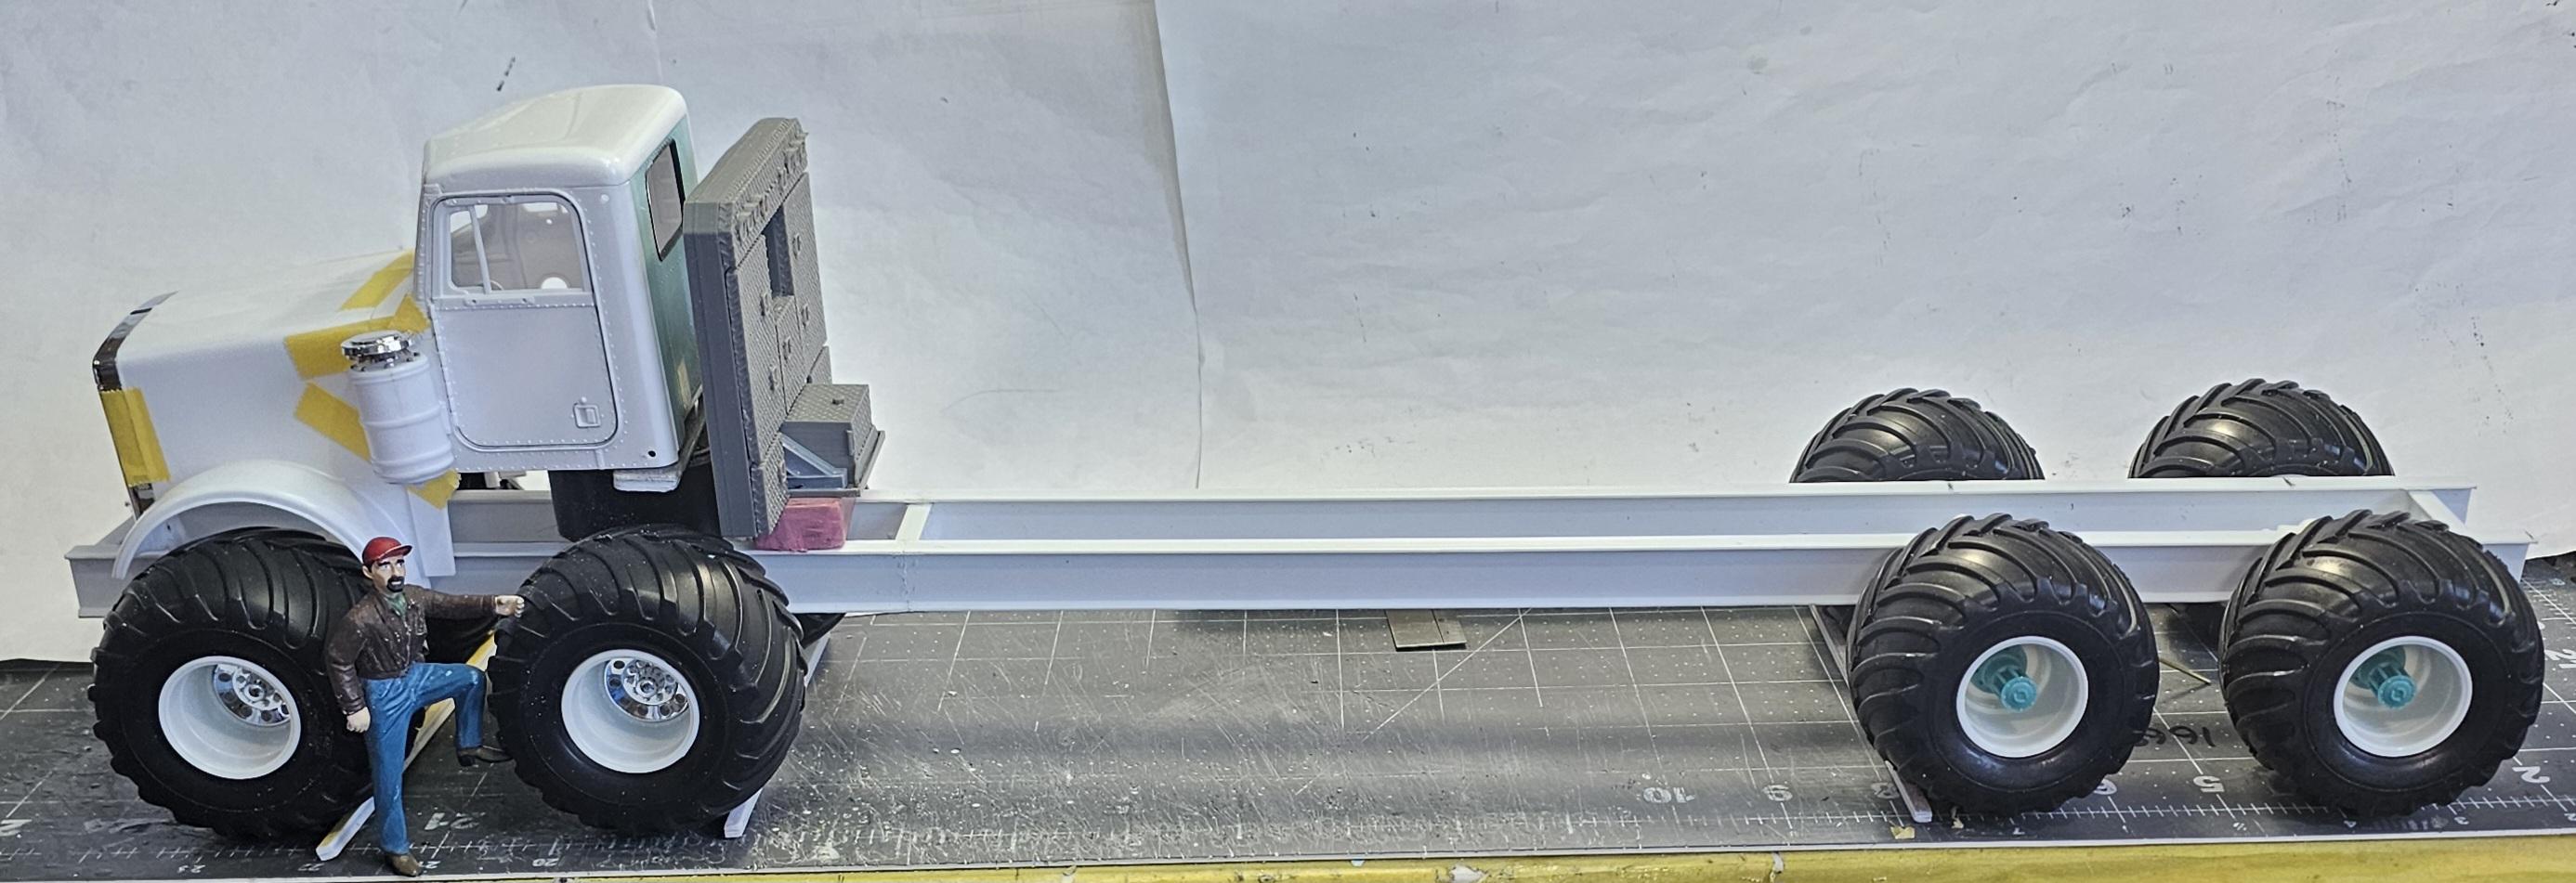
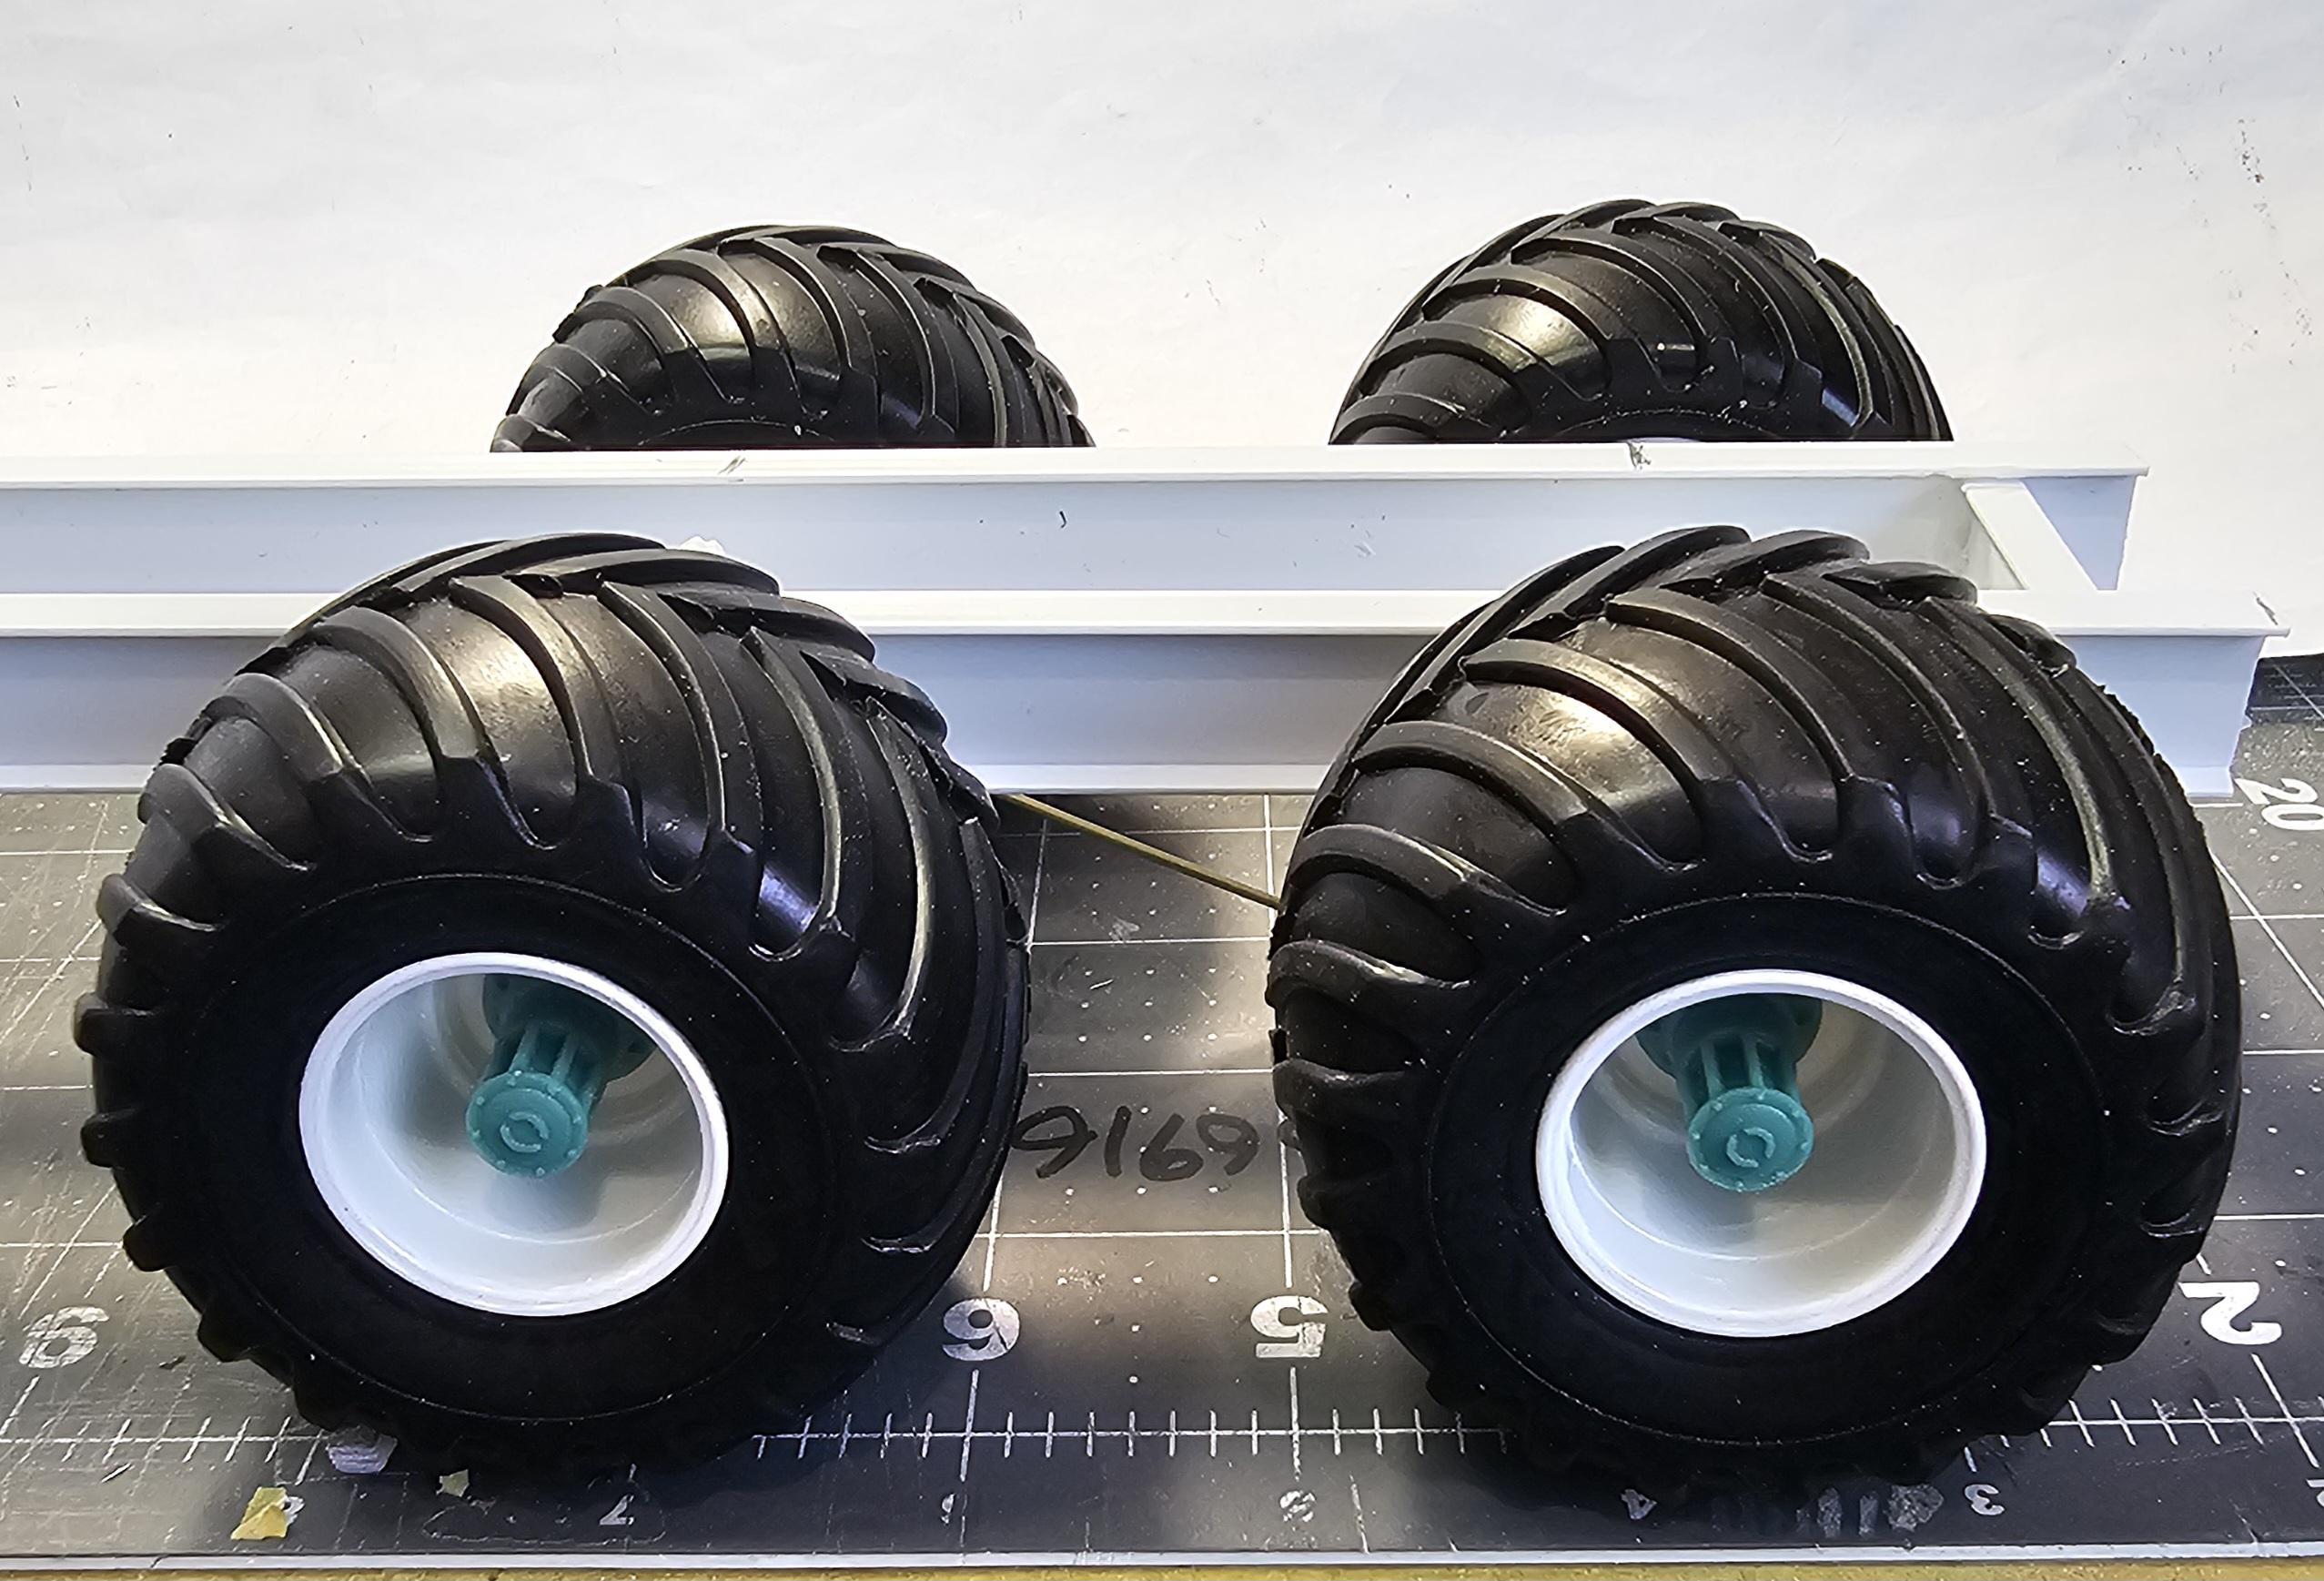
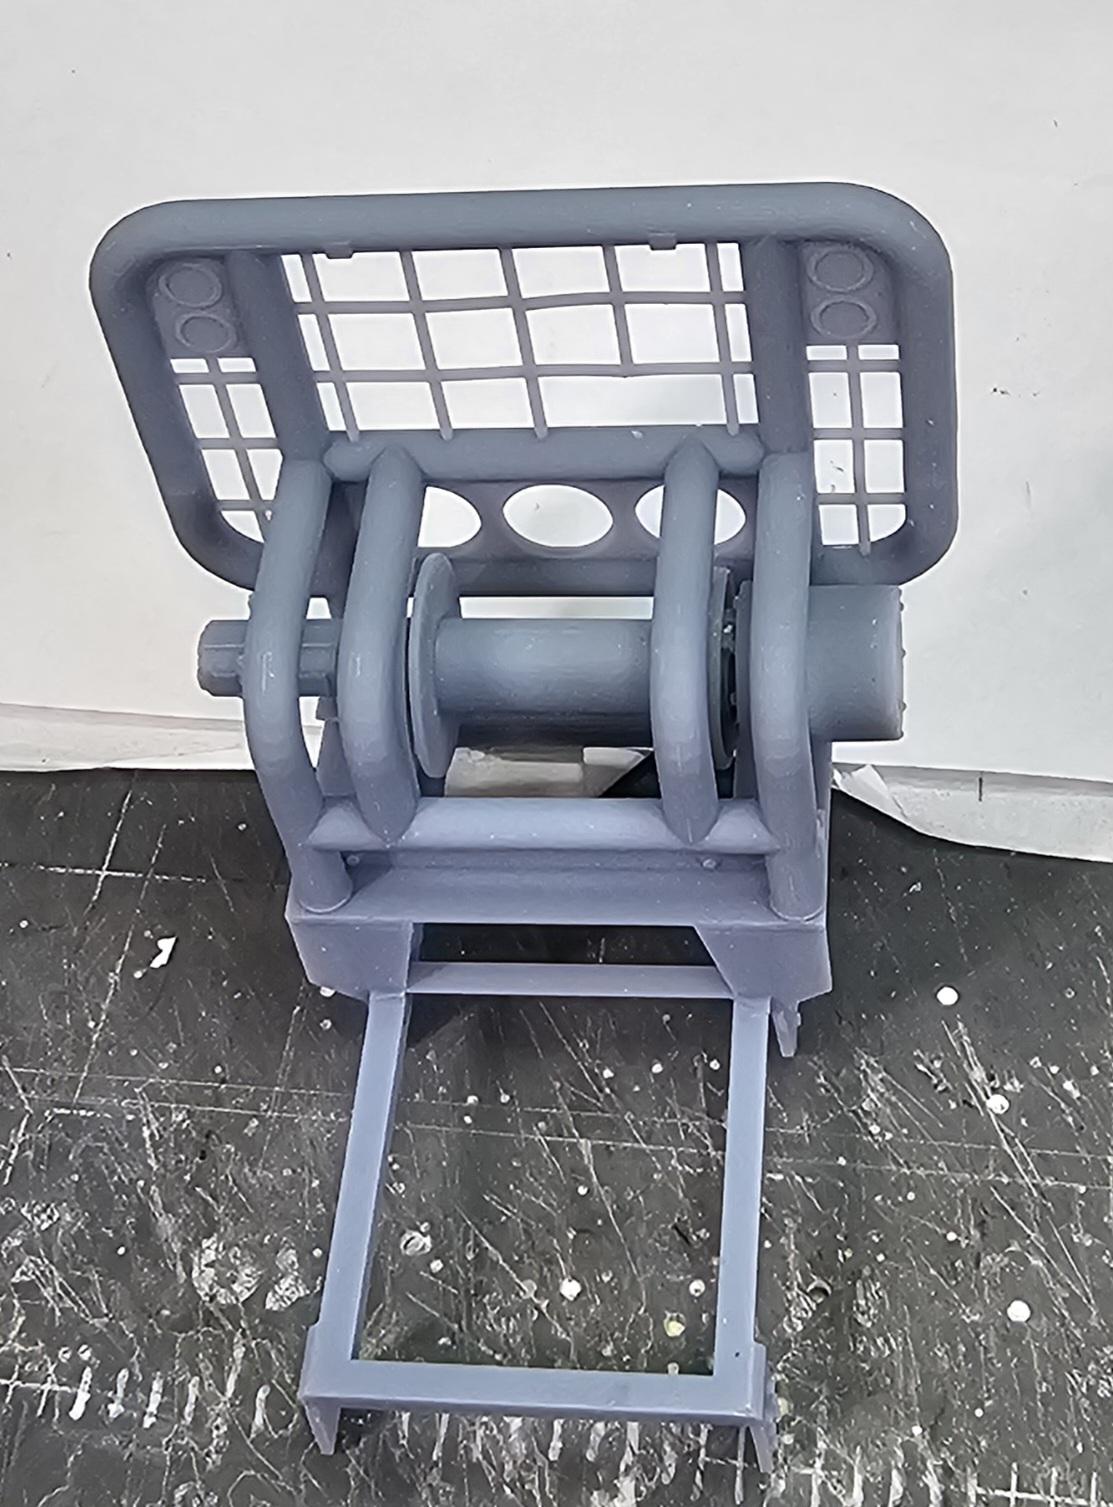
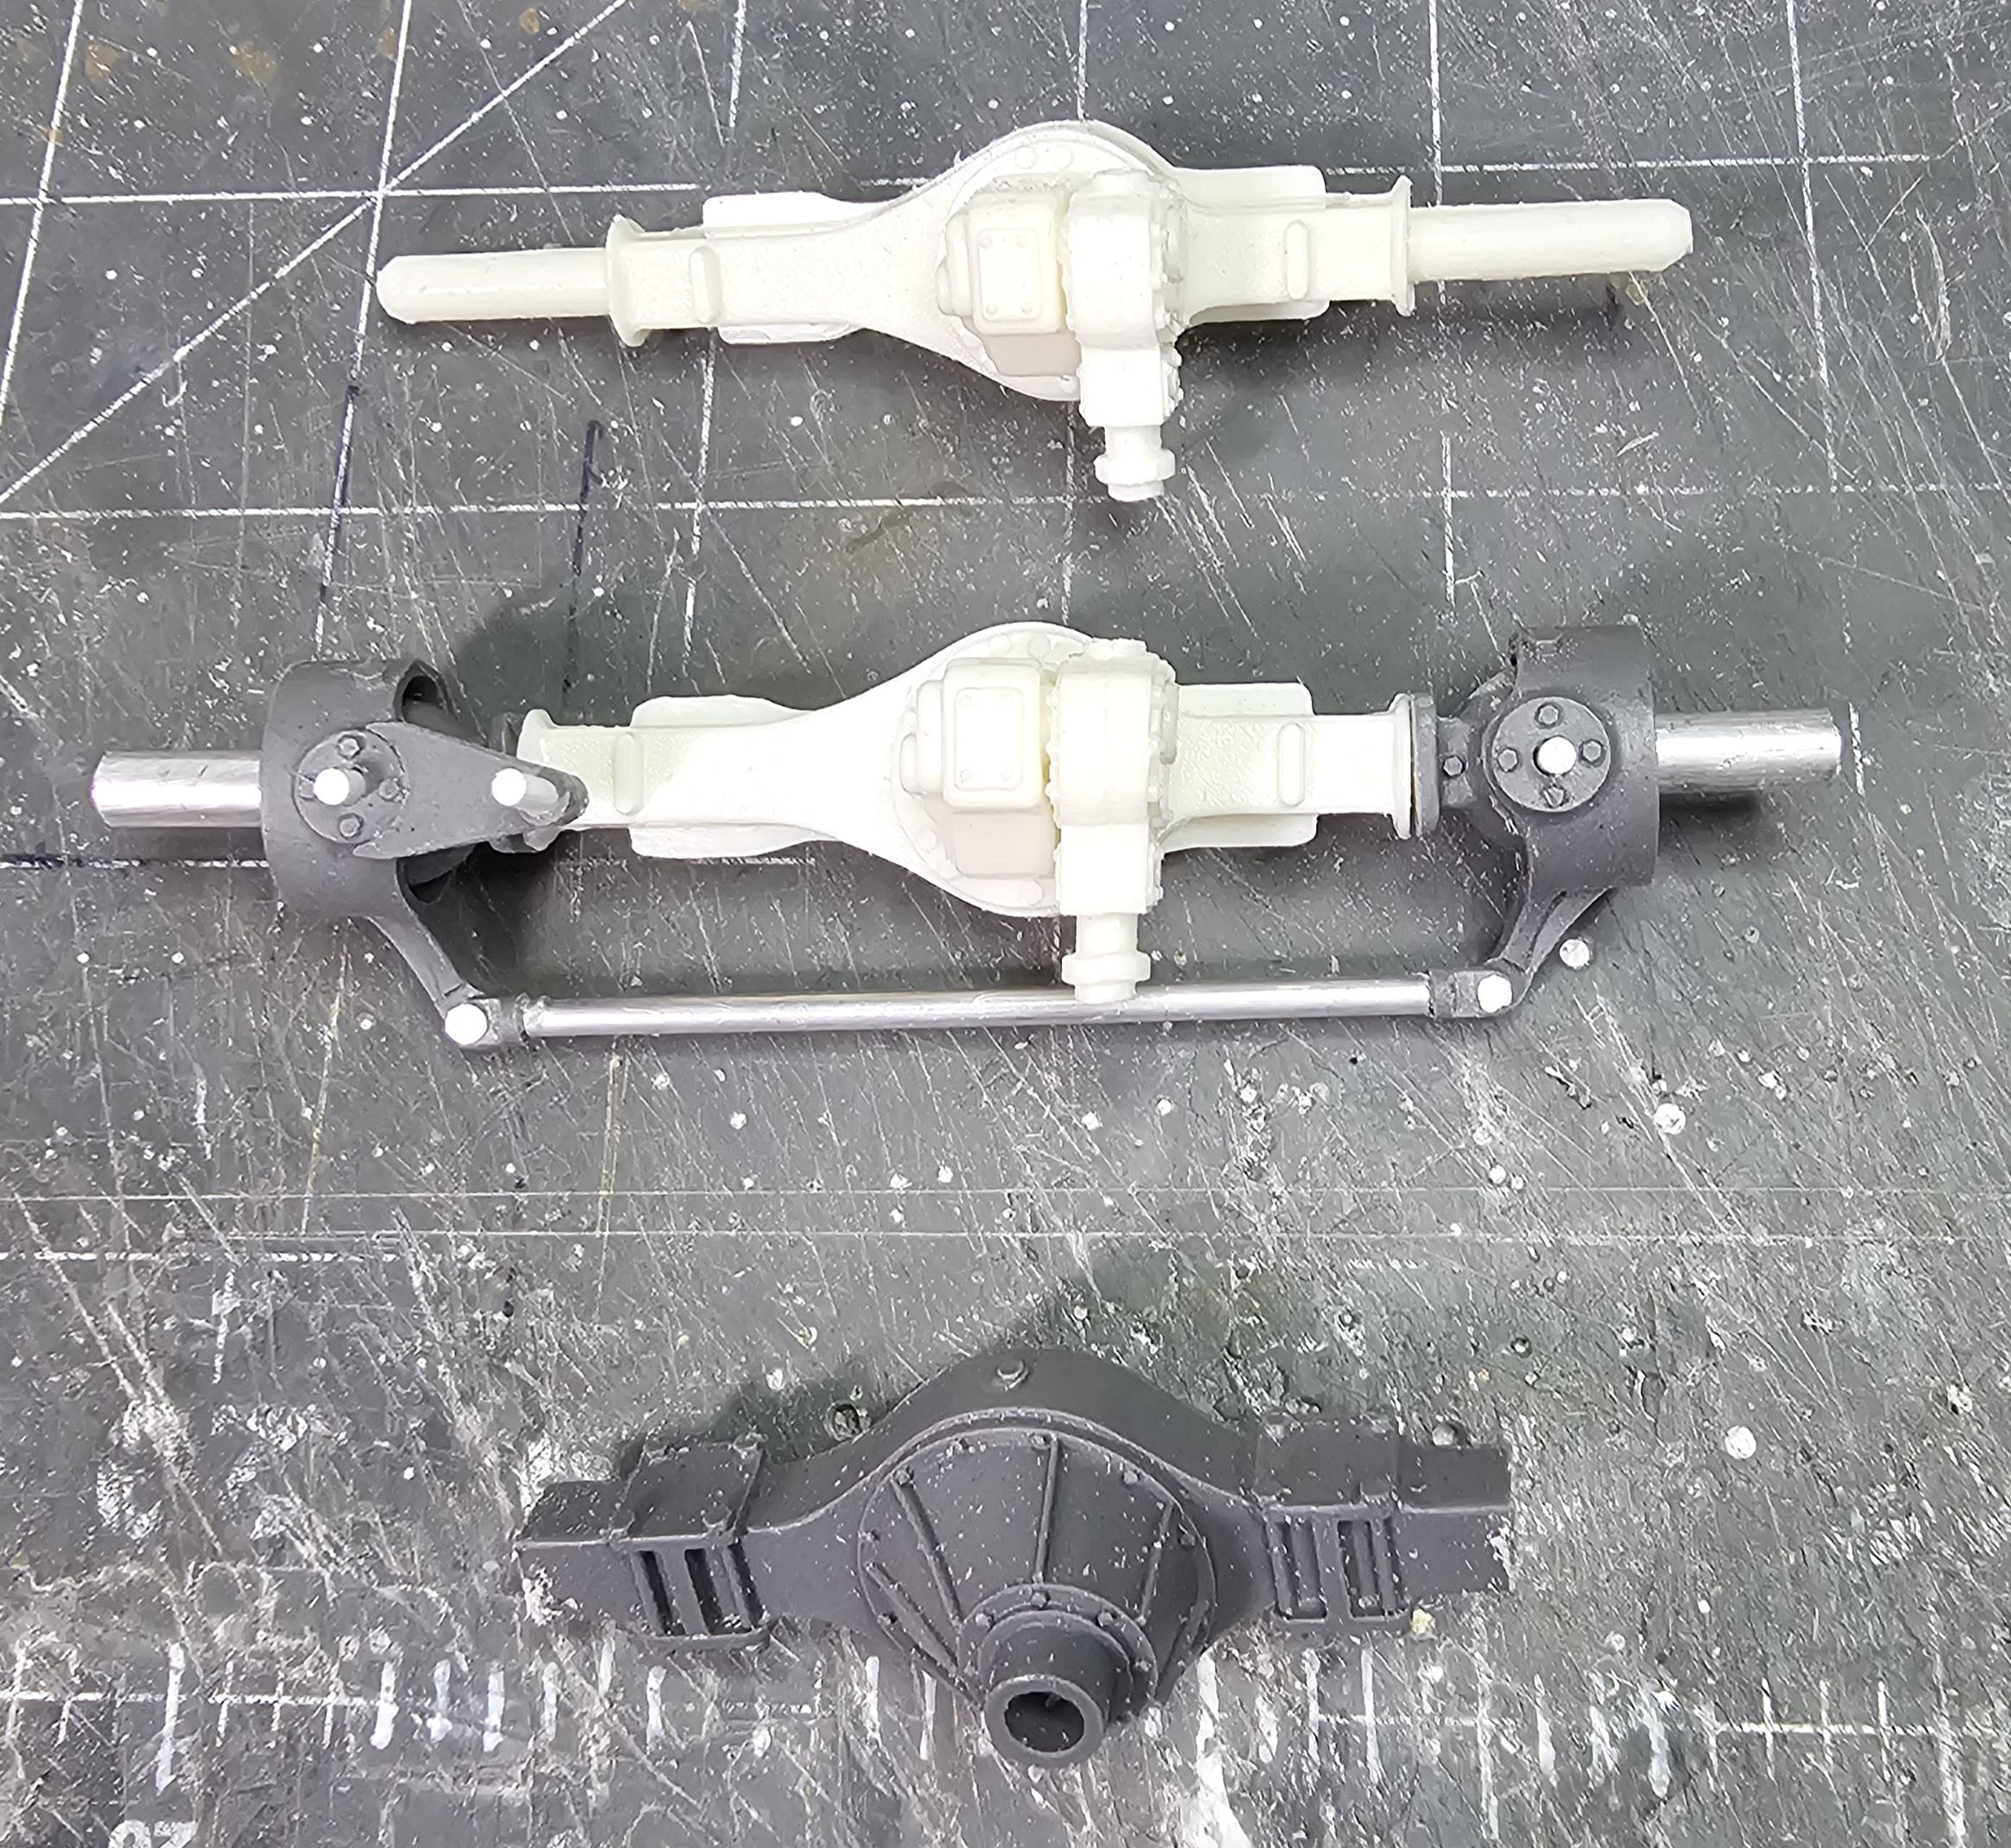
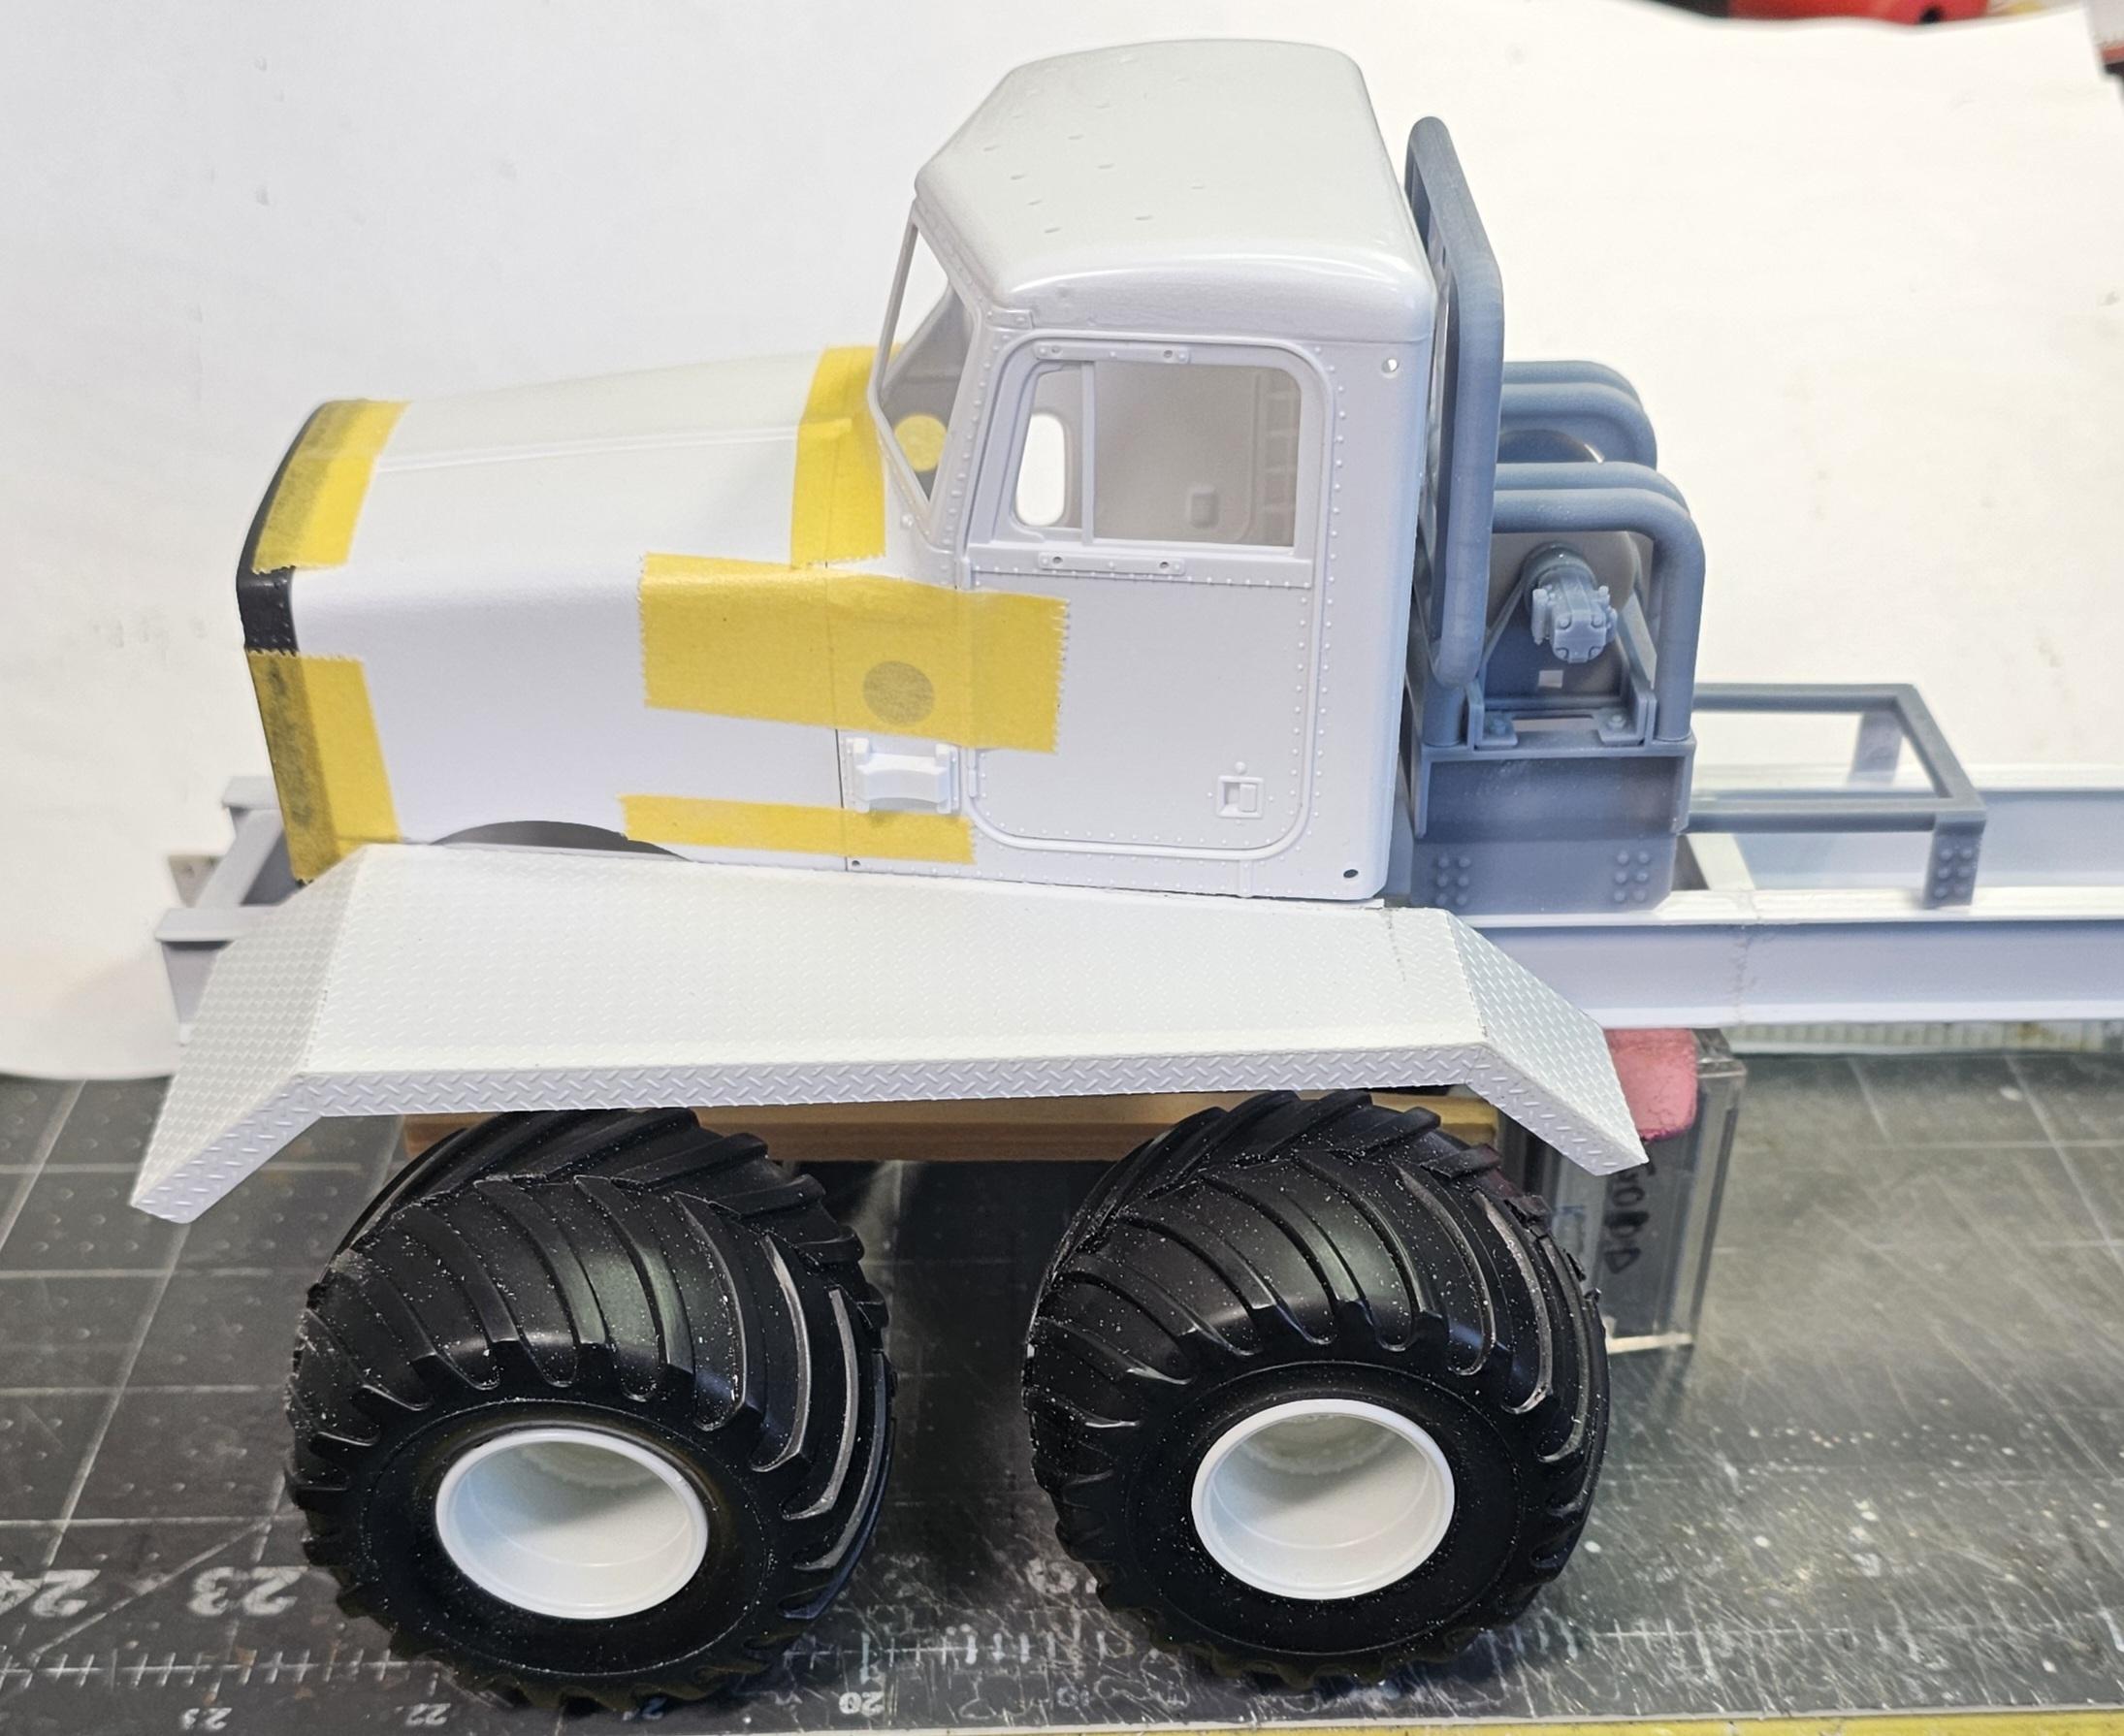
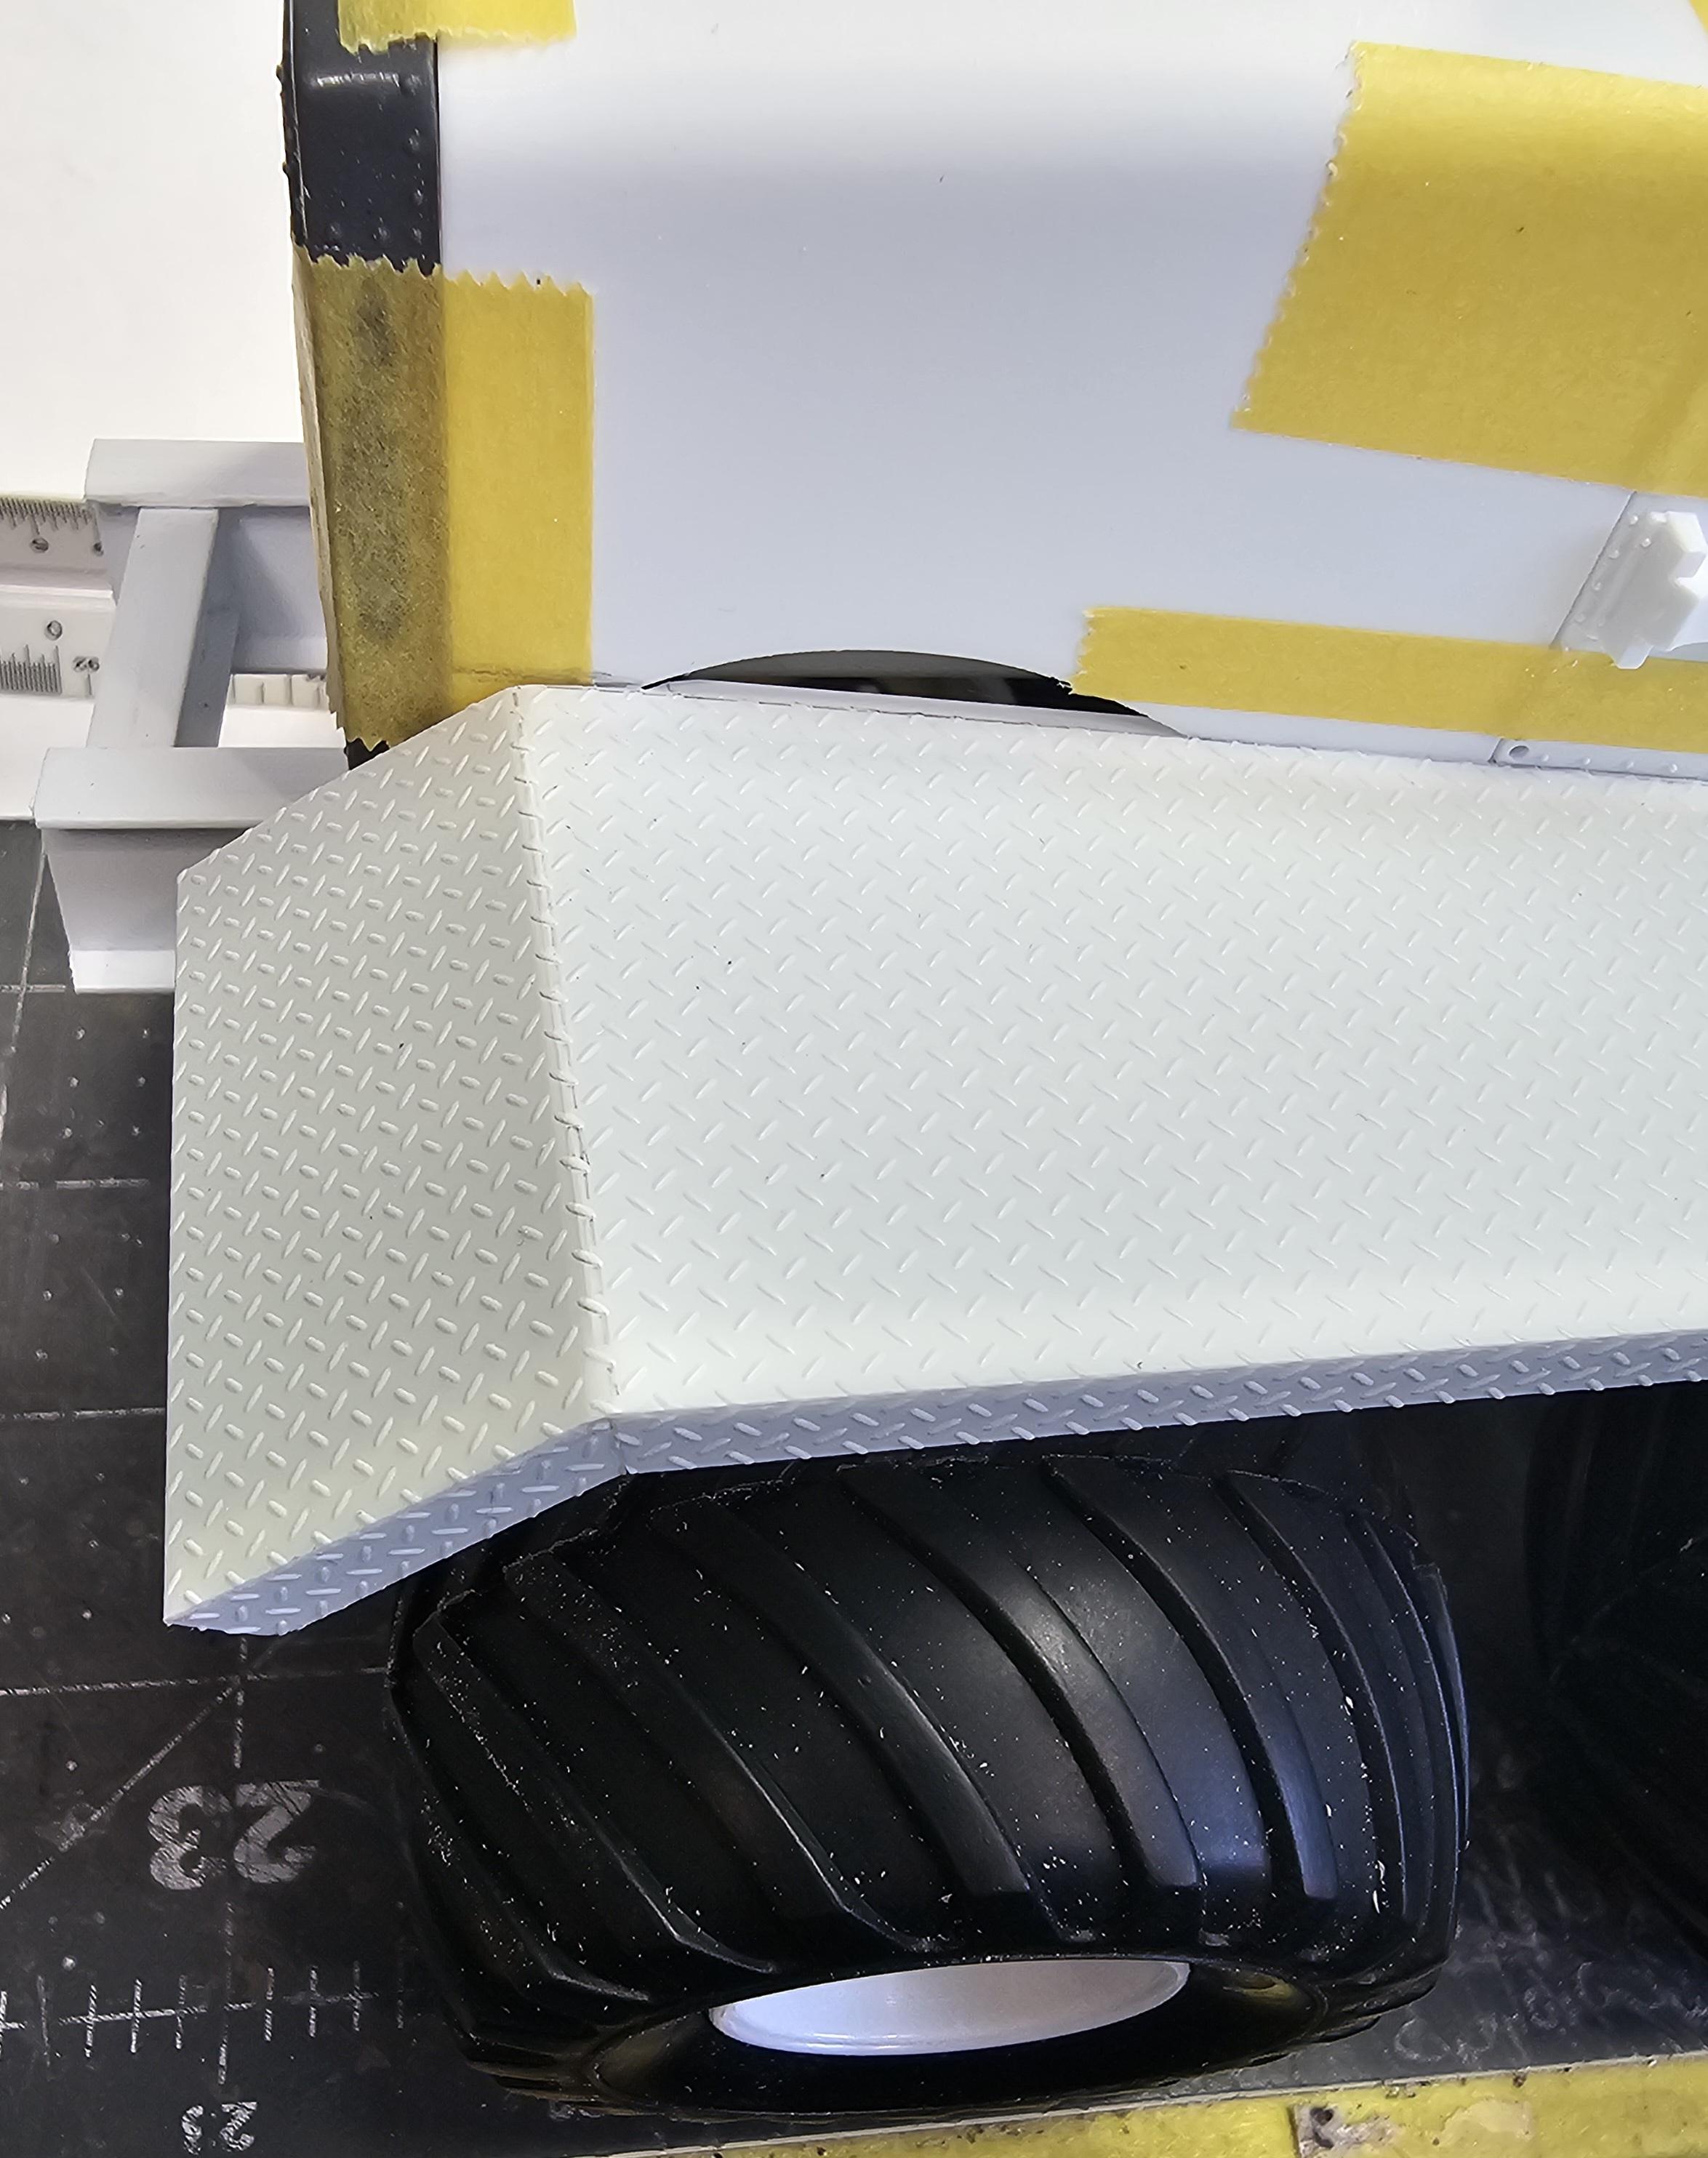
Hey all I know. I know not another build. Yupp, It's going to be a 1/24 scale Peterbilt 378 Alberta oilfield bed truck with a 400" W/B. It will have a Cat C15 6NZ compound turbo with a 3D Concepts Eaton Fuller 18 spd transmission. A headache rack from Paul at ST Supply with winch. Also it will have another winch from 3D Concepts. It will have a complete scratch built 14" tall x 4" wide x 3/4" thick frame. It will have 66" tall x 43" wide Terra tires, actually AMT monster truck Wheels/tires. It also has the monster truck planetary axles with aftermarket "U" joints and drive shafts. It is going to be a twin steer with hydraulic steering cylinders. I made the front steering axles by kit bashing two KFS front drive axles to make the monster truck axles steerable. I'm scratch building the front suspension springs (4 of em) from plastic strips. It will have custom front fenders made from (HO) scale diamond plate (it's closer to 1/24-25 scale). It will.have a 24' - 26' long scratch built bed, gin poles and deck surfaces. There will be many more items added along the way. Right now it's pretty much in the design stages. I plan on finishing the Payhauler and "Bill Signs" Peterbilt first, but will be working on this off and on along the way. So, here are some pictures for yous all to look at. Side view of the bed truck. This is just the mock-up frame. I'm building one for this. Front wheels and tires. rear wheels and tires. This will have a custom one off Hendrickson RS walking beam suspension from 3D Concepts with a 78" (1,982mm) center to center of the axle bushings and axles. This is the winch headache rack from Paul at ST Supply. This is it together. Custom made front axle. Turned to the left. Turned to the right. Top is the AMT kit axle. Next is my custom made steer axle. Bottom is the center of the KFS drive axle. I can still use it as a regular drive axle. Front drive axles with there drive shafts and "U" joints. Rear drive axles, drive shafts and "U" joints. Kinda of an over all veiw of the drive set-up. This view shows the custom front fenders. These are made from scratch from Plastsruct HO diamond plate. Closer view of the front diamond plate fenders. There is a TON of work still left to do. Thanks Ron G
- 105 replies
-
- 10
-

-
Hey Scott I tried that, it still hit when you turn the wheels. Ron G
-
I know that, but because the way that Revell did there steering axle. The chambers ran into the steering arm, so I moved them to were they are. I'll go back and look to see if I can fix this problem. Ron G
-
Yeah I know, but it's the only way I could get them to fit with the way the steering on this Revell kit works. Ron G
-
Farm Floater Truck 1/24th scale
ShakyCraftsman replied to Randy D's topic in WIP: Model Trucks: Big Rigs and Heavy Equipment
Okay Randy, I have you figured out. You have invented a shrink ray machine and these are actually real parts shrunk down to look like model parts. So, how much for this technology. Come on talk!!!! Really, HOLLY you know what! This is freakin amazing. Super quality work. I'm still recovering from the shock.😱 Ron G -
AMT monster truck tires?
ShakyCraftsman replied to ShakyCraftsman's topic in Model Building Questions and Answers
Thanks Russell -
Hey all Anyone know what the diameter for the AMT 1/25 scale monster truck tires is? Also how wide are they? Ron G
-
FDNY Wrecker
ShakyCraftsman replied to Scott Eriksen's topic in WIP: Model Trucks: Big Rigs and Heavy Equipment
WOW! Scott this is really looking righteous! Great job. Ron G