

ShakyCraftsman
-
Posts
797 -
Joined
-
Last visited
Content Type
Profiles
Forums
Events
Gallery
Everything posted by ShakyCraftsman
-
 In about 50 years...lol Just kidding Pal your doing a great job on your Payhauler. Ron G
 -
I'm getting there. Pretty soon I won't be able to go much further until I can splash on some paint. Ron G
-
Hello fellow modelers I'm back with more updates and some pictures for yous all to look at. I really appreciate all the comments, good or bad. So far they have been very positive and are giving me the will to keep trucking on this build. So here we go. This view shows the part #263Y, I'm not sure what this is, sitting in place on the frame. This view shows the part modified so you can actually mount it to the frame with supports. Another view showing the pipe and the supports that I added. I filled in the void also. This view shows it in place with the supports. This view shows the nut & bolts I added to the shock mounts on the rear axle. View from the rear. I had to add some material to the shock mounts on the rear axle so I had a place to fix the nuts and bolts to. This view shows the nuts and bolts I added to the rear shock mounts on the frame. This view shows the nuts and bolts I added to the front axles shock mounts. This view shows the nuts and bolts I added to the front shock mounts on the front of the frame. This view shows the bolt plates and bolt shafts I added to the front springs. Another view of the bolt plates and bolt shafts. This view shows the bolt shafts I added to the front axle. The other side of the front axle. They don't line up perfectly, but they give the proper illusion. At least that's my opinion. Another view of the same thing. This view shows the front shock in place, kinda. It's not fixed yet. And this view shows Jeff and me. I'm the good looking one on the right...lol 😆😅🤣😂 well that's it for now be back with more updates soon, I hope. Ron G

-
Hey all Here it is assembled. Ron G
-
R.O.G Peterbilt 359 Custom
ShakyCraftsman replied to BOZ's topic in WIP: Model Trucks: Big Rigs and Heavy Equipment
I'm in, save me a seat in the fron🧋🍿 Ron G -
AMT Exterior Post Doubles Vans
ShakyCraftsman replied to Bren's topic in WIP: Model Trucks: Big Rigs and Heavy Equipment
Hey Jeff we can use these weathering techniques on our Payhauler builds. 😉😁 Ron G -
Mack r685st
ShakyCraftsman replied to 53gmc's topic in WIP: Model Trucks: Big Rigs and Heavy Equipment
I'm in, save me a seat in the front row please. 🍿😁 Ron G -
The transmission is a Mack13/18 spd. From Paul at ST Supply. Ron G
-
Hey all Not an update really. I got some stuff in the mail today from Jamie at Mo'luminum. It's items for the "BS" Peterbilt 359. These are Bridgestone 425/65 R22.5 floats. These are some of his drive tires. Michelon 11R 22.5's. This is his Detroit Diesel 12V71N. This will be the engine for the "BS" Peterbilt 359. Ron G
-
Well he is a pretty squirrelly guy. 😆🐿🐿🐿🐿 Ron G
-
Your killing it Buddy!!!! You just have to show me up...lol😆😅🤣😂 Just messing with you Pal. Ron G
-
Thanks Gary, that's saying alot from a modeler like you. Ron G
-
Thanks BK Yeah, it's time consuming, but that to me is the whole point of modeling. Almost, anyone can throw a model together, but it takes a certain effort to go the extra step. Ron G
-
NO impact wrenches. You have to use a torque wrench...lol😆😅🤣😂 Ron G
-
Hey all Small update today. Got a little more done. It is really amazing to me how all those Small details can take so long to do. I had to replace the kit radiator hoses because they were to short. 🤔 so I made new ones out of some 1/8" (3mm) plastic rod. You can also see the white plastic fittings on the front bumper hydraulic valve. I made them out of some Plastsruct hexagonal rods. I drilled them out for the lines then cut them to size. This took forever. The redish color fittings on the hydraulic valve on the frame are from CTM's hydraulic hose and fittings kit. This view shows the radiator pipes with the hoses added. I made them from rapping some Tamiya masking tape, cut to size then colored them with a black sharpie. This mock up picture shows the radiator pipes in place. This view shows the brass screen that I made and added to the exhaust box on the frame. This view shows it after I painted the inside flat black. This is a mock-up picture for you guys to look at. Well that's it for now be back soon with more updates. Ron G
-
That's my boy, I knew you could do it...lol 😁😁 Ron G
-
Looks okay to me, don't forget the weathering will cover alot of this stuff up. 😁 Ron G
-
Don't forget there's a drain plug on the front axle too...😆😅🤣😂😂😂 Ron G
-
Yeah, Jeff you forgot to add the drain plug. 😆😅🤣😂😂😂 Ron G
-
Your making it hard to keep up Buddy. Ron G
-
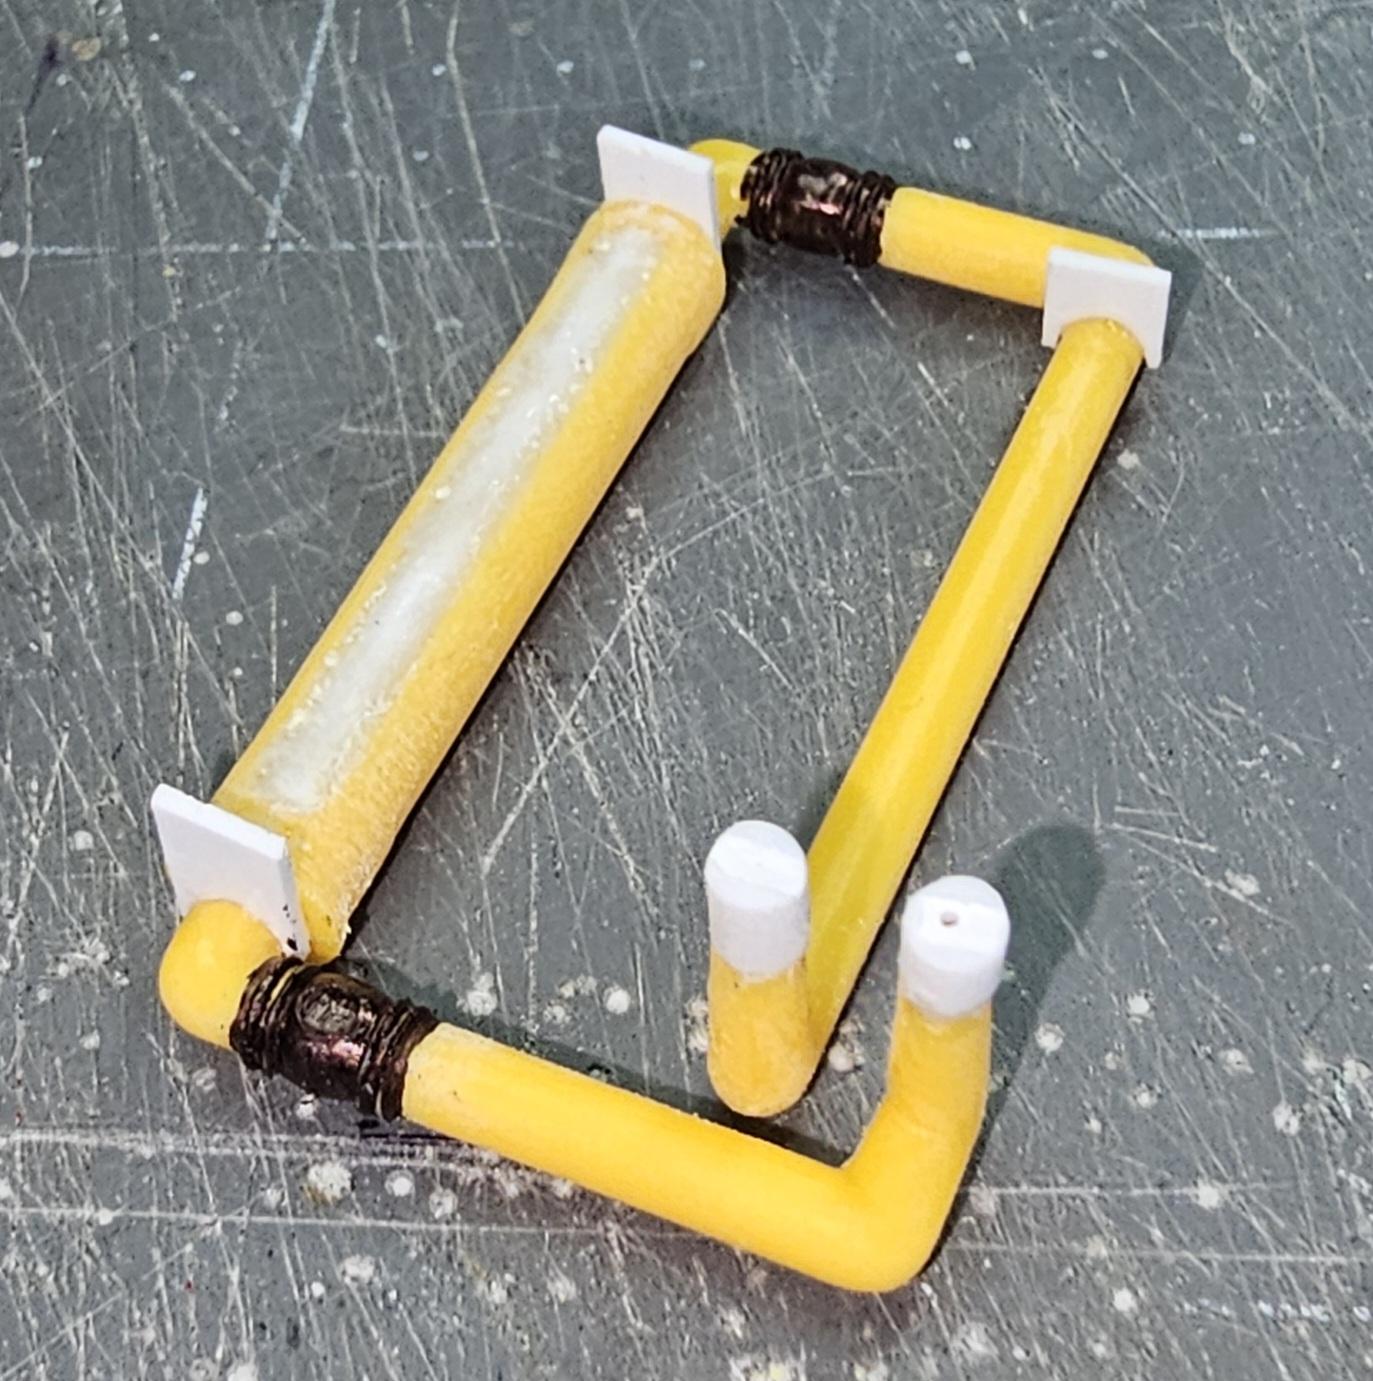
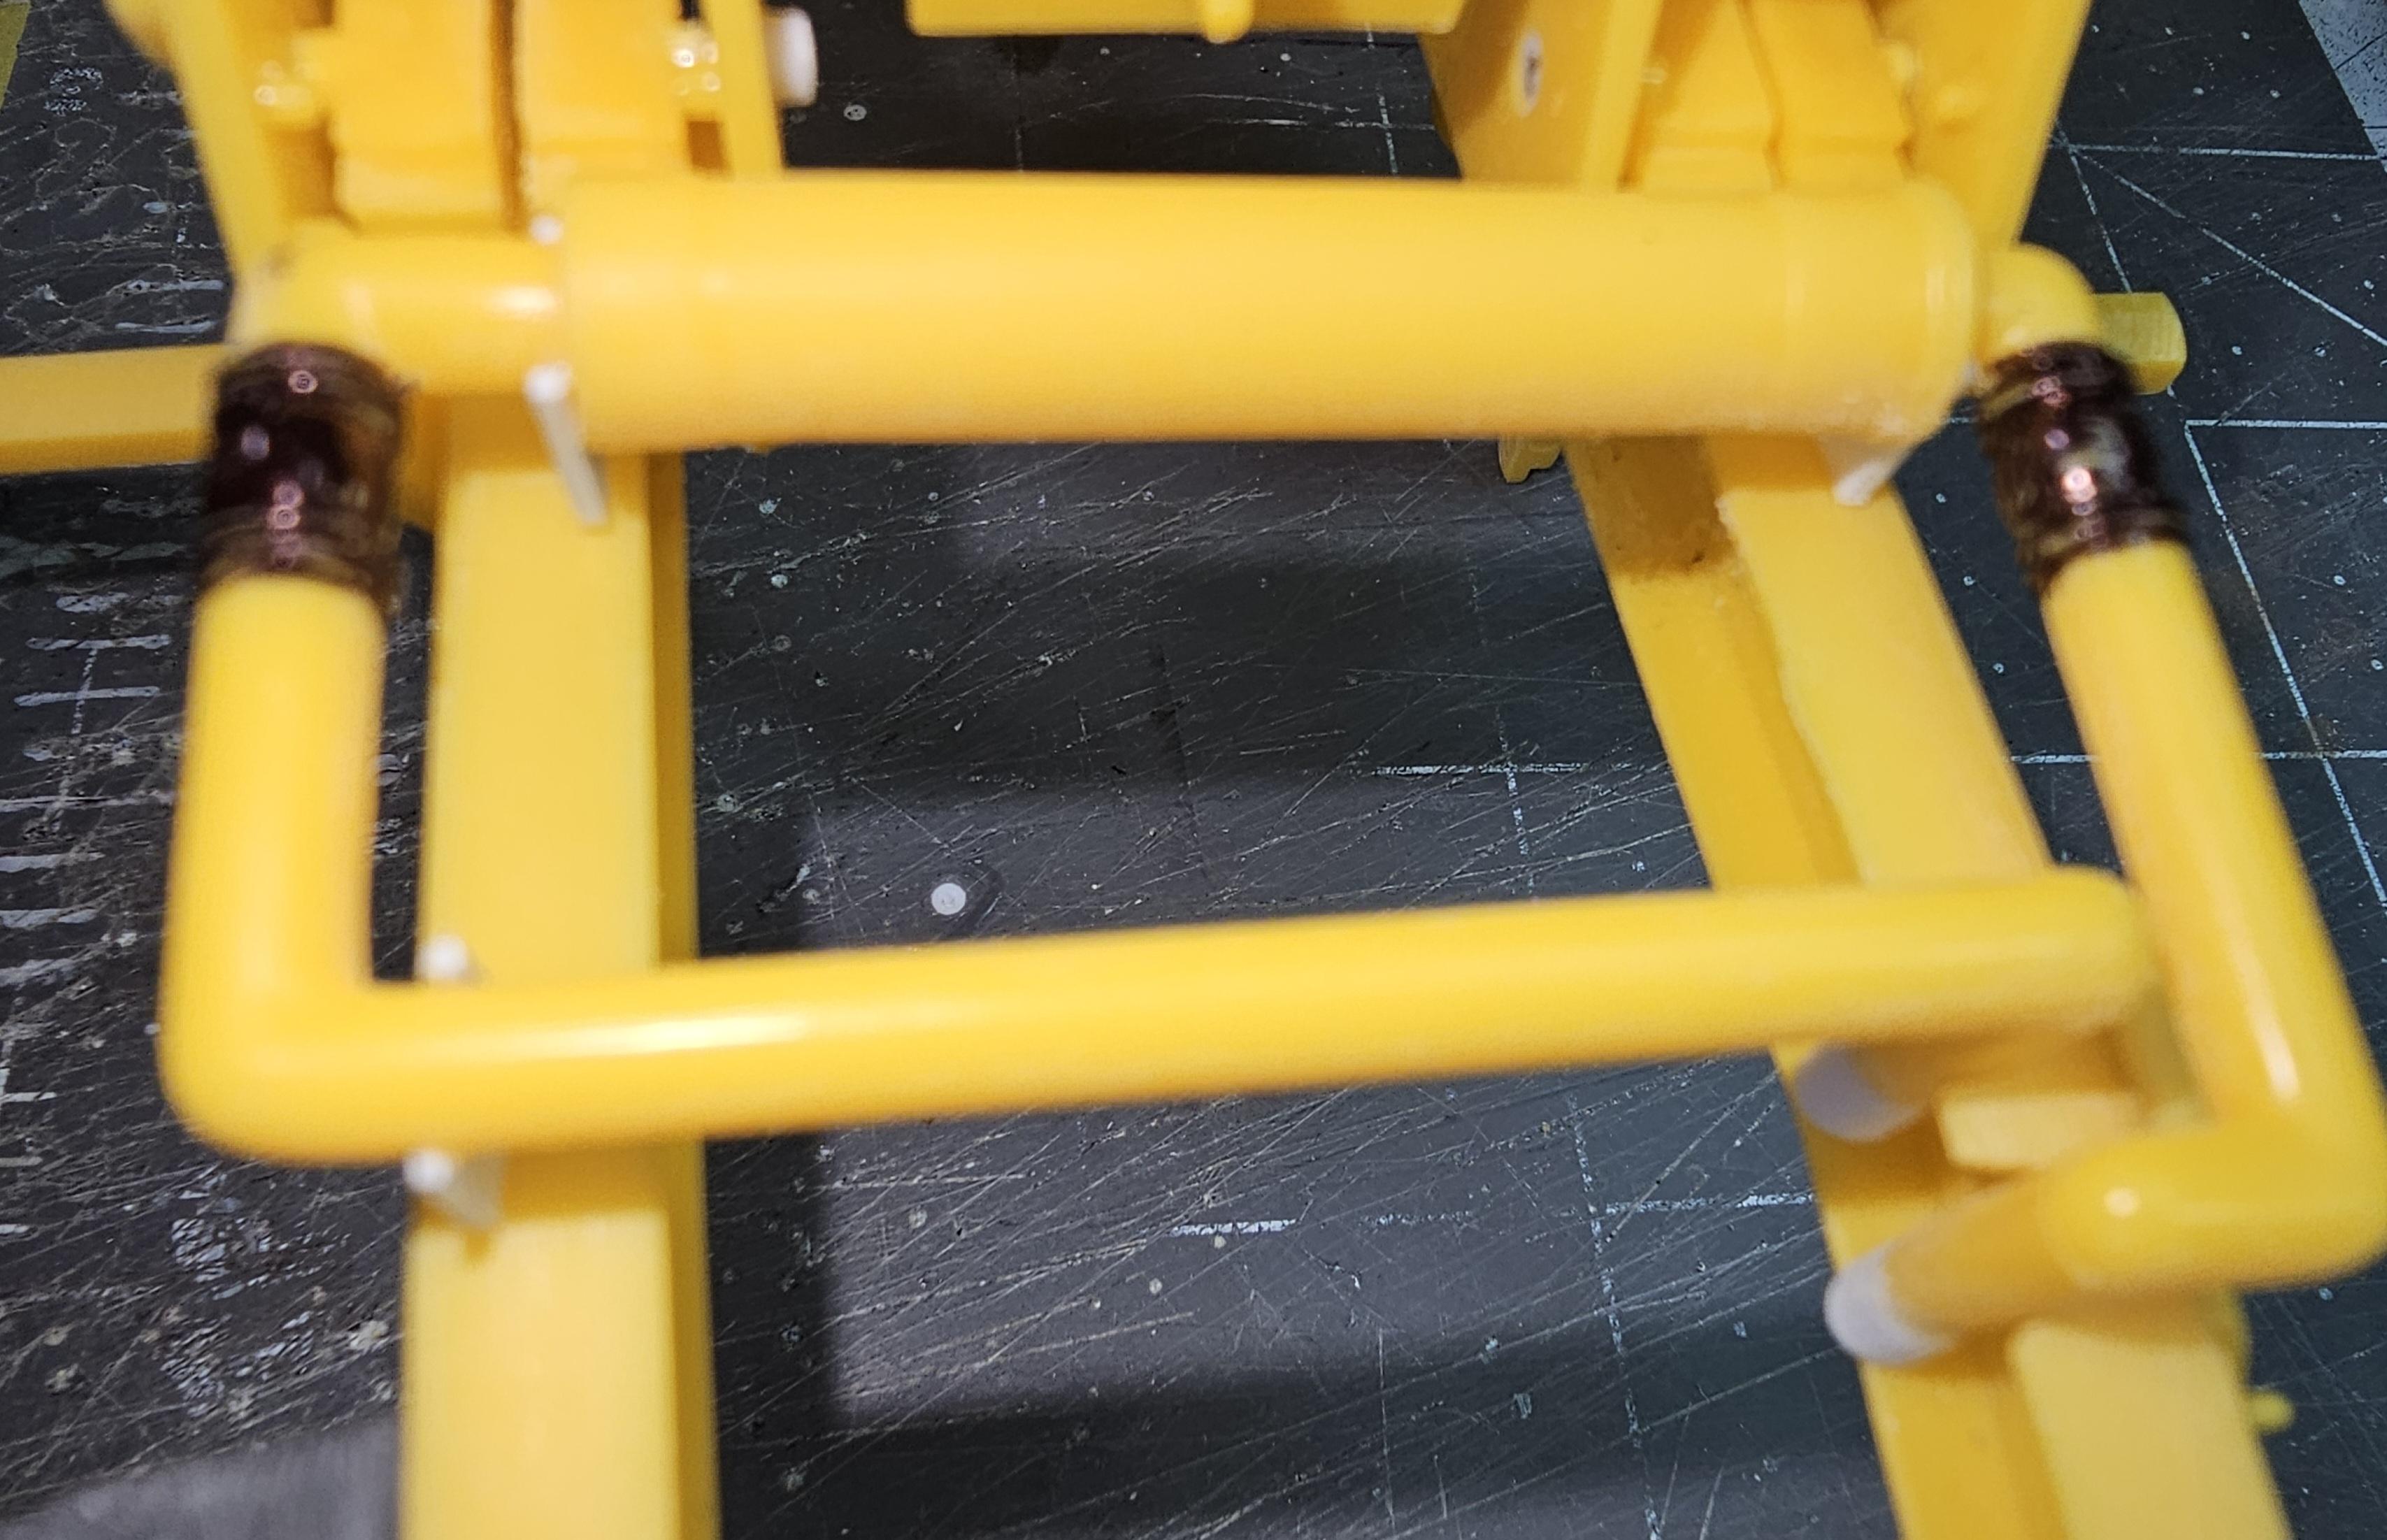
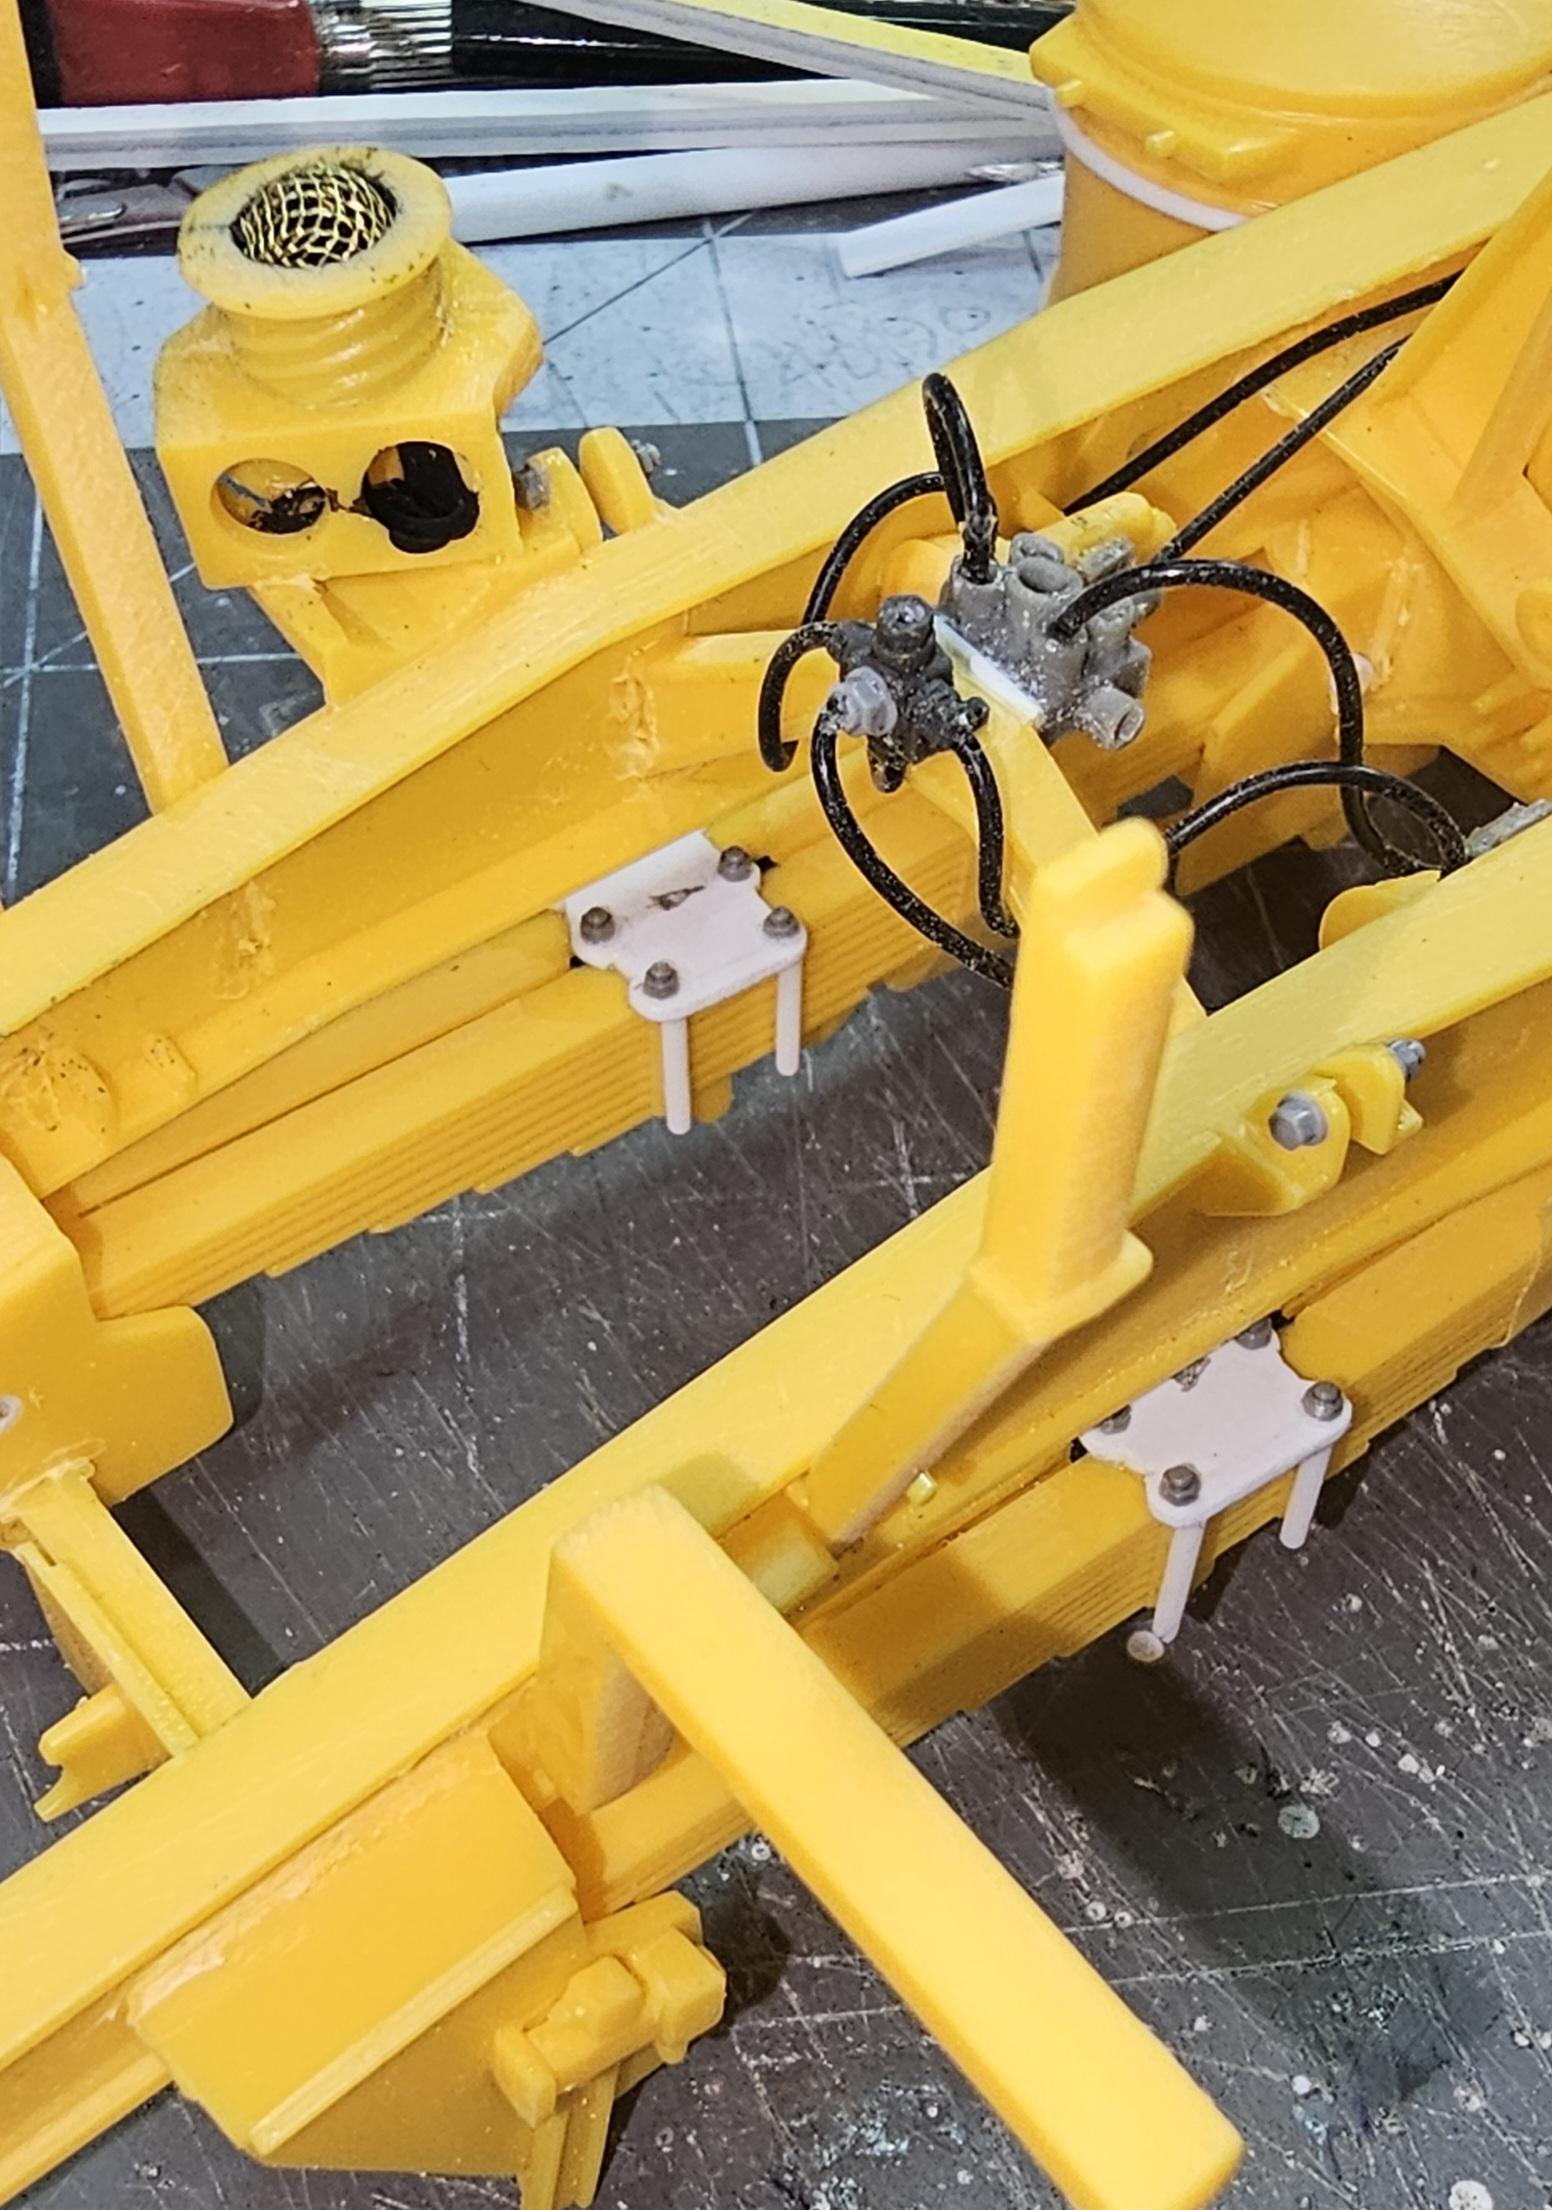
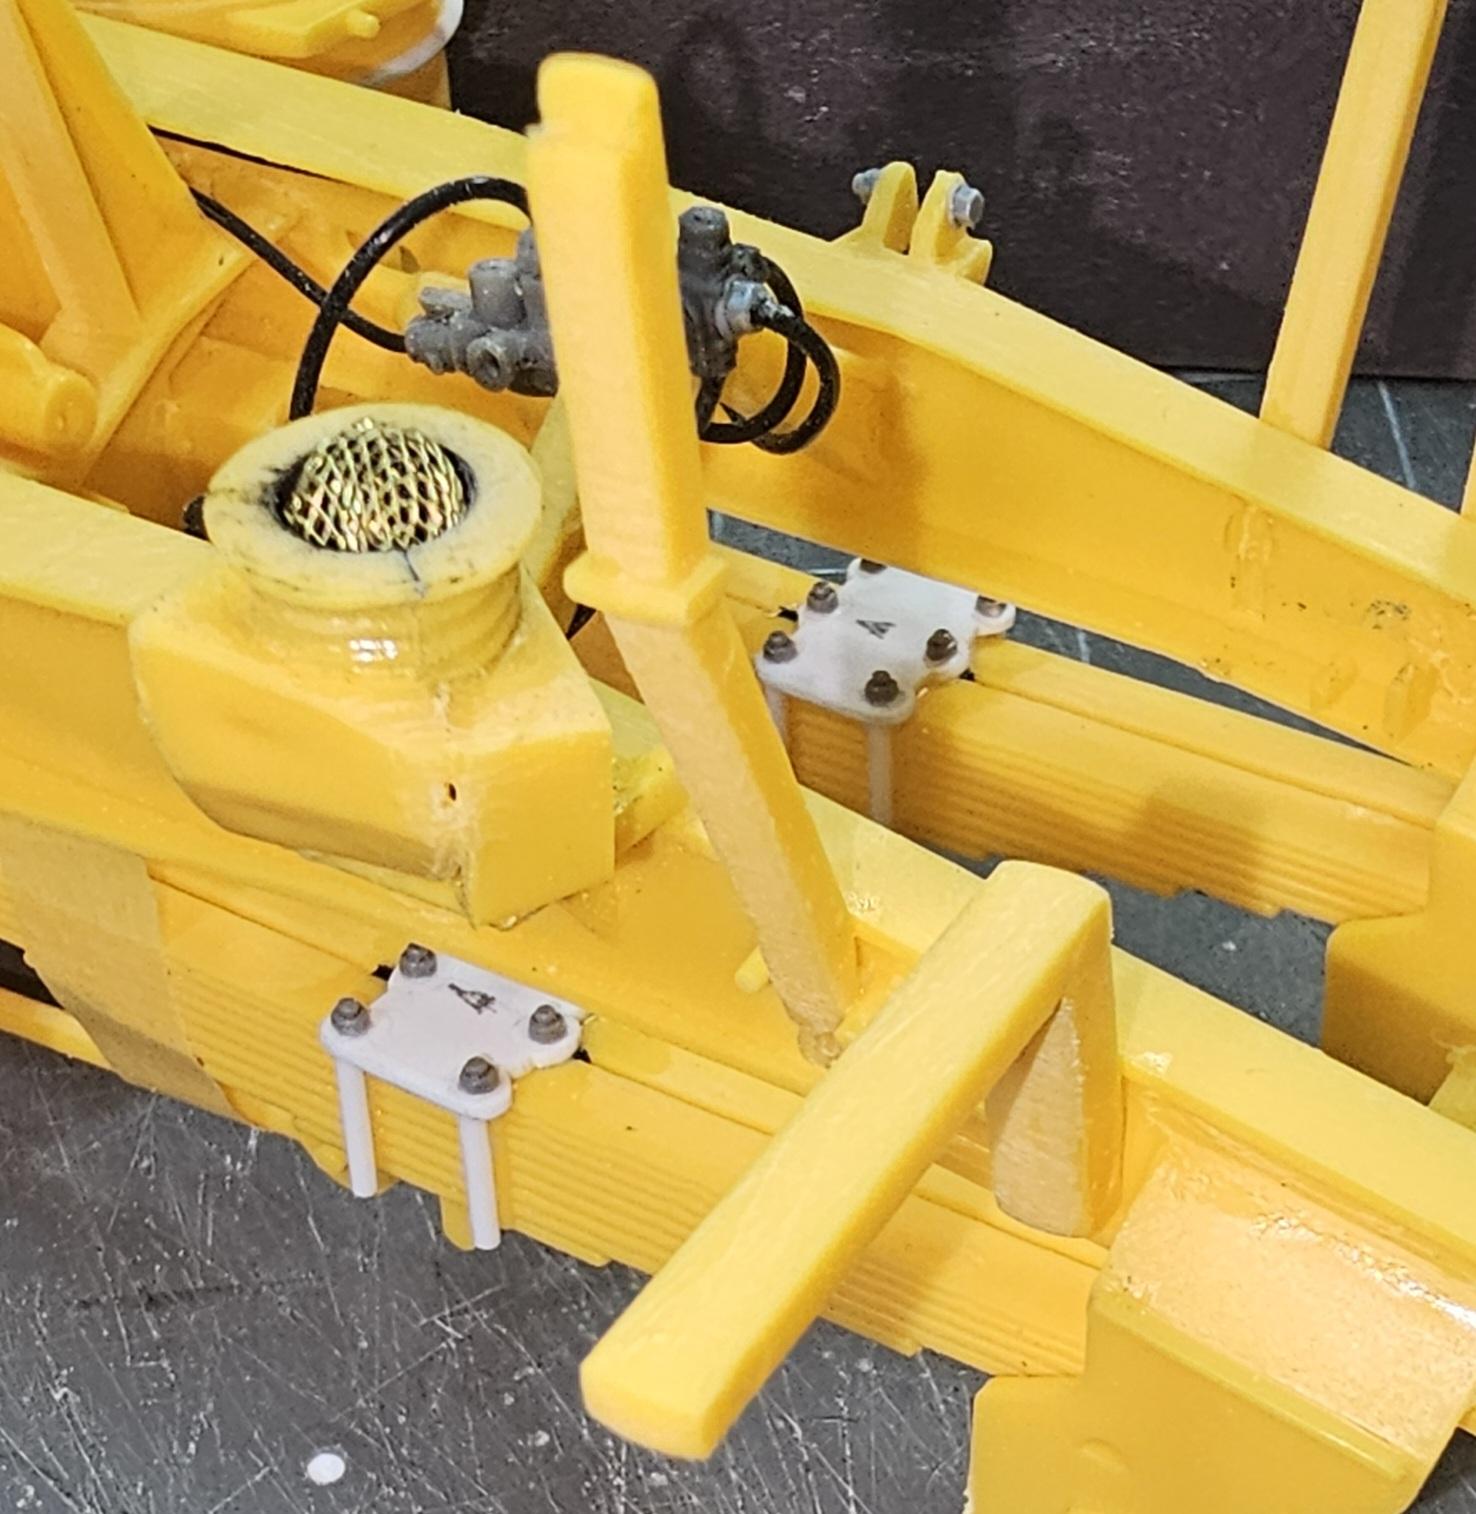
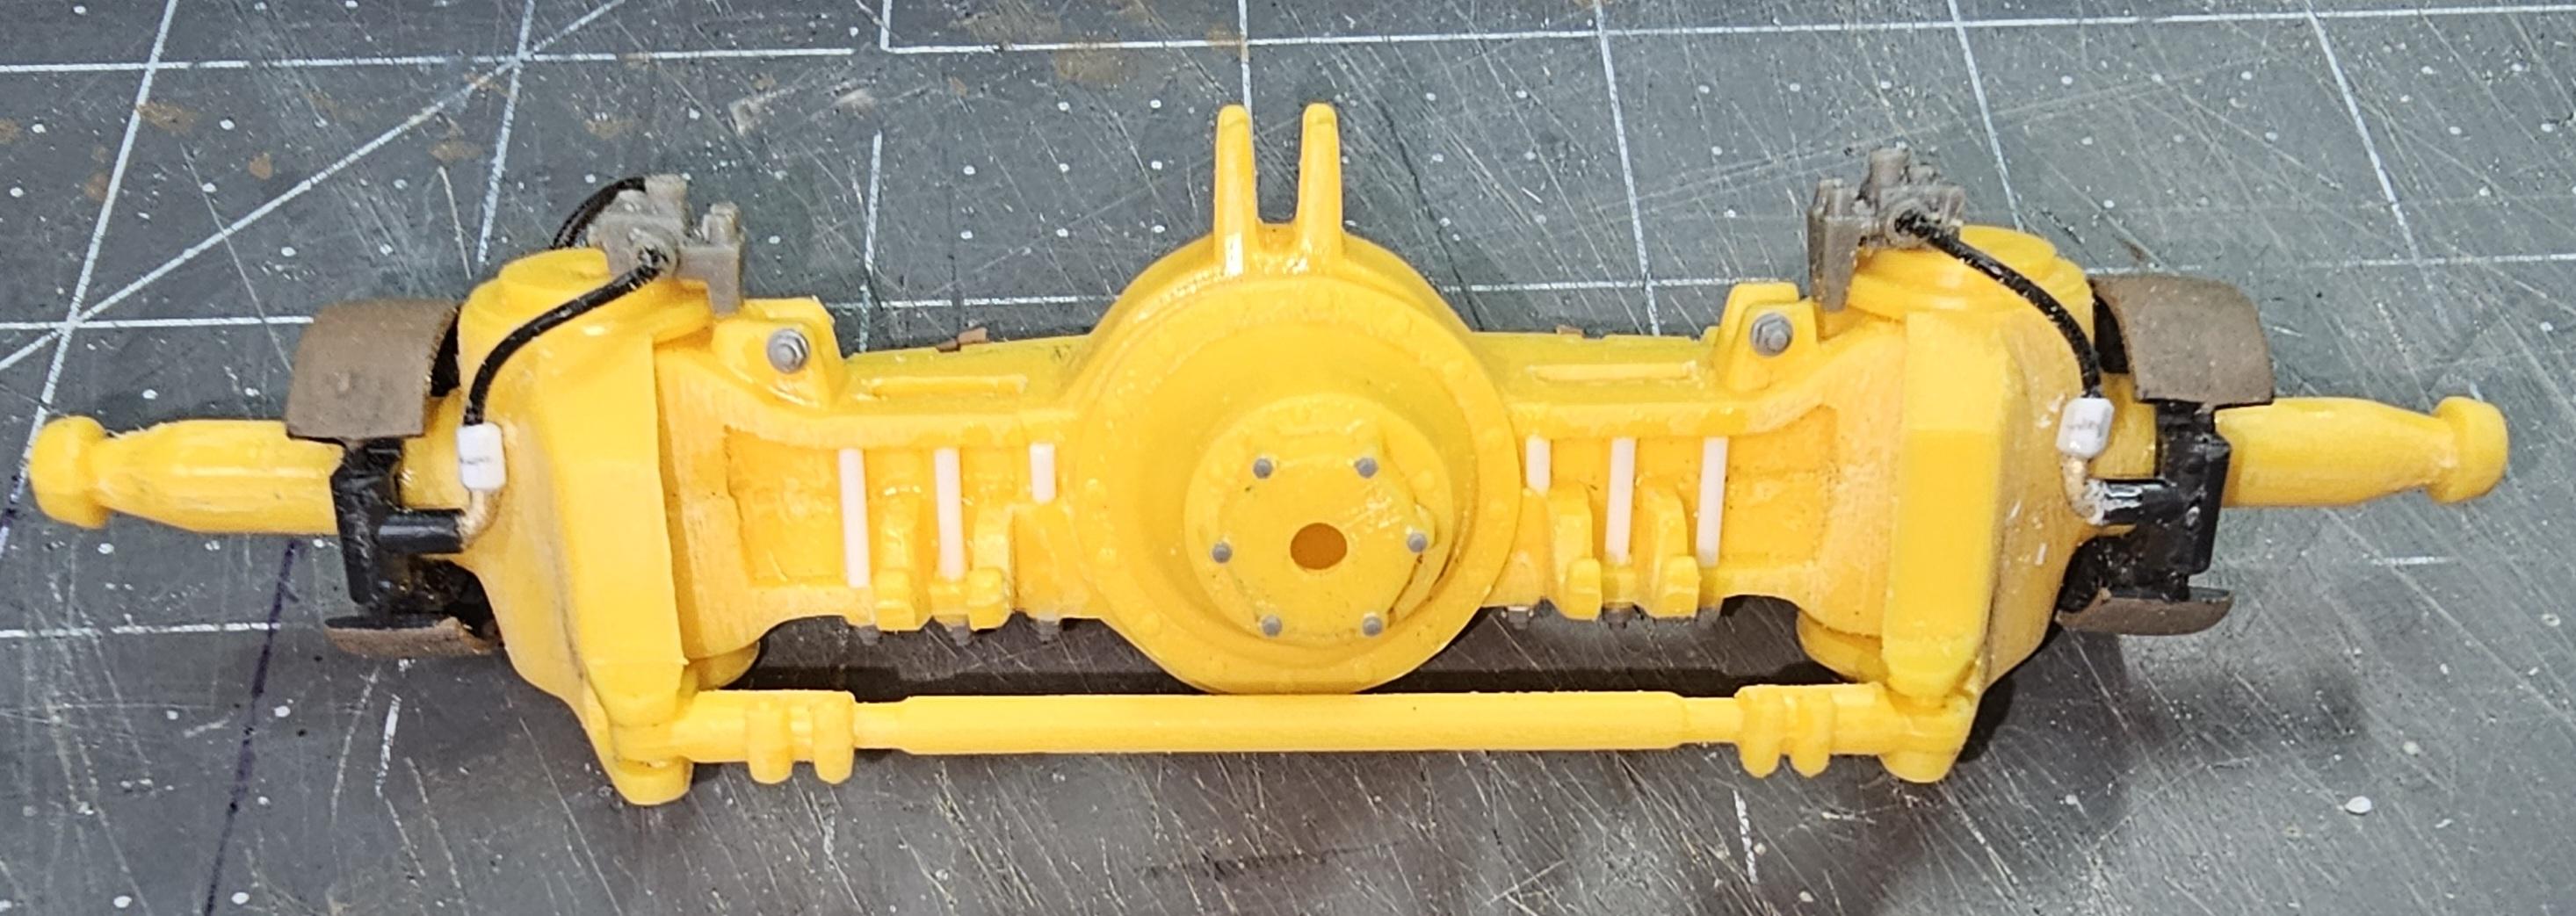
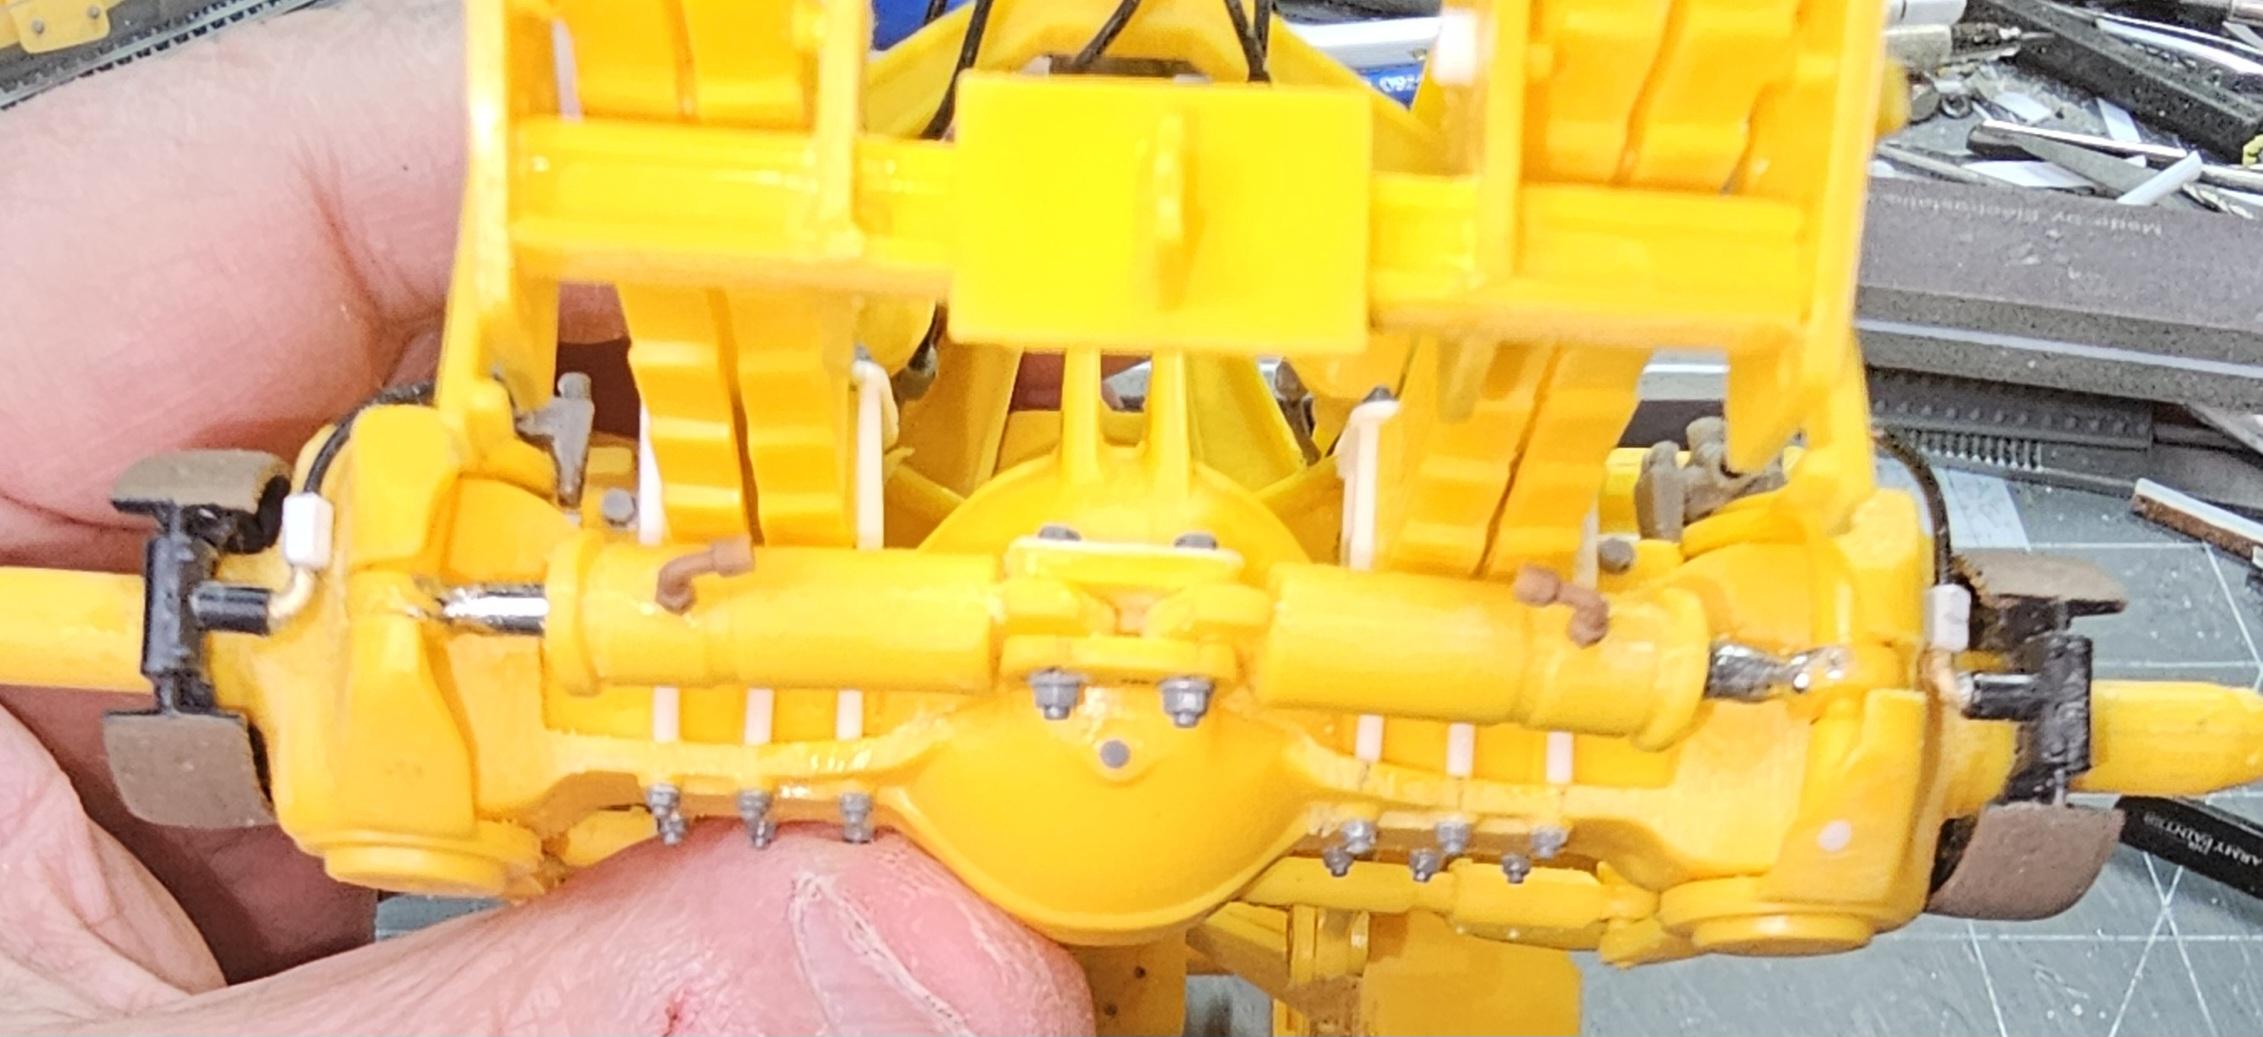
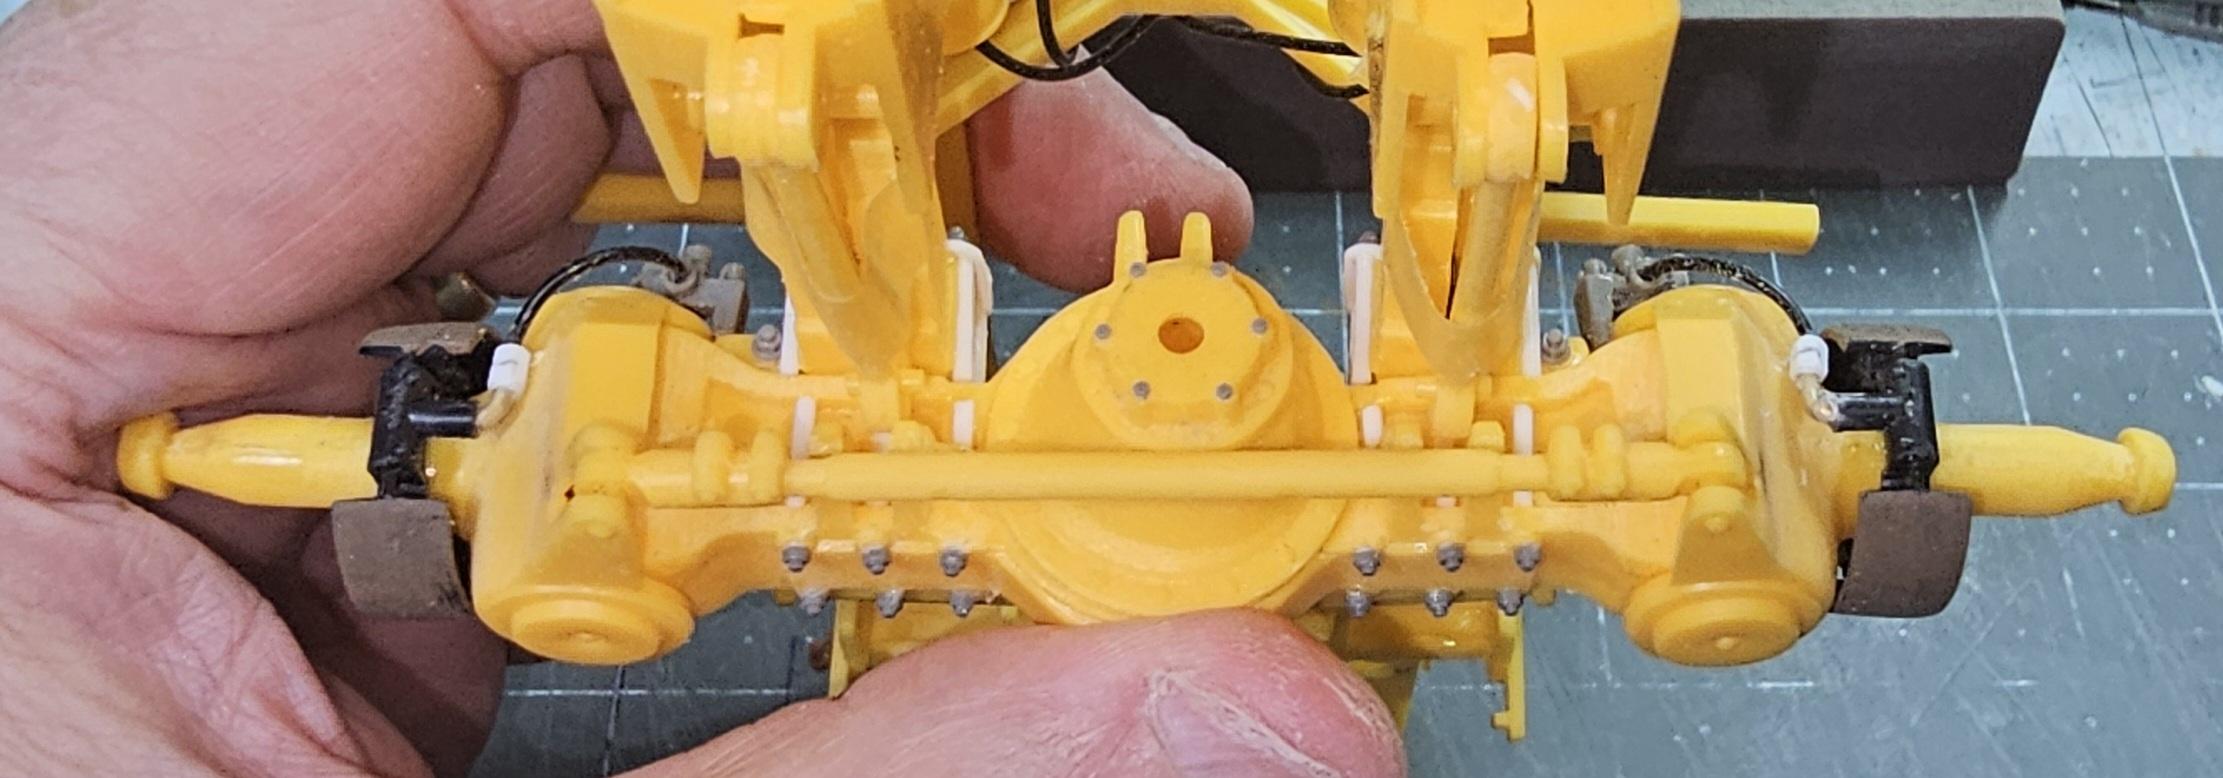
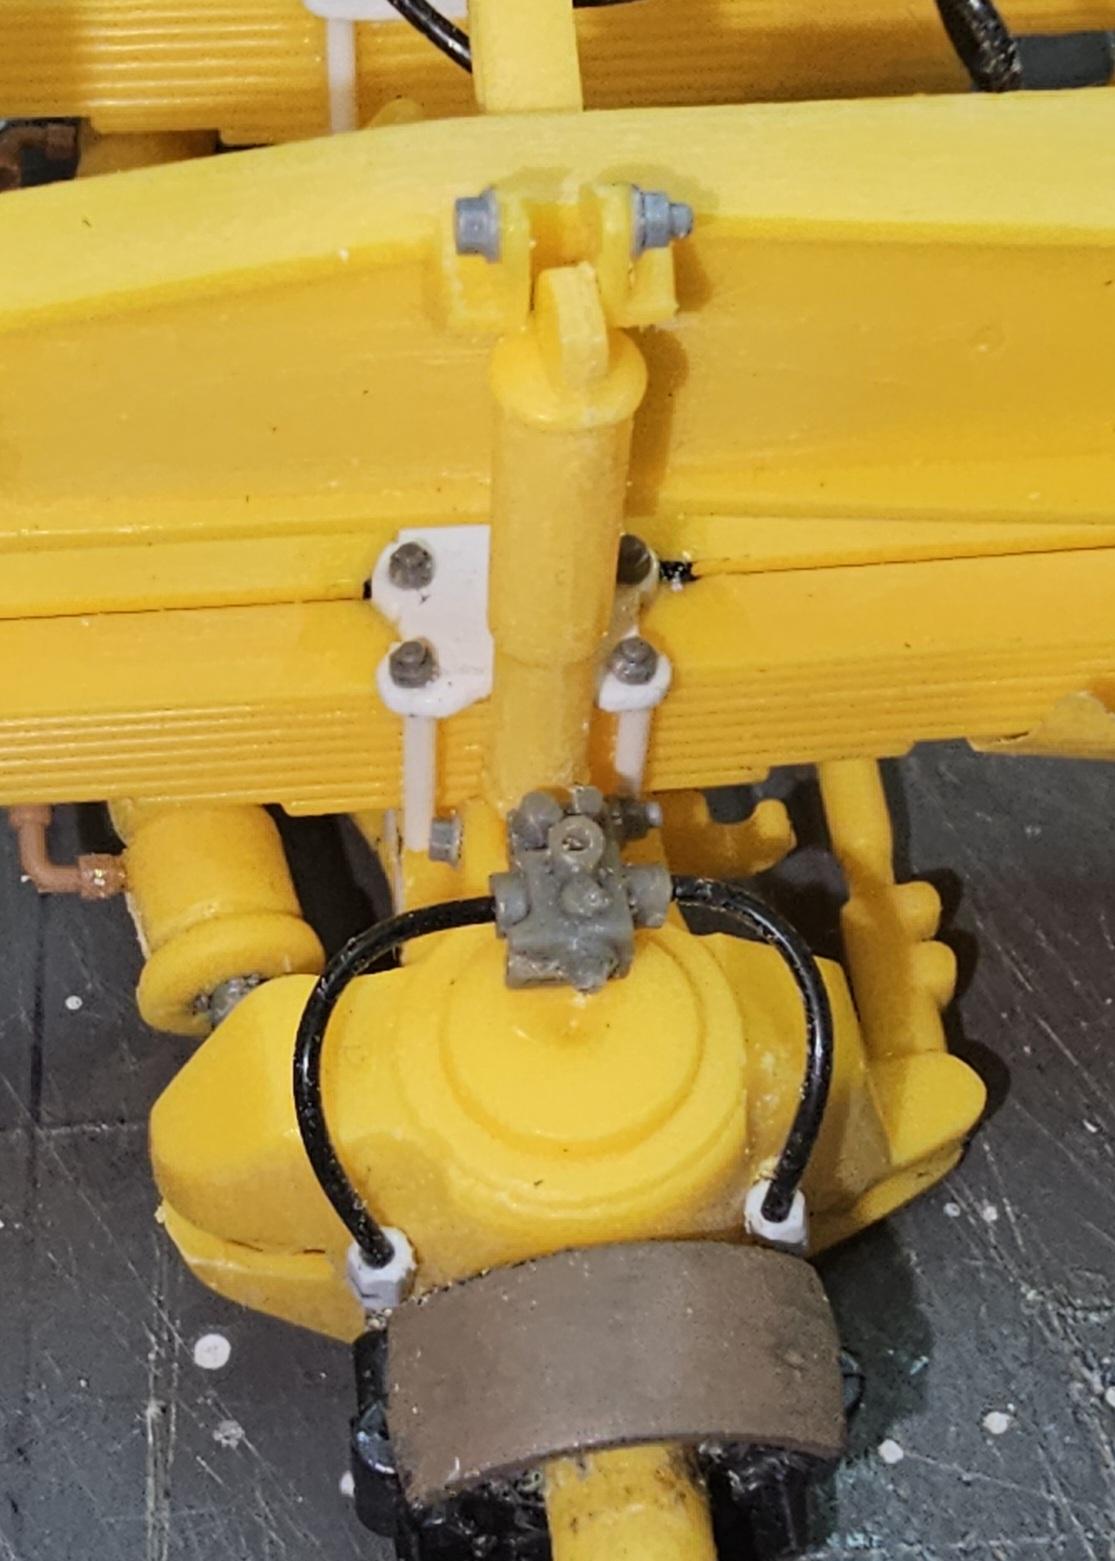
Hello fellow modelers I'm back with more updates. I started doing some of the plumbing. So here are some pictures for yous all. This view shows the new air valve I added in front of the hydraulic valve. I also started adding the air lines to the brake chambers. This view shows the hydraulic lines I added to the brake chambers abd to the fittings. This view shows the hydraulic fittings I added to the rear axle for the rear brake cylinders. Close up view of the hydraulic fitting for the rear brake cylinders. This view shows the air/hydraulic looms I added for routing the air and hydraulic lines. This is what I made the looms from. It's a peice of old phone cord with the wires removed. I then slice it into various lengths to create the looms. You hold them on with CA glue. This view shows the bolt heads I added to the rear axle. The other side of the rear axle and the bolt heads. Well I'm out of pictures so I guess that's it for now. Ron G
-
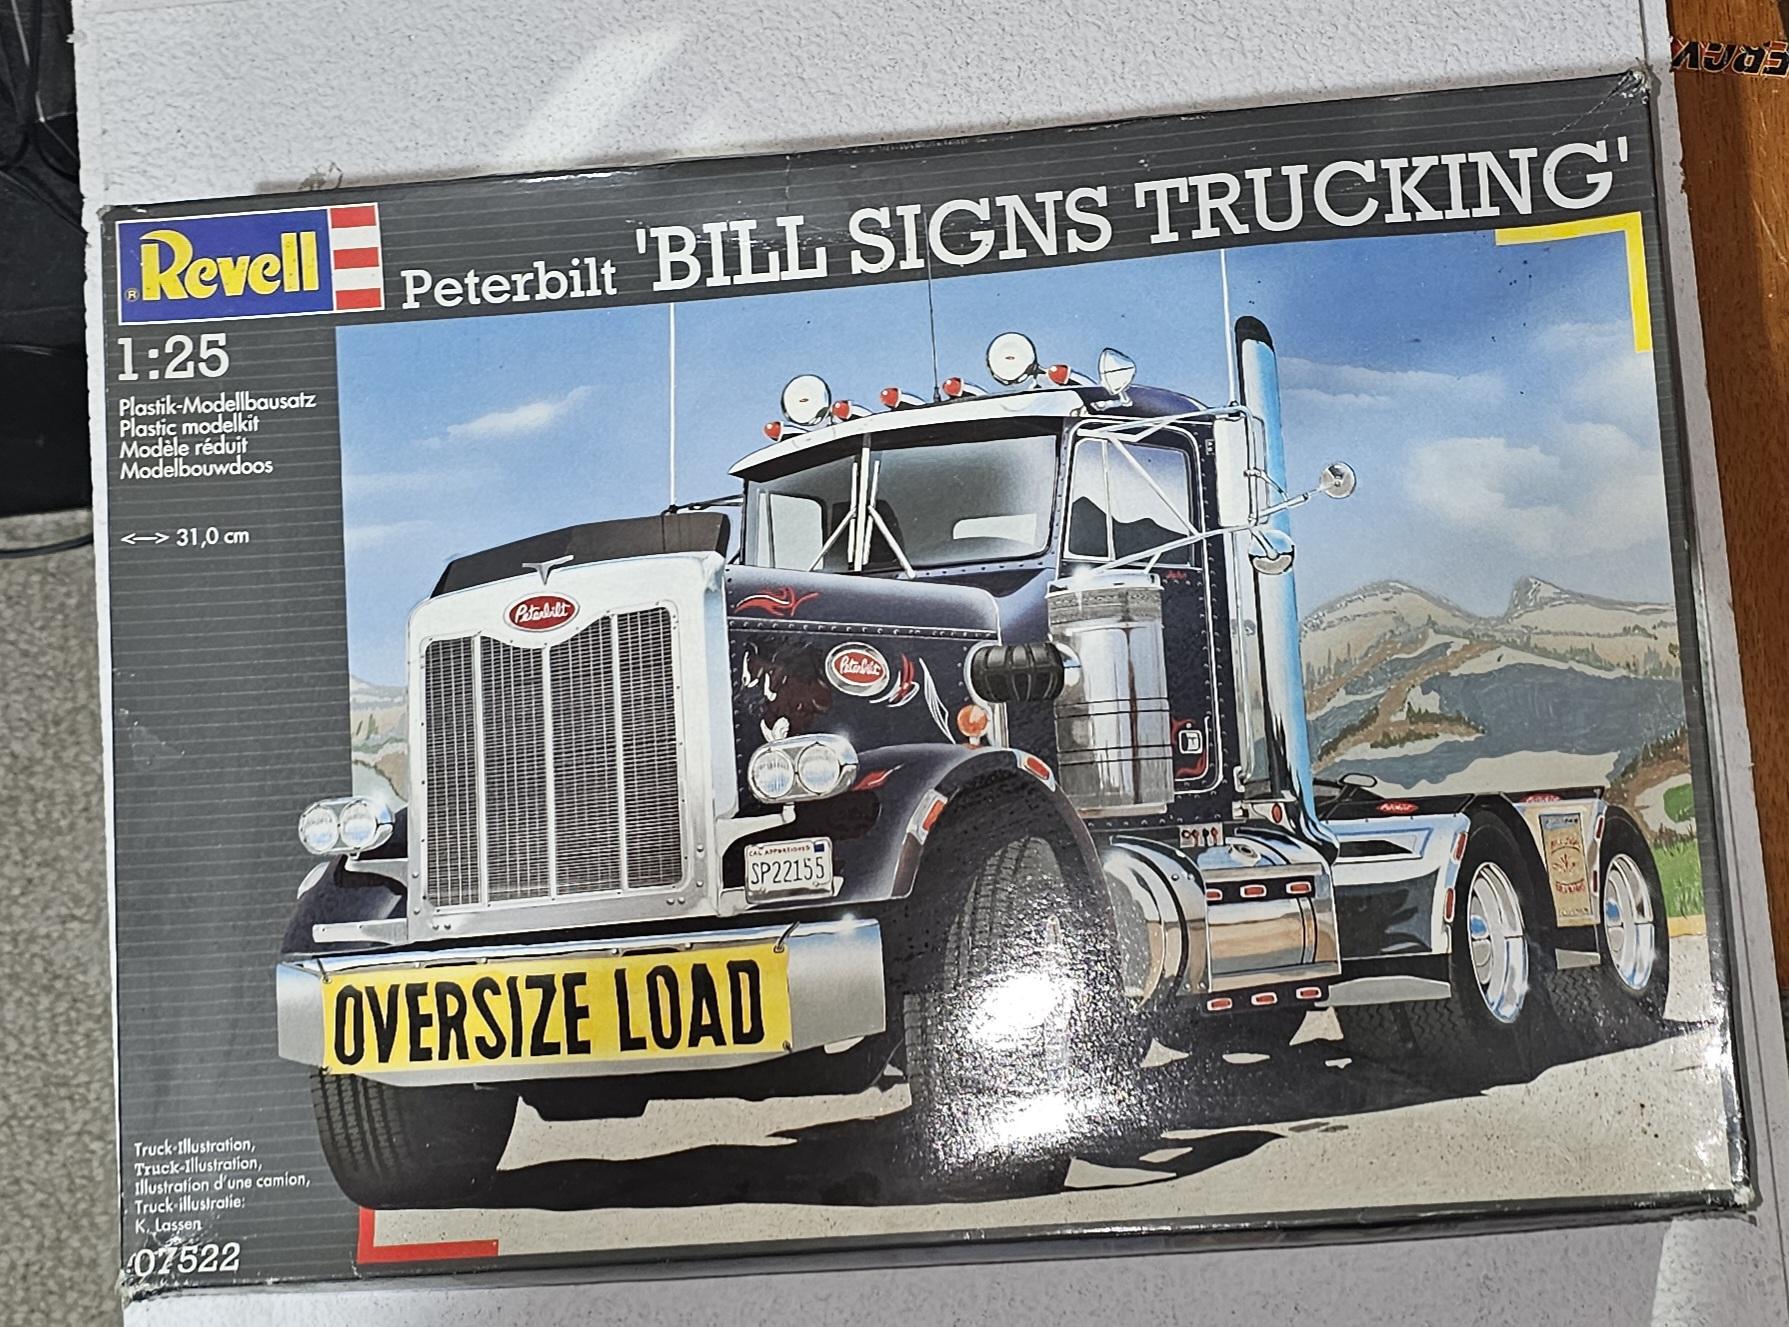
Hey all Jeff has a burn out option for when he runs out of steam on his Payhauler, a 1/24 Western Star. Well I have burn out option too, it's this the 1/25 scale Revell "Bill Signs" Peterbilt 359. I will be doing mine with standard frame supplied in the kit, not the Canadian spread ones. It will be a Heavyhaul tractor with a non steerable lift axle, a big Detroit Diesel 12V71N, 385/65 R22.5 front floats, and I'm going to cut down the sleeper from the kit into a 36" version with a 3D Concepts headache rack. This is the kit. Ron G
-
Hey all More work done on the Payhauler. I have the front axle assembled. This view shows the two hydraulic fittings that I added to the front steering cylinders. Also the bolt heads I added. This view shows the axle partially assembled. Also I replaced the mounting bolts that mount the axle to the springs. This view shows the front axle completely assembled. I added two hydraulic valves to the spindles so I could plumb the front brake cylinders. Another view of the front axle turned left. Another view showing the front axle turned right. This view shows the rolling chassis from the bottom. This view shows the rolling chassis with the engine sitting in place. Well that's it for now be back soon with more updates. Ron G
-
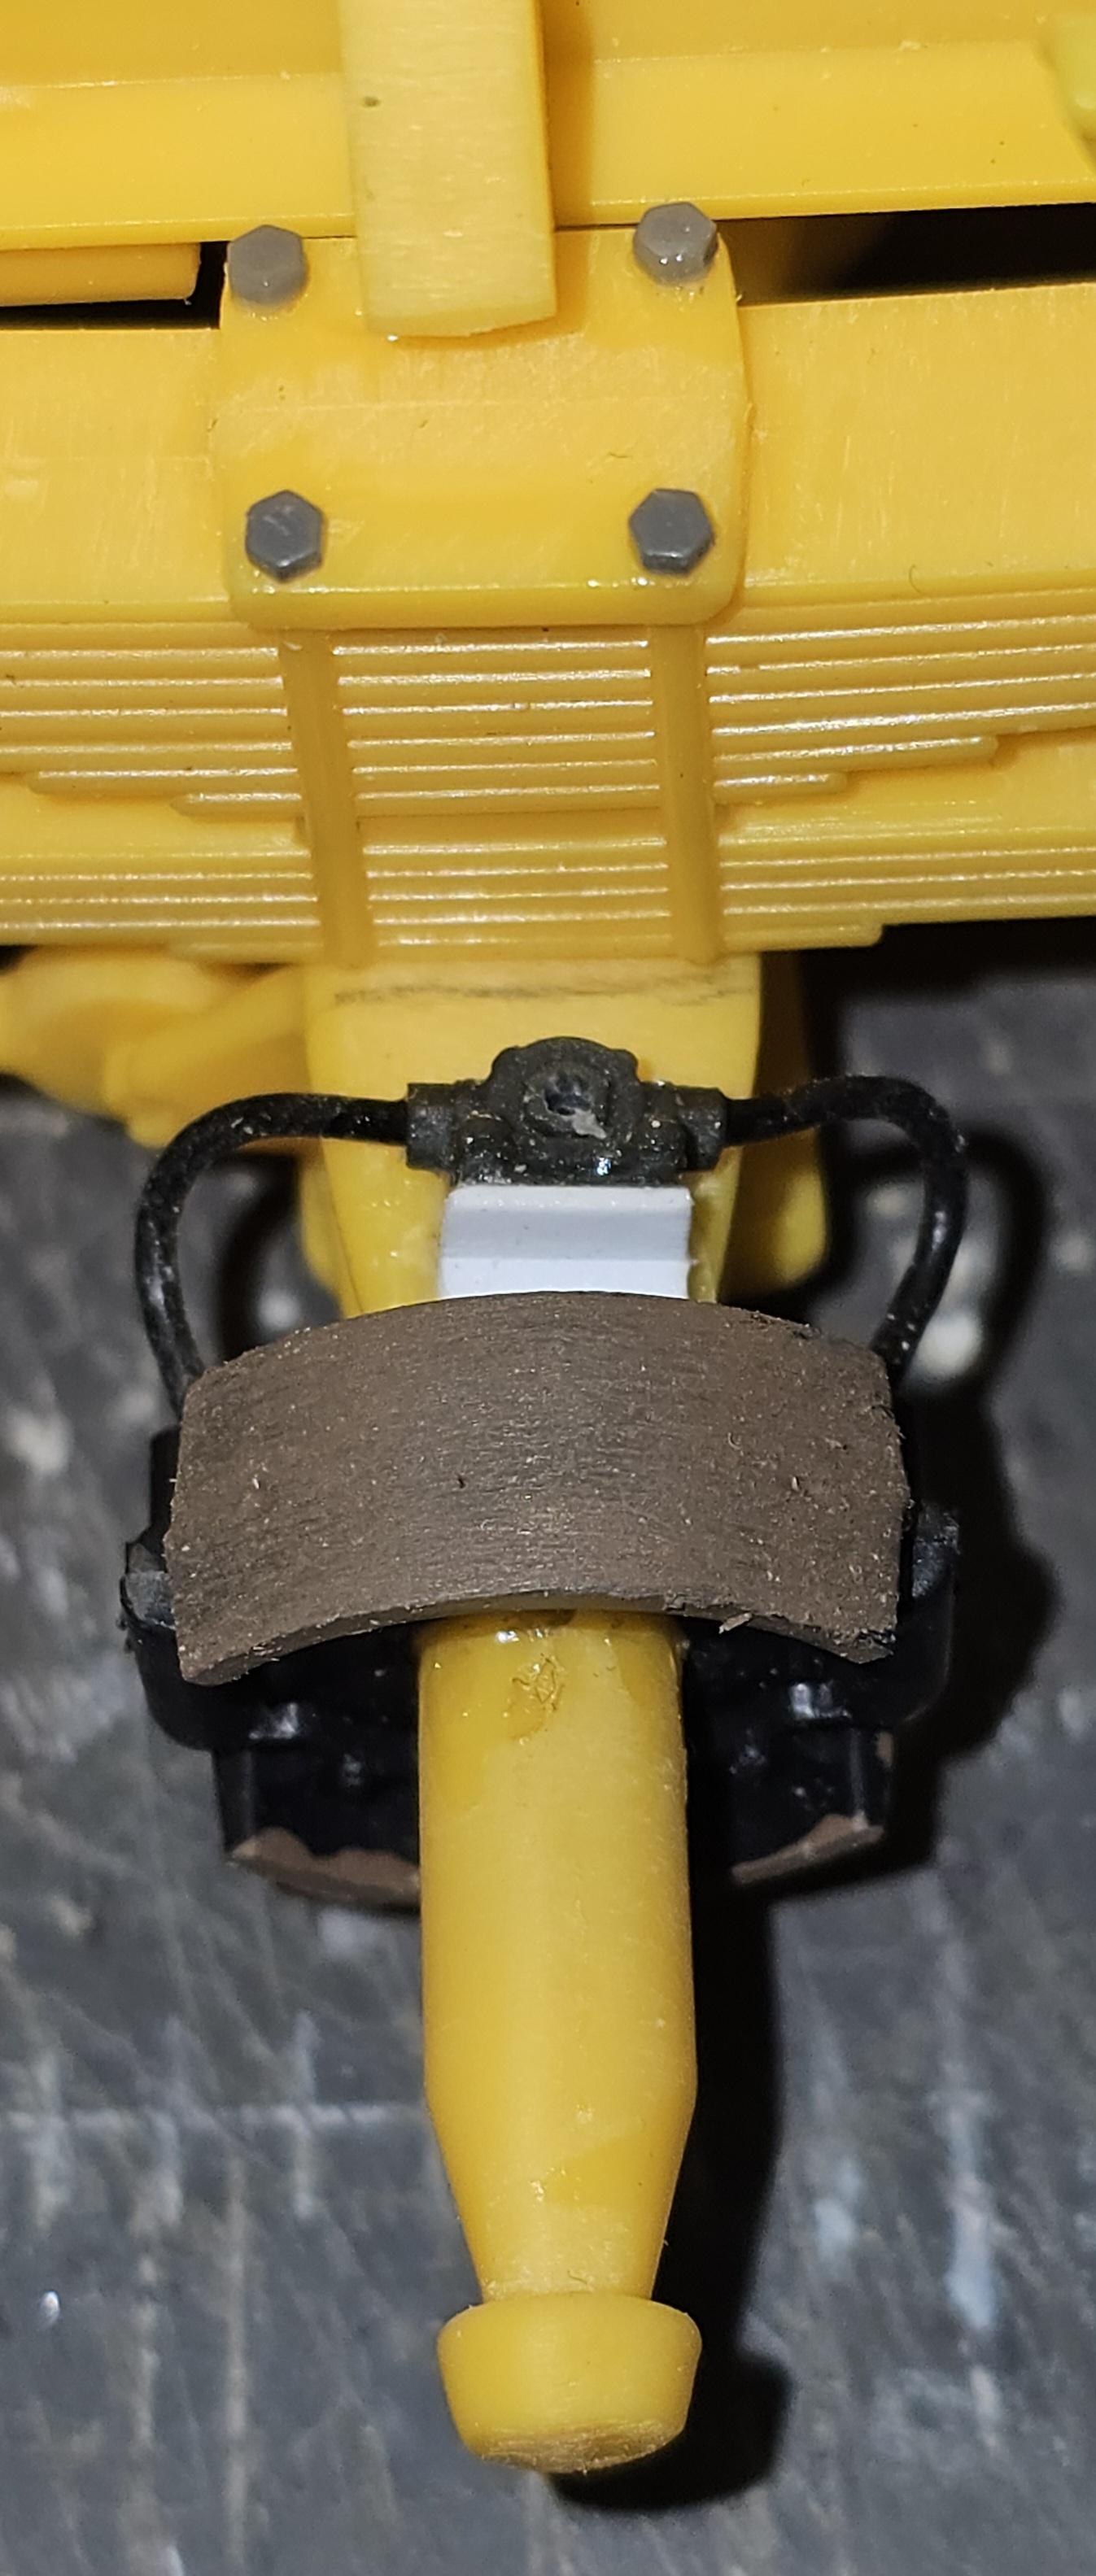
Hey all Small update did a little more work on the Payhauler. This view shows the outside wheels on the right that I added valve stems to. The back wheels on the left I painted the area that the brake shoes contact a gun metal. The black brake shoes I drilled the brake cylinders out to accept hydraulic fittings. This view shows the shoes inside the back wheels. This view shows the hydraulic fittings added to the brake shoe on the left. This view shows the hydraulic fittings I added to the steering cylinders. This view shows the exhaust pipe I modified to look more realistic. This view shows the engine almost finish painted. Another view of the engine. Well that's it for now be back soon with more updates. Ron G
-
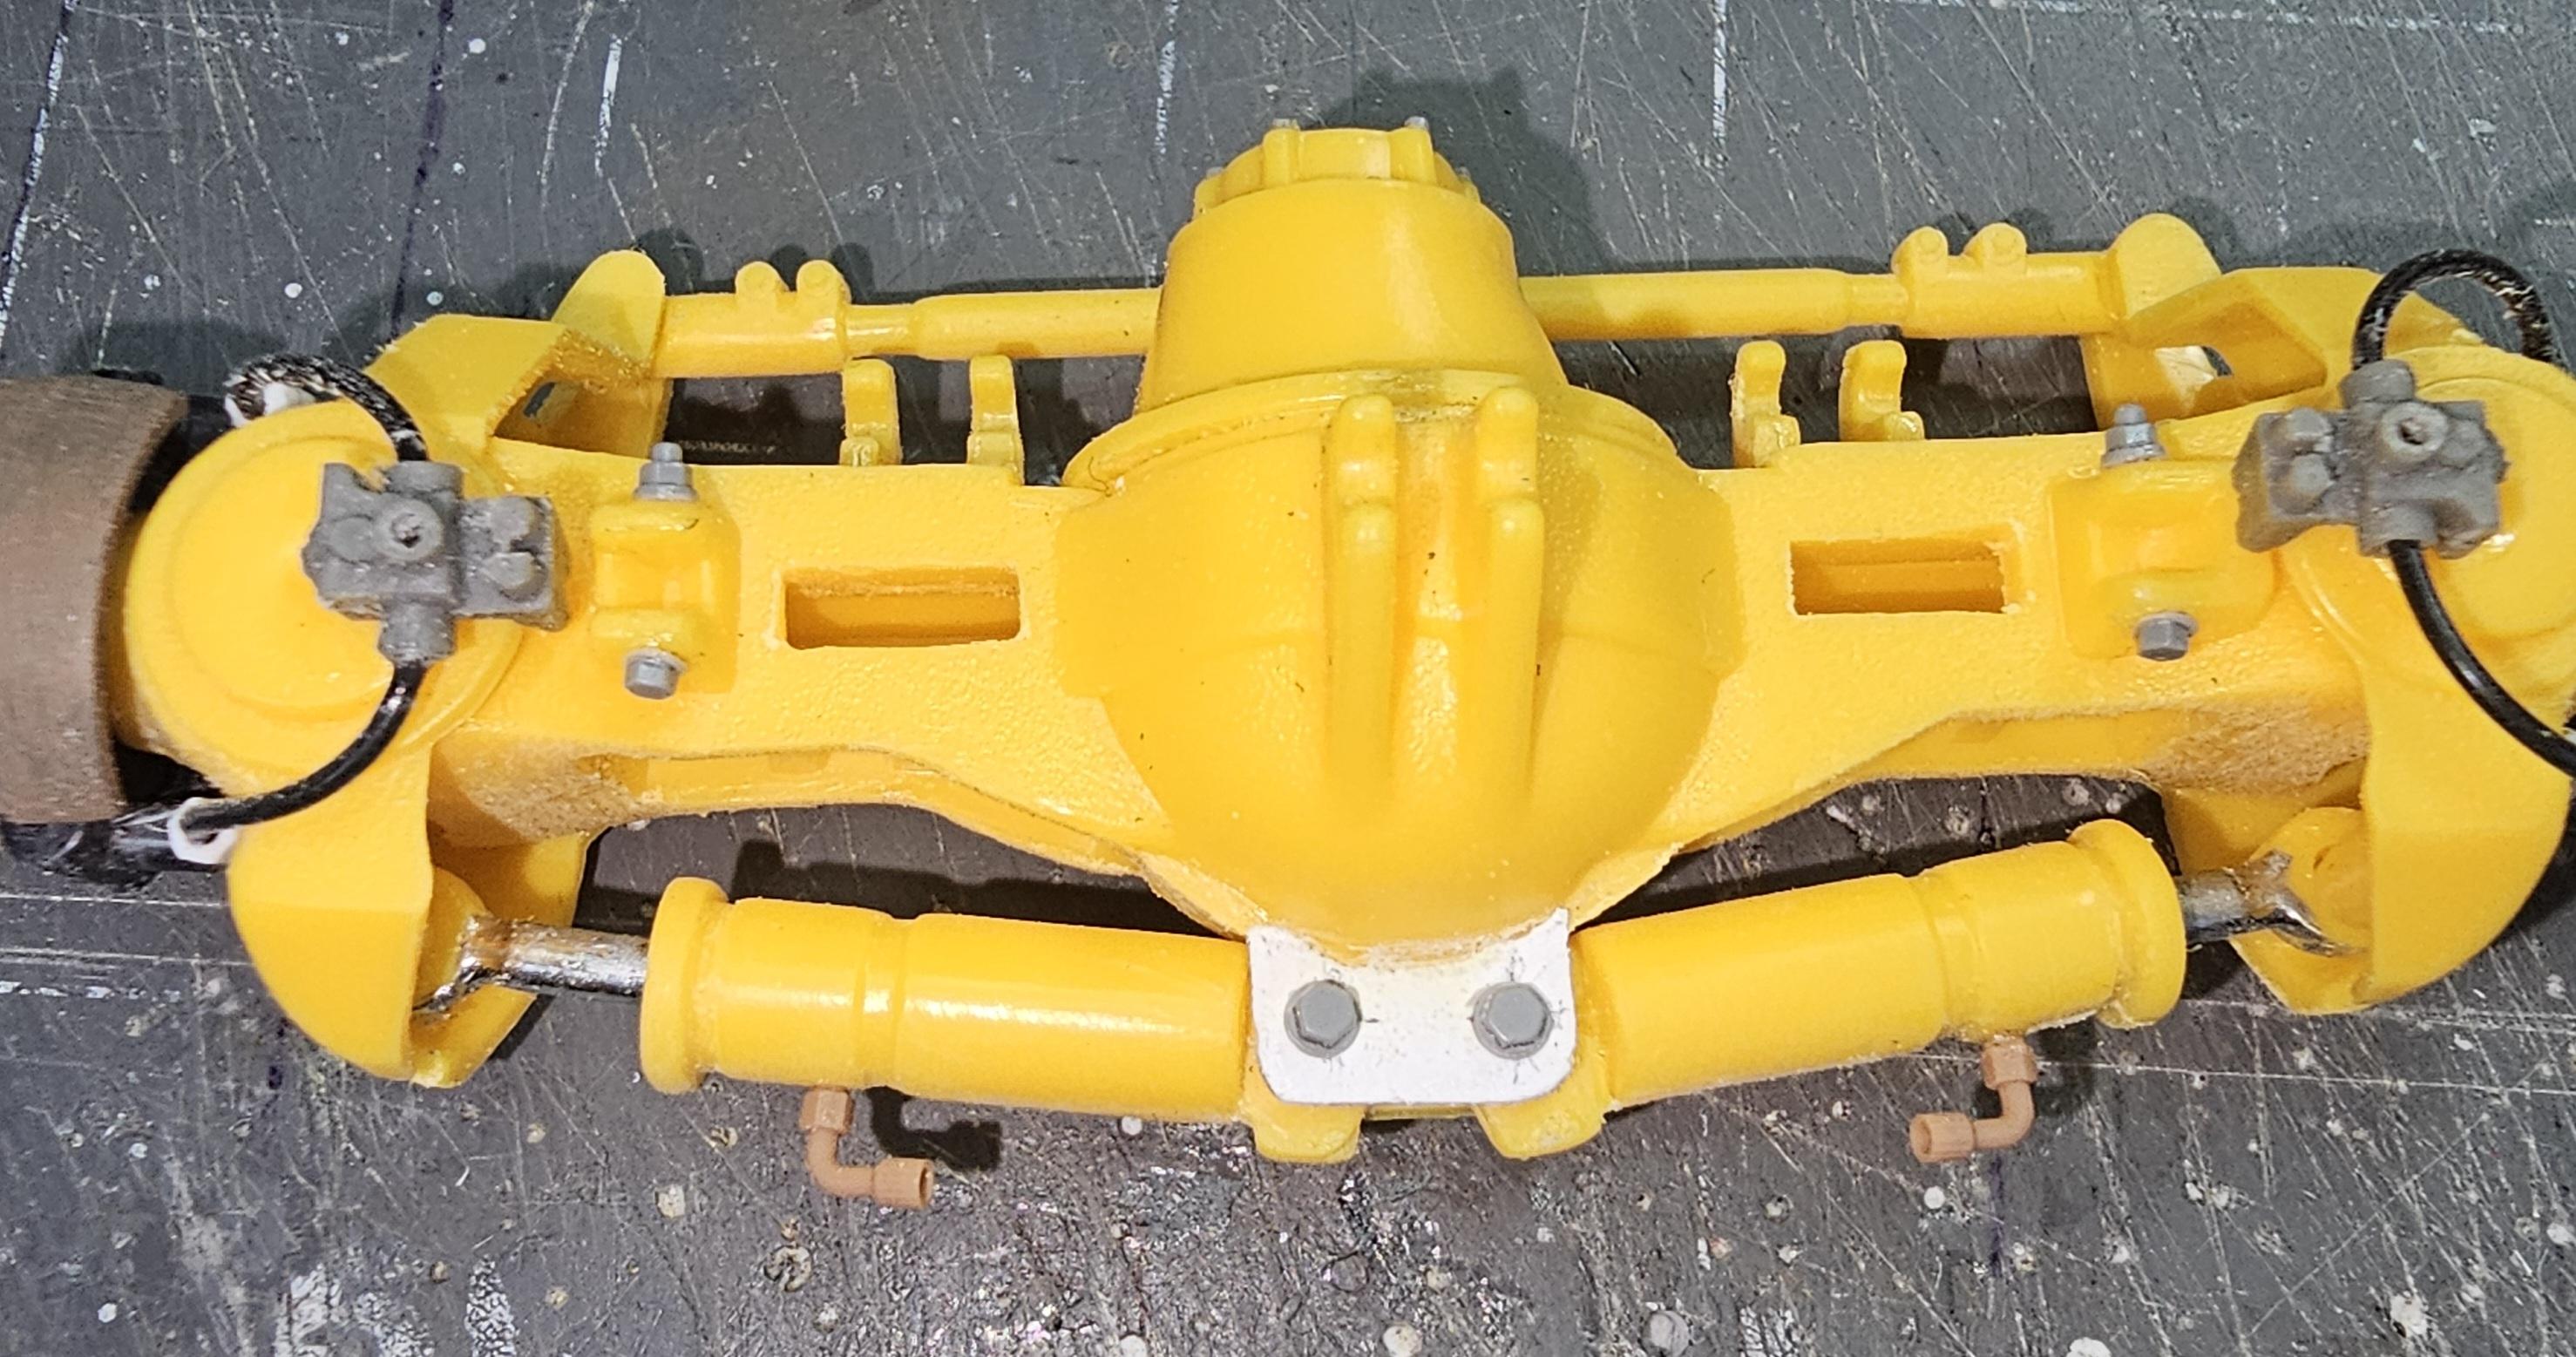
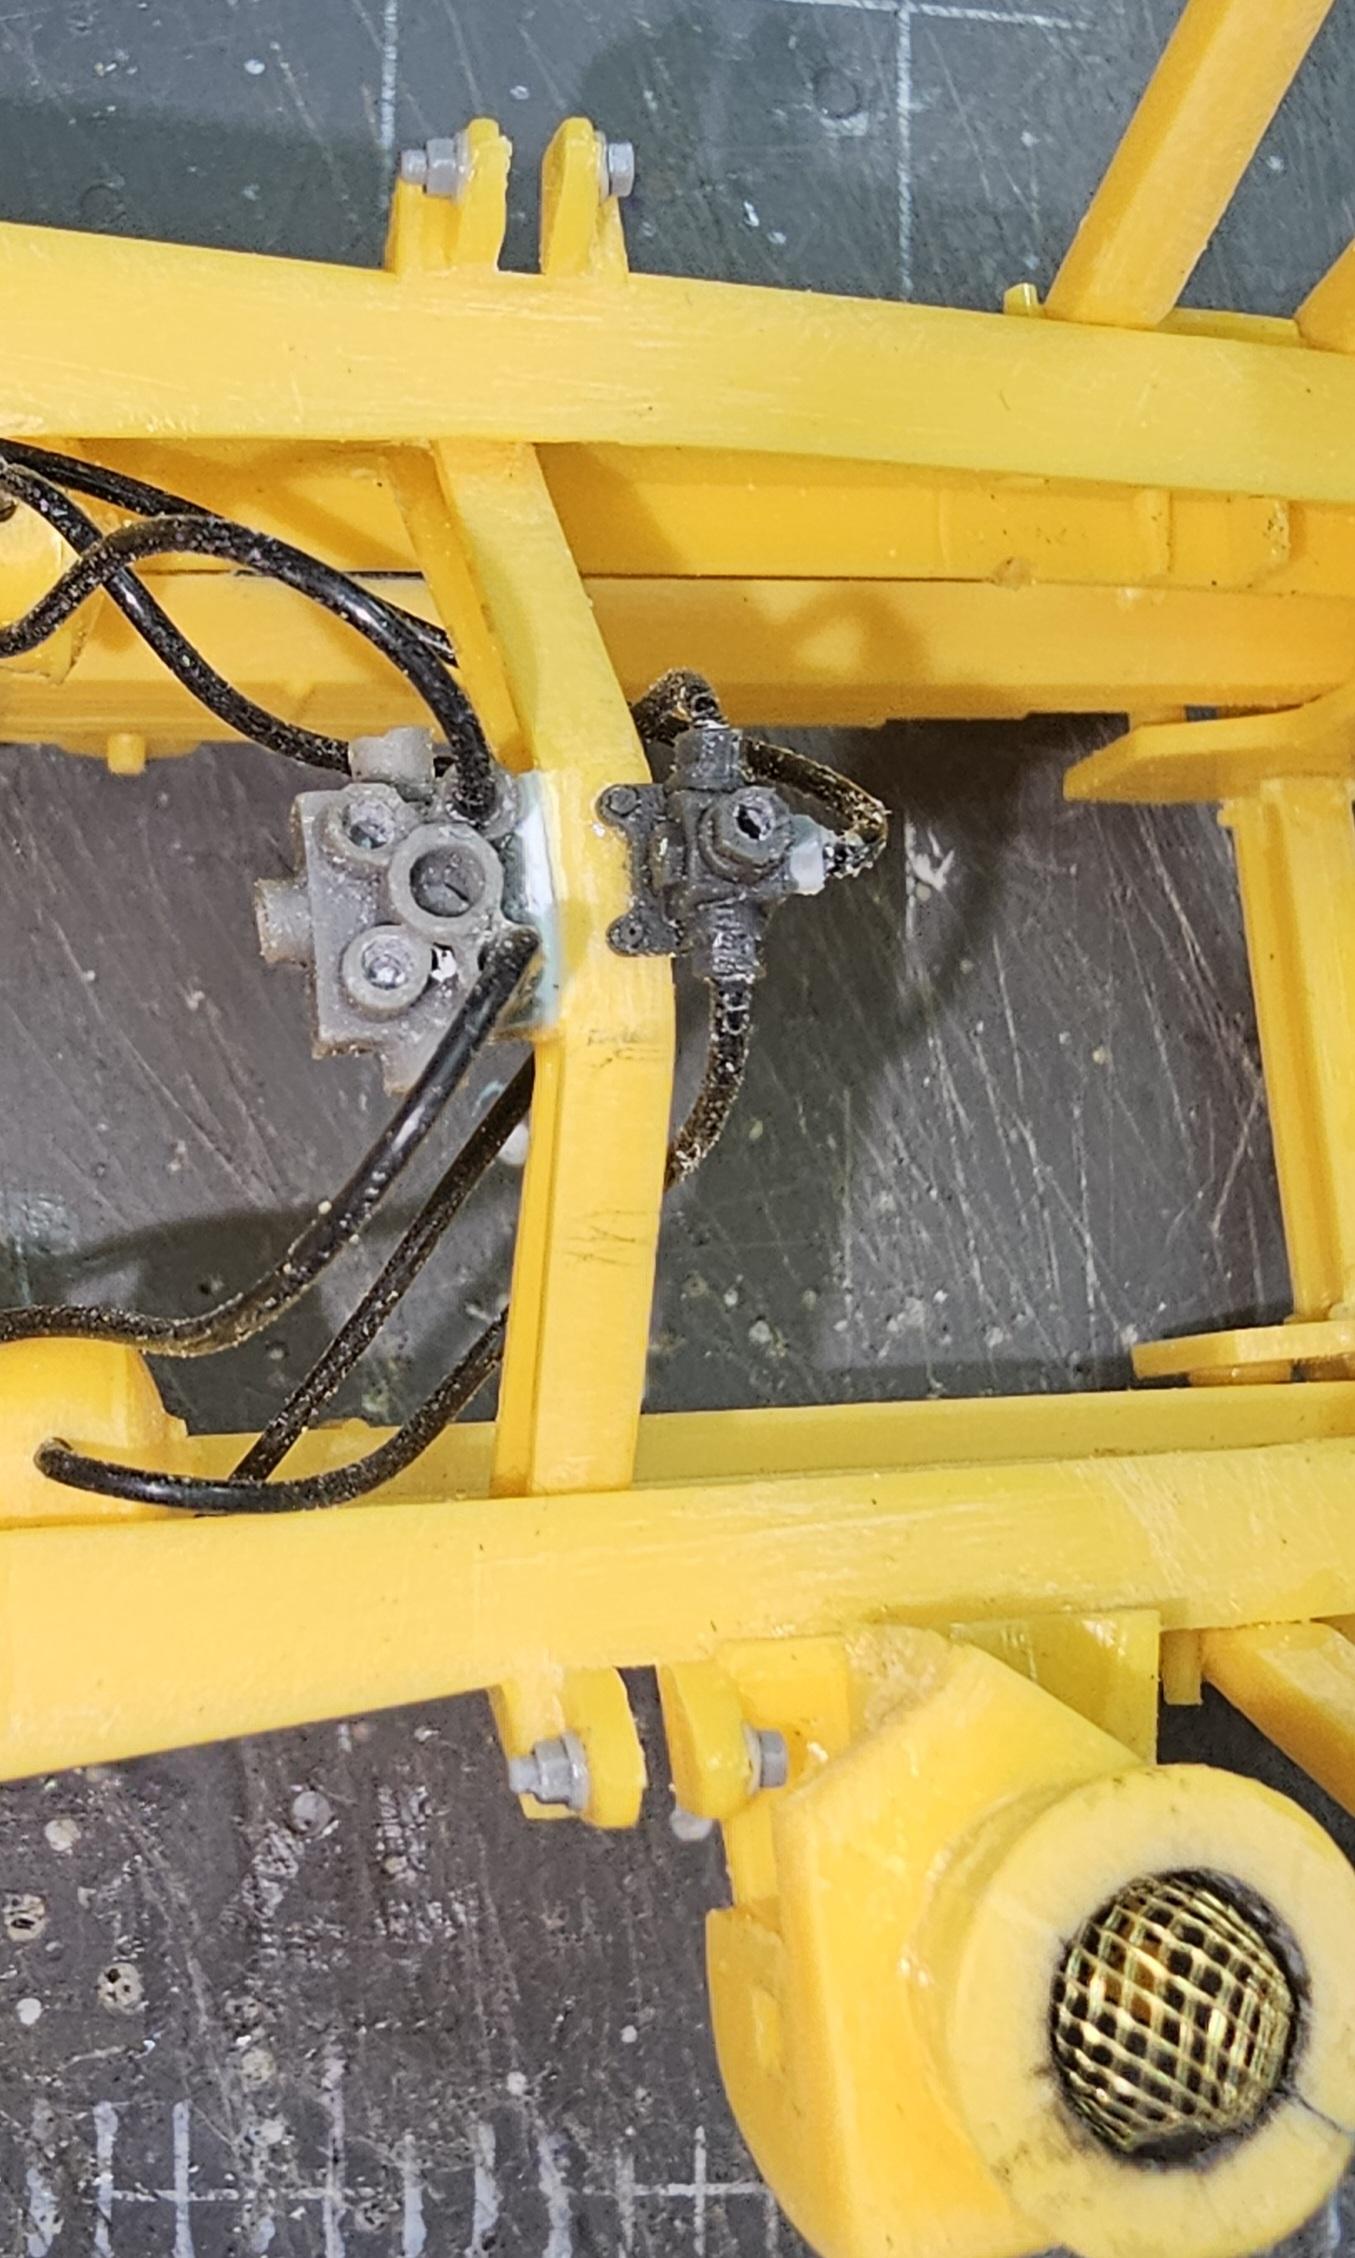
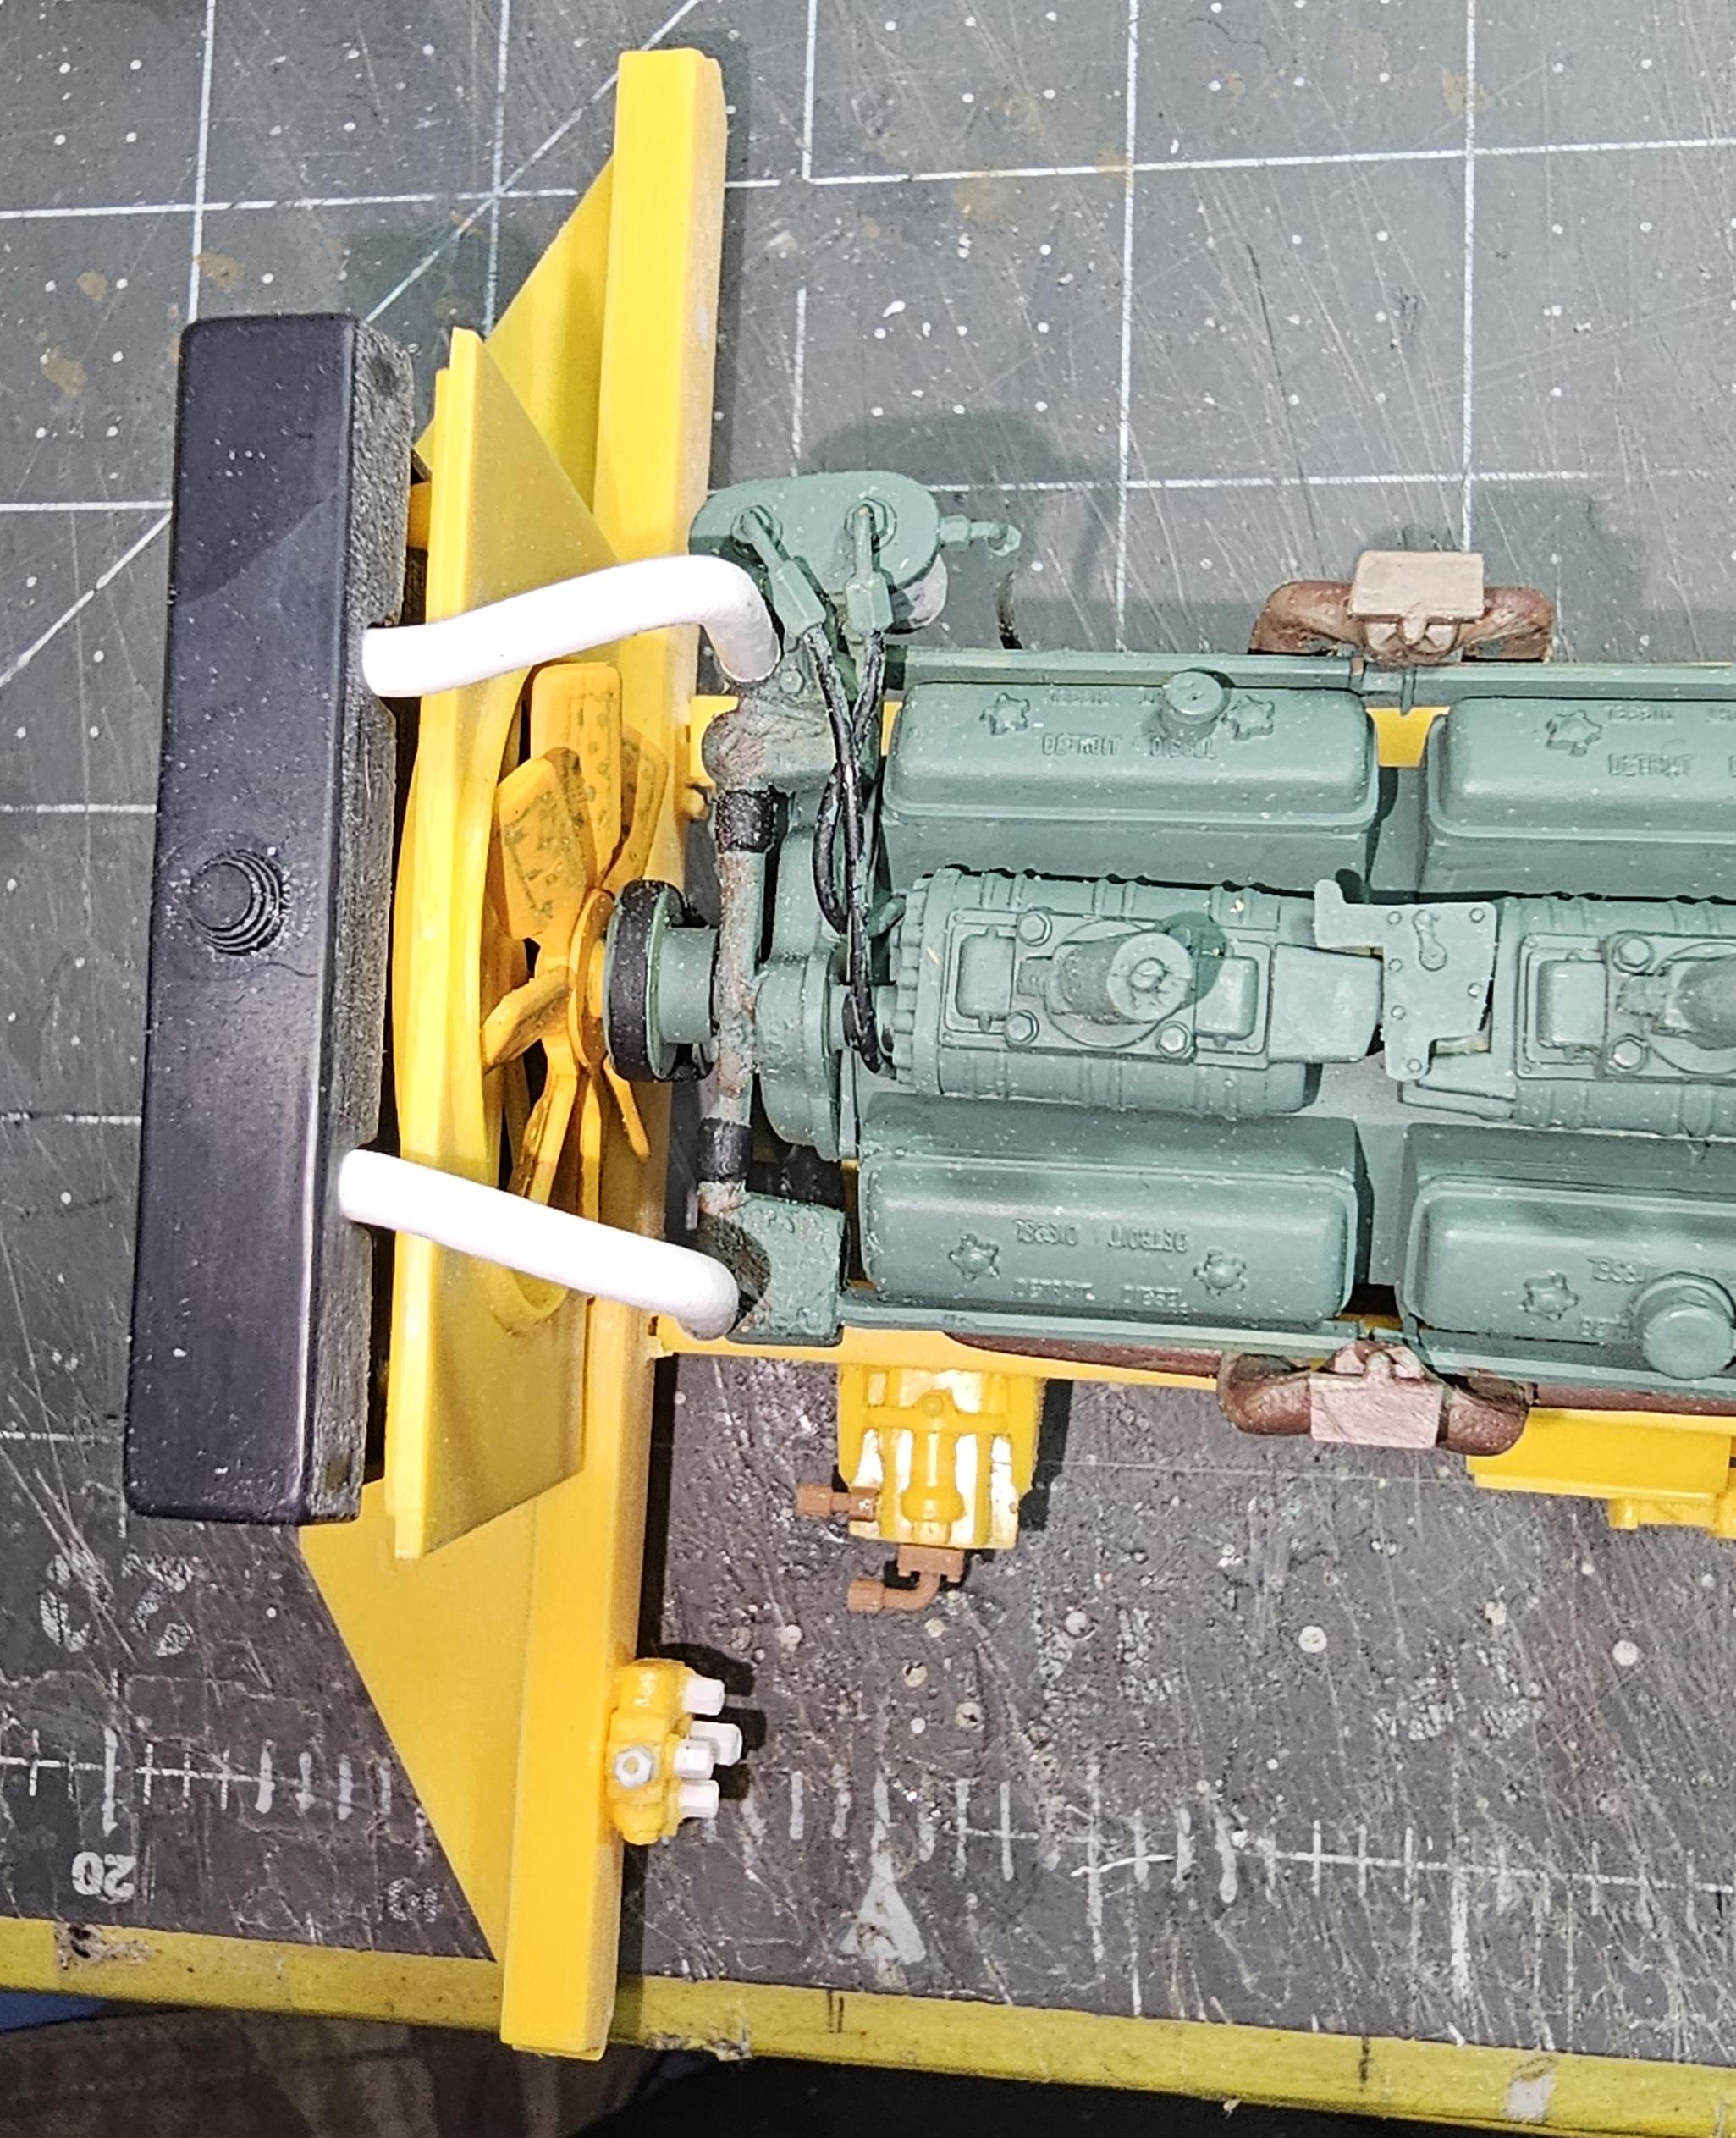
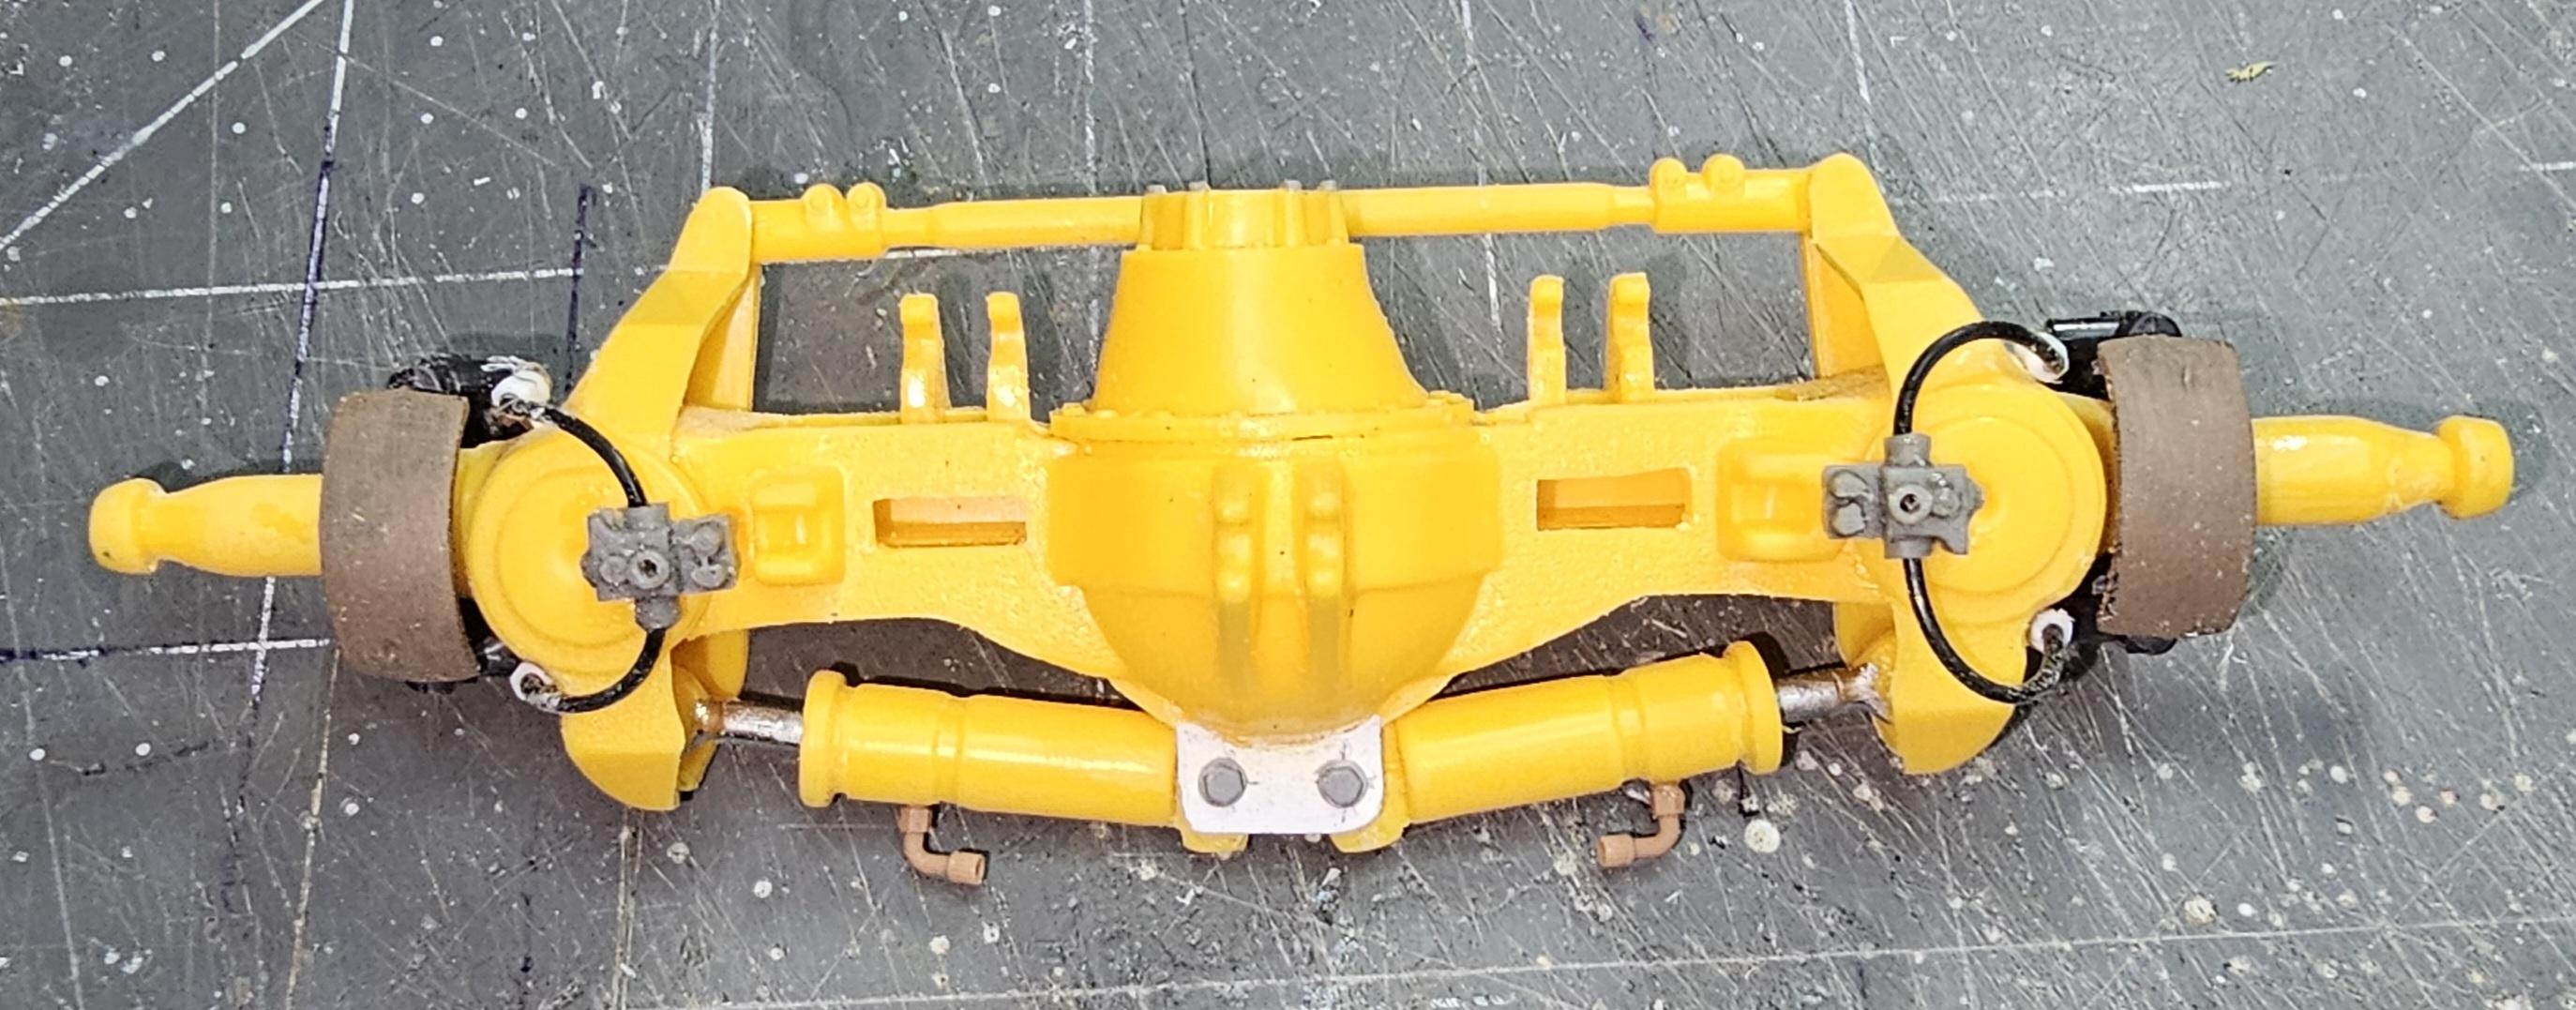
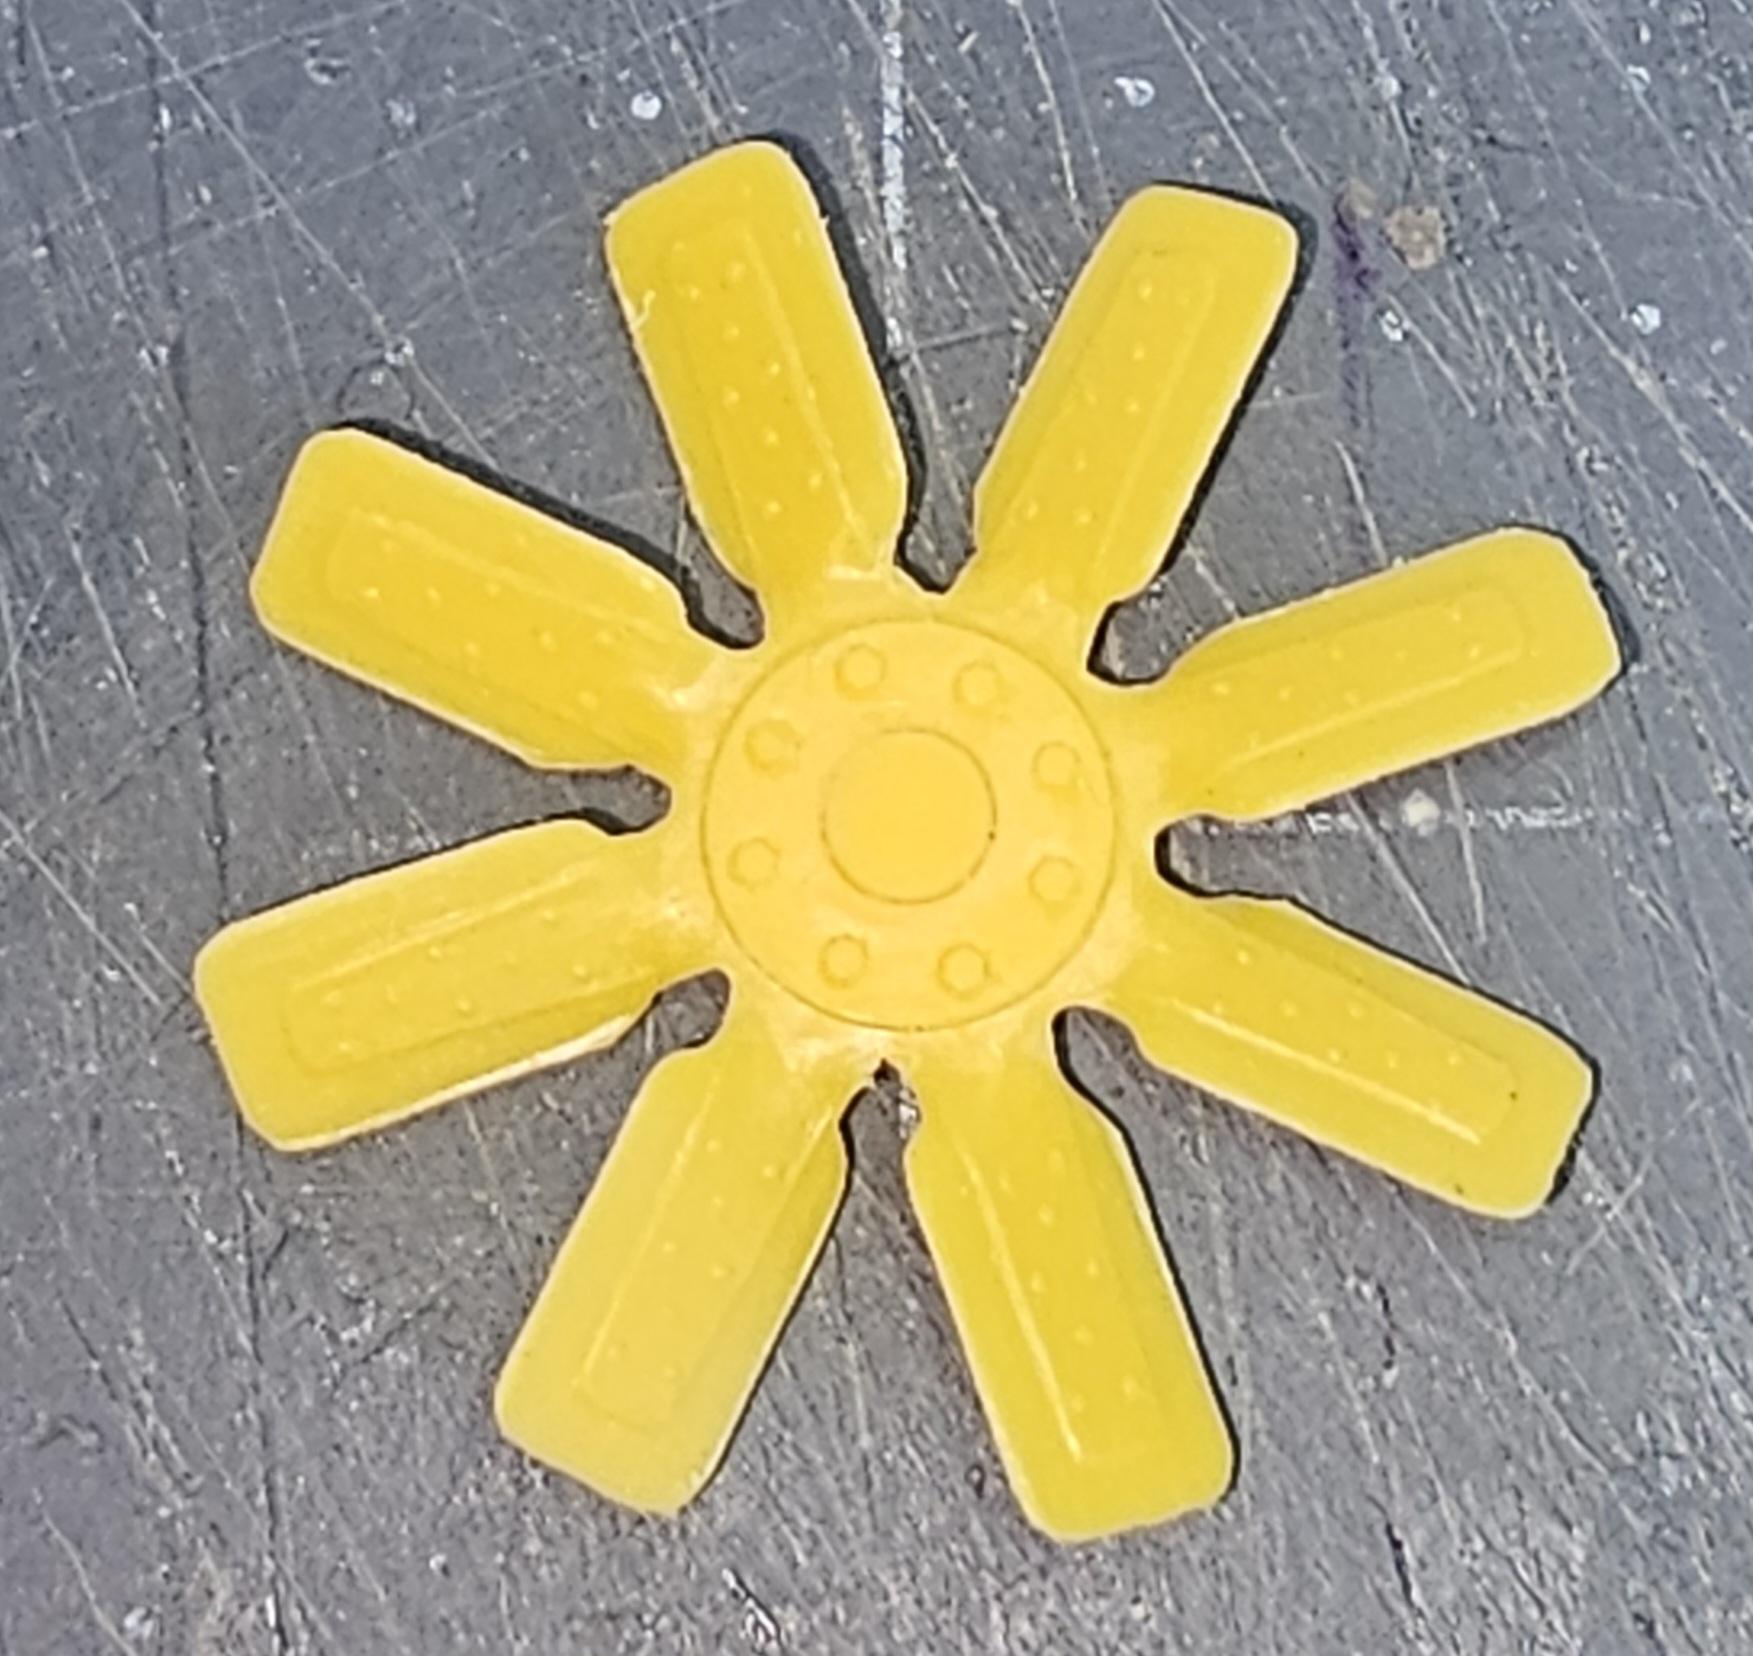
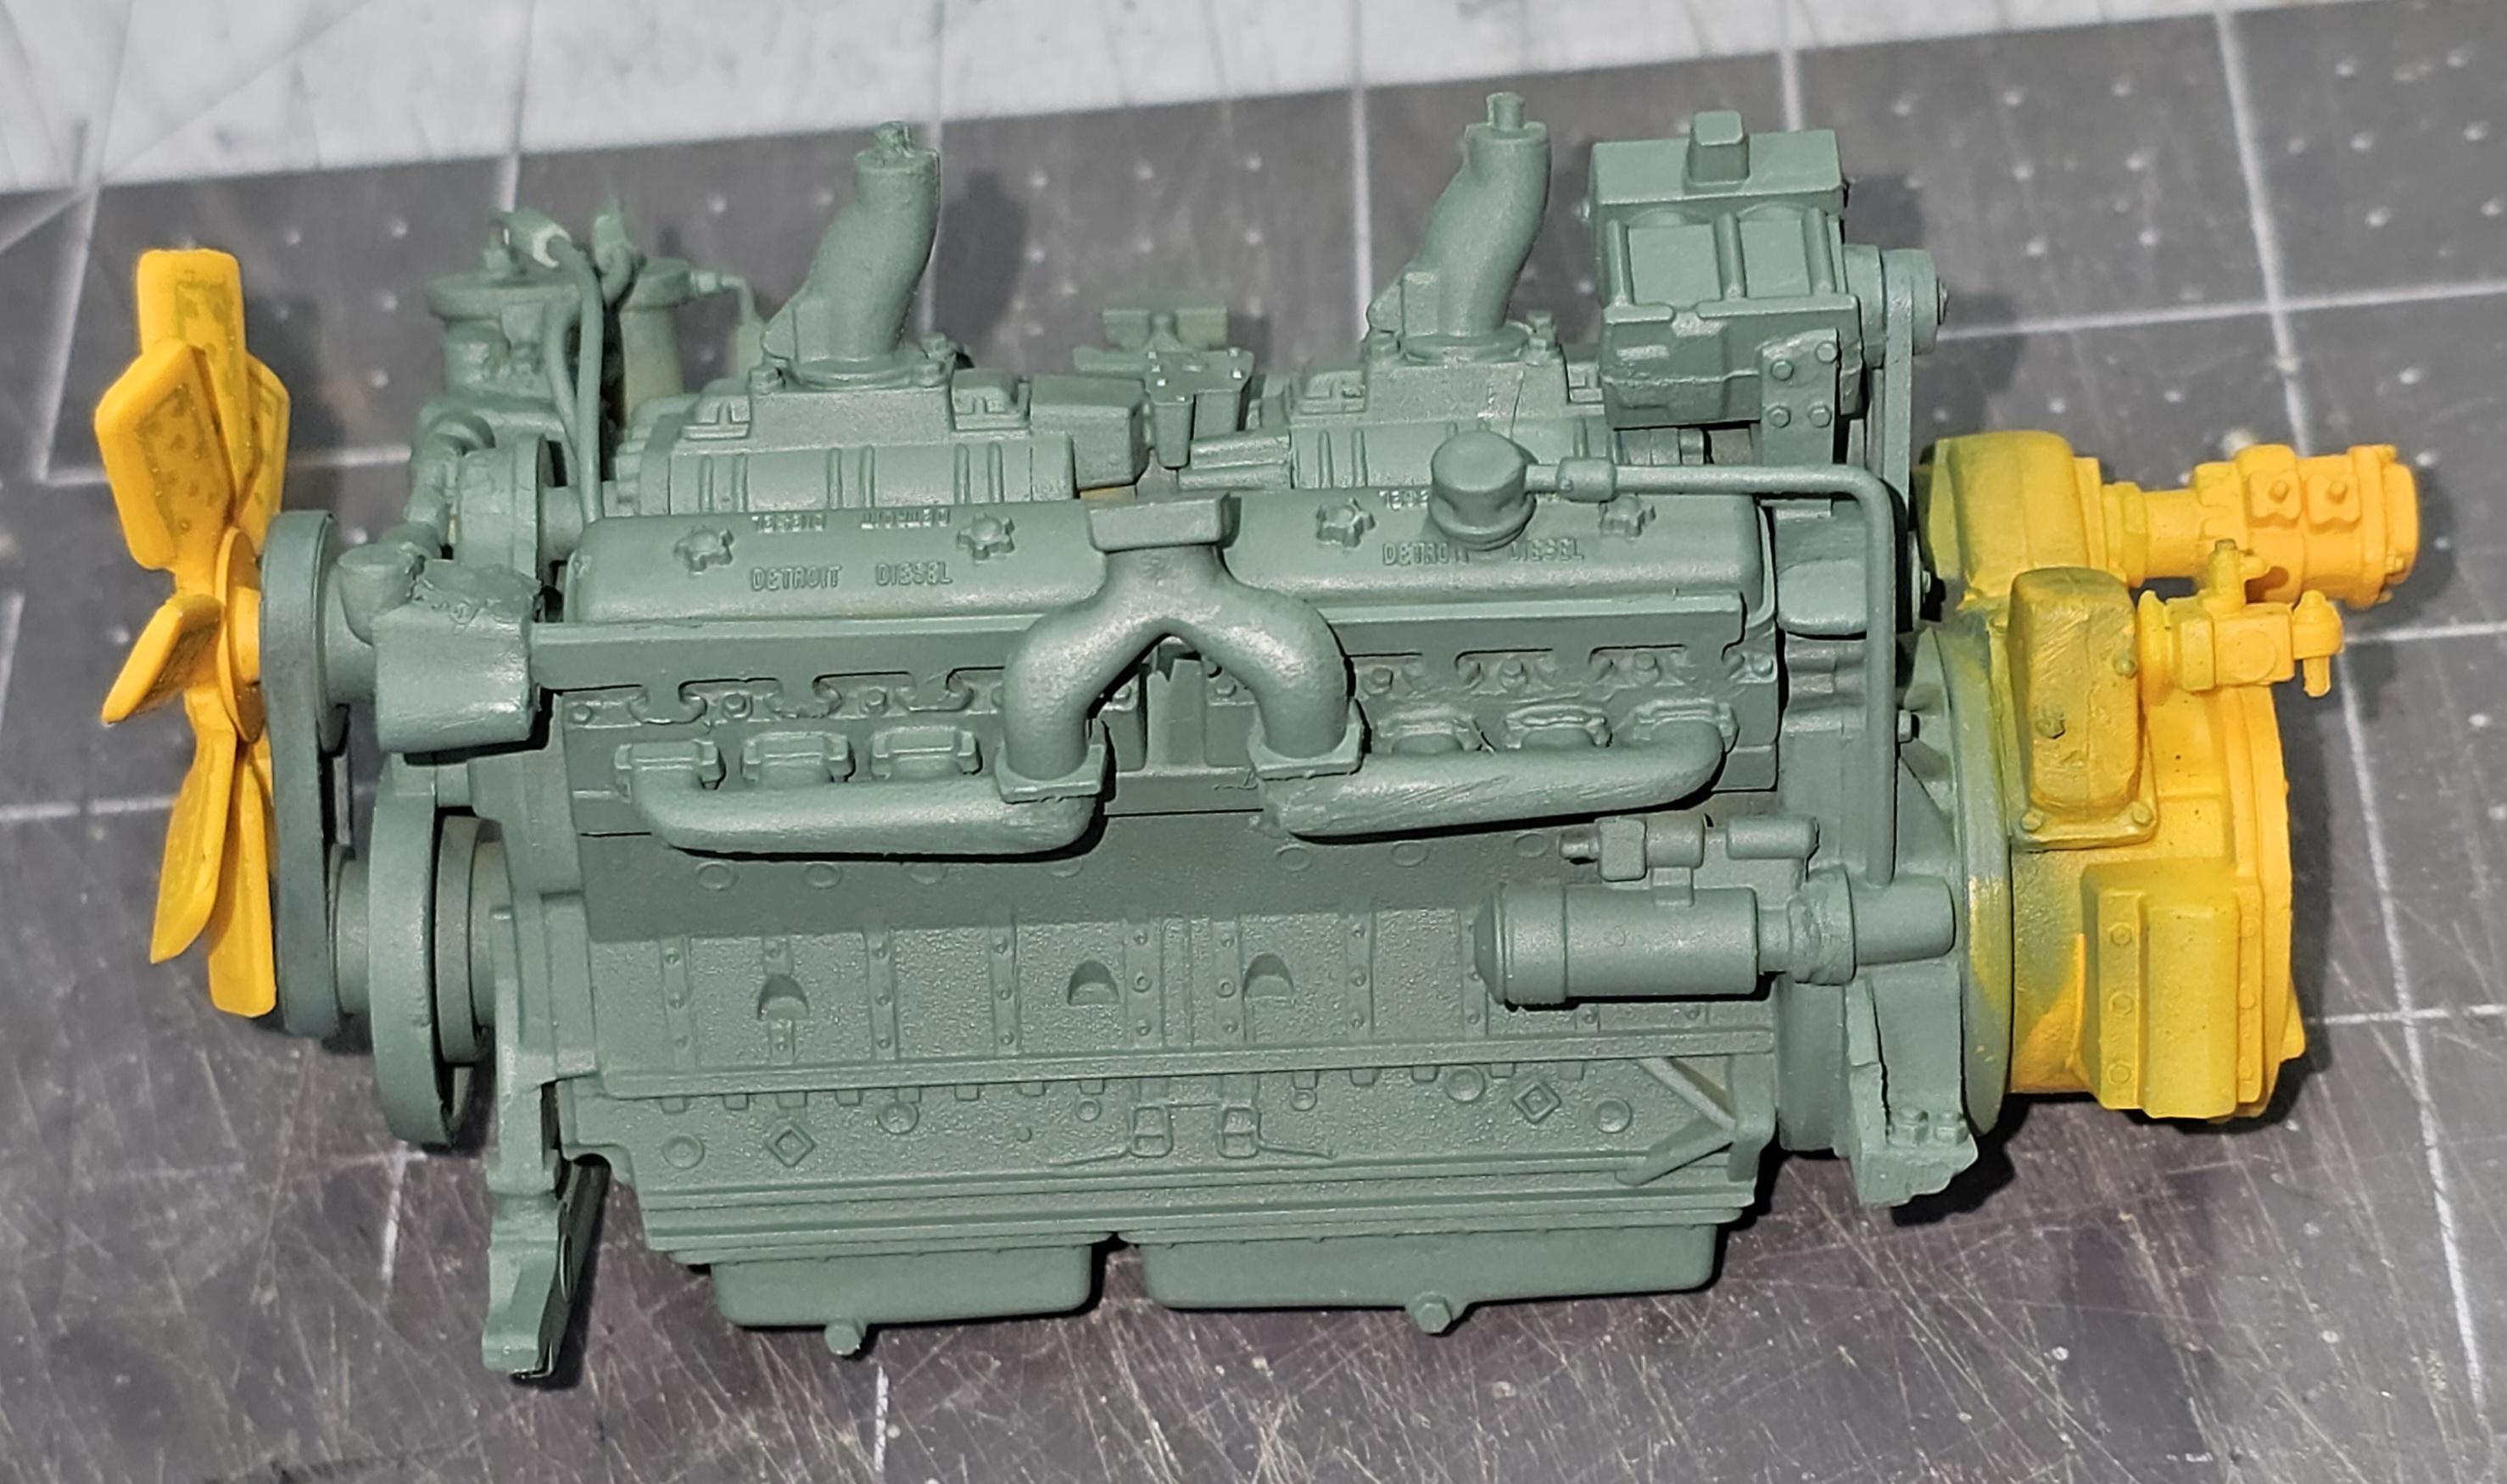
Hello fellow modelers I got some more work done on the Payhauler. I told Jeff I'm going NUTTY with all the bolt heads, but I can't back out now. So here are some pictures for yous all. This picture shows the lines and dots I added to the back of the fan blades. I hate when manufacturers put detail on parts, like this fan. That goes in towards the radiator where you can't see them.😵💫😱😤 So I added these markings with a permanent black marker. Once it is painted yellow they will just show through. Thus view shows the fuel tanks and the front and rear suspensions added. Another veiw of the finished frame. This view shows the front of the frame and the modulator valve that I moved to the front cross member. This view shows the rear differential. You can see that I replaced the drain plugs and the mounting bolts for the rear end. This view shows the bolt heads I added to the front cover of the differential. This view shows the holes I drilled in the rear brake cylinders to accept the plumbing. This view shows the rear differential in place, for pictures only. OKAY! I have some Detroit Diesel Alpine Green sprayed on the engine. I still need to finish the yellow up abd weather it up. Another view of the engine. To bad I had to cover up all those bolt heads. 😢 This view shows the engine sitting in the frame temperaly. And I found this on line. Pretty cool 😎. Kinda gives me some ideas. Hhmmmmm. 🤔 Well that's it for now be back soon. Ron G


.JPG.774a3f0a4e6382d92bc87ba6c267725e.jpeg.6050f8991bccdf285c491123c80ff65d.jpeg)