ShakyCraftsman
-
Posts
797 -
Joined
-
Last visited
Content Type
Profiles
Forums
Events
Gallery
Everything posted by ShakyCraftsman
-
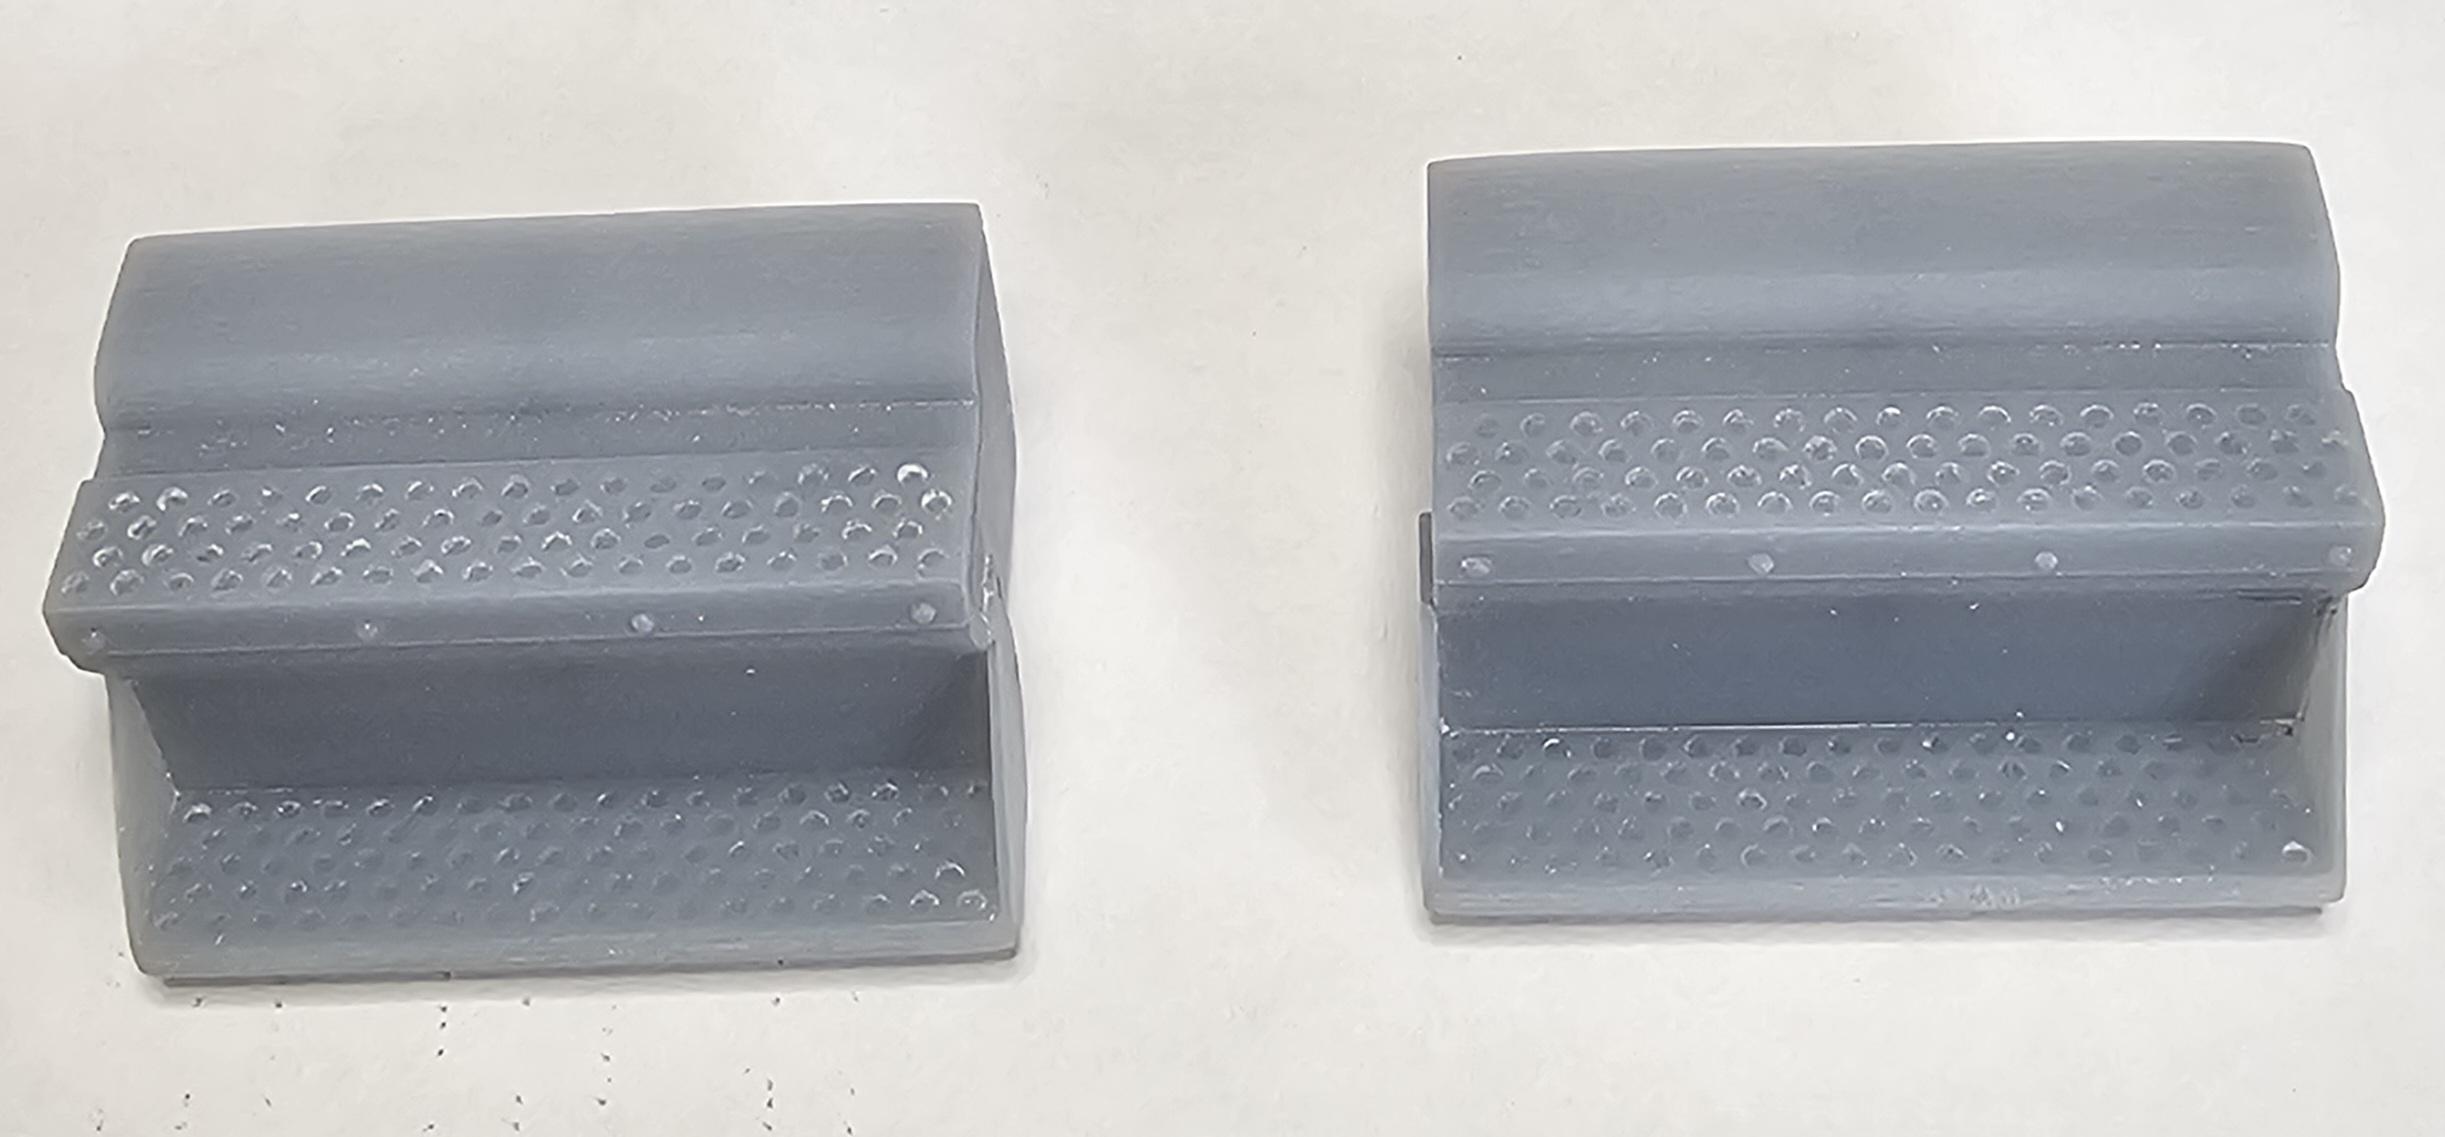
 Here you go. This view shows both of mine after sanding. This shows were I sanded. Each side sanded down to 0.032" thick. Now they look more realistic. I'll replace the bolt head detail before I paint them. Ron G
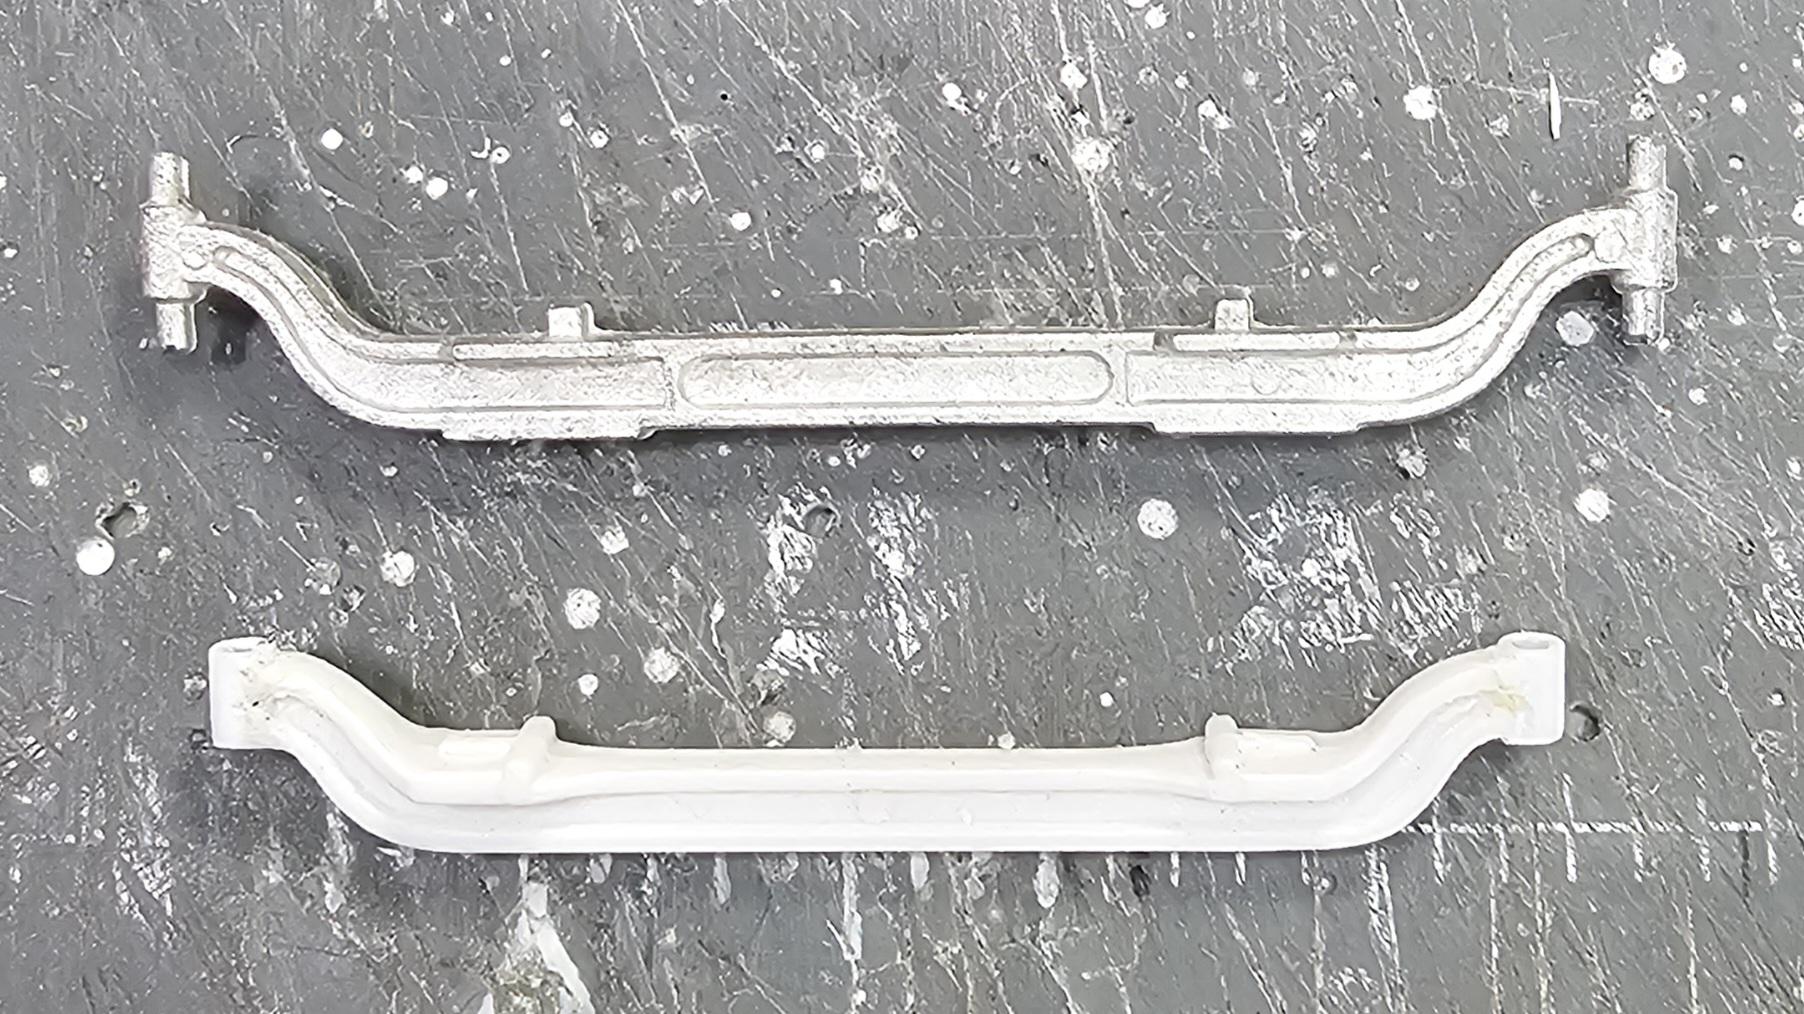
-
No problem here to help Pal. Ron G
-
I don't, but I'll get you one Tomorrow Gary. Ron G
-
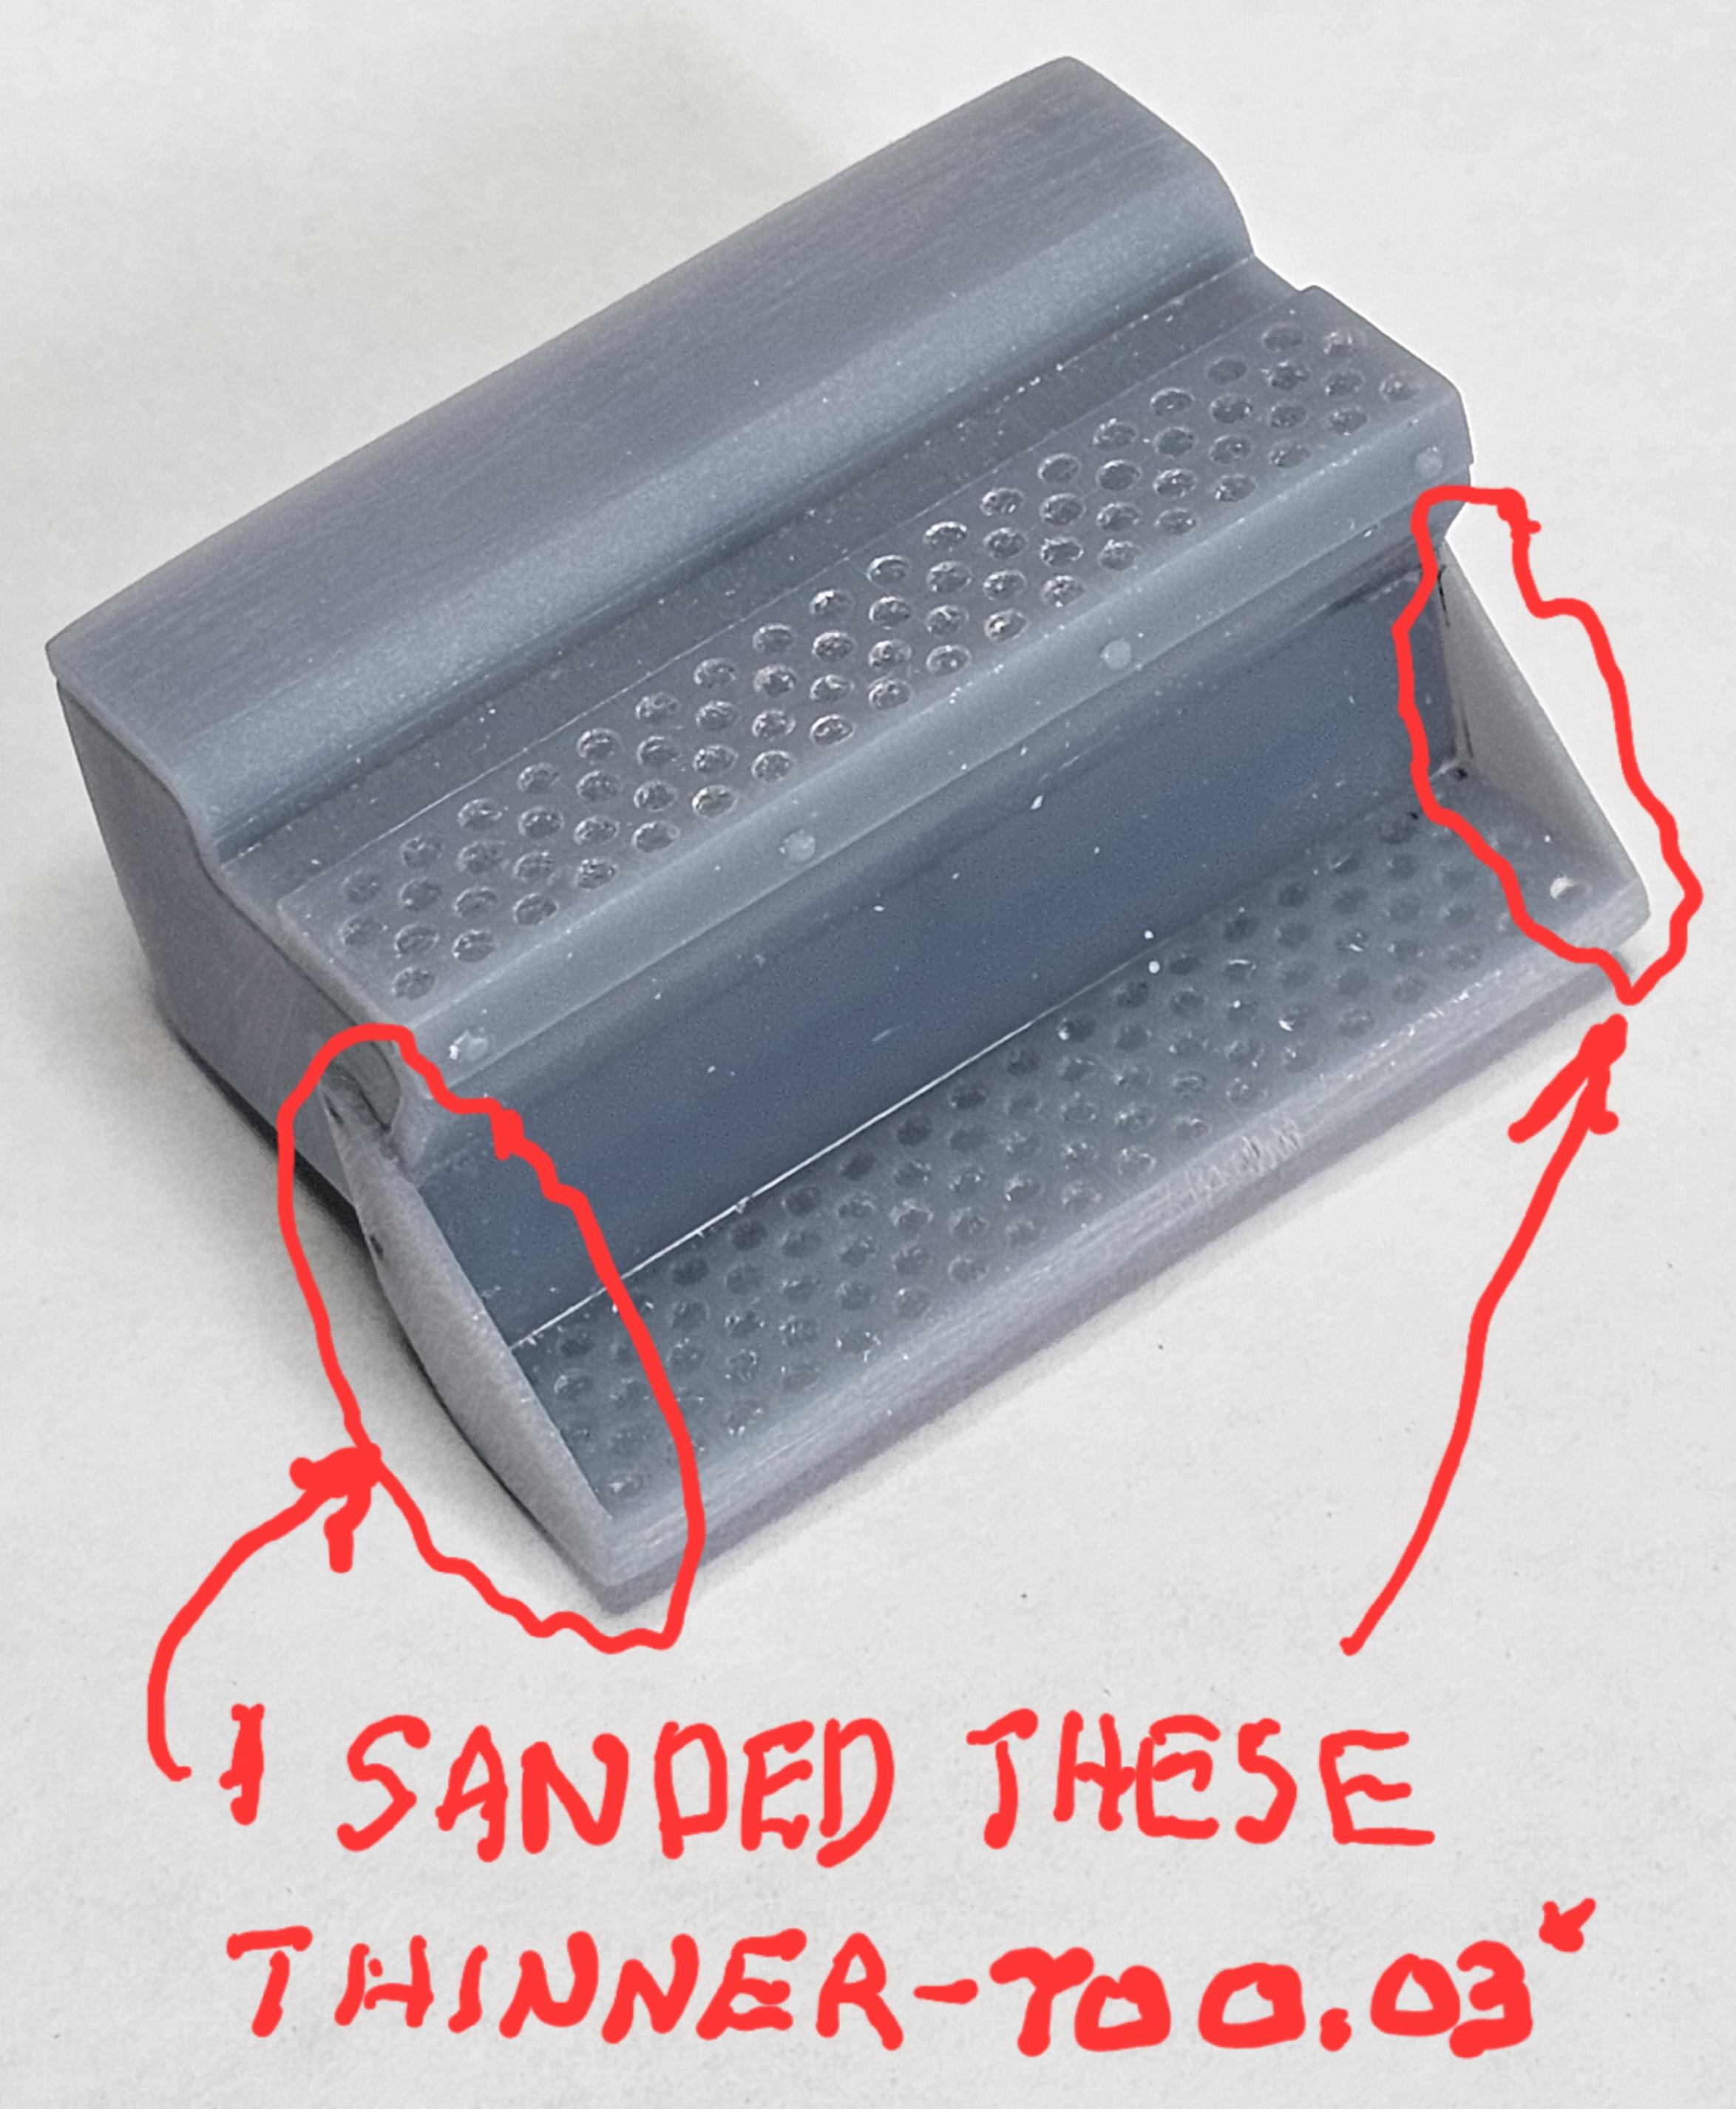
Hey Gary, sweet! I sanded the sides (triangular shape on the side) thinner to mske them look more correct. Ron G
-
Hey Brian I'm sure you'll figure it out. I use aluminum tubing for the cylinder rods because you can polish them to look like chrome. Ron G
-
WOW! Brian this looks to be a very interesting build. Save me a front row seat. 🍺🍿👍😁 Ron G
-
1970 Ford C 600
ShakyCraftsman replied to Biggu's topic in WIP: Model Trucks: Big Rigs and Heavy Equipment
So you found that last brain cell...lol 😆🤣😂🤣 Ron G -
1970 Ford C 600
ShakyCraftsman replied to Biggu's topic in WIP: Model Trucks: Big Rigs and Heavy Equipment
Great fix Buddy. Ron G -
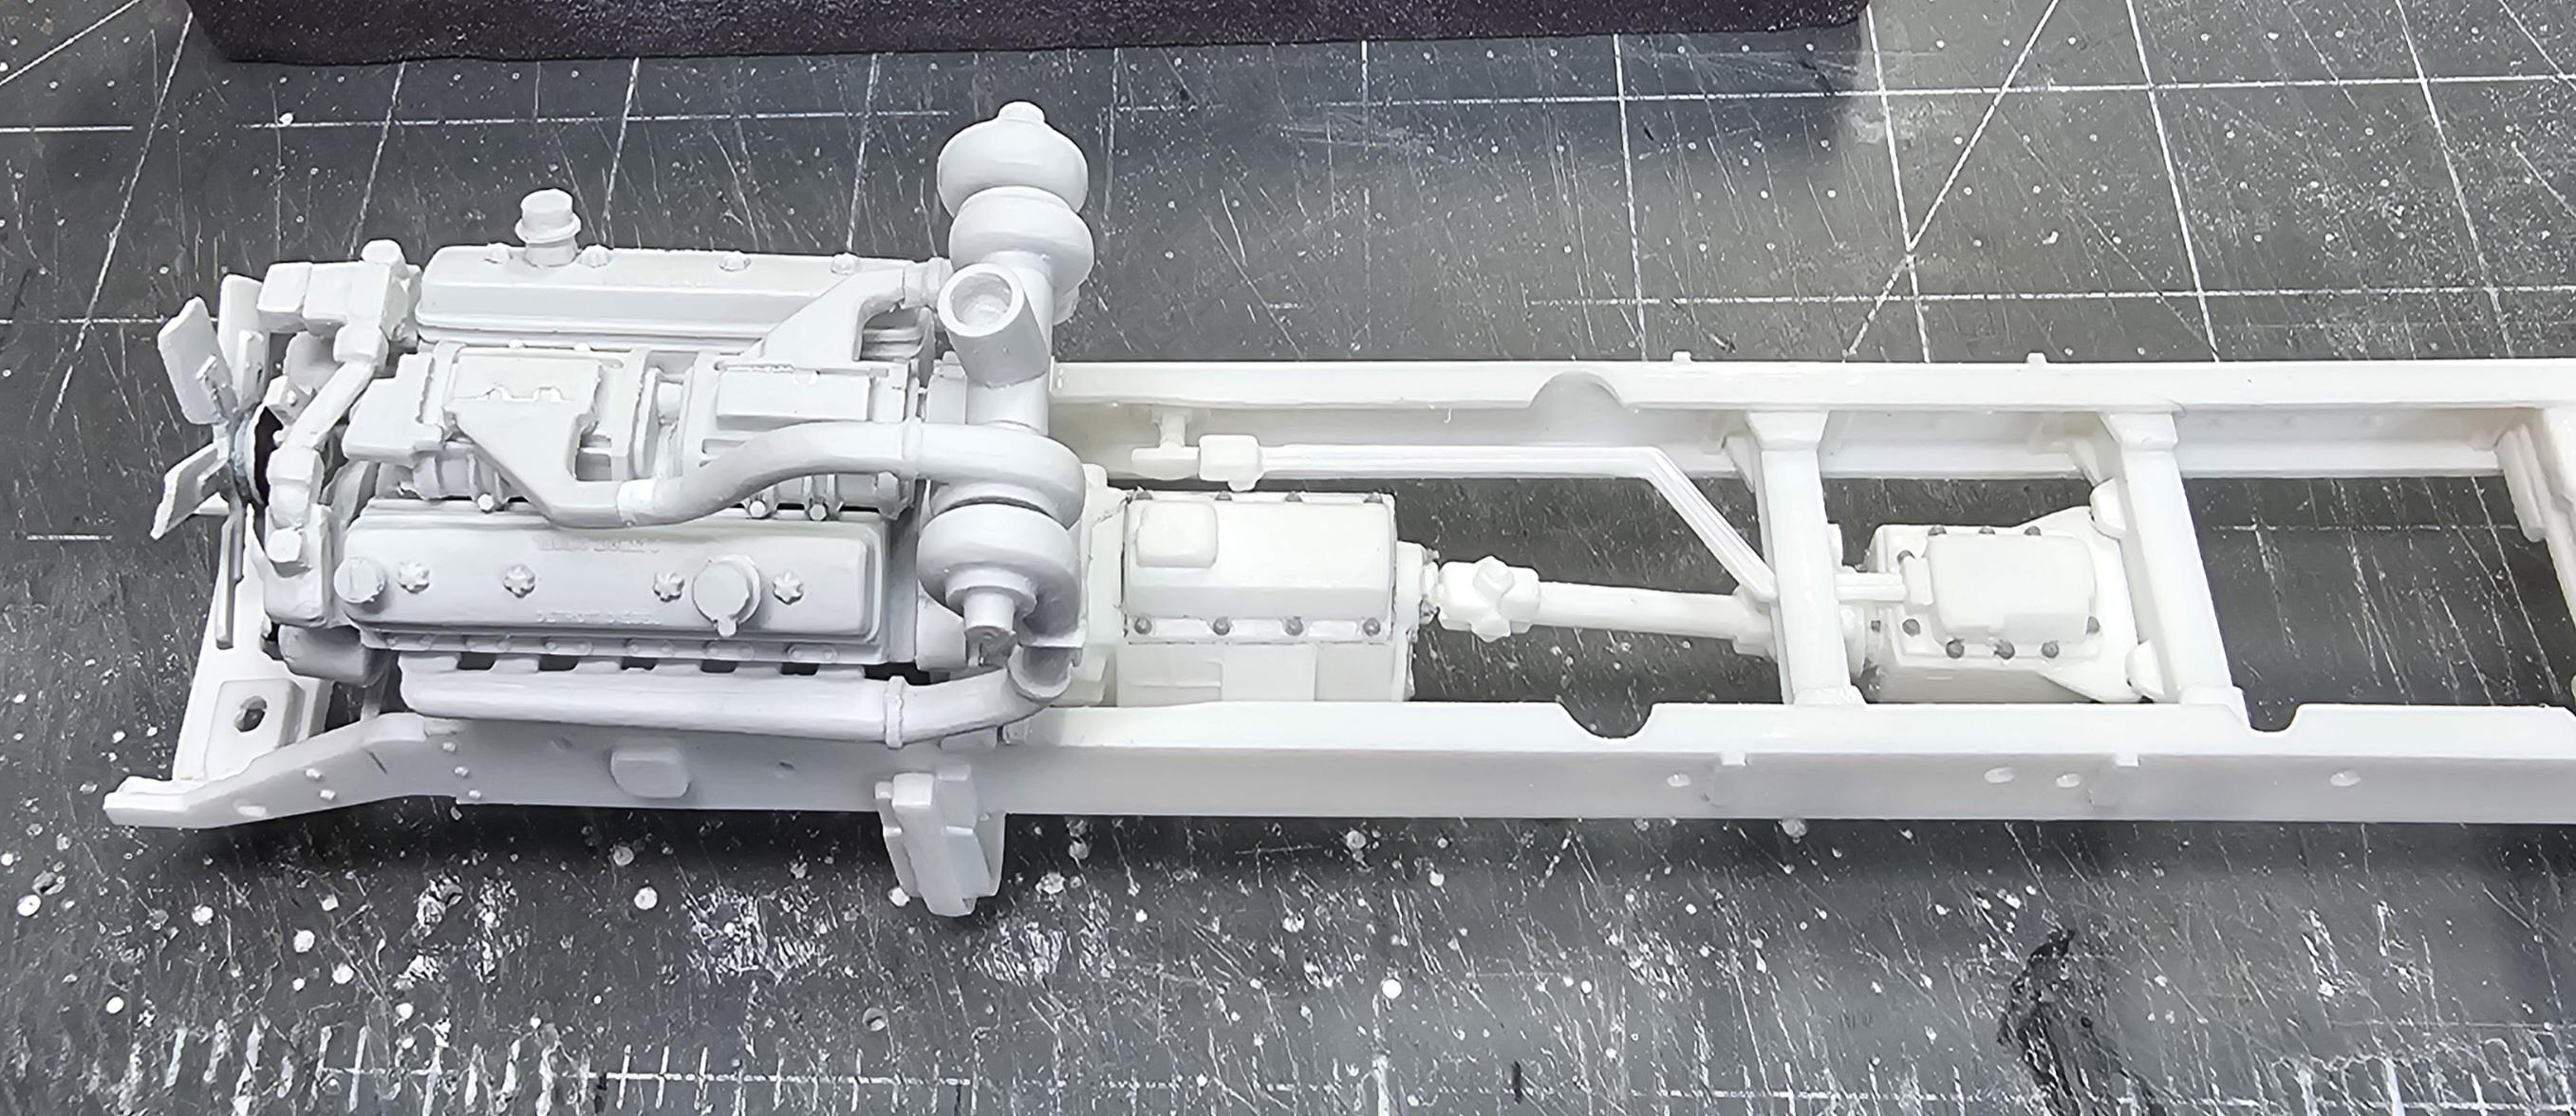
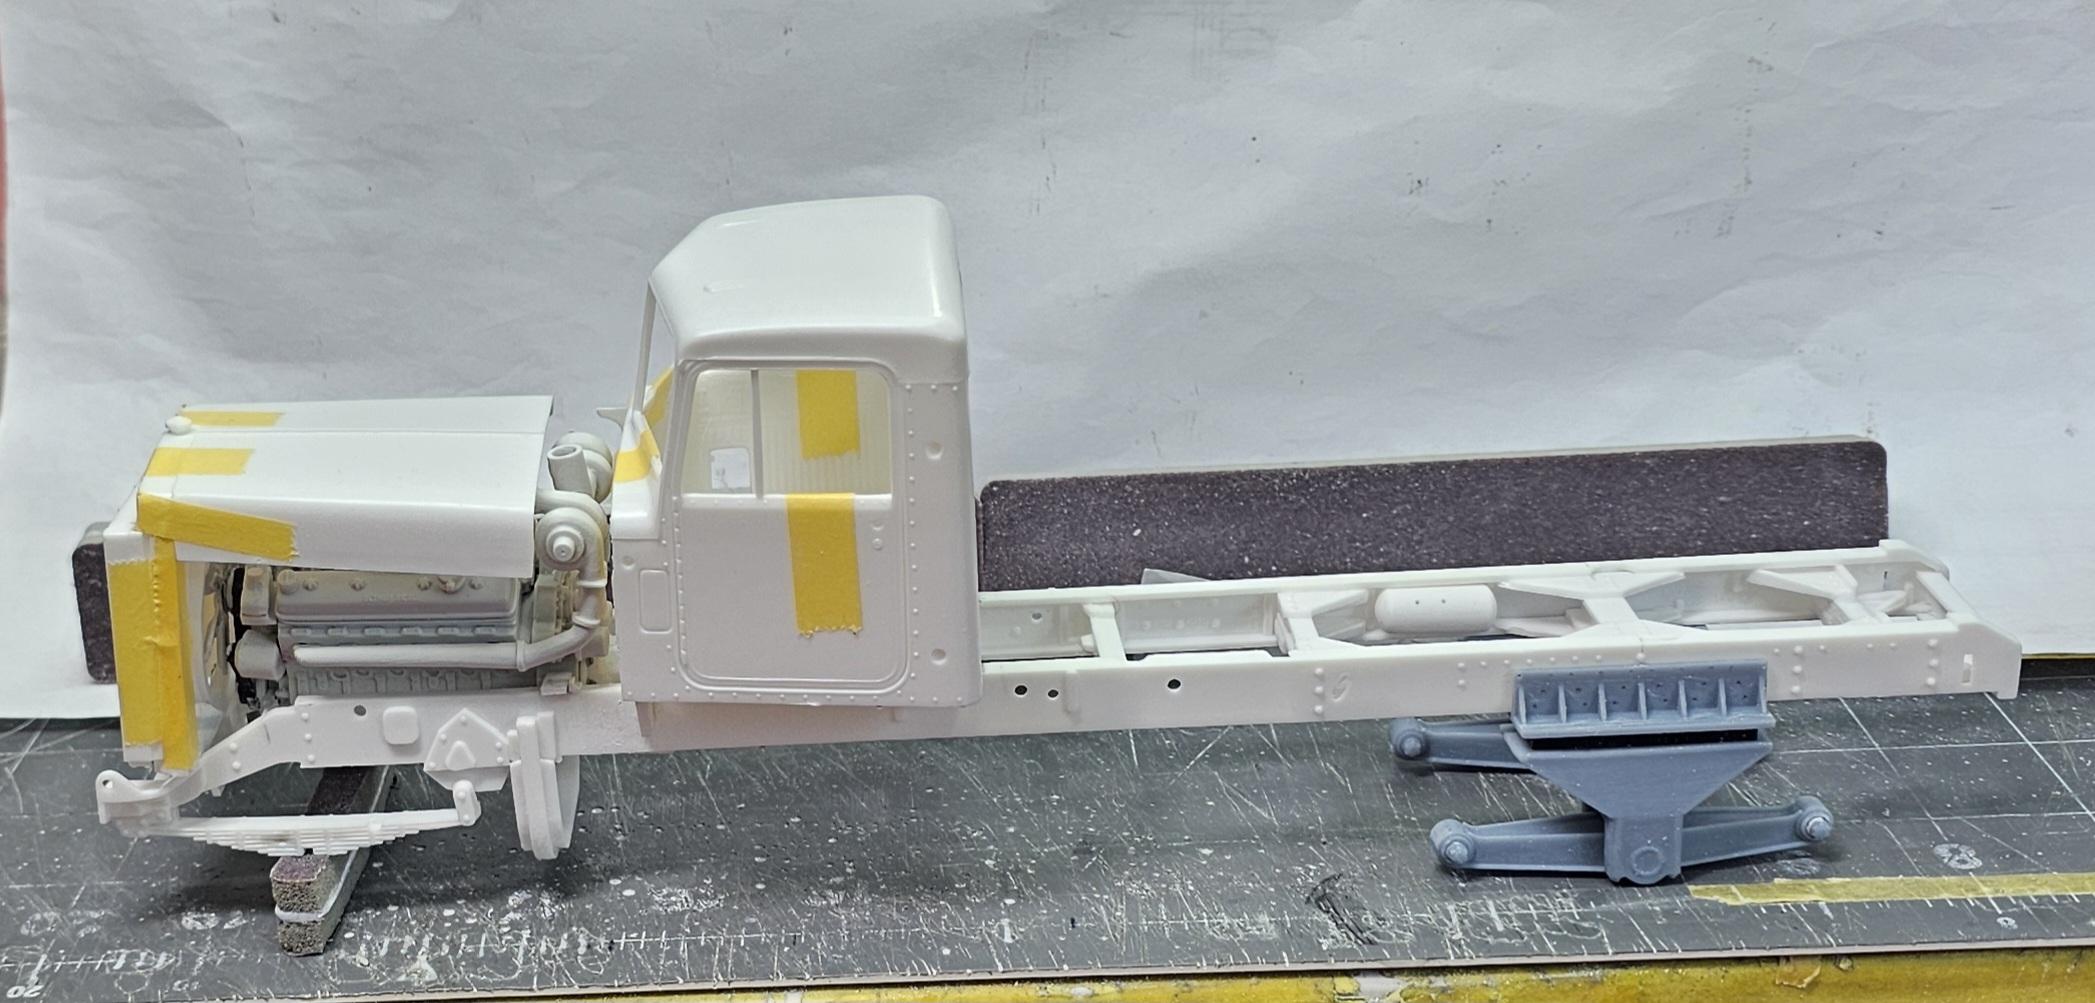
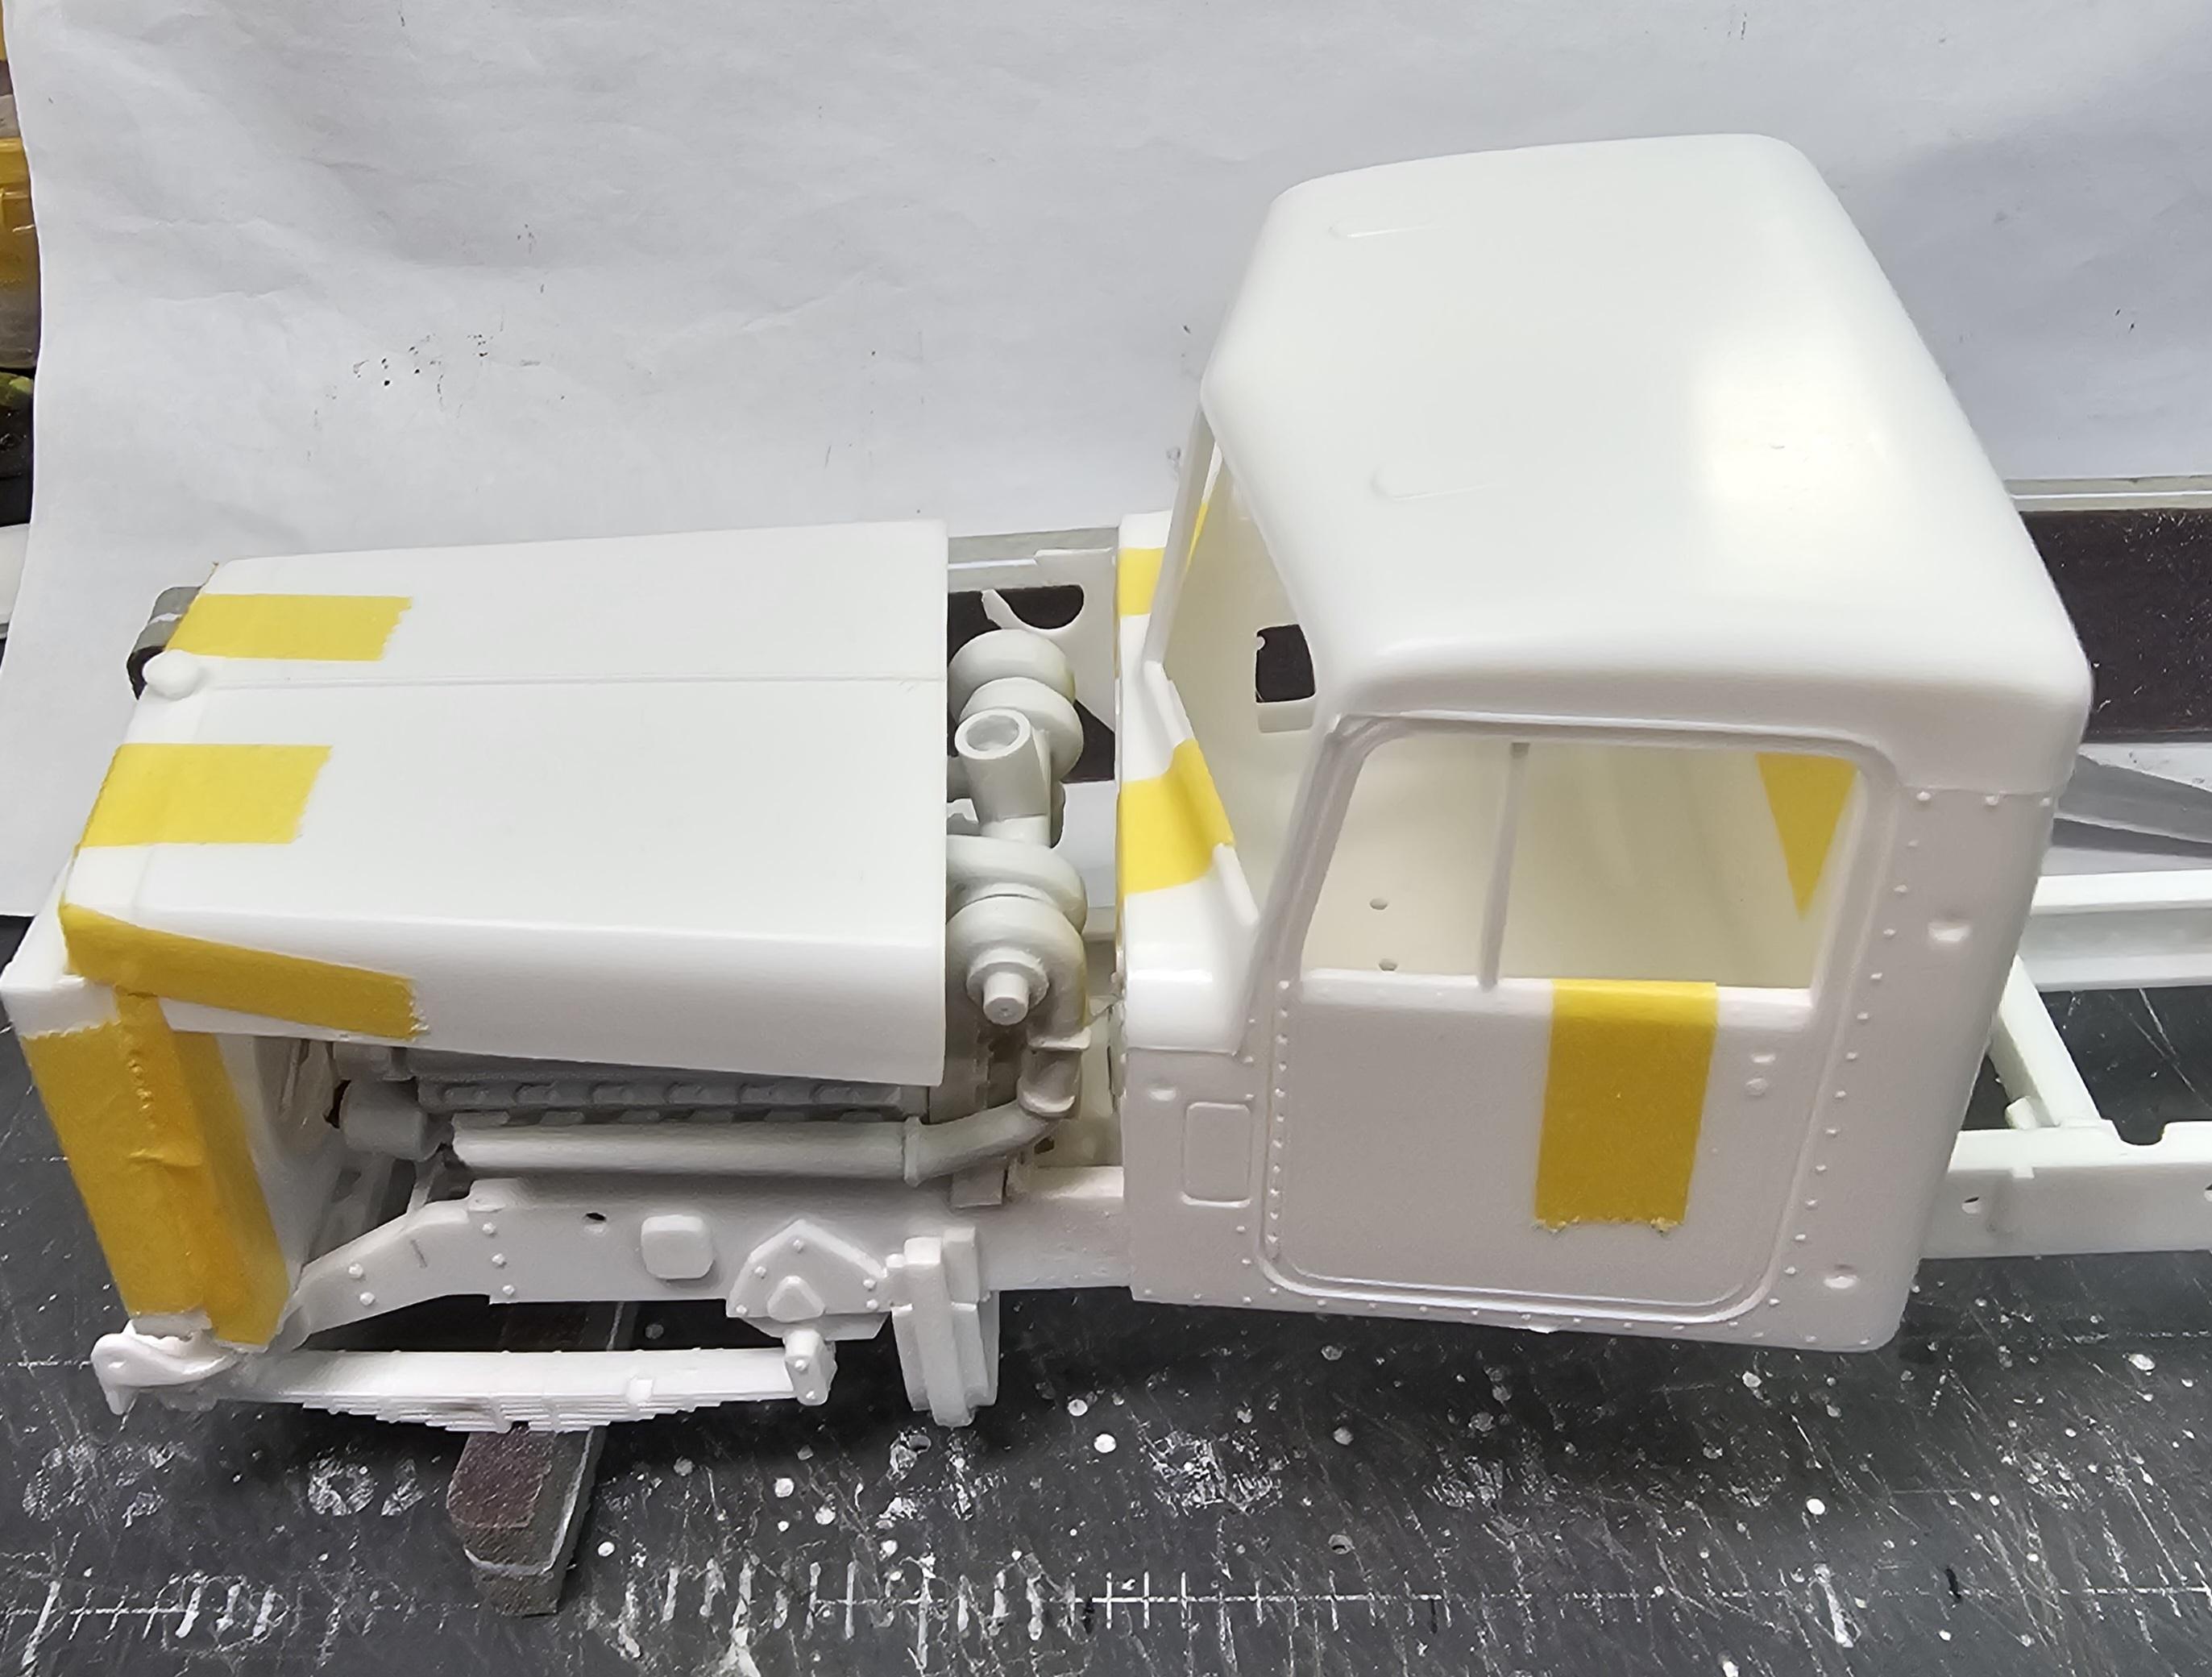
Hey all I have the frame assembled for this build. I also have the engine and both transmissions fitted (I decided to use the 5 by 4 trans from the kit). I still have a long way to go on this one. This view shows the 12V71-TT with both transmissions sitting in place. This view shows the cab and hood in place. I have to increase the length of the hood by a scale 15" in order to accommodate the turbos on the engine. This view shows the rear Hendrickson RS 1000 walking beam suspension from 3D Concepts. This view shows the gap between the hood and cab that needs to be filled in. A little mock-up with the W/T's. Well that's all for now be back with more soon. Ron G
-
1970 Ford C 600
ShakyCraftsman replied to Biggu's topic in WIP: Model Trucks: Big Rigs and Heavy Equipment
Looking great Buddy!👍🏻 Ron G -
Hey Pal It's pretty close to the kit engine in size and dimensions. There are a few differences between the 8V71 and the 8V92T. I had to rework the front engine mount so it would fit in the Astro 95 frame. But it wasn't much. Ron G
-
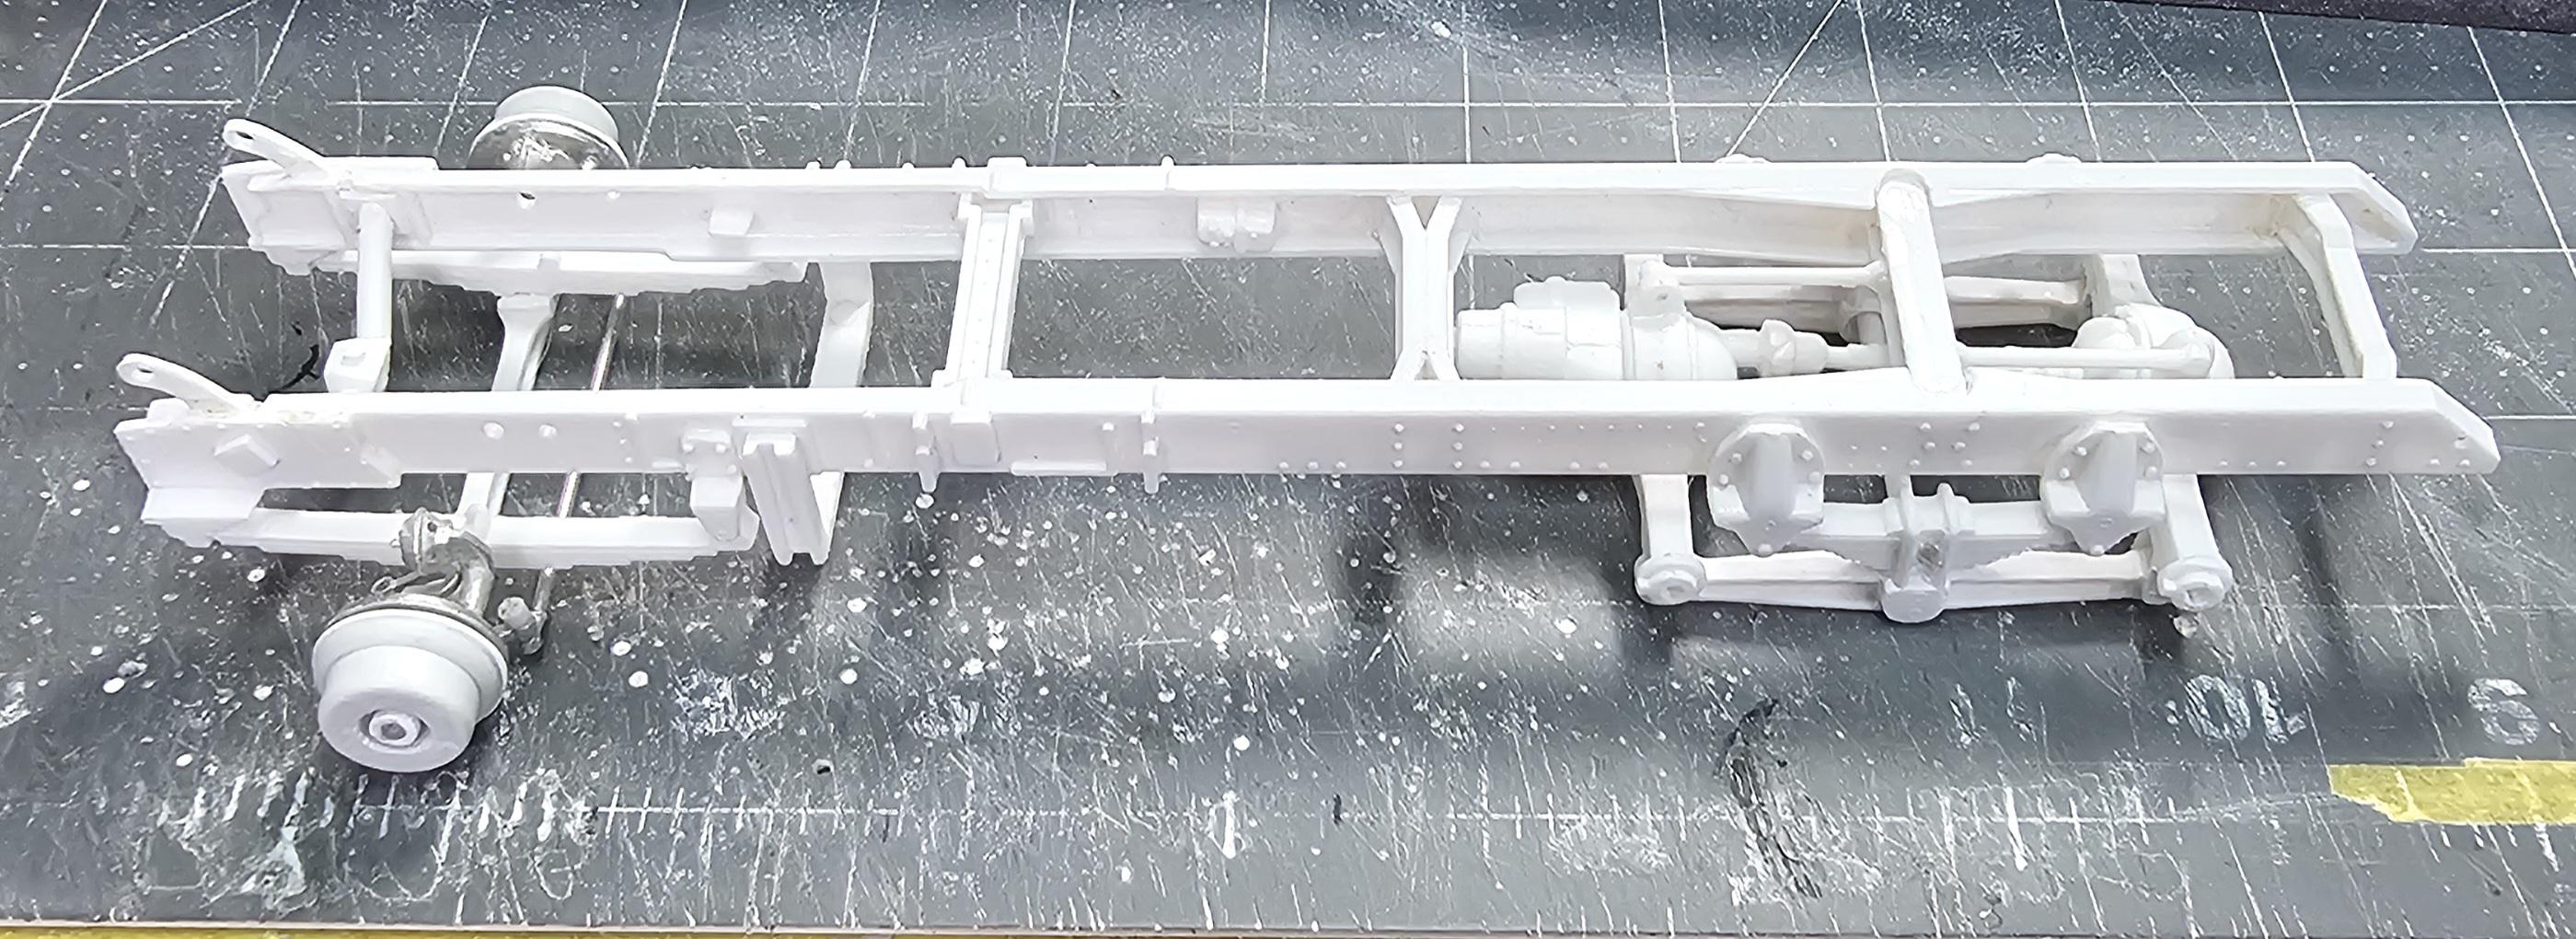
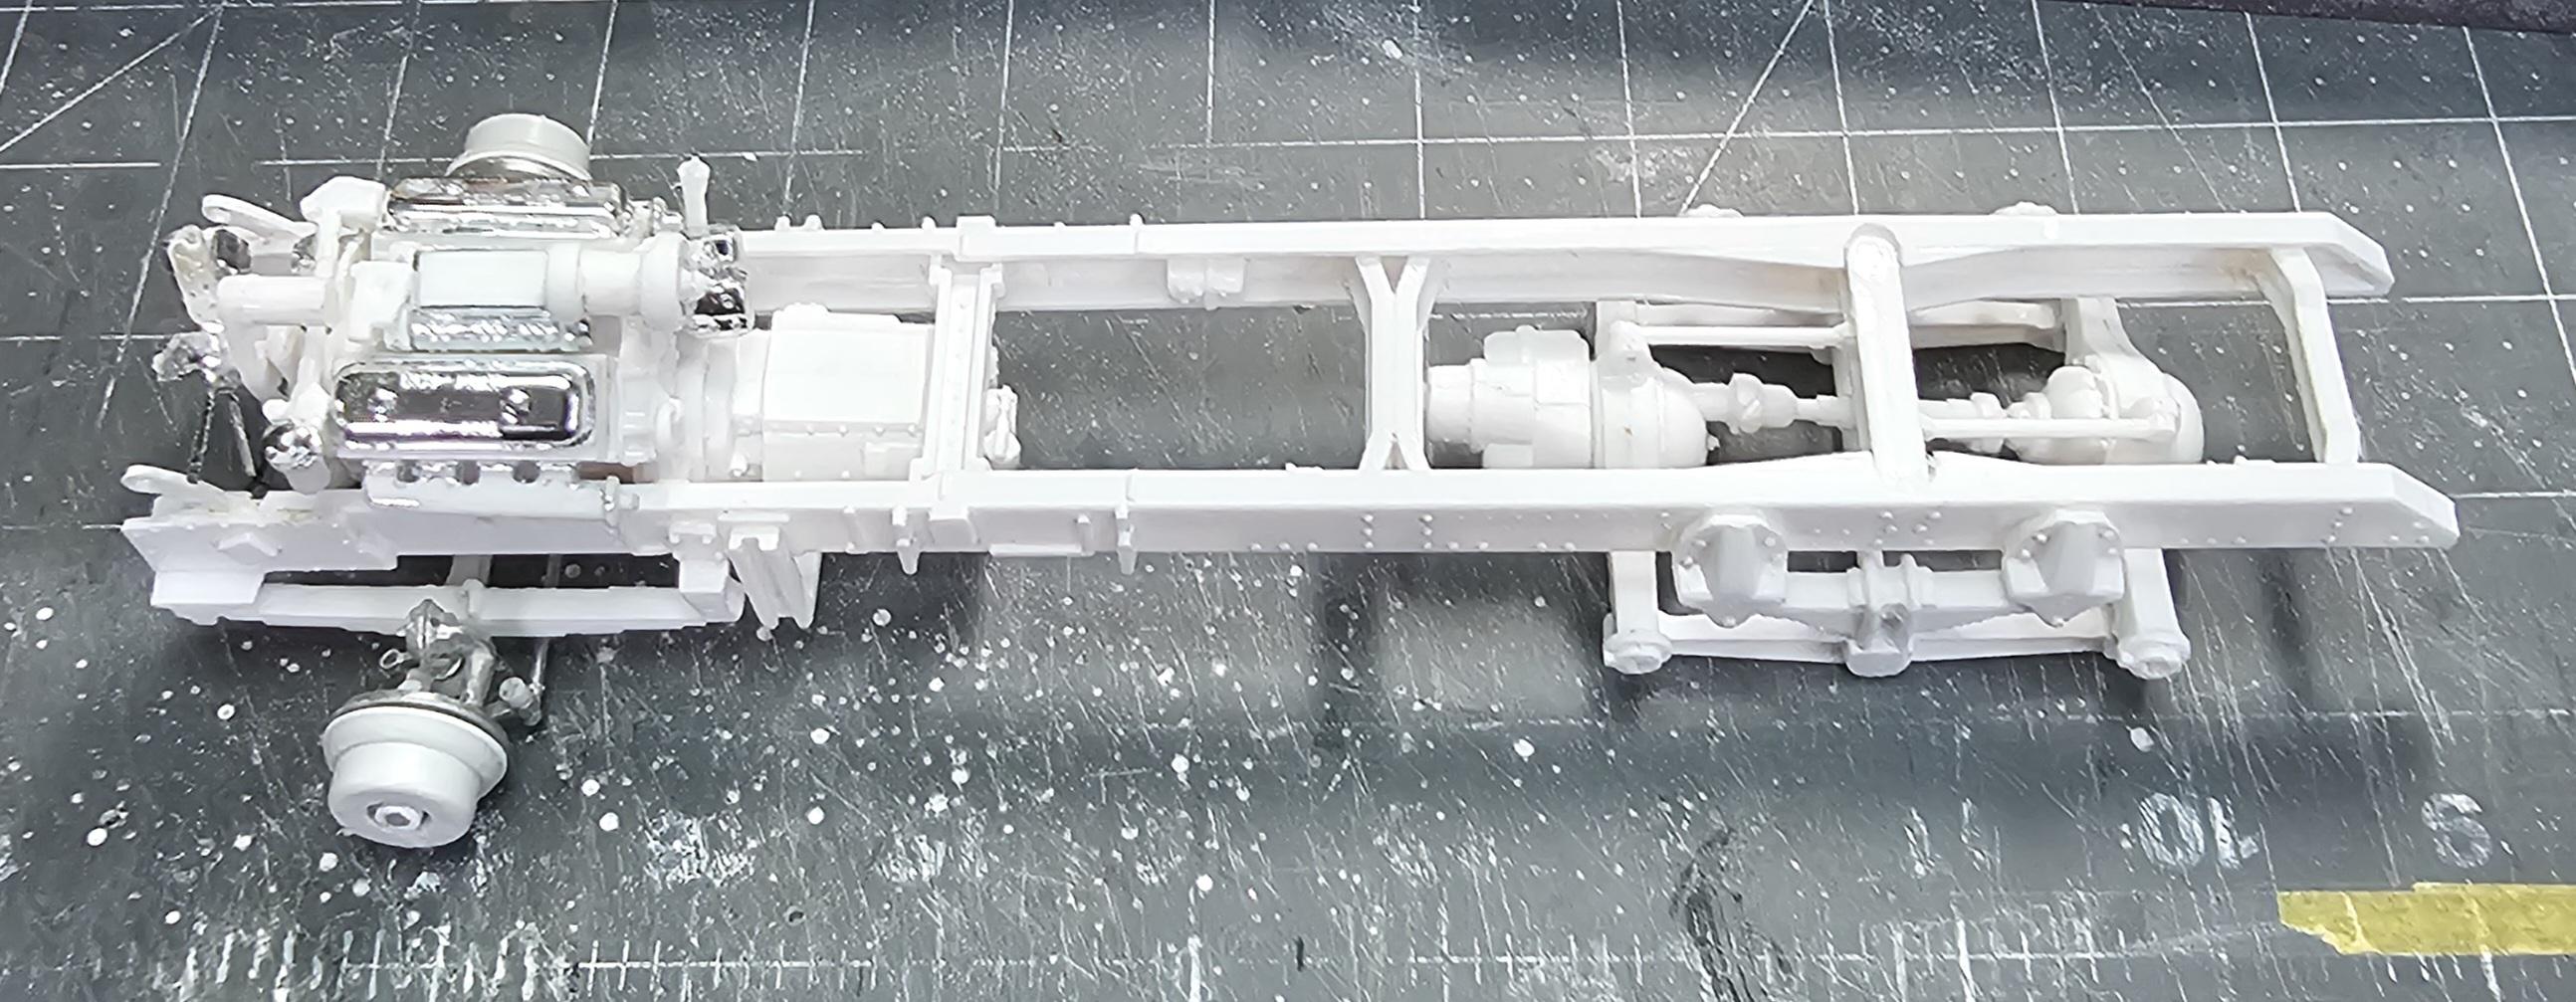
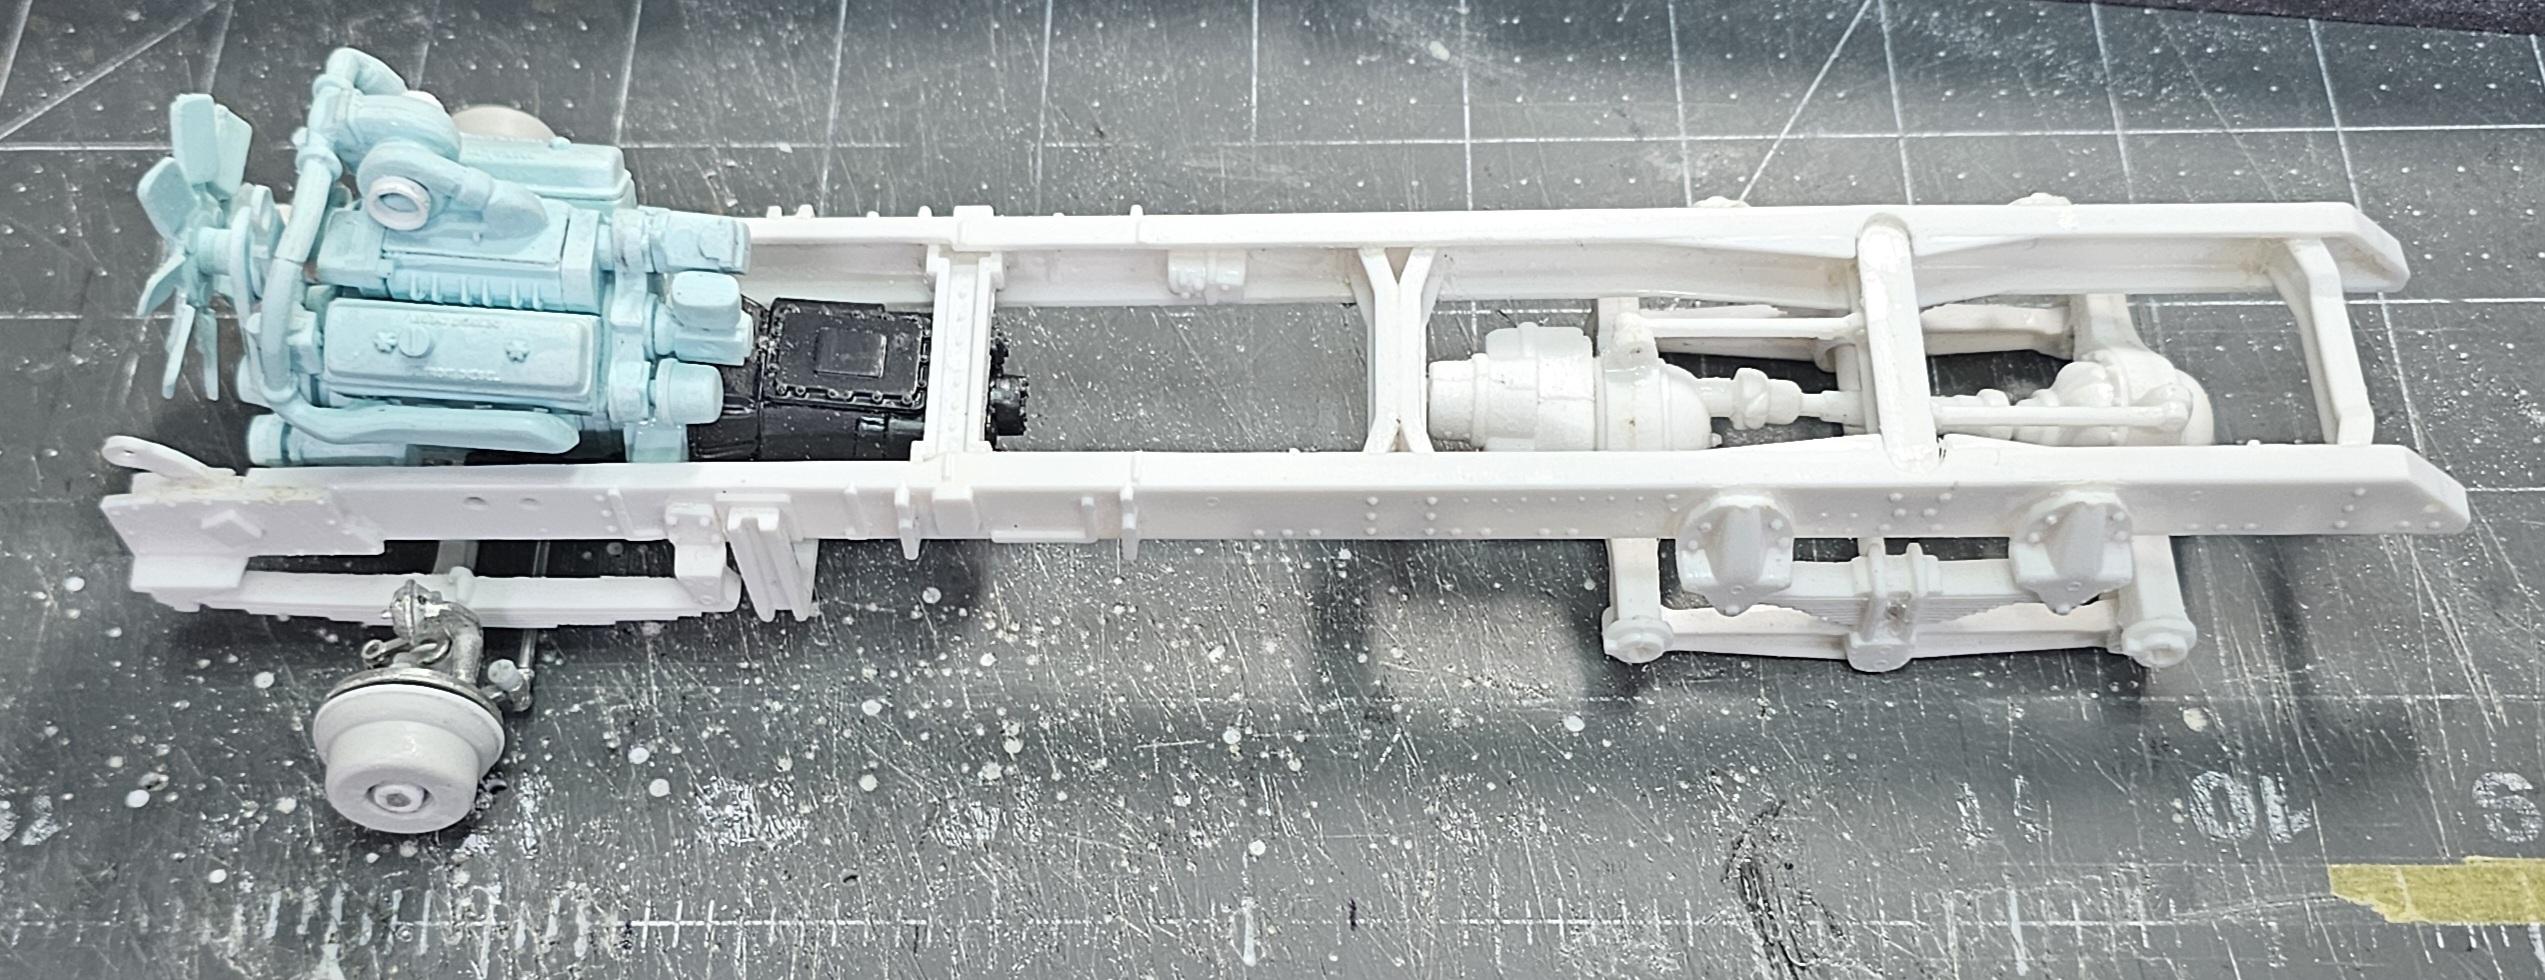
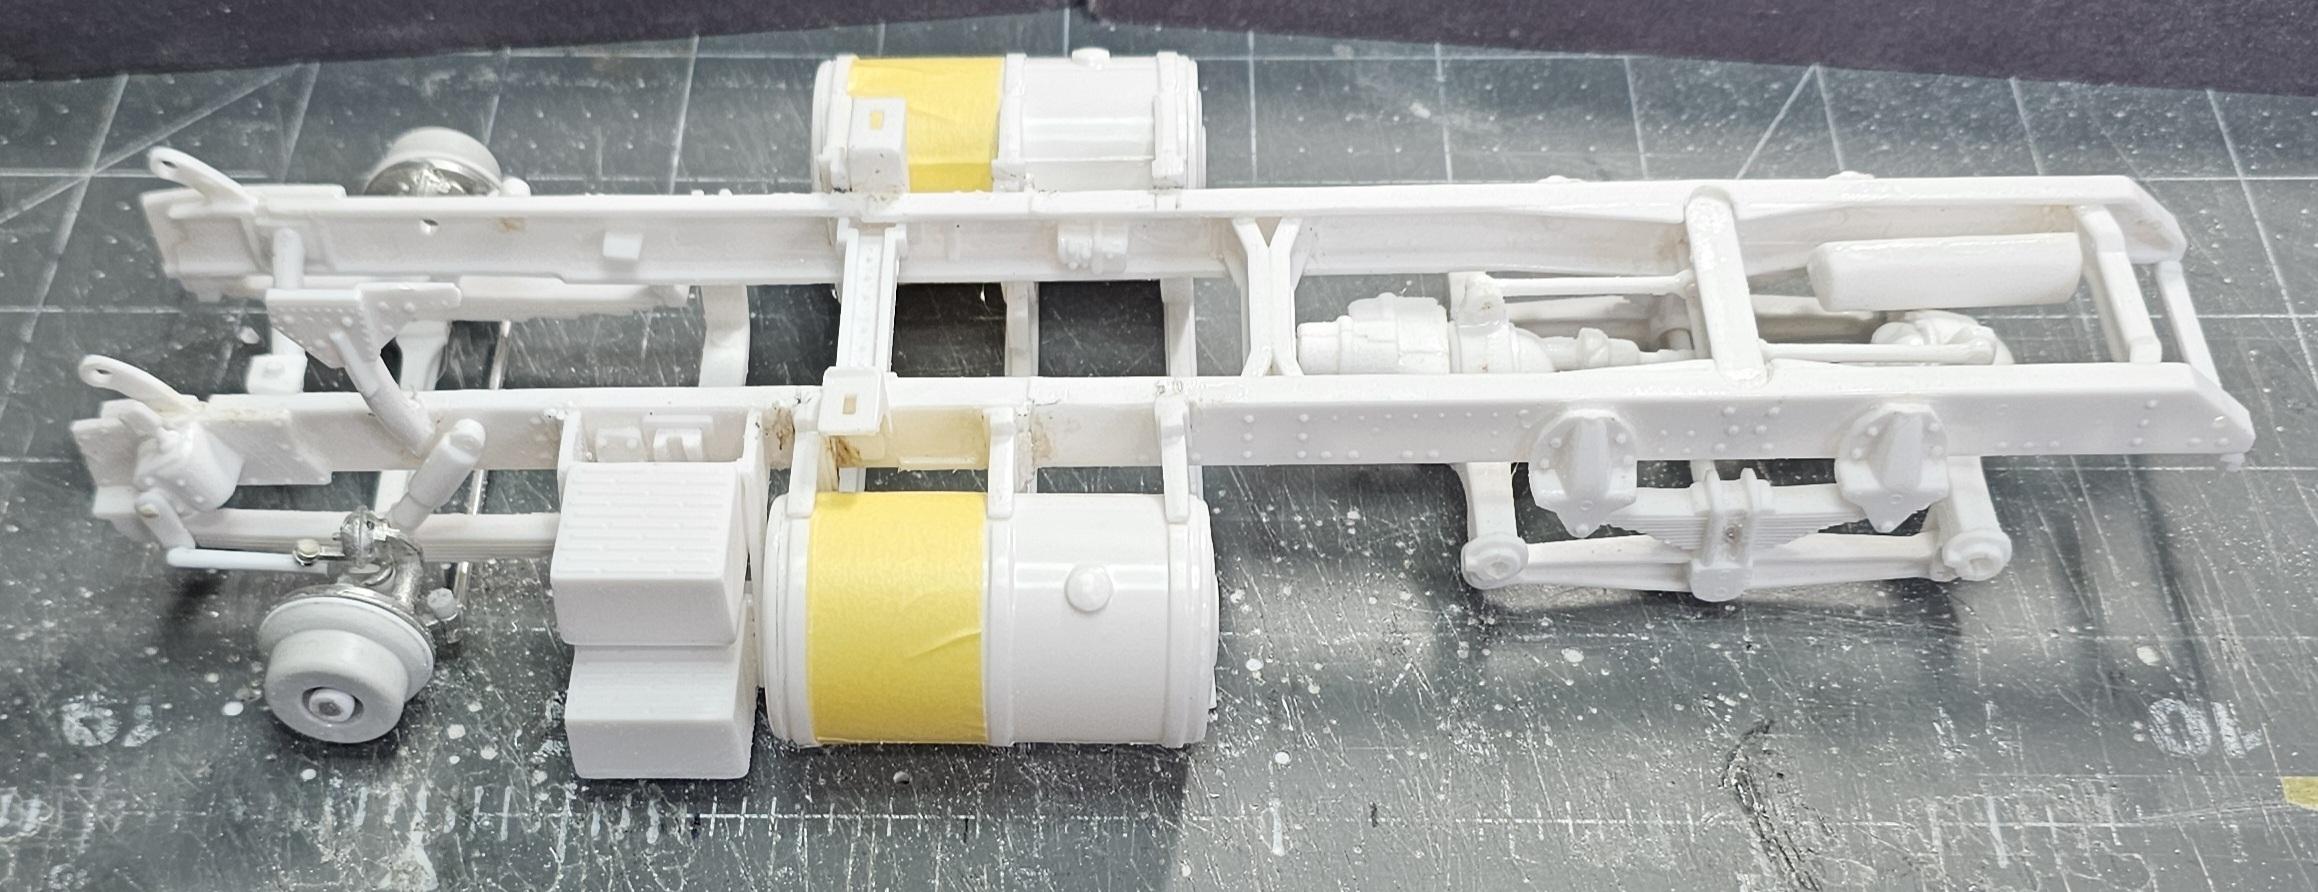
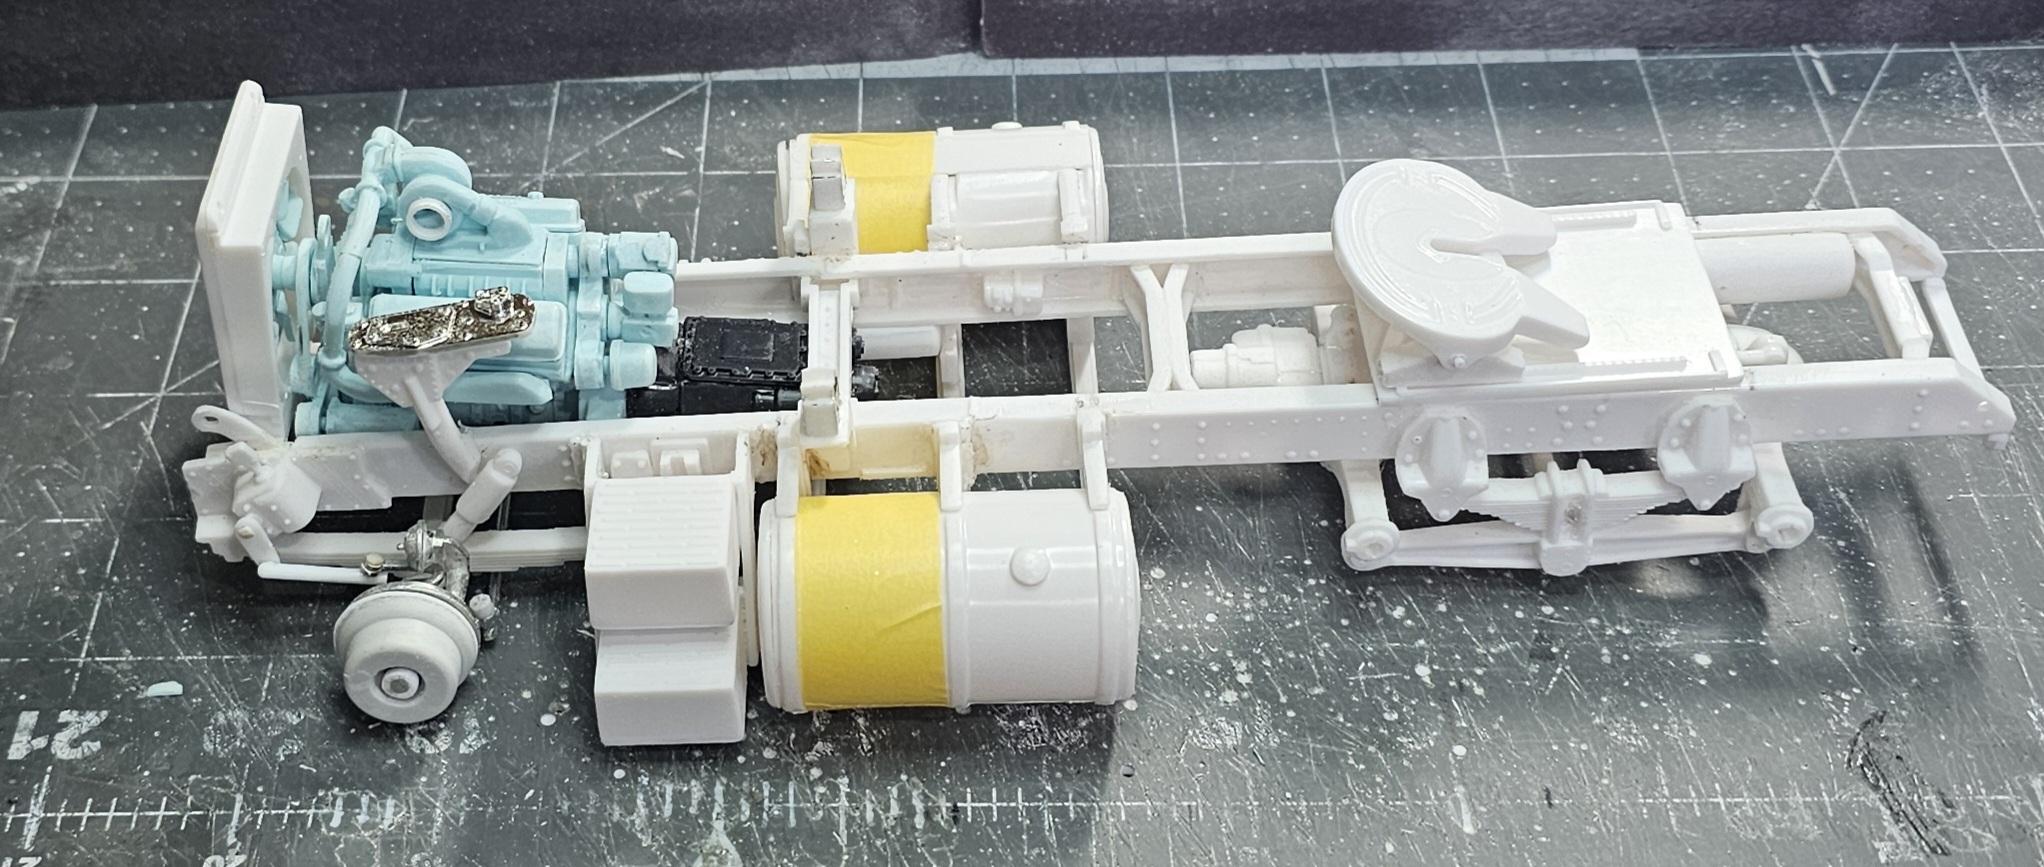
Hey all I have the frame assembled. Its almost complete except for the rear brake chambers, plumbing and a few other odds and ends. I also have the kit engine assembled, but I'm going to be using a Auslowe resin 8V92T. This view shows the frame with the rear and front suspension. This view shows the frame with the kit engine. This view shows the frame with the 8V92T. This view shows the front axle in neutral position. This view shows the front axle turned to the right. This view shows the front axle turned to the left. This view shows the frame with the fuel tanks in place. This view shows the frame with the tanks, fifth wheel, the 8V92T and radiator. Well that's all I have for now be back soon with more. Ron G
-
Be my guest Gary. Anything to help. Ron G
-
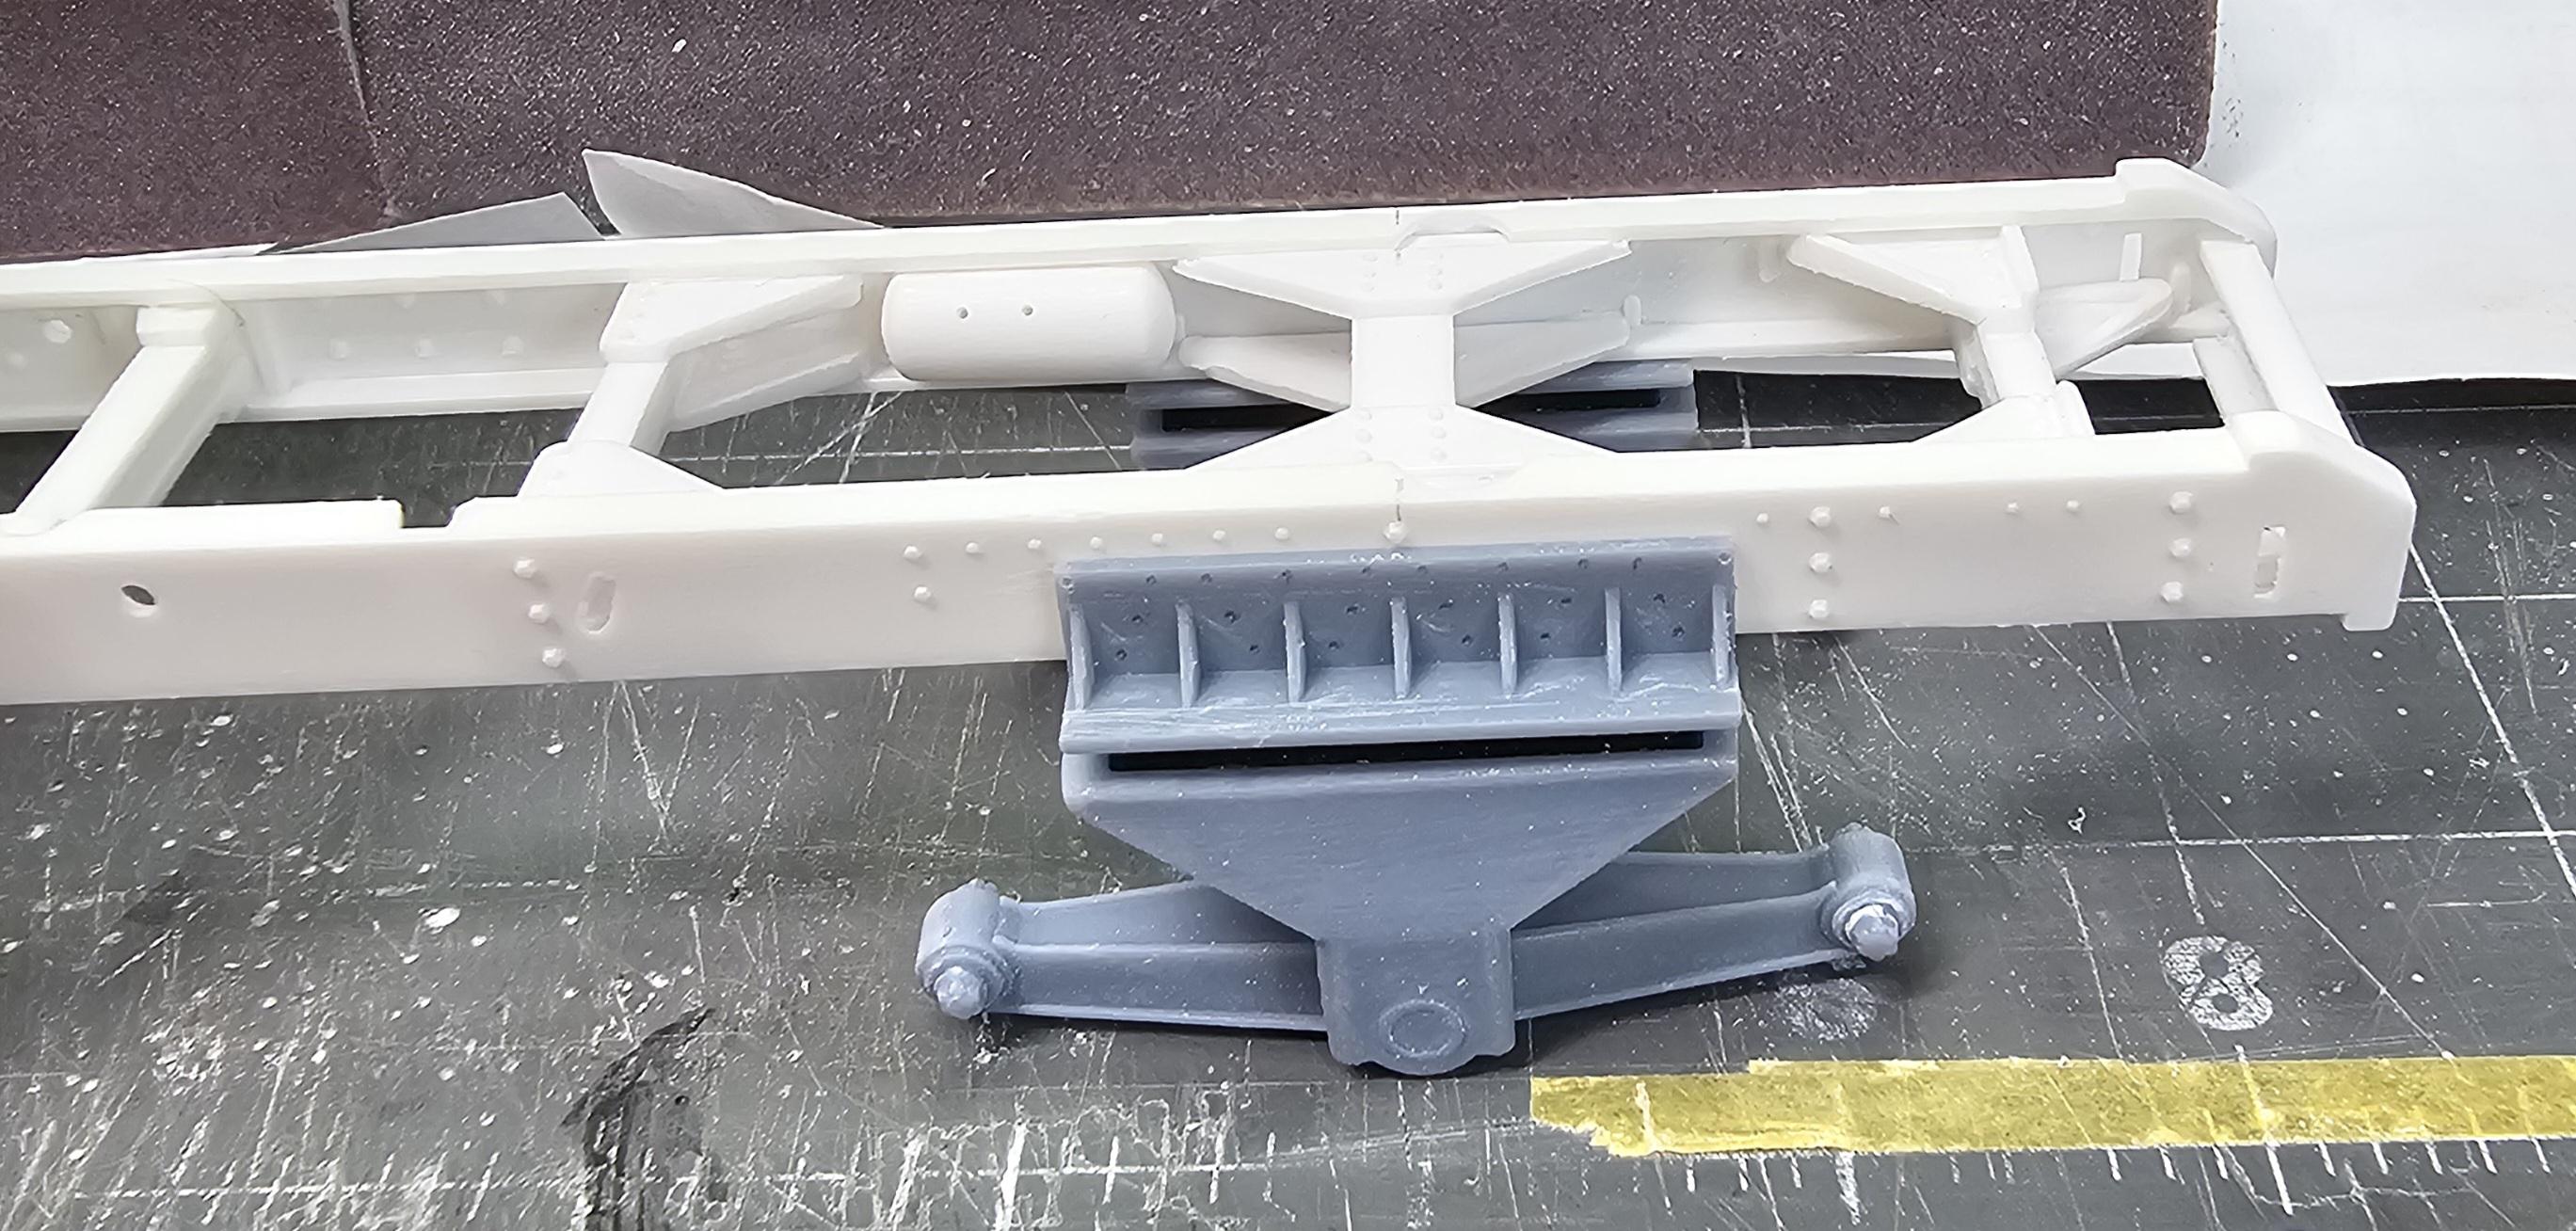
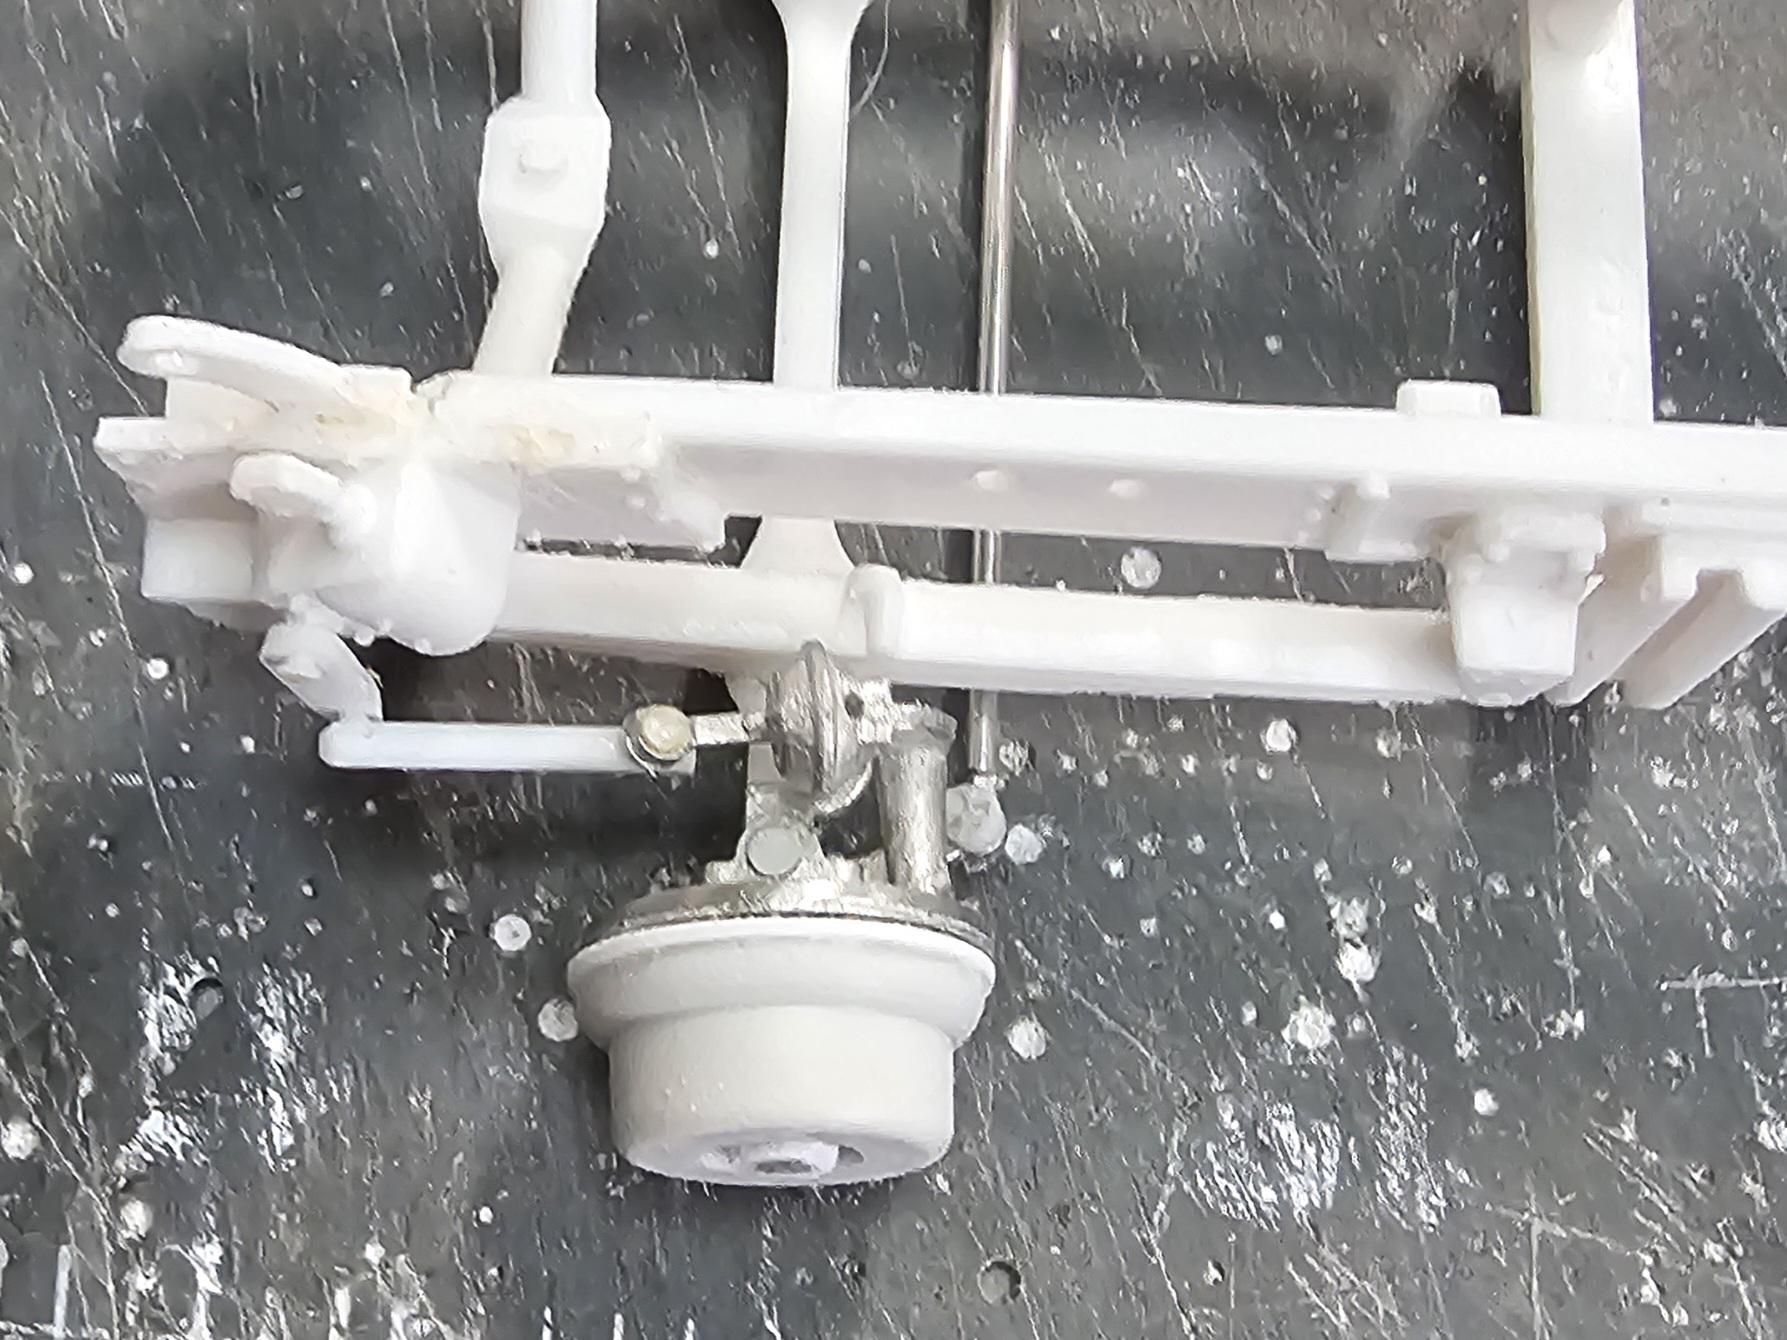
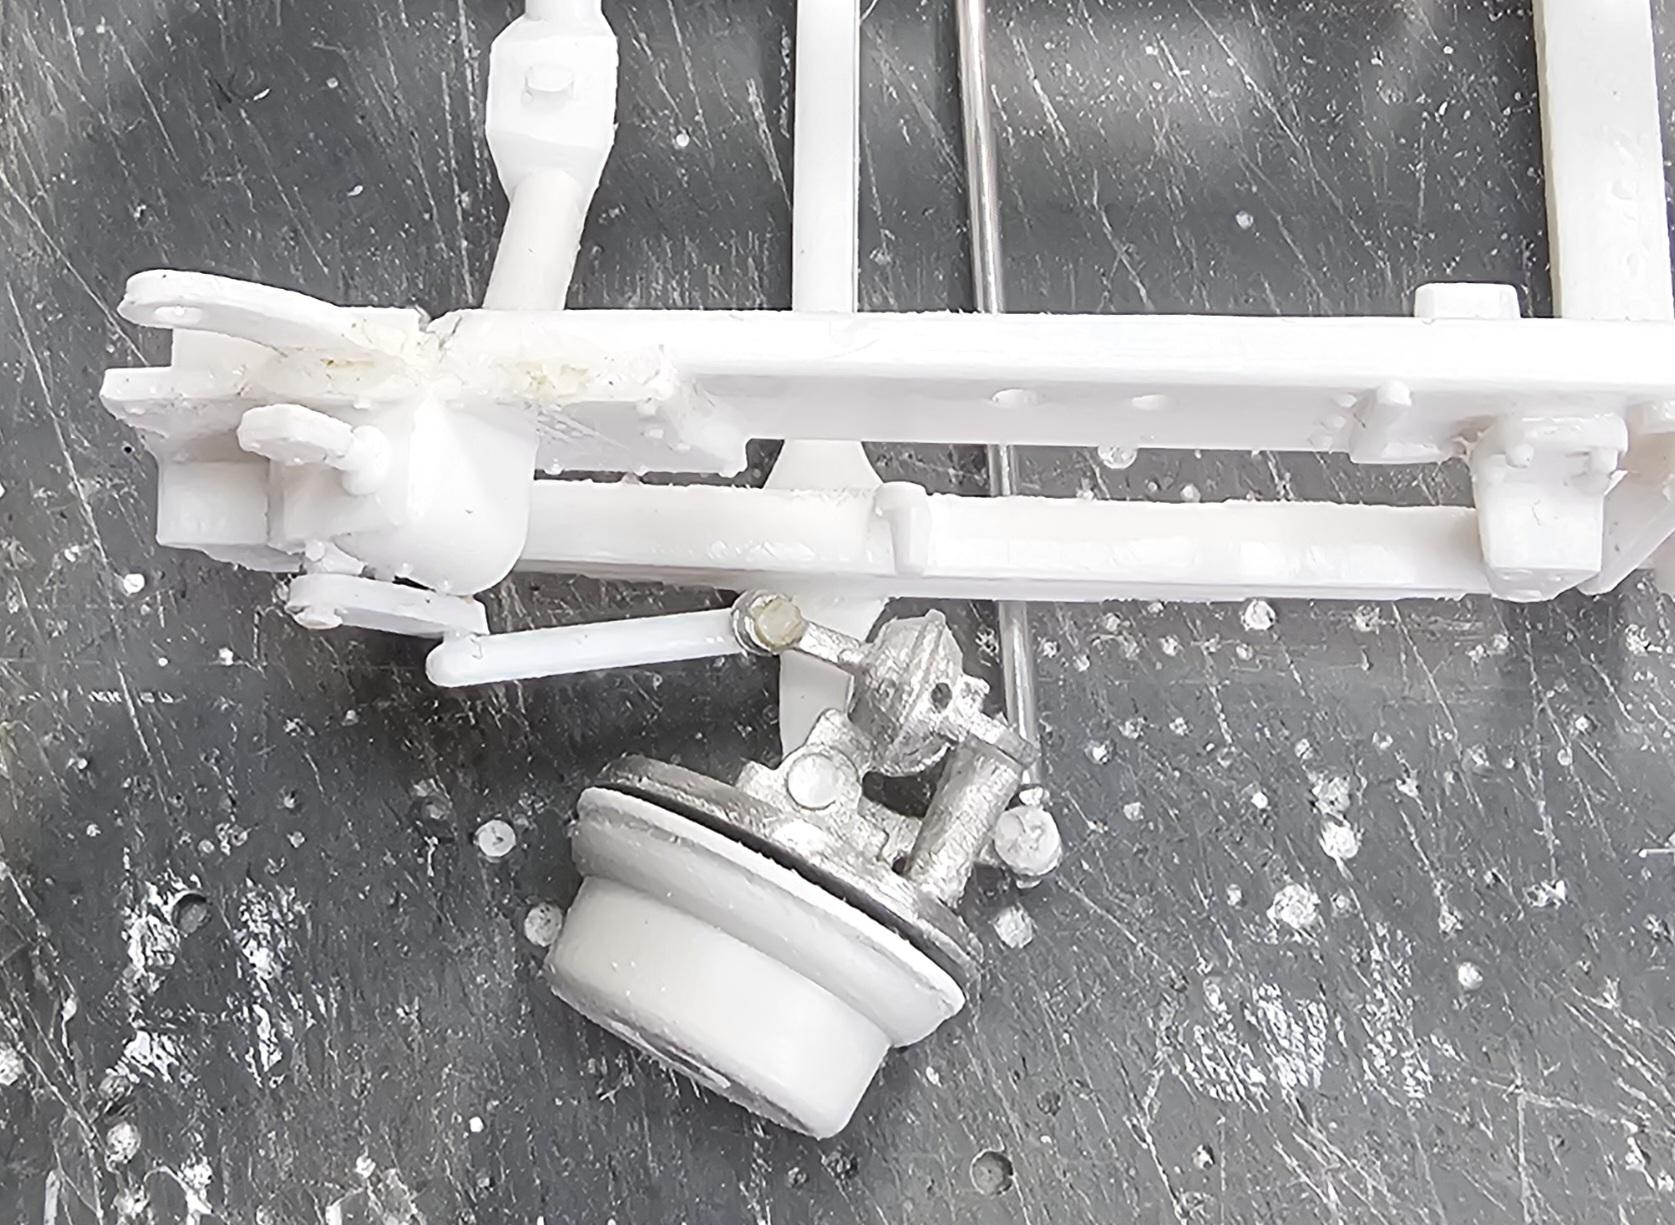
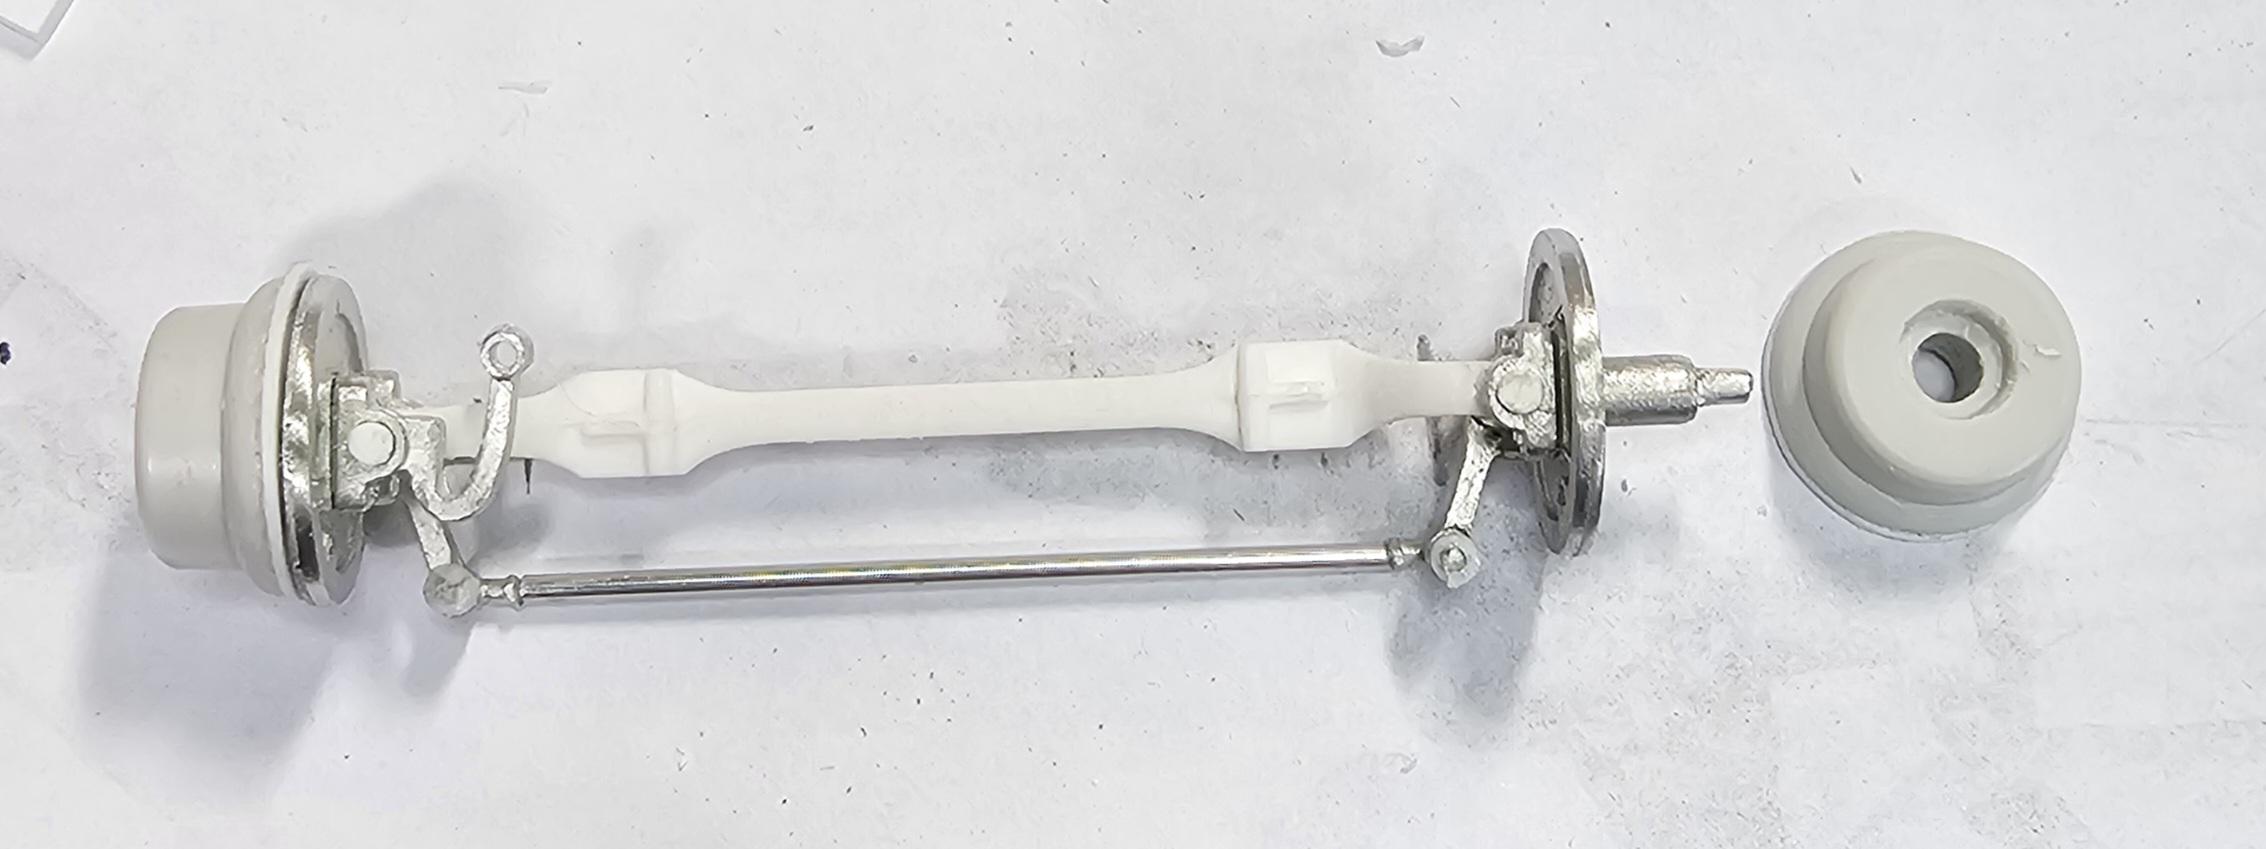
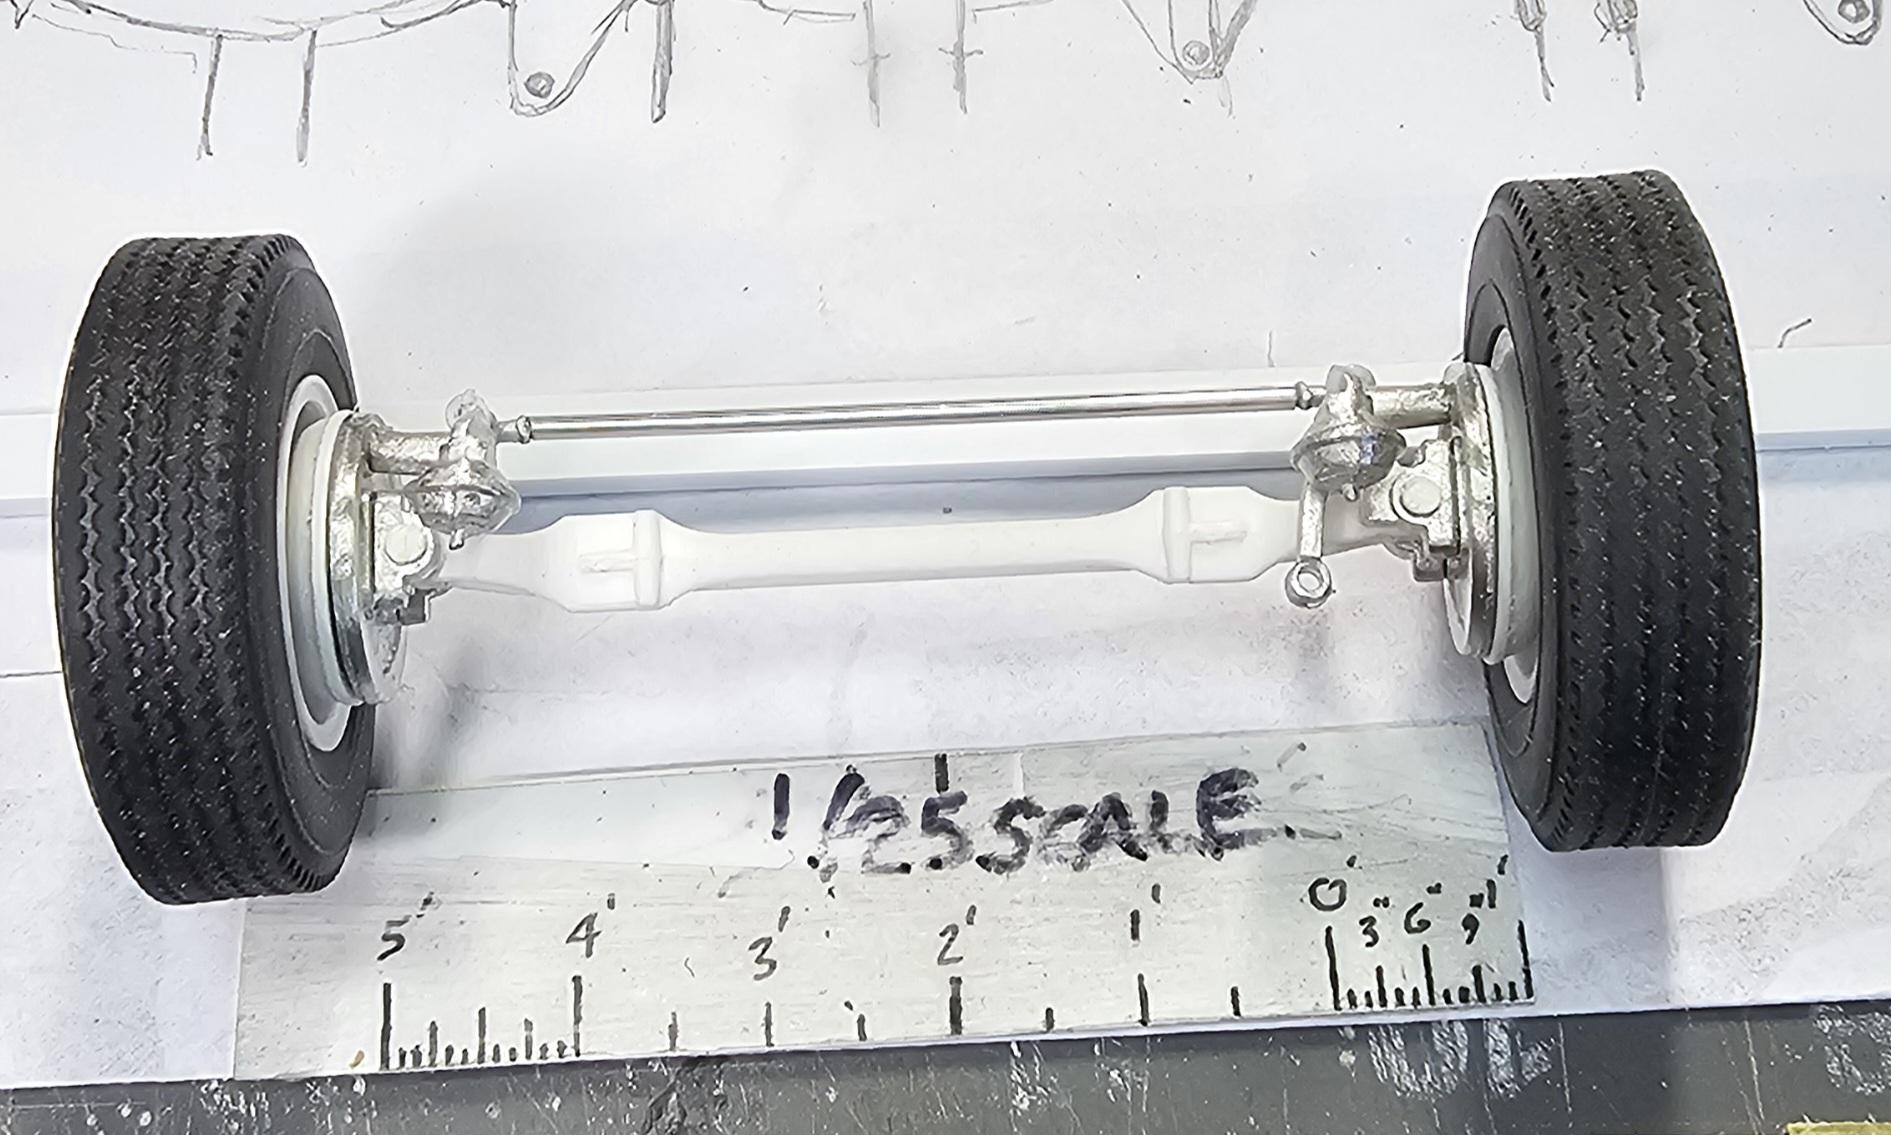
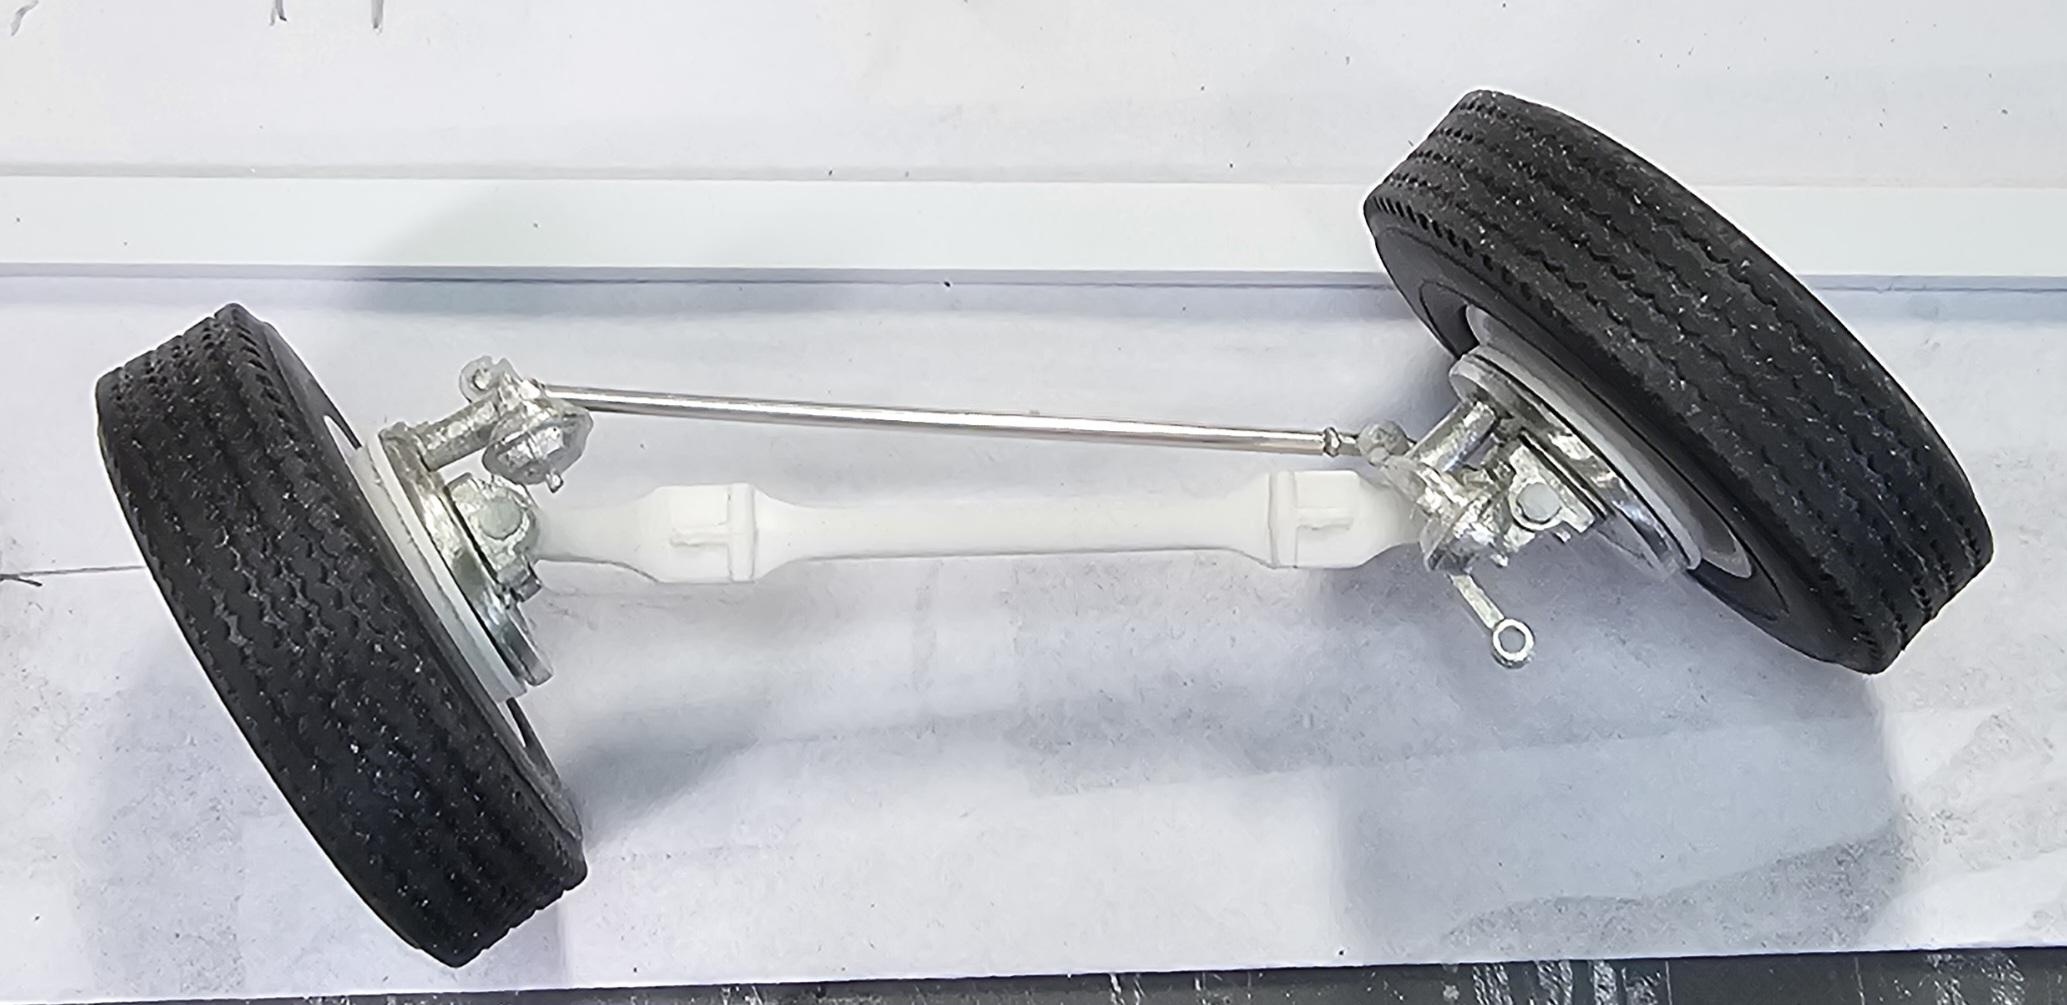
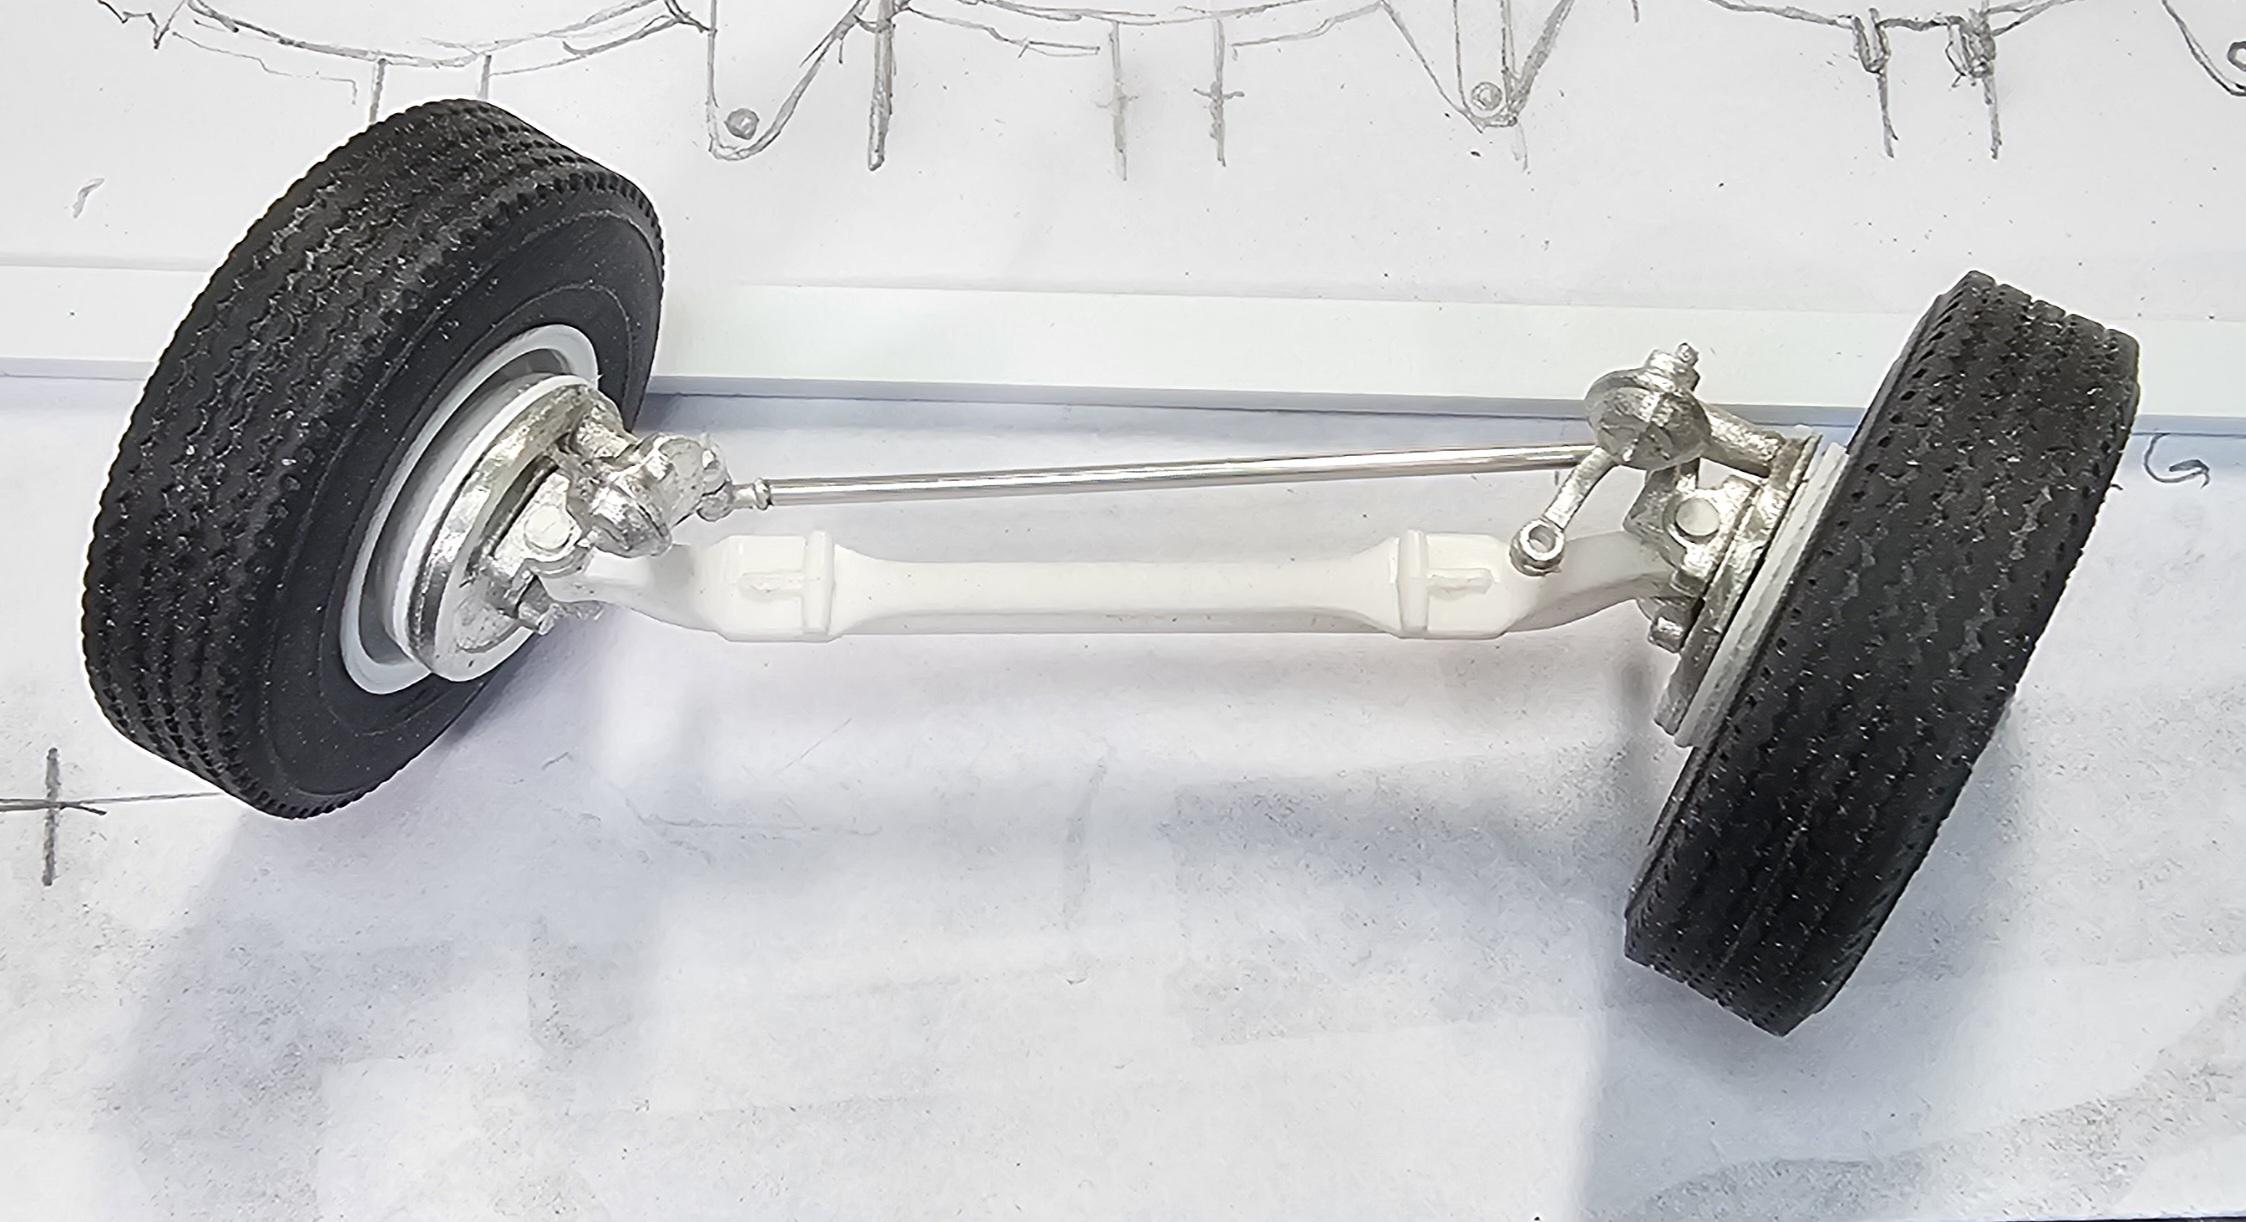
Hey all I worked on the Astro 95 today. I modified the front axle into a workable axle. I cut off the ends of the kit axle and replaced them with peices of 1/8" plastic tube. Using a 1/24 scale metal front axle as a guide on how long to make them. I glued the tubes to the part of the axle that was left. I used the rest of the metal axle parts to finish my axle. This view shows the metal 1/24 axle on top and the modified plastic axle on bottom. You can see the two tubes that were added for spindles. This view shows the finished axle. The brake drums are left overs from the flatbed trailer that I modified for the front axle. This view shows the front axle with the front W/T's added. This view shows the front axle turned to the left. This view shows the front axle turned to the right. Well that's it for now be back with more updates soon. Ron G
-
Thank God you feel better. I've been dealing with chronic back pain for over ten years, so I definitely know what you have been living with. Hope you are going to be able to fully recover. We all want to see what your next project is going to be. Ron G
-
Hey all I now have both trailers finished, almost. Still a few things to do like the plumbing, rub/load rails and painting. Front trailer. Dolly. Rear trailer. Both trailers and dolly. Well that's it for now be back with more soon. Ron G
-
Thanks Gary They are coming along. Alot of repetitive work.😁😉 Ron G
-
1970 Ford C 600
ShakyCraftsman replied to Biggu's topic in WIP: Model Trucks: Big Rigs and Heavy Equipment
Looking really good Buddy. Ron G -
Welcome to the forum Bill. You picked a real dozzie of a kit to jump into trucks with, but it looks like your tackling it okay. If you need any help just ask we are here to help. Ron G
-
Thanks Brian
-
Thanks Jürgen Your build is looking good also. Ron G
-
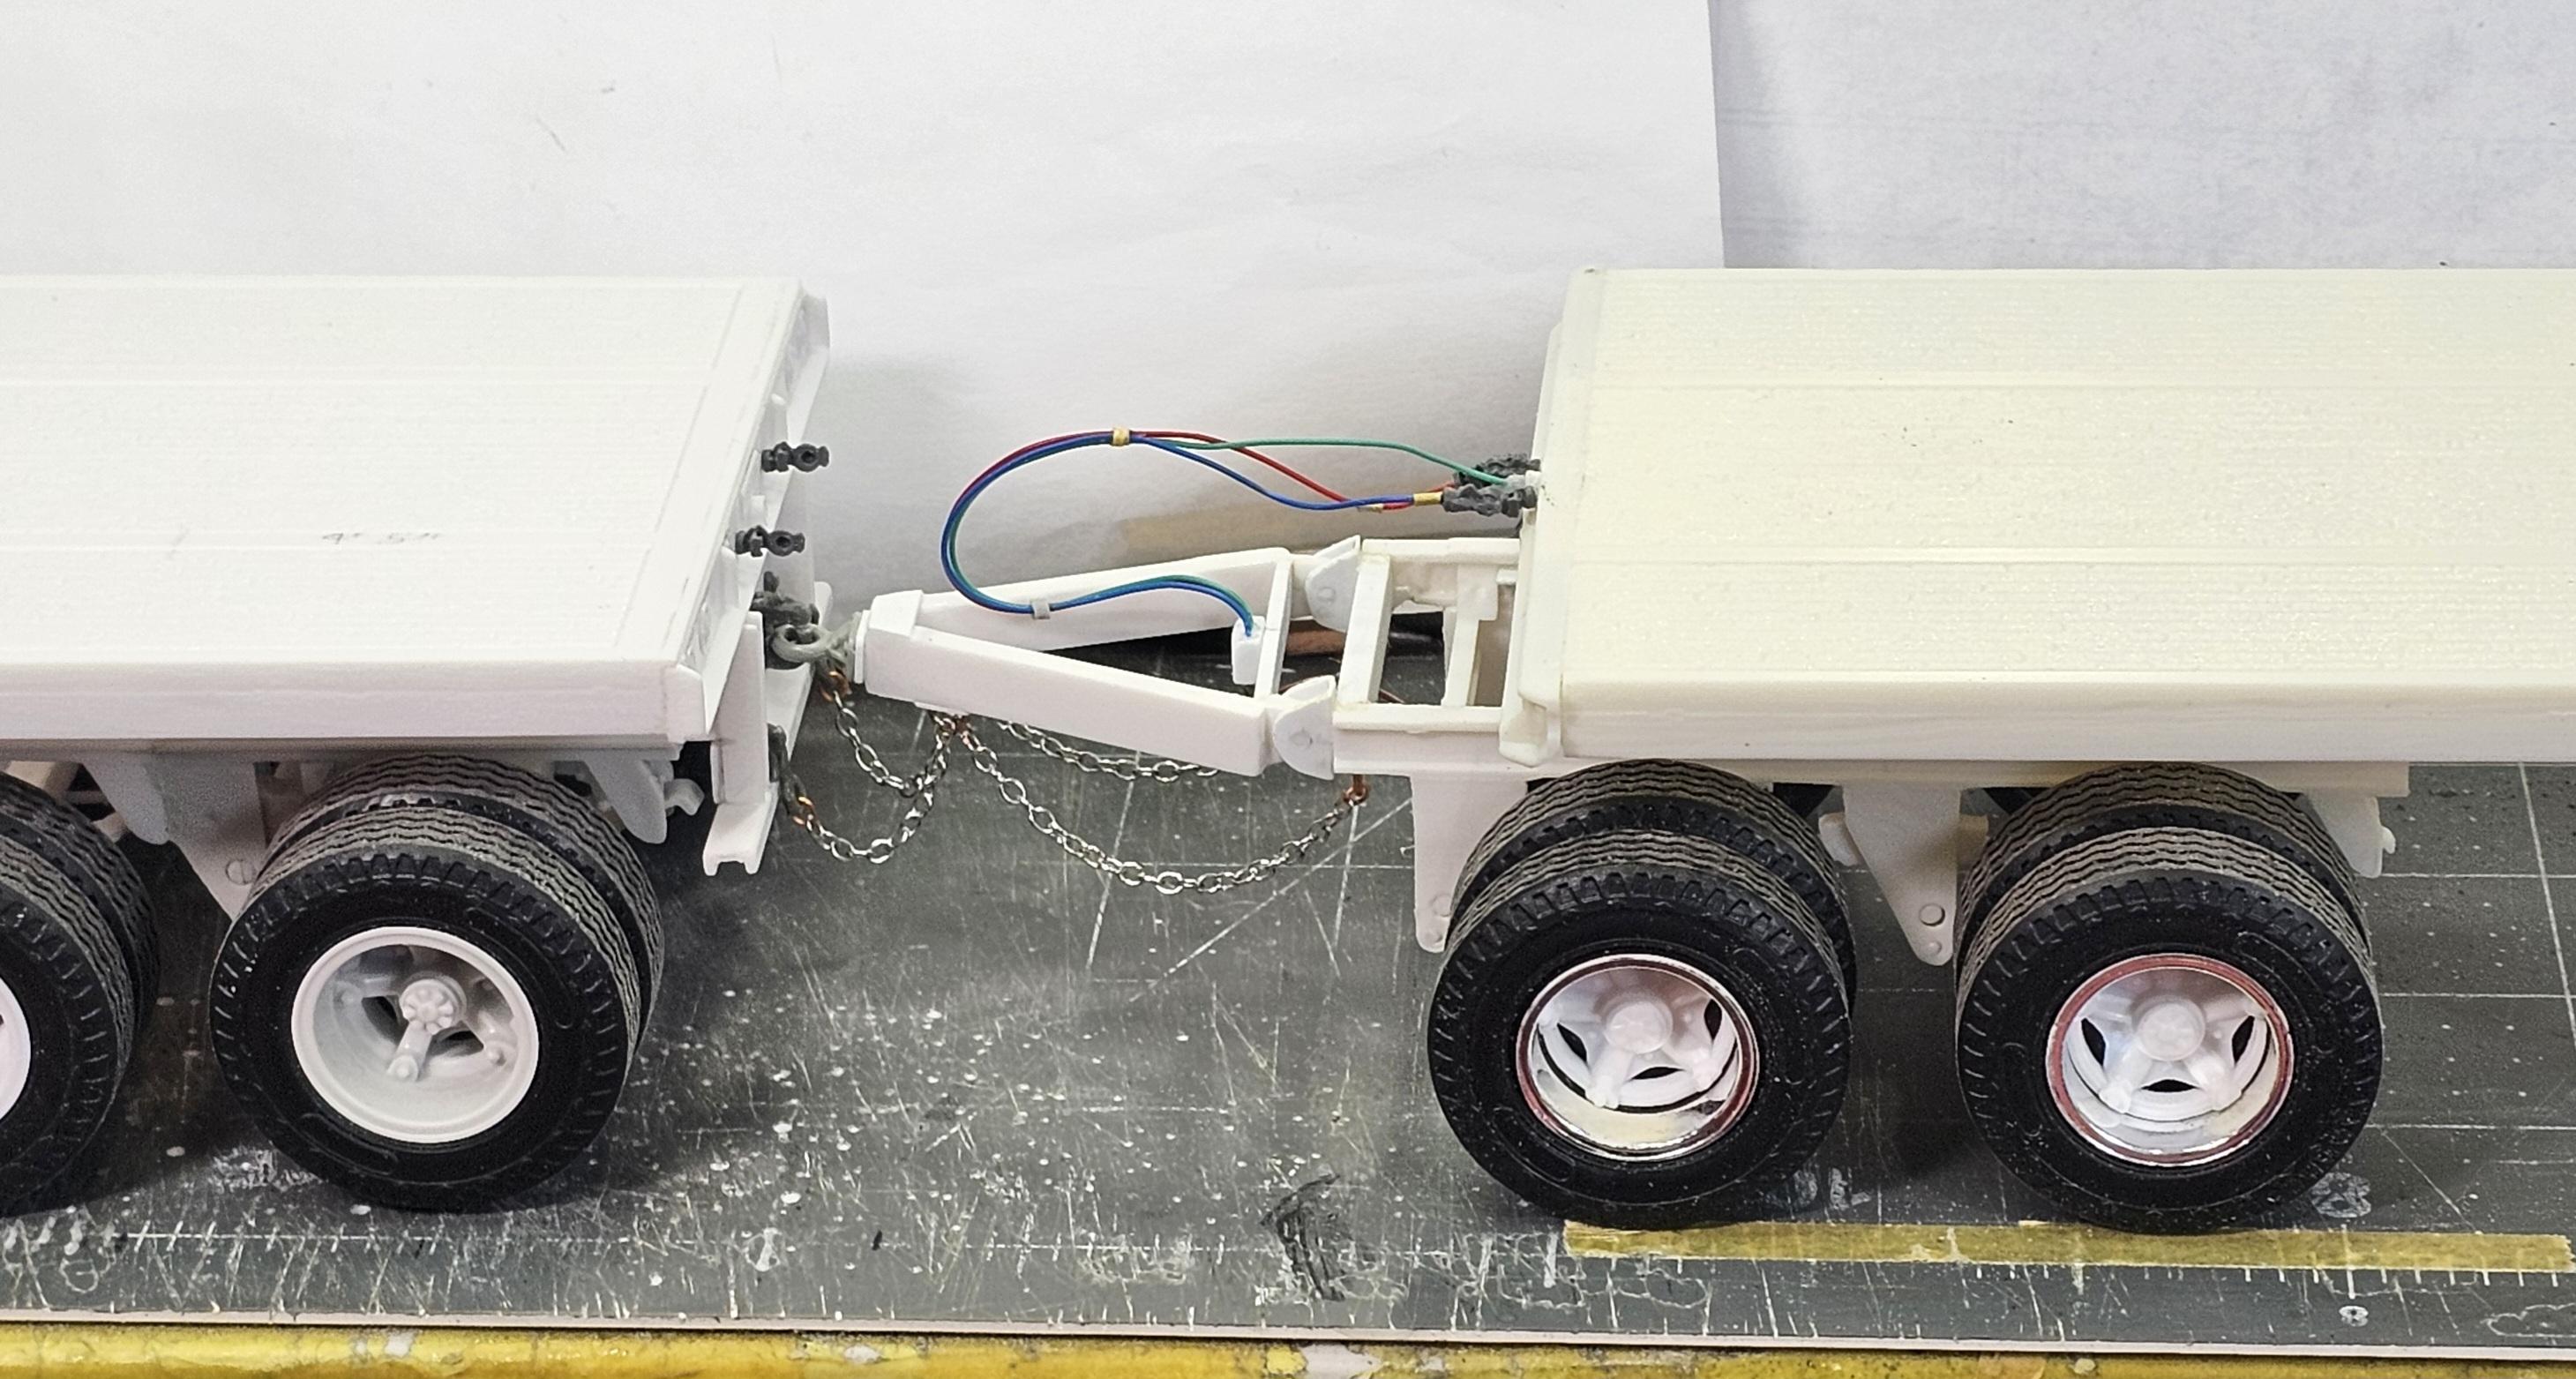
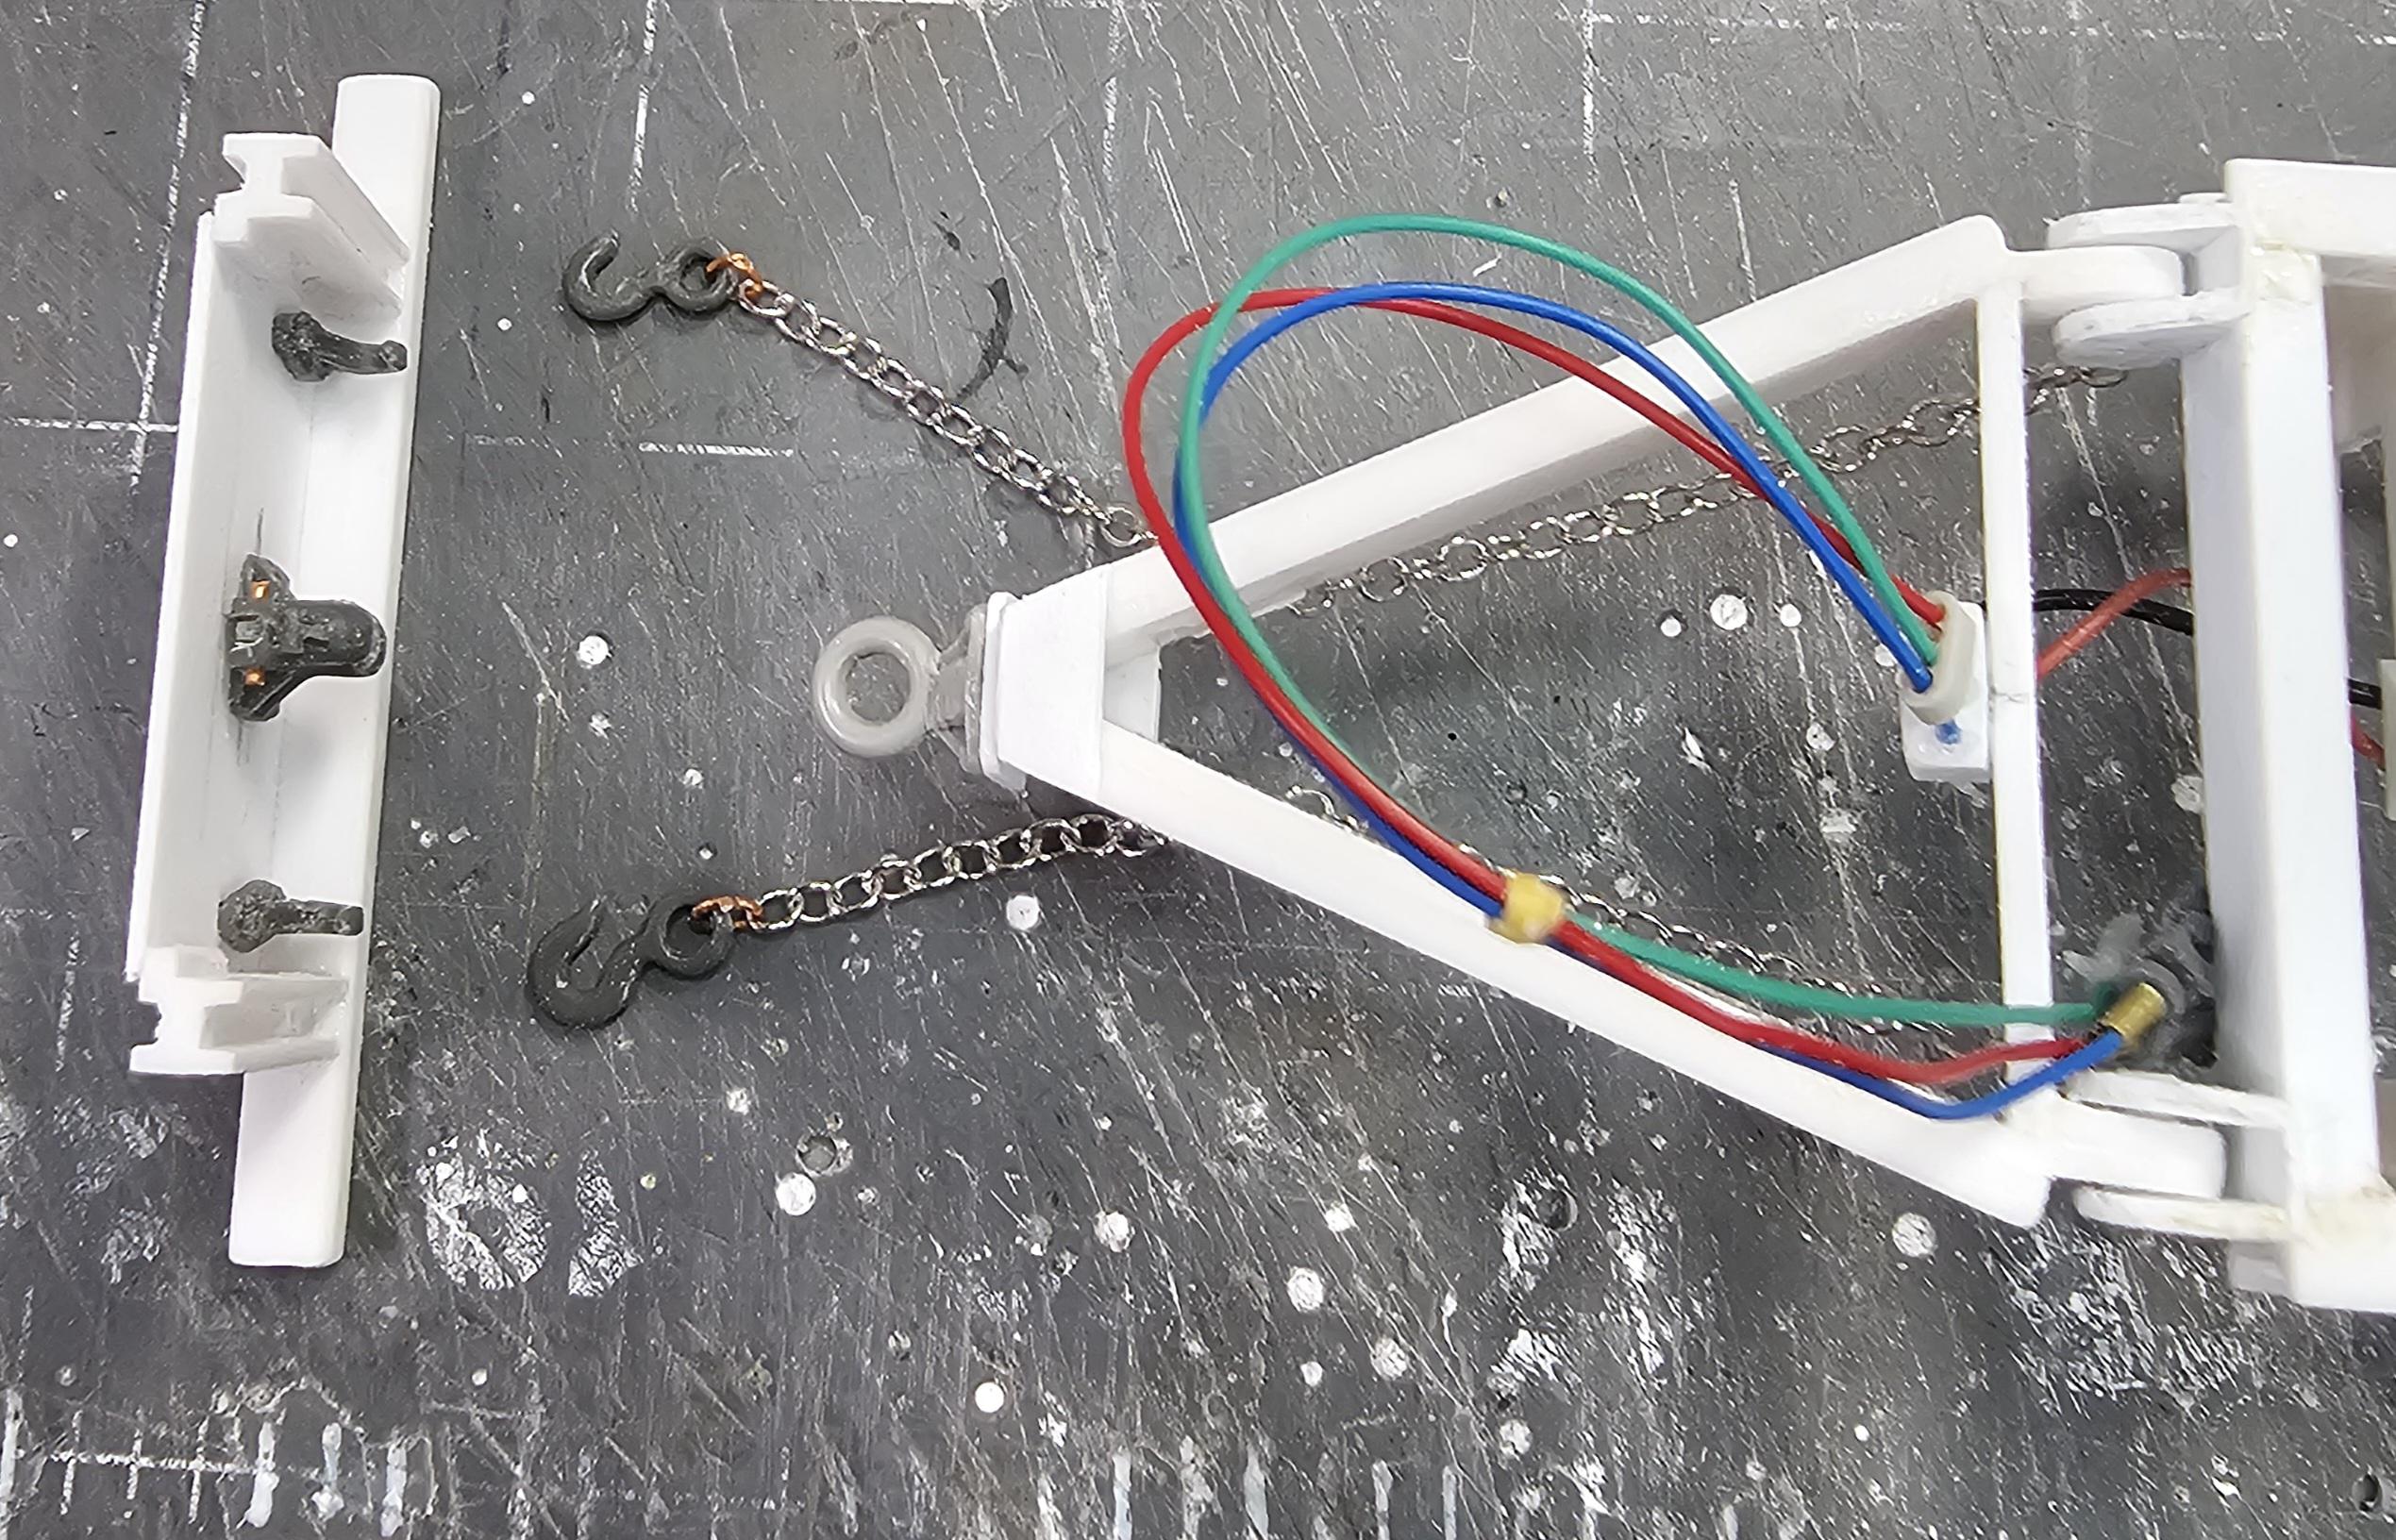
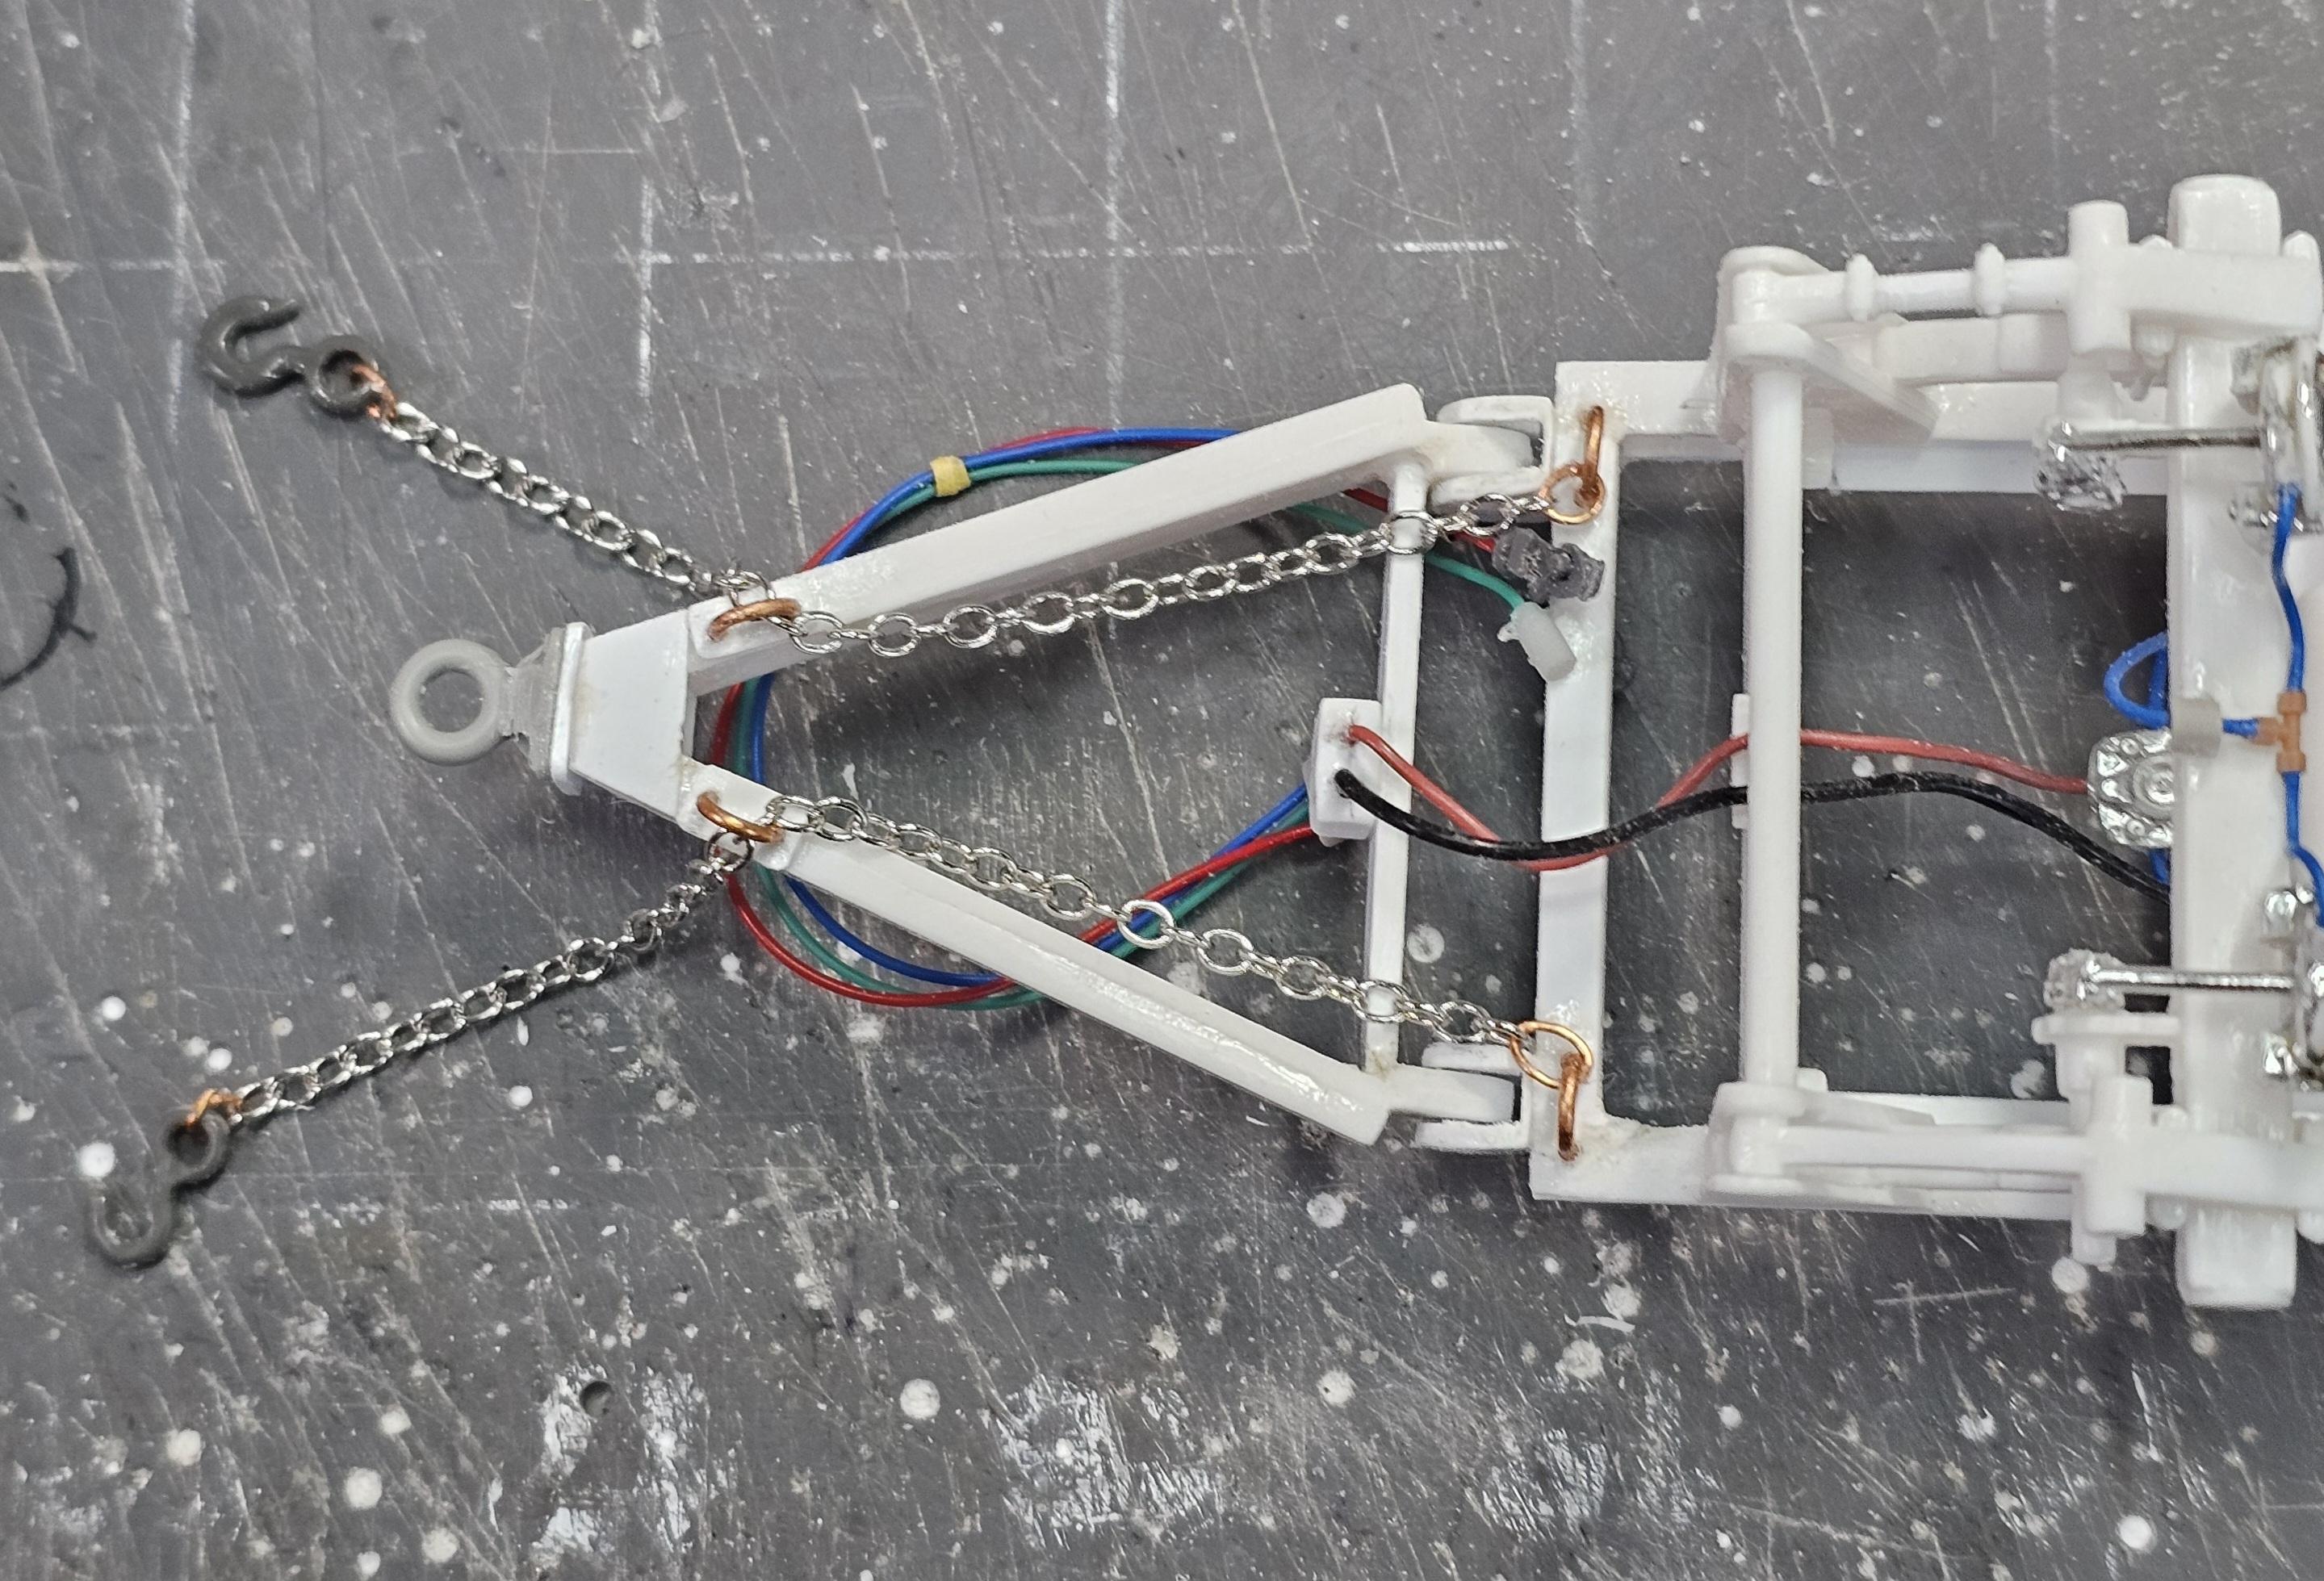
Hey all I did a little more work on the dolly. I added the safty chsins. And boy what a pain in the you know what! This view shows the chains with hooks, attached to the dolly. It also shows where they will hook up to the back of the front trailer. This view shows the bottom of the dolly. The rings at the rear of the dolly yoke were where I had all the trouble. Hooking up the chain ring, the chain and trying to connect everything involved alot of bad words! But I did get them attached. I'm working on the second/rear trailer right now. Well that's it for now be back soon. Ron G
-
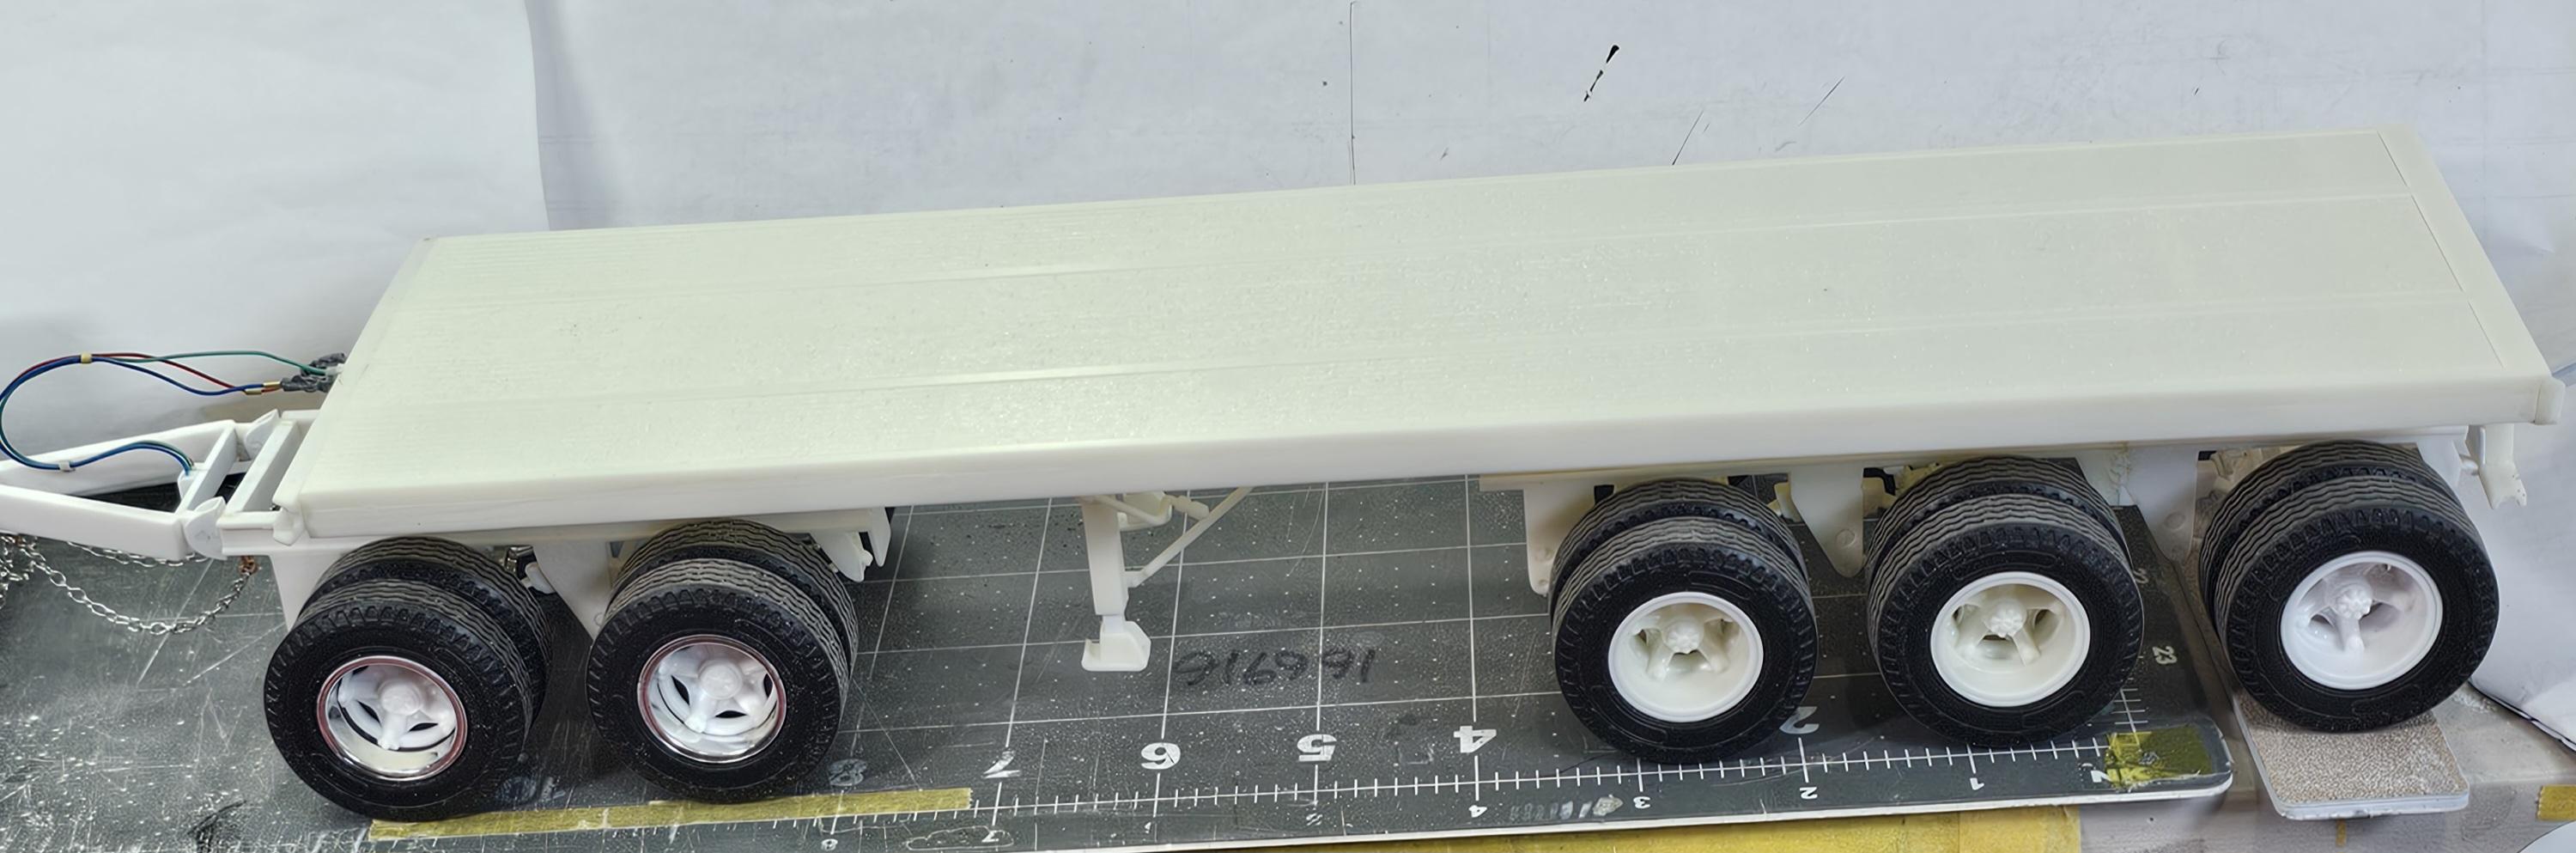
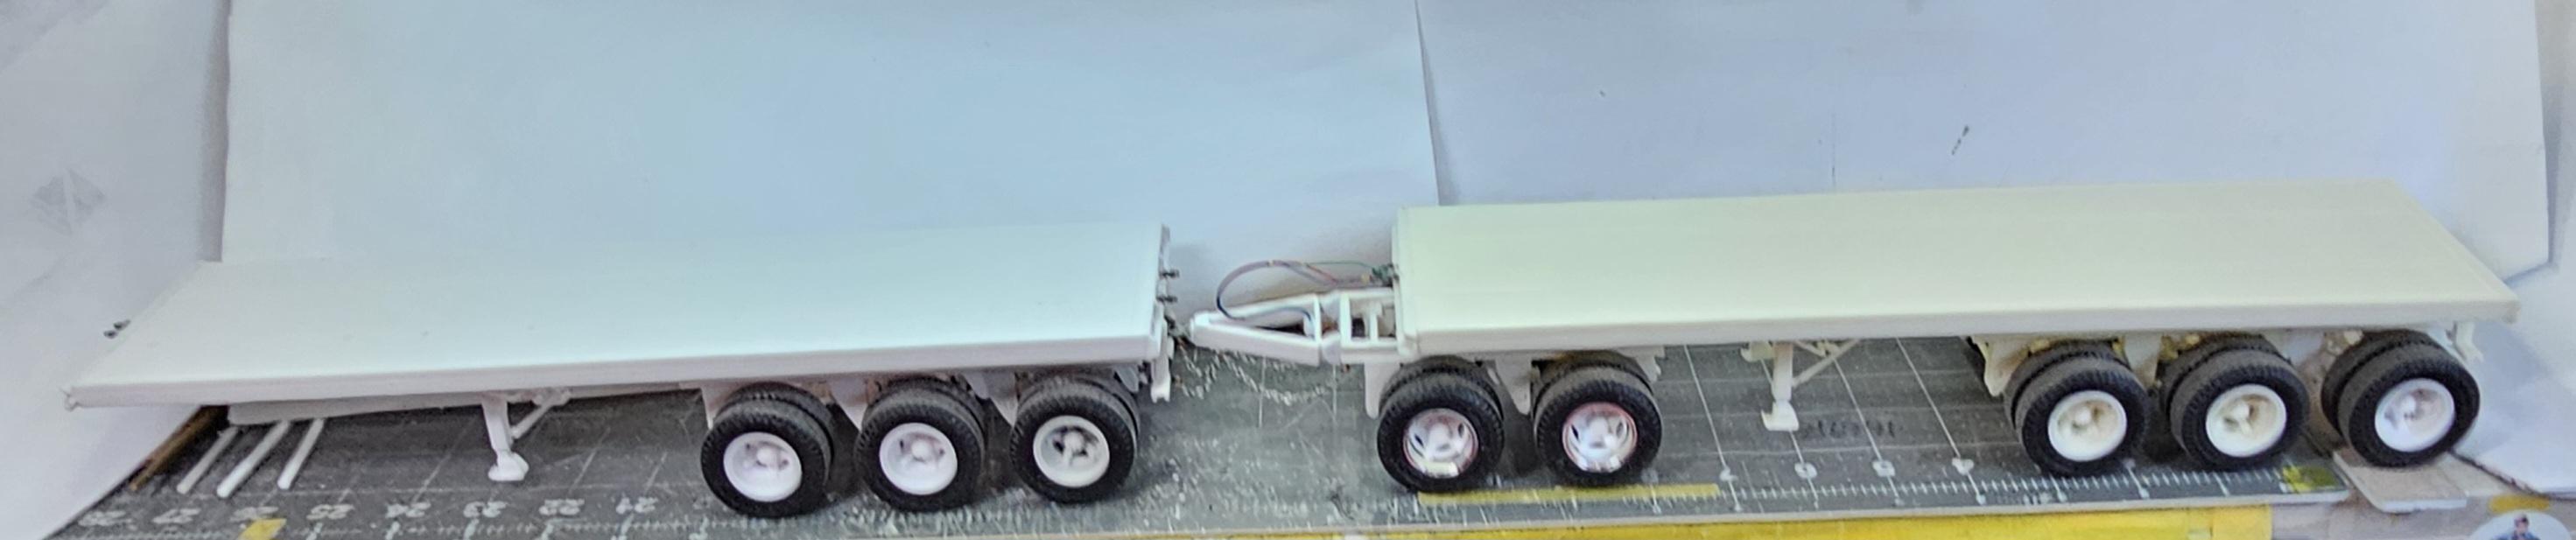
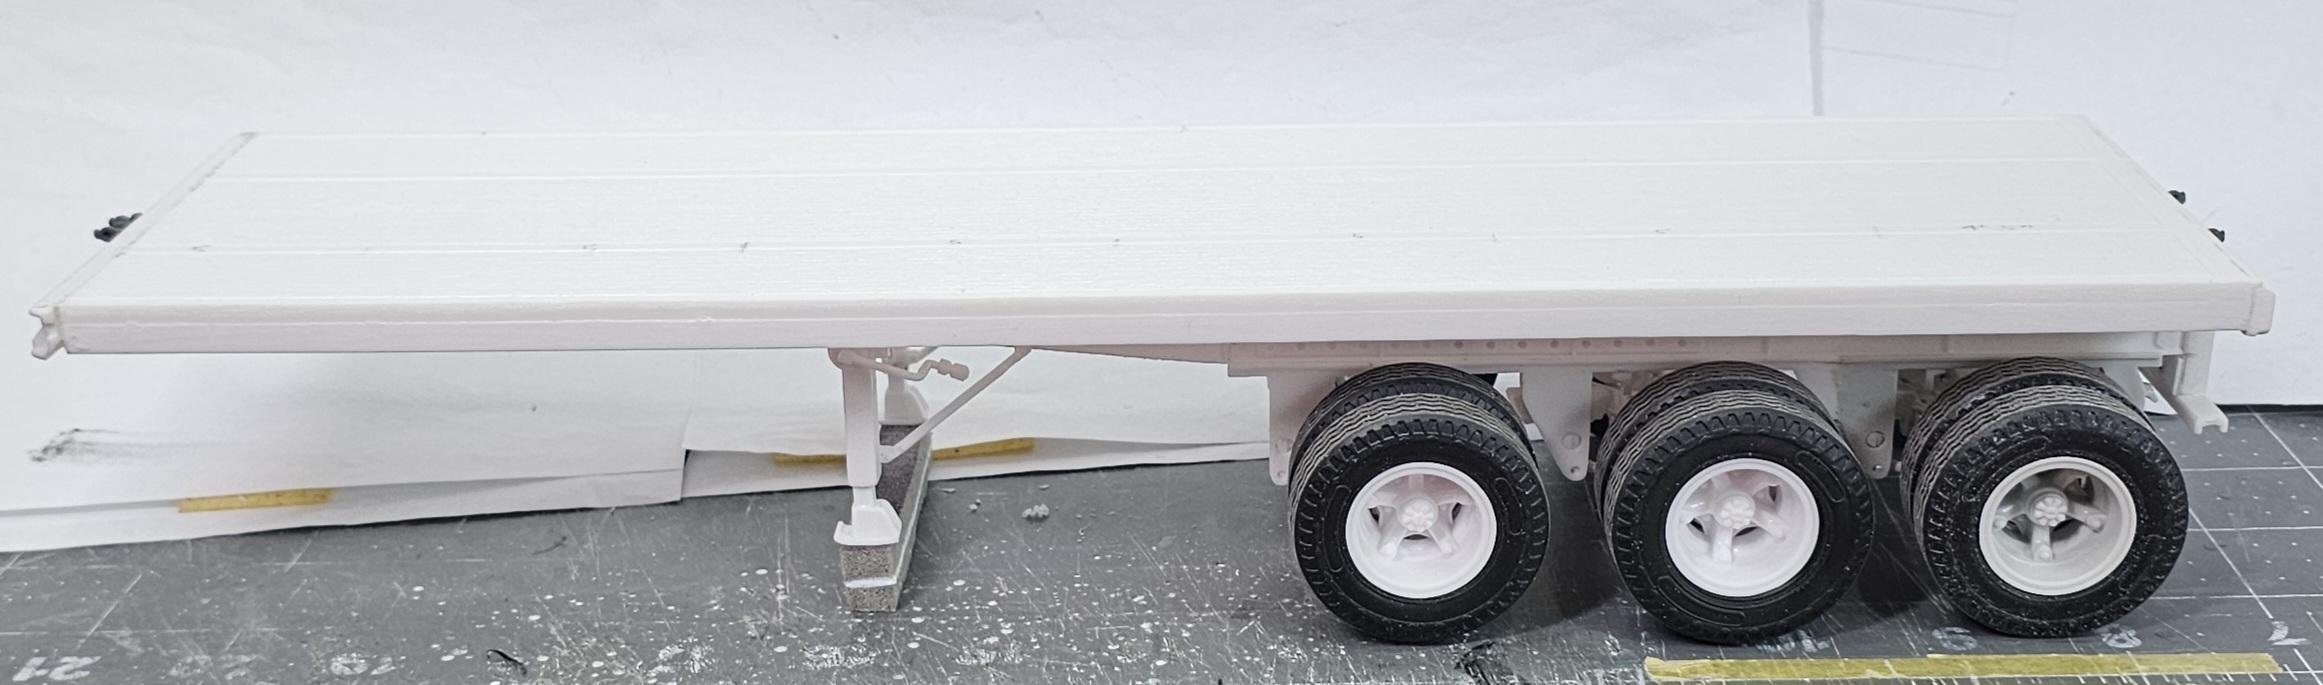
Hey all Small update. This view shows both trailers & dolly hooked up. There 30.25" (a scale 63' 1/25") long. This view shows the front trailer done and ready for paint & plumbing. Still have to do the rear trailer and truck to do, long way to go yet. Ron G
-
👍👍👍👍👍
-
Hey Gary St Supply has them in sets if 10 has 11 sets left. Ron G