89AKurt
-
Posts
8,426 -
Joined
-
Last visited
Content Type
Profiles
Forums
Events
Gallery
Everything posted by 89AKurt
-

What did you see on the road today?
89AKurt replied to Harry P.'s topic in General Automotive Talk (Trucks and Cars)
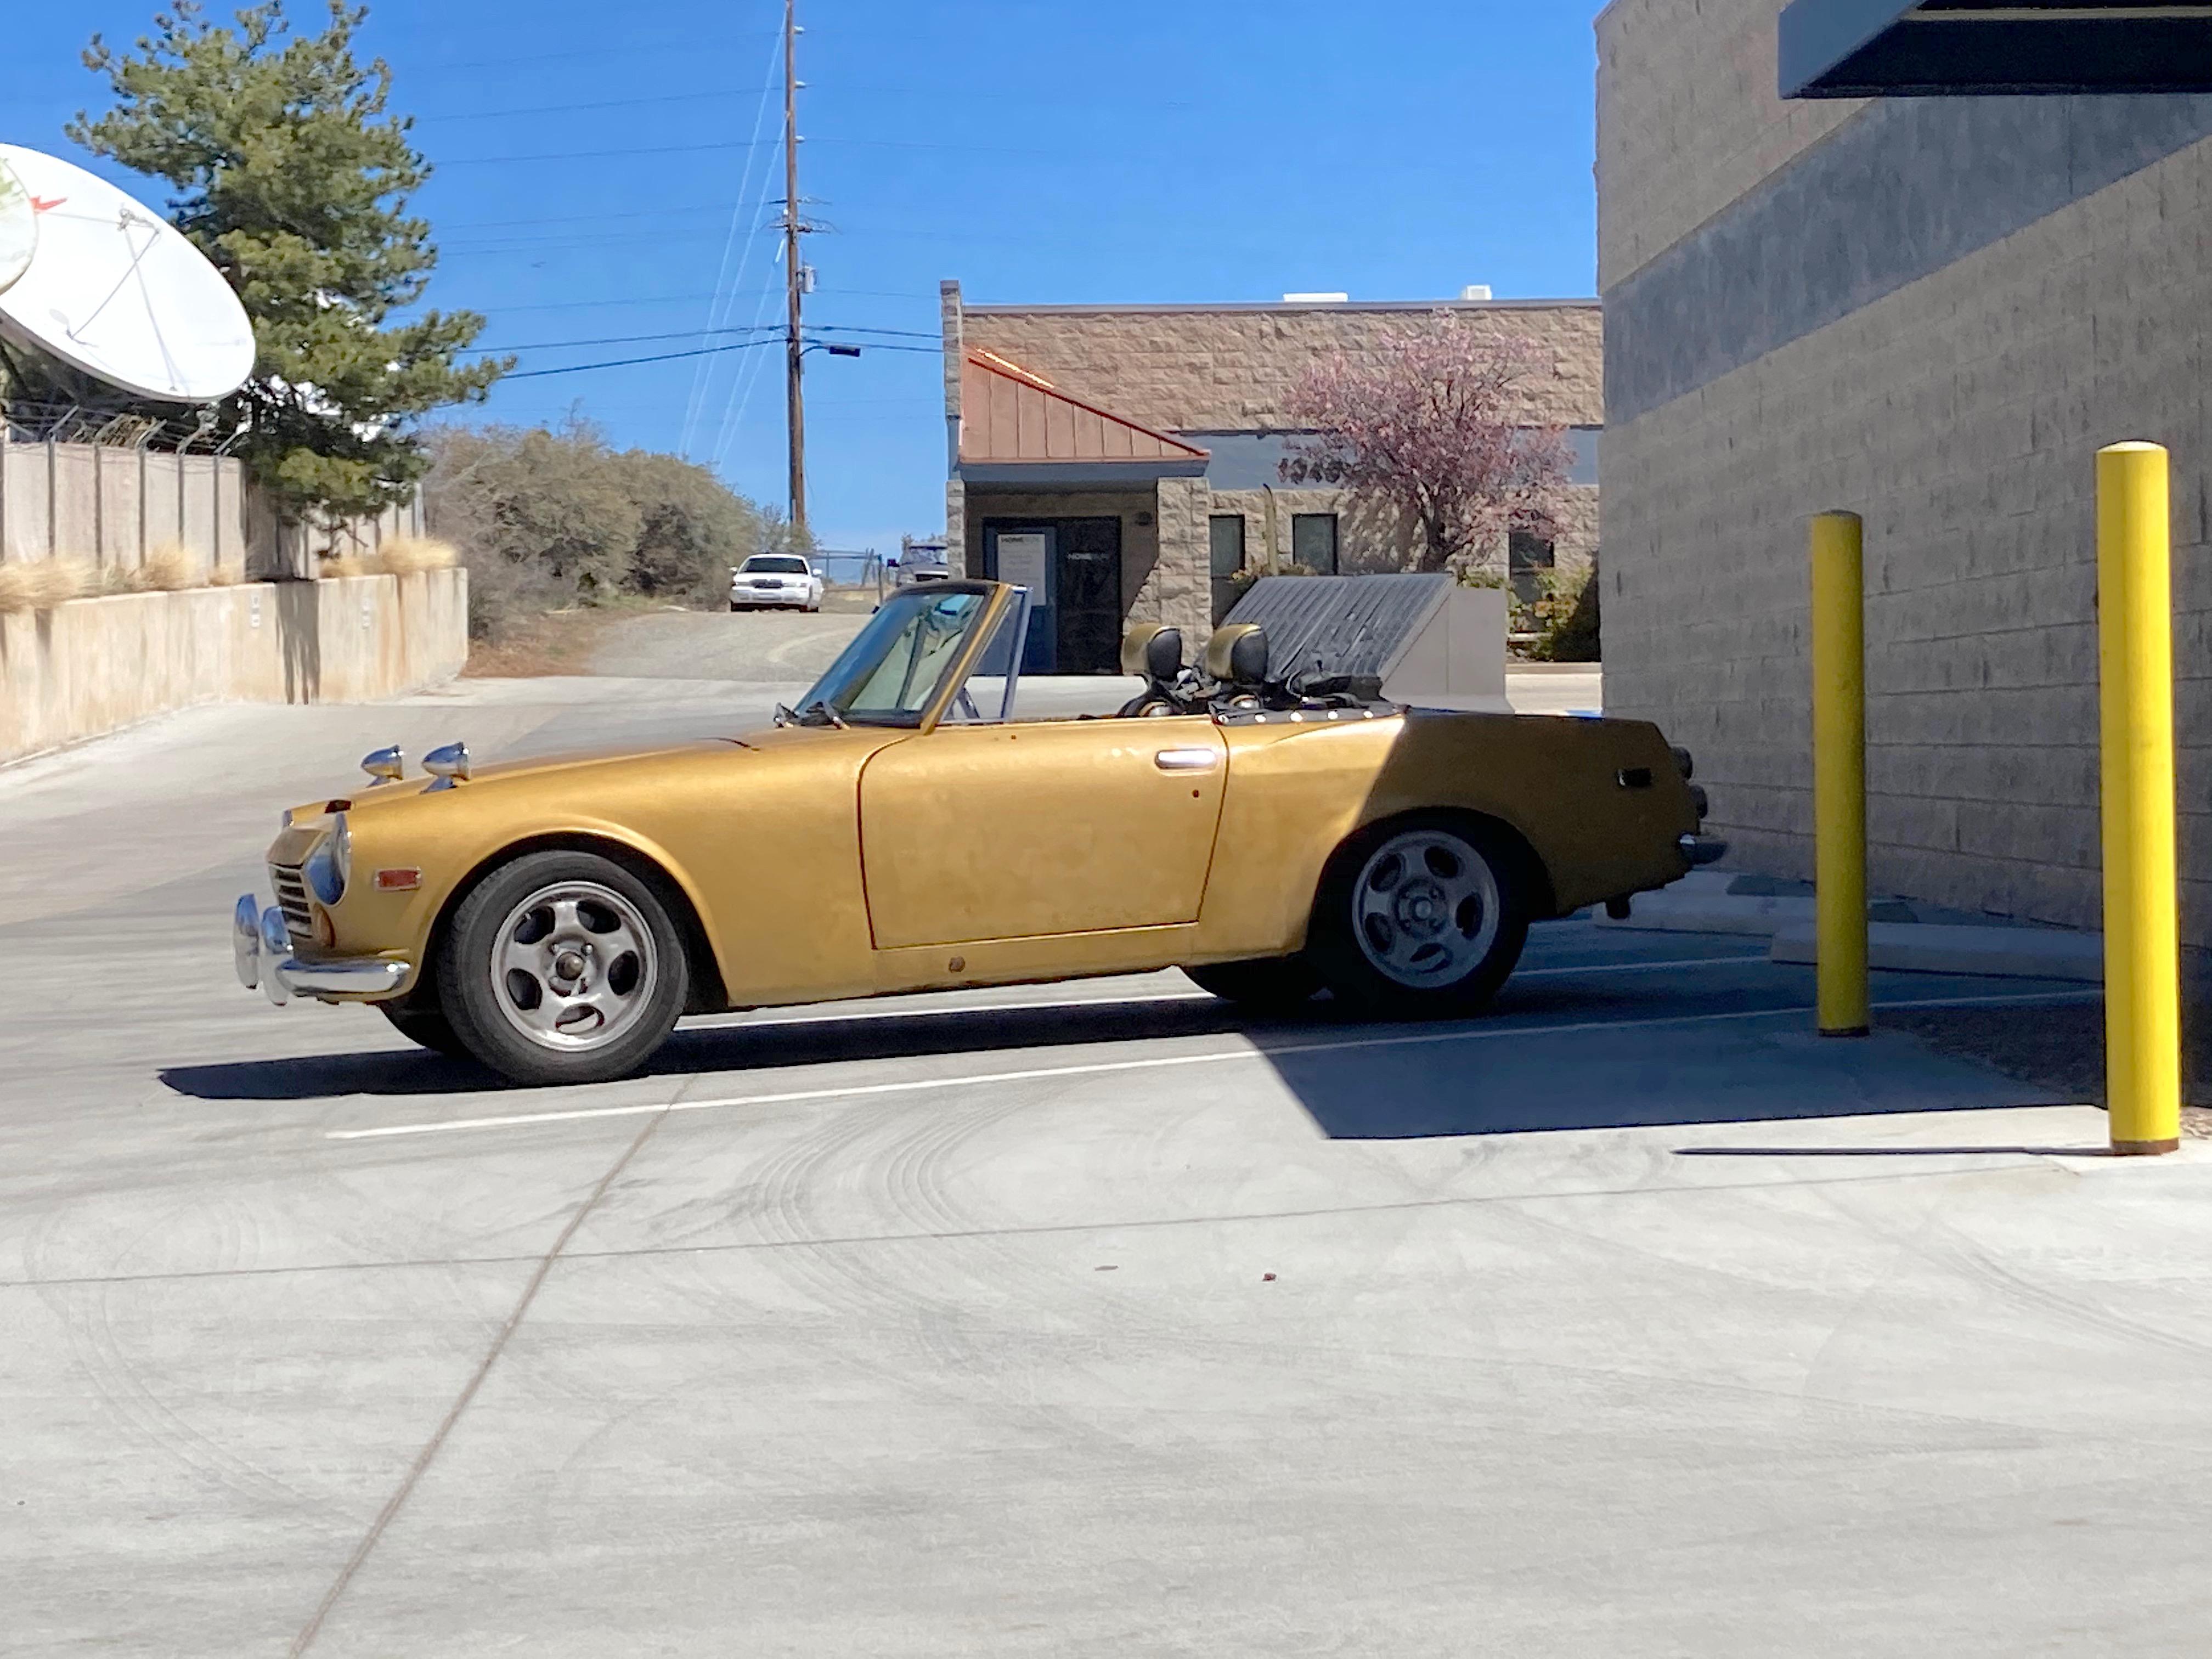
Datsun, forget the model name/number. Mazda stole the idea for the Miata, but then the Z became legend. Saw a bunch of other cool cars while driving around, and two Suzuki Samurais.
-
Fun details.
-
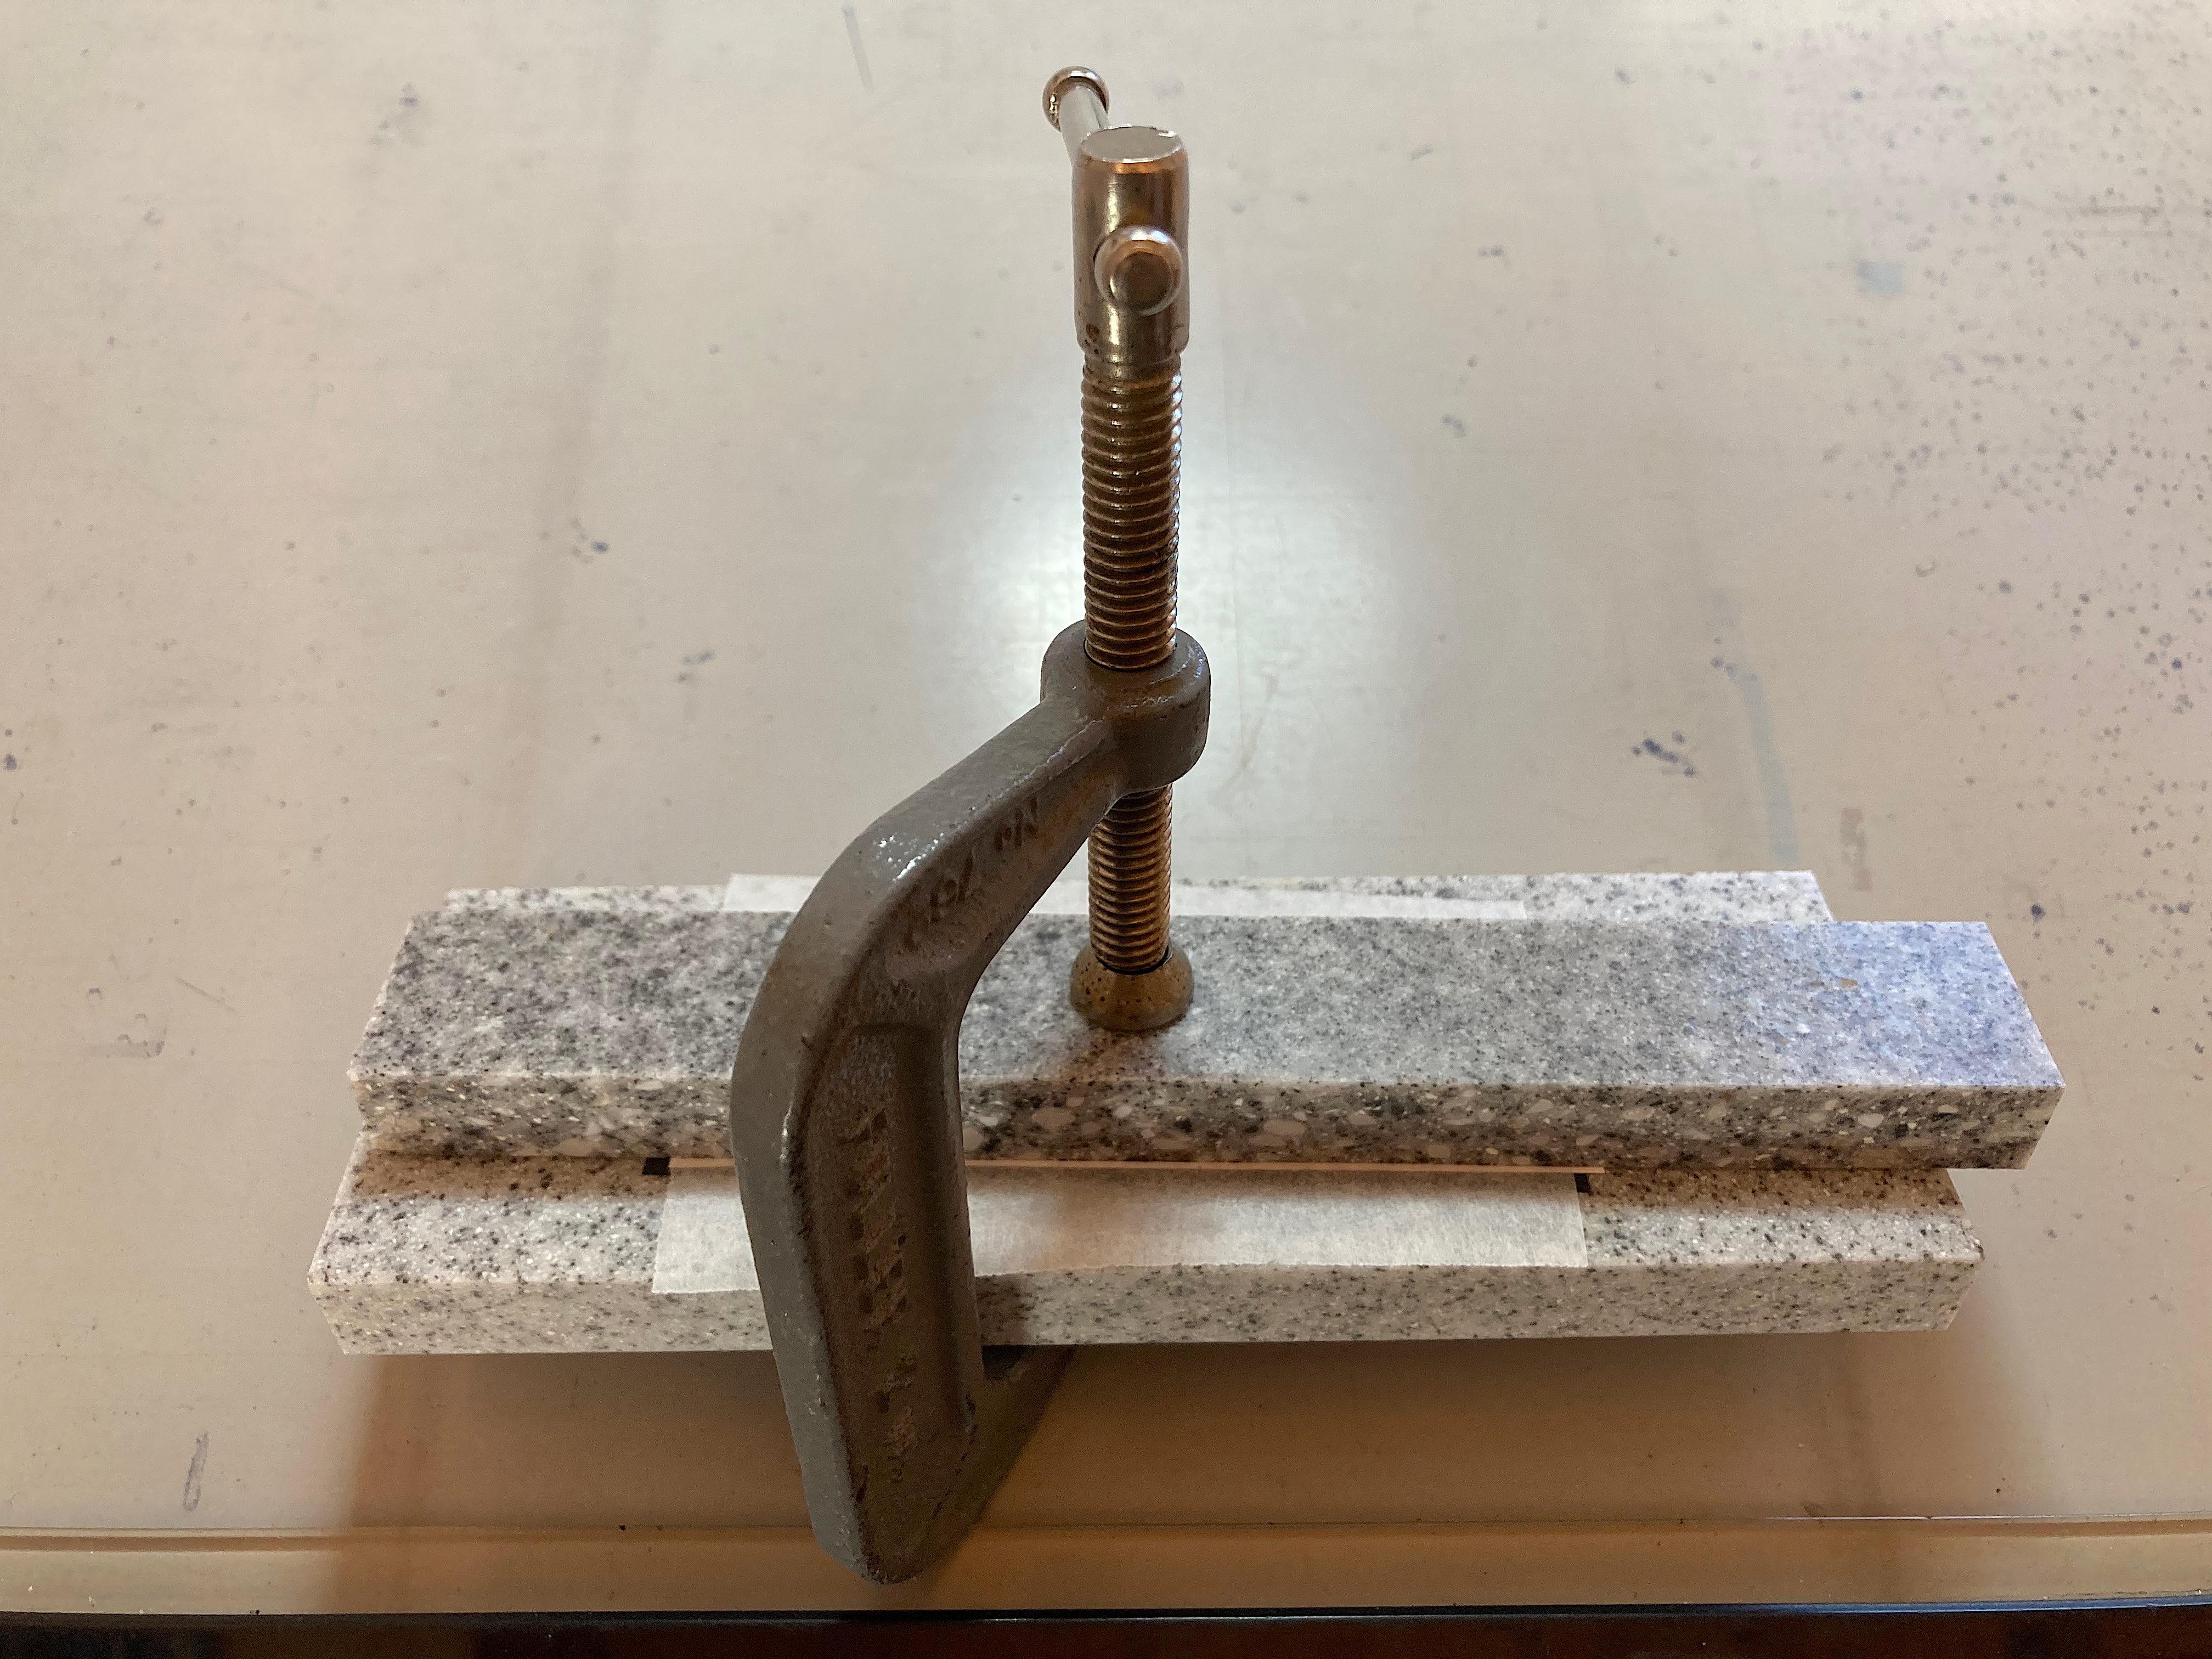
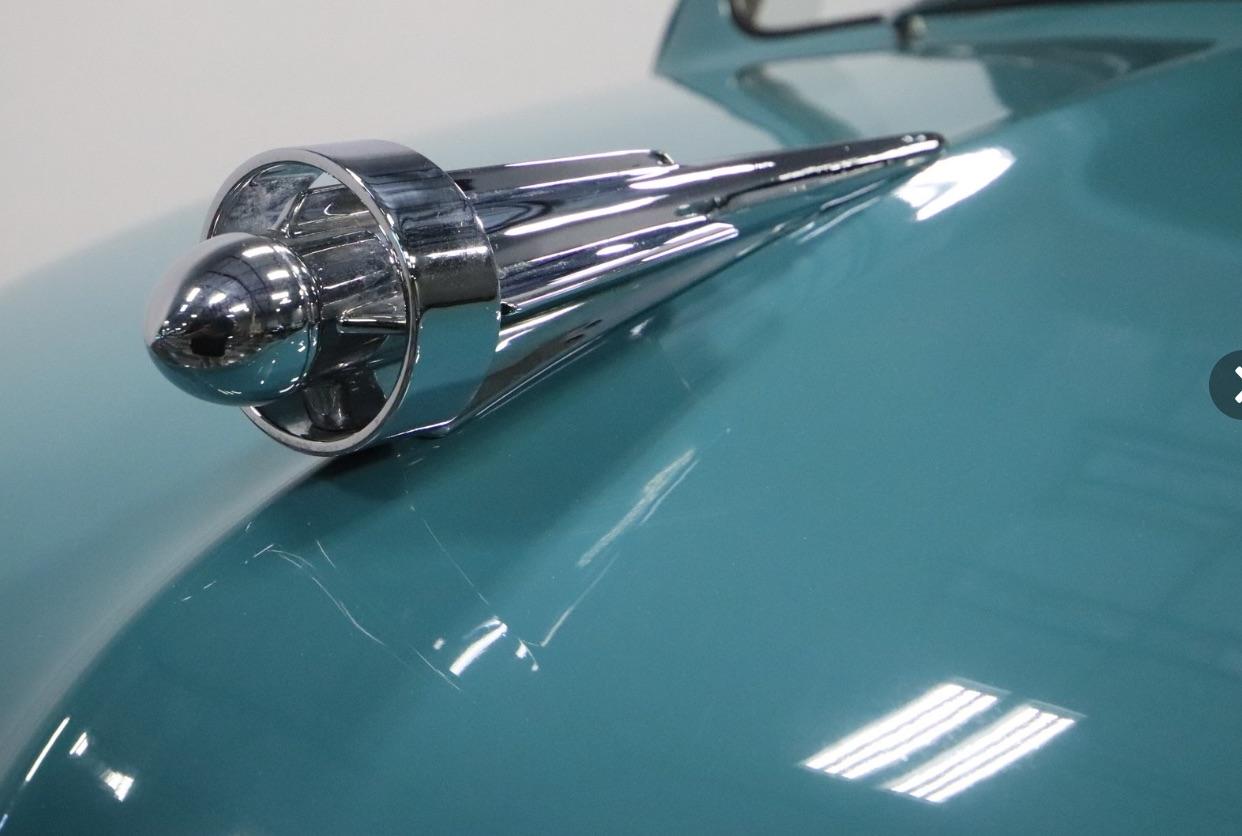
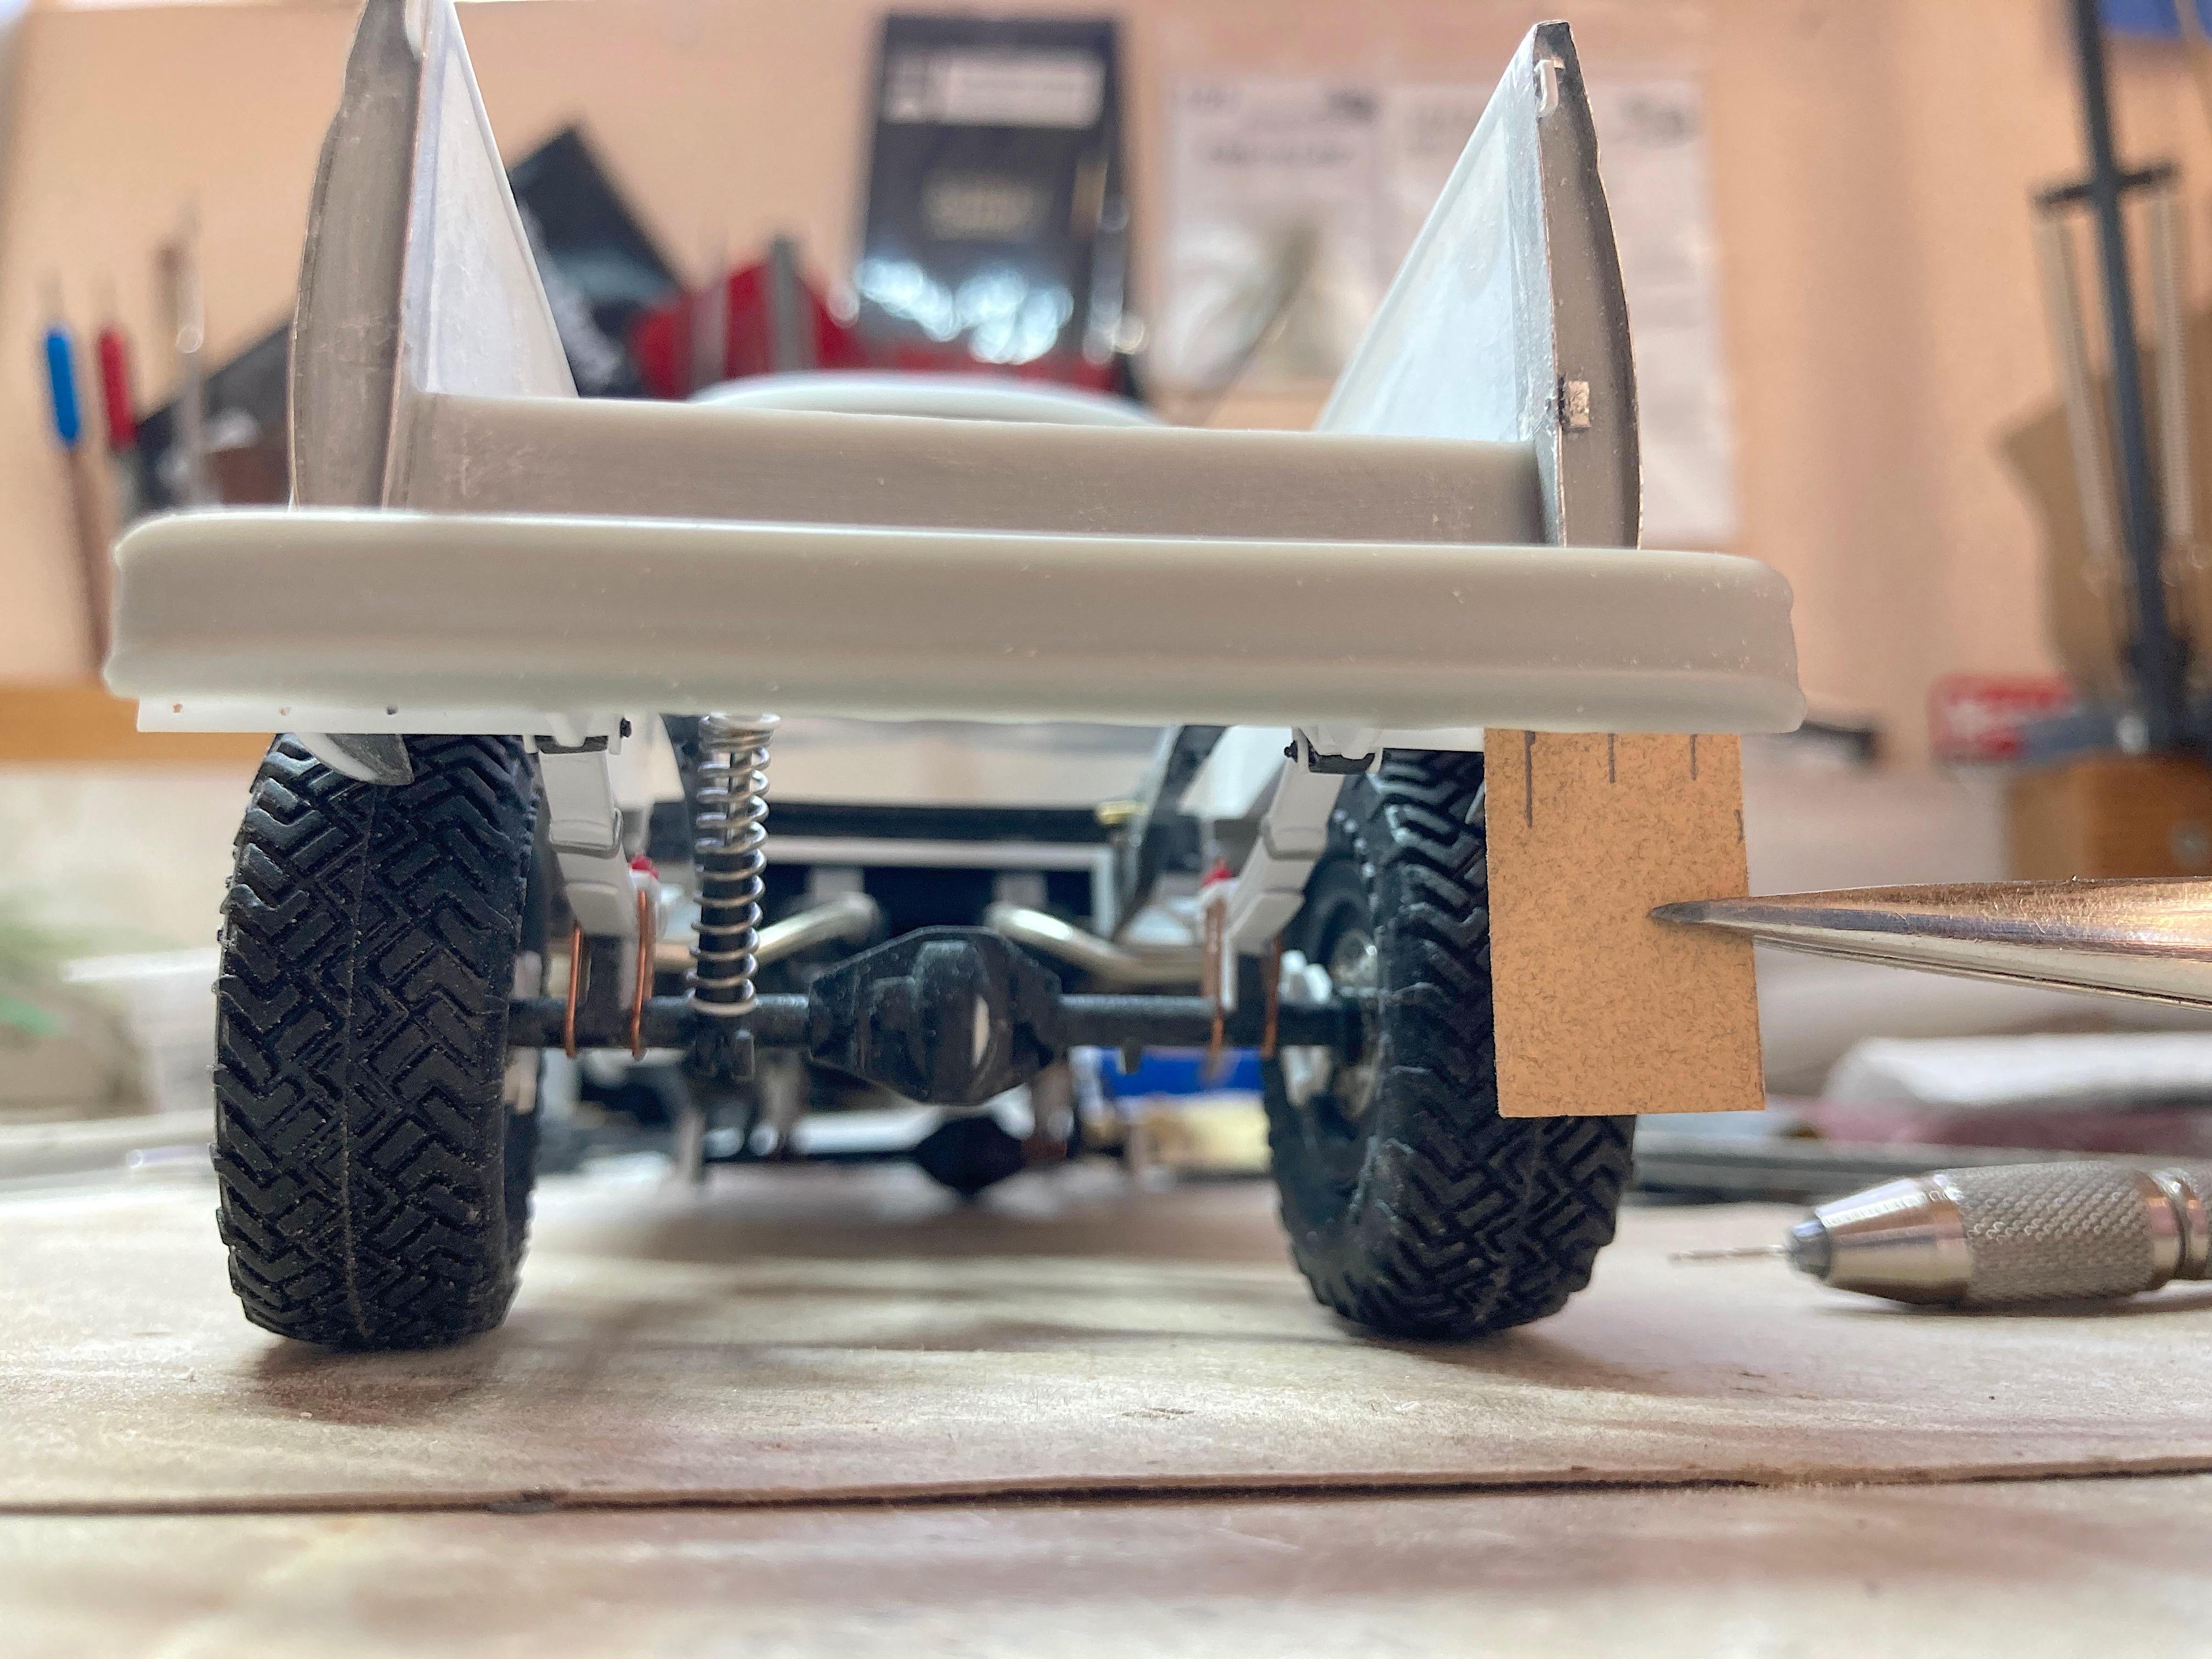
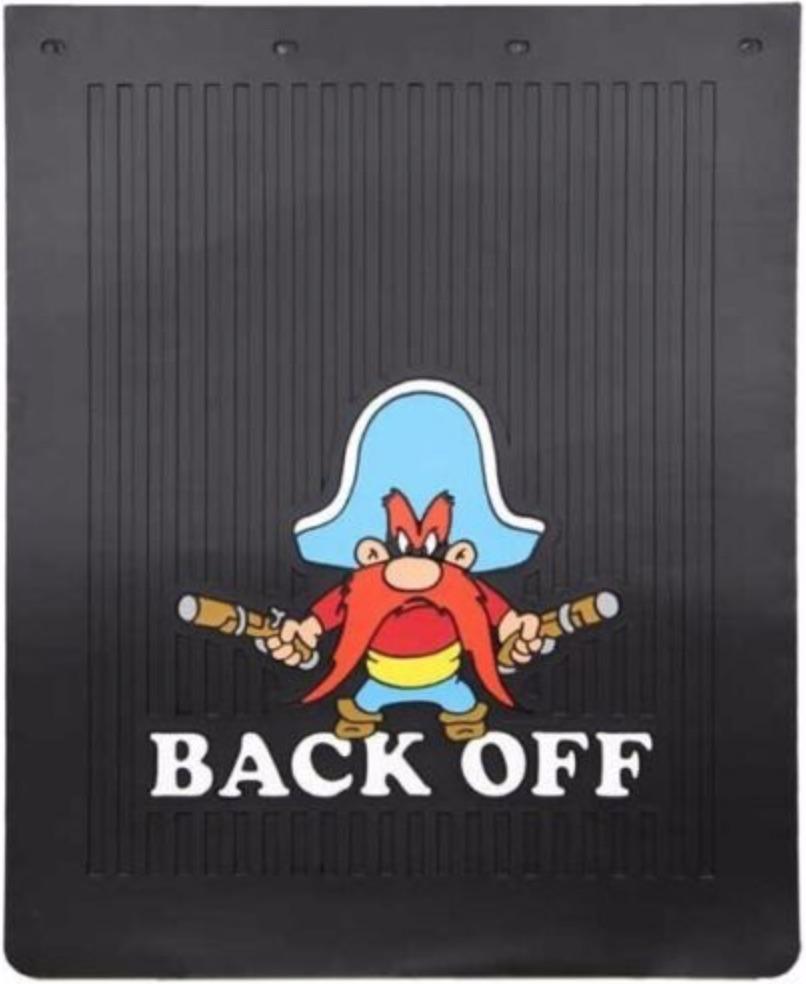
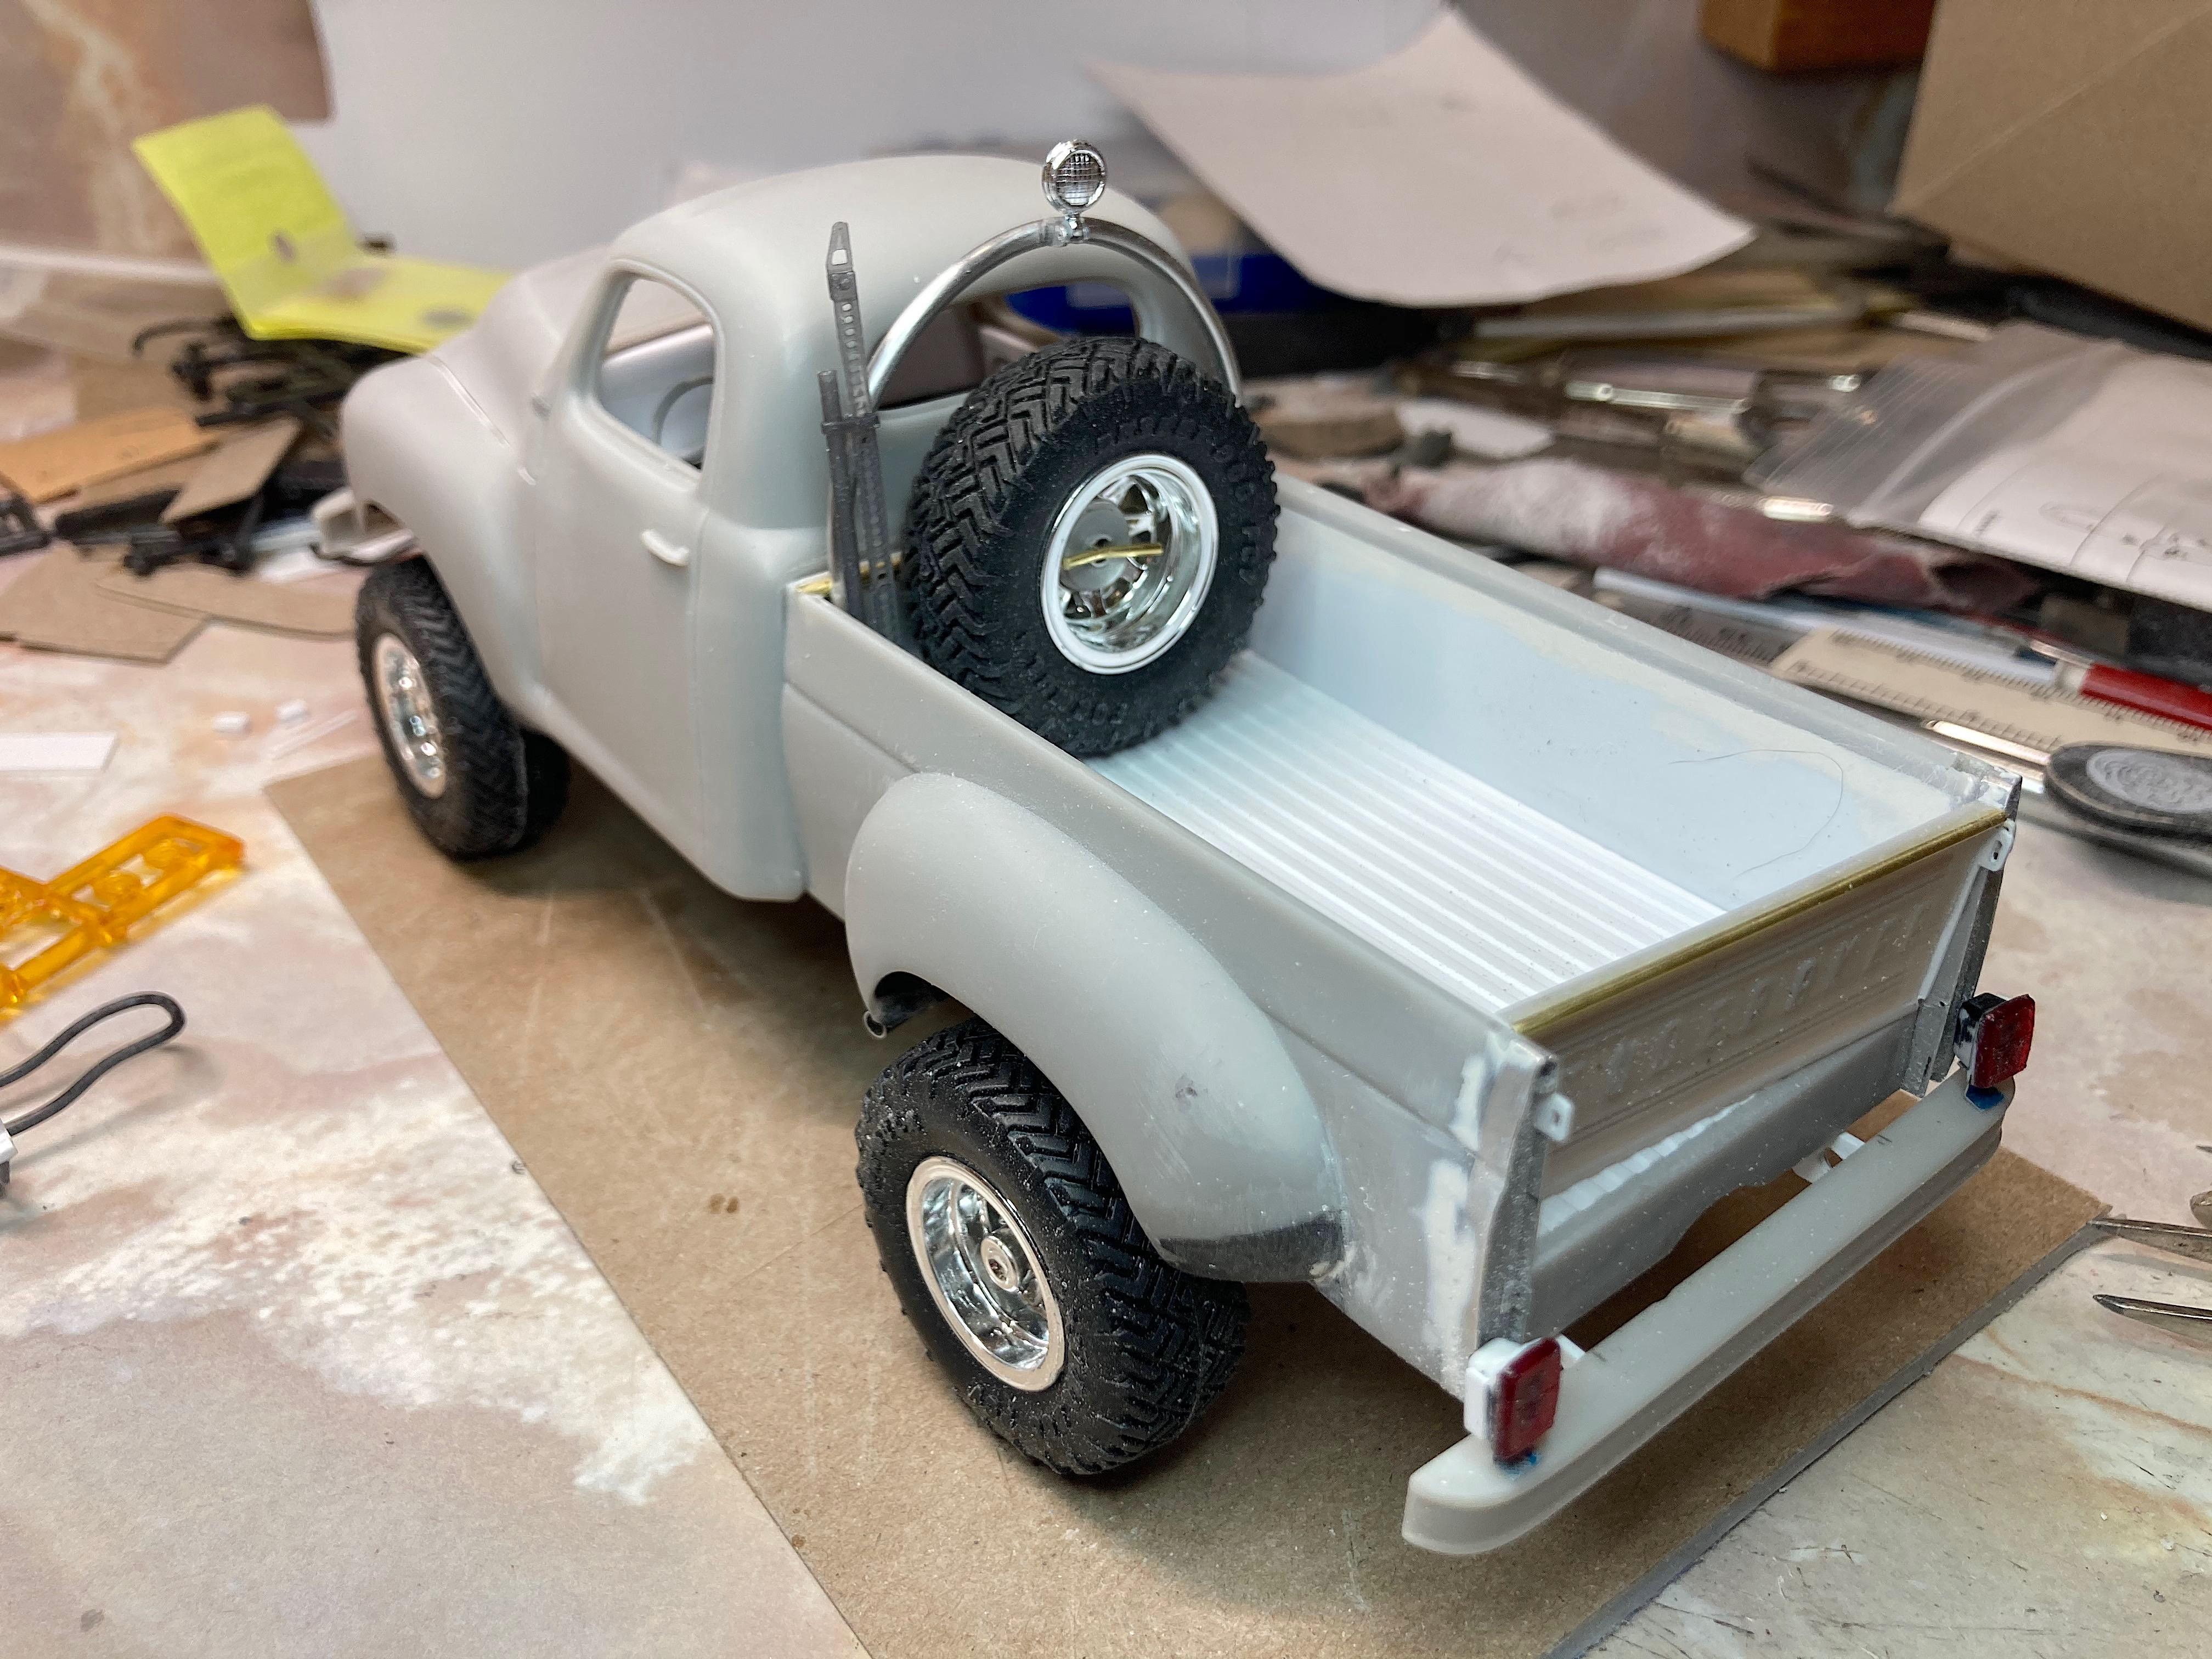
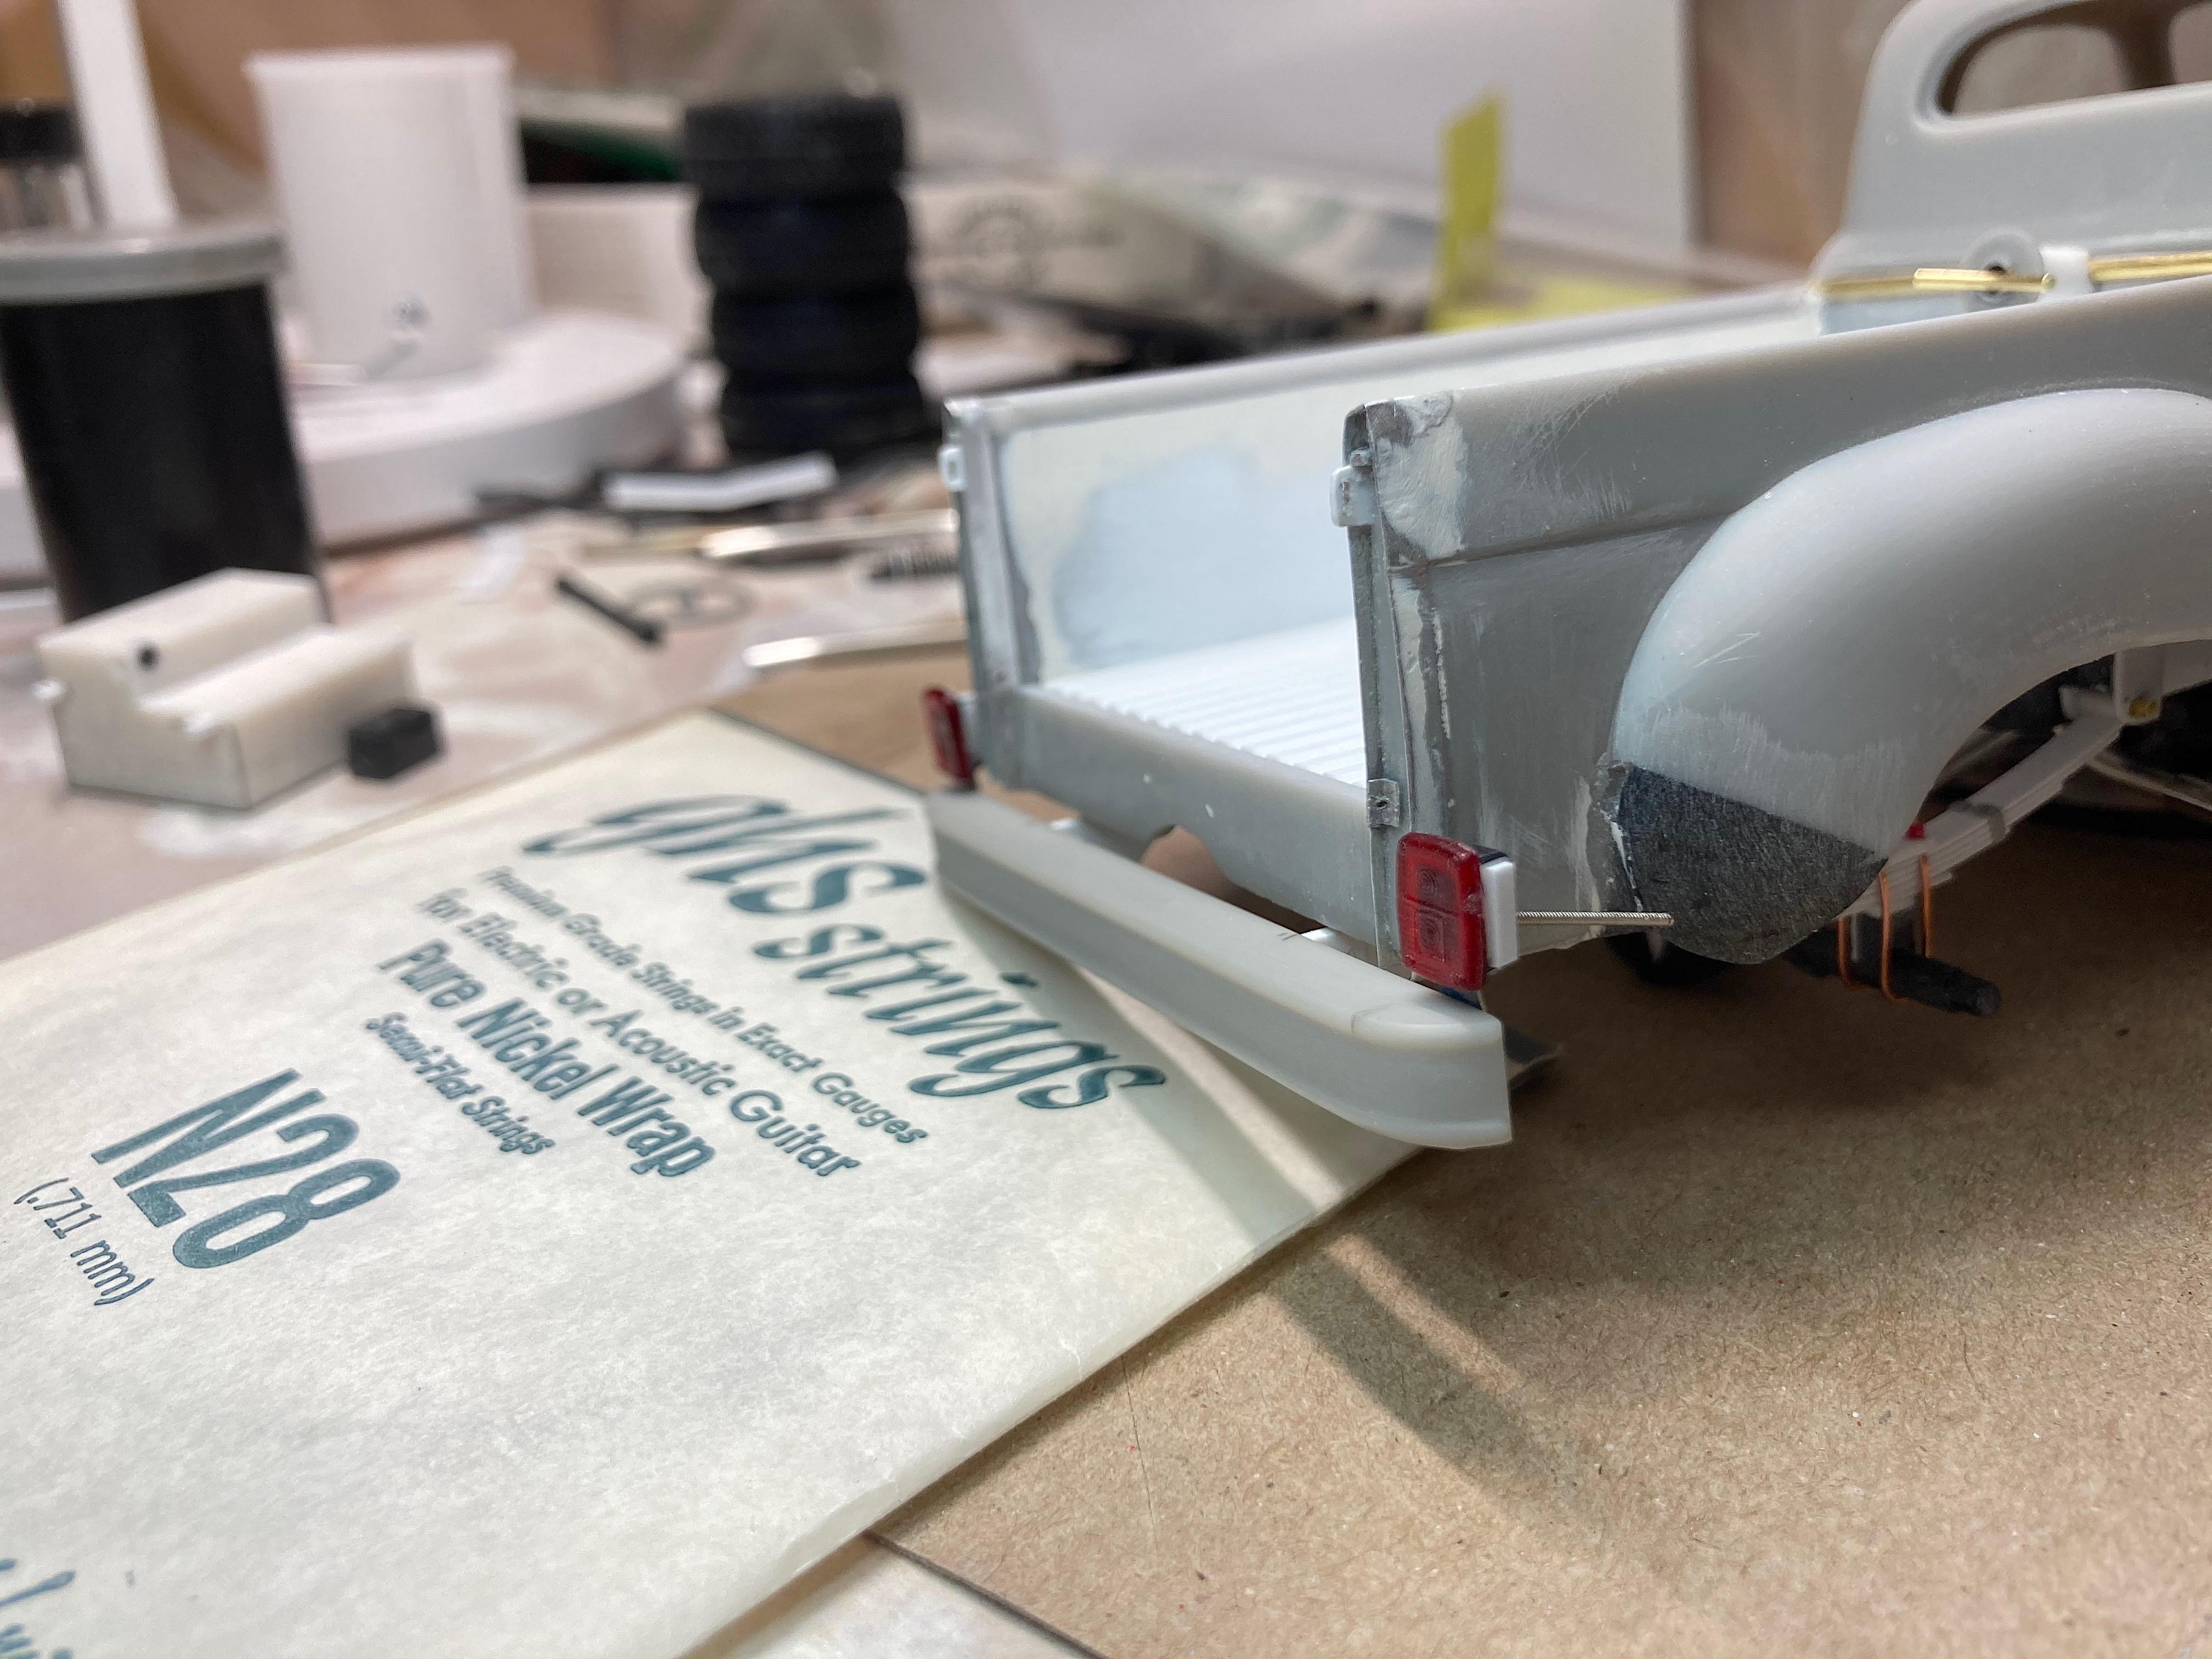
Gee thanks. ? I picked this look just to annoy guys like you. ? Mudflaps, glued to black paper. Used Corian® to clamp with. Made a wood block for the reduced kit box. After cutting with the crosscut saw, used the bench sander to get to size. Was very careful to not remove fingertips! ? Back to the mudflaps, after cutting to size, used the pen to blacken the edge. Used the calipers to clamp the sides of the box onto the block. When I was driving today, saw a pickup with gloves on the back bumper, which reminded me of seeing a truck with a wrench welded to the bumper, in an attempt to discourage tailgaters. ? I should blacken around the weld. Got a sheet of brown paper to make belts. First thing I did was wet the paper and roll the knurled knife handle over it to get a texture, it doesn't really show up. Detail Master photo-etch hardware, the slots are super small, had to shave the paper ends, and apply superglue, then roll the knife handle over it, to get thin enough to insert. Used superglue to attach belts to the p-e, Testors canopy glue to stick on the seat. Painted red on the Fireball Modelworks jack mount parts, figured it would be easier to see those knobs when using it, and I wanted some color. Even though the mounts are intended for roll bars, I located on the bed edge instead. Tailgate chains are done, used 2 sizes of solder wire. Forgot to mention that I got the gas cap detail done yesterday. I can have the tailgate up, but the hooks don't really go in well, so I will display with it down, which will hide the wrench and license plate light. ? I'm impressed with the decal printing, very sharp, there are tags and screws; used Molotov pen on the edge of the paper (did not apply as a decal). Have most of the items on the checklist marked off! Just need to finish the plug wires, then the engine can be installed, leading to the driveshafts and exhaust. Next are the handles, and the the big tiny project, the hood ornament. If the CAD guy would take the time to create the parts I'm making, it would make the Studebaker a nicer model, this ornament could be done.
- 108 replies
-
- 2
-

-
- 1953
- studebaker
- (and 2 more)
-
profiled by unscrupulous
-
Thank you. I made a list, and then found more things to do, and the list is still intimidating. ?
-
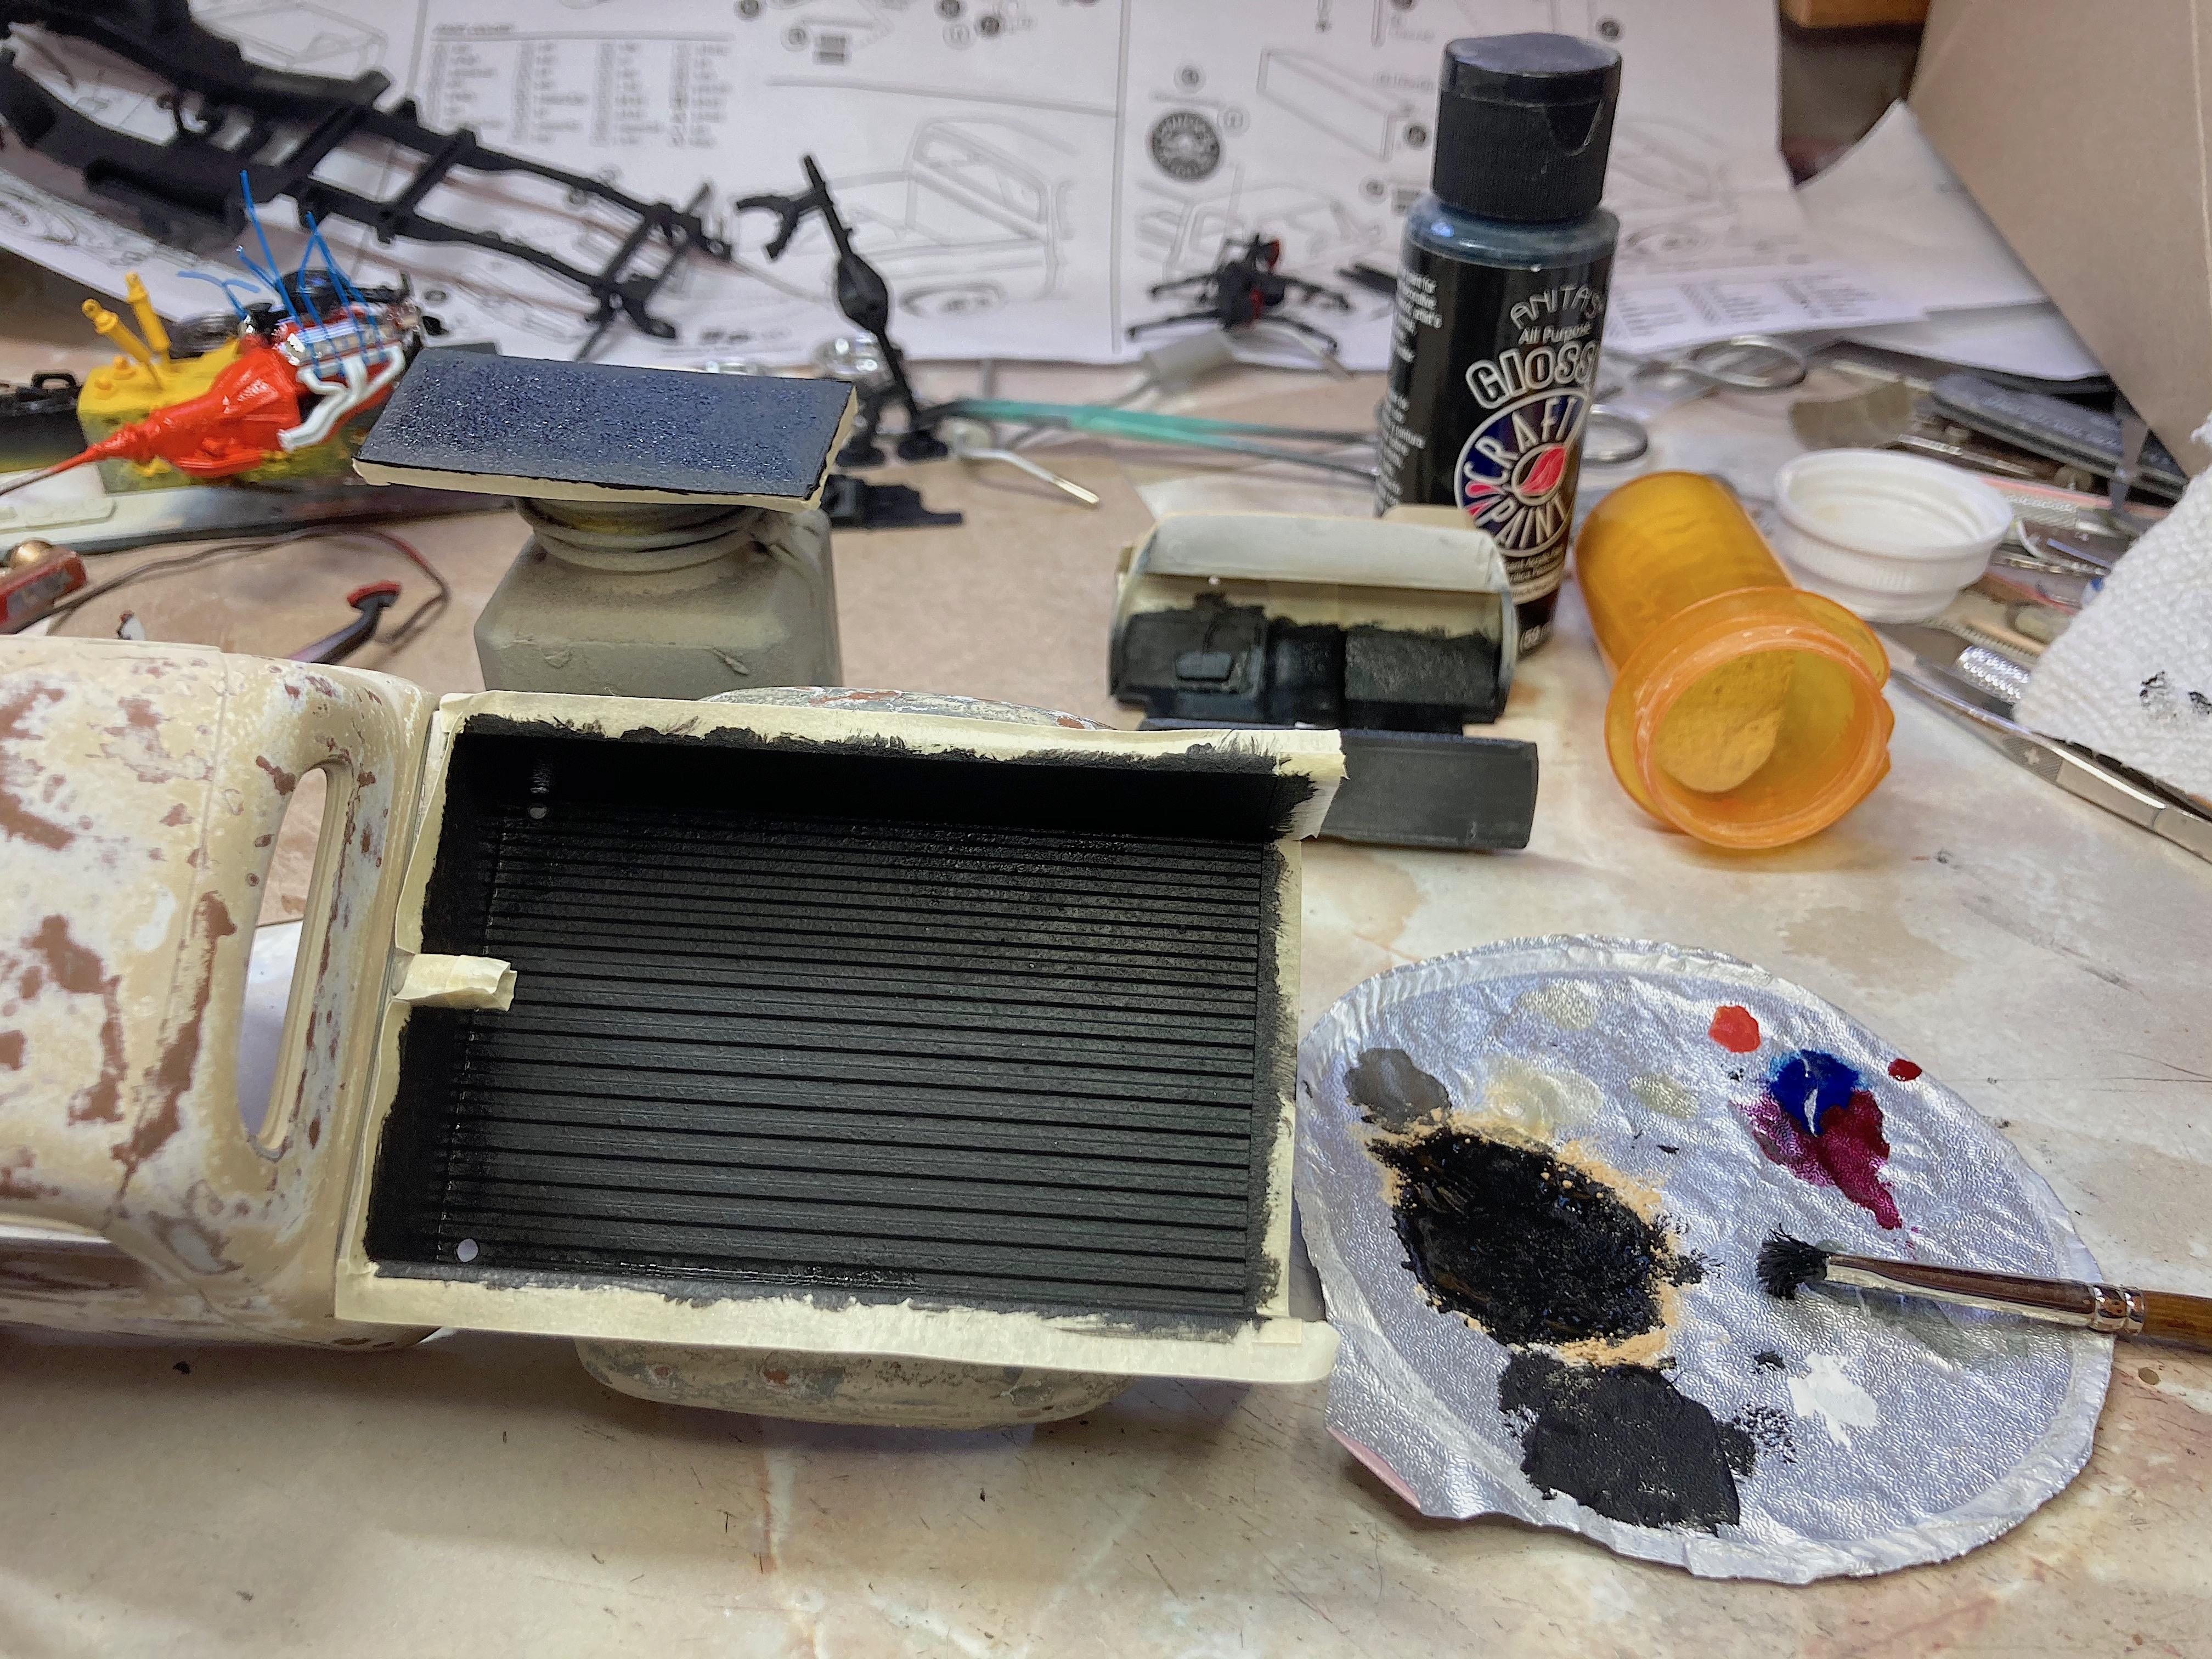
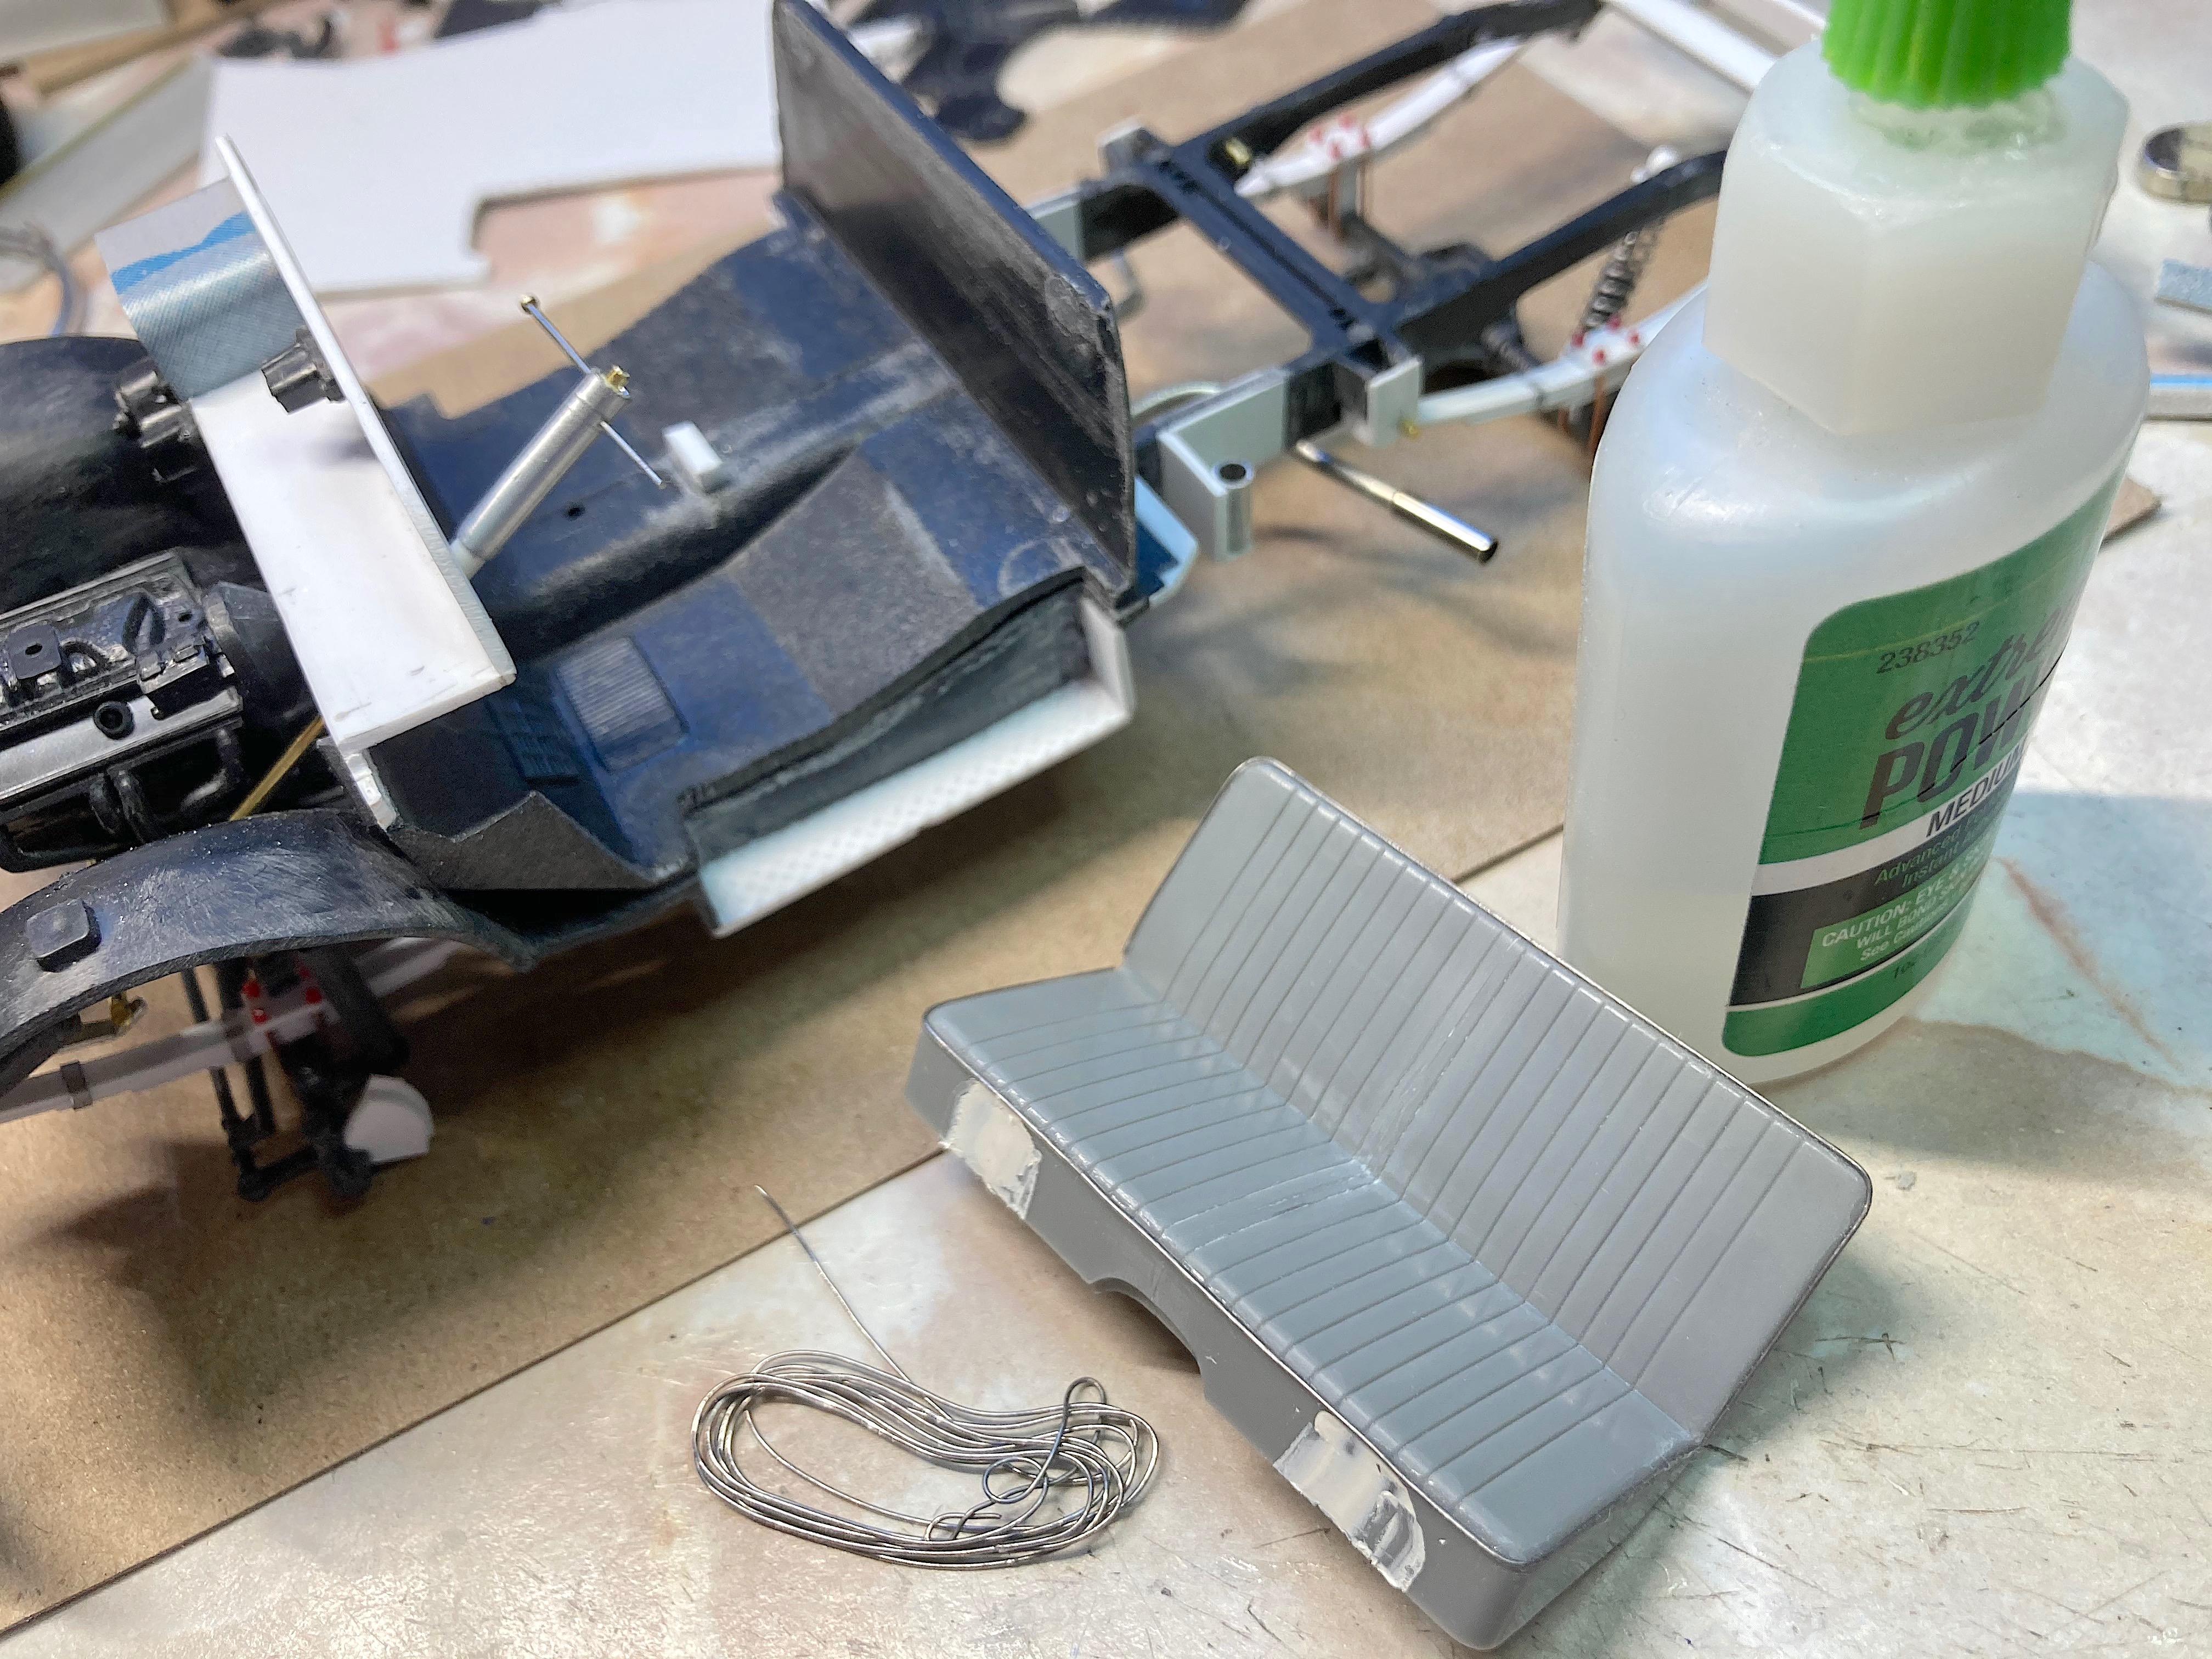
Thanks again for all the comments! I can hardly wait too. ? First thing this morning was to unveil the process. Before: Scrubbed the tires with Comet. Also scrubbed the body first with the toothbrush. Then wet-sanded with fresh sandpaper. After: Rhinoliner is done with acrylic artist paint, with tile grout mixed in. Used a short brush to stab at the paint to get the texture. Put in the real pickup cab to cure quickly, it's finally Spring here. Also did the floor, better than a rubber mat (or lousy rendition of carpet). Gauge decals applied. Made 2 switches, polished aluminum plate, black bezel is flash from the kit, sticker is the switch. Shirt pin knobs, some photo-etch screws for ignition, tiny lights. Solder wire for the high beam switch on the floor. Sprayed flat black again. Wheels got valve stems, used stretched black sprue. Then the halves got glued together. Sprayed Deft varnish on interior parts, lightly on the doors and dash, more over the gauges. I have done the leather seat process learned from my previous project. Started on chassis assembly. The suspension went together without glue except one shackle pin. Gas tank was glued on first, so it was easier to run the fuel line, forgot the procedure was to screw the back end of the chassis to the body, so will have to rely on glue. Have sanded the tires, this "rubber" works really nice, and painted in the treads. Kit decals, and Gofer bumper stickers applied. The shocks have punched aluminum with photo-etch screw heads. Looking more complete! Going to run heater hoses, had to do some research, found a video of a guy who was going to delete his heater to save weight. ? Also needed to know how to orient the parts I removed from the firewall, should have taken notes.
- 108 replies
-
- 2
-
-
- 1953
- studebaker
- (and 2 more)
-
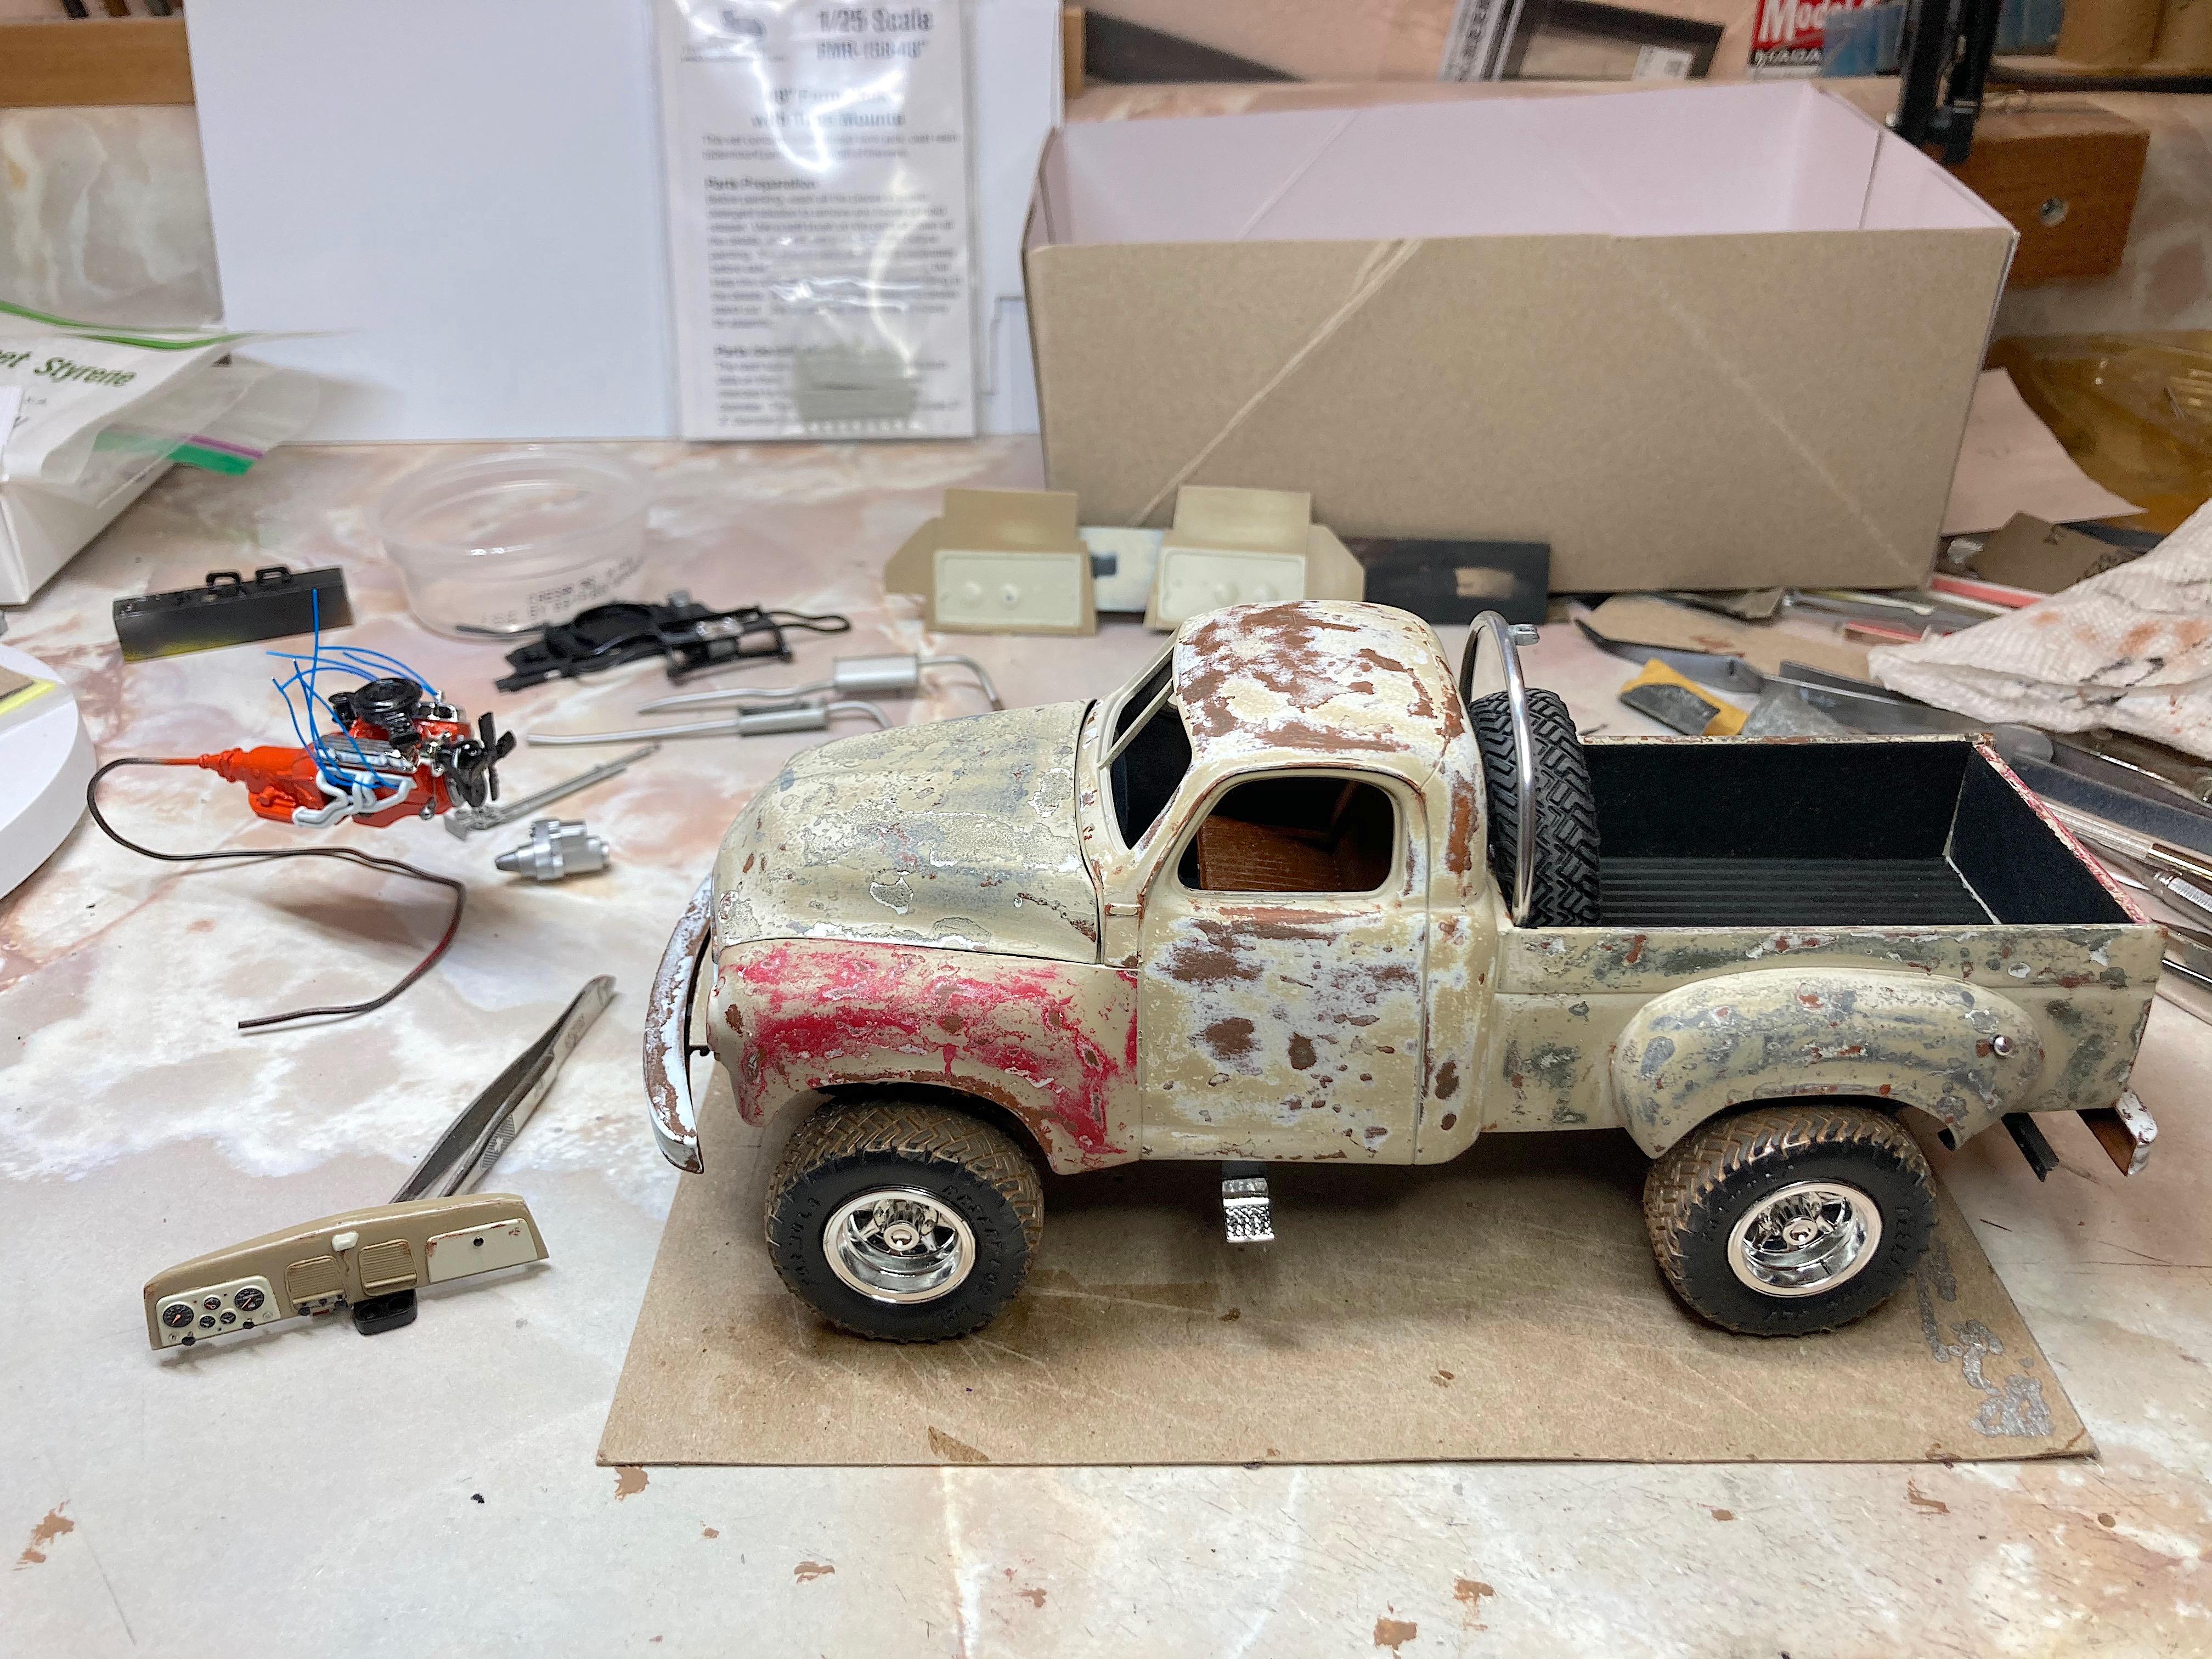
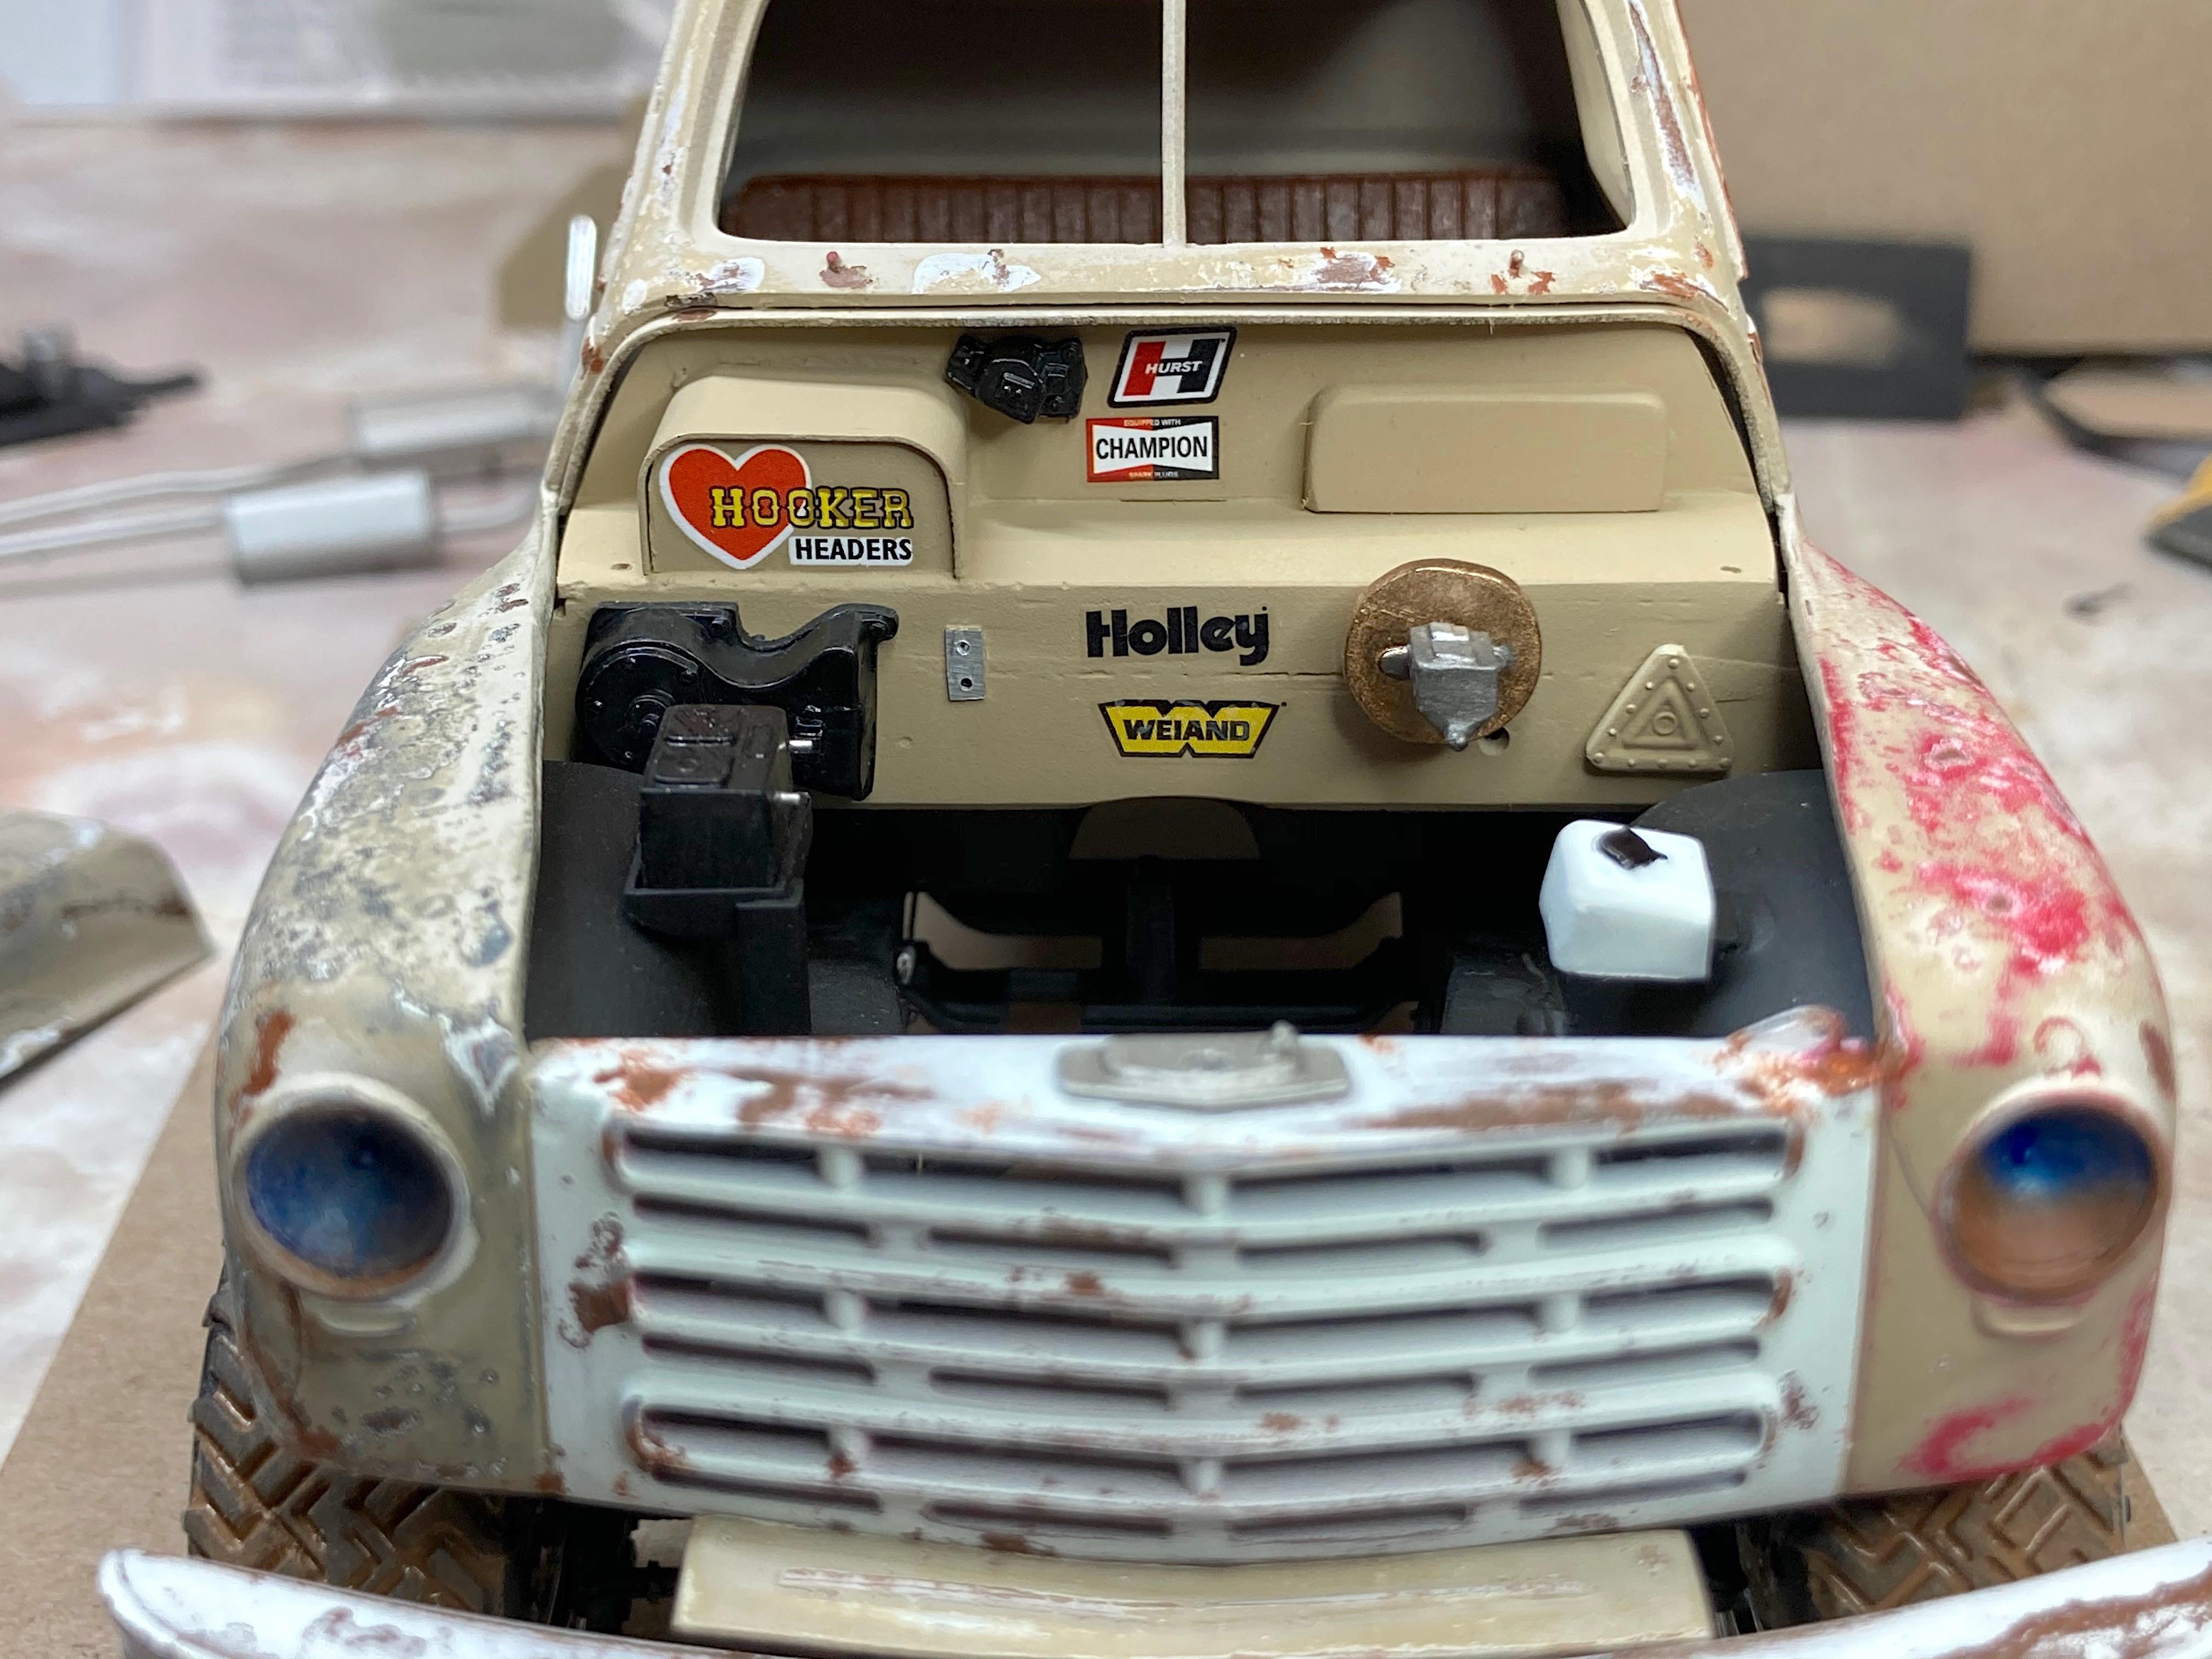
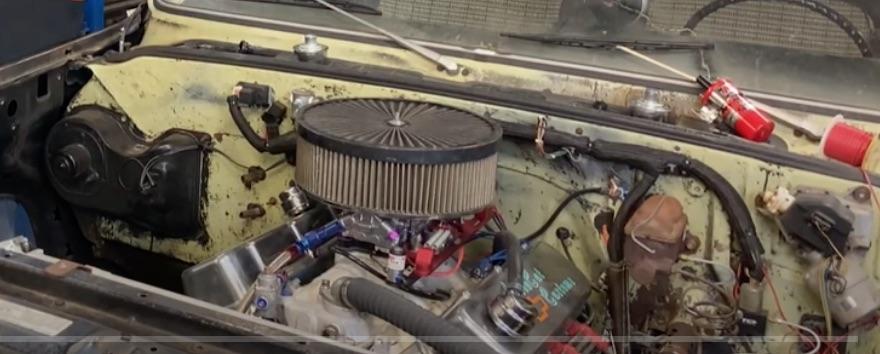
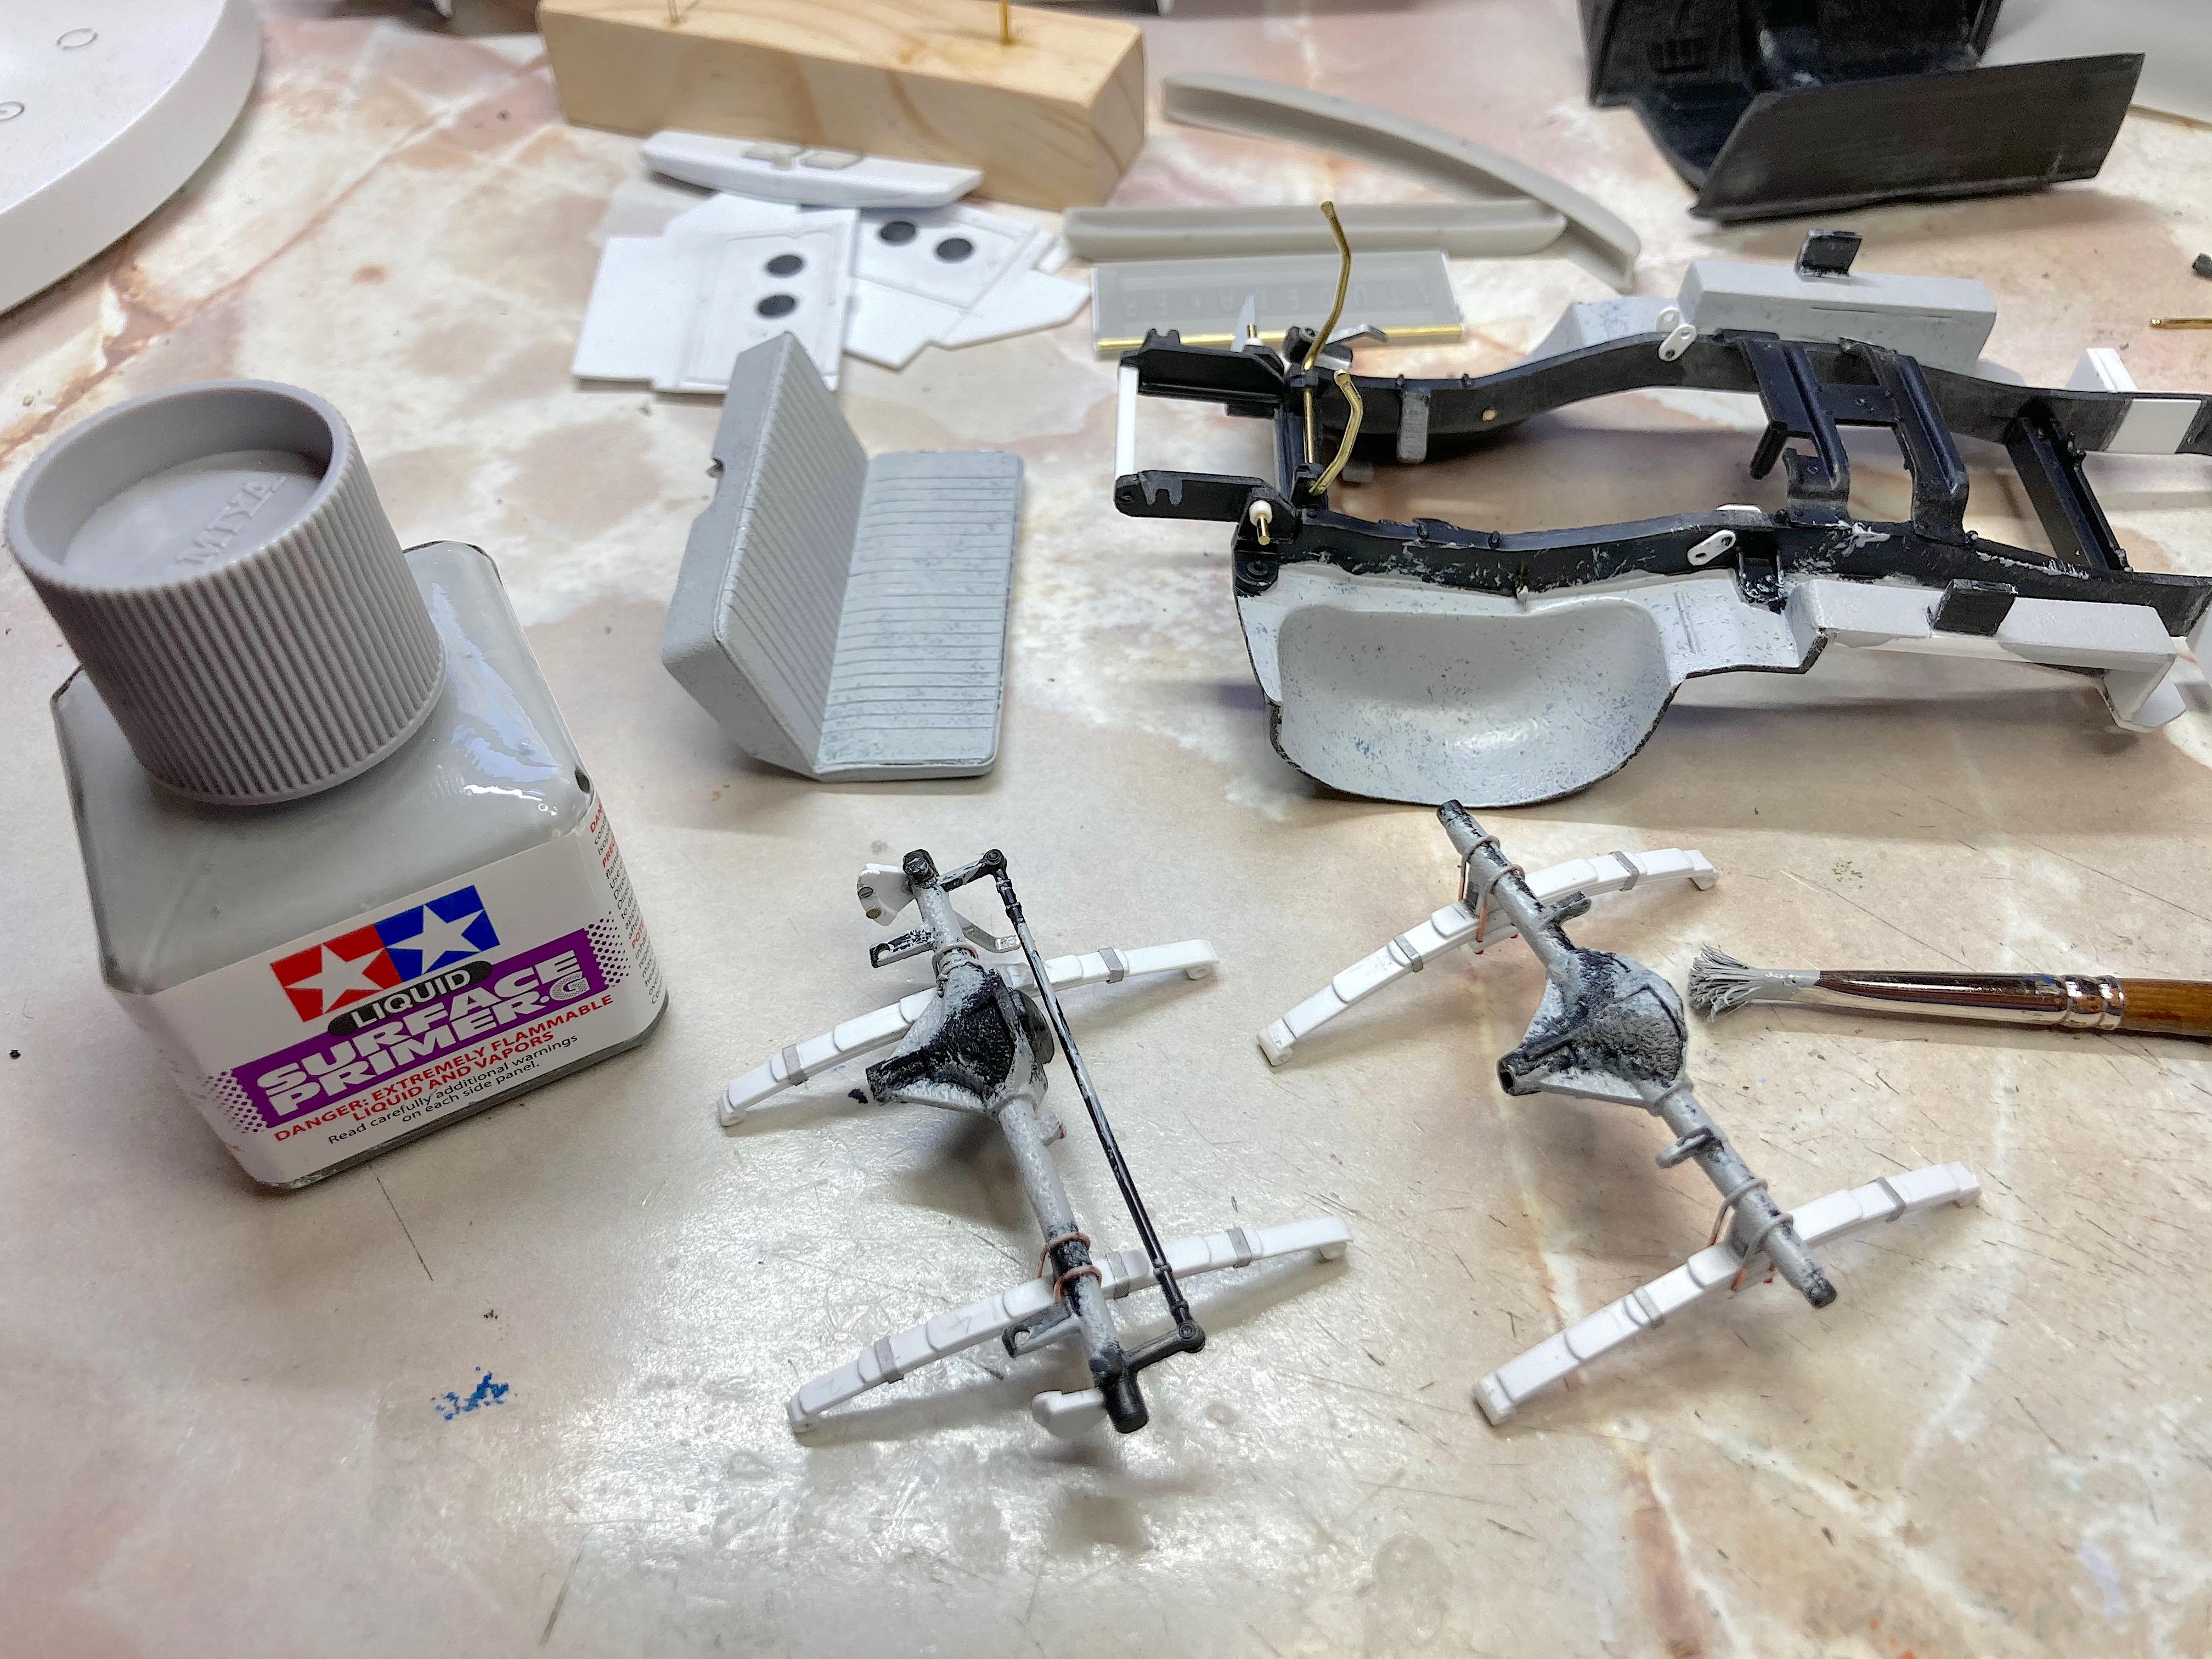
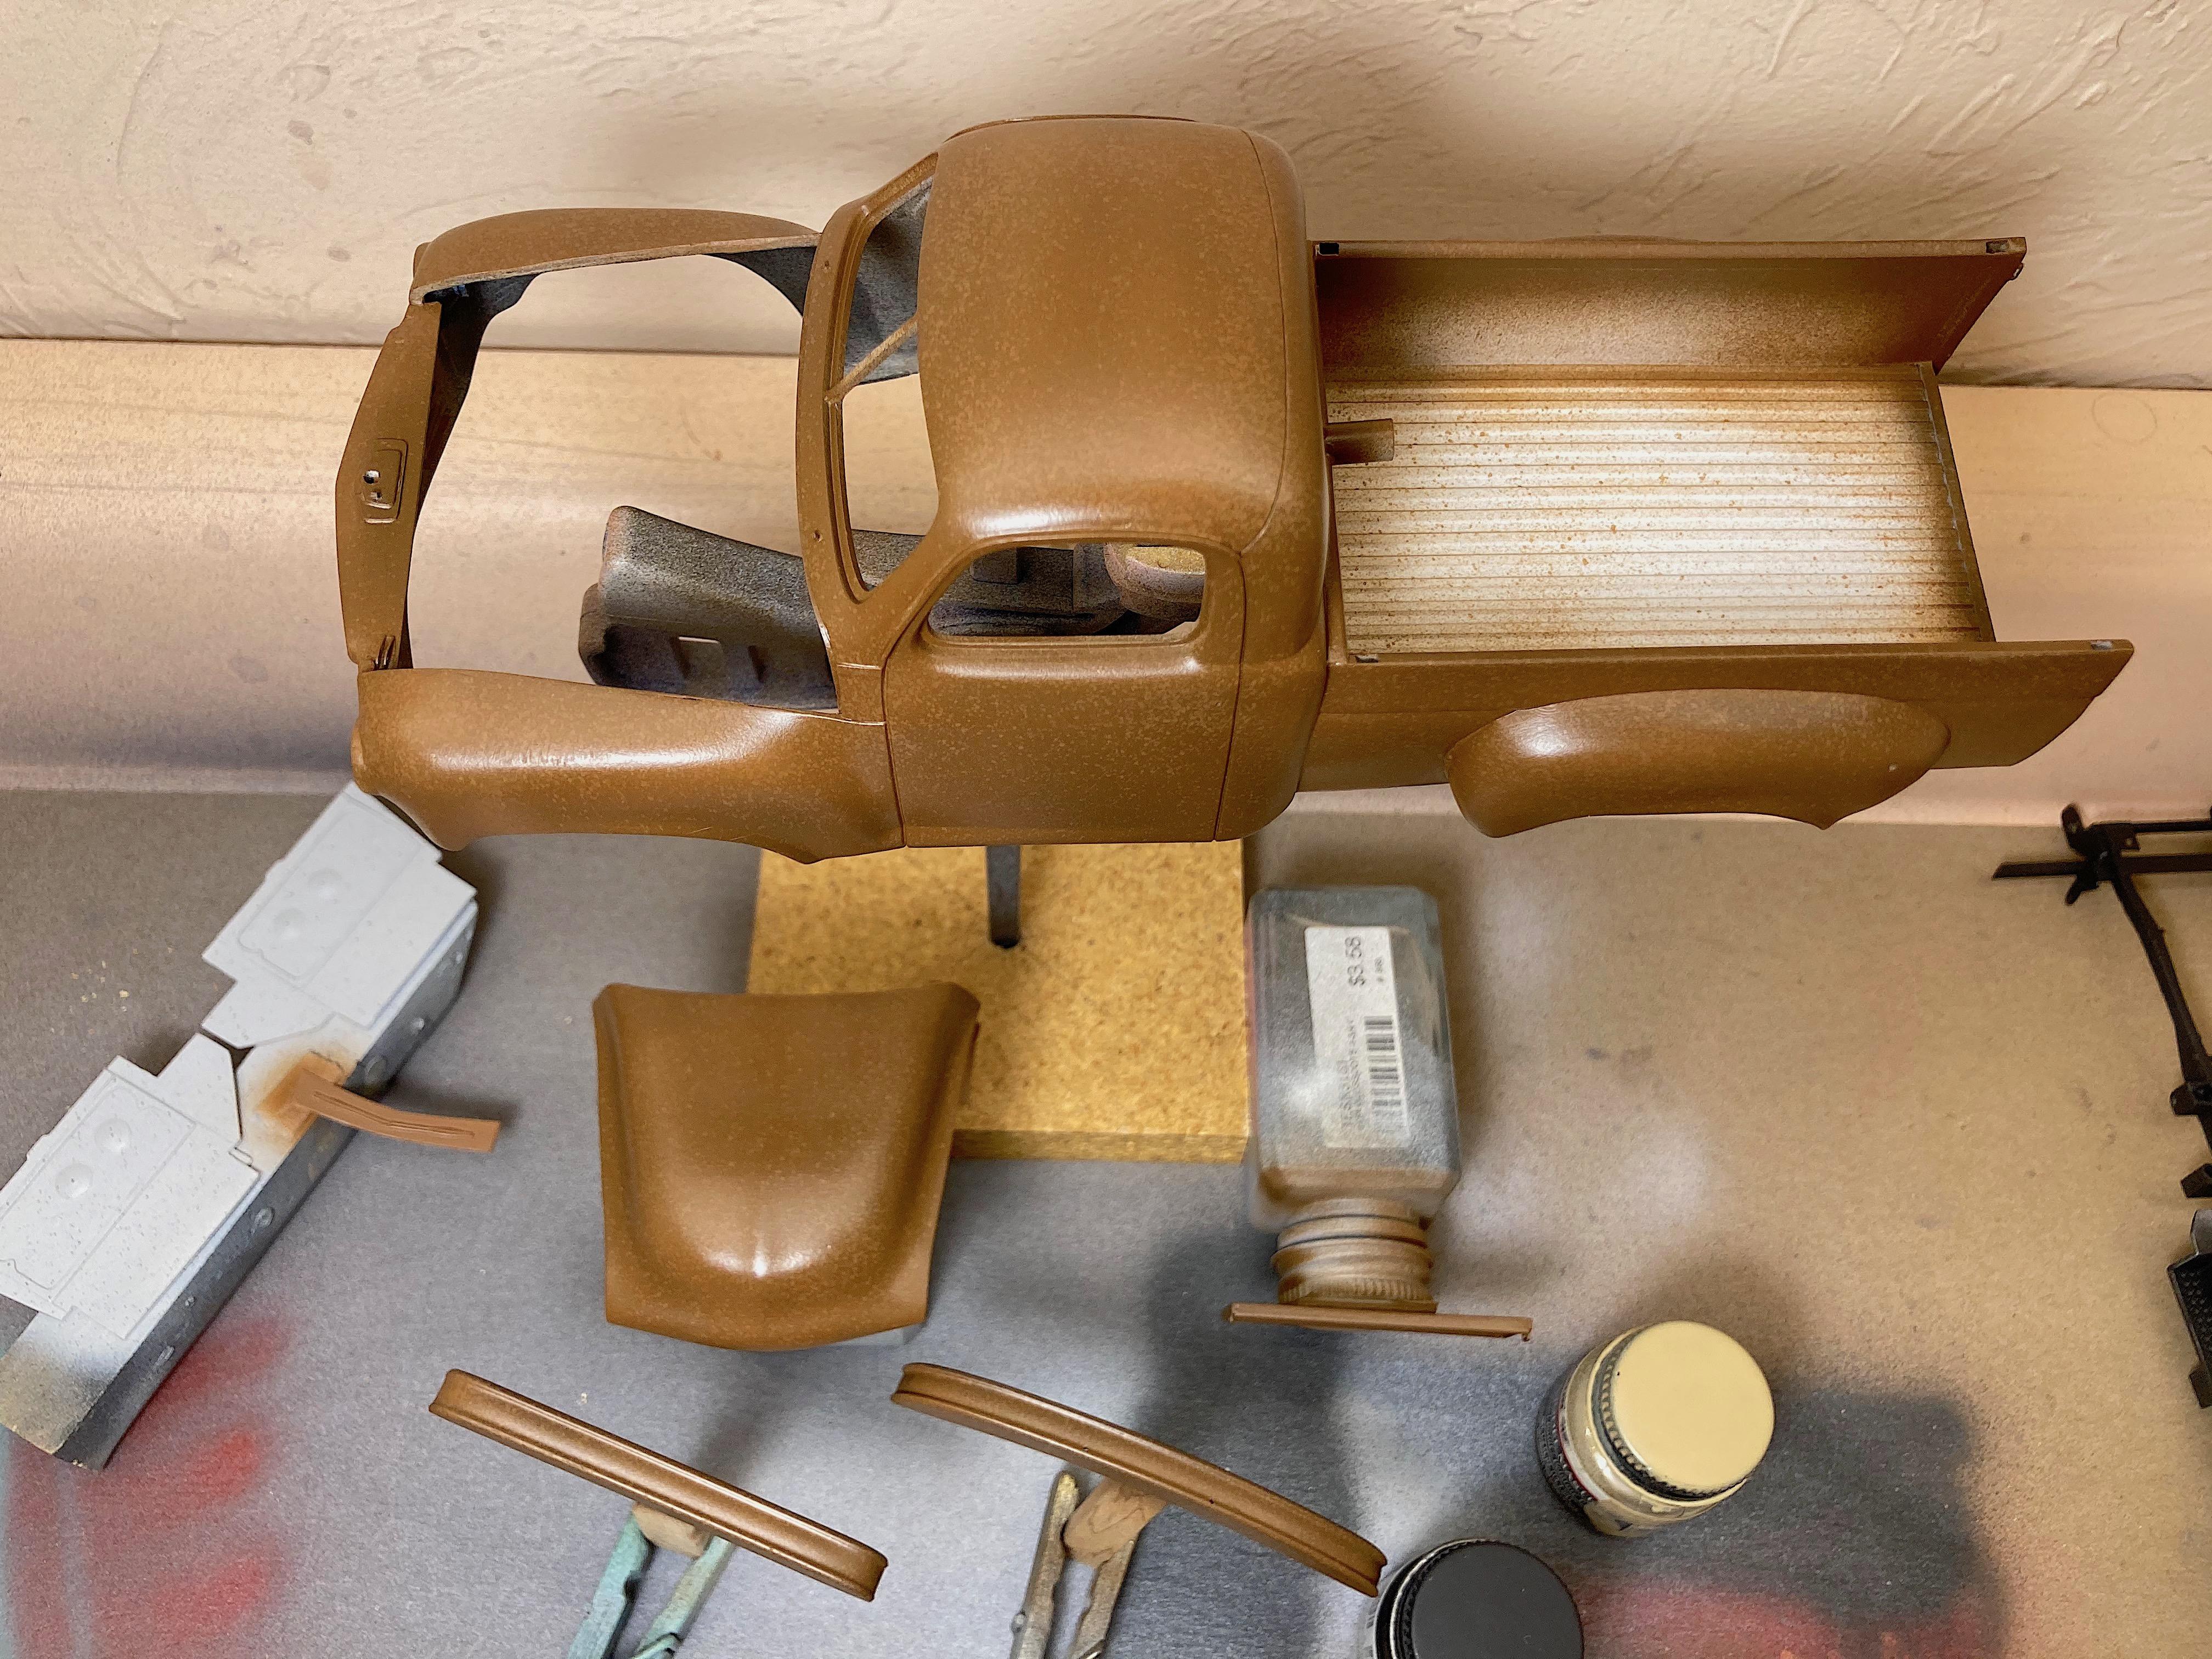
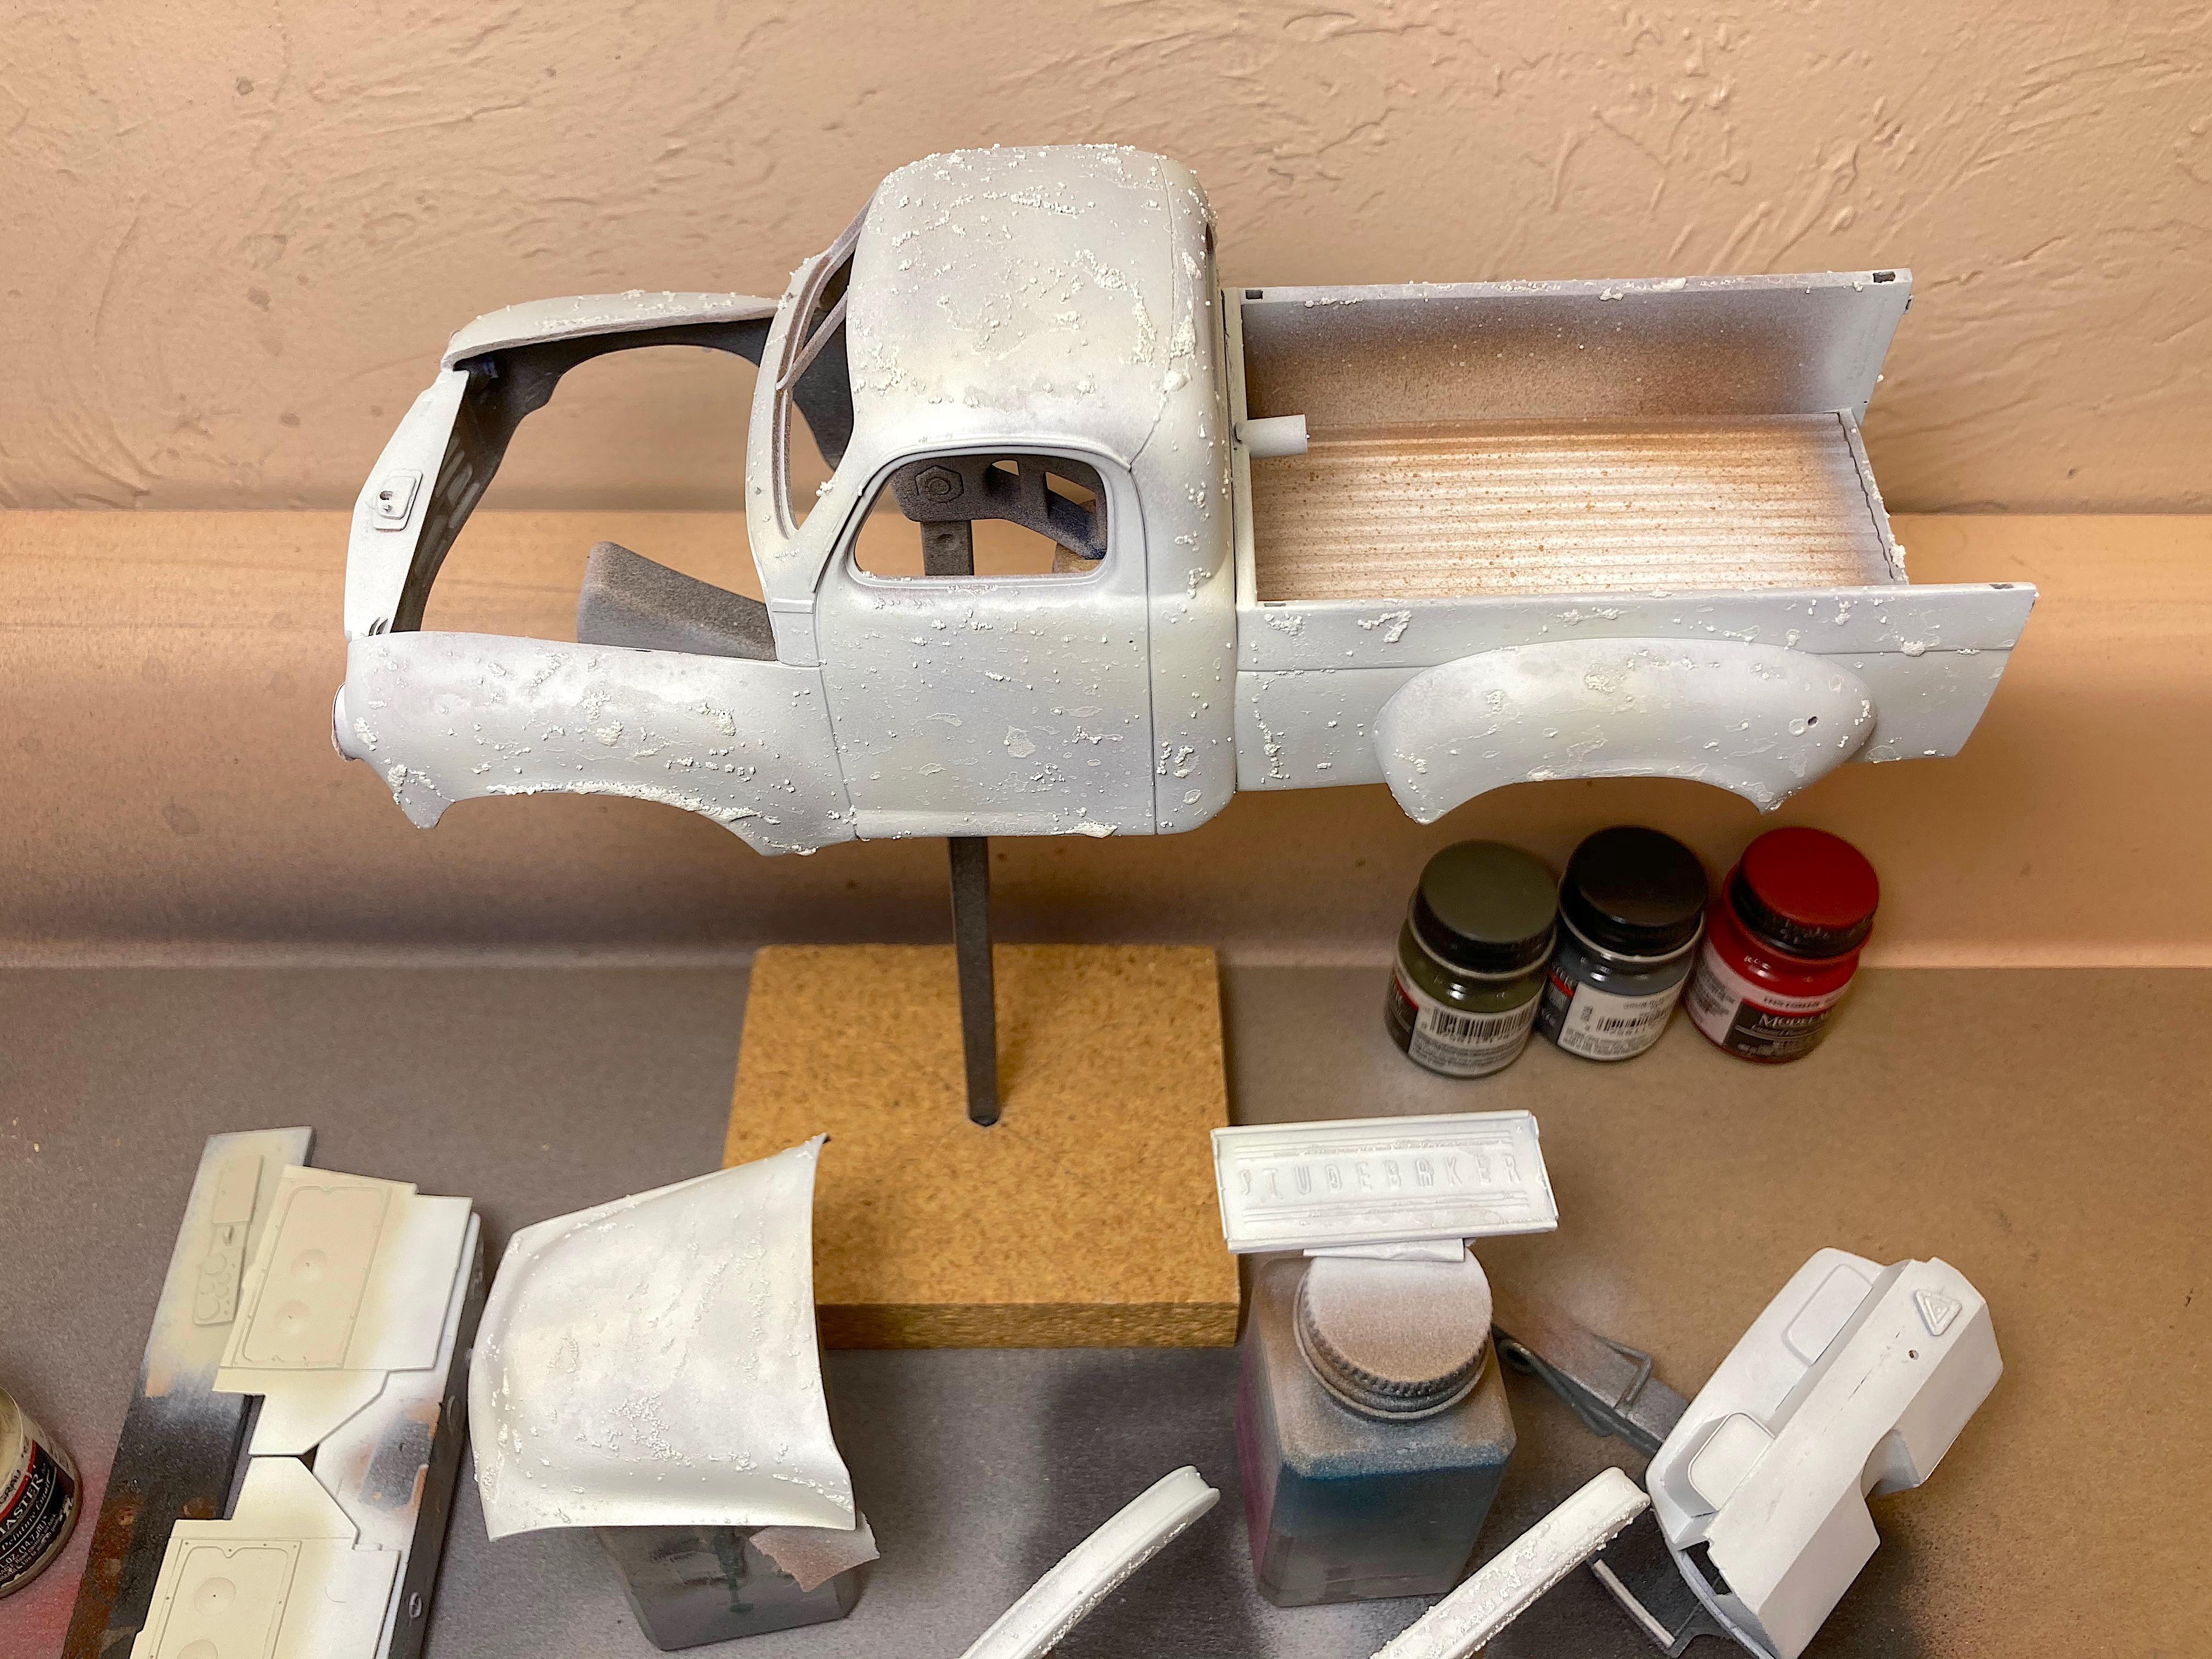
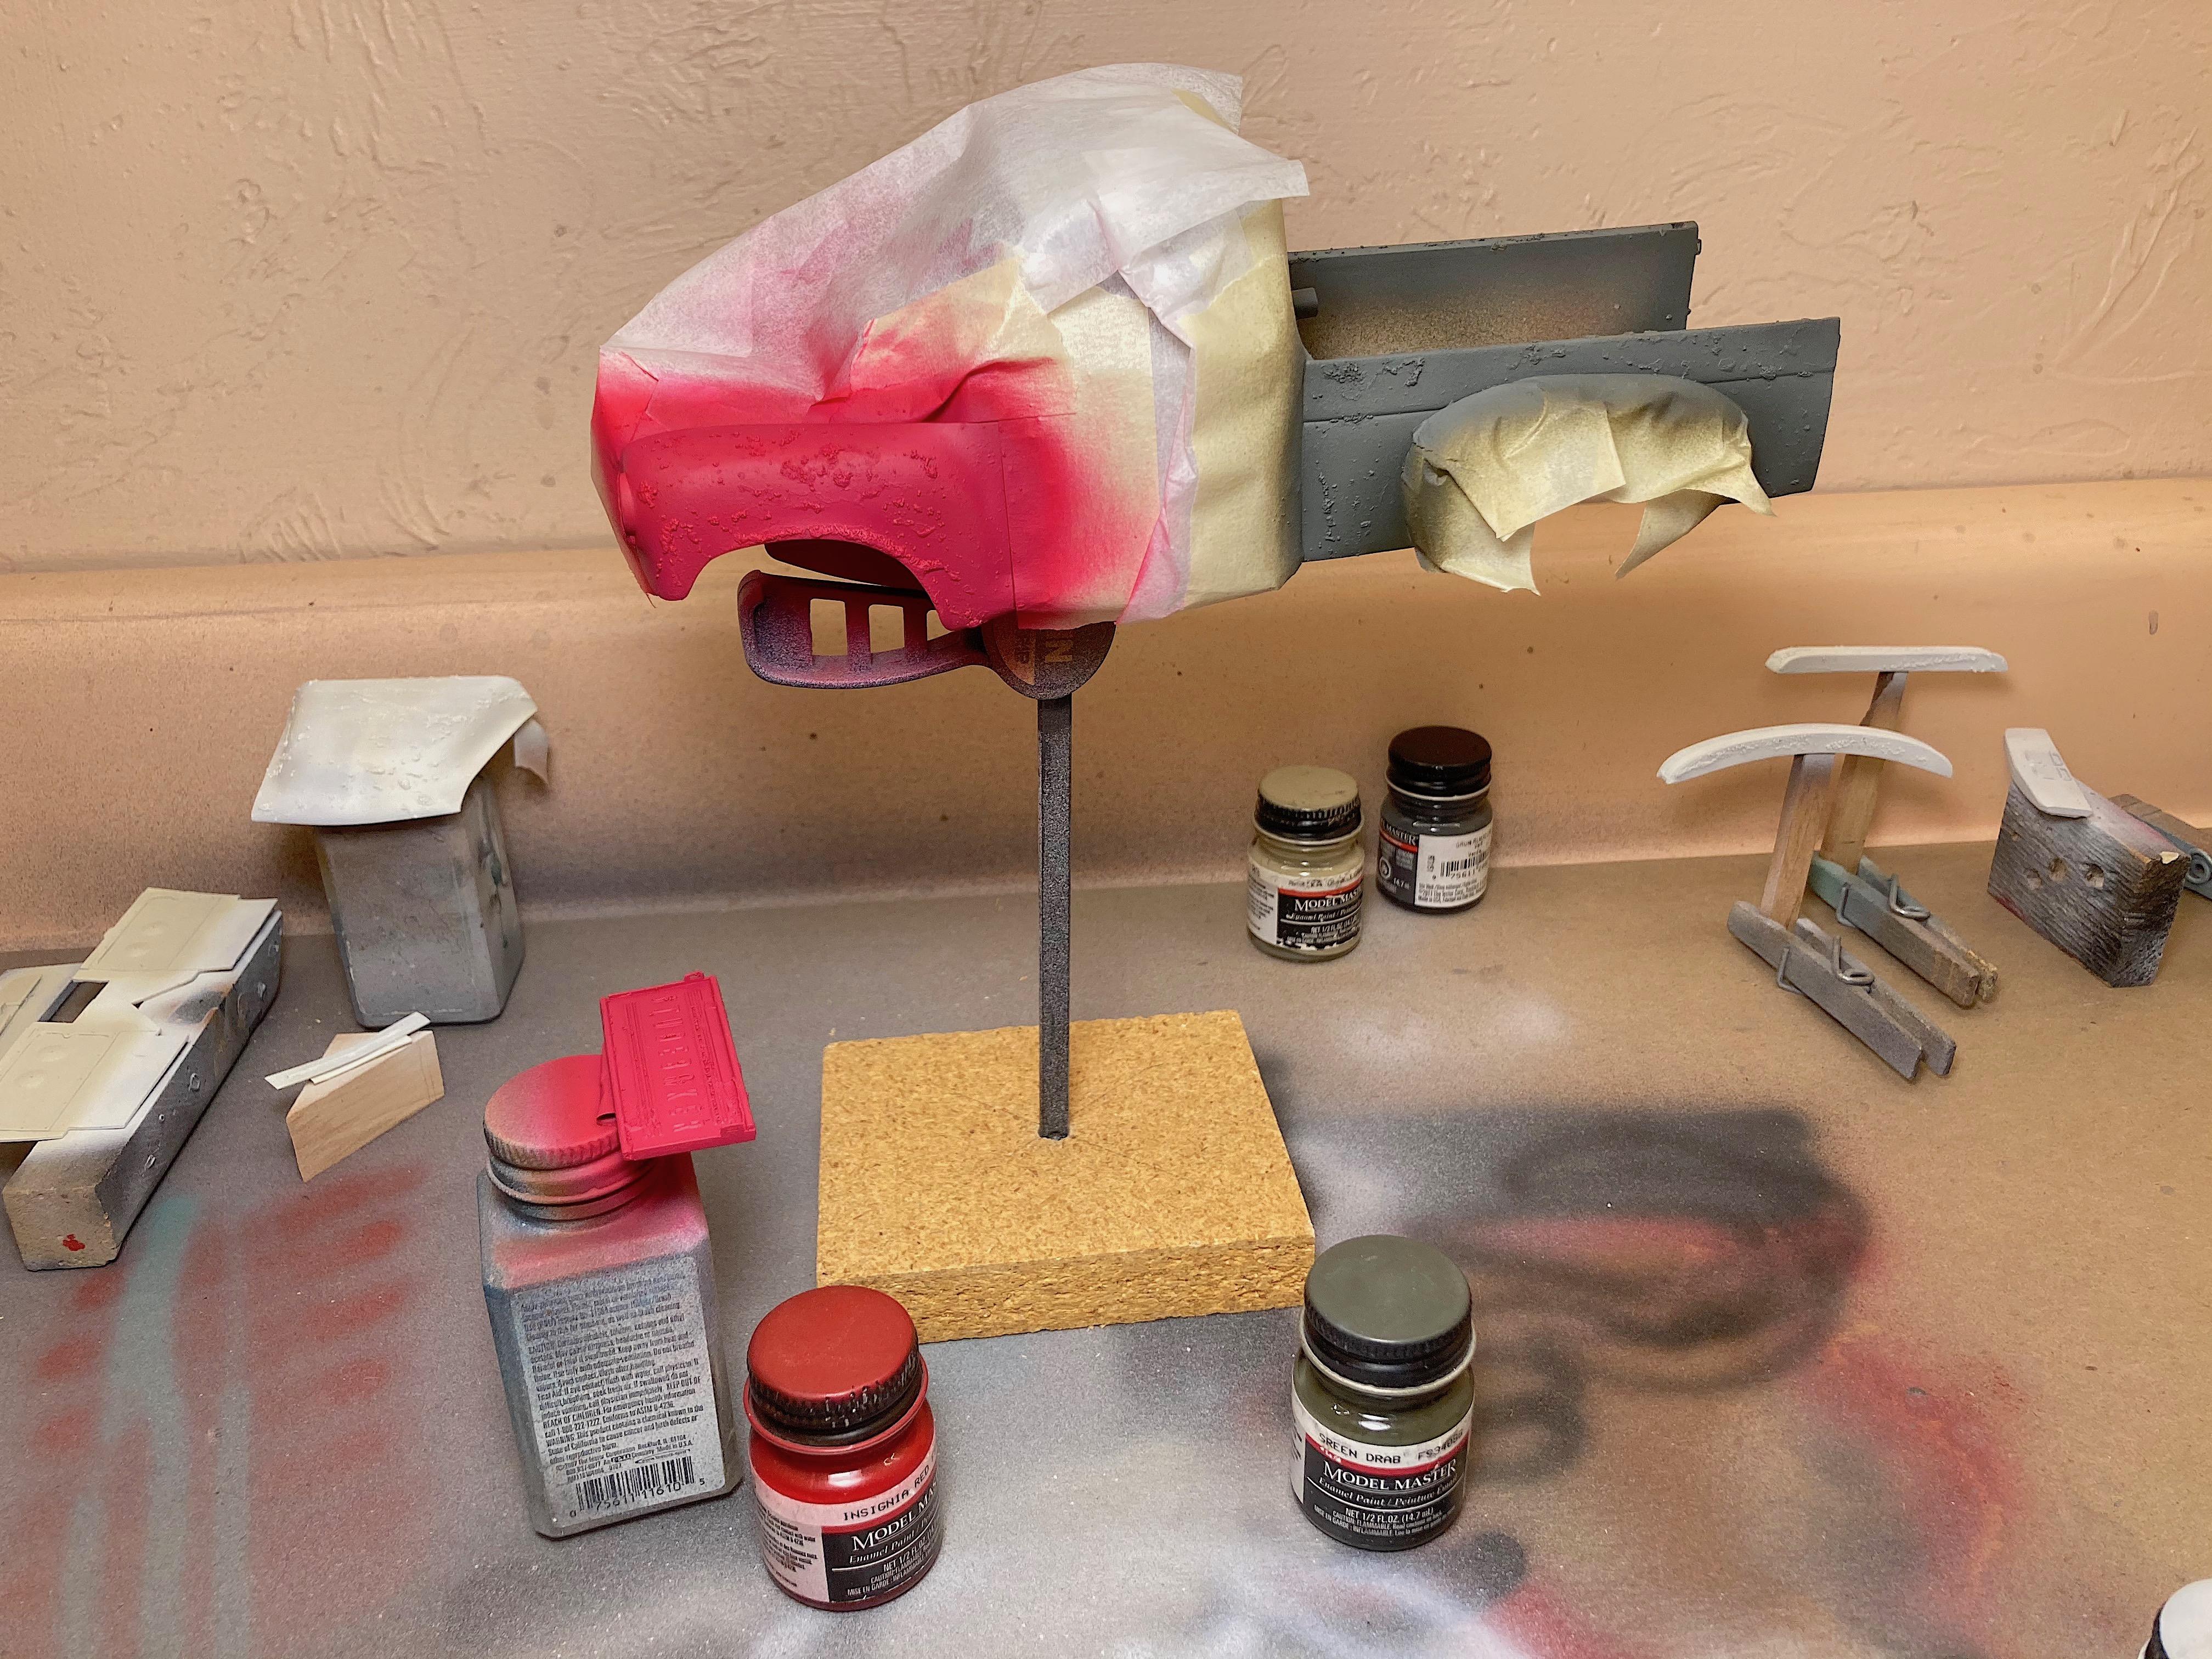
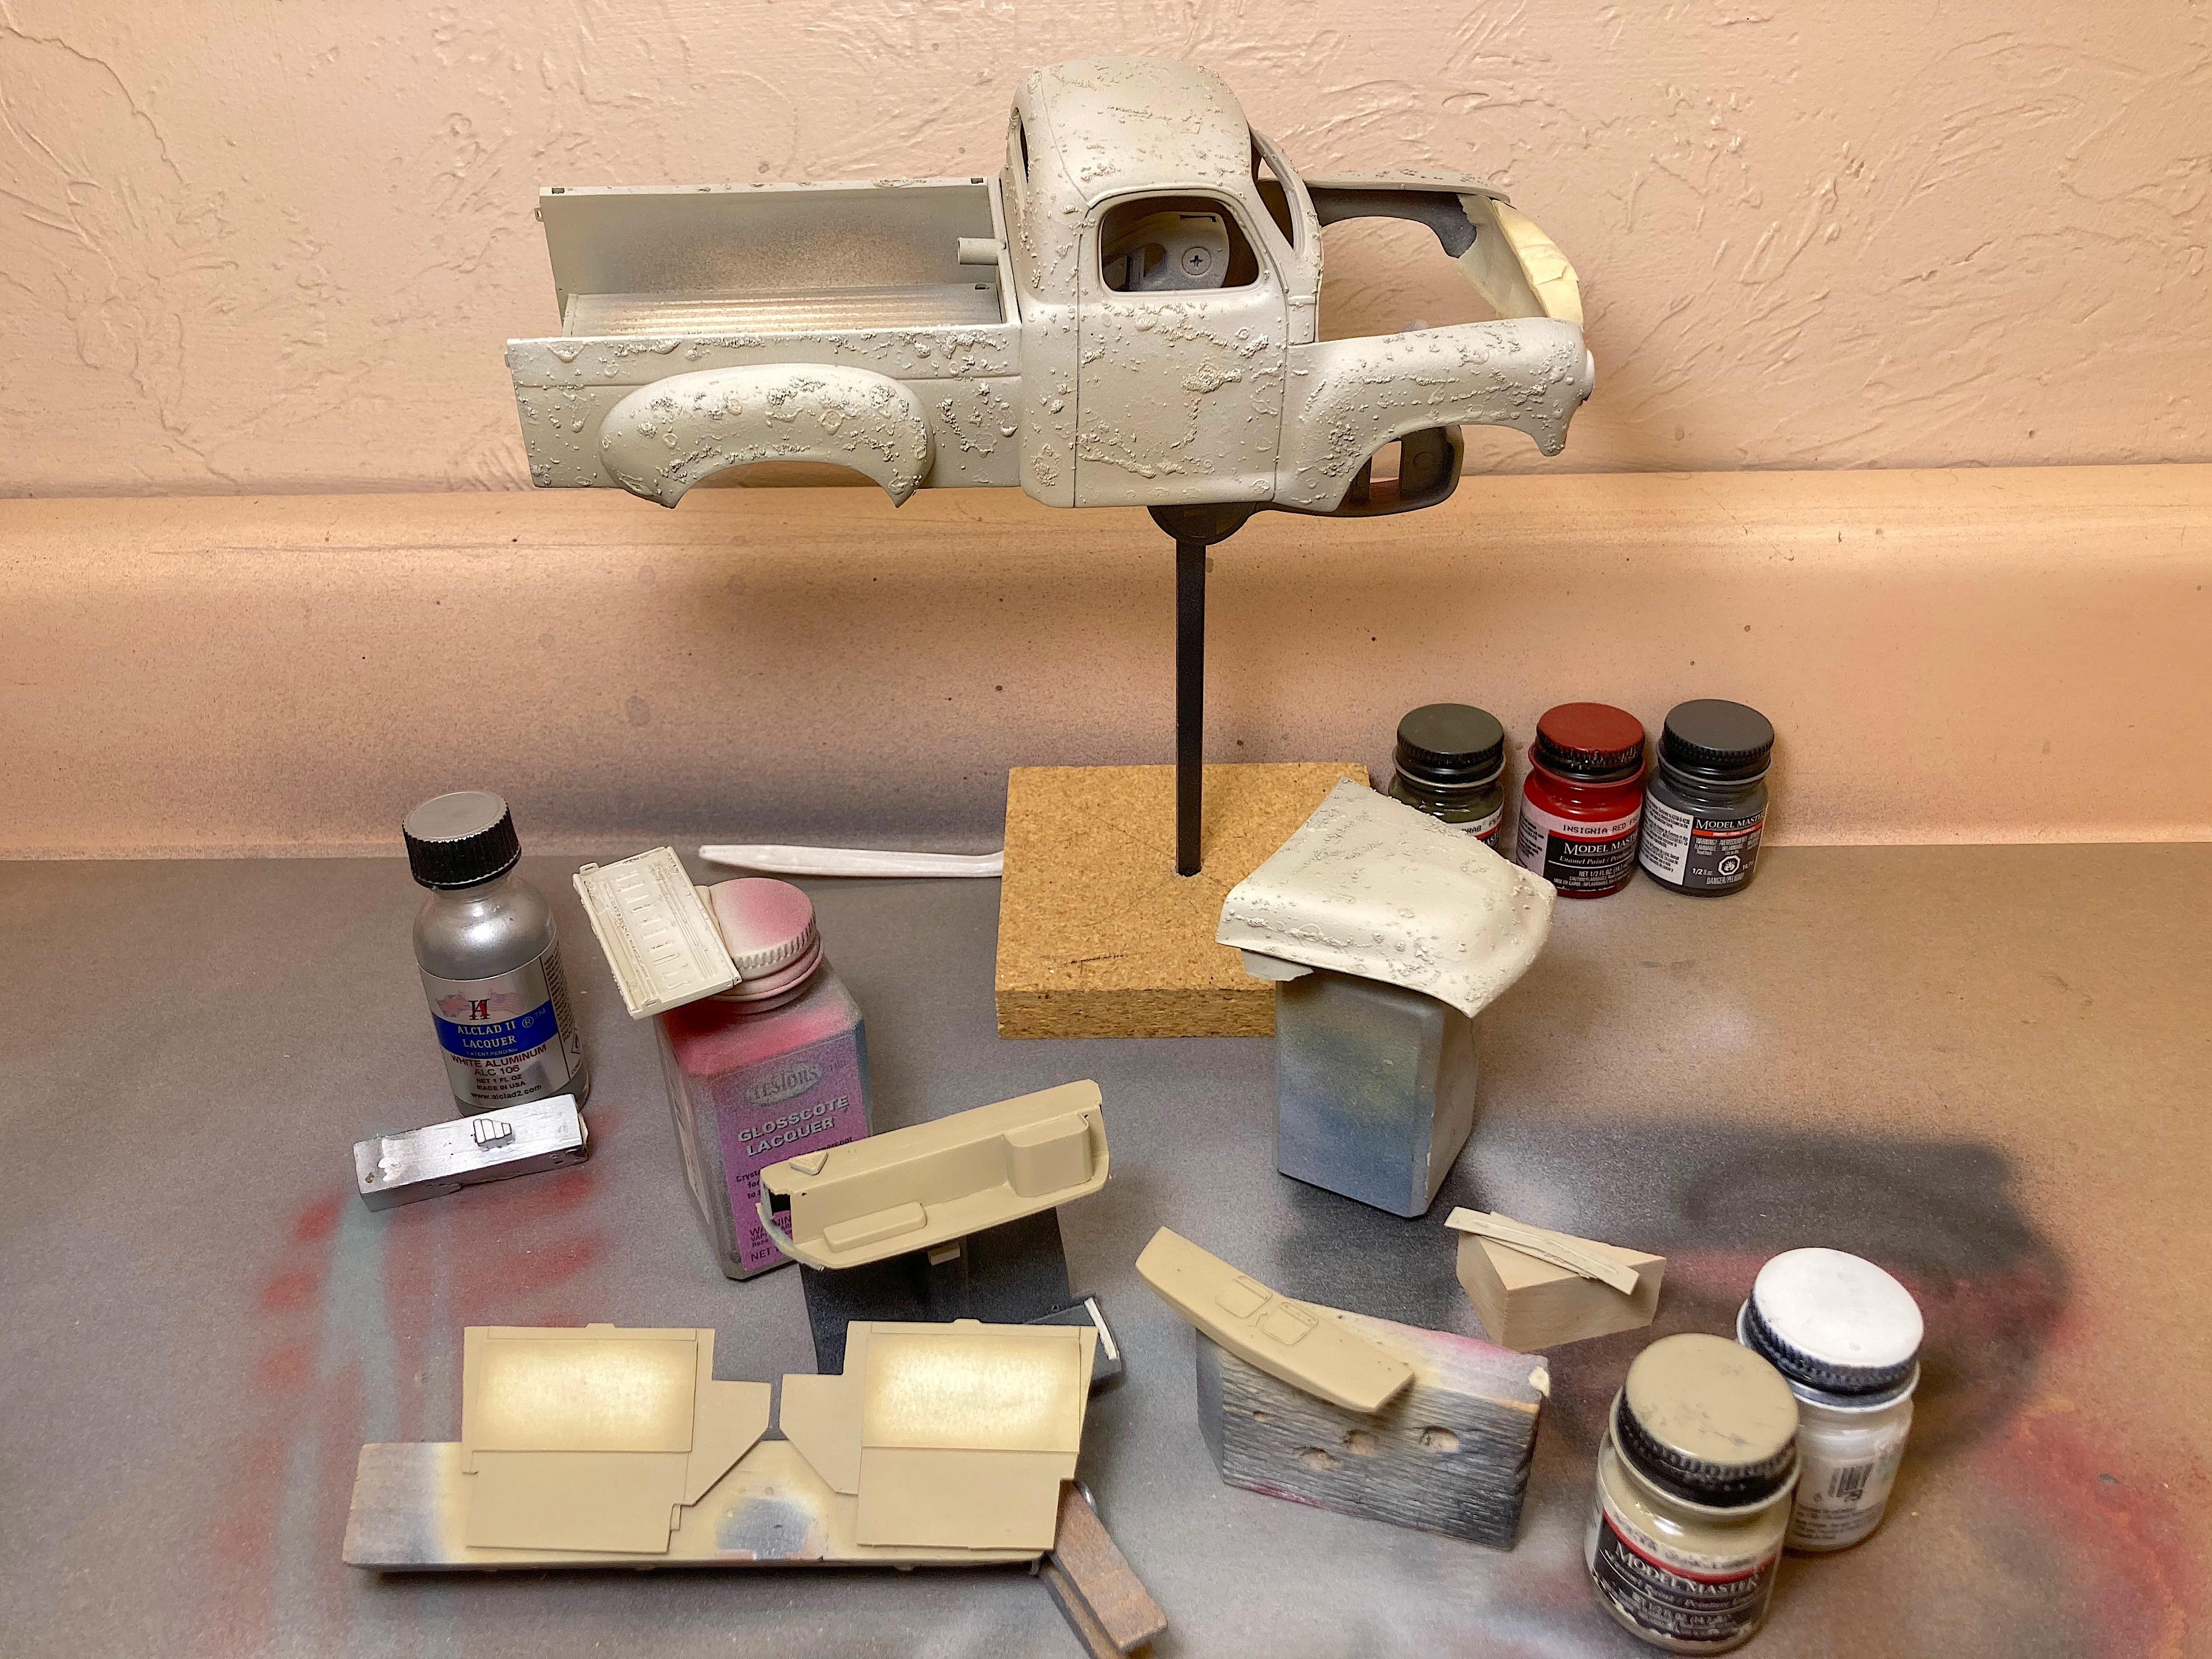
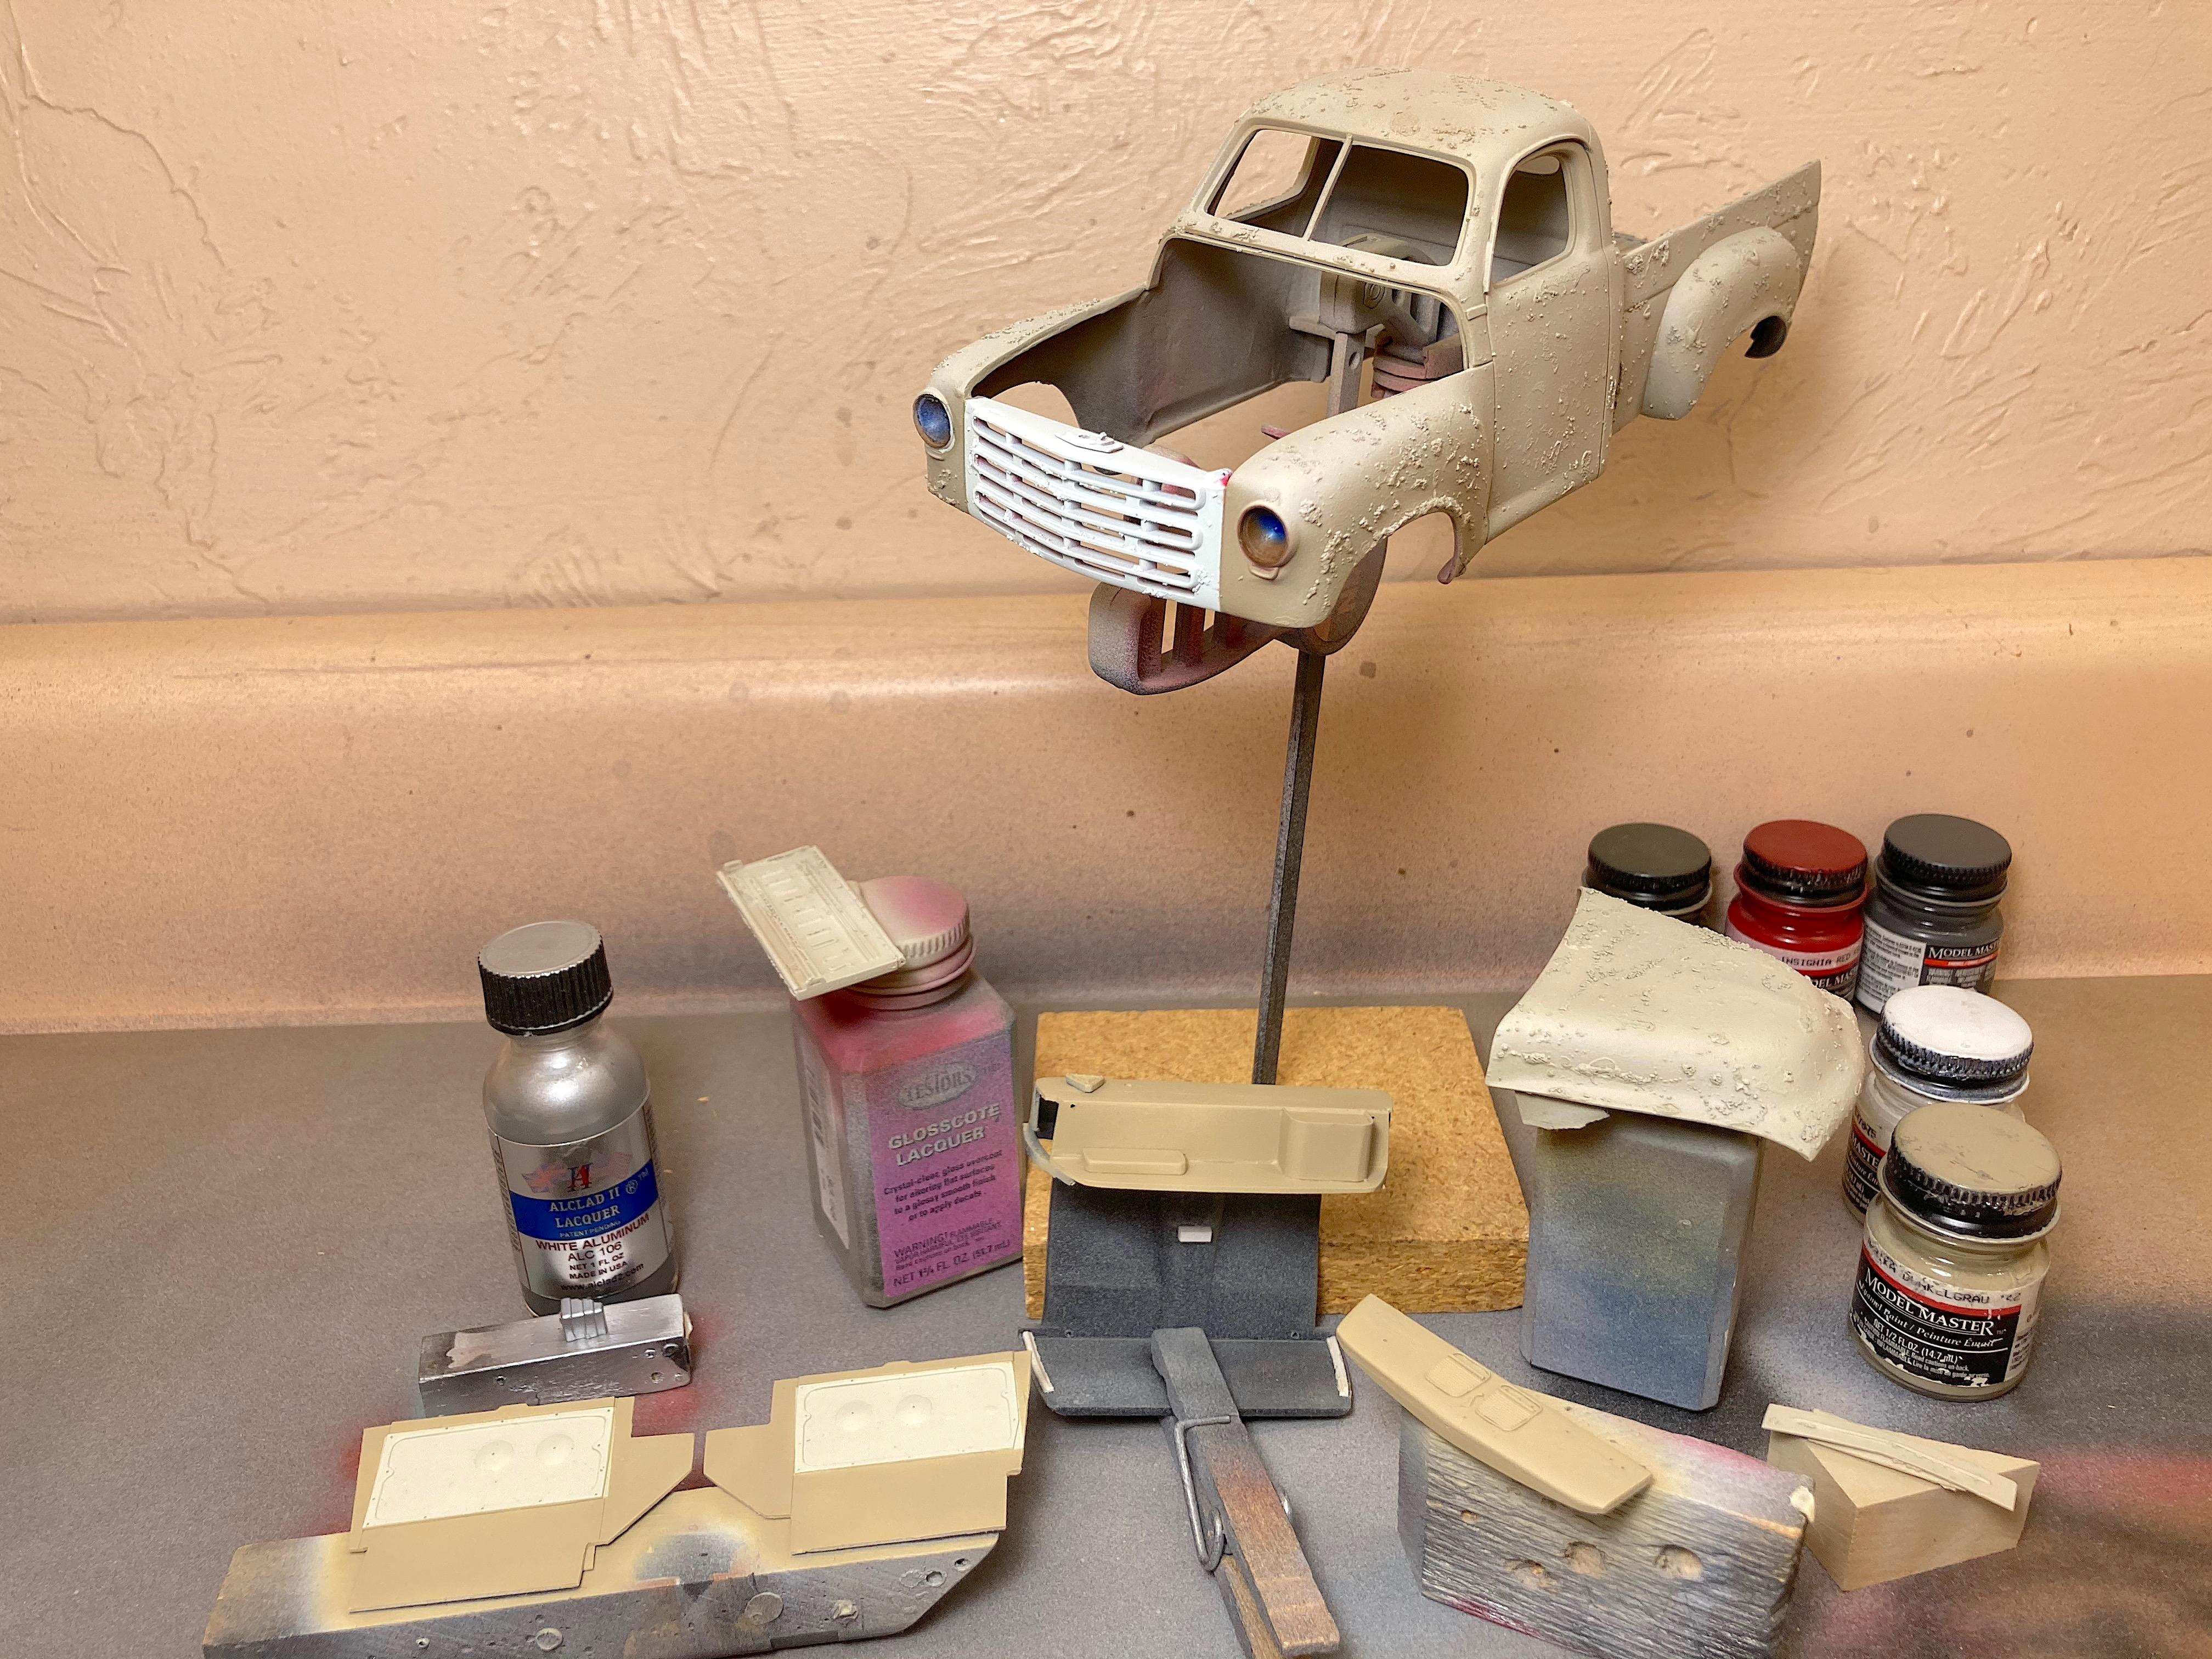
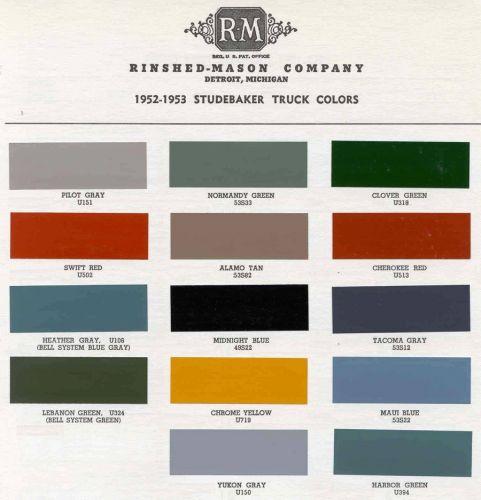
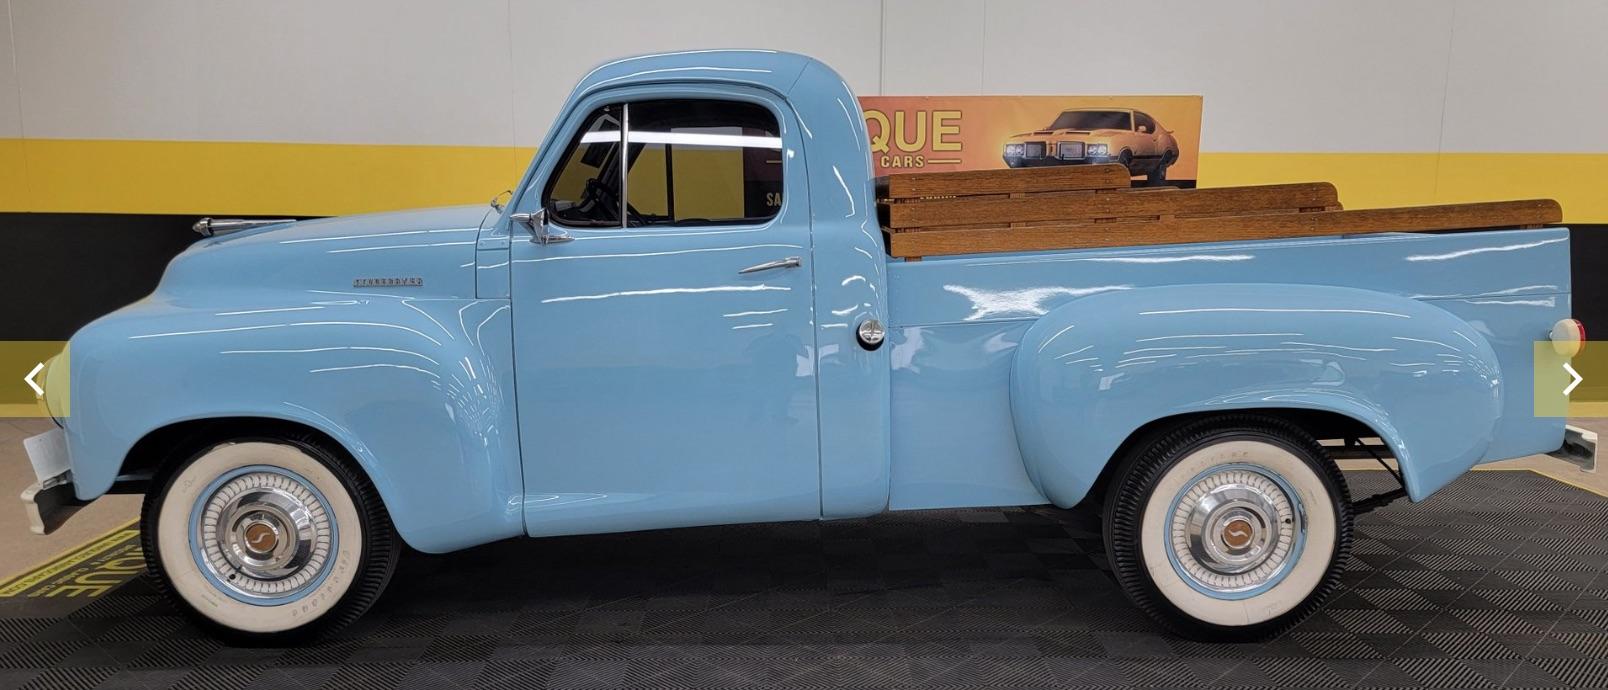
Thanks for the comments everyone. I'm on a mission, from God, to make an Easter Egg model. ? (heard on the radio, that it was an insult to tell a woman she's an Easter egg, meaning they put on way too much makeup) PAINT!!!!! ?♂️ Last night I got all the little parts done. First task today was to brush Tamiya primer on where there was cast iron texture, and under the chassis to help blend in new with existing, and the seat. Sprayed the grey primer on the body parts, flat black on the chassis. Masked the wheel backs like this, hoping it will make the brake disks appear to be separate from the wheel. At this point, if I was doing a shiny paintjob, I would have refined some areas, and done another coat. But I'm not, I'm on a mission to get this puppy done in a week! I took the roughest sanding stick to create buff damage marks. Next step was doing the rust, which is 'leather' with some flat black, then lighter tints until the last one which has Afrika yellow splattered on. First application of salt and water. Put in the cab of the pickup to dry faster. I have no idea what Studebaker used for primer, assumed it was white, so flat white was sprayed on. All layers are put on really thick and crappy, the more orange peel the better. Painted the Bilstein shocks. Interior panels are custom mixed. I want what could have been a repaired truck some time ago, perhaps it was a flatbed and they found a bed and good fenders, to fix it. Masked each color, because if it was sanded down, you would see that color when you shouldn't. Applied the salt for each coat too, should add more variation. I also added successive amounts of white to the color, top pass is the lightest, and concentrated on top. I looked at my stash of paint and compared to the paint charts to find something close that matched. I really wanted to do turquoise, but they didn't do that, and I didn't have any blue that I liked. Didn't worry about bad masking, it will be covered up with the last coat. Now it's time to mask the interior panels for the final color. The bumpers and grill are white. Painted flat black in the door jambs before this coat. While I was waiting for each coat to cure, I worked on the engine. I got oil filter decals at the last swap meet, so did the Fram. Used a reject turned aluminum oil filler from the previous build. Added fuel line from the pump to carb, will also run to the gas tank. Started the plug wires (not doing boots). Gearing up to assemble the chassis. Polished the roll bar.
- 108 replies
-
- 2
-
-
- 1953
- studebaker
- (and 2 more)
-
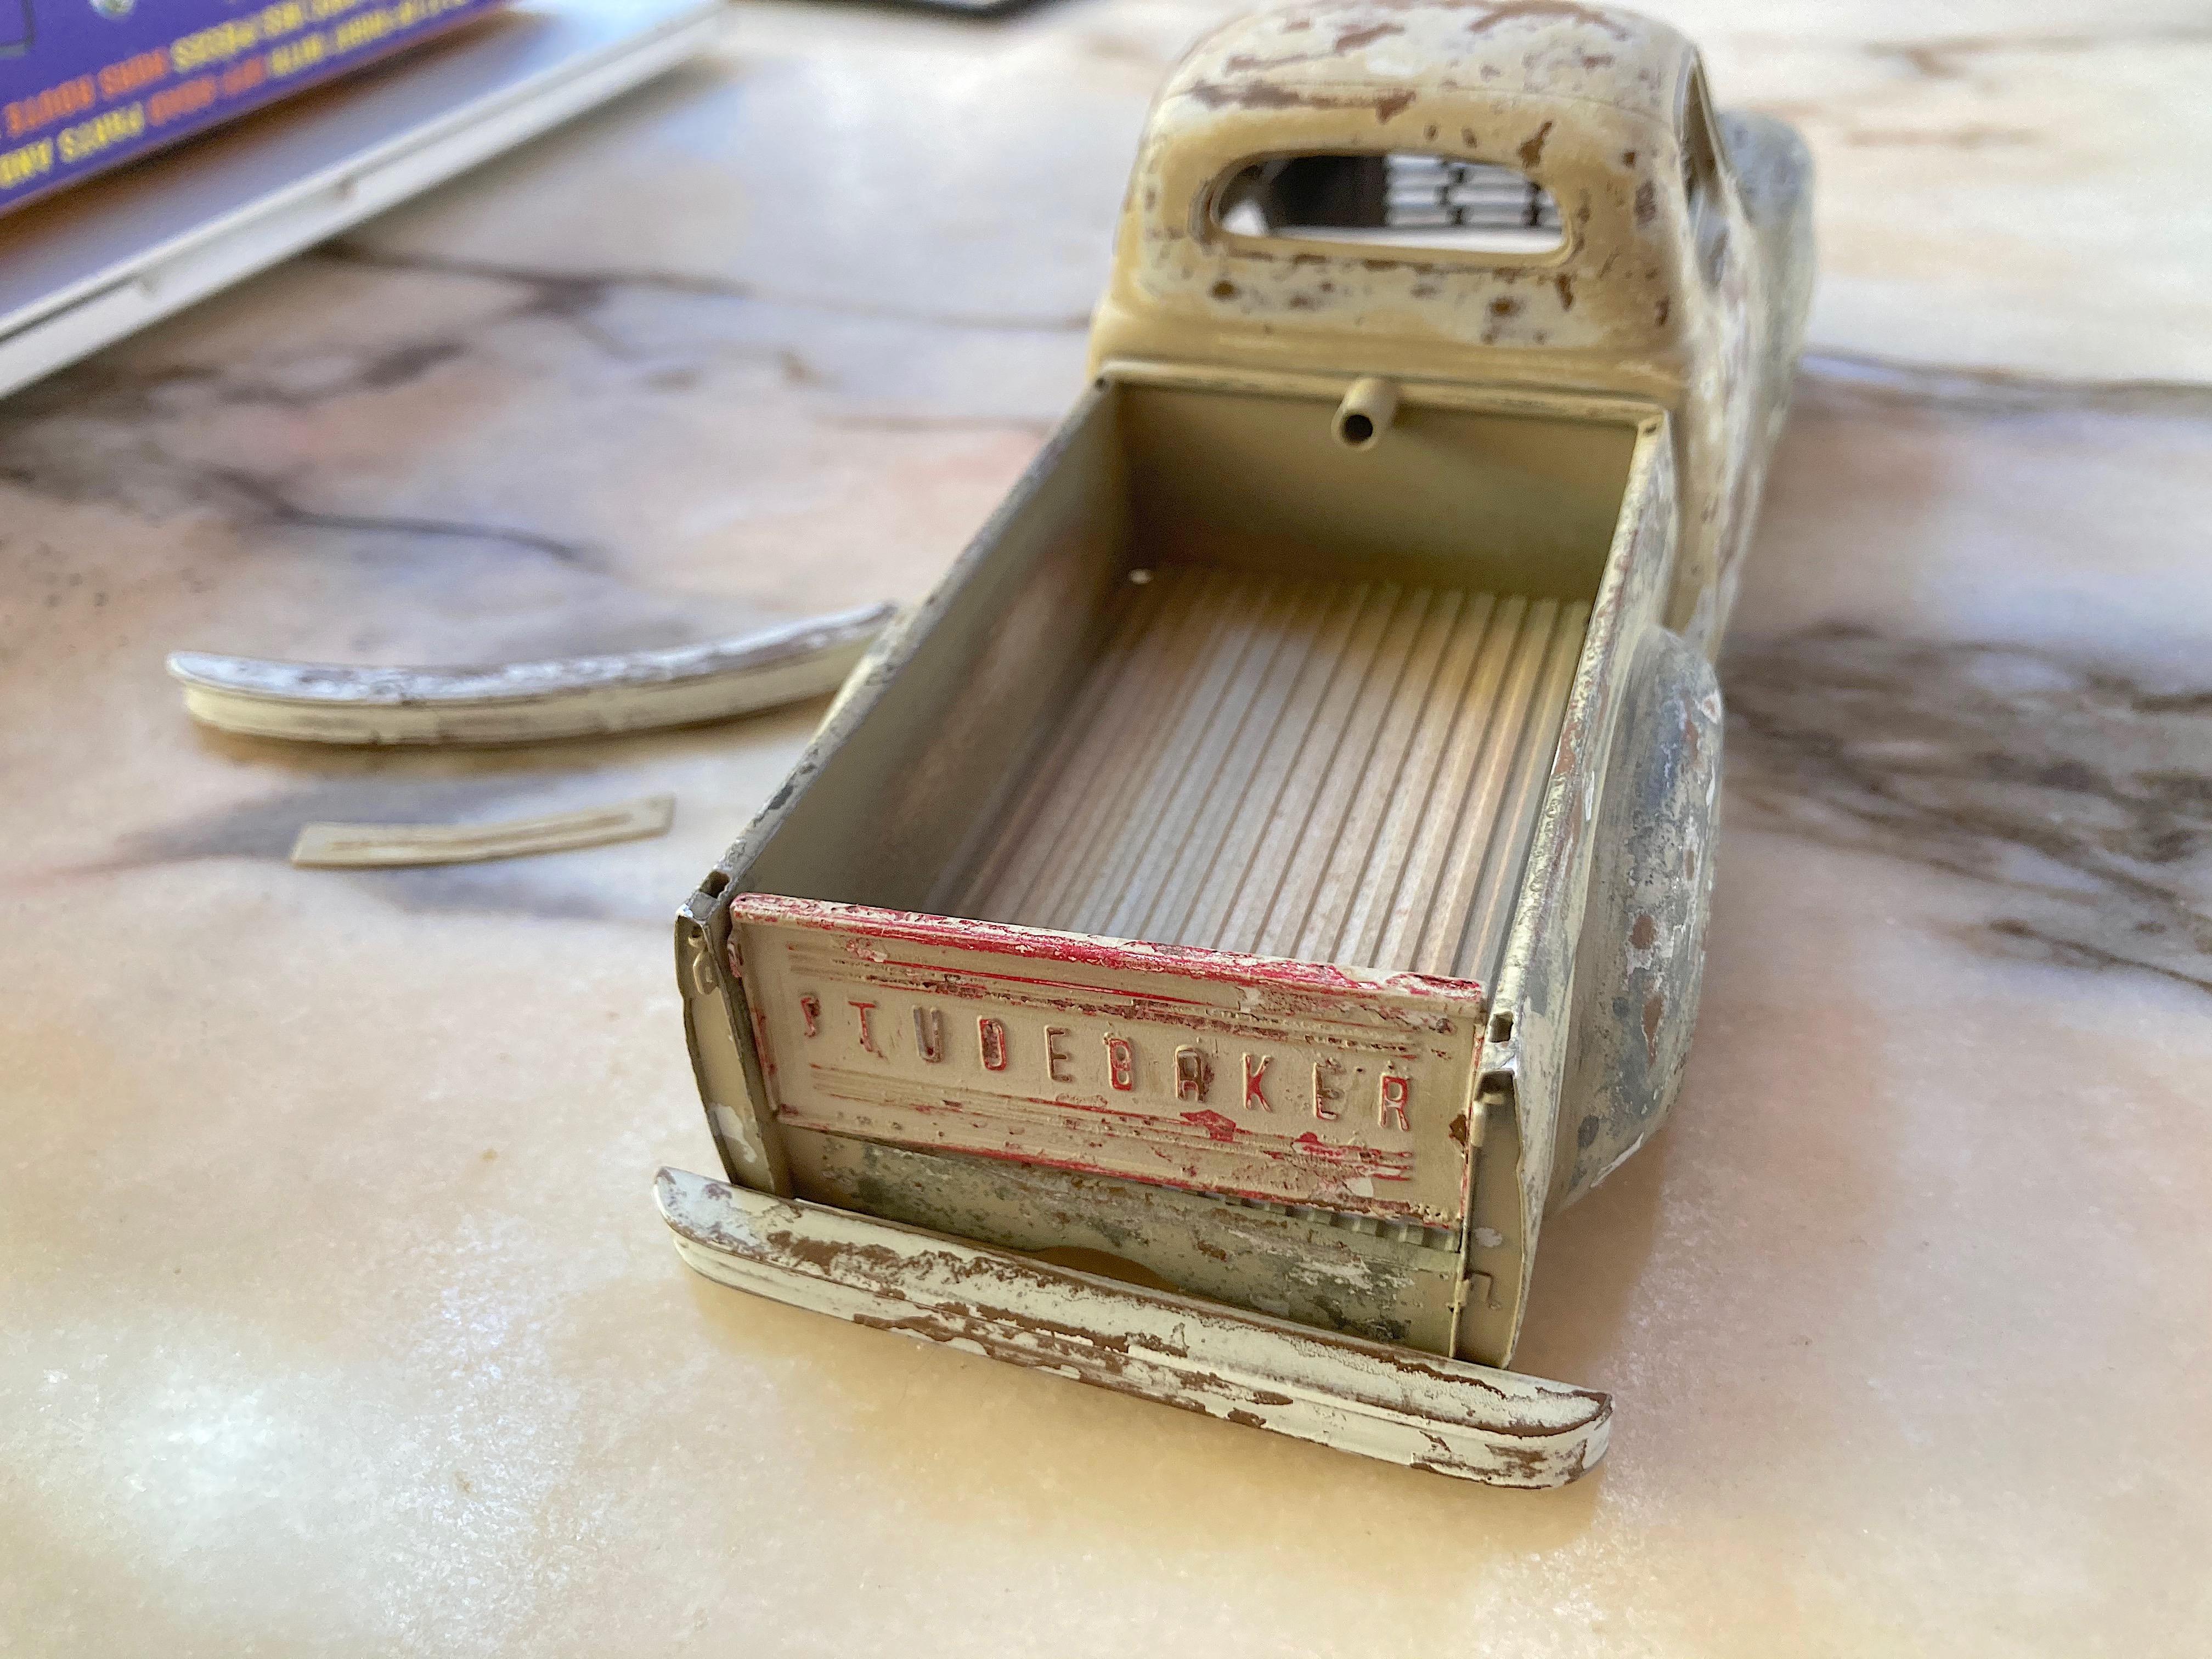
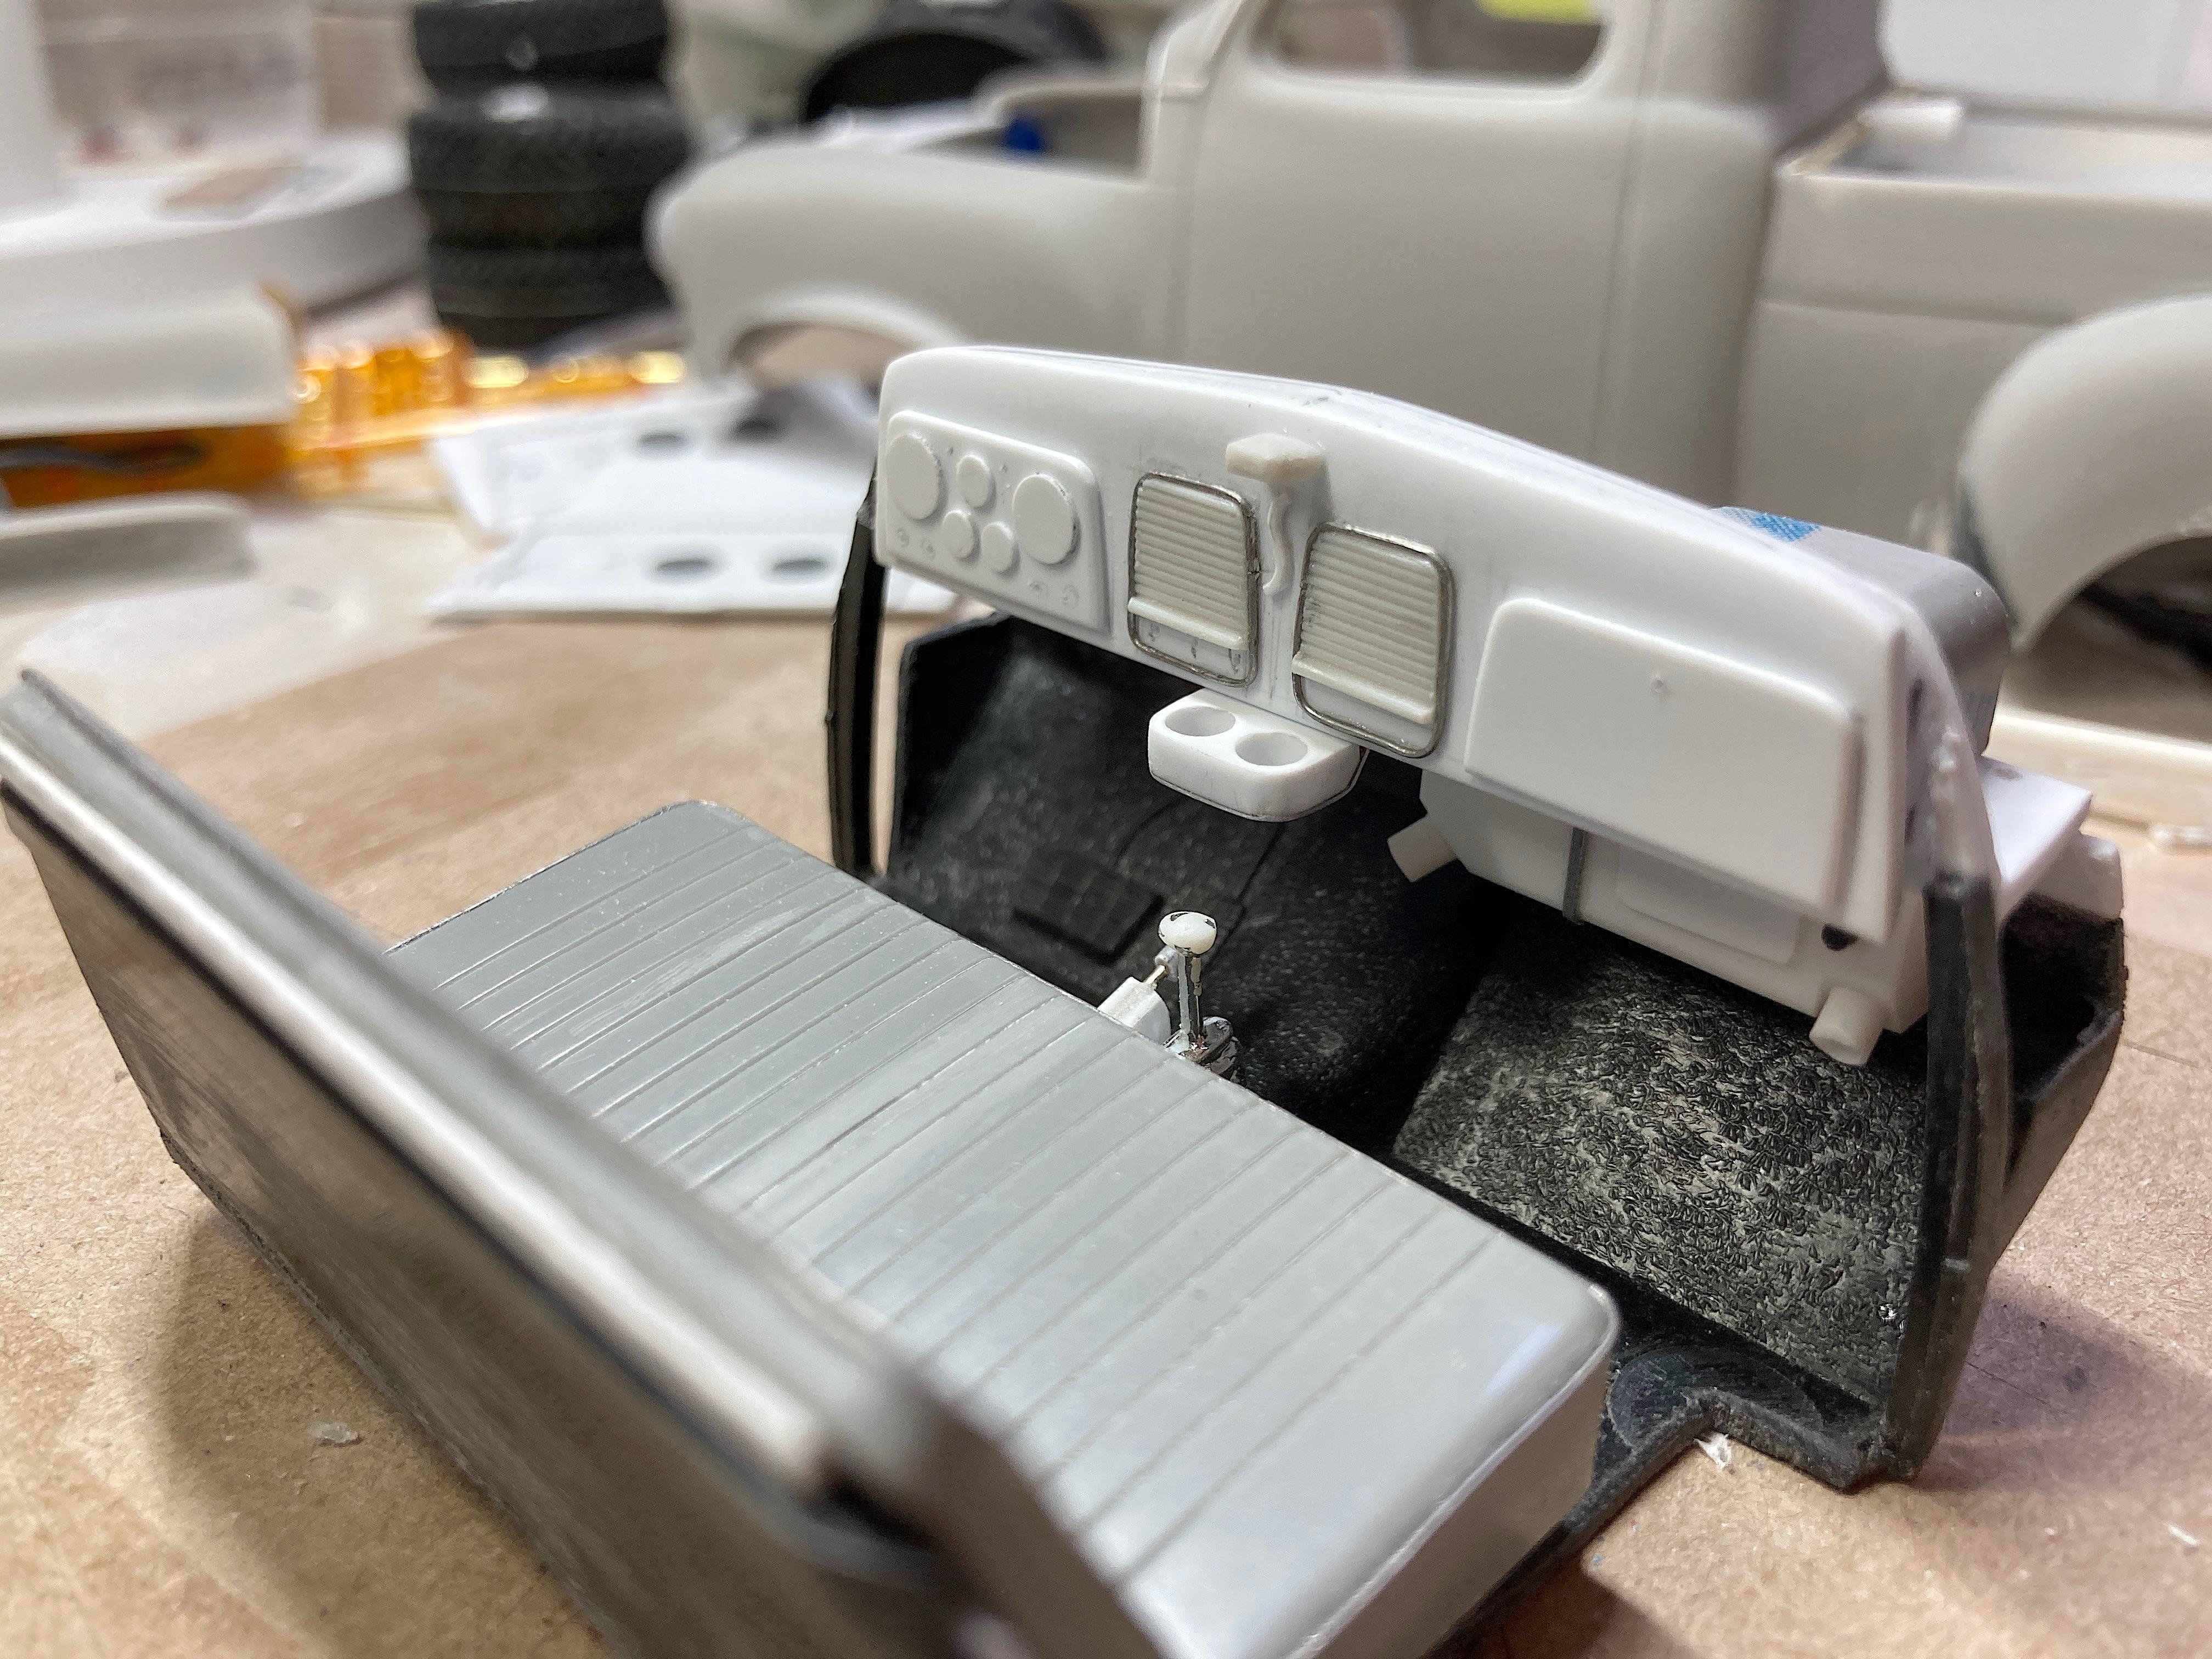
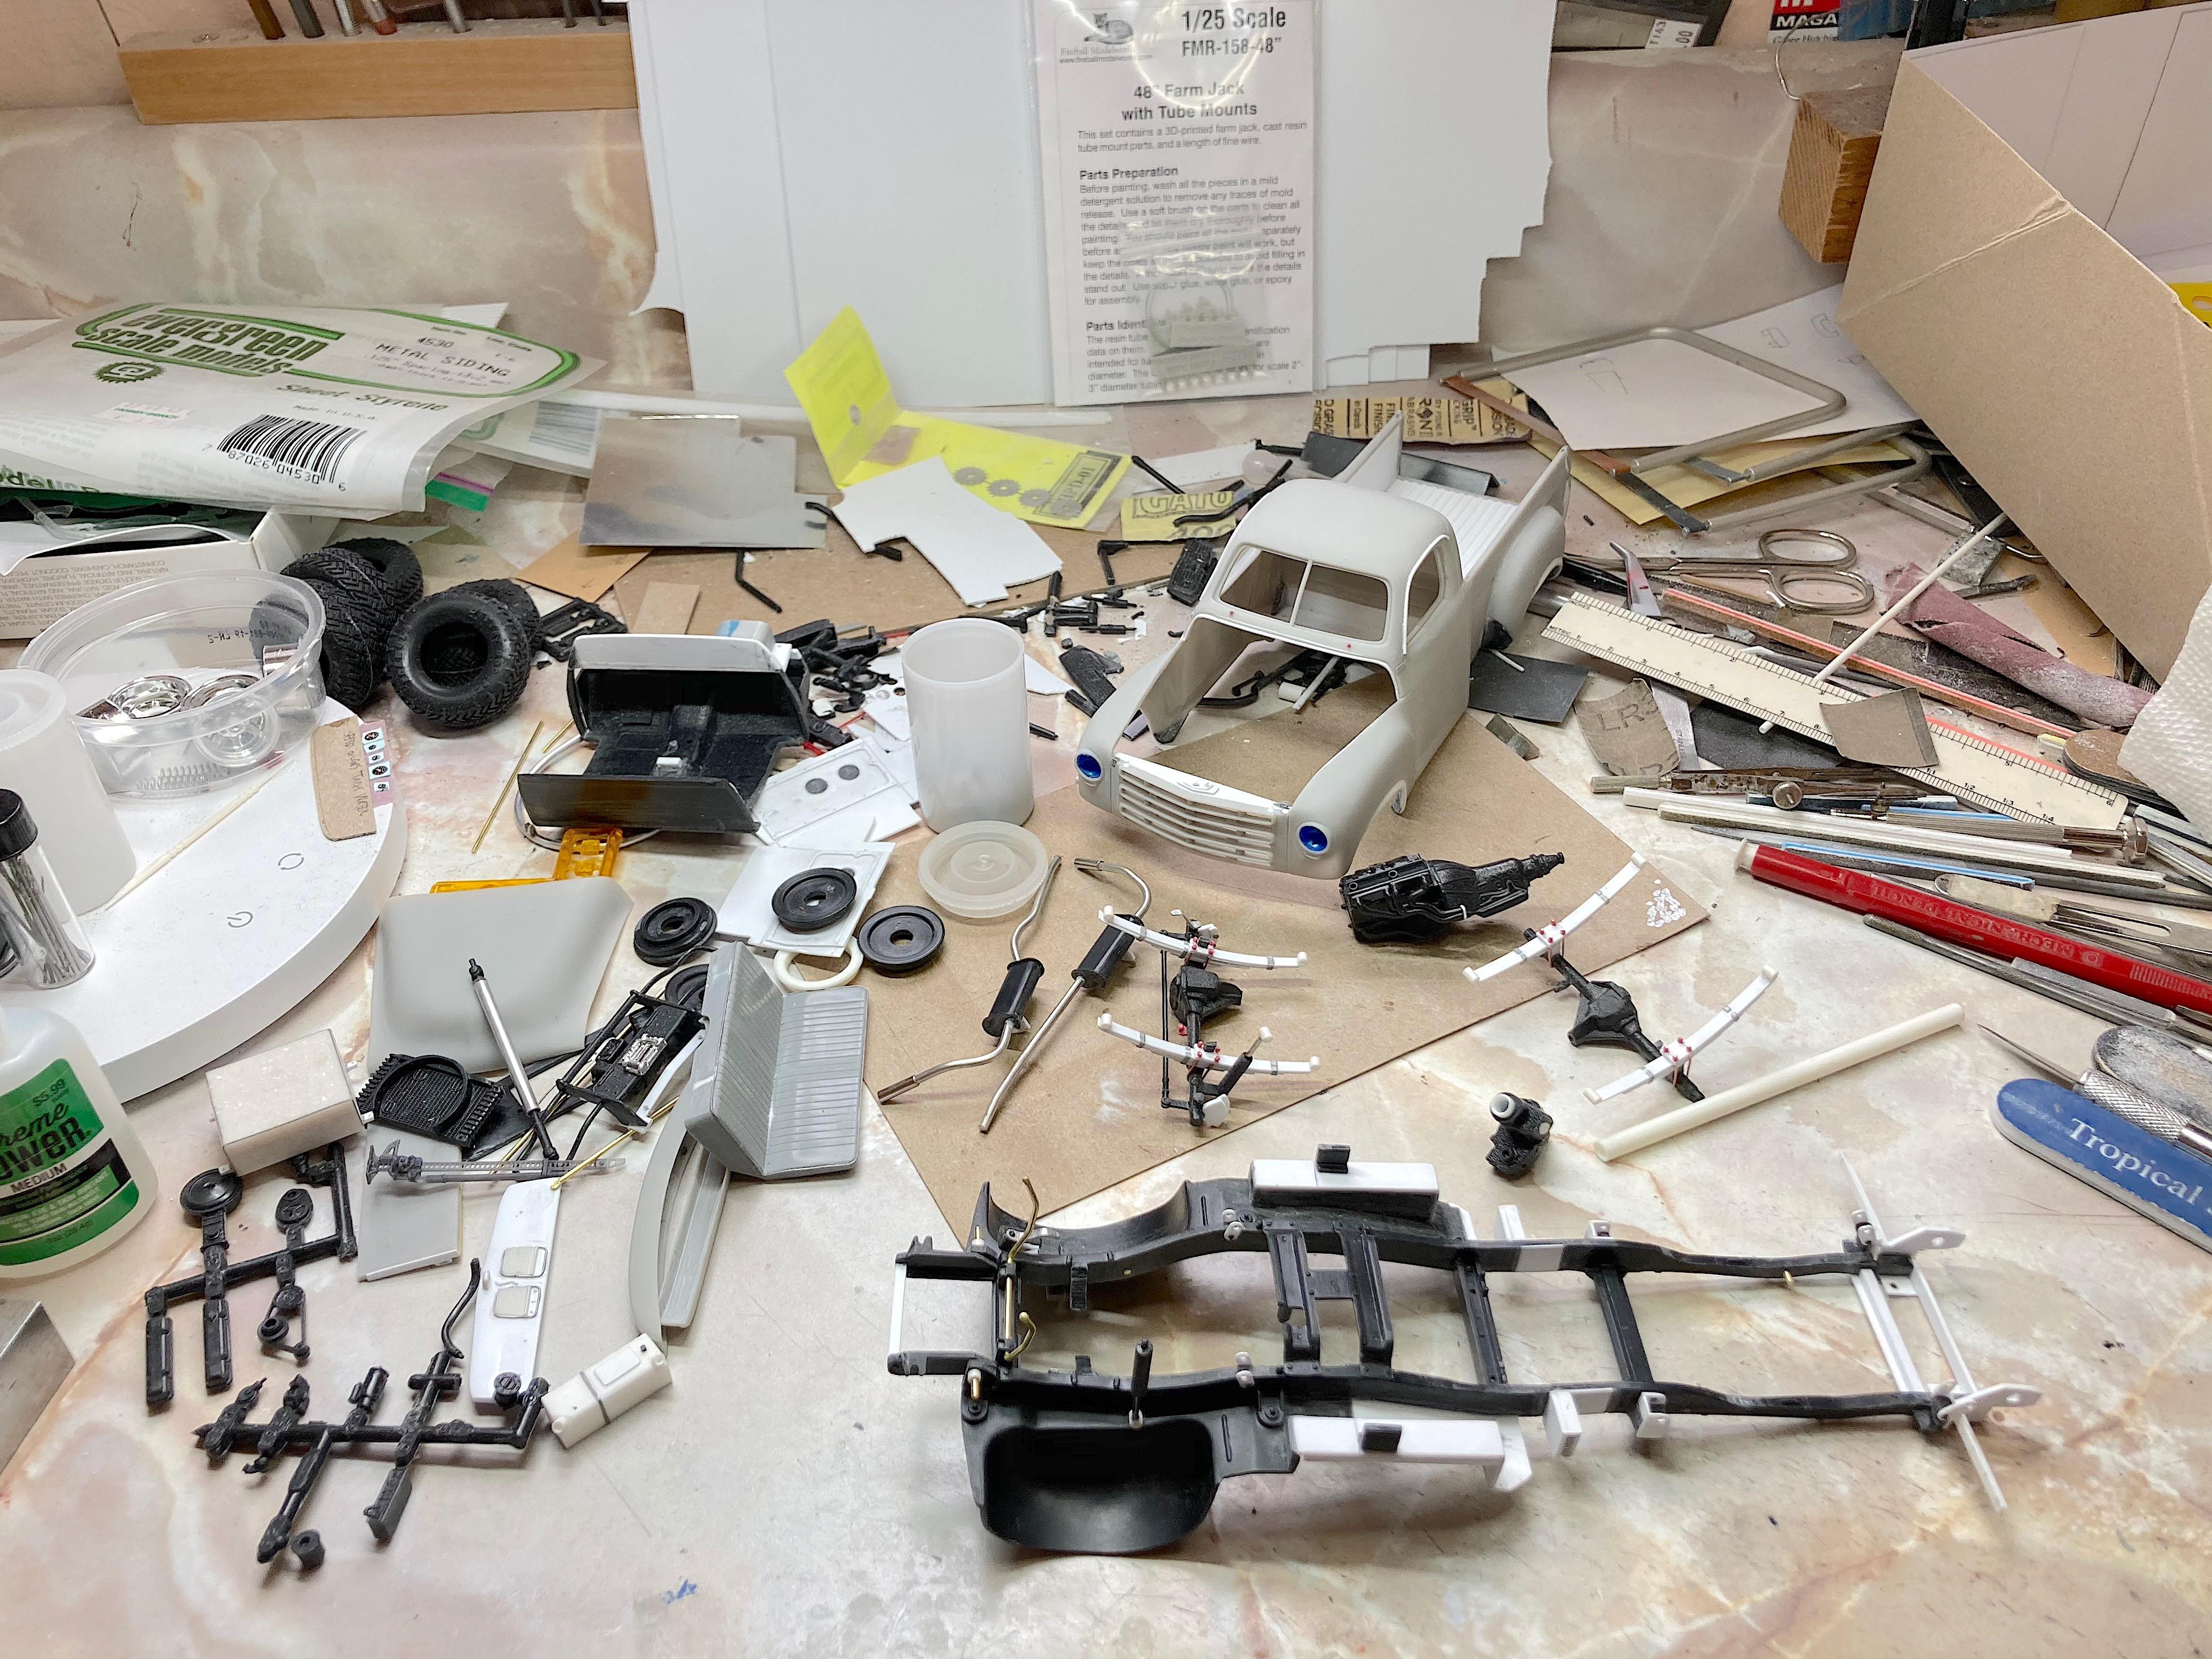
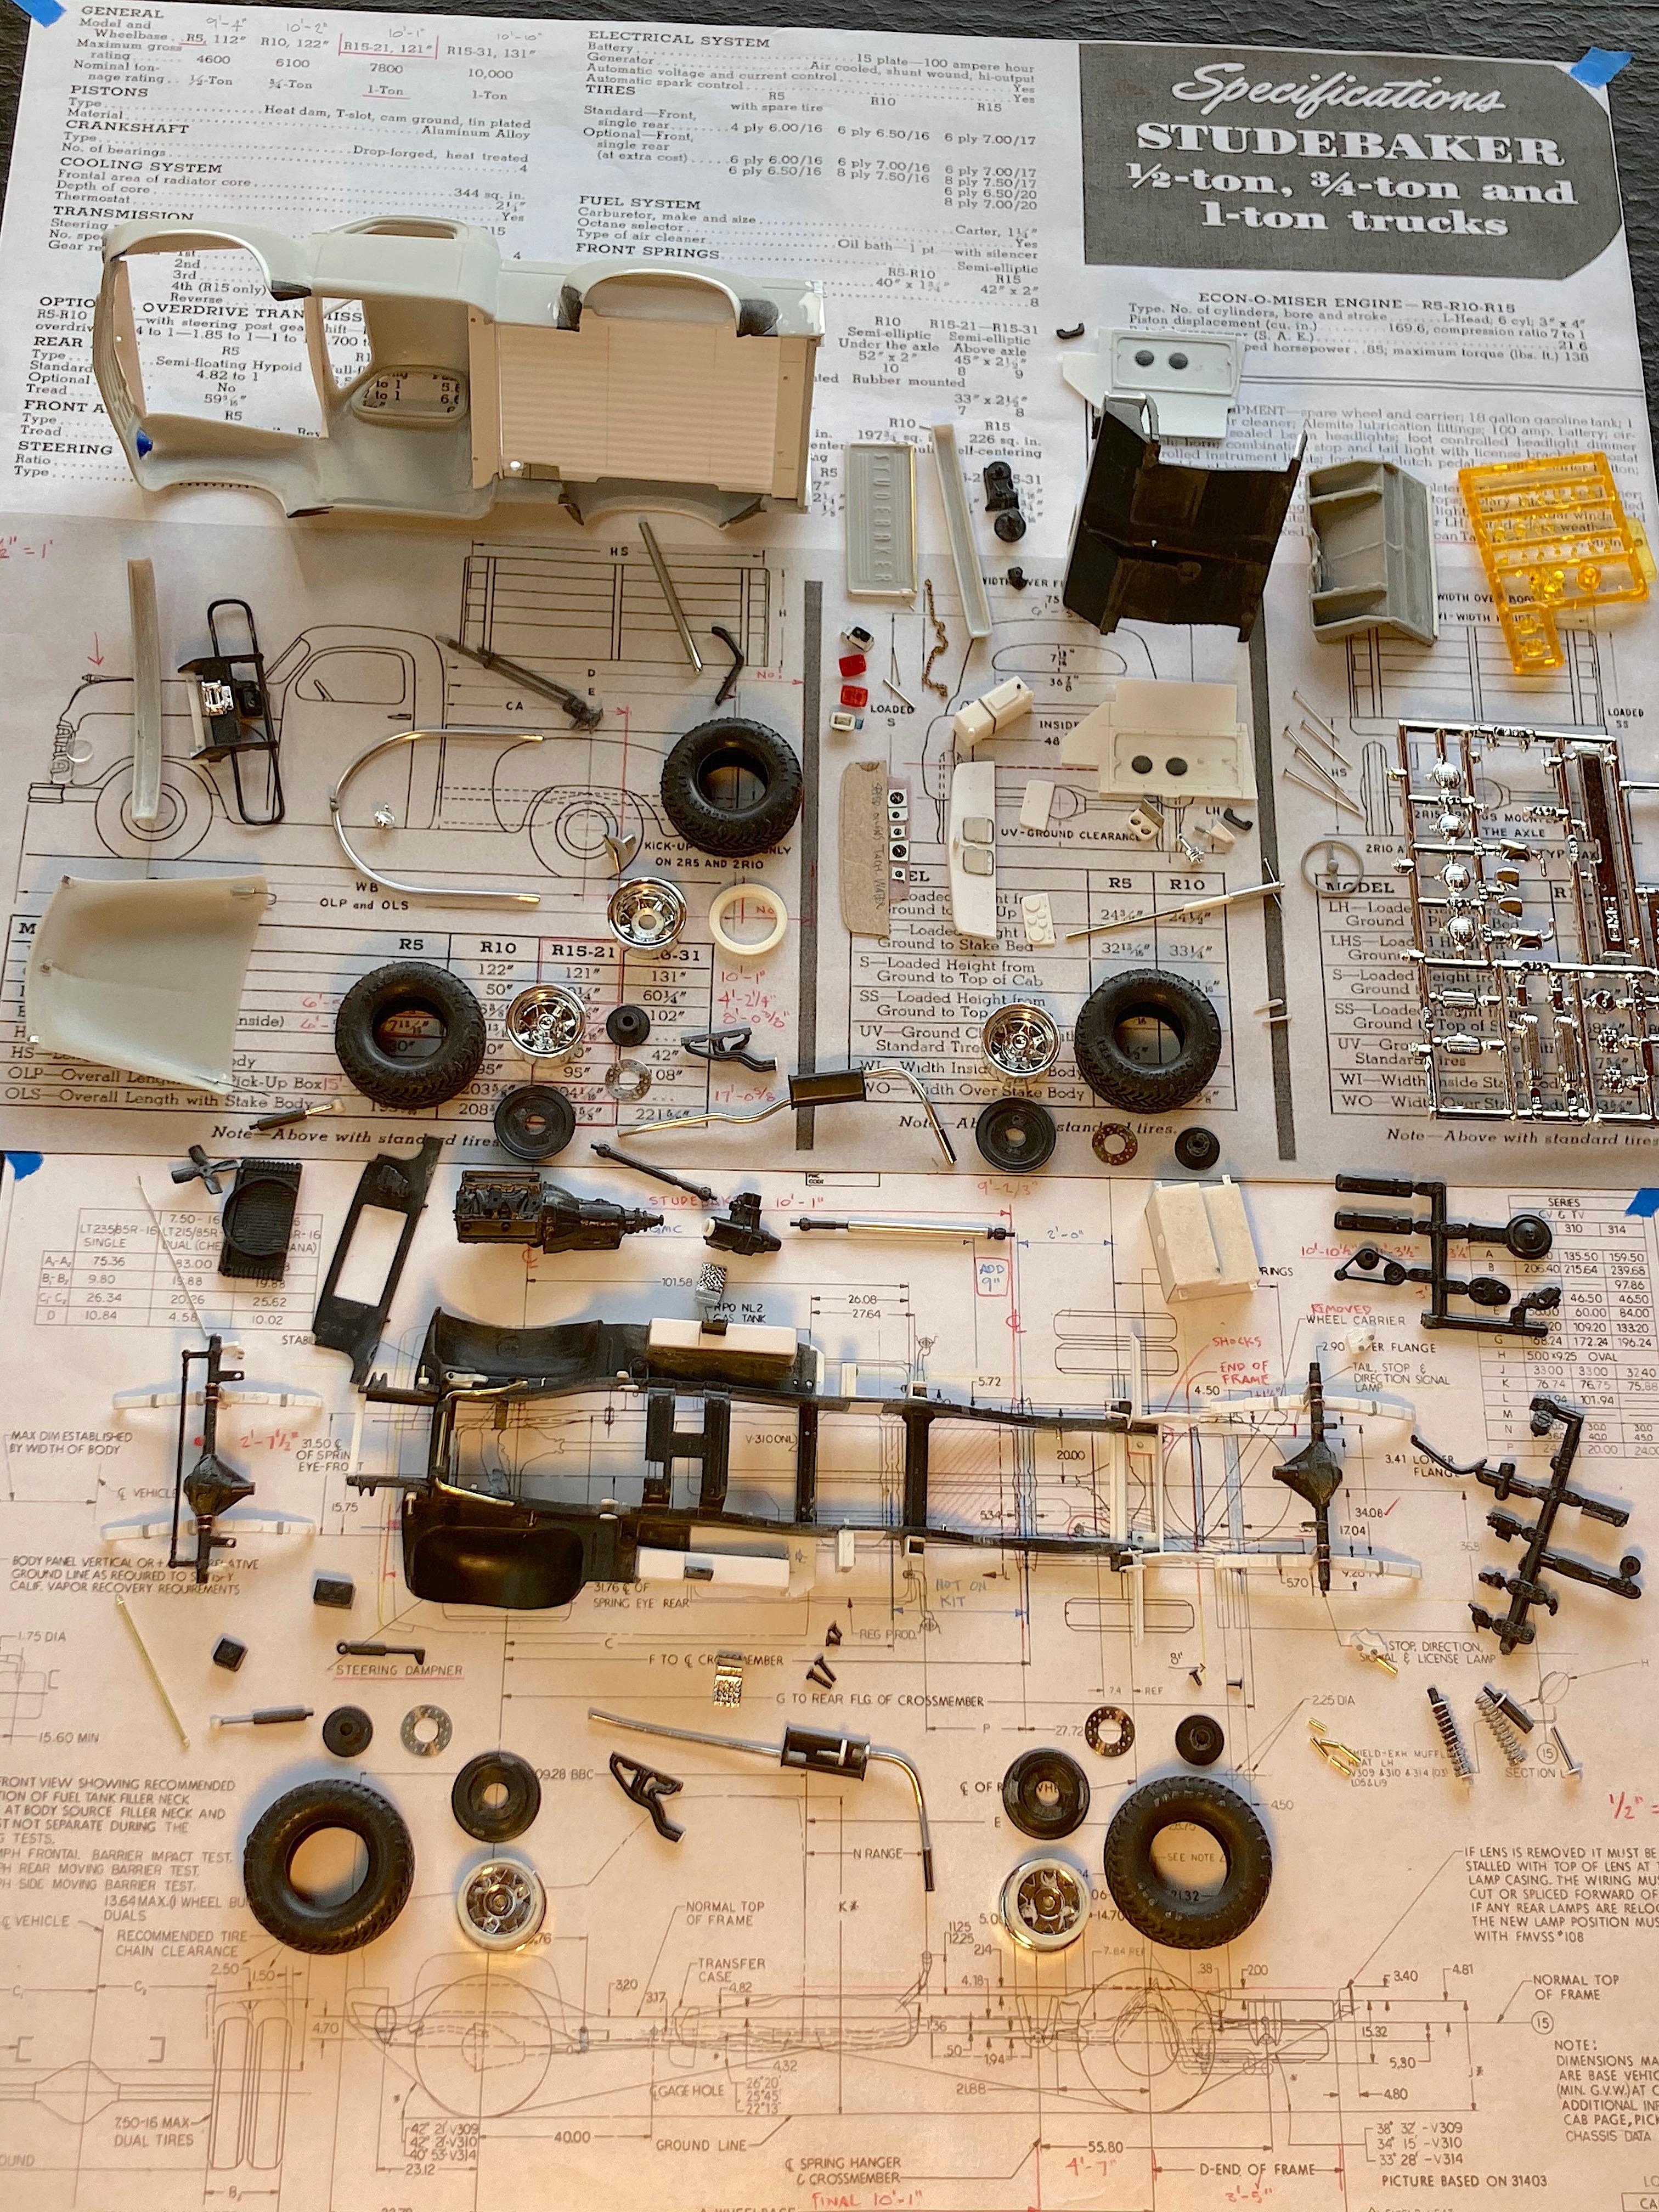
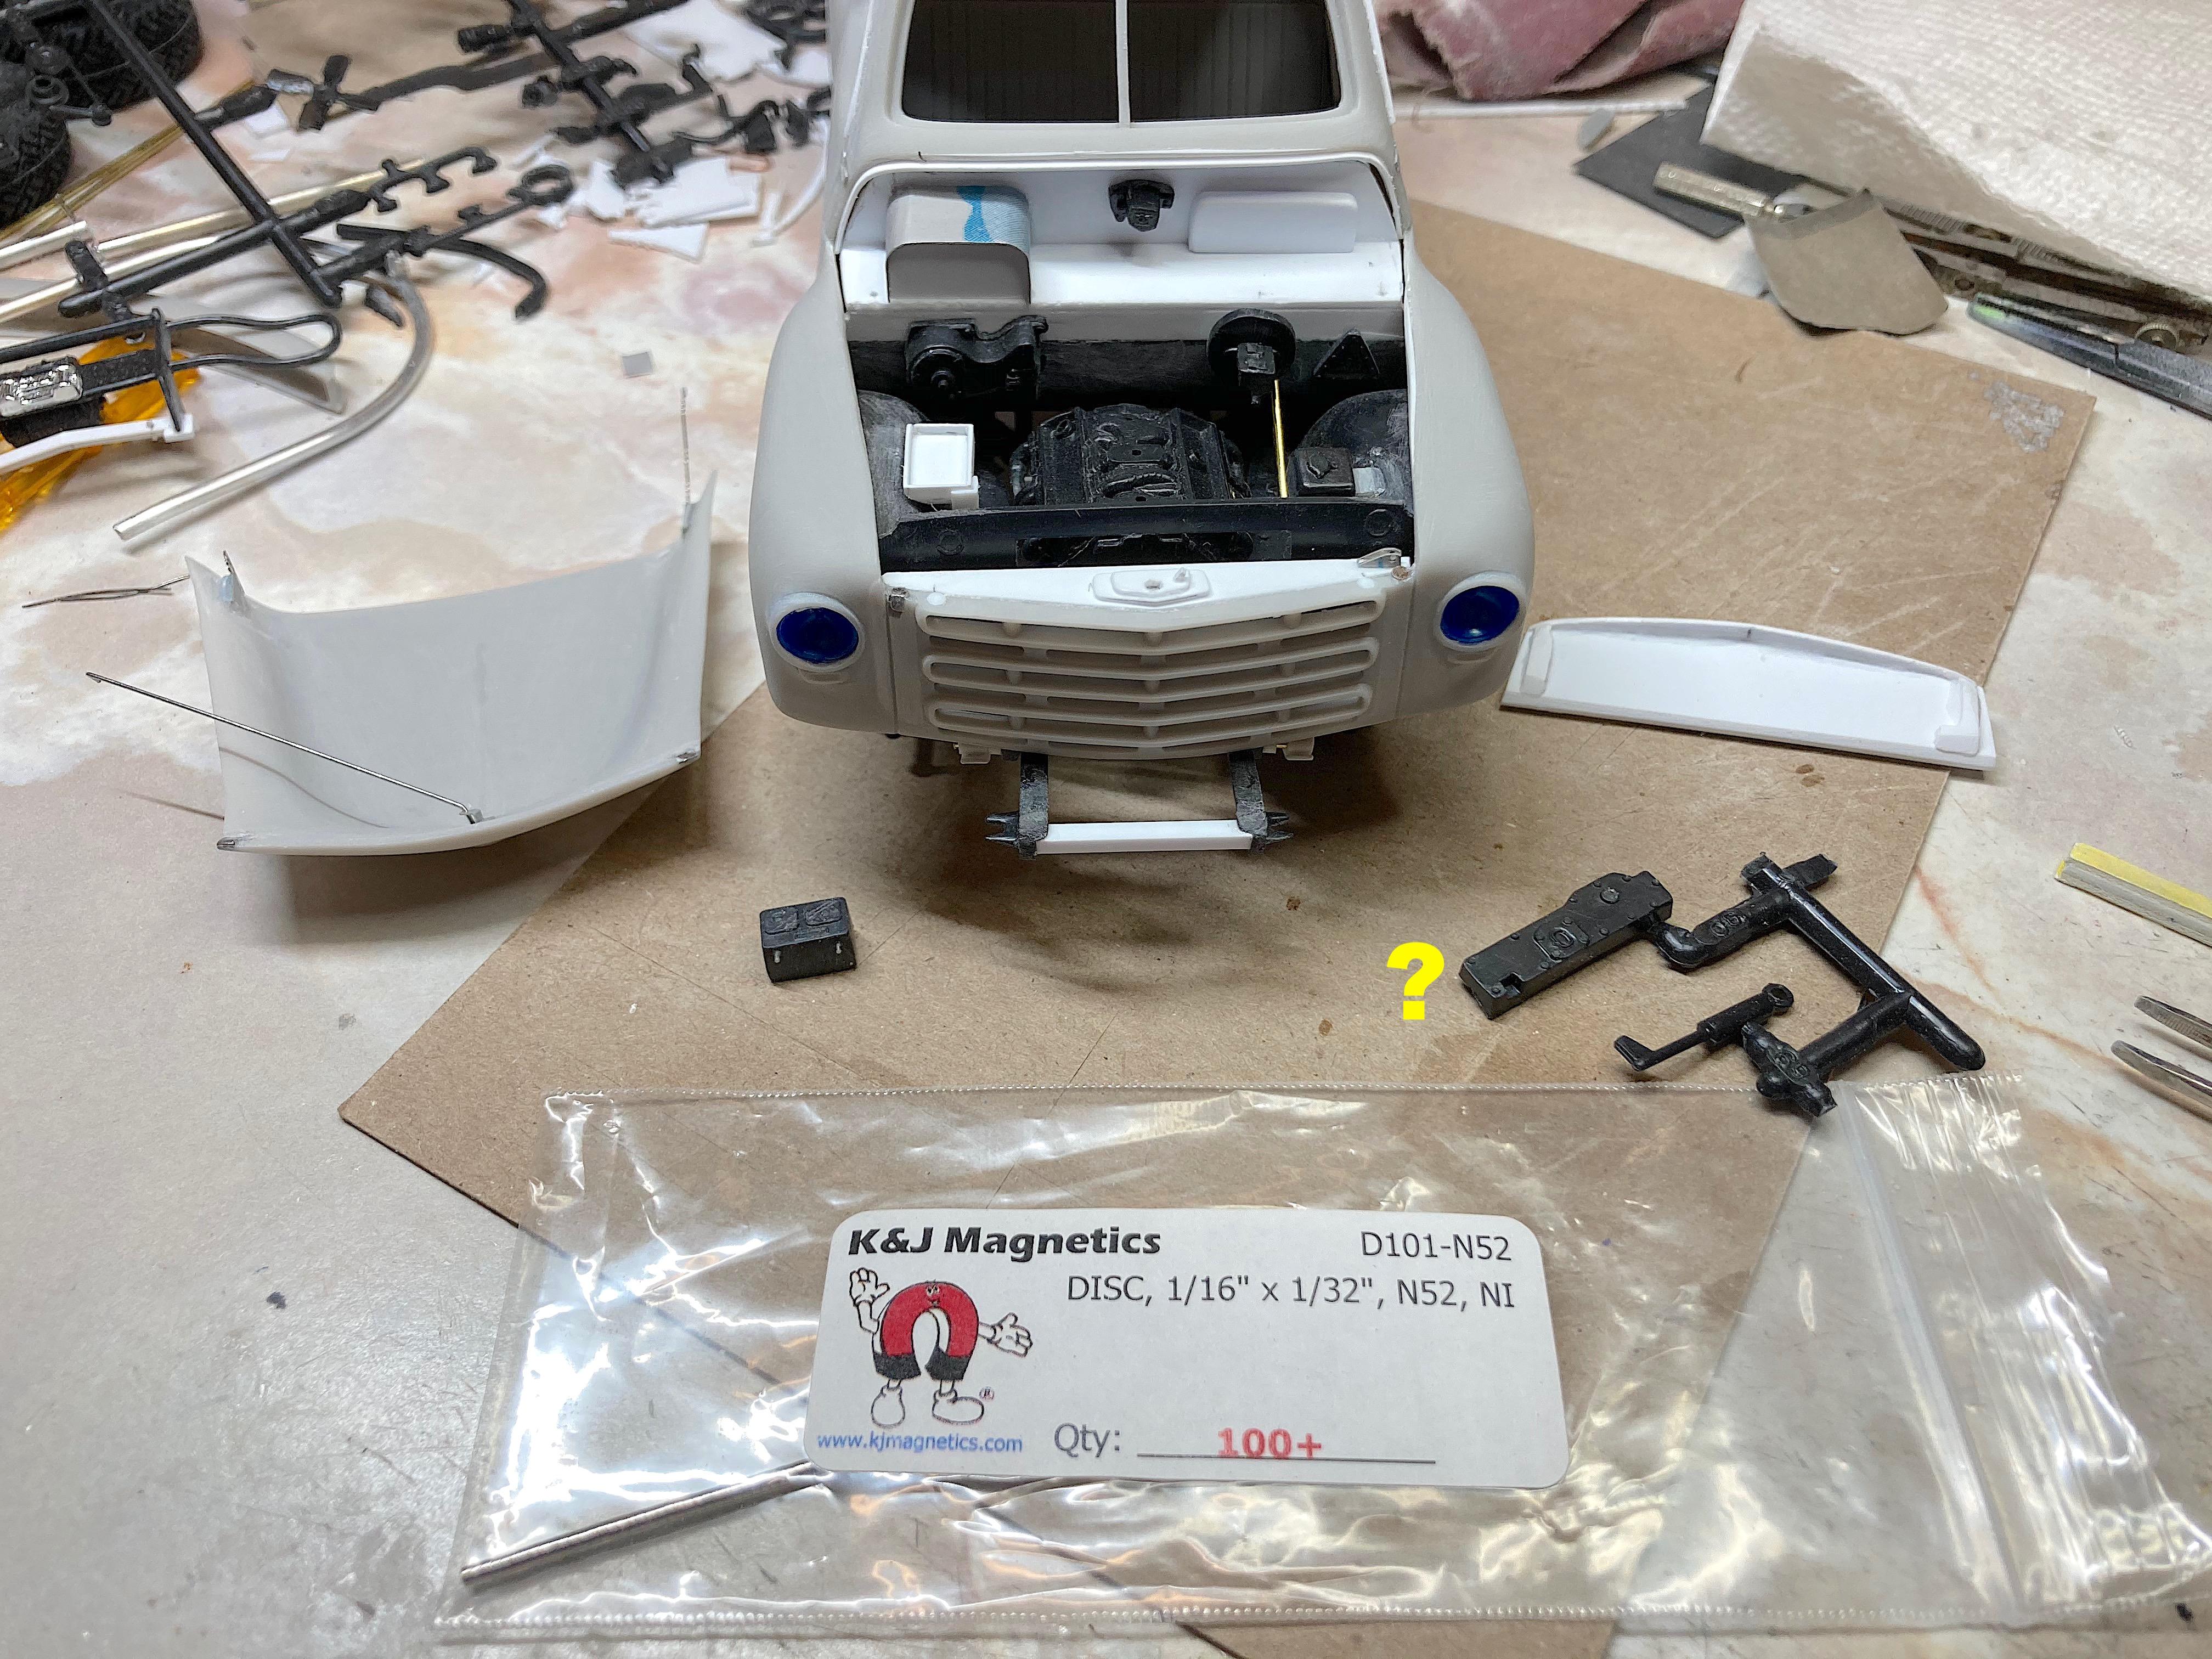
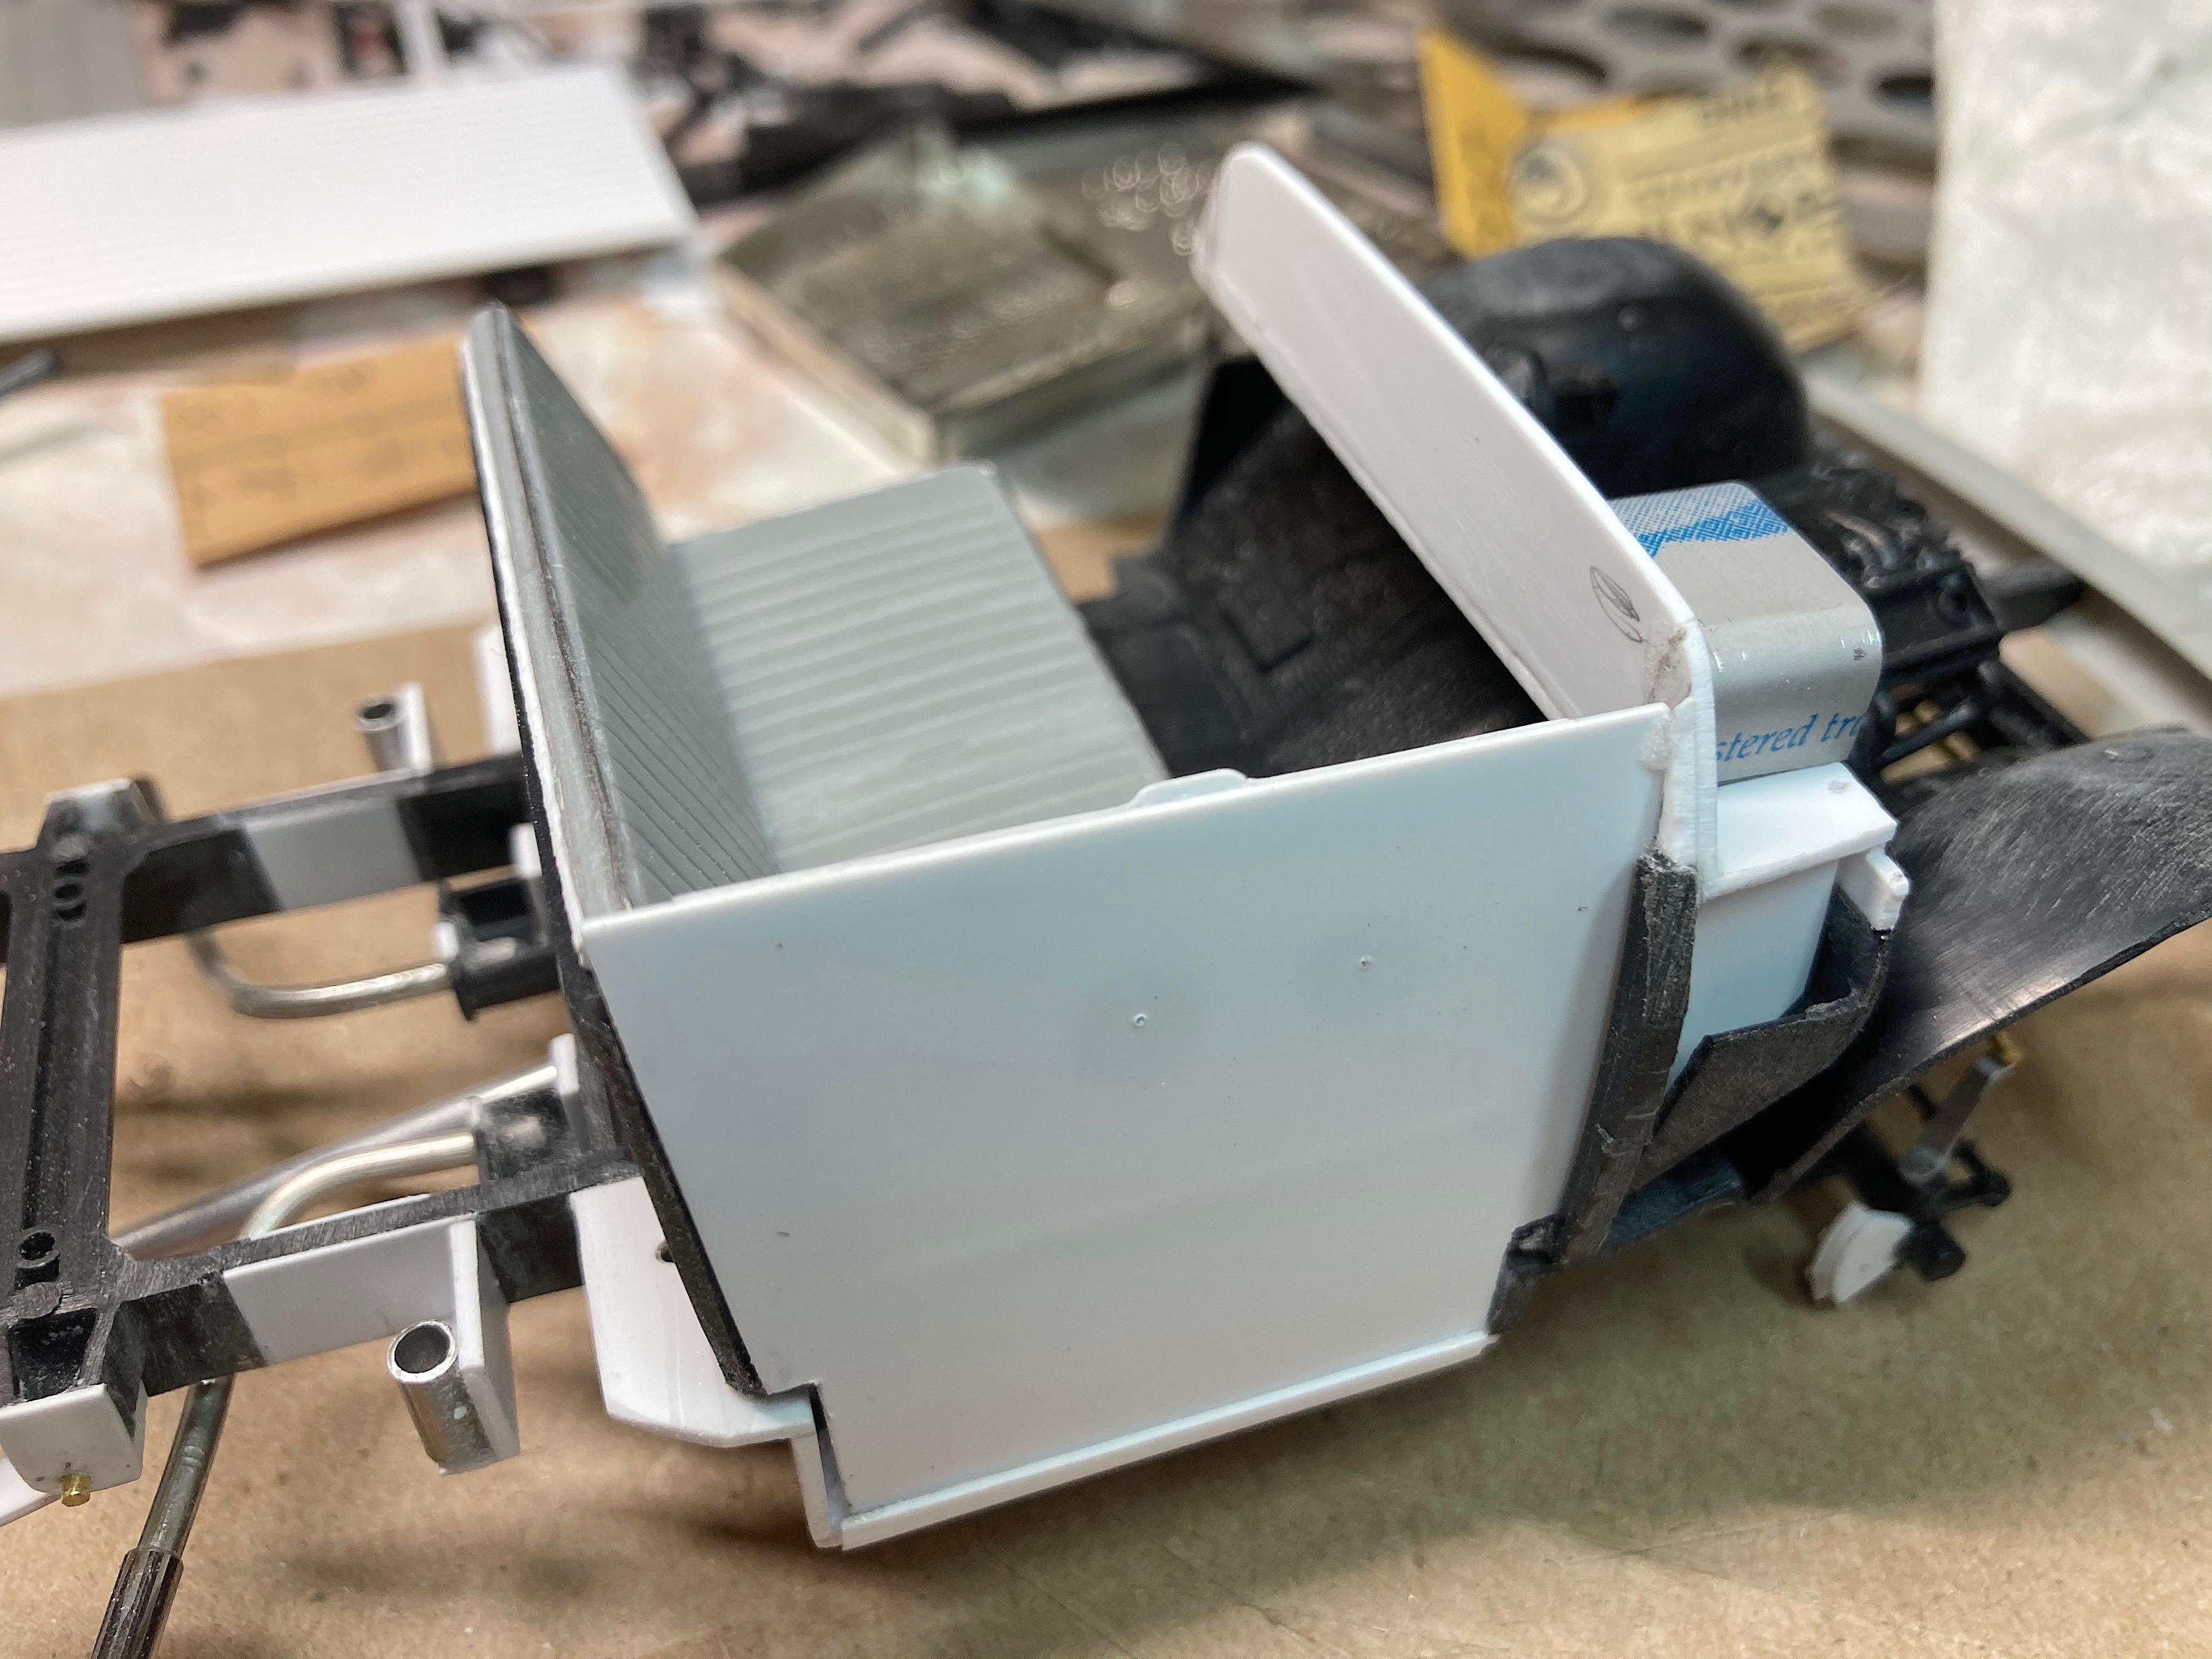
Looks like the hood latch. No matter, I made a heater box. ? Made cup holder, handbrake from styrene, aluminum plate, and a cut-up shirt pin,. The heater box is Corian®, which is totally imagineered too. Disassembled everything to prepare for paint. Cleaned up some parts, improved the front shocks, drilled spark plug holes in the block, etc. What a messy bench! I have cleaned up in preparation for clean parts paint and assembly. Shocks going through the floor pan wasn't cutting it for me. I was surprised how much I have modified the chassis, now that it's bare of parts. Laid everything out before washing in warm dish soap water. This is a fun extra step I enjoy doing, like the car ads. When I cleaned up the bench, unearthed the front bumper splash pan. ? Have some more parts to make, such as the hood ornament, door cranks, seatbelts, some photo-etch, that is not included here. Oh yea, "glass".
-
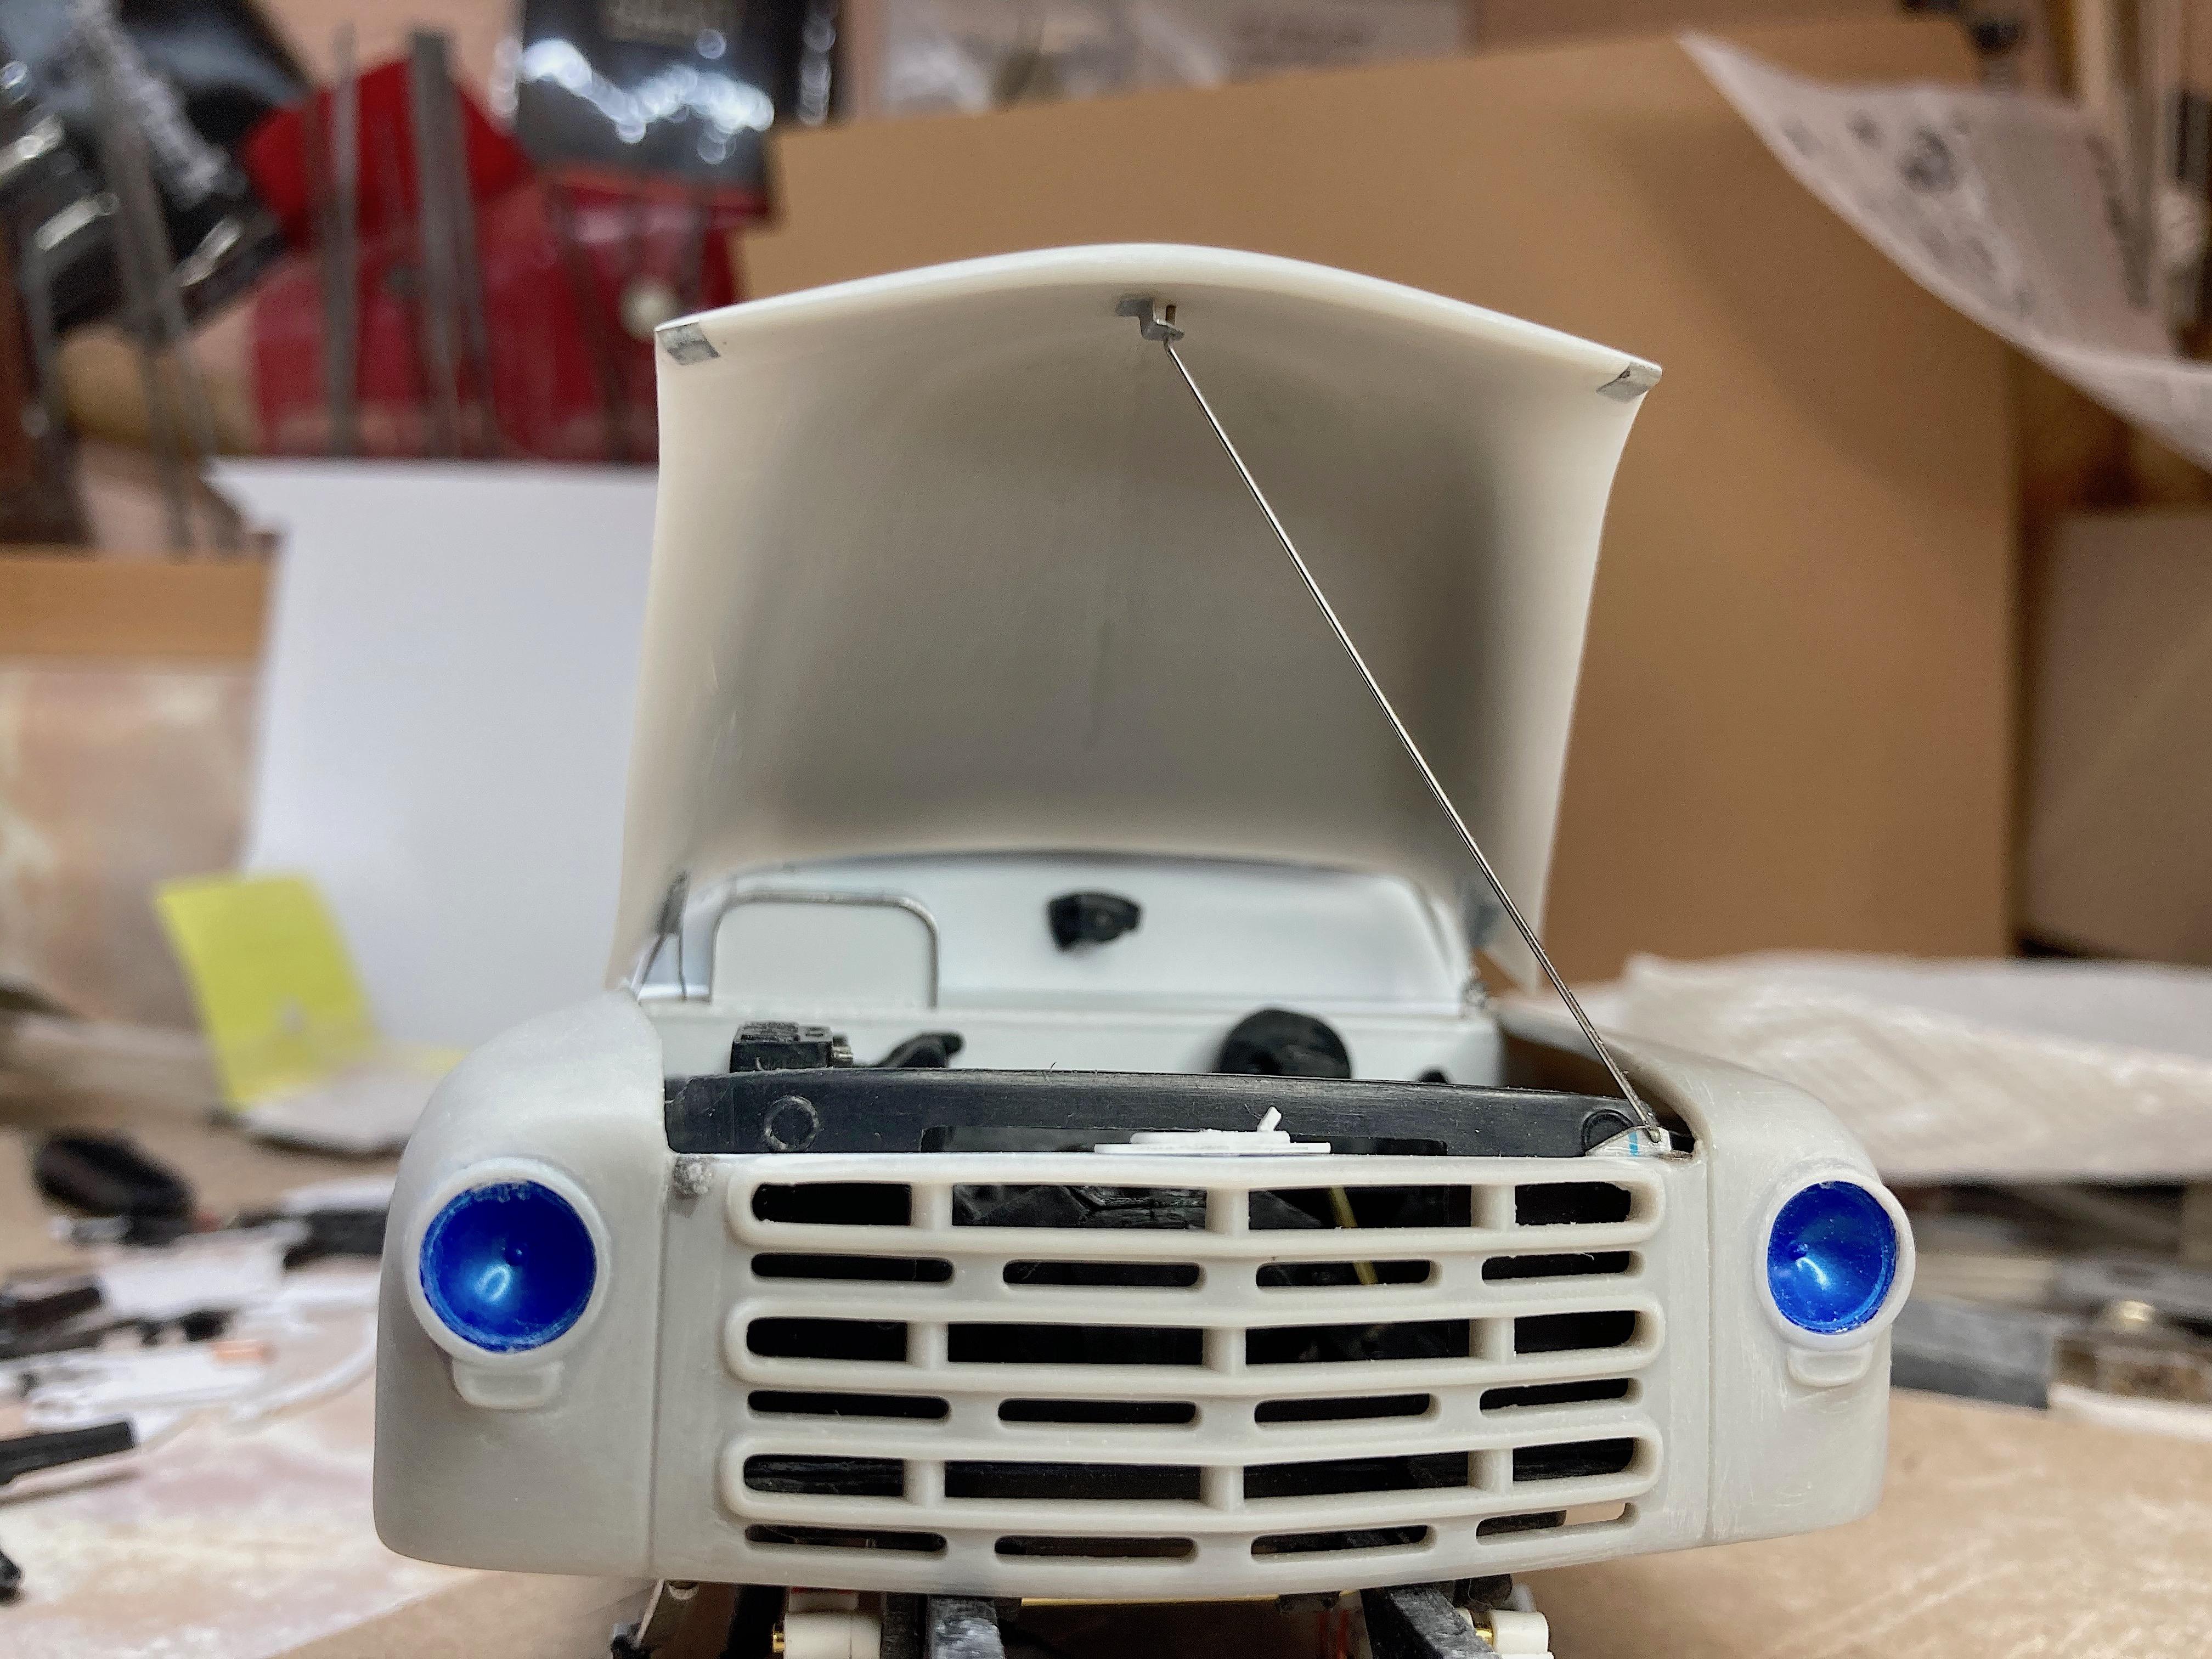
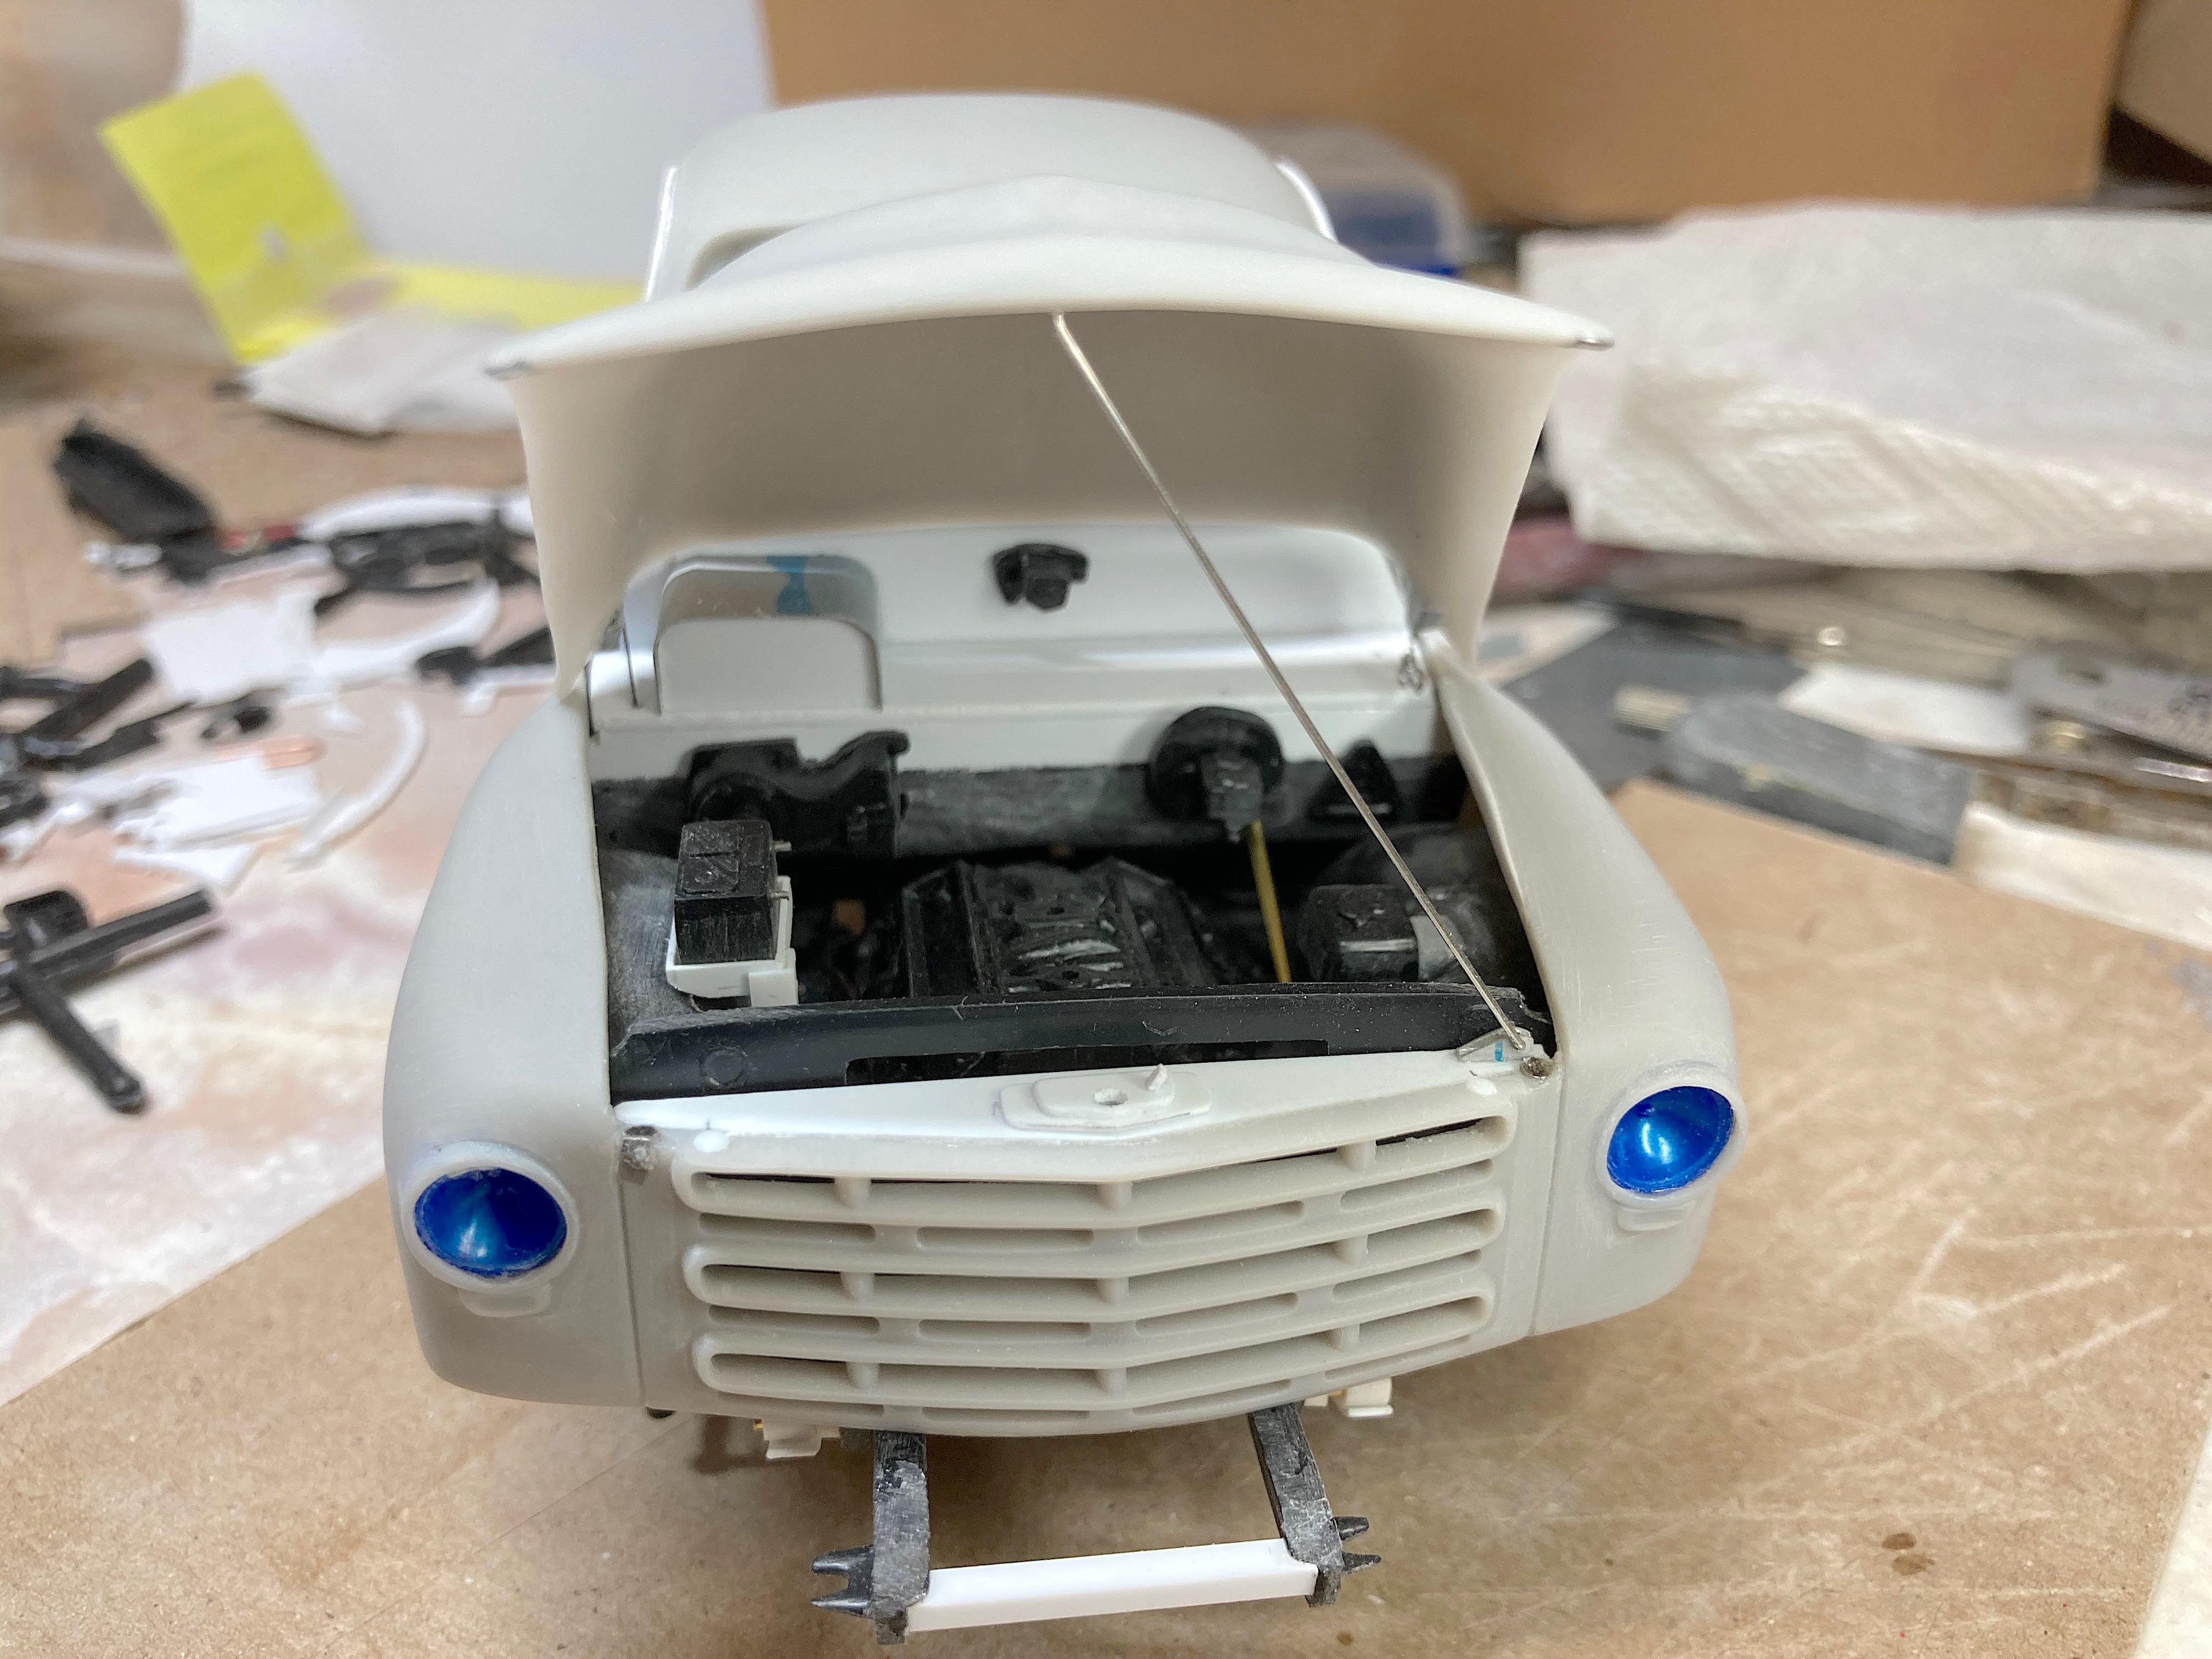
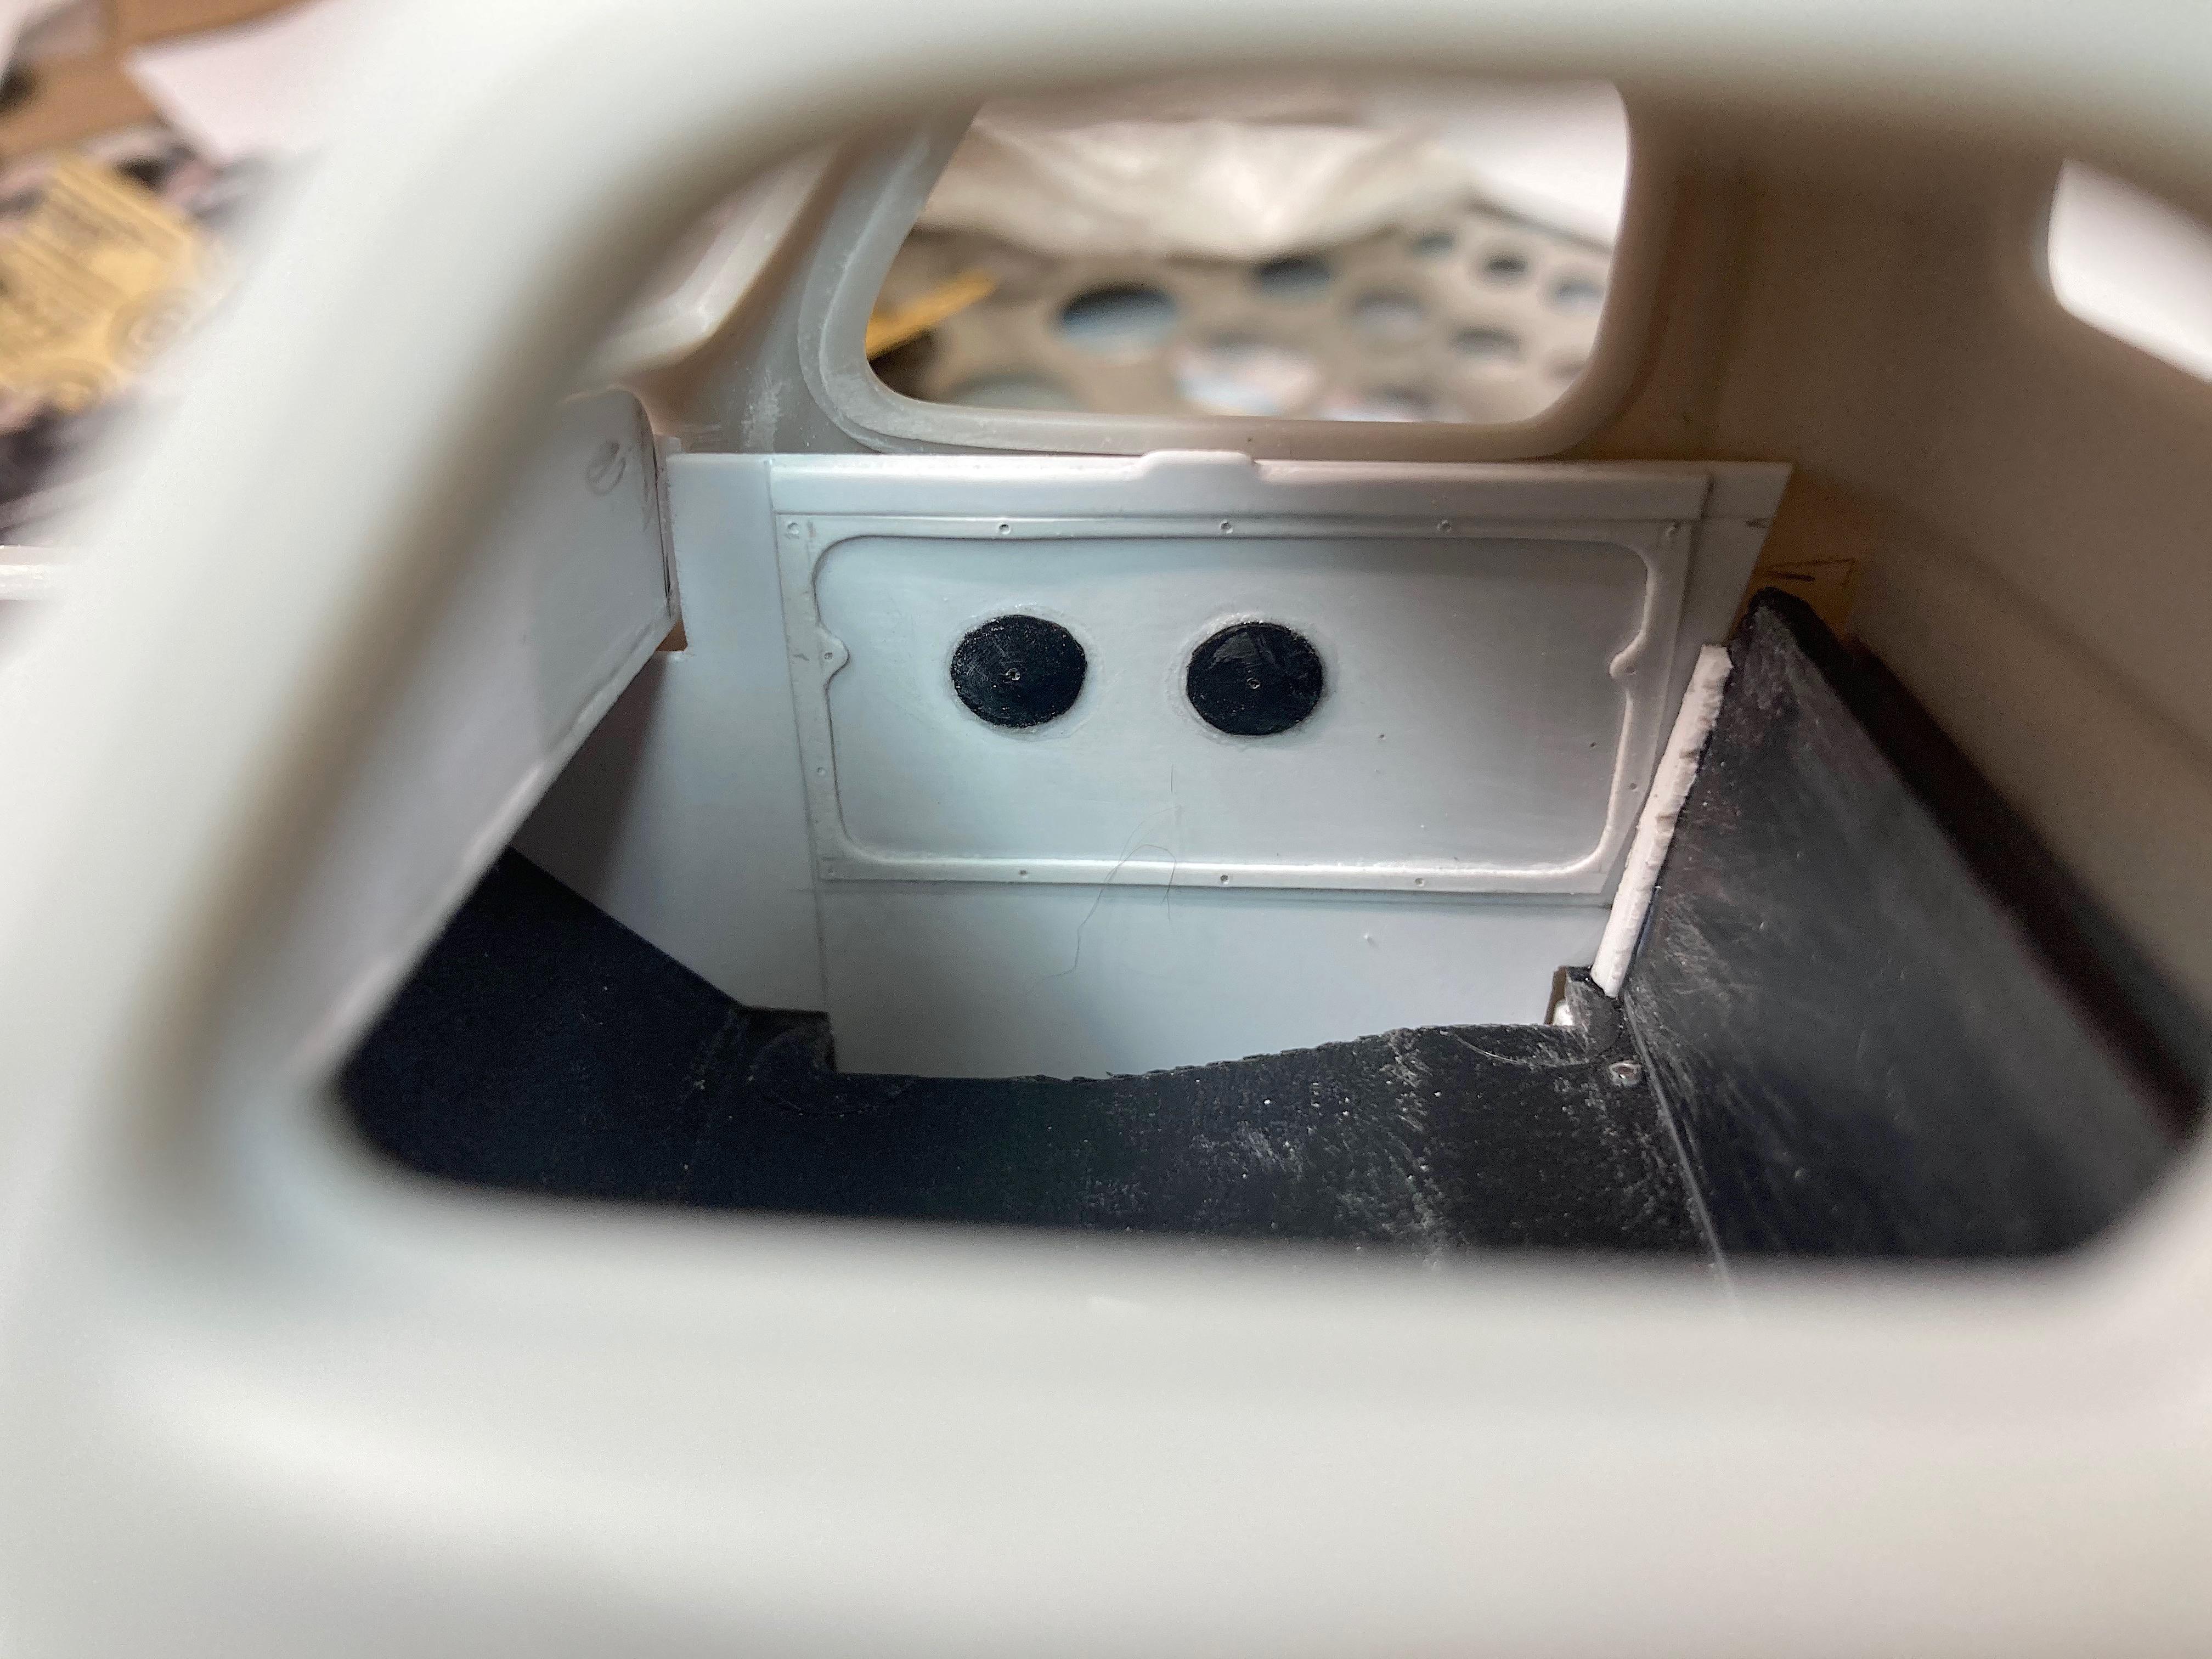
Yes, it's been working for me. Mudflap mounts are done, paper size based on a couple of flaps found on eBay. Back to the hood, prop rod added, newspaper printing plate mount, and the keeper on the hood. Also added magnets at the front, with steel plates on the hood. Made a battery tray, and a mount for the bottle (what it represents I don't know). Simple detail, a cover for the back of the instrument panel. There is a mystery part, can't find in the instructions, with the ? Sanded the body with sanding sticks and sandpaper. I'll spray a quick coat of primer to make sure I got everywhere. The kit steps are added, made mounts to hang them lower are made from a cut up kit part. I'm working on the scratch-built parts, by sanding, gluing, refining, as I'm taking it apart to prepare for painting.
- 108 replies
-
- 1
-
-
- 1953
- studebaker
- (and 2 more)
-
Different strokes for different blokes who are into sadomasochism.
-
by gremlin trolls
-
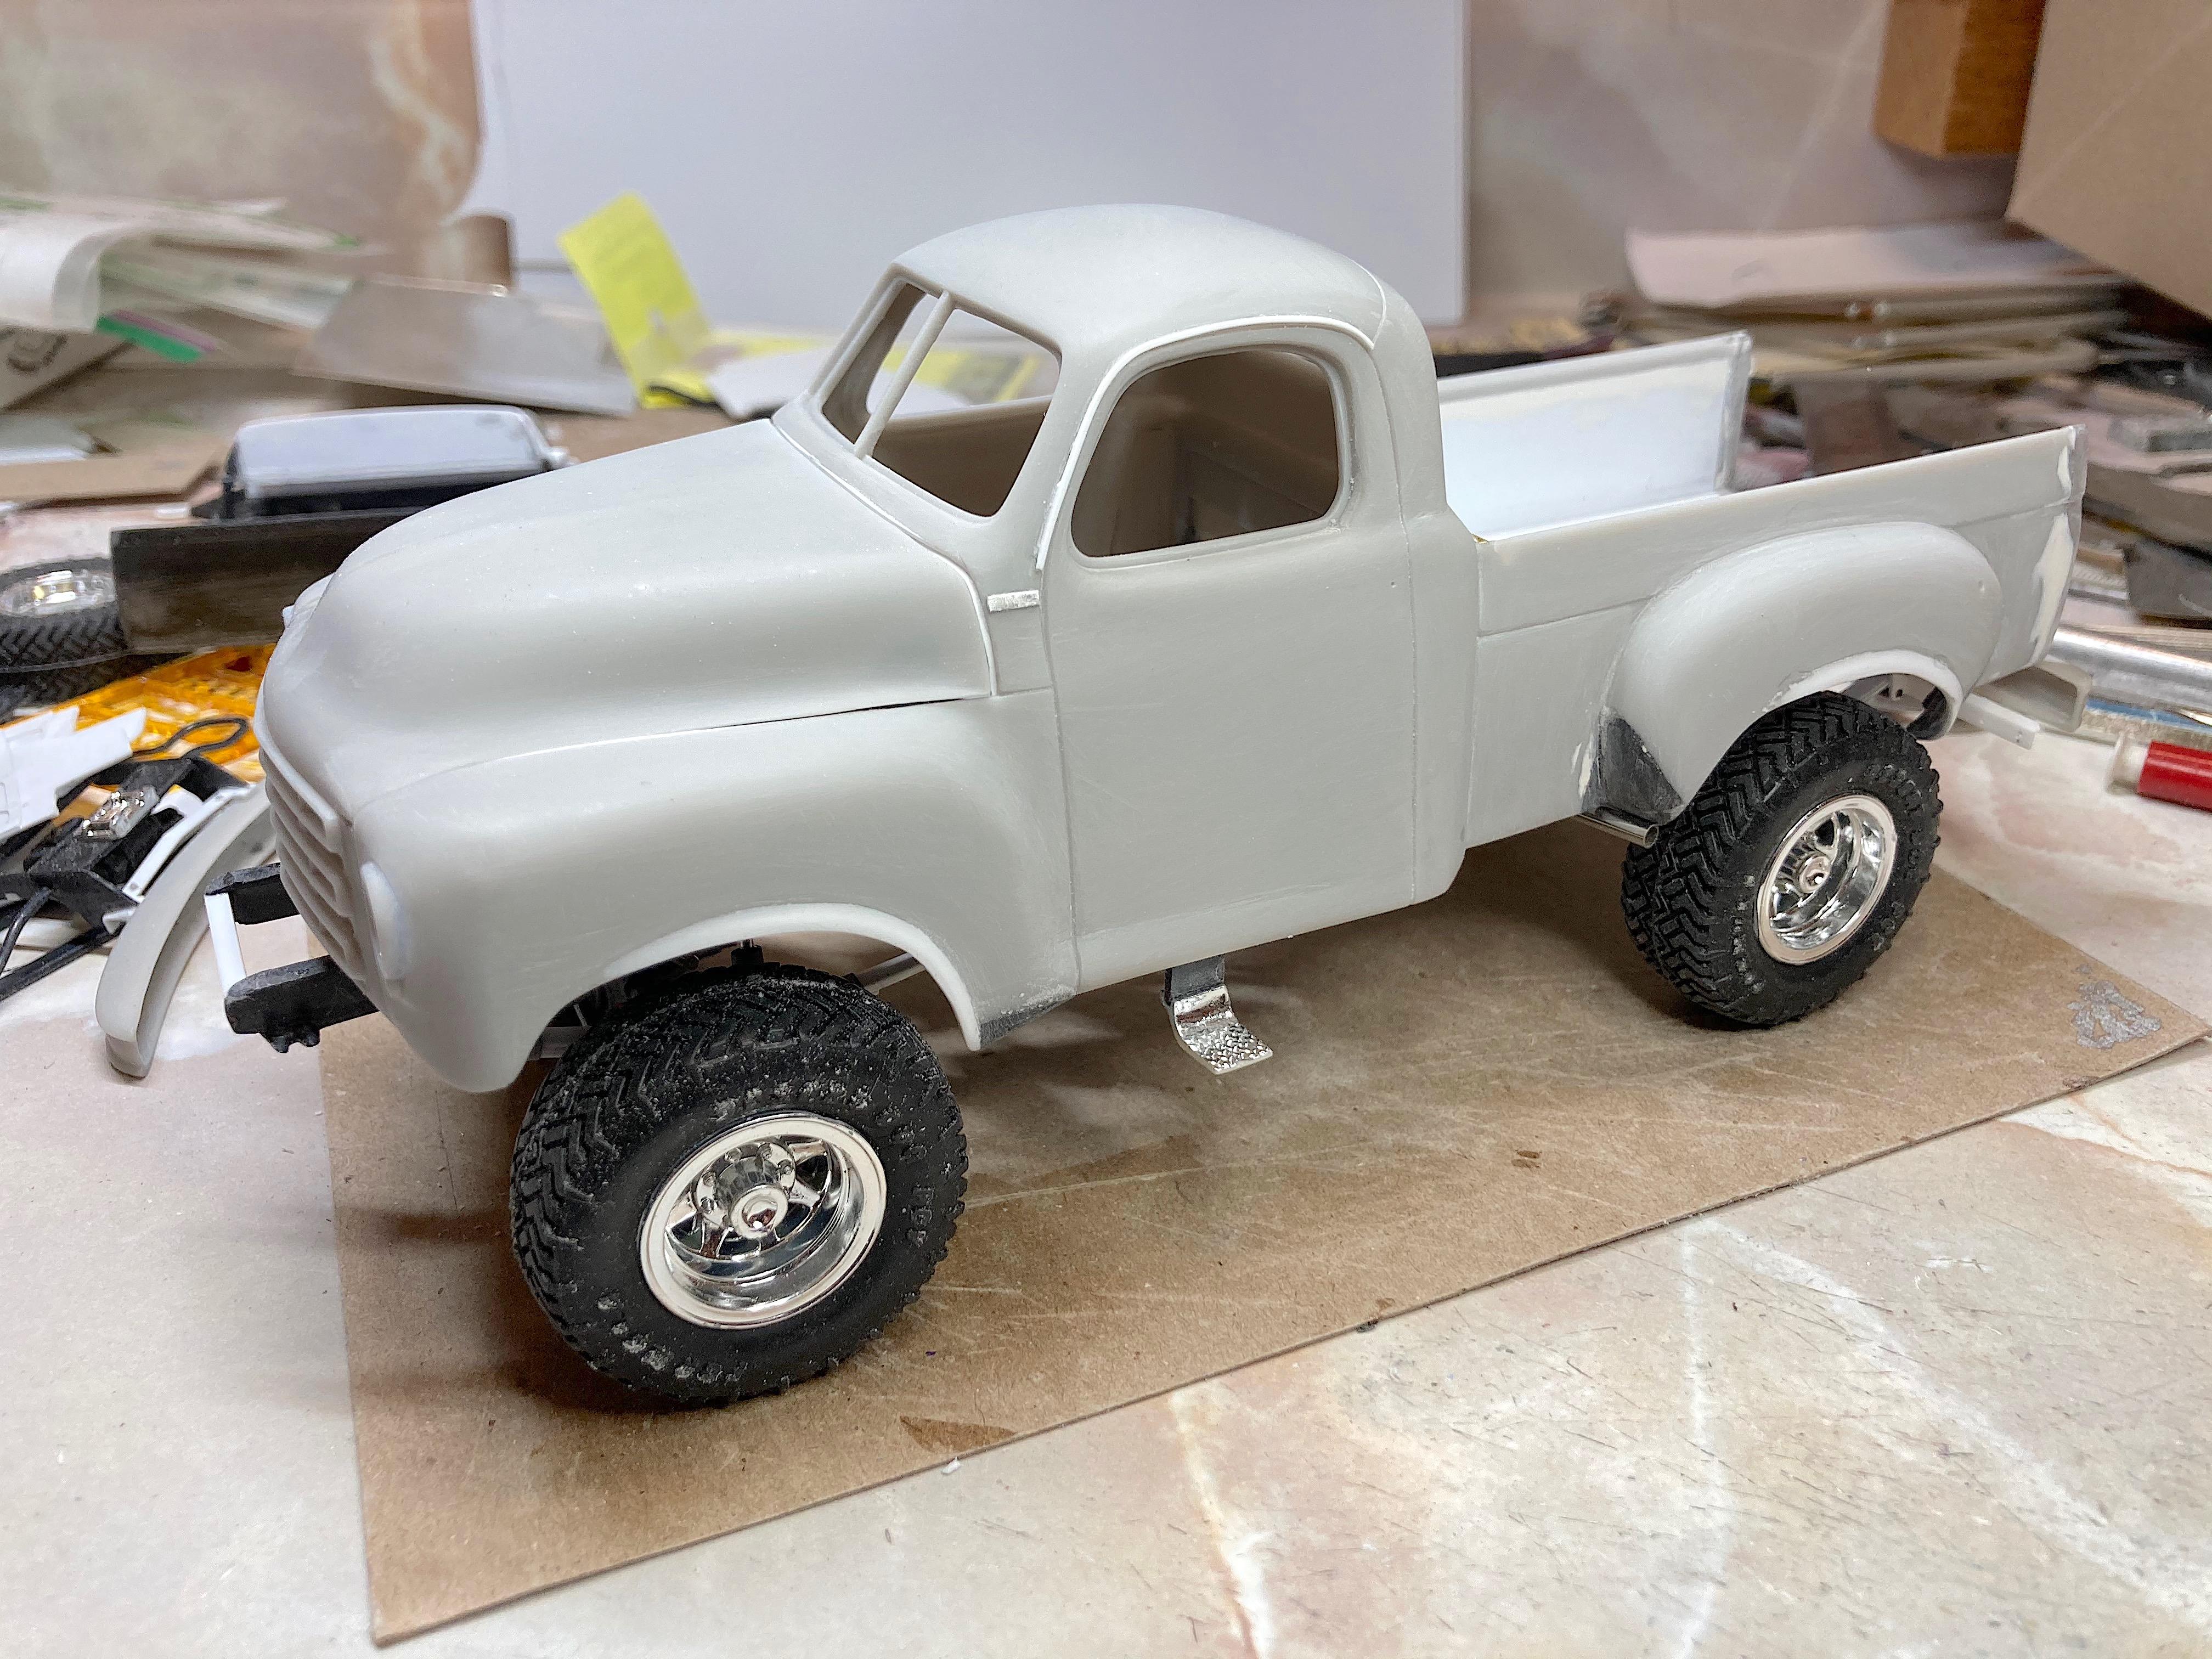
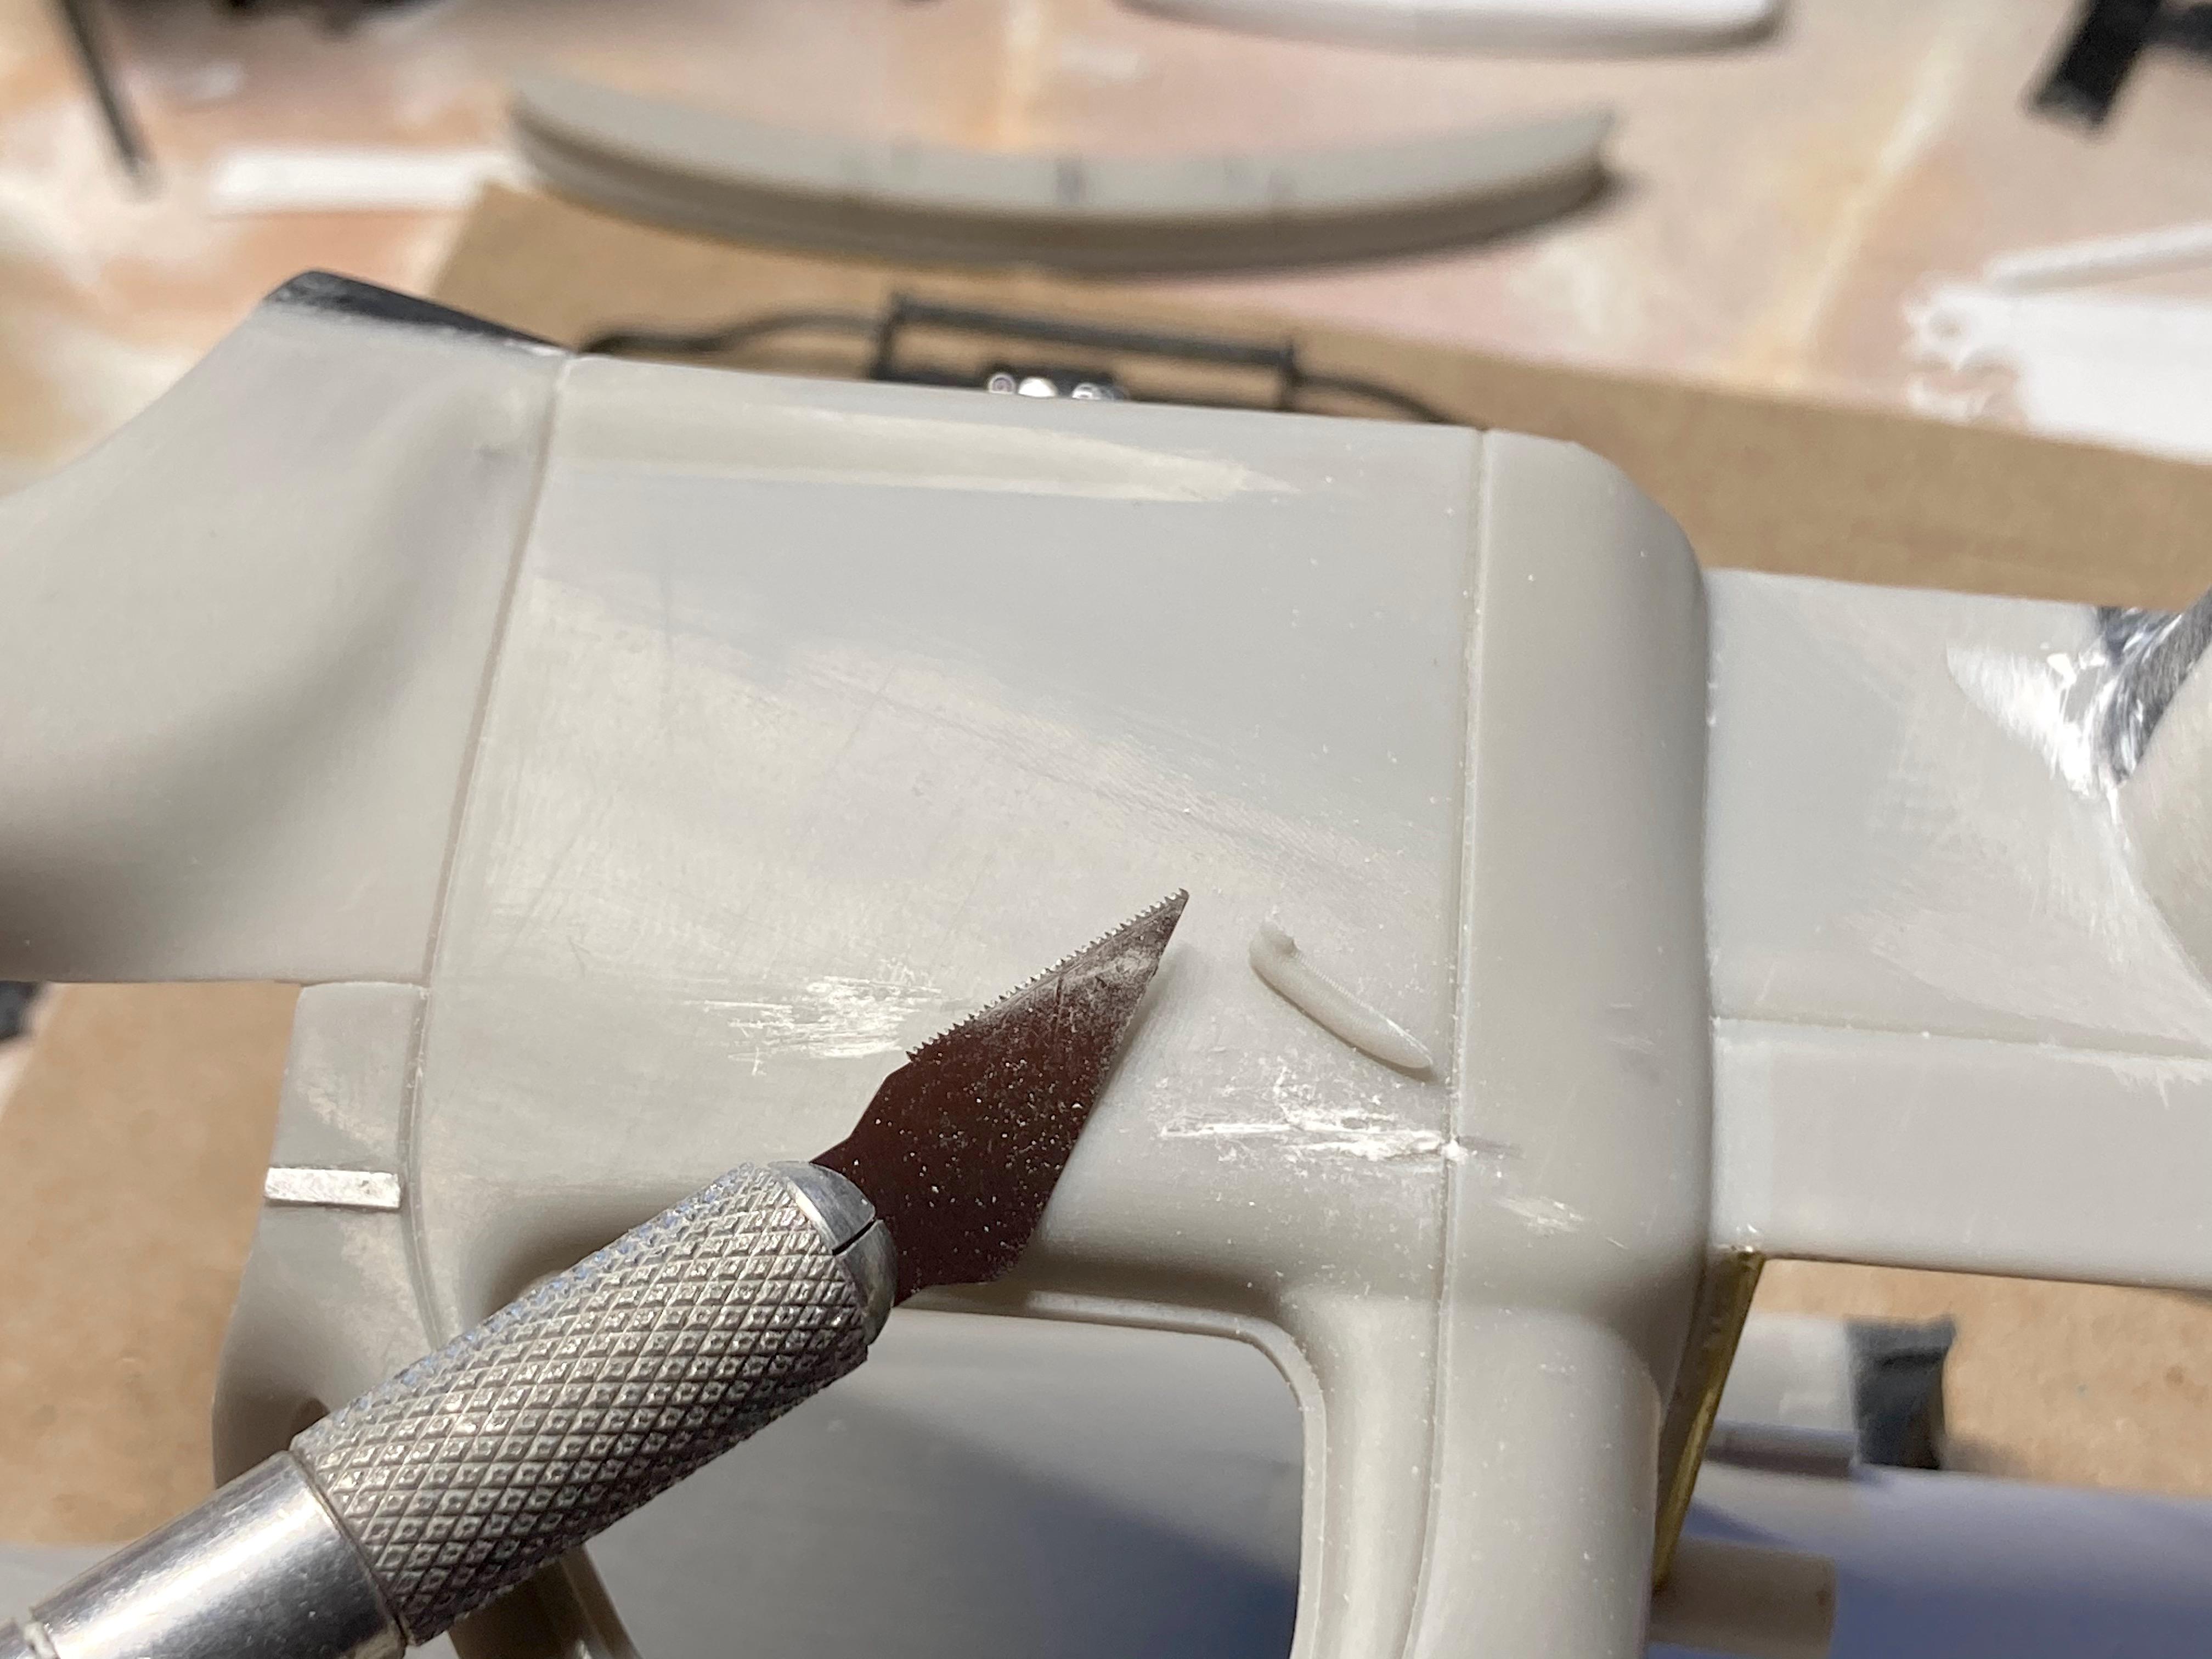
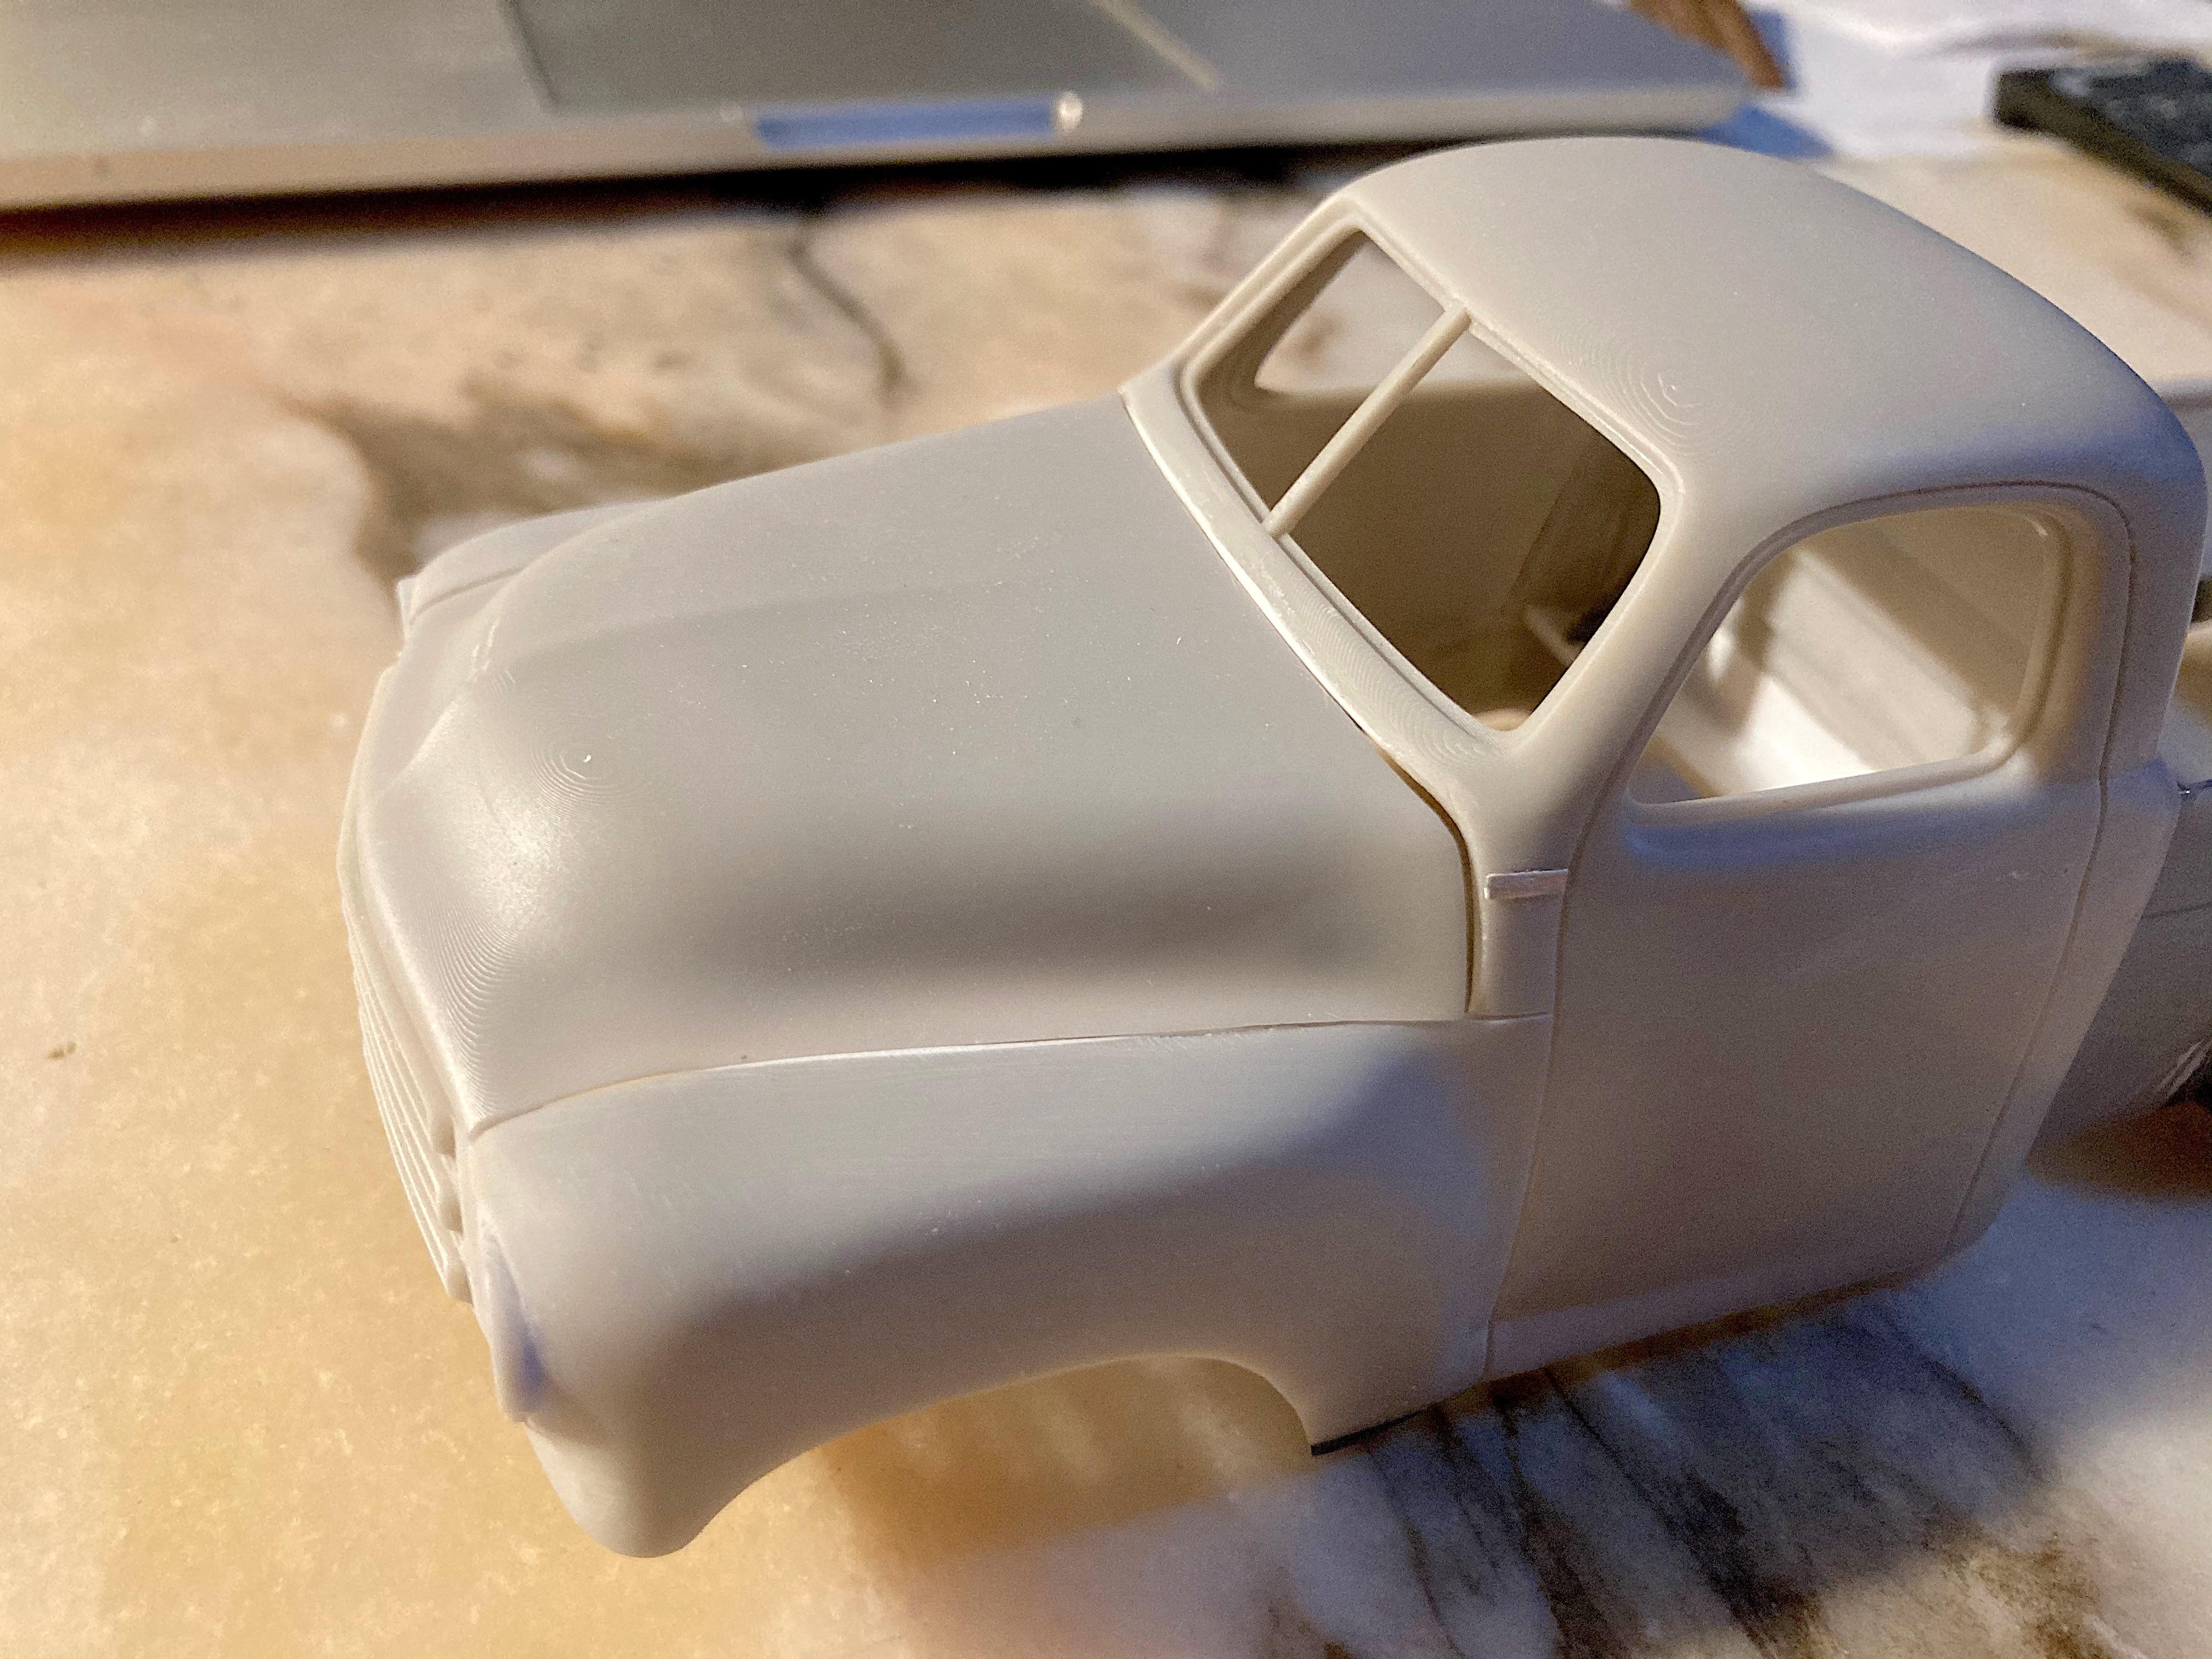
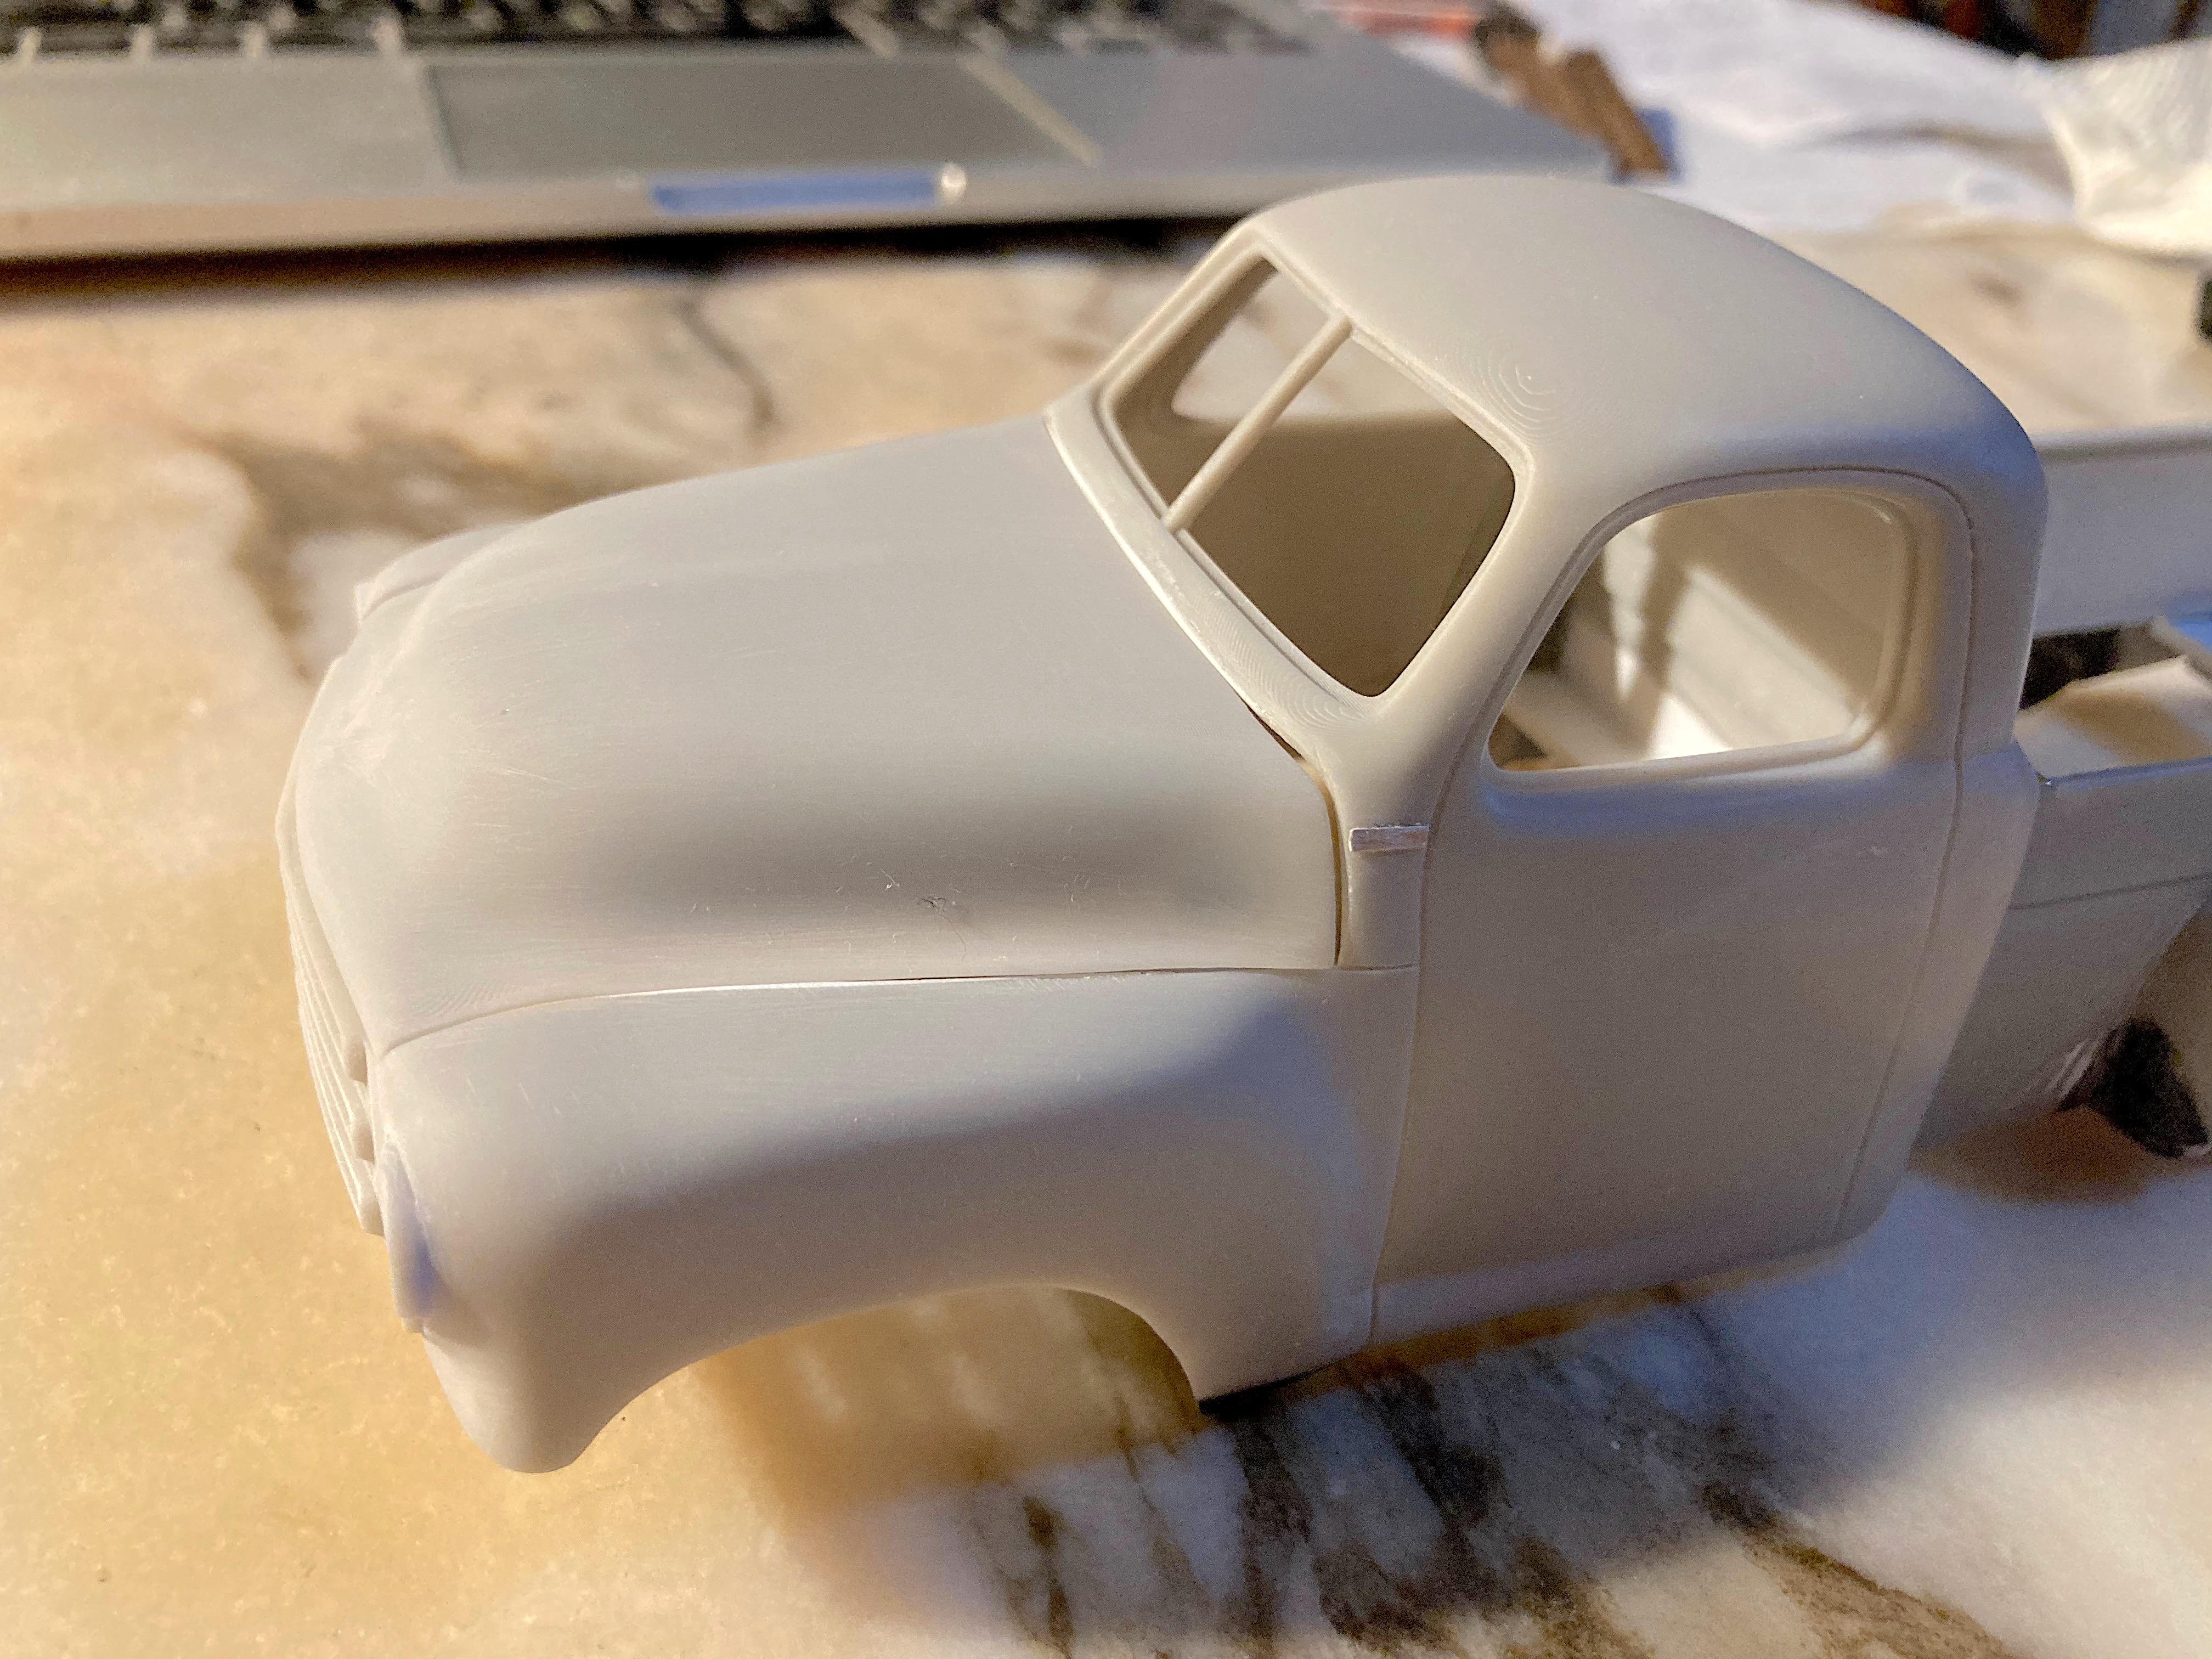
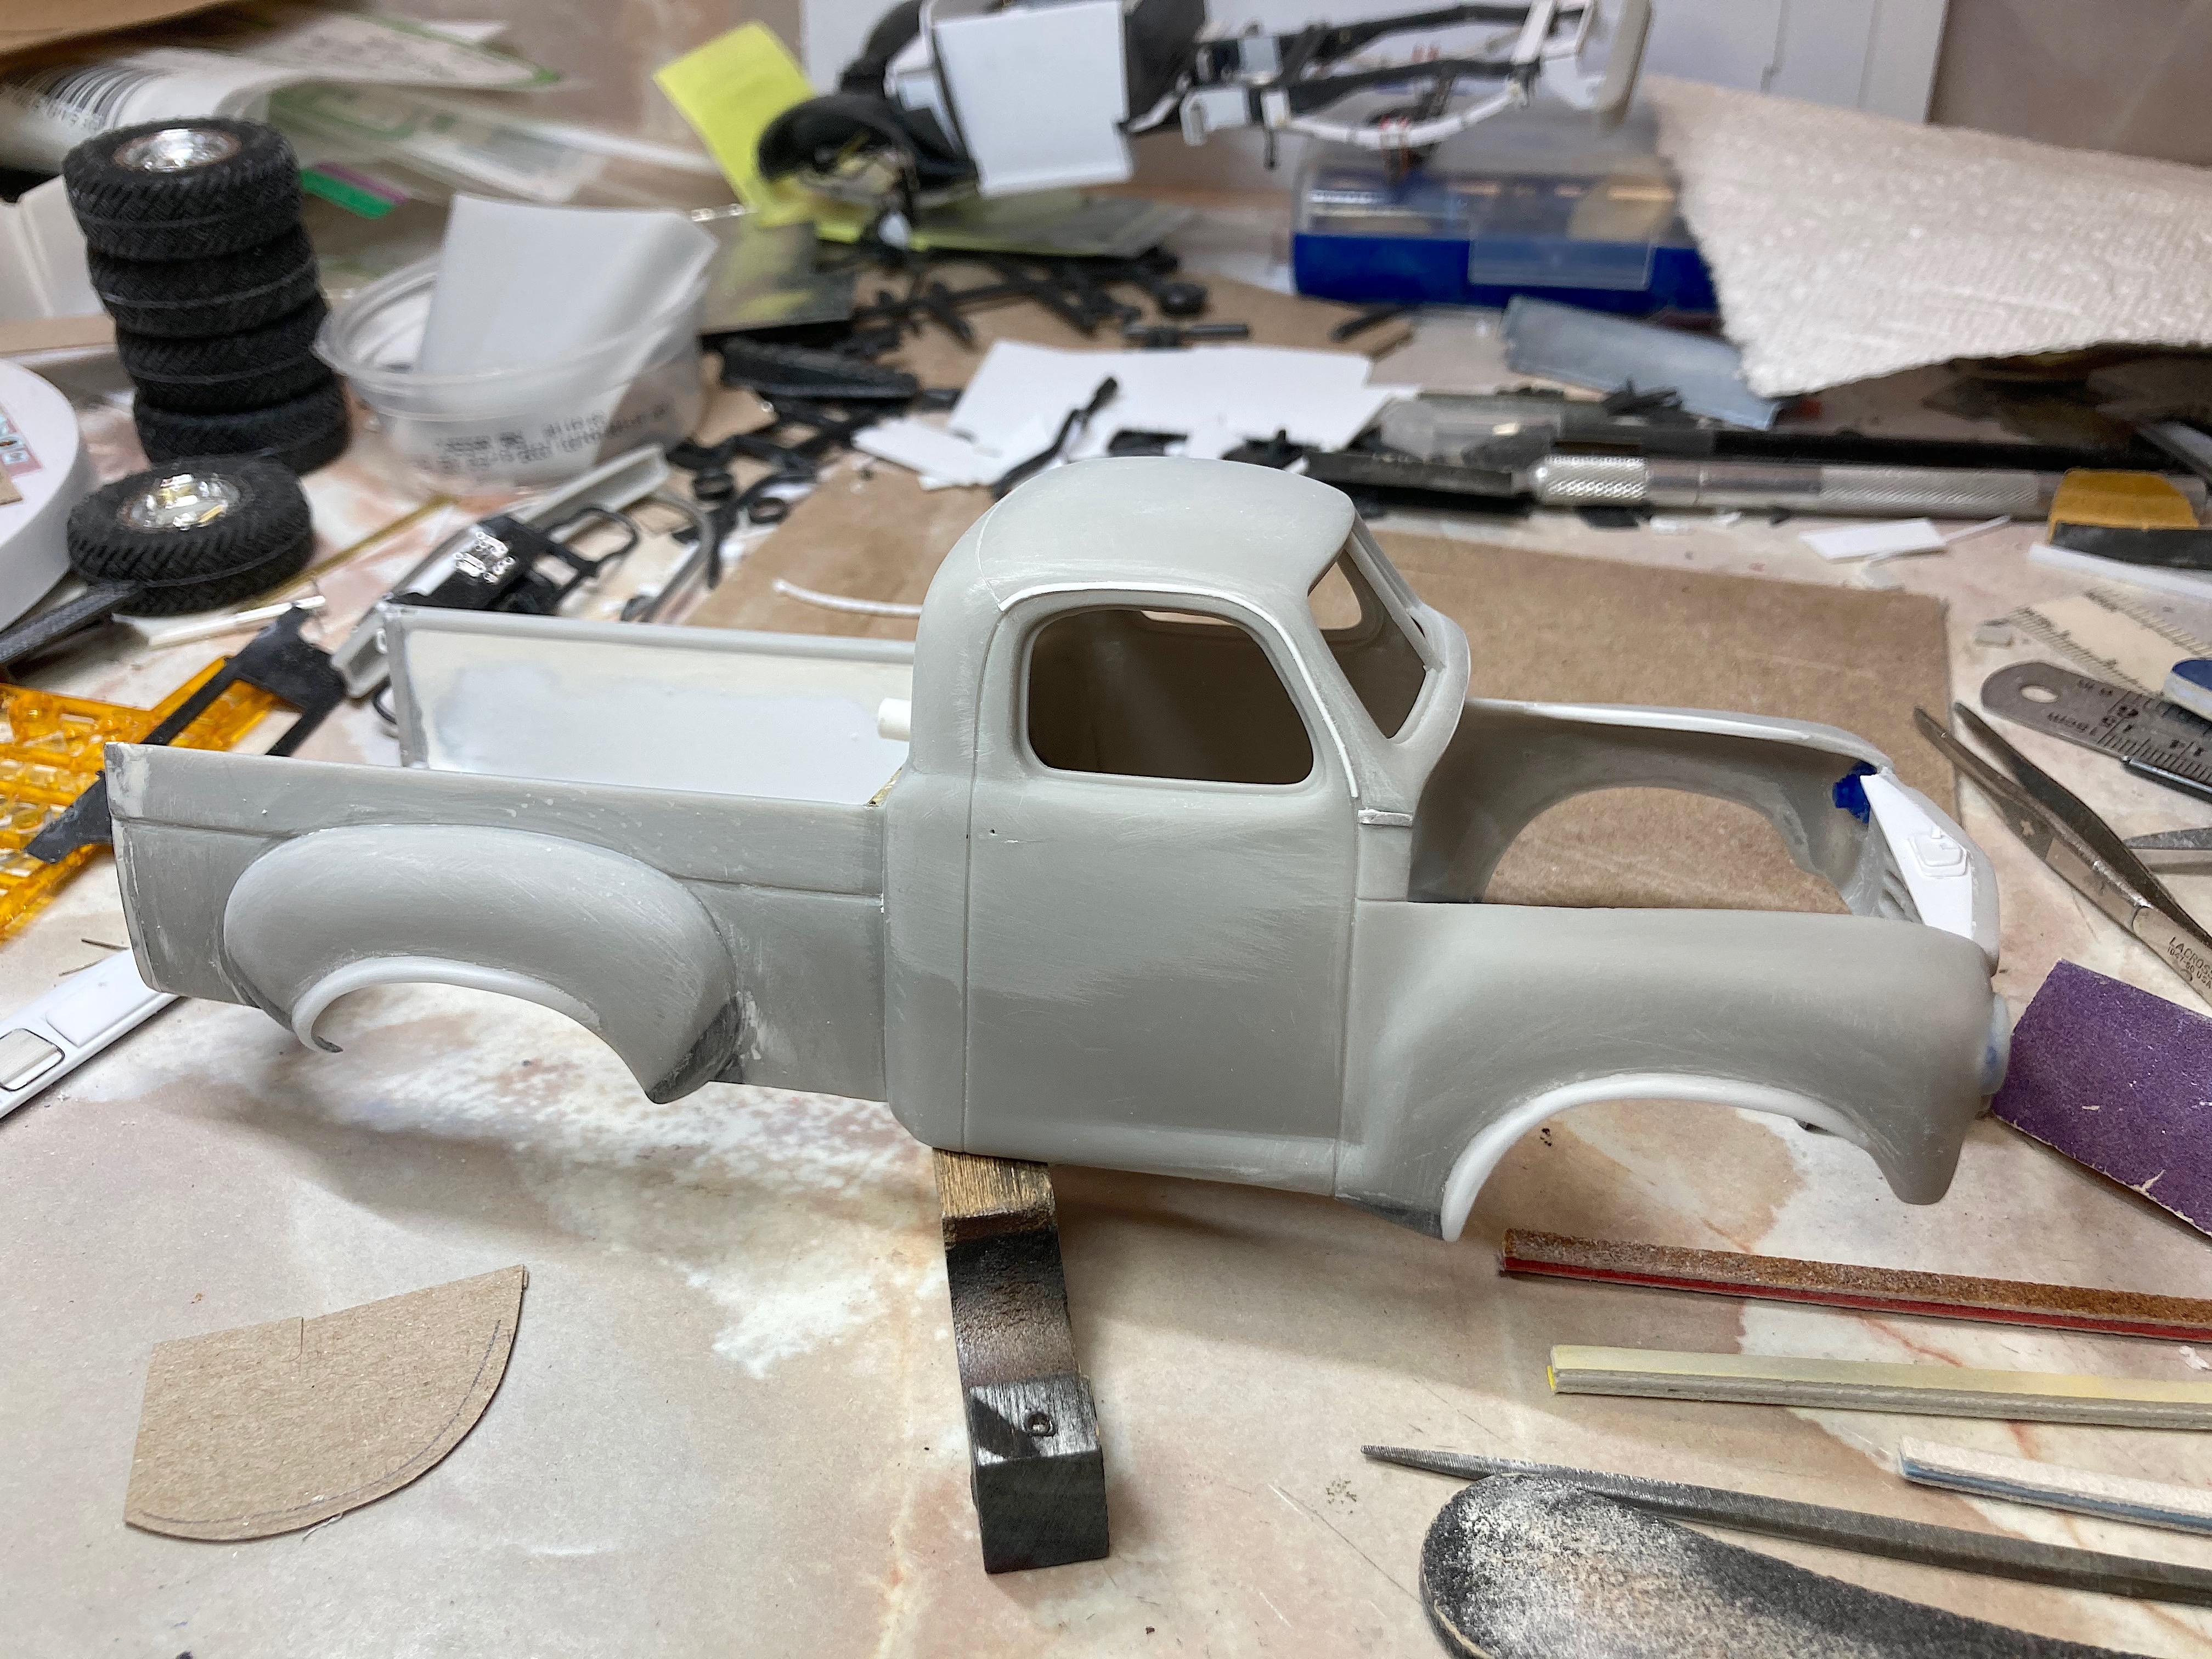
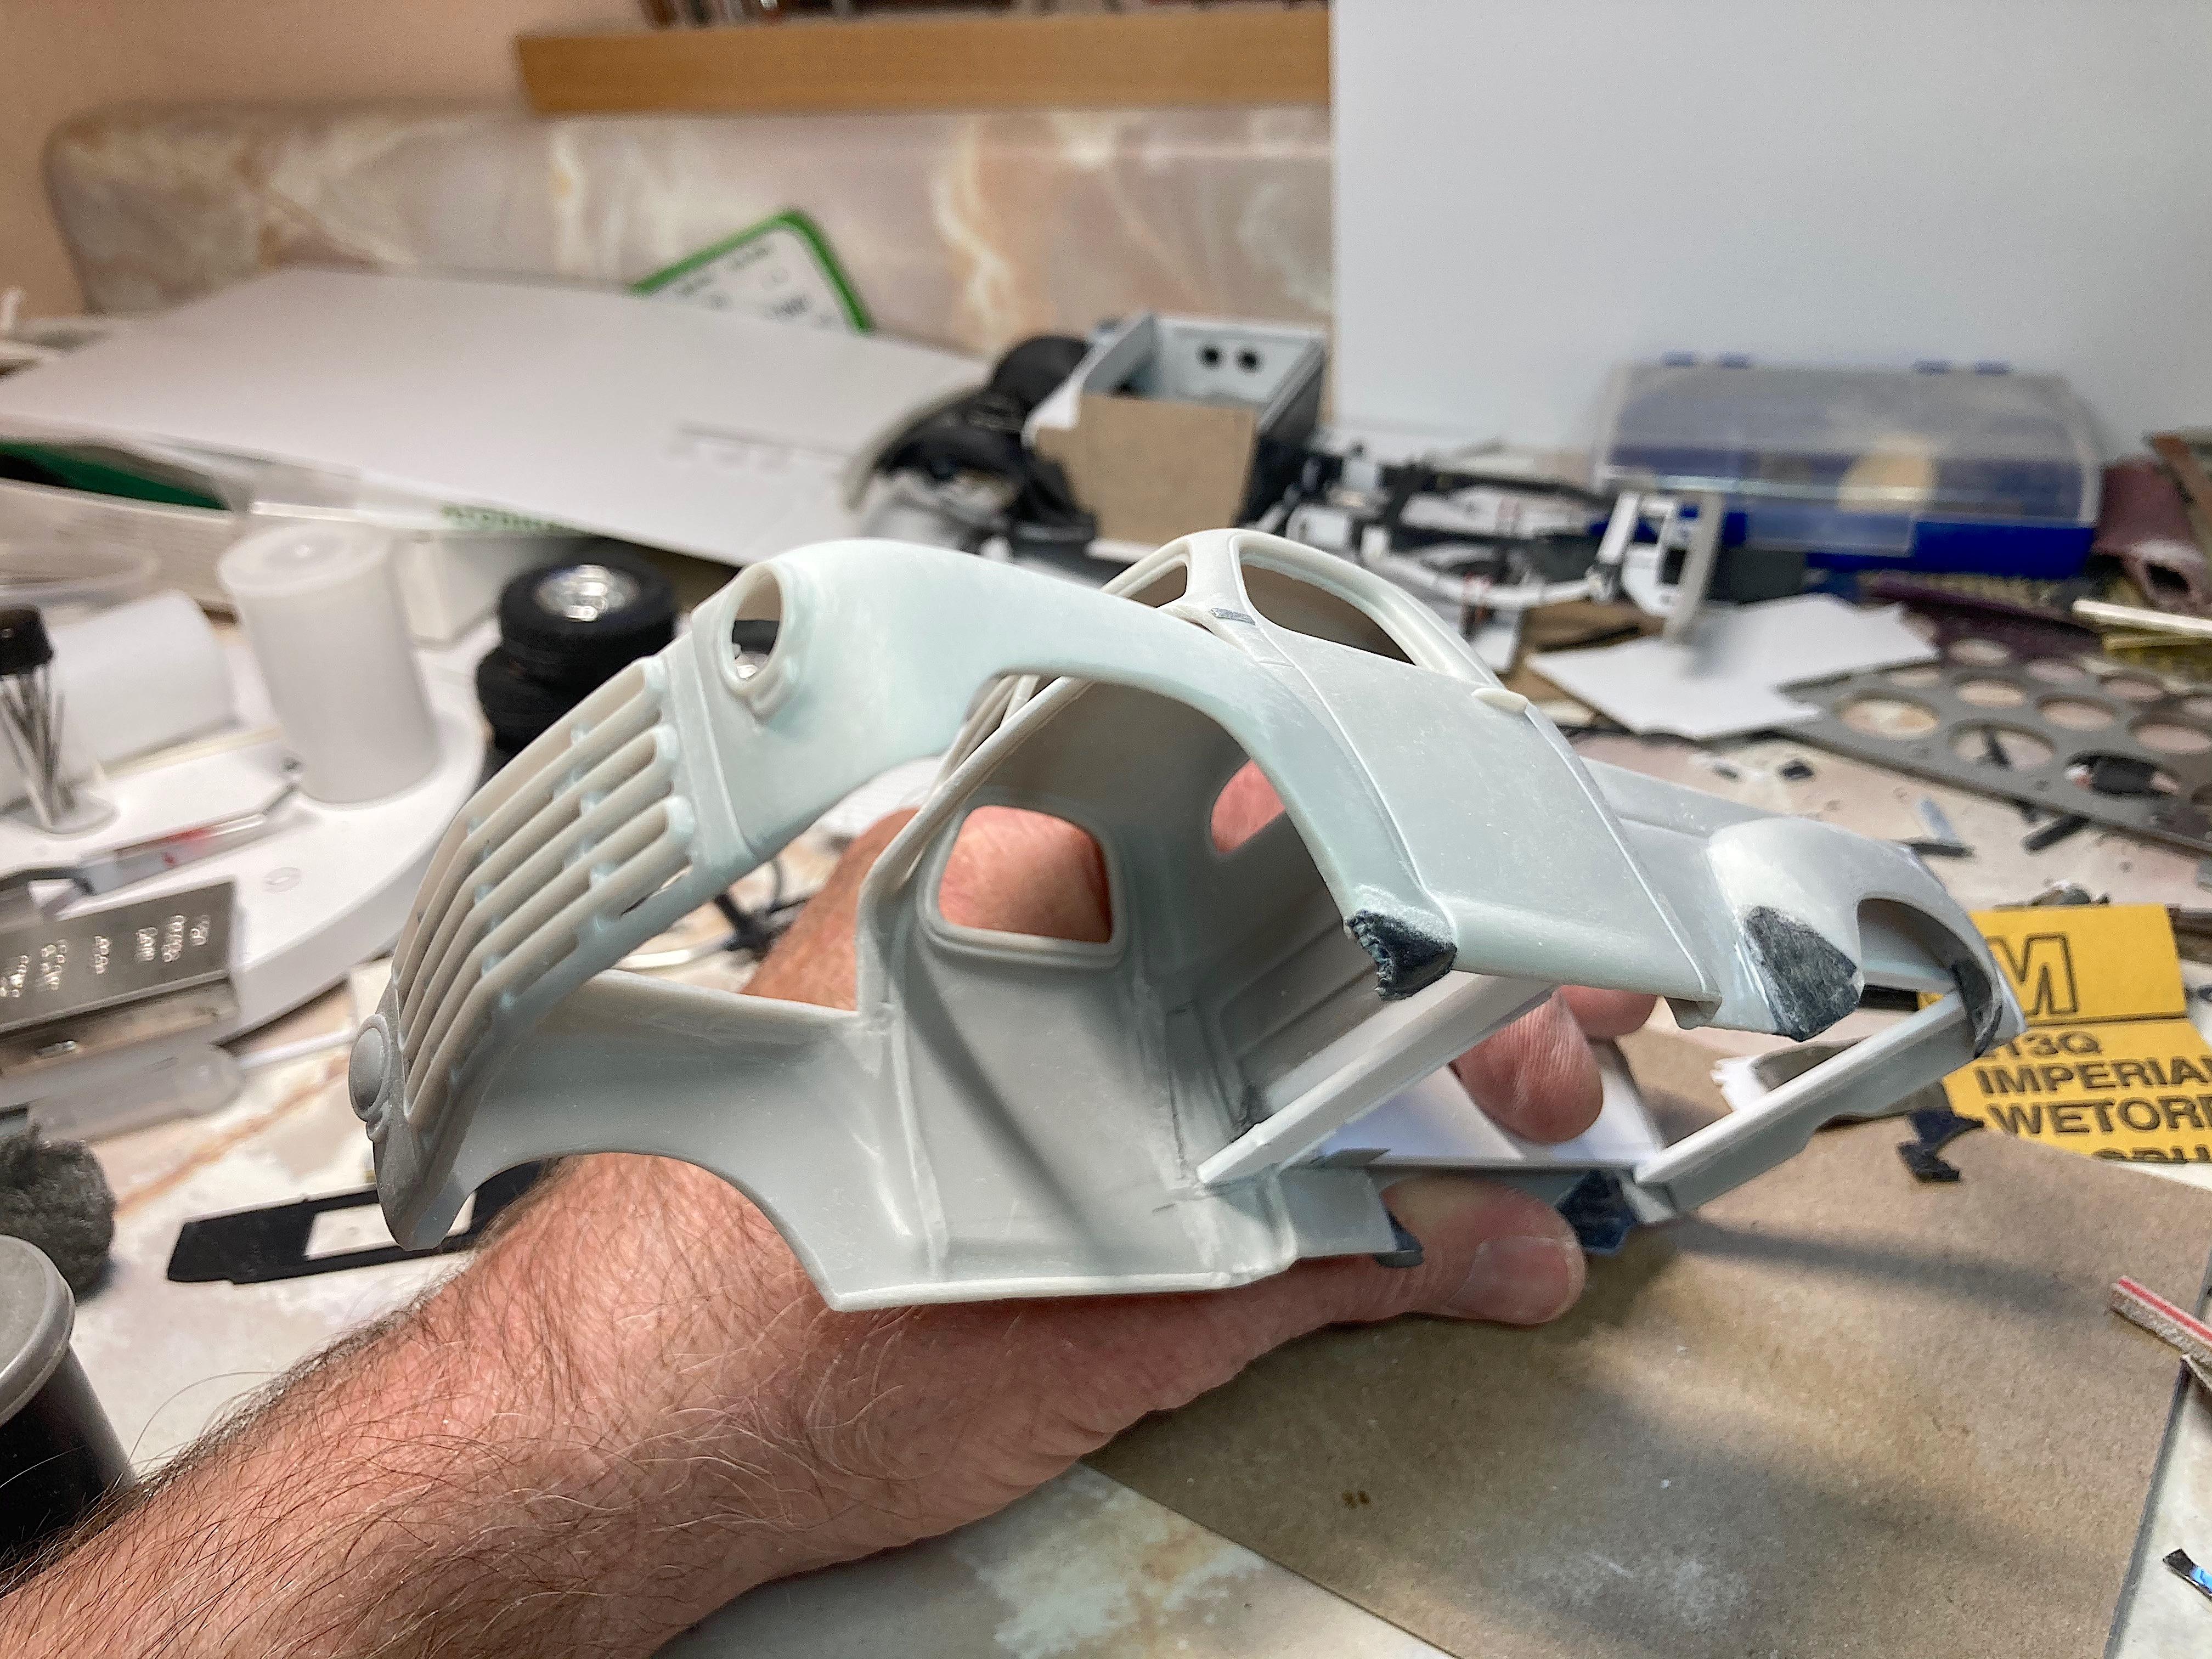
Thank you, and for taking a look and the kind comment. Picking away at the body. Trying out a new photo-etch saw, door handle is removed. The hood wasn't matching the cowl very well. Ran under hot water to bend some arc into it. Wet-sanded the hood too, removed the wood grain. I'm going to glue a ledge on the cowl, so the hood never sags down. Something most kits of this era of pickups don't have, the roof to back of the cab has a seam. Stuck a narrow strip of Scotch tape at a pencil line to run the scriber along, making short strokes. Then I used the other scriber (another new tool), pushed like a chisel, which straightened the line. Finished with fine steel wool. Added Grandt Line bolts to the brush guard. The radiator support has been getting whittled down. There are faint lips on the fender arches, so I used 0.03" styrene cut with the hot-wire. After gluing on, roughed to shape with the Dremel, then sanding sticks. Also added rain gutters, started with wide 0.02" styrene strips. Think that's it for the OCD details. ? Need to sand the rest of the body smooth. Made a list yesterday of what else needs to get done, hoping it will keep me focused, and not feel overwhelmed.
- 108 replies
-
- 2
-
-
- 1953
- studebaker
- (and 2 more)
-
Thank you for the suggestion, never would have thought of it. No on the floor mats, that would mean having to do separate pedals, since the doors don't open, not worth the effort. I have a plan for the floor...... Thank you. I'm looking forward to it more than you! ?
-
in the outhouse
-
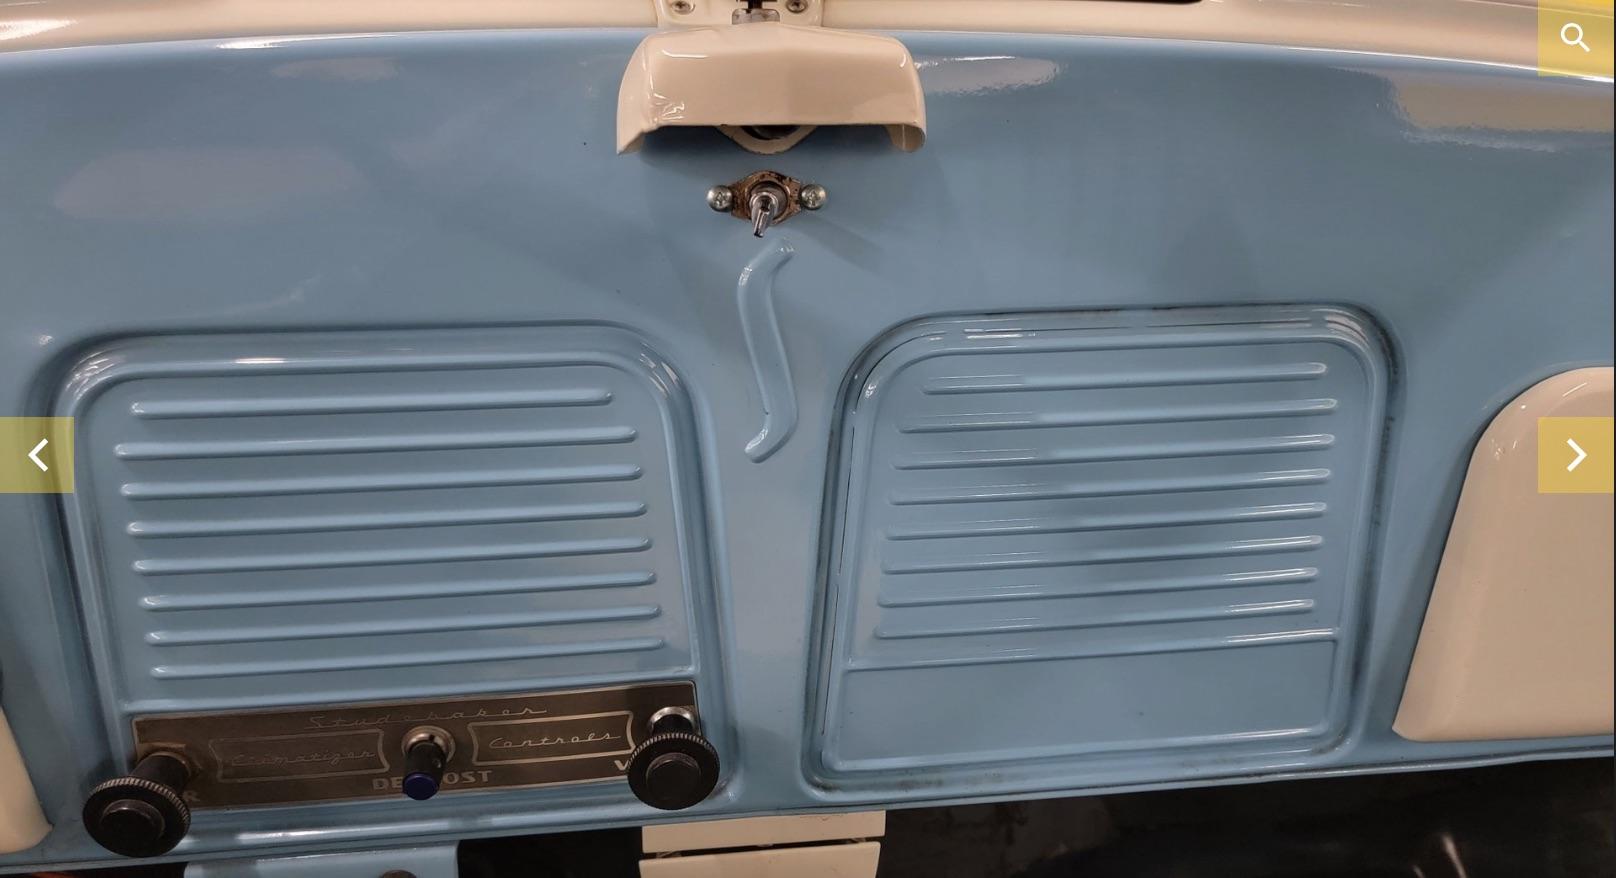
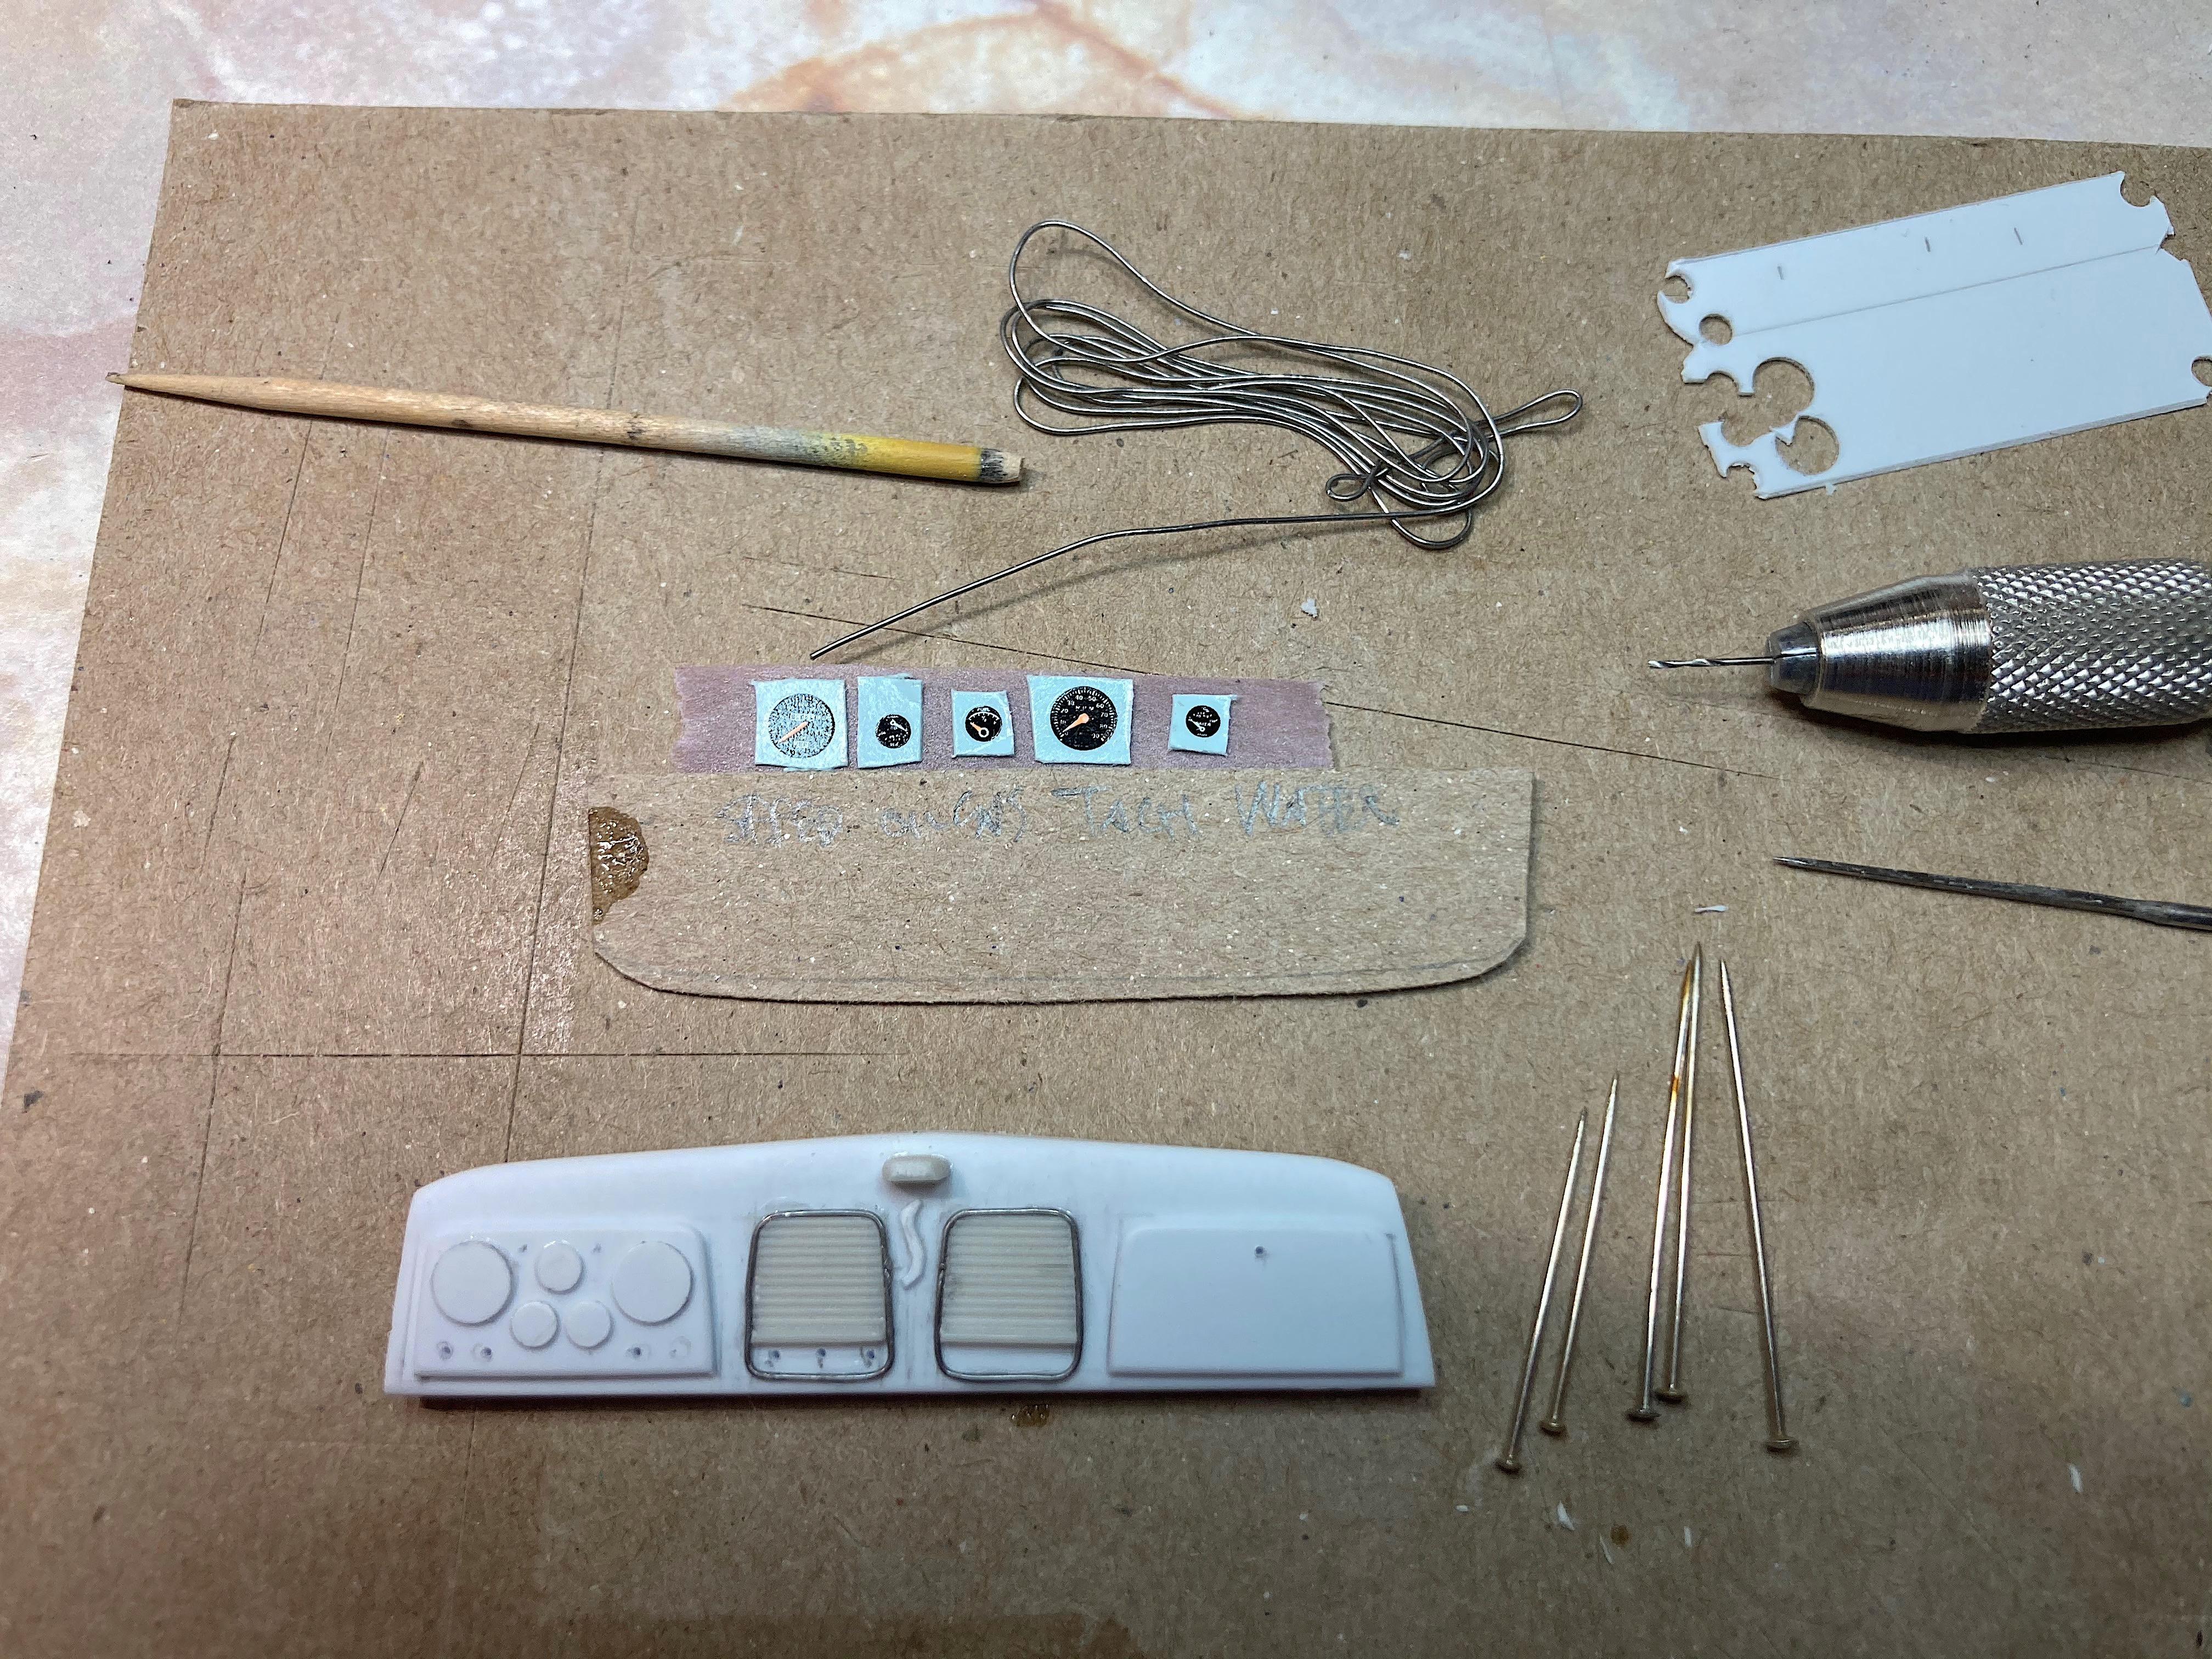
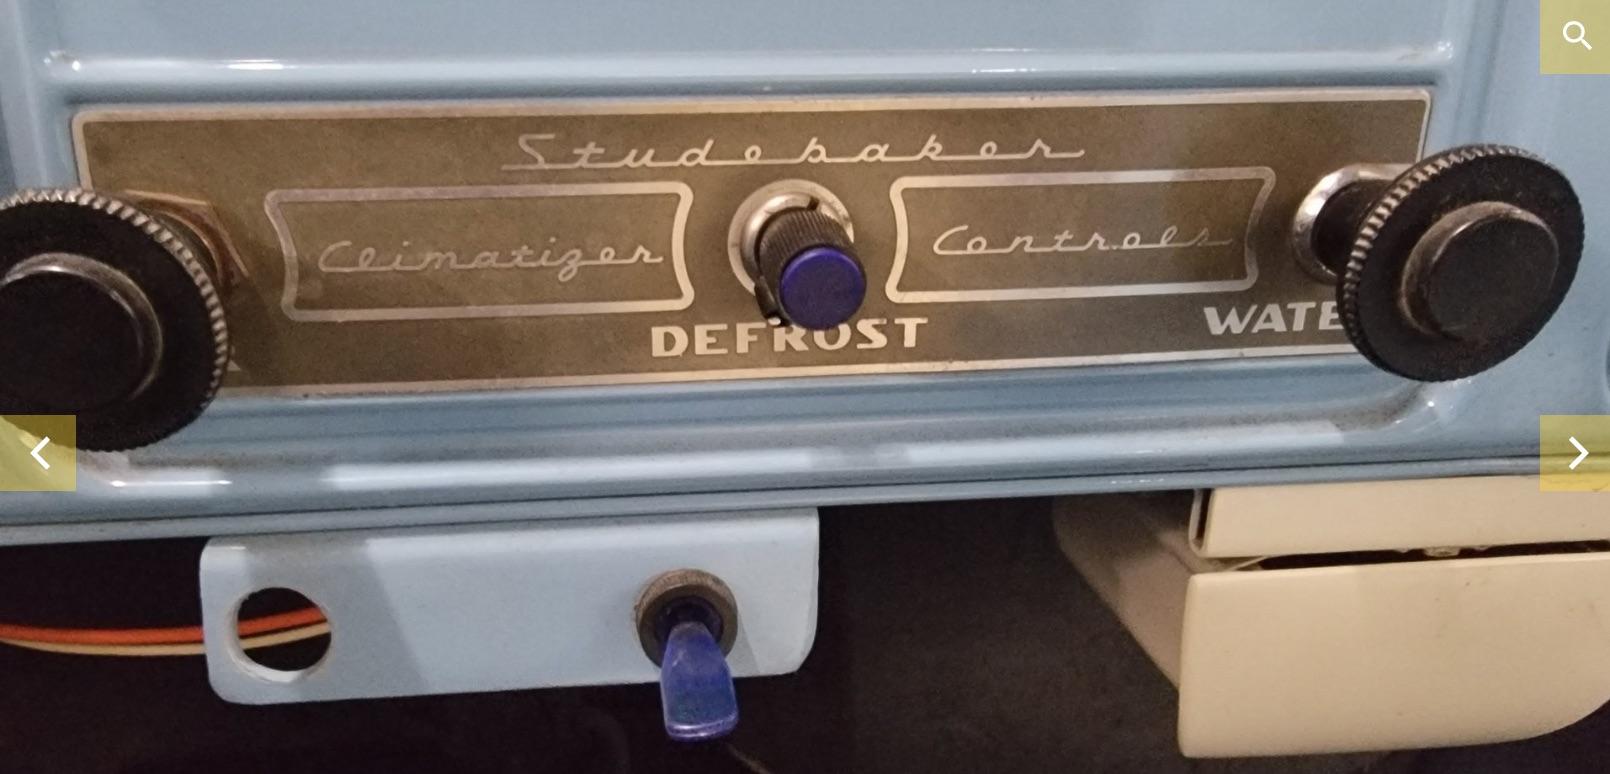
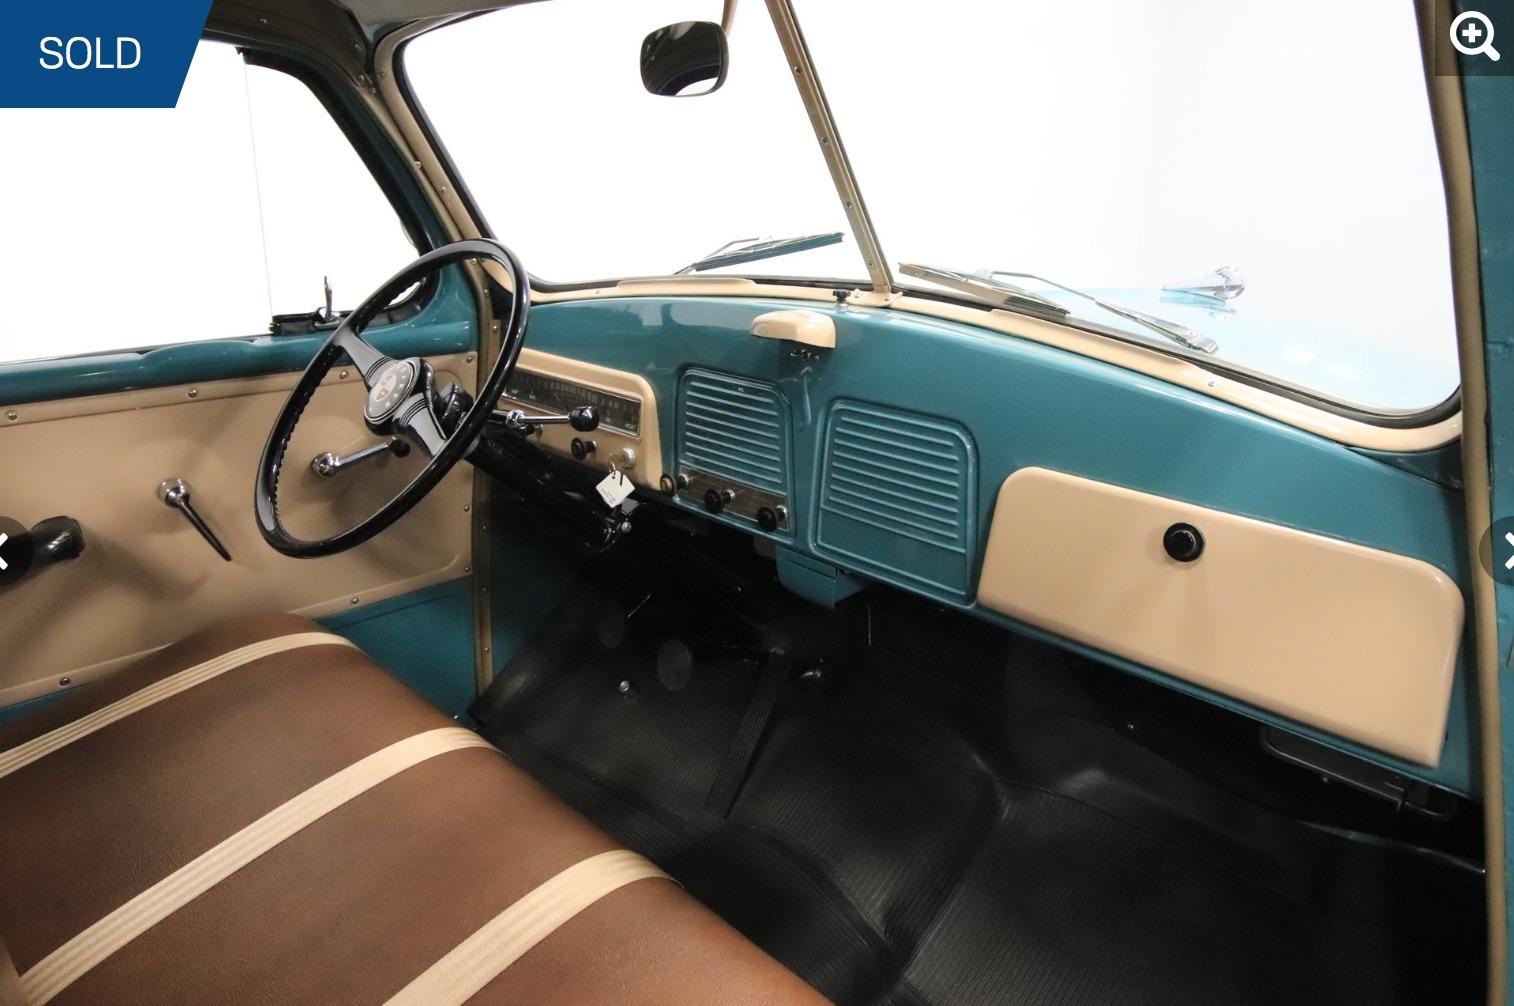
Found another picture of the mud flaps, original font. Dashboard is simple, except for the center panels. Found a door panel from the '62? Chevy, which is close enough. Cut apart with the hot-wire. Solder wire used to fake the edge. The glovebox and instrument panel are flat, I didn't bother tapering like the real thing. Punched out disks for the gauges, eyeballed the locations when glued on. Picked some shirt pins for knobs. The control panel is amusing.
- 108 replies
-
- 1
-
-
- 1953
- studebaker
- (and 2 more)
-
Called HAZMAT team
-
This ad was at the top of this forum. Marketing department might want to reconsider this photo, just sayin'. ?
-
Thanks, I love it! When I get the kit box shrinked to scale, could print the mudflaps.
-
Spoon in the wrong hands could be an a-salt weapon.
-
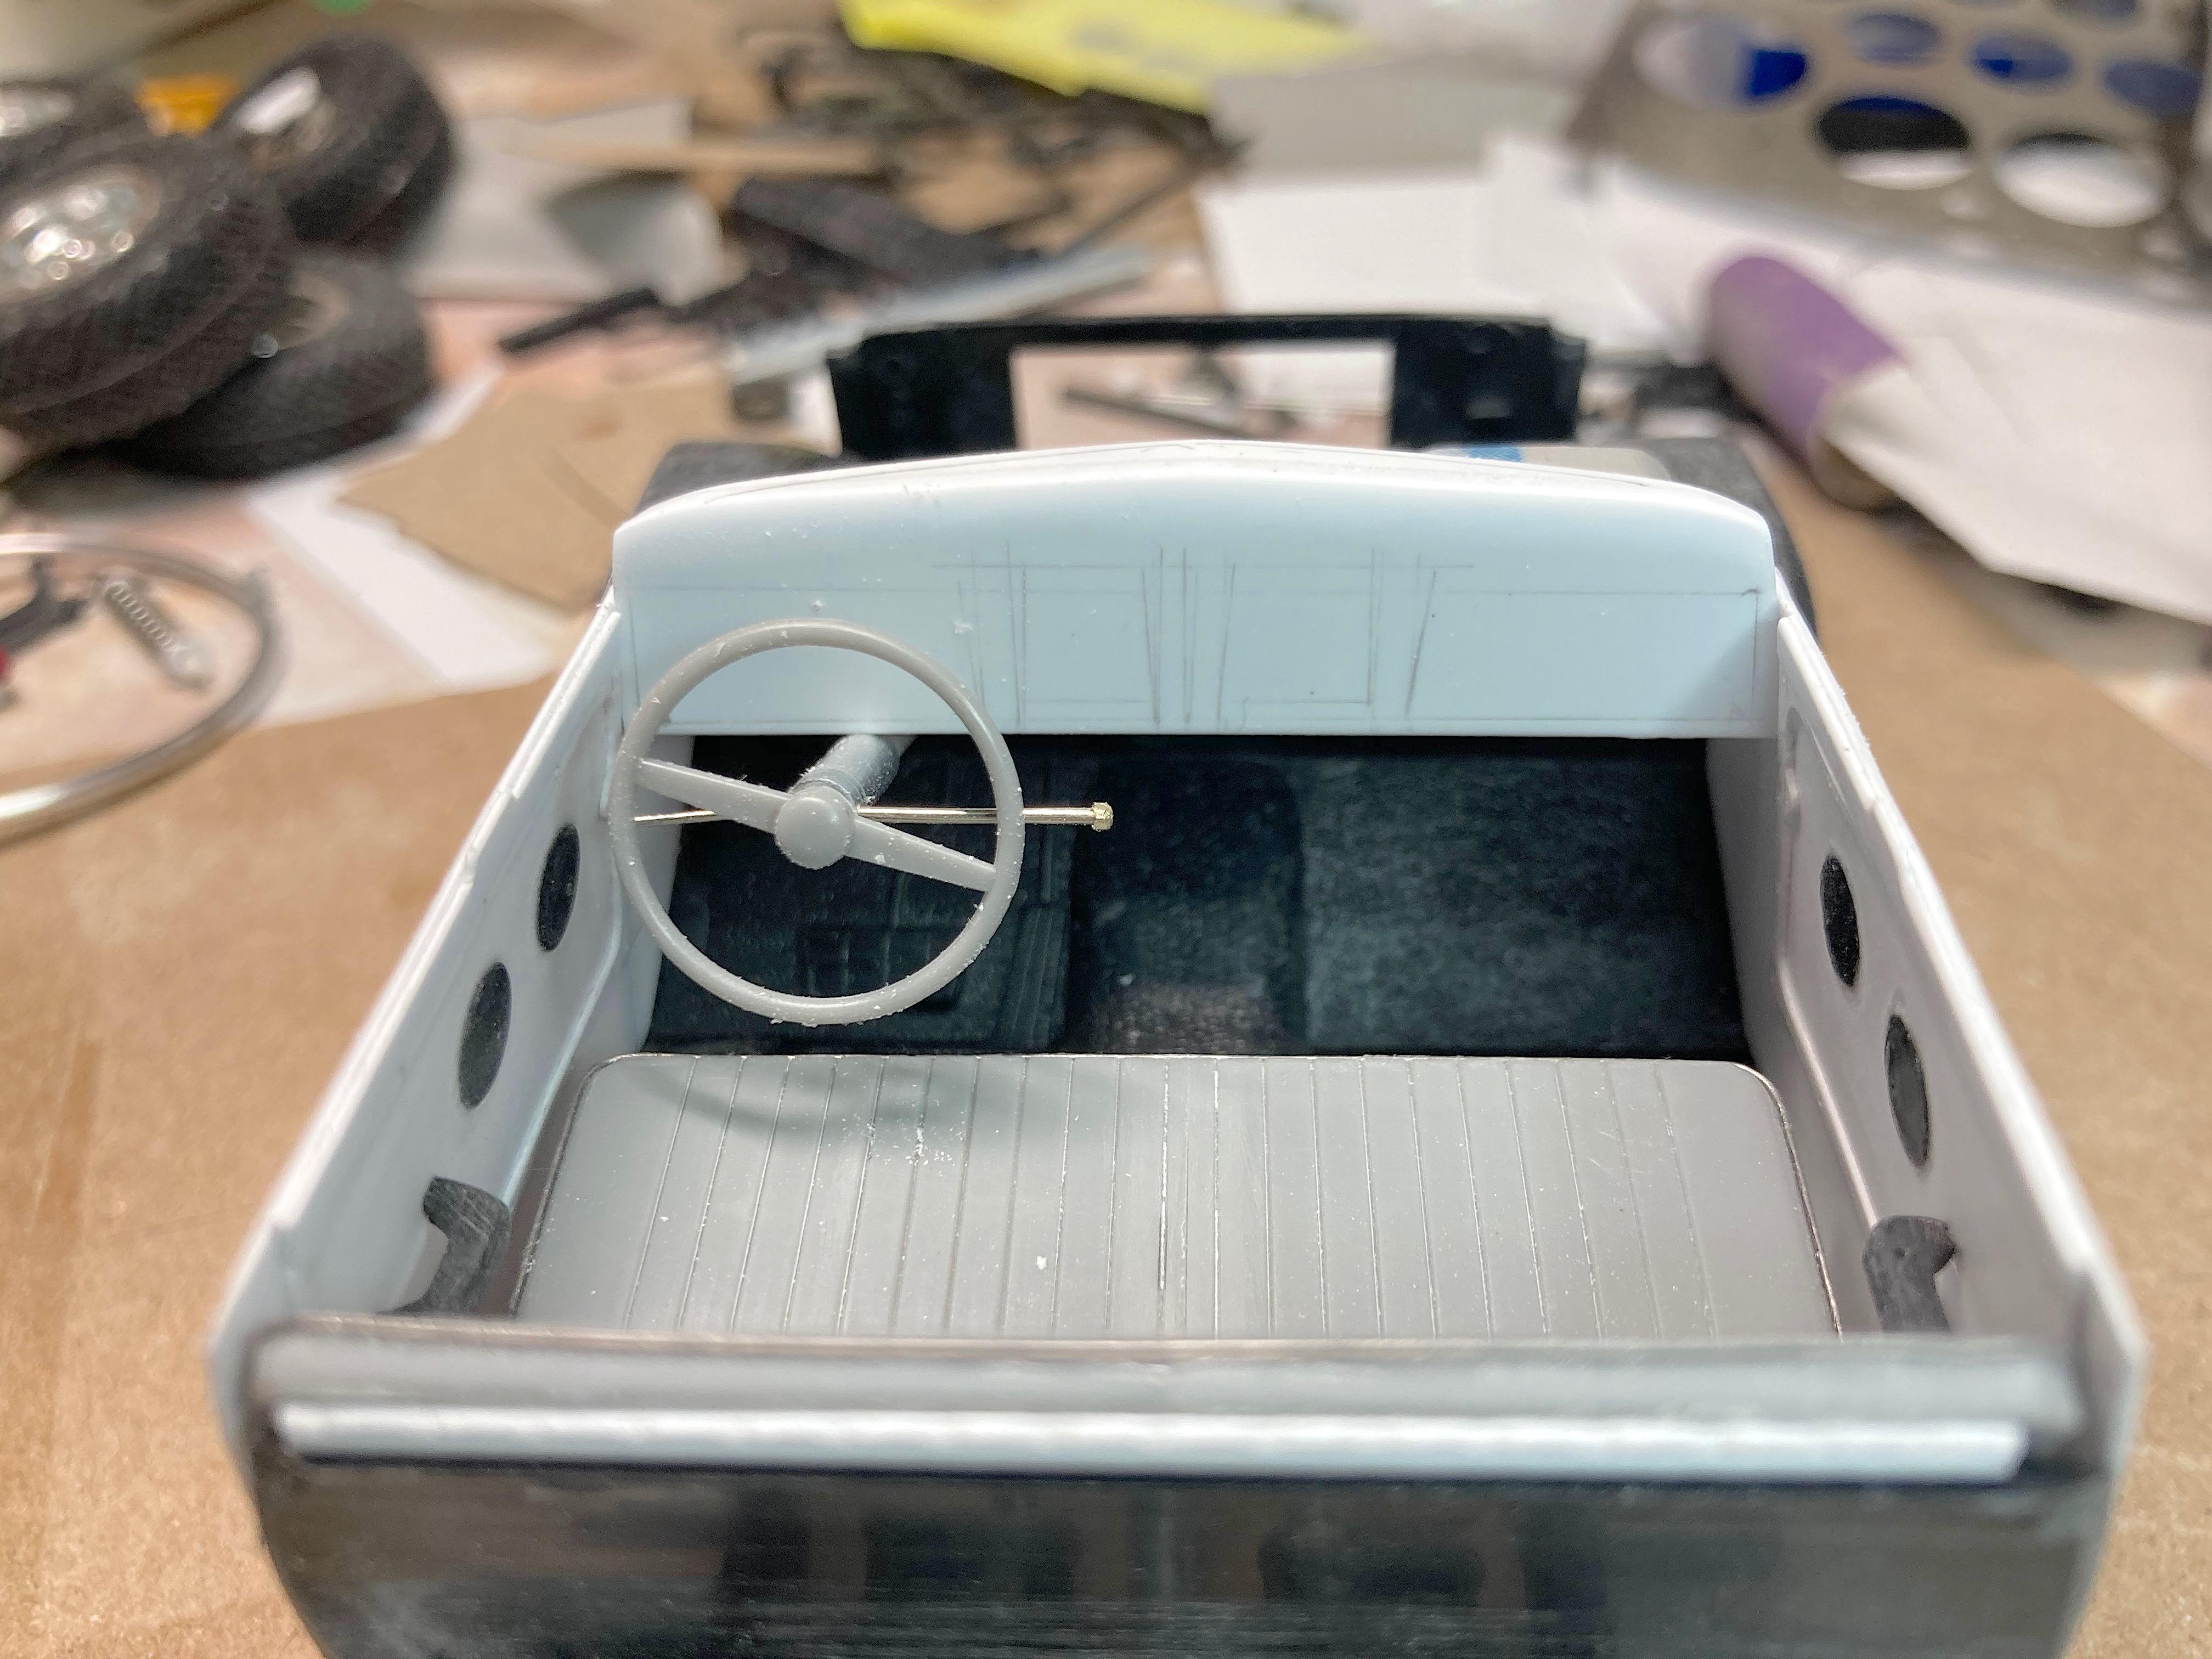
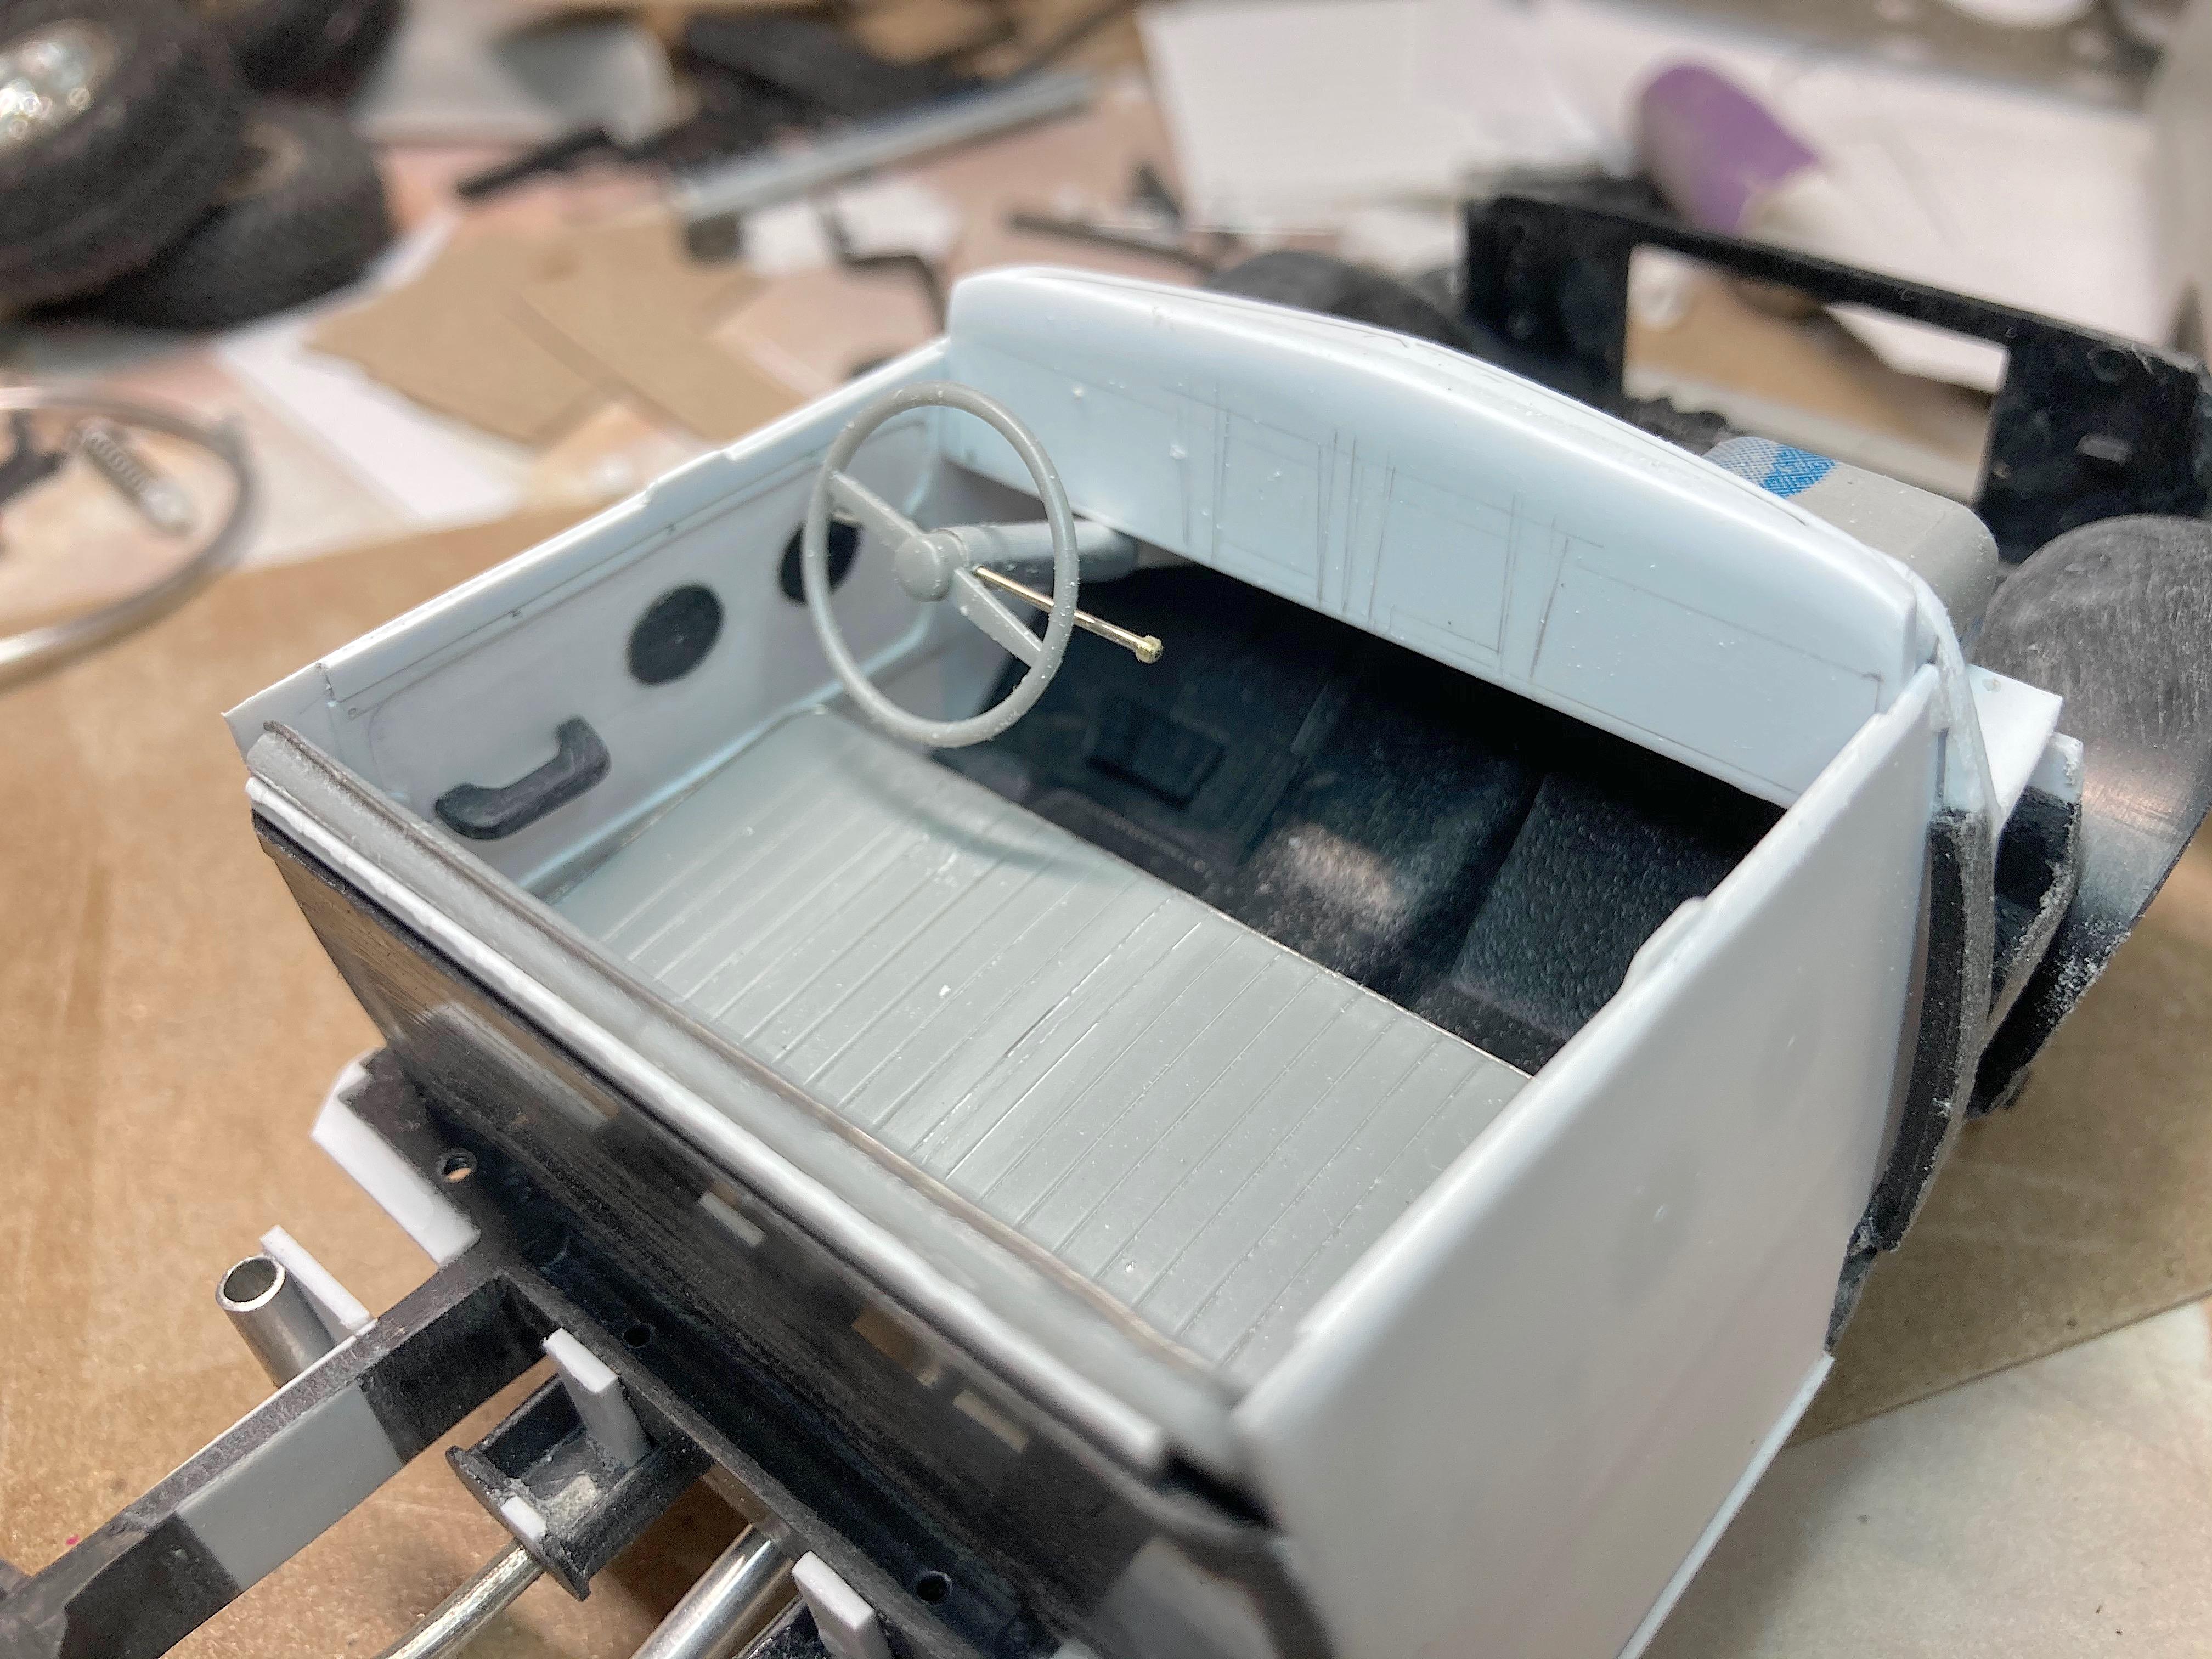
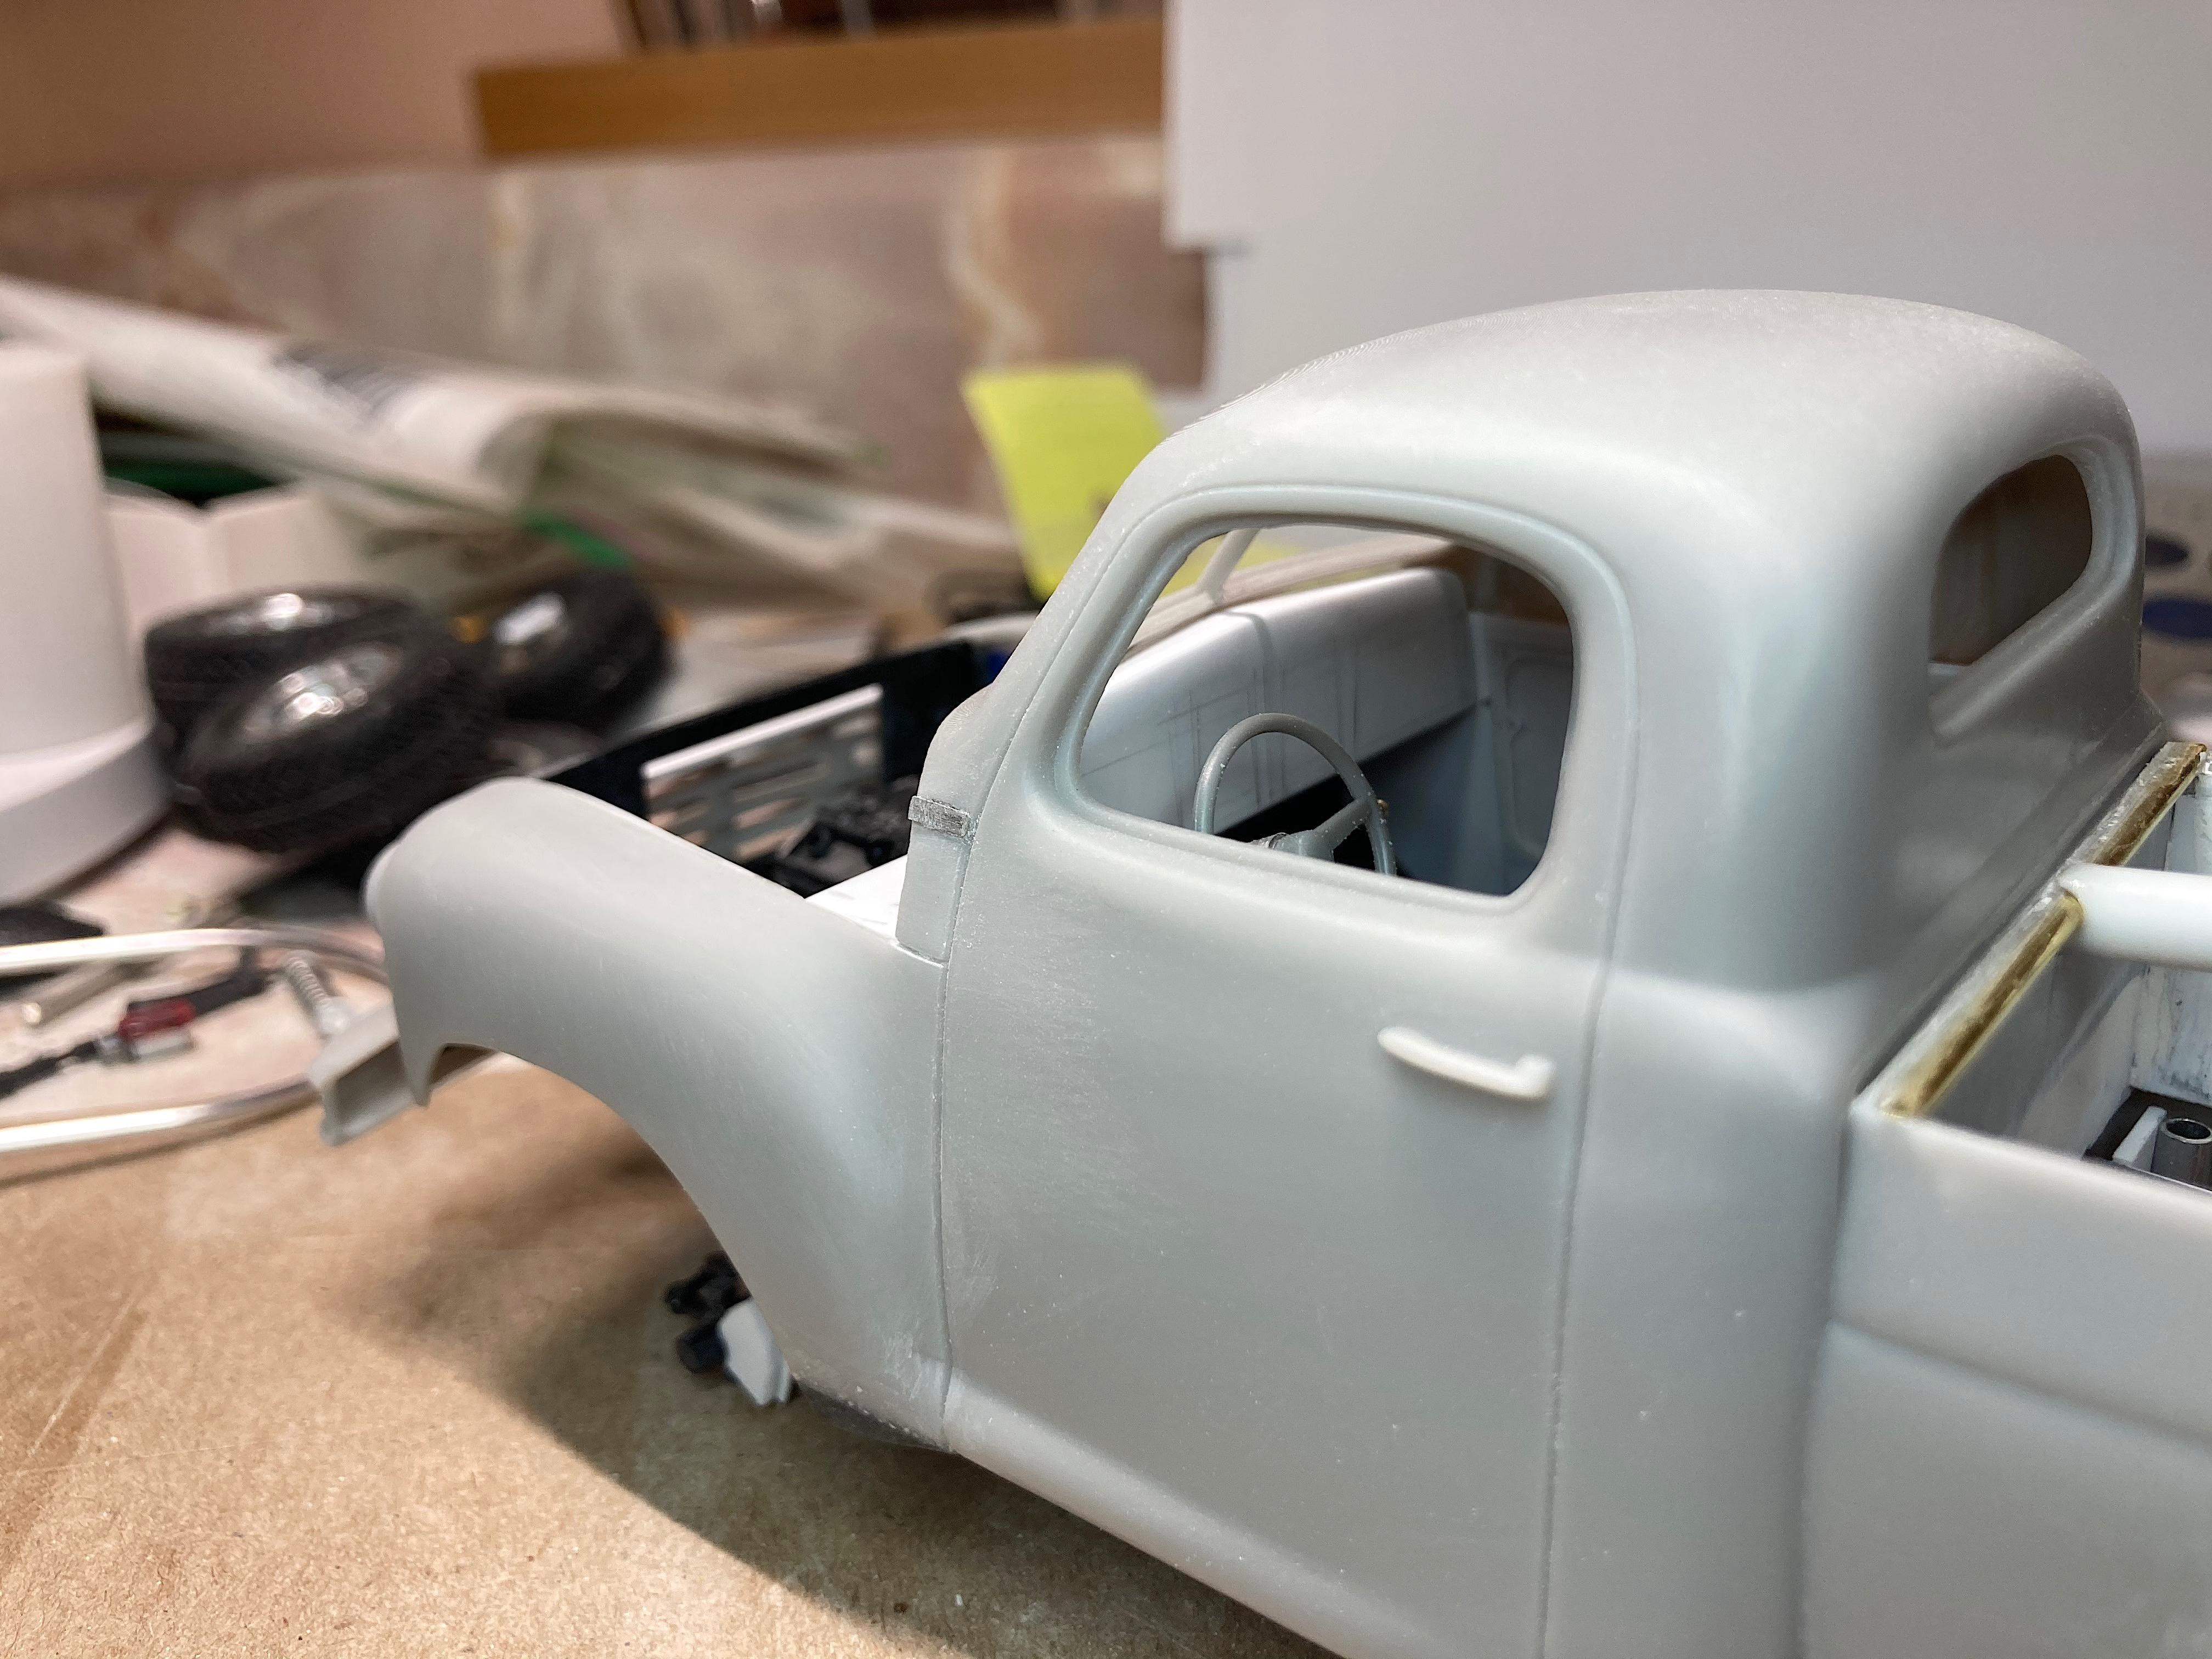
Interior major components are done. The more I'm stuffing into this, the tighter the fit between the chassis and body is getting. The other door panel is done, and made armrests. The dashboard is .1" styrene, with .02" on top that goes to the windshield. Ground off the molded on parking brake pedal, will make pull handle like what the Studebaker has. Evaluating how the steering wheel is located. Dash details, door handles, little light, seatbelts, maybe a heater box, still need to be done. Finally feels like I'm close, tilted up for a mockup. Debating about the cargo/backup light position. What I see needs to be done, saw off door handles, jack mounts, tailgate chain, use the kit steps, license plate light, gas filler grommet. Make mud flaps? I can't get the front bumper off, glue won't let go, won't be fun masking to paint it different than the chassis. Still need orange turn signals, winch details, windshield wipers, glass, and finally the hood ornament.
- 108 replies
-
- 1
-
-
- 1953
- studebaker
- (and 2 more)
-
is the sauce
-
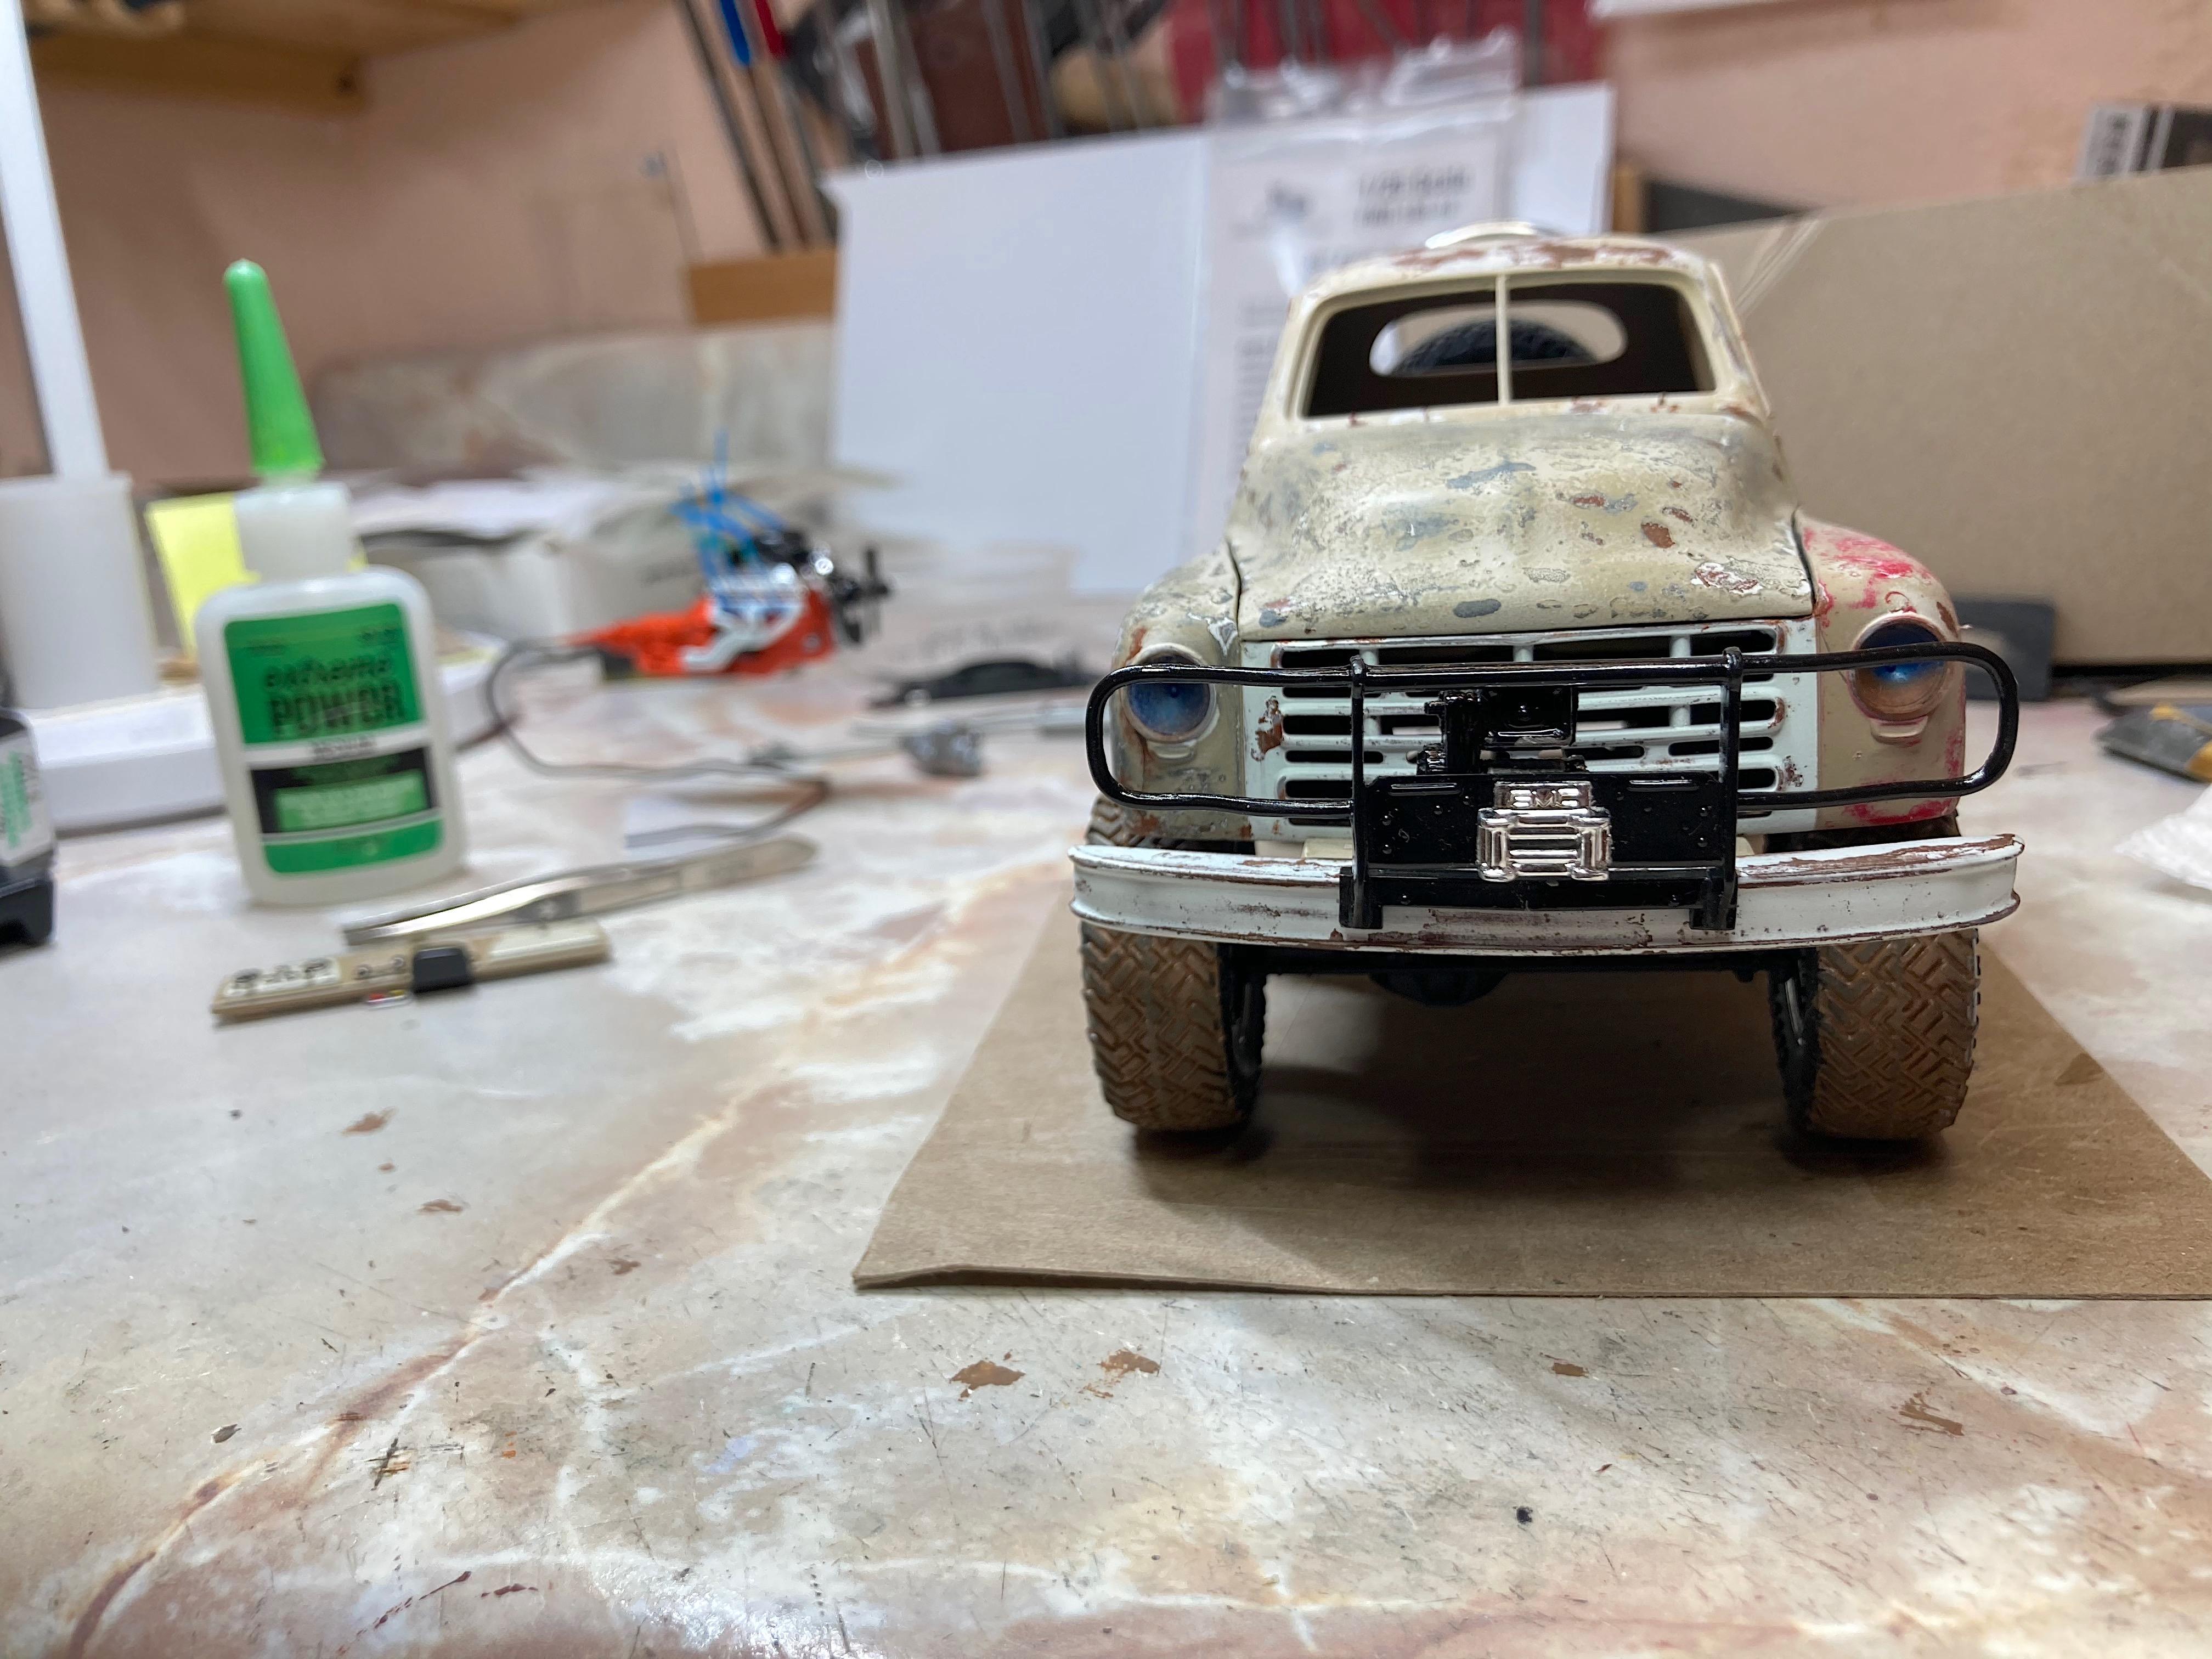
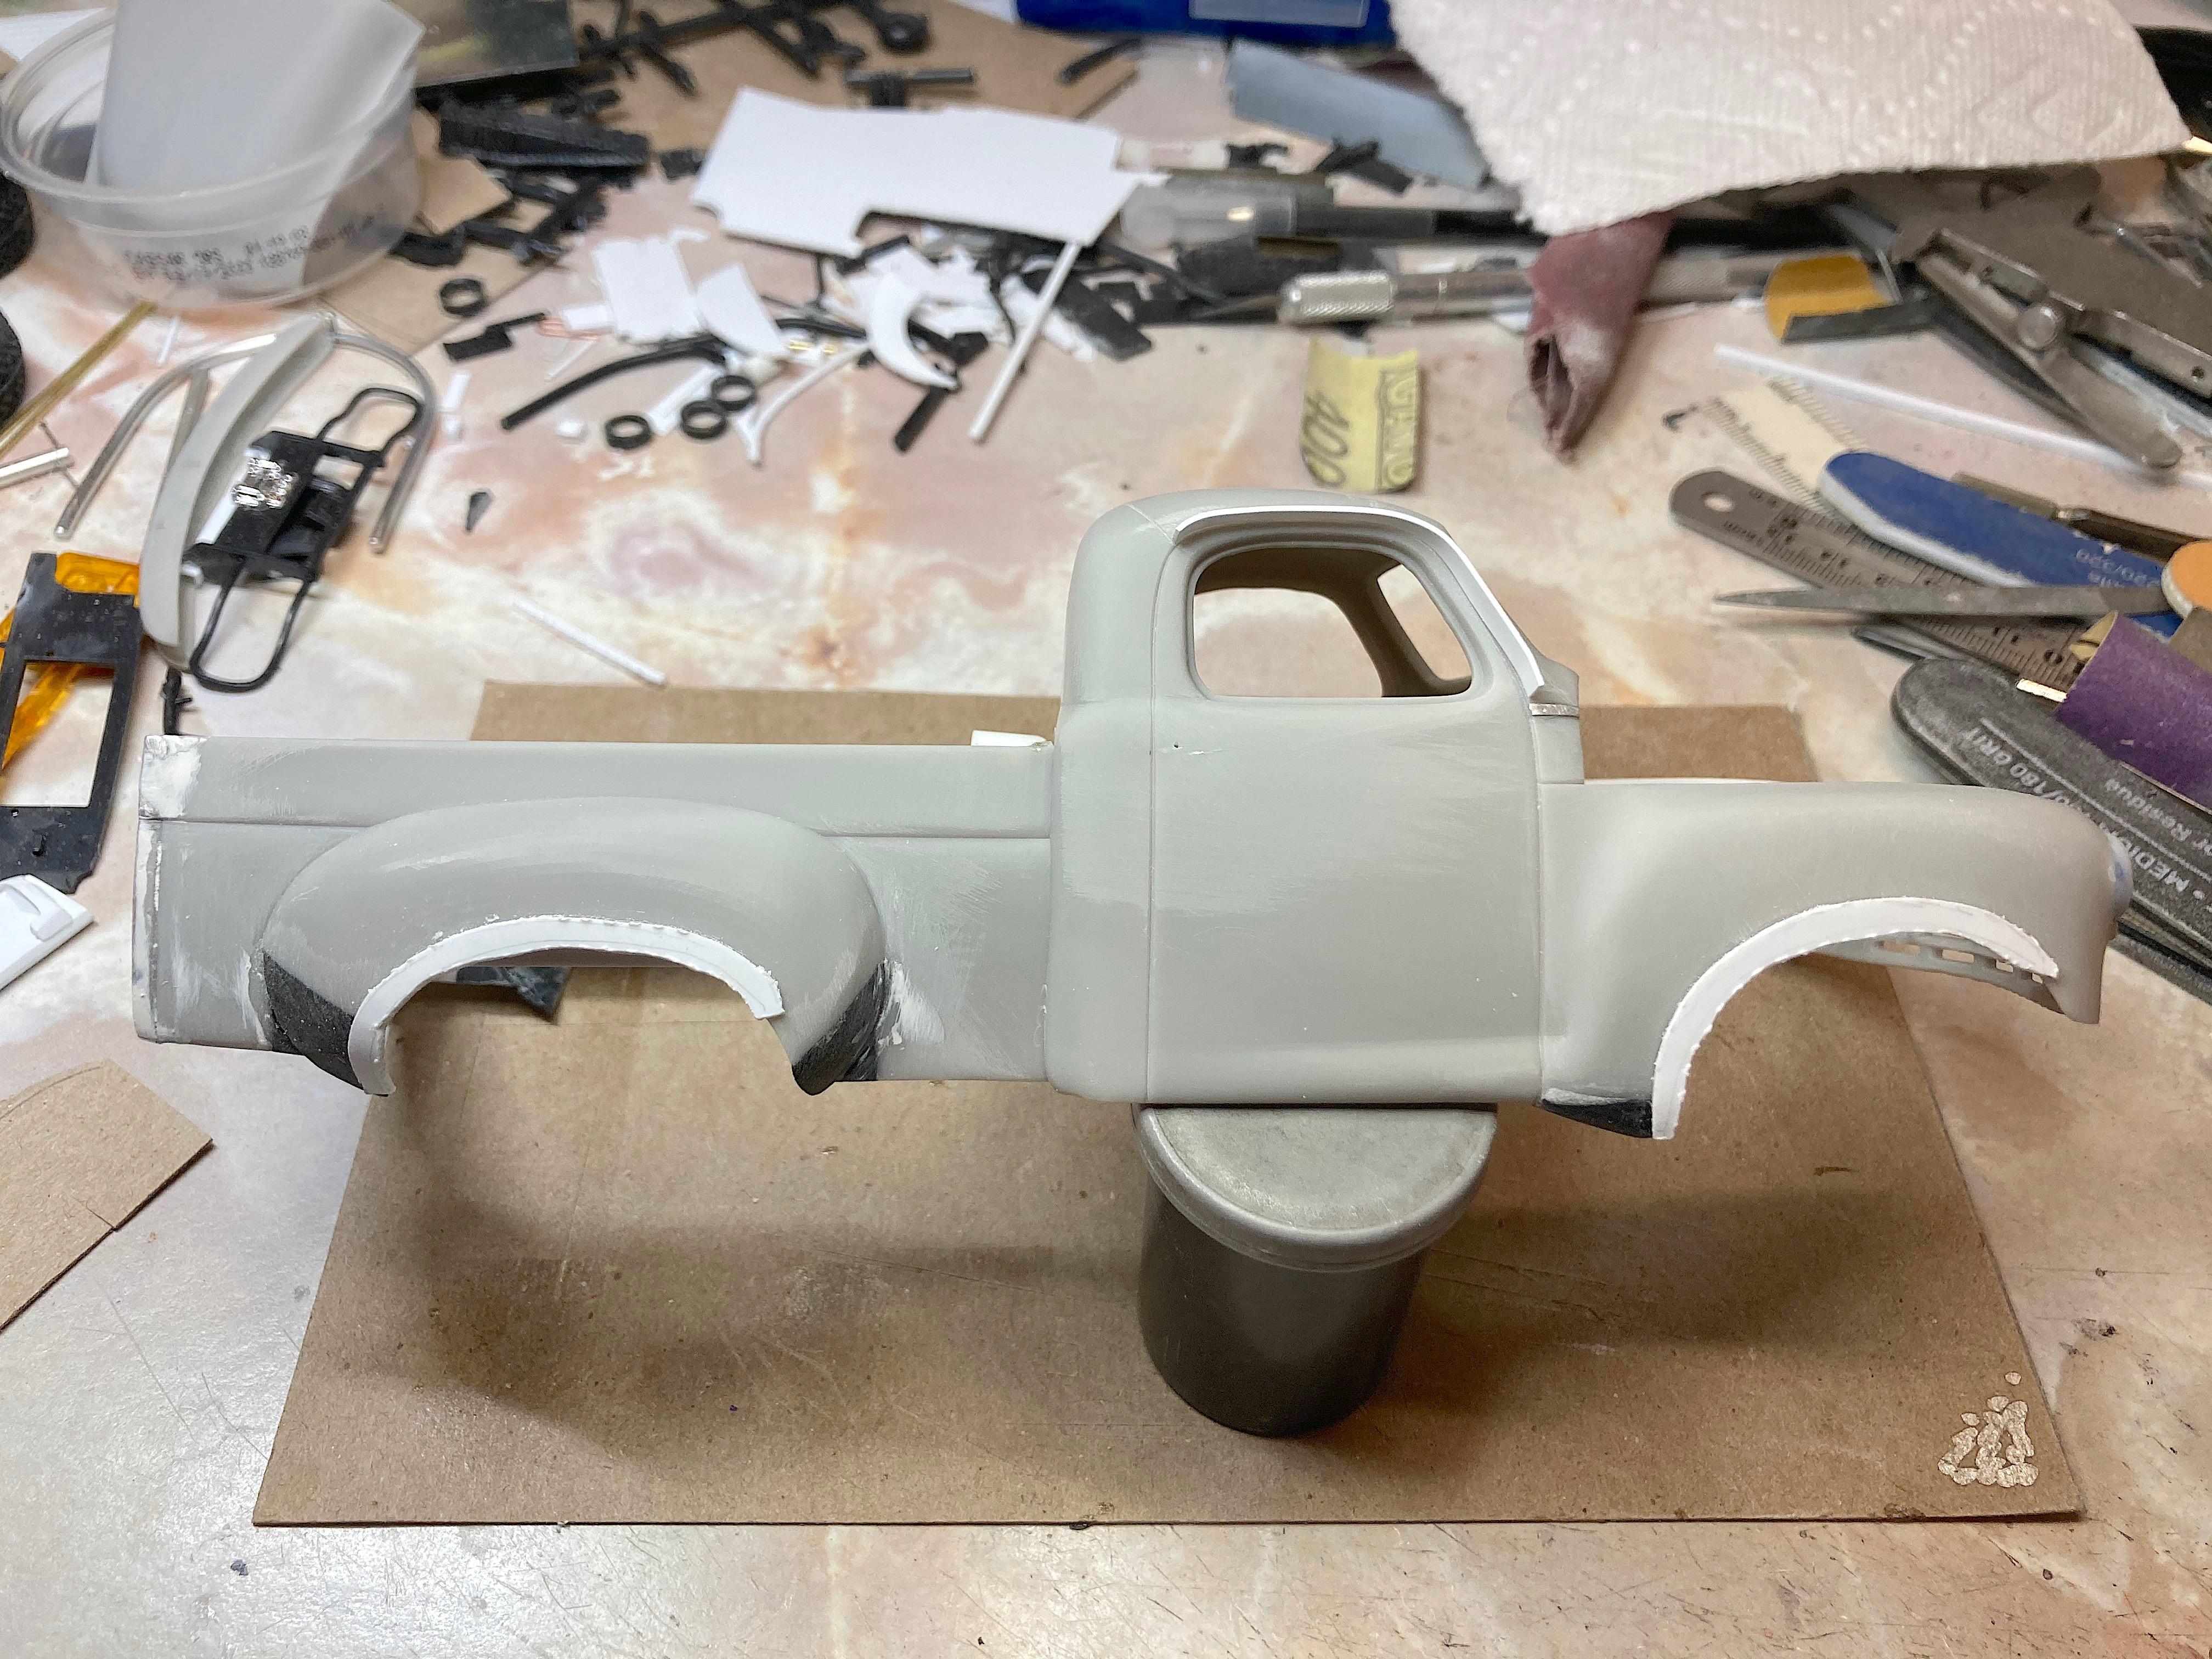
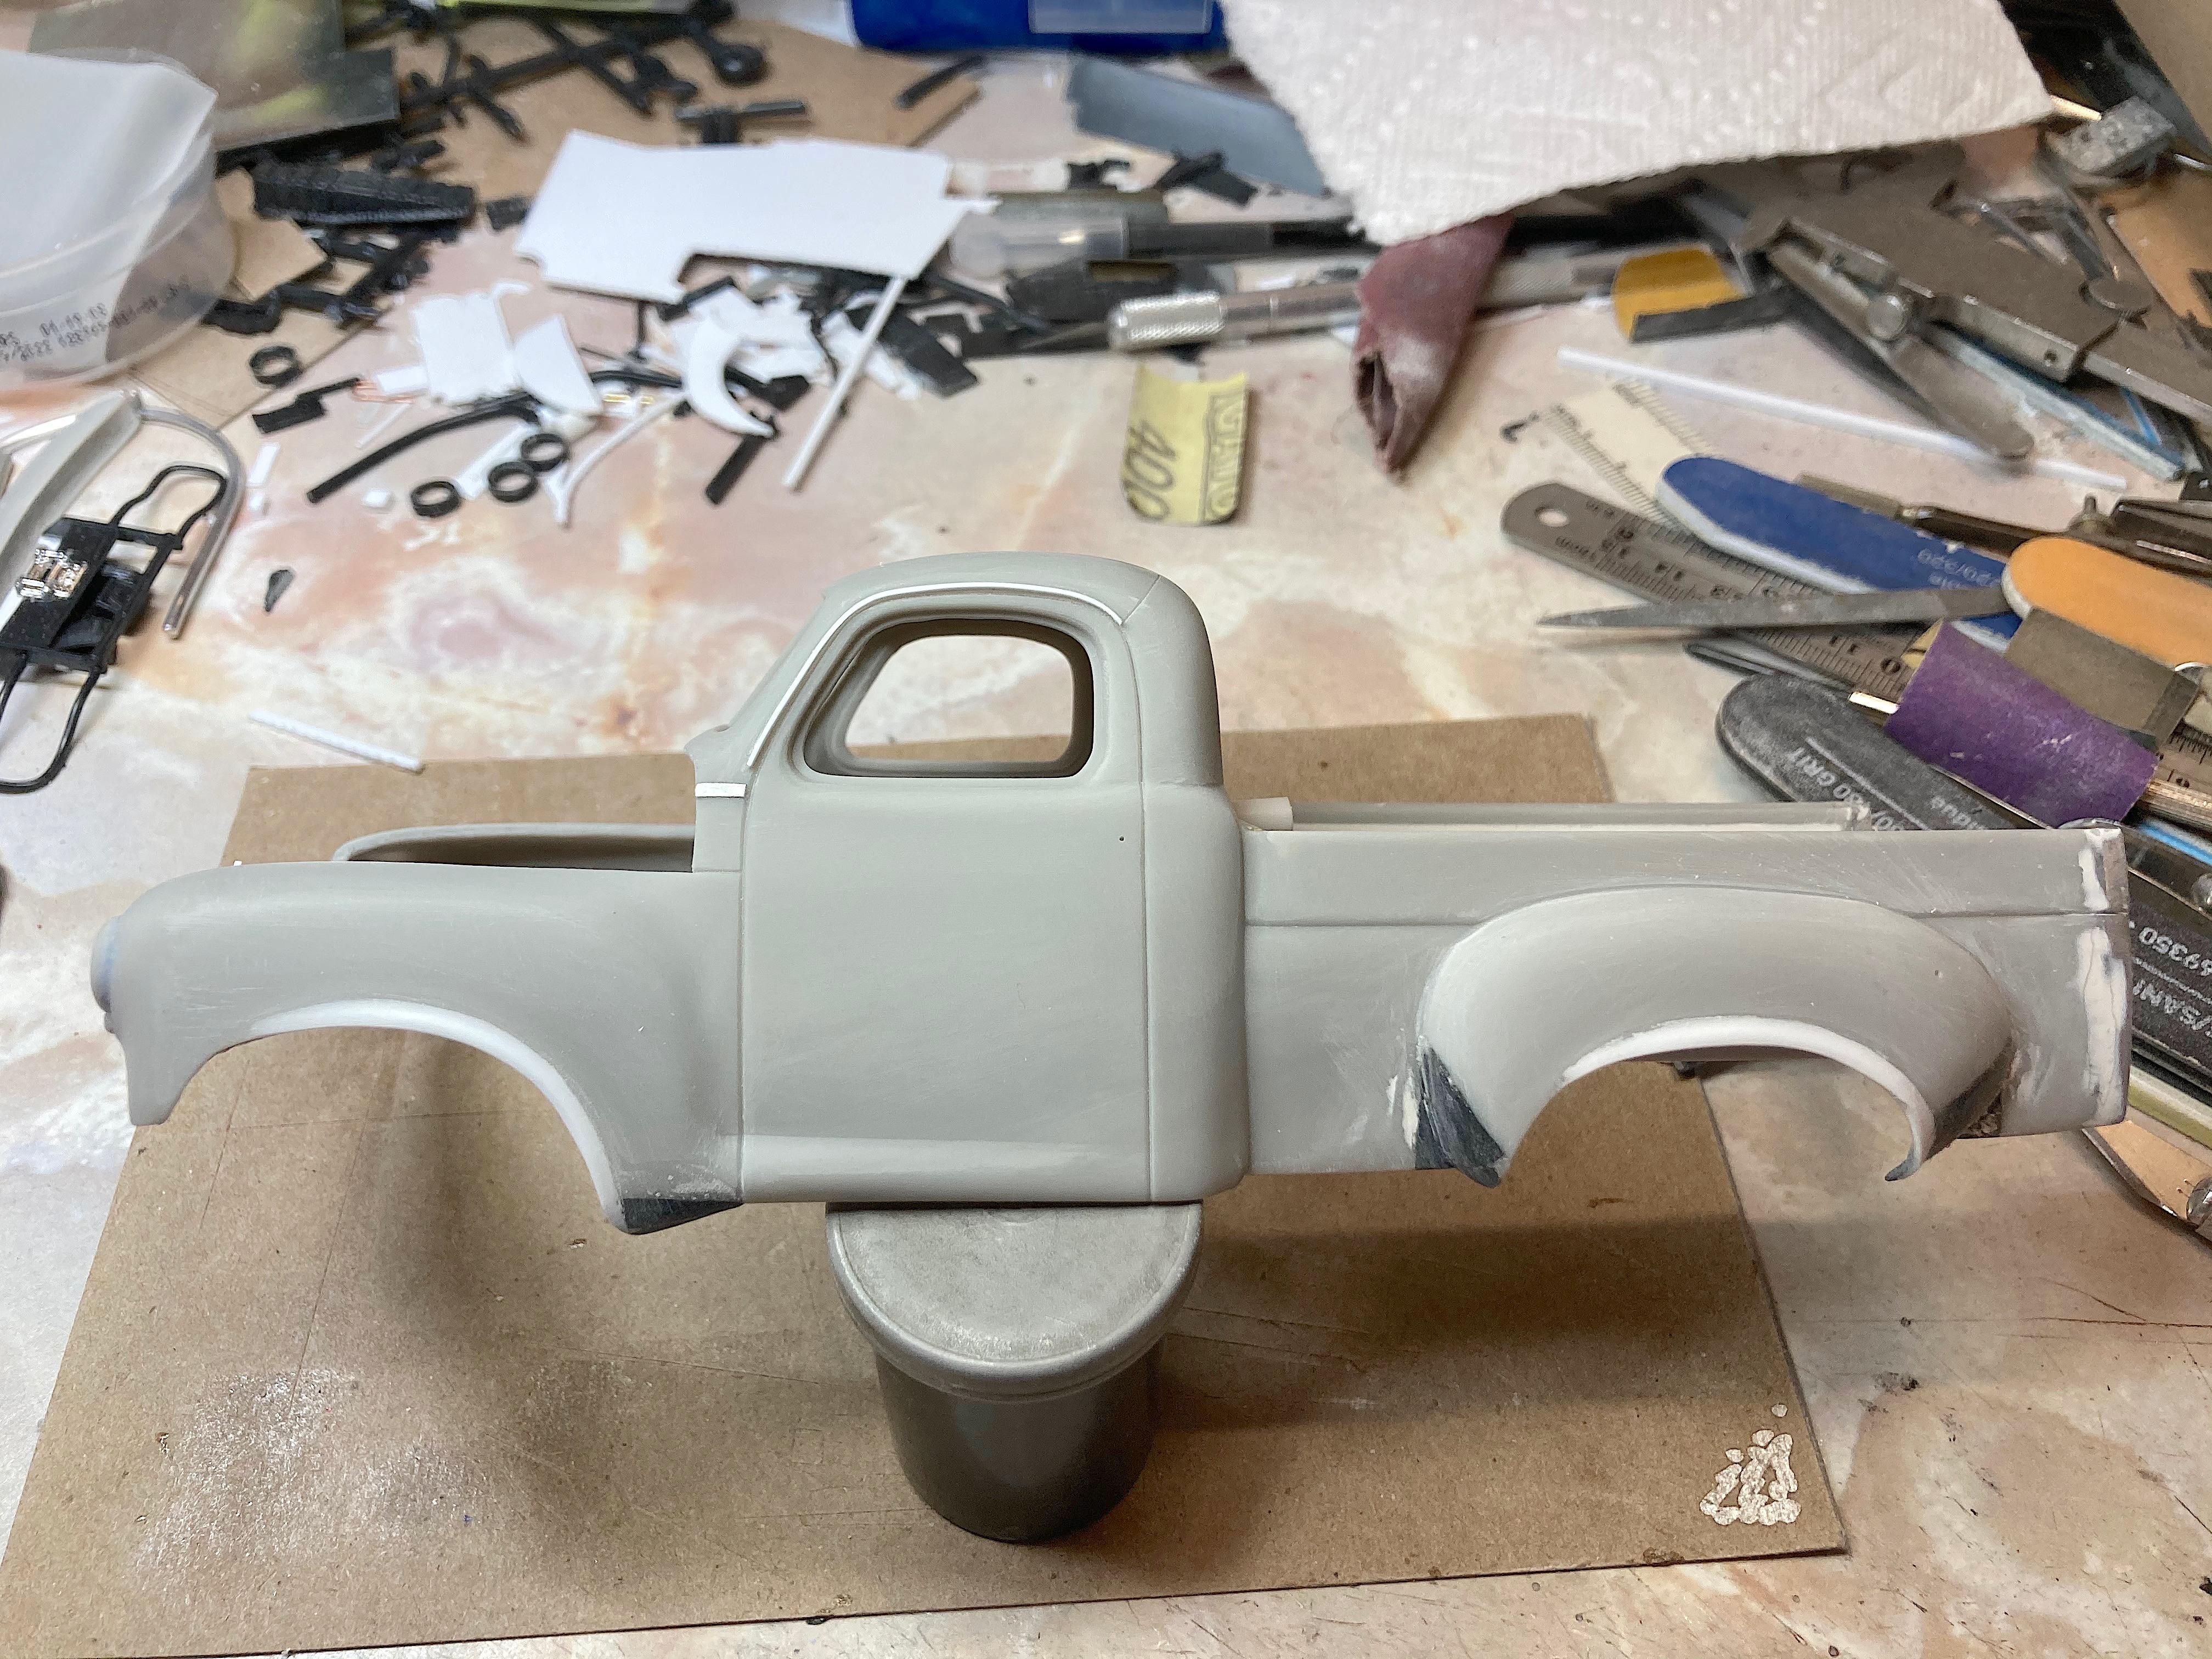
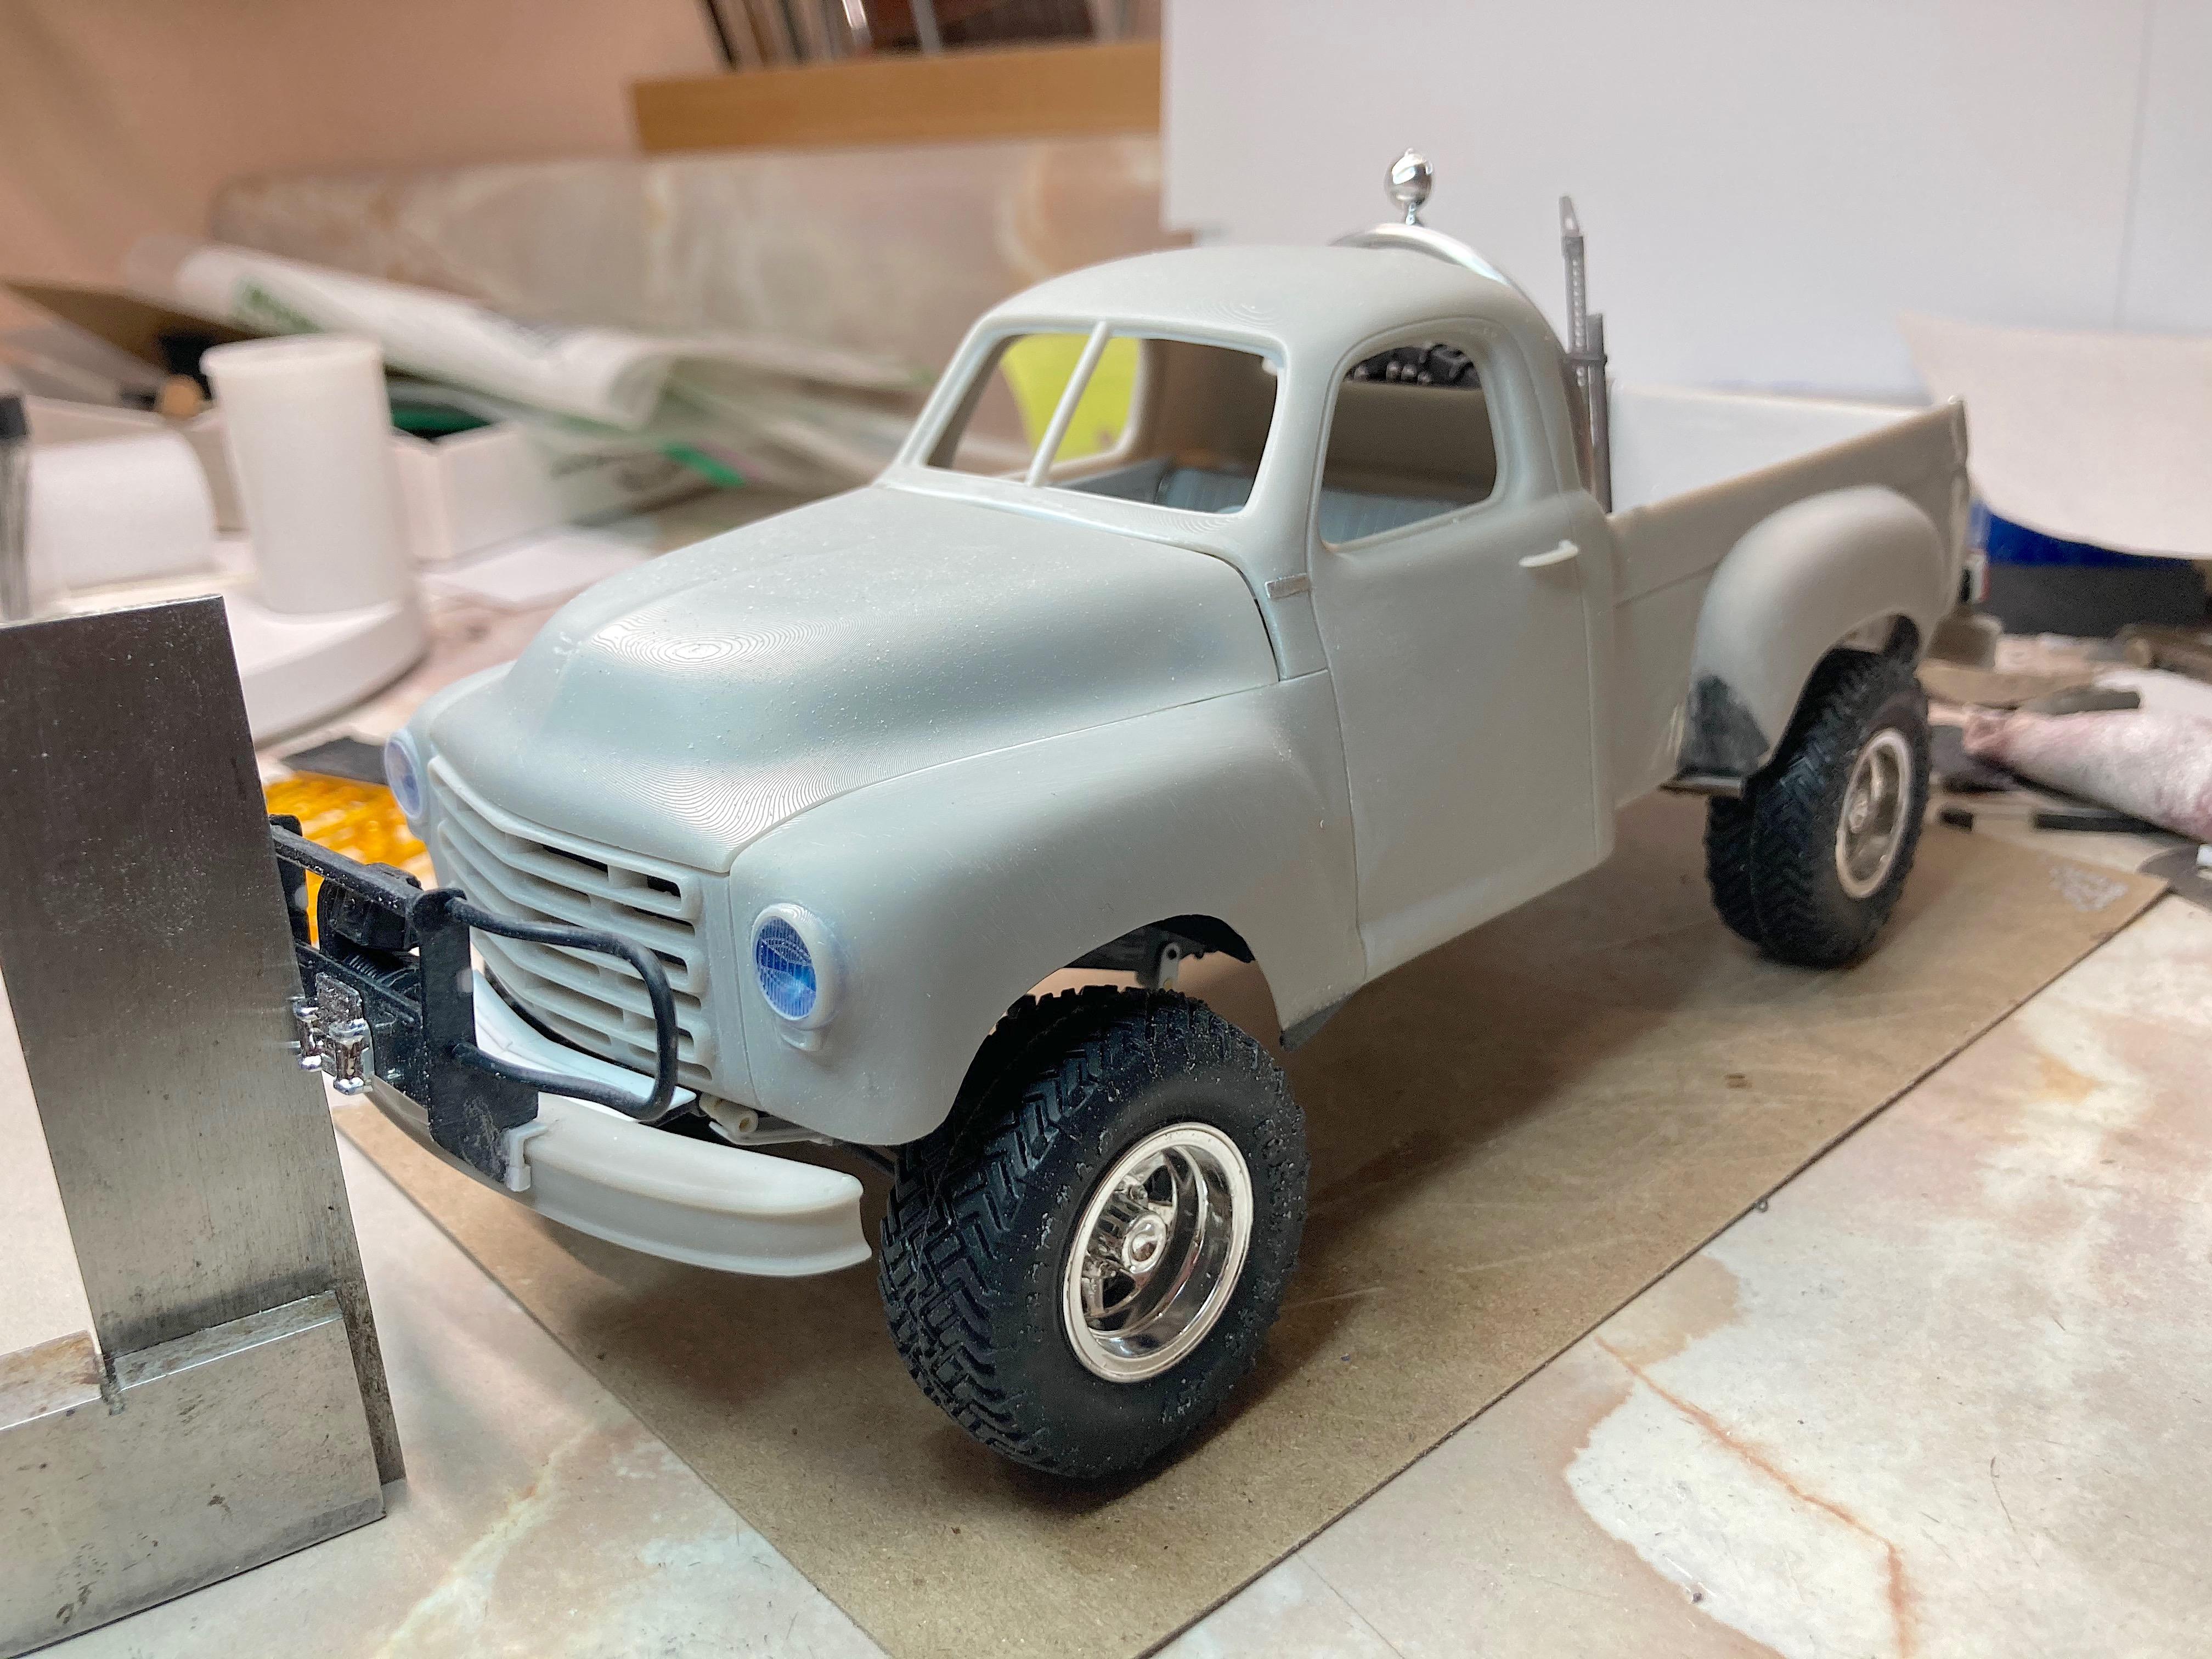
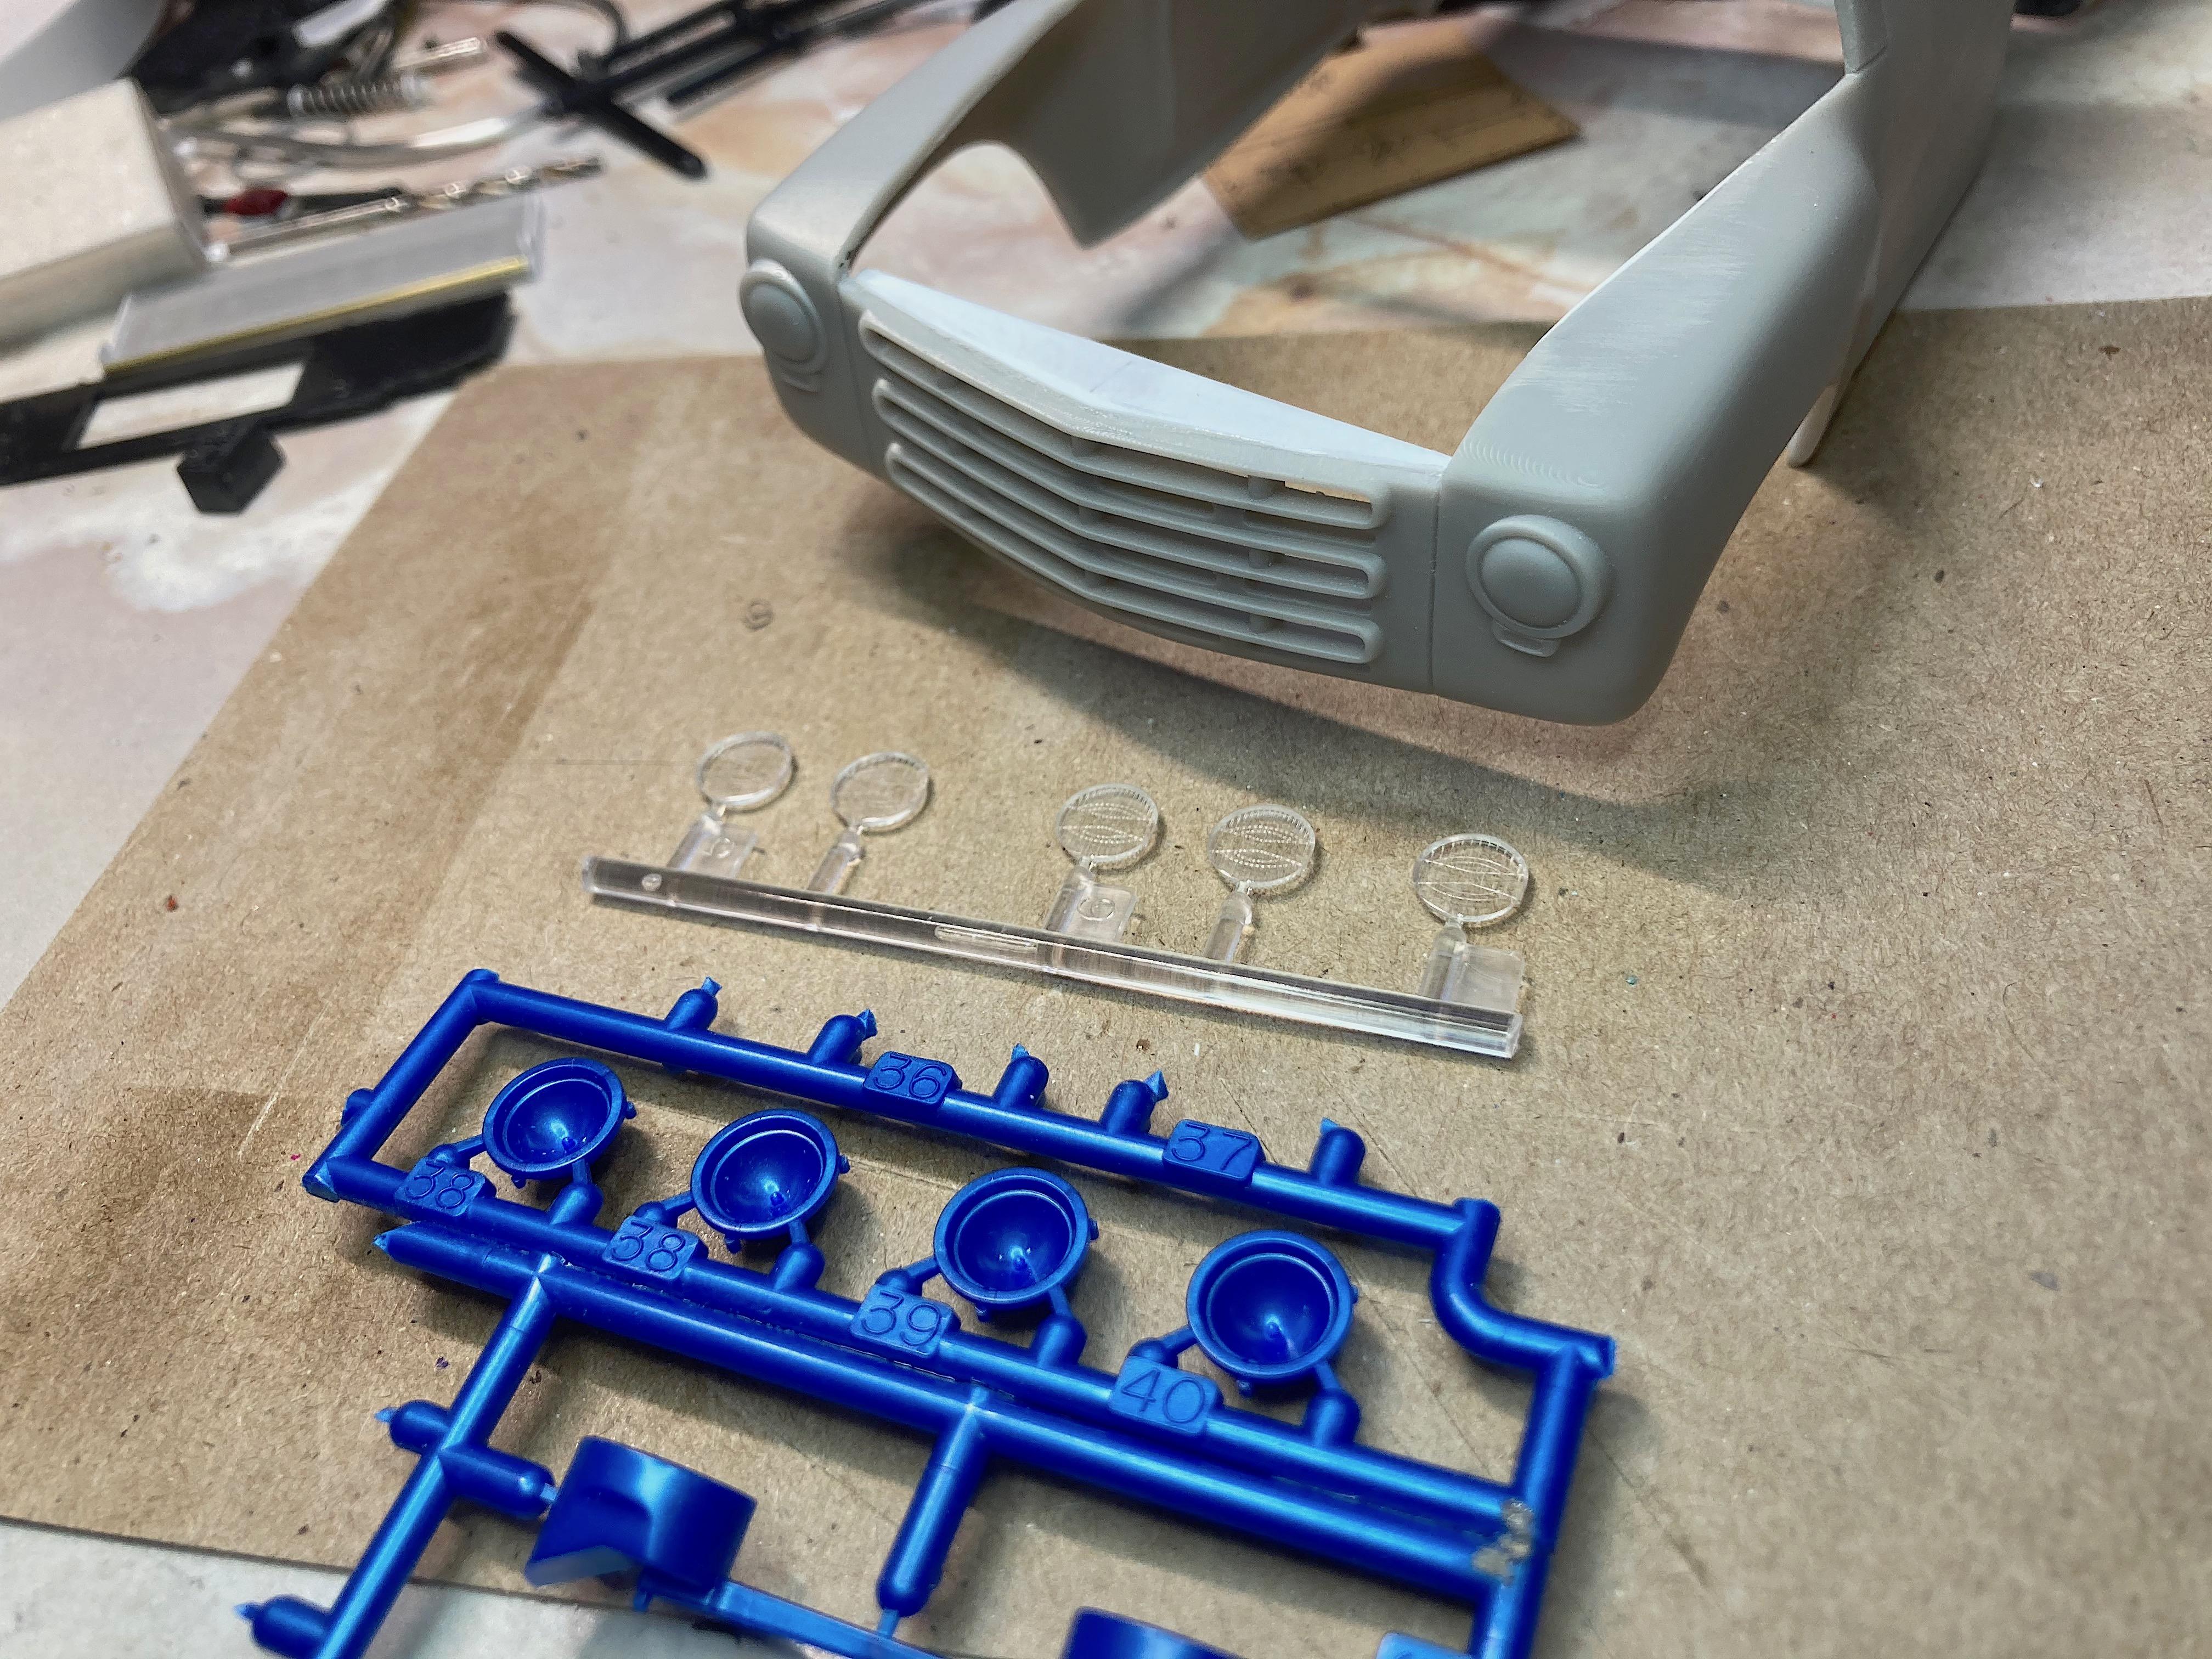
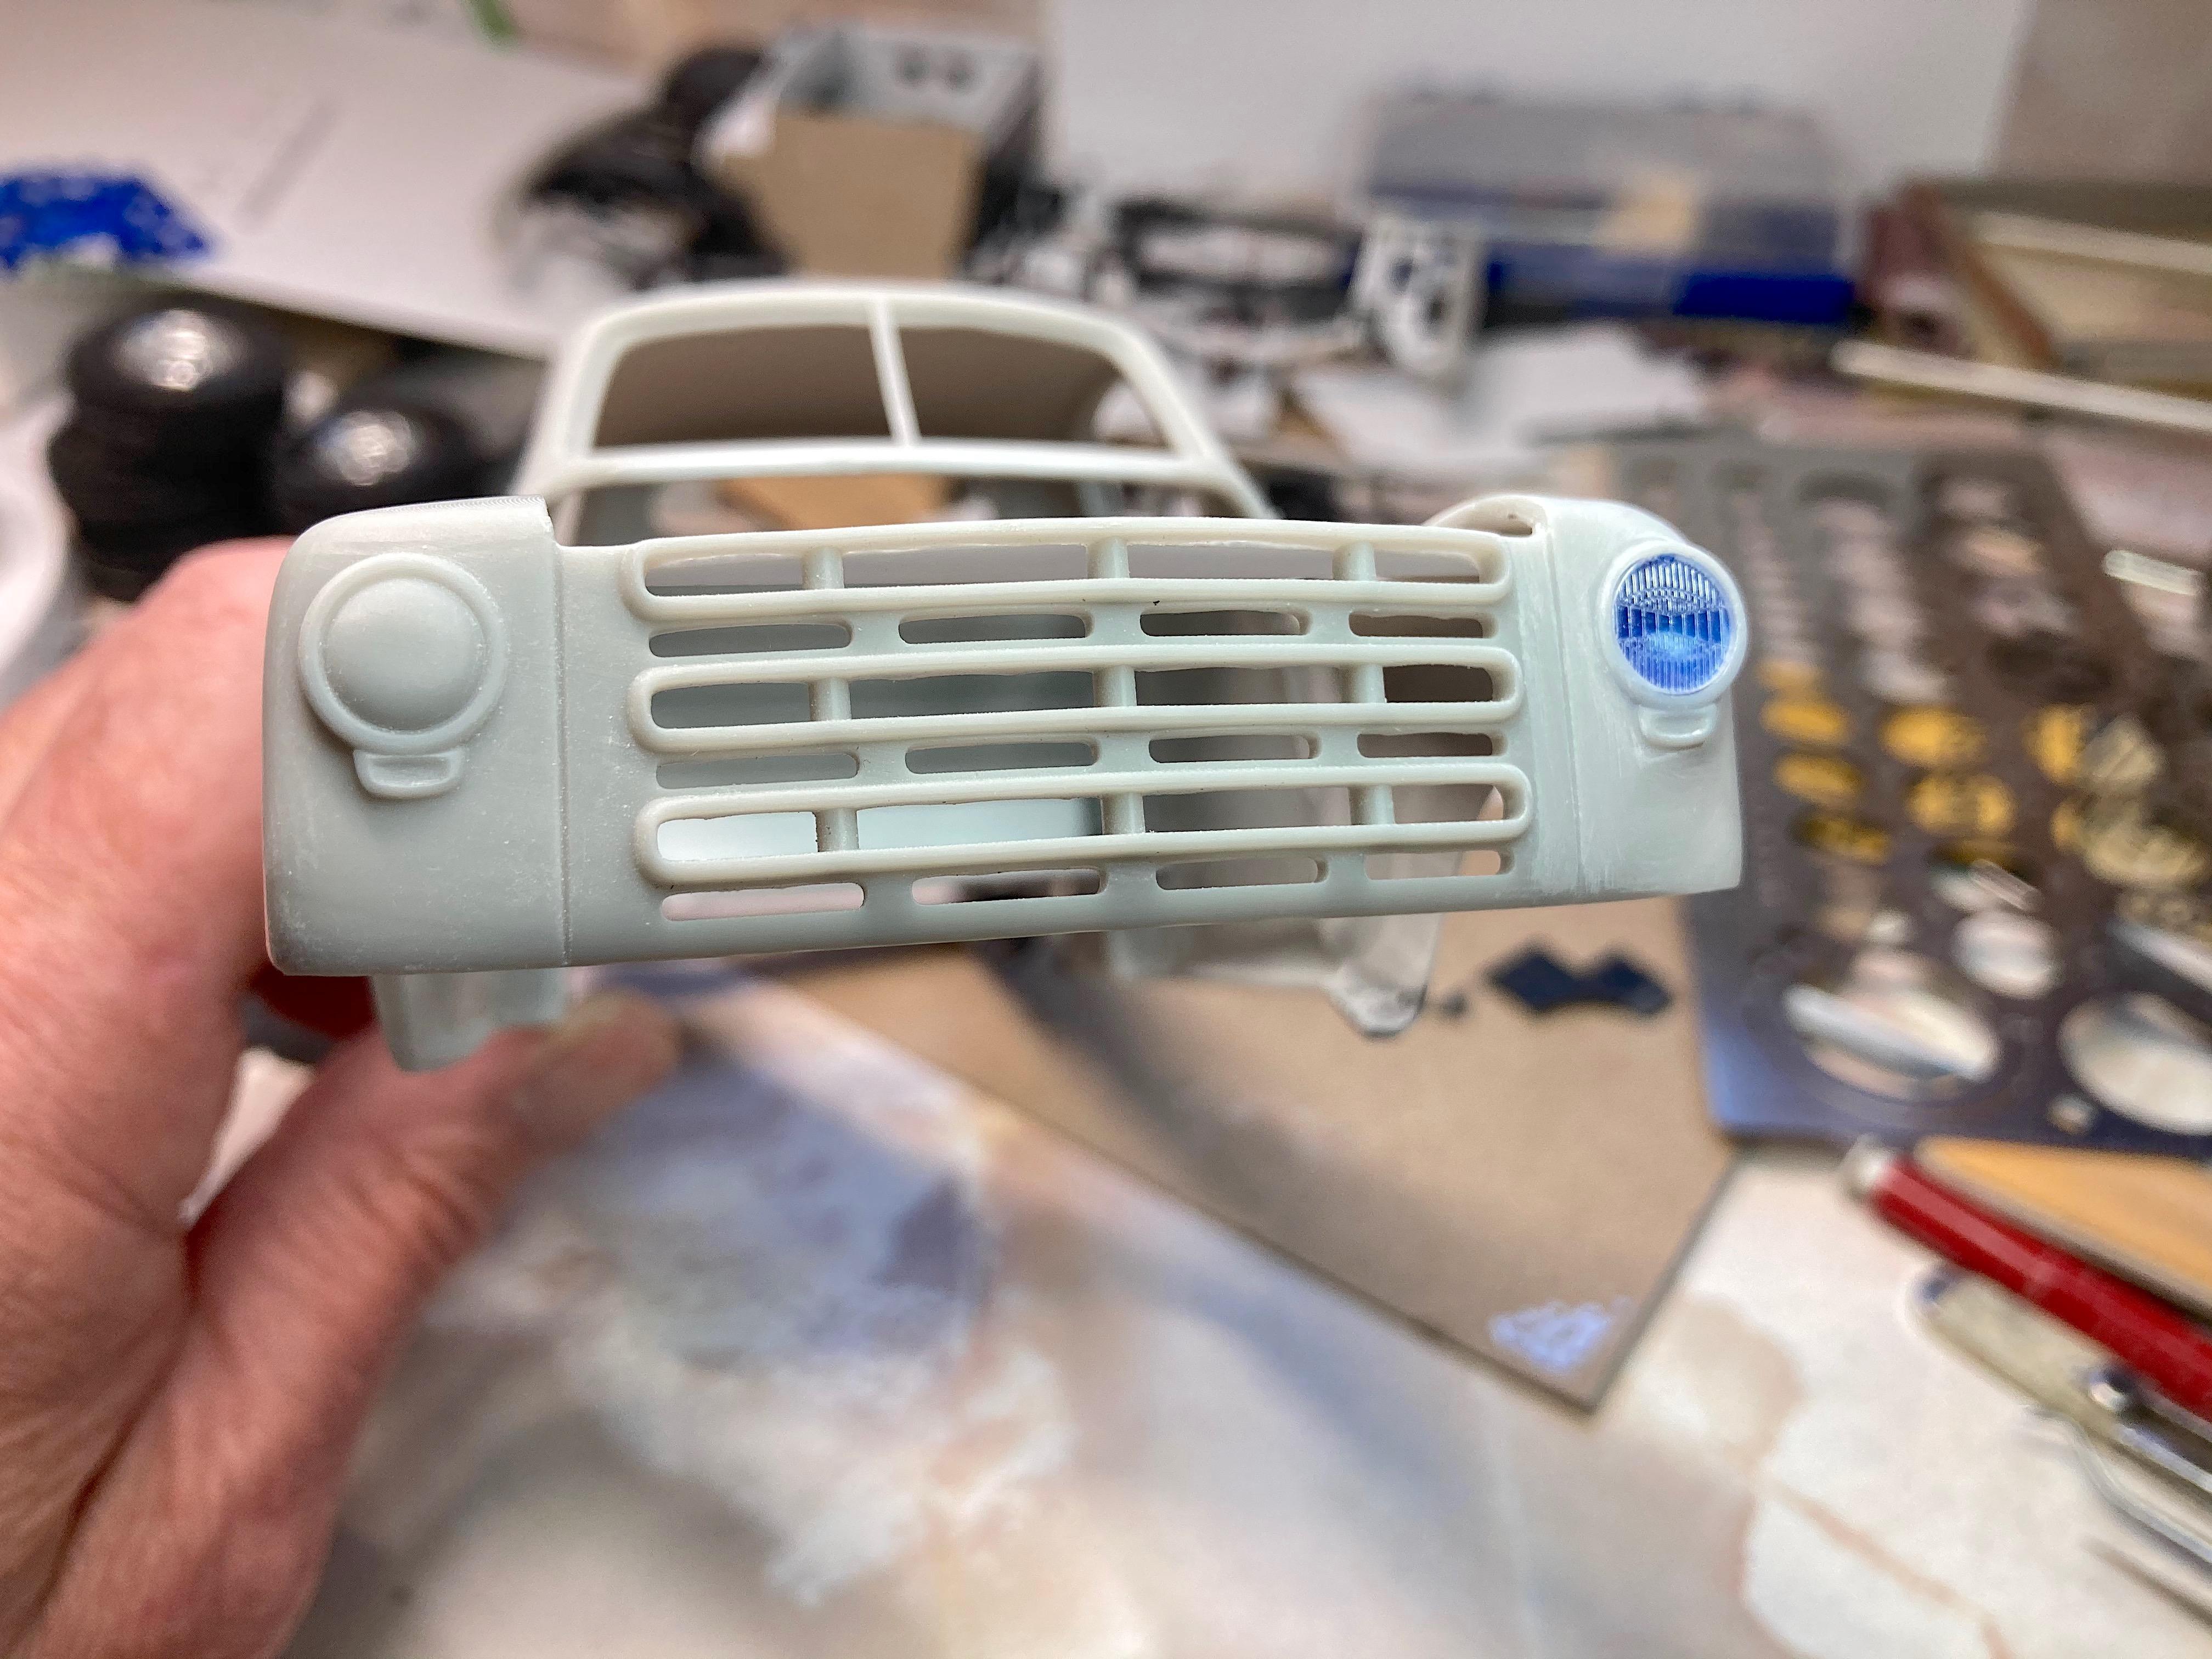
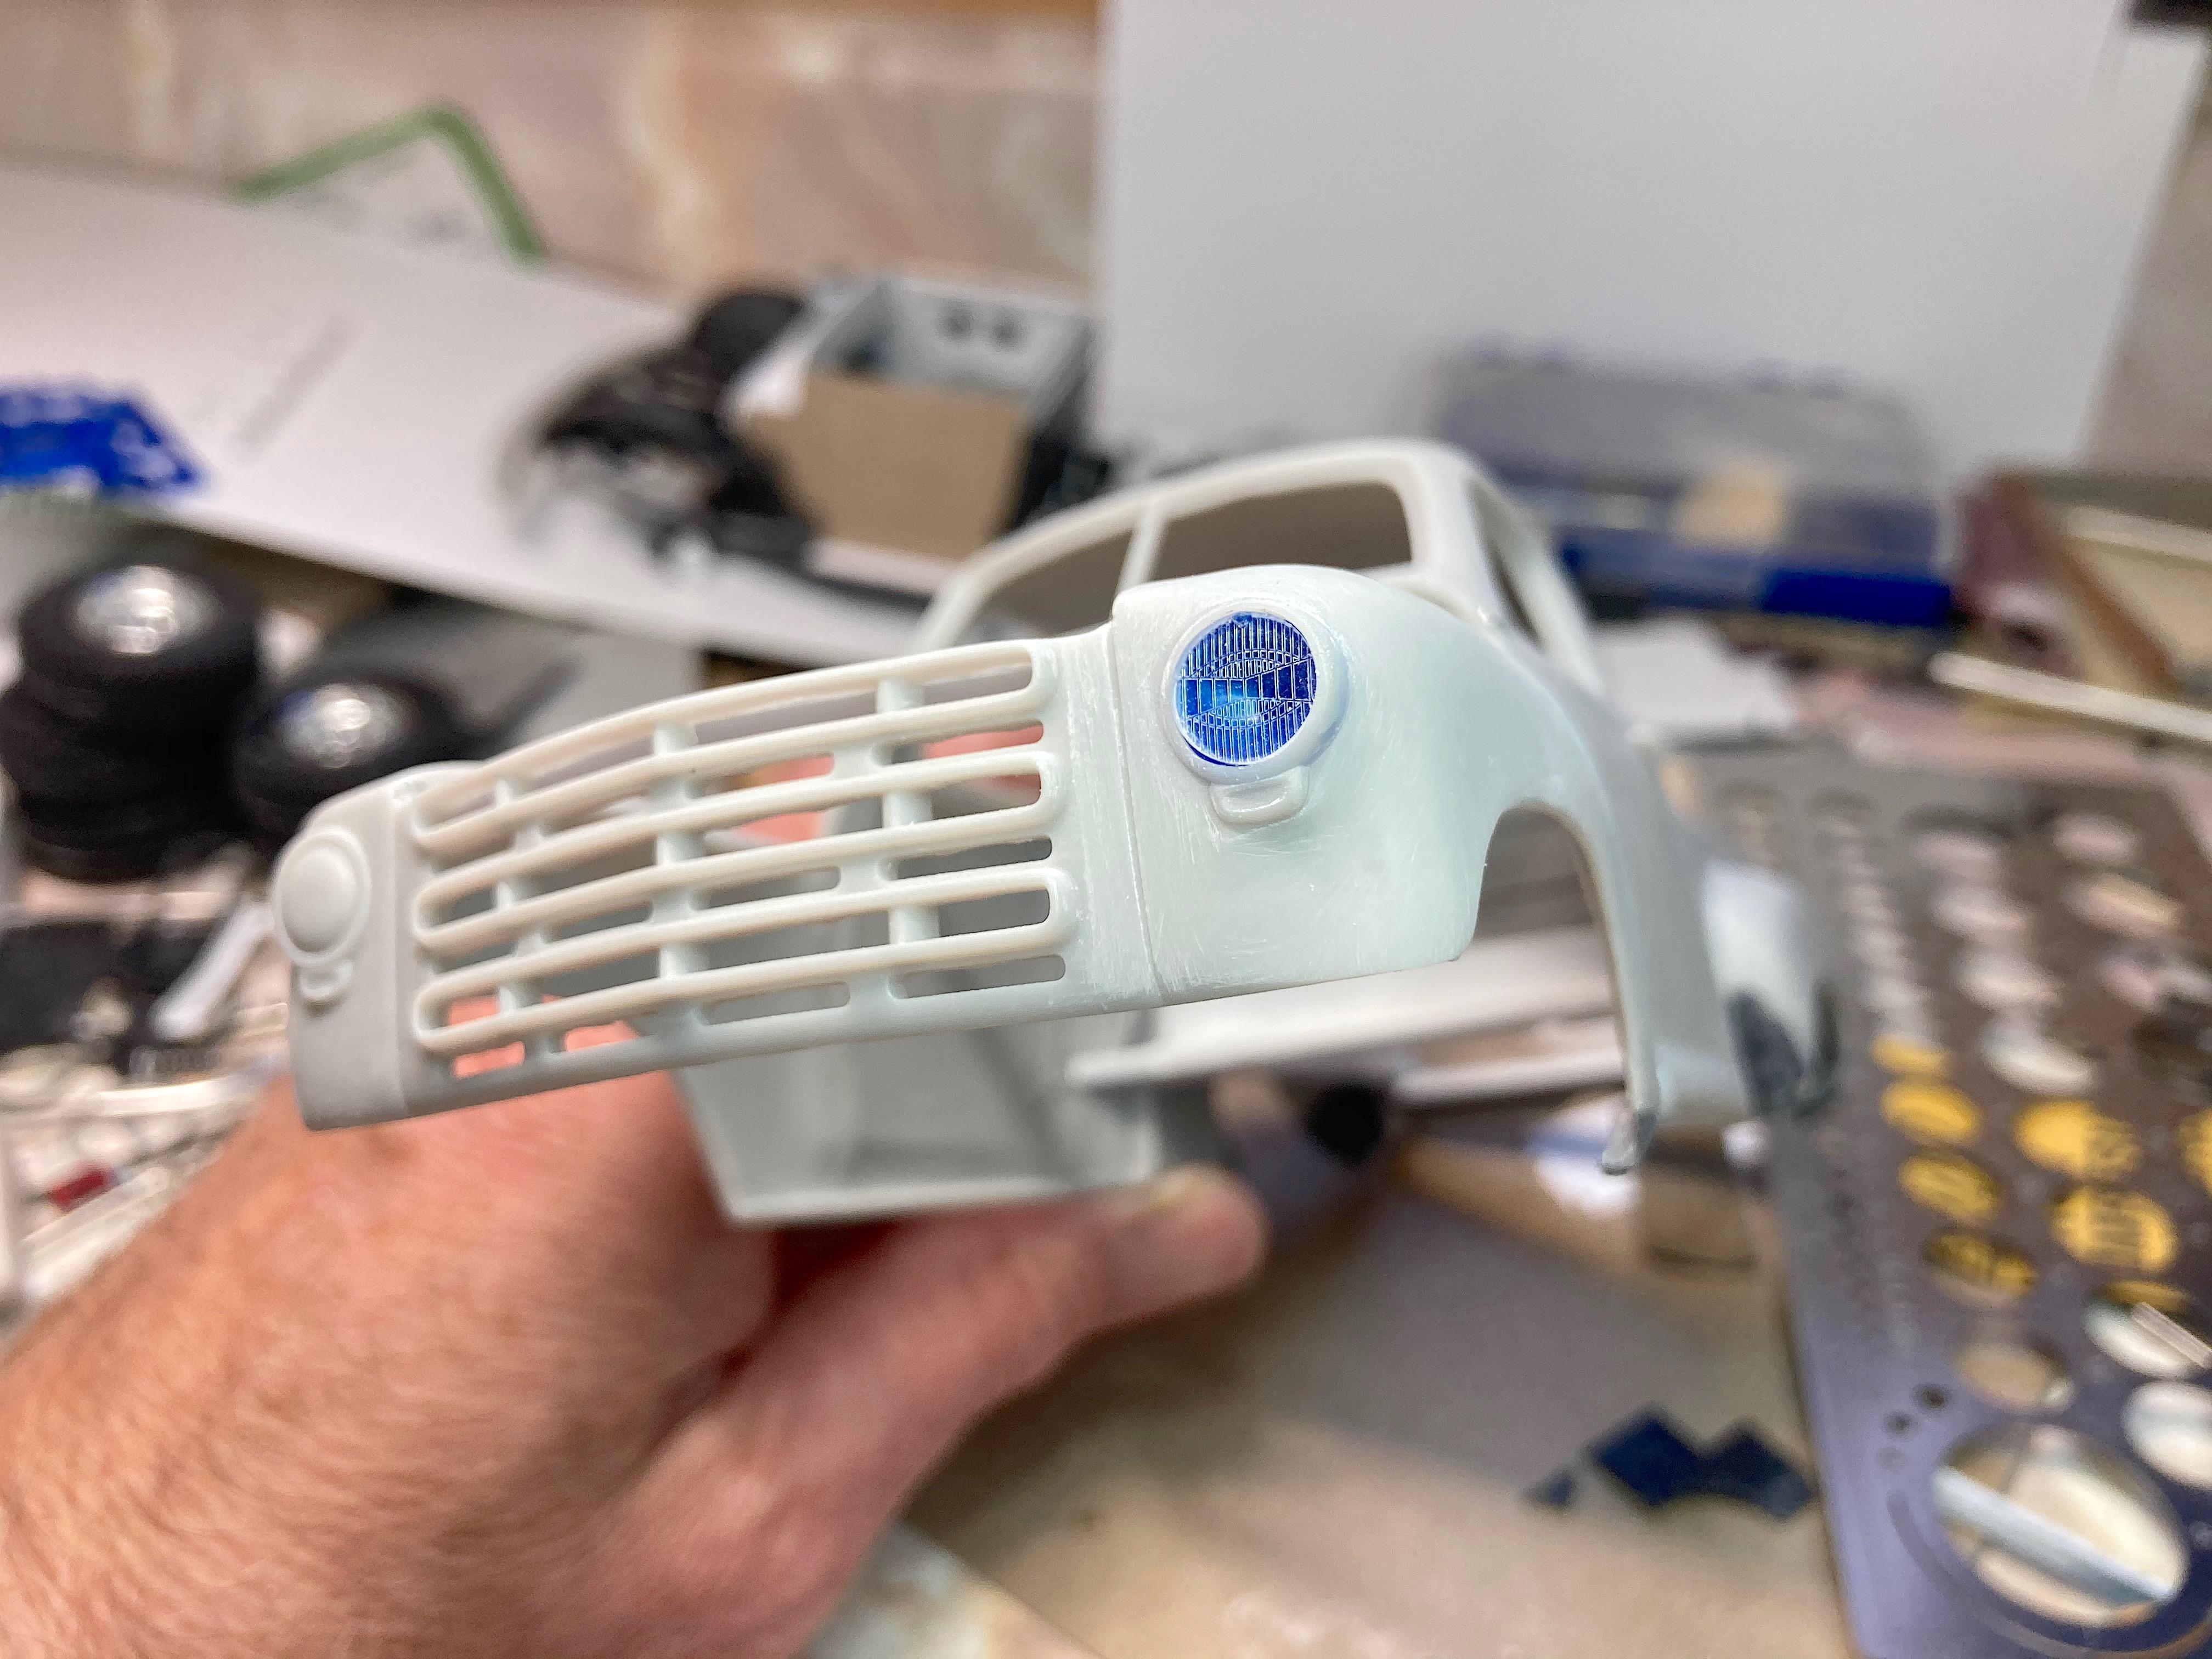
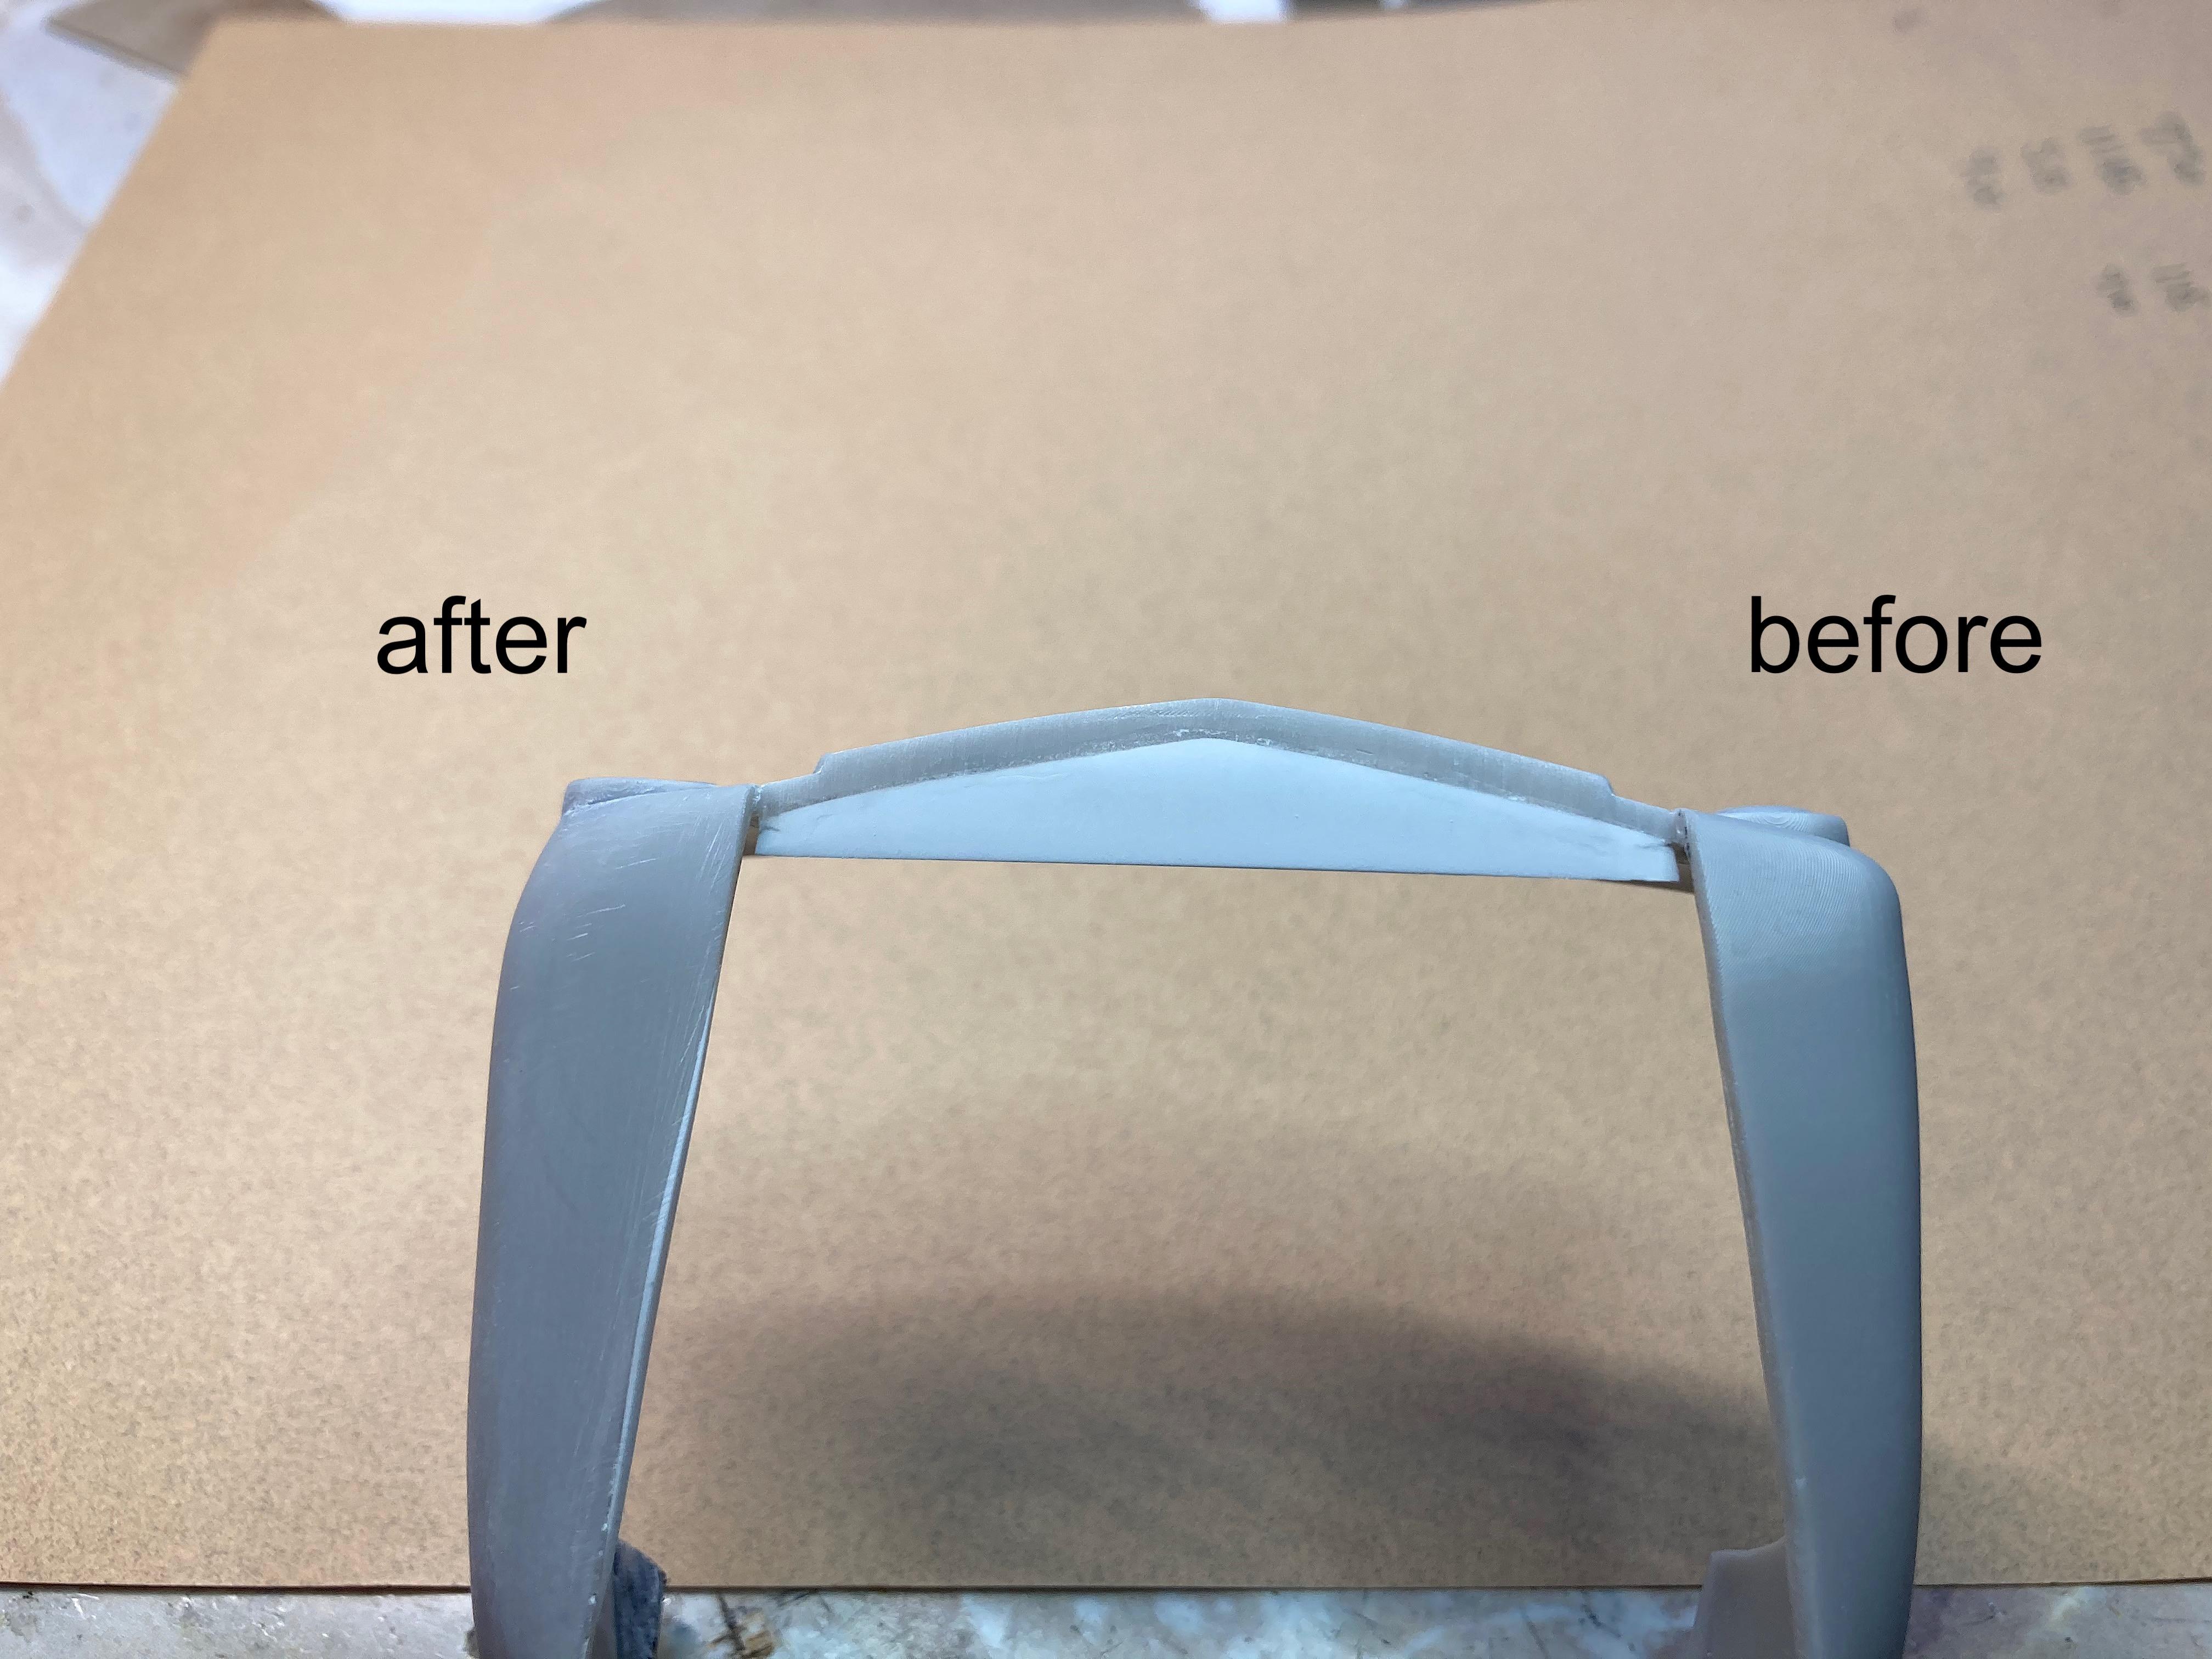
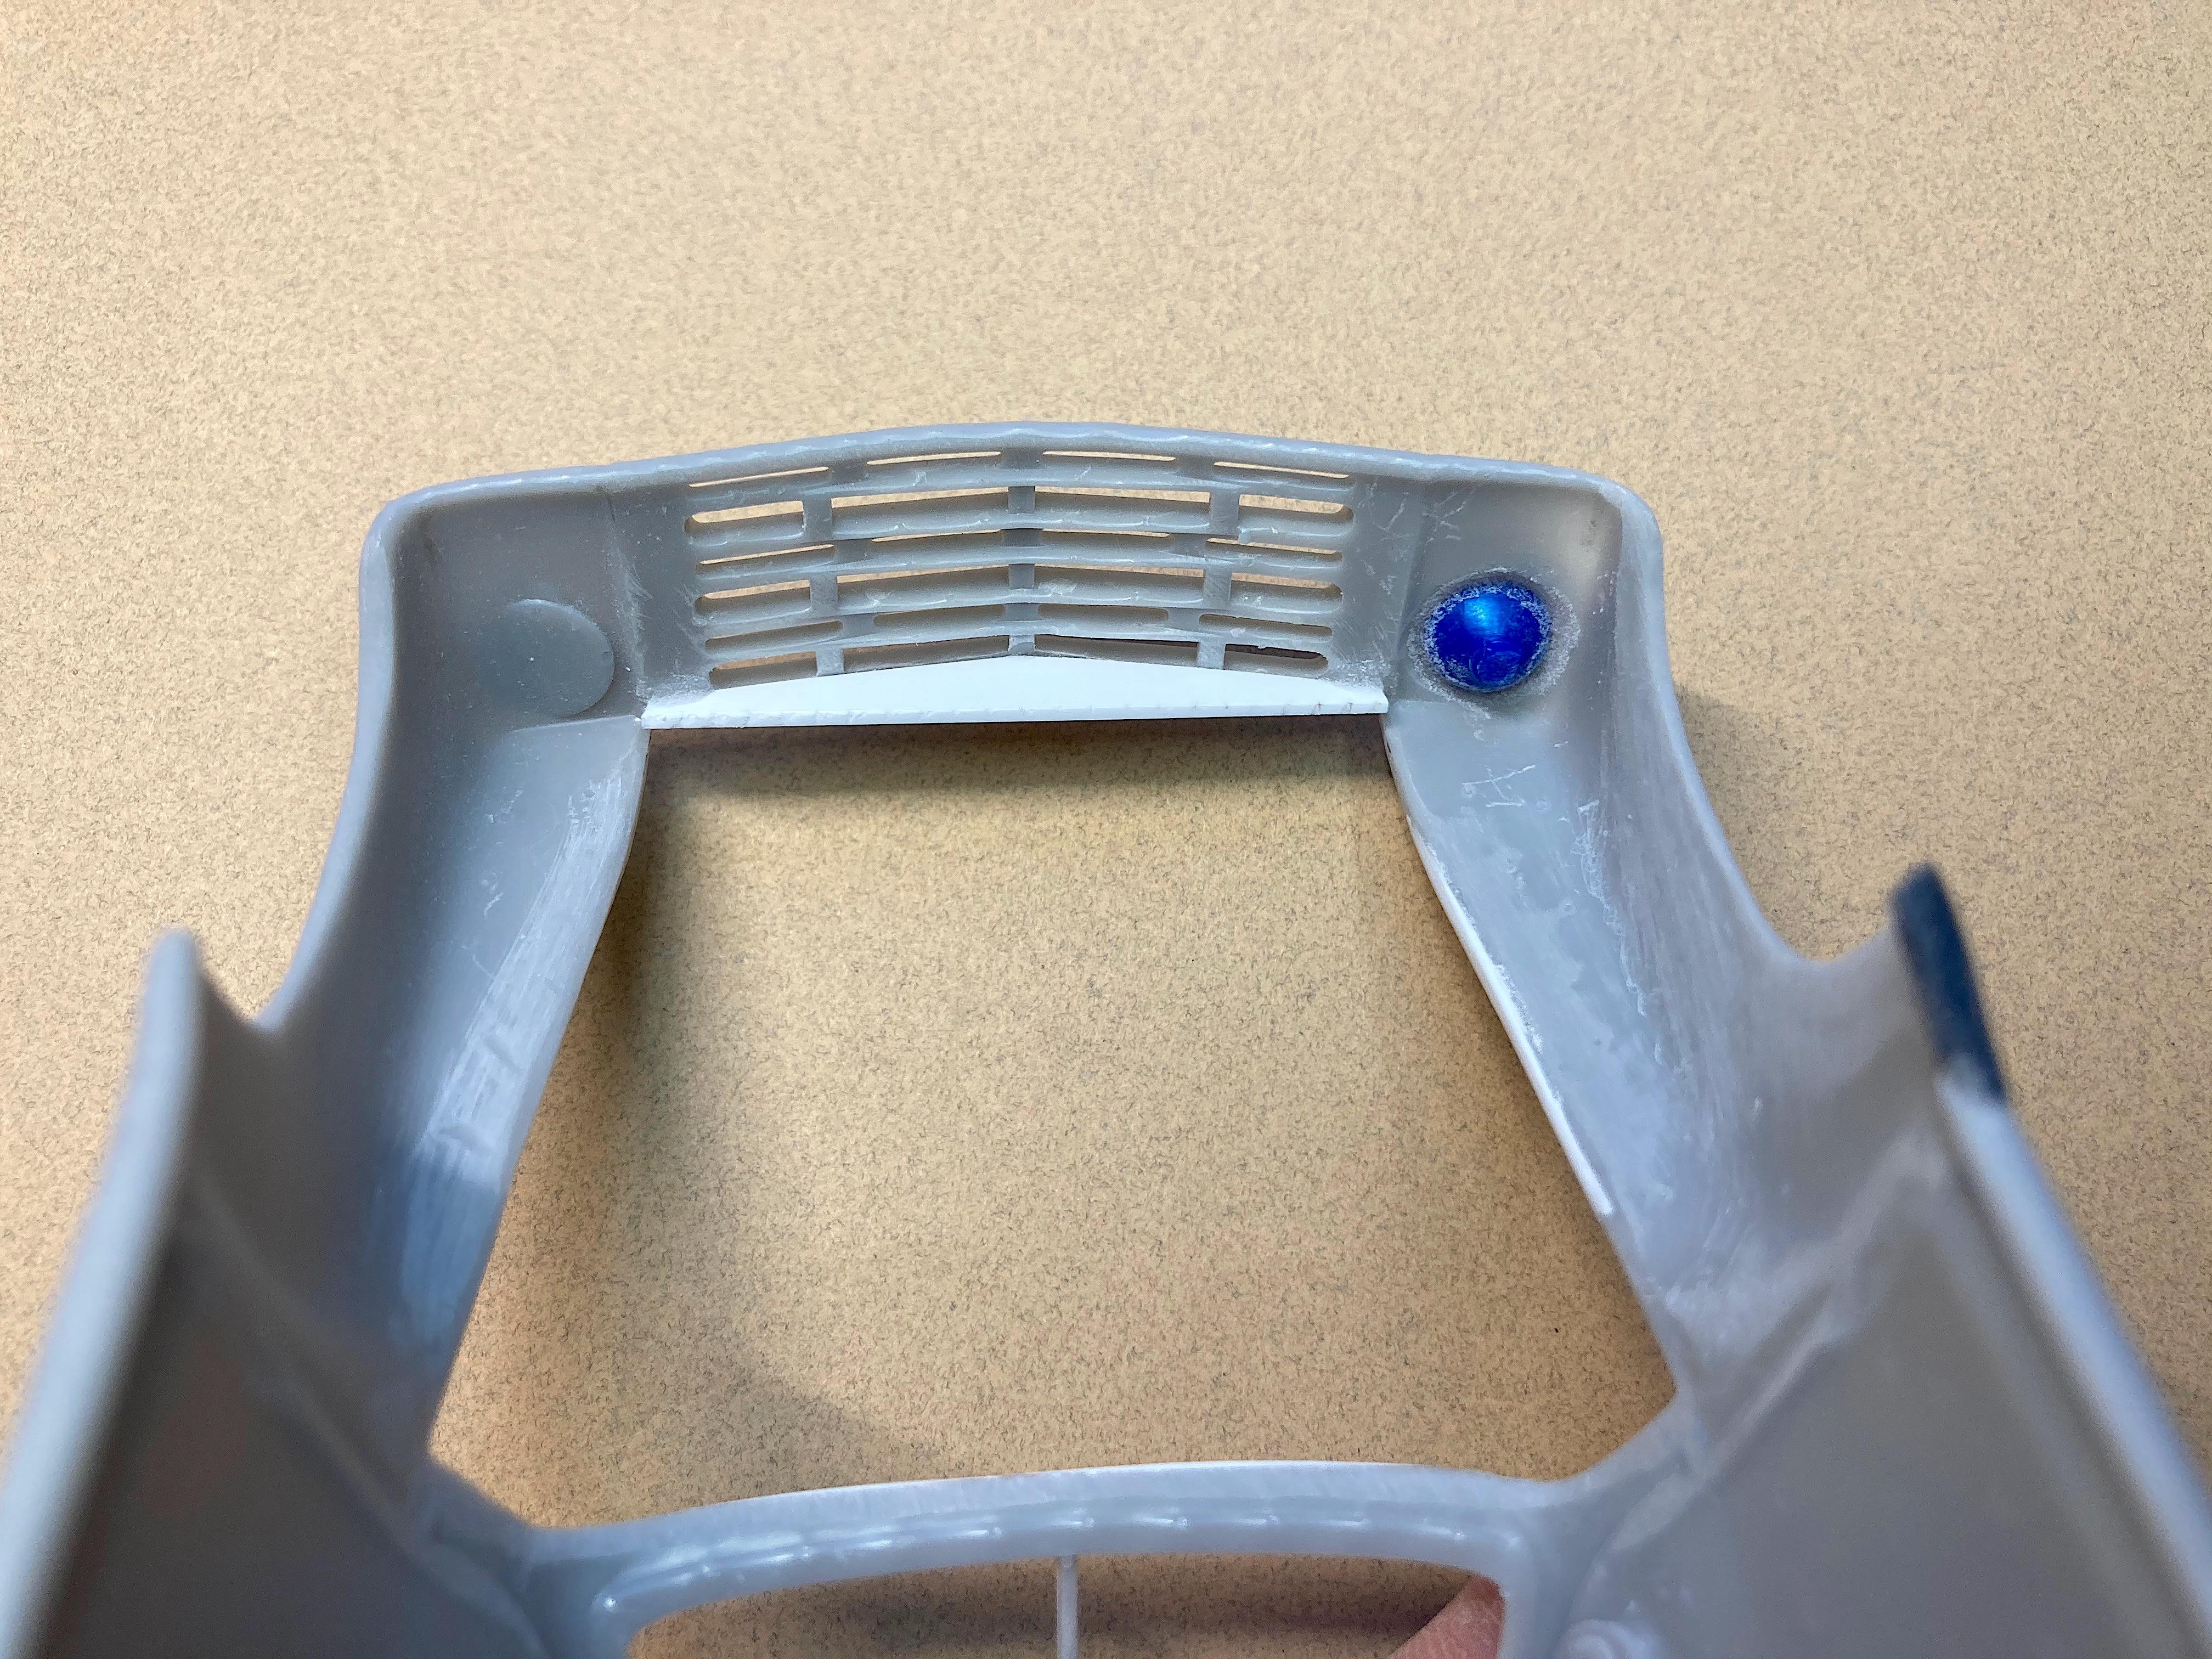
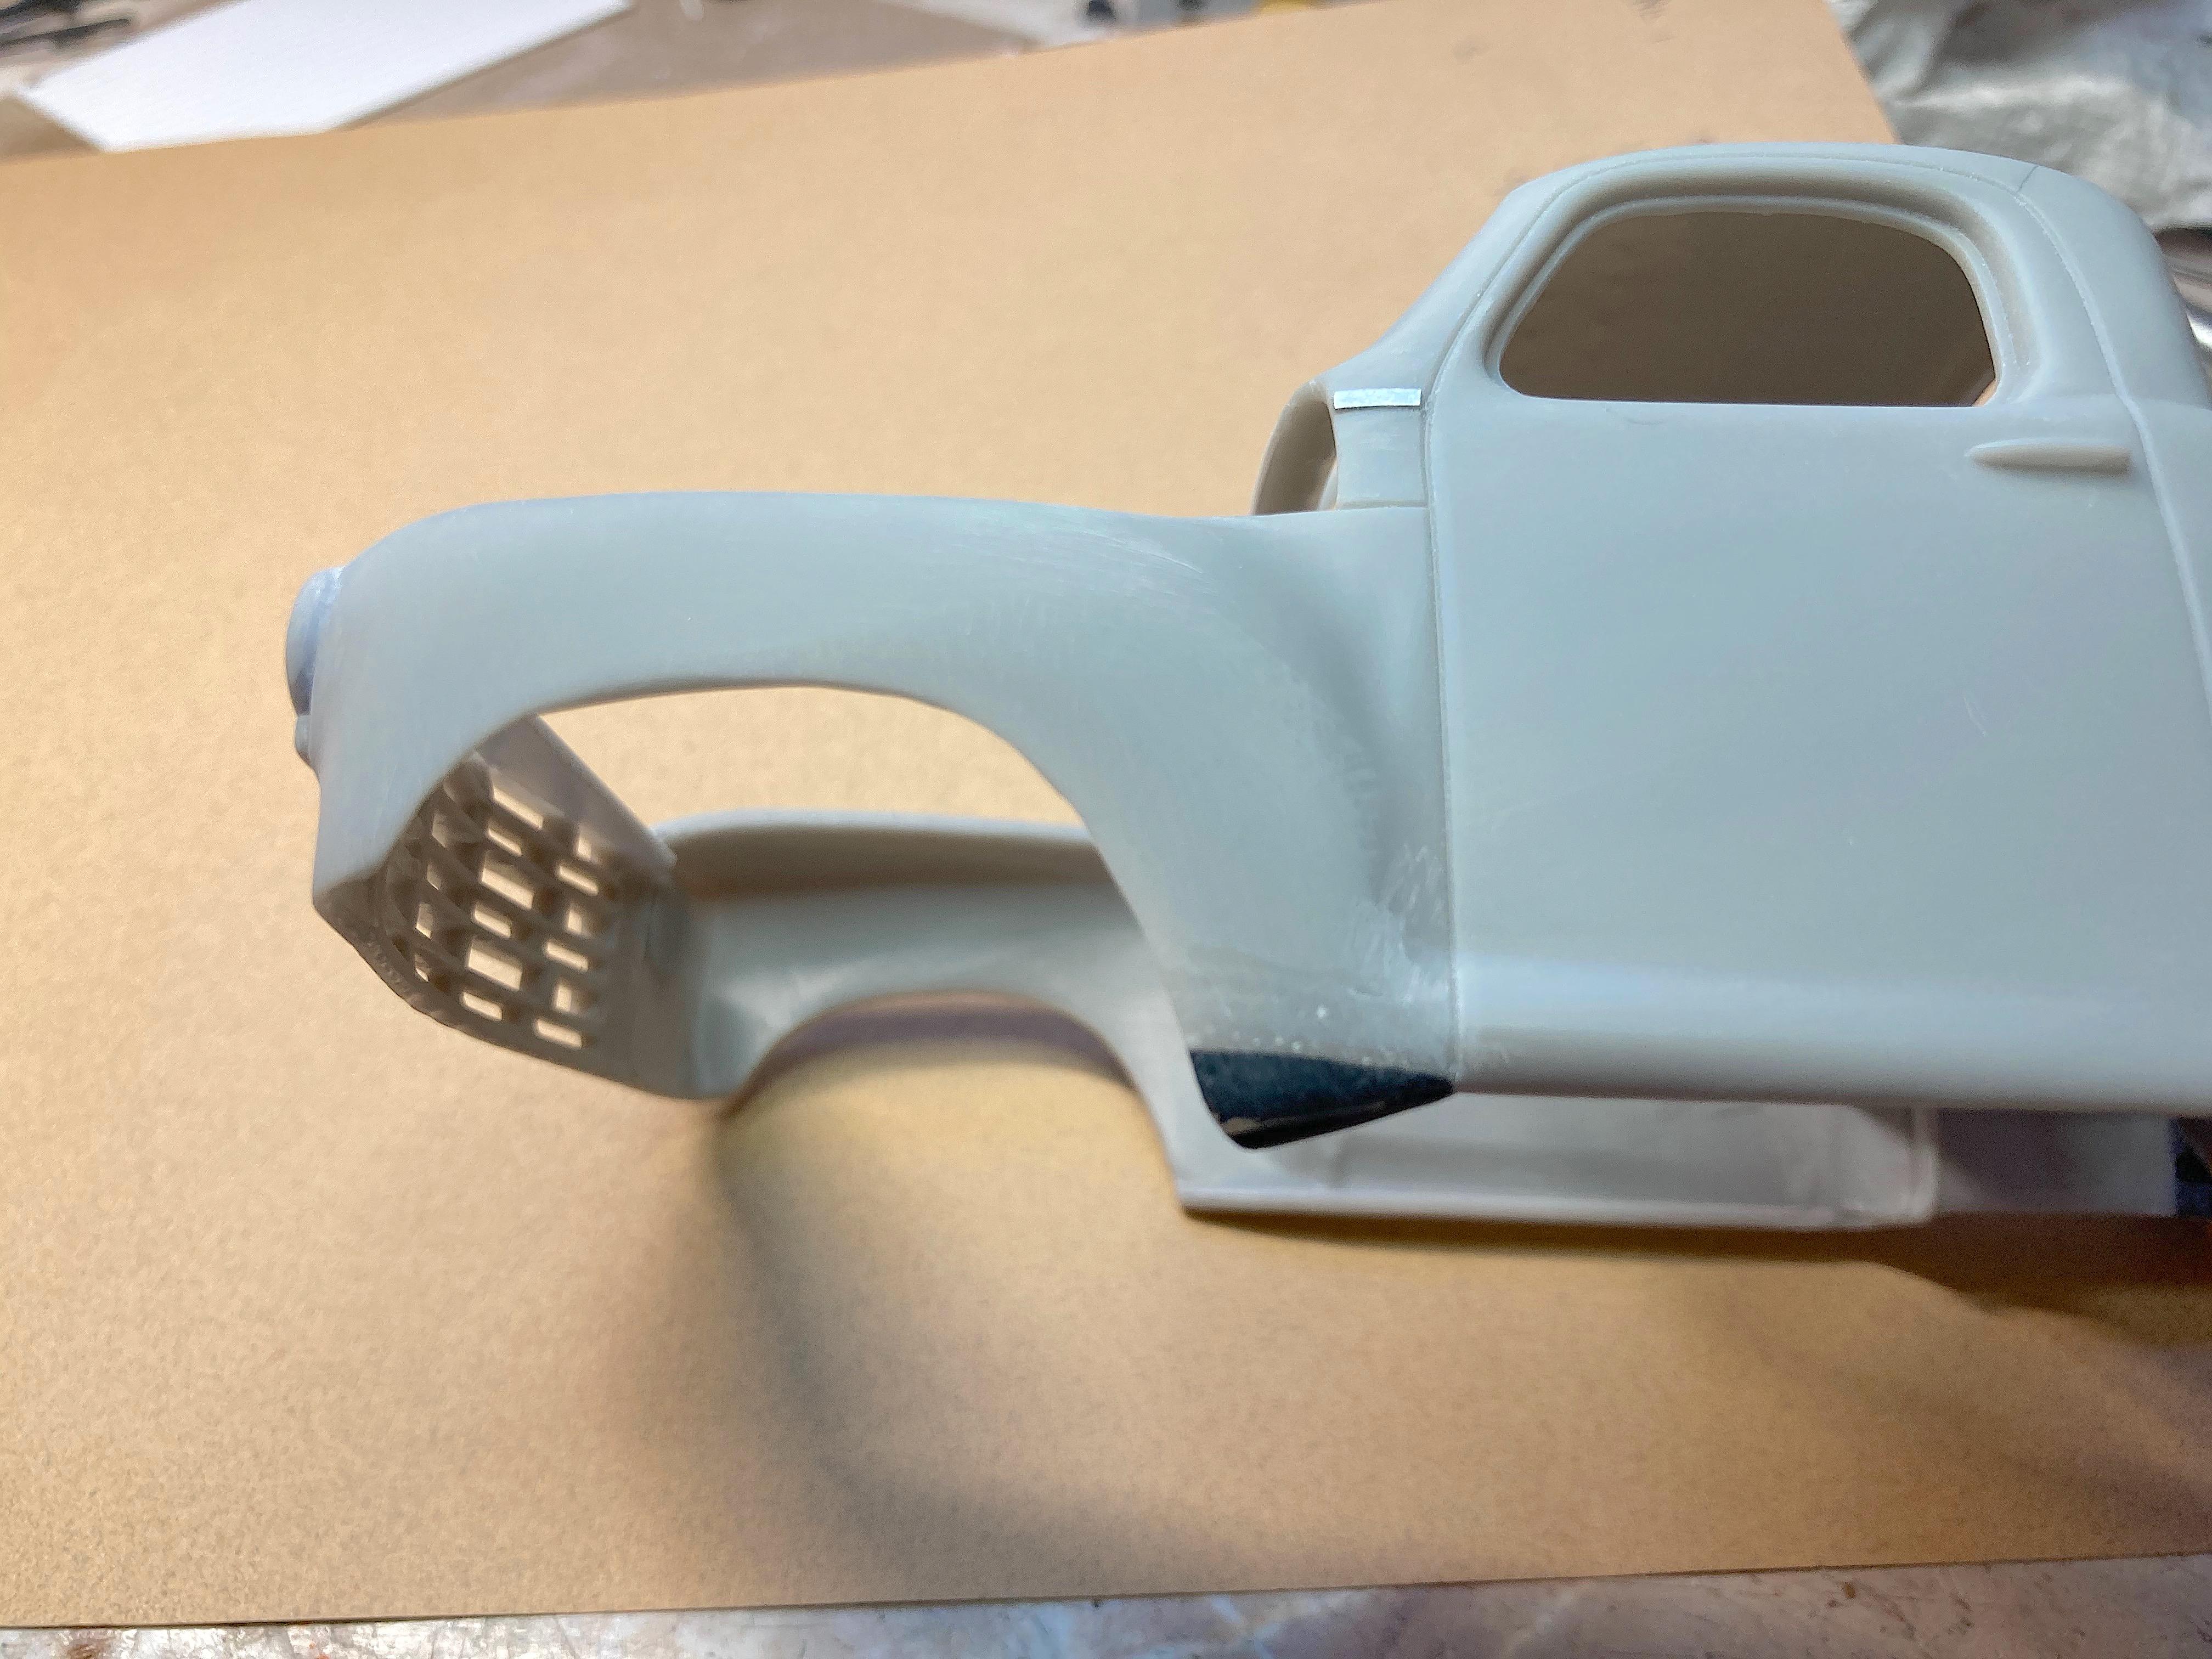
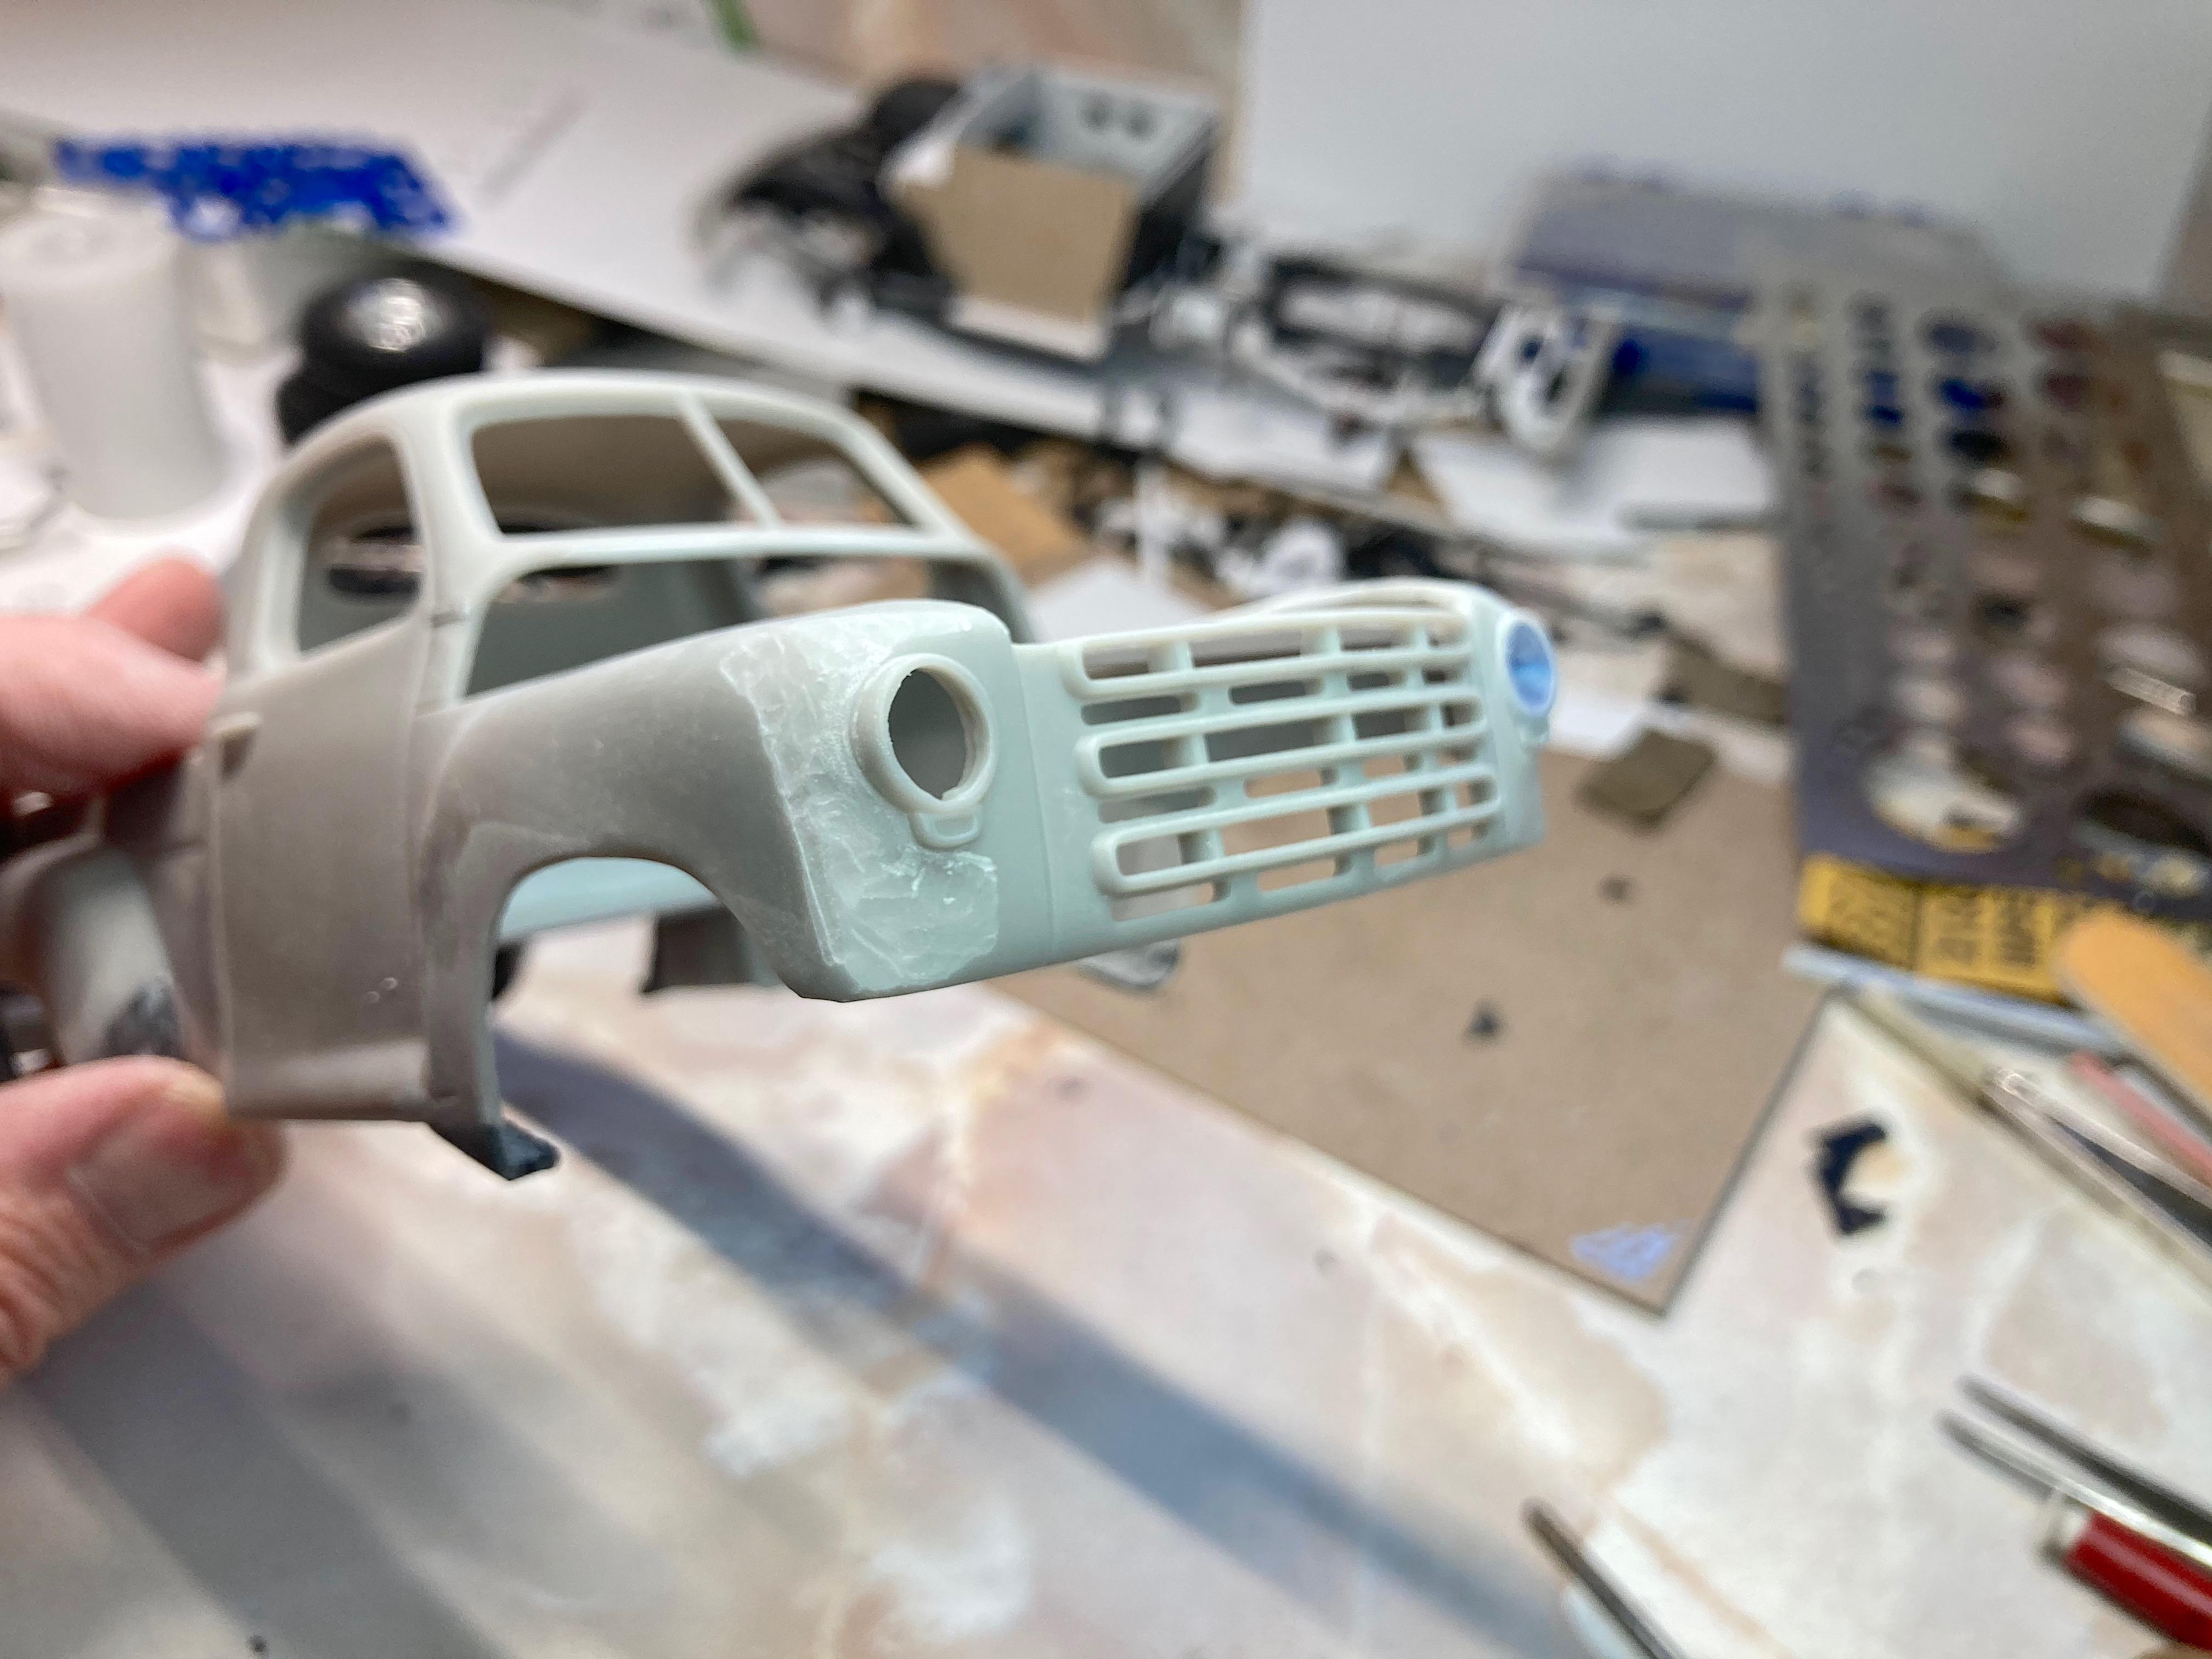
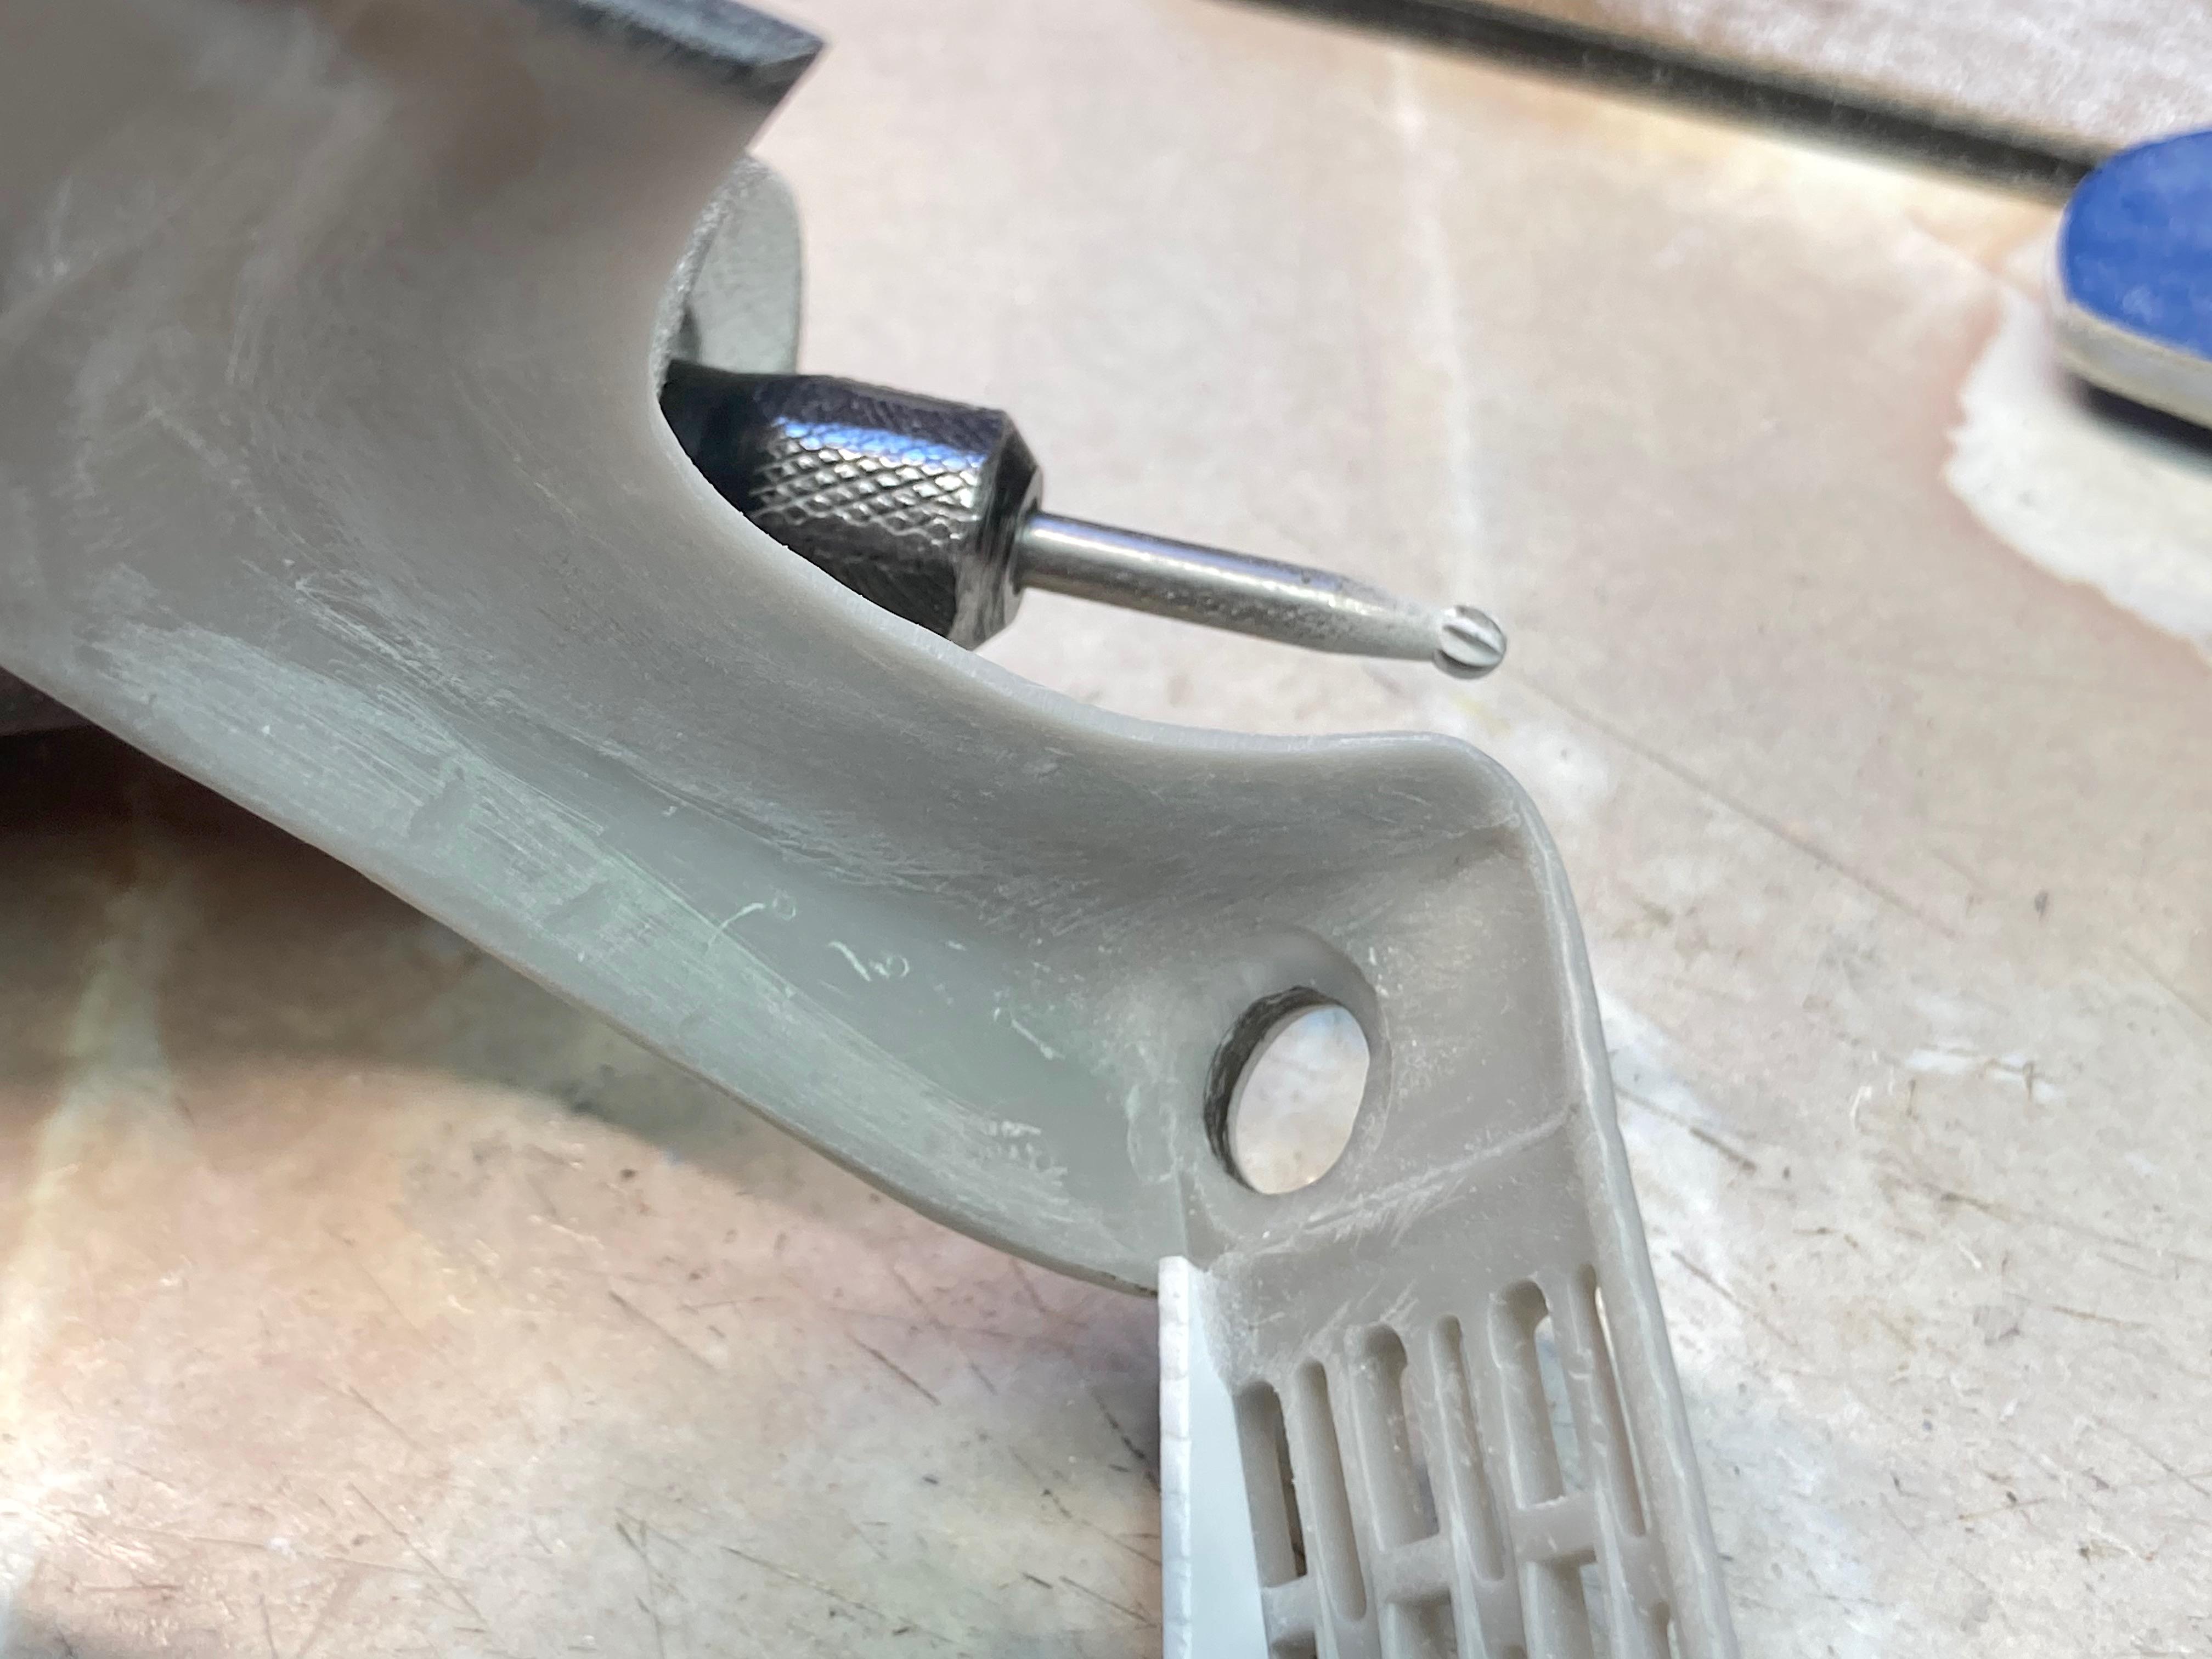
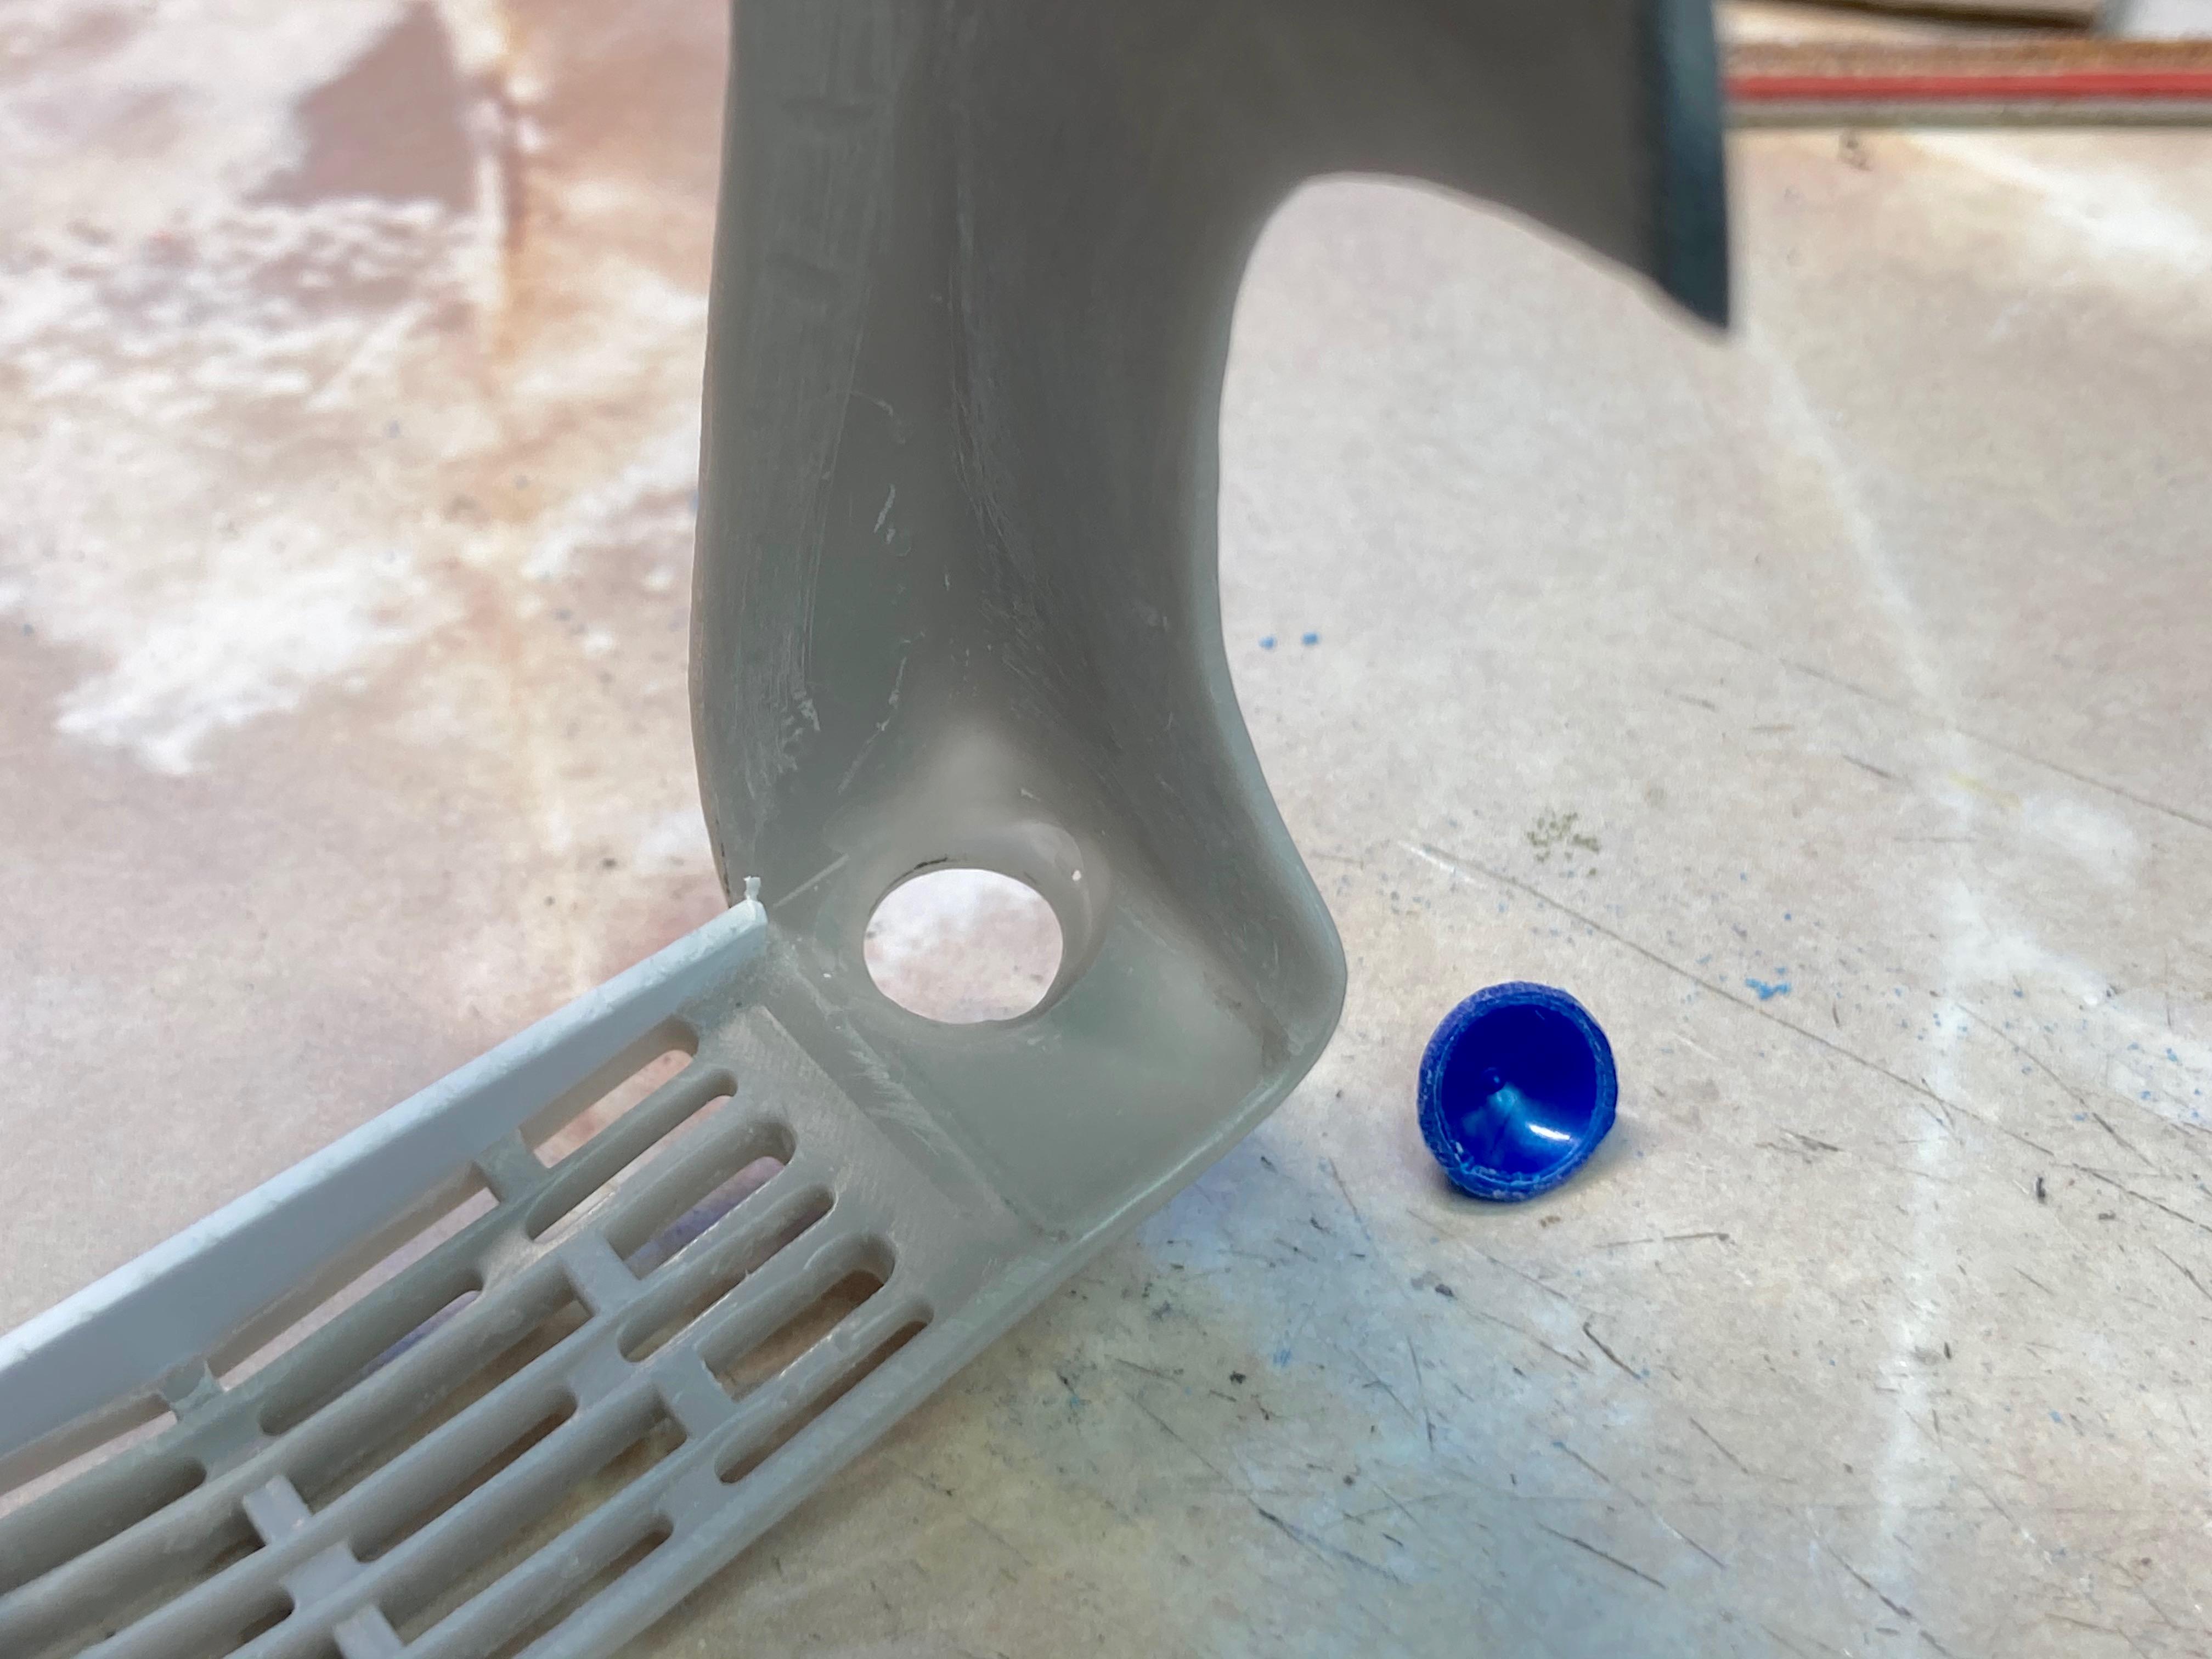
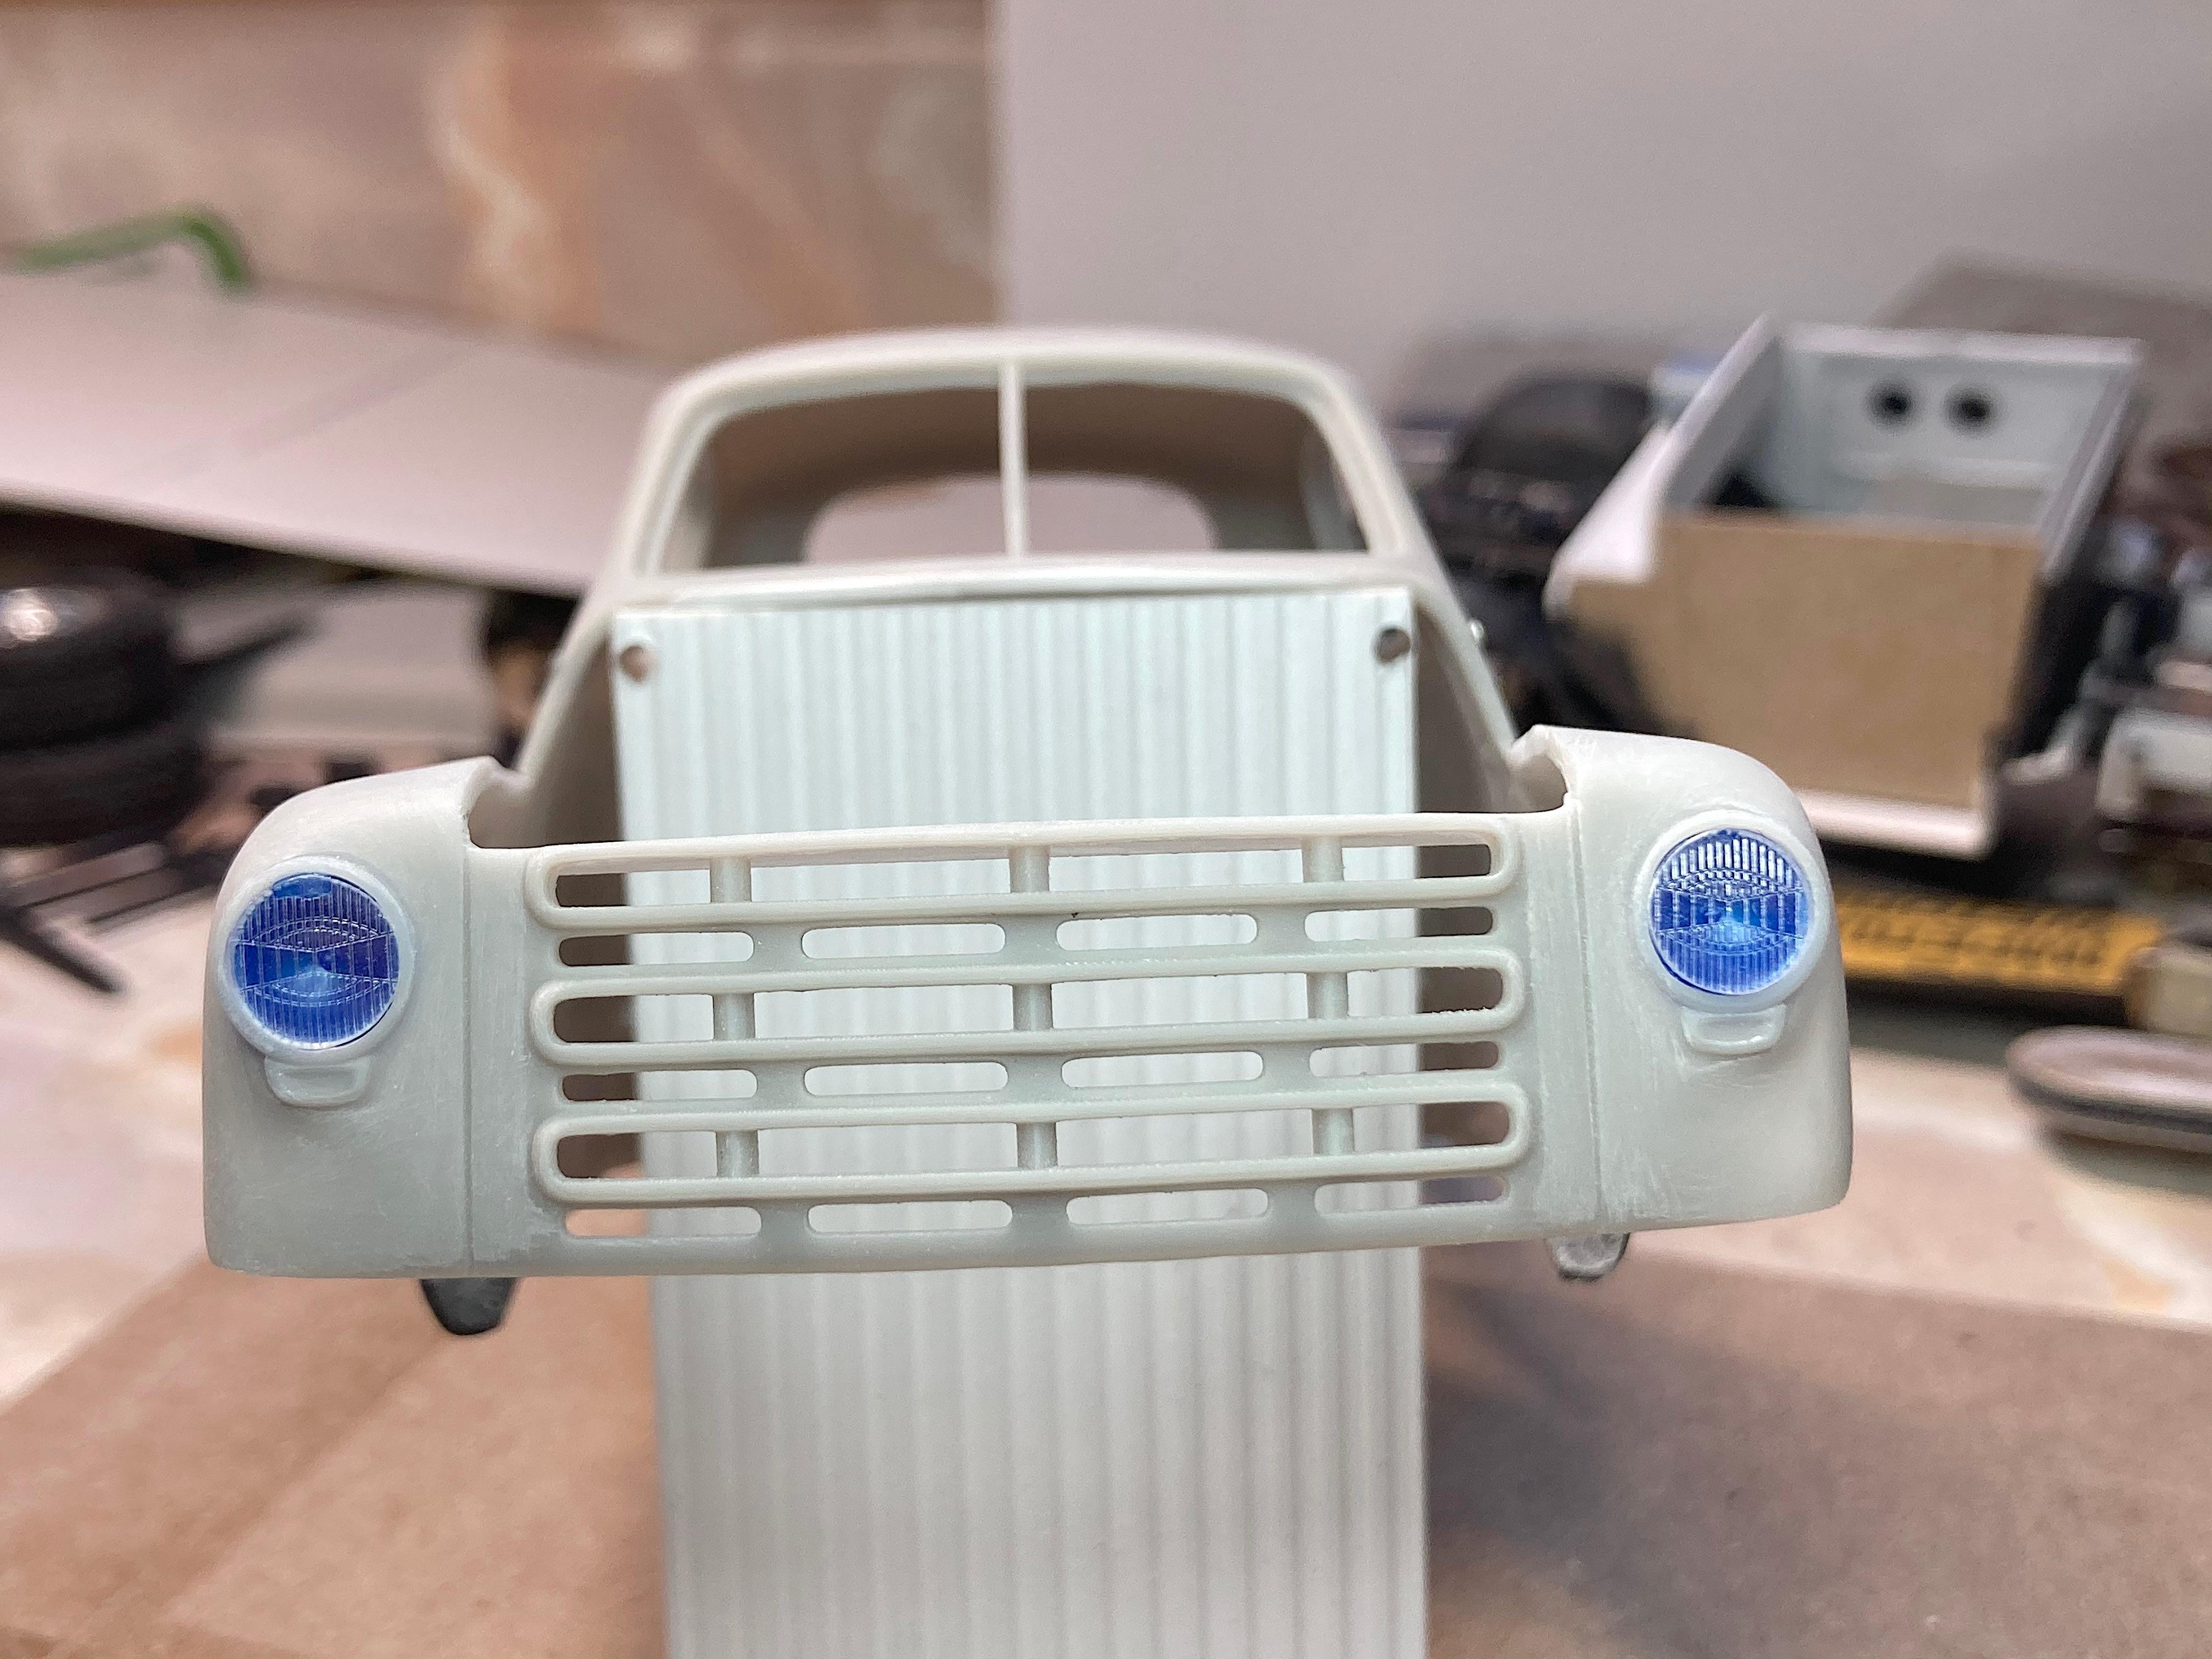
Thank you! It was. Thank you David. Yea, long trip, are we there yet? Today it was fixing a pet peeve, found on many models, the blind look. I have Subaru rally lights left over from my Cannonball project, I might buy more of these kits just for the lights. ? My OCD couldn't handle a subtle detail, the profile of the fenders around the headlights, it's hard to pick up on drawings. The more I looked at pictures of the real thing, the more things I noticed to add, such as the trailing edge of the front wheel arch which dips down, it was today when I saw that. There is also something, don't know the purpose, thought it was a patch or repair, but all these trucks have it, see if anyone notices. What I started with: Left side profile, and fender extension which is pieces cut from the GMC firewall. First headlight done. Self explanatory. Final shape. Took more pictures of each step, knowing I didn't screw it up. ? Roughed out the shape, and made the hole, with the Dremel. Removed the inside far as I dared. Marked with a pencil to help guide where to go. After using the round needle file, wrapped sandpaper around the Xacto handle to finalize the headlight hole. The Subie headlight was sanded down from the front edge, and around the perimeter, and beveled at the top. When I glued in, did only a drop at the top and bottom, when it was stuck, slathered glue around the inside perimeter and dumped on baking soda. I had broken through the outside, could have left as a rust hole, but instead filled with superglue/baking soda. DONE! Since the bezel trim is molded on, I have no choice other than paint it and the reflector chrome. Had to cut the radiator support for the bucket.
- 108 replies
-
- 2
-
-
- 1953
- studebaker
- (and 2 more)
-
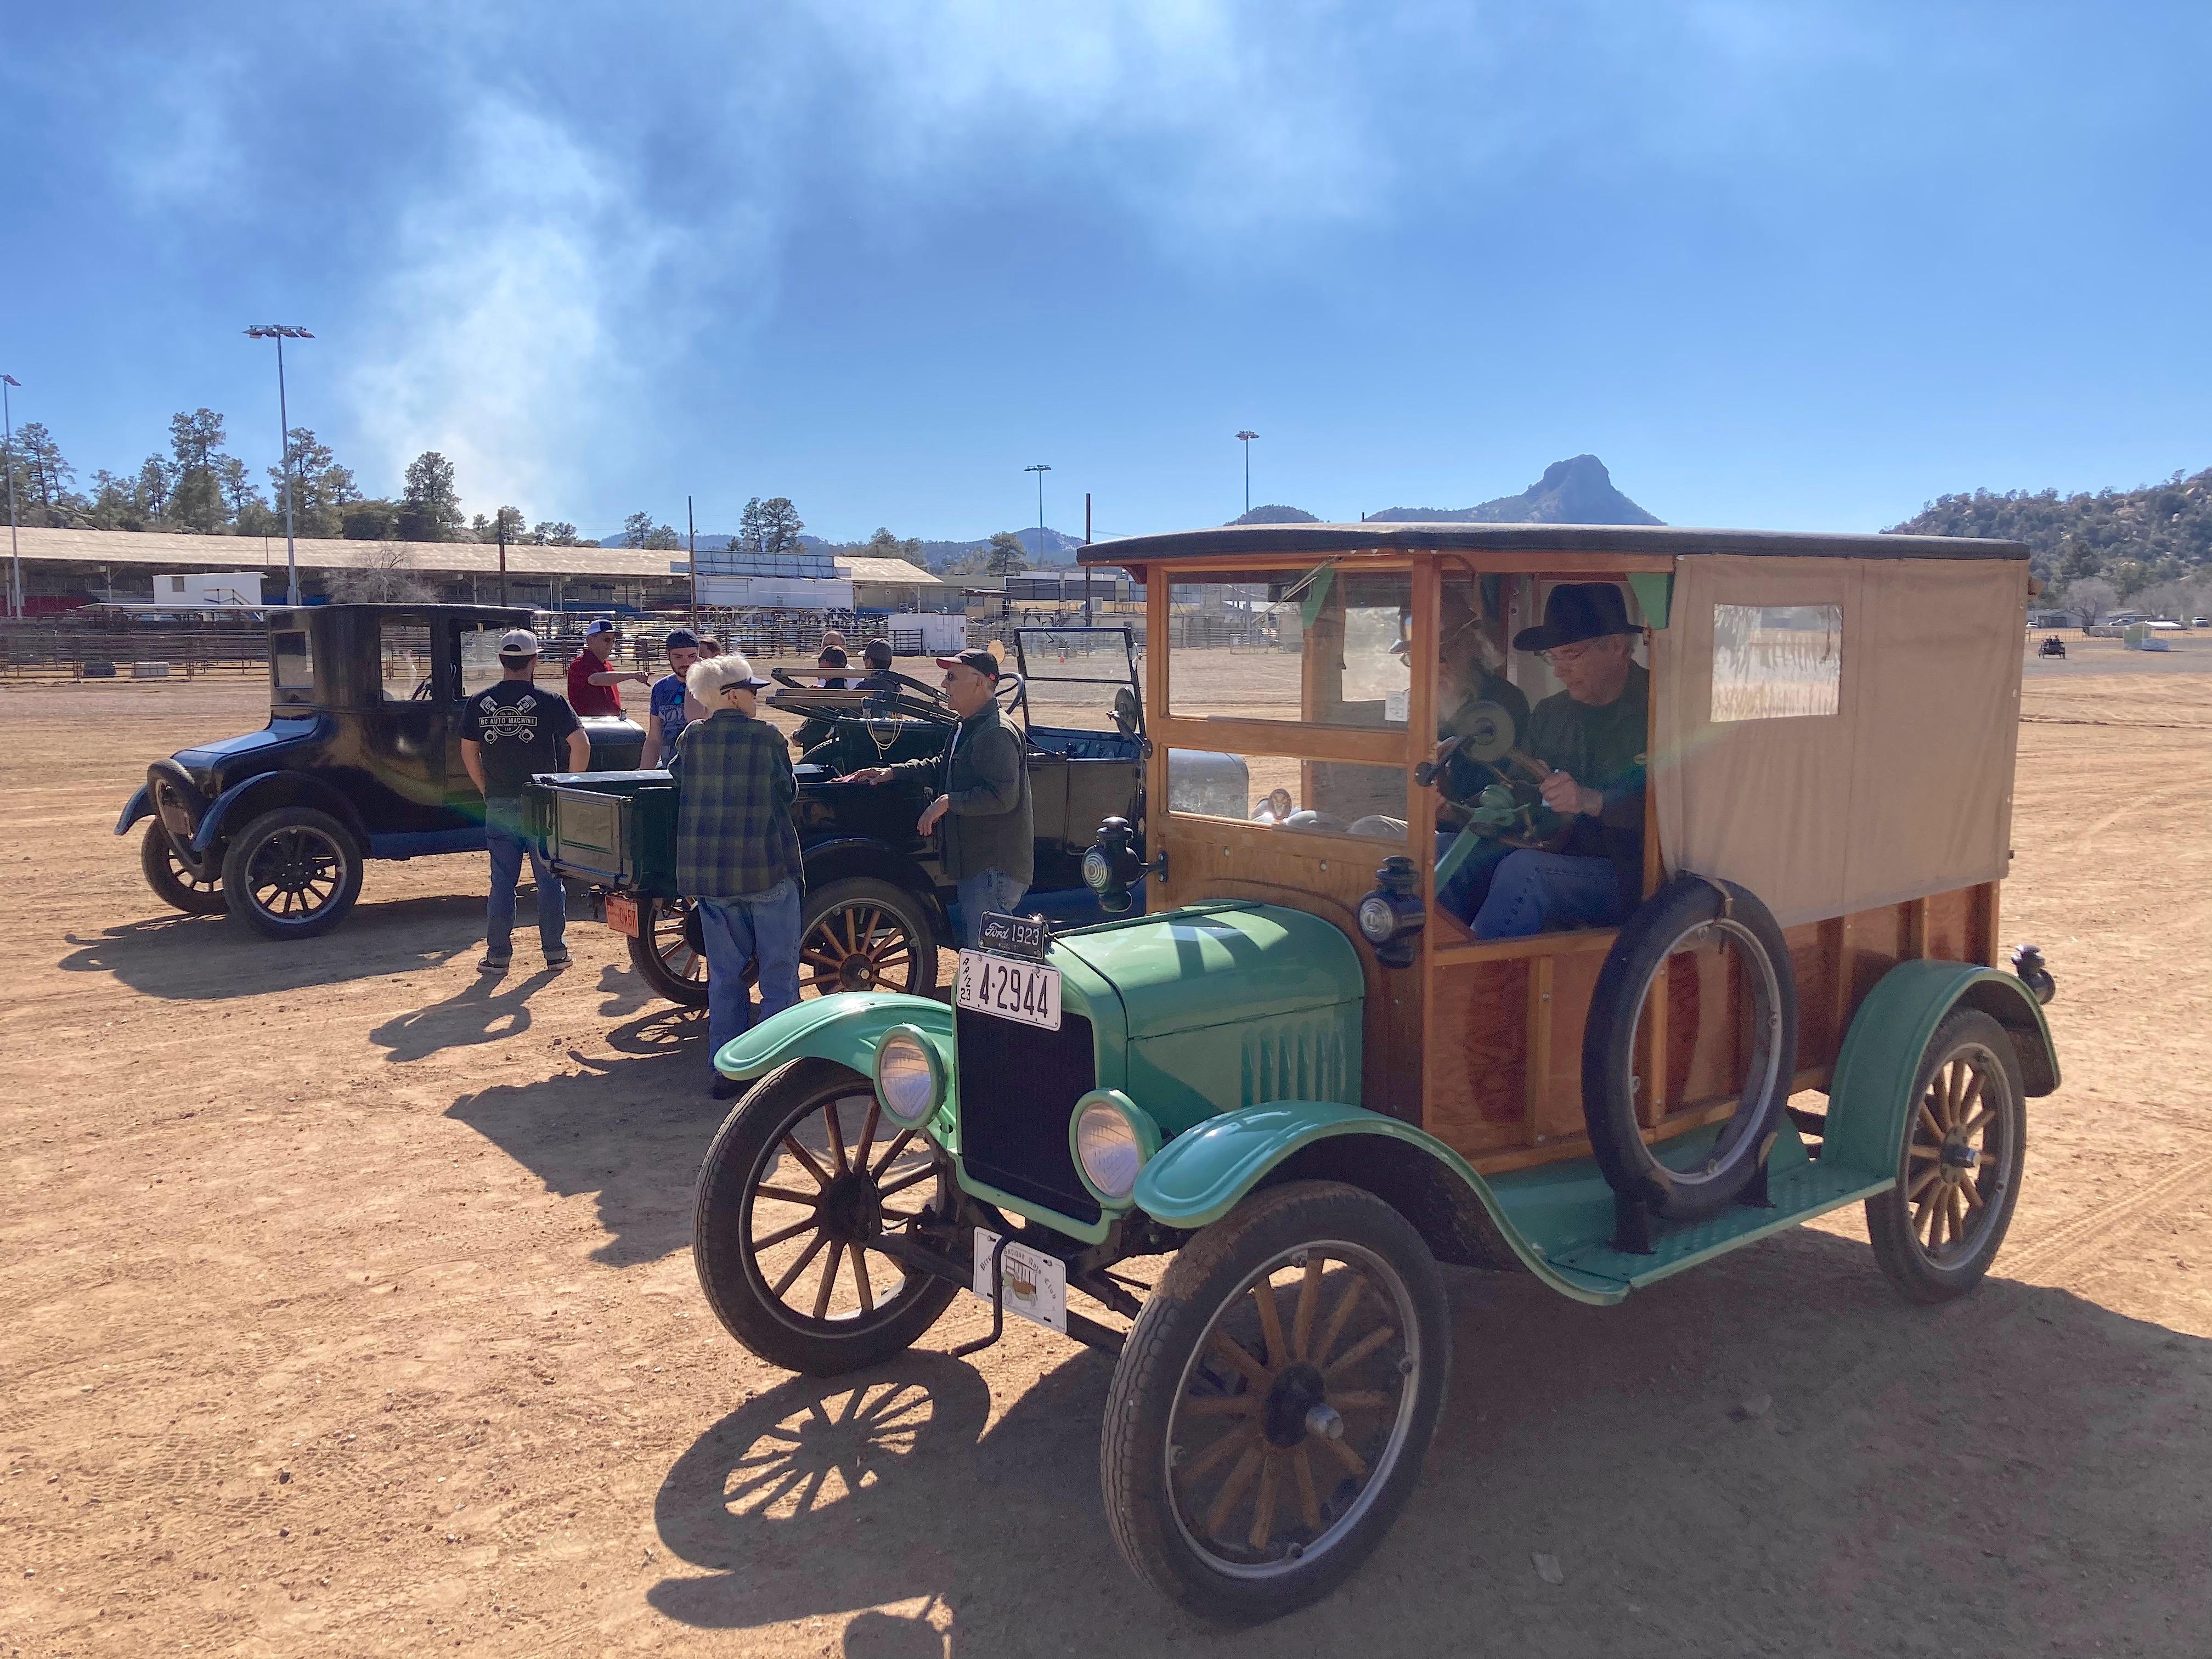
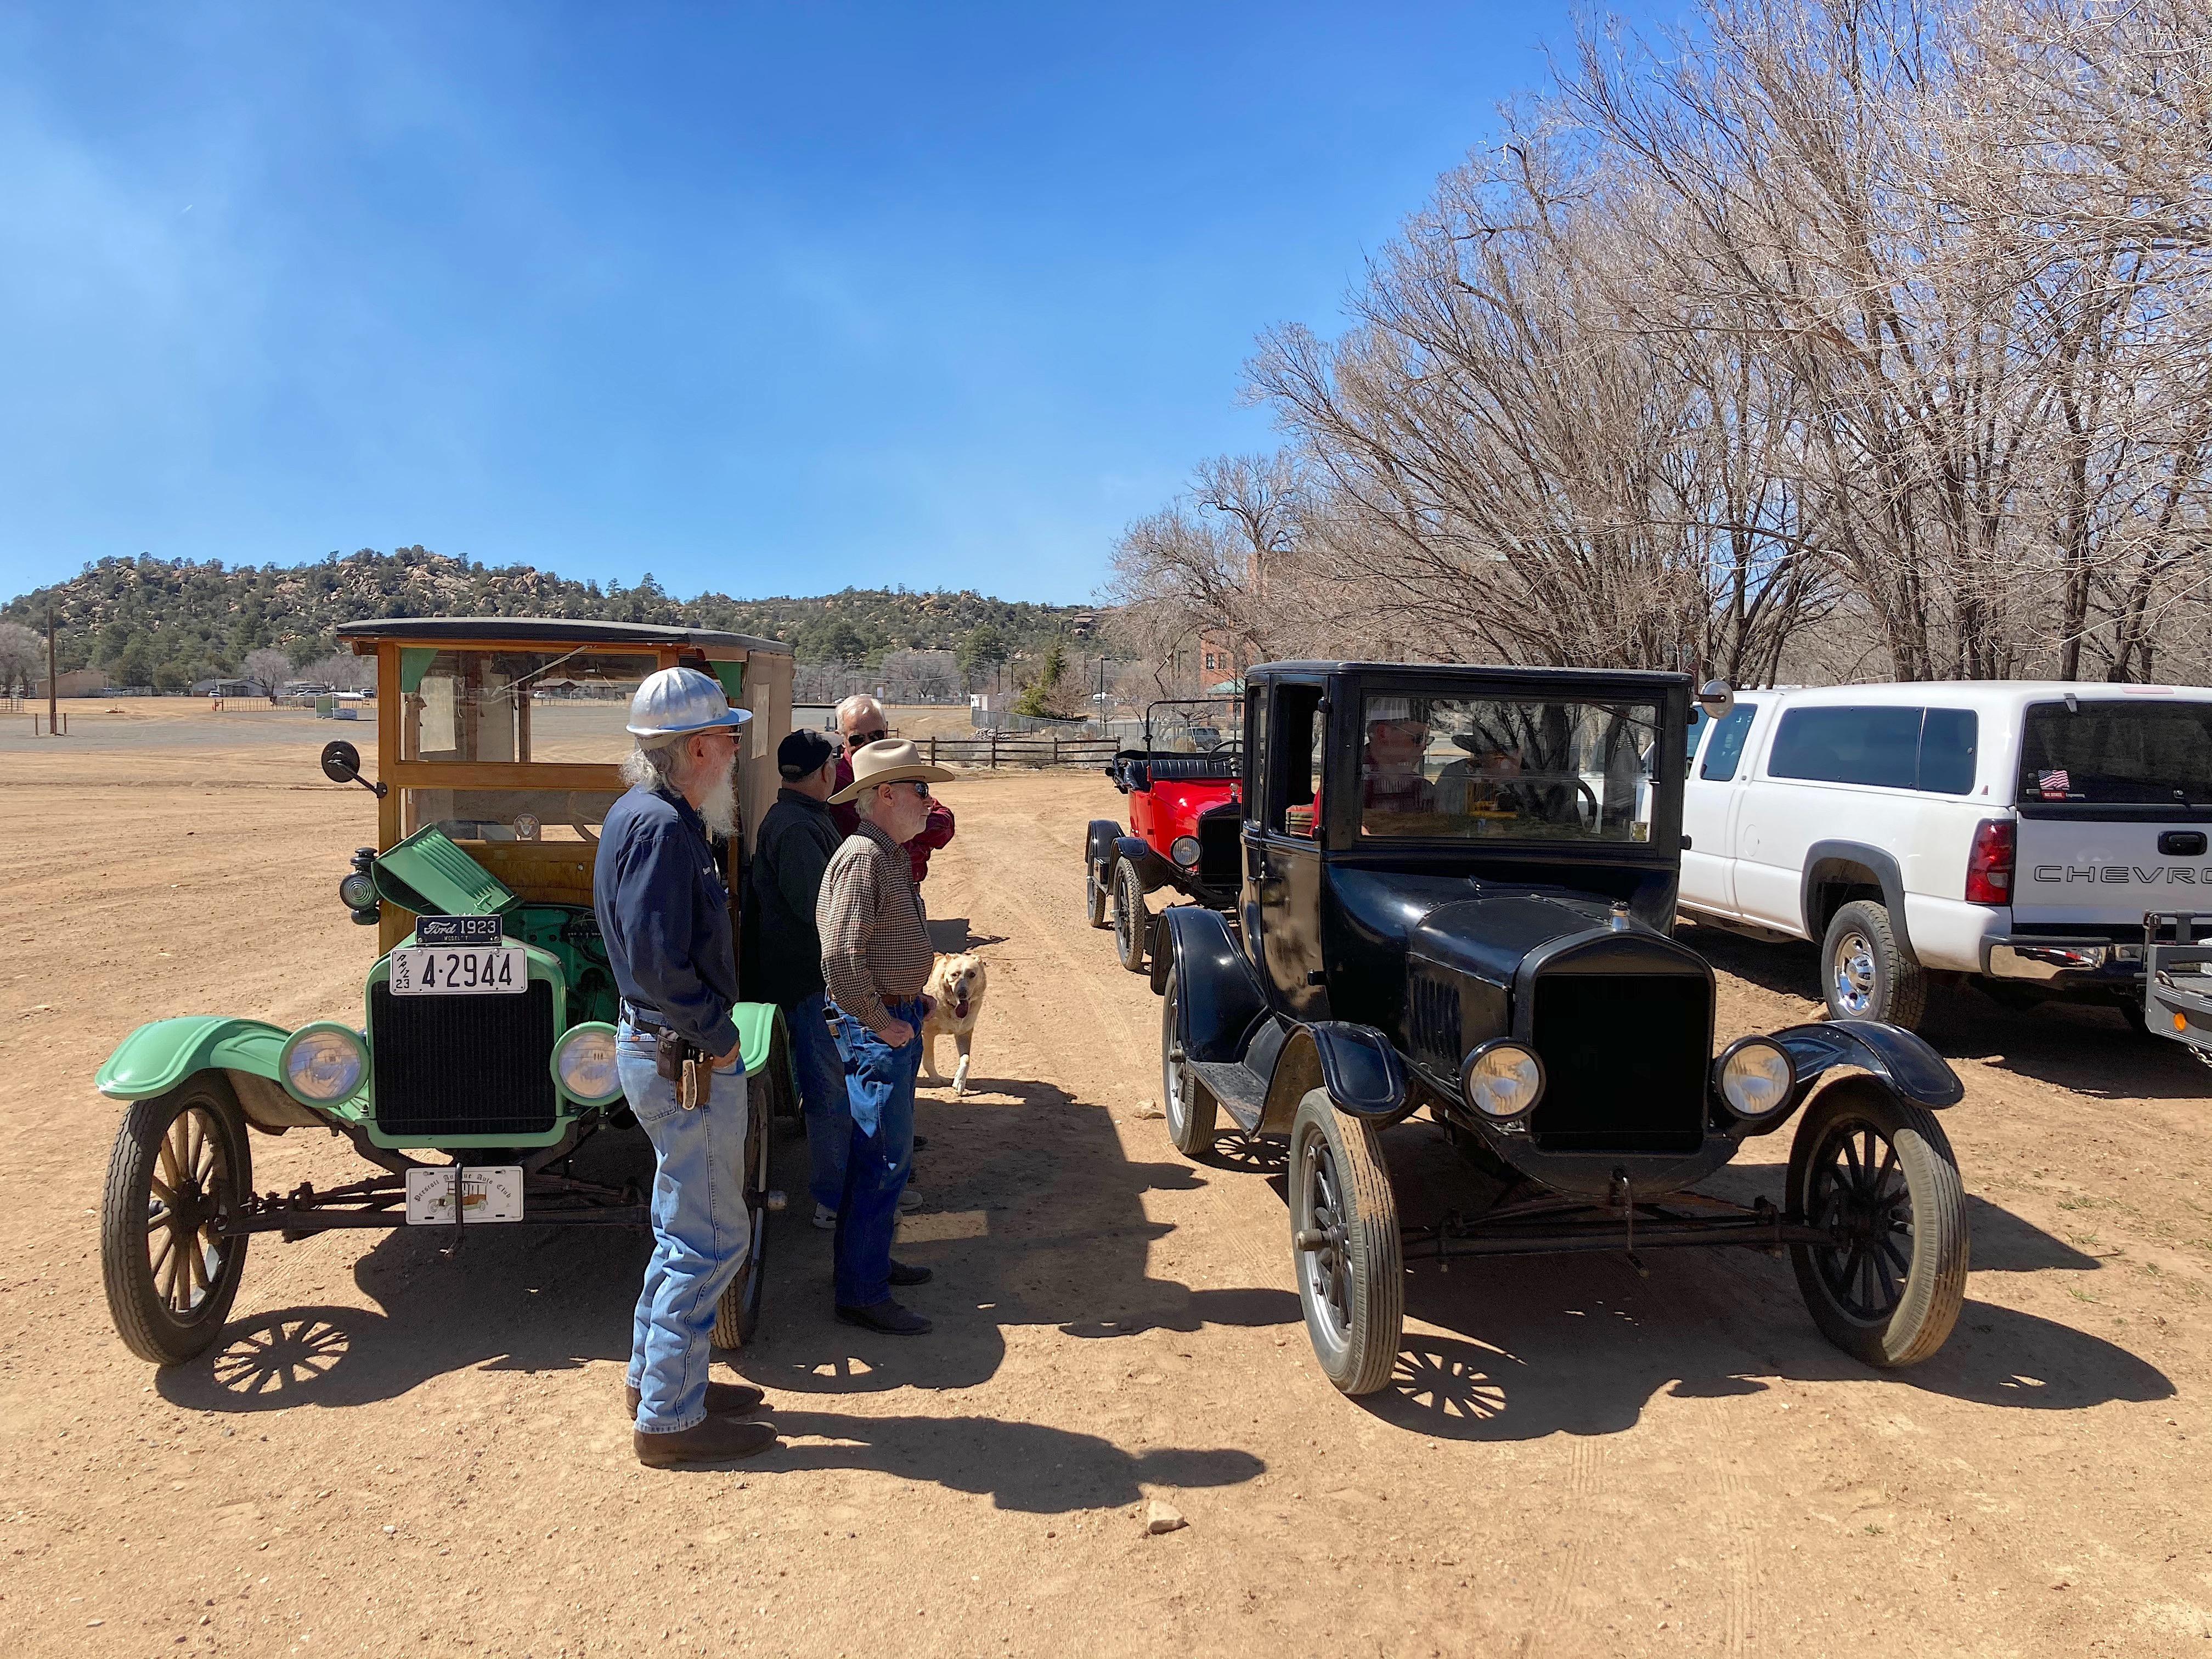
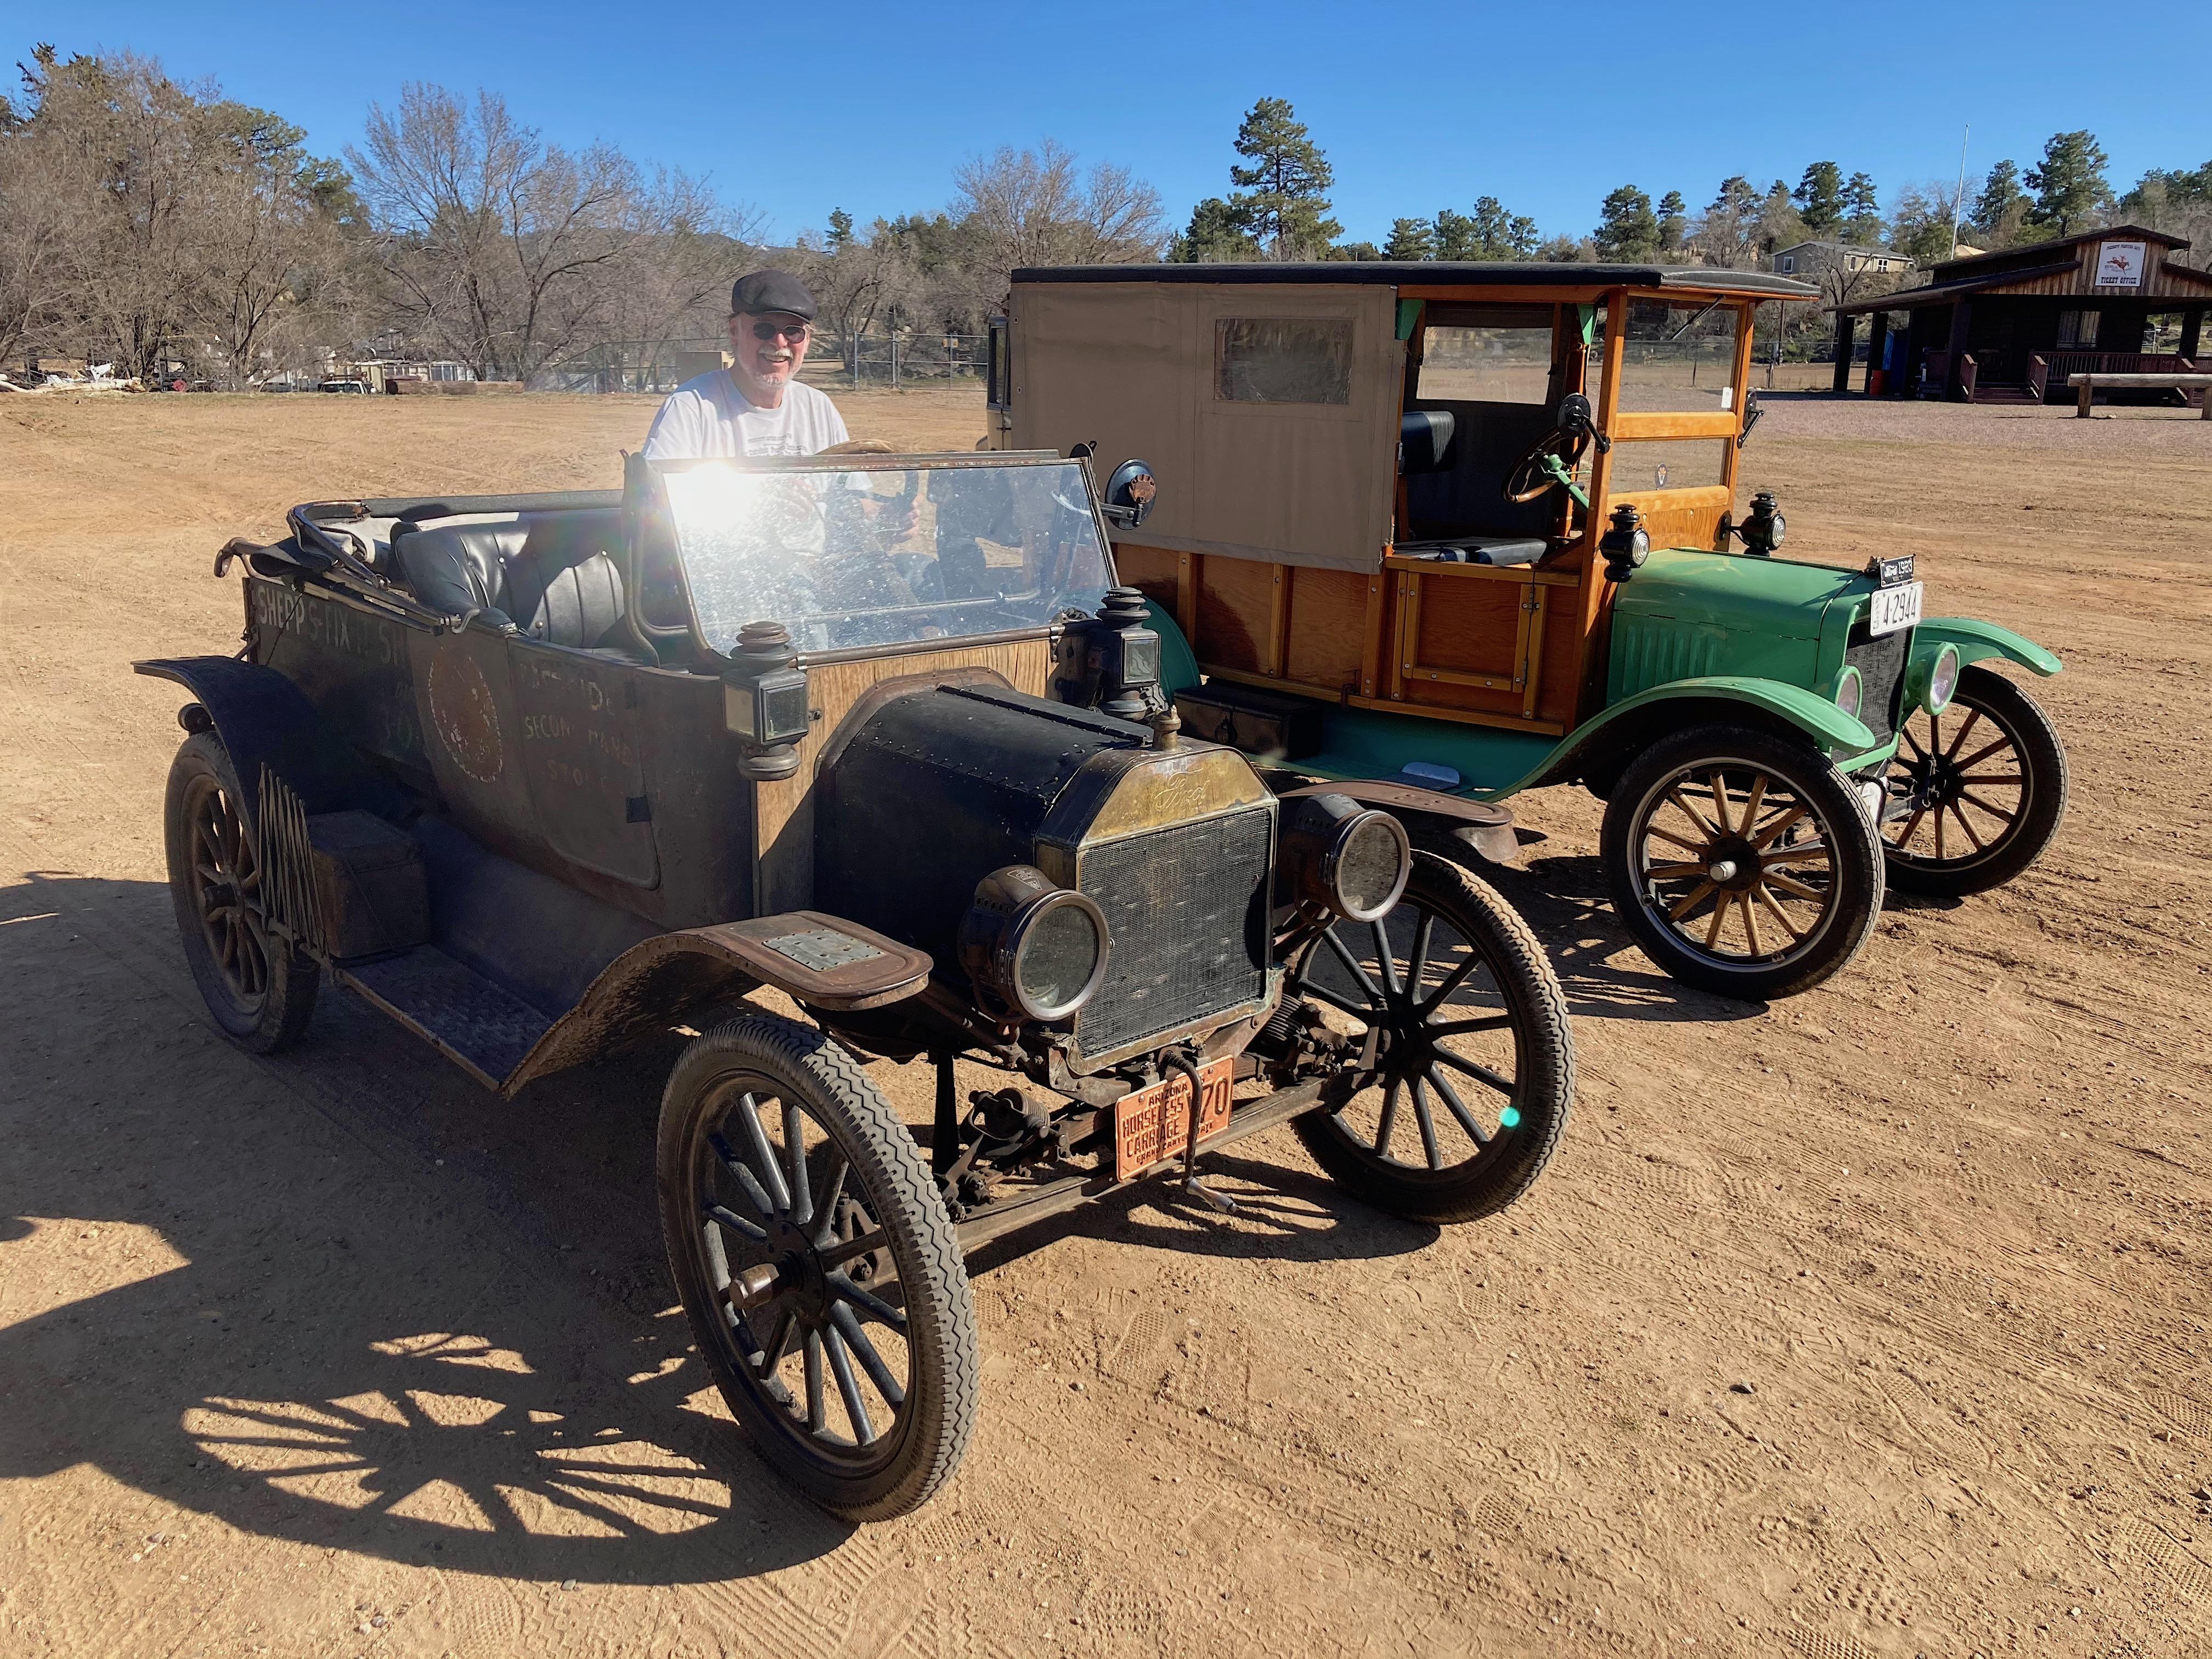
I learned how to drive a Model T
89AKurt posted a topic in General Automotive Talk (Trucks and Cars)
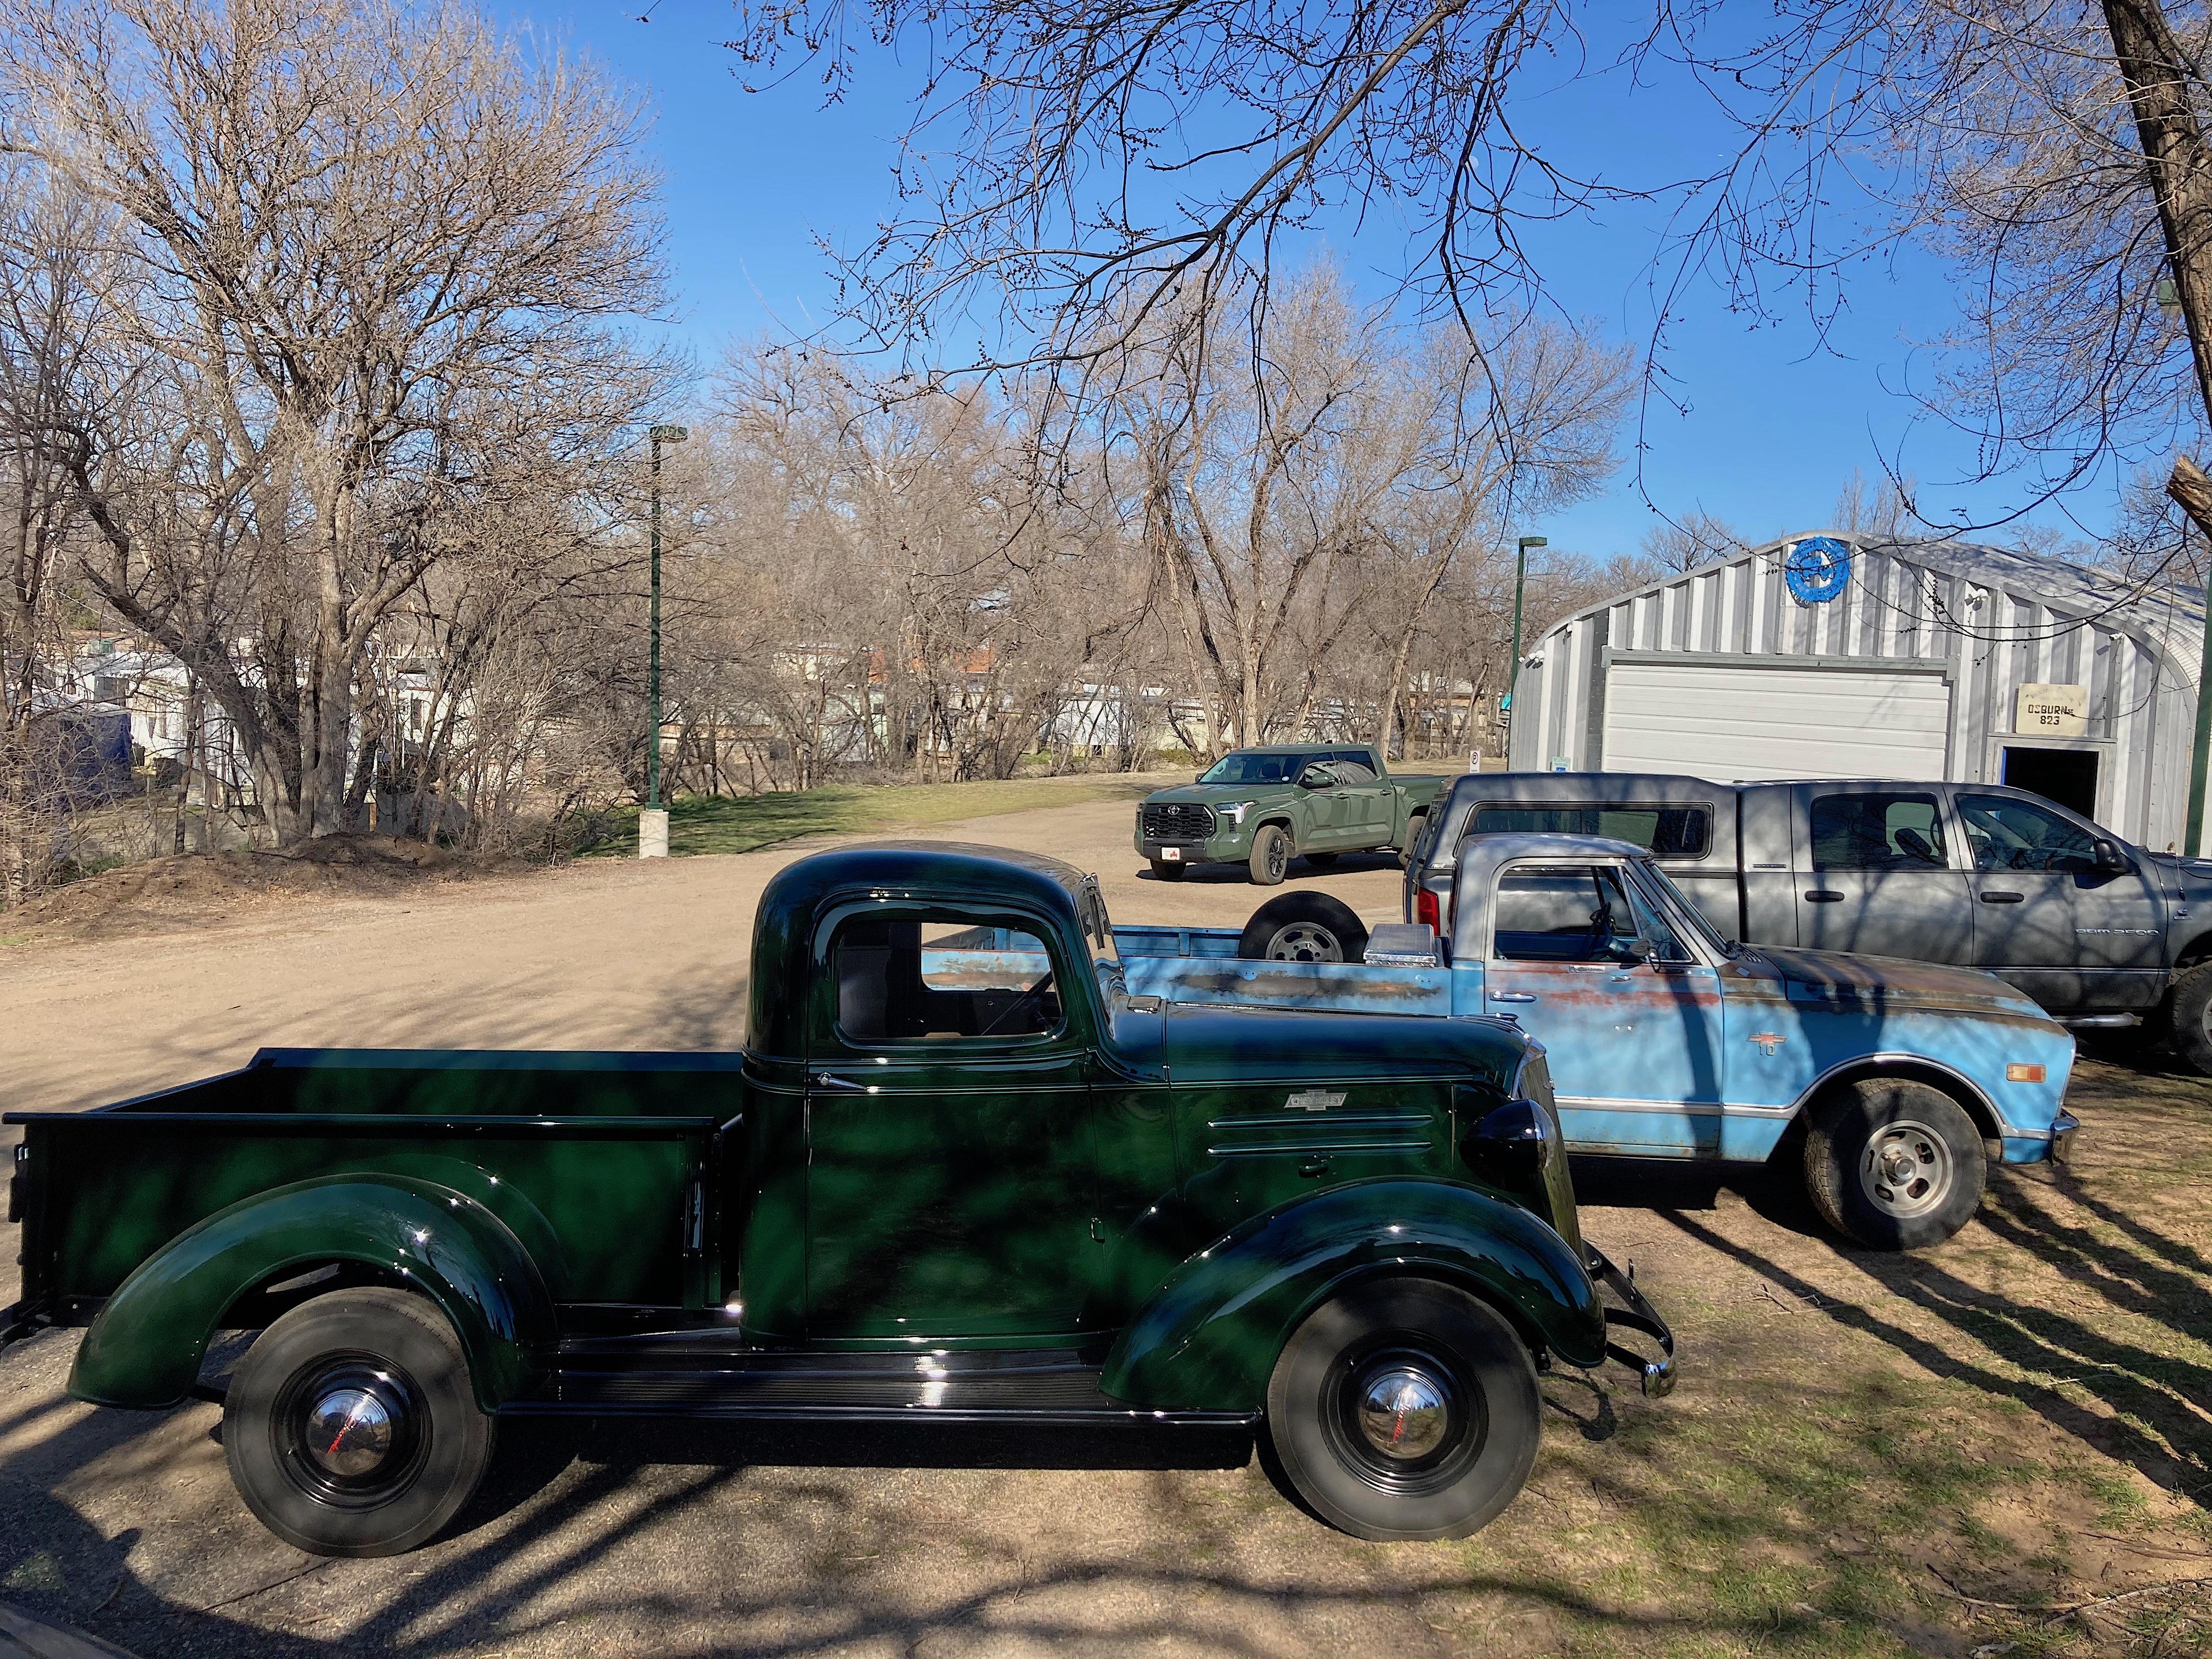
Yes, real Model Ts, not hot rods with modern running gear, the one in the videos is unrestored. Because they were warmed up, didn't learn what it takes to get one started from scratch, such as messing with the carb, flicking the switch and checking the amp meter, retarding the timing, pulling the choke, and whatever else depending on how the car was equipped. The first ones didn't even have batteries, some of these cars did have electric starters. The hardest thing to learn, the right foot is the brake, the left foot is used differently than a regular clutch. The hand brake does more than work for parking, it allows the left pedal to go into high gear. The lever on the right of the steering wheel is the gas, left lever does ignition advance/retard. There is a center pedal for engaging reverse. I watched a bunch of other guys learning before I went, so I knew the first steps, but had to learn on the fly what else to do. We had the Prescott Rodeo grounds to drive around. For the video of me driving, the owner stood on the running board. ? It was the most fun I had with the club. I also drove the depot hack, owned by a charter member. The PAAC has a clubhouse. My Blue Cloud next to a beautiful older Chevy pickup.
-
For cutting corners
-
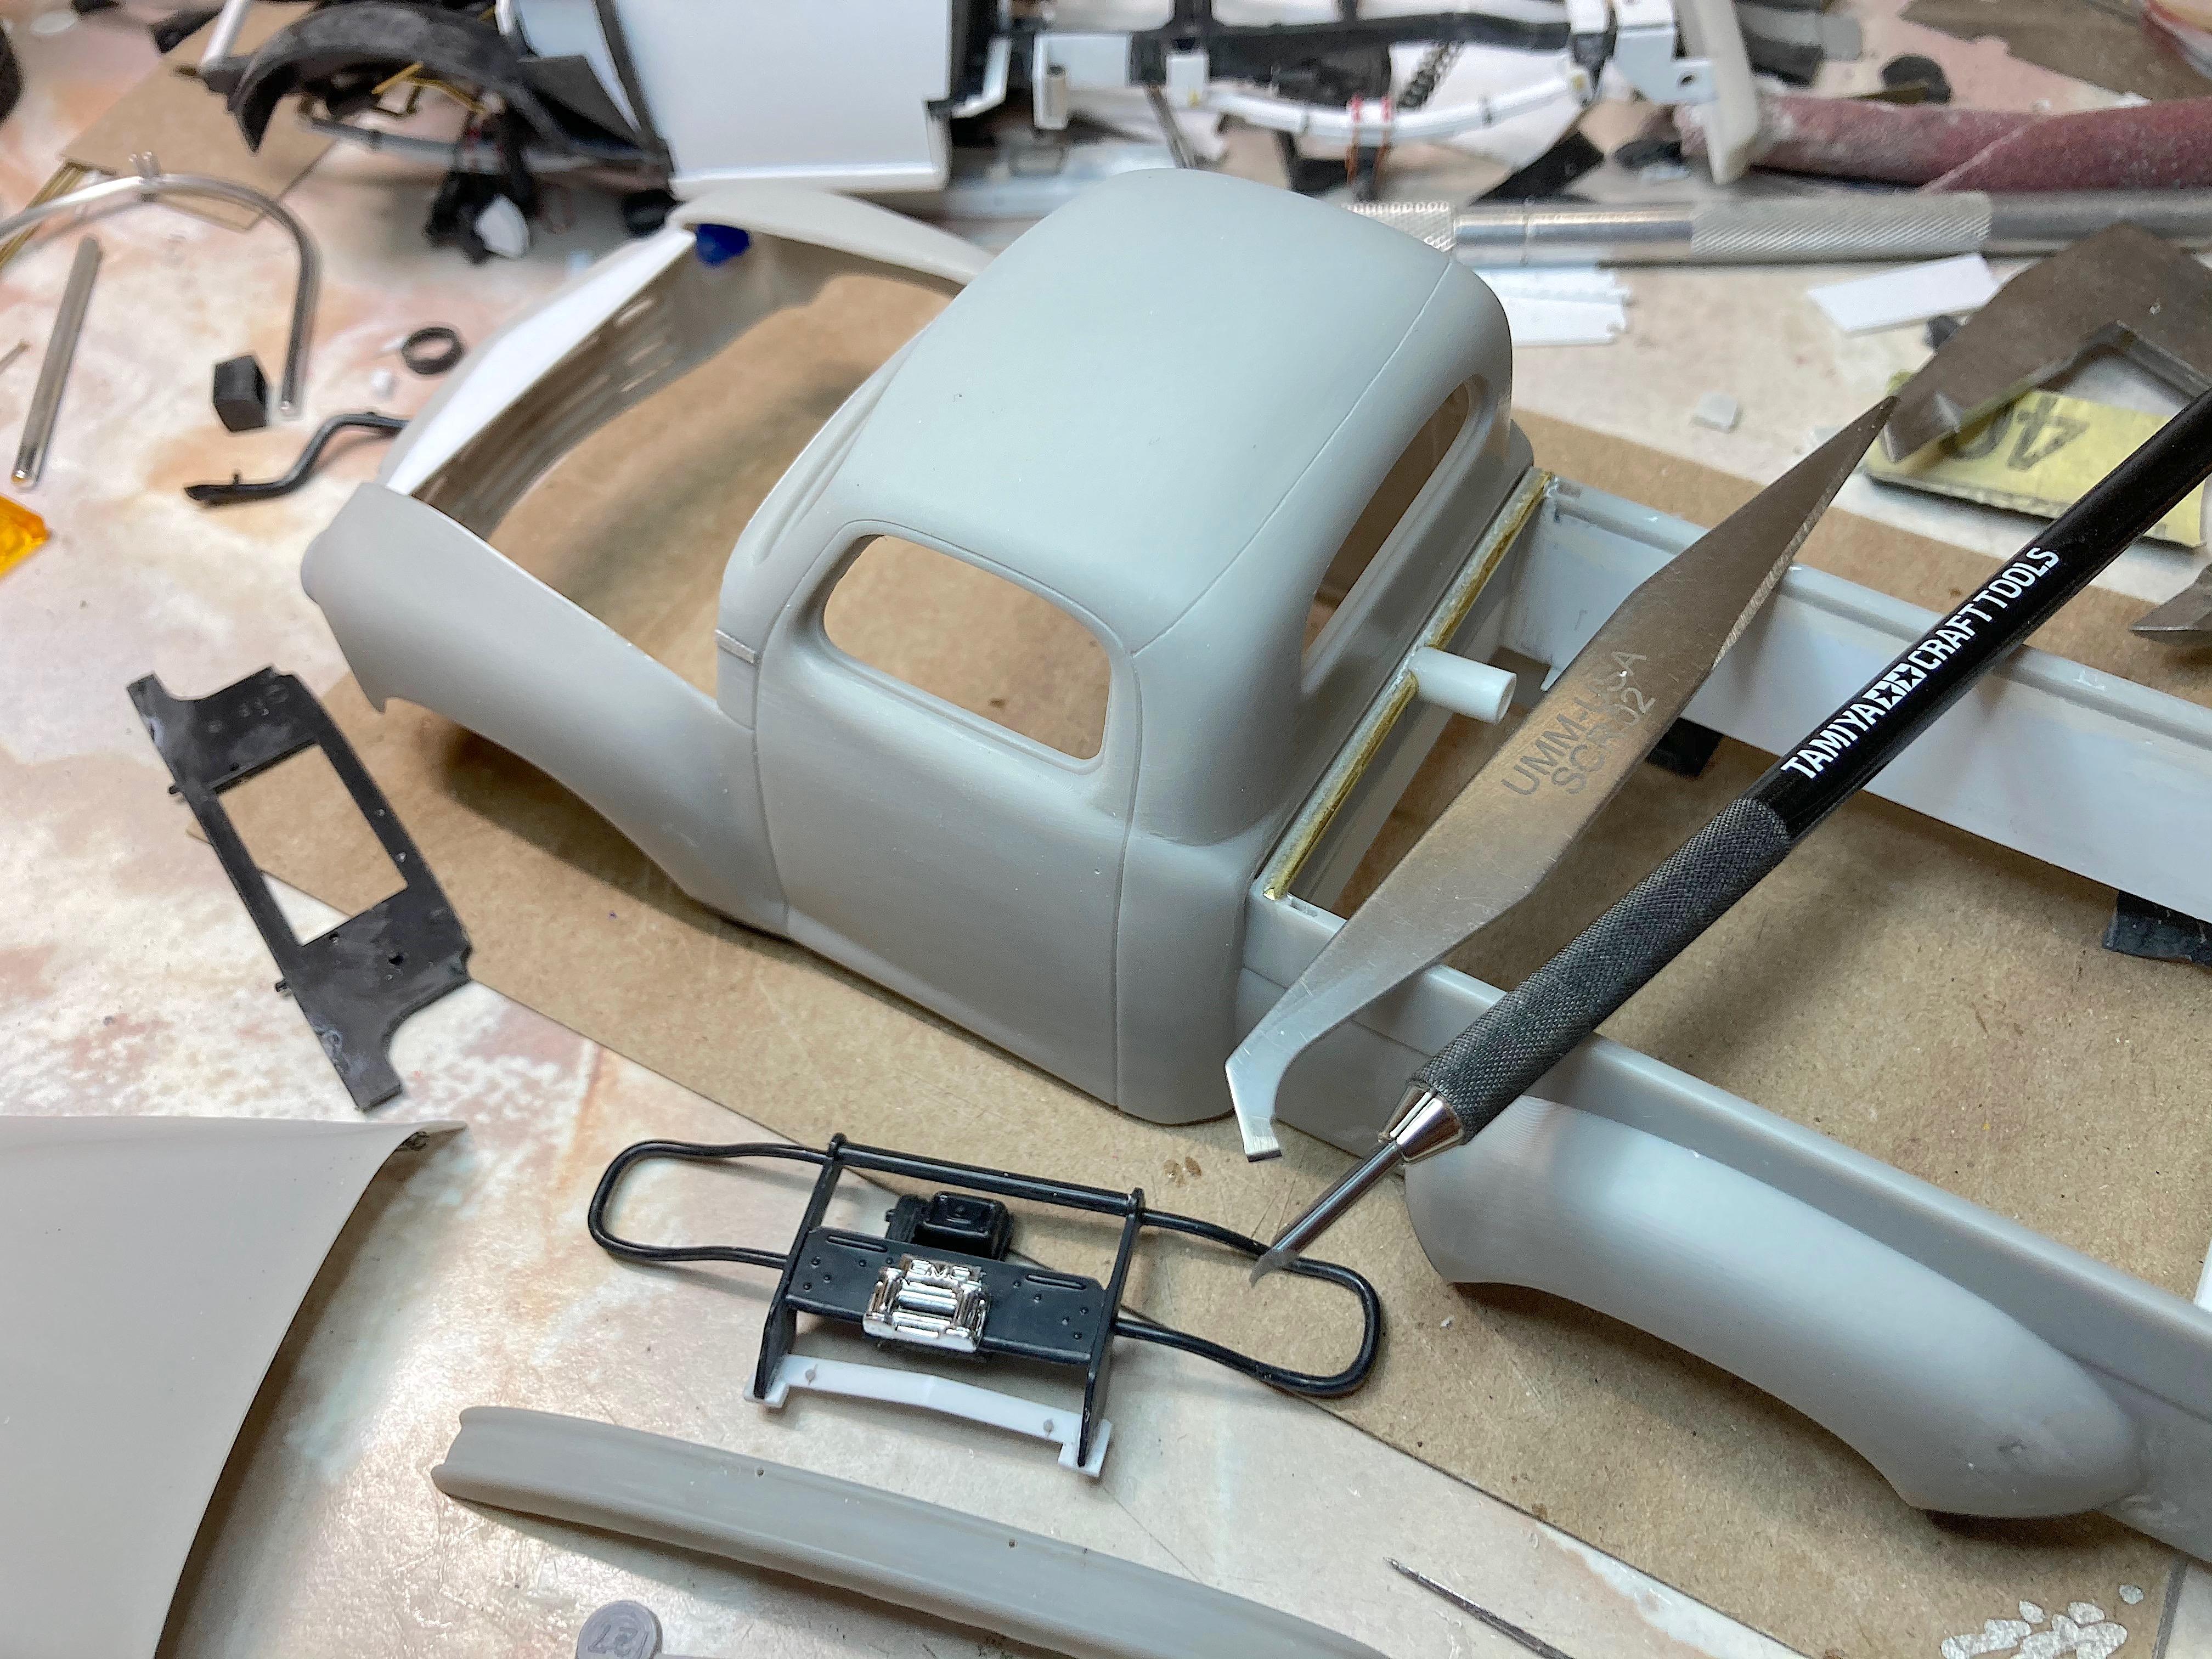
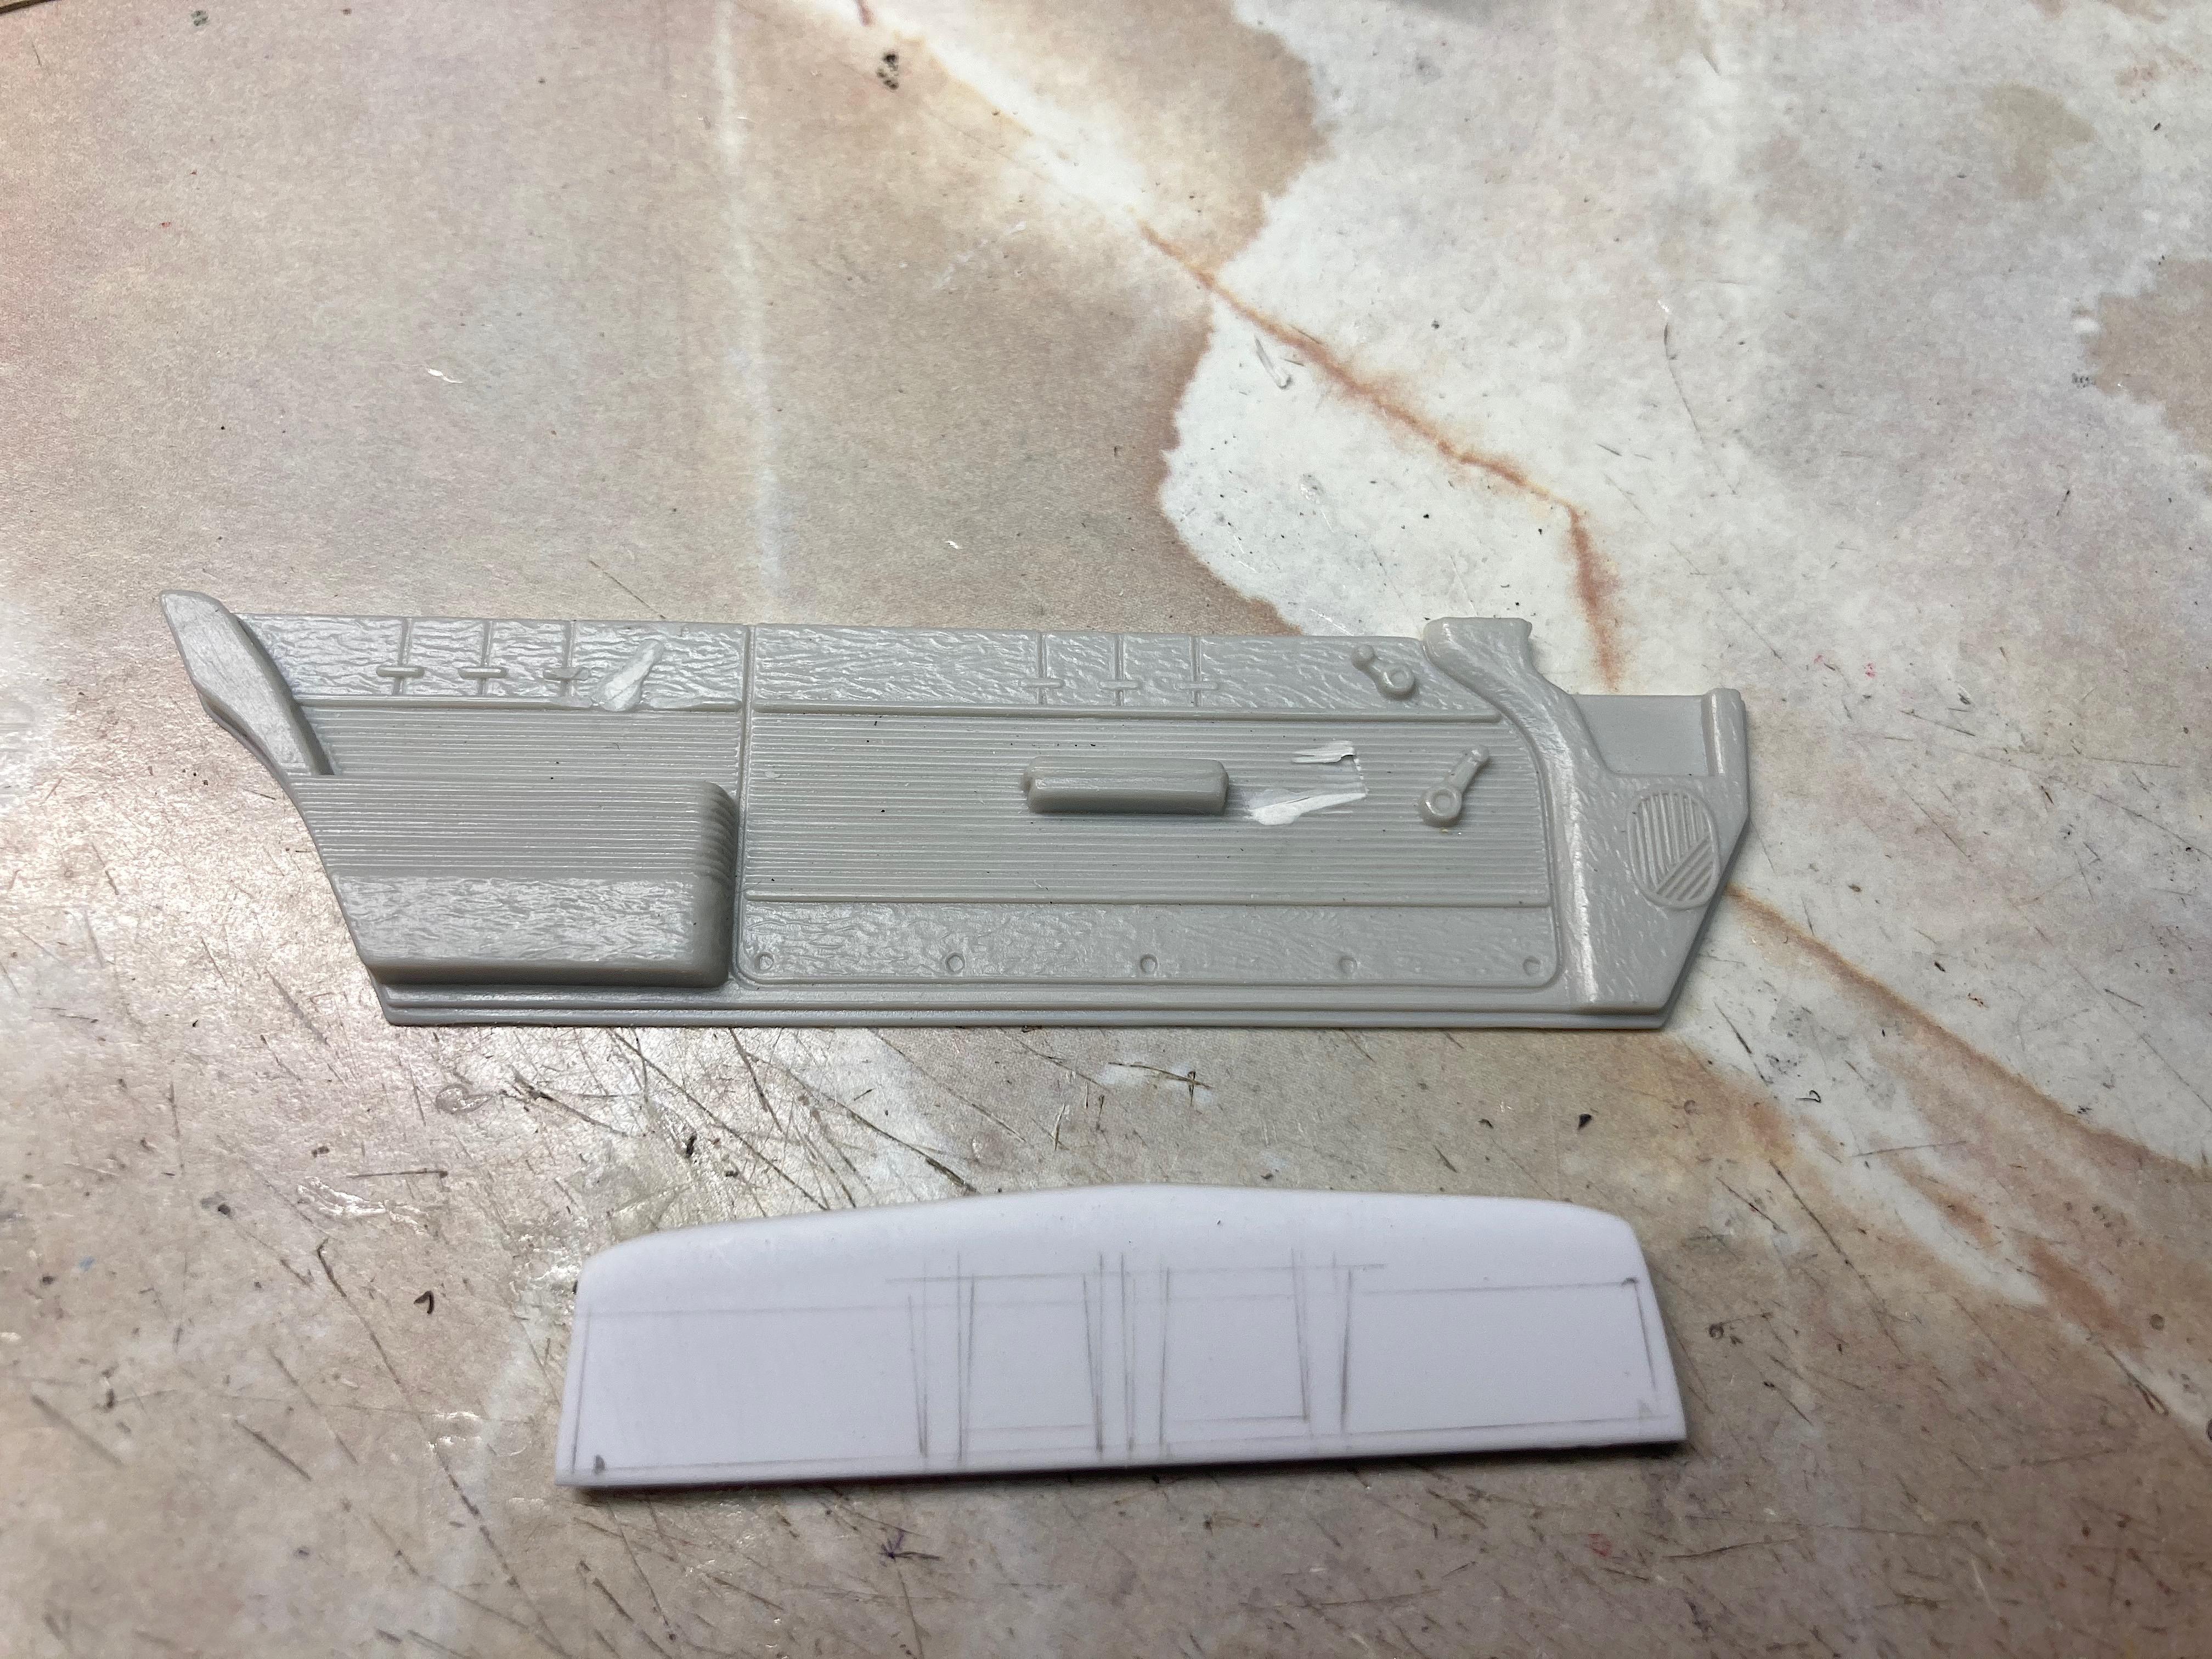
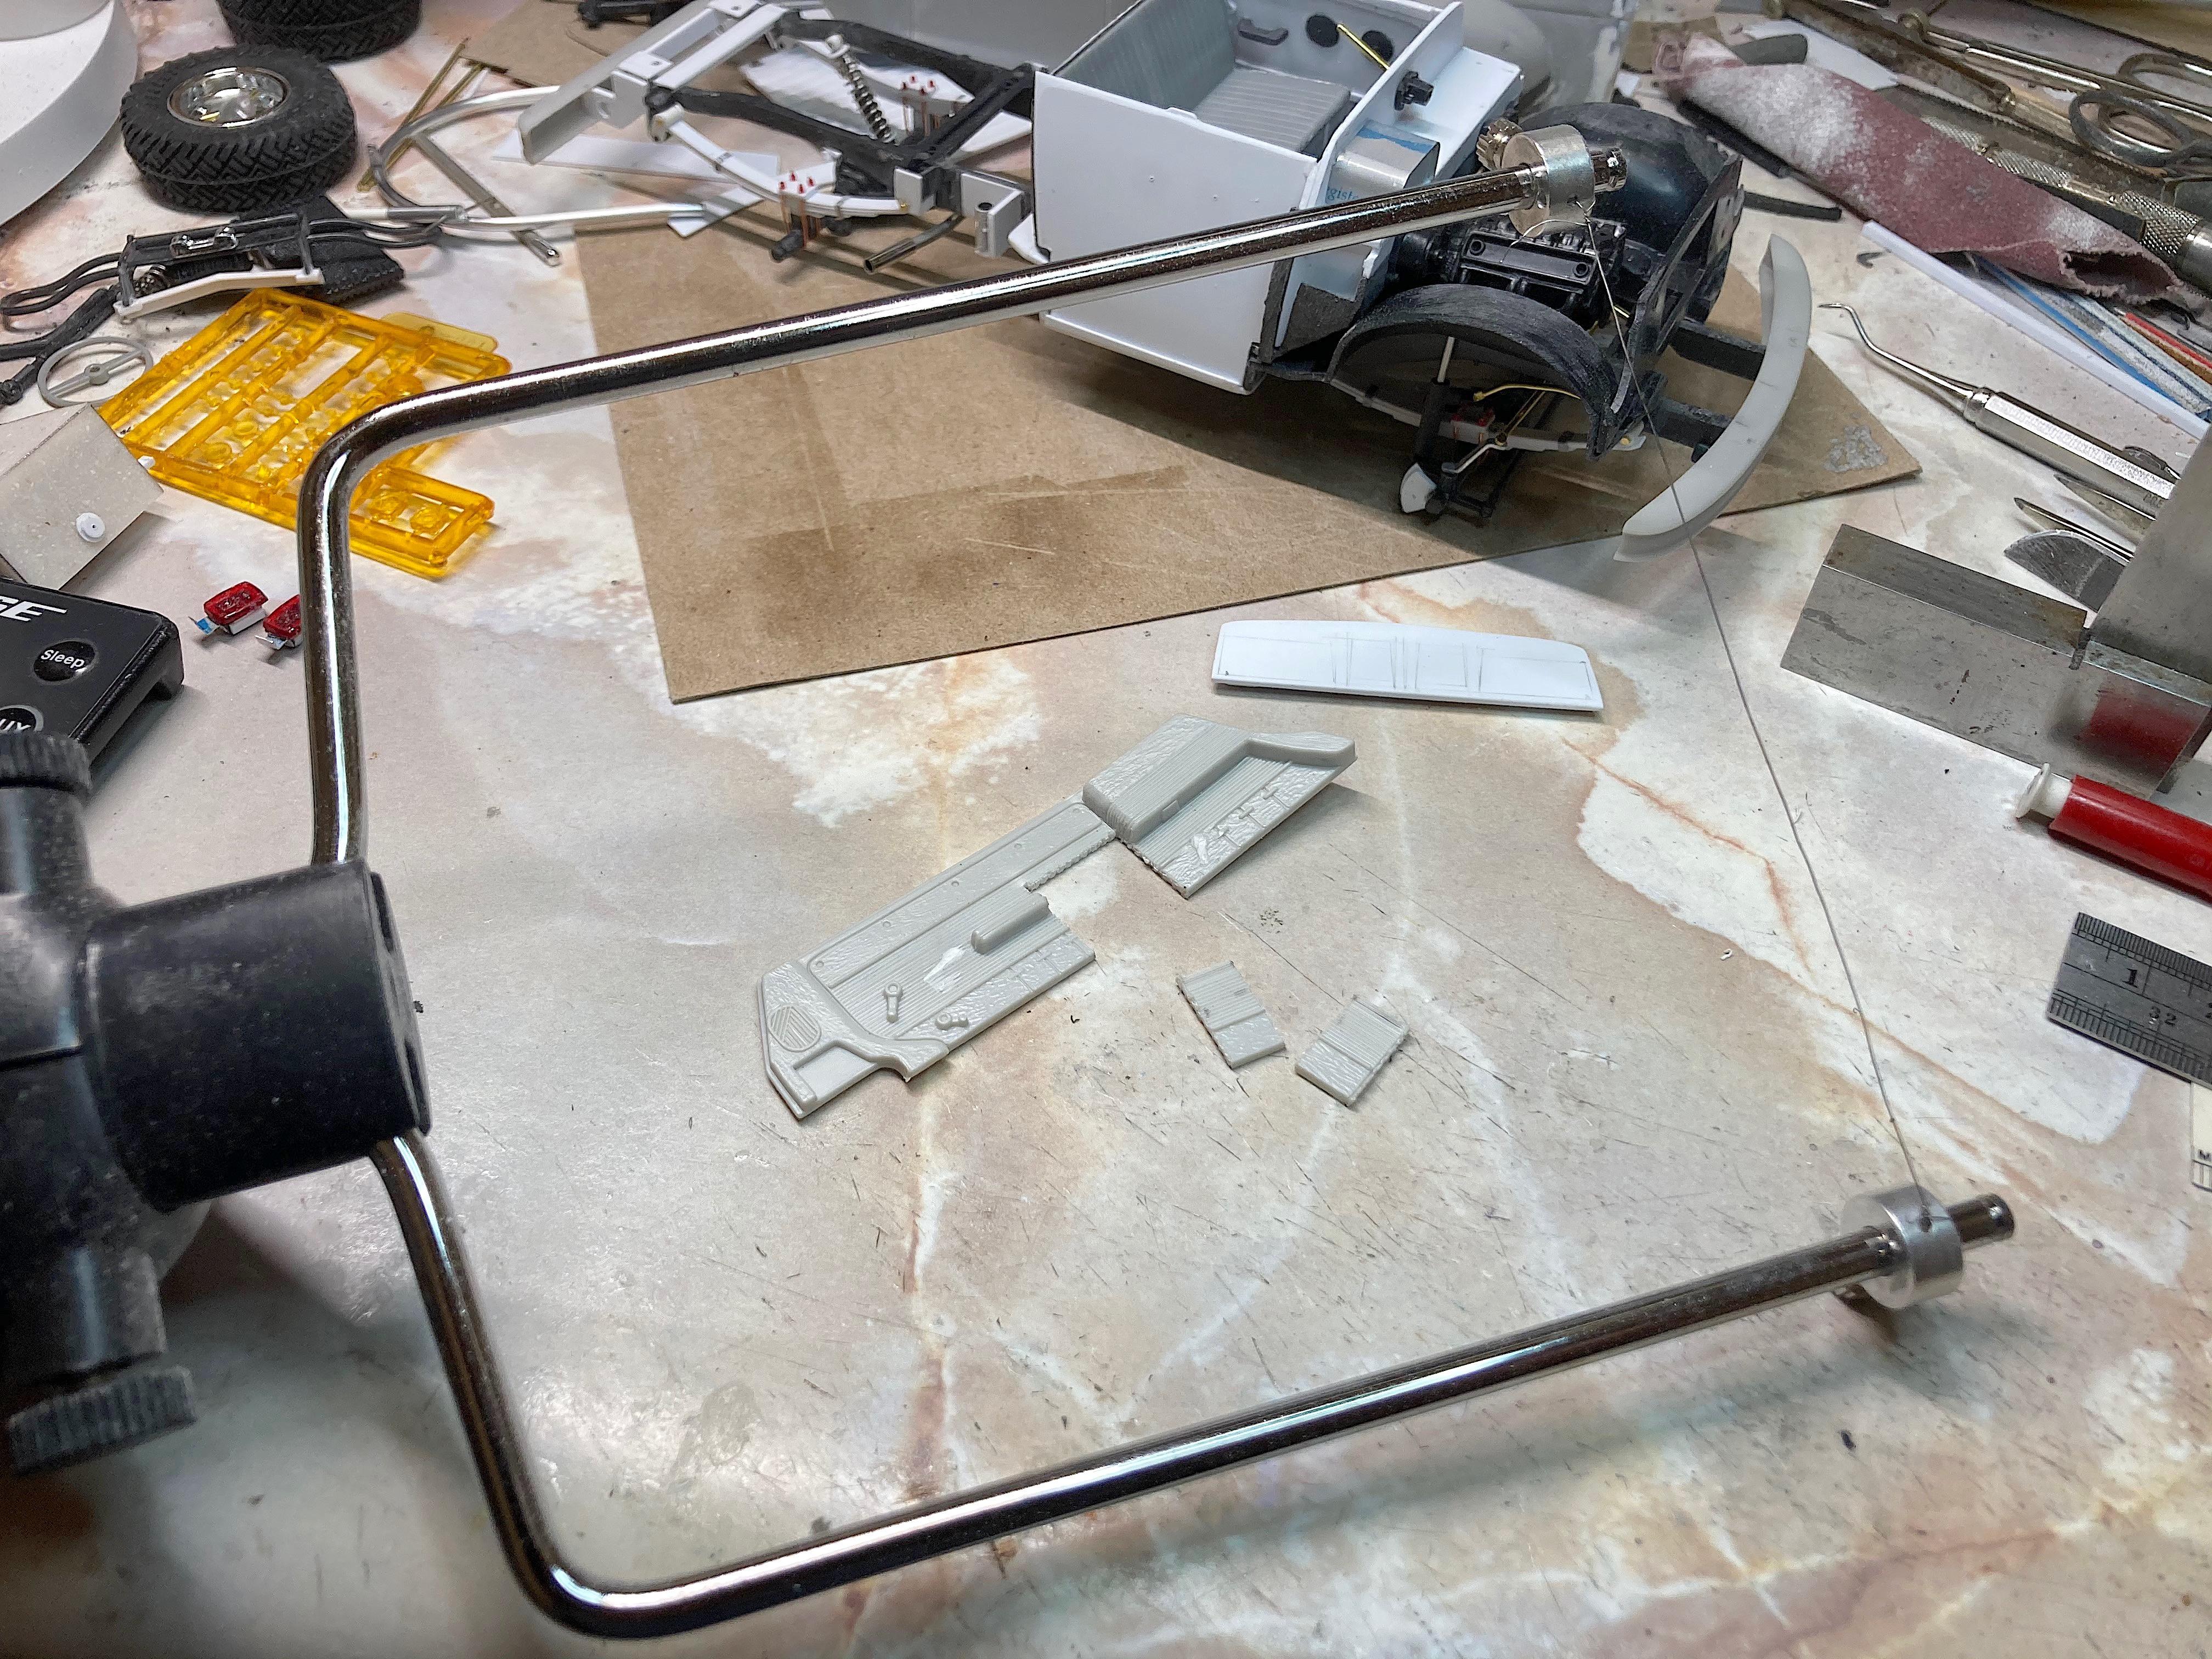
This morning I reworked the taillights that came off a junkyard GMC General truck. Brackets made from newspaper printing plate; guitar string will be bent during final assembly, to be the wiring in conduit. Solder wire used for seat piping. Took a break, learned how to drive a Model T. Now for the big job with the interior, made a cardboard pattern of the door. Cut .03" styrene with the hot-wire, then scribed the door lines, very easy because they are straight. The upper door panel was cut from .015" styrene with a knife; drilled holes in the corners then cut out the center, drilled shallow holes where screws are. The top is .02" styrene. Where the latch handle and window crank are, there is a shallow cone, wasn't sure how to make that. Tried a kit light bucket, chucked in the cordless drill, roughed with the Dremel, then sanding sticks. Cut the circle using the steel circle template, sanded the back down until it was good enough. Hope I can blend in with judicious sanding. Not doing the recess below, won't see it. Arm rest should be easy enough. Making the levers will be fun, might just cut my toenails. ? That's when I will cut off the outside door handles.
- 108 replies
-
- 1
-
-
- 1953
- studebaker
- (and 2 more)