89AKurt
-
Posts
8,426 -
Joined
-
Last visited
Content Type
Profiles
Forums
Events
Gallery
Everything posted by 89AKurt
-

Revell: '29 Model A Roadster - my GSL Common Kit entry
89AKurt replied to 89AKurt's topic in Model Cars
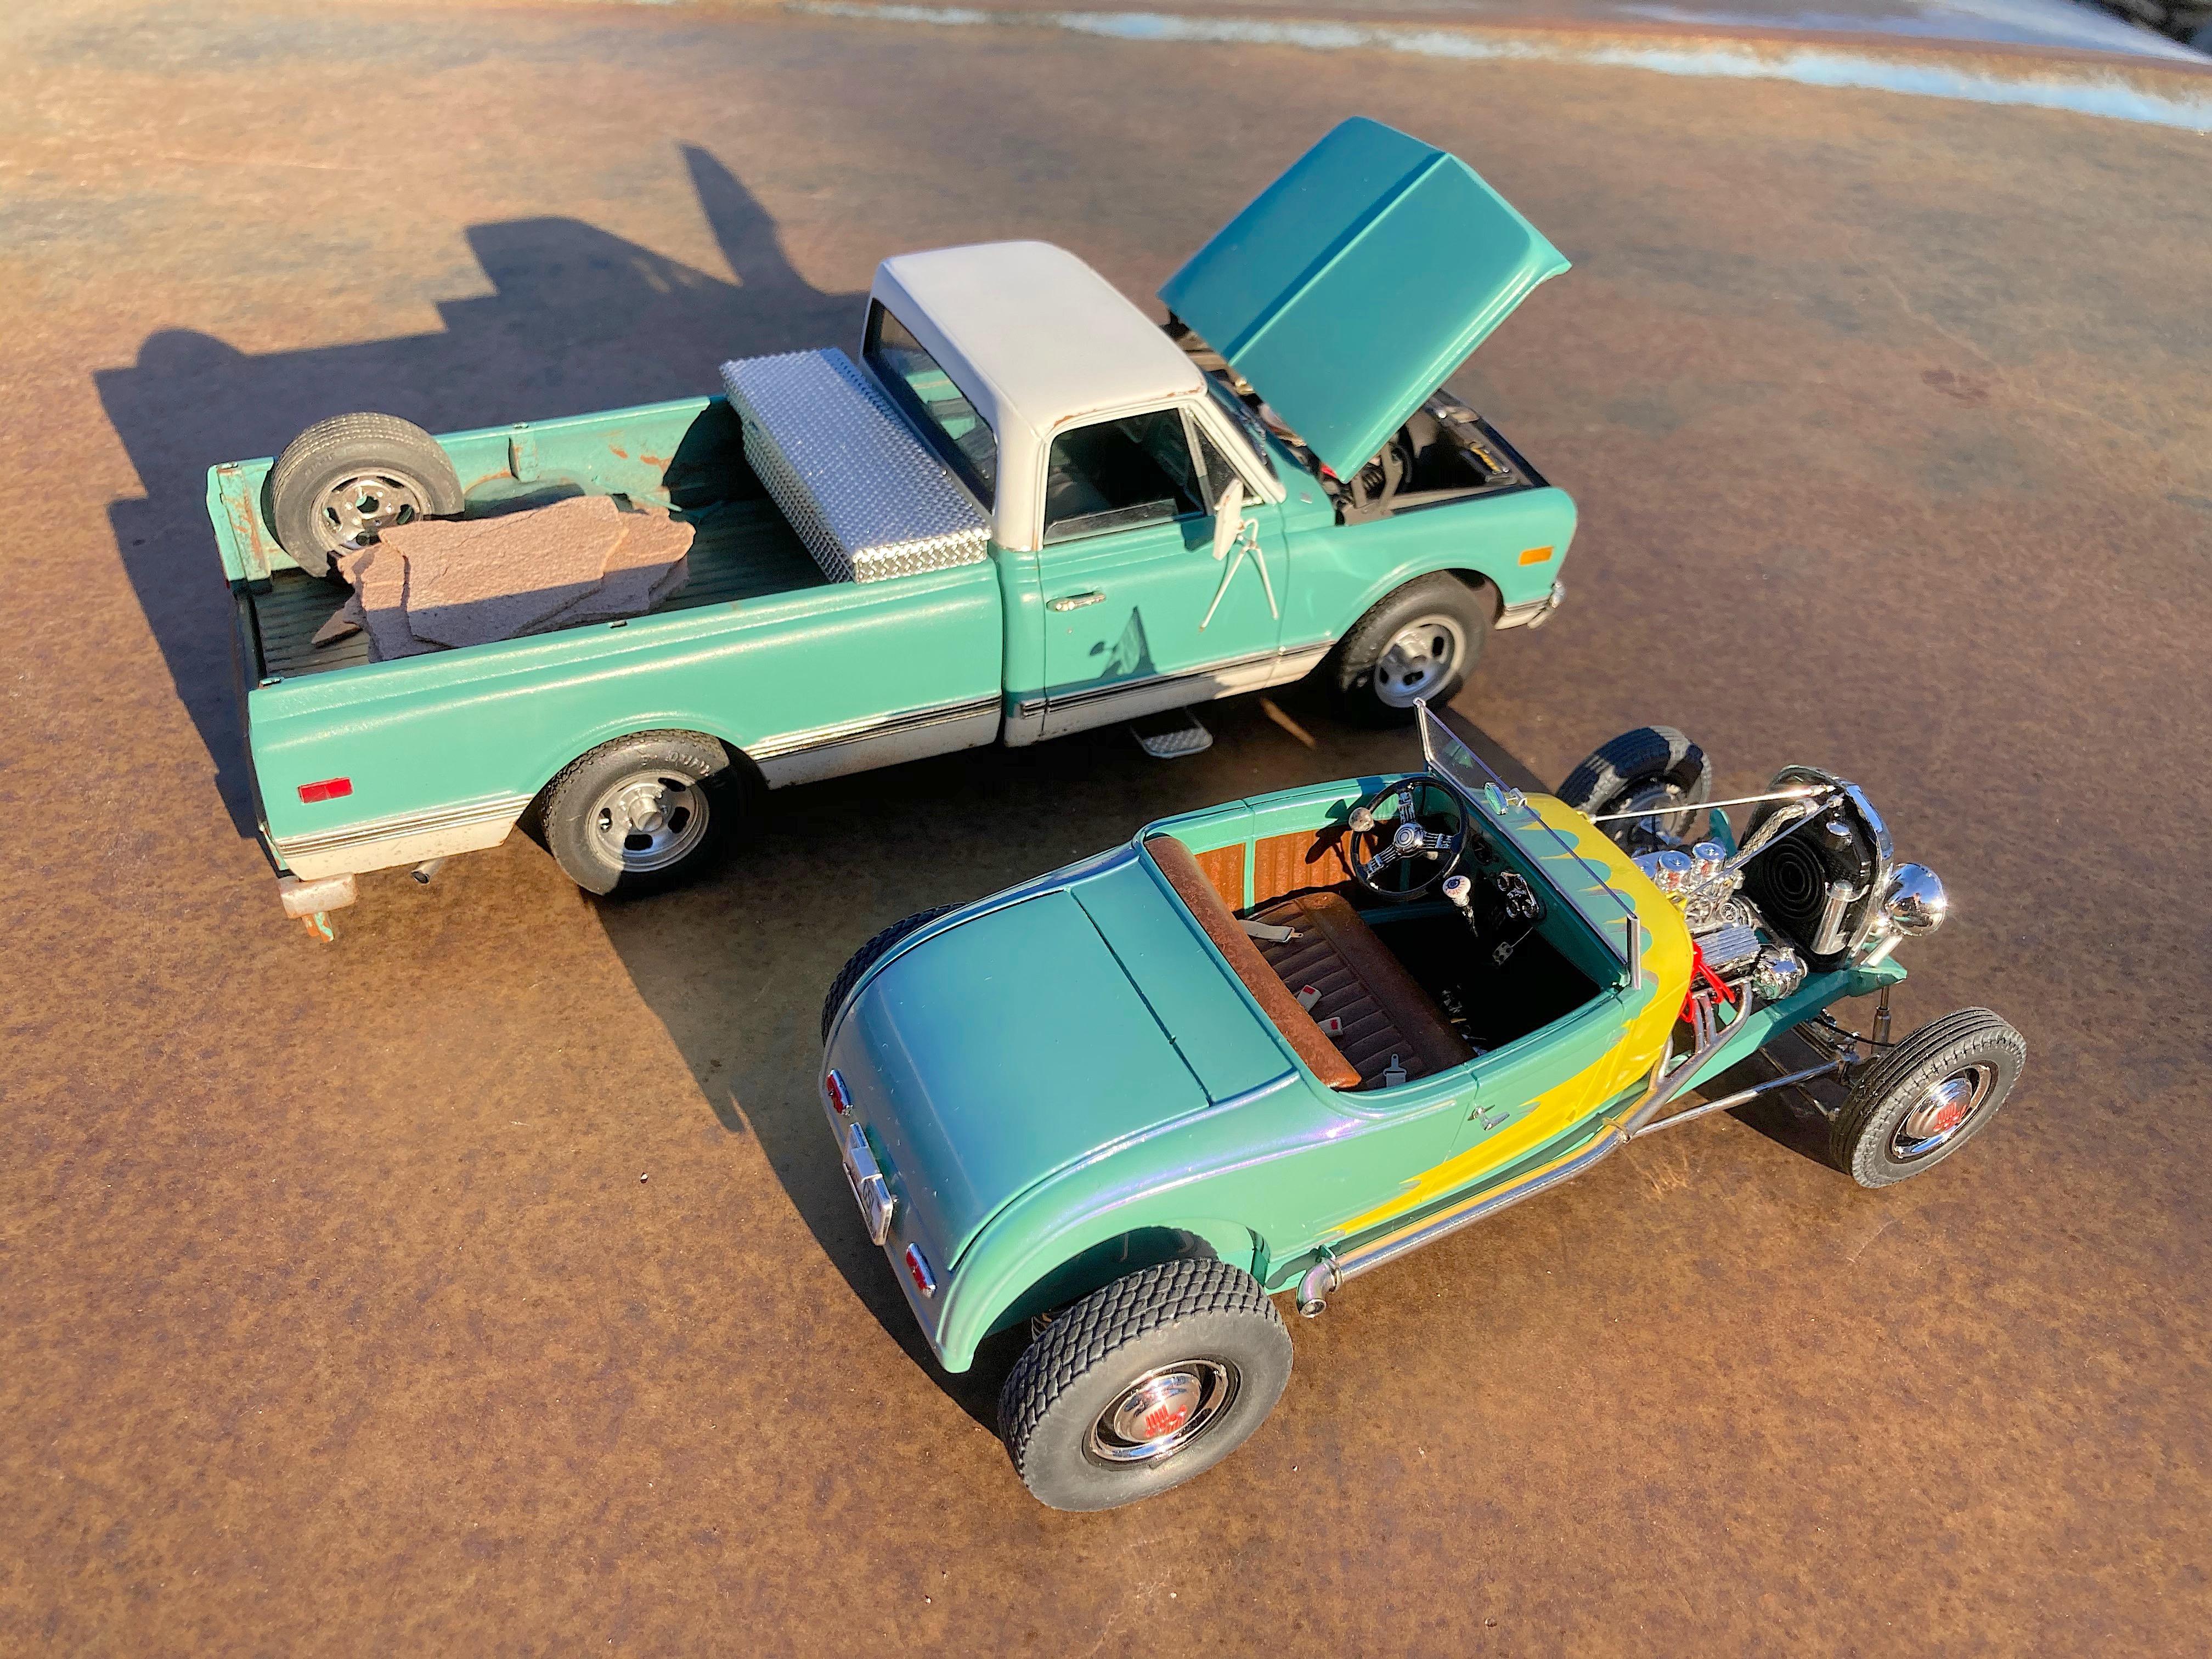
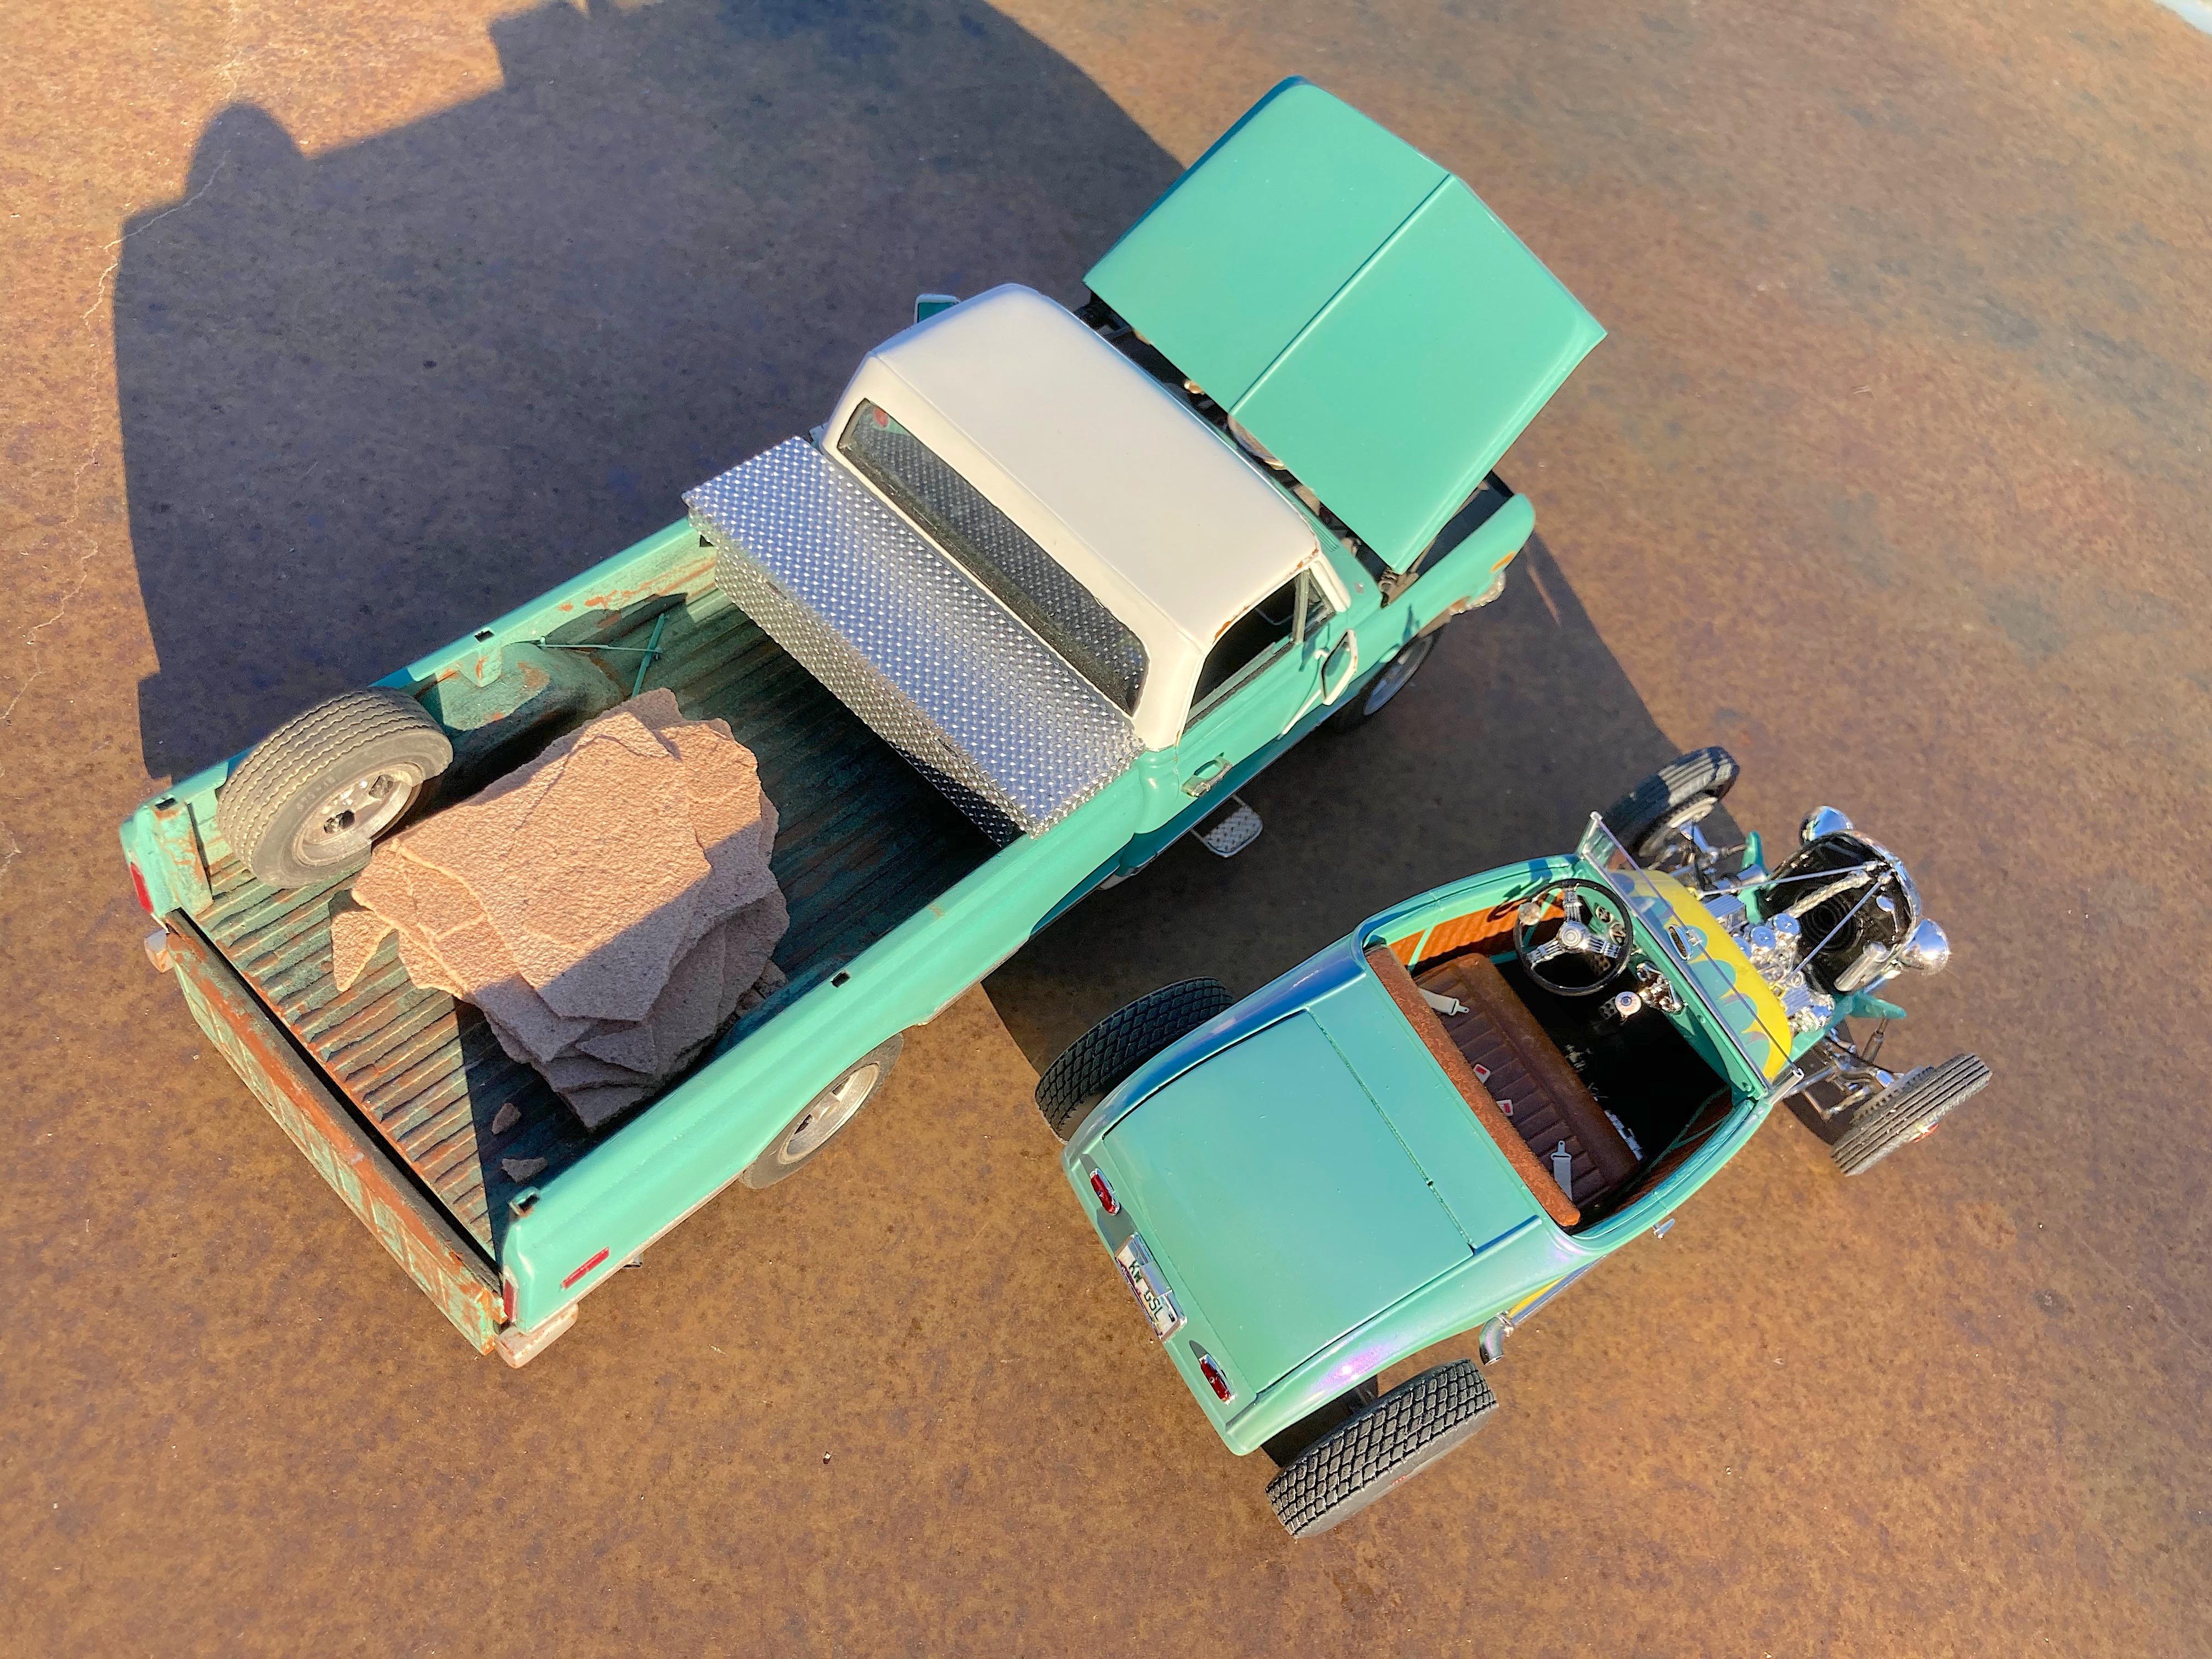
Thank you very much! Appreciate you being so supportive during the WIP process. ? Thought I should take pictures of the pickup that I ordered the Splash paint for. The Model A frame has only Dullcote, the pickup was left bare paint because the real truck had the never waxed patina.
- 13 replies
-
- 1
-

-
- 29 model a
- roadster
- (and 1 more)
-
the officer's dog
-
Eaten not stirred. ?
-
THREE WORDS ONLY with poison darts
-
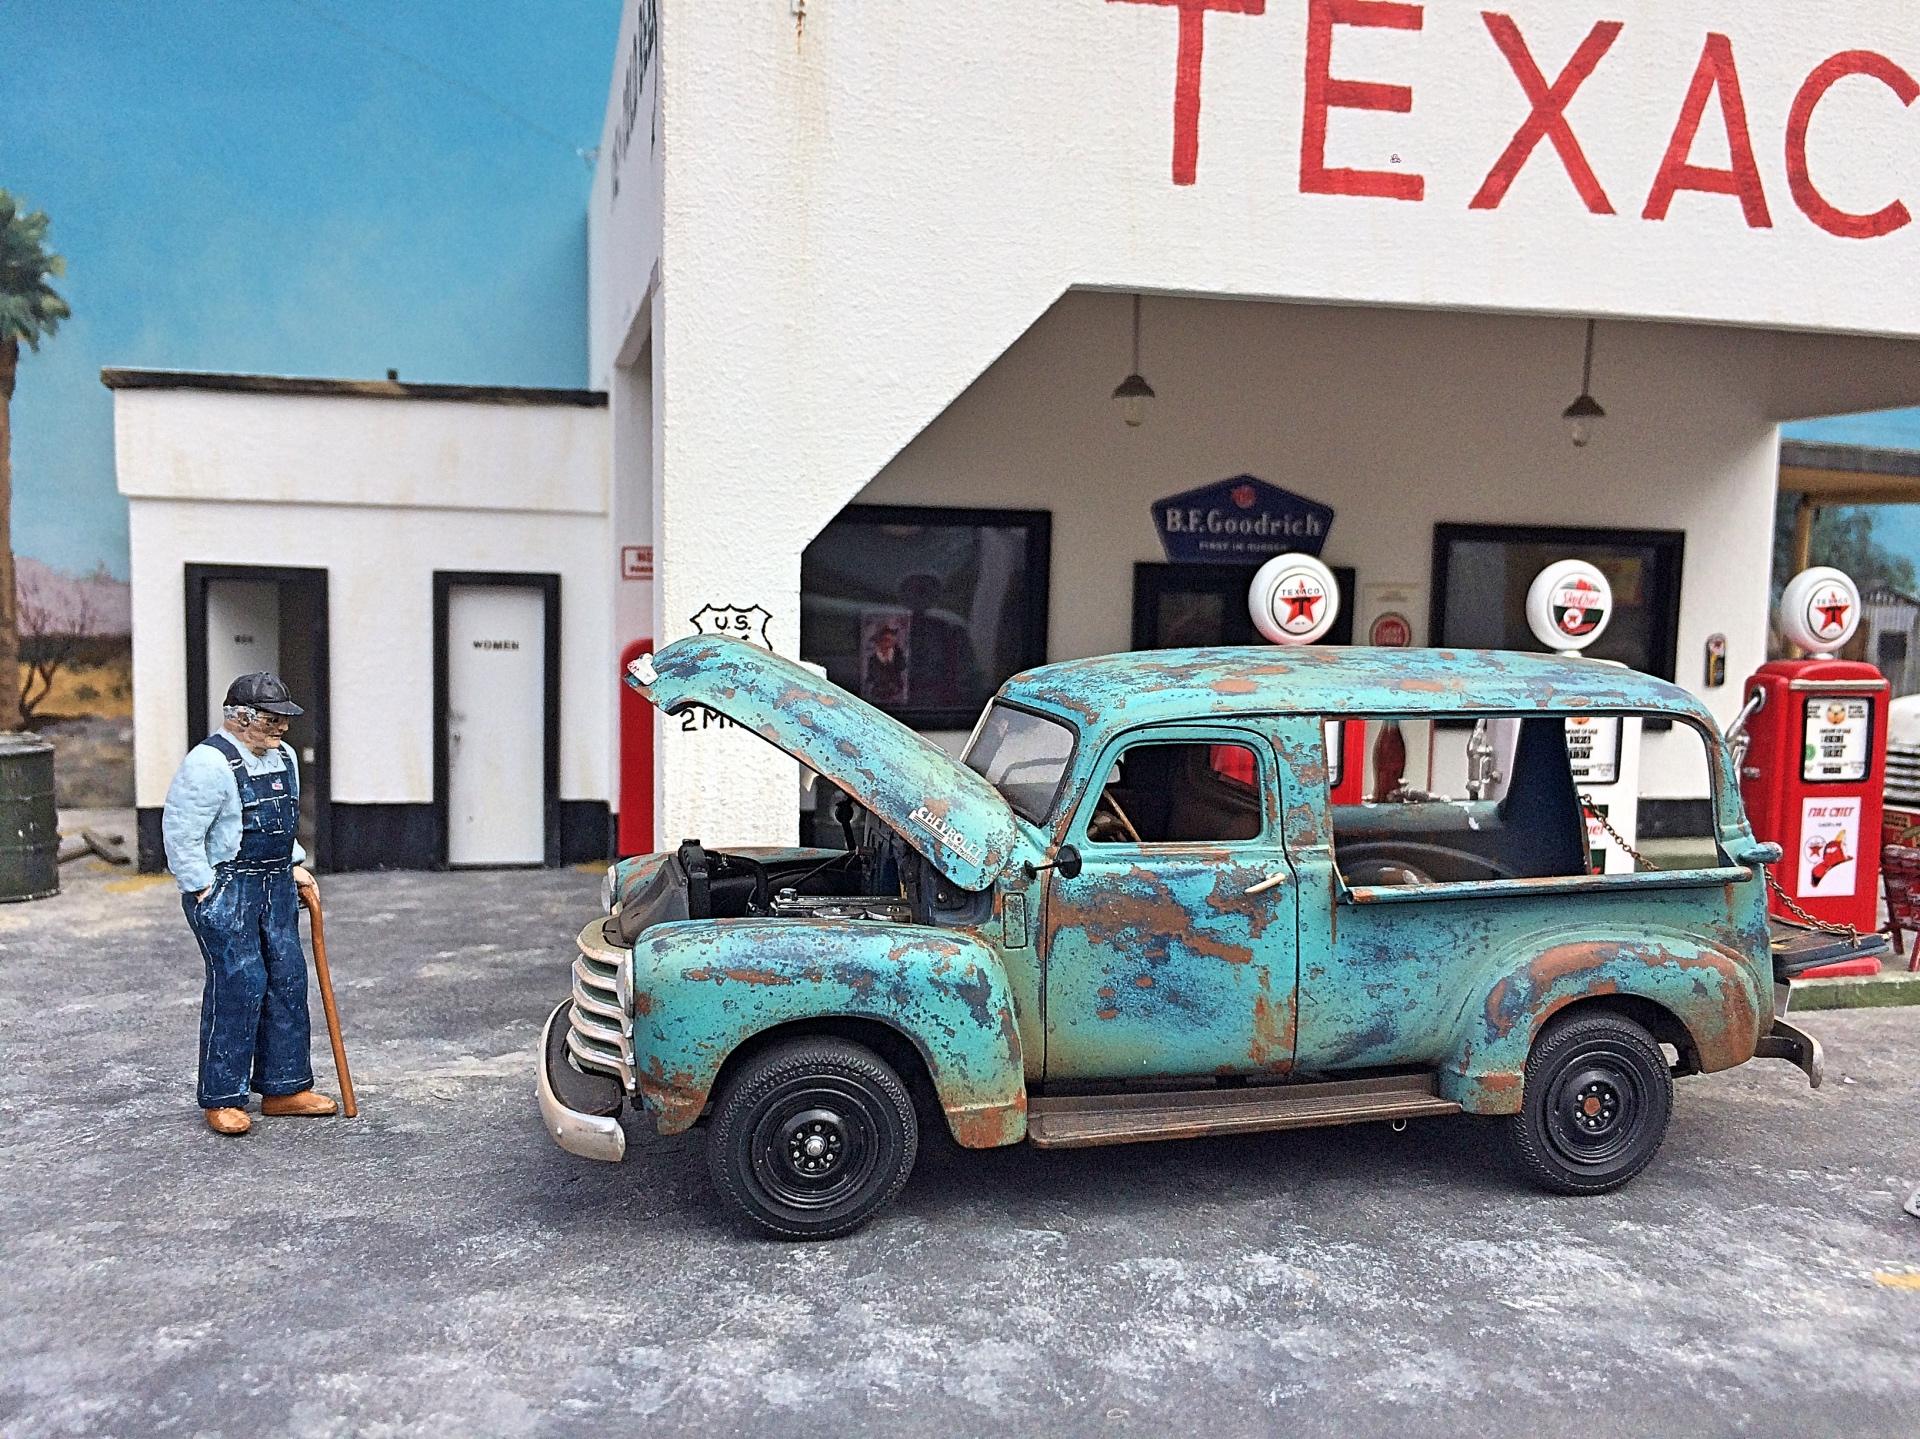
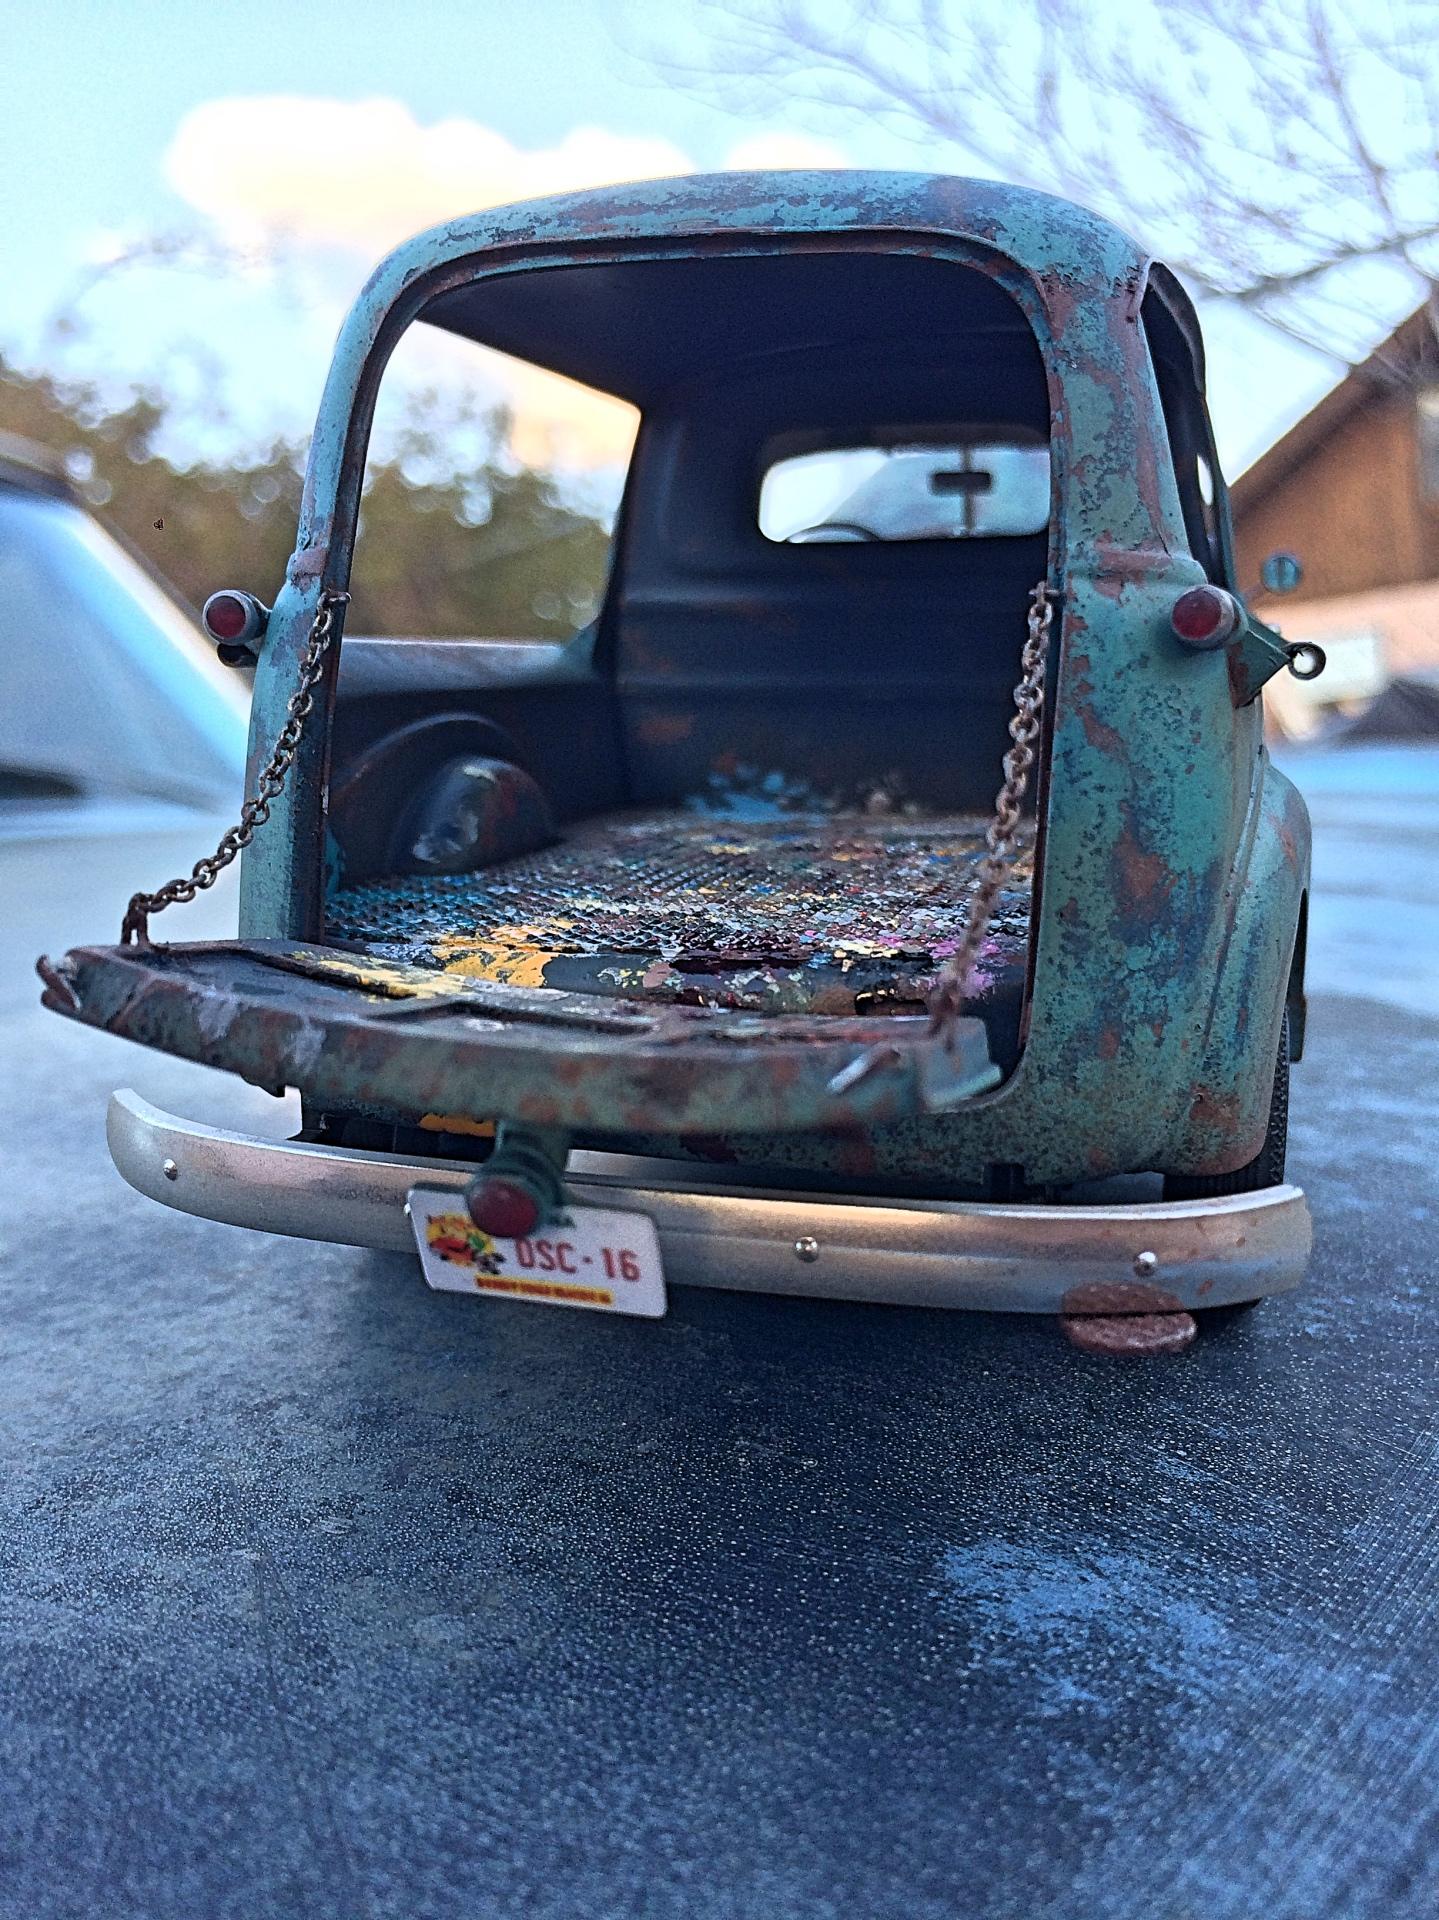
The closest I have is this Chevy Canopy Express, which is a conversion of a resin Panel conversion. If I started a Topic just for Canopy Express, I might be the only one. ?
-
Revell: '29 Model A Roadster - my GSL Common Kit entry
89AKurt replied to 89AKurt's topic in Model Cars
Thank you. Appreciate it. I'm counting on you getting first, again. ? Thank you. It's funny how I kept thinking of something to add. Totaled my time, 156 hours, that could have been spent shooting pool ? at the bar ? and still suck. Thought of something else to add. ?- 13 replies
-
- 1
-

-
- 29 model a
- roadster
- (and 1 more)
-
gonna get owned
-
Had to check in to see what you are doing, and how close to finishing you are. Impressed with the slice and dice of the body. The steel angle weight is a great idea.
-
Planned communities is nice term for urban sprawl.
-
in grade school
-
Snow and Deloreans make me laugh.
-
Revell: '29 Model A Roadster - my GSL Common Kit entry
89AKurt replied to 89AKurt's topic in Model Cars
Appreciate you chiming in on the WIP. ? Thank you! Thanks! I got it last century. Newspapers would use aluminum sheets that were mounted on rollers, that had the page in reverse, now I forget if it's called offset printing or what. Anyway, back then I could buy a sheet. It's better than aluminum flashing used for construction, which breaks when bent. I have a bunch somewhere that I need to find before I use up what is on hand. I call it poor boy's photo-etch. -
Leaked map exists.
-
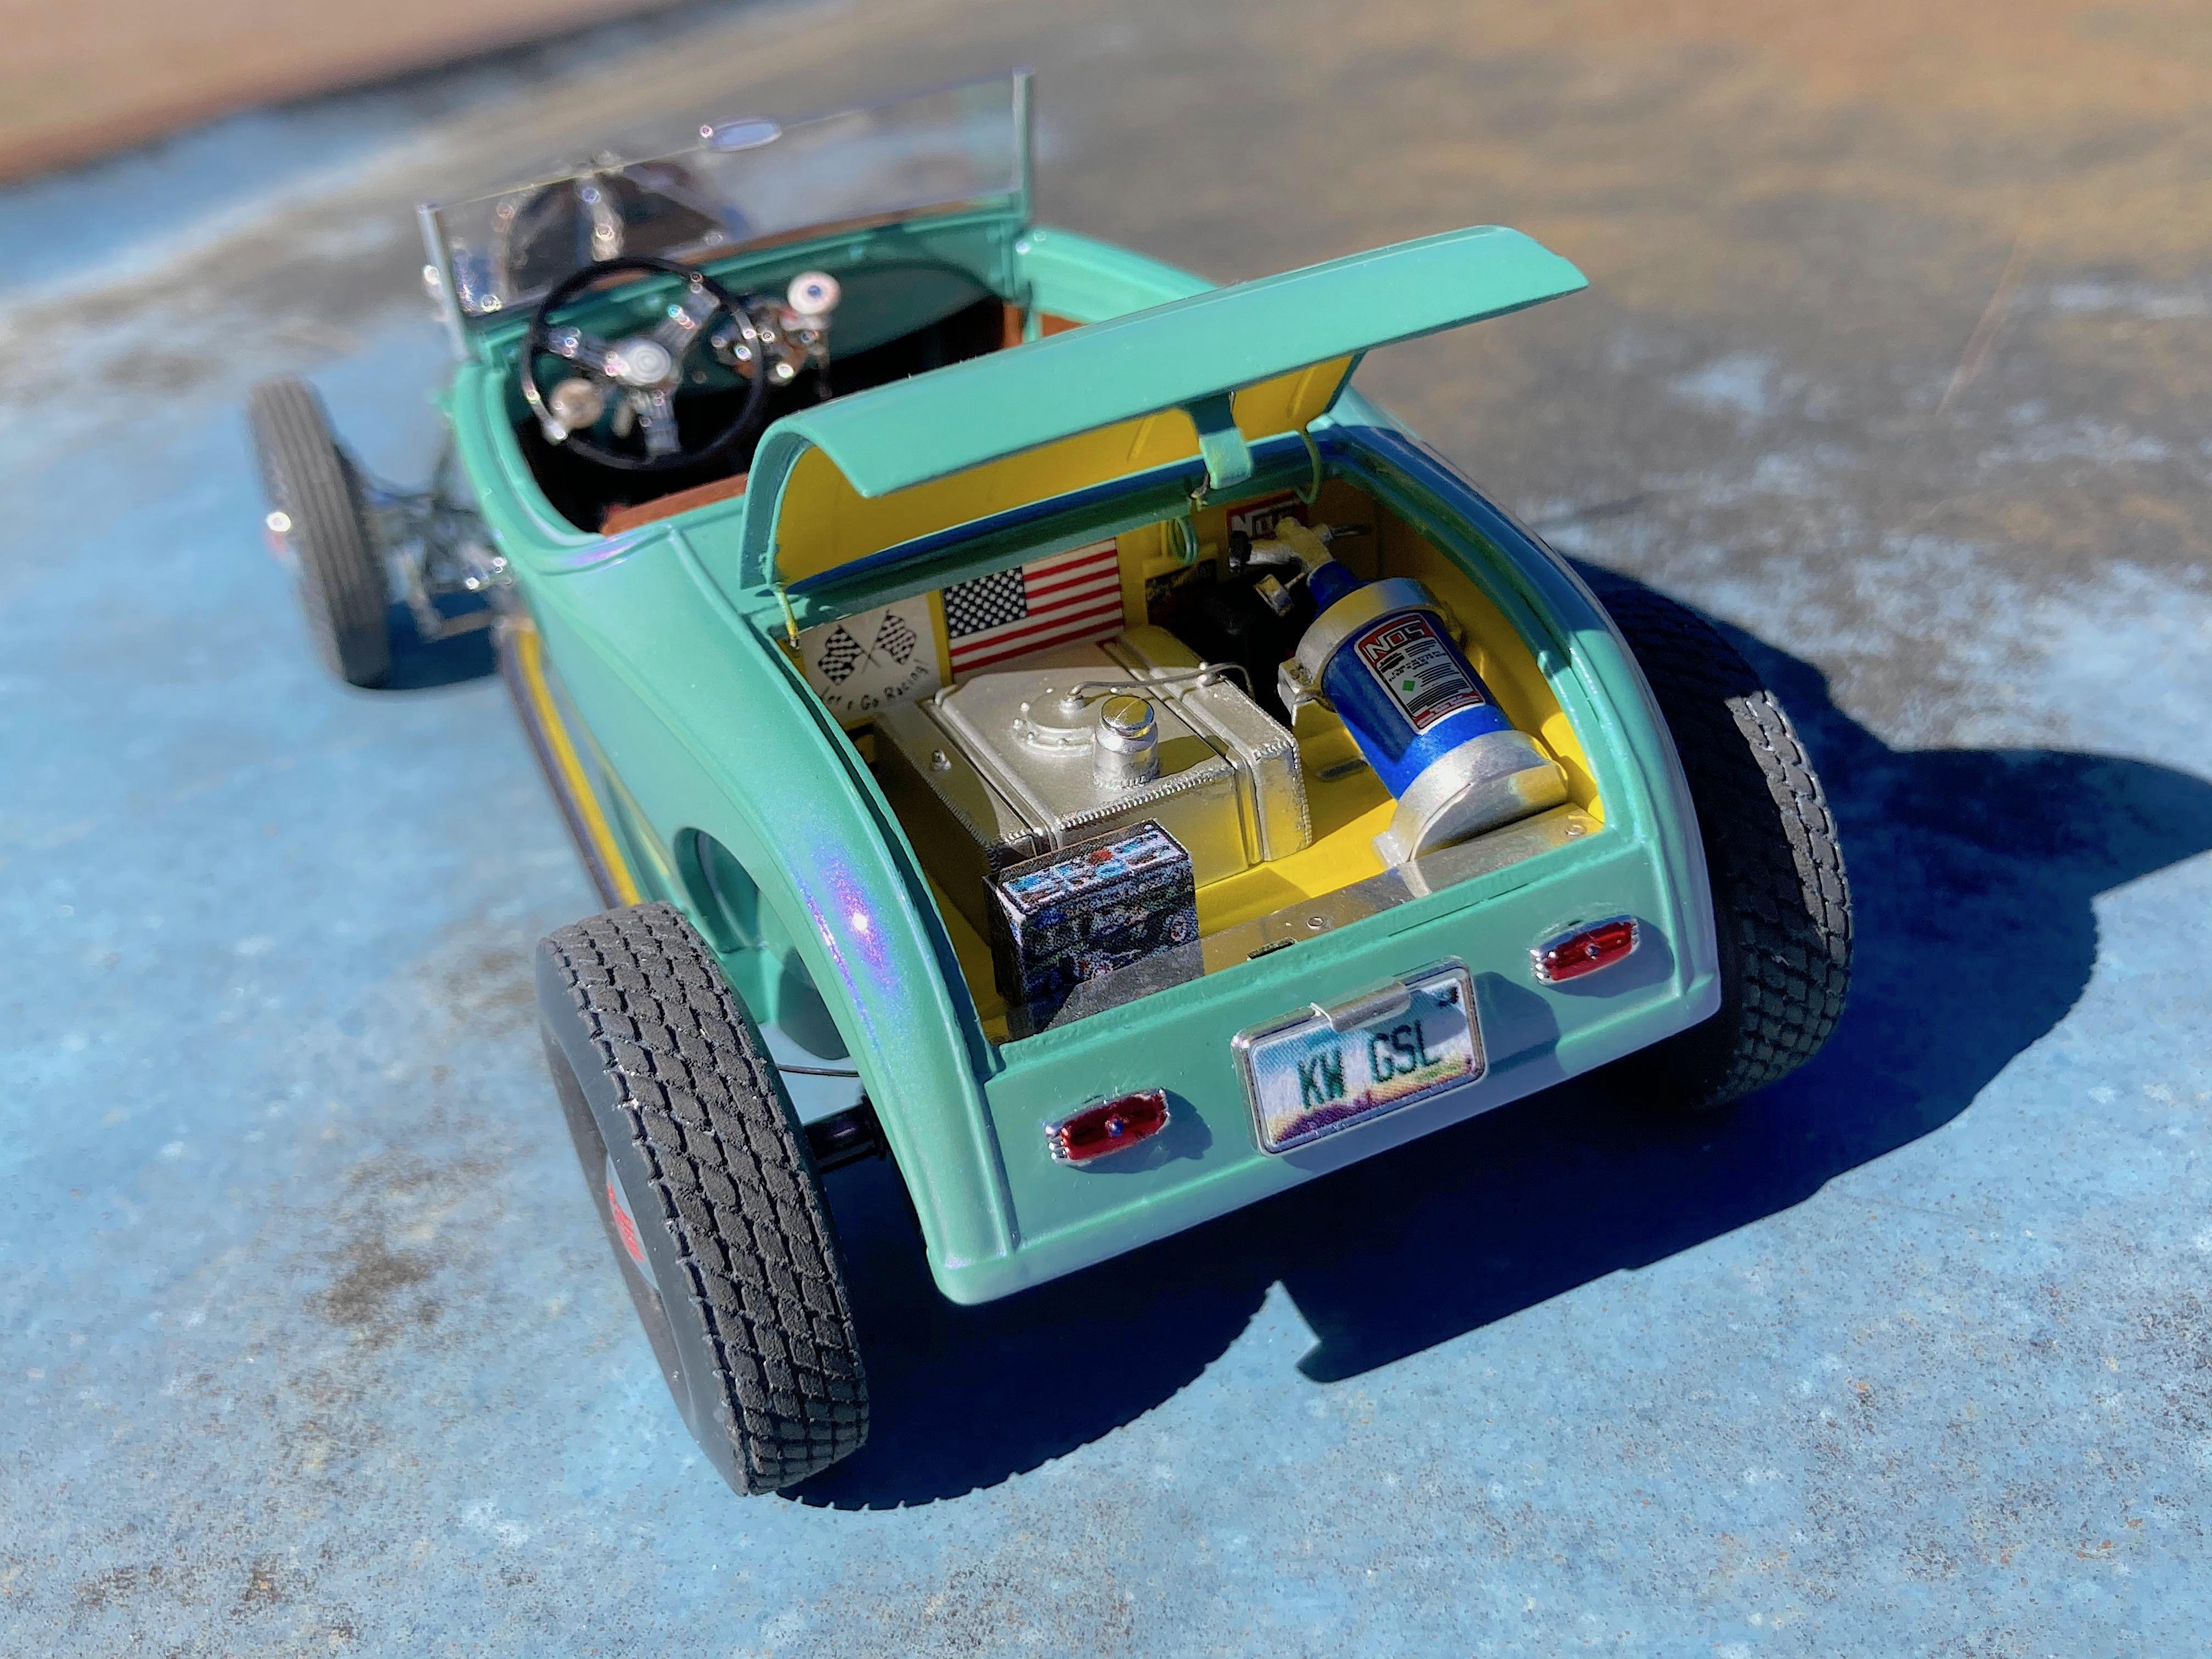
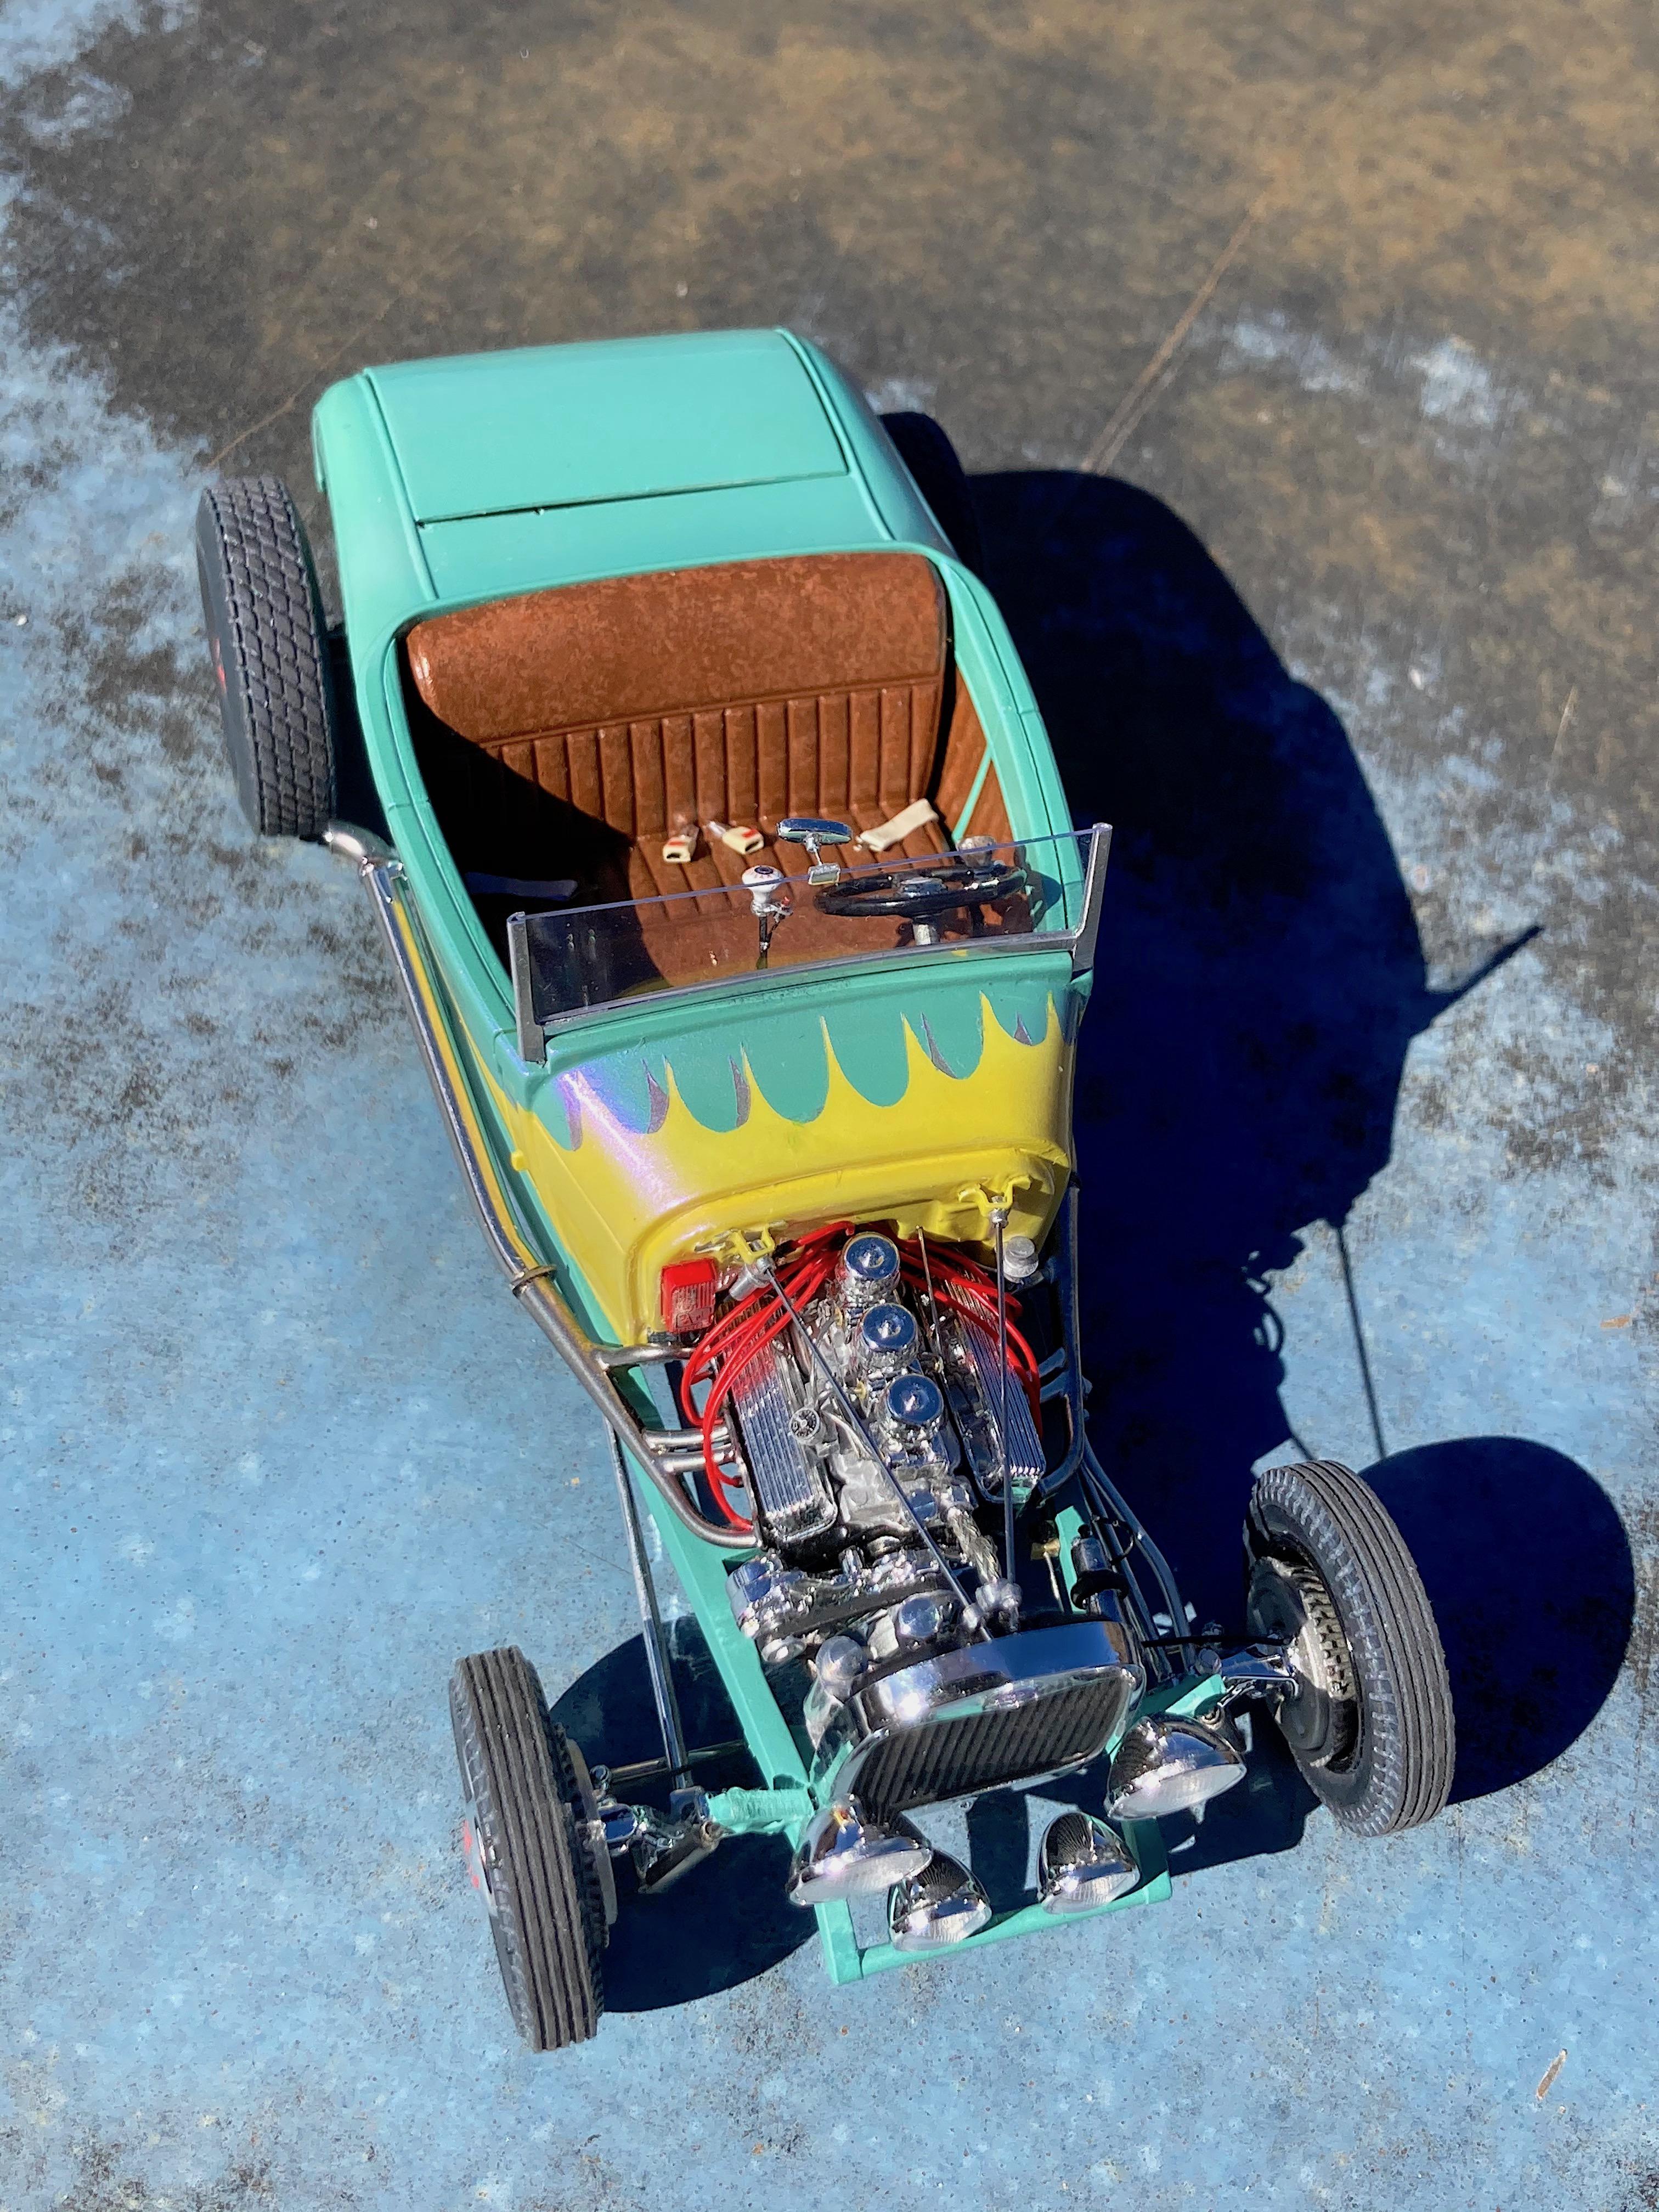
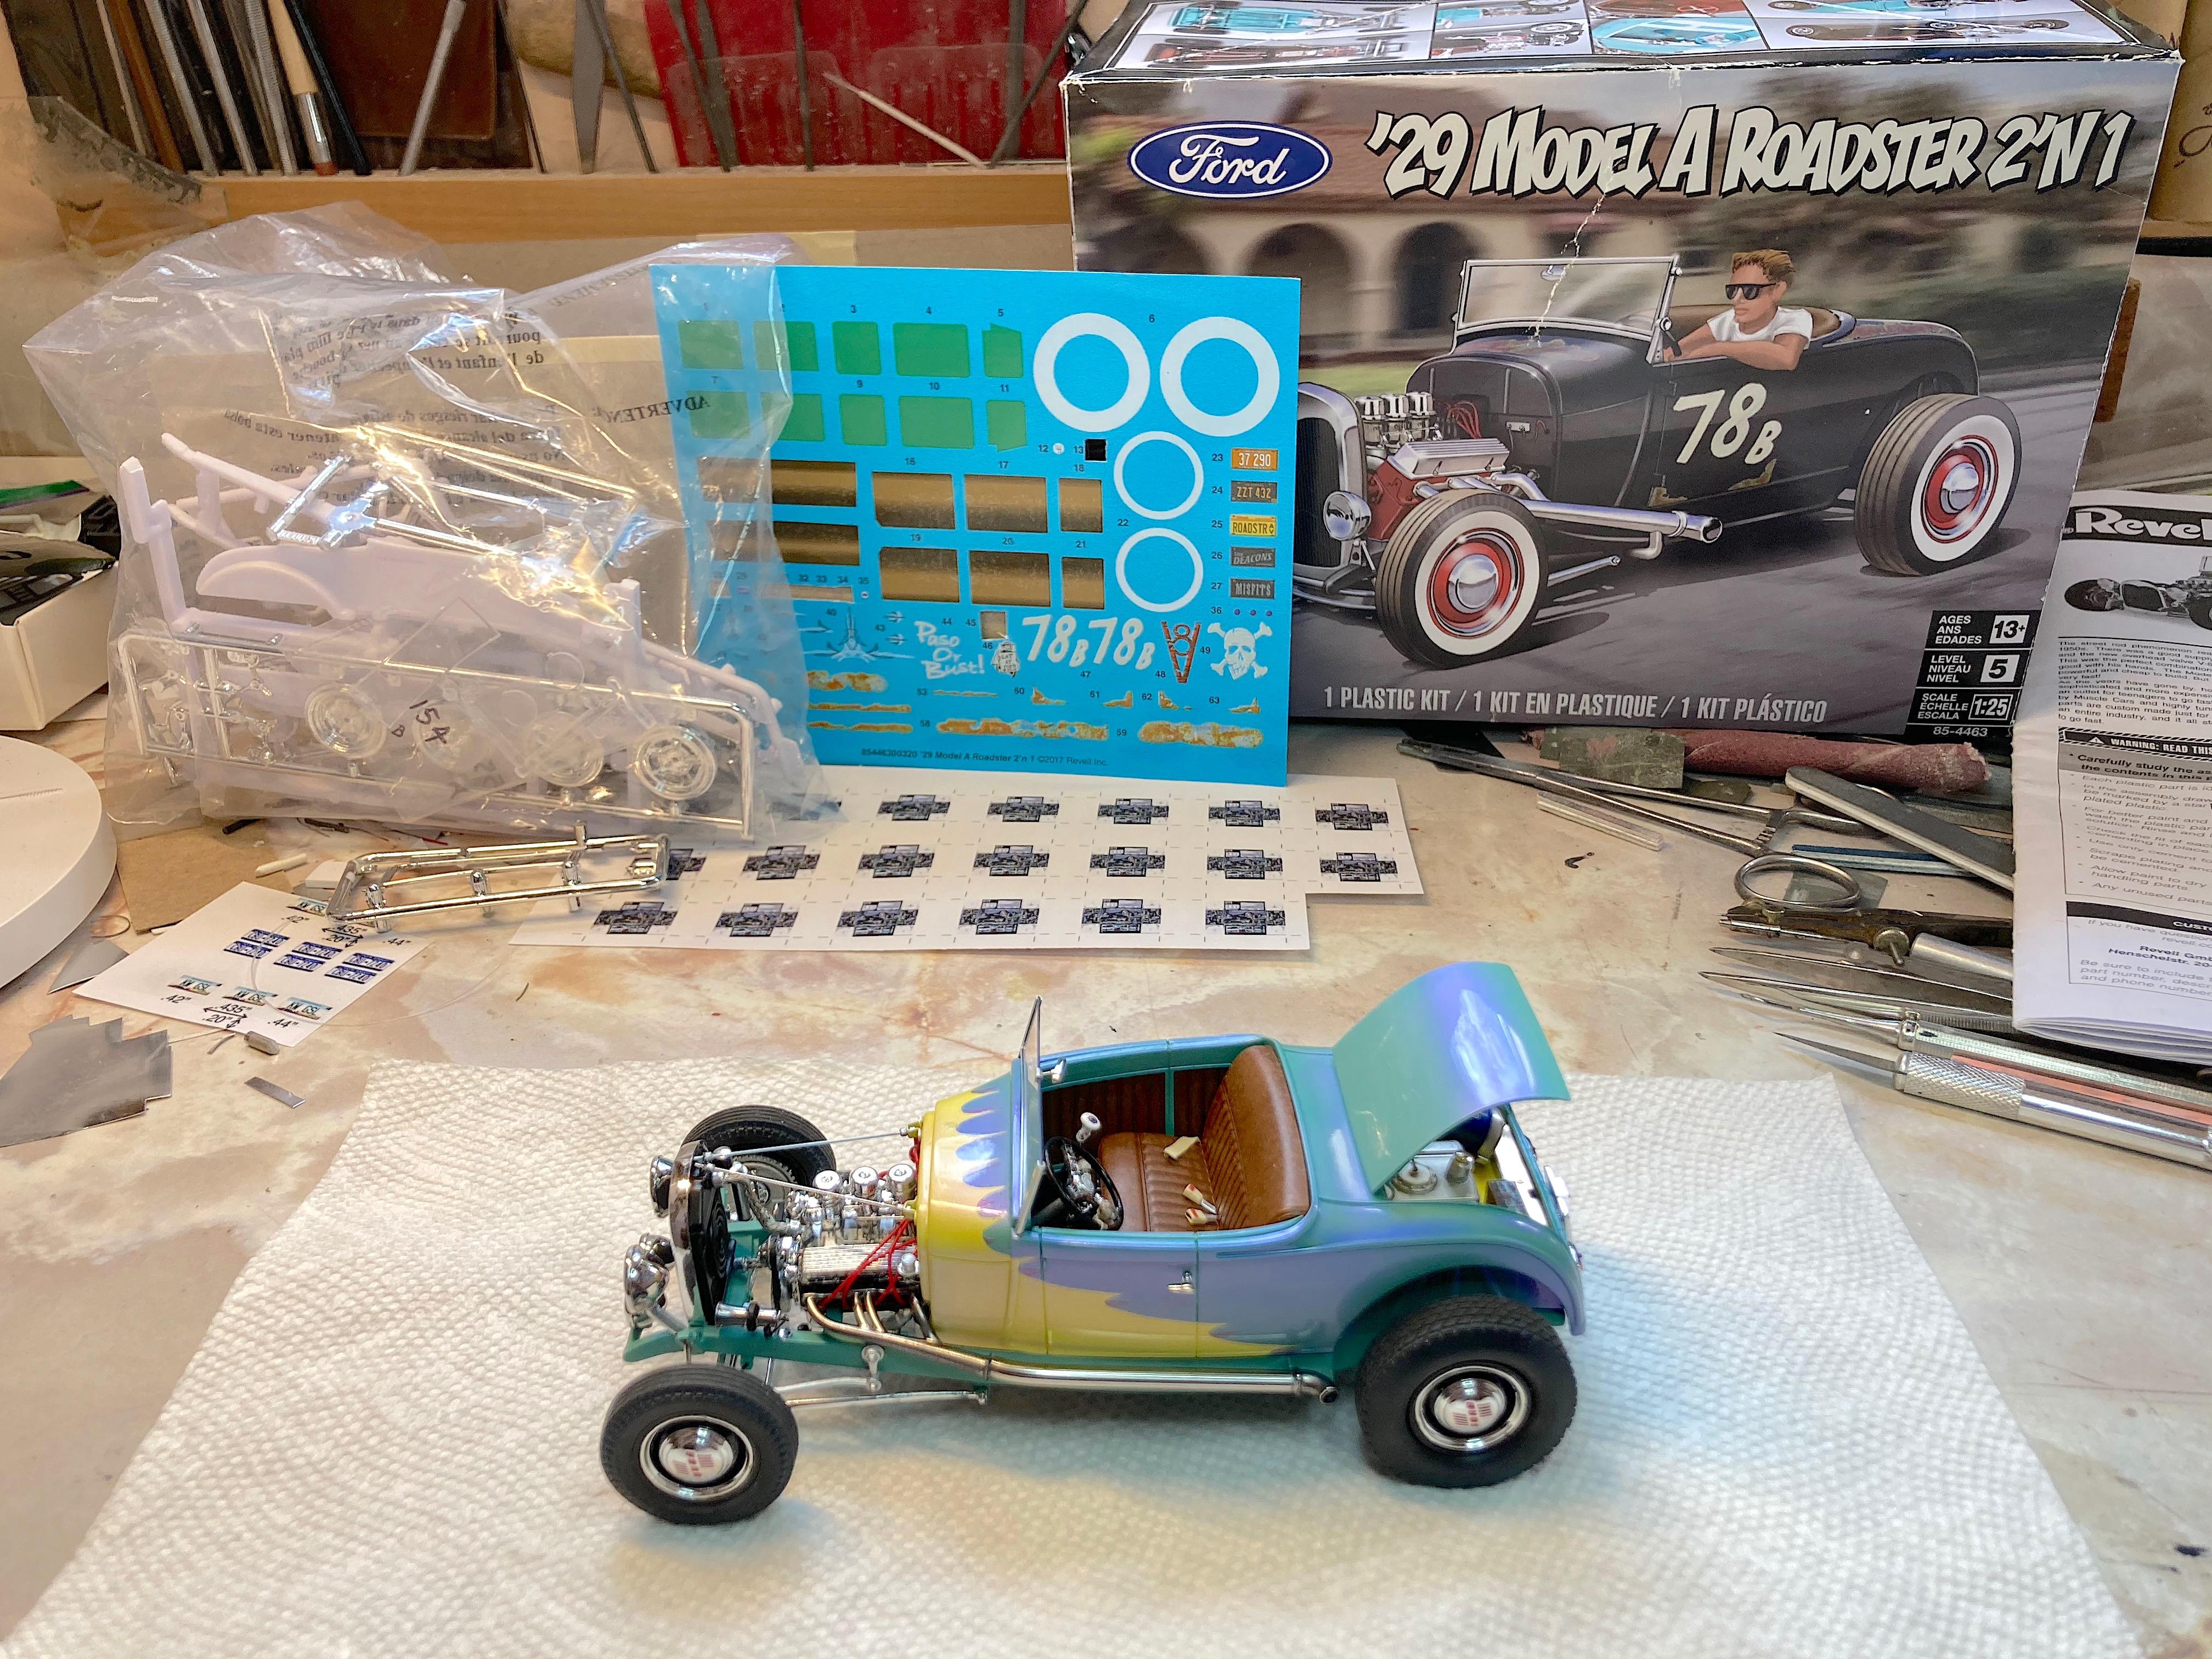
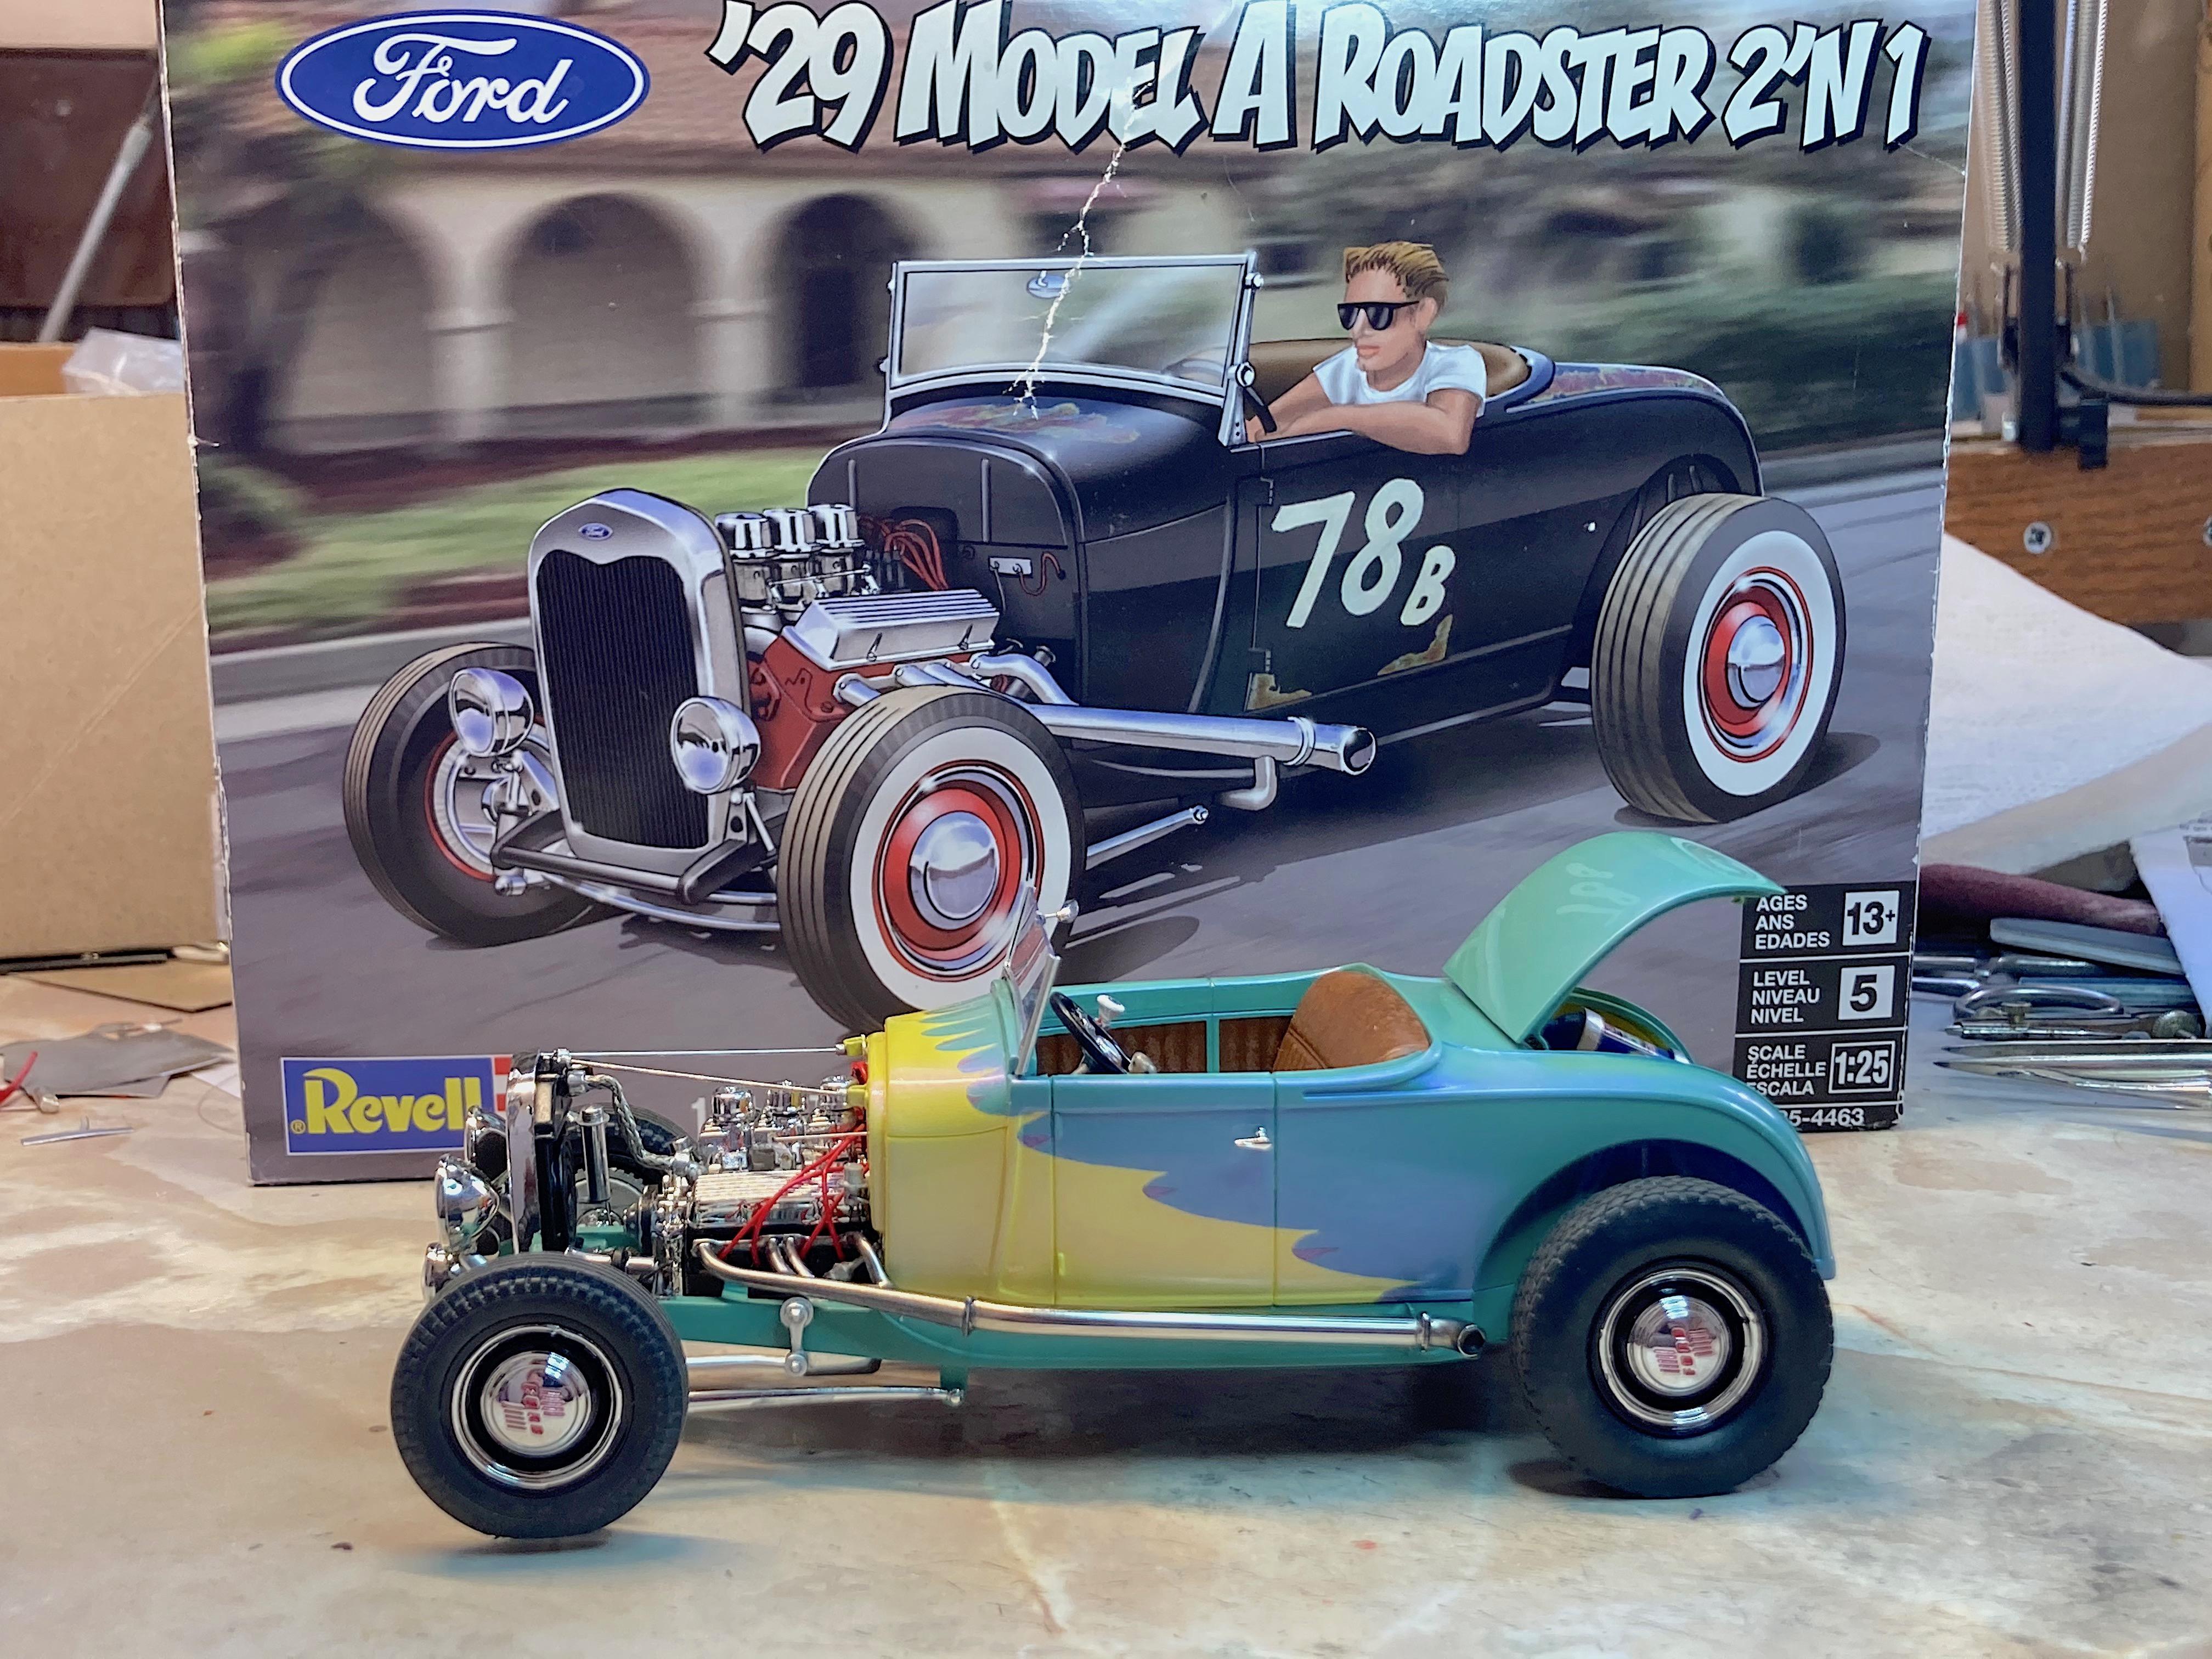
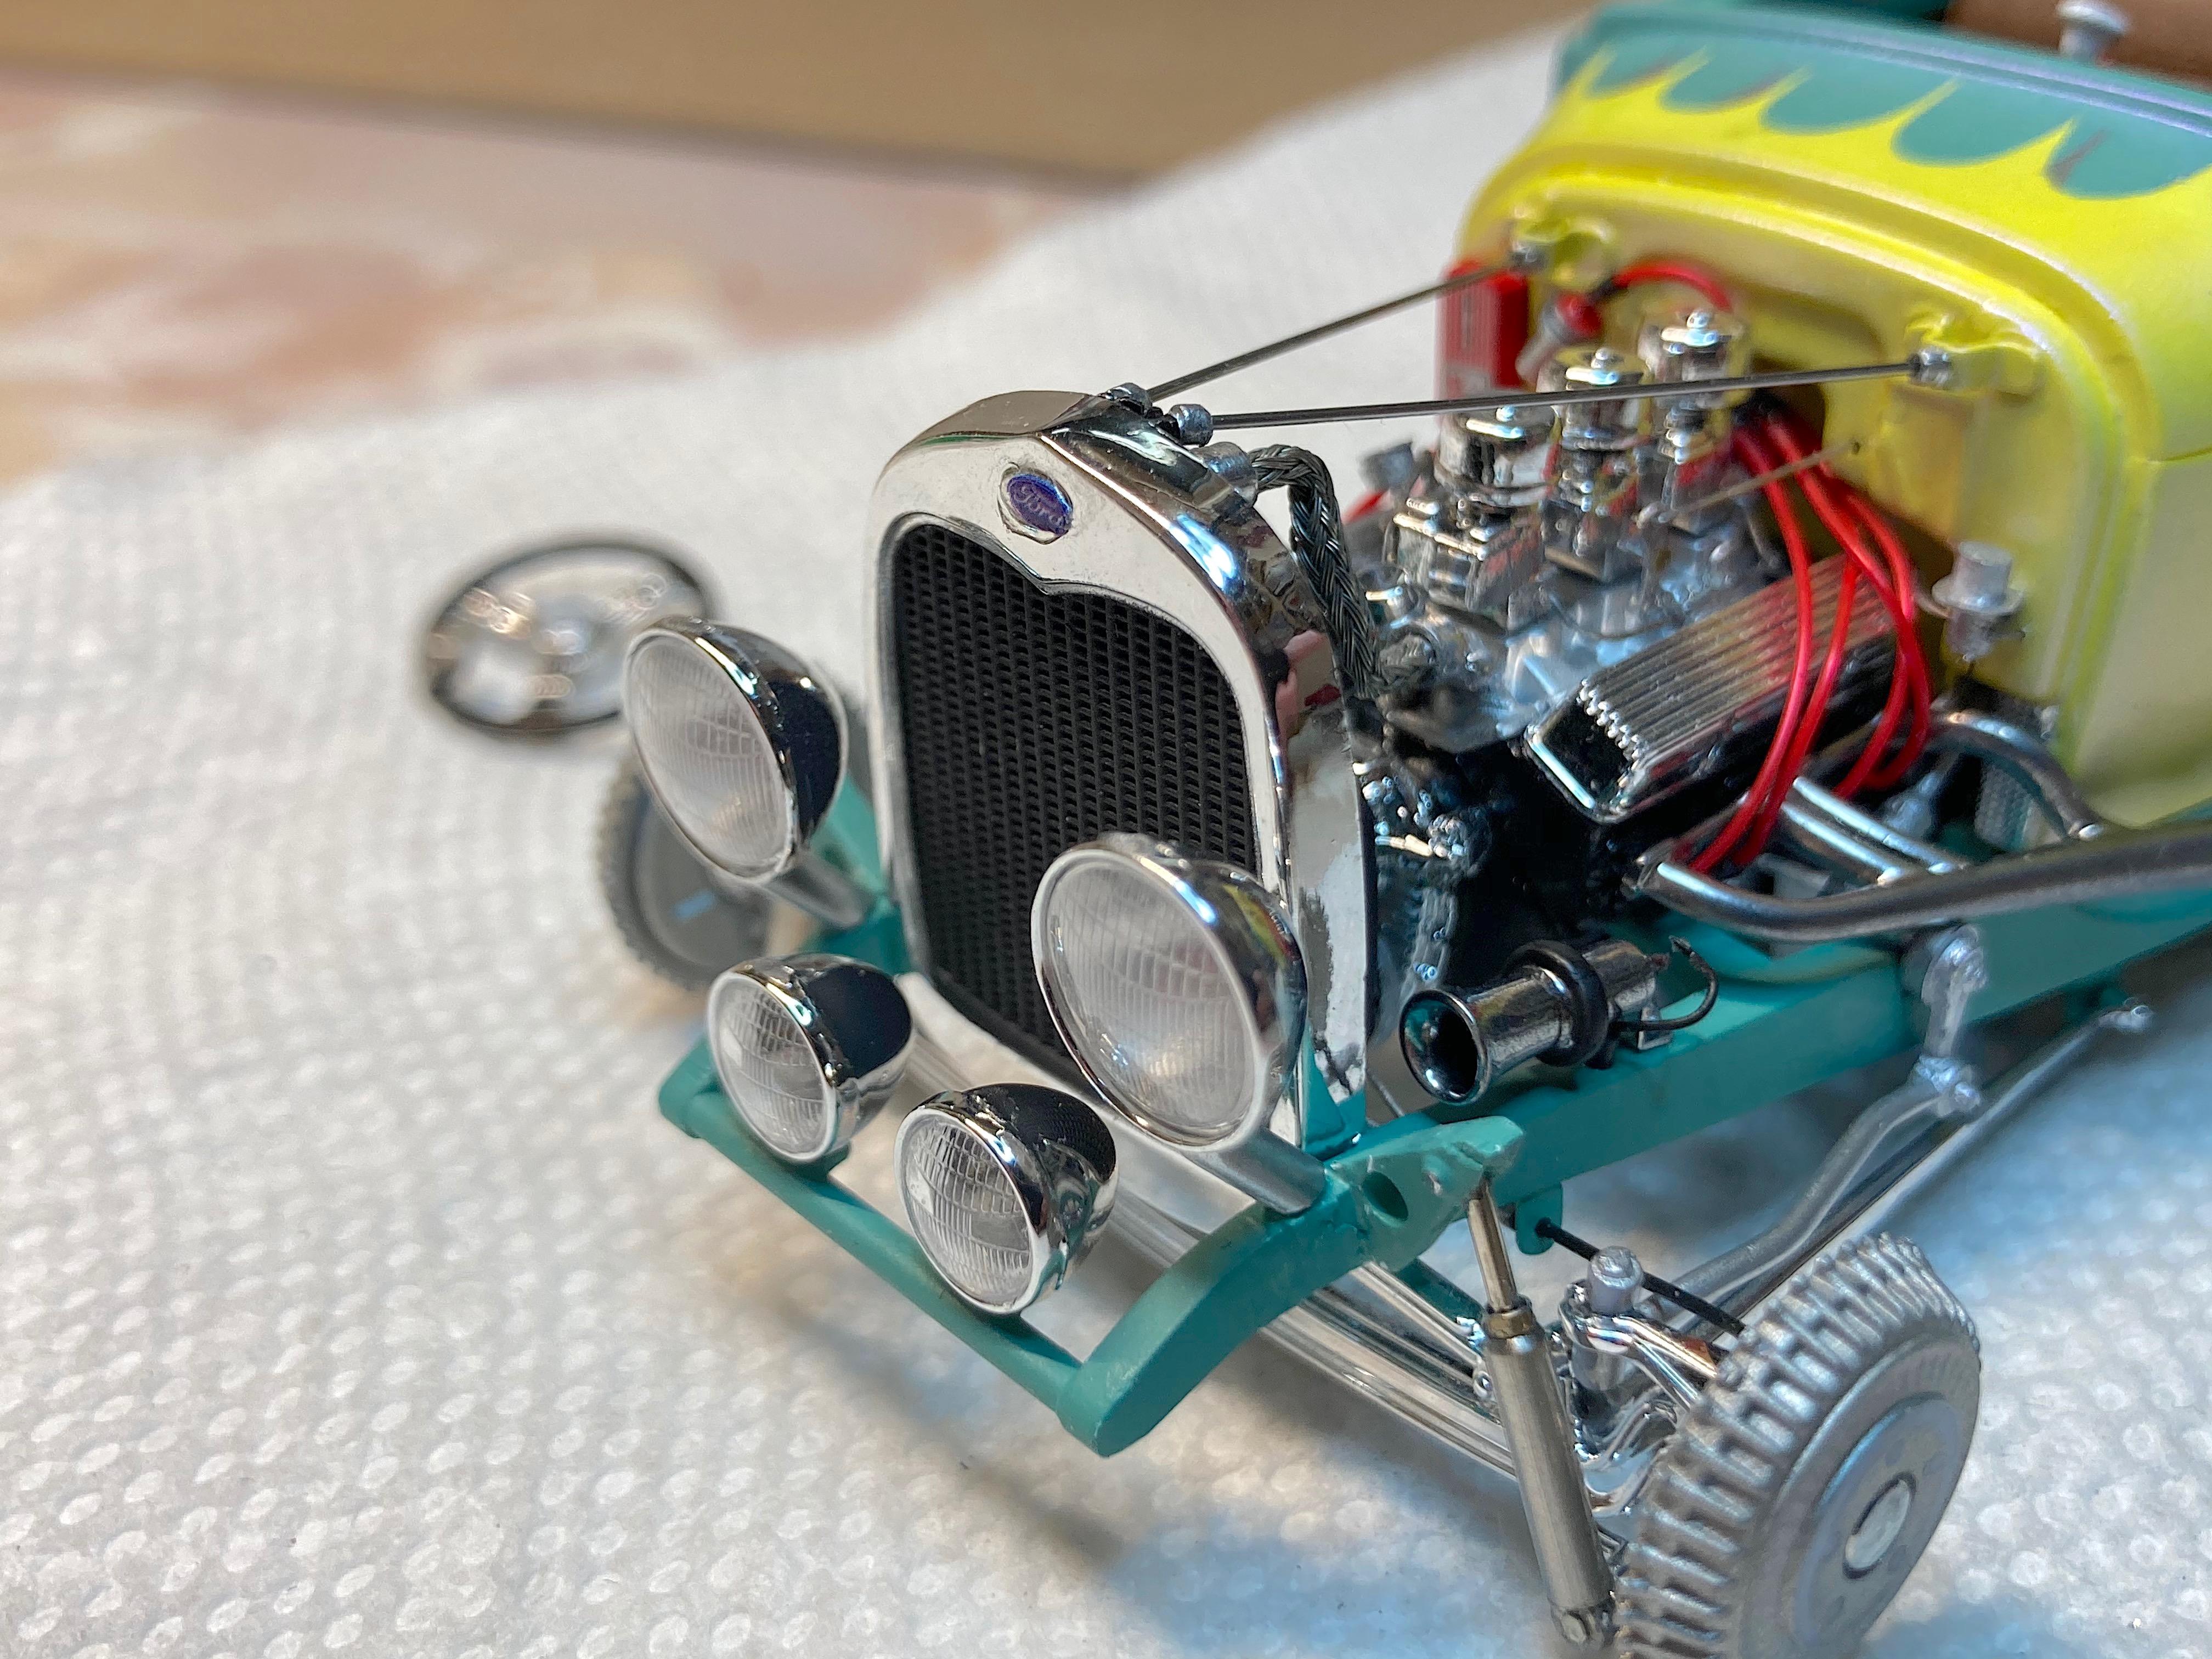
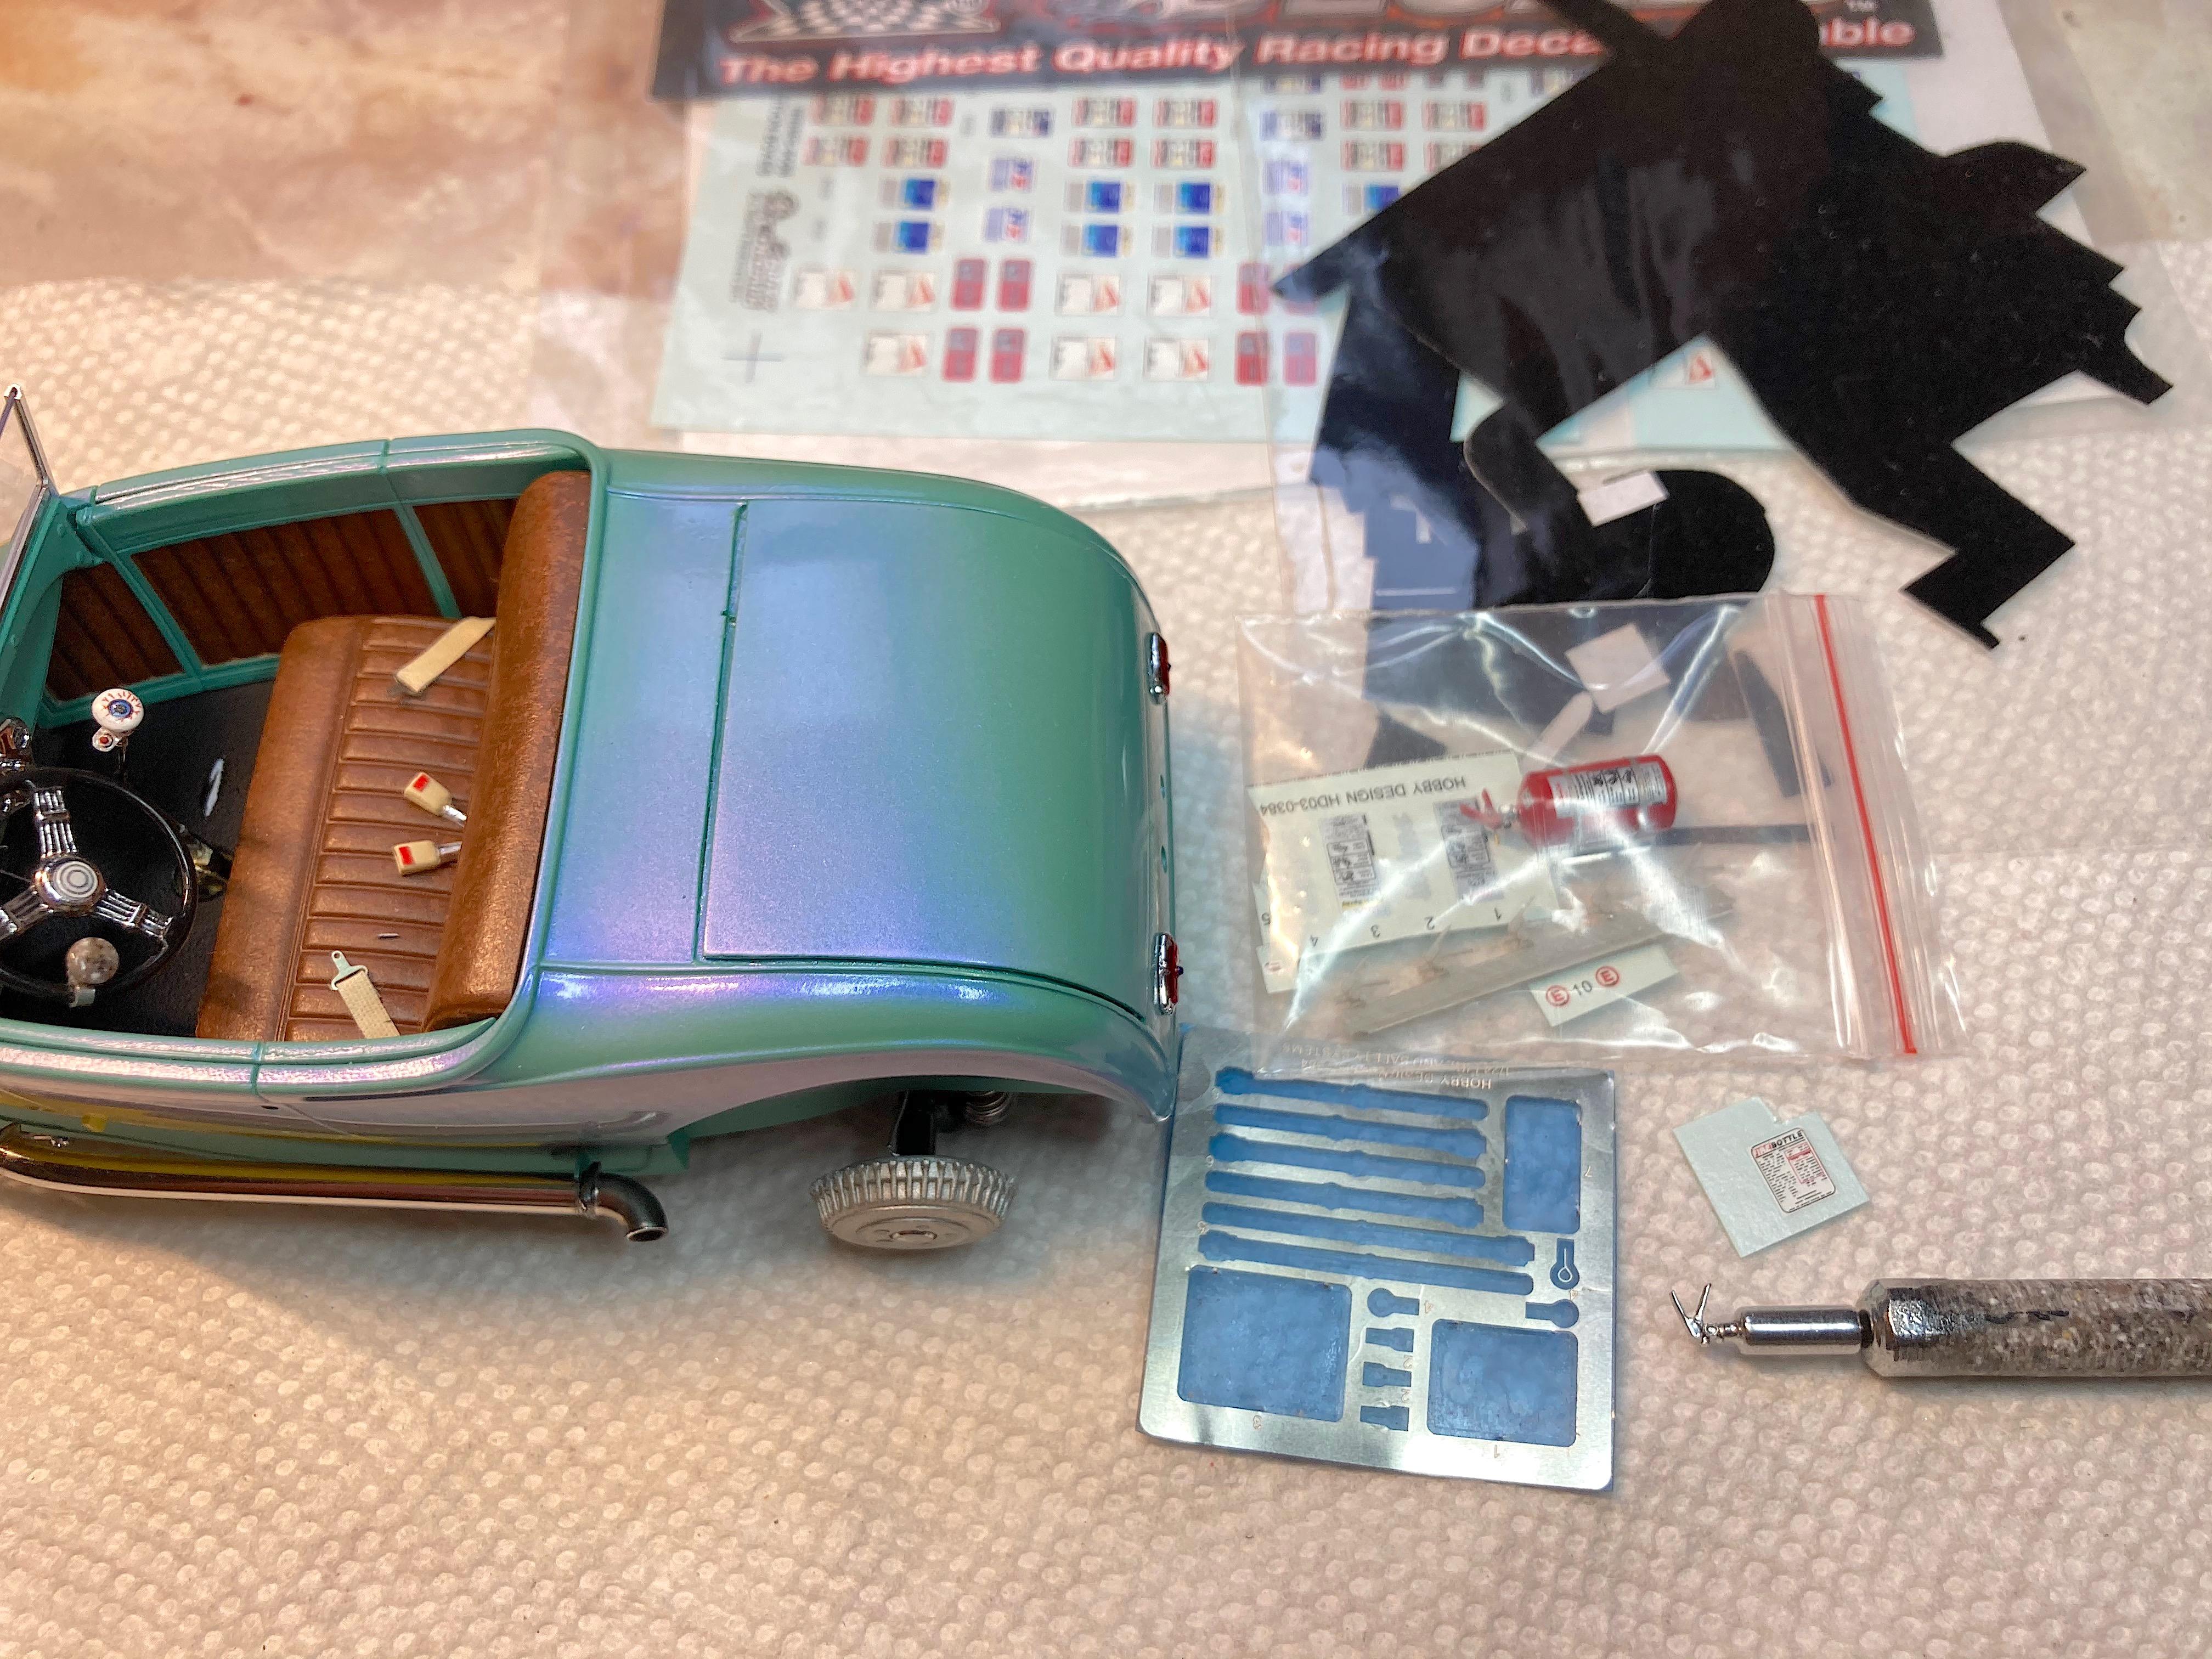
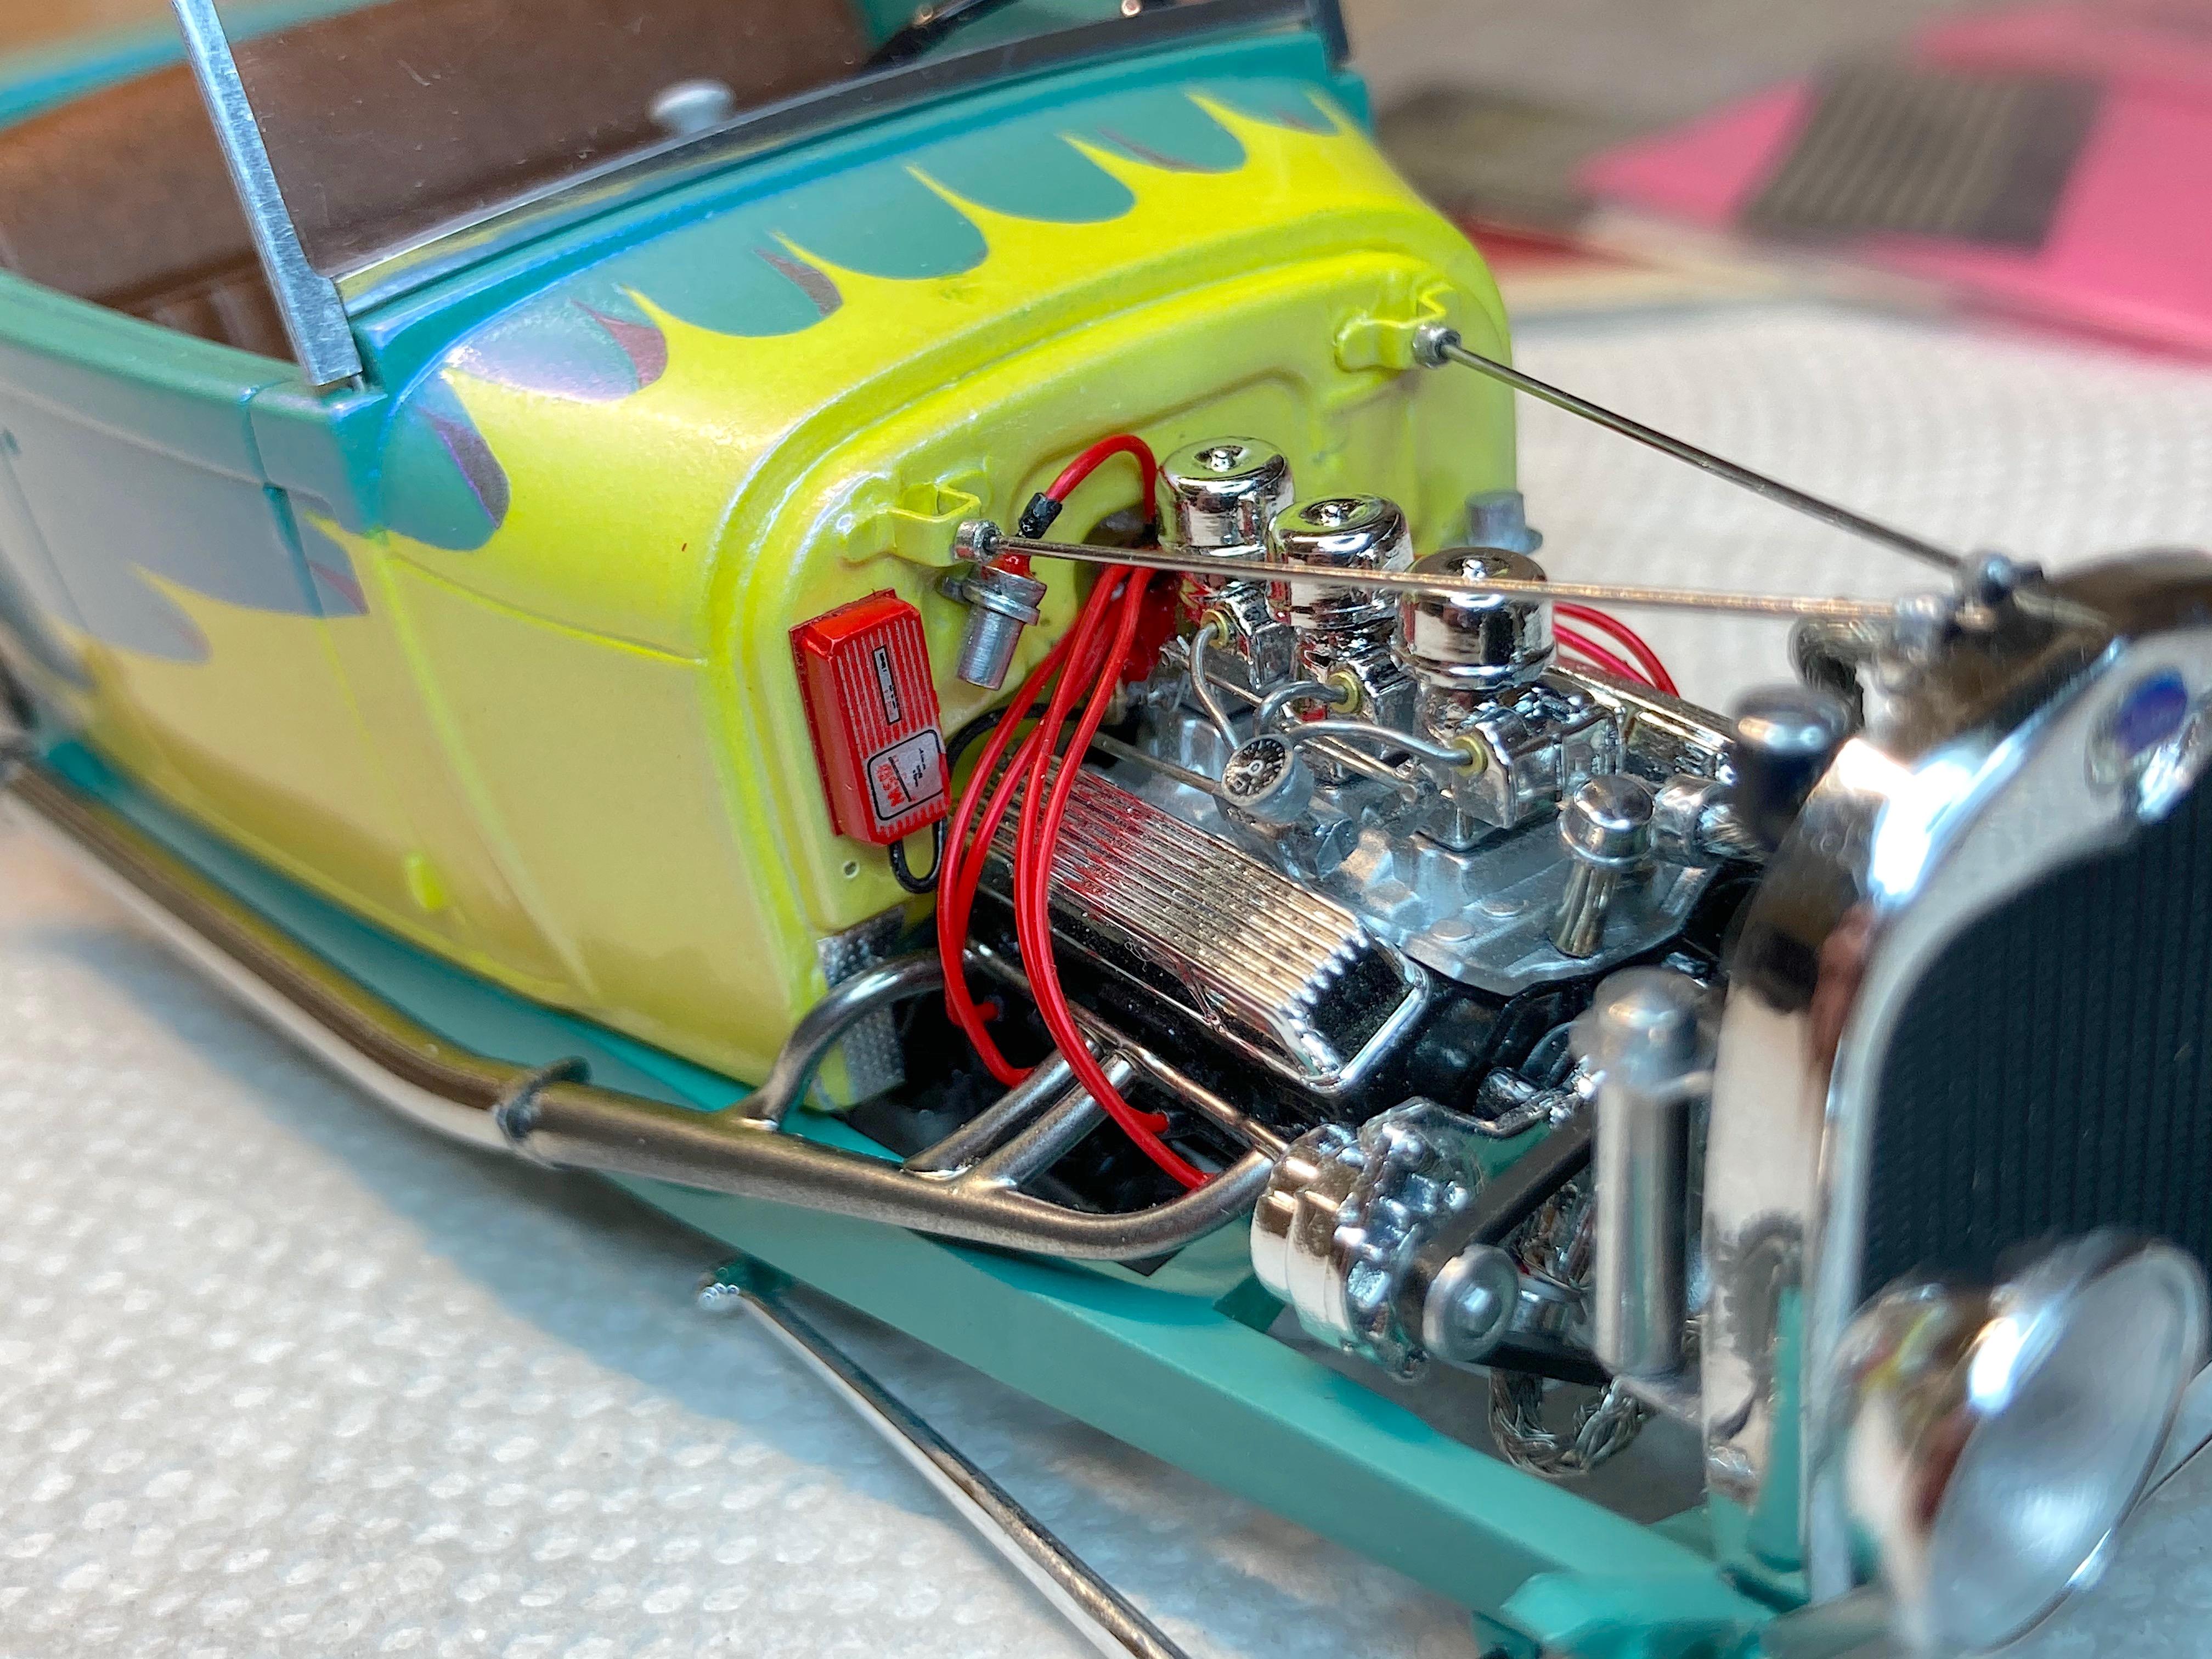
WIP: GSL Common Kit: [revision] just another Model A Roadster Fresh off the bench. After looking at the pictures, will be cleaning off the fuzz, and add some road trip weathering. It's been decades since I built a hot rod, and never a Model A. The only reason I built it, have entered the Common Kit class at every GSL (they have my Porsche 911 Speedster Turbo in the 'If I Had Designed It' class ?) that I attended, and have almost always got an award. I don't expect anything this time because I expect everyone and their brother will enter all kinds of awesome builds, so I hope that my additional details that are missing from the kit will make points. I have to admit, this was fun. ? Primary paint is special order Splash paints used on my '69 Chevy pickup THE GREEN BARGE with Model Master pearl clear on the body. My favorite scratch-building material is newspaper printing plate, almost every part utilized it. There are only five parts that are turned aluminum, four turned from Corian®. Added a nitrous system. If there is anything everyone should do when they build this kit, open the trunk so you can see the fuel tank and battery, come on Revell! I should take pictures of the bottom, since many details added are there. Will take glamor "studio" shots sometime.
- 13 replies
-
- 4
-
-
- 29 model a
- roadster
- (and 1 more)
-
GSL Common Kit: [revision] just another Model A Roadster
89AKurt replied to 89AKurt's topic in WIP: Model Cars
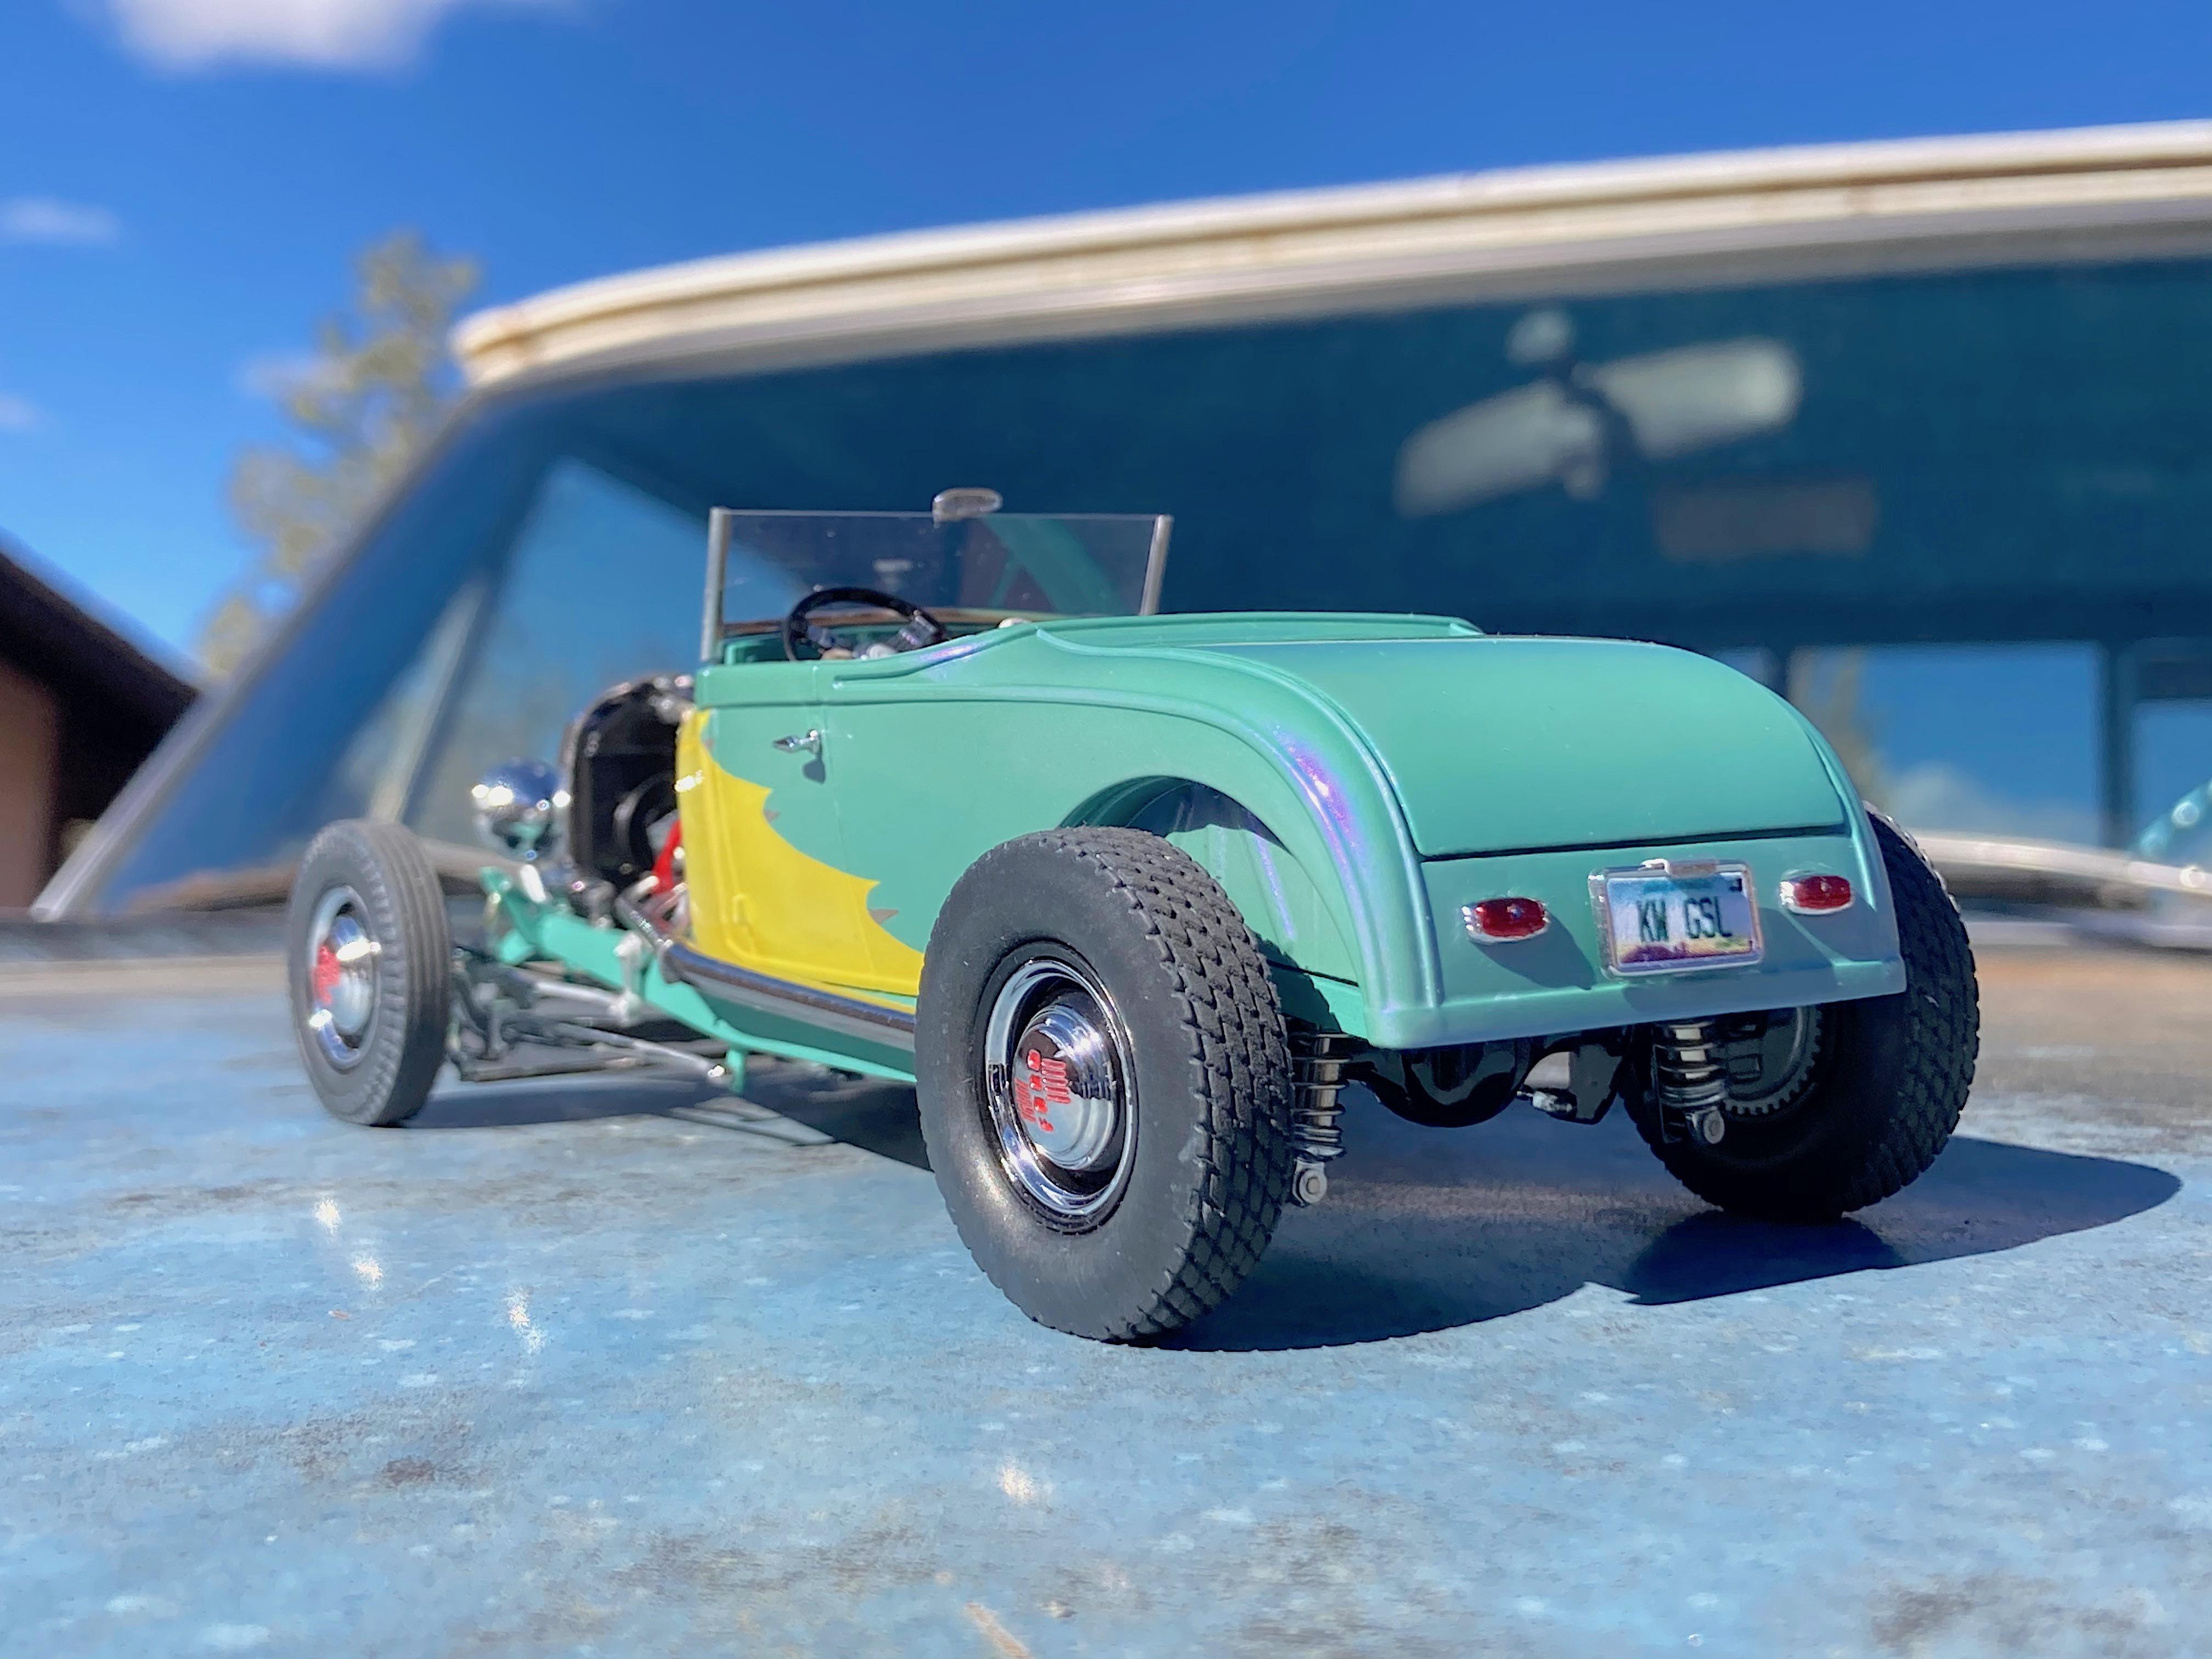
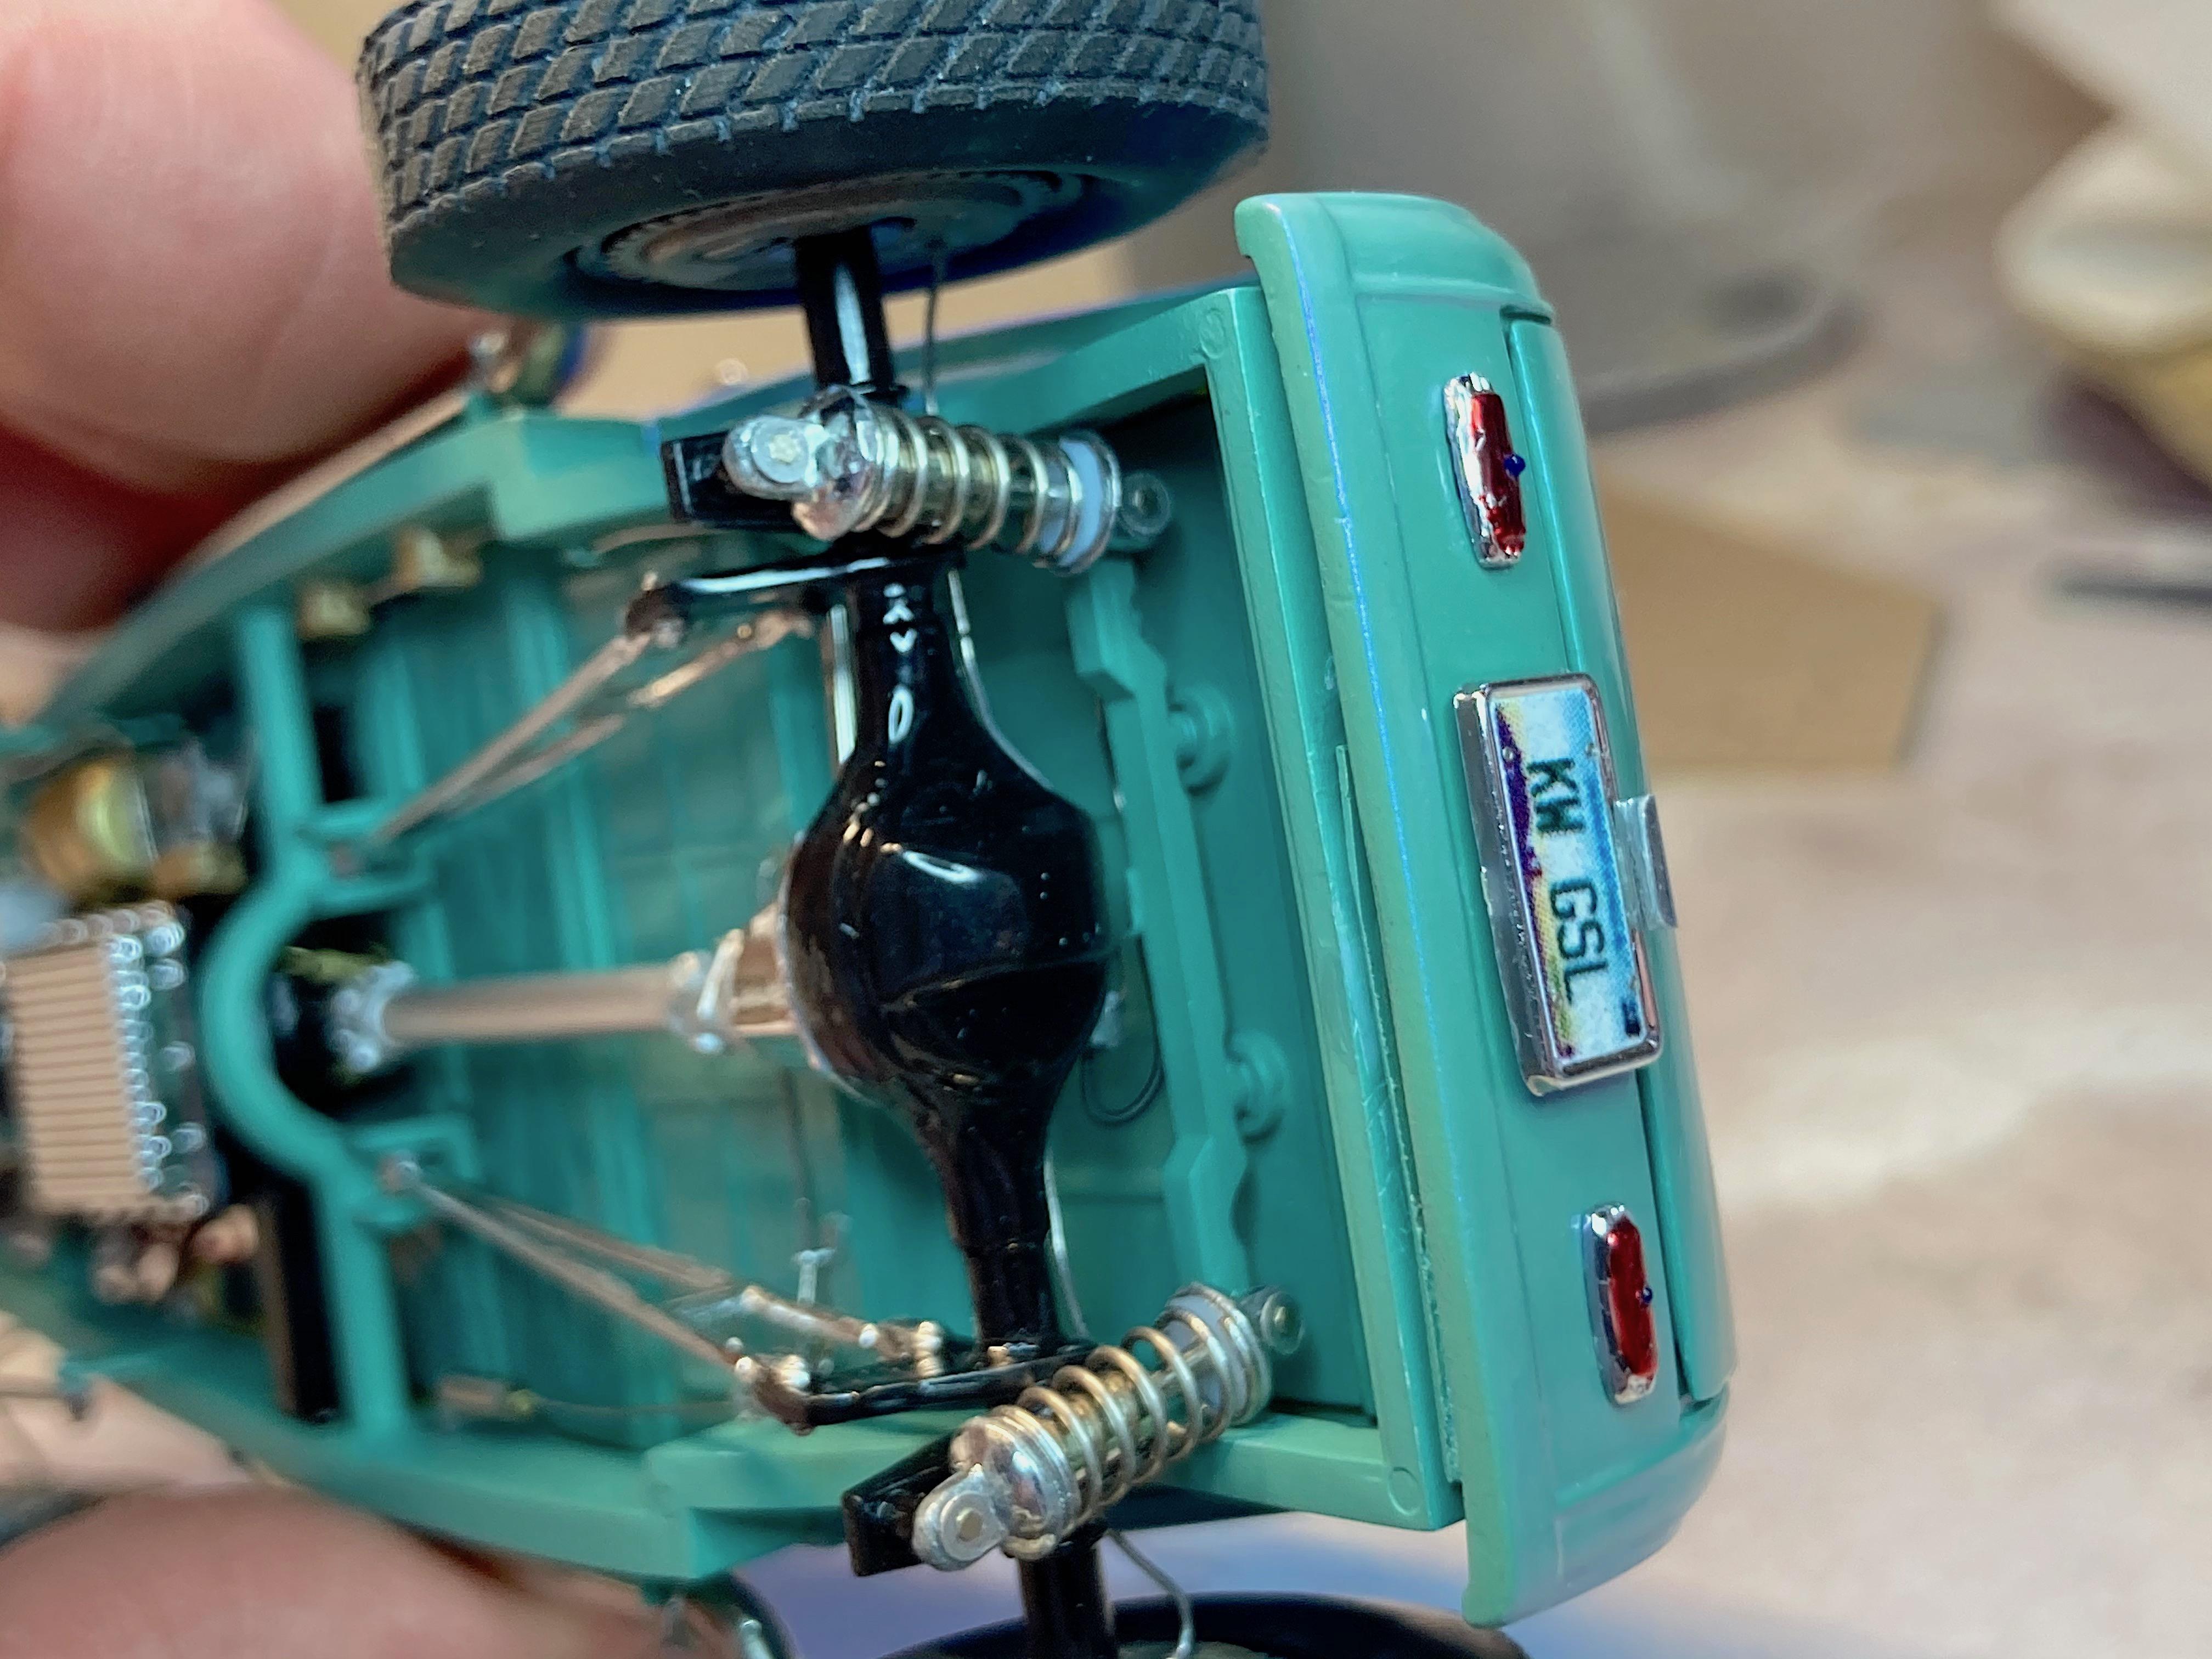
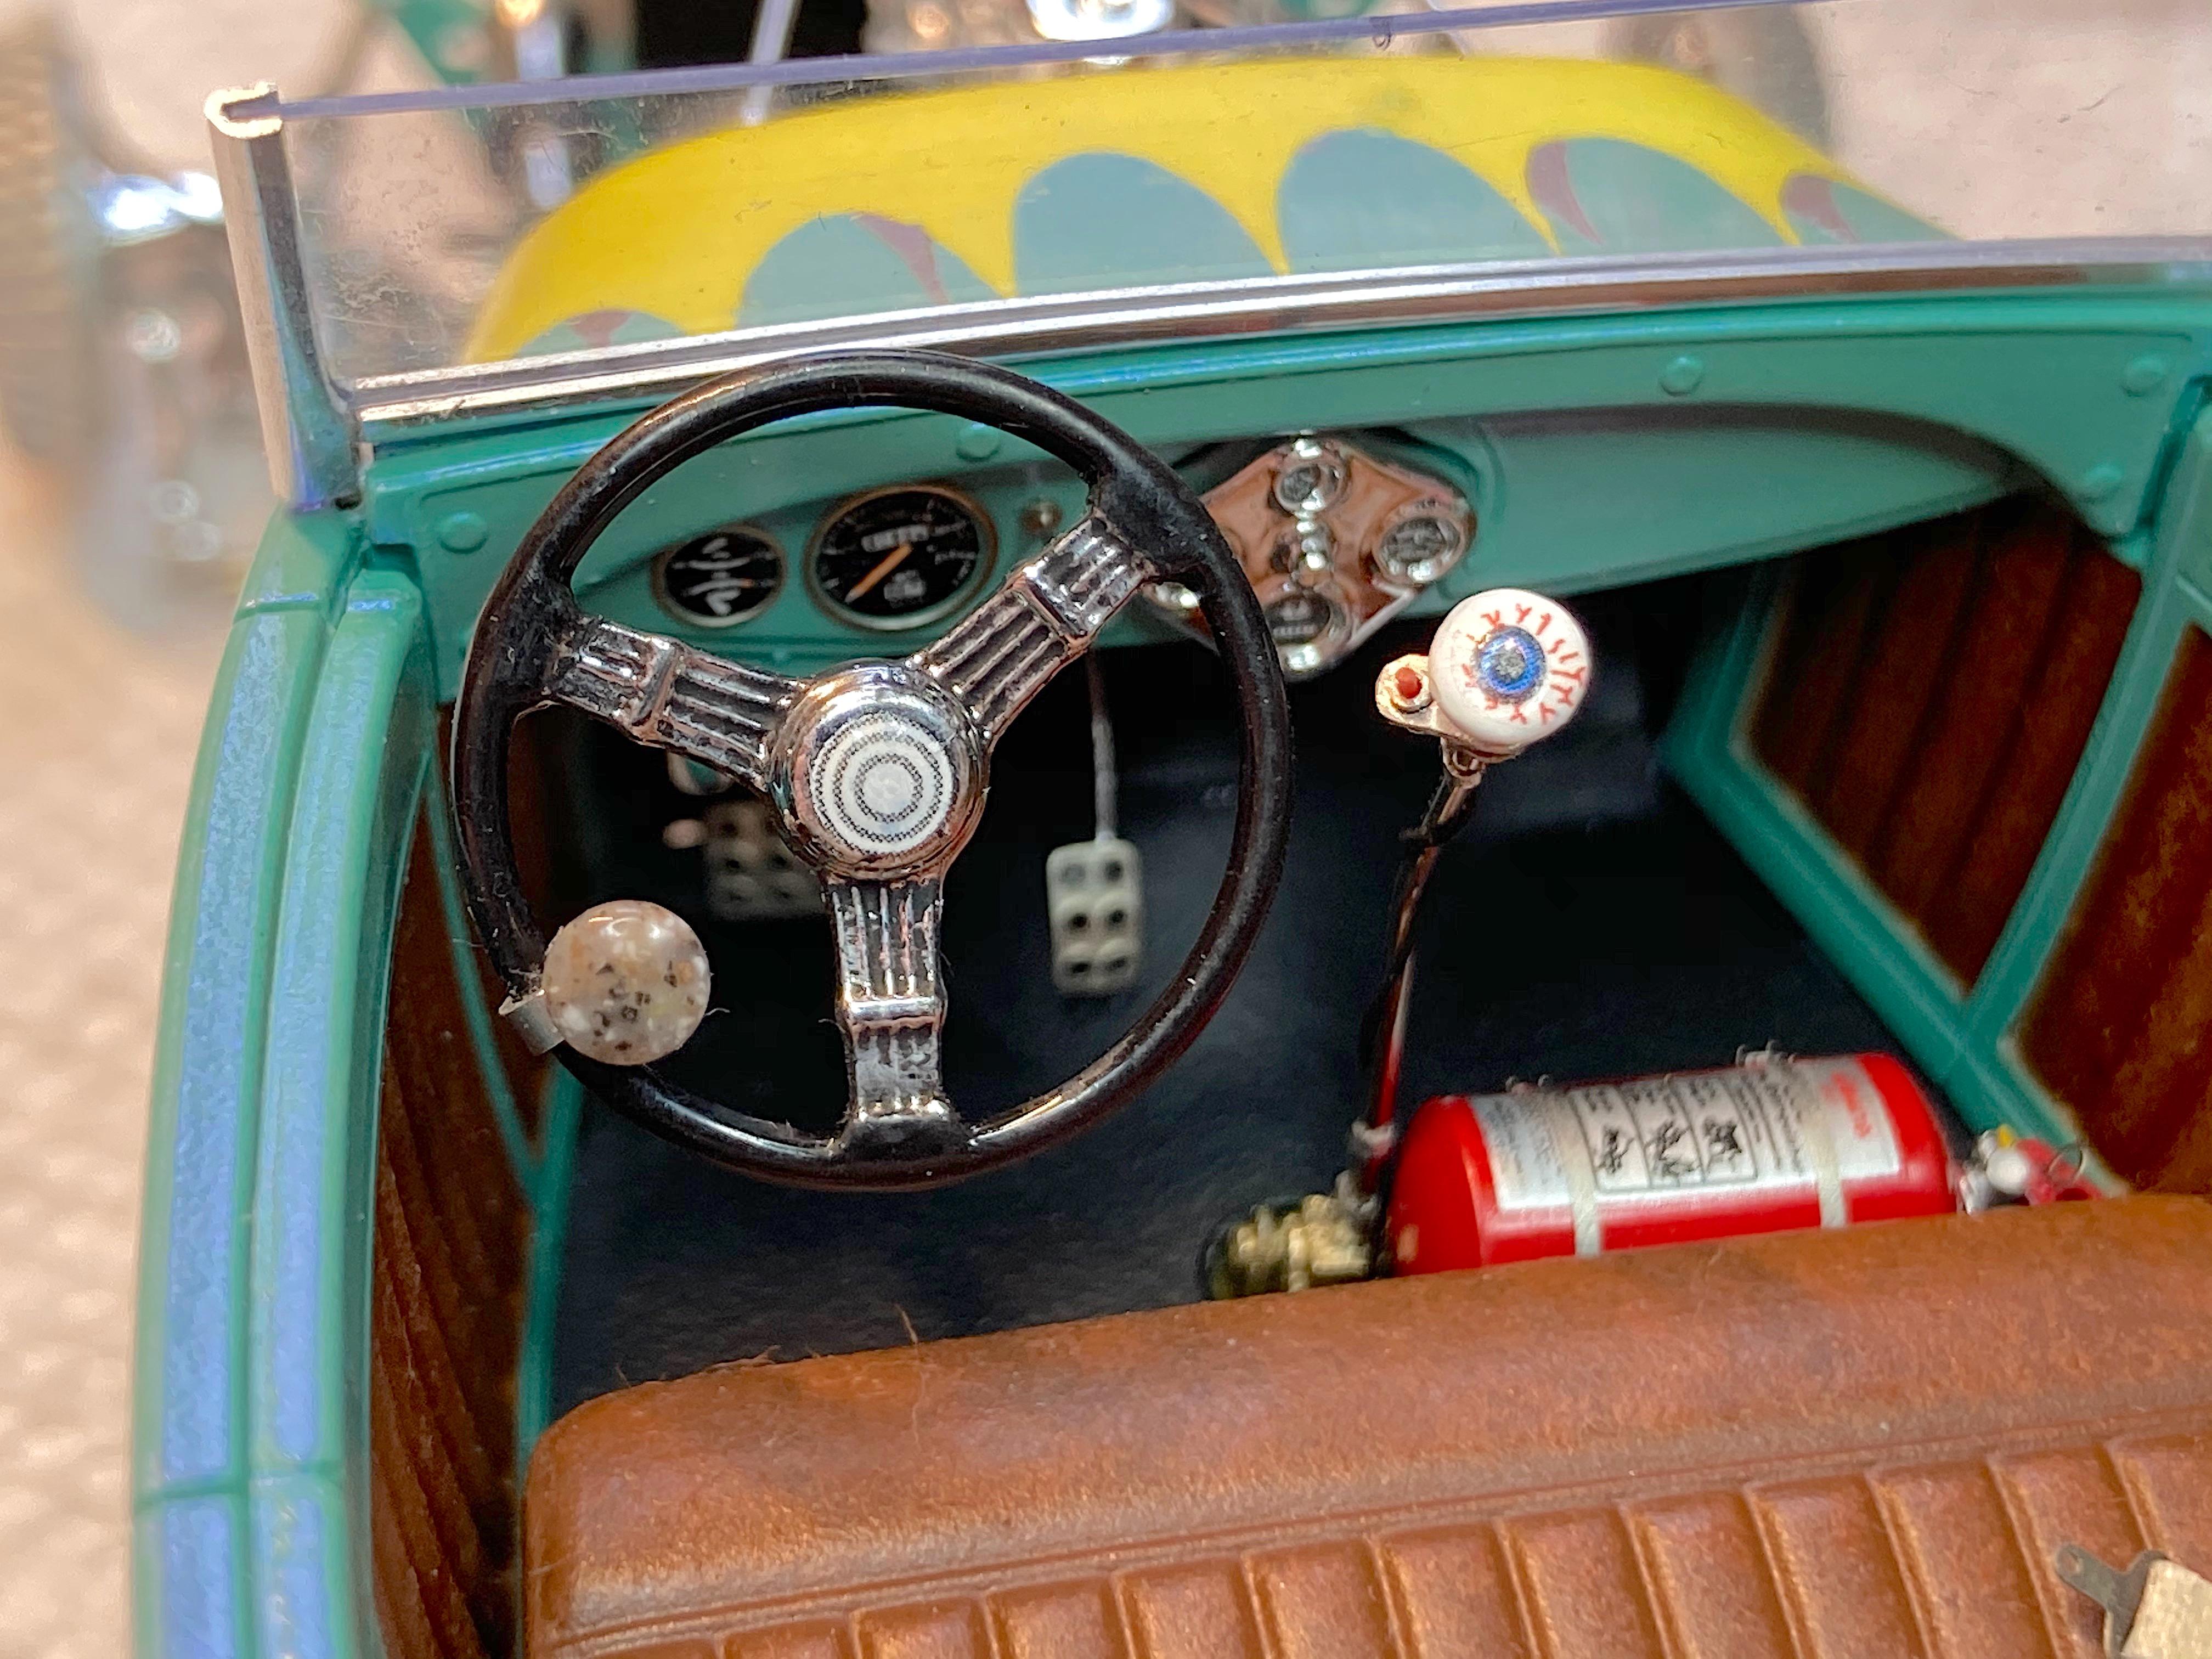
Thank you! ? No kidding! Thanks for your comment, pleasure to share such a build, even with the mistakes. Have to admit the trunk latch isn't working as well as before final assembly. ? I should have been working, but since I'm self-employed, and have no discipline, and was so close to finishing, I finished. The only thing I will do is slight road trip weathering, such as bug splats and a little dust. Modified the kit mirror to go with the windshield mount. Since I added more lights, then I better put on a license plate light, not having a working light is enough to get pulled over. Bent polished aluminum plate, glued in stretched clear sprue with testers canopy glue. Russell Cook and I collaborated on license plates, I had them printed, sprayed Deft varnish, stuck on with canopy glue too. Then added photo-etch screw heads. Then I glued on the wheels, and finally the door handles. Considered done. Super annoyed it's a tripod. Who needs a good windshield frame? I know those tend to get wrecked by the tight packaging.
-
dressed in camo
-
GSL Common Kit: [revision] just another Model A Roadster
89AKurt replied to 89AKurt's topic in WIP: Model Cars
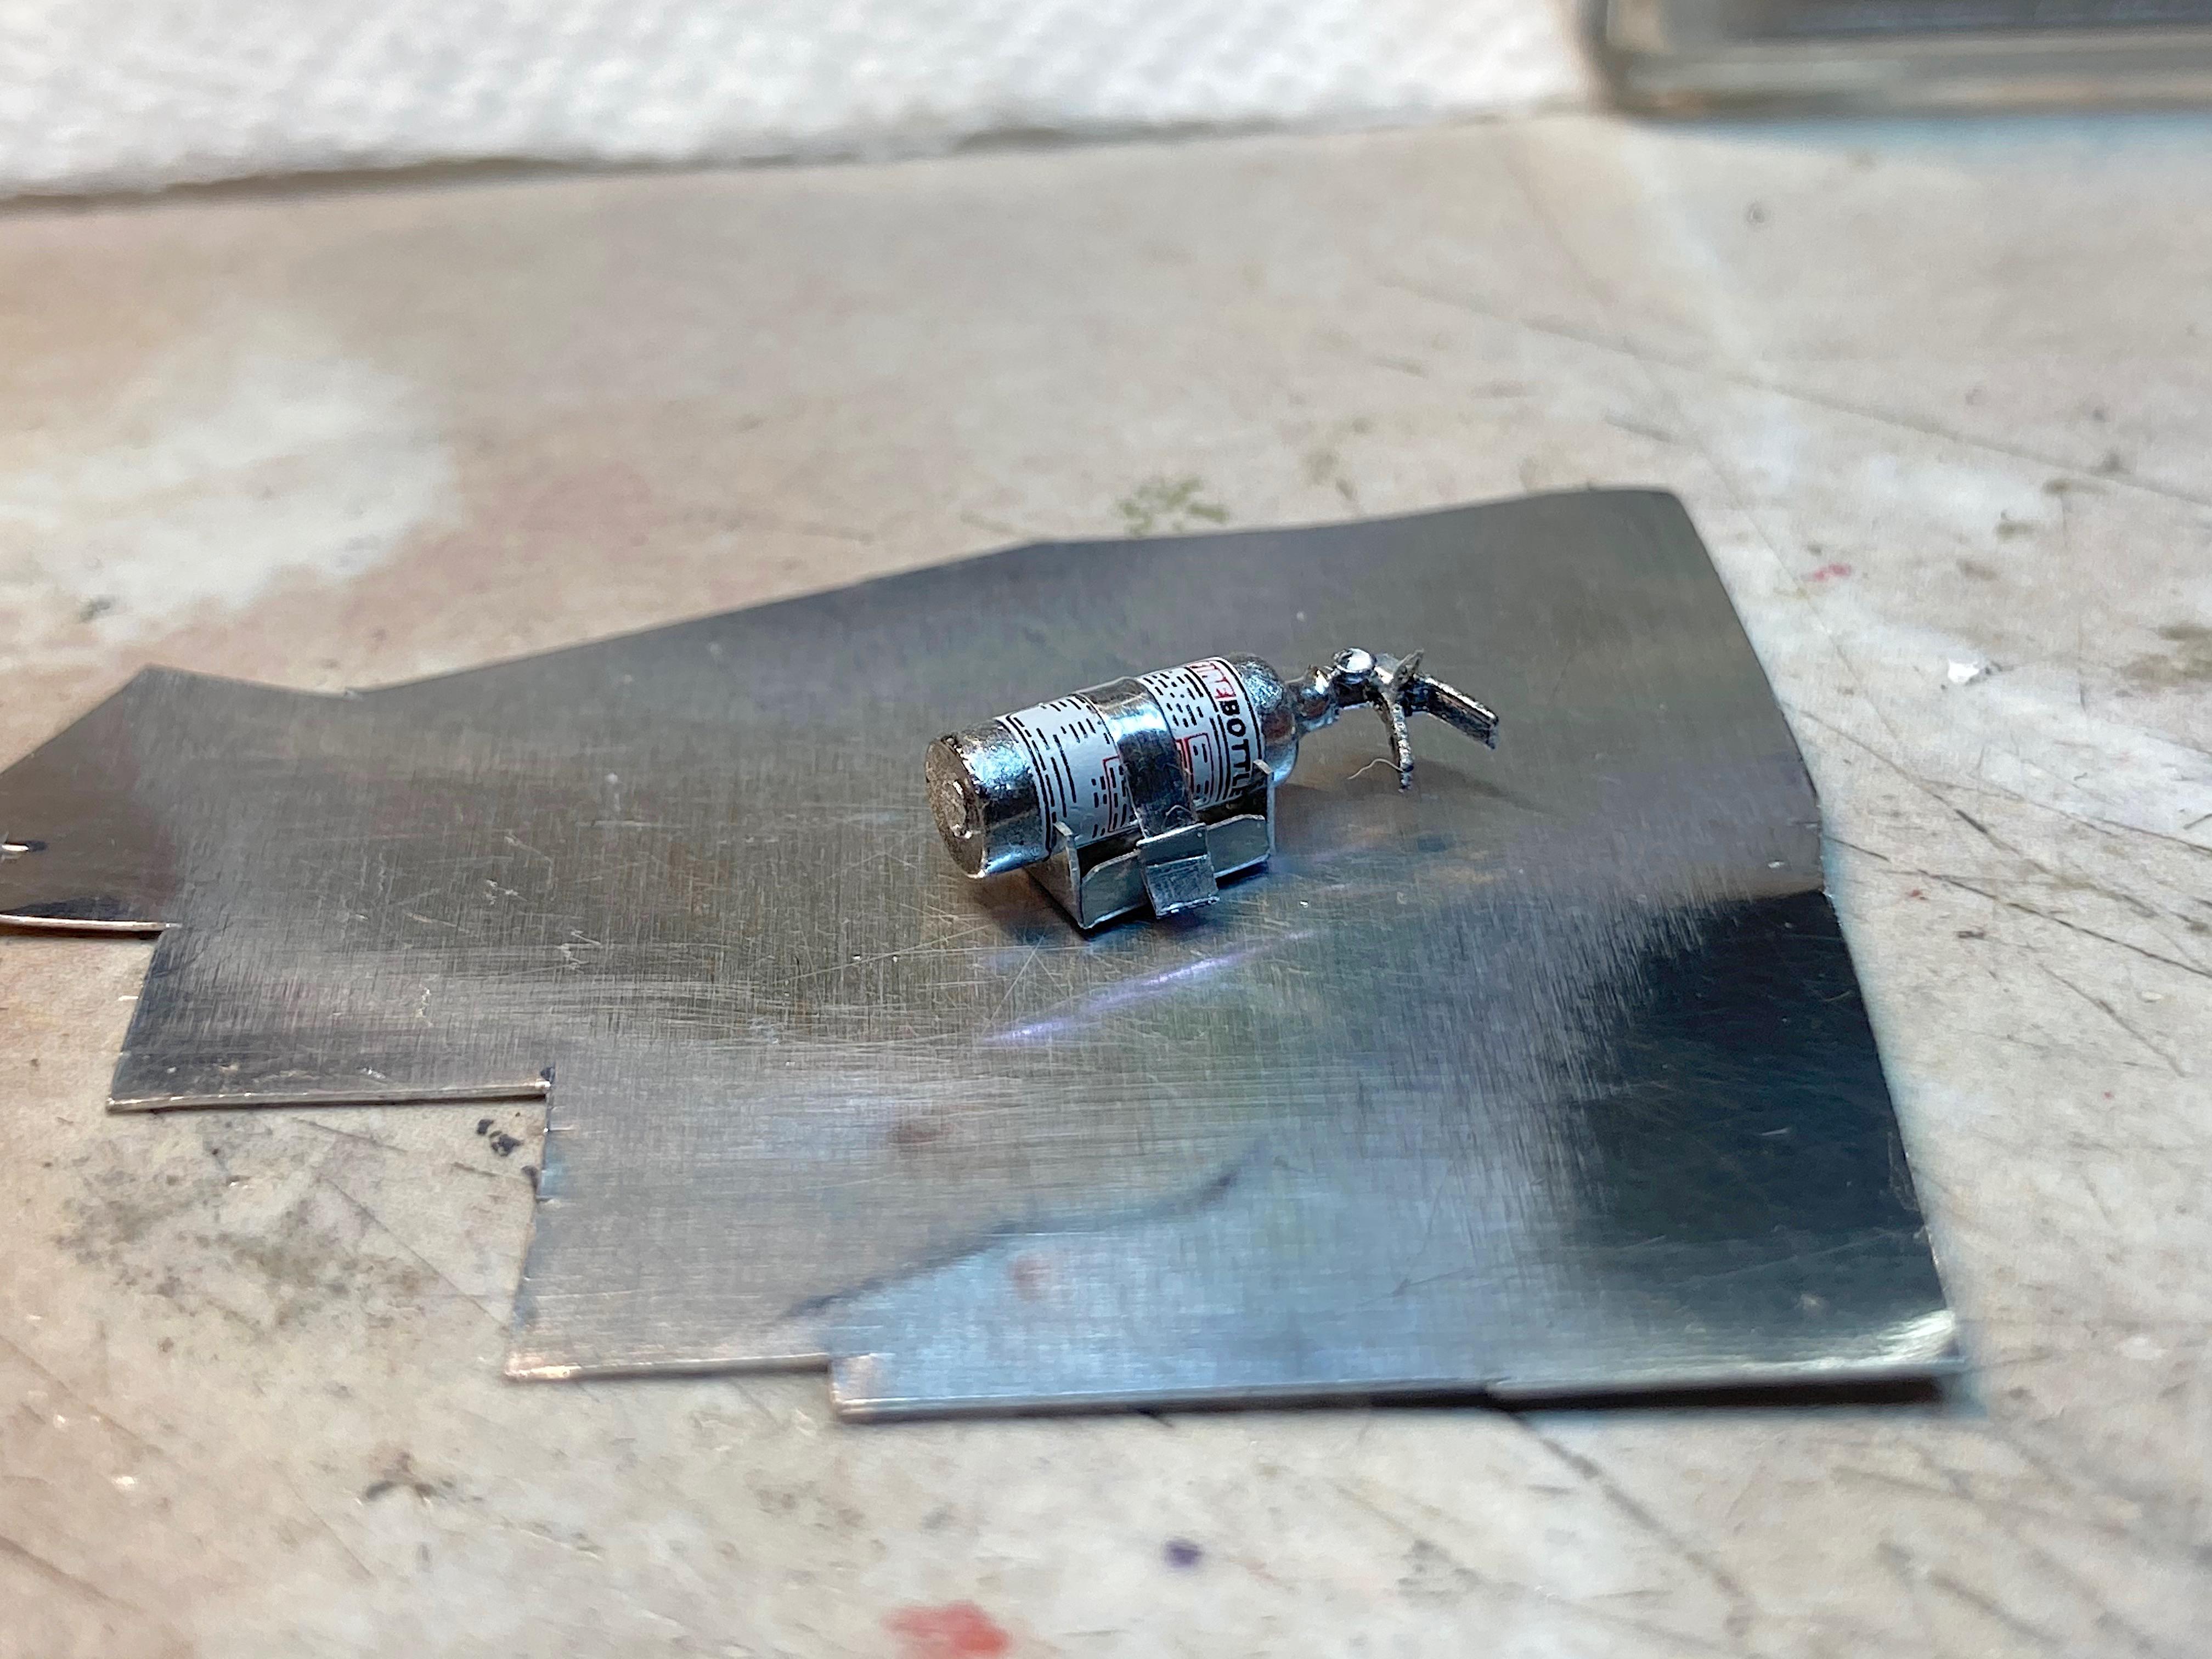
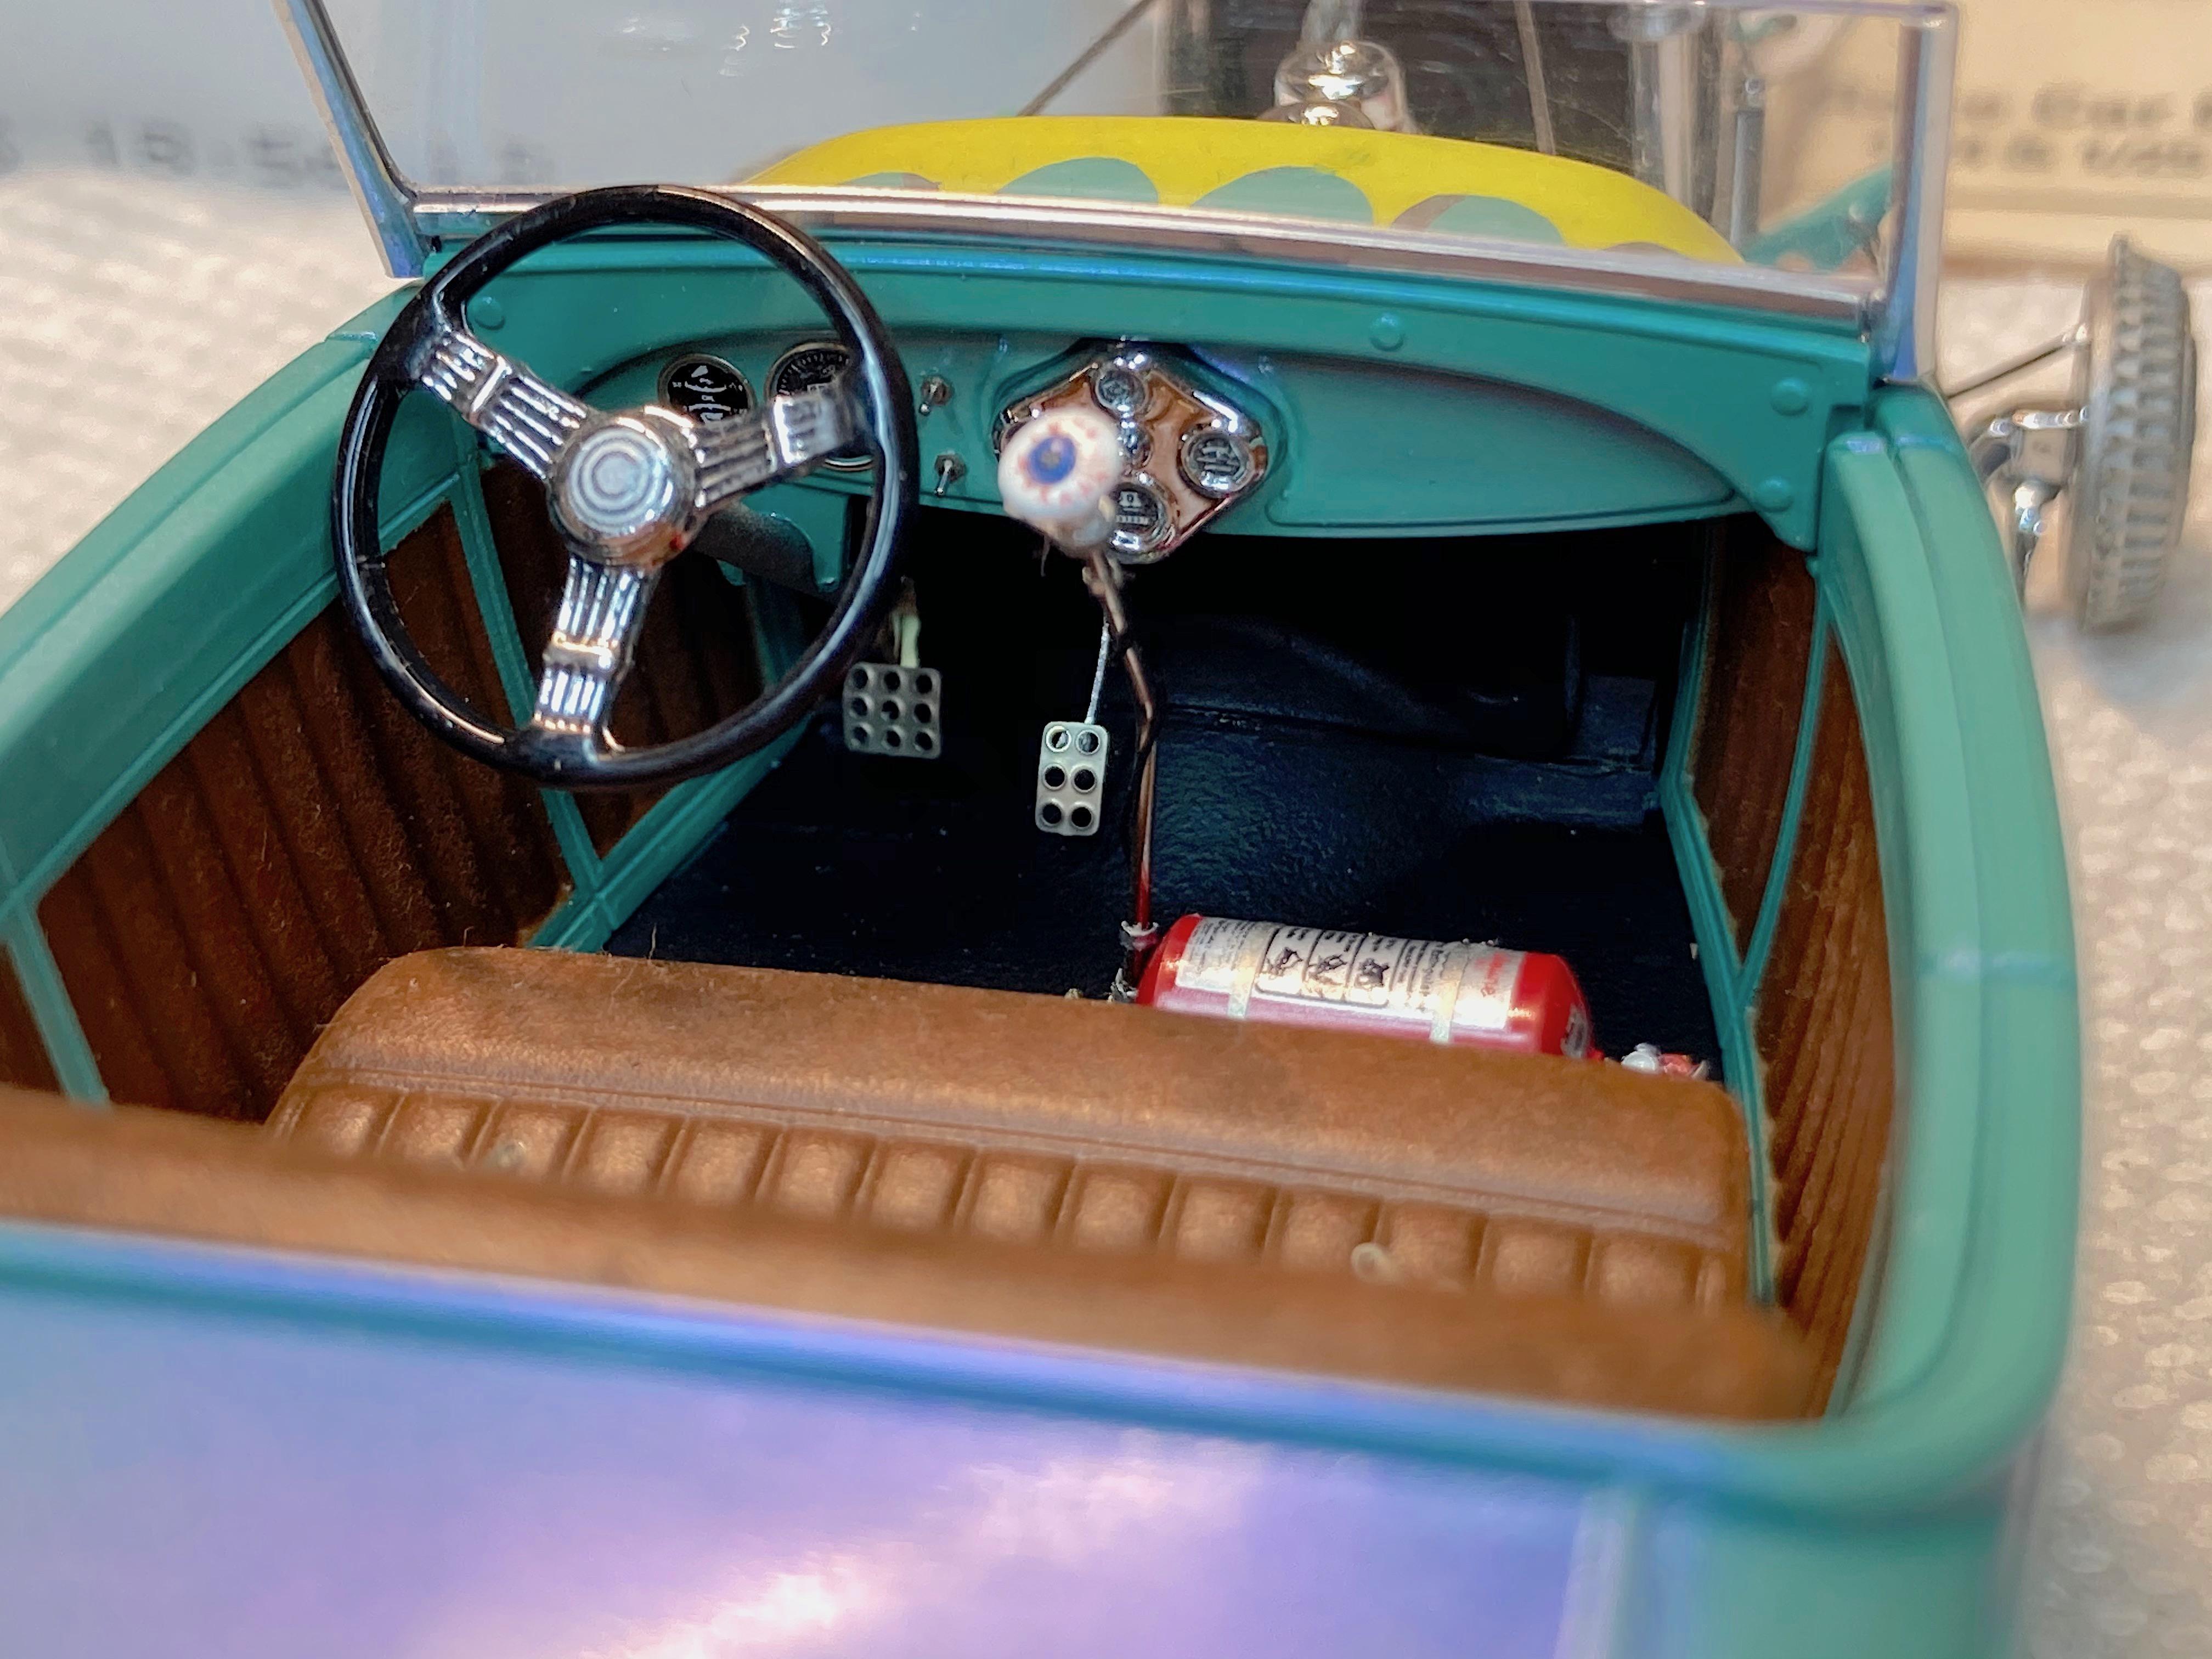
It will be interesting to see how far some builders will take it. Last time it was the Tamiya VW Beetle, what won First place, there was nothing from the interior of the kit in the model. I just wanted to finish this and not have another Bring Back Your Dead candidate. Fire extinguisher has been replaced. It's all chrome or polished aluminum. Made the mount from aluminum plate, aluminum tape for the strap. Added carpet only to the passenger side, driver side is rubber mat meant for business. The kit has 3 size headlights, I couldn't leave the small ones alone, and I like rally race cars, so it seemed like a natural. Did the HID bulbs again with the blue bulb. The spacing is what they were on the sprue. Guess I'll nickname it Four Eyes.
-
Sure beats using a broomstick!
-
provided by Alex
-
GSL Common Kit: [revision] just another Model A Roadster
89AKurt replied to 89AKurt's topic in WIP: Model Cars
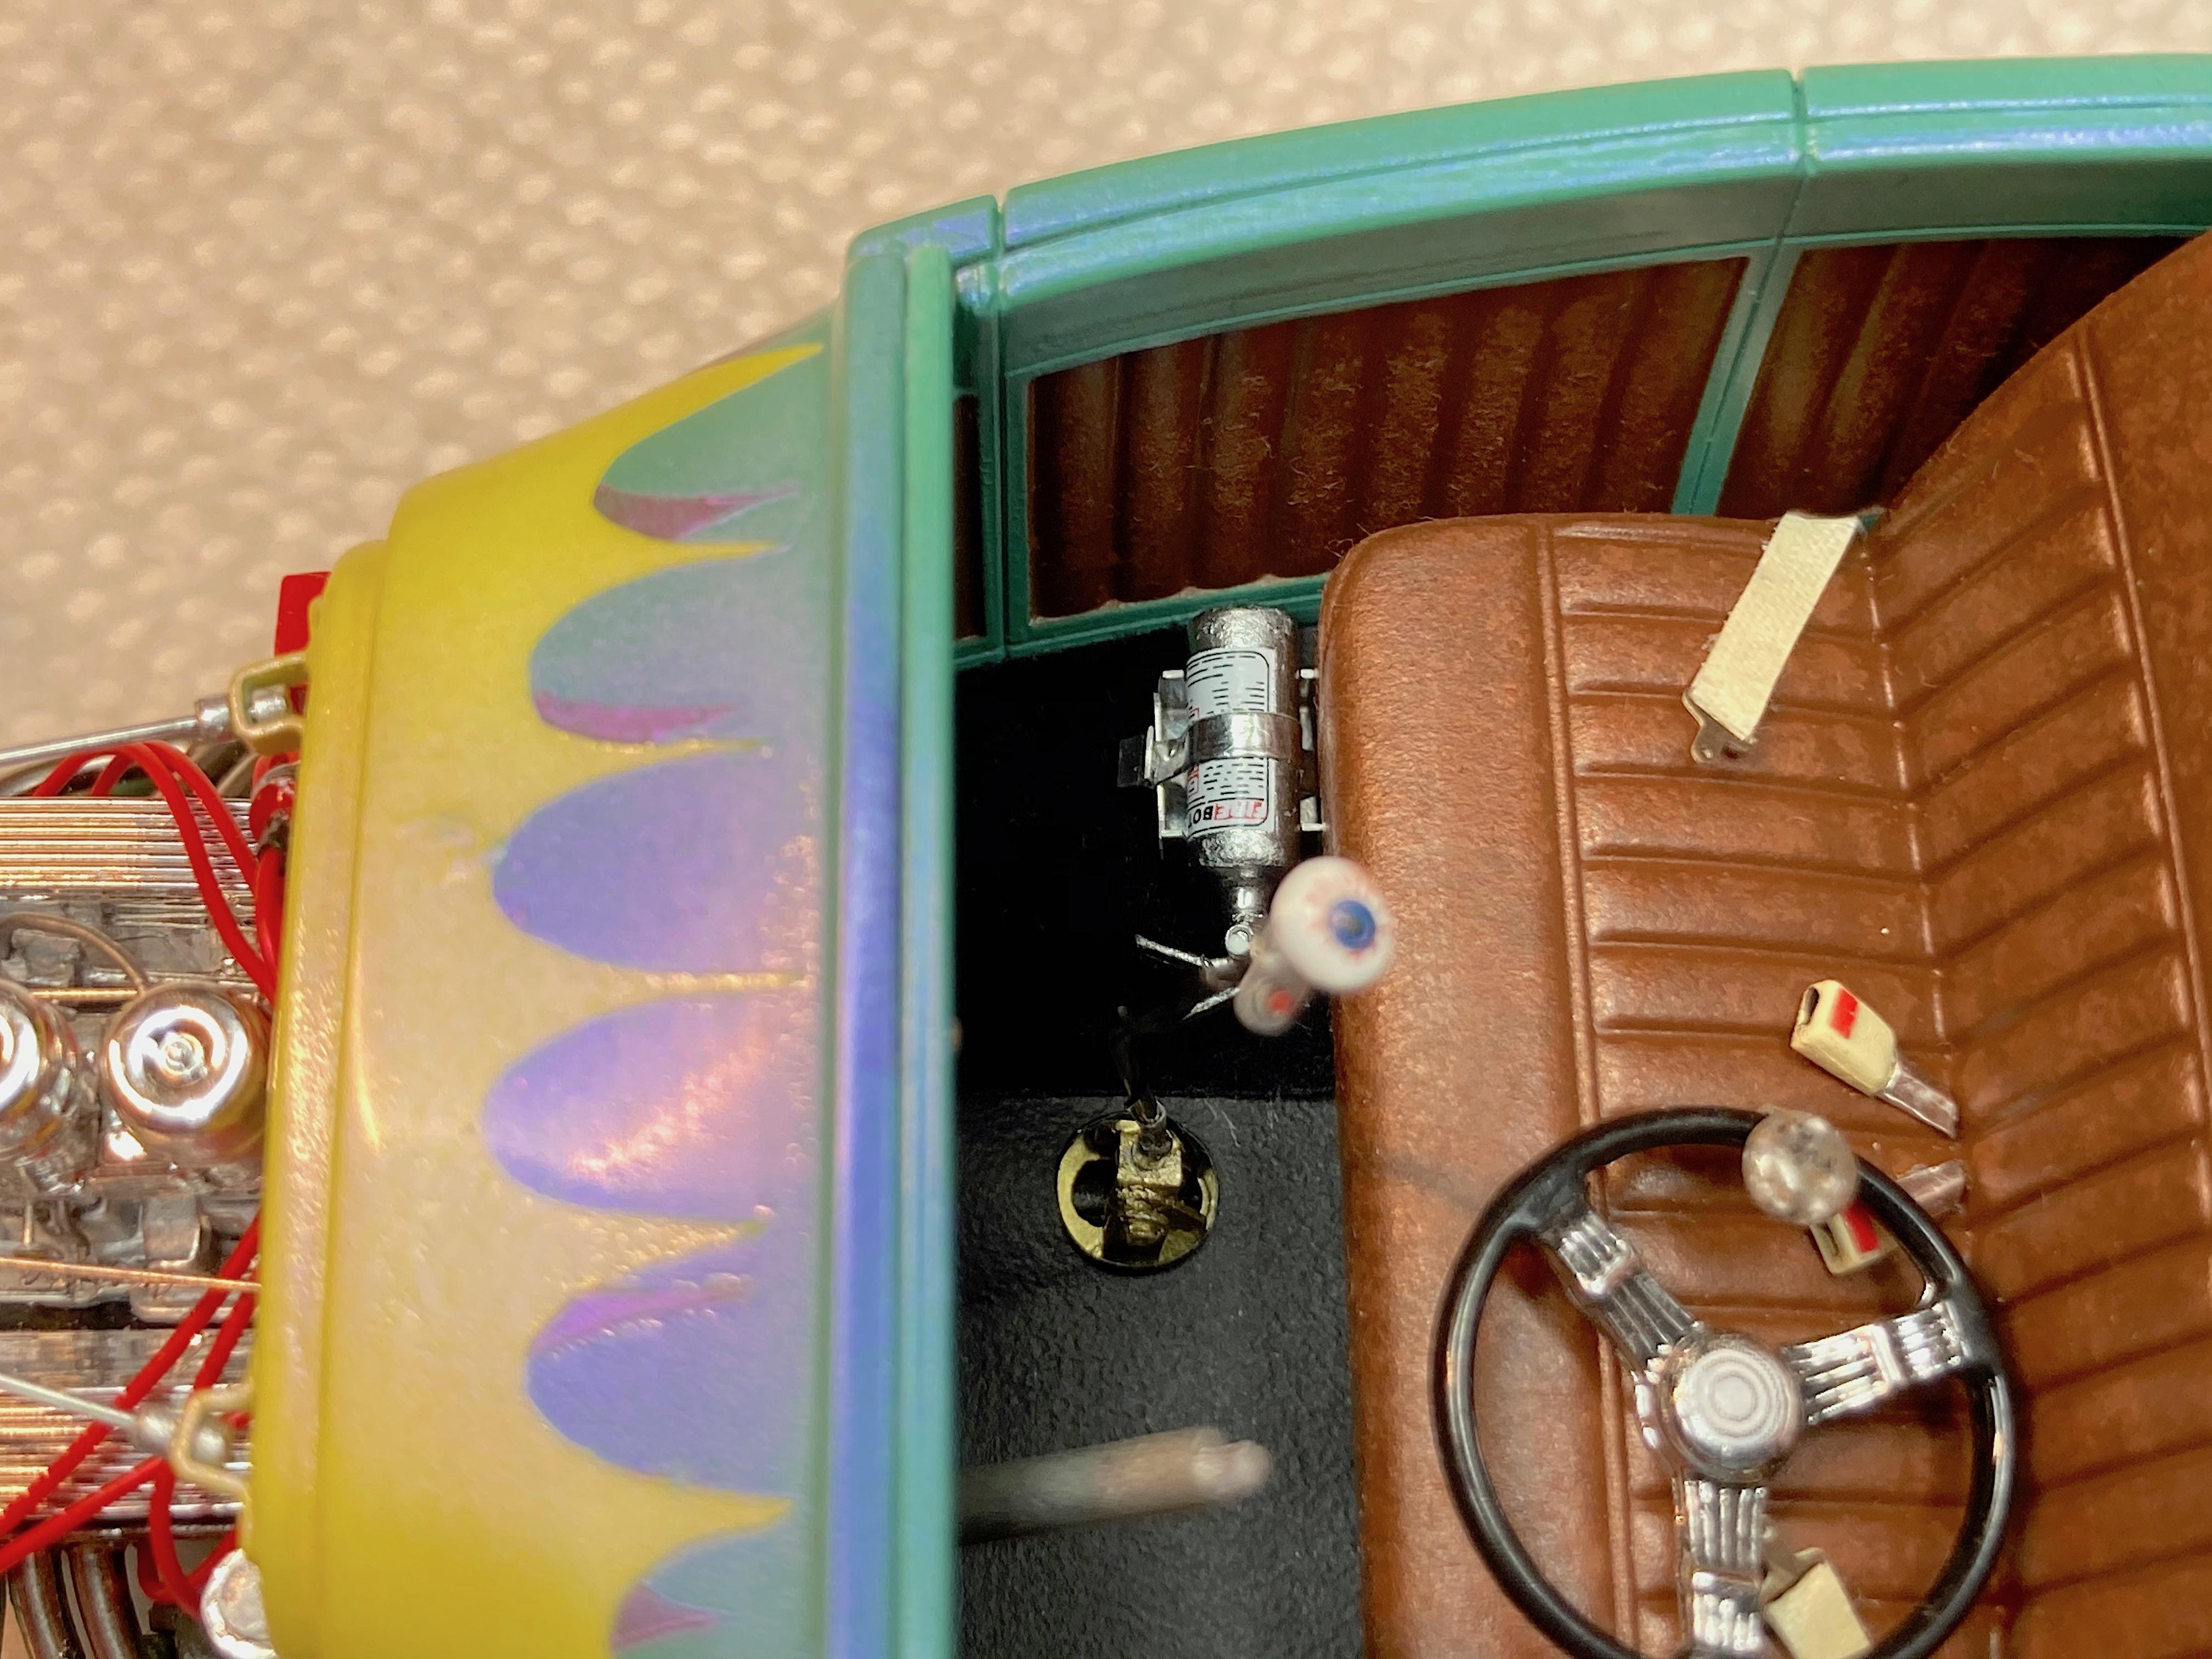
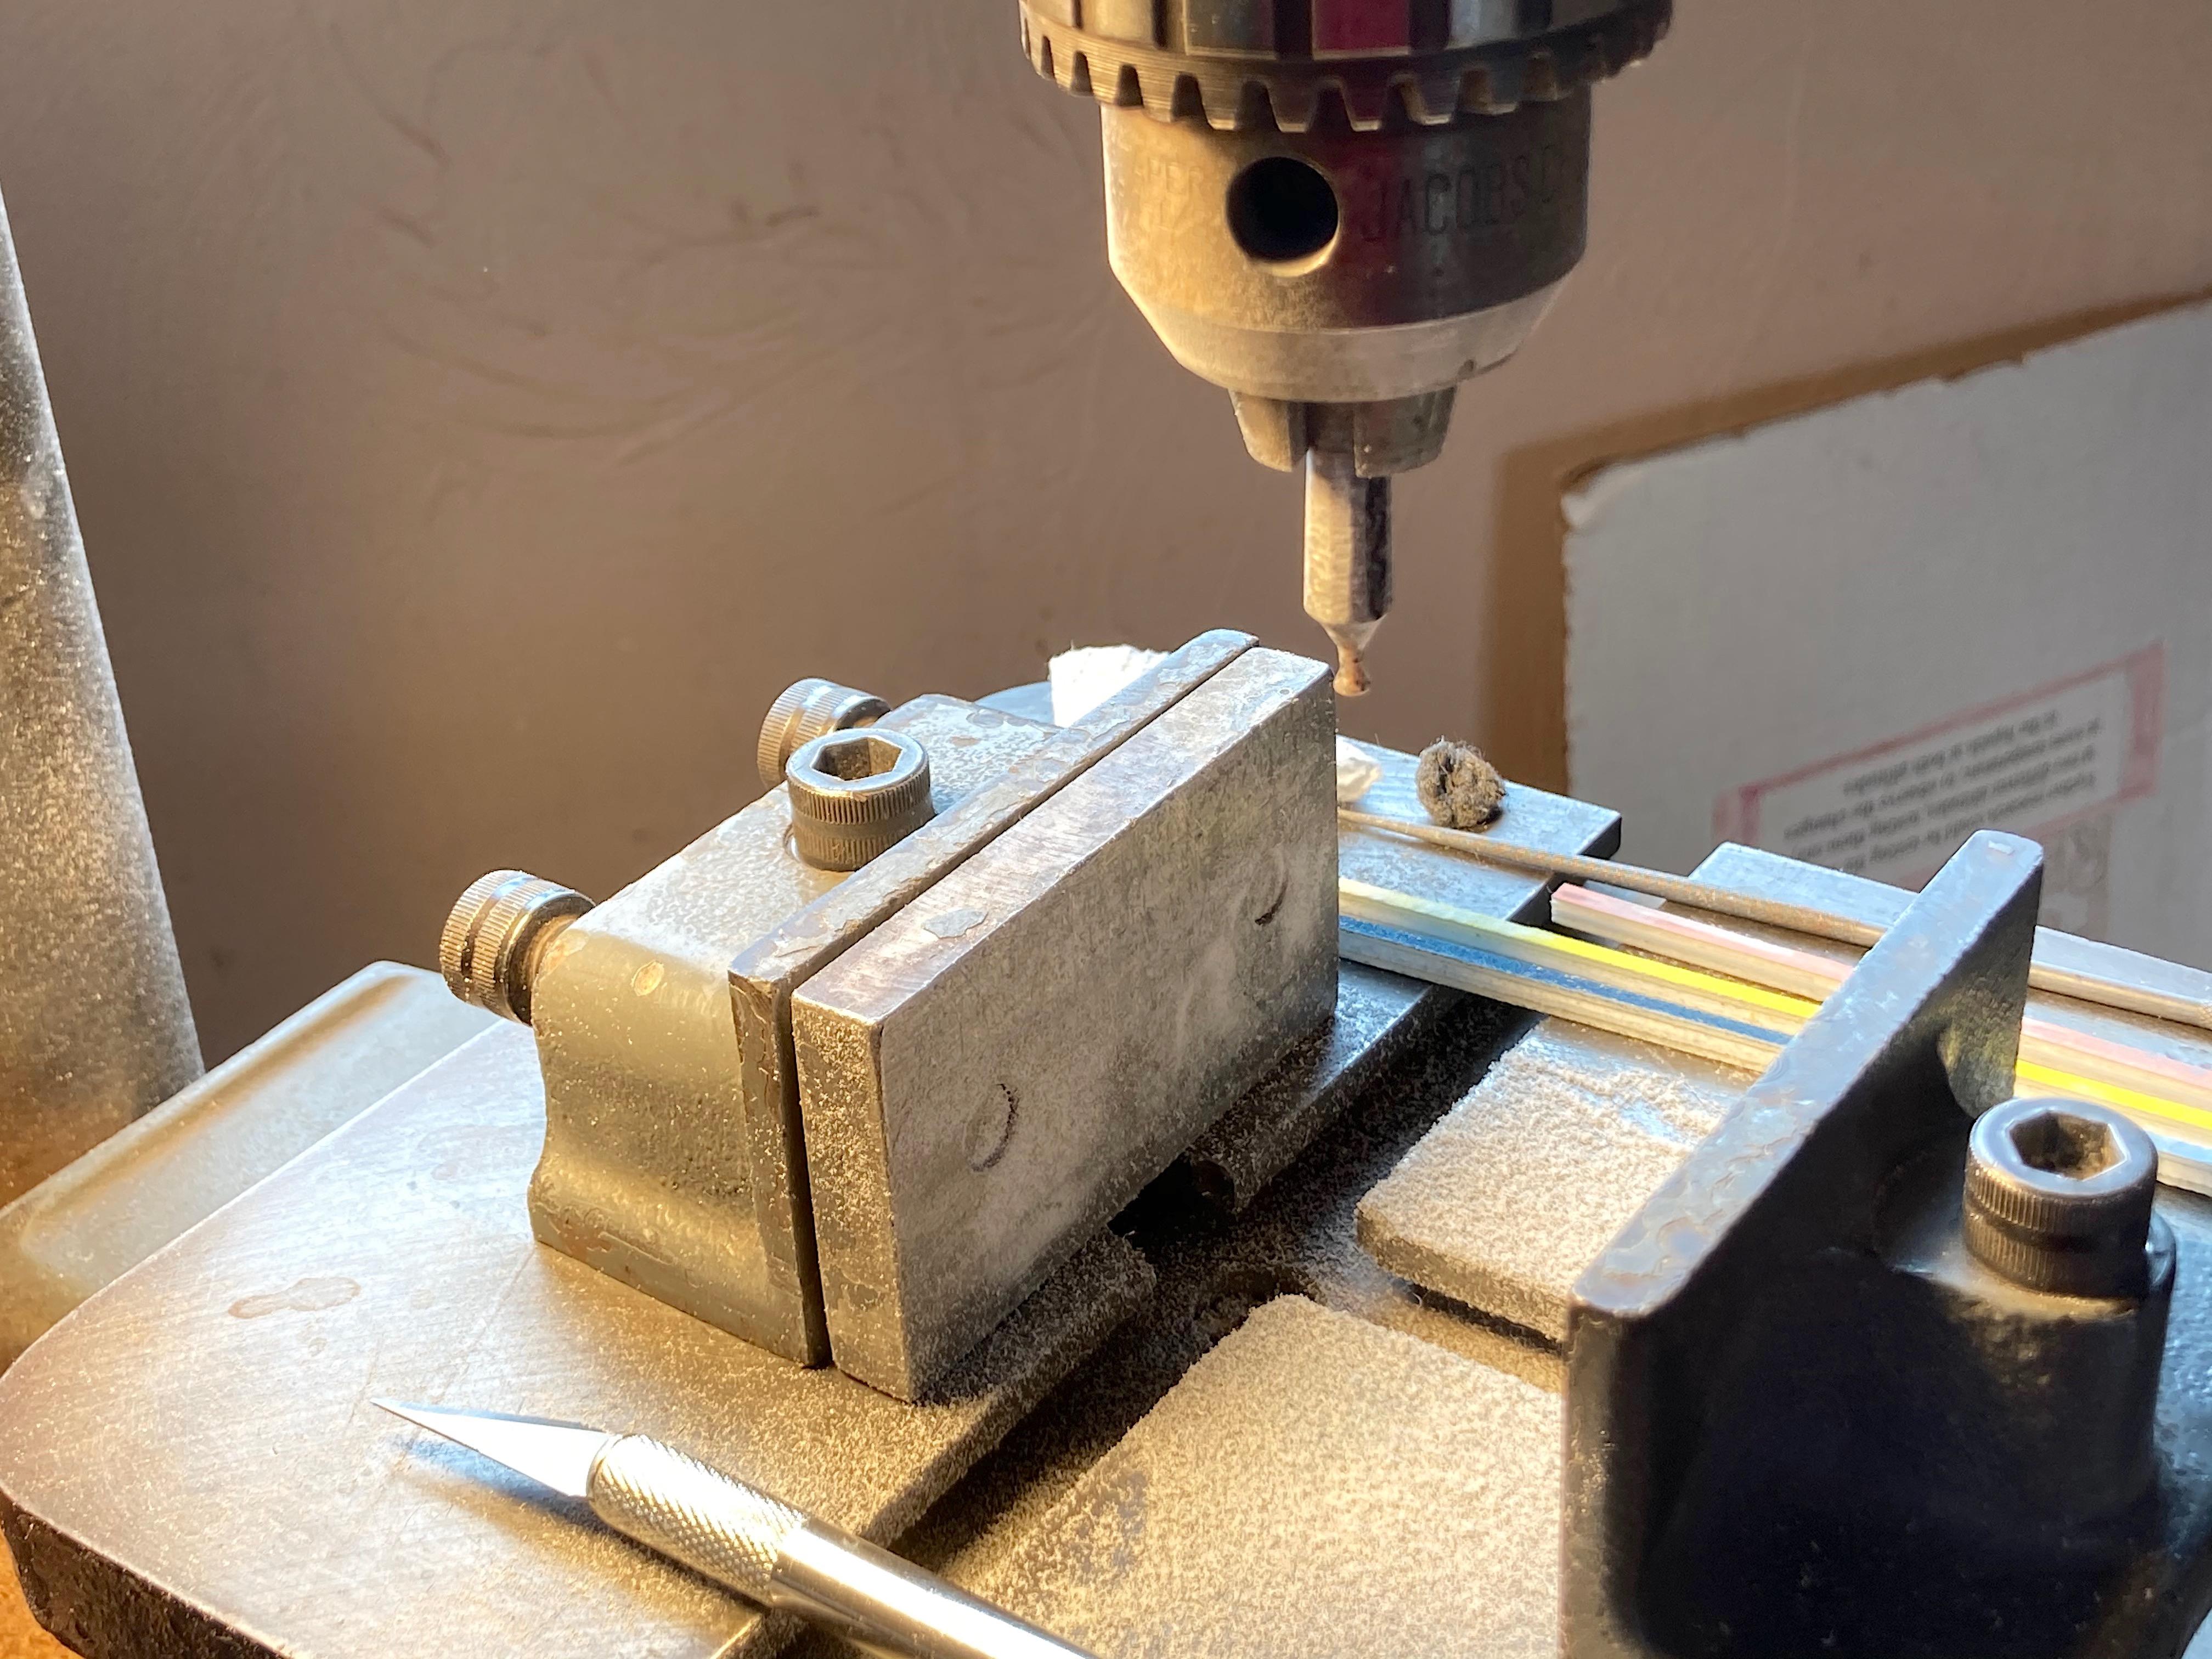
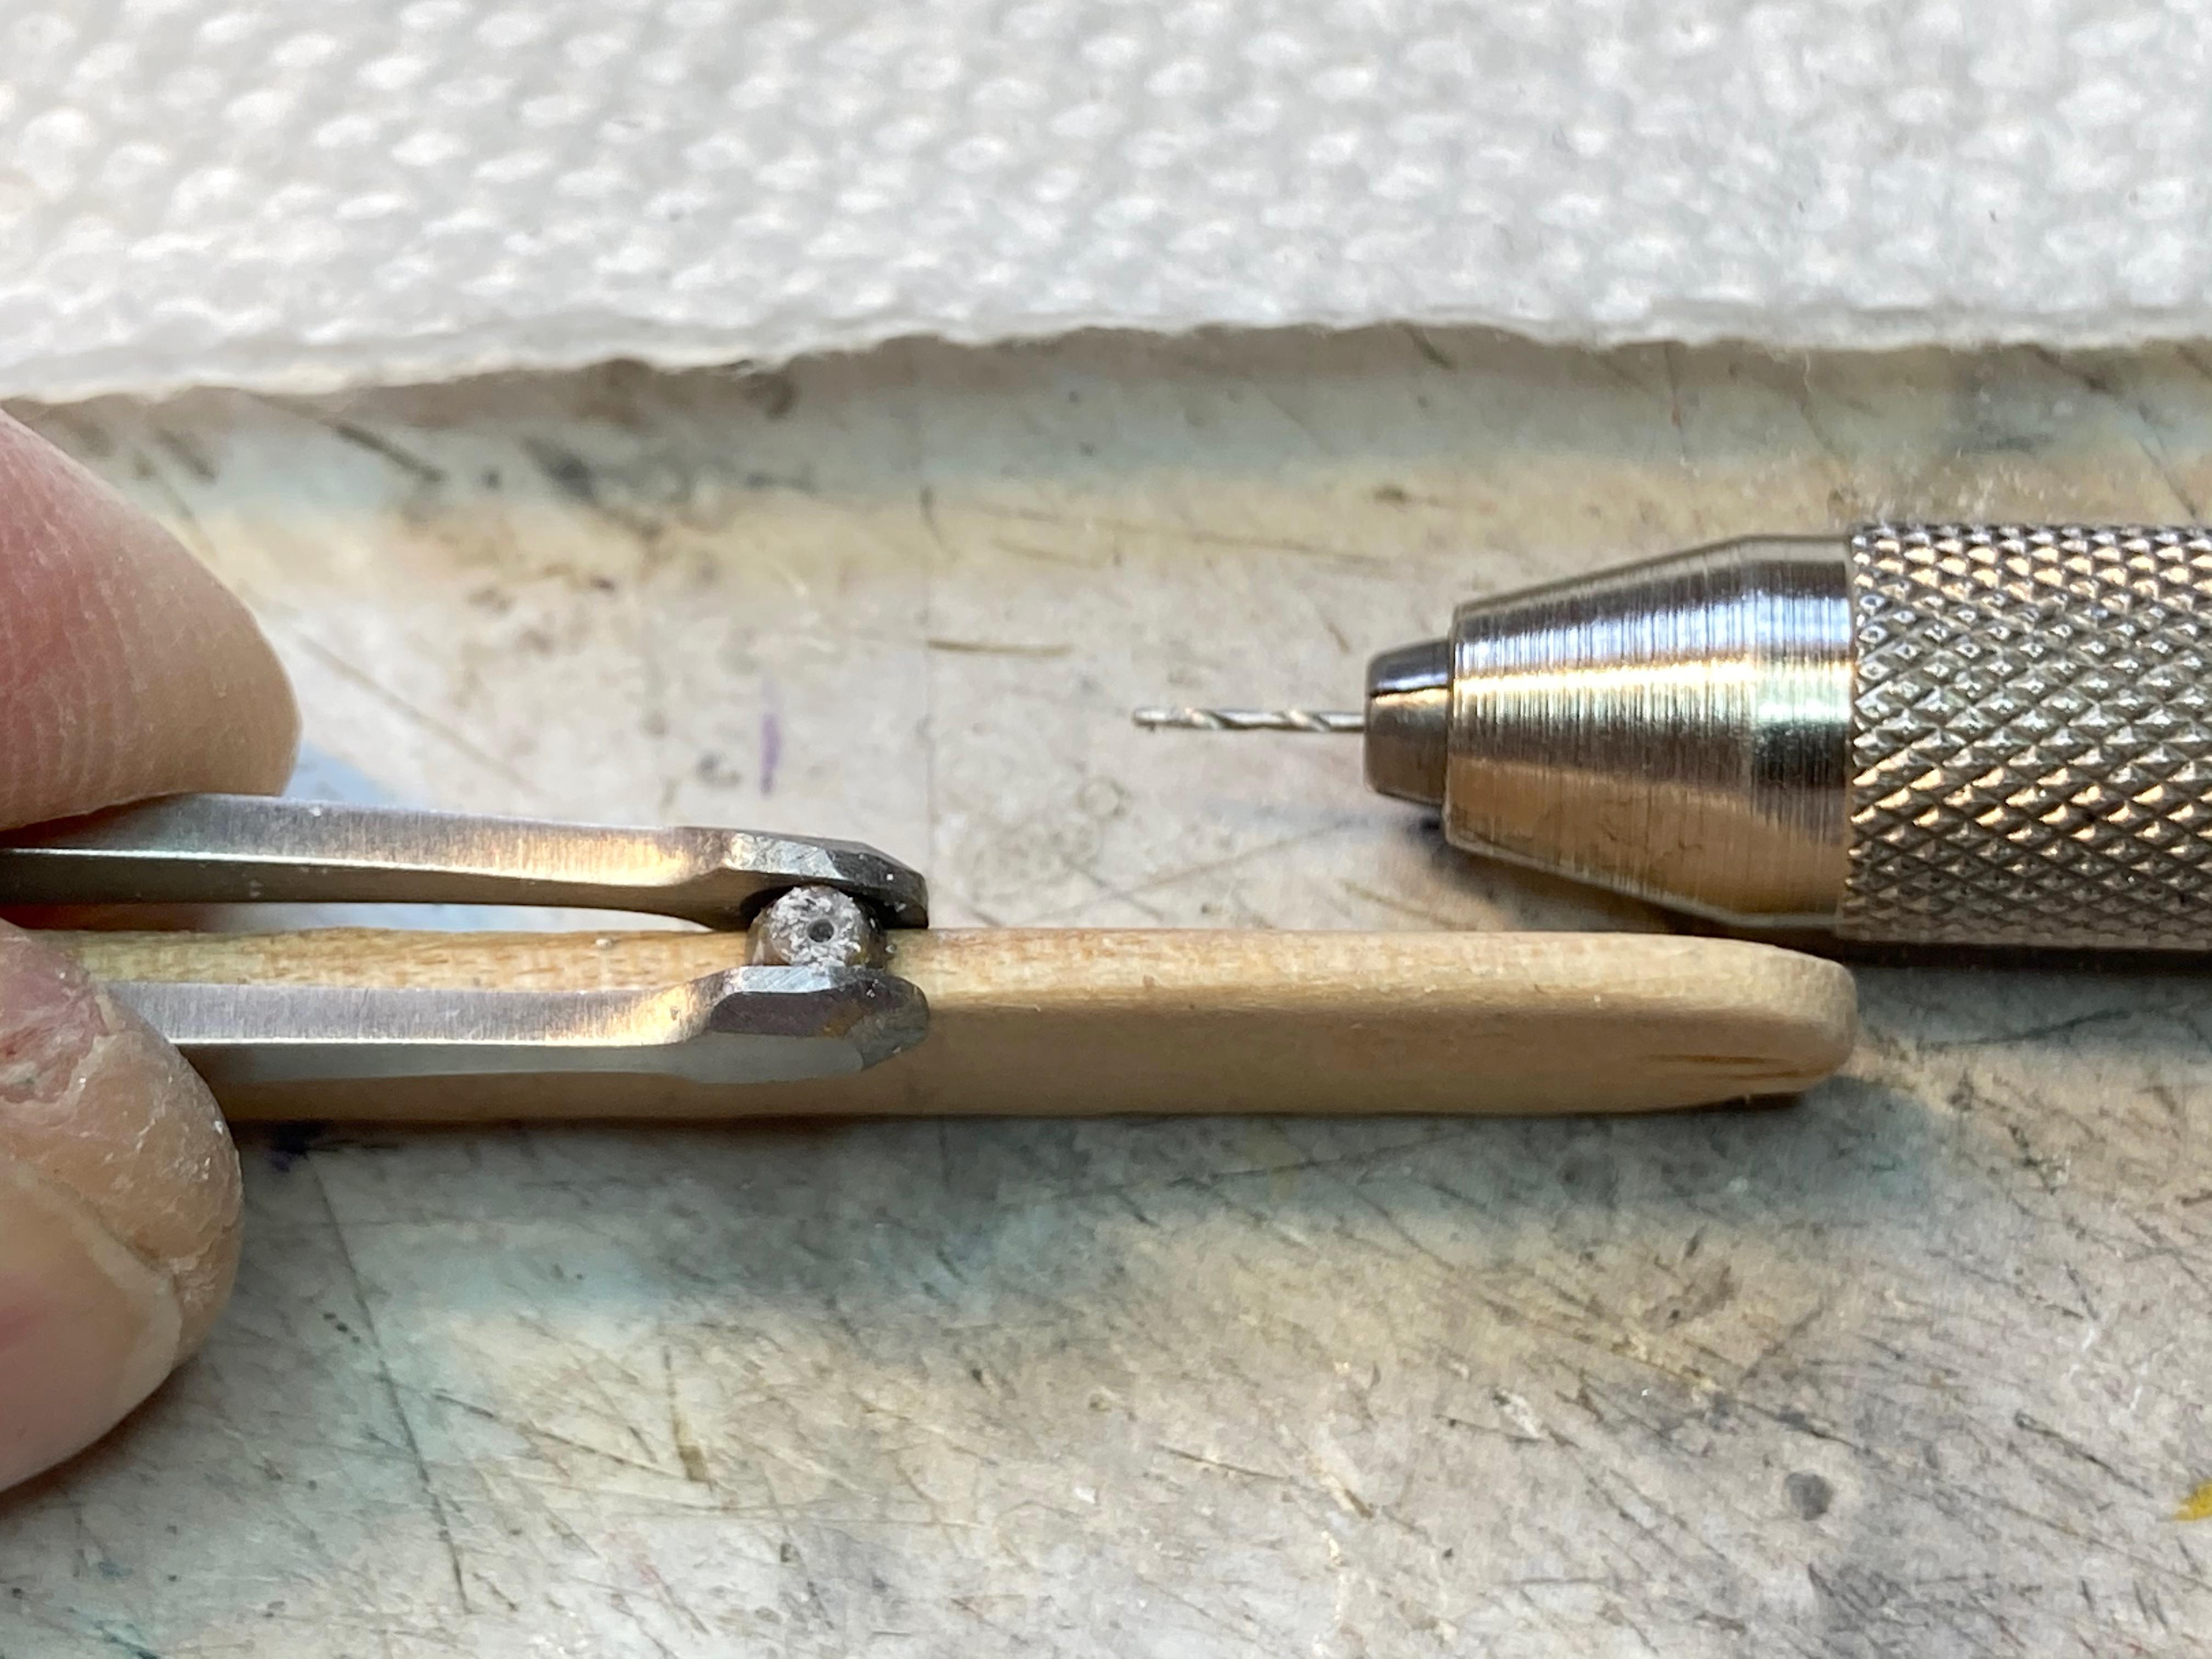
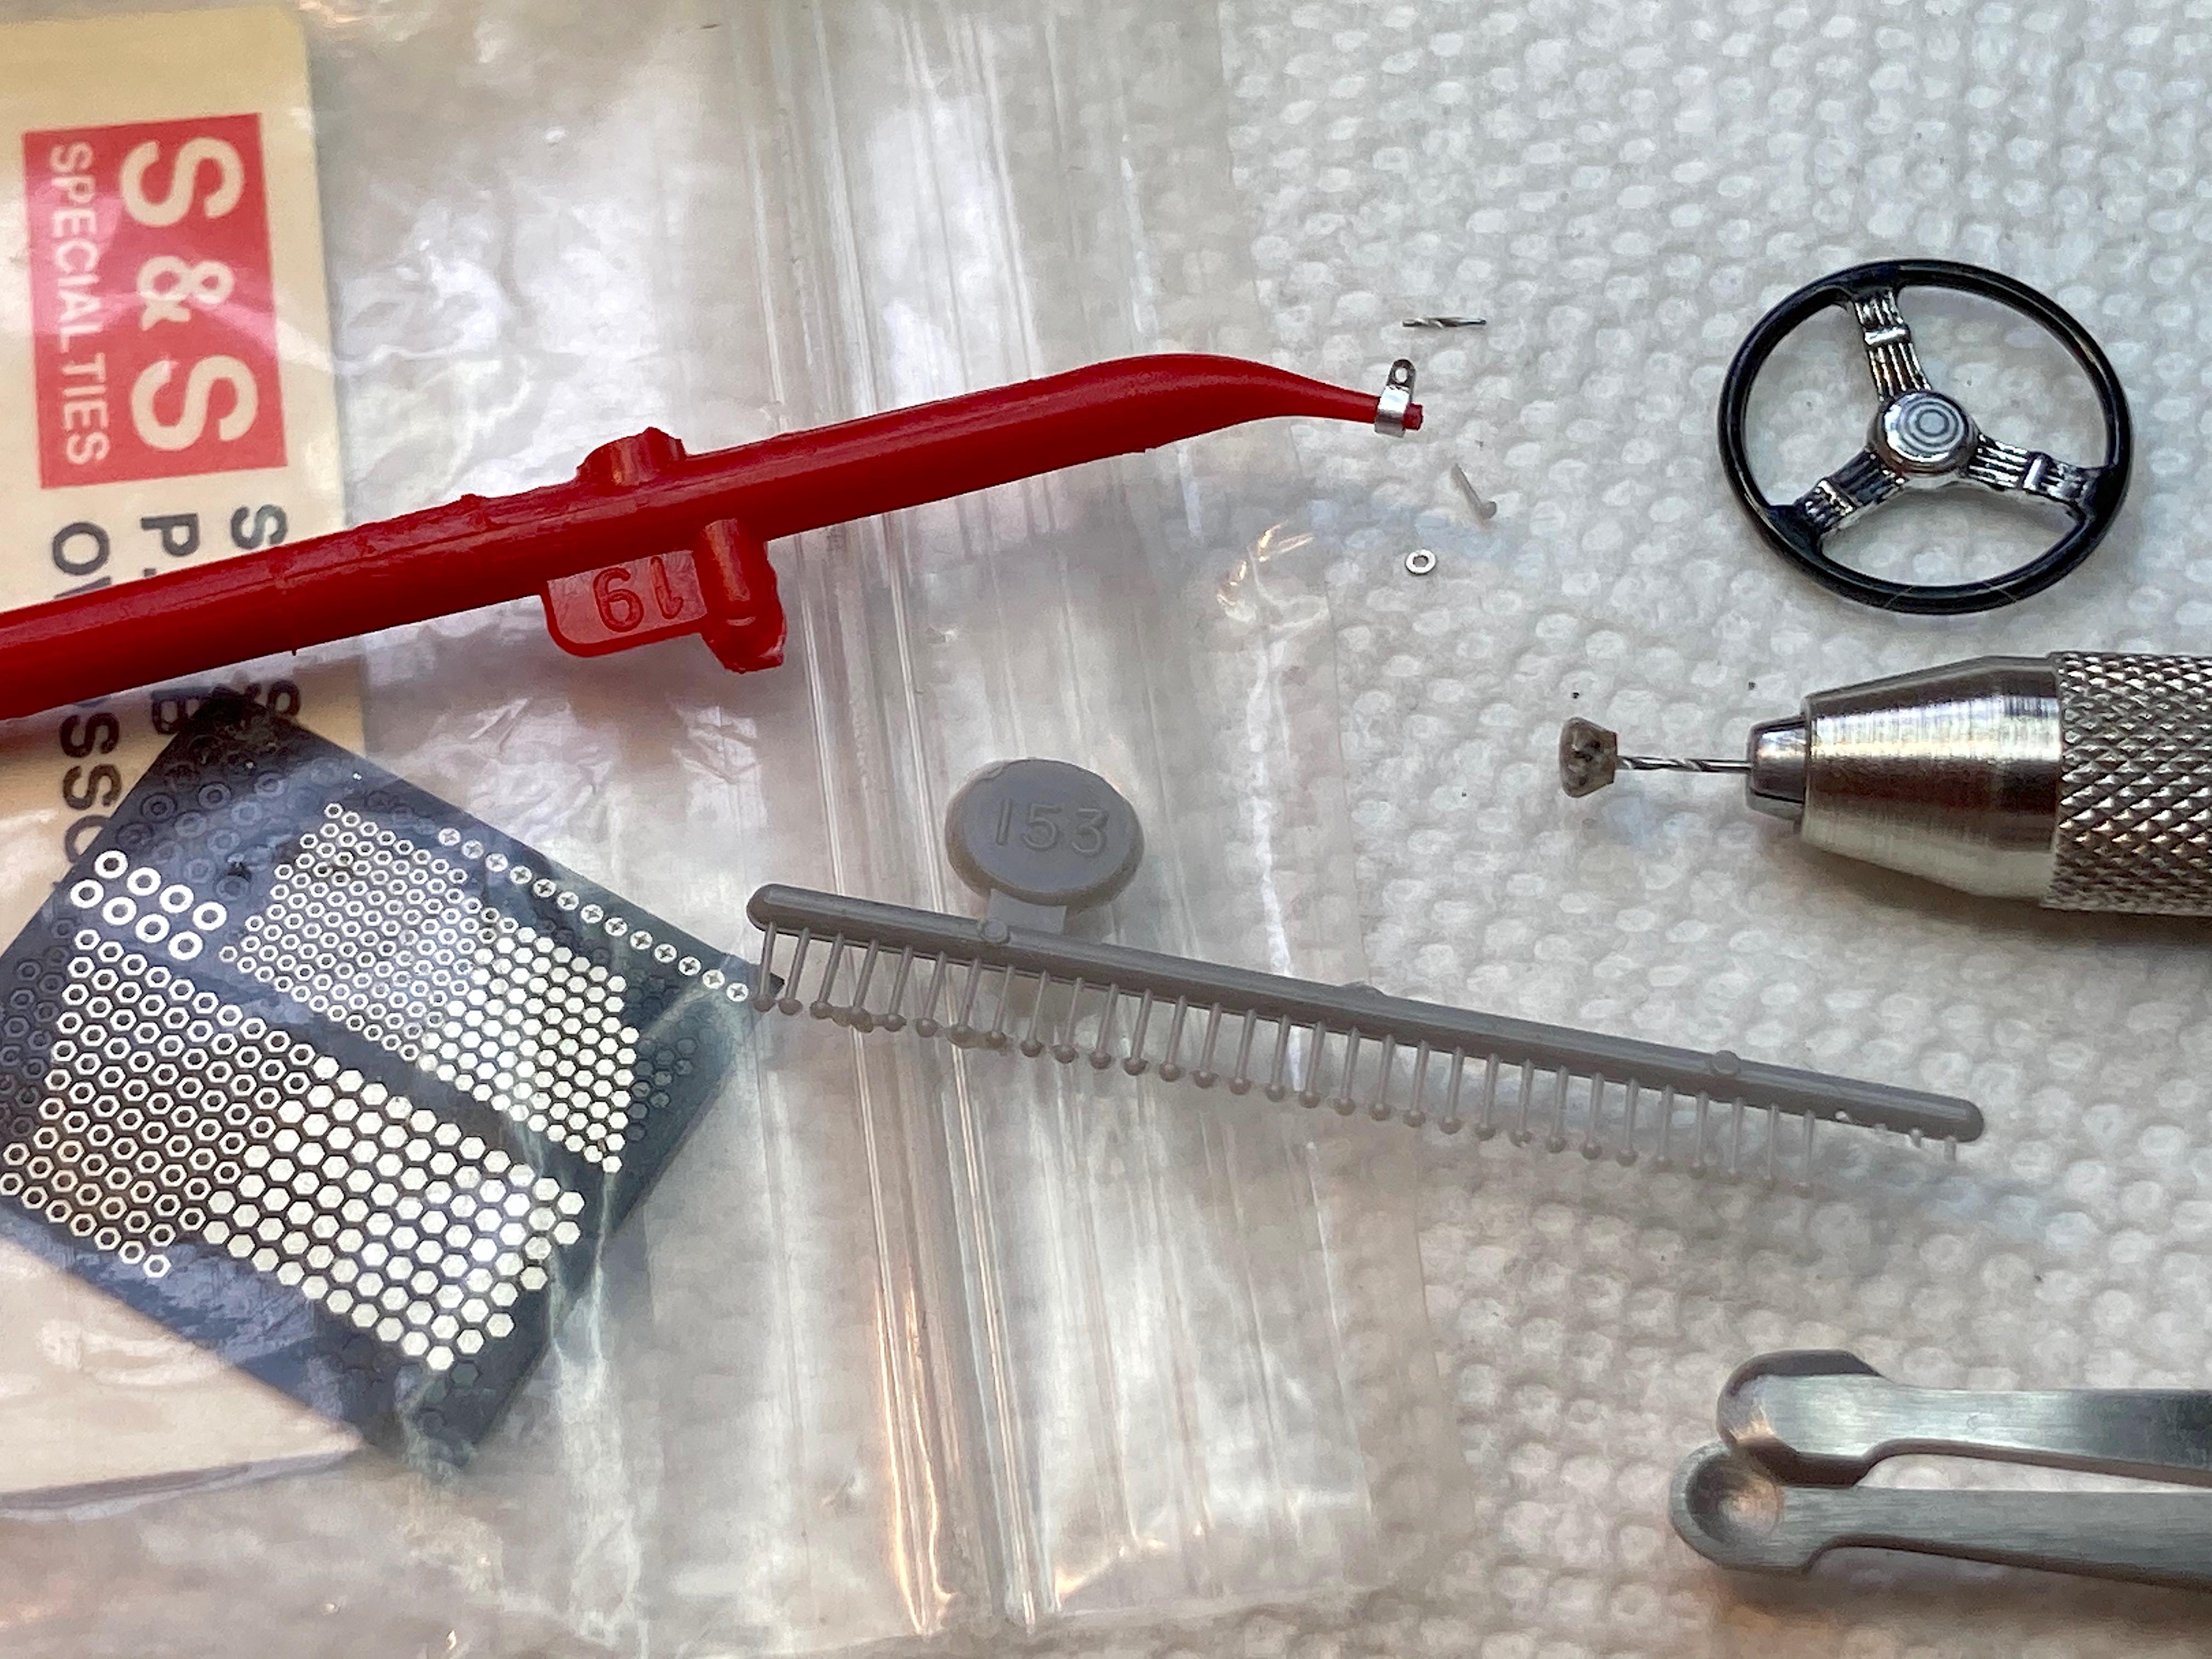
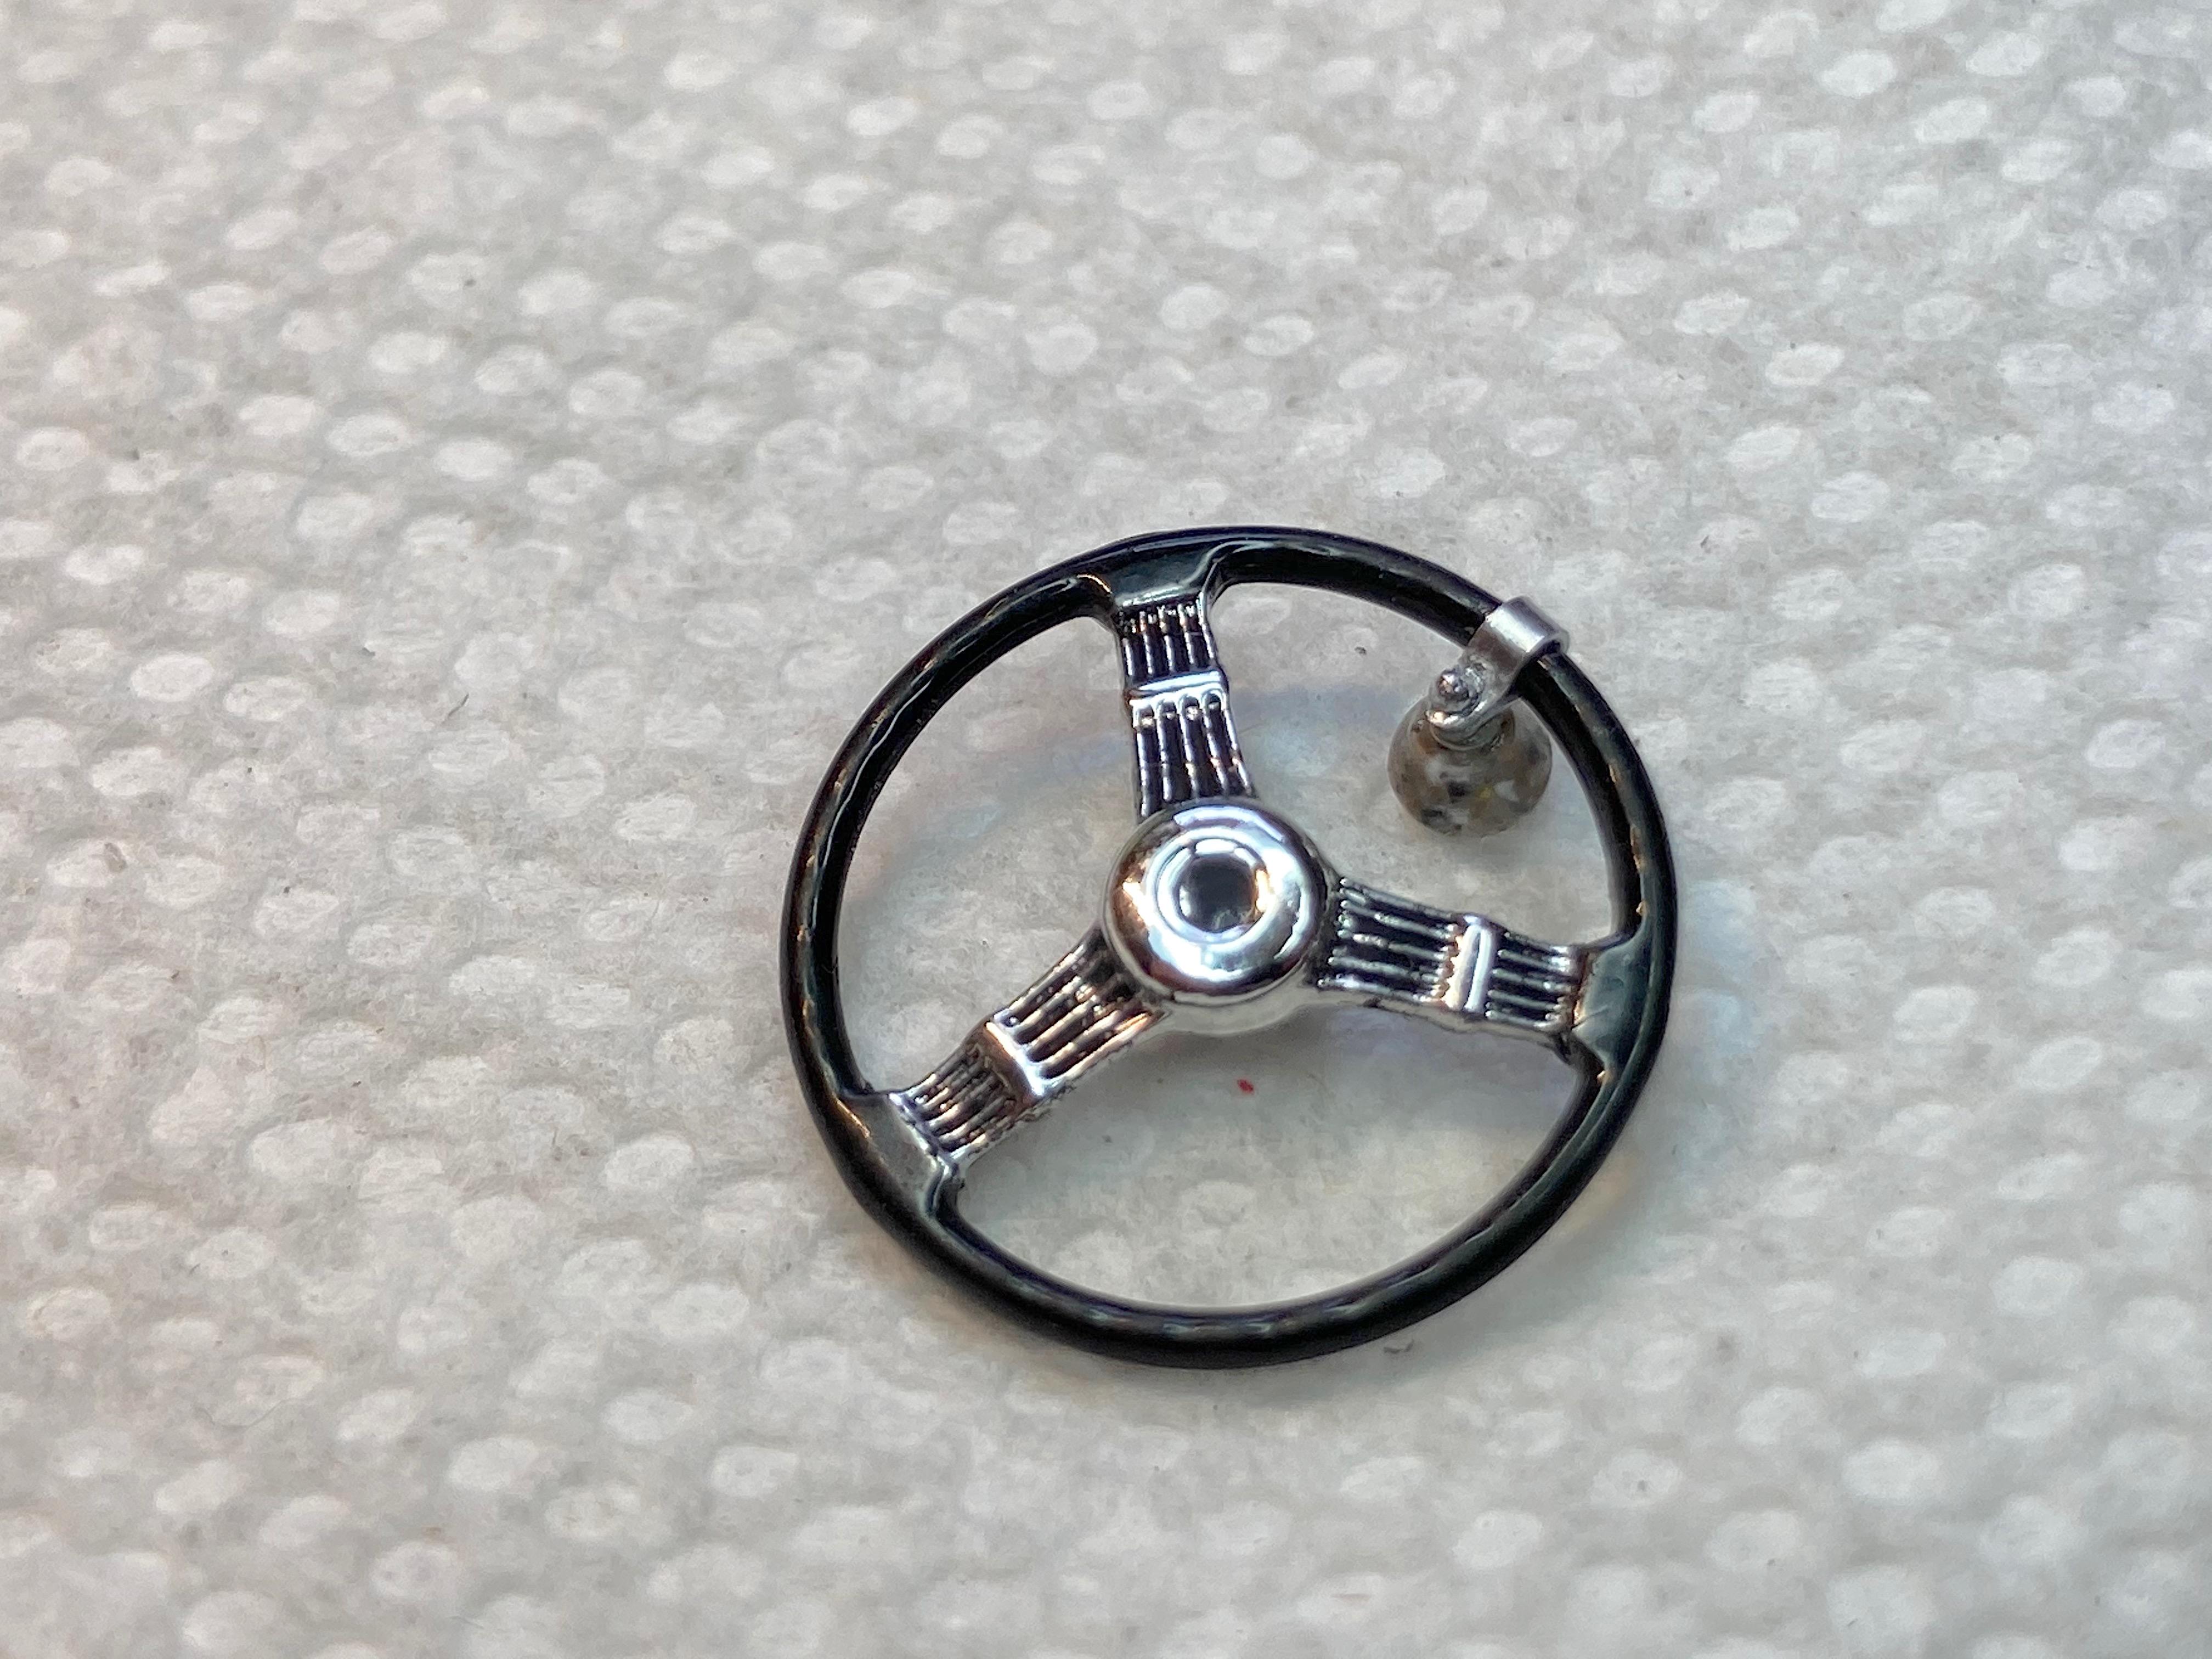
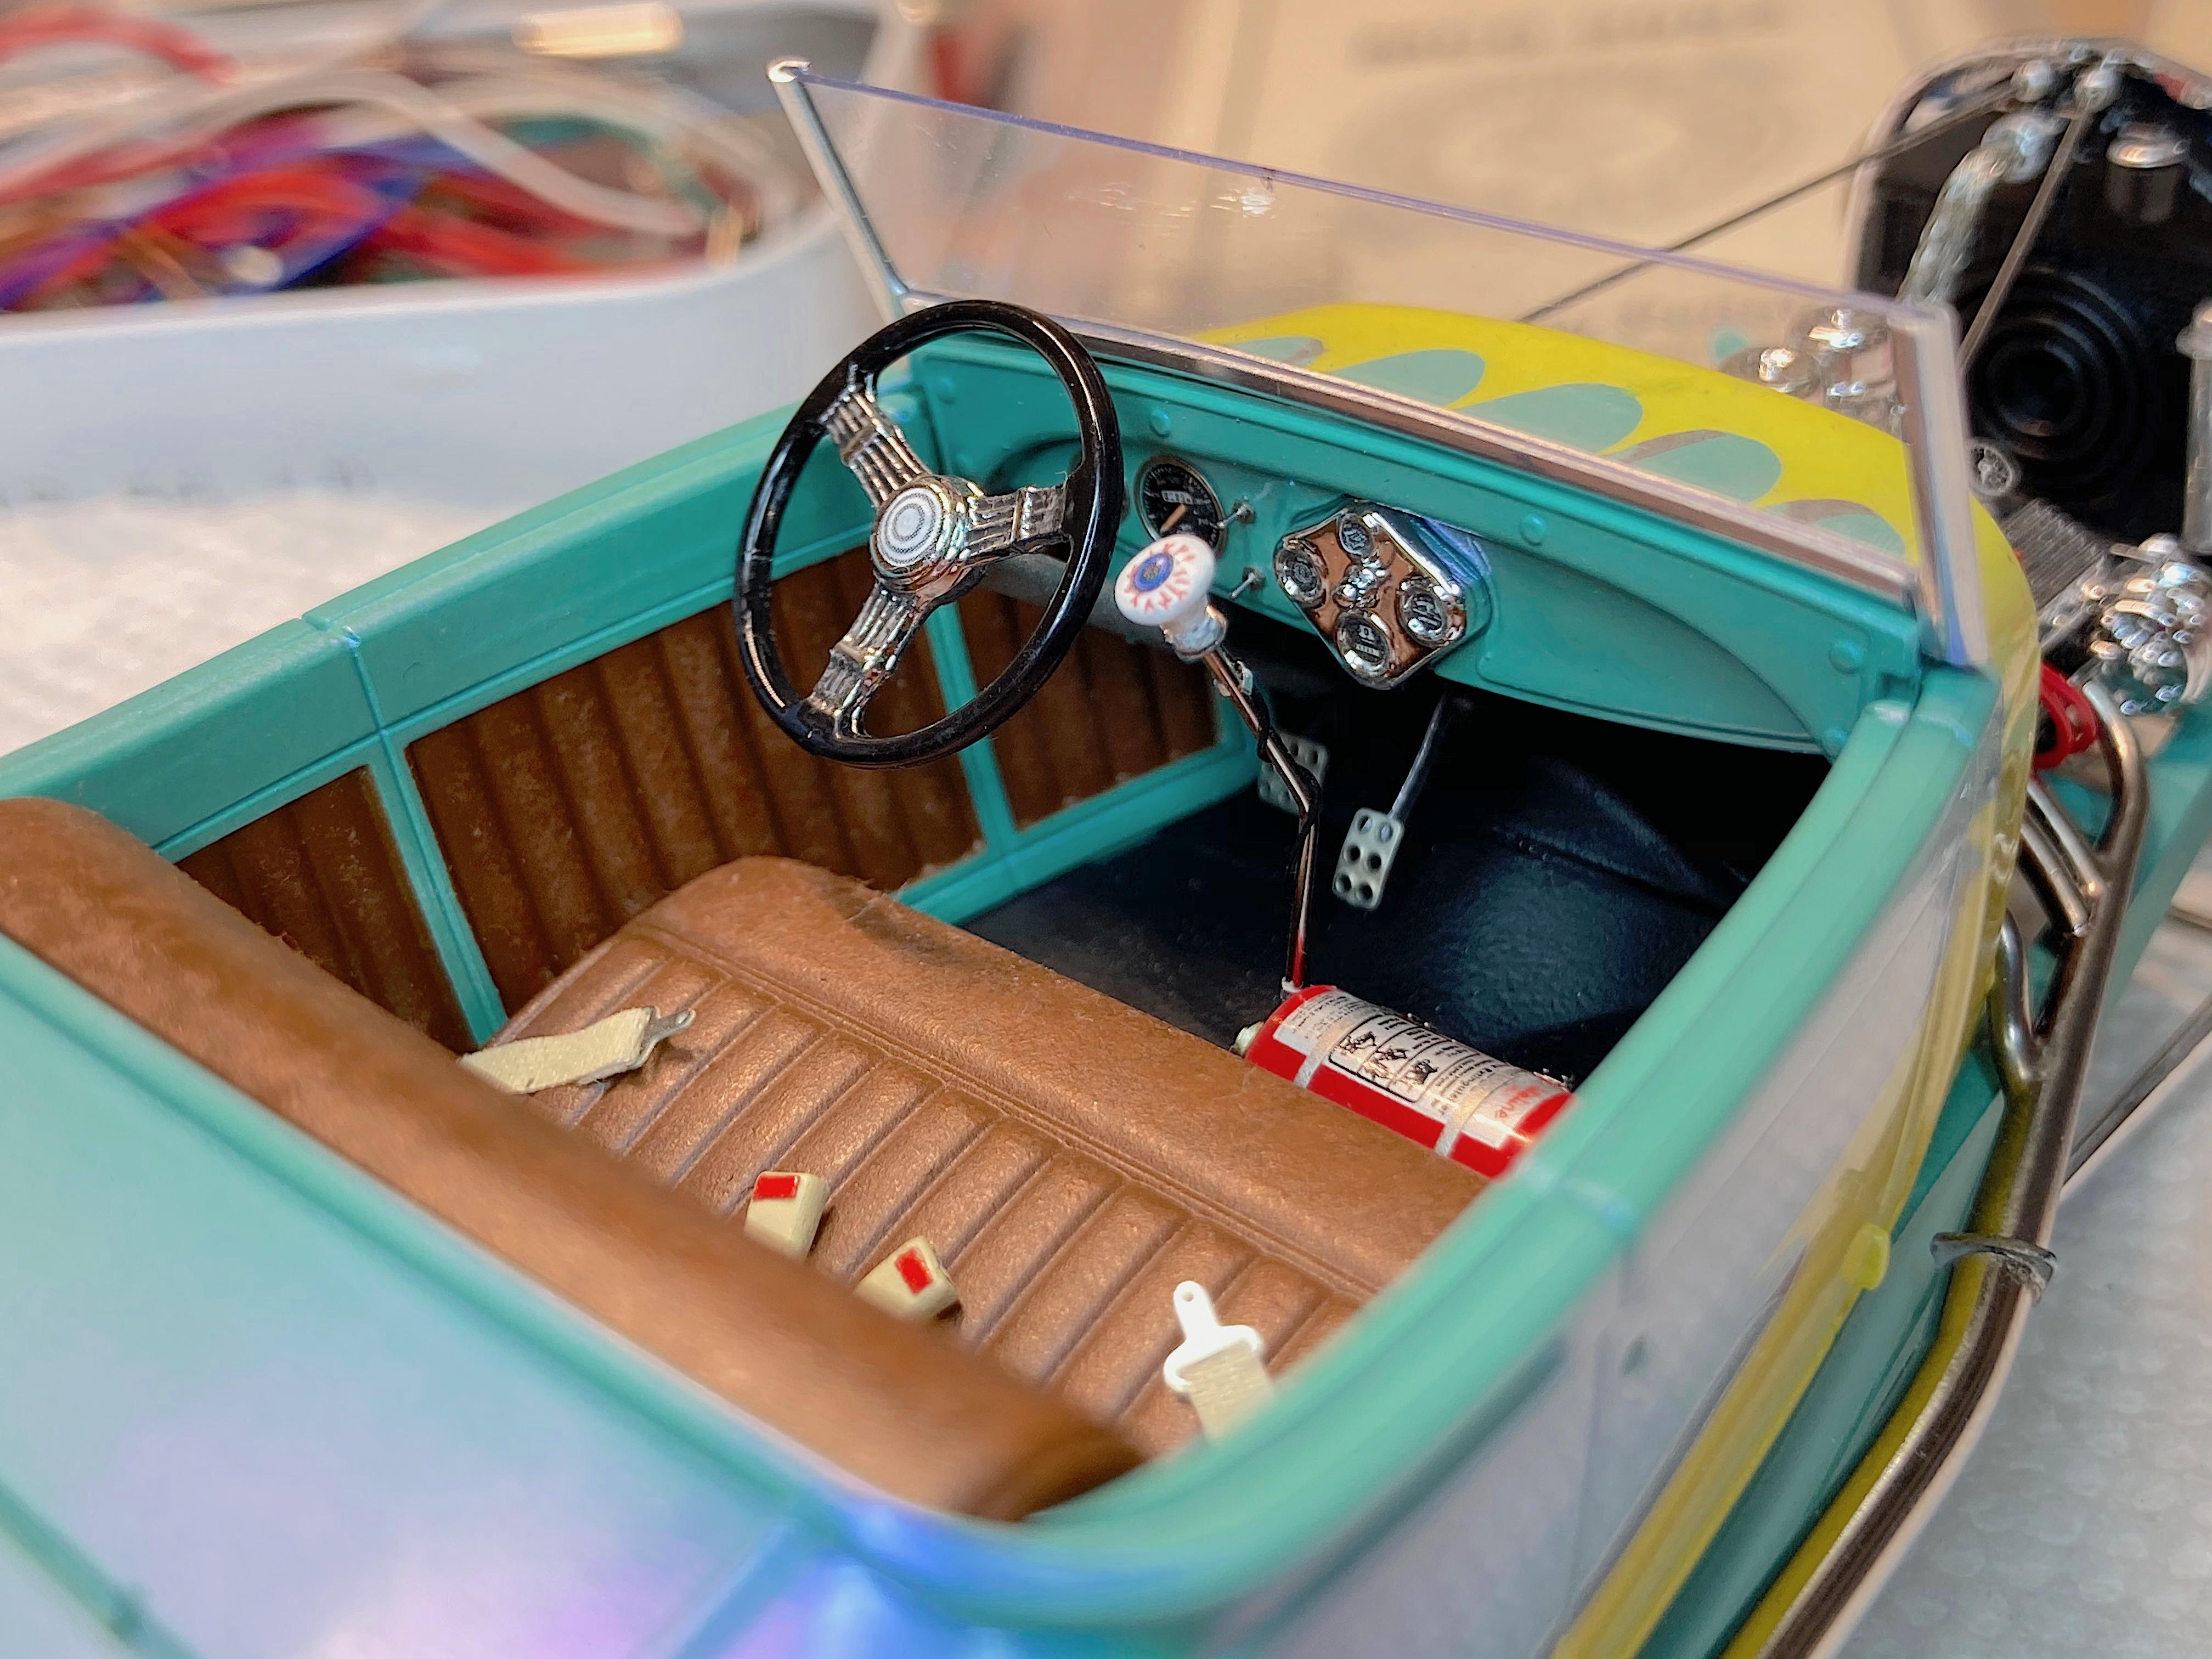
Thank you. ? Was wondering if anyone would notice that ant. ? I did after I took the picture, been seeing an occasional ant in the hobby room. Years ago I had a Carpenter ant (bigger black) infestation, moved a box and a bunch swarmed out, big time pest control job. Thought of another item, which was popular back in the day, and I never see anyone add this detail. They are called suicide knob, necker knob, or spinner knob. There was a large selection, so I figured nobody would say 'they never made one that looked like that.' Had some Corian® (or another brand, same kitchen countertop material) that had tiny grains that looks to scale. Used the drill press, Dremel with a steel bit (should have included in the picture), file, sanding sticks, steel wool, and for this metal polish. Finally got to use the pearl tweezers that I got last year from MicroMark. Super dicey to hold with fingers and use a drill (been there done that). ? My favorite thing to use, aluminum plate formed around the stretched sprue, drilled a hole for the Grandt Line rivet. Broke a drill on this one. ? Didn't need to glue onto the rim. Molotov pen used on the rivet. Didn't dare make it any smaller, happens to match the gear shift knob. Since Russell Cook pointed out how stupid that giant fire extinguisher looks.... Decided to rip that out. Turned a new bottle using the same Corian®, based on dimensions found online. Painted with the AK Interactive chrome which I'm really digging. Will hide the removed glue with self-adhesive black carpet. Have one pin left over, and another decal for the bottle.
-
IRS agents swarmed
-
GSL Common Kit: [revision] just another Model A Roadster
89AKurt replied to 89AKurt's topic in WIP: Model Cars
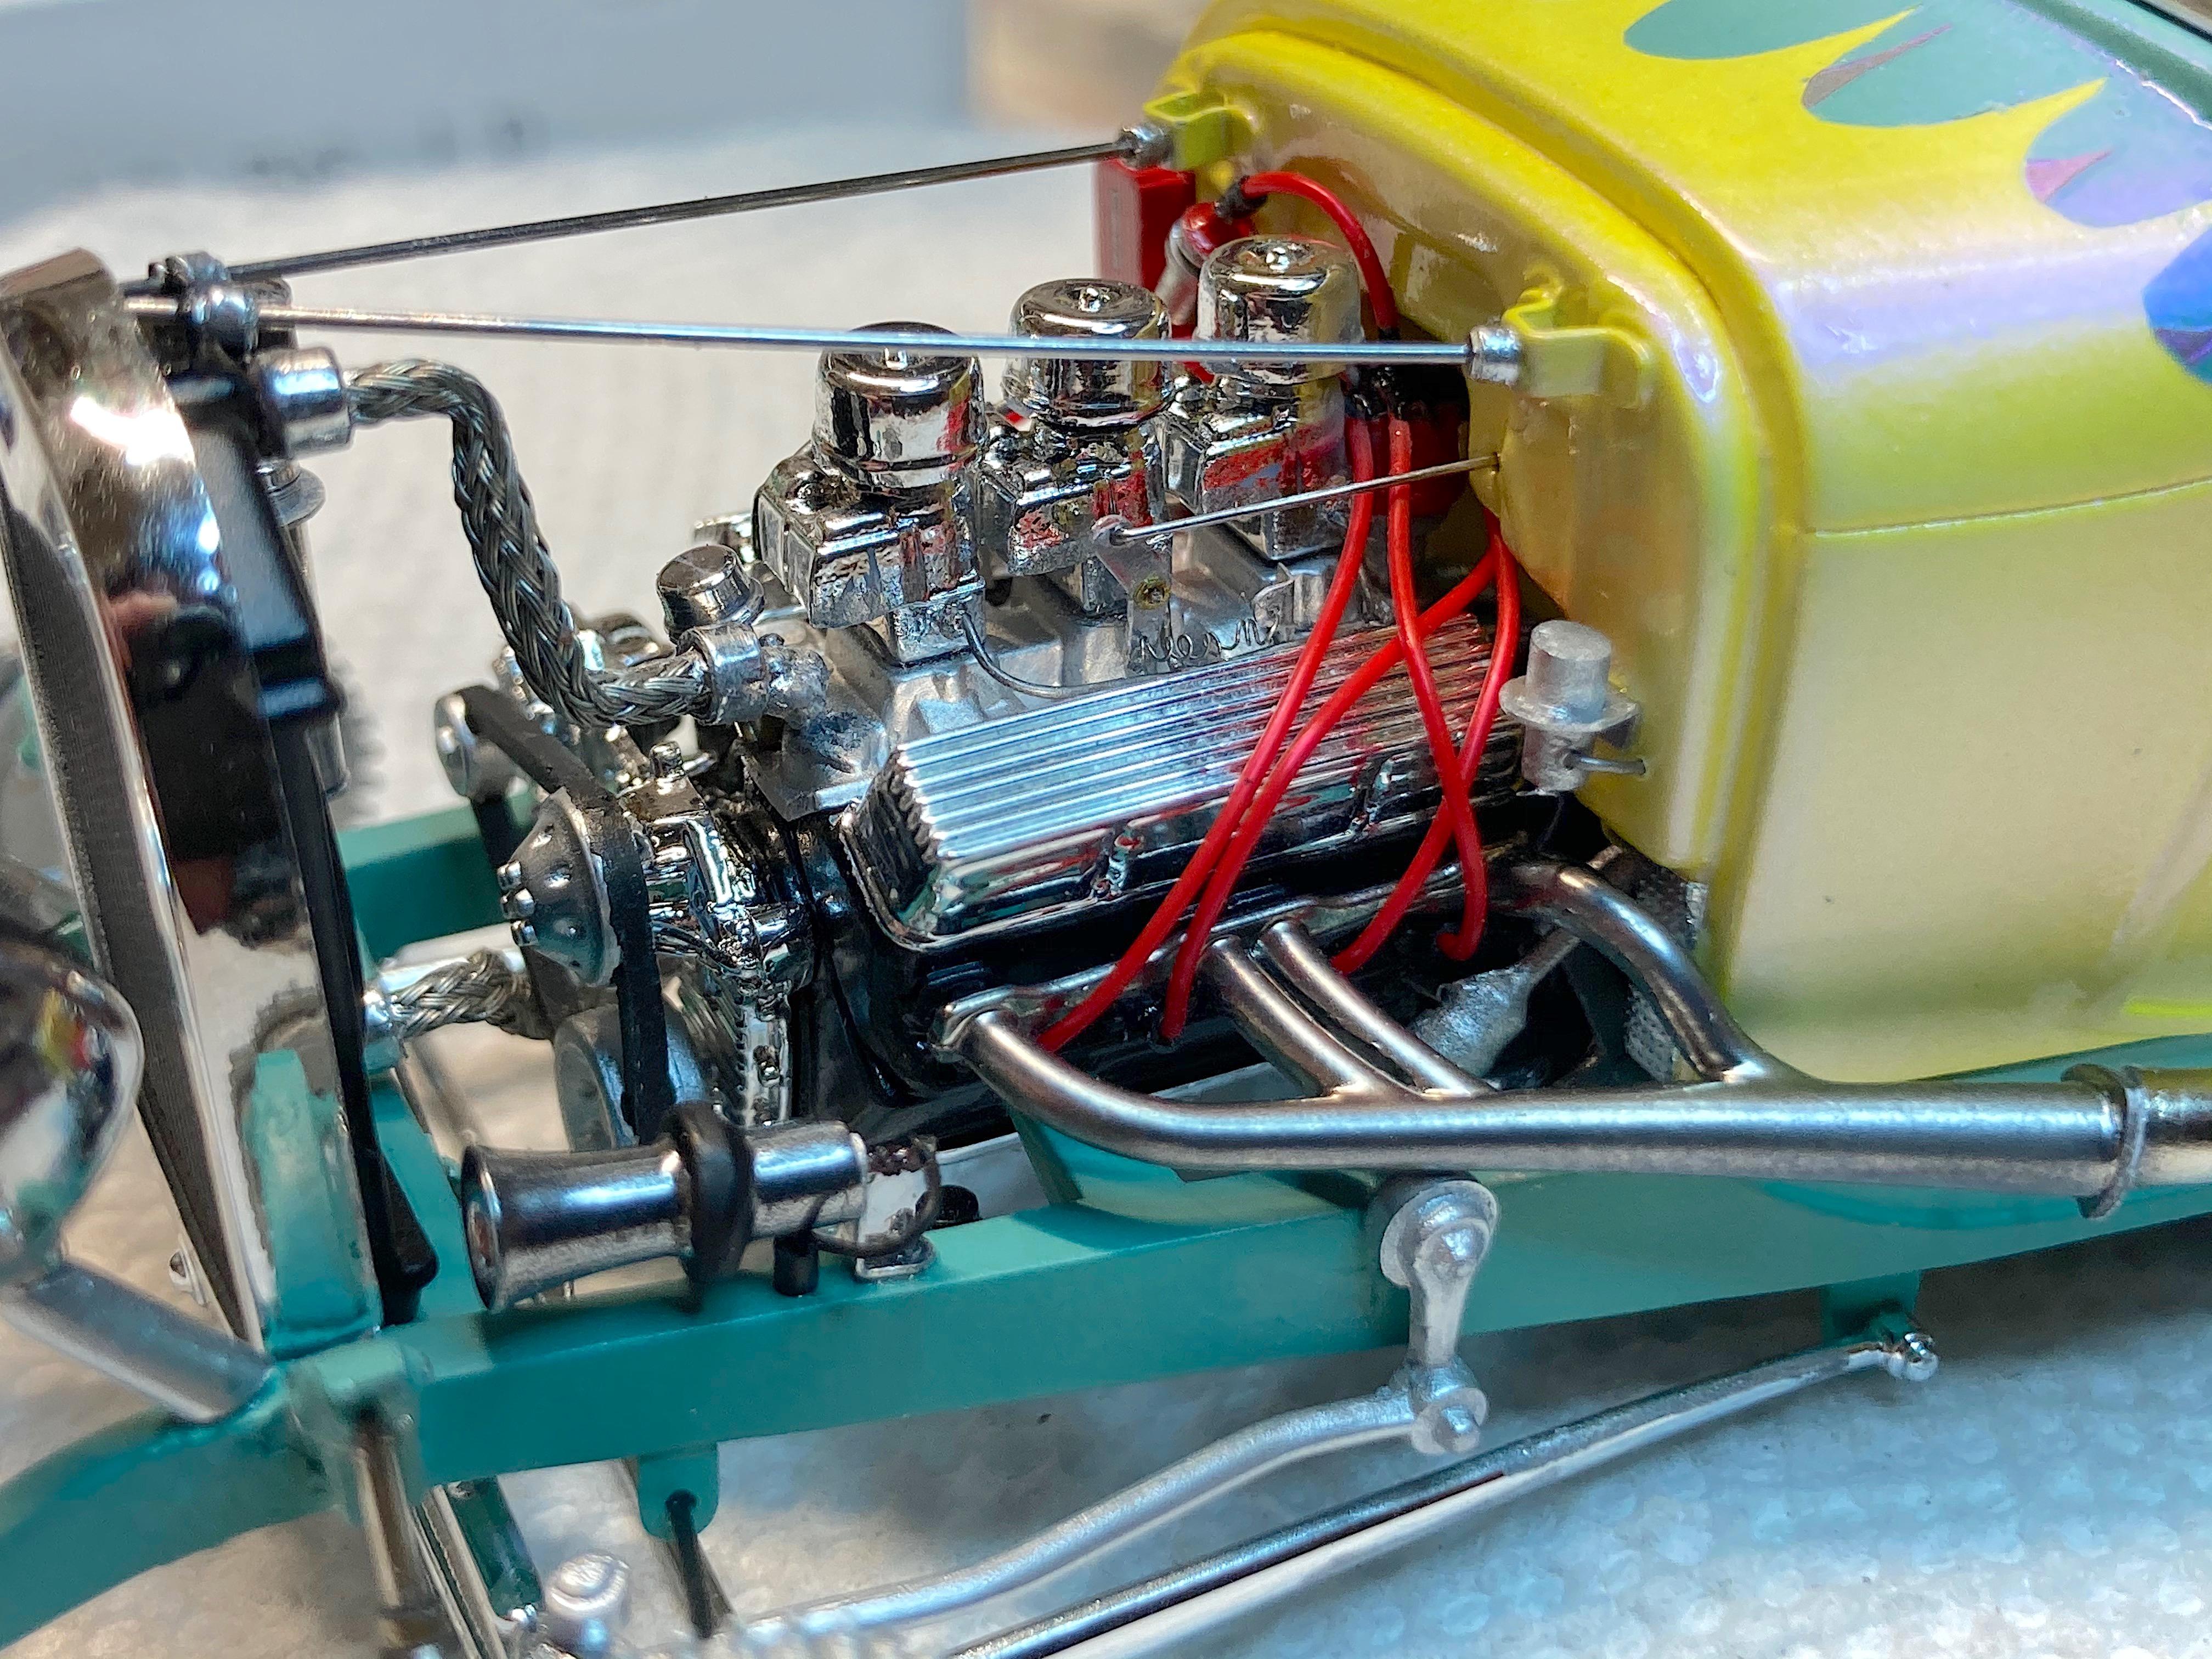
Finished the fuel system. First time I ever ran a fuel line from tank to carbs. Made a billet fuel filter from 2 sizes of stainless steel tubing. The first time I threaded the solder wire, I mauled it so bad that I redid it. Used brass photo-etch nuts. I'm bummed that my hinge latch isn't working as well as before assembly, am having interference issues with the frame, nitrous bottle, and who else knows what. The detail parts used, includes a collection of wires scavenged from dead electronic devices. Looks okay from this distance. ? Redid the carb linkage lever, and added a spring, which looks like **** in this picture. Brace rods installed, used wire insulation, and p-e steel nuts. Glued the Model Car Garage photo-etch pedals in. The main reason I take pictures, is to see what I've done. Sometimes I'm half blind, even with using the light magnifying glass. I added cigarette package foil for insulation by the headers. I think the header pipes should have a gap from the body, everyone else who reads this before building, should watch out for that.
-
from Rodeo Drive
-
GSL Common Kit: [revision] just another Model A Roadster
89AKurt replied to 89AKurt's topic in WIP: Model Cars
It's my OCD, I'm in the possessed and obsessed mode (the only way I get a model done), and I keep thinking of something else to do. Debating about adding cup holders. ? Thanks for taking a look. ? -
glowing from radioactive