89AKurt
-
Posts
8,426 -
Joined
-
Last visited
Content Type
Profiles
Forums
Events
Gallery
Everything posted by 89AKurt
-

ONE bottle of PLEDGE in Prescott !
89AKurt replied to 1972coronet's topic in Tips, Tricks, and Tutorials
Had to see why my town was mentioned! ? -
of the draw
-
GSL Common Kit: [revision] just another Model A Roadster
89AKurt replied to 89AKurt's topic in WIP: Model Cars
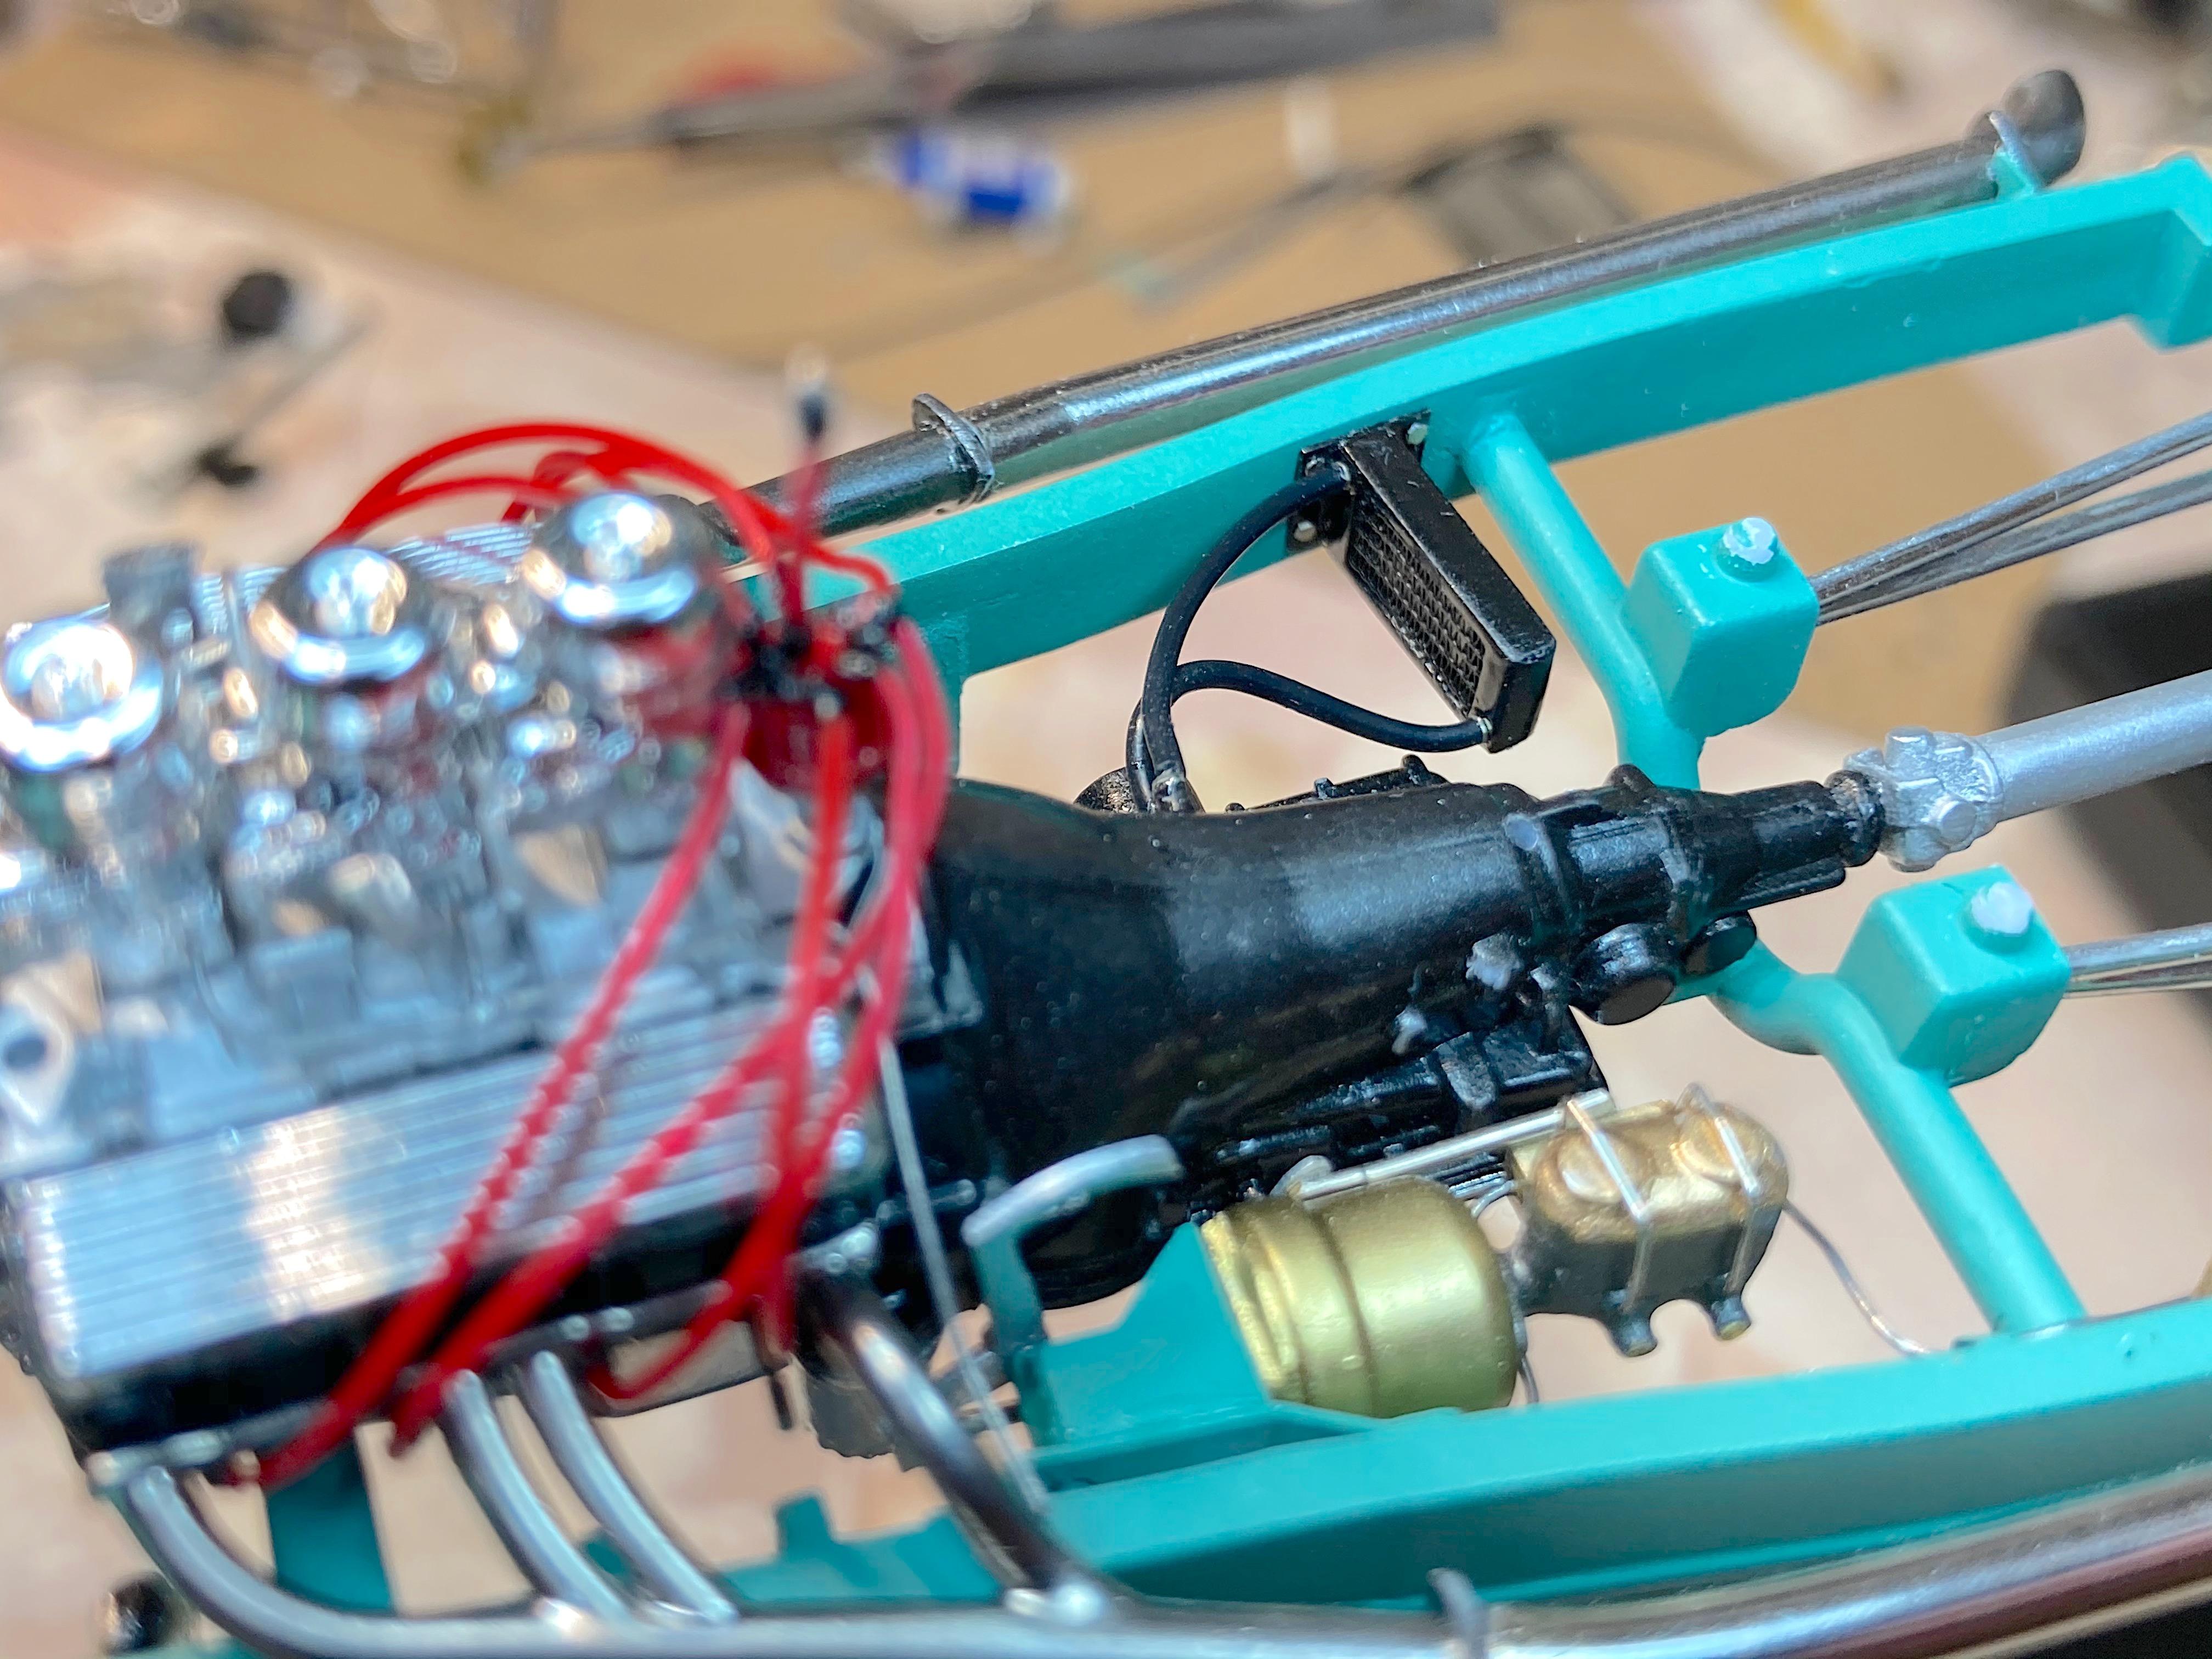
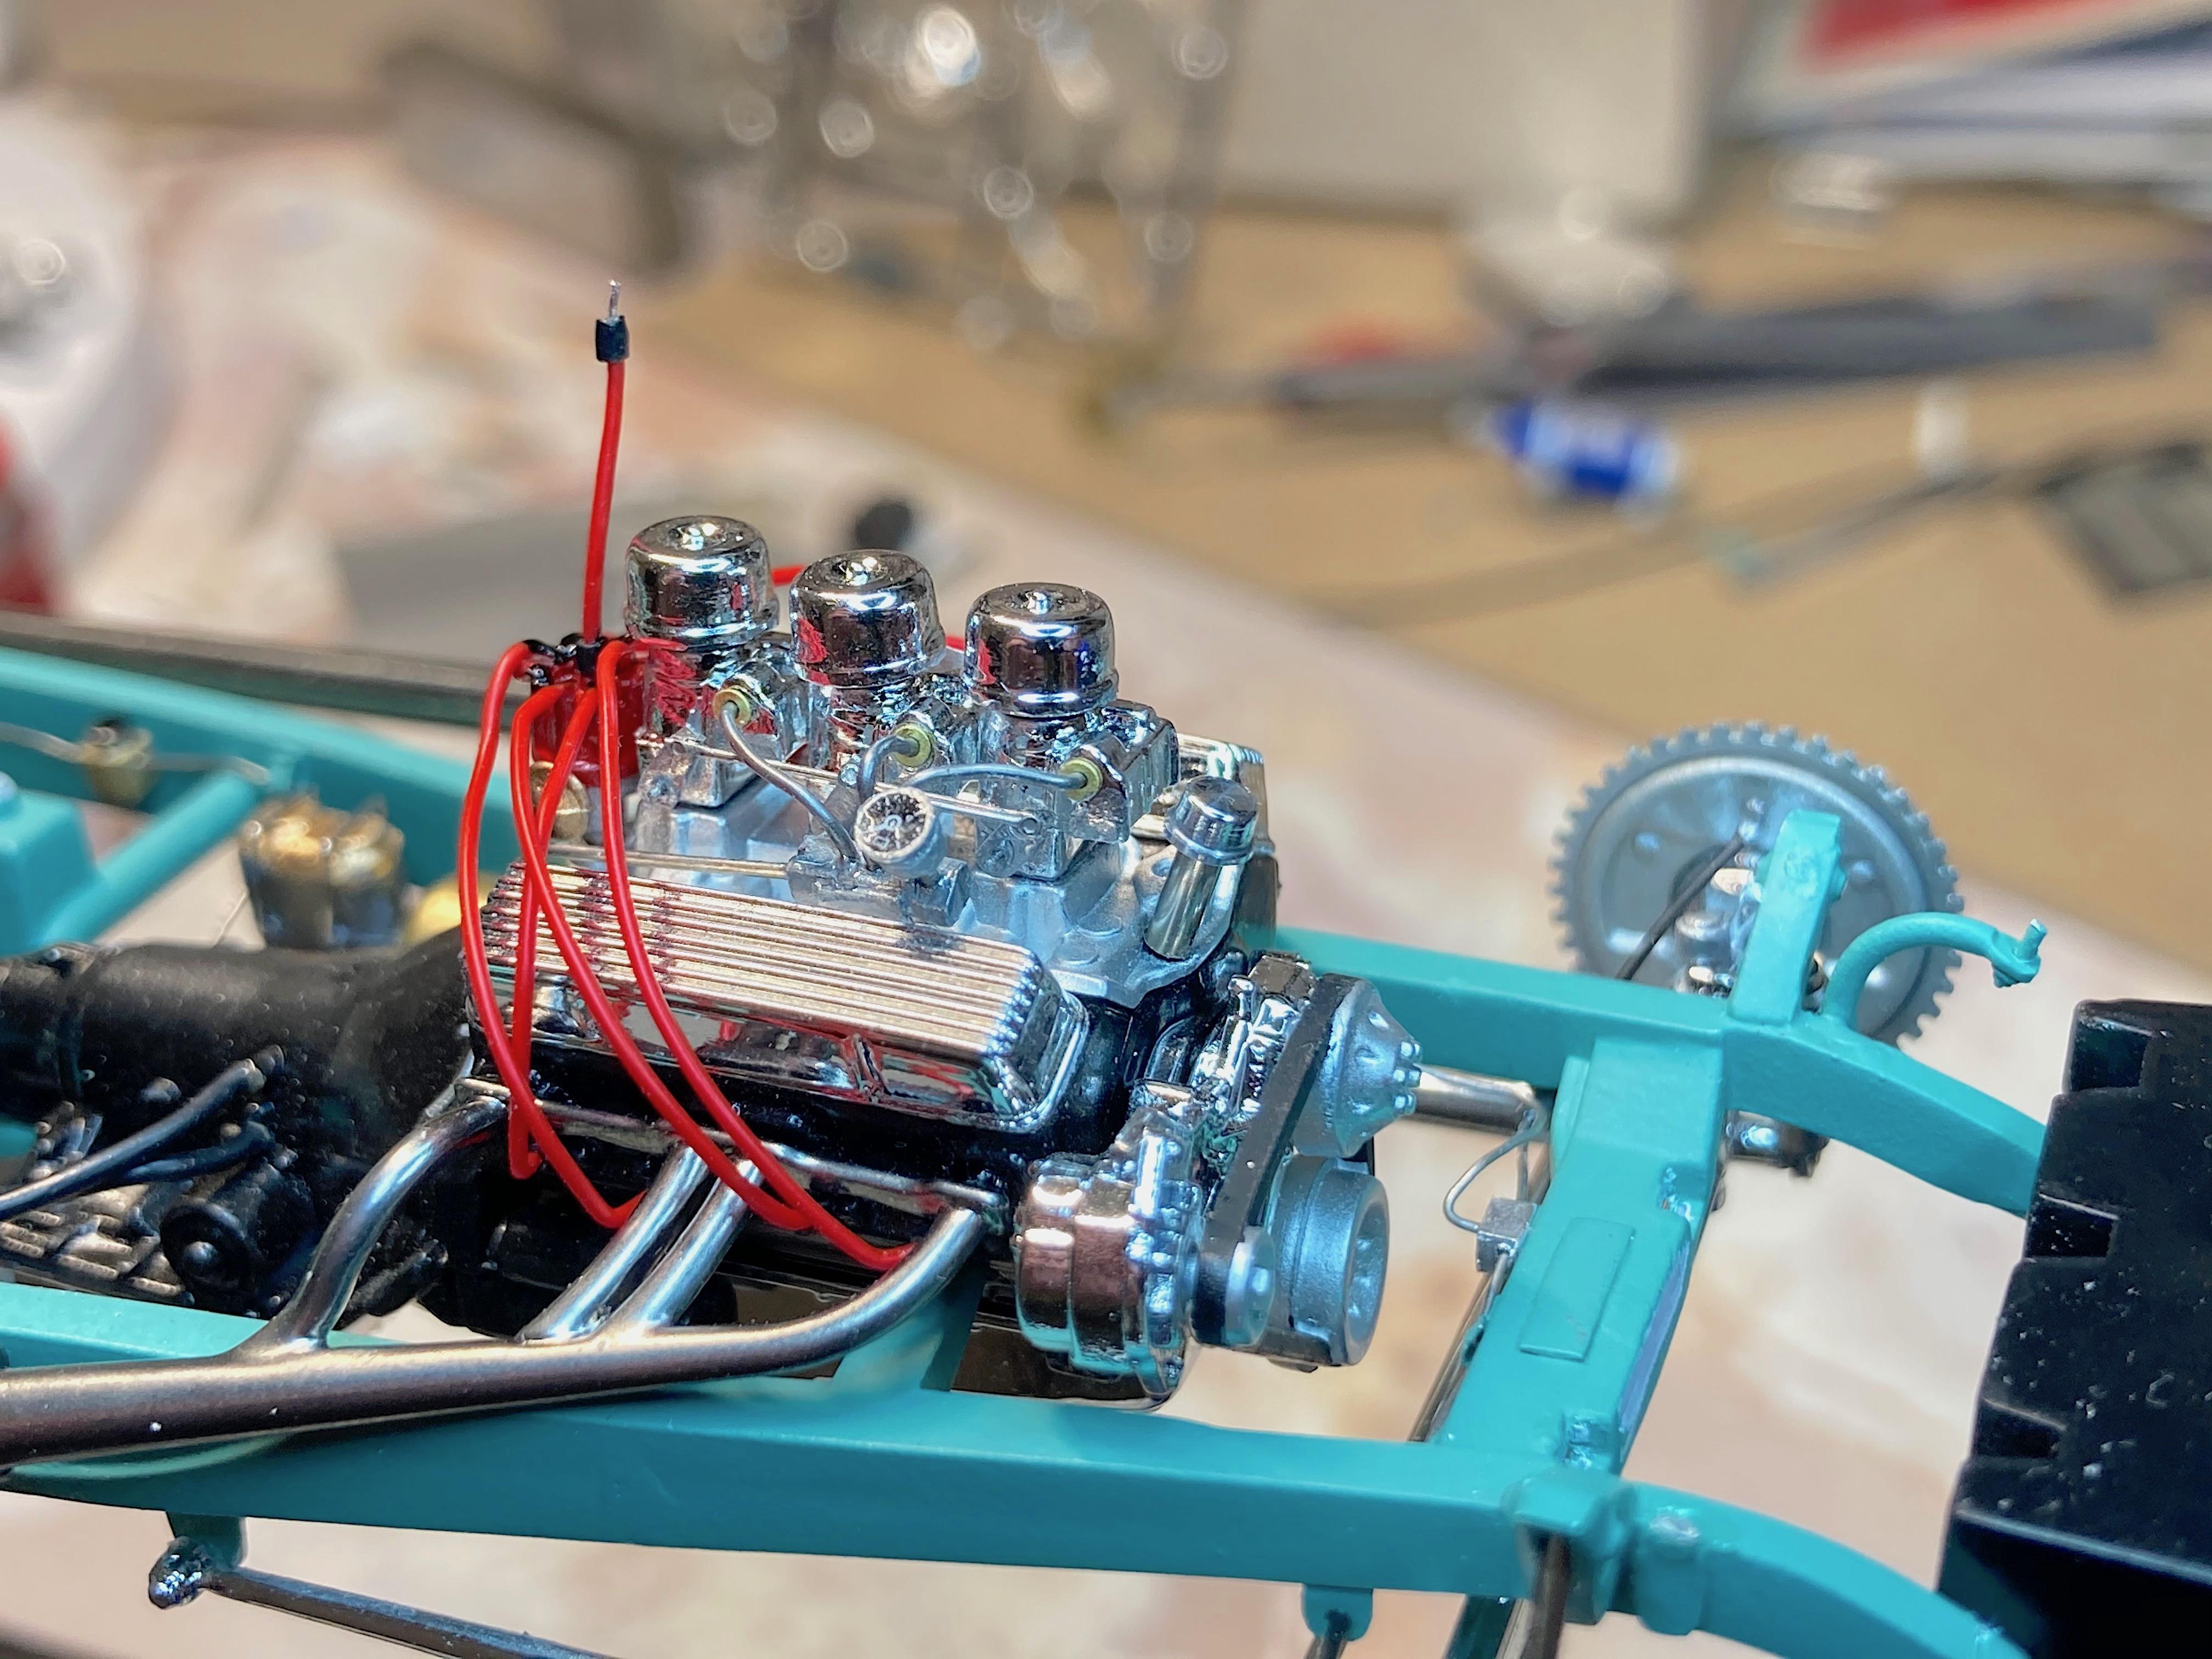
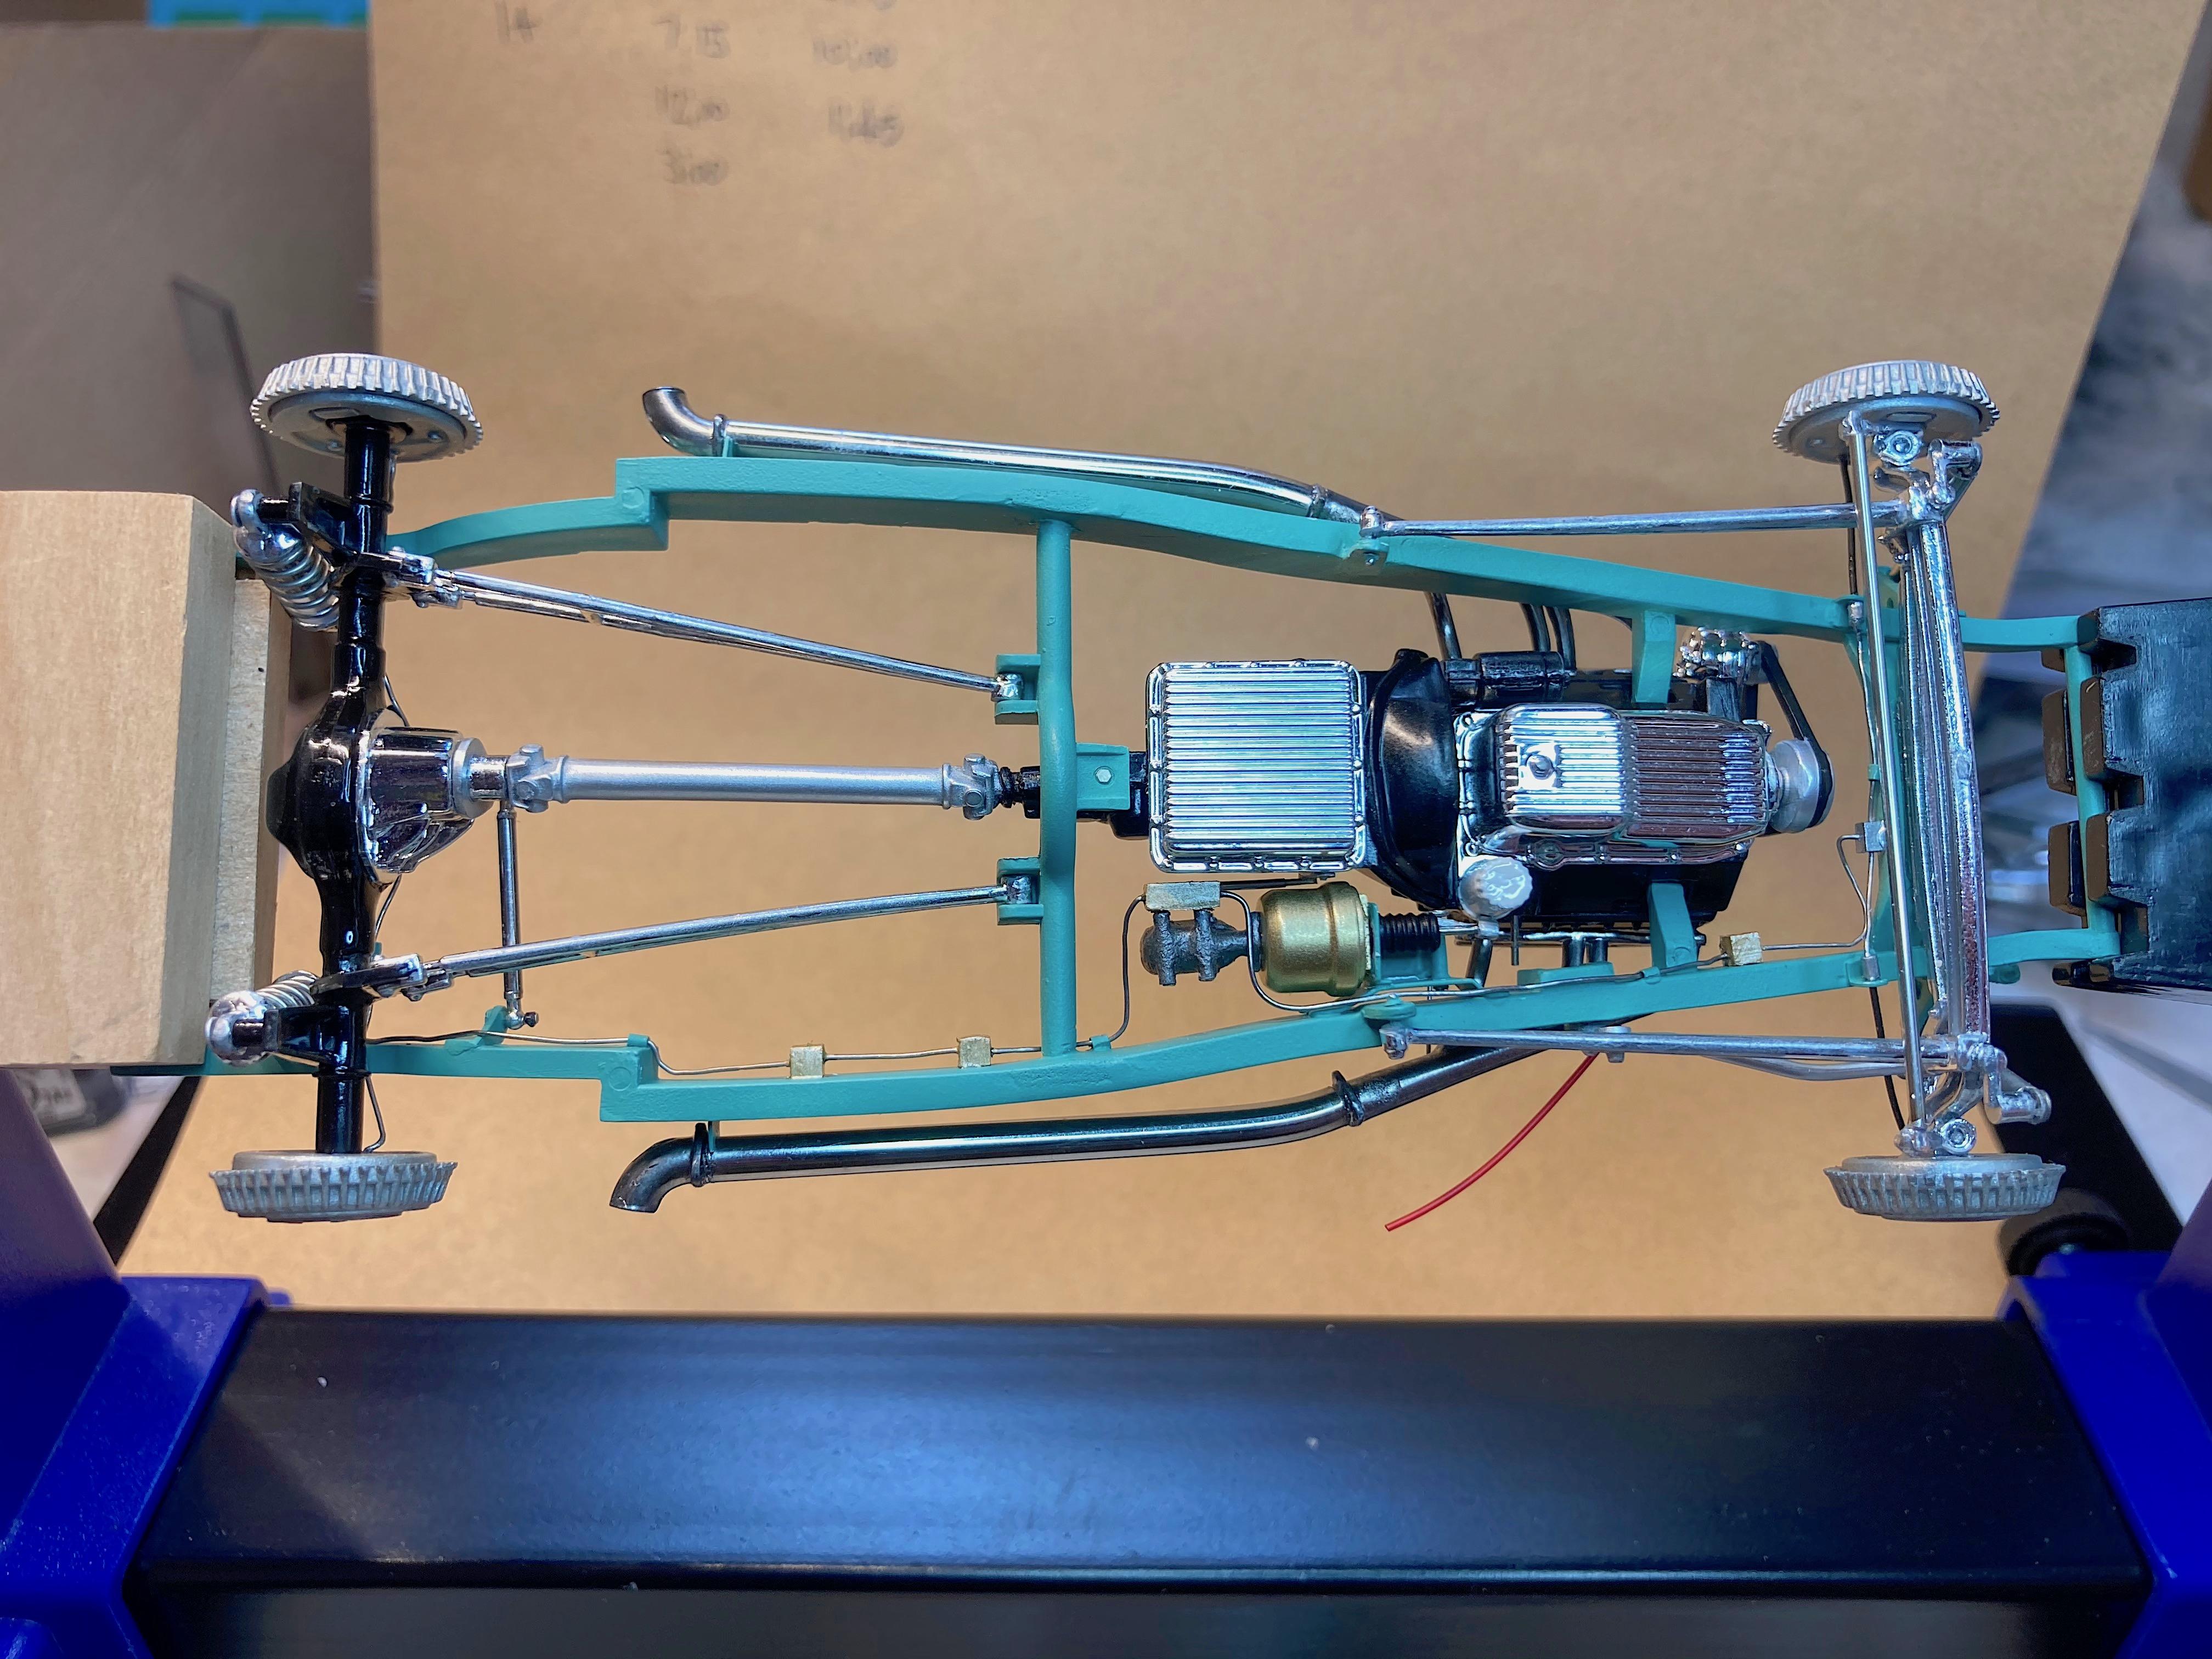
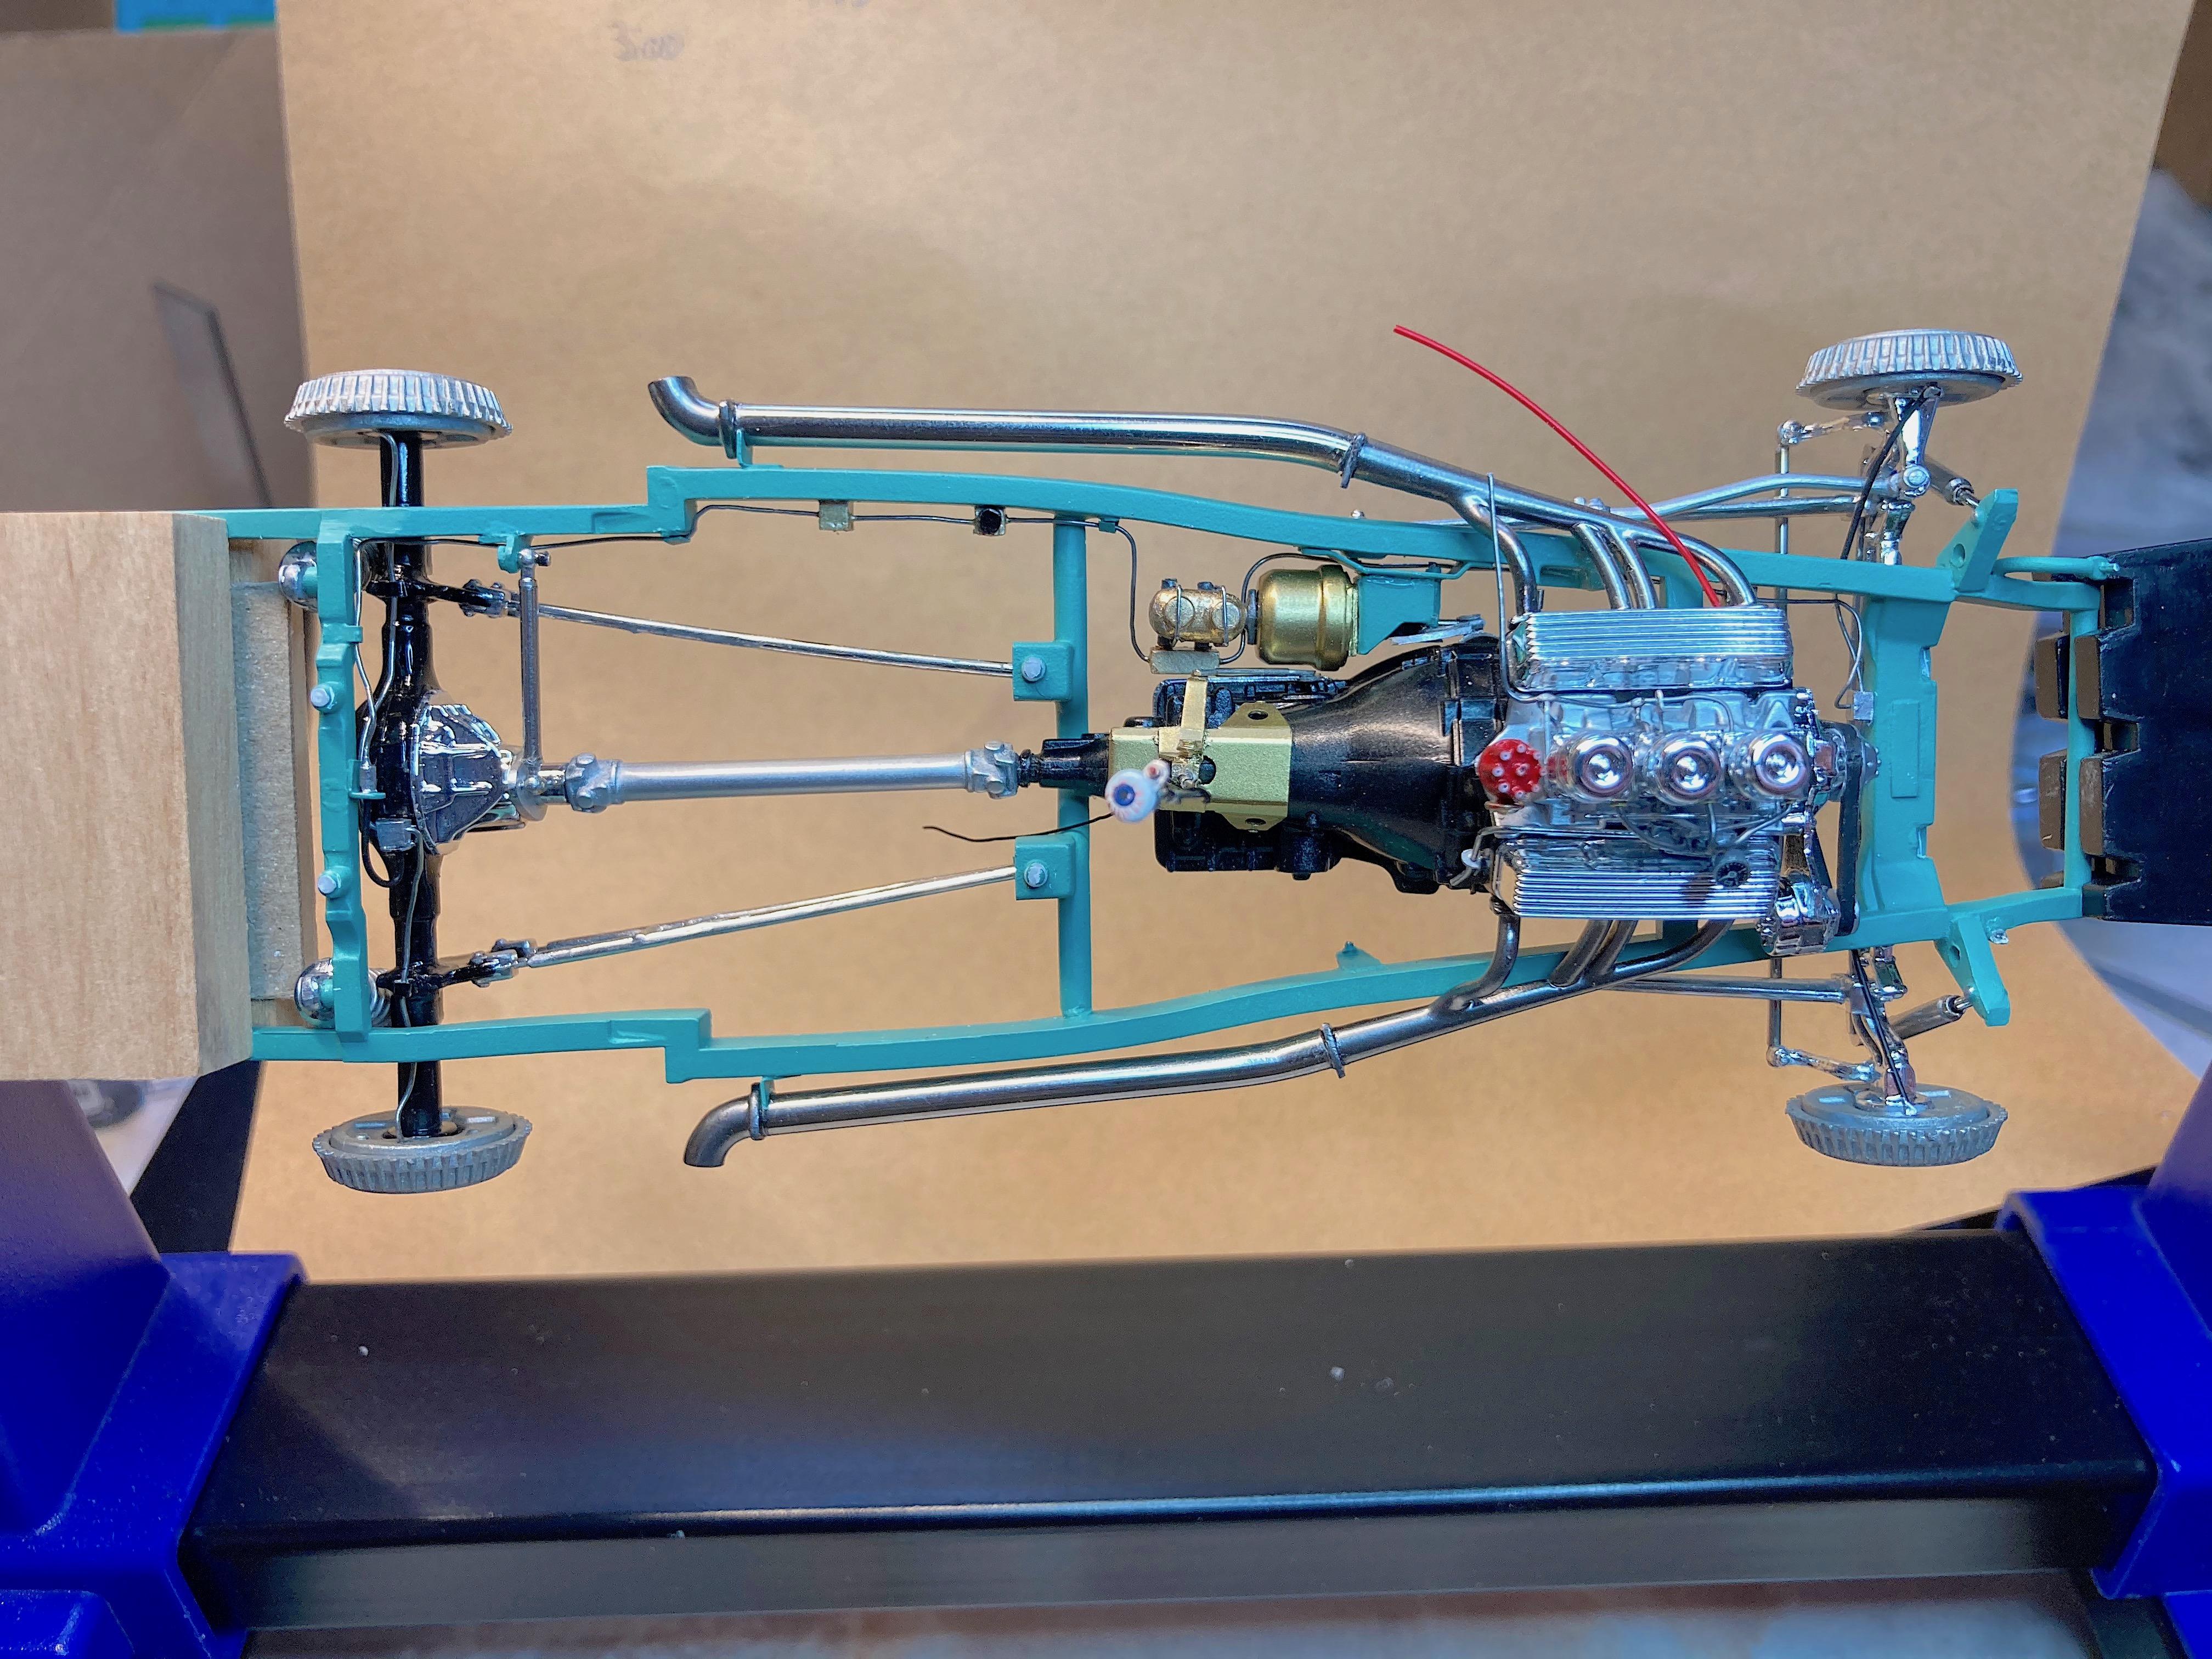
Thought of something else to make, a transmission cooler. I see the usual application is for RVs and pickups that tow stuff, so I figured it doesn't need to be as big. Had trouble finding a picture, but found a video, and when the guy pointed to where the lines go into the 700R4, I could see that Revell had the detail bumps there. Detail Master radiator face photo-etch, wire from my stash, photo-etch nuts finish that part. Another detail I have been thinking about making, crankcase ventilator / oil filler. My real pickup has this part on a valve cover, kit has nothing. Used the cordless drill, roughed to shape using the Dremel with cutoff disk, then files, sanding stick, steel wool, polish. Thinwall stainless steel tube completes that detail. Cooler fills that empty space nicely. Also turned the coil the same way. Painted the hubcap scripts.
-
until one day,
-
60's was an amazing time to be an American.
-
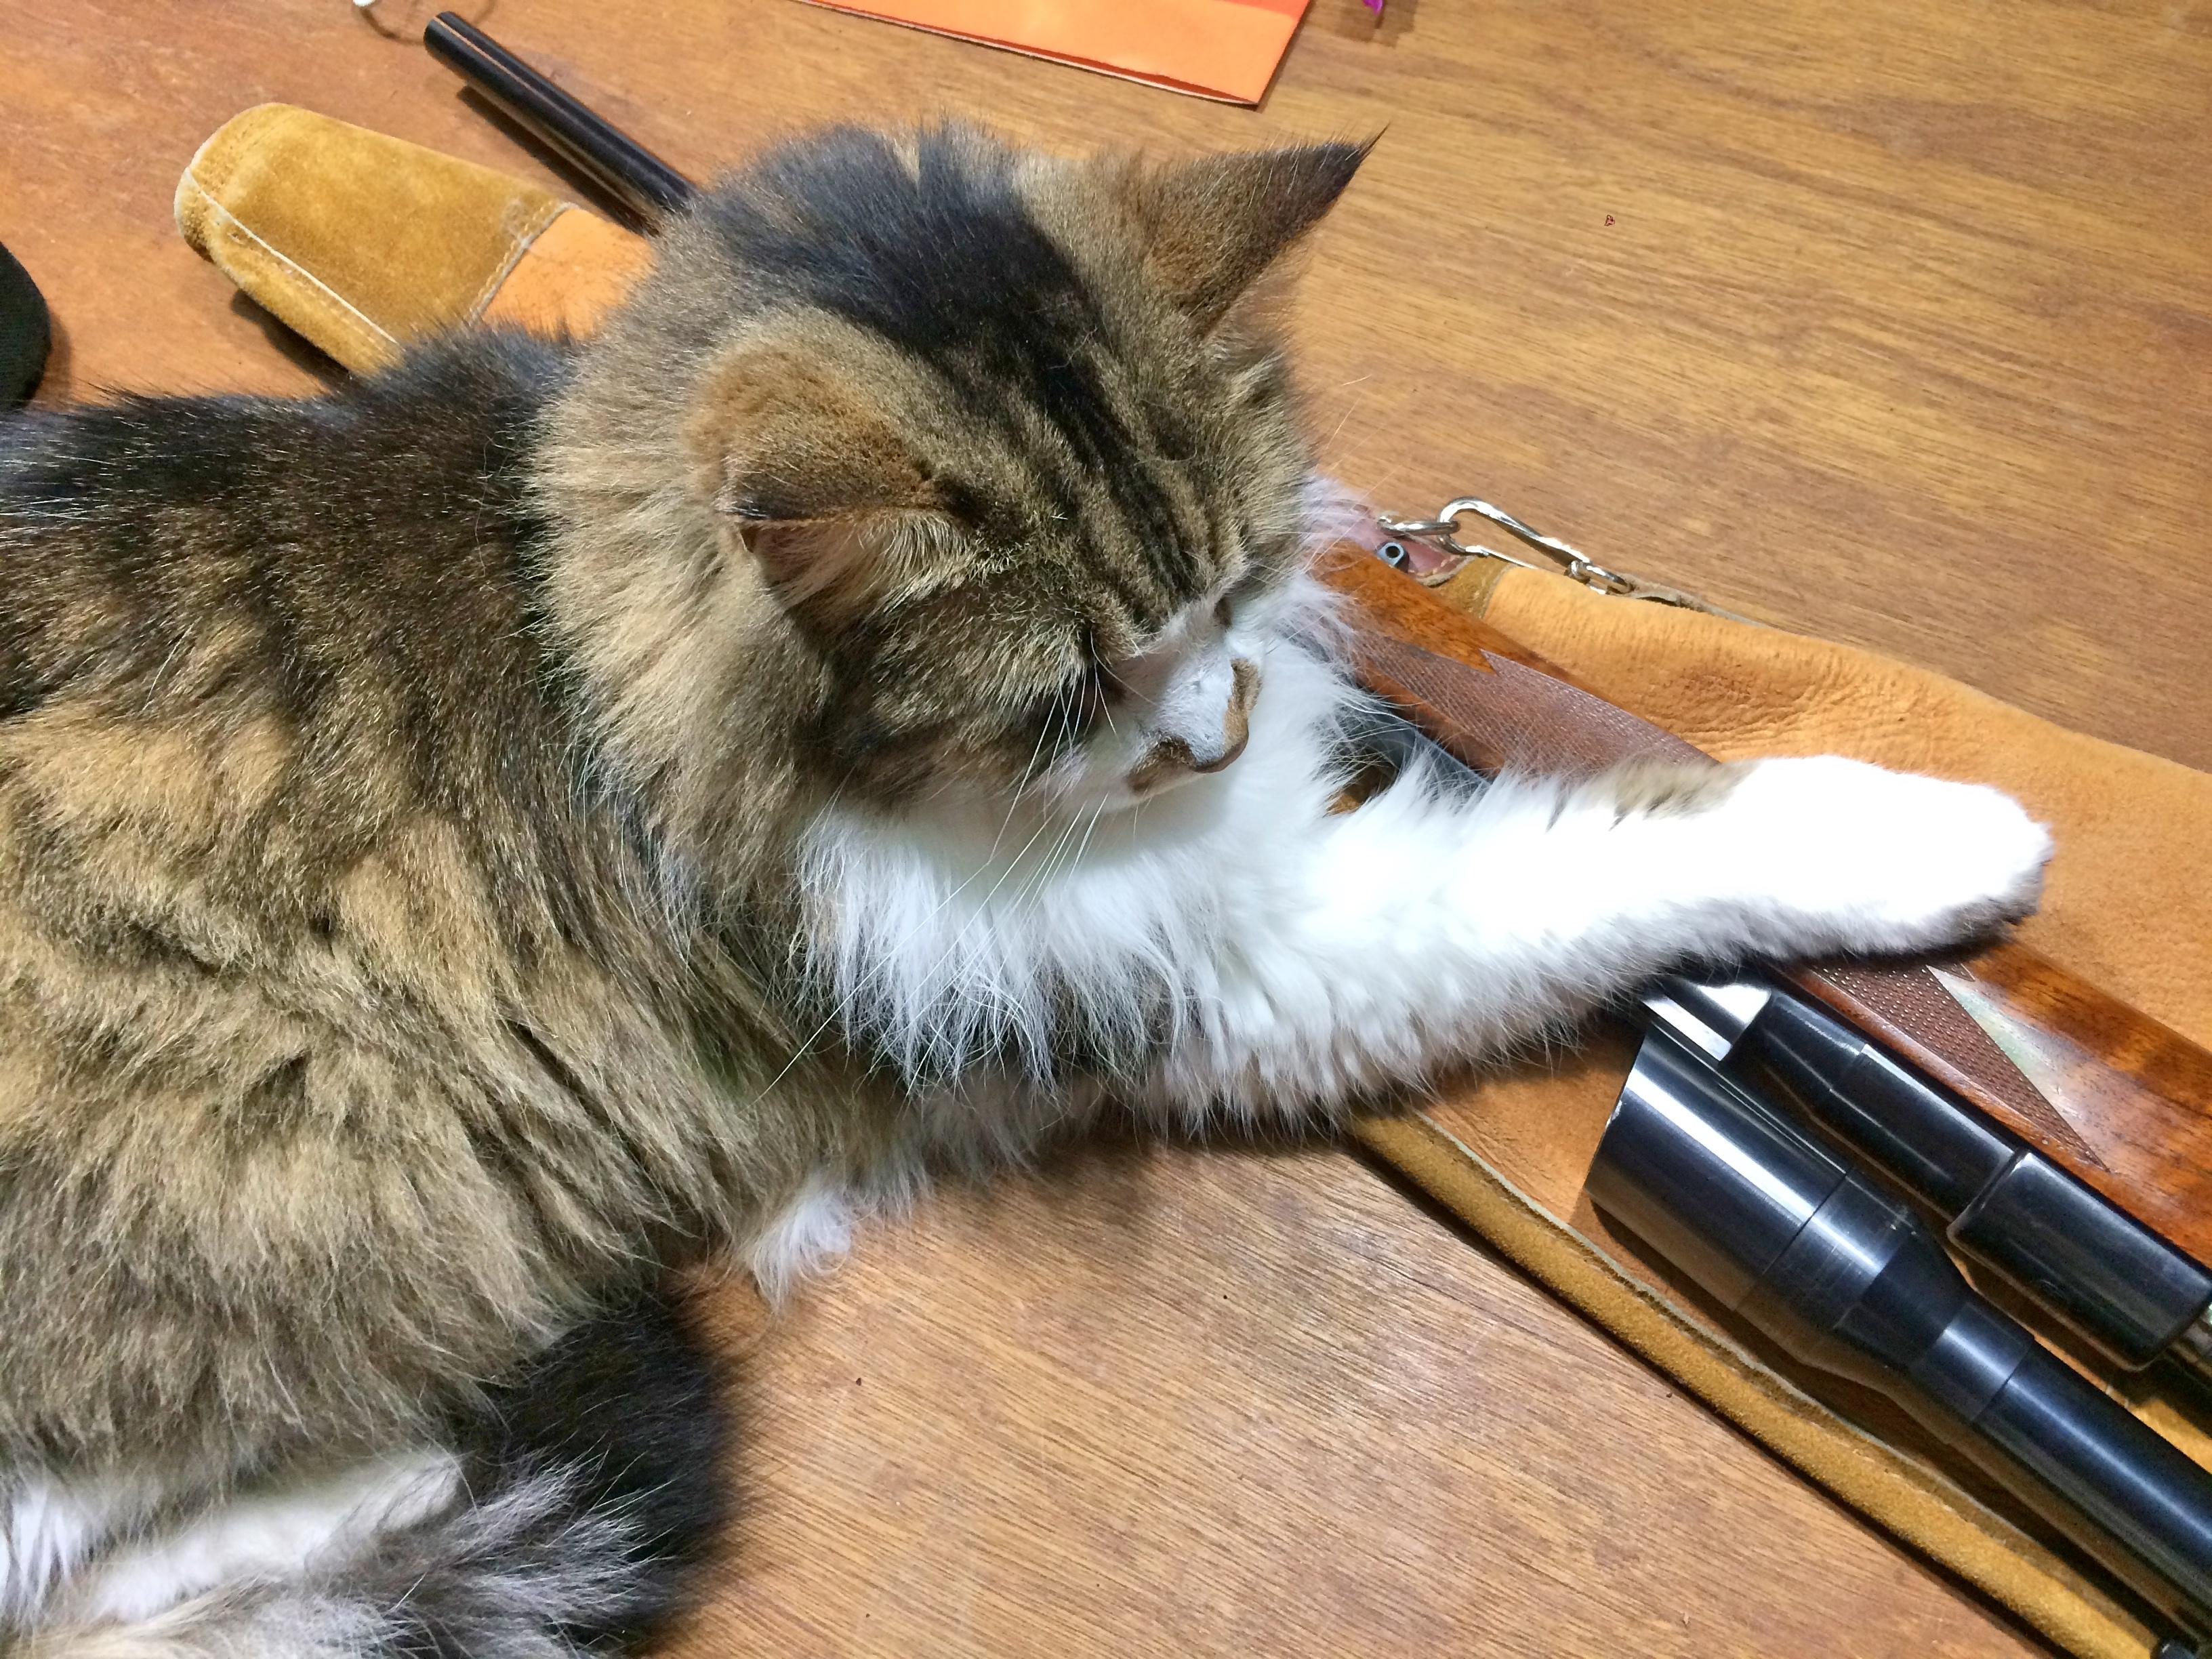
Very pretty. Cats love to lay on the newest thing that is laid down, don't they? It could be hardened steel, like this Mouser. ? Girlfriend put a soft luggage down by the door, and it's still there, with about a pound of fur embedded in it.
-
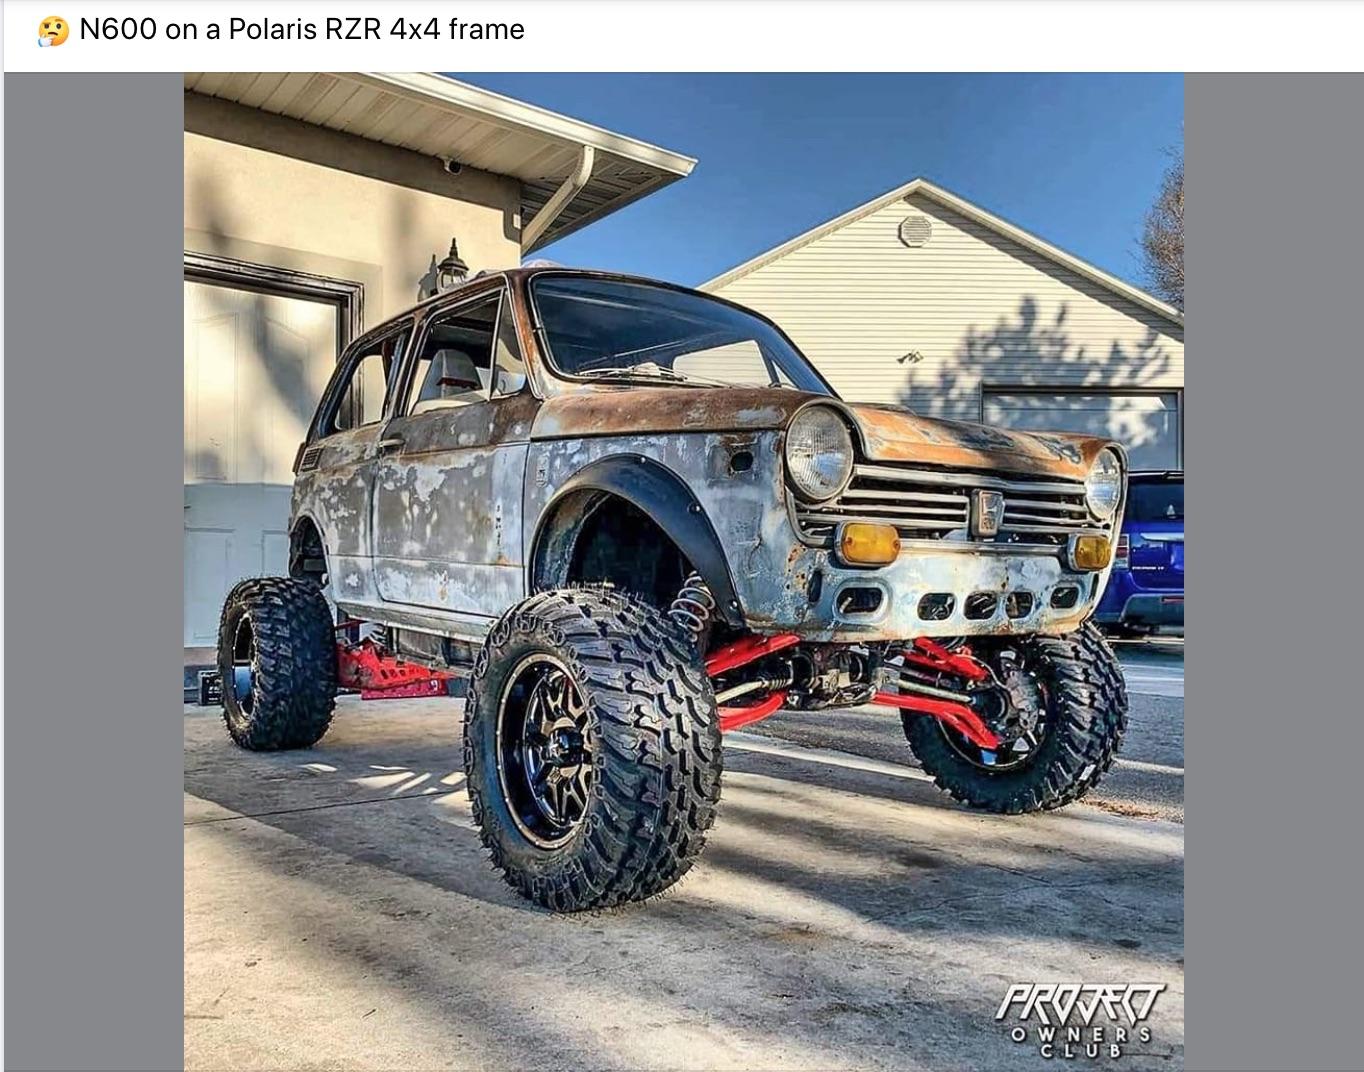
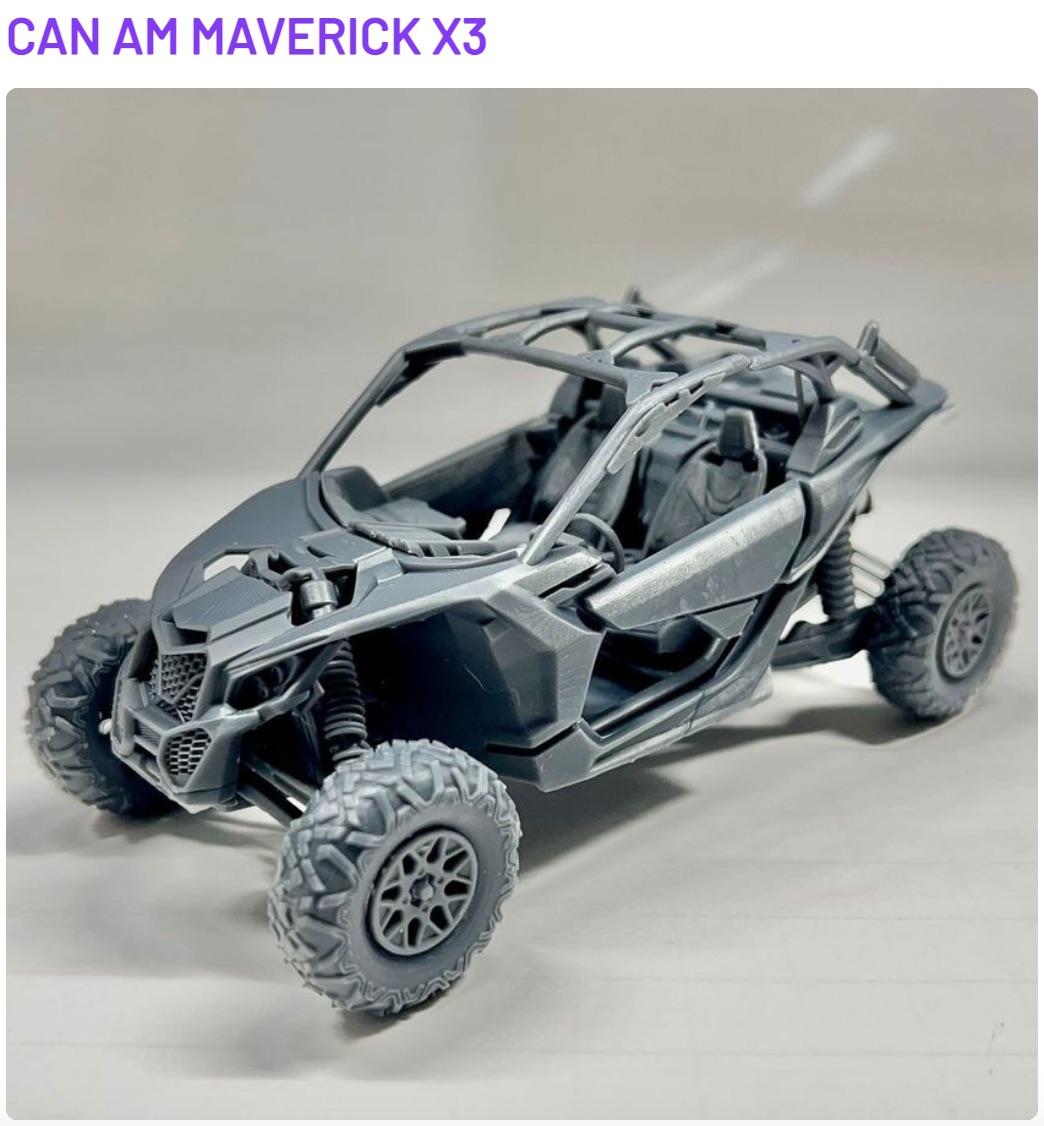
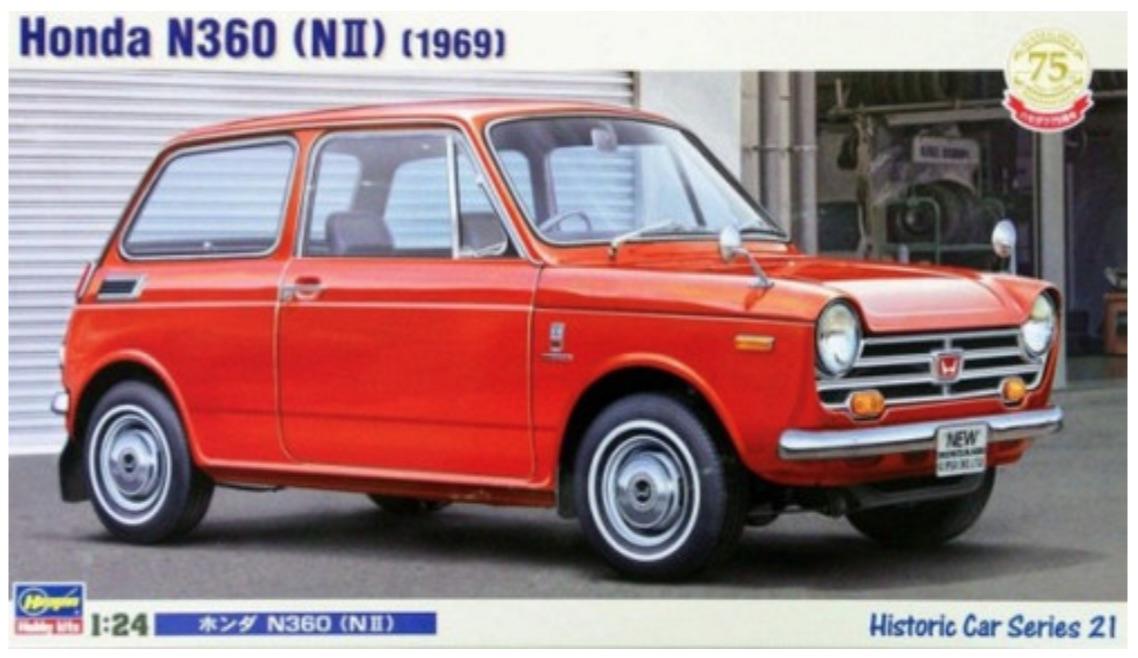
This is the third temptation, this week for me. Now there is a 3D printed side by side, and the Hasegawa kit, who wants something different to do? + =
- 10 replies
-
- 2
-

-
- honda n360
- can am
- (and 2 more)
-
Yin & Yang
-
of legendary centerfold
-
From an era where class meant something. ❤️ RIP Won't elaborate for fear of breaking a rule.??
-
GSL Common Kit: [revision] just another Model A Roadster
89AKurt replied to 89AKurt's topic in WIP: Model Cars
Thank you! Don't give up! I've seen another technique of shading such seats with washes to give a shadow effect, I started with the darkest shade, and finished with the original color, the lighter shades being at random in between. ? Spark plug wiring is done. Used wire insulation for the plug end, can't really see it, but the coil wire shows it well (still need to make the coil). The distributor end is smashed with pliers, there was no way to drill the cap! So I'm hoping superglue built up will mimic the 90º ends, will paint black in the morning. The really hard part was getting the wire into the drilled holes in the block, which is painted black, was using the iPhone light. Was concerned about clearance with the body, again there is no space. Why did Chevy have to put the distributor in back? I've noticed there is a ventilation tube at the front, which the kit does not have, so that's something my OCD is bothering me about.
-
Of course! ? Look forward to seeing this. ?
-
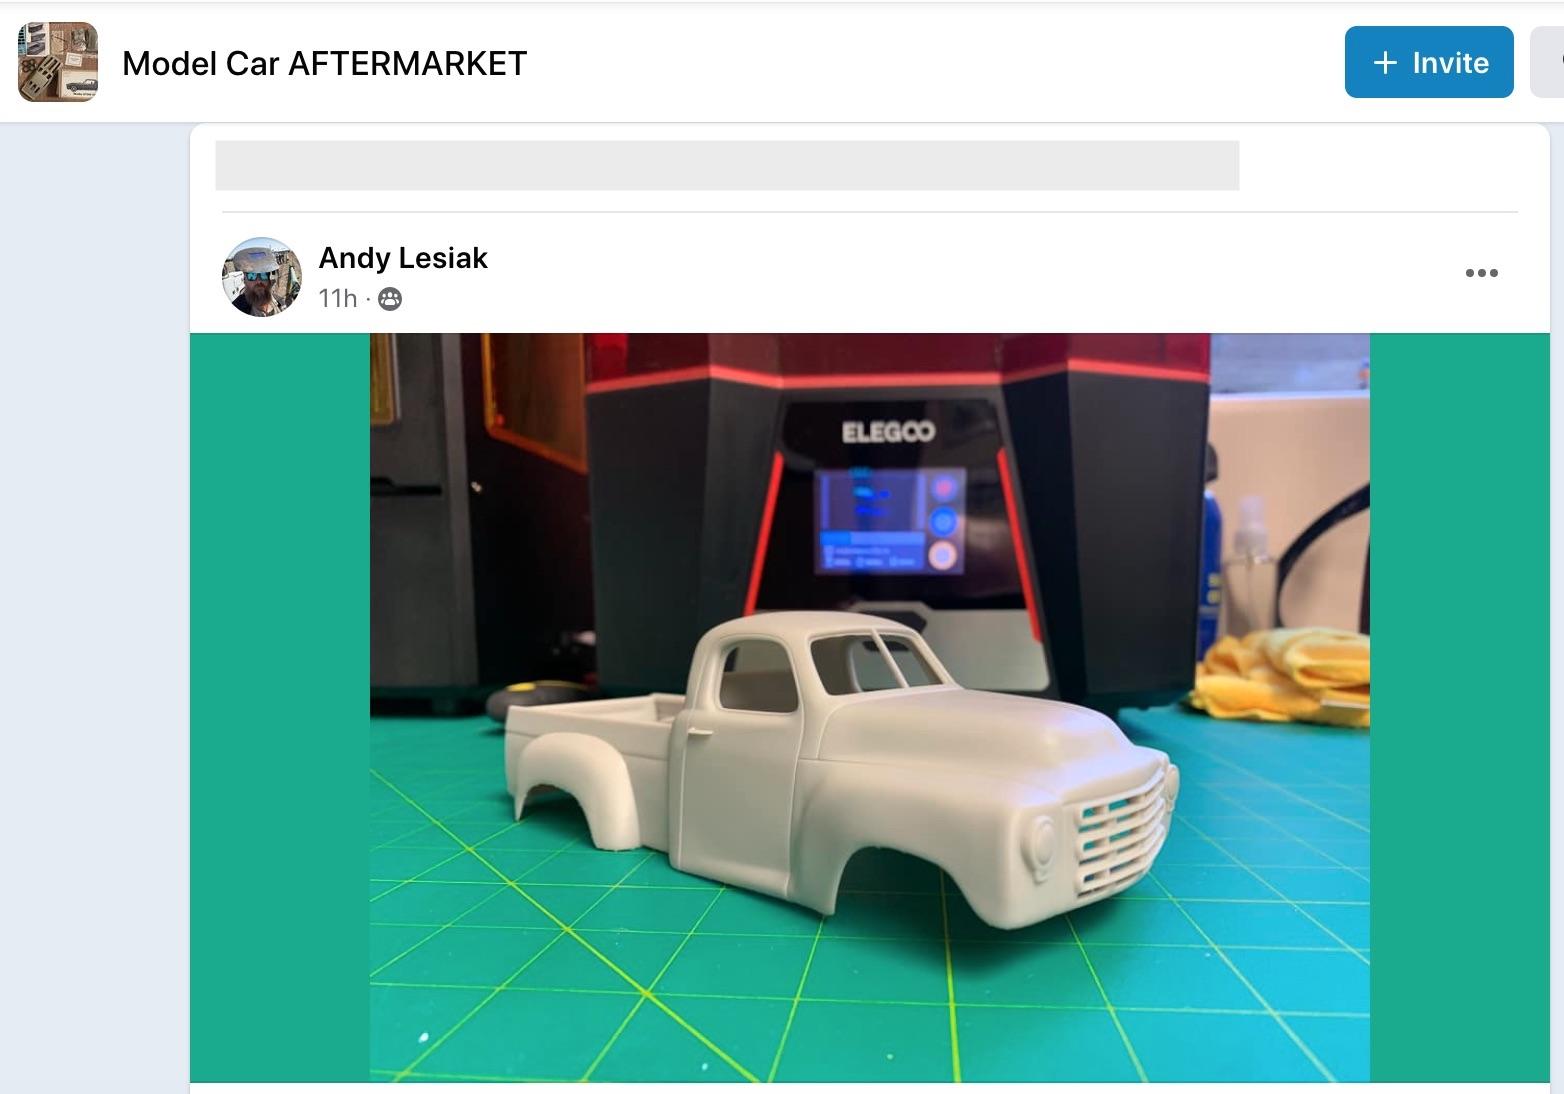
Stumbled upon this 3D printed 1953 Studebaker pickup that Andy Lesiak posted on Fakebook. He can also do a 1957 version. I've always liked these, didn't think twice about it. No interior, but it's simple enough for me to scratch build. Will post pictures when received.
- 4 replies
-
- 3
-
-
- studebaker
- pickup
- (and 2 more)
-
wearing the pants
-
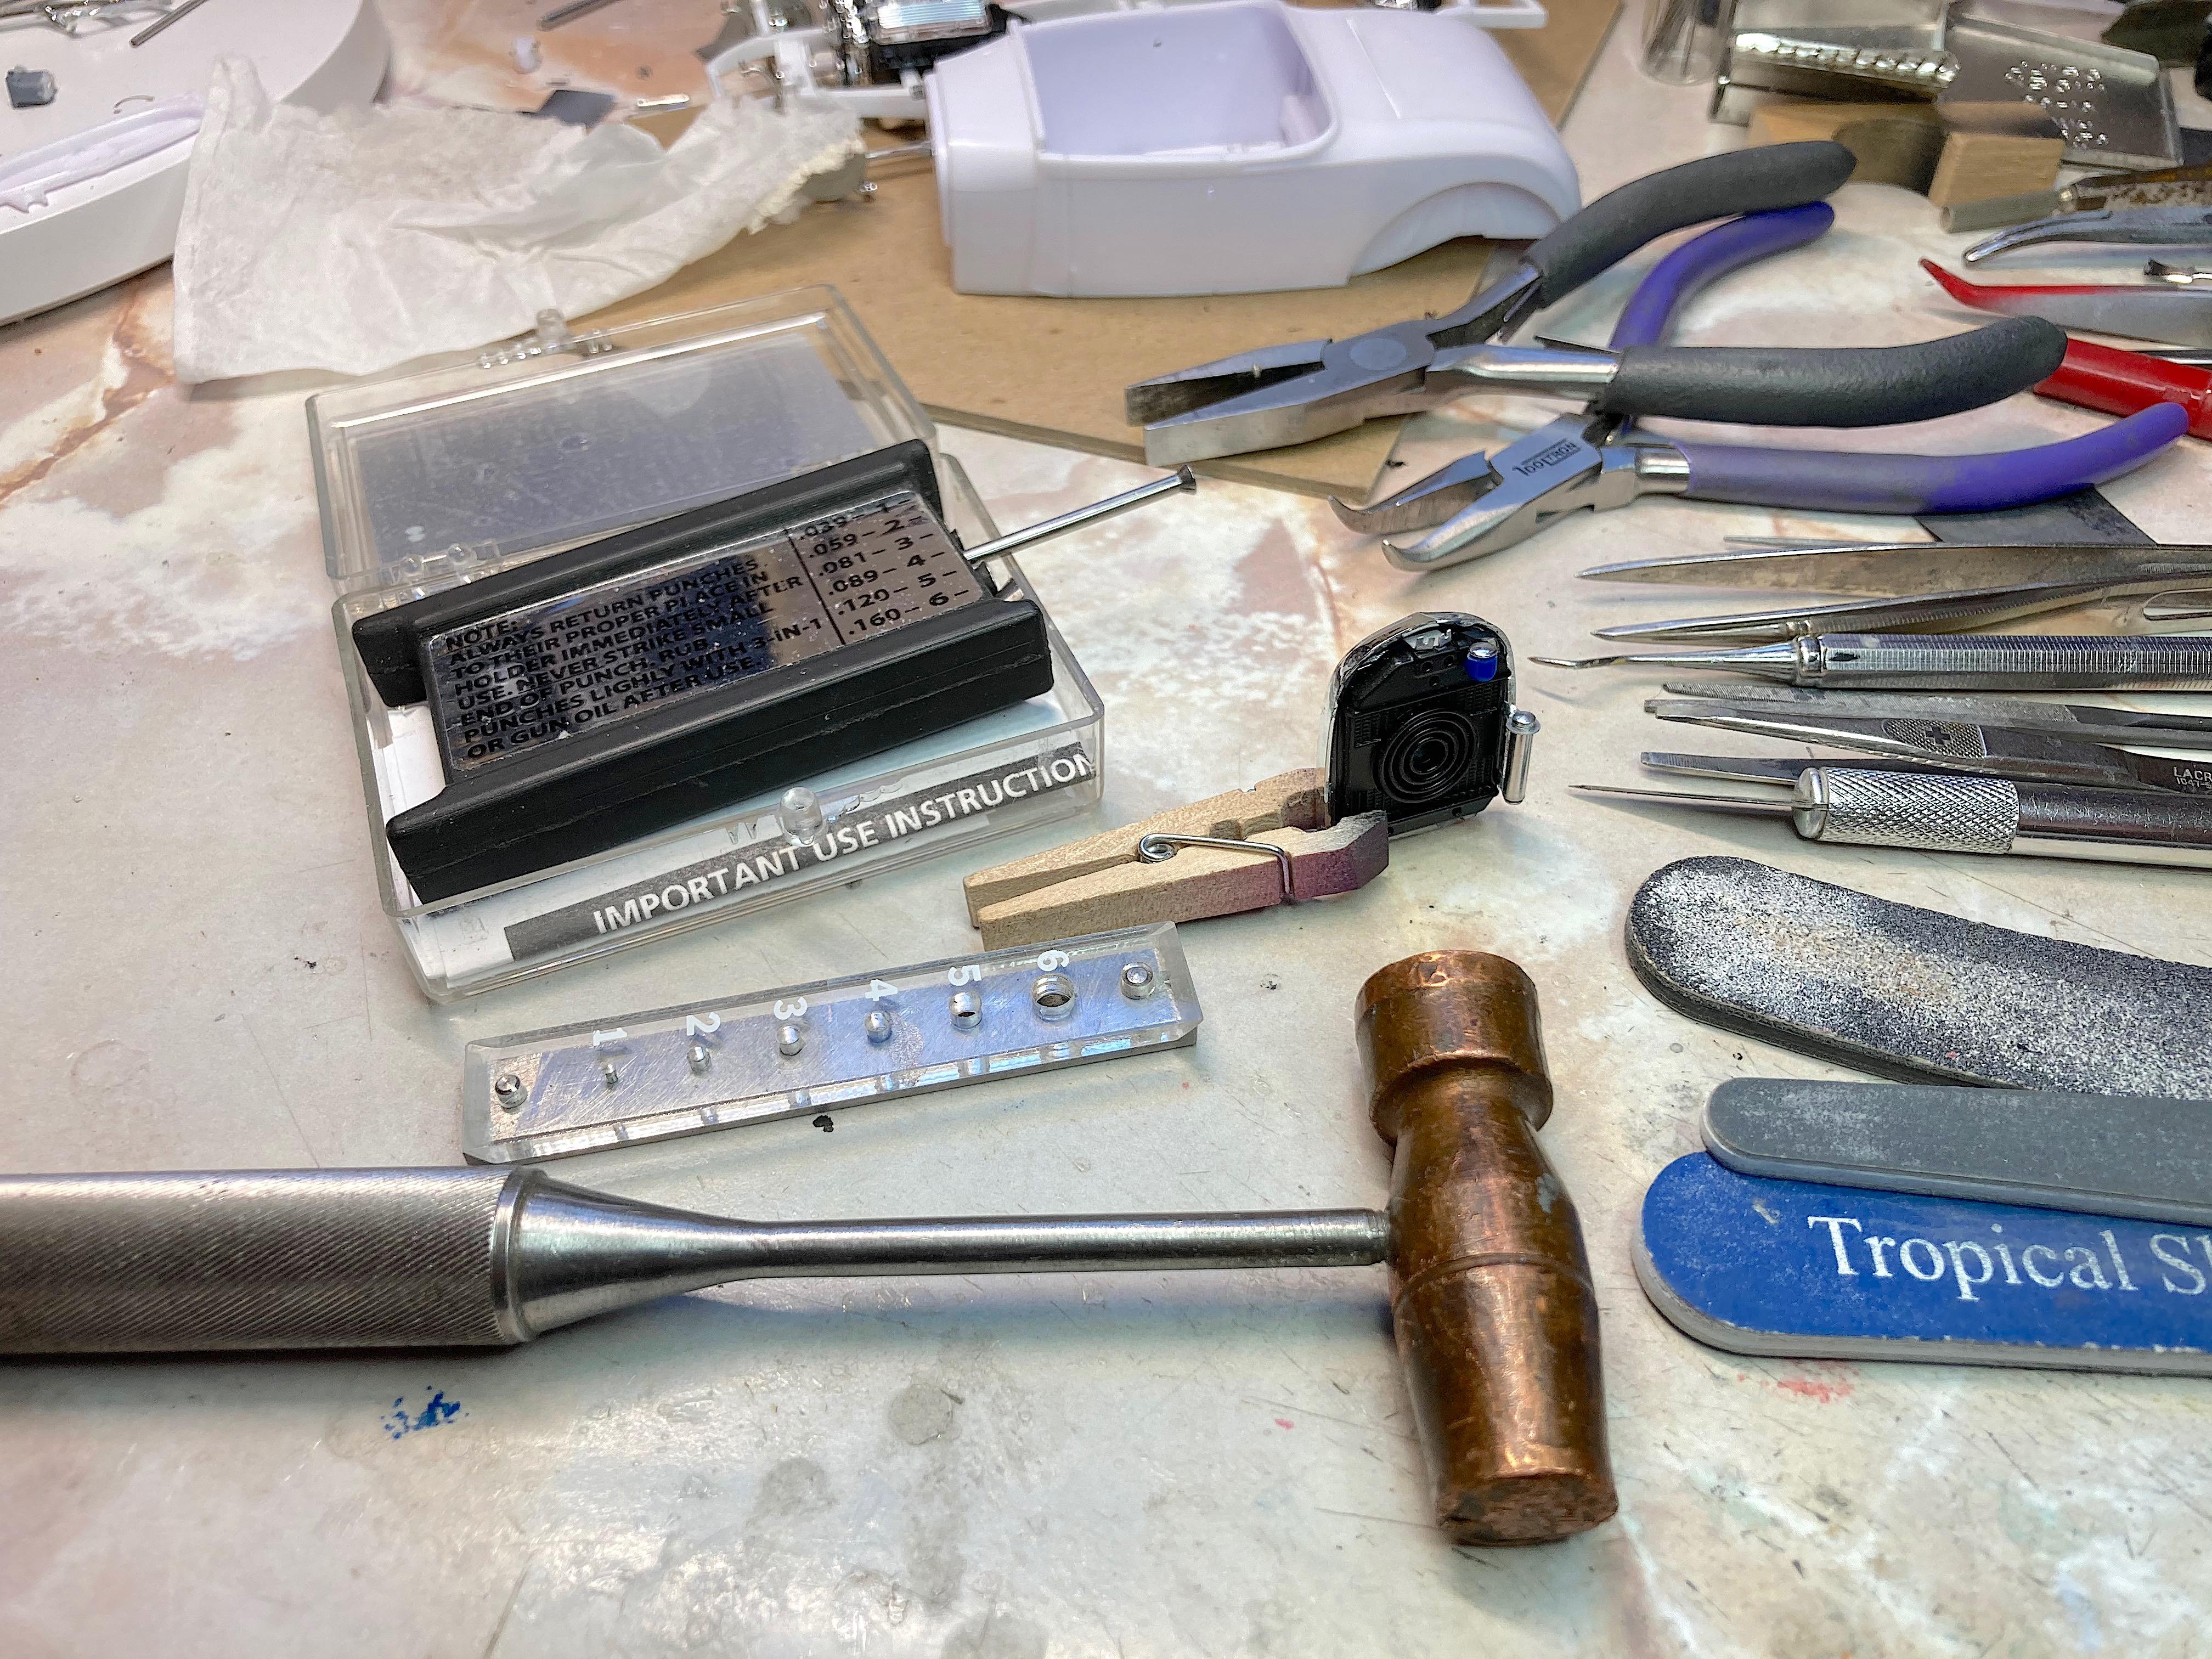
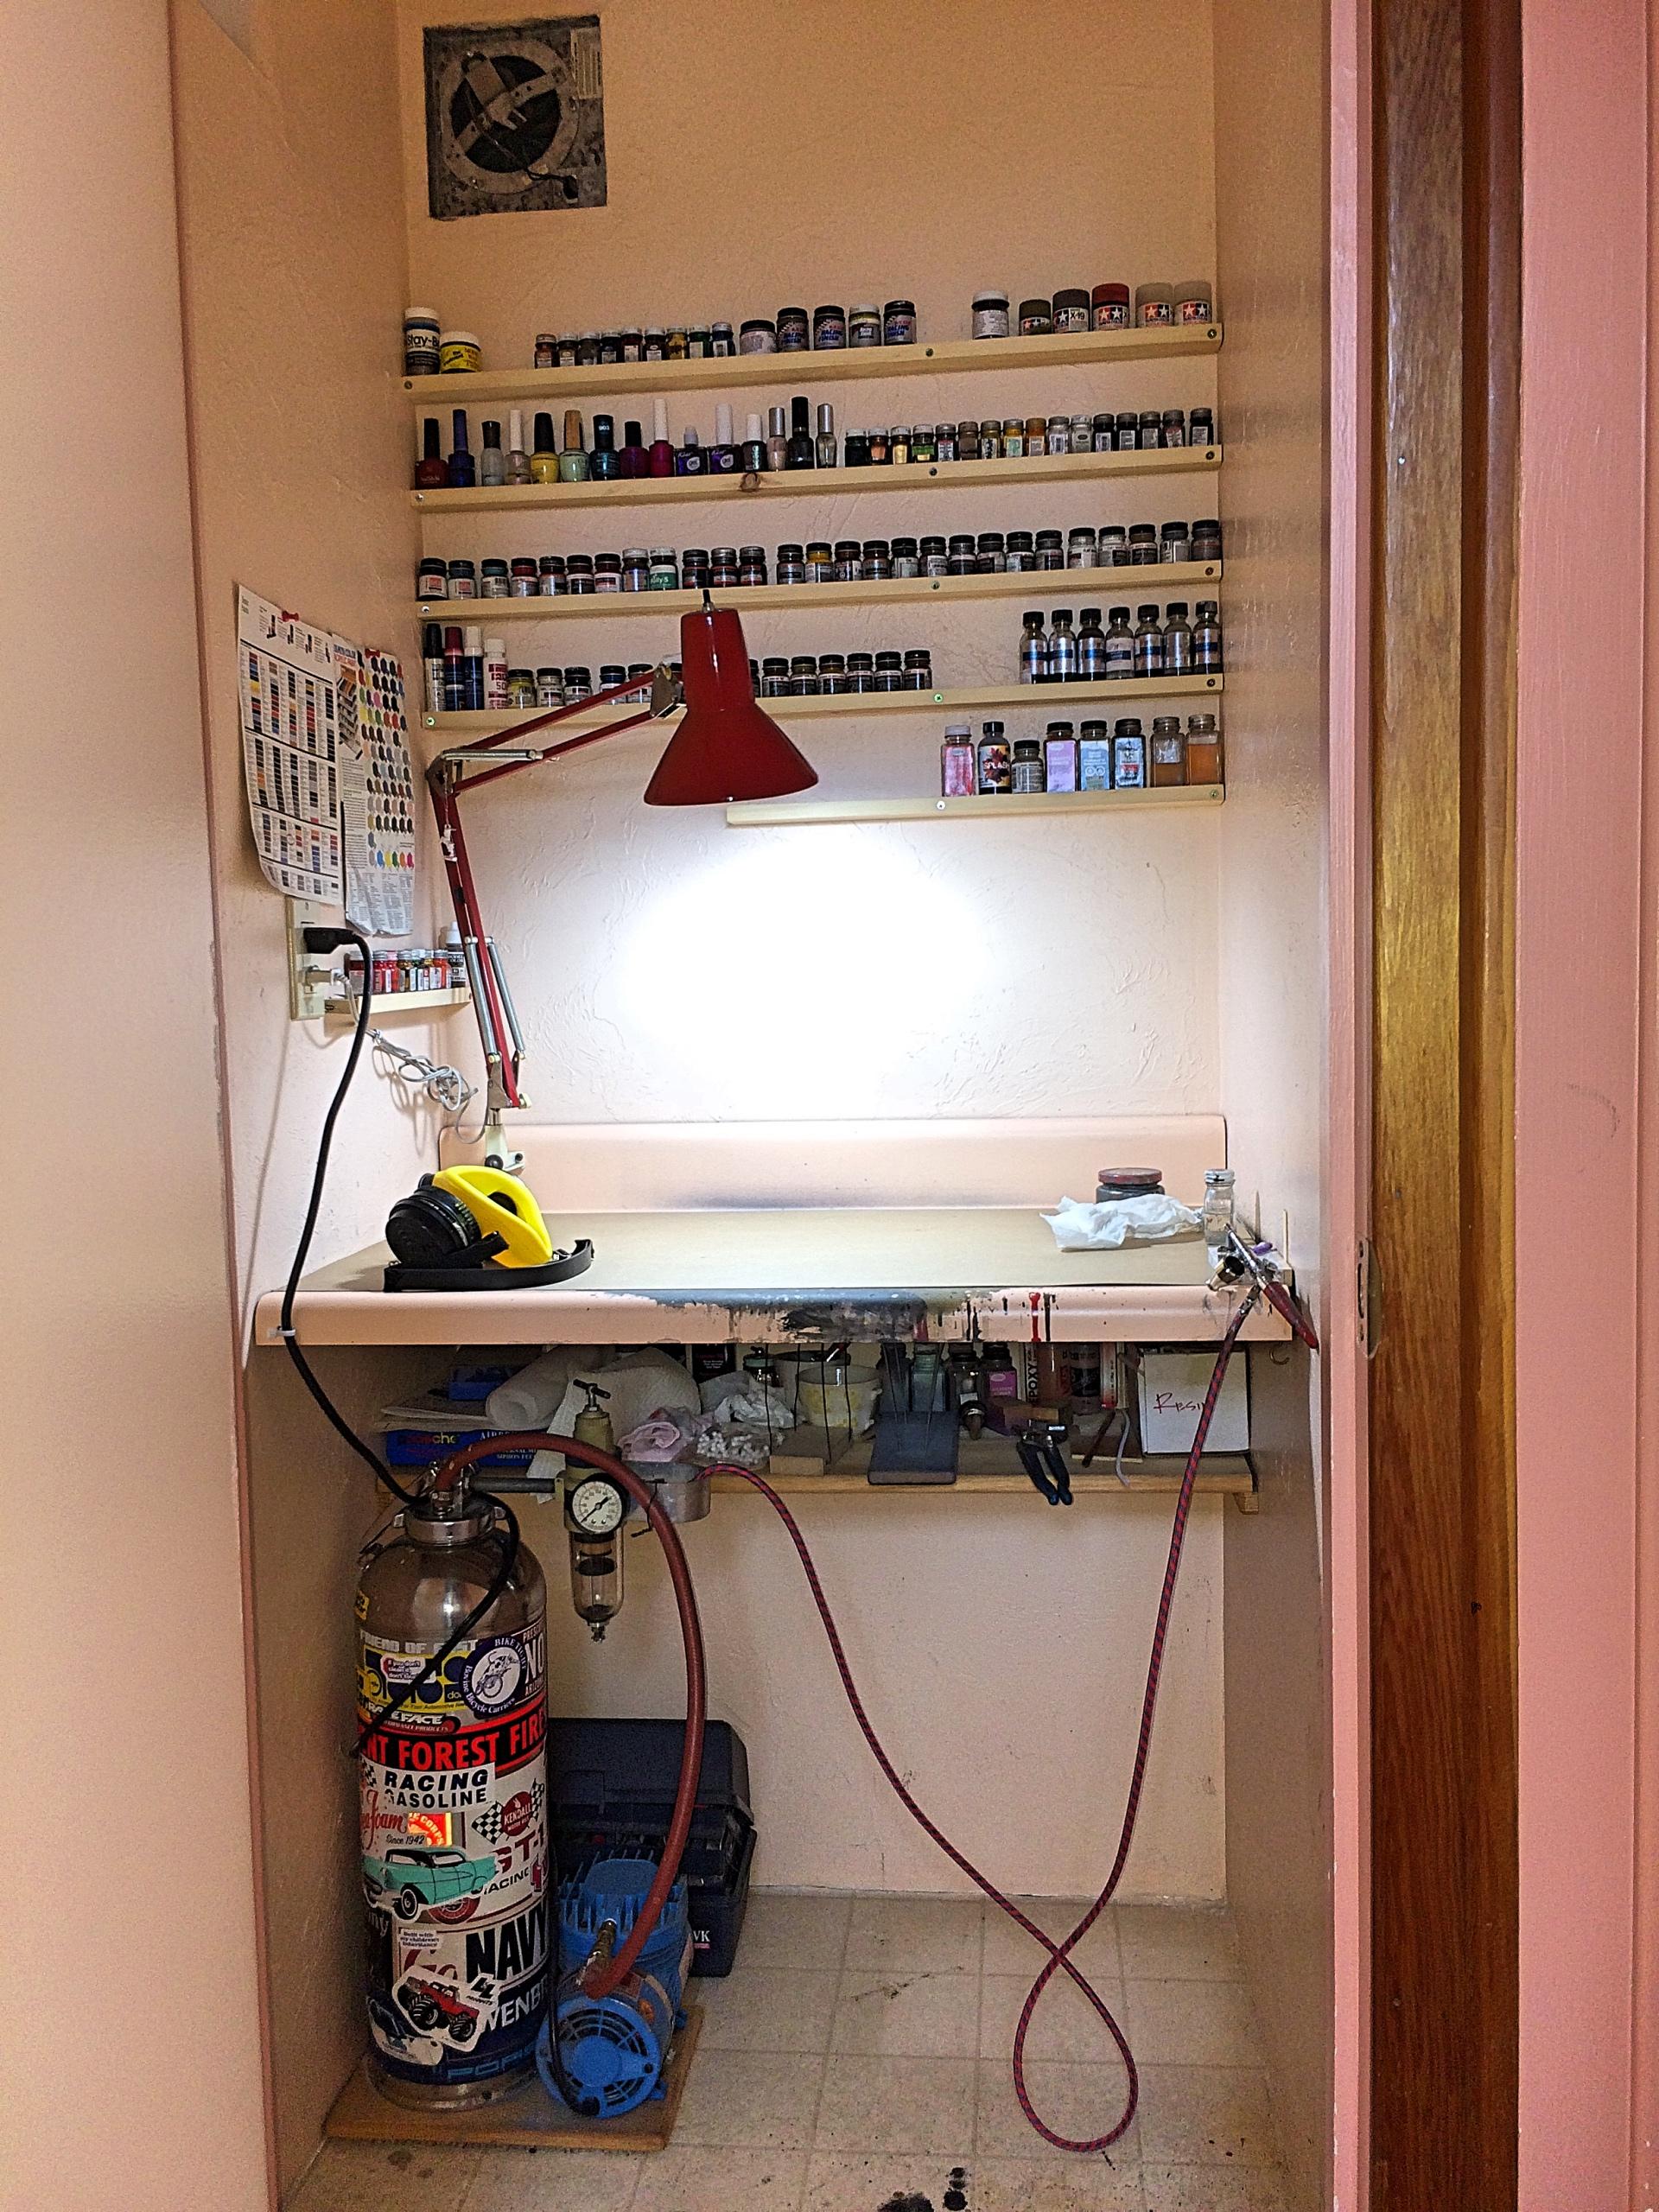
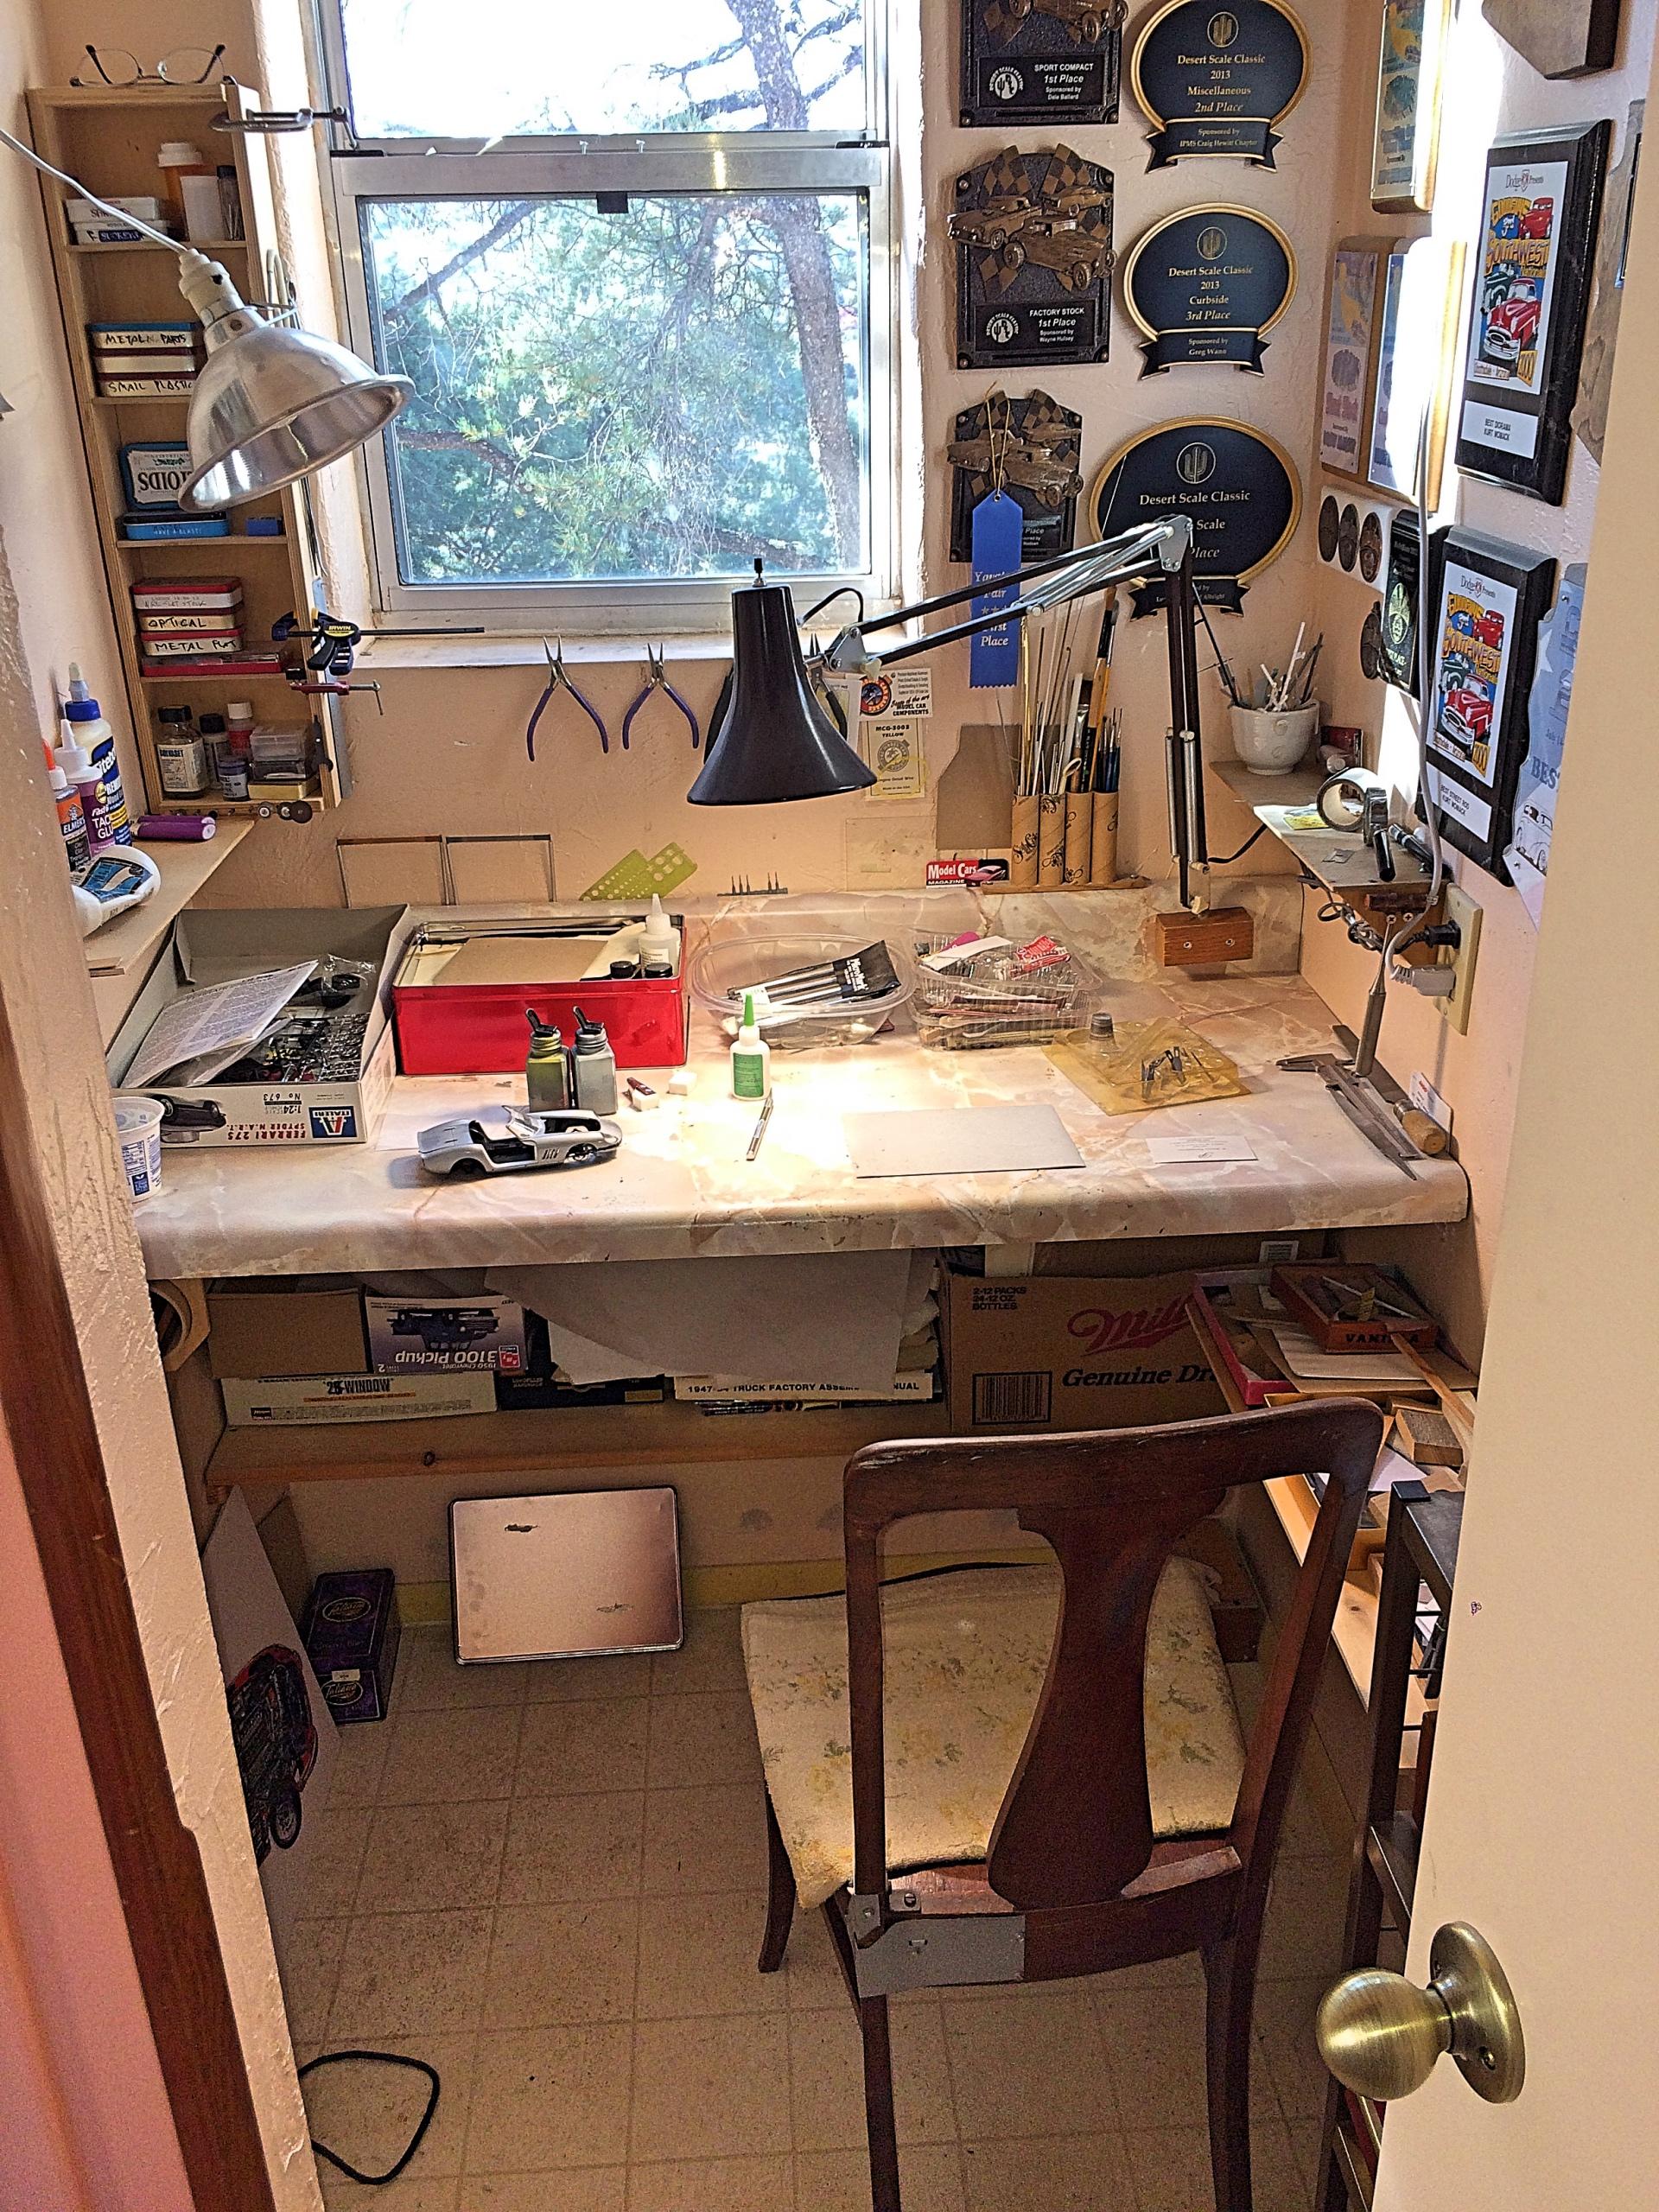
After seeing how sickeningly tidy some of you are, I'm not going to take an overall picture. ? My hobby room is only 4 feet wide, so I'm lucky to have enough open space for the project. That's why my WIP pictures show only the immediate area, with about 10% of the tools that were used are shown. Currently have 3 WIP in boxes on the floor, don't dare mix two or more on the bench unless I'm kit bashing. Looks like a hazmat scene at the moment, the current project when I decided to abandon the Russell Stover car. The latest upgrade was getting the LED light. Revamped my bench and paint booth 2019. This is the tidiest it's ever been. Added a LED strip light, and 2 shelves in the paint booth after this picture. So I'm not a good example. ?
-
GSL Common Kit: [revision] just another Model A Roadster
89AKurt replied to 89AKurt's topic in WIP: Model Cars
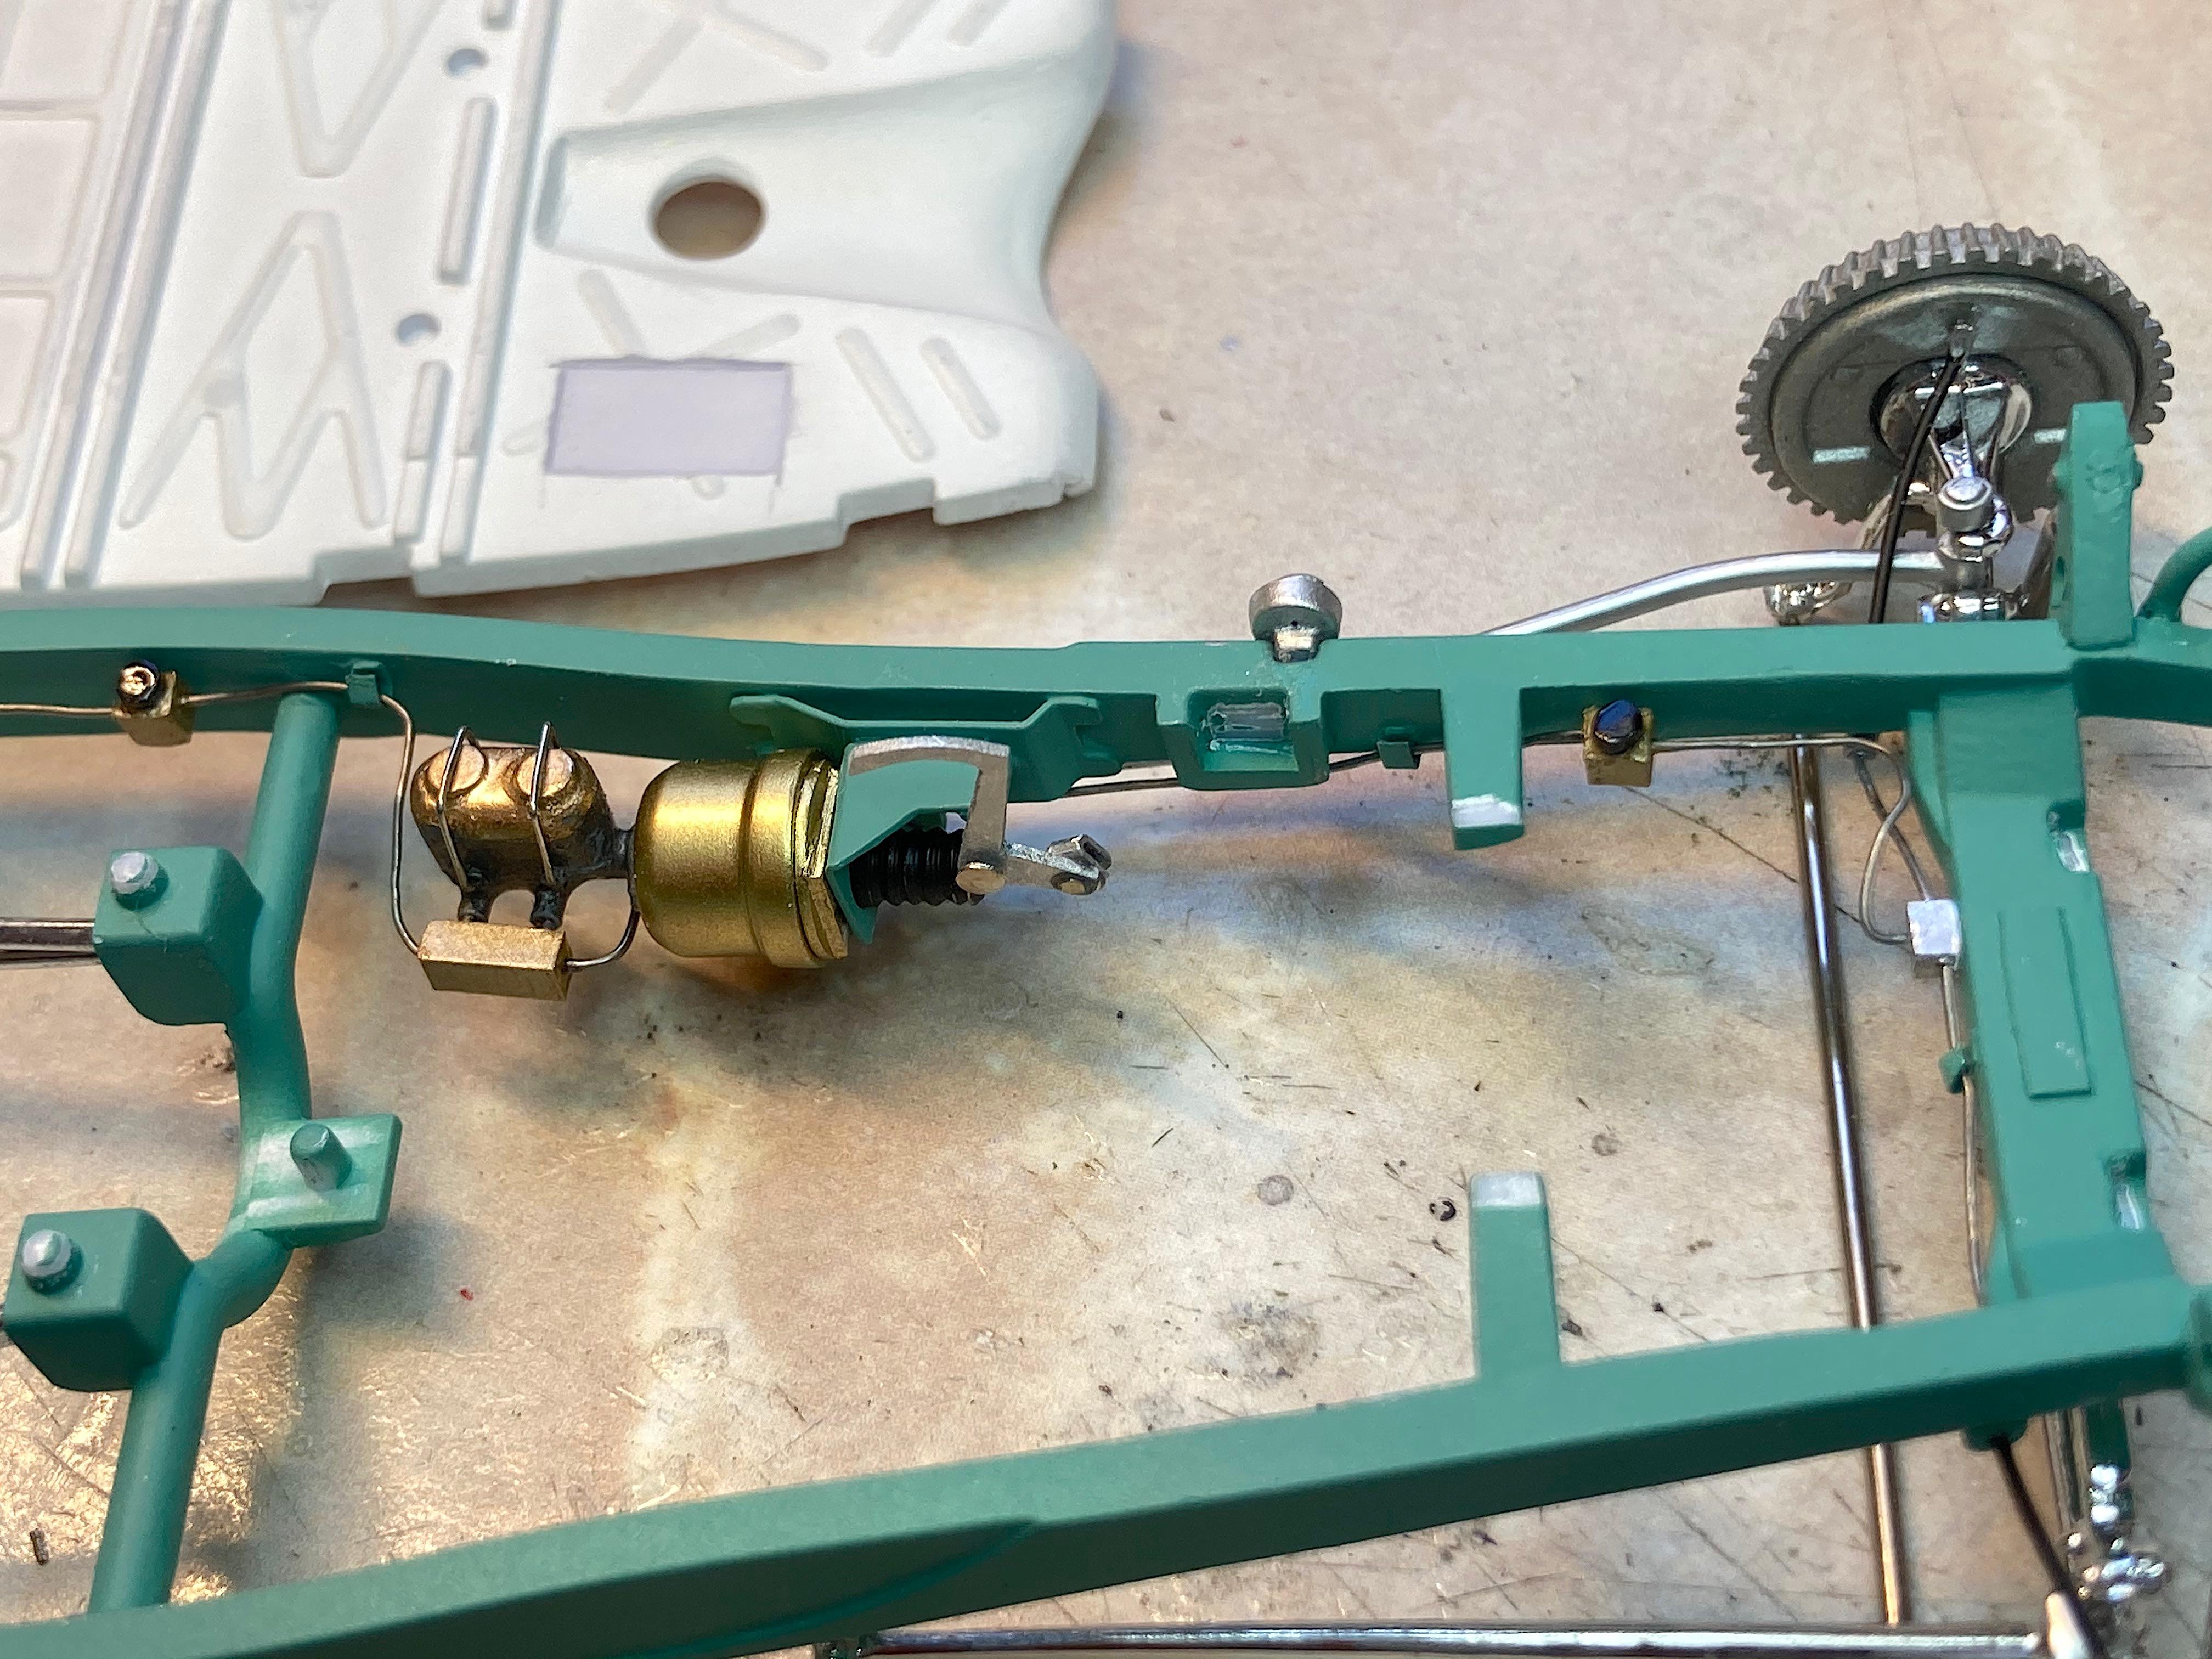
Finding out how tight everything is, discovered some clearance issues. First up, the brake pedal arm was clearing before, but adding just one tiny part caused interference with the engine. The other was finding out the wires that hold the 'cap' on were touching the floor, so I made an 'access hatch' and fixed that! Been wanting to use the circuit board holder. The rear frame rail didn't fit in the groove, so I made a wood adapter block. I think the way the wheels attach to the brake drums is lousy engineering. If you were to display without the wheels on, the studs are a nice detail. Sanded them off, and ground the center of the wheels down so they won't touch the steel pins. Painted the brake parts. Glued the engine and exhausts on. Now I can do the thing I don't really like to do (say what, after all this other stuff?), spark plug wires. With all the handling of the frame, broke a headlight mount, so need to rethink and redo those. ?
-
The CIA did
-
Johan ‘70 Cadillac ElDorado pro touring (low and aggressive)
89AKurt replied to Steve H's topic in WIP: Model Cars
First time I saw this WIP. I choose #2 wheels. I love that your are using a "collectible" Johan kit! -
GSL Common Kit: [revision] just another Model A Roadster
89AKurt replied to 89AKurt's topic in WIP: Model Cars
I figured out what to do with the steel pins. The rear axle, drilled deeper, front I cut about 3/16" off. It was friction fit, two fingers held the backing plate and a thumbnail pushed them in. I can't see a kid getting this part done without breaking the front axle. Brake lines are done. Used a generic diagram, which showed some sort of balancing valves and a "APV" inline, simple blocks of plastic. Also made T fittings from plastic, didn't go nuts with shaping or adding p-e nuts. Some touch-up paint still needs to be done. "Plug wire" for the flex lines, wire insulation for the transition to thin solder wire. This is the first time I ever did so much for the brakes.
-
Oh that's what the 3 dots are! Great job on the sidewalls, with the curve of the tire no less. I was planning to grind down the wheel center so it won't grind the steel pin. Thanks for the reply.
-
Missed the memorial.
-
Carl, I always appreciated you leaving encouraging comments, and playing my game! Sorry your MS is getting worse, and what I would think is the fear of all model builders, losing vision. Prayers. ?
-
Piled Higher & Deeper
-
Looking really good so far! Very interesting subject, to say the least. Were they known as the plumber's nightmare?
-
Nice job on those! I'm building the kit at the moment, making it as difficult as possible. ? I noticed the blue dots. You paint the white walls? Also noticed the brace rods over the engine. How did you glue the wheels on the brake drums, seems like no positive connection.