89AKurt
-
Posts
8,426 -
Joined
-
Last visited
Content Type
Profiles
Forums
Events
Gallery
Everything posted by 89AKurt
-

GSL Common Kit: [revision] just another Model A Roadster
89AKurt replied to 89AKurt's topic in WIP: Model Cars
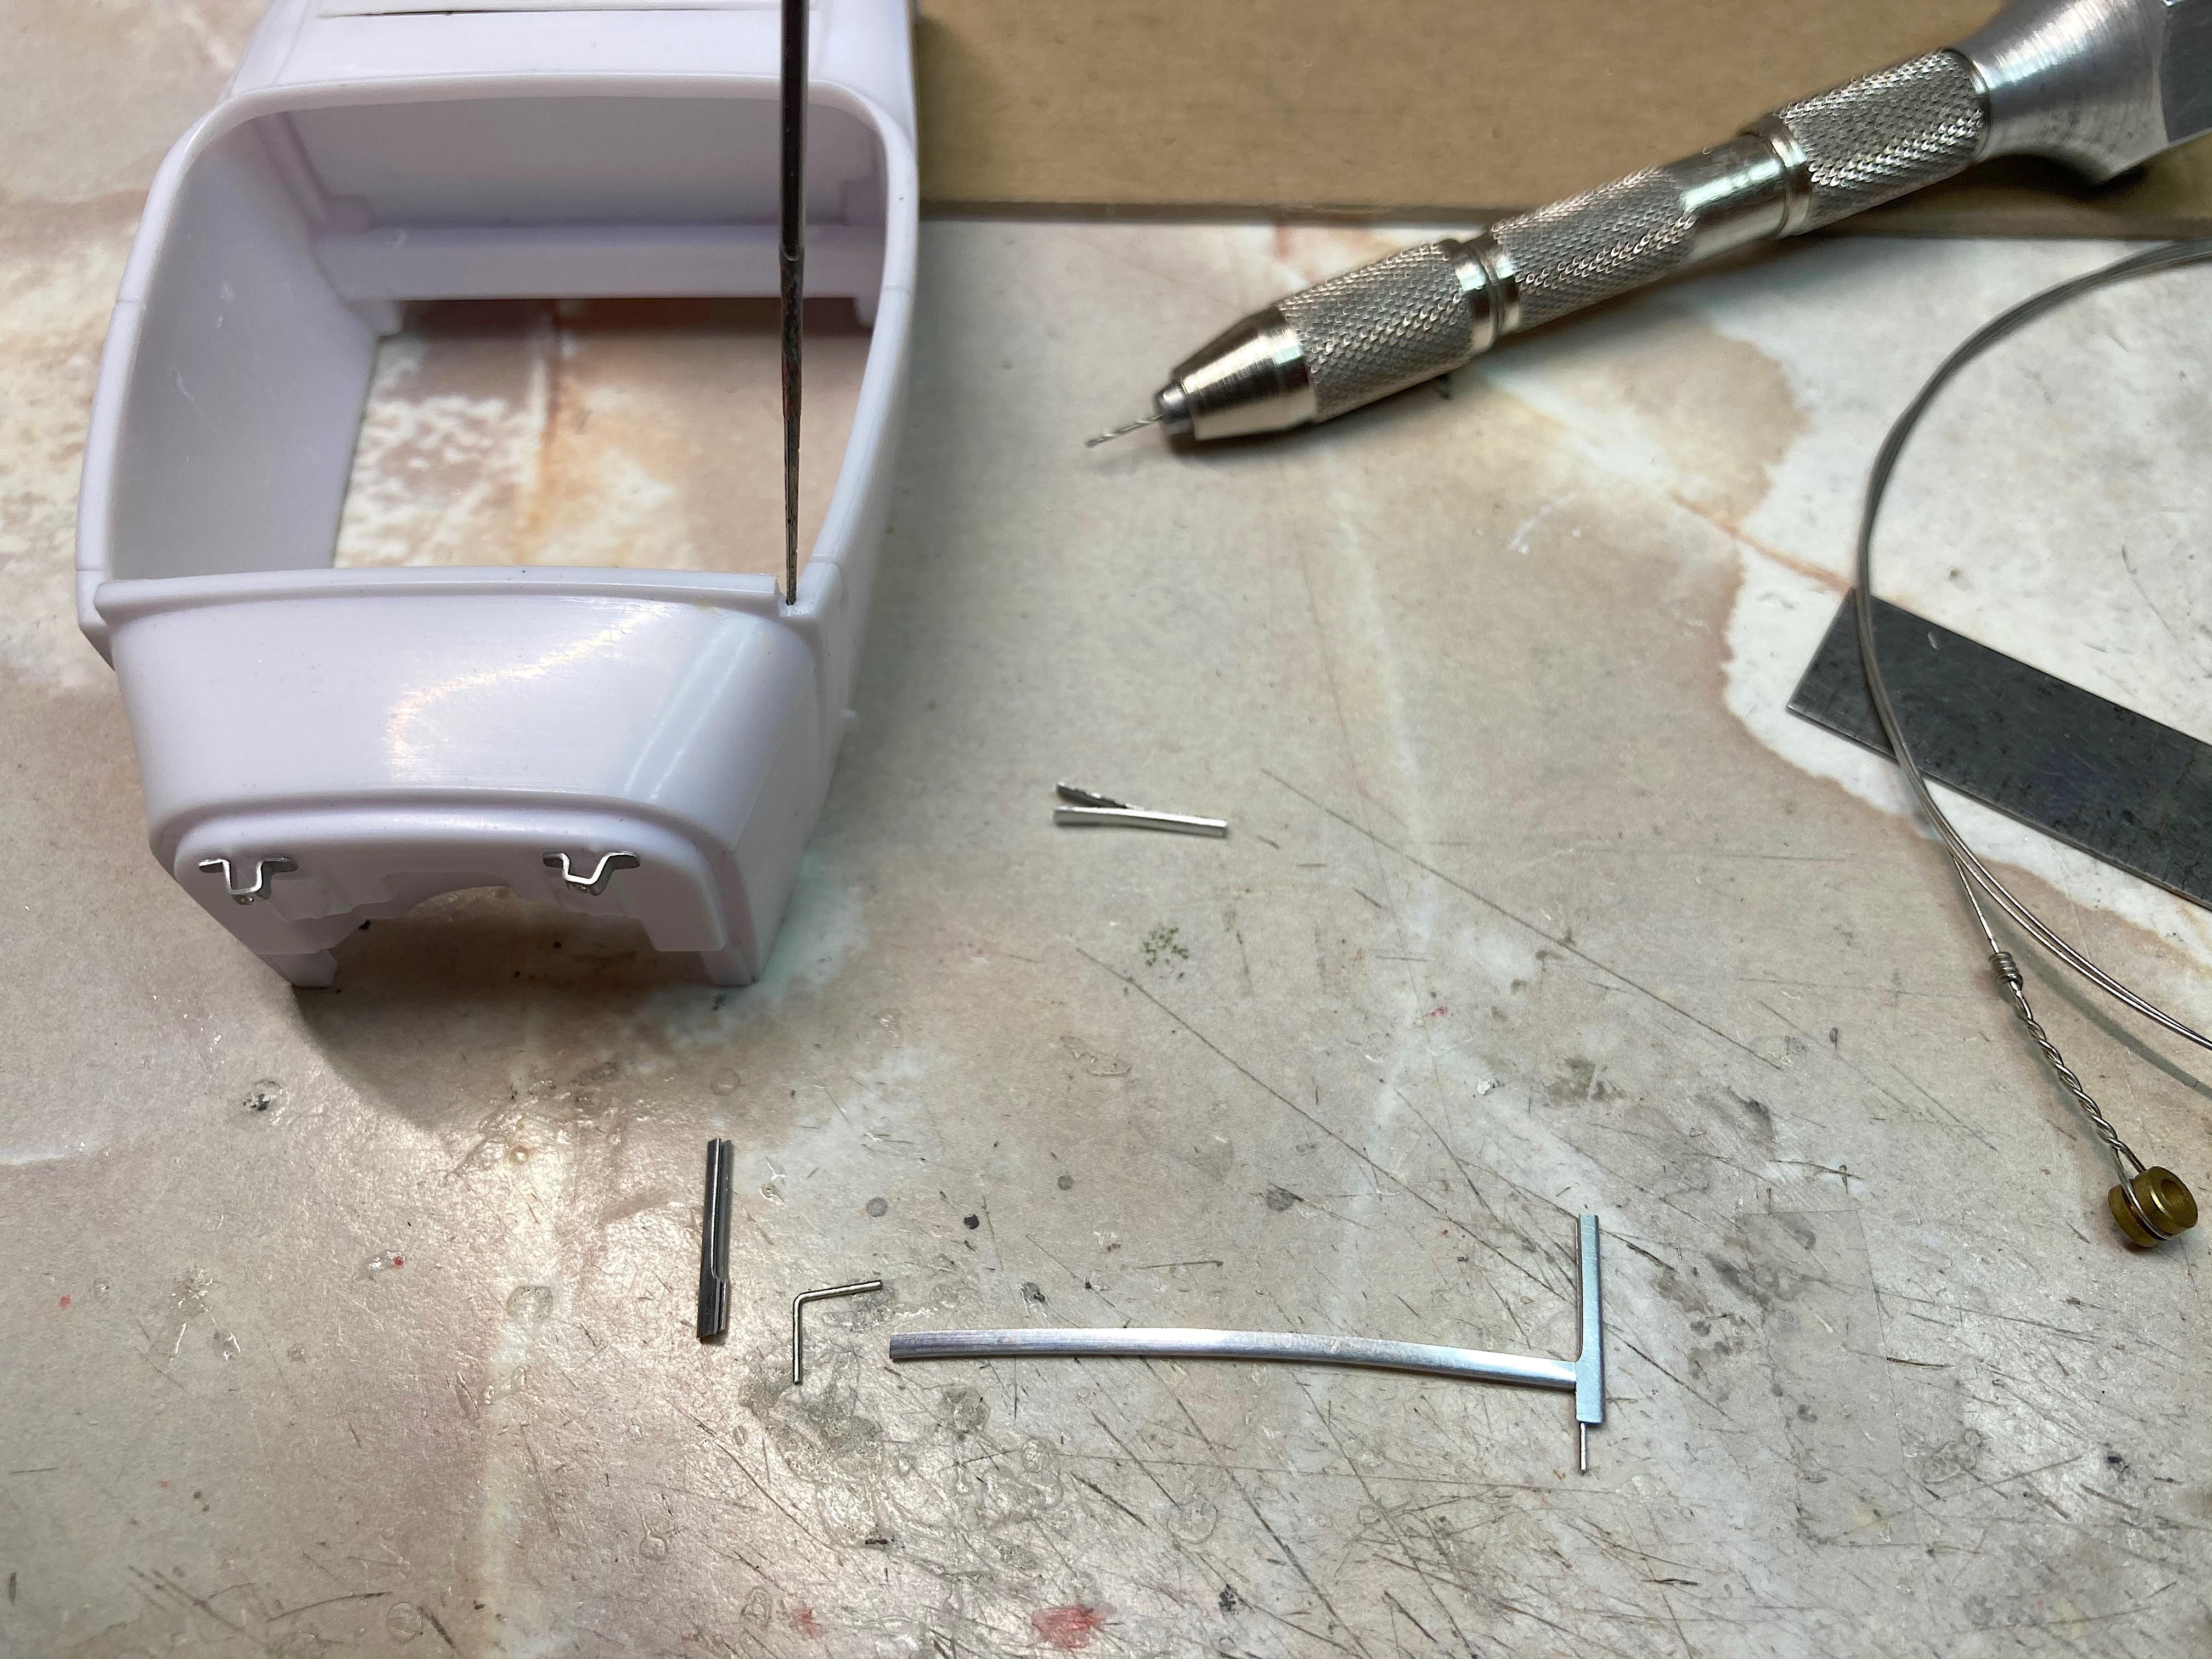
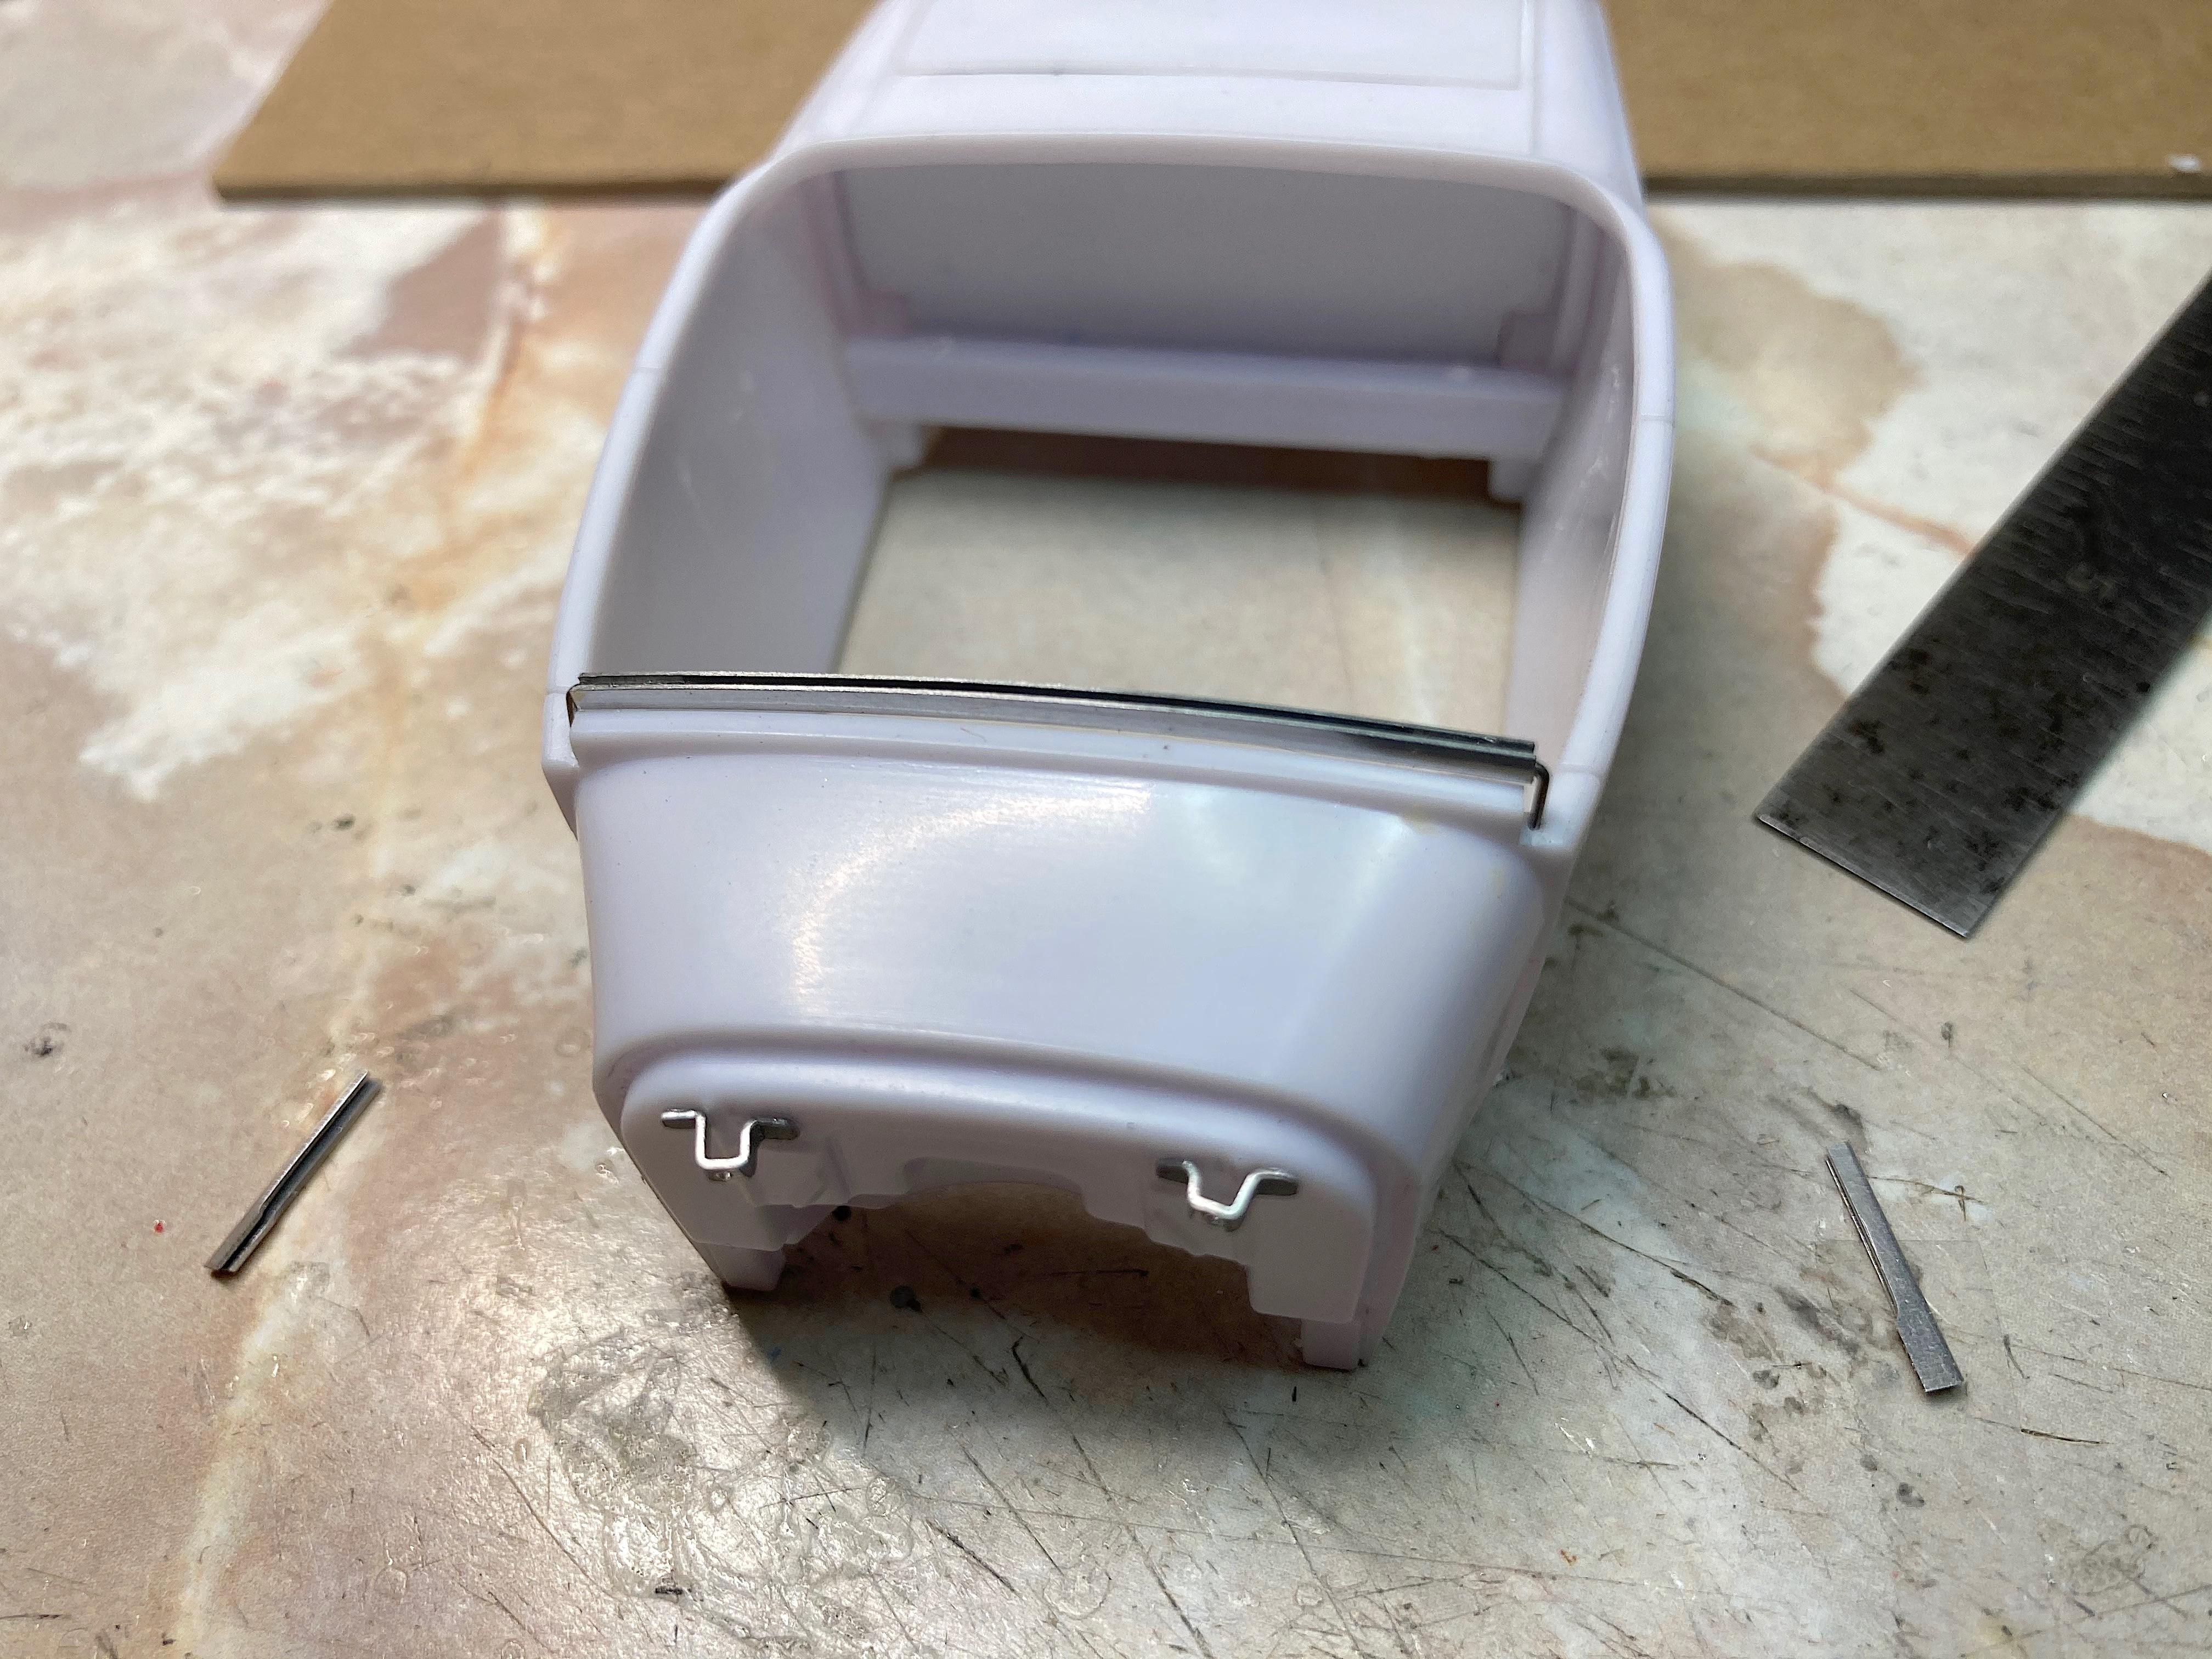
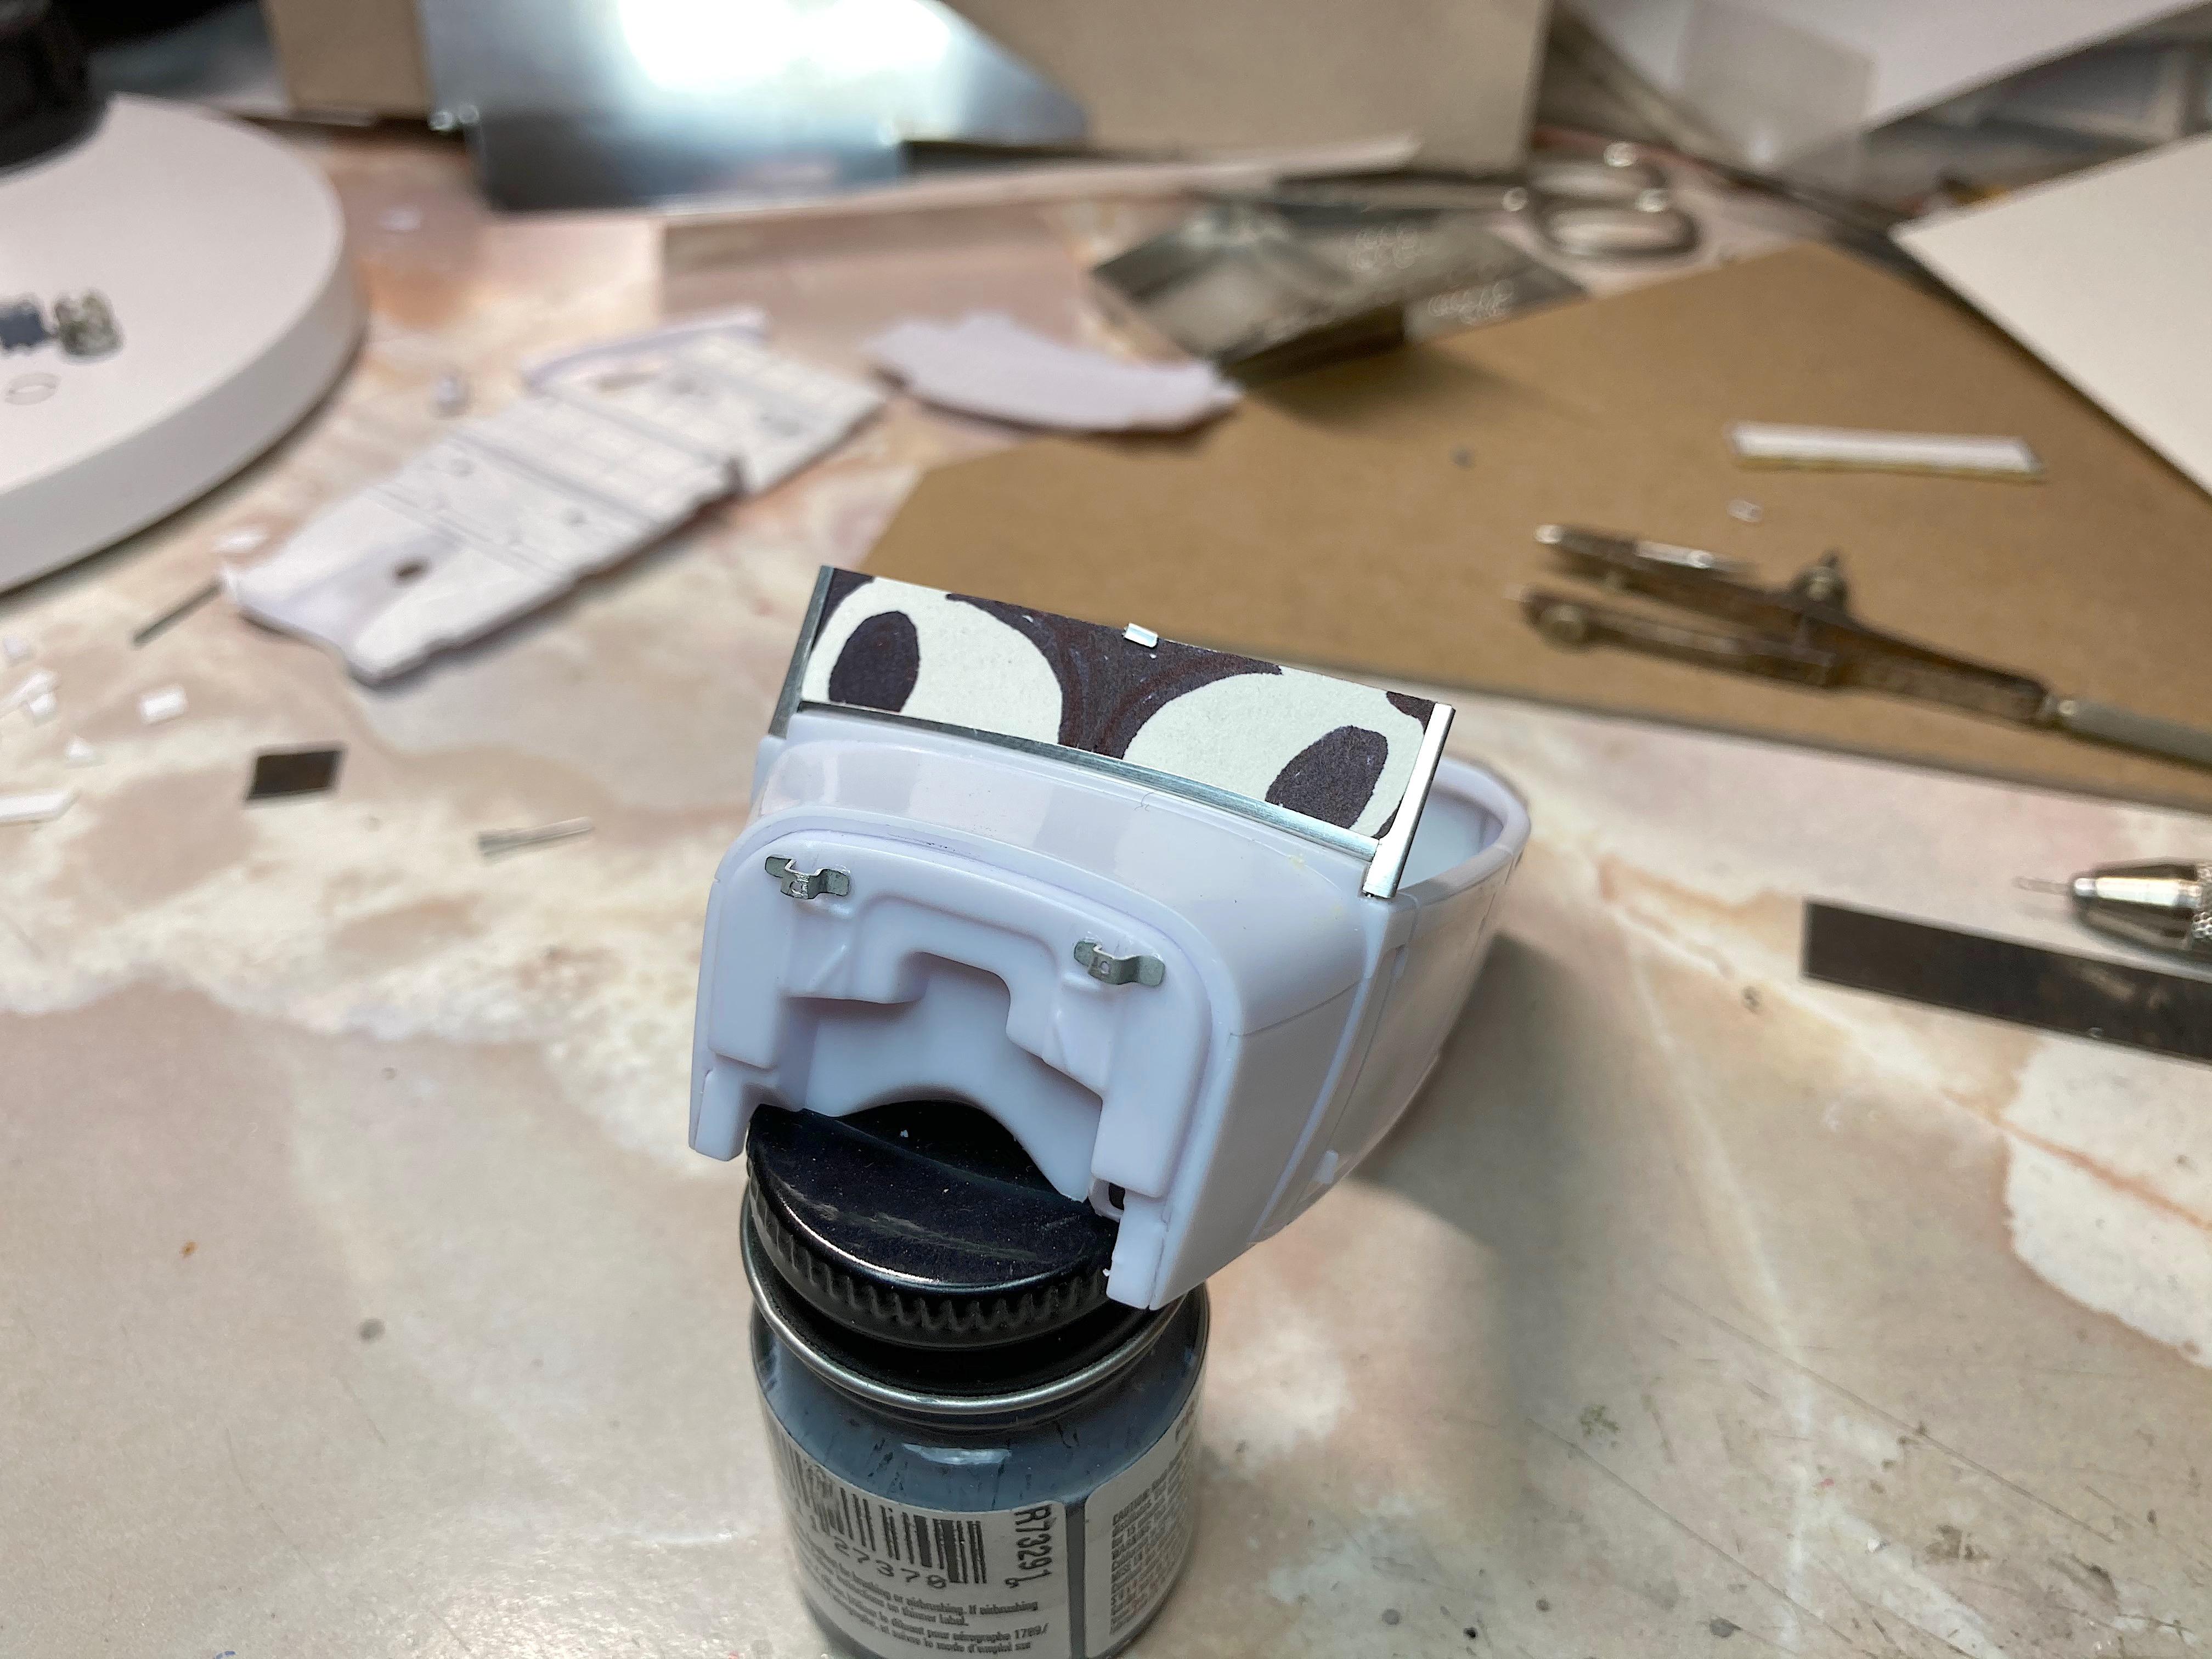
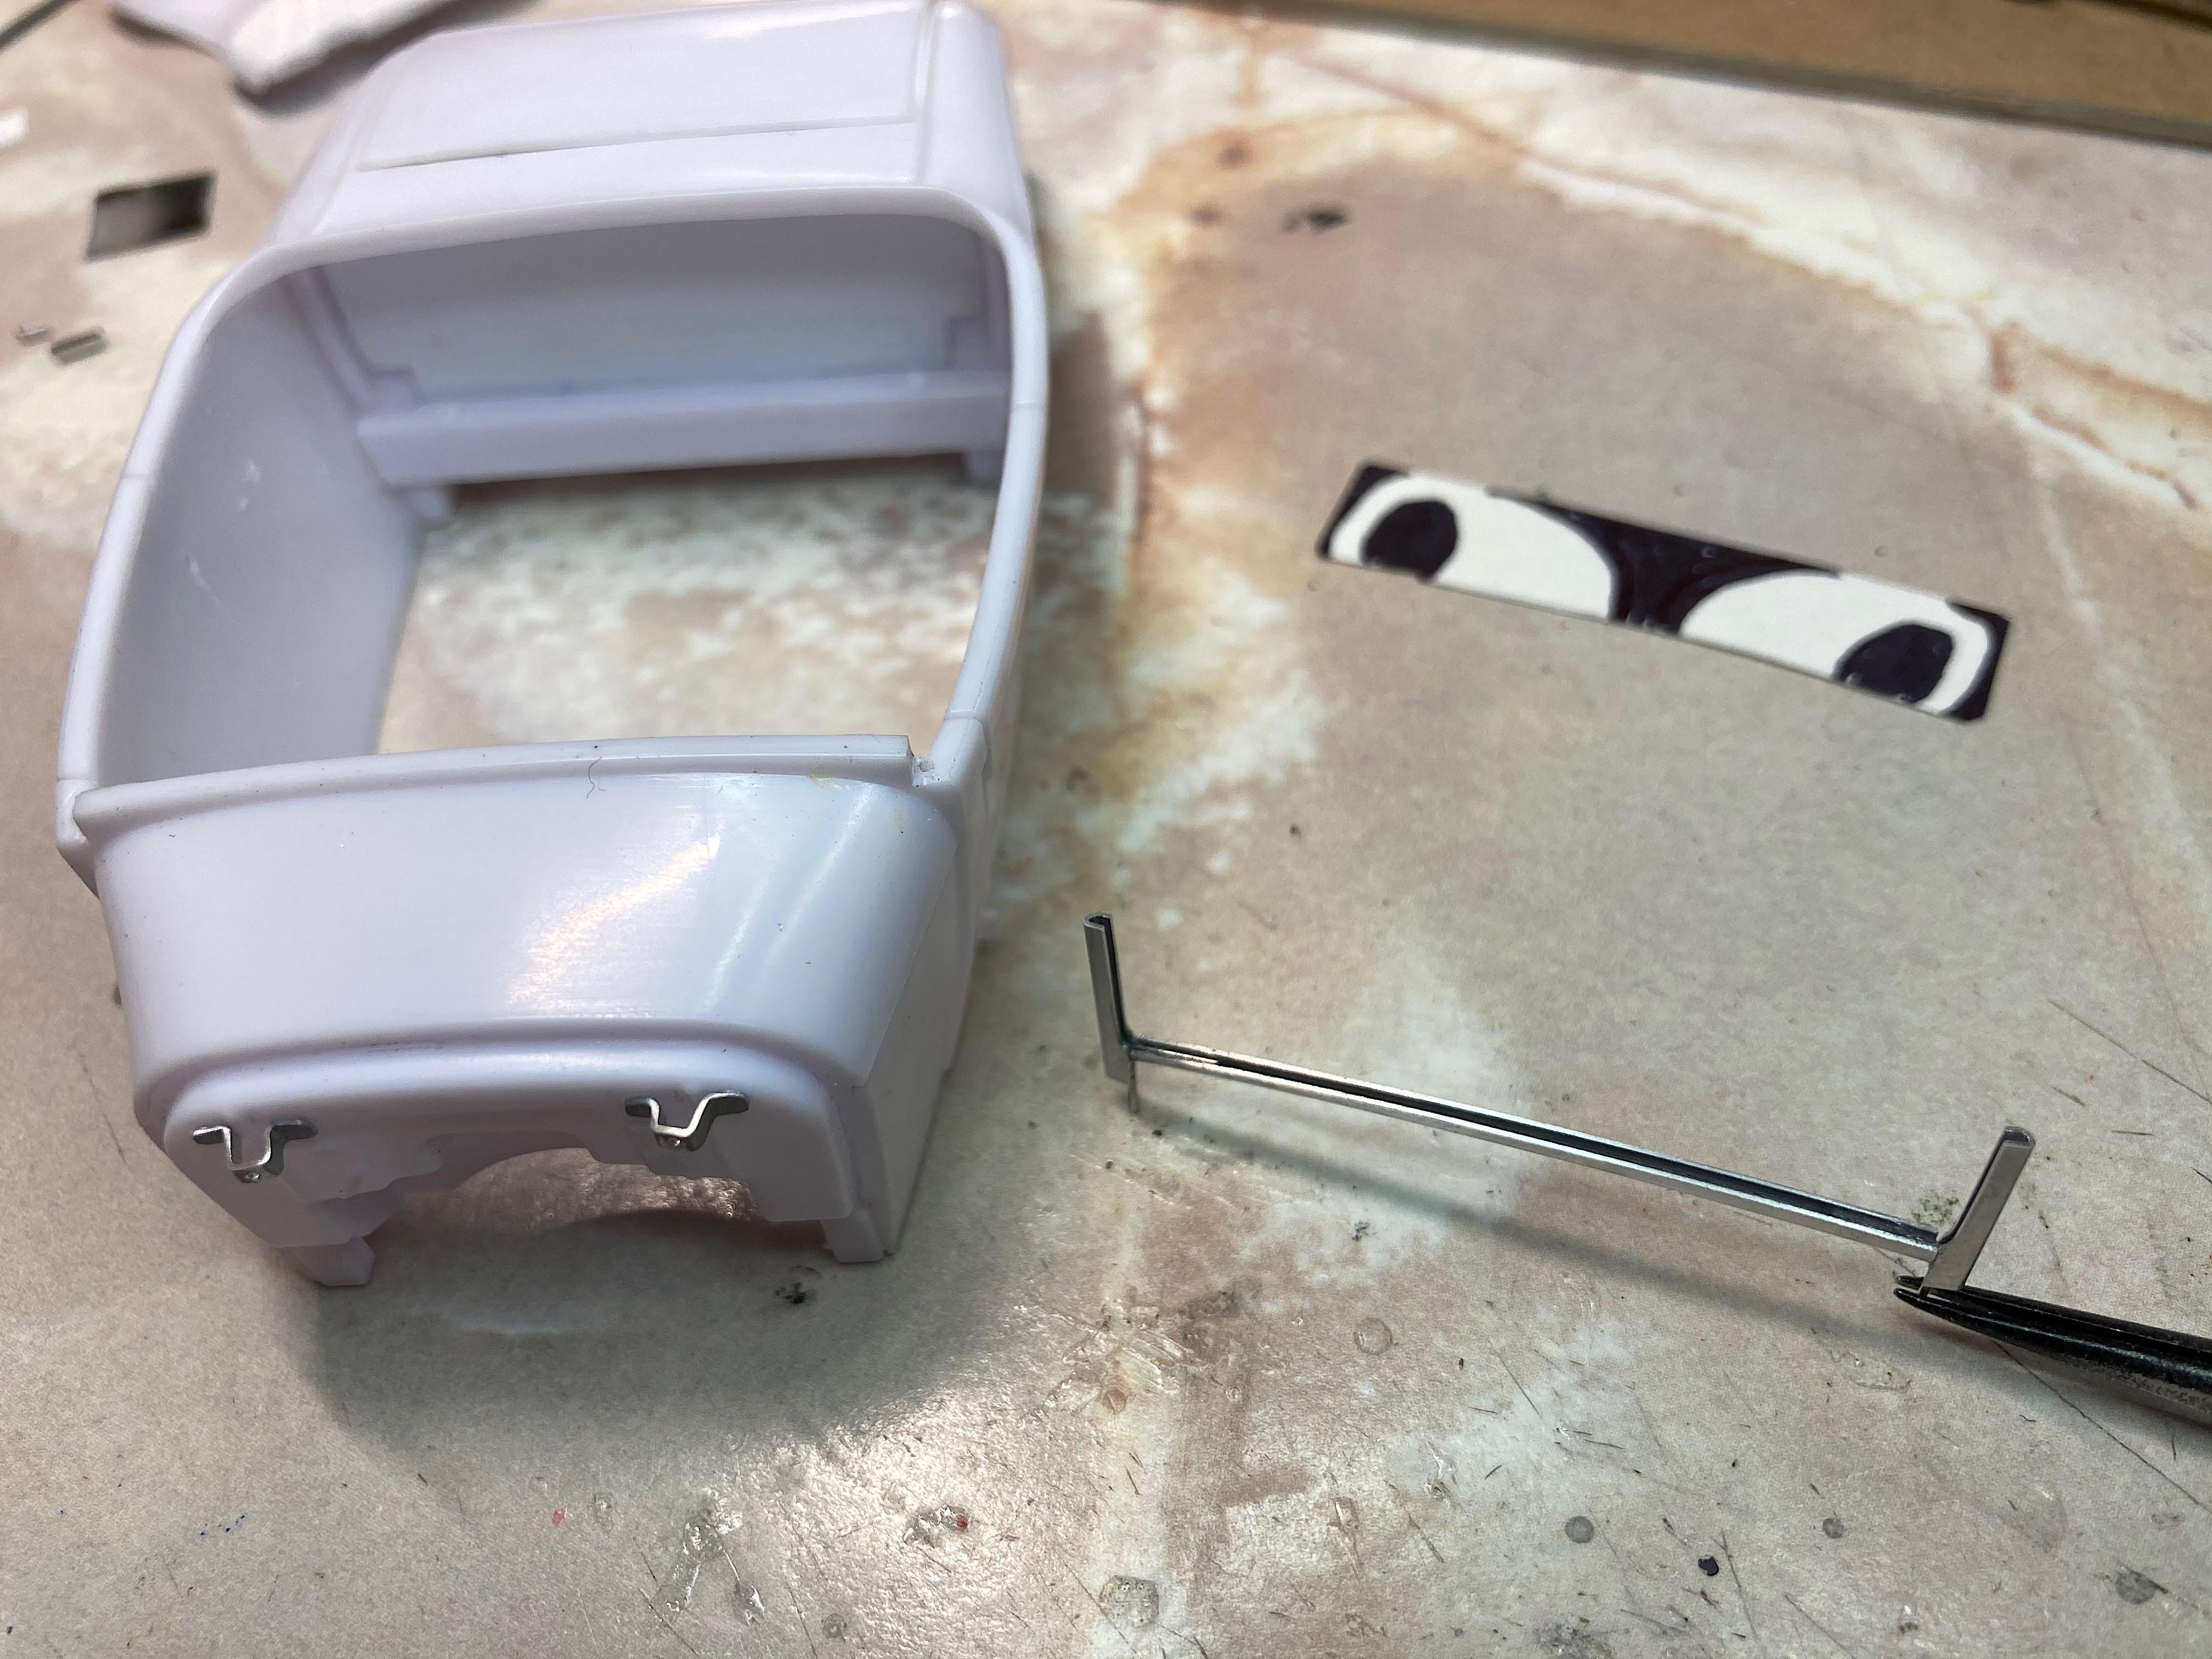
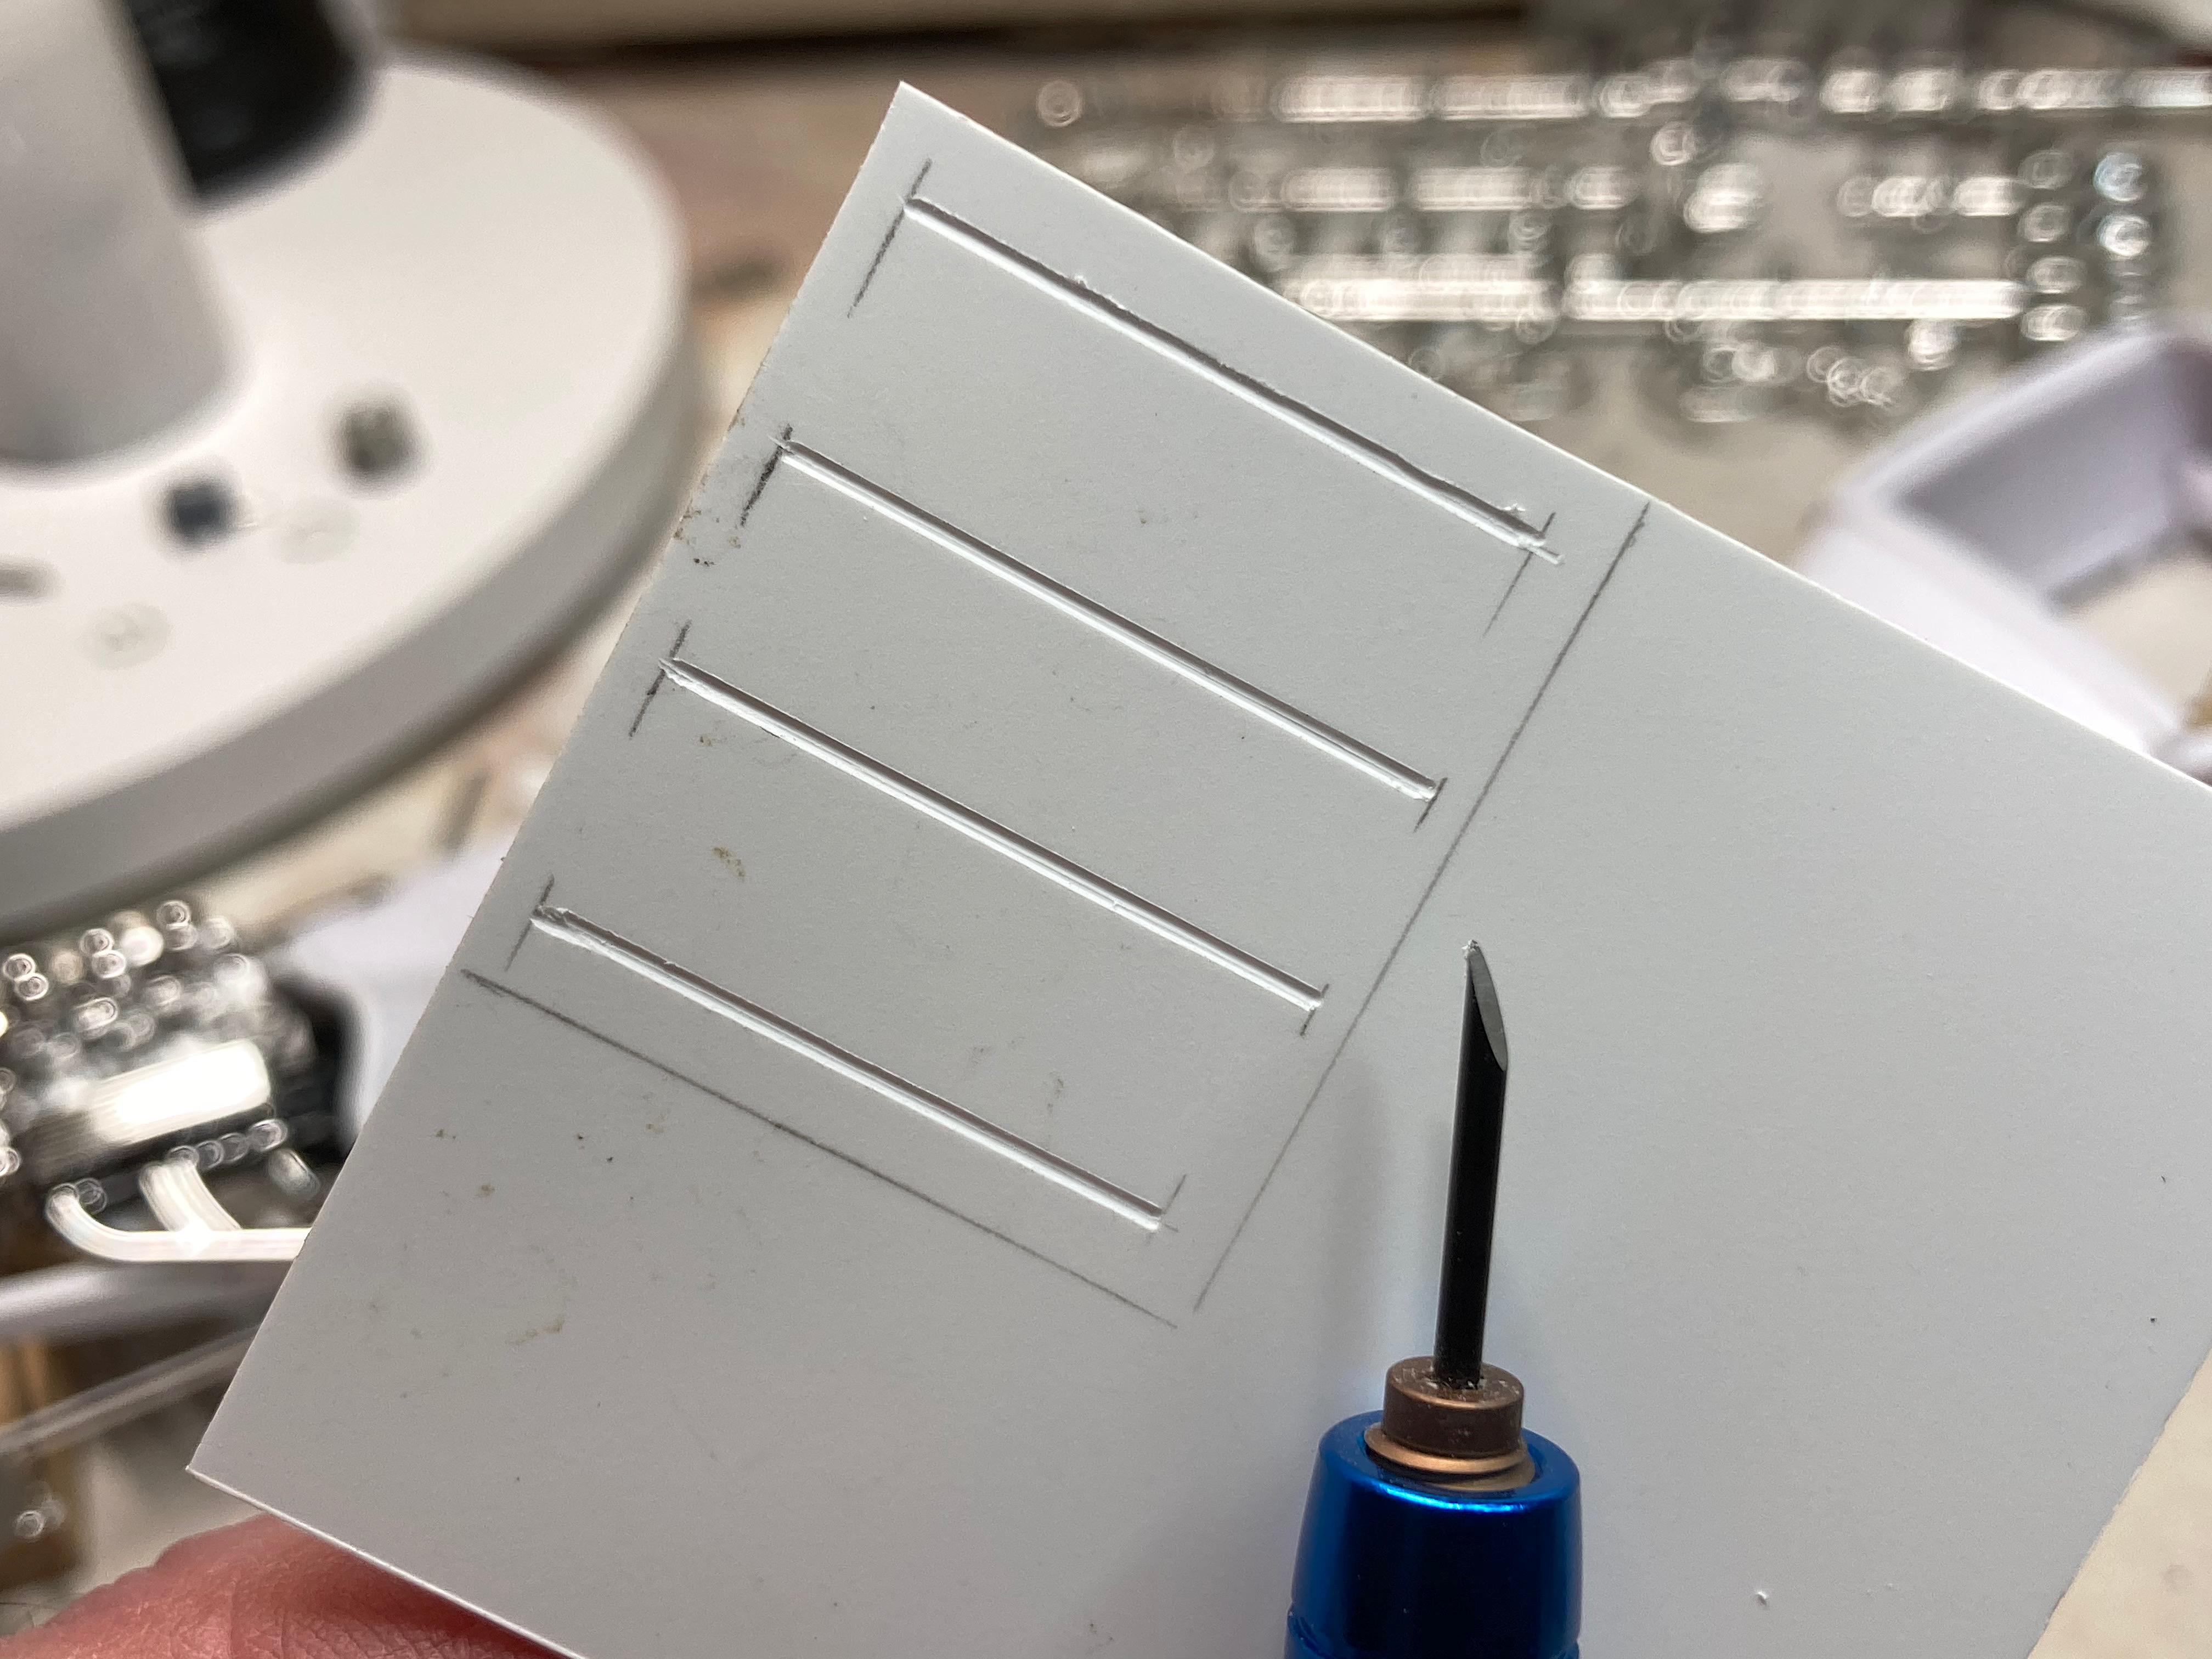
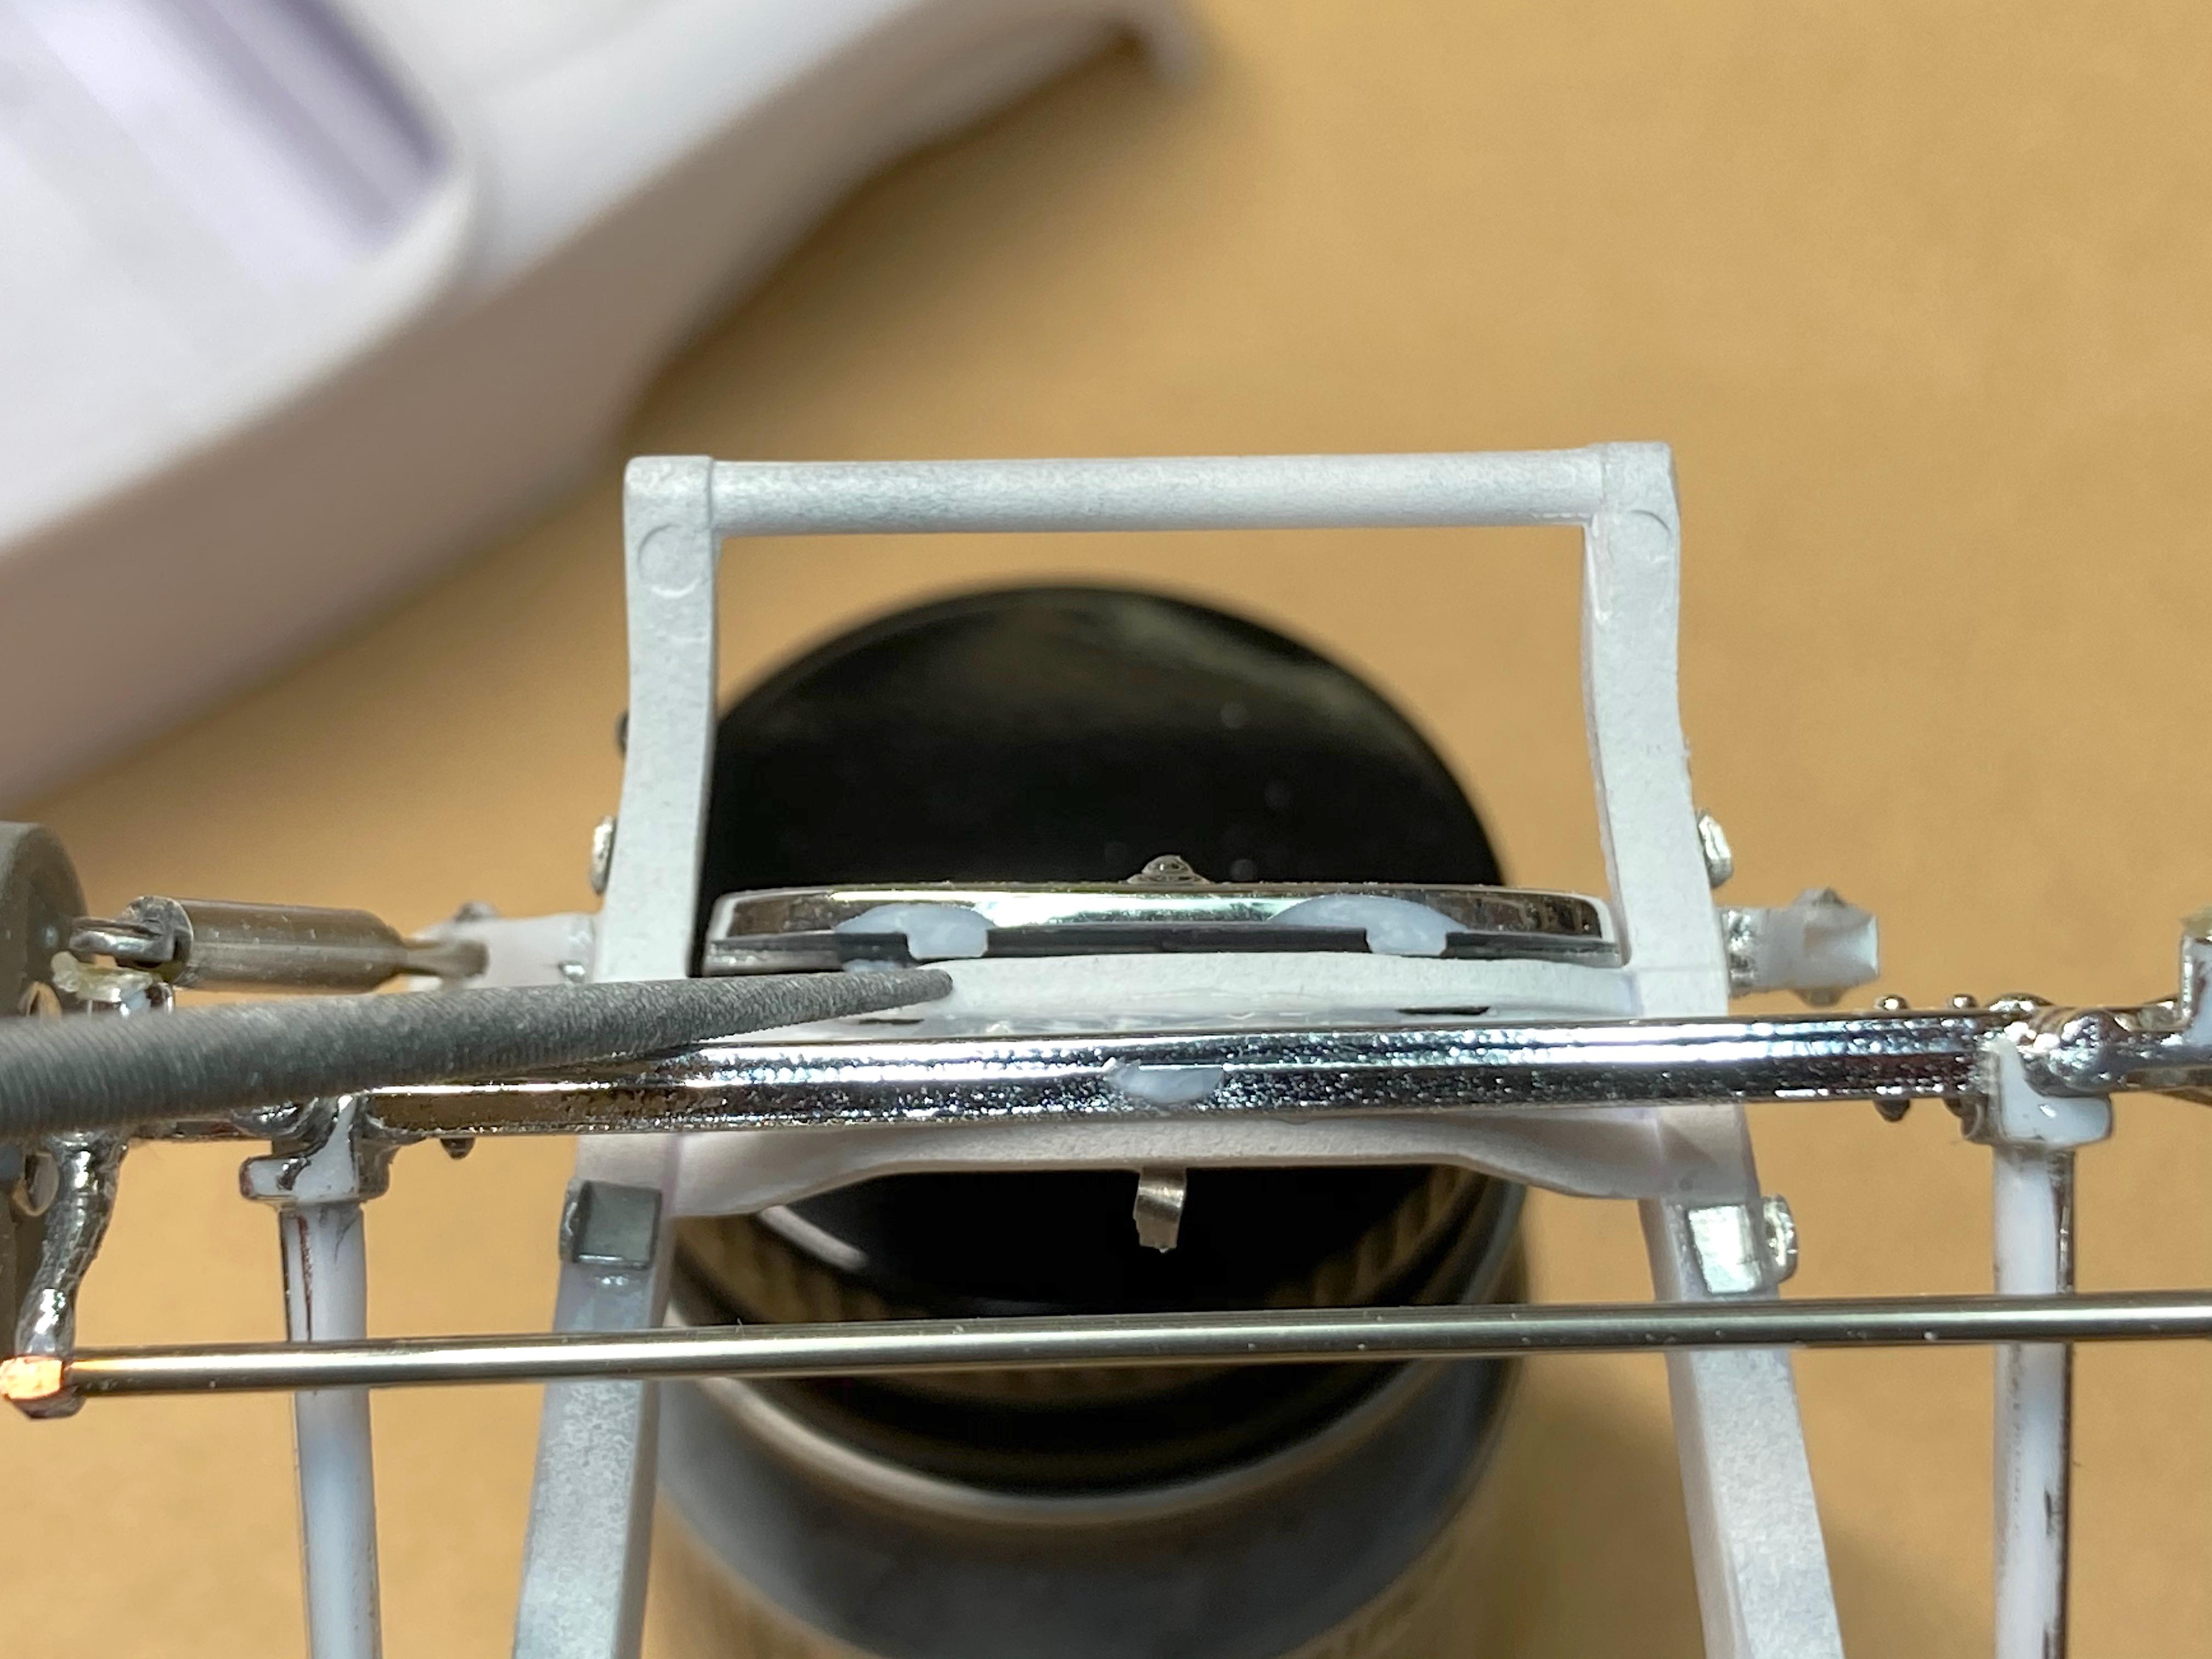
Got the windshield frame done. Had to make only one vertical post twice, so things are improving! No more bending of the aluminum frame, bent wire that connects at the corners, and is held into the body. Stuck the wires into the body, then glued into the bottom part. Just enough glue for the vertical posts, which needed to be tweaked because I didn't get the holes drilled at exactly the same rake yada yada. Then I carefully removed from the body, and added more glue into the gap of the vertical posts, making sure I didn't get any glue on the outside. Made a paper pattern for the "glass", marked the outside because I know it's not exactly the same on each side. ? This was fun, I'm sort of nuts about using this aluminum plate for anything I can think of. I'm going to make a mirror, use a tiny offcut to stick on top of the glass.
-
with broken glass
-
GSL Common Kit: [revision] just another Model A Roadster
89AKurt replied to 89AKurt's topic in WIP: Model Cars
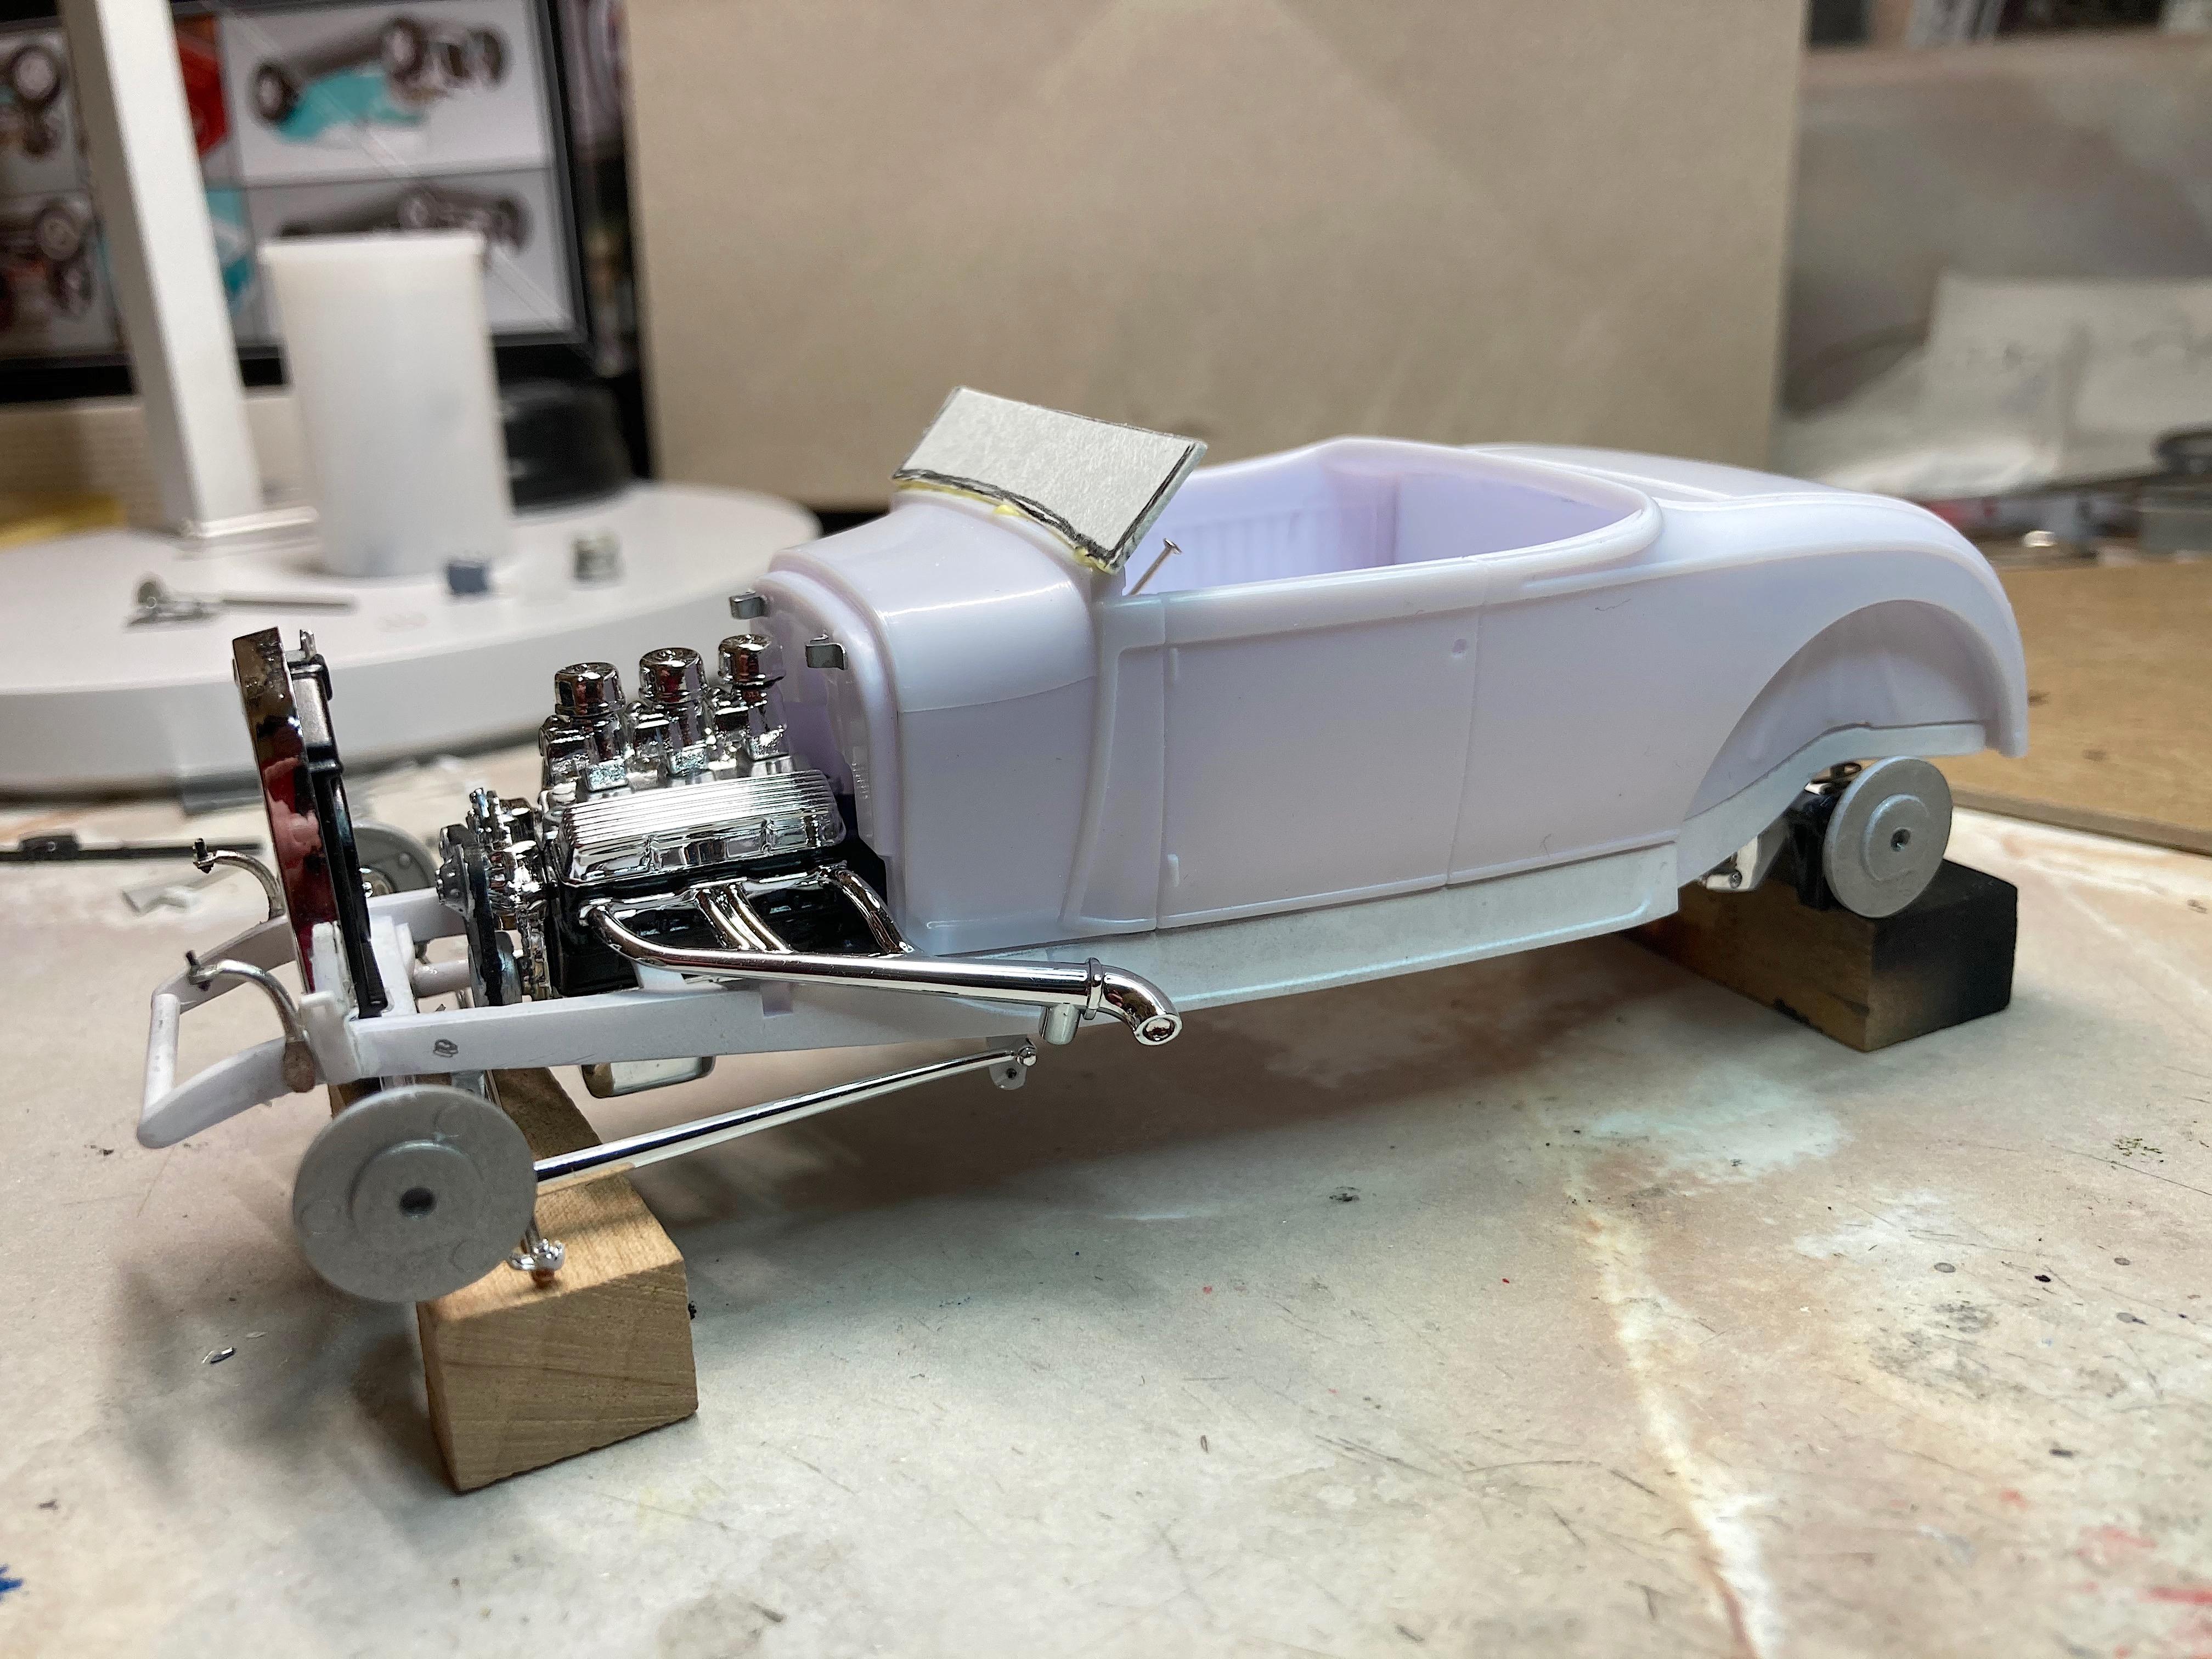
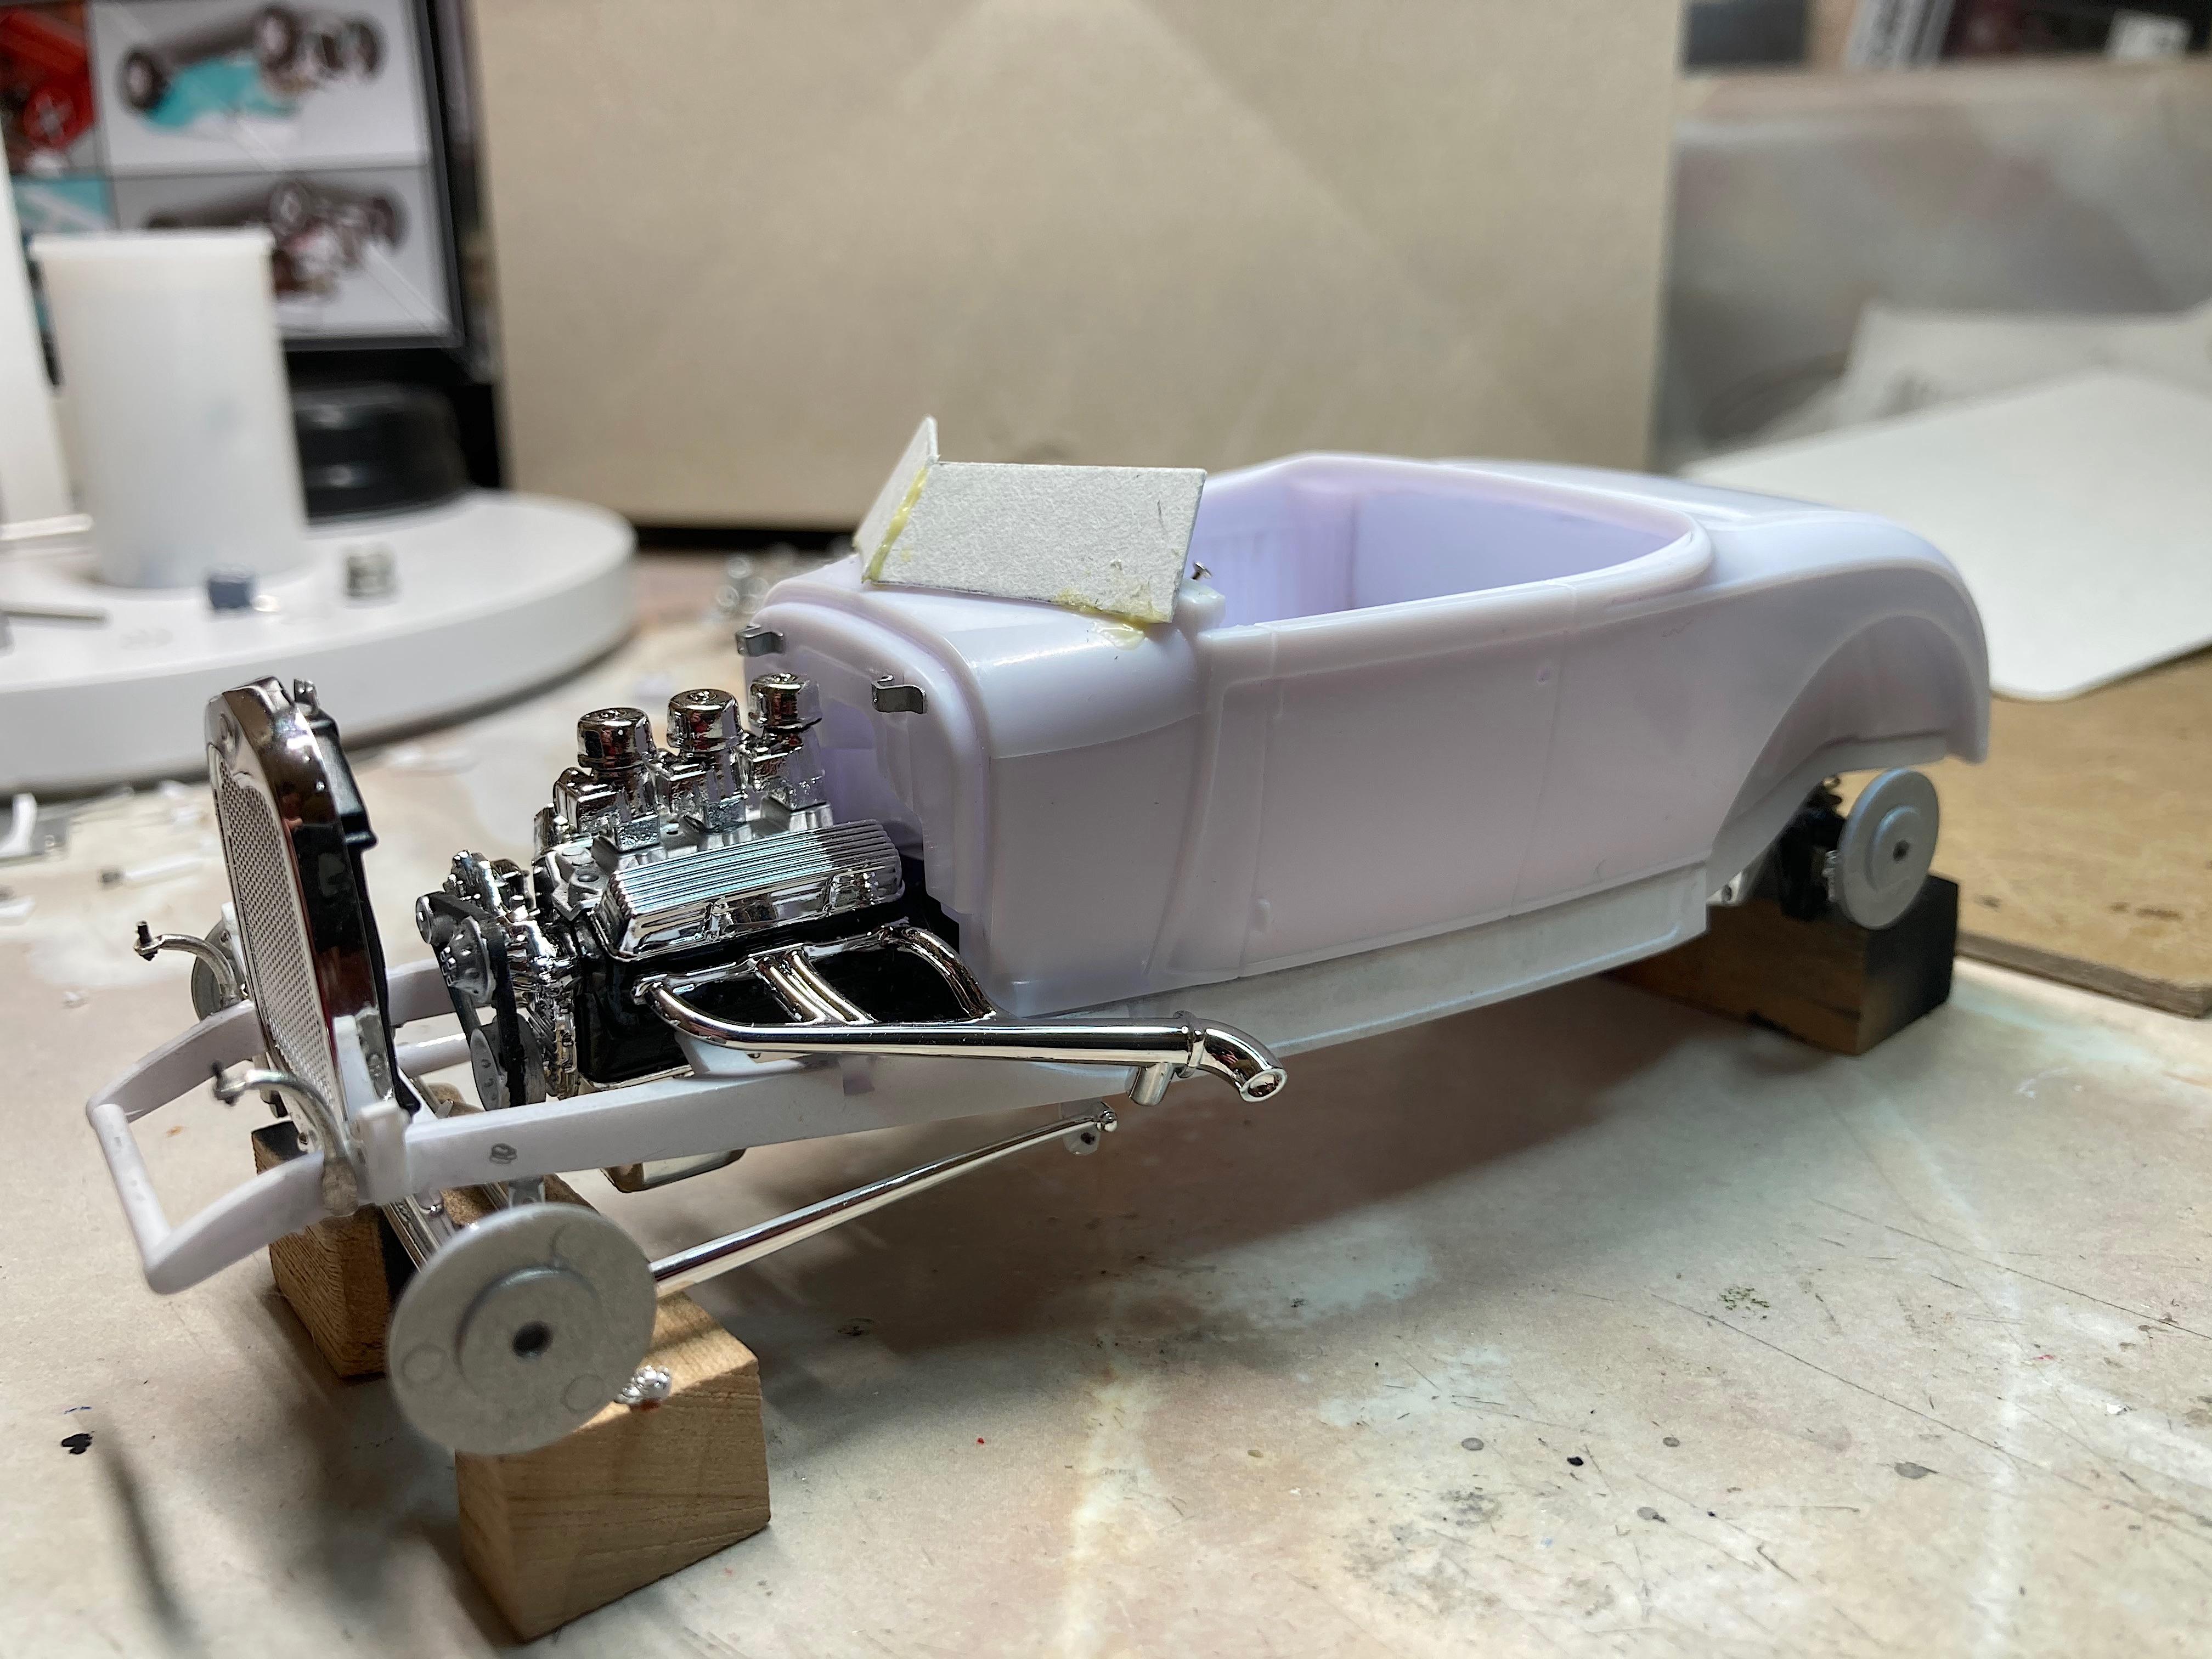
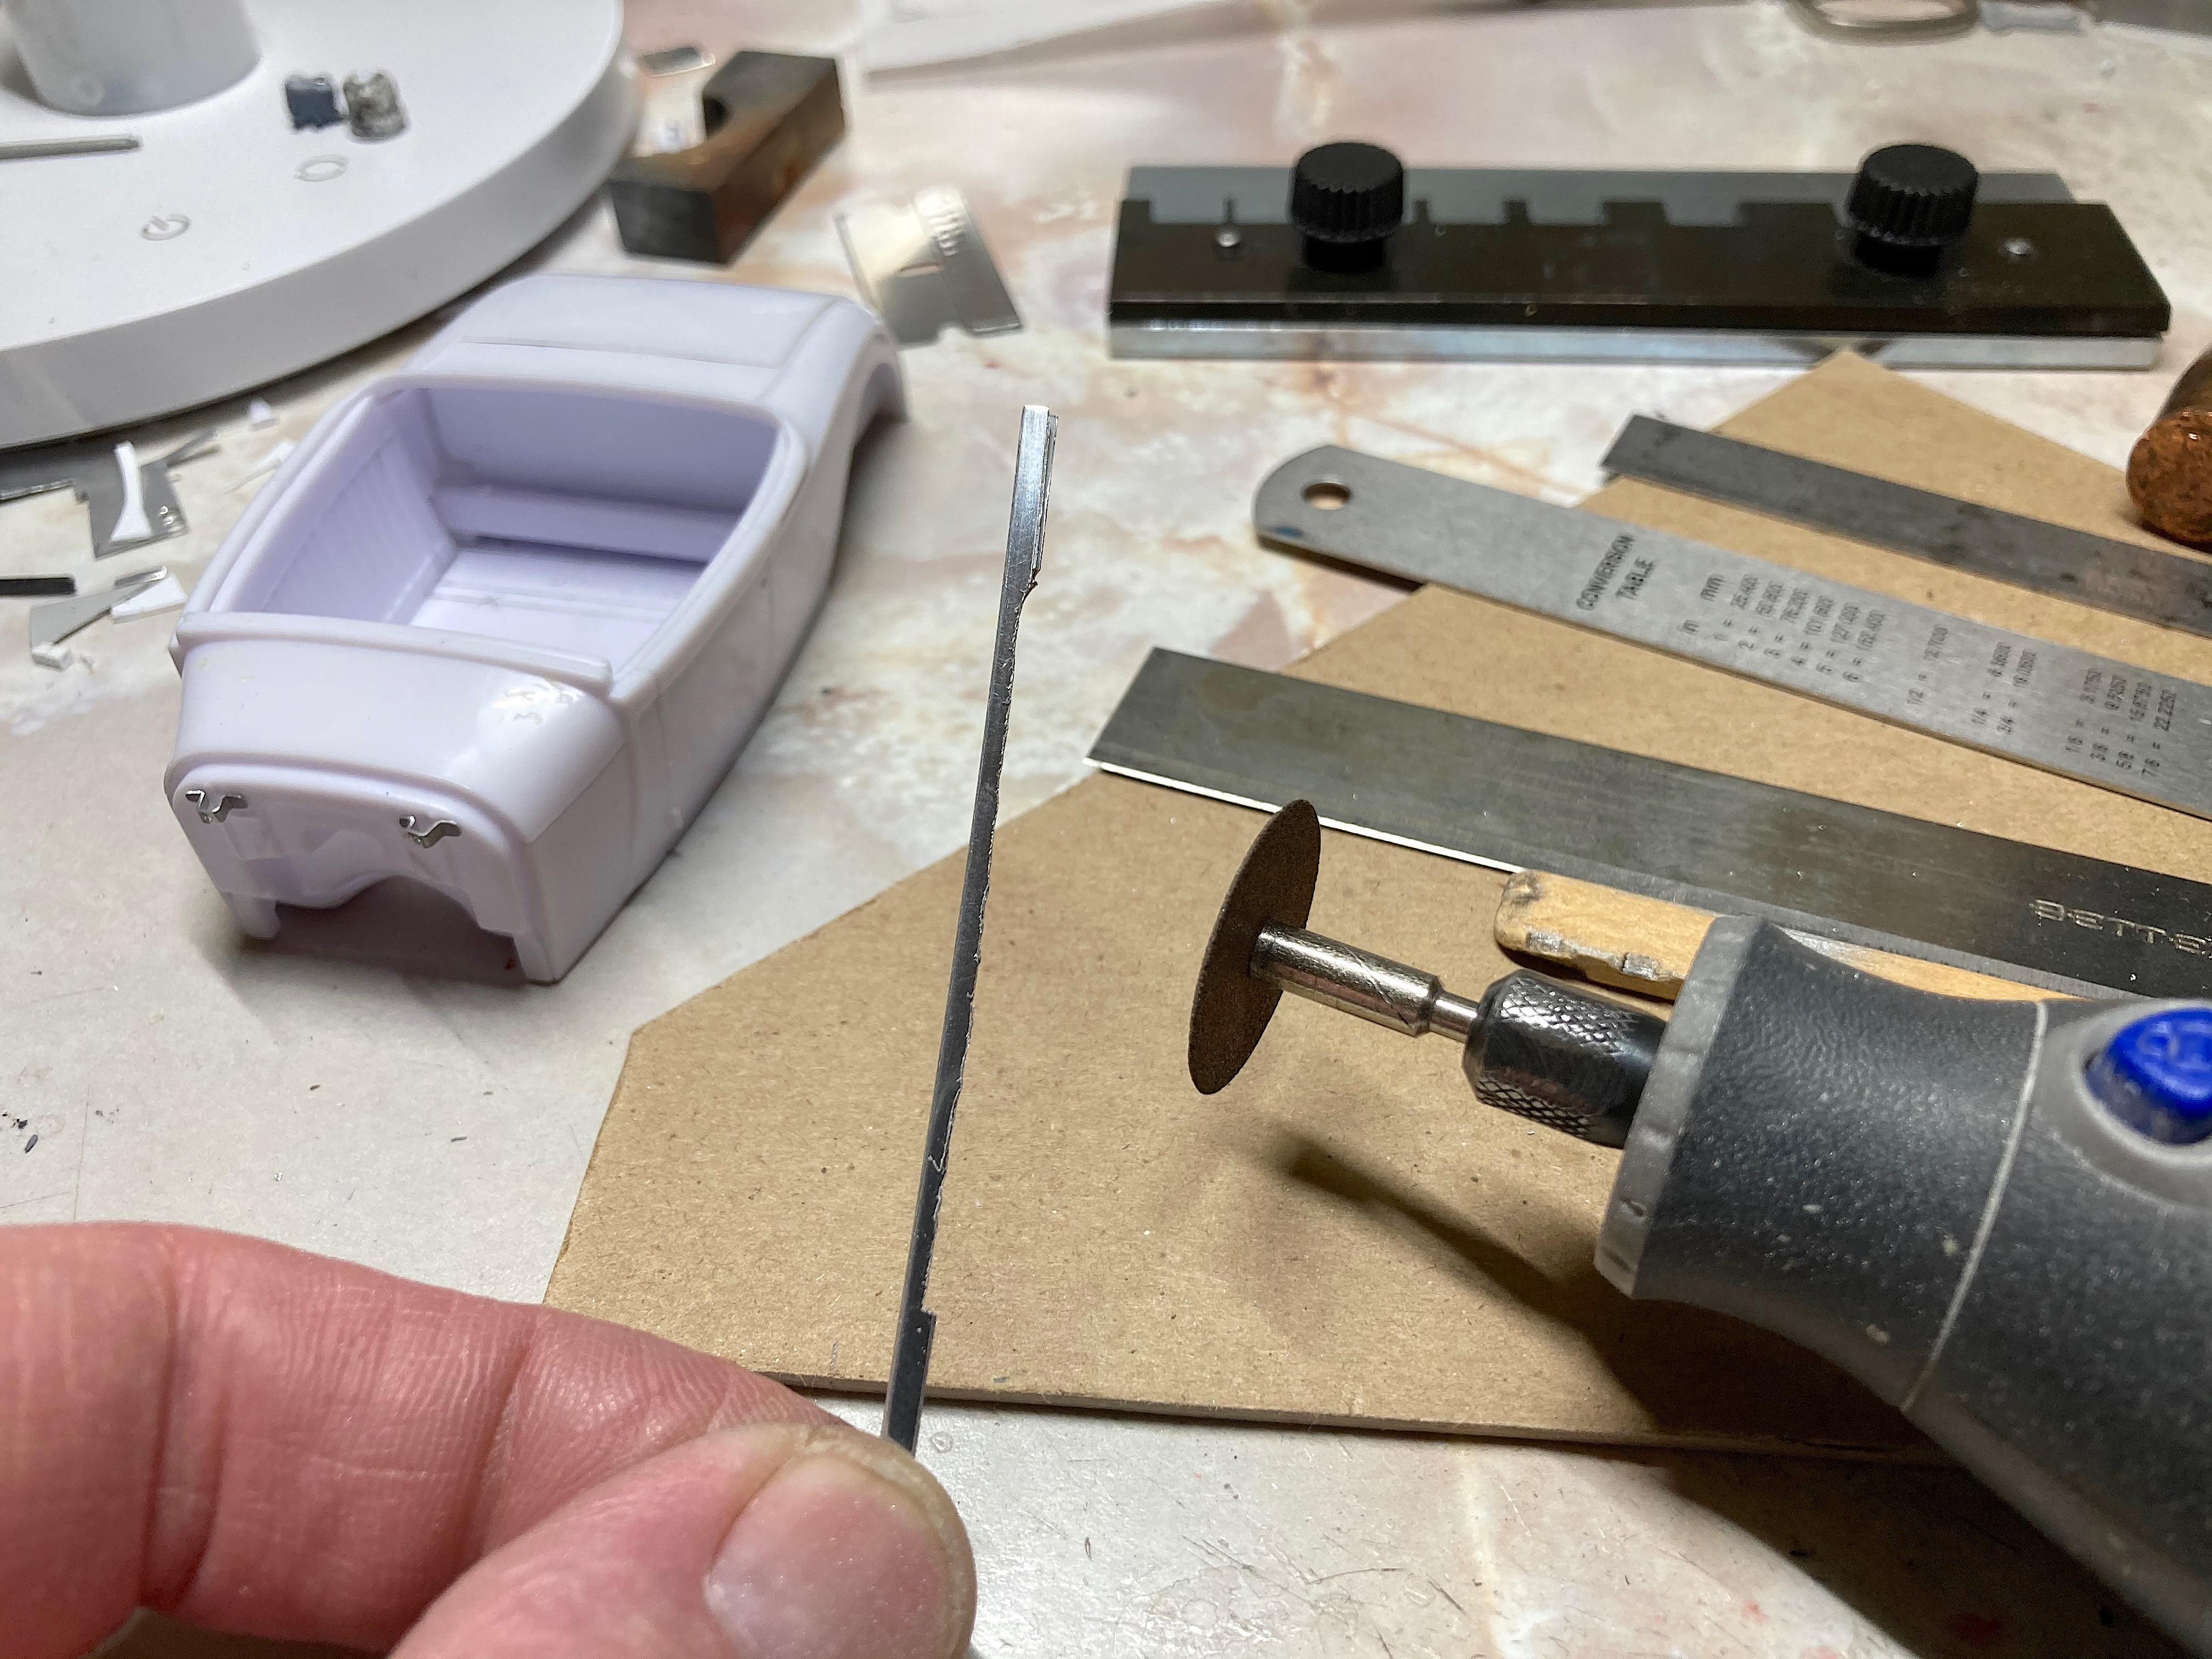
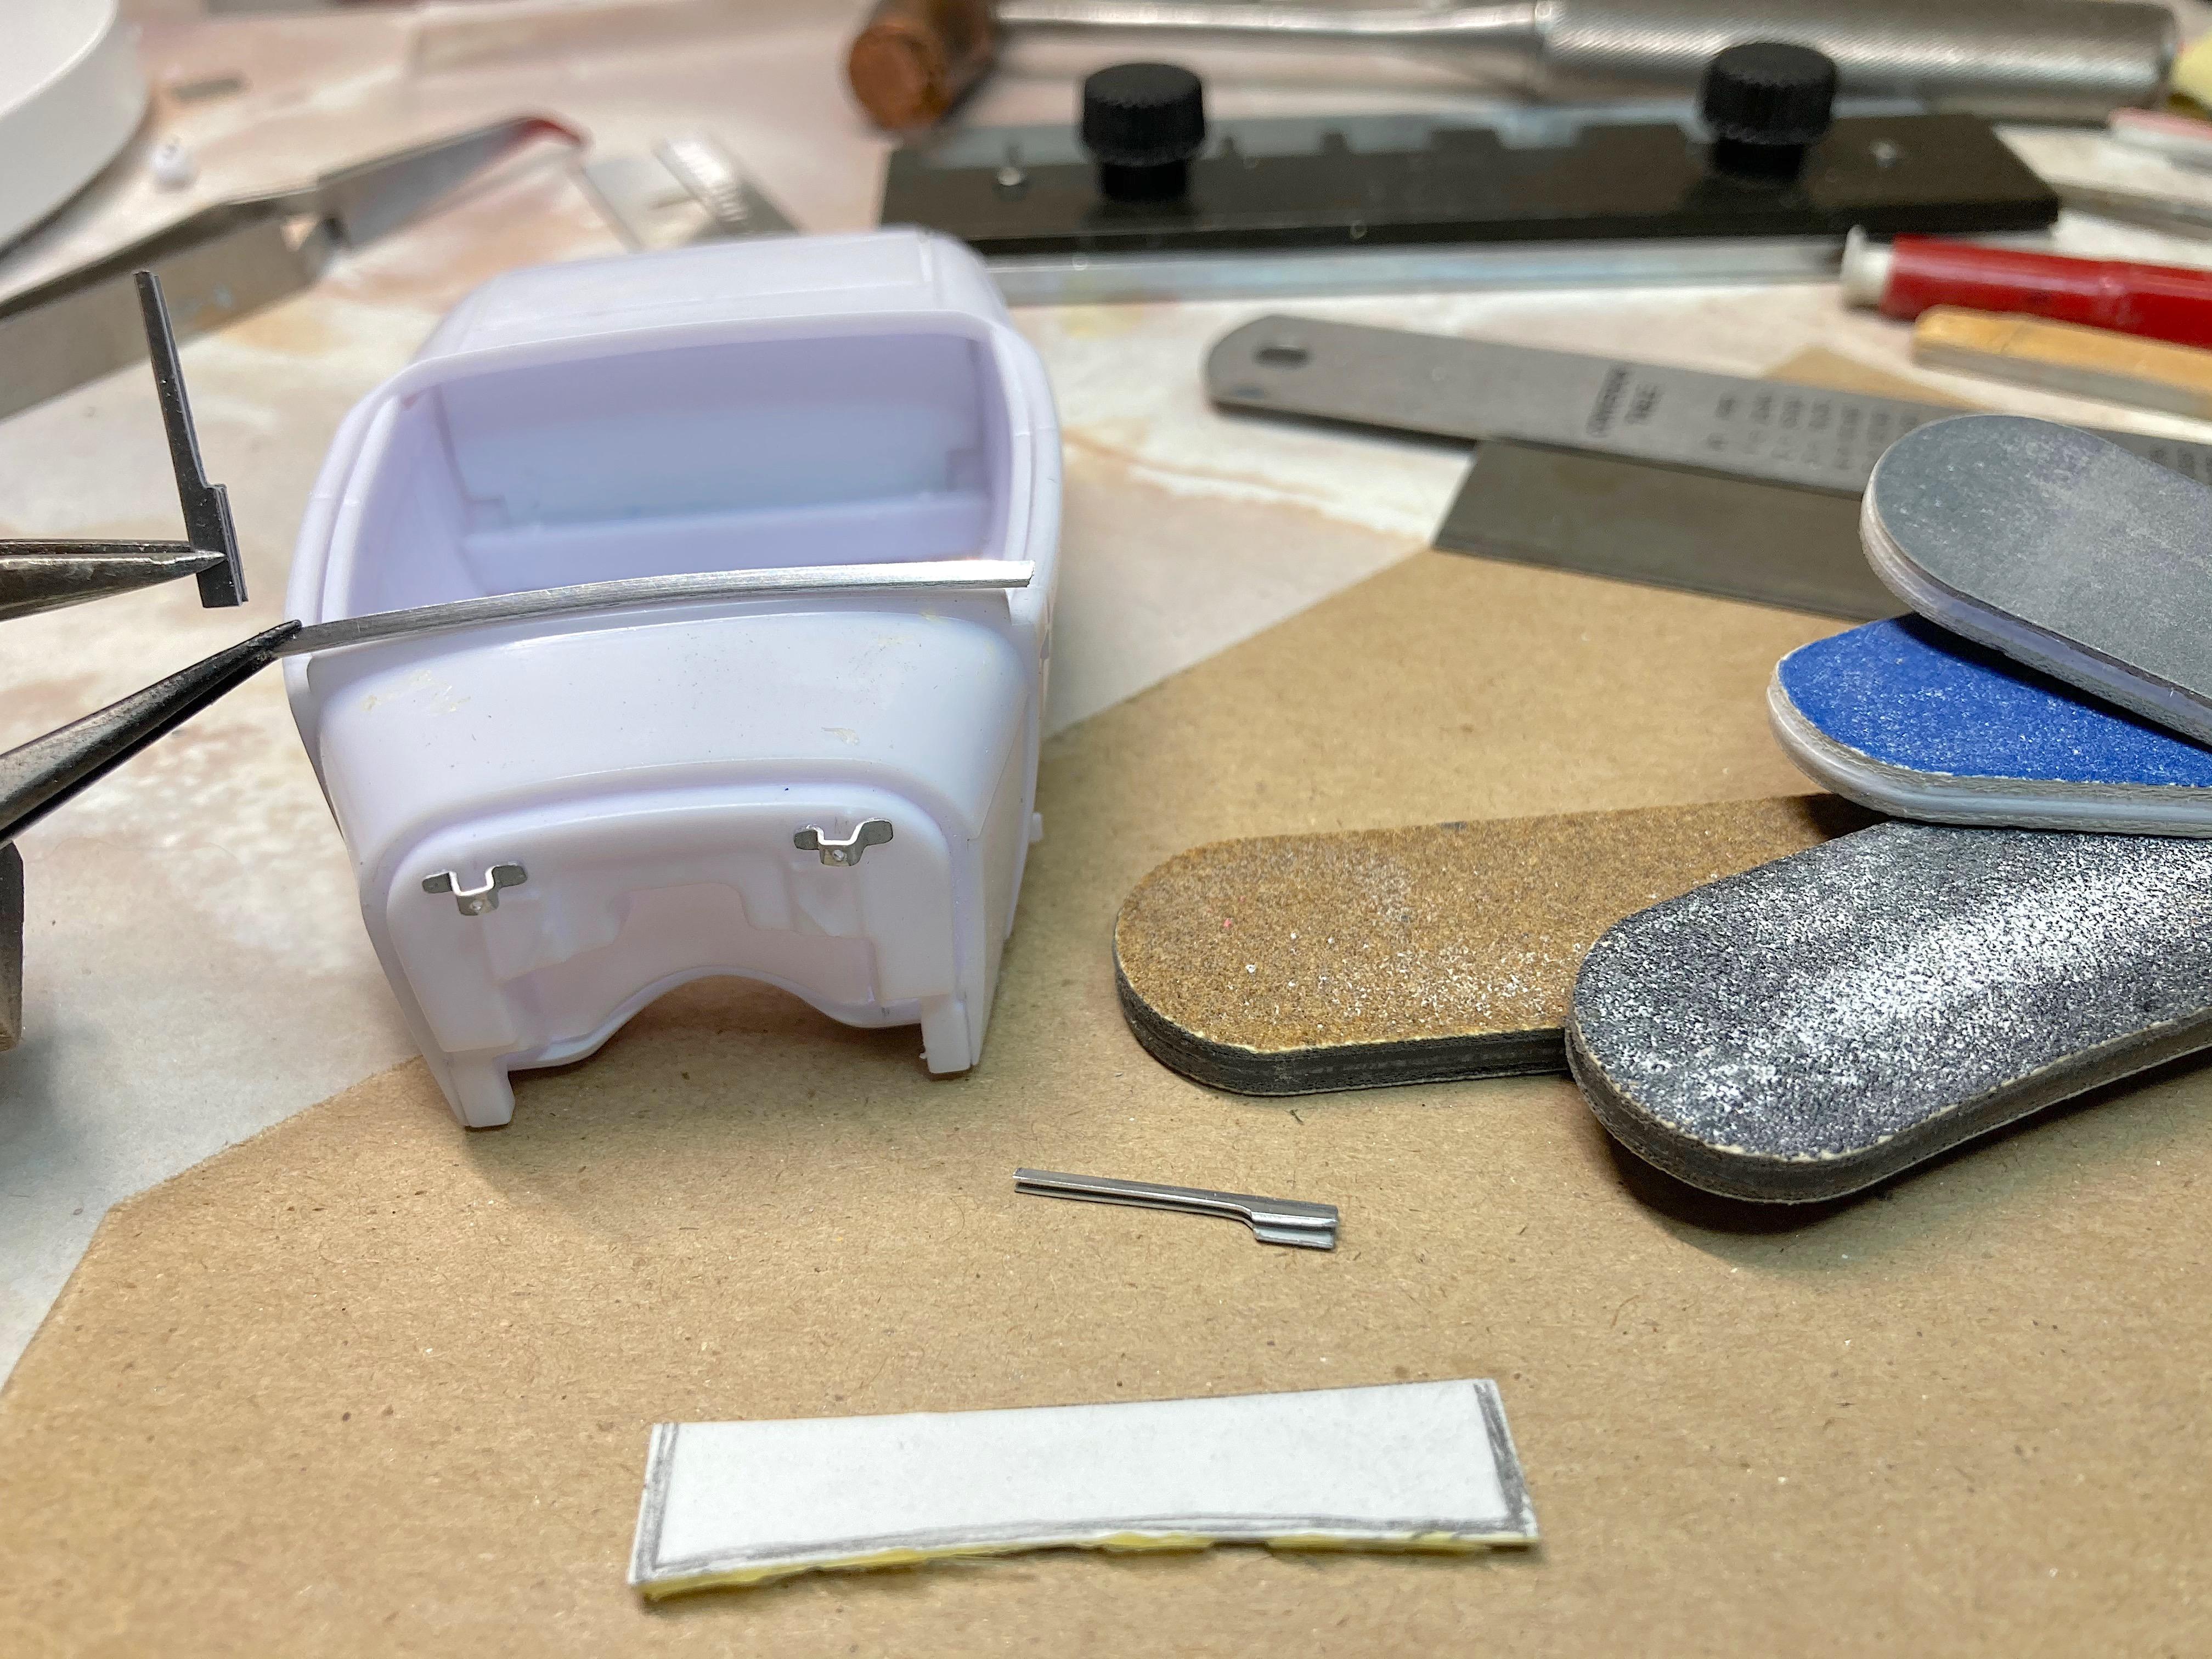
Thanks for the comments and support! If anything, it helps me find this old topic. Made the inner trunk panel, it's really simple, and got to use another tool I acquired recently. When more progress is made in the trunk area, will see it in place. Windshield is next, had to do mockups of easy flat, or split V design. I'm also thinking about doing a side pipe exhaust, not going underneath. Picked easy, have plenty of other time intensive things to do. First was polishing the aluminum plate, wet-sanded using the same emory cloth "sandpaper" for paint polishing. One thing I've learned, cut pieces bigger than the finished size, makes it easier for bending. Started with the photo-etch bender, on the back side, pushing down on the thick cardboard at first, then used a pine stick. So I had a 90º angle, used the thicker steel ruler to bend more using the wood stick. Then I used the thinner ruler, and hammered it down to get more of a U shape. It's impossible to get two 90º angles so close together, so this is a fake it until I make it moment. Did all this on the cardboard to reduce scratching the polished surface. The steel with the beveled edge is another recent tool, used to open up when the channel got smashed down too much. Used the Dremel with cutoff disk, ground down with it running perpendicular to the frame. Then used sanding sticks starting with very rough to super fine. Could not take a picture of how I was holding with 4 fingers, critical to think how to avoid bending and ruining it. Already forgot the lesson I told you about above, should have done the vertical pieces before cutting apart, DUH! Left the end wider, need to figure out if I should bend for fitting to the body, too often I design on the fly when I scratch build, because it's difficult to envision much less draw out, so I wing it. I also didn't measure anything during this whole step, all by eye. I have a dumb question, there appears to be tabs where the file is pointing to, shouldn't the grill meet flush with the frame here? You can see I added brake line brackets, for the change from steel to hose brake line. I better fill those ejection pin marks, first time i noticed them!
-
I found a nail 'polish' hoping it was close to the teal on that particular Lusso. Anything other than red, right?
-
Killz primer, unless
-
GSL Common Kit: [revision] just another Model A Roadster
89AKurt replied to 89AKurt's topic in WIP: Model Cars
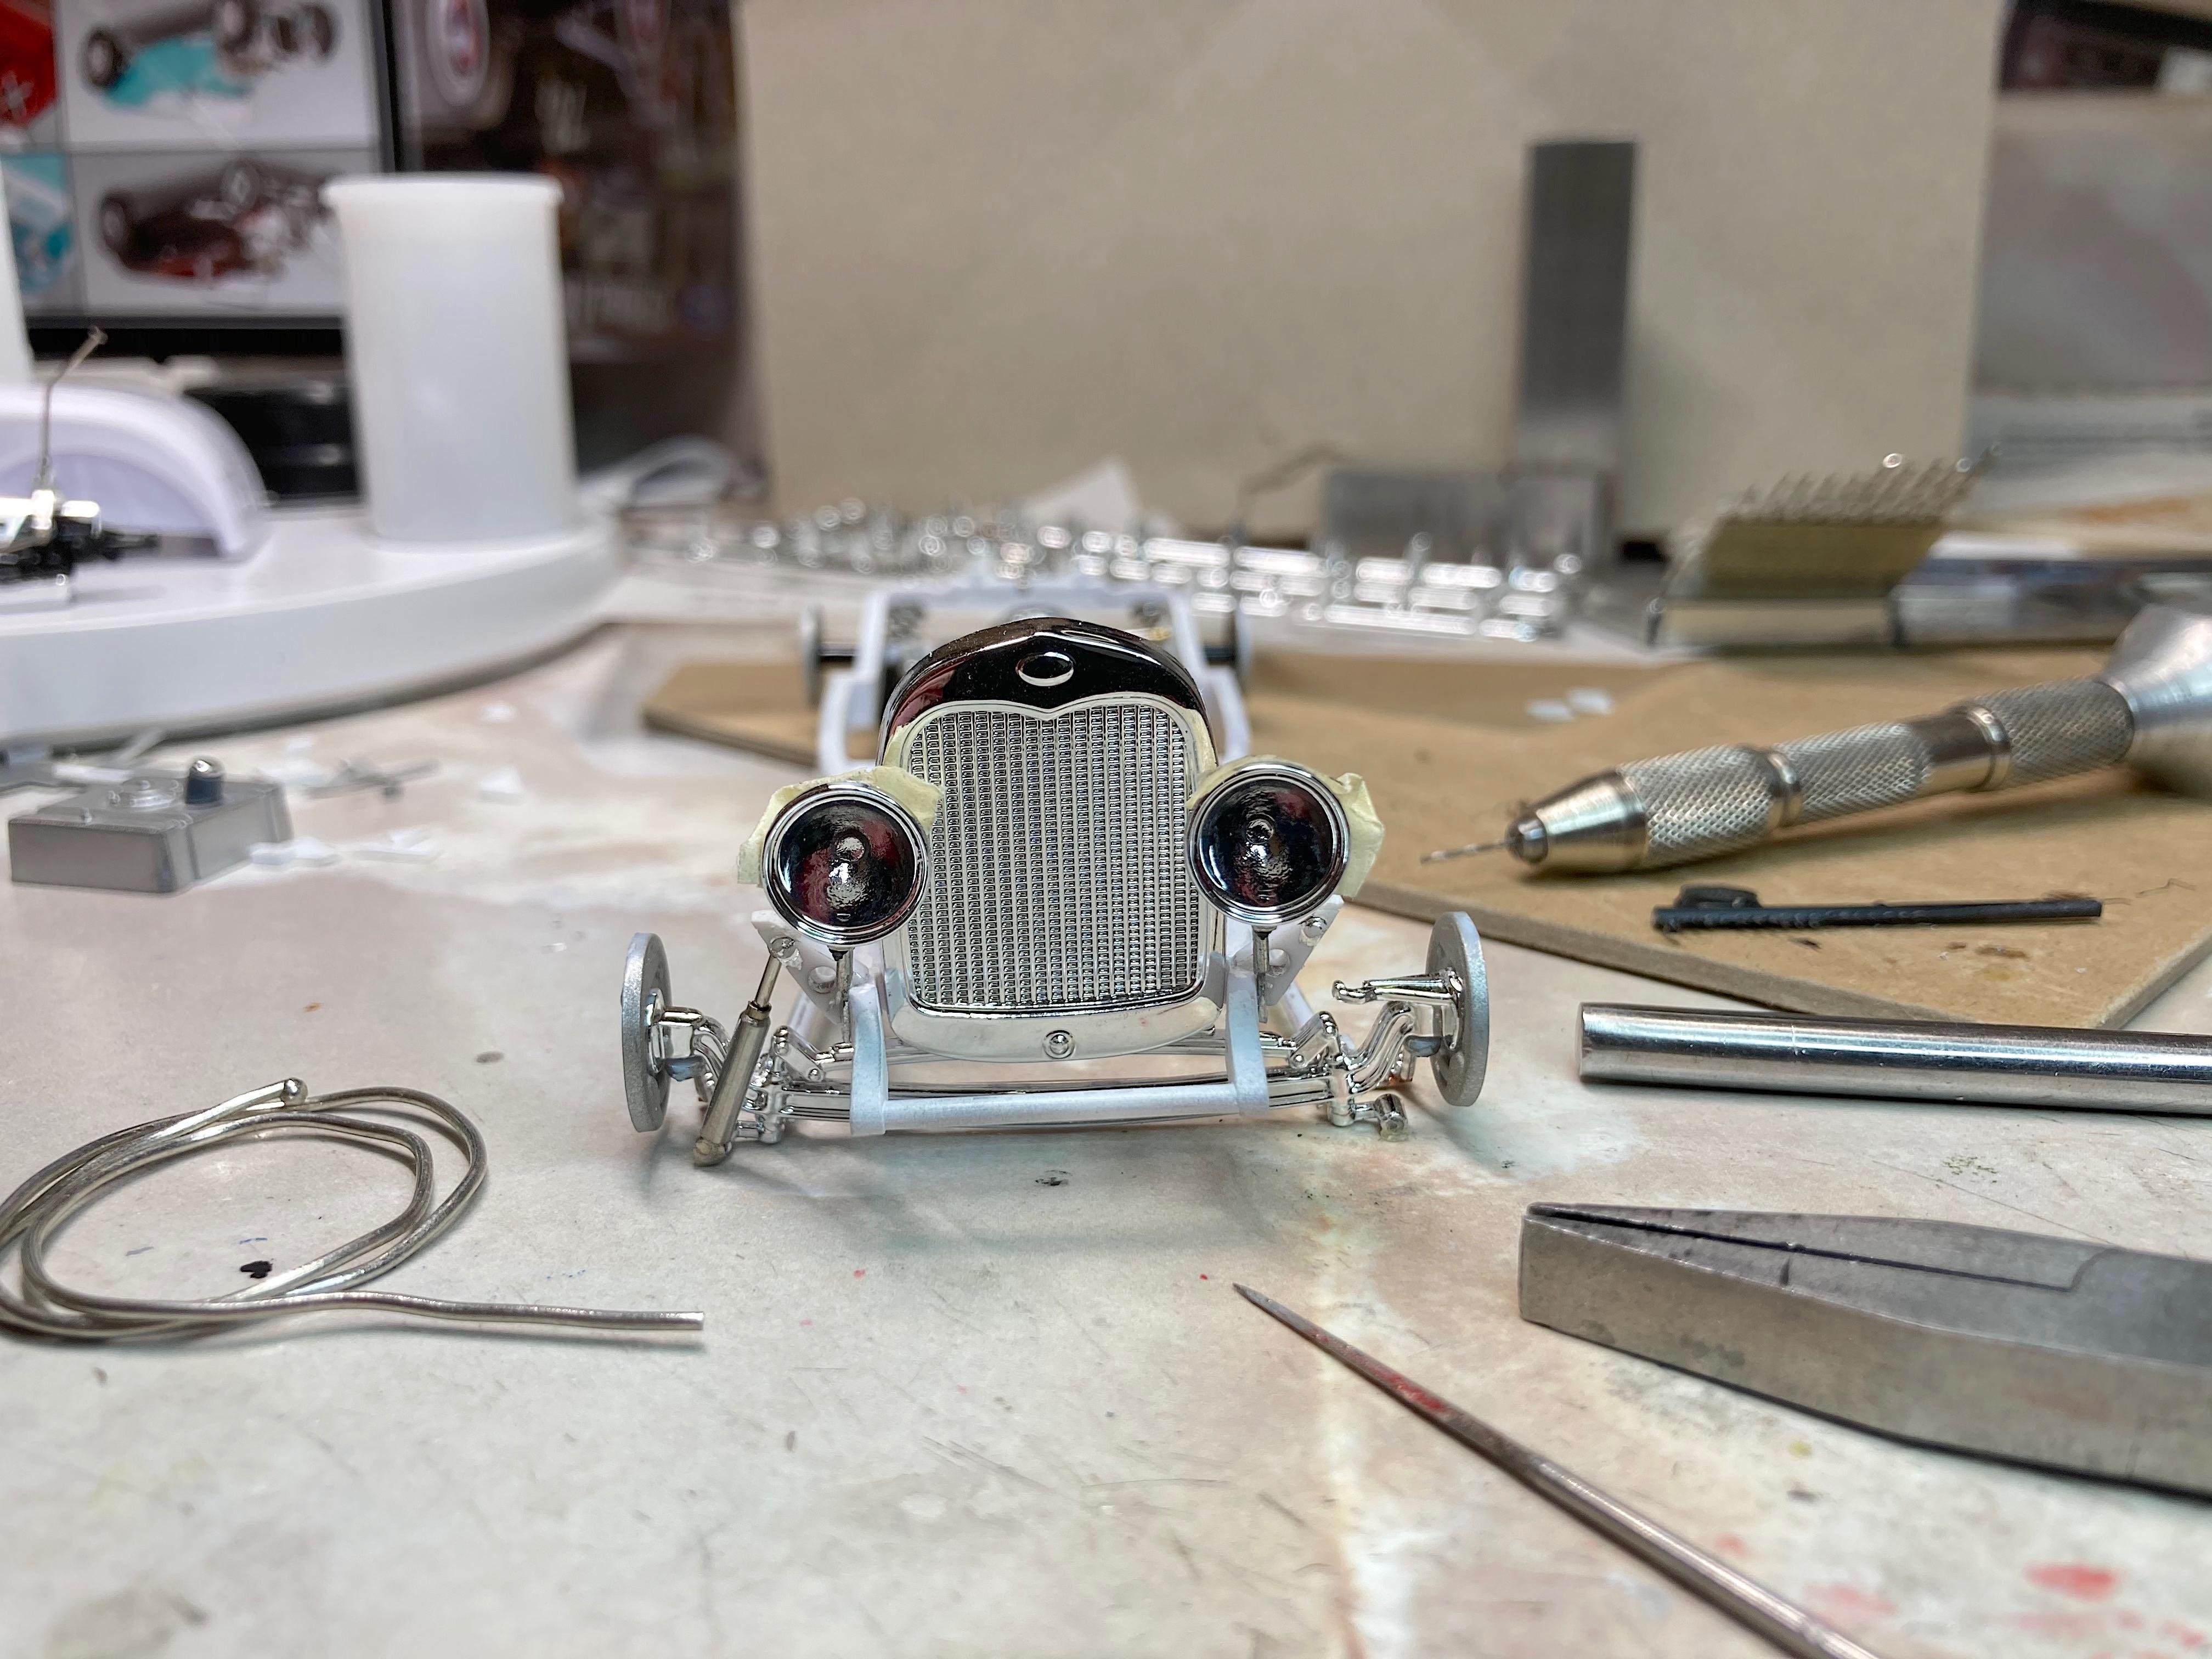
Well thank you! My iPhone takes better pictures than the Nikon SLR monster. McMaster is the source for the thin wall tubing. I'm almost out of one of the sizes, so someday I'll order two sticks. MicroMark is where I got the gauge, that's like being a kid at a candy store. All I got done was the headlights. Used solder, because it's easy to bend, smash with pliers, and drill. The risk is breaking. Went with the middle sized headlights. Started cleaning up various parts with needle nose files and sanding sticks. It's very annoying how the sprue is at the very top, where the ring and bucket are different sizes. And there are bumps near that spot on one of them. I'm debating whether to buy a Molotov pen, or what.
-
I have this kit, so of course I will be following!
-
GSL Common Kit: [revision] just another Model A Roadster
89AKurt replied to 89AKurt's topic in WIP: Model Cars
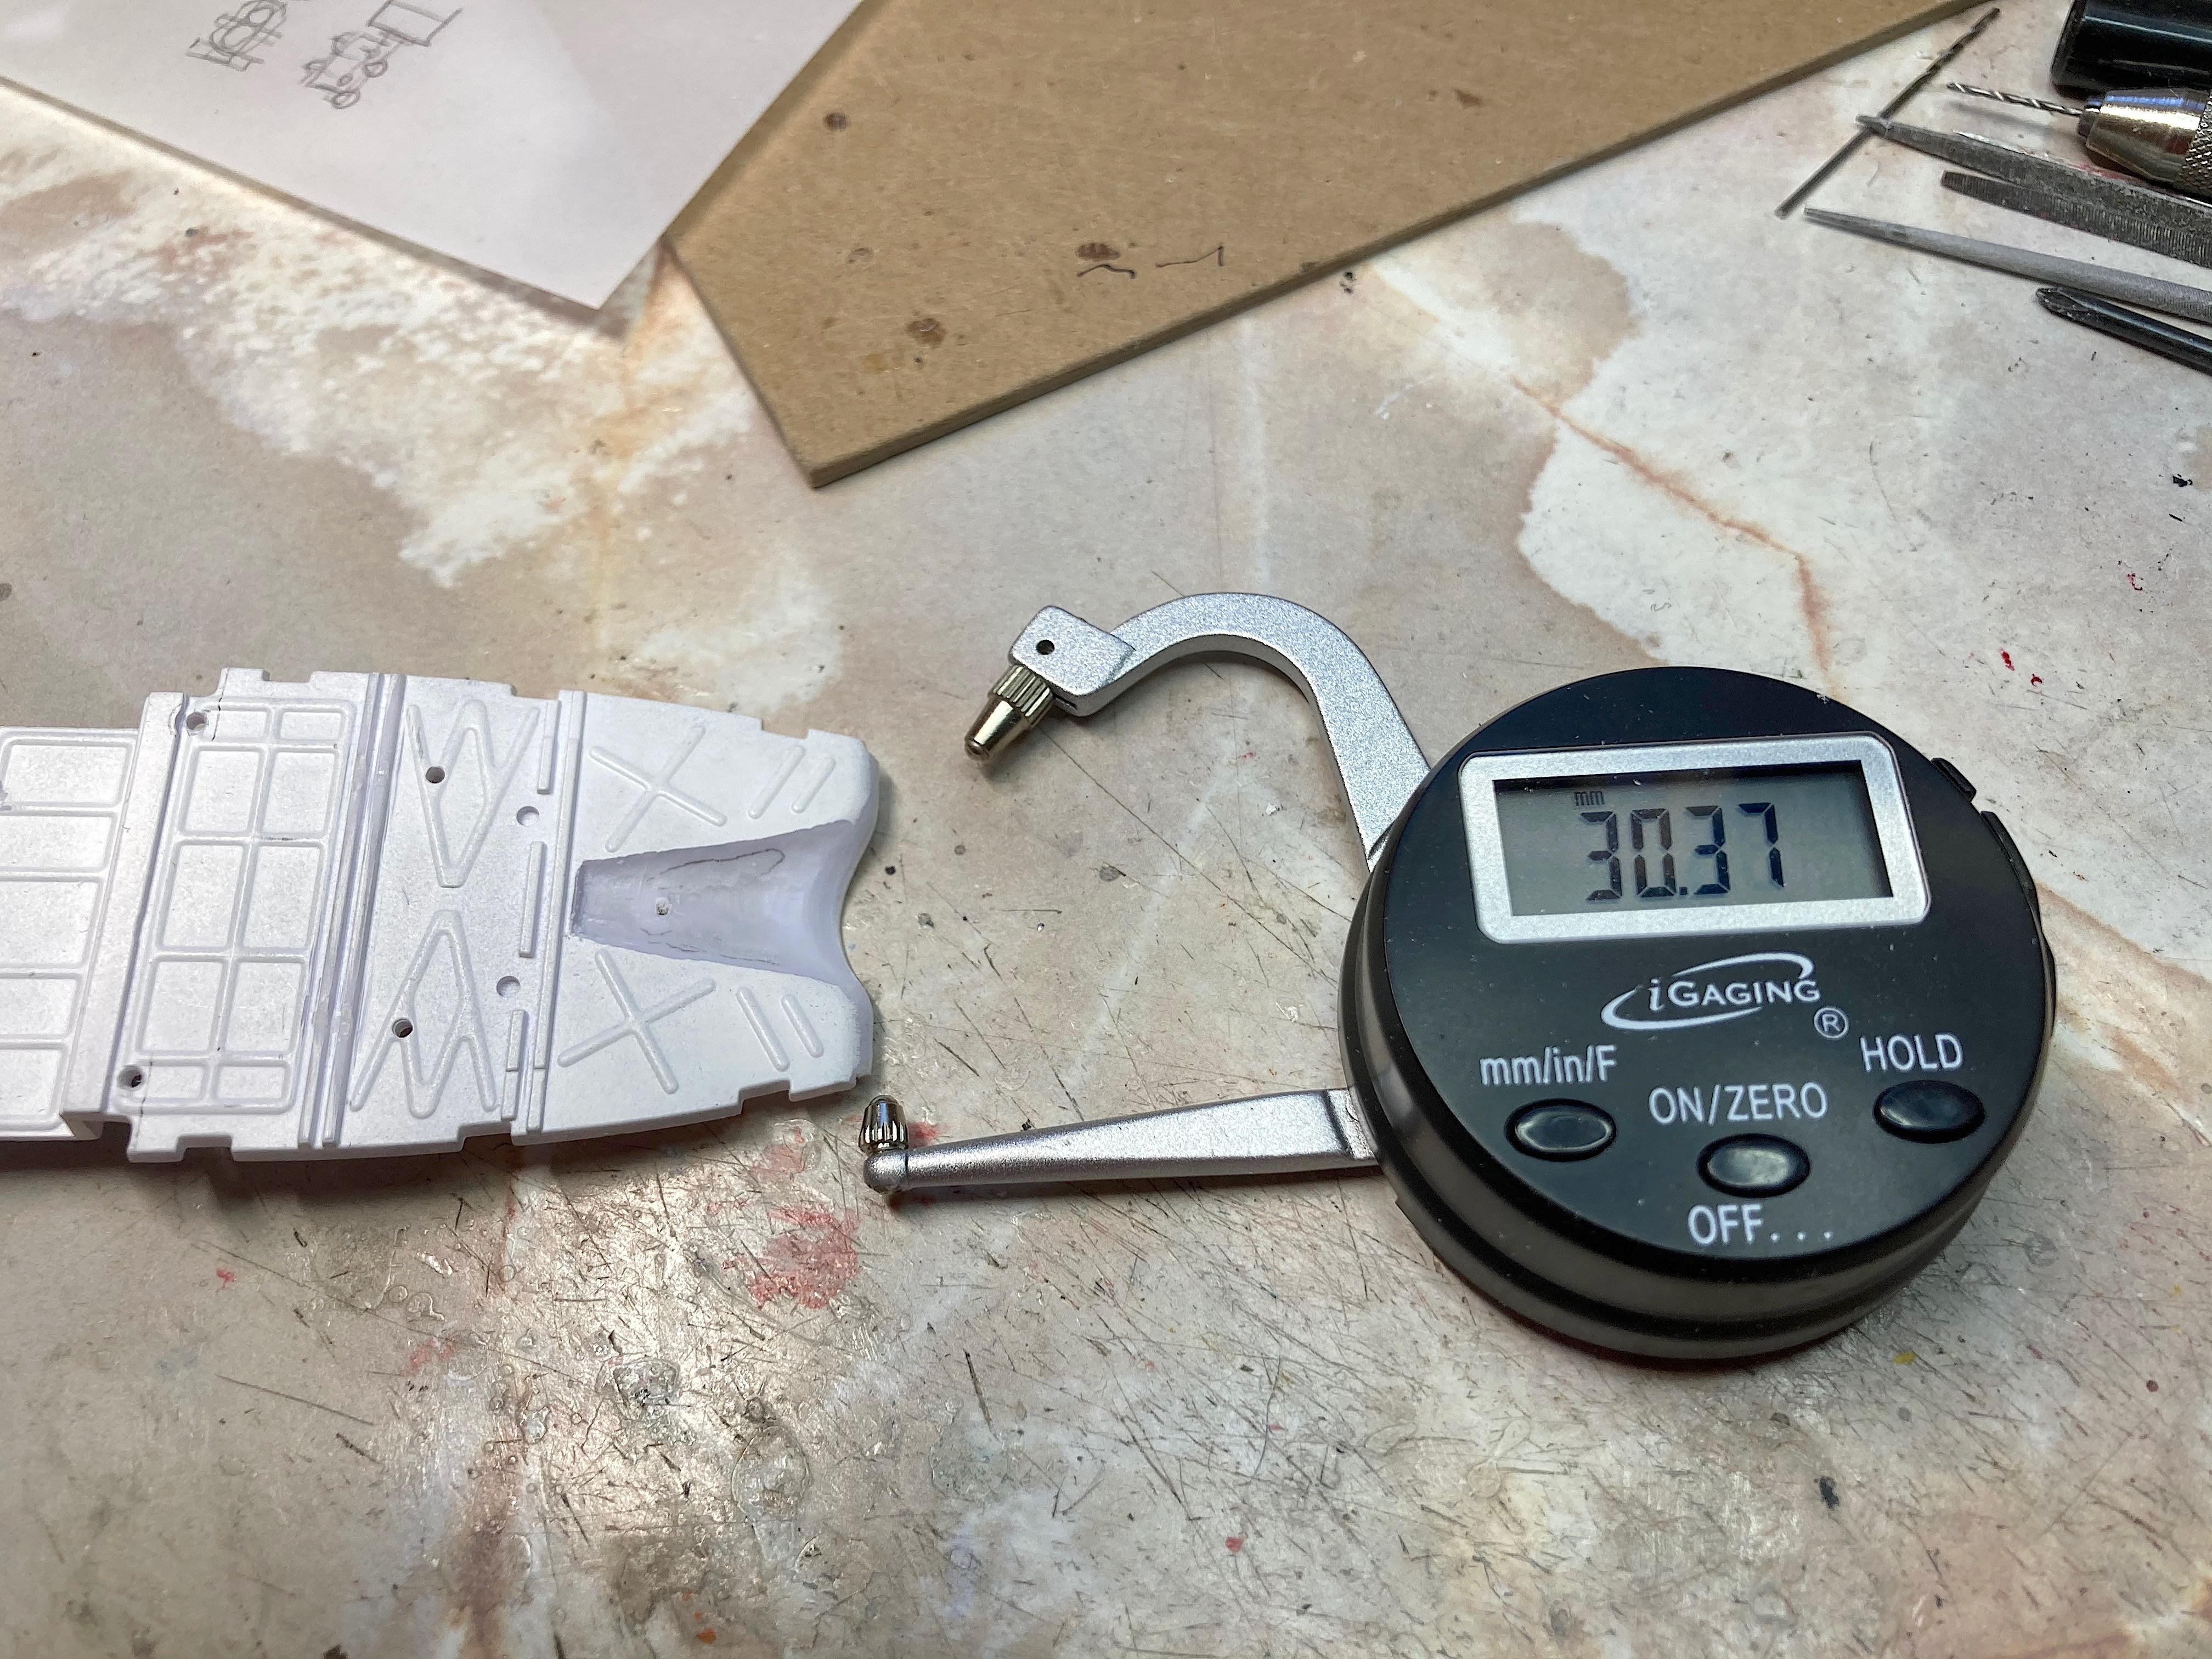
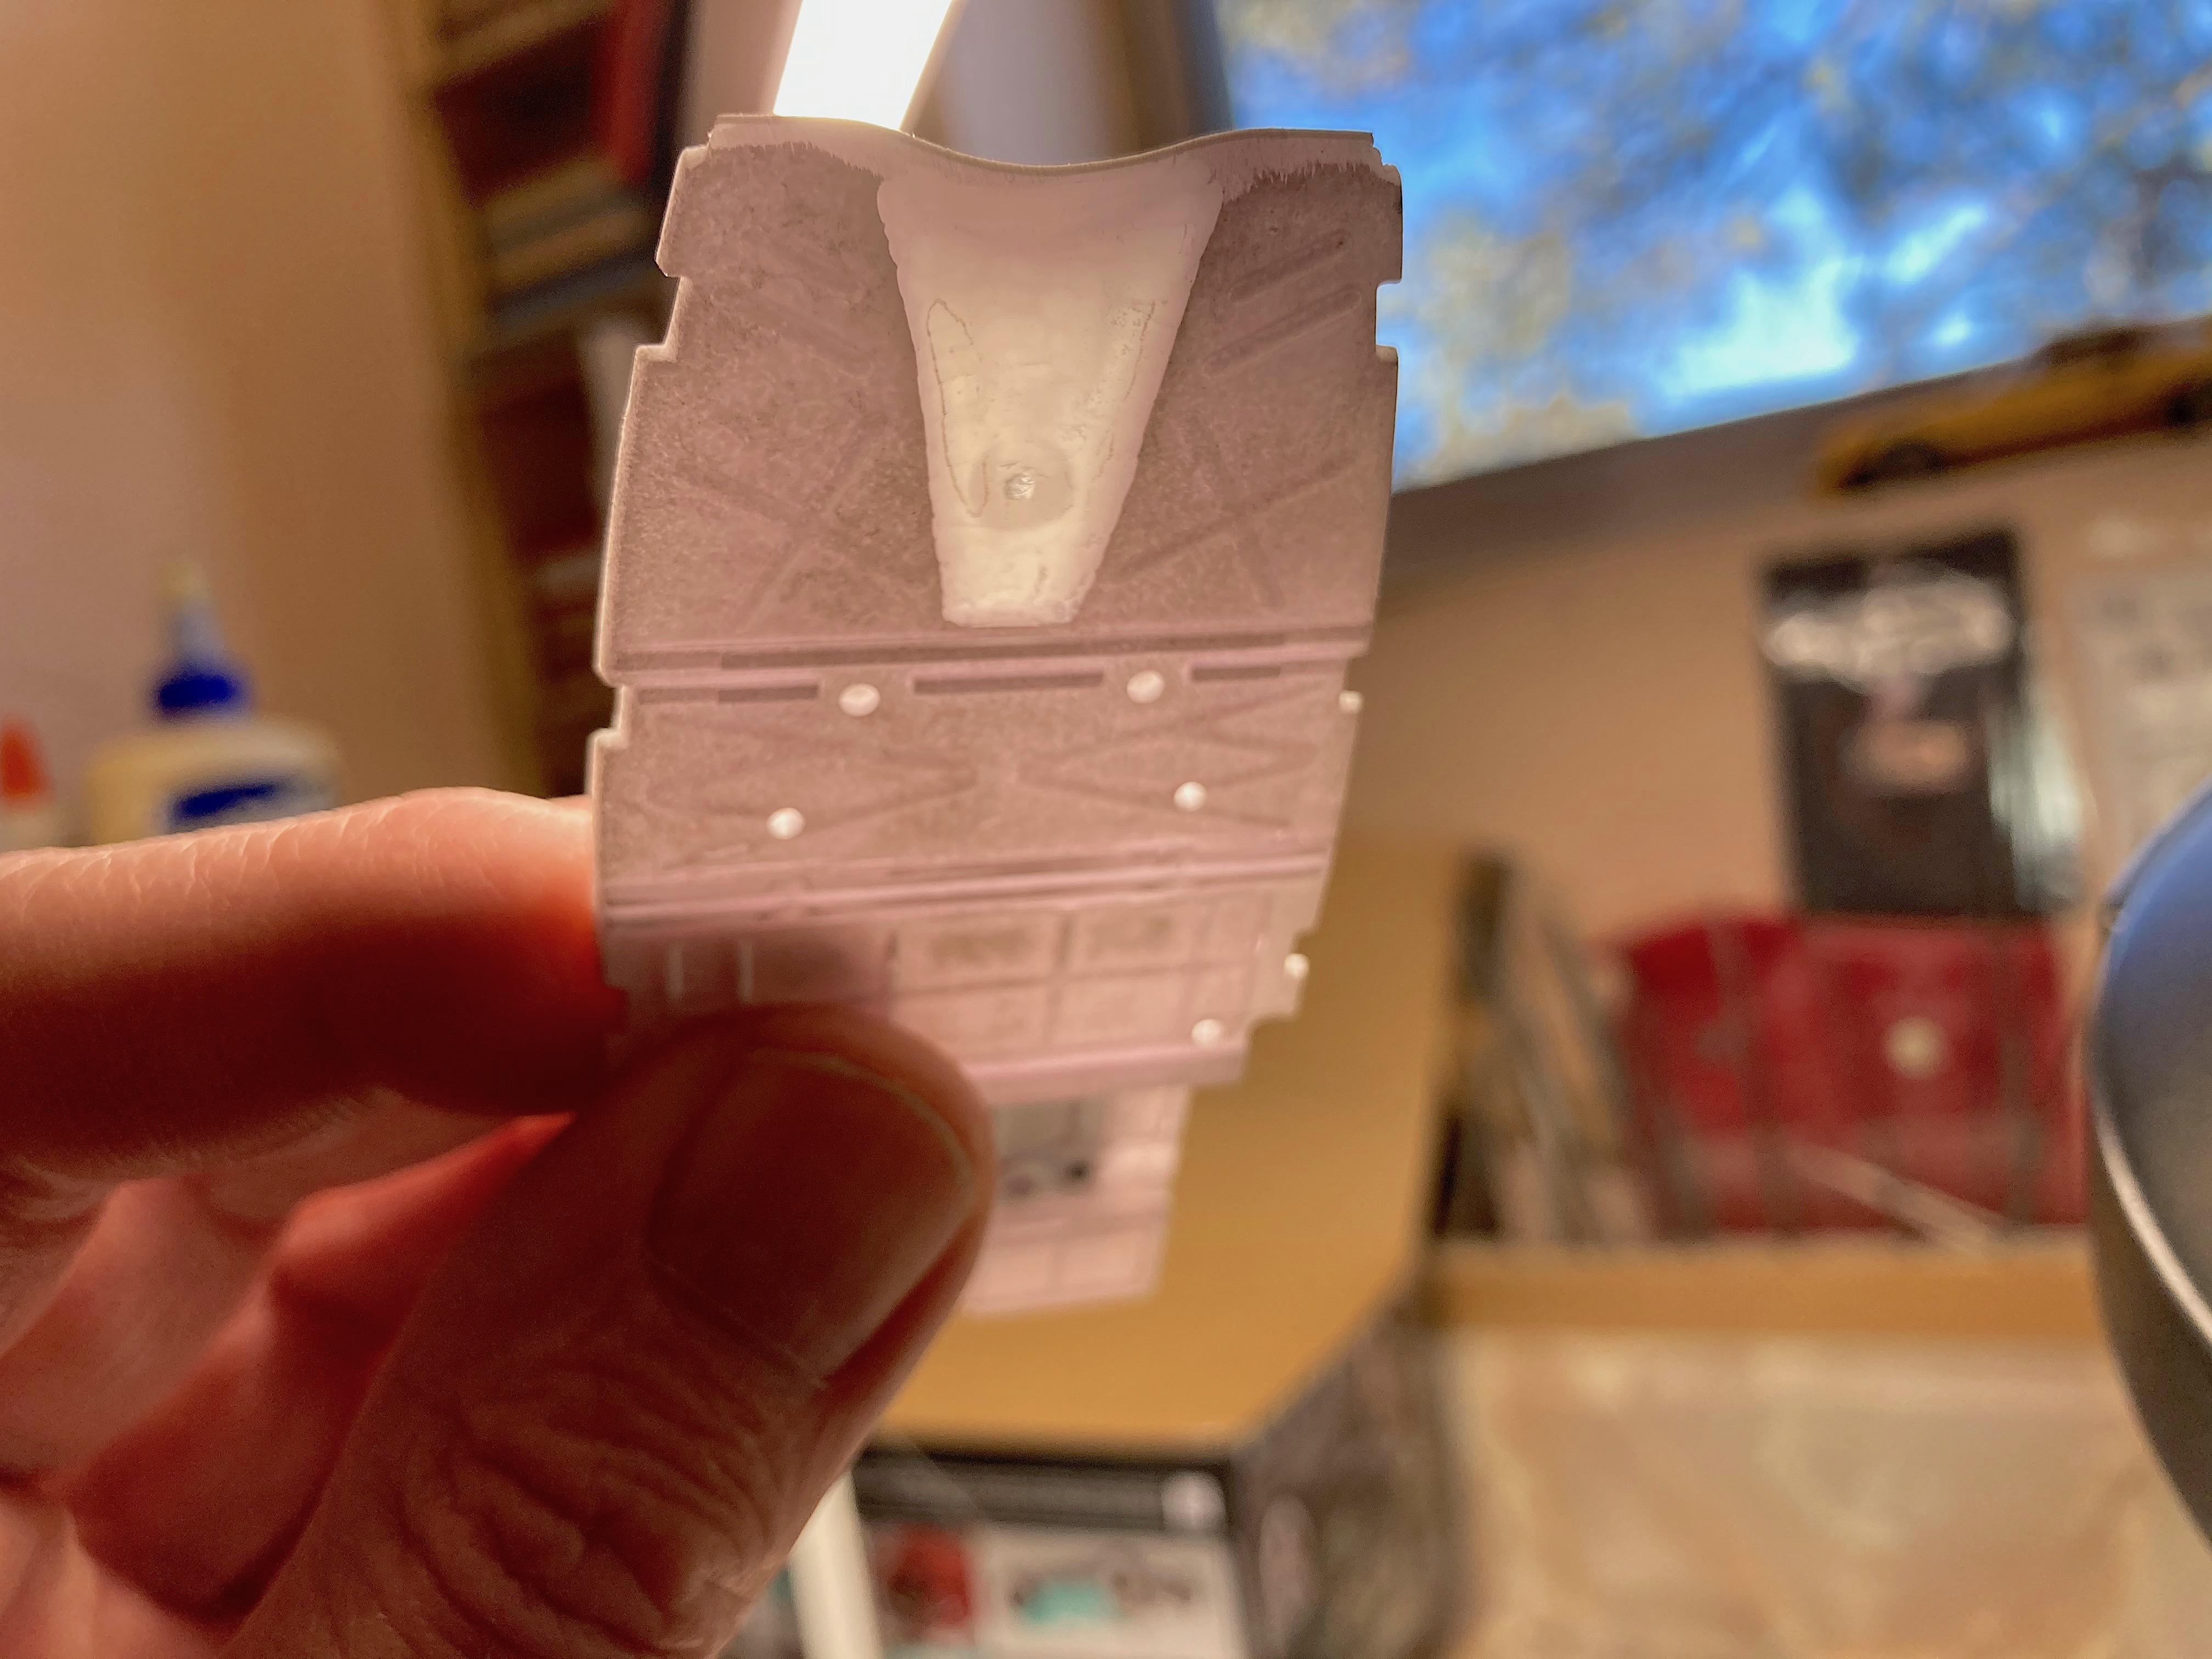
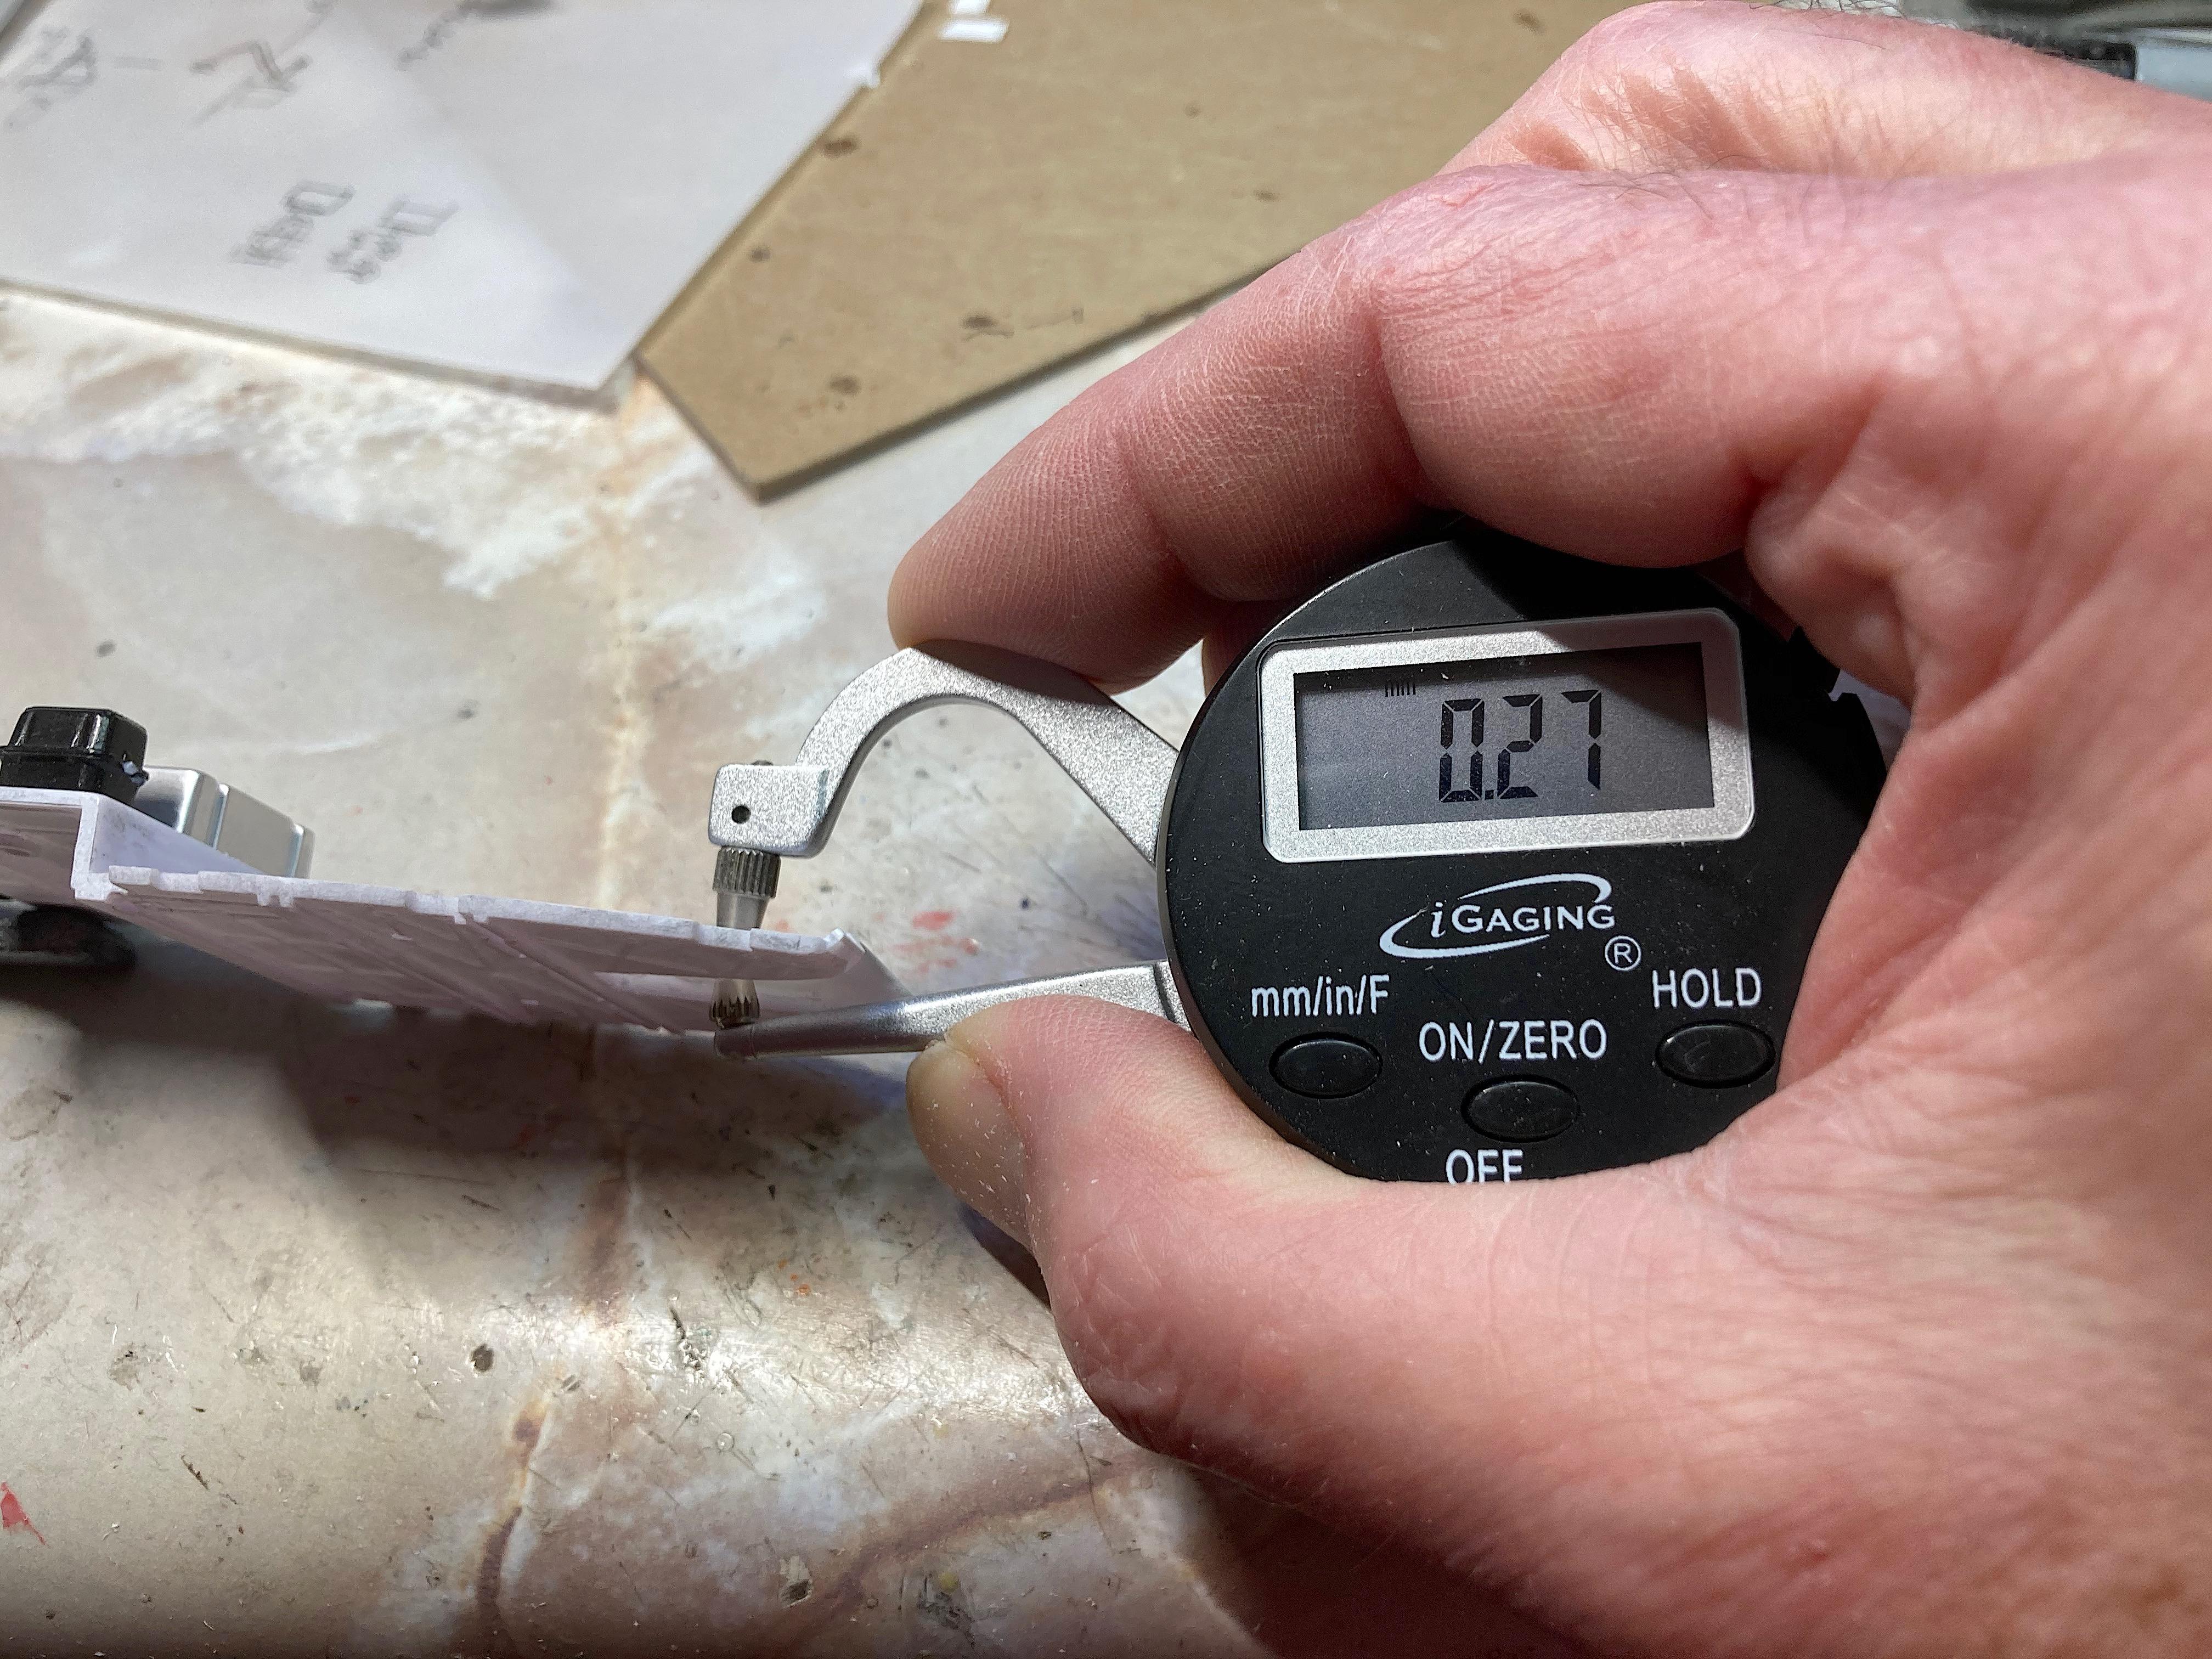
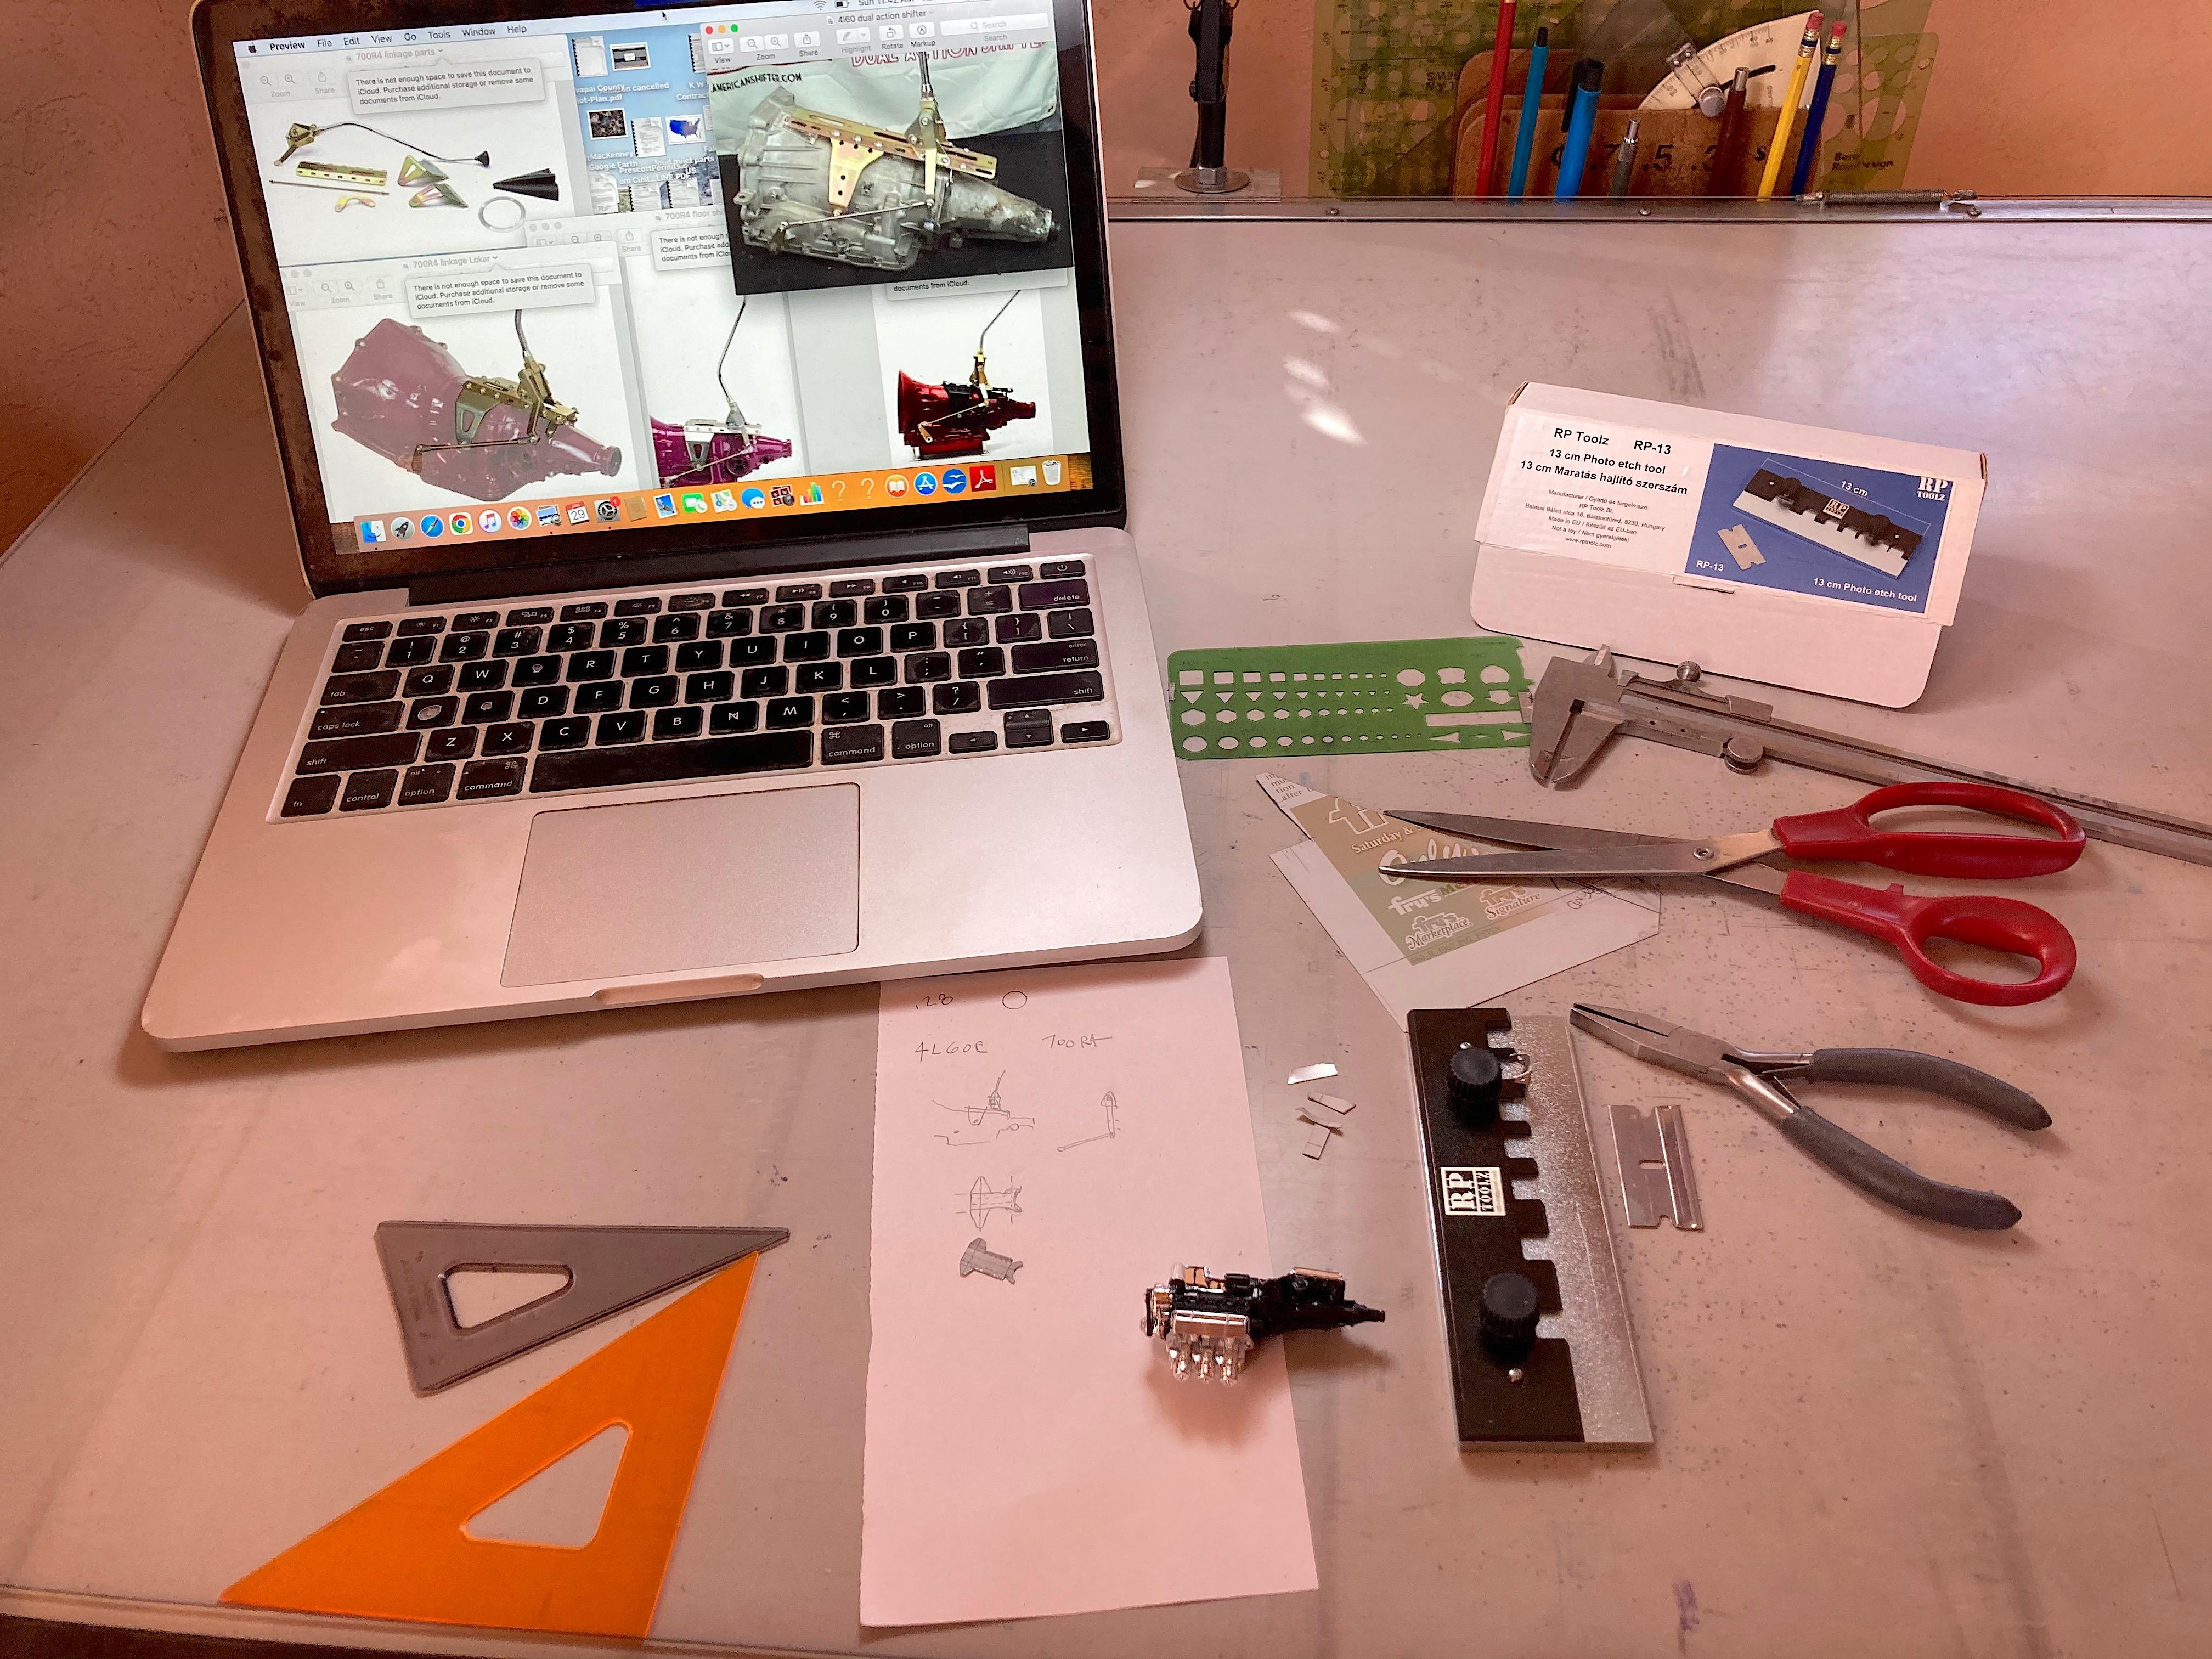
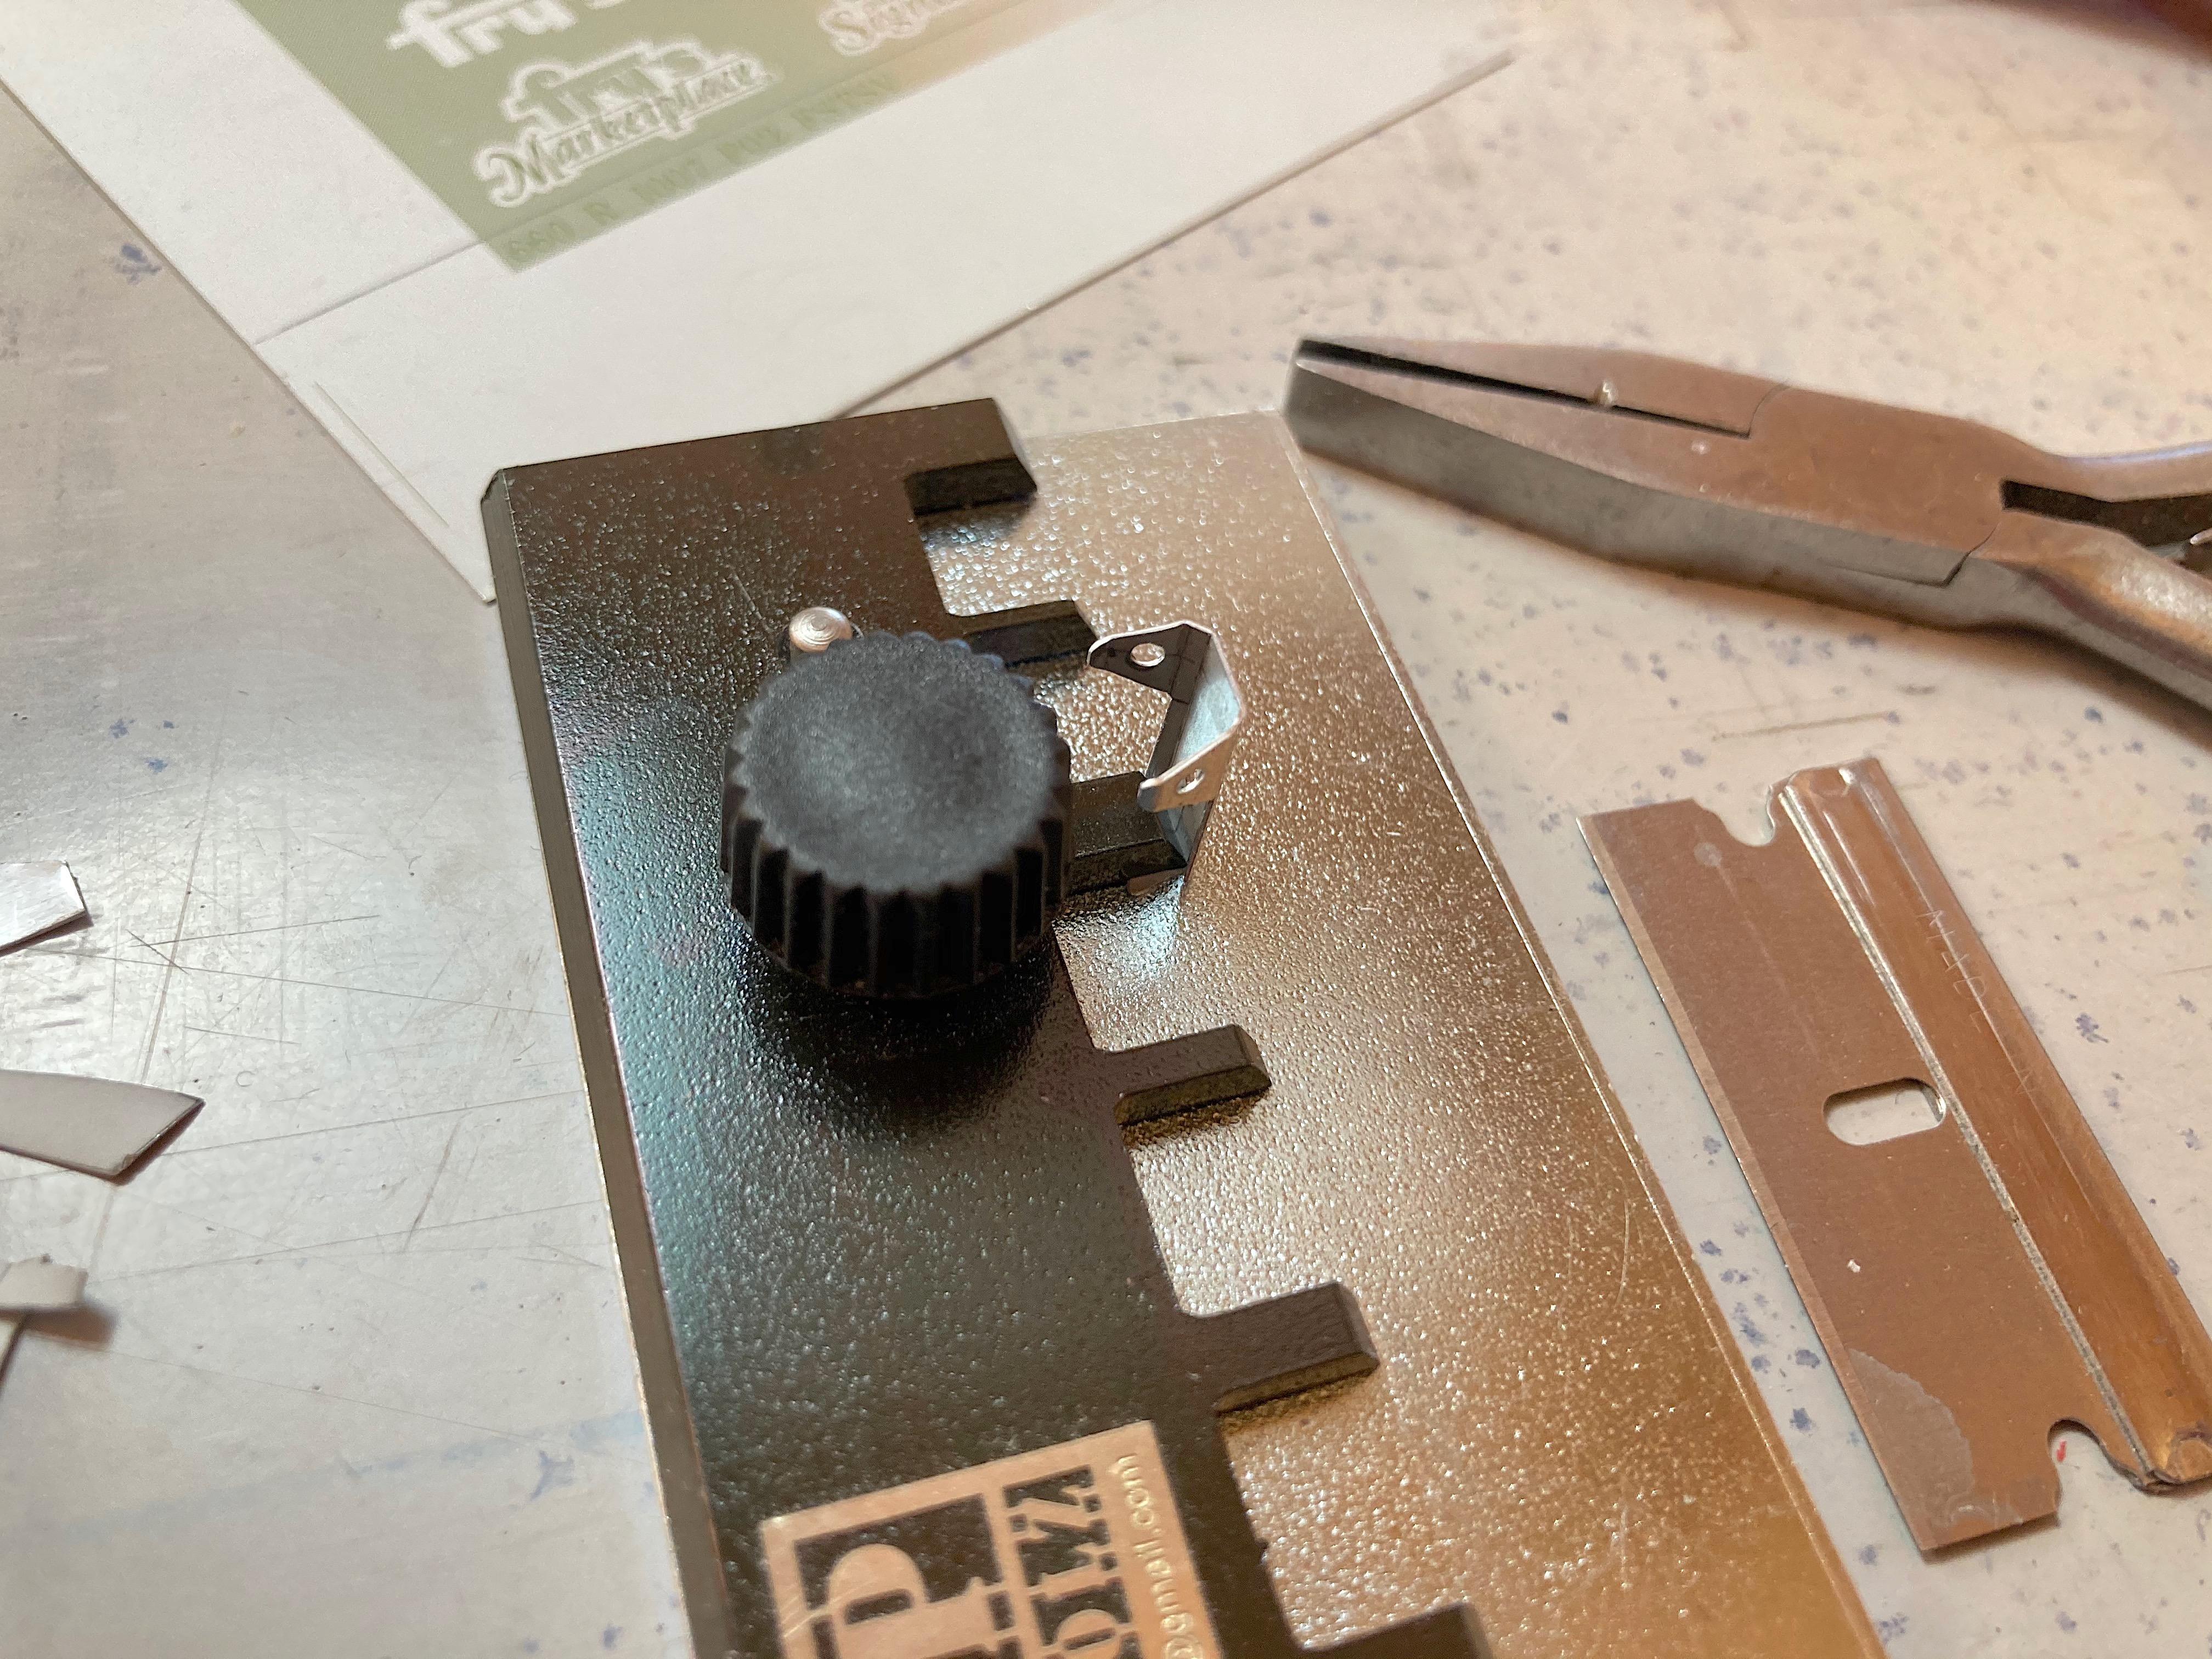
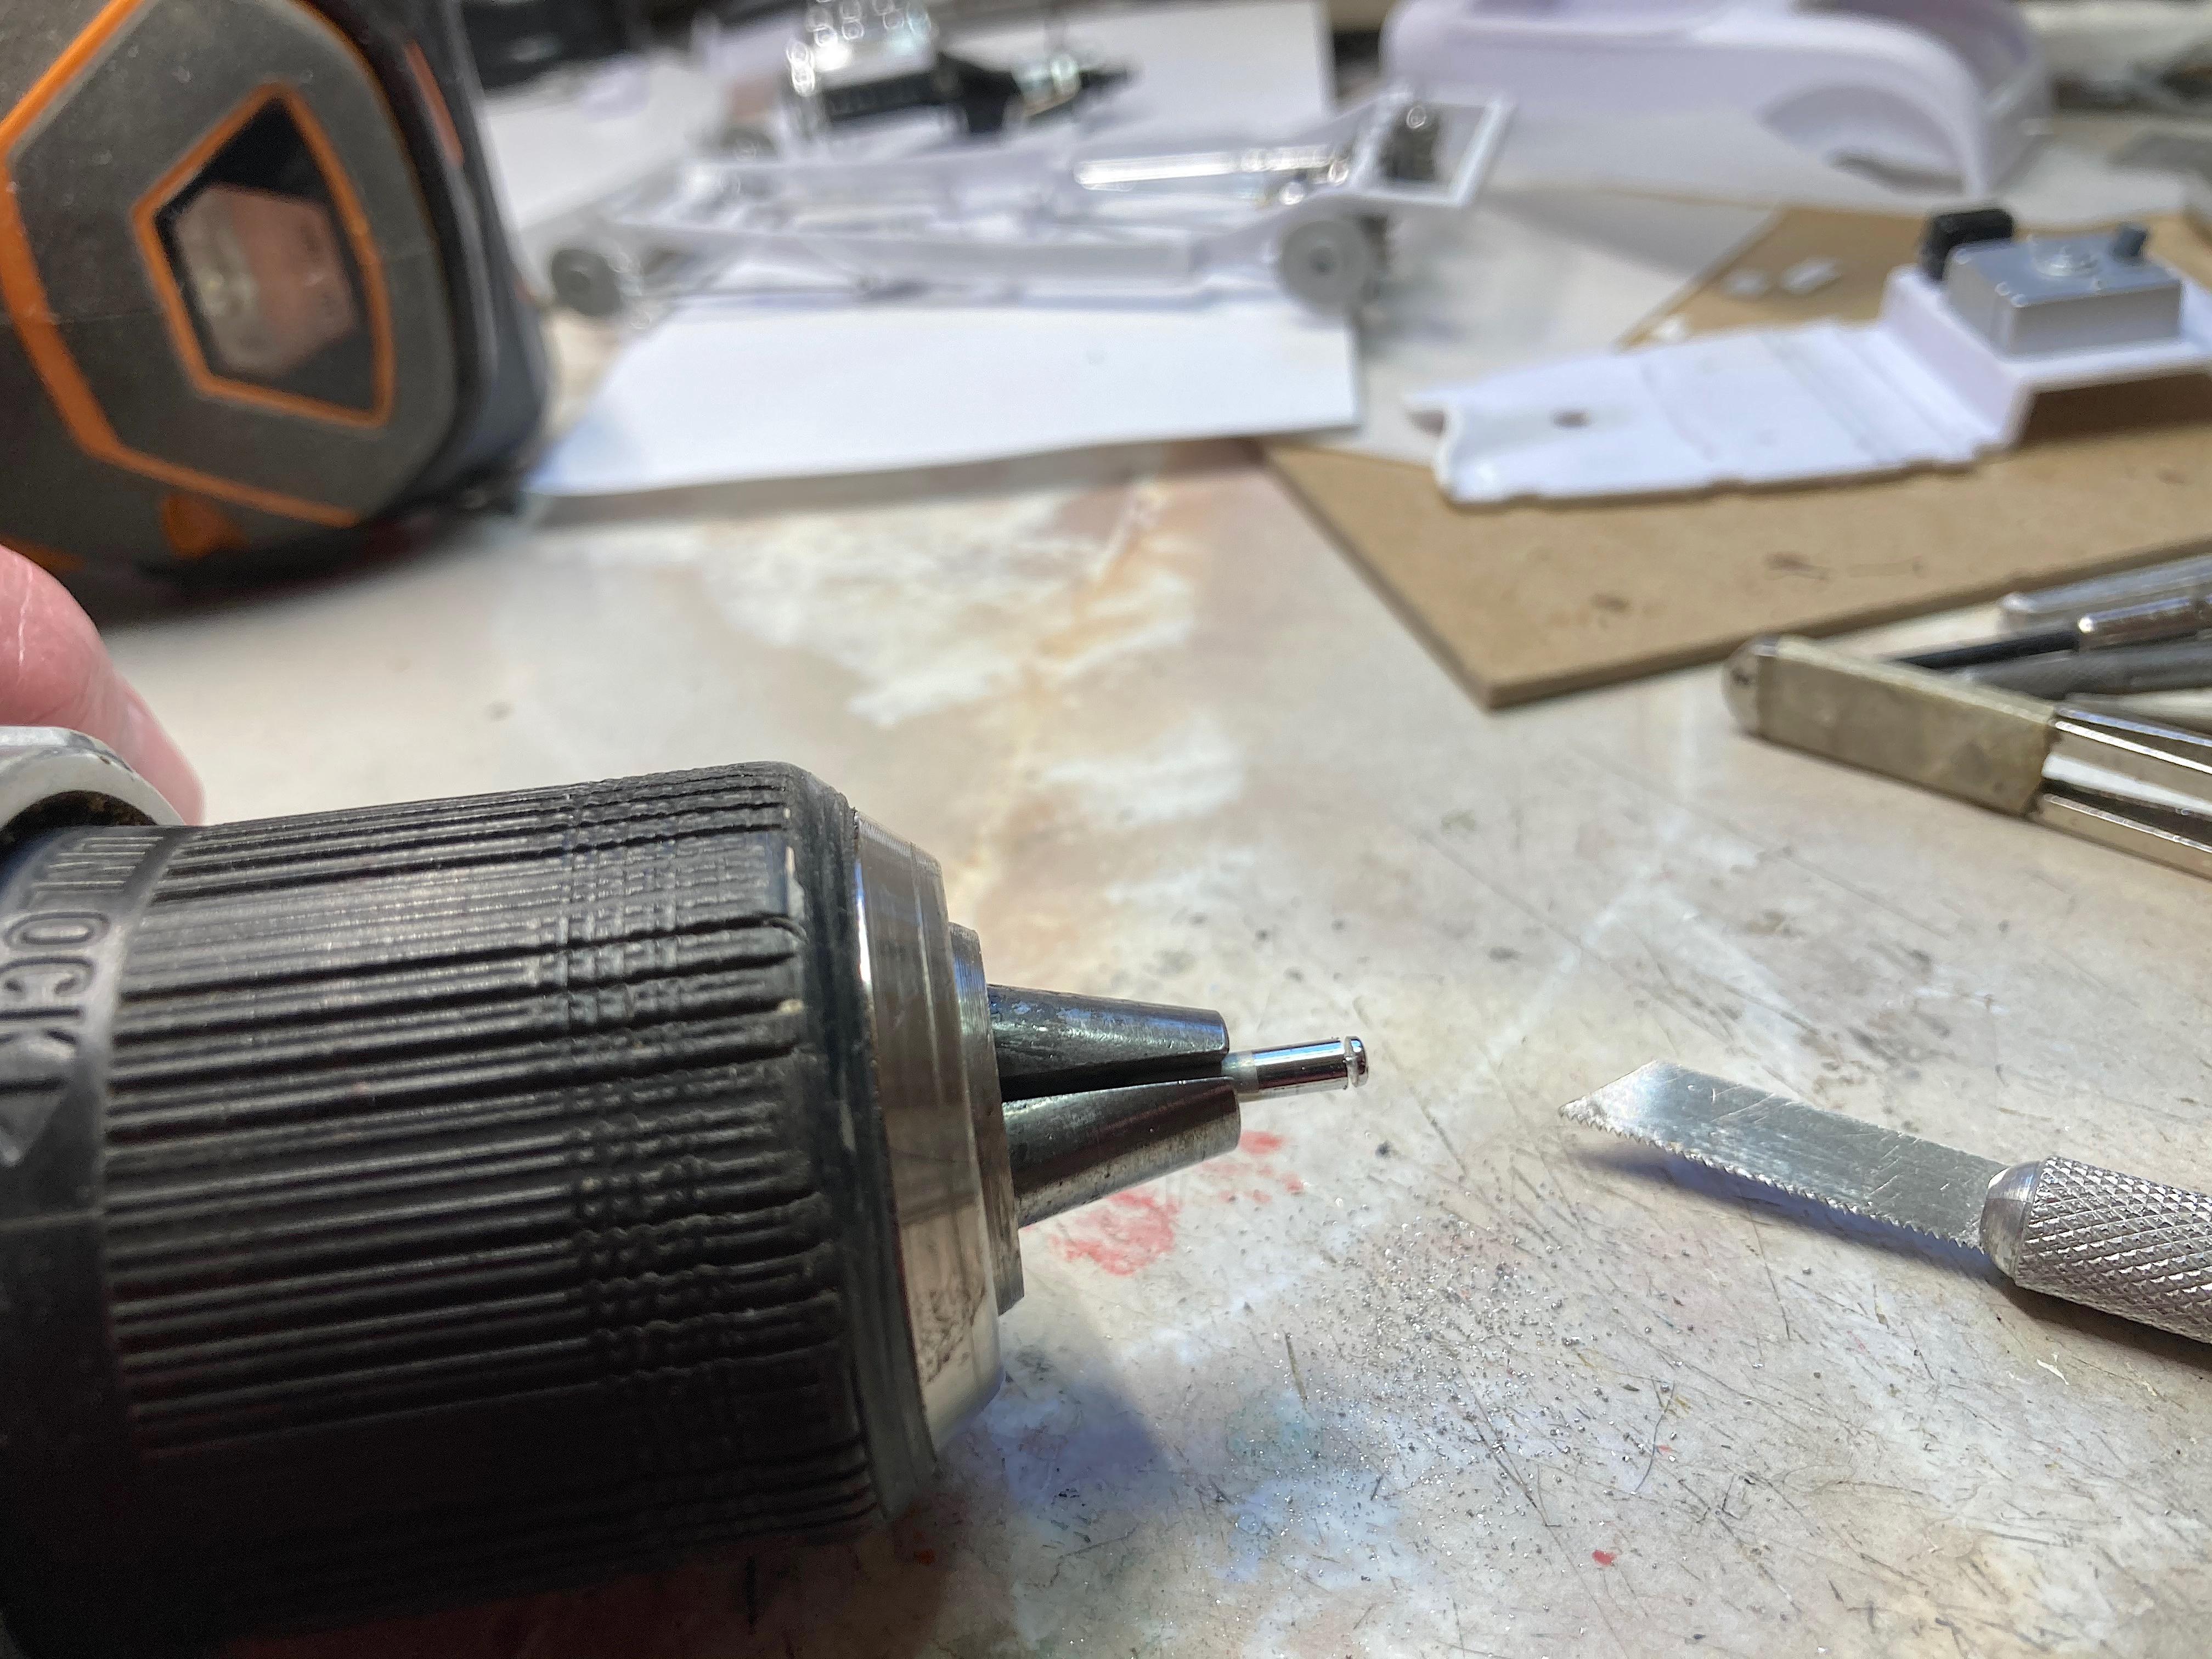
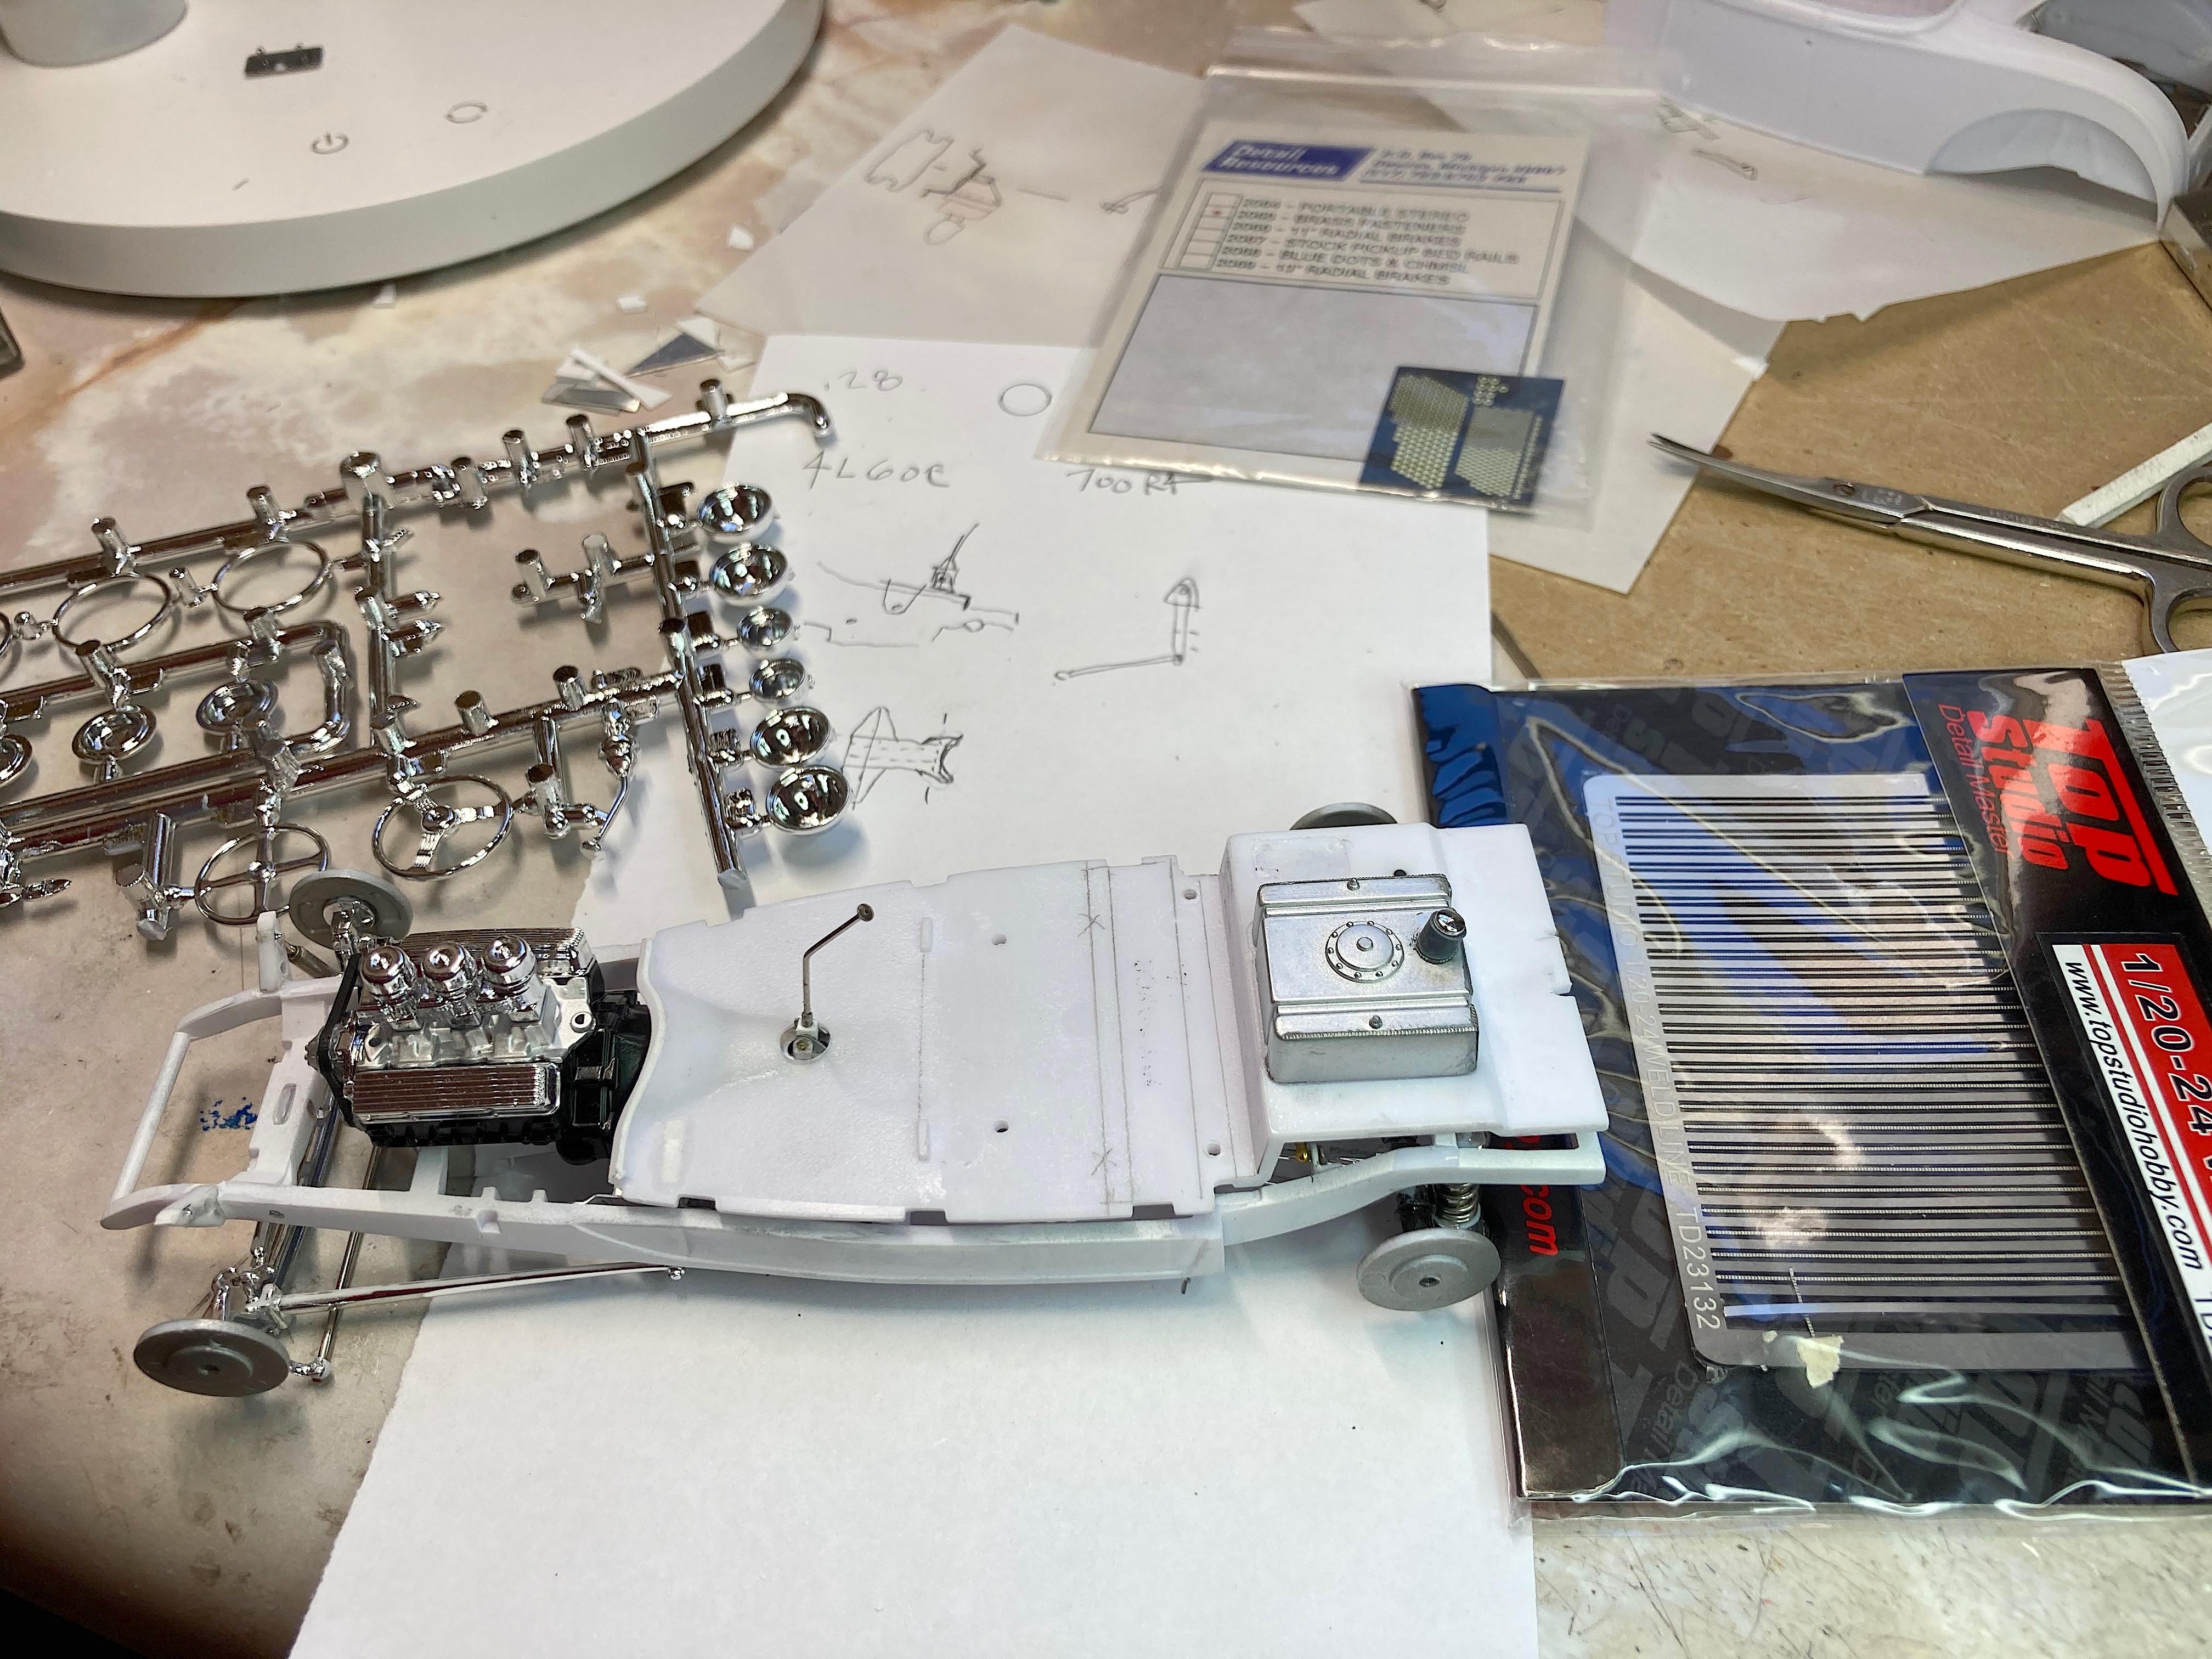
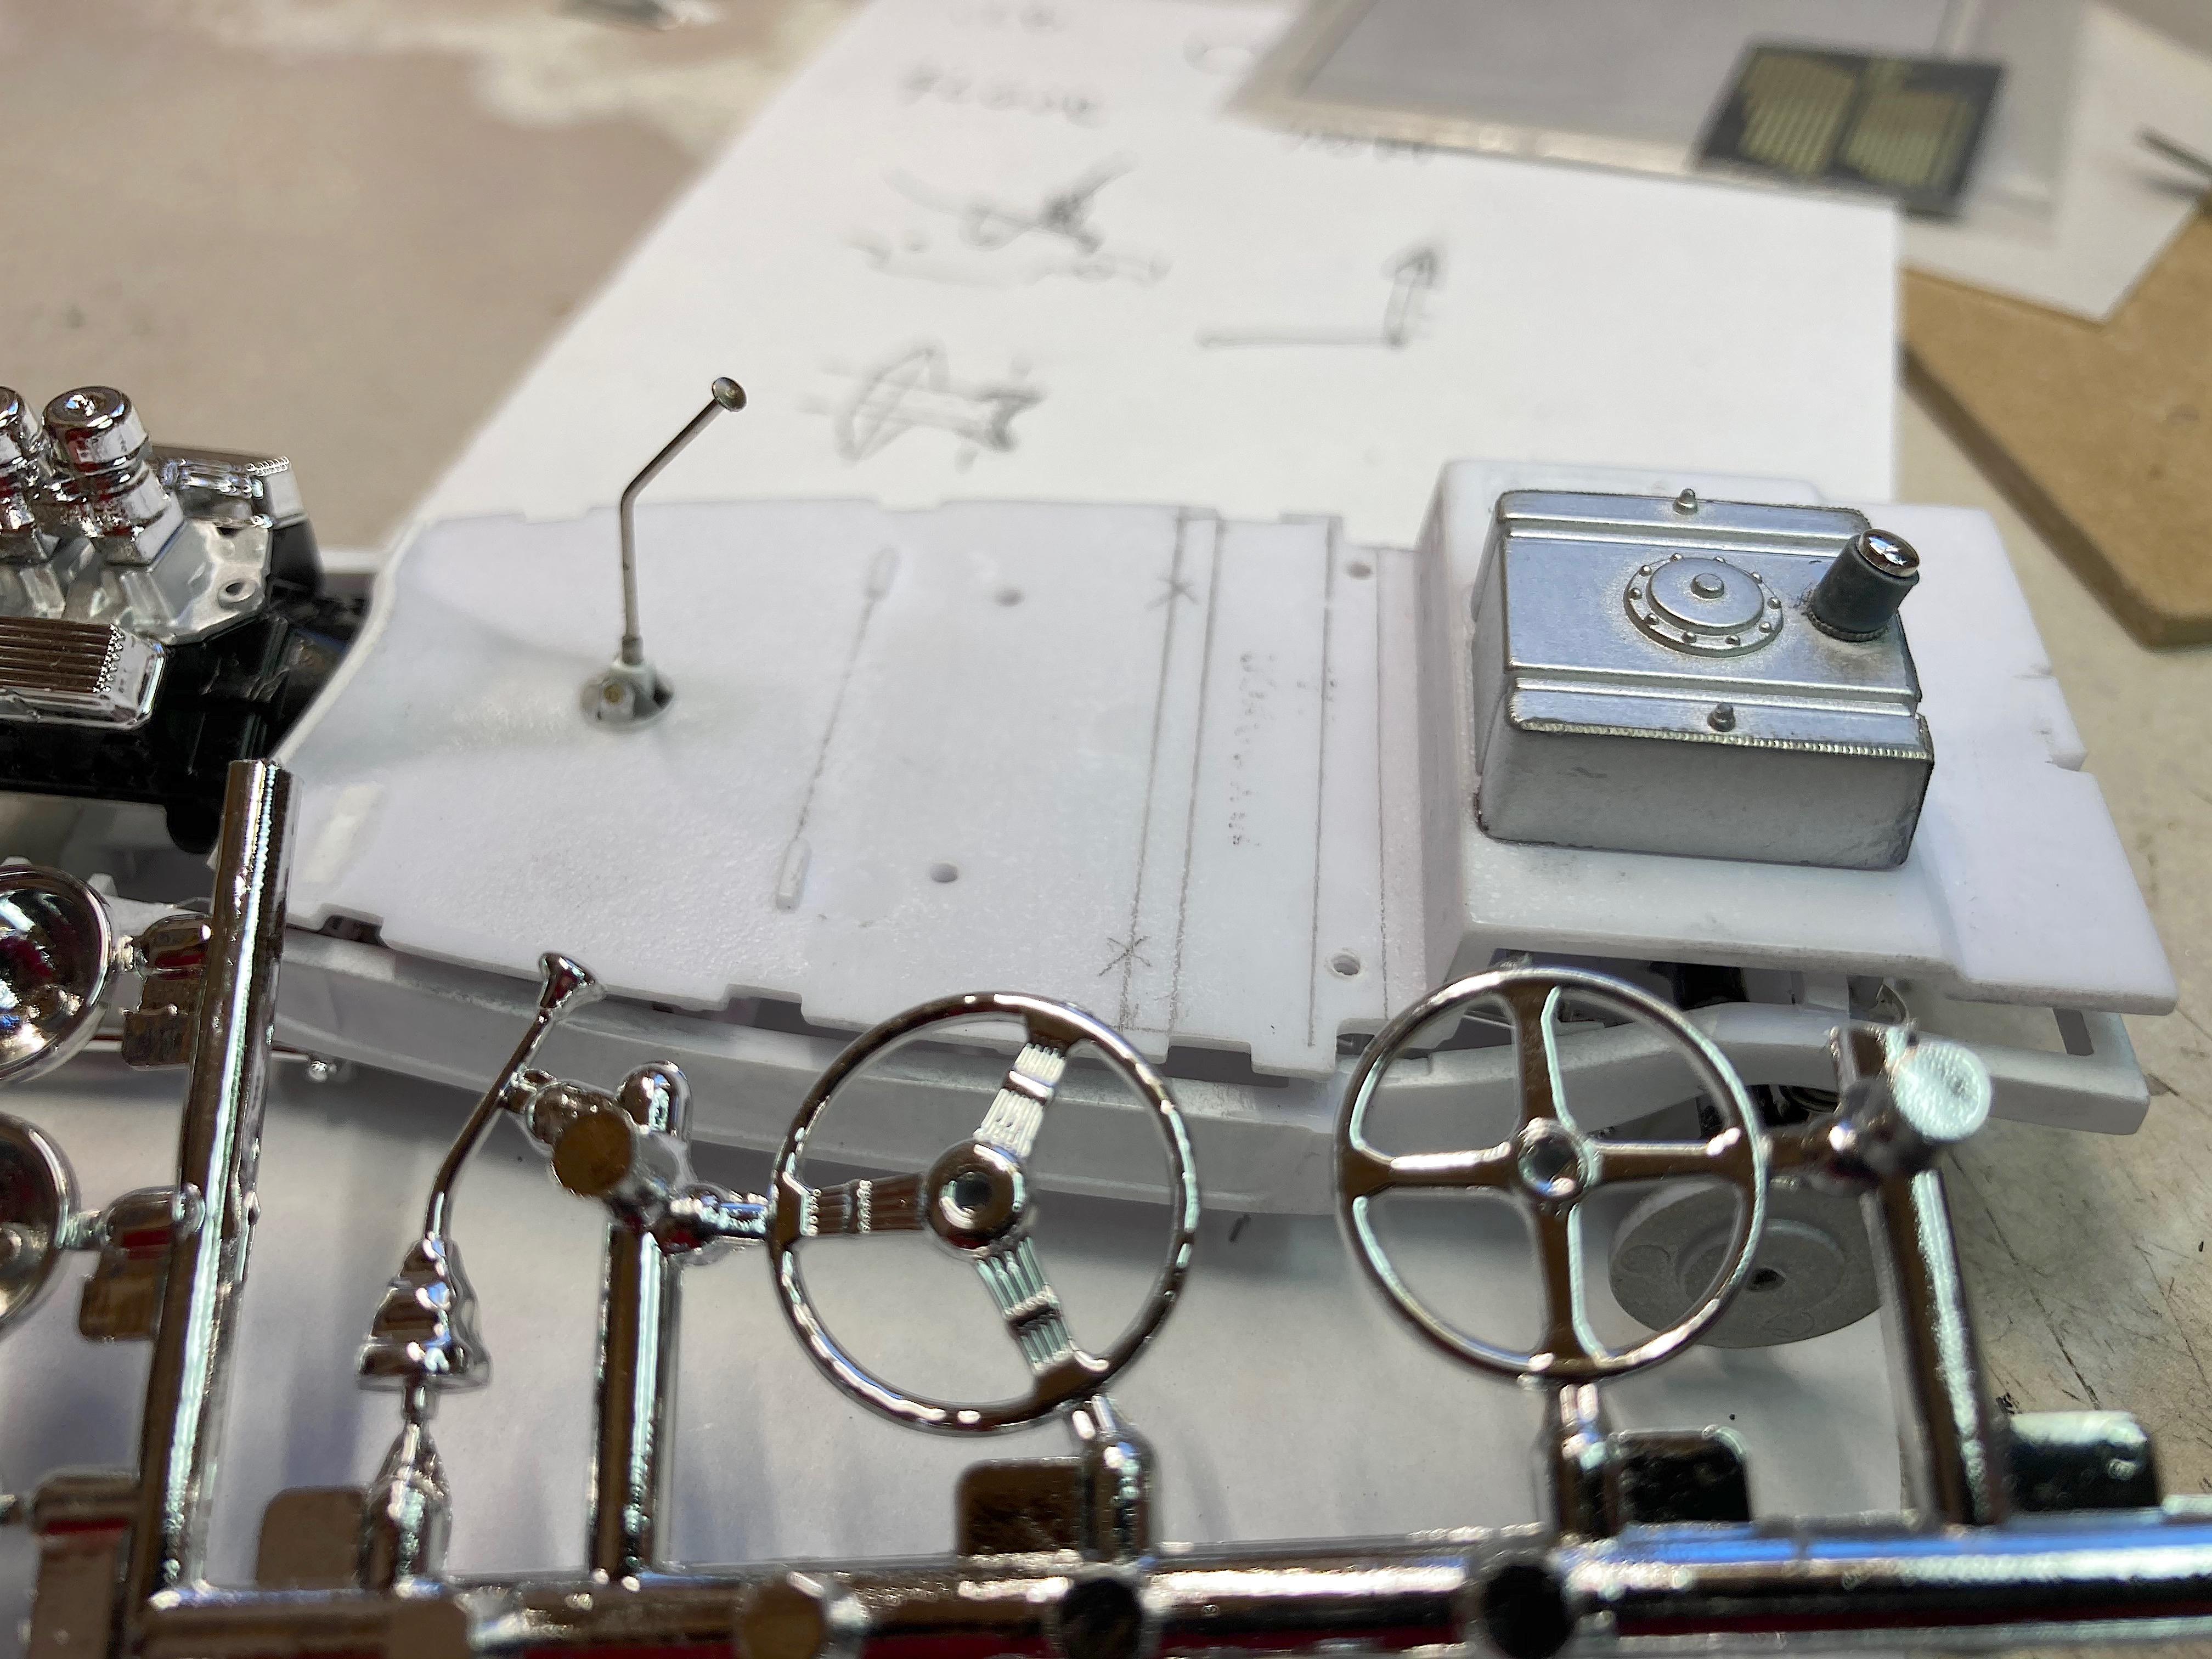
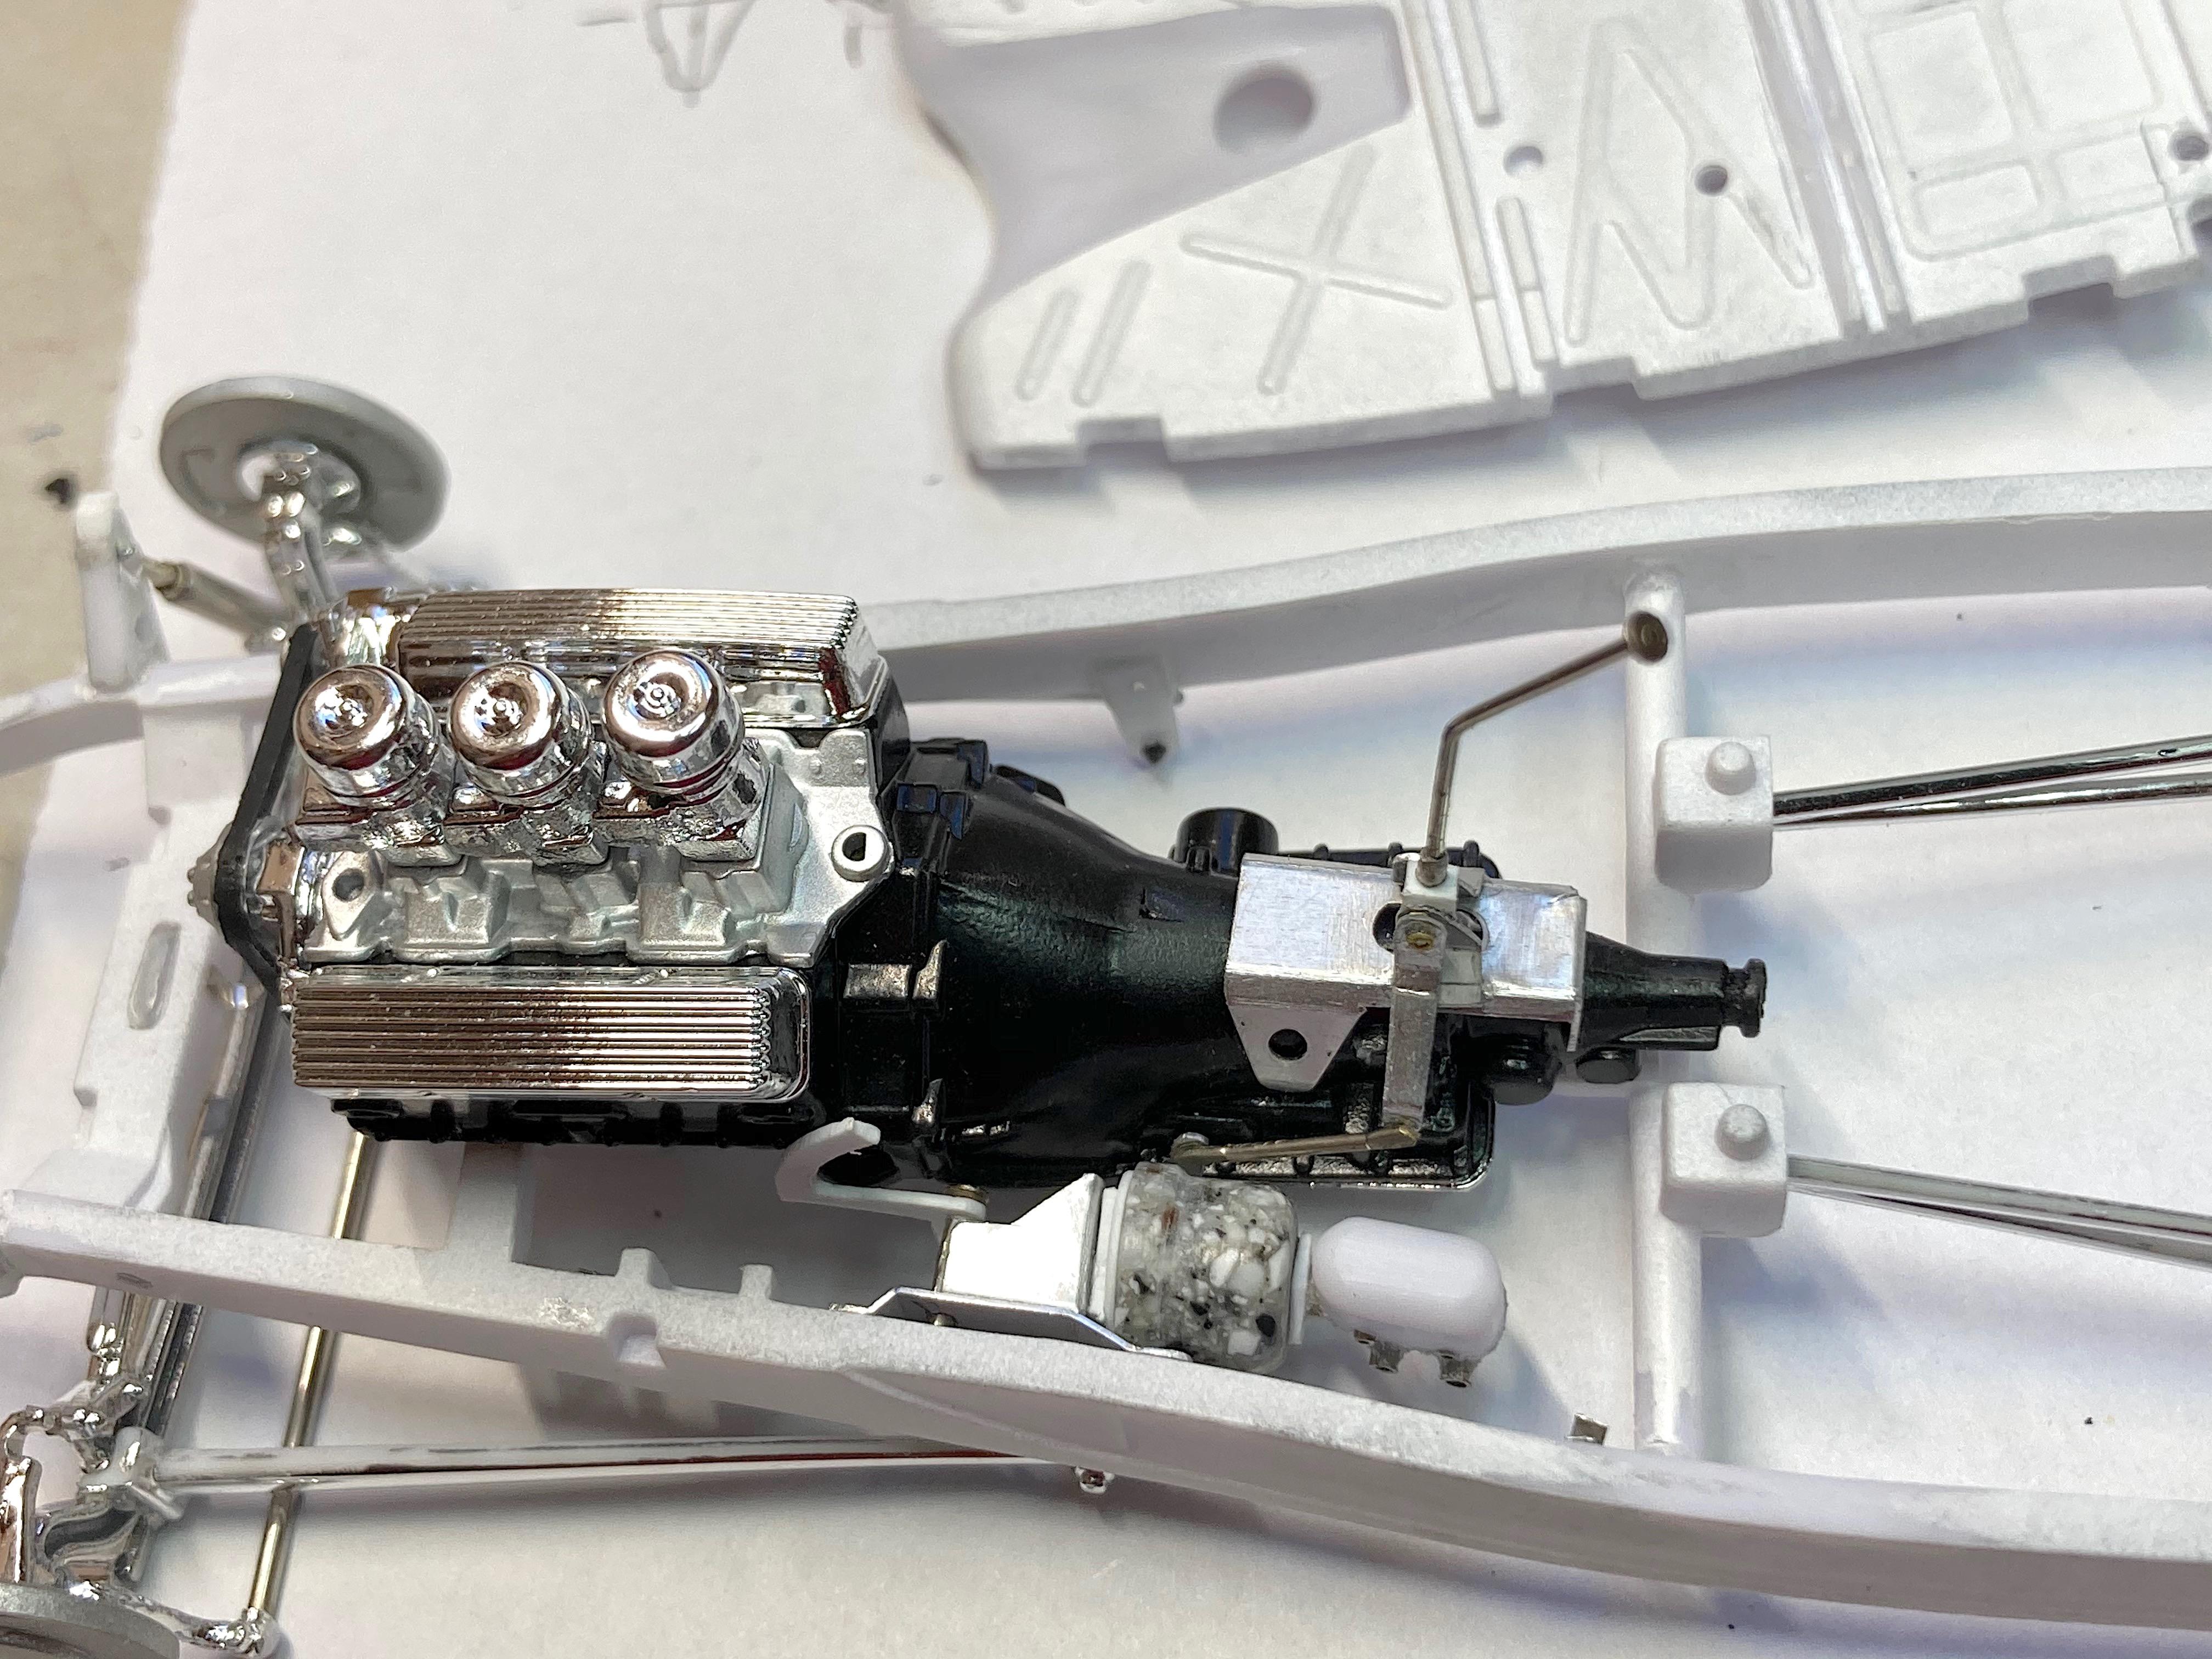
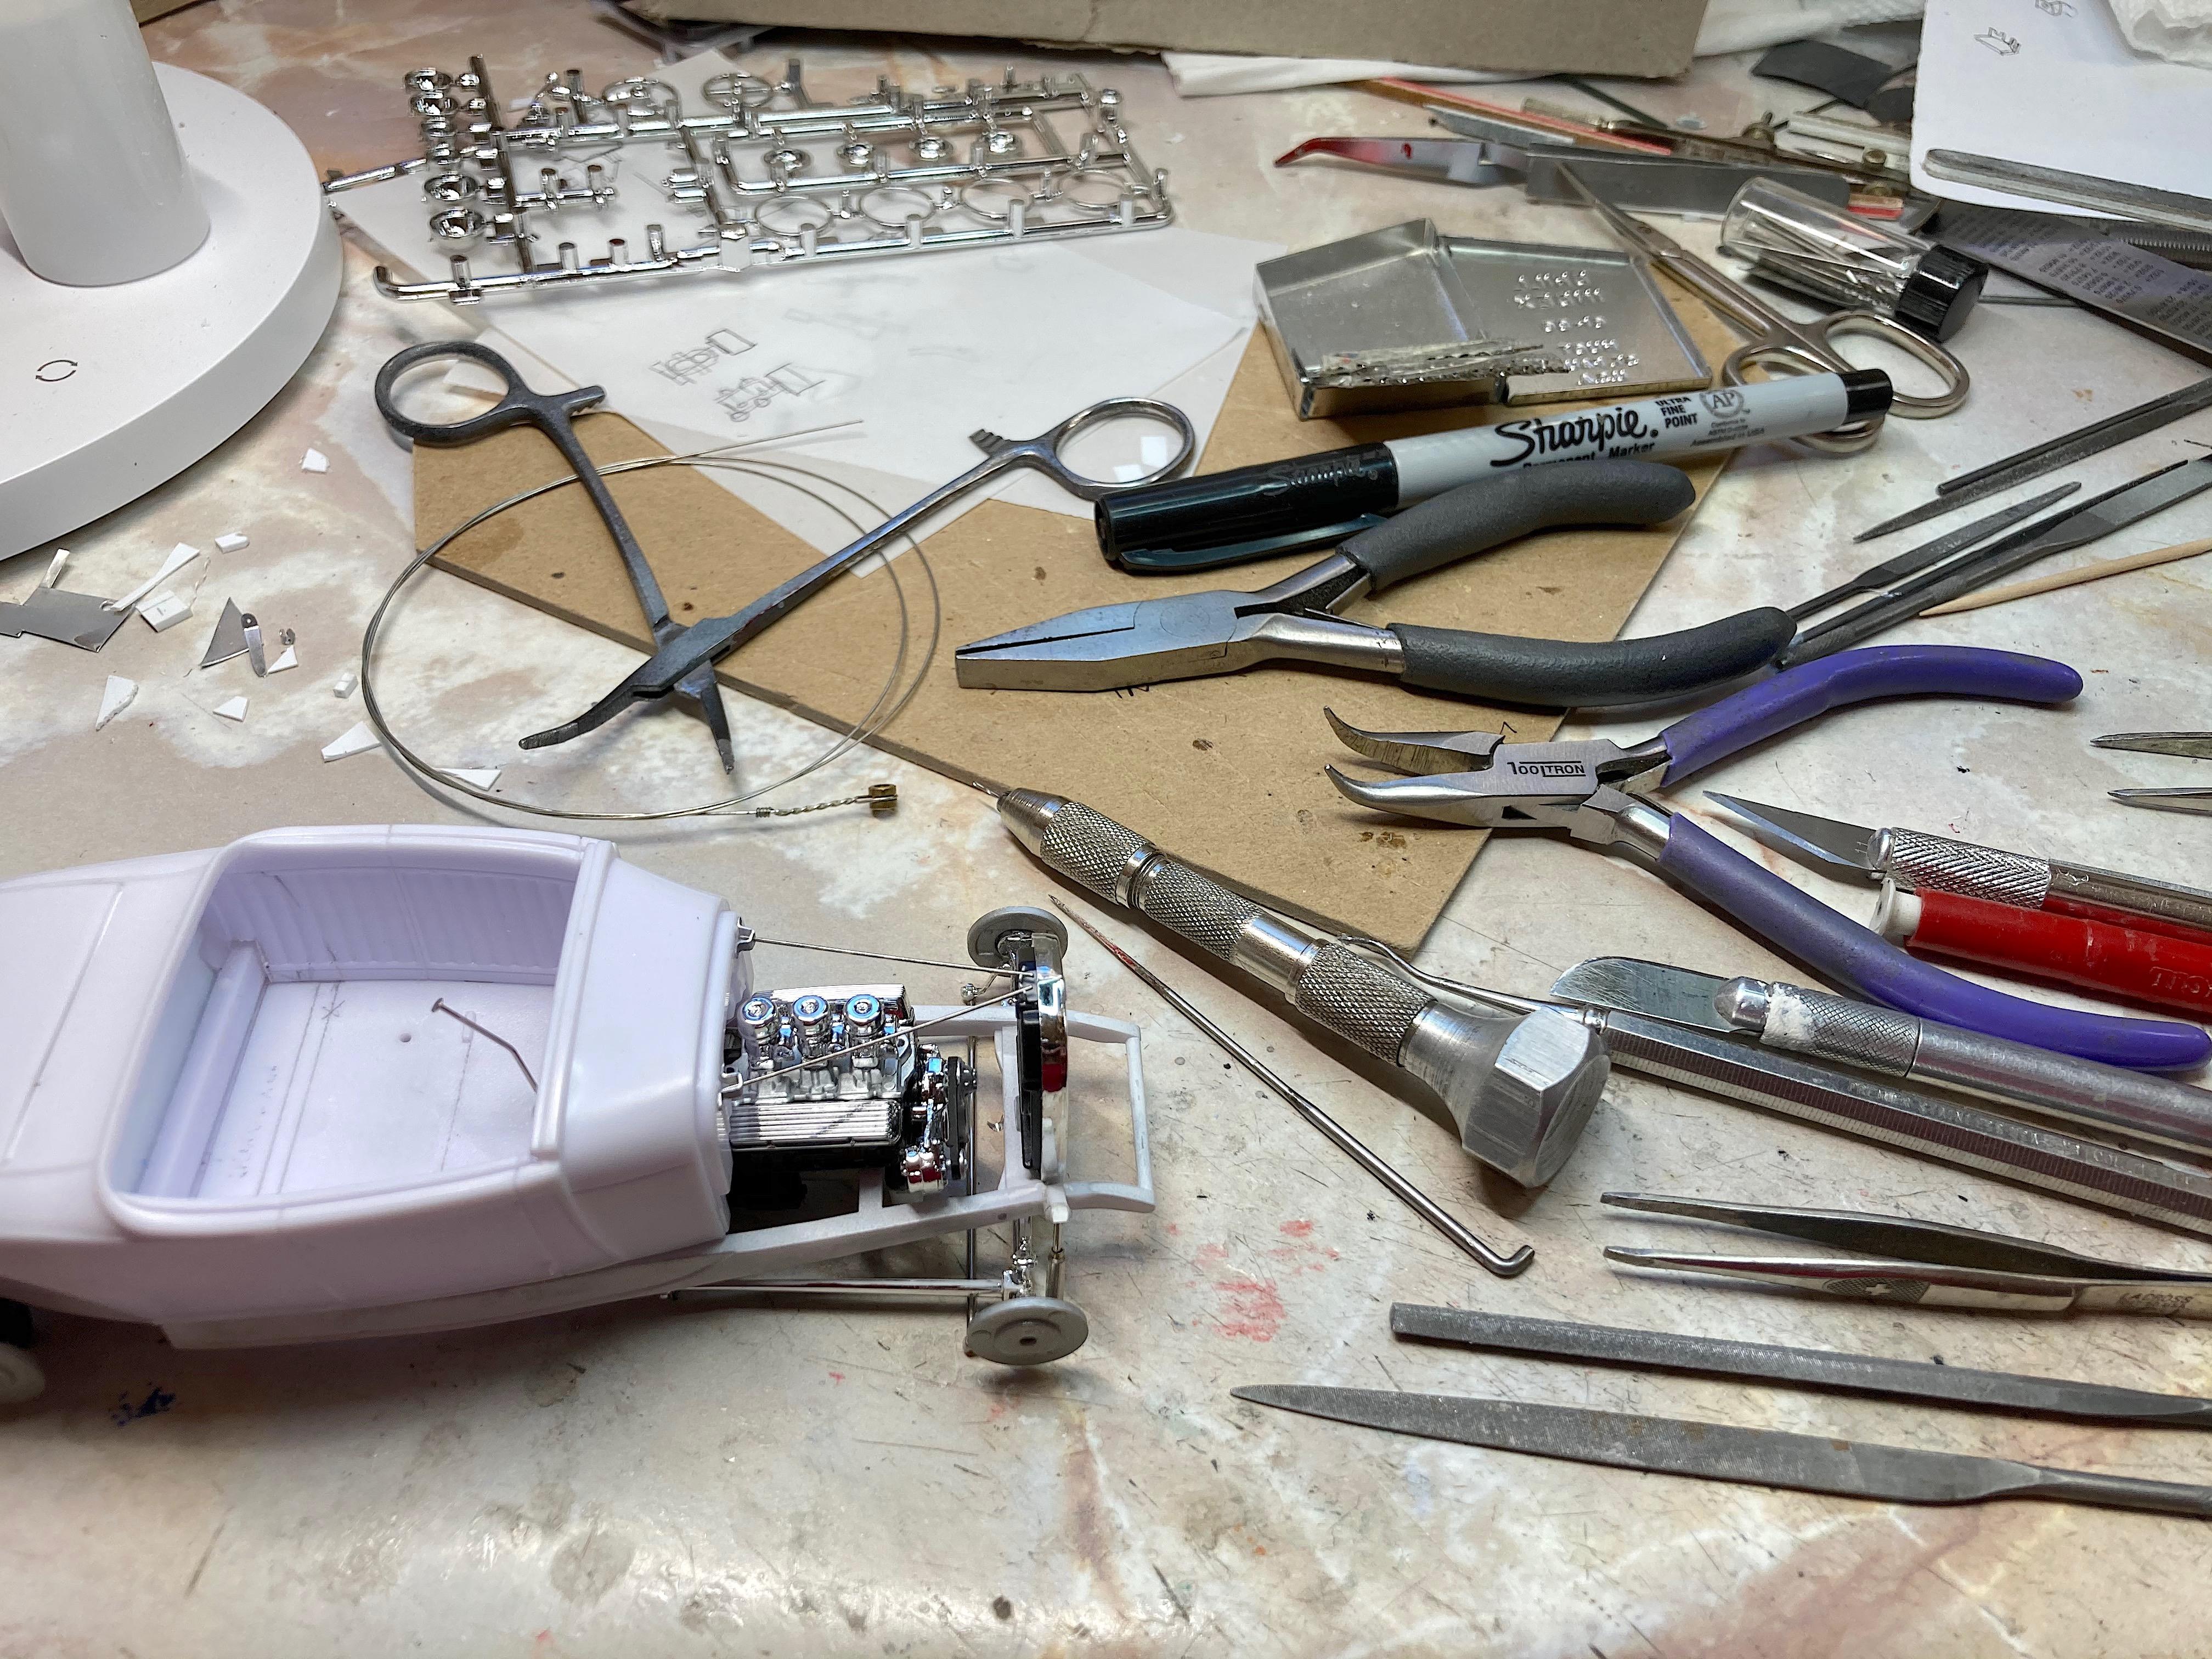
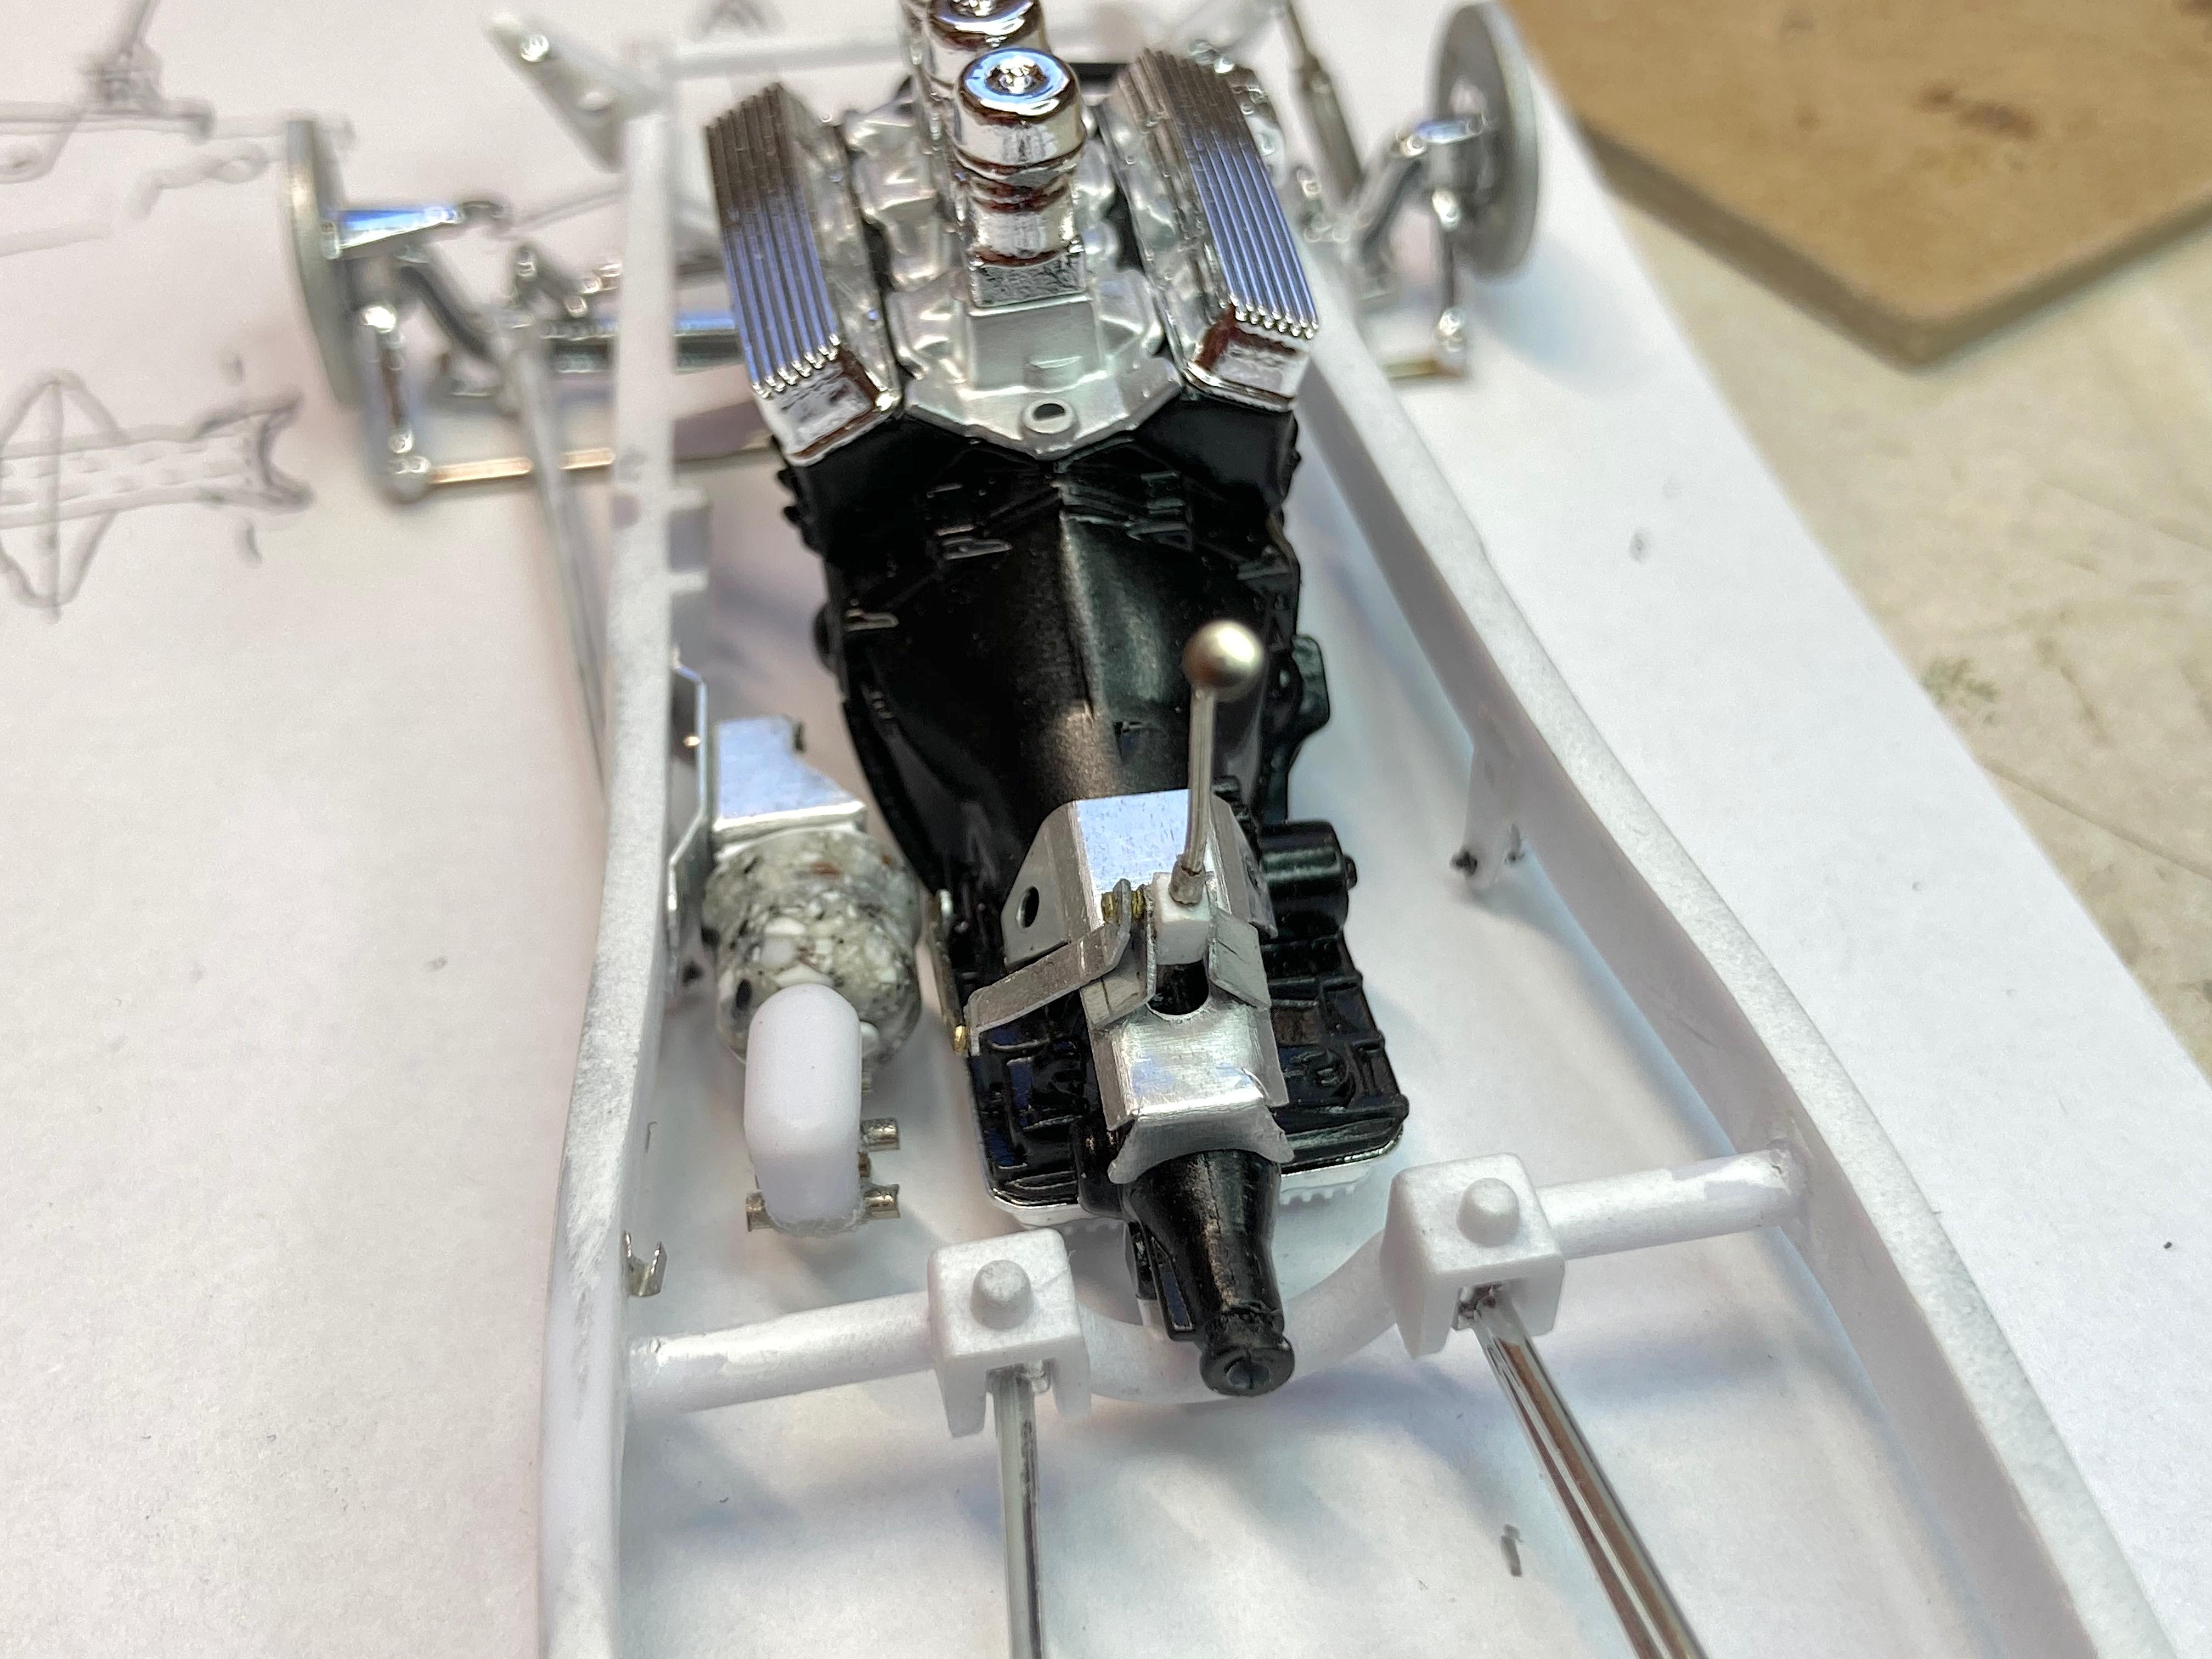
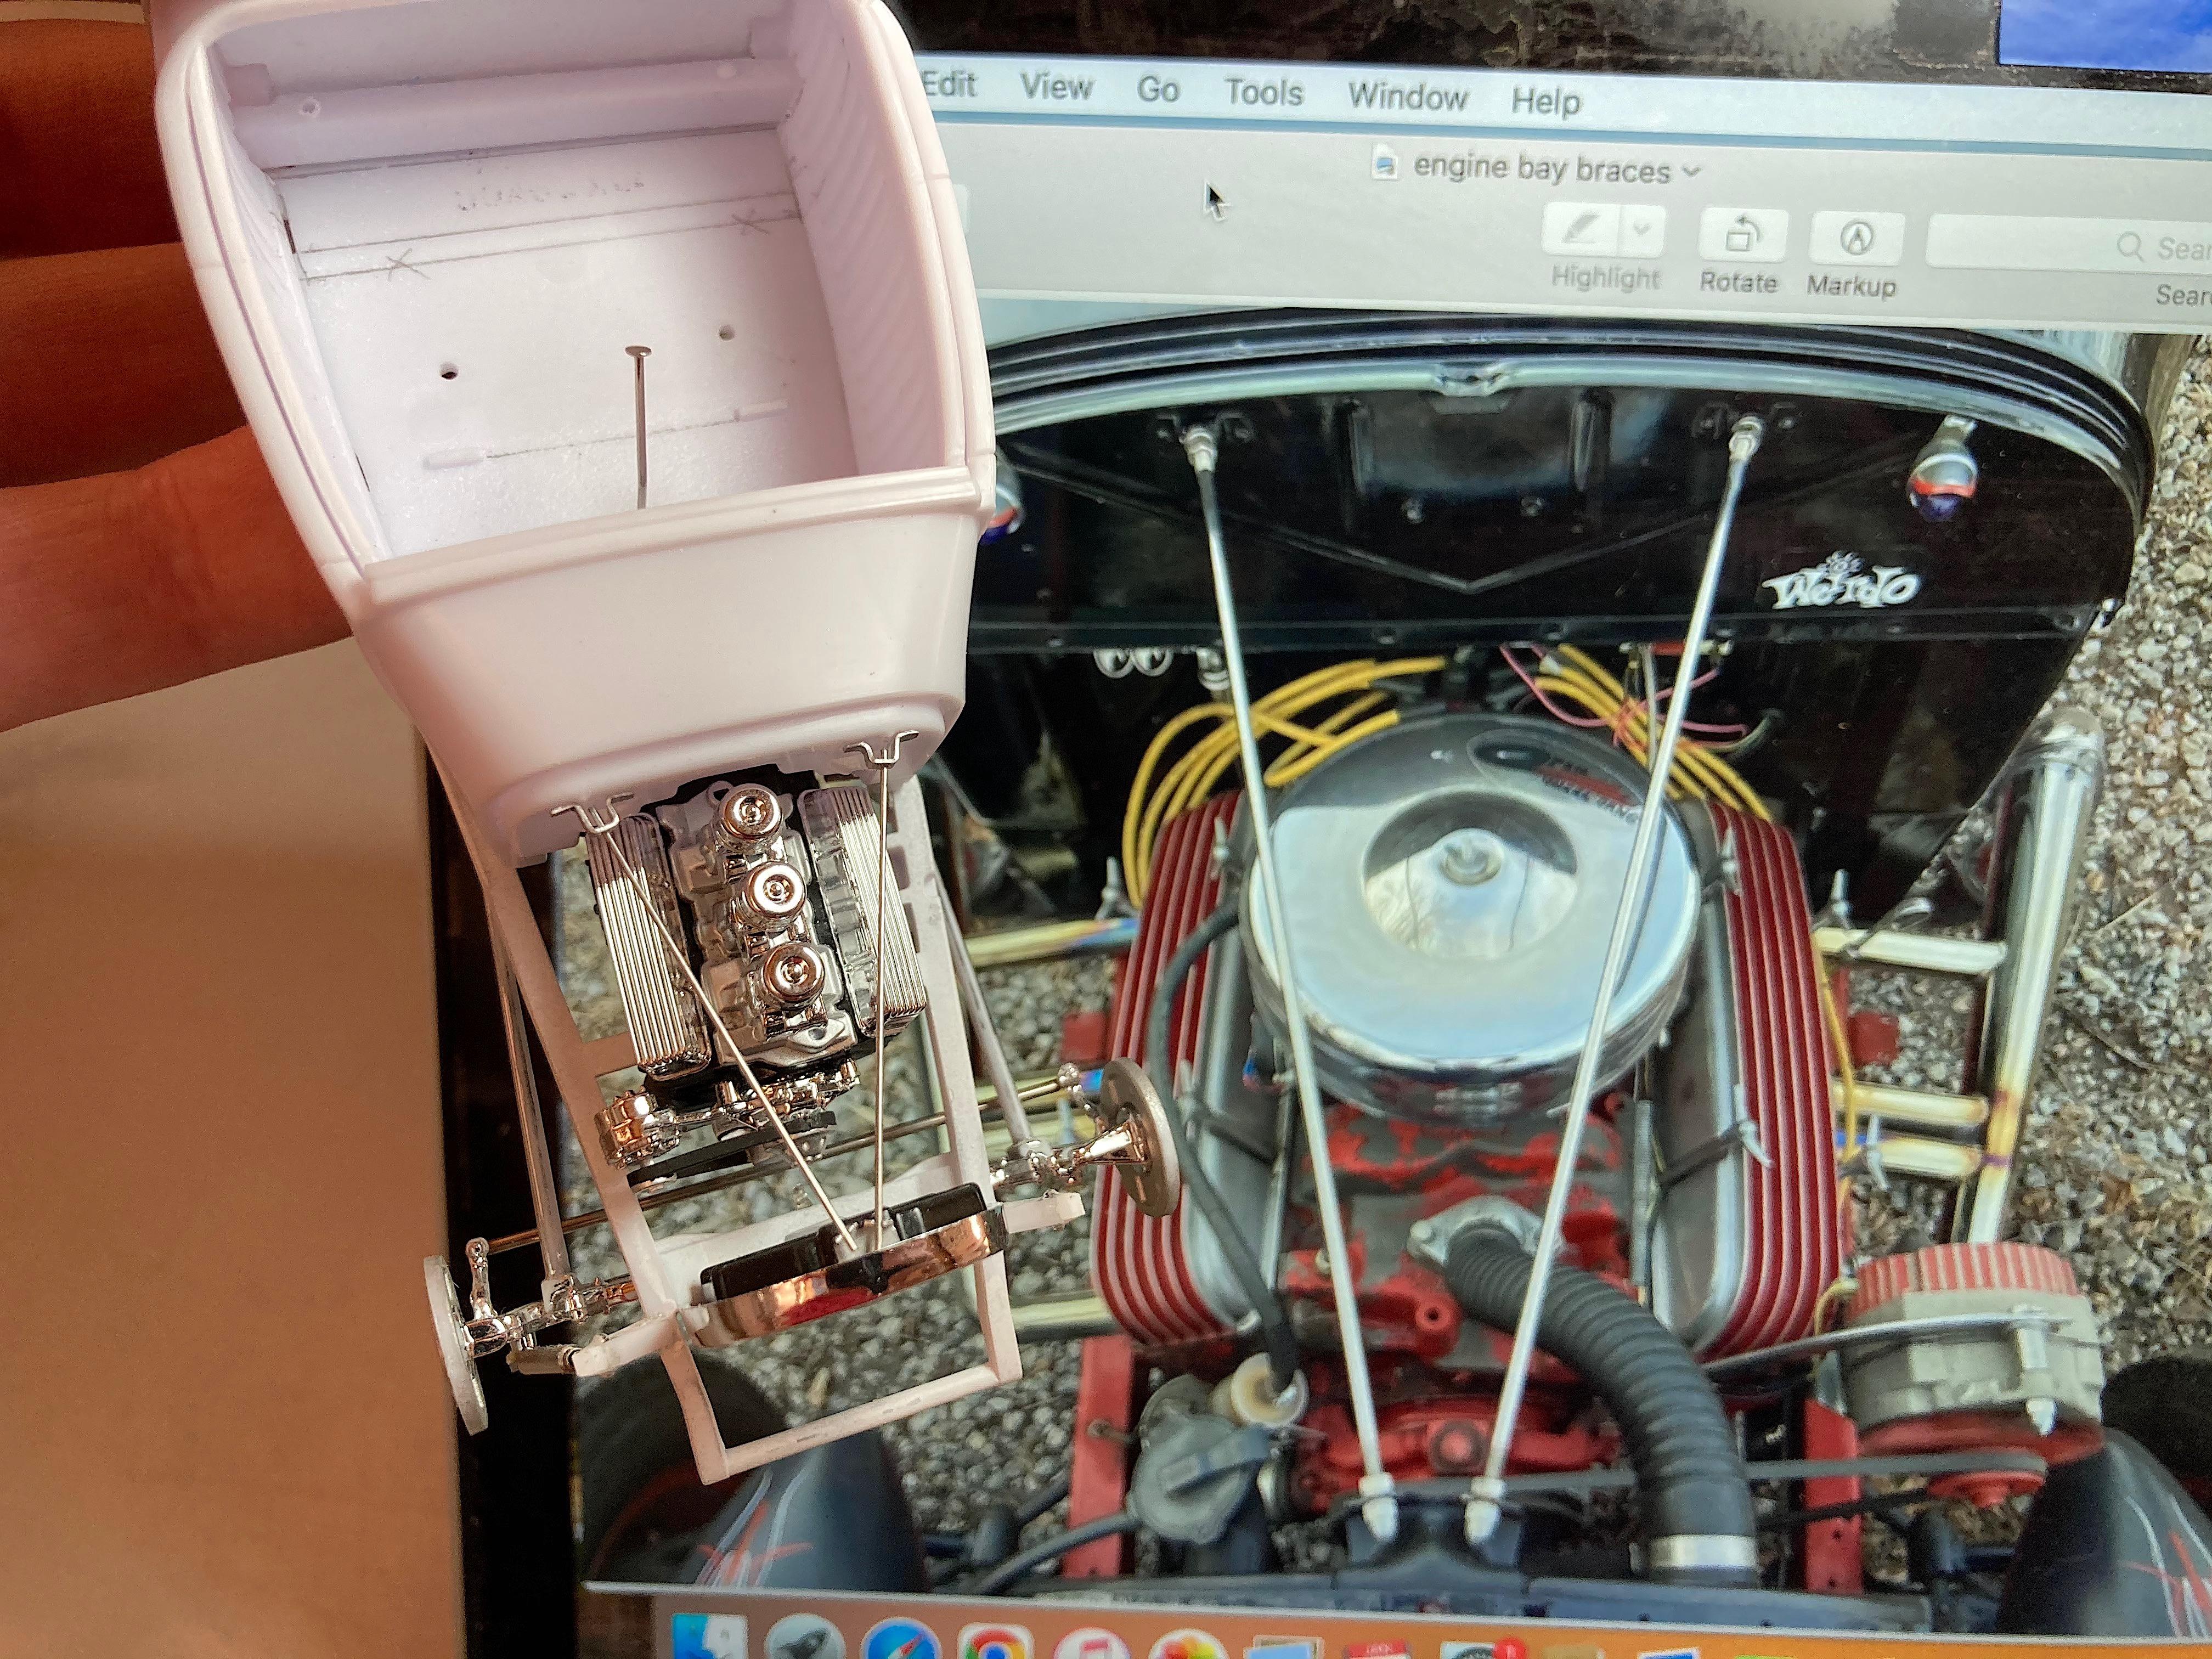
Thank you! It's not something I'm famous for doing, learning about everything, the hard way. ? Thought up a list when I was going to sleep last night, I was dreaming about what could get done today. First up, I *had to* make the transmission shift linkage, first pictures I found were for a column shift, that would not work, too bad because it's much simpler. Got to use a new tool! ? Whenever I thin plastic, had relied on light shining through, this was worth getting. The floor is 1.46" [edit: I'm thinking it's on the mm setting, when it's open that looks like 30mm not inches ?]. When I looked at the lack of clearance when the floor and engine were installed, this had to be done. Used the Dremel to get most of the way, then sanding sticks. Next was drawing the parts for the linkage assembly, combined some into one piece. One of my favorite scatch-building materials is newspaper printing plate, easy to drill, bends without breaking. I did not duplicate one brand, so it's generic. Took two tries, which is becoming normal on this project. This is a 700R4 transmission. Got to use the photo-etch bending tool, I'm getting the hang of what the notches are for. (I took a break from this, but will continue the progress for this forum) Normal people would be happy with just a shirt pin for the shift lever. ? Made the parts at the base, thinking after all this work I will not have a boot on the floor. Now that I'm looking at this picture, hope it fits under the dash. Now I see why Revell didn't include the master brake cylinder and linkage, no room for the exhaust. I did something easy for a break, made the only part that will be billet aluminum, the gas cap. This kit does not have a gas cap, because you can't see the gas tank. The aluminum rod was scavenged from a TV antenna, chucked into the cordless drill, started with a bastard file, then successive sanding sticks, emory cloth, steel wool, and finished with Blue Magic polish. Cut 95% of the way with the saw, then the X-acto blade (worst chance of losing it, good luck this time). Like I need to drive myself more crazy, *had to* try the photo-etch weld bead. Did the corners where you see them (not the back are you kidding?), even around the new filler neck. I was digging the radiator support on the reference car. Made brackets (twice again) from aluminum plate. The design does not duplicate the real car, since the firewall is not original. I'll have to make the acorn nuts later. ? Next major subassembly to do, the windshield. Even though I lucked out with one that isn't warped or broken (seen several people on this forum have that problem), I want a low cut one, was considering a Duval style, but will do a one piece that is tilted back. Am going to make headlight brackets, never liked what the kit has for mounts, makes me think of Marty Feldman. ?
-
Didn’t really know where to post this.(Barrett Jackson)
89AKurt replied to NYLIBUD's topic in The Off-Topic Lounge
Too funny, just before jumping out, saw this ad above the OT. They're smoking something for that Square body Blazer, and that Bronco! That's the influence these auctions have.
-
Didn’t really know where to post this.(Barrett Jackson)
89AKurt replied to NYLIBUD's topic in The Off-Topic Lounge
Since I have a '68 Chevy C-10 rust bucket, I checked out the website of another auction, looking at the reserve prices. Some of the prices are ridiculous, but hey, if you won the lottery would you care? I live about 100 miles from Snottsdale, could go in person and pay a bunch of money to take pictures I'll never look at later. I've enjoyed seeing the auctions in the past, saw Gen. Goring's armored Mercedes get fired up to leave it's special trailer for the block, for example. -
He could just sit around and become a vegetable, and stay safe. Or he could enjoy his life, doing what he enjoys. I have no use for the legacy networks. I don't have cable, since 2008. When I stayed at a hotel last year, I couldn't believe the junk on all the channels, the only thing worth watching was Star Wars. When I spent time with mom over the holiday, we watched recorded shows. Man I can't stand all the stupid ads, nice to be able to fast forward. Leno can stick with ScrewTube, some car enthusiasts have become millionaires with their channel, blows me away.
-
the brown streak ?
-
GSL Common Kit: [revision] just another Model A Roadster
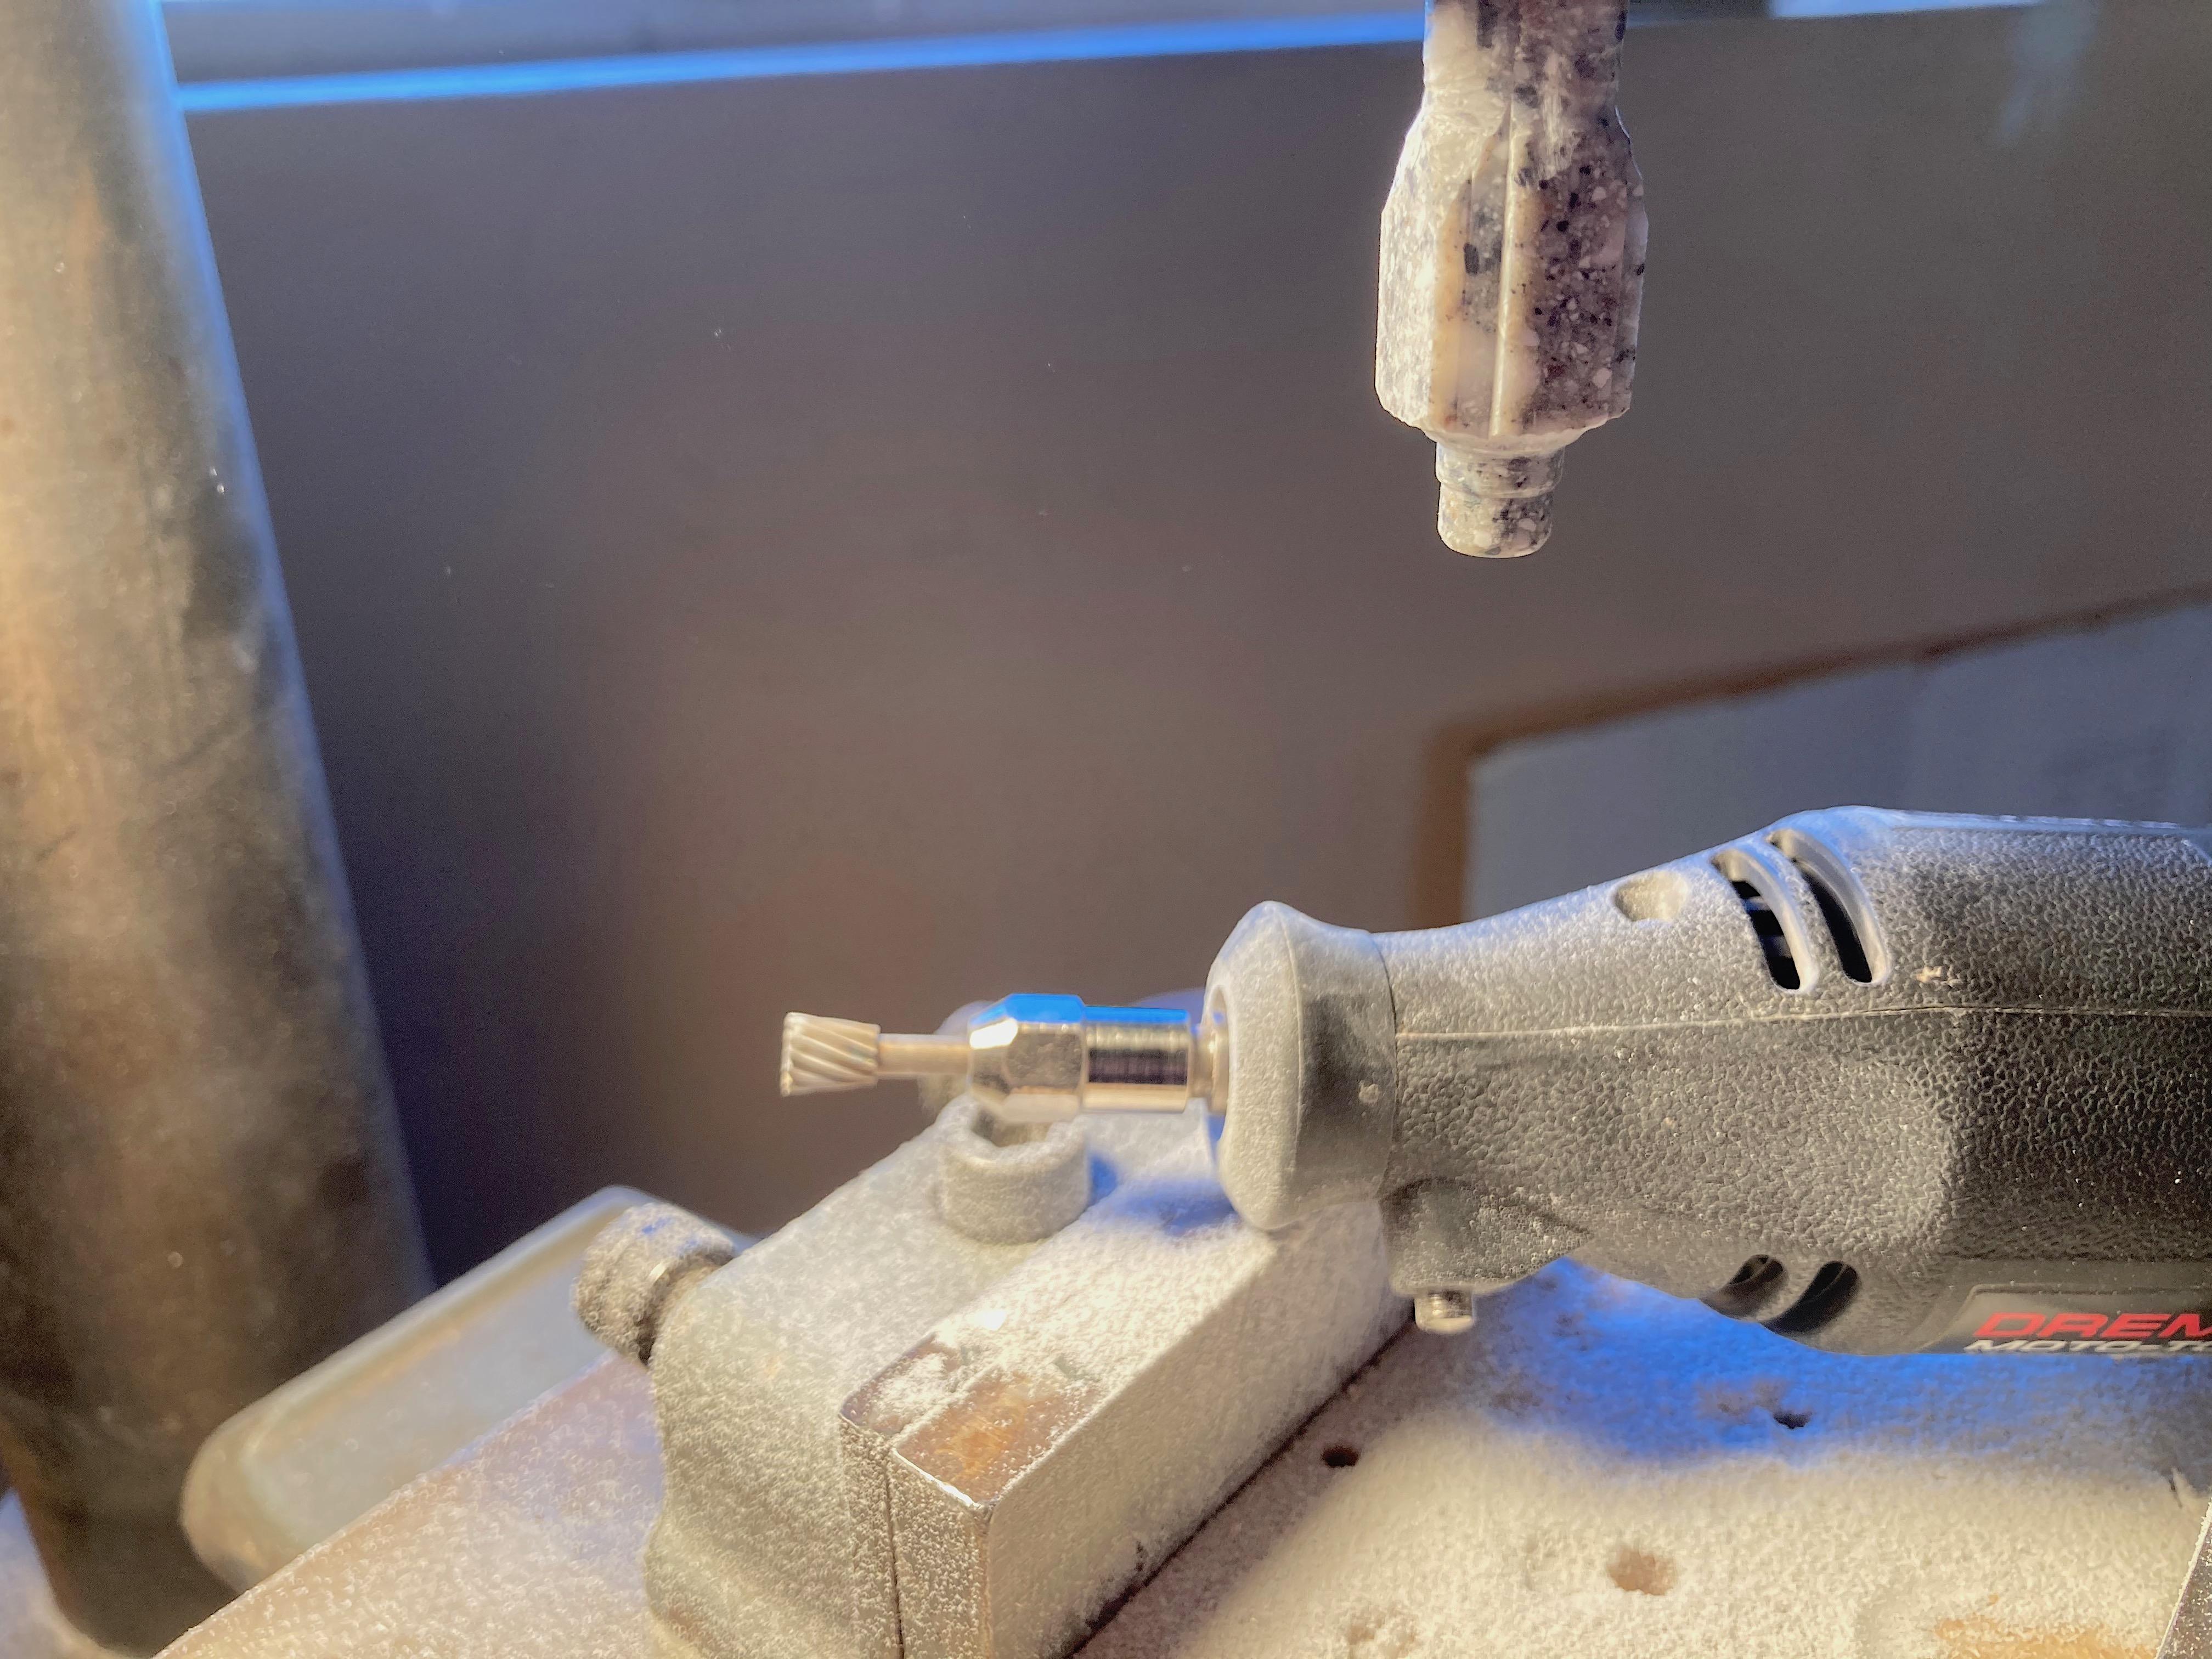
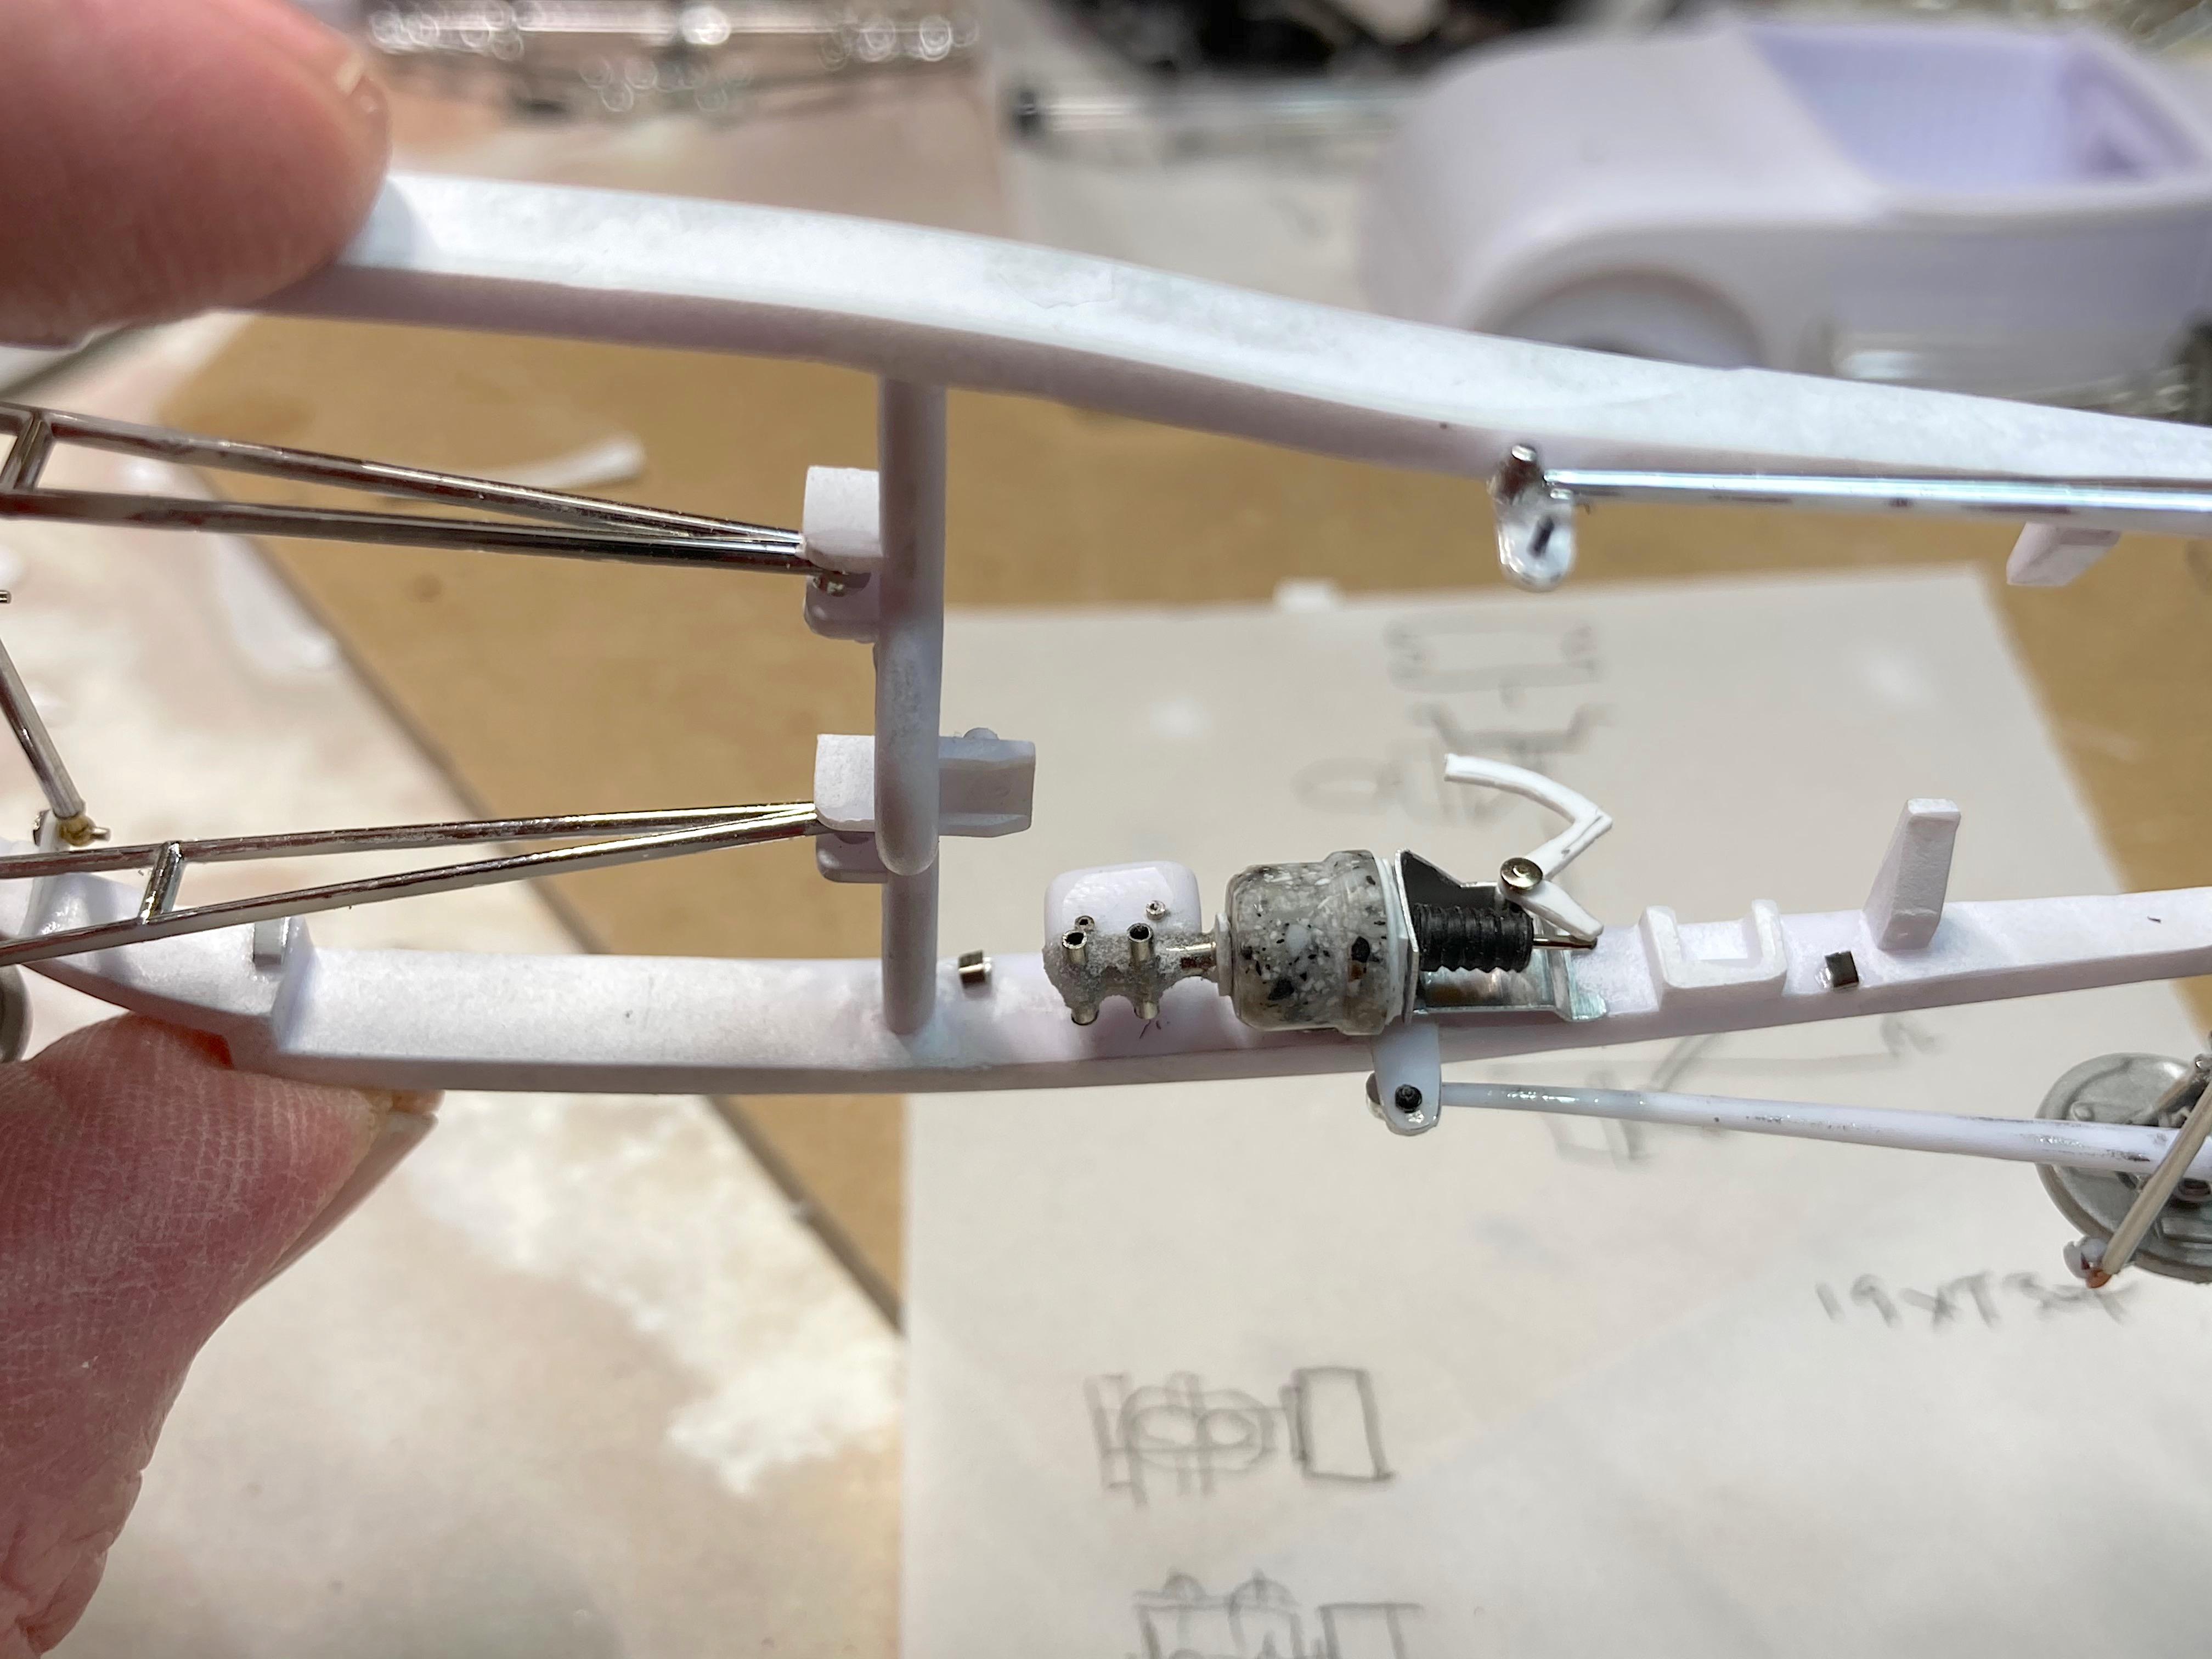
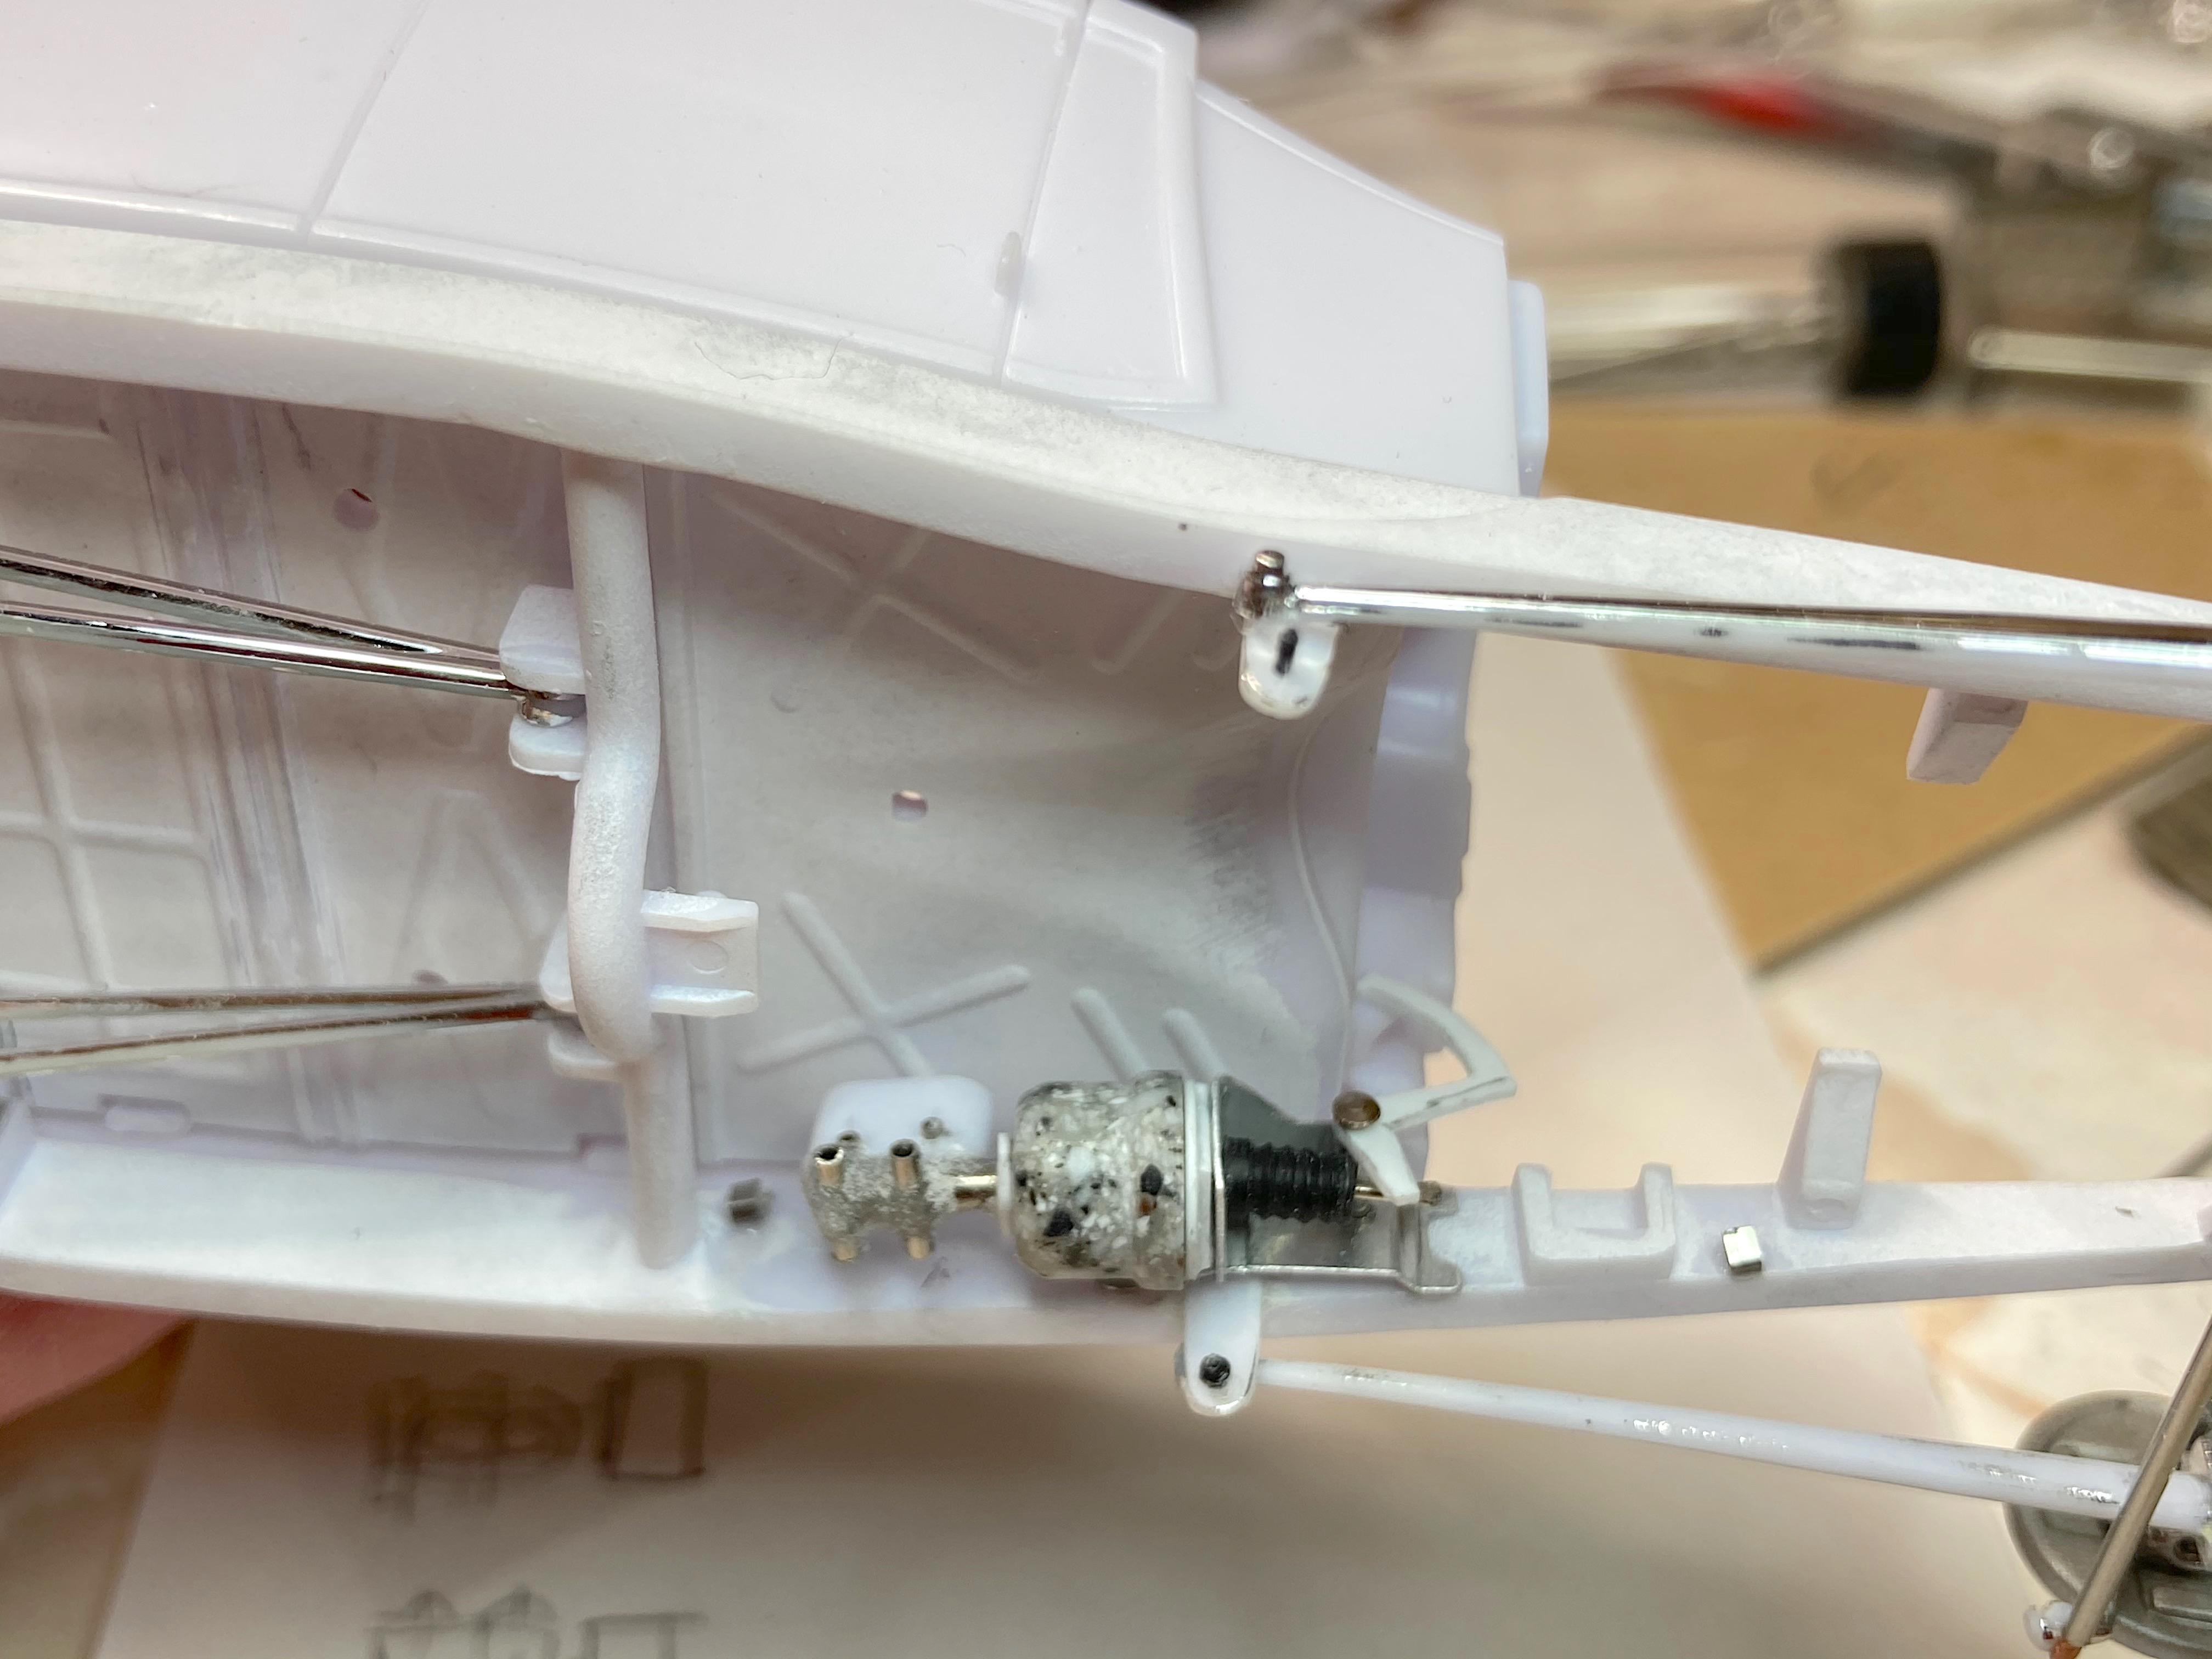
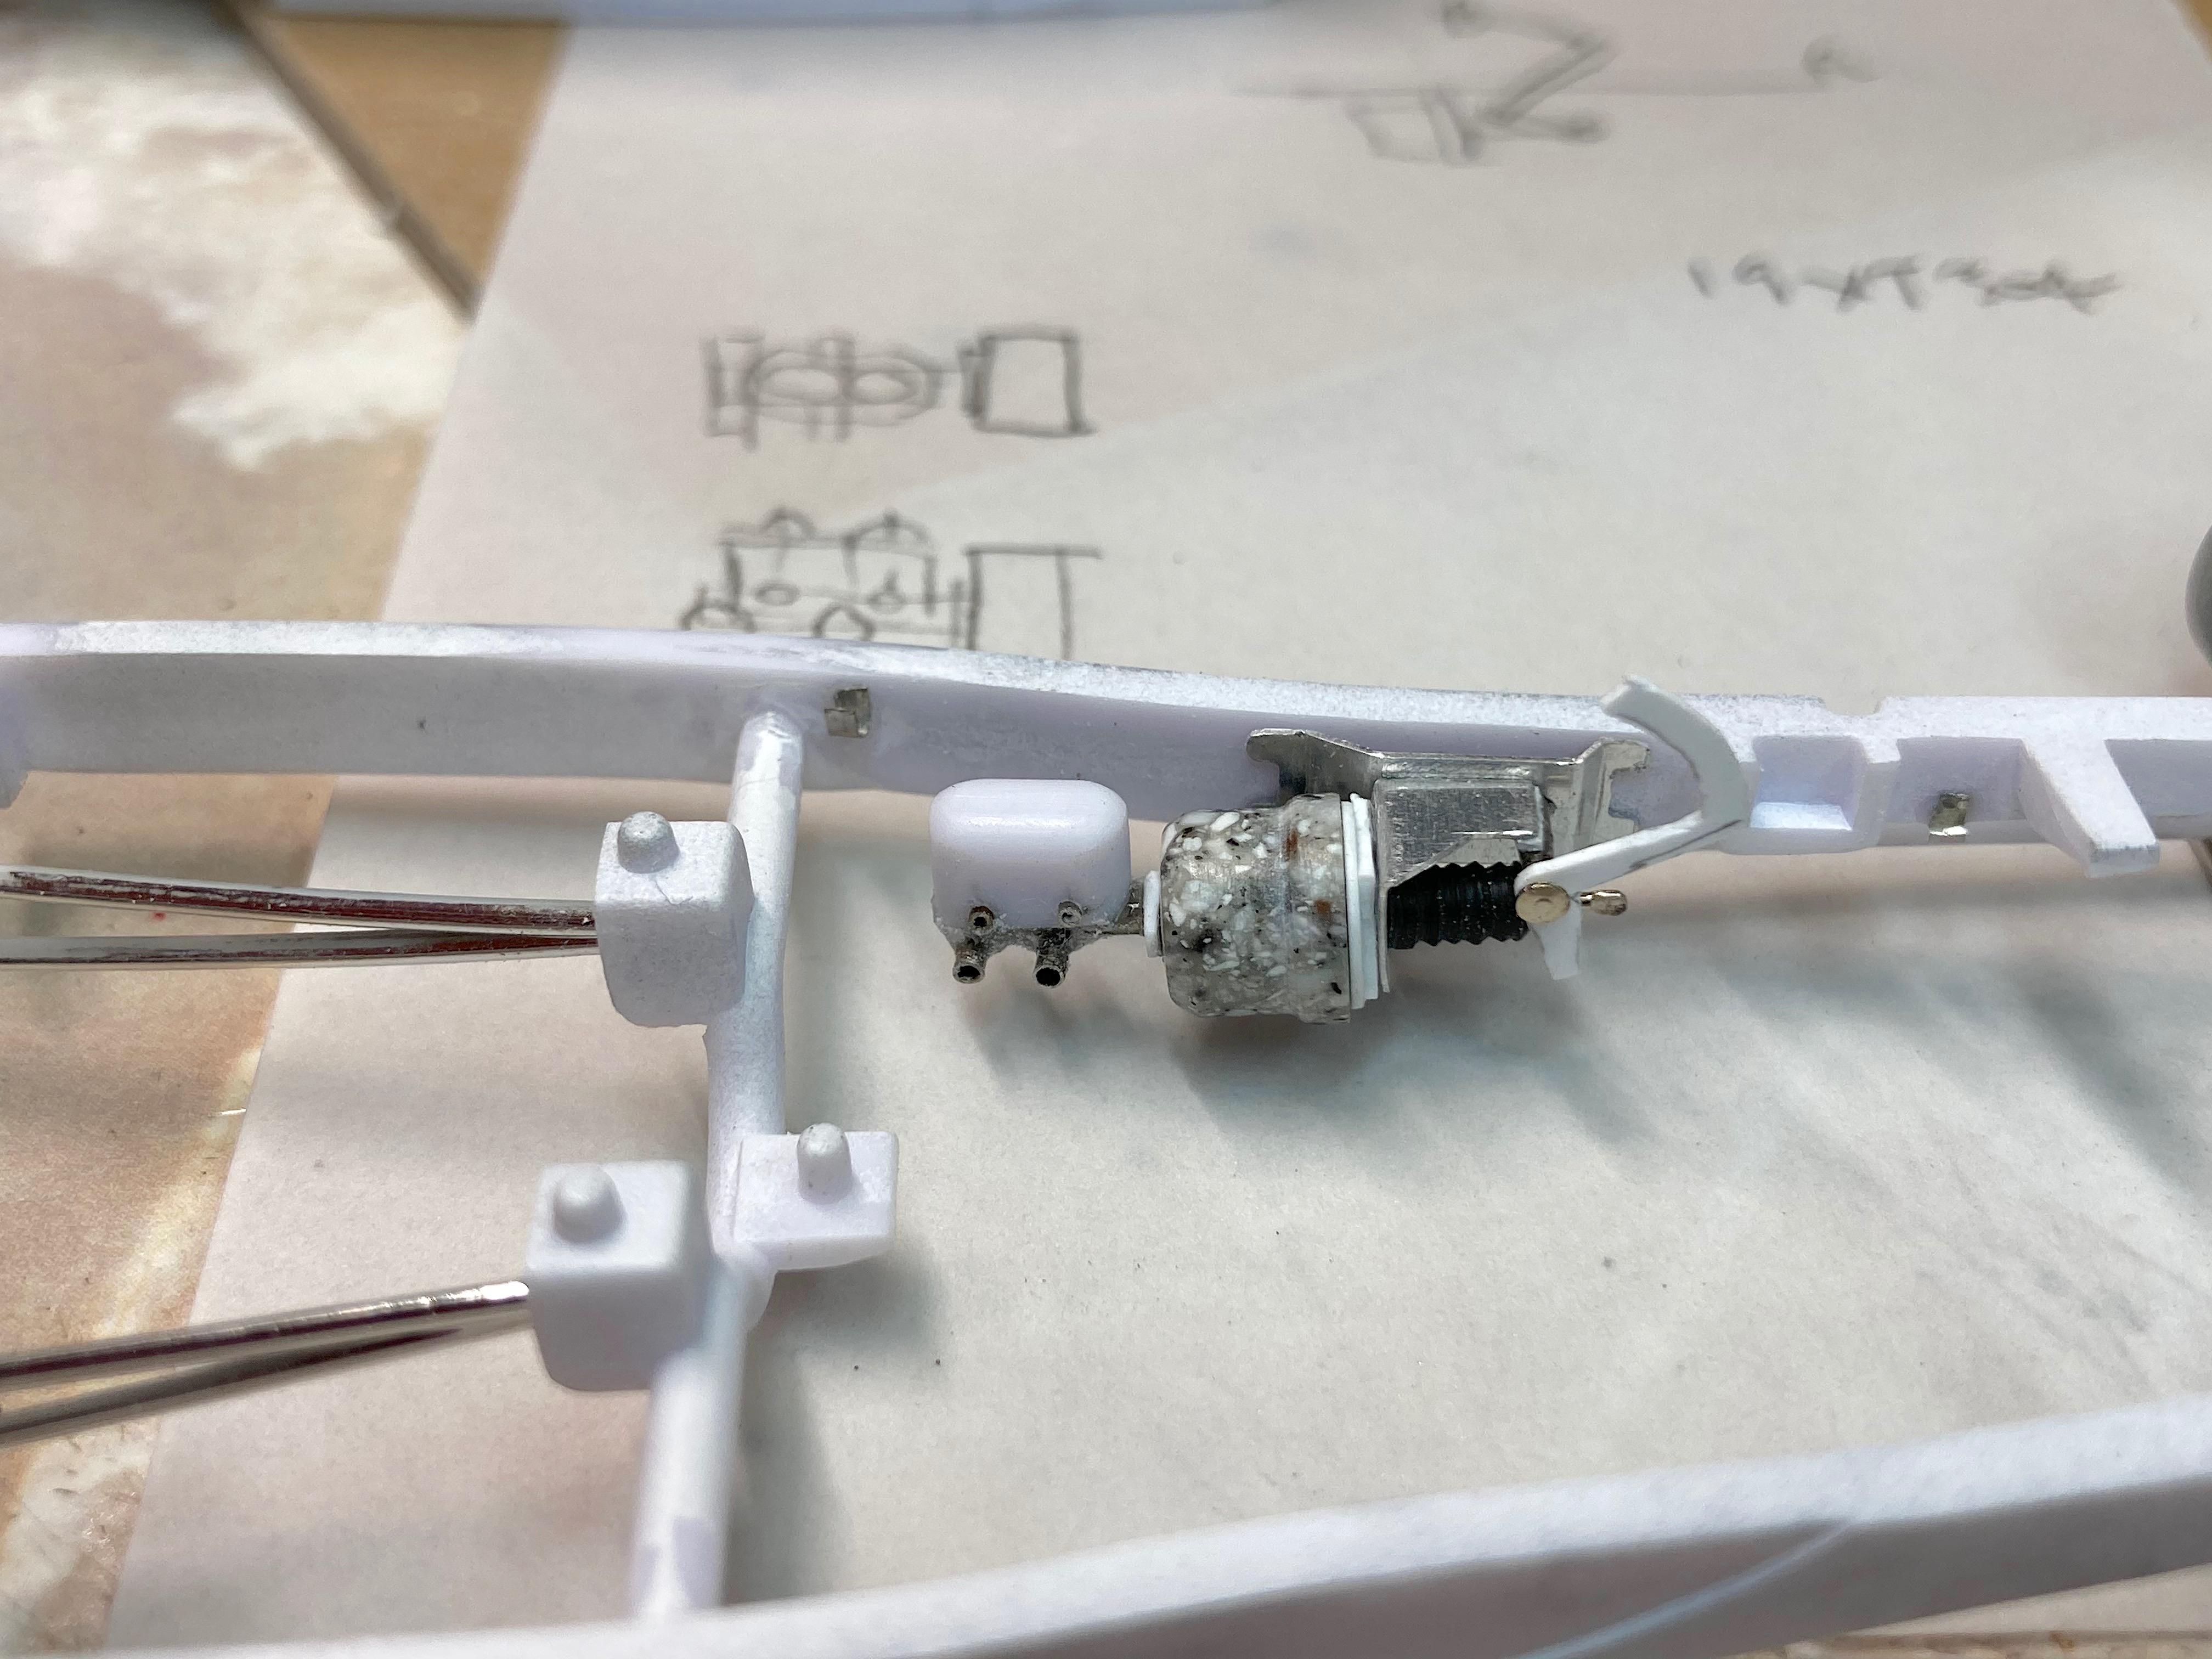
89AKurt replied to 89AKurt's topic in WIP: Model Cars
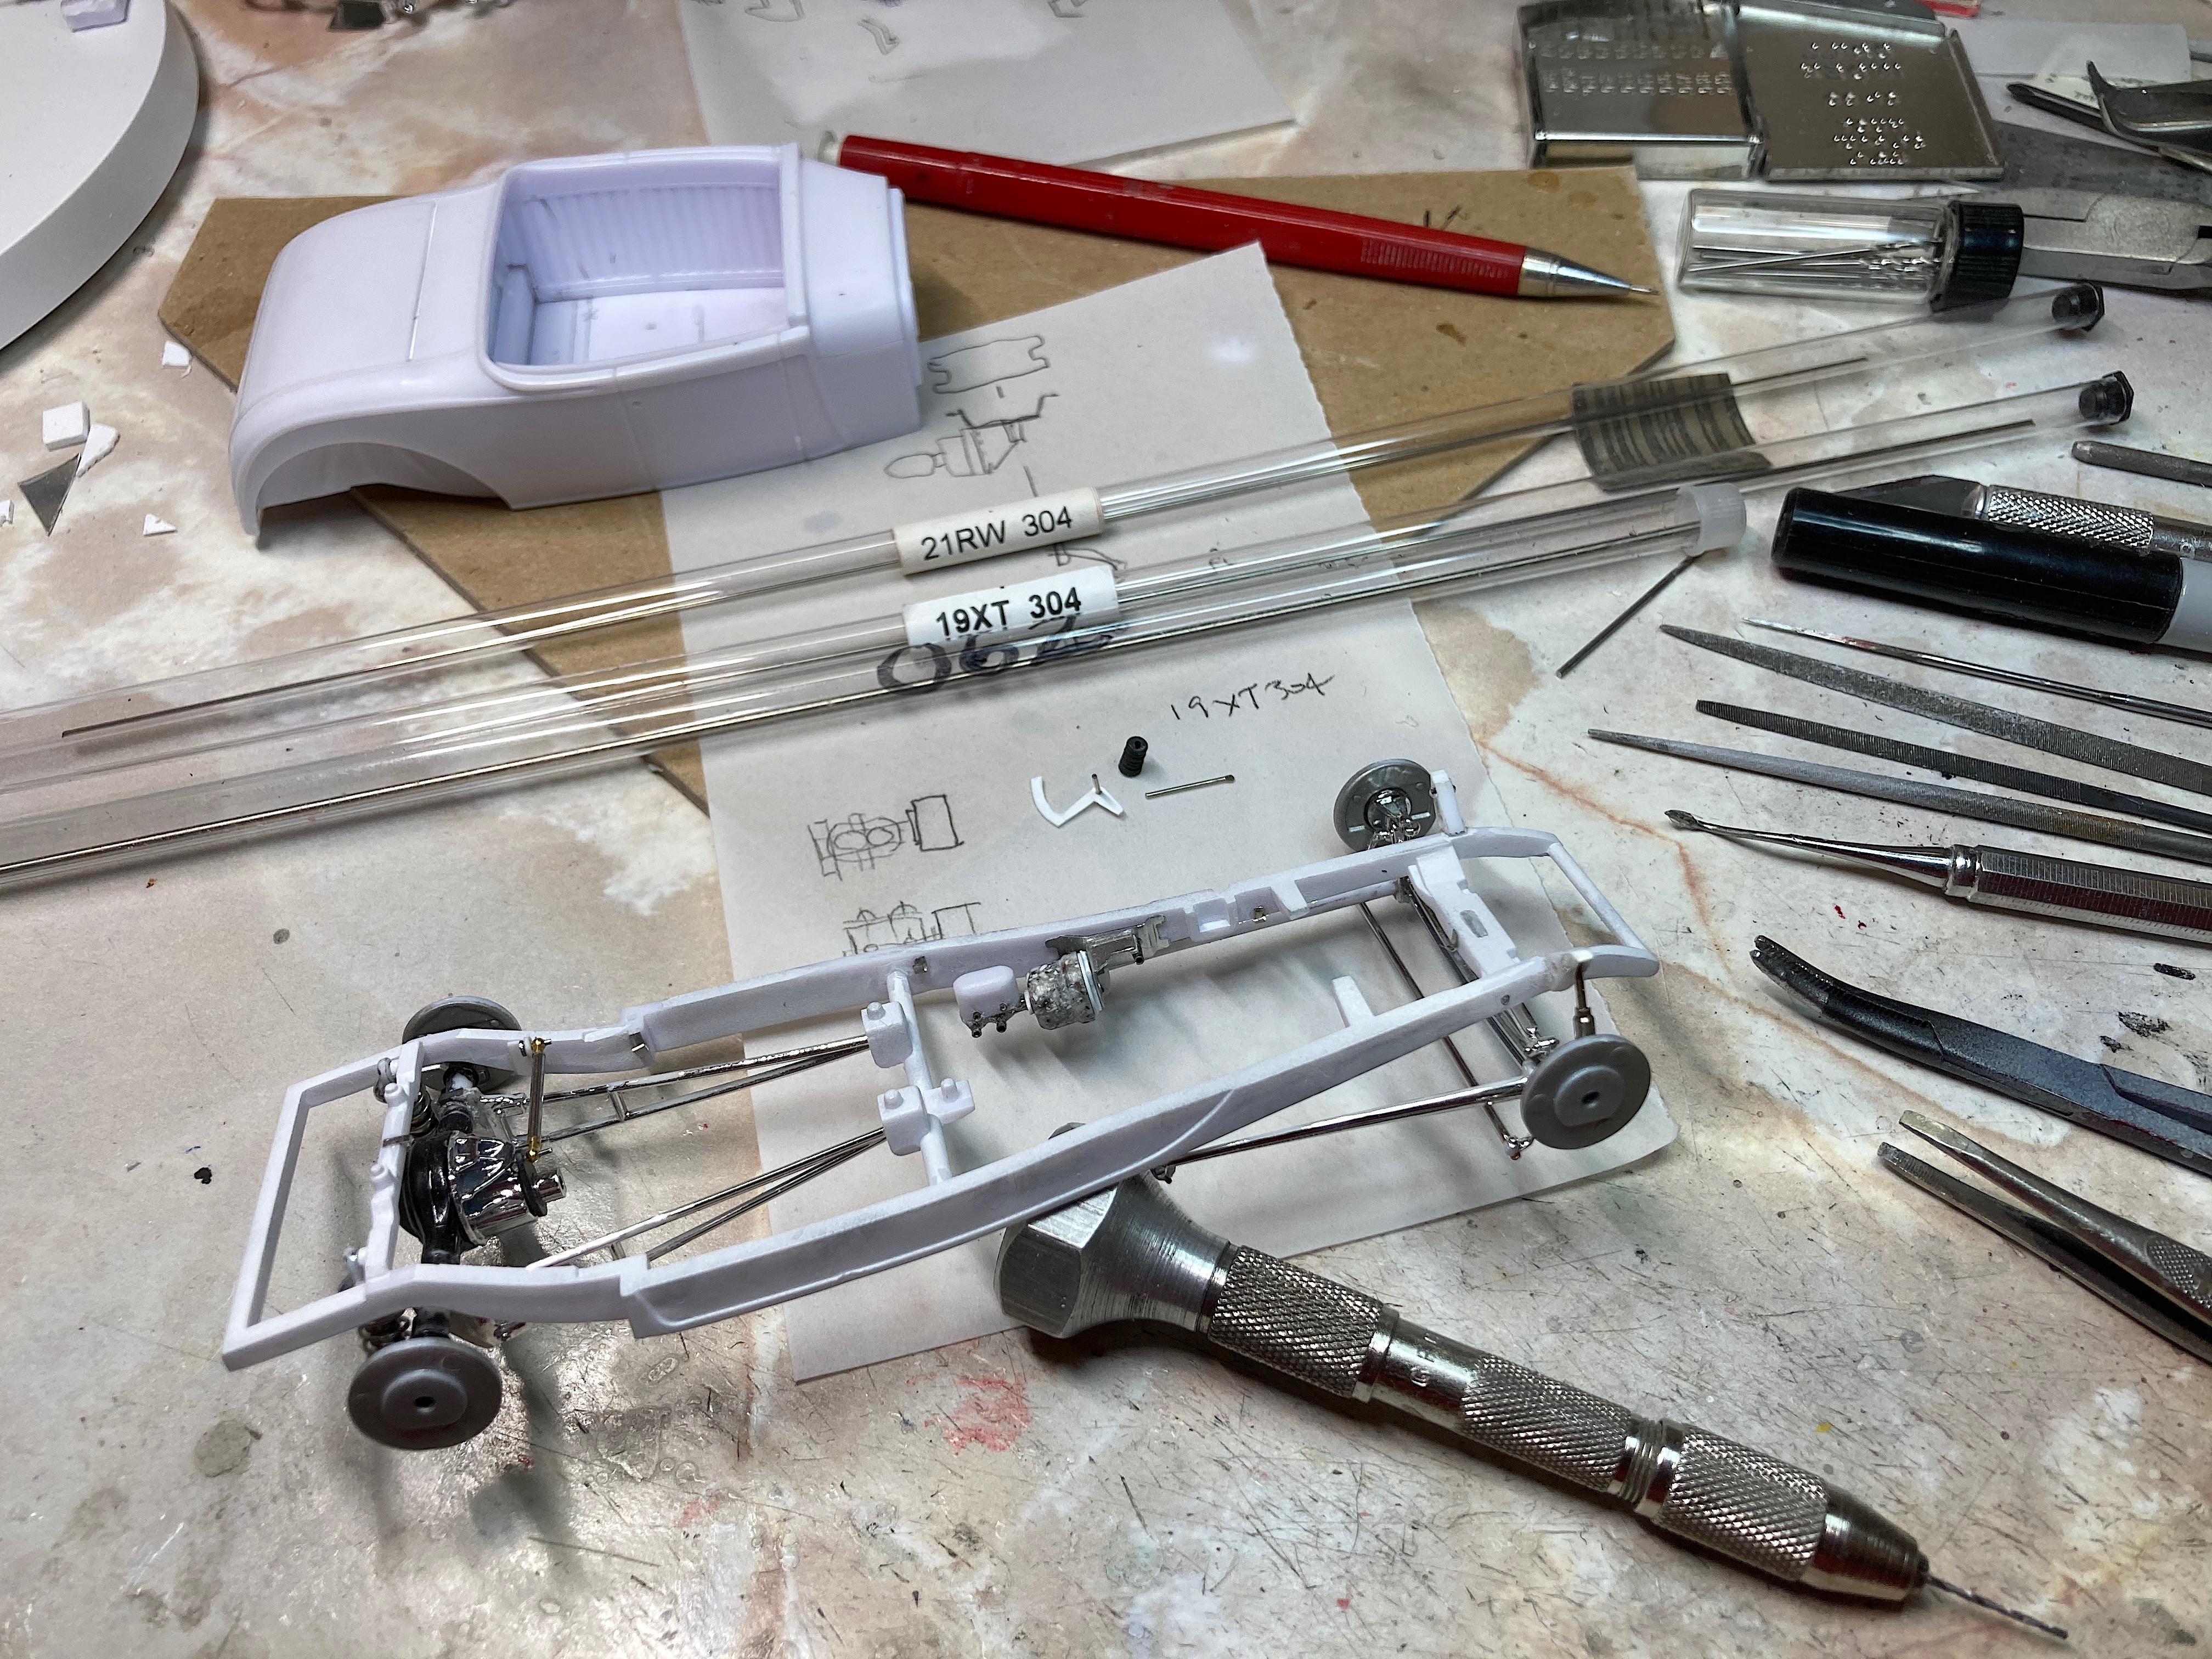
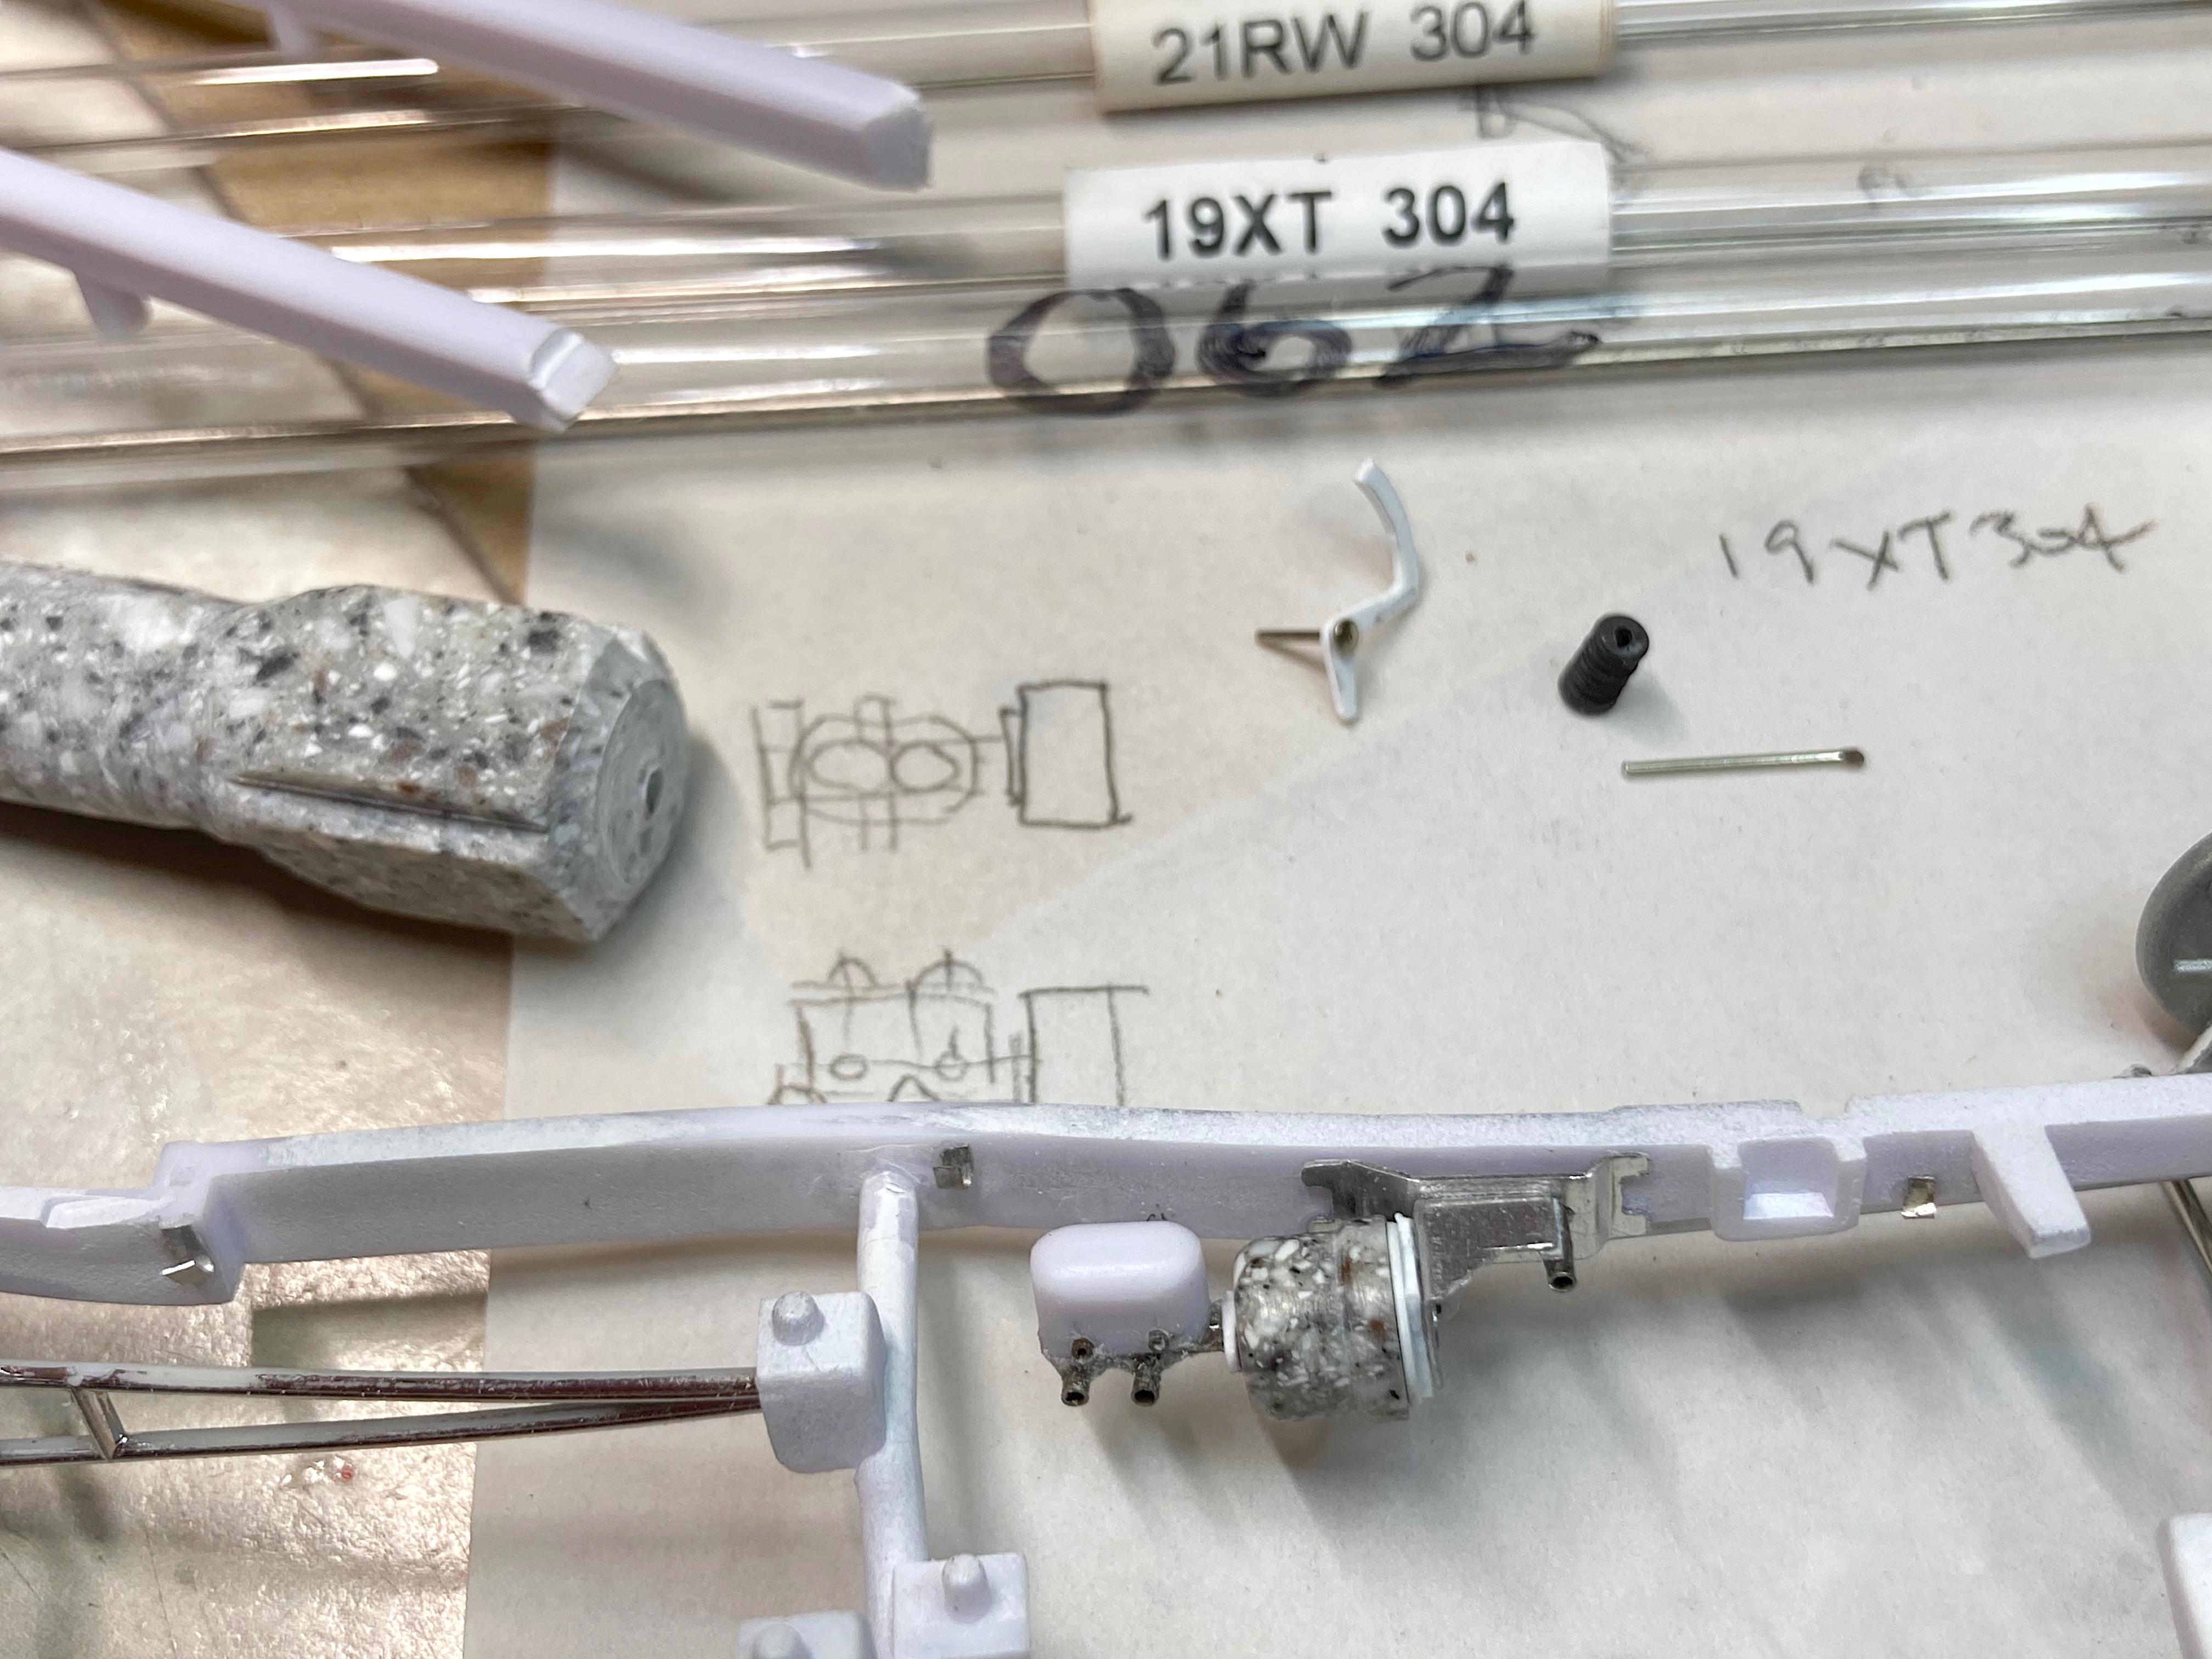
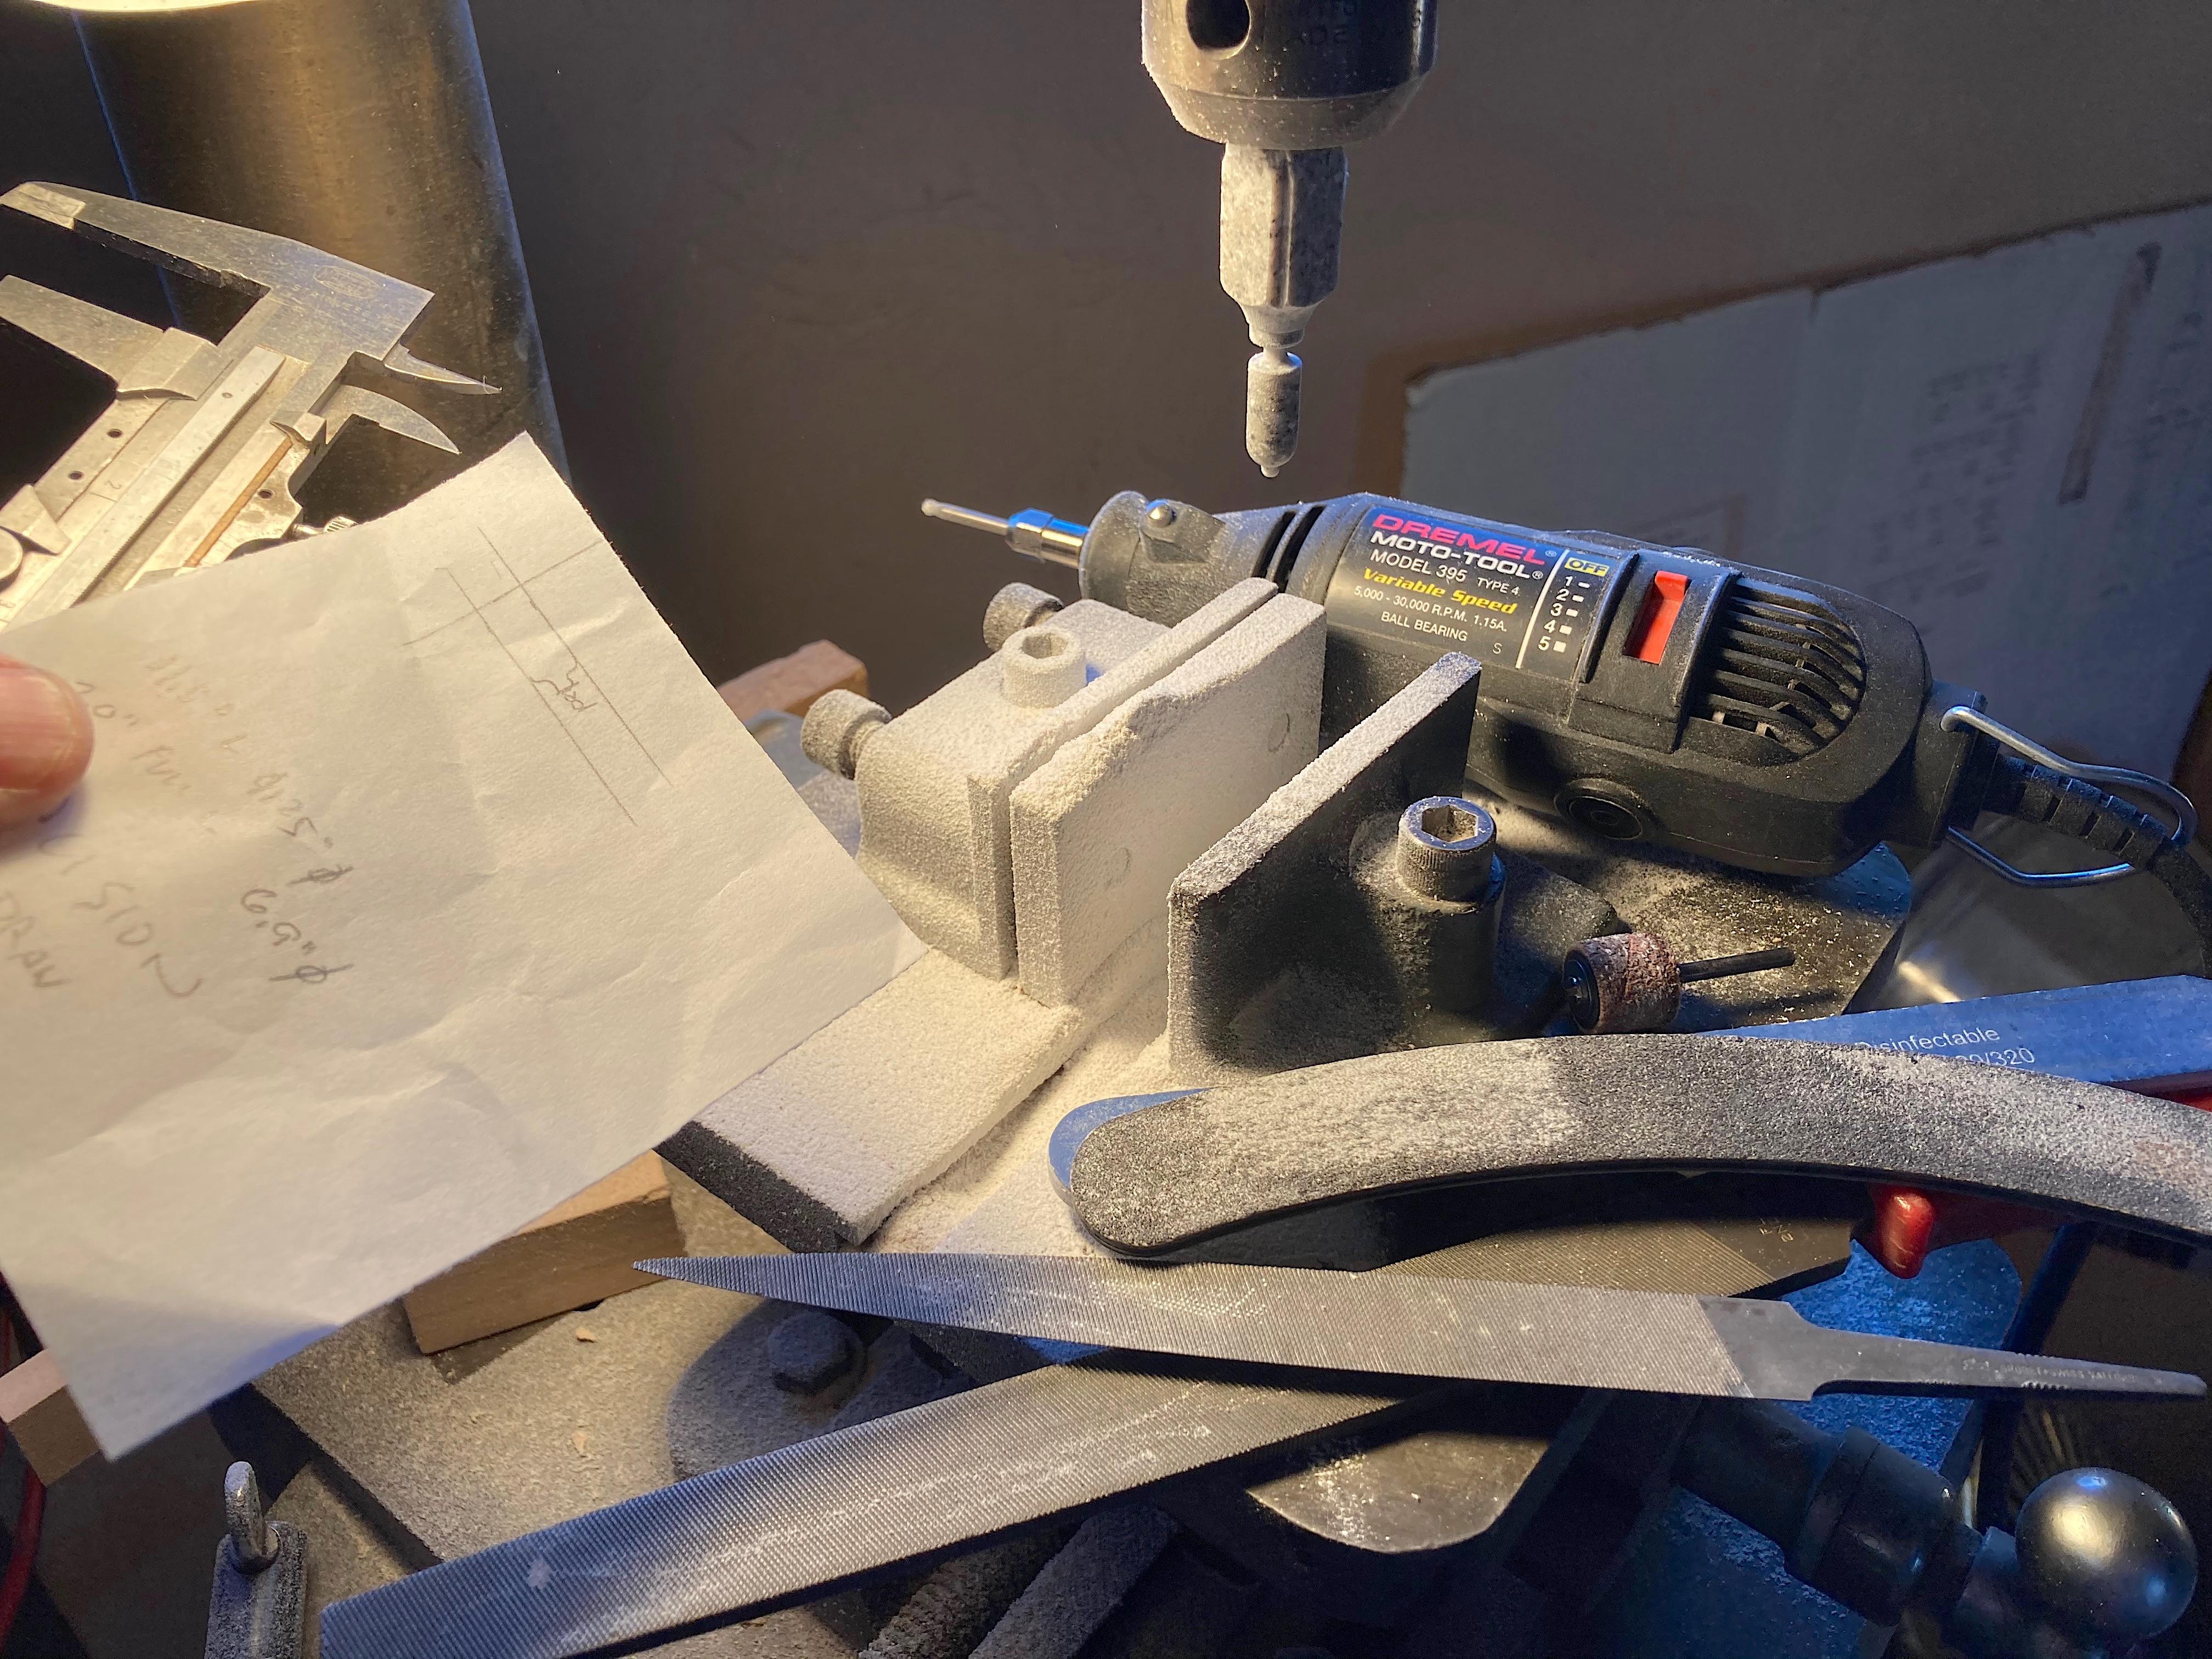
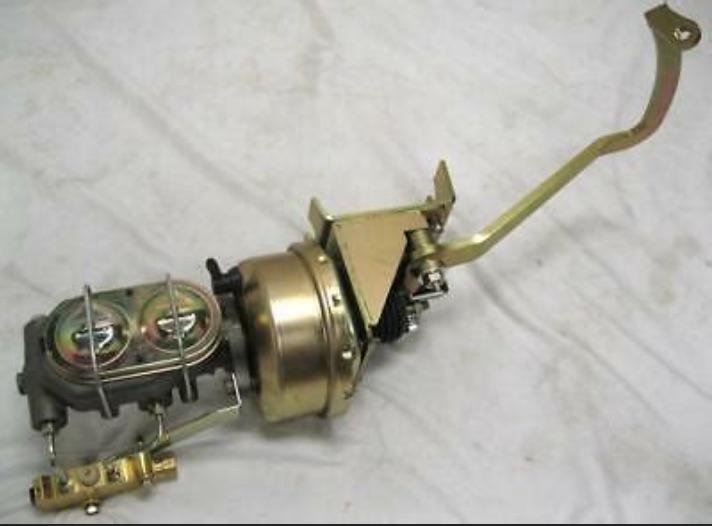
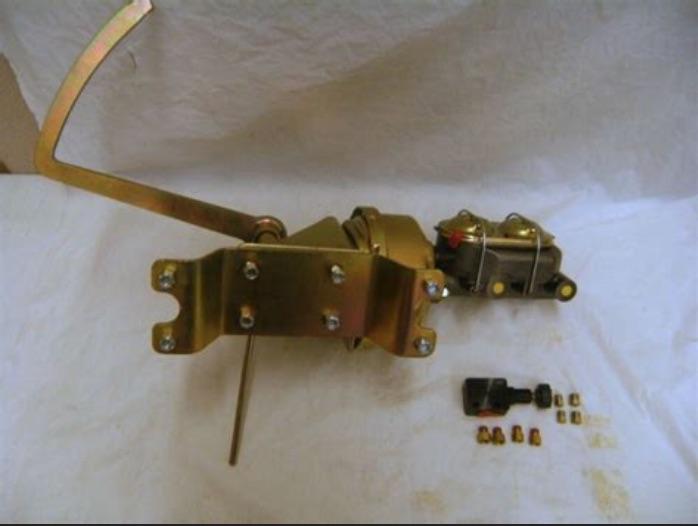
Appreciate it. Thank you for checking in. ? Been thinking about this, but haven't done anything all week. Didn't think I located the booster in the proper location, was thinking the pedal arm needs to go through the front of the floor under the firewall (I had a '48 Chevy pickup, that got me to thinking). Modified the bracket and glued further forward. First thing done today was turn the booster from Corian using the drill press, and a different Dremel bit which worked better than the sanding drum. Used black sprue for the bellows, chucked into the cordless drill, triangle files and steel wool shaped it, lucked out that there was a bubble in the sprue so it was easy to drill the hole while still in the chuck. Shirt pin is the shaft, smashed the end with pliers. The kit's funny shaped sprue was perfect for the brake fluid reservoir, not worried about shaping the top because you won't see it. Three different sized steel tubing was used, use the Dremel cutoff disk for cutting and finishing the ends. Superglue and baking soda holds all this together, and fills the gaps, next session I will file/sand to finish shape. I will have wire bent to hold the "cap". I am planning to run brake lines too, you can see tiny aluminum plate clamps on the frame. I did draw this out first, to get an idea of how to make it, no measurements, all by eye. I think someone who does 3D printing should offer this, since the kit totally lacks this part.
-
Day off works!
-
every time, repeating
-
Looks great! Would it be advisable to thin the door edges, or what, before painting? I have that kit, and 2 other later versions. I like all but the last version.
-
I stand corrected. Good thing I don't have to scratch-build one.
-
Accident lawyers make a killing off of suckers.
-
I never bothered getting one of those kits, so I don't know how horrid they are. But it does have an engine, which some of the Tamiya and Fujimi kits do not have. You did a nice job, more than it deserved.
-
trucker balancing on
-
GSL Common Kit: [revision] just another Model A Roadster
89AKurt replied to 89AKurt's topic in WIP: Model Cars
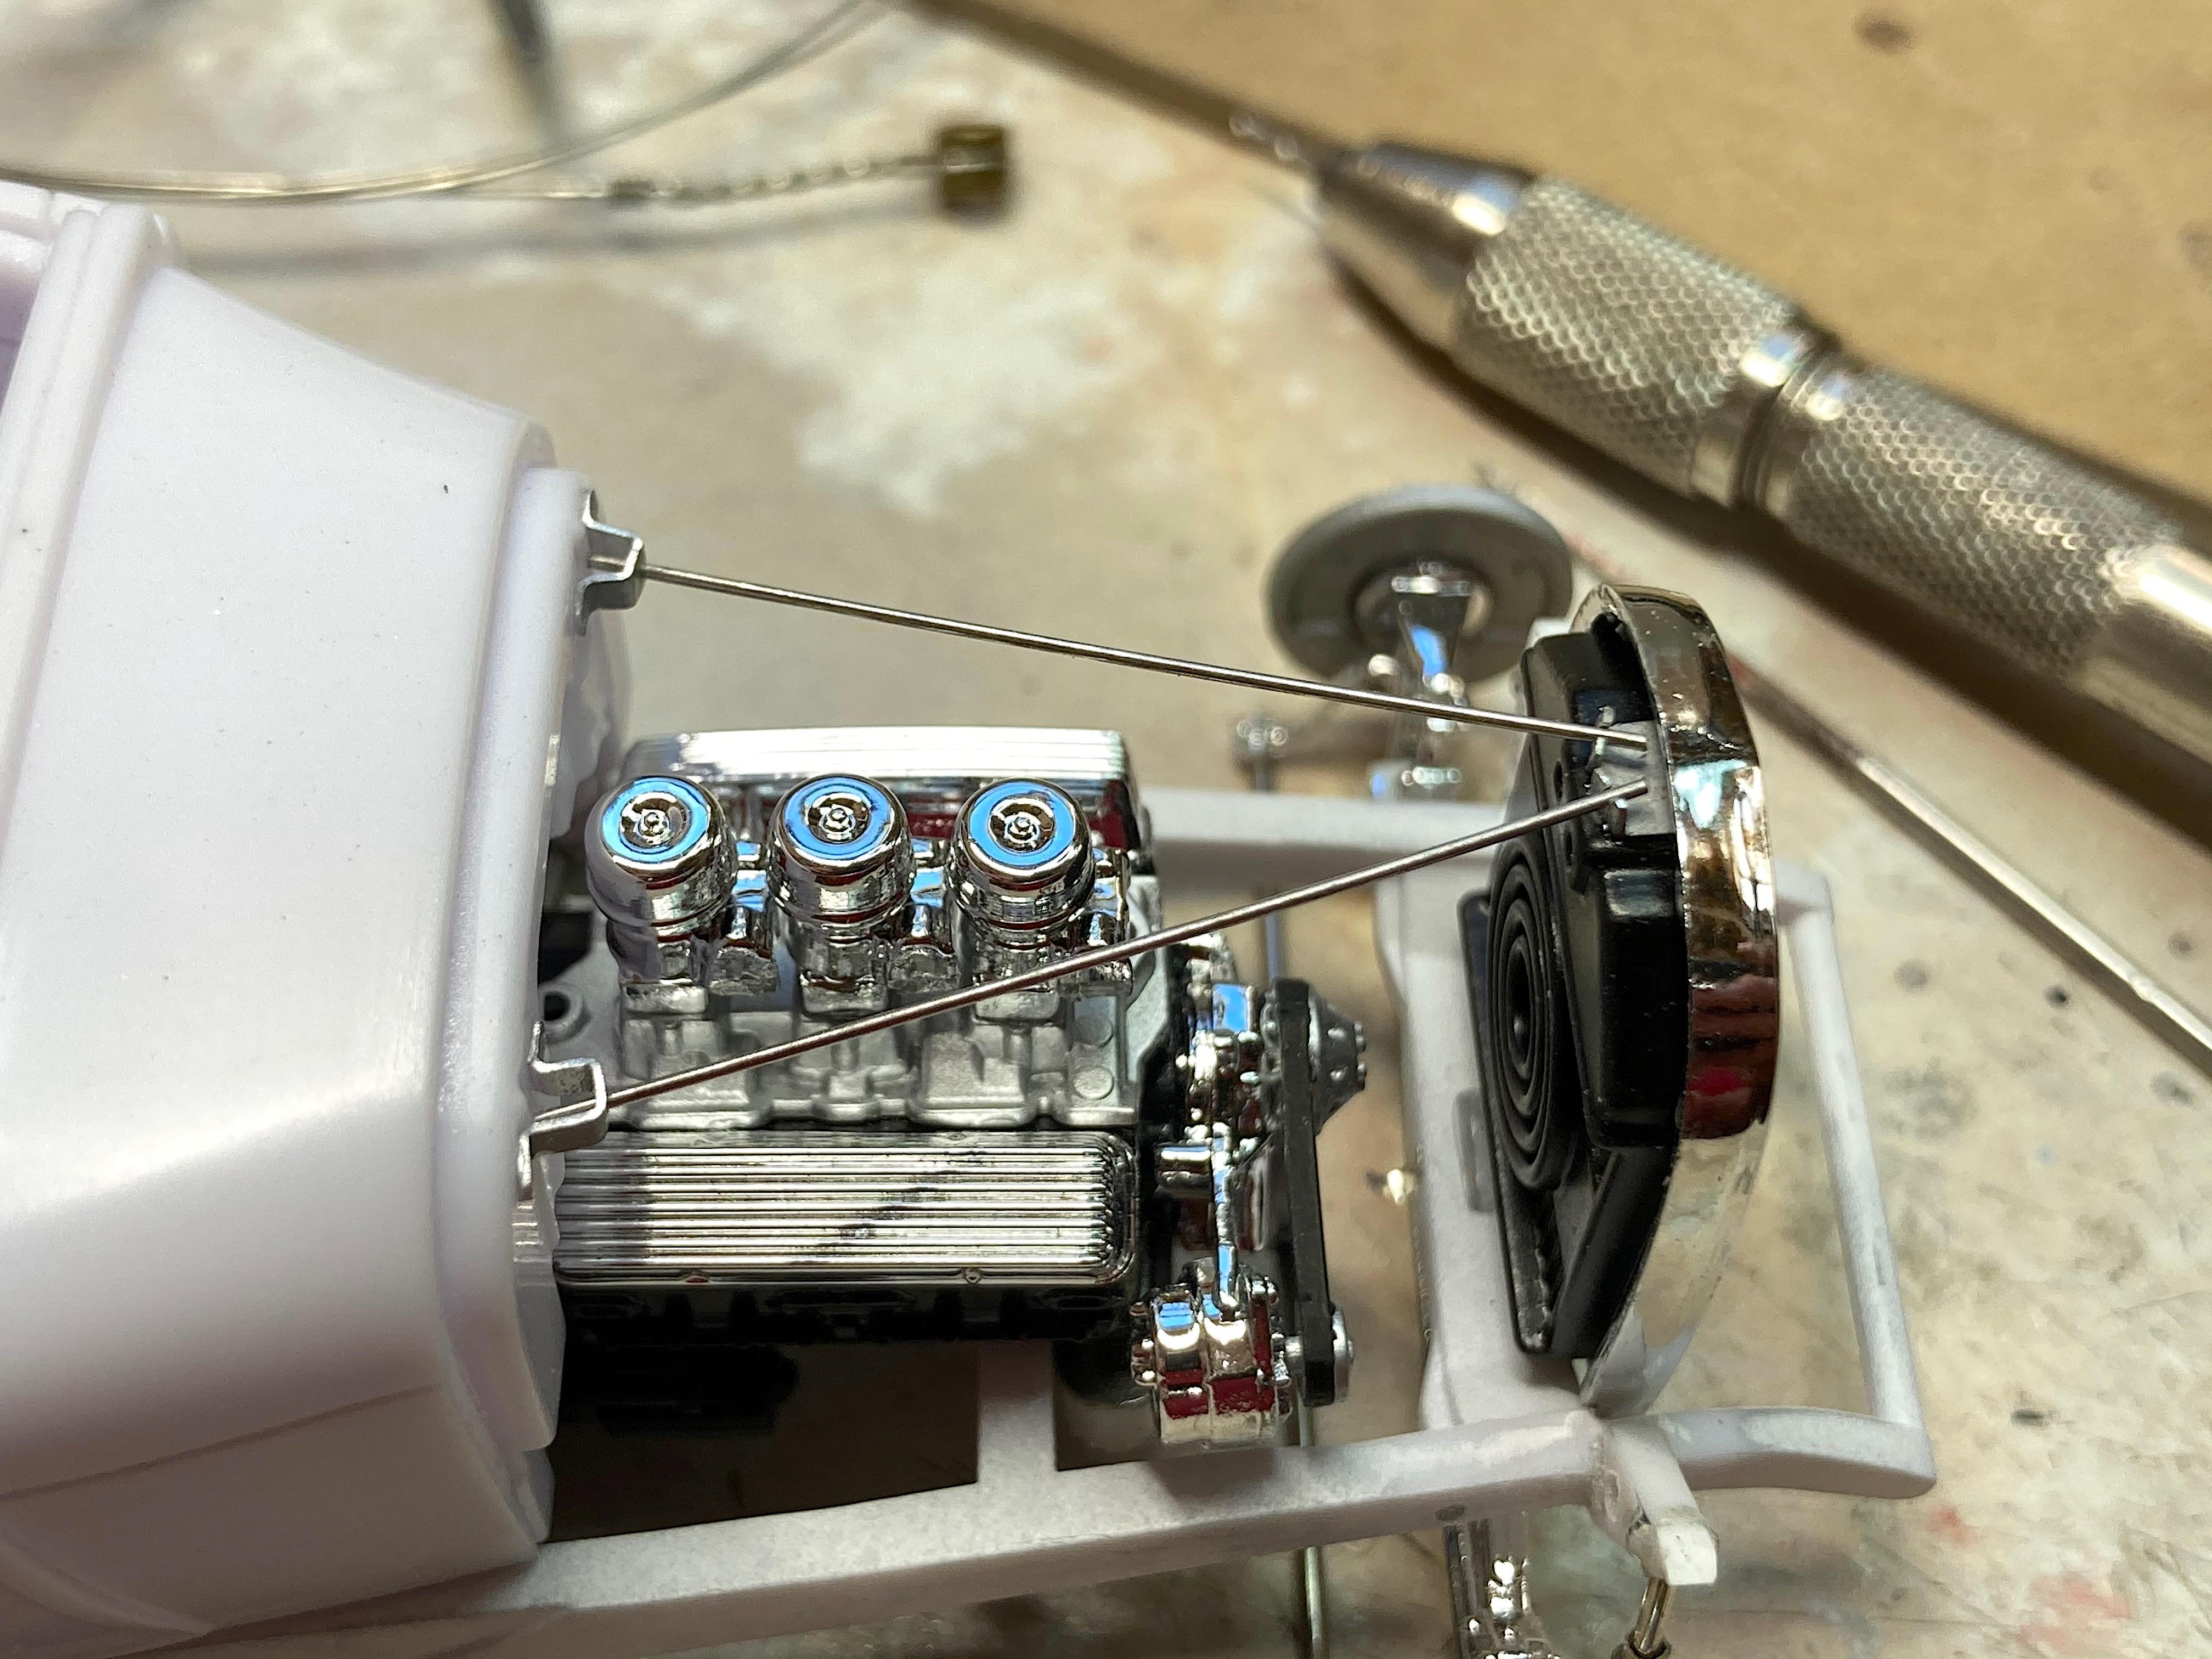
What are the carbs on the Revell - '29 Model A Roadster? Thought I better link to my topic about the engine and transmission. -
The '69 I had before, there were saddle tanks, and they put an electric pump under the floor of the cab, and there was a cover plate where the pump was on the block. I removed the tanks and that pump with a bunch of rubber hoses, and put a mechanical pump back on the engine. Excellent information, great picture of the carbs. To add to my above comment, I know there is a filter in the tank of my '68, and I have a Nissan steel filter before the carb (my mechanic says those filters catch smaller particles better than the clear plastic ones). Thank you!
-
I better put in my calendar! Haven't been building much at all, but skipped entering last year, so who knows.
-
First time I have seen your project. Wow ? Love that you're old school, we need to show how it was done before 3D printing.
-
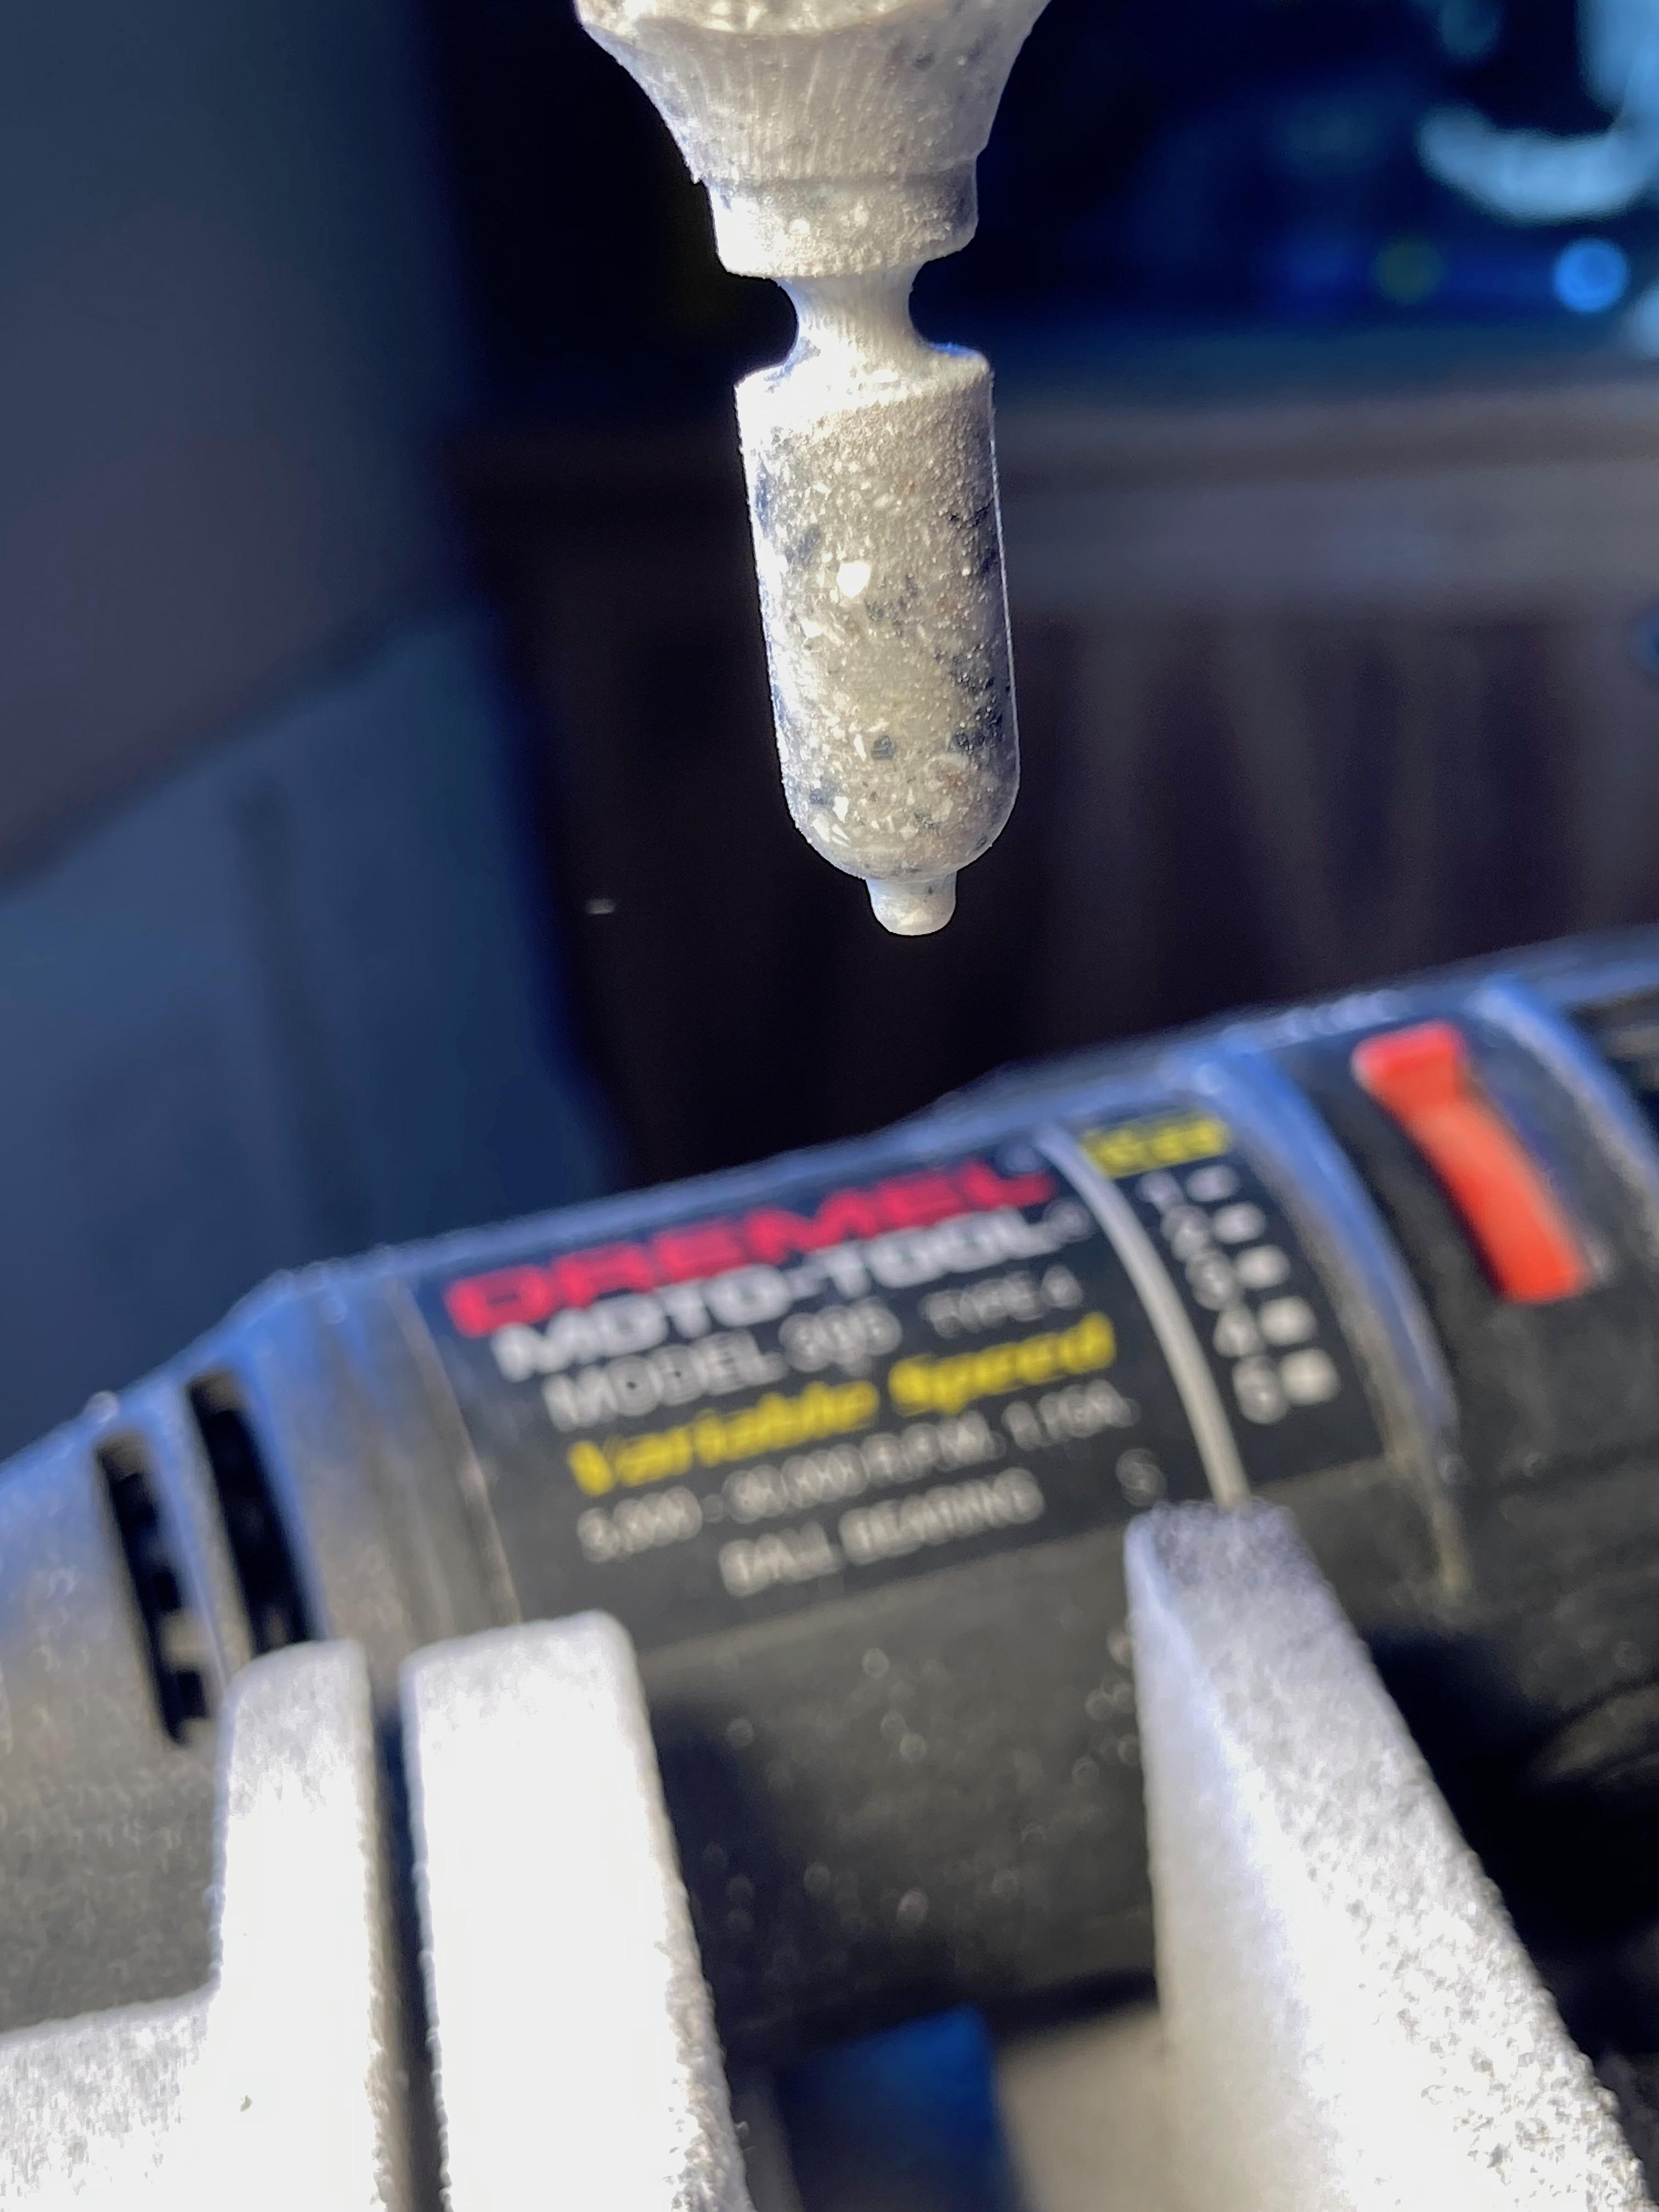
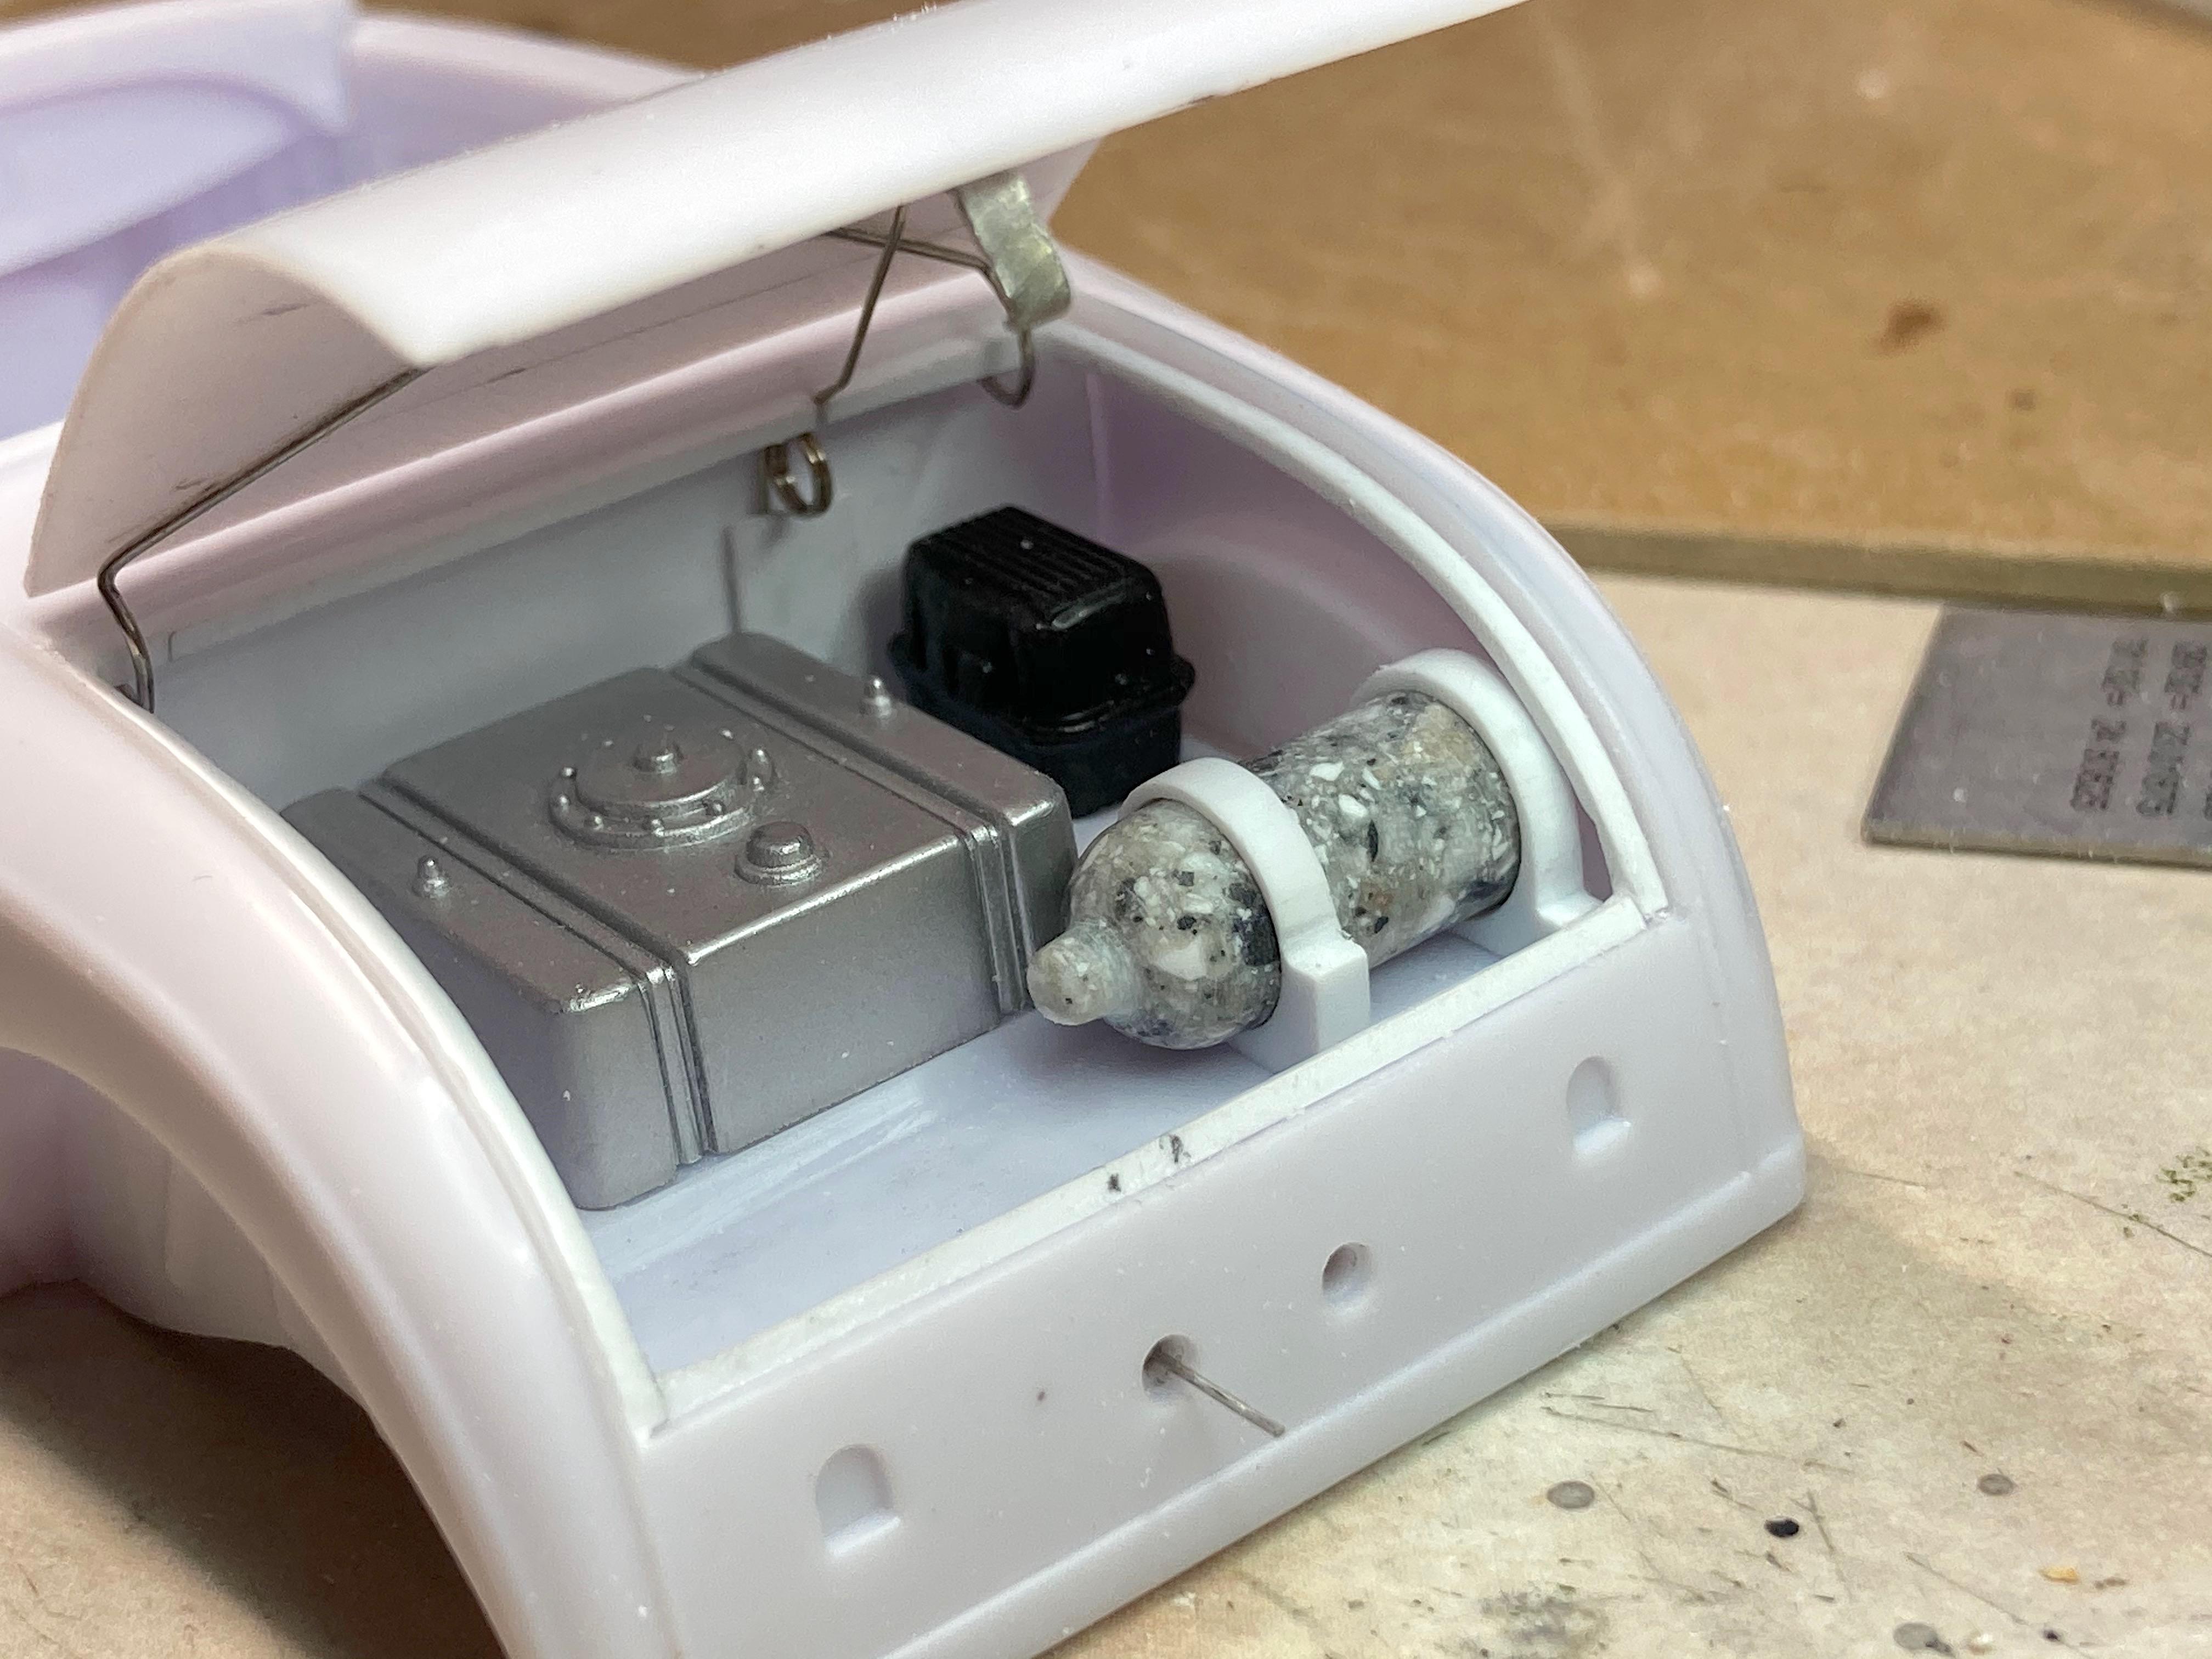
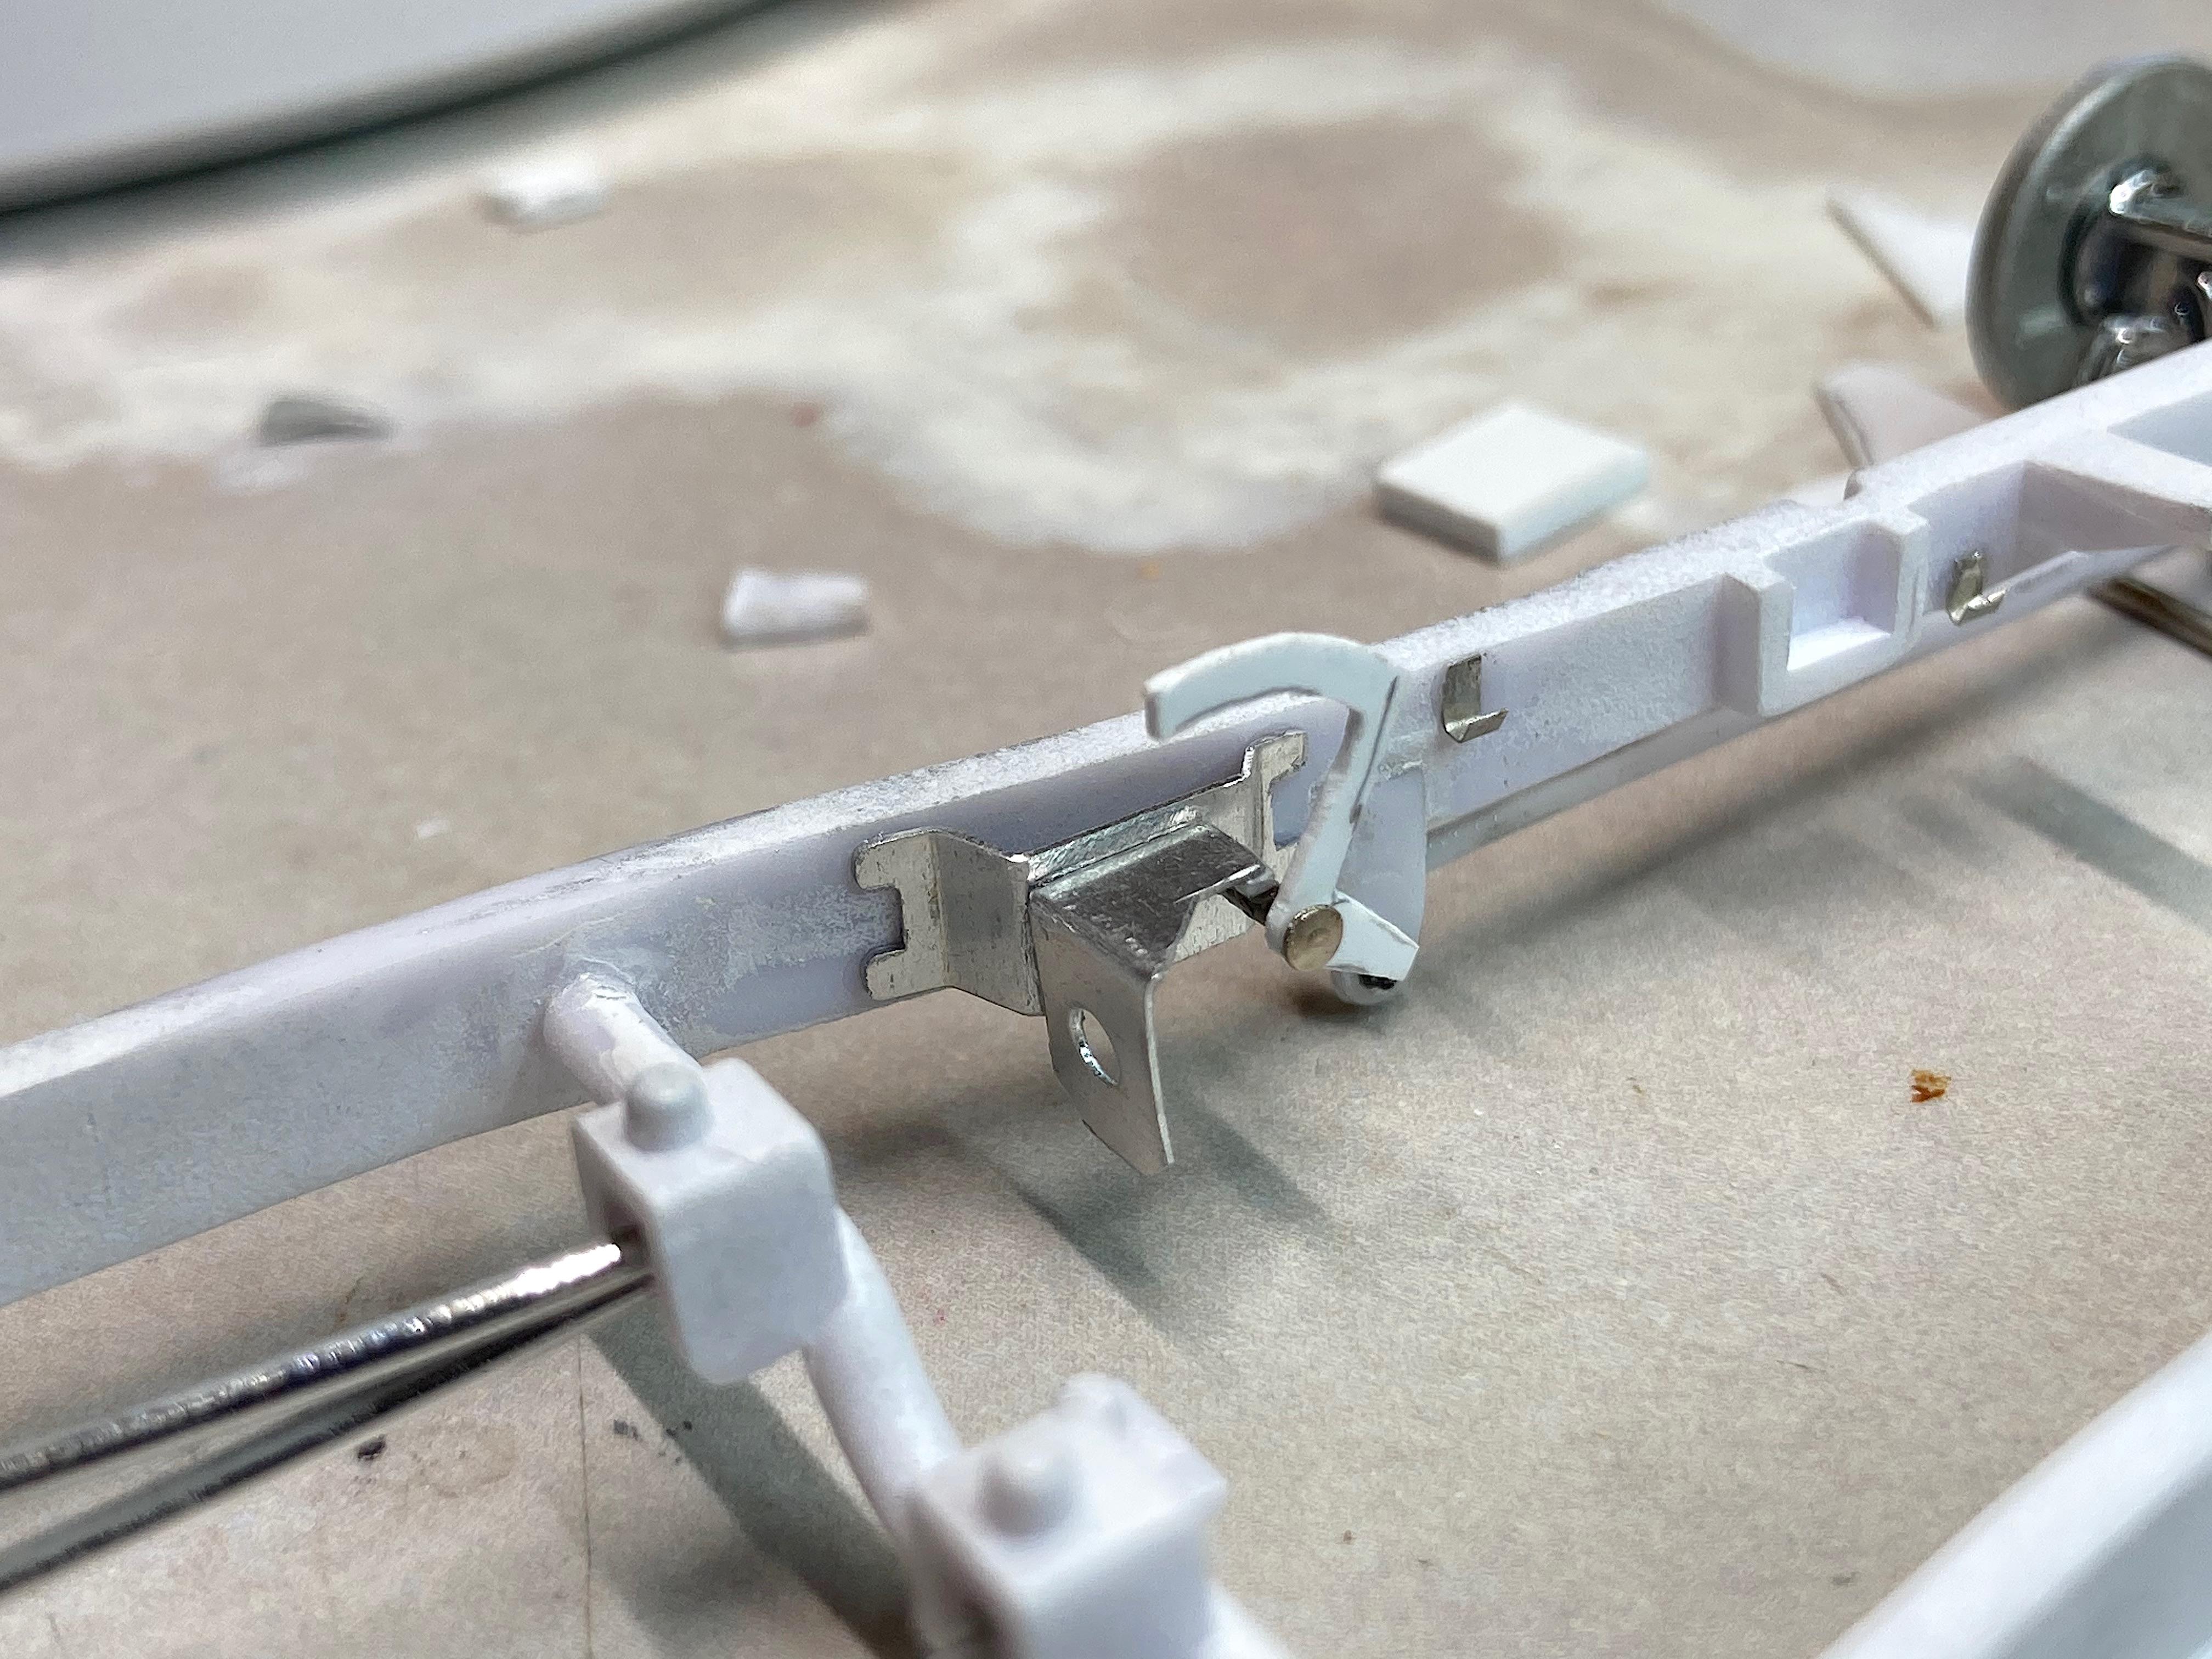
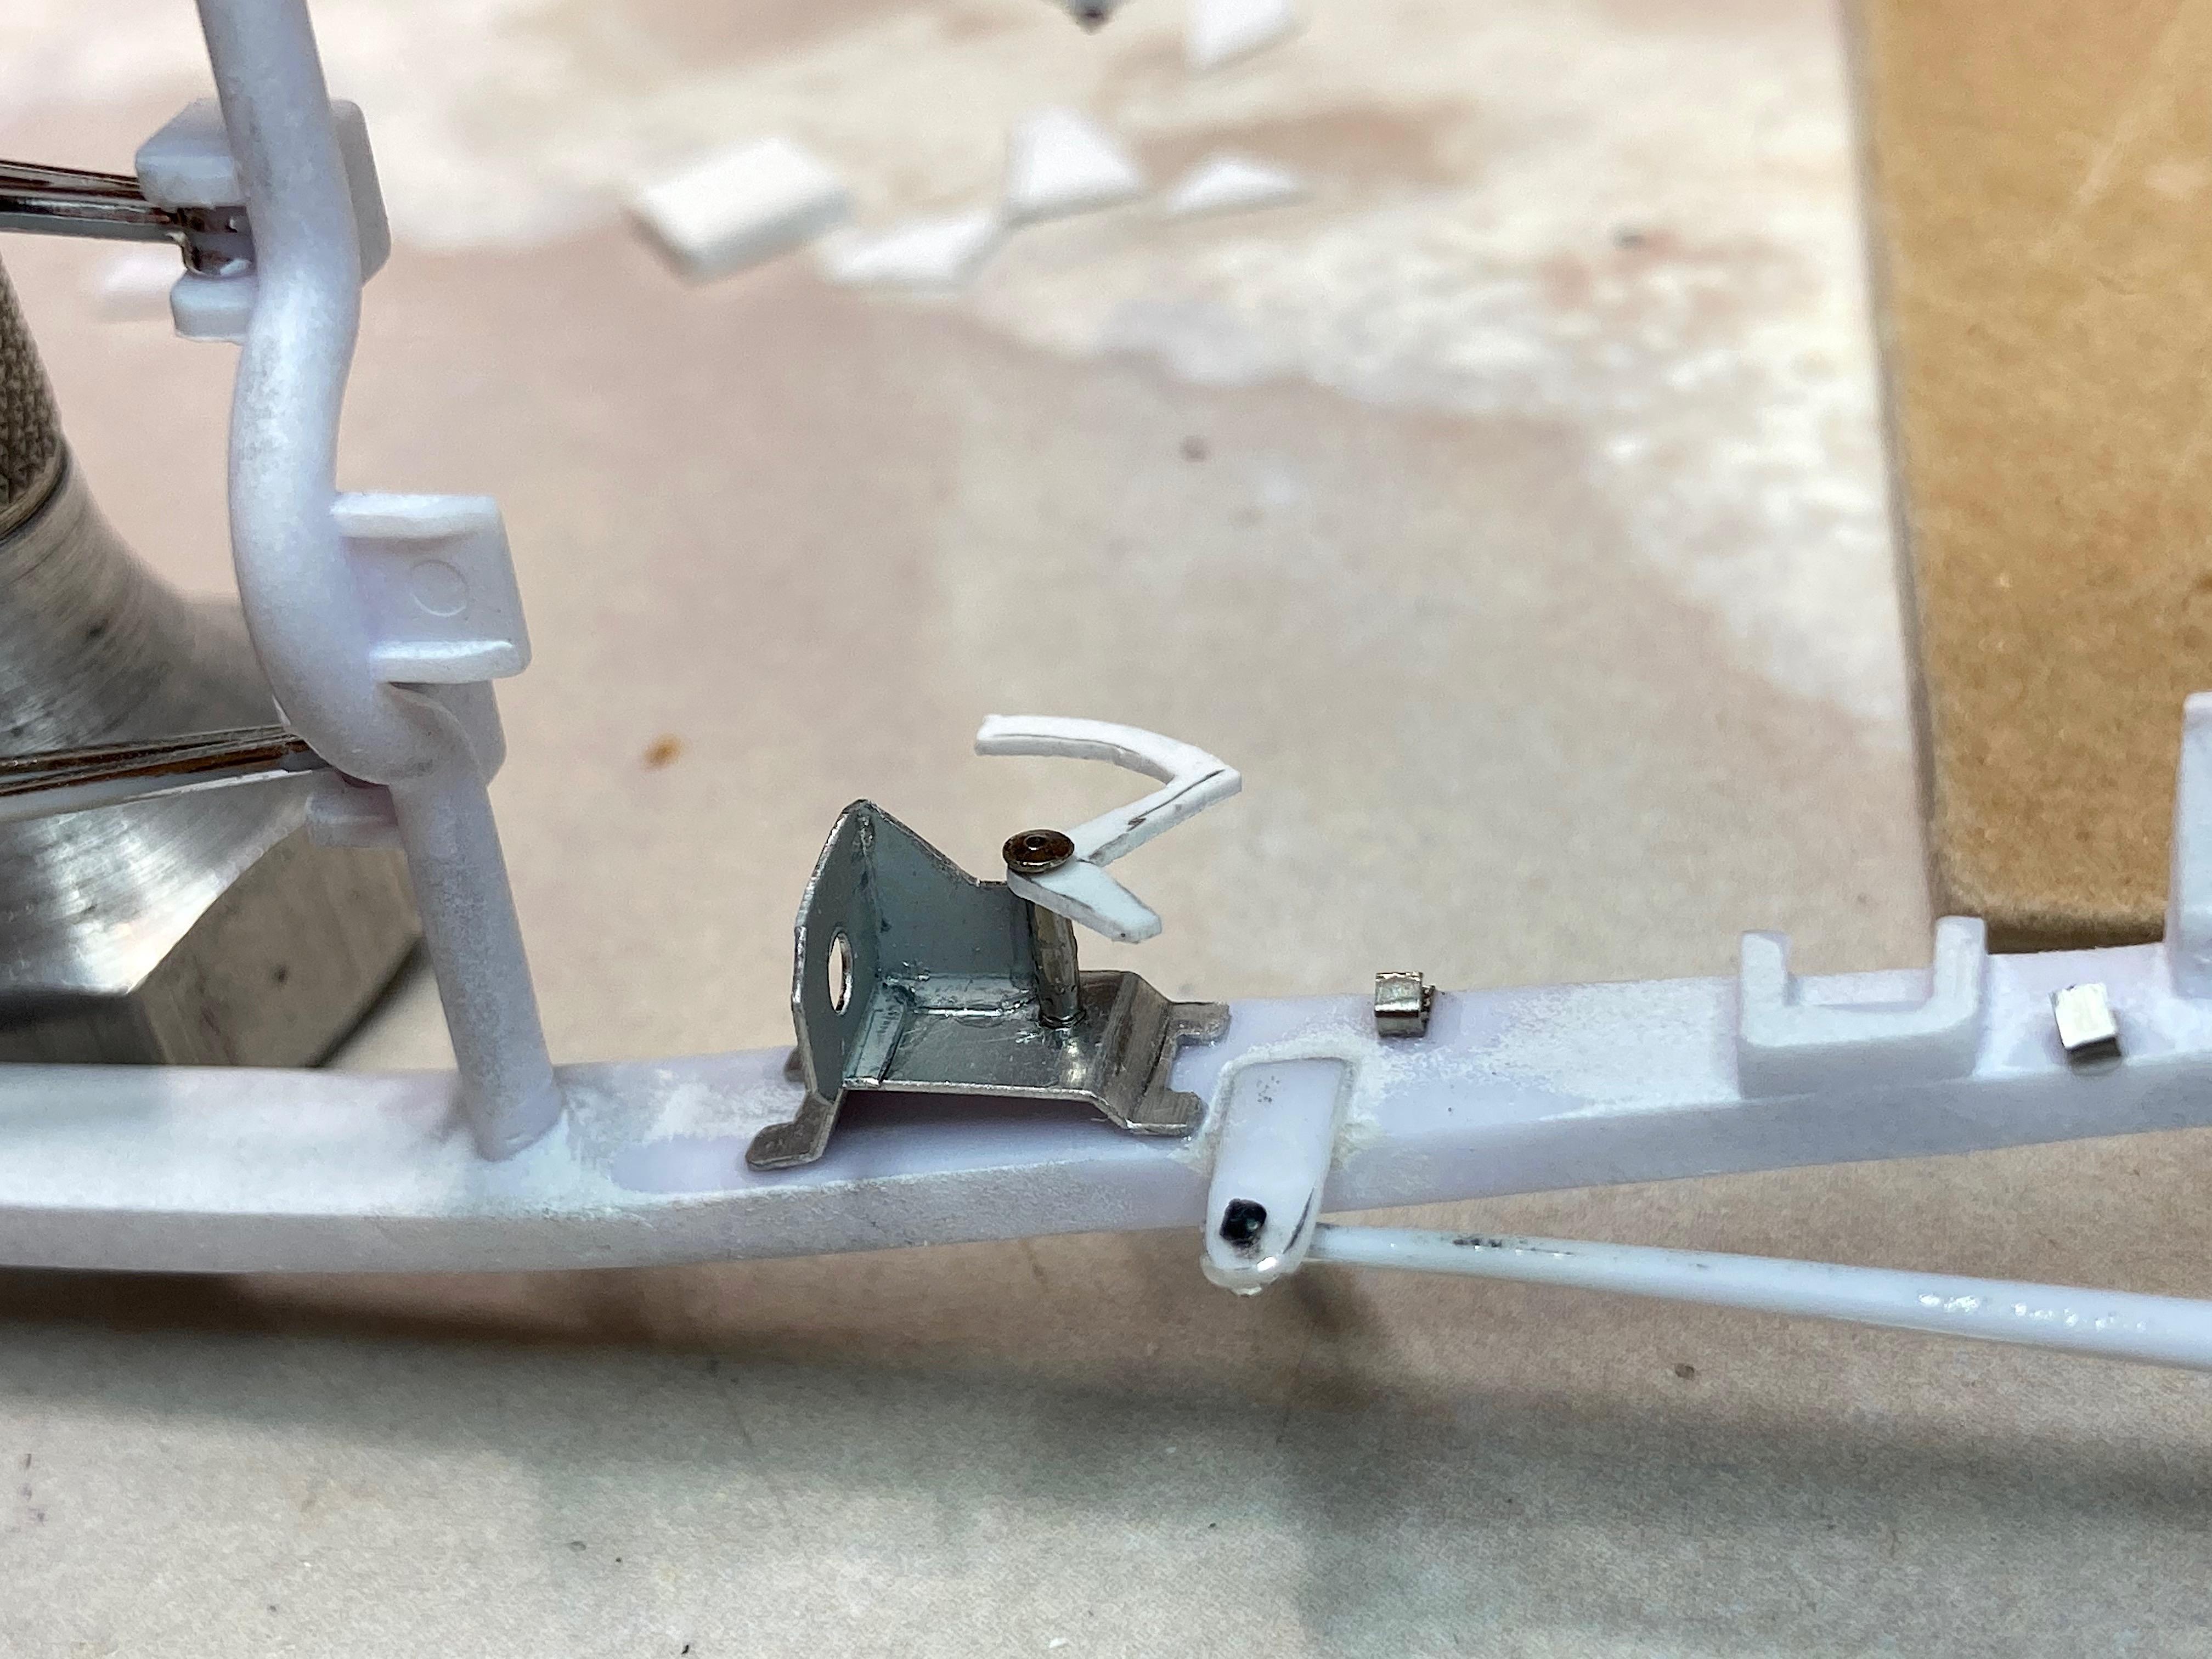
GSL Common Kit: [revision] just another Model A Roadster
89AKurt replied to 89AKurt's topic in WIP: Model Cars
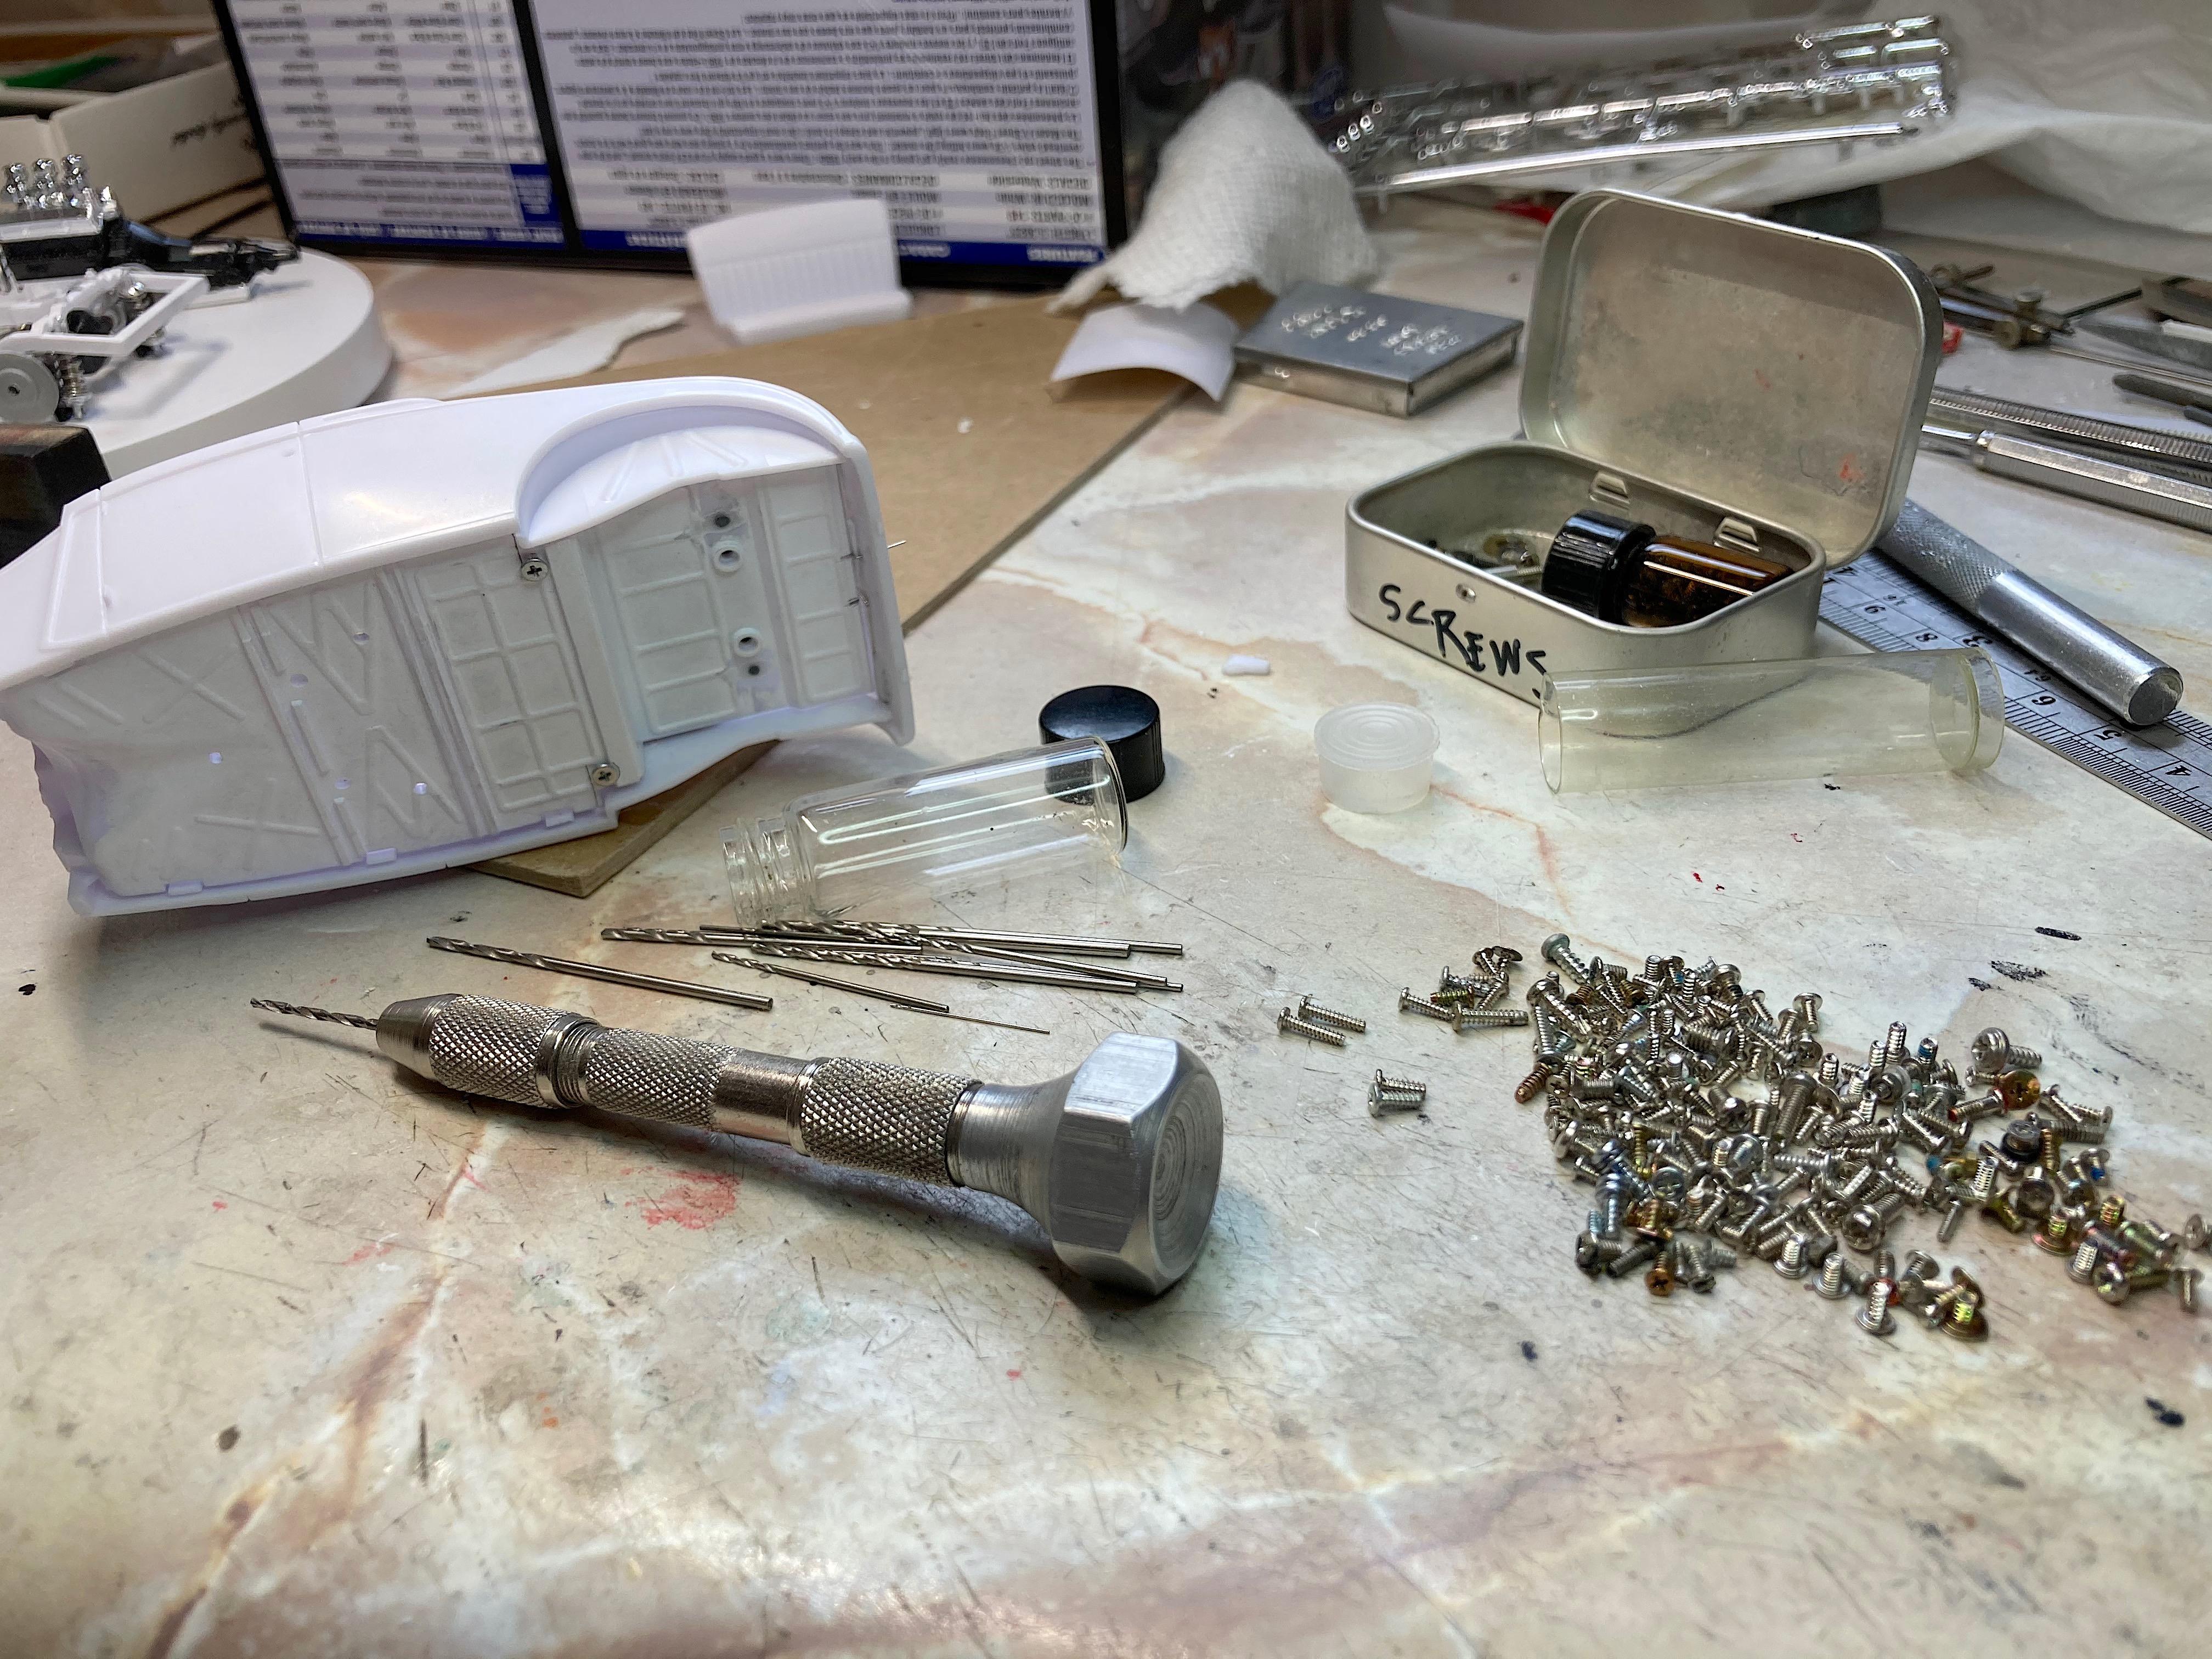
Spent time, which does not necessarily mean make progress, on trying to improve the trunk latch, but I keep forgetting that the more I mess with something, the more likely I'll mess it up. Moved on to adding a cross strut behind the seat, made from some of the big sprue tree, so I could screw the floor to the body. Found a pair of screws from my screw stash (I scavenged from a bunch of toys and junk CD players and such during my life). Made the nitrous bottle from Corian®, using the drill press and Dremel. Picked the biggest one I could find dimensions for, almost doesn't fit. Mount is 0.1" sheet styrene, drilled the holes first. Started the brake master cylinder, specifically the frame mount. Used aluminum newspaper printing plate, and steel tubing, the pin makes it look like I plan to make it move, but not happening. Not sure if I will duplicate the cylinder shown here, or do Wilwood.