absmiami
-
Posts
4,782 -
Joined
-
Last visited
Content Type
Profiles
Forums
Events
Gallery
Everything posted by absmiami
-
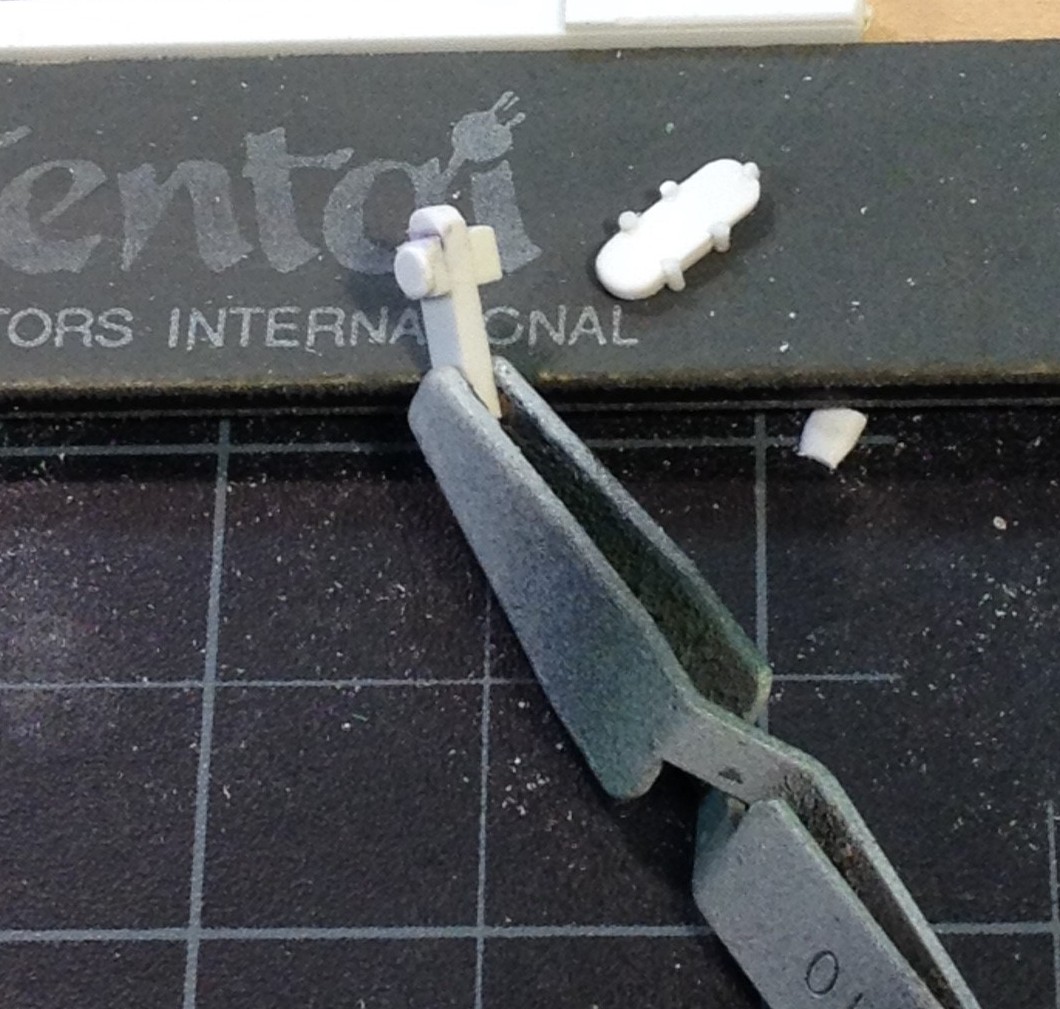
the cast white metal carburetor was not so useful - the original Merit casting in plastic was merely a sort of suggestion of what an Amal carb actually looks like and it sticks up and out of the top of the engine bay - it will be the first feature of the engine that you will see - so I'm making my own .....

-
the Herb Deeks kit - which I referenced in the Cooper Barn find blog - recast some of the Merit kit parts in white metal which gives me a great looking exhaust pipe - just had to clean it up and open the exhaust megaphone .....
-

Cooper barn find
absmiami replied to absmiami's topic in WIP: Other Racing: Road Racing, Land Speed Racers
thinking about making a few changes to the kit maybe more than a few ... I'll end up using about a dozen kit parts how about a Lotus 32 with the climax four ??? might have been one of Jimmy's favorites .... -
Cooper barn find
absmiami replied to absmiami's topic in WIP: Other Racing: Road Racing, Land Speed Racers
was unable to find a single Auto Kits 1/24th Lotus build on this site has anyone ever seen a build blog on this site ?? the kits aren't really that rare .... just wondering no - not the Tamiya kit that is/was the wrong scale ... -
Cooper barn find
absmiami replied to absmiami's topic in WIP: Other Racing: Road Racing, Land Speed Racers
got an idea .... which Auto kit did I trade for - the Lotus 25 ? let's do a build blog combining your build of the Ferrari and I'll build one of my Auto Kits we'll call it "trading places" or something stupid like that .... ??????? -
Cooper barn find
absmiami replied to absmiami's topic in WIP: Other Racing: Road Racing, Land Speed Racers
active ! yes, thank you like a yeast infection .... reaching back in my memory - were you active in doing the Watkins Glen meet/contest ? - would still like to go one year ... -
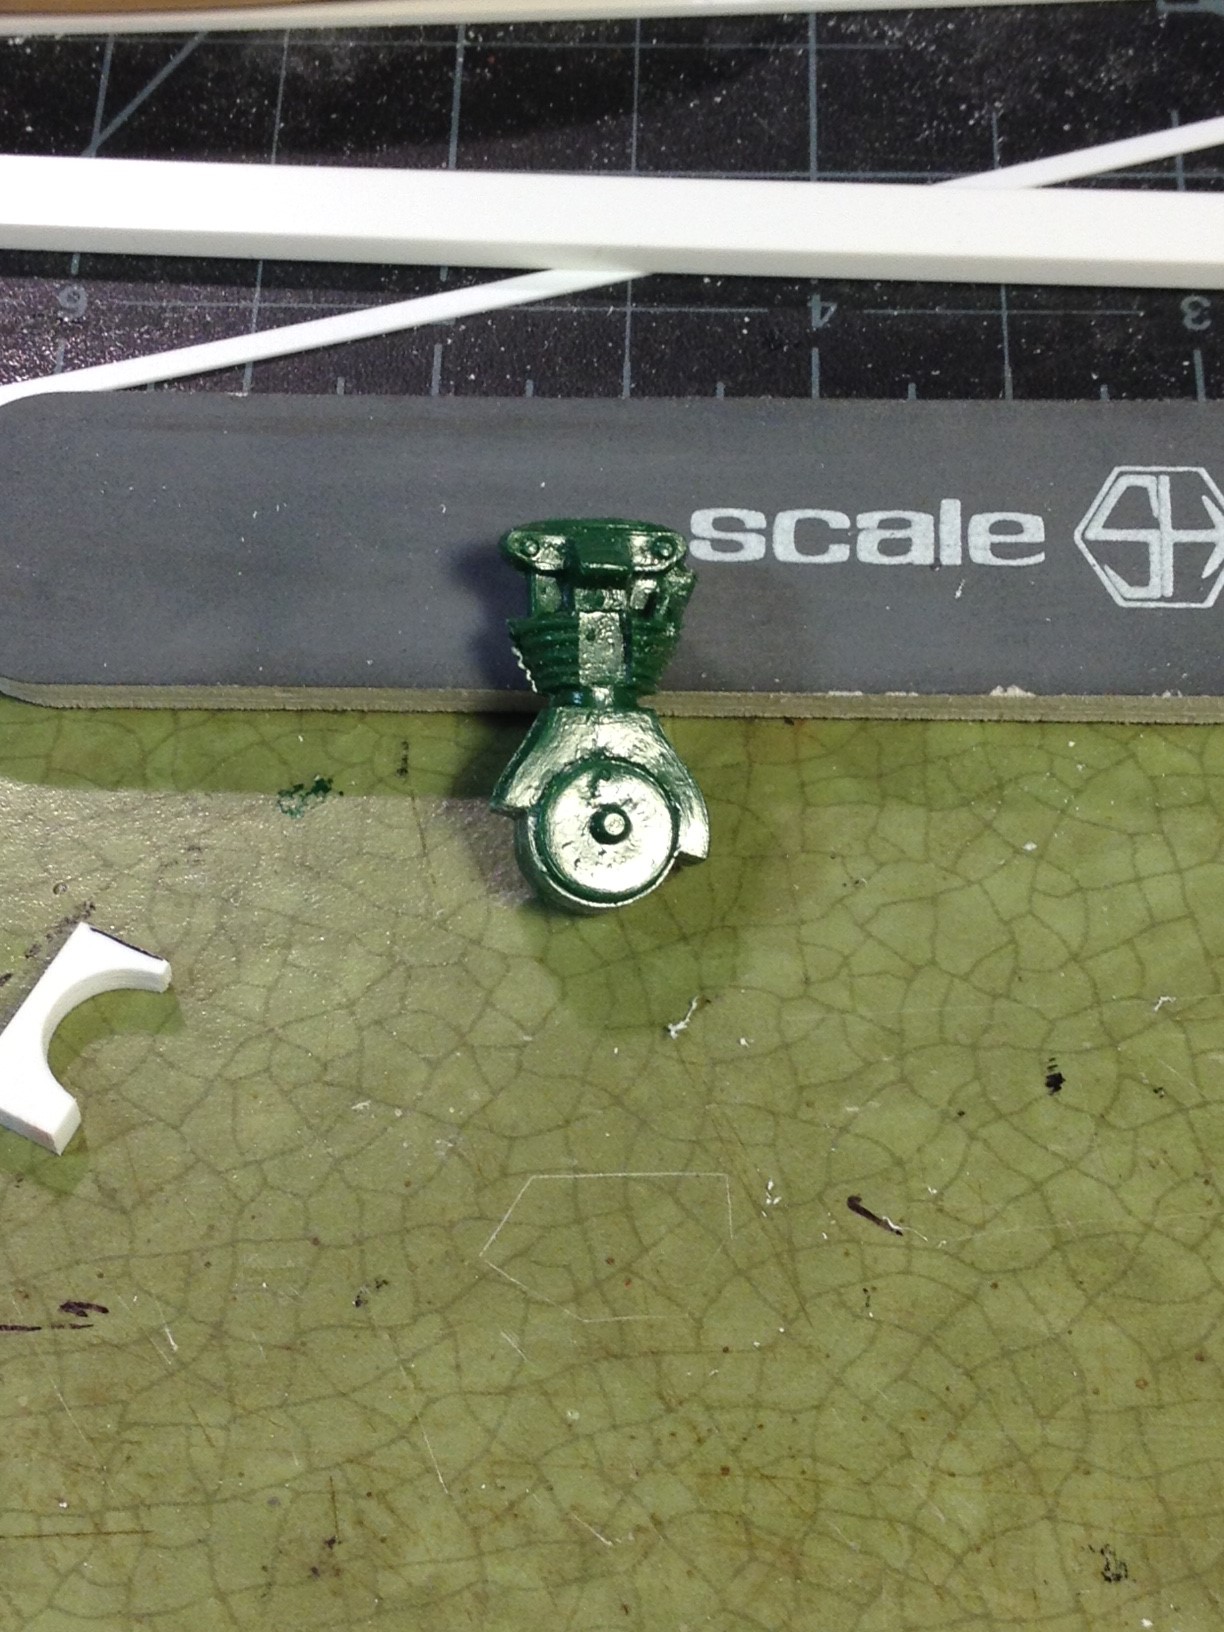
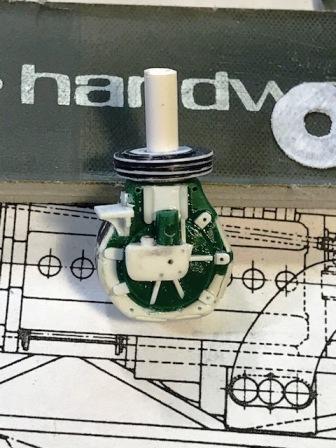
well - at least the old fashioned wingrove construction methods have given me a cylinder head that's a whole lot better than the Merit ....
-
so my hang up on 3D and CAD is this .... it would take me - a novice - a long time to learn how to draw these fin details as wafers - but I assume that the printer that you mention could re-produce these parts in greater accuracy than my sanding and scraping and if I were to get proficient - I could crank out a hole bunch of these for that Porsche engine that I want to make ...... hmmm ........
-
oh no oh no ... I feel another rant coming on ....... treat yourself to some $ 10.00 Perma-grit files and sanding sheets and then we'll talk or blog or whatever er - a 3D printed Norton Manx engine would look really good, wouldn't it .... sigh .....
-
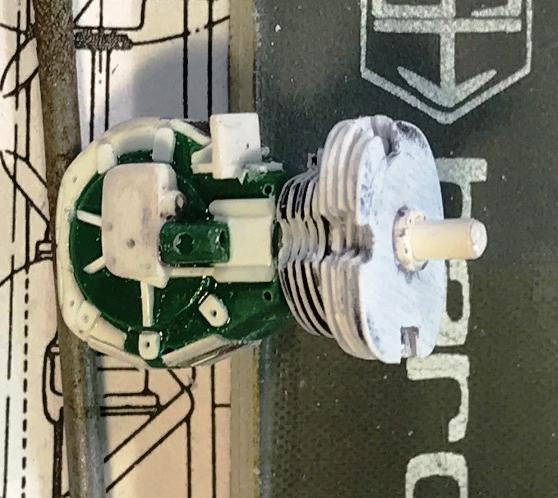
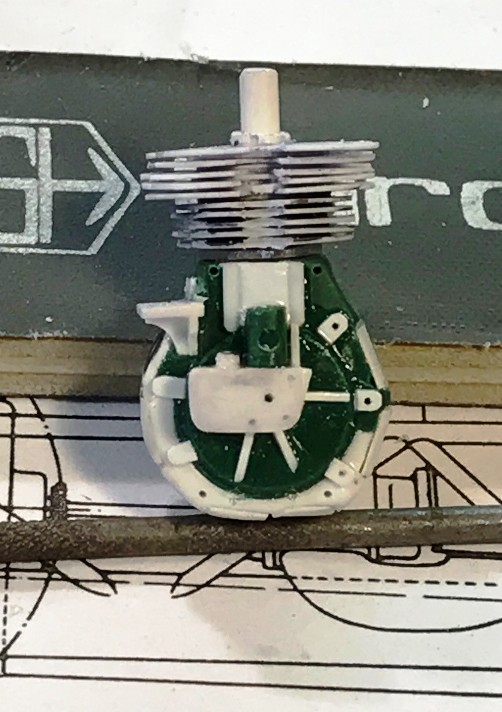
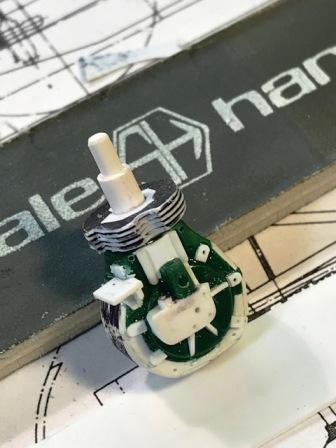
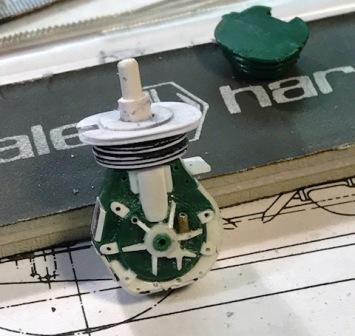
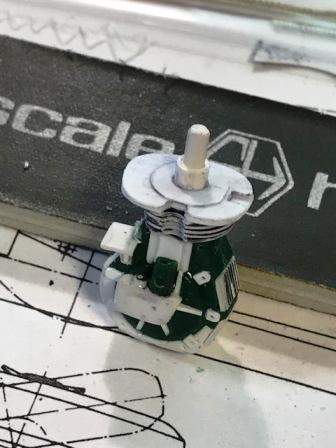
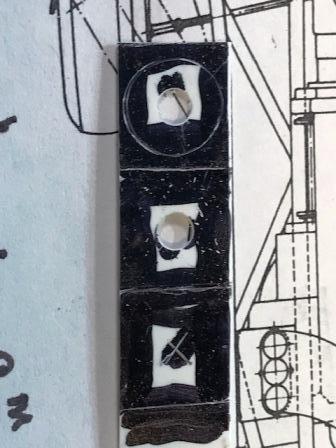
the fins at the top of the cylinder head are kidney bean shaped and are made with cut-outs for the exhaust, carb, and the mechanical drive leading from the crank case to the valve cover got the first two rows down - will make a couple more
-
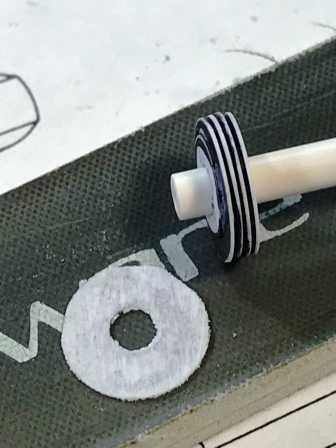
the fins are held in place on a plastic rod that can be set into the top of the crank case while each layer of fins are added
-
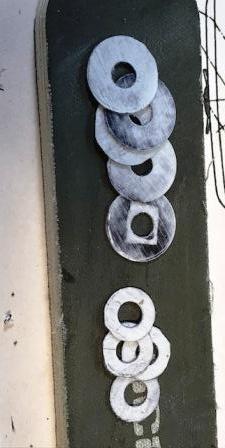
the fins are cut from .010 plastic sheet - scribed and marked for the circumference and the center holes - the lower fins are round and made with a series of two different size "donuts" of plastic - glued together with liquid glue .010 plastic is a little over-scale for 1/24th - but not much - I'll make five lower fins - the real thing had about eight .....
-
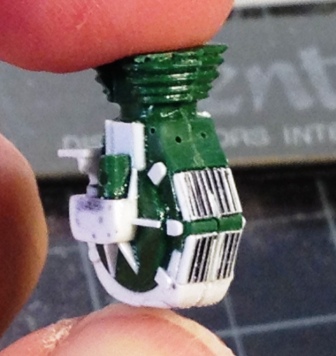
since I'm on an engine building kick - I decided to wheel the Cooper FIII back out of the barn for some work on the Norton Manx engine The Merit kit engine parts were glued together and then sawed apart to add the detaied engine features the cylinder head is finned ; the round lump that looks like a green growth cut from some old guy's neck is supposed to be the finned cylinder head - not so good - time to make the fins ....
-
Cooper barn find
absmiami replied to absmiami's topic in WIP: Other Racing: Road Racing, Land Speed Racers
decided to wheel the Cooper back out of the barn will do some engine building on the "Old Racing Engines" blog ....
-
the Scale Production GT40 eng kit will set you back about 70 bucks w shipping to N America if viewed rationally - it is way too much $$ but why view things rationally ? or how about this - the kit costs about $300.00 less than a MFH 1/24th kit which generally speaking - I can't afford .... haven't bought one in about 4 years ..... and... building this thing will keep you off the streets for about twenty hours or so ... I can spend a lot more than 70.00 dollars on the streets in about half that time and .... WHAT most of us can AFFORD is generally a function of how much PAIN we can endure from the spouse - you know - the one in charge of the finances .... So if I cop a 12th scale MHF kit this week - I am almost guaranteeing an unacceptably immense amount of pain in the foreseeable future ... those kits, Landman , are beautiful .... I wish I could afford one .... there - I feel better now . ....
-
Oh no I feel a rant coming on .....
-
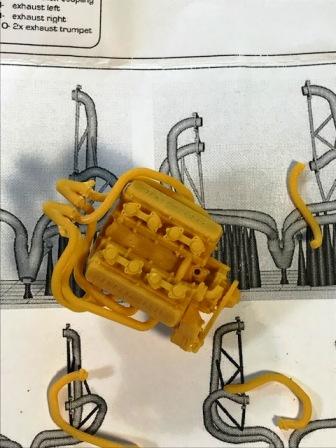
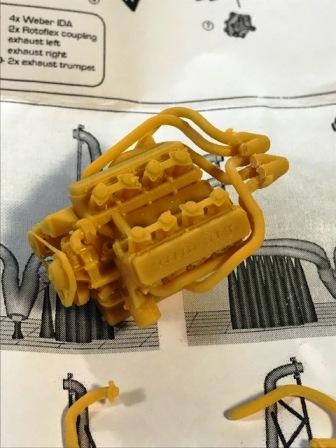
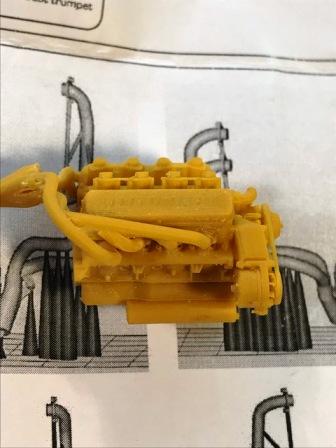
check out the detail on the water pump and pulley and the front of the engine now this won't go into the Lemans Miniatures GT40 w/out major chassis surgery but I think it will fit once the kit engine bulkhead is removed and replaced with something more accurate - See Randy D's GT40 build .... and the transmission !!!!
-
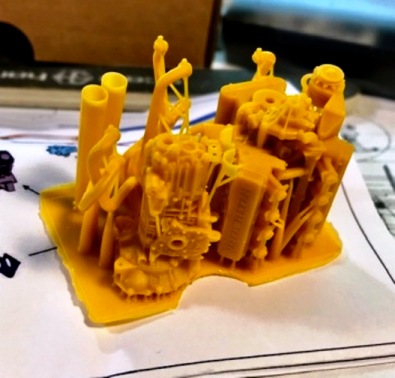
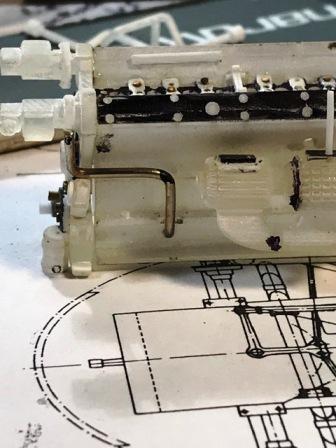
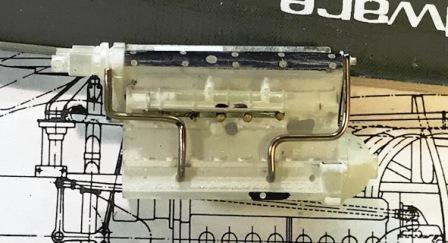
so the parts are off the supports and assembled for fit issues and pictures so here's Catch II: the exhaust bundles are casted in two parts with exhaust pipes crossing to the collectors I tried for an hour to assemble the two bundles - no can do - would love to know how Scale Production assembled their display engine ..... So I removed three exhaust pipes from the collectors to allow the loose assembly in the photos I'll have to attach the three separate pipes after painting and initial assembly - which will be a treat ... but as you can see - the detail is fiendish and accurate - and the 3D printing allow hollow part design so the exhaust tips are hollow right back to the collectors - try that on your plastic kit parts !
-
another random thought the engine was raced by Gurney, Shelby, and others - with carbs - and with fuel injection - with different exhaust header configurations and different sumps etc - in Indy cars and Can Ams and sports cars - Lotus 30 - Lolas - Gurney Indy Eagles - you name it ...... the kit engine is designed for the GT40 - but there are lots of other cars that this engine could find its way into if anyone else wants to post their build pictures of this kit here be my guest - gramps - buy one and do a build with fuel injection actually I bought two and might make one with fuel injection for an Indy car just a thought ....
-
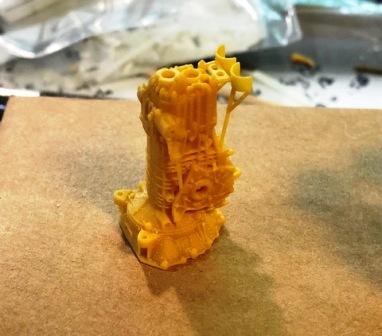
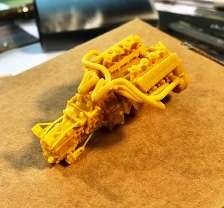
actually the supports can be cut in different ways depending on their length I used a diamond bur in a foredom drill for the longer stalks - that seems to put minimum stress on the parts also used one of the fine toothed hand saw blades sold by UMM - that seemed to work well for the shorter supports managed to get everything apart without major problems will post some shots of the individual parts this weekend once you've got all the parts free - that's when the fun begins ...
-
Catch I the parts come attached to 3D printed "stalks" and yes - you the modeler have to carefully remove each part it's like cutting through the Everglades grass near my home takes a while ....
-
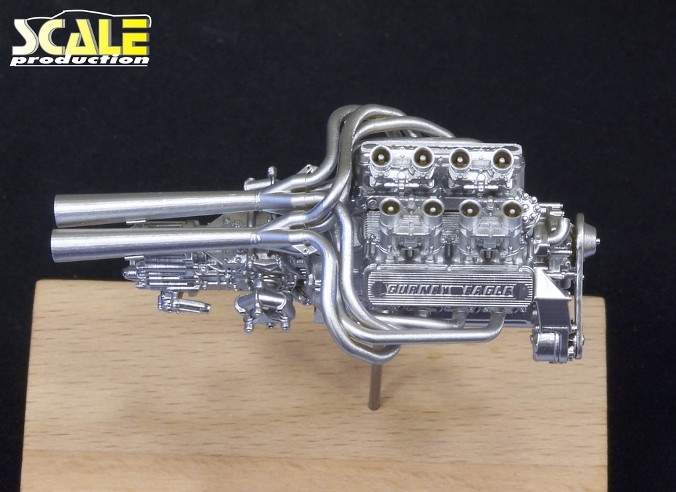
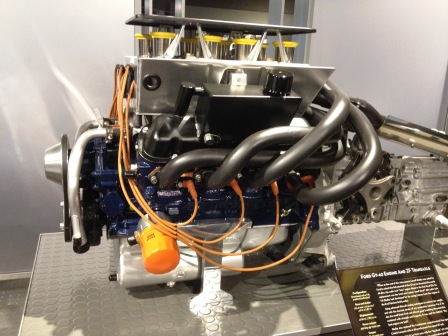
yes, observant one, it's a shot of the GT 40 engine on display at the Rev's Museum in Naples Florida - not Italy ... As raced by the Shelby team - it featured the Gurney Weslake scripted valve covers the photos are from Scale Production's site - they are a German outfit the engine is 3D printed in 24th scale - and yes, it has the neat Gurney Weslake valve covers .... comes as a kit per the 3rd photo .... for those of use who have not yet evolved to the level of Randy D's scratch-building skills [and maybe not in this lifetime ...] this kit provides a bonkers accurate and detailed GT40 engine - which could find it's way into an interesting number of kits / projects .... there is, of course, a catch .... or two ....
-
so I'm calling this "some old racing engines" - is 1968 old enough ??
-
spoiler alert next engine incoming ......
-
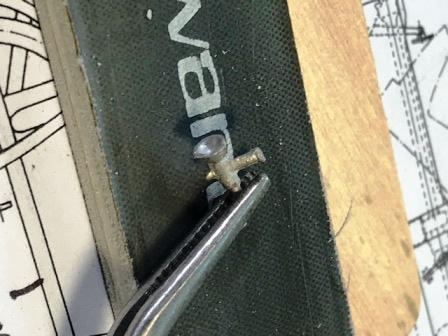
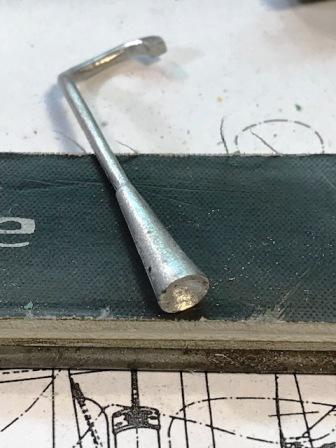
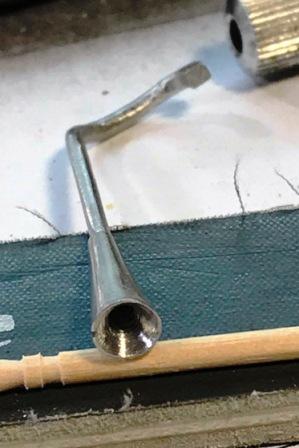
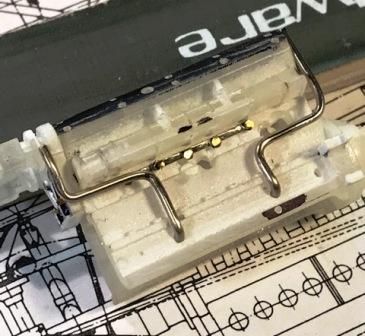
some more stuff the second picture shows a neat breather pipe that was 3D printed replacing that with a nickel silver pipe but will use that perforated cap - don't want to try to make that ! also made an oil entry line from brass rectangular stock and brass bolt heads that is glued to the cylinder head .....