absmiami
-
Posts
4,780 -
Joined
-
Last visited
Content Type
Profiles
Forums
Events
Gallery
Everything posted by absmiami
-
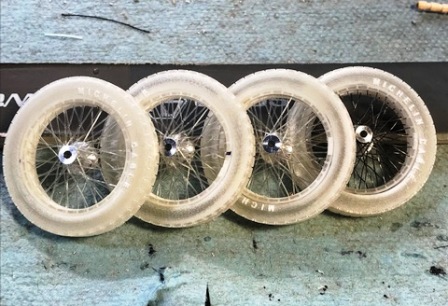
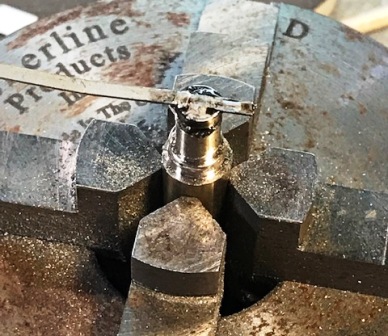
OK - the wheels are done - maybe not - mite try to "unwire"" the first wheel that was strung with steel and replace with fishing line the shapeways parts are made with a very tough material that I think will survive this surgery - but I'm not sure - thinking about it ... now on to the wheel nuts - again depicted in the photos on pg 1 will make these from nickel - could make them from plastic but the nickel finish will contrast nicely with the dark blue wheels - so away we go ... the first wh nut - shown here - was not so great ... tried a slightly different approach for wh nut II have to file a well defined slot onto the top of the "nut" and solder a bar across that when finished - is integral to the nut surface - then place the part back on to the lathe to drill the opening for the end of the axle - 1/16 hole ...

-
 holy cow .... yeah - I missed this thread too .... questions - the sub-assembly soldering on the de dion tube - are you using different temp solders and/or different settings on your soldering iron ?? did you use the same solder base/platform that you used for frame 1 ?? how are you marking and drilling holes in the brass sheet - as you know - your drill bit will wander every which way unless you've got a sort of divit in the brass sheet to guide the drill bit .... the leaf springs - are they nickel silver or what ?? you still planning to make the bonnet from brass sheet? you're a brave man ... I think you've got this thing figured out - but just in case - I've got the Joel Finn birdcage book if you want to check something .....
 -
super photos, JC I have not read the whole thread wasn't there an AMT or Revell Parts pack 427 engine ??? would be 1/25 th ...
-
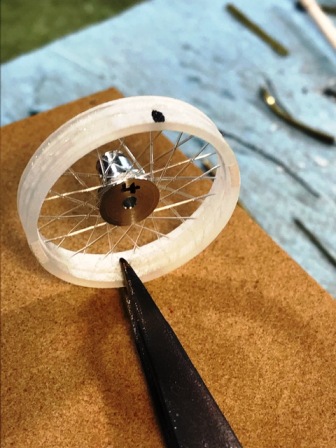
bottom "wire" - strung per Pico's pattern and then the top wires everything came out great - the last path of wire worked its way out of the groove at the top of the hub - but that is easily fixed glued the beginning and ends with super glue and away we go .... per the page 1 photos, the wheels will be painted royal blue probably some Tamiya acrylic that I picked up in a small hobby store - that's right - a hobby store! - in Queens ! no less ...
-
gone fishin' Pico's recommendation to use monofilament line for the wire wheels was not random works much better than the steel line of the same diameter as you wind the line in and out of the holes and around the hub it twists but this stuff is easy to un-twist so everything come out straight and tru lesson learned .....
-
and by the way Tim - the answer is Mars Bonfire .......
-
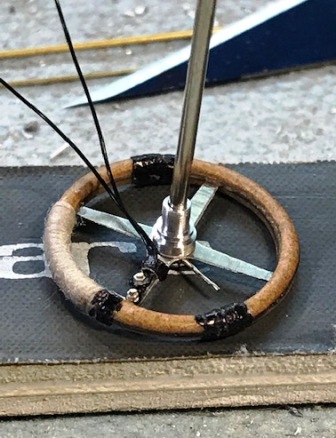
thank you Mr. Harrisburg ... I'm only 126,000 views behind your Bantam dragster - and catching up fast !! there is a third dimension somewhere in the modeling universe wherein we will find all of our lost model parts - from which someone will someday assemble one great model car ....... the back of the steering wheel gets a couple of wires, and a ring and collar to attach the steering wheel to the column the wires wrap around the collar and then disappear under the instr panel they connect the buttons on the steering wheel to what ??? probably something to do with the ignition and probably a necessary safety feature added in the restoration .....
-
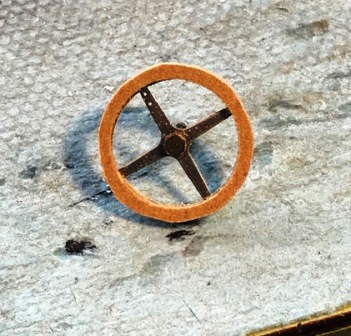
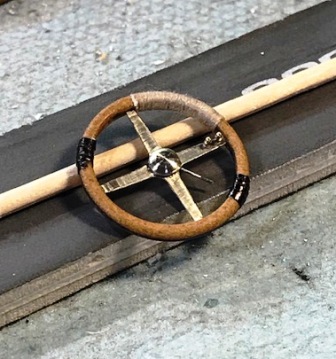
the renshape sandwich is filed/sanded down close to the outer edge of the rim and then chucked onto a foredom hand drill the shaping is finished on the fordom with sanding sticks. then - if you go back to page one - the wheel rim on the restored car has some tape and a section of some sort of string or cord done here with thread which is coated in floquil lacquer glaze the tape on the rim is about a 1/16 inch strip of old masking tape that is real sticky - wrapped and "painted" with a sharpie real hi tech !
-
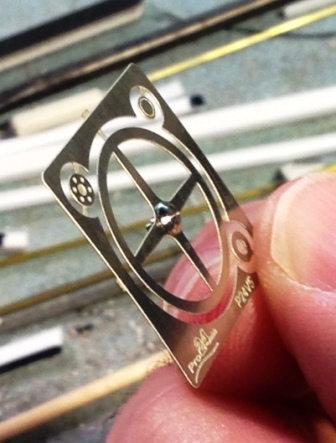
steering wheel ..... Profil24 photoetch rim plus renshape drew the outline and shaped the holes with a reamer and sanding drum then glued the renshape sandwich with epoxy and drilled the two small holes on the rim spoke the renshape is not really wood - but kinda looks like it in scale, the wood grain - renashape has no grain - isn't really visible so this will do
-
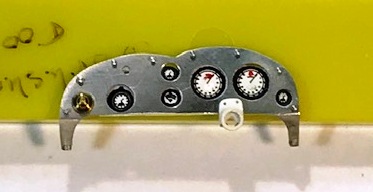
panel almost finished bezels are placed in while Micro Scale clear finish is setting the micro scale will glue these in place - the stuff is still drying on the left hand tach - the bezel for the gauge to the right of the tachs is missing - its cavorting with the dust bunnies in some unseen corner under my work bench - where it flew when I dropped it I hate when that happens .... gotta make a few more nickel silver parts anyway gonna work on the steering wheel and maybe try another wire wheel - this time with monofilament ...
-
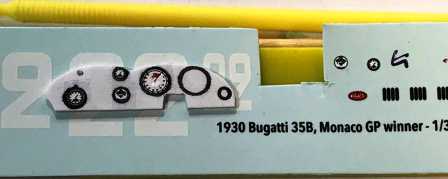
the gauges are from Indycals Bugatti set in 1/32 with the Bugatti script whited out on the tachs with a dab of acrylic paint
-
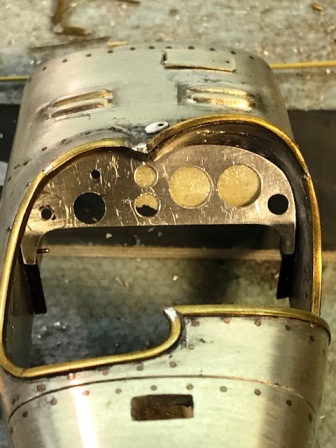
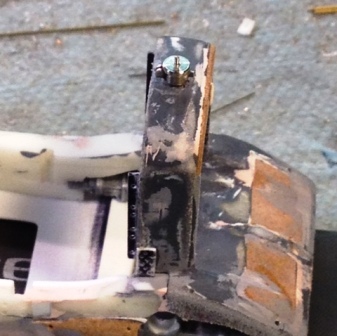
more panel work w test fit of tach bezels the steering column brace is made fr evergreen stock
-
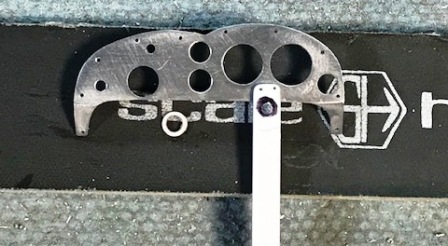
the instr panel is cut from .016 alu sheet using the plastic dash cutout that I had made months ago as a rough guide with a test fit in the body and a test fit of the tach bezels ...
-
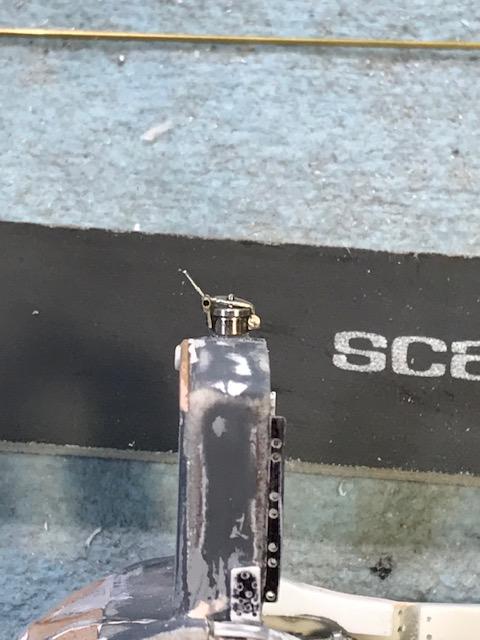
so now I've got a radiator cap with a handle that I can easily slip onto the radiator shell once everything is painted .... now to the dash ....
-
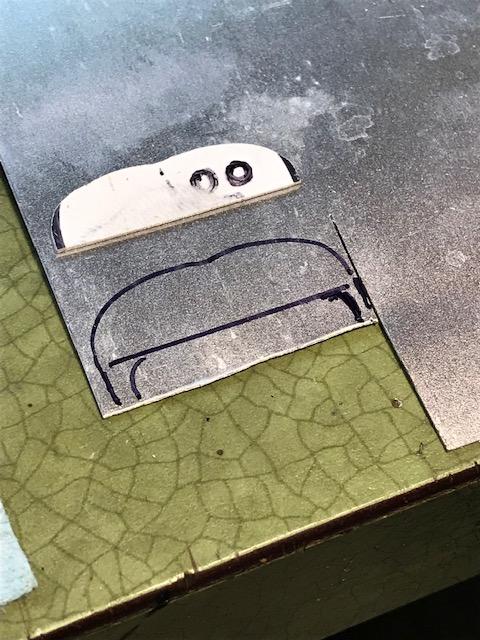
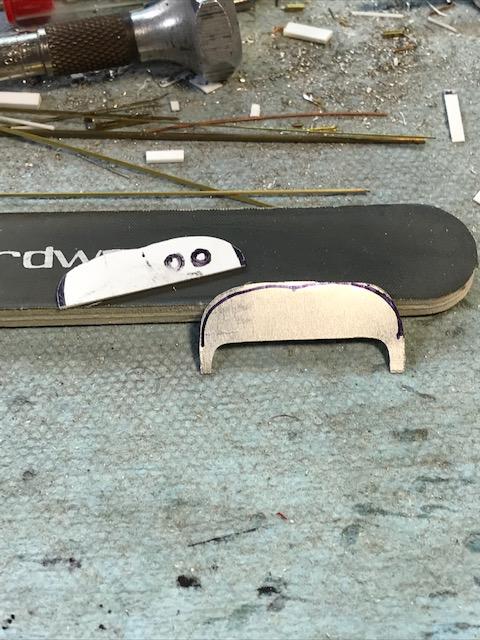
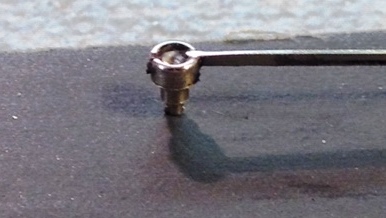
so these shots show the nickel silver handle that was filed from nickel silver and the latch for the front side of the cap
-
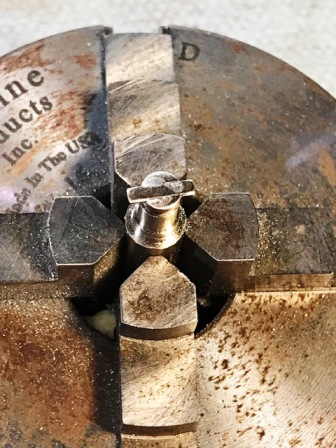
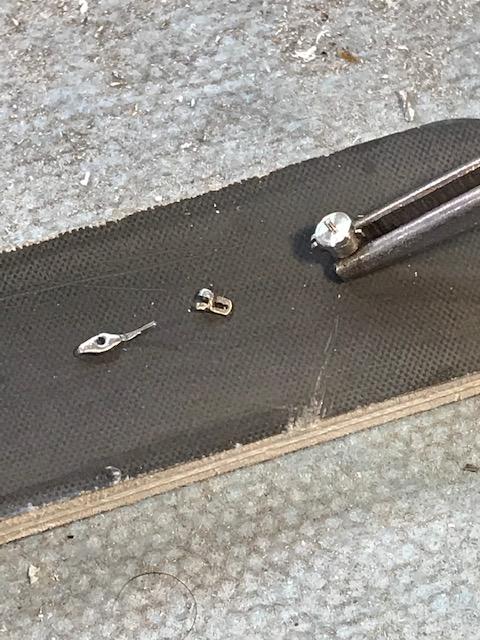
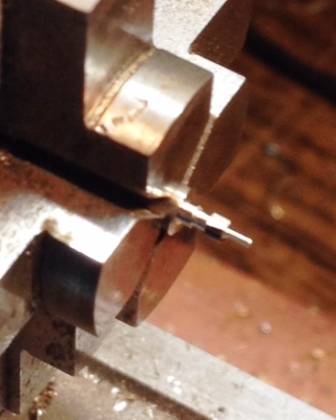
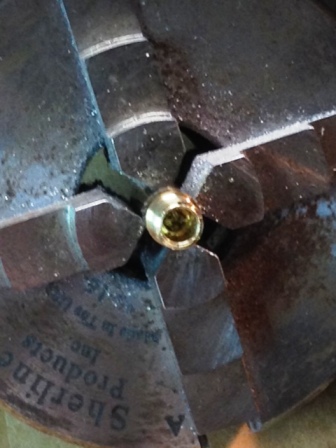
so the hinge in the third picture is the part that I ended up turning fr nickel silver with the flats filed in the lathe - using the bars of a four jaw chuck as reference points to file the flats ... - no intention of making a working hinge for the pressurized cap handle just want something that looks right ... then I had to make the cap handle and the latch that sits over the tab on the front of the cap ....
-
then I've got to saw a slot into the cap body - the chuck is handy for that and then solder a tab from nickel bar stock and then I made a sort of hinge on the back side of the cap body took four attempts to get that right ...
-
merry new yr I'll call this the radiator cap from hell ... the first two parts - from nickel silver round bar stock fairly straight forward - things got difficult from there ...
-
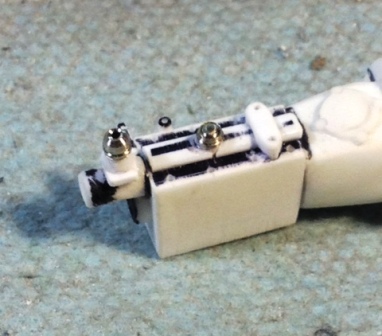
also did some more machining with nickel silver the steering wheel photo-etch is an accessory fr profil-24 - and is accurate for this car - but I machined a button the photo-etched part is not accurate for the Delage and is not 3 dimensional the bevel on the face of the button is machined by rotating the headstock about 30 degrees the cap at the end of in the fuel pressure pump is machined and then scored with a fine file nickel silver is fairly "soft" - so the file leaves its pattern marks then the transmission case inspection cap and the stick shift receptacle .....
-
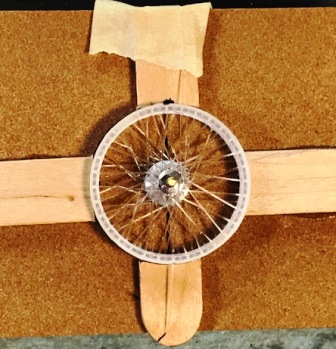
thanks to Mr harrisburg so begins the great wire wheel experiment always wanted to try this .... using soft steel wire just less than .010 - which is actually over-scale - but looks better to humans than scale wire would it has a tendency to twist during the back and forth thru the holes and around the hub so the results are OK but Pico suggested fishing line instead and I think I now know why ... gonna try that for the next wheel
-
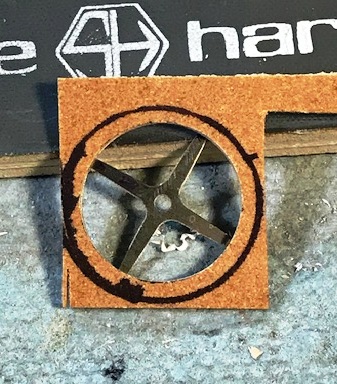
oops forgot to include a shot of the milling machine set up with the cutter sorry for the iffy focus - actually - I don't see the part that much better than this under magnification - maybe a little sharper .....
-
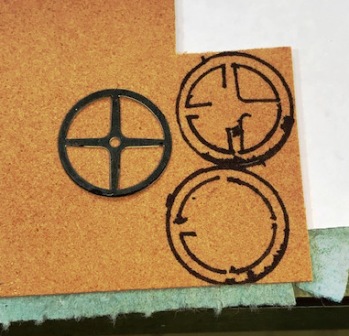
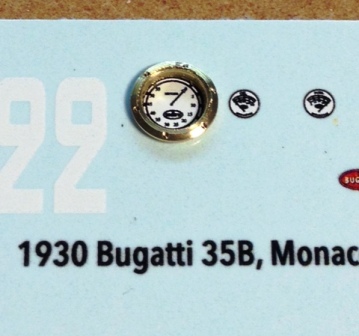
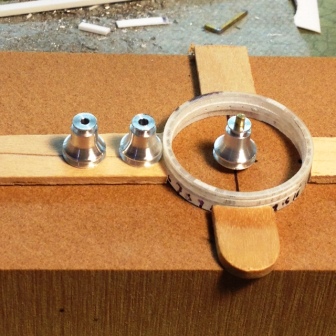
so the basic shape is cut on the lather and then the chuck is removed fr the lathe and set up on the milling machine with an indexer tool - to drill the dimples to suggest the screws - each dimple drilled at 60 degree intervals ... using .015 cutter for the dimples - .012 would be more scale accurate - but I broke my .012 cutter - and besides - .015 is easier to see! the chuck is then returned to the lathe to part the bezel from the brass stock then a test shot to show size relation to the tach decal from an Indycals 1/32 Bugatti sheet - this is about right - if I use these decals I'll have to remove the Bugatti script fr the gauge - but that will be easier than making my own Delage gauges ...
-
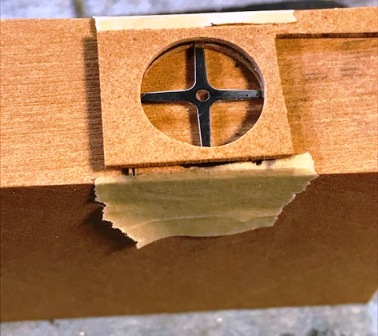
workshop space is limited so before I wire up some wheels I'm doing some more machining on the Sherline lathe and mill finished all four hubs and now machining some instr bezels for the dash - as pictured in 2 photos on page 1 some bezels will be machined from nickel silver rod but the bezels for the tachs appear to be brass - there are two tachs - not sure why - maybe the pounding and vibrations expected in a GP race in the mid twenties caused frequent instr breakage ?? - they may be run separately off of the separate cams - they appear to be the gauge opening is .160 with a bezel just wide enough to allow for some small dimples to be milled onto the ring - the tachs were screwed into the dash....
-
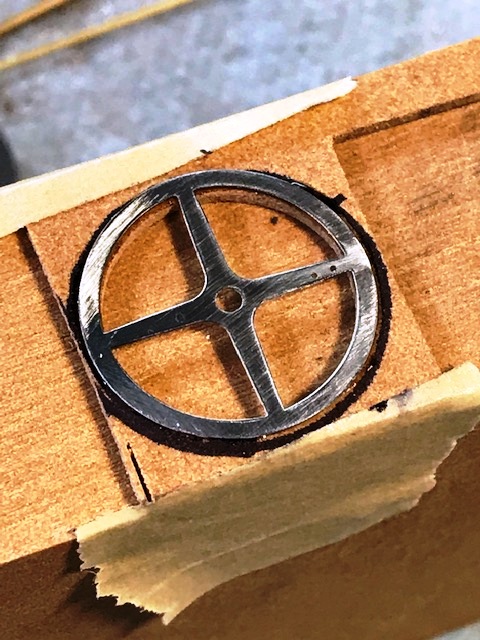
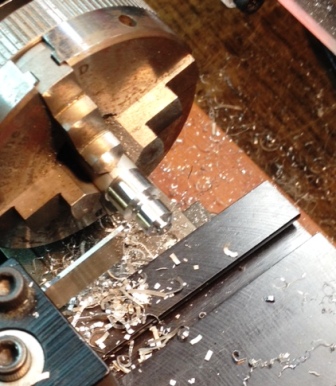
the first hub - dimensions based roughly on the corresponding hub in the Wills white metal Delage kit - shown in the third picture shaped with a ground cutter - like the one used on the axle halves - only smaller - with the headstock swiveled a few degrees for the taper then parted and set in the jig today's pico question - the spoke wiring will partially obscure the hub - so should I paint these things before I wire them ??????
-
thanks Codi - and can you tell me the name of the (once) young man who composed "born to be wild" ?? and you want me to take my time on the car ? - its been on my workbench for a year - I'm not sick of it yet .... but ..... actually I haven't gotten to the fun part yet - which as Pico knows - will be the finish on the body panels .... and thanks to Pico for ..... the third way ....(insert announcer in echo chamber) now its back to the lathe to make the hubs ...