absmiami
-
Posts
4,781 -
Joined
-
Last visited
Content Type
Profiles
Forums
Events
Gallery
Everything posted by absmiami
-
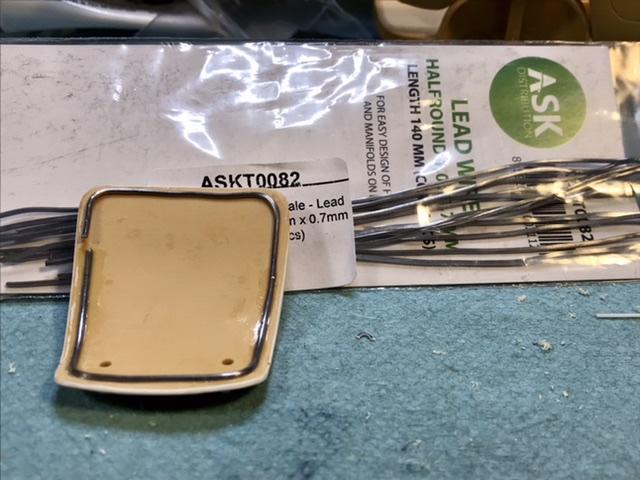
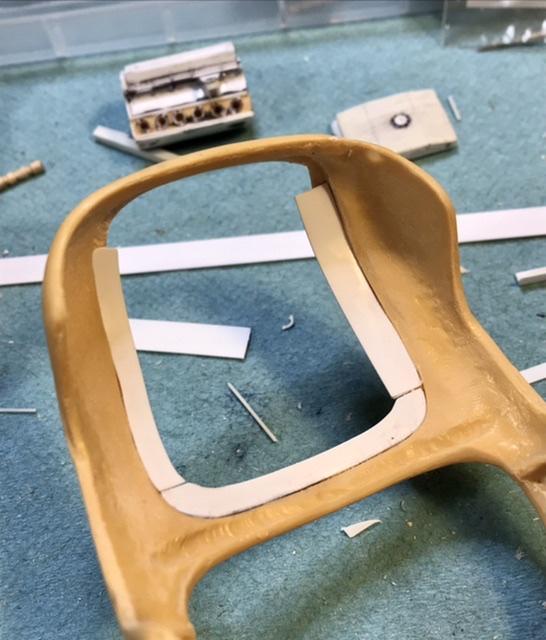
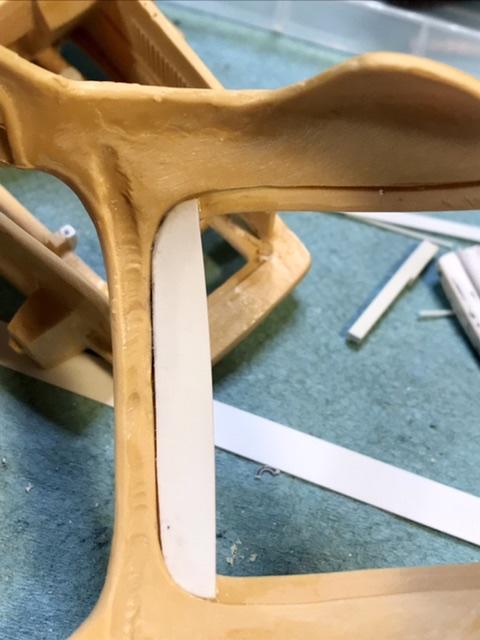
 Adding some lead wire and Evergreen to make the features reinforcing the trunk … the wire is very soft - so it will hug the contours of the hood - but its hard to glue - i had good results bonding to the resin with gorilla glue …
-
Which one ?
-
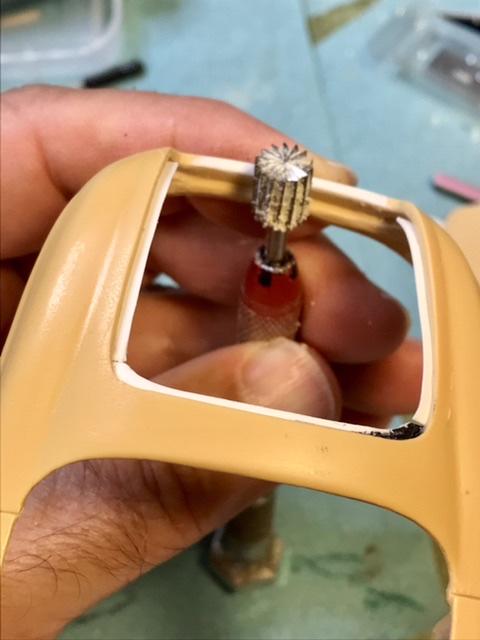
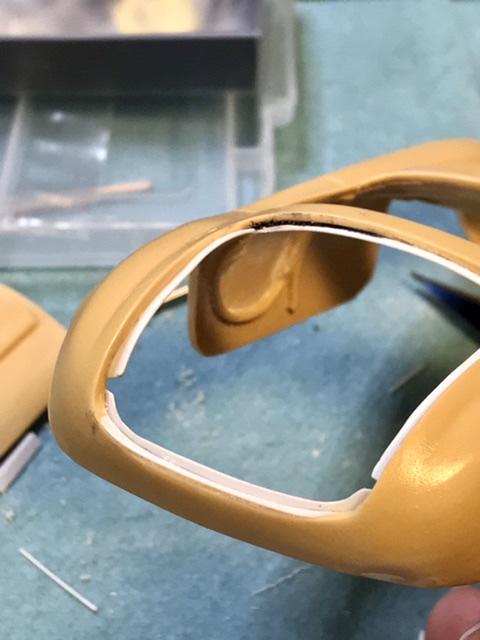
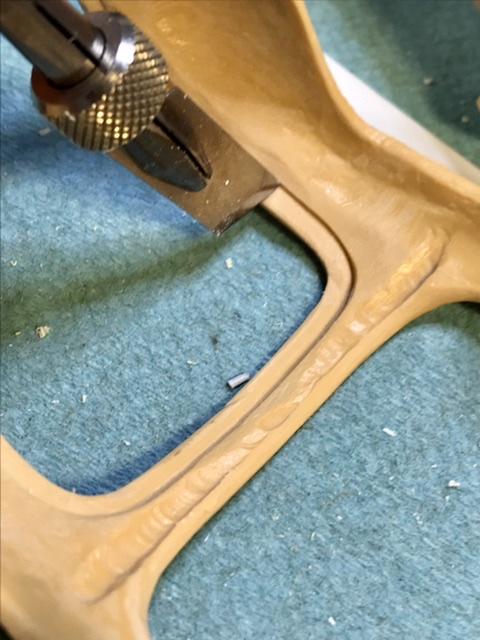
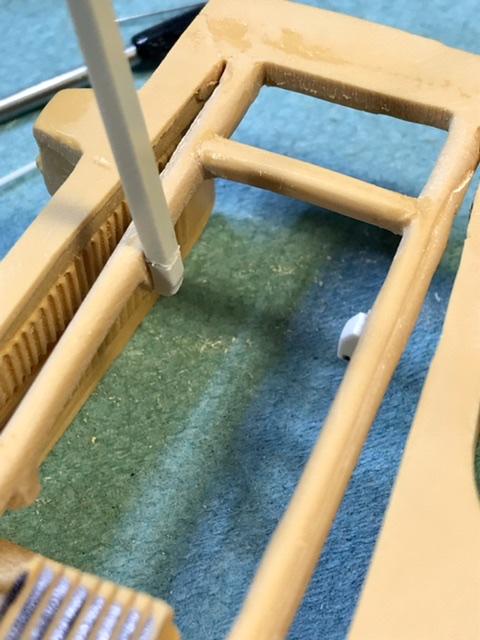
The base of the drip rail is a little tricky - used the cutter as a scriber to make this section of the “trench” - the steel cutters are excellent scribers in this application…
-
Gramps -yours is getting bilt too .. sooner than later ….
-
Dont you just live it when you send a text to the wrong part of the inter-planet ! Anyway … pierre - time for a resin kit - but remember - its sort if like craft beer - once you’ve tried it - you won’t go back ….
-
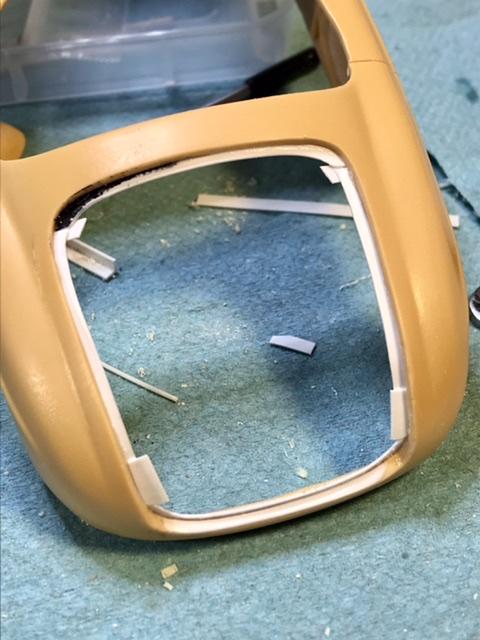
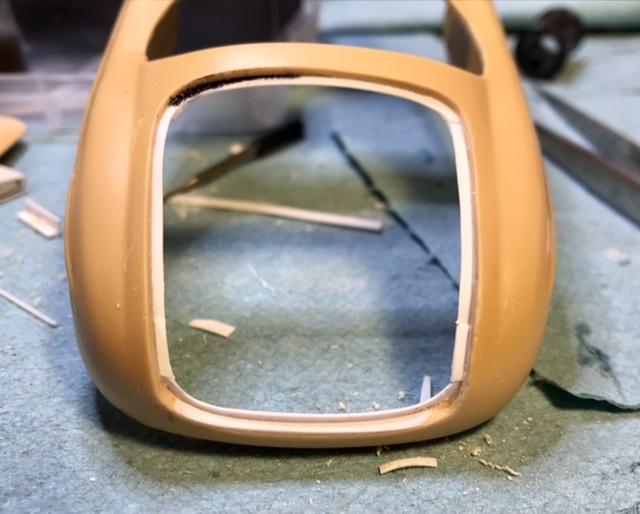
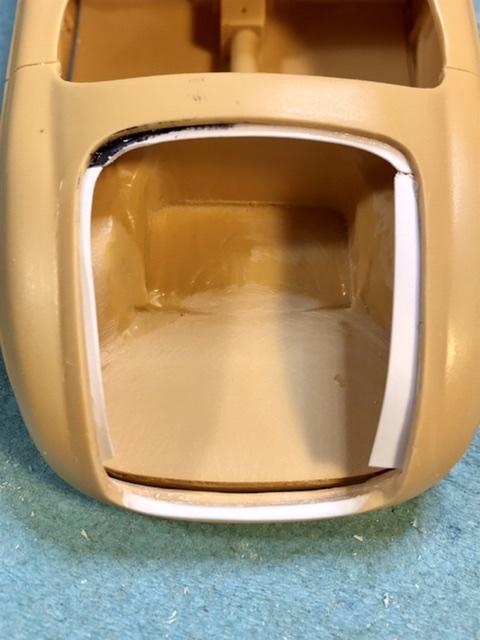
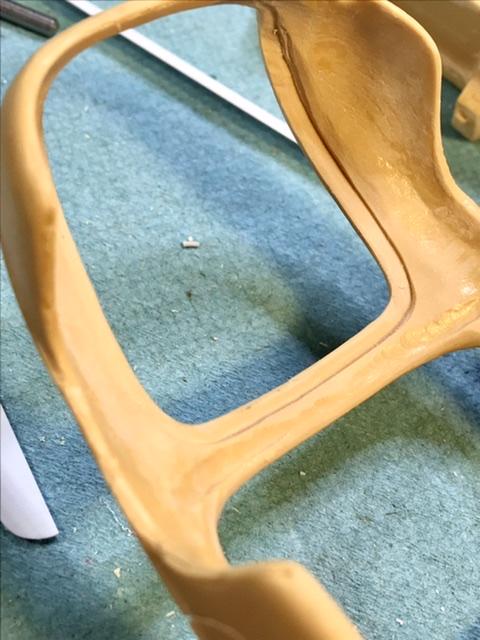
Then i can glue strips of the Evergreeen into the trench … and shape the lip …
- 565 replies
-
- 1
-

-
- quarterman
- fisher
- (and 1 more)
-
Here ….
-
Deepened the trench with some xacto blades - got a little carried away - scribed thru the body here - but thats a minor repair …
- 565 replies
-
- 1
-
-
- quarterman
- fisher
- (and 1 more)
-
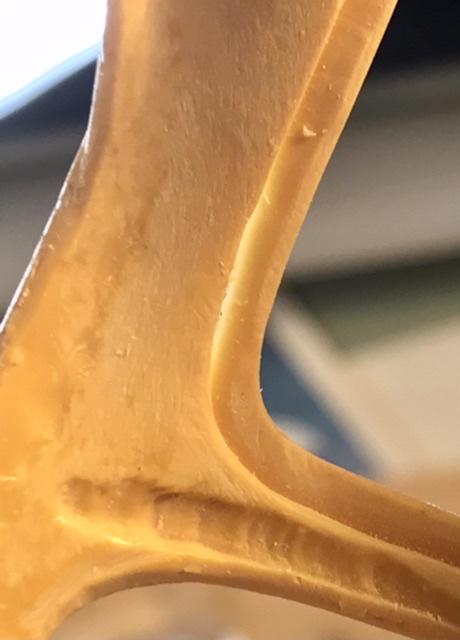
Back to the trunk - there are some pix on an earlier page of the car that building - i need to make a lip around the trunk opening - think its called a drip rail - im gonna build the lip with Evergreen styrene strip - .015 by .250 - but first i’m making a trench on the underside of the trunk opening at a 90 degree angle to the edge of the opening - using first the back side of this steel cutter - this allows me to sort of bevel the trench - keeping a consistent pattern around the trunk opening …
- 565 replies
-
- 1
-
-
- quarterman
- fisher
- (and 1 more)
-
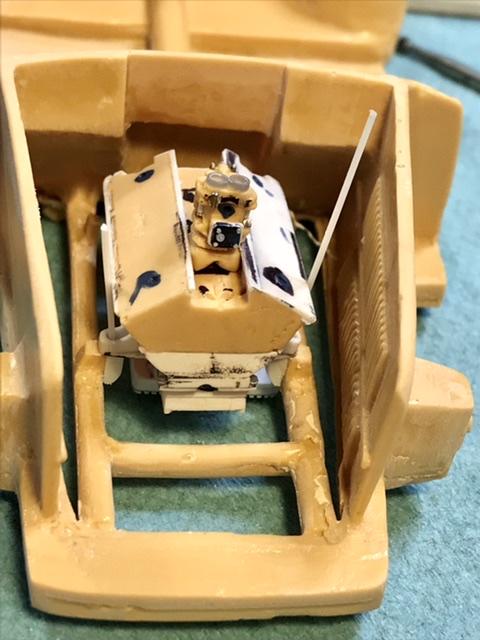
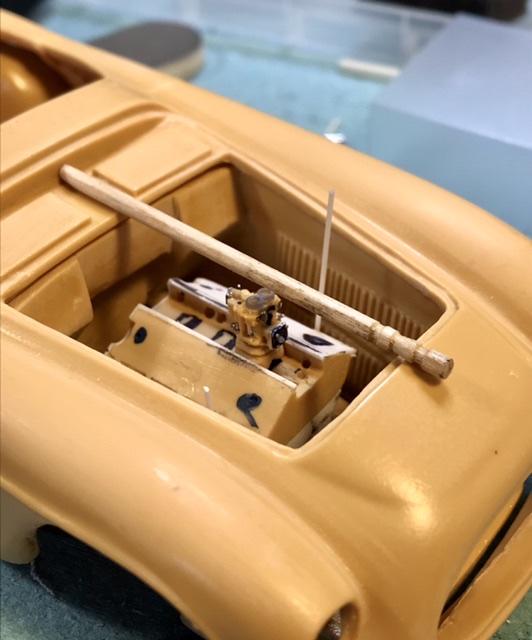
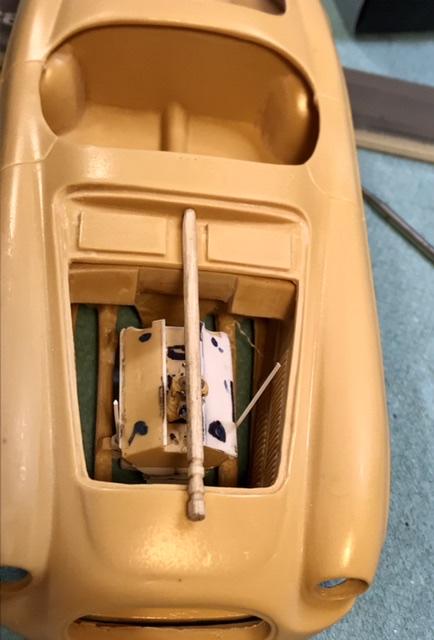
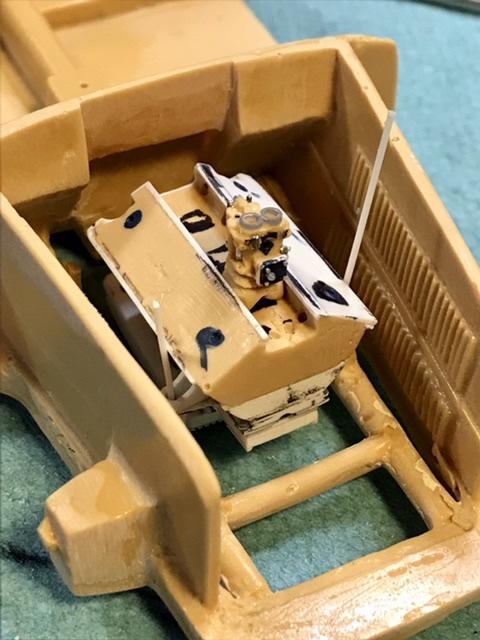
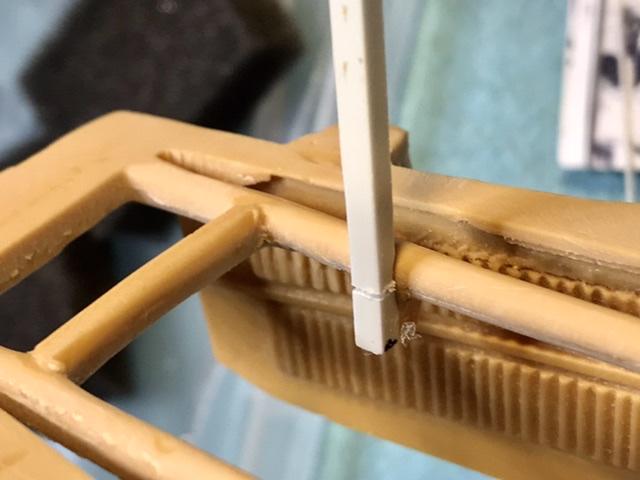
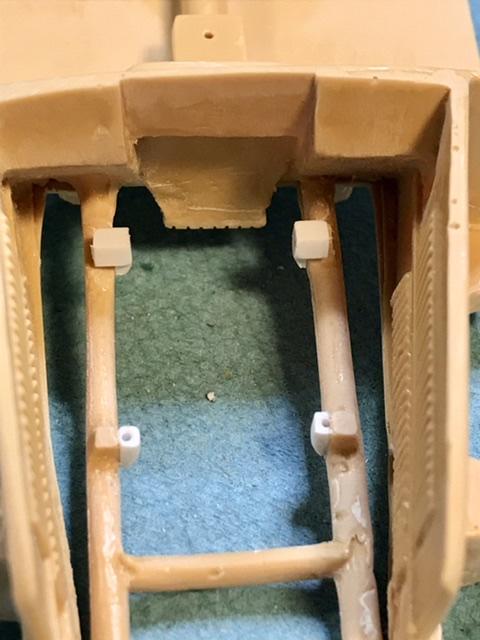
Using this hi tech toothpick - im measuring mount height and left/right location - and i can still make some small adjustments during assembly if needed - i usually have to …
-
The front mounts will secure tje engine w simulated bolts
-
Since im not using the UMI engine casting - i have to redo the mounts - although i think that the placement of the mounts on the frame rails is accurate …. So the new mounts were made fr Evergreen strip …
- 565 replies
-
- 1
-
-
- quarterman
- fisher
- (and 1 more)
-
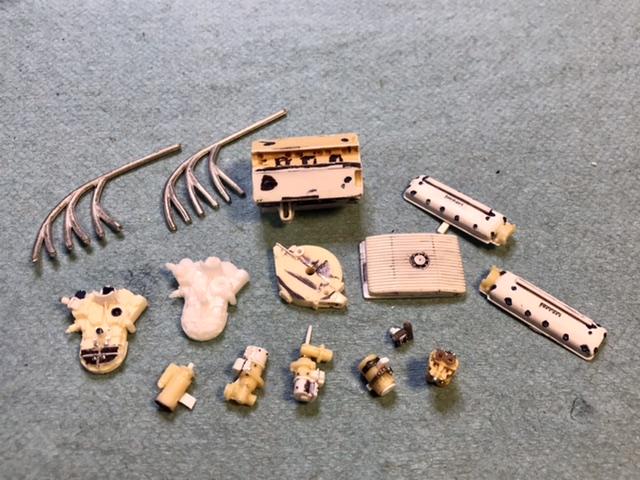
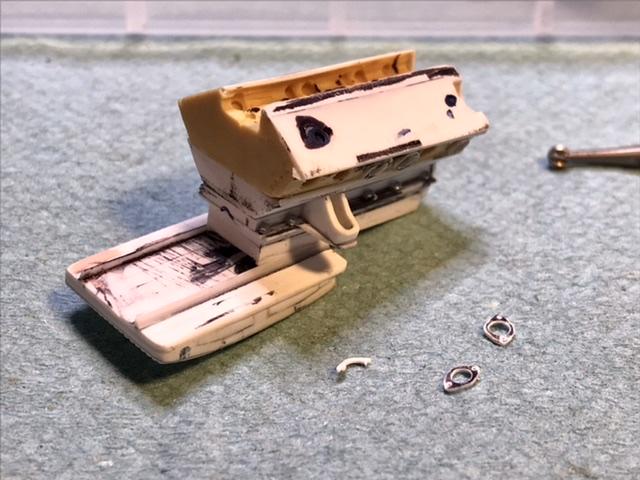
Barchetta needs an engine - these are the master parts for an early 12 cyl that will get casted and find its way into the engine bay … once assembly is under way - ill run down the differences between this engine and a later series 12 - such as the GTO family of engines ….
- 565 replies
-
- 2
-
-
- quarterman
- fisher
- (and 1 more)
-
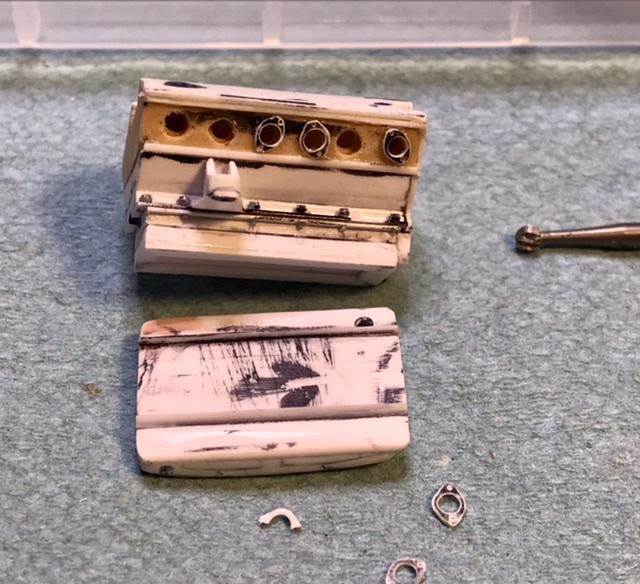
About that Ferrari - the early 12 that is posted on some older pages - 12 to 13ish - is back on the workbench briefly for a re-do - requested by caster Harold - i’ve seperated the sump from the crankcase - the seperate parts will eliminate some casting cavities that appeared when Harold attempted to cast these in one piece … once the castings return - this engine will migrate over to the land speed / comp / road course section - for installation in the UMI Quarterman Barchetta tribute build …
-
Well actually - this is the 24th sc engine - which was built on a dare fr randy D - the 25th scale DOHC will be built next - and that is destined for a 24th scale Lotus - and a 24th scale Eagle - the 25th scale Mad Mike DOHC will - just - fit into the 24th scale Indy body work … to be continued after a Ferrari interlude …
-
Thanx for that ..
-
got a better idea if you have the Dees' bible on Miller ... have a look at the 122 front drive - no too much different than the 91 fr dr think the line of the bonnet is a little different slightly different shape for the dr compartment opening and the engine had a bigger crankshaft ... just sayin ...
-
great great great I love comebacks ...
-
1975 McLaren Indy car - GSL
absmiami replied to absmiami's topic in Other Racing: Road Racing, Salt Flat Racers
I meant NNL's - not GSLs - no more of those ... -
no actually I think I got it rightwards ... It would be great to get Mark's analysis of the Vette - and - Randy's analysis of the Lola . Really ....
-
1975 McLaren Indy car - GSL
absmiami replied to absmiami's topic in Other Racing: Road Racing, Salt Flat Racers
And by the way - ill try to convince Dave to show this at a couple of GSLs - be brought it home fr the museum because his grand kids wanted to see it - thats cool! -
1975 McLaren Indy car - GSL
absmiami replied to absmiami's topic in Other Racing: Road Racing, Salt Flat Racers
More than a nice build - winning the GSL IN 83 - it was still a relatively small affair - but the competition was still fierce …