GeeBee
-
Posts
4,030 -
Joined
-
Last visited
Content Type
Profiles
Forums
Events
Gallery
Everything posted by GeeBee
-
 That's one very nice 'Man Cave' tidy and very well organised .....
 -
Had a look on your FB page this morning, some real nice images on there, your certainly a talented modeller ....
-
Improved Lighting & Magnification Options?
GeeBee replied to nitrojunkie's topic in Tips, Tricks, and Tutorials
I use a daylight balanced flouresent lamp, doesn't give me any shadow and runs pretty cool, -
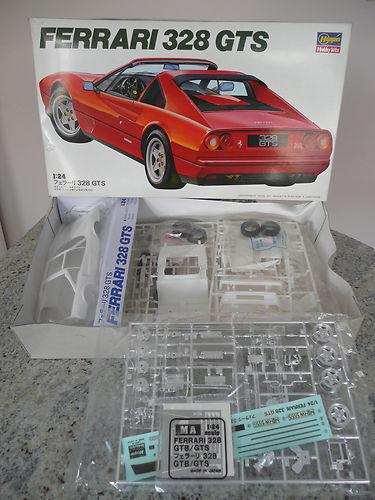
Another one added to the stash, it will go nicely with the hardtop version I have .....

-
They looked a little strange to me when I saw the pre-production model at the IPMS show, the tyres looked like they had way too deep a tread pattern, looking at mine, I think they changed them in the production models
-
Not a great deal done today, but after watching the F1, I did a little bit, cut the chrome lamp surround off the sprue, touched up the marks where they were cut off the sprue with a little Alclad, and fixed them into place, on the Tamiya version, the chrome ring around the rear lamps are part on the lens, and are a PITA to cover with BMF, the Revell version is totally different, the chrome part goes onto the body then the lens fixes onto that, leaving the chrome ring showing, also gives the lens a chrome backing making the lenses look a bit more realistic.
-
No, not far at all, and spent some time at the factory at Longbridge many years ago ..... infact Q gate, where I was based is the only part of the factory still standing, well not a great deal done since the chassis/floorpan went in, but hopefully I will spend some time in the hobby room later on today, but yesterday I got the roof panle fitted, and now it's really looking like a Mini now ..... the fit of the roof was that good, I really didn't need the masking tape to hold it on, looking at it now, I'm really glad I stripped the chrome off the wheels and went with the Alclad. Before the roof panel could be fitted it needed to be masked off so the rain gutter rail could be painted body colour, it was masked off using Tamiya masking tape, then burnished down and the Fiesta yellow was airbrushed using my Paasche F1 airbrush, it really is a great airbrush for doing these small detail jobs,
-
Bought this off eBay yesterday, hopefully I should have it in the week .... yes I like 911's, I was born the same year the 911 was first released.
-
Ordered this today, should have it early next week ...
-
A bit more done today, got the chassis/floorpan fitted, and a very good fit it was too, just a few clamps were used while the 2 part 3 hour glue went off, fitted the front & rear valances and the exhaust system, the rear valance needed a bit of masking tape to hold it in place while the glue dried, the front one fitted that well it didn't need holding in place, I'm not too bothered by the slight gap at the rear as the bumper will cover it, there's no way to fix it on before hand, as the chassis wouldn't fit in. Tried a bit of wax on the body,
-
They didn't look brilliant when they were on the chrome sprue, as the chome has gotten into the holes in the wheel trim, stripping the chrome, doing the primer/gloss black and then the Alclad showed up the holes a lot better, as the black stayed in the holes and the alclad stayed on the trim, the rest of the chrome looks pretty good.
-
Very nice build, I have a couple of the Tamiya one's to build ....
-
Superb build, and considering it was made totally out of plastic sheet, I'd love to be able to do something like this ....
-
paint booth just got here
GeeBee replied to CrazyGirl's topic in Model Building Questions and Answers
Not at all, it will save the plastic getting ruined by any overspray, the paper is easy to change when it gets too dirty, I usually pop a sheet of newspaper on the base, over the greaseproof paper, as it's easy to change. -
paint booth just got here
GeeBee replied to CrazyGirl's topic in Model Building Questions and Answers
X3 on that, I've had the same booth for a couple of years now, it's had acrylics, enamel and lacquer used through it, and still no explosion here .... the filters cost around £4.50 over here, I'm just ready to swap it again, this is only the 2nd time I've changed it, I do take it out from time to time and give it a good vacuum, just makes them last a little bit longer, Doesn't look as new as this now ..... but still works perfectly, so yes, you've got a good buy. -
Very nice build, love the colour ....
-
Improved Lighting & Magnification Options?
GeeBee replied to nitrojunkie's topic in Tips, Tricks, and Tutorials
The link Foxer has given is pretty much the same kind of lamp I use, apart from mine has a round fluorescent bulb in it and not LED's, not sure if you can get them over there, but there sold under the Lightcraft brand over here, without it I wouldn't be able to do half the detail work I do .... there around £55.00 over here -
Very nice build, alway thought about getting this kit, what was it like to build ?
-
It's powder blue, not green
-
Got the wheels and tyres fitted before I finished in the hobby room, the tyres are a great fit, I'm pleased with the way the Alclad went on, second time lucky, used 5 minute epoxy to fit them to the axles, and I was pleased to see that all four wheels sat on the floor ....
-
Looking good, I'd love to see a 1/24th version of the Morgan 3 wheelers, I went to the factory back in the mid 80's, fascinating place to visit, and things haven't changed that much today, there still glueing and screwing bits of wood together .....
-
Today the interior mirror was finished off using a small piece of BMF to replicate the mirror face, then the mirror was fixed onto the inner roof panel, before the interior goes in the bonnet needs to be held in place by a couple of pieces of masking tape, then you can turn the bodyshell over and fix the bonnet hinge into place, the only part that needs glueing into place is the part of the hinge that fixes onto the bonnet itself, the other side of the hinge is held into place by the interior pod, before commiting any glue to hold the interior into place, as always I did a dry run, and made a few marks on the inside of the body using a pencil, this gives me the locating points were the glue needs to be applied, with the interior in place (without being glued) I tried the chassis/floorpan to see if everything lined up, luckily it did, so the chassis and the interior were removed and a few spots of 5 minute epoxy were applied to the marks I have marked out with the pencil,the interior was now fixed into place permantly and held in place while the glue set, once the glue holding the interior into place had dried, the masking tape holding the bonnet into place was removed, one nice thing about this version of the Mini, is the bonnet can be opened and the way the hinge is held into place, the bonnet stays open on it's own ...... Looking inside once the interior fixed into place, the dashboard lines up perfectly with the bottom of the front window sill, Revell have really worked hard engineerring this model to fit together so well.
-
Very nice build, what was it like to put together ? I'm tempted to add one to the stash .....
-
About time you did a Mini ......
-
Bare Metail Foil - Which One?
GeeBee replied to MILD's topic in Model Building Questions and Answers
What he said .... the ultra chrome is a lot thicker and really doesn't want to conform to curves of any kind.