GeeBee
-
Posts
4,030 -
Joined
-
Last visited
Content Type
Profiles
Forums
Events
Gallery
Everything posted by GeeBee
-
It's still on the bench, I have two builds going at the same time ....
-
Superb build, and those photo's make it look very realistic
-
Very nice build, and that paintwork is flawless,
-
Save yourself some money and buy it in slightly larger quantities, http://www.paints4u.com/ProductDetails.aspx?productID=4417
-
 A few more off eBay .... yes I know, I have them already, but I got them at a good price, and the Mini arrived this morning and it didn't even make it to the stash pile, as it's on the building bench already, see here http://www.modelcarsmag.com/forums/index.php?showtopic=70840
-
I already had two of these in the stash, and the weekend I won another off eBay, it came this morning and instead of putting with the others in the stash, I decided I really needed to get one on the building board. A quick look at the parts, and compairing it against the Tamiya version I can see some plus points on the Revell version, a little more detail and a slightly different way of building it .. As always, I started with the body, not sure why, but I've always done it this way, one thing I noticed on the body was a moulding line on both front wings, the L/H side was slightly worst, and the line goes through the panel line that goes through the front valance and also goes around the top of the wings by the headlamps, it didn't take long to remove with a sanding stick, then smoothed out with a finer sanding pad. Before After That was the worst part of the body and apart from just cleaning off a little bit of flash, the body is pretty good, there's a lot more mould lines to remove on the Tamiya version After removing the bonnet and roof from the parts tree, and getting ready, I started on the engine, which goes together real well, I've left of certain parts until the engine has been sprayed green Although it tells you to fix in the engine first then fix on the inner wings, the Tamiya version has these moulded as part of the floorpan, I dry fitted the inner wings in place then tried to fix in the engine, which it did without any problems, so the inner wings and bulkhead were fixed into place, it will make painting a little easier and will of course look better Another nice touch over the Tamiya version is seperate subframes, the Tamiya version has them moulded as part of the floorpan with just the outer parts of the subframe to add, which you do have to add to the Revell version, but should look a little better once fitted and also has the little fuel pump fitted to the subframe, this is a seperate part and fits on without problems. A few parts mounted on cocktail stick ready for painting And the colour I'm going to be painting this one ?? I've had this paint for a while, as I was going to convert another Tamiya Mini to a Pre '66 body, I won't have to do this with the Revell version ....
-
That the colour, Aquarius blue metallic, it's actually automotive lacquer that I've had in the cupboard for a number of years, thought it was about time I used it ....
-
Thanks, I did catch that episode last year, it was one of the better one's that they did ....
-
I actually got a bit of work done today, finised off the flocking for the interior, and got a couple of coats of clear acrylci lacquer on, wet sanded and polished it out .... I tried another camera, and it's still getting the colour of the bodywork wrong, this it the colour it has been done it ...
-
Thanks, that photo was taken just after I had put on the a couple of coats of the clear orange, looks a little better after drying overnight,
-
Got the dash dry brushed in Tamiya bronze, then a couple of coats of clear orange, the switches will be picked out in black, took the masking tape off the side screens, pretty pleased with the results, started work on flocking the interior tub, which I will carry on with tomorrow
-
Not a great deal done to it this week, but got the interior tub masked up and painted the underneath satin black, got most of the smaller parts in primer and masked off the dash and airbrushed the panel desert sand, ready to make it look like wood, also got to mask off the glass in the side panels and get them airbrushed in satin black lacquer
-
Before sanding off anything, have a look at the clear parts, as the windows have tabs molded into them ....
-
Lonestar from Oz
GeeBee replied to Bennyg's topic in WIP: Model Trucks: Big Rigs and Heavy Equipment
Superb work .... -
No, as it was originally a GB on eScale, I never put up here, but I will put up photo's of the finished model ....
-
It's the camera on my phone, it has a mind of it's own when some colours are involved sometimes, time to get the Nikon out I think ....
-
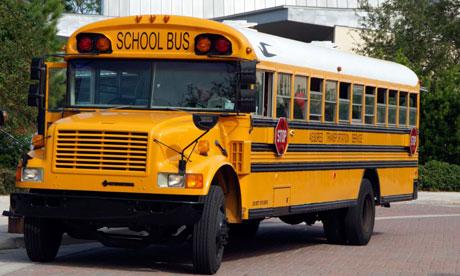
Having a look on Google, I can see what you mean, but this side of the pond, if you mention an American school bus, we usually think of the big yellow bonneted bus, I had the chance to go on one in the mid 90's when I was in Iowa visiting an airshow, because of the floods there no parking on the show ground, and there was a shuttle bus running from the college to the showground, one of the buses was the bonneted Bluebird bus .... it was a bit on the bouncy side, but something that I would never get the chance to do over here .... If Revell brought one out, I would certainly buy one, (or two)
-
I don't mind at all, it's a Tamiya paint stand, http://www.tamiya.com/english/products/74522stand/index.htm
-
Anybody else do this?
GeeBee replied to mnwildpunk's topic in General Automotive Talk (Trucks and Cars)
I haven't used rattle cans for many years now, although if I see the colour I want in a rattle can, I will buy it, but always decant it to use through the airbrush -
Sanded down the bondo on the seats, got the seats, interior and dash panel done in primer, then shot the tan enamel on, I thinned it using lacquer thinners so it will dry out much quicker ...
-
On one of the door the turn locks for the side screens were broken off, and to be honest they are a little on the small size, so holes were drilled where they should be, and dress making pins were glued into place, to make things look right, I cut them off the other door and did the same, they will picked out in aluminium after the clearcoat has gone on Seat backs were filled in with a bit of Bondo Interior will be done in tan with a wooden dash
-
If you order a brand new Morgan, you can specify the colour, and they will paint it in that colour .....
-
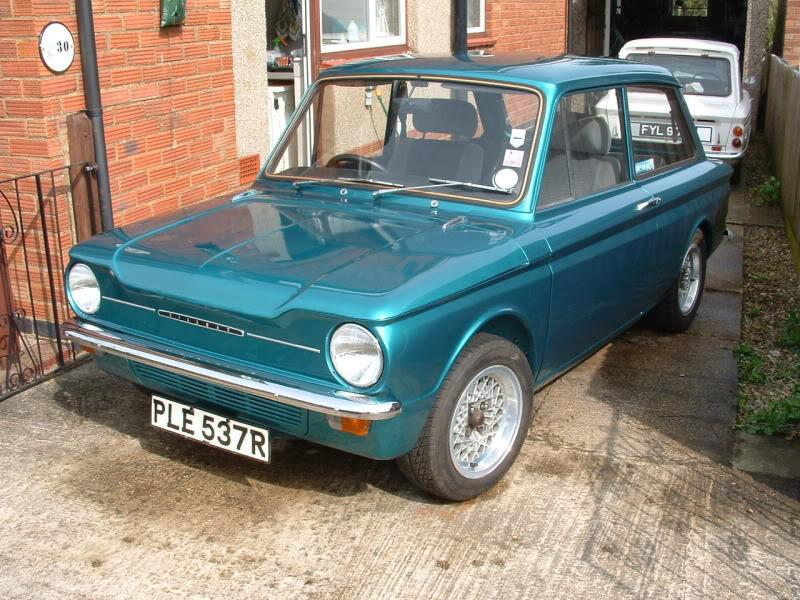
After winning another Tamiya Morgan on eBay over the weekend, I've had a spare second hand body in my stash for a while, it was the one I got to strip for parts for the Morgan I built last year, the paint was stripped, and the rear lamp housings were fixed on, a few marks were sanded out of the body, a couple of coats of grey plastic primer were applied, followed by a colour I have wanted to use for ages, and I have plenty of, it's a 1970 Chysler U.K colour, Aquarius metallic Blue, Hillman Imps, Avengers and Hunters were all painted in it .... Now it just needs to gas out for a few days then the clearcoat can go on
-
Airbrush Recomendations
GeeBee replied to Patrick2005's topic in Model Building Questions and Answers
If your going for a single action, I've been using a Paasche H series for a number of years, and had nothing but praise for it, I got the kit with 3 different needle set ups, I've used for enamel, acrylic and lacquer, easy to clean and maintain, and even living in the U.K I find spares easy to obtain direct from Paasche. -
Since seeing the photo, I've been in touch with Tamiya and Ebbro, both have confirmed that it will be a 1:24th scale kit in plastic, which will be sold under the Tamiya brand, the reason it has Ebbro on the box, is that It is a colaboration between Tamiya and Ebbro with the modified parts being designed by Kia San at Ebbro, I've been told it should be available around March time here in the U.K, I also been informed that Tamiya's original 2CV kit is also being re-released this year.