GeeBee
-
Posts
4,030 -
Joined
-
Last visited
Content Type
Profiles
Forums
Events
Gallery
Everything posted by GeeBee
-
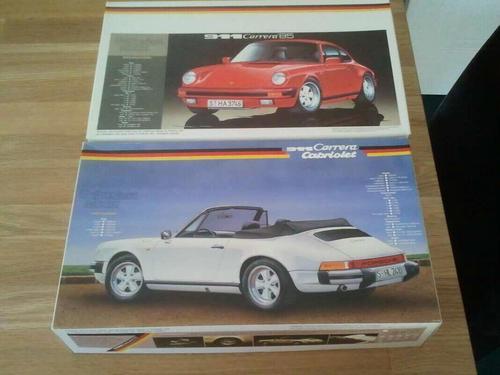
 I know what you mean, I had parts in the kit that the instructions didn't mention, I grabbed the instructions from the Turbo kit I have, and they show the parts that the Cabriolet instructions ommited ..... also the side repeaters needed to be 21mm from the bottom of the sill and 3mm from the front of the door shut line, no mention of this in the Cabriolet kit, but clearly shows a diagram in the Turbo kit ....
 -
If you look at the instructions, the chassis at the rear is supposed to locate in two tabs on the inside of the bumper, and yes it does fit, but the bottom of the chassis doesn't line up with the sills and the wheels are so far from the top of the wheel arches, it looked like it had to rear end jacked up, I cut off the tabs and just forced the rear of the chassis to meet with the body tub, and a few dabs of cyano' and some kicker did the trick, I did the same with the front, but then had trouble lining the front bumper with the slot on the floorpan it was supposed to line up with, it was about 3mm out of line, so the dremel came out with a cutting tool and a 3mm section was cut out of the front floorpan, again cycano' and zip kicker did the trick, after everthing is put together, you can't see non of the cutting etc, it's a real nice kit, but needs a lot of work to get the chassis, body and bumpers to line up, I also had to remove the rear parcel shelf cut that to fit and replace it, luckily the convertible hood hides all that as well ..... They are nice kits, the body looks spot on, but there not for the faint hearted .... will I build another ?? yes, of course, I have four more of these Porsche enthusiast kits to build one day ....

-
chocolate brown flocking ....
-
Here's a shot of it before the interior was finished .... For more photo's on the build, have a look here http://geebeesmodels.webs.com/porsche911cabriolet.htm
-
Your right, it does have more in there than the Tamiya version ....
-
I can't take credit for it Harry, I've been having them made for for the last 18 years but a company called 'Just in Case', based in Bristol, England, Dave who runs it is a personal friend and does a great job on them ... I have editied my original post, as the way I wrote it did sound as though I had actually made the case ....
-
I used Porsche white gold basecoat and clearcoated with acrylic lacquer the interior was done with Tamiya XF-64 Red Brown It is, very nice detail in the kit but a nightmare to get the ride height looking right
-
Built this as a 'Group Build' for another forum, then it got put on the back burner quite a few times, not the easiest kit to build, but I'm pretty happy with the results .... I put it in the acrylic showcase I had made for me, as soon as it was finished ...
-
Cheer's Jim, pop round anytime, you know where I am ....
-
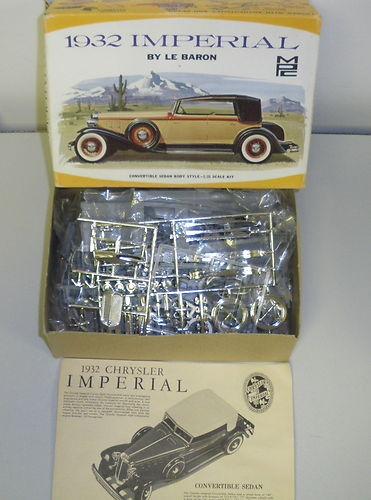
Not a lot of progress on this, but I have desided that it will built as a Morris, so I put the deal on the top of the engine and steering wheel, I also put the decal on the dash clocks, however I really wasn't happy with the way the Alclad on the wheels had turned out, looked more like polished aluminium that chrome, so they were stripped using oven cleaner, my best Alclad to date was doing the chrome on the '32 Chrysler, so thinking on how I did it back then, so I did a couple of coats of grey plastic primer, followed by a couple of coats of gloss black Testor's enamel thinned with lacquer thinners, then left to dry out for a day before putting the Alclad on using my Passche F1 set at 15 p.s.i, it's a good job I keep notes on previous builds .... This time the Alclad turned out just fine ....
-
Got these off eBay (Yes, again) there both enthusiast kits, £11.99 for the two ... that's around $18.00,
-
That's a really nice truck, I must get a start on my one soon ....
-
I had this model many years ago, a friend gave it to me but the body was broken, not sure what happened to it, but I got this one off eBay, the box is a little faded, didn't know they were so hard to find, the seller wanted near on £40 for it, I offered £20 and got it .....
-
Another '32 Chrysler
-
Got the engine bay finished, and the hubs, steering linkages and subframe fitted ...
-
I built mine with the green engine with a red cylinder head ....
-
The Tamiya Mini is my favorite kit of all time, until now !! I have built 6 of the Tamiya versions including one I converted to a more basic Mini with a lot of scratchbuilt parts and the proper 10" non Cooper wheels and front grille, but the Revell version has just got the detail in the kit a lot better, the engine is totally prototypical of the real thing, the interior is much better, mainly because of the front seat frames and the rear seat support in the middle, the dash is a lot easier to paint and detail as the clock binnicle is a seperate part, at the moment I'm enjoying this build and actually look forward to getting in the hobby room ...... So at the moment the Revell Mini has knocked the Tamiya off the top spot .....saying that I still have 7 of the Tamiya Mini's to build. Looking at the Revell kit, it looks like they will be releasing modified versions of this kit, just look at the floorpan and the rear shelf, there's flashed over holes in the rear shelf, possibly for a roll bar, and under the one seat it looks like seat rails for a racing seat, plus the bodyshell has molding indents for two fuel filler caps, possibly a Cooper S version next ??
-
Very nice conversion, many years ago I was asked to be the photographer at a Trabant meeting, and I've loved them ever since ....
-
Before closing the hobby room for the night, I decided to get a little bit of work done on the interior, so the gear lever, handbrake and seats went in ... also painted the wiper motor, which is molded to the bulkhead, also fitted the air filter
-
With the interior parts set aside to dry off, I now started work on the floorpan, before fitting the rear subframe I dry fitted it and found the pins were a slightly tight fit in the holes, not a fault with the kit, but just a little paint on both surfaces getting in the way, the holes were simply cleaned out using a small drill, not to drill the holes out any larger, but just to clean out the paint, but before the parts were fixed together, the fuel & brake lines were picked out using a silver permanent marker, then the rear dampers were fixed to the subframe and the subframe was fixed to the floorpan using 5 minute epoxy and clamped in place. With that set aside to dry, I now started to build the engine up, a few parts that had been airbrushed needed picking out in a detail colour, but all parts fitted onto the engine without any problem, now the engine can be fitted into the engine bay. With everything dry it was time to pop the engine into place, now I really should have followed the instructions, as with the radiator in place, there was no way the engine was going in, so the carburettor had to be taken off, so did the radiator, and a small part at the base of the radiator was sliced off, you can't see this once it's all together, but doing it makes it possible to put the radiator over the cooling fan and slide the radiator into place, a few drops of cyano' glue on the engine mount and the engine was pushed into place, next one will be done as per the intructions ....
-
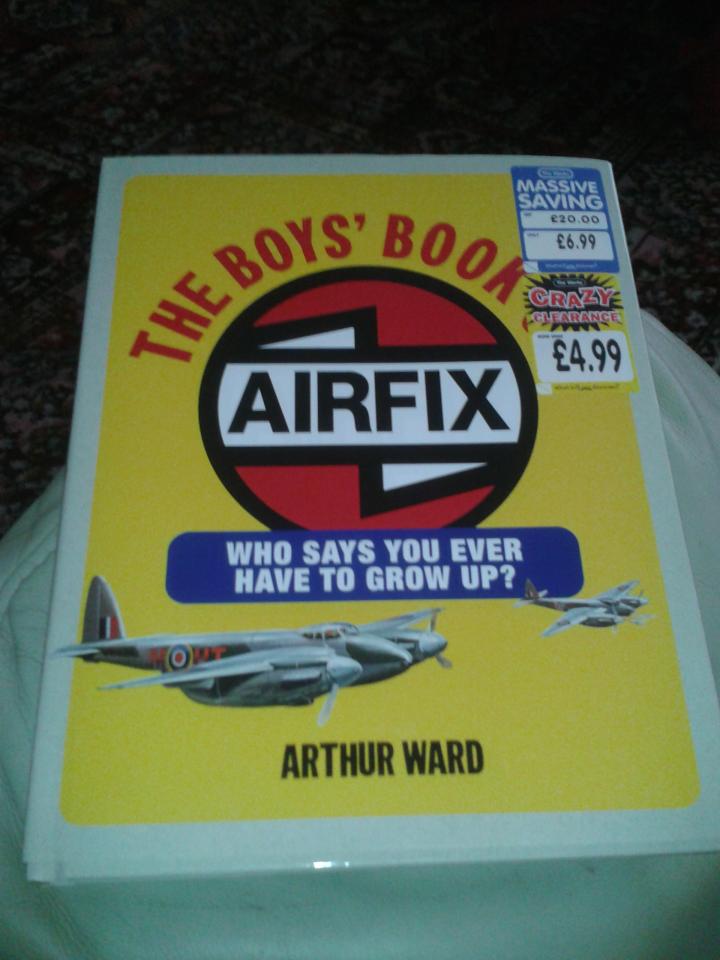
A few modelling books in my library, both good reads ....
-
What ? Damp dog, with all the water leaks they used to have .....
-
Finished the flocking last night and left it to dry out overnight, this is the first time I had used the Detail Master's flocking, it's a lot finer than the stuff I have used in the paste, next time I use it I think I will have to use a fine sieve, Looks better in real life as the photo makes the part look a lot bigger than it actually is, also got the seat frames and brackets painted black, another plus point for the Revell version, as the tamiya version does have a frame on the front seats .... also got the dask masked off and painted the satin black parts, now it needs re-masking and the centre part doing in a light grey
-
Got the seats masked up and airbrushed this morning, what I like about the artist paint shot through the airbrush is that I have never had any of the paint creep under the masking tape, thinned out, it really does spray well, and has that natural vinyl look to it Also started on the flocking, the stuff I bought ages ago looks to be a good match
-
Thank You .....